
2000e Mini-Resto

Thread Starter
OCD Victim

Joined: Sep 2005
Posts: 2,096
Likes: 29
From: SE London
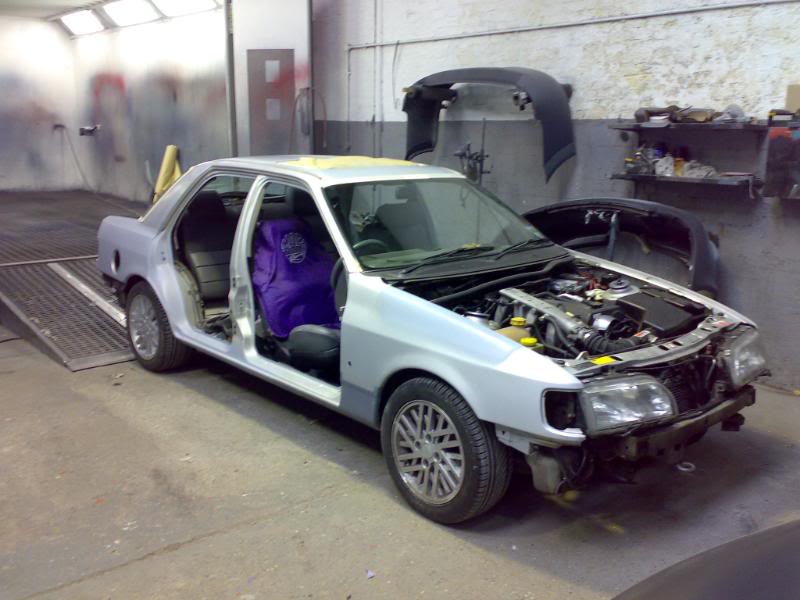
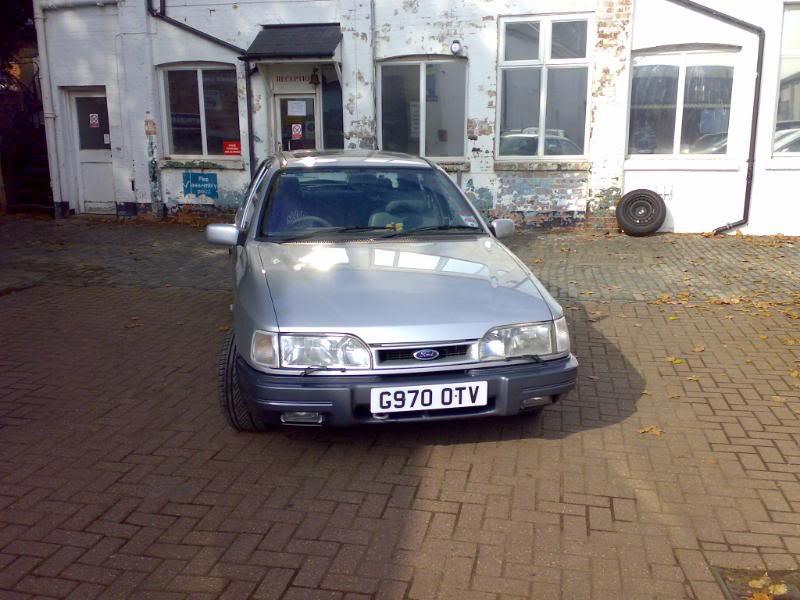
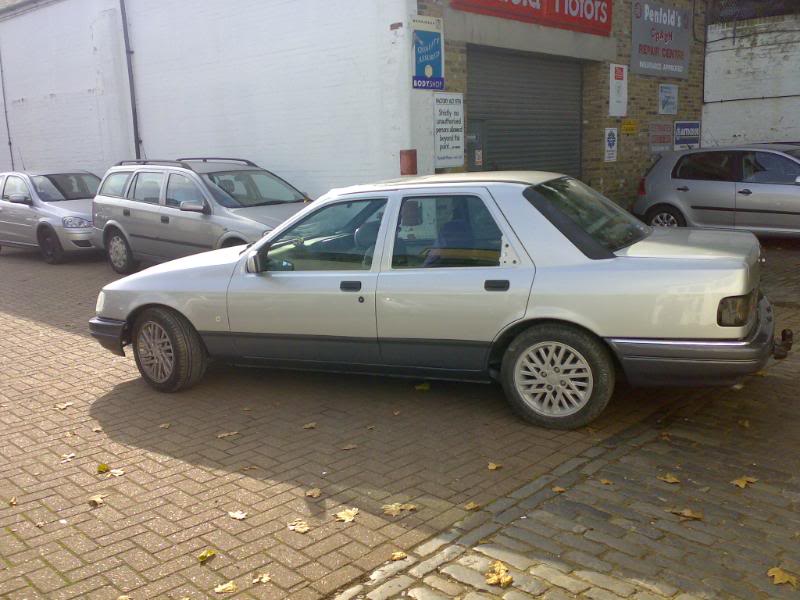
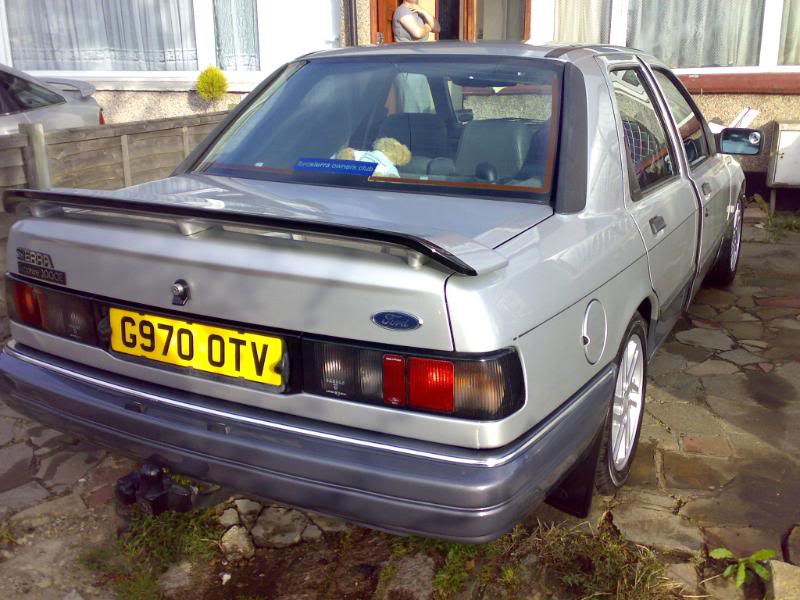
I thought I would introduce one of the collection, my other half's Sierra 2000e. It was brought in November 2006 from a member of the Ford Sierra Owners Club that I am involved with. The car is actually a Category C write-off (door got dented by second-previous owner). It is affectionately known as "Christine" and has truly lived up to her name, 3 water hoses, 2 fuel lines splitting and having to change the whole ECU system from standard EFi EEC-IV to closed-loop lambda-controlled system to control the split-personality.
Anyway, back to topic, it had been a bit quiet where I work at the moment (bodyshop as if the pics do not give it away) so I had the chance to drag Christine in for a bit of a makeover.
The drivers rear door has been changed for a better one (has no crumples), the bootlid changed for an almost-immaculate non-drilled version (as the previous one had a spoiler fitted with nuts and bolts) and loads of new (plus a couple of old bits) parts sitting around her.
1st October:
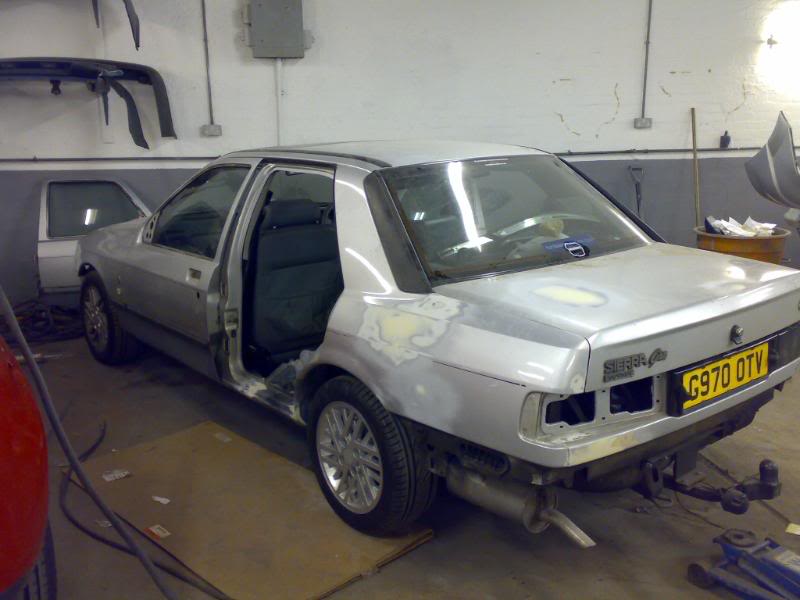
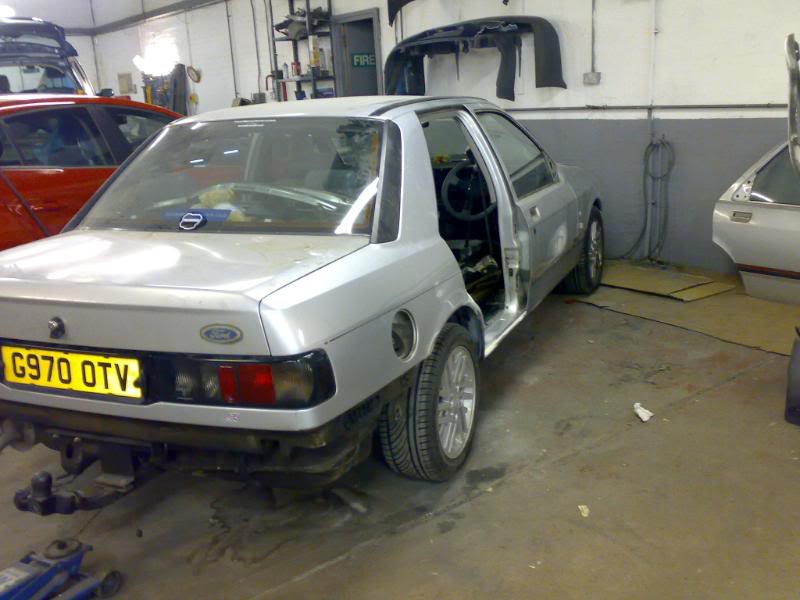
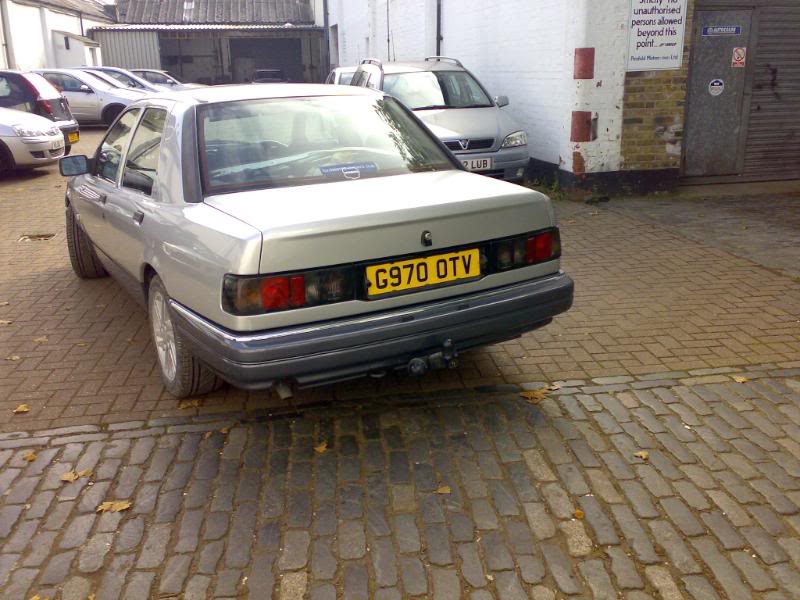
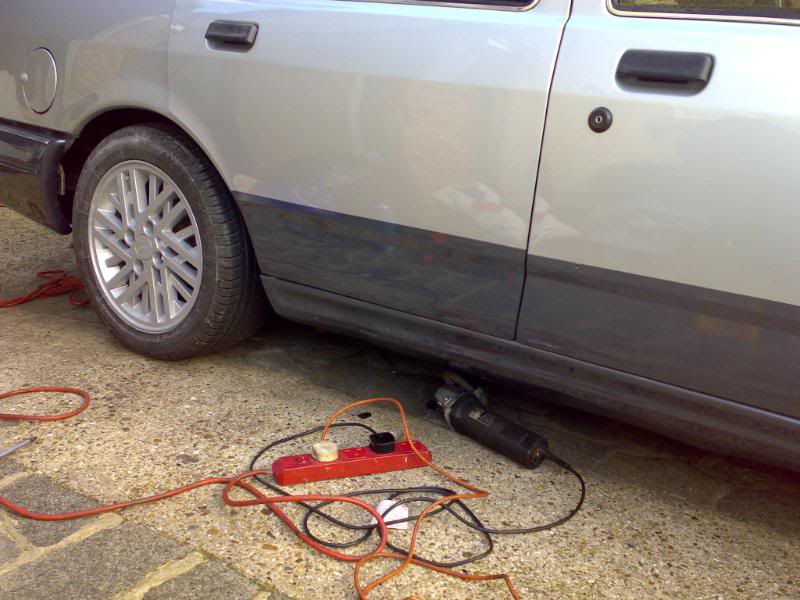
Sitting quite nicely in my workplace ready for an angle-grinder on Monday morning for 2 new sills, 2 replacement rear arches as required, the dent removed from the rear panel under the back light, plus anything else we find. TBH, we are not going to remove EVERY imperfection as she sits next to about 40 armoured vans every day and it will be an everyday car after all.
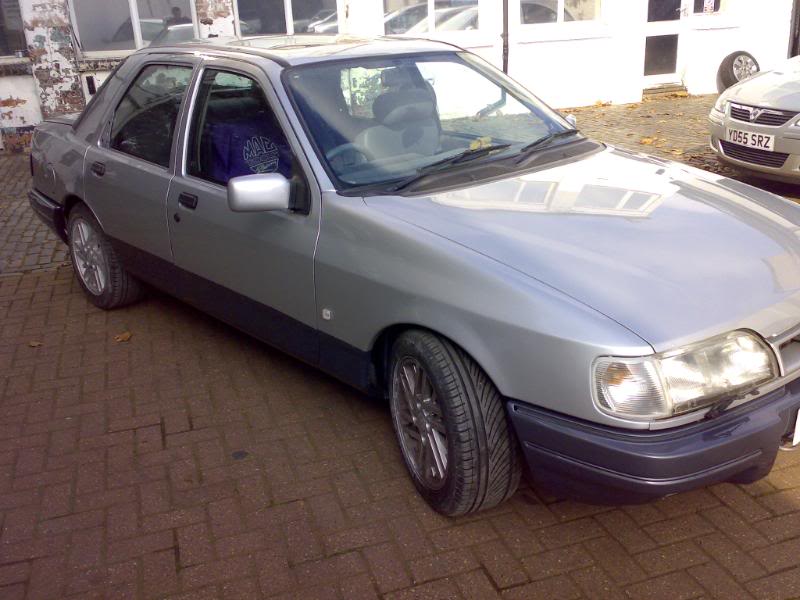
After that, if it all goes to plan, a full respray in Stratos Silver as a top colour, with the lower half being changed from the original Ford Moonstone Blue a slightly different colour, basically slightly darker and a lot more metallic to go with the nice metallic top colour.
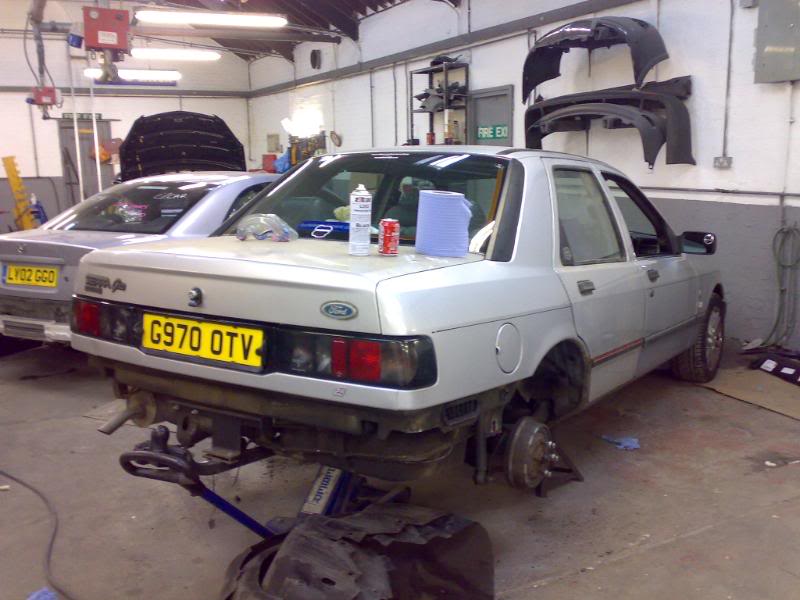
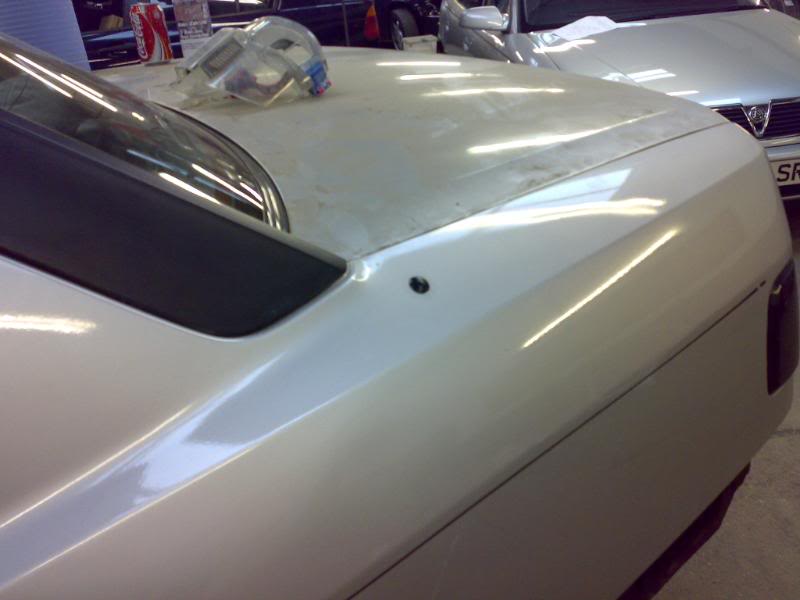
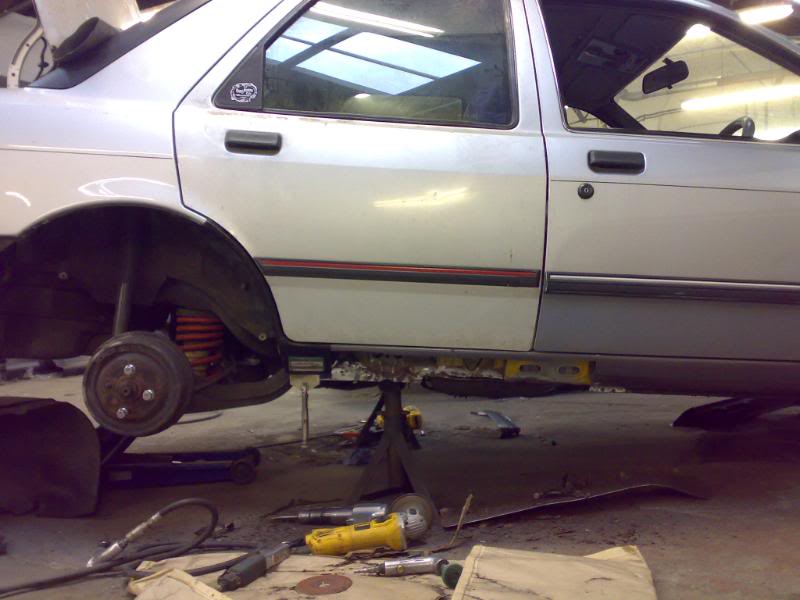
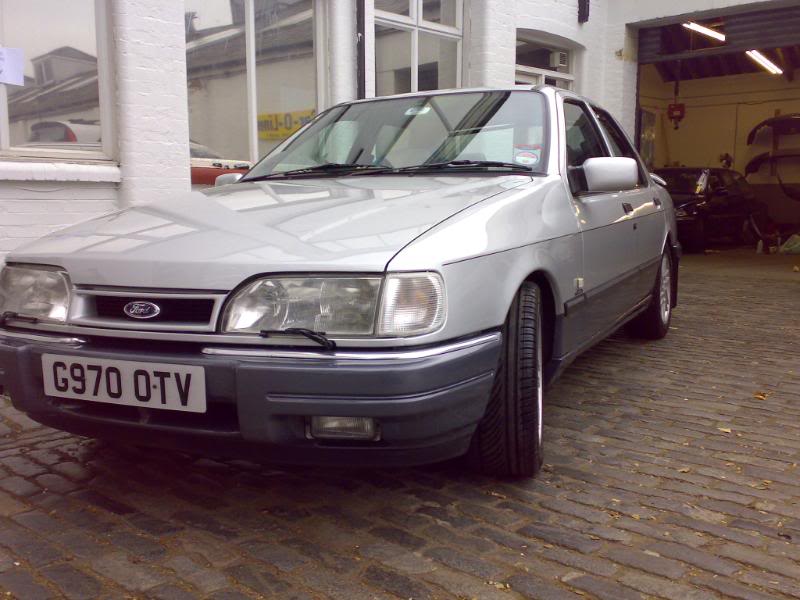
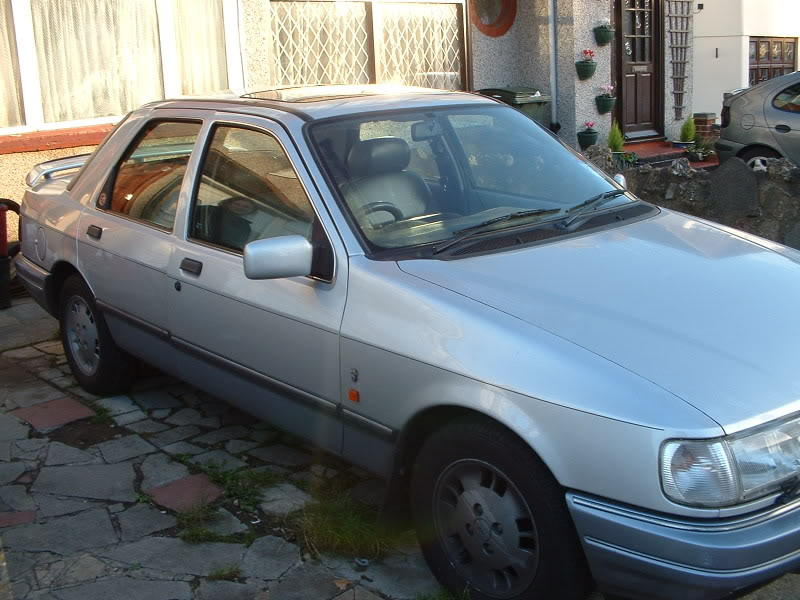
How the car started the morning. Replacement bootlid and drivers rear door were fitted on Saturday in preparation.
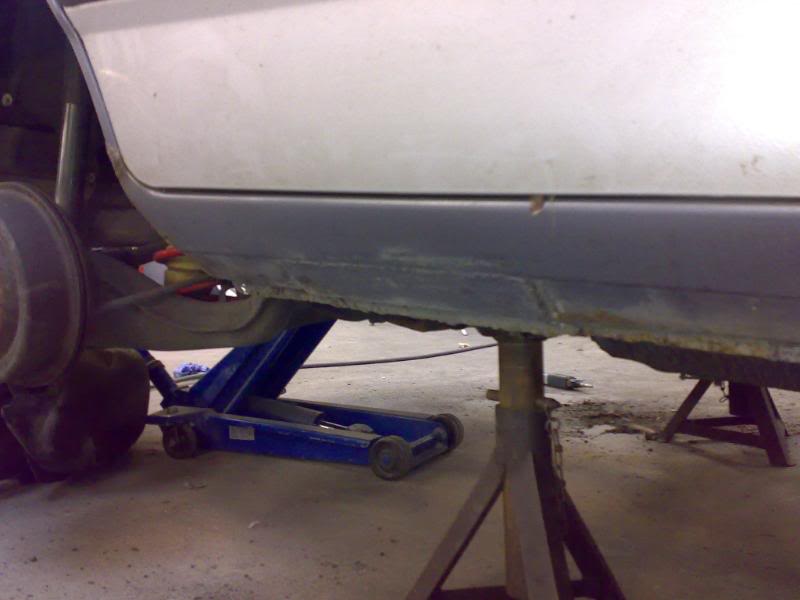
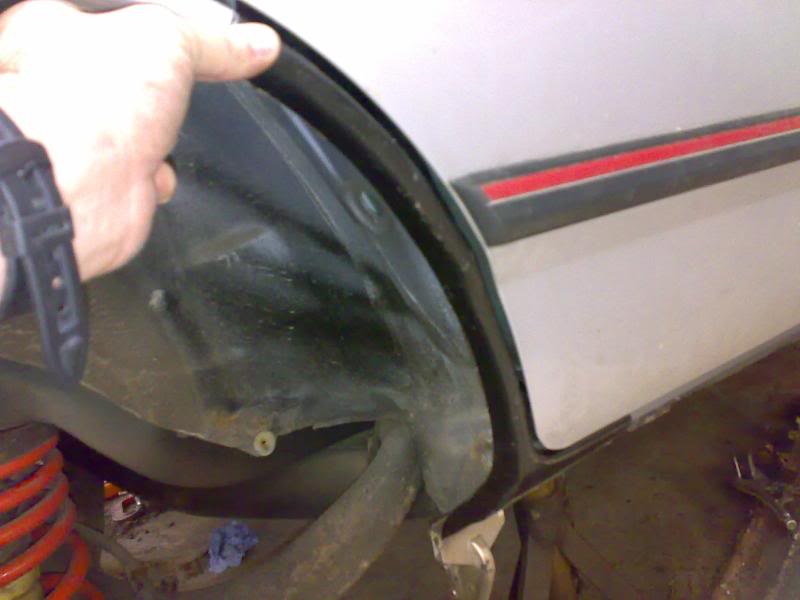
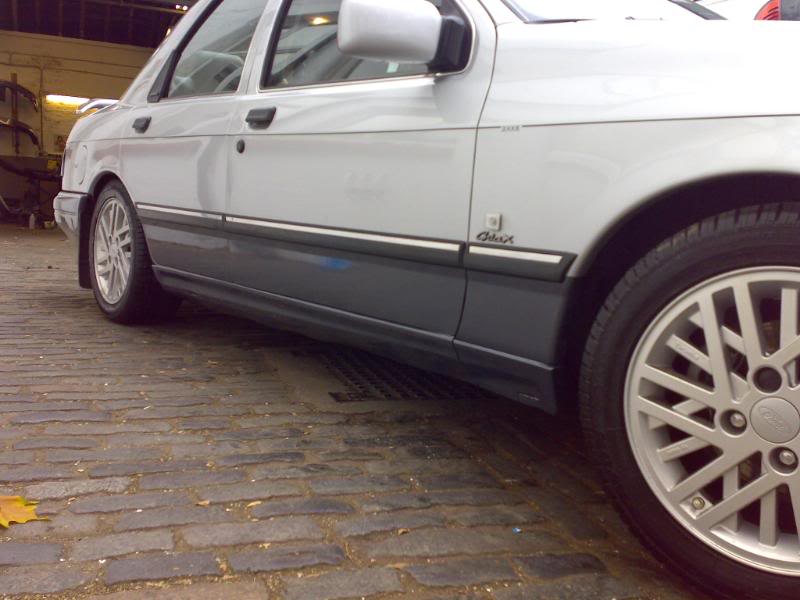
the offending drivers sill (patched up when we got it for the MOT)
the drivers rear arch starting to show
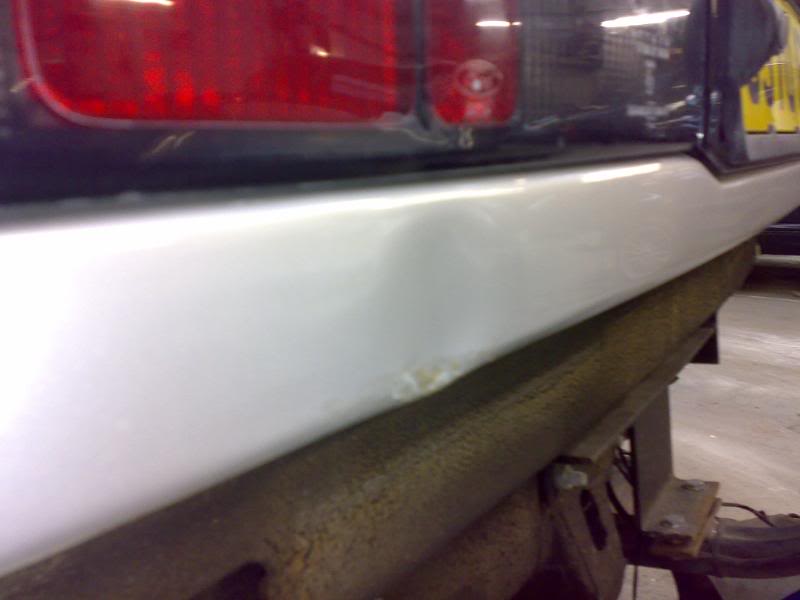
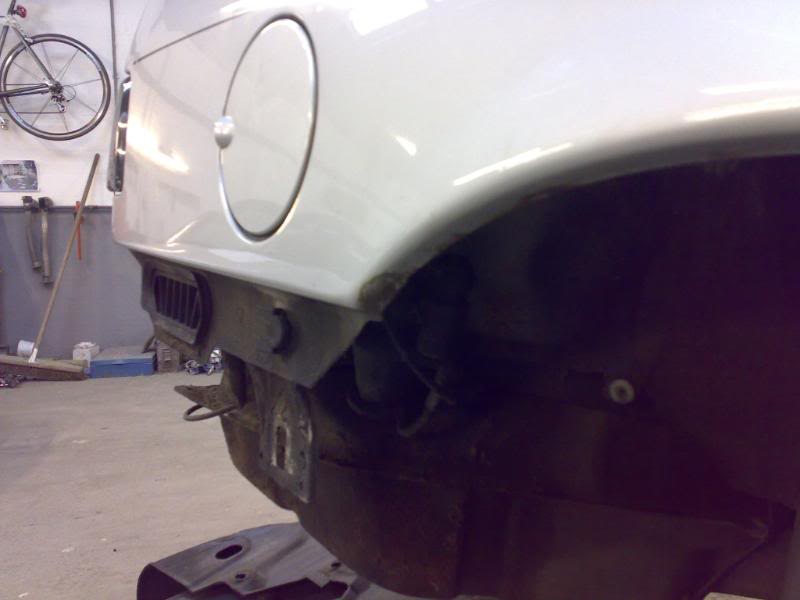
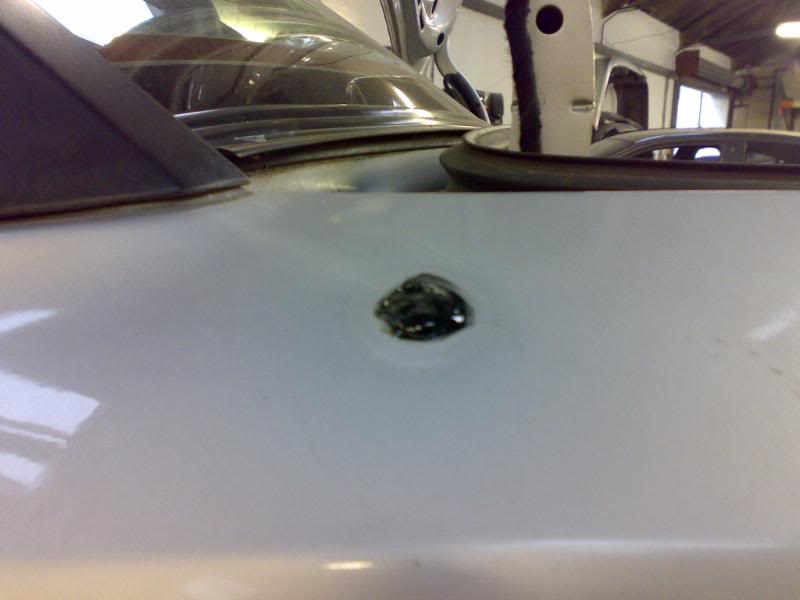
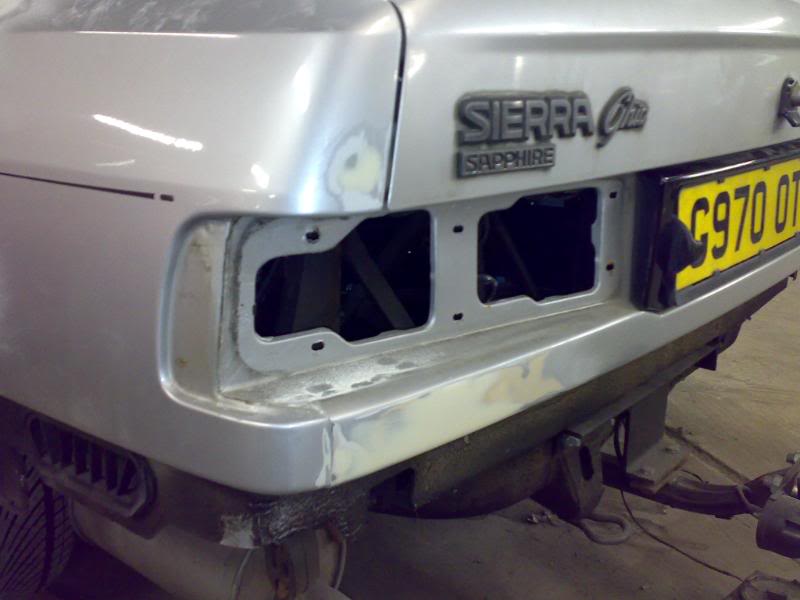
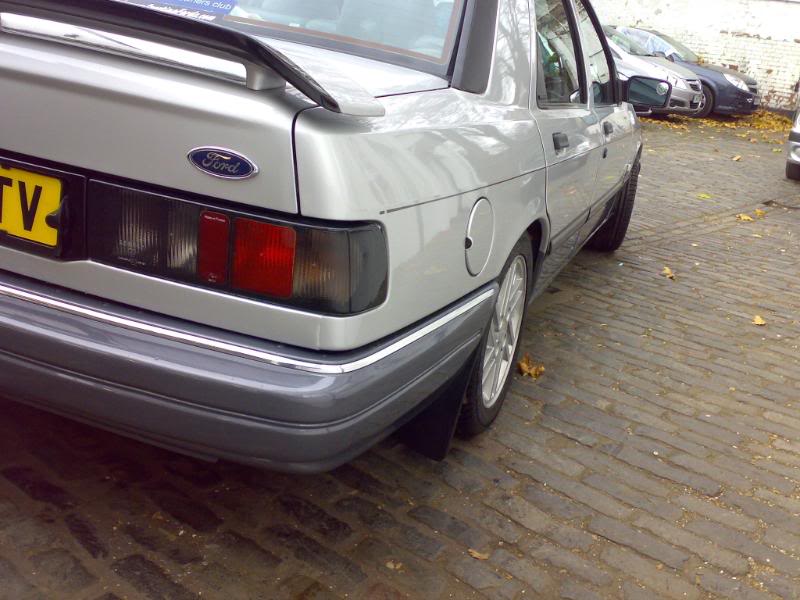
dent in the rear panel below light
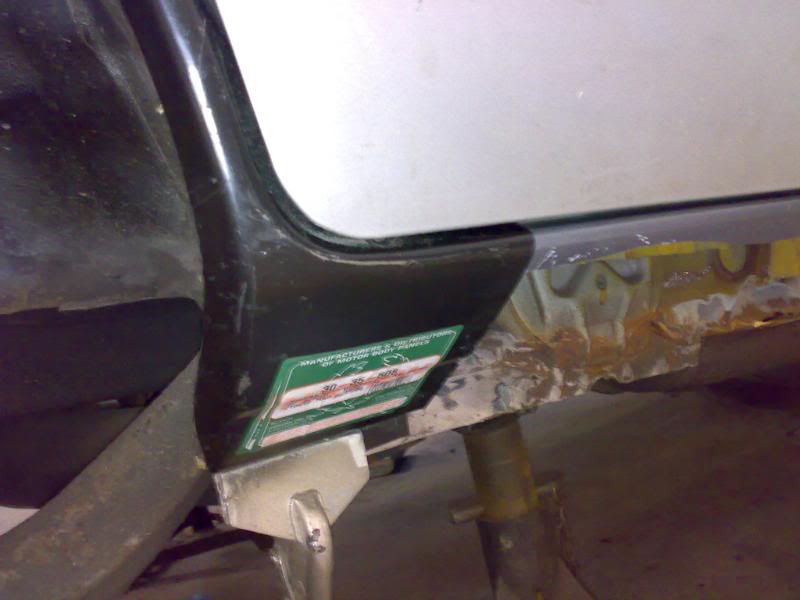
grommet in rear quarter where someone had put some dodgy aerial in @ some time
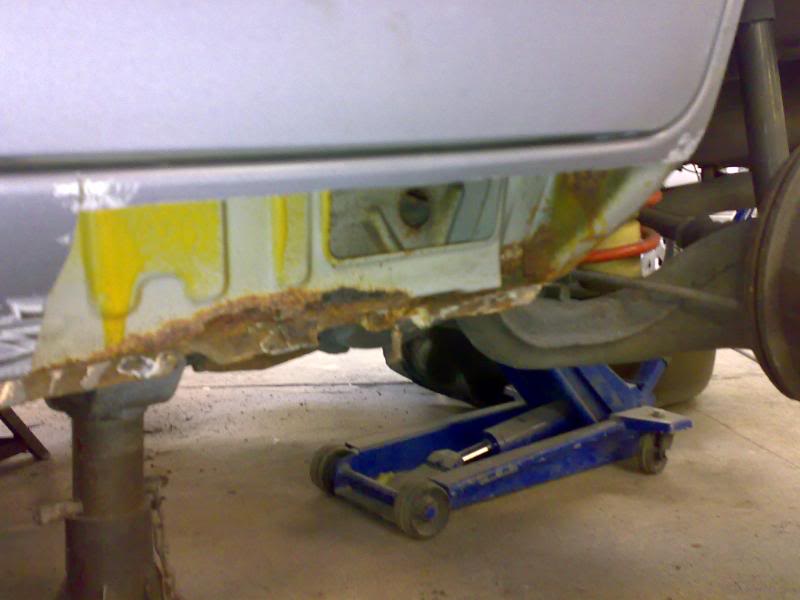
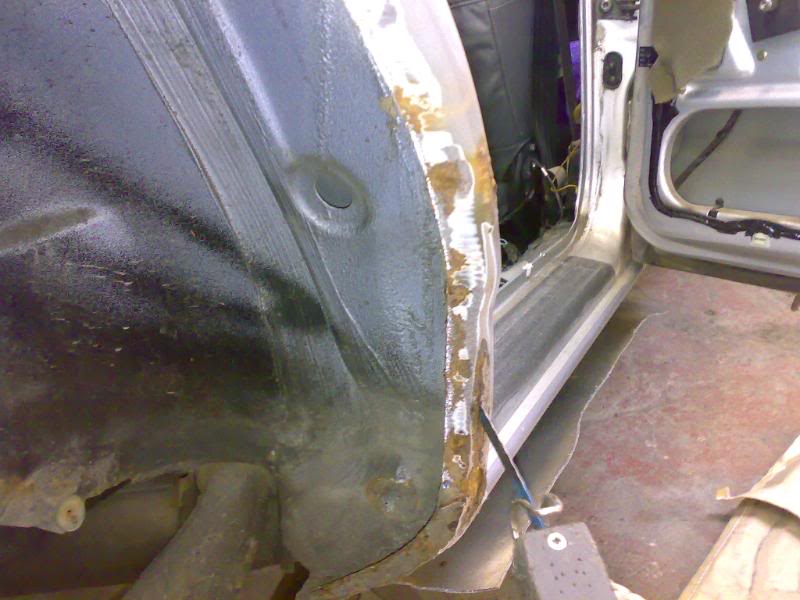
Passenger sill removed for inspection
All the rust that was there. Not bad for 18 years old. Inner section to be replated accordingly before new sill goes on

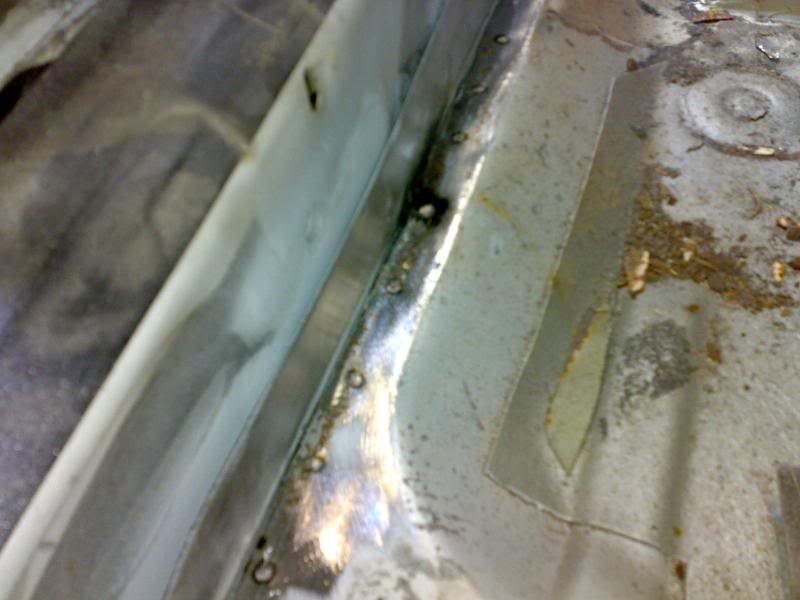
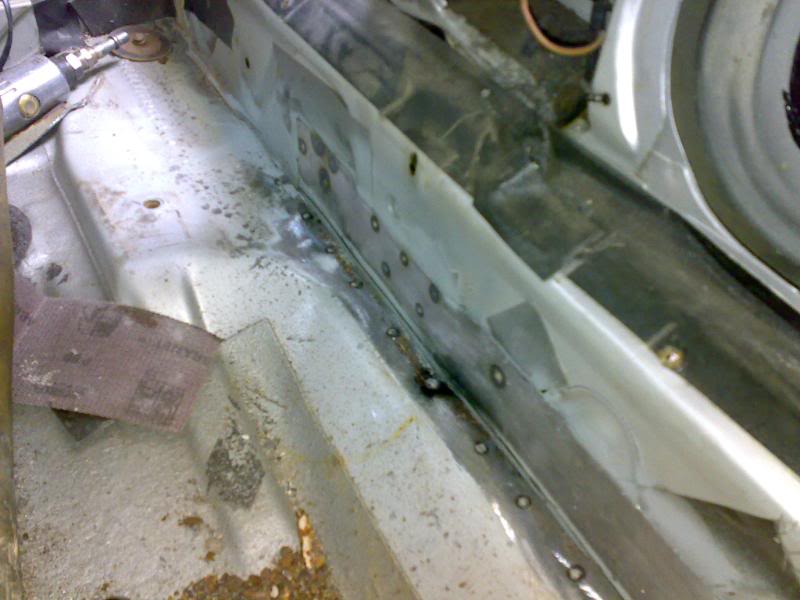
New piece to help strengthen the inner as it was looking a bit thin. Was bonded in using a 2k bonding agent as there was a chance of "blowing through" the existing metal when mig-welding. All traces of rust (surface and otherwise were then removed)
New sill section in place. Bonded in using 2k agent again on all the seams and joins. This is left for 12 hours to set before being spot-welded together, ensuring a watertight and factory-sealed join to prevent rusting again. Edges will be mig-welded in and smoothed over accordingly
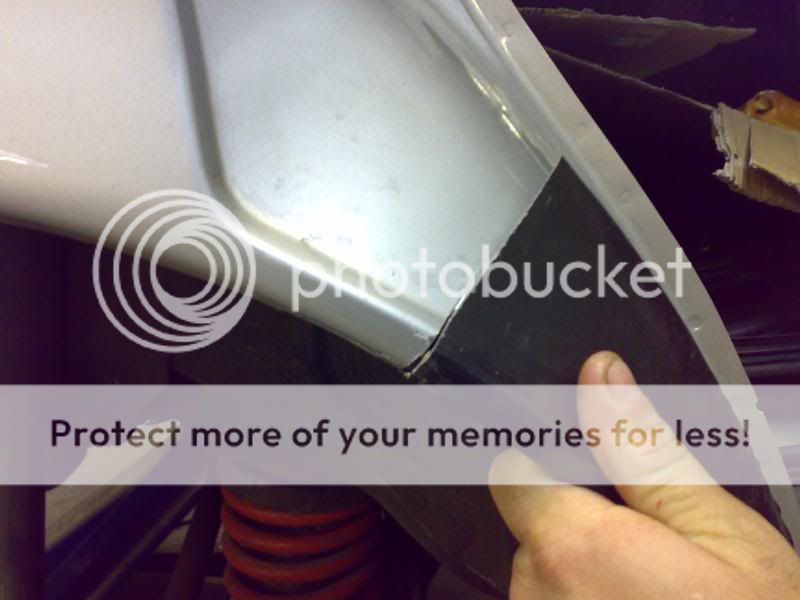
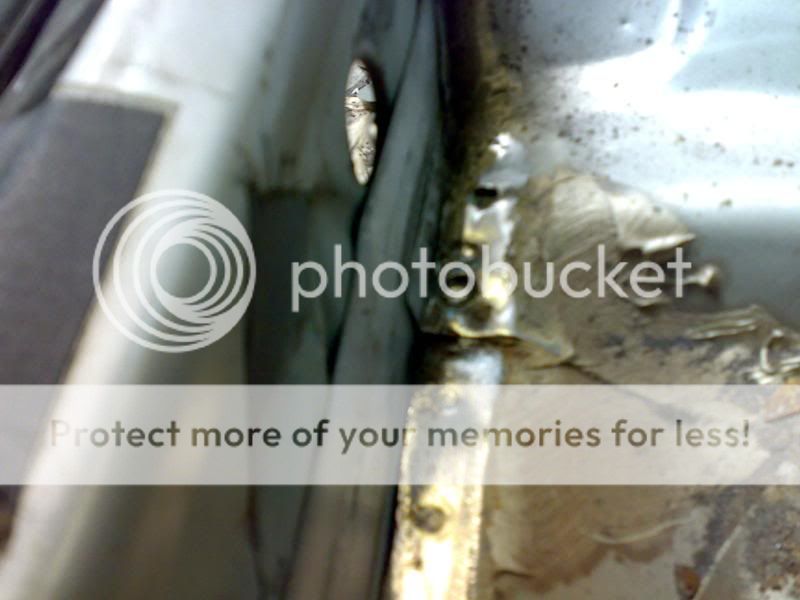
Aerial hole having had a plate put in using the 2k bonding agent (so as to prevent oxidisation within the tight area in the quarter panel and hole in the wing filled accordingly. Excess will be removed with a grinder when set and will then be ready for primer, no filler required.
A view from inside showing what I mean.
The 2K bonder is commonly used now within the motor trade. It sets like concrete, can be shaped like metal and does not crack like filler. IT is used to bond on many panels, including the mounting brackets for Golfs, quarter panels where applicable and many other applications. This makes it a much more viable option on repairs like this, where it also helps to prevent oxidisation internally which can then rust unseen and bring problems @ a later date. No heat, no oxidisation of good metal, no bare metal on show where you cannot see it.
2nd October:
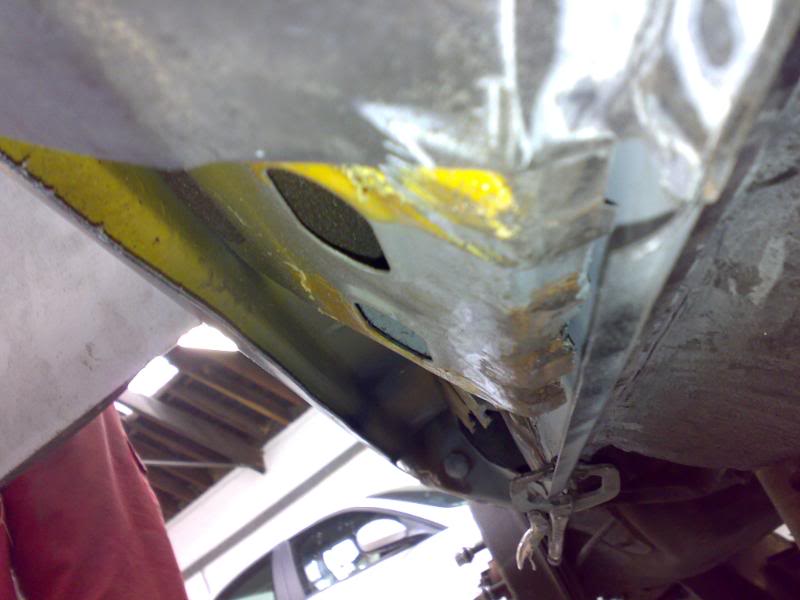
Removal of the rust where the previous damage had been. Not as bad as it looked actually.
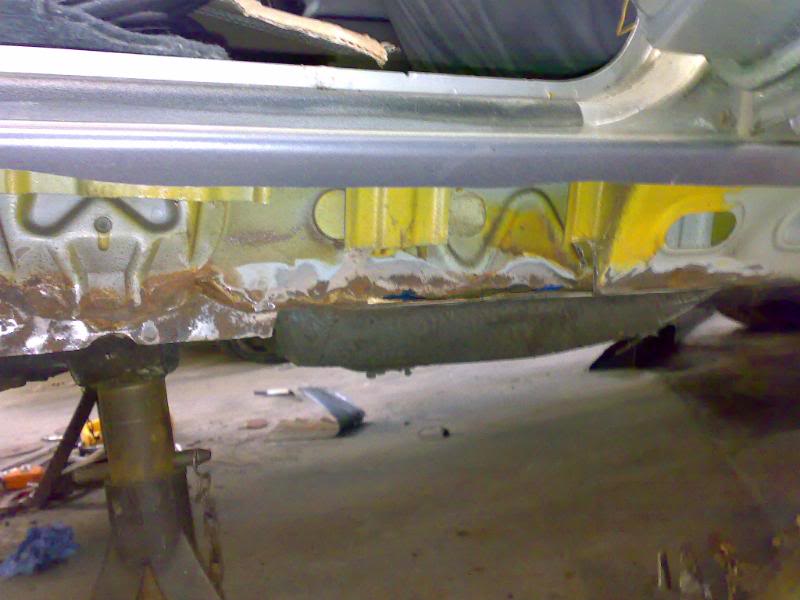
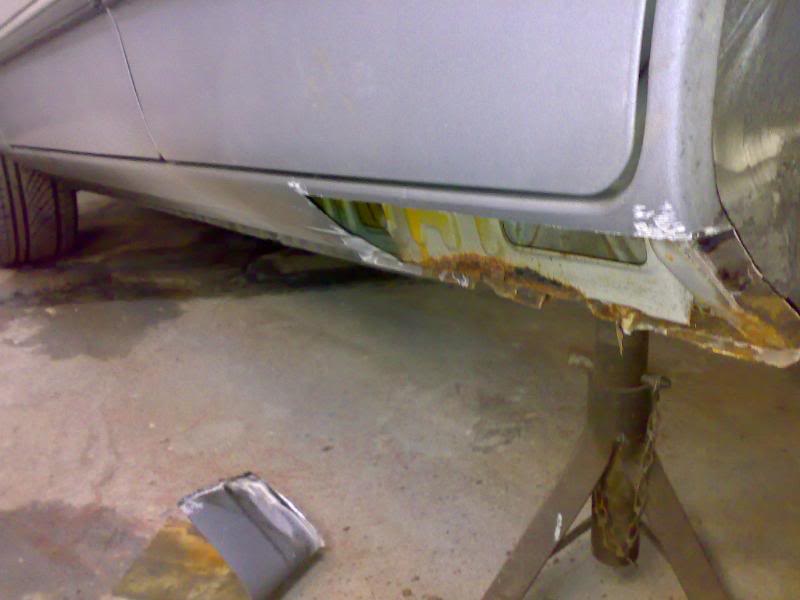
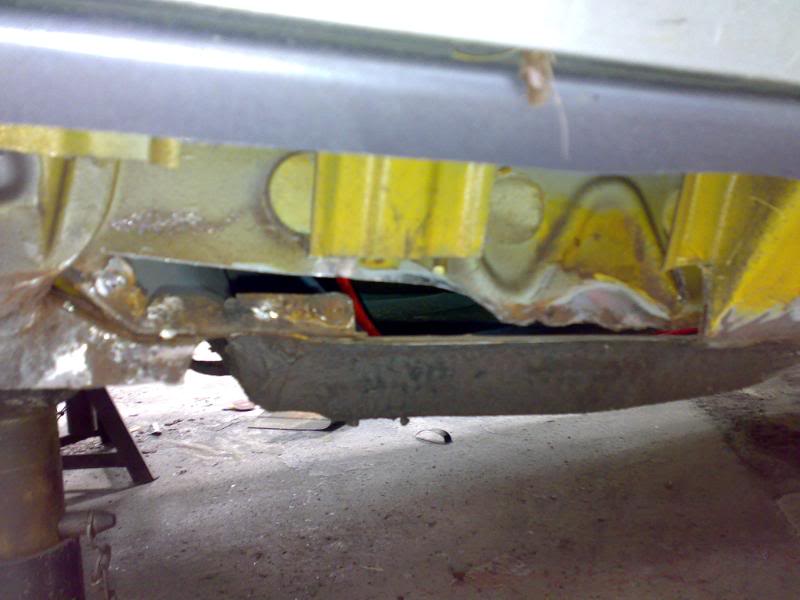
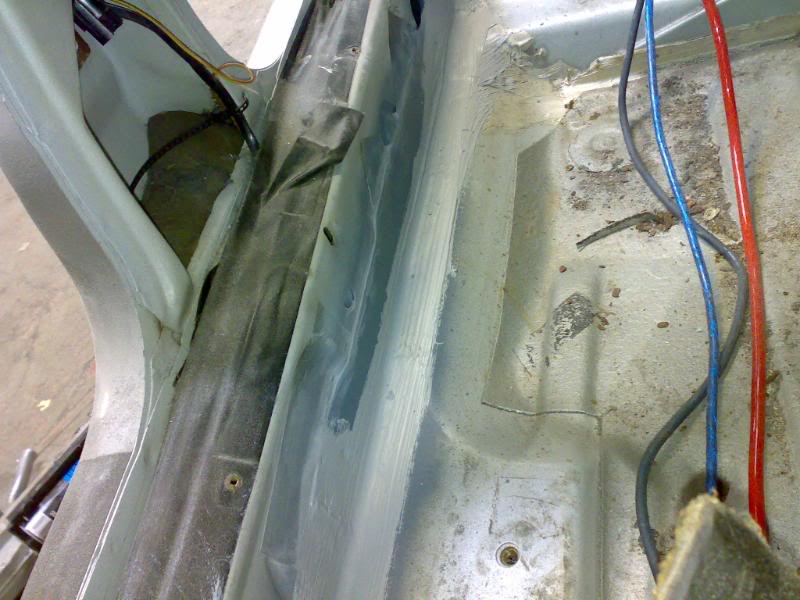
Not so good. Notice the lack of sill section @ the bottom. This was getting quite thin, so out it came. Unfortunately, it means having to go through to the floorpan so strength can be retained.
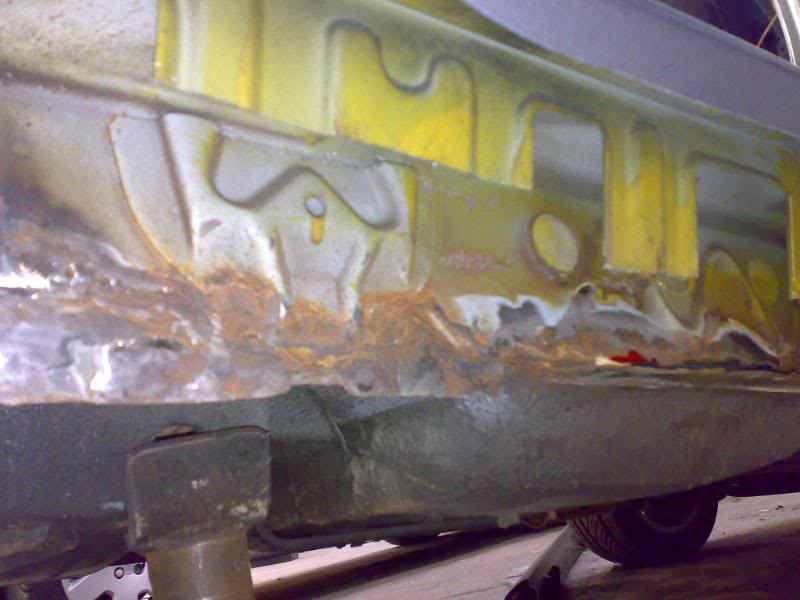
The extent of the corrosion. Note the strengthening plates which have had to be cut back. These will be reinstated with new metal before the sill is replaced.
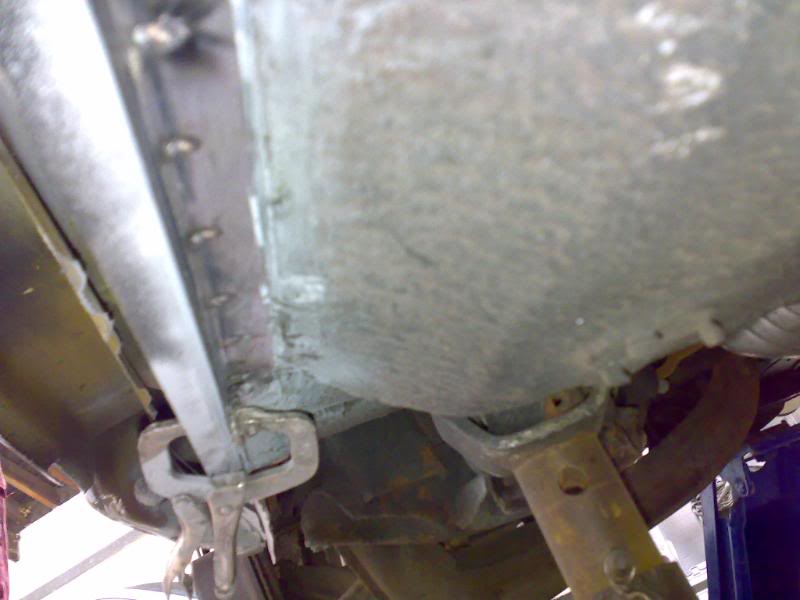
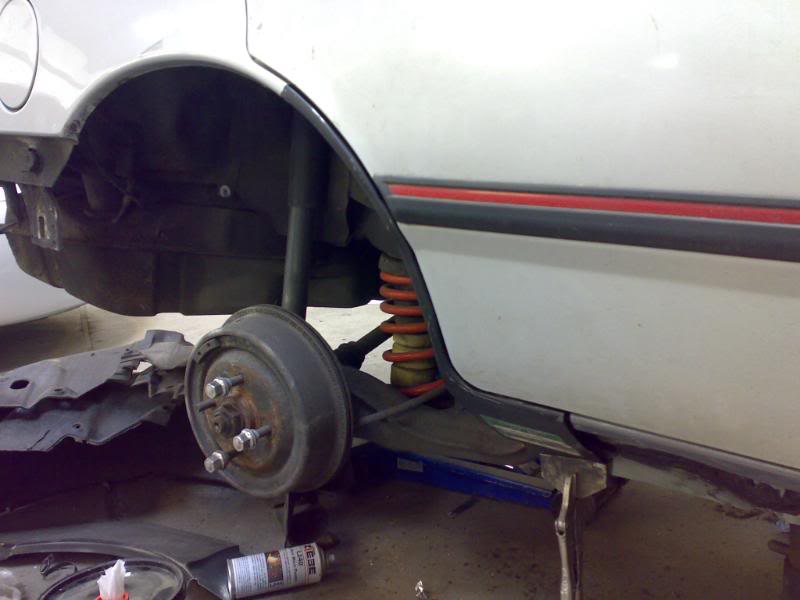
Good news though is that there is no more rust further down the sill section. Note lovely original factory waxoyl.
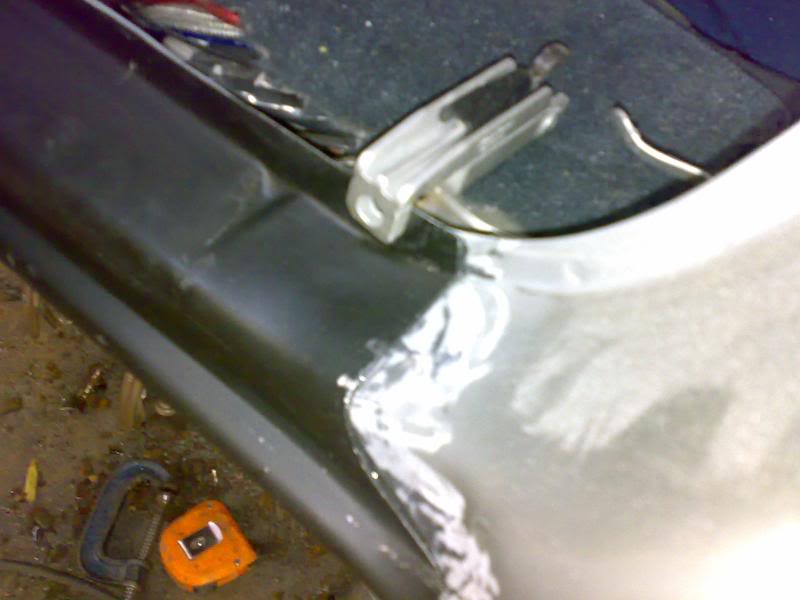
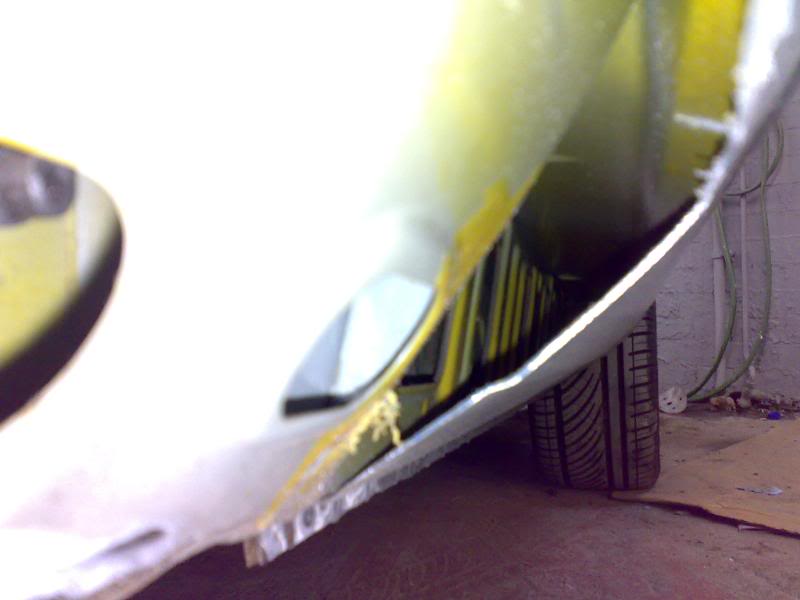
New arch section being laid into place. This will be cut in accordingly.
Nice edge where it goes round the door. How it should be.
Another shot showing the lines of how it will be set. I will probably have the bottom of the arch removed when tacked into place so that the sill is set in as a single section, cutting down on the number of welded joins along the sill.
The arch section is cut ready, just not put into place yet.
Anyway, back to topic, it had been a bit quiet where I work at the moment (bodyshop as if the pics do not give it away) so I had the chance to drag Christine in for a bit of a makeover.
The drivers rear door has been changed for a better one (has no crumples), the bootlid changed for an almost-immaculate non-drilled version (as the previous one had a spoiler fitted with nuts and bolts) and loads of new (plus a couple of old bits) parts sitting around her.
1st October:
Sitting quite nicely in my workplace ready for an angle-grinder on Monday morning for 2 new sills, 2 replacement rear arches as required, the dent removed from the rear panel under the back light, plus anything else we find. TBH, we are not going to remove EVERY imperfection as she sits next to about 40 armoured vans every day and it will be an everyday car after all.
After that, if it all goes to plan, a full respray in Stratos Silver as a top colour, with the lower half being changed from the original Ford Moonstone Blue a slightly different colour, basically slightly darker and a lot more metallic to go with the nice metallic top colour.
How the car started the morning. Replacement bootlid and drivers rear door were fitted on Saturday in preparation.
the offending drivers sill (patched up when we got it for the MOT)
the drivers rear arch starting to show
dent in the rear panel below light
grommet in rear quarter where someone had put some dodgy aerial in @ some time
Passenger sill removed for inspection
All the rust that was there. Not bad for 18 years old. Inner section to be replated accordingly before new sill goes on
New piece to help strengthen the inner as it was looking a bit thin. Was bonded in using a 2k bonding agent as there was a chance of "blowing through" the existing metal when mig-welding. All traces of rust (surface and otherwise were then removed)
New sill section in place. Bonded in using 2k agent again on all the seams and joins. This is left for 12 hours to set before being spot-welded together, ensuring a watertight and factory-sealed join to prevent rusting again. Edges will be mig-welded in and smoothed over accordingly
Aerial hole having had a plate put in using the 2k bonding agent (so as to prevent oxidisation within the tight area in the quarter panel and hole in the wing filled accordingly. Excess will be removed with a grinder when set and will then be ready for primer, no filler required.
A view from inside showing what I mean.
The 2K bonder is commonly used now within the motor trade. It sets like concrete, can be shaped like metal and does not crack like filler. IT is used to bond on many panels, including the mounting brackets for Golfs, quarter panels where applicable and many other applications. This makes it a much more viable option on repairs like this, where it also helps to prevent oxidisation internally which can then rust unseen and bring problems @ a later date. No heat, no oxidisation of good metal, no bare metal on show where you cannot see it.
2nd October:
Removal of the rust where the previous damage had been. Not as bad as it looked actually.
Not so good. Notice the lack of sill section @ the bottom. This was getting quite thin, so out it came. Unfortunately, it means having to go through to the floorpan so strength can be retained.
The extent of the corrosion. Note the strengthening plates which have had to be cut back. These will be reinstated with new metal before the sill is replaced.
Good news though is that there is no more rust further down the sill section. Note lovely original factory waxoyl.
New arch section being laid into place. This will be cut in accordingly.
Nice edge where it goes round the door. How it should be.
Another shot showing the lines of how it will be set. I will probably have the bottom of the arch removed when tacked into place so that the sill is set in as a single section, cutting down on the number of welded joins along the sill.
The arch section is cut ready, just not put into place yet.
Thread Starter
OCD Victim
Joined: Sep 2005
Posts: 2,096
Likes: 29
From: SE London
3rd October:

Only a little hole left after playing with the grinder some more
A new section was then made up of 2 pieces of metal set @ 90 degrees to each other and welded to make a basic frame up. This was then inserted into the gap and shaped accordingly.
This was then spot-welded into place along both the floorline and the sill.
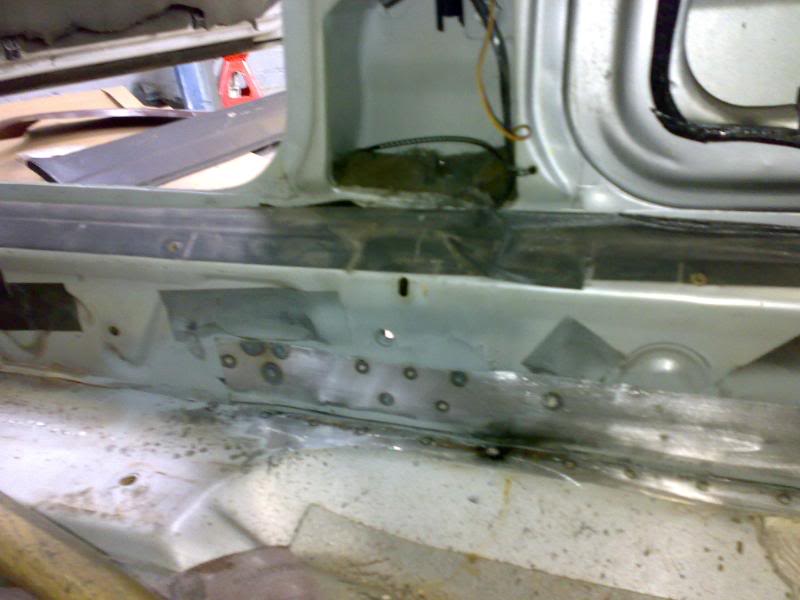
Once this was done, a line of 2K adhesive was applied along all the joins to act as both a sealant and to help support and prevent return of rust.
As an indication of its renewed strength, I got one of the lads in the panel shop to jump up and down in that area afterwards and nothing moved

The outer arch was then laid into place and a copious amount of 2K adhesive was put between the inner and outer arches and squeezed into place. This is to act both as a bonding agent and as a sealer to prevent any rust from coming back from the inside.

That was the arch-work for the day. Once the adhesive has set, it will be spot-welded and seam-welded into place making a solid structure again.
In the meantime, the hole that was filled in on Monday was ground down flat in preparation for painting.
Only a little hole left after playing with the grinder some more
A new section was then made up of 2 pieces of metal set @ 90 degrees to each other and welded to make a basic frame up. This was then inserted into the gap and shaped accordingly.
This was then spot-welded into place along both the floorline and the sill.
Once this was done, a line of 2K adhesive was applied along all the joins to act as both a sealant and to help support and prevent return of rust.
As an indication of its renewed strength, I got one of the lads in the panel shop to jump up and down in that area afterwards and nothing moved
The outer arch was then laid into place and a copious amount of 2K adhesive was put between the inner and outer arches and squeezed into place. This is to act both as a bonding agent and as a sealer to prevent any rust from coming back from the inside.
That was the arch-work for the day. Once the adhesive has set, it will be spot-welded and seam-welded into place making a solid structure again.
In the meantime, the hole that was filled in on Monday was ground down flat in preparation for painting.
Thread Starter
OCD Victim
Joined: Sep 2005
Posts: 2,096
Likes: 29
From: SE London
9th October: (had a few busy days in work so unable to get near Christine)
The inner section has been finished getting welded and seam-sealed thoroughly.
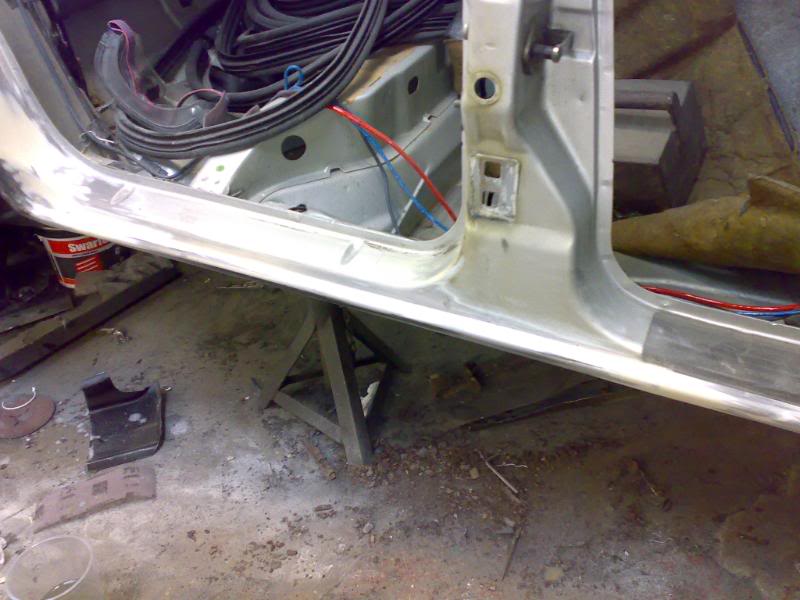
The outside sill on the drivers side has been finished, welded, and skimmed VERY lightly.

As you can see, it is a VERY light skim, barely rubbed back.
The corrosion on the drivers arch @ the back has been dug out, de-rusted and leaded in, the filed back so it is as smooth as the surrounding area.

The dent in the rear panel has been tapped out, just needs some "finishing" then probably it'll get leaded as well.
The nearside sill section has been fully welded into place and a skim put over the top. This will need smoothing back in due course, just ran out of time.
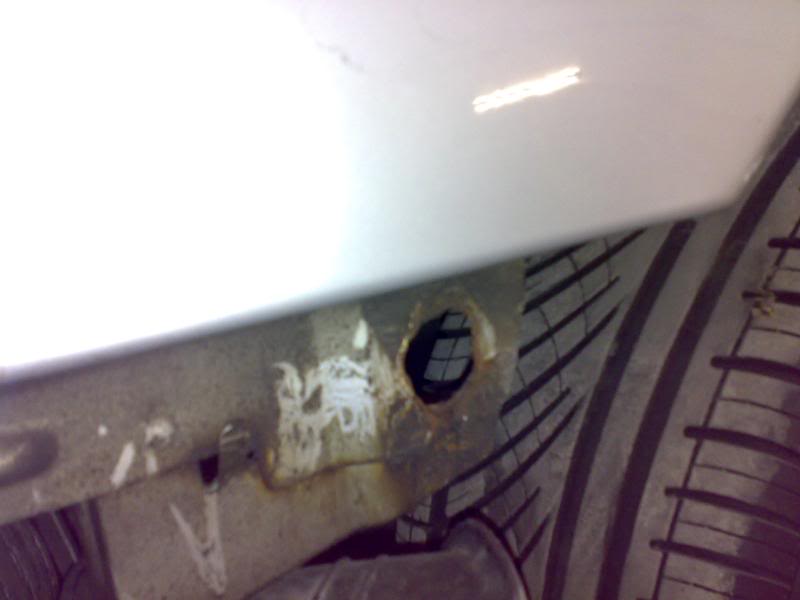
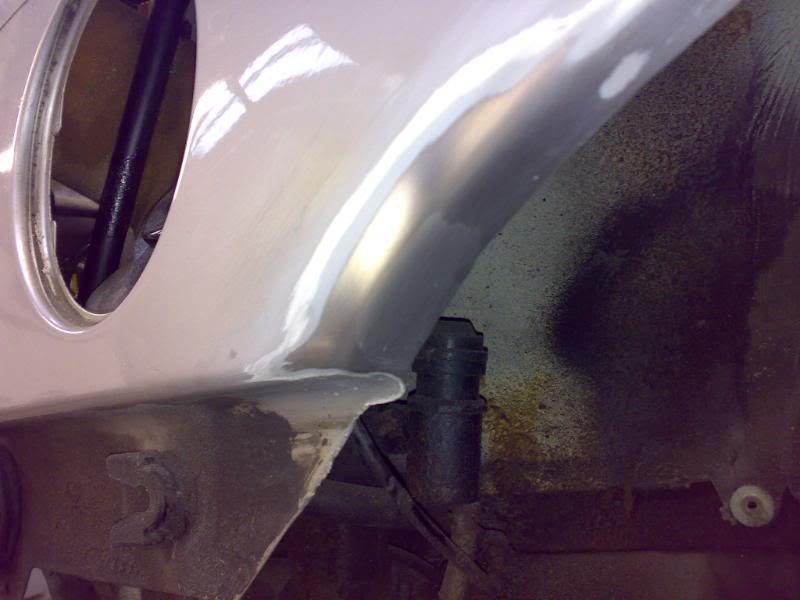
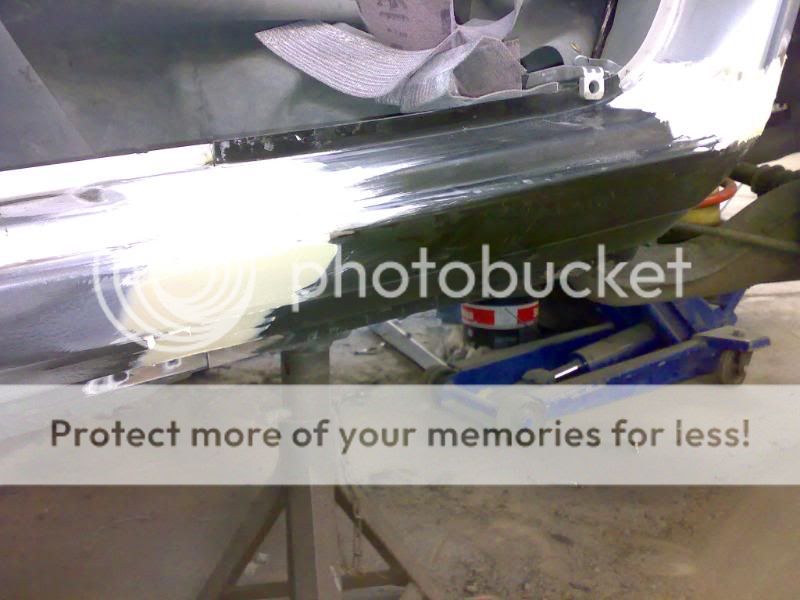
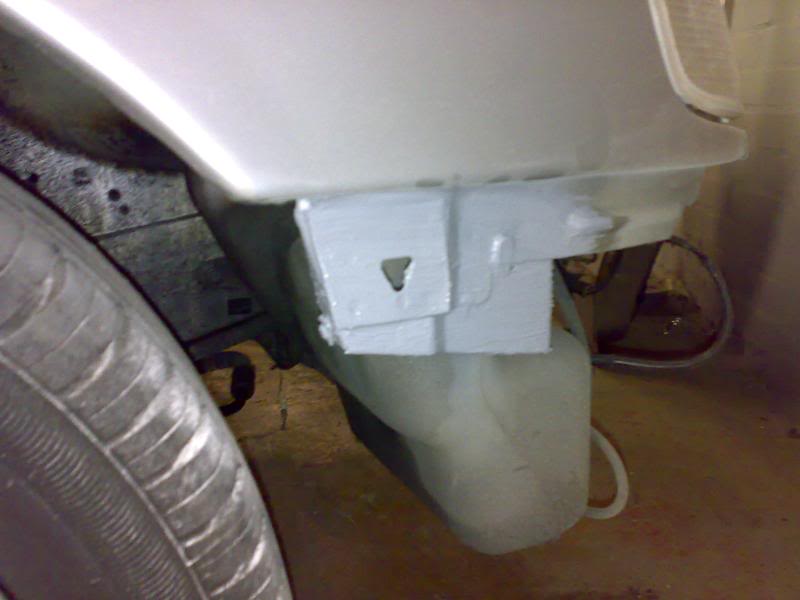
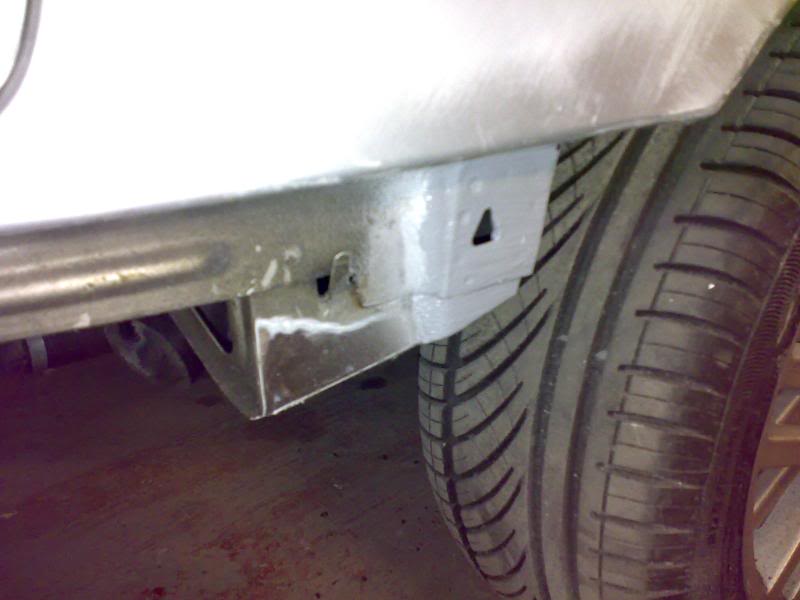
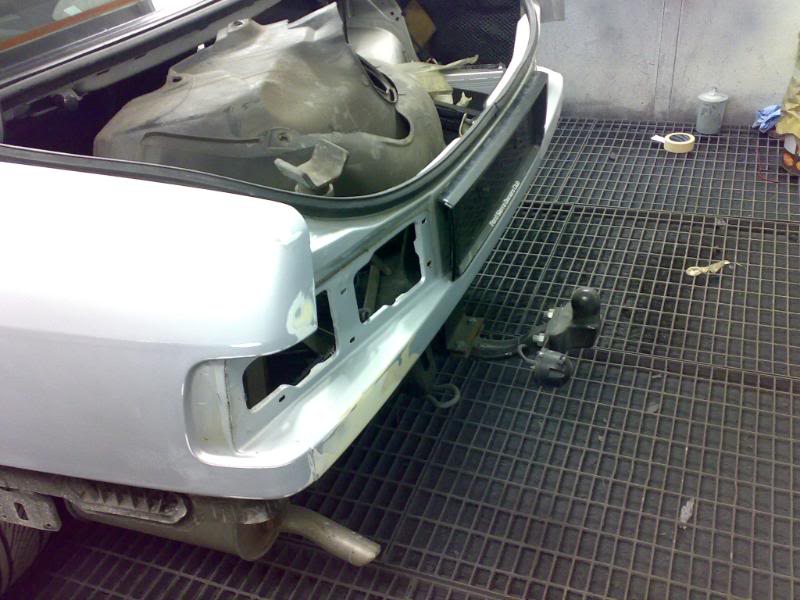
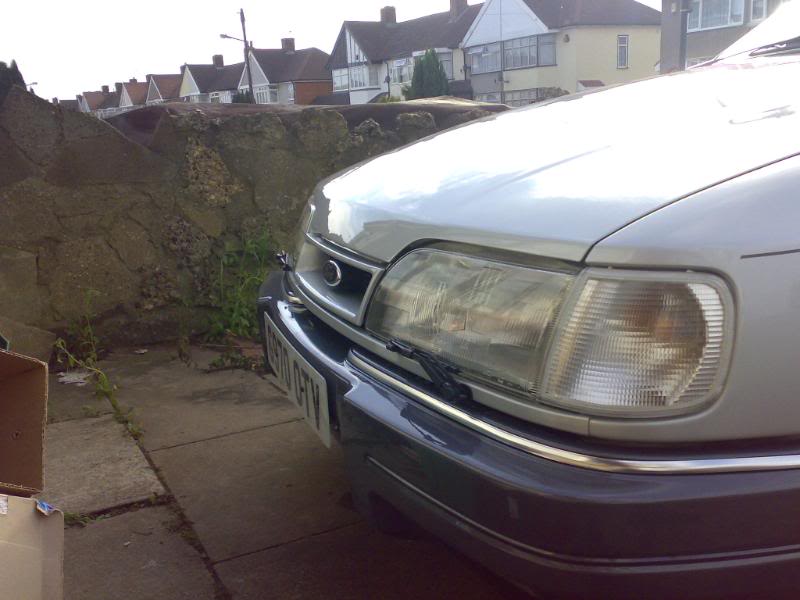
The offending holes in the front wings where the front bumper locates. Replacement panels have been made to replace the current holes, will just need finishing where the triangular holes are before welding into place.
The front bumper has also had two new front mounting brackets put into place. The passenger side is plastic-welded and bonded into place, with just the drivers side to do when the correct one turns up in the morning. Pictures to follow, but after all the work above done today, just did not get time today.
11th October:
Well, panelwork is finally finished :banan:
All the dents that have been found are now no longer, the mouldings have been removed (holes left in the doors as although it will be getting stuck-on mouldings this time round, I may want to put it back to screw-on ones in the future).
New locating points have been made in the front wings and spot-welded in place then sealed over
Drivers front door


Bootlid dents and imperfections

Dent in the drivers front wing that the previous owner admits he did when testing the front suspension when he owned it..... he now remembers to lean on the stronger part of the wing further in :bigcry:
Dent under the passenger rear light and the pin-dent on the quarter panel removed
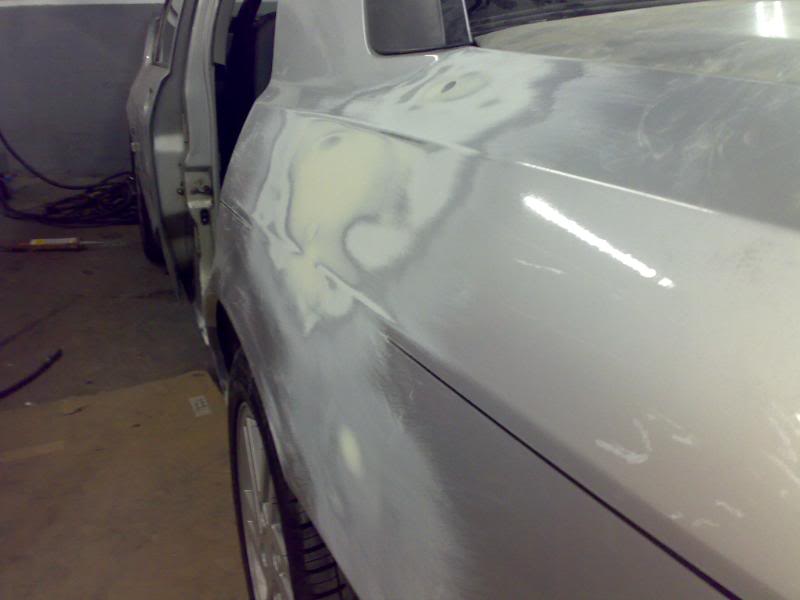
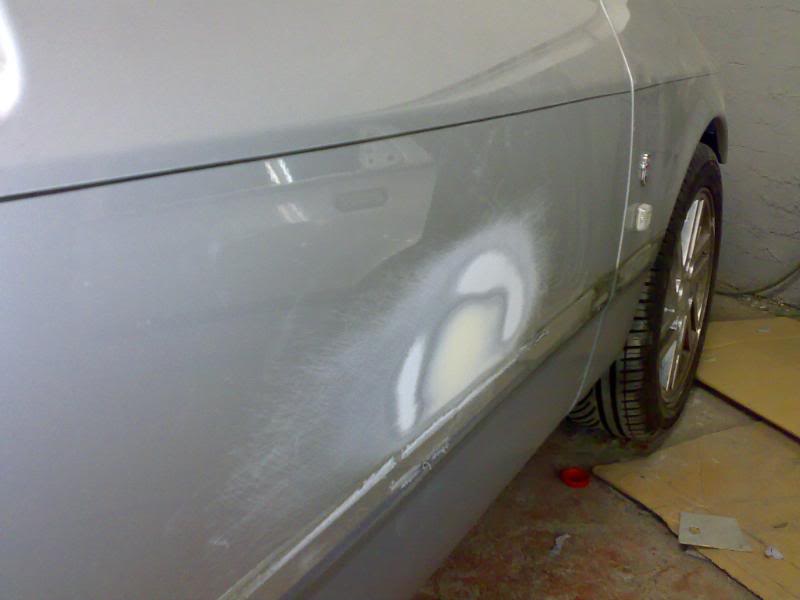
Big crease in the passenger quarter panel panel-beaten flat and the original swage line remade before being filed down and skimmed. Would have preferred to tap it back better but lack of access put paid to that idea
And finally, some overview shots of the work done
And some of the company that Christine has been keeping:
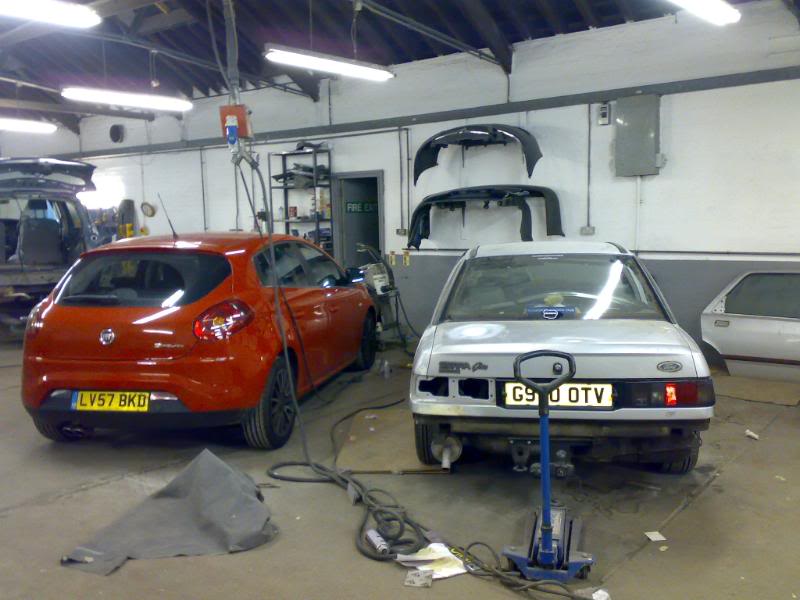
That is a 1 week old Fiat Bravo 150T (Fiat equivalent of Focus ST or similar). Other side is a '07 Audi A6 Avant (out of sight unfortunately, picture didn't come out).
All in all, not bad for 6 lunchtimes and a hour and half this evening after work.
The inner section has been finished getting welded and seam-sealed thoroughly.
The outside sill on the drivers side has been finished, welded, and skimmed VERY lightly.
As you can see, it is a VERY light skim, barely rubbed back.
The corrosion on the drivers arch @ the back has been dug out, de-rusted and leaded in, the filed back so it is as smooth as the surrounding area.
The dent in the rear panel has been tapped out, just needs some "finishing" then probably it'll get leaded as well.
The nearside sill section has been fully welded into place and a skim put over the top. This will need smoothing back in due course, just ran out of time.
The offending holes in the front wings where the front bumper locates. Replacement panels have been made to replace the current holes, will just need finishing where the triangular holes are before welding into place.
The front bumper has also had two new front mounting brackets put into place. The passenger side is plastic-welded and bonded into place, with just the drivers side to do when the correct one turns up in the morning. Pictures to follow, but after all the work above done today, just did not get time today.
11th October:
Well, panelwork is finally finished :banan:
All the dents that have been found are now no longer, the mouldings have been removed (holes left in the doors as although it will be getting stuck-on mouldings this time round, I may want to put it back to screw-on ones in the future).
New locating points have been made in the front wings and spot-welded in place then sealed over
Drivers front door
Bootlid dents and imperfections
Dent in the drivers front wing that the previous owner admits he did when testing the front suspension when he owned it..... he now remembers to lean on the stronger part of the wing further in :bigcry:
Dent under the passenger rear light and the pin-dent on the quarter panel removed
Big crease in the passenger quarter panel panel-beaten flat and the original swage line remade before being filed down and skimmed. Would have preferred to tap it back better but lack of access put paid to that idea
And finally, some overview shots of the work done
And some of the company that Christine has been keeping:
That is a 1 week old Fiat Bravo 150T (Fiat equivalent of Focus ST or similar). Other side is a '07 Audi A6 Avant (out of sight unfortunately, picture didn't come out).
All in all, not bad for 6 lunchtimes and a hour and half this evening after work.
Thread Starter
OCD Victim
Joined: Sep 2005
Posts: 2,096
Likes: 29
From: SE London
14th October:
Well, after a long, hard final attempt, Christine is almost ready.
Friday evening after work, she was driven up to the paint booth and the REAL prep work started.
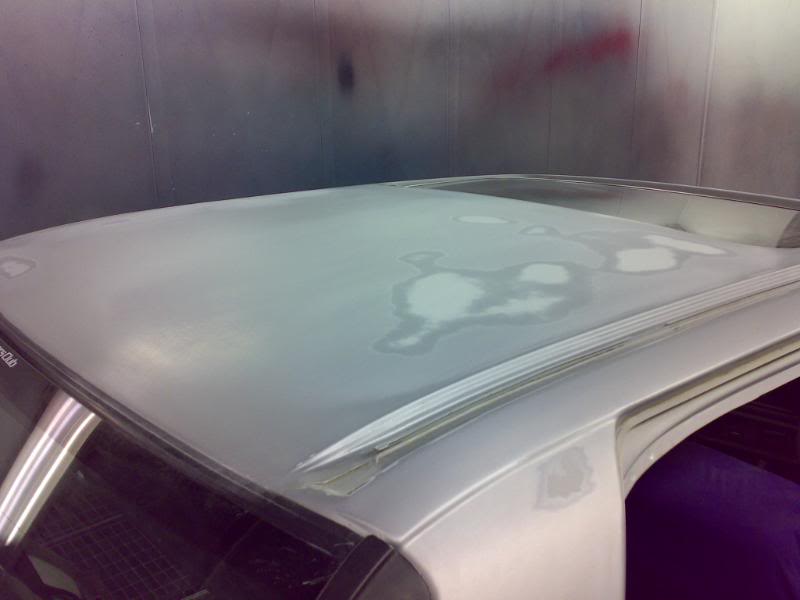
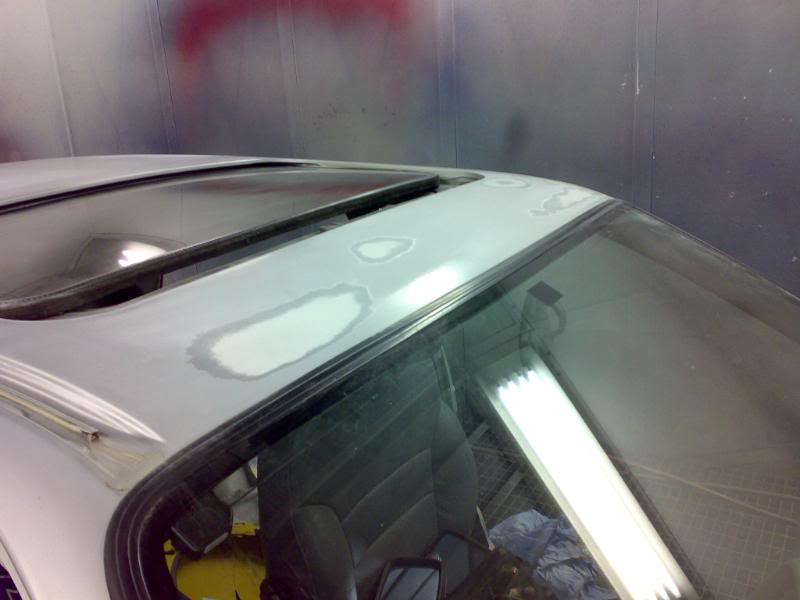
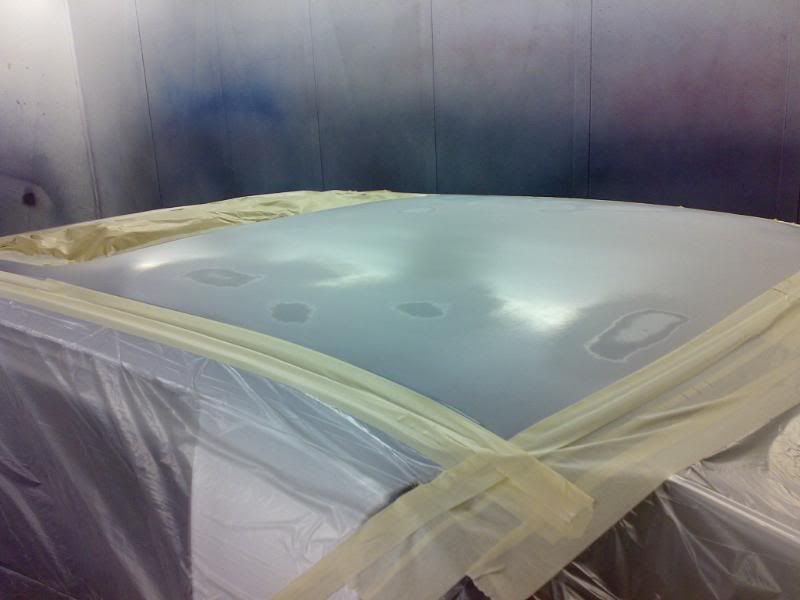
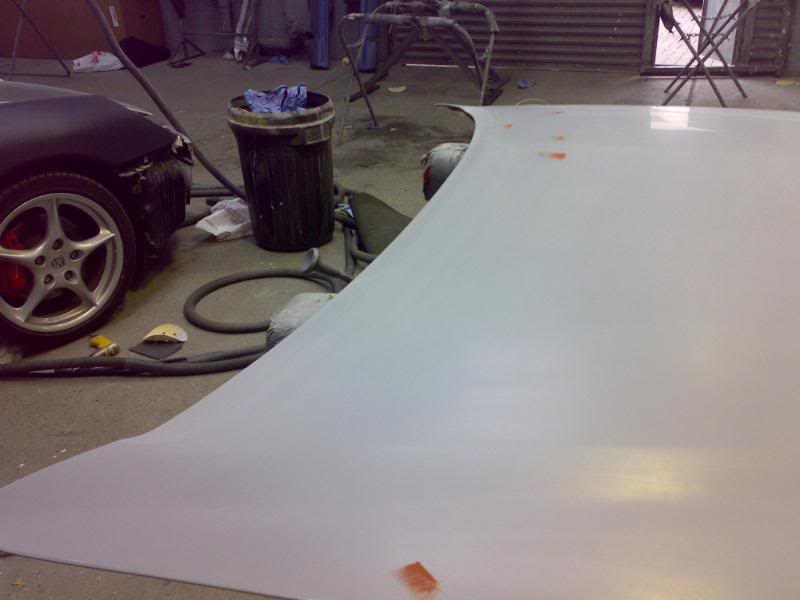
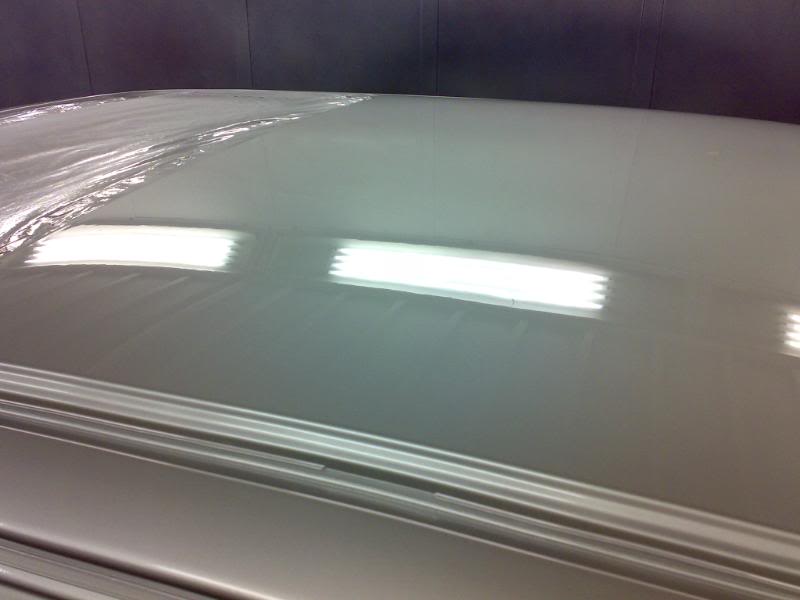
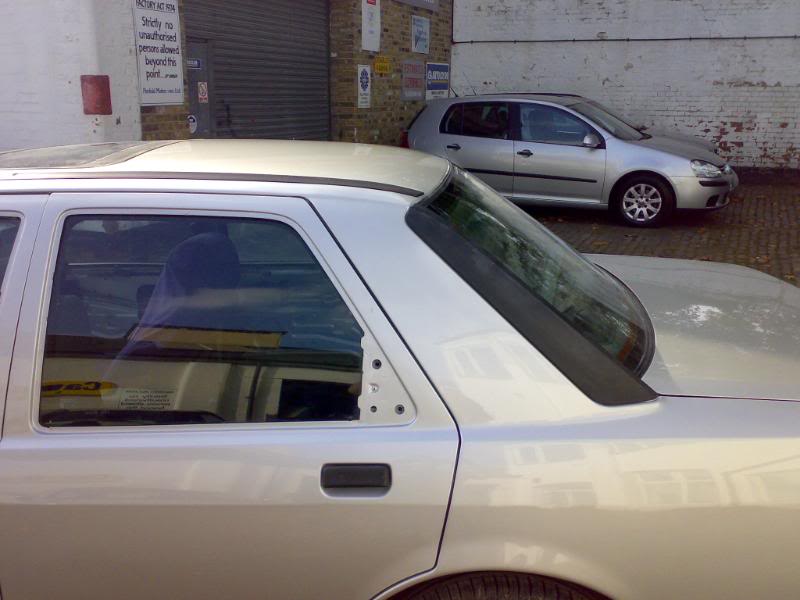
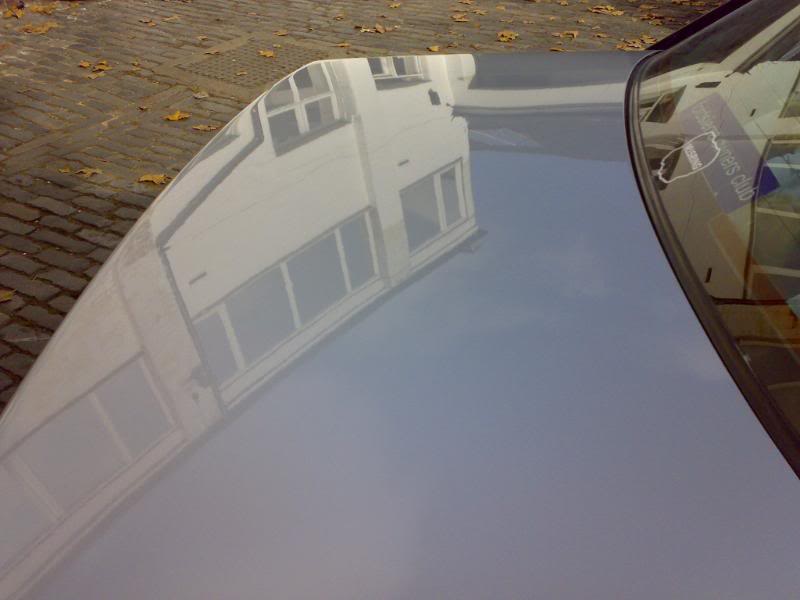
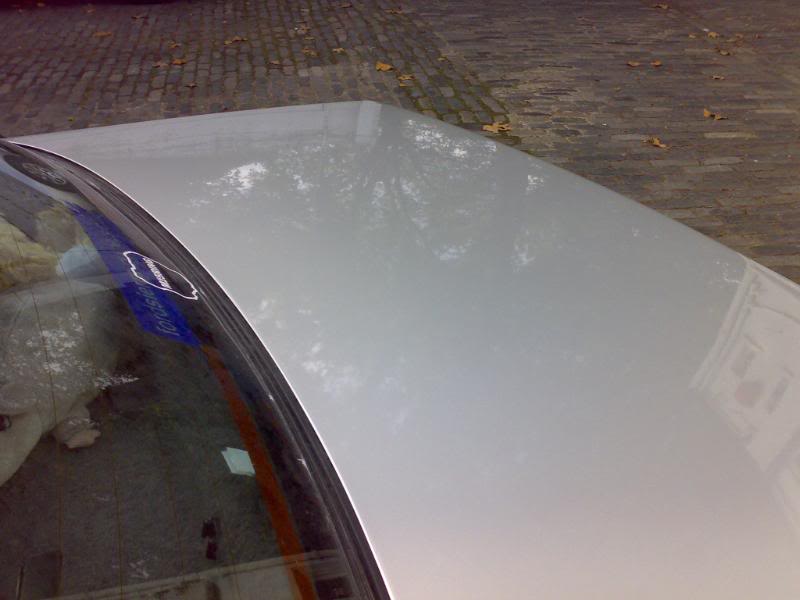
Scratches in the roof were a right pain to remove I must say...
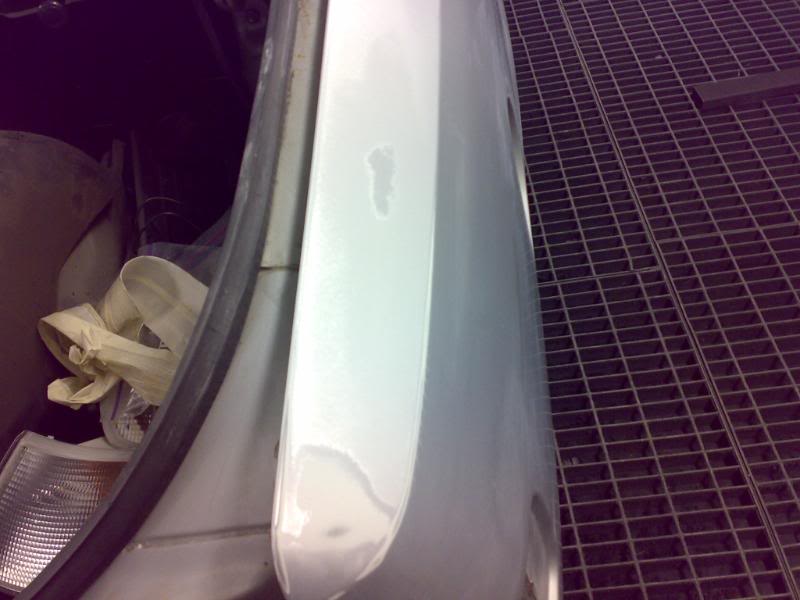
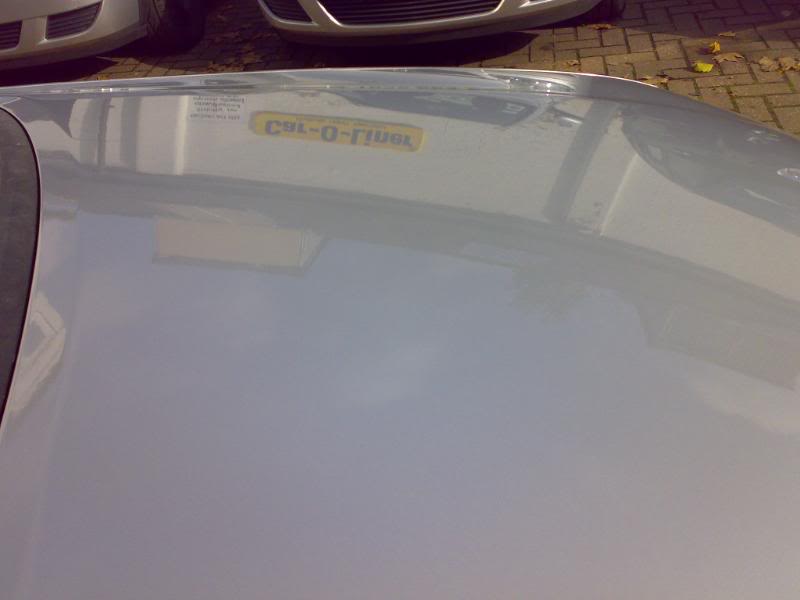
That annoying bit where the lacquer had peeled off when the new windscreen was fitted..
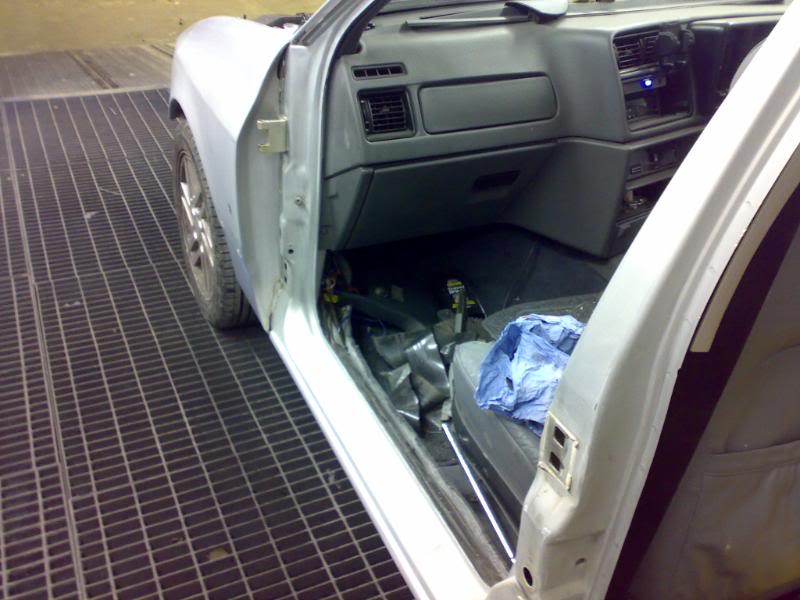
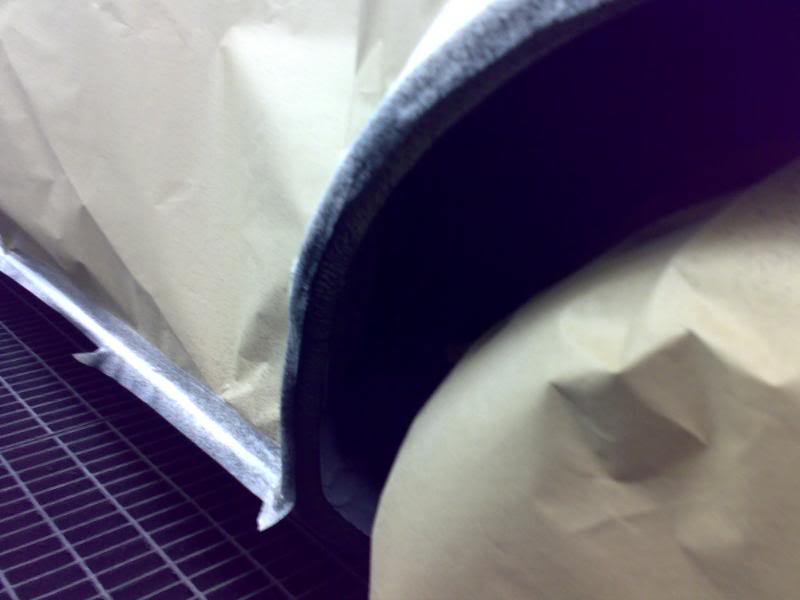
After this, Christine was wrapped up like a christimas turkey ready for some priming...
Well, after a long, hard final attempt, Christine is almost ready.
Friday evening after work, she was driven up to the paint booth and the REAL prep work started.
Scratches in the roof were a right pain to remove I must say...
That annoying bit where the lacquer had peeled off when the new windscreen was fitted..
After this, Christine was wrapped up like a christimas turkey ready for some priming...
Last edited by iansoutham; Apr 14, 2008 at 09:23 PM.
Thread Starter
OCD Victim
Joined: Sep 2005
Posts: 2,096
Likes: 29
From: SE London
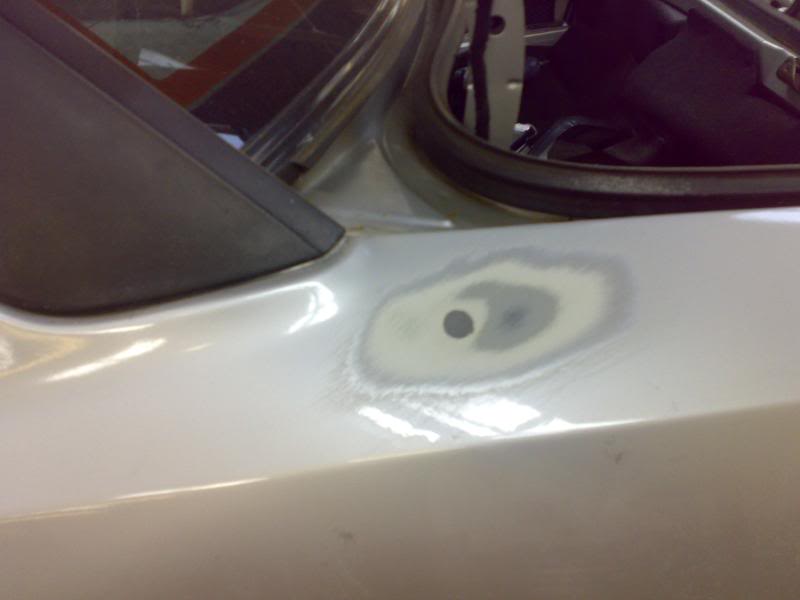
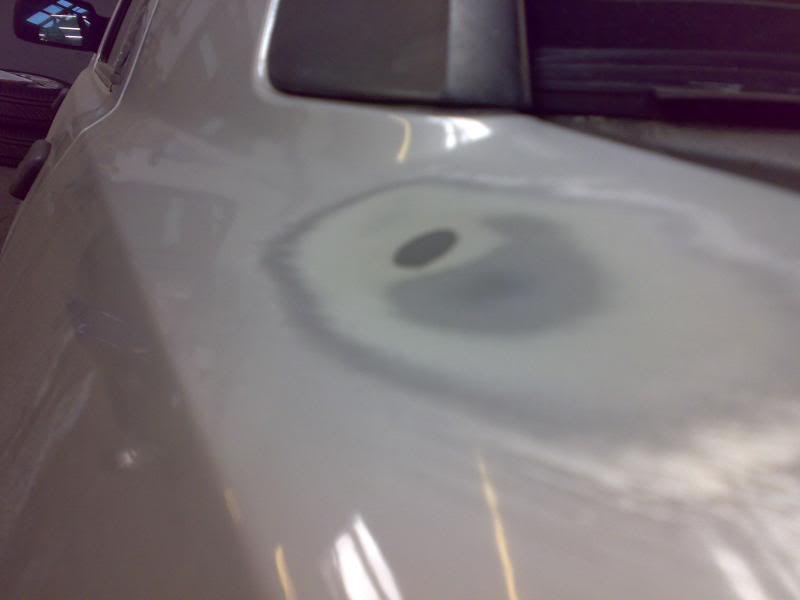
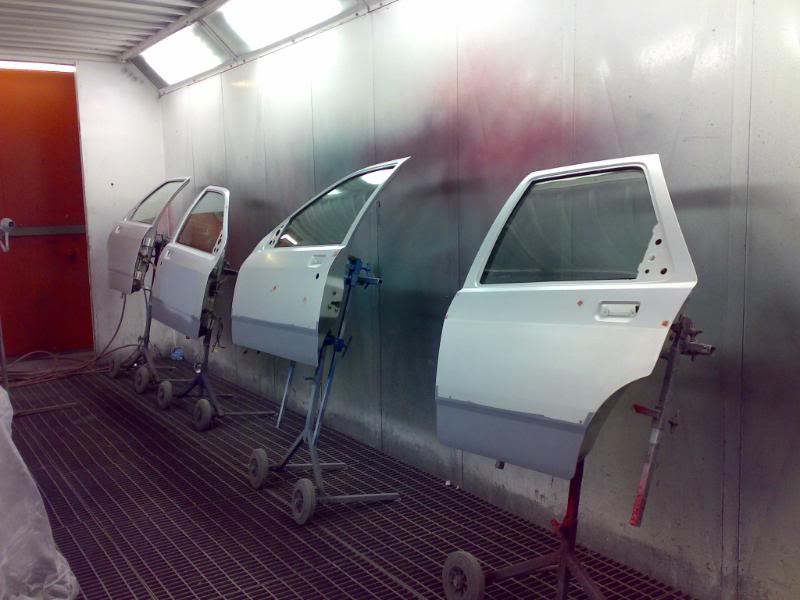
After priming and a quick bake, the tape was removed and it was out with the rubbing down of the primer, hence the light black tracer paint
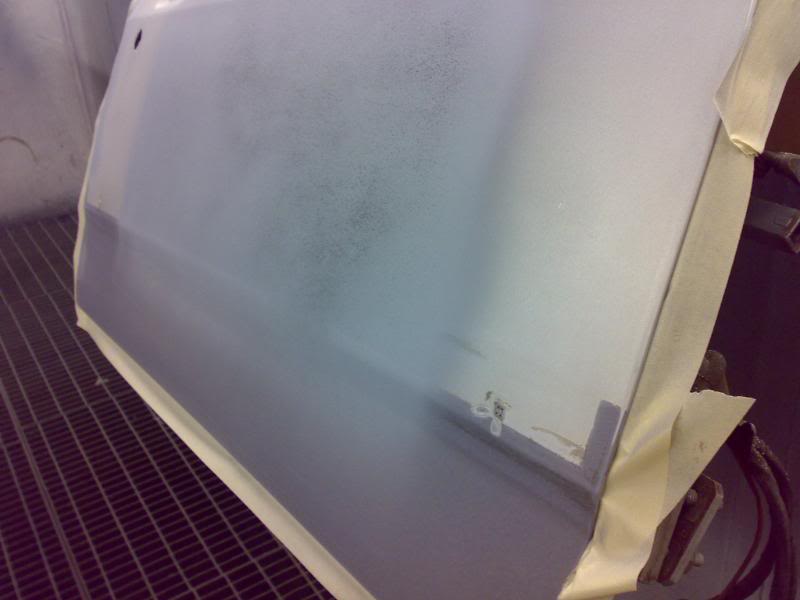
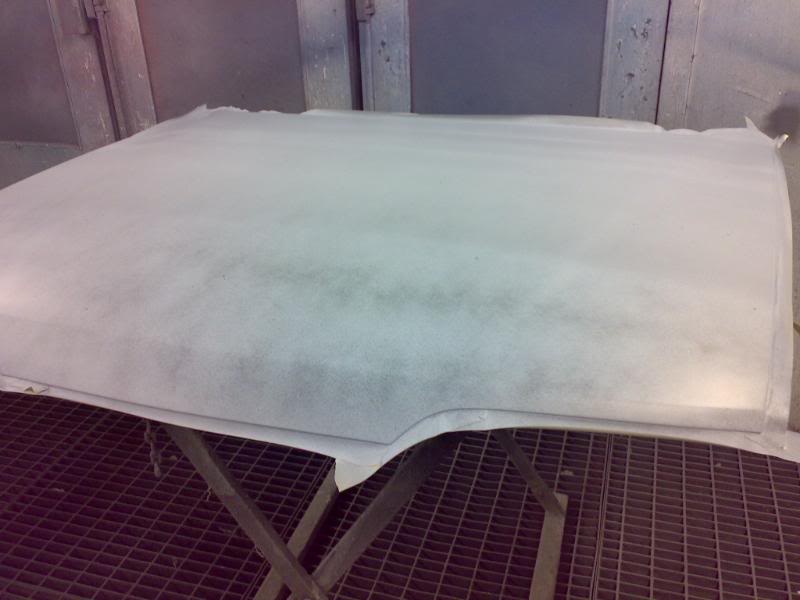
That was Friday evening. Saturday daytime was a killer, 3 hours of prep time, starting @ 8am....
Time for some stopper on the smaller imperfections. Please note that we did not remove EVERY minor imperfection due to:
a/ time
b/ it is still going to be an everyday car, not a show-car
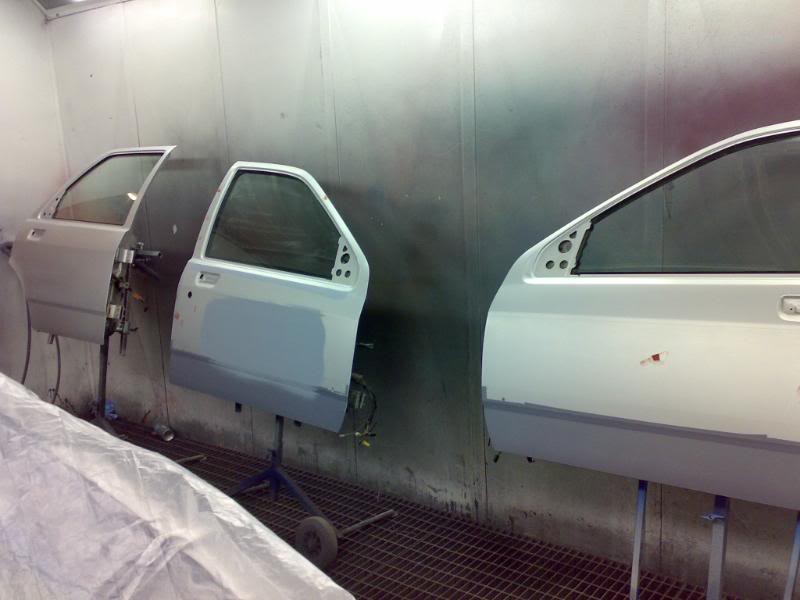
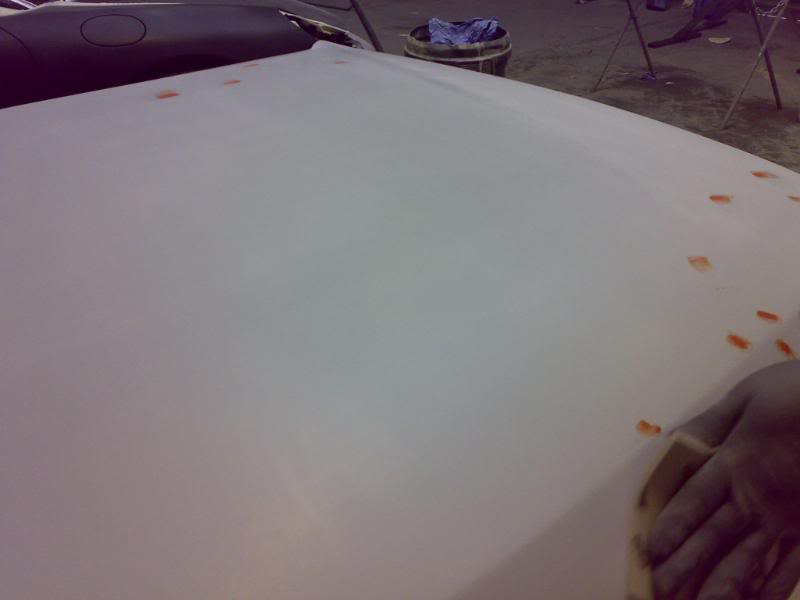
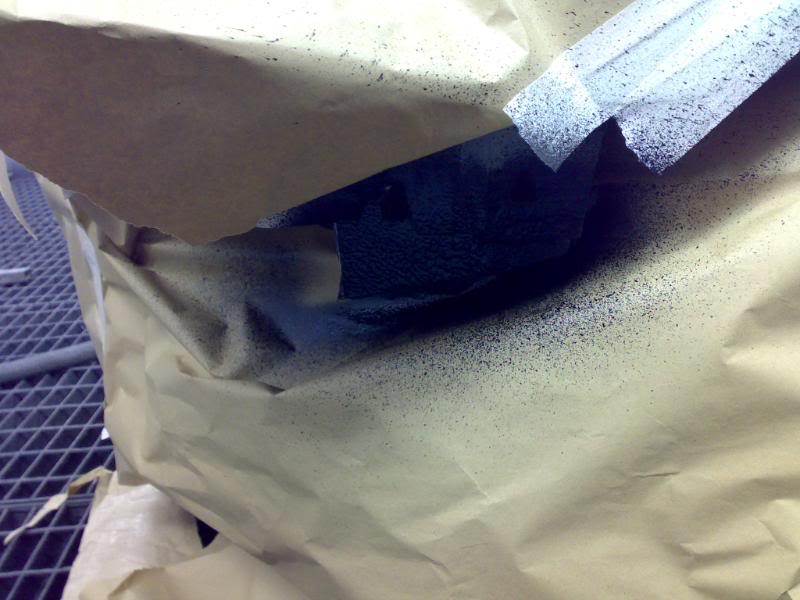

It was then ready for paint-time.
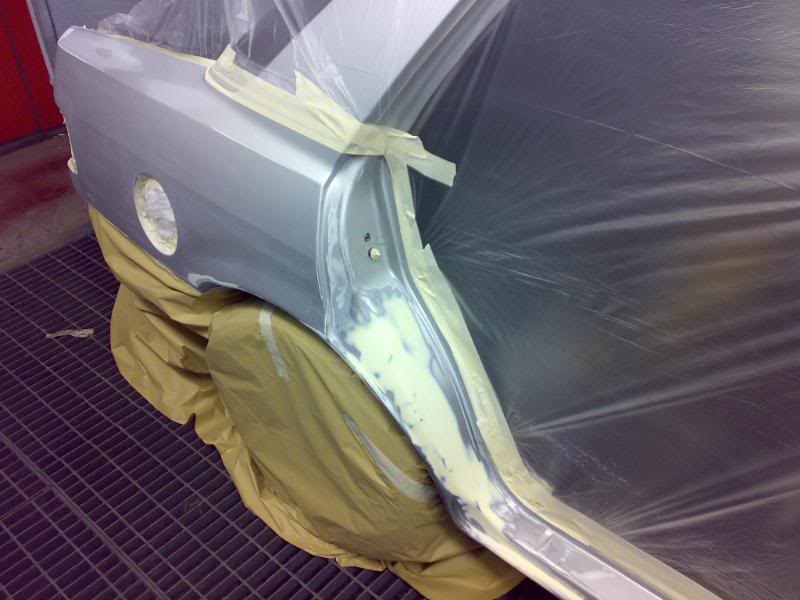
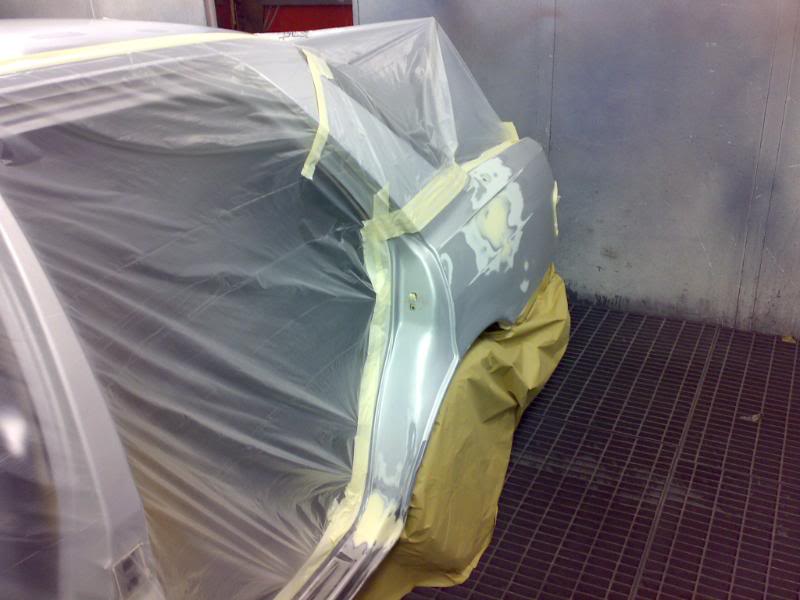
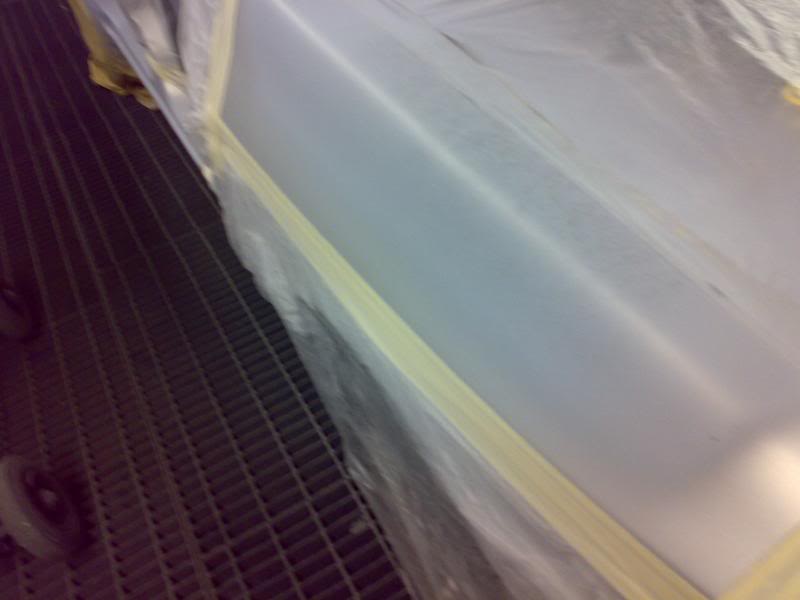
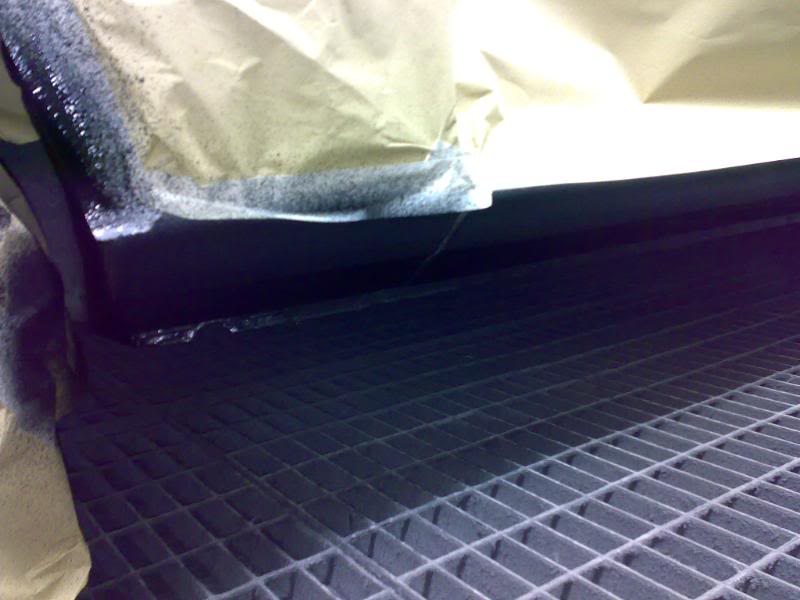
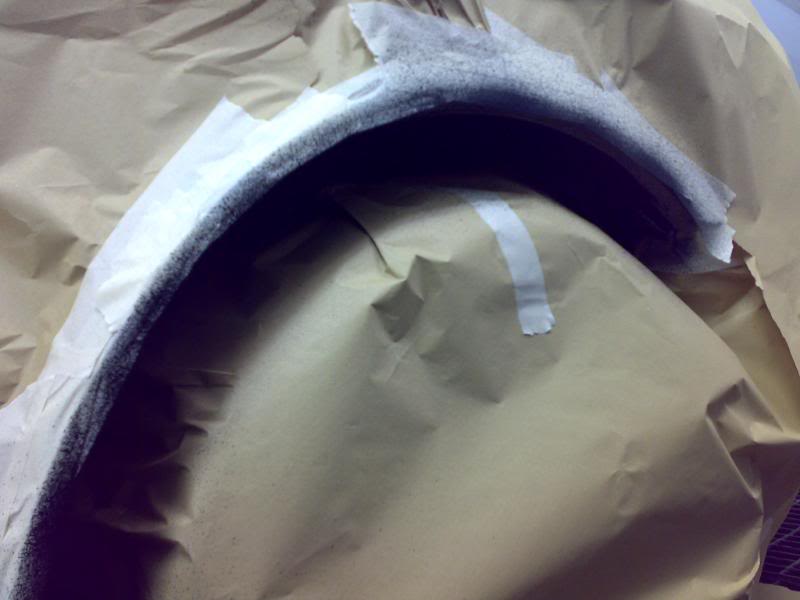
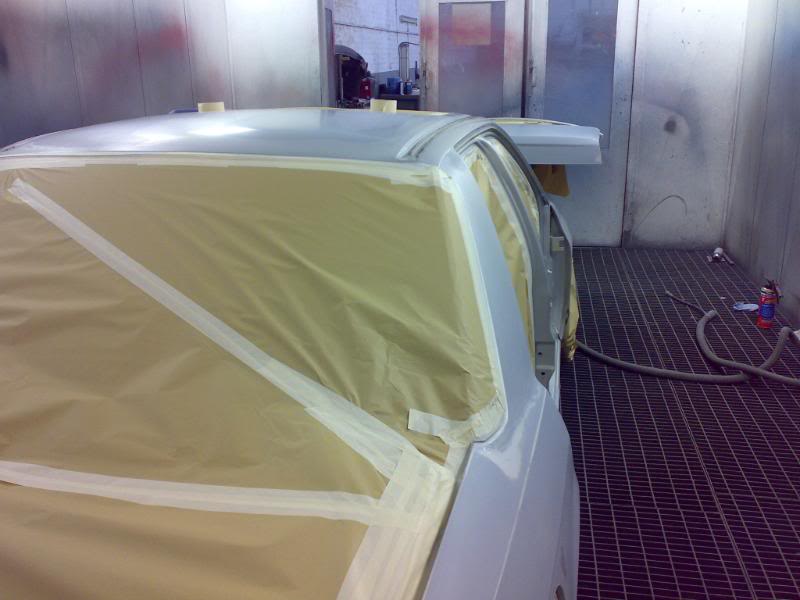
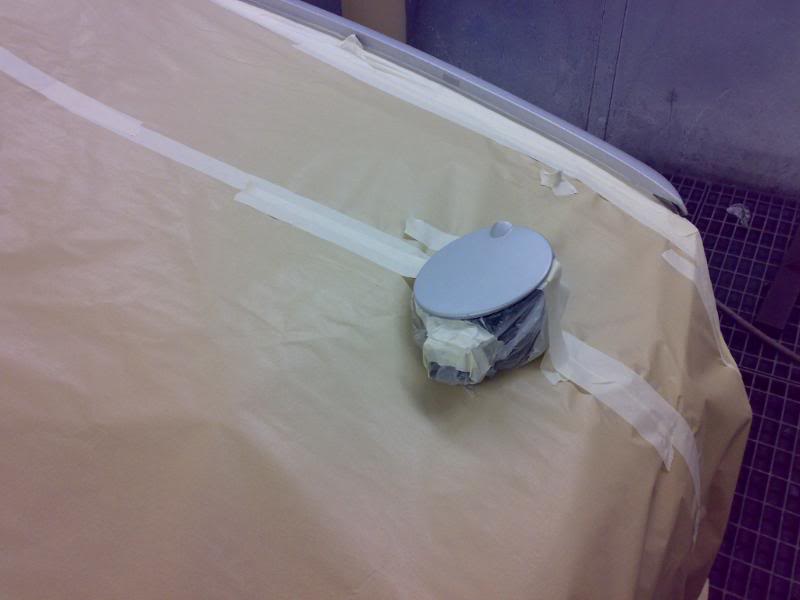
Masking the car up :

That was Friday evening. Saturday daytime was a killer, 3 hours of prep time, starting @ 8am....
Time for some stopper on the smaller imperfections. Please note that we did not remove EVERY minor imperfection due to:
a/ time
b/ it is still going to be an everyday car, not a show-car
It was then ready for paint-time.
Masking the car up :
Thread Starter
OCD Victim
Joined: Sep 2005
Posts: 2,096
Likes: 29
From: SE London
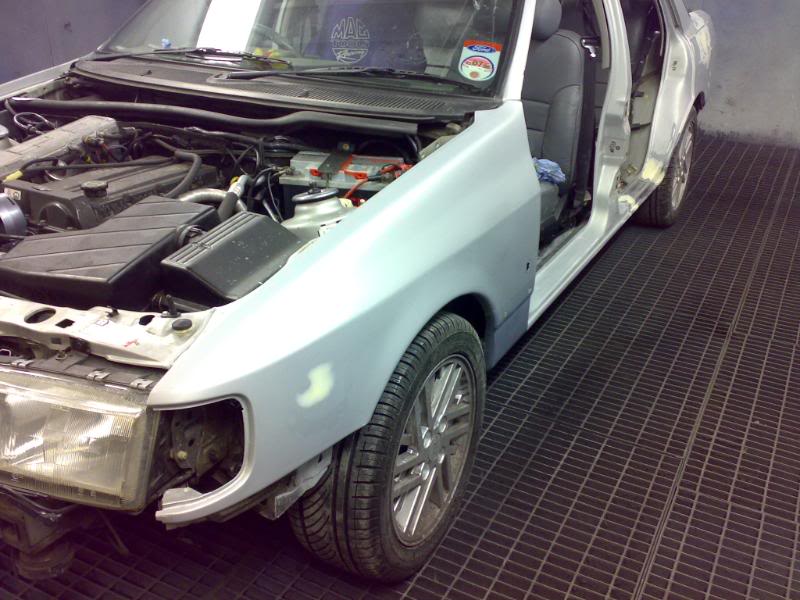
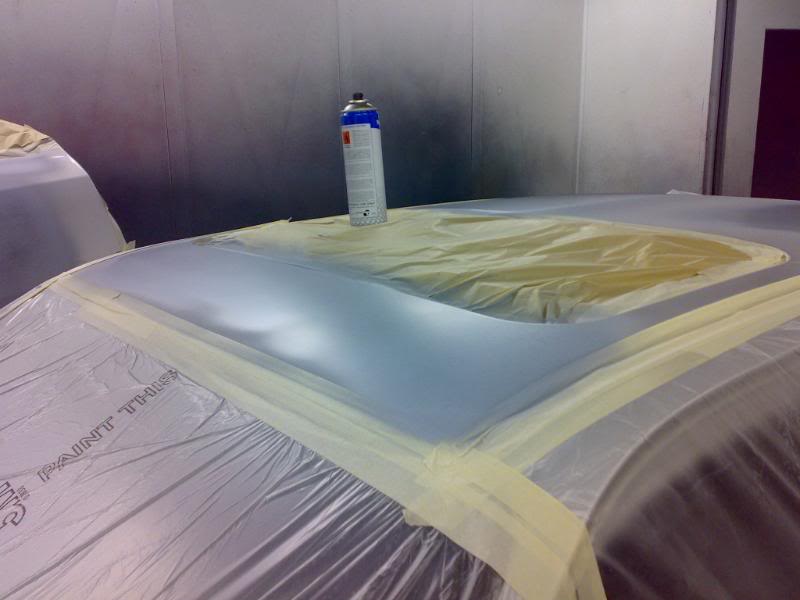
The paint..
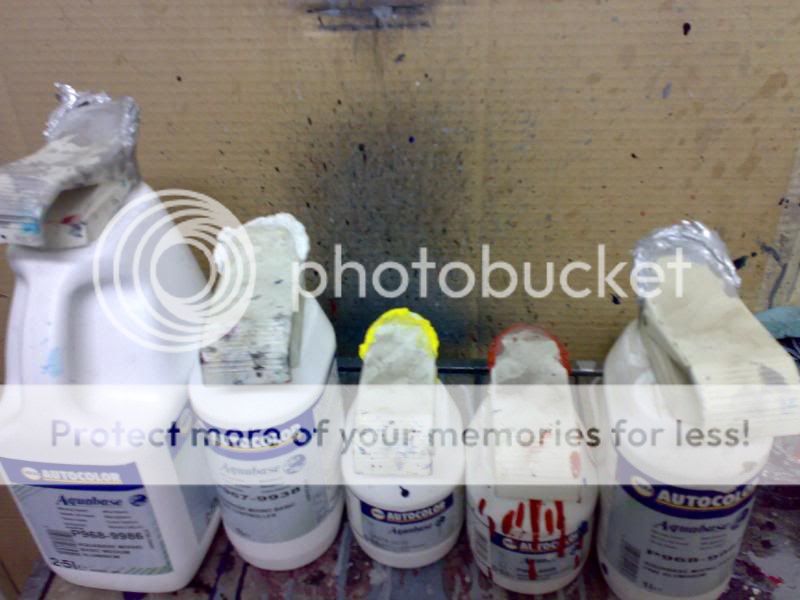
The Stratos Silver
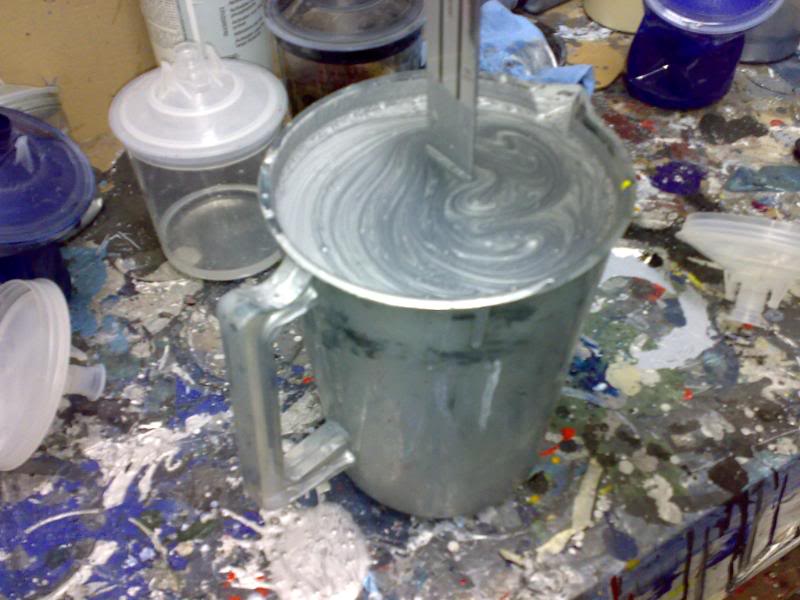
To give you a hint, look at the clear pots behind, they are 1 litre pots, this was a 3-litre pot..... we used 6 litres of Stratos Silver in the end
Christine was then covered from head-to-foot in her nice 1st paint, plus a litre and half of lacquer over the top
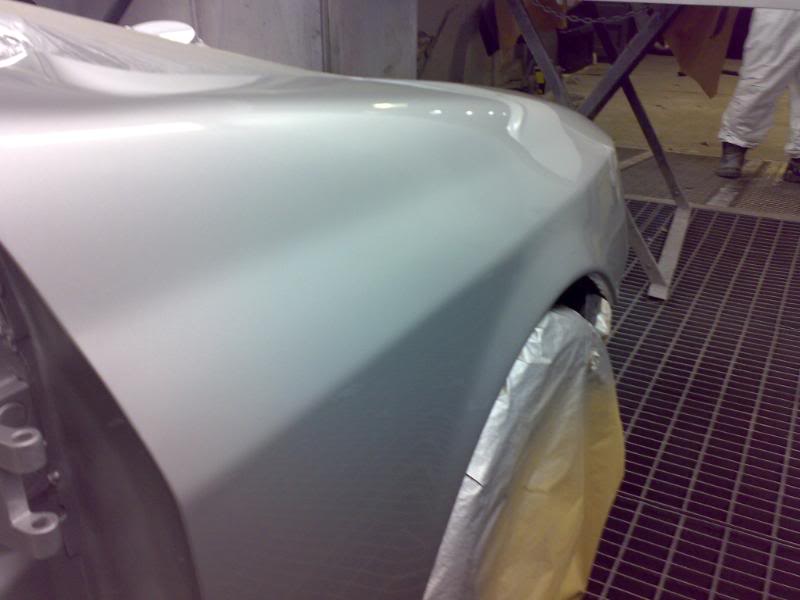
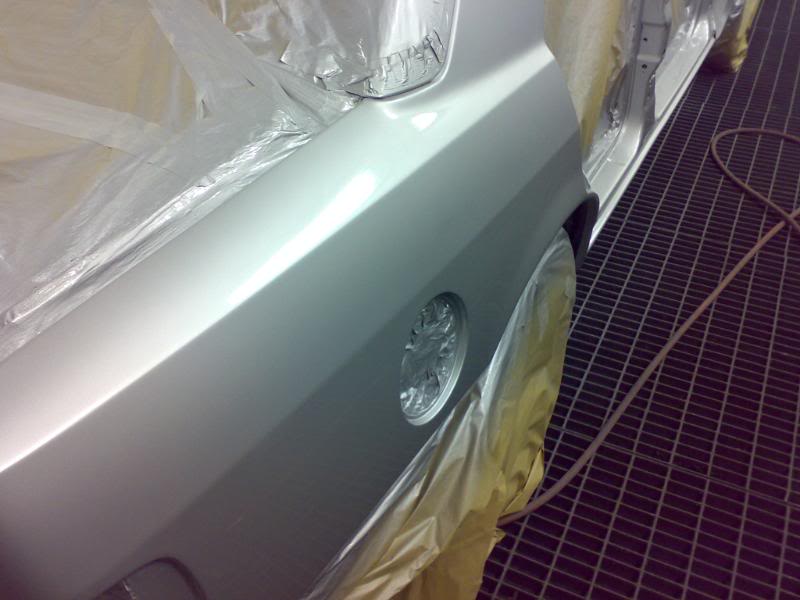
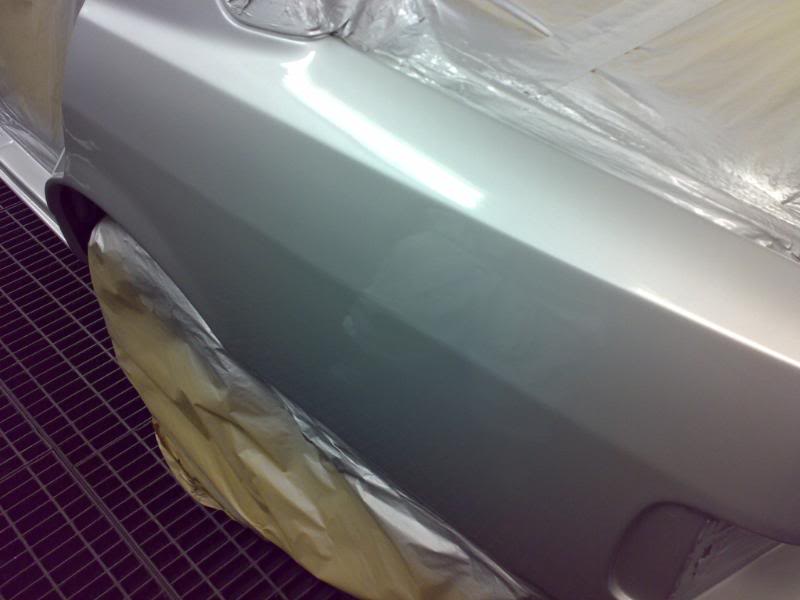
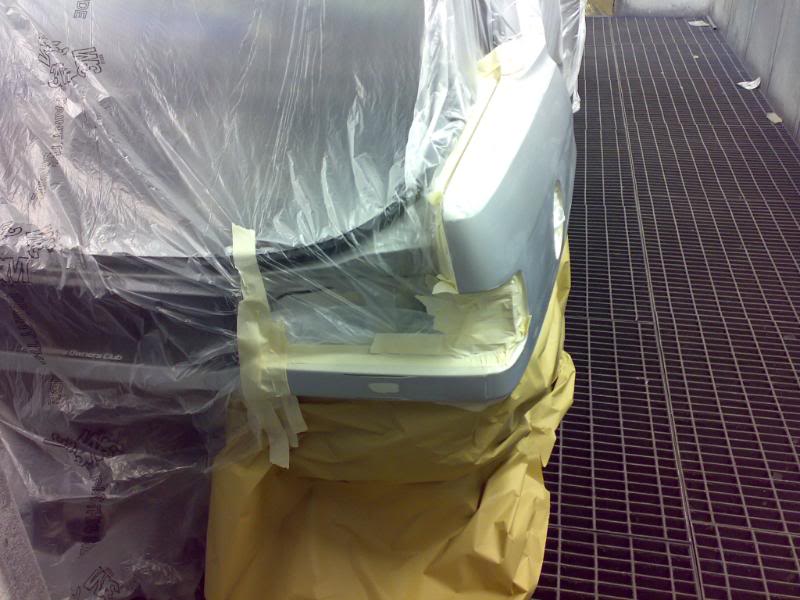
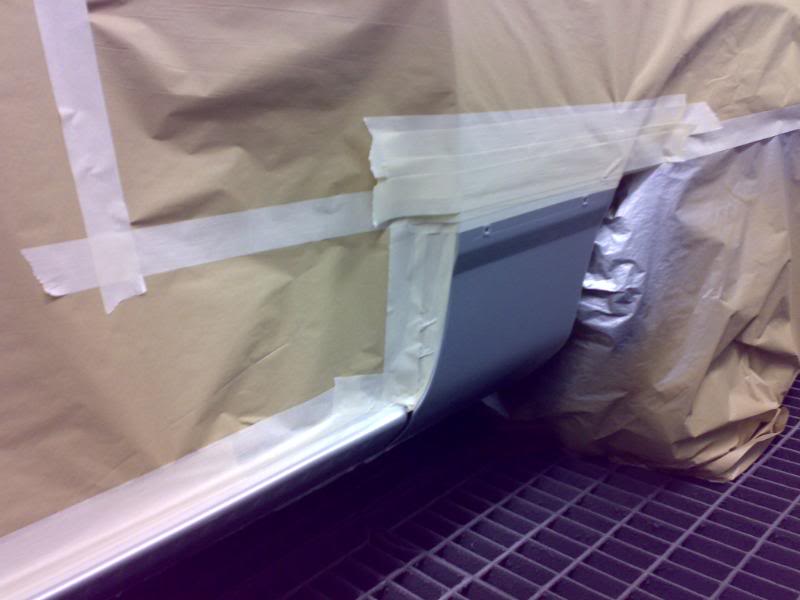
Now ready for the lower-colour:
Being masked up ready..

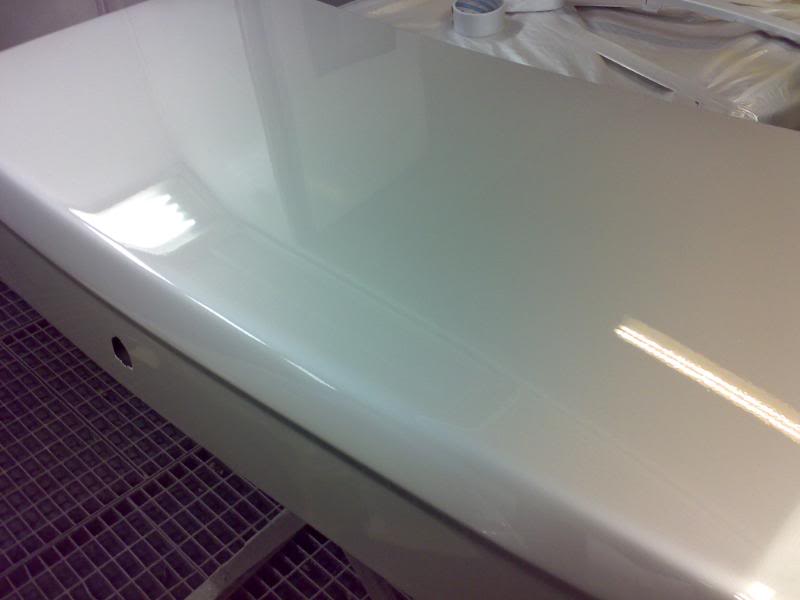
The whole car is now painted, with another layer of lacquer over the top of ALL the paint,
The Stratos Silver
To give you a hint, look at the clear pots behind, they are 1 litre pots, this was a 3-litre pot..... we used 6 litres of Stratos Silver in the end
Christine was then covered from head-to-foot in her nice 1st paint, plus a litre and half of lacquer over the top
Now ready for the lower-colour:
Being masked up ready..
The whole car is now painted, with another layer of lacquer over the top of ALL the paint,
Thread Starter
OCD Victim
Joined: Sep 2005
Posts: 2,096
Likes: 29
From: SE London
14th October:
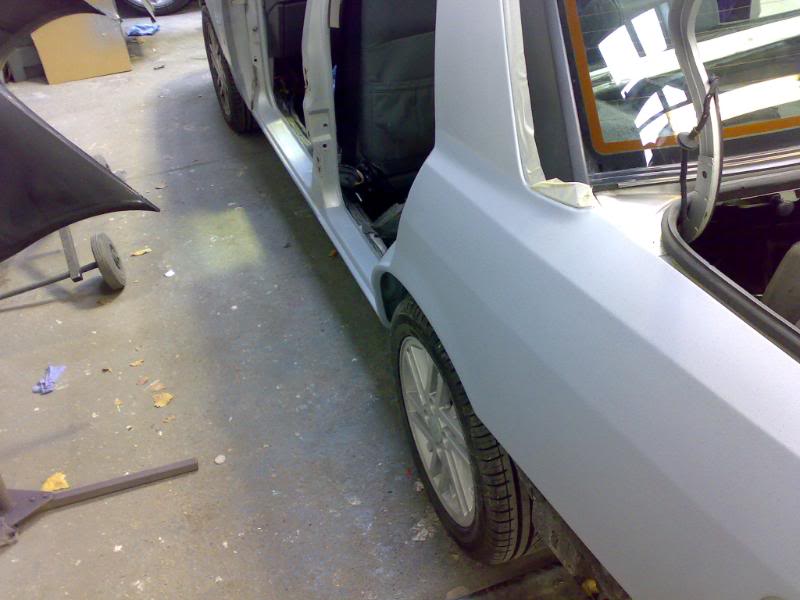
Some photos once the main closing panels were back on (ignore poor fitting gaps, etc.. as this was purely to get it home):
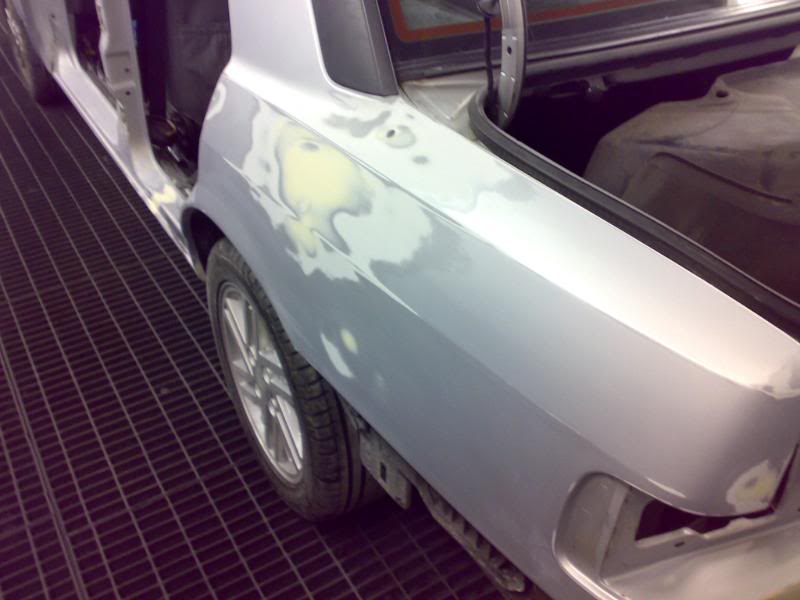
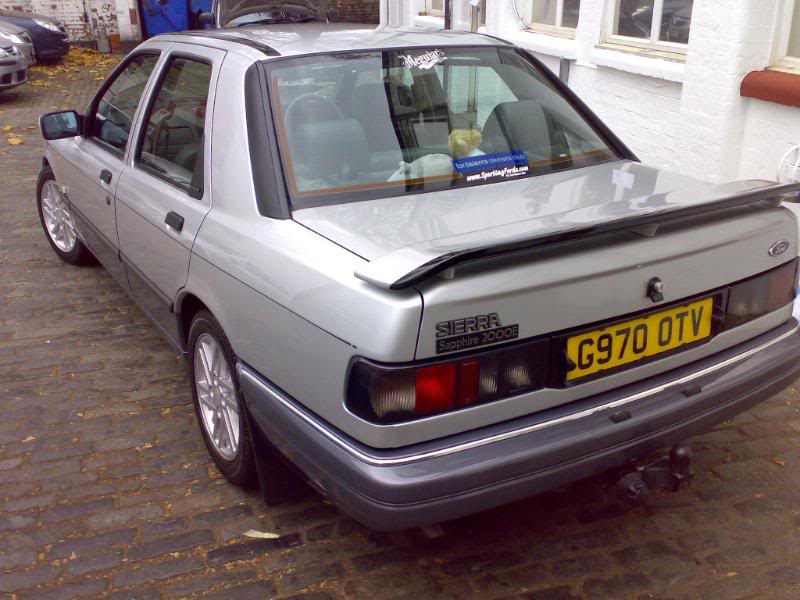
Some nice reflection shots:

Not bad seeing as that is literally how it came out of the booth. No polishing yet or anything....
Once back home, some more of the bits got fitted:
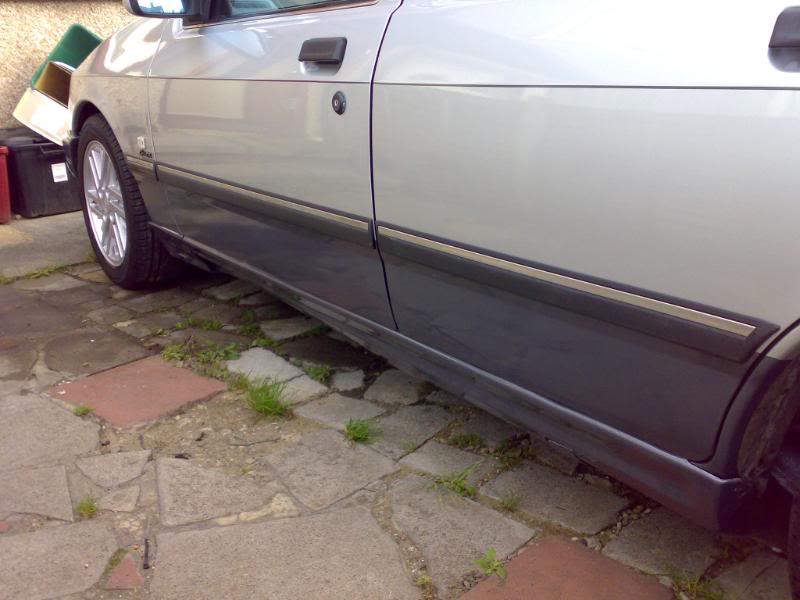
Cosworth sideskirts
New mirror covers:

Some photos once the main closing panels were back on (ignore poor fitting gaps, etc.. as this was purely to get it home):
Some nice reflection shots:
Not bad seeing as that is literally how it came out of the booth. No polishing yet or anything....
Once back home, some more of the bits got fitted:
Cosworth sideskirts
New mirror covers:
Trending Topics
Thread Starter
OCD Victim
Joined: Sep 2005
Posts: 2,096
Likes: 29
From: SE London
... and the final instalment (for now):
After a long and hard couple of weeks (with lots of lousy weather inbetween):
all mouldings on and sideskirts fitted properly
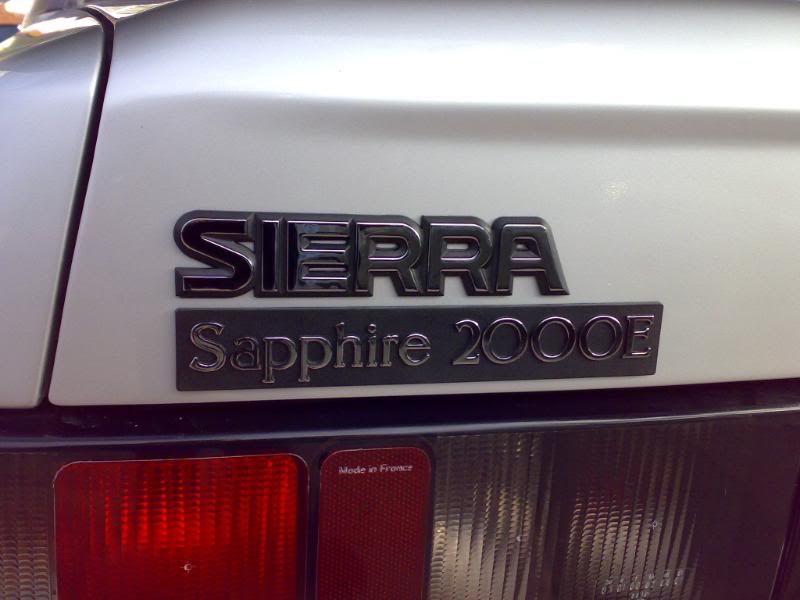
all new badges on the back
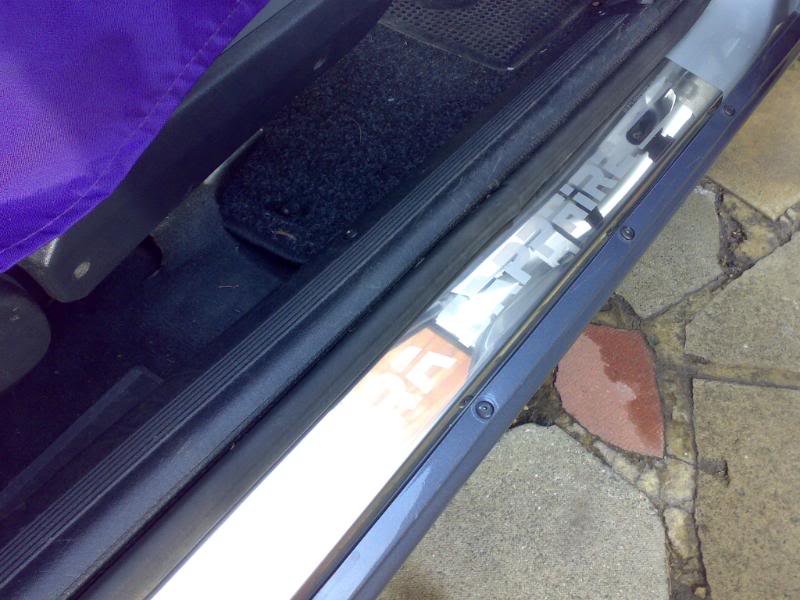
custom stainless steel sill plates
Cossie grille
custom pinstripe insert

and a few from the photos taken for its agreed valuation:


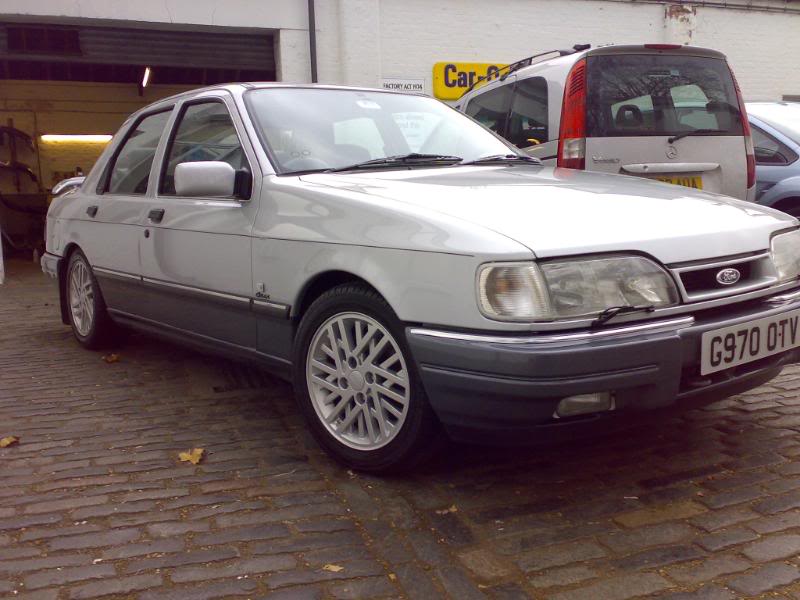
So, all in all, within a year, from
this:
to this:
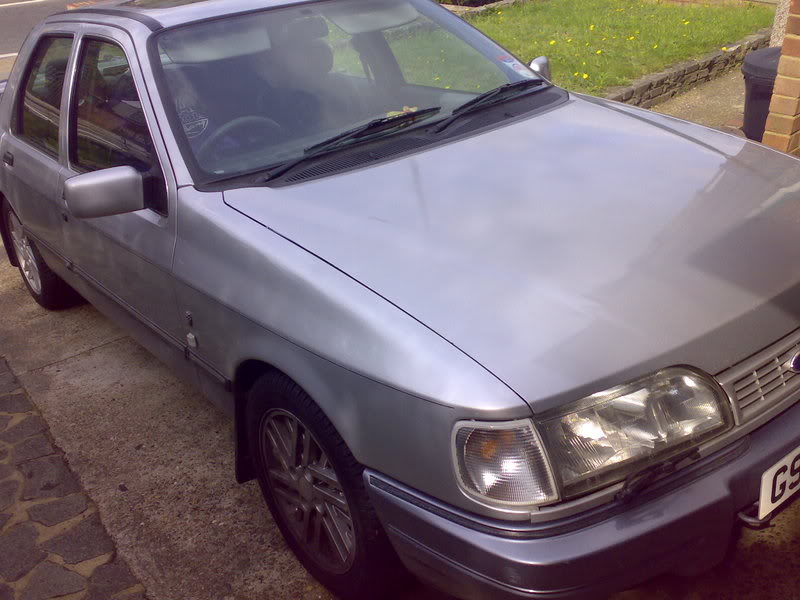
to this:

to now this:
This is the bodywork section...
Next is the engine build (work in progress).......
After a long and hard couple of weeks (with lots of lousy weather inbetween):
all mouldings on and sideskirts fitted properly
all new badges on the back
custom stainless steel sill plates
Cossie grille
custom pinstripe insert
and a few from the photos taken for its agreed valuation:
So, all in all, within a year, from
this:
to this:
to this:
to now this:
This is the bodywork section...
Next is the engine build (work in progress).......
Thread Starter
OCD Victim
Joined: Sep 2005
Posts: 2,096
Likes: 29
From: SE London
Okay, above has been the outside work-over, but, most of you will not have seen the engine bay. This is mainly because of the multiple oil leaks and dirty parts under the bonnet.
This is a situation which needs remedying (can't have a clean car and dirty engine bay).
So here goes:
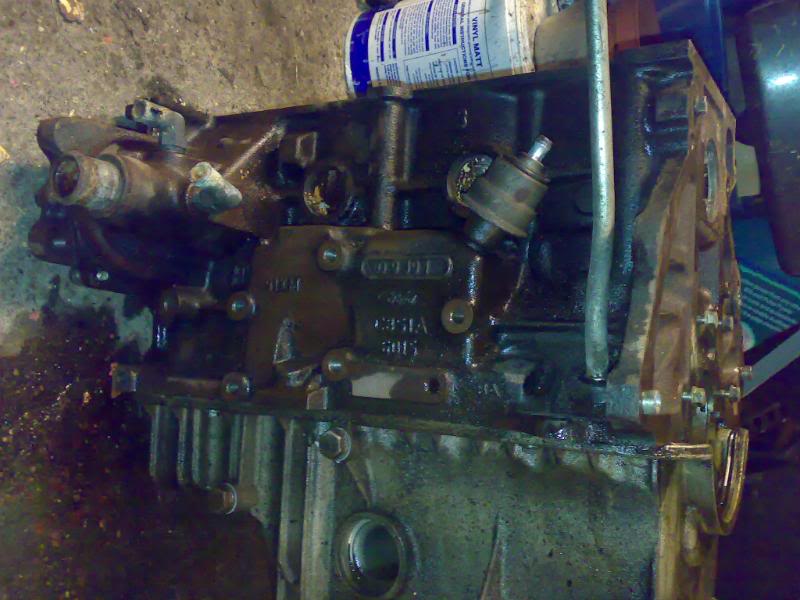
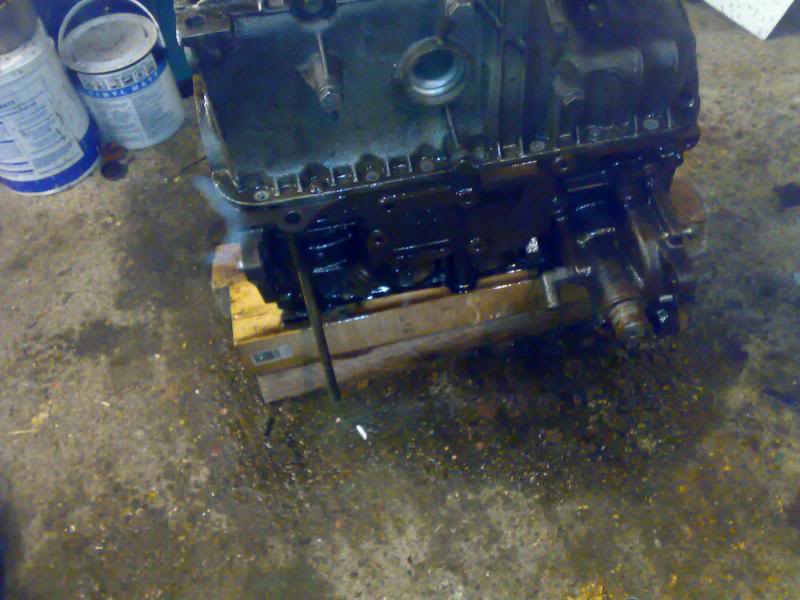
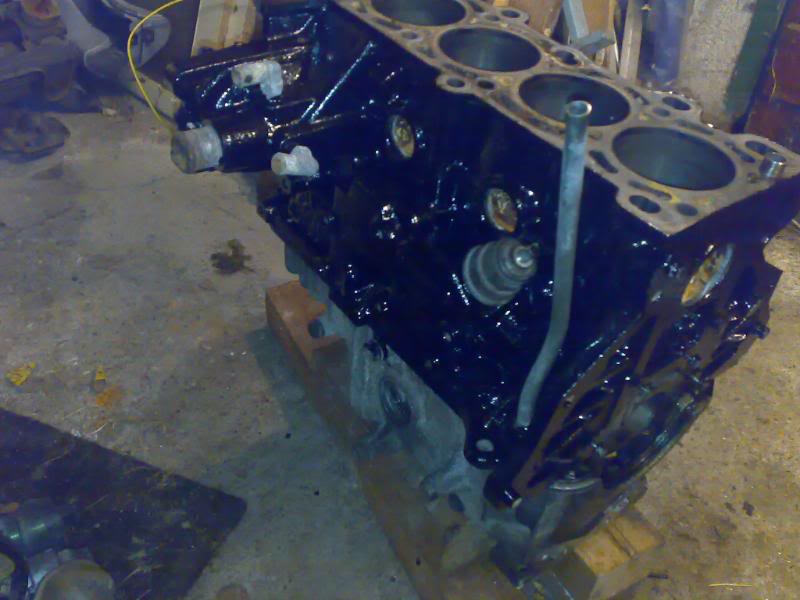
I have recently acquired a 2.0 DOHC 4x4 complete engine free of charge from a friend who had it cluttering up his garage space. The sump had been changed from another engine (sump currently on it has about 3 big holes in it, but these are not related to this engine). The engine is a October 1991 build, making it a reasonably late engine. The previous history is unknown to the most part.
The idea is to strip the engine down literally to bare components, clean, recondition and replace anything that needs it with genuine Ford parts. The block is going to get painted in Engine Enamel black, the cyinder head is staying original aluminium, along with the replacement sump. The inlet manifold will be getting some detail "inserts" to highlight specific conmponents, and the exhaust manifold will be getting treated to some VHT manifold paint (probably in black). The lambda-fitted downpipe will be getting treated and wrapped in Thermo-Tec exhaust wrap. Almost all the anciliaries will be getting replaced, alternator, starter motor, power-steering pump, etc... with new parts, or will be completely stripped, cleaned, painted and reassembled as recon/new-condition. ALL seals / gaskets in the engine will be getting replaced, and there will be new rings and shells. Basically, it will pretty much be a brand new engine. All brakctry, where possible, will be getting shot/sand blasted back to bare metal and repainted either in phosphate coatings or painted where applicable.
While the engine is out for the change, new gearbox seals will be going in, new engine mounts, centre prop-bearing and anything else that looks old or worn.
The Stripdown:
I do not have any pictures of the complete engine prior to stripdown as it was transported in 2 pieces. I do not have any decent pictures ATM of the cylinder head, mainly because it does not look any different really stripped, or built. These pics will follow over the next week or so as I clean the head
This is a situation which needs remedying (can't have a clean car and dirty engine bay).
So here goes:
I have recently acquired a 2.0 DOHC 4x4 complete engine free of charge from a friend who had it cluttering up his garage space. The sump had been changed from another engine (sump currently on it has about 3 big holes in it, but these are not related to this engine). The engine is a October 1991 build, making it a reasonably late engine. The previous history is unknown to the most part.
The idea is to strip the engine down literally to bare components, clean, recondition and replace anything that needs it with genuine Ford parts. The block is going to get painted in Engine Enamel black, the cyinder head is staying original aluminium, along with the replacement sump. The inlet manifold will be getting some detail "inserts" to highlight specific conmponents, and the exhaust manifold will be getting treated to some VHT manifold paint (probably in black). The lambda-fitted downpipe will be getting treated and wrapped in Thermo-Tec exhaust wrap. Almost all the anciliaries will be getting replaced, alternator, starter motor, power-steering pump, etc... with new parts, or will be completely stripped, cleaned, painted and reassembled as recon/new-condition. ALL seals / gaskets in the engine will be getting replaced, and there will be new rings and shells. Basically, it will pretty much be a brand new engine. All brakctry, where possible, will be getting shot/sand blasted back to bare metal and repainted either in phosphate coatings or painted where applicable.
While the engine is out for the change, new gearbox seals will be going in, new engine mounts, centre prop-bearing and anything else that looks old or worn.
The Stripdown:
I do not have any pictures of the complete engine prior to stripdown as it was transported in 2 pieces. I do not have any decent pictures ATM of the cylinder head, mainly because it does not look any different really stripped, or built. These pics will follow over the next week or so as I clean the head
Thread Starter
OCD Victim
Joined: Sep 2005
Posts: 2,096
Likes: 29
From: SE London
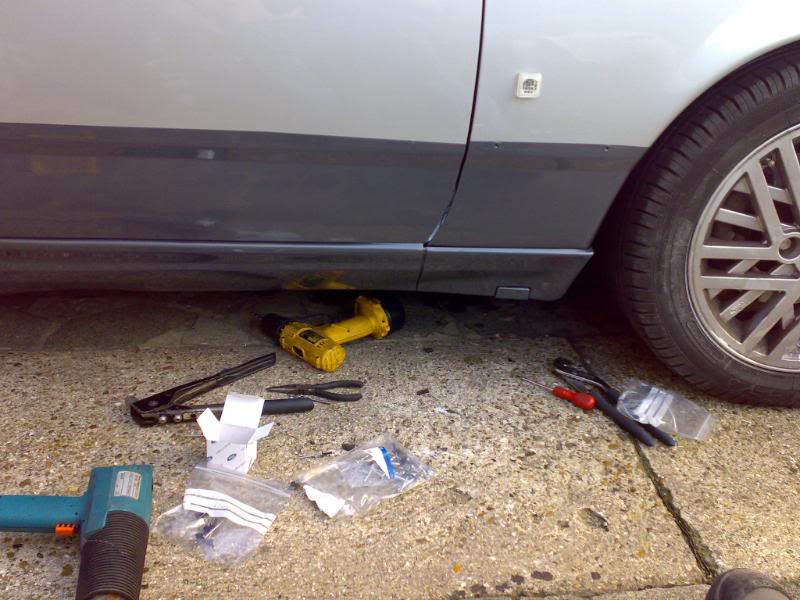
Well, the 1st load of bits started to get cleaned up tonight:
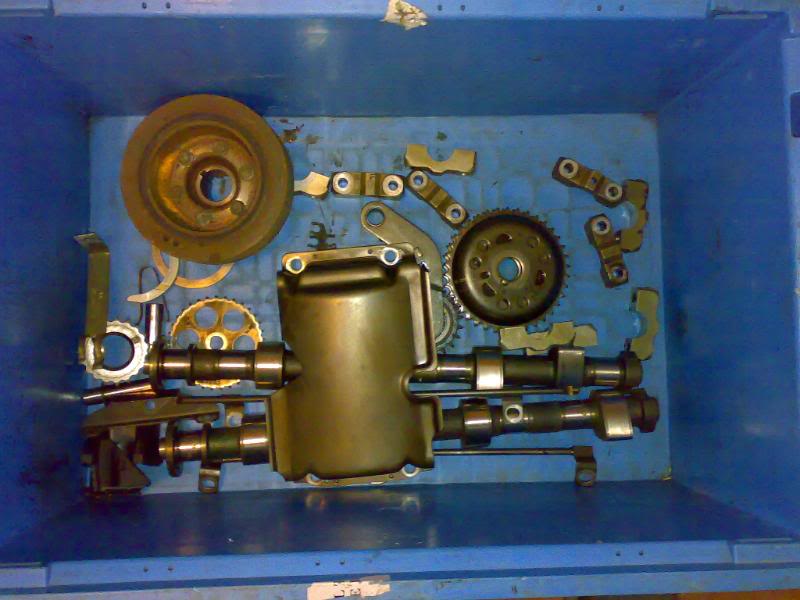
Includes bottom pulley ready for painting, cams cleaned and prepped, all sprockets cleaned and inspected, etc...
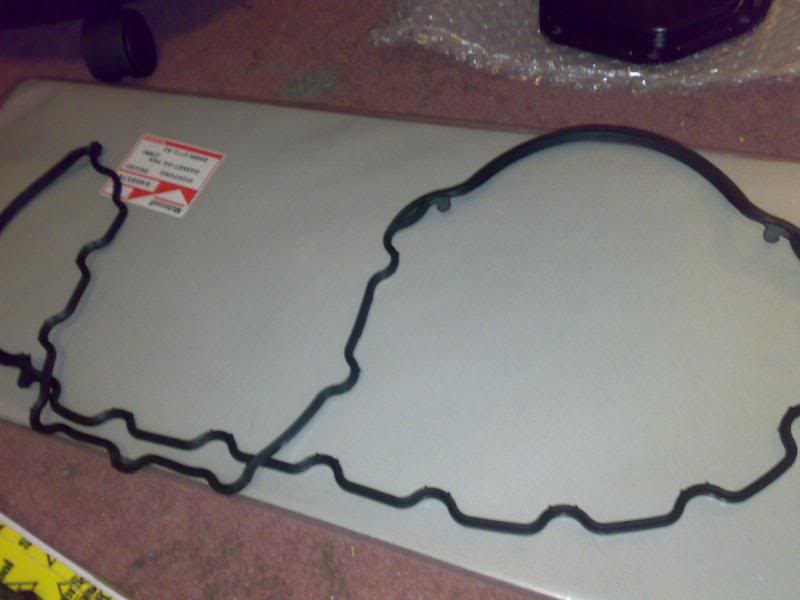
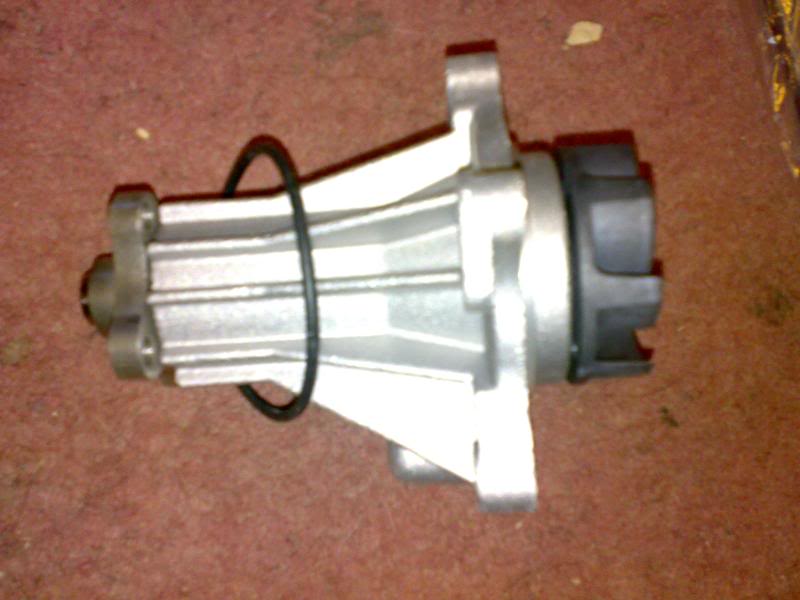
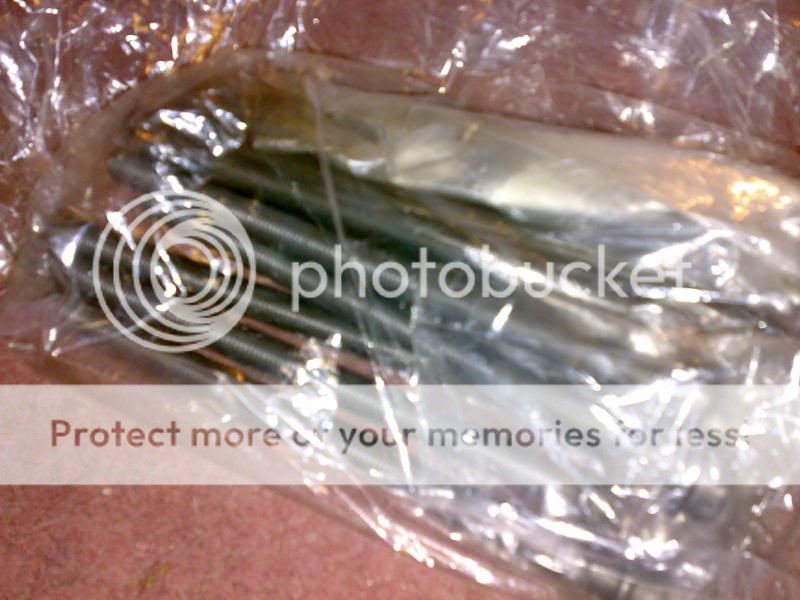
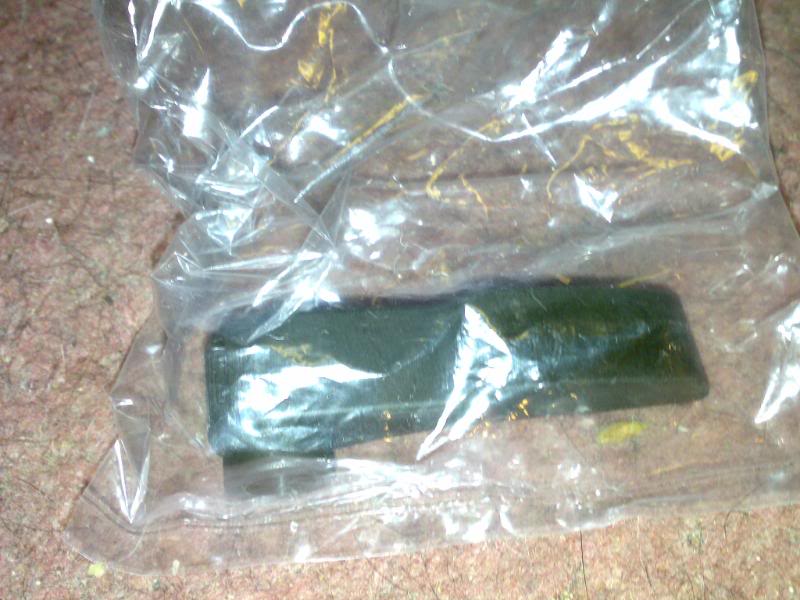
New parts (1st lot anyway) arrived today as well:
Sump gasket
New water pump
Set of head bolts
Oil relief value spring
Oil chain guide
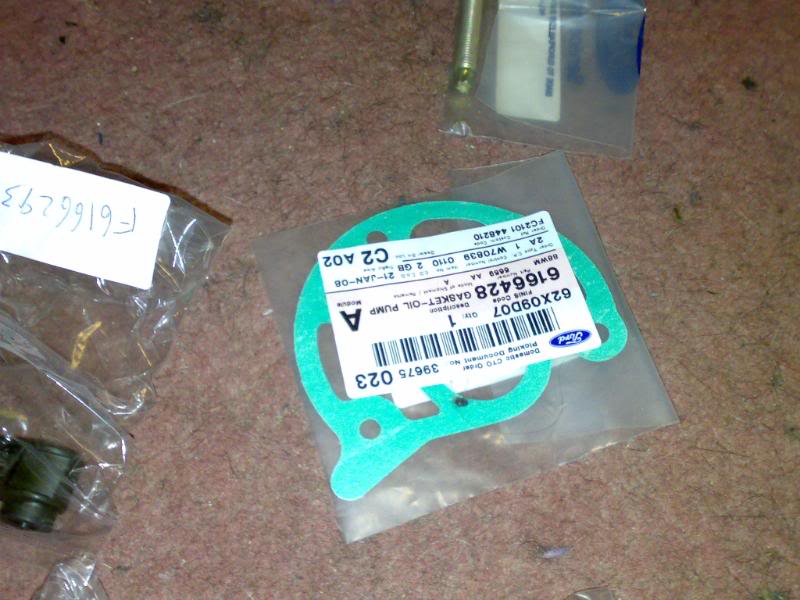
Oil pump gasket
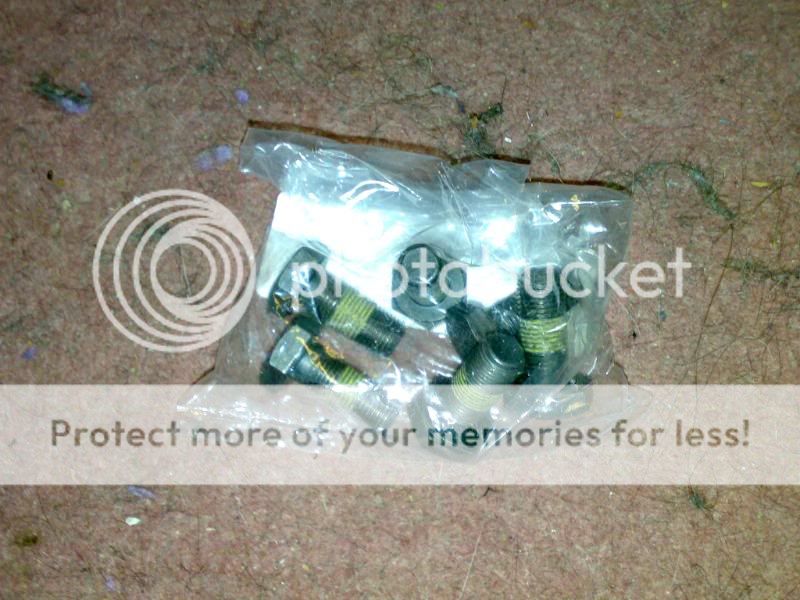
Some conrod stretch bolts (note the weird threads)
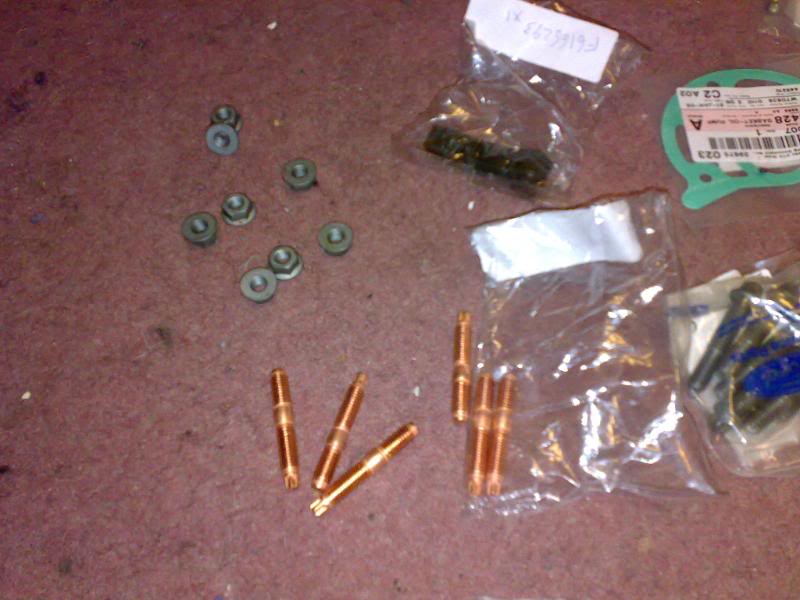
Some assorted nuts and studs
New Ford fibre headgasket (not a fan of later steel ones)
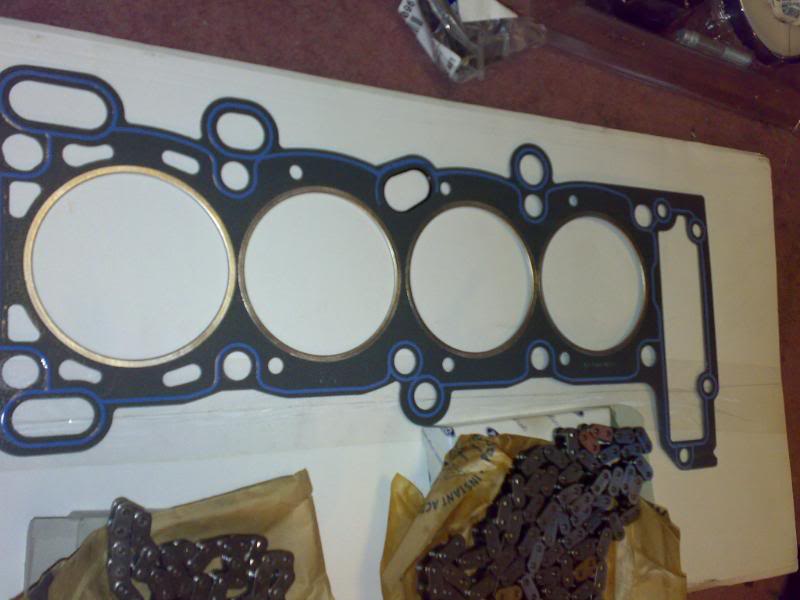
Timing chain (note gold timing location links)
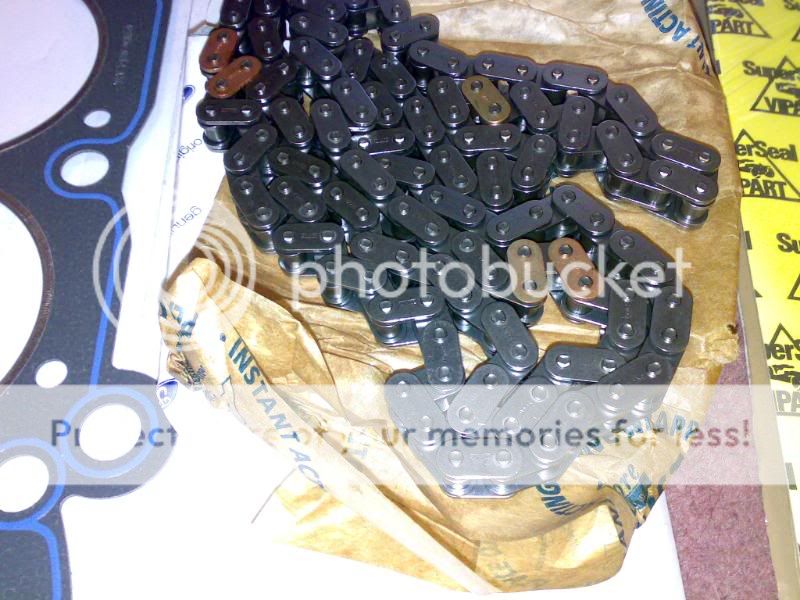
Oil pump chain
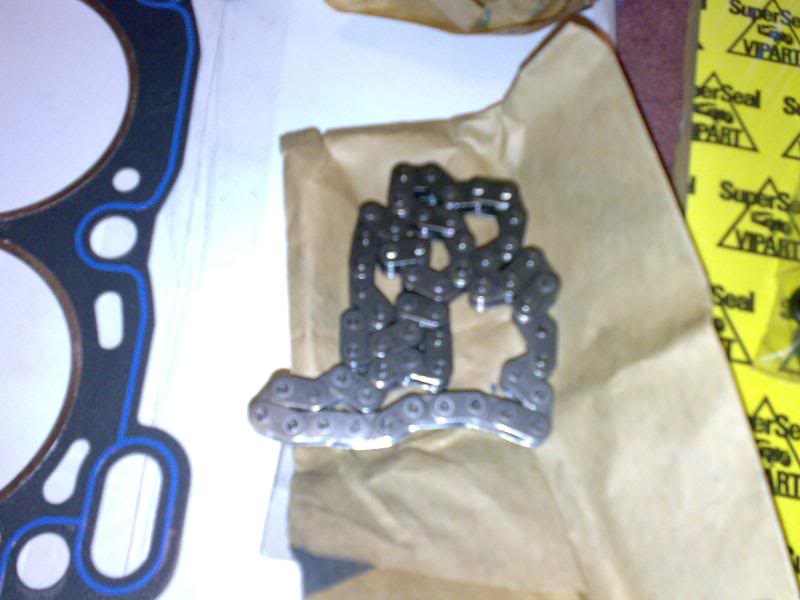
Hydraulic timing chain tensioner "bomb"
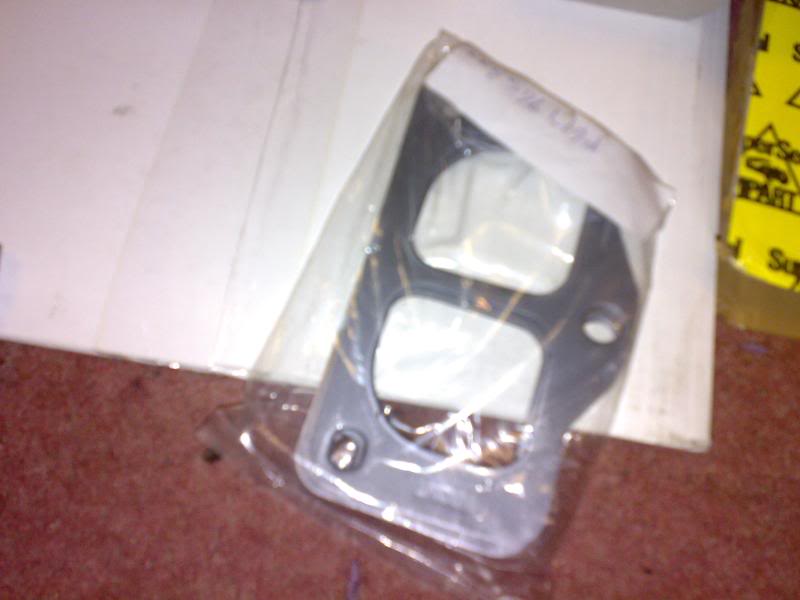
Exhaust manifold gaskets
Assorted top-end gaskets and seals

Modified lower timing cover
Overview of some of the main components in todays delivery.
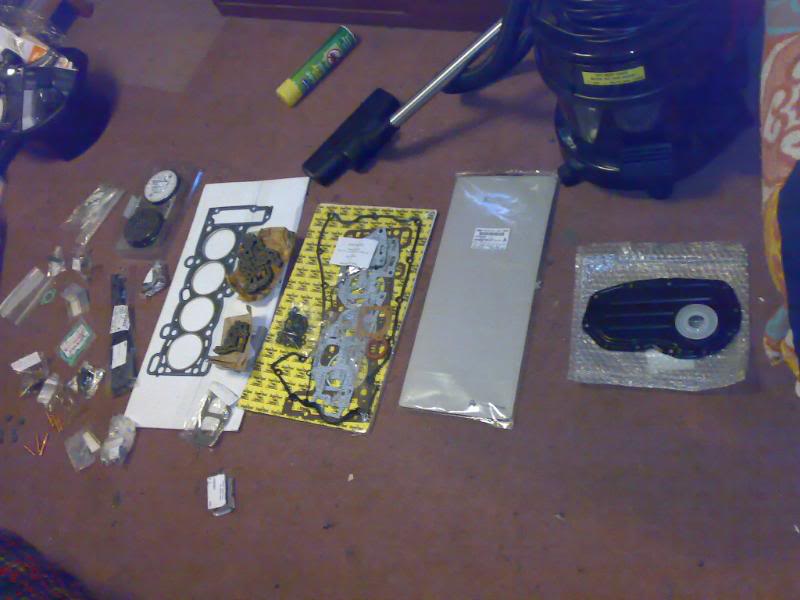
Not in shot are the tensioner arms, rear main seal and housing, and a couple of other minor items.
Retail, this little lot alone would come in at around �250 + vat :shock
And this is just the beginning :cry :cry :cry
Includes bottom pulley ready for painting, cams cleaned and prepped, all sprockets cleaned and inspected, etc...
New parts (1st lot anyway) arrived today as well:
Sump gasket
New water pump
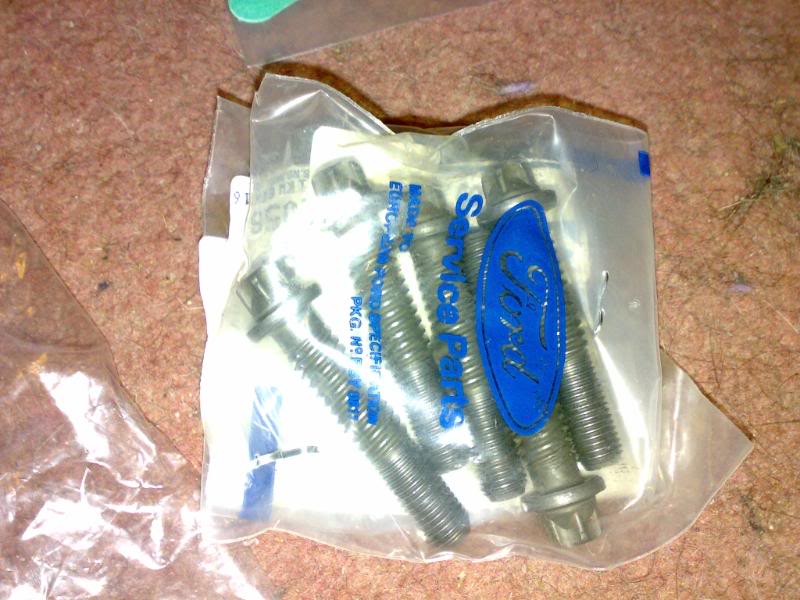
Set of head bolts
Oil relief value spring
Oil chain guide
Oil pump gasket
Some conrod stretch bolts (note the weird threads)
Some assorted nuts and studs
New Ford fibre headgasket (not a fan of later steel ones)
Timing chain (note gold timing location links)
Oil pump chain
Hydraulic timing chain tensioner "bomb"
Exhaust manifold gaskets
Assorted top-end gaskets and seals
Modified lower timing cover
Overview of some of the main components in todays delivery.
Not in shot are the tensioner arms, rear main seal and housing, and a couple of other minor items.
Retail, this little lot alone would come in at around �250 + vat :shock
And this is just the beginning :cry :cry :cry
Thread Starter
OCD Victim
Joined: Sep 2005
Posts: 2,096
Likes: 29
From: SE London
Next update.
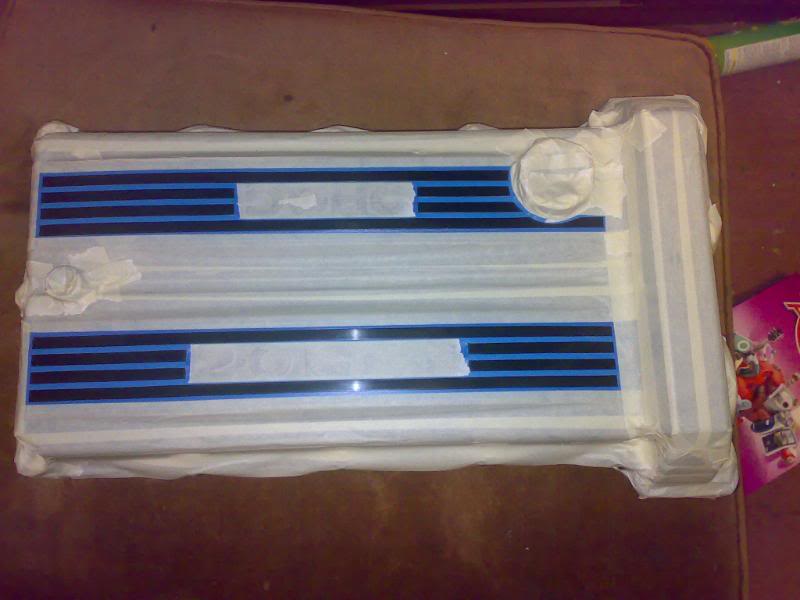
TwinCam rocker covers are notorious for looking horrible and cracking, so in the loft I just happened to find a brand new one :smokin
Bit of detailing time:
(all masked and ready for painting)
Painted with plastic primer base then coated in Stratos Silver (to match the bodywork) and lacquered:
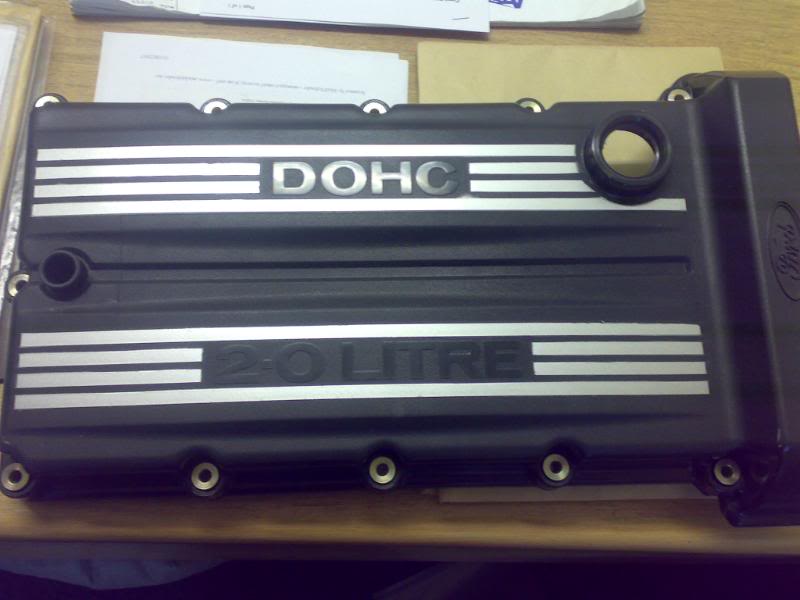
Finished off with logo in the middle of the front cap:
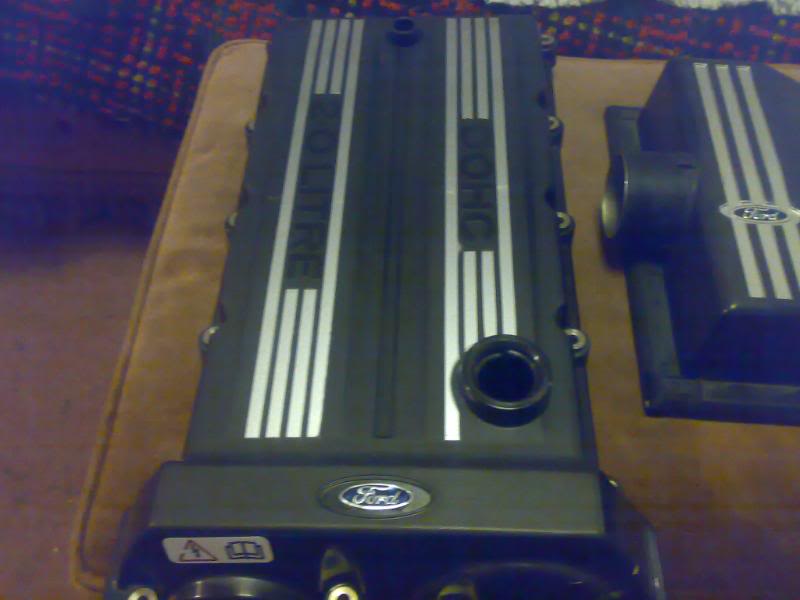
Decided to do the airbox lid as well
centre Ford logo removed by dremel-style grinder and painted as per rocker cover:
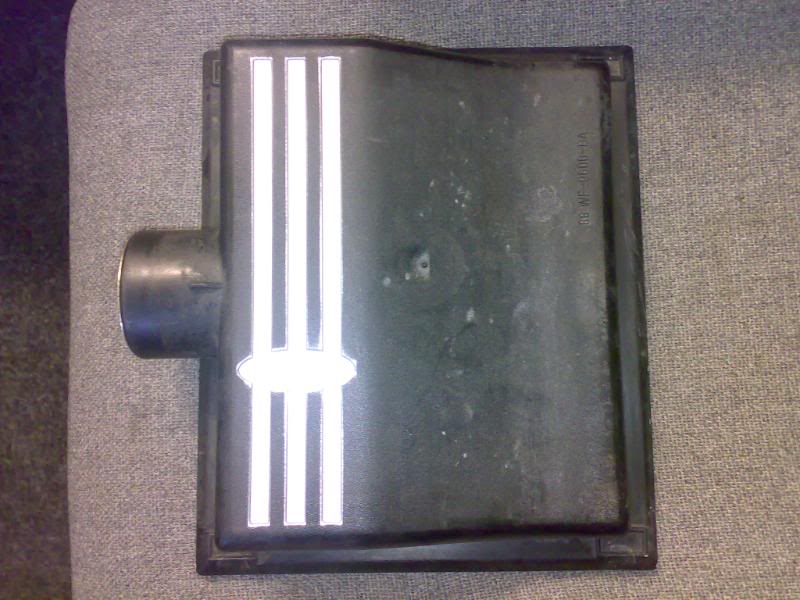
finished with side step badge from Ford Corsair:
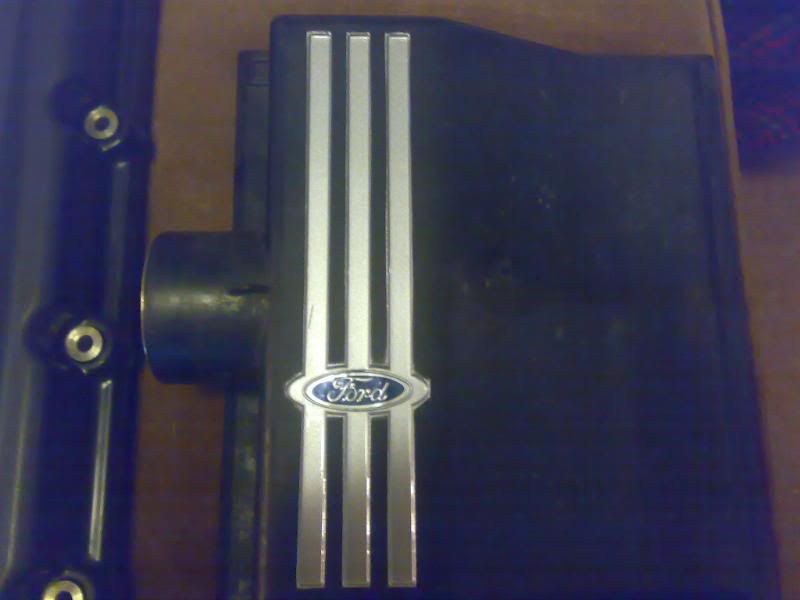
the edges round the badge still need to be de-nibbed back to make smoother, but that is a job for another weekend.
TwinCam rocker covers are notorious for looking horrible and cracking, so in the loft I just happened to find a brand new one :smokin
Bit of detailing time:
(all masked and ready for painting)
Painted with plastic primer base then coated in Stratos Silver (to match the bodywork) and lacquered:
Finished off with logo in the middle of the front cap:
Decided to do the airbox lid as well
centre Ford logo removed by dremel-style grinder and painted as per rocker cover:
finished with side step badge from Ford Corsair:
the edges round the badge still need to be de-nibbed back to make smoother, but that is a job for another weekend.
Thread Starter
OCD Victim
Joined: Sep 2005
Posts: 2,096
Likes: 29
From: SE London

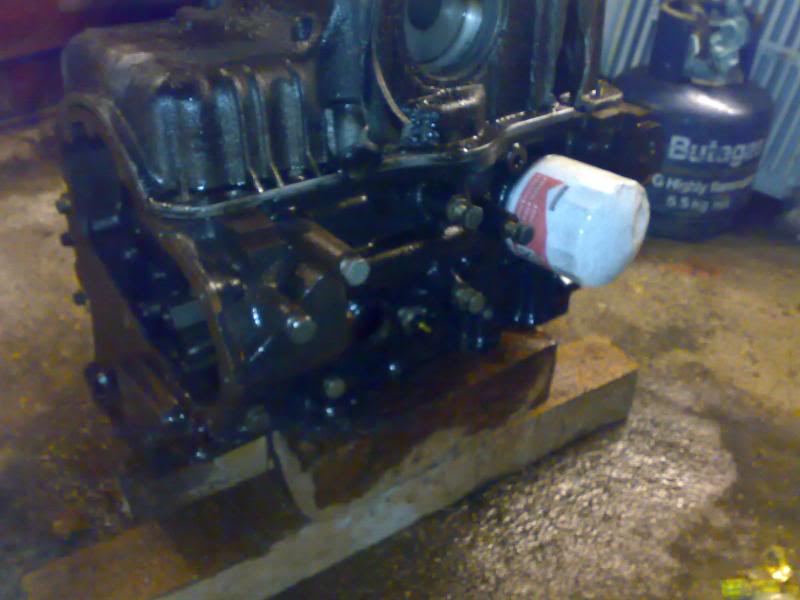
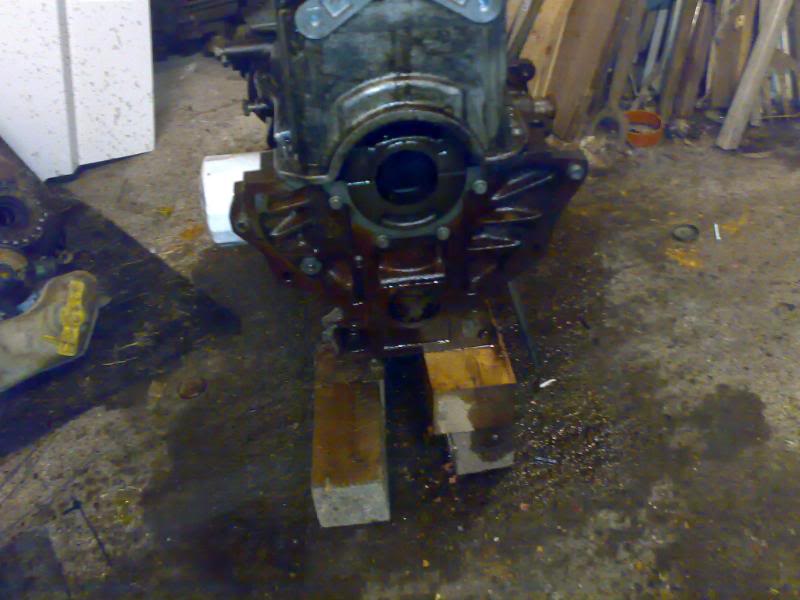
Things like the oil filter, oil pressure switch, etc.. have been left on so as to provide a good sealing area for replacements that are not covered in enamel. These bits will be replaced accordingly.
Turned back over, the painting begins:

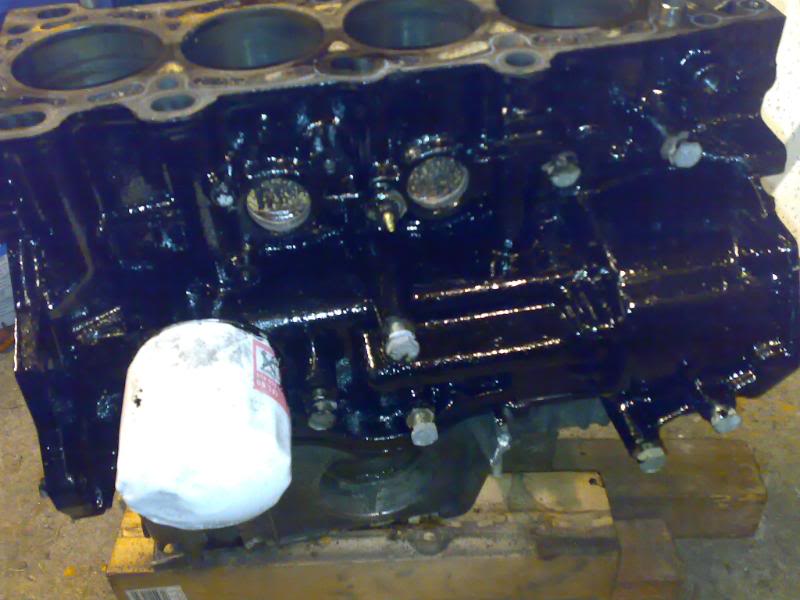
(engine number section left unpainted as per original engine design)
When this is all dried, this coat will be rubbed back and repainted again to give the final finish.
Some more new bits arriving from Fords:
to replace the old bits:
Hope you like it so far, and more to follow shortly.....
Thread Starter
OCD Victim
Joined: Sep 2005
Posts: 2,096
Likes: 29
From: SE London
Minor update time. More bits have arrived in work:
Nothing interesting this time really
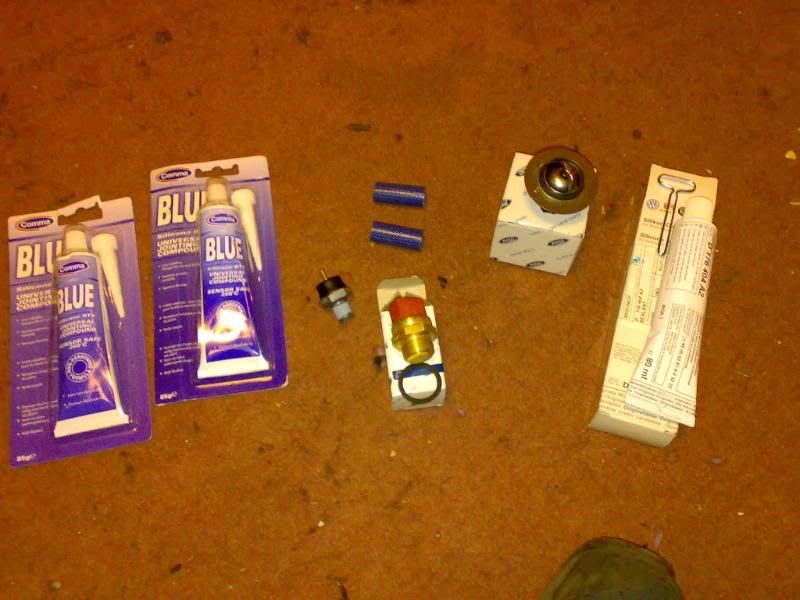
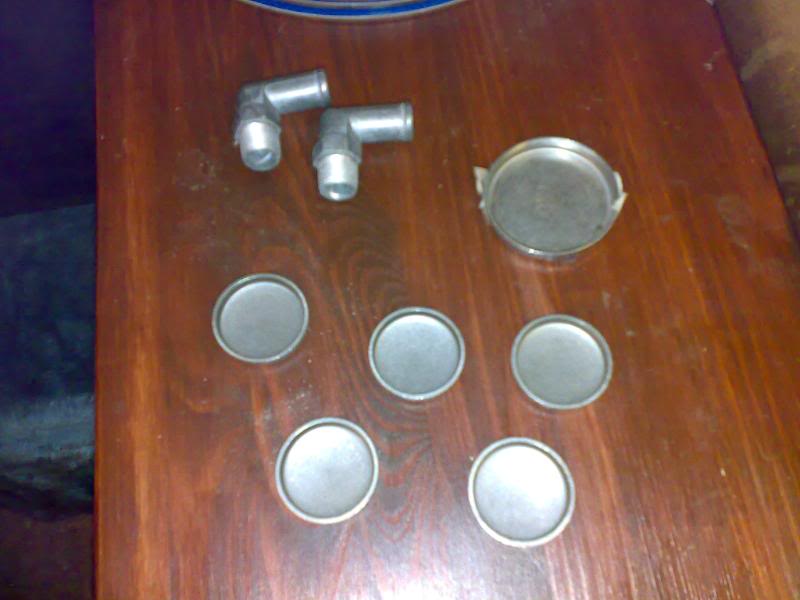
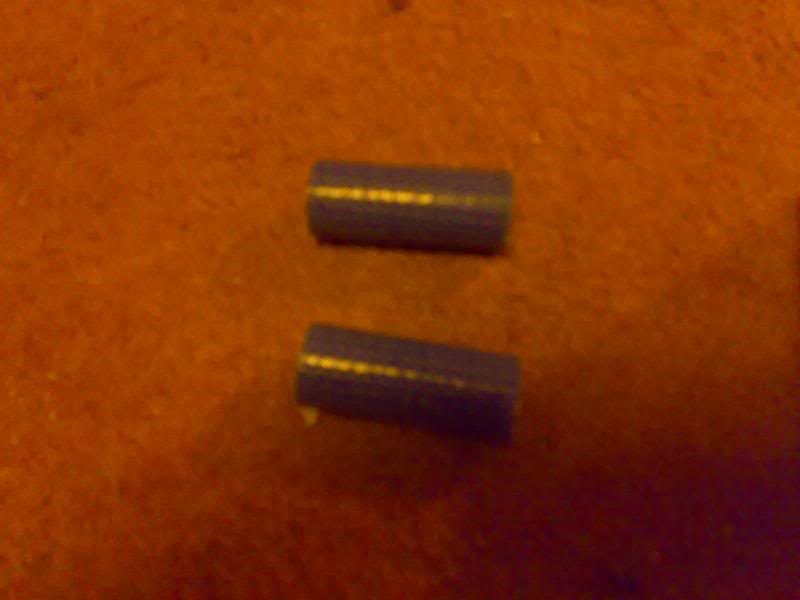
2 x new breather reinforced flexi connections (pain to change and always disintegrate on old engines)
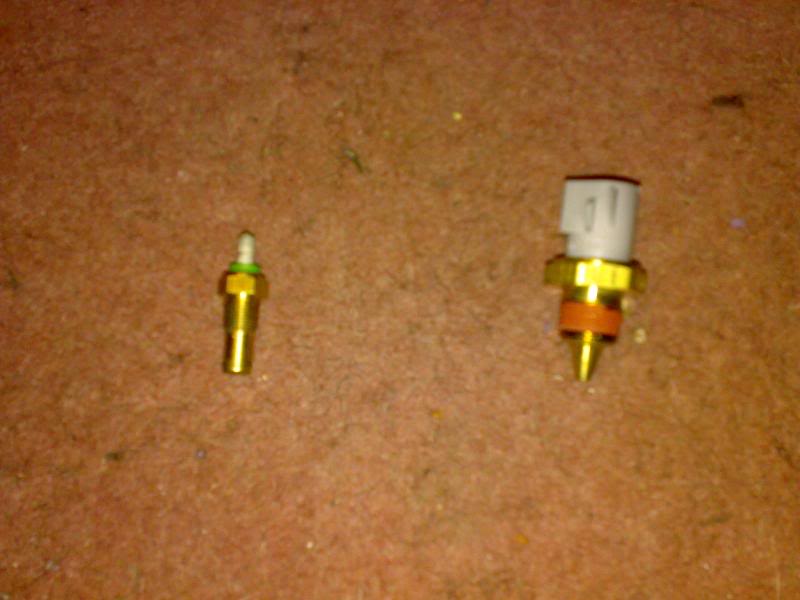
Mondeo TD (+a/con) dual-speed fan switch and new oil pressure switch. Fan switch is good on the twincam as instead of the fans cutting in @ 100 and 110 degrees, it now cuts in @ 95 and 100 degrees, which makes a lot of difference in the summer. Also works on RS2000 models (and almost any other Ford with twin fans and a/c)

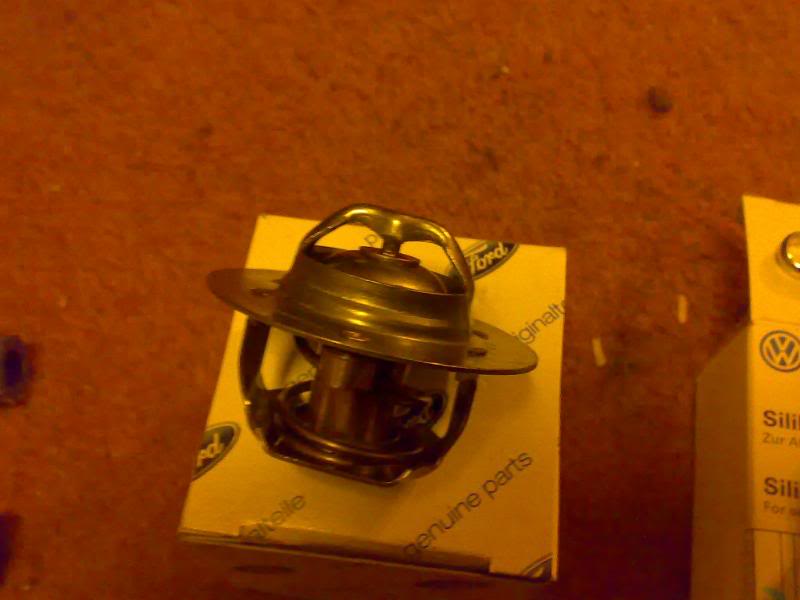
New 88 degree thermostat
and yes, this is a VW part
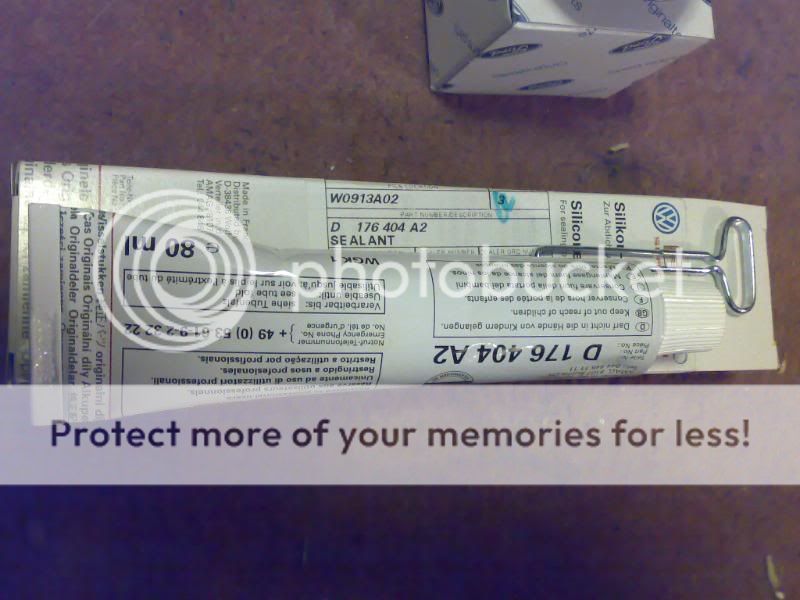
This is the sealant that VW use on all of their sumps instead of gaskets. They put this on, bolt the sump up and wait 12 hours. This stuff sets hard (I know Ford do a similar thing with Transit Connect intermediate sumps but it is not a patch on this stuff from VW) and the only way to remove it is with a sharp knife and chisel. :shock
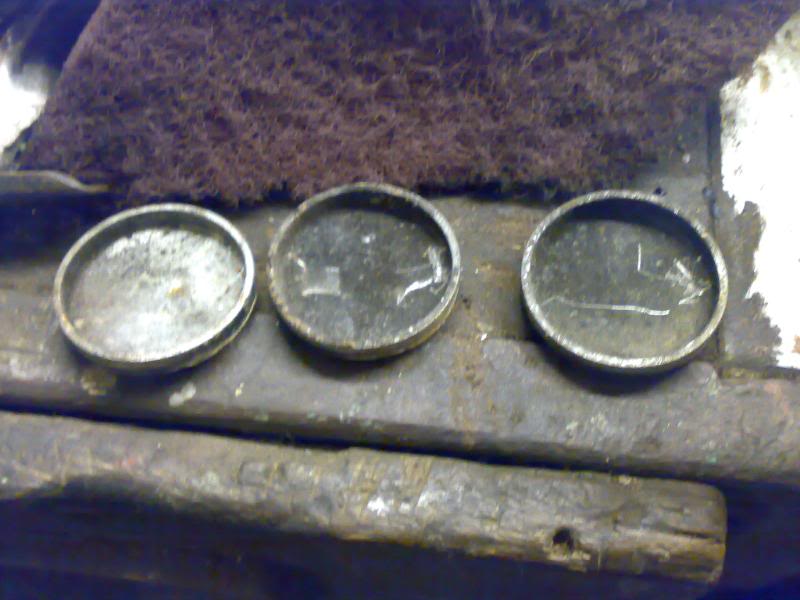
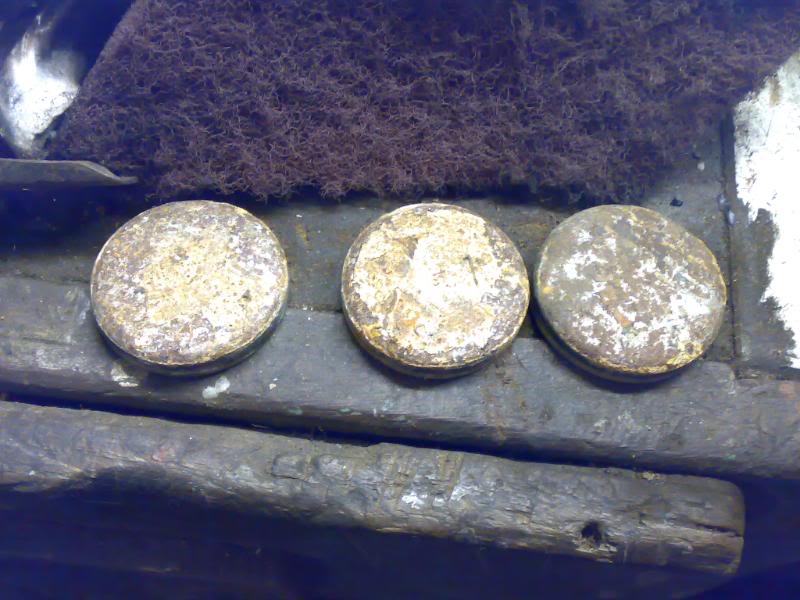
As I do not want any chances of leaks, this will be getting used on the sump along with the standard rubber gasket and also round the core plugs to make sure they do not leak.
The Blue Hylomar is purely for anything with a water gasket on.
Nothing interesting this time really
2 x new breather reinforced flexi connections (pain to change and always disintegrate on old engines)
Mondeo TD (+a/con) dual-speed fan switch and new oil pressure switch. Fan switch is good on the twincam as instead of the fans cutting in @ 100 and 110 degrees, it now cuts in @ 95 and 100 degrees, which makes a lot of difference in the summer. Also works on RS2000 models (and almost any other Ford with twin fans and a/c)
New 88 degree thermostat
and yes, this is a VW part
This is the sealant that VW use on all of their sumps instead of gaskets. They put this on, bolt the sump up and wait 12 hours. This stuff sets hard (I know Ford do a similar thing with Transit Connect intermediate sumps but it is not a patch on this stuff from VW) and the only way to remove it is with a sharp knife and chisel. :shock
As I do not want any chances of leaks, this will be getting used on the sump along with the standard rubber gasket and also round the core plugs to make sure they do not leak.
The Blue Hylomar is purely for anything with a water gasket on.
Thread Starter
OCD Victim
Joined: Sep 2005
Posts: 2,096
Likes: 29
From: SE London
And another bit of updating:
Had the cylinder head taken by my father to a friend of his who owns a place what specialises in engineering biased towards speedway racing bikes and some car bits to have the cylinder head checked and cleaned as required.
Before:

After:
Skimmed 10-thou across the face, and the valve seats checked and re-cut as necessary. After a thorough assessment, head confirmed as servicable and is ready for a little more "cosmetic" cleaning and then rebuilding.
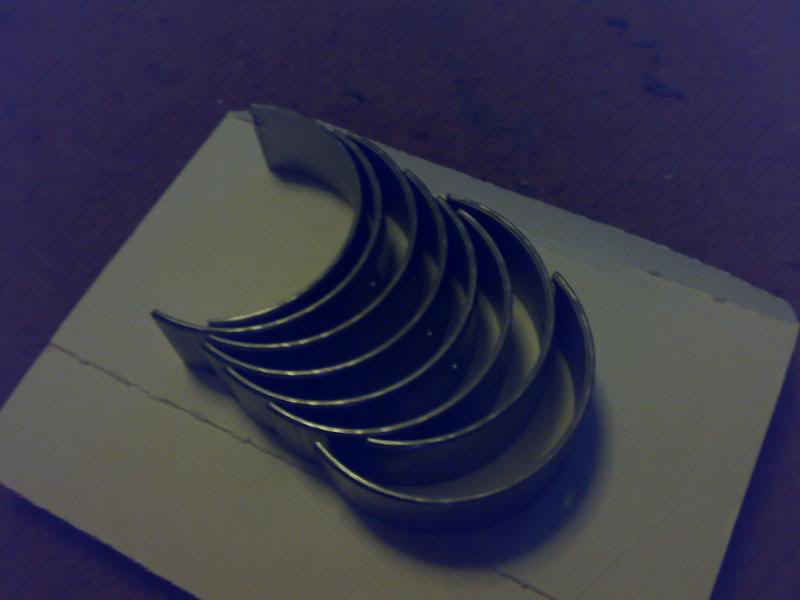
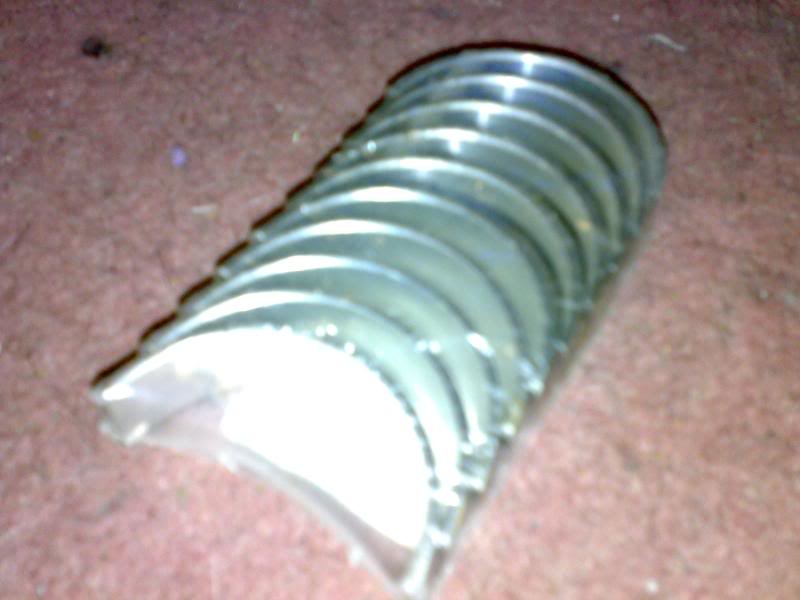
Also ordered @ the same time was a whole new set of rings, shells, thrust washers, etc.... from his supplier for his racing engines, which means that the components should be able to last a little bit longer than the standard Ford stuff, plus the added bonus that I will be getting it all for cost price, so should all come in @ less than the price for a single piston ring set :thumbs
Had the cylinder head taken by my father to a friend of his who owns a place what specialises in engineering biased towards speedway racing bikes and some car bits to have the cylinder head checked and cleaned as required.
Before:
After:
Skimmed 10-thou across the face, and the valve seats checked and re-cut as necessary. After a thorough assessment, head confirmed as servicable and is ready for a little more "cosmetic" cleaning and then rebuilding.
Also ordered @ the same time was a whole new set of rings, shells, thrust washers, etc.... from his supplier for his racing engines, which means that the components should be able to last a little bit longer than the standard Ford stuff, plus the added bonus that I will be getting it all for cost price, so should all come in @ less than the price for a single piston ring set :thumbs
Thread Starter
OCD Victim
Joined: Sep 2005
Posts: 2,096
Likes: 29
From: SE London
Next update:
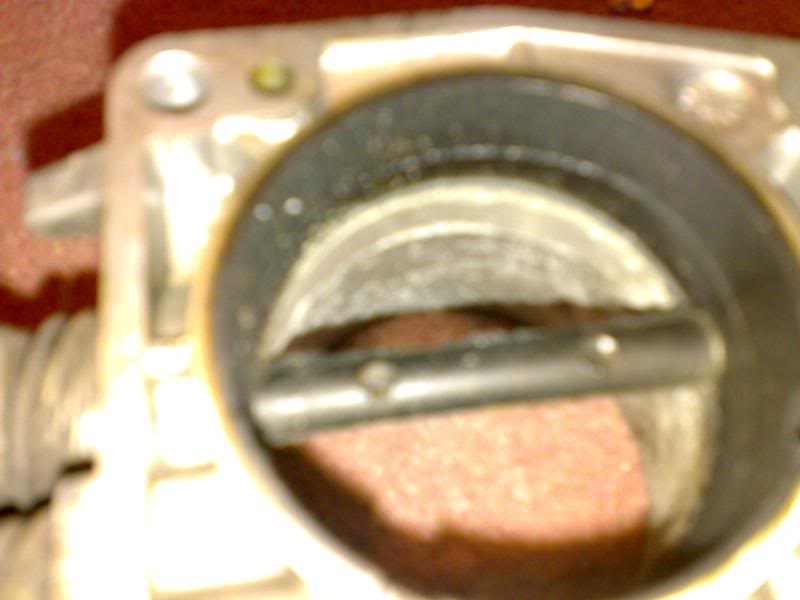
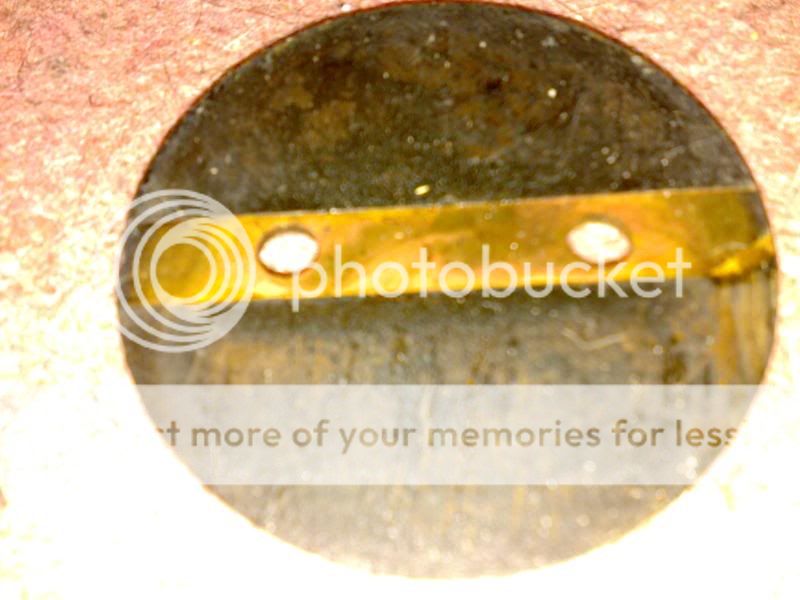
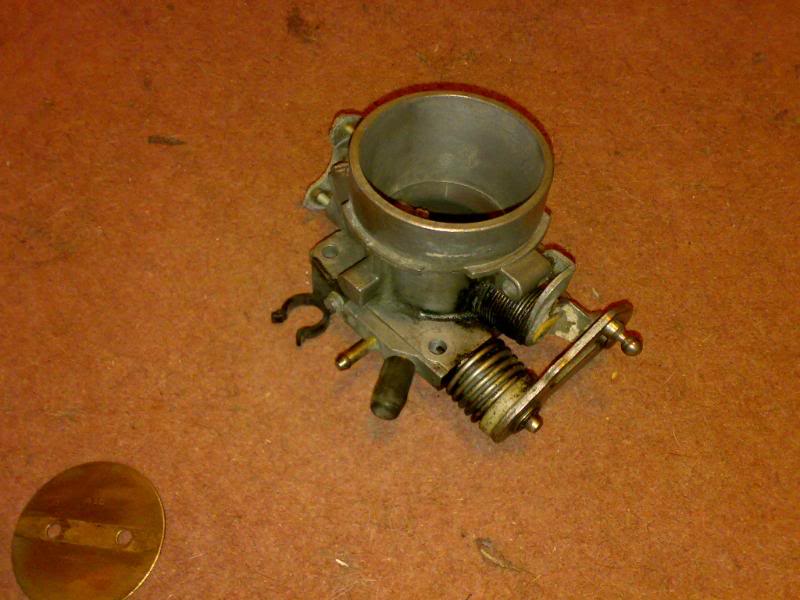
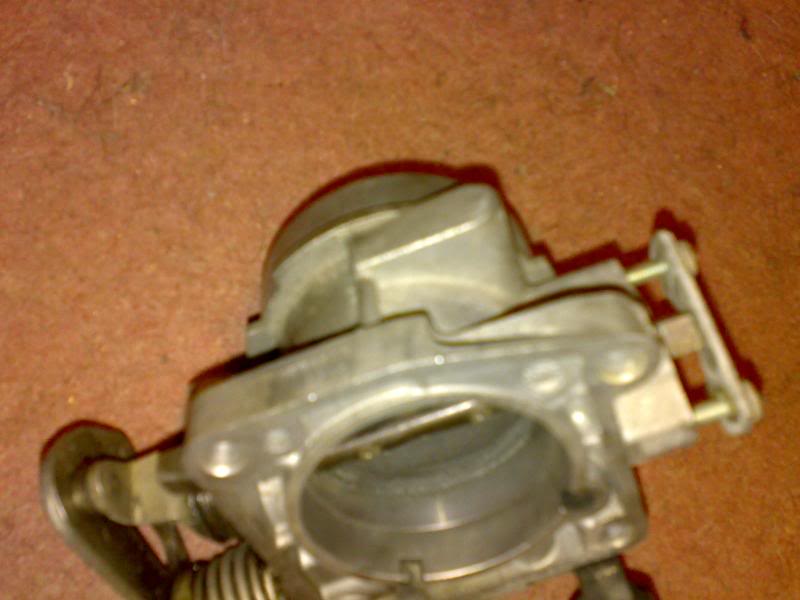
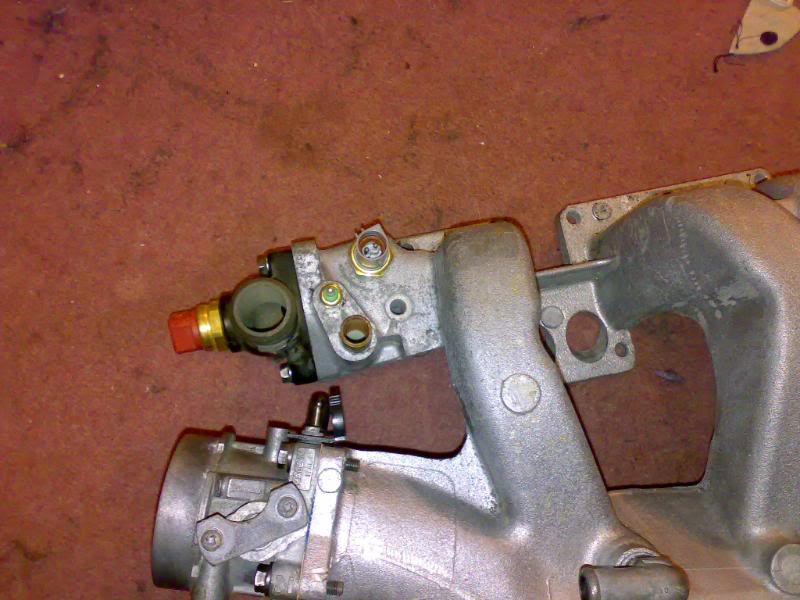
Believe it or not, this inlet manifold was actually on a running engine :shock
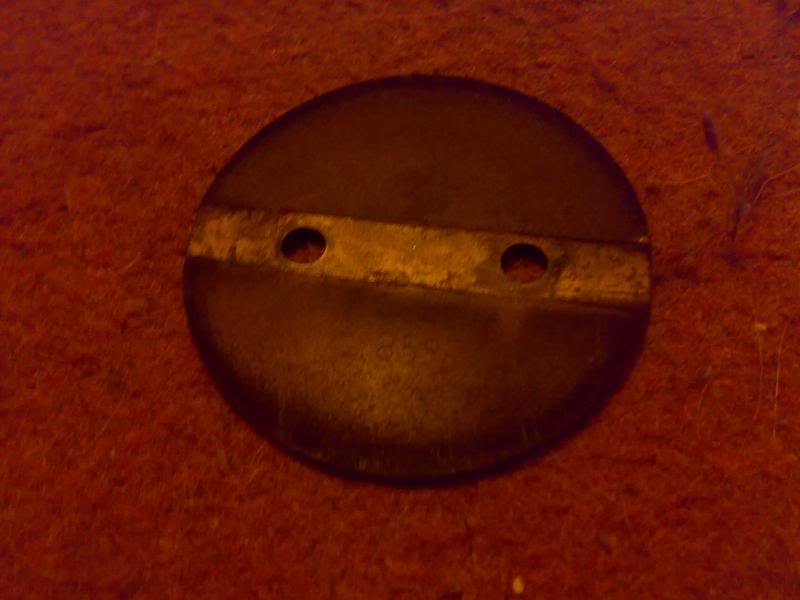
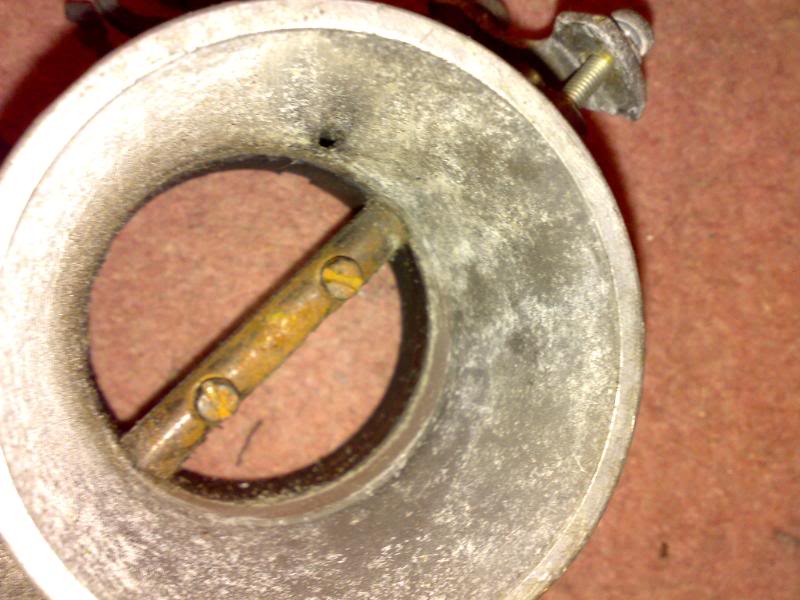
throttle body:

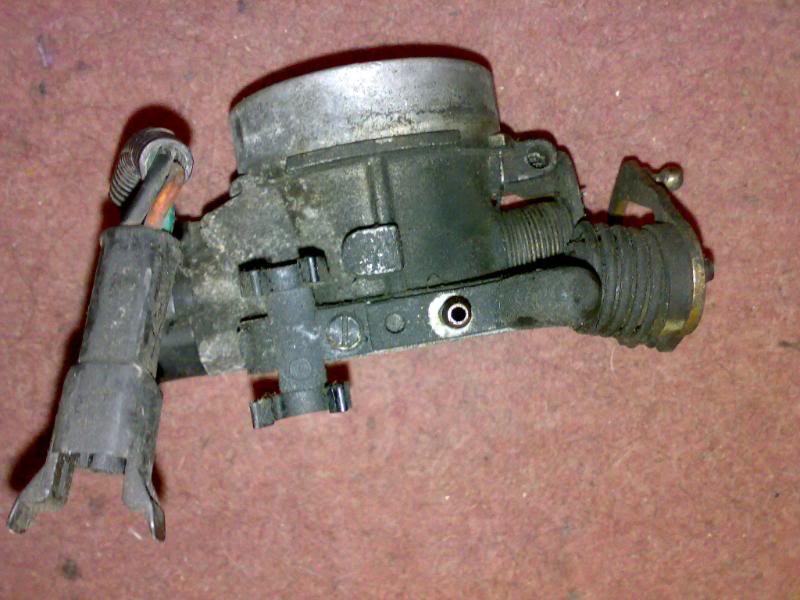
Once stripped a little:
Inlet manifold:
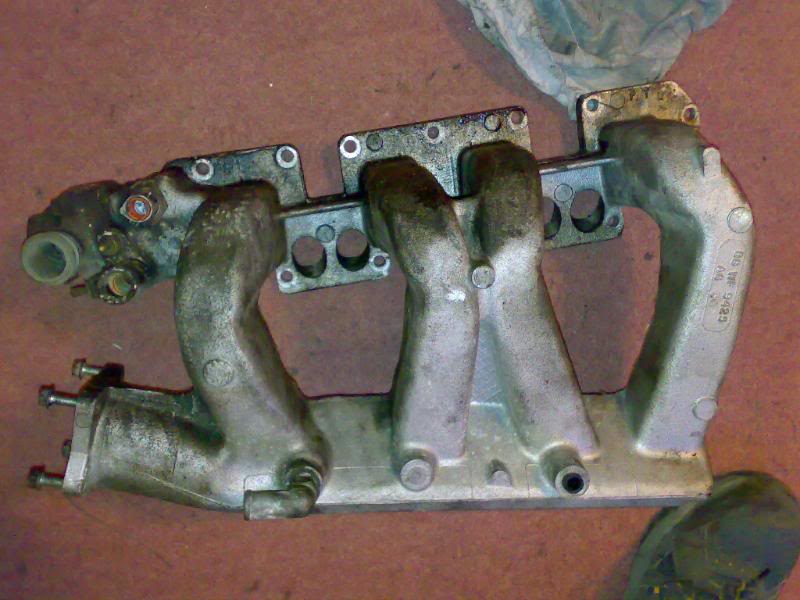
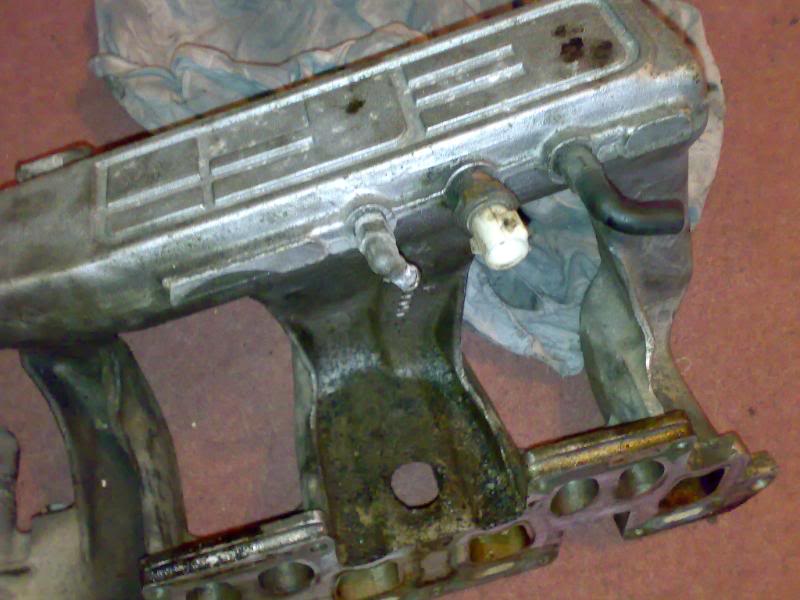
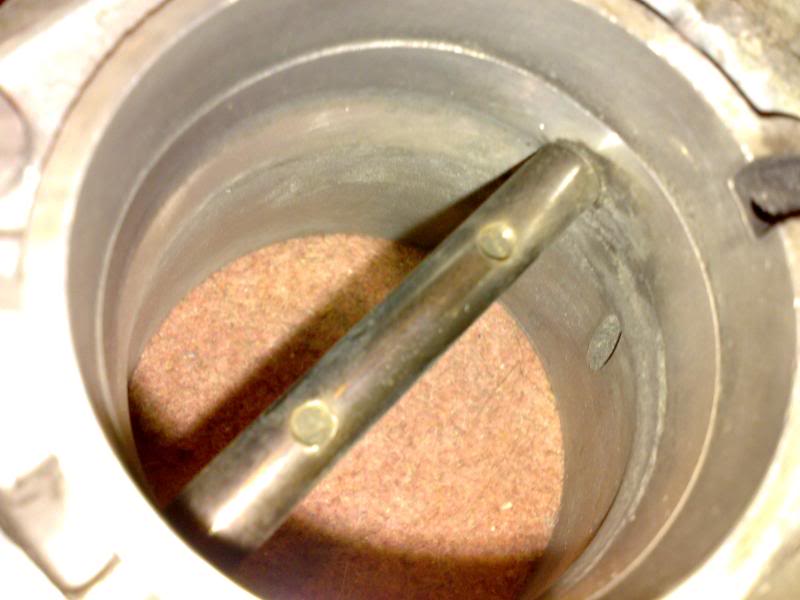
How much crap gets into engines :cry
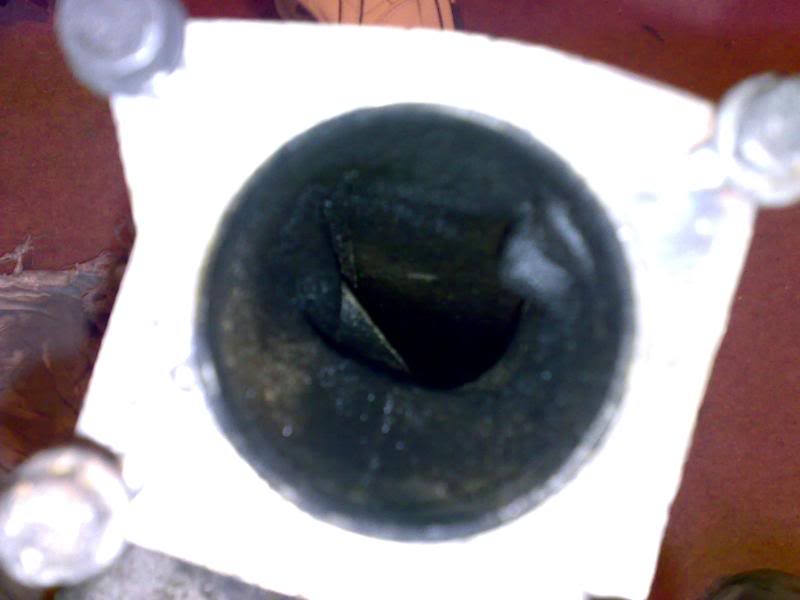
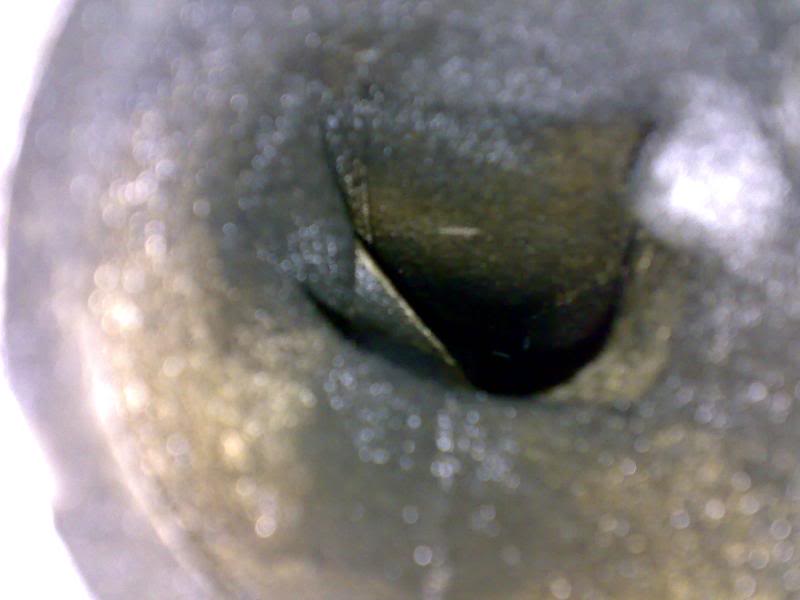
This is all from engine fumes, and if ever there is a reason to keep breather systems in tip-top condition, the pics above should be it.
Believe it or not, this inlet manifold was actually on a running engine :shock
throttle body:
Once stripped a little:
Inlet manifold:
How much crap gets into engines :cry
This is all from engine fumes, and if ever there is a reason to keep breather systems in tip-top condition, the pics above should be it.

Thread Starter
OCD Victim
Joined: Sep 2005
Posts: 2,096
Likes: 29
From: SE London
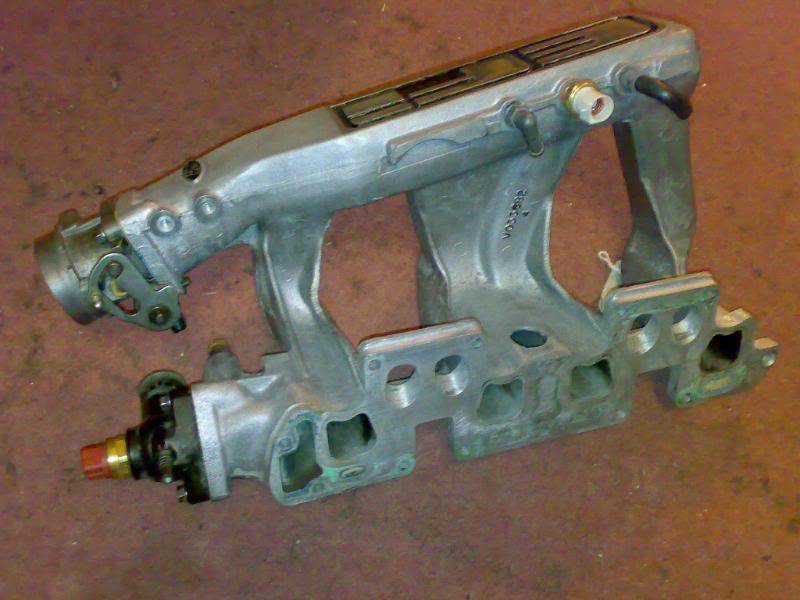
Inlet manifold:
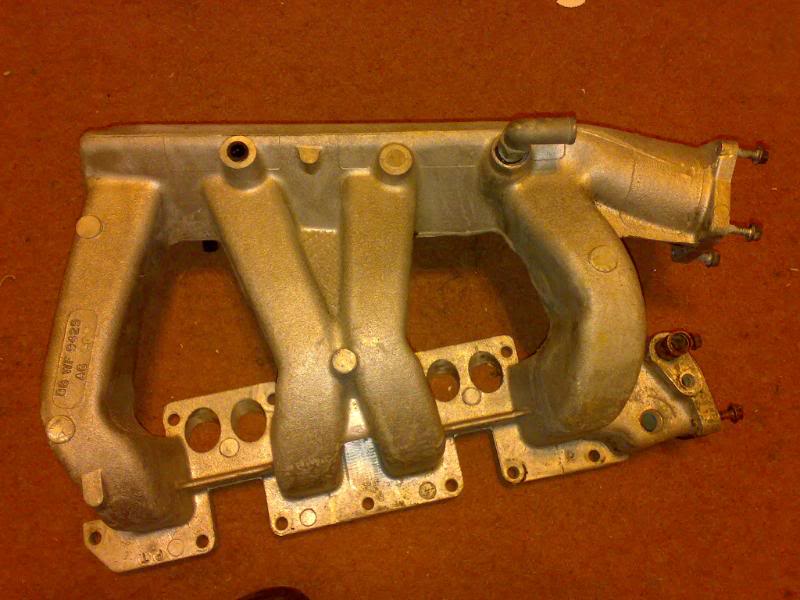
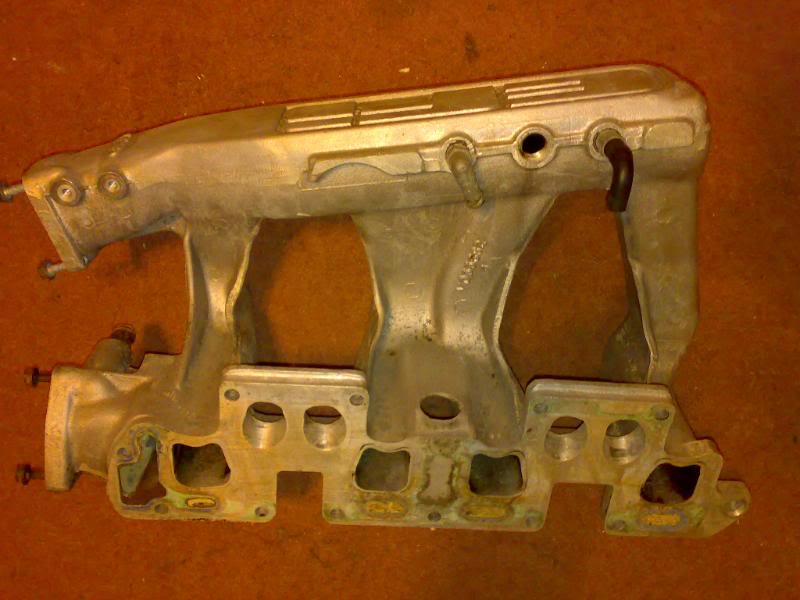
That is realistically about as clean as it will be getting as any remaining contamination is now part of the metal and short of media blasting it (not a good idea on any inlet part due to bits getting trapped and sucked into the engine @ a later date. I will be giving it a quick going over though with the wire wool to try and get it more even, plus the mounting flange needs to be skimmed back to smooth.... but you get the general idea.
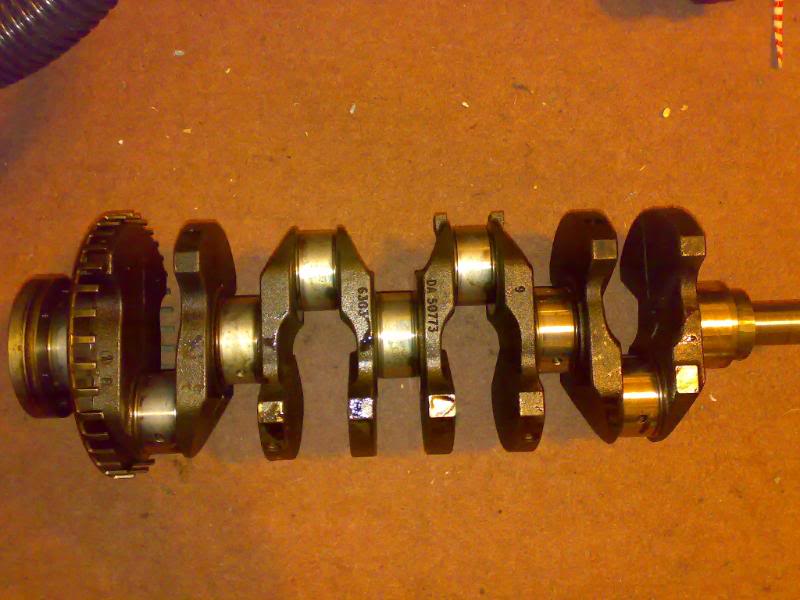
Crankshaft:
Also managed to break 2 alloy unions off in the block by the water pump whilst trying to remove them :cry :smt011
Just as well I have some new ones ready and waiting, and @ least they broke now rather than when the engine is in the car and I am connecting the hoses back up.
Just got to drill the remains out, retap the holes (tapered holes as well which makes it worse) and insert new pieces.
All I have to do now is find where I left the oil pump and fuel rails, give them a good clean and recondition and I should be just about ready to reassemble it all.
Got to pick up the replacement sump (engine is going 2wd and current broken sump is 4wd) on the 8th March, get it cleaned out and I should have a full "short-block".
Then it will be onto the cylinder head...... :cry
That is realistically about as clean as it will be getting as any remaining contamination is now part of the metal and short of media blasting it (not a good idea on any inlet part due to bits getting trapped and sucked into the engine @ a later date. I will be giving it a quick going over though with the wire wool to try and get it more even, plus the mounting flange needs to be skimmed back to smooth.... but you get the general idea.
Crankshaft:
Also managed to break 2 alloy unions off in the block by the water pump whilst trying to remove them :cry :smt011
Just as well I have some new ones ready and waiting, and @ least they broke now rather than when the engine is in the car and I am connecting the hoses back up.
Just got to drill the remains out, retap the holes (tapered holes as well which makes it worse) and insert new pieces.
All I have to do now is find where I left the oil pump and fuel rails, give them a good clean and recondition and I should be just about ready to reassemble it all.
Got to pick up the replacement sump (engine is going 2wd and current broken sump is 4wd) on the 8th March, get it cleaned out and I should have a full "short-block".
Then it will be onto the cylinder head...... :cry
Thread Starter
OCD Victim
Joined: Sep 2005
Posts: 2,096
Likes: 29
From: SE London
Guess what time it is? Yep, update time.....
Todays delivery from the nice men @ Ford is...
Air intake charge temperature sensor

Some modified auxiliary front cylinder head bolts (small ones that go down the front round the chain area)

Some flywheel bolts (I never reuse flywheel bolts)
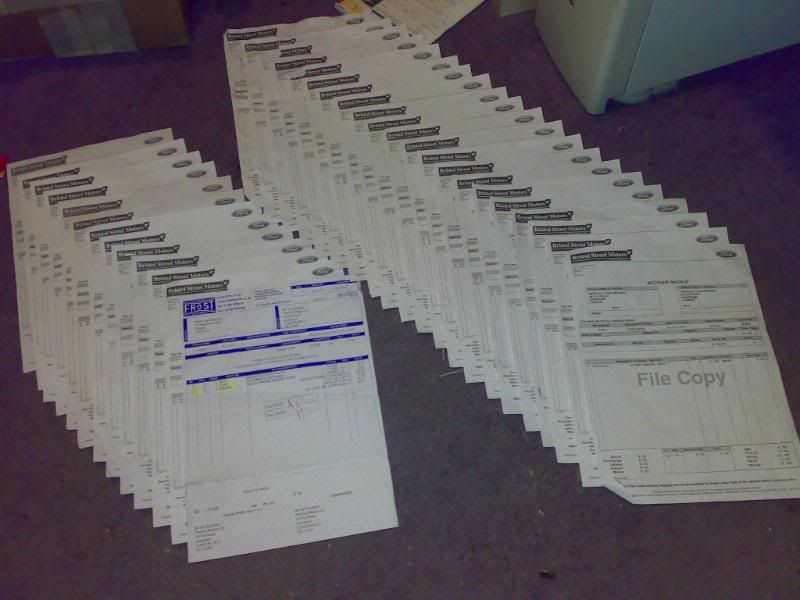
And, while I have had time this evening, I have sat down and laid out some of the bills just so people can see how expensive this little lot can be in the wrong hands (there is only 1 or 2 items per invoice as these bits have been brought as and when, there is still a couple of larger bills missing, but I have got to find where I put them :cry )
Todays delivery from the nice men @ Ford is...
Air intake charge temperature sensor
Some modified auxiliary front cylinder head bolts (small ones that go down the front round the chain area)
Some flywheel bolts (I never reuse flywheel bolts)
And, while I have had time this evening, I have sat down and laid out some of the bills just so people can see how expensive this little lot can be in the wrong hands (there is only 1 or 2 items per invoice as these bits have been brought as and when, there is still a couple of larger bills missing, but I have got to find where I put them :cry )
Thread Starter
OCD Victim
Joined: Sep 2005
Posts: 2,096
Likes: 29
From: SE London
Right, rebuild time....
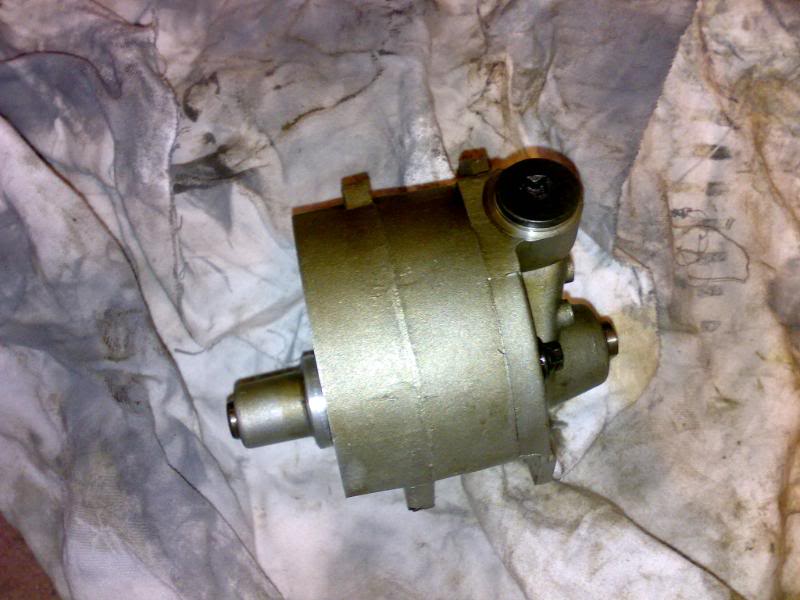
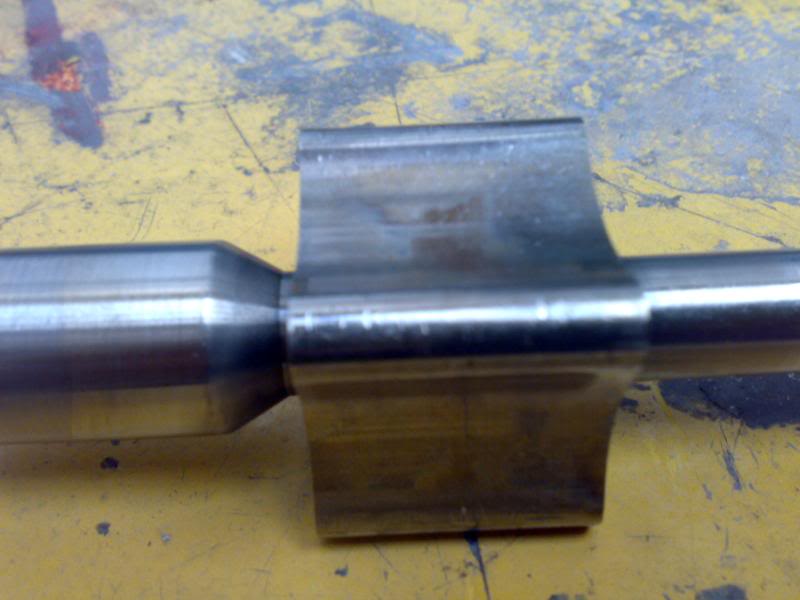
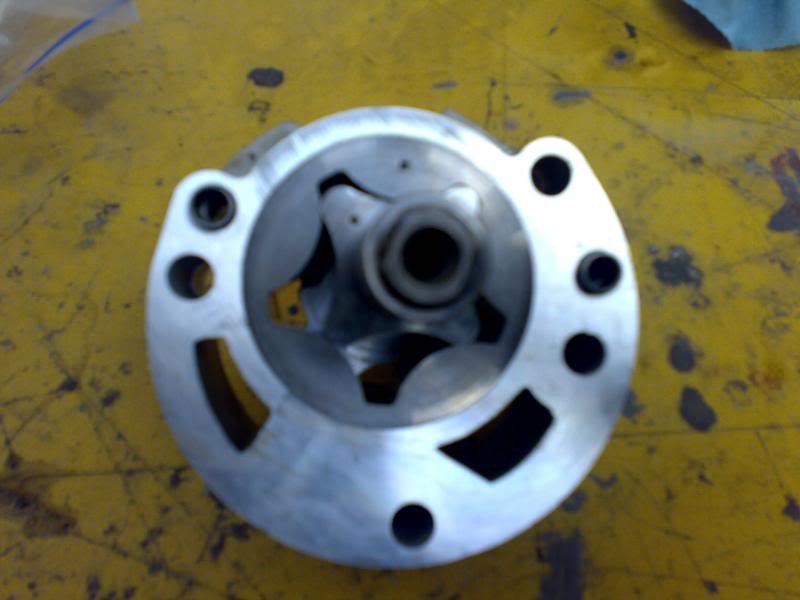
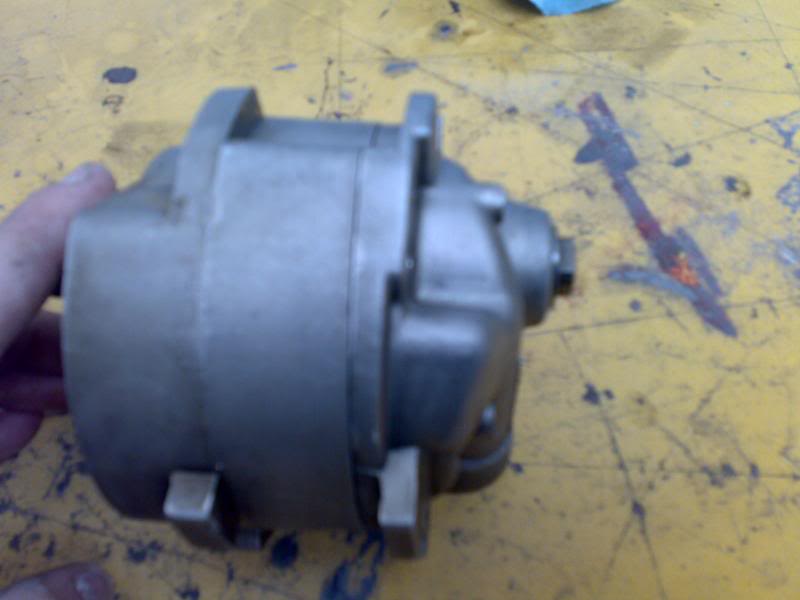
today the oil pump came apart for a good old inspection, clean and rebuild.
How it started off (nice and mucky)

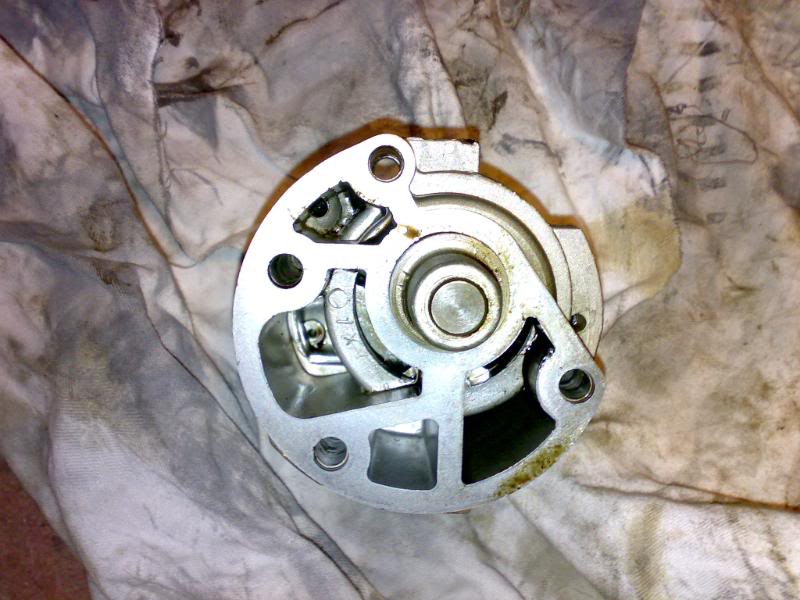
After undoing a T45 torx bolt for the oil pressure relief spring housing and 2 E8 reverse-torx bolts for the casing, along with a slight coaxing with a rubber mallet, this is what I ended up with
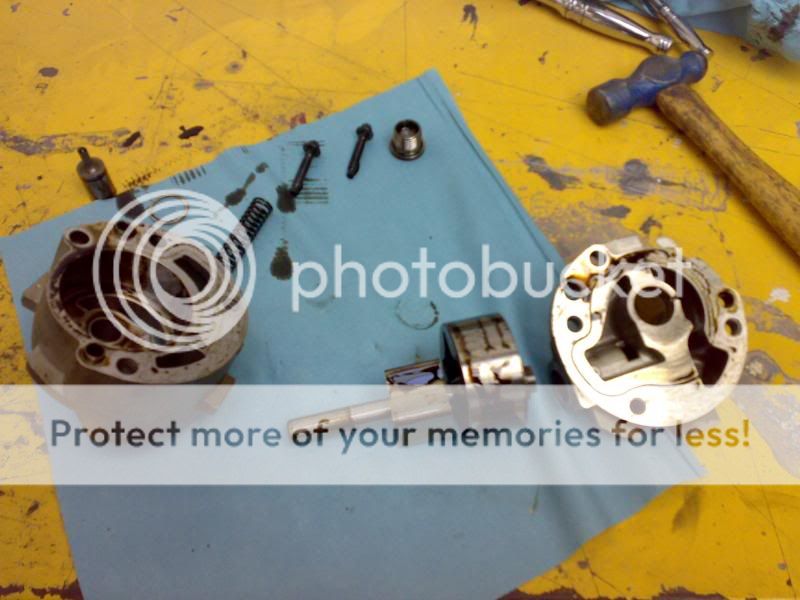
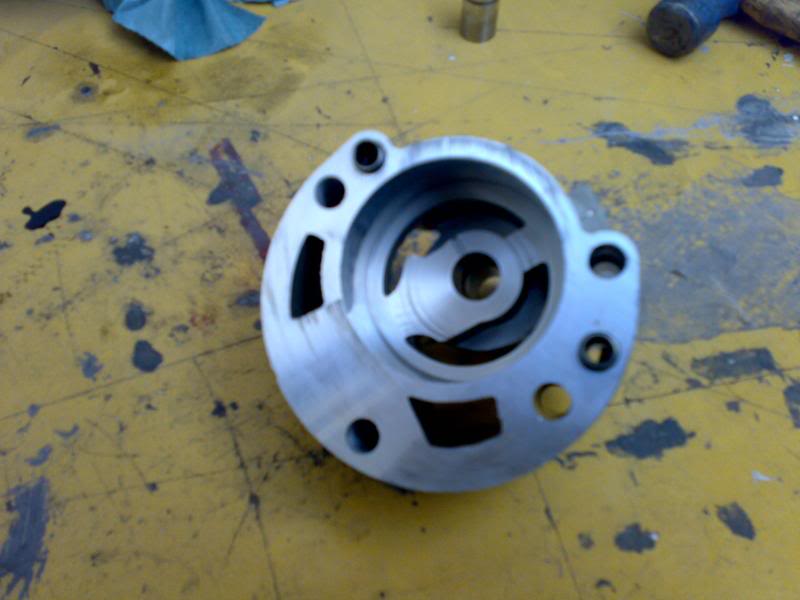
A thorough inspection has been made of all the components, along with a few other important details. On one part of the gear drive for the oil pump there is a little pair of lines, these MUST be set to the back of the pump (there is also a punched dot on one side). Failure to do this will result in reduced oil pressure as the pump will be working against itself.
Next was time for all the bits to go into the paint booth gun wash machine and get blasted with some thinners @ about 140psi which works wonders for cleaning microscopic contamination from surfaces and pores
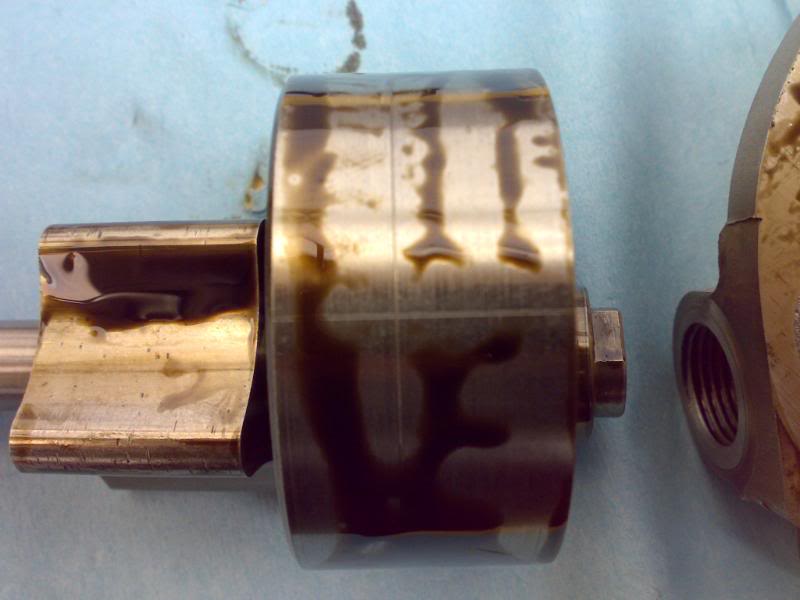
Outer gear drive (as pictured above)
As you can see, nice and clean (even managed to get a mirror finish, most people get shiny bodywork, not me, gotta be clean and shiny inside as well :cry )
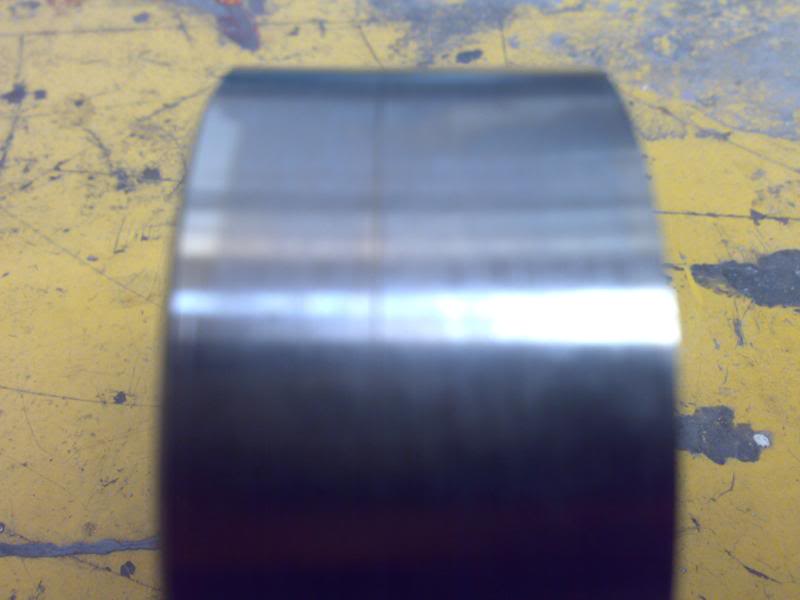
Inner drive gear. There are a couple of small scores in the surfaces at the highest point. This is nothing to worry about and is a natural occurance. Had the engine not been maintained reasonably well, this scoring would be worse and would be repeated on the edge of the outer drive gear. This is one of the reasons that I always recommend using a good semi or fully synthetic oil and changing it reguarly. This is the point where contamination that misses the oil pickup filter ends up and damage here WILL cause reduced oil pressure and possible excessive engine wear.
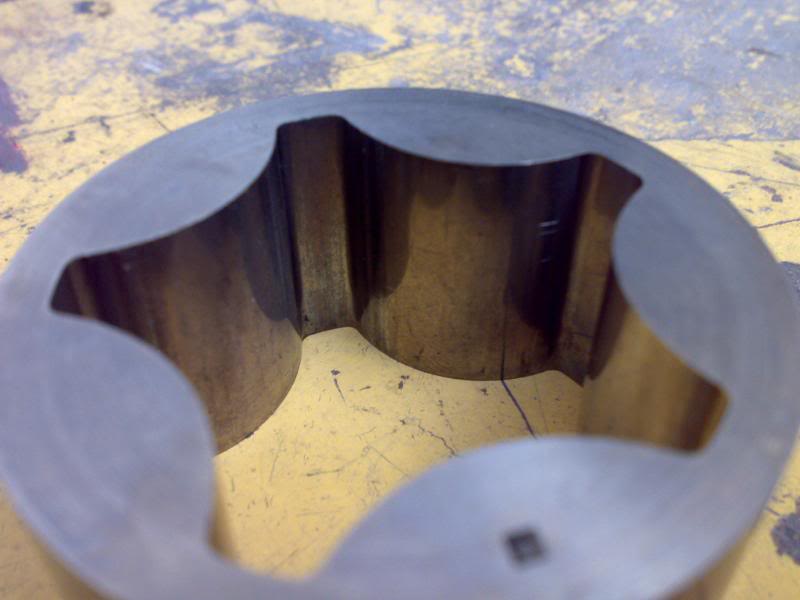
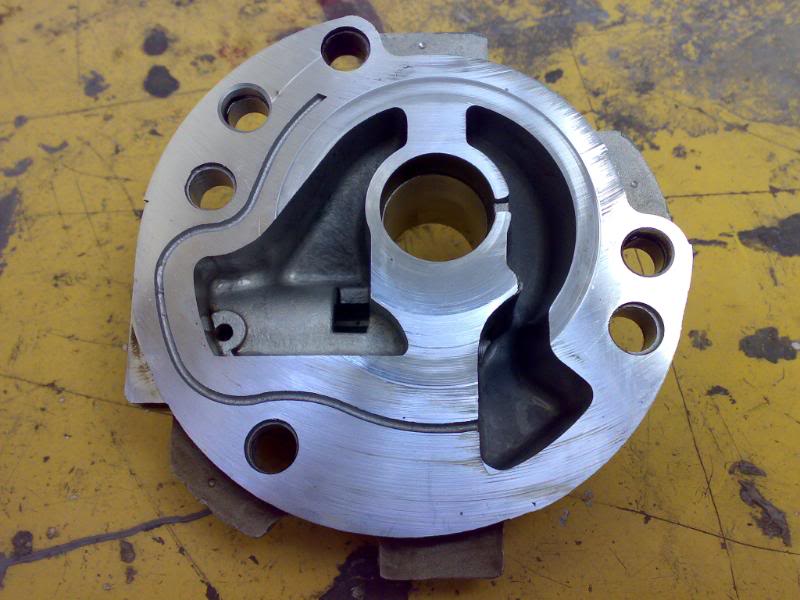
Outer casing all nice and cleaned.
Other half of outer casing
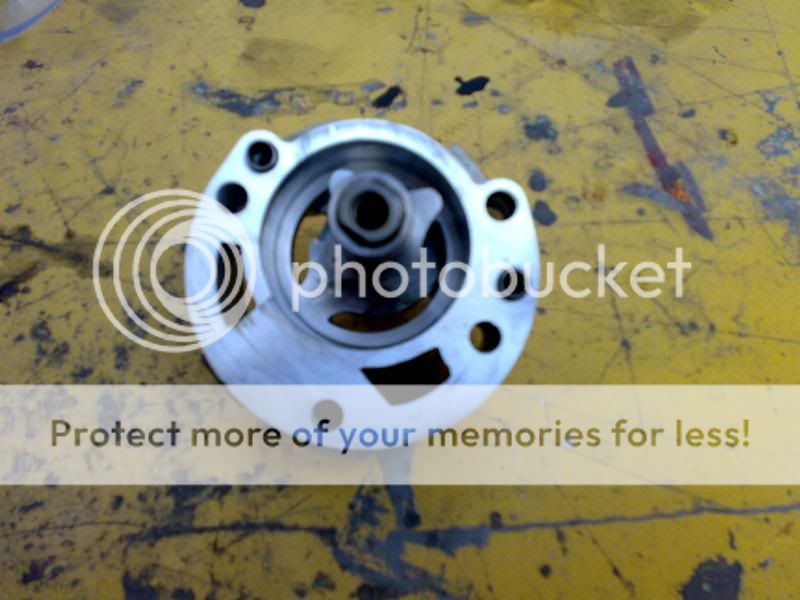
Rebuilding the oil pump:
inner shaft inserted back into the rear casing
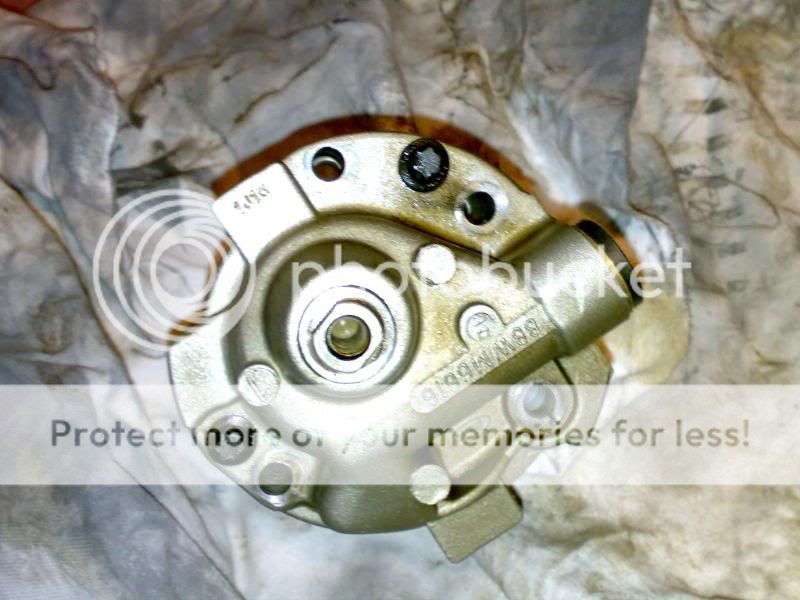
Outer drive set into place. Note the 2 alignment dots. These make sure that the oil pump is set in the correct orientation.
Other outer casing attached and E8 bolts tightened up
Onto the pressure relief valve
First goes the relief valve plunger piston. This is worked by the oil and compresses the relief spring. Above a certain pressure, the piston is forced upwards and the excess oil diverts through the outer casing back to the beginning
(picture showing the drain channel)
Next goes the pressure relief spring. I always change these as they go weak over the years. Renewing this simple item worth a couple of pennies can mean over 10-15psi difference in oil pressure :shock

Above is the order they return in, including applying a small amount of thread-locking compound to the T45 bolt as these have a habit of coming undone during use. It cannot fall out due to the block casing preventing it, but can cause a considerable drop in oil pressure. Something to note for anyone with an I4 engine and always worth checking when replacing a timing chain or doing a head gasket.
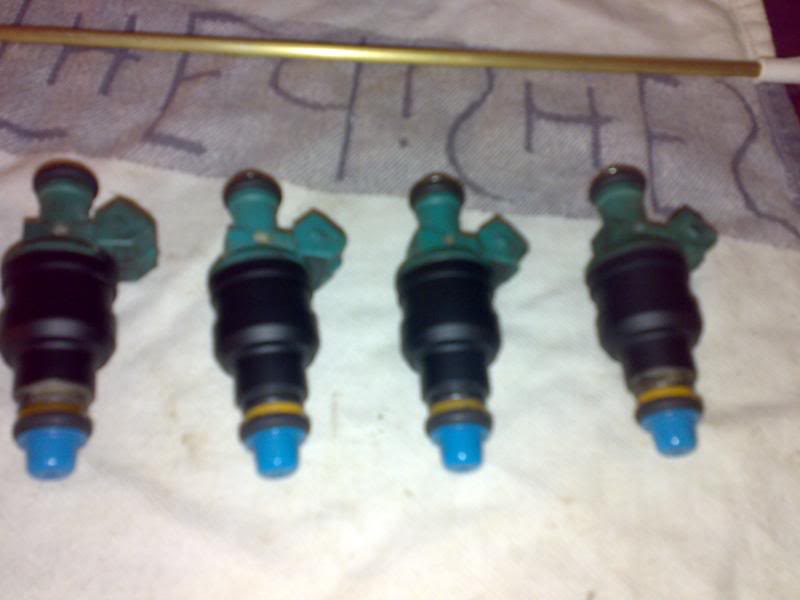
That is the oil pump done. Also in today collection was a nice set of Vauxhall 2.5 V6 fuel injectors. They have been fully refurbished with new seals, new filters and spray / flow checked and calibrated accordingly. These flow up to 210cc each, giving a technical power option of up to approximately 147bhp using closed-loop engine management (which I have already converted the 2000e to :smokin ) instead of the standard 125-130bhp.
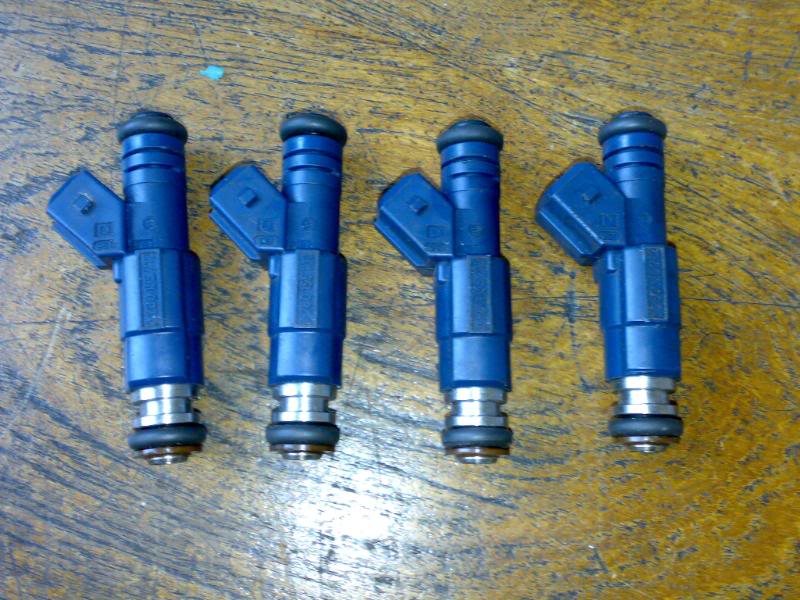
and a picture of the injectors that WERE going to be fitted (standard twincam ones)
Hope you like....
today the oil pump came apart for a good old inspection, clean and rebuild.
How it started off (nice and mucky)
After undoing a T45 torx bolt for the oil pressure relief spring housing and 2 E8 reverse-torx bolts for the casing, along with a slight coaxing with a rubber mallet, this is what I ended up with
A thorough inspection has been made of all the components, along with a few other important details. On one part of the gear drive for the oil pump there is a little pair of lines, these MUST be set to the back of the pump (there is also a punched dot on one side). Failure to do this will result in reduced oil pressure as the pump will be working against itself.
Next was time for all the bits to go into the paint booth gun wash machine and get blasted with some thinners @ about 140psi which works wonders for cleaning microscopic contamination from surfaces and pores
Outer gear drive (as pictured above)
As you can see, nice and clean (even managed to get a mirror finish, most people get shiny bodywork, not me, gotta be clean and shiny inside as well :cry )
Inner drive gear. There are a couple of small scores in the surfaces at the highest point. This is nothing to worry about and is a natural occurance. Had the engine not been maintained reasonably well, this scoring would be worse and would be repeated on the edge of the outer drive gear. This is one of the reasons that I always recommend using a good semi or fully synthetic oil and changing it reguarly. This is the point where contamination that misses the oil pickup filter ends up and damage here WILL cause reduced oil pressure and possible excessive engine wear.
Outer casing all nice and cleaned.
Other half of outer casing
Rebuilding the oil pump:
inner shaft inserted back into the rear casing
Outer drive set into place. Note the 2 alignment dots. These make sure that the oil pump is set in the correct orientation.
Other outer casing attached and E8 bolts tightened up
Onto the pressure relief valve
First goes the relief valve plunger piston. This is worked by the oil and compresses the relief spring. Above a certain pressure, the piston is forced upwards and the excess oil diverts through the outer casing back to the beginning
(picture showing the drain channel)
Next goes the pressure relief spring. I always change these as they go weak over the years. Renewing this simple item worth a couple of pennies can mean over 10-15psi difference in oil pressure :shock
Above is the order they return in, including applying a small amount of thread-locking compound to the T45 bolt as these have a habit of coming undone during use. It cannot fall out due to the block casing preventing it, but can cause a considerable drop in oil pressure. Something to note for anyone with an I4 engine and always worth checking when replacing a timing chain or doing a head gasket.
That is the oil pump done. Also in today collection was a nice set of Vauxhall 2.5 V6 fuel injectors. They have been fully refurbished with new seals, new filters and spray / flow checked and calibrated accordingly. These flow up to 210cc each, giving a technical power option of up to approximately 147bhp using closed-loop engine management (which I have already converted the 2000e to :smokin ) instead of the standard 125-130bhp.
and a picture of the injectors that WERE going to be fitted (standard twincam ones)
Hope you like....
Thread Starter
OCD Victim
Joined: Sep 2005
Posts: 2,096
Likes: 29
From: SE London
More new bits....
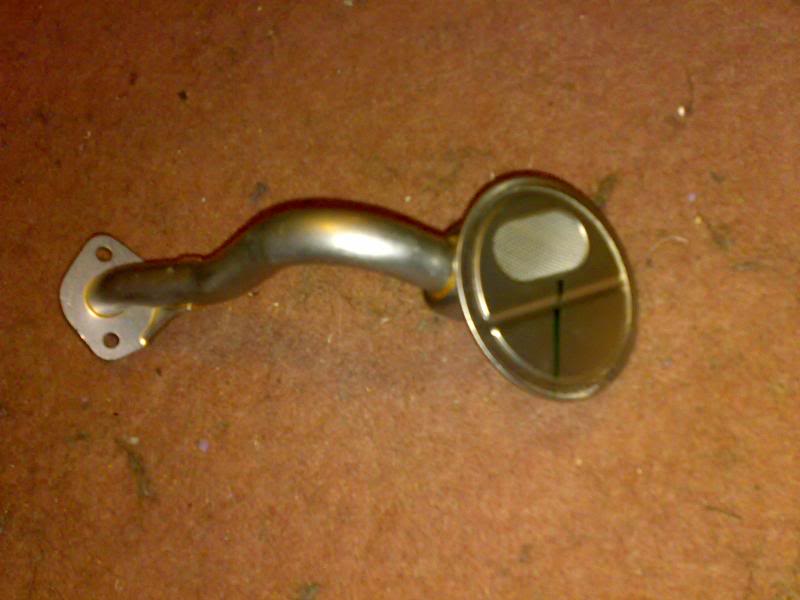
Oil pump pickup pipe (as modifying 4wd block to 2wd)
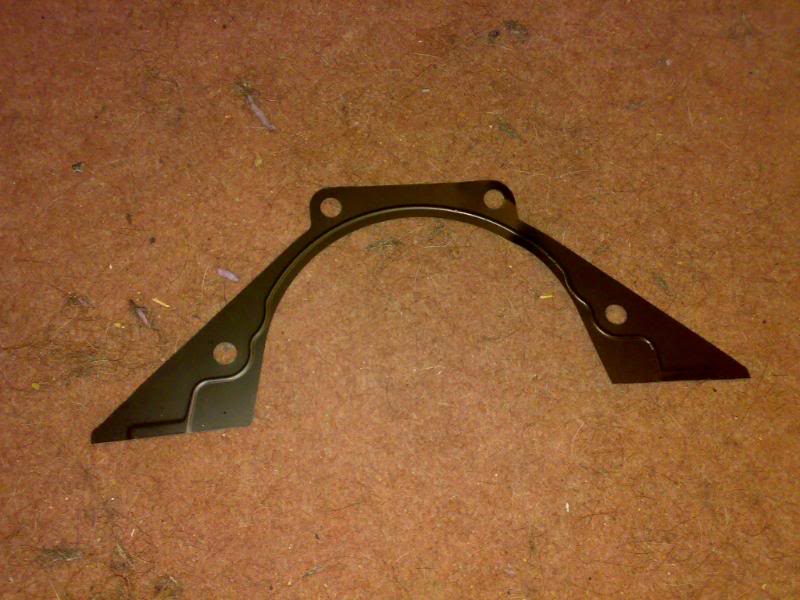
Rear crank main seal metal gasket
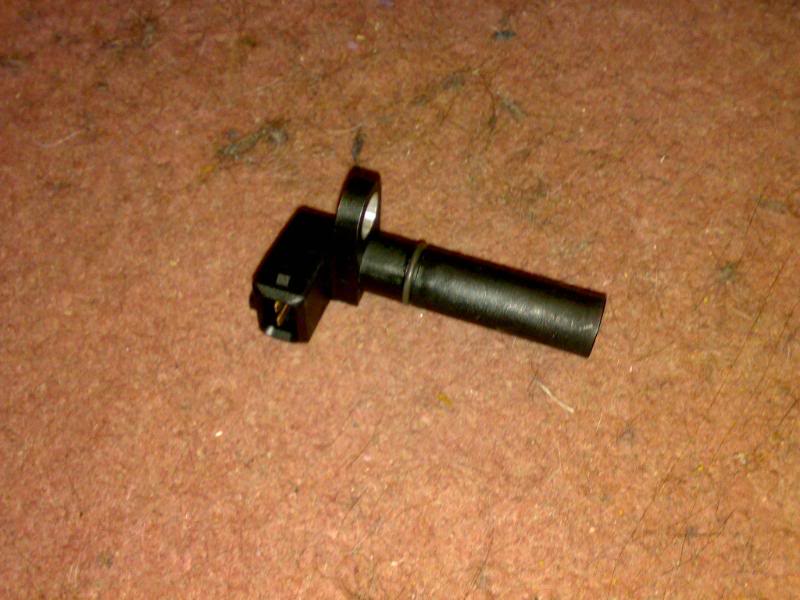
New crankshaft position sensor
Oh do the blokes @ Ford love me ATM, must be doing their bonuses wonders :cry
Oil pump pickup pipe (as modifying 4wd block to 2wd)
Rear crank main seal metal gasket
New crankshaft position sensor
Oh do the blokes @ Ford love me ATM, must be doing their bonuses wonders :cry
Thread Starter
OCD Victim
Joined: Sep 2005
Posts: 2,096
Likes: 29
From: SE London
Okay, more pics.
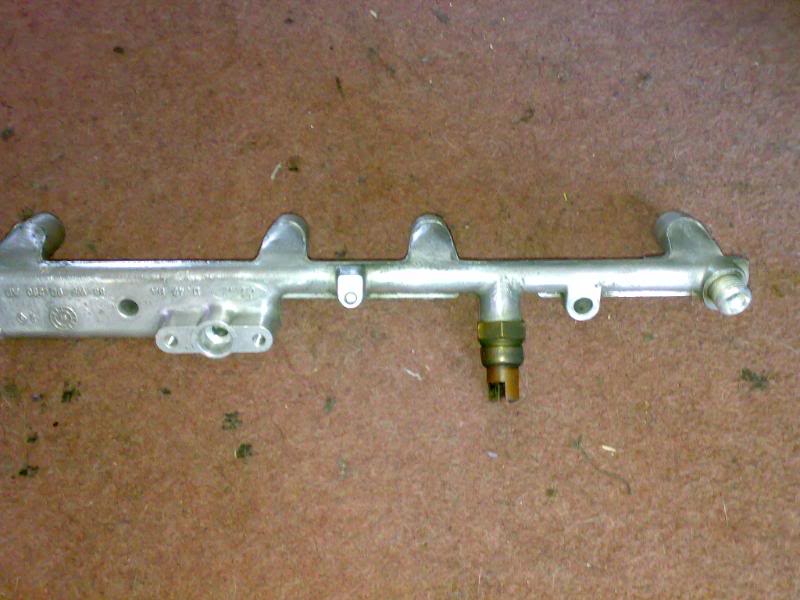
Fuel rail cleaned off
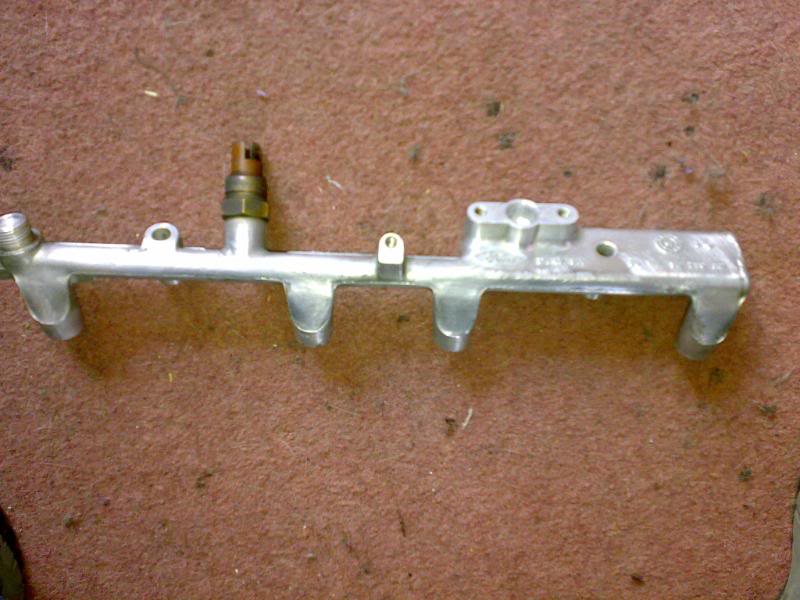
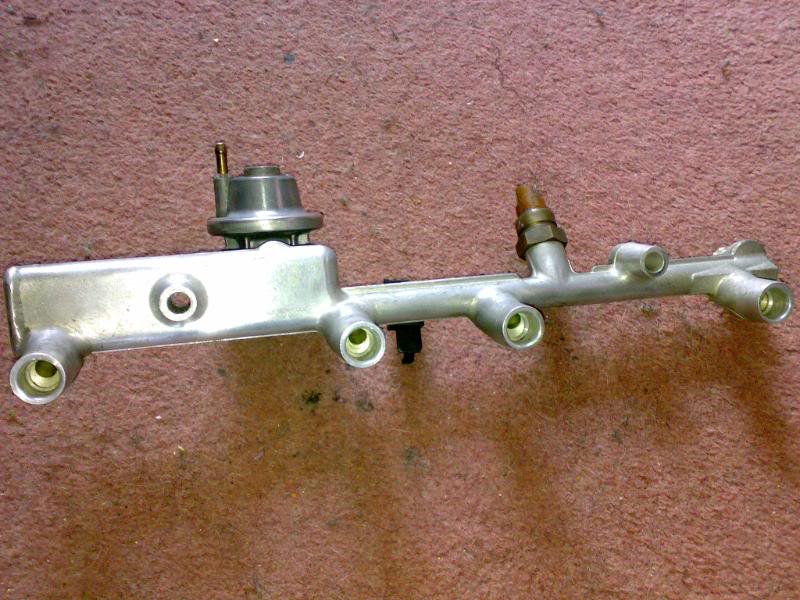
Reassembled with fuel pressure regulator and new o-ring
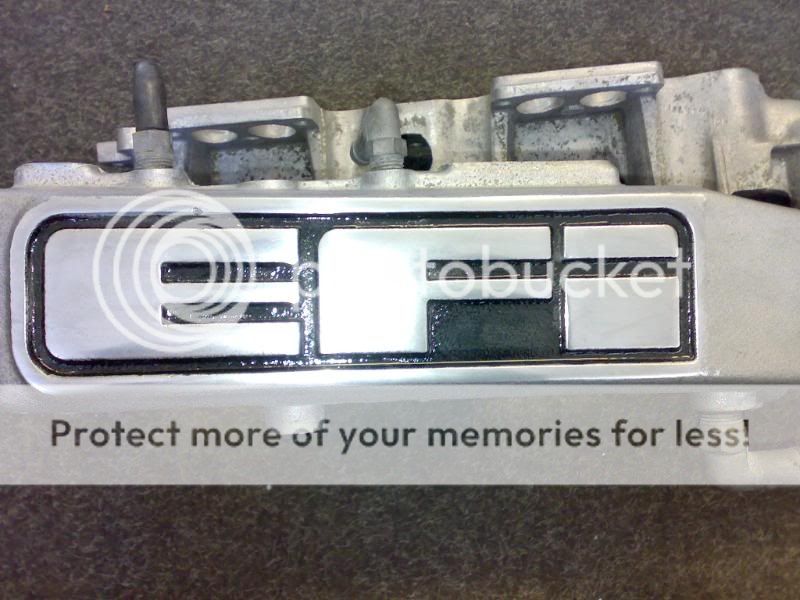
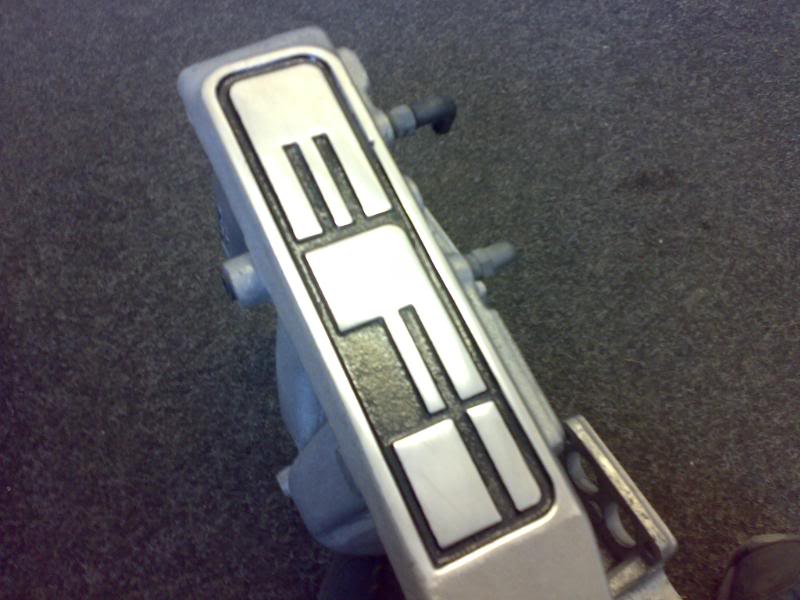
Inlet manifold has had the section between the letters painted with black engine enamel
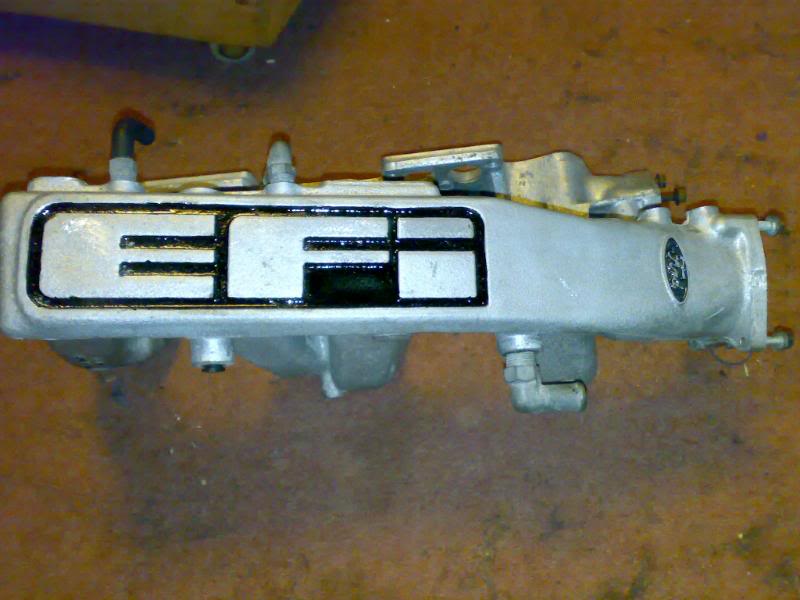
The Ford logo on the manifold has been painted in as well and then the top smoothed back to show the lettering in original alloy finish
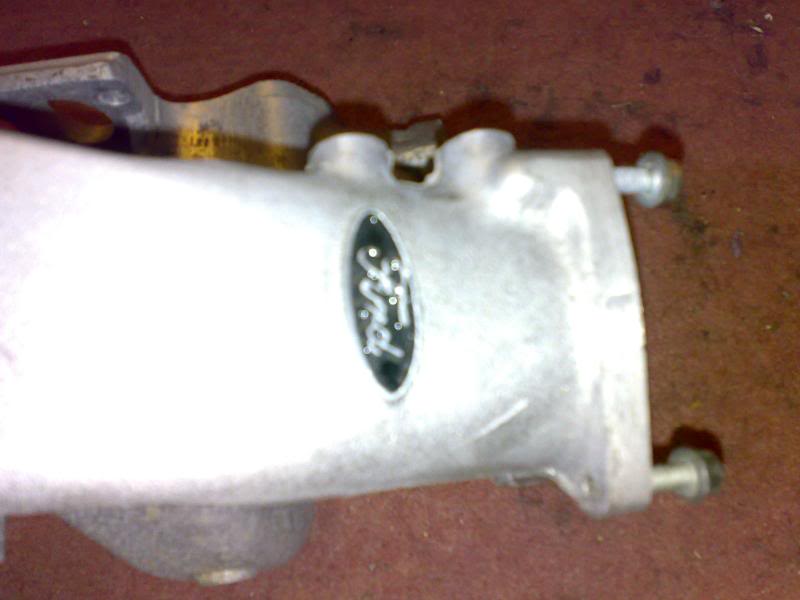
Just in the process of polishing the lettering up on the manifold so that it is smooth compared to the grained finish on the rest of the manifold. It will then be time to reassemble the throttle-body, sensors, etc... and once the valves are back in the cylinder head, reassemble the inlet manifold onto the head, fit fuel rail and injectors, etc....
Fuel rail cleaned off
Reassembled with fuel pressure regulator and new o-ring
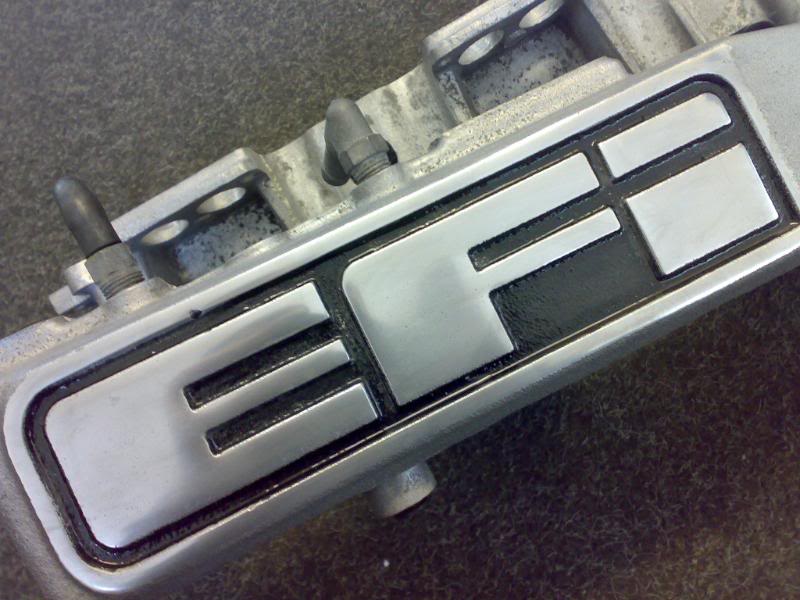
Inlet manifold has had the section between the letters painted with black engine enamel
The Ford logo on the manifold has been painted in as well and then the top smoothed back to show the lettering in original alloy finish
Just in the process of polishing the lettering up on the manifold so that it is smooth compared to the grained finish on the rest of the manifold. It will then be time to reassemble the throttle-body, sensors, etc... and once the valves are back in the cylinder head, reassemble the inlet manifold onto the head, fit fuel rail and injectors, etc....
Thread Starter
OCD Victim
Joined: Sep 2005
Posts: 2,096
Likes: 29
From: SE London
Progress @ last.
Took the inlet manifold into work today for a bit of fettling @ lunchtime, and an hour later:
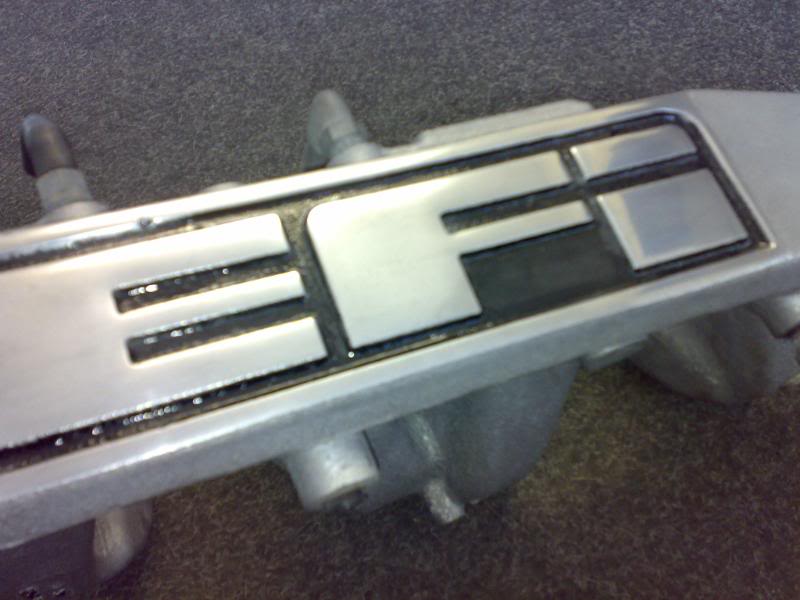
And once home, started to reassemble the main parts
The manifold is now ready for putting away in the loft until called for.
Onto the next part (the block next)
:thumbs :thumbs :thumbs
Took the inlet manifold into work today for a bit of fettling @ lunchtime, and an hour later:
And once home, started to reassemble the main parts
The manifold is now ready for putting away in the loft until called for.
Onto the next part (the block next)
:thumbs :thumbs :thumbs
Thread Starter
OCD Victim
Joined: Sep 2005
Posts: 2,096
Likes: 29
From: SE London
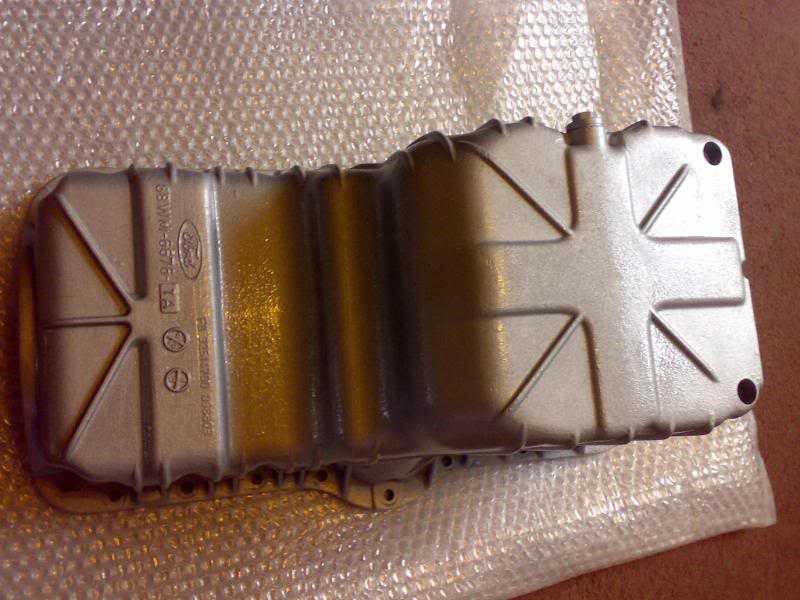
Okay, managed to get a sump from a friend, but unfortunately he had painted it gloss black hammerite (don't ask, he did his whole engine and underneath the car in the stuff :shock ).
So, first off it was time to laboriously remove all the old paint from the sump and make it nice and smooth.
Unfortunately, these pics have come out so "out-of-focus" I ended up deleting them :cry .
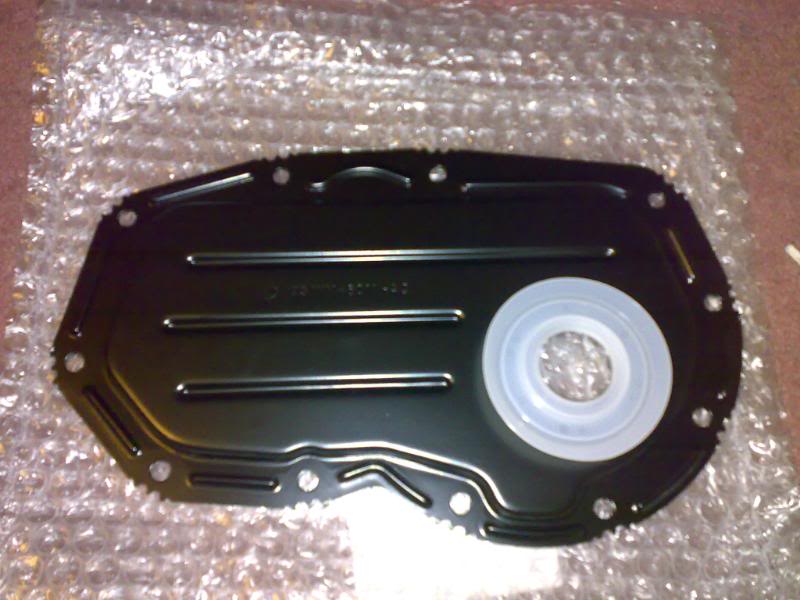
However, once back to original aluminium, you need to apply an "etch" before you can do anything. As I had needed to sand the sump back, I had lost the original grained finish on the sump, so it was out with the etch-primer and 2 costs of that later plus 3 coats of primer, the sump looked like this:
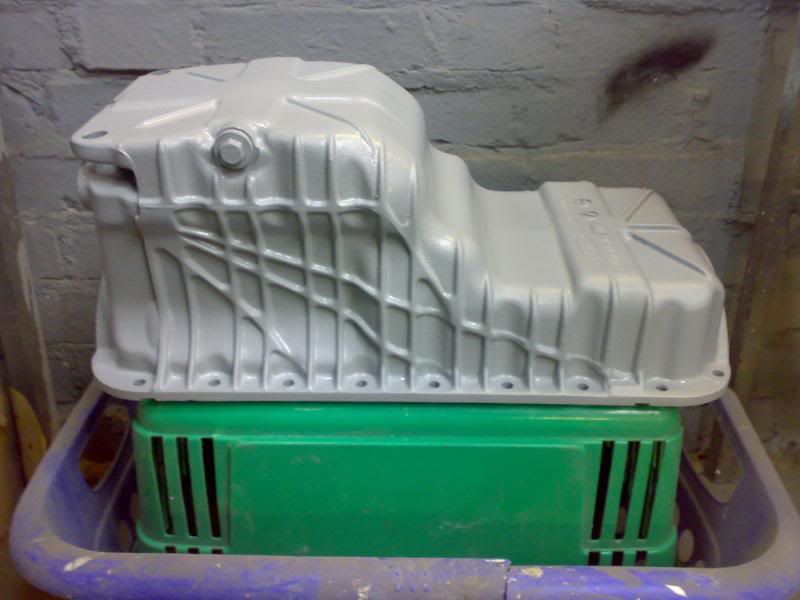
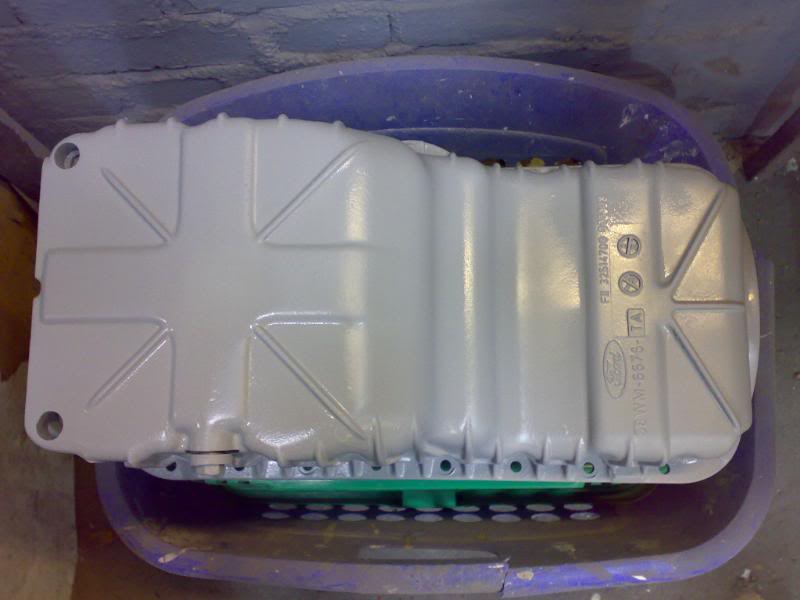
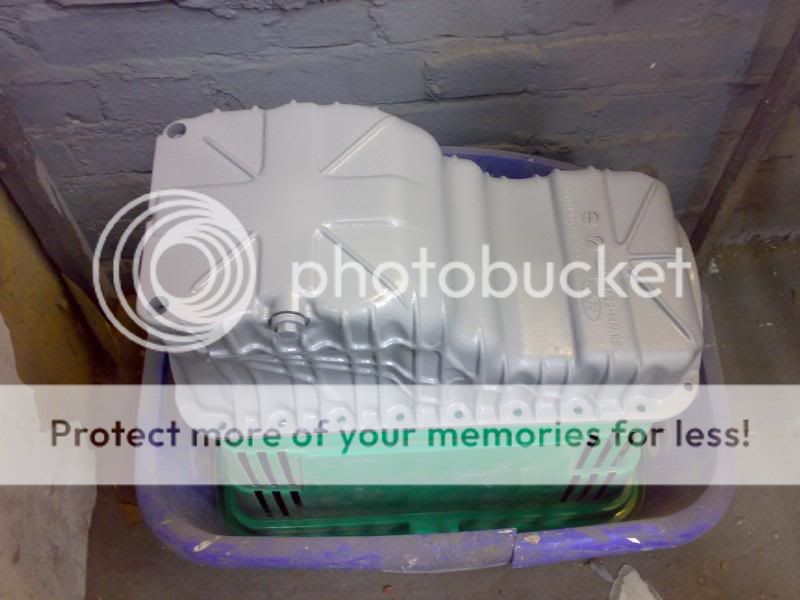
Nice and grey, but unfortunately, completely smooth finish and completely the wrong colour.
So, on with the next section, the paint.
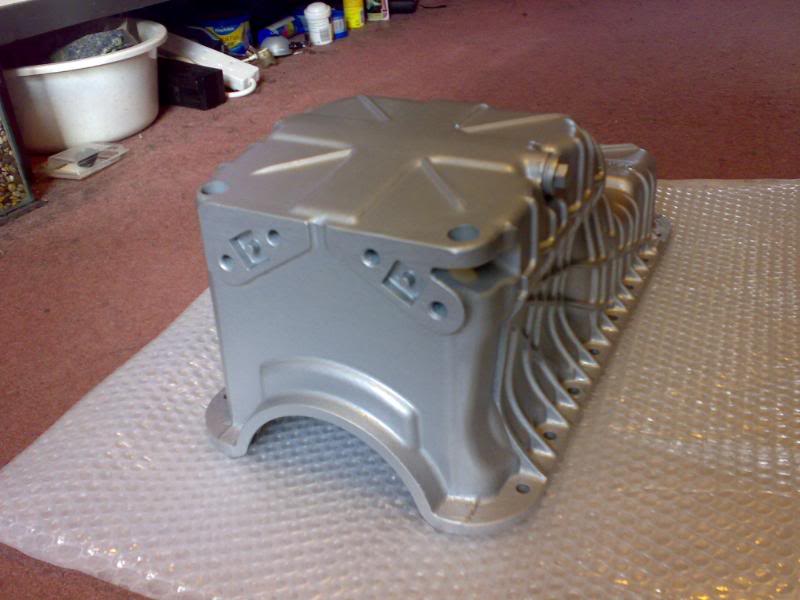
Much better, and a nice grained finish starting to appear.
So, first off it was time to laboriously remove all the old paint from the sump and make it nice and smooth.
Unfortunately, these pics have come out so "out-of-focus" I ended up deleting them :cry .
However, once back to original aluminium, you need to apply an "etch" before you can do anything. As I had needed to sand the sump back, I had lost the original grained finish on the sump, so it was out with the etch-primer and 2 costs of that later plus 3 coats of primer, the sump looked like this:
Nice and grey, but unfortunately, completely smooth finish and completely the wrong colour.
So, on with the next section, the paint.
Much better, and a nice grained finish starting to appear.
Thread Starter
OCD Victim
Joined: Sep 2005
Posts: 2,096
Likes: 29
From: SE London
Yay, we have a short block @ last.....
Todays update is more of a "how-to" build a short block up.
Firstly I got to use my new cylinder honing tool, about �22 from Frost Automotive.
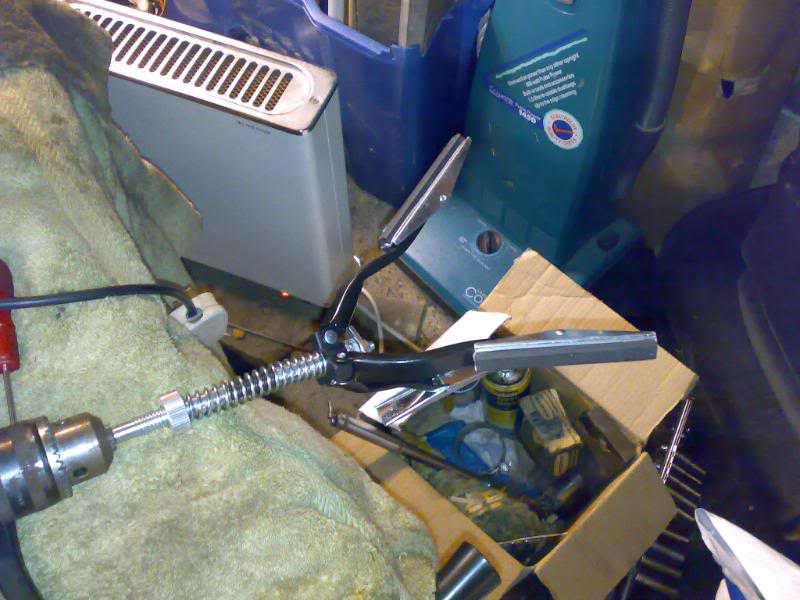
A little bit of time and some lubricant later, we have four cylinders all honed nicely
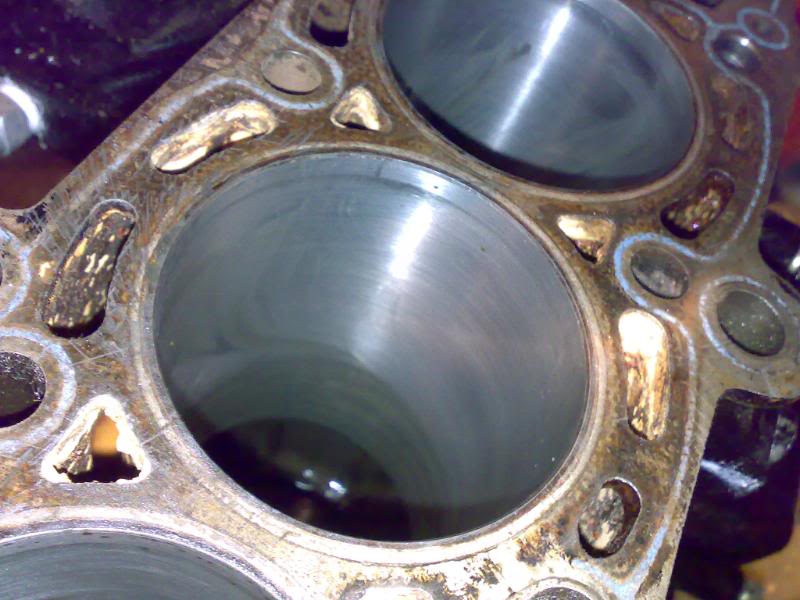
The cylinders should really be honed whenever fitting new piston rings as it allows the rings to bed in smoother and help prevent glazing on the bores. Number 1 cylinder proved to be a minor pain as it has received a little more wear in the past compared to the other cylinders, but nothing to be worried about. It just meant a little more attention was needed.
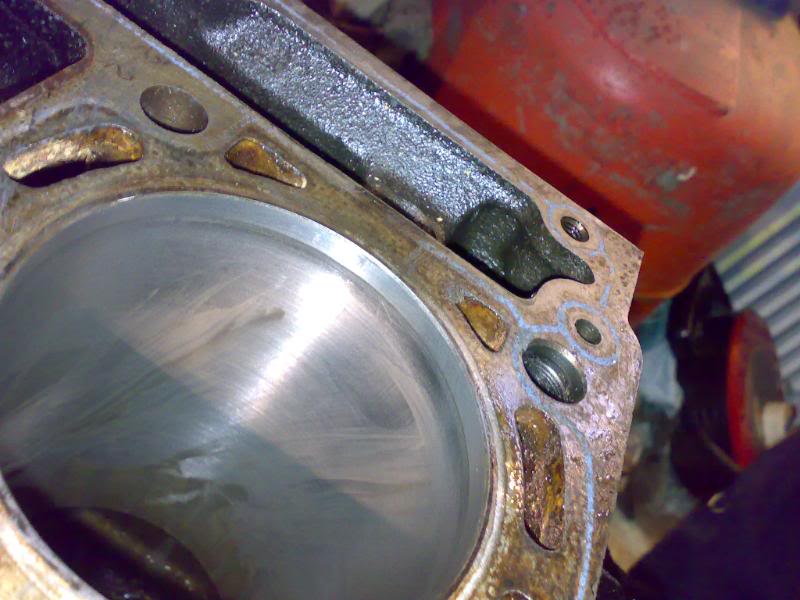
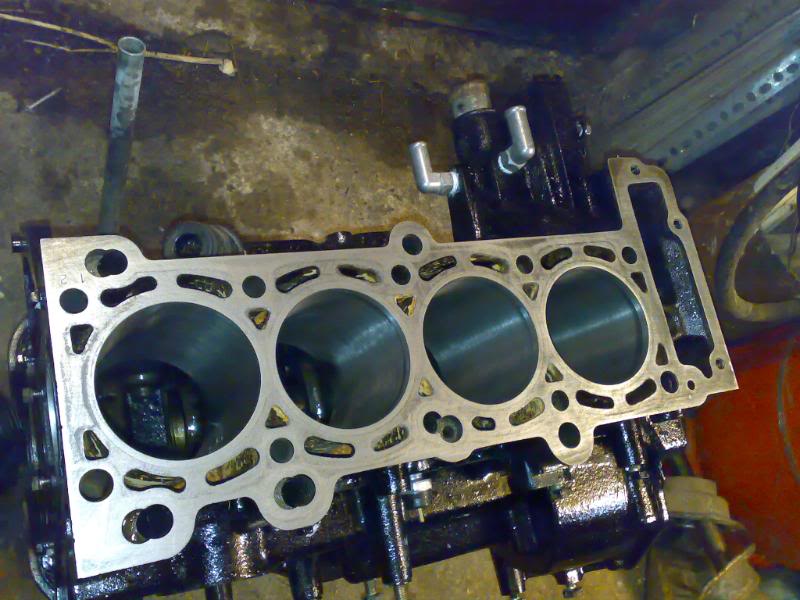
Next was smoothing the block mating face. A nice flat plate and some emery, along with a nice spraying of WD40, and we have a nice and smooth block face.
Always remember though not to keep rubbing the block face in the same direction or you just end up with lots of scratches that can prevent a solid sealed gasket.
Once this was done, we moved onto the piston rings. From my previous post, you will gather that the piston rings have been fitted already, so all that was needed was a "light" dab of grease around the rings and into the grooves themselves before fitting inside the piston ring compressor and sliding down the bores from the top of the block.
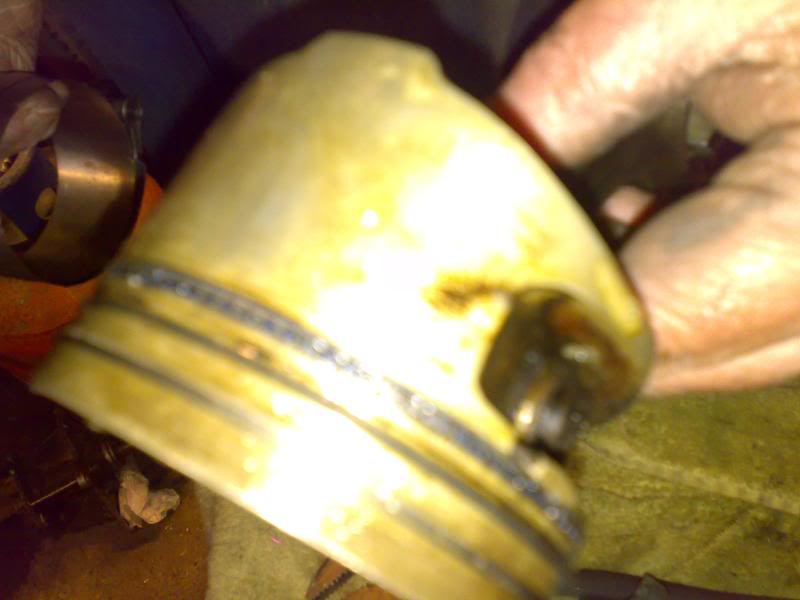
Unfortnately, I have not got an image ATM of the pistons fitted, that will follow in the next day or so once I get it all back on the ground.
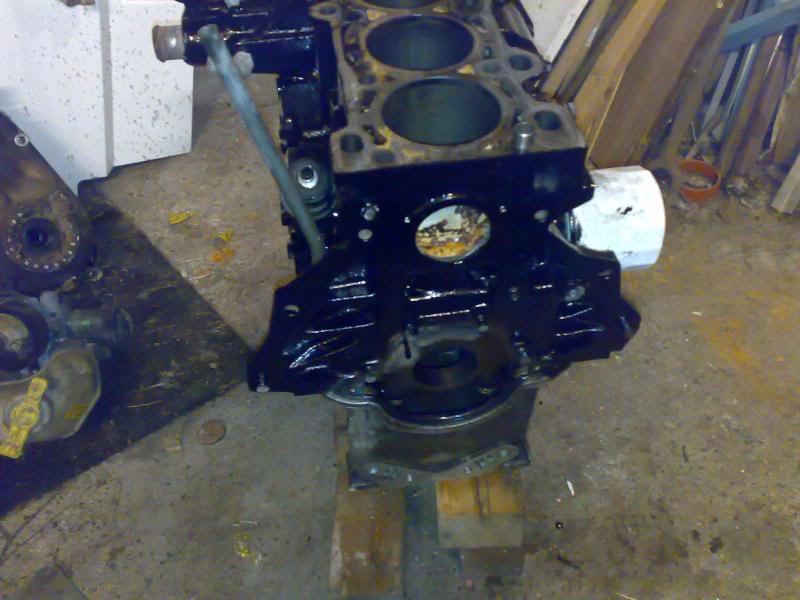
Once the block was up on the workbench and upended, the temporary sump was removed to expose this.
A quick clean and some removal of the crank main caps and we were ready for assembly.
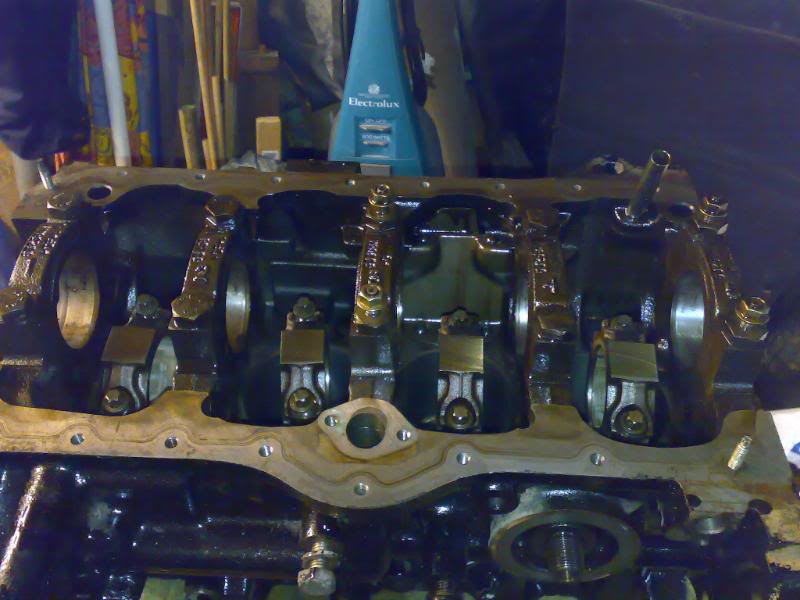
After fitting the block side of the crank bearing shells (the ones with the groove cut into them for oil lubrication), the crank was lowered into place.
If you look in the picture, you can just see the half of the crank shell with the groove showing.
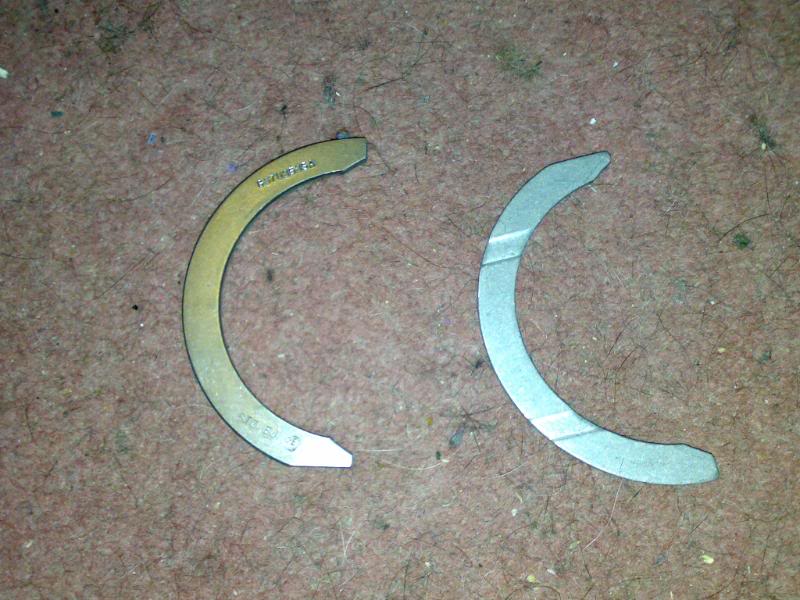
The new thrust washers were then slotted into place. These were not fitted before the crank as it is possible for the crank to damage the washers and you would be unable to see once fitted. If the thrust washers are fitted afterwards, a good and secure fit is pretty much guaranteed.
Once fitted and checked, the other half of the crank shells were fitted into the corresponding caps and soaked in SAE 10W fork oil. This will stay on the bearings fine until such time as the engine is fully assembled.
The crank bolts were then fitted and torqued up to 90Nm in 3 stages, making sure that nothing was overstressed. The crank was then rotated to make sure that nothing was fitted too tight. Once turned, the crank bolts were then rechecked to make sure that any oil had not prevented an accurate reading on the bolts. They were all fine.
Onto the conrods. The new shells were fitted to the conrods themselves and were then pushed up to the crank, leaving a slight gap to allow the oil to cover. An amount of oil was then poured onto the shells. Each conrod cap was then fitted in turn using new stretch bolts (E10 reverse Torx). They were tightened in stages, starting with handtight, then 20Nm and finally 90 degrees afterwards.
Okay, this makes the basic short block. From here, it is onto all the "ancillary" parts, seals, brackets, etc...
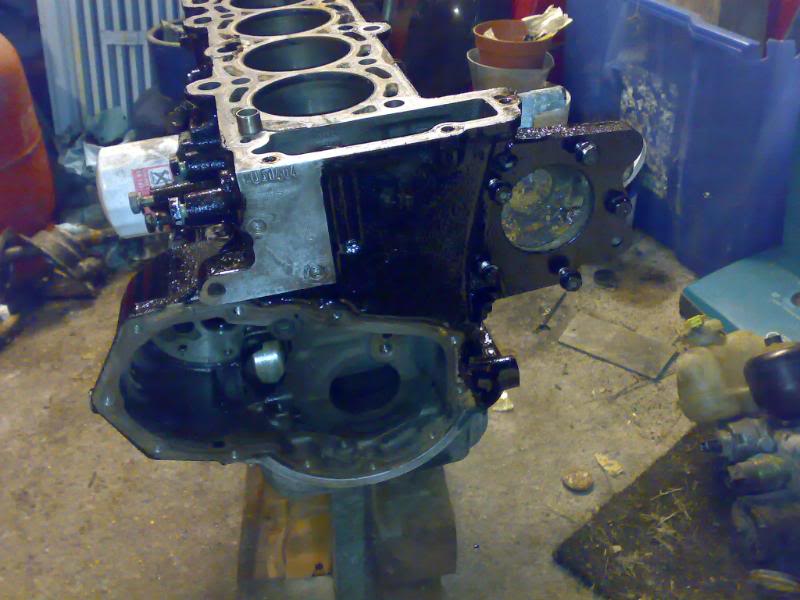
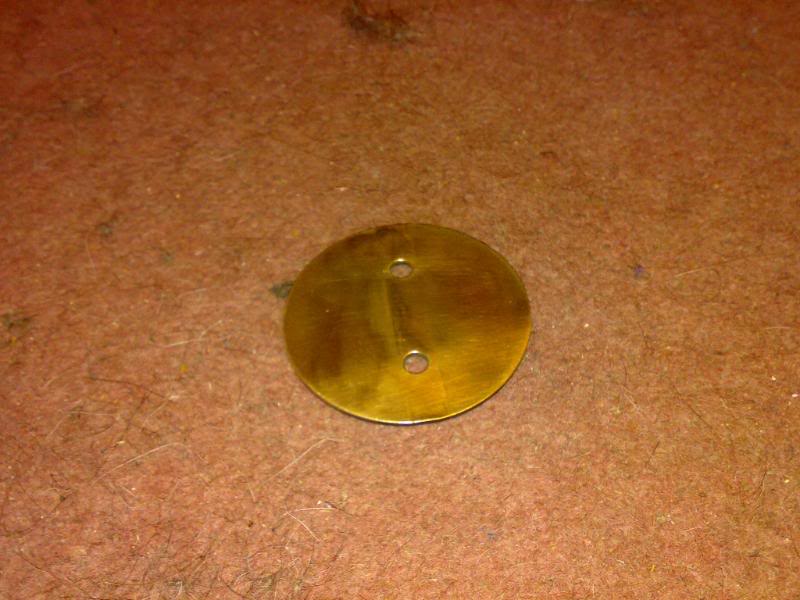
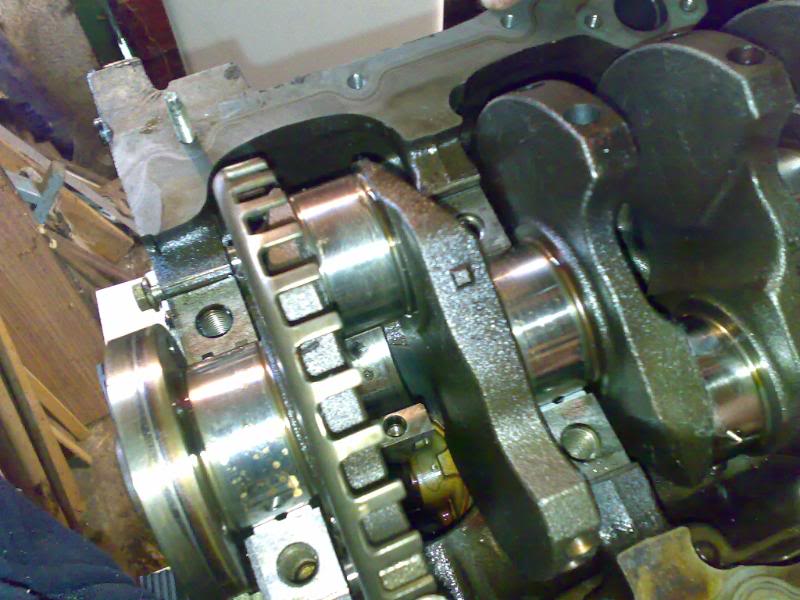
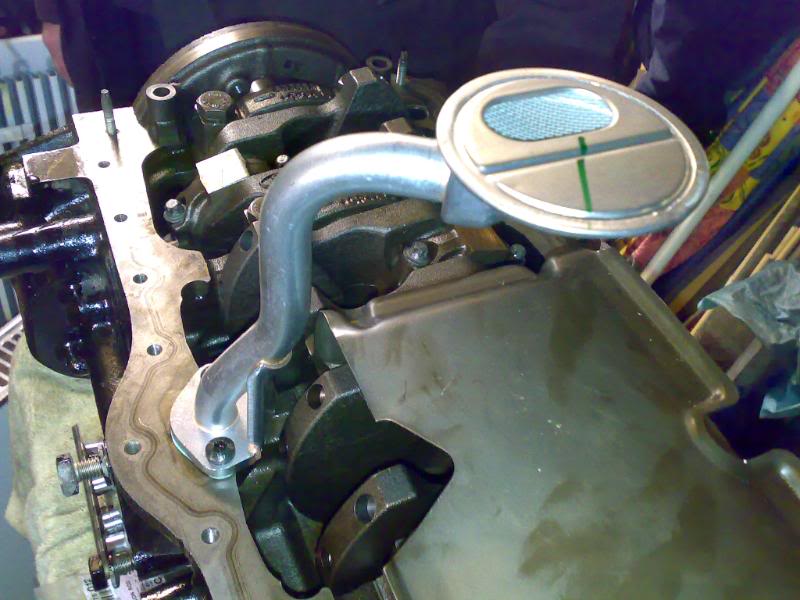
Next is the baffle plate for the crank and the oil pump pickup pipe. This is a brand new pickup pipe, with a new gasket fitted on the mounting flange. The baffle plate is held in place with 4 x 12mm nuts. and the oil pickup pipe with 2 x T30 torx bolts.
Next is the rear main oil seal. This is housed in a casing that is attached to the block by 4 x 10mm bolts.
Before fitting the rear seal, a liberal amount of grease was applied to the inside of the seal and to the fitting tool (which comes with the seal as part of a set). The tool is designed to fit inside the rear main seal and then push over the edge of the crank, preventing the seal from tearing whilst being fitted. A new metal retaining gasket was fitted @ the same time between the block and the main seal housing.

The front sump mounting flange was then fitted. This is a half-moon bracket that bolts to the front of the block where the sump goes and helps maintain a good seal. A small amount of sealant was added to the mating faces before it too was assembled.
Right, after this, we were ready for the sump to be fitted. A quick check of everything that had been fitted was made and double-checked (not a good idea to forget anything @ this stage).
All was good, so it was onto the sump.
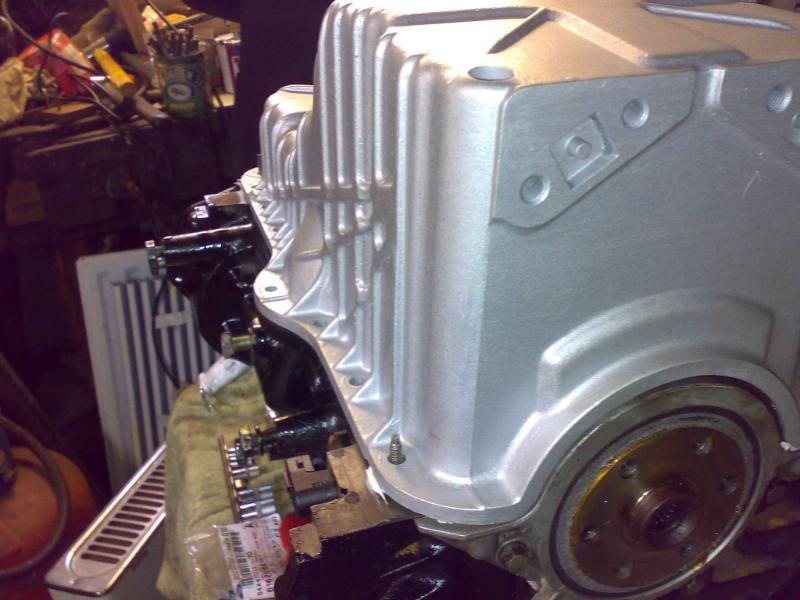
On the sump mating face, there is a recess groove that the gasket sits into. Normally, you would not apply any extra adhesives or sealants other than where the sump gasket has to change direction, but as I do not wish to be redoing this job @ a later stage, a small bead of the VW sump sealant was run inside the groove before the gasket was fitted. A similar bead was run around the sump where the gasket would sit. The sump was then fitted and tightened up with the bolts handtight, then tightened to approximately 10Nm. Any excess sealant was then removed (surprisingly not a lot actually).
Sump fitted and bolted down.
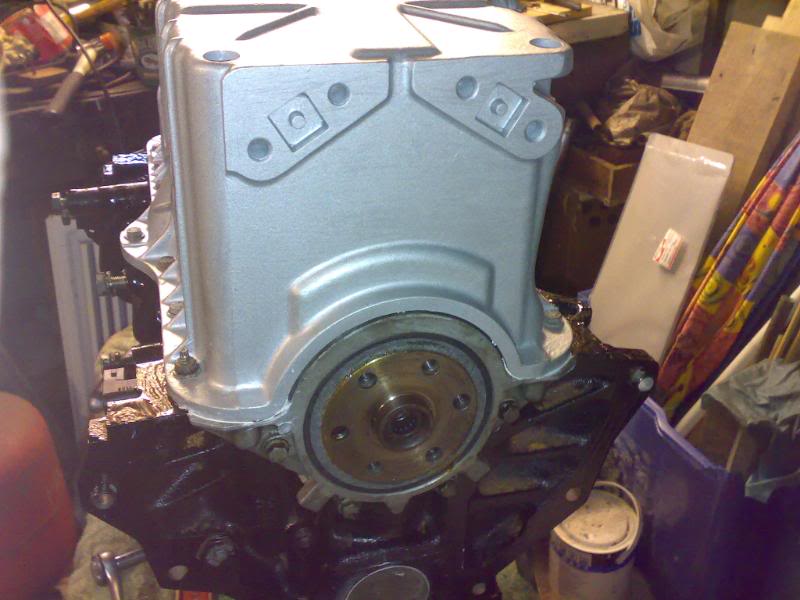
New crankshaft sensor was fitted.
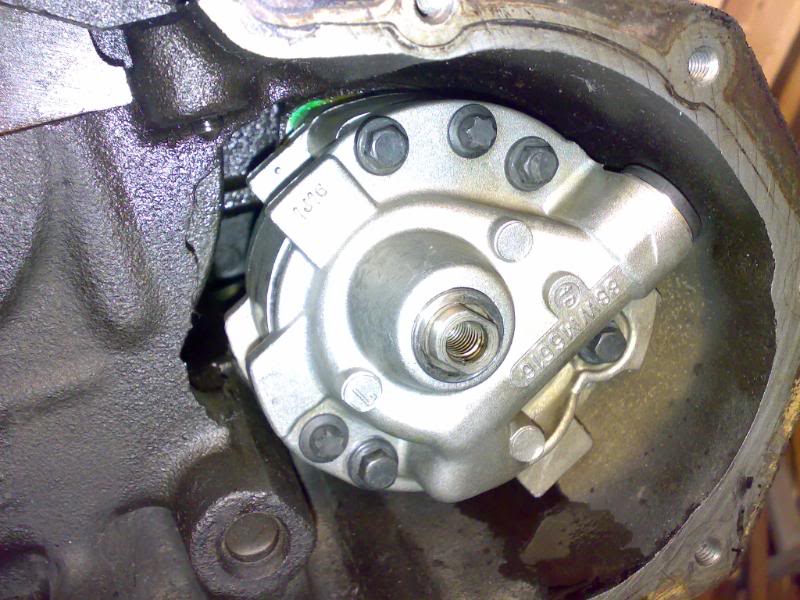
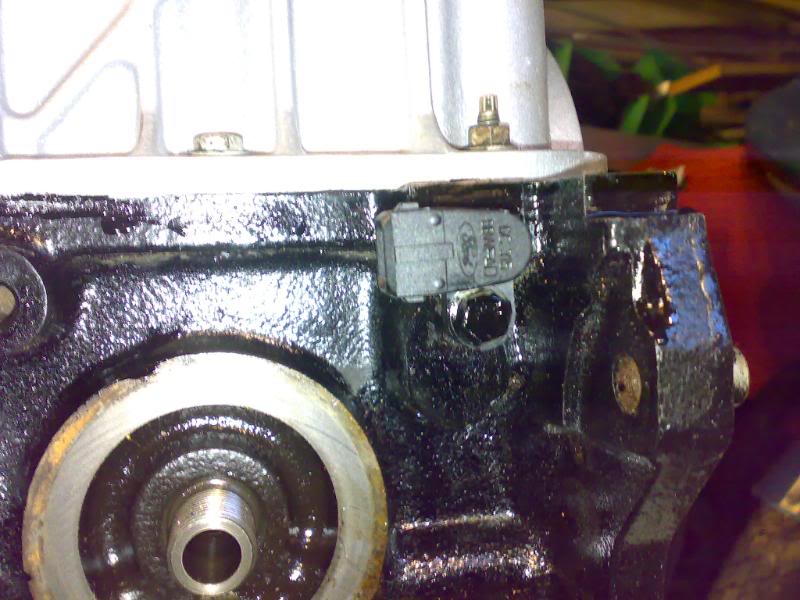 Onto the front of the engine, a new waterpump was fitted with a new o-ring. The o-ring was greased and then tightened accordingly to 25Nm. The bolt heads were then painted back in with engine enamel to match the engine. The oil pump was fitted, again with a new gasket which was coated lightly in grease before assembly to help prevent the gasket snagging as it is tightened and tearing. Prior to fitting, an amount of oil had been poured into the oil pump, although the pump will need to be turned by hand when fitted into the car to get some decent oil in there before starting the car up.
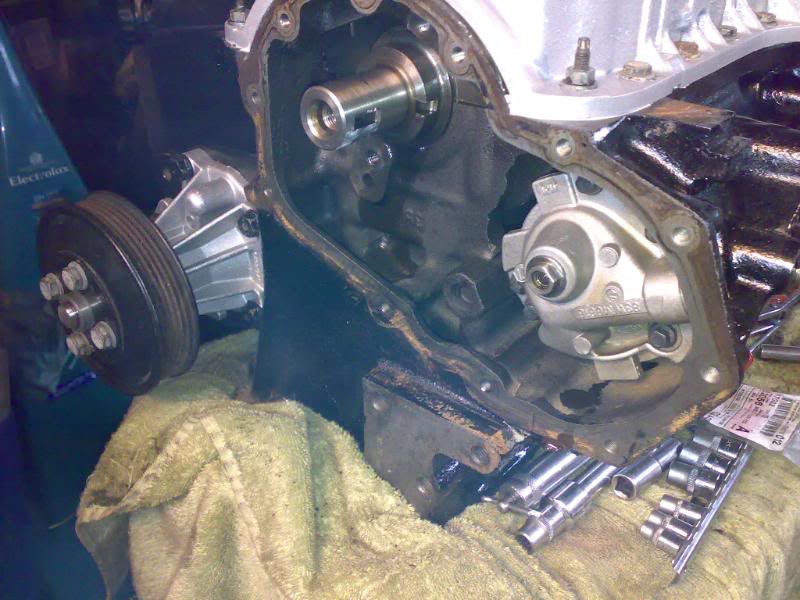
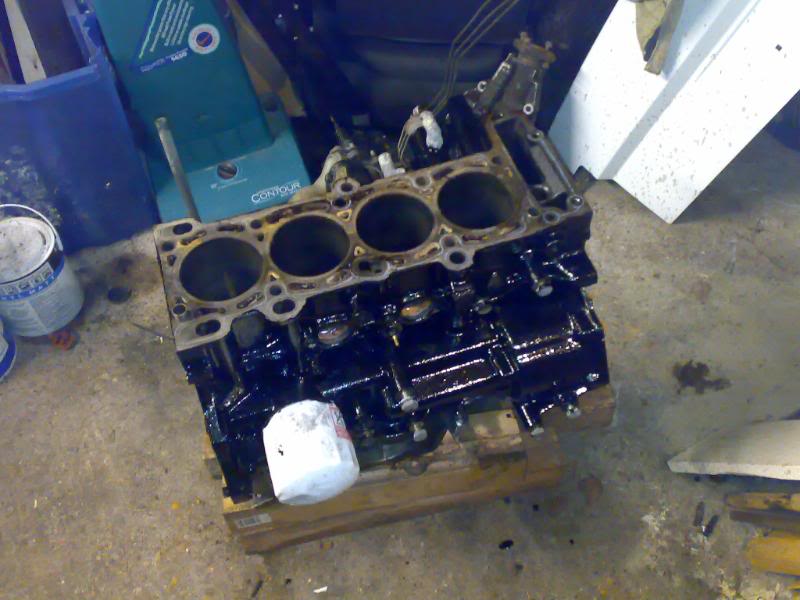
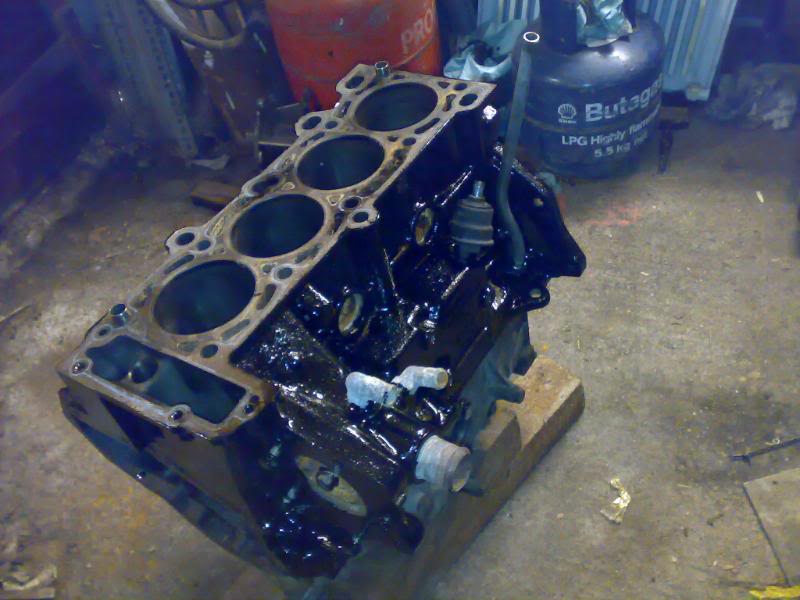
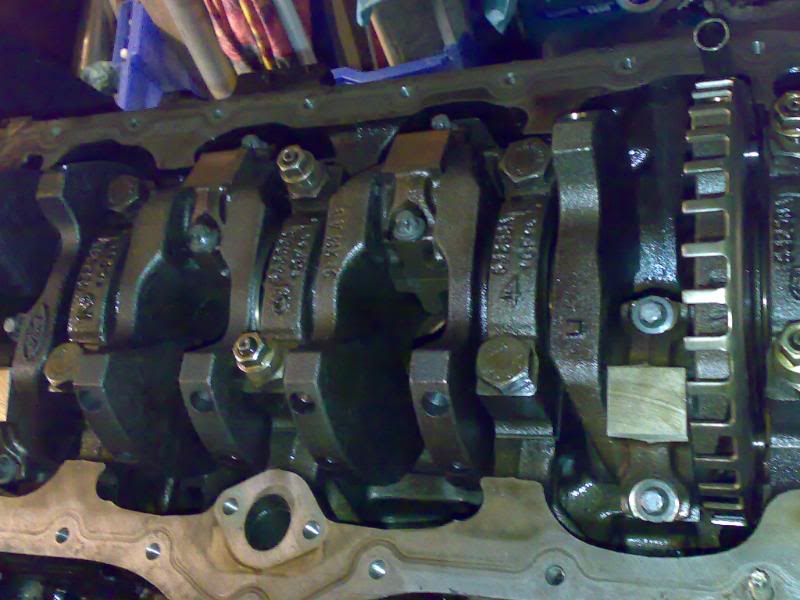
All that was left @ this point was to touch in any last bits of paint on the block that had been missed initially and to clear up some of the mess.
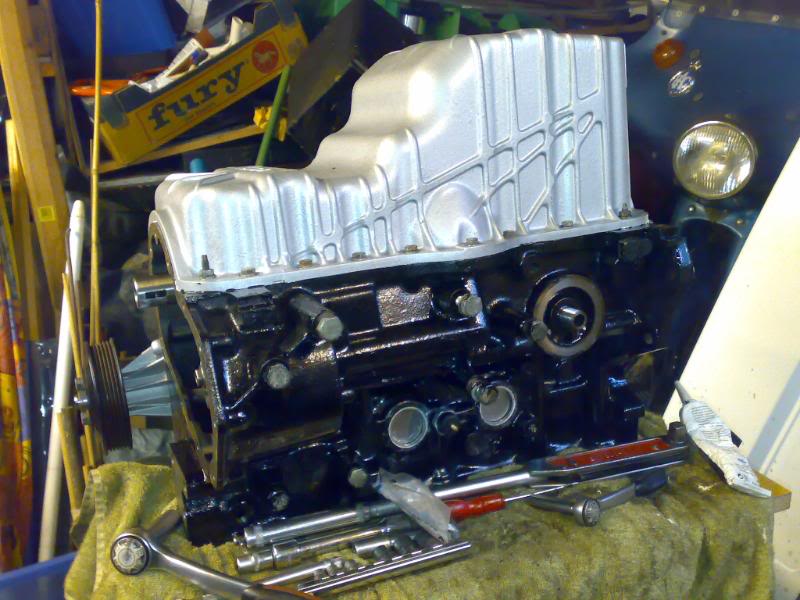
So, to leave it, a few overview shots of todays work.

Todays update is more of a "how-to" build a short block up.
Firstly I got to use my new cylinder honing tool, about �22 from Frost Automotive.
A little bit of time and some lubricant later, we have four cylinders all honed nicely
The cylinders should really be honed whenever fitting new piston rings as it allows the rings to bed in smoother and help prevent glazing on the bores. Number 1 cylinder proved to be a minor pain as it has received a little more wear in the past compared to the other cylinders, but nothing to be worried about. It just meant a little more attention was needed.
Next was smoothing the block mating face. A nice flat plate and some emery, along with a nice spraying of WD40, and we have a nice and smooth block face.
Always remember though not to keep rubbing the block face in the same direction or you just end up with lots of scratches that can prevent a solid sealed gasket.
Once this was done, we moved onto the piston rings. From my previous post, you will gather that the piston rings have been fitted already, so all that was needed was a "light" dab of grease around the rings and into the grooves themselves before fitting inside the piston ring compressor and sliding down the bores from the top of the block.
Unfortnately, I have not got an image ATM of the pistons fitted, that will follow in the next day or so once I get it all back on the ground.
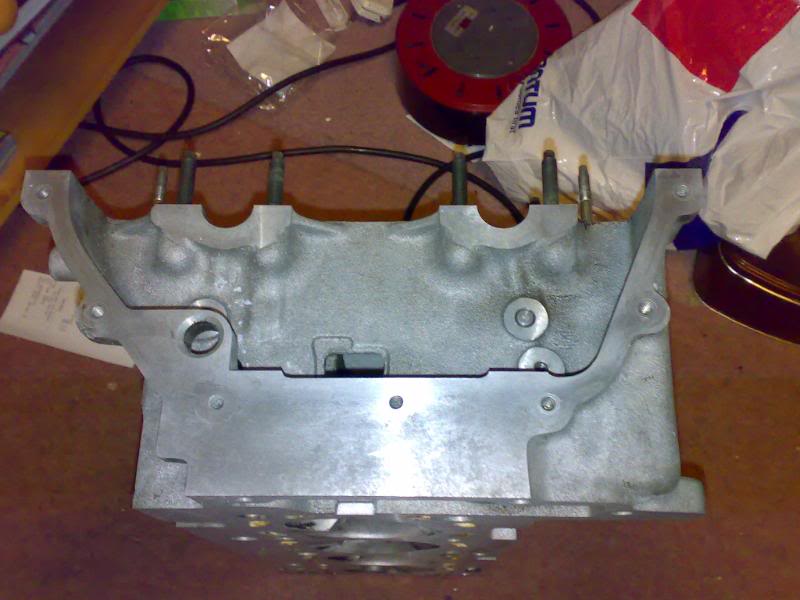
Once the block was up on the workbench and upended, the temporary sump was removed to expose this.
A quick clean and some removal of the crank main caps and we were ready for assembly.
After fitting the block side of the crank bearing shells (the ones with the groove cut into them for oil lubrication), the crank was lowered into place.
If you look in the picture, you can just see the half of the crank shell with the groove showing.
The new thrust washers were then slotted into place. These were not fitted before the crank as it is possible for the crank to damage the washers and you would be unable to see once fitted. If the thrust washers are fitted afterwards, a good and secure fit is pretty much guaranteed.
Once fitted and checked, the other half of the crank shells were fitted into the corresponding caps and soaked in SAE 10W fork oil. This will stay on the bearings fine until such time as the engine is fully assembled.
The crank bolts were then fitted and torqued up to 90Nm in 3 stages, making sure that nothing was overstressed. The crank was then rotated to make sure that nothing was fitted too tight. Once turned, the crank bolts were then rechecked to make sure that any oil had not prevented an accurate reading on the bolts. They were all fine.
Onto the conrods. The new shells were fitted to the conrods themselves and were then pushed up to the crank, leaving a slight gap to allow the oil to cover. An amount of oil was then poured onto the shells. Each conrod cap was then fitted in turn using new stretch bolts (E10 reverse Torx). They were tightened in stages, starting with handtight, then 20Nm and finally 90 degrees afterwards.
Okay, this makes the basic short block. From here, it is onto all the "ancillary" parts, seals, brackets, etc...
Next is the baffle plate for the crank and the oil pump pickup pipe. This is a brand new pickup pipe, with a new gasket fitted on the mounting flange. The baffle plate is held in place with 4 x 12mm nuts. and the oil pickup pipe with 2 x T30 torx bolts.
Next is the rear main oil seal. This is housed in a casing that is attached to the block by 4 x 10mm bolts.
Before fitting the rear seal, a liberal amount of grease was applied to the inside of the seal and to the fitting tool (which comes with the seal as part of a set). The tool is designed to fit inside the rear main seal and then push over the edge of the crank, preventing the seal from tearing whilst being fitted. A new metal retaining gasket was fitted @ the same time between the block and the main seal housing.
The front sump mounting flange was then fitted. This is a half-moon bracket that bolts to the front of the block where the sump goes and helps maintain a good seal. A small amount of sealant was added to the mating faces before it too was assembled.
Right, after this, we were ready for the sump to be fitted. A quick check of everything that had been fitted was made and double-checked (not a good idea to forget anything @ this stage).
All was good, so it was onto the sump.
On the sump mating face, there is a recess groove that the gasket sits into. Normally, you would not apply any extra adhesives or sealants other than where the sump gasket has to change direction, but as I do not wish to be redoing this job @ a later stage, a small bead of the VW sump sealant was run inside the groove before the gasket was fitted. A similar bead was run around the sump where the gasket would sit. The sump was then fitted and tightened up with the bolts handtight, then tightened to approximately 10Nm. Any excess sealant was then removed (surprisingly not a lot actually).
Sump fitted and bolted down.
New crankshaft sensor was fitted.
Onto the front of the engine, a new waterpump was fitted with a new o-ring. The o-ring was greased and then tightened accordingly to 25Nm. The bolt heads were then painted back in with engine enamel to match the engine. The oil pump was fitted, again with a new gasket which was coated lightly in grease before assembly to help prevent the gasket snagging as it is tightened and tearing. Prior to fitting, an amount of oil had been poured into the oil pump, although the pump will need to be turned by hand when fitted into the car to get some decent oil in there before starting the car up.All that was left @ this point was to touch in any last bits of paint on the block that had been missed initially and to clear up some of the mess.
So, to leave it, a few overview shots of todays work.
Thread Starter
OCD Victim
Joined: Sep 2005
Posts: 2,096
Likes: 29
From: SE London
Next update.
Sorry about the length of time taken but other "projects" have had to take my attention.
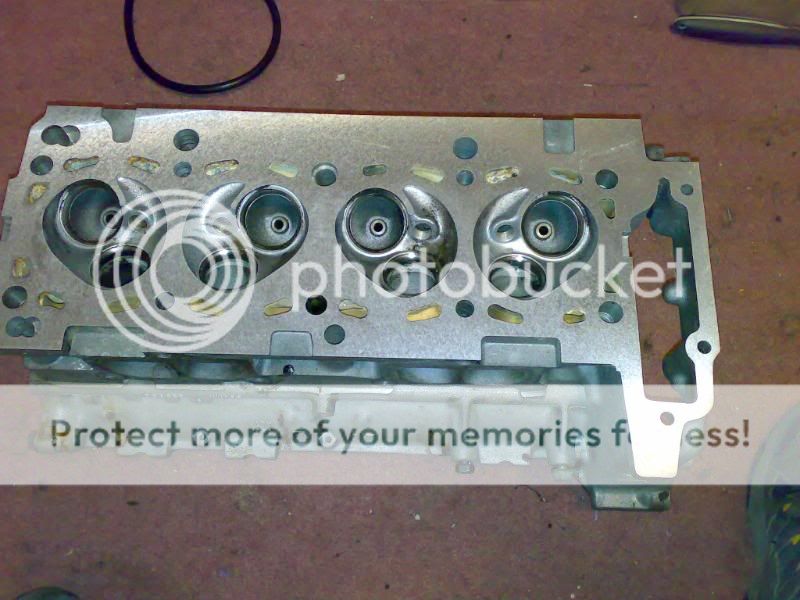
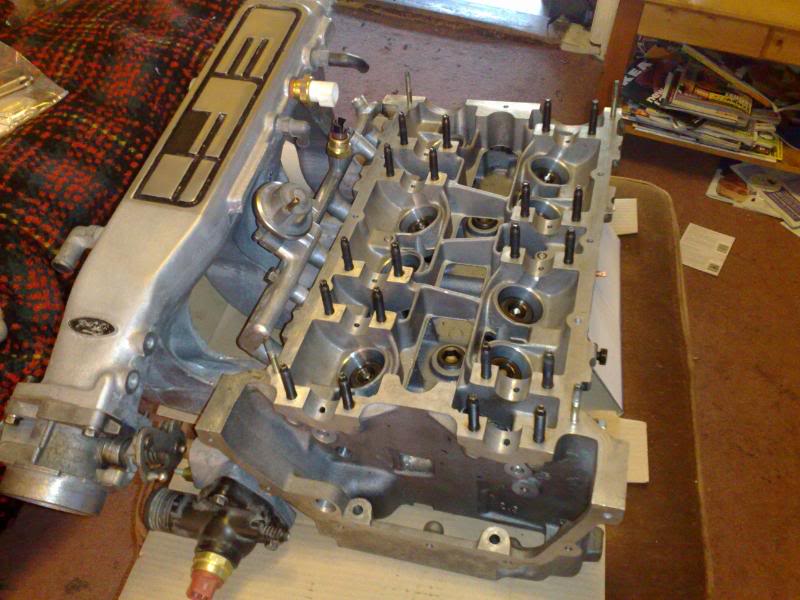
Okay, so, from the begining. We have one cylinder head that has been three-angle cut and had the valves lapped in
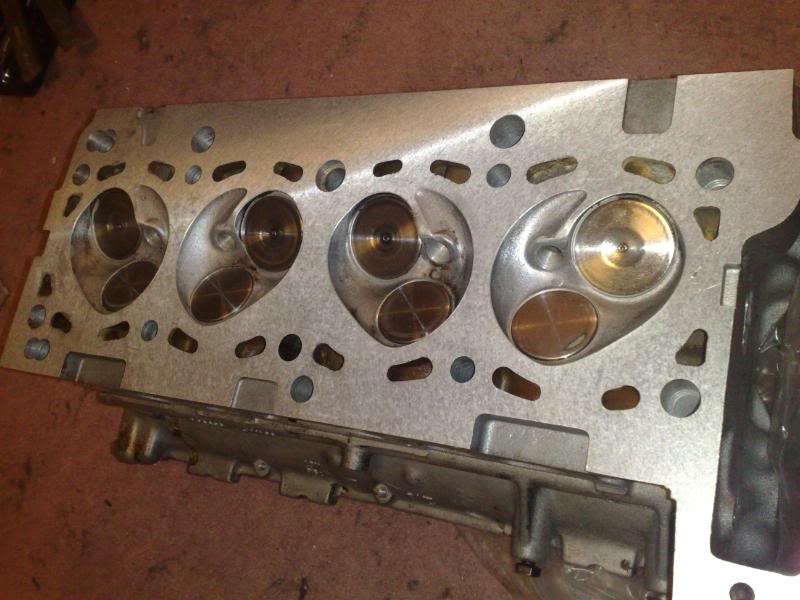
On the cylinder head itself, there are some sharp points within the combustion chamber which can help cause detonation, so these were removed carefully. Some people go further and fully flow the cylinder head, but as I am running standard cams and so forth, this really is unecessary for this application.
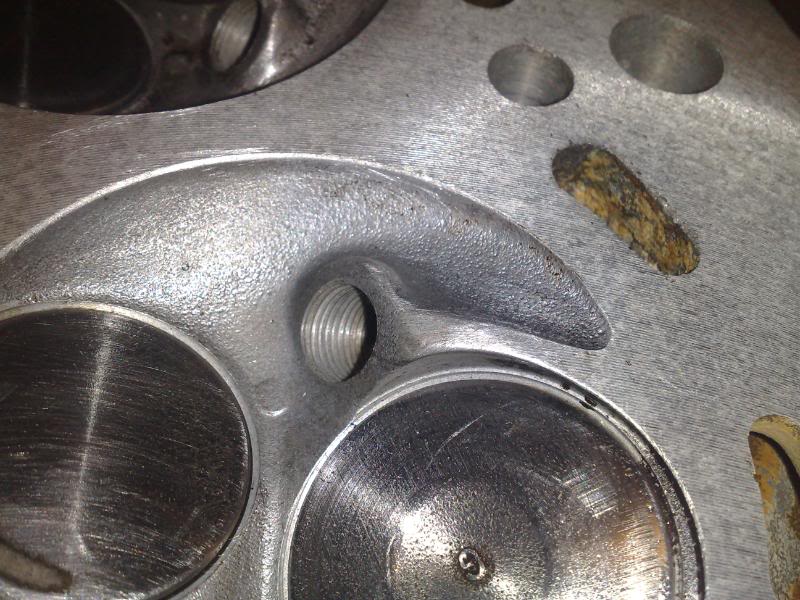
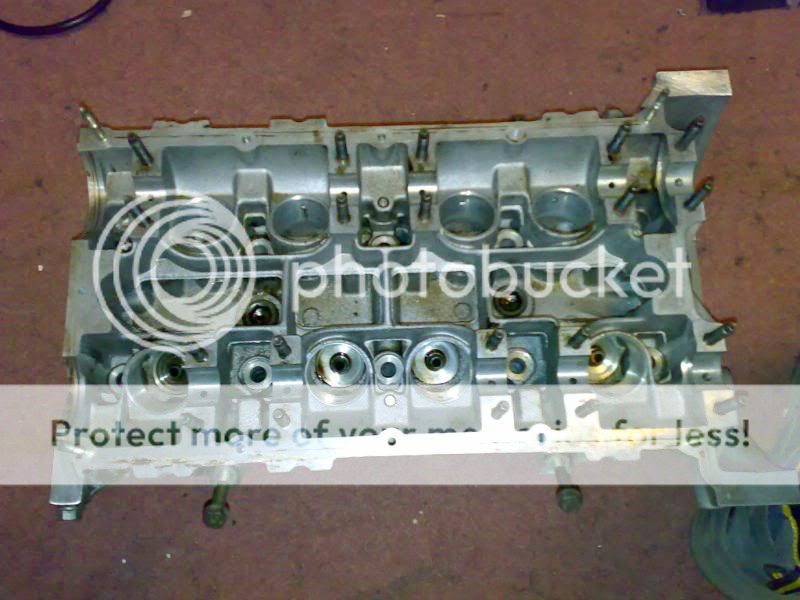
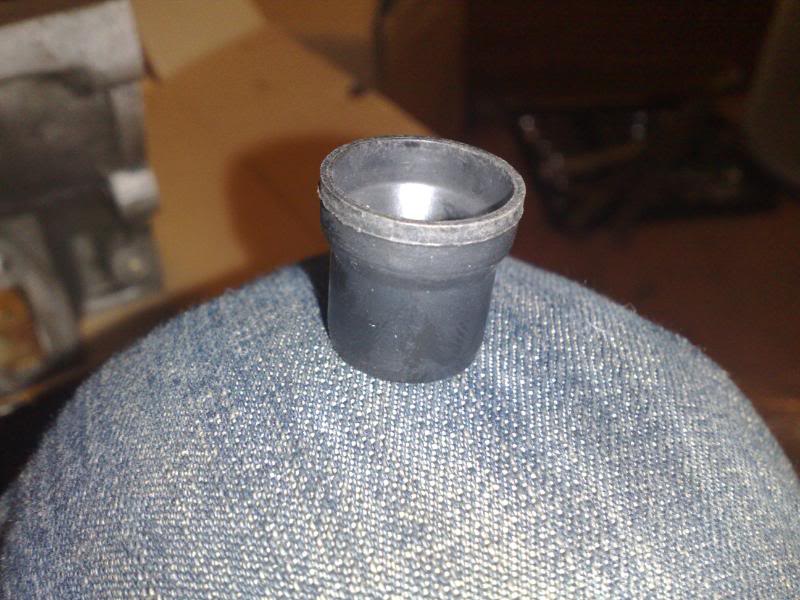
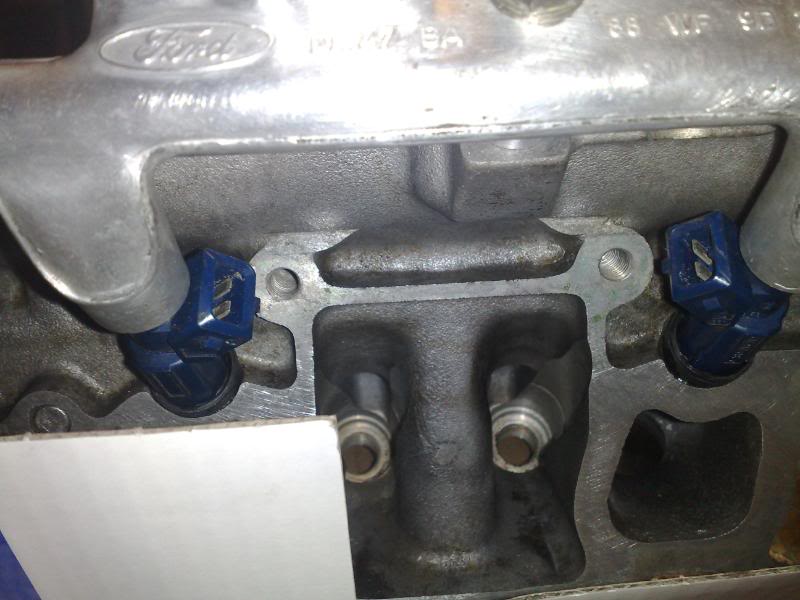
First thing added is the valve adaptors. These are basically plastic caps that the injectors sit into
They are a friction fit and have to go from
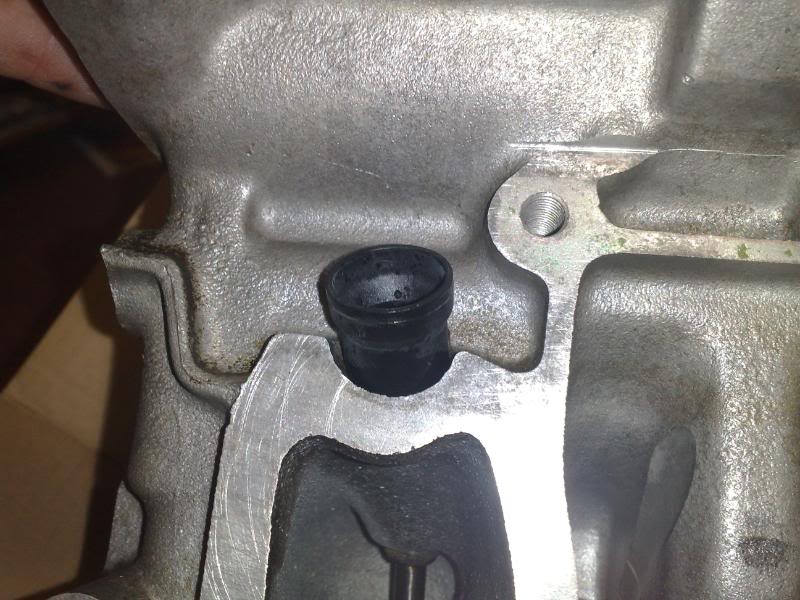
...to...
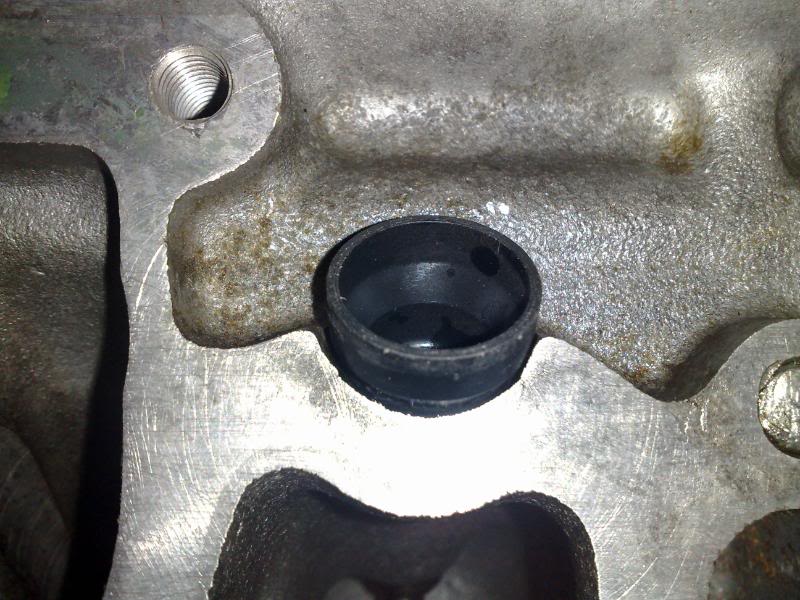
and to give you some idea of the size
Once tapped into place, the injectors are next. These have to have the o-rings greased to help prevent "snagging" of the seal on the apertures which will cause fuel leaks
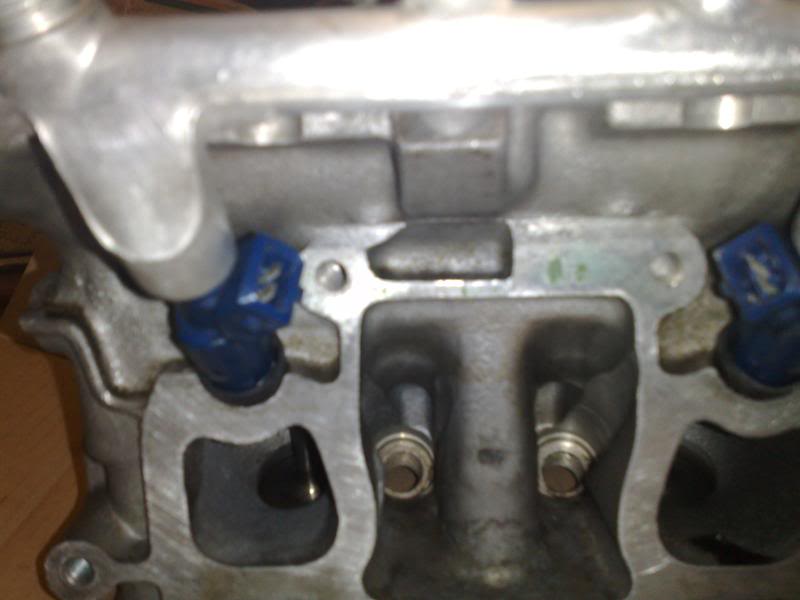
Fuel rail is then attached and bolted down.
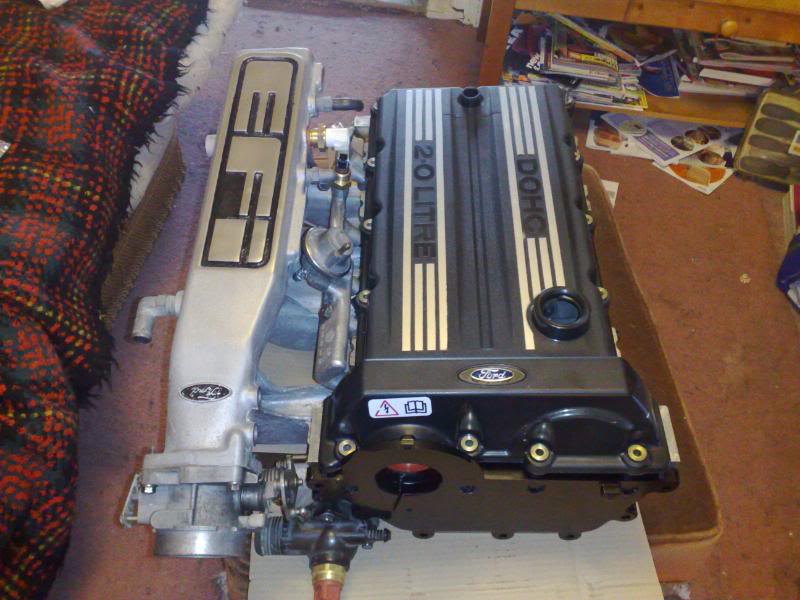
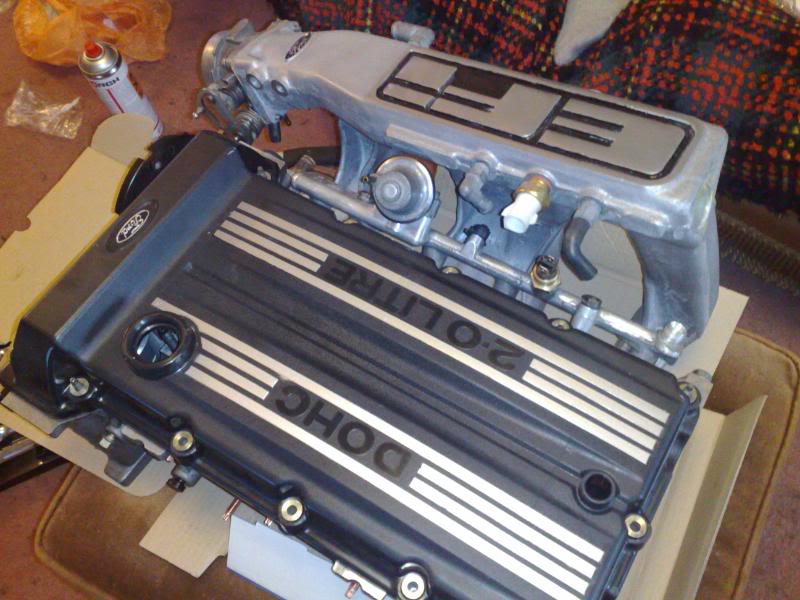
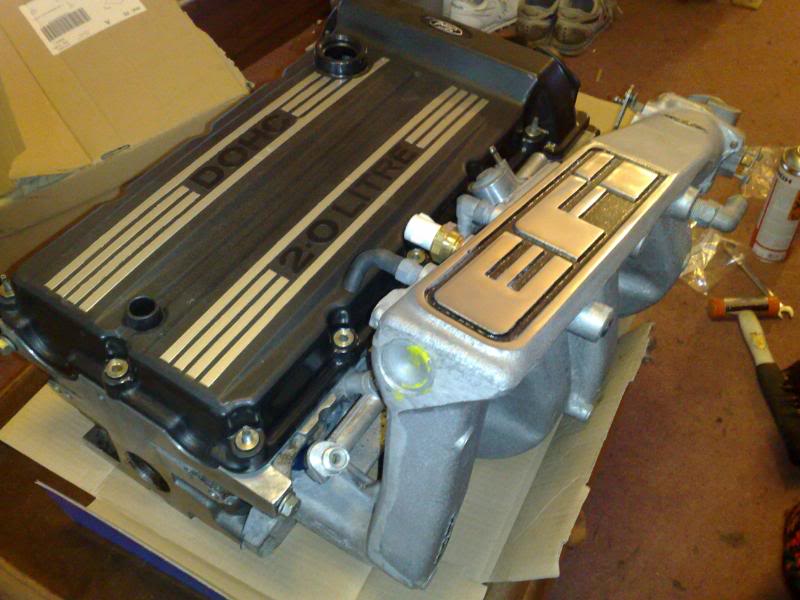
Two plastic spark plug locator blocks were fitted and then the inlet manifold and gasket

That is the work for this evening really, but I thought I'd throw the new rocker cover on as well to see and overall impression of what is to come
Sorry about the length of time taken but other "projects" have had to take my attention.
Okay, so, from the begining. We have one cylinder head that has been three-angle cut and had the valves lapped in
On the cylinder head itself, there are some sharp points within the combustion chamber which can help cause detonation, so these were removed carefully. Some people go further and fully flow the cylinder head, but as I am running standard cams and so forth, this really is unecessary for this application.
First thing added is the valve adaptors. These are basically plastic caps that the injectors sit into
They are a friction fit and have to go from
...to...
and to give you some idea of the size
Once tapped into place, the injectors are next. These have to have the o-rings greased to help prevent "snagging" of the seal on the apertures which will cause fuel leaks
Fuel rail is then attached and bolted down.
Two plastic spark plug locator blocks were fitted and then the inlet manifold and gasket
That is the work for this evening really, but I thought I'd throw the new rocker cover on as well to see and overall impression of what is to come


Thread Starter
OCD Victim
Joined: Sep 2005
Posts: 2,096
Likes: 29
From: SE London
Cheers for the replies so far guys.
To think that the car was only brought as a cheap runaround for the other half as we had just sold her XR3i (RS Replica) and she needed transport.
... and to make it worse, it's not finished yet!!!!!
To think that the car was only brought as a cheap runaround for the other half as we had just sold her XR3i (RS Replica) and she needed transport.
... and to make it worse, it's not finished yet!!!!!

Thread
Thread Starter
Forum
Replies
Last Post
FuzzyP
Technical help Q & A
2
Jun 4, 2012 08:47 PM
doga-ot
General Car Related Discussion.
9
Apr 29, 2012 05:24 PM