What a furrking joke! not looking forward to doing the rest!
 09-06-2013, 08:55 AM
#1
Zetec Turbo Baby Yeahhhh
Thread Starter
[IMG]http://i996.photobucket.com/albums/af84/FreshSmellinZetec/VIDEO0054_0000005217.jpg[/IMG

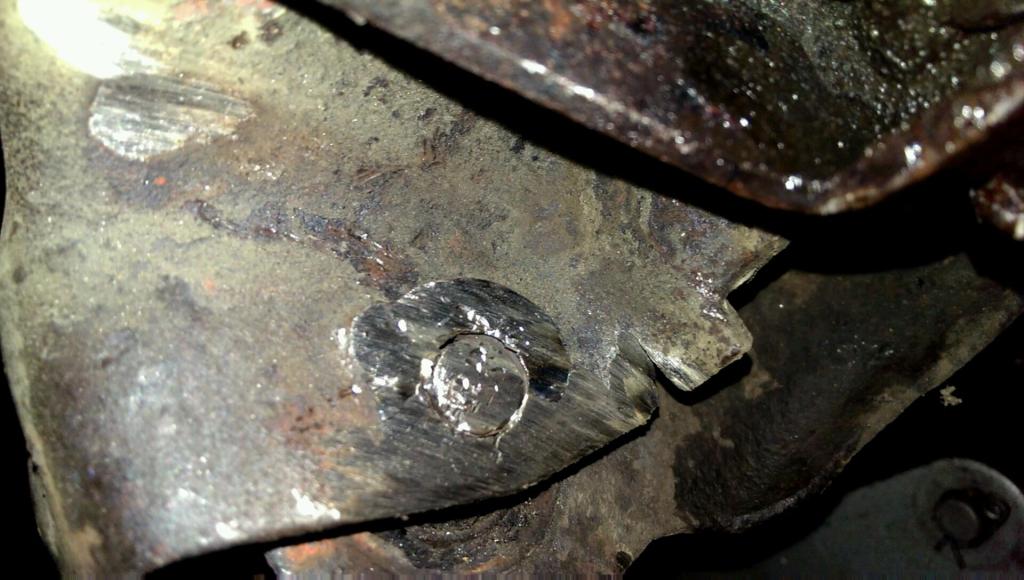
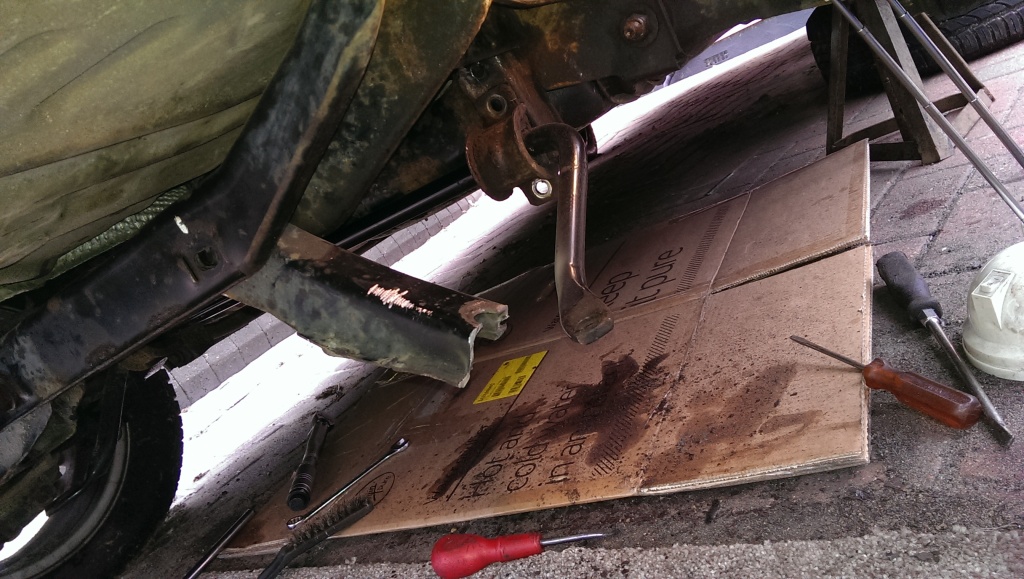
Focus mk1 rear control arm totally seized so have gone to these lengths to get it out and still nothing. Feel like it could be the same story for every other bolt on the suspension as I'm replacing all the suspension components!
Anyone come up against this before and what was your best way of attacking the job as a whole?


 09-06-2013, 09:26 AM
#4
I have started to replace the nuts and bolts like this on my cars with titanium ones as the NEVER corrode! there are plenty of places that do them on the net! Ironically I started with the exhaust manifold ones! If I cant get titanium ones I use stainless steel! good old Henry Ford really knows how to save the pennies and cost us pounds!


Trending Topics
09-06-2013, 10:06 AM
#8
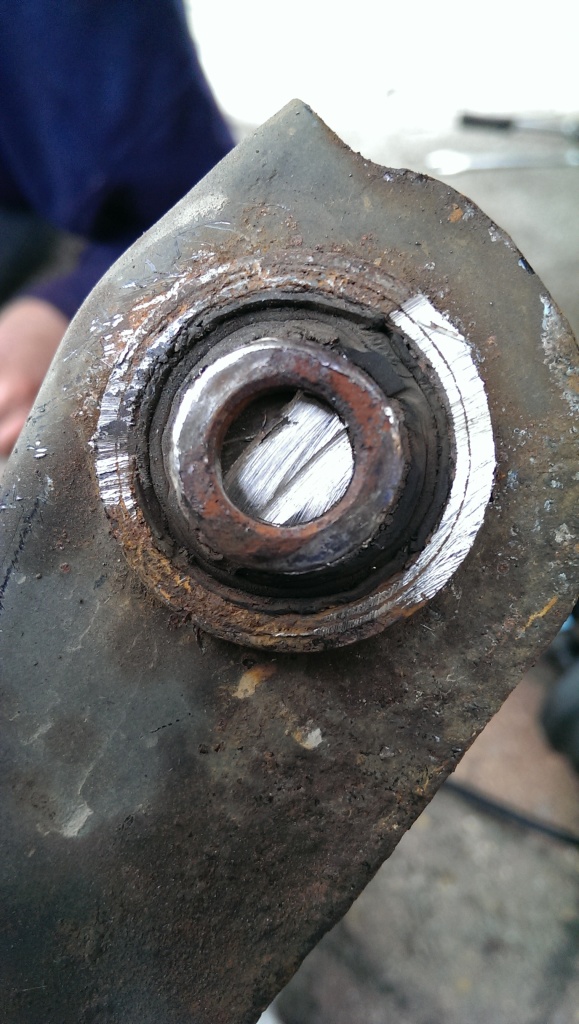
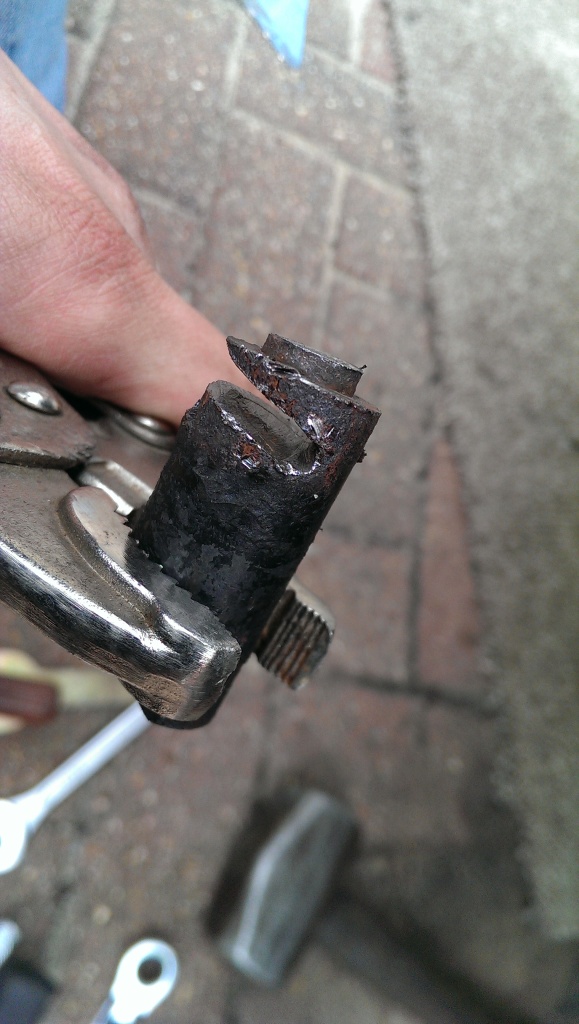
It's pretty common, total nightmare! What it is the bolt corrodes into the metal sleeve inside the bush. If you can get into it cut the bolt either side of the bush. Don't forget that the inner lower arm bolt that attaches to the subframe adjusts the toe/camber so will need setting up after.
Send a message to peevee on here, he has recently refurbished his rear subframe so should be able to give you some pointers.
Send a message to peevee on here, he has recently refurbished his rear subframe so should be able to give you some pointers.
09-06-2013, 10:14 AM
#9
Zetec Turbo Baby Yeahhhh
Thread Starter
Those sets are a bit hit n miss with the sizes though
I have started to replace the nuts and bolts like this on my cars with titanium ones as the NEVER corrode! there are plenty of places that do them on the net! Ironically I started with the exhaust manifold ones! If I cant get titanium ones I use stainless steel! good old Henry Ford really knows how to save the pennies and cost us pounds!
09-06-2013, 10:23 AM
#10
These look really interesting! do you only use these to remove already fucked nuts or on the first attempt? I must of used well over 500nm of force yesterday trying to get off the nut with steelsons (steelson attached to a ring spanner attched to a huge long pole for leverage)
Those sets are a bit hit n miss with the sizes though
Those sets are a bit hit n miss with the sizes though
09-06-2013, 02:00 PM
#11
ModFocus
Join Date: May 2011
Location: chichester
Posts: 145
Likes: 0
Received 0 Likes
on
0 Posts
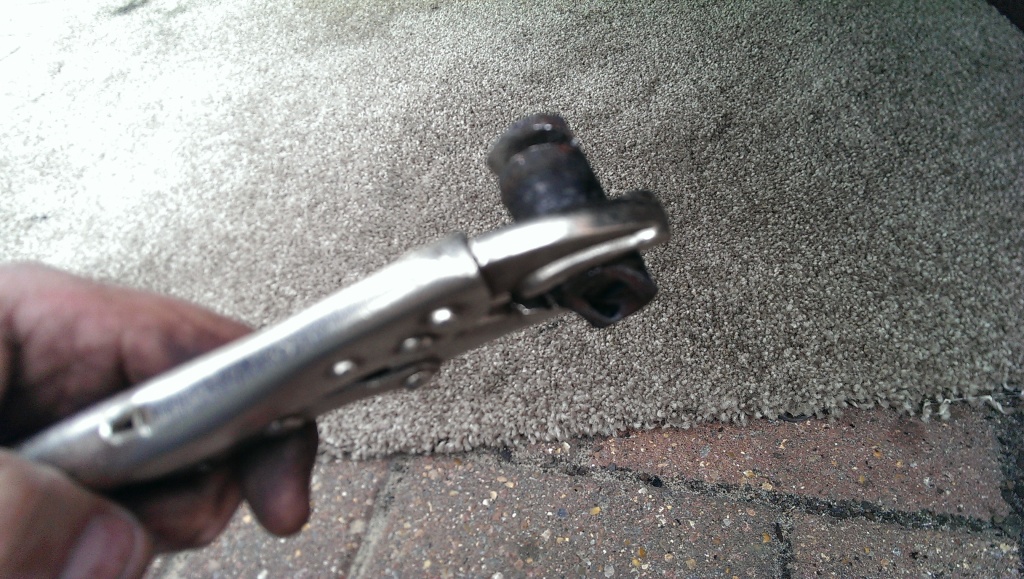
I had the same issue on my focus's but I found that its only those bolts on the arm that I had any issue with, I cut the head of and the nut then cut a 5mm centre piece out of the bush then battered the life out of it until it come free,.. you can pick up those bushes for pennies on interweb or just go to your Mr FORDS dealers
 09-06-2013, 02:24 PM
#13
Too many posts.. I need a life!!
Get gas torch and heat up bolts till glowing red, undo like new after that, if font work at 1st heat again undo lil bit n do back up a bit keep doing this till they loosen,
It's time consuming but deffo works
Took me 5 hours to undo nuts on my 4i manifold!
And still snapped 2 lol
It's time consuming but deffo works
Took me 5 hours to undo nuts on my 4i manifold!
And still snapped 2 lol
09-06-2013, 08:18 PM
#14
Zetec Turbo Baby Yeahhhh
Thread Starter
Get gas torch and heat up bolts till glowing red, und like new after that, if font work at 1st heat again undo lil bit n do back up a bit keepdoing this till they loosen,
It's time consuming but deffo works
Took me 5 hours to undo nuts on my 4i manifold!
And still snapped 2 lol
It's time consuming but deffo works
Took me 5 hours to undo nuts on my 4i manifold!
And still snapped 2 lol
Going to look into this. I watched a vid on how the old design of sockets is shit, all the pressure on the corners! What a wank idea.
I had the same issue on my focus's but I found that its only those bolts on the arm that I had any issue with, I cut the head of and the nut then cut a 5mm centre piece out of the bush then battered the life out of it until it come free,.. you can pick up those bushes for pennies on interweb or just go to your Mr FORDS dealers

 09-06-2013, 08:38 PM
#15
Ben

I have started to replace the nuts and bolts like this on my cars with titanium ones as the NEVER corrode! there are plenty of places that do them on the net! Ironically I started with the exhaust manifold ones! If I cant get titanium ones I use stainless steel! good old Henry Ford really knows how to save the pennies and cost us pounds!
09-06-2013, 09:46 PM
#16
you cant fix stupid
iv done all my rear end and had same probs as you. i removed whole subframe and disc cut where i could and hacksaw blades where i couldnt. nightmare job and drove me insane.
 09-06-2013, 10:50 PM
#18
PassionFord Post Troll

Join Date: Apr 2004
Location: West Sussex
Posts: 3,174
Likes: 0
Received 0 Likes
on
0 Posts
If you have lots to do I would recommend one of these -
http://m.alibaba.com/product/5970303...on_heater.html
Because the heat is localised to just the nut or the bolt it's a lot more effective than using gas. I'm not sure where you buy induction heaters from normally but mine came from my snap on man.
There are a couple of vids on you tube about them if your not sure.
09-06-2013, 11:03 PM
#20
PassionFord Post Troll
Join Date: Apr 2004
Location: West Sussex
Posts: 3,174
Likes: 0
Received 0 Likes
on
0 Posts
Ginge , very true. i cant stress enough how much time it has saved.
Found one on eBay but I'm sure you can find one cheaper elsewhere.... if the link works.
http://bit.ly/17ANY5W
Found one on eBay but I'm sure you can find one cheaper elsewhere.... if the link works.
http://bit.ly/17ANY5W
09-06-2013, 11:37 PM
#22
Zetec Turbo Baby Yeahhhh
Thread Starter
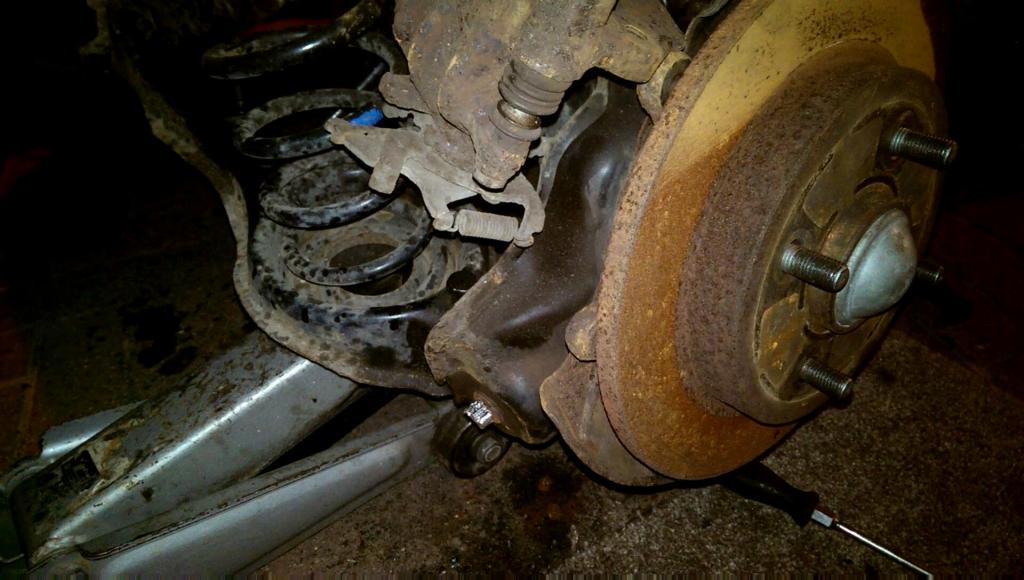
I've already got a few parts off of one side, bits i've got left to do are the upper control arm inner bolt, the trailing arm bushes, and the trailing arm link outer bolt (cut out job).. oh and the shock..
Anyone have any issues with replacing the trailing arm bush (the one that goes through a circle in the trailing arm, with the two flat blades sticking out that attach to the subframe nearest the middle of the car)
Some are saying it needs to be pressed in and out, i reckon a blow torch should suffice for in and out though?!
10-06-2013, 12:46 PM
#24
Zetec Turbo Baby Yeahhhh
Thread Starter
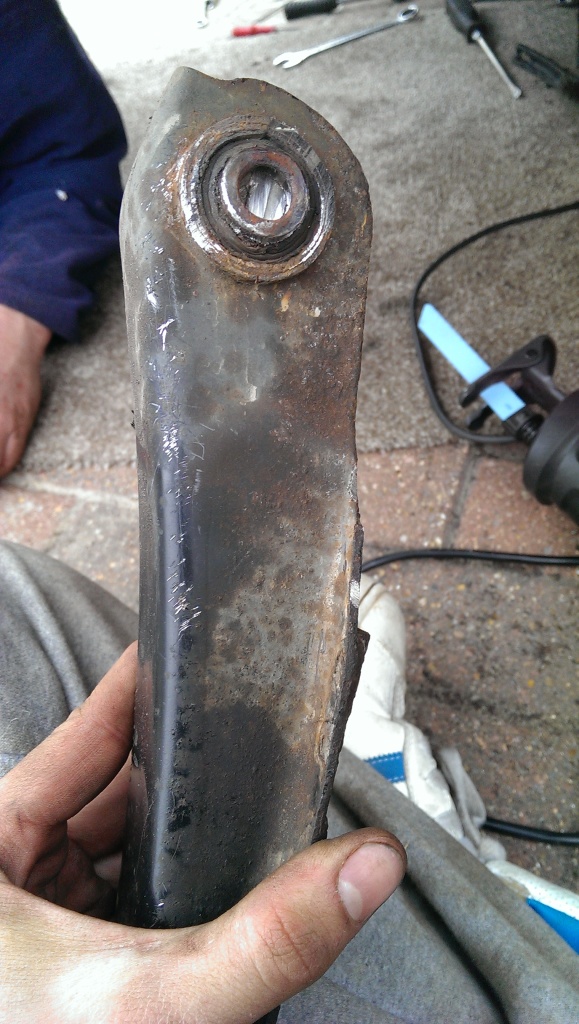
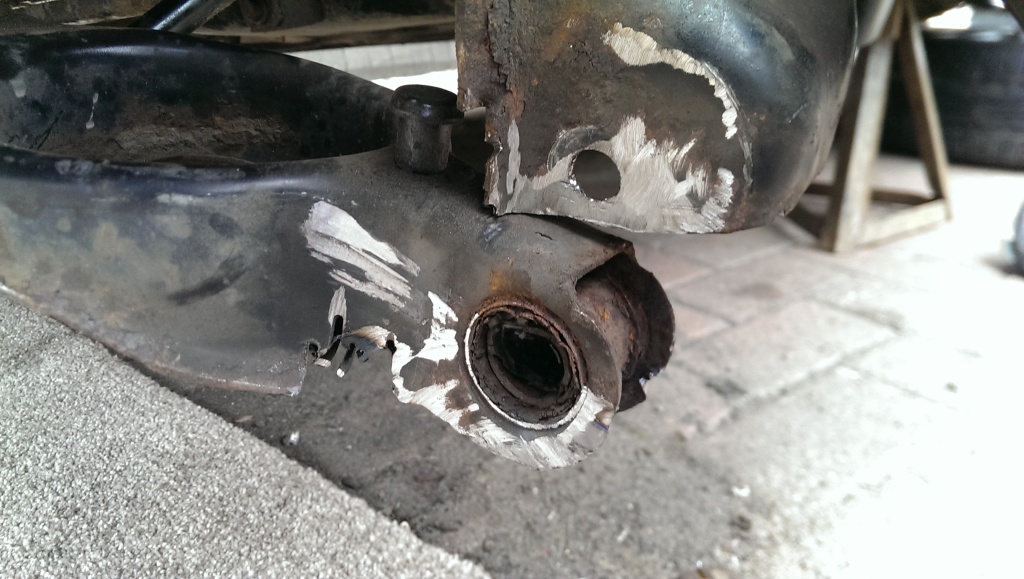
probably looking to get a new knuckle now seeing as i have shaved so much material from either side of the lower control arm mount! don't want to risk it strength wise!
10-06-2013, 05:21 PM
#26
Ben
10-06-2013, 06:06 PM
#27
Too many posts.. I need a life!!

Knowing what this was like, I bought another subframe and built it up ready.


And then sold on the existing one. Of the 2nd hand frame I bought, on the bench / workmate, it was quite straight forward and only ended up having to cut a couple of bolts. Would not have liked to have done the work with it on the car.
As for the rear bushes, there is an extractor / installer tool.

I'd definitely go for the 2nd subframe method as I did, might cost a bit more but saves you so much grief. Swapping the subframe out as well on a disc braked version takes very little time. A bit more if you have drums as you have to piss about with brake lines and then brake bleeding.
And then sold on the existing one. Of the 2nd hand frame I bought, on the bench / workmate, it was quite straight forward and only ended up having to cut a couple of bolts. Would not have liked to have done the work with it on the car.
As for the rear bushes, there is an extractor / installer tool.
I'd definitely go for the 2nd subframe method as I did, might cost a bit more but saves you so much grief. Swapping the subframe out as well on a disc braked version takes very little time. A bit more if you have drums as you have to piss about with brake lines and then brake bleeding.
Last edited by Colin_P; 10-06-2013 at 06:10 PM.
11-06-2013, 11:07 AM
#28
Zetec Turbo Baby Yeahhhh
Thread Starter
That looks a ton easier! did you remember to set the design height?
That tool is what i need, but I can't bring myself to buy it for a job i'll never do again! There must be another way to do it....???
That tool is what i need, but I can't bring myself to buy it for a job i'll never do again! There must be another way to do it....???
11-06-2013, 12:10 PM
#30
you cant fix stupid
i agree. i put plenty of grease on the bolt and in the hole. stops it rusting to the inner bush sleeve i hope. also i plaster it over the head and the thread and nut thats exposed after fitting to prevent corrosion. all the dirt and grime sticks to it and it will look ugly but cant do any harm
11-06-2013, 12:42 PM
#31
Zetec Turbo Baby Yeahhhh
Thread Starter
So many tips in this thread.. Think this should be stickied haaha.
How do you suppose you do this in a vice, the vice would have to open up as wide as the thames, i've only got a vice that open about 6 inches lol
How do you suppose you do this in a vice, the vice would have to open up as wide as the thames, i've only got a vice that open about 6 inches lol
11-06-2013, 05:20 PM
#33
Too many posts.. I need a life!!
 11-06-2013, 06:16 PM
#35
Too many posts.. I need a life!!
It doesn't work quite as simply as that.
As the change in height is way out at the end of the arms, a 40mm drop out there would mean only say a 10mm reduction where you measure the design height.
Can't remember what they were now are I did the calcs on the back of a fag packet. A tape measure and a calculator is all you need.
As the change in height is way out at the end of the arms, a 40mm drop out there would mean only say a 10mm reduction where you measure the design height.
Can't remember what they were now are I did the calcs on the back of a fag packet. A tape measure and a calculator is all you need.
11-06-2013, 06:49 PM
#36
Zetec Turbo Baby Yeahhhh
Thread Starter
A very good point. Did not think of that! Well it won't be too hard to mock up hopefully  can't wait to have it all replaced. Might even treat her to a lick of hammerite for the subframe lol
11-06-2013, 07:59 PM
#37
Too many posts.. I need a life!!
If it is work in progress and it is off the road, dropping the frame only takes about 15 minutes and those bolts will be fine.
You will find it so much easier to work on.
Getting the springs back in can be fun if you only have standard / DIY standard spring compressors. You really need the 'duck billed' type.
You will find it so much easier to work on.
Getting the springs back in can be fun if you only have standard / DIY standard spring compressors. You really need the 'duck billed' type.
11-06-2013, 09:05 PM
#38
Zetec Turbo Baby Yeahhhh
Thread Starter
If I ever attemp the job again then that's what I will do. yeah they were quite fiddly but I found a way around that, put the spring compressors on the inside of the spring and you will be able to pop them in, this only works because of the hole in the seat of the lower control arms.

Thread
Thread Starter
Forum
Replies
Last Post
Fudgey
General Car Related Discussion.
2
17-09-2015 01:06 PM