
AHK Racing, my ultimate Ford Sierra 3dr


Thread Starter
Wahay!! I've lost my Virginity!!
Joined: Jul 2015
Posts: 82
Likes: 4
From: Norway, Vestfold
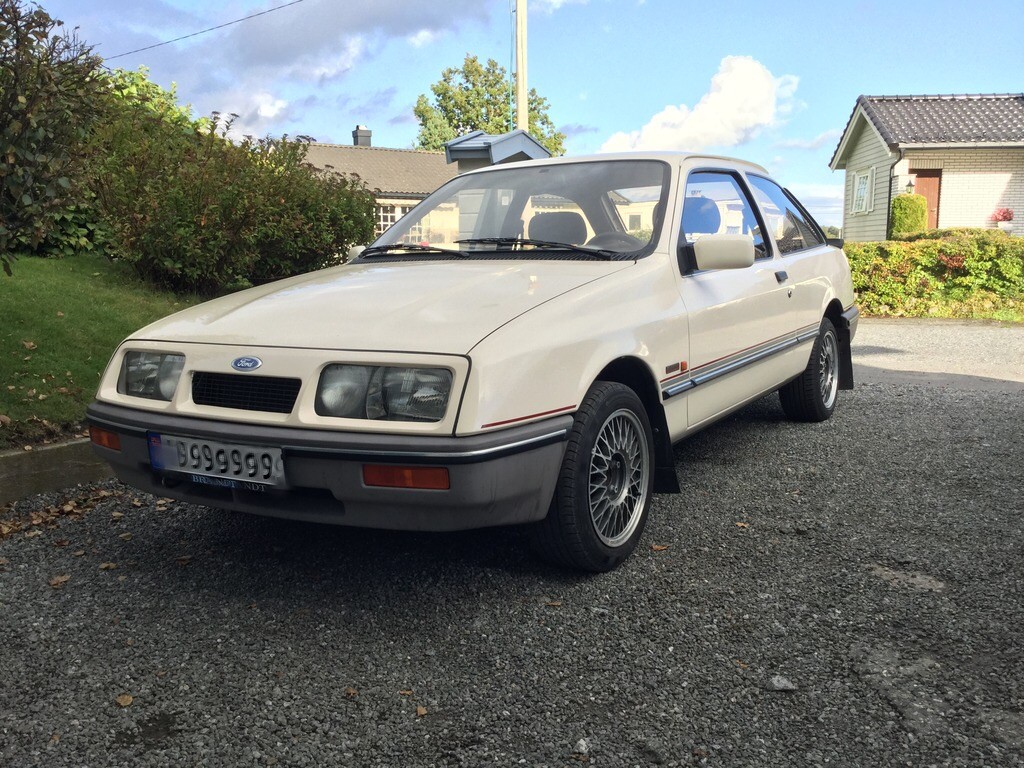
Hi all you people with passion for Fords  My name is Anders Holst Kjellsen and I am from Norway. I have a huge passion for racing! So with that I will introduce my car I bought and imported from Sweden
My car story:
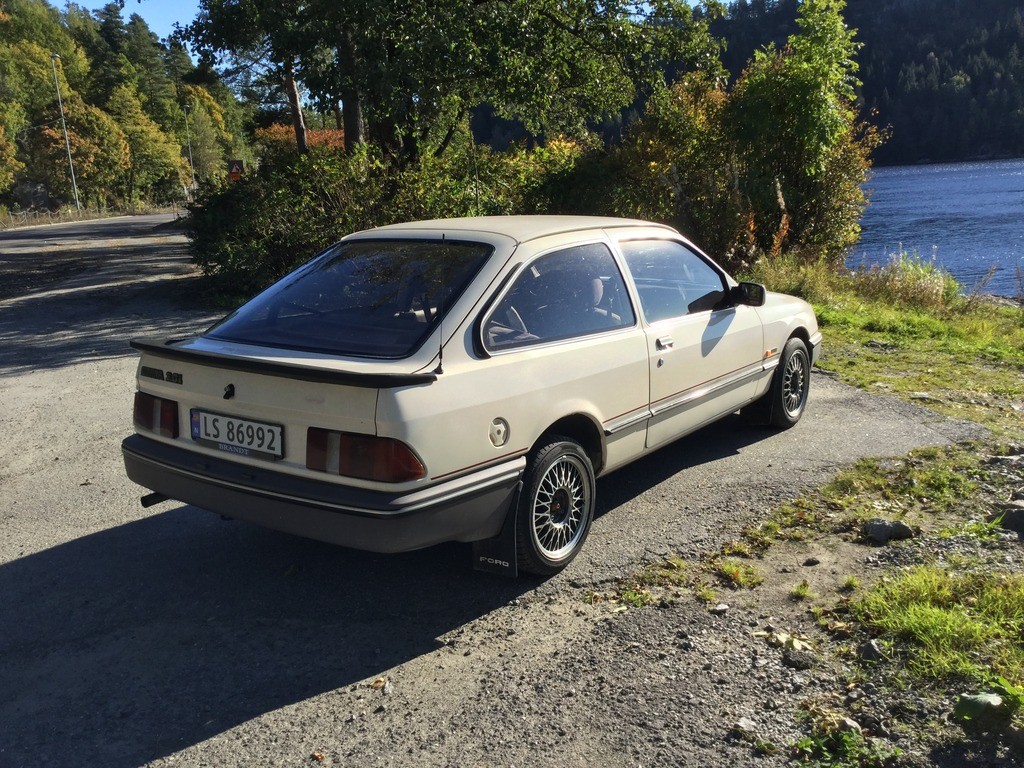
I found my Ford Sierra 2.0i late last year in 2016, right before the winter. It was found 3 hours from Norway in Sweden. When I first saw the car, I just could not drive back home without it. I was in shock when I saw his garage with magnesium parts etc from Blomquist and not enough with that TWO Cosworth 3 doors One used in rally and one is a project. Well, I drove the Sierra for a test drive and I was in love. I definitely needed the car! I was even more shocked when I saw the miles on it. It had about 32000 km!!! It has now 3500 km! I drove it home with no troubles at all It has the EFI 2.0 engine, but without the tacho, powersteering, it has the L exterior and interior. But I got the rubber wing in the deal to give it a little tough touch and the wing helps a little at the track
Some pictures of the car
My goals and dreams:
My first goal is to get it to trackdays. Make the car safe as possible and make the car handle much better than stock, but still have it road legal. So I can enjoy a sunday(everyday) drive. Drive it to the track, drive the whole day and drive back.
My other goal and dream is to try out some racing with it in the future Autocross, hill clim etc. To have it as my ultimate car
I have a lot of pictures that I will post, as I have done a lot since I bought the car. So be patient with me
PS: Many pictures is gone because Photobuck changed everything. So sorry for the lost pictures. But later in the posts the pictures is back again with another image company.
Anders Holst Kjellsen
My car story:
I found my Ford Sierra 2.0i late last year in 2016, right before the winter. It was found 3 hours from Norway in Sweden. When I first saw the car, I just could not drive back home without it. I was in shock when I saw his garage with magnesium parts etc from Blomquist and not enough with that TWO Cosworth 3 doors
Some pictures of the car
My goals and dreams:
My first goal is to get it to trackdays. Make the car safe as possible and make the car handle much better than stock, but still have it road legal. So I can enjoy a sunday(everyday) drive. Drive it to the track, drive the whole day and drive back.
My other goal and dream is to try out some racing with it in the future
I have a lot of pictures that I will post, as I have done a lot since I bought the car. So be patient with me
PS: Many pictures is gone because Photobuck changed everything. So sorry for the lost pictures. But later in the posts the pictures is back again with another image company.
Anders Holst Kjellsen
Last edited by Kjellsen; Aug 8, 2017 at 07:33 PM. Reason: To get a more universal point on my Sierra. Using it for many other things than just Racing.
Thread Starter
Wahay!! I've lost my Virginity!!
Joined: Jul 2015
Posts: 82
Likes: 4
From: Norway, Vestfold
Thread Starter
Wahay!! I've lost my Virginity!!
Joined: Jul 2015
Posts: 82
Likes: 4
From: Norway, Vestfold
My first problem and still exists today. I hope that disapears after changing other things like the coil etc. I had/has a problem that the car is hesitating and have small "cuts" when doing litle throttle movement. I dont know how much, but say tops 20%. I thought it was the pump as it has not being used for a long time. So bought a overkill pump for my 30 year old 115 hp, the 044 A real one, not fake But that didn't cure the problem. But after that change I didn't like the sound from the pump. I thought something is wrong with it. I sent it back, not before a couple days ago I got my refund. So I needed a new fuel pump. What to do! Hmmm.. Looked at Aeromotive fuel systems.


BINGO, Aeromotive Phantom 340 universal in-tank systemSupports over 700 hp carburettors or EFI. Very easy to install, cleans it up under the car and are *silent*


Used these to use my oem fuel lines

Installed

I also did a new relay and wires to the pump so it i getting loads of VoltsIt did not help the problem, but I have now no need for baffled tank outside the fuel tank. It works great for its purpose


BINGO, Aeromotive Phantom 340 universal in-tank system


Used these to use my oem fuel lines

Installed

I also did a new relay and wires to the pump so it i getting loads of Volts
Last edited by Kjellsen; Mar 10, 2017 at 09:52 AM. Reason: Forgot to write something
Thread Starter
Wahay!! I've lost my Virginity!!
Joined: Jul 2015
Posts: 82
Likes: 4
From: Norway, Vestfold
Trending Topics
Thread Starter
Wahay!! I've lost my Virginity!!
Joined: Jul 2015
Posts: 82
Likes: 4
From: Norway, Vestfold
I have changed the locks and got new keys. I hope I can get rid of some, because having one for ignition and fuel cap, one for the rear and one for the sides is maybe toooo much :S hehe


I took also a service to the engine. Everything was oem! Spark plugs, leads etc was from factory hehe! So changed the cooling water to red and filled a bottle Redline water wetter. Changed the spark plugs and leads, NGK plugs and universal leads that I cut to length. Oil filter changed to Royal Purple with good filtration and filled up new oil, Royal Purple HPS 20w-50 with high Zink in it. New 82 celcius thermostat and new waterpump. New oem fuel filter


Then I wanted a instrument with tachometer Cut a piece from another Sierra at the wreckers. Then made it all nice with some braided and heat shrink Soldered the loom in the car and Voila


I also began to get some parts for my plans in the winter I got an brake pump from a Cosworth 3DR

Complete front hubs from Cosworth 3dr

I got a free spare ohc engine I will rebuild this later with throttle bodies etc. The cylinder is already under some magic work

Cossie 4x4 rear suspension, I will use 3DR trailing arms and arb.

My new gearbox and diff oil

"Few" parts was ordered :P


Bought som used 4 pot calipers and rear Koni's. Front arb clamps. I will have the calipers refurbished with pistons etc

Refurbish kit from BigRed, H&R springs and rear hatch dampers

New diff mount and bushes

3dr trailing arms!

7" diff with LSD and 3.92:1

CL brakes RC5+ pads, rear spring bushes and arb link bushes

Diff tool, camber and toe in shims,an6 hose clamps, diff seals

Top end gasket kit

Diamond discs

Bushings, HD geabox mount, brake bias valve.

Frobt strut top bushes, wheel studs and nuts and wiring for the fans

Quickshift, stainless braided brake lines, 2.7 locktolock steering

Koni frobt struts

Vdoes, oil temp, pressure and water temp

Rear calipers and yokohamas advan neova AD08R in 205/50-15"


Some random photos from a cruise


I took also a service to the engine. Everything was oem!


Then I wanted a instrument with tachometer


I also began to get some parts for my plans in the winter

Complete front hubs from Cosworth 3dr

I got a free spare ohc engine

Cossie 4x4 rear suspension, I will use 3DR trailing arms and arb.

My new gearbox and diff oil

"Few" parts was ordered


Bought som used 4 pot calipers and rear Koni's. Front arb clamps. I will have the calipers refurbished with pistons etc

Refurbish kit from BigRed, H&R springs and rear hatch dampers

New diff mount and bushes

3dr trailing arms!

7" diff with LSD and 3.92:1

CL brakes RC5+ pads, rear spring bushes and arb link bushes

Diff tool, camber and toe in shims,an6 hose clamps, diff seals

Top end gasket kit

Diamond discs

Bushings, HD geabox mount, brake bias valve.

Frobt strut top bushes, wheel studs and nuts and wiring for the fans

Quickshift, stainless braided brake lines, 2.7 locktolock steering

Koni frobt struts

Vdoes, oil temp, pressure and water temp

Rear calipers and yokohamas advan neova AD08R in 205/50-15"


Some random photos from a cruise


Thread Starter
Wahay!! I've lost my Virginity!!
Joined: Jul 2015
Posts: 82
Likes: 4
From: Norway, Vestfold
Then the work begins for the winter. I had the walls and floor painted I also fitted new lights with Leds with help from family. They ARE bright


So e pictures under the car and of the rust.


Removed the inlet manifold. Removed the furl injectors to replace the o-rings. I made a little injector clean rigg Works great!


Ever seen so clean inlets ports on a 30 year old ohc?

Mounted and oil pressure adapter and VDO pressure sensor

Some new parts, again :P MSD coil, hood locks and rear hatch locks

Removed the crankshaft pulley... Yes, I forgot the big washer and destroyed the pulley Lesson learned. Long time since the last time.. Hehe :P


Removed the front and rear suspension.


Sold the old suspension

These will be refusbished

Test fitted the seat Cant wait to get in it and DRIVE

New welding machine and extras Love to fabricate things and weld? Need one for the rust and cage


Test fitted the fans. Just waiting for the mounts and need to do some wiring. Easy

Then I fabricated the plate for the VDO gauges Will have oil pressure warning lamps in red. The plate is in carbon Who doesnt like carbon


New bolts to the suspension They will be sent to galvanizing.

New metall to fix the rust

Preparing for rust repair and cage. Removed all the sound mats


Removed the gearbox, flywheel and clutch Replaced the rear and speedo waier seal.


Recieved a cossie 2wd sump, gasket, seals, spark plugs, clips, bolts


I finally got my rear roll cage! Cant wait to begin on this. But first, RUST

That is all I have now for you. A "quick" up to speed update on Passionford :P I tried my best to remember it all and write something. But hope you like it And sorry my english is a bit rough :P


So e pictures under the car and of the rust.


Removed the inlet manifold. Removed the furl injectors to replace the o-rings. I made a little injector clean rigg


Ever seen so clean inlets ports on a 30 year old ohc?

Mounted and oil pressure adapter and VDO pressure sensor

Some new parts, again :P MSD coil, hood locks and rear hatch locks

Removed the crankshaft pulley... Yes, I forgot the big washer and destroyed the pulley


Removed the front and rear suspension.


Sold the old suspension

These will be refusbished

Test fitted the seat

New welding machine and extras


Test fitted the fans. Just waiting for the mounts and need to do some wiring. Easy

Then I fabricated the plate for the VDO gauges


New bolts to the suspension

New metall to fix the rust

Preparing for rust repair and cage. Removed all the sound mats


Removed the gearbox, flywheel and clutch


Recieved a cossie 2wd sump, gasket, seals, spark plugs, clips, bolts


I finally got my rear roll cage! Cant wait to begin on this. But first, RUST

That is all I have now for you. A "quick" up to speed update on Passionford
Last edited by Kjellsen; Mar 10, 2017 at 04:56 PM.


Advanced PassionFord User
Joined: May 2011
Posts: 2,419
Likes: 272
From: God knows!
Bloody hell you've been busy and nice collection of parts. How long until it's finished and you're racing?
Is this model of Sierra common in scandanavia?
Is this model of Sierra common in scandanavia?
Last edited by jonfoc; Mar 10, 2017 at 05:48 PM.
Thread Starter
Wahay!! I've lost my Virginity!!
Joined: Jul 2015
Posts: 82
Likes: 4
From: Norway, Vestfold
Thread Starter
Wahay!! I've lost my Virginity!!
Joined: Jul 2015
Posts: 82
Likes: 4
From: Norway, Vestfold
 Yeah, it has been a busy time. But now goes the hard work. Welding fresh steel in the car and kick some rust out
Well.. My goal is before summer. But I cant put time on the white board, I try to do the ONLY work needed. But I always does a little work more than that
I have only have one trackday in my life in 2014. Always been a spectator, looking at movies etc.. So hoping to begin racing after a time with trackdays and learning more about racing. How to setup my car, driving lines, lessons with instructors etc

I have not seen so many of the 2.0i. Just the 2.0IS. It has different exterior and interior.
Thread Starter
Wahay!! I've lost my Virginity!!
Joined: Jul 2015
Posts: 82
Likes: 4
From: Norway, Vestfold
NOW I have removed the sound deadning:P Wasn't done in my earlier post. Cleaned it up and sprayed some rust killer on the rust. Next job is to weld some new steel in 


Last edited by Kjellsen; Mar 11, 2017 at 01:47 PM.


That's a very nice find! Good luck with the build. Keep an eye on the fitment of those Polyrace bushes from rallydesign. I ordered a set for the rear trailing arms a couple of years ago, but the bushes were too small for the holes in the arms. The second set they sent me had the exact same problem. In the end it's best to use the Cosworth spherical bearings from GGR.


Thread Starter
Wahay!! I've lost my Virginity!!
Joined: Jul 2015
Posts: 82
Likes: 4
From: Norway, Vestfold
That's a very nice find! Good luck with the build. Keep an eye on the fitment of those Polyrace bushes from rallydesign. I ordered a set for the rear trailing arms a couple of years ago, but the bushes were too small for the holes in the arms. The second set they sent me had the exact same problem. In the end it's best to use the Cosworth spherical bearings from GGR.
Hmmm..! Never had that problem before when using them. But I will keep that in my mind when mounting them. Thanks!

Thread Starter
Wahay!! I've lost my Virginity!!
Joined: Jul 2015
Posts: 82
Likes: 4
From: Norway, Vestfold
I continued attacking the rust today Grinded the paint, drilled the welding spots, cleaned the bracket before painted welding primer. I then was changing my disc, tighten the disc *CRACK* motherf..... That stopped my work on the rust. I will delivere the grinder tomorrow. Se what they say.


I tried to mount my cooling fans onto the radiator Well... that went well. NOT! :P The zip ties didnt hold.. grrr..

Well.. I could mount the LED lamps for the oil pressure switch 3/4 hokes drill something must have happened in my brain.. because the last one is waaay off.. Enough to eat my soul So a new plate must be fabricated :P


I tried to mount my cooling fans onto the radiator

Well.. I could mount the LED lamps for the oil pressure switch


Thread Starter
Wahay!! I've lost my Virginity!!
Joined: Jul 2015
Posts: 82
Likes: 4
From: Norway, Vestfold
Soundd about right for that modOh yes
I have always wanted turbo and upto 3-350
Thread Starter
Wahay!! I've lost my Virginity!!
Joined: Jul 2015
Posts: 82
Likes: 4
From: Norway, Vestfold
Thread Starter
Wahay!! I've lost my Virginity!!
Joined: Jul 2015
Posts: 82
Likes: 4
From: Norway, Vestfold
 Not so many to see in Norway either and most of them are using the YB engine. Not that it is negative, just want to do the things the way I want to do
 Cheers Kjellsen
Thread Starter
Wahay!! I've lost my Virginity!!
Joined: Jul 2015
Posts: 82
Likes: 4
From: Norway, Vestfold
I delivered my grinder to service at Tess. That will send it to Metabo. Most likely I get a new one. I hope that wont take a long time
I can continue other things I still need to get my suspension ready to get galvanized. Bushing need to be removed, bearings and old paint. I got my paint remover today, so I will try that out tomorrow I think. I got some boxes to get things organized when dismantling the axles etc. Ordered a couple 12.9 bolts that is difficult to get in Norway. Strange, but true.. So ebay saved my day :P Still need to get 4 bolts for the front cradle.
I received studs for the inlet and exhaust sides on the cylinder head and gasket tube for some places that need when mounting new oil pan gasket.

I can continue other things
I received studs for the inlet and exhaust sides on the cylinder head and gasket tube for some places that need when mounting new oil pan gasket.

15000
Joined: Nov 2009
Posts: 46
Likes: 0
From: Finland
What! A Norwegian build and no huge turbo and mega horsepower.
Very nice car and shell you got there. Dash with out cracks nice! Seems you have solved my fuel pump problem.
Greetings from Finland
Very nice car and shell you got there. Dash with out cracks nice! Seems you have solved my fuel pump problem.
Greetings from Finland
Last edited by MedFin; Mar 16, 2017 at 12:28 PM.
Thread Starter
Wahay!! I've lost my Virginity!!
Joined: Jul 2015
Posts: 82
Likes: 4
From: Norway, Vestfold
thanks!
Last edited by Kjellsen; Mar 19, 2017 at 11:22 AM.
Thread Starter
Wahay!! I've lost my Virginity!!
Joined: Jul 2015
Posts: 82
Likes: 4
From: Norway, Vestfold
Now, since I can`t work om my rust. I am working on the suspension. Need to remove bushings, bearing, studs. So I can deliver it to be galvanized at Vestby Galanisering. So looking forward to get it back all shiny and fresh! After that my plan is to get some parts powdercoated for some extra protection and nice finish It is a car that will be used alot, but I like to do the little extra when I first do it
Started the day with installing my "new" tool on my bench! So happy with it, it works and does what it supposed to do I find a new one so expensive for a good one. So need to use alot of money for a good old one

I also recieved my Cosworth 2wd pickup pipe and oil pump from Paul, PJ motorsport

Started with the busings. I made a tool as I dont have a press to press the bushings out. It usually work, it worked on ONE.. The rest just said NOPE!
So I will just ask Ford workshop in Larvik. They have helped me before with this. I hope in the future to get a small press to to things like bearings etc. I dont like to smash them in with a hammer. I will ask them again with the bearing install.

Started the bearing removal for the front spindles and it goes with no problems at all Old ones out and in the thrash. I did use a hammer to smash the studs out, new longer studs will be used instead

Bearings out

Finished both sides The right side has links if anyone was thinking about that.

Mounted boxes on the wall to get things a bit more organized

Started so with the rear axles

Off with the CV boot clamps and boot.


I have new boots and clamps. But I never get rid of my old ones before I mounted the new. They look like new too New 12.9 unbraco bolts is to be used instead of the oem ones.

Now finished one side! But I need to clean it up before starting on the next one


Started the day with installing my "new" tool on my bench! So happy with it, it works and does what it supposed to do

I also recieved my Cosworth 2wd pickup pipe and oil pump from Paul, PJ motorsport

Started with the busings. I made a tool as I dont have a press to press the bushings out. It usually work, it worked on ONE.. The rest just said NOPE!
So I will just ask Ford workshop in Larvik. They have helped me before with this. I hope in the future to get a small press to to things like bearings etc. I dont like to smash them in with a hammer. I will ask them again with the bearing install.

Started the bearing removal for the front spindles and it goes with no problems at all
Old ones out and in the thrash. I did use a hammer to smash the studs out, new longer studs will be used instead
Bearings out

Finished both sides

Mounted boxes on the wall to get things a bit more organized

Started so with the rear axles

Off with the CV boot clamps and boot.


I have new boots and clamps. But I never get rid of my old ones before I mounted the new. They look like new too
New 12.9 unbraco bolts is to be used instead of the oem ones.
Now finished one side! But I need to clean it up before starting on the next one


Thread Starter
Wahay!! I've lost my Virginity!!
Joined: Jul 2015
Posts: 82
Likes: 4
From: Norway, Vestfold
I am interested to about the end

Thread Starter
Wahay!! I've lost my Virginity!!
Joined: Jul 2015
Posts: 82
Likes: 4
From: Norway, Vestfold
Now I have washed the parts free from pant remover. On the smaller parts like the front hubs, the paint went off really good. But the trailing arms and cradle needs sandblasting. I will need to do that to the snall parts to get then 100% clean from paint. Making some calls today to get them blast and I hope I can use my mate blast equipment. Correct my english if something waaay wrong


Thread Starter
Wahay!! I've lost my Virginity!!
Joined: Jul 2015
Posts: 82
Likes: 4
From: Norway, Vestfold
I started today pressing the old bushings out the rear arb links. Didn`t know that was possible before buying new bushings from Motomobil. So that saves me some money

Then I fitted the spring on the belt tensioner. Much easier when changing the timing belt

Fitted new sprocket wheel for the timing belt.

Fitted a oil seperator from a Cosworth 3dr and used some sealer from Loctite on the threads for the sensors.

Then dismantled the short shifter as I am not happy with the play in the bearing So I hope a new SKF bearing will do the deal on this problem


Then I dismantled the steering rack. Yes I am using the manual steering, I will one day mount a electric pump with another rack. Or I will mount a electric motor on the axle. It will be 2.7 locktolock, I think it is 4,2 oem. It also will be painted before mounting it back together


[URL=http://s143.photobucket.com/user/DeLaX89/media/Ford%20Sierra%2020i/A675EB0D-9F13-4190-B183-93C51C84698D.jpg.html]


Then I fitted the spring on the belt tensioner. Much easier when changing the timing belt

Fitted new sprocket wheel for the timing belt.

Fitted a oil seperator from a Cosworth 3dr and used some sealer from Loctite on the threads for the sensors.

Then dismantled the short shifter as I am not happy with the play in the bearing
So I hope a new SKF bearing will do the deal on this problem

Then I dismantled the steering rack. Yes I am using the manual steering, I will one day mount a electric pump with another rack. Or I will mount a electric motor on the axle.


[URL=http://s143.photobucket.com/user/DeLaX89/media/Ford%20Sierra%2020i/A675EB0D-9F13-4190-B183-93C51C84698D.jpg.html]


Thread Starter
Wahay!! I've lost my Virginity!!
Joined: Jul 2015
Posts: 82
Likes: 4
From: Norway, Vestfold
I found a new rear crank seal in one of the boxes. So I changed it, hopefully it will be a leak free time ahead

Washed the plate so it is ready for galvanizing

The gearbox needed a good clean after 30 years of abuse/use from a old lady
It is in a good shape, not much play in the front axle bearing. But some, it works and has no bad sounds. So hopefully it will be a good gearbox for my 115hp at the moment


I couldn`t just clean it and look at it without thinking.. paint.. It needs paint.. So I found some rim paint in black and it came out looking much better then I thought I also changed the top lid gasket.


Washed the plate so it is ready for galvanizing

The gearbox needed a good clean after 30 years of abuse/use from a old lady
It is in a good shape, not much play in the front axle bearing. But some, it works and has no bad sounds. So hopefully it will be a good gearbox for my 115hp at the moment


I couldn`t just clean it and look at it without thinking.. paint.. It needs paint.. So I found some rim paint in black and it came out looking much better then I thought
I also changed the top lid gasket.


