AHK Racing, my ultimate Ford Sierra 3dr


 28-03-2017, 06:46 PM
#42
Wahay!! I've lost my Virginity!!
Thread Starter

I delivered trailing arms, cradles, arb's and gearbox cradle for mediablasting yesterday. I was shocked when I woke up this morning when I saw the text on my phone. " finished blasting" Next step is to brush the paint of the smaler parts and send them to galvanizing. I also got a nice deal in Norway at a fabricator for my wish about getting the oil pan big wings, about 2L extra. Talked to Mike Rainbird about his version and said I could copy his in Norway

Next step is to brush the paint of the smaler parts and send them to galvanizing. I also got a nice deal in Norway at a fabricator for my wish about getting the oil pan big wings, about 2L extra. Talked to Mike Rainbird about his version and said I could copy his in Norway  01-04-2017, 08:55 AM
#43
Wahay!! I've lost my Virginity!!
Thread Starter
My health is not being nice to me for the time. That kills alot of my motivation. I hope for some motivation boost 22.April on the racing course, learning more about the driving bit and theory
But, I got out last night. Drillee the front cradle to 12 mm to accept the Cosworth bolt sizes.

Started then on modifying the gearbox cradle to accept the new HD mount. I have used it before with succes. But this time I am doing it the correct way. Welded the big hole in center. Drilled new mounting holes and the center hole for the gearbox bolt. Need to do the center hole bigger. Spacers is also needed to get the axle in the correct angle. Its anot 11mm taller, but I will measure the axle on a another car.


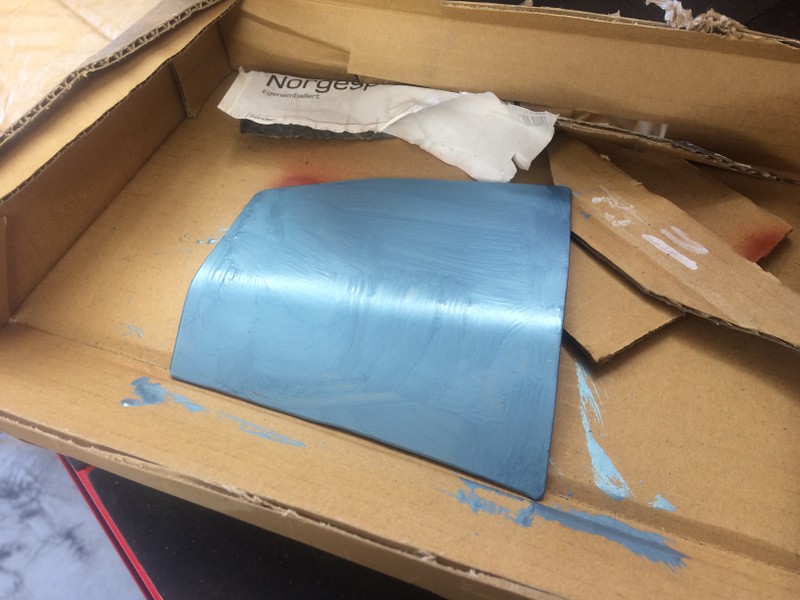
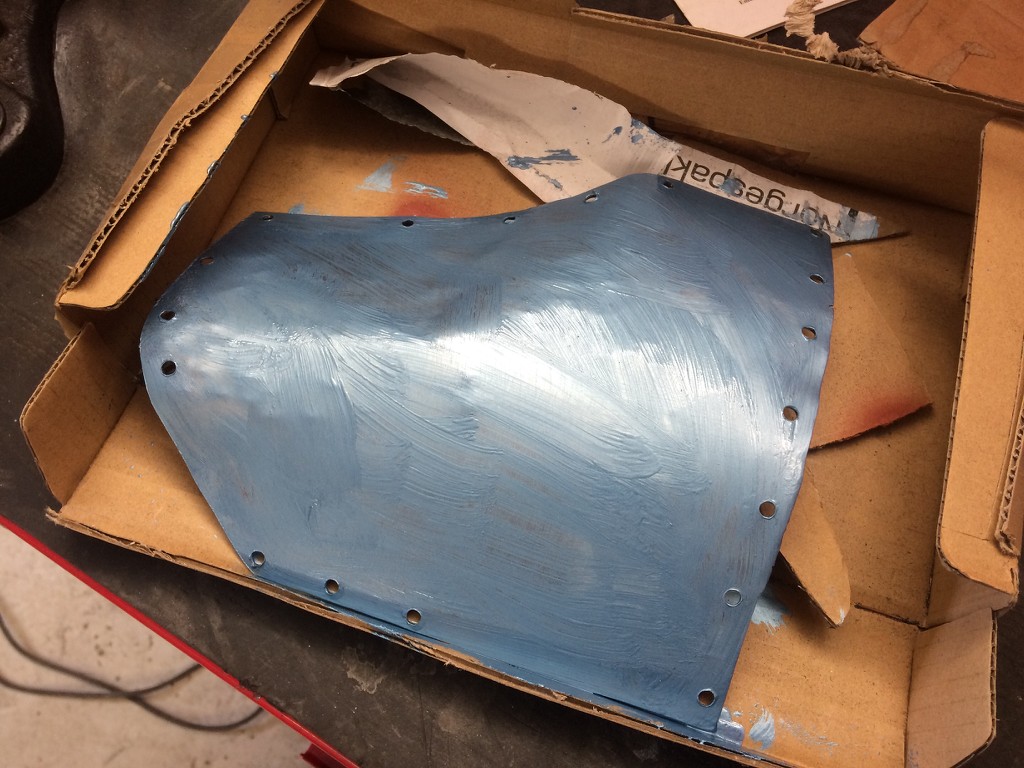
The oil pan is getting more volum with big wings with Mike Rainbirds solution. I mailed with him and he was Nice enogh to give me pictures and info to make it in Norway. I found damages on the gasket surface, so frustrated A hole need welding and drilling. Then new threads is needed for the sump bolt, but thats typical. But nothings impossible, so it will be good in the end


But, I got out last night. Drillee the front cradle to 12 mm to accept the Cosworth bolt sizes.

Started then on modifying the gearbox cradle to accept the new HD mount. I have used it before with succes. But this time I am doing it the correct way. Welded the big hole in center. Drilled new mounting holes and the center hole for the gearbox bolt. Need to do the center hole bigger. Spacers is also needed to get the axle in the correct angle. Its anot 11mm taller, but I will measure the axle on a another car.


The oil pan is getting more volum with big wings with Mike Rainbirds solution. I mailed with him and he was Nice enogh to give me pictures and info to make it in Norway. I found damages on the gasket surface, so frustrated
A hole need welding and drilling. Then new threads is needed for the sump bolt, but thats typical. But nothings impossible, so it will be good in the end 


 01-04-2017, 09:59 PM
#46
PassionFord Post Troll
Great project
02-04-2017, 05:20 PM
#48
Wahay!! I've lost my Virginity!!
Thread Starter
It started with a good day and I thought! Hey, why shouldnt I try my new seats and mounts today. So I can get a little extra motivation Mounted the sliders and the the brackets onto the sliders. Then went to the car to "just bolt them in".....  I know.. Everyone can make mistakes, even OMP.. But, WTF... the one who made the bracket rig or the welder must be having a BAD day for my brackets..
 They are just weyyy off the oem mounting points. I know, some modifications is it always. But that cant be fixed without destroying it..
Well.. Enough complaining from me, some min. 25x25x 3mm FIA mounts will be fabricated for the seats That is what I should have done rom the beginning


After that disaster.. I was curious about the condition of the LSD discs inside the diff. Got the c-clips out, removed the flanges, loosened the side adjusters and removed the unit. Dismantled the crown wheel to get to the 2 small bolts that hold the lid. Opens the lid and the discs are shown. Dirty, but looks good inside. The silicone grease is so sticky! So I began to clean the discs and housing.
Then there was dinner and I stoped and closed the door


Mounted the sliders and the the brackets onto the sliders. Then went to the car to "just bolt them in"..... They are just weyyy off the oem mounting points. I know, some modifications is it always. But that cant be fixed without destroying it..Well.. Enough complaining from me, some min. 25x25x 3mm FIA mounts will be fabricated for the seats
That is what I should have done rom the beginning


After that disaster.. I was curious about the condition of the LSD discs inside the diff. Got the c-clips out, removed the flanges, loosened the side adjusters and removed the unit. Dismantled the crown wheel to get to the 2 small bolts that hold the lid. Opens the lid and the discs are shown. Dirty, but looks good inside. The silicone grease is so sticky! So I began to clean the discs and housing.
Then there was dinner and I stoped and closed the door


 02-04-2017, 07:59 PM
#49
15000
Join Date: Nov 2009
Location: Finland
Posts: 46
Likes: 0
Received 0 Likes
on
0 Posts
Looking gooood man! Nice welding with the transmission mount. What engine mounts are you about to use?
I have been thinking these:
https://silverproject.eu/en/shop/toy...exus-sc300-92/
They are 70mm high and will fit sierra.
I have been thinking these:
https://silverproject.eu/en/shop/toy...exus-sc300-92/
They are 70mm high and will fit sierra.
Last edited by MedFin; 02-04-2017 at 08:01 PM.
03-04-2017, 08:30 AM
#50
Wahay!! I've lost my Virginity!!
Thread Starter
Looking gooood man! Nice welding with the transmission mount. What engine mounts are you about to use?
I have been thinking these:
https://silverproject.eu/en/shop/toy...exus-sc300-92/
They are 70mm high and will fit sierra.
I have been thinking these:
https://silverproject.eu/en/shop/toy...exus-sc300-92/
They are 70mm high and will fit sierra.
I am using my OEM mounts as I on a budget and they work perfectly with only 35000 km them
But the mounts you linked to looks good. If they are the right height, why not use them, but for later
 03-04-2017, 06:08 PM
#51
Wahay!! I've lost my Virginity!!
Thread Starter
More parts Was is it this time

It is a alloy toothed drive kit, alternator, waterpump and crank pulley with 36-1 timing disc. The timing disc is for later plans with other fun wtuff


Received my new bearing for mye short shifter. As the other one had alot off play. SKF bearing So if other want to change to a good and fresh bearing, just use the part number

Sent from my iPad using Tapatalk

It is a alloy toothed drive kit, alternator, waterpump and crank pulley with 36-1 timing disc. The timing disc is for later plans with other fun wtuff


Received my new bearing for mye short shifter. As the other one had alot off play. SKF bearing
So if other want to change to a good and fresh bearing, just use the part number 
Sent from my iPad using Tapatalk
10-04-2017, 03:26 PM
#52
Wahay!! I've lost my Virginity!!
Thread Starter
After some days off the project. I got out and continued welding. After seeing many others driving around with their fun car. I got some inspiration. I will finish the chassi work and cage before doing anything else. So I can have it done faster and the hard work is over
I did not like my previous welding and as I am not using OMP seat bracket. I removed the small outer bracket and cut the inner in half. So only the propshaft can be mounted. I will be using 35x35x2 mm for the seats and do it by the FIA rules. I will finish the rest and grind the welds down tomorrow as I need some food and my neck/back said NO :P


I did not like my previous welding and as I am not using OMP seat bracket. I removed the small outer bracket and cut the inner in half. So only the propshaft can be mounted. I will be using 35x35x2 mm for the seats and do it by the FIA rules. I will finish the rest and grind the welds down tomorrow as I need some food and my neck/back said NO :P

 20-04-2017, 05:15 PM
#53
Wahay!! I've lost my Virginity!!
Thread Starter
Its going slow lately as my health is not so great. But I have begun the first stage of treatment to strike down the issues
I have recieved a package and got myself a new handy tool
In the package it was:
4 60ml bottles of 100 000cst to my lsd rebuilt. Only replacing the fluid
Sabelt alloy sidemount seat brackets, only for one seat for now. Will order for the other seat later when mounting them. Just need one pair to make the mounts on the chassi.
FIA kill switch with waier for the outside. It was a cheap package deal with some extra safety in mind, when going to trackdays
Radiator fan mounts as the last ones broke, bad ones..

I also ordered a nice little tool that make my rust killer job so much easier. With the normal size grinder, I cant get to all the metall without make it ugly So now it will be much easier to cut metal accurate

I have recieved a package and got myself a new handy tool
In the package it was:
4 60ml bottles of 100 000cst to my lsd rebuilt. Only replacing the fluid
Sabelt alloy sidemount seat brackets, only for one seat for now. Will order for the other seat later when mounting them. Just need one pair to make the mounts on the chassi.
FIA kill switch with waier for the outside. It was a cheap package deal with some extra safety in mind, when going to trackdays
Radiator fan mounts as the last ones broke, bad ones..

I also ordered a nice little tool that make my rust killer job so much easier. With the normal size grinder, I cant get to all the metall without make it ugly
So now it will be much easier to cut metal accurate  20-04-2017, 09:38 PM
#55
Wahay!! I've lost my Virginity!!
Thread Starter
21-04-2017, 07:44 PM
#57
Wahay!! I've lost my Virginity!!
Thread Starter
21-04-2017, 09:25 PM
#58
Advanced PassionFord User
What a brilliant looking project, and very welly documented, thanks it's a very interesting read
01-07-2017, 09:37 AM
#59
Wahay!! I've lost my Virginity!!
Thread Starter
01-07-2017, 09:59 AM
#60
Wahay!! I've lost my Virginity!!
Thread Starter
In these day I am looking for someone to help me with the rust repair. As it takes time before I can do it myself and I want to get the car ready for next year. I have sent an email to a mate in Poland. But I will also talk to a local place as the price in shipping to Poland etc is expensive. So the best would be to have it done local.
So on monday I am taking a trip to Autodoc to talk about the rust job. So hopefully it is a ok price. Then I will send the car to sandblasting under the car and in the engine bay. Then painting the engine bay, underside and floor with cage myself. The cage will go in after the rust job. It will be half cage with seatbelt mounts.
I have been strict on not buying anything lately. But I got a one time deal, as I see it :P A gearbox to handle my future POWER Got it from a top bloke in Norway It need some new bearing etc to be perfect. But as a used gearbox from a Cosworth, I cant say anything bad. It was so clean and could be used if needed. But I choose not too. Will be used when my new engine is finished. I am have a debate with myself. TURBO OR ITB`S I want have 3-400 in my life just once.. But I also looove the screaming itb`s
Anyway, here is the gearbox! A Cosworth 2wd T5. Just need the shifter, flywheel, clutch, cradle and starter.


I also got a new fuel lid because the oem one has bad gasket that is almost impossible to find. It fits okay and does the job. Got it on ebay for a decent price


So on monday I am taking a trip to Autodoc to talk about the rust job. So hopefully it is a ok price. Then I will send the car to sandblasting under the car and in the engine bay. Then painting the engine bay, underside and floor with cage myself. The cage will go in after the rust job. It will be half cage with seatbelt mounts.
I have been strict on not buying anything lately. But I got a one time deal, as I see it :P A gearbox to handle my future POWER
Got it from a top bloke in Norway I want have 3-400 in my life just once.. But I also looove the screaming itb`s Anyway, here is the gearbox! A Cosworth 2wd T5. Just need the shifter, flywheel, clutch, cradle and starter.


I also got a new fuel lid because the oem one has bad gasket that is almost impossible to find. It fits okay and does the job. Got it on ebay for a decent price


 02-07-2017, 10:10 AM
#61
Wahay!! I've lost my Virginity!!
Thread Starter
I am changing from Photobucket to Imageshack as they want 399$ to let me see others pictures etc.. Premium 19$ at ImageShack. The DOWNside is that ALL my postet pictures at forums will be no longer available. So sorry for that! But all the updates from now and in the future will be available. I will maybe update the forumes past posts, but it will take alot time. So be patience
Thanks!
Thanks!
03-07-2017, 03:21 PM
#62
Wahay!! I've lost my Virginity!!
Thread Starter
After much talk with my better halv in the house. I got out in the garage to work on the Sierra It helps with a wife that supports your hobby and says some wize words " take one task at a time. Dont see the whole project. Complete one thing on the car everyday and dont begin on another thing before you are done with it". She knows how MUCH this costs, but still supports and says: its your hobby and as long it makes you happy
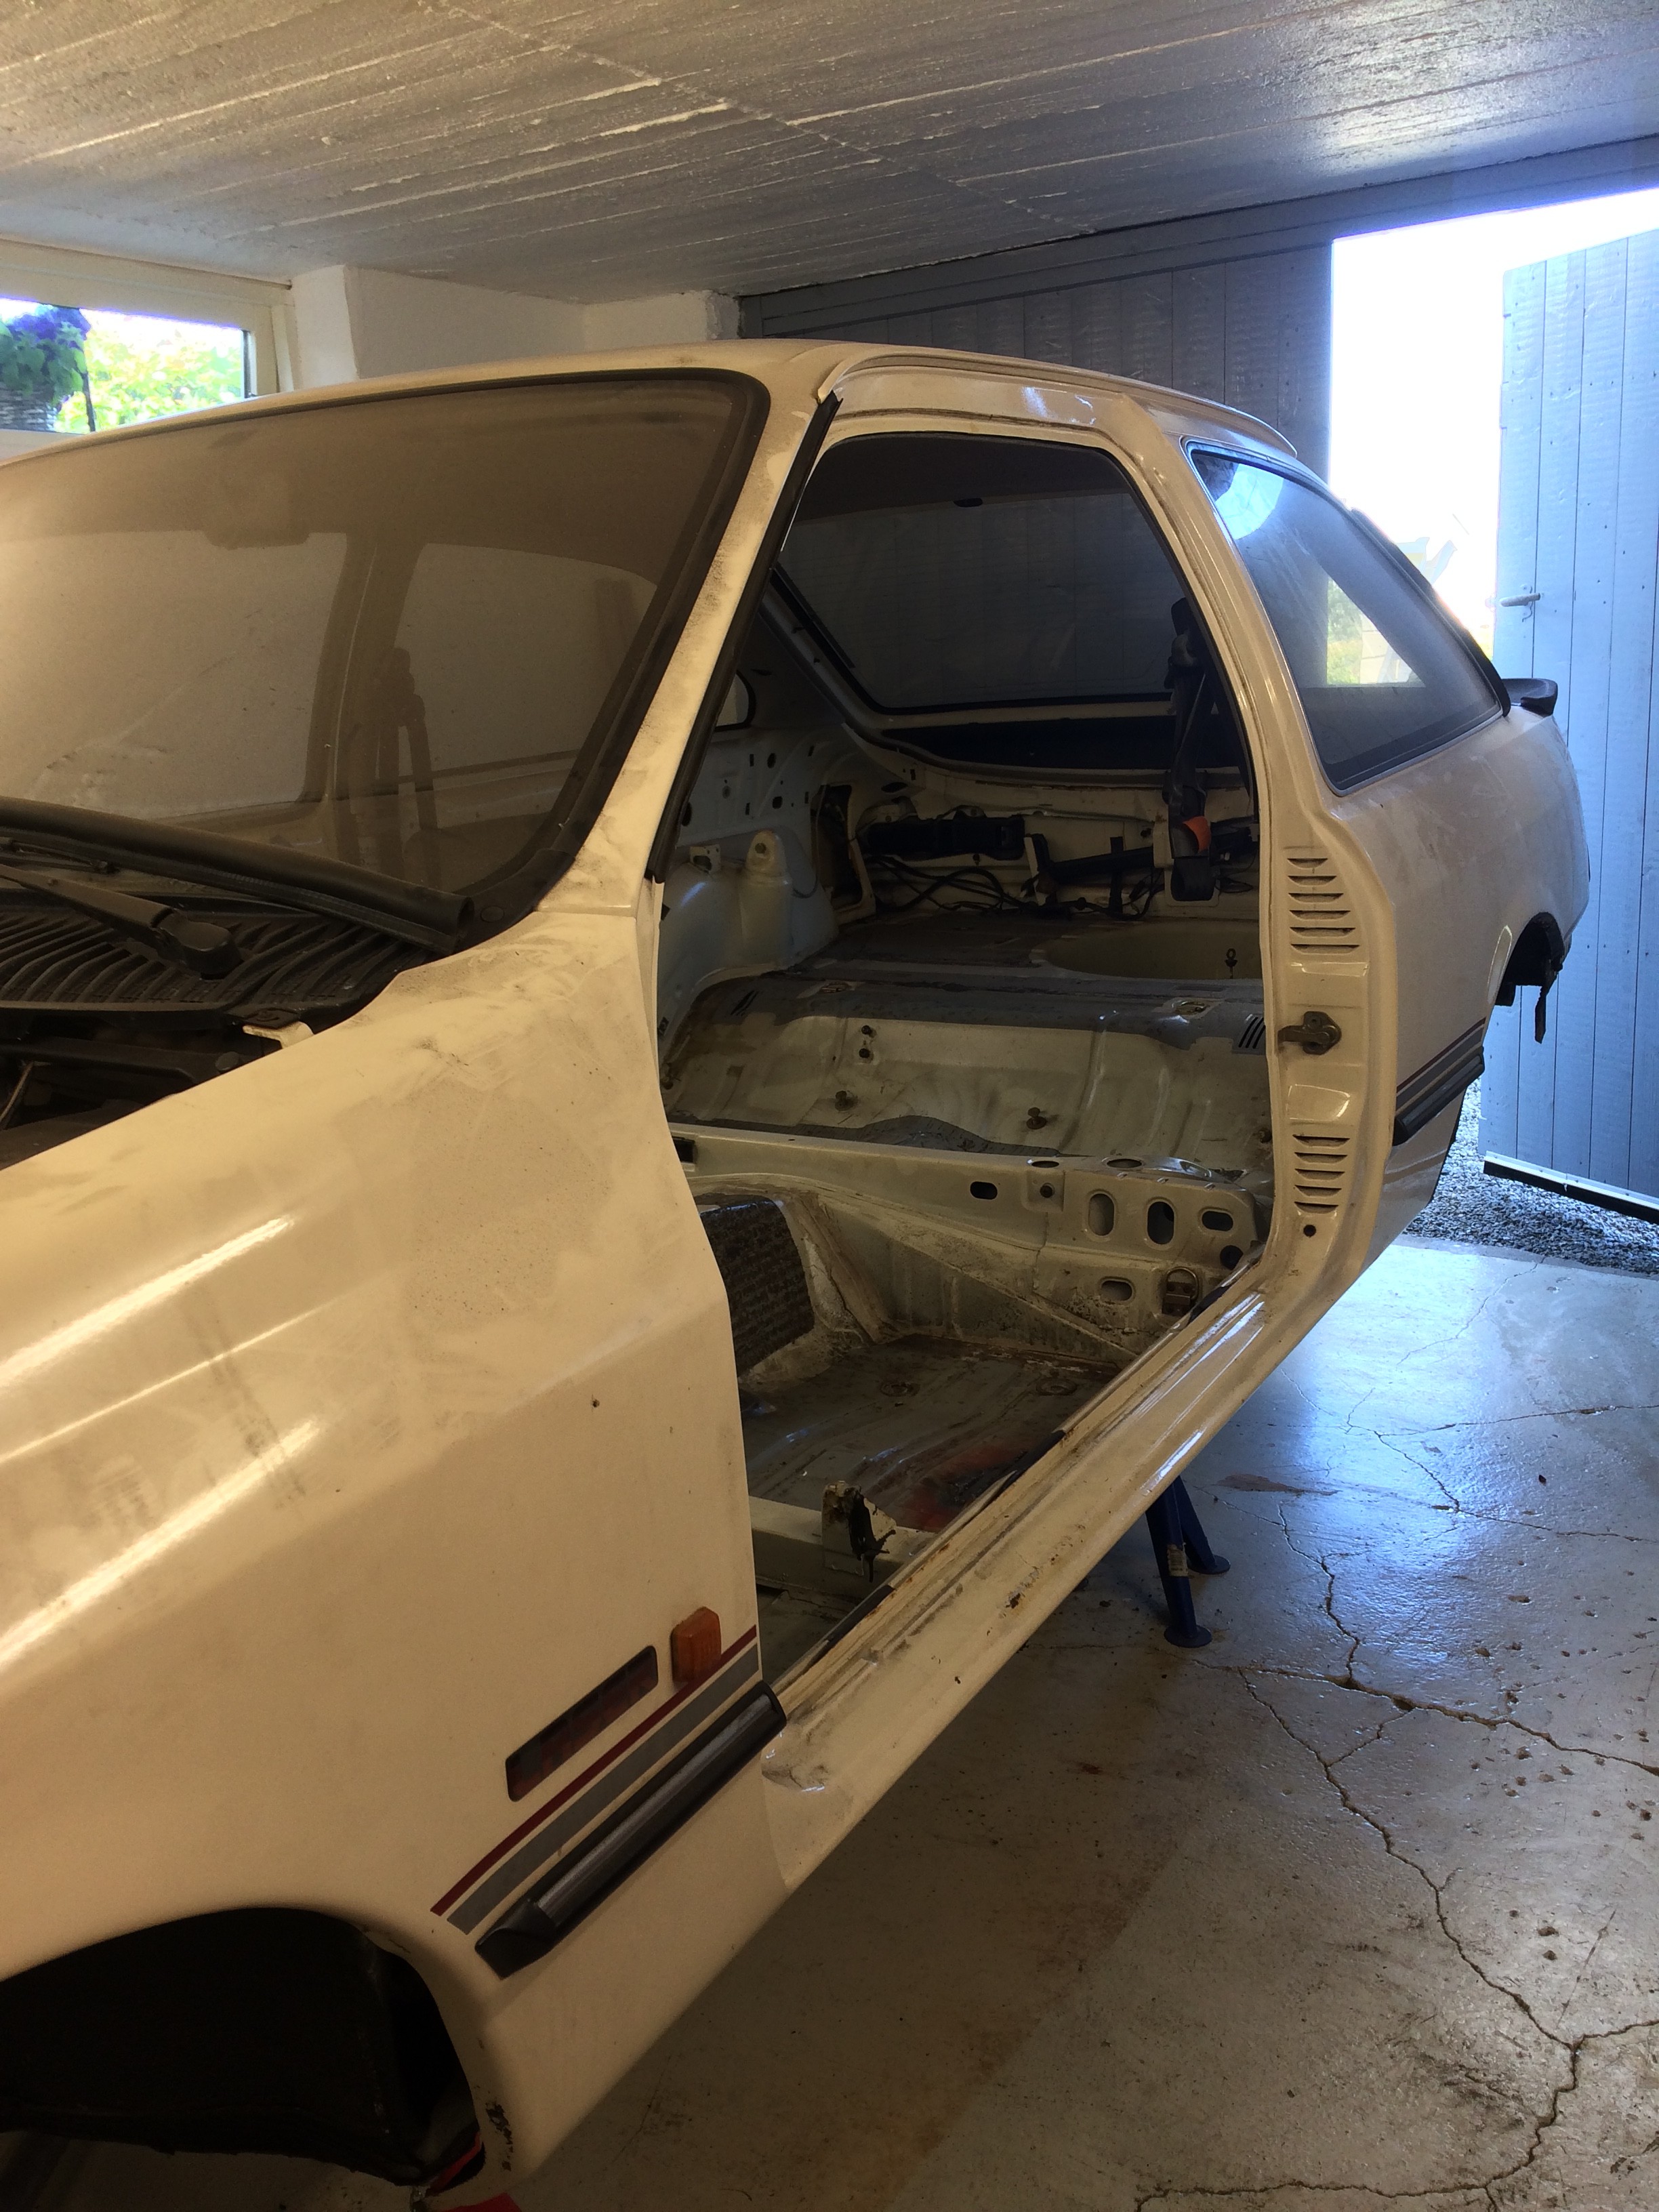
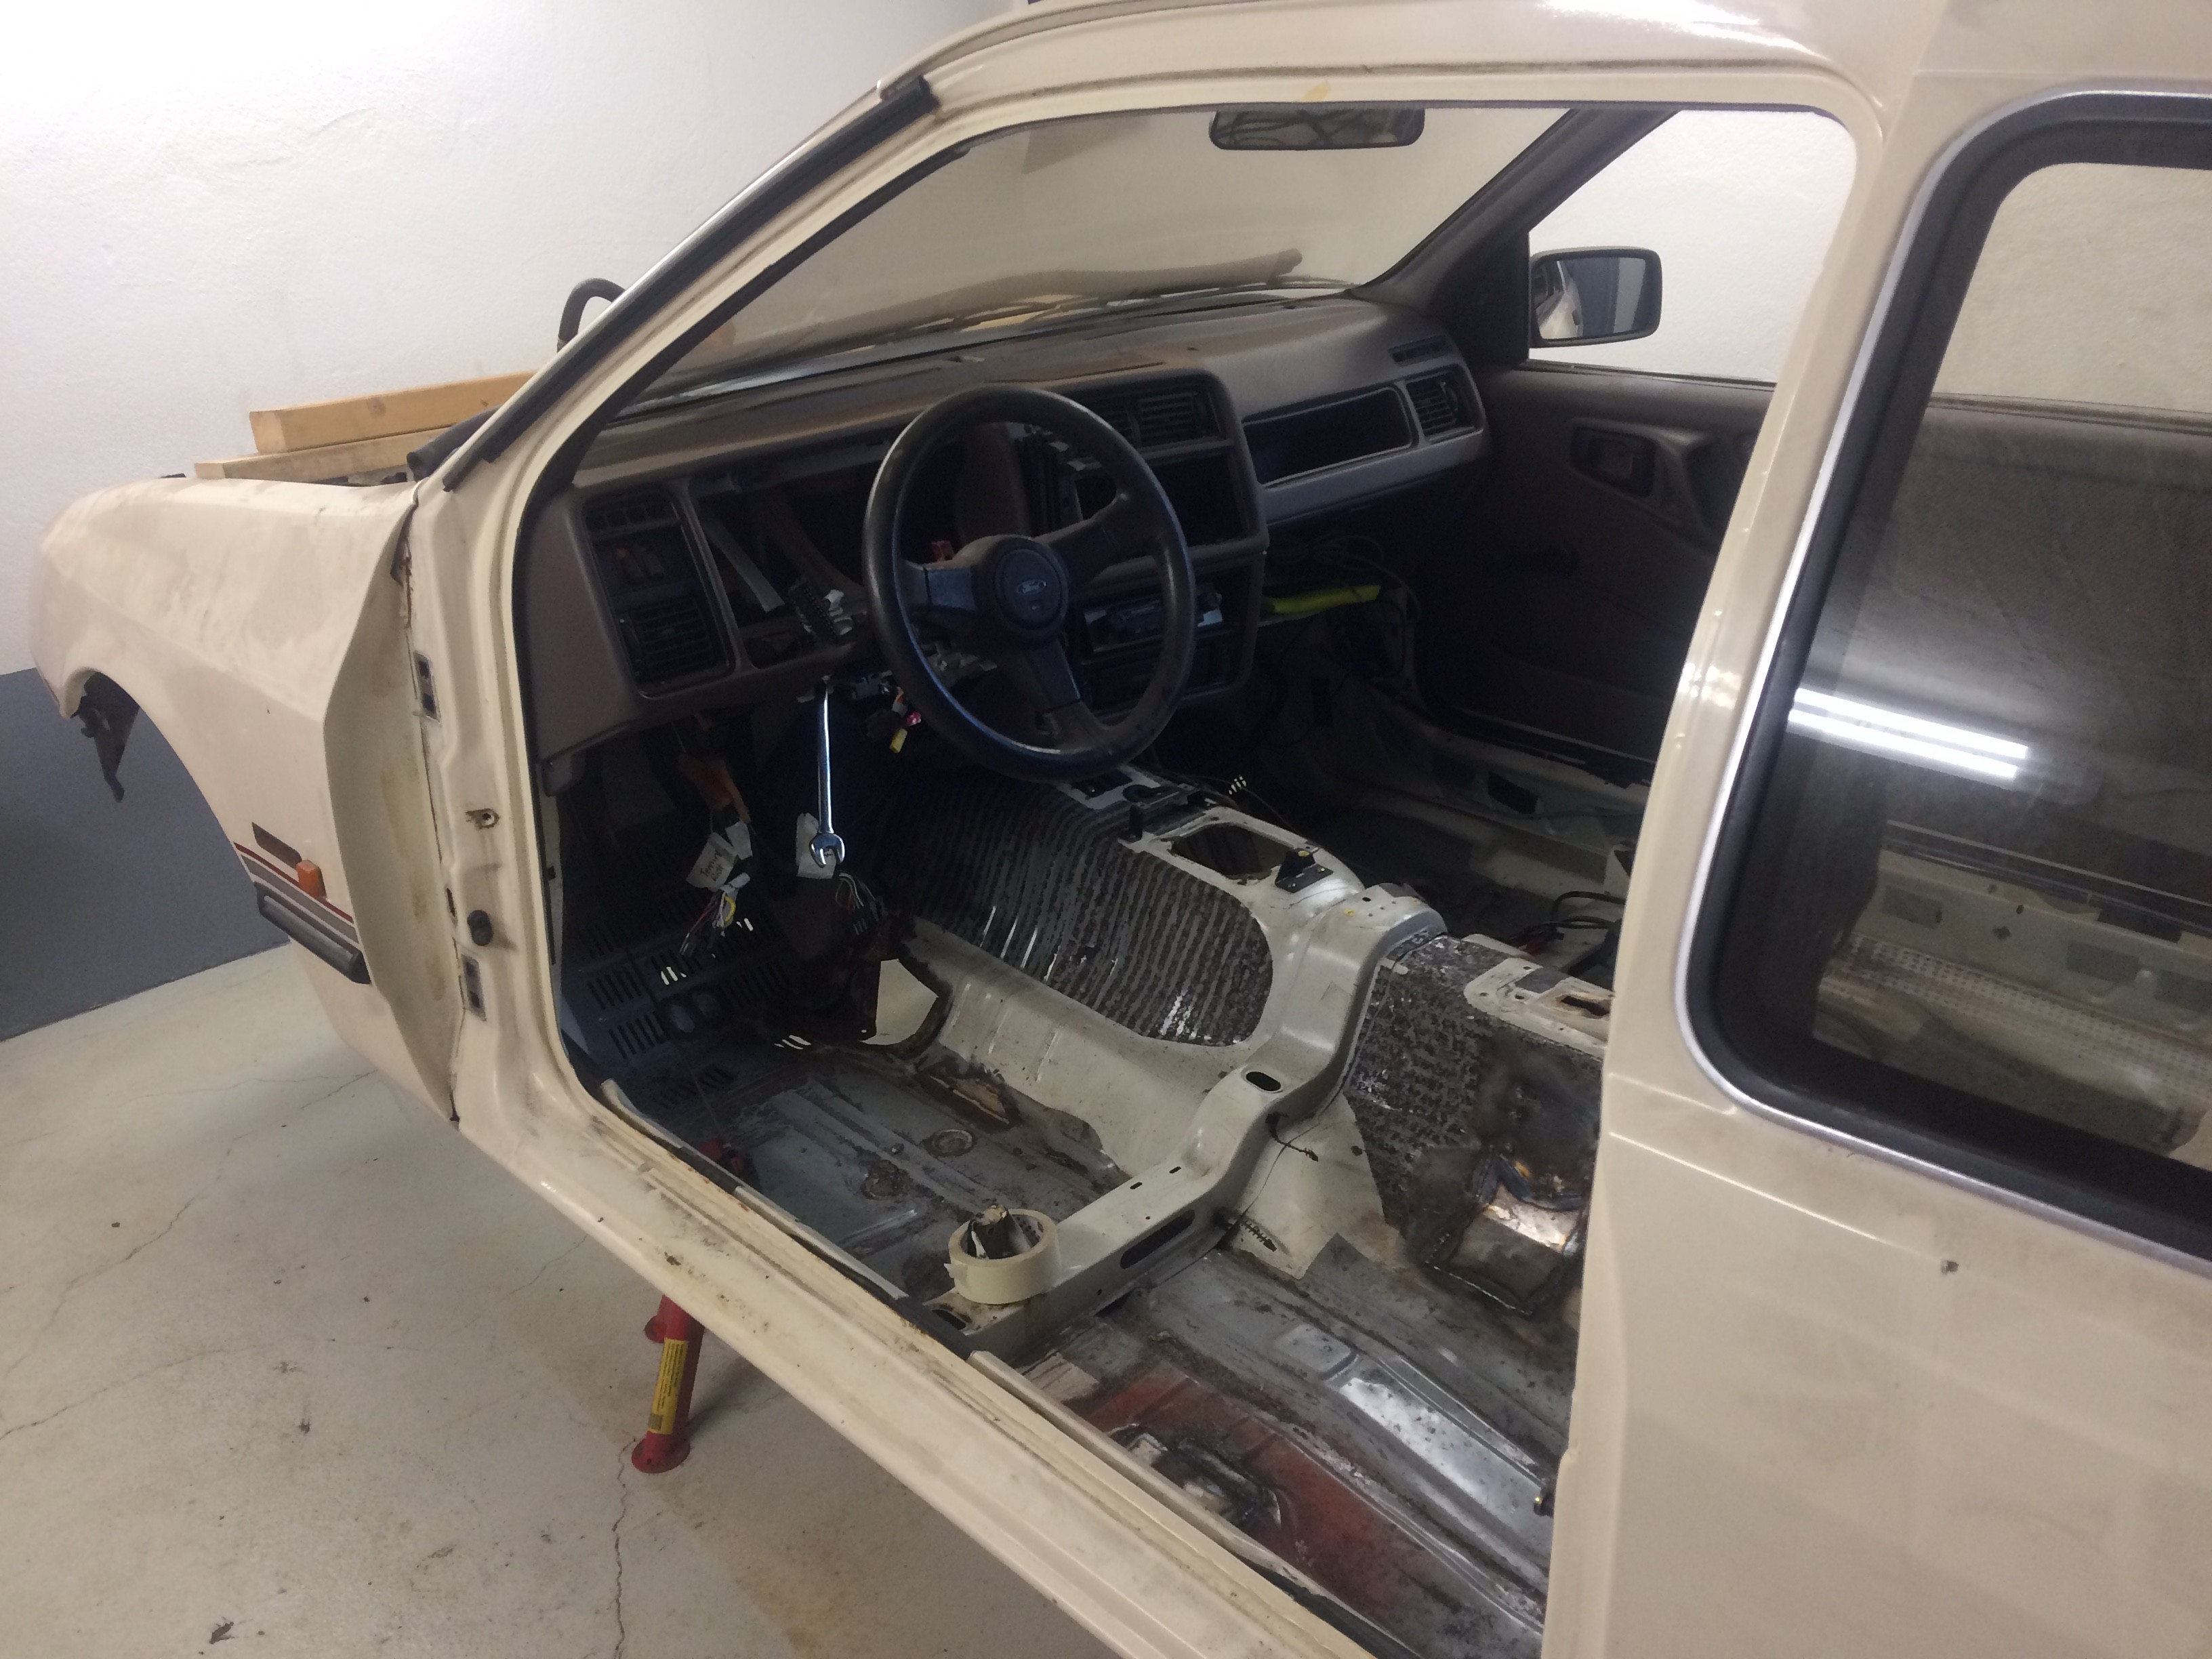
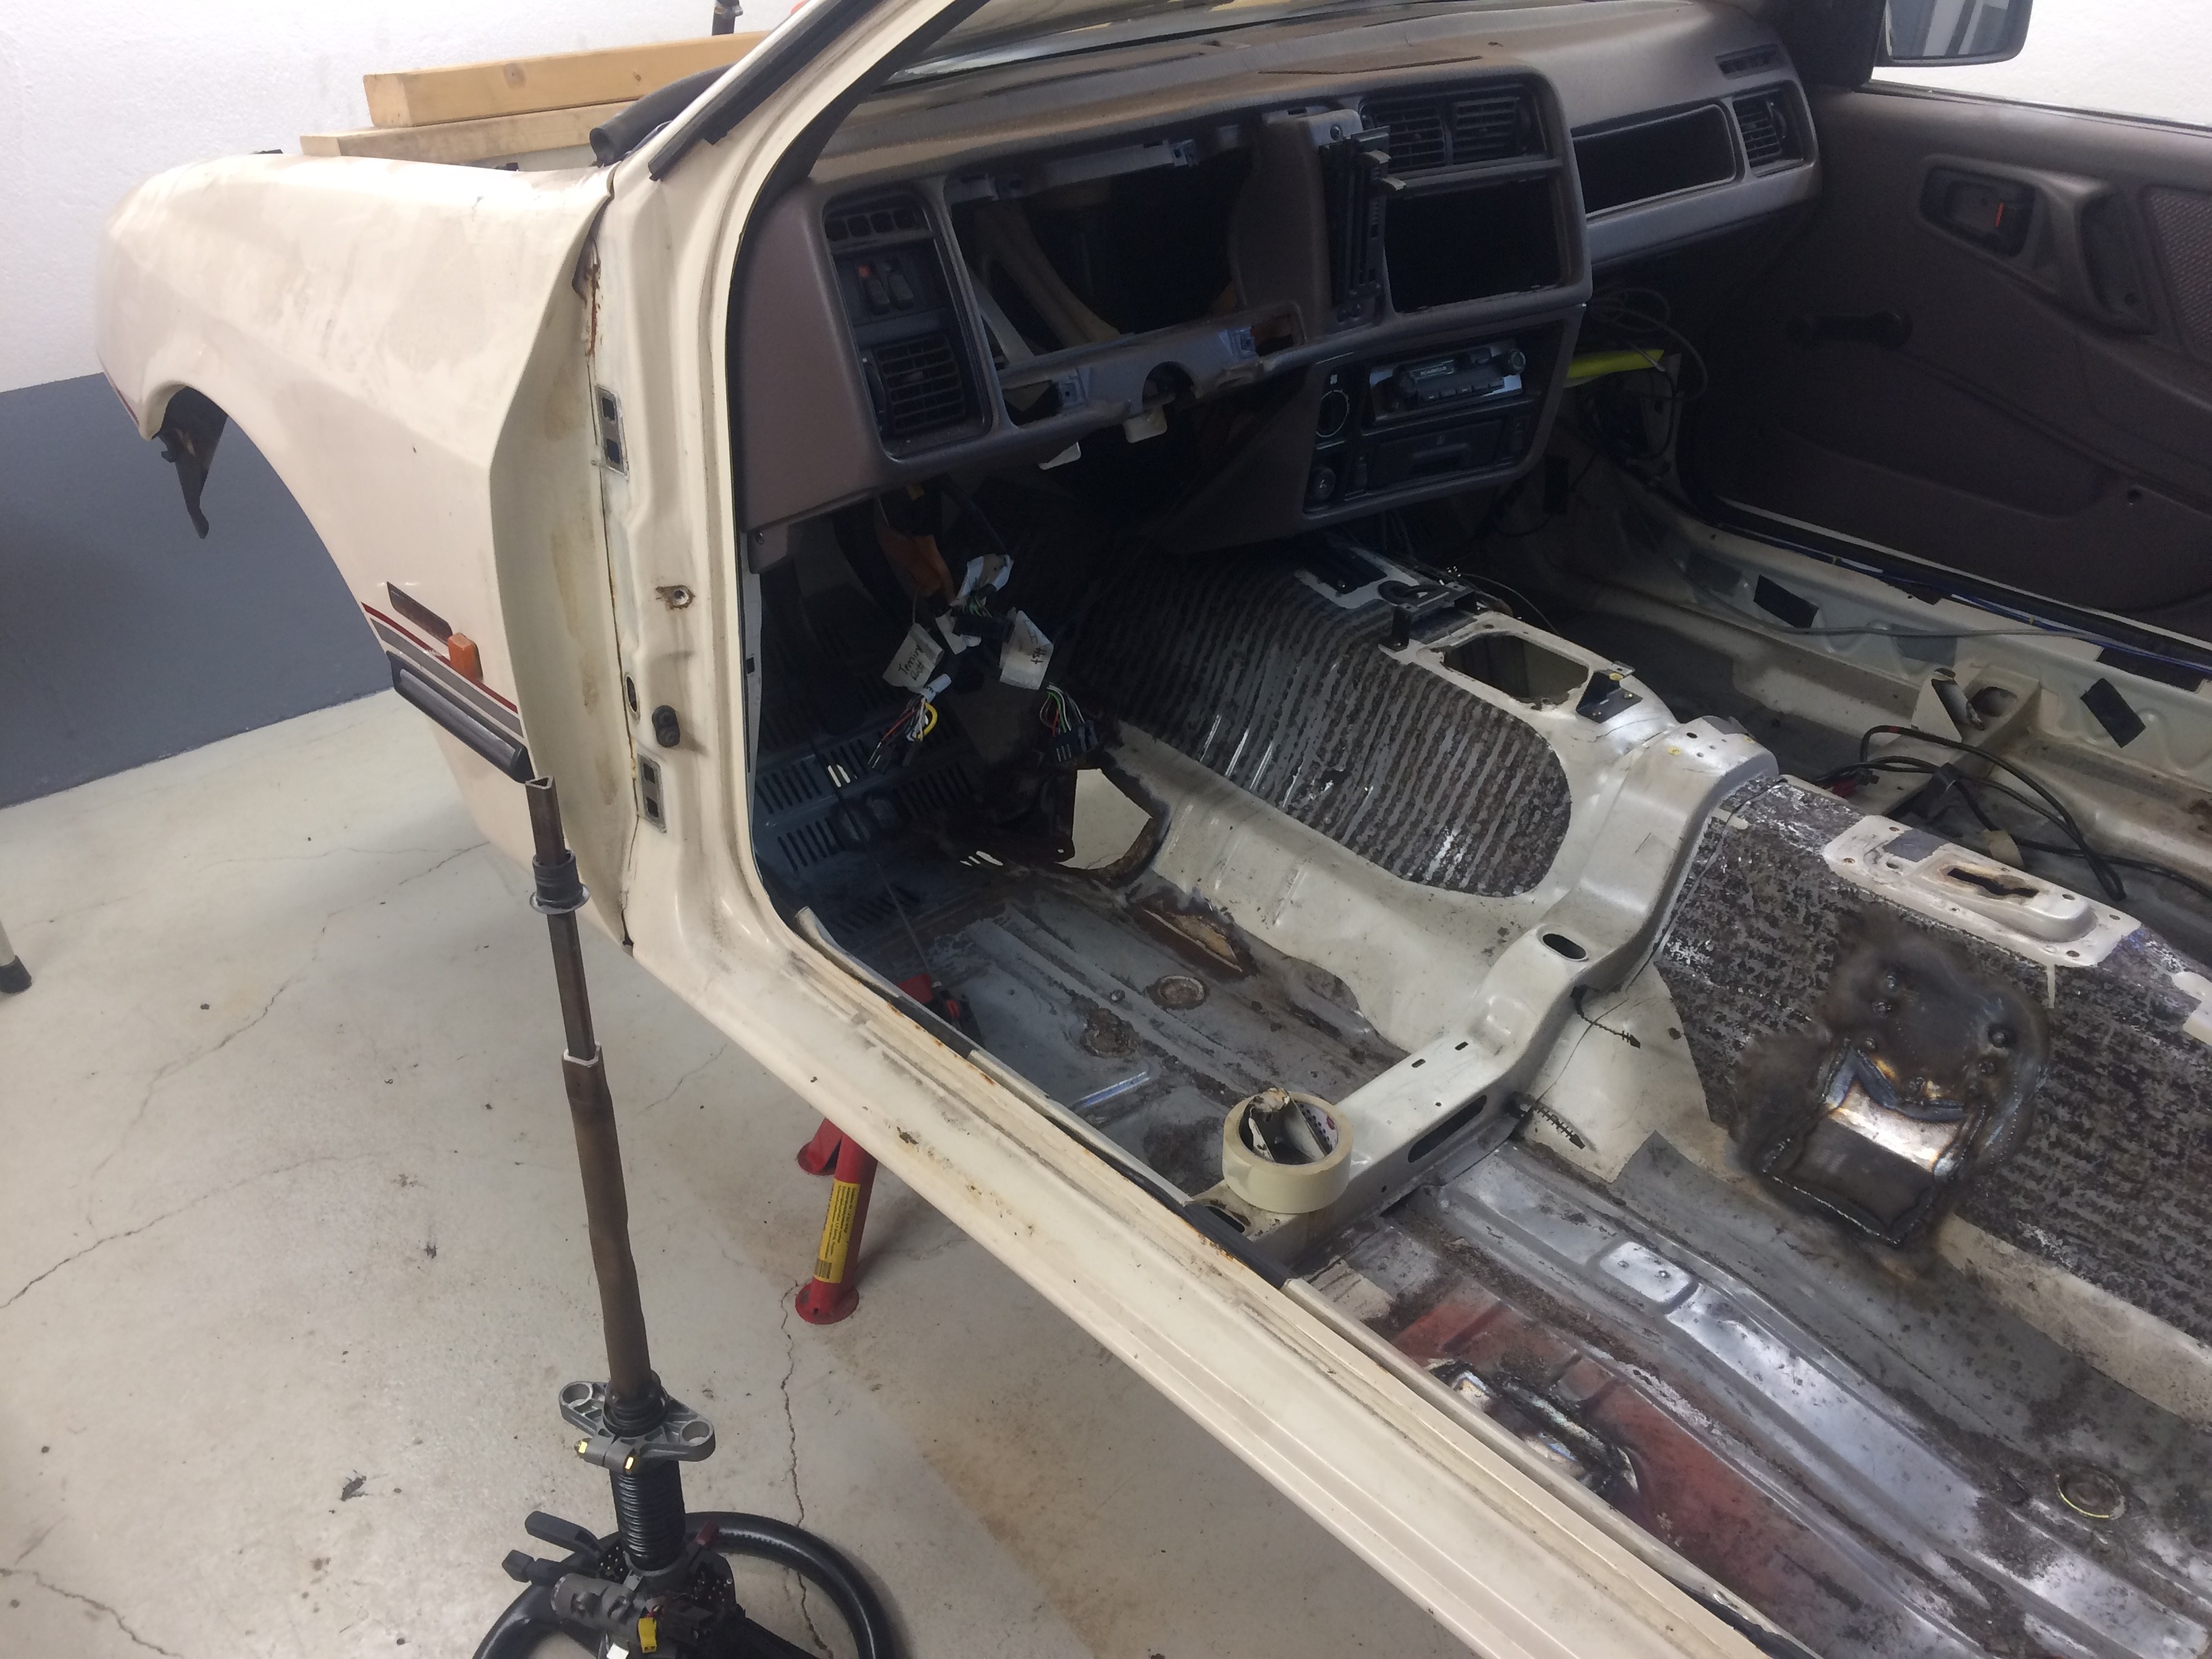
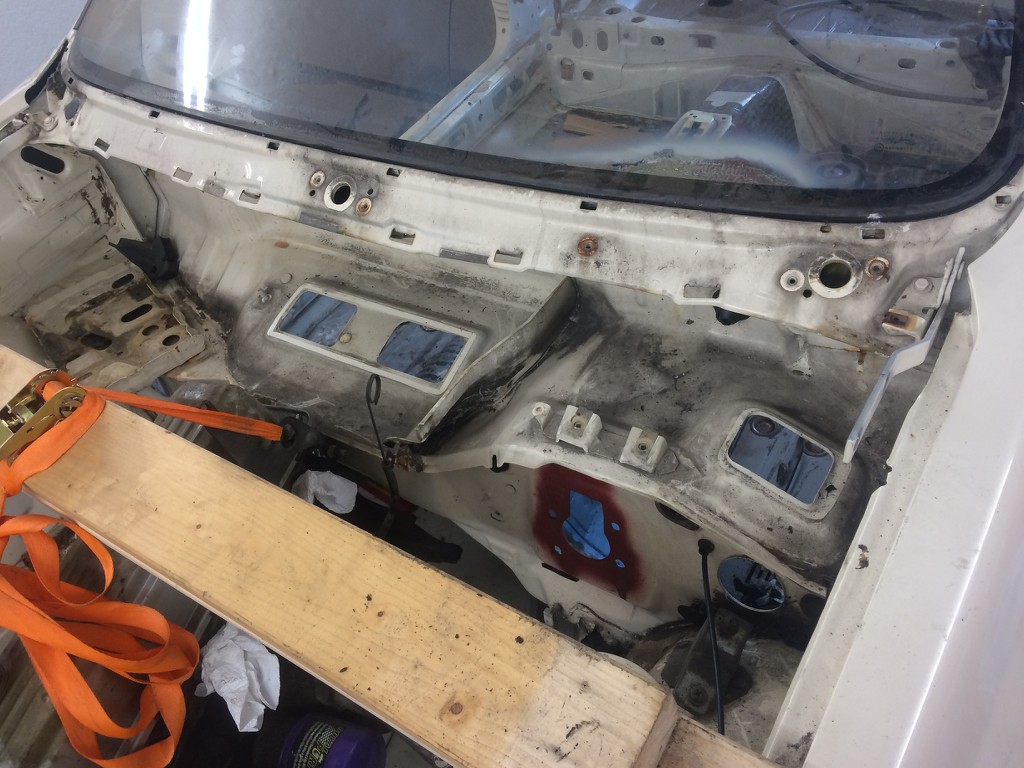
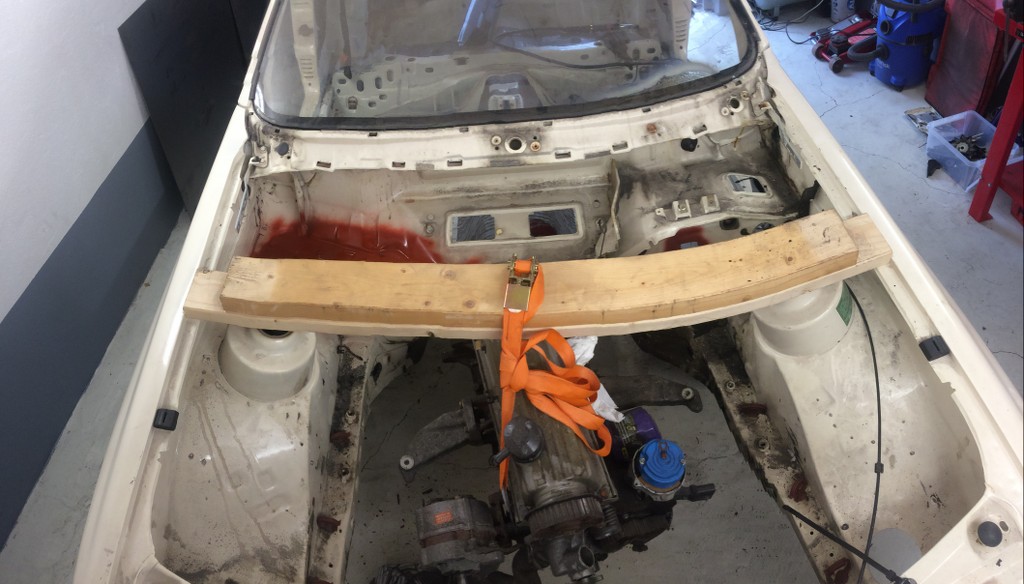
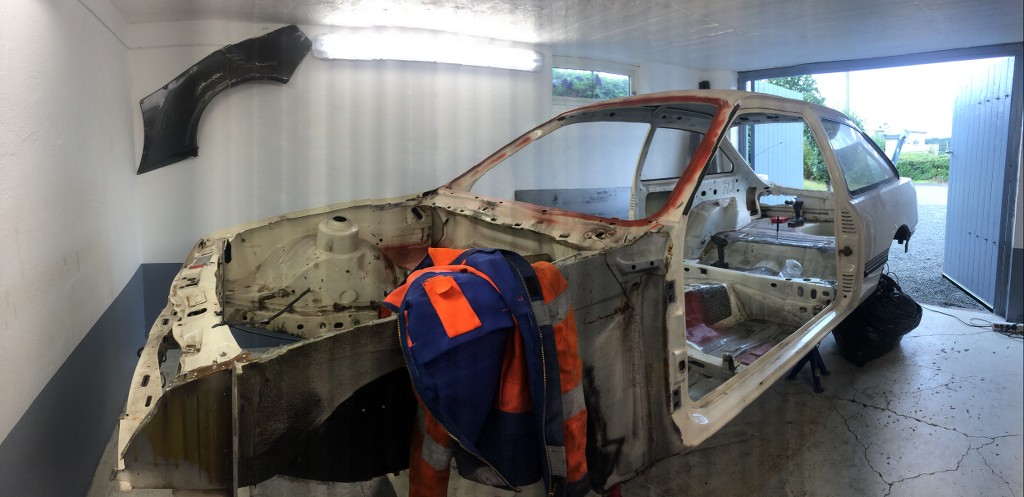
I removed the doors today with the rubbergasket. So the light in my little garage lights up the inside the car better and for SPACE :P MUCH easier to work on the car now.
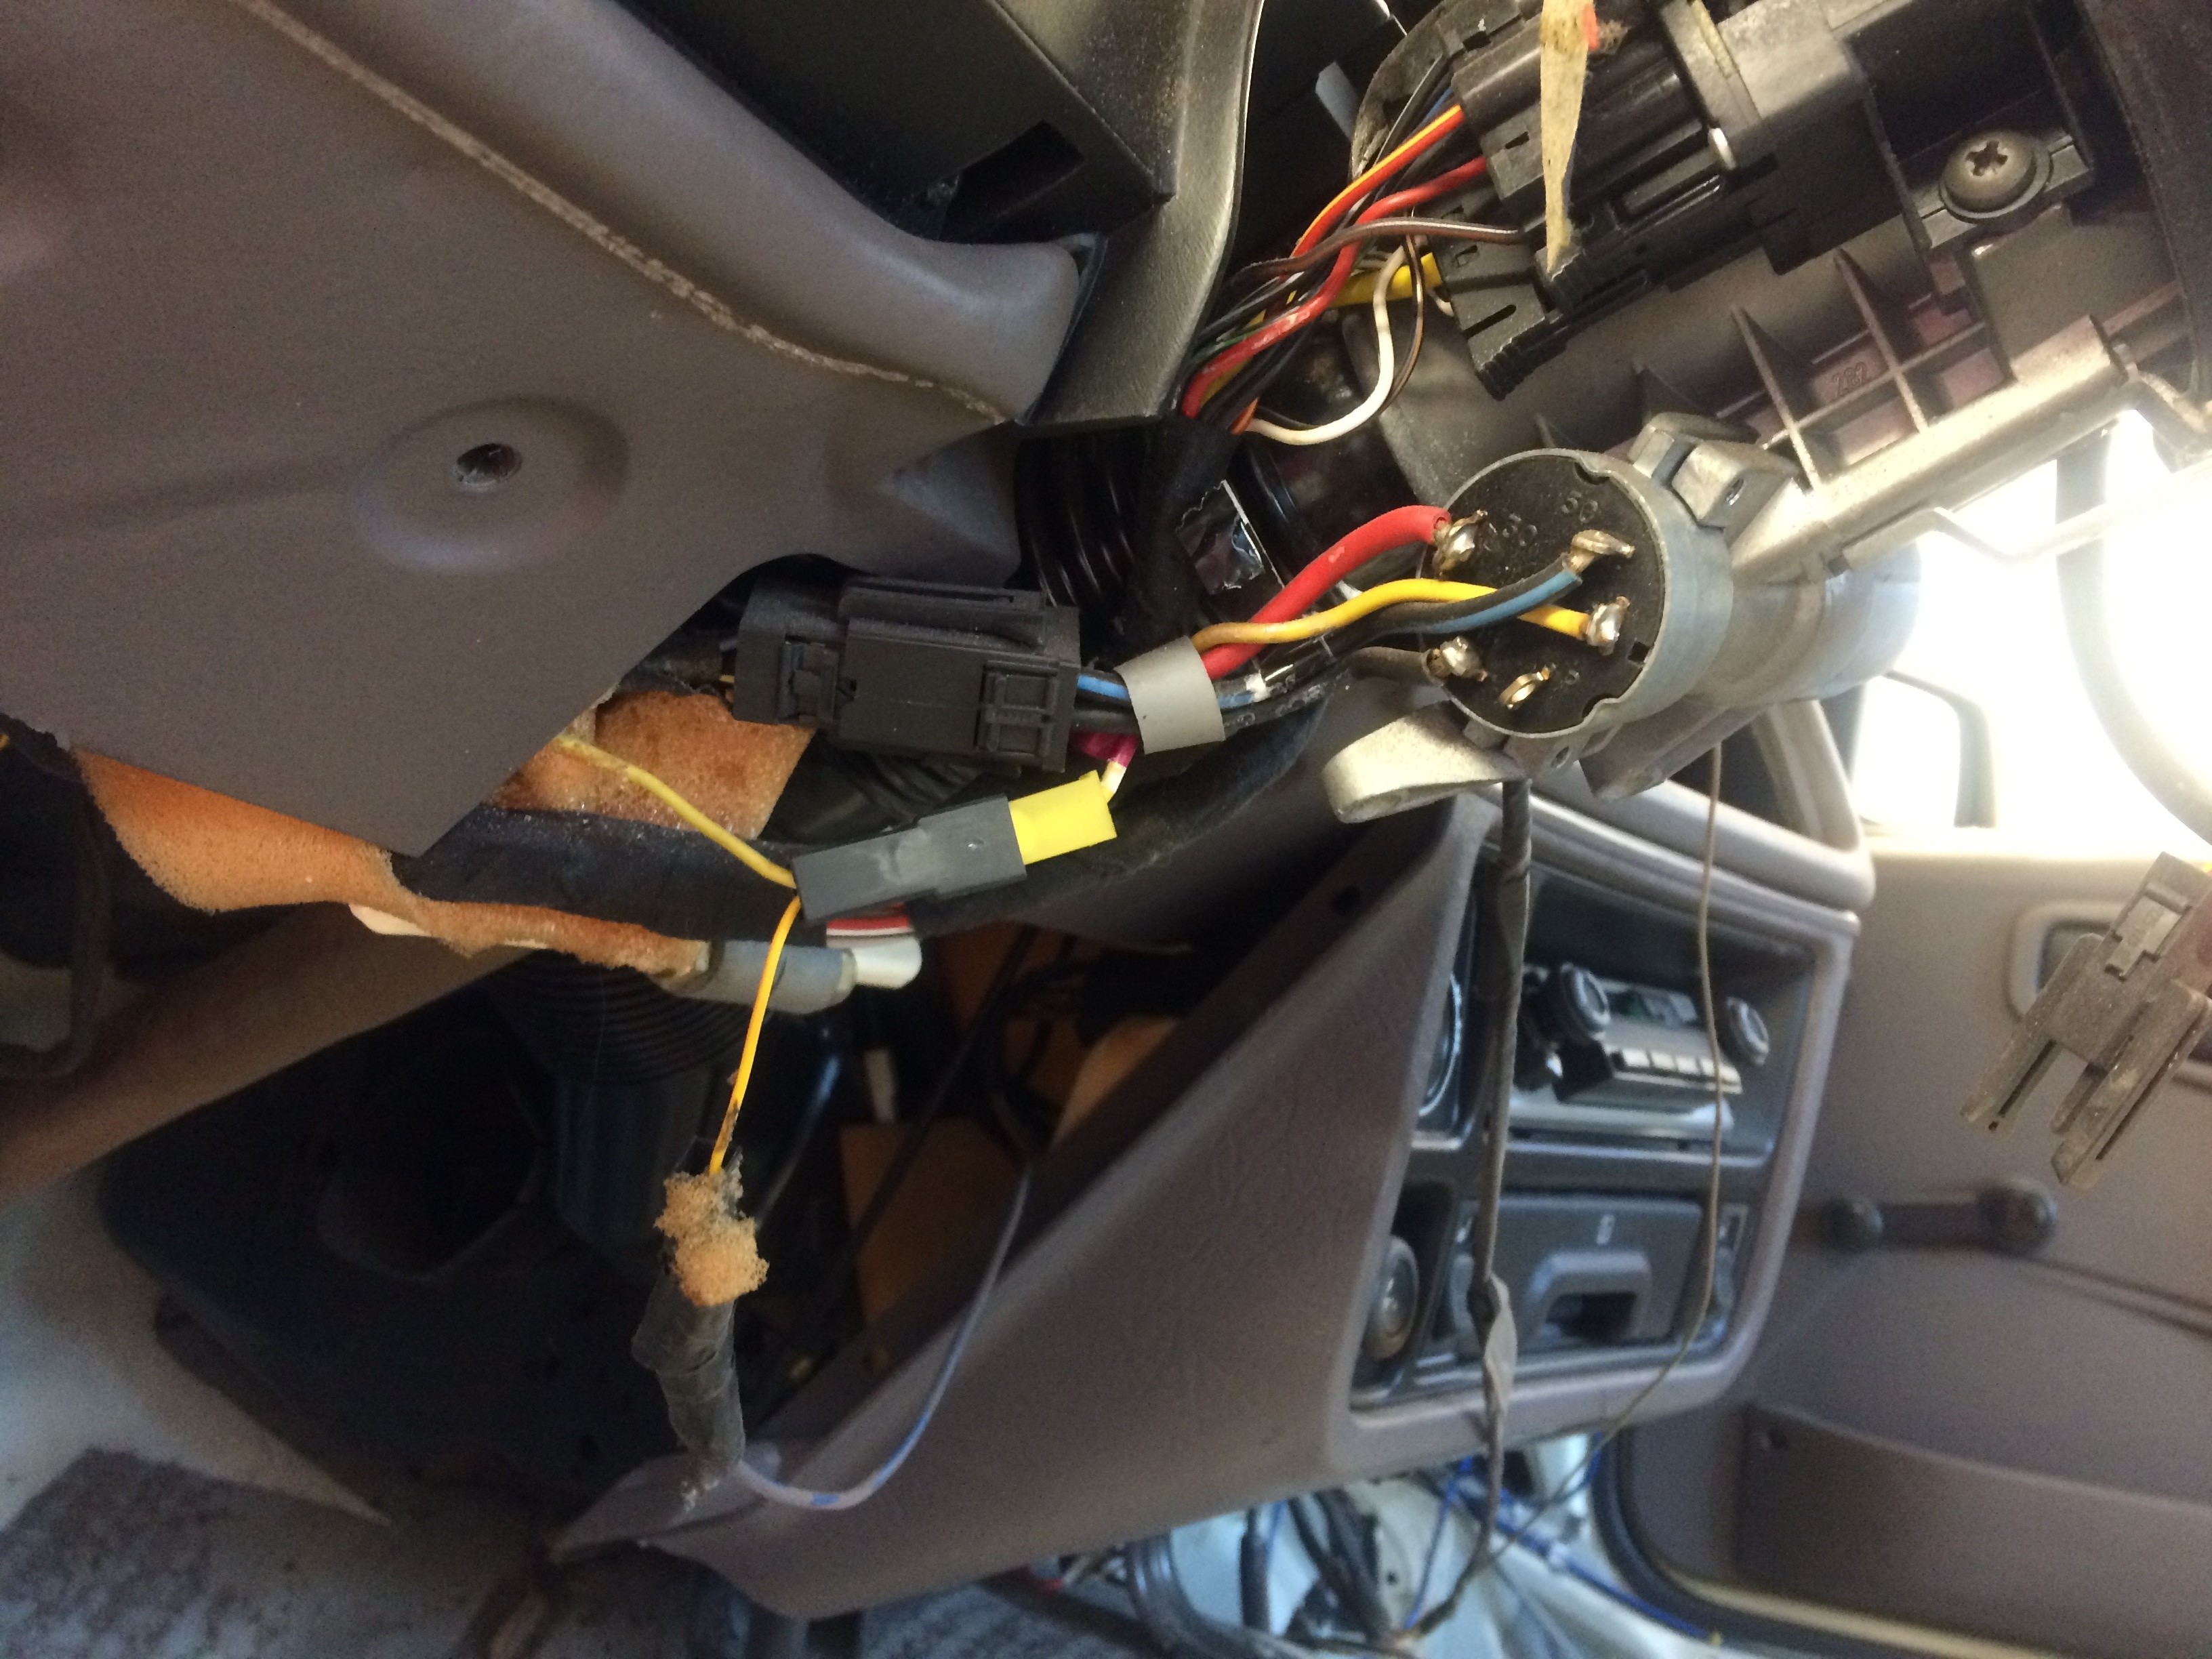
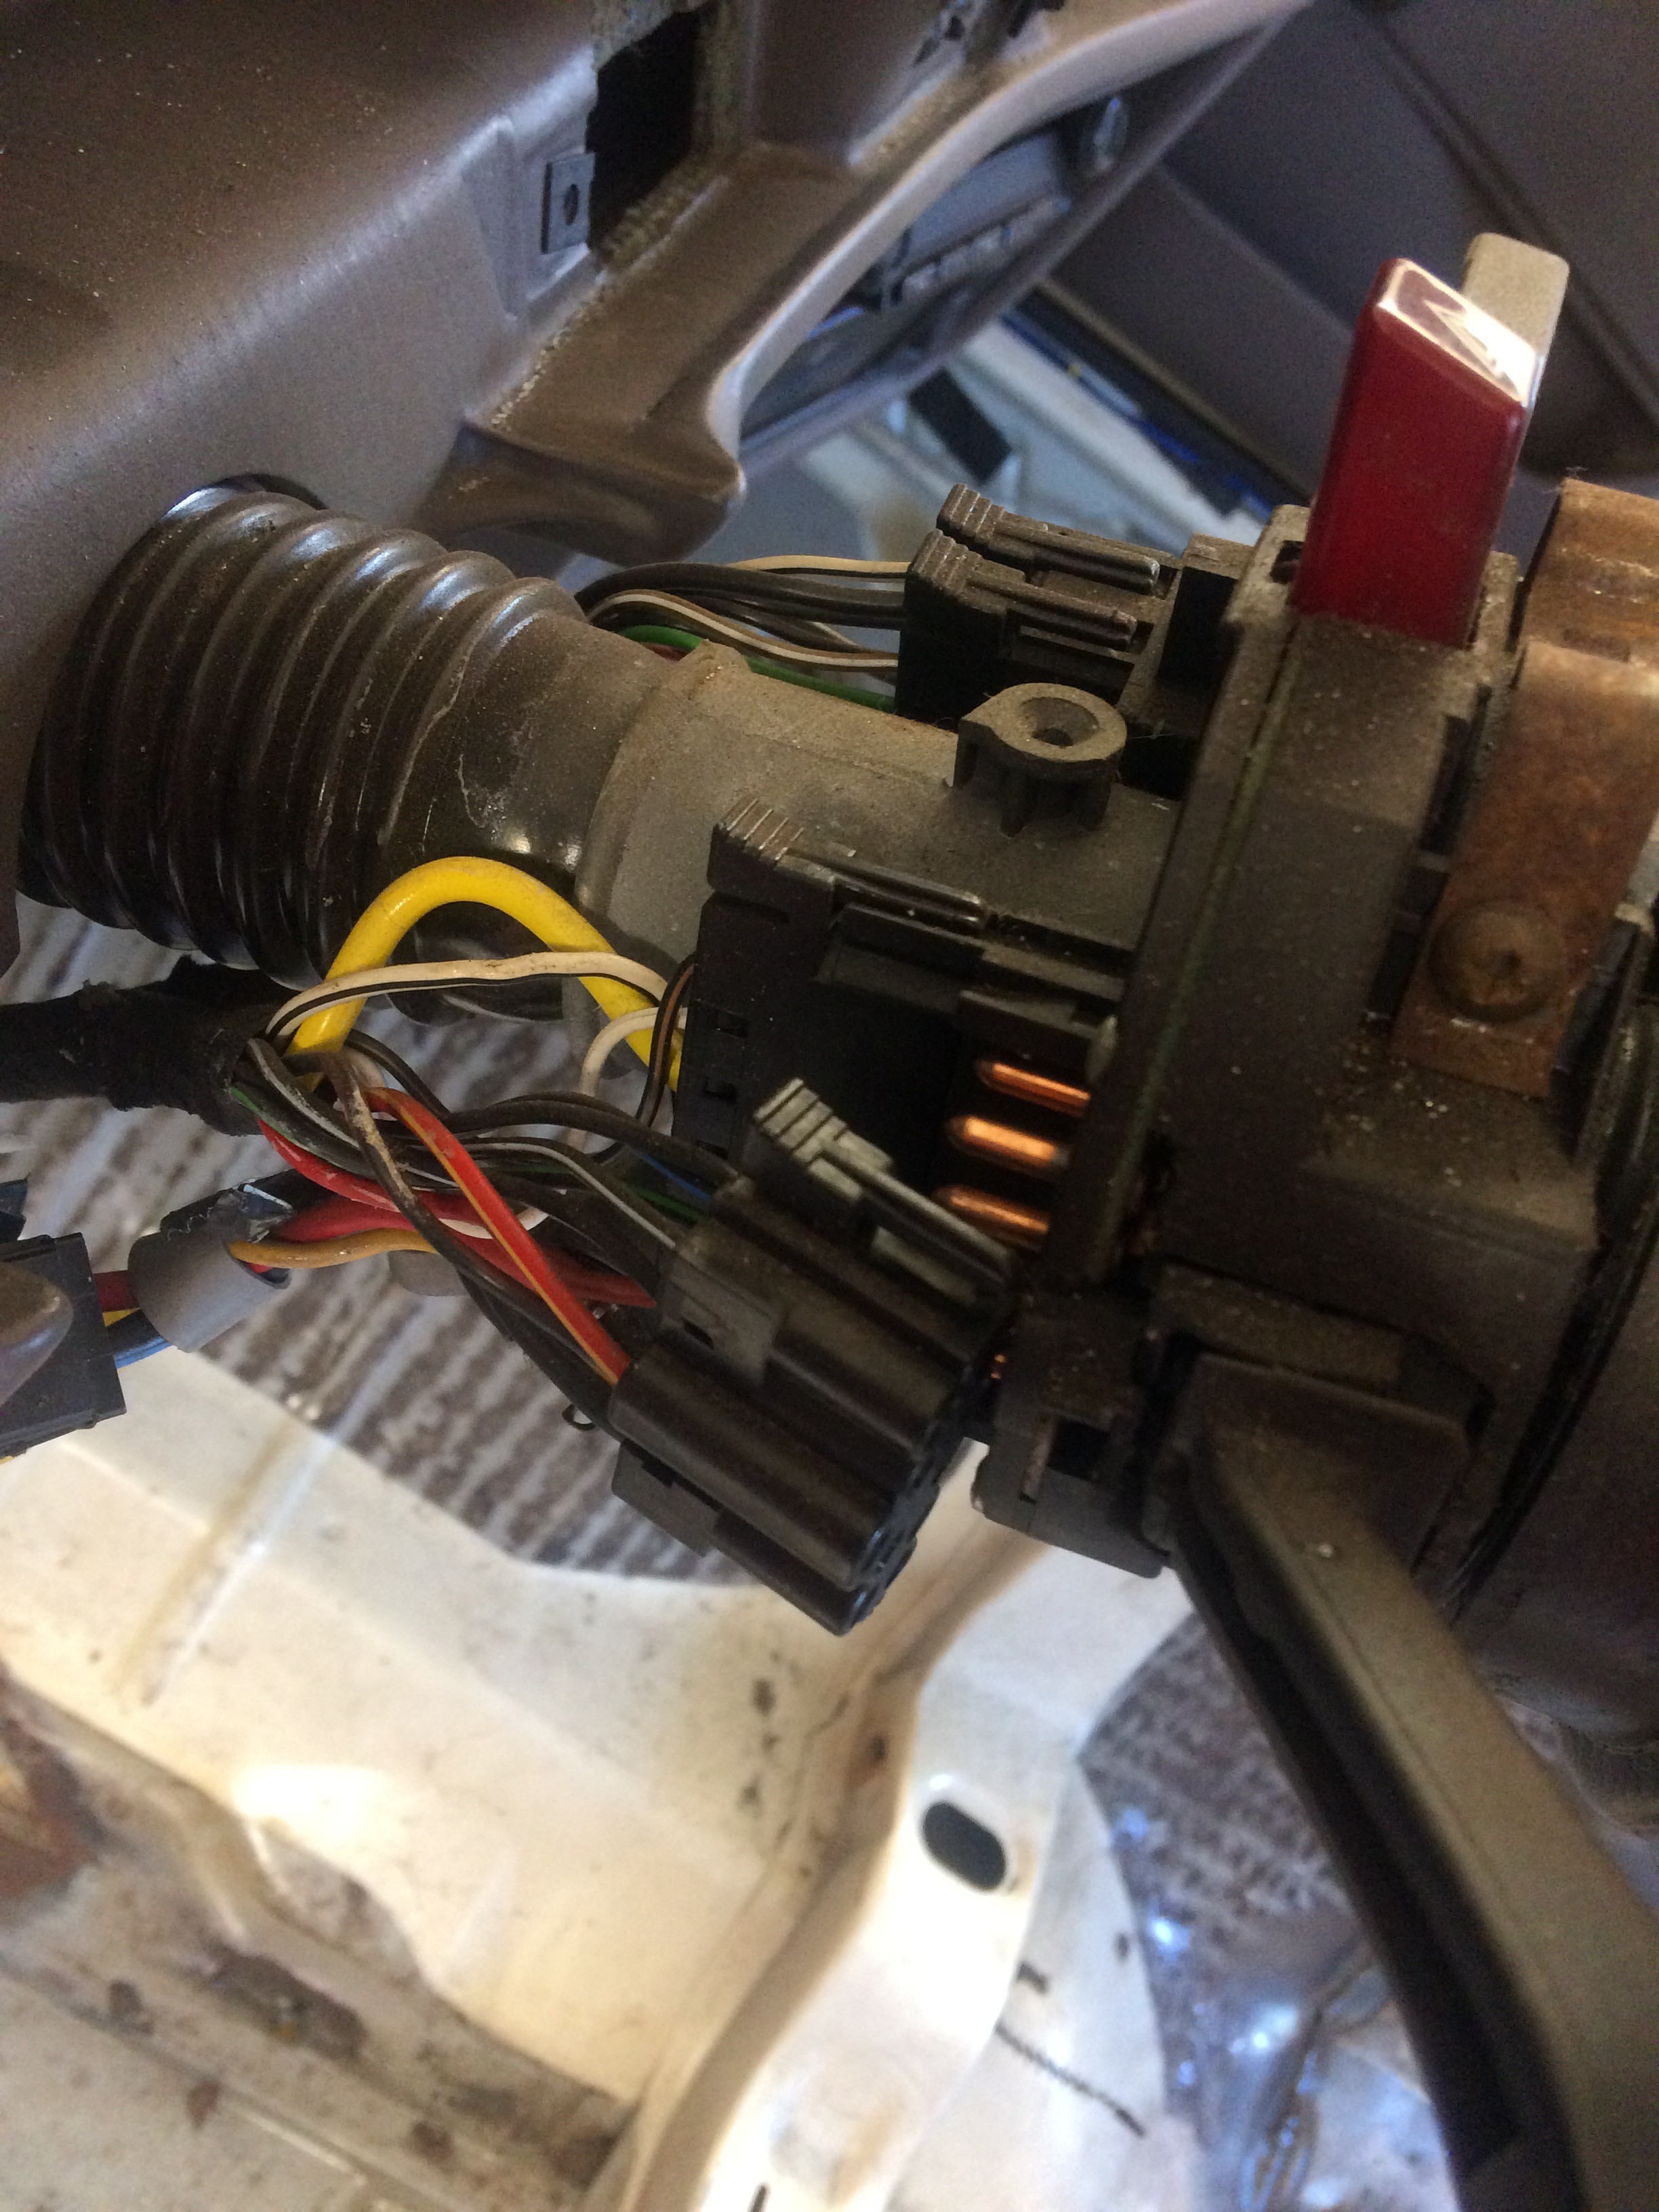
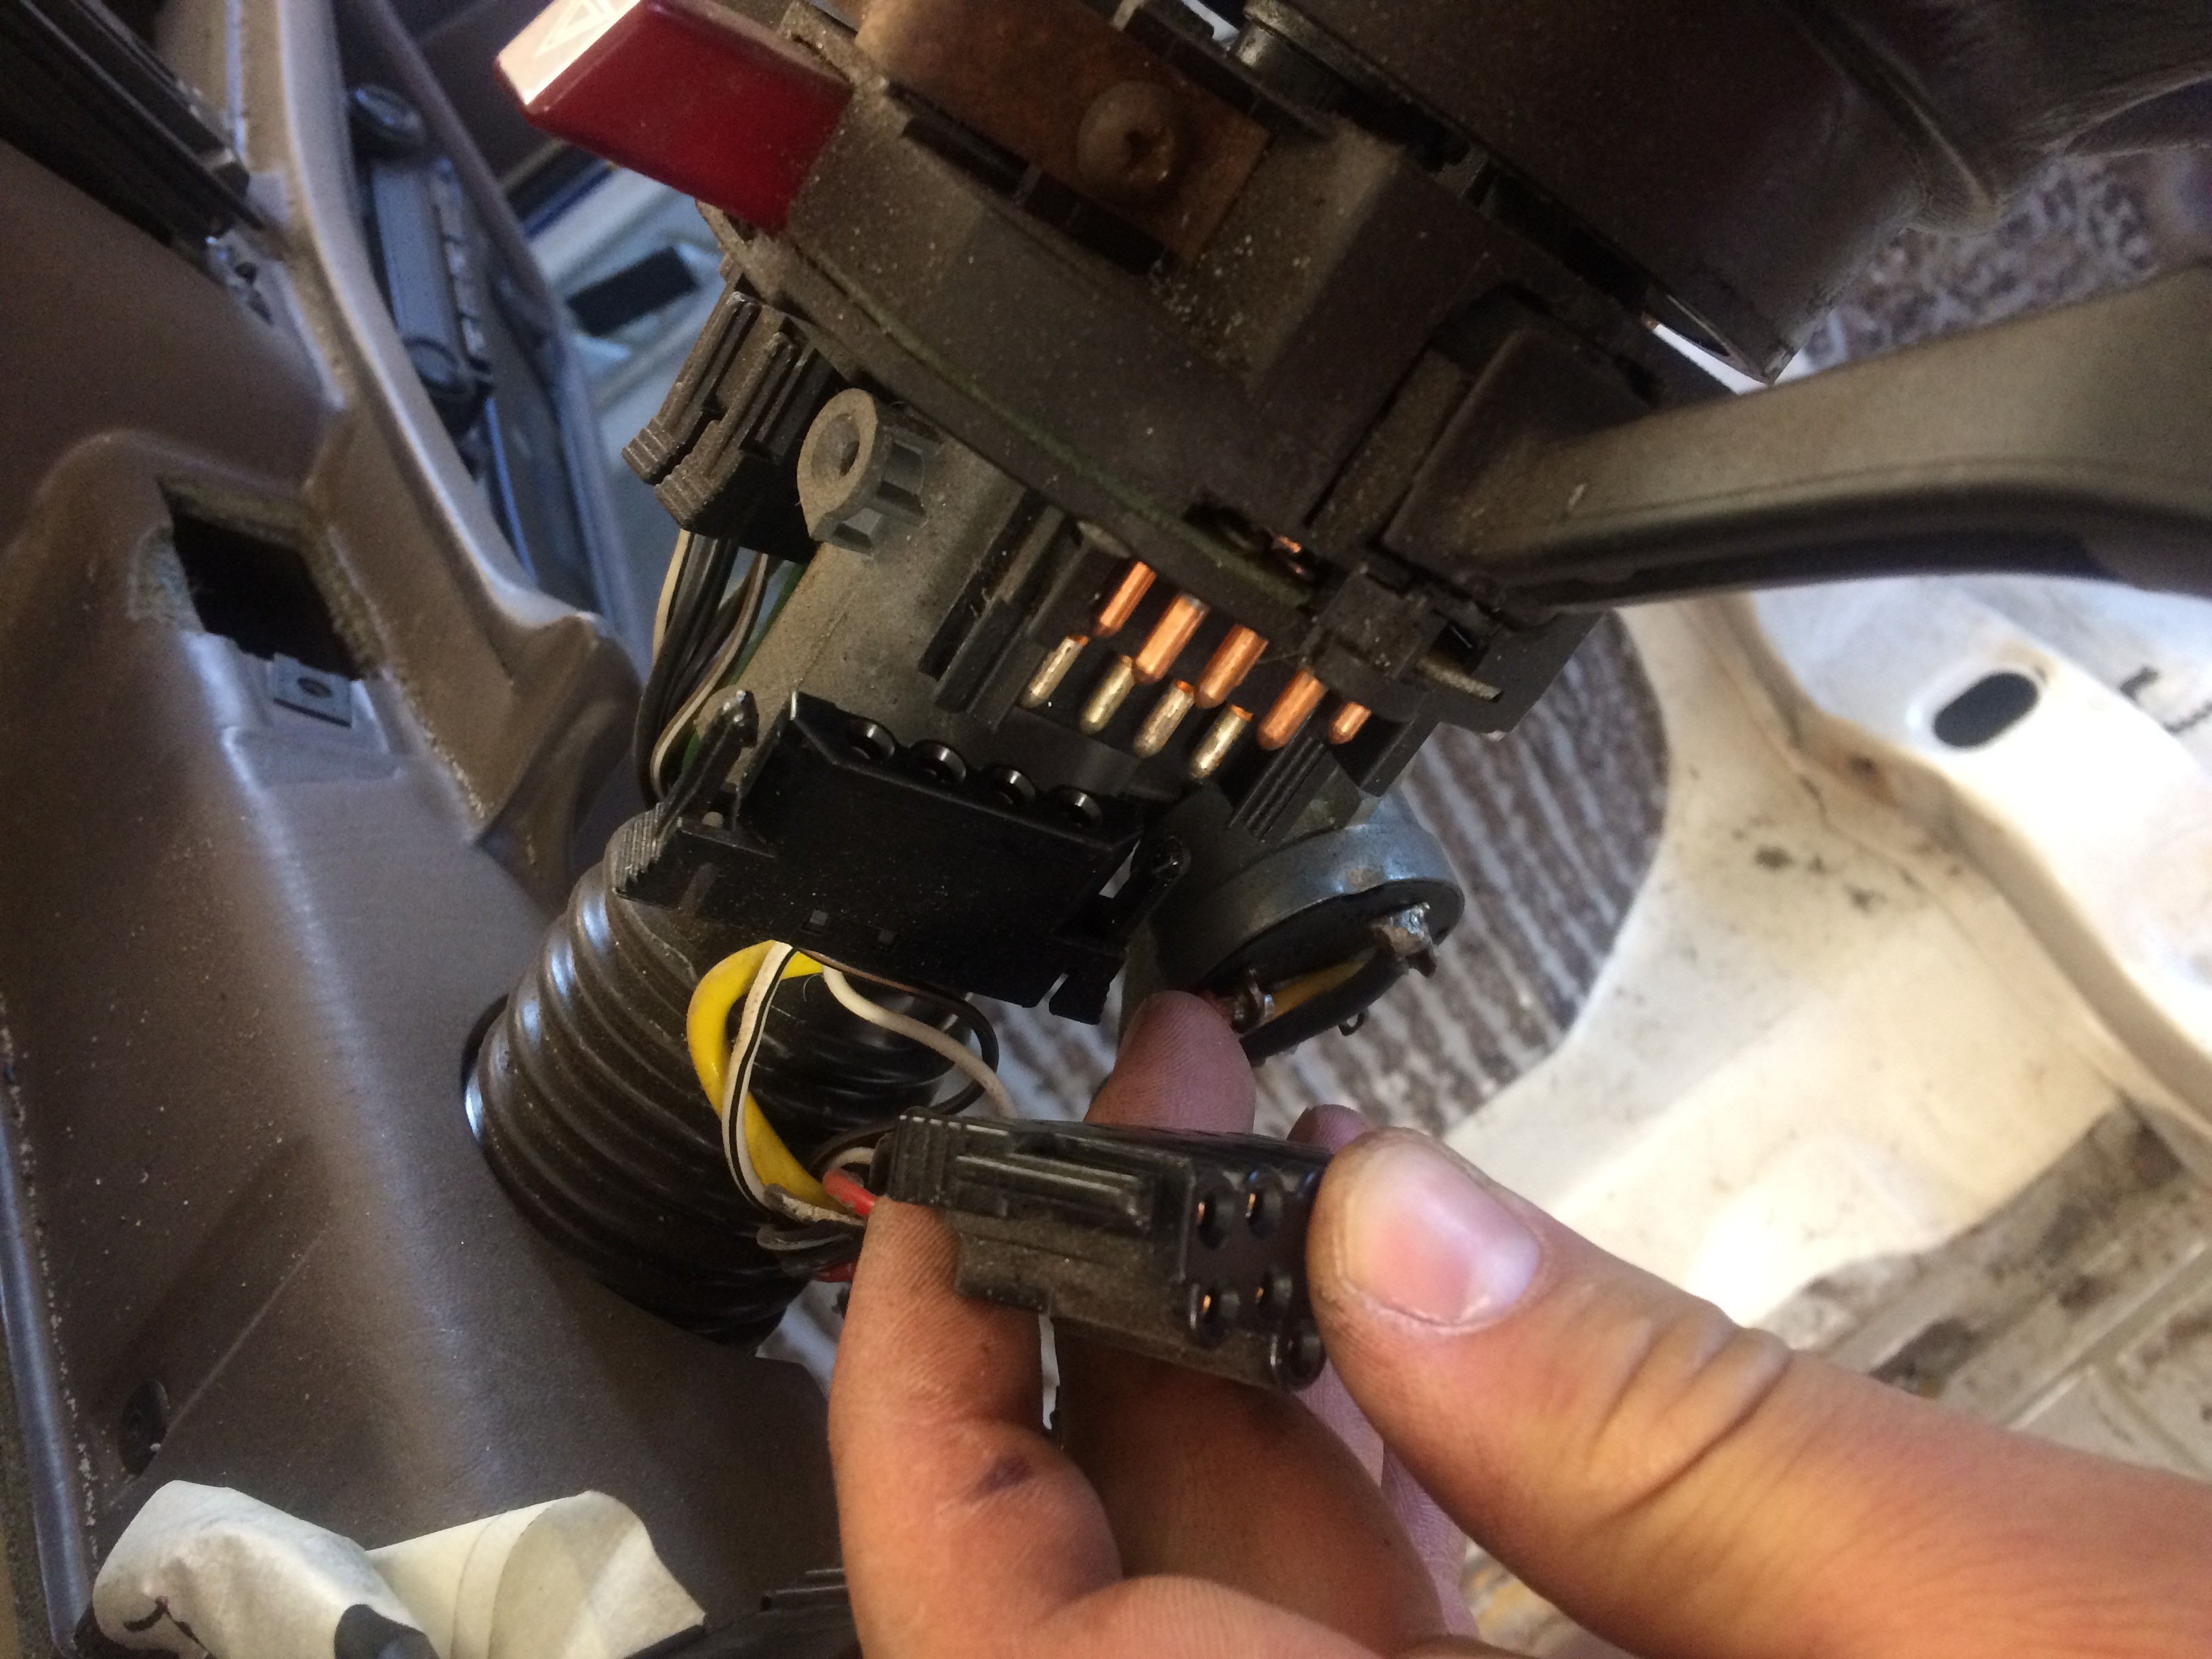
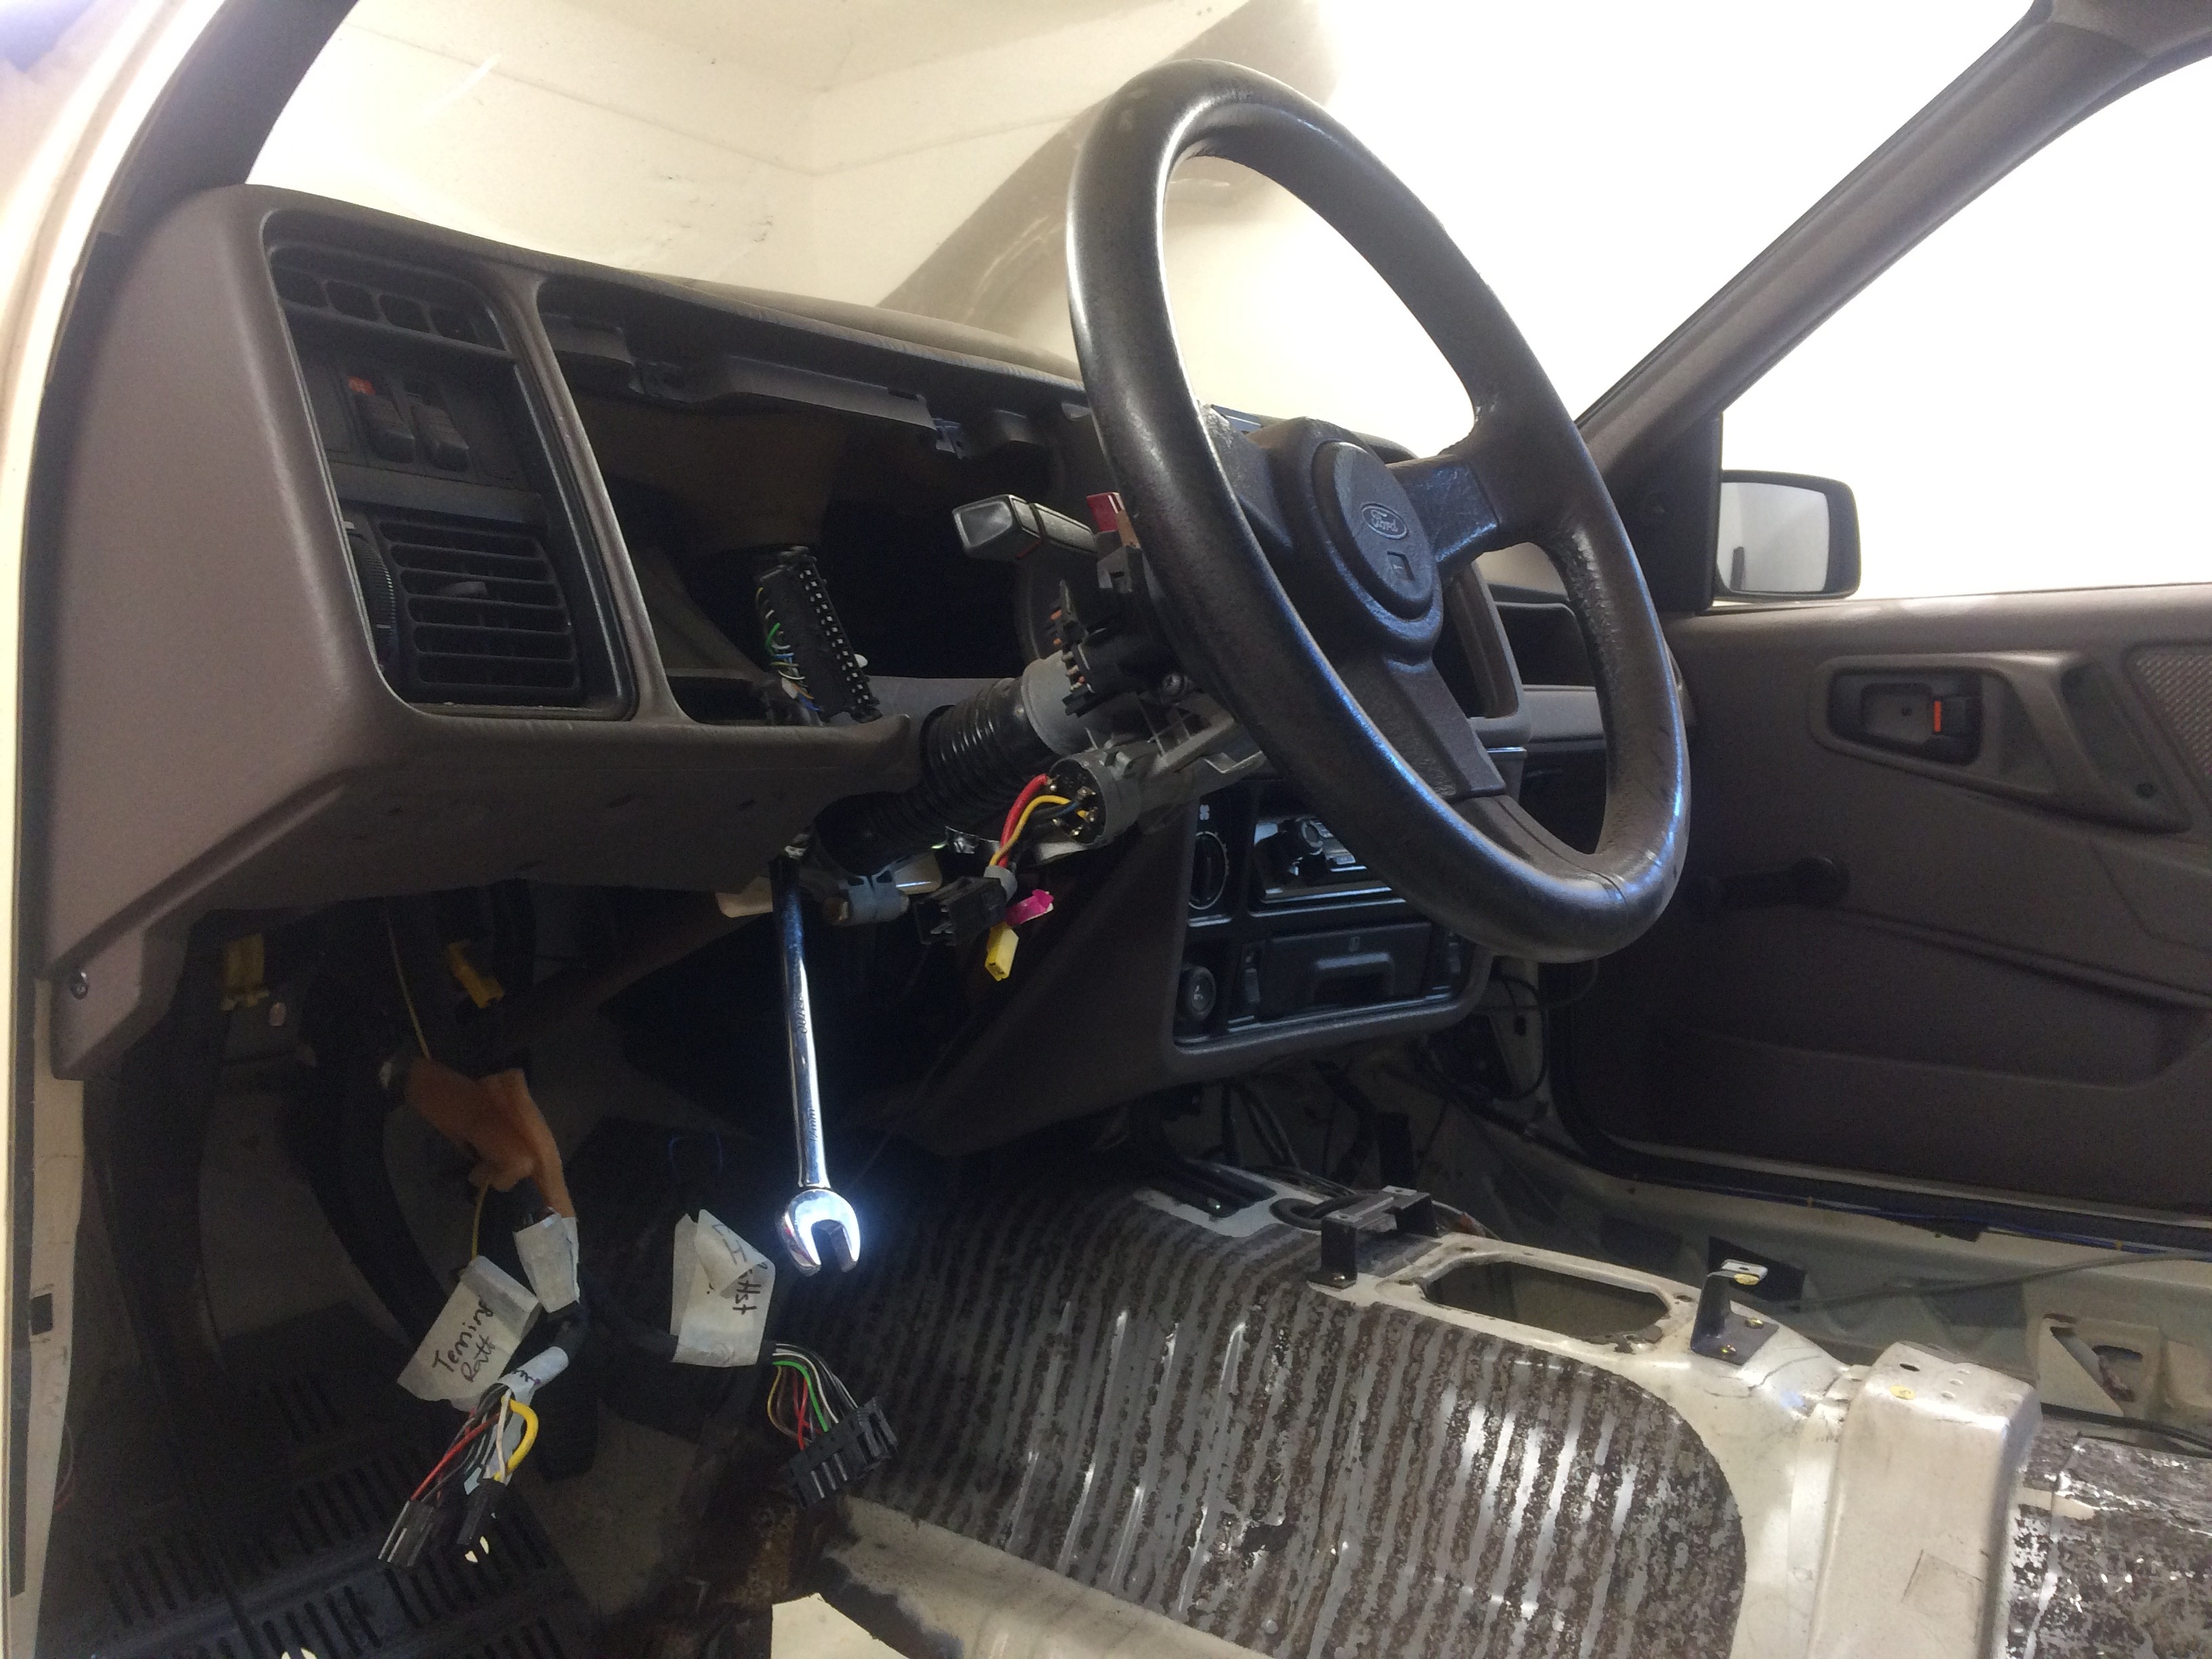
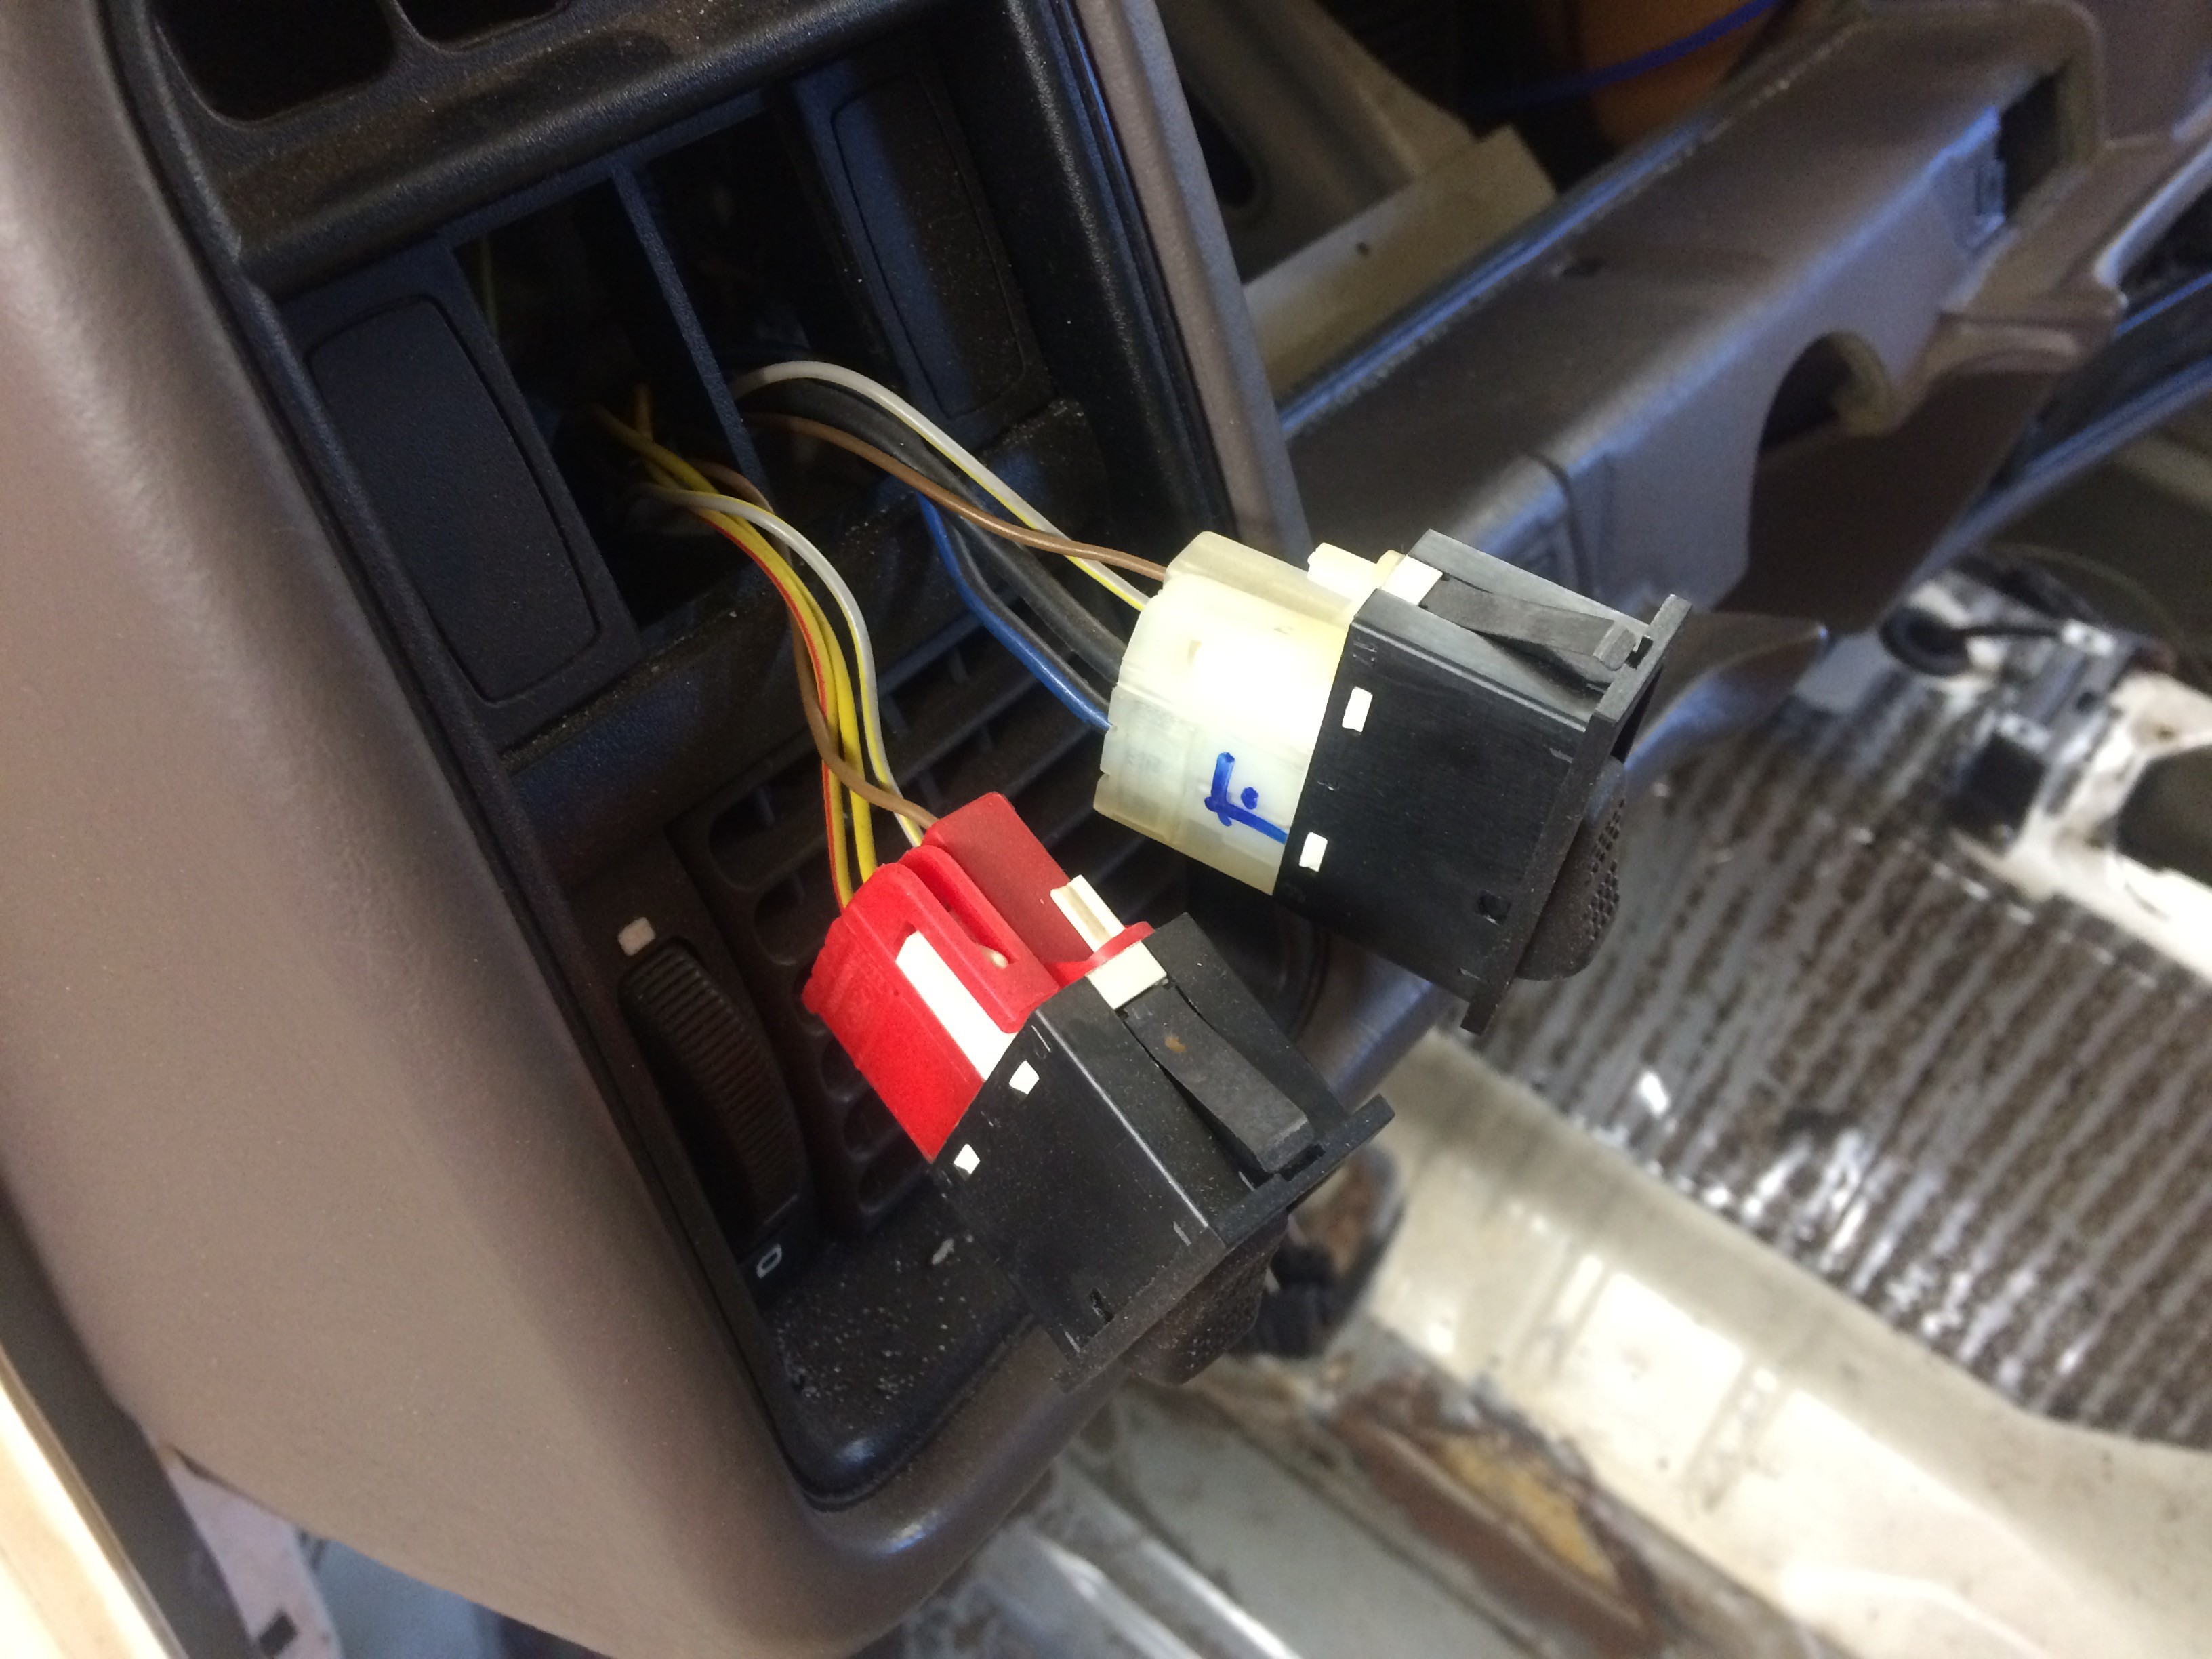
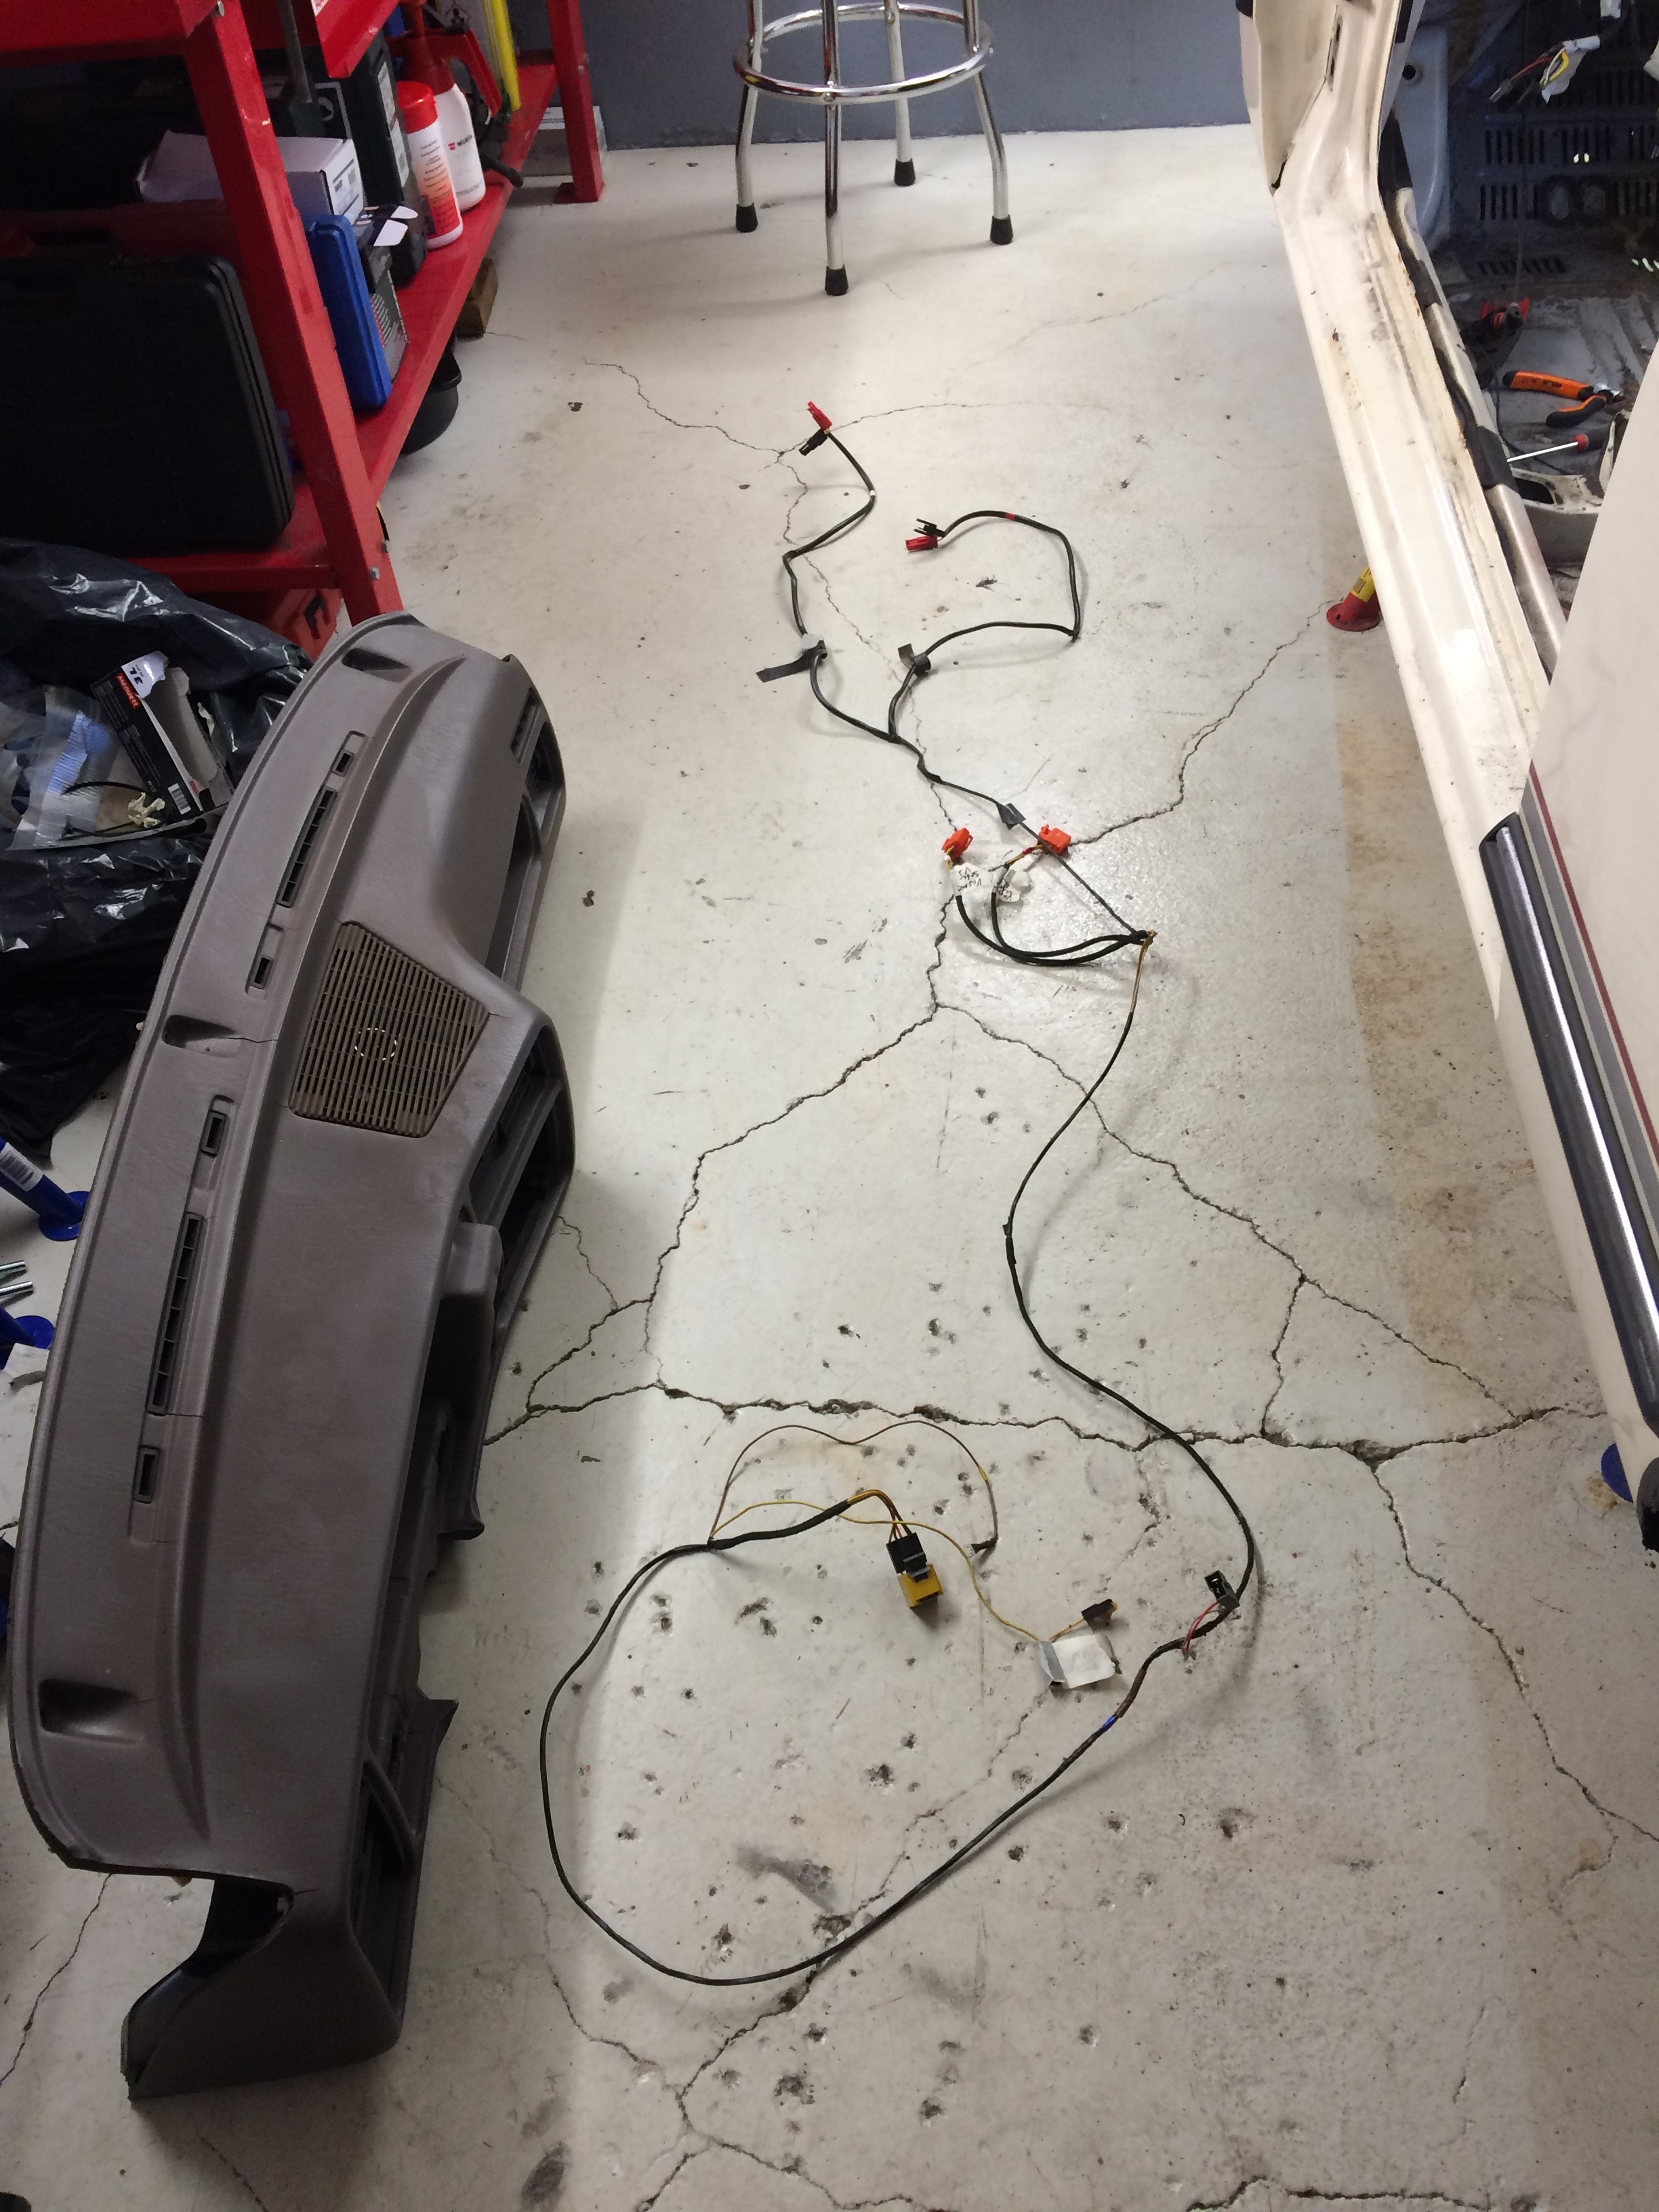
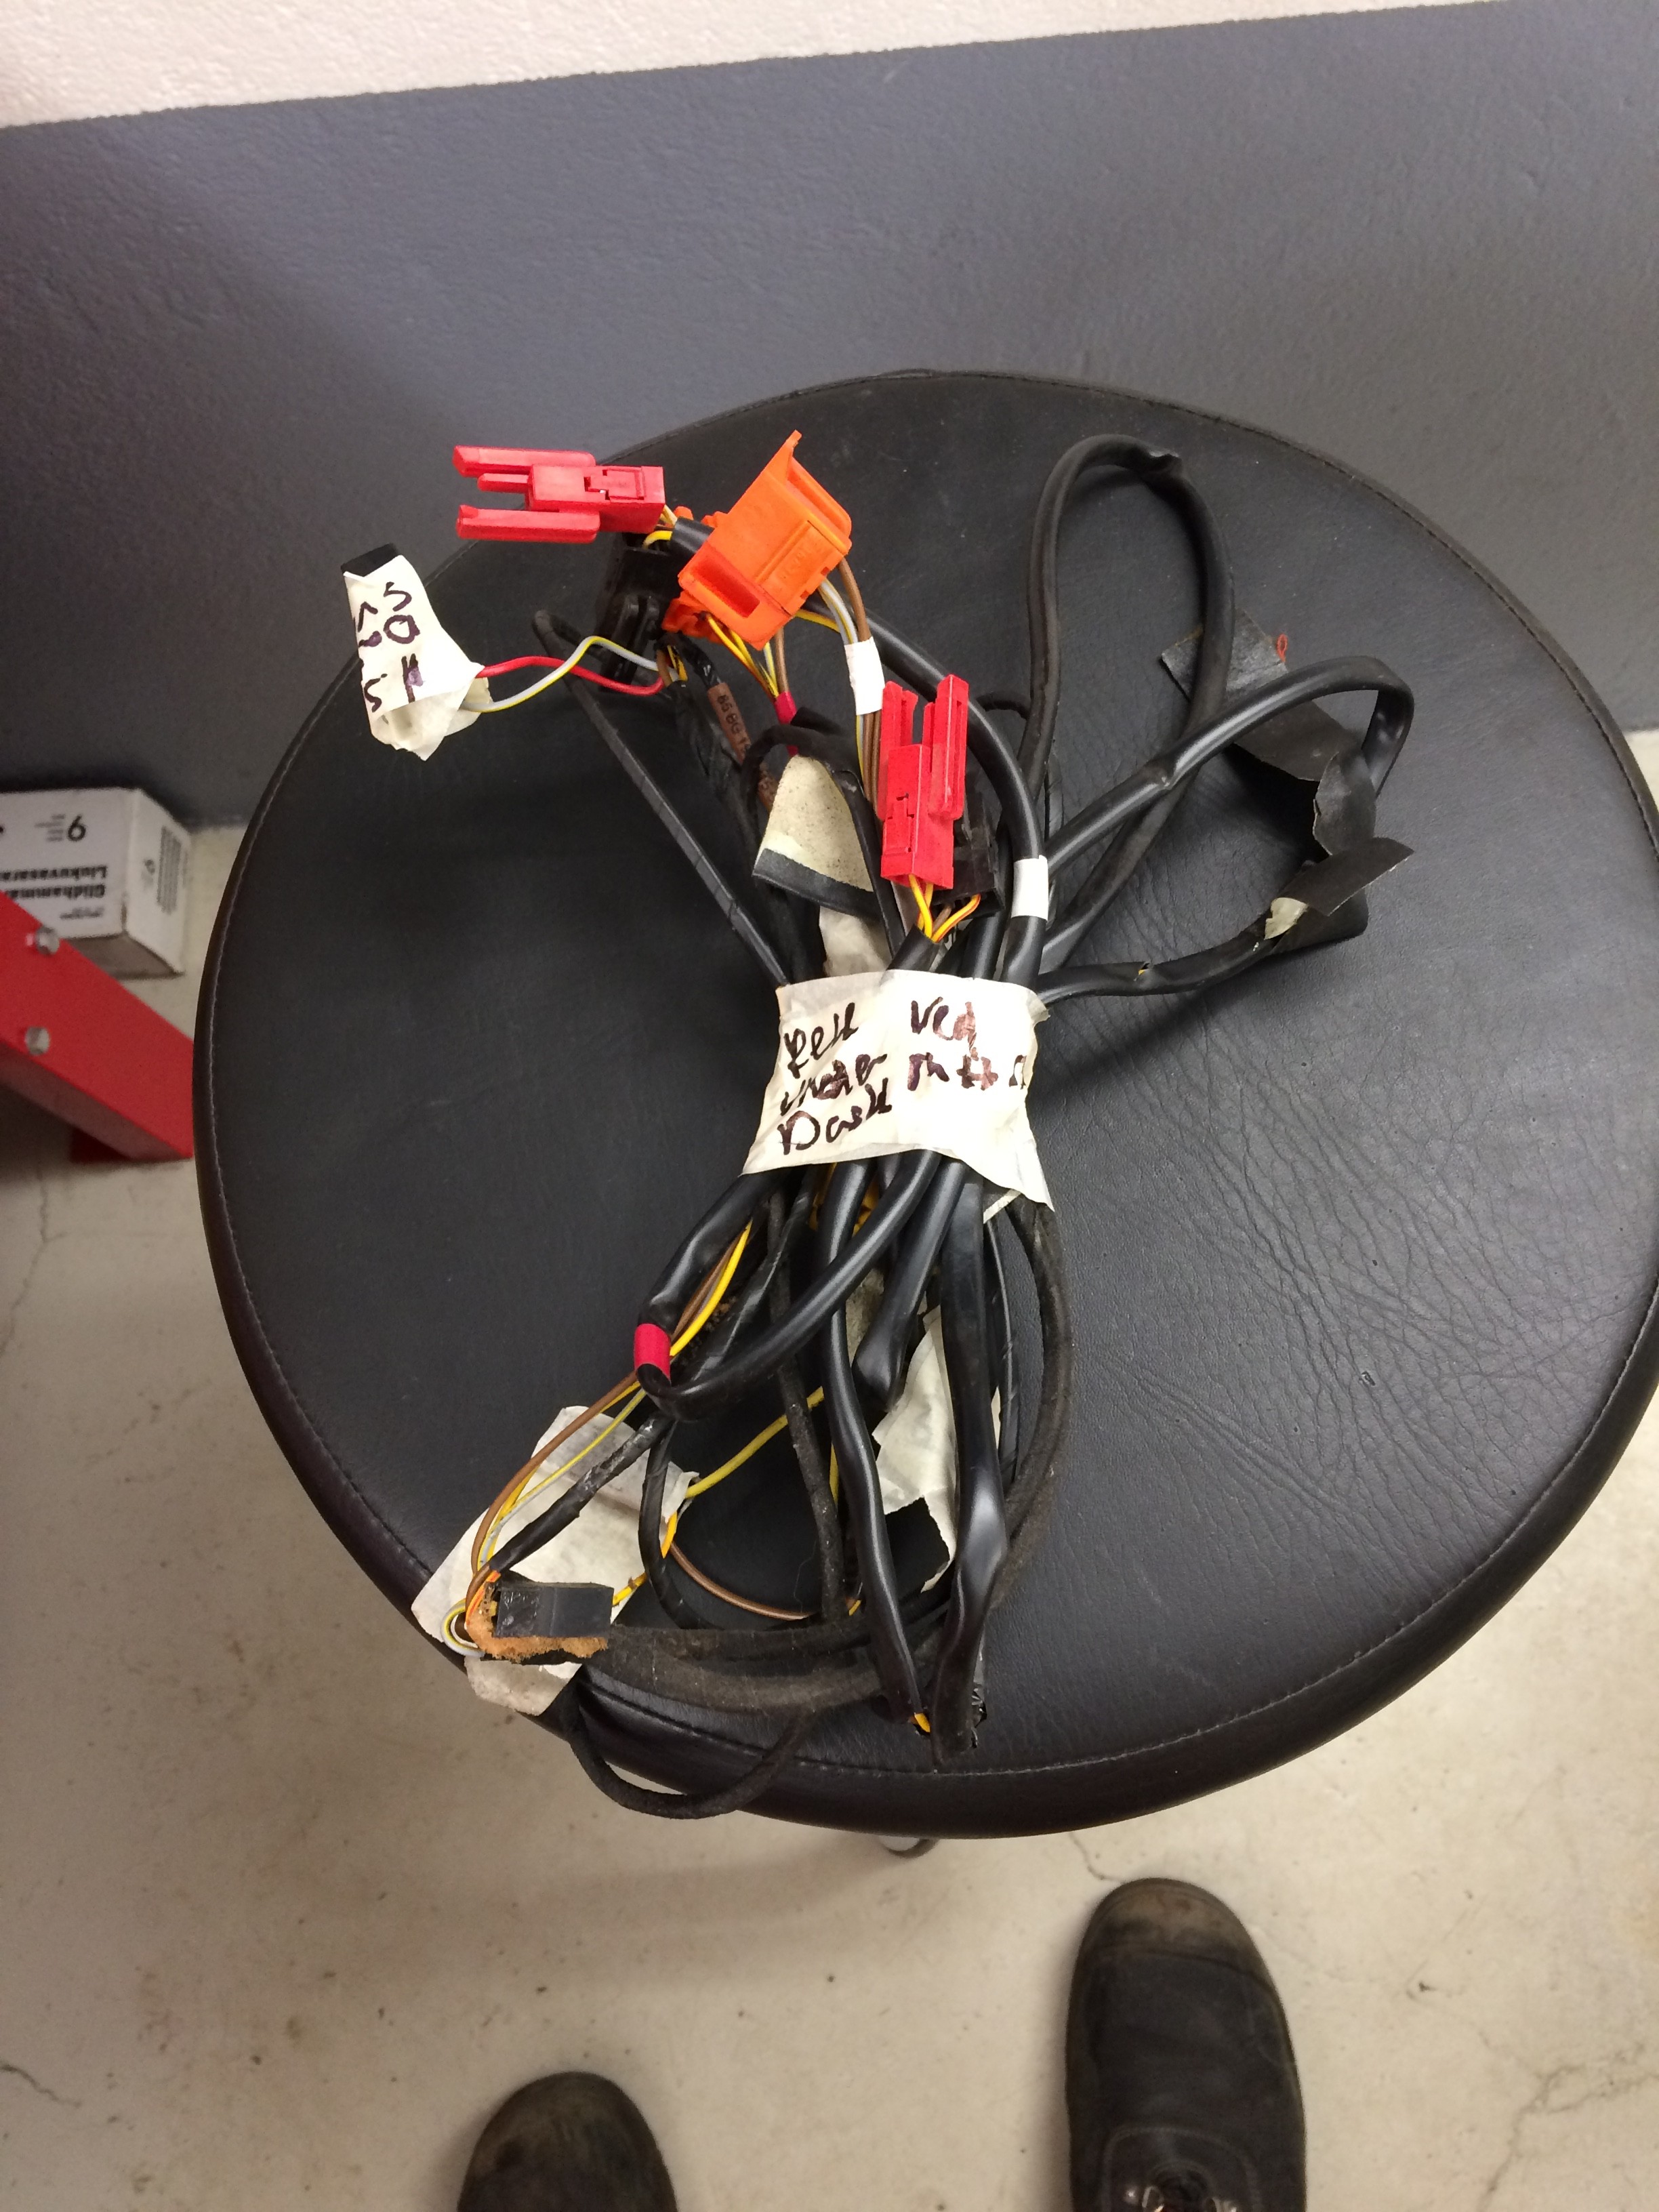
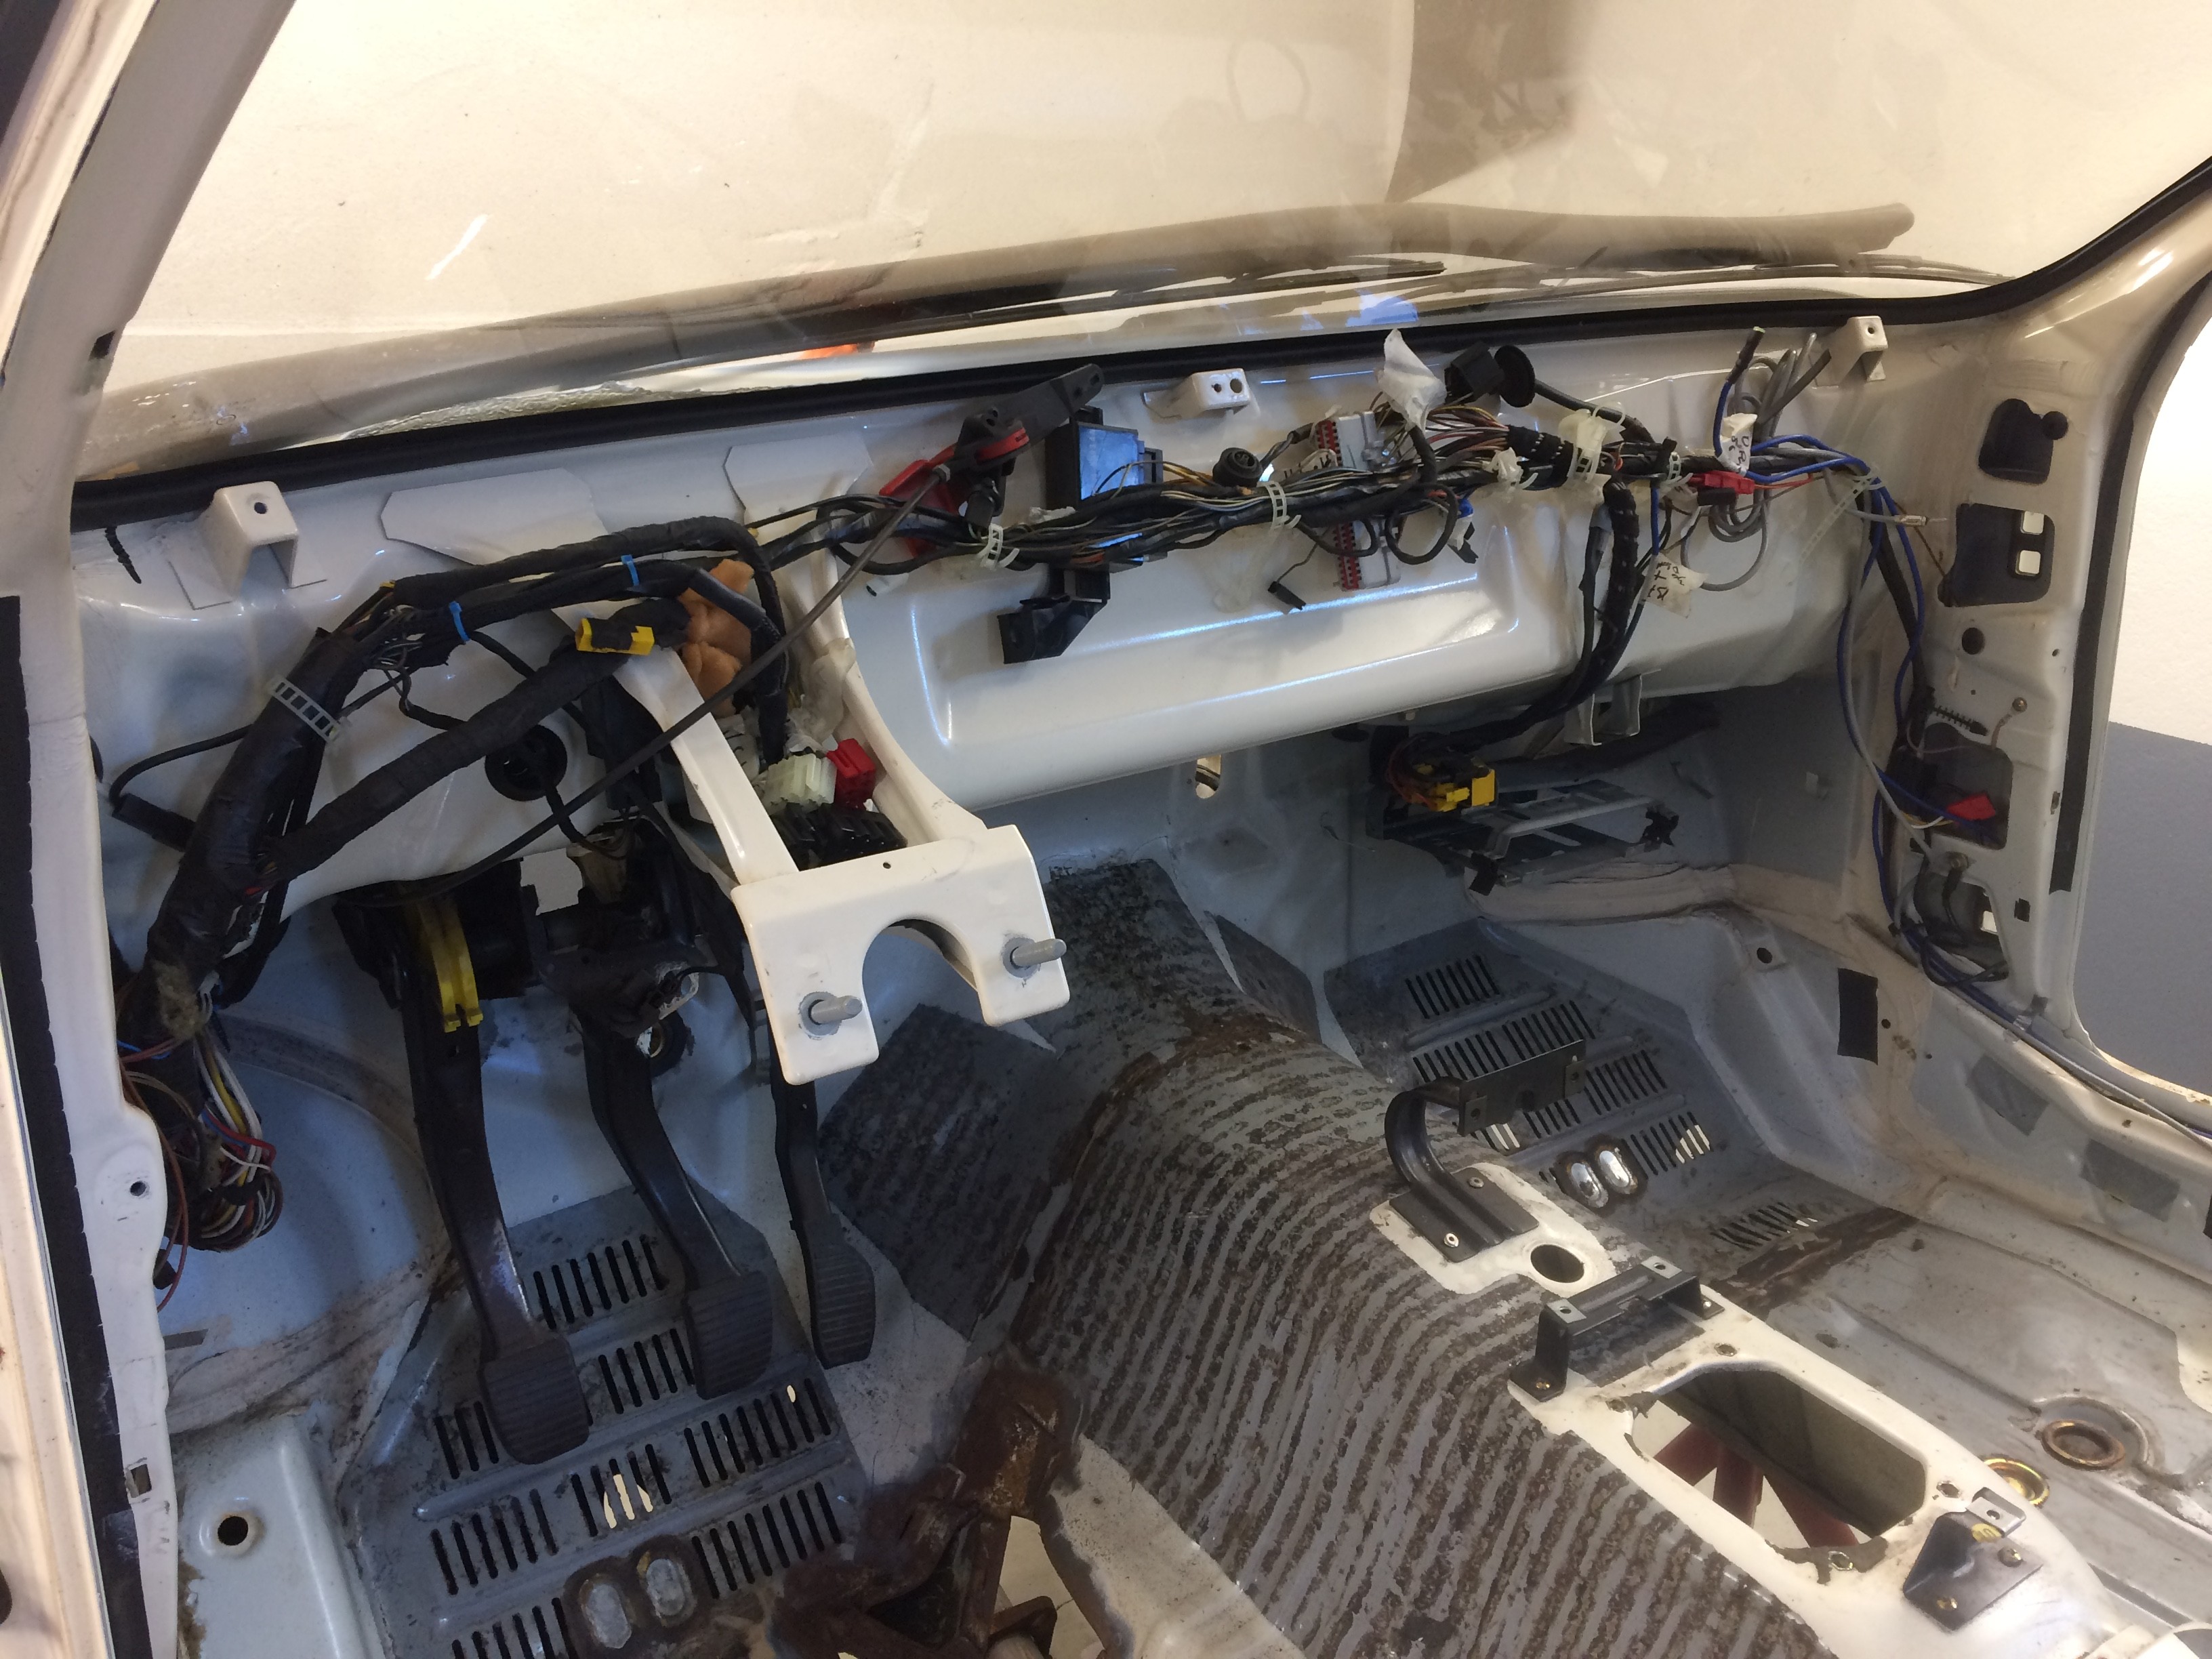
Then I "attacked" the dash and steering column. Off with the column, the bushing need to be replaced before mounting it back. Then removed the little bits that holds the dash in place. Switches, radio, contacts, loom.
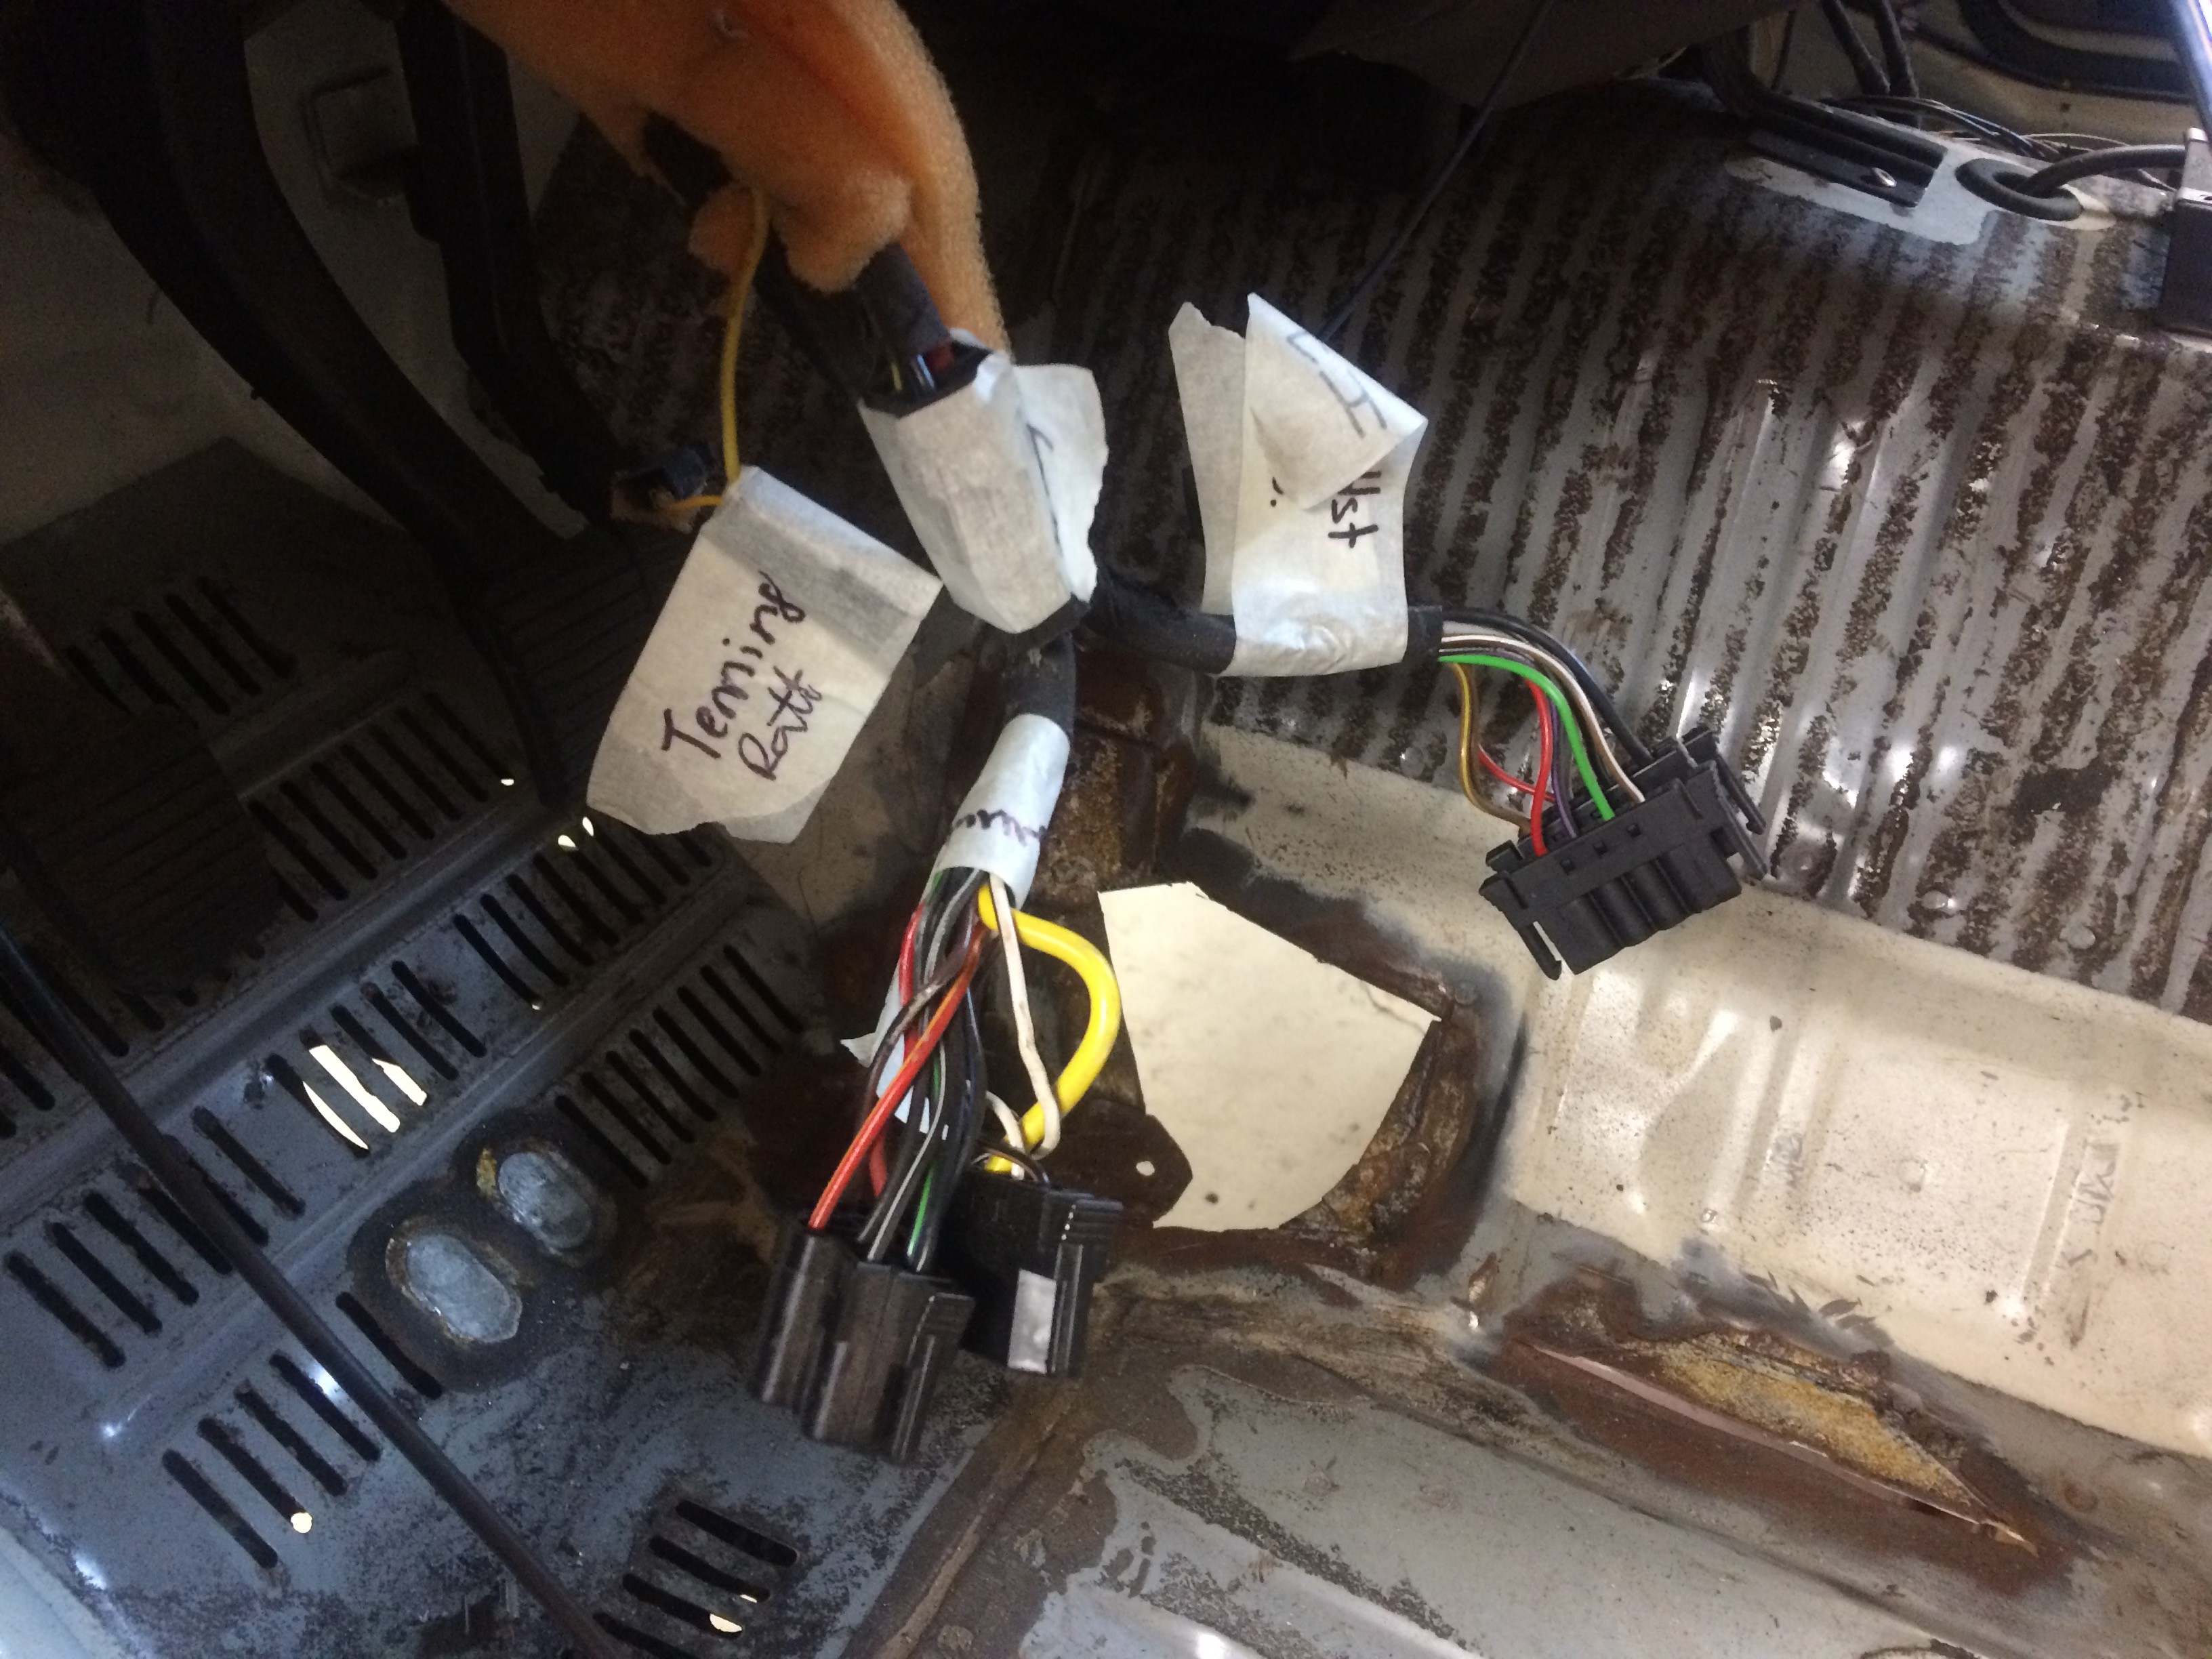
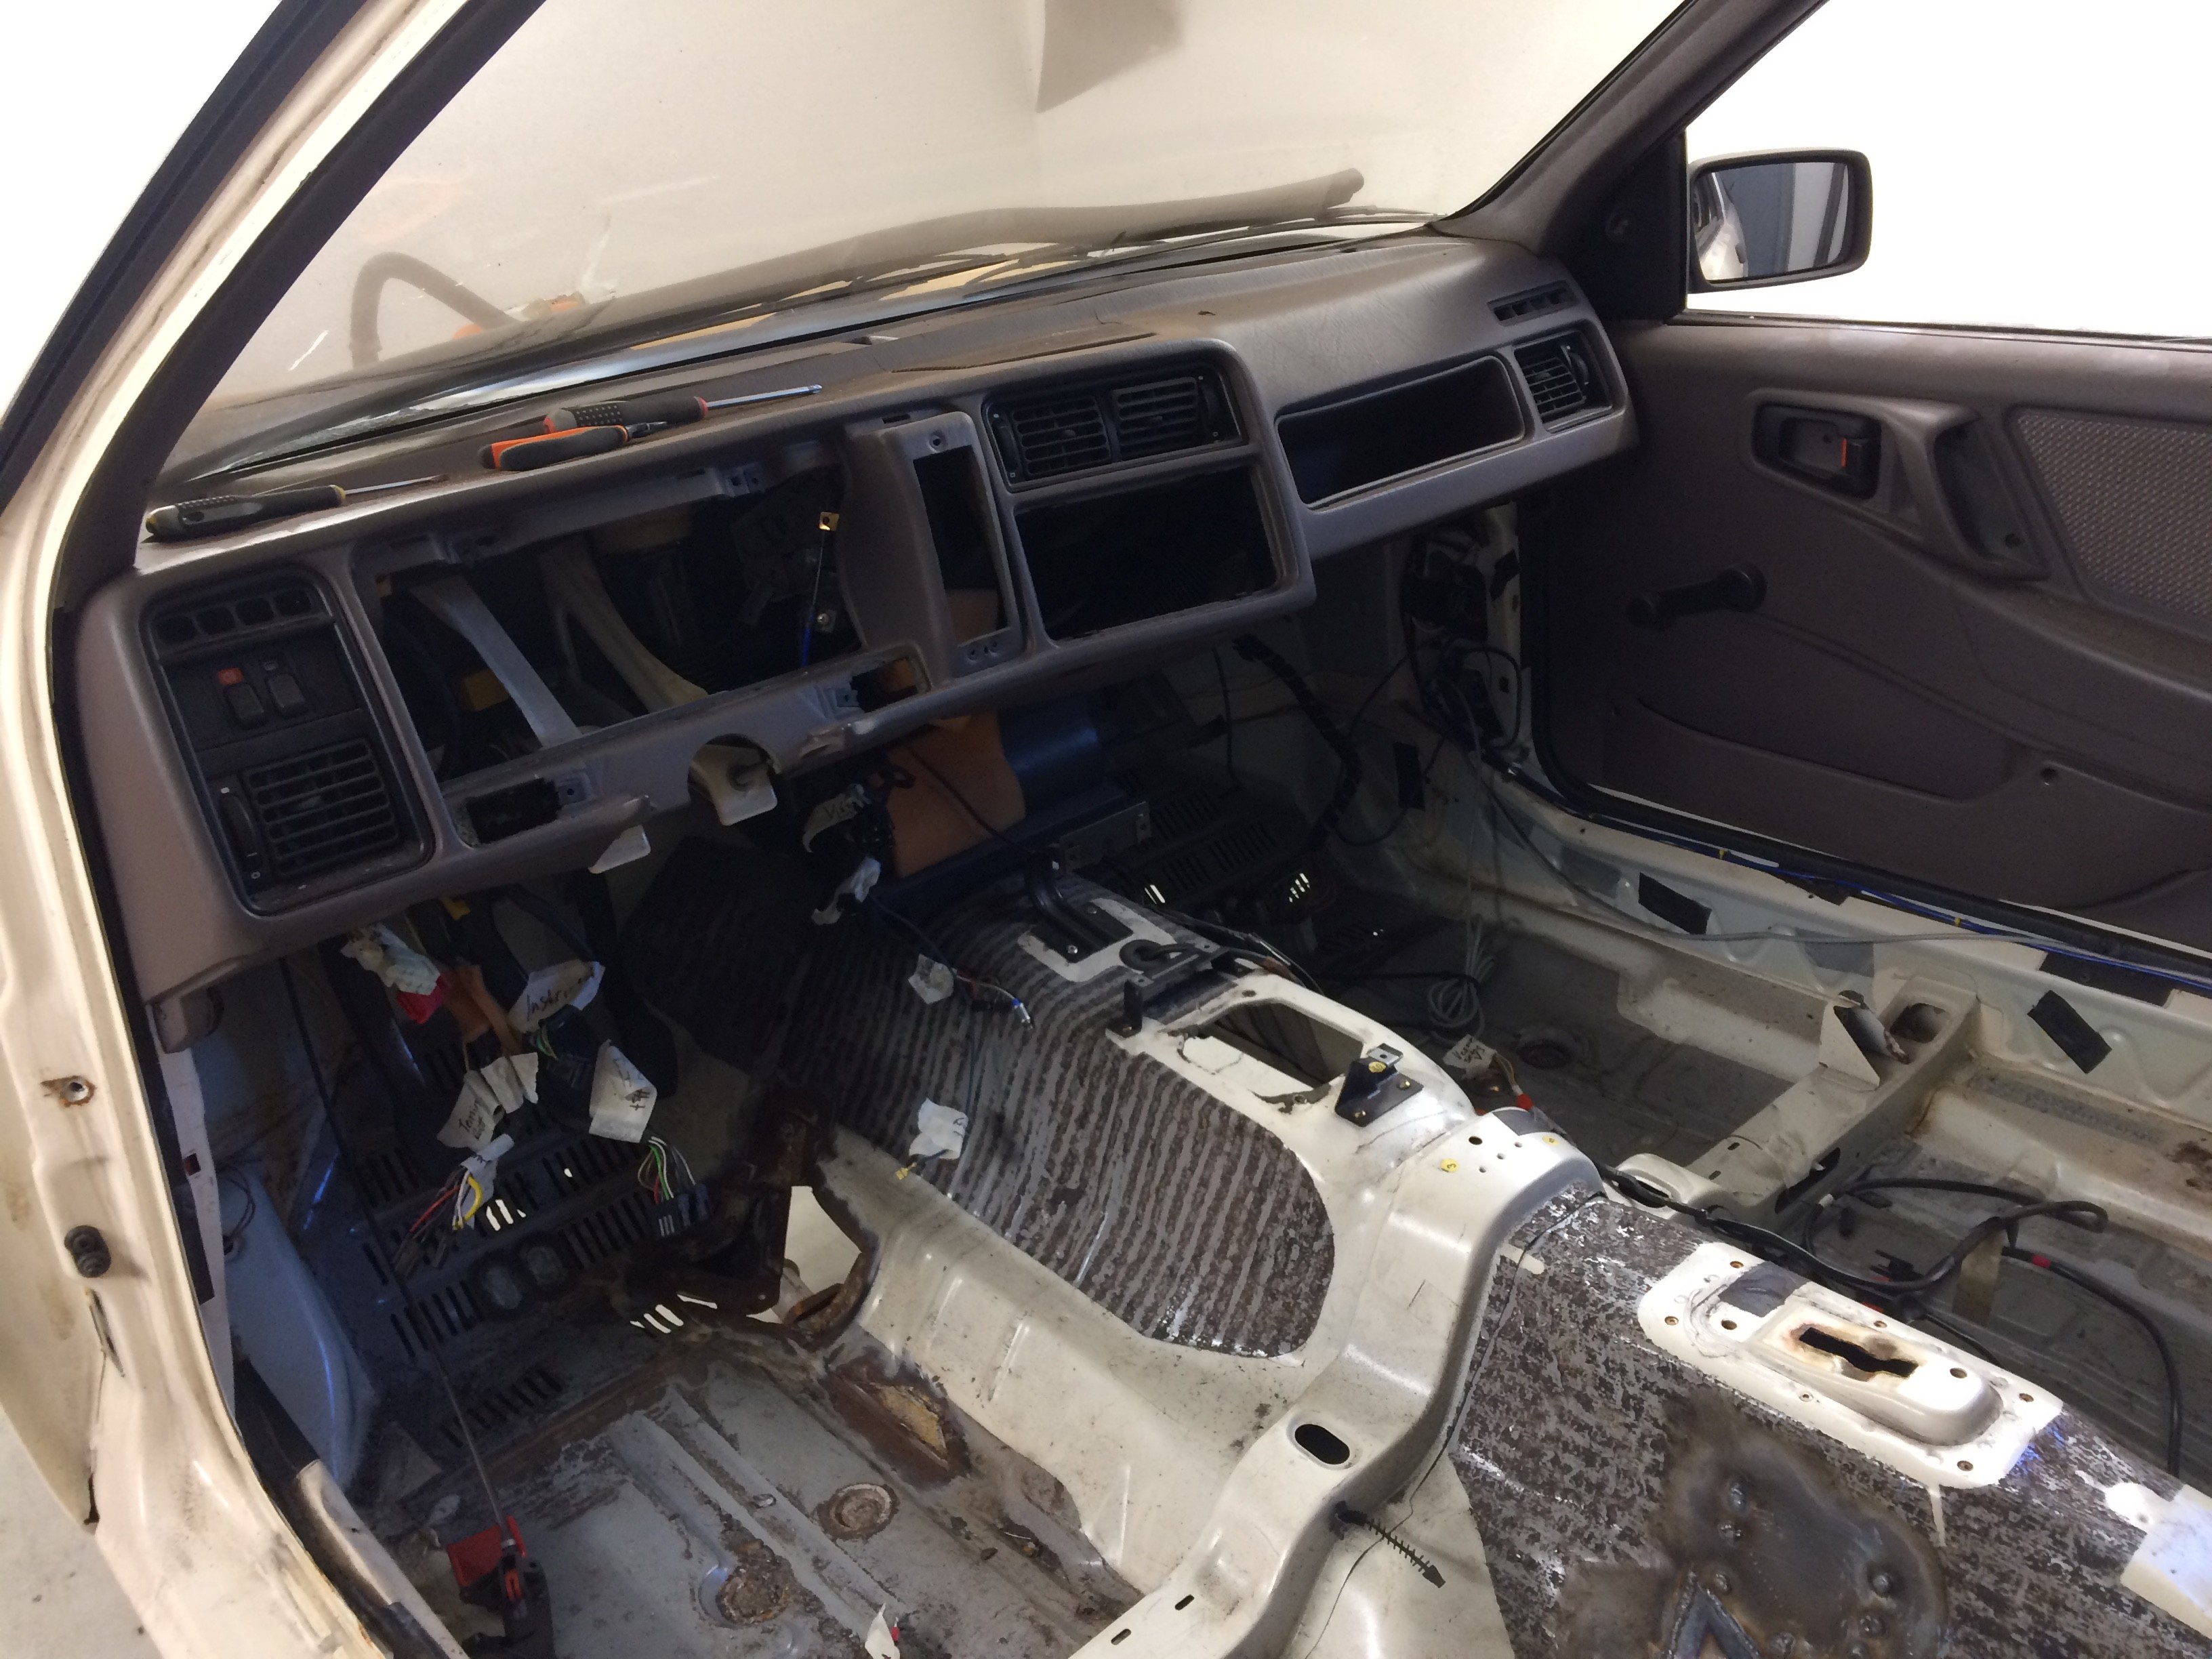
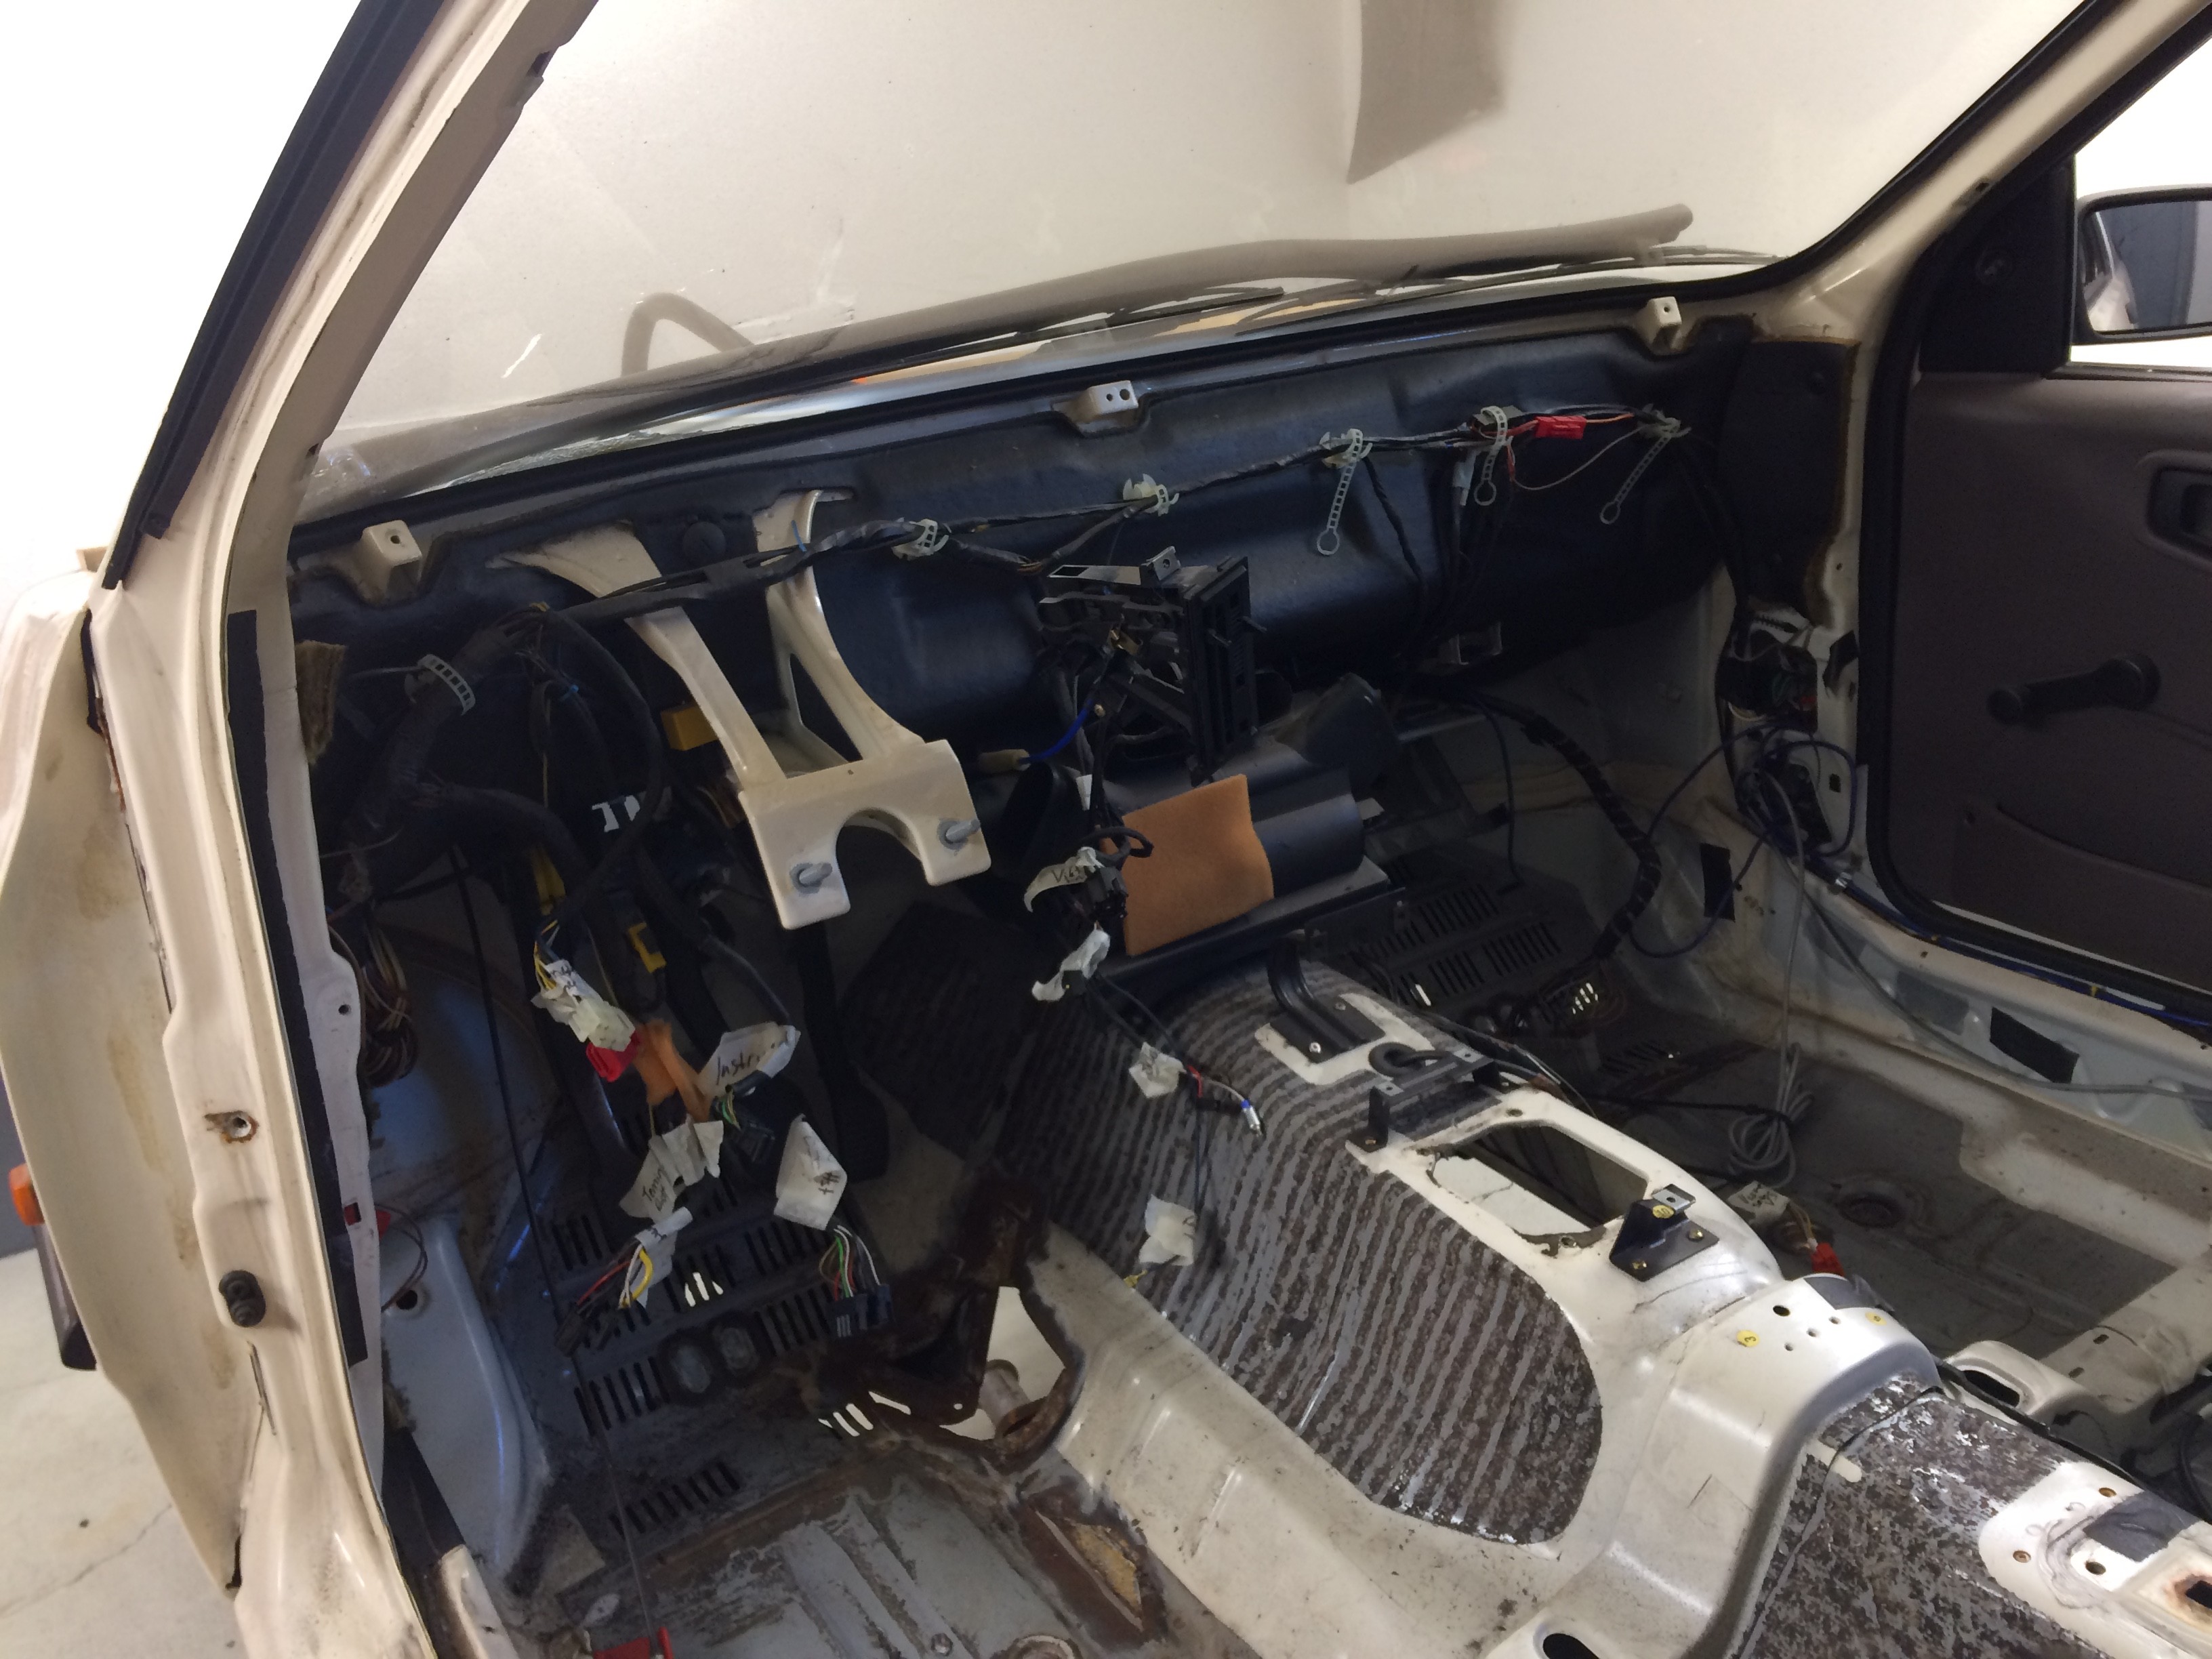
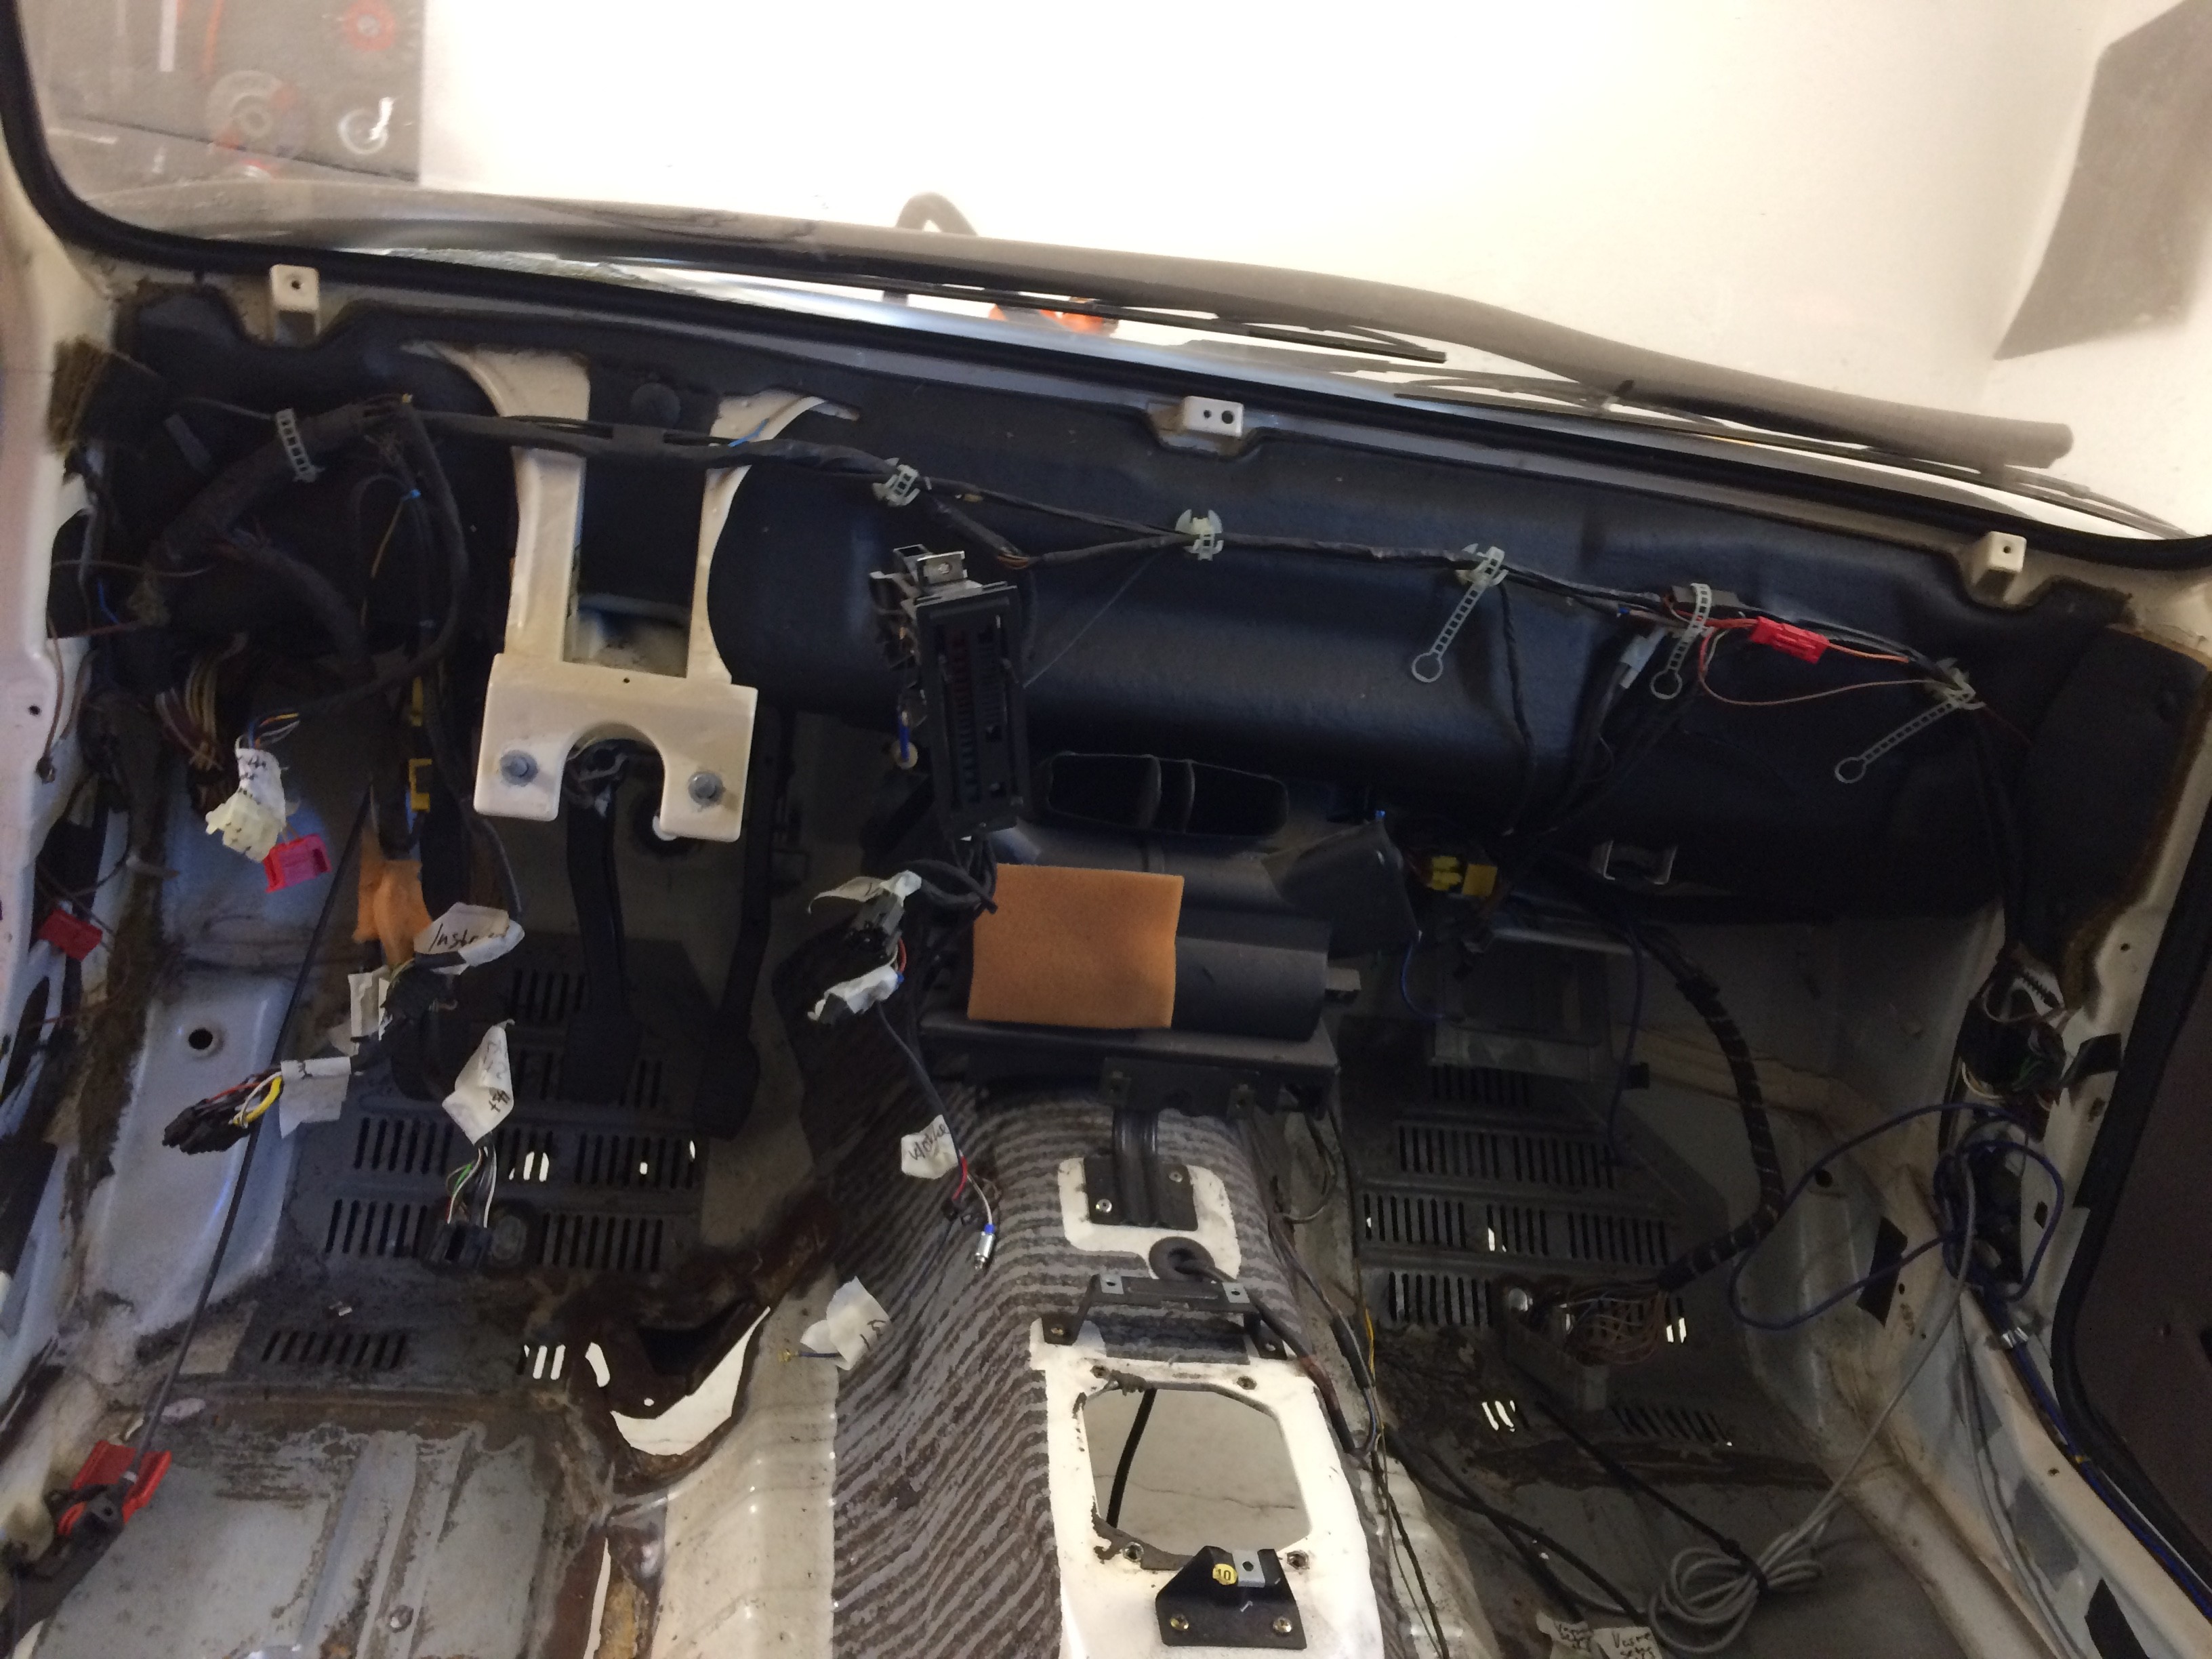
Used the battery drill and tok out the screws before removing lower and top dash Sooo much more space, again.. The sound deadning was removed, because race car Organized the loom soo it wont just lay on the floor when welding the rust. Removed the loom for the heater in the seats. Got it all out without destroying the loom
I have marked everything so the frustration is less when mounting it all back It is know ready for some rust welding. Time for some pictures 
Etter mye prat og motivasjon fra min bedre halvdel i huset. Har jeg kommet meg igang med Sierran Hjelper med � f� litt kloke ord som " ikke se ALT arbeidet, se kun en ting om gangen og fullf�r en ting om gangen". S� � da f�r jeg pr�ve p� det fremover.


Mvh
Kjellsen
I removed the doors today with the rubbergasket. So the light in my little garage lights up the inside the car better and for SPACE :P MUCH easier to work on the car now.
Then I "attacked" the dash and steering column. Off with the column, the bushing need to be replaced before mounting it back. Then removed the little bits that holds the dash in place. Switches, radio, contacts, loom.
Used the battery drill and tok out the screws before removing lower and top dash
I have marked everything so the frustration is less when mounting it all back
It is know ready for some rust welding. Time for some pictures Etter mye prat og motivasjon fra min bedre halvdel i huset. Har jeg kommet meg igang med Sierran
Mvh
Kjellsen
06-07-2017, 08:59 AM
#63
Wahay!! I've lost my Virginity!!
Thread Starter
I got out and welded a little piece of metal yesterday. It had angles etc, so it took some time. Then I grinded down earlier welds and painted rustprimer on them. So it stops rusting againg until I am painting the floor. I also ordered a new steel plate, 2mm 1000mm x 500 mm. It is on the gearbox tunel. So if the flywheel want to take a trip, it is the oem spec thickness.
19-07-2017, 08:06 PM
#64
Wahay!! I've lost my Virginity!!
Thread Starter
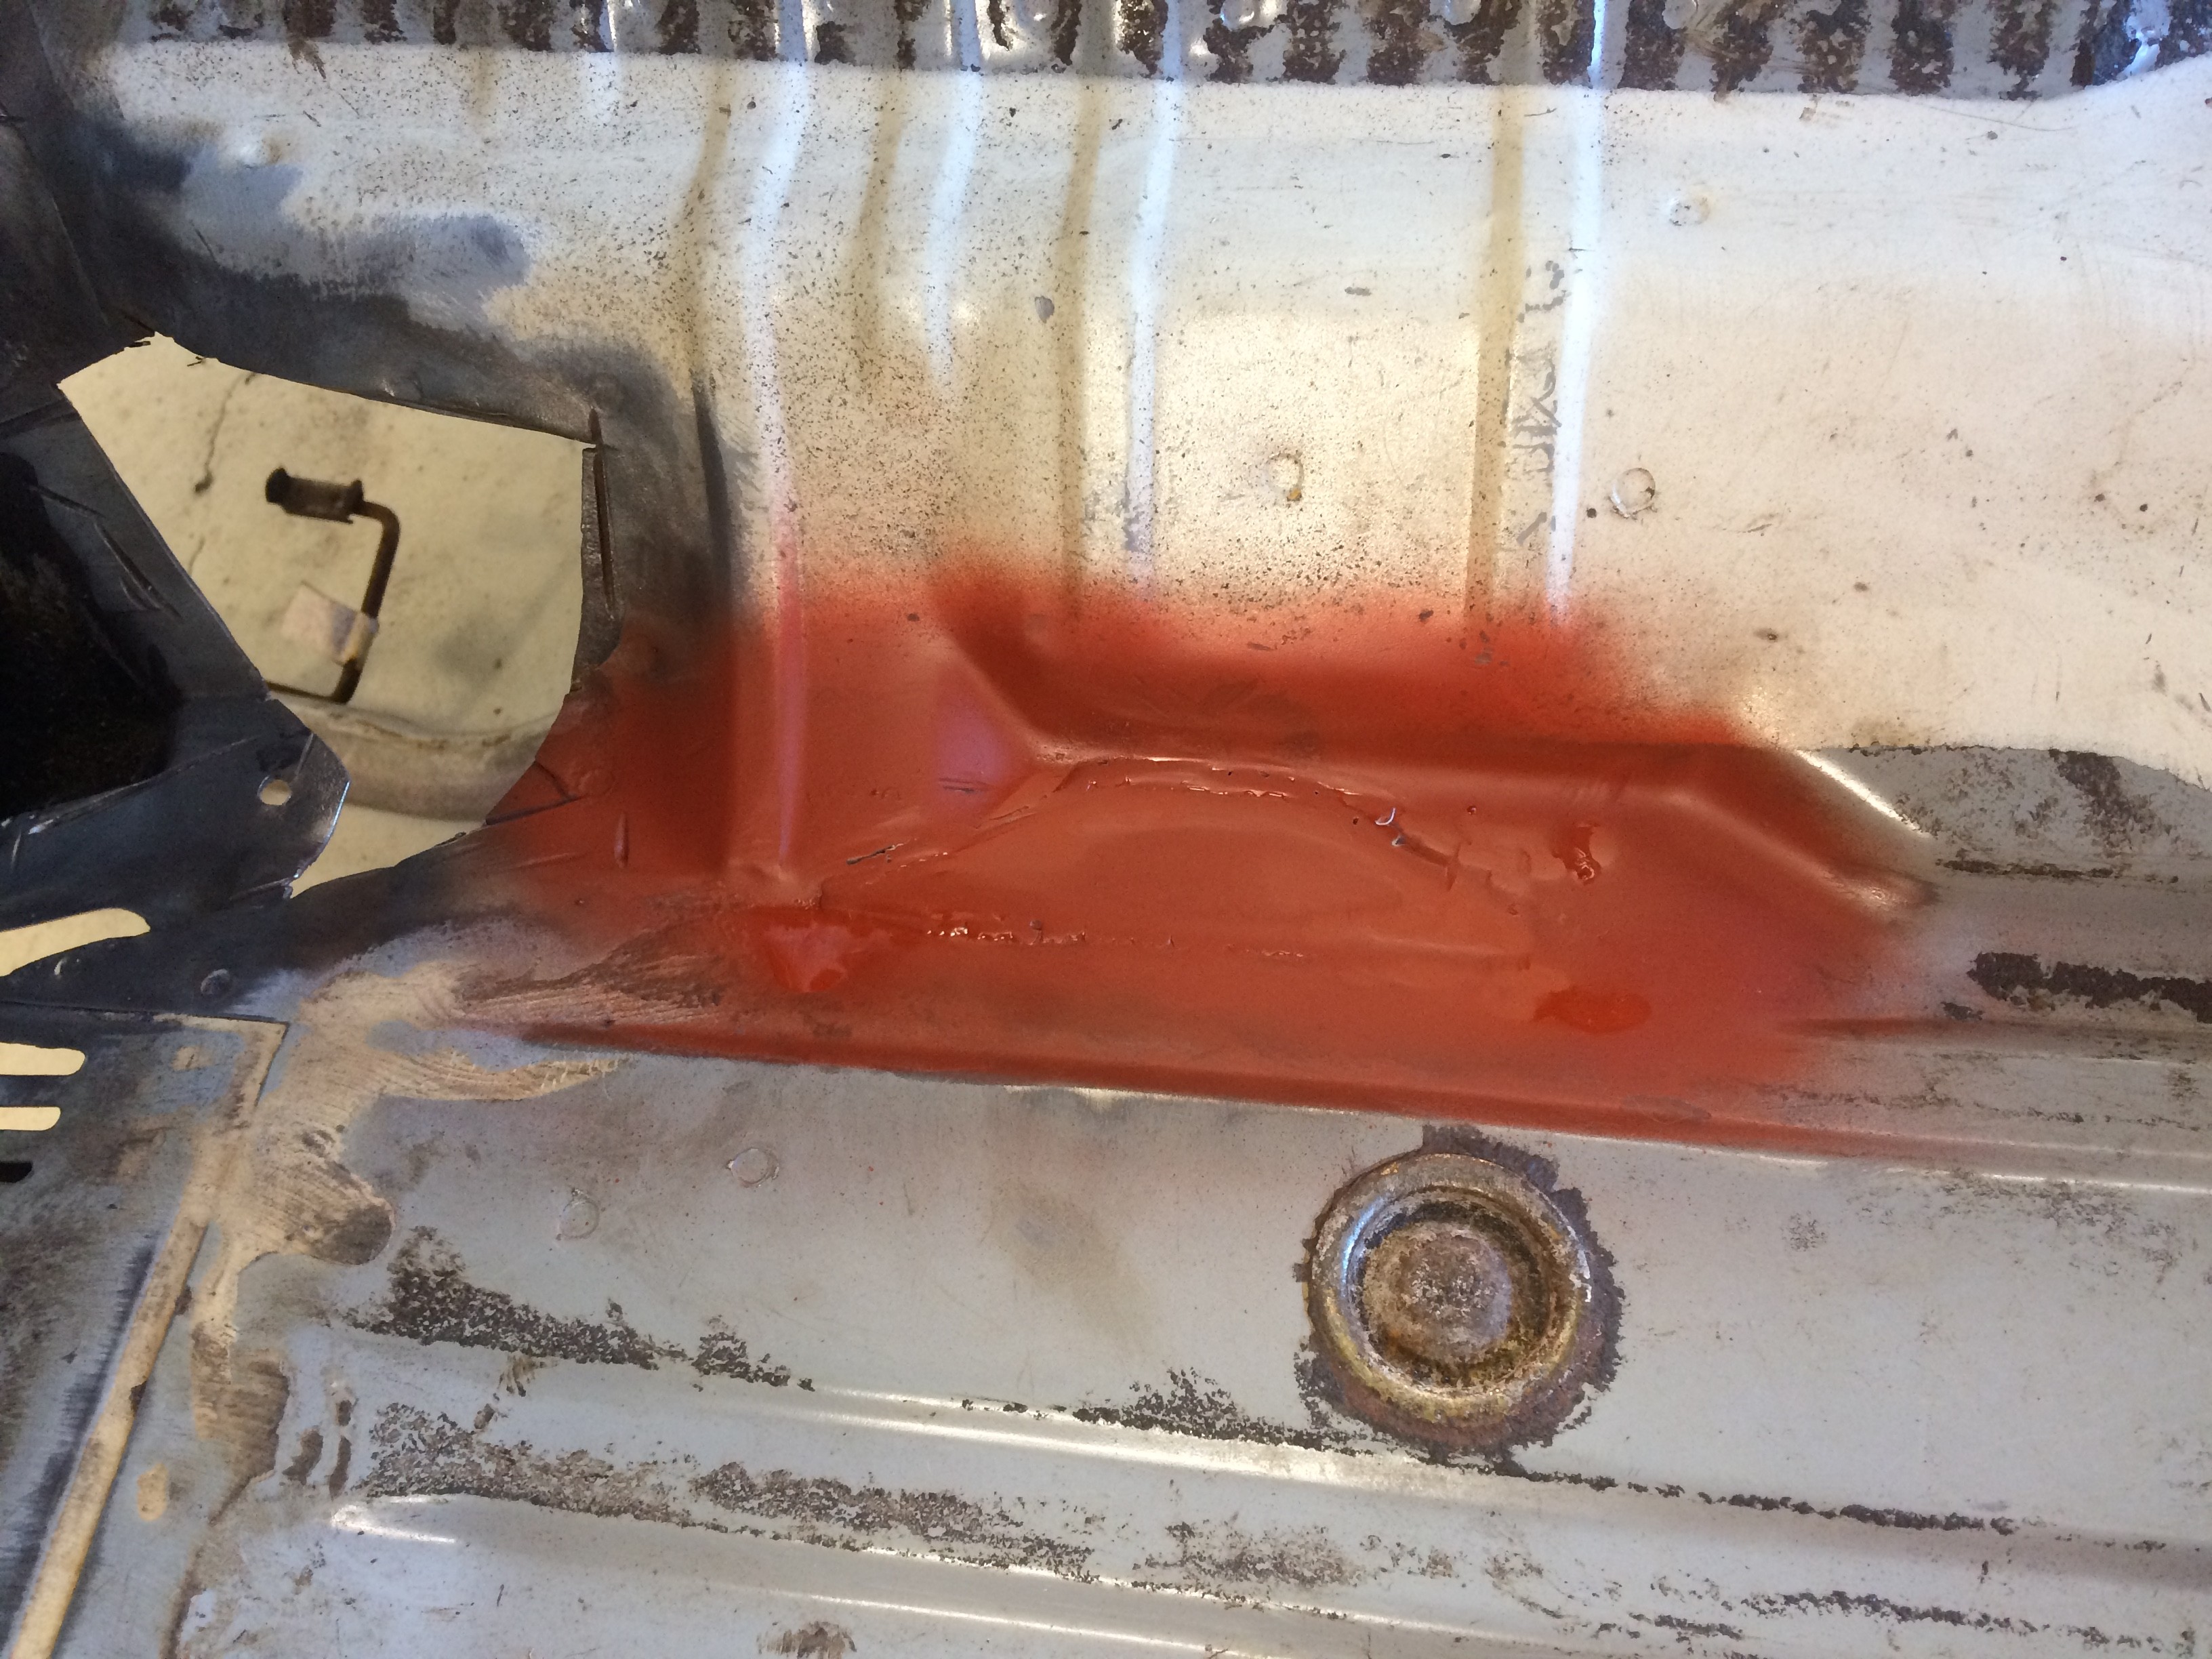
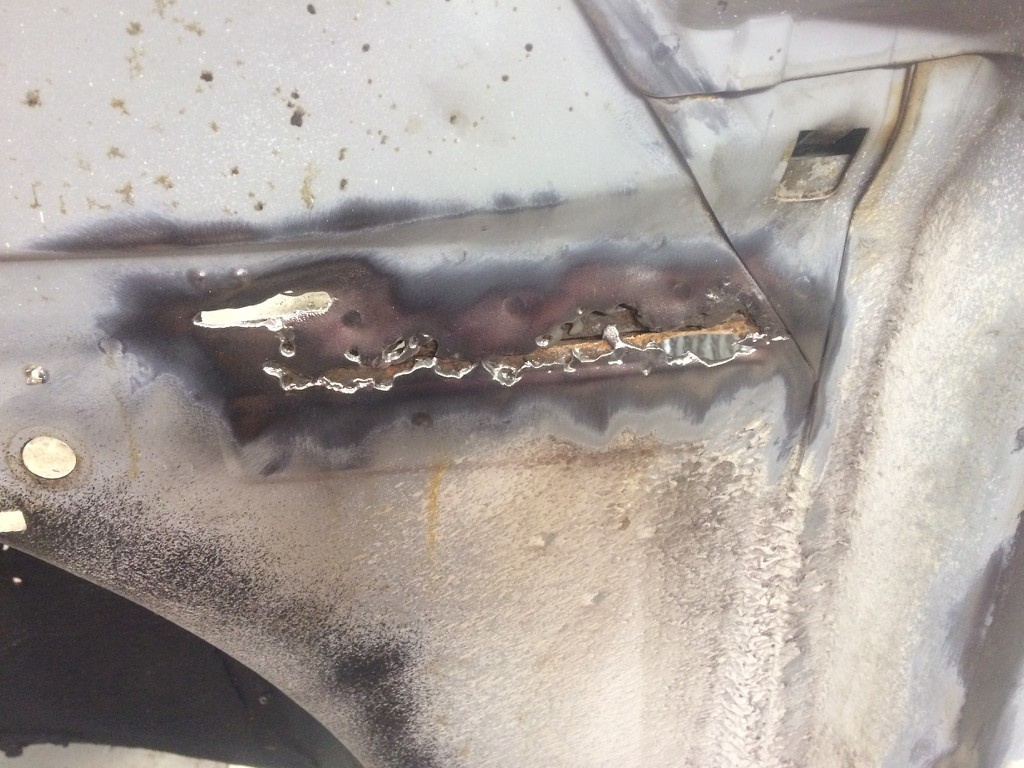
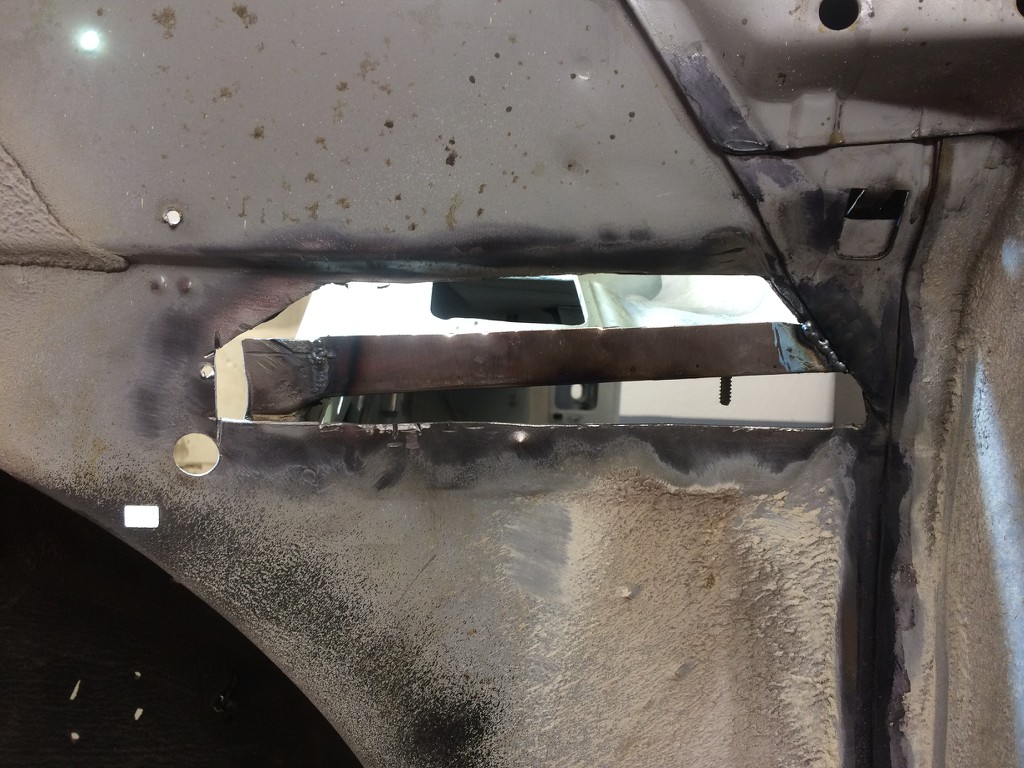
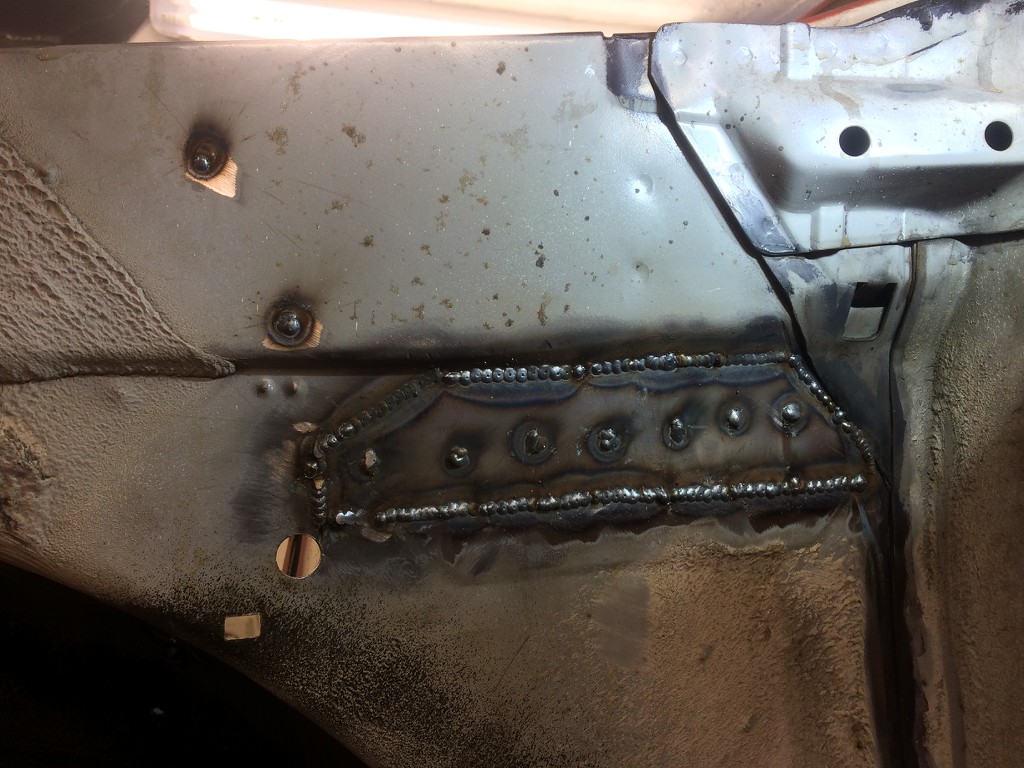
Long time since an update! But.. No excuse.. hehe! I attacked the most difficult part on the gearbox/floor place. Where it was a ton of rust. So after some grinding with the wheelbrush. I painted the surface with some Volvo welding primer, good stuff that does the job. Cut out a piece and got it tacked in after "some" grinding. Welded it all around and then cut out a new piece to be welded in I was very happy in the end after the work, because dealing with 2mm sheetmetal is not easy I only need to grind it down flush before fiting a 0.9mm plate over the same place, as it is a 2 layer piece. I hope the other side goes faster as I know now what I am facing
Some pictures of the work
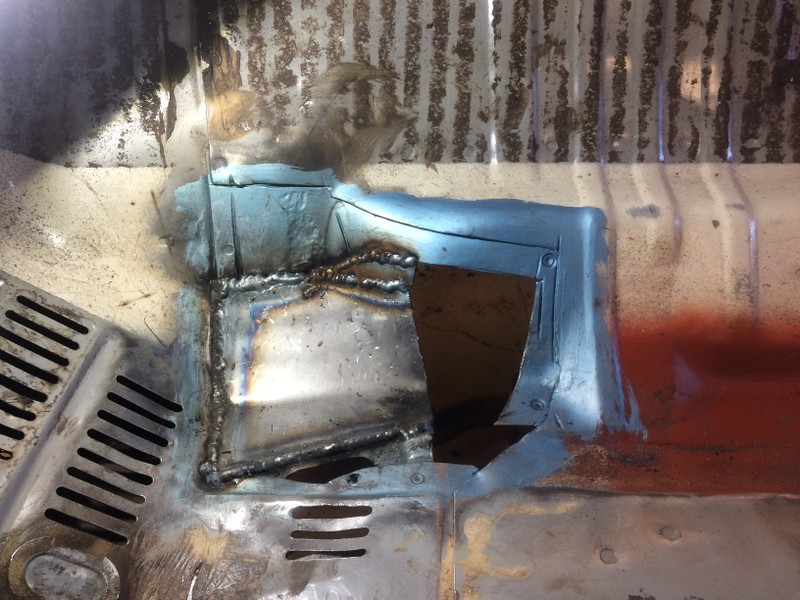

I was very happy in the end after the work, because dealing with 2mm sheetmetal is not easy I only need to grind it down flush before fiting a 0.9mm plate over the same place, as it is a 2 layer piece. I hope the other side goes faster as I know now what I am facing Some pictures of the work
25-07-2017, 02:43 PM
#65
Wahay!! I've lost my Virginity!!
Thread Starter
Well.. I have been back and forth before about selling the Sierra. But this is not the case as I am selling my roll cage. You cant se the ad as it is on a Norwegian site, but I am certain someone on the FordClubNorway forum thinking: Oh god! not again... hehe!
It is being sold because I want something else. I want to have the choice to one day say: I want to race a weekend in the Norwegian Championship in GT5 class or do a hill climb. I contacted Motorsportdeler in Norway. As they are certified Safety Devices dealer. I wrote that I want a full roll cage 6 point with cross and harness bar in the rear and side bars in front. Still waiting for a reply, I did it last night. So need to have som patient
I have then opportunity to get in the both worlds. Have a road car and sometimes race when I get the chance. Yes, many have said it is ton a job to take the roll cage out and in etc. Not for me, maybe when I am 90 years old I dont care, its my car and I love what I do! This is my passion
I have also the opportunity to use the rear seats if I am going on a long trip.. Sooo.. Where is the rear seats.. Now before you say: I told you so or you shouldn`t done that... I was in because racecar mode x 10 when I started removing everything. So I hope to get a second hand rear seats one day
Best regards
Kjellsen

hehe! It is being sold because I want something else. I want to have the choice to one day say: I want to race a weekend in the Norwegian Championship in GT5 class or do a hill climb. I contacted Motorsportdeler in Norway. As they are certified Safety Devices dealer. I wrote that I want a full roll cage 6 point with cross and harness bar in the rear and side bars in front. Still waiting for a reply, I did it last night. So need to have som patient
I have then opportunity to get in the both worlds. Have a road car and sometimes race when I get the chance. Yes, many have said it is ton a job to take the roll cage out and in etc. Not for me, maybe when I am 90 years old
I dont care, its my car and I love what I do! This is my passion I have also the opportunity to use the rear seats if I am going on a long trip.. Sooo.. Where is the rear seats.. Now before you say: I told you so or you shouldn`t done that... I was in because racecar mode x 10 when I started removing everything. So I hope to get a second hand rear seats one day
Best regards
Kjellsen
26-07-2017, 08:12 PM
#66
Wahay!! I've lost my Virginity!!
Thread Starter
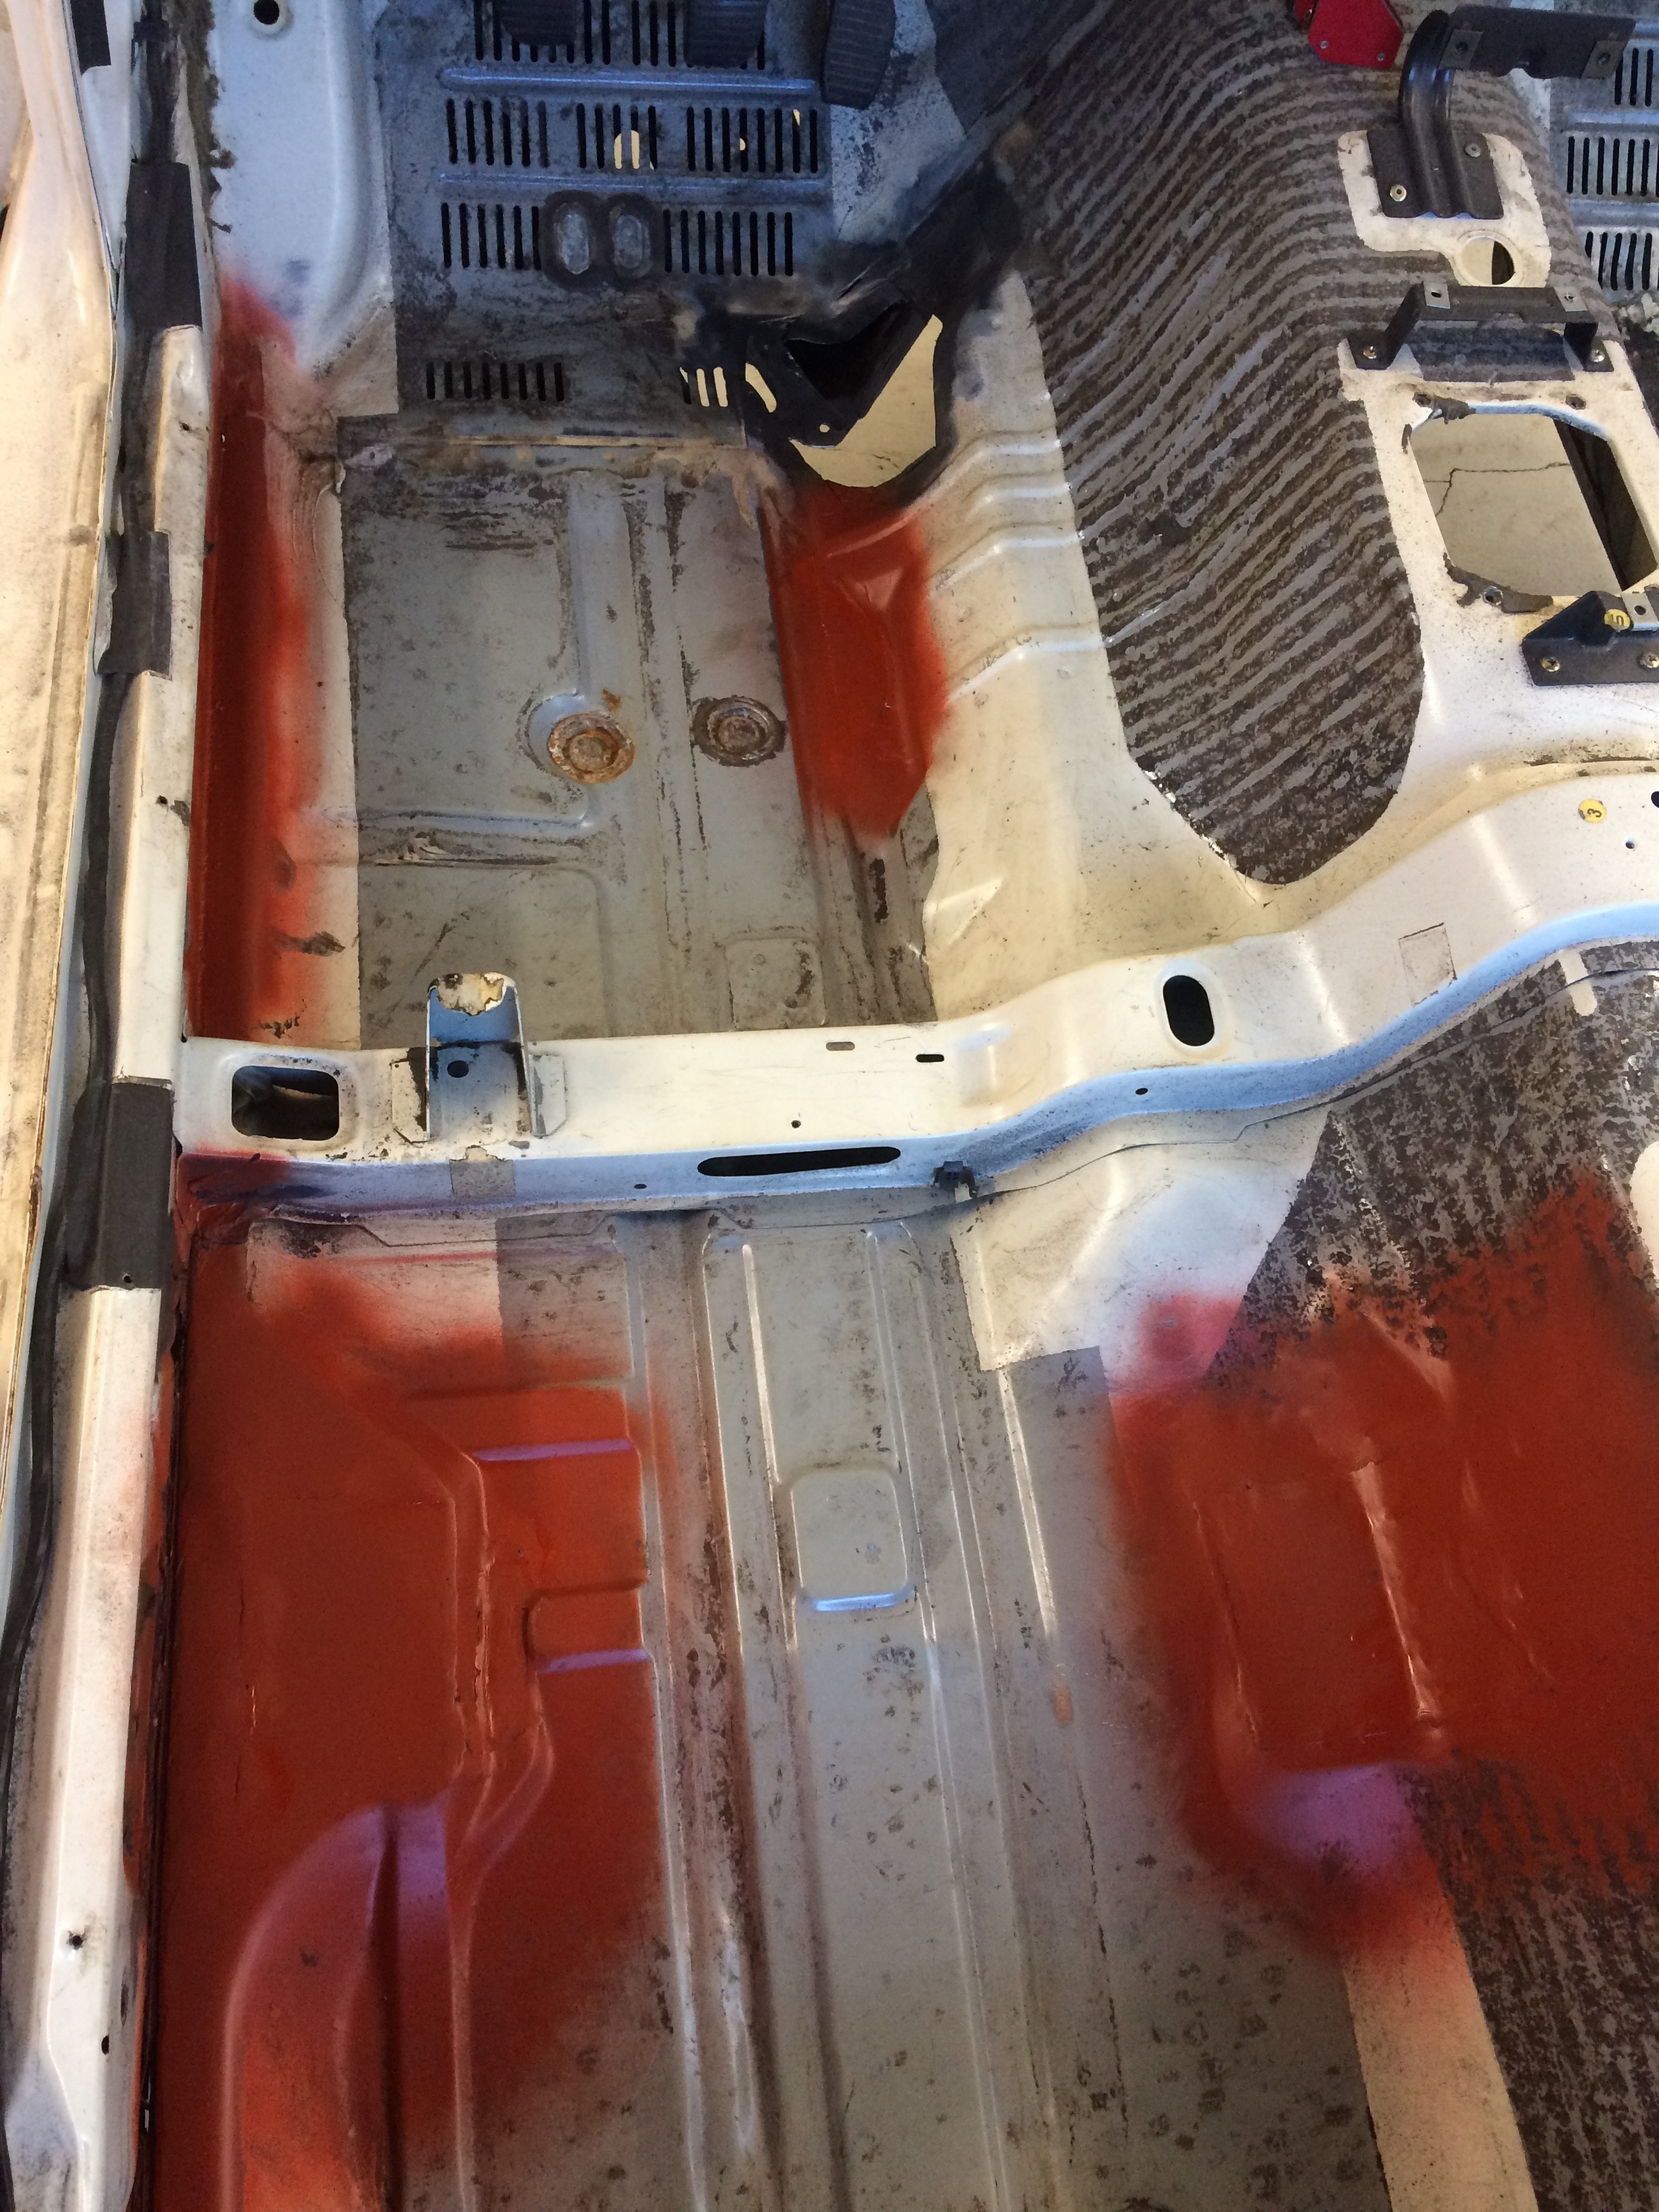
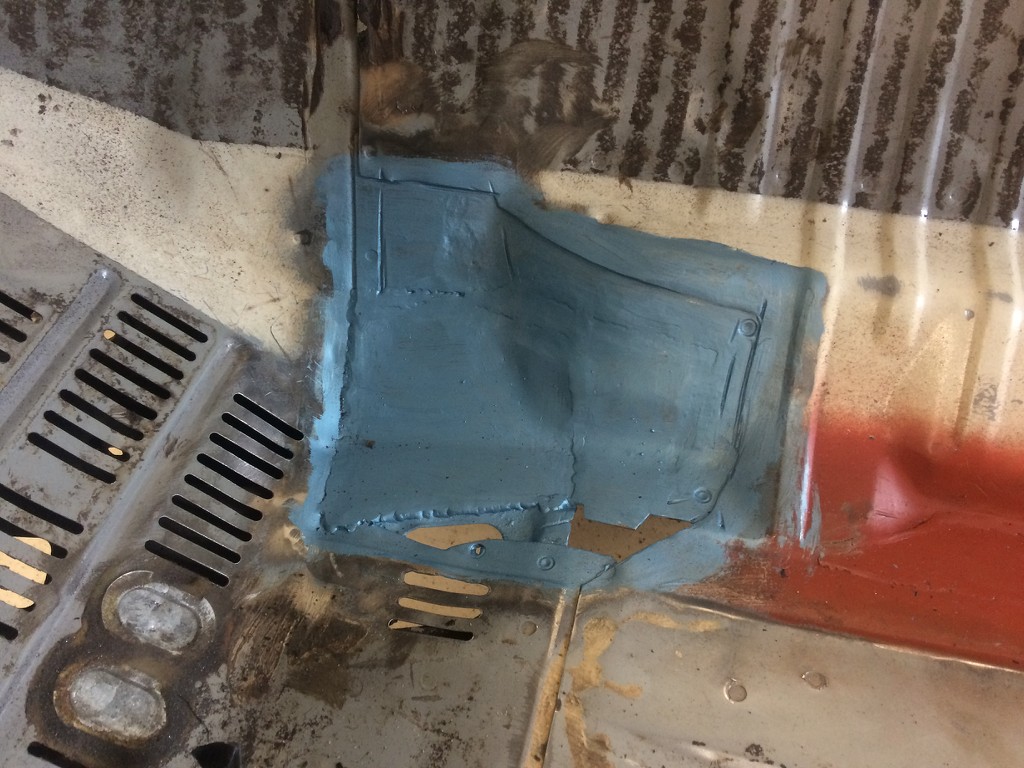
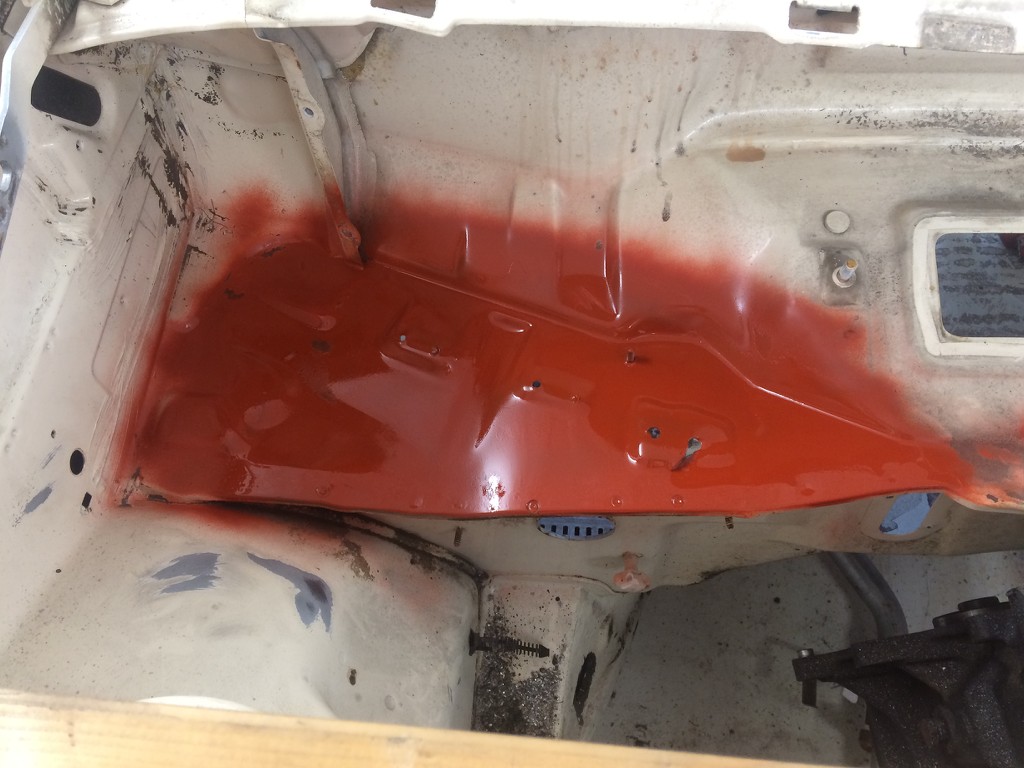
Smoth out the welding and painted with some welding primer. Ready for last metal plate.
While the welding primer dries. I began to remove the window wipers and the plastic under those.
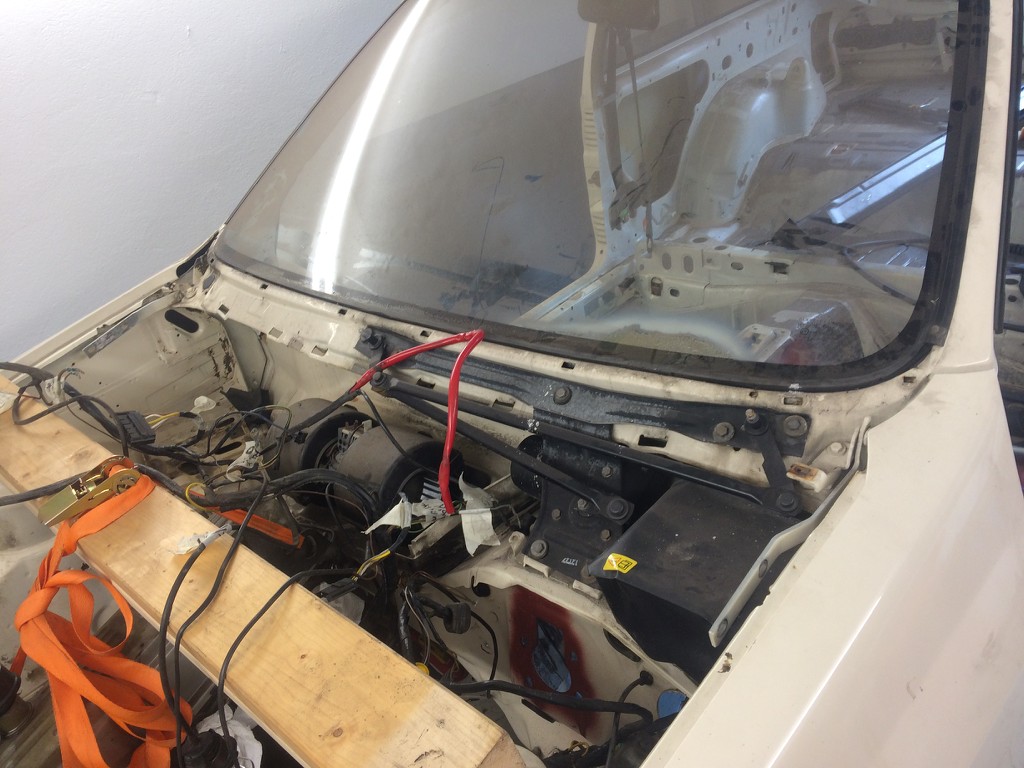
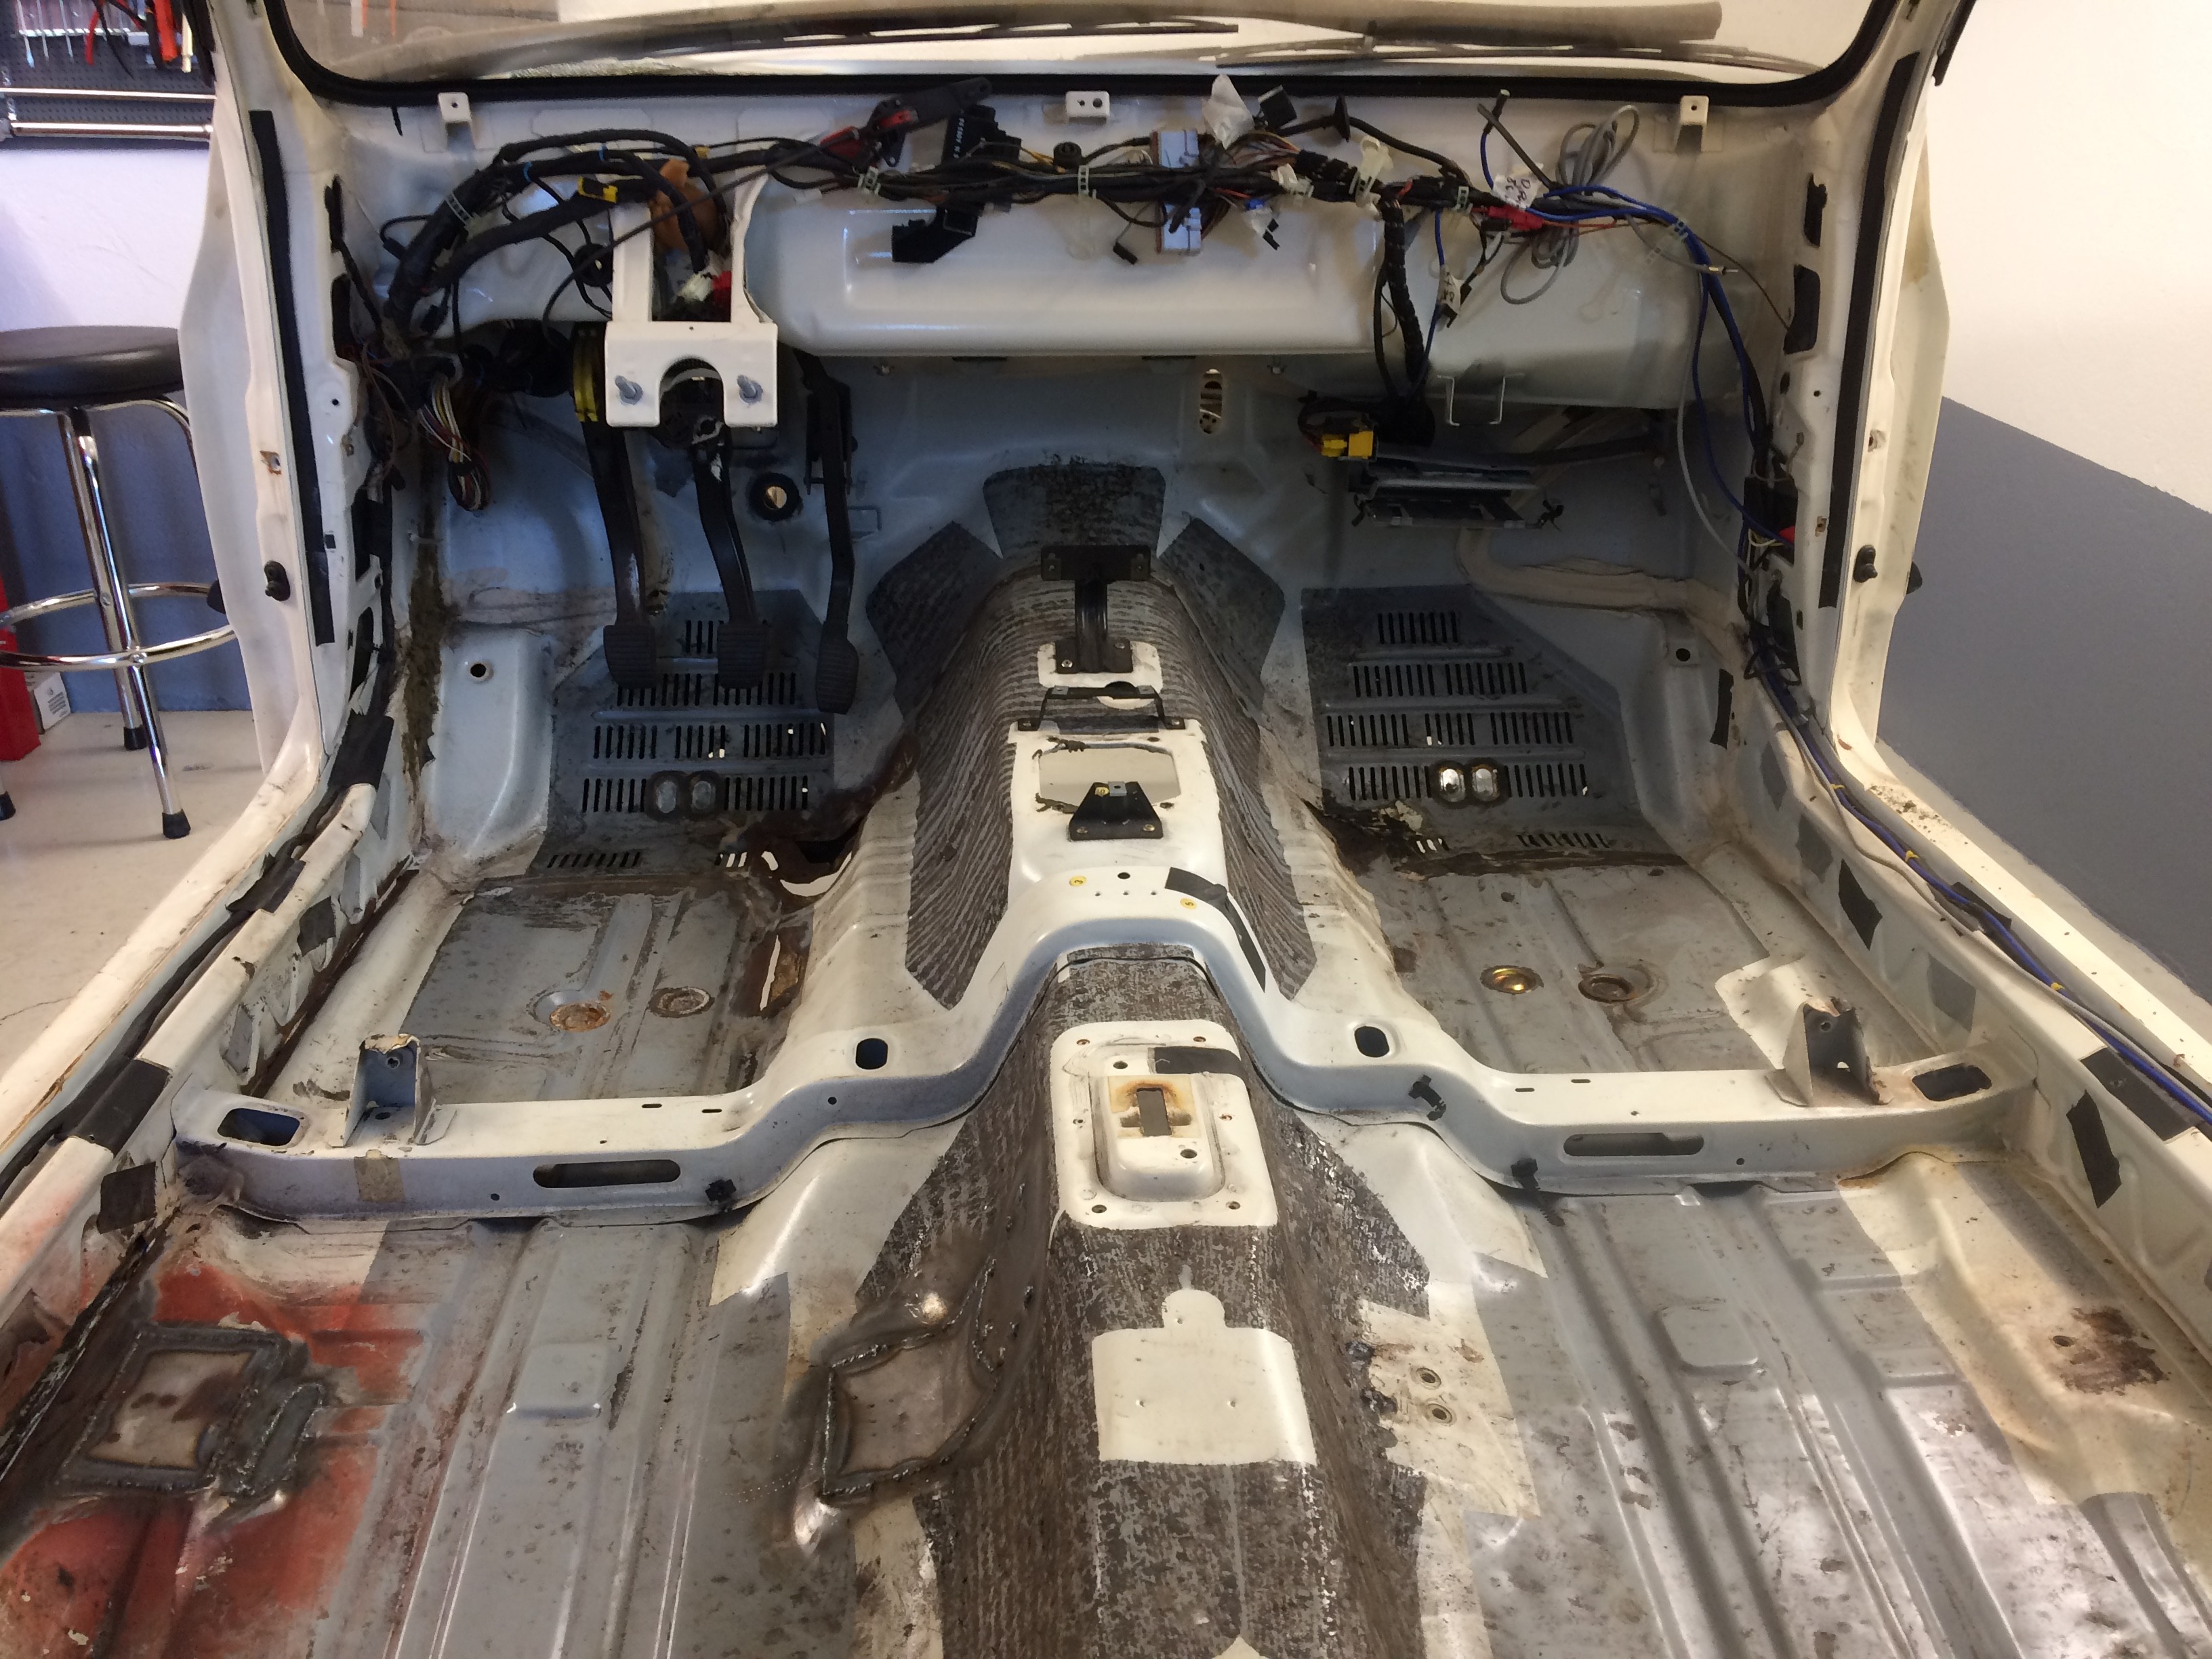
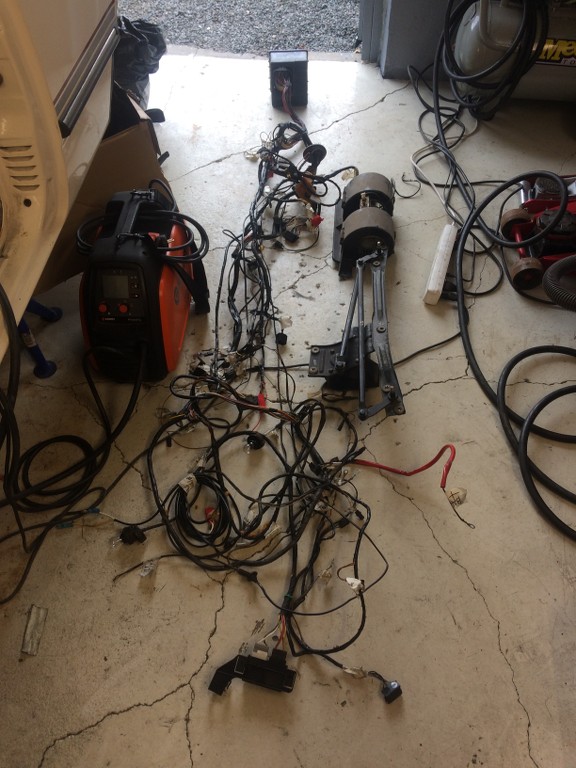
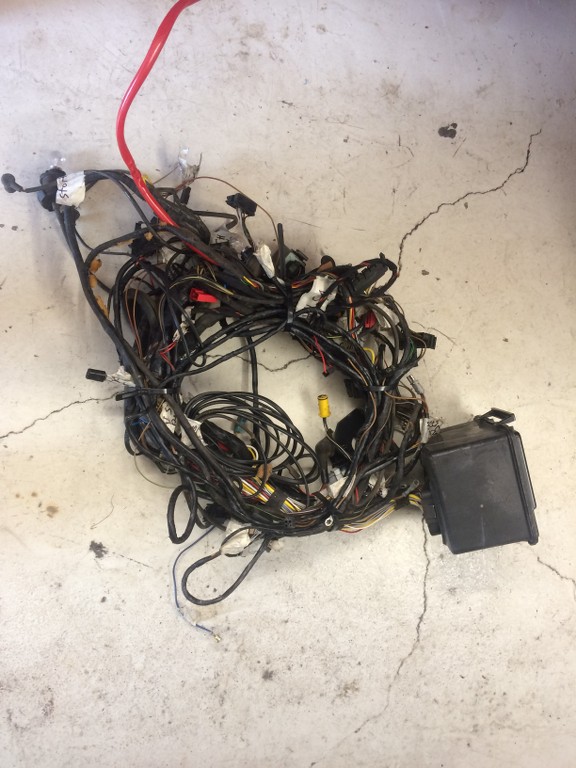
I started then to remove the complete wiring harness from the car. Main harness and the engine harness. I can know remove the wiring I dont need, such as electric door lock system. Then buy some new electric tape without glue to get a refreshed harness.

Out with the engine harness
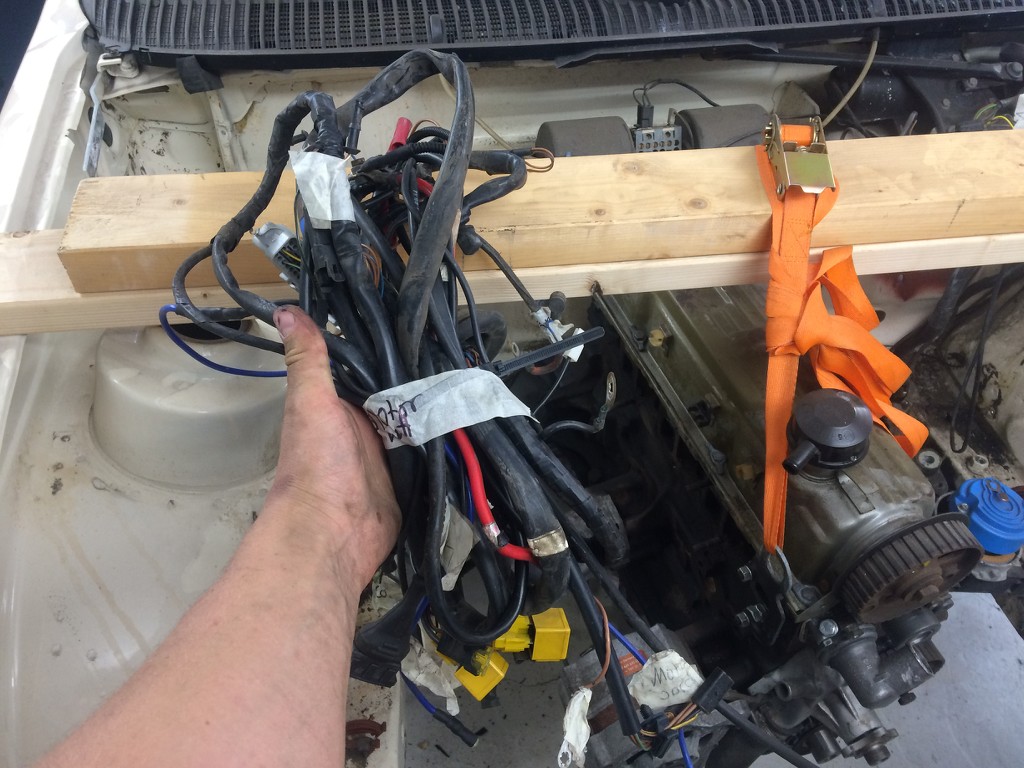
Out with the car harness + coupe fan and wiper engine.
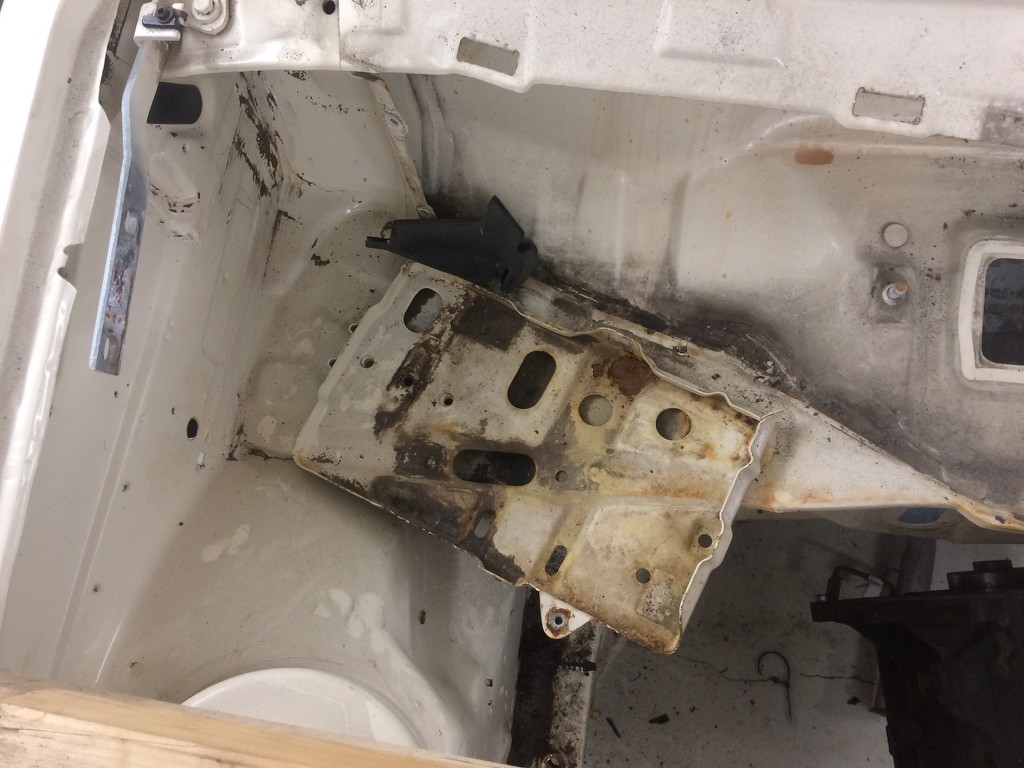
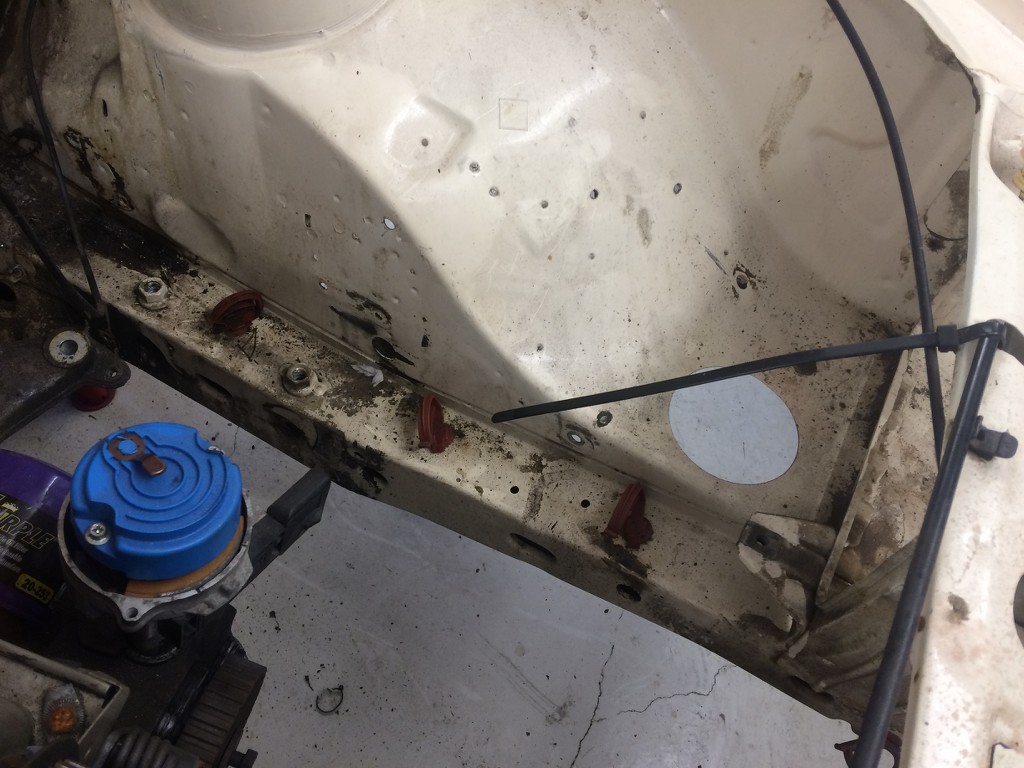
Since I am moving the battery back or to the center of the car. I removed the battery plate. Grinded the surface clean and sprayed some rust primer, because I dont know when I am painting. Instead of the battery I will mount the catch can there
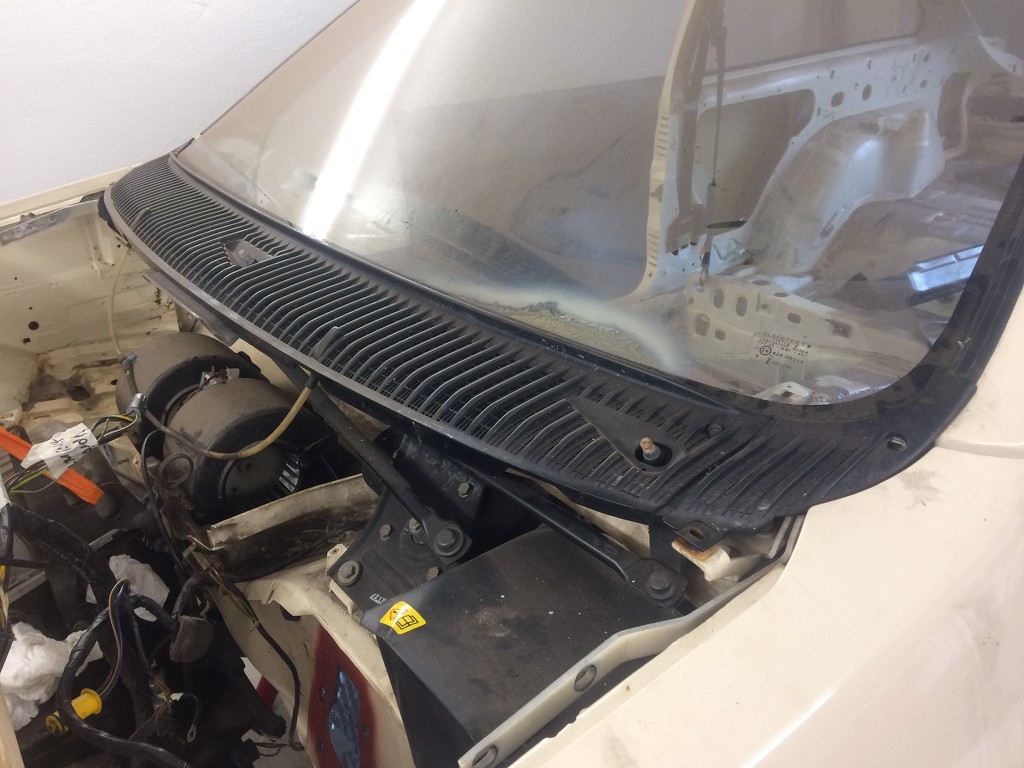
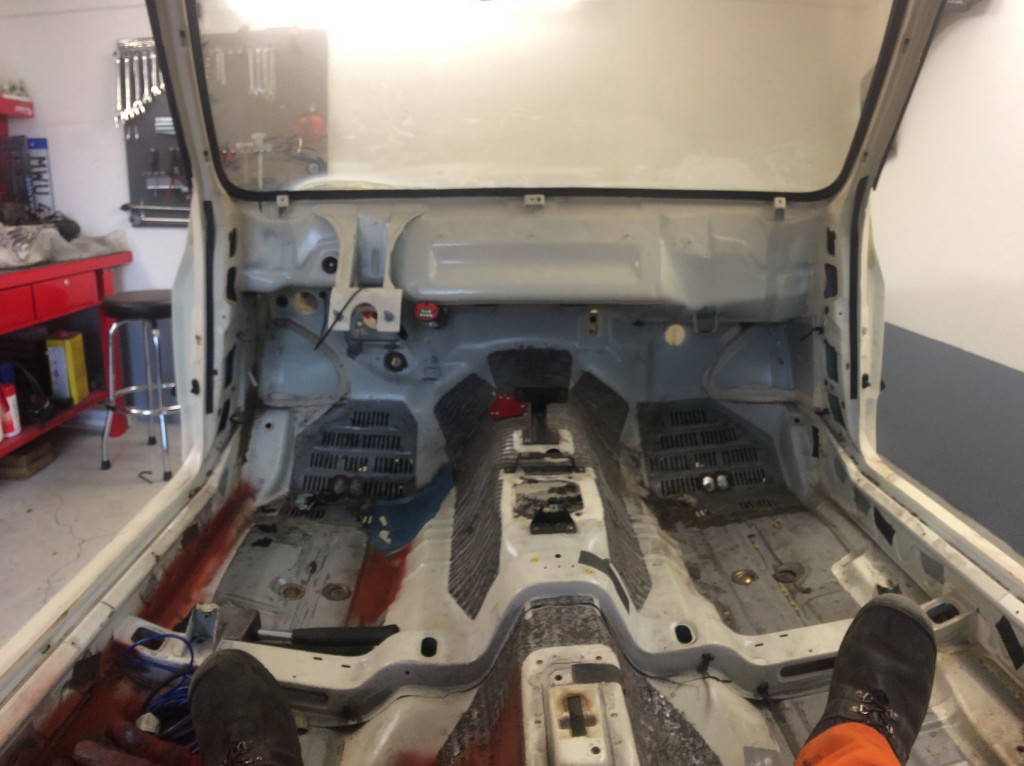
I felt I was in a good shape today. So I attacked my front windshield :P After som hard work the glue gave up and the windshield was free. I grinded off the old glue and paint. I was happy to find ZERO rust So rust primer on and I was finished for the day.

Some random photos

While the welding primer dries. I began to remove the window wipers and the plastic under those.
I started then to remove the complete wiring harness from the car. Main harness and the engine harness. I can know remove the wiring I dont need, such as electric door lock system. Then buy some new electric tape without glue to get a refreshed harness.
Out with the engine harness
Out with the car harness + coupe fan and wiper engine.
Since I am moving the battery back or to the center of the car. I removed the battery plate. Grinded the surface clean and sprayed some rust primer, because I dont know when I am painting. Instead of the battery I will mount the catch can there
I felt I was in a good shape today. So I attacked my front windshield :P After som hard work the glue gave up and the windshield was free. I grinded off the old glue and paint. I was happy to find ZERO rust
Some random photos
 28-07-2017, 05:25 PM
#68
Wahay!! I've lost my Virginity!!
Thread Starter
Recieved the Cometic exhaust gaskets today. So my engine builder can finish the ohc 8v head for my pinto. It will be a mild EFI cam kit before deciding on throttle bodies or turbo
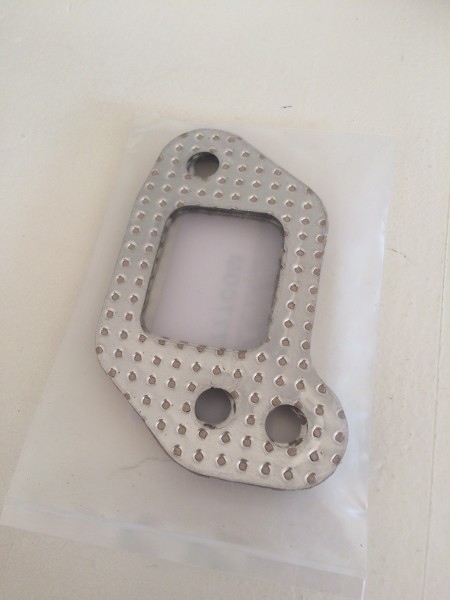
The following users liked this post:
Kjellsen (28-07-2017)
29-07-2017, 03:16 PM
#71
Wahay!! I've lost my Virginity!!
Thread Starter
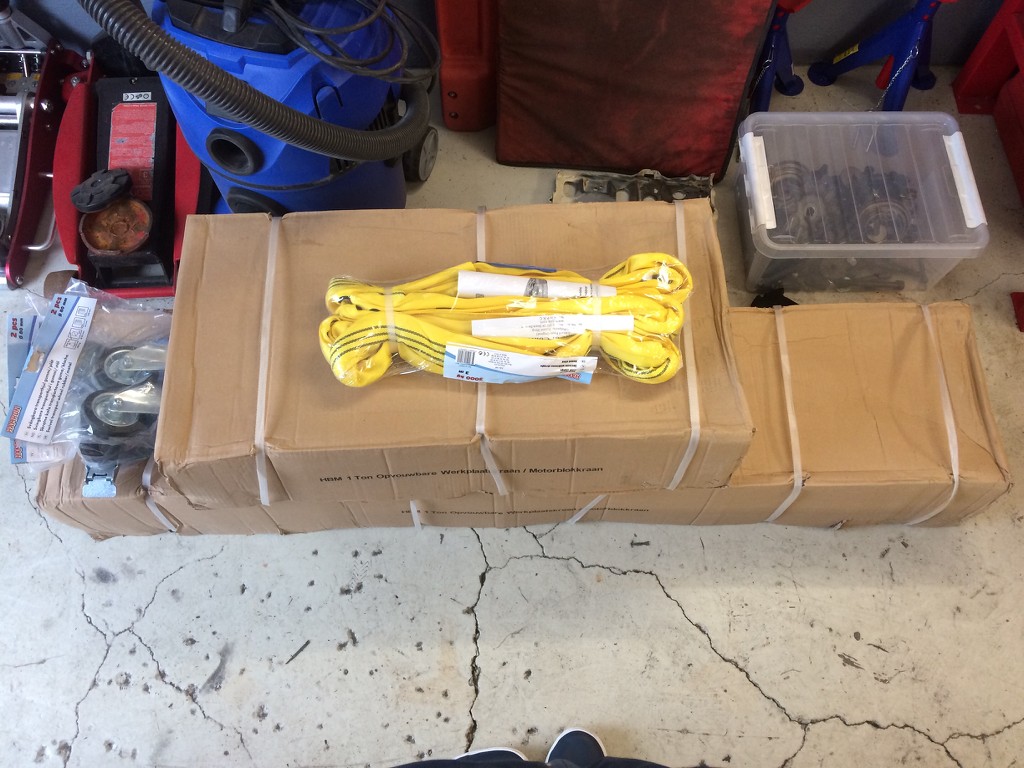
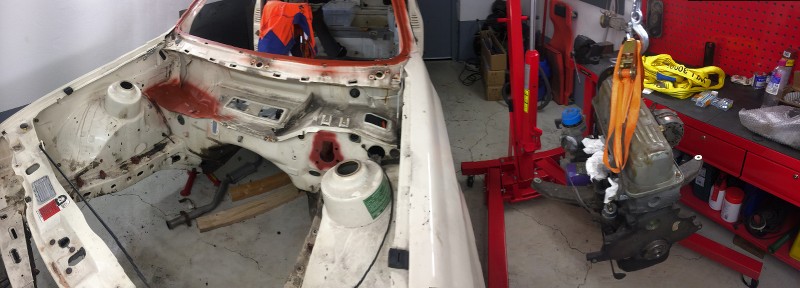
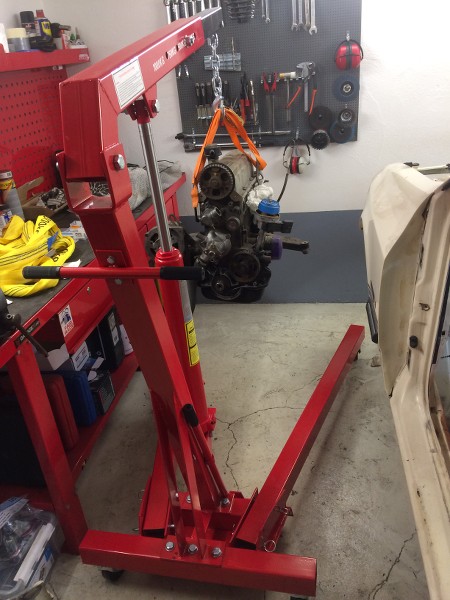
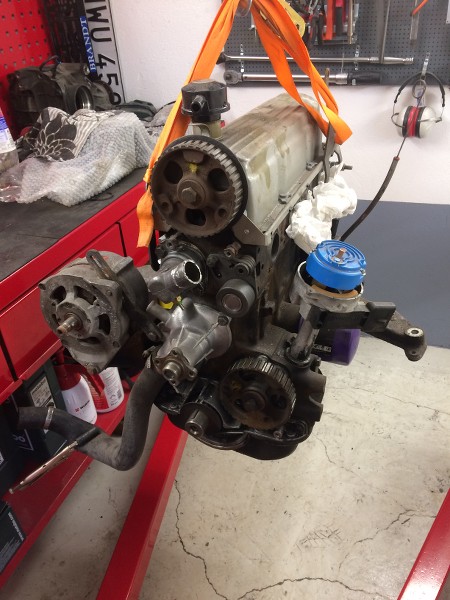
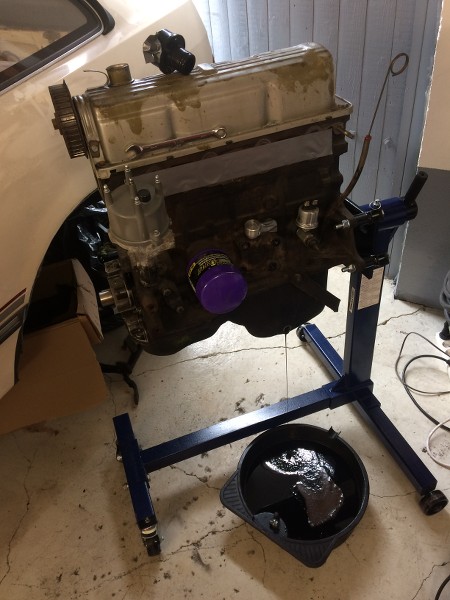
Today I assembled the engine lifter and lifted the Pinto out It will get some attention after the car is ready for the engine. It will have Cosworth 2wd big wing oil pan, new bolts, paint, gaskets, cam kit, head change etc. Little things, but necessary
31-07-2017, 05:54 PM
#72
Wahay!! I've lost my Virginity!!
Thread Starter
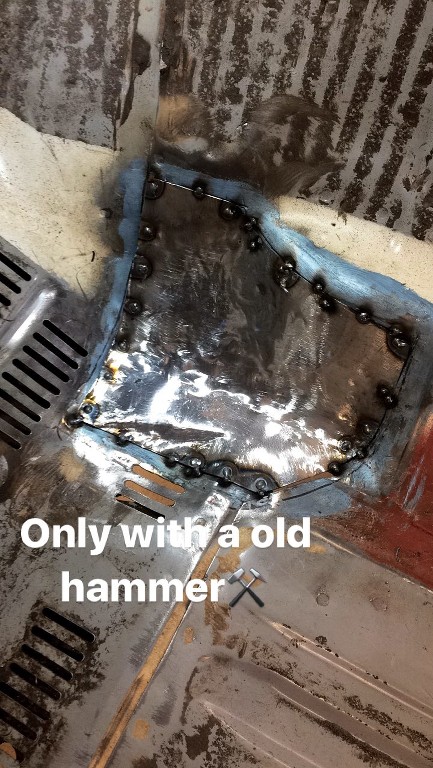
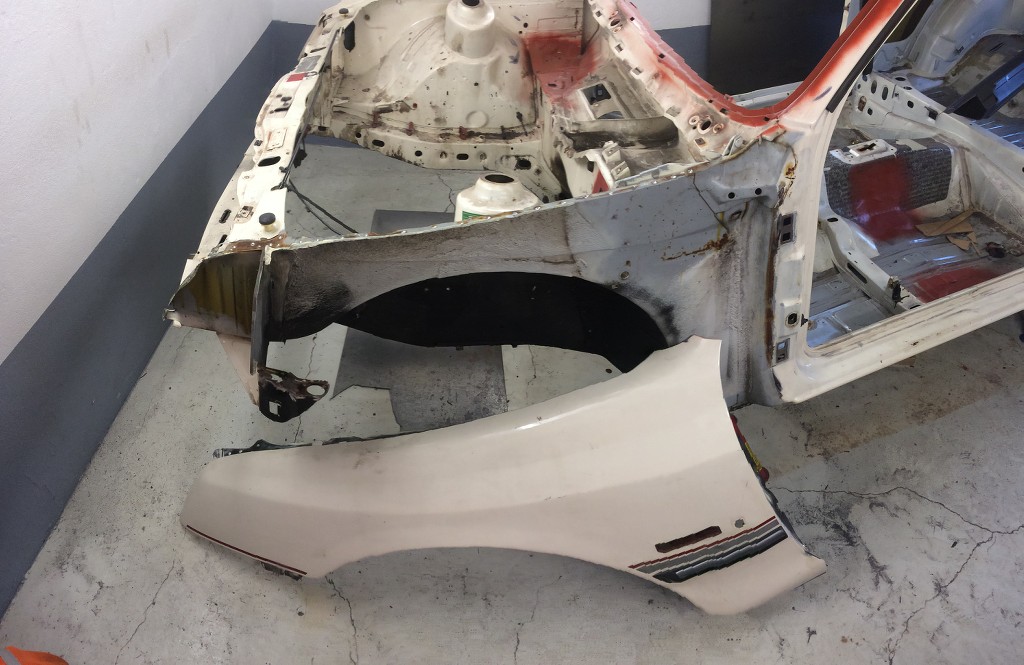
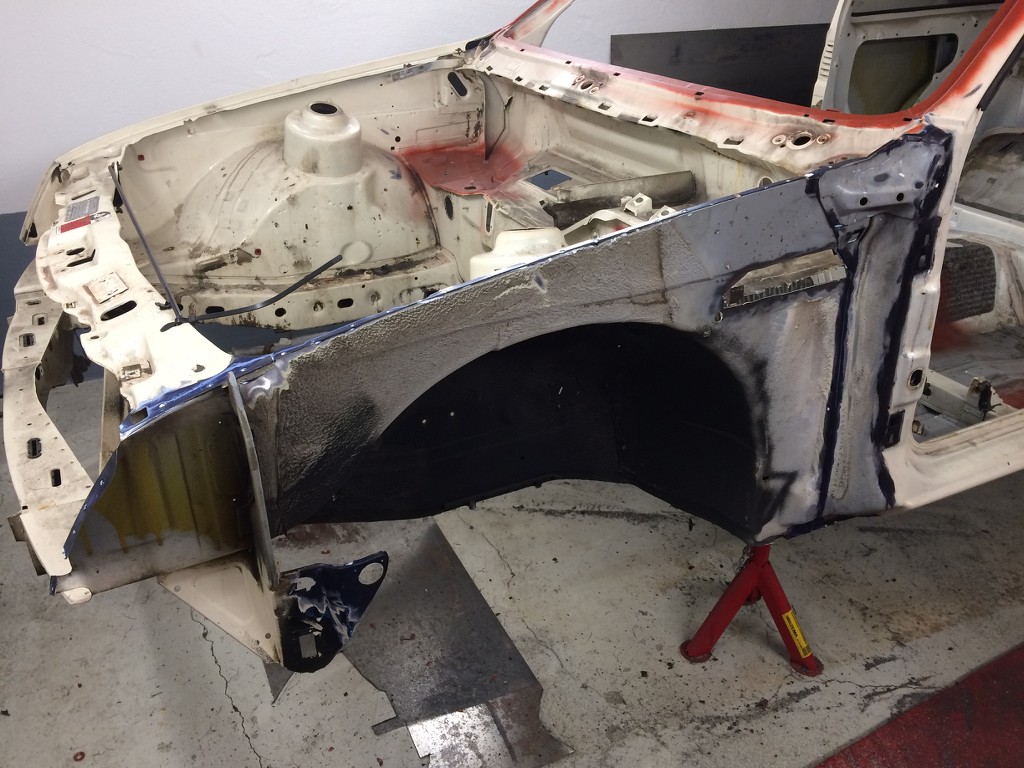
I finally finished the worst rust place on the left side Lots of bending and using the hammer before it got okay enough to weld it completely. I drilled out the welding spots and removed the fender to get to the rocker panel. I did find some rust under the fender, but nothing that isn`t normal on the Sierras.
08-08-2017, 07:47 PM
#73
Wahay!! I've lost my Virginity!!
Thread Starter
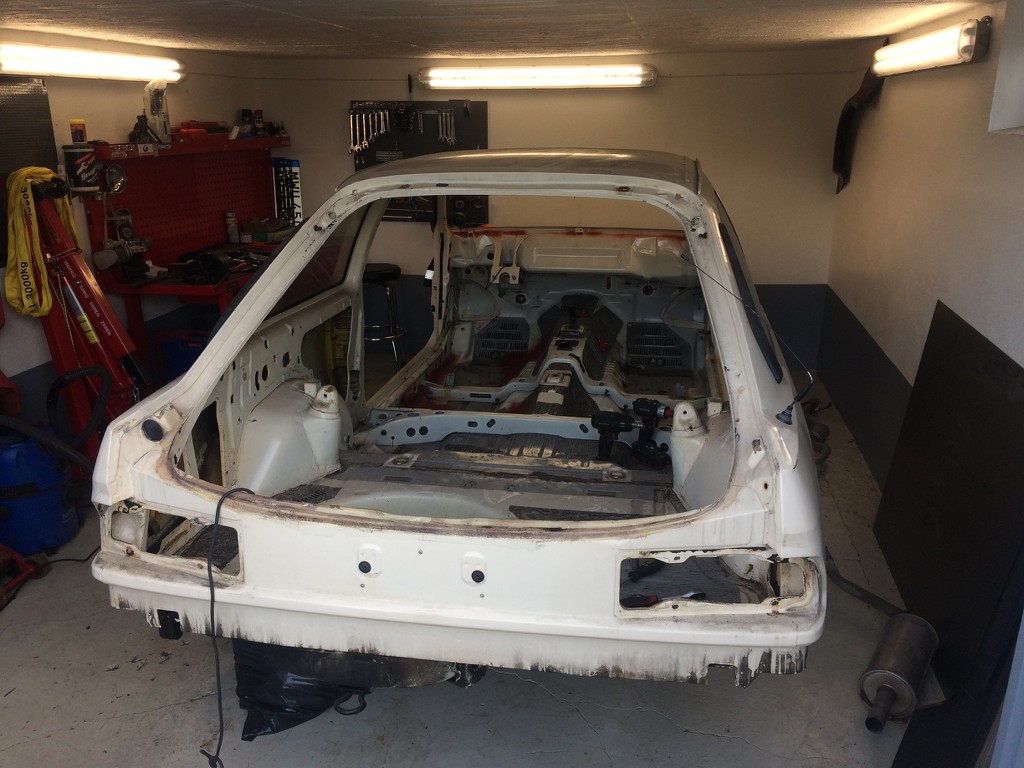
Today I wanted to do the little things that also was needed. I wanted also some time off the rust welding. I removed the head liner (correct?) and the hood lock. That is because I am using aerocatch with locks. Possible with an another hood, a fiberglass version of the cosworth 3dr. Removed the rear lights and struggled with the nuts, as the studs came off the lights. Maybe I can use other screws on them. If not, I need to find other lights. I also removed the tailgate so it would be easy to make the car roll over after making the car stand. I maybe will using glassfiber, awaiting the pricelist.
10-08-2017, 08:39 PM
#74
Wahay!! I've lost my Virginity!!
Thread Starter
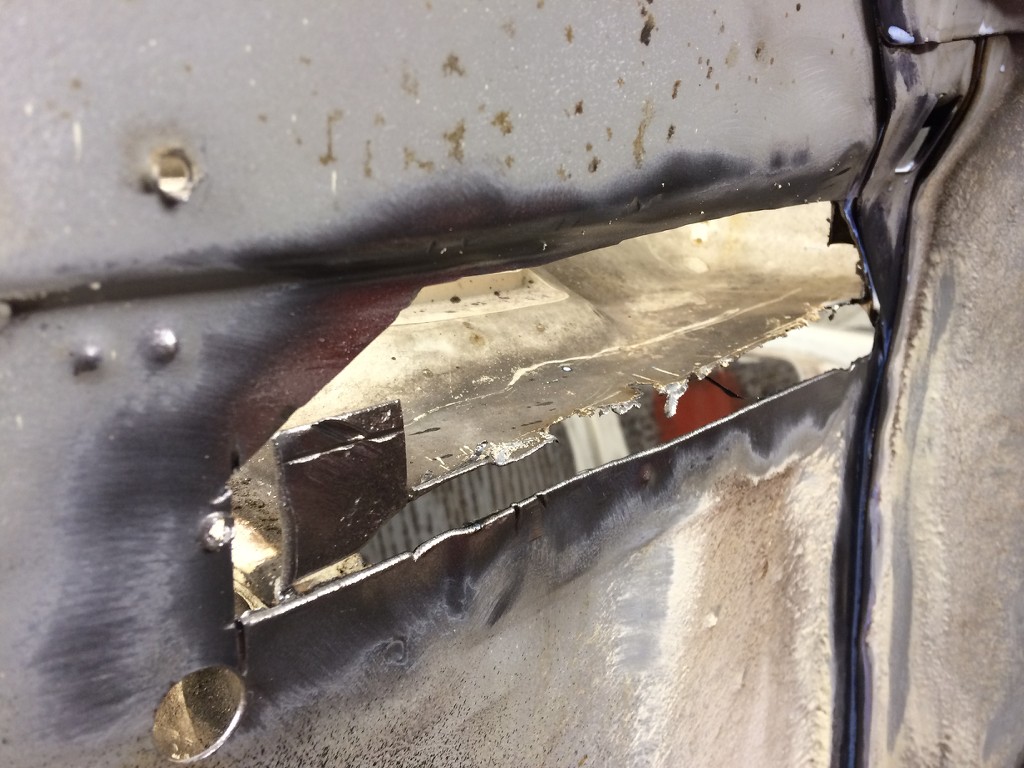
I did some work yesterday. I grinded some rust away and cut away more rust. Was more than I thought. But no suprise there and no big deal It is a doubel layer with a bend plate there. But could not cut it perfect without another tool I dont have. A air hacksaw, so I need that before I finish that. Grinded some surface rust and painted with some rust converter. Before I began on the rocker panel. Almost got the spot welds drilled before the night.

11-08-2017, 05:43 PM
#75
Wahay!! I've lost my Virginity!!
Thread Starter
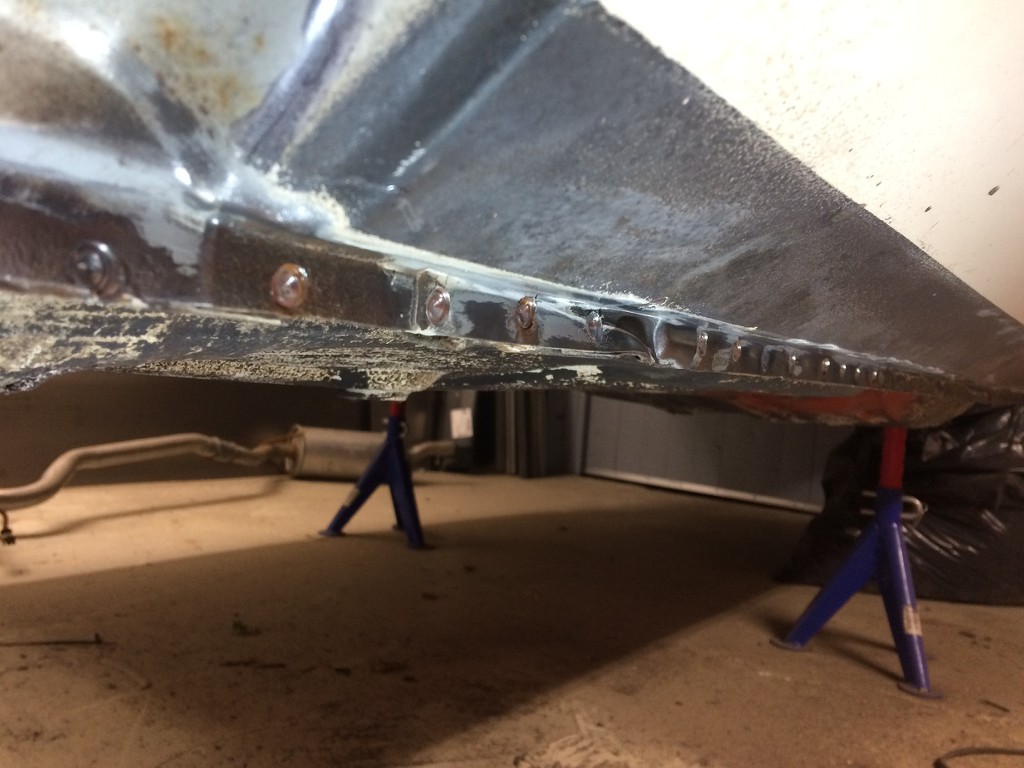
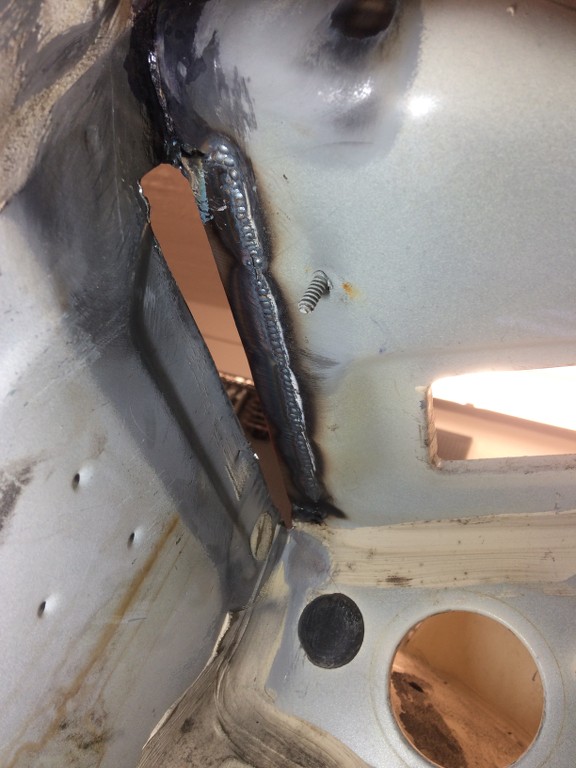
I got a new tool, hack saw to get into the small places with more accurate cut Then bended and welded in place a new piece on the inner plate. Then an new outer plate. Very happy with that! Just need some grinding belts so I can grind some down before finishing the last little piece inside in the corner in the engine bay. Things like this that take alot of time. But it will be great in the end.

13-08-2017, 09:38 AM
#76
Wahay!! I've lost my Virginity!!
Thread Starter
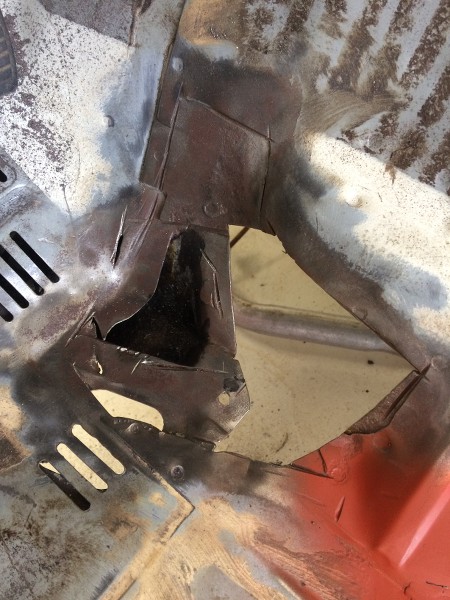
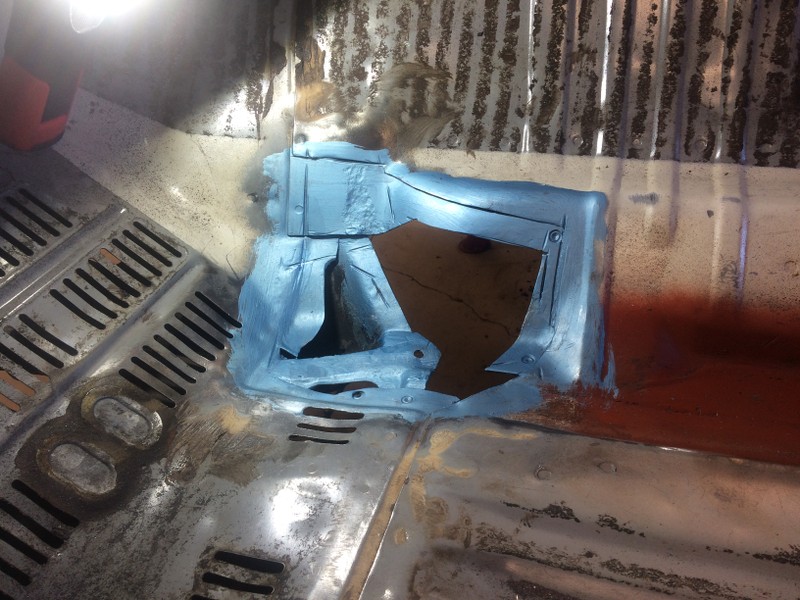
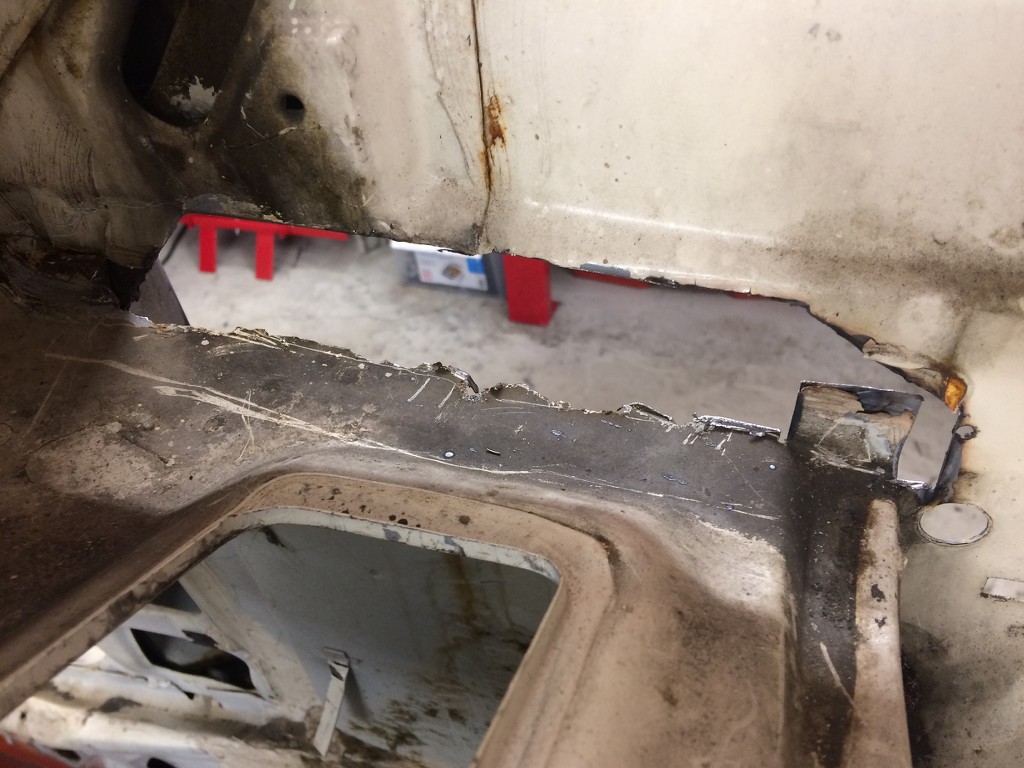
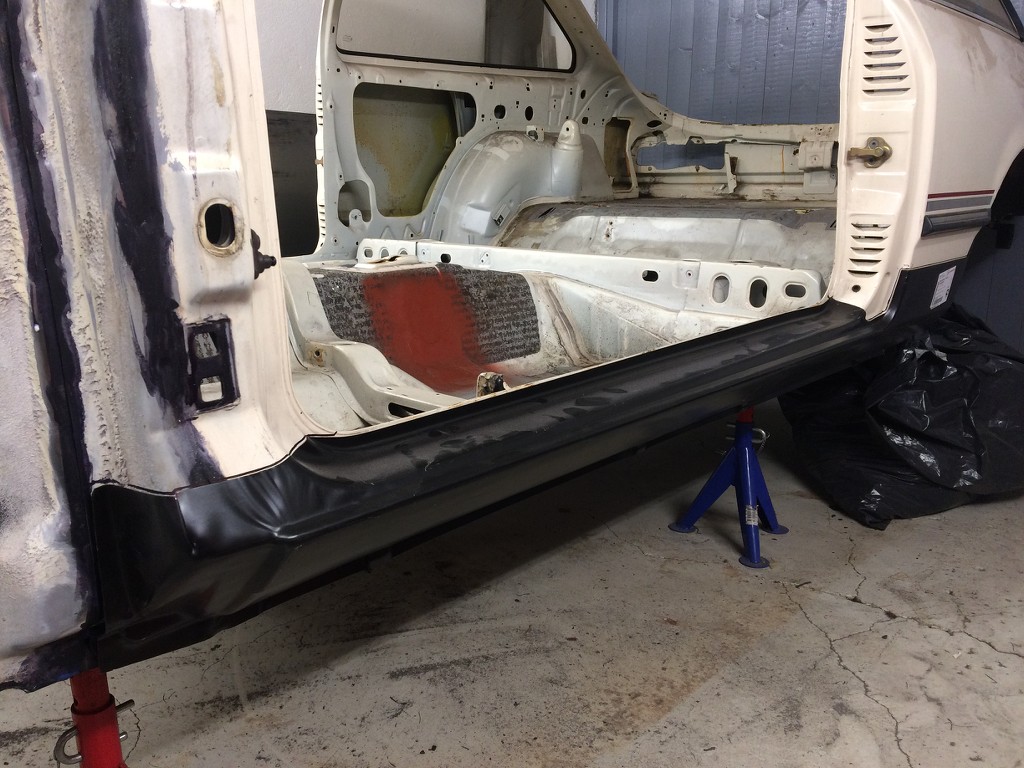
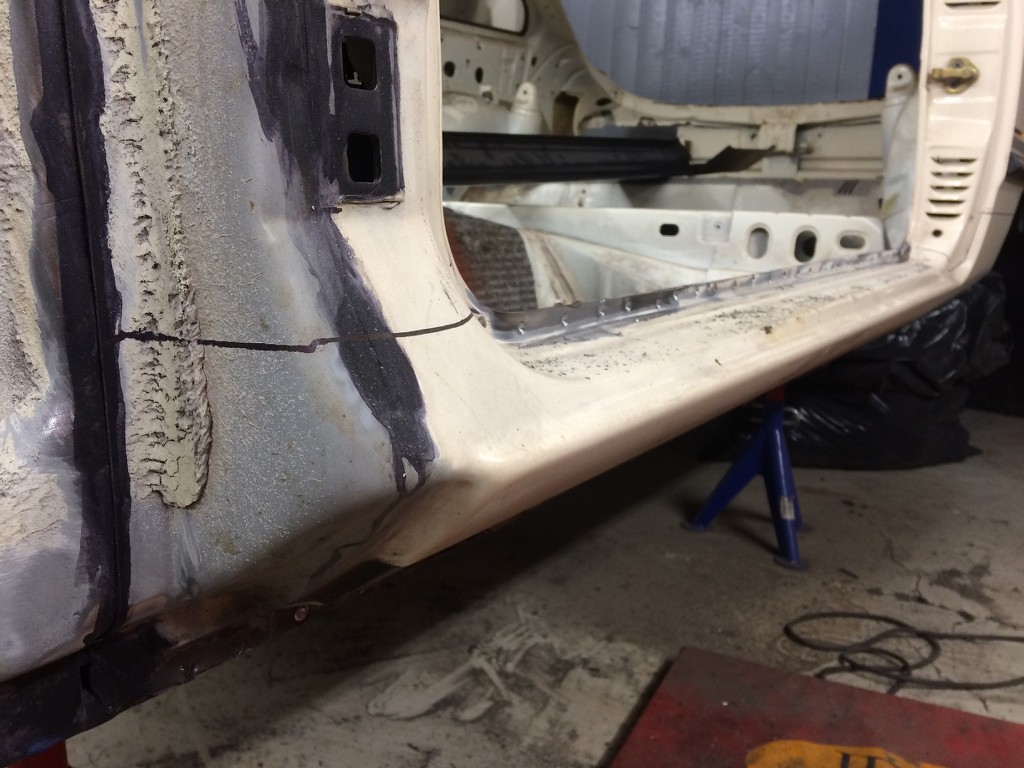
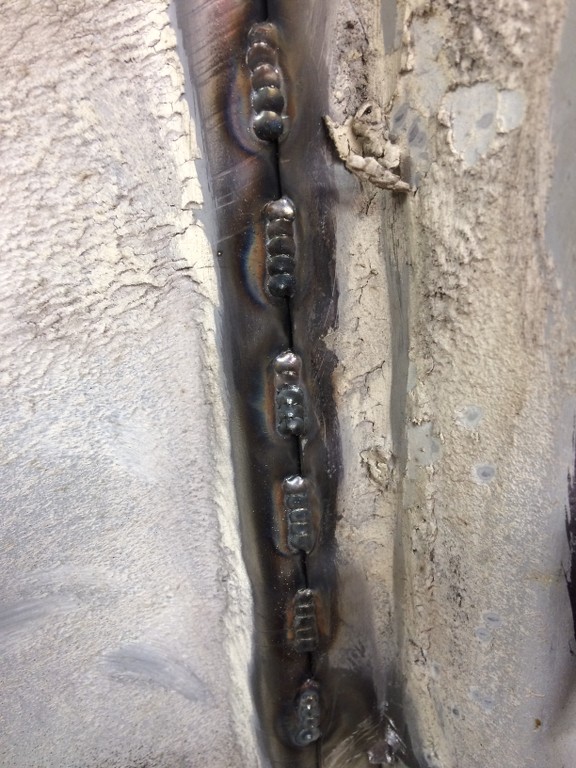
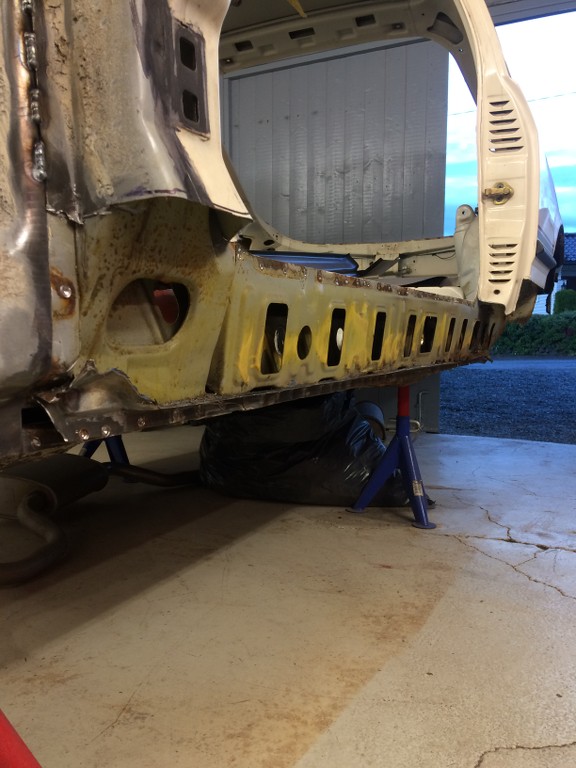
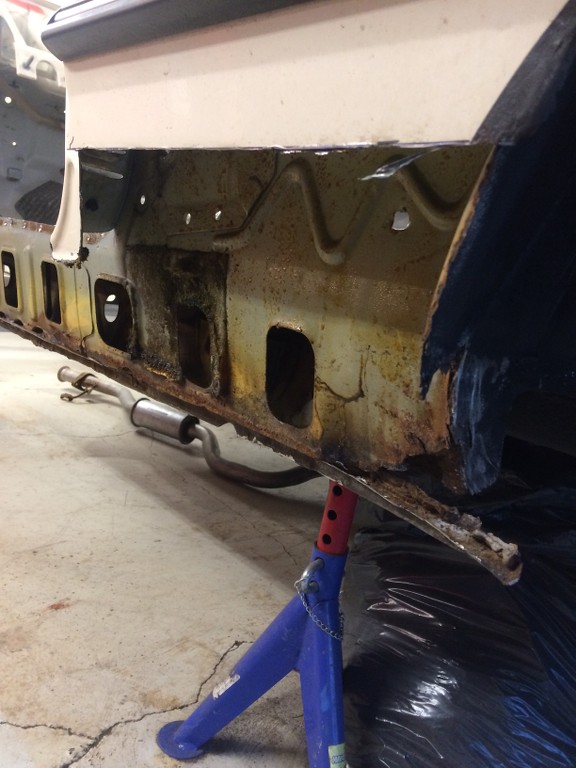
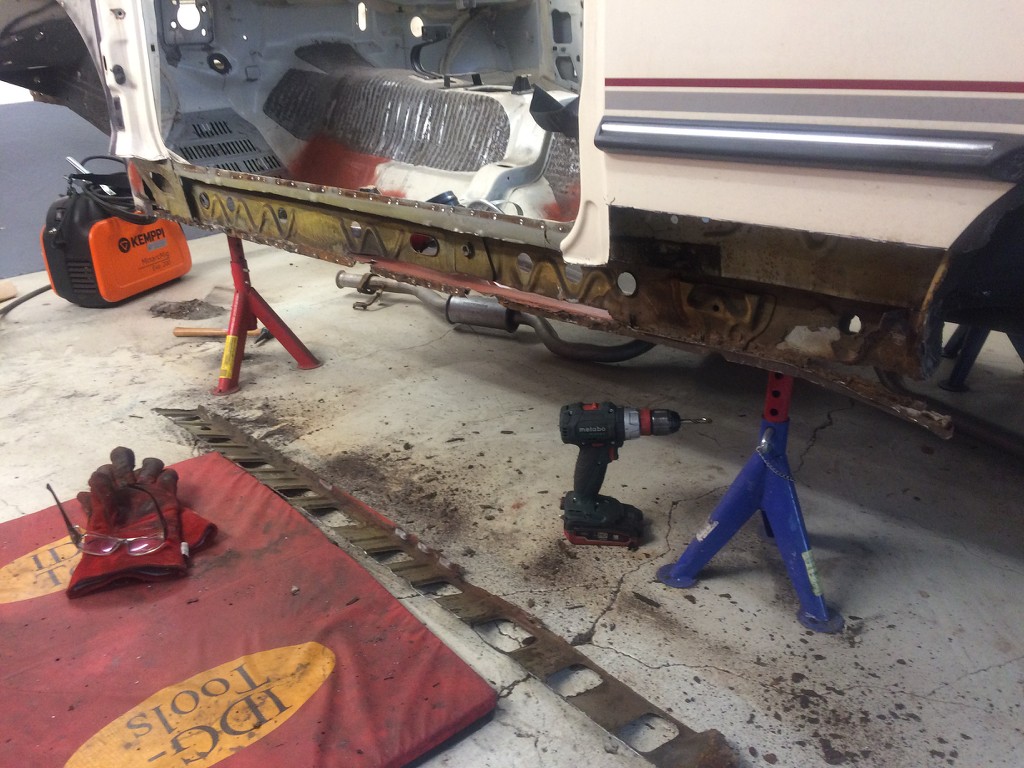
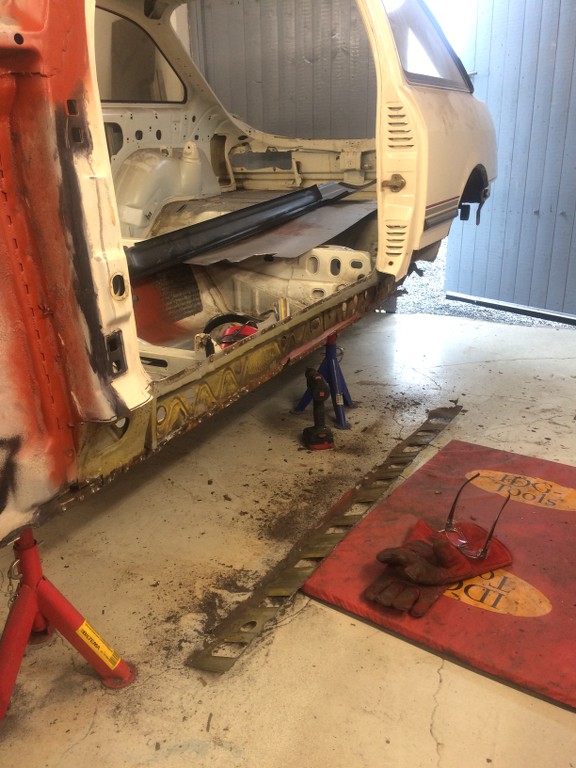
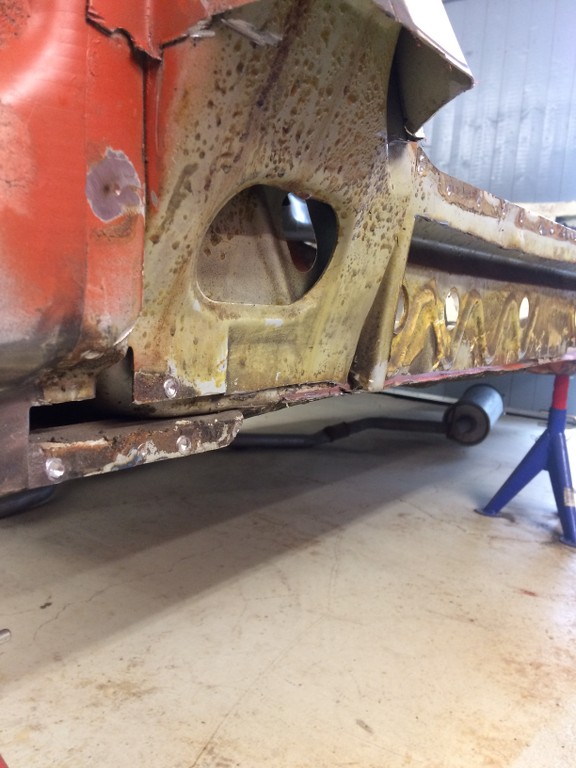
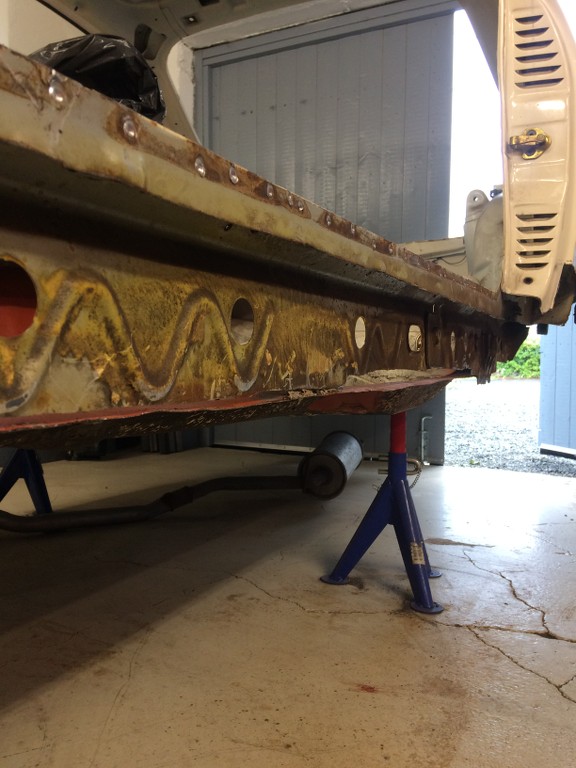
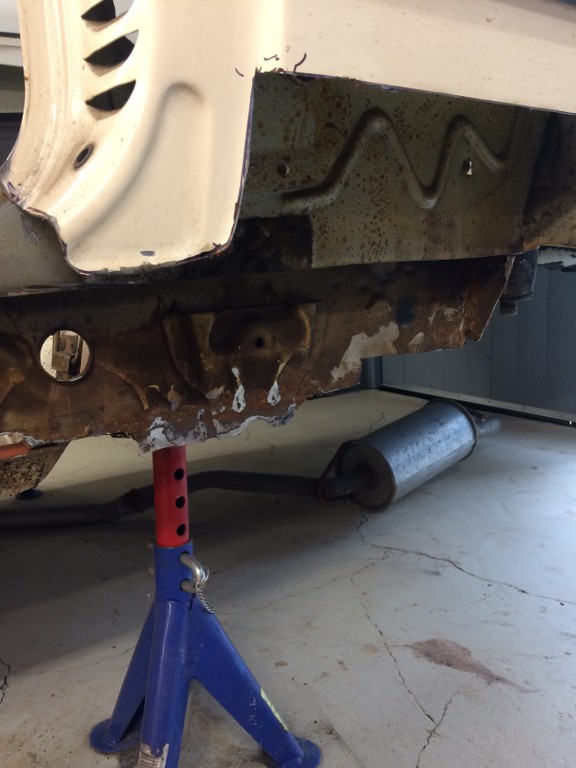
I kicked myself out of the house and in the garage yesterday. Not so easy, but if I can get some time off my health problems. Then I need it I started with wleding some holes from my previous welds. Grinded the welds down and thought I would start with seam welding. I have never seam welded a car before and it will be fun to try it out and see how the car handles on the track after seam welding. I have seen long seam welds, 5000 tacks on a car etc. My choice is 5 tacks together as a seam with some distance and waiting in between welds. So that the chassi wont twist or anything by the heat. I ran into some rust, off course  Grinded, cut new piece, painted weld primer on. Welding that piece on tomorrow. I attacked the rocker panel, roughly cut out the panel. Need to grind and remove the metal pieces that did not came off. As you see the rear is the worst place with rust. So never again on the norwegians roads in winter time! Only transport is with a closed trailer to a ice like with rally winter tires
I know there is only rust rust rust updates. But suddenly paint is on, cage is in etc. So I hope people are still here watching
Grinded, cut new piece, painted weld primer on. Welding that piece on tomorrow. I attacked the rocker panel, roughly cut out the panel. Need to grind and remove the metal pieces that did not came off. As you see the rear is the worst place with rust. So never again on the norwegians roads in winter time! Only transport is with a closed trailer to a ice like with rally winter tires I know there is only rust rust rust updates. But suddenly paint is on, cage is in etc. So I hope people are still here watching
15-08-2017, 05:18 PM
#77
Wahay!! I've lost my Virginity!!
Thread Starter
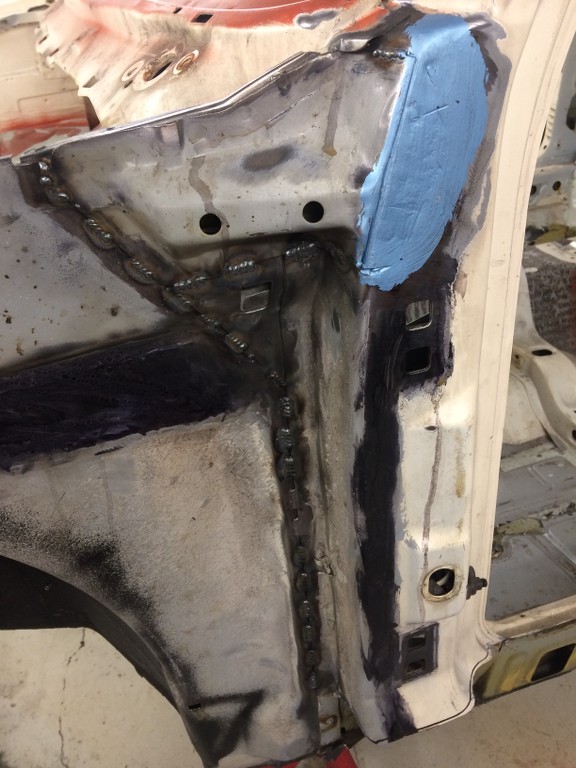
Done a bit more today, not so much because of my bad day. But better with something done than nothing. Suddenly the rust on the left side is finished and gone. It removed the rust, need to use the wire wheel and rust converter. But first weld som fresh steel on the places that it has been cut away. Opened the middle steel plate that are behind the panel to get into the inner wall off steel for some rust removing.
I cant wait to do something else. Like mounting the roll cage from Safety Devices It will be a motivation thing to look at when installed and I work on other things.
I cant wait to do something else. Like mounting the roll cage from Safety Devices
17-08-2017, 08:39 PM
#78
Wahay!! I've lost my Virginity!!
Thread Starter
Something just find it way into the house today Always fun with parts!
The con rods has been on a shelf for 5 years now and bought from Burton Power for about 5 years ago. I got them for the cost of ONE The lenght is 128.3mm and weigh 579g. They are for pinto pistons, as the top is 24mm. They have also real ARP 2000 bolts. Cant wait to get them fitted with some forged pistons one day Not my priority, but I could not turn down the great deal

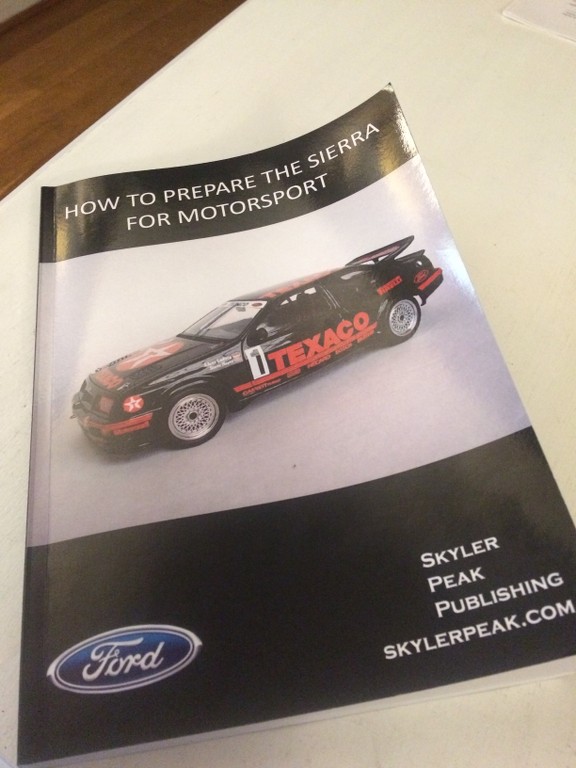
I also got a great book So much info about things and not so difficult to learn and do myself. I will not have the Gr.A parts, more like an Gr.N car for me But all the angels, spring rates etc are in the book .
The con rods has been on a shelf for 5 years now and bought from Burton Power for about 5 years ago. I got them for the cost of ONE
I also got a great book


