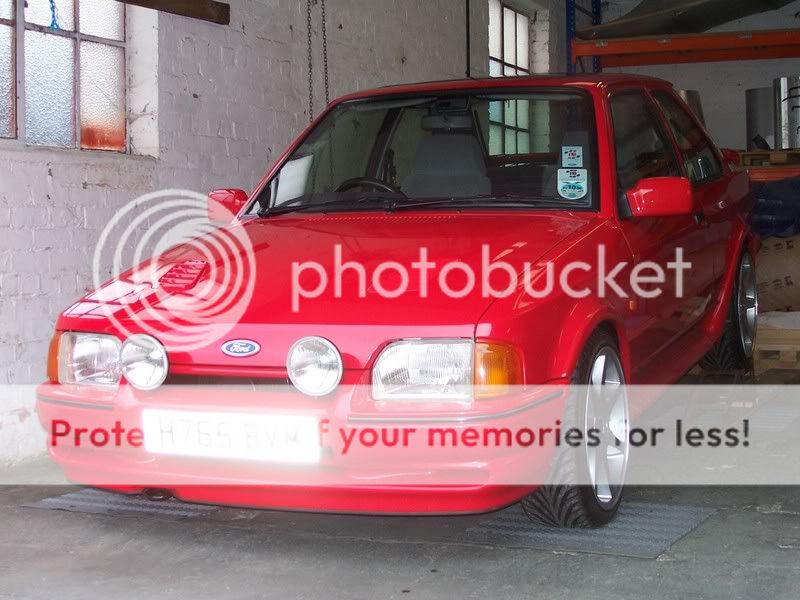
H765 BVM - My Concours Series 2 Resto Project
 12-01-2008, 12:34 PM
#1
Parts Restoring Nutter
Thread Starter

Ive copied and pasted this from the Rs Owners club forum so ignore the dates.
Well after much thought last weekend i decided to start the restoration of my Series 2. I was going to leave it till after 2007 show season had ended and get it ready in time for Santa Pod 2008 but i thought that 15 months is better 7 months to plan it out and get the works under way.
Now some of you know i competed in the Post 81 Novice concours last year and done very well including winning the Gold Cup and National Day for its class which was an honour to say the least.
Anyway when i was doing the shows and when people were looking around the car, the majority of them got on there hands and knees to have a look underneath the car, which is clean and painted black but it isnt detailed in any way so this is what i will be embarking on for the next 15 months, which will also include, The whole underside will be painted red, the engine & bay detailed, suspension detailed, pipes, clips, grommets, knickers the lot.
Now this i will have to do in my spare time and on my own, and i will be taking my time so that i get it absolutly perfect so expect the updates to be few and far between but when i do abit on the car i will take pics and put them on here.
I started in my lunchtime today so took a few pics of how i got on.
Thanks for looking :thumbsup: :thumbsup: :thumbsup:
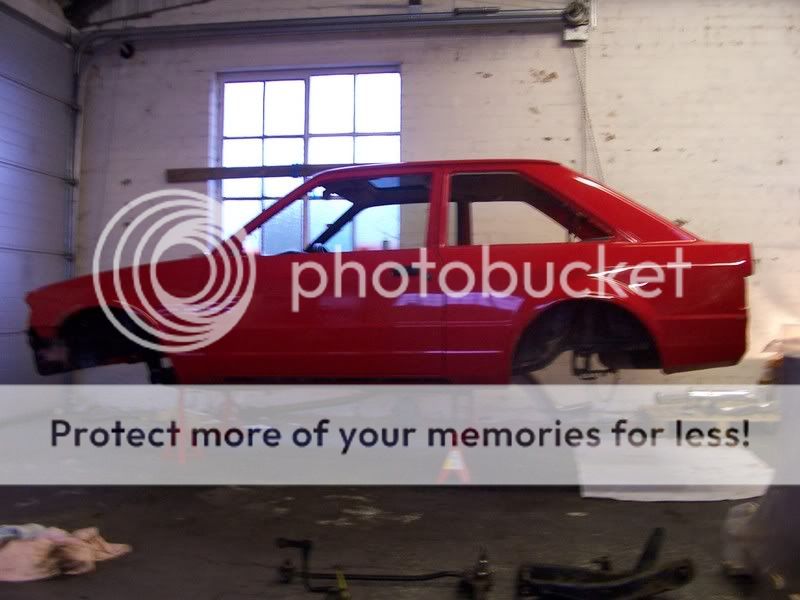
Up onto the ramps she goes
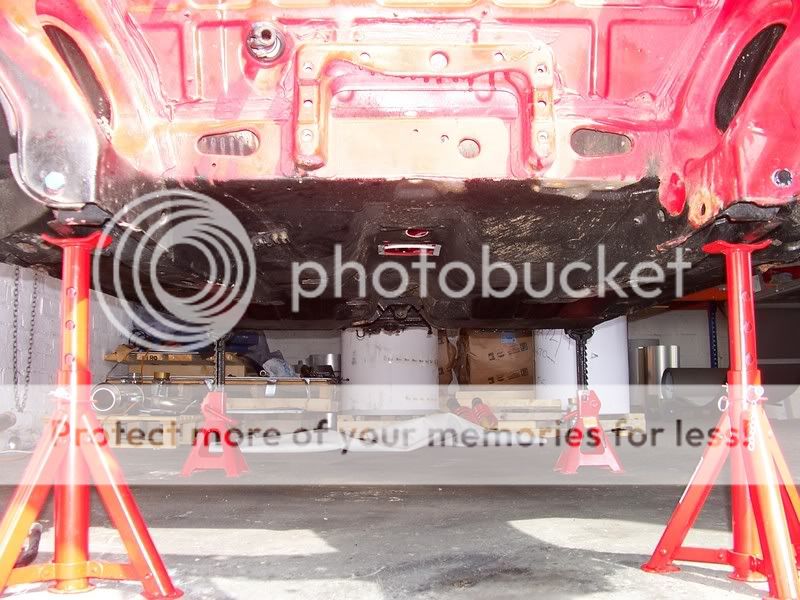
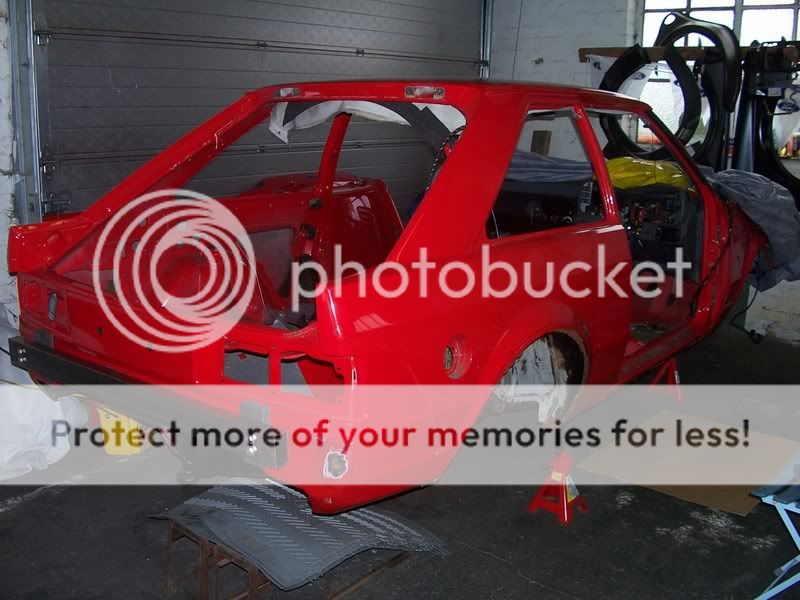
Up onto the axle stands
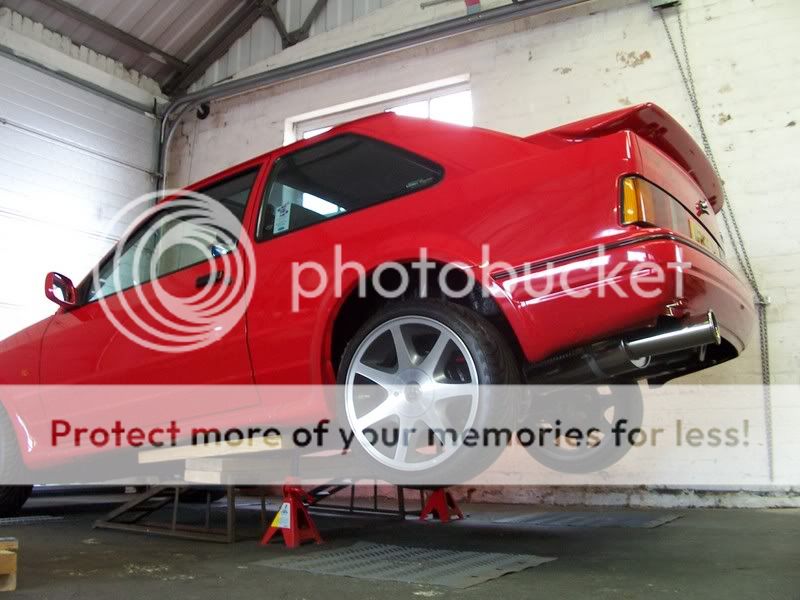
Rear and side few

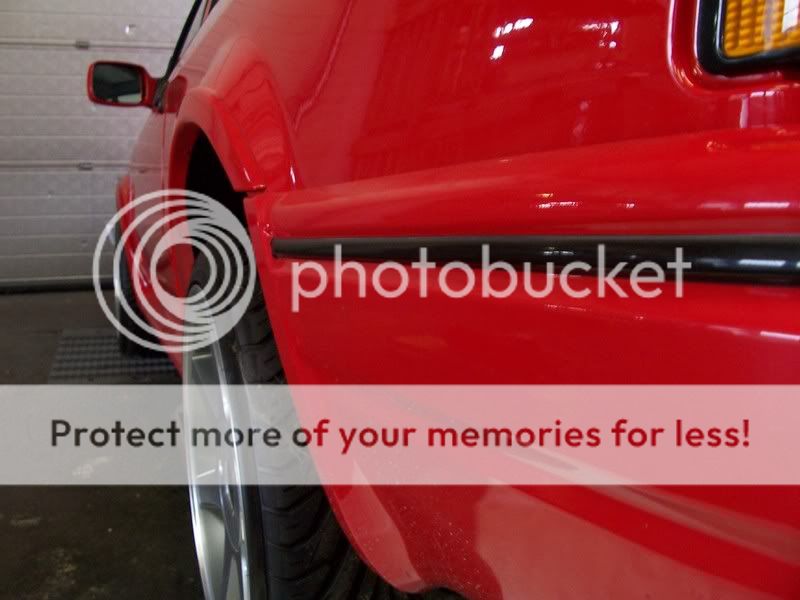
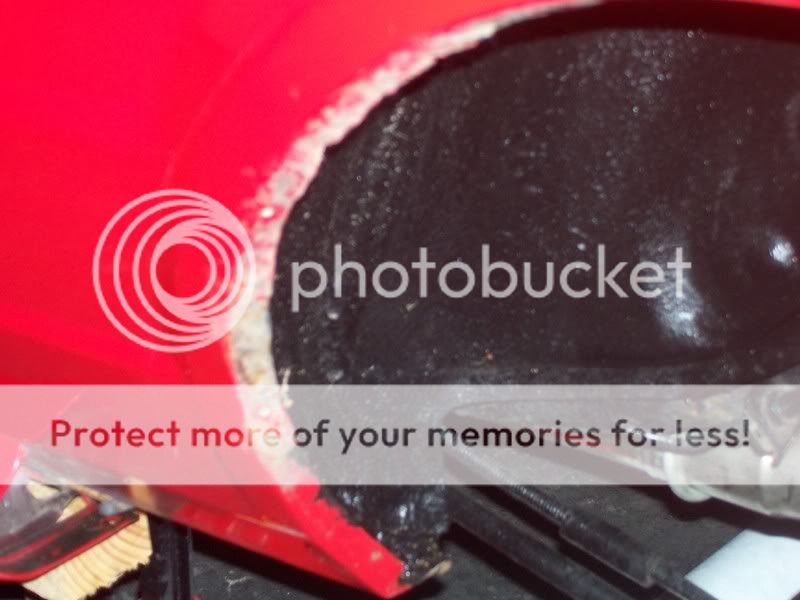
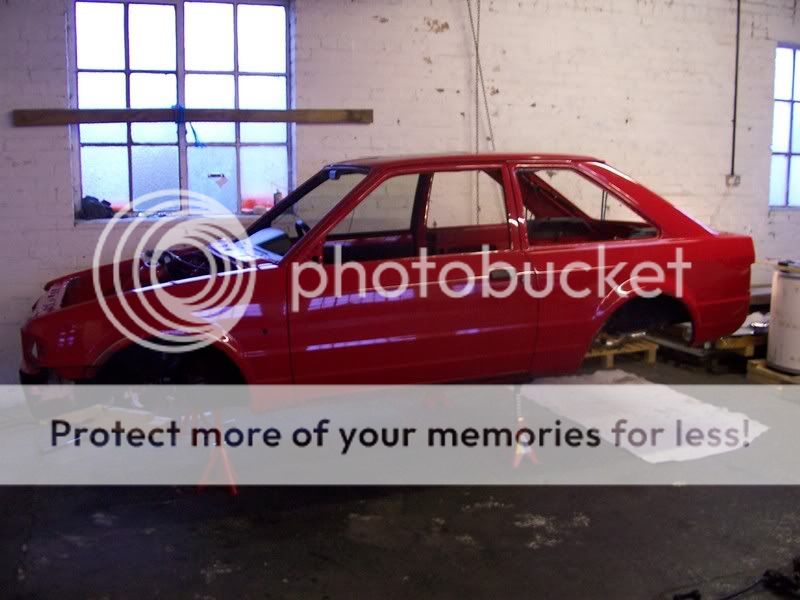
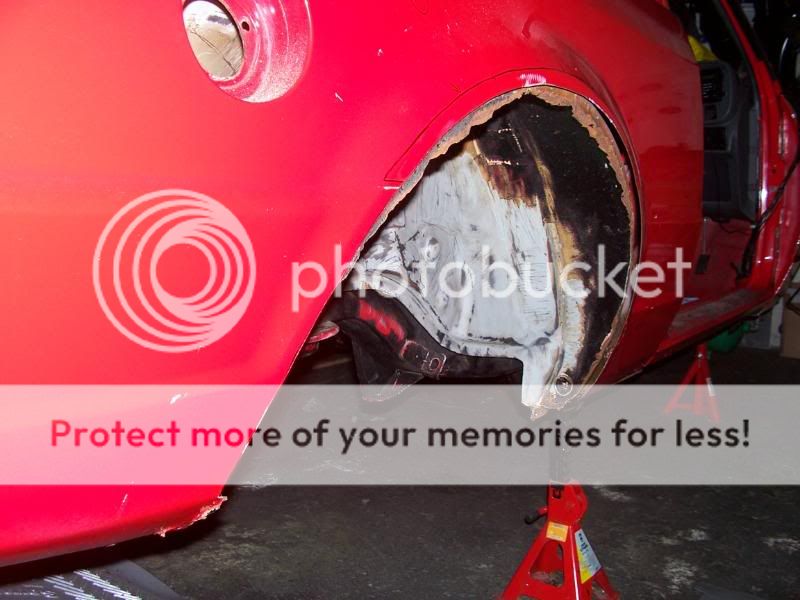
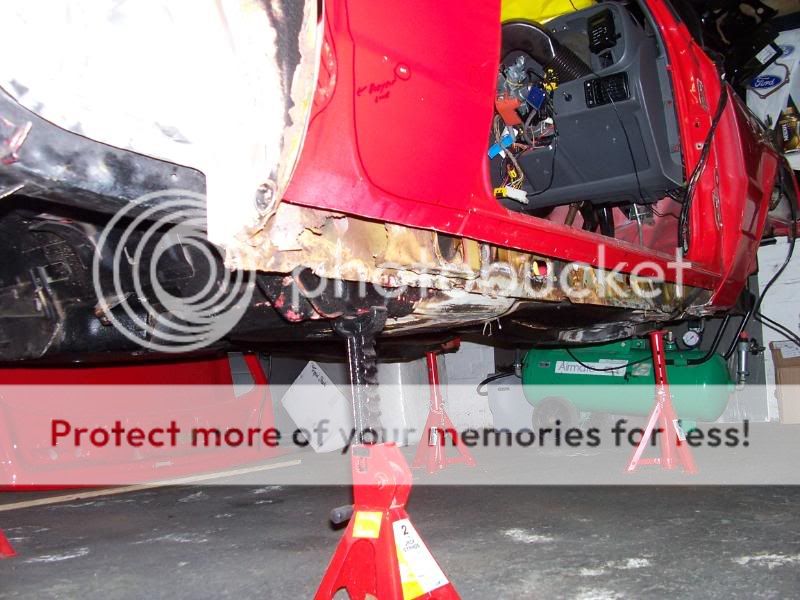
Rear bumper off and bodykit off

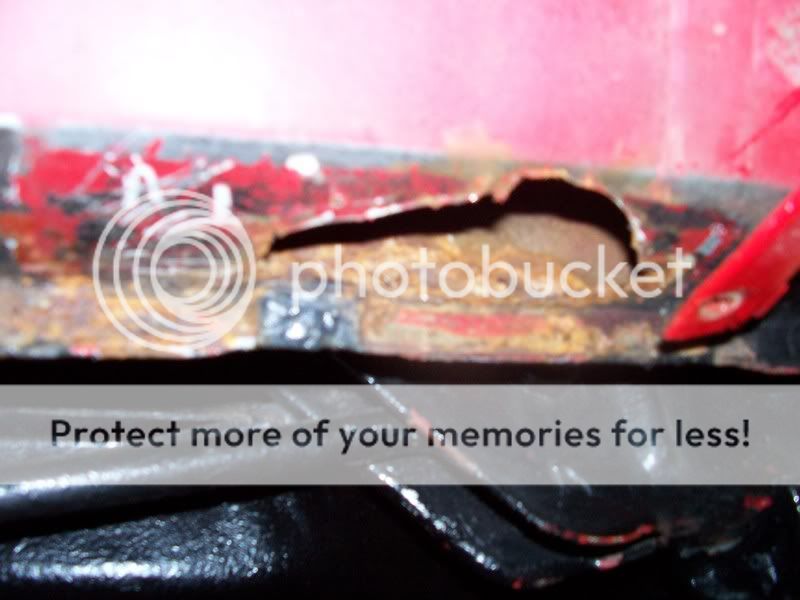
When i removed the rear skirts i was greeted by this on the near side
[color=#ffffff]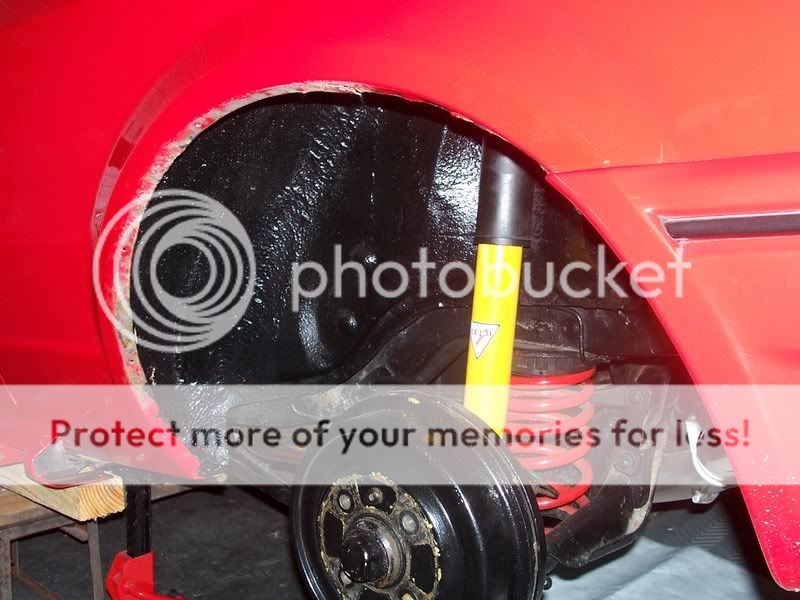
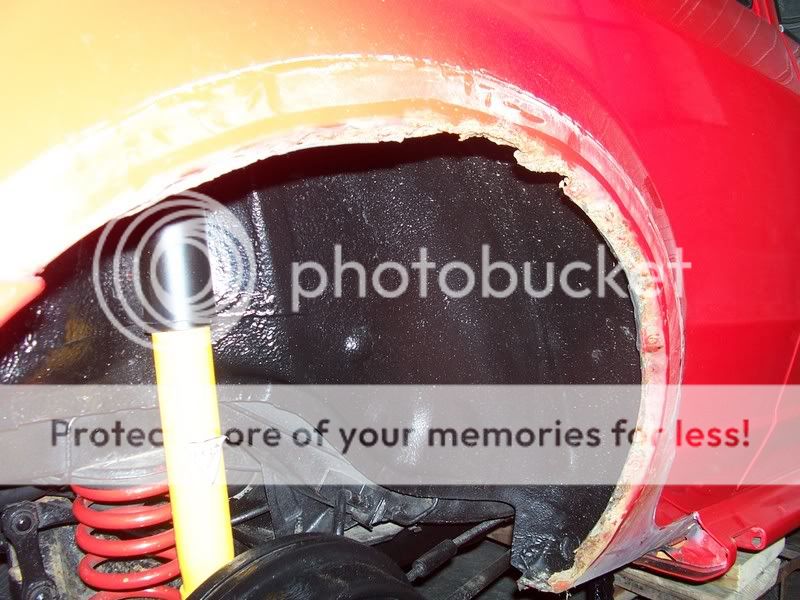
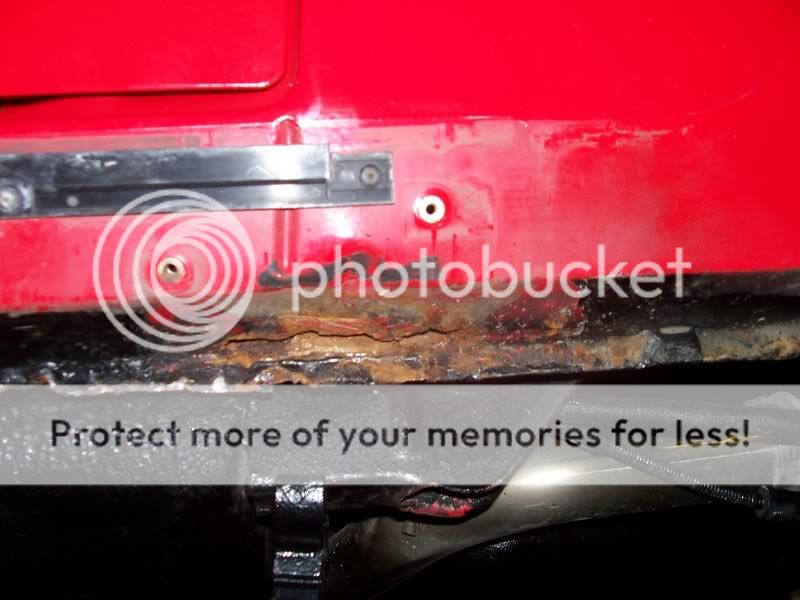
And this on the Off side
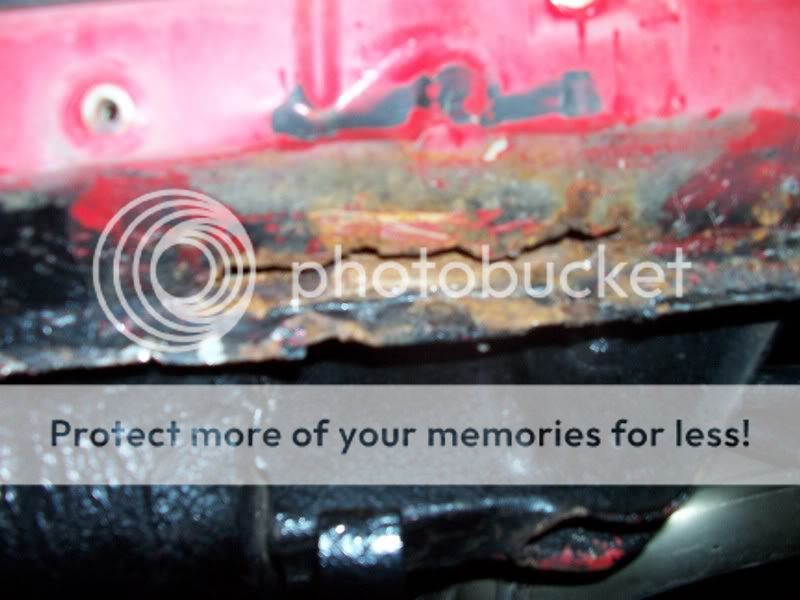
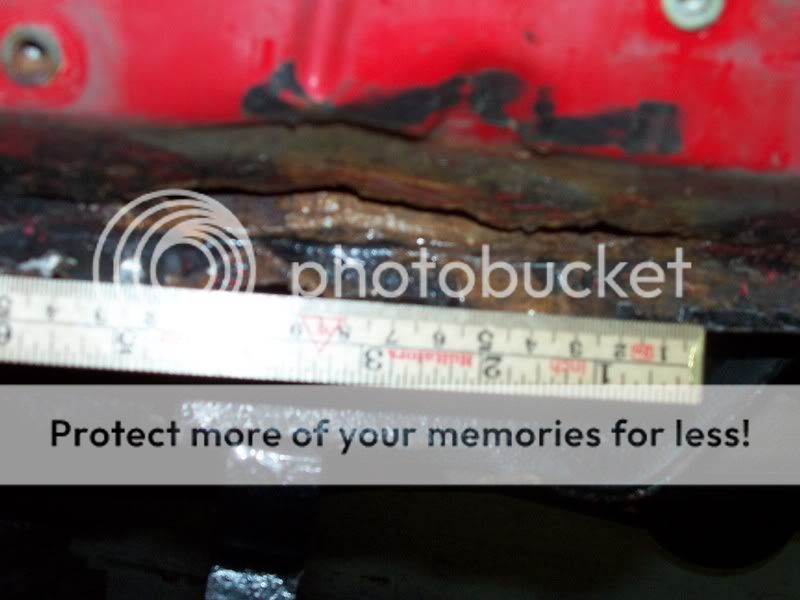
And this under the cills
Now as you can see the arches and cills are bad but not major. Can somebody give some ideas on how to go about fixing them.
CheeRS
Chris
Well after much thought last weekend i decided to start the restoration of my Series 2. I was going to leave it till after 2007 show season had ended and get it ready in time for Santa Pod 2008 but i thought that 15 months is better 7 months to plan it out and get the works under way.
Now some of you know i competed in the Post 81 Novice concours last year and done very well including winning the Gold Cup and National Day for its class which was an honour to say the least.
Anyway when i was doing the shows and when people were looking around the car, the majority of them got on there hands and knees to have a look underneath the car, which is clean and painted black but it isnt detailed in any way so this is what i will be embarking on for the next 15 months, which will also include, The whole underside will be painted red, the engine & bay detailed, suspension detailed, pipes, clips, grommets, knickers the lot.
Now this i will have to do in my spare time and on my own, and i will be taking my time so that i get it absolutly perfect so expect the updates to be few and far between but when i do abit on the car i will take pics and put them on here.
I started in my lunchtime today so took a few pics of how i got on.
Thanks for looking :thumbsup: :thumbsup: :thumbsup:
Up onto the ramps she goes
Up onto the axle stands
Rear and side few
Rear bumper off and bodykit off
When i removed the rear skirts i was greeted by this on the near side
[color=#ffffff]
And this on the Off side
And this under the cills
Now as you can see the arches and cills are bad but not major. Can somebody give some ideas on how to go about fixing them.
CheeRS
Chris
 12-01-2008, 12:37 PM
#2
Parts Restoring Nutter
Thread Starter
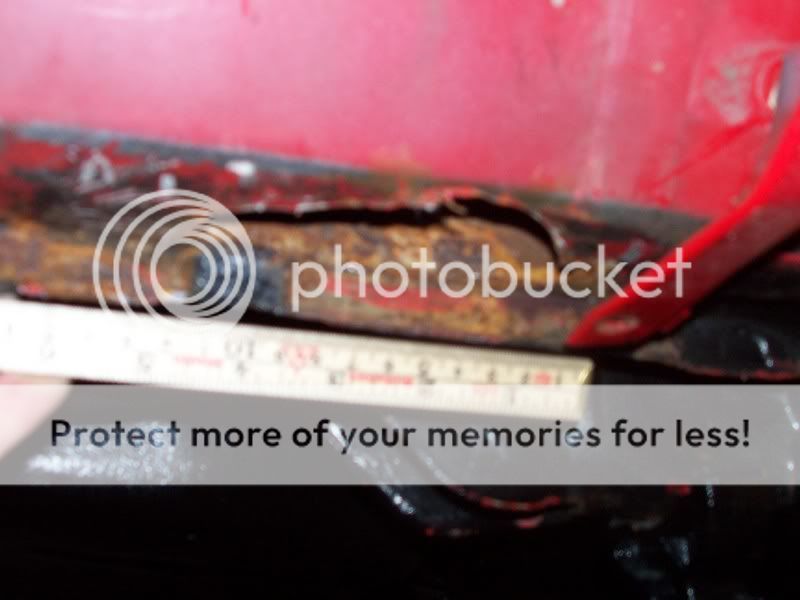
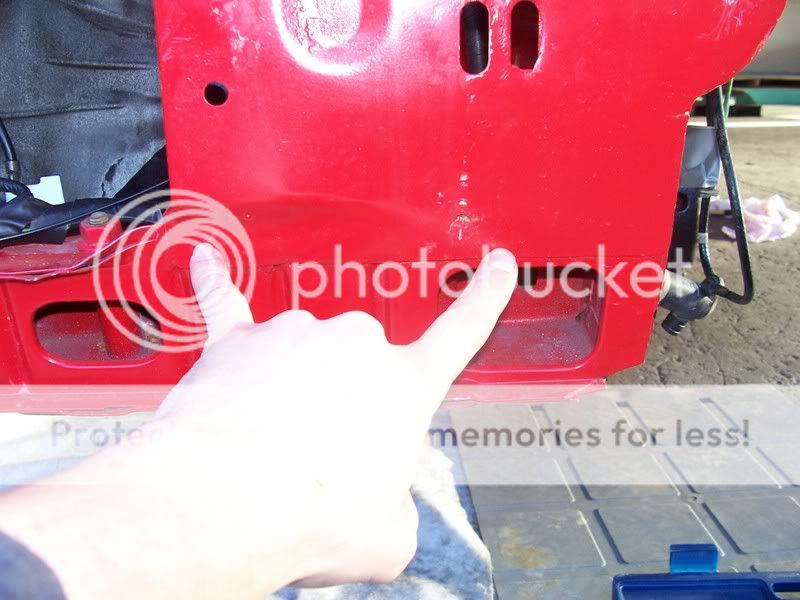
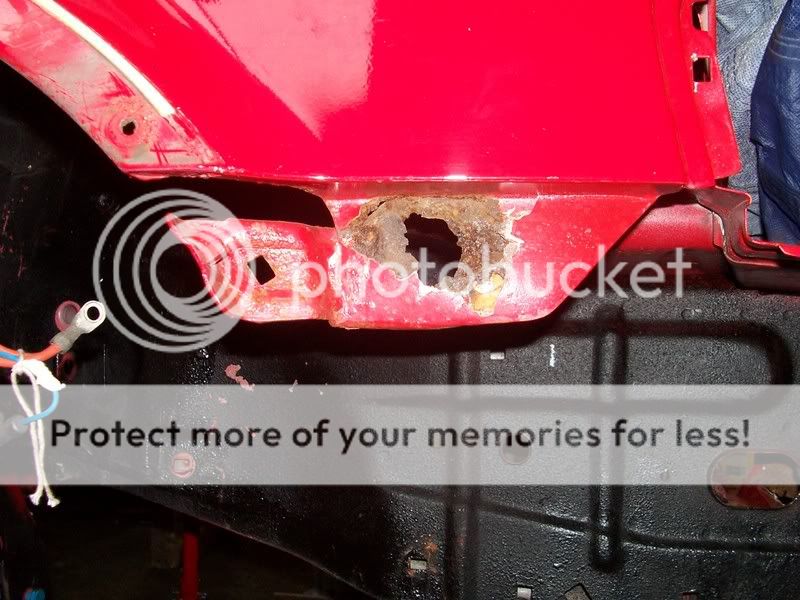
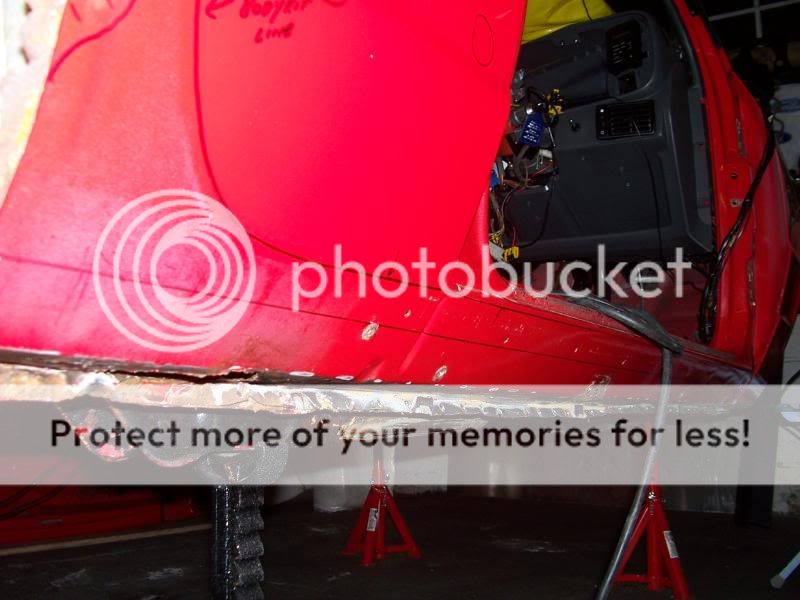
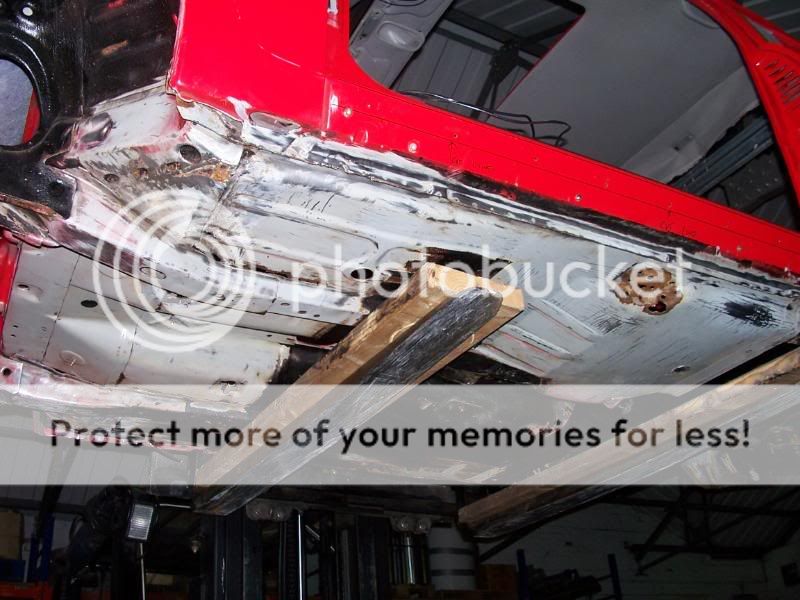
below are some pics of the sills and i used a measuring tape to give you an idea on how big holes are.
Near side. The flash is a bit strong but the hole is just under 6" long.
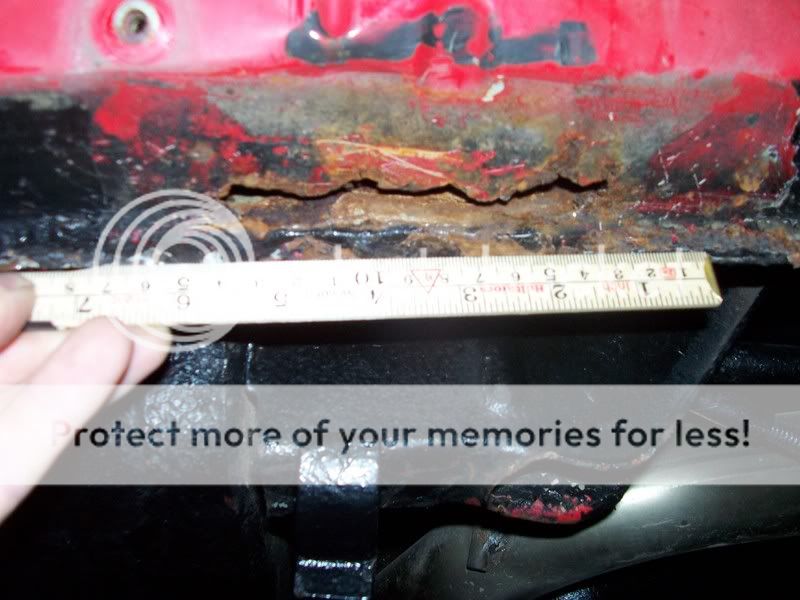
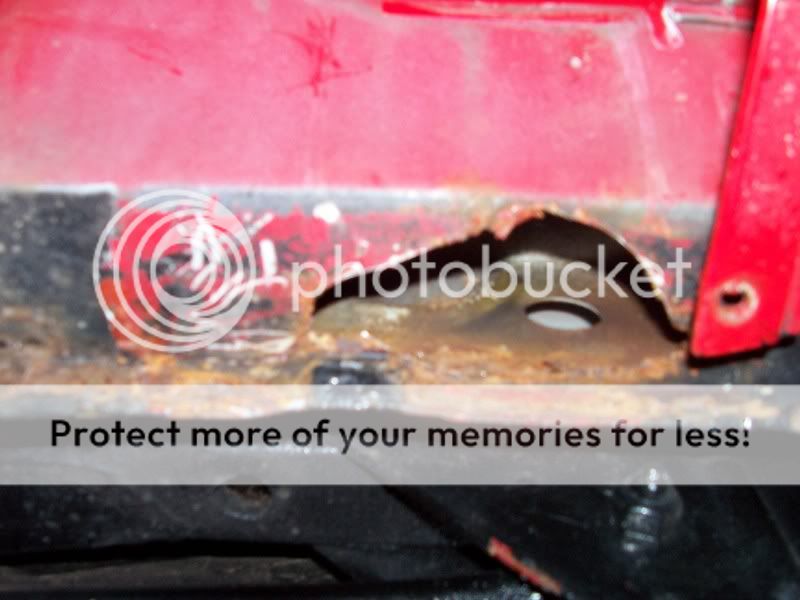
another pic of near side. The rest of the sill is solid as i gave it a good prod with a screwdriver but im not planning to sell the car in the future so im thinking of putting in a sill anyway to stop the tin worm coming back in another place. Might as well do the job right. Question is , is putting in a sill a big job???? Whats involved? Also i doubt i will get a genuine sill so will have to go down the aftermarket route but im wondering if all the holes will be the same on the copy panels for the bodykit mounts??????
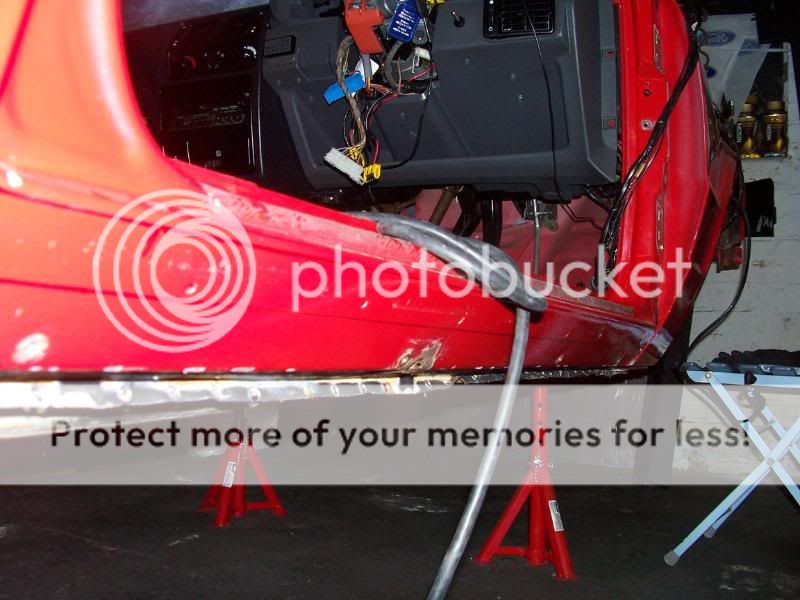
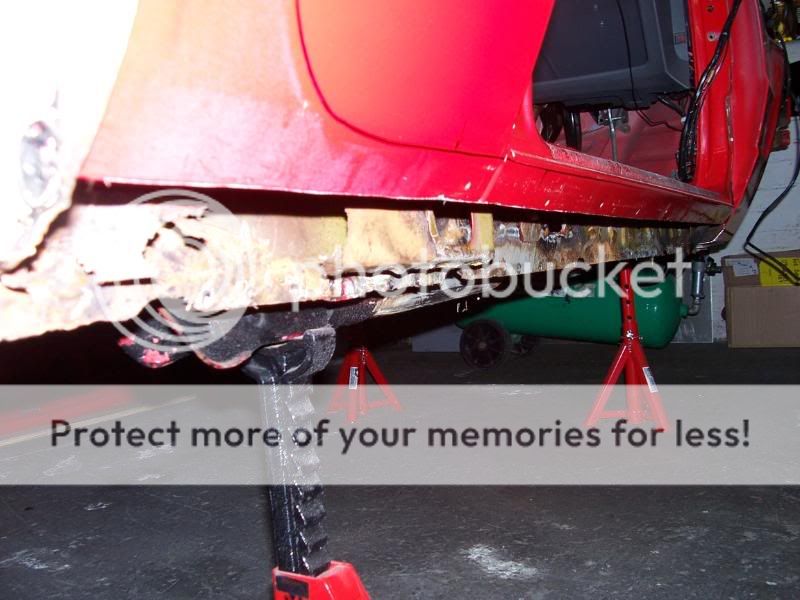
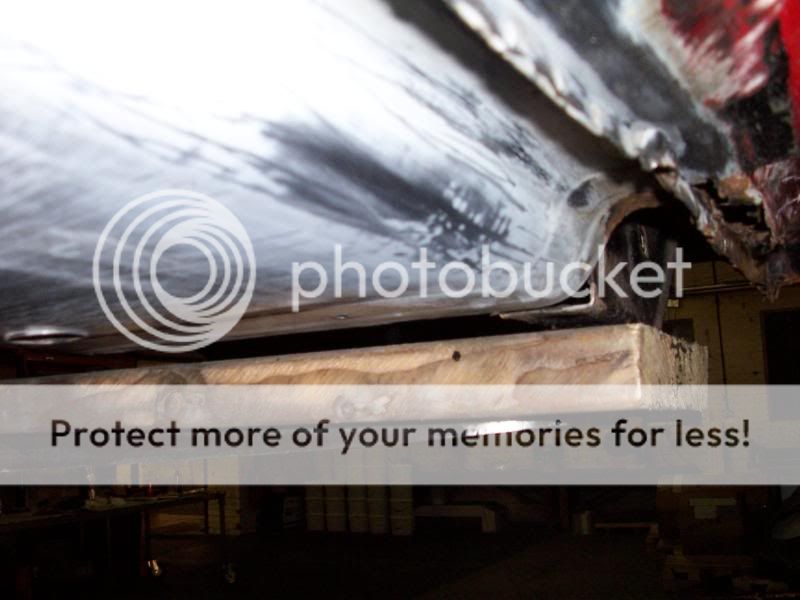
Off side sill
Sorry for the flash but tape reads 5"
The rest of the sill is also solid but thinking i might as well do it properly while im at it.
Near side. The flash is a bit strong but the hole is just under 6" long.
another pic of near side. The rest of the sill is solid as i gave it a good prod with a screwdriver but im not planning to sell the car in the future so im thinking of putting in a sill anyway to stop the tin worm coming back in another place. Might as well do the job right. Question is , is putting in a sill a big job???? Whats involved? Also i doubt i will get a genuine sill so will have to go down the aftermarket route but im wondering if all the holes will be the same on the copy panels for the bodykit mounts??????
Off side sill
Sorry for the flash but tape reads 5"
The rest of the sill is also solid but thinking i might as well do it properly while im at it.
12-01-2008, 12:40 PM
#3
Parts Restoring Nutter
Thread Starter
Howdi all.
Cheers for the comments :thumbsup: :thumbsup:
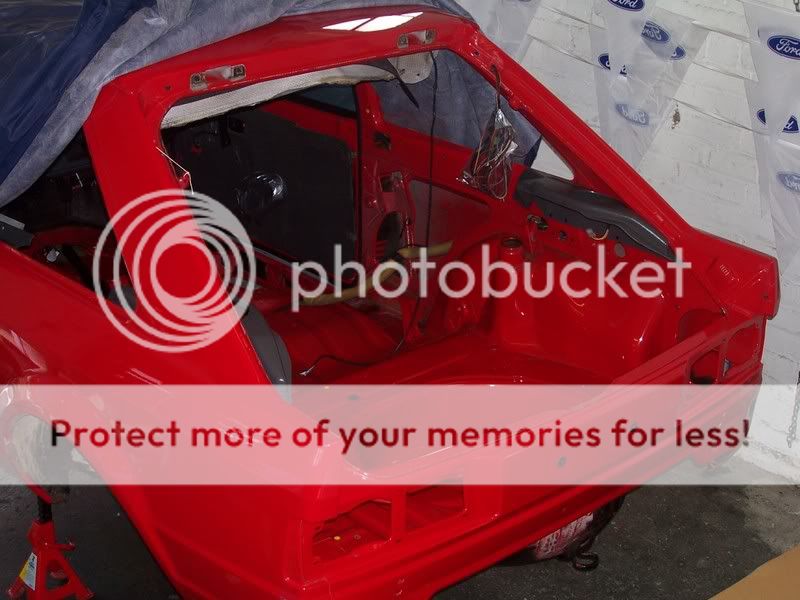
Well i got another spare few hours yesterday afternoon so wipped the cover off and got stuck in but first was to make a quarantine area for all the interior parts and engine parts - hoses, tanks headlights etc


All this will be fully seales off once all the parts are in and so that no dust can enter. Fooking hate dust
More stripping of interior
Note in pics below that every nut, bolt, clip interior part was was photographed before it was removed, then logged and then put into a labled bag. I think this is the best thing to do if its your first time otherwise you might end up with the fuel pump in the fooking glove box lmao lmao lmao


Its all coming along as id planned, The running gear will be getting dropped soon and my good mate Dave aka Monster will be helping to lift out the engine so that it can be stripped down and rebuilt along with bead blasting as much as i can and getting powder coated.
Ive already got visions of what it will look like when its finished.
It will be one to see in 2008

Cheers for the comments :thumbsup: :thumbsup:
Well i got another spare few hours yesterday afternoon so wipped the cover off and got stuck in but first was to make a quarantine area for all the interior parts and engine parts - hoses, tanks headlights etc
All this will be fully seales off once all the parts are in and so that no dust can enter. Fooking hate dust
More stripping of interior
Note in pics below that every nut, bolt, clip interior part was was photographed before it was removed, then logged and then put into a labled bag. I think this is the best thing to do if its your first time otherwise you might end up with the fuel pump in the fooking glove box lmao lmao lmao
Its all coming along as id planned, The running gear will be getting dropped soon and my good mate Dave aka Monster will be helping to lift out the engine so that it can be stripped down and rebuilt along with bead blasting as much as i can and getting powder coated.
Ive already got visions of what it will look like when its finished.
It will be one to see in 2008
12-01-2008, 12:41 PM
#4
Parts Restoring Nutter
Thread Starter
Right, just a little update.
Got a spare few hours last night so got myself stuck in again
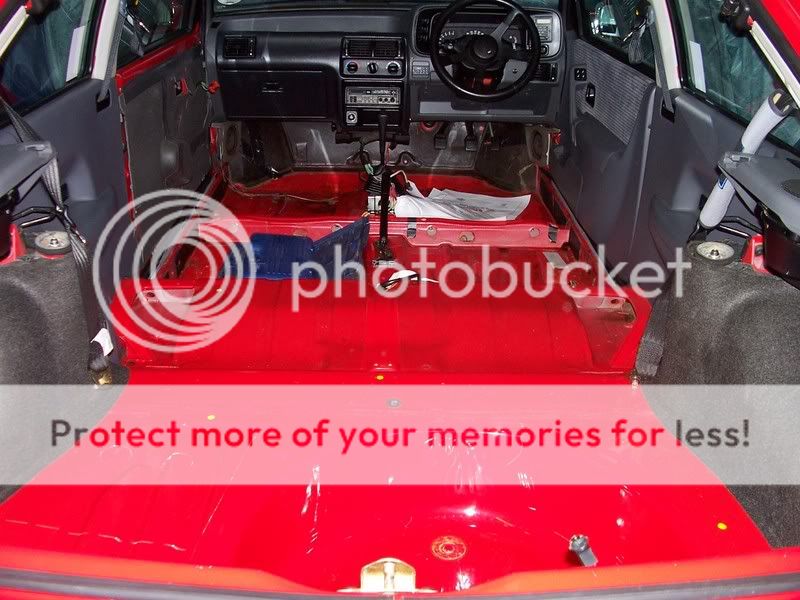
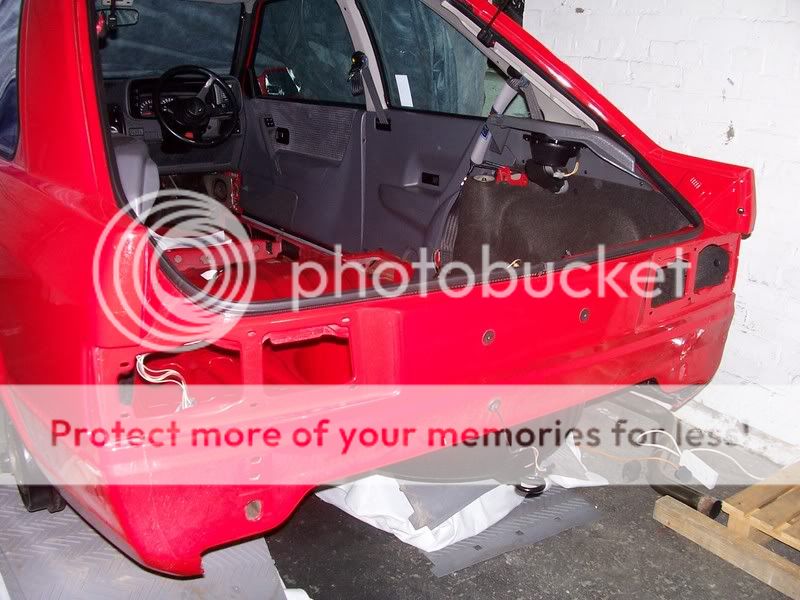
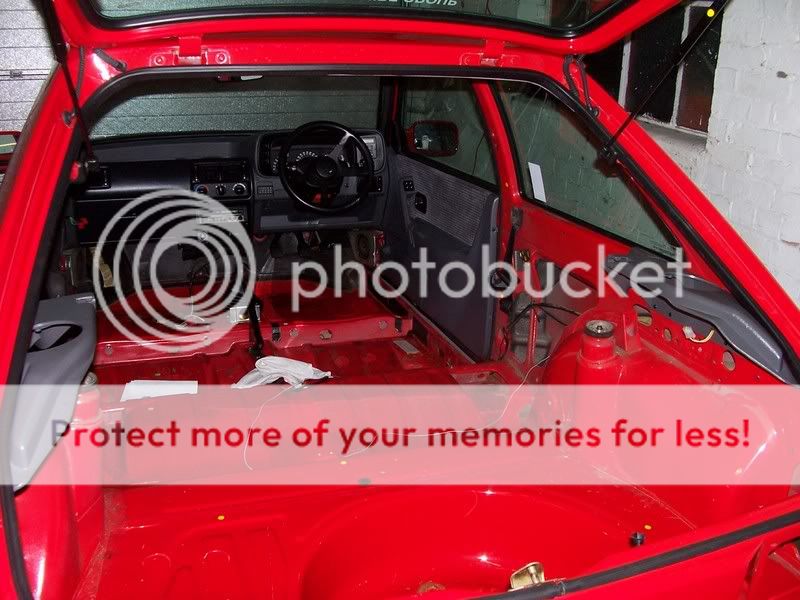
I managed to get most of the interior out. I will be leaving the dashboard in as i dont think i could handle all the wires everywhere. This will be fully masked off before painting the inside. I also left the speaker pods on as they are riveted on and i didnt want to drill them out until i know you can still get them. Anyone??
Its amazing what can build up in your washer bottle ale: ale: ale:

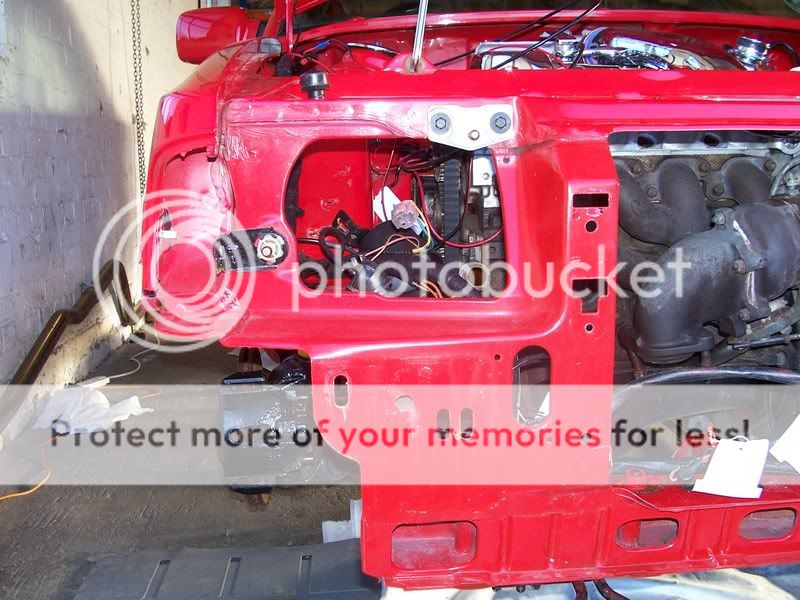
Then it was off with the front bumper, lights etc
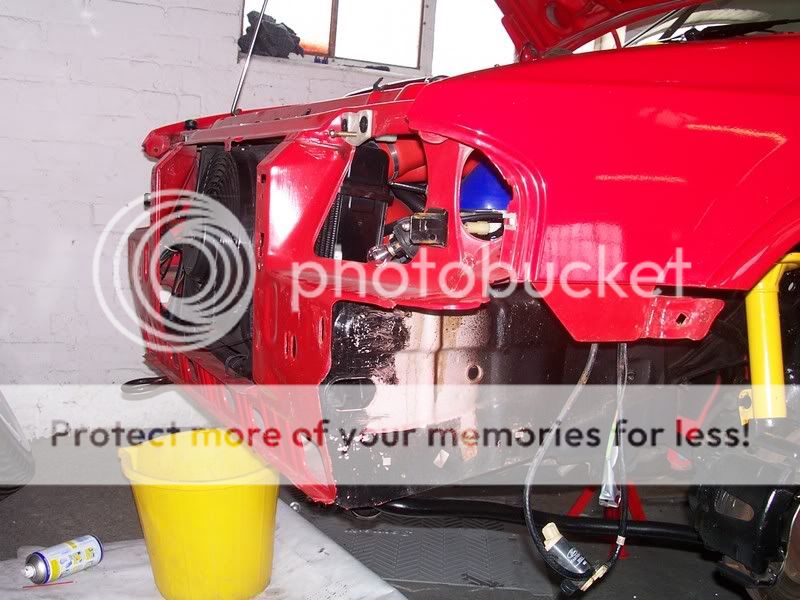
Then it was out with the rad, which will be replaced by a nice shiny monster alloy one, also removed alternator and starter motor. All is going well
The front panel that houses the lights etc will be replaced as its started to go where the bumper mounts but i will hopefully be able to retain the original factory seal to the wings. Paul/Matt can this be done lads?????
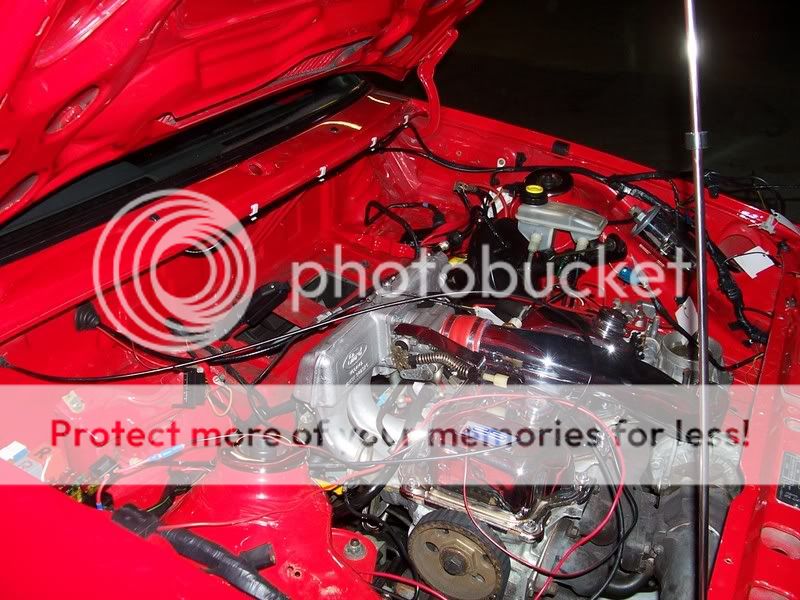
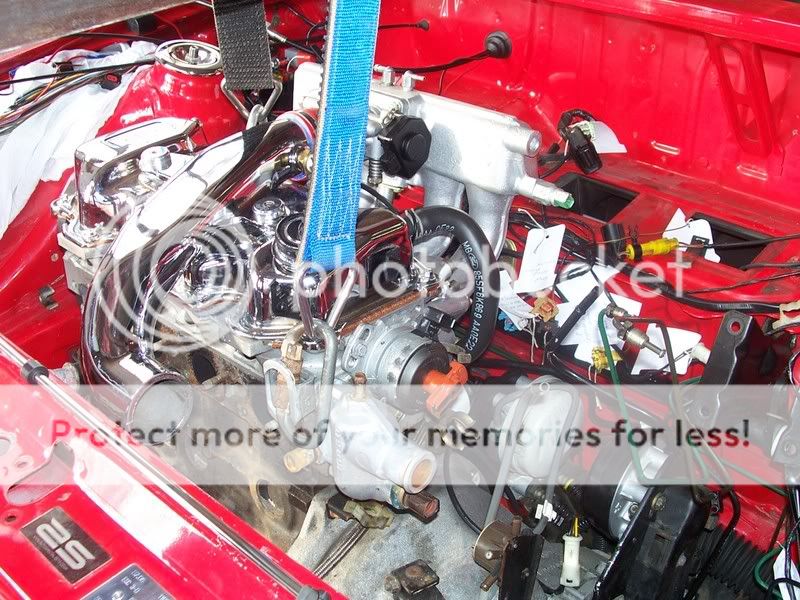
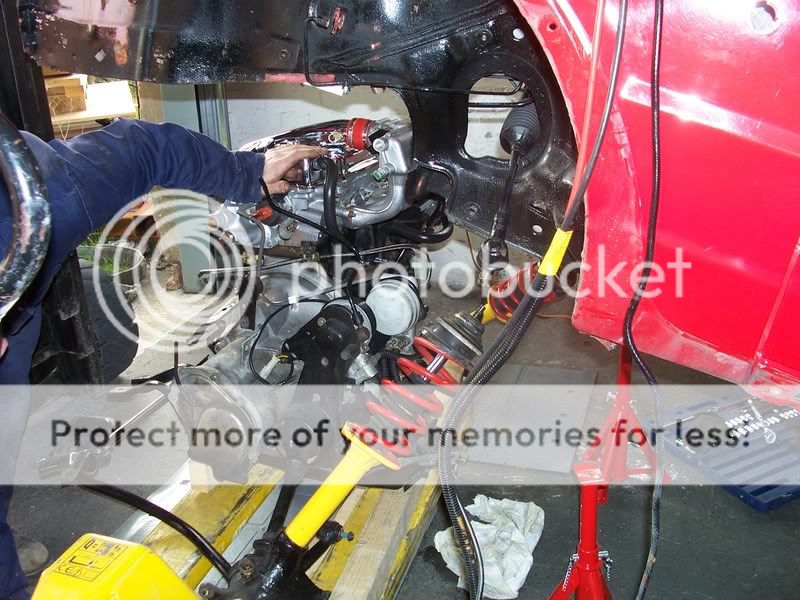
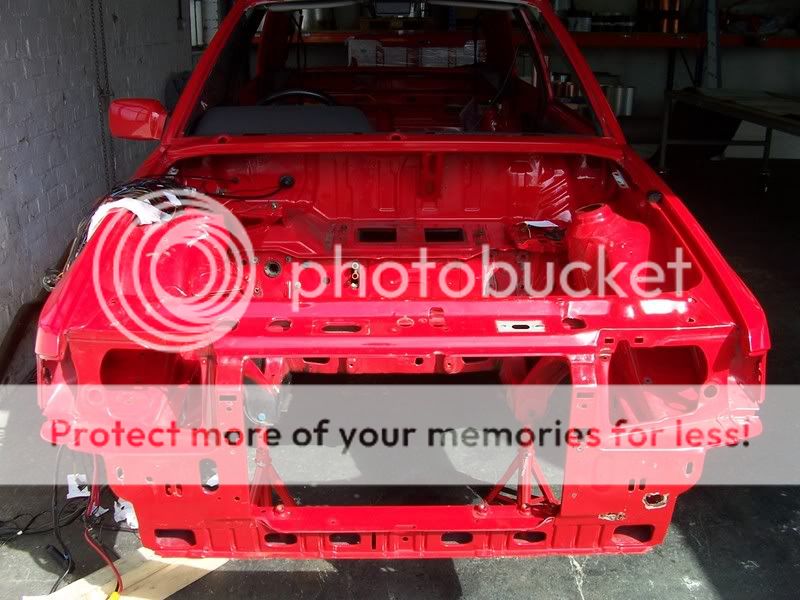
Engine bay before i got stuck in
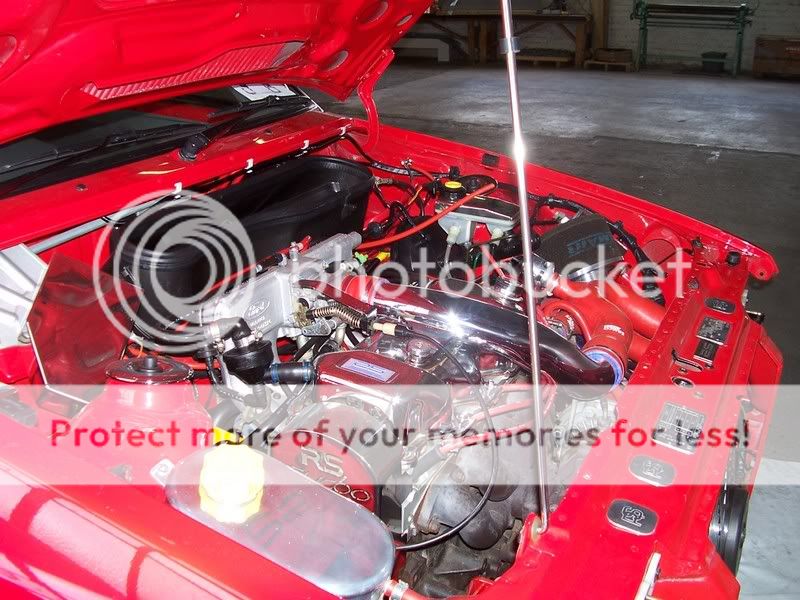
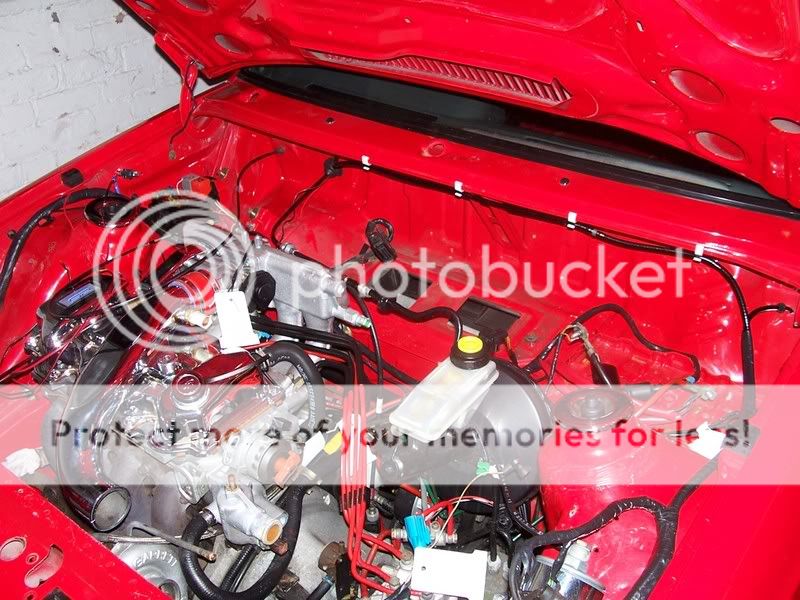
Then
What the fook have i started lmao lmao
Notice how every switch ive taken off i photographed where it was then tagged it. I got this idea from Paul Ruddy - RS16i Resto, I think this will save me one fooking huge headache when i come to put it all back together :doh:
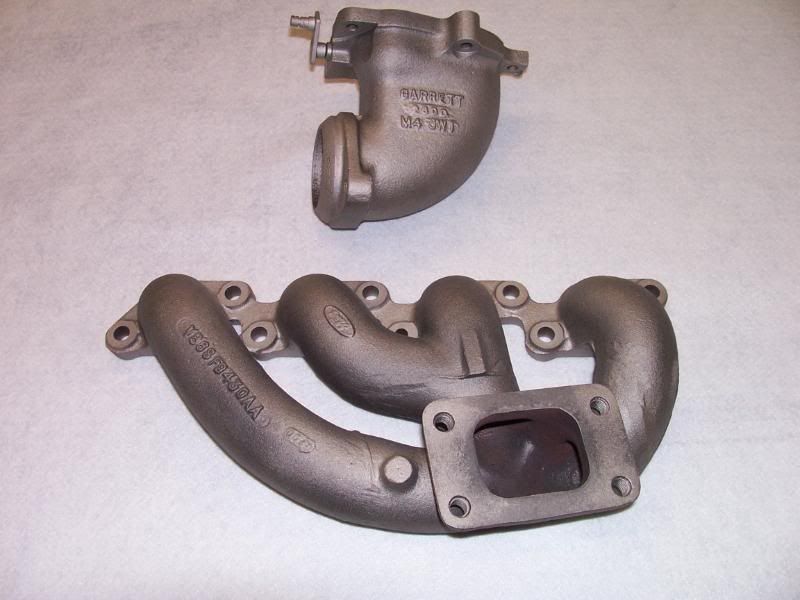
What does this do then lmao lmao Plan is to stage 1 it just to give it that little ooommmffffffff
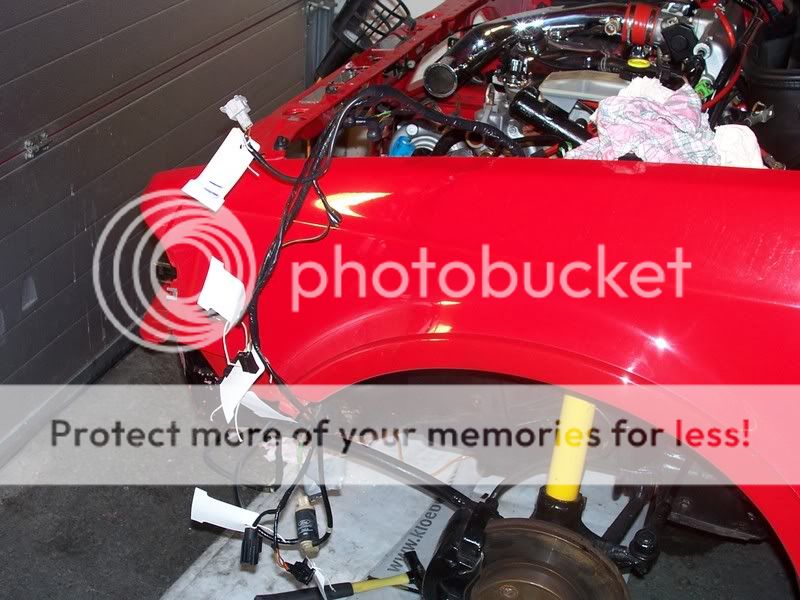
Then it was out with all the air intakes and wiper mechanisms,what a biyatch they were
Well its getting there slowly but surely.
The bit i am dreading is removing all the air flow meter and master cylinder/brake set up. Any tips on doing this and also whats the best way to remove the turbo????
Hopefully more pics later on after ive got my hands dirty.
All going so far so good
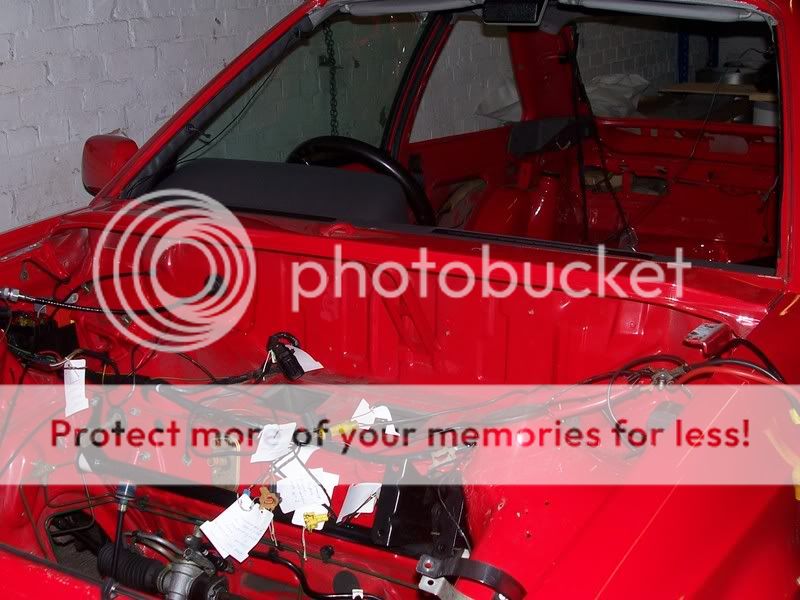
Got a spare few hours last night so got myself stuck in again
I managed to get most of the interior out. I will be leaving the dashboard in as i dont think i could handle all the wires everywhere. This will be fully masked off before painting the inside. I also left the speaker pods on as they are riveted on and i didnt want to drill them out until i know you can still get them. Anyone??
Its amazing what can build up in your washer bottle
ale: ale: ale: Then it was off with the front bumper, lights etc
Then it was out with the rad, which will be replaced by a nice shiny monster alloy one, also removed alternator and starter motor. All is going well
The front panel that houses the lights etc will be replaced as its started to go where the bumper mounts but i will hopefully be able to retain the original factory seal to the wings. Paul/Matt can this be done lads?????
Engine bay before i got stuck in
Then
What the fook have i started lmao lmao Notice how every switch ive taken off i photographed where it was then tagged it. I got this idea from Paul Ruddy - RS16i Resto, I think this will save me one fooking huge headache when i come to put it all back together :doh:
What does this do then lmao lmao Plan is to stage 1 it just to give it that little ooommmffffffff
Then it was out with all the air intakes and wiper mechanisms,what a biyatch they were
Well its getting there slowly but surely.
The bit i am dreading is removing all the air flow meter and master cylinder/brake set up. Any tips on doing this and also whats the best way to remove the turbo????
Hopefully more pics later on after ive got my hands dirty.
All going so far so good
12-01-2008, 12:43 PM
#5
Parts Restoring Nutter
Thread Starter
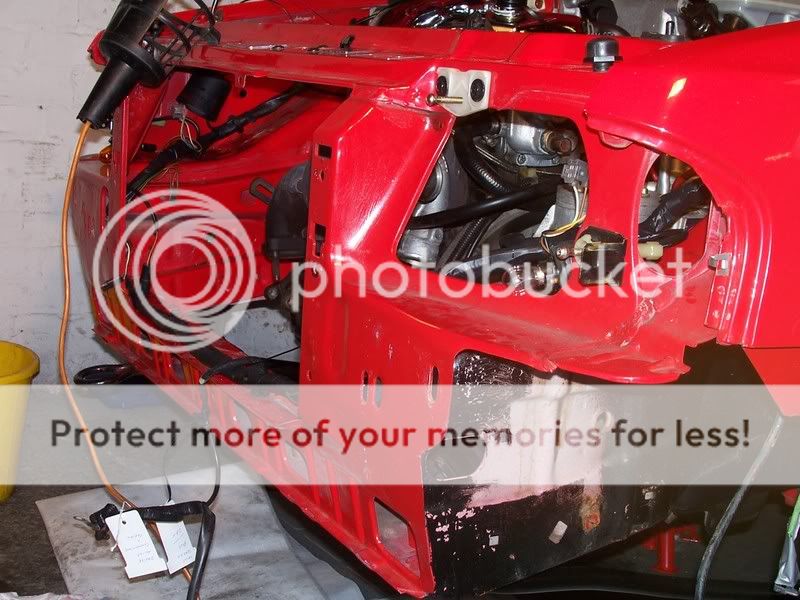
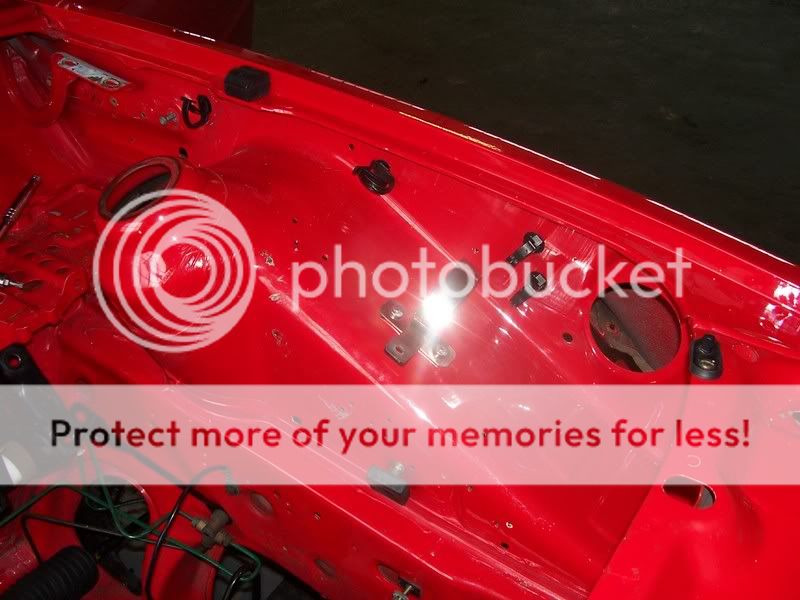
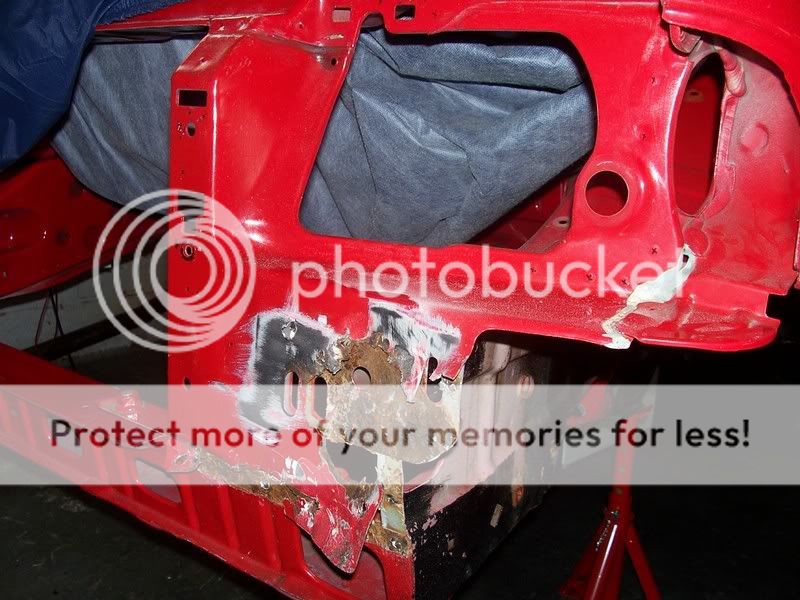
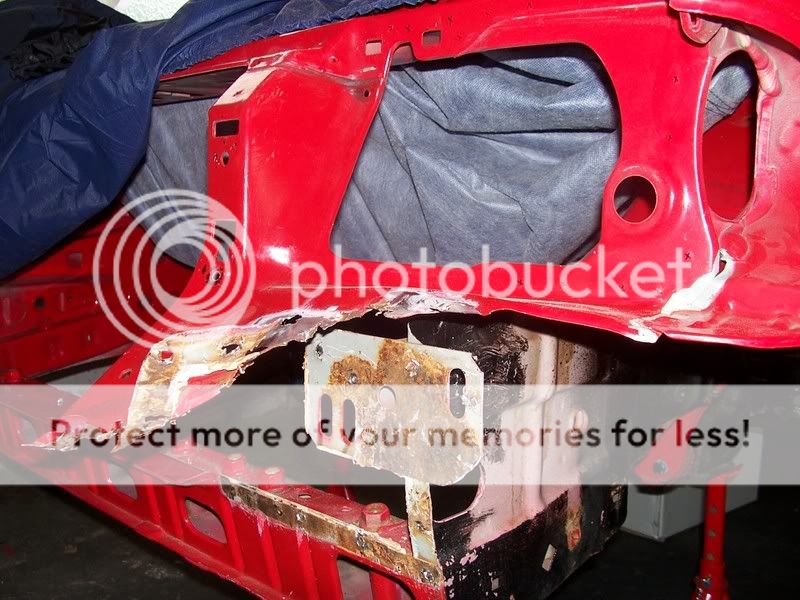
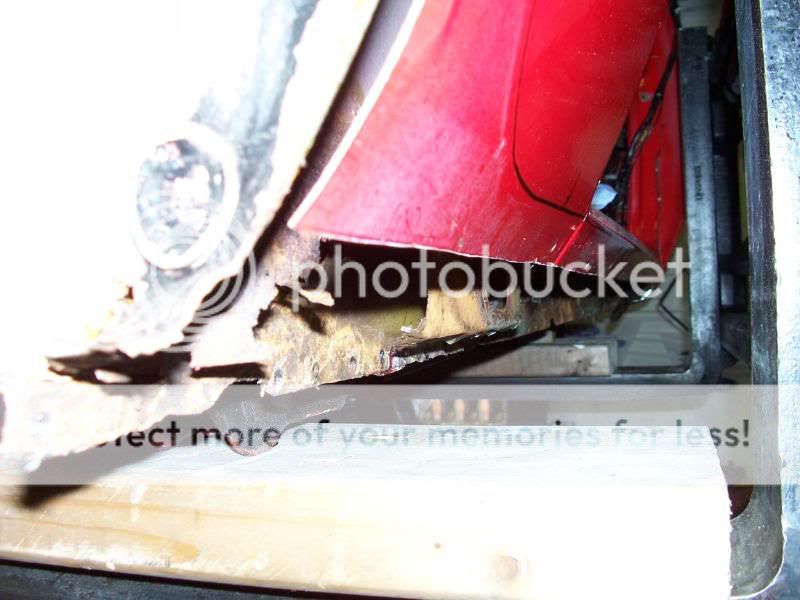
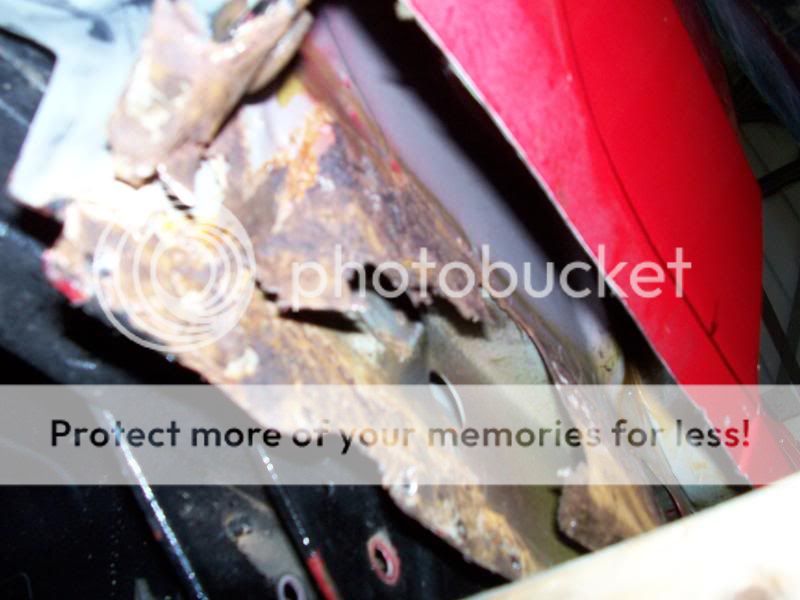
Here are a few pics of the front panel.
Looking at it i think it should be cut here but im no expert

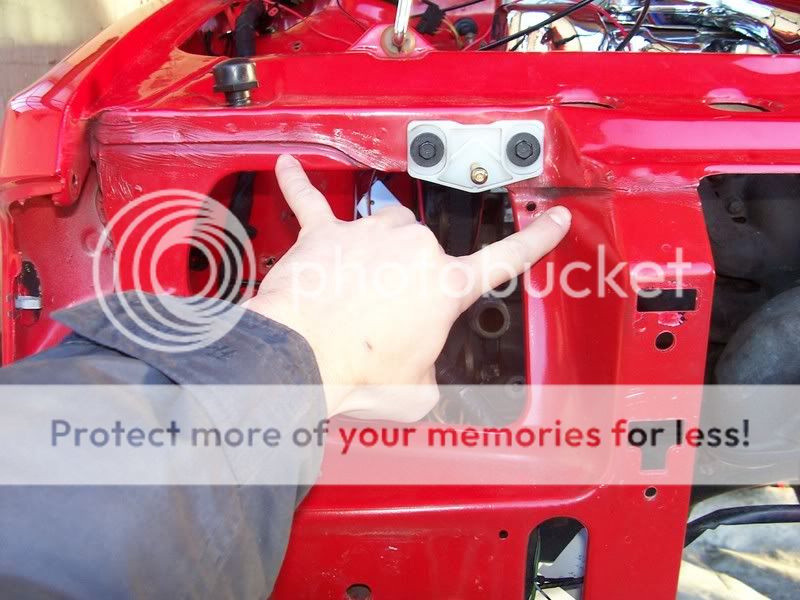
It looks like its spot welded here also so might be able to drill them out and air chisel off
View from the inside where radiator is. Fooking tin worm
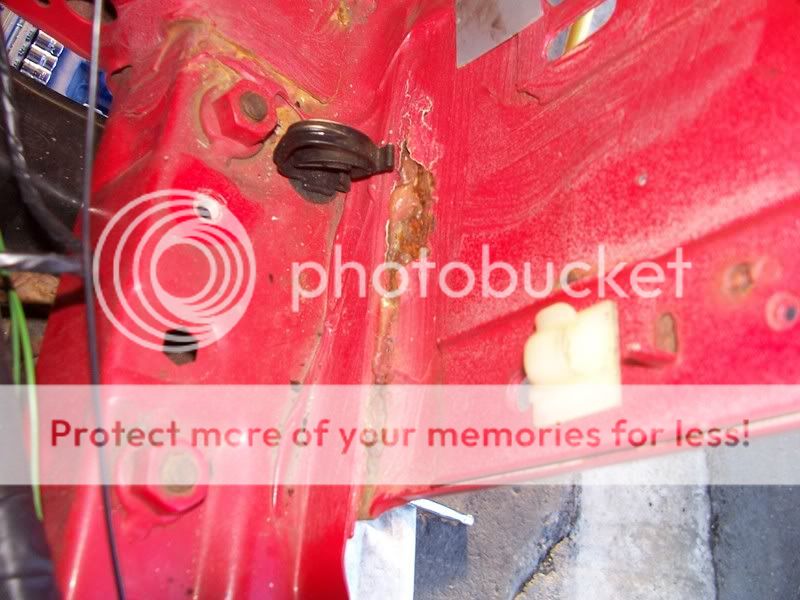
It has also found its way to here so might have to get some new brackets made

CheeRS
Chris
Looking at it i think it should be cut here but im no expert
It looks like its spot welded here also so might be able to drill them out and air chisel off
View from the inside where radiator is. Fooking tin worm
It has also found its way to here so might have to get some new brackets made
CheeRS
Chris
12-01-2008, 01:09 PM
#6
Parts Restoring Nutter
Thread Starter
Its update time
Can i just say a massive big thanks to Dave AKA Monster for helping me get my engine out last weekend. CheeRS mate. Top Man
Well last sat this is where we started
With my forklift skills and daves engine removal skills the engine was out in no time with no skinned knuckles and no head scratching.
It dropped faster than a whore's knickers lmao lmao
First we gently took the weight while the subframe was unbolted
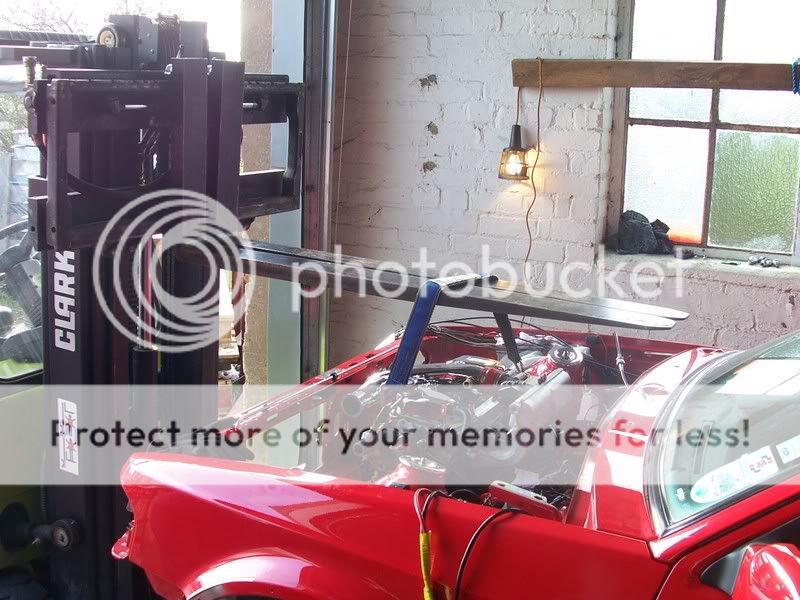
And dropped onto blocks. After a quick inspection by the man himself :hehe: :hehe: i took the forklift out of the way.
Then we raised the car to give us enough clearence to just pull the engine out using a pallet truck. Easy peasy
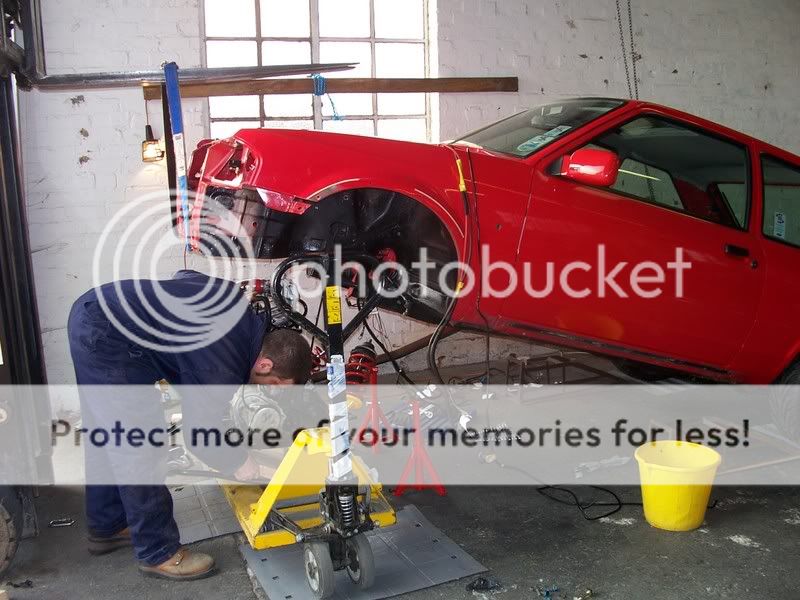
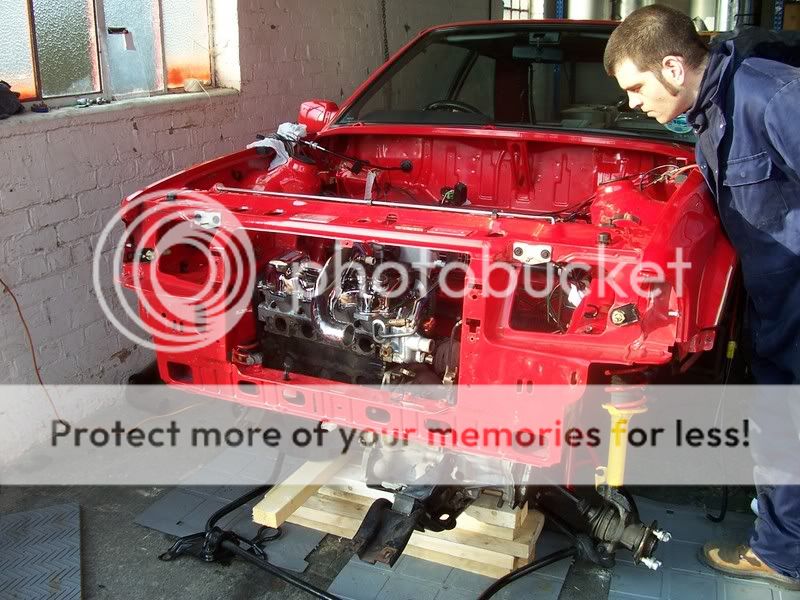
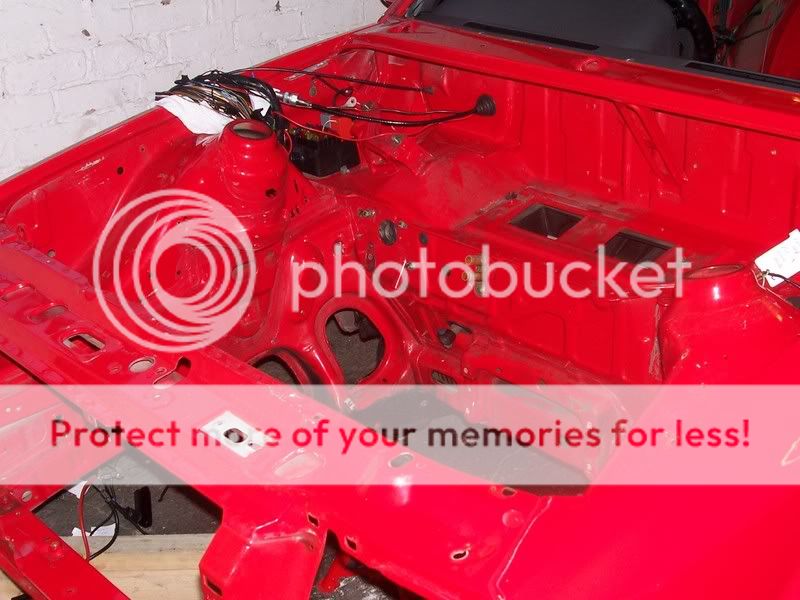
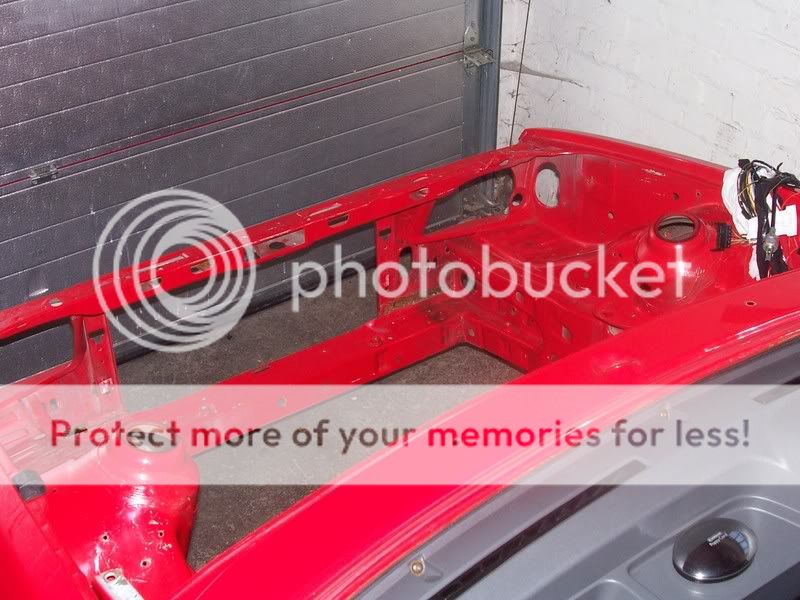
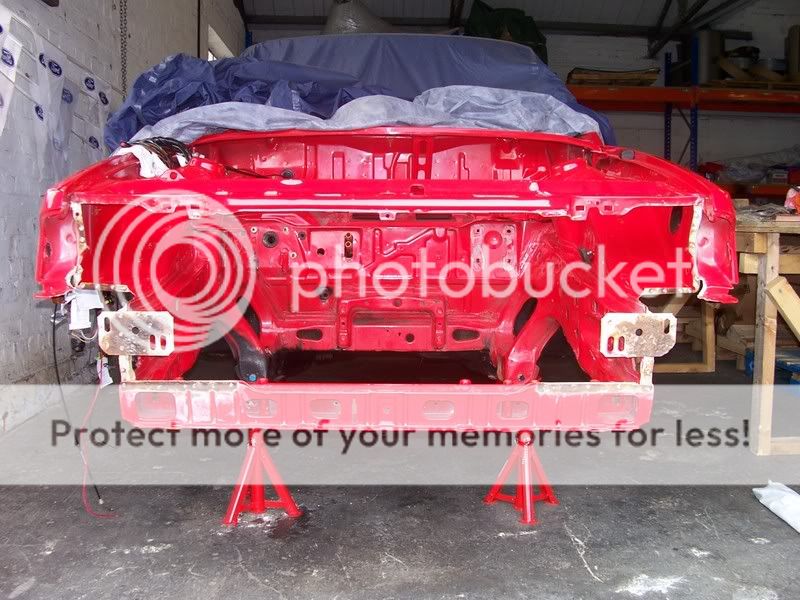
And voila. Engine bay without the engine

Now as the engine come in quick sharp time Dave had even had time to remove all my glass so armed with a trusty screwdriver out come the rear quarters, rear screen and because my front screen was all murky white on the bottom and will be replaced we just pushed the front screen out cracking it everywhere lol.
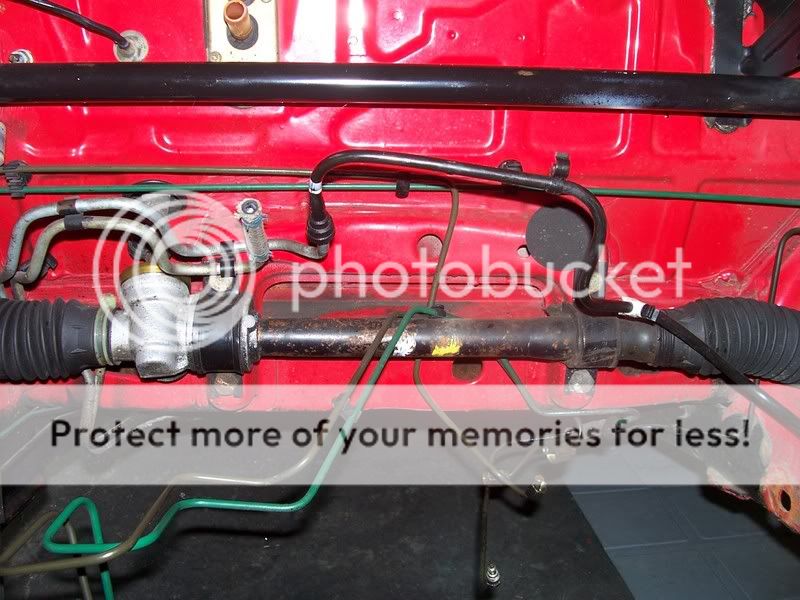
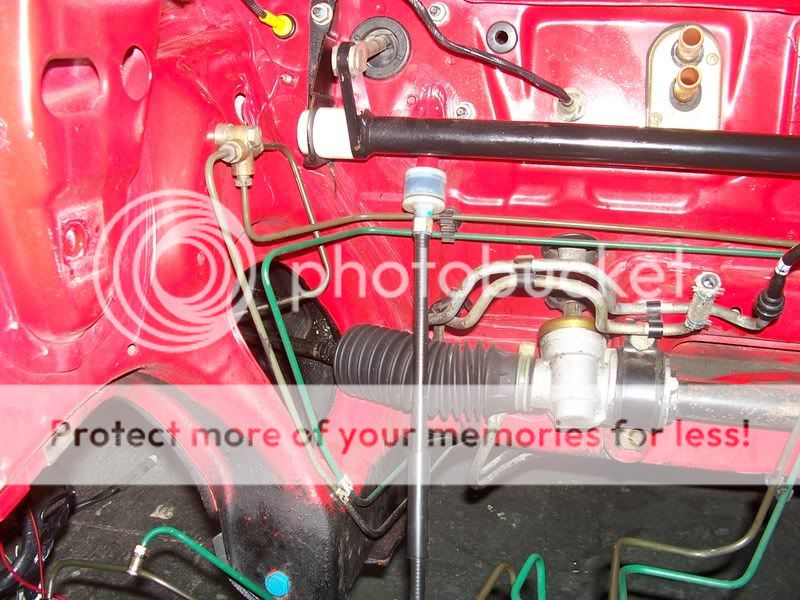
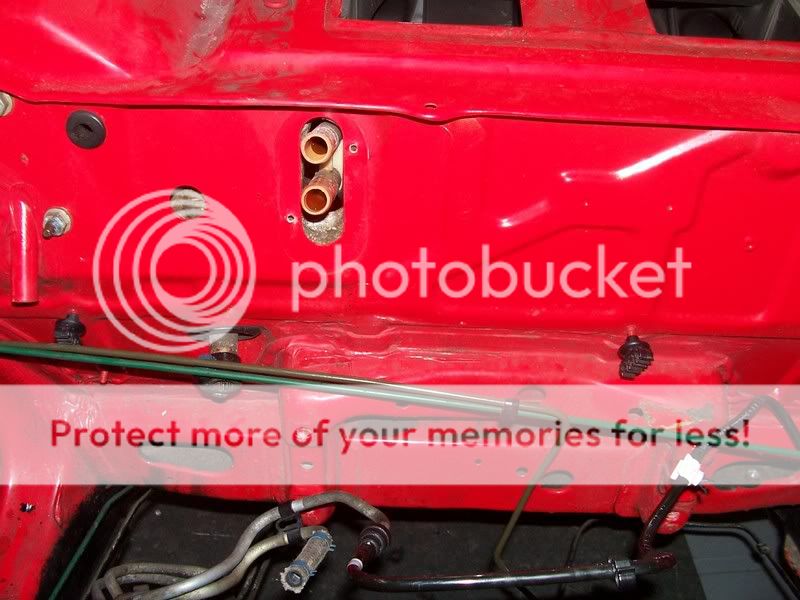
During the course of this week ive been working overtime to get the car stripped including everything in the engine bay, brake servos, lines, fuel lines, steering rack etc then under the rear of the car removing all the suspension, fuel tank, all brake and fuel lines and all of which ive taken photos of. I can put pics up if you like but there are only of clips etc and where everything goes.
All suspension off
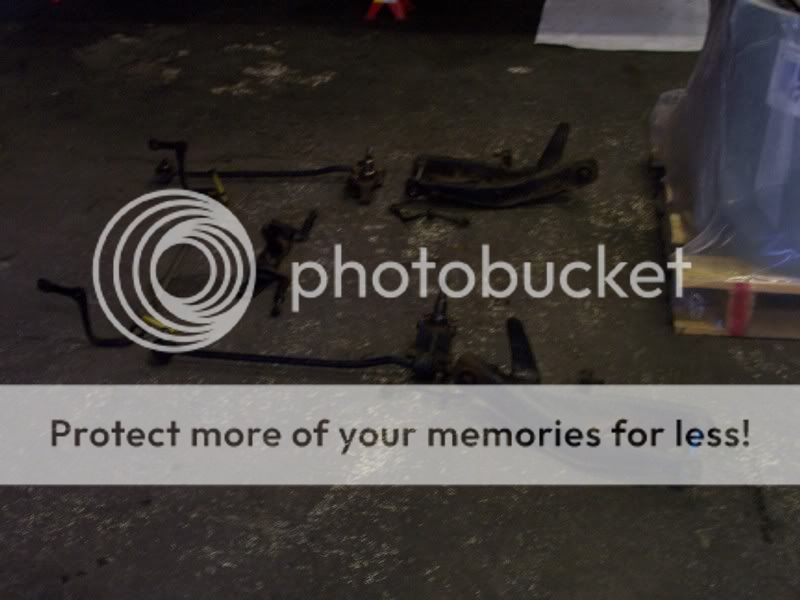
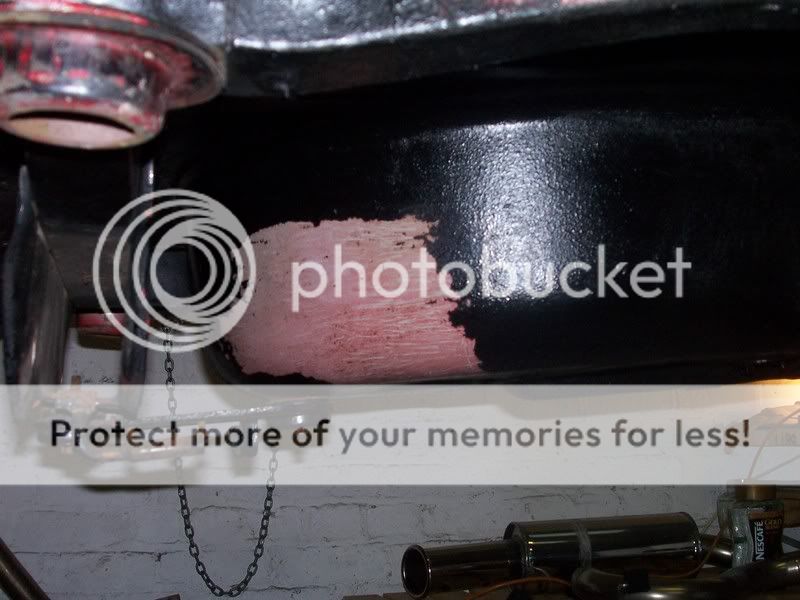
I couldnt resist having a bit of a rub lmao lmao
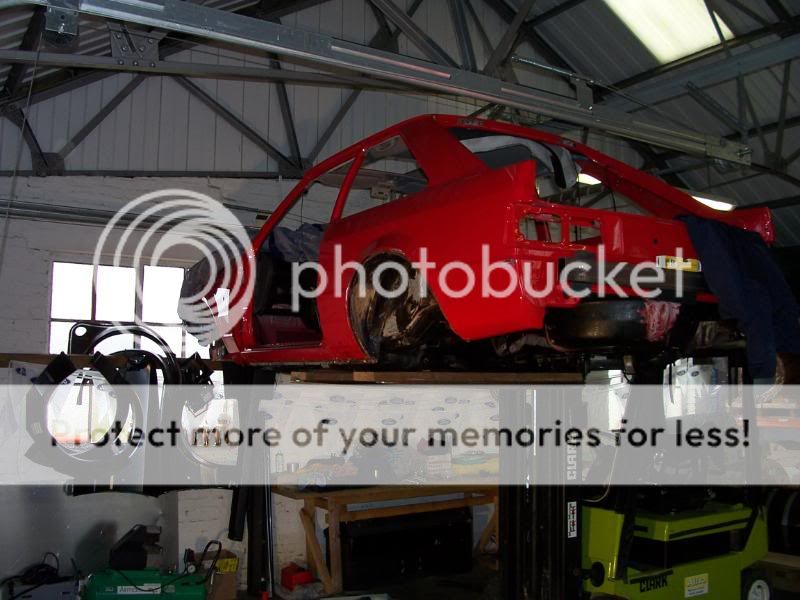
And finally this is how the car is sitting at the moment
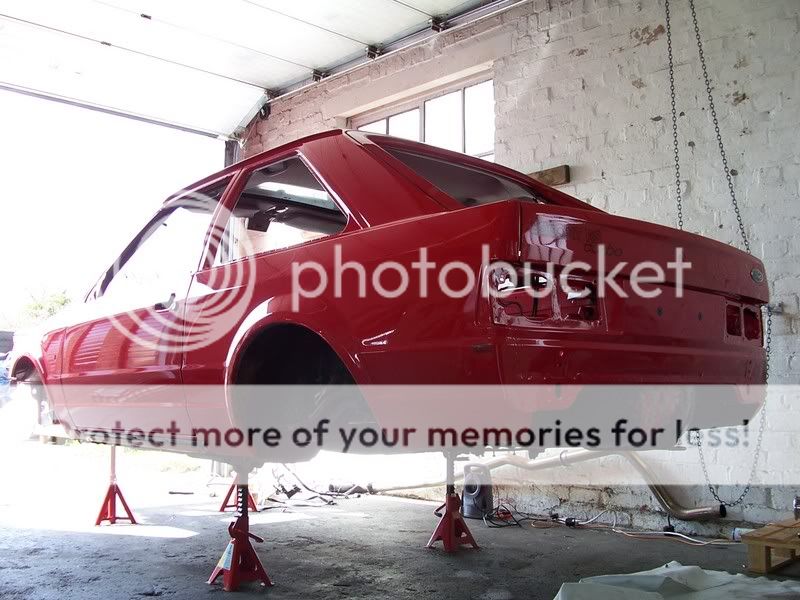
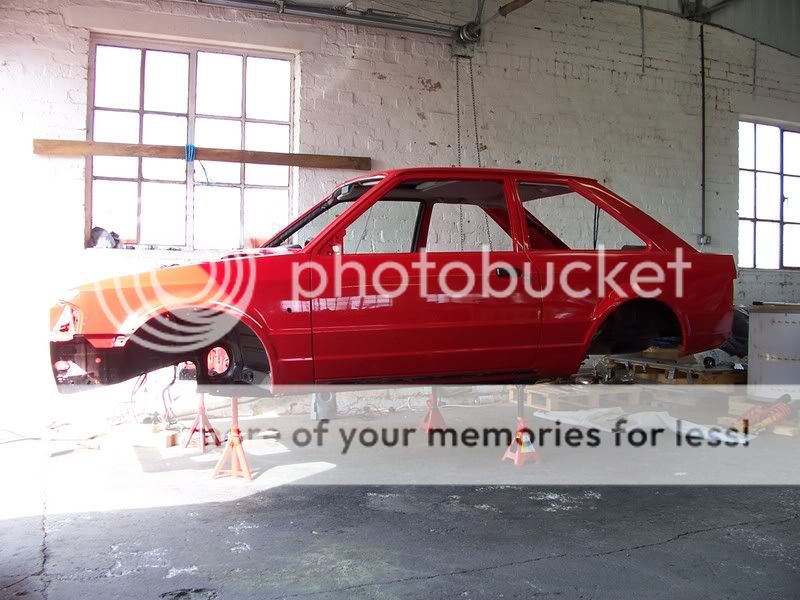

Its getting there peeps
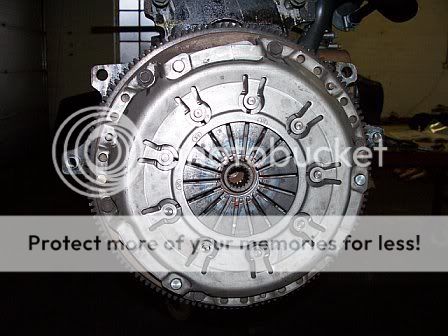
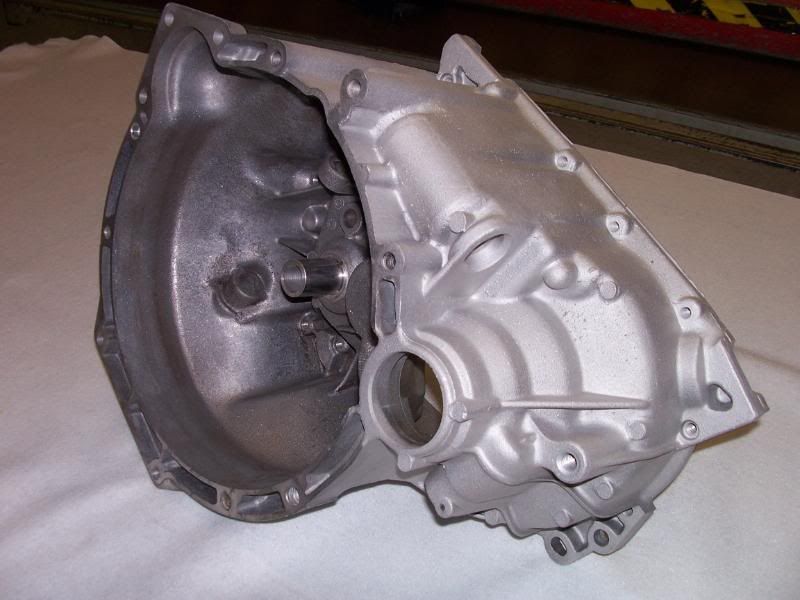
Tonight i have been attacking the engine. Removing all abs pumps n belts etc and removed the gearbox so that i can put the engine on a stand.
The Gearbox itself was in superb condition but for piece of mind it will be going to get stripped and checked out and while doing this i will get the casing bead blasted to get it all bufty new again.
Hope your all enjoying this thread cos i certainly am enjoying showing you all the concourse preperation of my Series 2
cheeRS
Chris
Can i just say a massive big thanks to Dave AKA Monster for helping me get my engine out last weekend. CheeRS mate. Top Man
Well last sat this is where we started
With my forklift skills and daves engine removal skills the engine was out in no time with no skinned knuckles and no head scratching.
It dropped faster than a whore's knickers lmao lmao
First we gently took the weight while the subframe was unbolted
And dropped onto blocks. After a quick inspection by the man himself :hehe: :hehe: i took the forklift out of the way.
Then we raised the car to give us enough clearence to just pull the engine out using a pallet truck. Easy peasy
And voila. Engine bay without the engine
Now as the engine come in quick sharp time Dave had even had time to remove all my glass so armed with a trusty screwdriver out come the rear quarters, rear screen and because my front screen was all murky white on the bottom and will be replaced we just pushed the front screen out cracking it everywhere lol.
During the course of this week ive been working overtime to get the car stripped including everything in the engine bay, brake servos, lines, fuel lines, steering rack etc then under the rear of the car removing all the suspension, fuel tank, all brake and fuel lines and all of which ive taken photos of. I can put pics up if you like but there are only of clips etc and where everything goes.
All suspension off
I couldnt resist having a bit of a rub lmao lmao
And finally this is how the car is sitting at the moment
Its getting there peeps
Tonight i have been attacking the engine. Removing all abs pumps n belts etc and removed the gearbox so that i can put the engine on a stand.
The Gearbox itself was in superb condition but for piece of mind it will be going to get stripped and checked out and while doing this i will get the casing bead blasted to get it all bufty new again.
Hope your all enjoying this thread cos i certainly am enjoying showing you all the concourse preperation of my Series 2
cheeRS
Chris
12-01-2008, 01:21 PM
#7
Parts Restoring Nutter
Thread Starter
Well i was a very busy boy yesterday and Chris i stayed out of the pub yesterday mate well in the afternoon anyway.
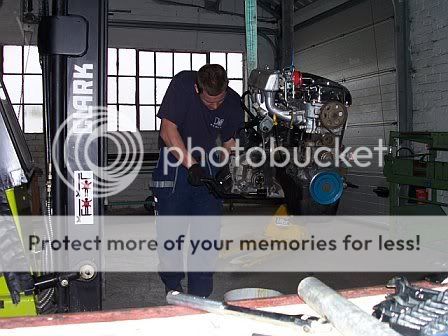
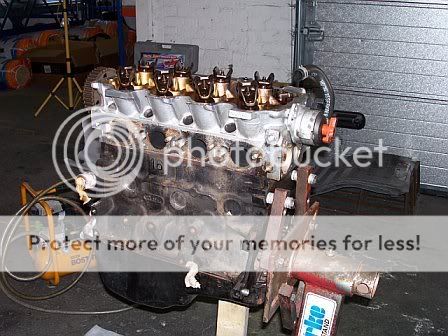
Anyway yesterday i went over to see Dave (Monster) for a chin wag and a brew and he has kindly lent me his engine stand and a few air tools so armed with them i set about mounting the engine and basicly started to strip it down. And of course taking some pics :hehe: :hehe: :hehe:
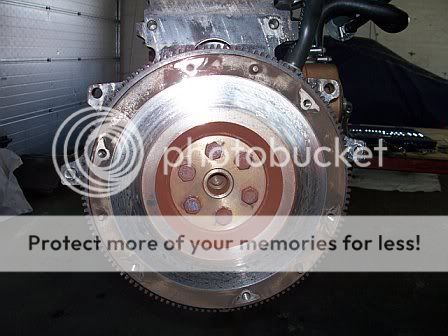
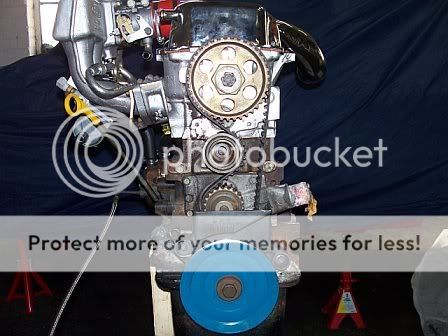
Removal of driveshafts


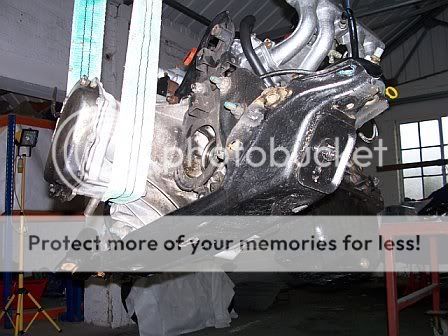
Gearbox and clutch off
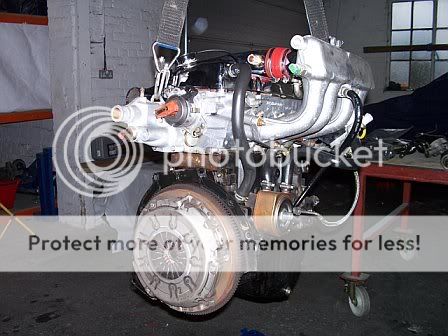
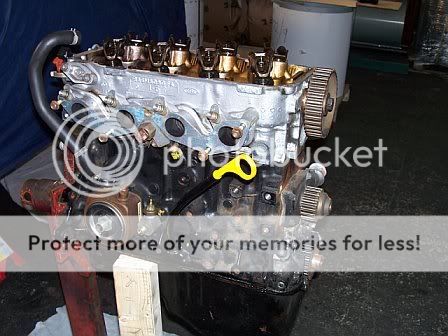
Then it was mounted
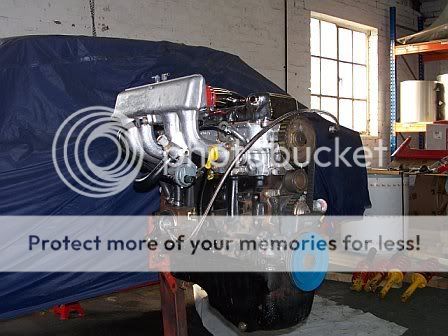
I can wait to start stripping this down and rebuilding it again.
cheeRS
Chris
Anyway yesterday i went over to see Dave (Monster) for a chin wag and a brew and he has kindly lent me his engine stand and a few air tools so armed with them i set about mounting the engine and basicly started to strip it down. And of course taking some pics :hehe: :hehe: :hehe:
Removal of driveshafts
Gearbox and clutch off
Then it was mounted
I can wait to start stripping this down and rebuilding it again.
cheeRS
Chris
Trending Topics
12-01-2008, 01:22 PM
#8
Parts Restoring Nutter
Thread Starter
Okey dokey peeps. Its another update time
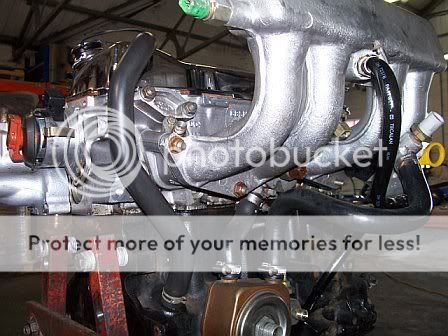
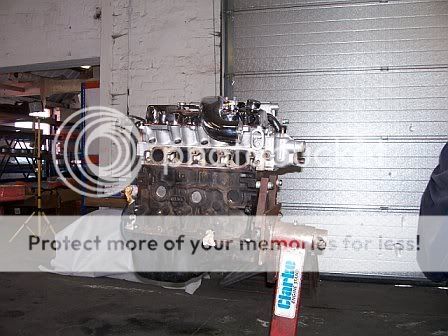
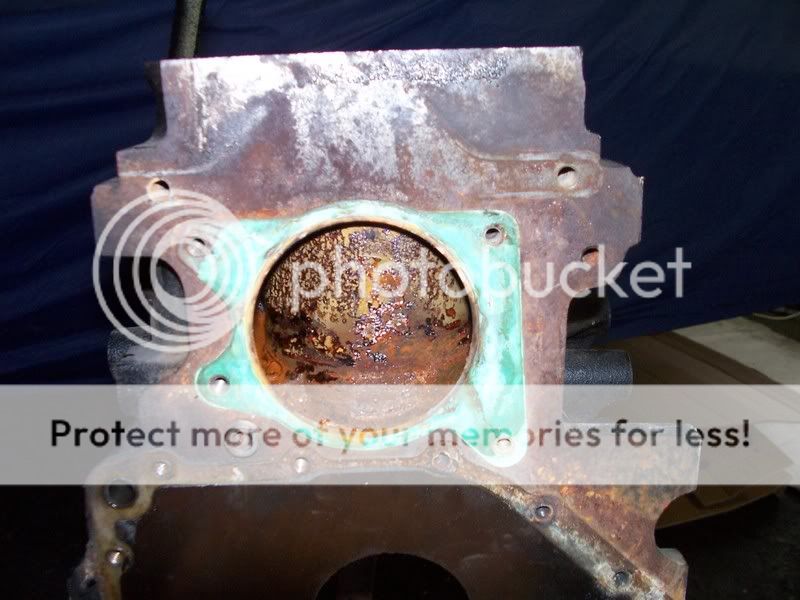
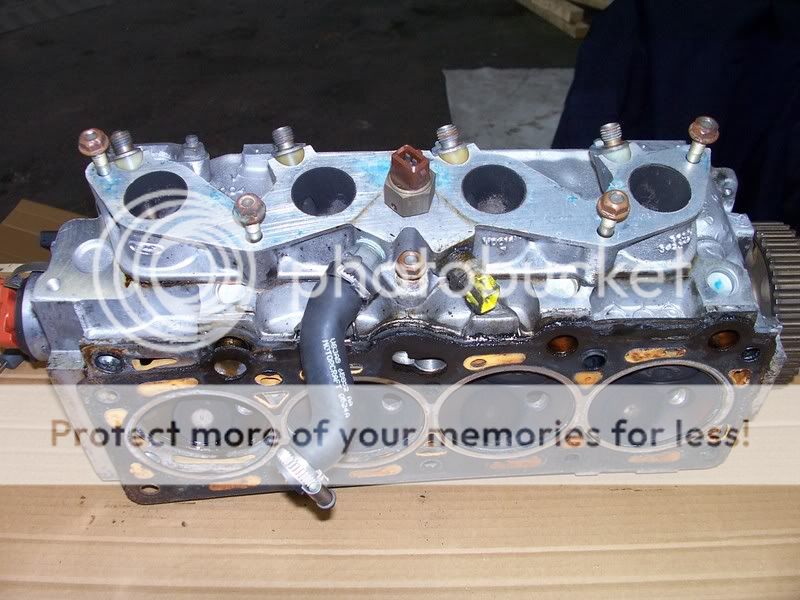
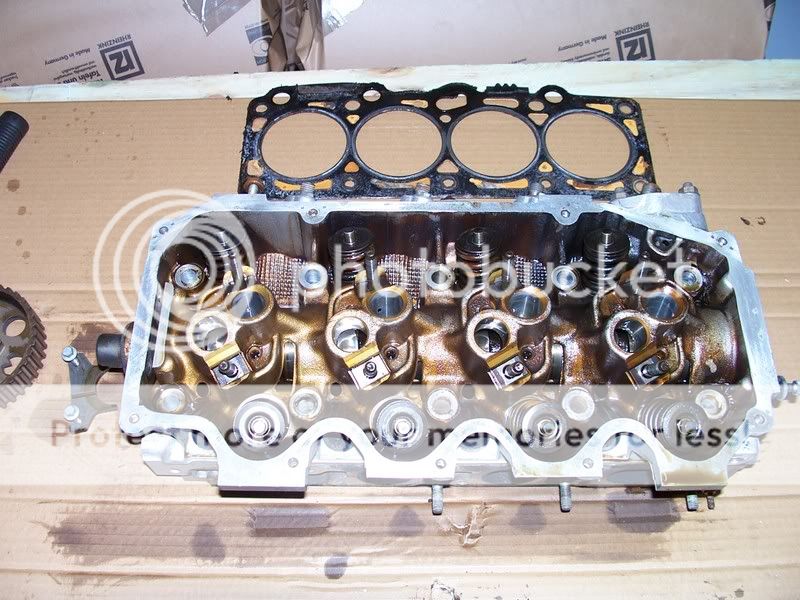
Now that the car is fully stripped and ready for the bodyshop i turned my attention to the engine.
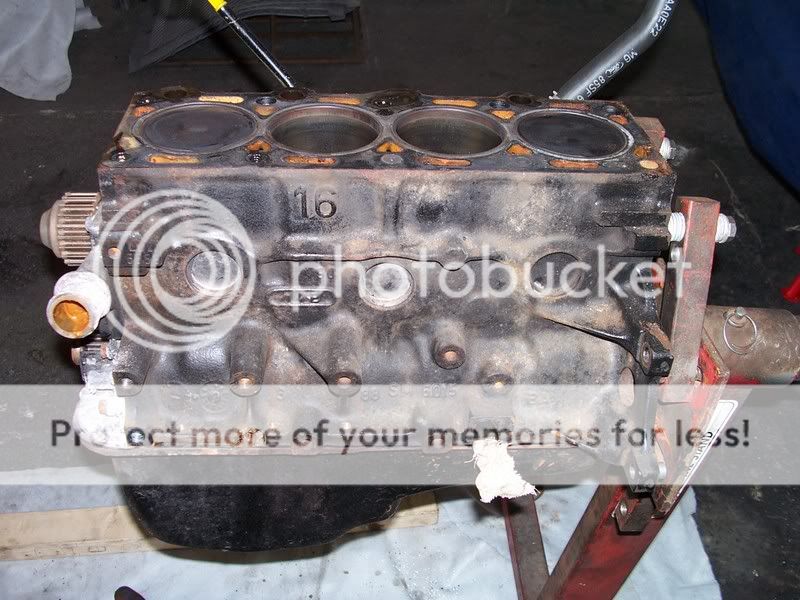
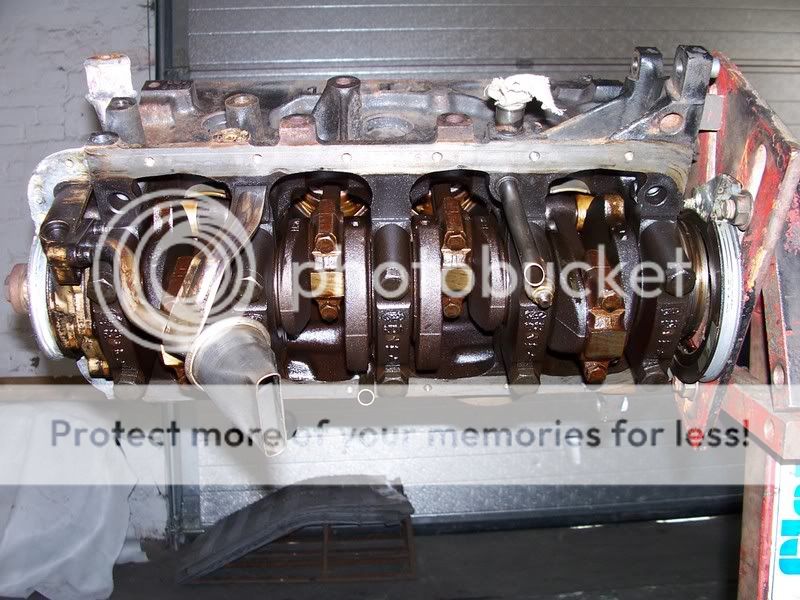
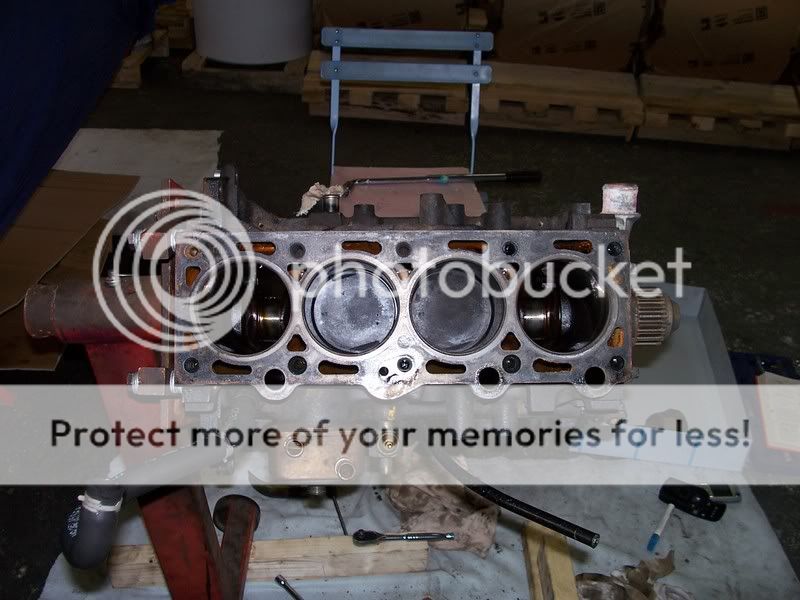
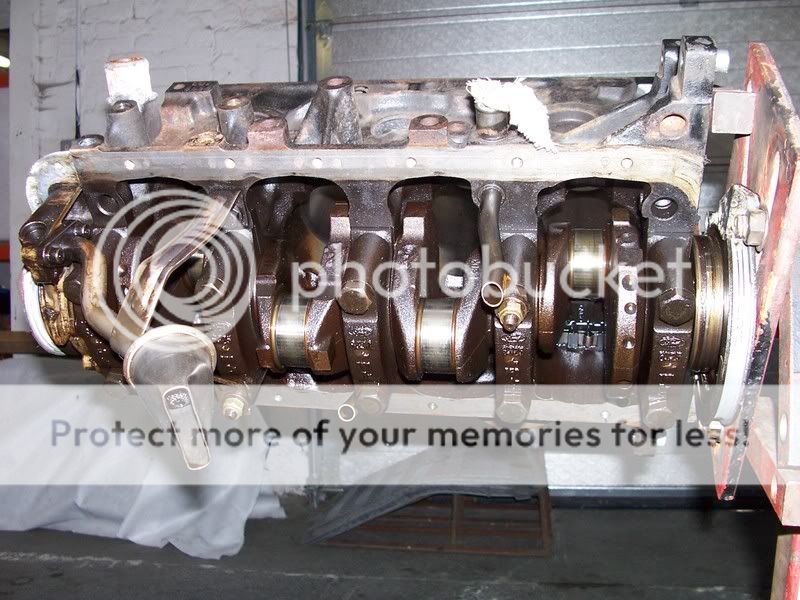
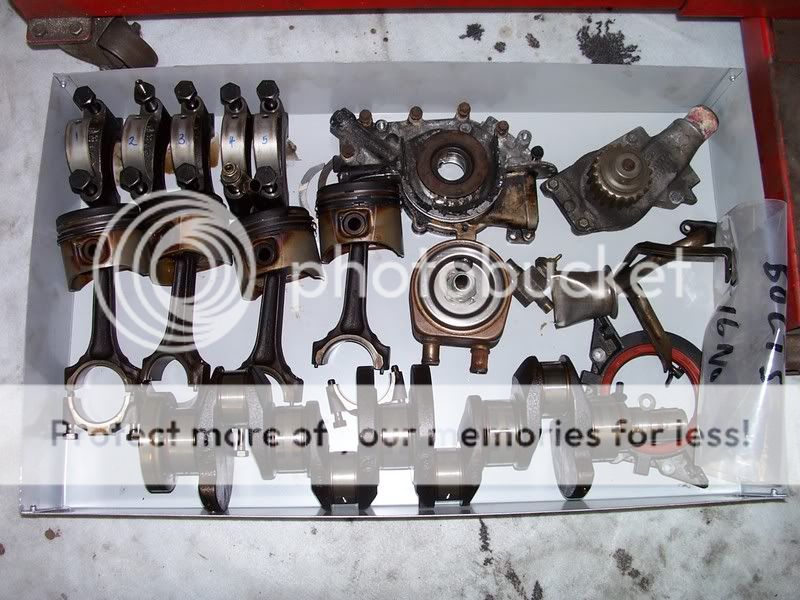
Everything is laid out the way it came out
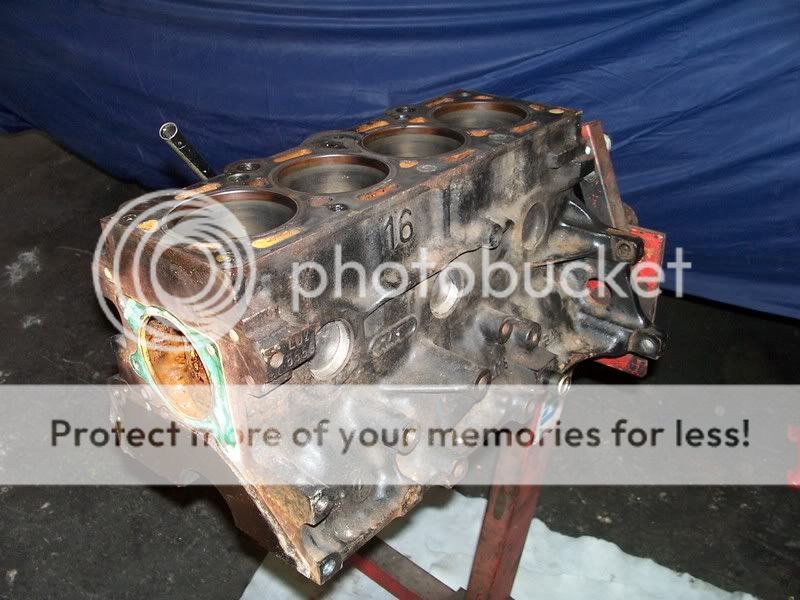
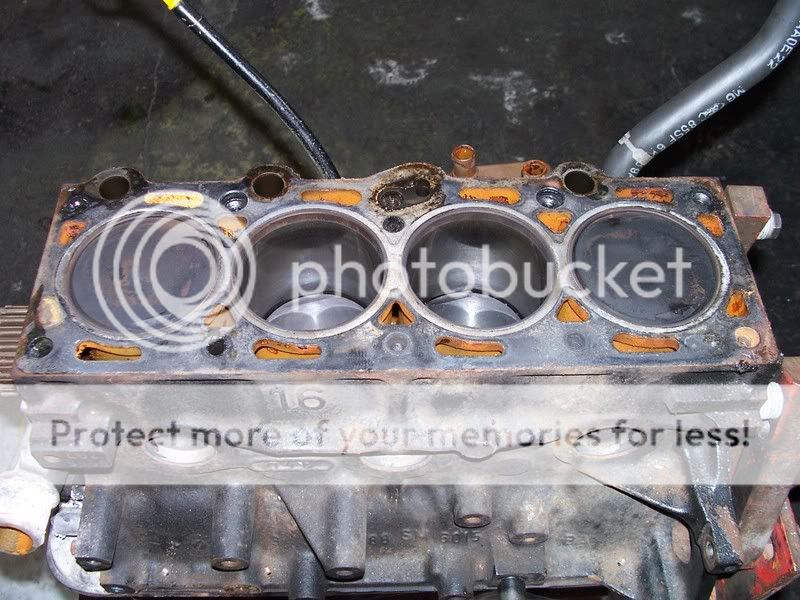
Check out the water jackets. No wonder my water looked like shite
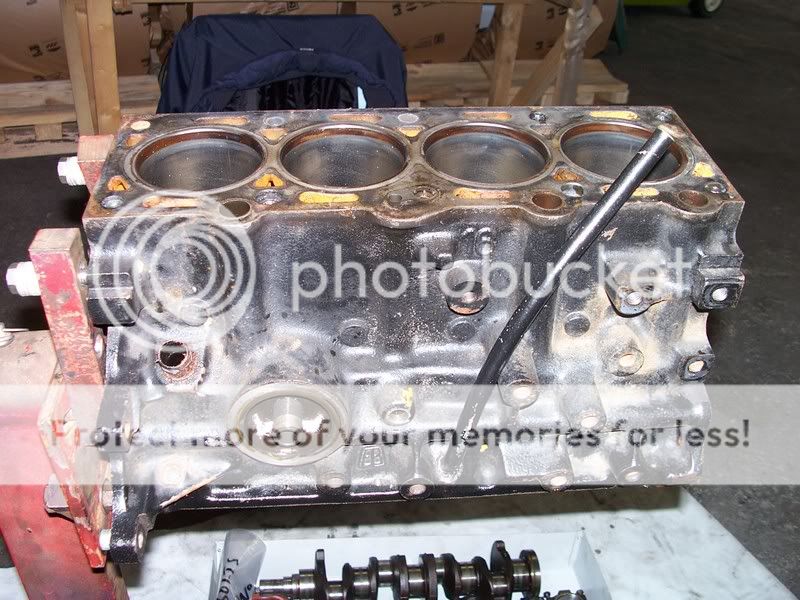
My plans for the engine are
Block:
Vapour blasted to get minty mint then painted. Not sure of colour yet. Any ideas????
New Core Plugs and oil gallery plugs
Bores honed and will be housing Mahle pistons and new rings. Still undecided whether to bore it out to 1.9
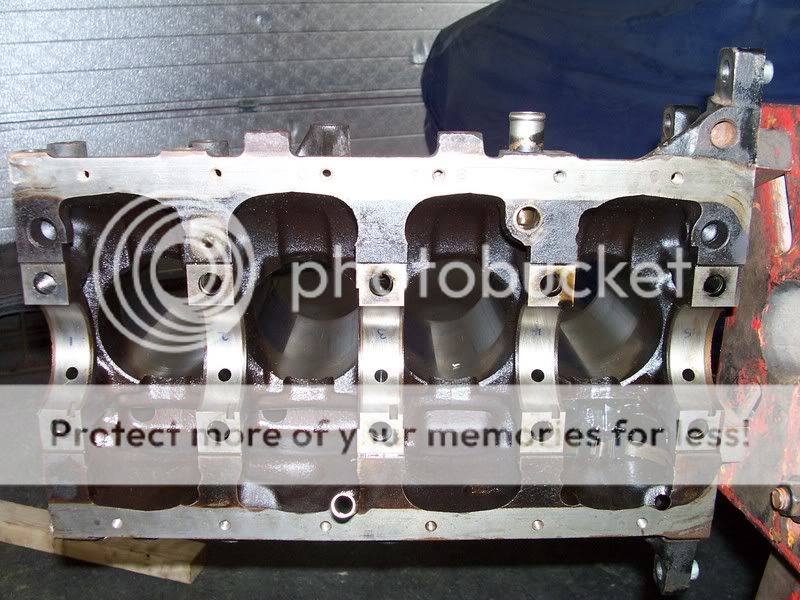
Lightened and balanced crank and flywheel. Journels are perfect condition so will just require new shells and new main bearing bolts. Con Rods will also be checked.
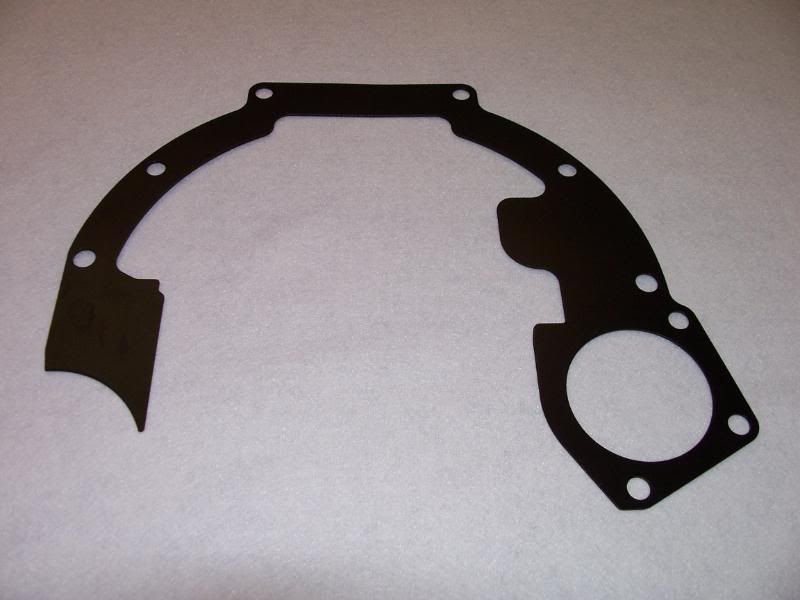
New oil and water pump and new sump and also every gasket renewed.
Head
The head will be cleaned thoroughly and decoked
Gas flowed, new valves, fast road cam, new followers, stem seals etc
Work on the block and head will be done by
http://www.impulsedevelopments.co.uk/.
Anyway there is not much more preparation i can do now so hopefully the next pics will be of it in the spray booth
cheeRS
Chris
Now that the car is fully stripped and ready for the bodyshop i turned my attention to the engine.
Everything is laid out the way it came out
Check out the water jackets. No wonder my water looked like shite
My plans for the engine are
Block:
Vapour blasted to get minty mint then painted. Not sure of colour yet. Any ideas????
New Core Plugs and oil gallery plugs
Bores honed and will be housing Mahle pistons and new rings. Still undecided whether to bore it out to 1.9
Lightened and balanced crank and flywheel. Journels are perfect condition so will just require new shells and new main bearing bolts. Con Rods will also be checked.
New oil and water pump and new sump and also every gasket renewed.
Head
The head will be cleaned thoroughly and decoked
Gas flowed, new valves, fast road cam, new followers, stem seals etc
Work on the block and head will be done by
http://www.impulsedevelopments.co.uk/.
Anyway there is not much more preparation i can do now so hopefully the next pics will be of it in the spray booth
cheeRS
Chris
12-01-2008, 01:24 PM
#9
Parts Restoring Nutter
Thread Starter
Hi all.
Sorry, i havent had any updates recently. Ive not touched the car in about 3 weeks as i believe when your doing stuff like this you need time away from it otherwise you will end up in the fooking nut house lmao lmao
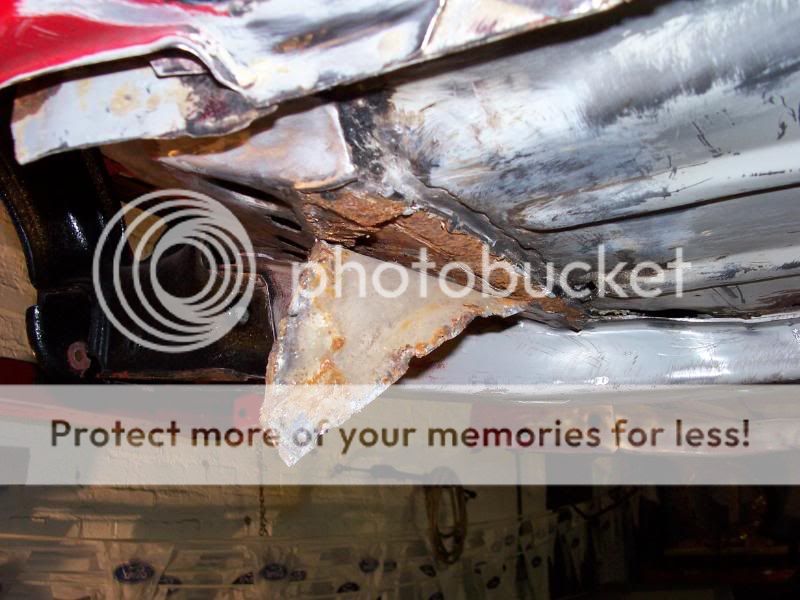
Anyway, work was very quite today so it thought i would tackle some tinworm. Oh dear
First job was to remove the rotton tailgate, rotton as in round the bottom corner of window seal (Common Problem) and a fist size rust patch under neath where the rear wiper mount is
Then on closer inspection i noticed a small rust bubble so had a bit of a poke and it was bigger than i thought, so both the lower rear valence's will be cut out and replaced with new ones

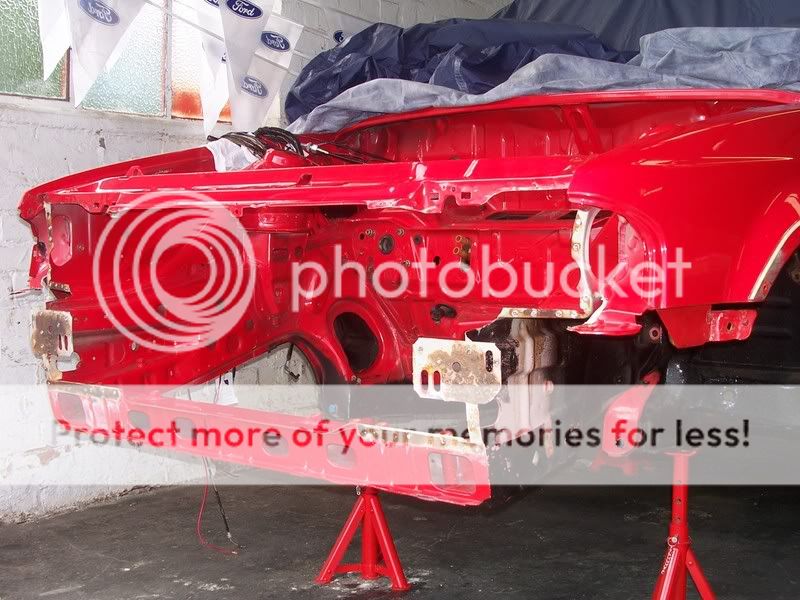
Once this was done i turned my attention to the front
I didnt realise until Mixja from off here informed me that ford still do these as replacement panels. It also saves you fitting a full front panel and also means you can retain that all important seal where the slam panel meets the front wings. Made me a happy man.
The panels are �21 each from ford. Bargain
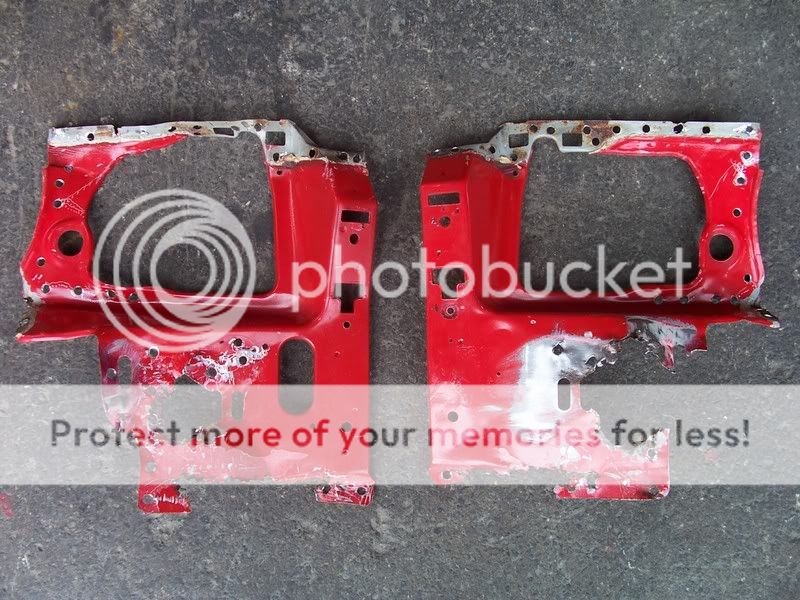
They took a bit of getting off but after a bit of swearing they werent to bad in the end
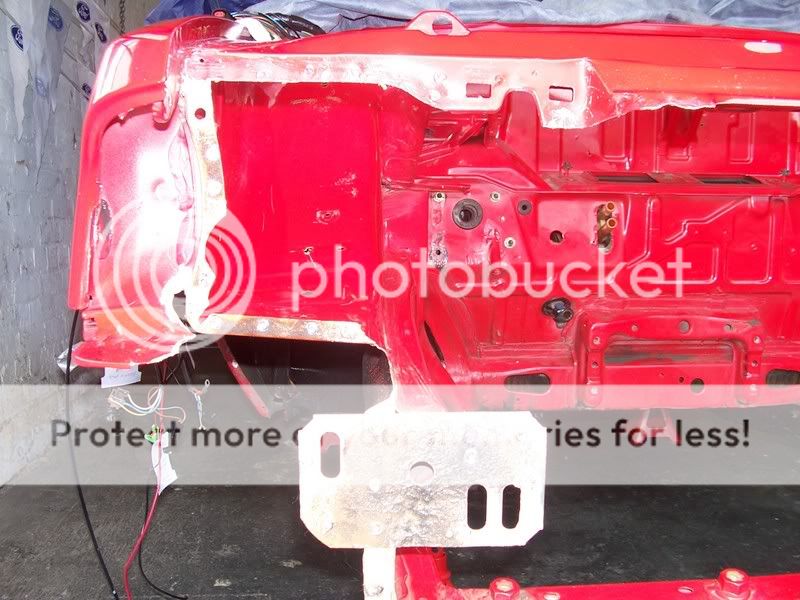
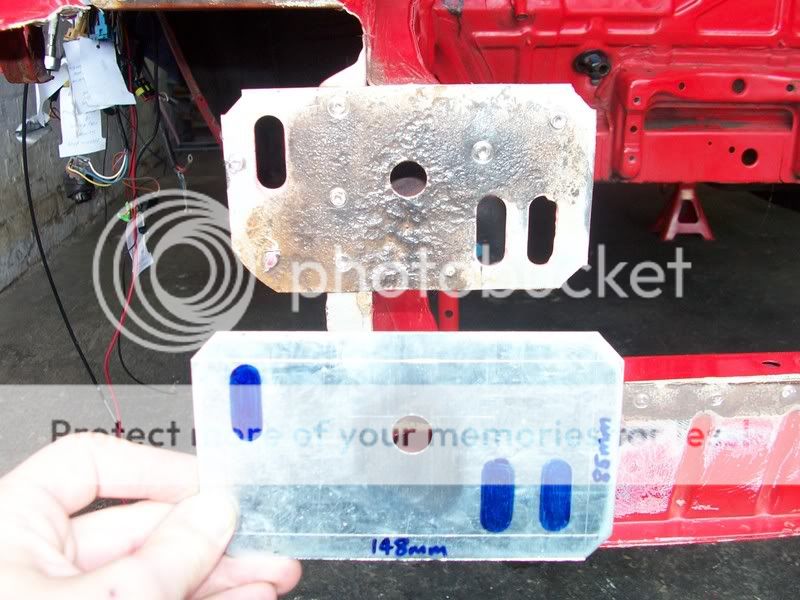
My good mate Monster is kindly going to fab me some new mounting brackets as these are fooked, i even made him a small template using galv sheet so it makes it nice and easy.
See mate, always thinking about ya lmao lmao
Anyway thats it for now.
More updates soon :thumbsup: :thumbsup:
Sorry, i havent had any updates recently. Ive not touched the car in about 3 weeks as i believe when your doing stuff like this you need time away from it otherwise you will end up in the fooking nut house lmao lmao
Anyway, work was very quite today so it thought i would tackle some tinworm. Oh dear
First job was to remove the rotton tailgate, rotton as in round the bottom corner of window seal (Common Problem) and a fist size rust patch under neath where the rear wiper mount is
Then on closer inspection i noticed a small rust bubble so had a bit of a poke and it was bigger than i thought, so both the lower rear valence's will be cut out and replaced with new ones
Once this was done i turned my attention to the front
I didnt realise until Mixja from off here informed me that ford still do these as replacement panels. It also saves you fitting a full front panel and also means you can retain that all important seal where the slam panel meets the front wings. Made me a happy man.
The panels are �21 each from ford. Bargain
They took a bit of getting off but after a bit of swearing they werent to bad in the end
My good mate Monster is kindly going to fab me some new mounting brackets as these are fooked, i even made him a small template using galv sheet so it makes it nice and easy.
See mate, always thinking about ya lmao lmao
Anyway thats it for now.
More updates soon
:thumbsup: :thumbsup:
12-01-2008, 01:28 PM
#10
Parts Restoring Nutter
Thread Starter
Well all i can say its been a while LOL
Mmmmmmmmmm where do i start
After a nice holiday in turkey last month i started cracking on with the S2.
Started removing all underseal from rear arches, took ages and ages
Lookng sorry for itself
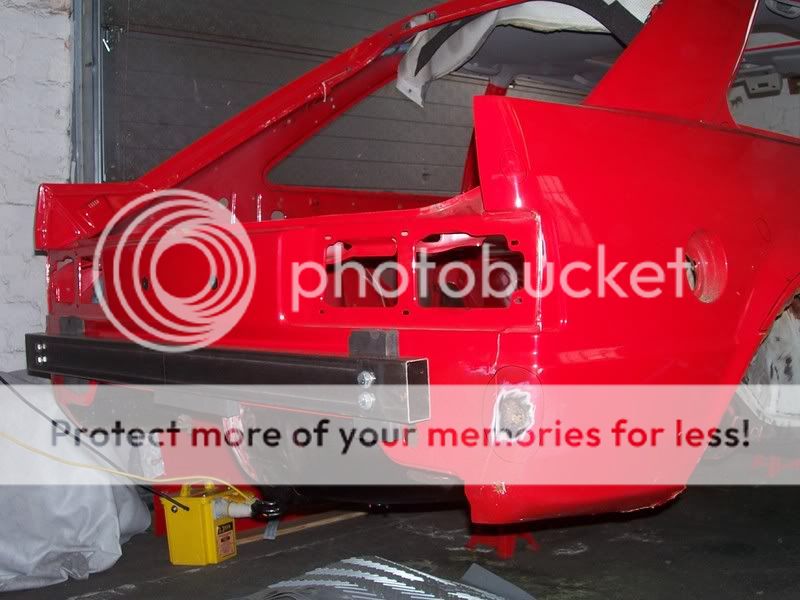
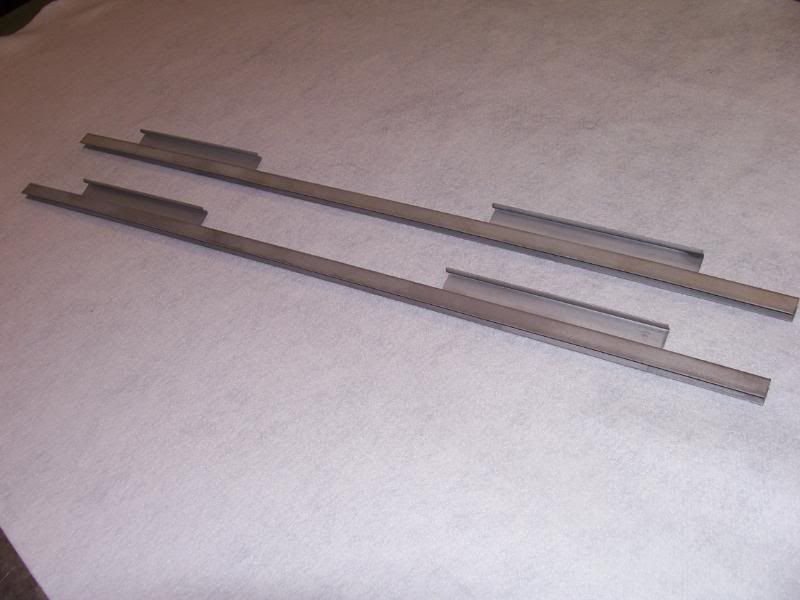
Rear spit mounting bar offered up after measuring and drilling holes out for where it mounts where the bumper fixes too
Removed the front floor pan sound pads with a little heat and got the grinder out. It didnt look prettyale: but these will be cut out in the right places so that you wont even be able to tell they have been done


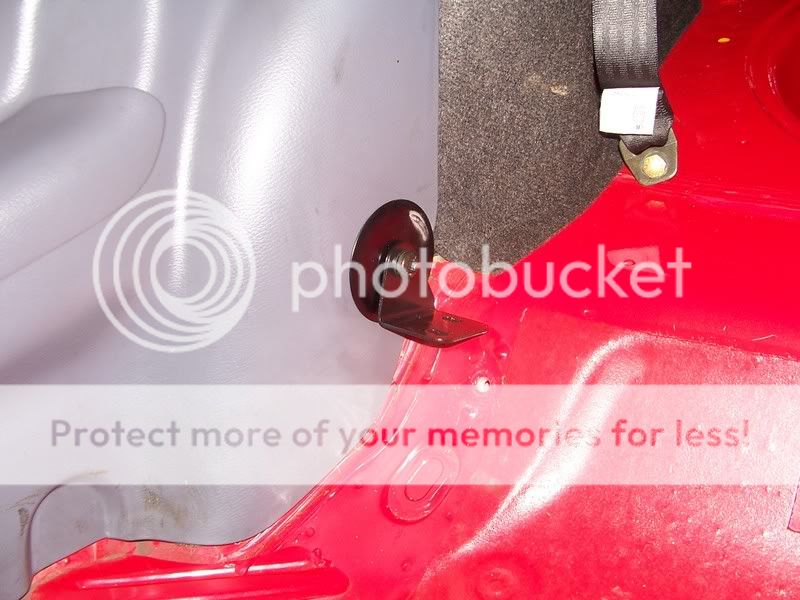
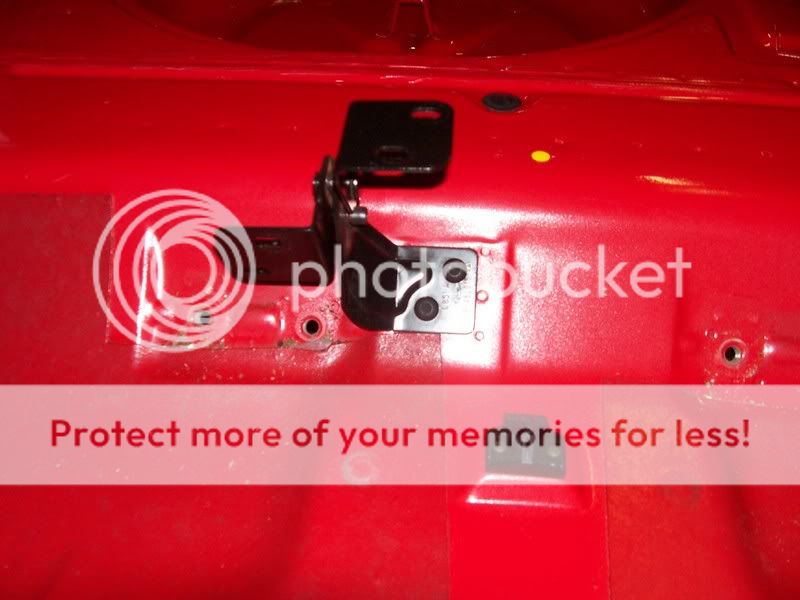
The seat mounts were totally shot so marked them out ready to be cut
and drilled out the spot welds so that the mount plate can be removed
Passenger side
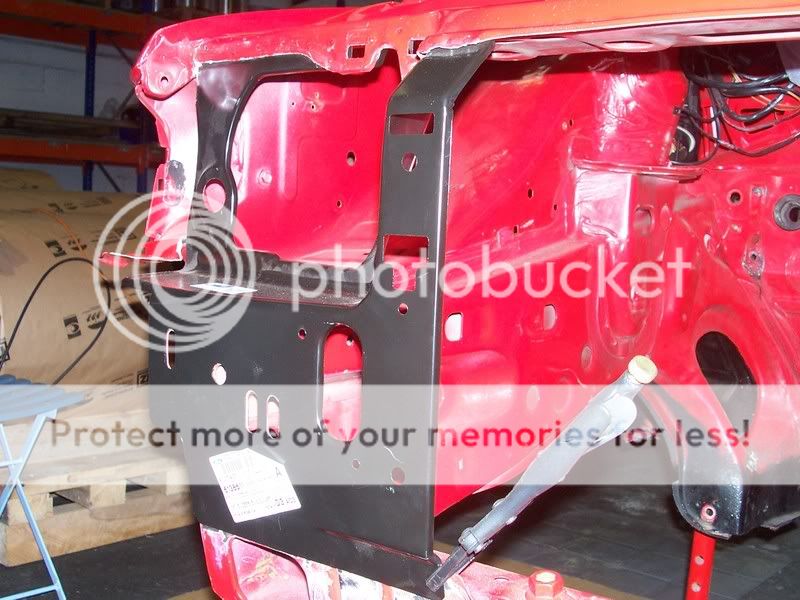
I offered one of the genuine front headlight panels in and they fit perfect.
Both sides will be spot welded in and not the normal plug welds
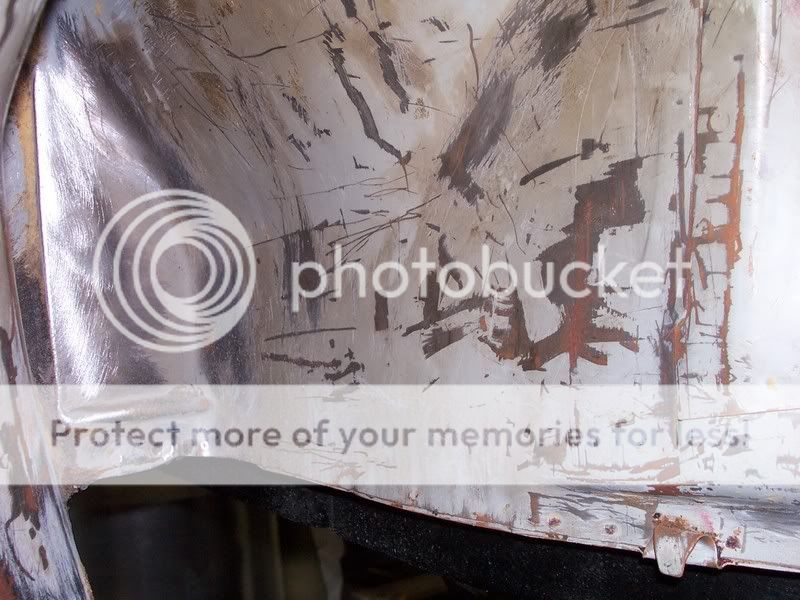
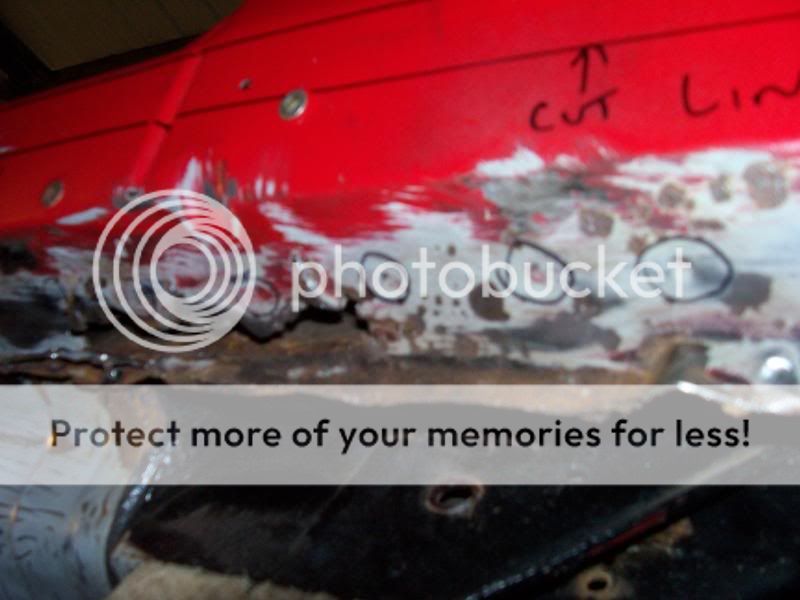
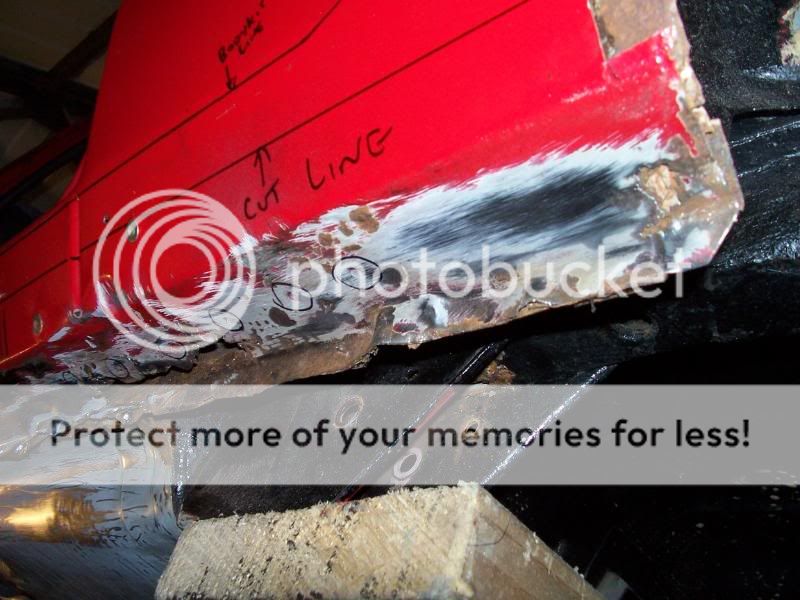
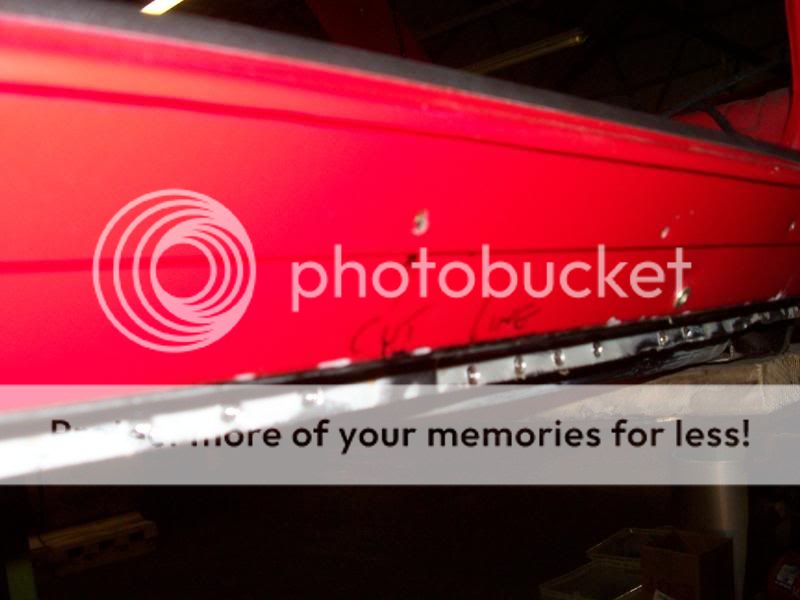
Before i started chopping out the arches and sills etc i marked out where the edge of the body kit sits as i want to keep all cuts and welds under the kit. I was told if you cut out panels where the eye can see you can never get them right


I then marked out my cut line on the bodywork.
I kept it 15mm below the kit line on the rear arches and 30mm below on the sills.
I also had a long think on how i would mark out and re attach the centre bodykit section mount as you couldnt do it afterwards on the new sill, well you could do using a template but if your out 3-5mm when welding new sill on that could make all the difference in getting perfect lines on the kit, so i thought i would cut just below the mount holes so that ive got an original base to mount the centre section and mark rest of holes
Then its chop chop chopale:
Mmmmmmmmmm where do i start
After a nice holiday in turkey last month i started cracking on with the S2.
Started removing all underseal from rear arches, took ages and ages
Lookng sorry for itself
Rear spit mounting bar offered up after measuring and drilling holes out for where it mounts where the bumper fixes too
Removed the front floor pan sound pads with a little heat and got the grinder out. It didnt look pretty
ale: but these will be cut out in the right places so that you wont even be able to tell they have been done The seat mounts were totally shot so marked them out ready to be cut
and drilled out the spot welds so that the mount plate can be removed
Passenger side
I offered one of the genuine front headlight panels in and they fit perfect.
Both sides will be spot welded in and not the normal plug welds
Before i started chopping out the arches and sills etc i marked out where the edge of the body kit sits as i want to keep all cuts and welds under the kit. I was told if you cut out panels where the eye can see you can never get them right
I then marked out my cut line on the bodywork.
I kept it 15mm below the kit line on the rear arches and 30mm below on the sills.
I also had a long think on how i would mark out and re attach the centre bodykit section mount as you couldnt do it afterwards on the new sill, well you could do using a template but if your out 3-5mm when welding new sill on that could make all the difference in getting perfect lines on the kit, so i thought i would cut just below the mount holes so that ive got an original base to mount the centre section and mark rest of holes
Then its chop chop chop
ale:
12-01-2008, 01:29 PM
#11
Parts Restoring Nutter
Thread Starter
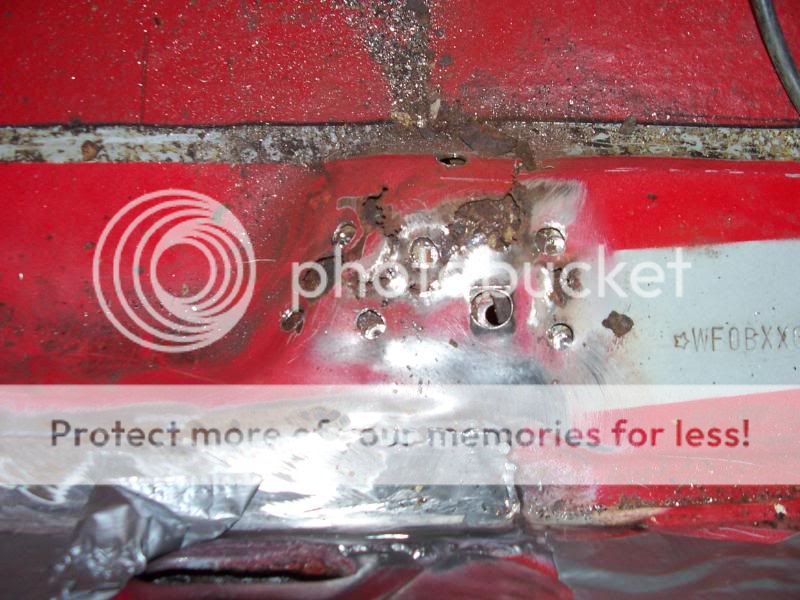
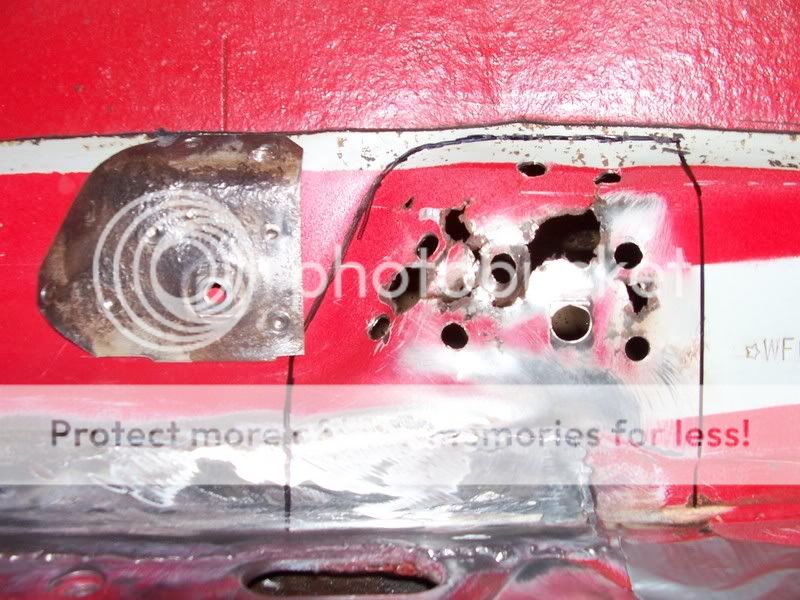
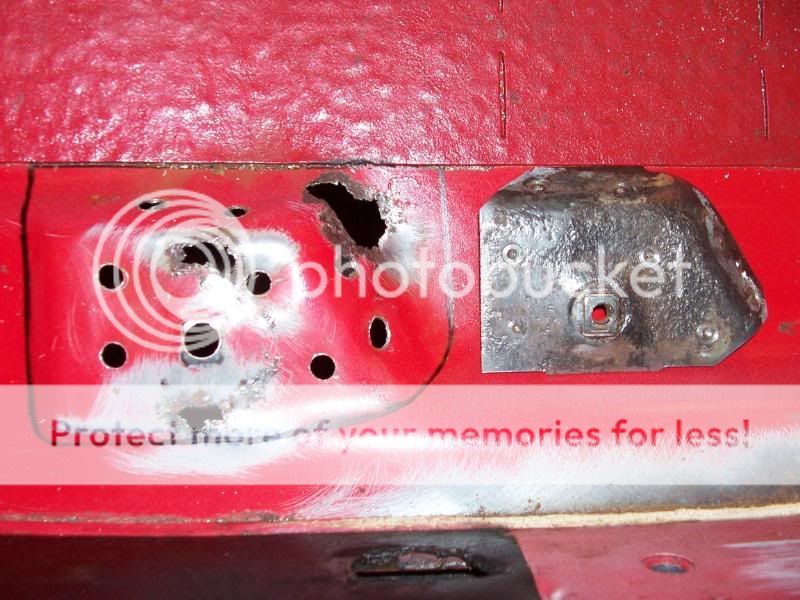
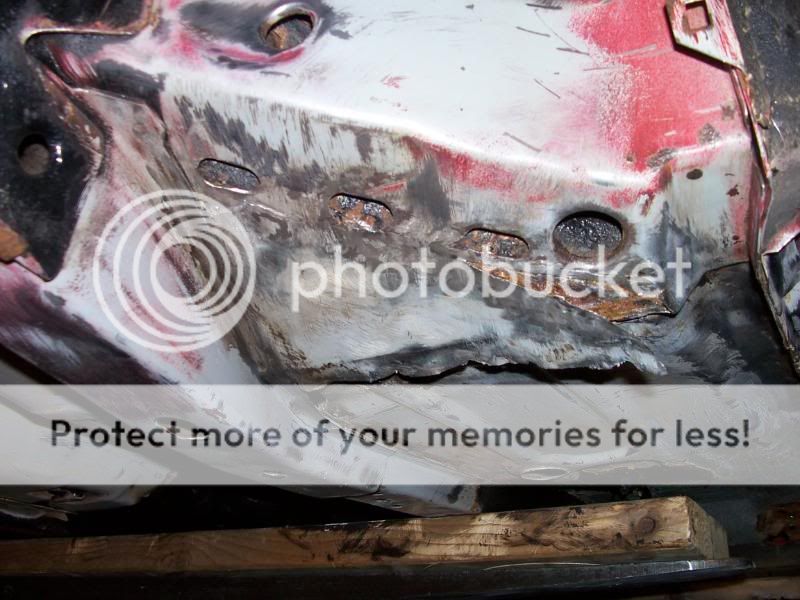
Once i removed the sill i noticed that at the rear there is a bracket that is factory spot welded to the sill. This was far to gone to repair so i will try and make one that looks as near as original. Luckily i have guillotines, folders, presses, shrink & Stretch machines and swage machines at work so it shouldnt be too hard to do
Passenger side was same
Below pic shows the holes that were in the sills, which is the reason why the brackets mentioned above are rusted to fook

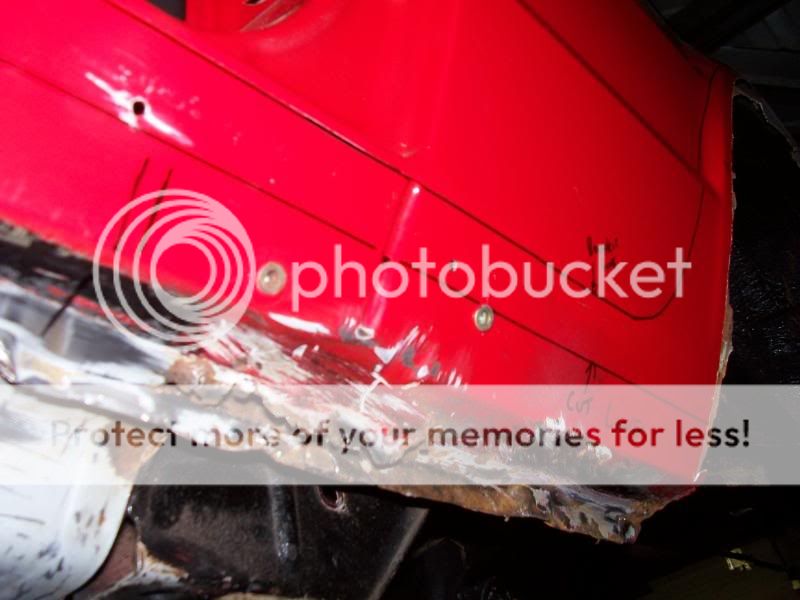
A closer pic of my cut line and you can make out the centre bodykit section mount holes that i mentioned earlier
This is the stage of my spit at the moment. My welder mate is finishing it off this weekend so will hopefully be mounted to car on sun/mon

But me being me and wanting to crack on witht the underside i improvised LOL
The worst job ever
ale: scraping off 17 year old underseal @ 1am
So nice to see factory grey primer
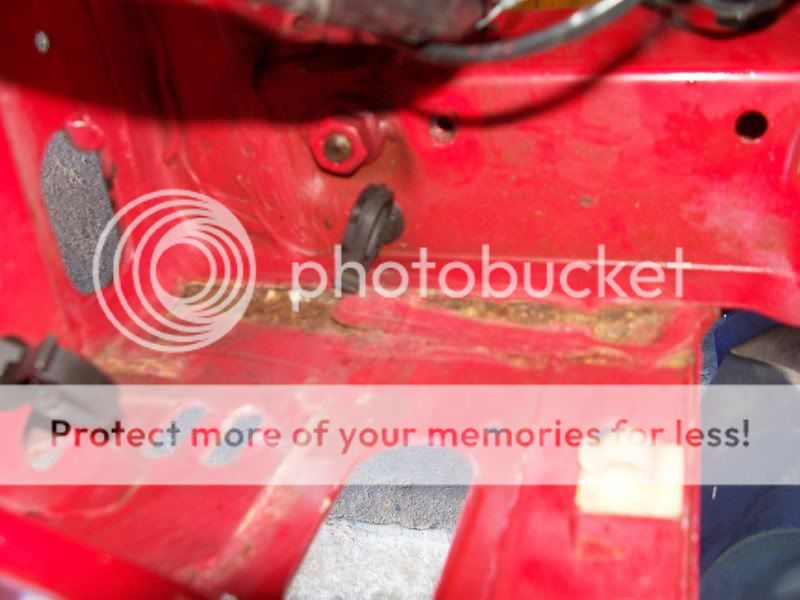
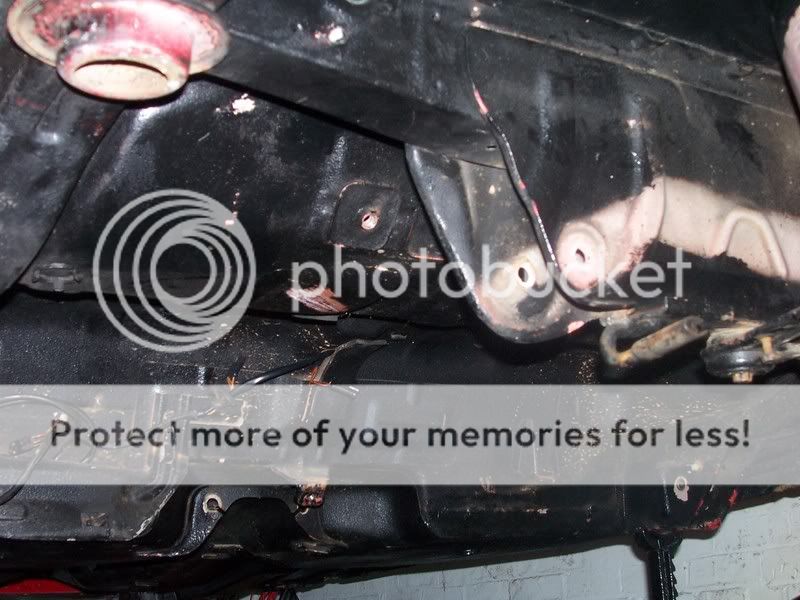
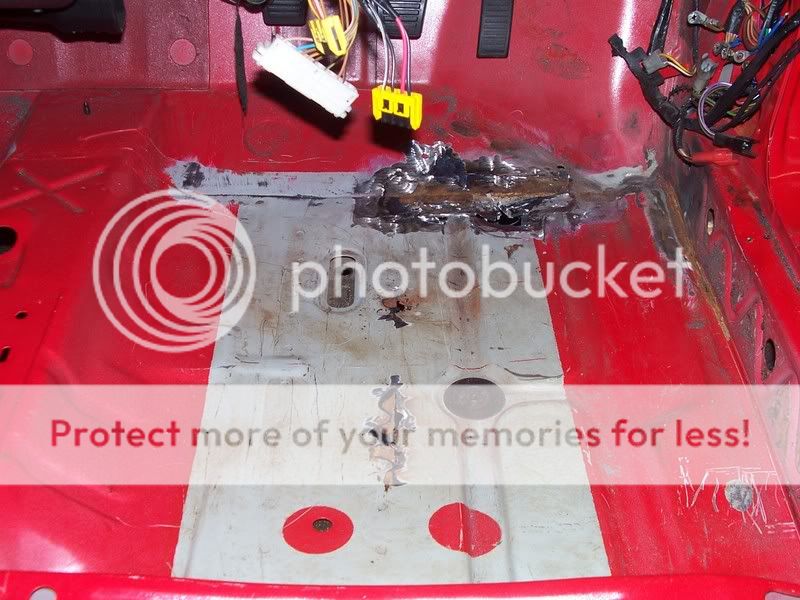
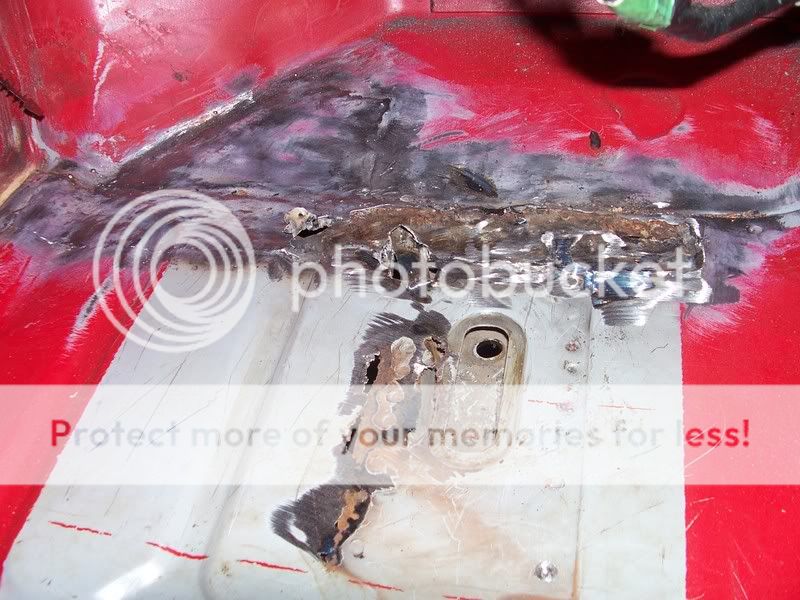
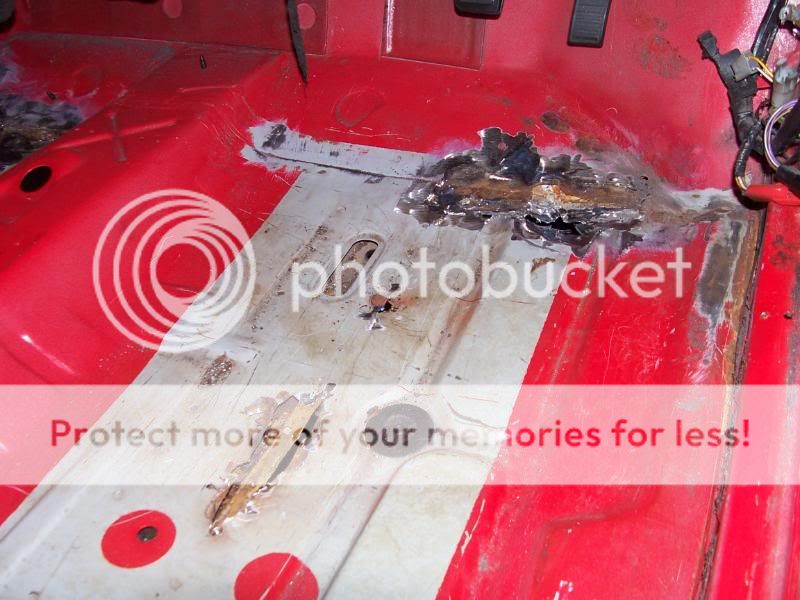
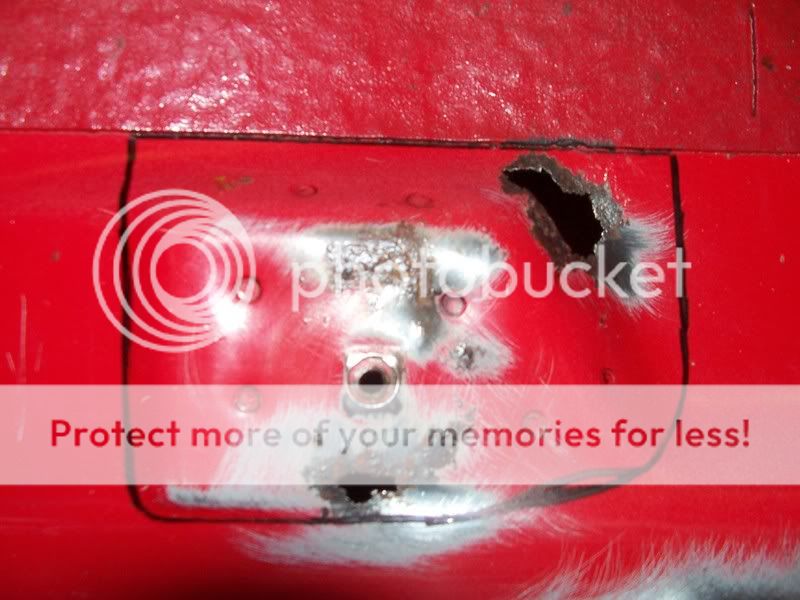
Rear belly of floor pan had a huge dent in where some
Totally Flat

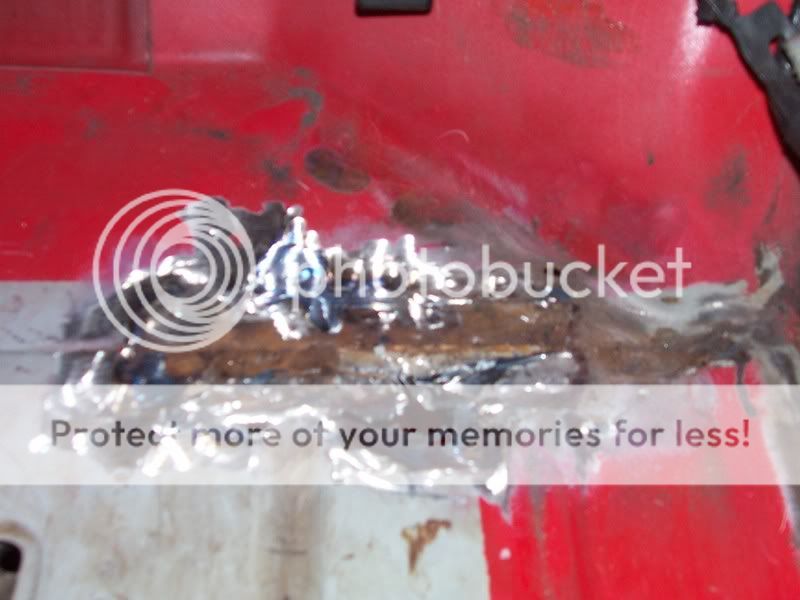
This has got to be the worst design ford did :wft: :wft: putting so many drain holes in the floor to bulkhead support plate as water gets in there and rots our poor floor pans away. Most series 1 & 2's rot on the inside near this place and we can all see why
Im gonna cut mine out and manufacture another plate for both sides.
something a bit modified but keeping the drain holes.
Also found a plate that somebody previous had welded in without cutting old shite out :wft:
 12-01-2008, 01:30 PM
#12
Parts Restoring Nutter
Thread Starter
Well, thats as far as i have got on the bodywork side of things so i turned my attention to other bits and pieces.
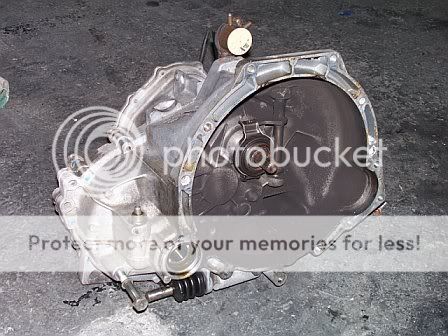
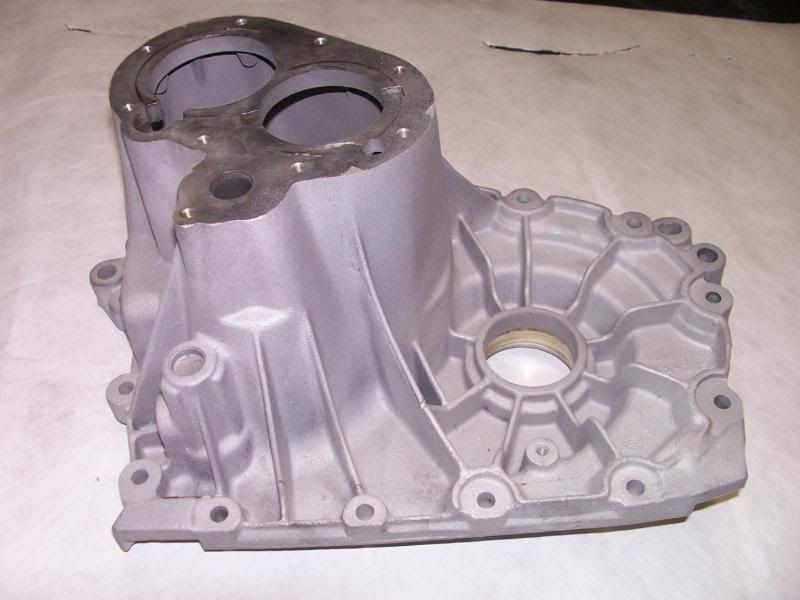
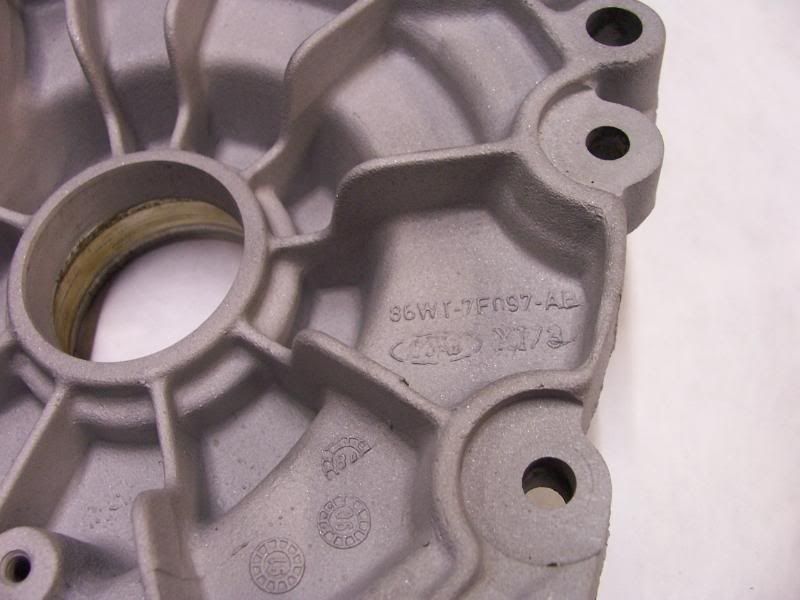
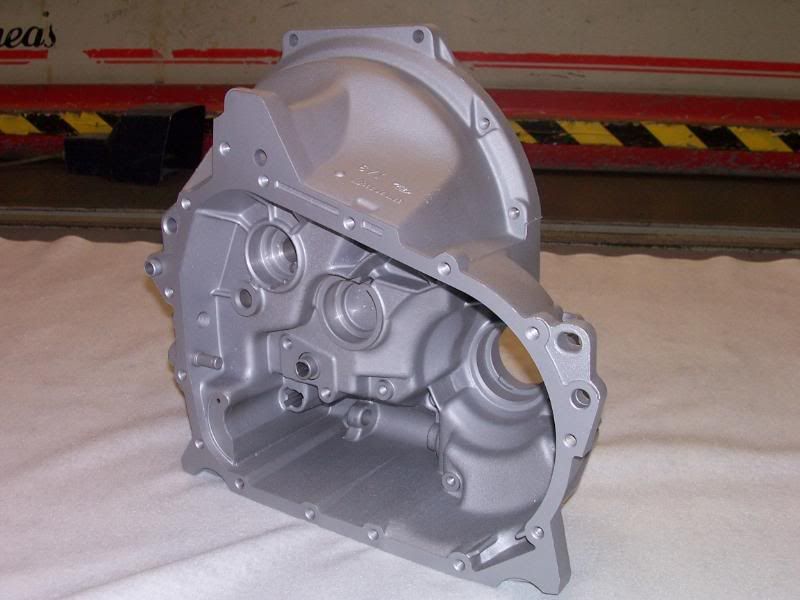
Big Thanks to Ste Morley from my Local group for getting my gearbox stripped for me. He lives next to a guy who worked for Ford when the factory was at Speke, Liverpool and he worked on th gearbox side of things and knows them inside out, + he has all the home made gadgets to strip them especially the one to get the LSD out as its pressed in with 3 ton.
I didnt get any pics as i wasnt there when he stripped it but this is what it looked like when i collected it
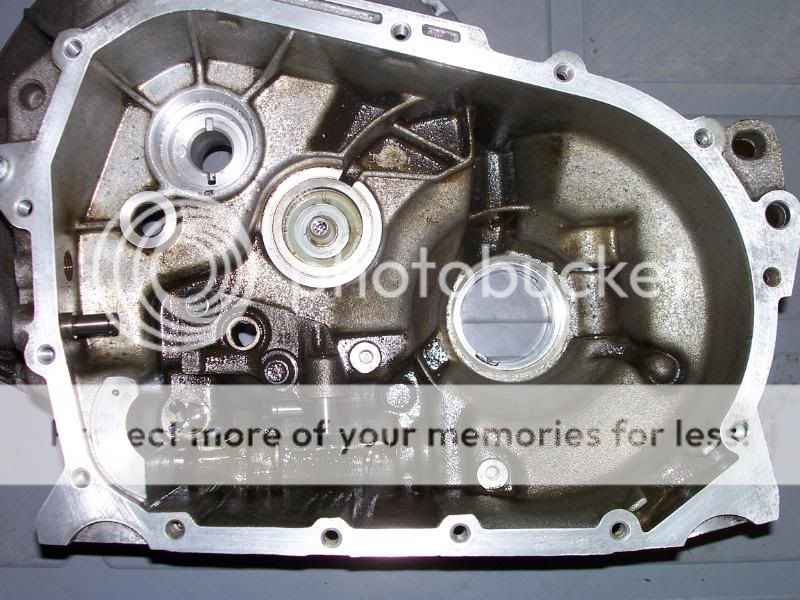
He said everything was in perfect condition and has been very well looked after. Will only require a couple of new bearings and seals
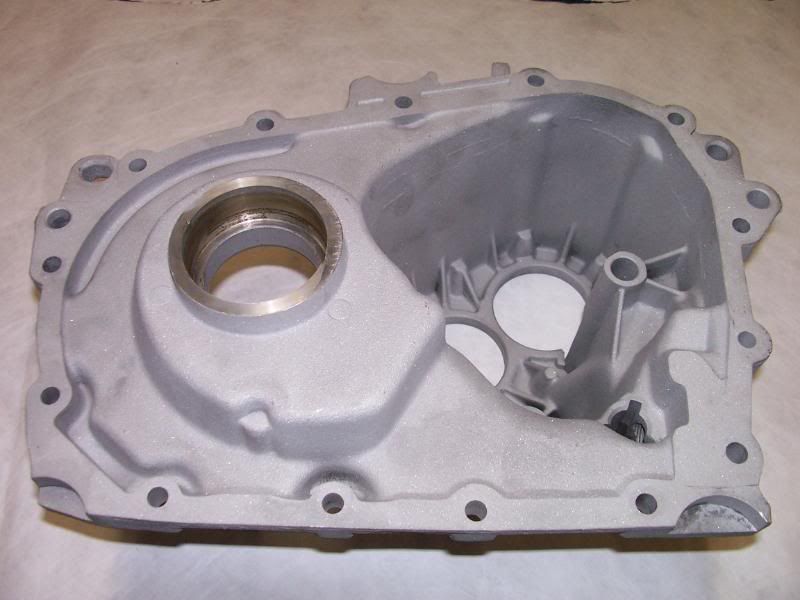
All the casings are now at the blasters getting glas beaded so will get some pics up when i collect it.
I then moved onto all my nuts/bolts/screws/washers/ brackets etc that i needed electroplated.
I sent them away to be done and when i recieved them i got the shock of my life they had all been done silver instead of gold. Was gutted but thanks to Rs Stevo he put me in touch with a company called Willow Chrome based in St Helens. I took everything down yesterday and everything will be ready to pick up fri morning so again i will get some pics up of the finished products, all 507 of them LOL
Just to give you an idea of what i had to go through when labelling all parts up, here are some pics,
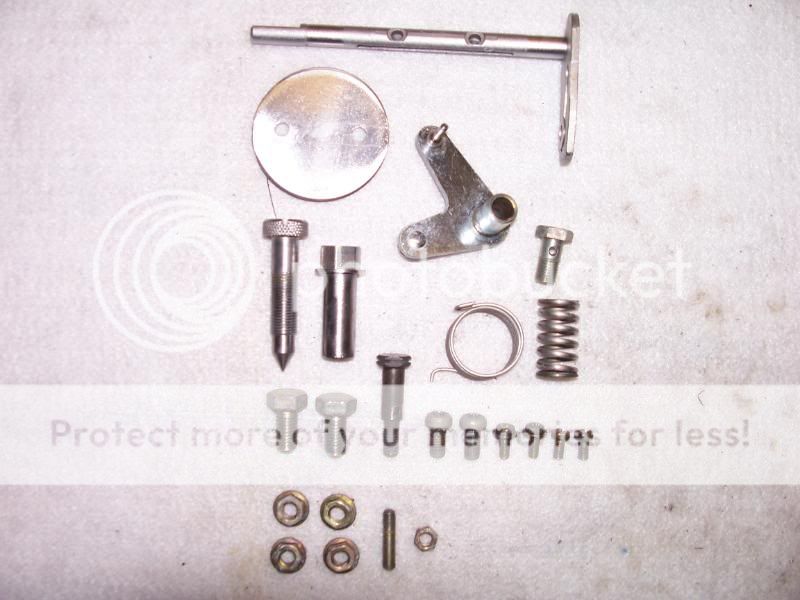
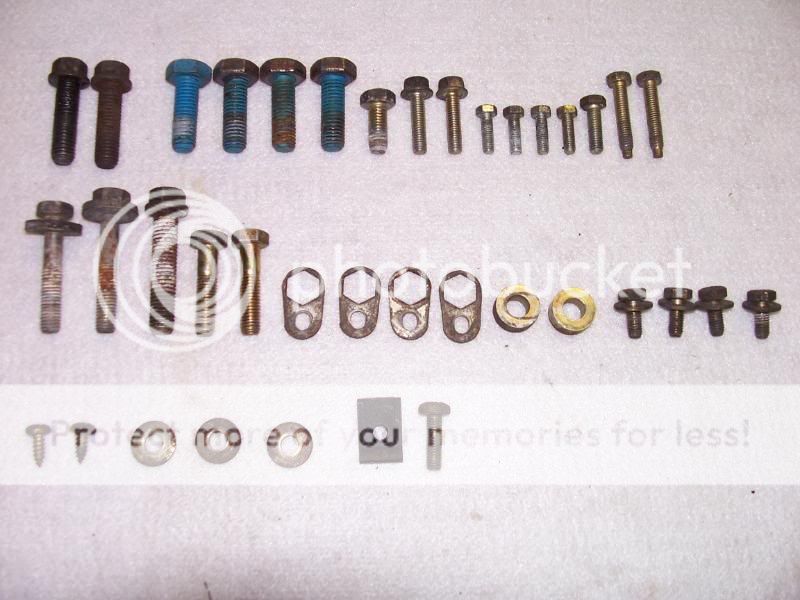

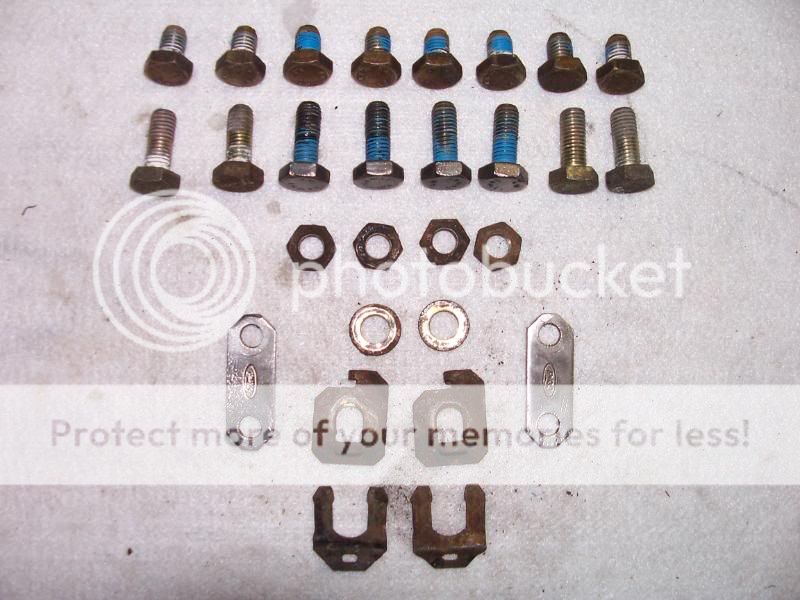
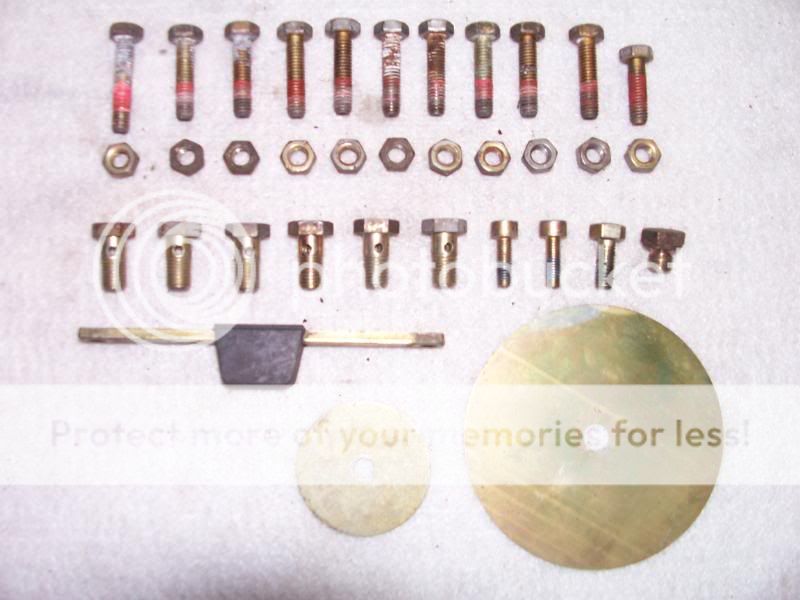
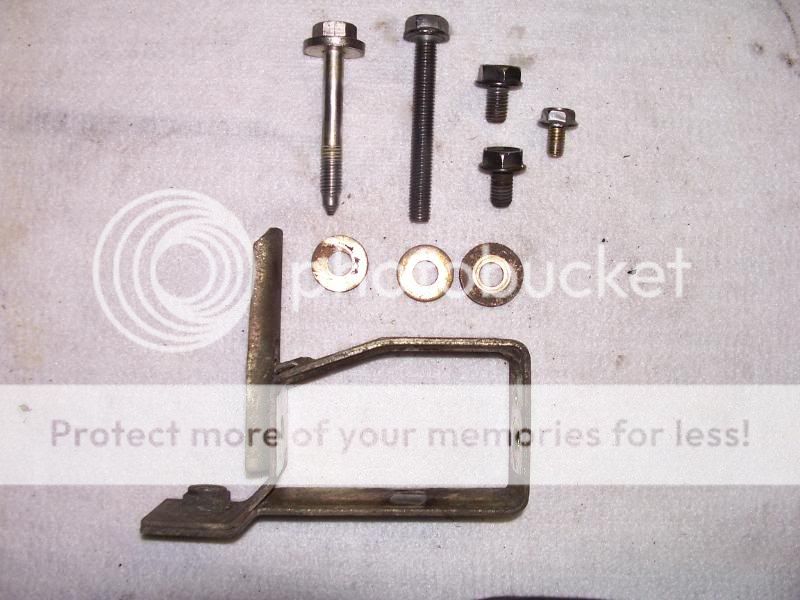
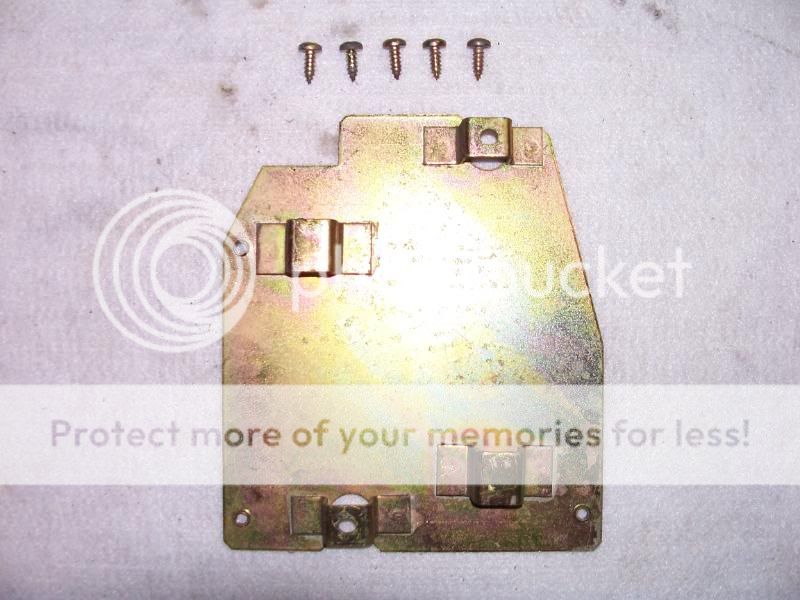
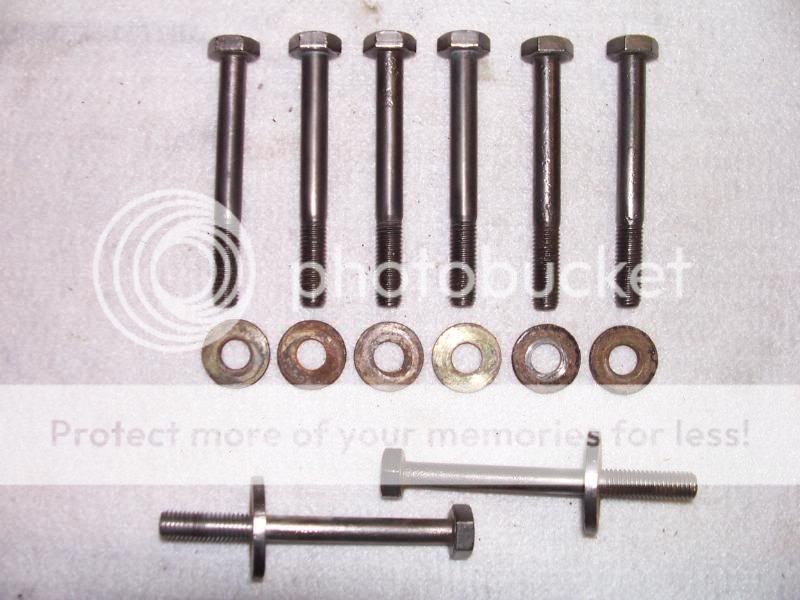
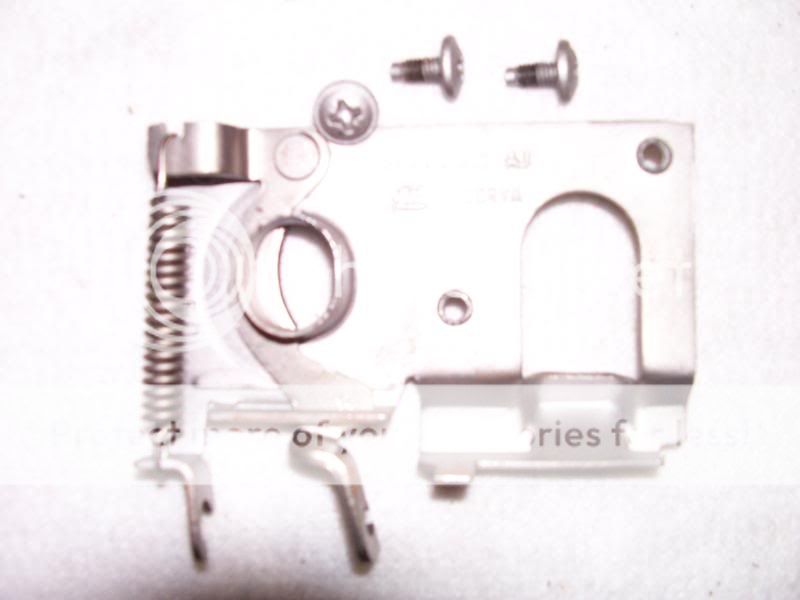
Everything was photographed, measured and logged so i know exactly where everything is for, sad i know but suppose its part and parcel of succesfull restoration.
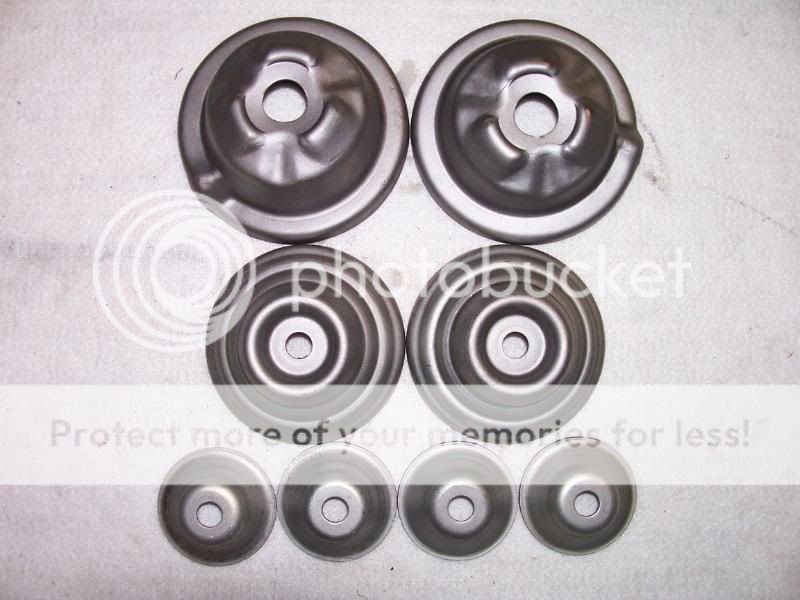
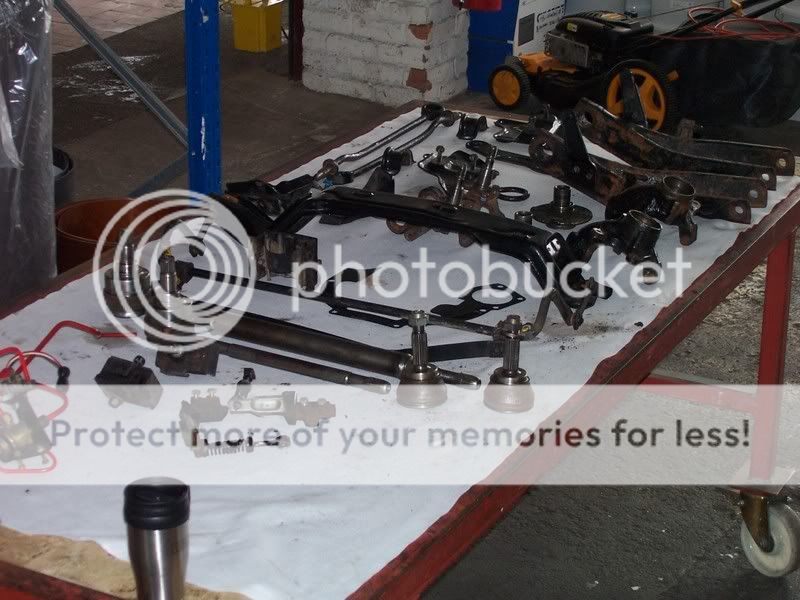
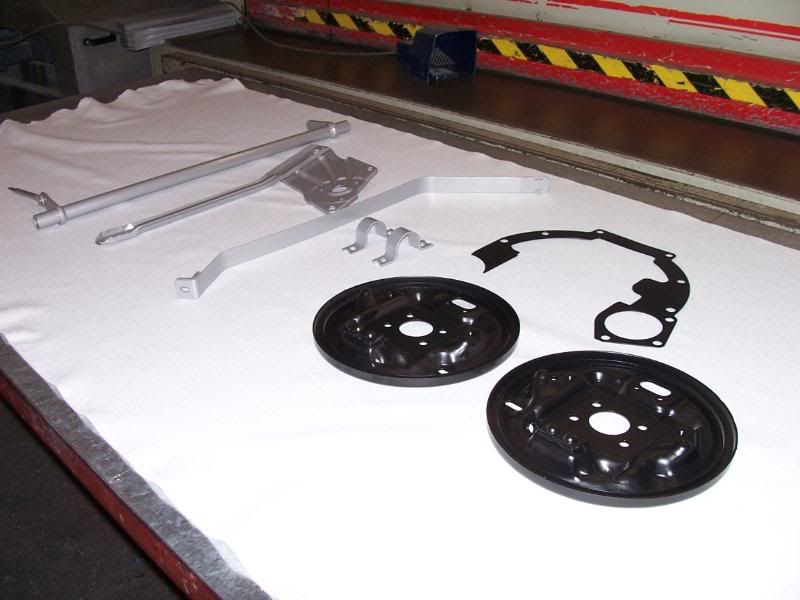
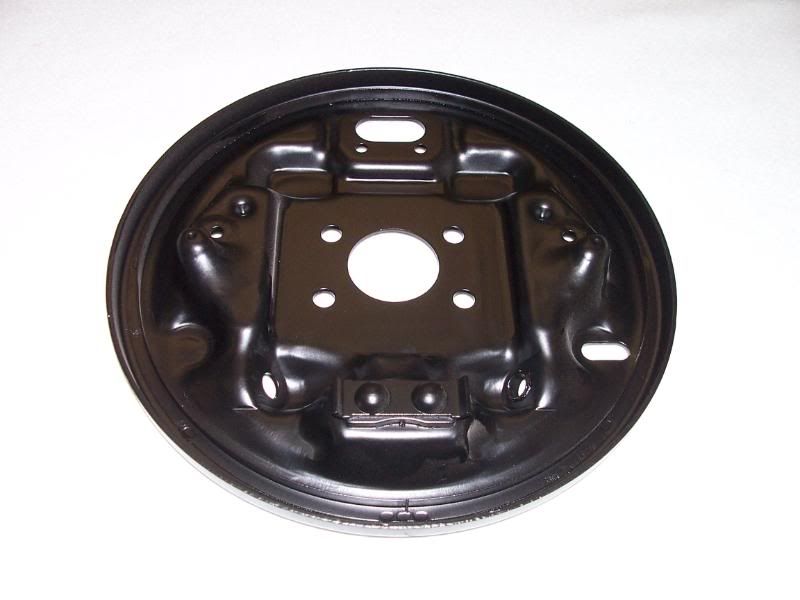
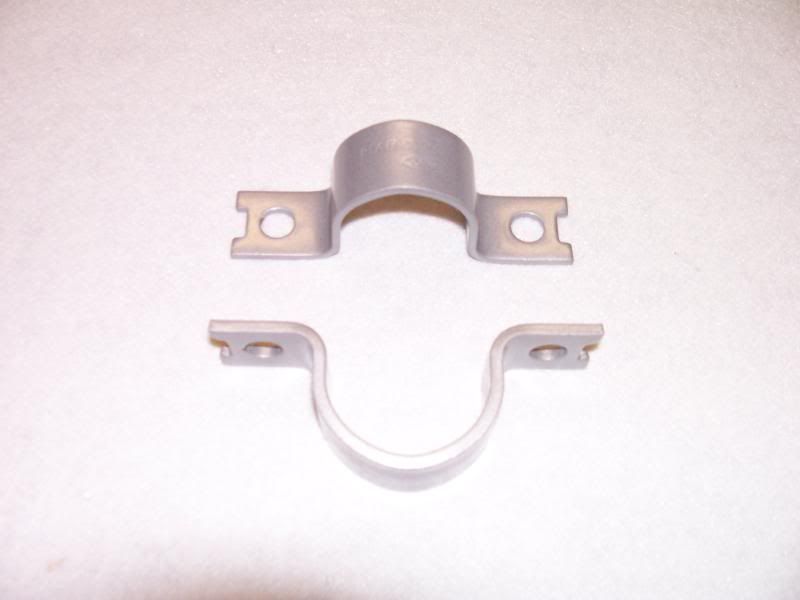
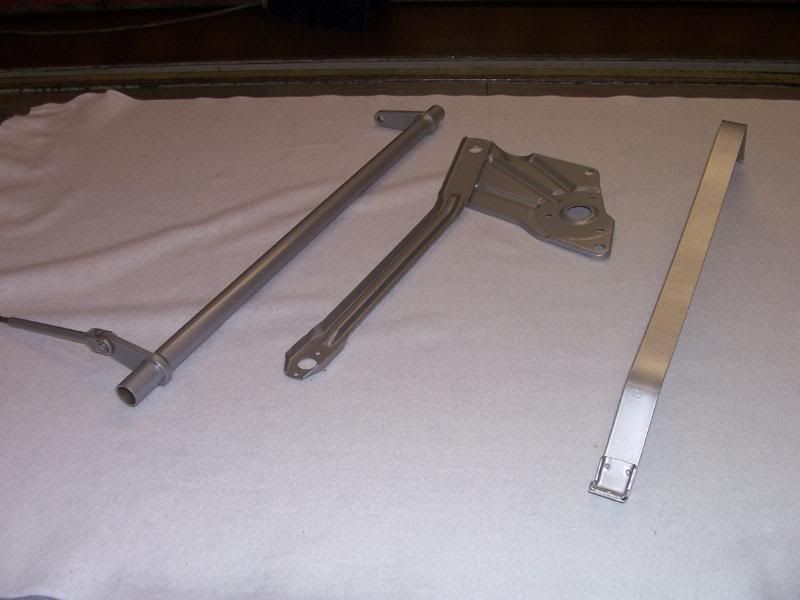
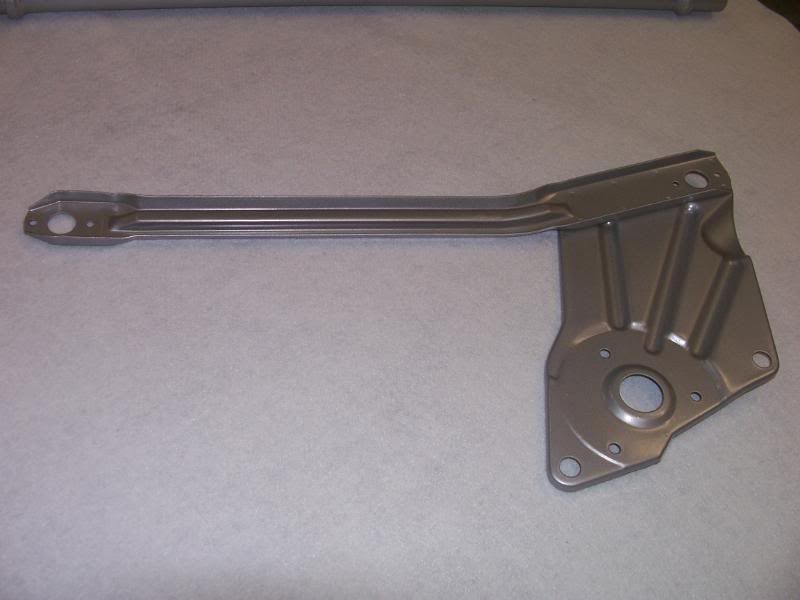
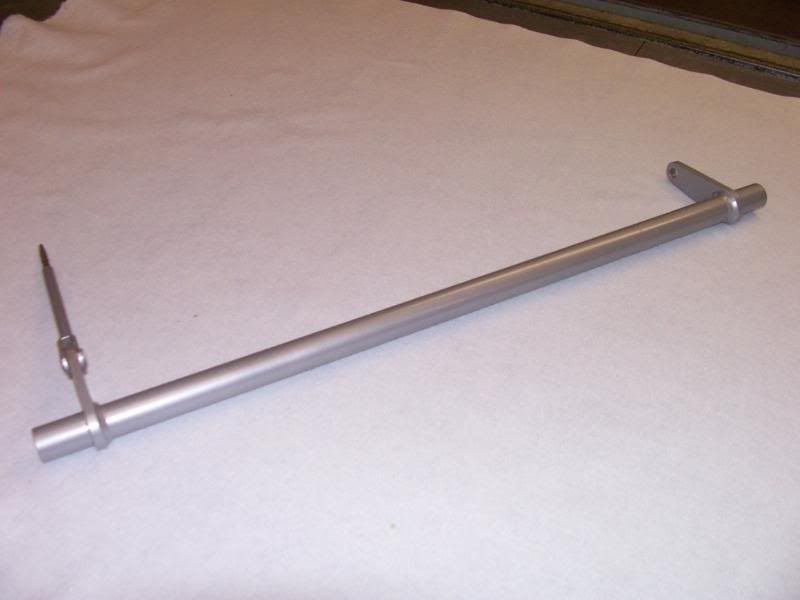
Next i turned my attention to all the powder coating items
This is what they looked like before

And after degreasing, blasting, undercoating and powder finieshed this is the finished products. Pics dont do them justice but they look good enough to eat
Colour is Silver Pearl Metallic


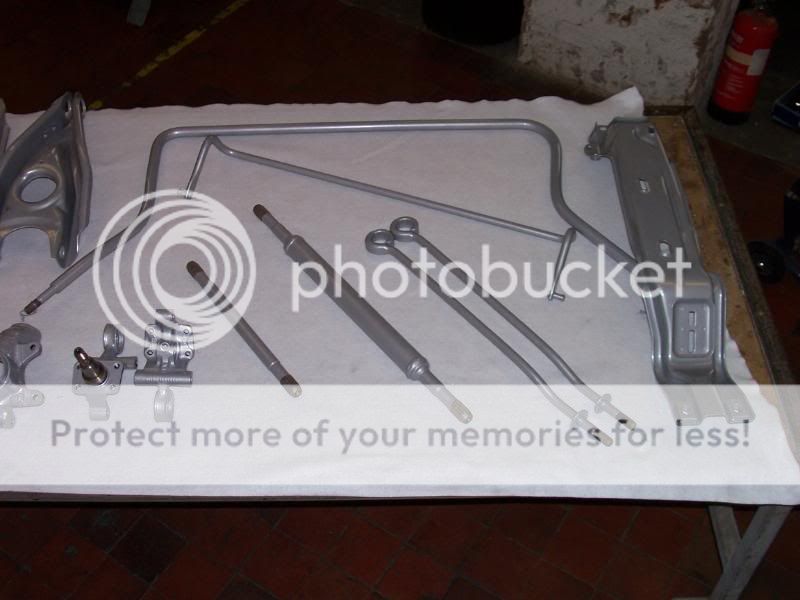
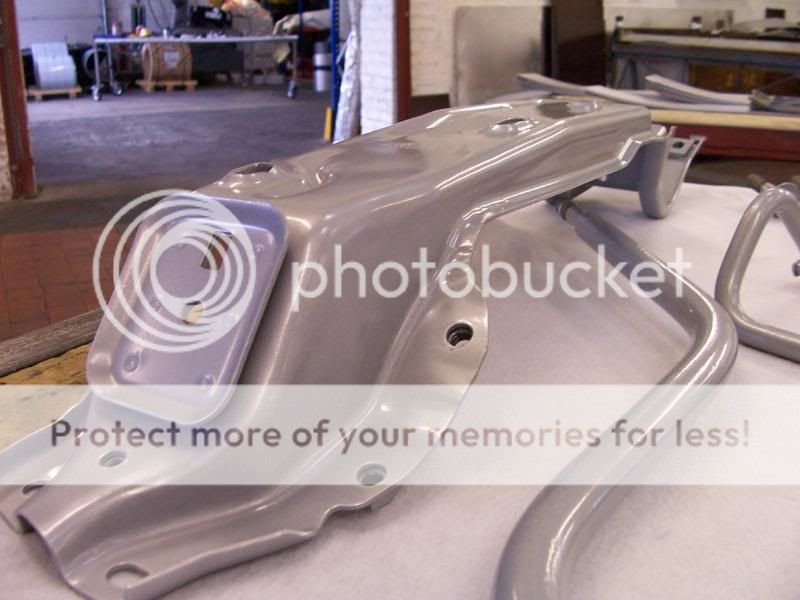
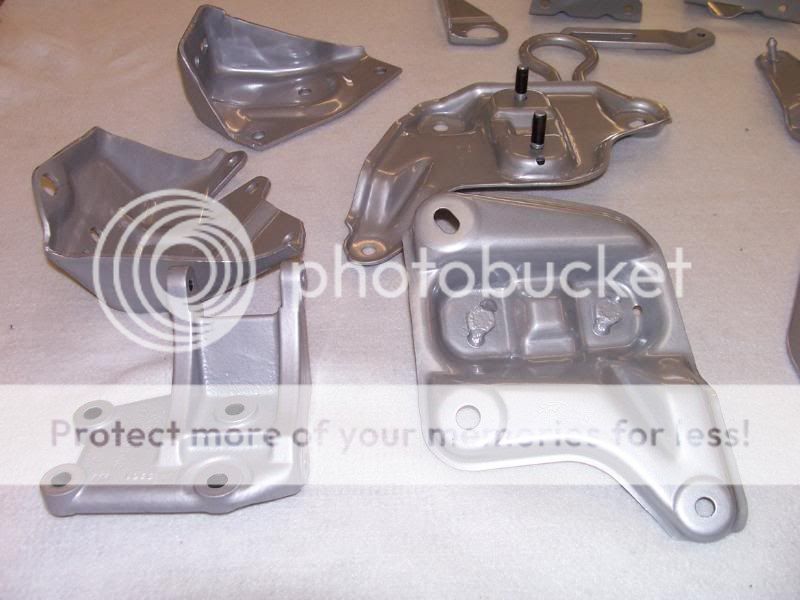
Ford stamp as clear as ever

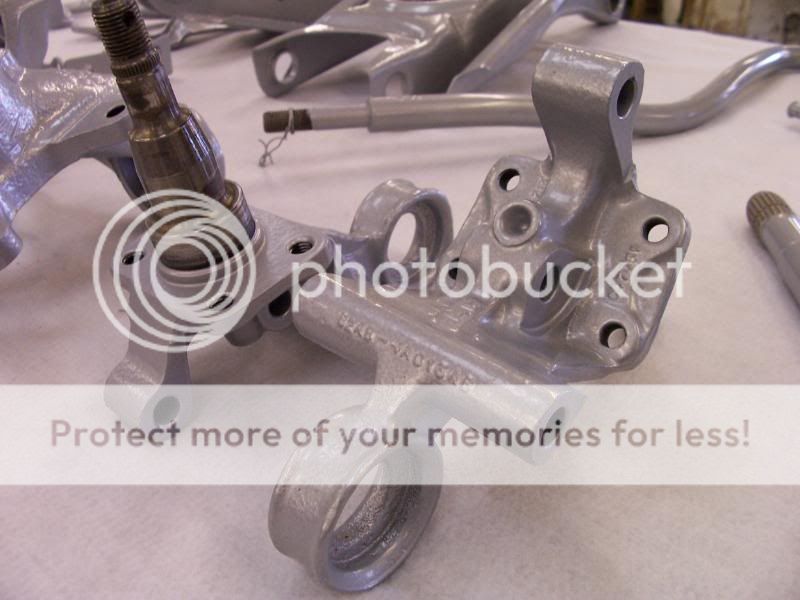
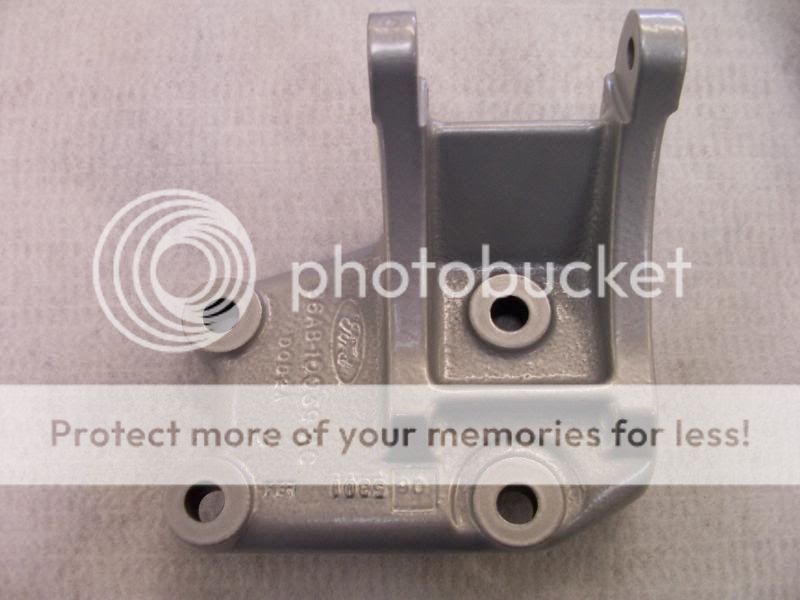
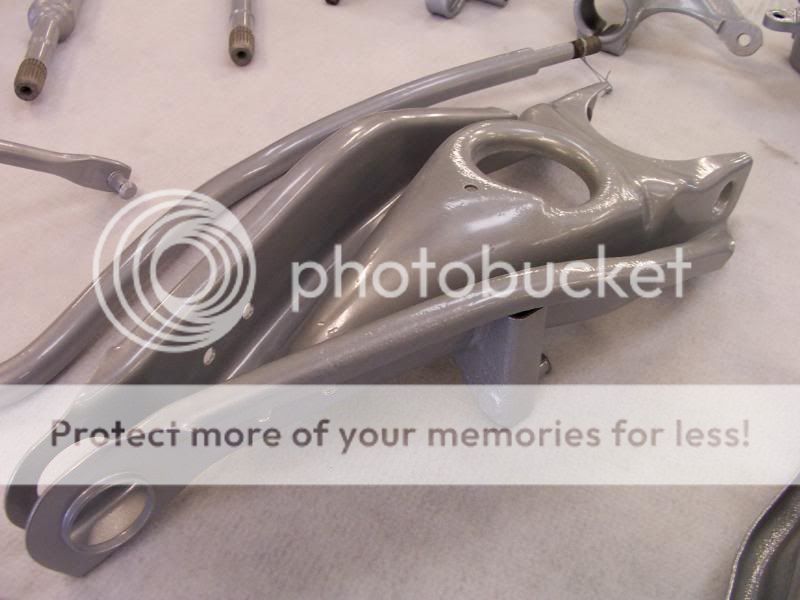
BIG THANKS TO STEVE AT NORTHWEST ENAMELLERS IN BUCKLEY FOR DOING
ALL MY POWDER COATING. THE QUILITY IS AMAZING AND THE SERVICE IS TOP NOTCH.
Link to site below or phone steve on 01244 544739 and tell him Chris from the Cheshire Rs Owners club sent you
http://www.northwestenamellers.co.uk/
Hope you all like everything whats going on with the resto so far????
As this is the first time i have done anything like this before im doing everything a bit blind but im giving everything i do total thought first, but if you see anything in the pics above and think, why did he do it like that or why didnt he do it like this then please speak up as all you experianced bodyworkers/panel beaters/restorers do this for a living and i need as much info as possible.
Also below is my new toy
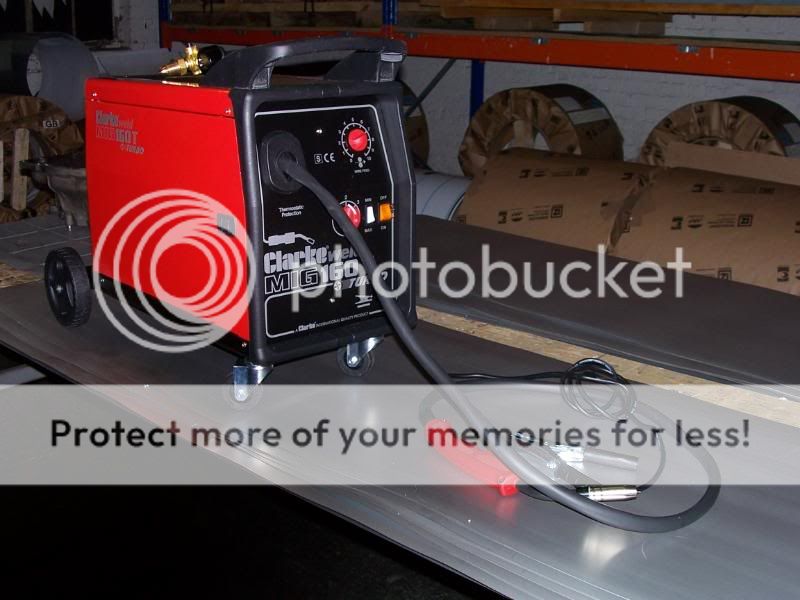

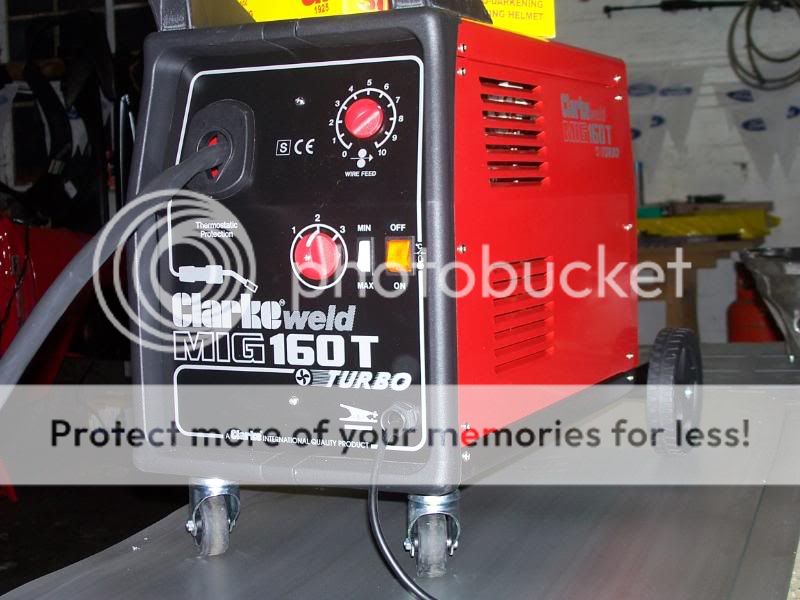
Also a big thanks to Steve(Weldequip) from the Mig Welding Forums for sorting me out with the welder. Cheaper than anywhere and pished on Machine Mart. If your into welding and stuff then have a browse on the forums. Some good info on mig/tig welding etc
http://www.mig-welding.co.uk/forum/index.php
CheeRS
Chris
Big Thanks to Ste Morley from my Local group for getting my gearbox stripped for me. He lives next to a guy who worked for Ford when the factory was at Speke, Liverpool and he worked on th gearbox side of things and knows them inside out, + he has all the home made gadgets to strip them especially the one to get the LSD out as its pressed in with 3 ton.
I didnt get any pics as i wasnt there when he stripped it but this is what it looked like when i collected it
He said everything was in perfect condition and has been very well looked after. Will only require a couple of new bearings and seals
All the casings are now at the blasters getting glas beaded so will get some pics up when i collect it.
I then moved onto all my nuts/bolts/screws/washers/ brackets etc that i needed electroplated.
I sent them away to be done and when i recieved them i got the shock of my life
they had all been done silver instead of gold. Was gutted but thanks to Rs Stevo he put me in touch with a company called Willow Chrome based in St Helens. I took everything down yesterday and everything will be ready to pick up fri morning so again i will get some pics up of the finished products, all 507 of them LOLJust to give you an idea of what i had to go through when labelling all parts up, here are some pics,
Everything was photographed, measured and logged so i know exactly where everything is for, sad i know but suppose its part and parcel of succesfull restoration.
Next i turned my attention to all the powder coating items
This is what they looked like before
And after degreasing, blasting, undercoating and powder finieshed this is the finished products. Pics dont do them justice but they look good enough to eat
Colour is Silver Pearl Metallic
Ford stamp as clear as ever
BIG THANKS TO STEVE AT NORTHWEST ENAMELLERS IN BUCKLEY FOR DOING
ALL MY POWDER COATING. THE QUILITY IS AMAZING AND THE SERVICE IS TOP NOTCH.
Link to site below or phone steve on 01244 544739 and tell him Chris from the Cheshire Rs Owners club sent you
http://www.northwestenamellers.co.uk/
Hope you all like everything whats going on with the resto so far????
As this is the first time i have done anything like this before im doing everything a bit blind but im giving everything i do total thought first, but if you see anything in the pics above and think, why did he do it like that or why didnt he do it like this then please speak up as all you experianced bodyworkers/panel beaters/restorers do this for a living and i need as much info as possible.
Also below is my new toy
Also a big thanks to Steve(Weldequip) from the Mig Welding Forums for sorting me out with the welder. Cheaper than anywhere and pished on Machine Mart. If your into welding and stuff then have a browse on the forums. Some good info on mig/tig welding etc
http://www.mig-welding.co.uk/forum/index.php
CheeRS
Chris


 12-01-2008, 05:55 PM
#17
I've found that life I needed.. It's HERE!!
Join Date: Sep 2007
Location: derby
Posts: 998
Likes: 0
Received 0 Likes
on
0 Posts
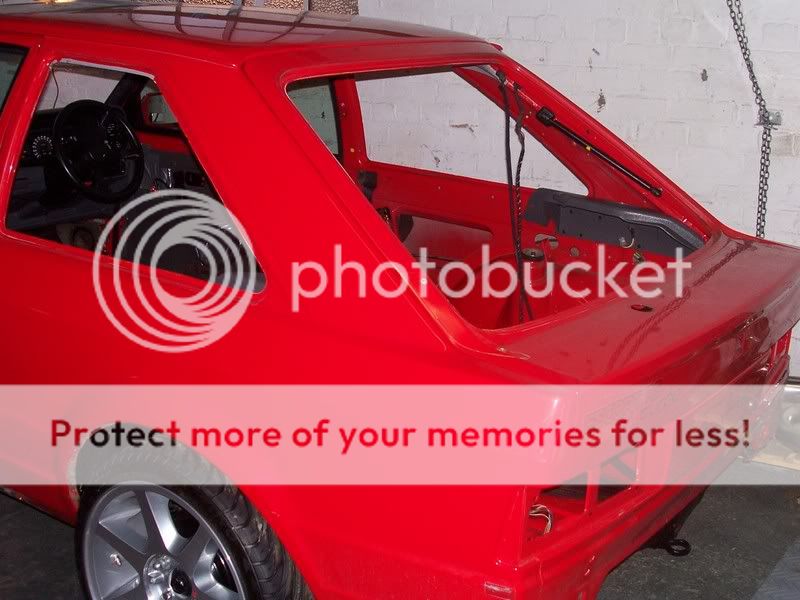
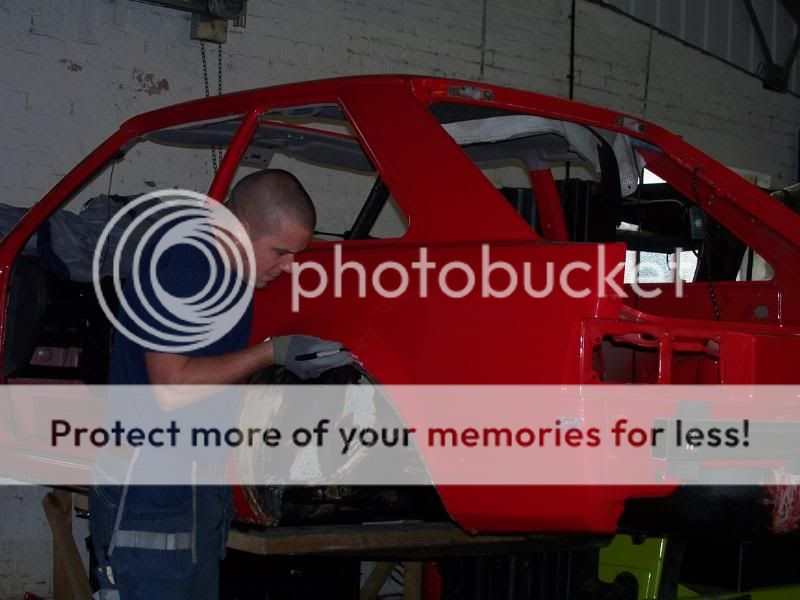
cant believe whats hidding behind that kit.
it looks so mint before you stripped it.
will look even better when all done.
great work so far mate
it looks so mint before you stripped it.
will look even better when all done.
great work so far mate
 13-01-2008, 05:49 PM
#19
Advanced PassionFord User

Join Date: May 2003
Location: sunny stockton on tees
Posts: 1,514
Received 0 Likes
on
0 Posts
well done matie looking good, i remember talking to you in a pub at our show last year (lightwater valley) had a few beers and some laughs, keep up the good work.


 28-05-2008, 09:44 PM
#28
Parts Restoring Nutter
Thread Starter
Well well well, this is an update long overdue so hope you enjoy this one.
Had a bit of a break from the car as im trying to look after my pregnant
fiancee as well as working all the hours under the sun at work but im
really pushing hard on getting her finished and ready for Cumbria 2009
So here goes...................
Had some more blasting & powder coating done


And then the last of the powder coating i needed doing
Had a bit of a break from the car as im trying to look after my pregnant
fiancee as well as working all the hours under the sun at work but im
really pushing hard on getting her finished and ready for Cumbria 2009
So here goes...................
Had some more blasting & powder coating done
And then the last of the powder coating i needed doing
28-05-2008, 09:59 PM
#29
Parts Restoring Nutter
Thread Starter
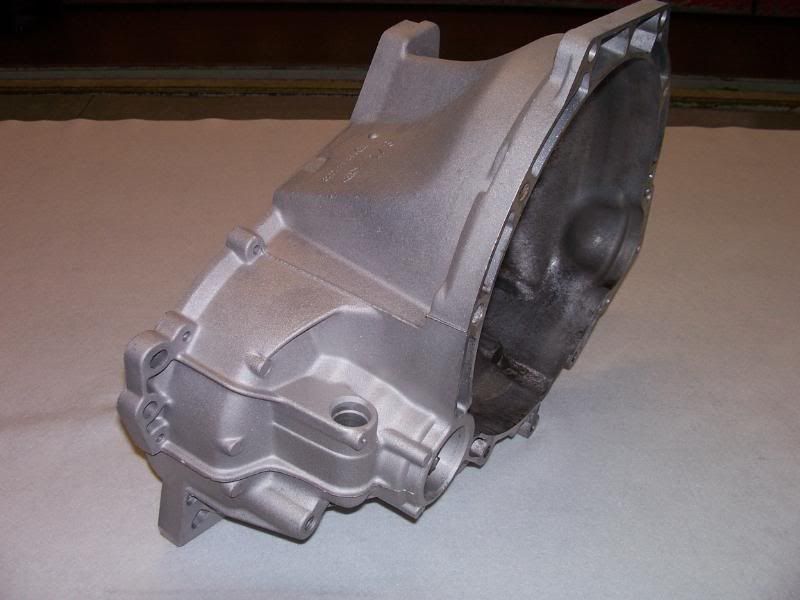
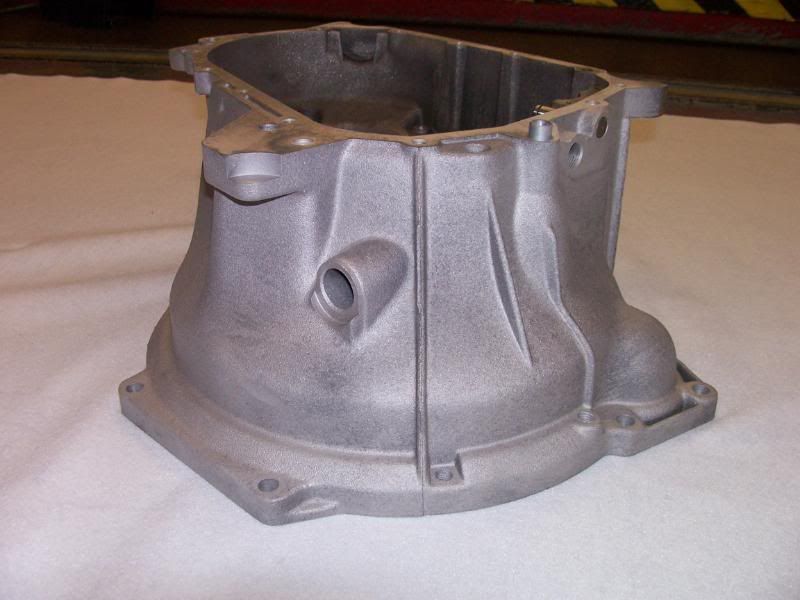
Next i turned my attention to painting the gearbox casings using a product
called Alumablast (by Eastwood) which is the easiest paint in the world to use and the finish is top notch, especially on freshly blasted aluminium.
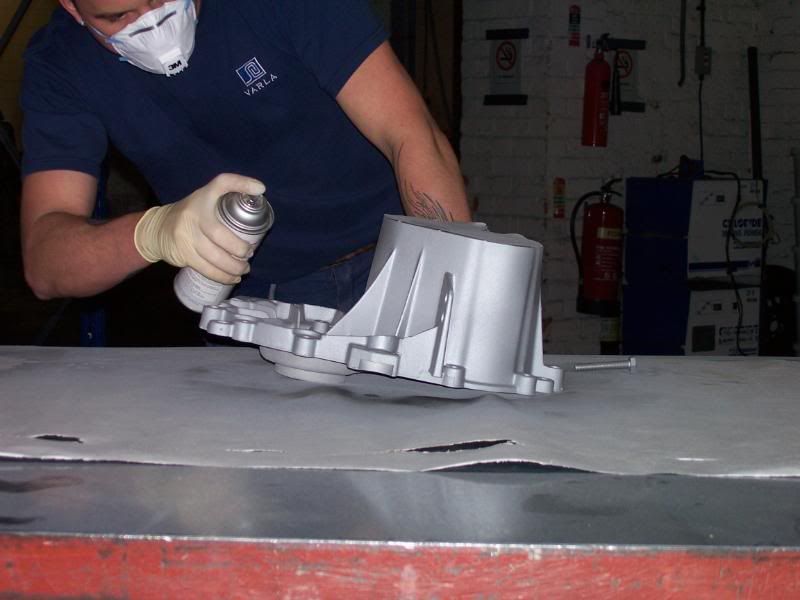
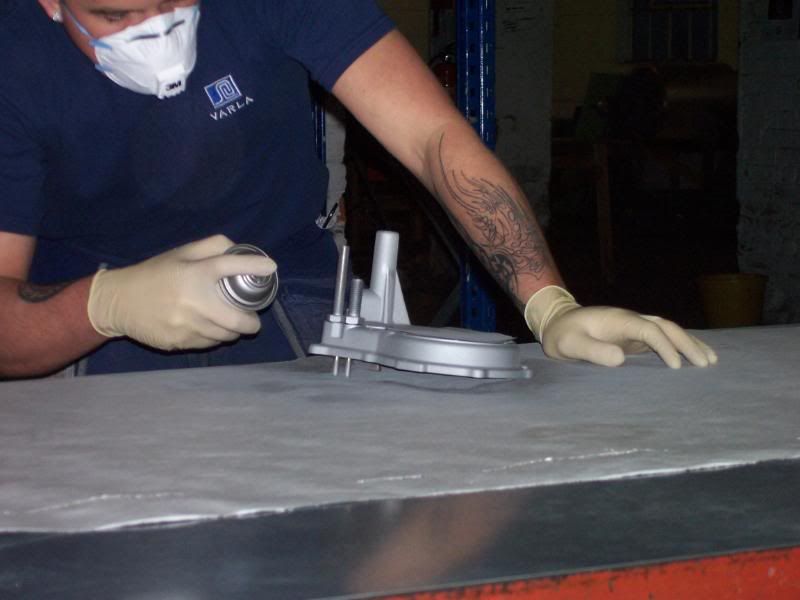
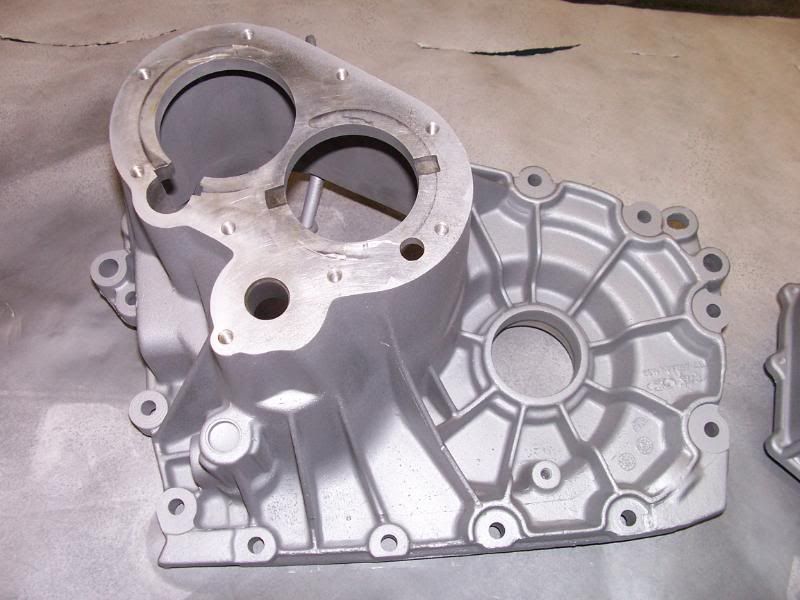
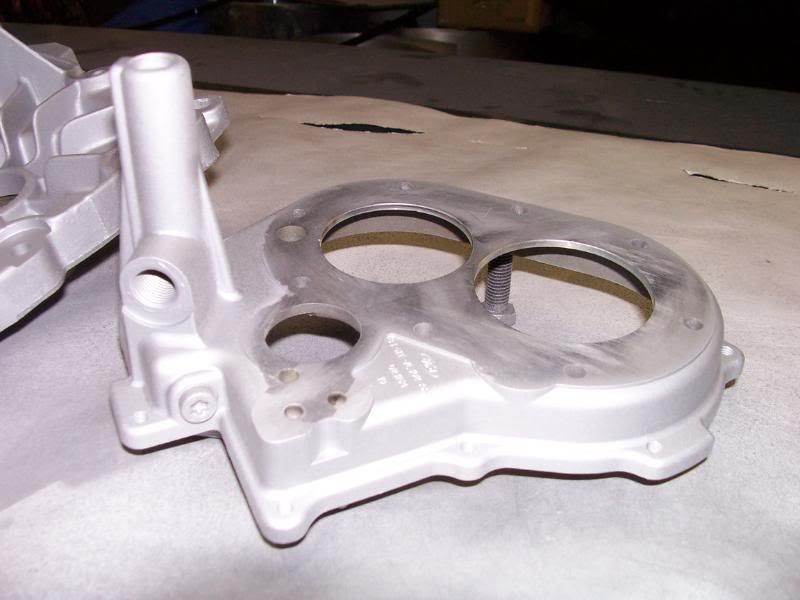
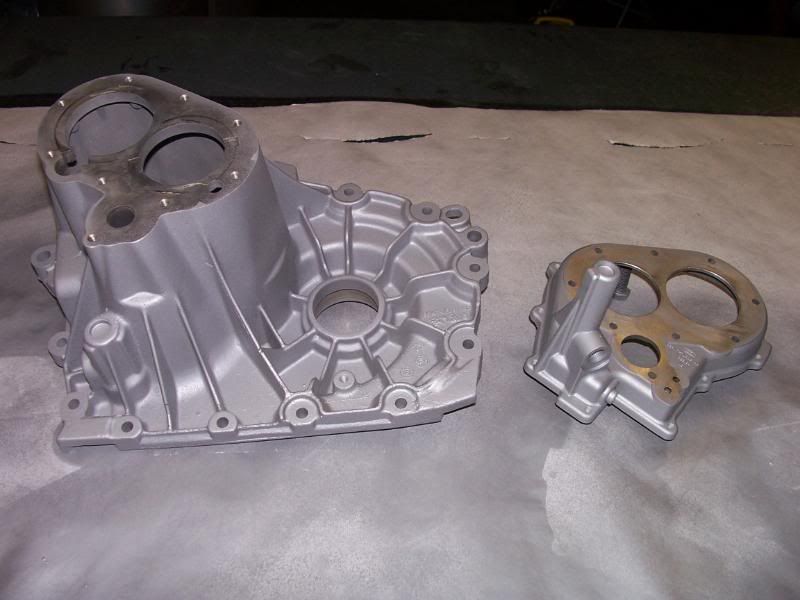
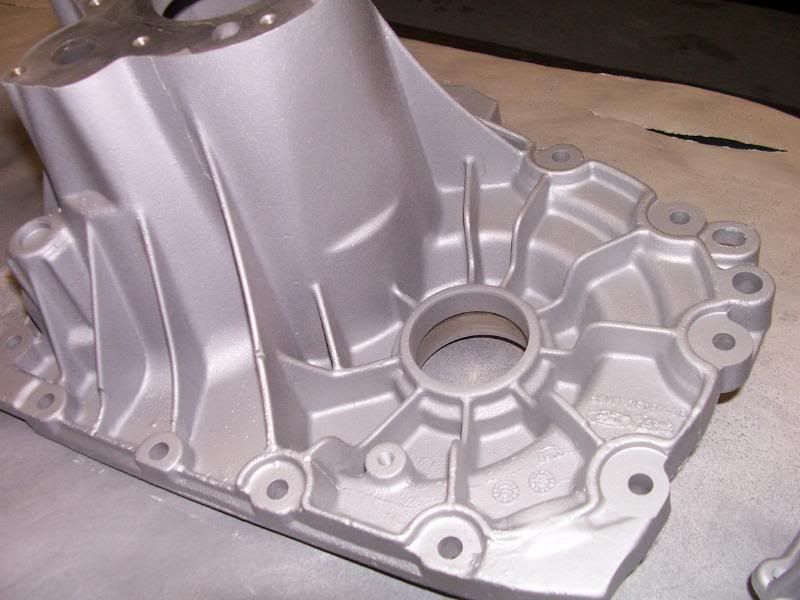
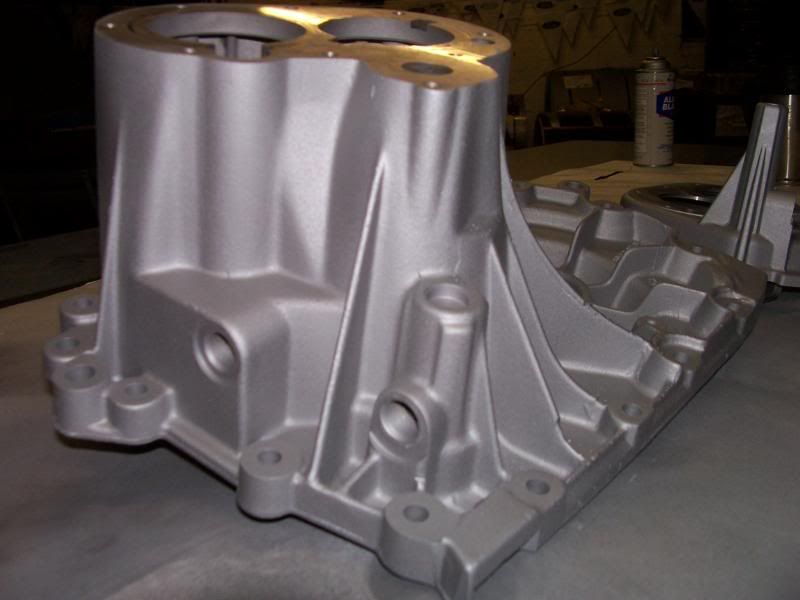
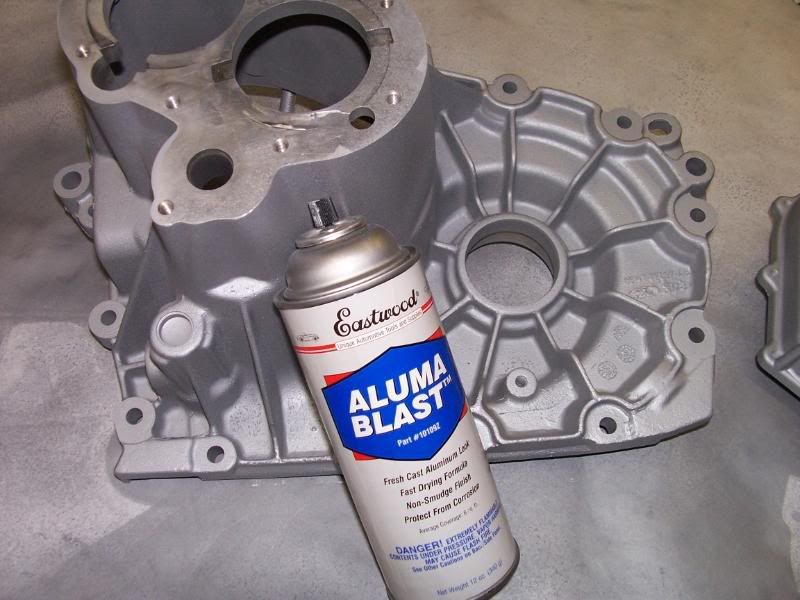

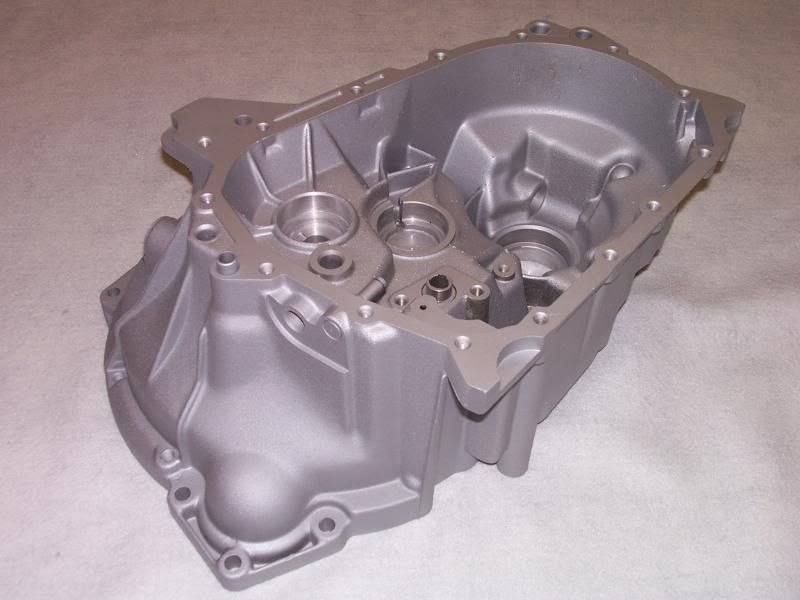
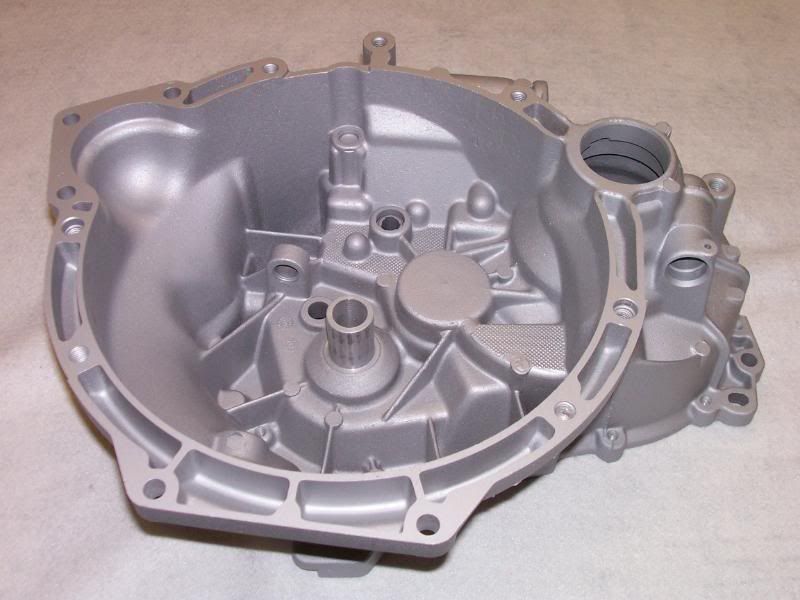
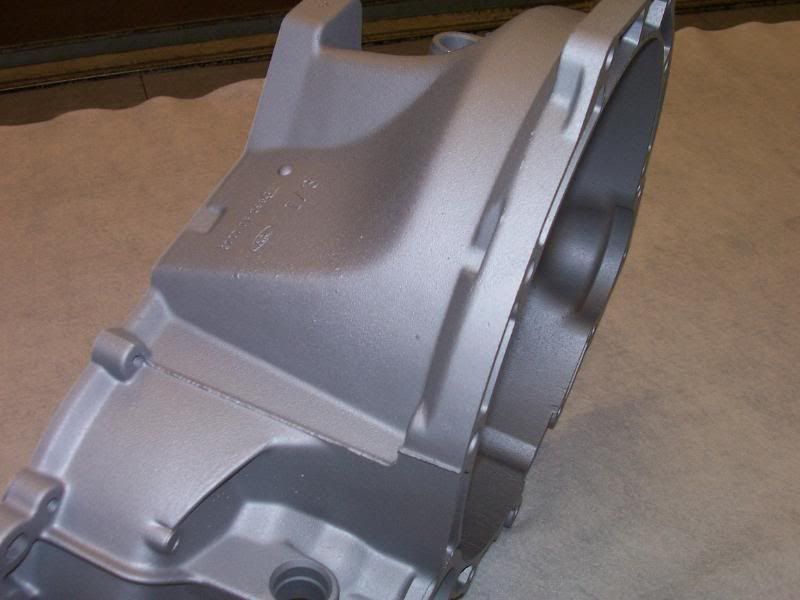
called Alumablast (by Eastwood) which is the easiest paint in the world to use and the finish is top notch, especially on freshly blasted aluminium.
28-05-2008, 10:08 PM
#30
Parts Restoring Nutter
Thread Starter
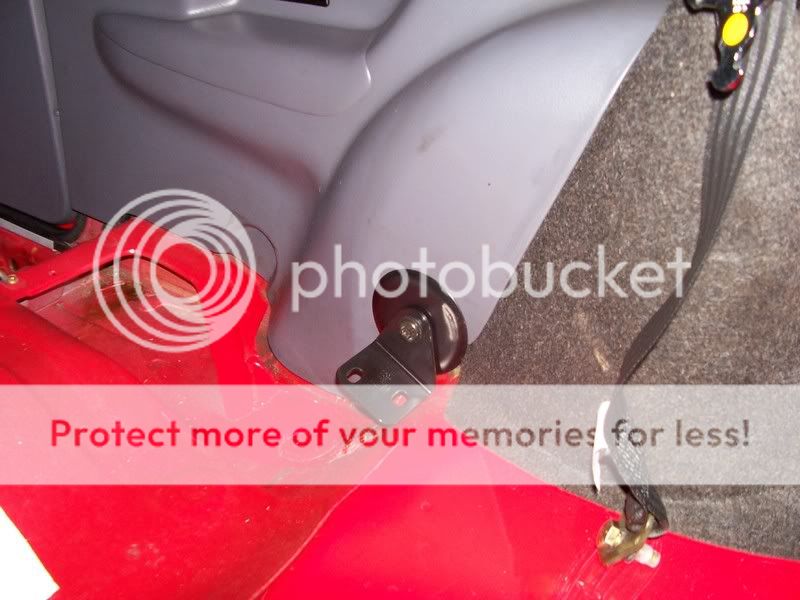
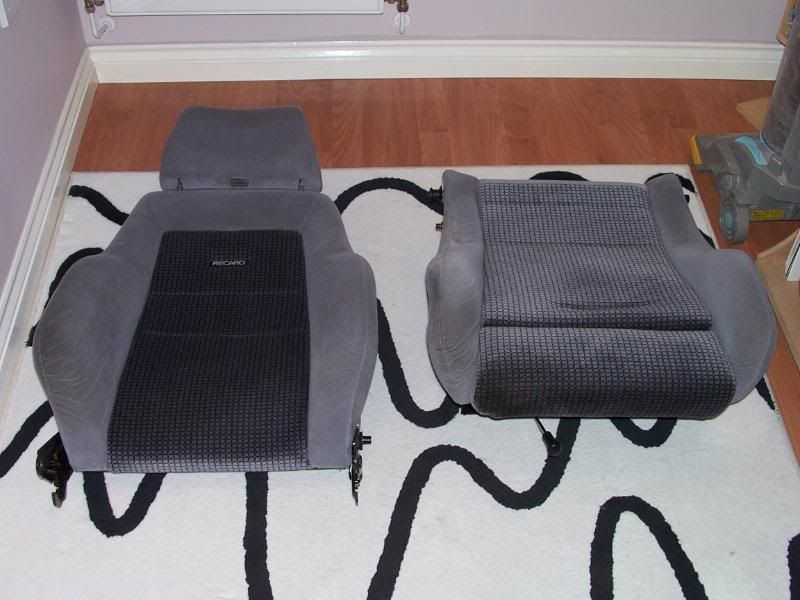
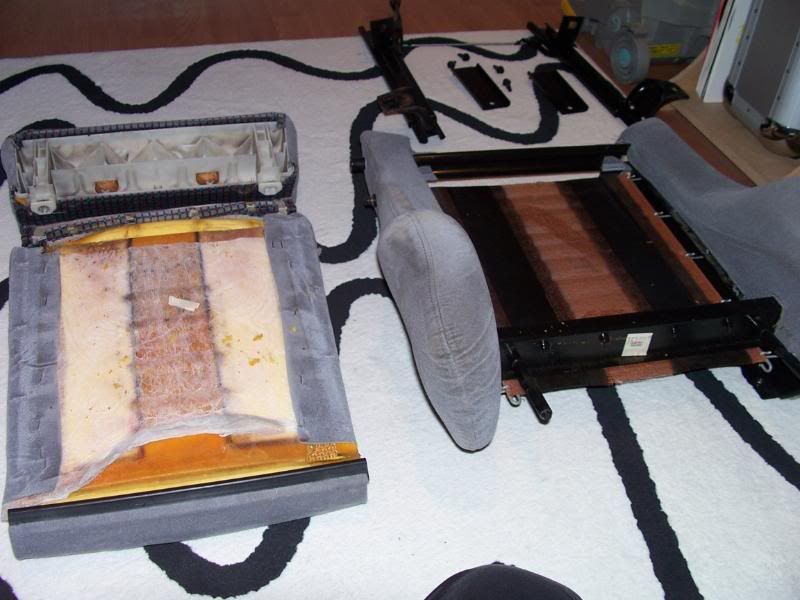
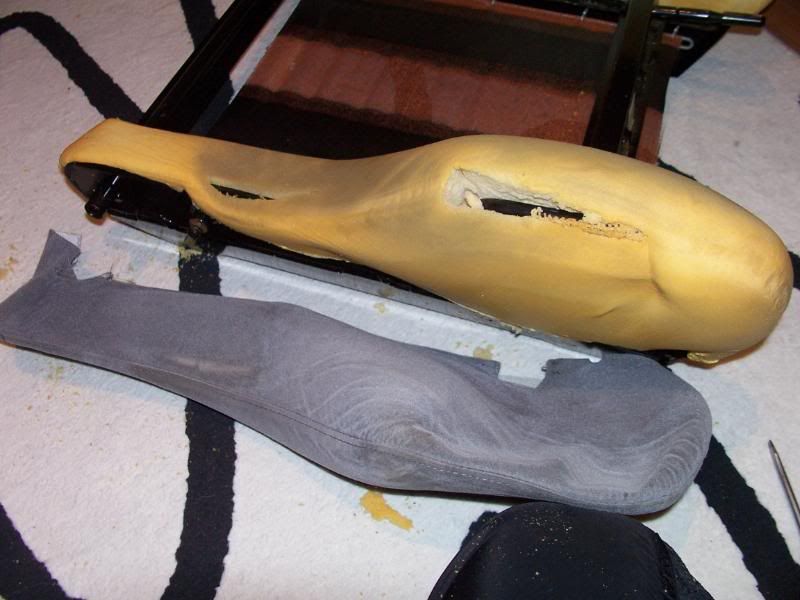
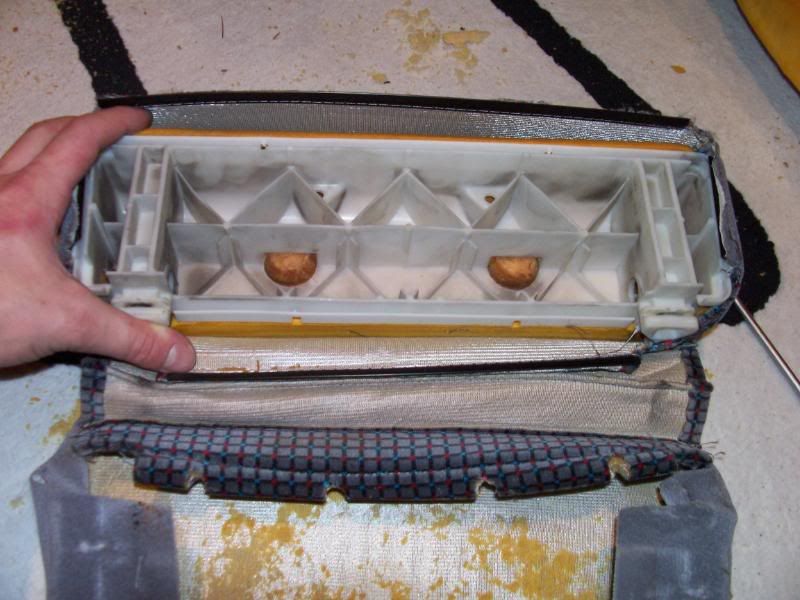
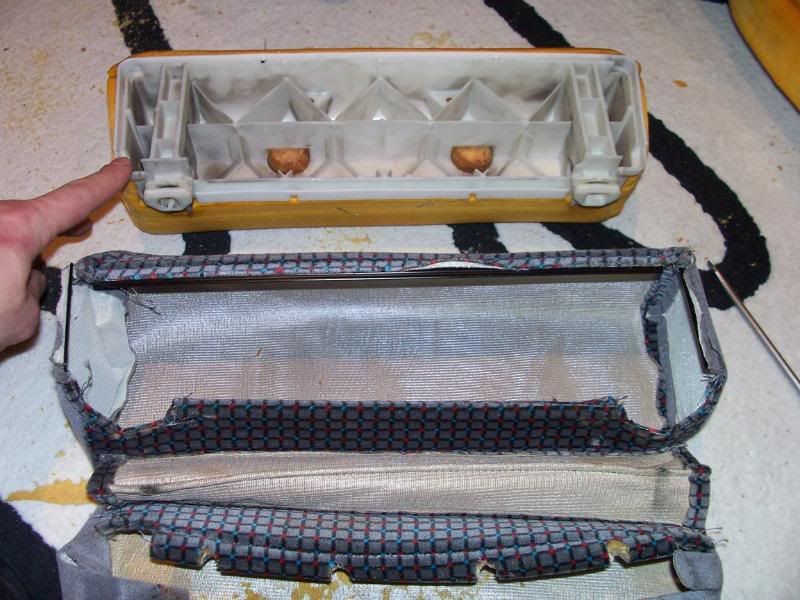
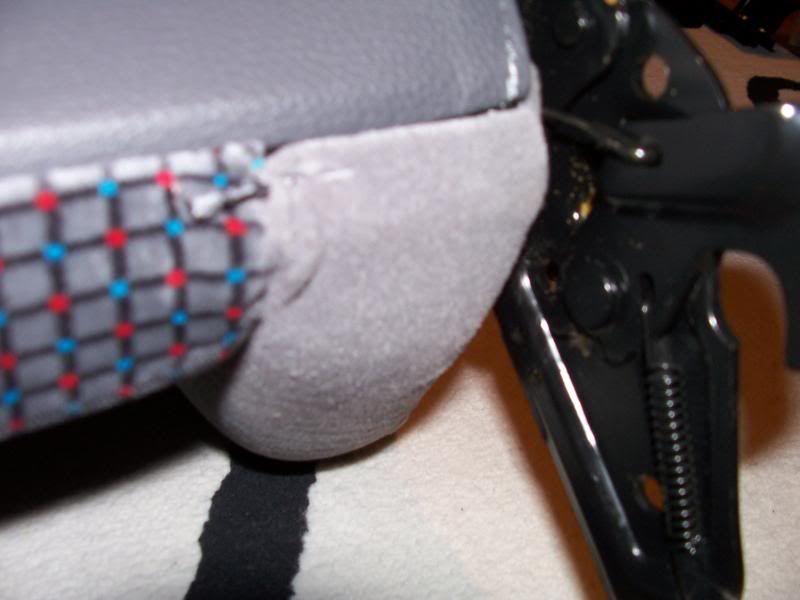
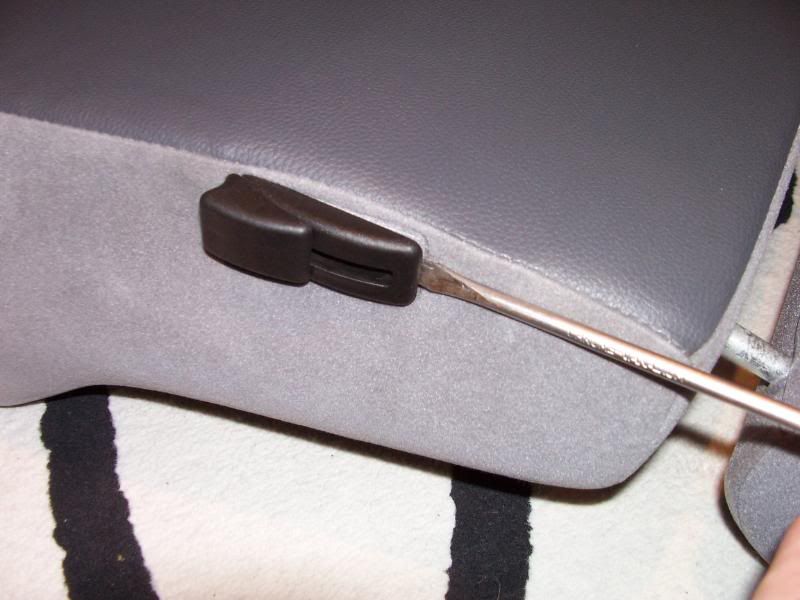
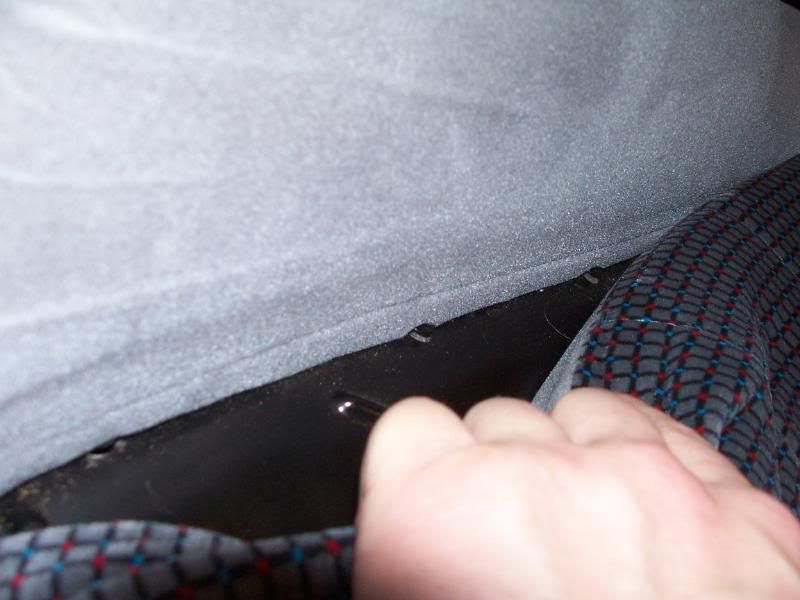
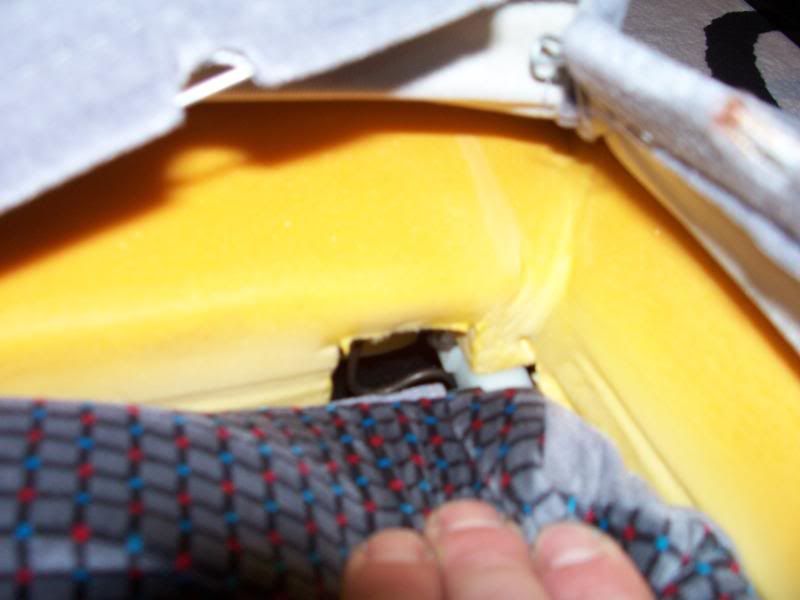
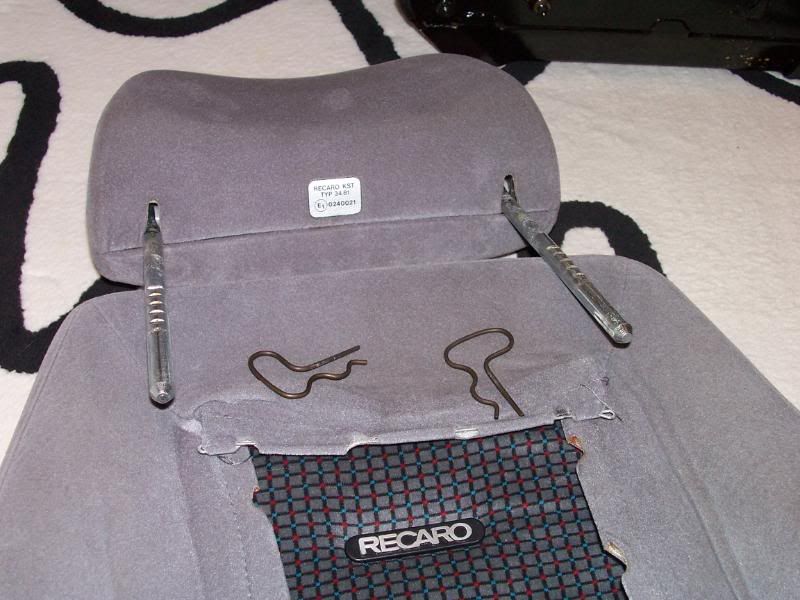
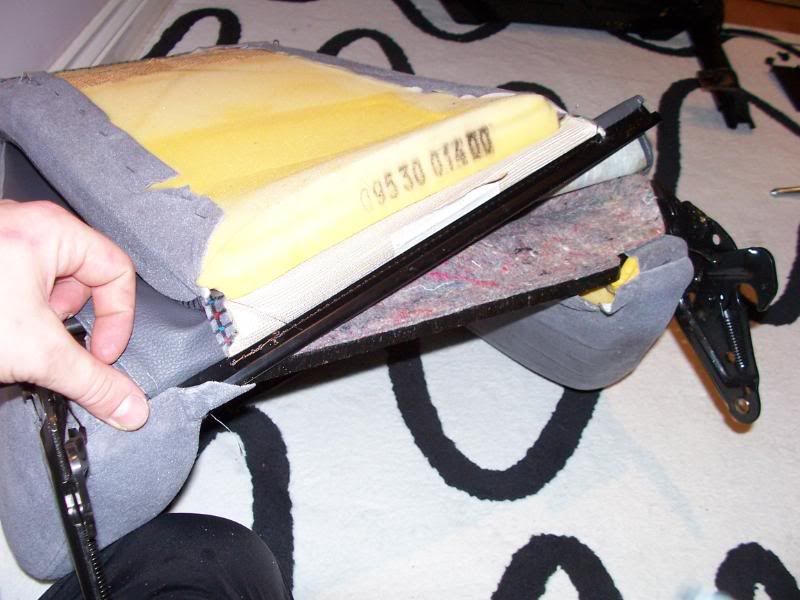
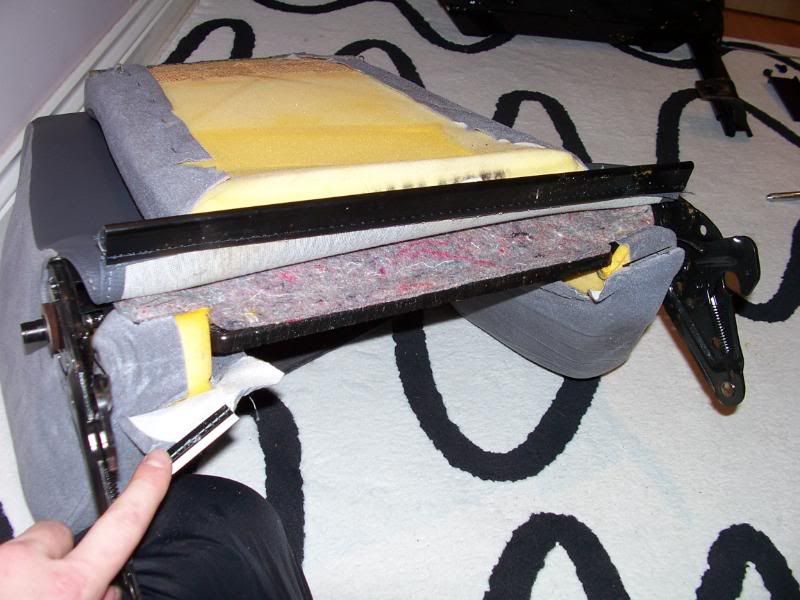
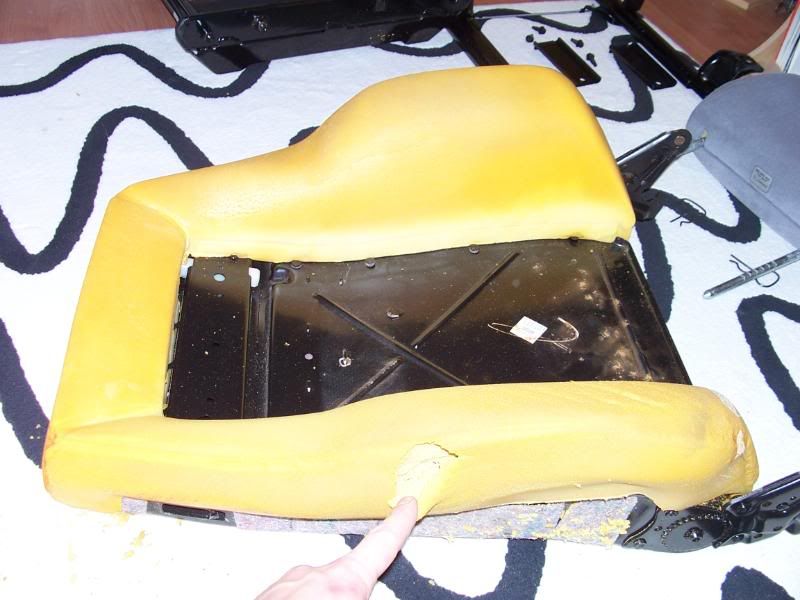
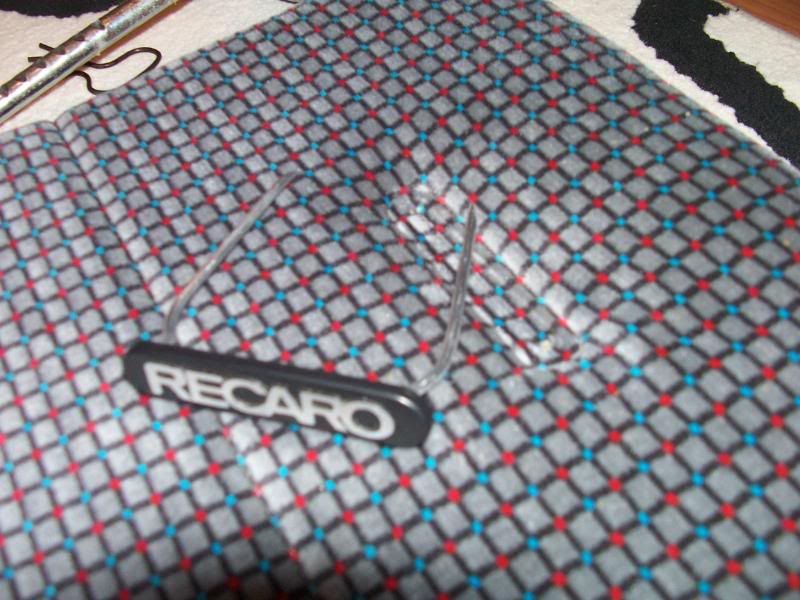
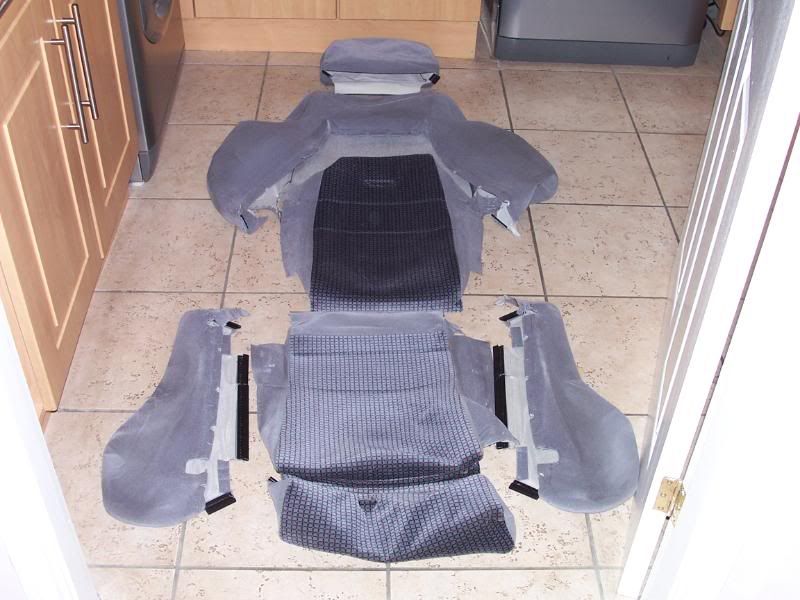
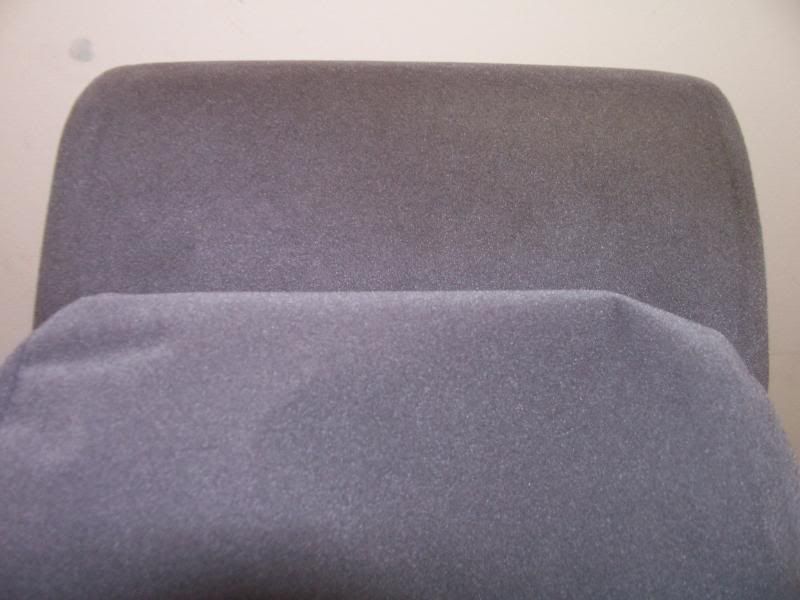
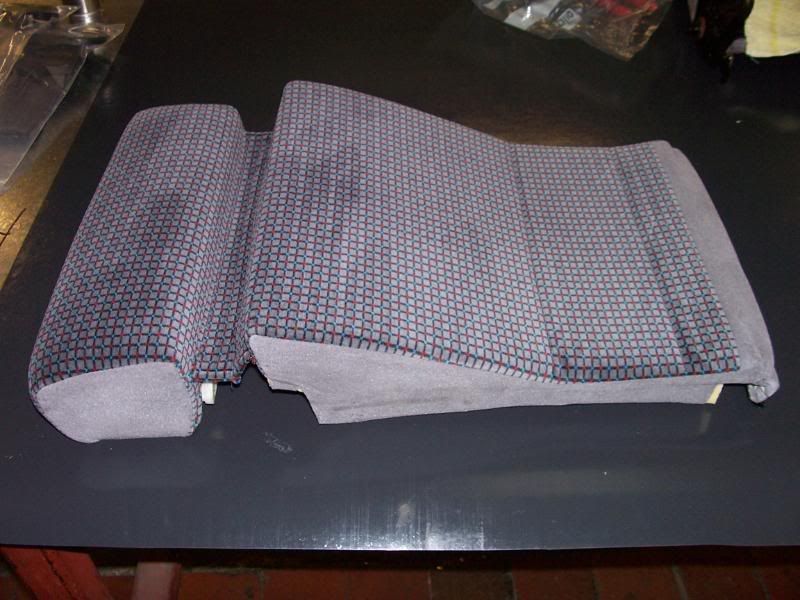
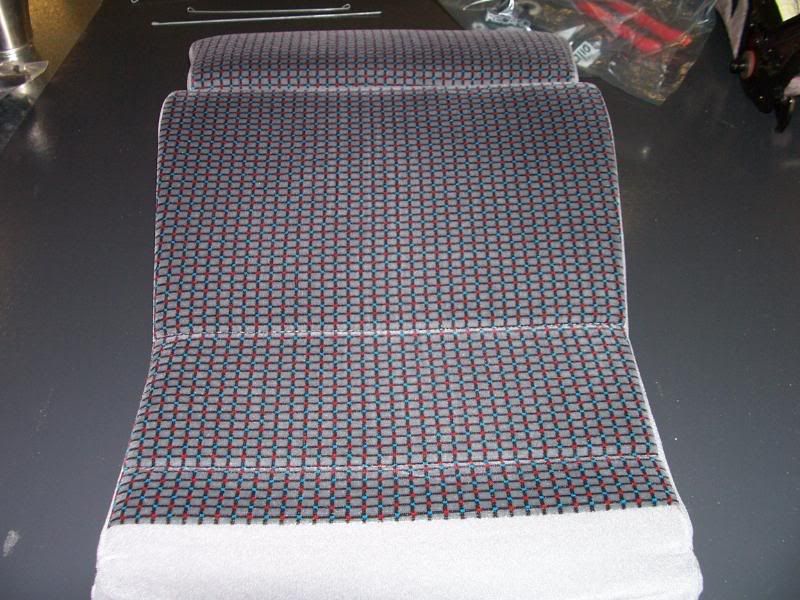
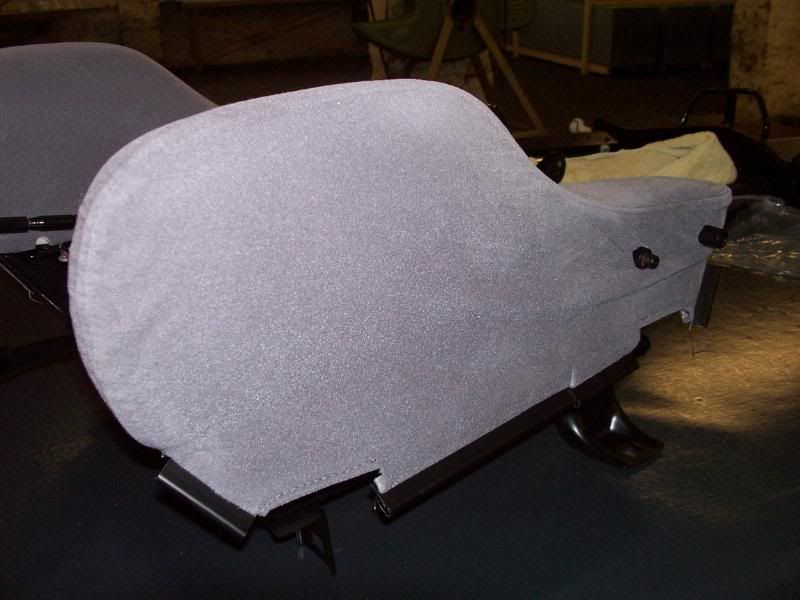
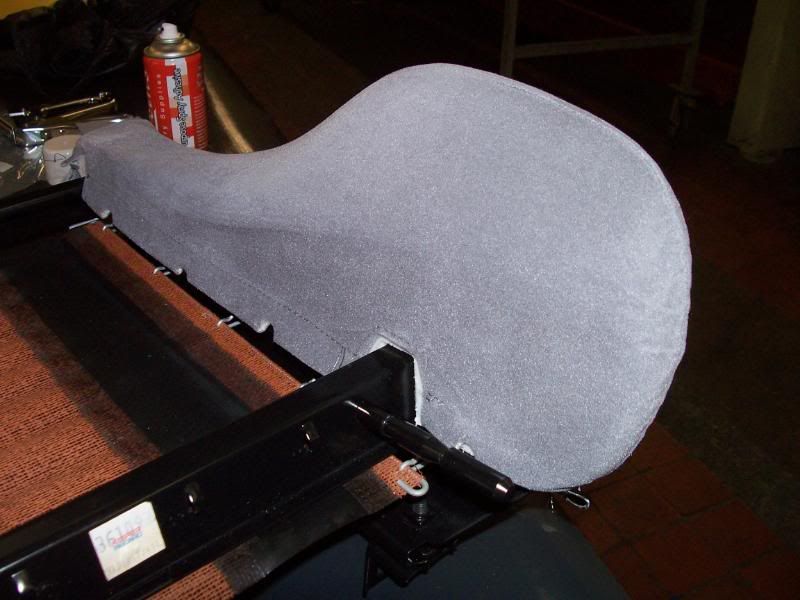
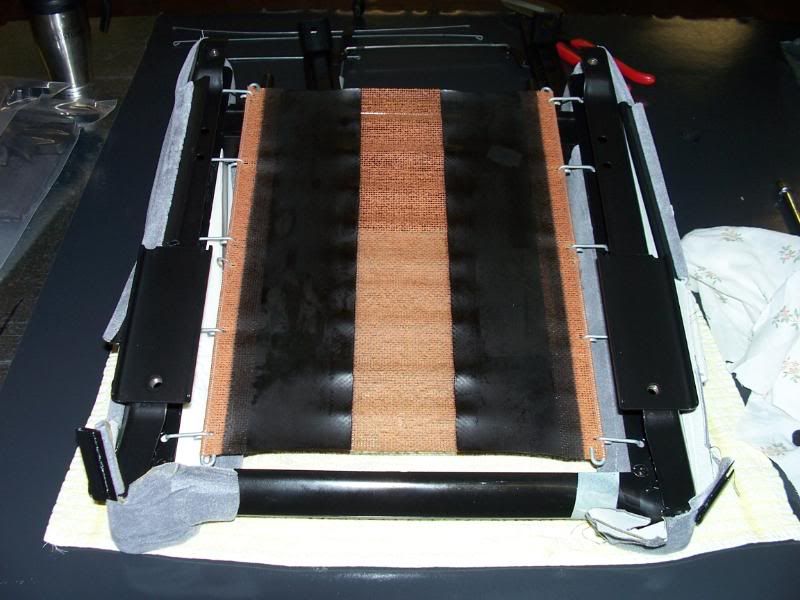
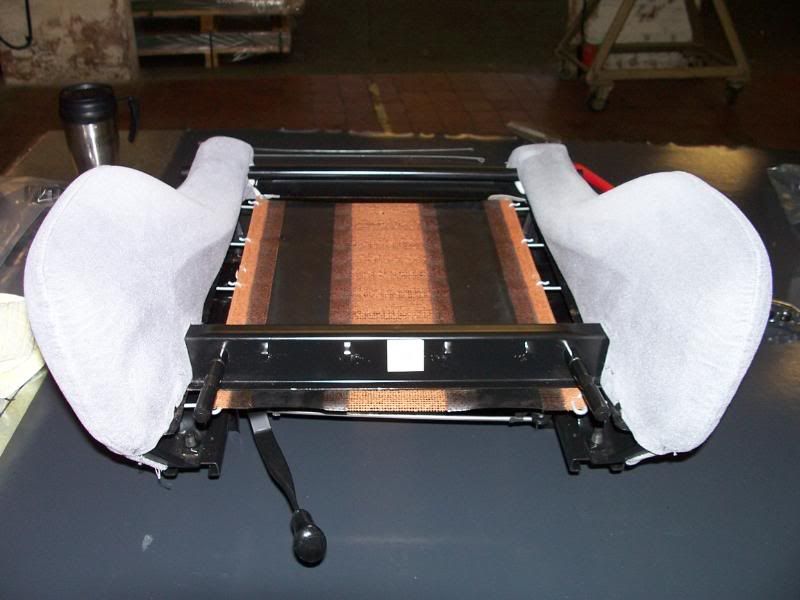
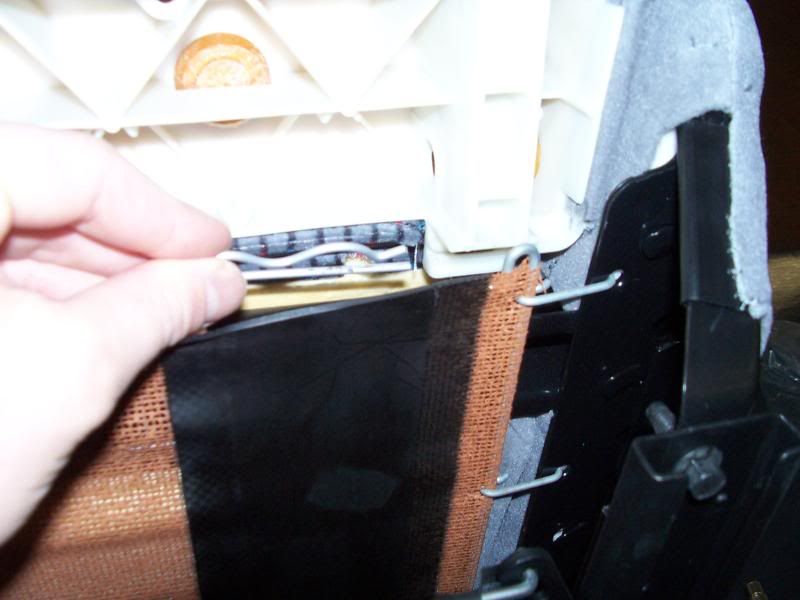
I then turned my attention the the front seats
Big Big thanks to Gareth (Juddzey455) for all his help and for supplying me a mint full seat cover which i refitted to my drivers side seat to make
to mint pairs as my passenger one has hardley been sat in
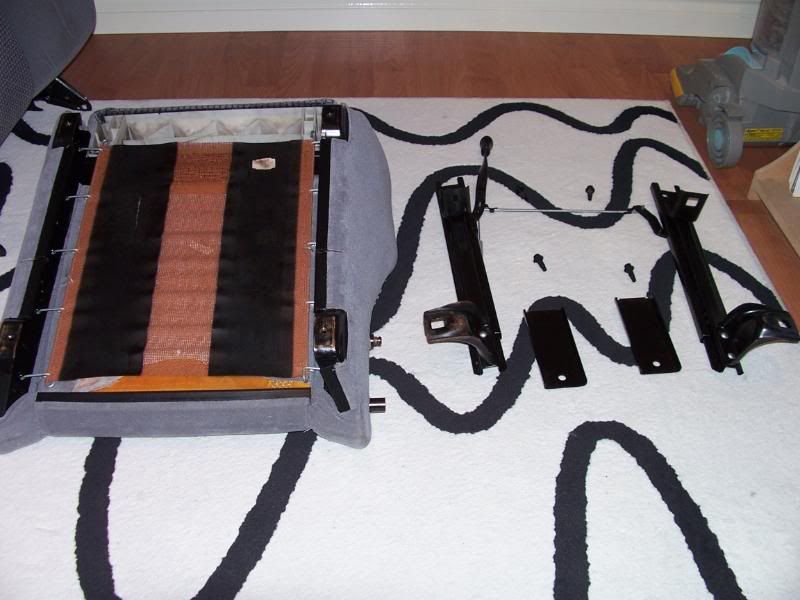
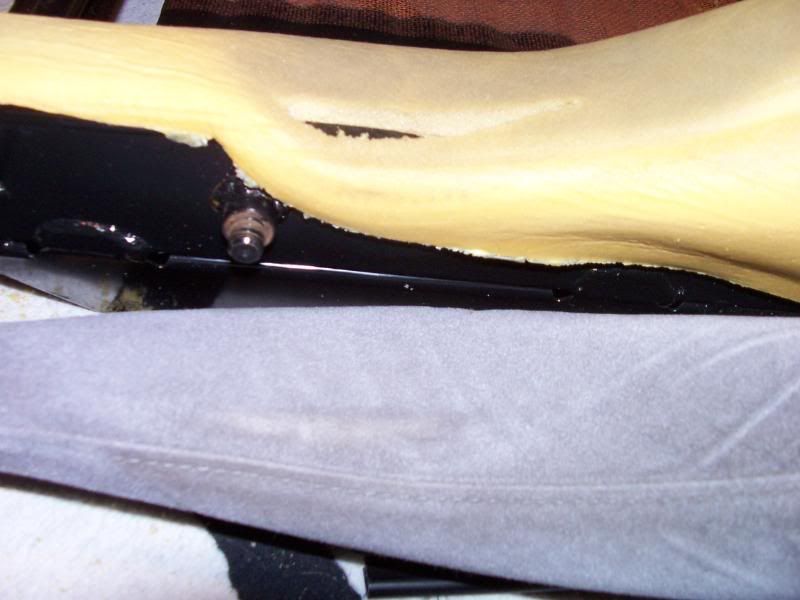
Seat strip down


Big Big thanks to Gareth (Juddzey455) for all his help and for supplying me a mint full seat cover which i refitted to my drivers side seat to make
to mint pairs as my passenger one has hardley been sat in
Seat strip down
Last edited by Chris Latham; 29-05-2008 at 07:40 AM.

 29-05-2008, 08:26 AM
#35
Parts Restoring Nutter
Thread Starter
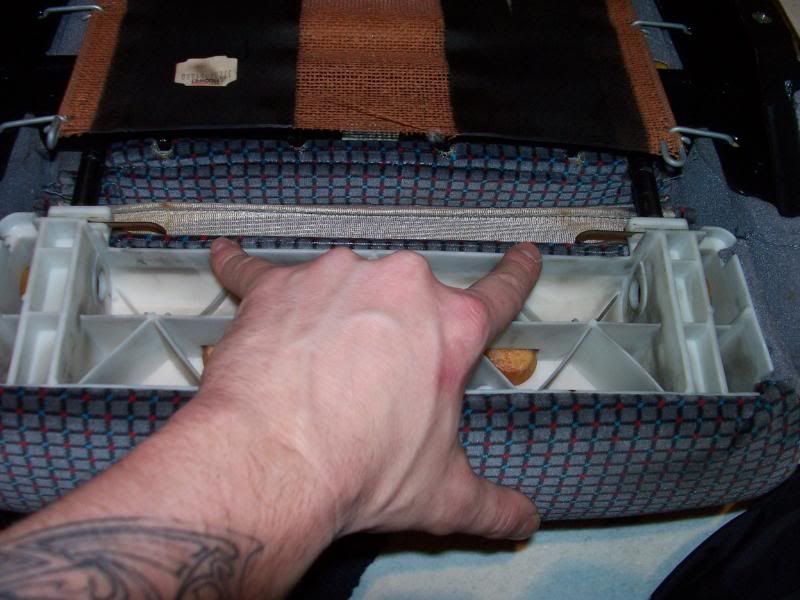
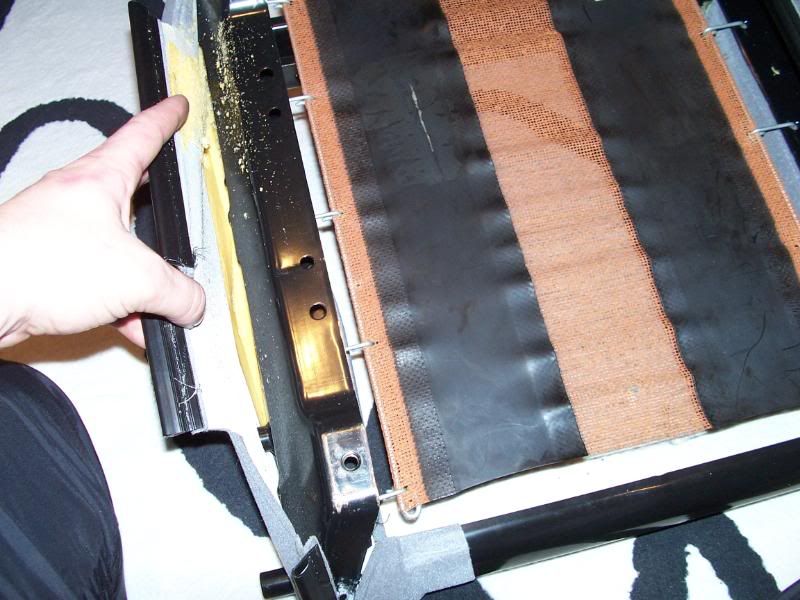
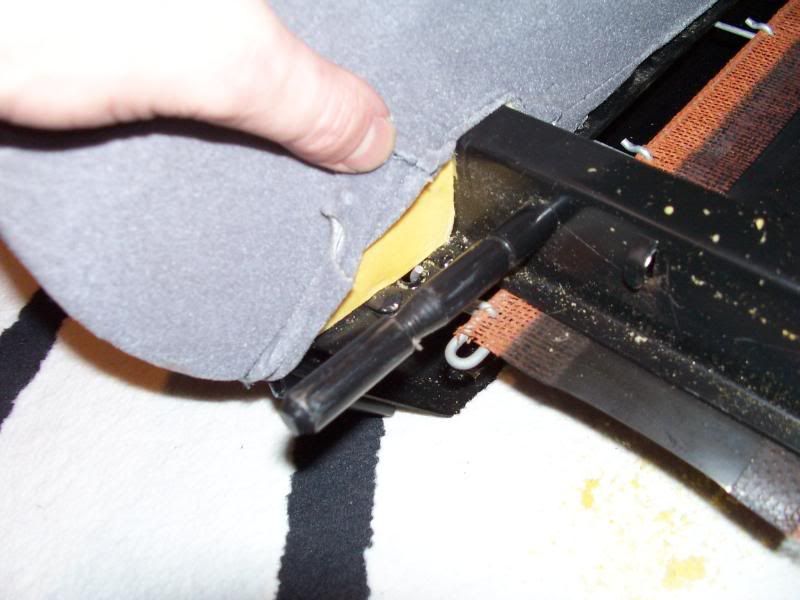
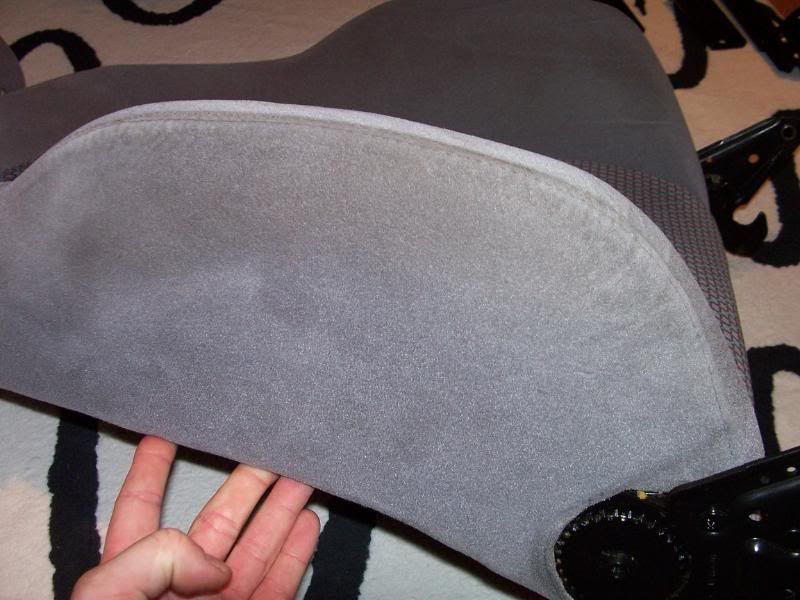
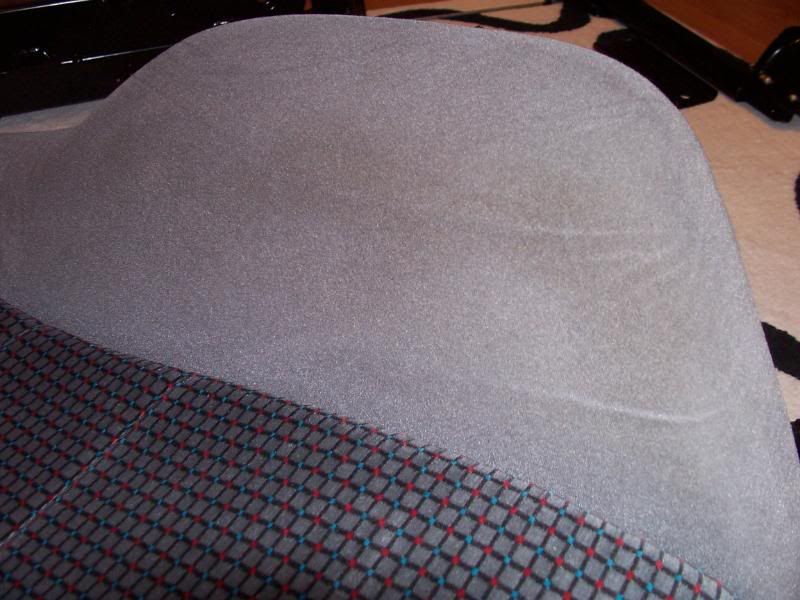
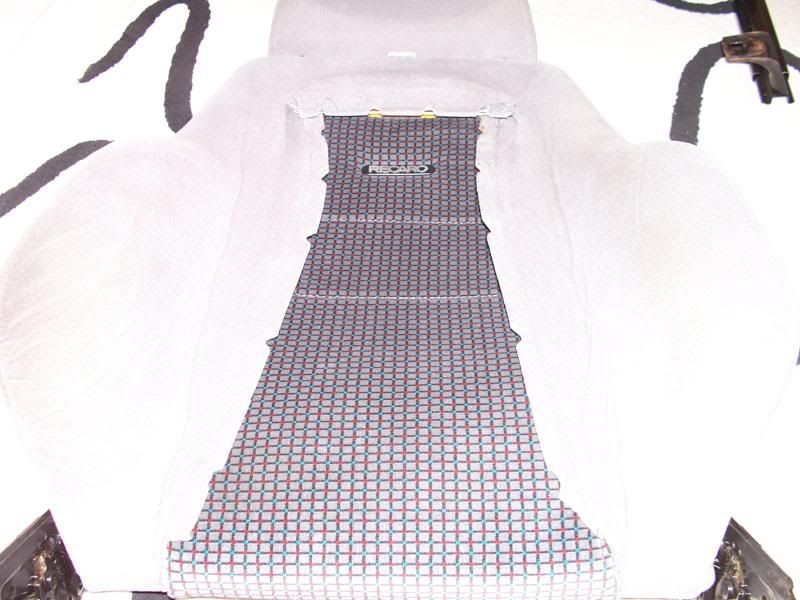
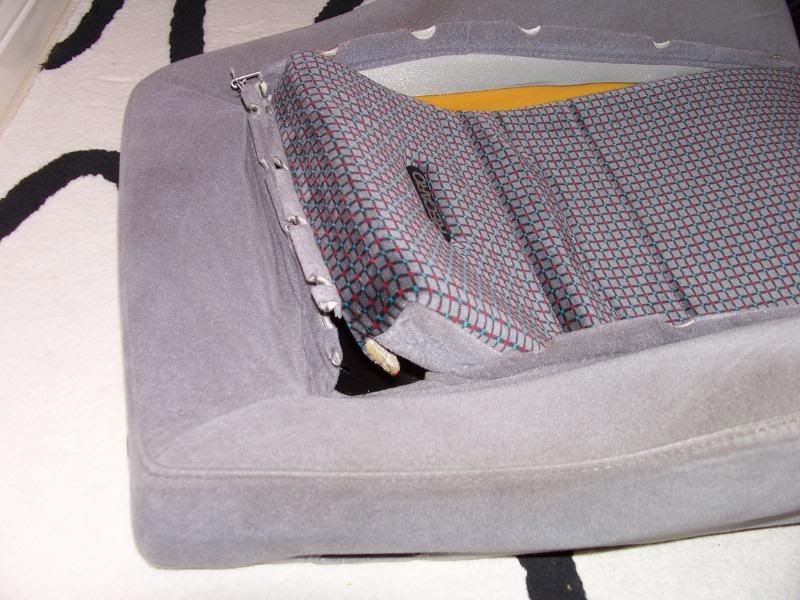
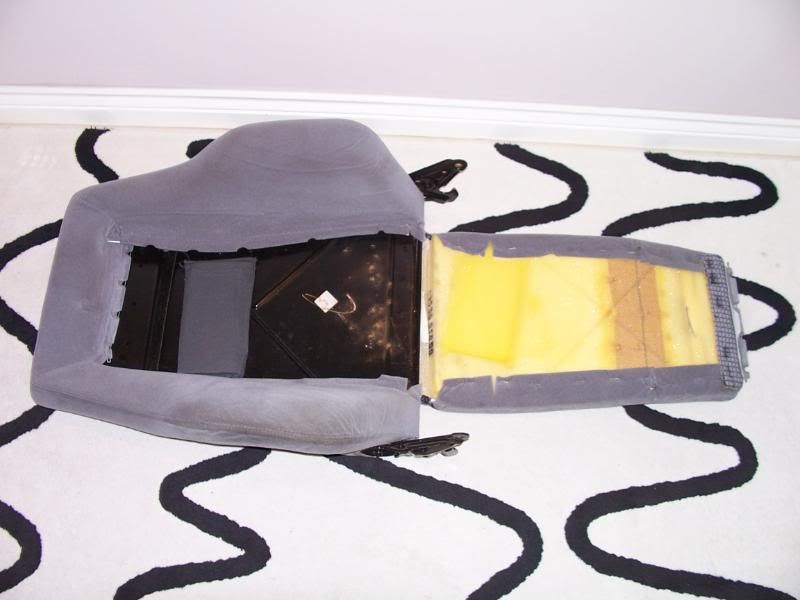
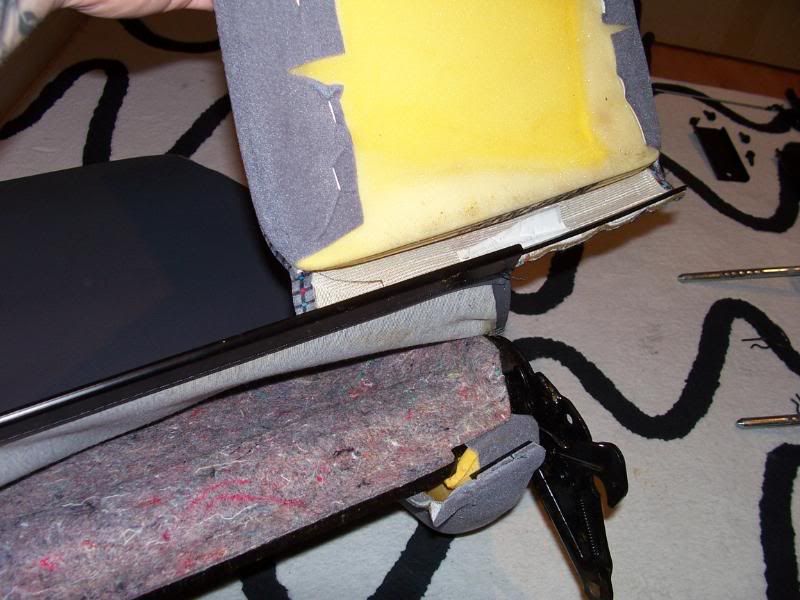
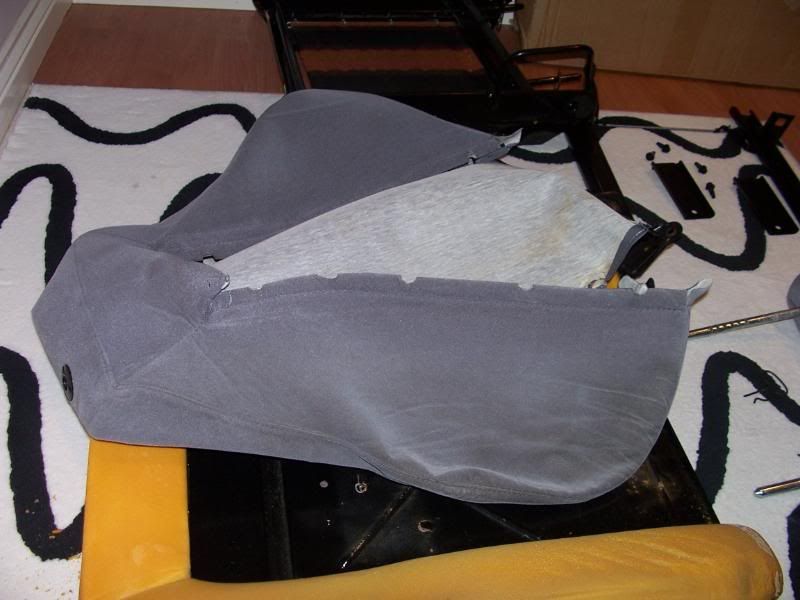
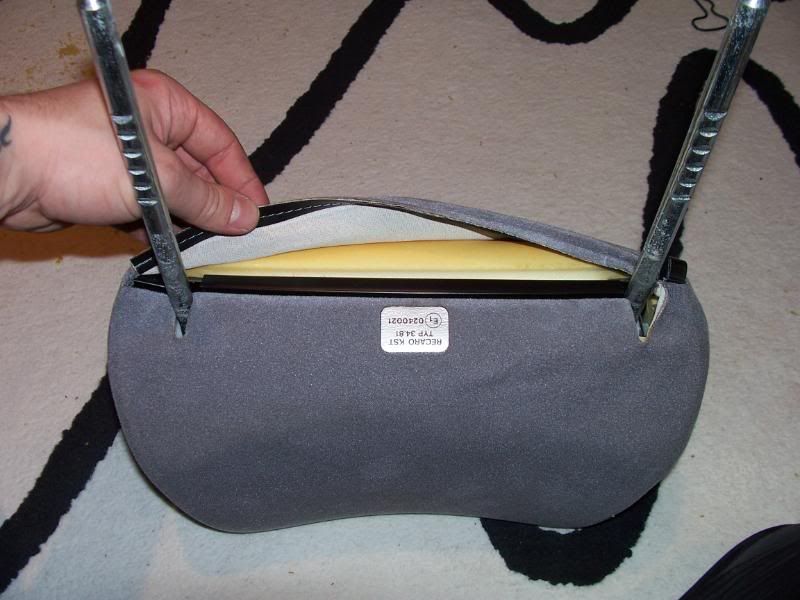
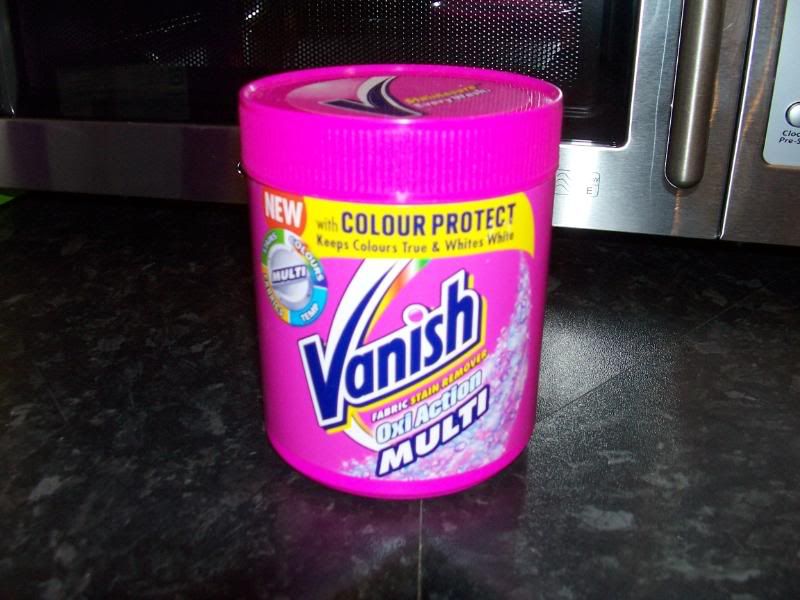
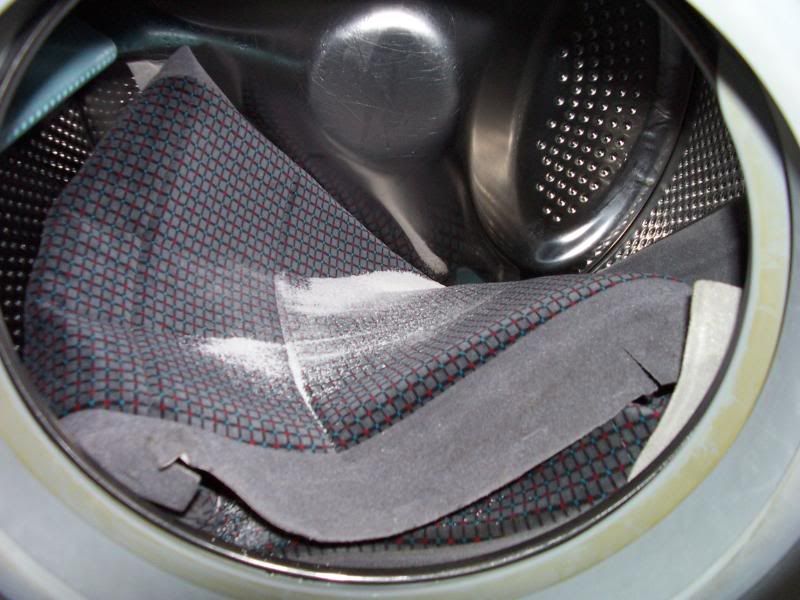
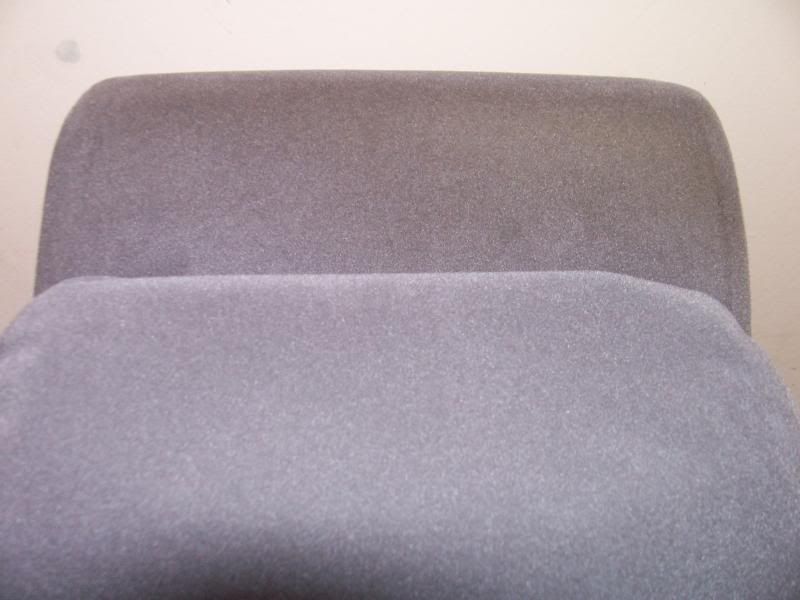
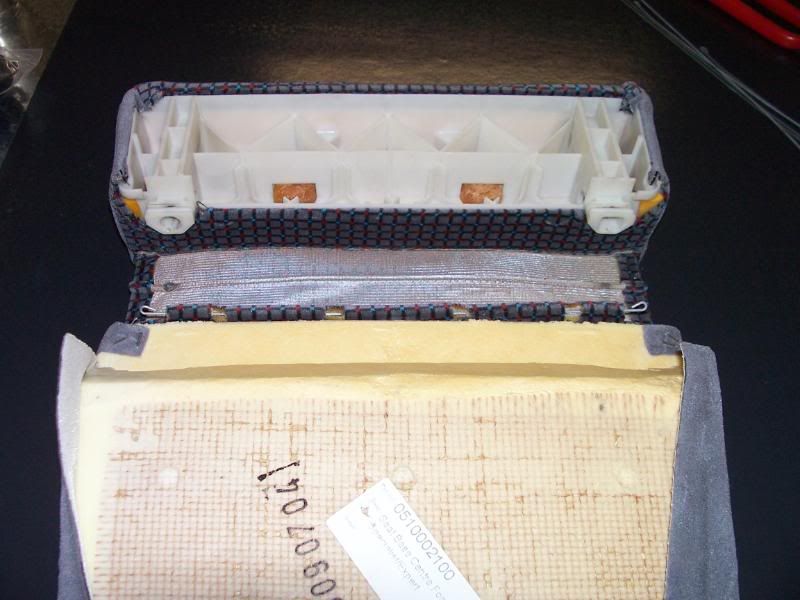
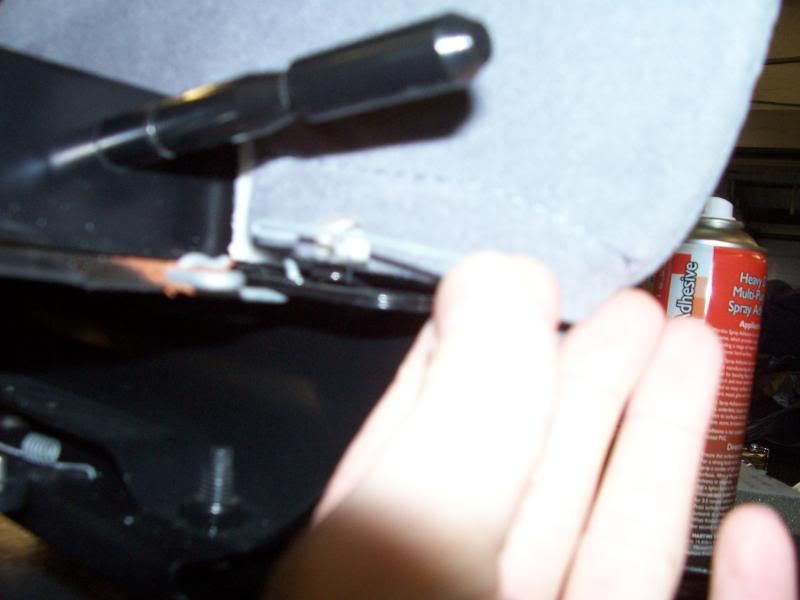
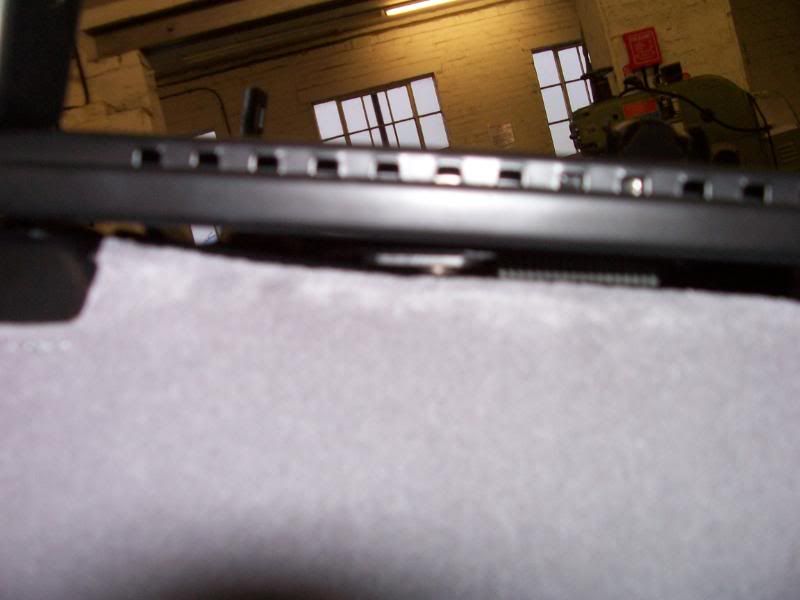
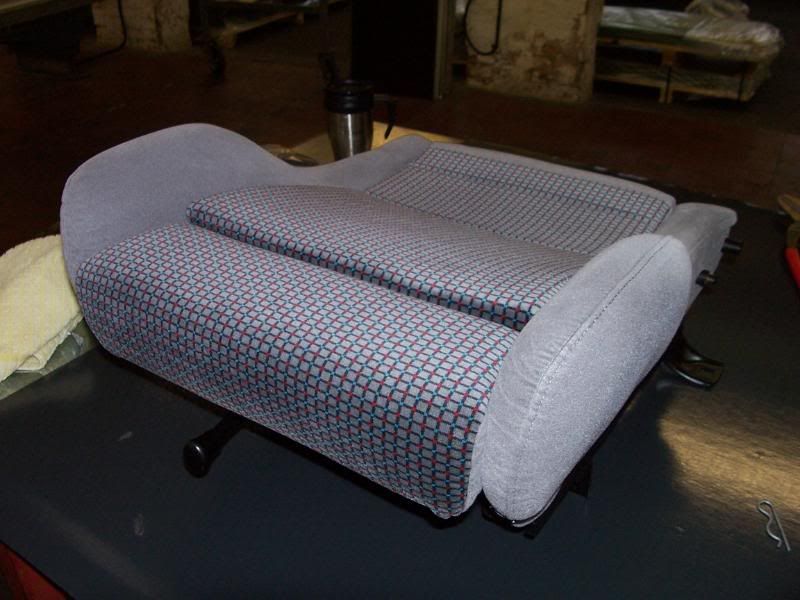
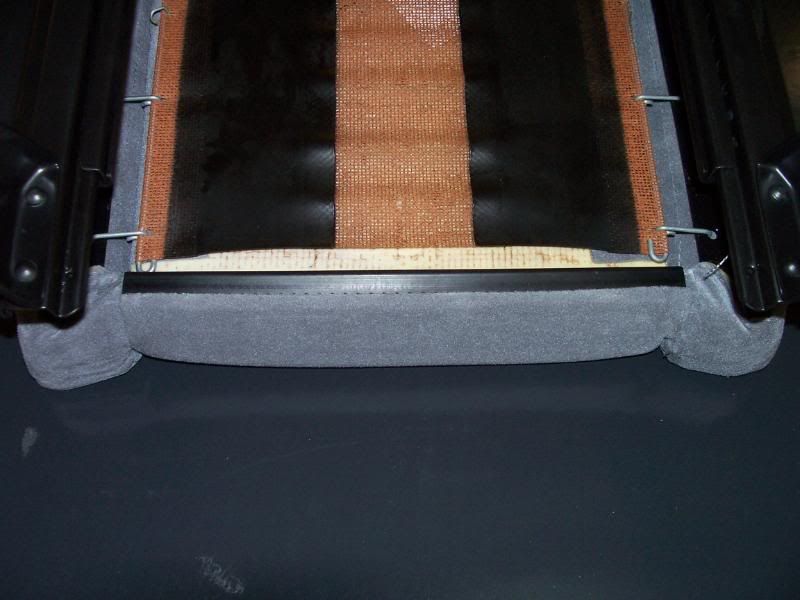
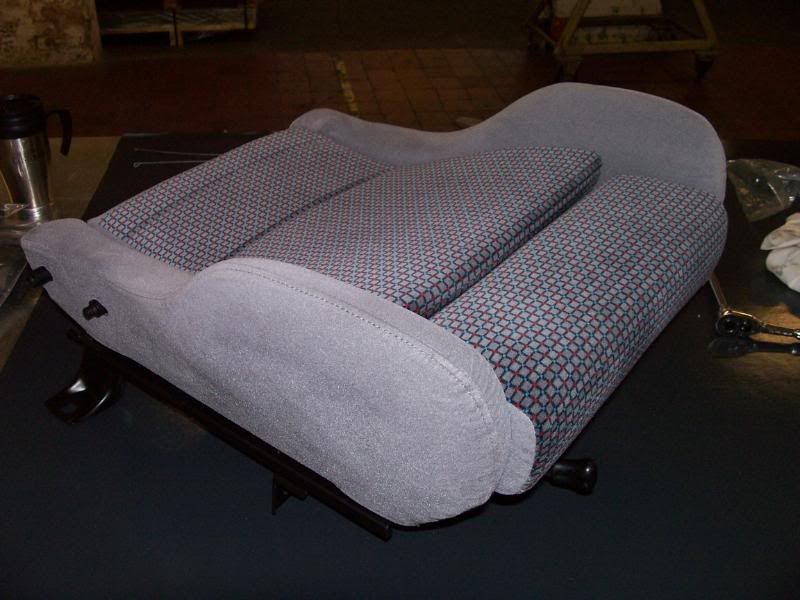
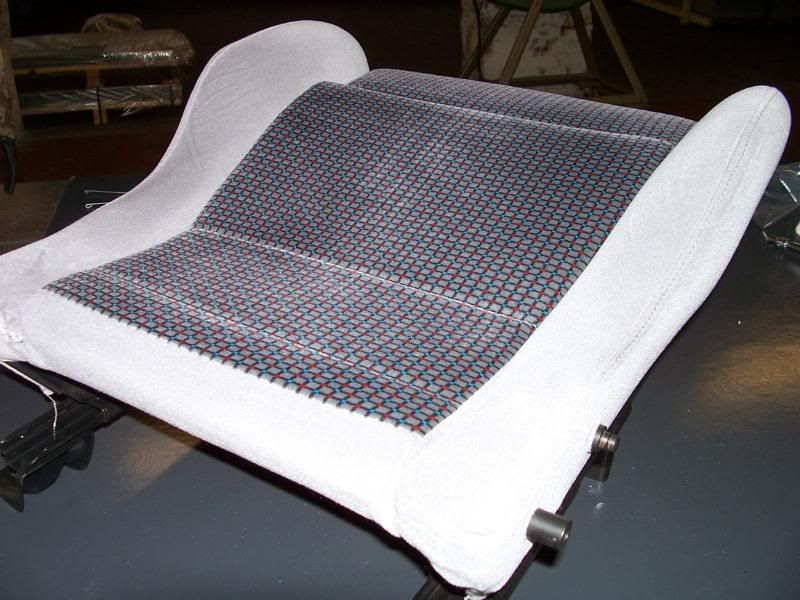
Then onto rebuilding the front seats once they were all machine washed
and steamed
As you can see in the pics below, the difference is amazing after a good
old wash
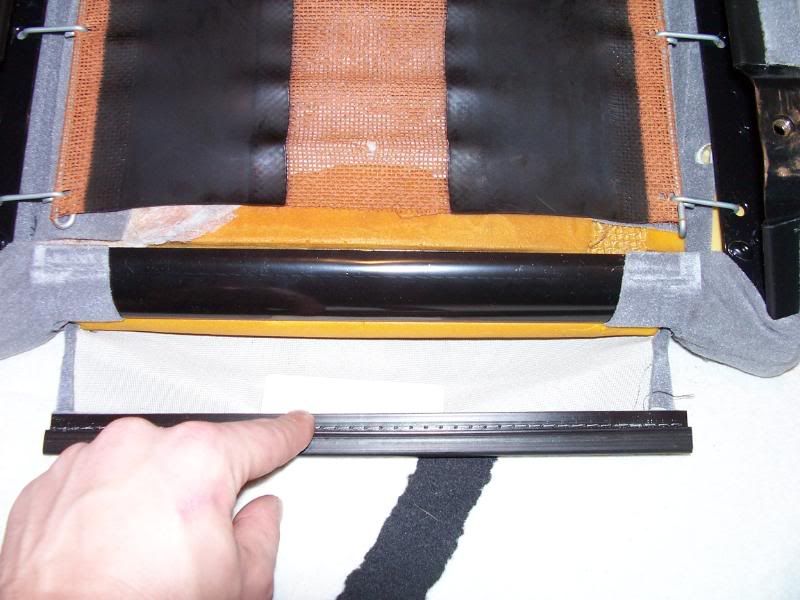
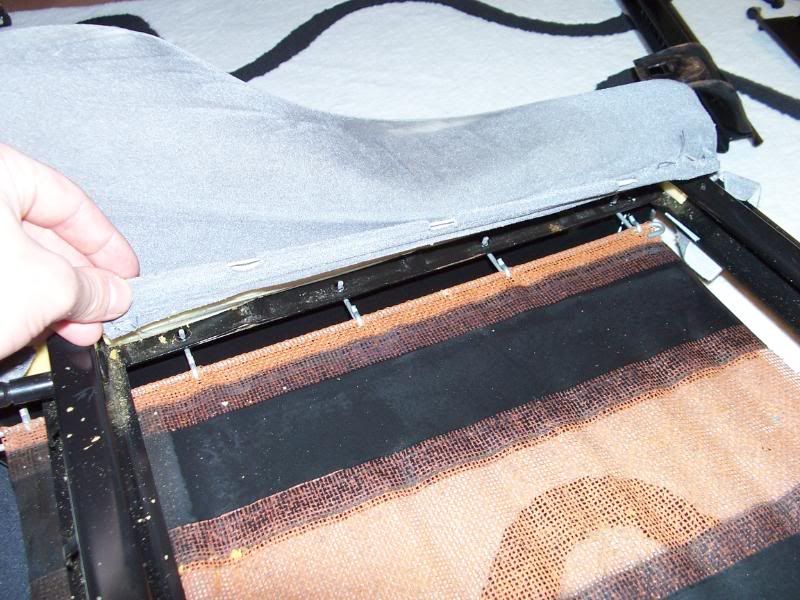
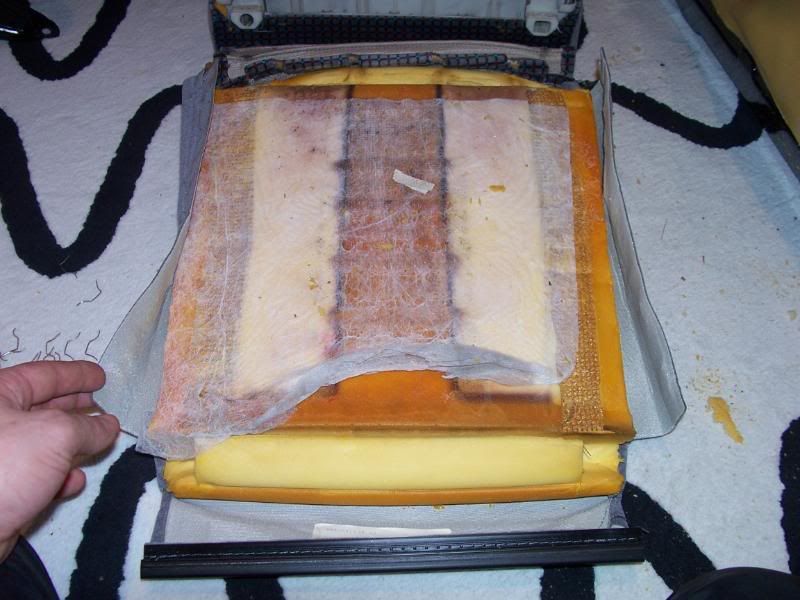
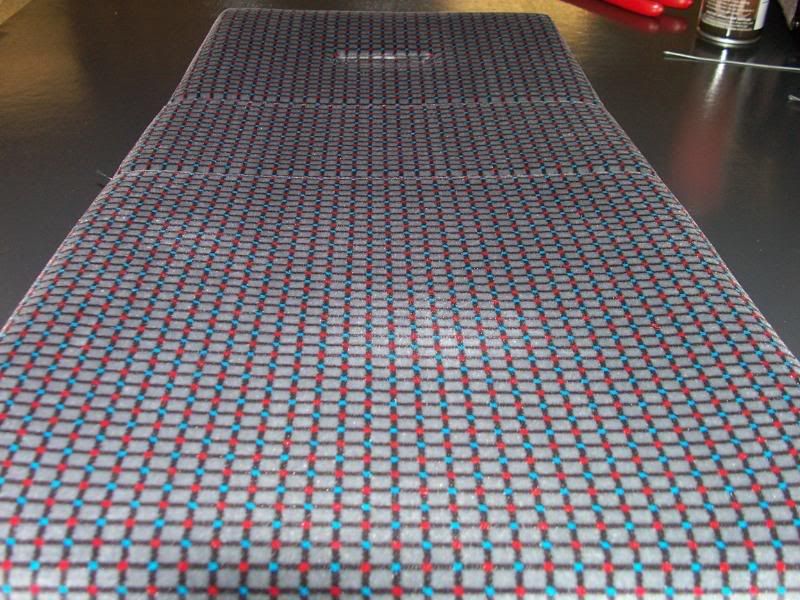
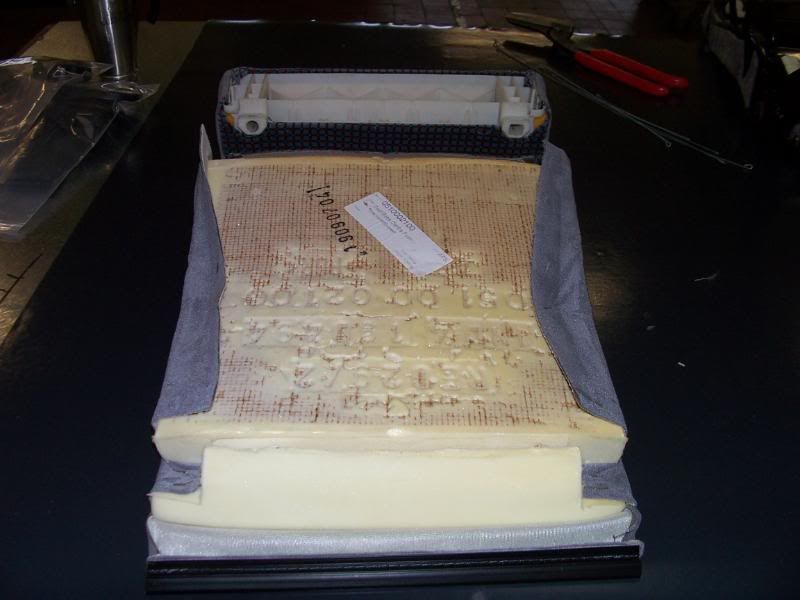
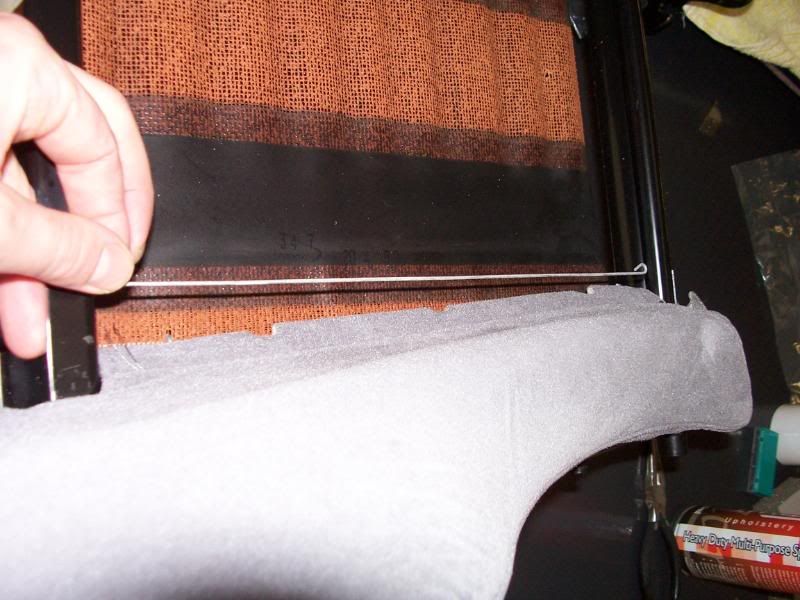
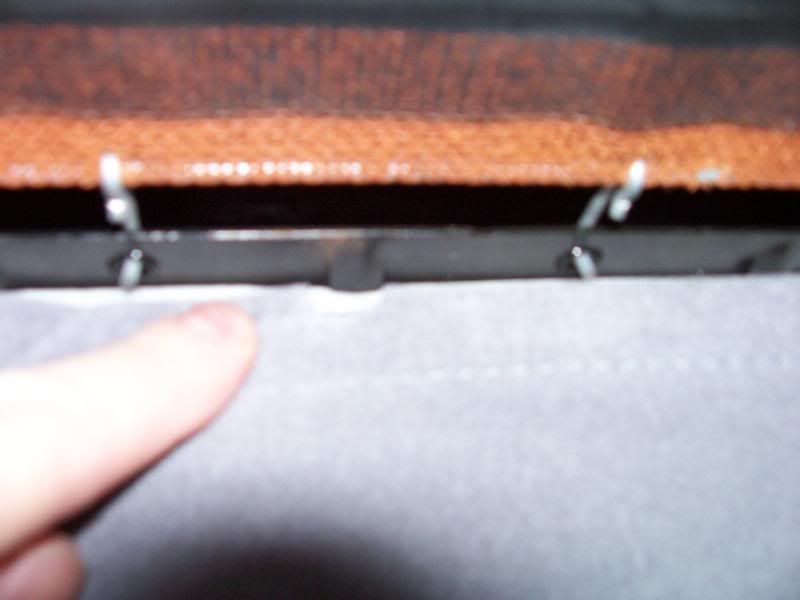
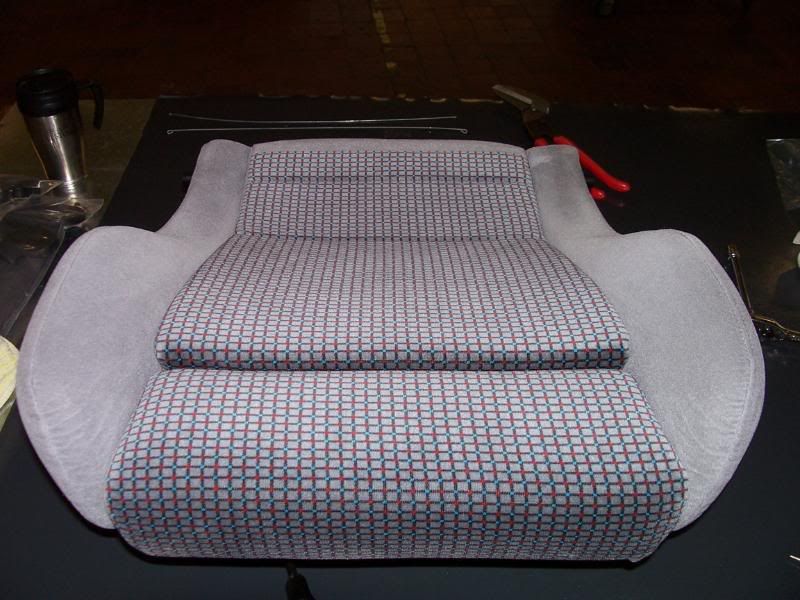
Centre cover glued and stapled back on
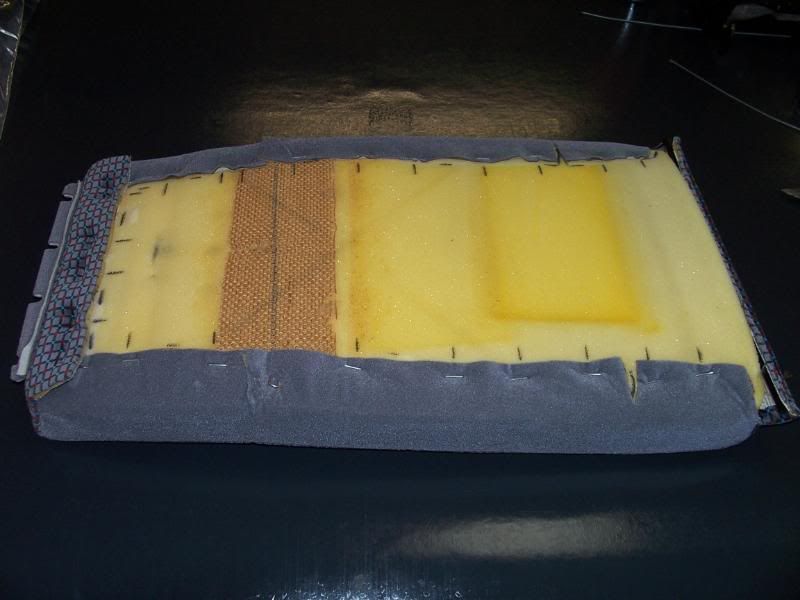
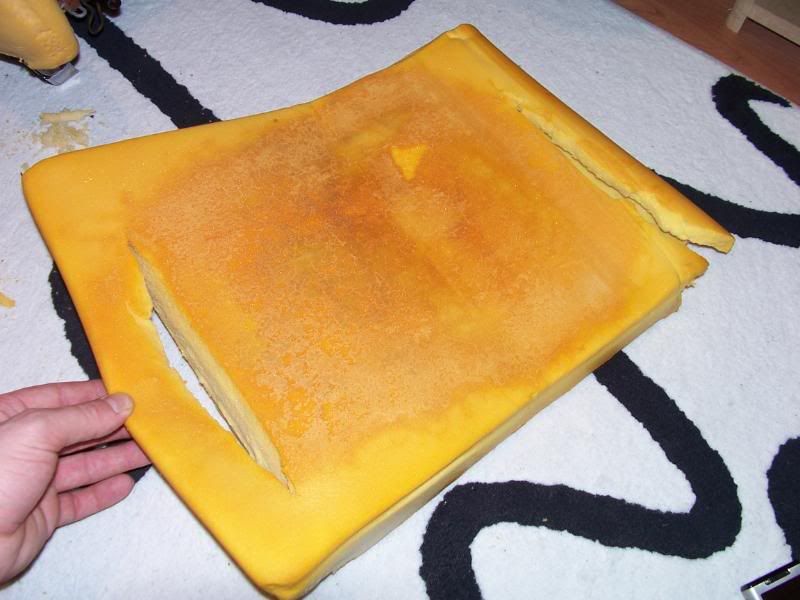
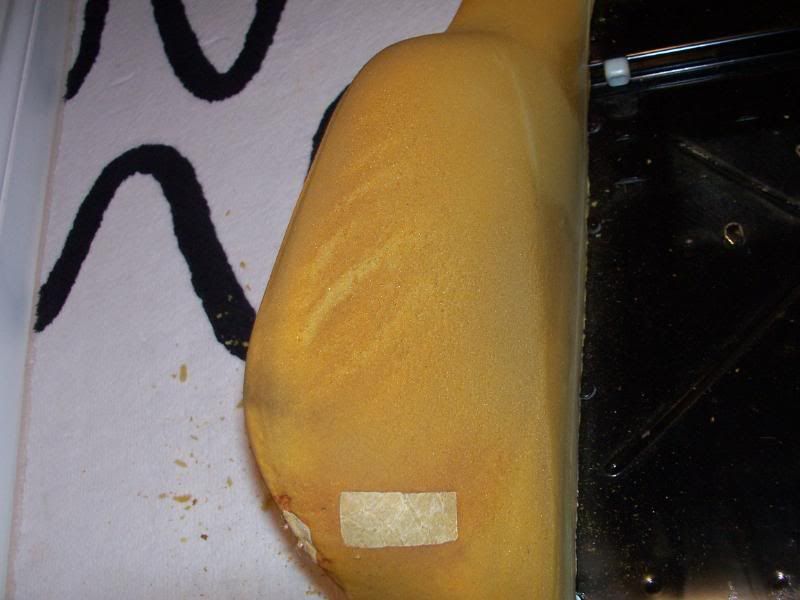
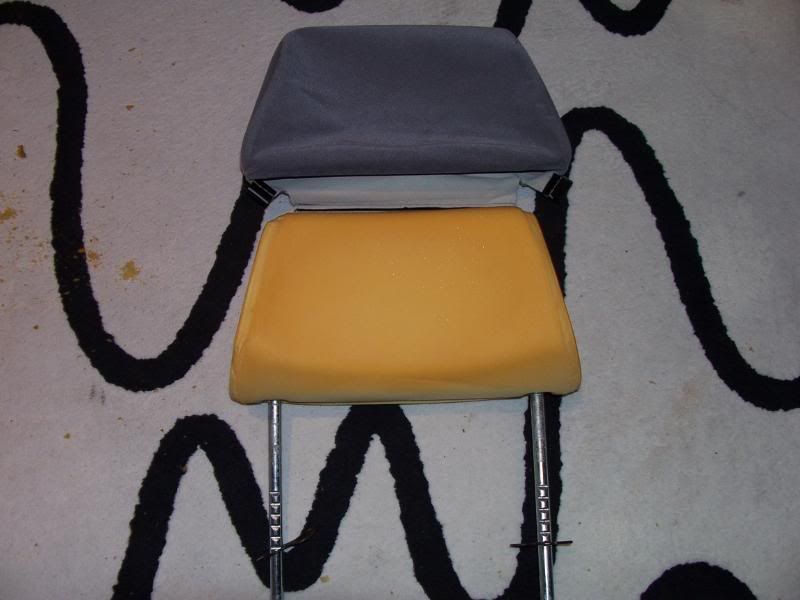
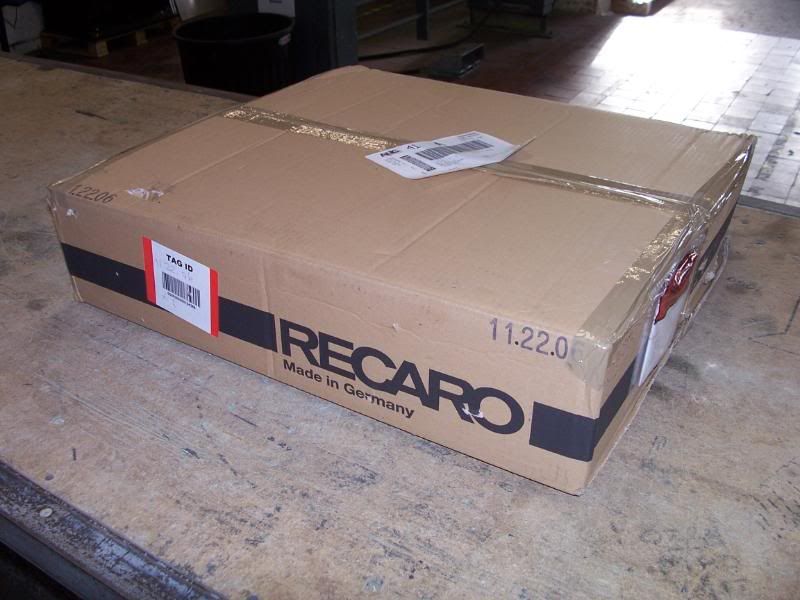
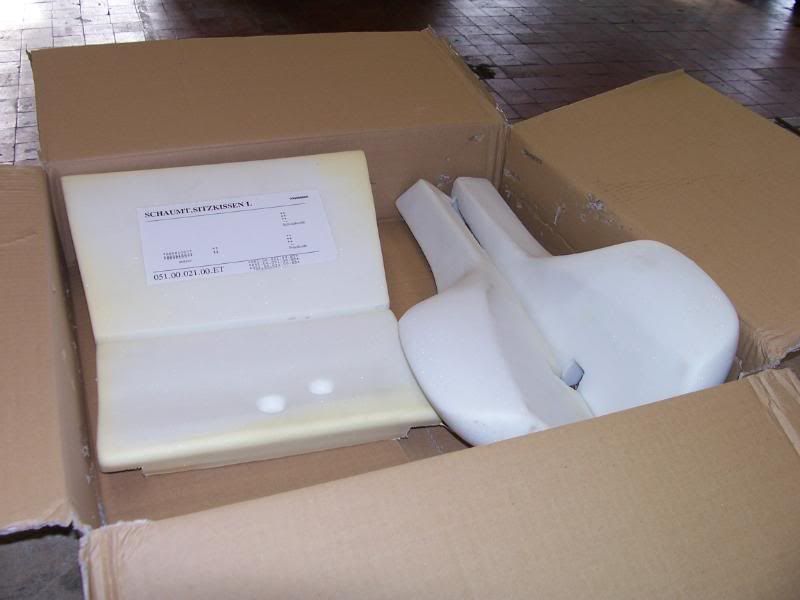
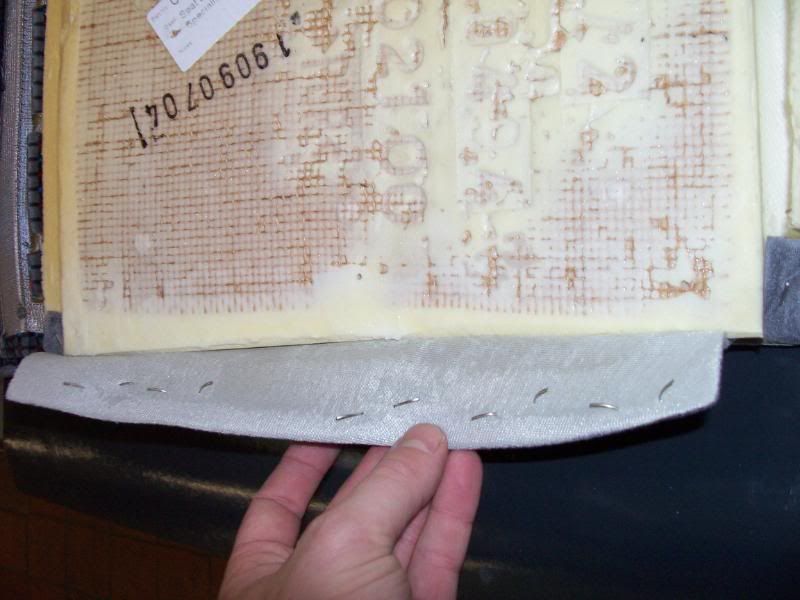
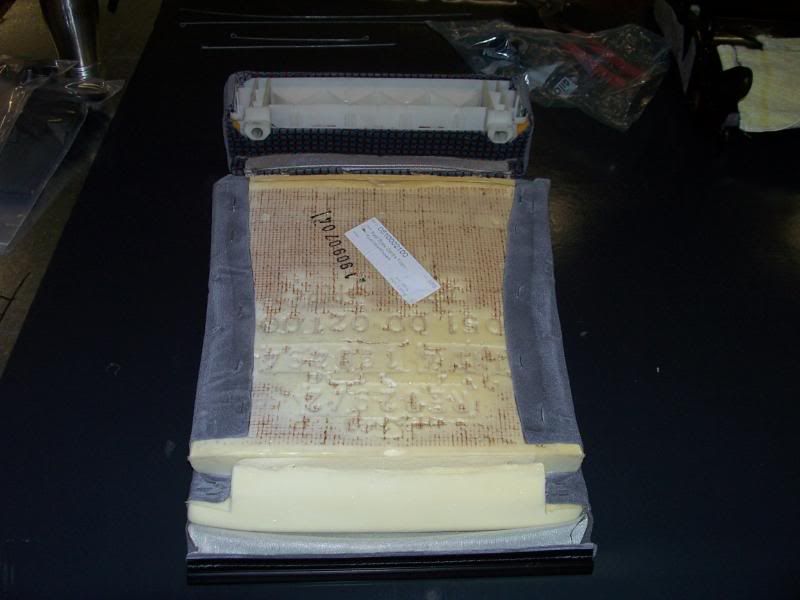
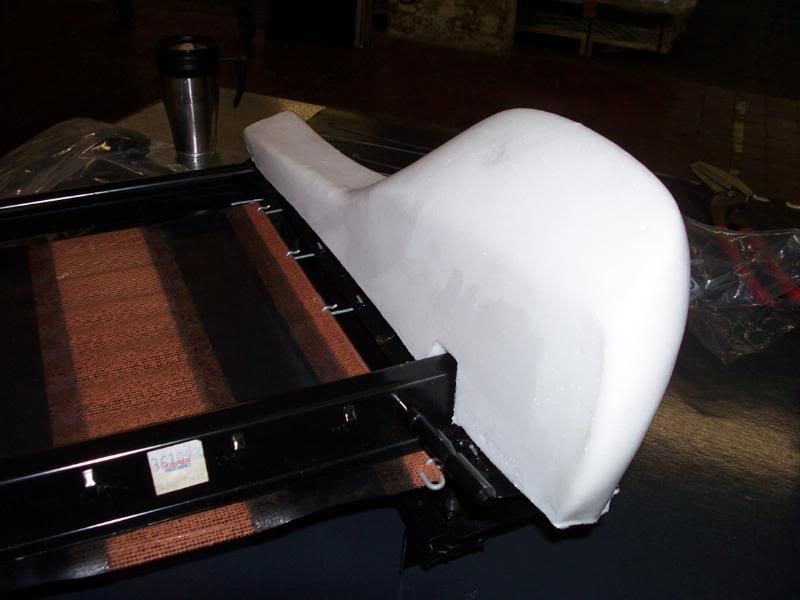
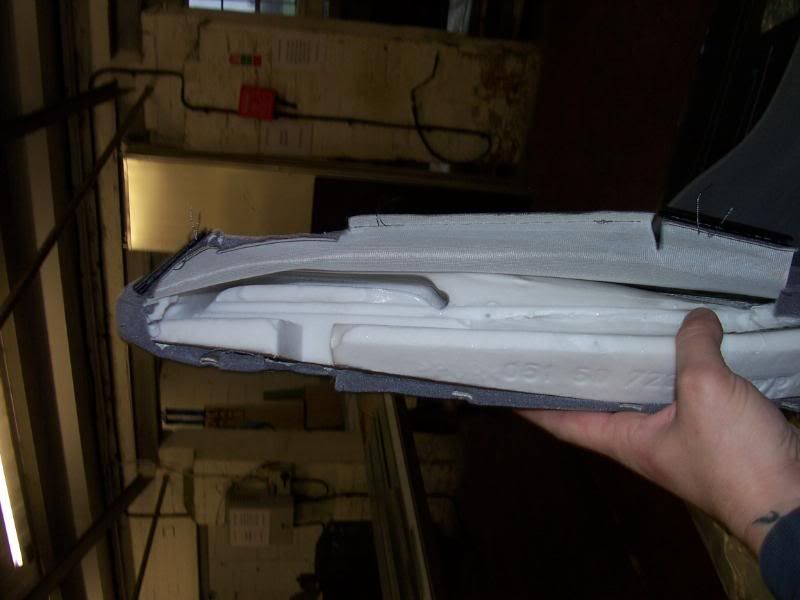
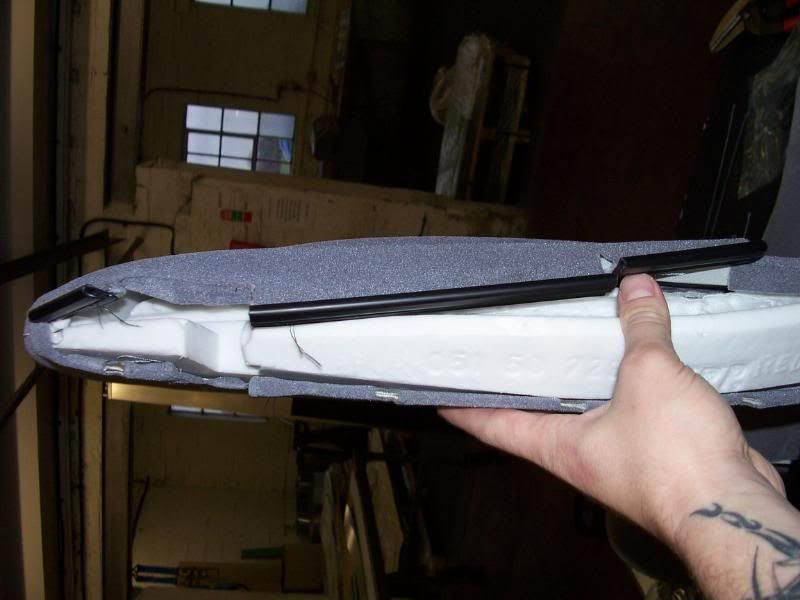
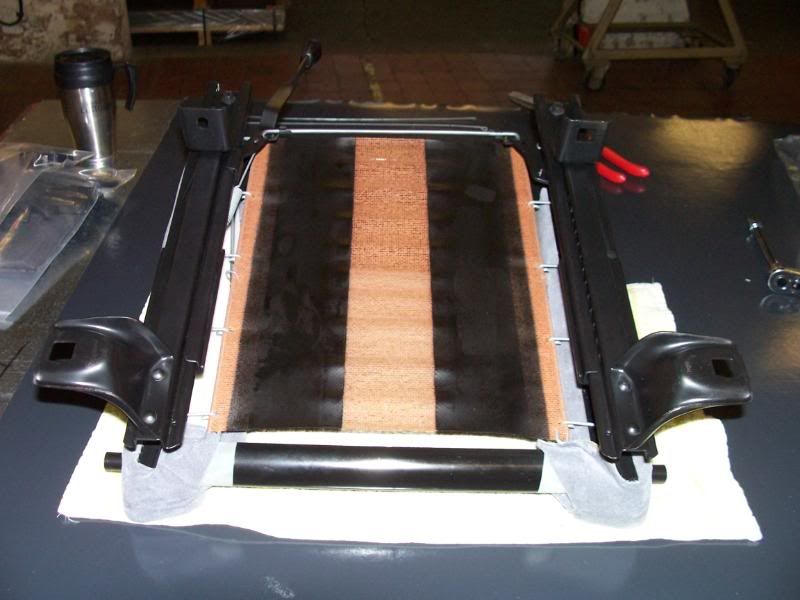
New centre foams & base bolsters arrived from Capital Seating
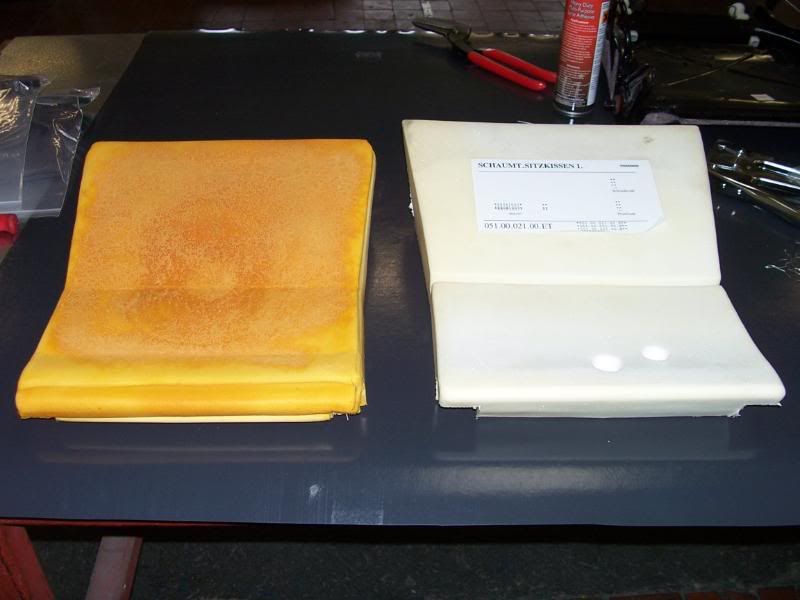
New base foam Vs Old base foam, Big difference isnt there
and steamed
As you can see in the pics below, the difference is amazing after a good
old wash
Centre cover glued and stapled back on
New centre foams & base bolsters arrived from Capital Seating
New base foam Vs Old base foam, Big difference isnt there
 29-05-2008, 03:09 PM
#39
I've found that life I needed.. It's HERE!!
You are the man!!!! Cant wait to see the finished result. Will be like walking in to a Ford Showroom 18 years ago. Will look the bo***cks.