
my Moonstone 3 Door ...
 19-10-2007, 11:26 AM
#1
I thought I'd start this thread so we I can watch my car change whilst I've got it. I've waited a long time for my Cosworth so I am going to hold onto this one for a while  ... but I do have a few plans for it
With inspiration from some fabulous threads and awesome cars on here I am going to try and achieve a strong, reliable (?!), neat street car. I am hoping to keep it on the roads as much as possible whilst I am working on it but I have a few other commitments that keep me busy: shift work, young family,old house
I got the car with a full service history and genuine milage. I got it with a full folder of receipts spent on it and I am going to continue to keep all receipts from what I spend (although I will never add them up ... I really do not want to know how much that is ) I do all my own servicing, so all my servicing check lists will be kept. I have heard of bad experiences of guys taking their cosworths to Ford dealers and thats in the UK ... I'd hate to think what would happen here in Australia 
I want to keep it looking as standard as possible, but I will choose quality and performance over Ford items as required Everything I do shall be reversable so if one day I want a totally original car again I can 
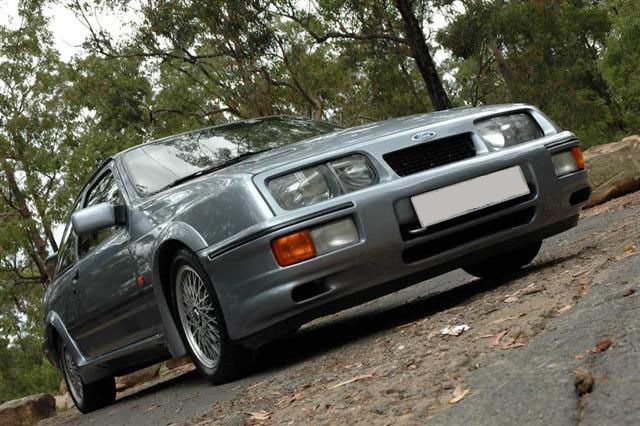
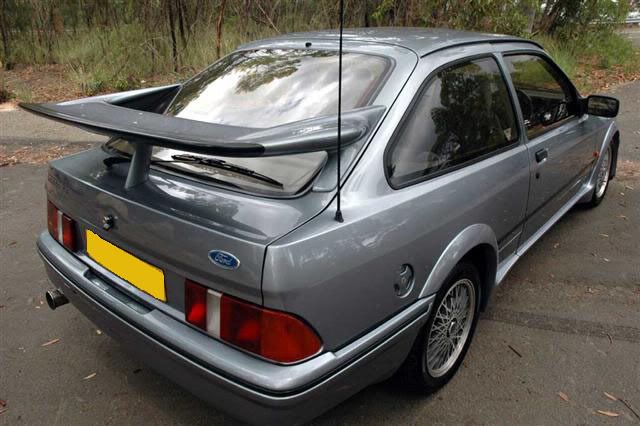
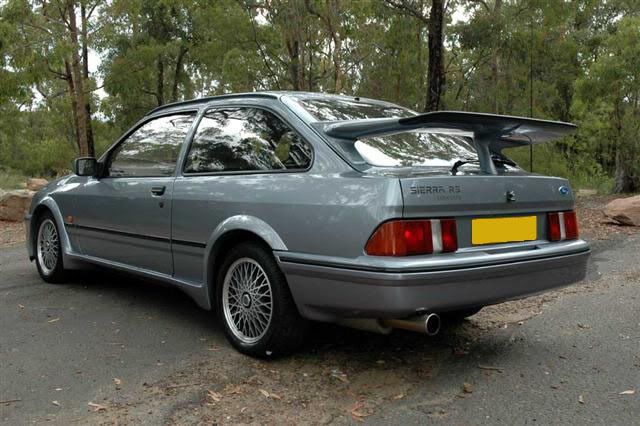
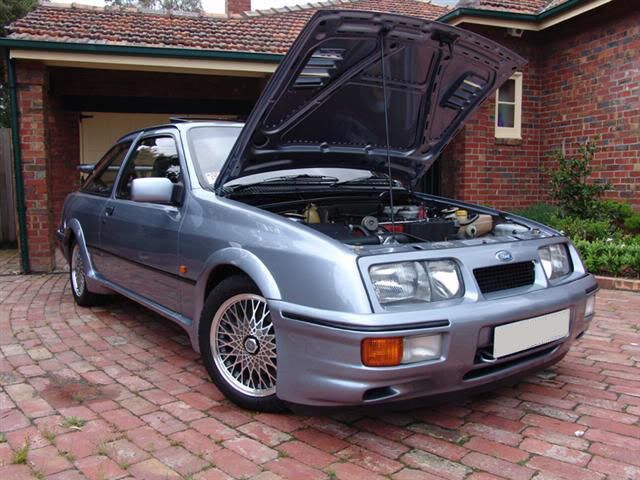
Well here she is ...
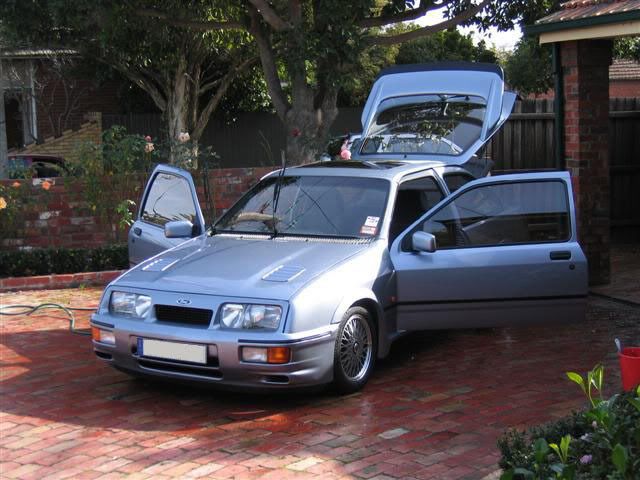
getting a good clean ...
I have driven it often in good weather whenever I could ... and its street presence in Australia is awesome.
Then then one day whilst I had it parked (securely) at work I came out to find a puddle of coolant under the car. Long story short: my water pump was leaking from the shaft seal so it was off the road for the car and time for a newy.
I had a few other issues that needed sorting so this was the time. I knew that to make this car reliable I need to replace any 20 year old (original) perishable items (hoses,belts etc) that might let me down at the worst time. Things I wanted to do included
1. replace the water pump
2. power steering fluid lines were seeping (the ones at the bottle) ... they needed to be replaced before they failed
3. fix up any messy electrical wiring (particualy at the battery. I'm not an electrician but i am very fussy and I HATE messy wiring
and a general tidy up was in order.
So I went from this ...
to this ...

And no ... I am not taking the engine out. Yet
More details to follow
... but I do have a few plans for it With inspiration from some fabulous threads and awesome cars on here I am going to try and achieve a strong, reliable (?!), neat street car. I am hoping to keep it on the roads as much as possible whilst I am working on it but I have a few other commitments that keep me busy: shift work, young family,old house
I got the car with a full service history and genuine milage. I got it with a full folder of receipts spent on it and I am going to continue to keep all receipts from what I spend (although I will never add them up ... I really do not want to know how much that is
) I do all my own servicing, so all my servicing check lists will be kept. I have heard of bad experiences of guys taking their cosworths to Ford dealers and thats in the UK ... I'd hate to think what would happen here in Australia I want to keep it looking as standard as possible, but I will choose quality and performance over Ford items as required
Well here she is ...
getting a good clean ...
I have driven it often in good weather whenever I could ... and its street presence in Australia is awesome.
Then then one day whilst I had it parked (securely) at work I came out to find a puddle of coolant under the car. Long story short: my water pump was leaking from the shaft seal so it was off the road for the car and time for a newy.
I had a few other issues that needed sorting so this was the time. I knew that to make this car reliable I need to replace any 20 year old (original) perishable items (hoses,belts etc) that might let me down at the worst time. Things I wanted to do included
1. replace the water pump
2. power steering fluid lines were seeping (the ones at the bottle) ... they needed to be replaced before they failed
3. fix up any messy electrical wiring (particualy at the battery. I'm not an electrician but i am very fussy and I HATE messy wiring
and a general tidy up was in order.
So I went from this ...
to this ...
And no ... I am not taking the engine out. Yet
More details to follow
Last edited by rudeboy; 29-03-2010 at 10:16 AM.
 19-10-2007, 12:11 PM
#2
PassionFord Post Whore!!
iTrader: (9)
Join Date: May 2003
Location: Essex/Middlesex
Posts: 7,836
Likes: 0
Received 0 Likes
on
0 Posts
nice work.............................
when you taking the engine out then
dont fight it.....................all us 3dr owners do it, its a right of passage
Good luck with it all must be awesome oning one of those all they way over there
when you taking the engine out then
dont fight it.....................all us 3dr owners do it, its a right of passage
Good luck with it all must be awesome oning one of those all they way over there
 19-10-2007, 11:13 PM
#5
[quote="rsnissan"]
when you taking the engine out then
Thanks Andy ... I have seen the trouble you have caused with your banter This has taken me long enough as it is  and I want it on the roads before it gets to hot ... no aircon and Australian summers remember
I'm not sure how many are in Australia, off the top of my head I can think of 4-5 three doors that I know of that get driven but there would be many more than that (does anyone know?) ... I know many are tucked away and hidden. You never see them on the roads but there is often a car advertised for sale.
Anyway here's some pics to show you the level of detail I am going to.
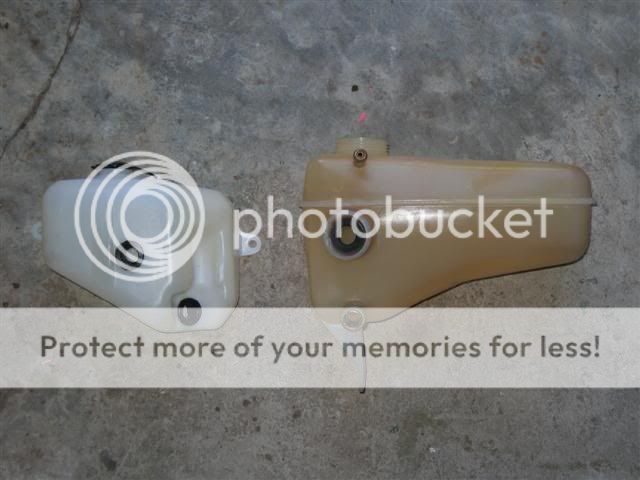
Fluid bottles out and getting a clean (PAS is done to ... no pics though). I have bought a sticker kit for the bay and a black cap for the header tank.
Before ...
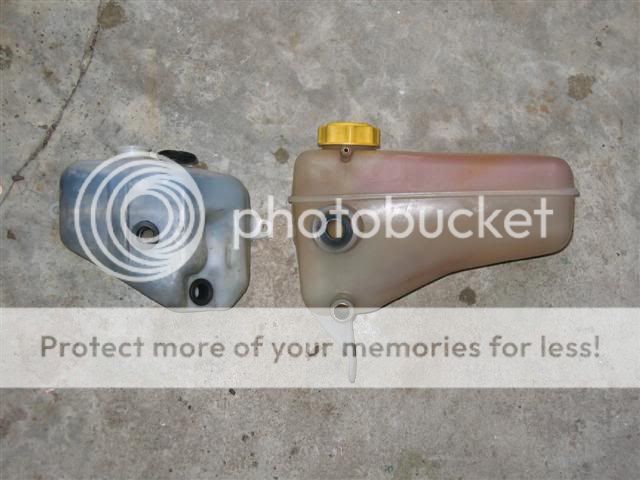
after ...
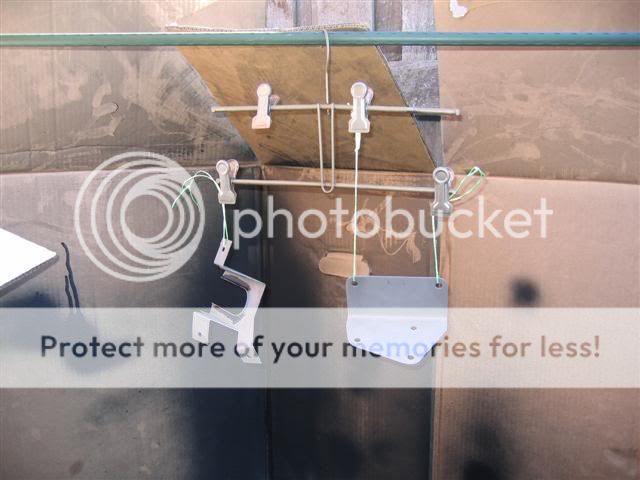
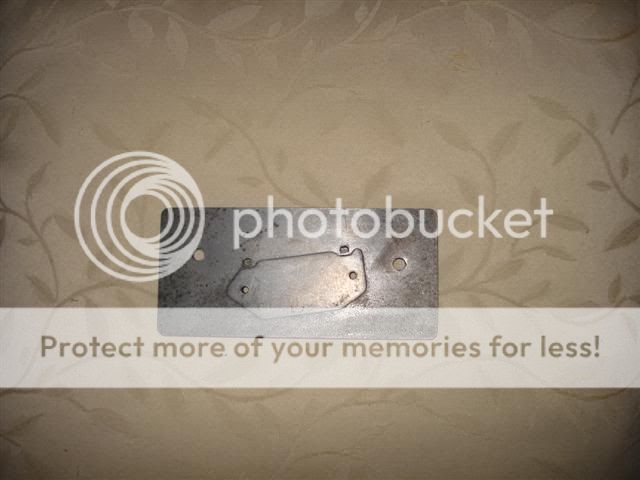
The brackets were looking a little scabby so they got blasted and painted by me in my makeshift spray booth! ...
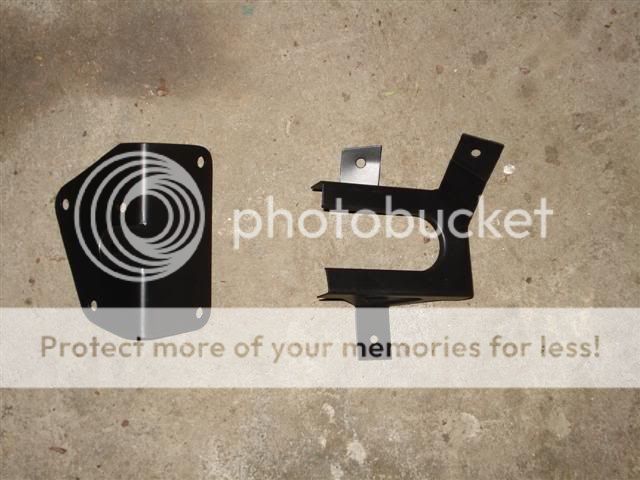
Has anyone else got rubber inserts on their MAP sensor bracket ... mine are a bit second hand and I want to replace them but when I asked the question it seems that nuts welded onto the bracket and no rubber is the norm
Anyway I got rid of this (it looked worse in the flesh) ...
and bolted on this ...
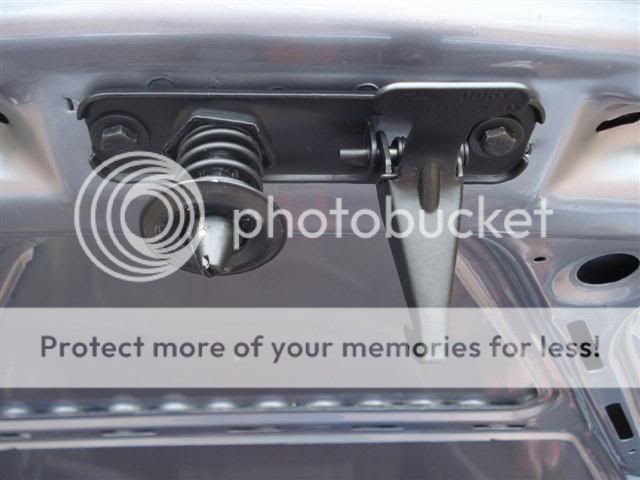
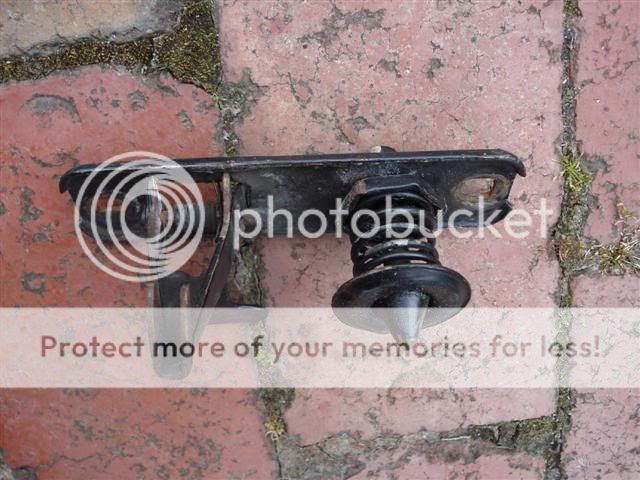
then I sanded down (as it was a bit crusty to) and sprayed my bonnet stay and whacked in a new fitting kit

Yes I have polished my bonnet
and this needs a polish ...
More to come.
Moser
when you taking the engine out then
Thanks Andy ... I have seen the trouble you have caused with your banter
This has taken me long enough as it is I'm not sure how many are in Australia, off the top of my head I can think of 4-5 three doors that I know of that get driven but there would be many more than that (does anyone know?) ... I know many are tucked away and hidden. You never see them on the roads but there is often a car advertised for sale.
Anyway here's some pics to show you the level of detail I am going to.
Fluid bottles out and getting a clean (PAS is done to ... no pics though). I have bought a sticker kit for the bay and a black cap for the header tank.
Before ...
after ...
The brackets were looking a little scabby so they got blasted and painted by me in my makeshift spray booth! ...
Has anyone else got rubber inserts on their MAP sensor bracket
Anyway I got rid of this (it looked worse in the flesh) ...
and bolted on this ...
then I sanded down (as it was a bit crusty to) and sprayed my bonnet stay and whacked in a new fitting kit
Yes I have polished my bonnet
and this needs a polish ...
More to come.
Moser

Trending Topics

 20-10-2007, 09:52 PM
#10
PassionFord Post Whore!!

Join Date: May 2003
Location: aldershot
Posts: 3,577
Likes: 0
Received 0 Likes
on
0 Posts
very inspirational mate, i hope to bring my cossie over there when i move out in a few years time, not sure what i will have by then, but i shold get about 50k in my hand off the army for my time served then it seeing whats on offer then, RS500 or if i am lucky (hers hoping) an RS 200, i intend trying to join your defence force until i am 55 then retire out there fingers crossed
22-10-2007, 10:15 AM
#11
Thanks boys for the comments
rsnissan and lamb chops I've enjoyed reading/watching your threads ... thats why mines up here now
Ryan cheers for the heads up on the bottles ... being in Australia I'm faced with wicked freight prices so if I can clean up a part to my standards then I'm best to stick with it. How's the water pump ... 70GBP for delivery ... but in the long run its good to know whats available and whats not (just in case I f@#k it, cleaning it )
dave cos4x4 I wish I could work as fast as you ... love your projects man (if I could justify three cars a mk11 cossie (olympic blue BTW) would be just brilliant )
mk2rstaff come to Aus man ... and bring a '500 with you, we cant have enough in this country. It will last forever (we dont have enough water to wash cars at the moment let alone rust cars ... sad but true).
AJC & cossie4i cheers ...
rsnissan and lamb chops I've enjoyed reading/watching your threads ... thats why mines up here now
Ryan cheers for the heads up on the bottles ... being in Australia I'm faced with wicked freight prices so if I can clean up a part to my standards then I'm best to stick with it. How's the water pump ... 70GBP for delivery
... but in the long run its good to know whats available and whats not (just in case I f@#k it, cleaning it )dave cos4x4 I wish I could work as fast as you ... love your projects man (if I could justify three cars
mk2rstaff come to Aus man ... and bring a '500 with you, we cant have enough in this country. It will last forever (we dont have enough water to wash cars at the moment let alone rust cars
... sad but true).AJC & cossie4i cheers
22-10-2007, 10:41 AM
#13
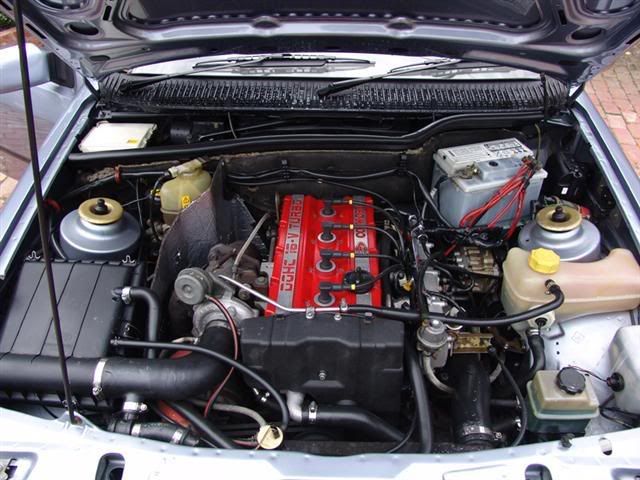
Righty'o time to get serious ...
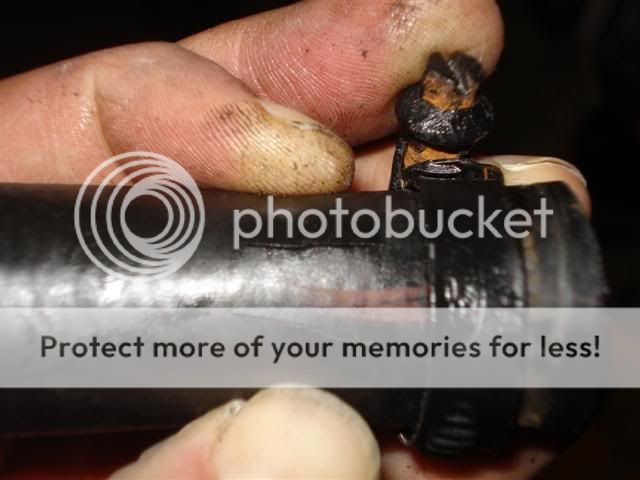
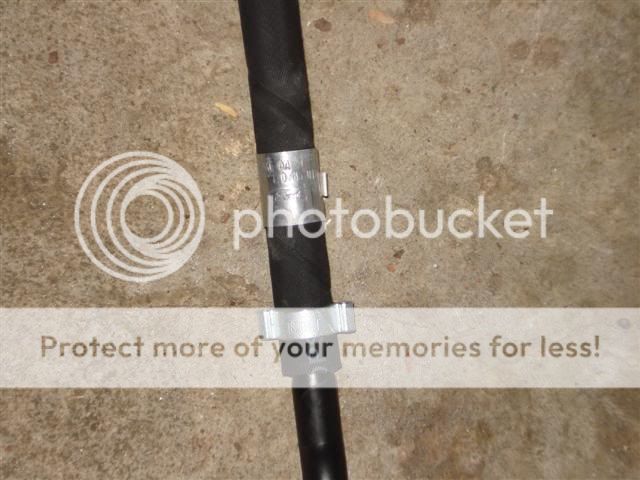
One of the things I had to do was get stuck into the PAS system ... the return line (small dia) from the metal cooler line to the reservoir was seeping fluid ... in a year (with not much driving) it had gone from 'max' to 'min' and you could see it was wet with fluid ... not good enough for me . Also the supply line from the reservoir to the pump was cracked ... sure to fail one day
Whilst I had the PAS system open it was time to replace all rubber hoses so nothing (fingers crossed ) would let me down. Also the cooler line was terribly crusty and looked shite ... (it looked worse in real life) ...

Out came the pump for a clean up and this was the line that was poor ...
some piccys of what I could see on the hose ...
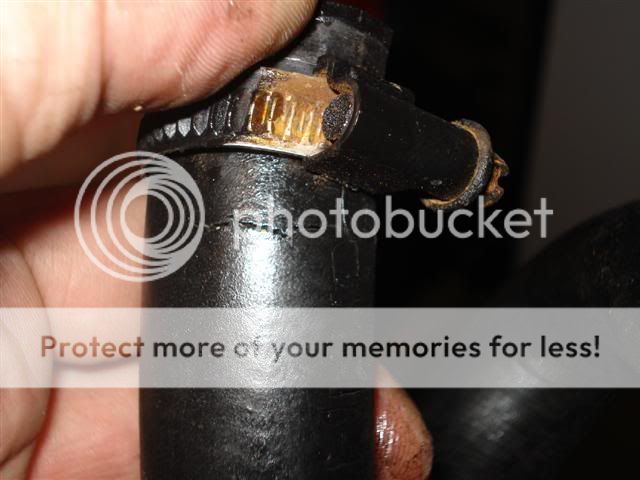
Aaahhh those clamps ... next was to replace all clamps with these awesome full stainless (no more rusty) clamps. I actually found the listing of these clamps in the 'concourse' section of pf and discovered they are made in Australia ... solid band too so they dont cut your hose and with a bit of metal polish come up SHINEY ... fully recommended.

One of the things I had to do was get stuck into the PAS system ... the return line (small dia) from the metal cooler line to the reservoir was seeping fluid ... in a year (with not much driving) it had gone from 'max' to 'min' and you could see it was wet with fluid ... not good enough for me
Whilst I had the PAS system open it was time to replace all rubber hoses so nothing (fingers crossed
Out came the pump for a clean up and this was the line that was poor ...
some piccys of what I could see on the hose ...
Aaahhh those clamps ... next was to replace all clamps with these awesome full stainless (no more rusty) clamps. I actually found the listing of these clamps in the 'concourse' section of pf and discovered they are made in Australia
... solid band too so they dont cut your hose and with a bit of metal polish come up SHINEY
22-10-2007, 11:14 AM
#14
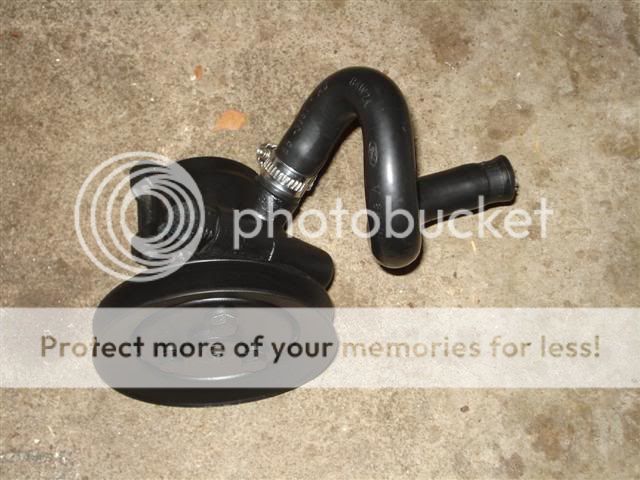
I got onto Ford UK and the only hose I could get was the main one from the pump to the rack (the only one that wasn't leaking BTW  ). As I was changing every rubber hose out it came, heres the old and new ...
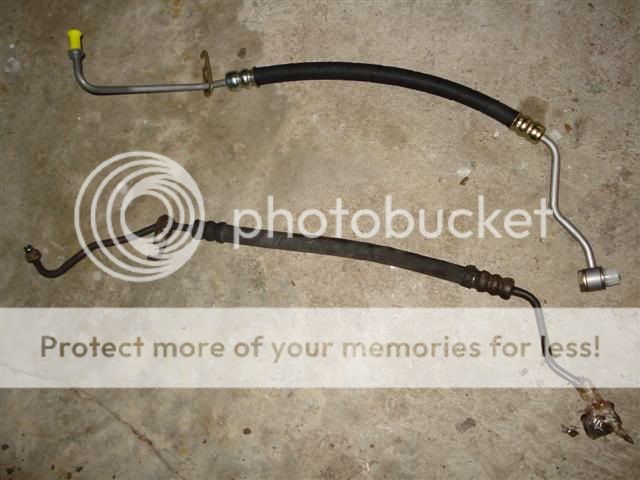
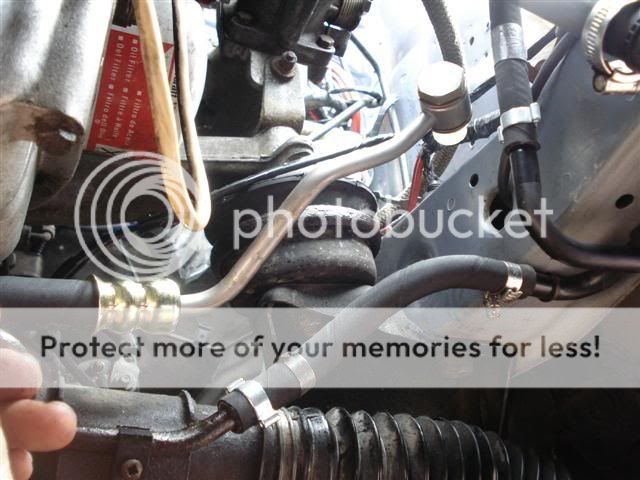
With the metal pipe it was blasted, zinc primed and engine enamaled. I got new hoses from a hydraulic hose specialist and reswaged them on (trying to look standard ... I know the 'ears' are to large but oh well ) ...
and how sad is this: I even removed and polished the Ford identification plate to put on the hose ) ...
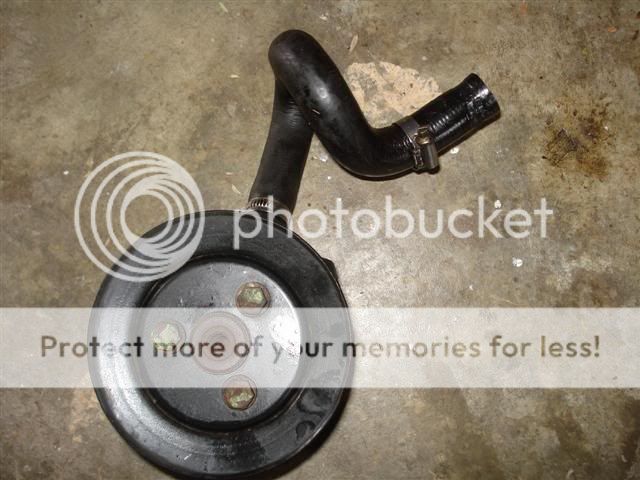
Here's the pump cleaned up (surface rust was disolved with rust eating acid), painted and with it's replacement hose (check out that clamp ) ...
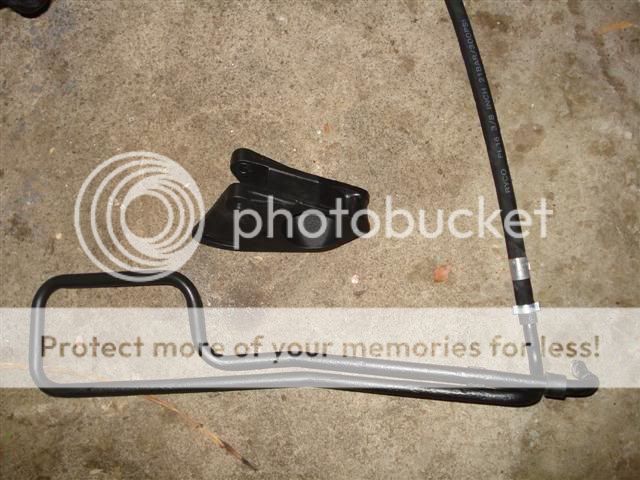
Heres a box o' bits ready to go ...
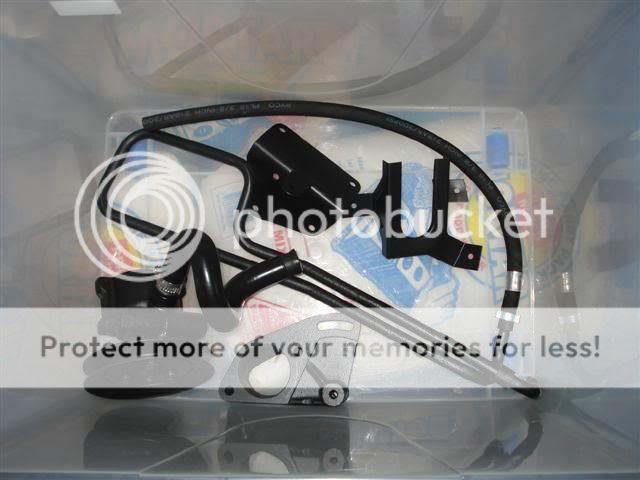
and the hoses in place (note the ID plates ) ...
... that is now all rubber hoses replaced and metal items sprayed in the PAS system (reservoir and fluid yet to go).
I've sprayed all the brackets ... I just need to find one replacement saddle clamp rubber for the cooler pipe as the leaking fluid had disolved it Can anyone help?
Moser
). As I was changing every rubber hose out it came, heres the old and new ...With the metal pipe it was blasted, zinc primed and engine enamaled. I got new hoses from a hydraulic hose specialist and reswaged them on (trying to look standard ... I know the 'ears' are to large but oh well
and how sad is this: I even removed and polished the Ford identification plate to put on the hose
Here's the pump cleaned up (surface rust was disolved with rust eating acid), painted and with it's replacement hose (check out that clamp
) ...Heres a box o' bits ready to go ...
and the hoses in place (note the ID plates
) ...... that is now all rubber hoses replaced and metal items sprayed in the PAS system
(reservoir and fluid yet to go).I've sprayed all the brackets ... I just need to find one replacement saddle clamp rubber for the cooler pipe as the leaking fluid had disolved it
Can anyone help?Moser
 27-10-2007, 01:26 AM
#16
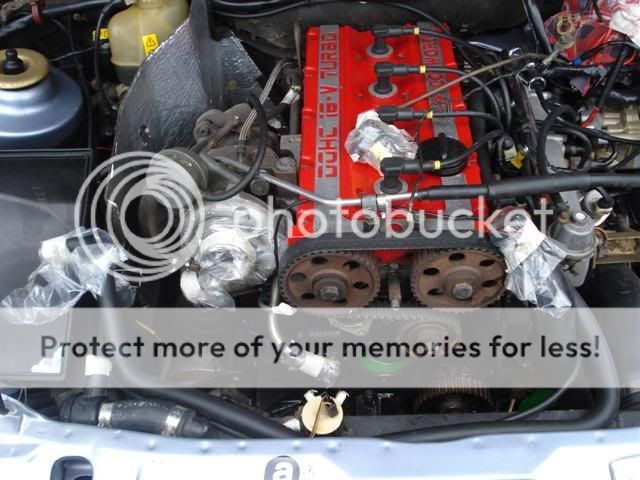
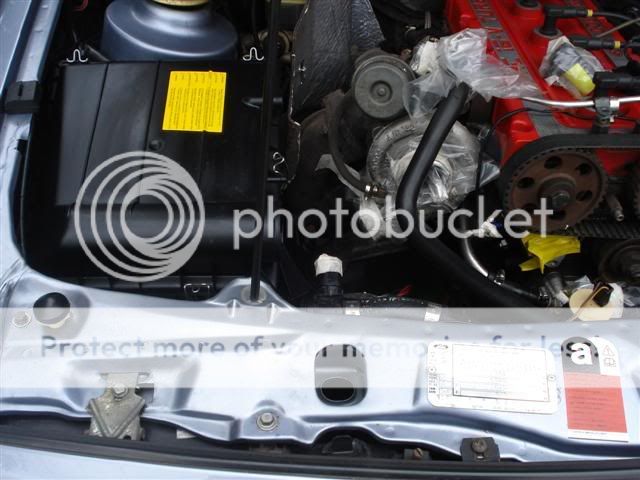
OK I have now removed everything that I need to ... the offending water pump is out ready for the new one, I've taken out the thermostat for a clean up and a newy I've removed all the hoses around the turbo (in and out) for a clean up and for access ... now was a good time to check that it was in good nic to
Some bits ...
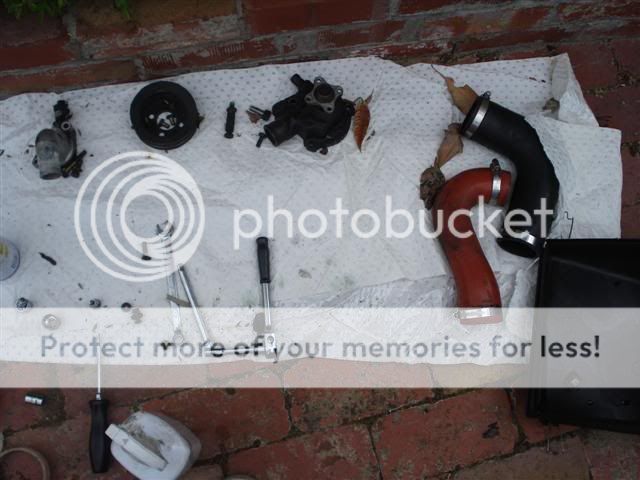
and this is the extent of the bay strip down (although since this pic the airbox came right out to give me access for another job ... photos later). I was going to remove the alternater for a clean and a respray but I soon discovered that the lower mount bolt is to long to come out without removing the radiator fans ... I'll just have to save this job for when I 'overhaul' the cooling system
Good news is the turbo compressor blades look good to me ...
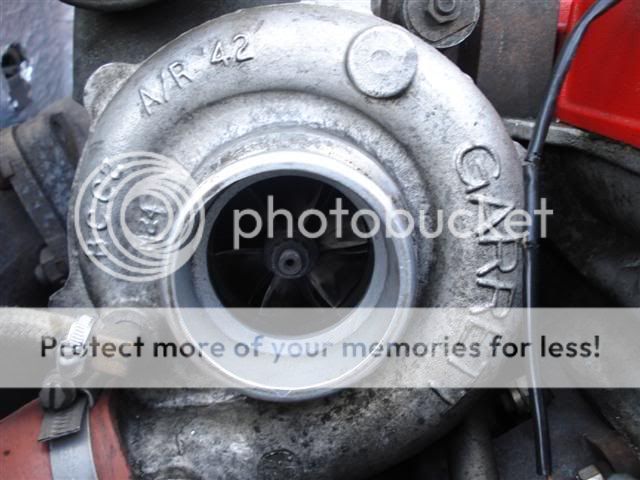
... and if there is one thing I've seen a few of in my time are blades (although on a slighty larger scale )

Heres my makeshift spray booth in use again ... this time for the water pump pulley and bolt heads and I thought I'd give the lifting eyes the once over. You'll see one of the bonnet catch screws from the slam panel there ... I have repainted those and the alarm sensor mount at the front of the bay ... so everything is the colour it is meant to be

More to come ...
Moser
Some bits ...
and this is the extent of the bay strip down (although since this pic the airbox came right out to give me access for another job ... photos later). I was going to remove the alternater for a clean and a respray but I soon discovered that the lower mount bolt is to long to come out without removing the radiator fans ... I'll just have to save this job for when I 'overhaul' the cooling system
Good news is the turbo compressor blades look good to me ...
... and if there is one thing I've seen a few of in my time are blades (although on a slighty larger scale
)Heres my makeshift spray booth in use again ... this time for the water pump pulley and bolt heads and I thought I'd give the lifting eyes the once over. You'll see one of the bonnet catch screws from the slam panel there ... I have repainted those and the alarm sensor mount at the front of the bay ... so everything is the colour it is meant to be
More to come ...
Moser


 29-10-2007, 09:59 AM
#23
Thanks boys for the postive comments
JETTECH03 hello mate ... thanks for checking out what I've been up to ... its taken a while but I'm getting there I can't wait until your project reaches the country ... I've got to see it in the flesh (it will bring back memories of my first project , although mine never got back on the roads )
graeme you have pm
Twins as you would agree ... its the attention to details that make a car unique
JETTECH03 hello mate ... thanks for checking out what I've been up to ... its taken a while but I'm getting there
graeme you have pm
Twins as you would agree ... its the attention to details that make a car unique
29-10-2007, 10:24 AM
#24
and just quickly ...
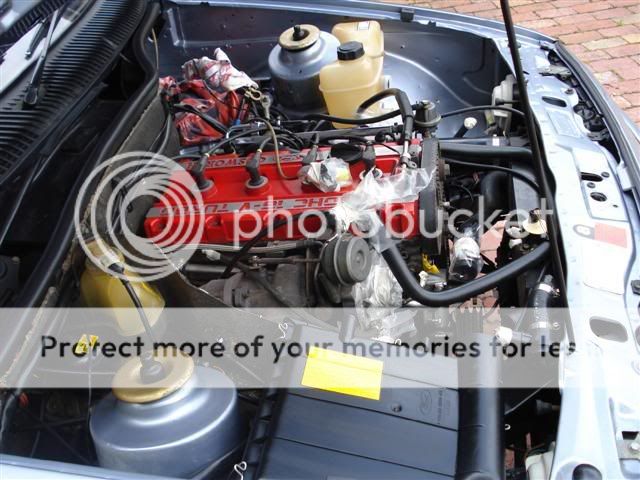
I must say that I was more than impressed with the condition of the cooling system on my cos (except of course the water pump which had decided to drop its guts ) The coolant was clean, the components weren't rotten and the hoses were in pretty good condition.
I got a new water pump sent out with new bolts from the UK ... although only one of the three bolts were correct so I went to a local engineering joint and put the bolts on the bench ... and he came back with new identical bolts (same head markings) for the total sum of f@#k all! I think next time I'll just source bolts locally
Anyway here's the new pump and new hardware ready to go on (plus a cometic reuseable gasket)
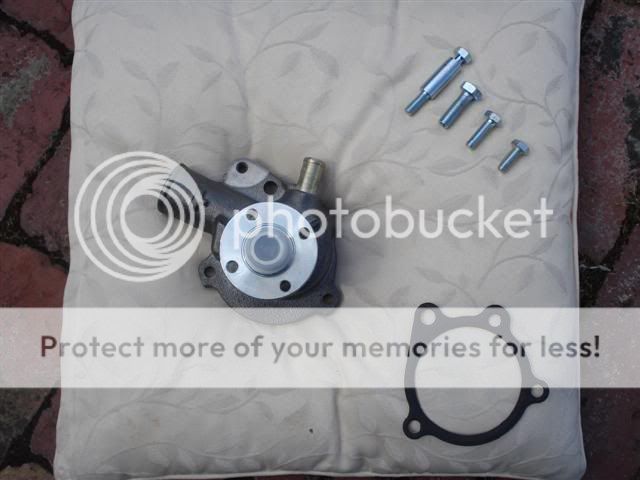
... and all bolted up ...
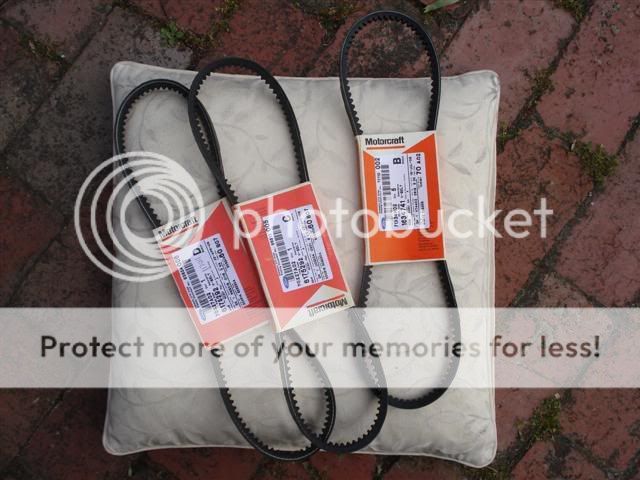
all ready for a set of new belts to drive it
I must say that I was more than impressed with the condition of the cooling system on my cos
) The coolant was clean, the components weren't rotten and the hoses were in pretty good condition. I got a new water pump sent out with new bolts from the UK ... although only one of the three bolts were correct
so I went to a local engineering joint and put the bolts on the bench ... and he came back with new identical bolts (same head markings) for the total sum of f@#k all! I think next time I'll just source bolts locally Anyway here's the new pump and new hardware ready to go on (plus a cometic reuseable gasket)
... and all bolted up ...
all ready for a set of new belts to drive it
31-10-2007, 09:36 AM
#26
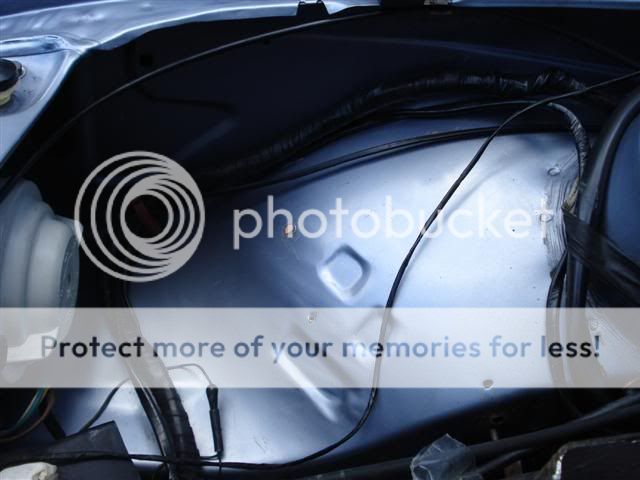
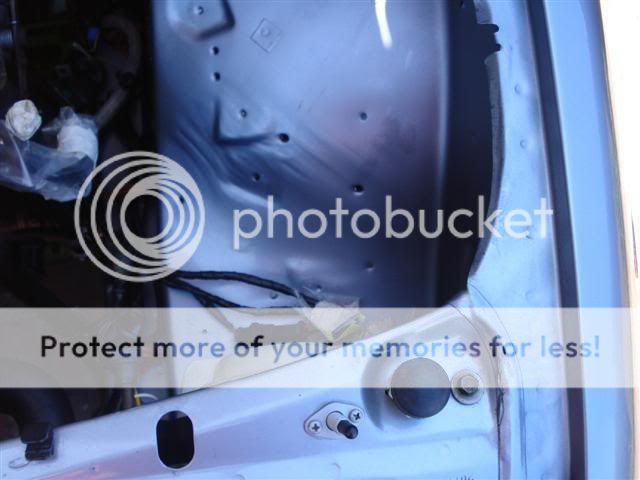
So when I peeked down behind the lower airbox I could see the wiring harness had seen better days ... so now was the time to get in there so I took the airbox right out so I could have a proper look .
Like I've said before , I'm not an electrician but I've seen a few cable runs before and I hate messy wiring (and I know that sort of frustrating issues it can cause )
With the airbox out I was faced with this, pretty good really as all the wiring and insulation was in good condition it was just the harness protection that had fallen away ... it was a fabric type material , and it was time for better (oh and the inner wing was in good nic to ).
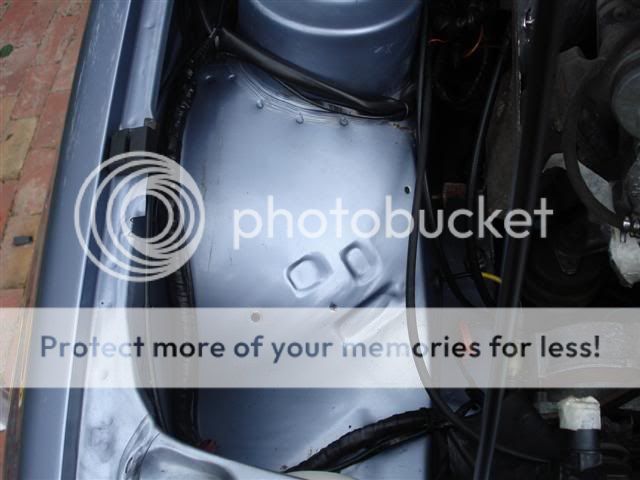
I had been recommended to (find and) use this stuff by a sparky at work ... it sh#ts on PVC tape . When you stretch it then wrap it it sticks (fuses ) to itself. It lasts longer and offers greater protection than vinyl (although it is quite thick ) ...
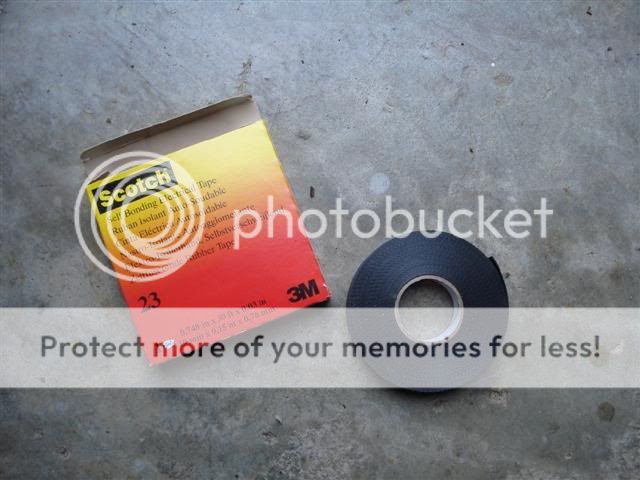
which gave these results ...
then I realised that someone (surely Ford wouldn't ) had decided that a bit of gaffer tape to the strut was good enough ... not good enough for me though ... I had to do this properly :
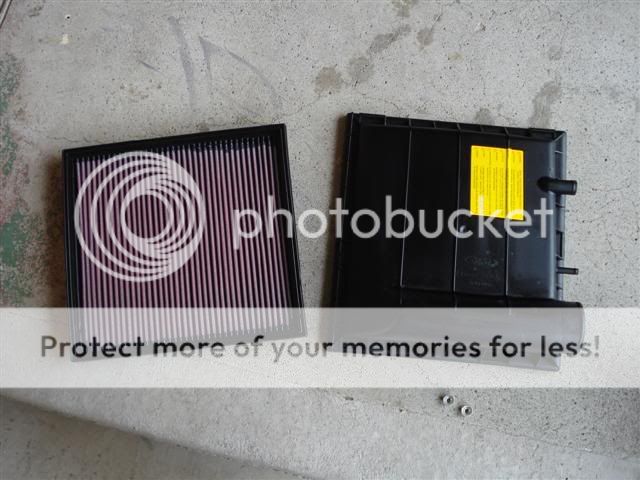
now that I was happy with the harness  , the airbox got a good clean, some Autoglm vinyl protector, a new decal and some new hardware (sourced locally this time ) oh and a spanking new K&N panel filter ... stock looks remember
ready to go ...
... and all bolted up
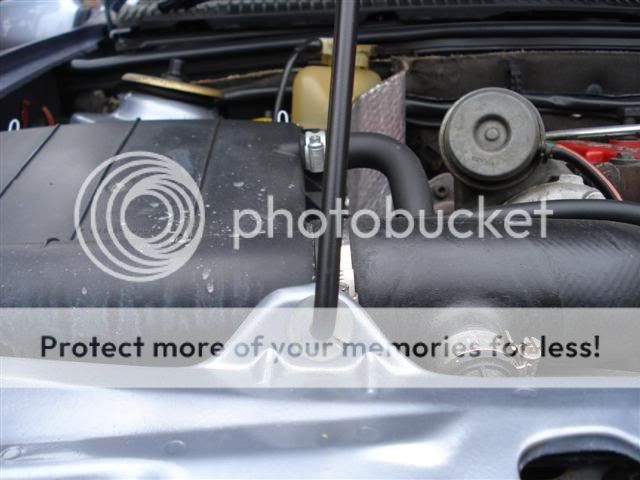
... oh and I couldn't help myself with a trial picture with the header tank and its new decal and black cap put in postion ...
... so now was the time to get in there so I took the airbox right out so I could have a proper look Like I've said before , I'm not an electrician but I've seen a few cable runs before and I hate messy wiring
(and I know that sort of frustrating issues it can cause )With the airbox out I was faced with this, pretty good really
... it was a fabric type material (oh and the inner wing was in good nic to I had been recommended to (find and) use this stuff by a sparky at work ... it sh#ts on PVC tape
. When you stretch it then wrap it it sticks (fuses ) to itself. It lasts longer and offers greater protection than vinyl which gave these results ...
then I realised that someone (surely Ford wouldn't
) had decided that a bit of gaffer tape to the strut was good enough ... not good enough for me though ... I had to do this properly :now that I was happy with the harness
ready to go ...
... and all bolted up
... oh and I couldn't help myself
 01-11-2007, 12:29 PM
#28
Regular Contributor

Just awesome mate!
Like the others are saying.... It is just a matter of time before that motor comes out!! Look at me!!! I just wanted to change the bloody clutch! Next thing I know... its all on!!... or should that be out?!?
Good work.
Like the others are saying.... It is just a matter of time before that motor comes out!! Look at me!!! I just wanted to change the bloody clutch! Next thing I know... its all on!!... or should that be out?!?
Good work.
 03-11-2007, 10:40 AM
#31
Originally Posted by CossieGirl
Car will be better than new
baggy dog, Brian cheers lads
BRAMMAR, Sidewayz, marco polo, rsnissan and JamesS2RS thank you for the comments boys
it keeps me posting RS_Gav I'd love to take the engine out and do this all at once but ... have you noticed that most of my photos are taken on a concrete floor
03-11-2007, 11:07 AM
#32
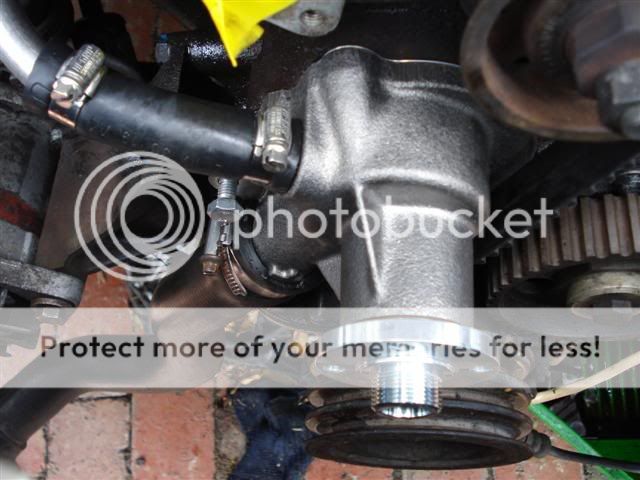
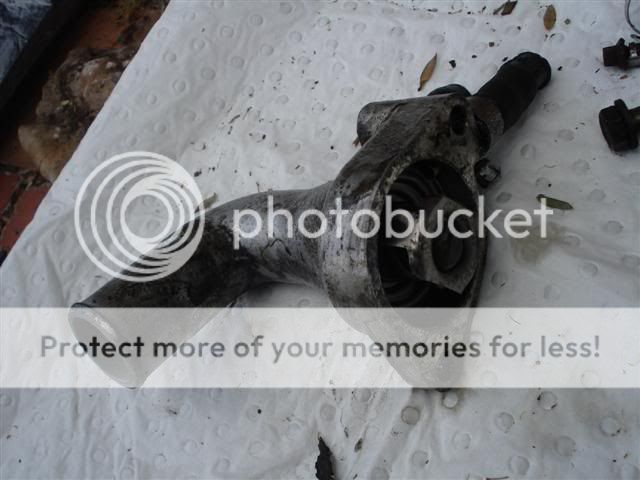
When I walked out to my car and found the puddle of coolant under it the first place I could find that was wet was the thermostat elbow ... so I thought the gasket had let go . After I got the car home I took off the cam belt cover off and saw that the water pump was leaking and the cam belt/pulleys had thrown the coolant back up onto the thermostat elbow even though it (probably wasn''t) leaking but I had already decided to take it apart and change/reseal it anyway so here we go ...
heres the old one taken off ...
When I had ordered the pump from the UK I had also orded the theromostat (and new seal and retaining ring) ... just as well 'cause I had a bastard of a time getting the old one out
On the outide I was surprised how good it looked but when I tried to take out the retaining ring ... oh my god The seal under the thermostat had swollen and hardened and I couldn't get the ring out. I took it to work and got the assistance of an extra pair of hands, a heat gun and a couple of screwdrivers plus a pair of pliers ... and got out the retaining ring
Long story short ... I cleaned up the thermostat housing and got it ready for new seals and a splash of paint ...
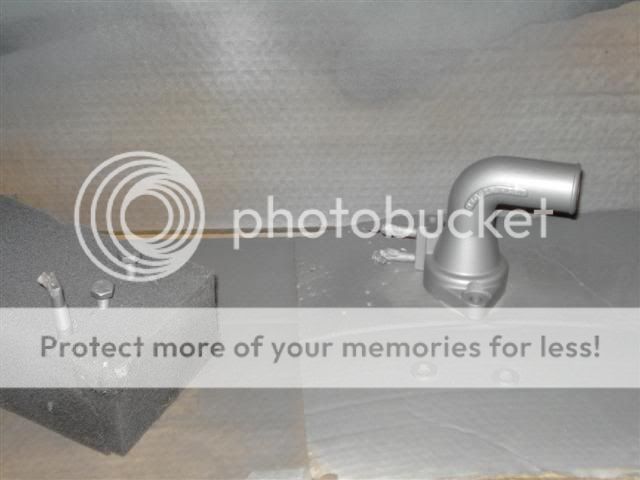
Then I got all the new bits together (seal, ring thermostat and bolts) ...
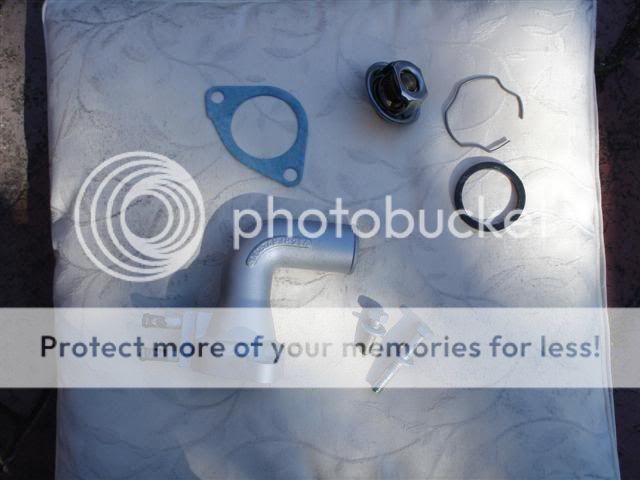
... and assembled it
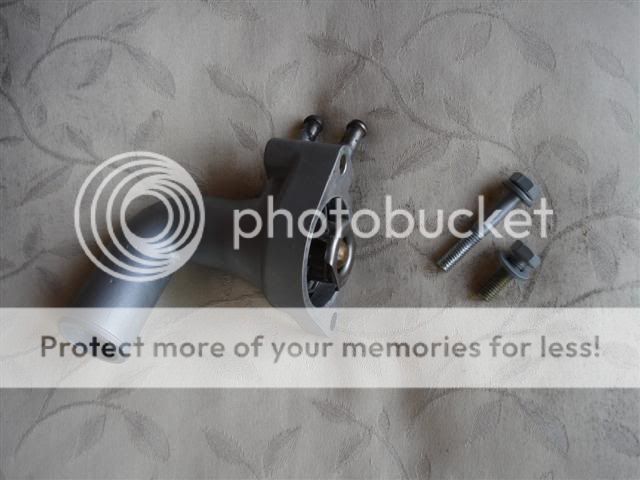
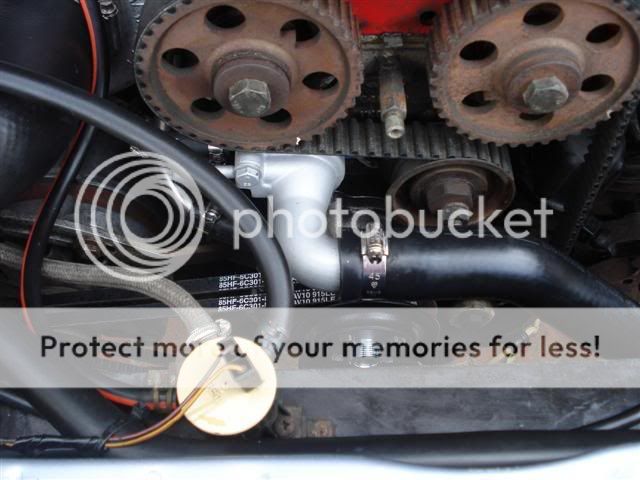
Here she is, bolted up with some paint-on 'Hylomar' instant gasket. How long do you think those belts will stay lined up Note the new coolant hose, clamps and bleed plug (no clamp on this yet ... I'll do this after I've bleed the coolant system when I first run it
the first place I could find that was wet was the thermostat elbow ... so I thought the gasket had let go heres the old one taken off ...
When I had ordered the pump from the UK I had also orded the theromostat (and new seal and retaining ring) ... just as well 'cause I had a bastard of a time getting the old one out
On the outide I was surprised how good it looked but when I tried to take out the retaining ring ... oh my god
The seal under the thermostat had swollen and hardened and I couldn't get the ring out. I took it to work and got the assistance of an extra pair of hands, a heat gun and a couple of screwdrivers plus a pair of pliers ... and got out the retaining ring Long story short ... I cleaned up the thermostat housing and got it ready for new seals and a splash of paint ...
Then I got all the new bits together (seal, ring thermostat and bolts) ...
... and assembled it
Here she is, bolted up with some paint-on 'Hylomar' instant gasket. How long do you think those belts will stay lined up
 13-11-2007, 09:18 AM
#39
Well firstly my daily driver finally let me down it burst a coolant hose whilst I was driving home from nightshift ... so the worst has happened ... both my two cars are both off the road at the same time .
On a lighter note ... I've had heaps of fun buying tools for this job , heres a selection that I've used on the following wiring repairs
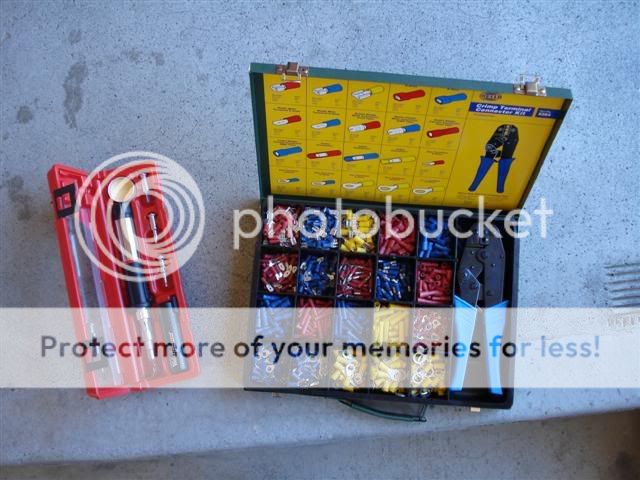
that butane powered pyropen rocks .
Anyway the water pump is in , the power steering hoses are replaced so now I am up to sorting wiring . The first place I started was with the wiring going to the bonnet sensor (at the slam panel) I assume it is for the alarm ... this is what I started with, bad tapeing and a dodgy join ...
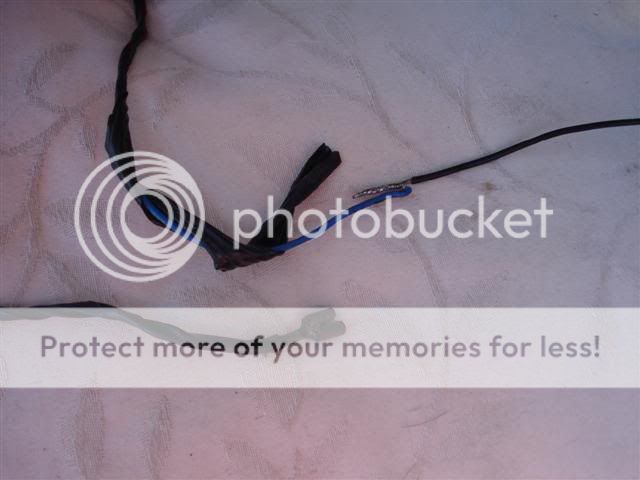
so I took out the sensor components and cleaned/painted them (half of the screw sensor so I knew where to adjust it to and cut out the old wiring. I then used new wire, protected it with heat shrink and cooked it on with my pyropen and crimped on (with my new kit) the correct terminals

Heres the sensor remounted on the slam panel and the wiring tucked up and hidden along the inner wing nice and neat . Note I've already reprotected the washer bottle harness
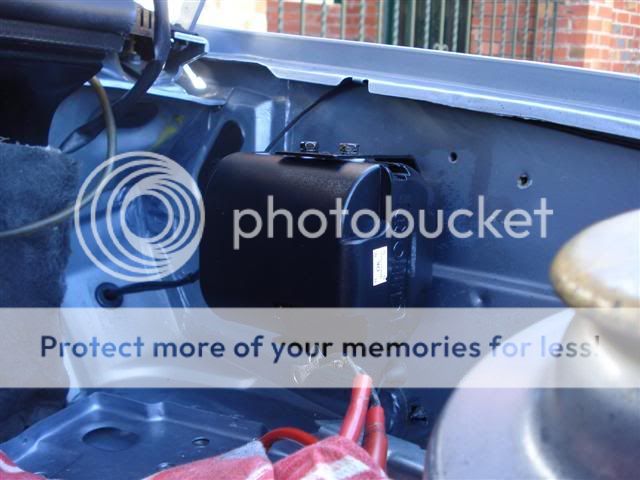
Whilt I was working on the alarm it was time to clean the alarm's siren and remount it neatly and tidy its wiring to ...
it burst a coolant hose whilst I was driving home from nightshift ... so the worst has happened ... both my two cars are both off the road at the same time .On a lighter note ... I've had heaps of fun buying tools for this job
that butane powered pyropen rocks
.Anyway the water pump is in
so I took out the sensor components and cleaned/painted them (half of the screw sensor so I knew where to adjust it to
Heres the sensor remounted on the slam panel and the wiring tucked up and hidden along the inner wing
nice and neat Whilt I was working on the alarm it was time to clean the alarm's siren and remount it neatly and tidy its wiring to
...
13-11-2007, 09:36 AM
#40
Looking down the inner wing along the chassis leg I saw this (which I had already cleaned up/degreased previously) ...
so some more cleaner , some rubber fusing tape and a little force resulted in this ...

The worst of it cant be seen ... there were two main positive leads that ran along the chassis leg (up in the photo) which had no harness protection (just insulation) so with a heavy application of rubber tape they came up well
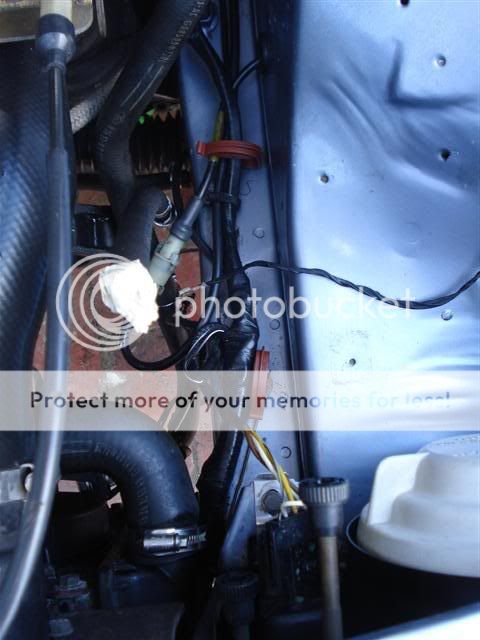
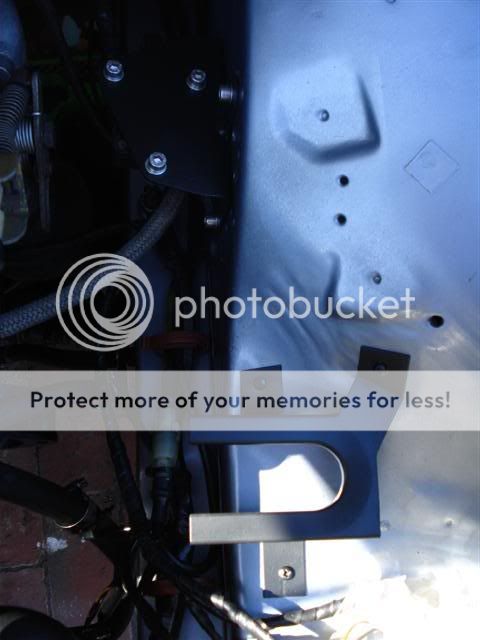
Now I/m getting somewhere ... MAP sensor and bracket installed and PAS bottle bracket on ...
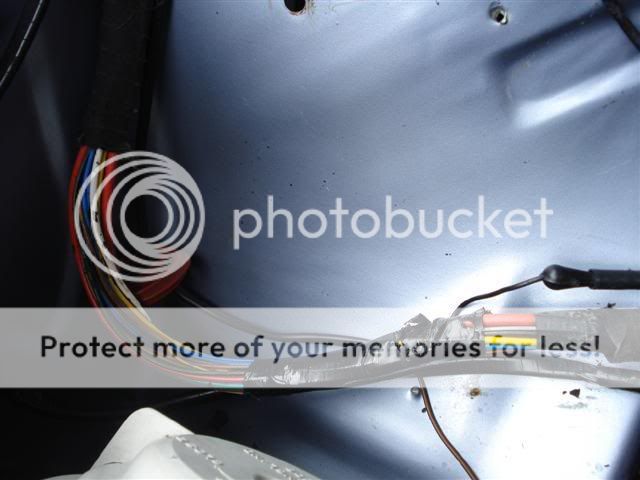
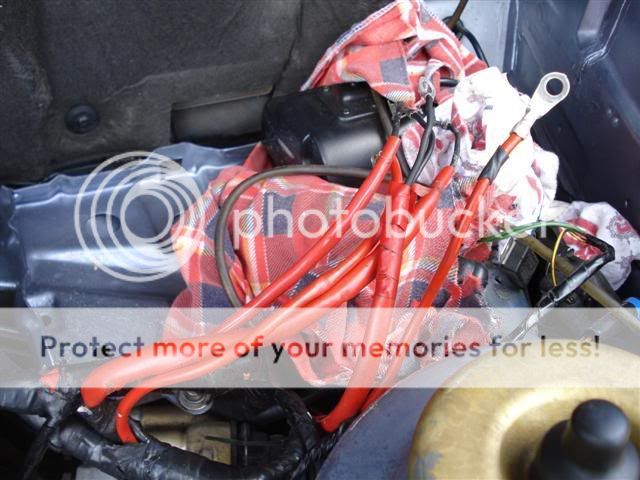
and heres to the reason why I started to tidy the wiring, what I was faced with at the battery conections ...
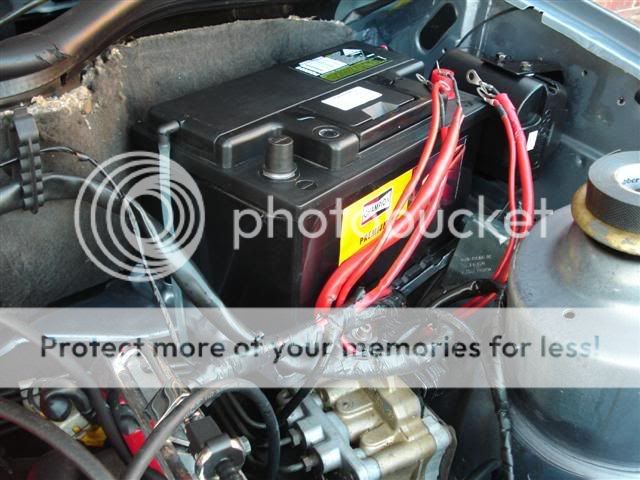
to start with I dropped the battery (new) into place (with the most powerful CCA battery I could find ... for ballsy starts ) I was surprised it filled the try ... not much room between it and the alarm siren . I have already started to reroute the wiring ...
I have taken out the main earth lead and found it to be badly chaffed ... but I was shocked when I removed the main positive lead to the starter it was TERRIBLE (photos later) but I have a plan
so some more cleaner
The worst of it cant be seen ... there were two main positive leads that ran along the chassis leg (up in the photo) which had no harness protection (just insulation) so with a heavy application of rubber tape they came up well
Now I/m getting somewhere ... MAP sensor and bracket installed and PAS bottle bracket on ...
and heres to the reason why I started to tidy the wiring, what I was faced with at the battery conections ...
to start with I dropped the battery (new) into place (with the most powerful CCA battery I could find ... for ballsy starts
) I was surprised it filled the try ... not much room between it and the alarm siren I have taken out the main earth lead and found it to be badly chaffed
... but I was shocked when I removed the main positive lead to the starter it was TERRIBLE