
Oldest Rally Sierra. Time for some tlc


Wahay!! I've lost my Virginity!!
Joined: Mar 2011
Posts: 74
Likes: 1
From: Norway

I'm Finding My Feet Here Now
Joined: Apr 2006
Posts: 149
Likes: 0
From: lincolnshire
hi mate good project , going back a bit you were asking about the intercooler , we used to rally a 3 dr back in the 90 s and we had a intercooler like that in ours , it was standard width but wider in the depth as if someone had welded two together, someone sugested it was gpa one but i wasnt sure at time looked too good for a home build , ive got a mcrea motorsport red car that i want to get started on but havent a garage to work in yet but we will get a start soon
Thread Starter
Rock Out!!
Joined: Feb 2005
Posts: 441
Likes: 2
From: Isle of man
Thanks for the info Bri308. Go on get that car sorted 
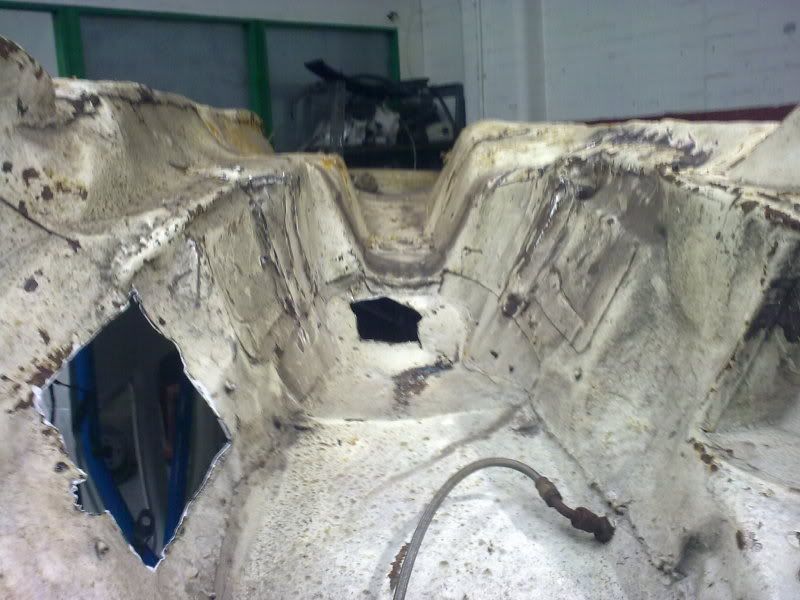
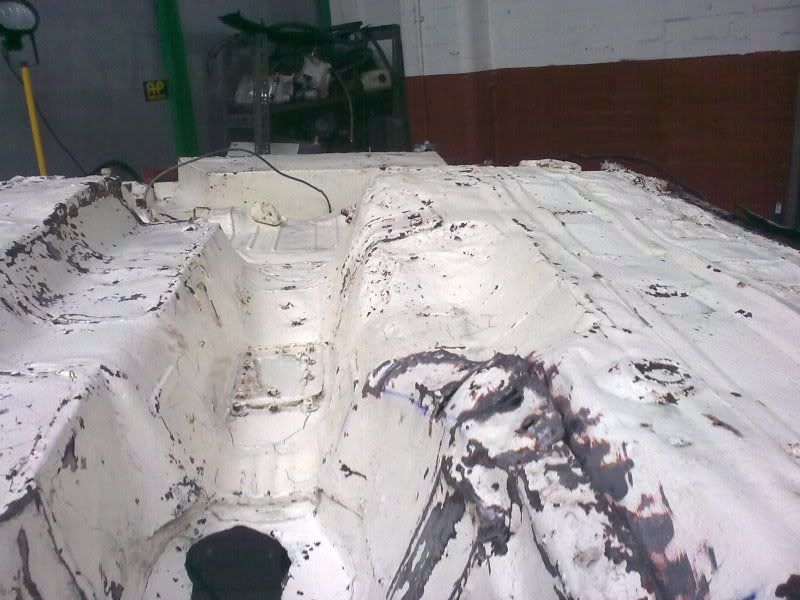
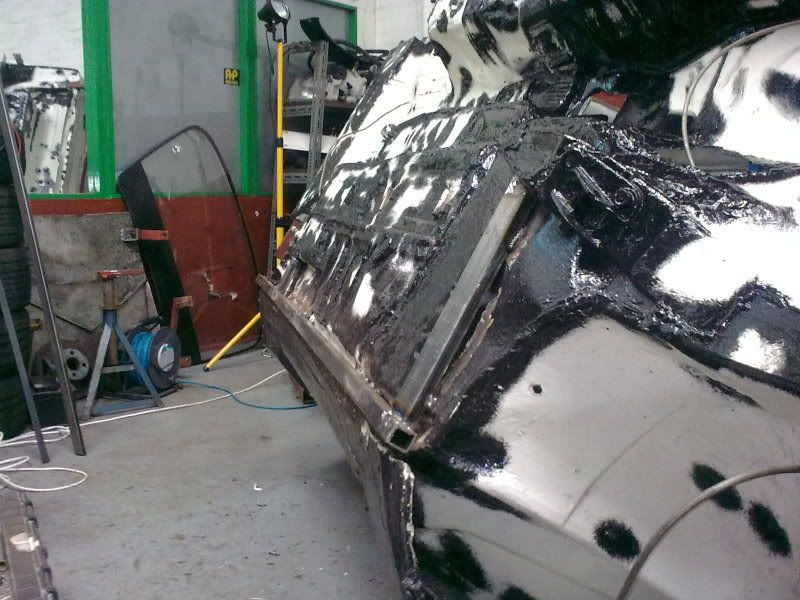
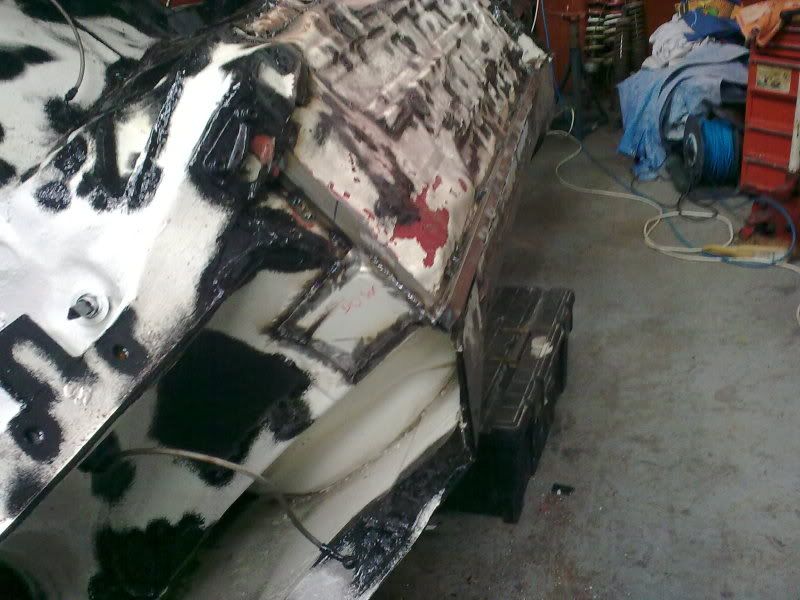
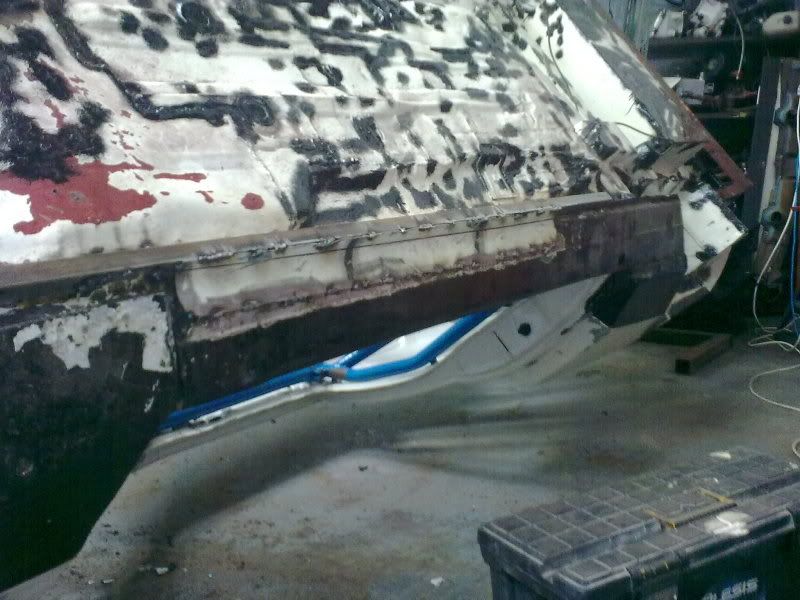
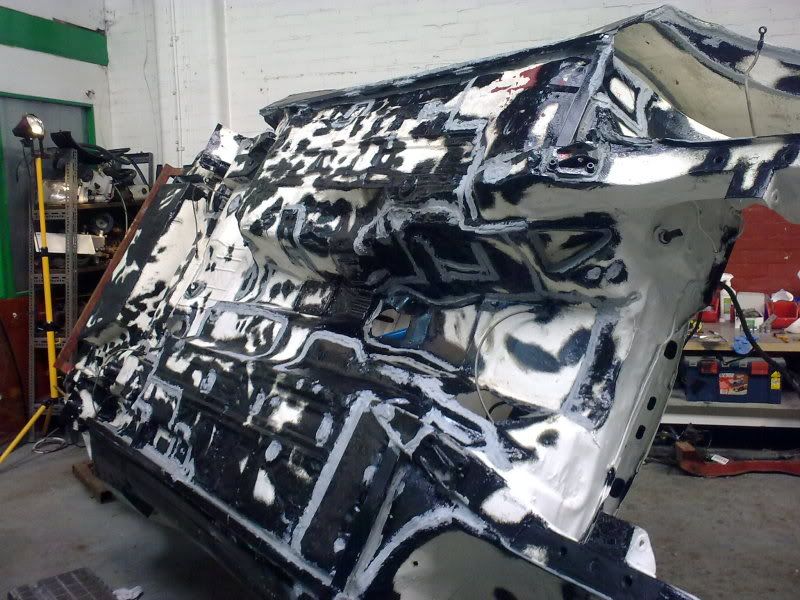
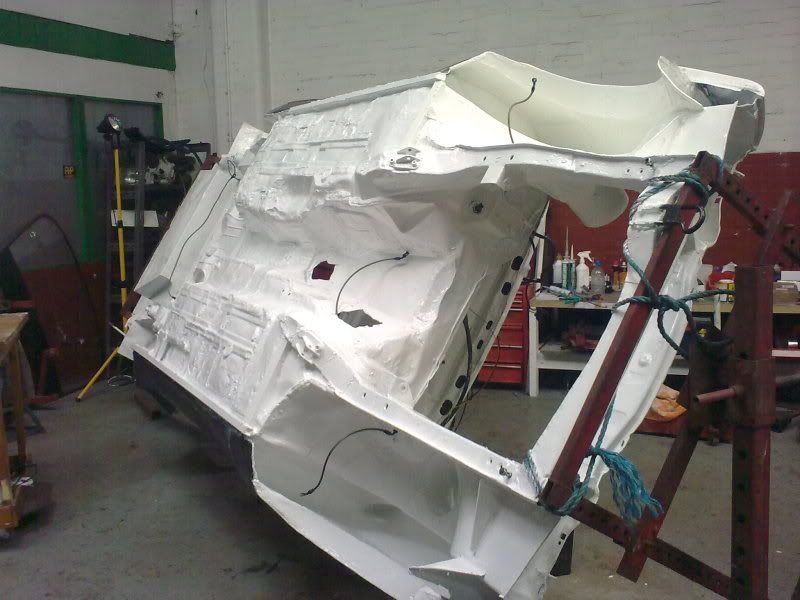
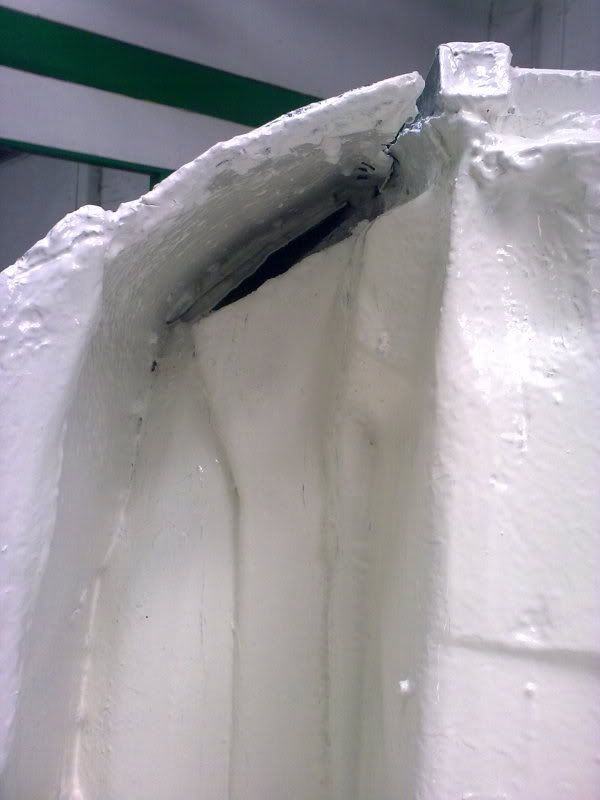
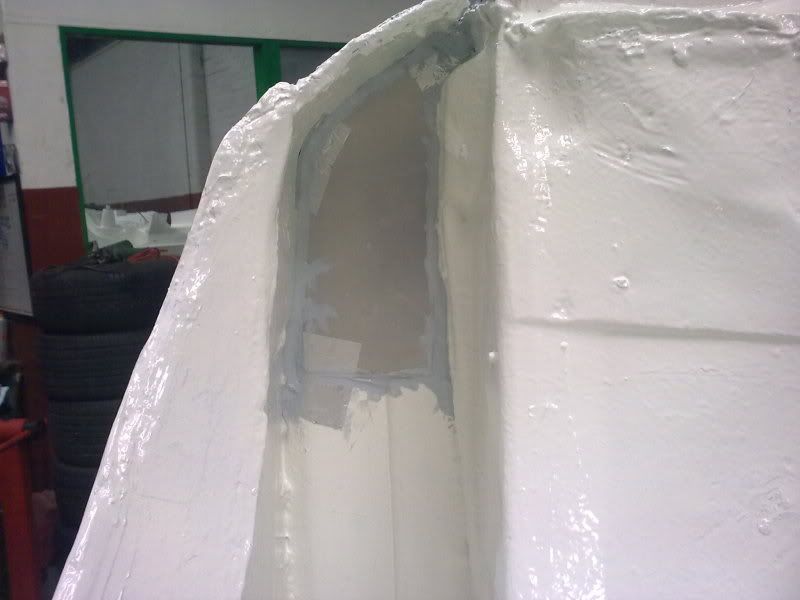
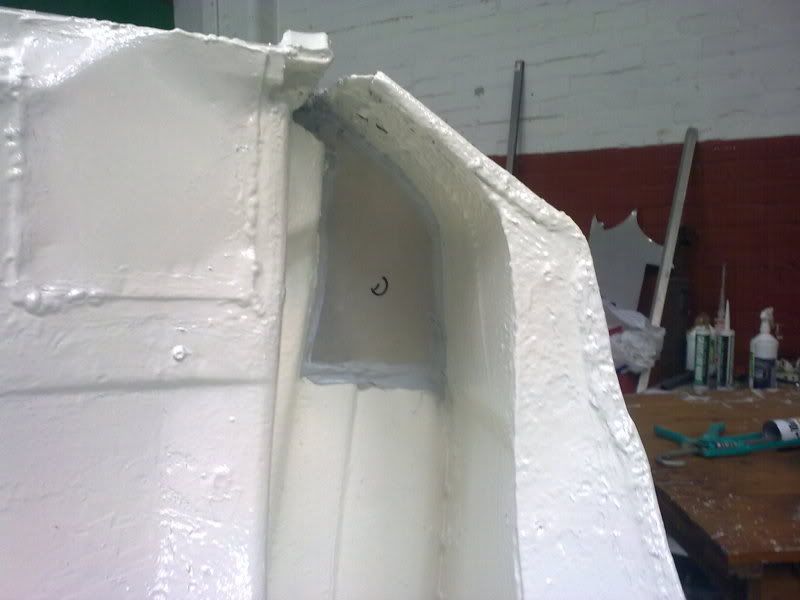
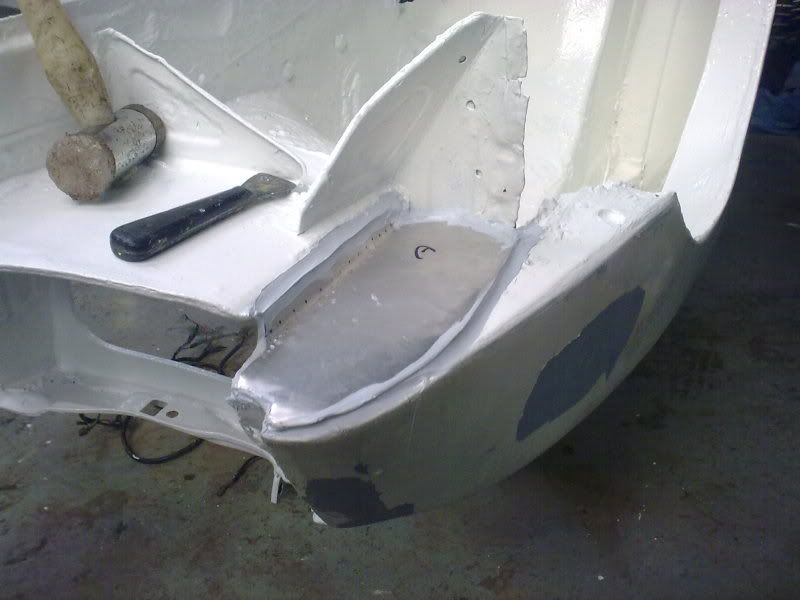
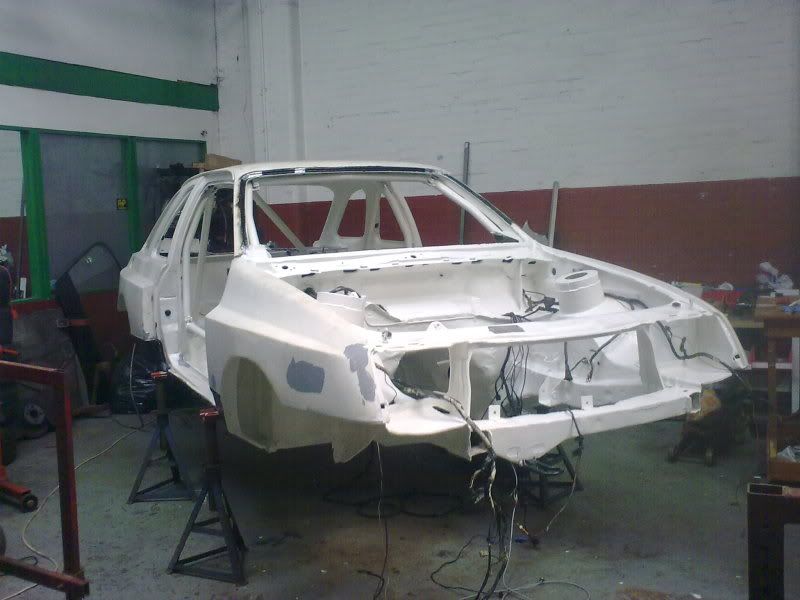
Right, I've been doing the unexciting bits for the last few days.
I got started on fixing the tunnel so that the box would align properly.
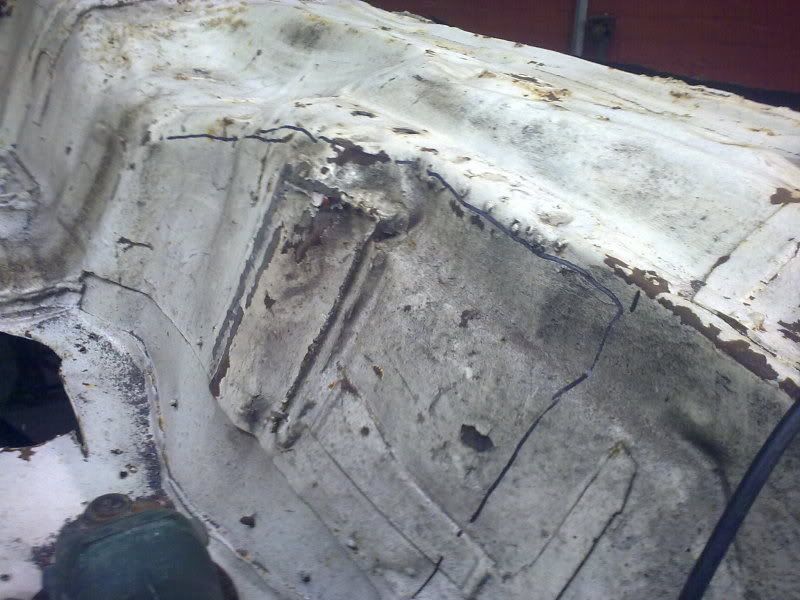
The old mount was part of the problem, so that was ground flat.
And as there was a step in the edge of the tunnel, it was just a case of cutting around the top edge and then folding it to become a straight drop to the floor.
It's not very easy to see, but the tunnel is now over an inch wider where it was catching.
I am in awe of Marine clean! One spray on, one quick wash off....
As I dig deeper I find annoying water traps that have to be bled.
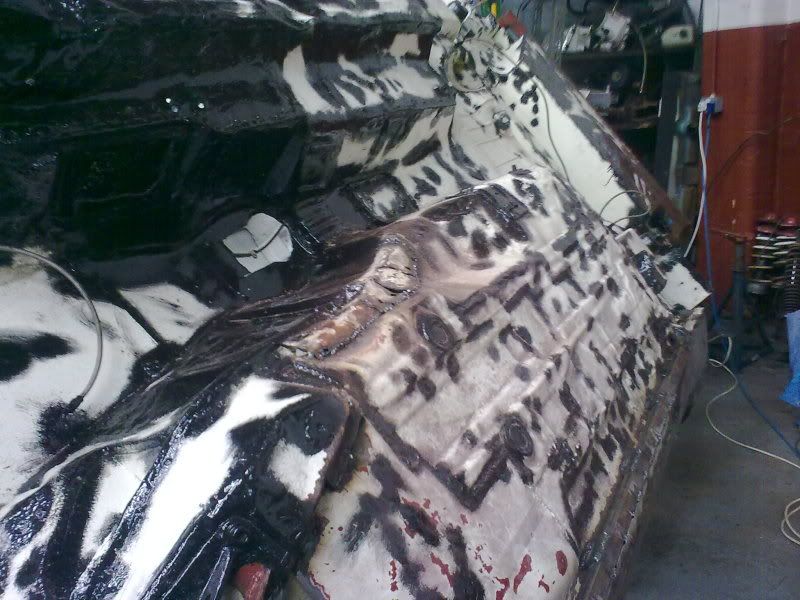
As I hadn't got any welding wire, I put some por 15 on her arse.
Then when I had some wire I started getting some strengh back into her.
I want to try not to think about just getting rid of panels that are getting thin and old, as they are all as bad as each other.
So it would start with sills then inners then floor, then...
As she is now just an occasional road car only, just making sure she dosnt fold up will make me happy
she's getting there....slowly.
Right, I've been doing the unexciting bits for the last few days.
I got started on fixing the tunnel so that the box would align properly.
The old mount was part of the problem, so that was ground flat.
And as there was a step in the edge of the tunnel, it was just a case of cutting around the top edge and then folding it to become a straight drop to the floor.
It's not very easy to see, but the tunnel is now over an inch wider where it was catching.
I am in awe of Marine clean! One spray on, one quick wash off....
As I dig deeper I find annoying water traps that have to be bled.
As I hadn't got any welding wire, I put some por 15 on her arse.
Then when I had some wire I started getting some strengh back into her.
I want to try not to think about just getting rid of panels that are getting thin and old, as they are all as bad as each other.
So it would start with sills then inners then floor, then...
As she is now just an occasional road car only, just making sure she dosnt fold up will make me happy
she's getting there....slowly.
Thread Starter
Rock Out!!
Joined: Feb 2005
Posts: 441
Likes: 2
From: Isle of man
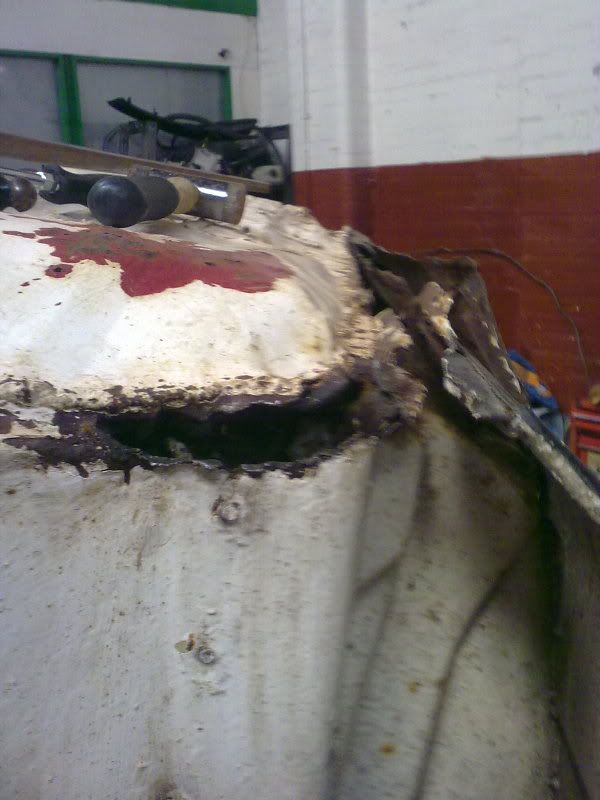
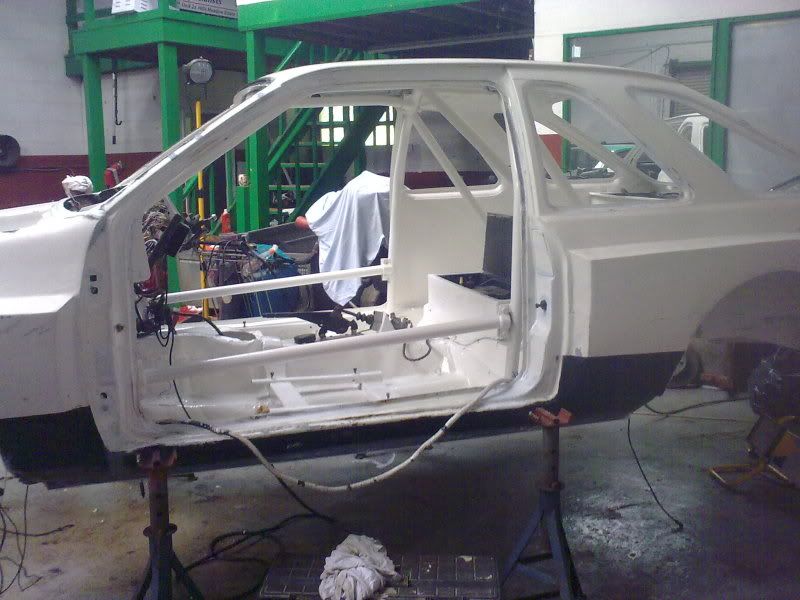
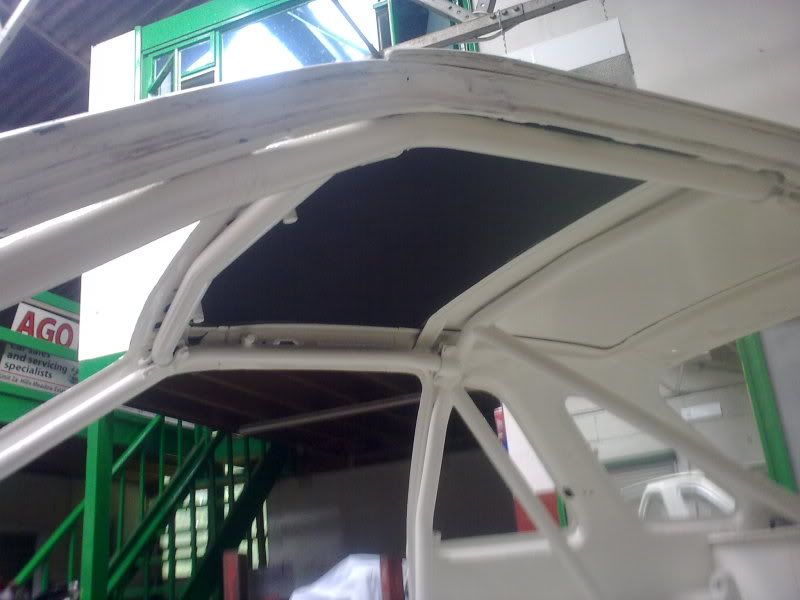
Hi Joshy, yes stripping and dipping or blasting was considered, but If I had blasted her she would have just been a stain on the opposite wall
The Arches arn't a kit, they are hand shaped ally that was then riveted on. The shell has changed shape so much that if they were to be parted fron the inner part of the shell they would never line up again. Also the edges of the wings are rolled around the inner steel and wouldn't survive being bent open to release them.
It's just one of them things, work with what is still living or junk the lot.
she's hanging in there, just.
Thread Starter
Rock Out!!
Joined: Feb 2005
Posts: 441
Likes: 2
From: Isle of man
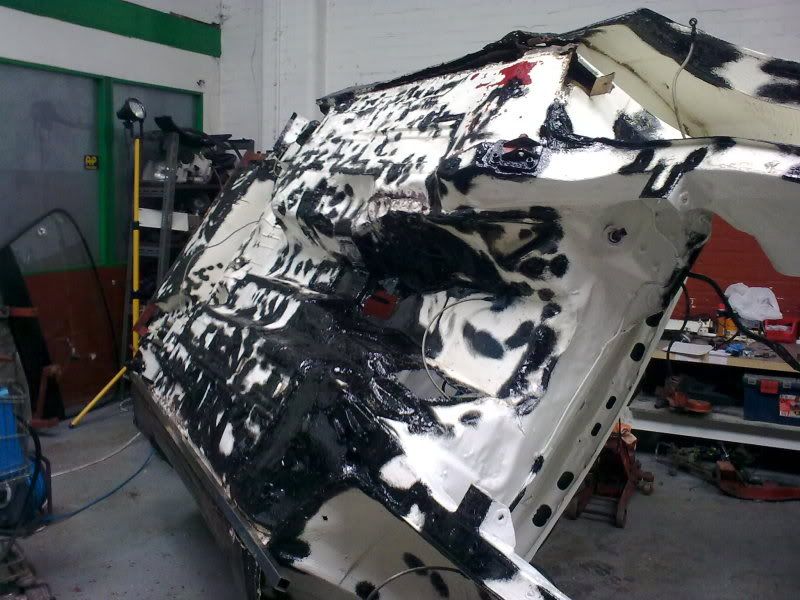
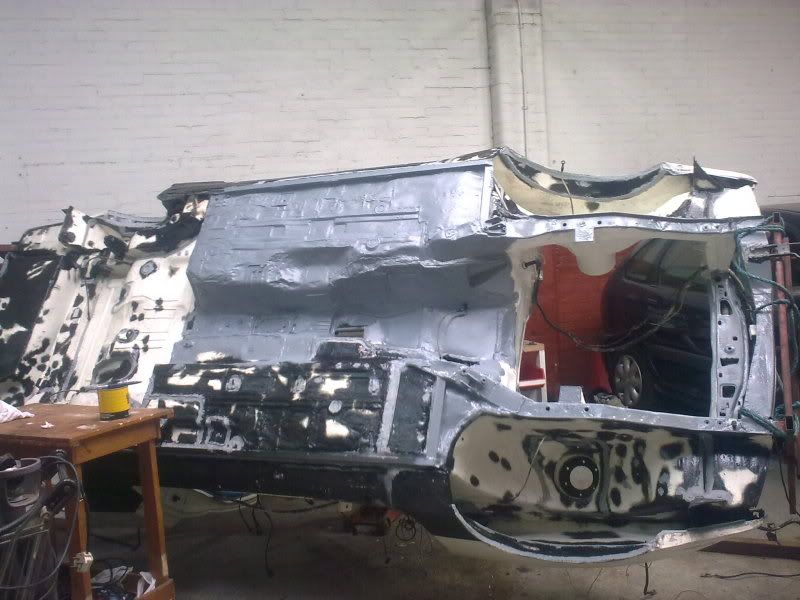
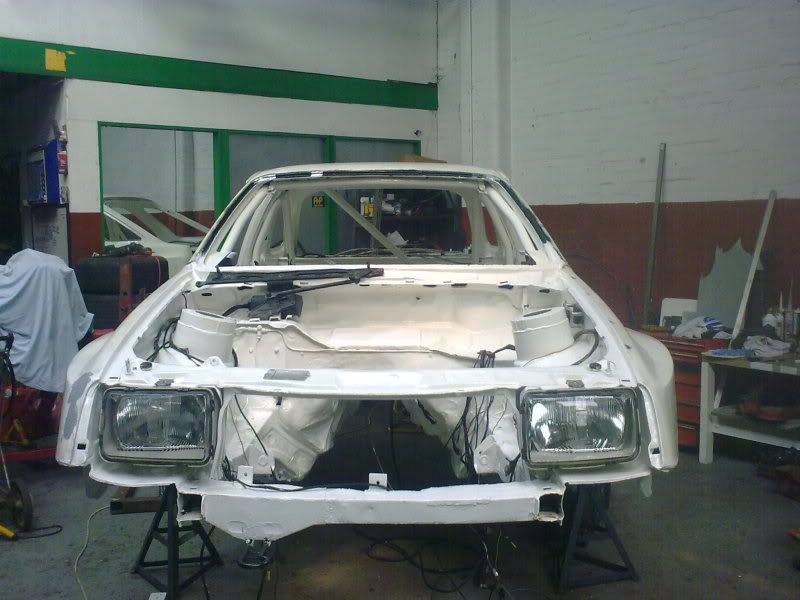
I spent today perfecting the Zen art of weling a mars bar to a toilet seat.
It would have been easier than welding the old lady.
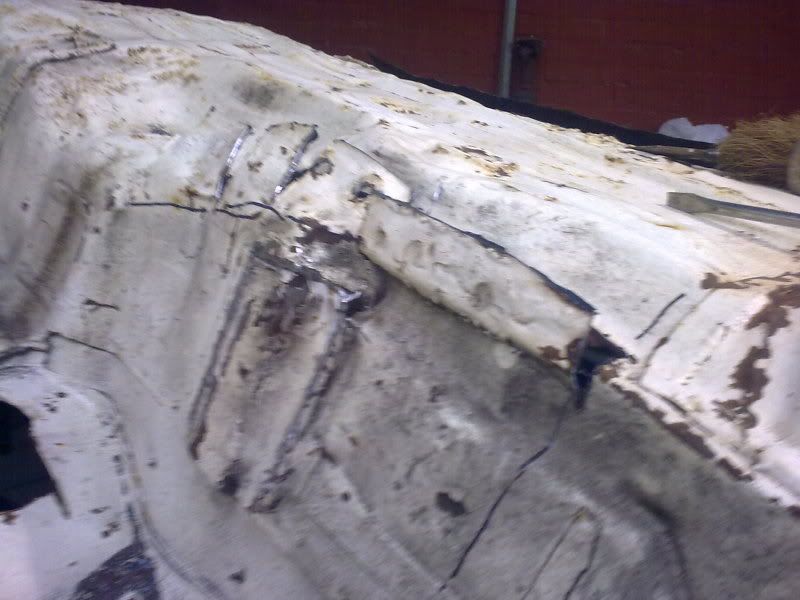
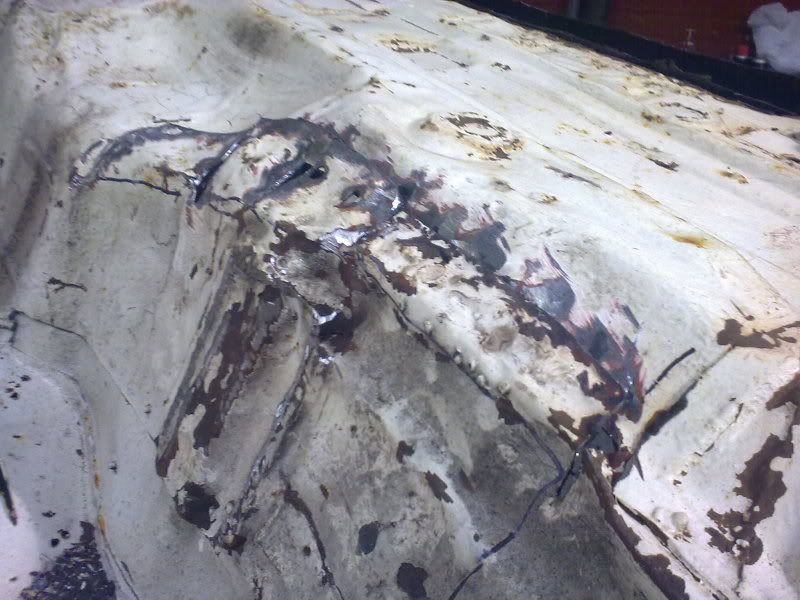
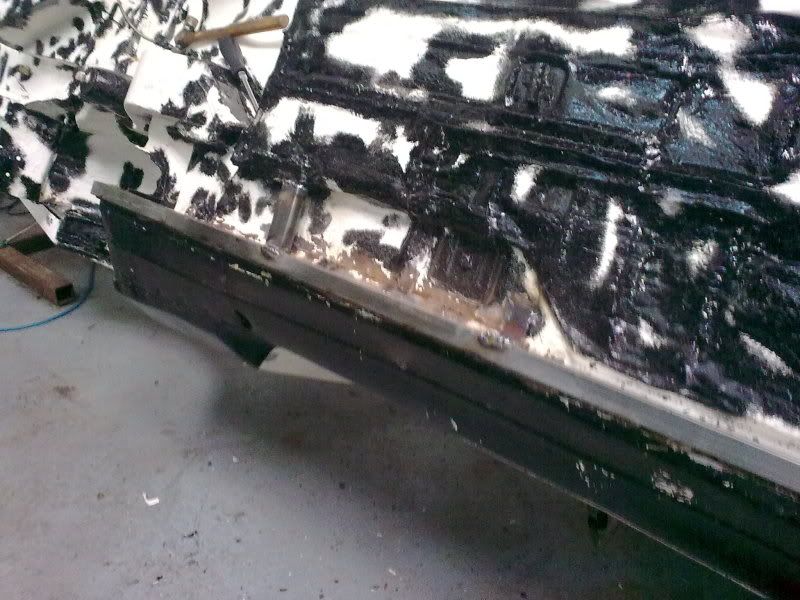
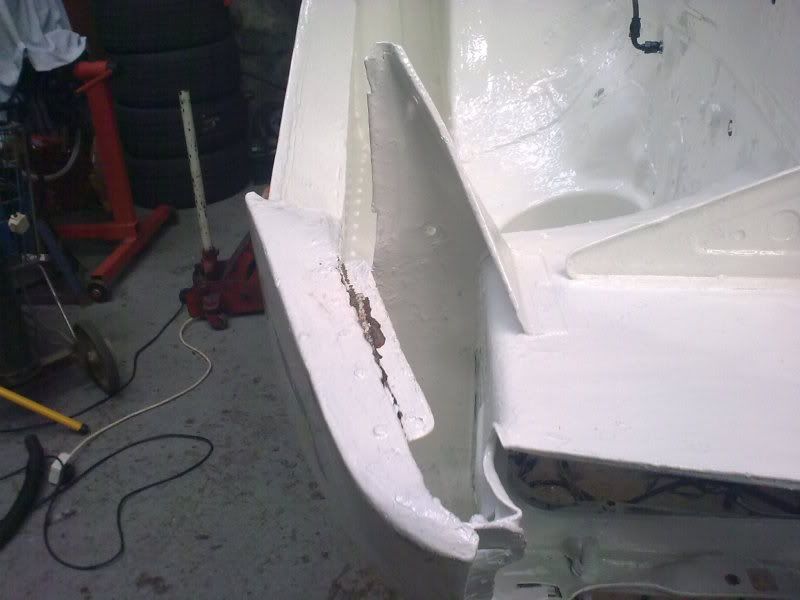
Anyway, I got the outside of the g/box tunnel welded
Then added some strength to the front chasis rail
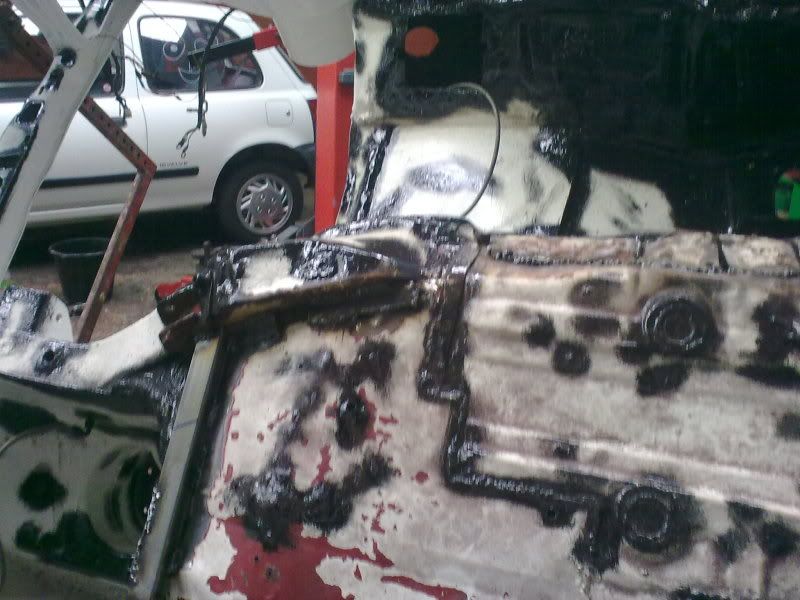
Then after welding the inner sills to the floor, the welder and my hand I put a strengthening bar along where the old sill edge was, like the other side.
the hole at the front got patched
Then I welded a new sheet of steel along the old sill to attach it to the new bar.
Then I sat down and let all my singed bits cool down
It would have been easier than welding the old lady.
Anyway, I got the outside of the g/box tunnel welded
Then added some strength to the front chasis rail
Then after welding the inner sills to the floor, the welder and my hand I put a strengthening bar along where the old sill edge was, like the other side.
the hole at the front got patched
Then I welded a new sheet of steel along the old sill to attach it to the new bar.
Then I sat down and let all my singed bits cool down


Awesome project mate I probably seen this when it was first built as i was a regular noseying through the MCD/RED fencing when i was growing up and my grandads work was 400 metres away !!
Thread Starter
Rock Out!!
Joined: Feb 2005
Posts: 441
Likes: 2
From: Isle of man
Cheers for the feedback guys 
Just to let you all know I'm still doing a bit..
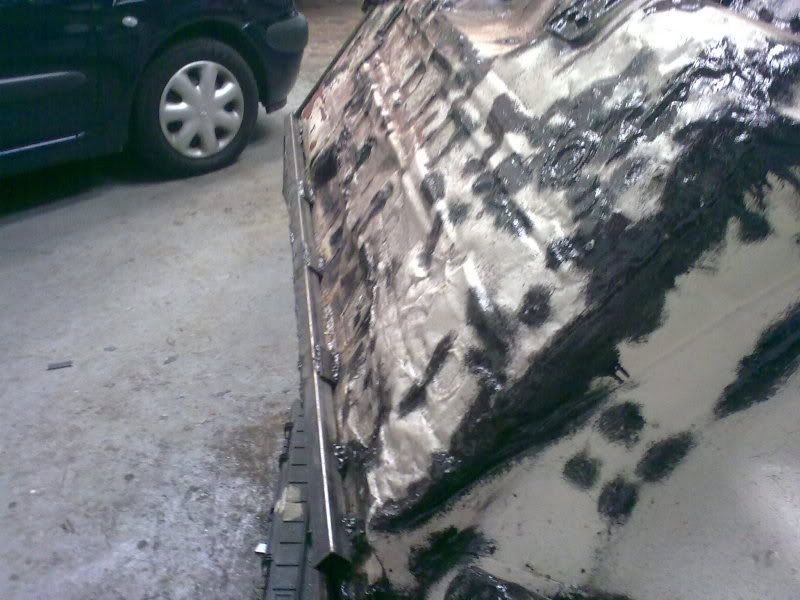
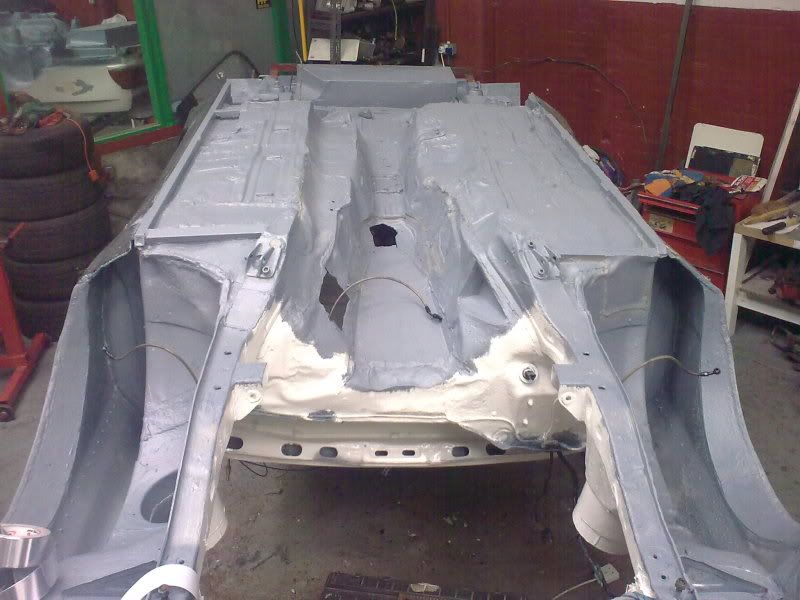
The rest of the underside bare metal was given two coats of por15.
Then the areas that were too big for seam sealant were filled out with fisher f1. It's stuff we use at work for attaching threaded bar into stone. it goes pretty hard.
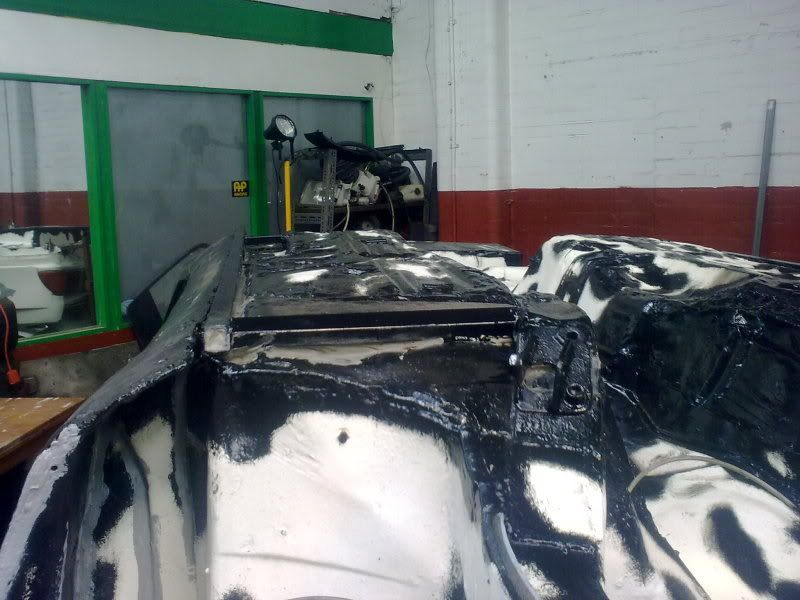
Now I'm just going round the whole underside with brush on and squeeze in seam sealant.
I've done all the arches so far, but there not exactly what you'd call exciting things to photograph.
When thats all done in the next few days, the underside will be getting a coat of primer and then two or three coats of hammerite.
Just to let you all know I'm still doing a bit..
The rest of the underside bare metal was given two coats of por15.
Then the areas that were too big for seam sealant were filled out with fisher f1. It's stuff we use at work for attaching threaded bar into stone. it goes pretty hard.
Now I'm just going round the whole underside with brush on and squeeze in seam sealant.
I've done all the arches so far, but there not exactly what you'd call exciting things to photograph.
When thats all done in the next few days, the underside will be getting a coat of primer and then two or three coats of hammerite.
Thread Starter
Rock Out!!
Joined: Feb 2005
Posts: 441
Likes: 2
From: Isle of man
At last, the seam sealant is done.
The onle way to get it right where you want it is to use your fingers on some of it, which as you probably know means getting it all over yourself.
Everything in my world now sticks to something else.
And so it begins! See you on the other side.
The onle way to get it right where you want it is to use your fingers on some of it, which as you probably know means getting it all over yourself.
Everything in my world now sticks to something else.
And so it begins! See you on the other side.
Thread Starter
Rock Out!!
Joined: Feb 2005
Posts: 441
Likes: 2
From: Isle of man
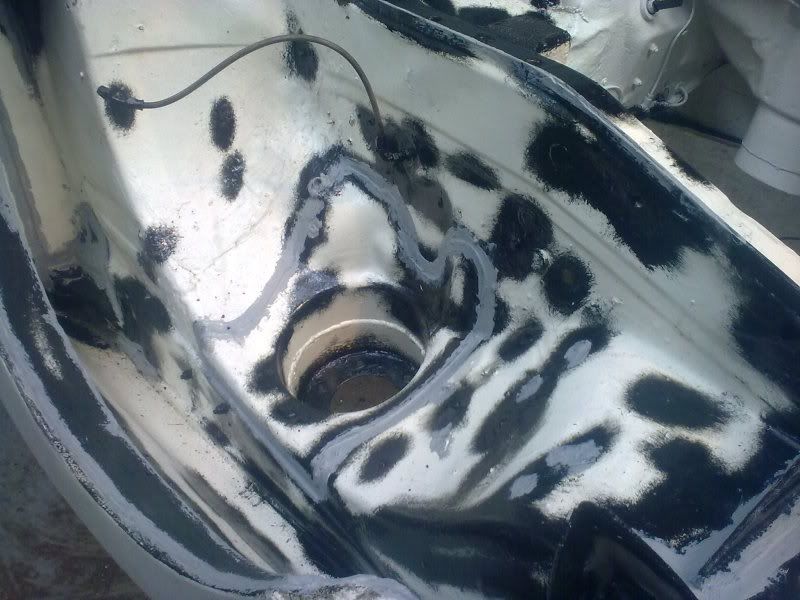
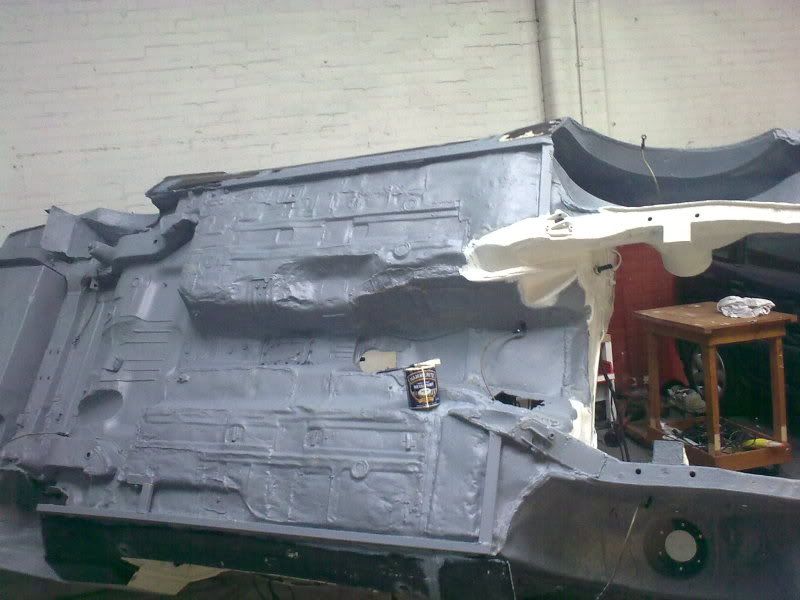
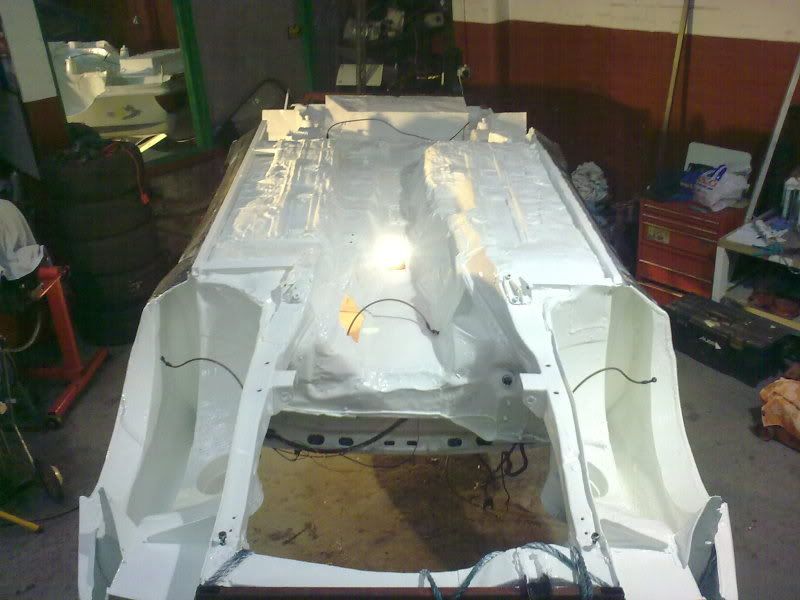
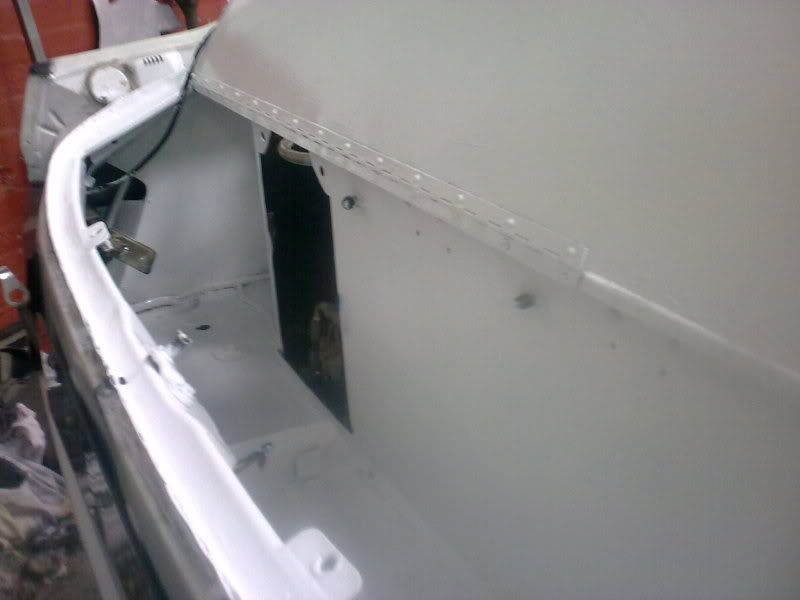
Spent today priming the rest of the interior. It's hard to see most of it as it's upside down.
I am determined this time to stop water getting to the places that it can cause grief. Places like the base of the wing extentions
So I made up some ally plates and after fixing they were sealed in place.
The front of the wings has a trap so this was covered too.
I am determined this time to stop water getting to the places that it can cause grief. Places like the base of the wing extentions
So I made up some ally plates and after fixing they were sealed in place.
The front of the wings has a trap so this was covered too.
Too many posts.. I need a life!!
Joined: Aug 2004
Posts: 937
Likes: 8
From: Surrey
good work there keep us updated you are saving a very special old Sierra there. There is another resto thread on another xr4 believed to be one of andy rouse original merkur-T shells from 85/86 good to see these cars being saved.
Thread Starter
Rock Out!!
Joined: Feb 2005
Posts: 441
Likes: 2
From: Isle of man
Hi all, just a quick update.
I've finally finished doing the long and boring job of painting the underside and inside of the car.
After everything was primed and given two or three coats of paint, it was all given four coats of wax (another really exciting job)
I can safely confirm that there is almost no chance of me becoming a bufty
She was also lifted off the spinner stands and is upright again.
Now I'm just starting to put electrical parts back in place temporarily so I can sort out the wiring, (joy)
Thread Starter
Rock Out!!
Joined: Feb 2005
Posts: 441
Likes: 2
From: Isle of man
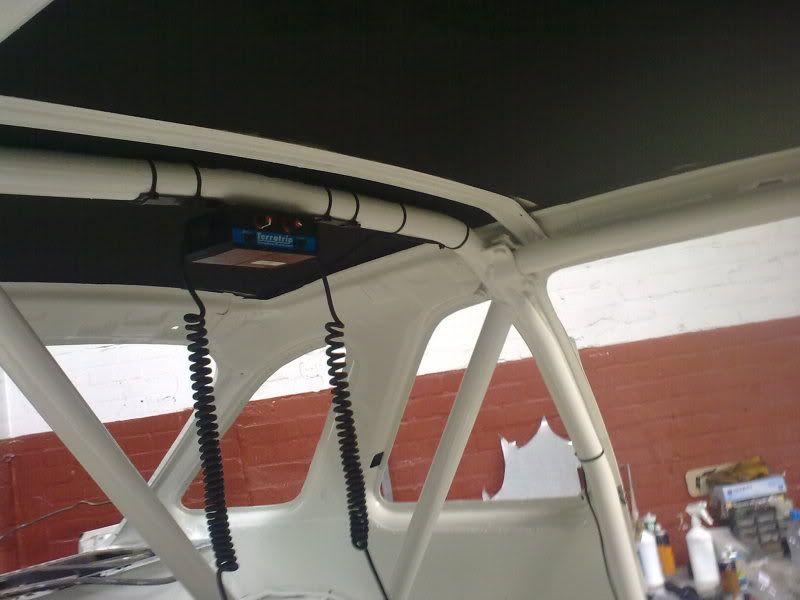
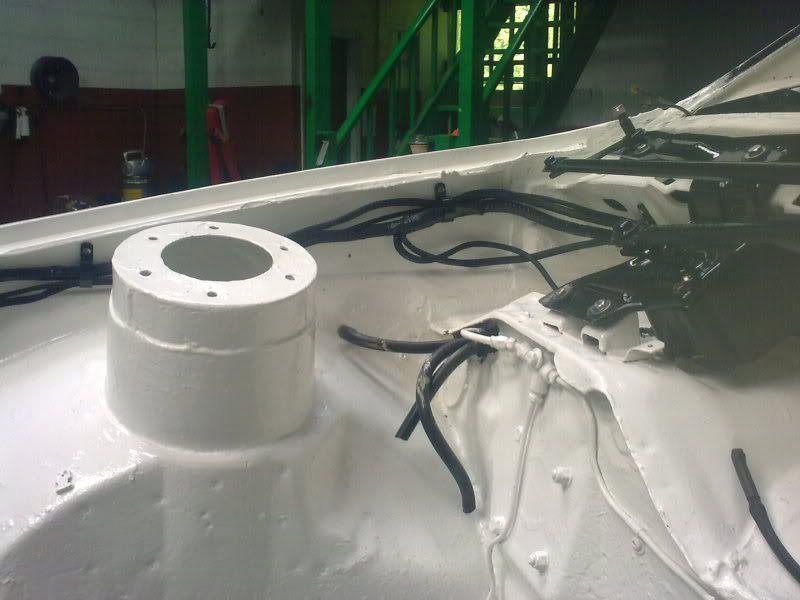
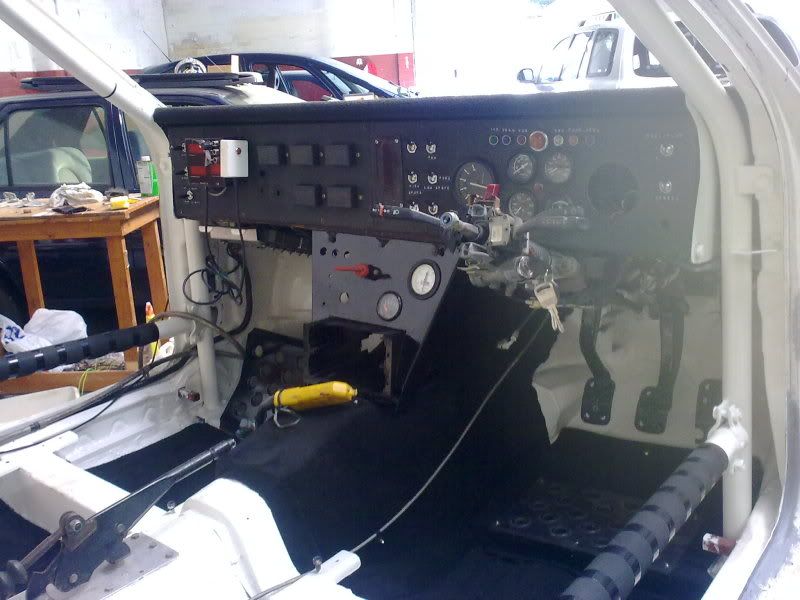
This week I as mostly been wiring!
Although first, as I lost a load of pics by accident from my phone the other day,
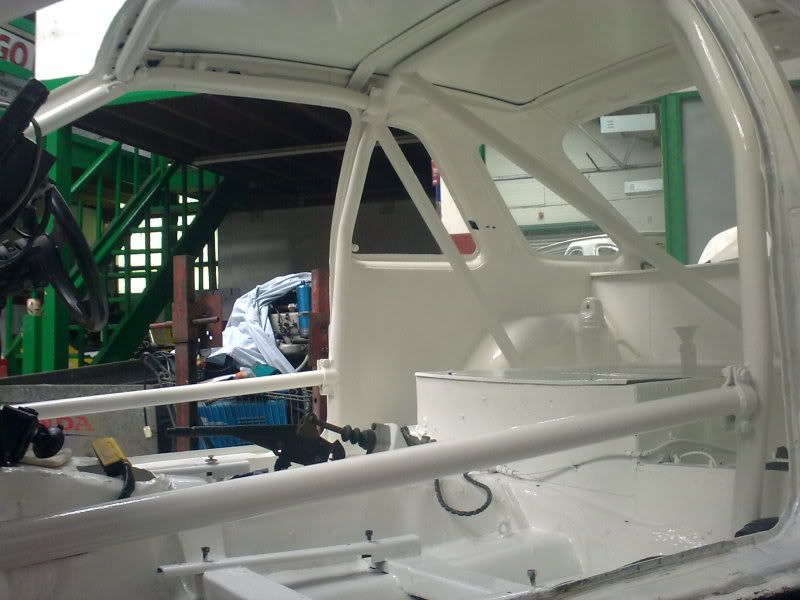
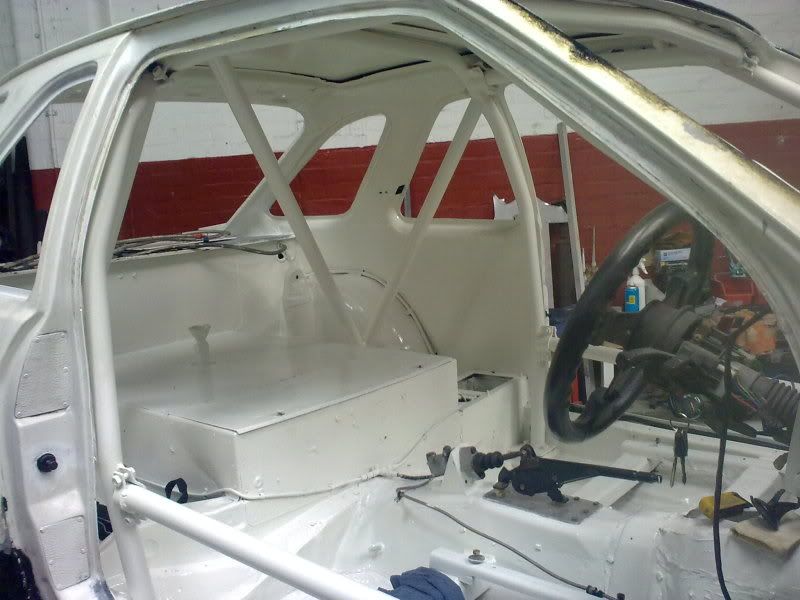
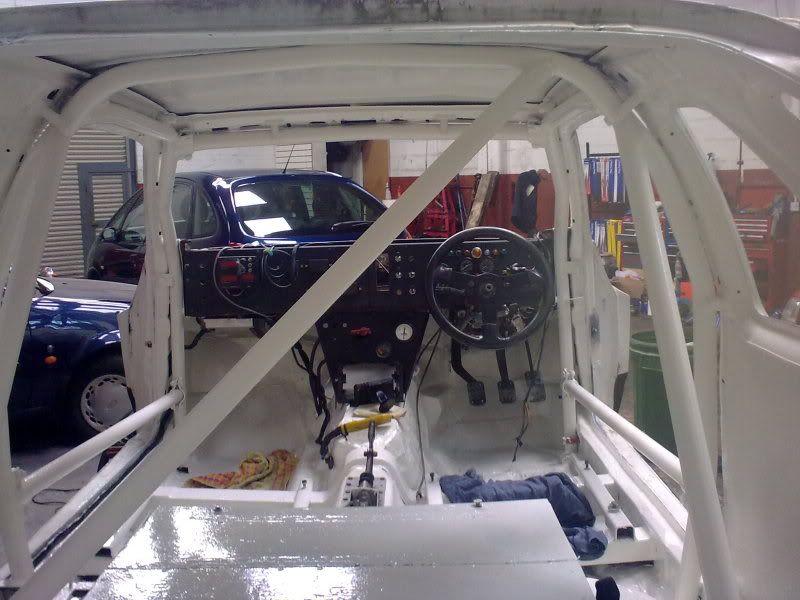
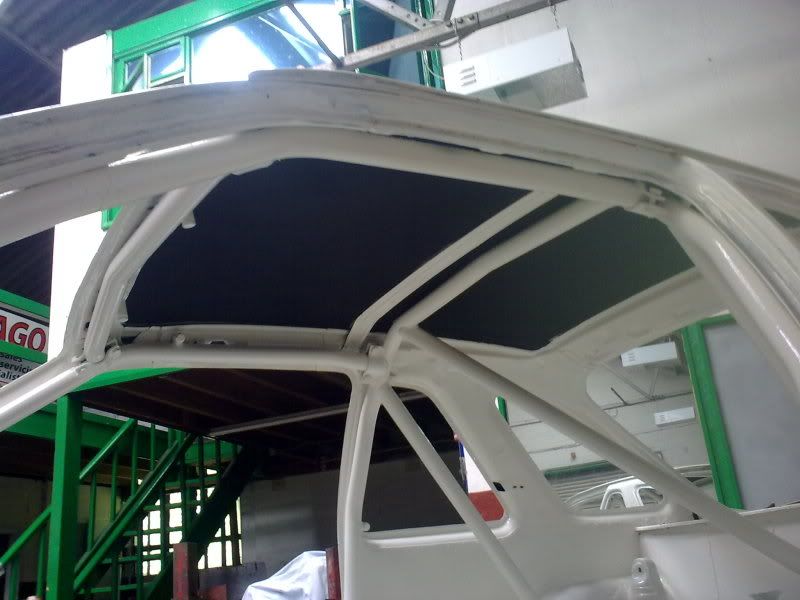
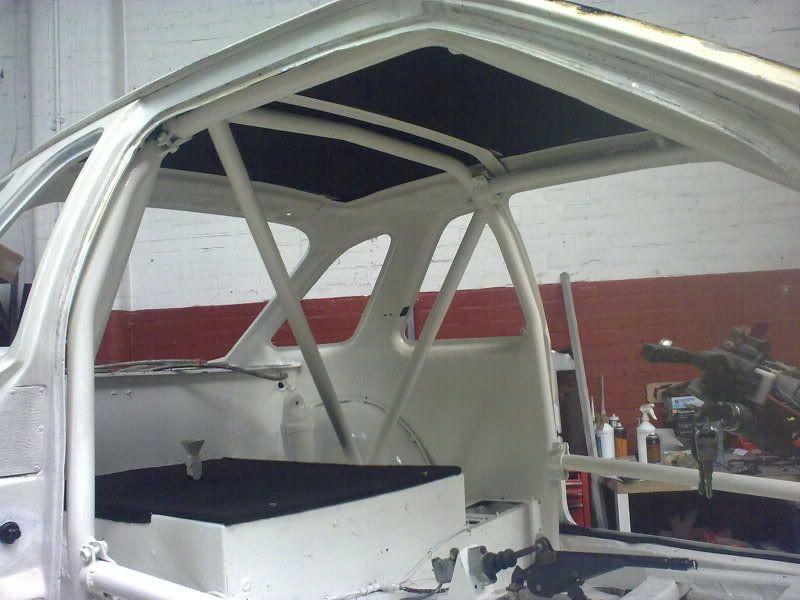
here are a couple of shots of her shiny interior close up.
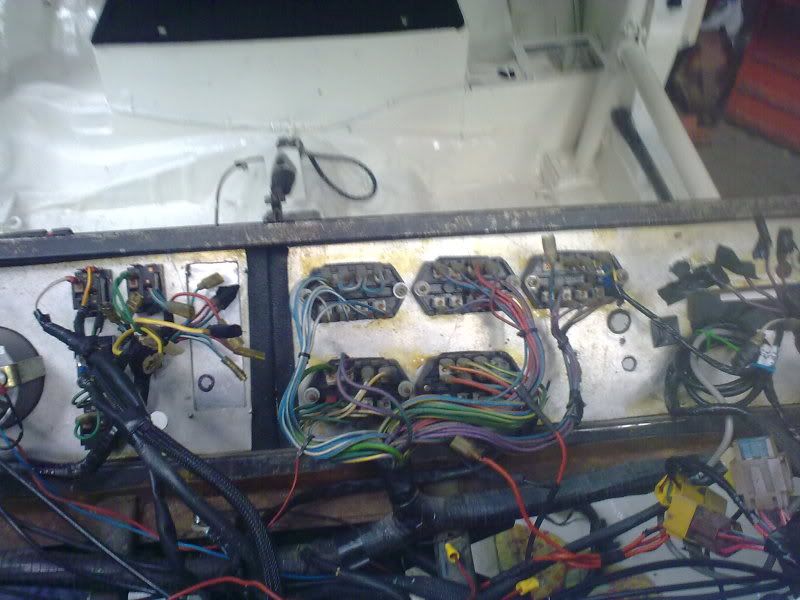
As I said I have been doing the wiring, wrapping and sorting the different feeds for stuff.
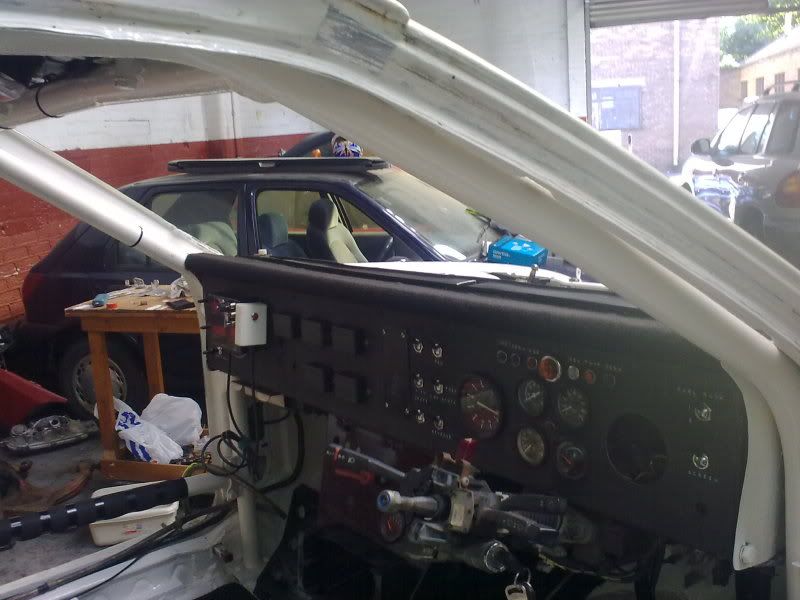
Although looking at this pic it looks like I have just picked up an old loom and thrown it behind the dash.
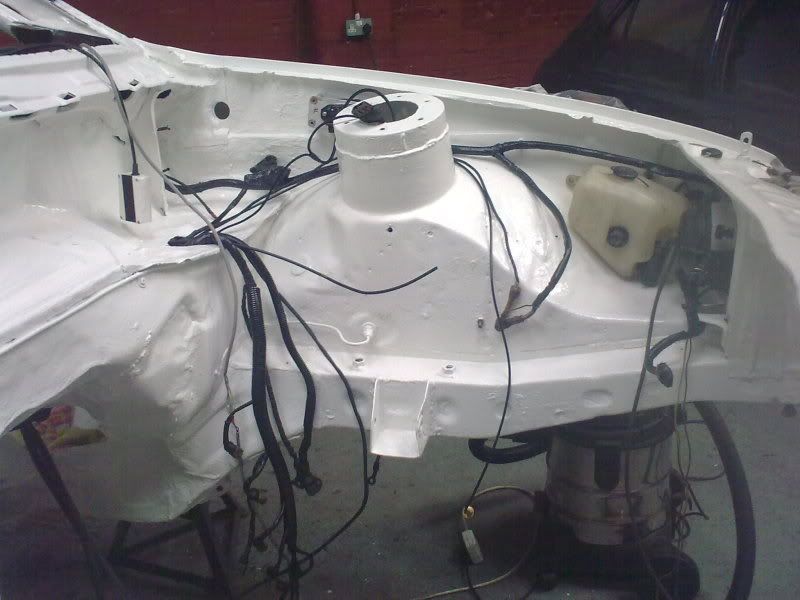
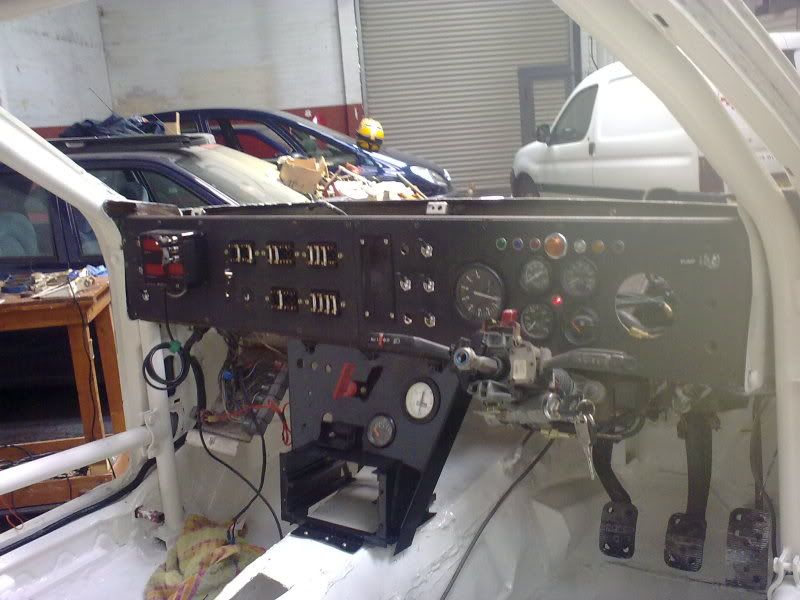
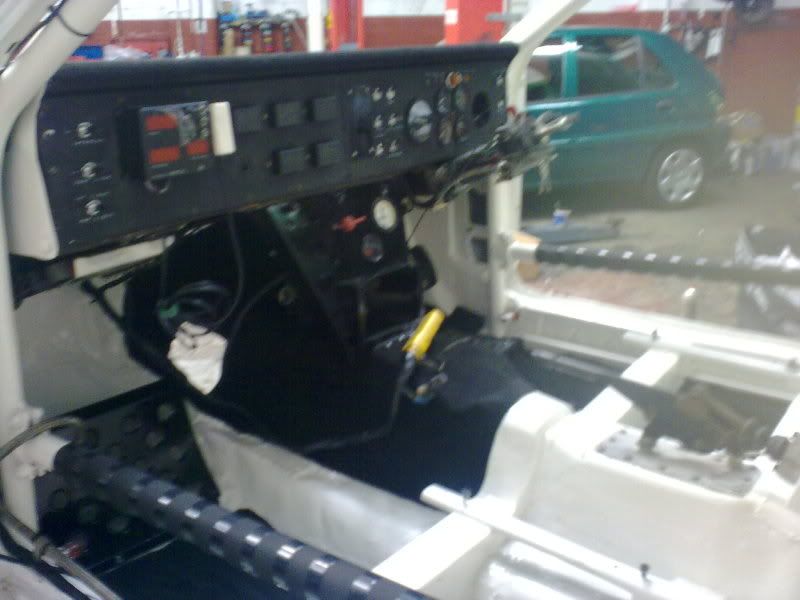
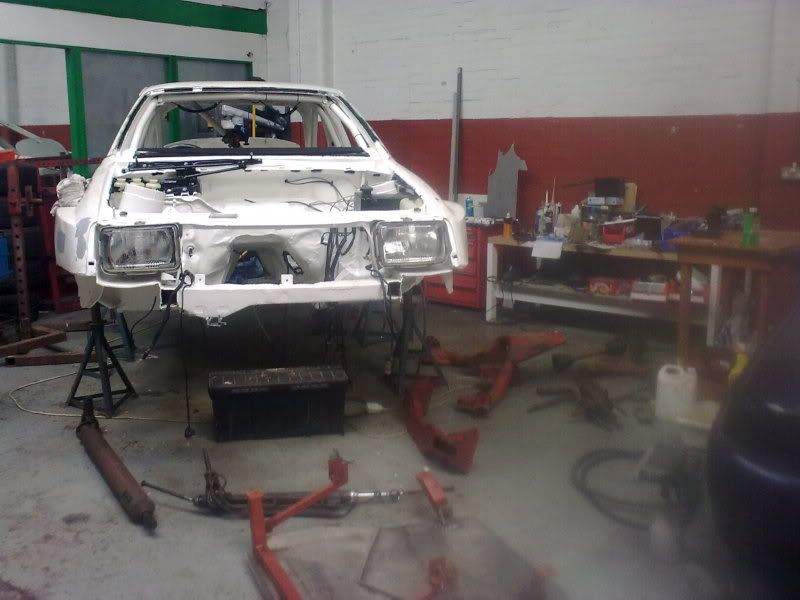
Parts have started to get sprayed and re fitted for testing electrics. So the ecu holder and main panel are back in.
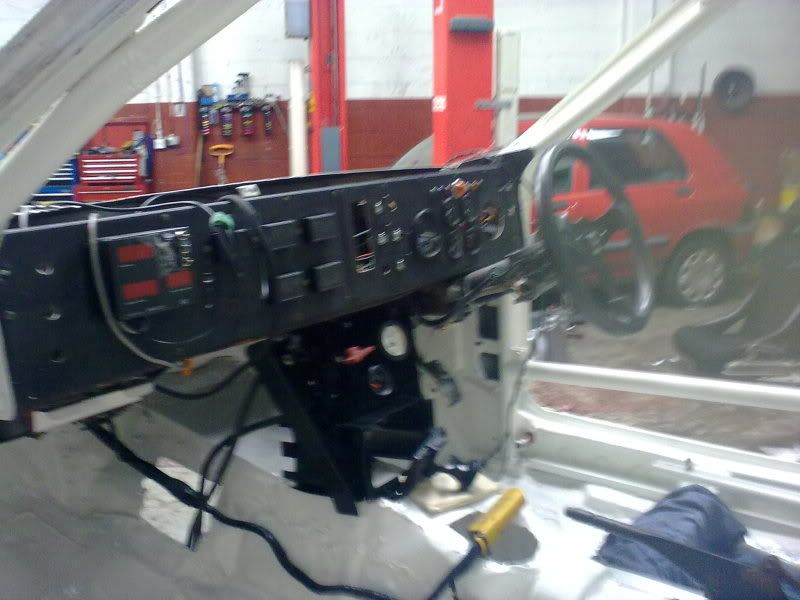
I have ordered a load of overbraid and heatshink ends. It will start to neaten up soon
Although first, as I lost a load of pics by accident from my phone the other day,
here are a couple of shots of her shiny interior close up.
As I said I have been doing the wiring, wrapping and sorting the different feeds for stuff.
Although looking at this pic it looks like I have just picked up an old loom and thrown it behind the dash.
Parts have started to get sprayed and re fitted for testing electrics. So the ecu holder and main panel are back in.
I have ordered a load of overbraid and heatshink ends. It will start to neaten up soon


Thread Starter
Rock Out!!
Joined: Feb 2005
Posts: 441
Likes: 2
From: Isle of man
Hi Boothy, no I never heard anything back.
I've got most of her history sorted now.
There is a few names missing from the list of owners/drivers, but Dougie watson Clark (The driver when CG ford built her) was able to give me all the info I needed.
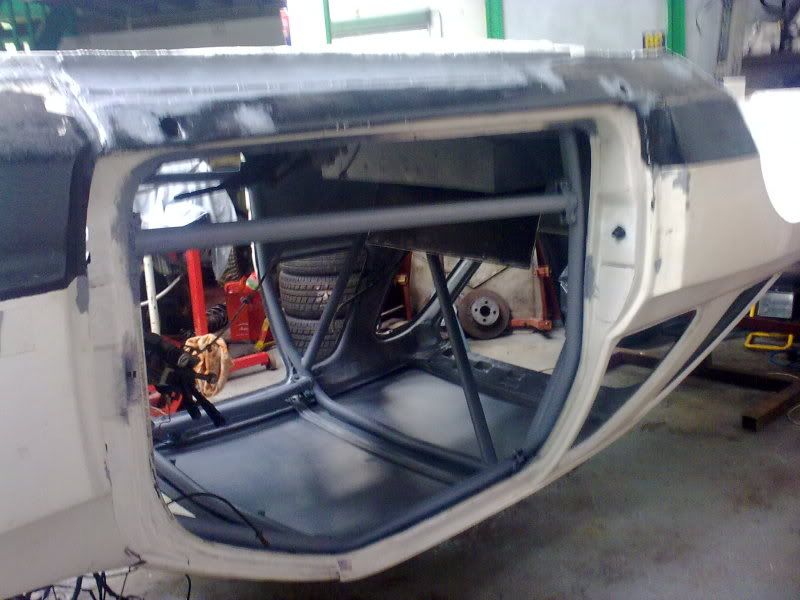
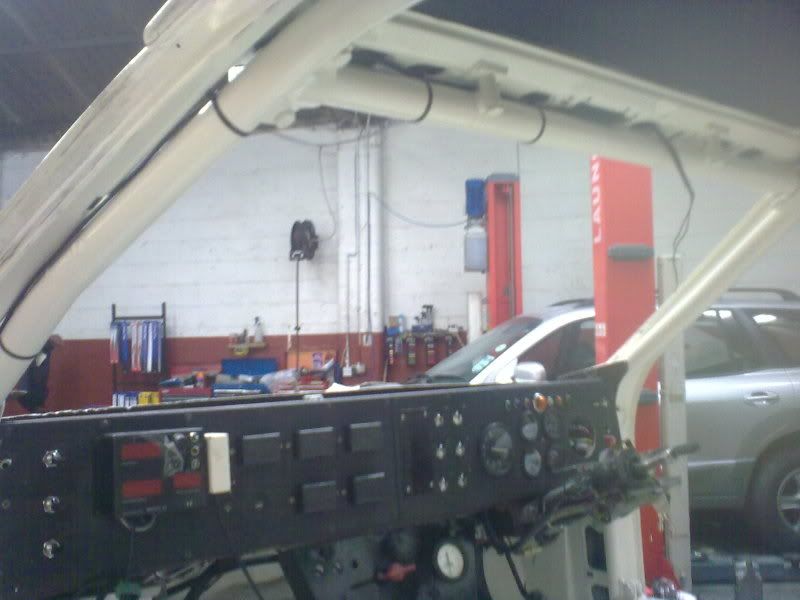
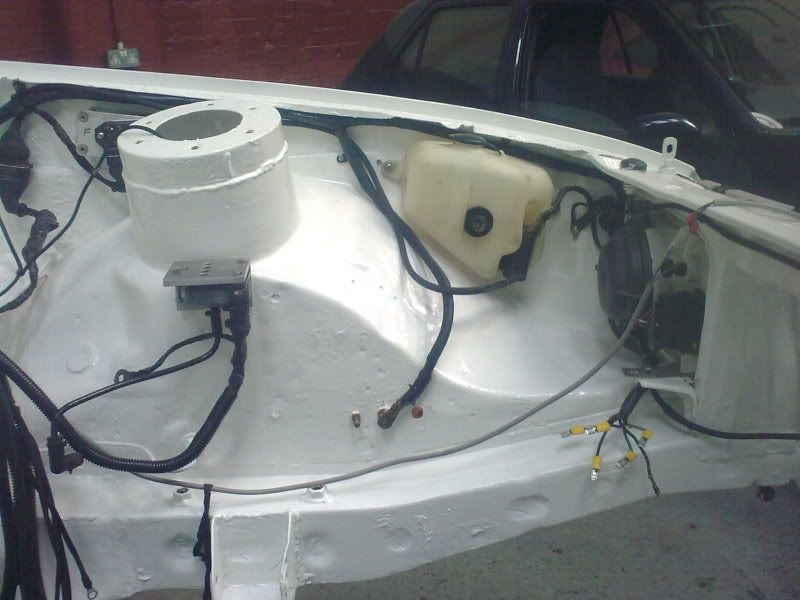
I spent awhile doing more wiring today.
This, belive it or not, is her getting neater.

I'm no auto eletrician, but I am enjoying (saddo) working my way through the mass of cables.
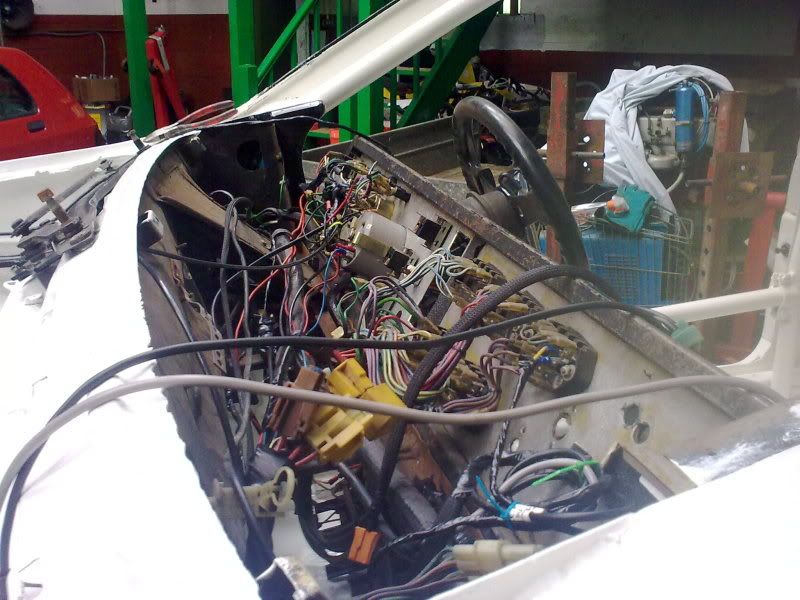
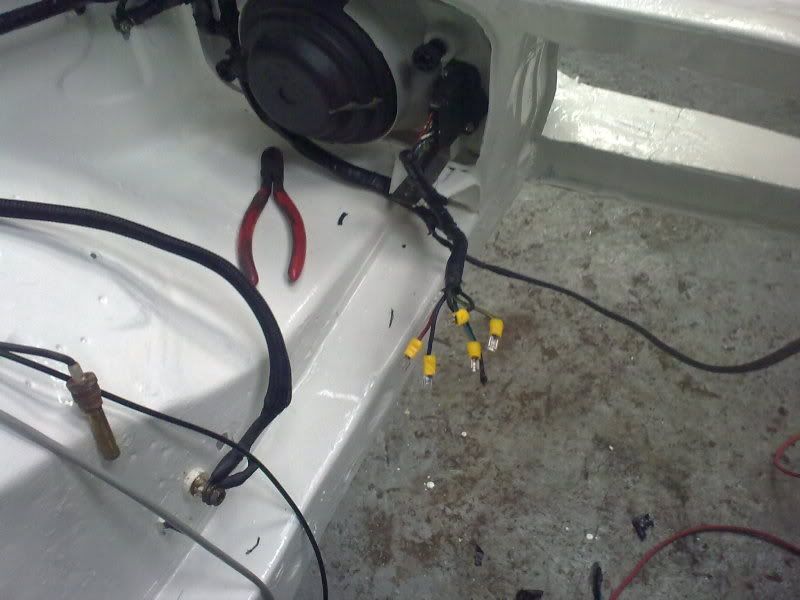
I opened up all the 'ends' of the loom I could find at the front, both sides (pic below shows just the left)
and just followed by colour the path of the wires through the handmade loom.
It is actually very simple and very neat.
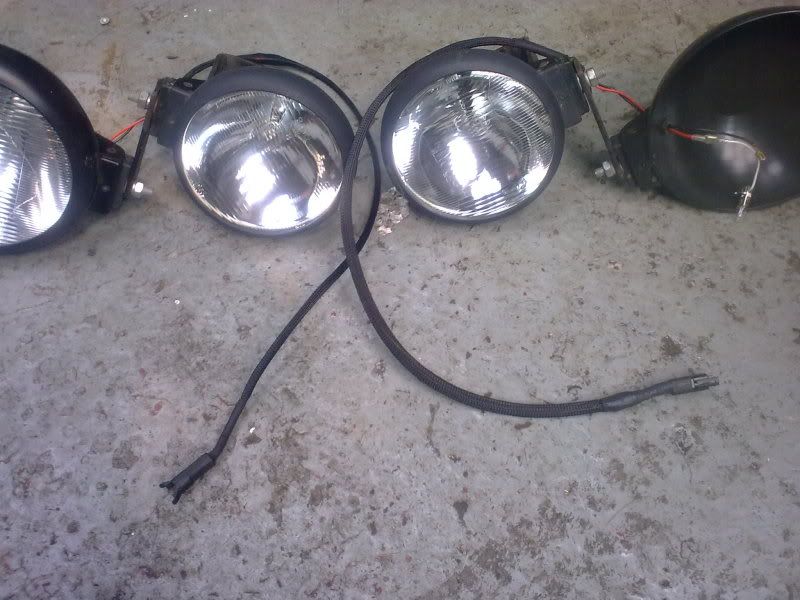
I managed by the end of the day to get, lowers spots, upper spots, rear fogs, fuel pumps 1+2, fuel gauge, electric fans, manual reversing lights.
I even found a pair of cables tied up that came off the horn loom, that foxed me for a minute till I remembered that rally cars have co-driver foot activated horns.
Now that the heat shrink and overbraid is here I can neaten up the cables.
First up was the indicators
Then I started on everything coming into the bay

By now, if it stood still long enough, I braided and heat shrunk it.
The dog is in hiding now after I tried it on his tail.
I've got most of her history sorted now.
There is a few names missing from the list of owners/drivers, but Dougie watson Clark (The driver when CG ford built her) was able to give me all the info I needed.
I spent awhile doing more wiring today.
This, belive it or not, is her getting neater.
I'm no auto eletrician, but I am enjoying (saddo) working my way through the mass of cables.
I opened up all the 'ends' of the loom I could find at the front, both sides (pic below shows just the left)
and just followed by colour the path of the wires through the handmade loom.
It is actually very simple and very neat.
I managed by the end of the day to get, lowers spots, upper spots, rear fogs, fuel pumps 1+2, fuel gauge, electric fans, manual reversing lights.
I even found a pair of cables tied up that came off the horn loom, that foxed me for a minute till I remembered that rally cars have co-driver foot activated horns.
Now that the heat shrink and overbraid is here I can neaten up the cables.
First up was the indicators
Then I started on everything coming into the bay
By now, if it stood still long enough, I braided and heat shrunk it.
The dog is in hiding now after I tried it on his tail.
PassionFord Post Whore!!
iTrader: (1)
Joined: Jan 2006
Posts: 5,412
Likes: 186
From: Norfolk Drives: Couple of Fords
You're making good progress Baz. Can't wait to see the finished article. Always nice to see an interior come together I think!
Out of interest, where did you get the braid from?
Out of interest, where did you get the braid from?
Thread Starter
Rock Out!!
Joined: Feb 2005
Posts: 441
Likes: 2
From: Isle of man
Got a few hours in today, still wiring.
she now has her intercom back in.
And braided cable in place for interior light.
I have sorted out most of the original switches and now have fused switching for all of the stuff listed in the last post
plus lights inside and in the boot, map light, intercom, heater etc.
By jiggling them round and hunting high and low in boxes I managed to get all the switches to be matching in their groups. (very sad I know )
)
At last I now have individual fuses for each cable run, And, I know which is which. Result.
I've ordered some multi pin waterproof connertors for the spot lights, so they can be wired on and be removable.
she now has her intercom back in.
And braided cable in place for interior light.
I have sorted out most of the original switches and now have fused switching for all of the stuff listed in the last post
plus lights inside and in the boot, map light, intercom, heater etc.
By jiggling them round and hunting high and low in boxes I managed to get all the switches to be matching in their groups. (very sad I know
At last I now have individual fuses for each cable run, And, I know which is which. Result.
I've ordered some multi pin waterproof connertors for the spot lights, so they can be wired on and be removable.
absoloutely fantastic work baz !!!
and hats off to you for not replacing the floor pans imo it would of lost some of the originality / nostalga of the car looking underneath to see mint floorpans !!
keep up the good work fella !!
beef
and hats off to you for not replacing the floor pans imo it would of lost some of the originality / nostalga of the car looking underneath to see mint floorpans !!
keep up the good work fella !!
beef
Thread Starter
Rock Out!!
Joined: Feb 2005
Posts: 441
Likes: 2
From: Isle of man
Cheers Guys,
@Beefy, I know what you mean about not changing major parts. With this one there is soo much that is old and battered that anything that looks too modern would stand out like a sore thumb.
When I was about to paint the inside, I was going to go for a nice shiny frozen white, but the duller old diamond white just looked more in keeping.
I have been slugging away with the wiring (almost done, werhoo) and now everything works and is fused.
I sorted out the heated screen wiring, thanks to replies in the general room. Even the timer relay works.
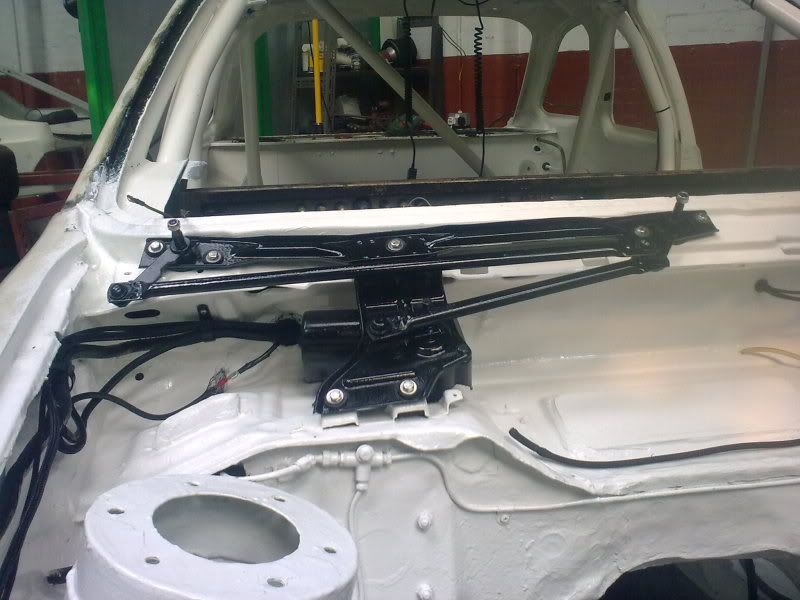
A lot of the braided wiring has now been attached back in the bay
I even threw a lick of paint at the wiper motor
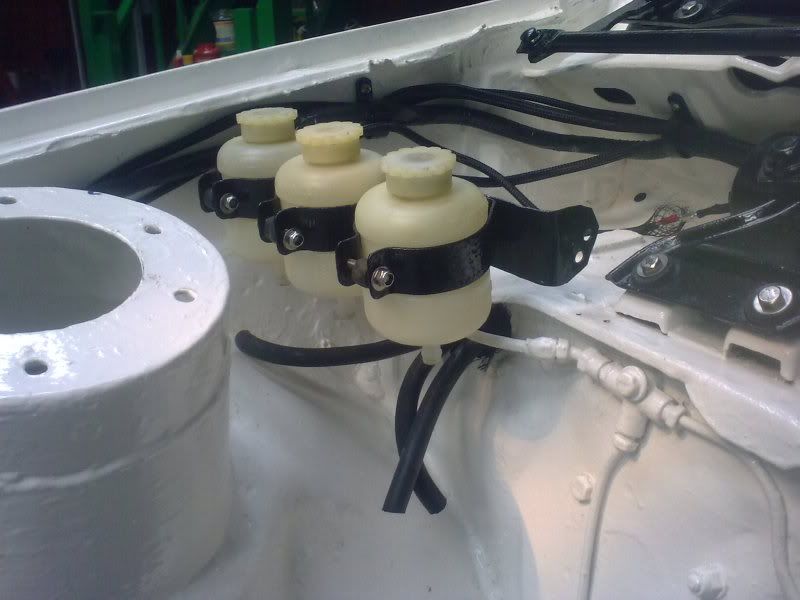
I had changed the position of the hoses for the clutch and brakes to the resevoirs, as previously they came out through the top of the bulkhead and leaked like sieves into the cab.
Now they are through the front.
To protect them I cut up some big braided rubber fuel hose and slipped them over the smaller hoses to stop them rubbing on the bulkhead.
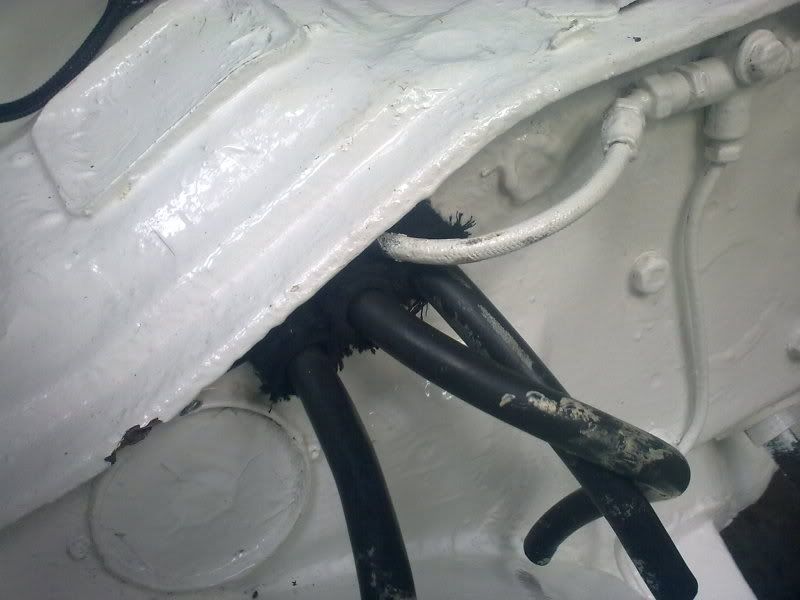
The old footrest that was a bit of manky battered ally got a clean and then some of the carpet covering and the anti slip rubber put on. Came up well, I thought.
And in situ.
@Beefy, I know what you mean about not changing major parts. With this one there is soo much that is old and battered that anything that looks too modern would stand out like a sore thumb.
When I was about to paint the inside, I was going to go for a nice shiny frozen white, but the duller old diamond white just looked more in keeping.
I have been slugging away with the wiring (almost done, werhoo) and now everything works and is fused.
I sorted out the heated screen wiring, thanks to replies in the general room. Even the timer relay works.
A lot of the braided wiring has now been attached back in the bay
I even threw a lick of paint at the wiper motor
I had changed the position of the hoses for the clutch and brakes to the resevoirs, as previously they came out through the top of the bulkhead and leaked like sieves into the cab.
Now they are through the front.
To protect them I cut up some big braided rubber fuel hose and slipped them over the smaller hoses to stop them rubbing on the bulkhead.
The old footrest that was a bit of manky battered ally got a clean and then some of the carpet covering and the anti slip rubber put on. Came up well, I thought.
And in situ.

Thread Starter
Rock Out!!
Joined: Feb 2005
Posts: 441
Likes: 2
From: Isle of man
After a week away, I was able to get cracking again.
And yes I'm still bloody wiring
Today was the spots and their multi conectors.
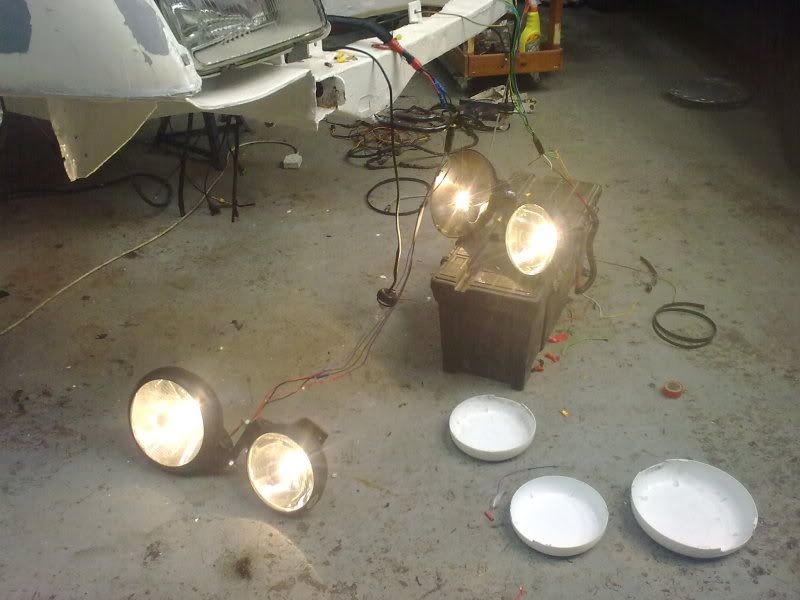
I was, I have to say, mildly suprised when they all worked first time.
They are wired to be lower spots as fog lights with the rears (middle pos on dash switch) or just lower spots (down pos on dash switch)
The upper spots have their own switch.
Once I had sorted the wiring I tidied up the feeds

And yes I'm still bloody wiring
Today was the spots and their multi conectors.
I was, I have to say, mildly suprised when they all worked first time.
They are wired to be lower spots as fog lights with the rears (middle pos on dash switch) or just lower spots (down pos on dash switch)
The upper spots have their own switch.
Once I had sorted the wiring I tidied up the feeds
Last edited by baz walton; Jul 26, 2011 at 06:18 PM.
Thread Starter
Rock Out!!
Joined: Feb 2005
Posts: 441
Likes: 2
From: Isle of man
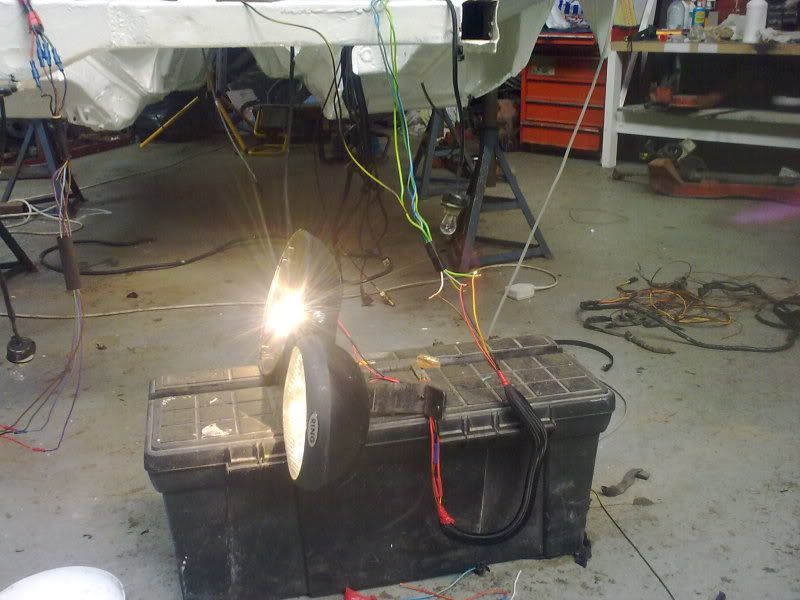
I tidied up the other end of the spots cables today
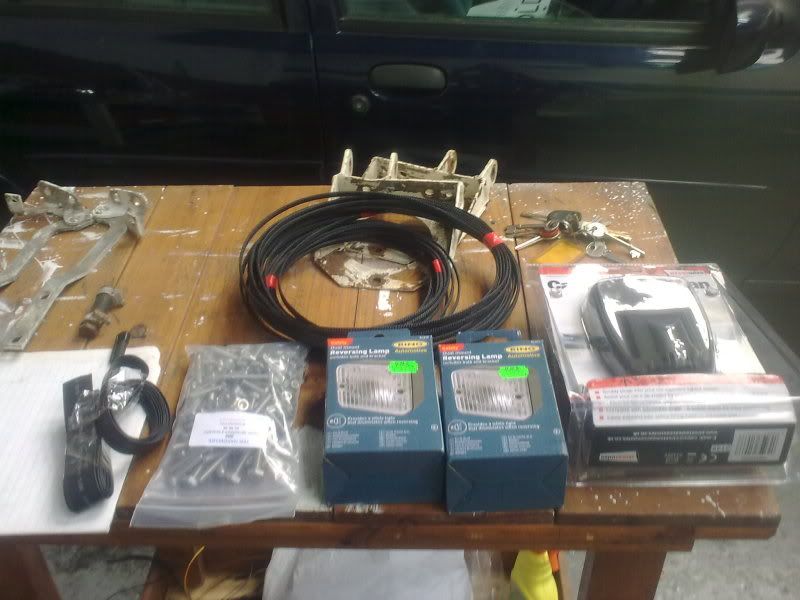
Then got some new toys
Some people post shots of great stuff like wonderfully fabricated engine parts or new expensive shiny bling.
What do I post pics of, new lights and a heater and some bolts. ( very sad )
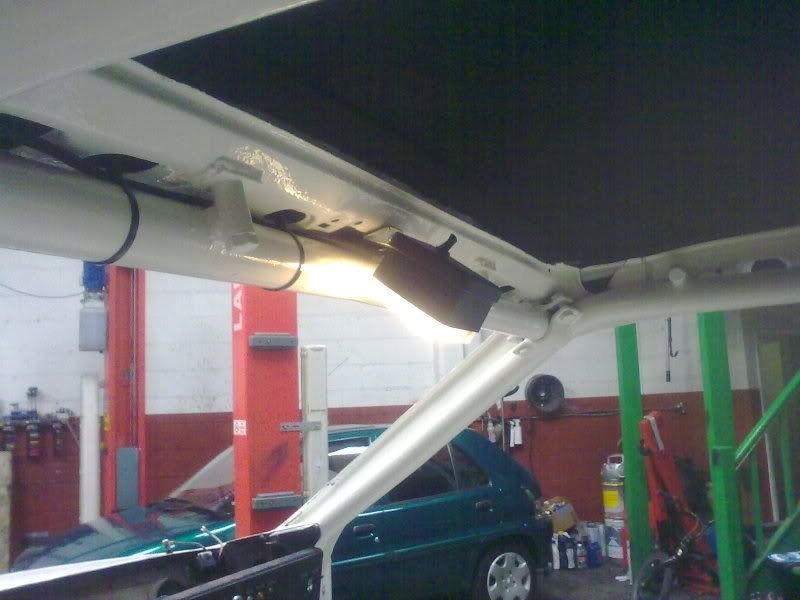
I fitted up one of the interior lights.
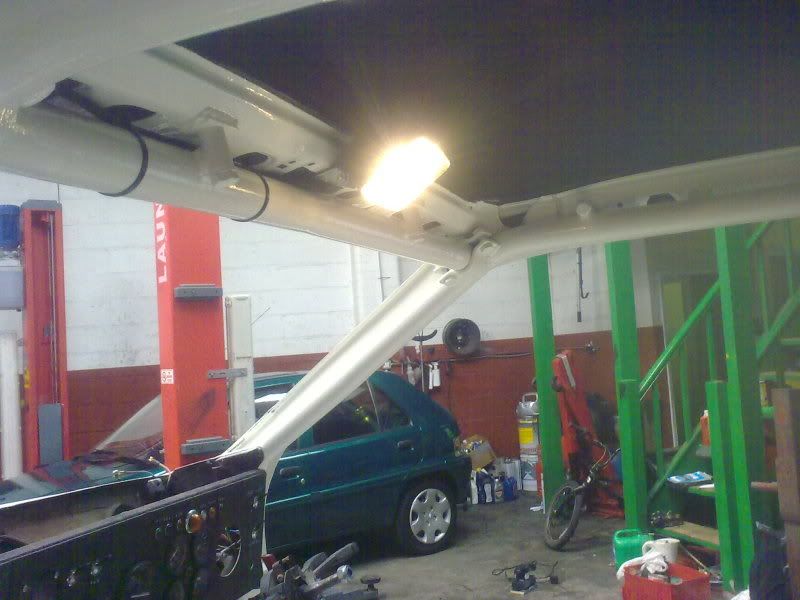
I made sure it would point at the 'what's the chances it will go tits up' wiring behind the dash, for when I'm out at night and everything suddenly stops
I got the spare wheel stay painted up and put back in
Then cracked on with the engine bay bits.
The header tank got a spash and put back

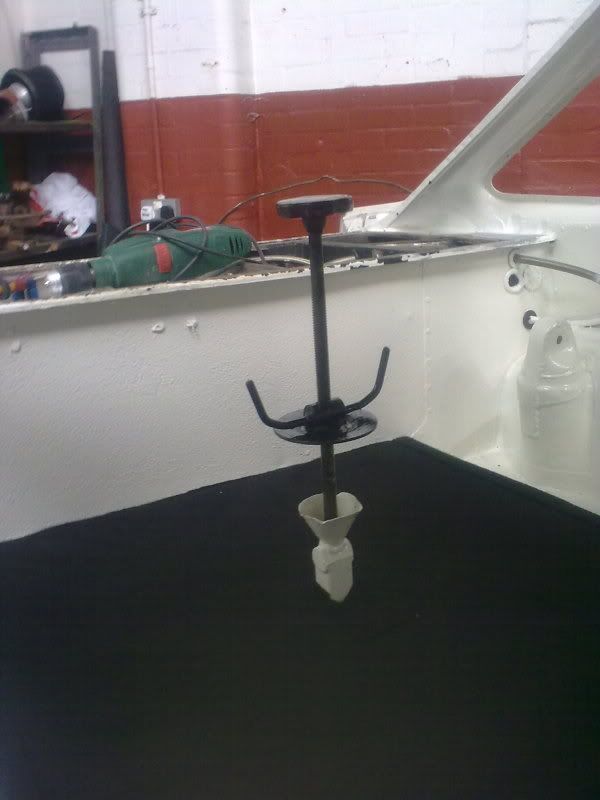
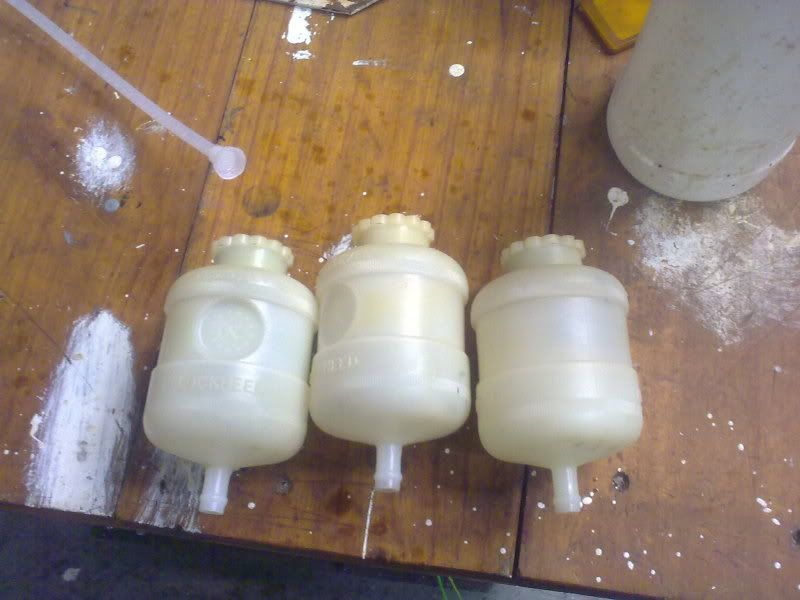
Then I started cleaning the fluid bottles
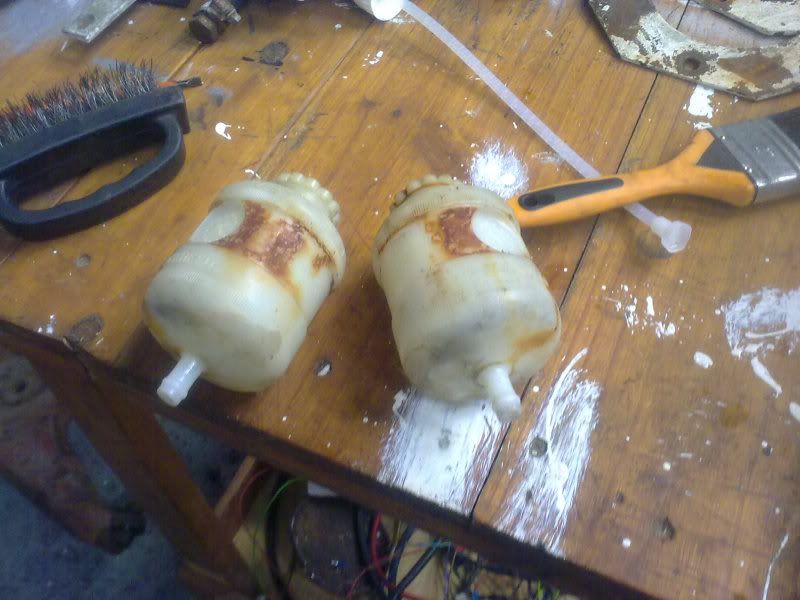
I love Marine clean...
And back in situ
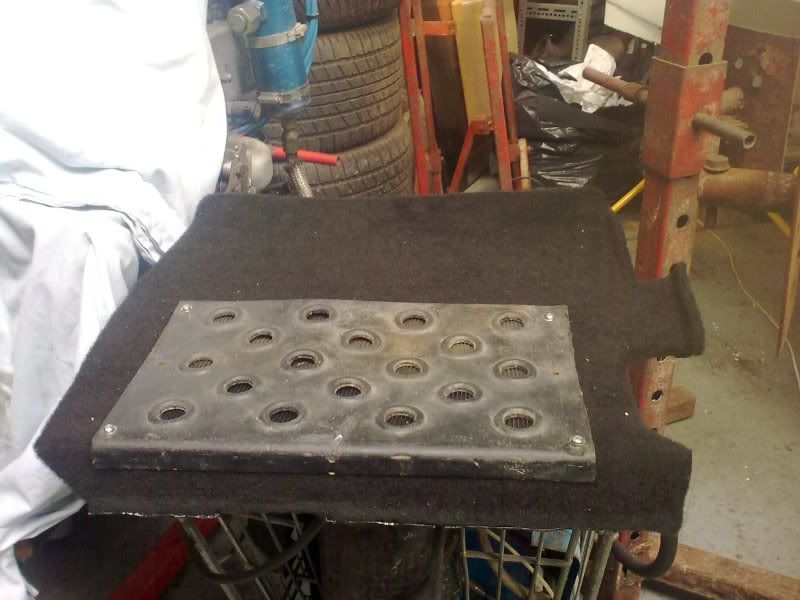
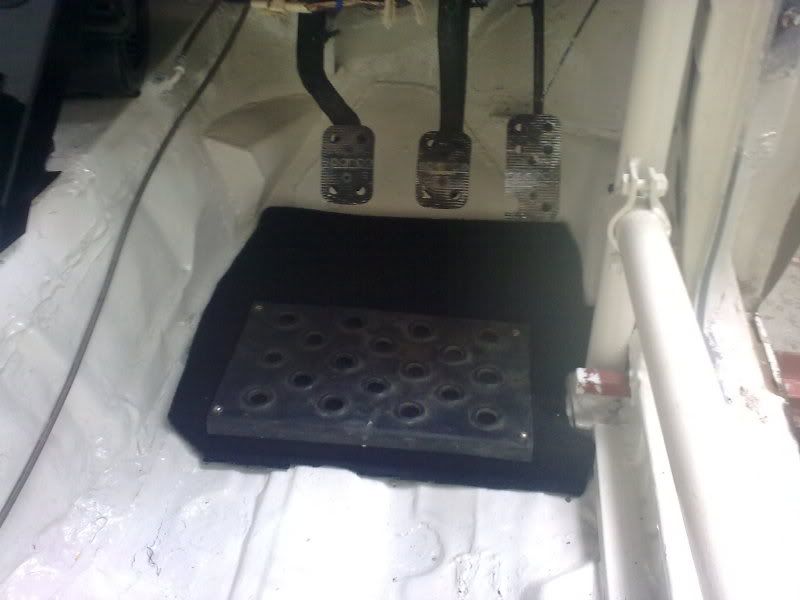
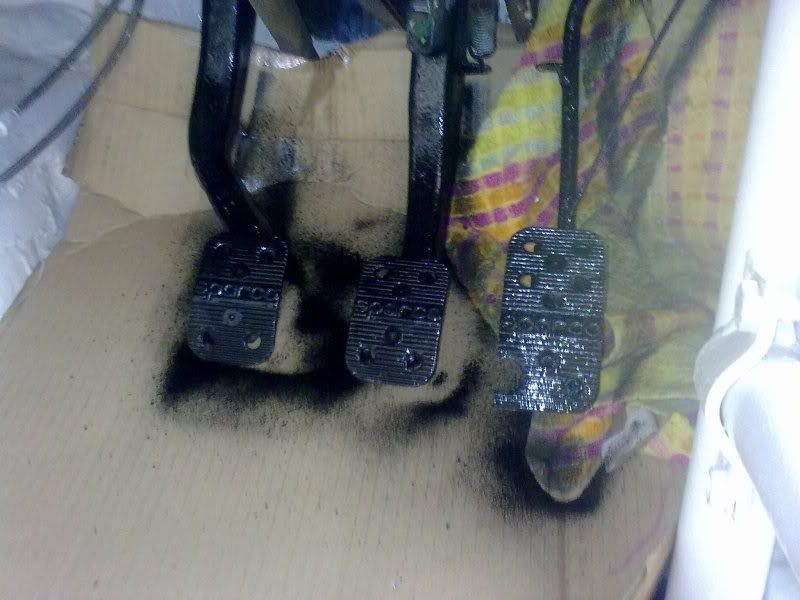
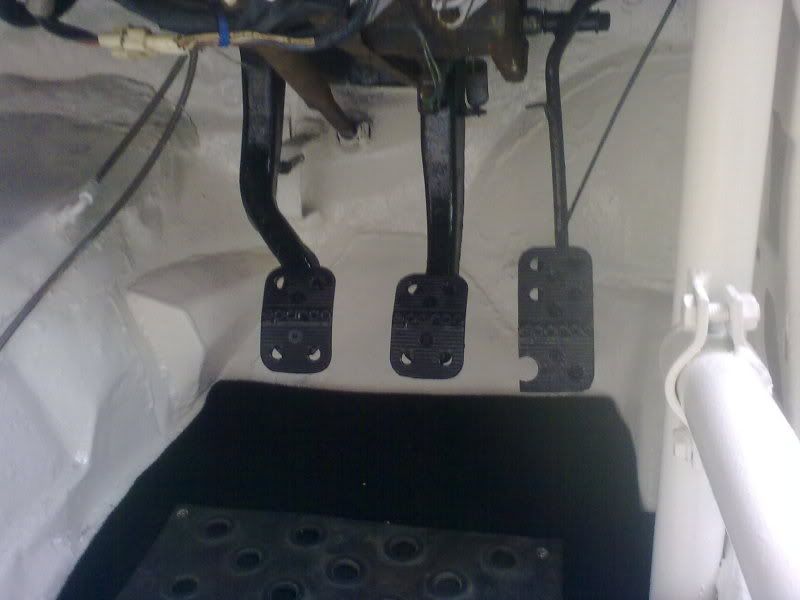
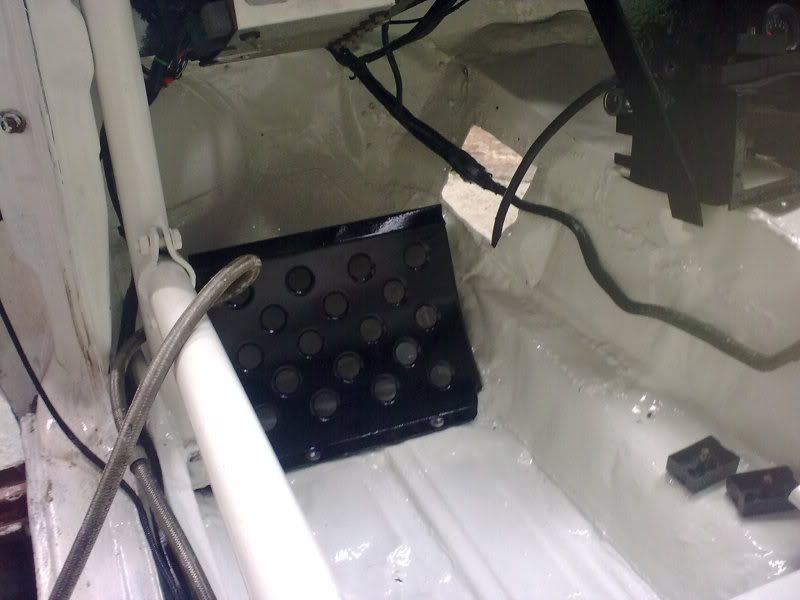
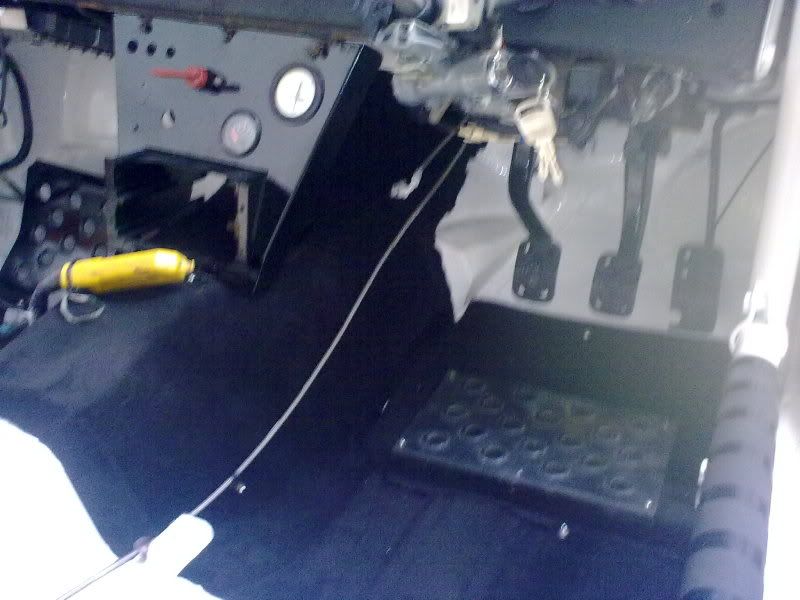
Spot quiz, how do you botch spray the pedals without taking them all out and without making the new shiny white footwell black?
Like this....
Then got some new toys
Some people post shots of great stuff like wonderfully fabricated engine parts or new expensive shiny bling. What do I post pics of, new lights and a heater and some bolts. ( very sad )
I fitted up one of the interior lights.
I made sure it would point at the 'what's the chances it will go tits up' wiring behind the dash, for when I'm out at night and everything suddenly stops
I got the spare wheel stay painted up and put back in
Then cracked on with the engine bay bits.
The header tank got a spash and put back
Then I started cleaning the fluid bottles
I love Marine clean...
And back in situ
Spot quiz, how do you botch spray the pedals without taking them all out and without making the new shiny white footwell black?
Like this....

Thread Starter
Rock Out!!
Joined: Feb 2005
Posts: 441
Likes: 2
From: Isle of man
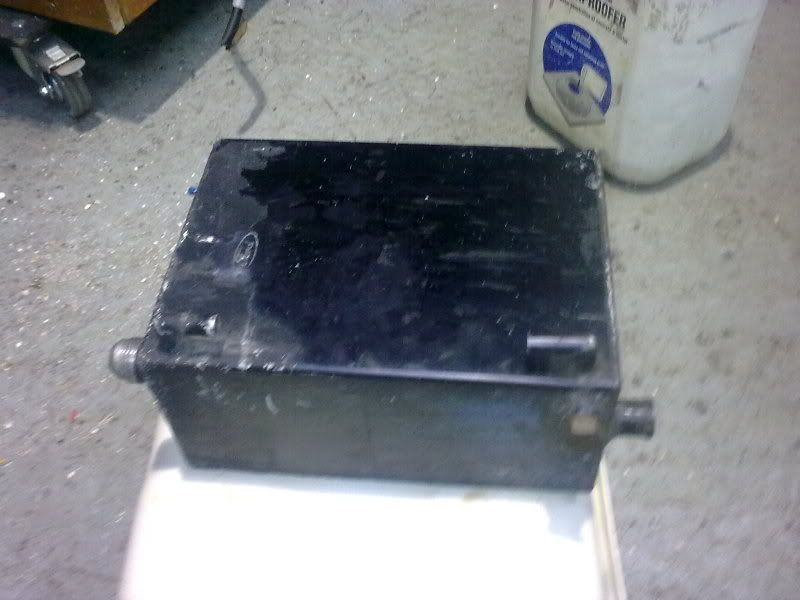
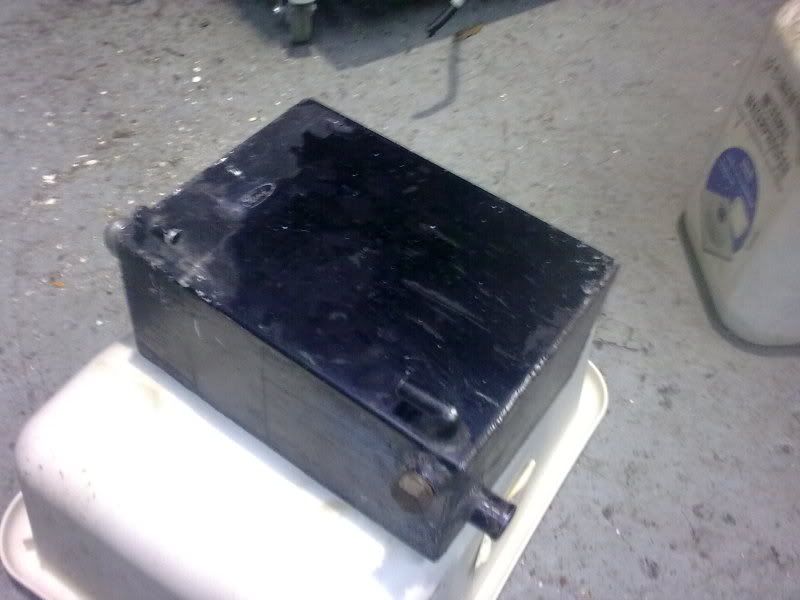
First up today, I got the oil catch tank ready for a spray.
I'm a bit curious about this as it wouldn't (I would have thought) been on the original nat asp engine, but then it may have been.
Or it may have been added when the turbo charged eng was put in.
It looks old. Big and bulky.
It sat in the wheel arch originally and the pipe fed it though the inner wing.
Anyone recognise it from something else. It is stamped Ford.
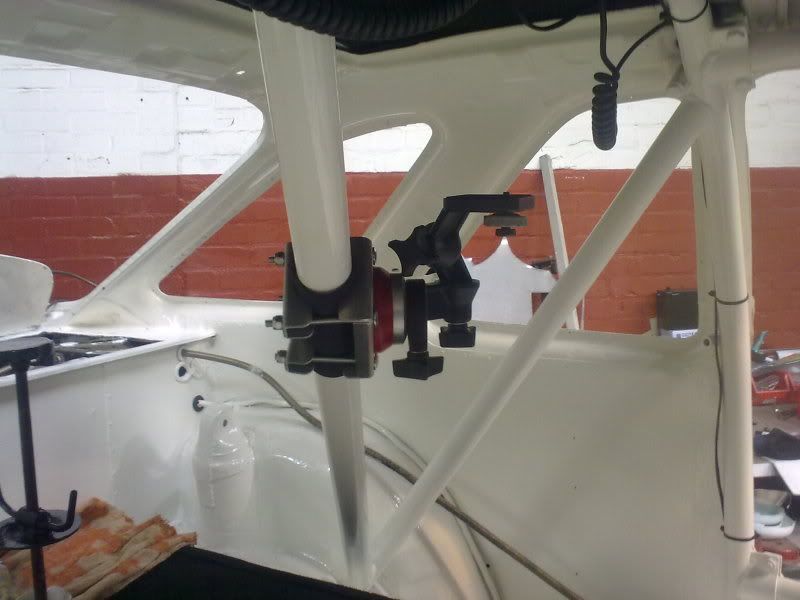
The co-driver foot rest has gone back in
Along with the video cam mount.
I put some rubber round the tube this time to stop it scratching it.
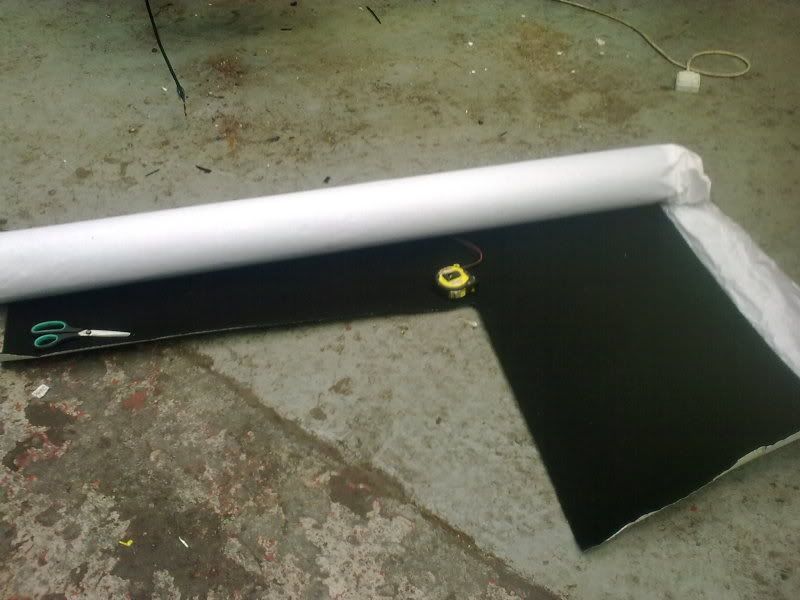
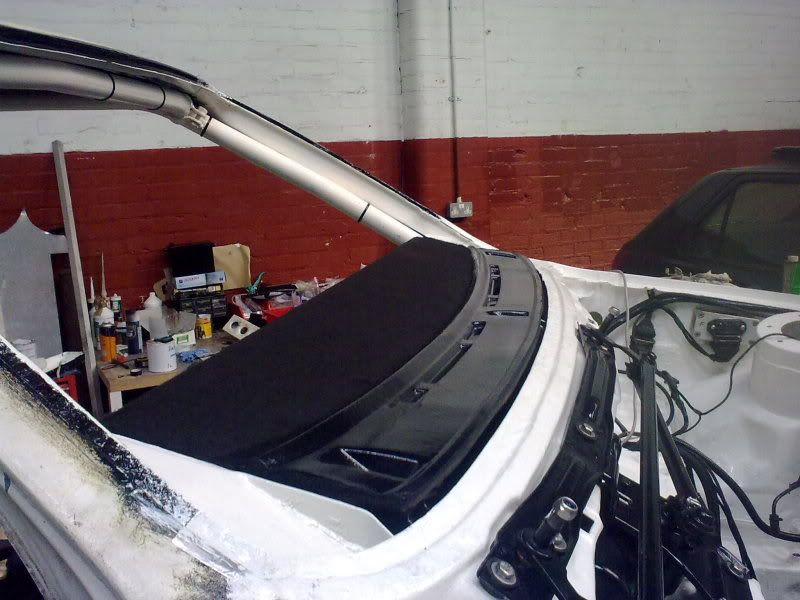
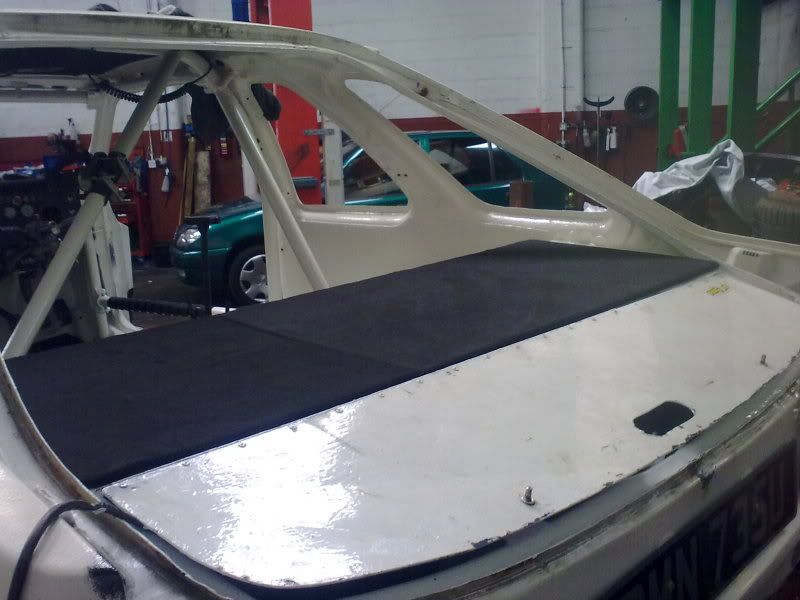
Then it was time to start the last of the carpeting.
I covered the dash as it acts like flocking and stops the glare,
although mine was matt black before, so not as much of a problem.
The floor sections got done
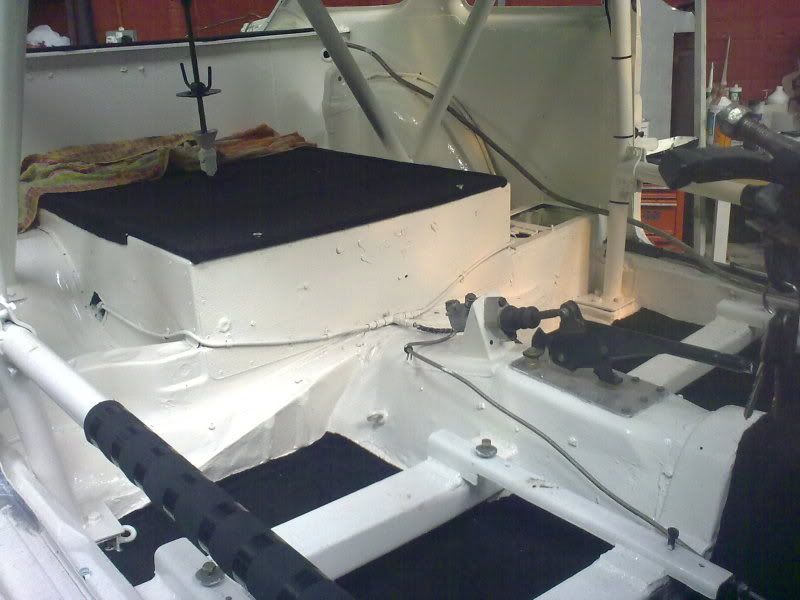
Then the front tunnel.
What a job that was, all the carpet wanted to stick to was itself and then the tunnel.
As I had some left over I did the covers for the boot and tank/pumps.
It may quieten it all down a bit
I'm a bit curious about this as it wouldn't (I would have thought) been on the original nat asp engine, but then it may have been.
Or it may have been added when the turbo charged eng was put in.
It looks old. Big and bulky.
It sat in the wheel arch originally and the pipe fed it though the inner wing.
Anyone recognise it from something else. It is stamped Ford.
The co-driver foot rest has gone back in
Along with the video cam mount.
I put some rubber round the tube this time to stop it scratching it.
Then it was time to start the last of the carpeting.
I covered the dash as it acts like flocking and stops the glare,
although mine was matt black before, so not as much of a problem.
The floor sections got done
Then the front tunnel.
What a job that was, all the carpet wanted to stick to was itself and then the tunnel.
As I had some left over I did the covers for the boot and tank/pumps.
It may quieten it all down a bit


Thread Starter
Rock Out!!
Joined: Feb 2005
Posts: 441
Likes: 2
From: Isle of man
This week was about cleaning. Well, scraping/ wire brushing/ degreasing. Those nice jobs you look forward to so much.
Just about everything that was left to clean has finally been done, so now it will be a mass painting session next week (ish)
Some of the bits scattered about in various stages of cleanliness.
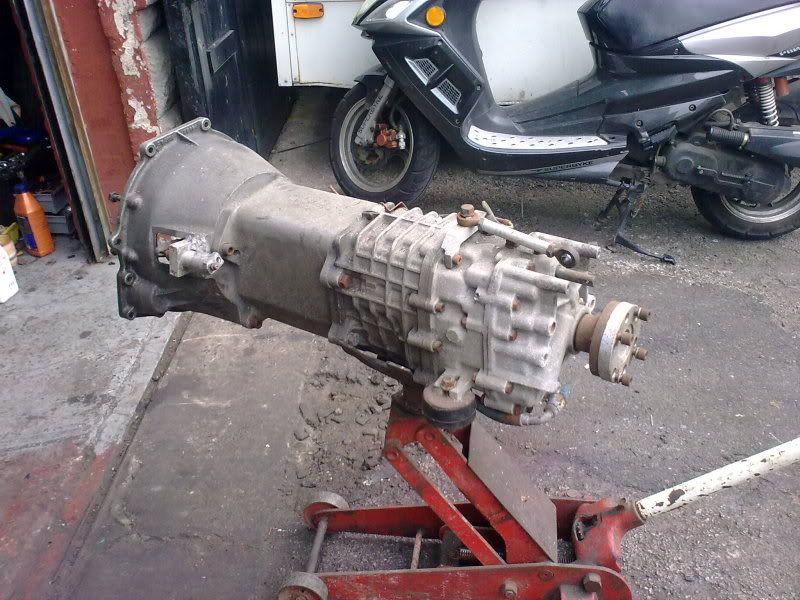
The gearbox got trundled out to get a wash behind the ears. Along with the brakes and exhaust and beam etc.
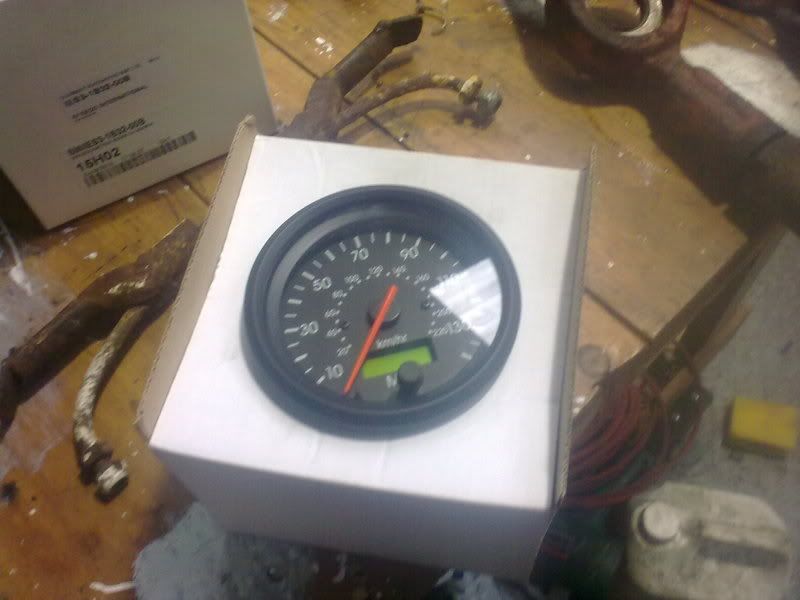
I got some new fuel line and a new vdo fuel dip sender and a nice new shiny speedo
I managed to get a couple of coats of paint into the boot as well this week.
Just about everything that was left to clean has finally been done, so now it will be a mass painting session next week (ish)
Some of the bits scattered about in various stages of cleanliness.
The gearbox got trundled out to get a wash behind the ears. Along with the brakes and exhaust and beam etc.
I got some new fuel line and a new vdo fuel dip sender and a nice new shiny speedo
I managed to get a couple of coats of paint into the boot as well this week.