
Fiesta Mk4 Rebuild


Virgin
Joined: Nov 2010
Posts: 2
Likes: 0
From: Brusque - SC Brazil
great Job, Iḿ from Brazil, and I�m puting on Duratec in a Mk4 too, but only engine, not rebuilding the car again 
How did you make the support of engine, this on ?
You can look my Topic if you want.
In Uk have many many parts, here we don�t have, need to search a loooooooott
http://fordhp.com.br/forum/viewtopic...st=0&sk=t&sd=a
How did you make the support of engine, this on ?
You can look my Topic if you want.
In Uk have many many parts, here we don�t have, need to search a loooooooott
http://fordhp.com.br/forum/viewtopic...st=0&sk=t&sd=a

Virgin
Joined: Oct 2010
Posts: 5
Likes: 0
From: Trinidad
Hey man, I am doing a similar project here in Trinidad.
What drive shafts are you using?
http://www.facebook.com/?ref=home#!/...4&id=507779487
What drive shafts are you using?
http://www.facebook.com/?ref=home#!/...4&id=507779487

Thread Starter
Regular Contributor
Joined: May 2009
Posts: 231
Likes: 0
From: Wokingham
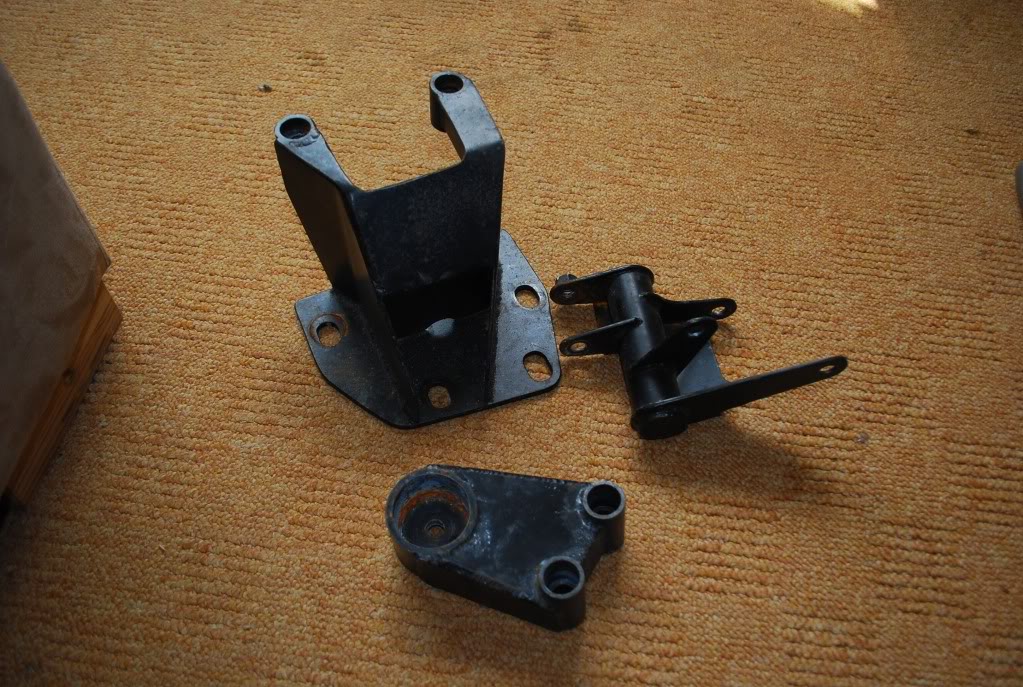
Engine Mounts were custom made. Im getting better spec'd ones though, so those will be for sale soon.
Driveshafts are staying as Mk5 ZS shafts.
As for progress, not a massive amount to report on till Jan/Feb.
For now, here is a video summarising 2010 of this project.
http://www.youtube.com/watch?v=0OI7vI_g8Y0
Driveshafts are staying as Mk5 ZS shafts.
As for progress, not a massive amount to report on till Jan/Feb.
For now, here is a video summarising 2010 of this project.
http://www.youtube.com/watch?v=0OI7vI_g8Y0

Thread Starter
Regular Contributor
Joined: May 2009
Posts: 231
Likes: 0
From: Wokingham
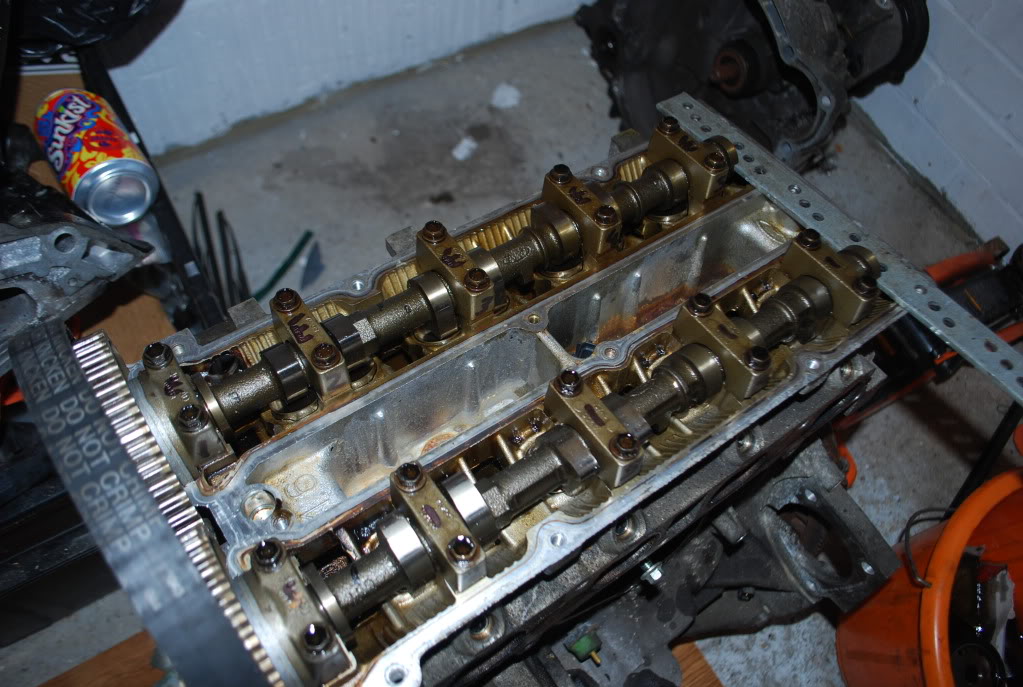
Little bit more progress.
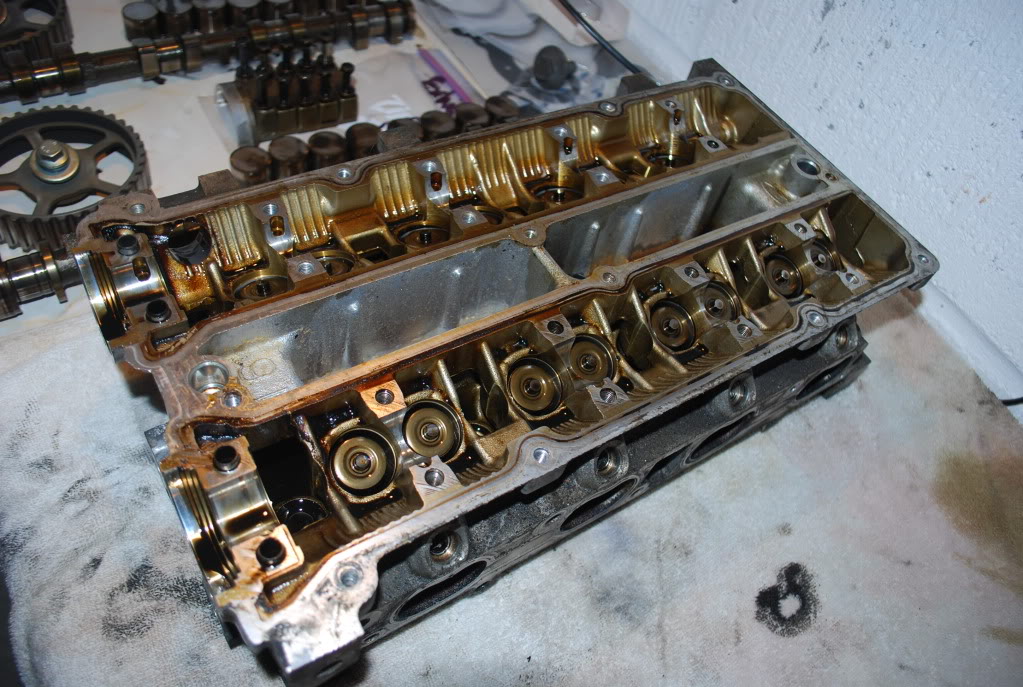
The cylinder head has been sent away to get some work done on it. Should get it back nicely spec'd up.
Gearboxis also going away, when I get it back it should be similar to a CTS Stage 2+ IB5. So good news there.
Also had some good news on the crank regarding the keyway, so I should get this back soon.
Thread Starter
Regular Contributor
Joined: May 2009
Posts: 231
Likes: 0
From: Wokingham
quick update
Few bits done today. I had to go to the house to get some electrical bits sgned off, so thought while I wait, why not do some work.
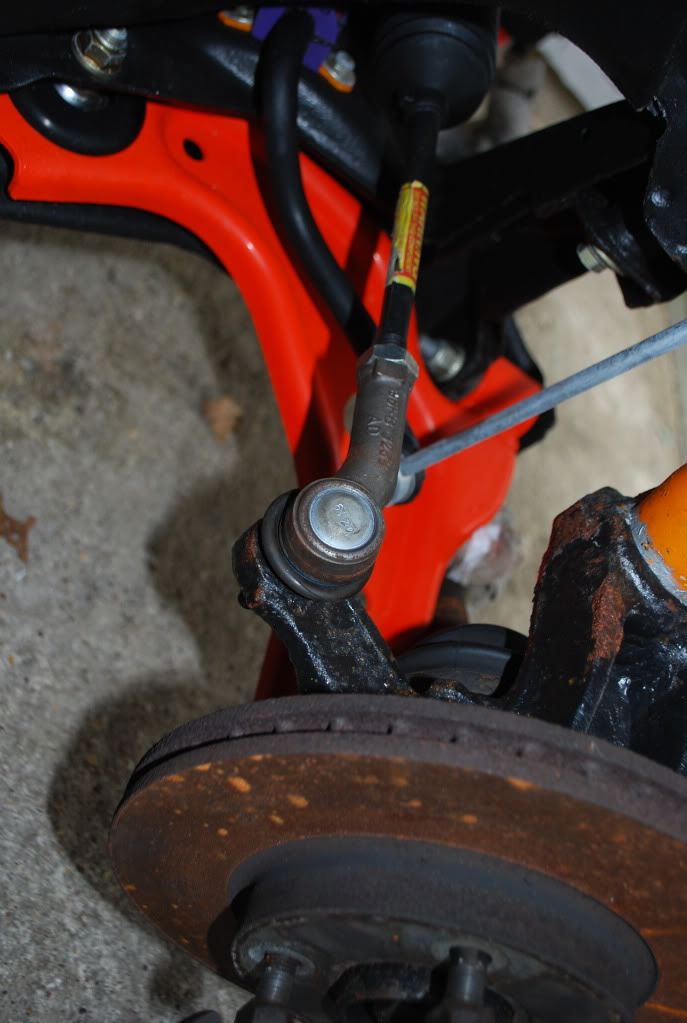
I had to swap the track rod ends round as I put them on the wrng way **idiot**
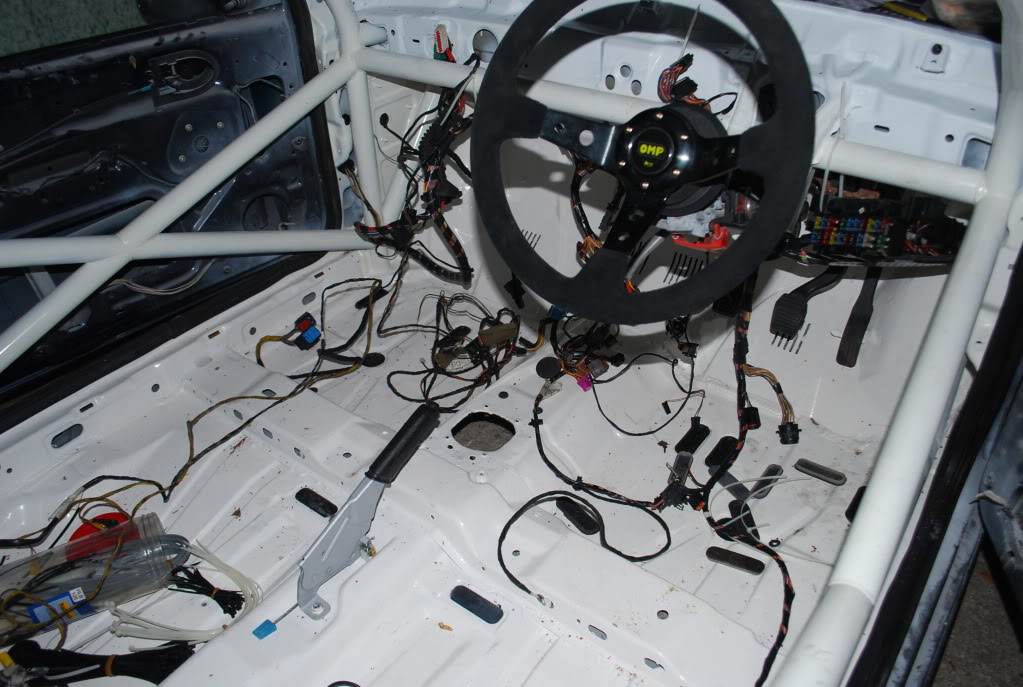
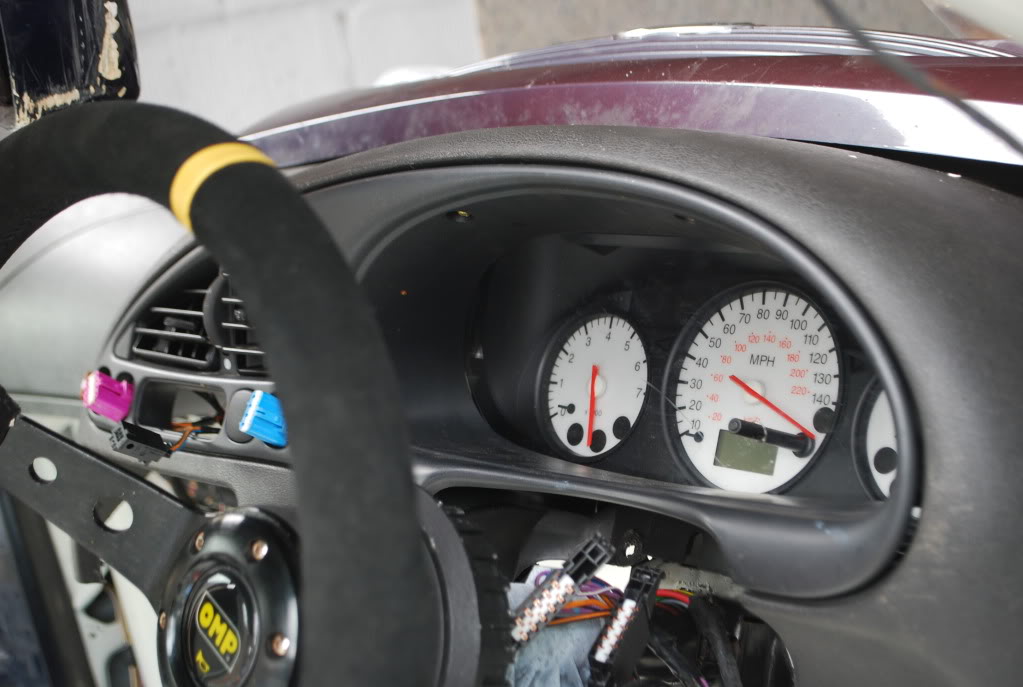
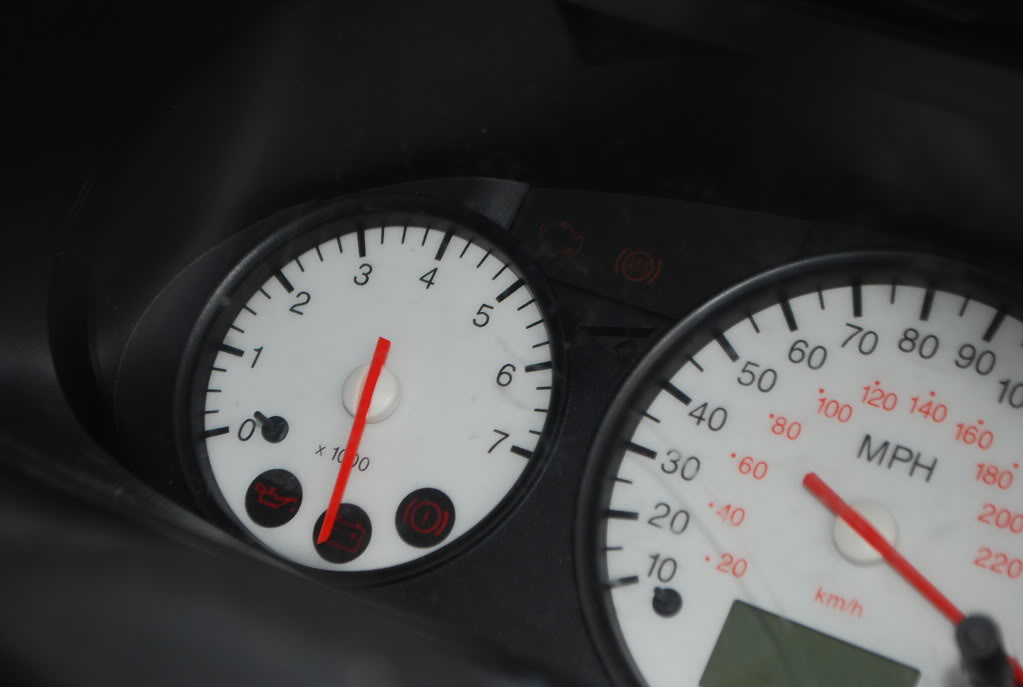
I then looked at the dash and thought "that looks a bit chunky"...
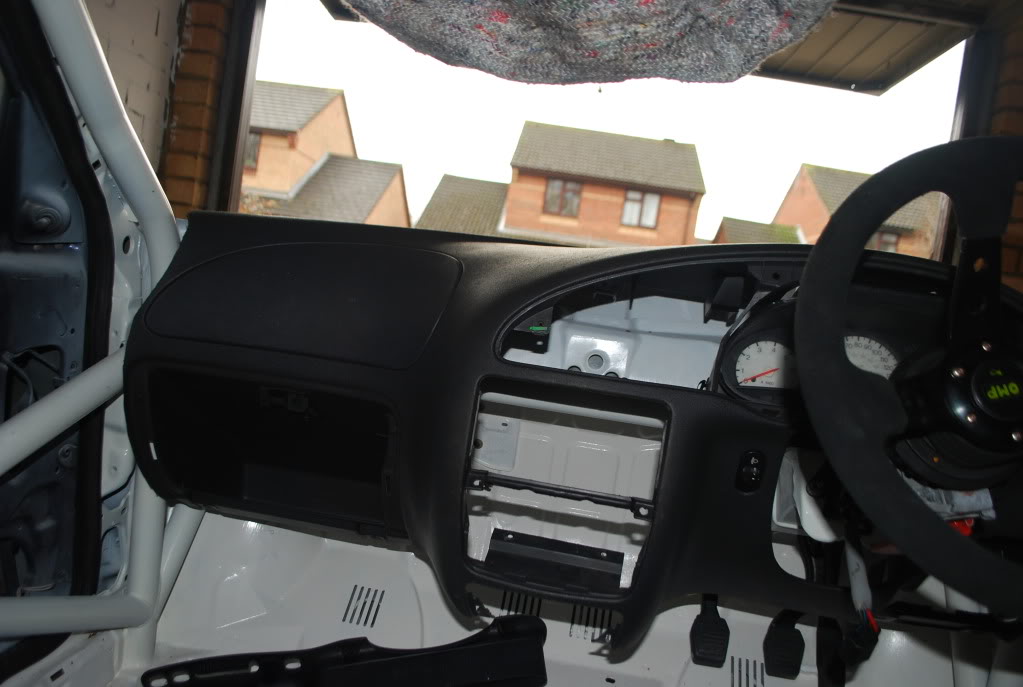
so out it came

I got the dremel out and took a small chunk off the dash

Leavin me with this slim fast version of a dash
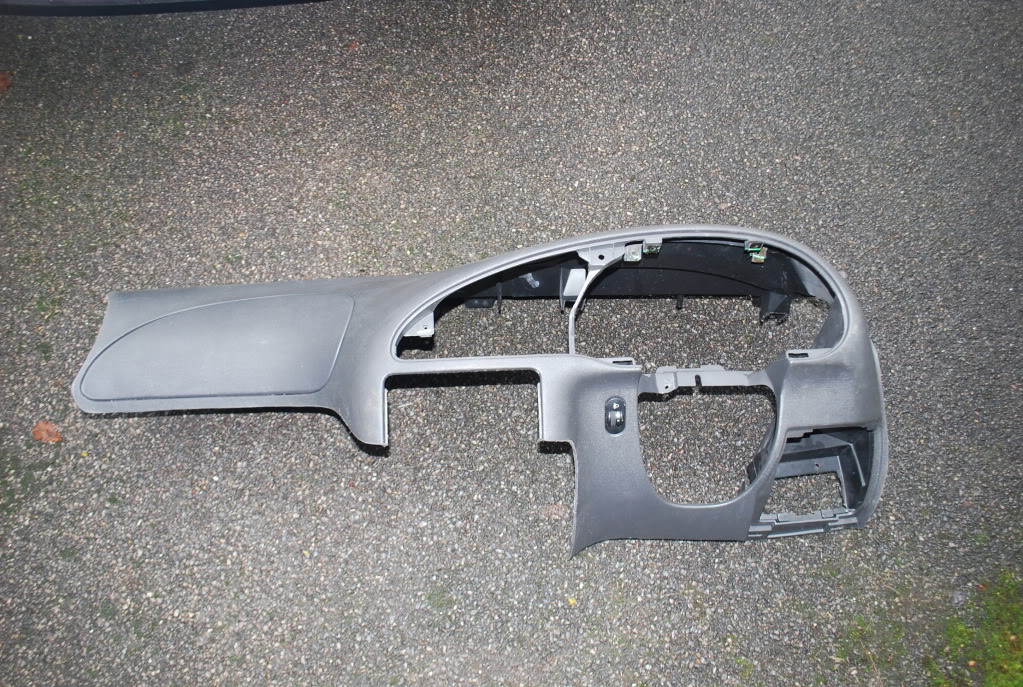
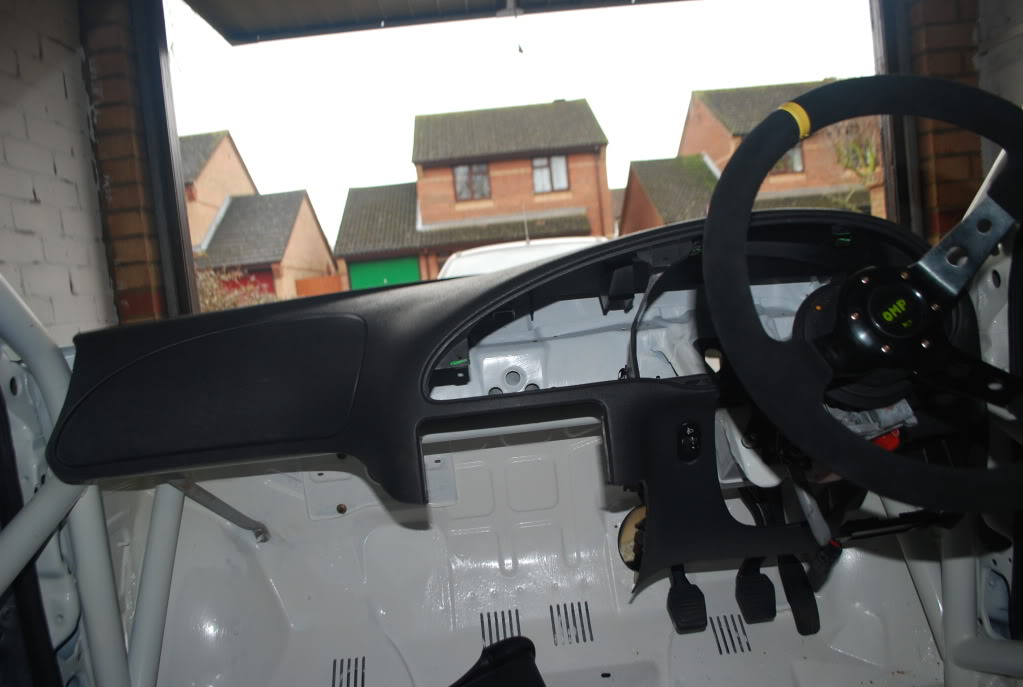
Might take more out still
At this point, I literally felt like I was knocking on deaths door, so closed up and went home
Few bits done today. I had to go to the house to get some electrical bits sgned off, so thought while I wait, why not do some work.
I had to swap the track rod ends round as I put them on the wrng way **idiot**
I then looked at the dash and thought "that looks a bit chunky"...
so out it came
I got the dremel out and took a small chunk off the dash
Leavin me with this slim fast version of a dash
Might take more out still
At this point, I literally felt like I was knocking on deaths door, so closed up and went home


Thread Starter
Regular Contributor
Joined: May 2009
Posts: 231
Likes: 0
From: Wokingham
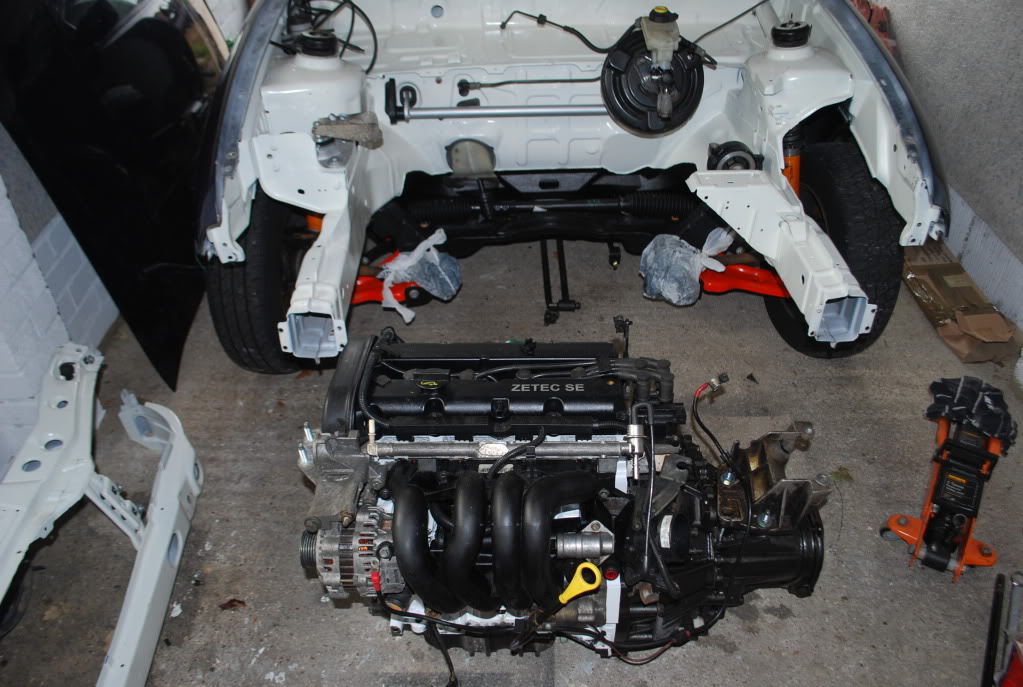
Update - Temporary Engine Begin!
On a spur of the moment budgeting session and a quick call around to some friends, I've managed to source most the bits to get the car running with a temporary setup while I build the 2.0 monster.
Today I went to Essex to fetch a few bits.
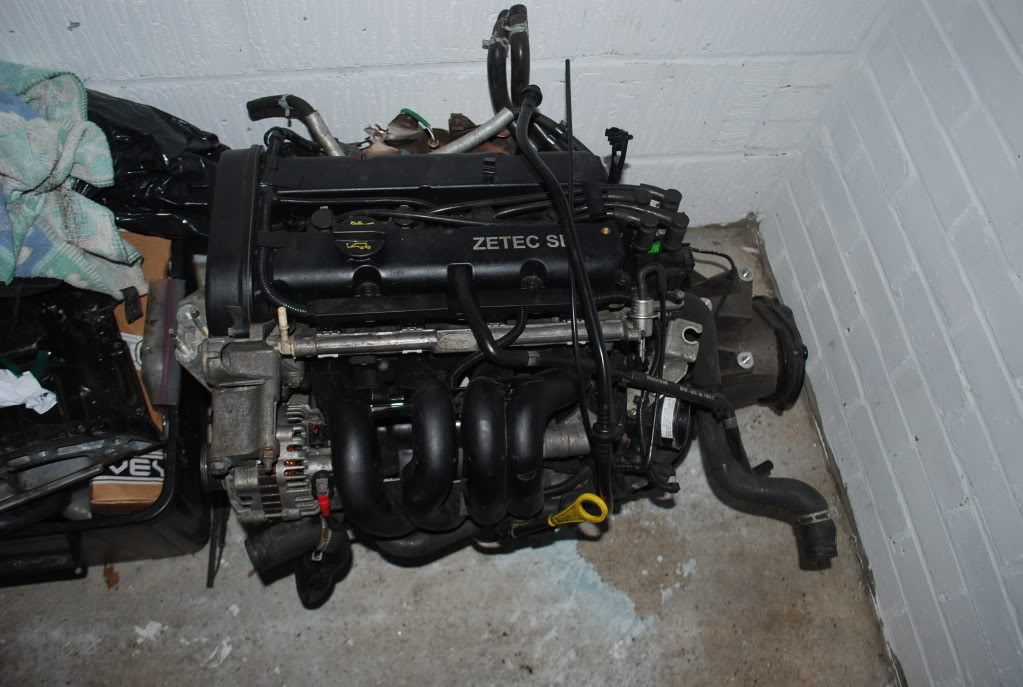
Picked up a 50K 1.6 SE (although its burning oil) complete with gearbox, loom, ECU, key, airbox, manifold etc etc. I also picked up some gear linkages from MarkyMark off here on my way home
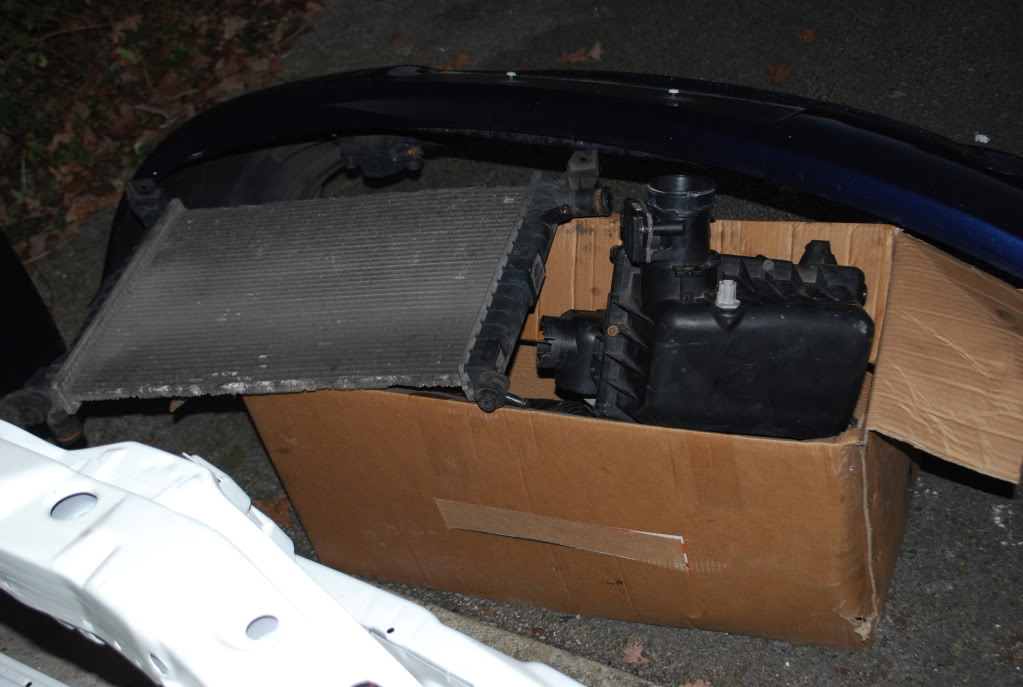
Yesterday Ed dug out a radiator which I then stole, and a Cat and down pipe.
Ben kindly sent these to me for a good price,
and I put them on the car to make me feel like I wasnt far away :laugh:
I made a start on the loom but it was getting cold, dark and I was hungry. So I gave up at this point.
All for now.
On a spur of the moment budgeting session and a quick call around to some friends, I've managed to source most the bits to get the car running with a temporary setup while I build the 2.0 monster.
Today I went to Essex to fetch a few bits.
Picked up a 50K 1.6 SE (although its burning oil) complete with gearbox, loom, ECU, key, airbox, manifold etc etc. I also picked up some gear linkages from MarkyMark off here on my way home
Yesterday Ed dug out a radiator which I then stole, and a Cat and down pipe.
Ben kindly sent these to me for a good price,
and I put them on the car to make me feel like I wasnt far away :laugh:
I made a start on the loom but it was getting cold, dark and I was hungry. So I gave up at this point.
All for now.
Thread Starter
Regular Contributor
Joined: May 2009
Posts: 231
Likes: 0
From: Wokingham
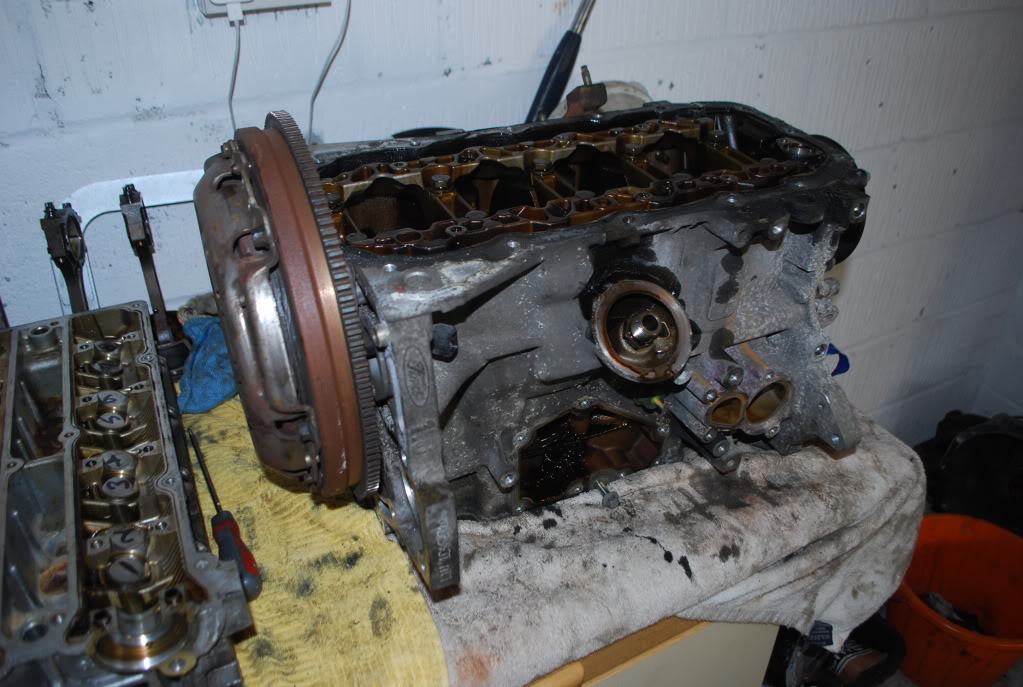
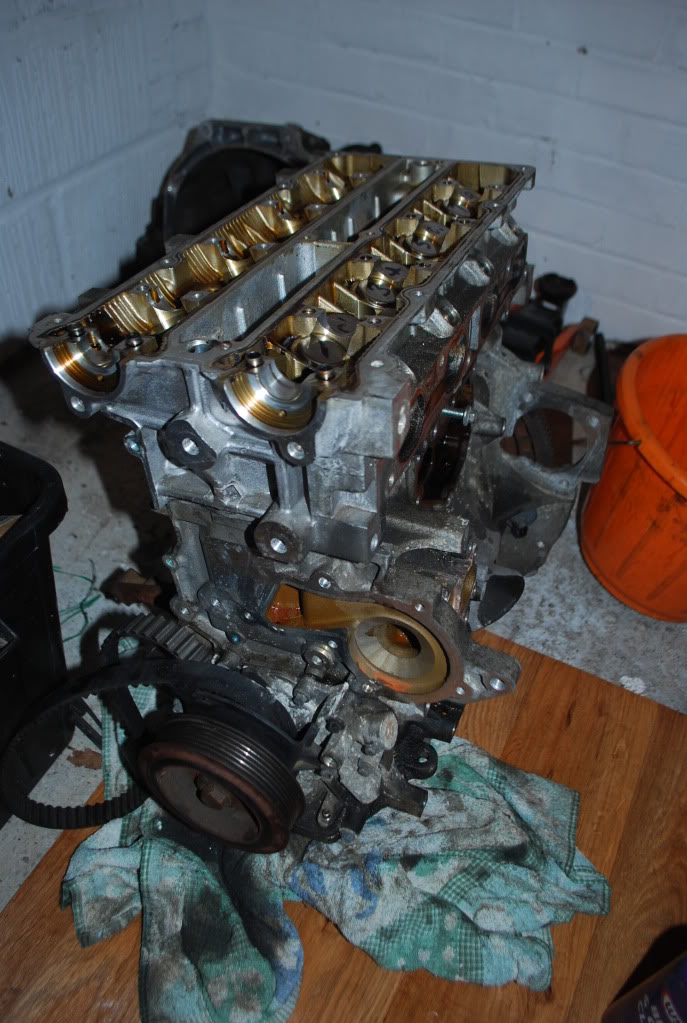
Been a bit busy lately. Excuse the massive update...
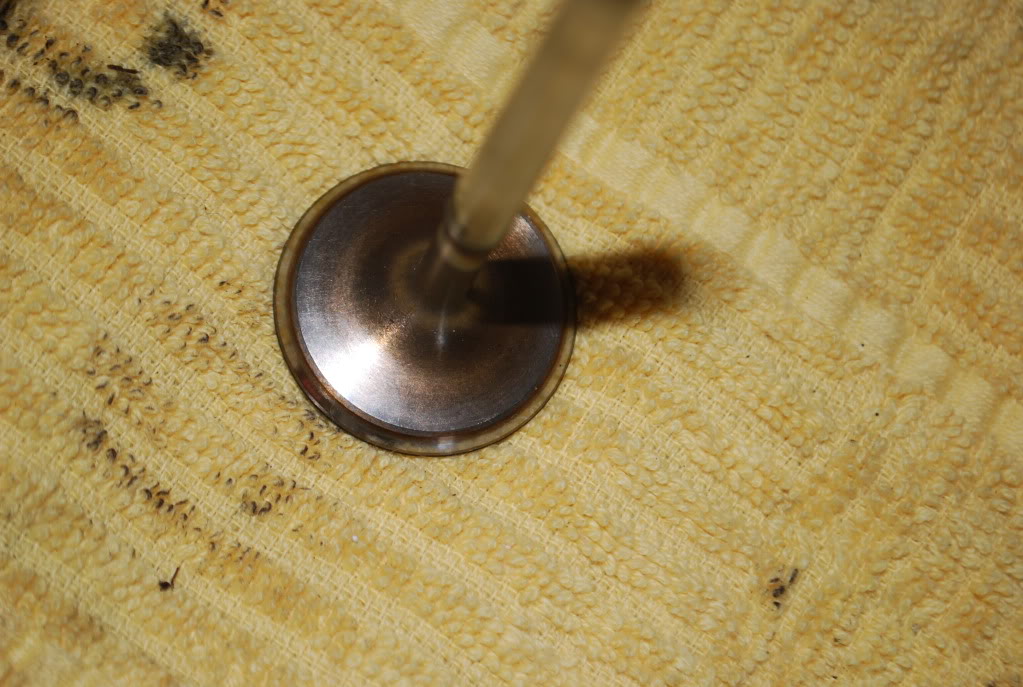
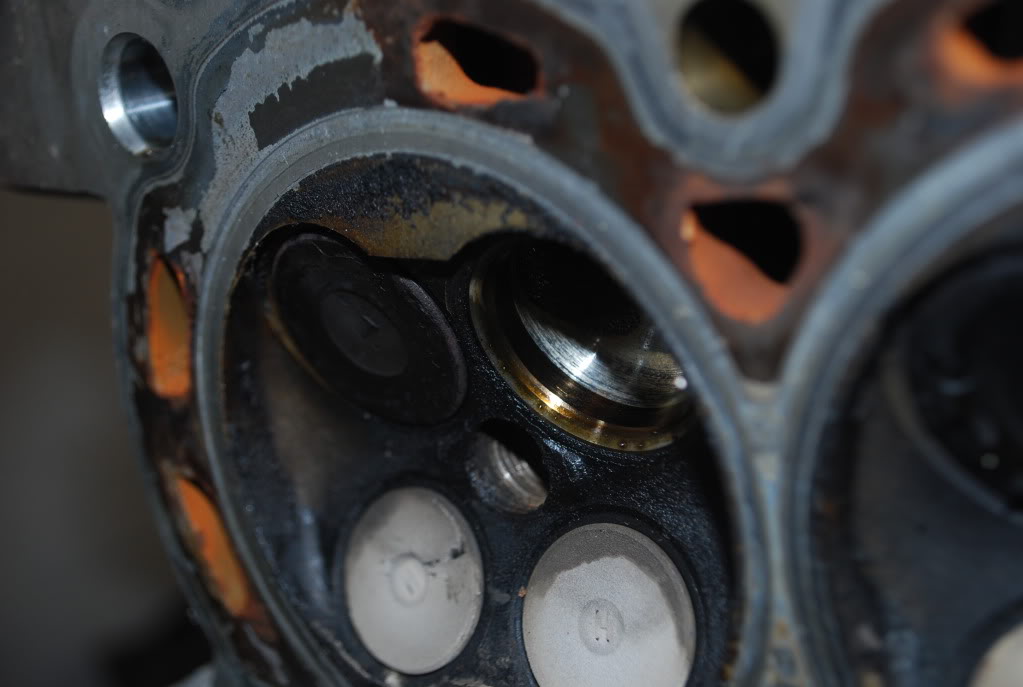
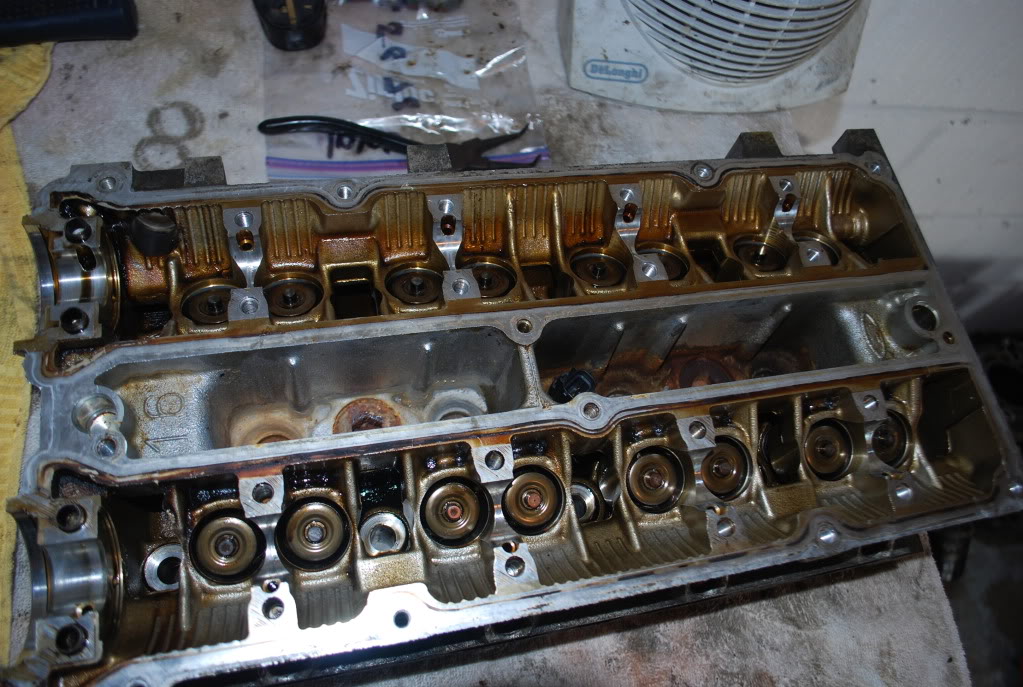
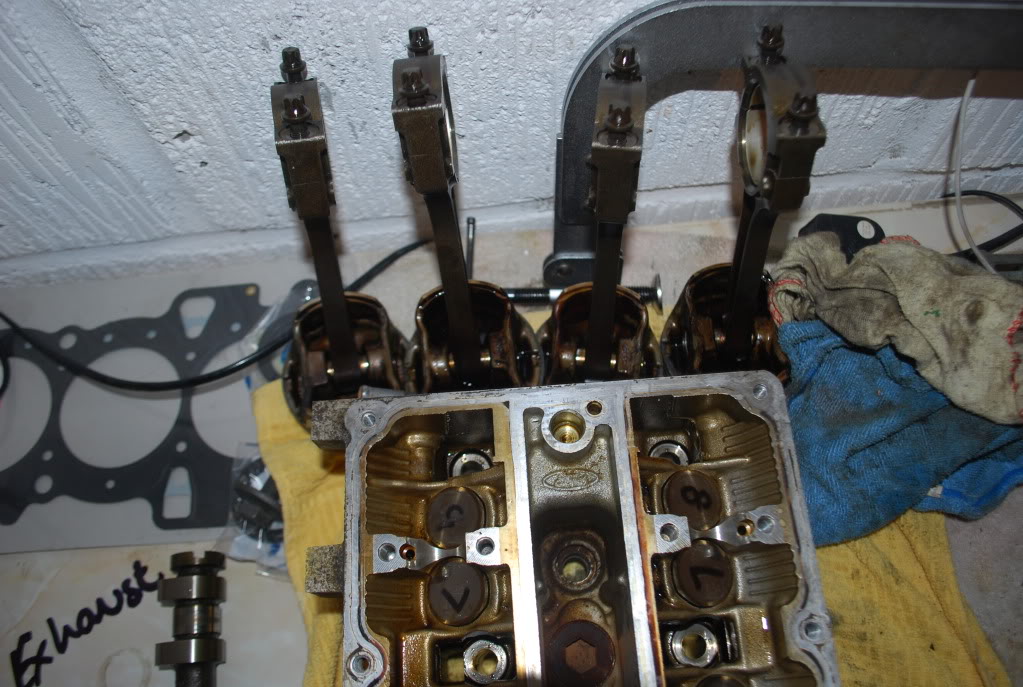
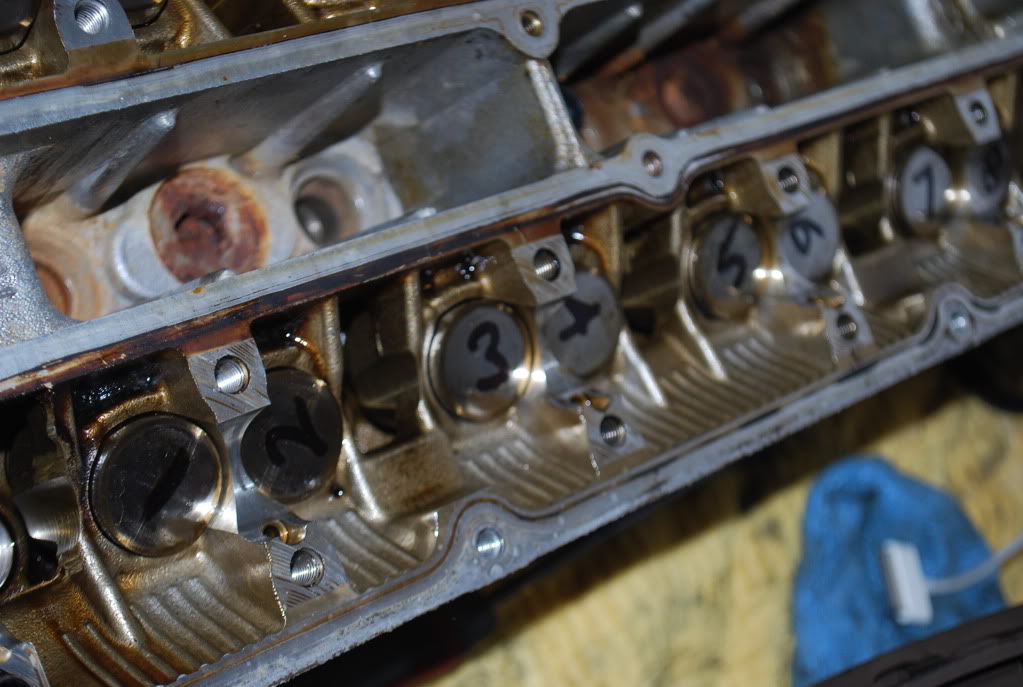
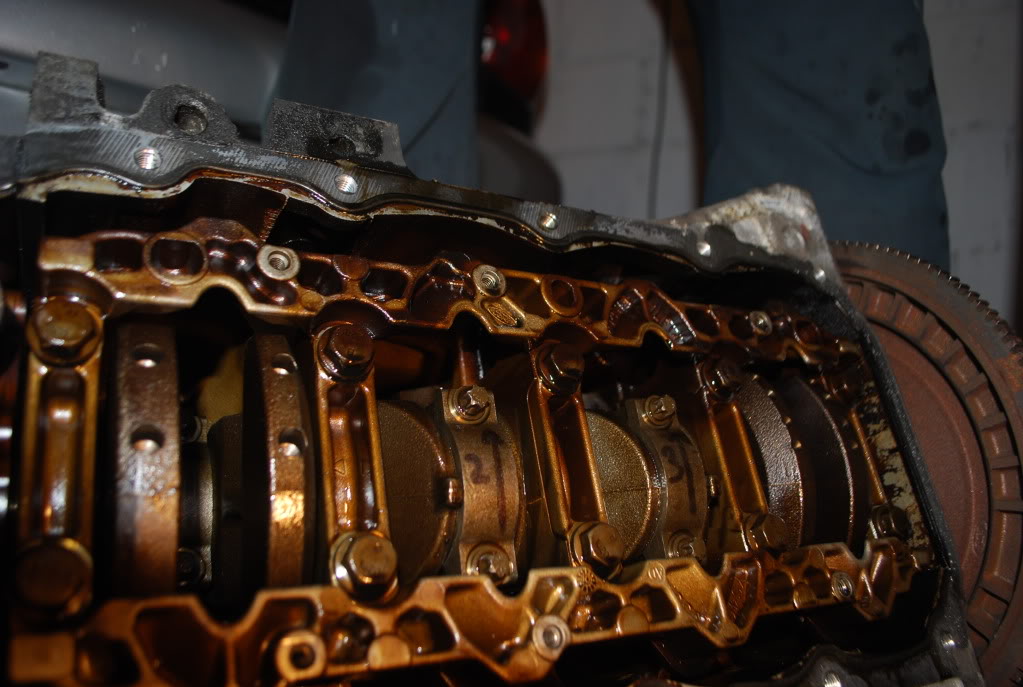
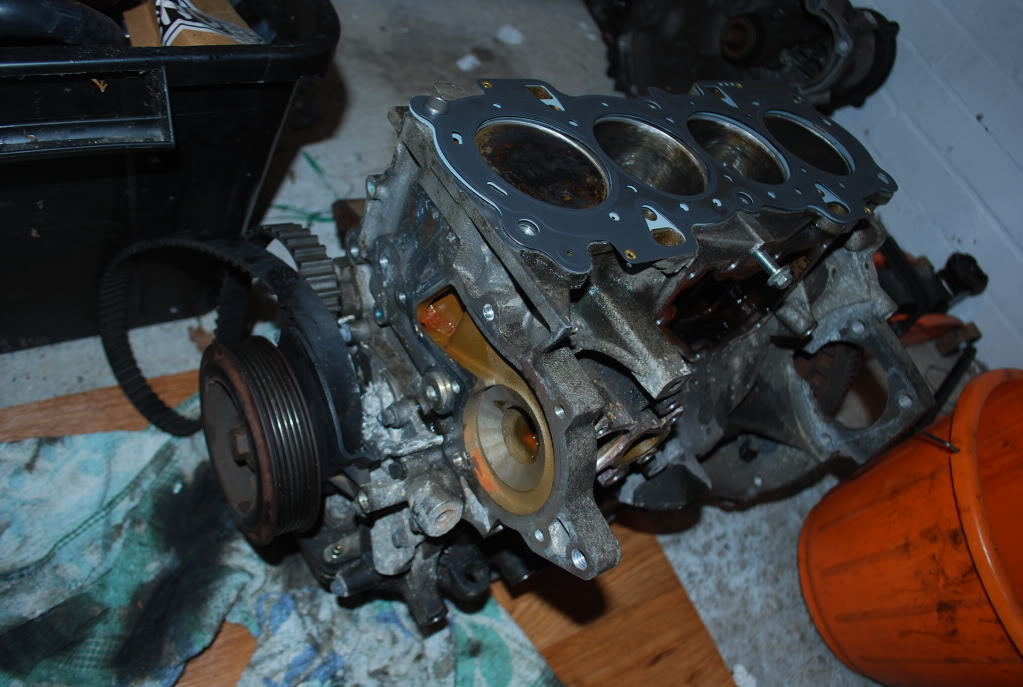
Stripped the 1.6. Almost ready to be rebuilt.

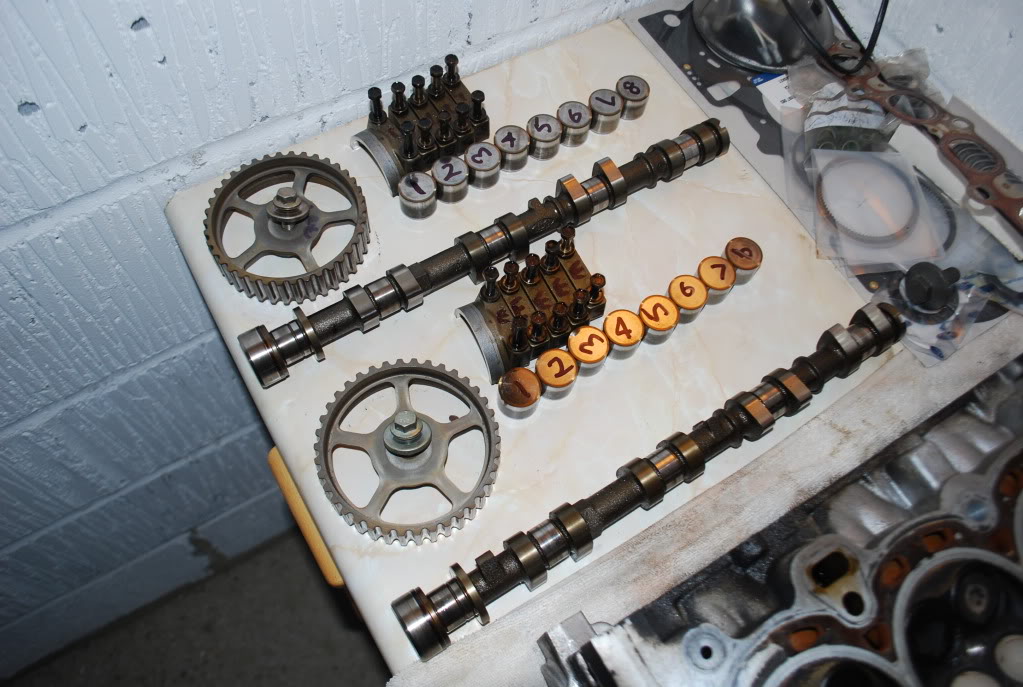
Just wating on some tools to come back from a friend who is borrowing them. Then I can crack on with that.
I've had to do some calculations for work at uni, so thought some people might be interested in whats being done behind the scene as such regarding my 2.0 engine.
The main (static) specification of of my 2.0 is
- 1999cc
- 87.5mm bore
- 83.1mm stroke
- 12:1 Compresson ratio
- Max Engine Speed 8500RPM
- Standard Inlet valve 35mm
- Standard Exhaust Valve 30mm
I worked out that I will have a mean piston speed of 23.5m/s. Reaching Race speeds here, infact, it is faster than a Ferrari F360
The displacement volume comes to 0.00601m^3 per piston, giving an inlet valve area of 0.00135m^3.
From this, I found that I needed an inlet port size of 29.3mm (diameter) and an inlet valve diameter of 37.2mm. Although the port size may be alright, my oversized valves only bring the diameterup 1mm, to 36mm. However, this is running of mean values and doesnt take into account ram-air effects.
The exaust side of things seems fine, with a port size of 24mm nd a valve size of 30.5mm, while Im runnin a 31mm valve.
Fuel wise, I came to a conclusion that my fuel pump needs to run 1190cc/min for a 300hp engine, so I've already factored in some margin of safety.
Injectors need to run 357cc/min with an 80% duty cycle for 300hp, so again, there is an extra margin of safety there. Good news as well, as the injectors which came with the bike bodies run 400cc/min
Also did a quick spread sheet to get some inlet lengths.
Listing different air temperatures and fining the Velocity of sound in a gas, I matched these to the max RPM value I'll be seeing (8500RPM) and split them across various orders.
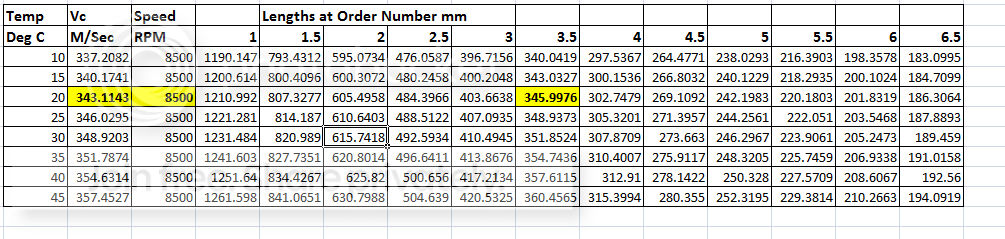
Going off what I've been told by experts, order 3.5 is usually where the optimum is found. This is coming from a guy who designed the Clio V6 engine inlet system, the Cosworth YB engine and various F1 winning engines. So Im inclined to believe him.
I then put the same calculations into a spreadsheet listing the entire RPM range with increments of 100RPM from 2000 - 8500.
The figure Im looking for is the figure given in the above image, and this roughly crops up at several orders throughout th rev range.
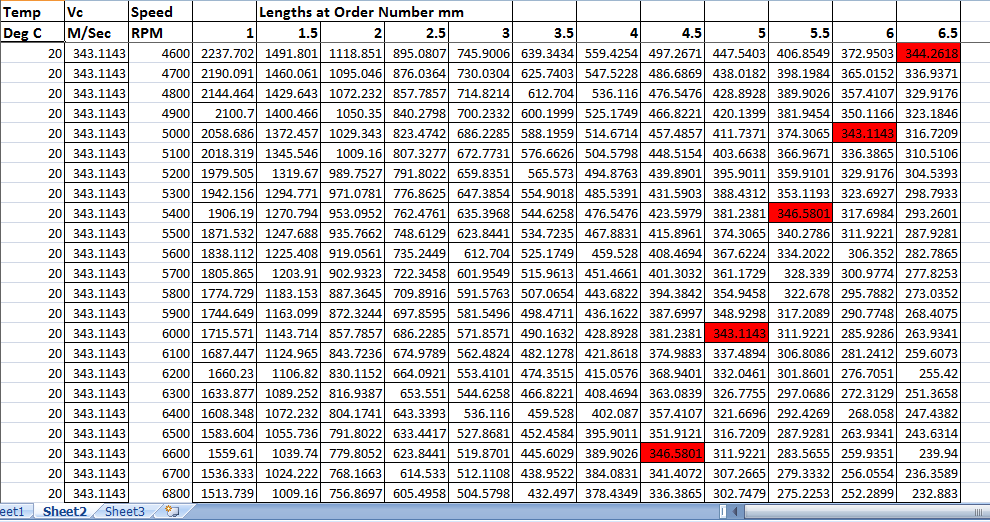
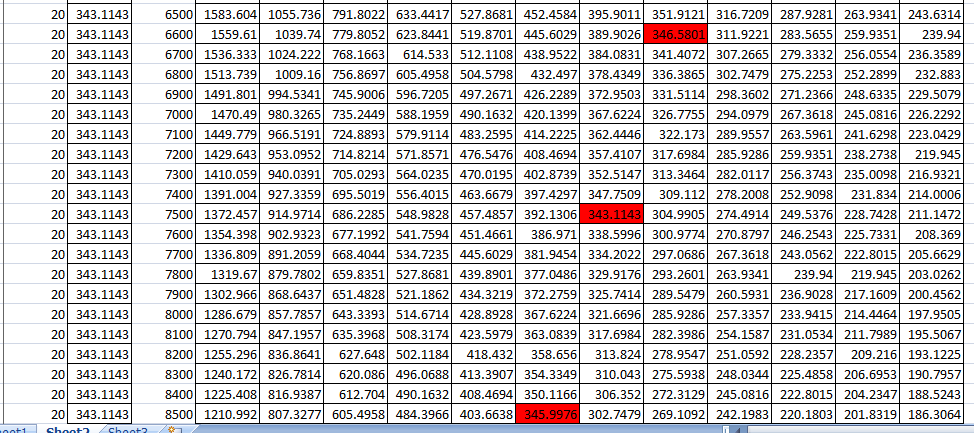
This means I need an inlet length of roughly 345mm from valve head to trumpet face. Obviously this is varied by bore diameter, tapers and actual desgn of the inlet, but its a good figure to work from.
The highlighted figures are where peak torque would occur due to the inlet (providing other characteristics of the engine allow it). A good spread across the spread sheet is a good sign!
Concept designs will be made this week and I'll try get som CAD models posted up within 2 weeks.
Bit of geeky-ness for you there
Stripped the 1.6. Almost ready to be rebuilt.
Just wating on some tools to come back from a friend who is borrowing them. Then I can crack on with that.
I've had to do some calculations for work at uni, so thought some people might be interested in whats being done behind the scene as such regarding my 2.0 engine.
The main (static) specification of of my 2.0 is
- 1999cc
- 87.5mm bore
- 83.1mm stroke
- 12:1 Compresson ratio
- Max Engine Speed 8500RPM
- Standard Inlet valve 35mm
- Standard Exhaust Valve 30mm
I worked out that I will have a mean piston speed of 23.5m/s. Reaching Race speeds here, infact, it is faster than a Ferrari F360
The displacement volume comes to 0.00601m^3 per piston, giving an inlet valve area of 0.00135m^3.
From this, I found that I needed an inlet port size of 29.3mm (diameter) and an inlet valve diameter of 37.2mm. Although the port size may be alright, my oversized valves only bring the diameterup 1mm, to 36mm. However, this is running of mean values and doesnt take into account ram-air effects.
The exaust side of things seems fine, with a port size of 24mm nd a valve size of 30.5mm, while Im runnin a 31mm valve.
Fuel wise, I came to a conclusion that my fuel pump needs to run 1190cc/min for a 300hp engine, so I've already factored in some margin of safety.
Injectors need to run 357cc/min with an 80% duty cycle for 300hp, so again, there is an extra margin of safety there. Good news as well, as the injectors which came with the bike bodies run 400cc/min
Also did a quick spread sheet to get some inlet lengths.
Listing different air temperatures and fining the Velocity of sound in a gas, I matched these to the max RPM value I'll be seeing (8500RPM) and split them across various orders.
Going off what I've been told by experts, order 3.5 is usually where the optimum is found. This is coming from a guy who designed the Clio V6 engine inlet system, the Cosworth YB engine and various F1 winning engines. So Im inclined to believe him.
I then put the same calculations into a spreadsheet listing the entire RPM range with increments of 100RPM from 2000 - 8500.
The figure Im looking for is the figure given in the above image, and this roughly crops up at several orders throughout th rev range.
This means I need an inlet length of roughly 345mm from valve head to trumpet face. Obviously this is varied by bore diameter, tapers and actual desgn of the inlet, but its a good figure to work from.
The highlighted figures are where peak torque would occur due to the inlet (providing other characteristics of the engine allow it). A good spread across the spread sheet is a good sign!
Concept designs will be made this week and I'll try get som CAD models posted up within 2 weeks.
Bit of geeky-ness for you there
Thread Starter
Regular Contributor
Joined: May 2009
Posts: 231
Likes: 0
From: Wokingham
Fair bit has happened recently.
Rebuilt the 1600 temporary engine.


Routed the interior loom

Got my custom mounts through for the 2.0

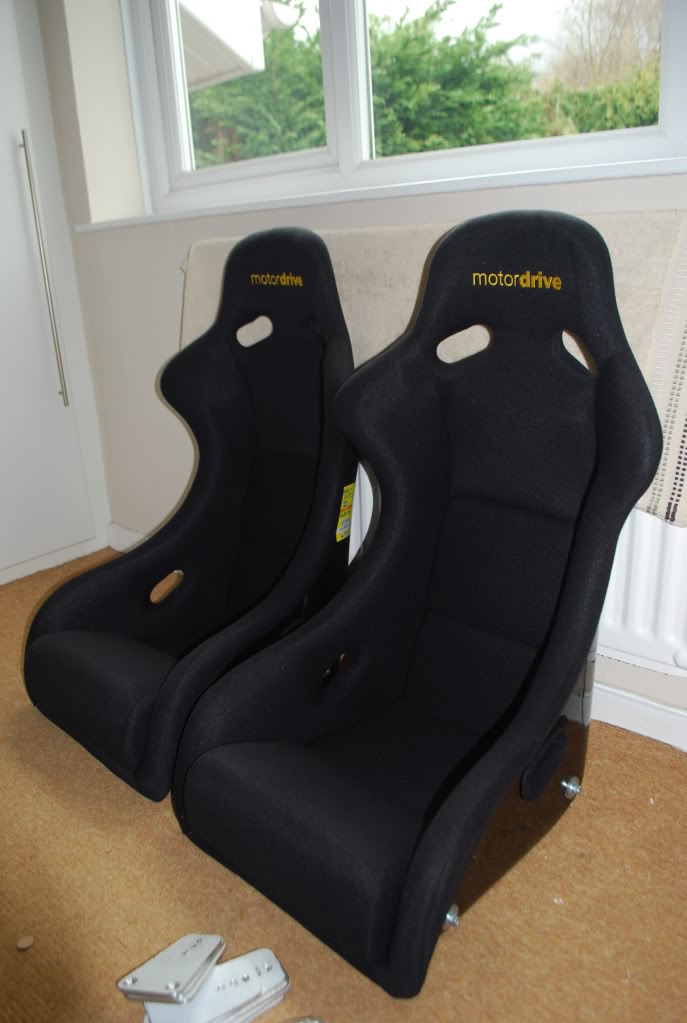
Bought some seats

Should be getting a load of work done soon, and hopeflly see it on the road in the next few months
Rebuilt the 1600 temporary engine.
Routed the interior loom
Got my custom mounts through for the 2.0
Bought some seats
Should be getting a load of work done soon, and hopeflly see it on the road in the next few months
Thread Starter
Regular Contributor
Joined: May 2009
Posts: 231
Likes: 0
From: Wokingham
Few bits have happened since my last update.
IF you dont already know, the car is getting a temporary engine, a 1600 SE from a Zetec-S. I rebuilt it with new rings and bearings and a few other bits and bobs. The aim is to try and drive it this year.
With this in mind, I spent lots of ���
handbreak cable for my rear disc conversion which I've been meaning to get for months

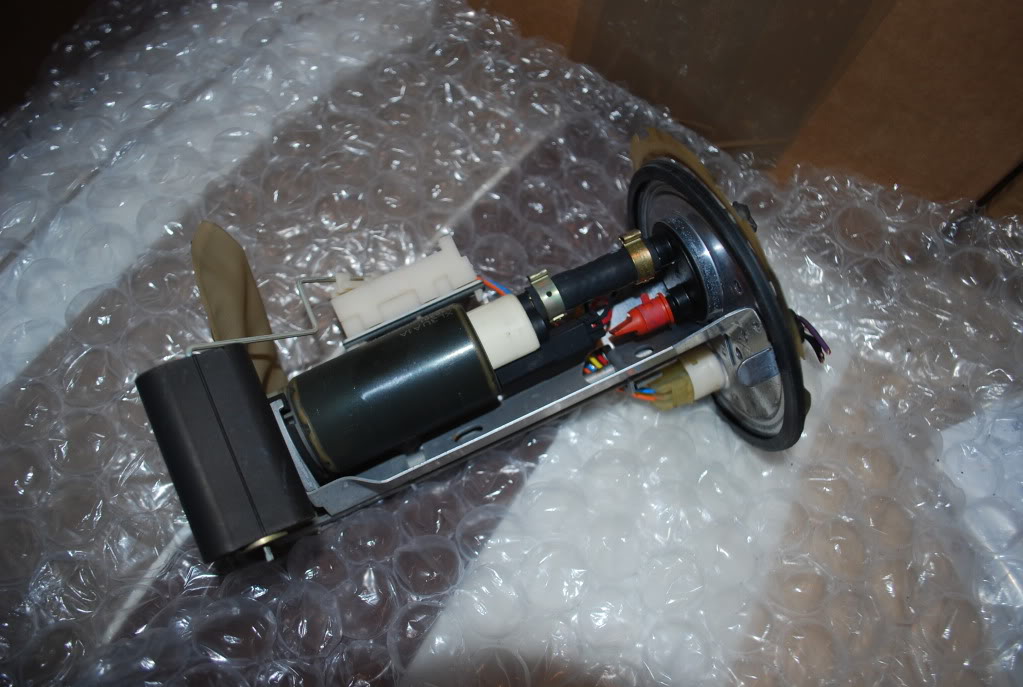
I bought a Mk5 fuel pump, and got sent two. So if anyone wants a fuel pump, lt me know!
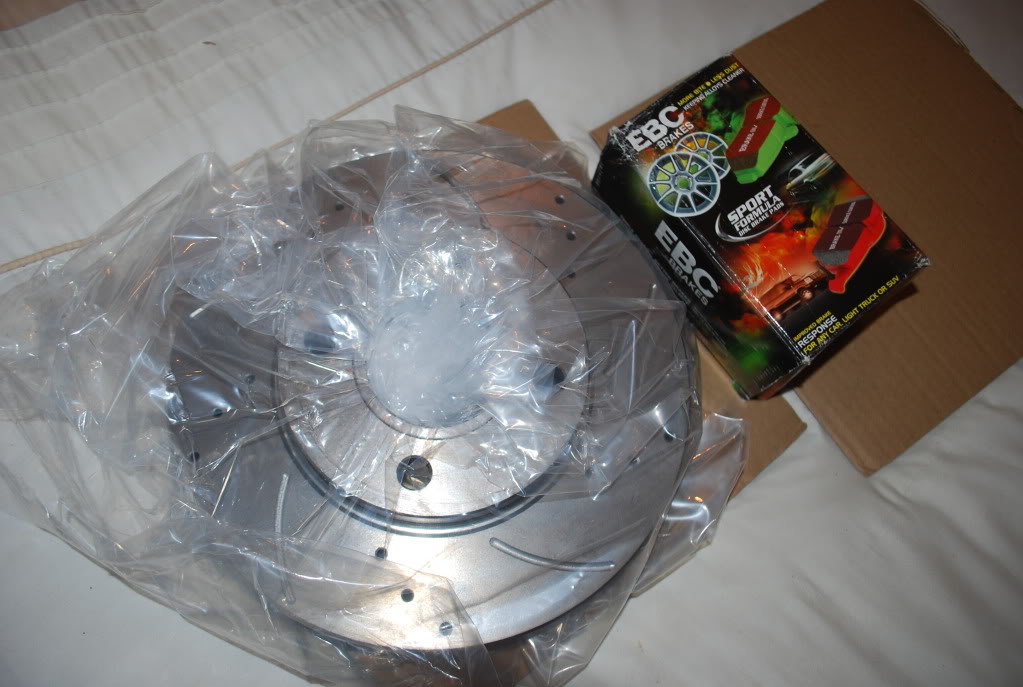
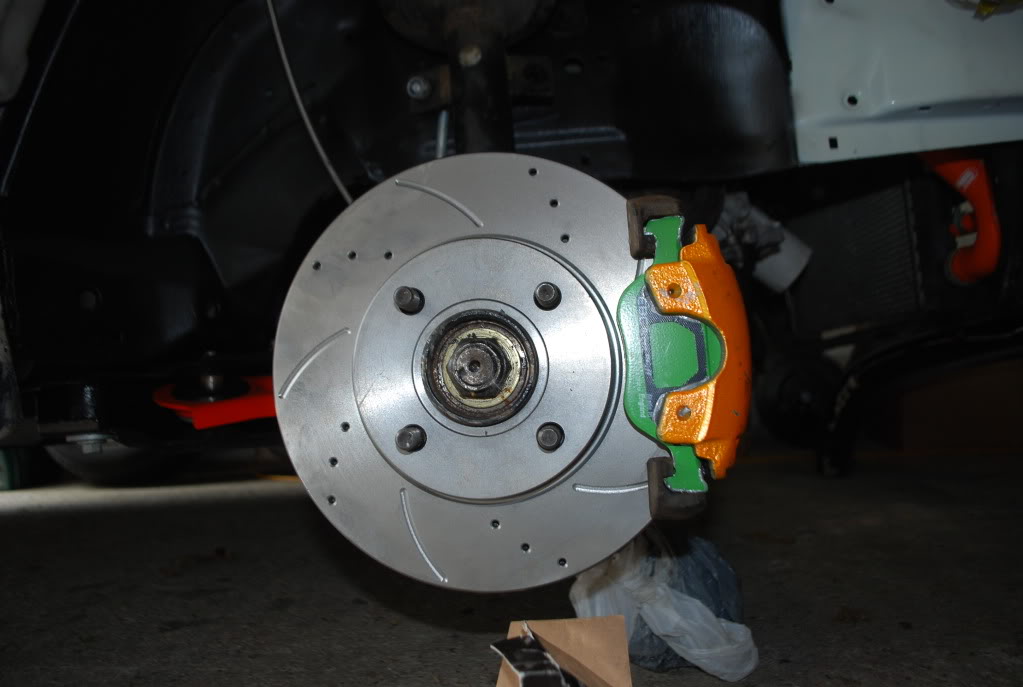
Got some brakes through, drilled and grooved discs with EBC greenstuff pads. I know they arent the best but will work fine till I get the 4 pots on.
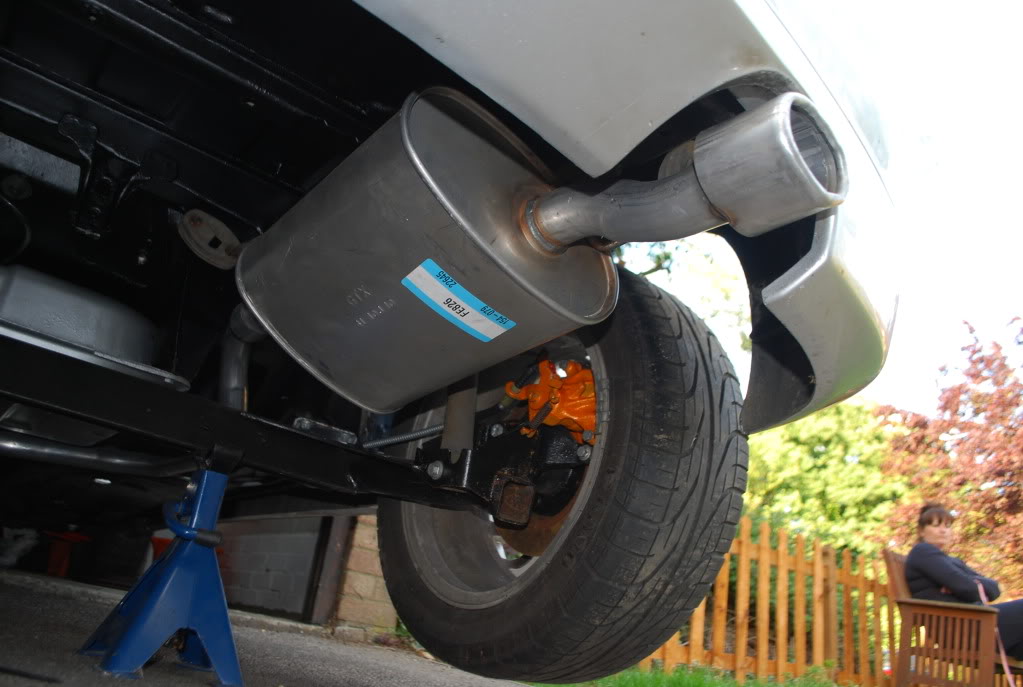
The exhaust
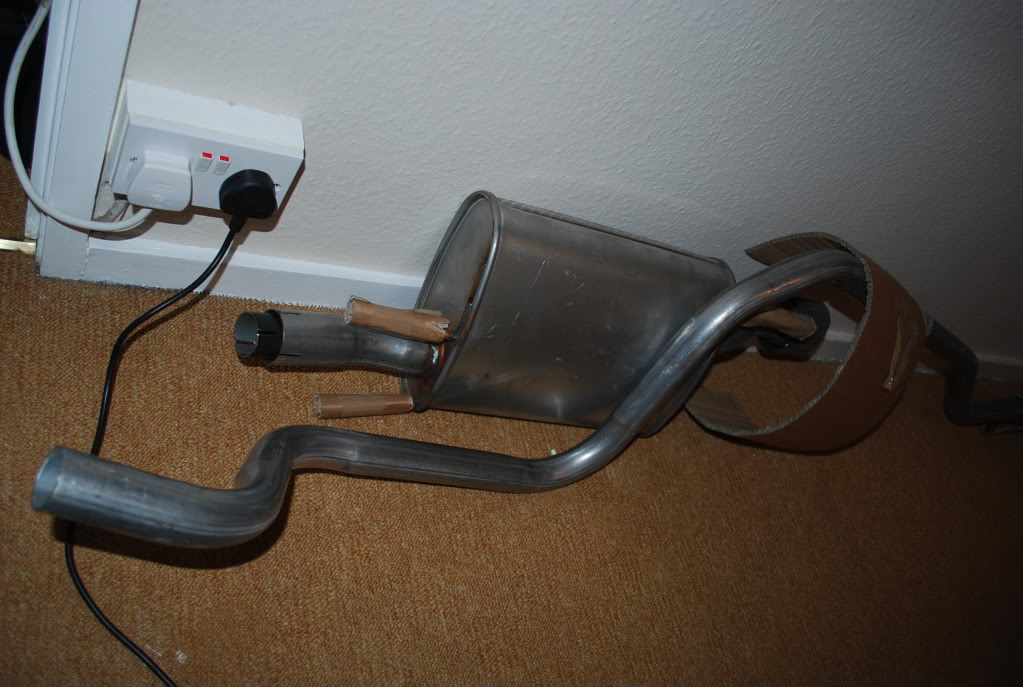
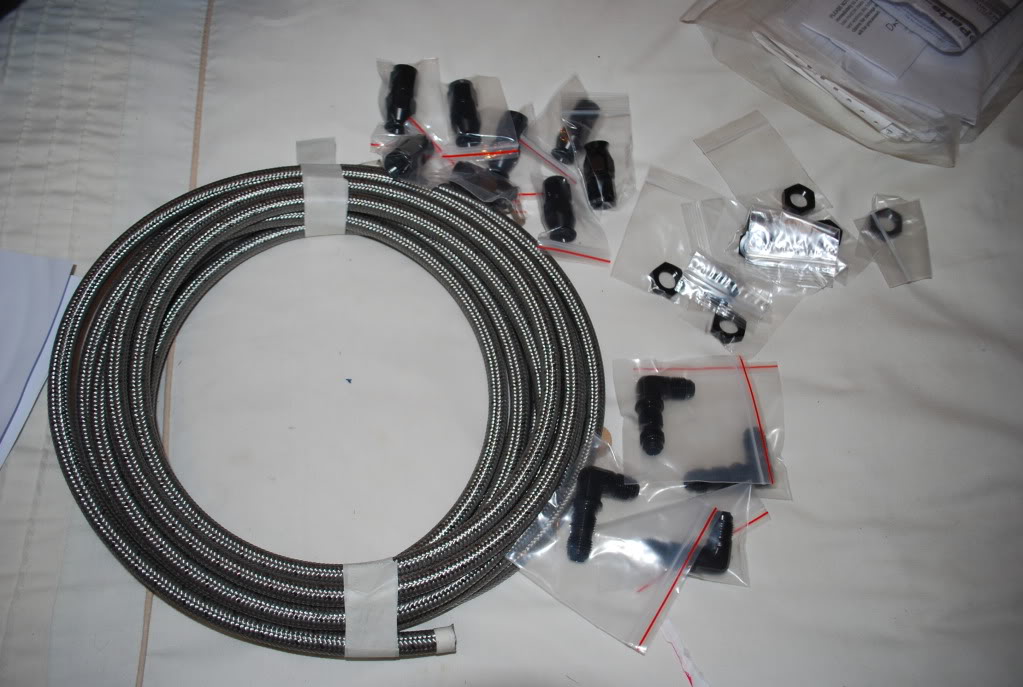
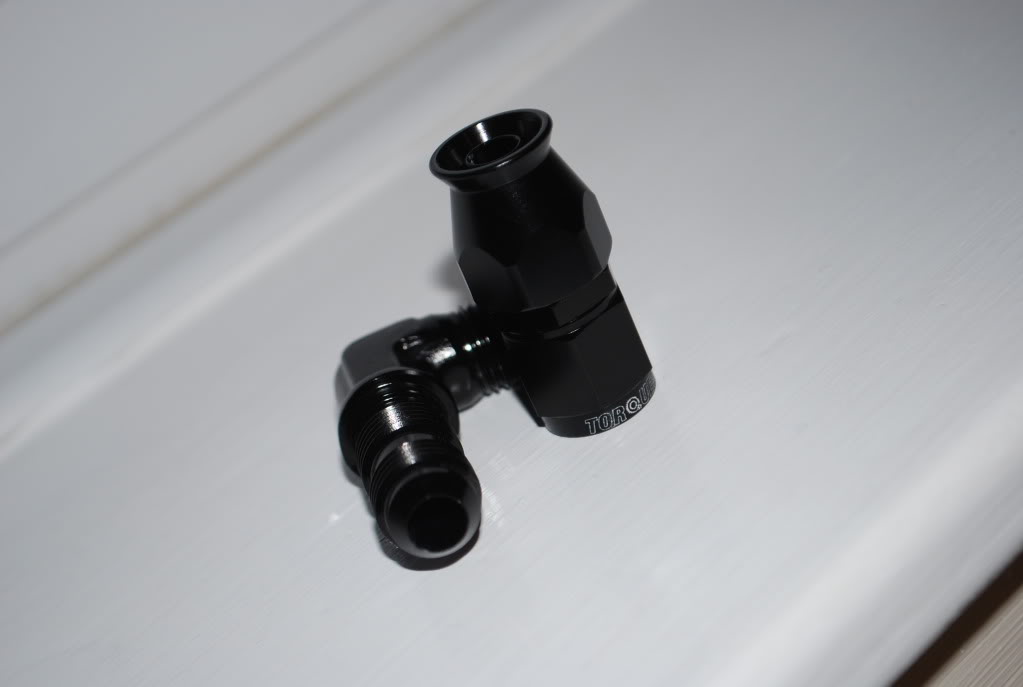
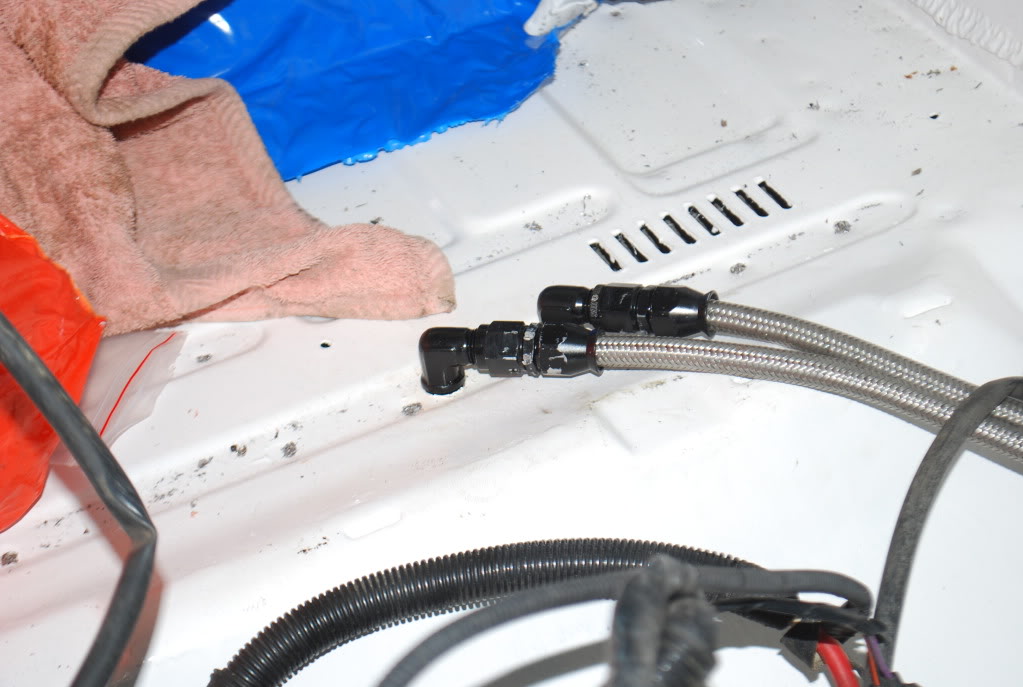
fuel lines. They are braided Teflon Hose with all black fittings. I will need some finishers too but this should sort me out for now.
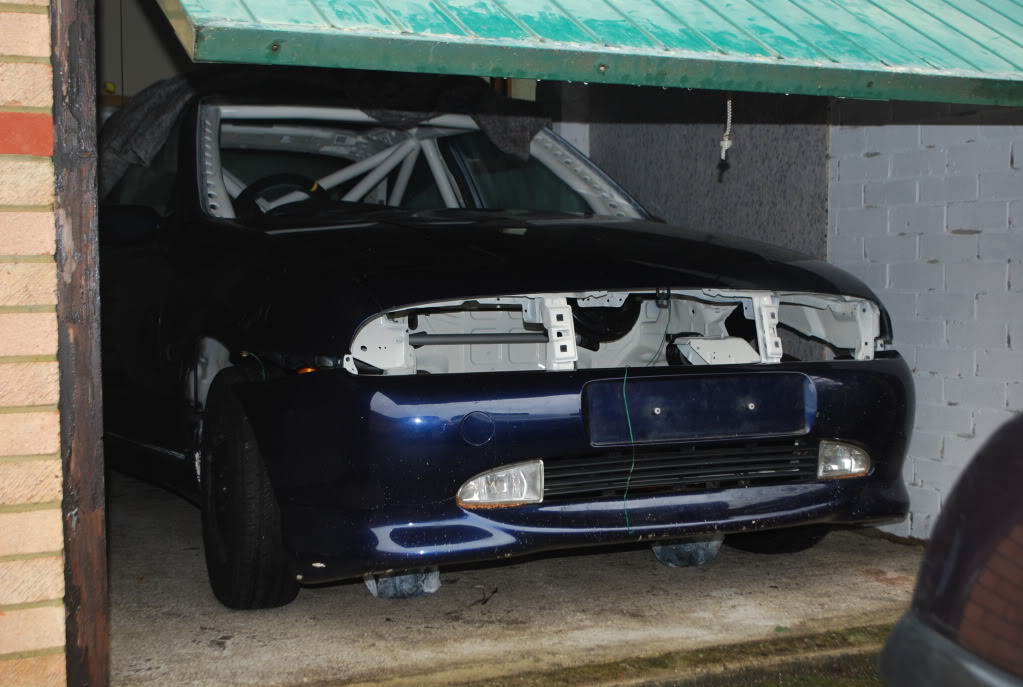
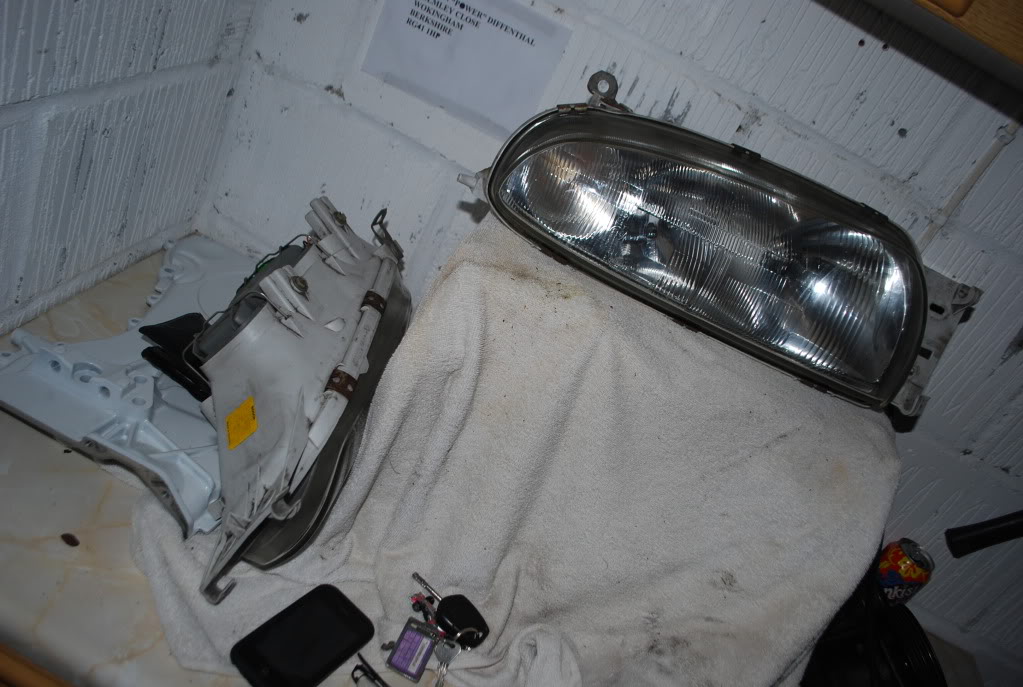
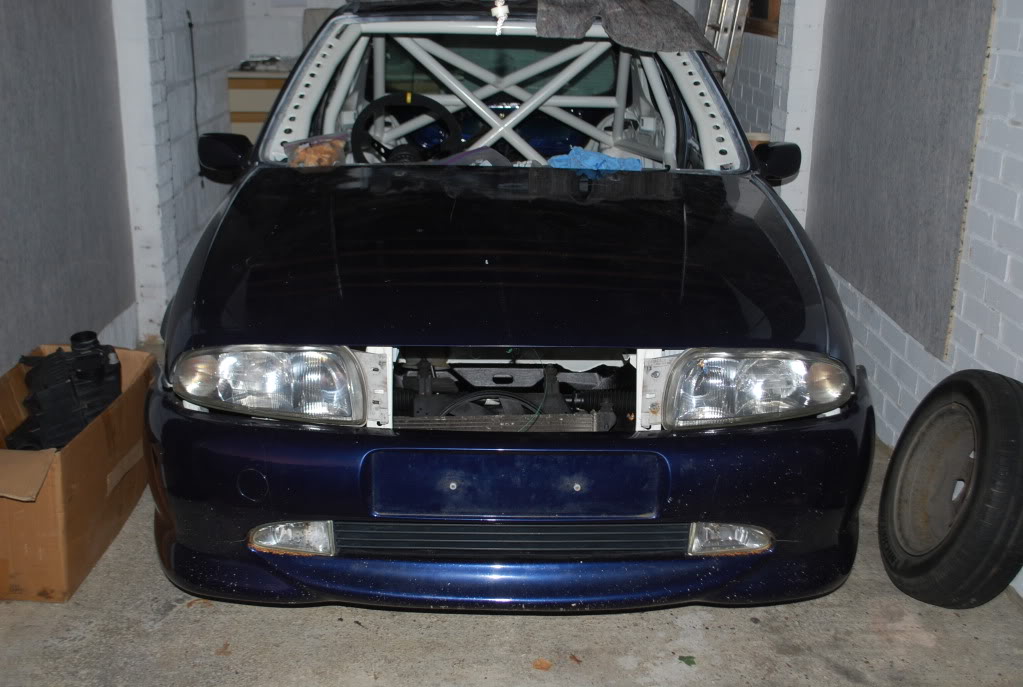
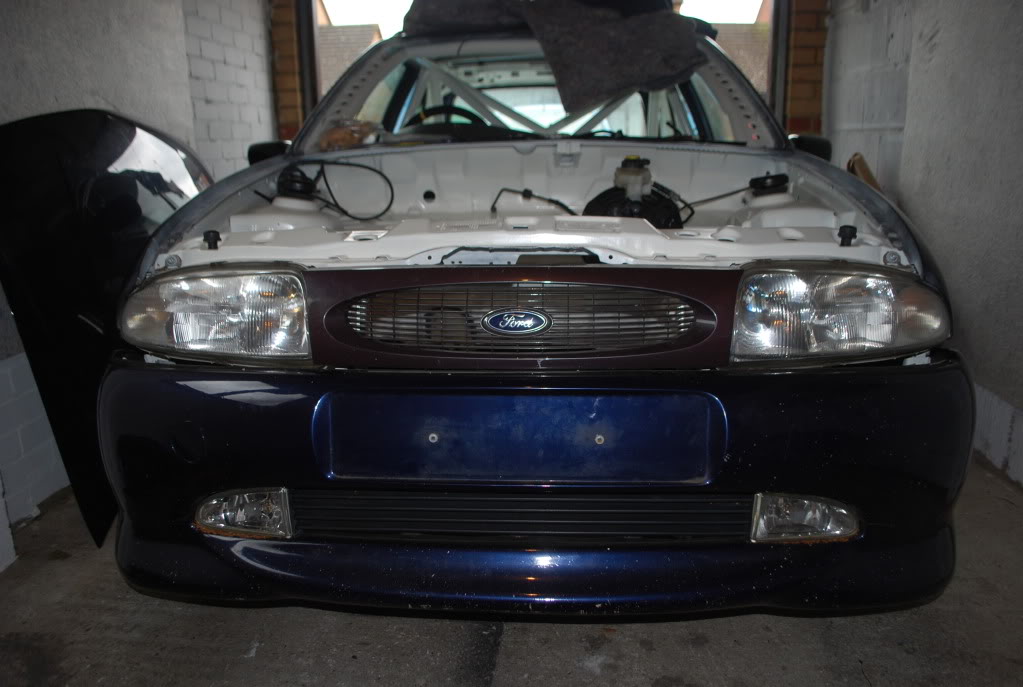
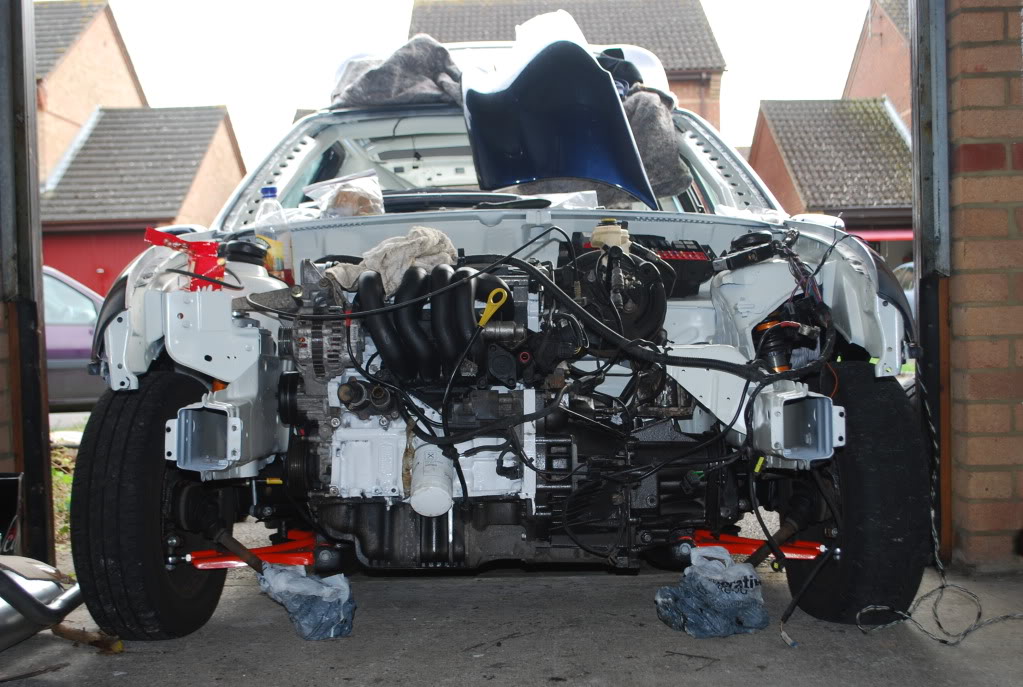
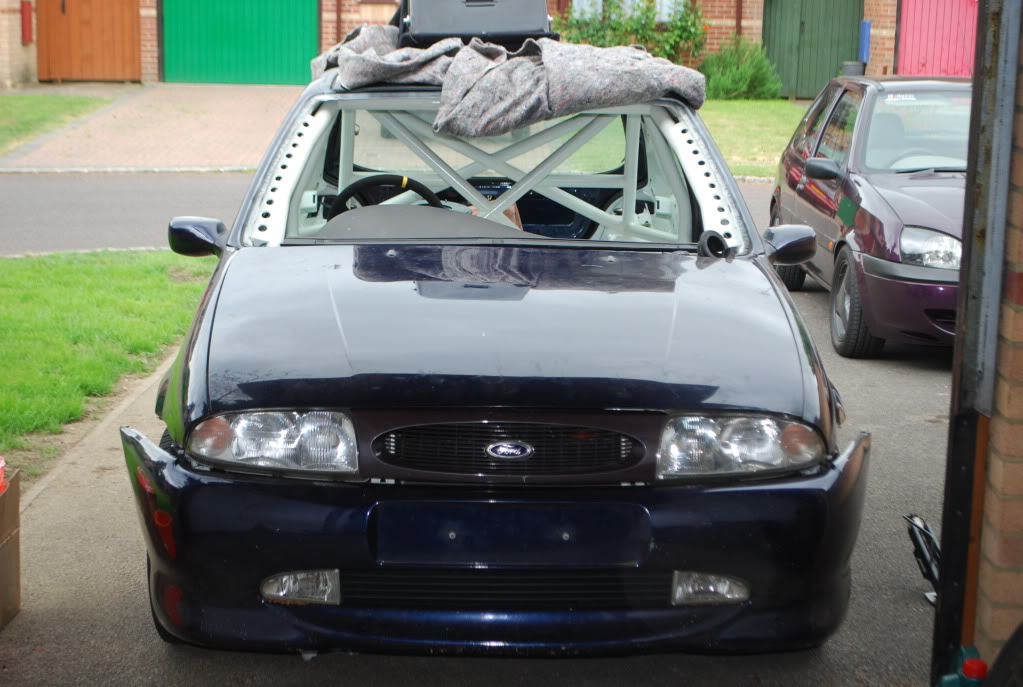
Then one day I started off with test fitting the lightsand grill. They are a very good fit. I though makig the front removable would mess with the way in which they sit, but if anything its improved it.
Got the front end off and the engine in position
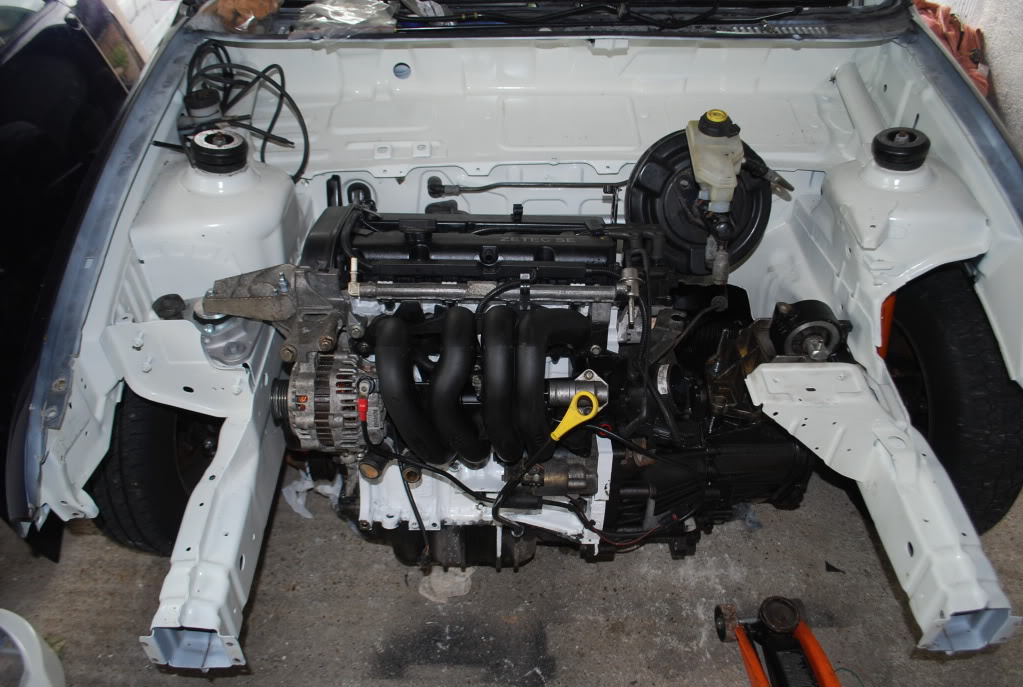
Didnt take long to put it into place. Considering it was only me to do it and all I had was a jack lol.
Started fiddling about with the loom
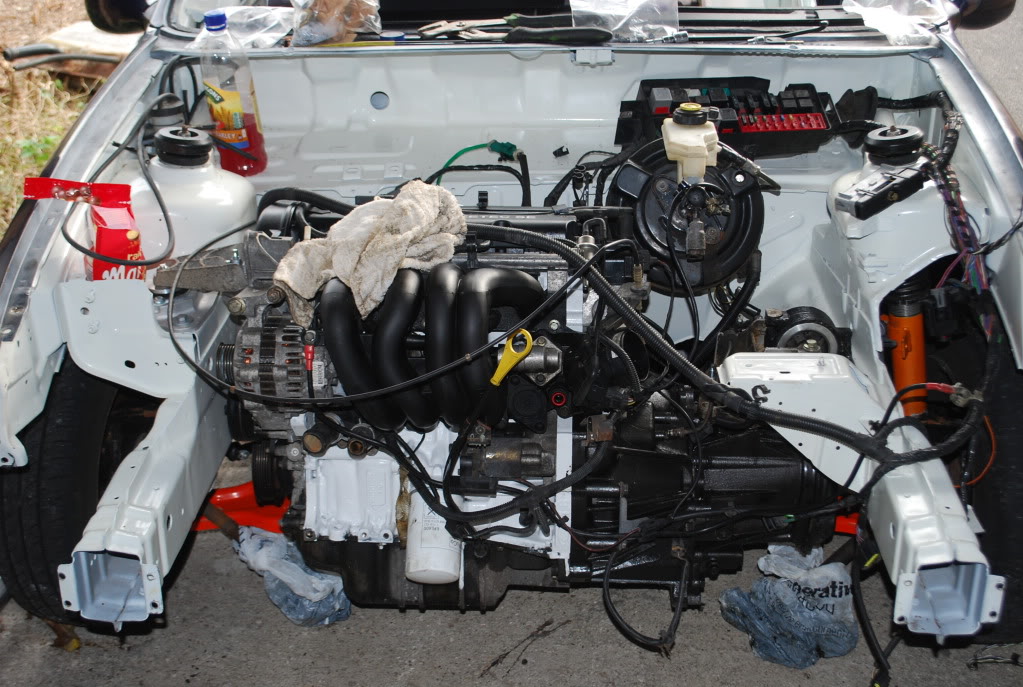
And got all this back in
Managed to get some formof life into it quickly
Various ARP bolts from Jon, along with a Very lightweght flywheel!

I painted up the fuel tank and swapped the pumps over

and also gtmy seats

and side mounts
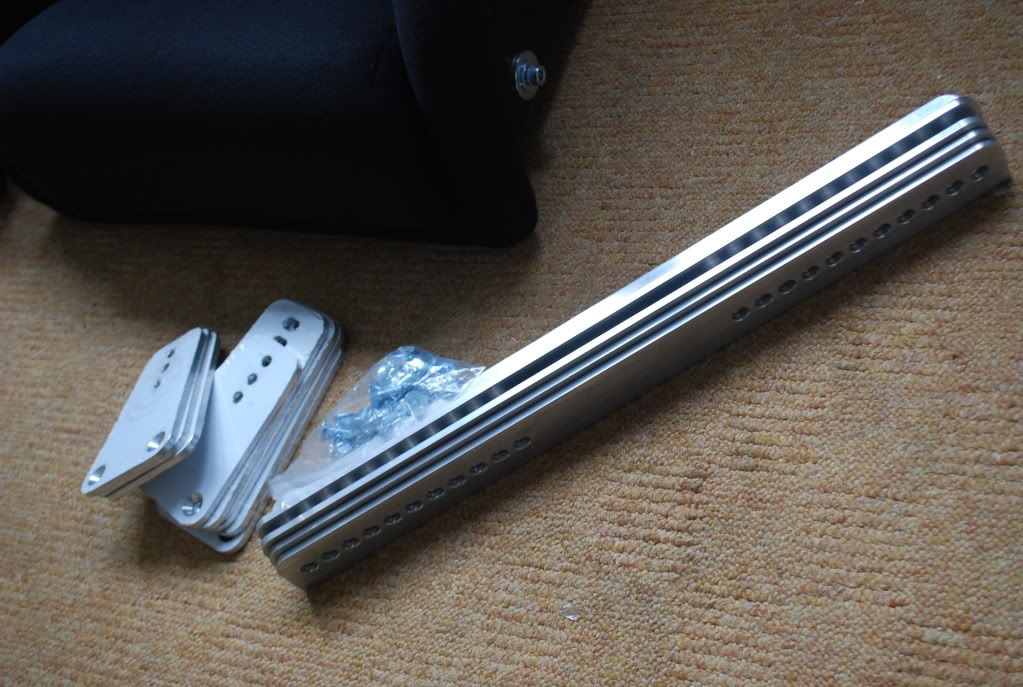
Big thanks to ShawSpeed for all these
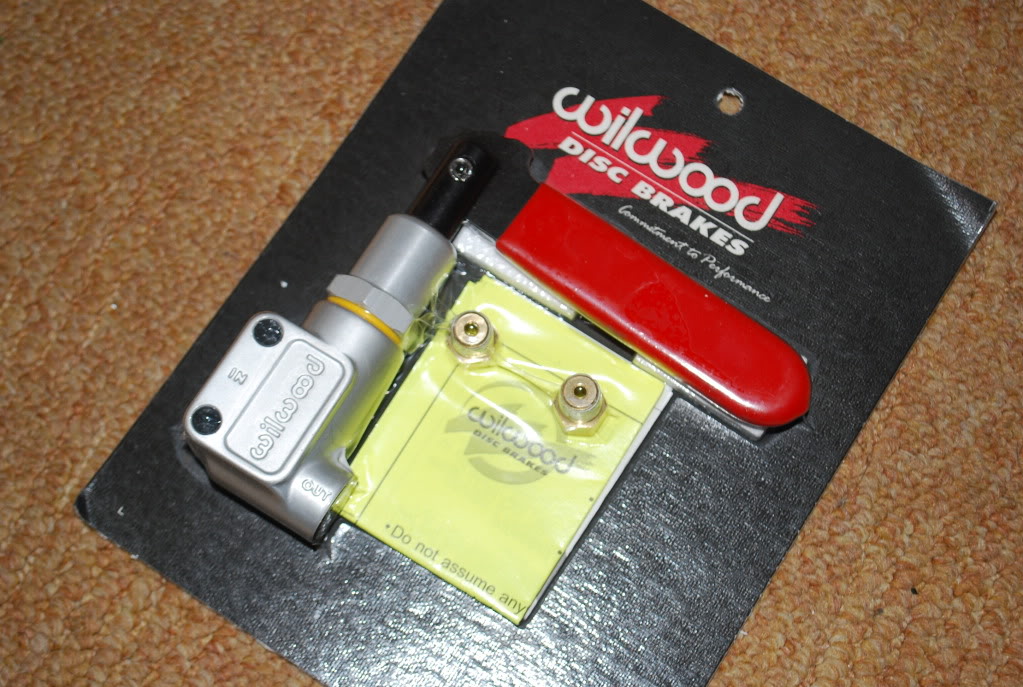
My brake lines came through this week with a WillWood Bias adjuster
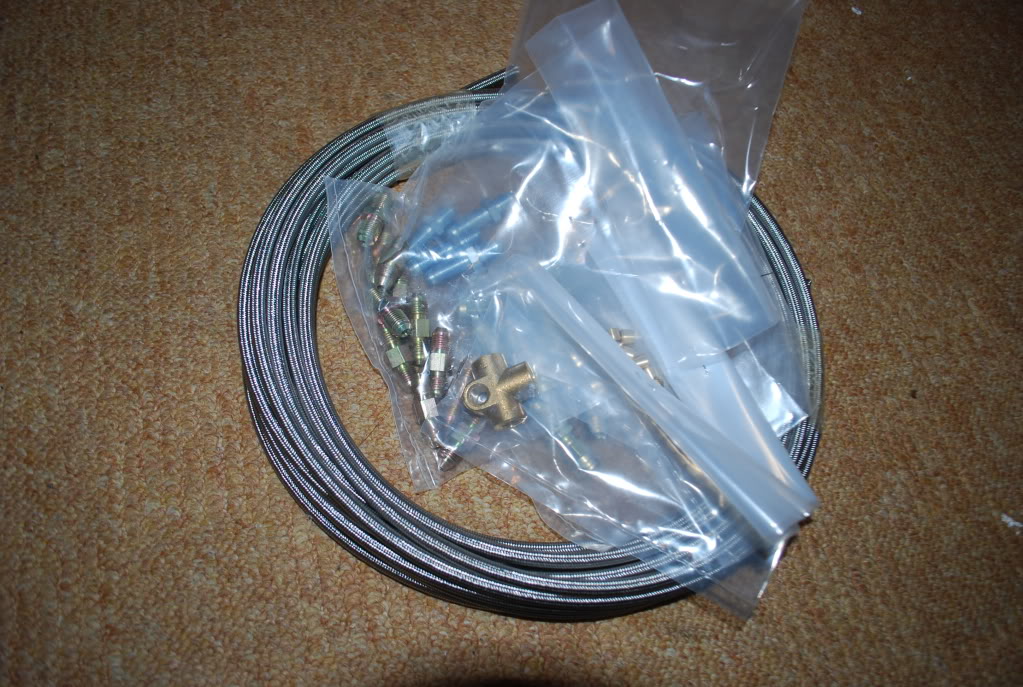
Made up the fuel lines

Just need a drill bit large enough to fit the bulk head fittings in.
With the need for a new header tank, a VW Golf one was thought of. I purchased one for pennies off eBay and got it this week.
The only problem is it isnt a perfect match, the exit diameter is a couple mm too small for the entry hole to the Samco hose.
So a quick bit of chopping about with some hoses found a solution which works a treat.

There is only one breather hole, but this suits me fine with the new rad setup.
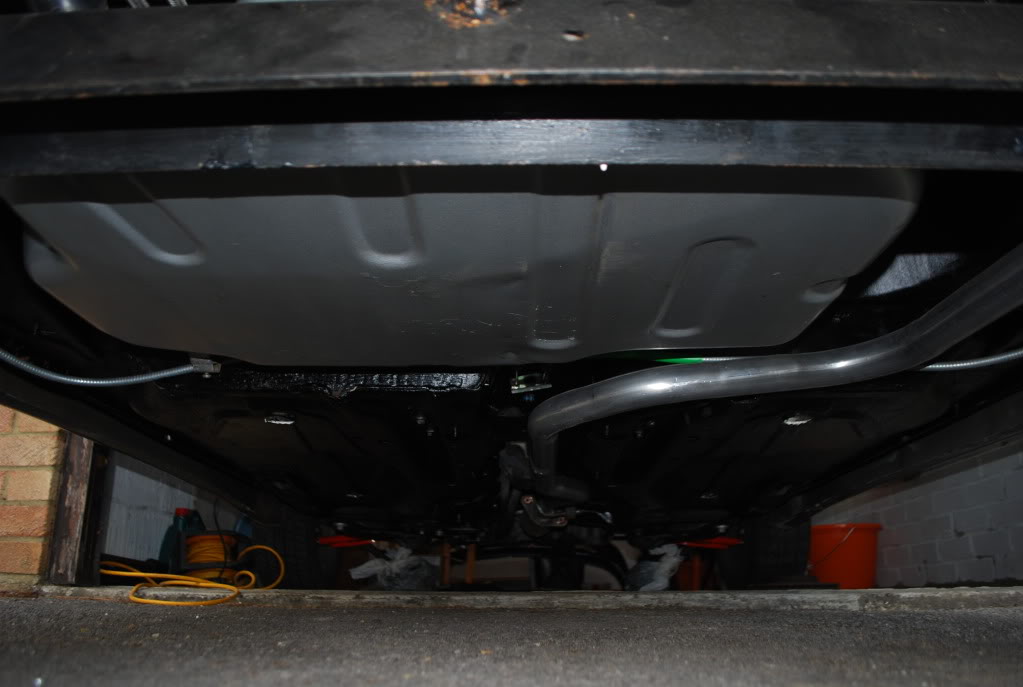
I also mocked up the fuel tank to fit the hoses, looks nice under a clean car.

Handbrake cable also went on, Tried it on my callipers and it was extremely tight, so may need to check the callipers have been built up properly.
The interior loom was tidied up. Its all connected (bar the boot wiring) and all tucked away.
Now the big issue, the engine loom.
I originally was going to keep the fuse box in the engine bay. I pulled the box apart and with a lot of dummy fitting, I've decided where to put it.
It's going to be mounted upside down inside the car where the pollen fitler used to go. This is so the fuses, relays etc are still visible and the only holes needed are the size of your fist to get the wiring through.
So all in all a good day! Might see it running soon!
IF you dont already know, the car is getting a temporary engine, a 1600 SE from a Zetec-S. I rebuilt it with new rings and bearings and a few other bits and bobs. The aim is to try and drive it this year.
With this in mind, I spent lots of ���
handbreak cable for my rear disc conversion which I've been meaning to get for months
I bought a Mk5 fuel pump, and got sent two. So if anyone wants a fuel pump, lt me know!
Got some brakes through, drilled and grooved discs with EBC greenstuff pads. I know they arent the best but will work fine till I get the 4 pots on.
The exhaust
fuel lines. They are braided Teflon Hose with all black fittings. I will need some finishers too but this should sort me out for now.
Then one day I started off with test fitting the lightsand grill. They are a very good fit. I though makig the front removable would mess with the way in which they sit, but if anything its improved it.
Got the front end off and the engine in position
Didnt take long to put it into place. Considering it was only me to do it and all I had was a jack lol.
Started fiddling about with the loom
And got all this back in
Managed to get some formof life into it quickly
Various ARP bolts from Jon, along with a Very lightweght flywheel!
I painted up the fuel tank and swapped the pumps over
and also gtmy seats
and side mounts
Big thanks to ShawSpeed for all these
My brake lines came through this week with a WillWood Bias adjuster
Made up the fuel lines
Just need a drill bit large enough to fit the bulk head fittings in.
With the need for a new header tank, a VW Golf one was thought of. I purchased one for pennies off eBay and got it this week.
The only problem is it isnt a perfect match, the exit diameter is a couple mm too small for the entry hole to the Samco hose.
So a quick bit of chopping about with some hoses found a solution which works a treat.
There is only one breather hole, but this suits me fine with the new rad setup.
I also mocked up the fuel tank to fit the hoses, looks nice under a clean car.
Handbrake cable also went on, Tried it on my callipers and it was extremely tight, so may need to check the callipers have been built up properly.
The interior loom was tidied up. Its all connected (bar the boot wiring) and all tucked away.
Now the big issue, the engine loom.
I originally was going to keep the fuse box in the engine bay. I pulled the box apart and with a lot of dummy fitting, I've decided where to put it.
It's going to be mounted upside down inside the car where the pollen fitler used to go. This is so the fuses, relays etc are still visible and the only holes needed are the size of your fist to get the wiring through.
So all in all a good day! Might see it running soon!

Thread Starter
Regular Contributor
Joined: May 2009
Posts: 231
Likes: 0
From: Wokingham
I've done more on this lately. Finding it hard to cram some time in during my last few weeks at uni but I'm getting there.
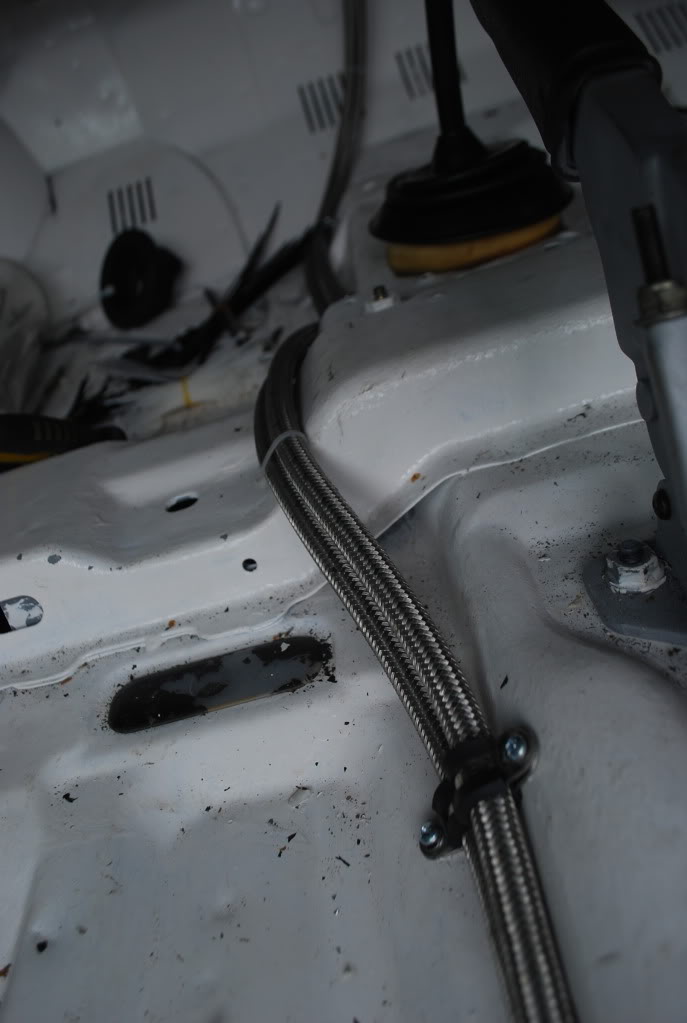
Since the last update I've made up all the fuel lines and fitted them through the car. P-clips are on order to tie them down to the floor.
Brakes lines have started to get made up. Loosely fitted these too, just trying to get the lengths sorted before it all gets fitted down.
The engine loom is sorted.
Rear brakes are on.
Pictures!
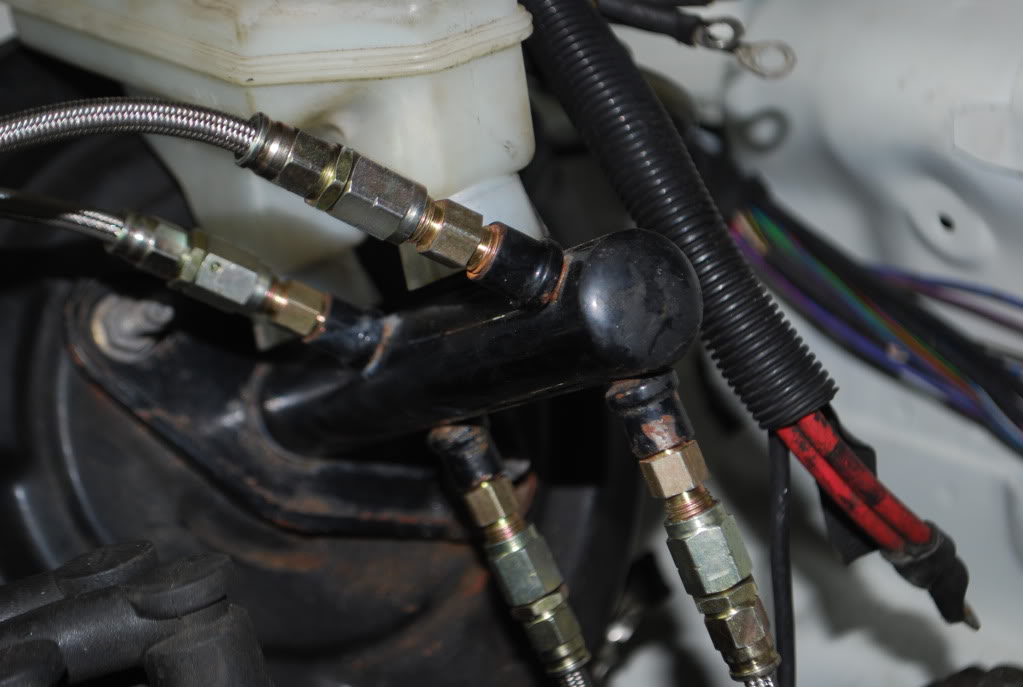
Brake lines from master cylinder
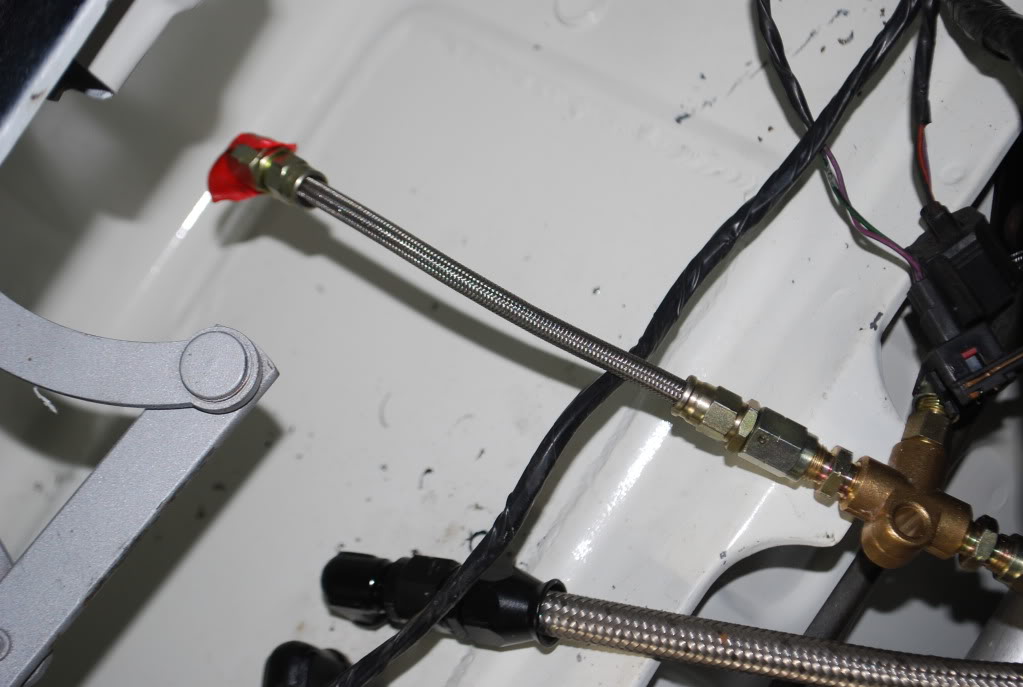
T-Piece the two rears together
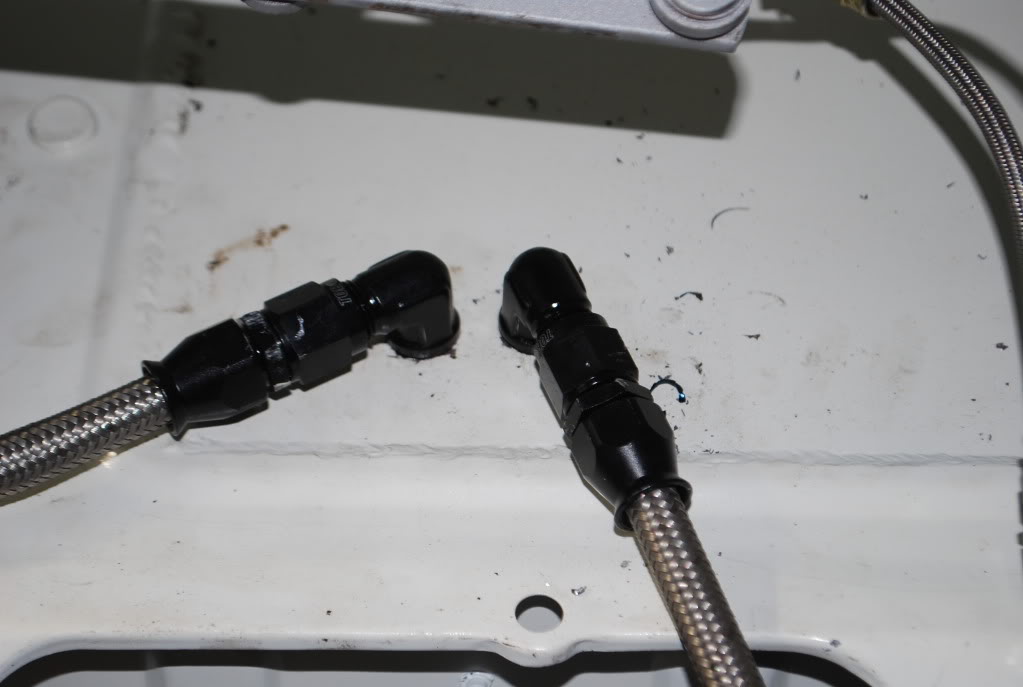
Fuel lines coming through the bulkhead
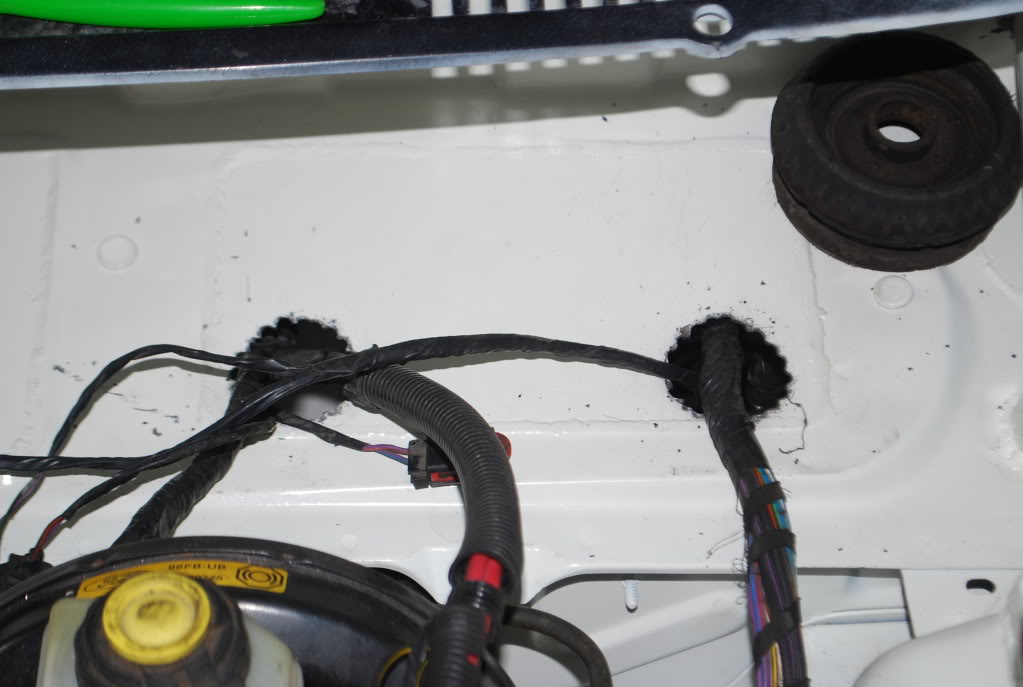
Loom holes. this was a tricky one. The hole cutters I had were so weak. So we had to drill several holes and then drill the circle of holes out. Very rough finish but a file and a gromet will fix that.
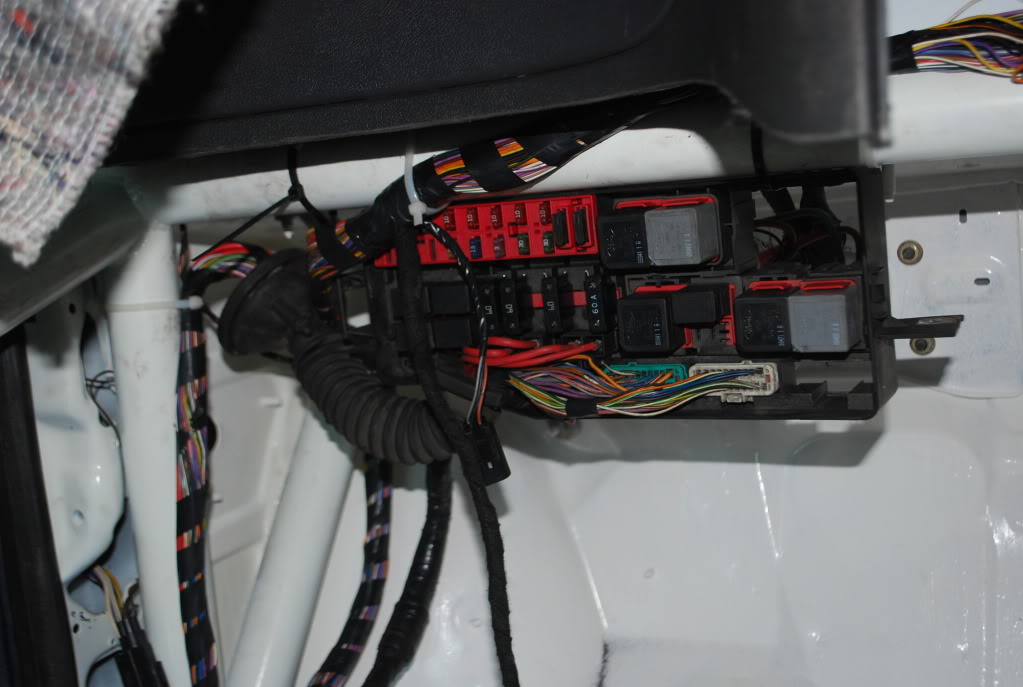
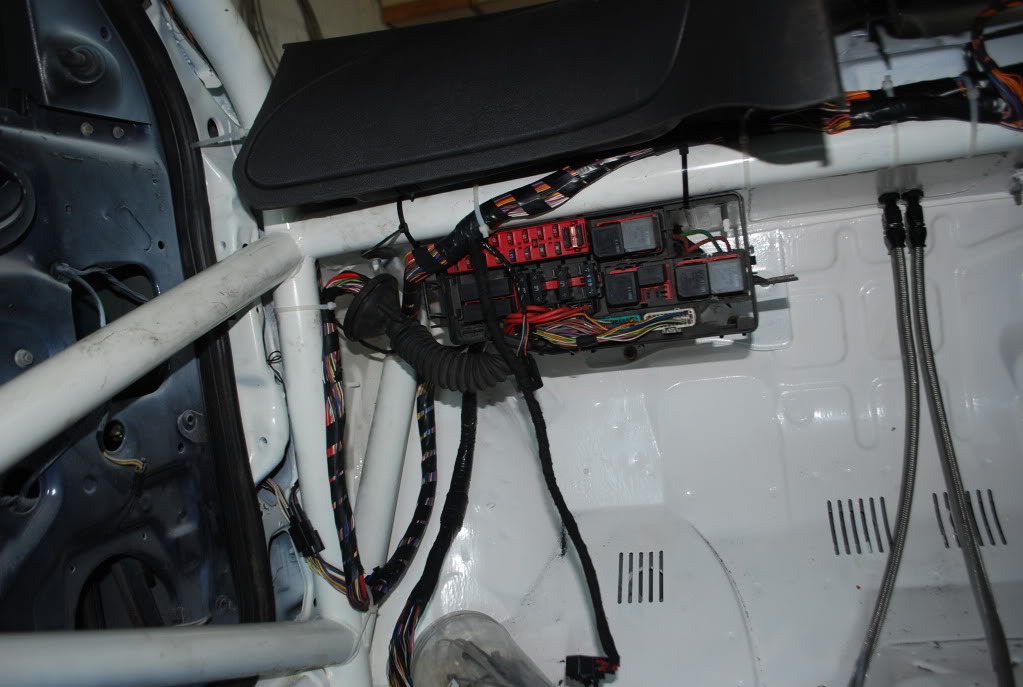
And the relocated fuse box
Then the fuel lines coming through the floor from the tank
Organised chaos in the engine bay
and the rear brakes on
Since the last update I've made up all the fuel lines and fitted them through the car. P-clips are on order to tie them down to the floor.
Brakes lines have started to get made up. Loosely fitted these too, just trying to get the lengths sorted before it all gets fitted down.
The engine loom is sorted.
Rear brakes are on.
Pictures!
Brake lines from master cylinder
T-Piece the two rears together
Fuel lines coming through the bulkhead
Loom holes. this was a tricky one. The hole cutters I had were so weak. So we had to drill several holes and then drill the circle of holes out. Very rough finish but a file and a gromet will fix that.
And the relocated fuse box
Then the fuel lines coming through the floor from the tank
Organised chaos in the engine bay
and the rear brakes on


Thread Starter
Regular Contributor
Joined: May 2009
Posts: 231
Likes: 0
From: Wokingham
I was going to but ended up using Halfords paint as I couldnt get hold of a spray gun/compressor.
Started tidying bits up.
The rad support I had didnt quite fit, it wasnt deep enough for the rad to fit. So got a Zetec-S one.
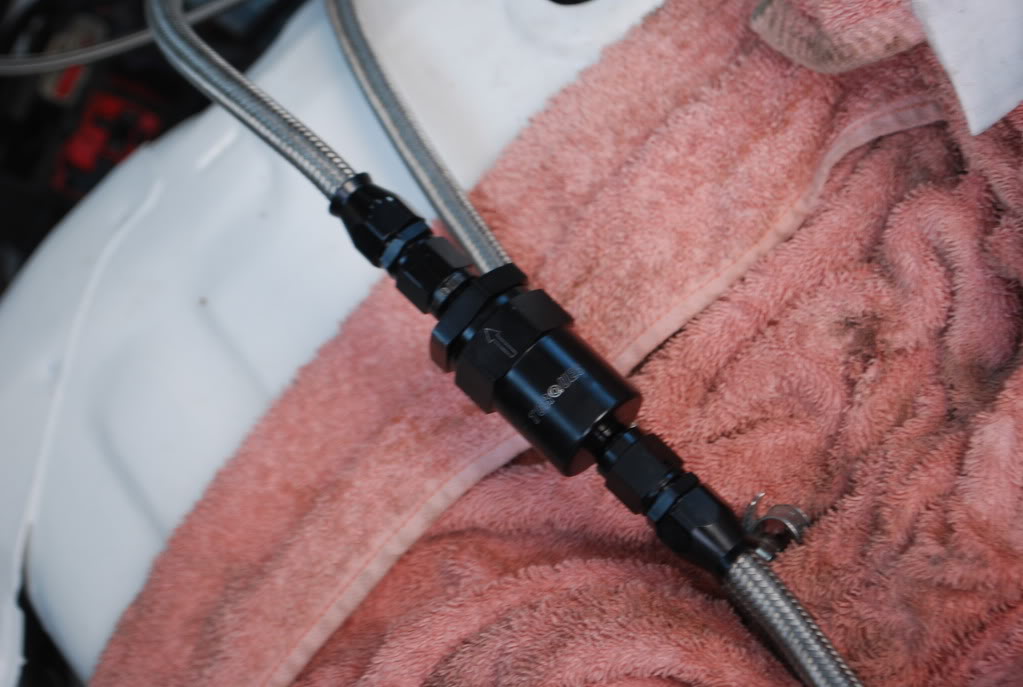
I then clamped down all the fuel lines and fitted the filter.
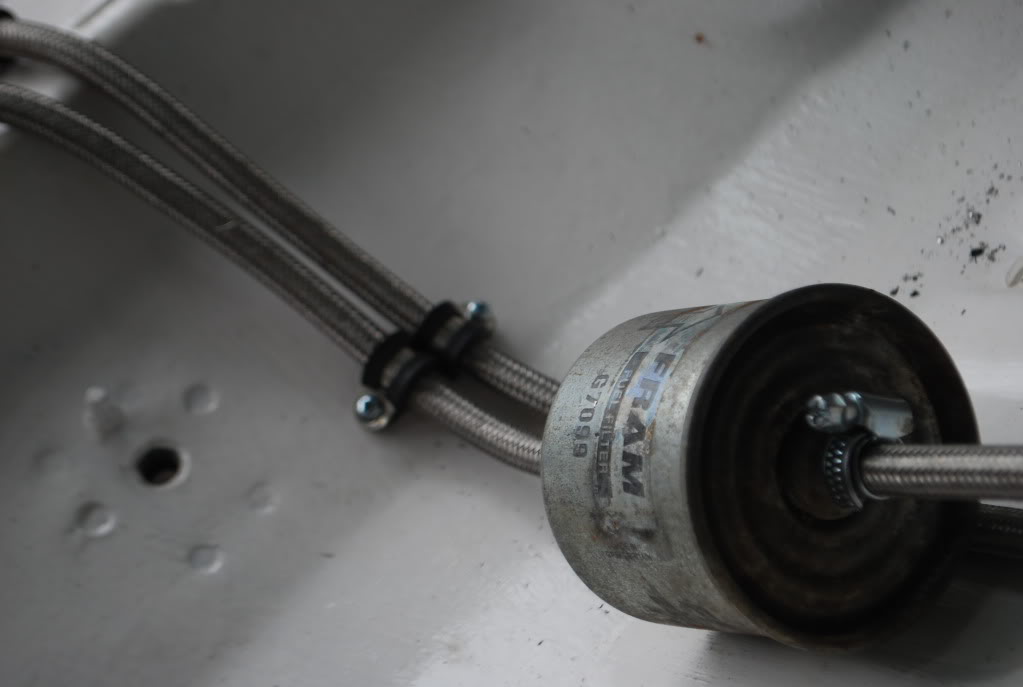
A bracket for the filter will be made up.
After earthing everything out, I put the battery in to see what worked and what didn't.
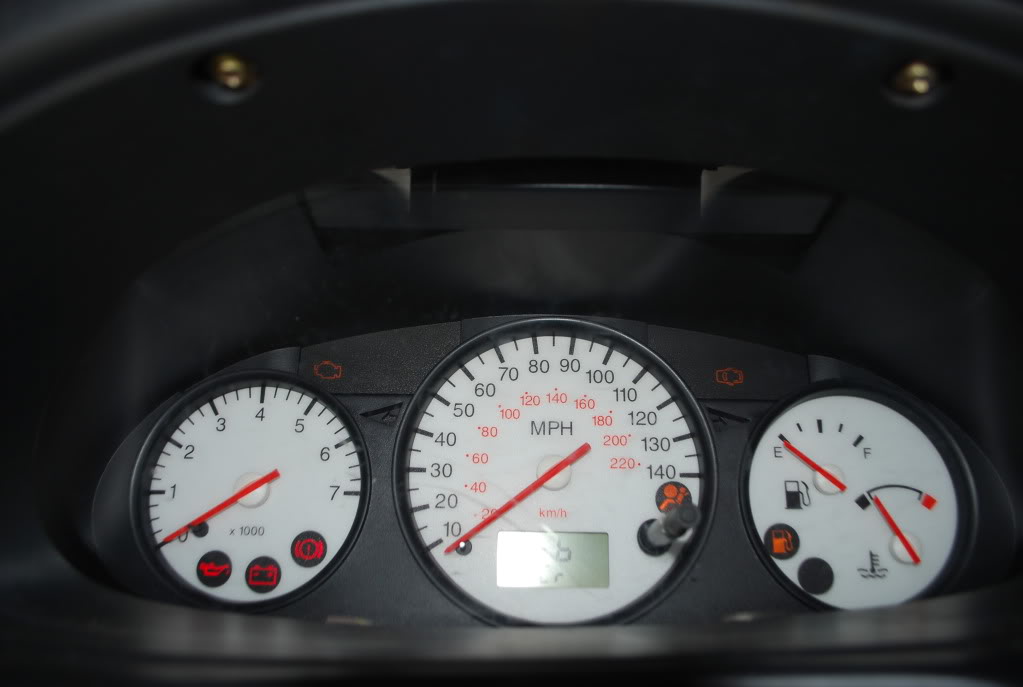
All the things that I expected to come up, did. I do have a problem with the stalk though where the indicators aren't working correctly, the windscreen wiper doesn't work and the hi-beams dont work. Thats about all that doesn't work. I need to double check everything and see whats wrong.
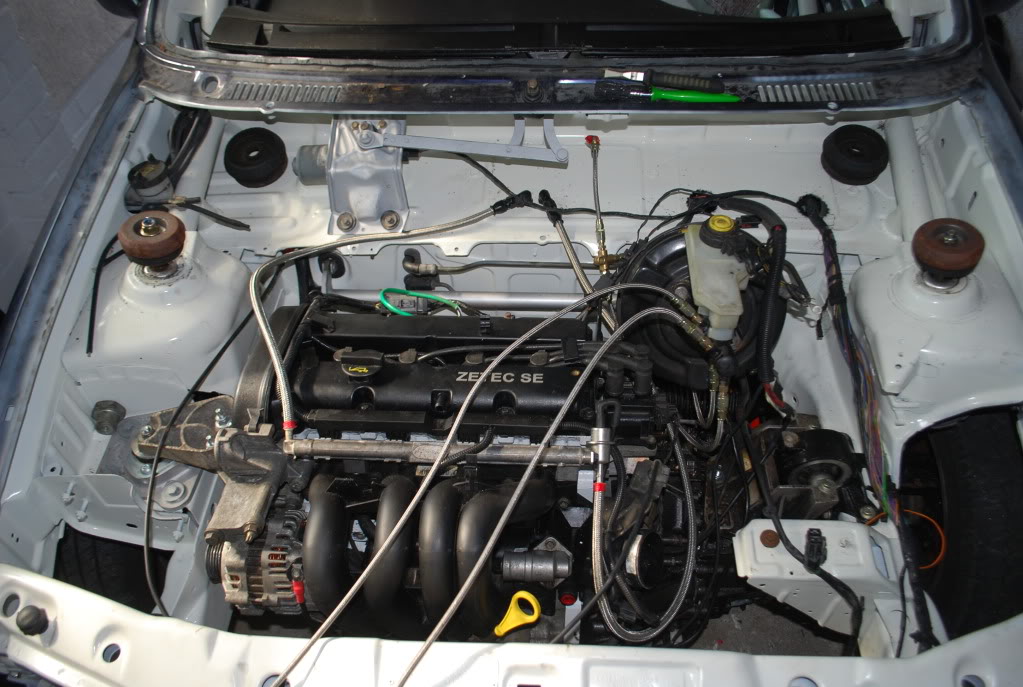
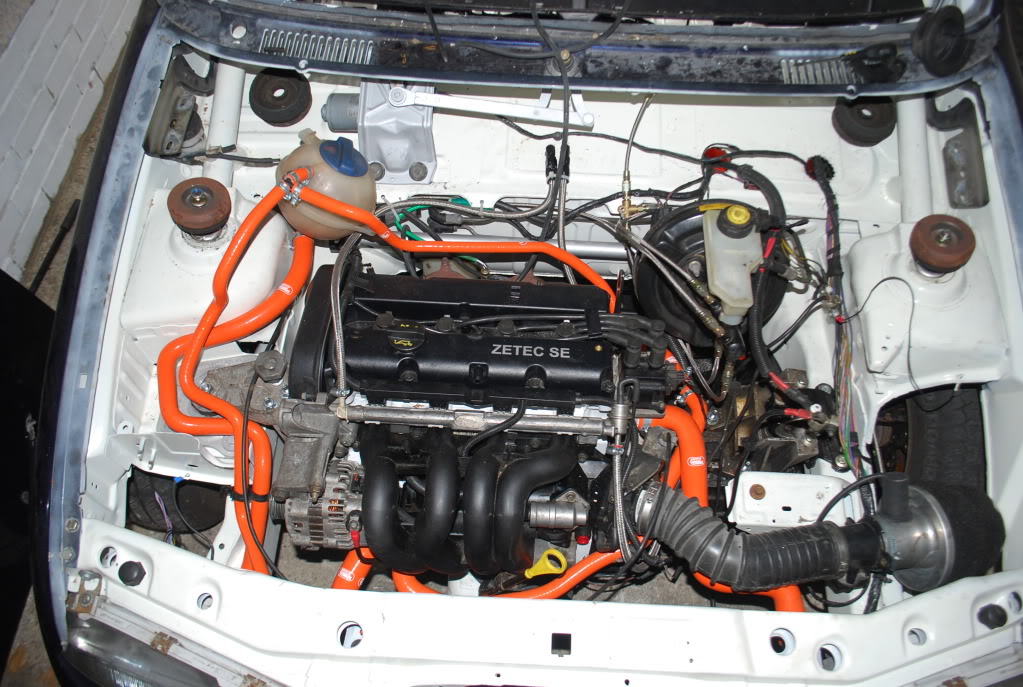
Quick shot of the engine bay (which still needs to be tidied up)
Fitted front brakes - mainly to clear some room in the garage
and tucked it all away
Need to order lots of brake fittings and a few other things.
Cheers
Started tidying bits up.
The rad support I had didnt quite fit, it wasnt deep enough for the rad to fit. So got a Zetec-S one.
I then clamped down all the fuel lines and fitted the filter.
A bracket for the filter will be made up.
After earthing everything out, I put the battery in to see what worked and what didn't.
All the things that I expected to come up, did. I do have a problem with the stalk though where the indicators aren't working correctly, the windscreen wiper doesn't work and the hi-beams dont work. Thats about all that doesn't work. I need to double check everything and see whats wrong.
Quick shot of the engine bay (which still needs to be tidied up)
Fitted front brakes - mainly to clear some room in the garage
and tucked it all away
Need to order lots of brake fittings and a few other things.
Cheers
Thread Starter
Regular Contributor
Joined: May 2009
Posts: 231
Likes: 0
From: Wokingham
Update. Good and bad.
Bad
Duratec idea is out the window. I've sold most bits to get some money back. Could justify spending everything I had to at this point in my life.
Good
Good news is the car id definitely staying and well on its way to working.
Got it running, just can't drive it yet
Bit more has happened to this since the last update.
Had a problem with fuel leaks. Sorted this with some hose finishers and a billet fuel filter.
Exhaust is on and fuel tank up
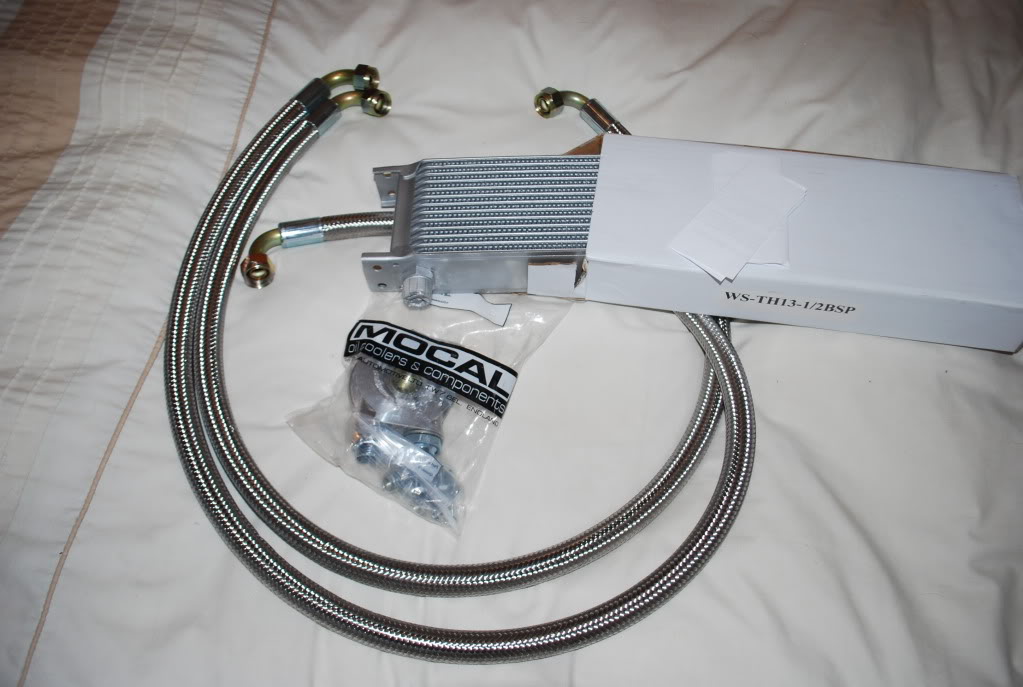
Got all this through the post


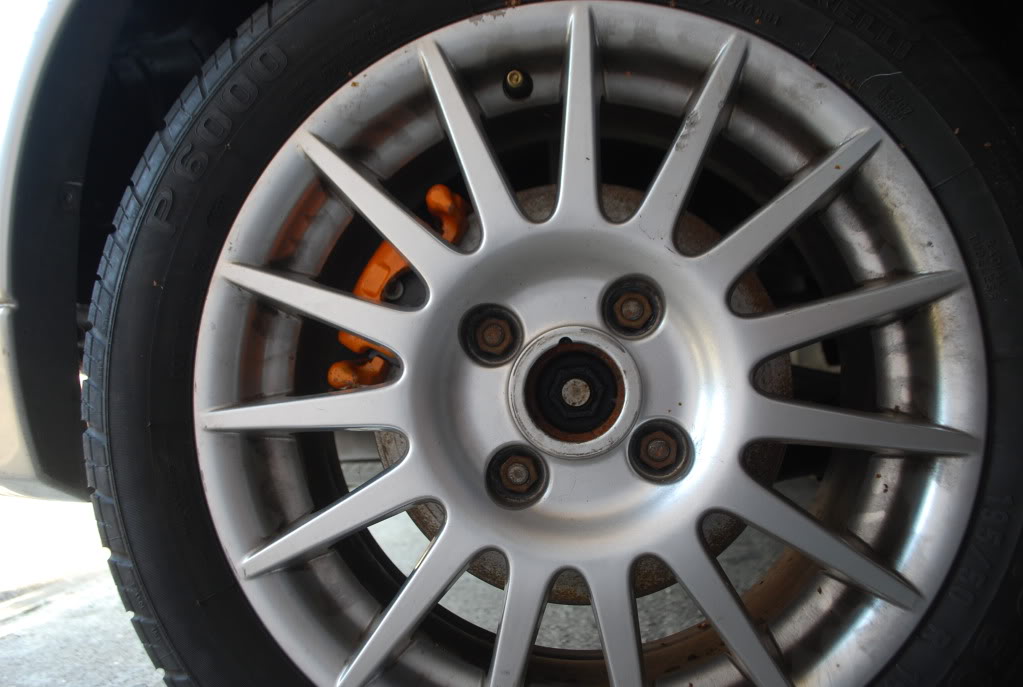
then got some tyres
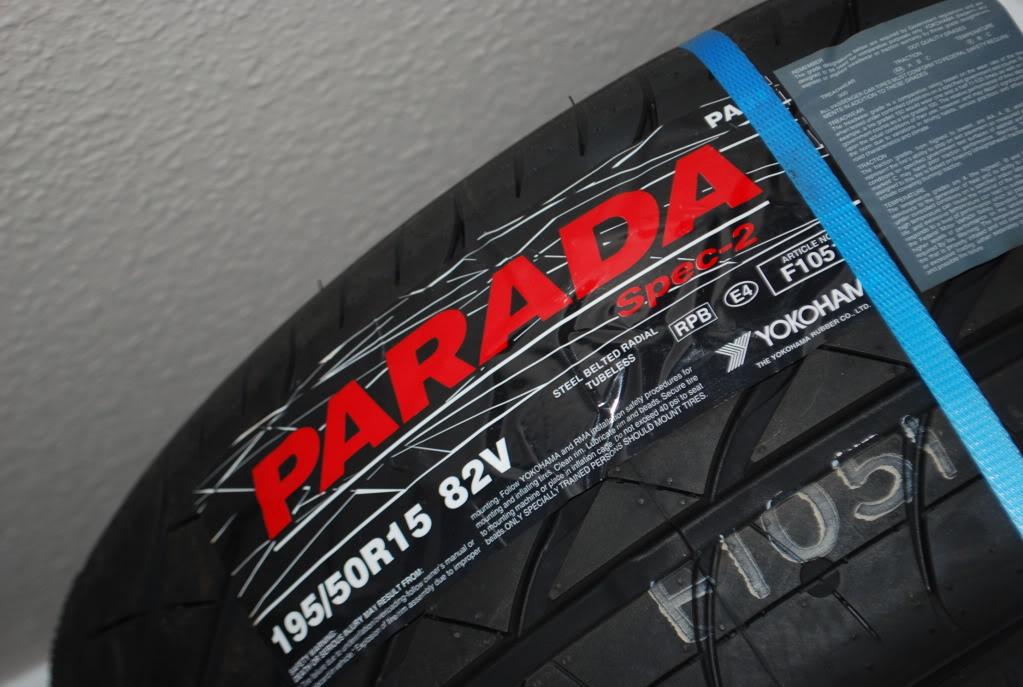
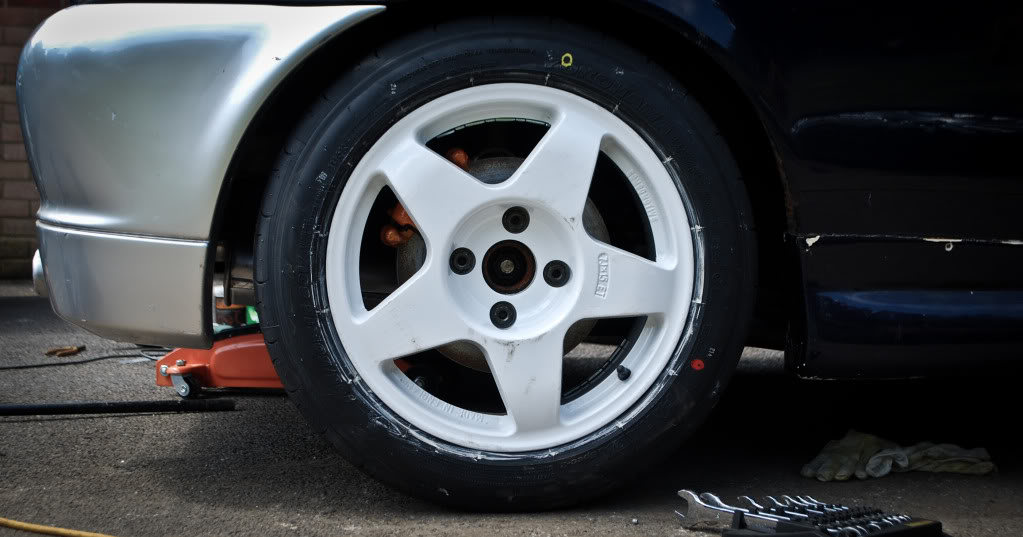
and some wheels to suit.
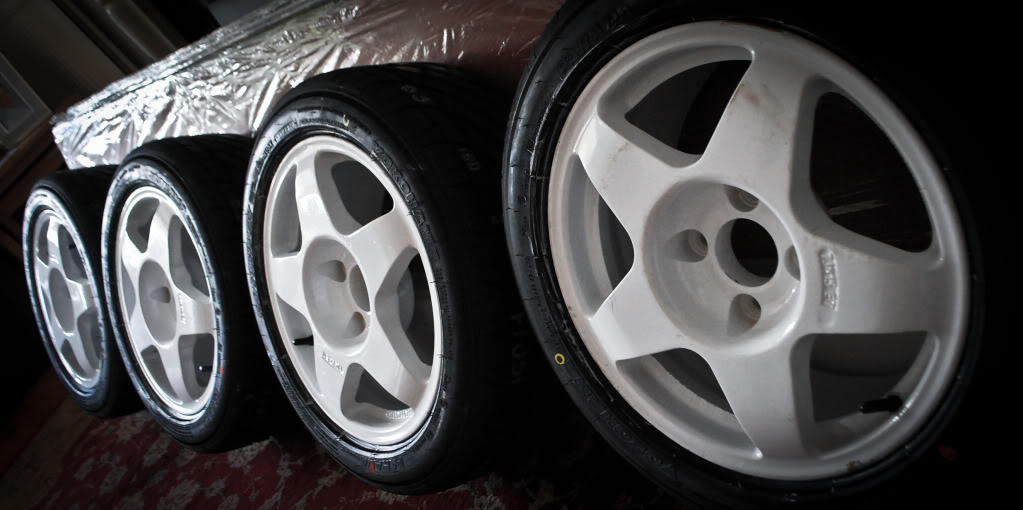
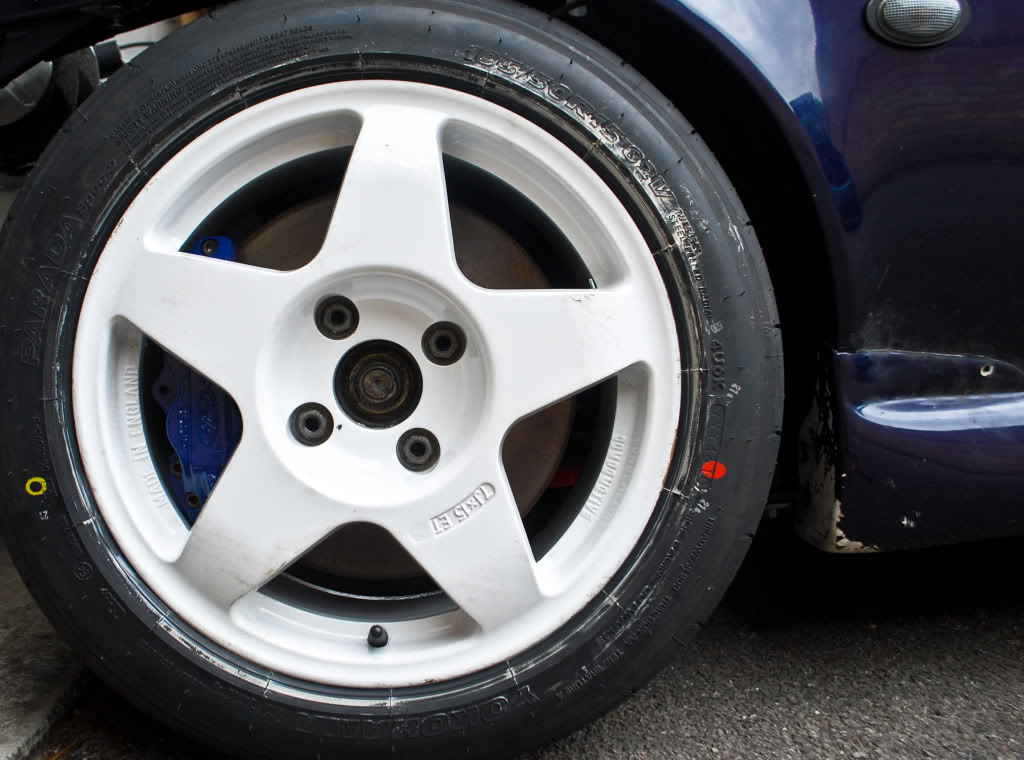
They fit over my new front brakes - Ford Racing Puma 4 pots.
Brake lines are laid, tightened and bolted down. Was waiting for the wheels to put the brakes on, so they should be on and bled in the next couple days.
Driveshafts are in and gearbox fluid is in.
I have a 50mm core Cossie rad to go on, so will get that sorted soon too. Then I can test drive it!
Bad
Duratec idea is out the window. I've sold most bits to get some money back. Could justify spending everything I had to at this point in my life.
Good
Good news is the car id definitely staying and well on its way to working.
Got it running, just can't drive it yet
Bit more has happened to this since the last update.
Had a problem with fuel leaks. Sorted this with some hose finishers and a billet fuel filter.
Exhaust is on and fuel tank up
Got all this through the post
then got some tyres
and some wheels to suit.
They fit over my new front brakes - Ford Racing Puma 4 pots.
Brake lines are laid, tightened and bolted down. Was waiting for the wheels to put the brakes on, so they should be on and bled in the next couple days.
Driveshafts are in and gearbox fluid is in.
I have a 50mm core Cossie rad to go on, so will get that sorted soon too. Then I can test drive it!
Thread Starter
Regular Contributor
Joined: May 2009
Posts: 231
Likes: 0
From: Wokingham
Cage was a little over �1000. This included the cage (supplied and fitted), front end made removable, cut roof, welded up holes in bulk head and a hole in the floor.
Best price I got quoted by far!
I turned 21 in February this year.
Best price I got quoted by far!
I turned 21 in February this year.

Advanced PassionFord User
Joined: May 2011
Posts: 2,419
Likes: 272
From: God knows!
Thanks pal. 1000 is a great price. I only asked about your age as it seems you have skills way beyond your years, especially when I see the spreadsheets and equasions that you use for injector size and trumpet length. Very very impressive, great build. Shame about the engine change though.
Jon
Jon
Thread Starter
Regular Contributor
Joined: May 2009
Posts: 231
Likes: 0
From: Wokingham
It was part of my degree, so I had to learn it. Although it was interesting. A performance engine will be put into this in later years; would be a shame not to with the chassis this thing has! But for now, I need money elsewhere!
rear brake lines are finished and tightened.
Fronts are pretty much done too, but my only drill bit I had at the garage broke. Will finish it off later.
Front brakes were mounted. Unfortunately, due to the slow speed of PumaBuild postage services, I can't bleed the brakes. So I need to wait till I get my pads through from them to bleed them.
Got a new clutch pipe that works perfectly. Bled that and it works well.
Meant to be collecting some metal to make up my frames for the seats. So hopefully get them done soon too.
Pics.
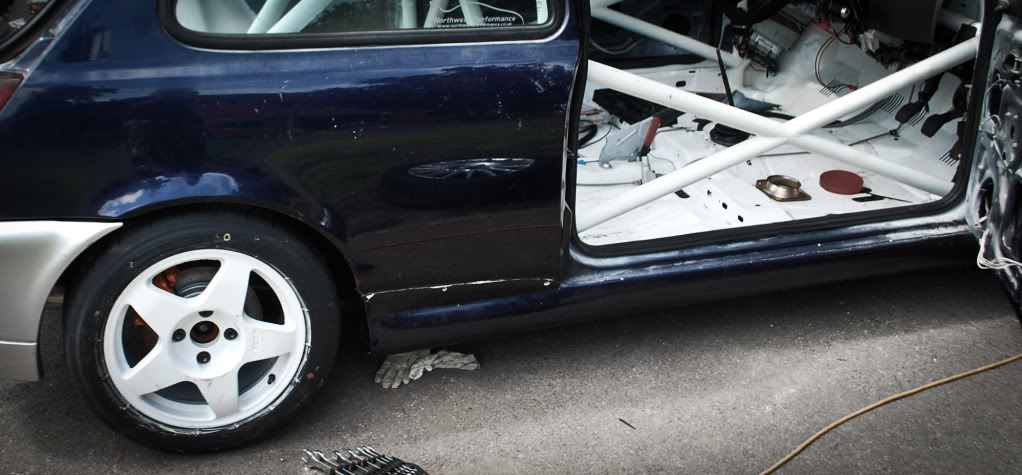
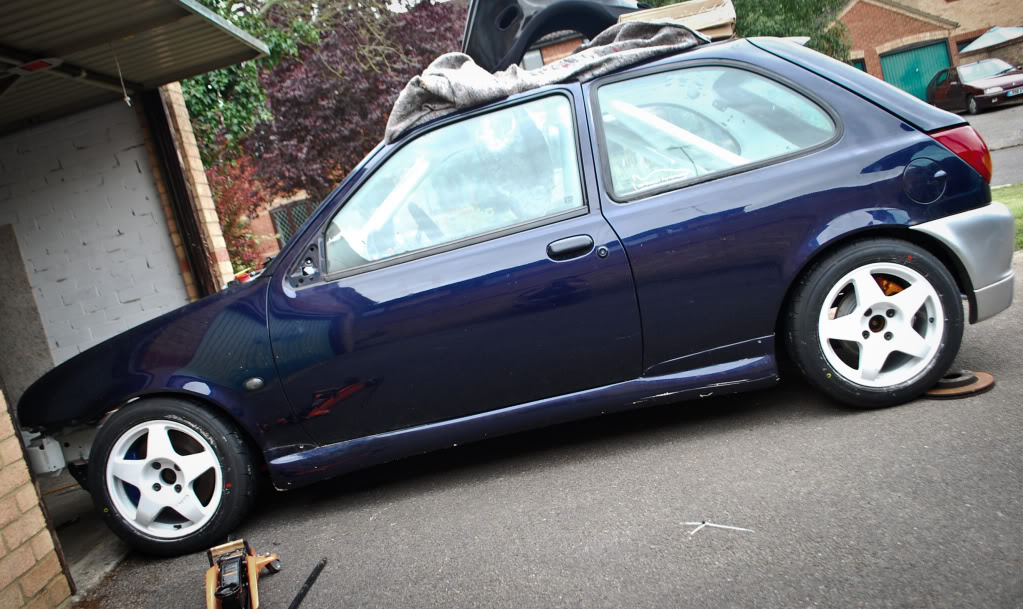
Not bad paintwork for a year of not being cleaned haha
rear brake lines are finished and tightened.
Fronts are pretty much done too, but my only drill bit I had at the garage broke. Will finish it off later.
Front brakes were mounted. Unfortunately, due to the slow speed of PumaBuild postage services, I can't bleed the brakes. So I need to wait till I get my pads through from them to bleed them.
Got a new clutch pipe that works perfectly. Bled that and it works well.
Meant to be collecting some metal to make up my frames for the seats. So hopefully get them done soon too.
Pics.
Not bad paintwork for a year of not being cleaned haha
Thread Starter
Regular Contributor
Joined: May 2009
Posts: 231
Likes: 0
From: Wokingham
Fuel lines are from Torques.co.uk - they have an eBay shop too. This was more affordable. Brilliant customer service from these people.
UPDATE
Todays effots saw a big leap.
Front brakes were finally mounted and lines positioned. So all thats done and out the way.
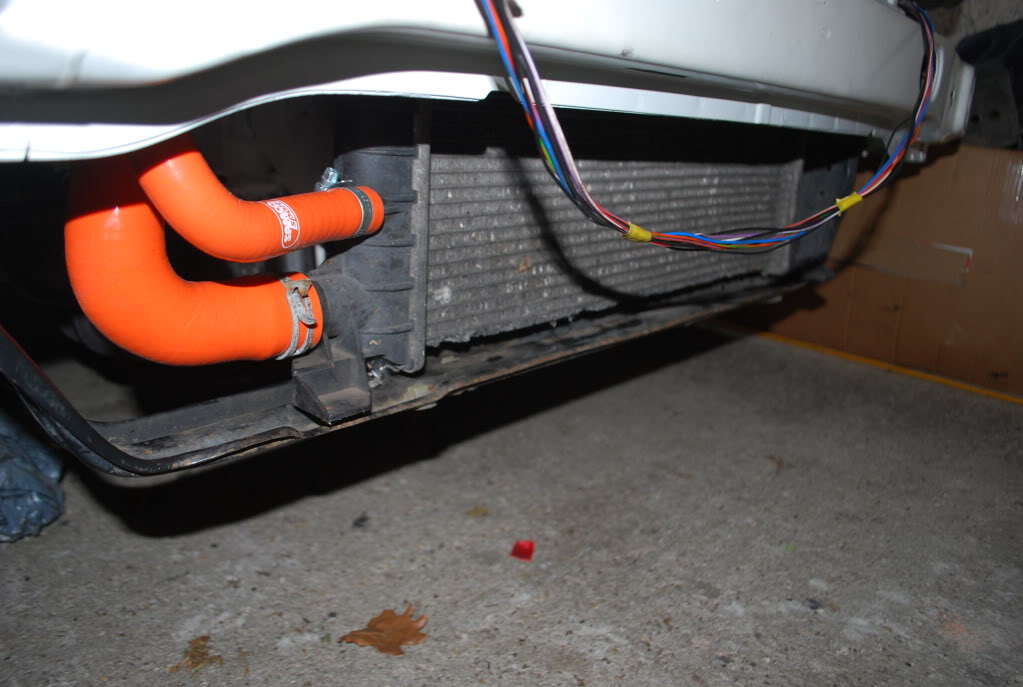
I then moved onto the new rad setup. I bought a cosworth 50mm core rad
Compared the two.

Mssive difference in core

With twin fans!

And made som mounting brackets andgot it into positon

Next was sorting the hoses out. I hated where the header tank was, floating about near the wiper motor. So I decided to move the battery to the boot and mount it where the battery would sit.
Sorting the hoses out was a bit of a head scratch and some trial and error, but its all plumbed in

Engine bay looks miles cleaner
More soon.