
ZX10R turbo kit car build - update 10-08-13

 30-12-2010, 09:40 PM
#242
10K+ Poster!!
Thread Starter

Cheers for the positive comments lads 
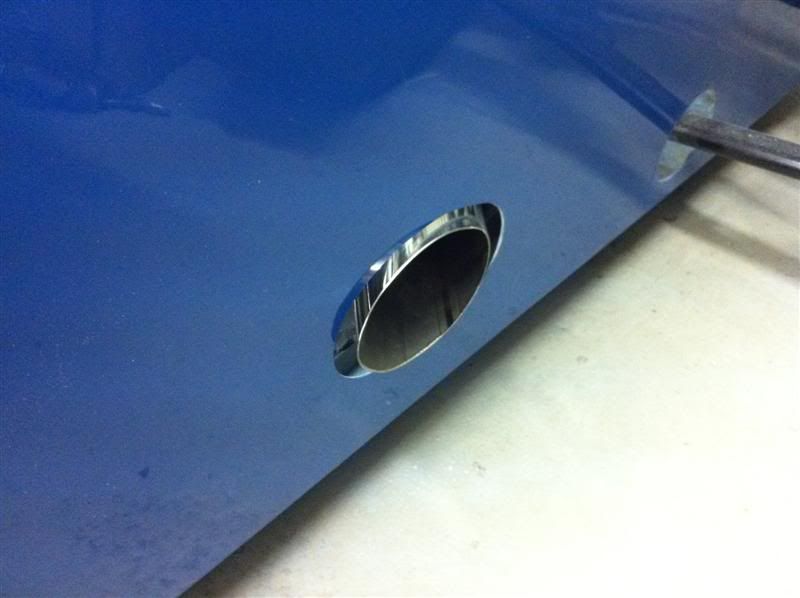
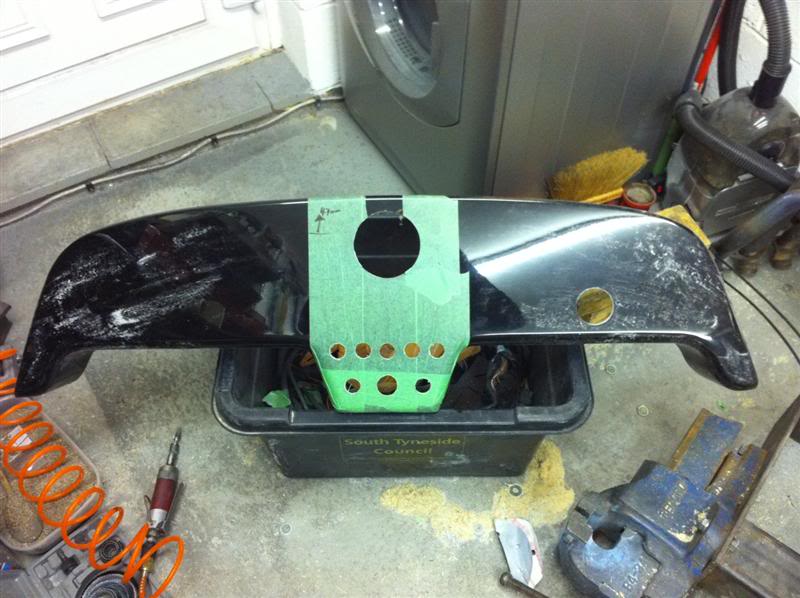
Just for you you nosey git... the hole in the bottom of the petrol tank is 62mm diameter.
Been down to Mac#1 this morning with a mate to drop of some parts off to be modified to suit his Mac Type 9R... while we were there I collected some of the switches which were on back order, still waiting on two but I can still progress the dash panel in the mean time.
Once home I went in the garage and welded on the clamp on exhaust fitting to the end of the silencer

then welded a bracket to the end of the silencer to allow it to be supported from above by a rose jointed linkage.
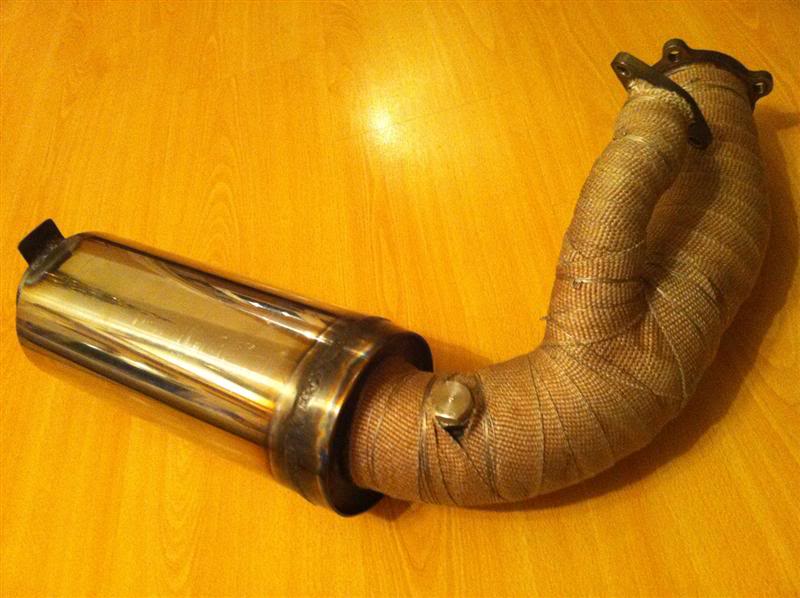
The silencer was then wrapped in Thermo Tec Generation II Copper Heat Wrap
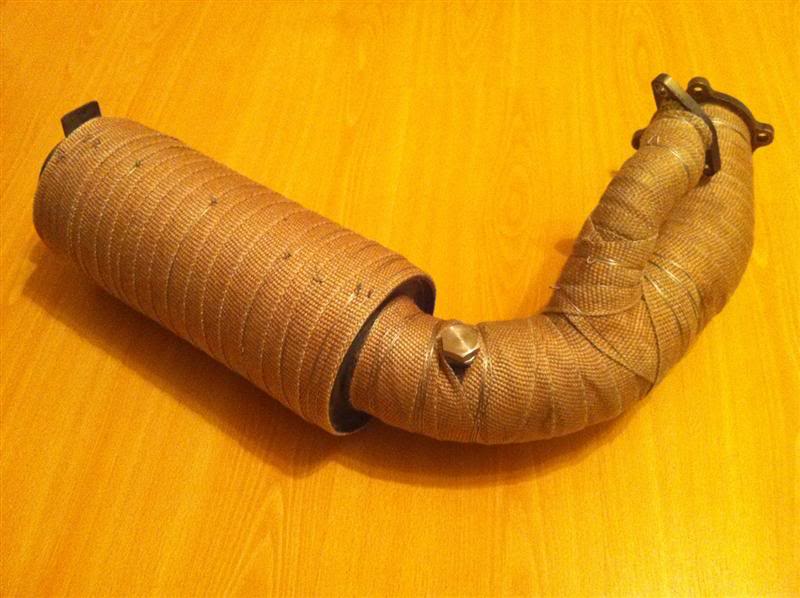
and then given a couple of coats of Thermo Tec High Heat paint.
That's all for now folks.
Just for you you nosey git... the hole in the bottom of the petrol tank is 62mm diameter.
Been down to Mac#1 this morning with a mate to drop of some parts off to be modified to suit his Mac Type 9R... while we were there I collected some of the switches which were on back order, still waiting on two but I can still progress the dash panel in the mean time.
Once home I went in the garage and welded on the clamp on exhaust fitting to the end of the silencer
then welded a bracket to the end of the silencer to allow it to be supported from above by a rose jointed linkage.
The silencer was then wrapped in Thermo Tec Generation II Copper Heat Wrap
and then given a couple of coats of Thermo Tec High Heat paint.
That's all for now folks.

 30-12-2010, 10:50 PM
#245
10K+ Poster!!
Thread Starter
 03-01-2011, 08:22 PM
#246
10K+ Poster!!
Thread Starter
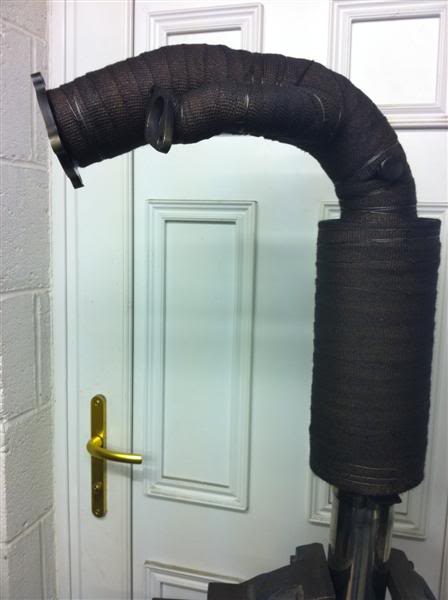
I finally got round to bolting the exhaust on with some new gaskets, which allowed me to cut the hole in the side panel for the last time.
This is how it looks with a 3" inwardly rolled tailpipe
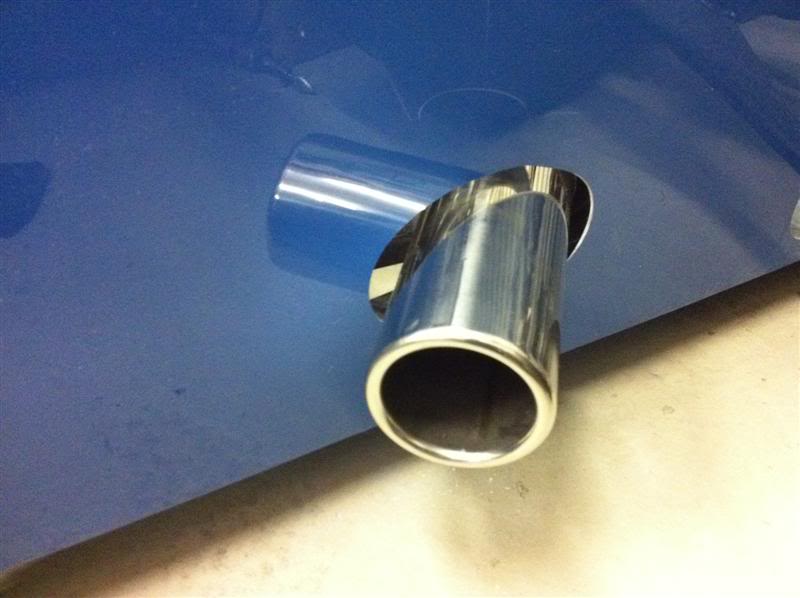
But i didn't like it so cut it to have the slash cut look... much better
Here's a shot of the finished exhaust, just waiting on the rose joints being delivered then it will be supported/hung at the end of the silencer.
The dash panel rested in position
Hole cut for the steering column
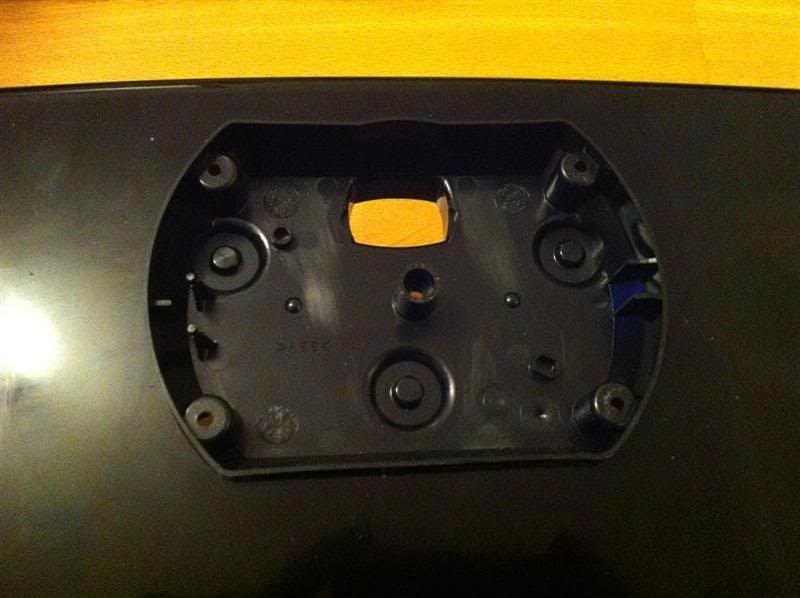
Marked out and cut the holes for the switches, then progressed cutting the hole for the clocks.
Sort of how the finished article will look, after the IVA i'll be adding some guages (boost/oil temp/charge air temp) below the standard instrument cluster.
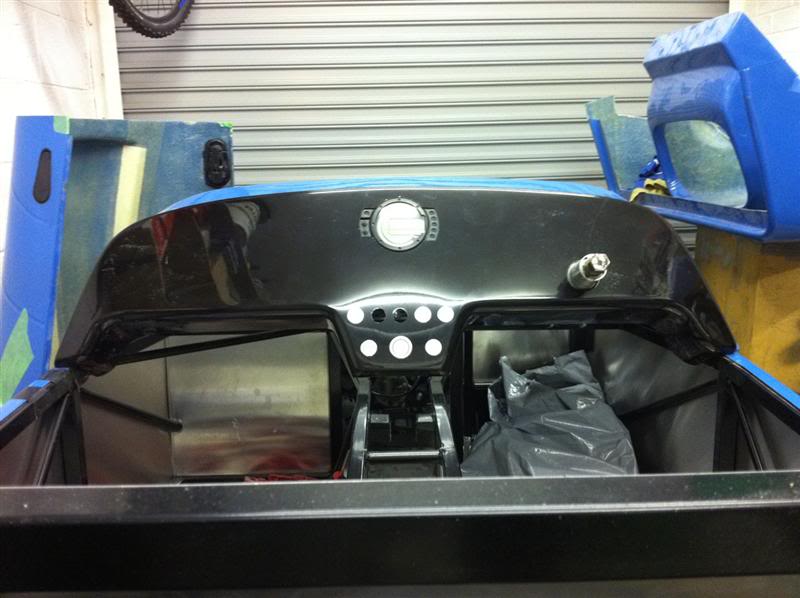
I'm not happy with the cutting of the dash panel around the clocks, it will need to be addressed in one way or another as it looks poor!
This is how it looks with a 3" inwardly rolled tailpipe
But i didn't like it so cut it to have the slash cut look... much better
Here's a shot of the finished exhaust, just waiting on the rose joints being delivered then it will be supported/hung at the end of the silencer.
The dash panel rested in position
Hole cut for the steering column
Marked out and cut the holes for the switches, then progressed cutting the hole for the clocks.
Sort of how the finished article will look, after the IVA i'll be adding some guages (boost/oil temp/charge air temp) below the standard instrument cluster.
I'm not happy with the cutting of the dash panel around the clocks, it will need to be addressed in one way or another as it looks poor!
04-01-2011, 08:19 PM
#250
10K+ Poster!!
Thread Starter
Thought people would prefer the exhaust with a slash cut 
Here's a tiny update from today, not done much other than collect this header tank from the post office
then decided where the fuel pressure regulator was going to be fitted, measured up and ordered the braided fuel lines and fittings needed to complete the fuel side of things
Not long at all til it's ready to be wired up and then fired up!
 04-01-2011, 10:21 PM
#252
Thought people would prefer the exhaust with a slash cut
Here's a tiny update from today, not done much other than collect this header tank from the post office
then decided where the fuel pressure regulator was going to be fitted, measured up and ordered the braided fuel lines and fittings needed to complete the fuel side of things
Not long at all til it's ready to be wired up and then fired up!
 04-01-2011, 10:29 PM
#254
10K+ Poster!!
Thread Starter
Just spotted this and I want one... it's class 
It's a shame money needs spending elsewhere at the moment, i'll have to treat myself when the cars on the road!

It's a shame money needs spending elsewhere at the moment, i'll have to treat myself when the cars on the road!
04-01-2011, 10:42 PM
#256
10K+ Poster!!
Thread Starter
I'll probably not bother with one around the doors but when I go for a play over the lakes etc i'll shove one on, i reckon a stone catching you on the bonce after being kicked up by a bike in front would bring tears to your eyes or cave your skull in!
04-01-2011, 11:23 PM
#258
10K+ Poster!!
Thread Starter
Running around 300bhp at well under 1bar with forged internals etc it should be ok but with the boost wound up and the possibility of 450bhp+ it may be a different story, will just have to wait and see.
This is the spec below, although that kit uses the gt3071r turbo.
http://www.bigccracing.com/shop/prod...0&source=thumb
This is the spec below, although that kit uses the gt3071r turbo.
http://www.bigccracing.com/shop/prod...0&source=thumb
Last edited by Red16; 04-01-2011 at 11:33 PM.
05-01-2011, 06:10 PM
#259
I'm Finding My Feet Here Now

Join Date: Aug 2004
Posts: 125
Likes: 0
Received 0 Likes
on
0 Posts
great project btw, looks fantastic so far, would love to build one, maybe next year.
05-01-2011, 06:10 PM
#260
10K+ Poster!!
Thread Starter
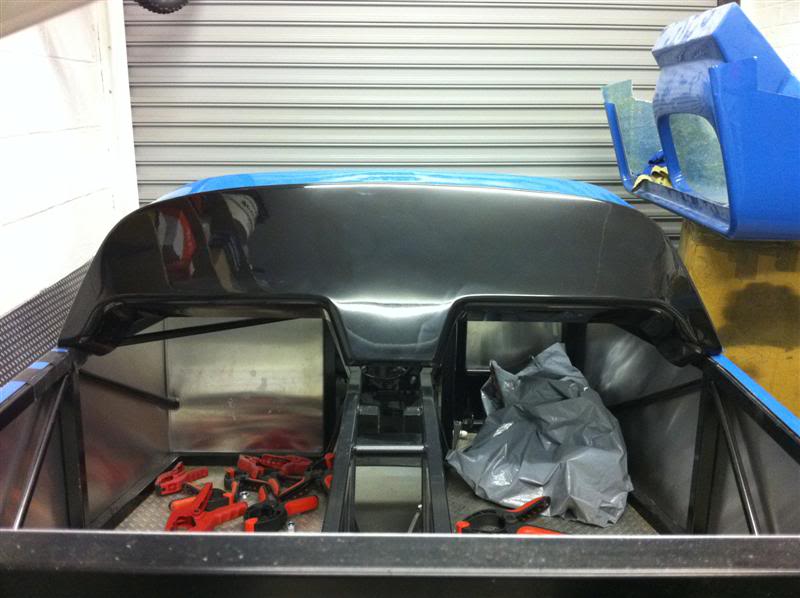
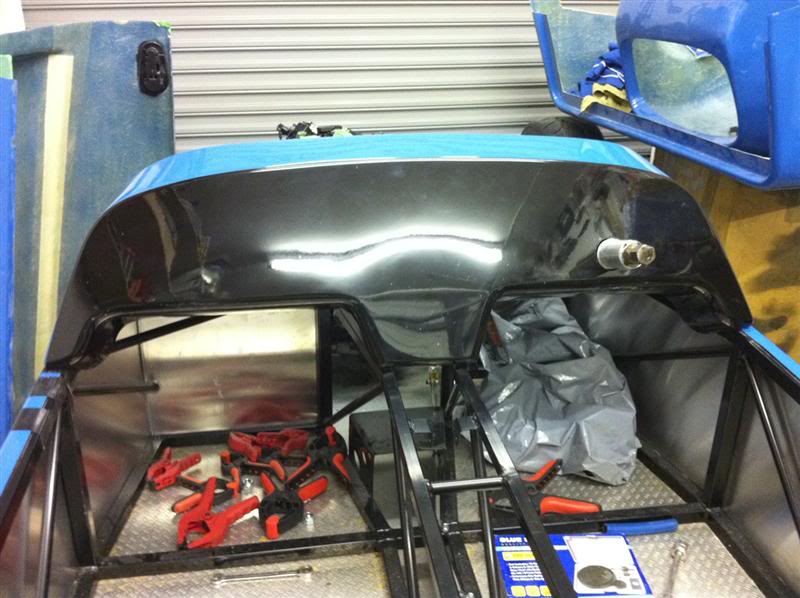
This afternoon I had another look at the dash, it was decided that it definitely needed some remedial work because it looked hideous!  as you can see below
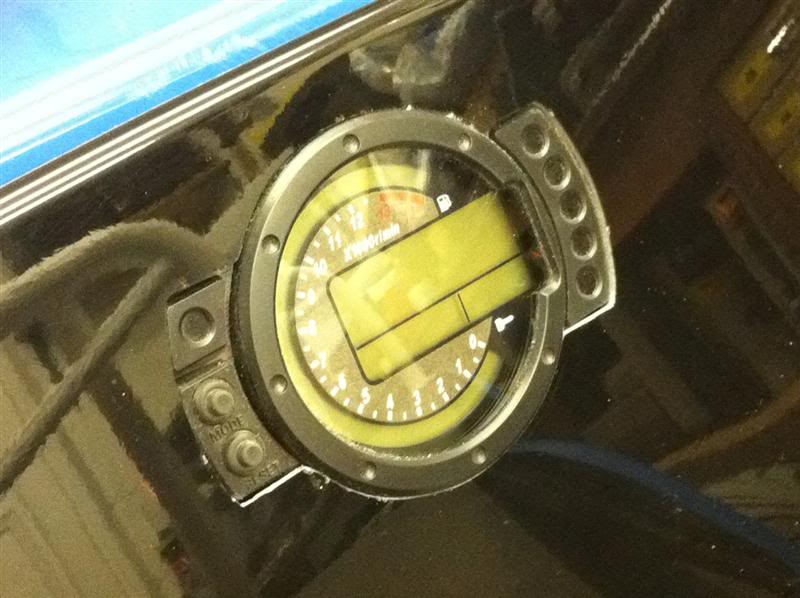
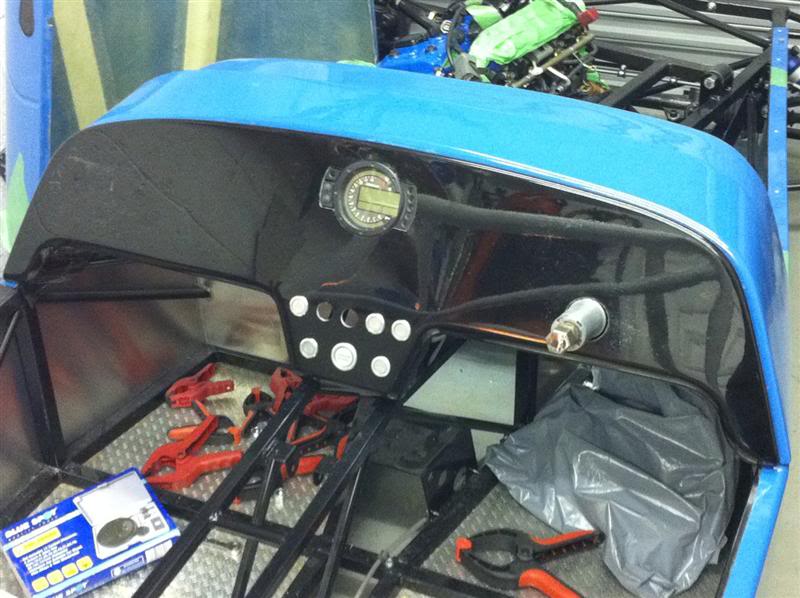
So I dismantled the clocks, then marked out and cut the new orifice into the dash

The rear of the clocks fits through the dash from behind like so
and when assembled the clocks look like this... much better

It definitely would have looked better with the speedo face flush with the dash panel as per the previous way if the cutting had been neat but this way looks much better than the previous with untidy cutting. I may redo the dash at a later date.
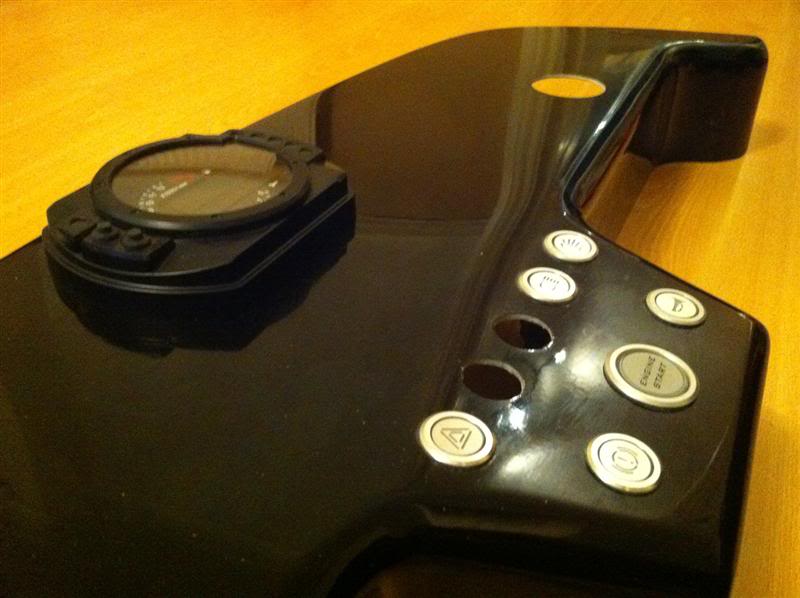
The semi complete dash back on the car
Handbrake lever fitted
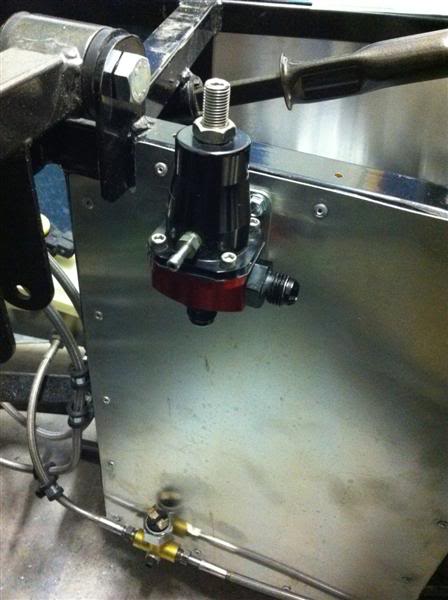
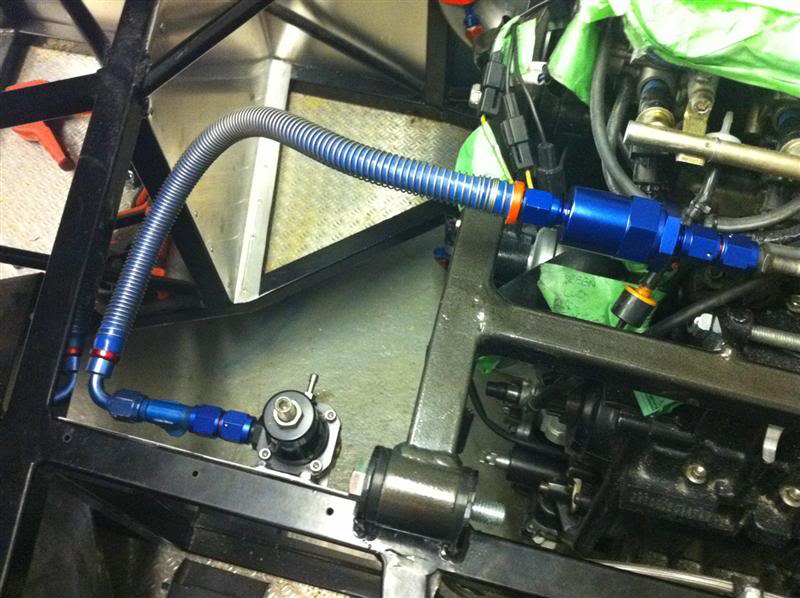
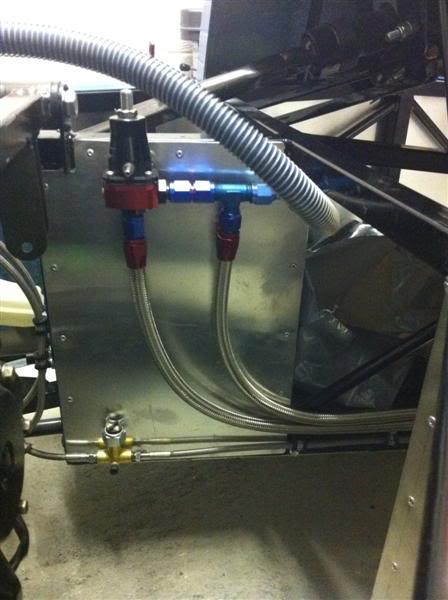
Aeromotive fuel pressure regulator mounted, waiting for the fuel lines to be delivered.
So I dismantled the clocks, then marked out and cut the new orifice into the dash
The rear of the clocks fits through the dash from behind like so
and when assembled the clocks look like this... much better
It definitely would have looked better with the speedo face flush with the dash panel as per the previous way if the cutting had been neat but this way looks much better than the previous with untidy cutting. I may redo the dash at a later date.
The semi complete dash back on the car
Handbrake lever fitted
Aeromotive fuel pressure regulator mounted, waiting for the fuel lines to be delivered.
 05-01-2011, 08:50 PM
#264
10K+ Poster!!
Thread Starter
Nope, not long at all really... still hoping to have it finished April and on the road in May.
I have to admit, the way they are now is growing on me.
06-01-2011, 07:43 PM
#265
10K+ Poster!!
Thread Starter
I've been playing outside today while the weather was reasonably mild, I got the springs rearranged on the coilovers, so the 225lb are now on the fronts and the 175lb on the rears, which was a job I had been putting off for ages, nice to get it ticked off the list.
Then the bonnet pins were fitted
From the rear of the Aerocatch you can see how they meet with the pins.
I still need to fit the rubber bushes over the top of the pins, the bonnet is clamped down onto these holding it securely.

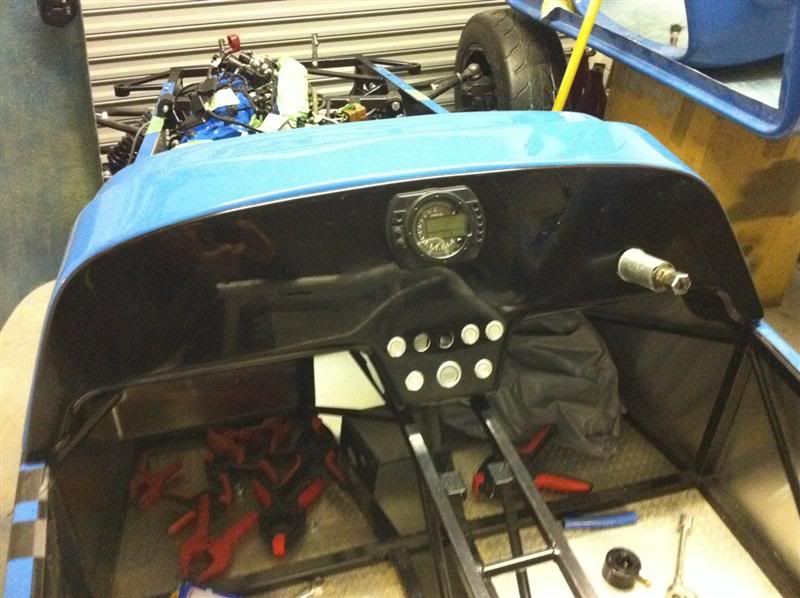
While the car was outside and with the newly fixed bonnet and nose cone on, I decided to take some more photos
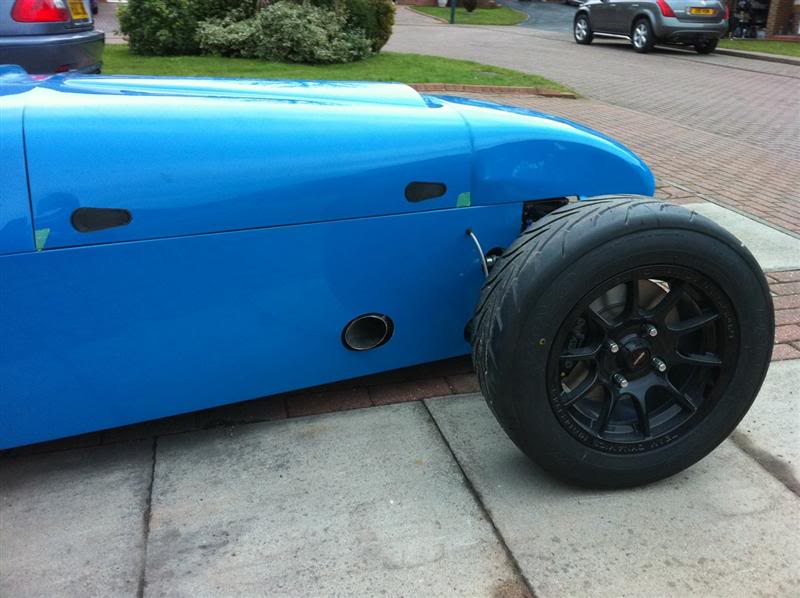
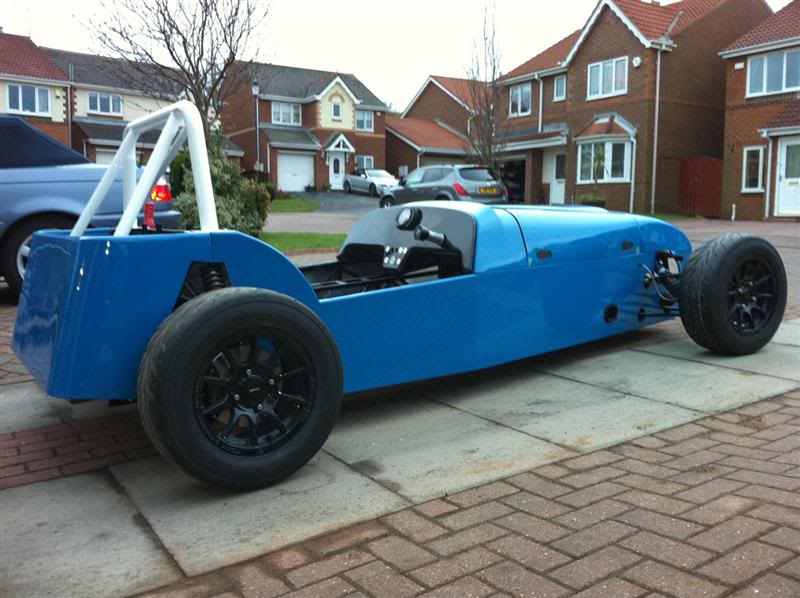
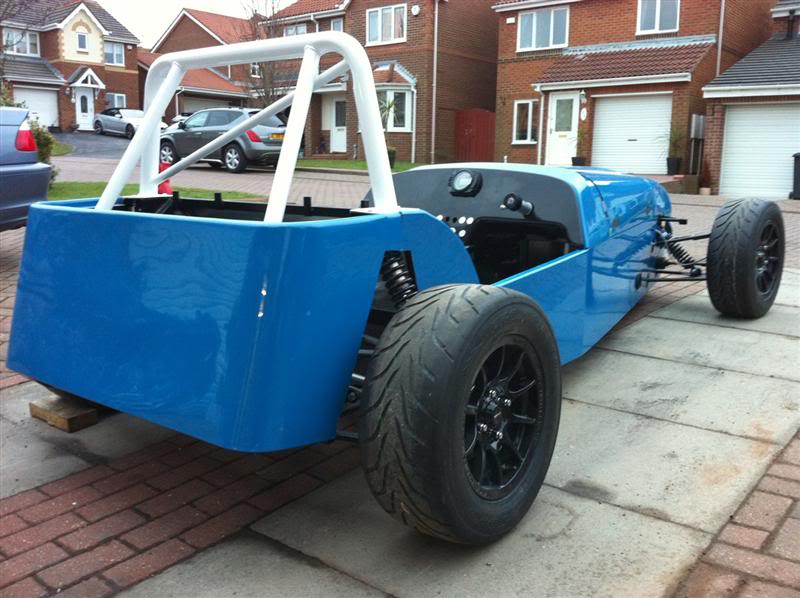

Seeing it like this, I had a really big grin on my face
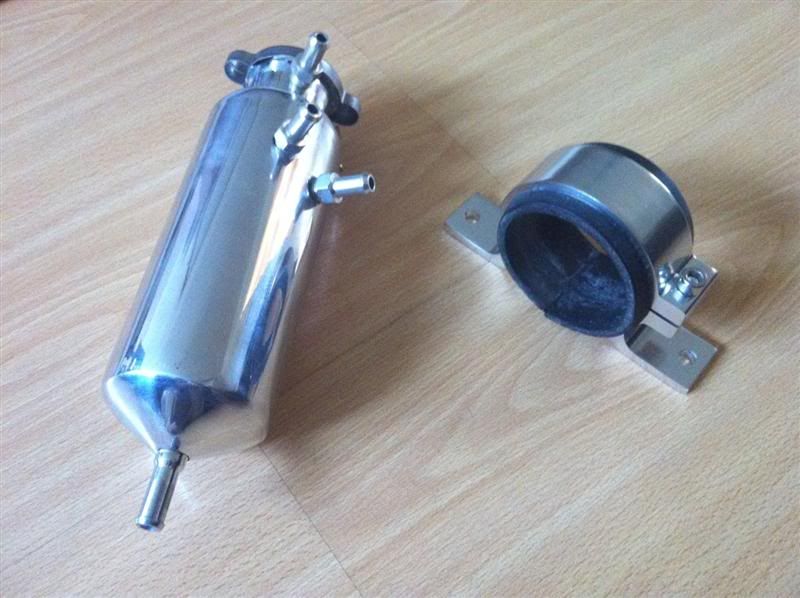
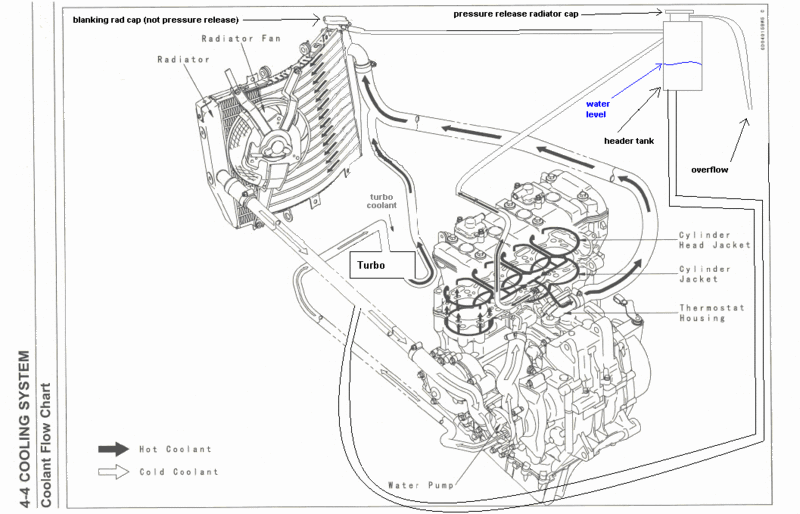
This is the plan for the cooling system, replacing the expansion tank with a header tank.
Then the bonnet pins were fitted
From the rear of the Aerocatch you can see how they meet with the pins.
I still need to fit the rubber bushes over the top of the pins, the bonnet is clamped down onto these holding it securely.
While the car was outside and with the newly fixed bonnet and nose cone on, I decided to take some more photos
Seeing it like this, I had a really big grin on my face
This is the plan for the cooling system, replacing the expansion tank with a header tank.
 06-01-2011, 10:51 PM
#268
PassionFord Regular
iTrader: (1)
Join Date: May 2009
Location: eastbourne
Posts: 477
Likes: 0
Received 0 Likes
on
0 Posts
just sat and read all 7 pages and ive got to say this project is fooking awsome, i love it.
theres a guy in polegate were i live with an orange one of these and that has the same engine as yours but without the turbo and ive seen it just ripping past me down the bypass and its scaryly quick, i mean like next to you , blink, and its then gone so fuck knows what yours is gunna go like!!!!!!! 0 to 60 sub 2 secs???
theres a guy in polegate were i live with an orange one of these and that has the same engine as yours but without the turbo and ive seen it just ripping past me down the bypass and its scaryly quick, i mean like next to you , blink, and its then gone so fuck knows what yours is gunna go like!!!!!!! 0 to 60 sub 2 secs???
08-01-2011, 12:25 PM
#271
10K+ Poster!!
Thread Starter
08-01-2011, 12:25 PM
#272
10K+ Poster!!
Thread Starter
I didn't do anything on the car yesterday due to feeling a bit unwell but I did manage to take delivery of some parcels...
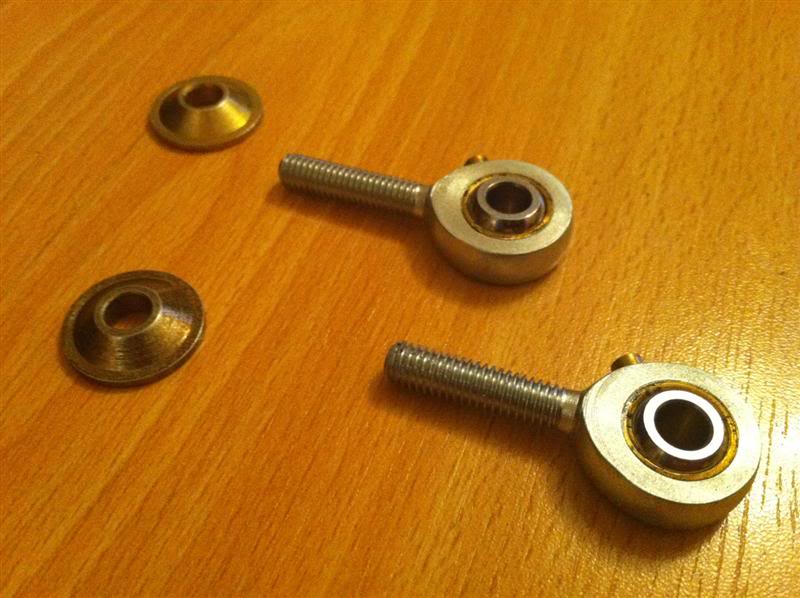
First off some rose joints and misalignment spacers for the exhaust support hanger.
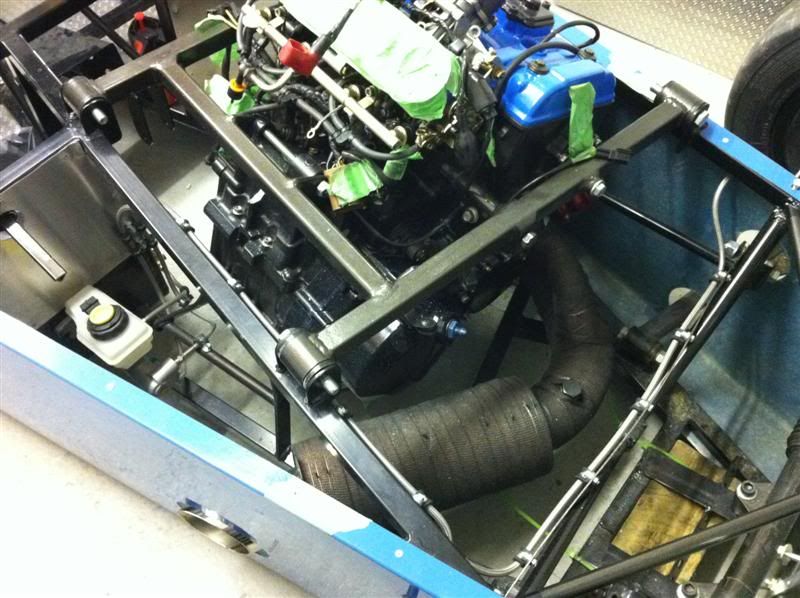
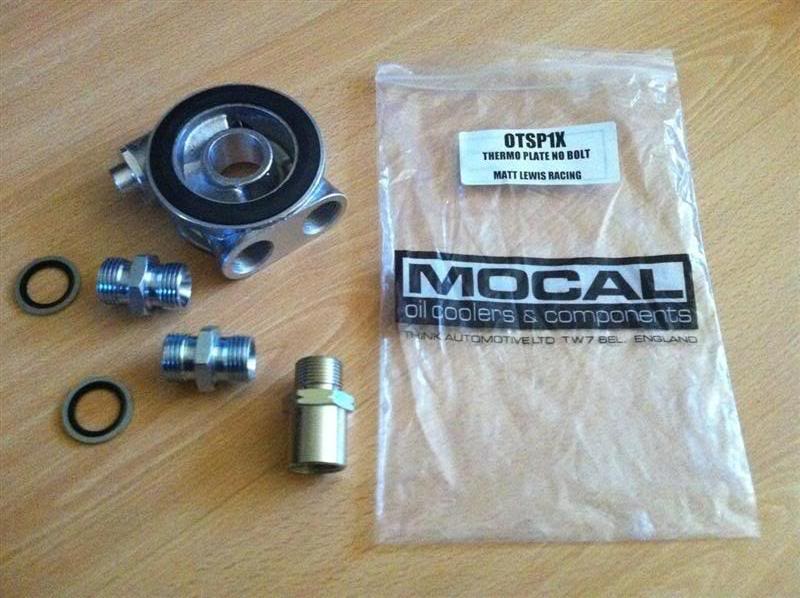
If you've been reading the thread you'll remember the standard oil/water heat exchanger has been removed to make space for the turbo, meaning no oil cooling at all, so I've been doing a bit of research and I have been unable to find an upgraded oil cooler kit for a Kawasaki ZX10R.
The Kawasaki oil filter thread is M20x1.5 and the oil filter seal is I.D. 54mm and O.D. 62mm.
I found on ebay a Mocal sandwich plate with built in thermostat intended for Peugeot 106/206/306 GTI, the dimensions looked suitable so I ordered it.
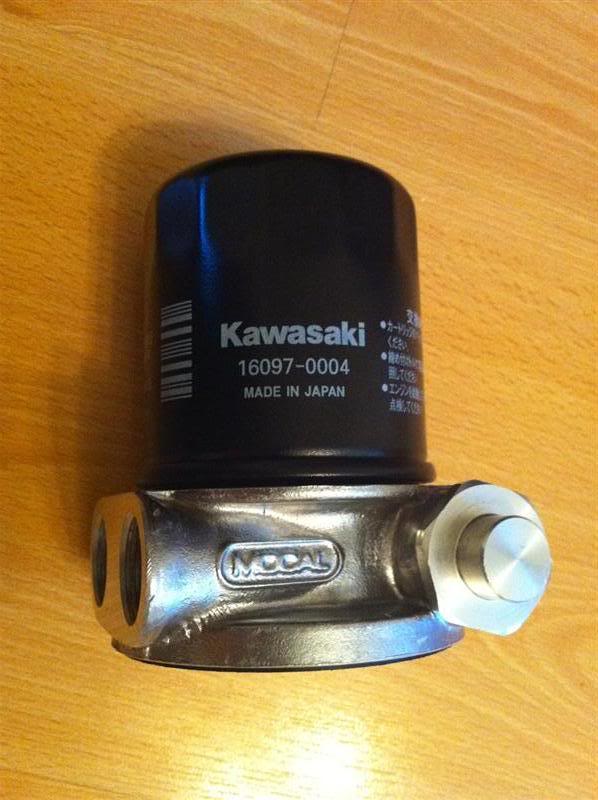
Here it is...
The oil filter screws on nicely and seals nicely against the sandwich plate, result... well it will be if it fits to the remote oil filter mount, but there doesn't look to be any reasons why it will not.
First off some rose joints and misalignment spacers for the exhaust support hanger.
If you've been reading the thread you'll remember the standard oil/water heat exchanger has been removed to make space for the turbo, meaning no oil cooling at all, so I've been doing a bit of research and I have been unable to find an upgraded oil cooler kit for a Kawasaki ZX10R.
The Kawasaki oil filter thread is M20x1.5 and the oil filter seal is I.D. 54mm and O.D. 62mm.
I found on ebay a Mocal sandwich plate with built in thermostat intended for Peugeot 106/206/306 GTI, the dimensions looked suitable so I ordered it.
Here it is...
The oil filter screws on nicely and seals nicely against the sandwich plate, result... well it will be if it fits to the remote oil filter mount, but there doesn't look to be any reasons why it will not.
 09-01-2011, 08:47 PM
#275
10K+ Poster!!
Thread Starter
It's from ebay Jeff, it's nitrile lined not teflon, I went with the nitrile as I thought it would be easier to work with.
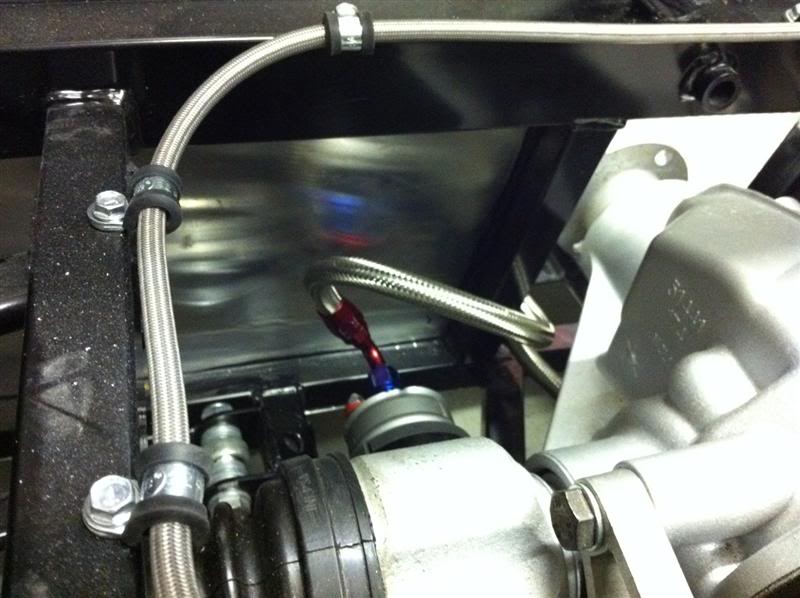
Loosely fitted some parts today, here's how the fuel hoses and filter fit between the regulator and rail.
and with the inlet in place
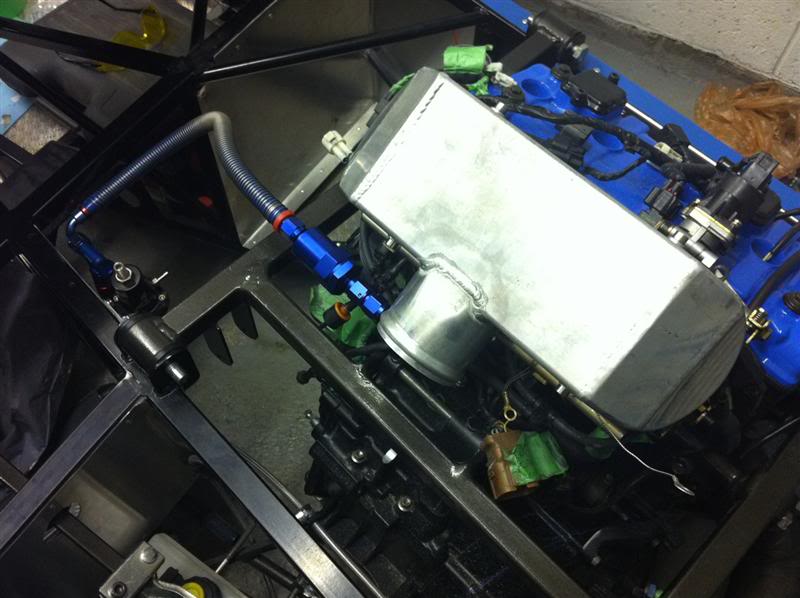
Cut to length and then made up the hoses, here's the Bosch 044 pump outlet
Return hose to tank, it fits a lot better when routed and fastened down correctly
and finally the feed/return hoses connected to the fuel pressure regulator.
I'll get round to fastening the hoses securely to the car tomorrow.
Loosely fitted some parts today, here's how the fuel hoses and filter fit between the regulator and rail.
and with the inlet in place
Cut to length and then made up the hoses, here's the Bosch 044 pump outlet
Return hose to tank, it fits a lot better when routed and fastened down correctly
and finally the feed/return hoses connected to the fuel pressure regulator.
I'll get round to fastening the hoses securely to the car tomorrow.
09-01-2011, 11:22 PM
#277
10K+ Poster!!
Thread Starter
Cheers kidda, they were easy enough to assemble really, it's definitely best to cut the hose with an angle grinder with a slitting disc, much better than a hacksaw.
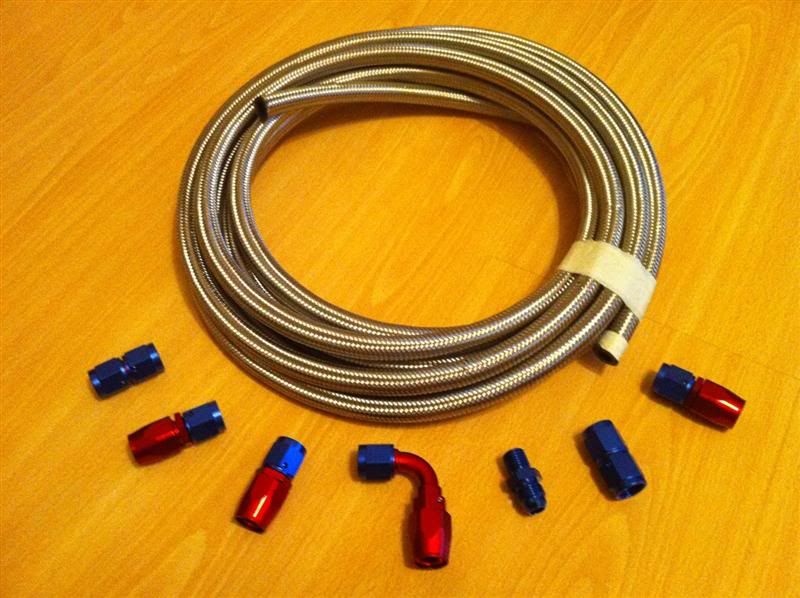
I've just ordered some Aeroquip socketless push on hose and fittings to plumb in the remote oil filter and oil cooler... hopefully the oil cooler I ordered the other day will turn up in the post tomorrow
I've just ordered some Aeroquip socketless push on hose and fittings to plumb in the remote oil filter and oil cooler... hopefully the oil cooler I ordered the other day will turn up in the post tomorrow
10-01-2011, 10:38 PM
#279
10K+ Poster!!
Thread Starter
Yeah the rail only has a feed to it, it enters the rail in the centre, there's no return directly from the rail, only from the regulator, but it works exactly the same.
11-01-2011, 08:53 PM
#280
10K+ Poster!!
Thread Starter
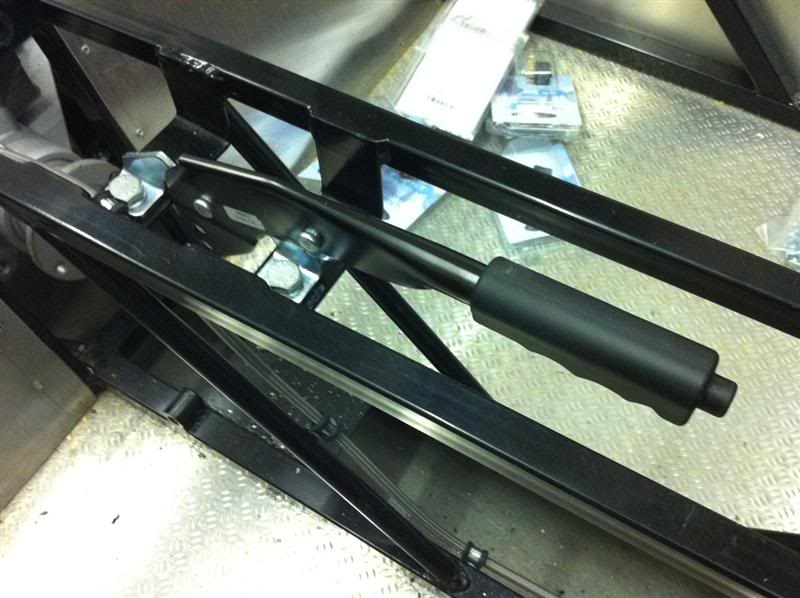
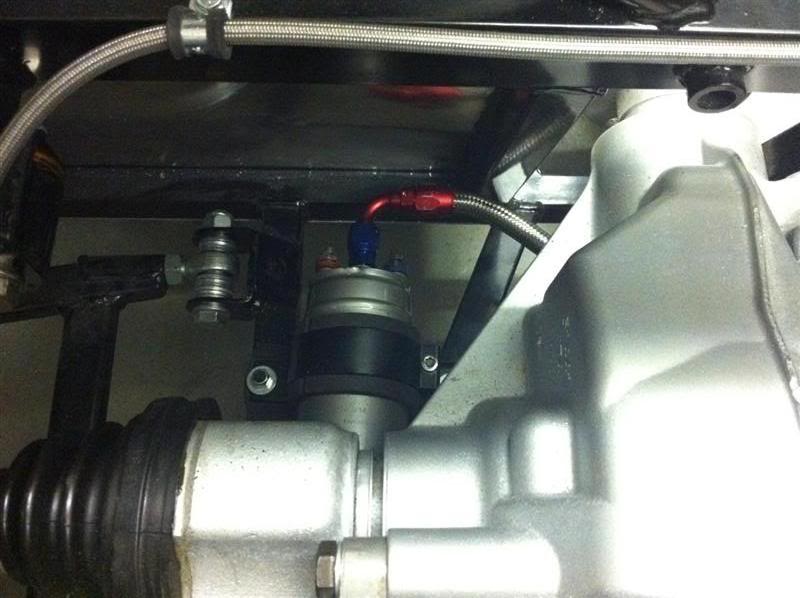
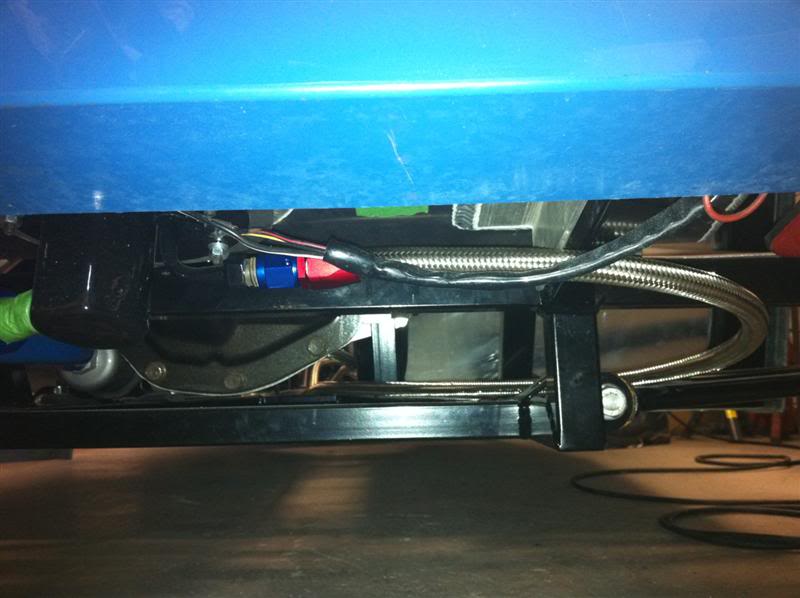
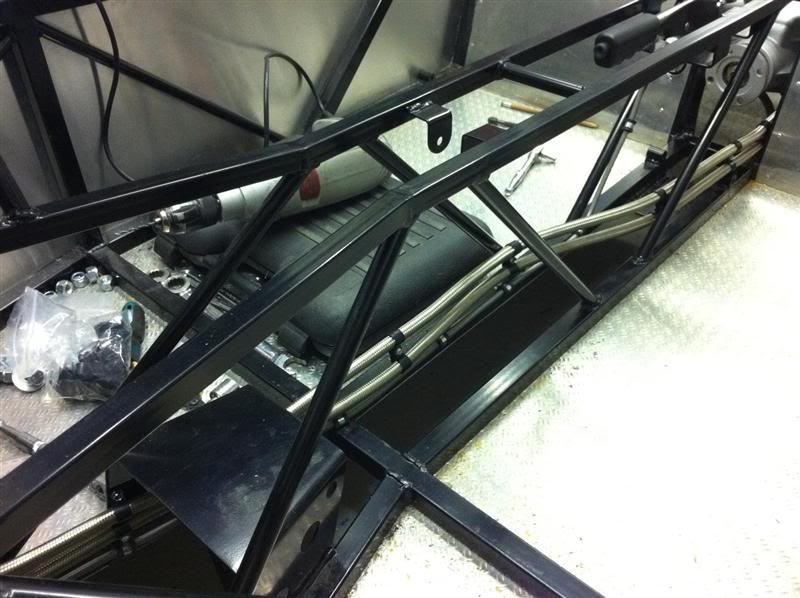
Today I tidied up the fuel hoses and secured them to the chassis

and took delivery of a non return valve to use on the breather outlet of the petrol tank
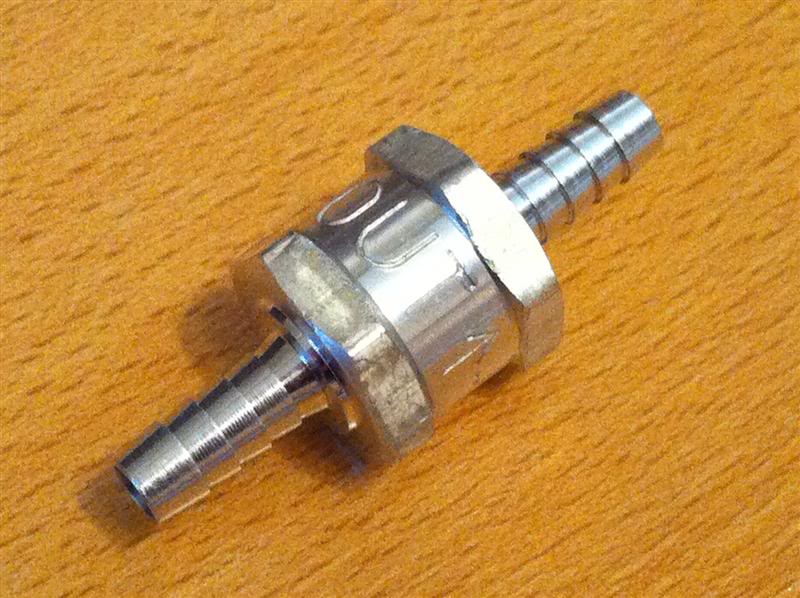
and took delivery of a non return valve to use on the breather outlet of the petrol tank