
ZX10R turbo kit car build - update 10-08-13


 02-10-2010, 02:31 PM
#123
I've found that life I needed.. It's HERE!!

Join Date: Feb 2006
Location: wakefield
Posts: 1,007
Likes: 0
Received 0 Likes
on
0 Posts
looking good! what the cooler a fd3 rx7 one? im turboing my kit car a t the moment think ive seen your on locost builders im having to have a custom cooler made as mine abit smaller than a mac 1 in the nose couldnt get anything to fit in there!
here is mine before and how it is at moment

now,


we have the same goal but different ways of getting there i think keep it up!!!
here is mine before and how it is at moment
now,
we have the same goal but different ways of getting there i think keep it up!!!
 02-10-2010, 08:51 PM
#125
10K+ Poster!!
Thread Starter

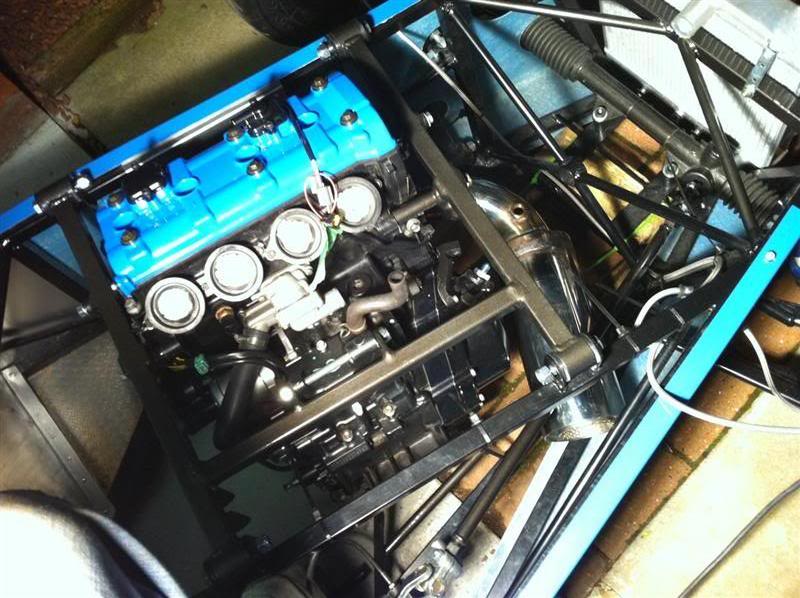
Small update for today
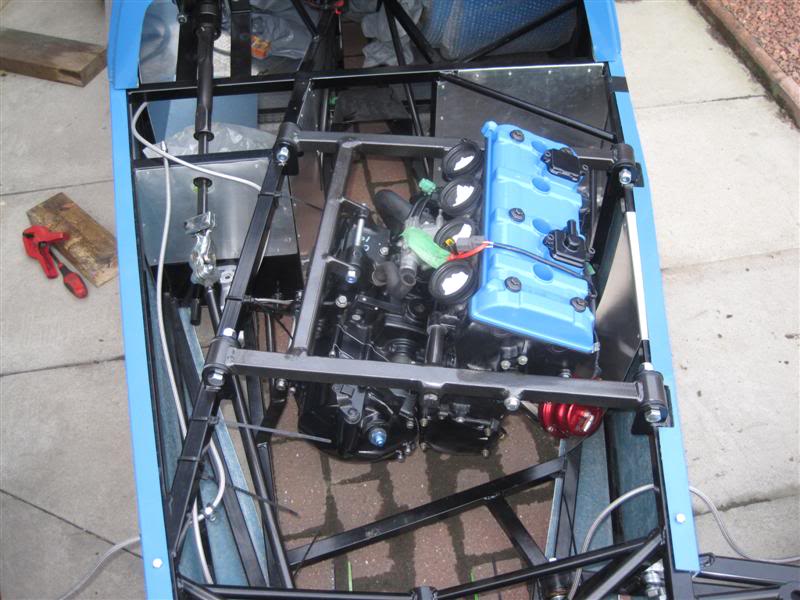
Welded up the lower engine mount
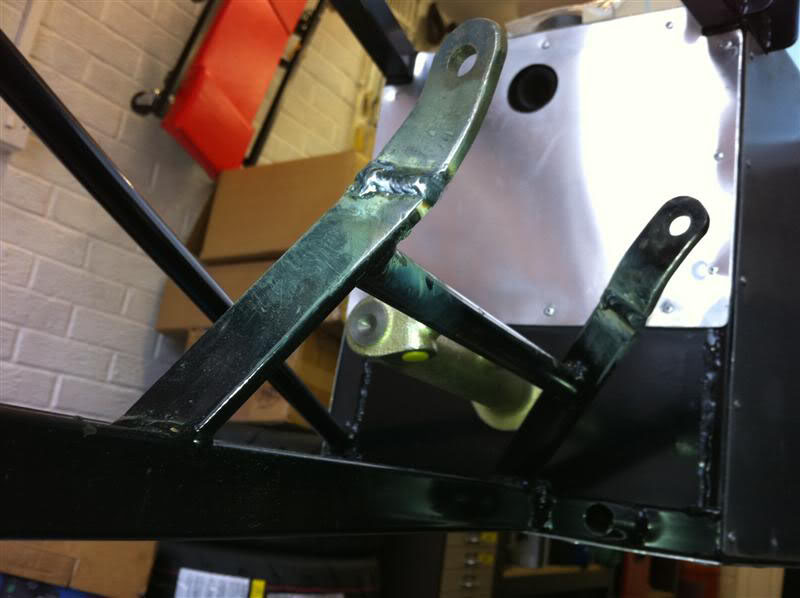
Gace it a lick of paint
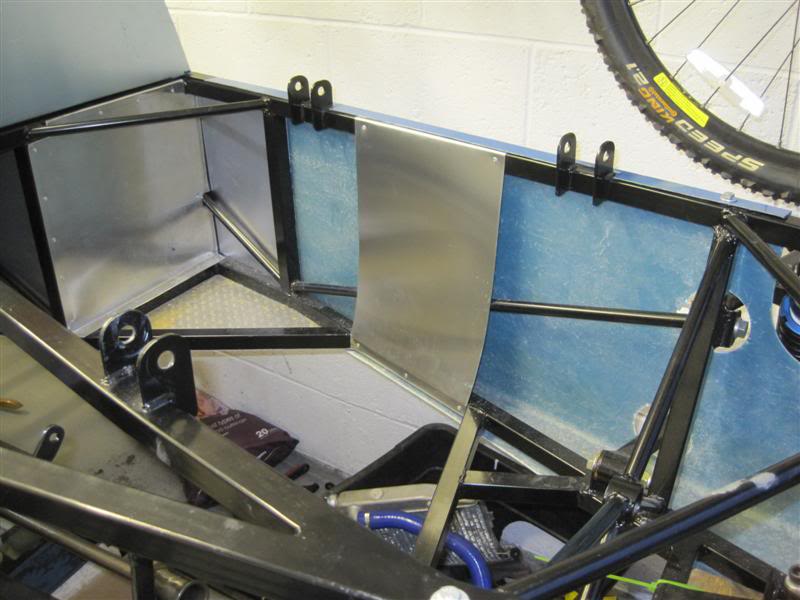
Fabricated a heat shield for the passenger side of the engine bay, as the turbo sits very close to the powder coated diagonal chassis bracing bar, it should also help prevent the fibreglass side panel from warping with the heat.
Cheers Dunc, do it mate, it's so satisfying... I'll have such a big grin on my face when it's road legal and I can go out in it 
Yeah it is an RX7 one, well noticed!
Love the look of the updated car, looks cracking in black and white
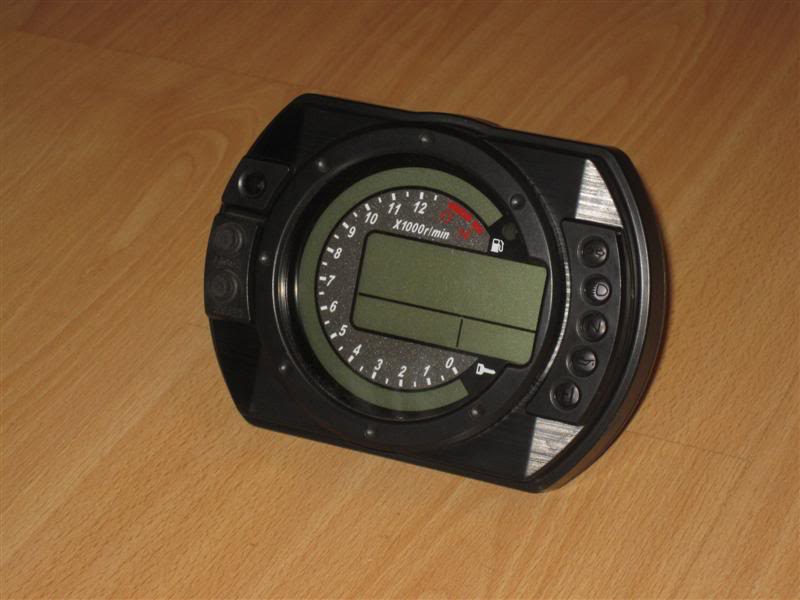
How do you find the Race Technology Dash2? I'm not yet sure which way I'm going to go with regards to a dash setup.
LOL, that's exactly what I'm hoping for
Welded up the lower engine mount
Gace it a lick of paint
Fabricated a heat shield for the passenger side of the engine bay, as the turbo sits very close to the powder coated diagonal chassis bracing bar, it should also help prevent the fibreglass side panel from warping with the heat.
Yeah it is an RX7 one, well noticed!
Love the look of the updated car, looks cracking in black and white
How do you find the Race Technology Dash2? I'm not yet sure which way I'm going to go with regards to a dash setup.
 03-10-2010, 09:39 PM
#127
10K+ Poster!!
Thread Starter
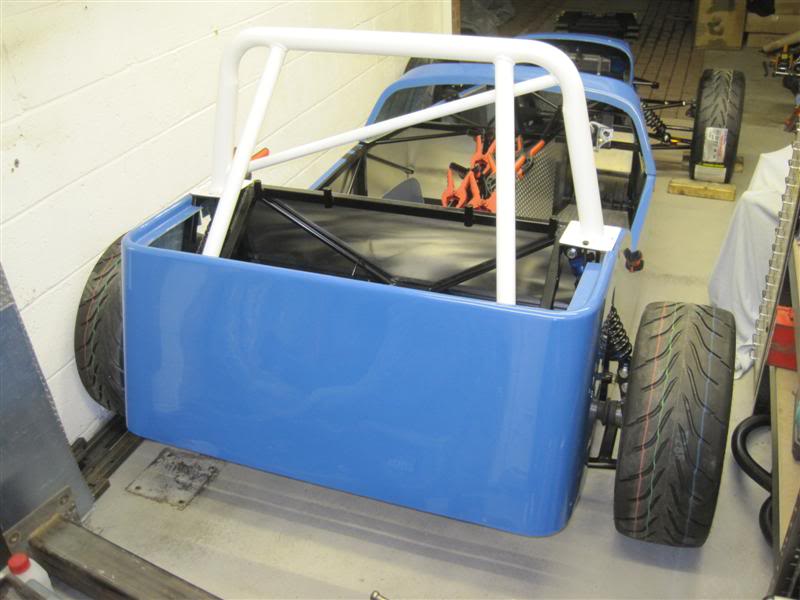
Been pottering in the garage again this afternoon, thought about it and then thought about it again before rivotting the side panels into position for the final time.
So now I'm ready for the brake hoses and if I really pull my finger out the car could be on wheels with fully functioning brakes by the close of play tomorrow.
Oh I will do, building it is good fun but I imagine driving it will be so much better
So now I'm ready for the brake hoses and if I really pull my finger out the car could be on wheels with fully functioning brakes by the close of play tomorrow.
Oh I will do, building it is good fun but I imagine driving it will be so much better
03-10-2010, 10:32 PM
#128
Regular Contributor
Excellent progress! I love how it's not even finished yet and it's getting modified! Did you come to a conclusion about your exhaust set up and routing?
05-10-2010, 06:24 PM
#130
10K+ Poster!!
Thread Starter
Not entirely sure yet but at the moment I'm fancying having a combined silencer/cat inside the engine bay with the tailpipe sticking out of the passenger side of the car.
The turbo orientated the way it is works quite well actually. The outlet of the turbo will need to be modified slightly but it will still be pointing upwards, then with a 90 degree bend will feed into the top of the passenger side of the intercooler, then out from the drivers side of the intercooler to the inlet manifold.
05-10-2010, 06:33 PM
#131
10K+ Poster!!
Thread Starter
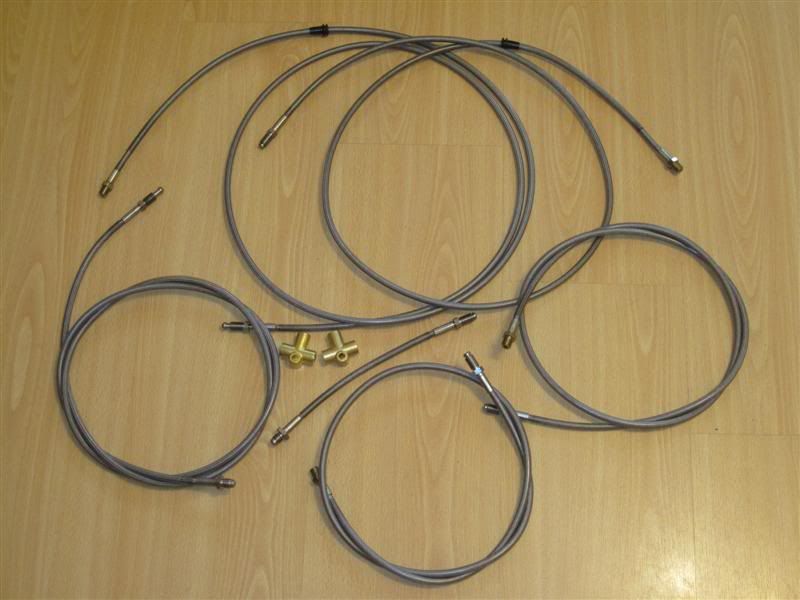
I ordered a full set of custom braided brake hoses yesterday, but the fittings required to fit the Wilwood calipers needed to be ordered in, if all goes to plan the hoses will be made up tomorrow and i can get them fitted to the car.
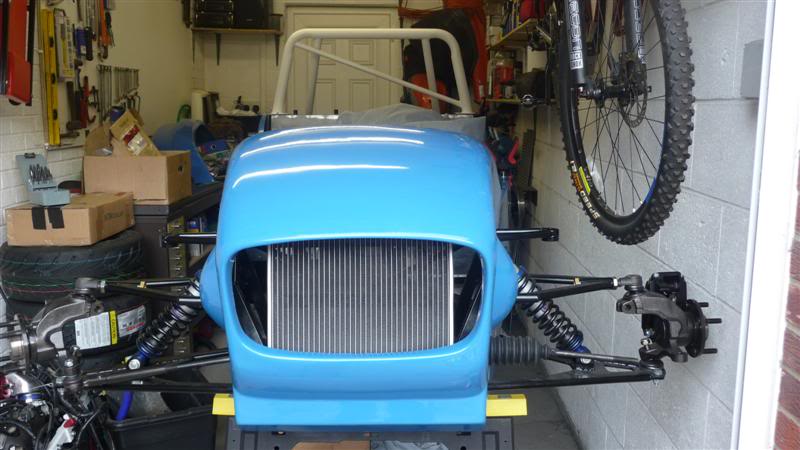
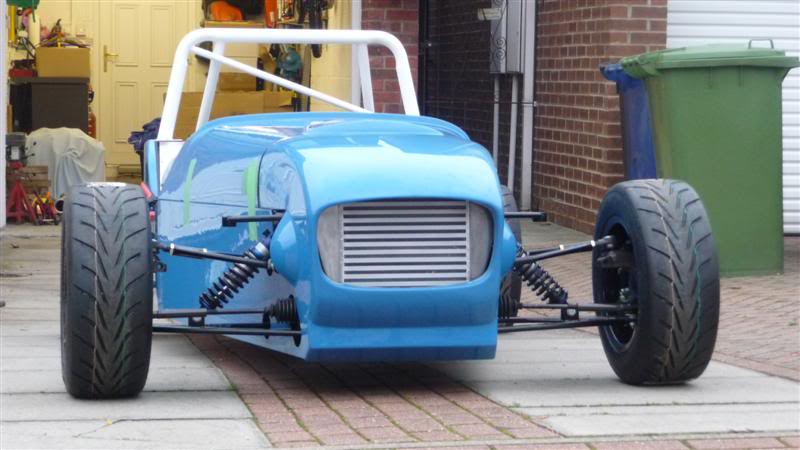
I began to fit the radiator today, held it in position with green cable ties to allow the nose cone to be fitted to ensure it would fit inside the nose cone alright and leave adequate space for the intercooler to go infront.
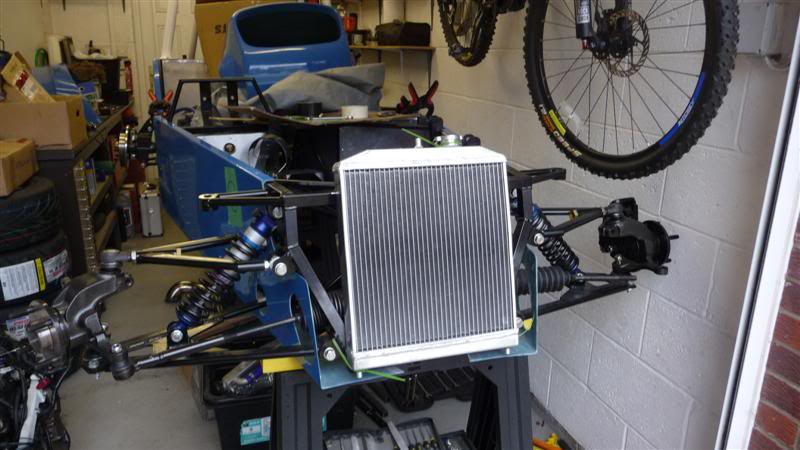
Tried the nose cone on and it fit perfectly
I then realised I didn't have any material in the garage to make brackets with, doh! So a quick trip to B&Q and I ended up with these zinc plated brackets which were just about perfect.
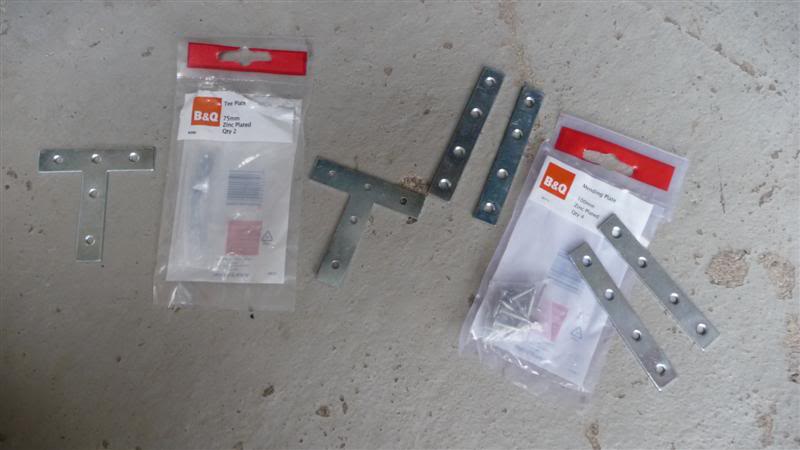
The holes in the brackets were opened out to accomodate the radiator mounting bolts and then the chassis was drilled so they could be bolted to the car.
The upper brackets have yet to be fitted. I'm leaving those until later to give me the option of making a little bit more space in small part of the nose cone for the intercooler.
I began to fit the radiator today, held it in position with green cable ties to allow the nose cone to be fitted to ensure it would fit inside the nose cone alright and leave adequate space for the intercooler to go infront.
Tried the nose cone on and it fit perfectly
I then realised I didn't have any material in the garage to make brackets with, doh! So a quick trip to B&Q and I ended up with these zinc plated brackets which were just about perfect.
The holes in the brackets were opened out to accomodate the radiator mounting bolts and then the chassis was drilled so they could be bolted to the car.
The upper brackets have yet to be fitted. I'm leaving those until later to give me the option of making a little bit more space in small part of the nose cone for the intercooler.
06-10-2010, 08:29 PM
#132
10K+ Poster!!
Thread Starter
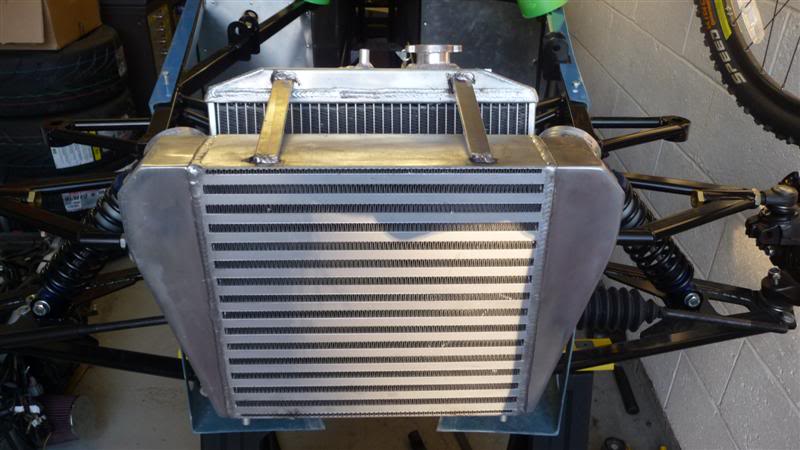
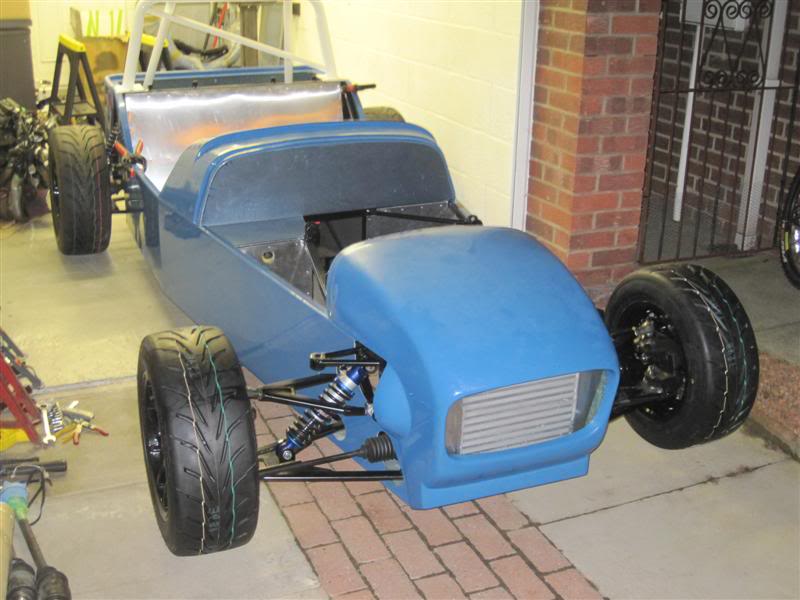
Today I have mostly been pissing about with an intercooler and radiator.
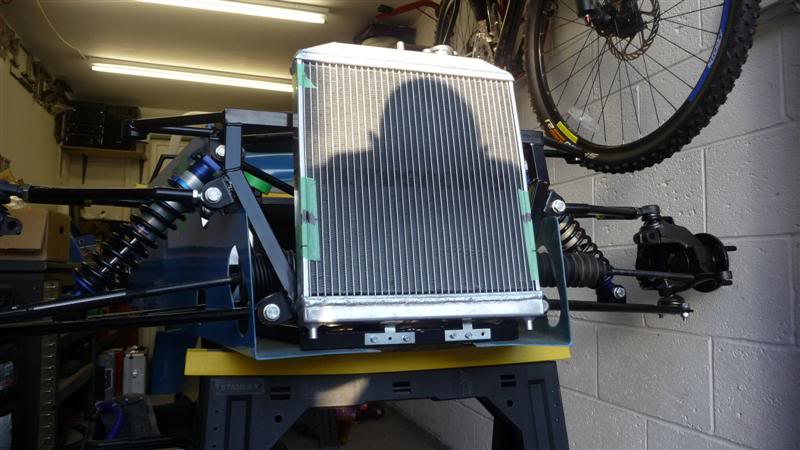
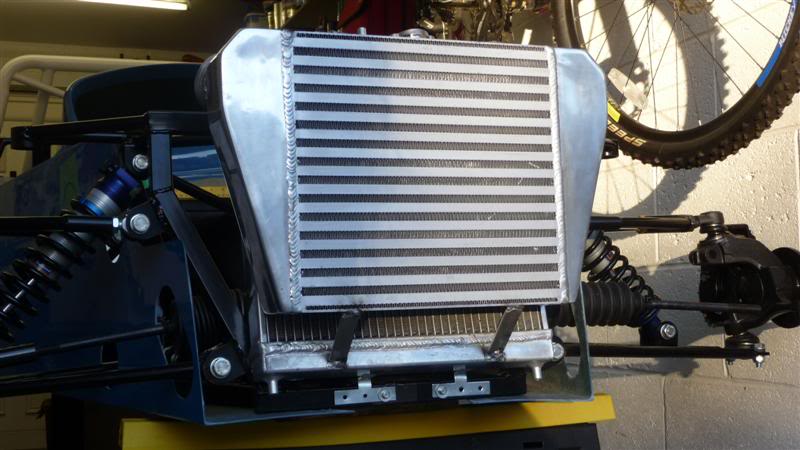
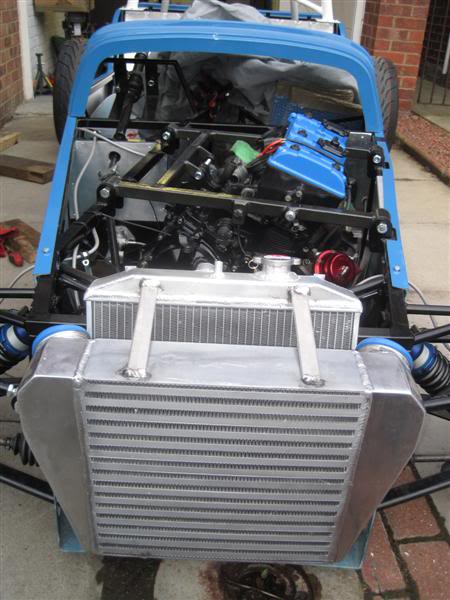
The intercooler inlet/outlet pipes have been cut off at an angle, rotated and then rewelded. Then brackets were made and welded to hold the intercooler onto the radiator.
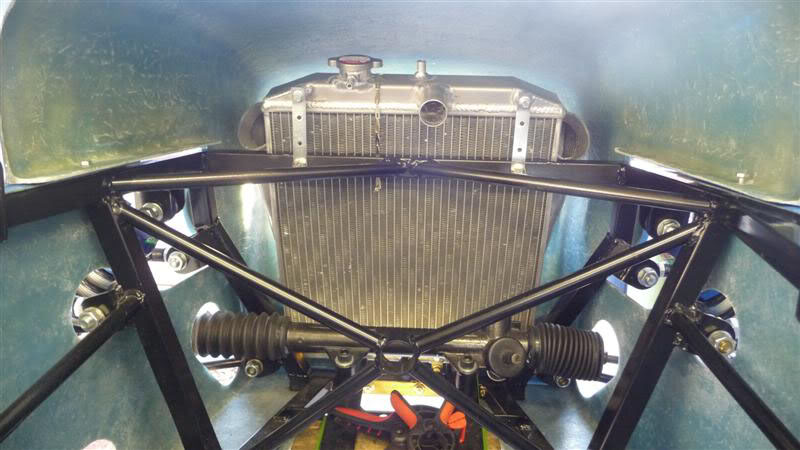
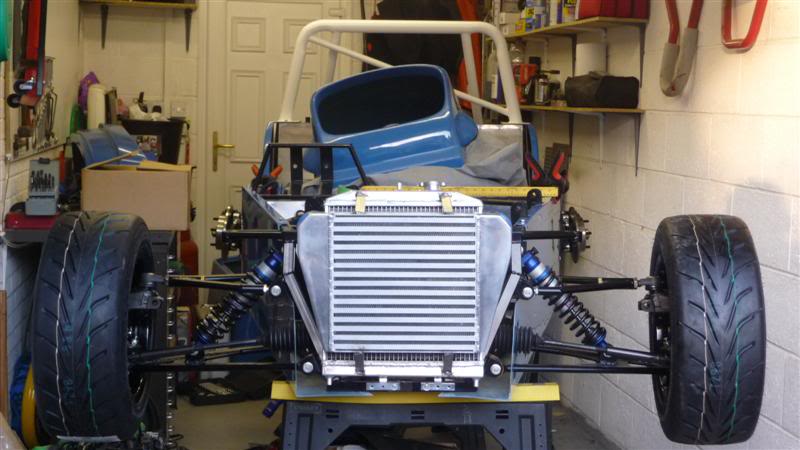
With the nose cone on you can see it's a tight fit but not fixing the upper radiator mounts to the chassis yesterday paid off, as it allowed the rad to be moved back slightly to gain enough space for the intercooler to clear the nose cone.
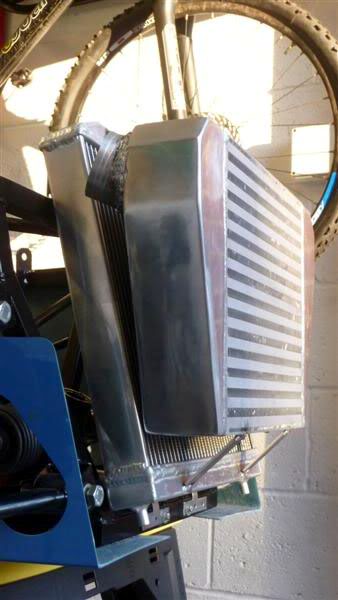
I think it'd probably look better and more subtle if the cooler was painted matt black.
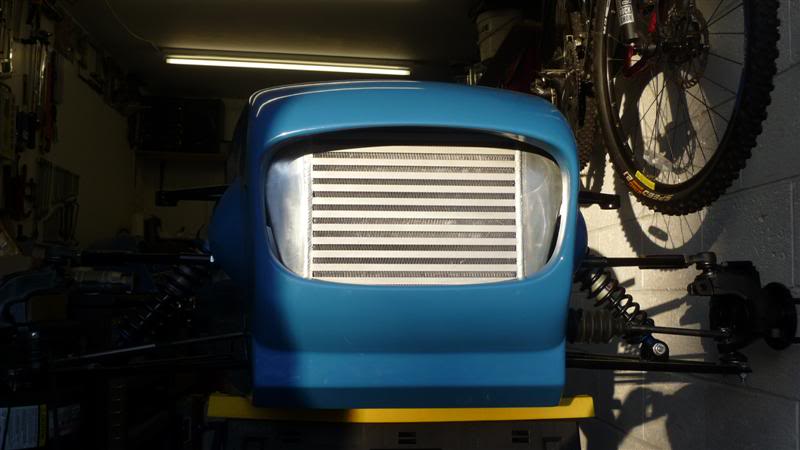
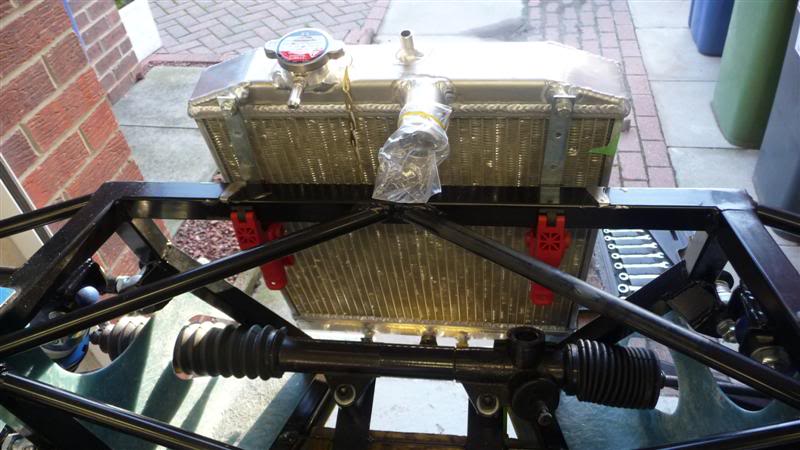
Here you can see how the modified intercooler inlets/outlets now clear the radiator ready for boost pipework to be routed down either side of the engine bay.
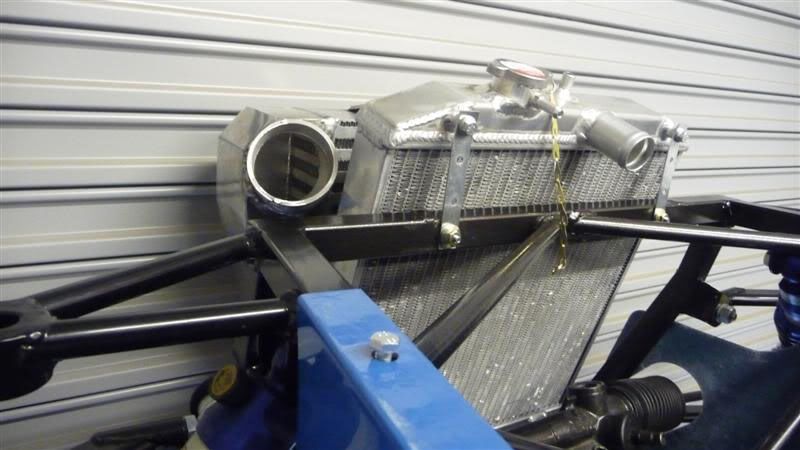
The intercooler inlet/outlet pipes have been cut off at an angle, rotated and then rewelded. Then brackets were made and welded to hold the intercooler onto the radiator.
With the nose cone on you can see it's a tight fit but not fixing the upper radiator mounts to the chassis yesterday paid off, as it allowed the rad to be moved back slightly to gain enough space for the intercooler to clear the nose cone.
I think it'd probably look better and more subtle if the cooler was painted matt black.
Here you can see how the modified intercooler inlets/outlets now clear the radiator ready for boost pipework to be routed down either side of the engine bay.
06-10-2010, 08:57 PM
#133
afpmsl !!
i love this pic

the shadow of your bald bonce and lugs lol ,
looks like humpty dumptys sneaking up behind you bud !!
cracking bit of fab going on in the front , will the garage be big enough to have it as a roller ??
ohh and make the passenger seat quick release will ya , judging that space it may have to come out if im lucky enough for a passenger ride lol
beef
i love this pic
the shadow of your bald bonce and lugs lol ,
looks like humpty dumptys sneaking up behind you bud !!
cracking bit of fab going on in the front , will the garage be big enough to have it as a roller ??
ohh and make the passenger seat quick release will ya , judging that space it may have to come out if im lucky enough for a passenger ride lol
beef
06-10-2010, 09:53 PM
#134
10K+ Poster!!
Thread Starter
I know what you mean about the photo, reminds me of Uncle fester, lol, I didn't notice the shadow until I was posting the photos on this thread!
The car with wheels and arches on will just squeeze between the wall and the bench, with an inch or two to spare, length is not a problem, but I do have to move my vice stand as it is in the way where it currently lives.
lol @ the passenger seat. It'll be fine mate, I'm sure you'll squash yourself into it at one of the teeside park meets next year
07-10-2010, 08:00 PM
#135
10K+ Poster!!
Thread Starter
Still no brake lines yet, rang the company who are making them today and they still hadn't received the fittings which were ordered on Monday 
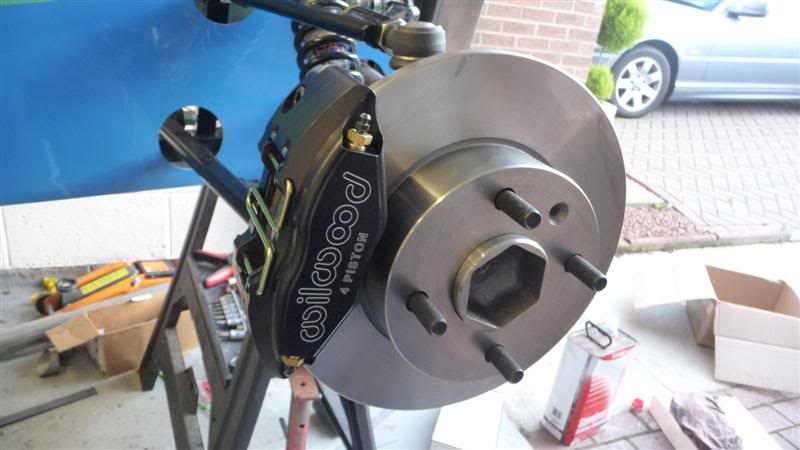
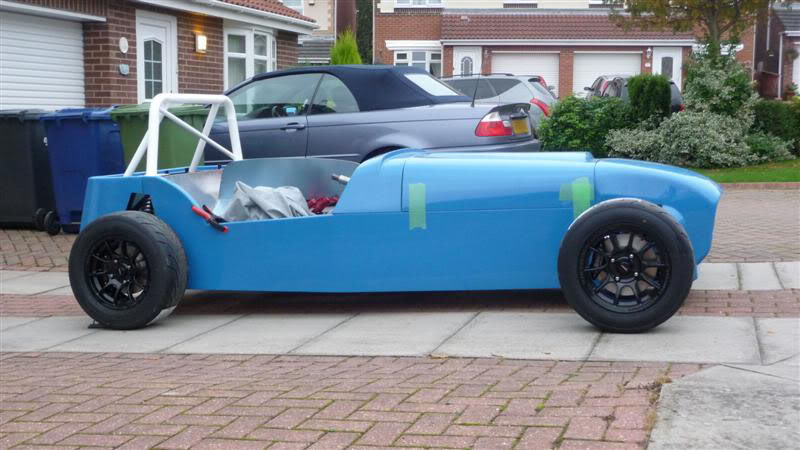
I couldn't wait any longer, so set about fitting the brakes to the front end of the car
Next step was to fit the wheels, but could only get 3 on as the bench was in the way for the last one.
Front brakes hiding behind the Pro Race 1.2 wheel
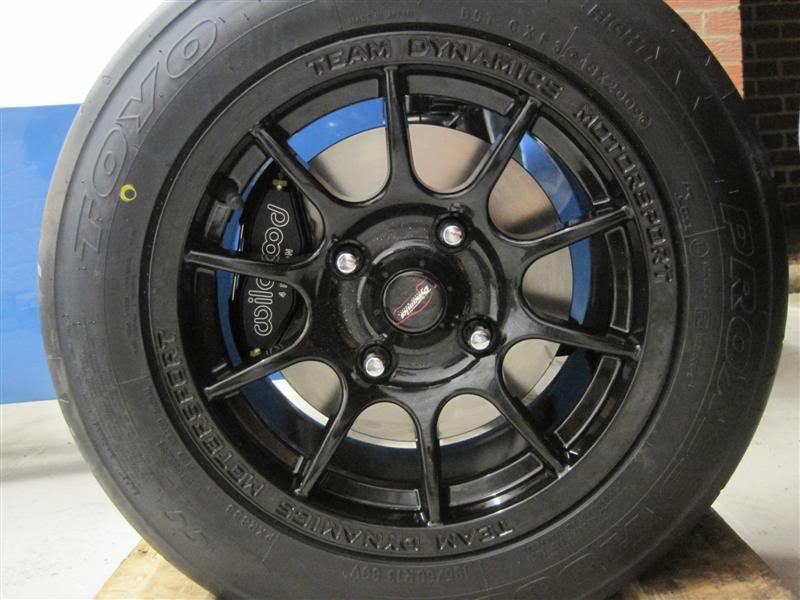
With the help of R6Franky and some of the neighbours the car was moved forward, the last wheel fitted and then finally lowered to the floor
End of play today I'm a very happy bunny
I couldn't wait any longer, so set about fitting the brakes to the front end of the car
Next step was to fit the wheels, but could only get 3 on as the bench was in the way for the last one.
Front brakes hiding behind the Pro Race 1.2 wheel
With the help of R6Franky and some of the neighbours the car was moved forward, the last wheel fitted and then finally lowered to the floor
End of play today I'm a very happy bunny
 08-10-2010, 04:09 PM
#141
10K+ Poster!!
Thread Starter
Cheers. Glad you enjoyed reading it.
 10-10-2010, 01:18 AM
#143
Advanced PassionFord User
awesome build mate! i can rate those civic coolers, ive used them in the past, good cheap radiators, worth the money, looks like this will be an awesome tool!!
10-10-2010, 11:35 PM
#144
10K+ Poster!!
Thread Starter
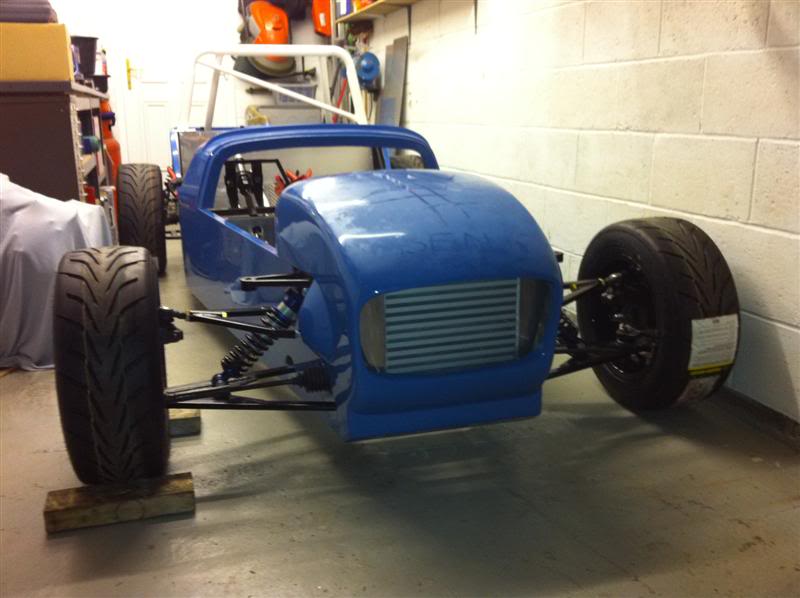
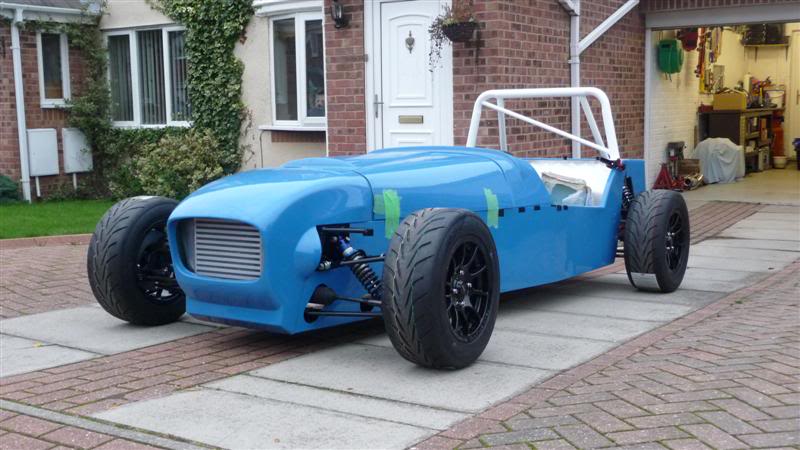
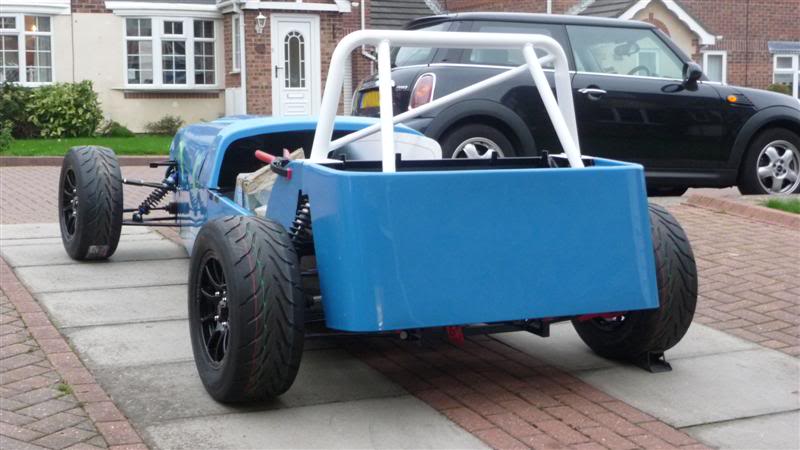
No real updates lately, but I've had the car out on the drive in the sun, so decided to take some photos... as you do 
Thanks for the feedback on the radiator, nice to know someone else has used it with good results
14-10-2010, 02:35 PM
#145
10K+ Poster!!
Thread Starter
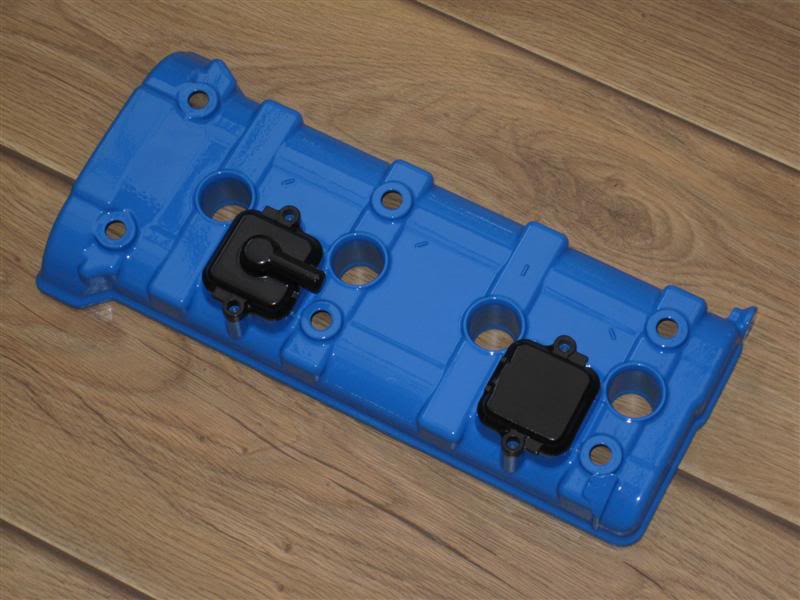
I've been trying my hand at painting with 2k paints with my compressor/spray gun, results arent too bad for a first go
Cam cover colour is now co-ordinated
Cam cover colour is now co-ordinated
15-10-2010, 01:10 PM
#146
10K+ Poster!!
Thread Starter
Not done much on the car due to the wetaher being poor and me wanting to get it on the drive in the fresh air, instead of being couped up in the garage, but in the mean time a few parcels have arrived...
Two sets of flush mounting Aerocatch fittings to secure the bonnet to the car
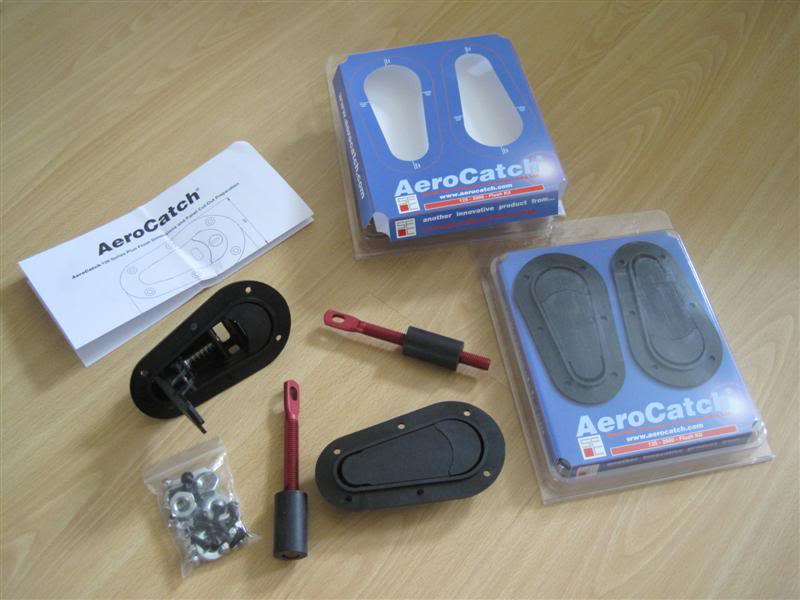
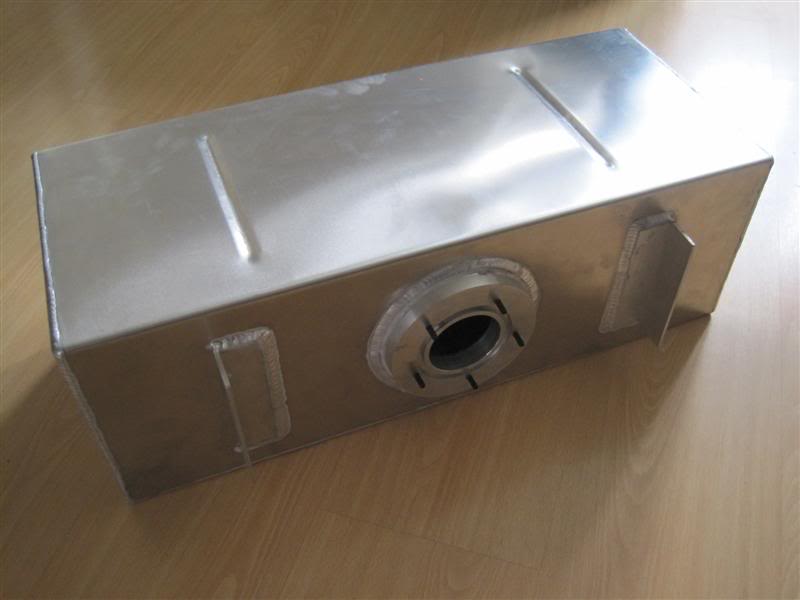
A Mac Motorsports petrol tank, with internal baffles
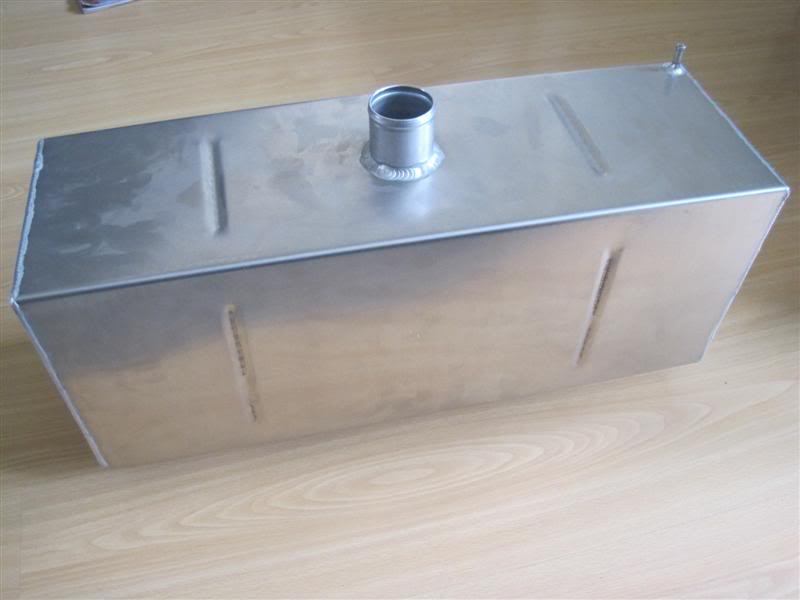
which is flanged and grooved to suit the ZX10R standard fuel pump/sender unit and seal arrangement
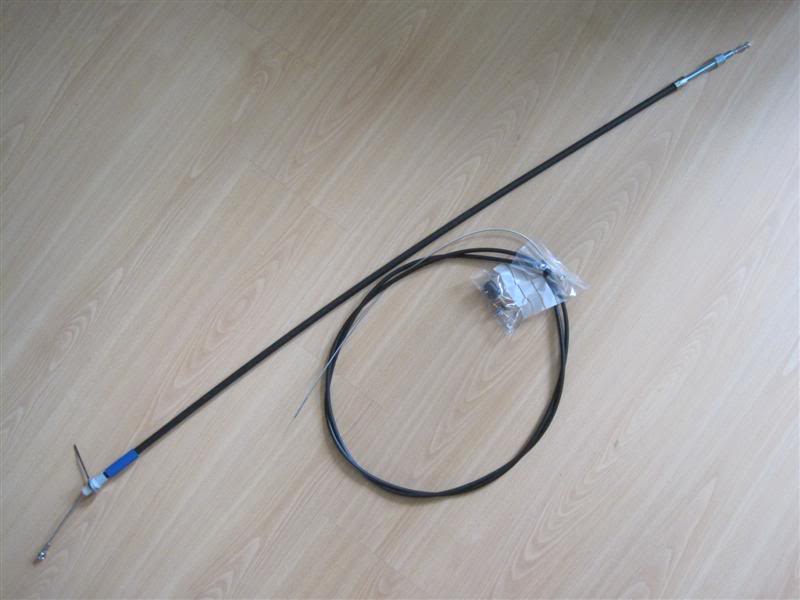
and last but not least a new accelerator cable and clutch cable kit
Two sets of flush mounting Aerocatch fittings to secure the bonnet to the car
A Mac Motorsports petrol tank, with internal baffles
which is flanged and grooved to suit the ZX10R standard fuel pump/sender unit and seal arrangement
and last but not least a new accelerator cable and clutch cable kit
30-10-2010, 10:29 AM
#147
10K+ Poster!!
Thread Starter
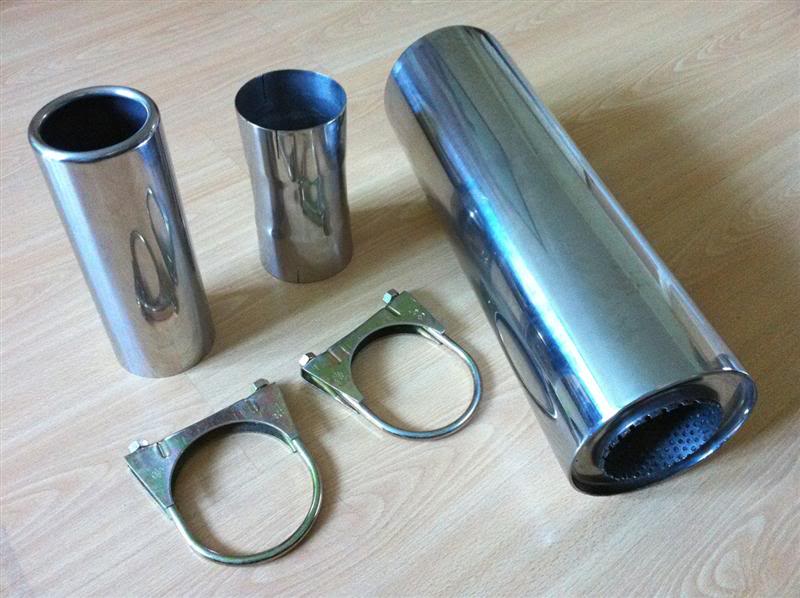
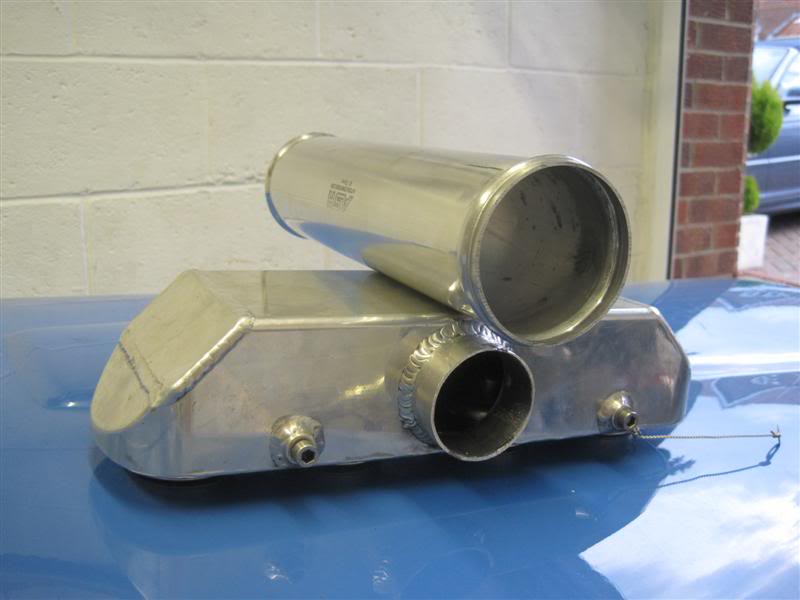
Some 76mm/3" bore exhaust parts arrived in the post this morning
I bought a 2.75"/70mm diameter aluminium pipe to modify the inlet manifold with

The original pipework feeding the inlet manifold was 51mm/2" diameter

The plan is to to bring the inlet manifold inlet pipework up to the same size as the intercooler by cutting and welding this new piece into it. You can see the size difference in the photo below.
I bought a 2.75"/70mm diameter aluminium pipe to modify the inlet manifold with
The original pipework feeding the inlet manifold was 51mm/2" diameter
The plan is to to bring the inlet manifold inlet pipework up to the same size as the intercooler by cutting and welding this new piece into it. You can see the size difference in the photo below.
30-10-2010, 06:27 PM
#148
10K+ Poster!!
Thread Starter
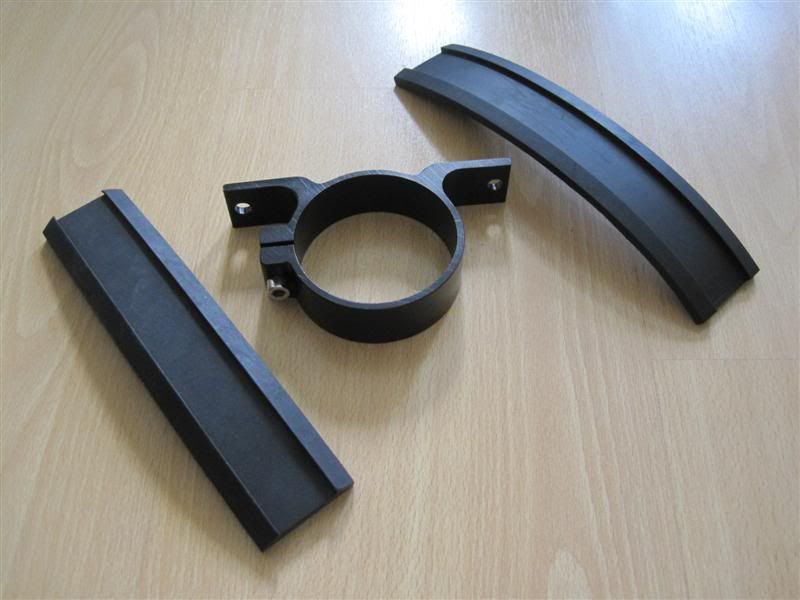
I've also bought a billet alloy fuel pump cradle to mount the Bosch 044 pump with.
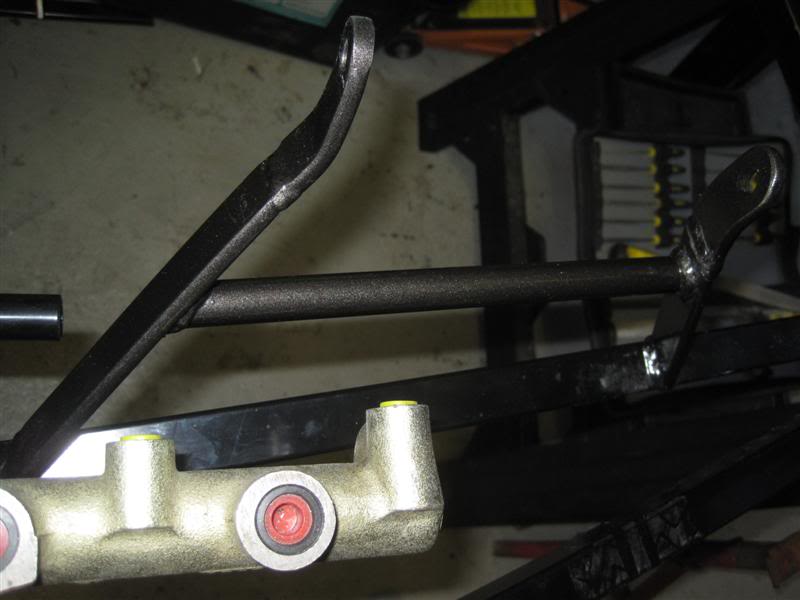
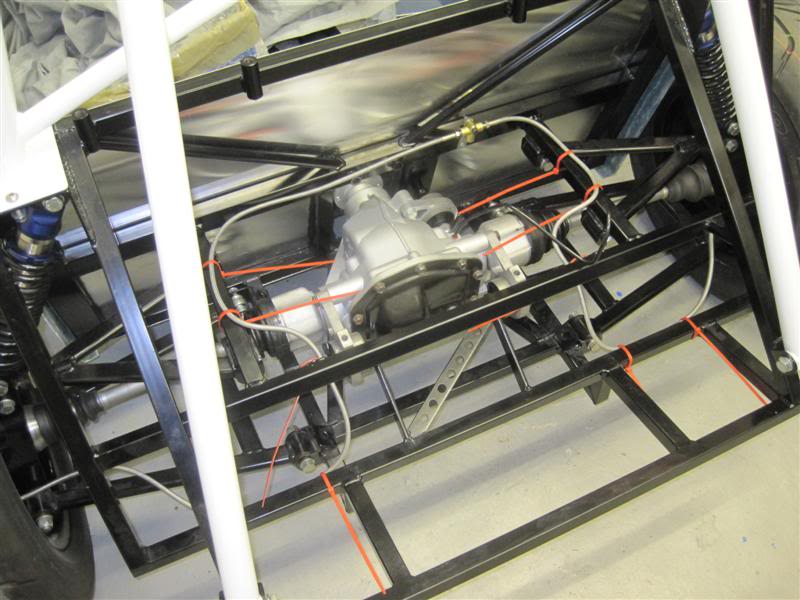
I've been painting in the garage today but inbetween doing that I began fitting the braided brake hoses to the chassis...
Brake light switch, T piece and link hose connected to the master cylinder

The rear hoses are mocked up now, ready to be fitted properly when I next work on the car
I've been painting in the garage today but inbetween doing that I began fitting the braided brake hoses to the chassis...
Brake light switch, T piece and link hose connected to the master cylinder
The rear hoses are mocked up now, ready to be fitted properly when I next work on the car


 31-10-2010, 05:42 PM
#152
10K+ Poster!!
Thread Starter
Thanks guys
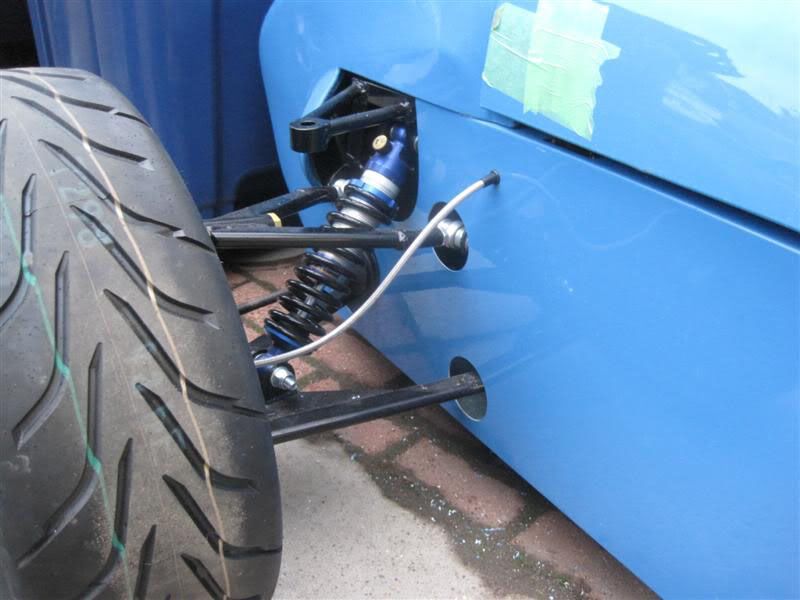
Done a bit today, only a little bit though!
Fitted the front brake hoses to the calipers, drilled the side panels and fed the hoses through with a grommet.
Done a bit today, only a little bit though!
Fitted the front brake hoses to the calipers, drilled the side panels and fed the hoses through with a grommet.
 31-10-2010, 08:53 PM
#154
10K+ Poster!!
Thread Starter
Forgot to add these photos a while back, from when I decided to change the colour of the engine casings.
Fired the compressor up and the casings were given a couple of coats of primer
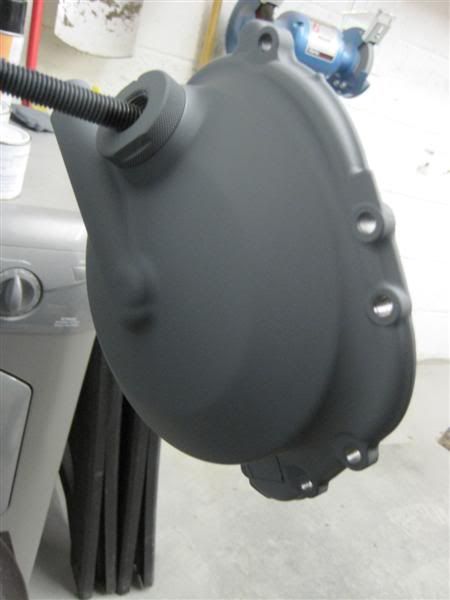
then some black top coat
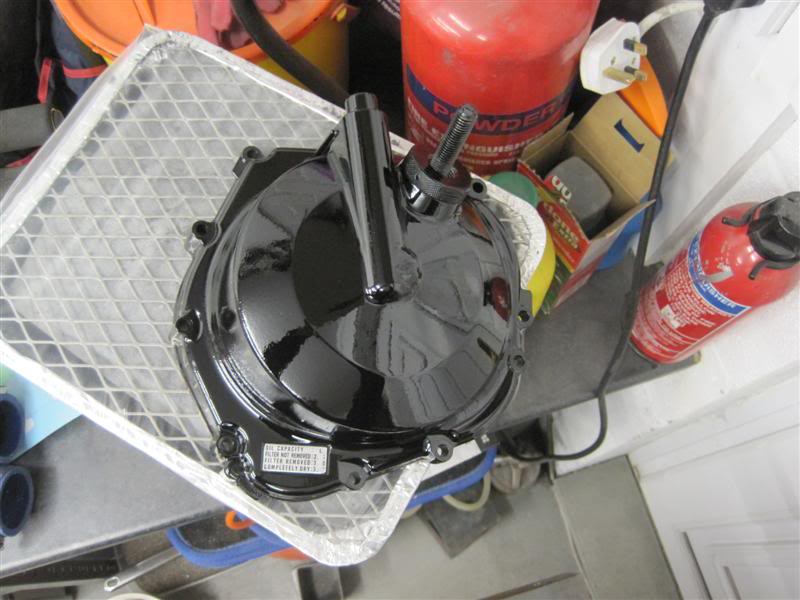
and some lacquer

While the covers are off you can see the modified Muzzy lock up clutch which is in the engine
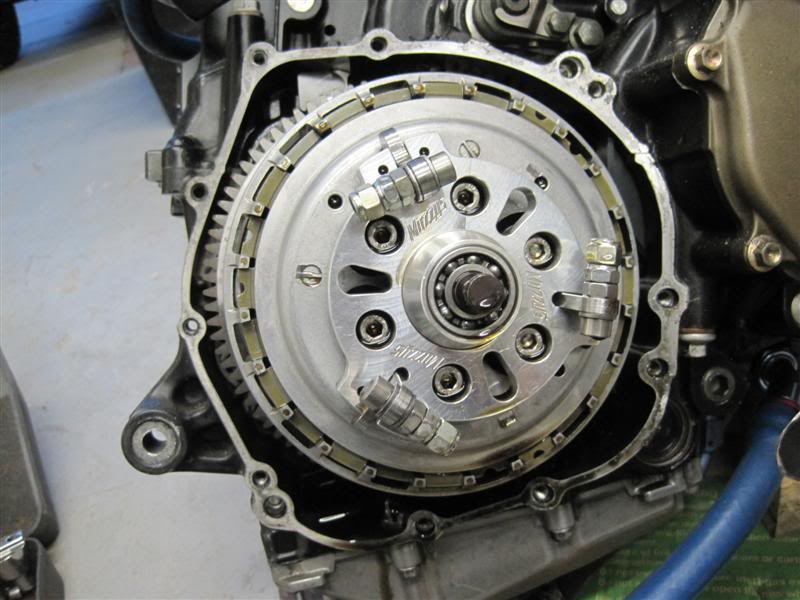
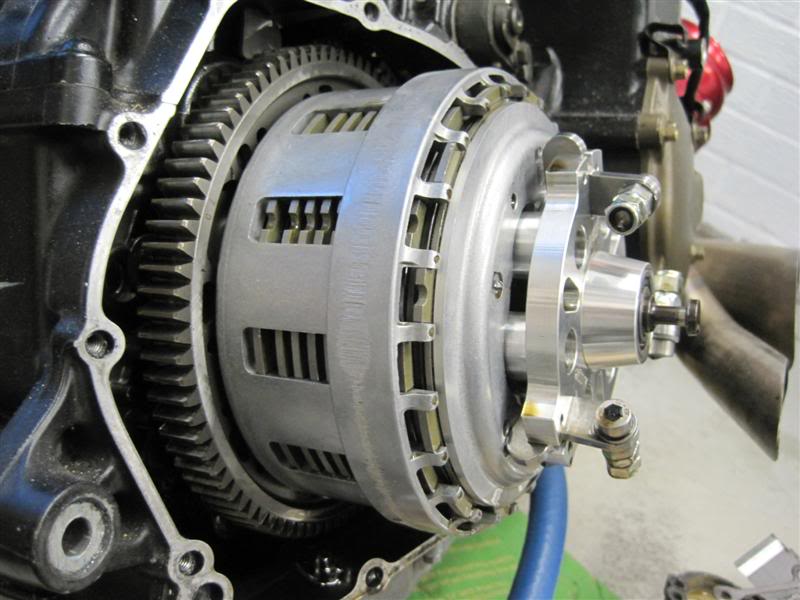
Description of the lockup clutch kit taken from Muzzys website...
It's a complete kit that includes a weight plate, weights, a new puller shaft, anti-sprag washer, anti-sprag nut and a billet CNC machined spacer ring.
The lockup clutch applies increasing pressure to the clutch pack as the engine RPM rises. More weight increases the pressure at lower RPMs and adds more pressure as the RPM rises. The lockup virtually eliminates high RPM clutch slip in high horsepower applications and therefore extends clutch life.
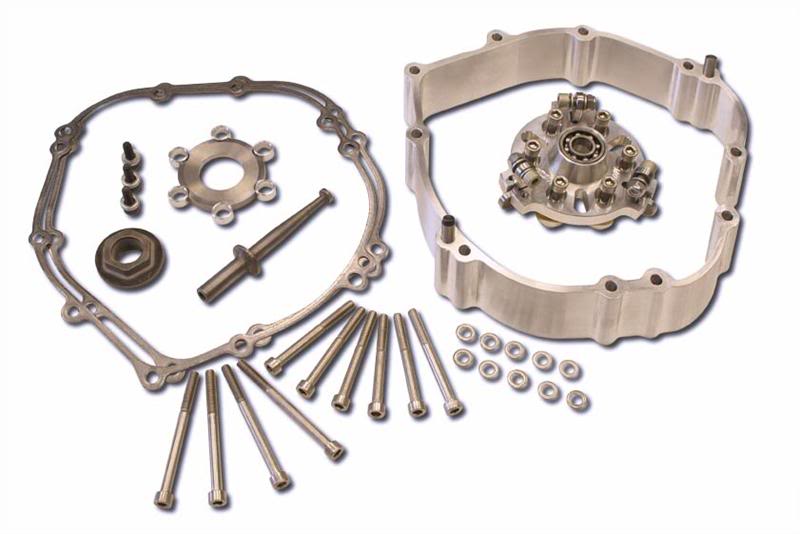
So that should come in handy when I take it for a remap and a bigger dollop of boost
Fired the compressor up and the casings were given a couple of coats of primer
then some black top coat
and some lacquer
While the covers are off you can see the modified Muzzy lock up clutch which is in the engine
Description of the lockup clutch kit taken from Muzzys website...
It's a complete kit that includes a weight plate, weights, a new puller shaft, anti-sprag washer, anti-sprag nut and a billet CNC machined spacer ring.
The lockup clutch applies increasing pressure to the clutch pack as the engine RPM rises. More weight increases the pressure at lower RPMs and adds more pressure as the RPM rises. The lockup virtually eliminates high RPM clutch slip in high horsepower applications and therefore extends clutch life.
So that should come in handy when I take it for a remap and a bigger dollop of boost
02-11-2010, 08:55 AM
#156
10K+ Poster!!
Thread Starter
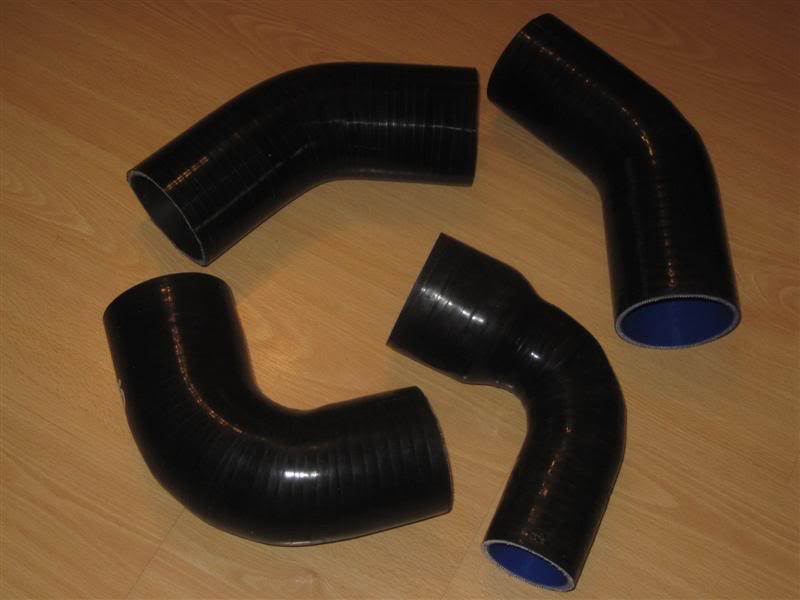
Had some boost hoses delivered to me this morning, they're 70mm internal diameter apart from one that is a 70mm to 51mm reducer for the turbo outlet to boost pipework.
04-11-2010, 07:23 PM
#157
10K+ Poster!!
Thread Starter
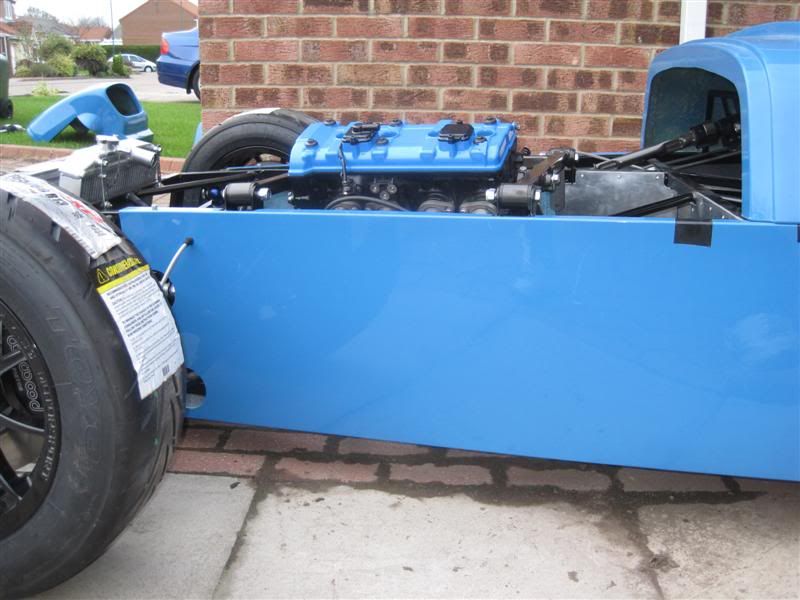
Fitted the engine today
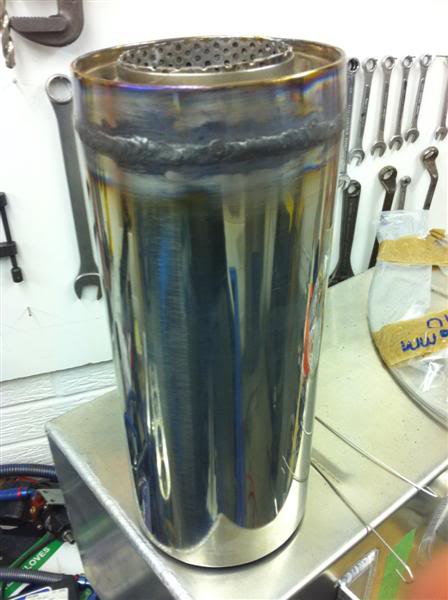
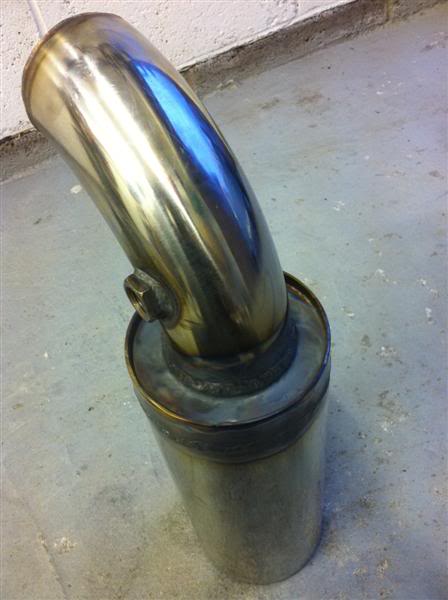
Then had a look at the exhaust routing and it turns out the exhaust silencer I bought was a little on the long side, but rather than send it back I thought I'd shorten it myself, and this is the result
that's all for today
Then had a look at the exhaust routing and it turns out the exhaust silencer I bought was a little on the long side, but rather than send it back I thought I'd shorten it myself, and this is the result
that's all for today
05-11-2010, 08:50 PM
#160
10K+ Poster!!
Thread Starter
Cheers lads
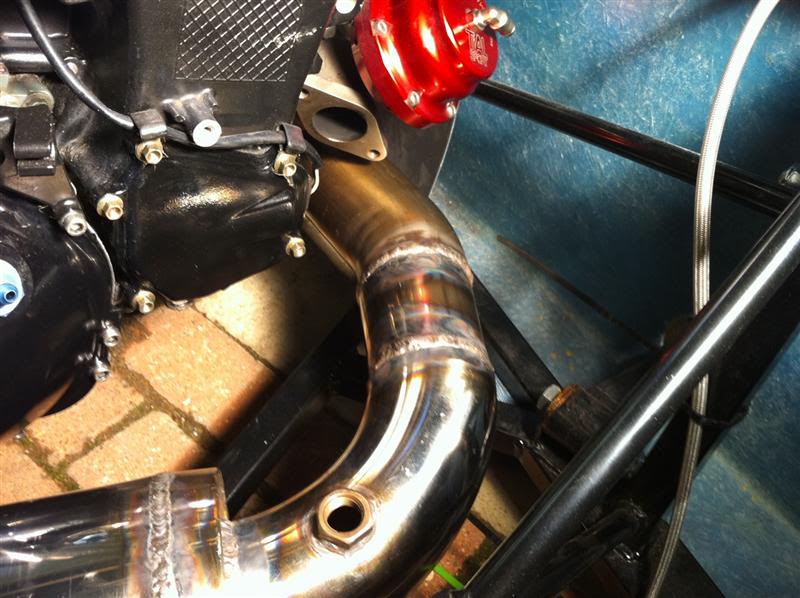
Here's an update of what I've been busy with today.
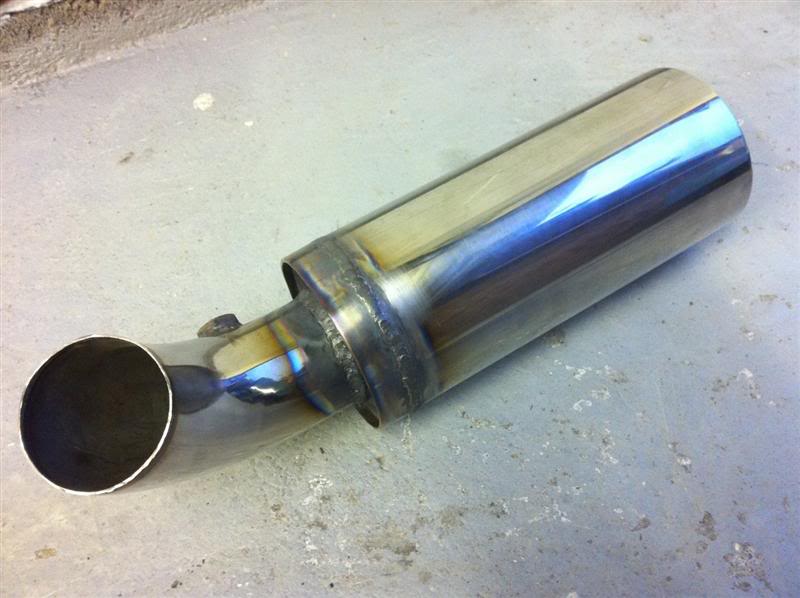
Chopped the slash cut end off the exhaust and welded a straight piece on the end of it
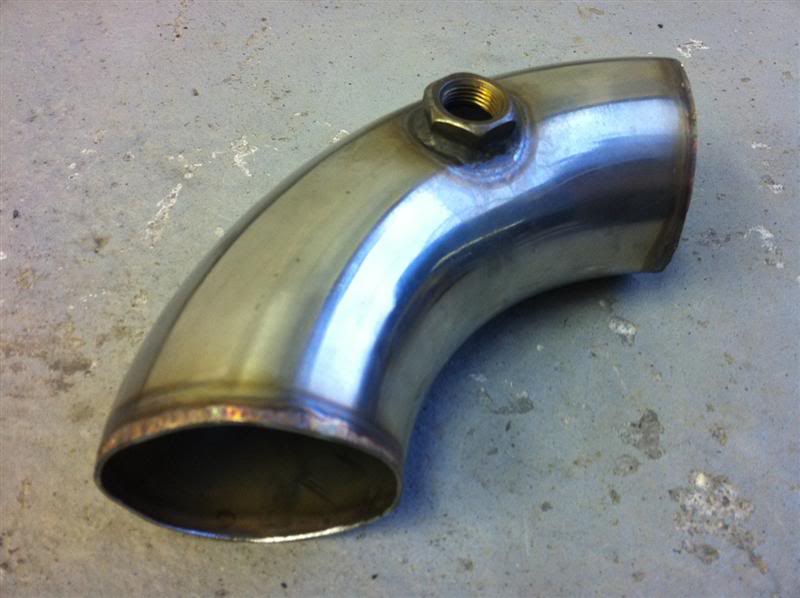
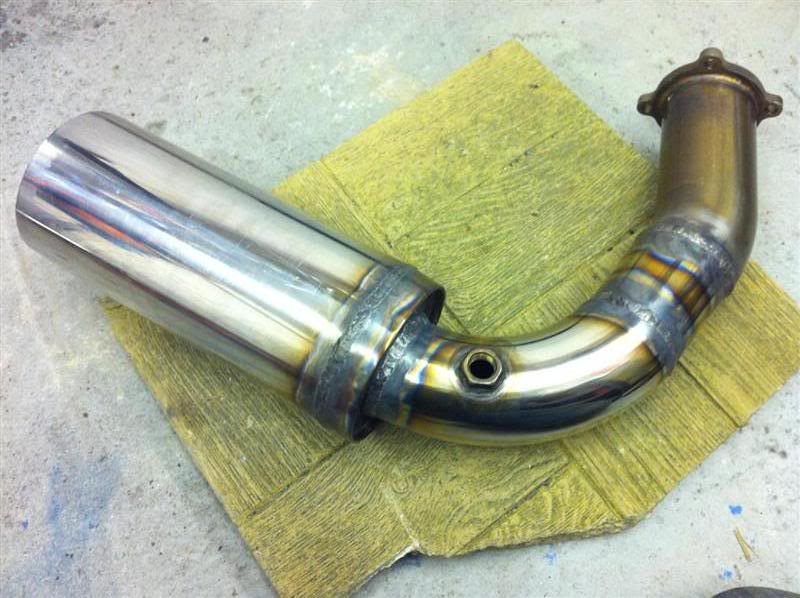
Butchered an unused 3" stainless steel downpipe I had in the garage which was originally intended for my Evo 5, the result was a bend with lambda sensor boss fitted.
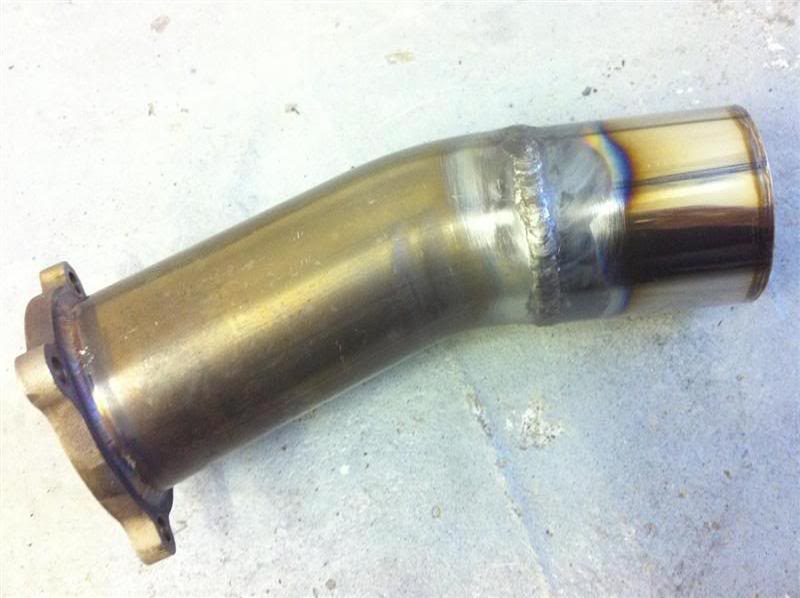
Welded it onto the silencer
The two pieces were then welded together to make this exhaust
Bolted to the turbo it looks like this
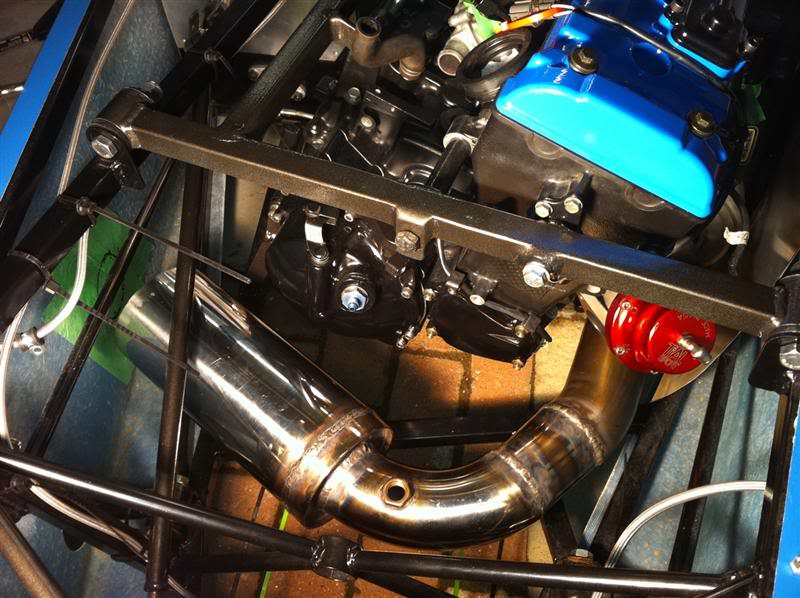
Tomorrows job is to add a hanging bracket to the silencer, cut a hole in the side panel and weld on the tailpipe
Oh and sort out the pipework from the external wastegate, which will be piped back in before the silencer
That is all
Here's an update of what I've been busy with today.
Chopped the slash cut end off the exhaust and welded a straight piece on the end of it
Butchered an unused 3" stainless steel downpipe I had in the garage which was originally intended for my Evo 5, the result was a bend with lambda sensor boss fitted.
Welded it onto the silencer
The two pieces were then welded together to make this exhaust
Bolted to the turbo it looks like this
Tomorrows job is to add a hanging bracket to the silencer, cut a hole in the side panel and weld on the tailpipe
Oh and sort out the pipework from the external wastegate, which will be piped back in before the silencer
That is all
Last edited by Red16; 05-11-2010 at 08:52 PM.