ZX10R turbo kit car build - update 10-08-13
 06-05-2010, 02:21 PM
#41
10K+ Poster!!
Thread Starter

Not been doing a lot on the car lately, been too busy playing Modern Warfare 2 on the PS3, the big kid that I am 
Anyway, I took delivery of a package from Mac#1 this morning
A new steering column and linkages, and a my Sierra rack which has been shortened
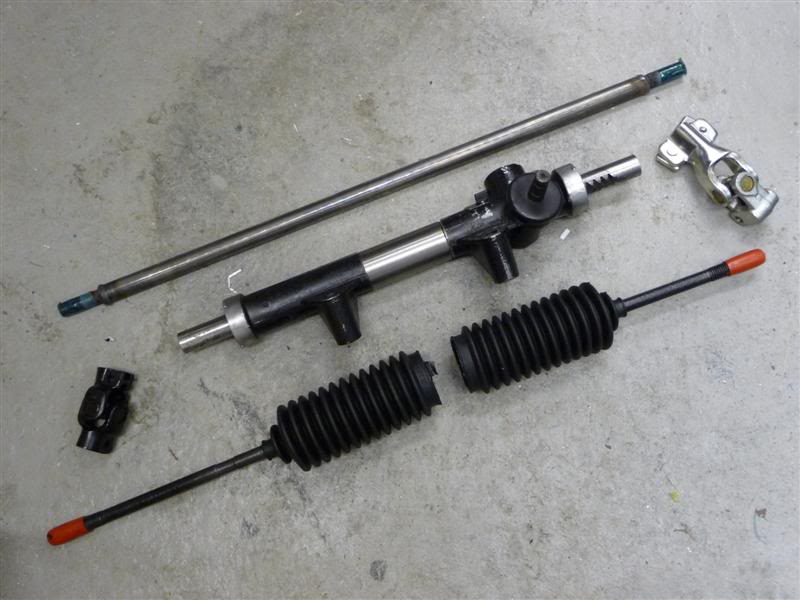
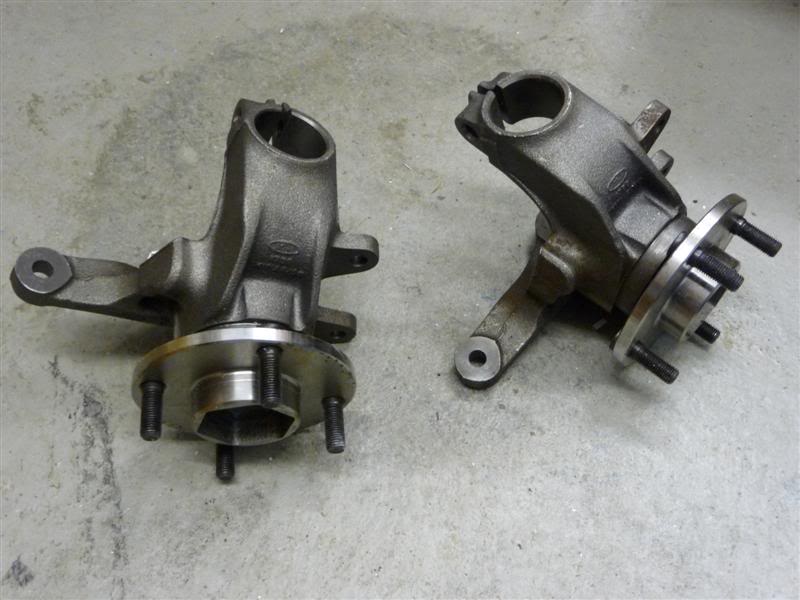
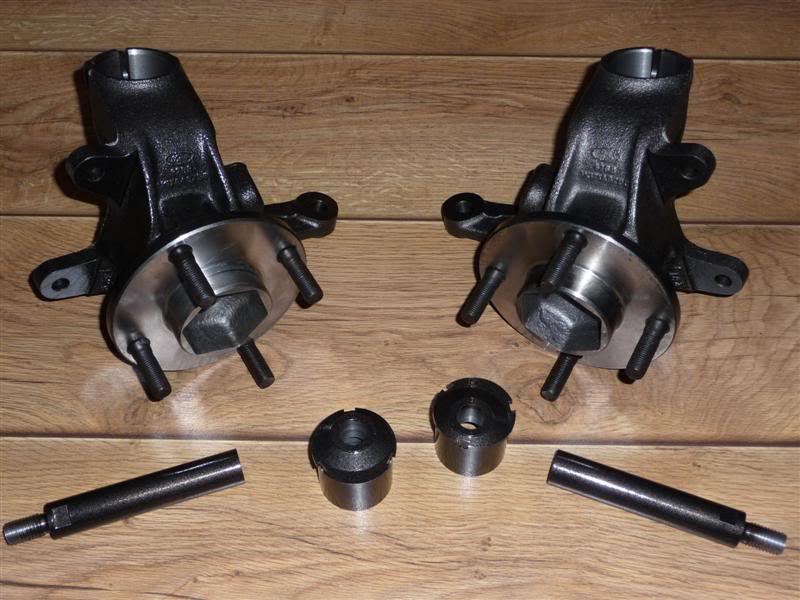
and a pair of Sierra uprights, unfortunately theyre both for the same side of the car
Thanks
Well if you do give me a wave, you're welcome to a spin in it. Where you from?
Anyway, I took delivery of a package from Mac#1 this morning
A new steering column and linkages, and a my Sierra rack which has been shortened
and a pair of Sierra uprights, unfortunately theyre both for the same side of the car
Thanks
Well if you do give me a wave, you're welcome to a spin in it. Where you from?
Last edited by Red16; 06-05-2010 at 02:49 PM.

 11-05-2010, 10:49 PM
#44
10K+ Poster!!
Thread Starter
Here's the poorest update ever 
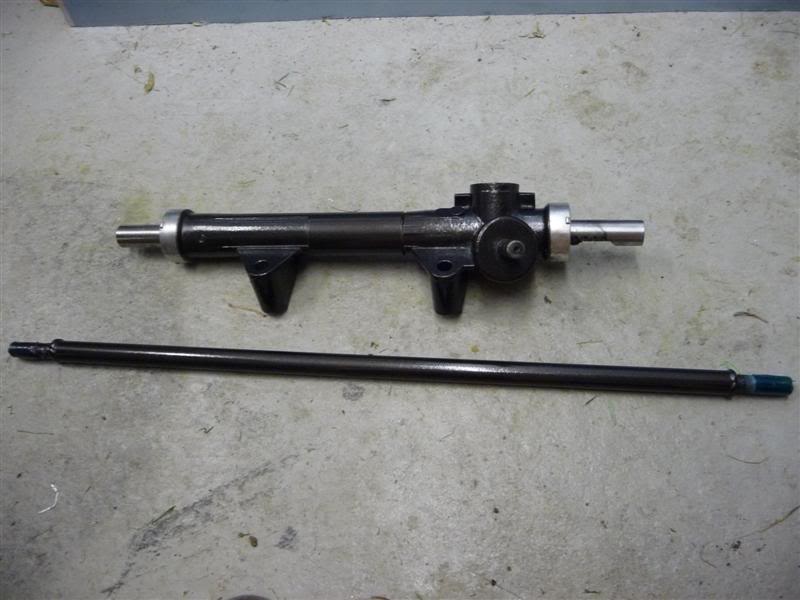
A coat of Hammerite Hammered spray paint and the steering rack and link arm look like this
I might get round to fitting the rack and cutting the holes in the bodywork for the rack arms to come through tomorrow, then if i'm really lucky fix the bodywork to the chassis permanently
A coat of Hammerite Hammered spray paint and the steering rack and link arm look like this
I might get round to fitting the rack and cutting the holes in the bodywork for the rack arms to come through tomorrow, then if i'm really lucky fix the bodywork to the chassis permanently
11-05-2010, 11:26 PM
#45
I've found that life I needed.. It's HERE!!
Very nice project really like the Mac kits very nice quality, fit of the grp bodywork looked great too
will be a animal once completed
will be a animal once completed
24-06-2010, 03:54 PM
#46
10K+ Poster!!
Thread Starter
Not much progress of late due to work, but I've managed to spend a bit of money and get some new parts
A set of Team Dynamics Pro Race 1.2 wheels with Toyo R888 tyres in 205/60/13 for the rear and 185/60/13 for the front.
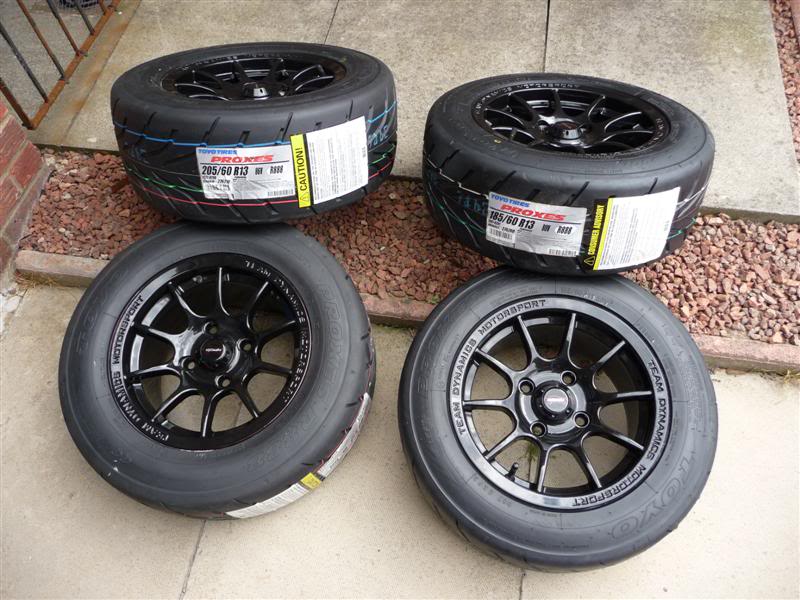
The fronts weigh in at 12.5kg per corner and the rears 13.6kg per corner.
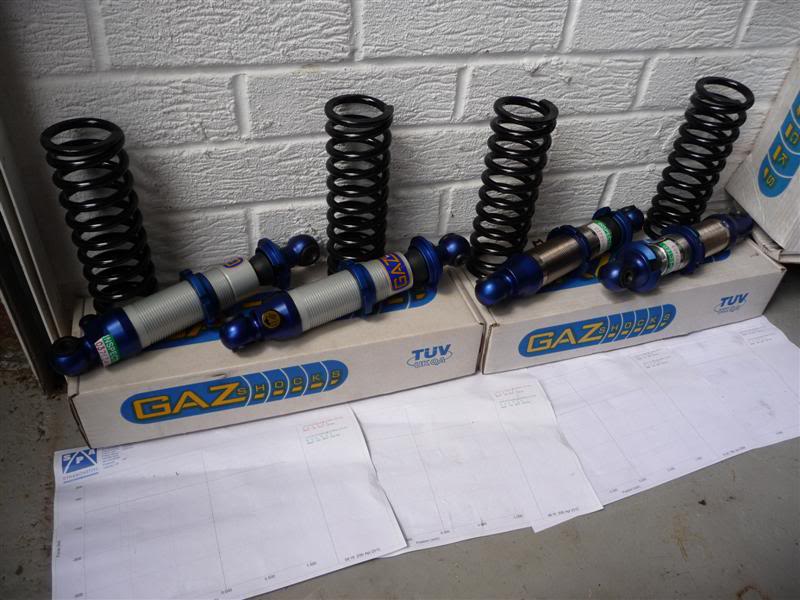
A set of Gaz Gold coilovers, revalved to work upside down.
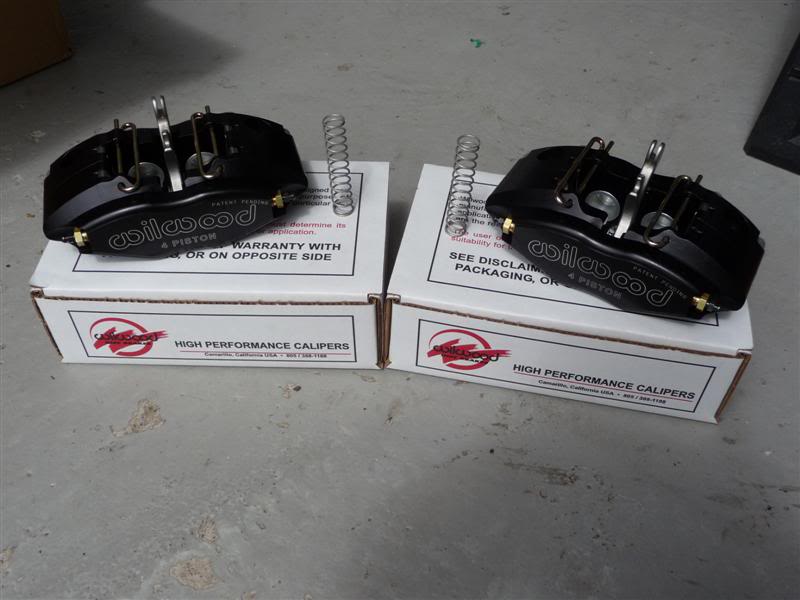
Wilwood 4 pot rear handbrake calipers.
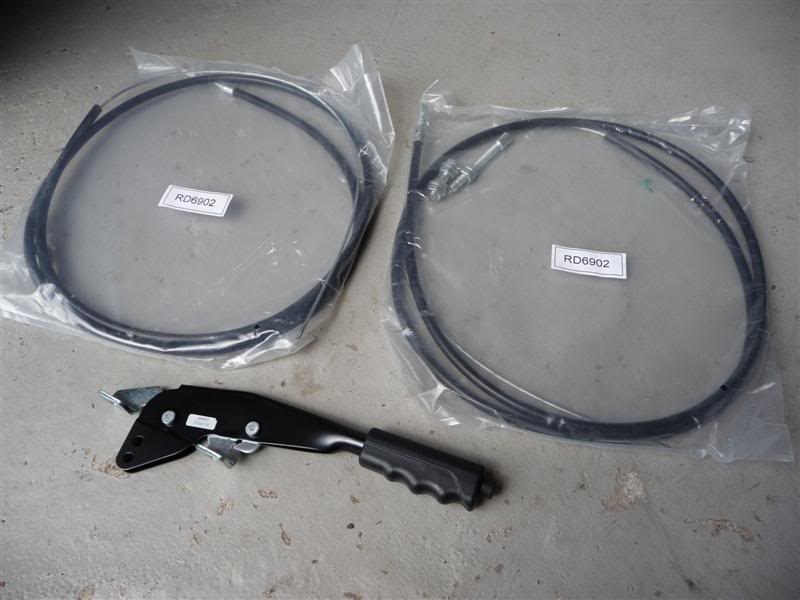
Handbrake lever and cables to suit the above calipers.
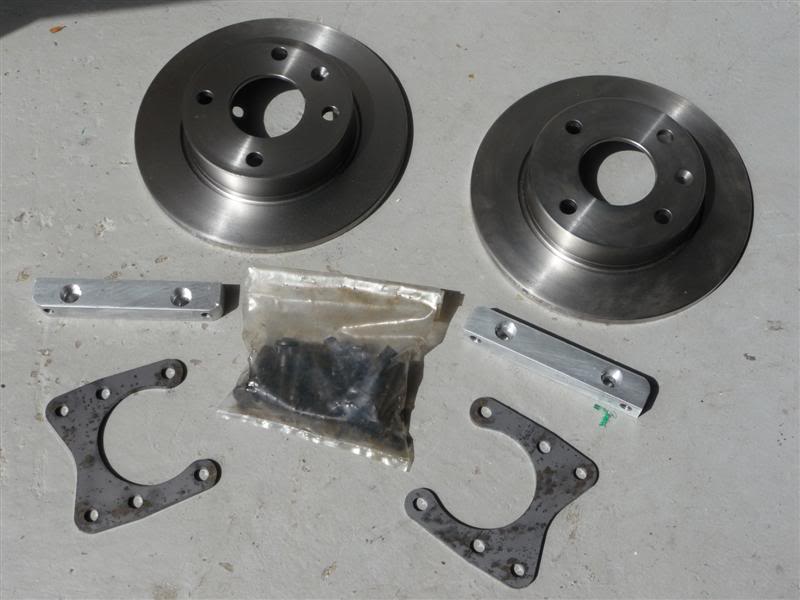
Solid rear discs, rear caliper mounting brackets and a bag of longer wheel studs to suit the Pro Race 1.2 wheels.
Solid front discs and Wilwood 4 pot calipers.
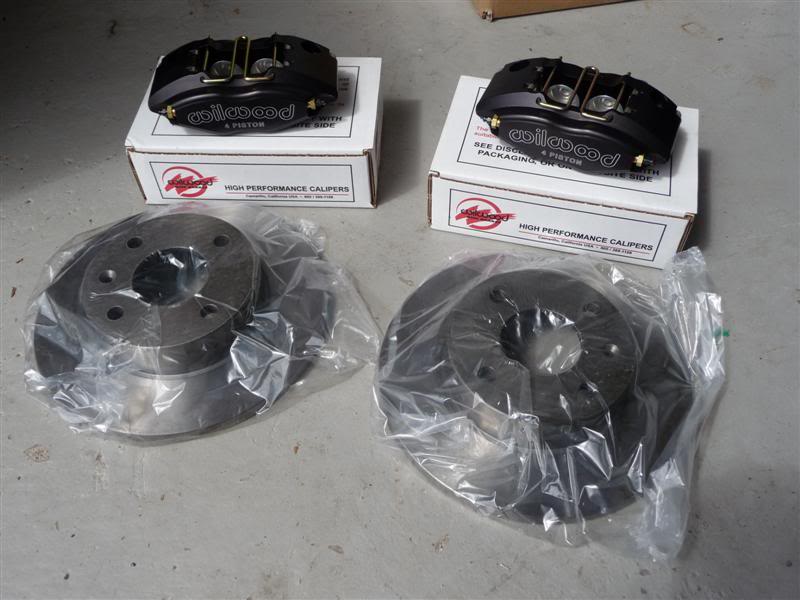
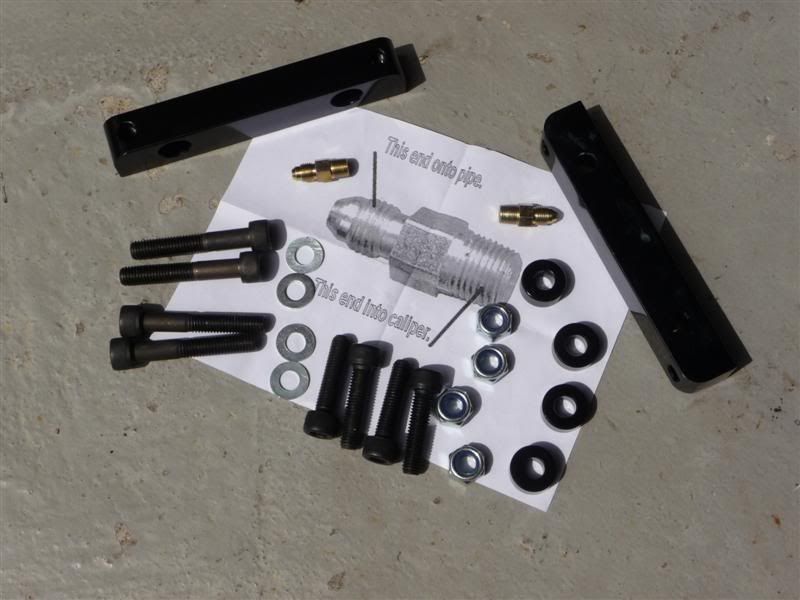
Front brake caliper mounting brackets, bolts and brake fittings.
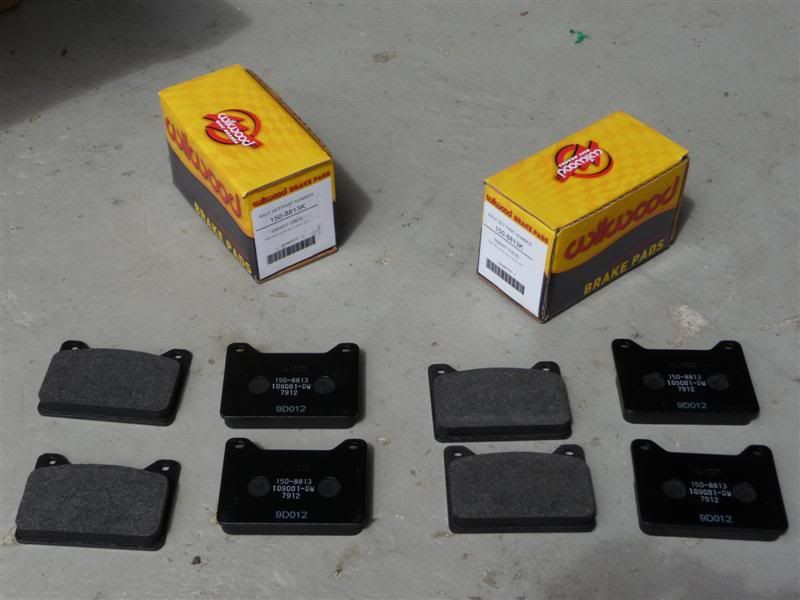
And a set of front and rear brake pads.
If I pull my finger out I could have a rolling chassis very soon
A set of Team Dynamics Pro Race 1.2 wheels with Toyo R888 tyres in 205/60/13 for the rear and 185/60/13 for the front.
The fronts weigh in at 12.5kg per corner and the rears 13.6kg per corner.
A set of Gaz Gold coilovers, revalved to work upside down.
Wilwood 4 pot rear handbrake calipers.
Handbrake lever and cables to suit the above calipers.
Solid rear discs, rear caliper mounting brackets and a bag of longer wheel studs to suit the Pro Race 1.2 wheels.
Solid front discs and Wilwood 4 pot calipers.
Front brake caliper mounting brackets, bolts and brake fittings.
And a set of front and rear brake pads.
If I pull my finger out I could have a rolling chassis very soon
Last edited by Red16; 25-06-2010 at 10:19 PM.

 25-06-2010, 10:24 PM
#51
10K+ Poster!!
Thread Starter
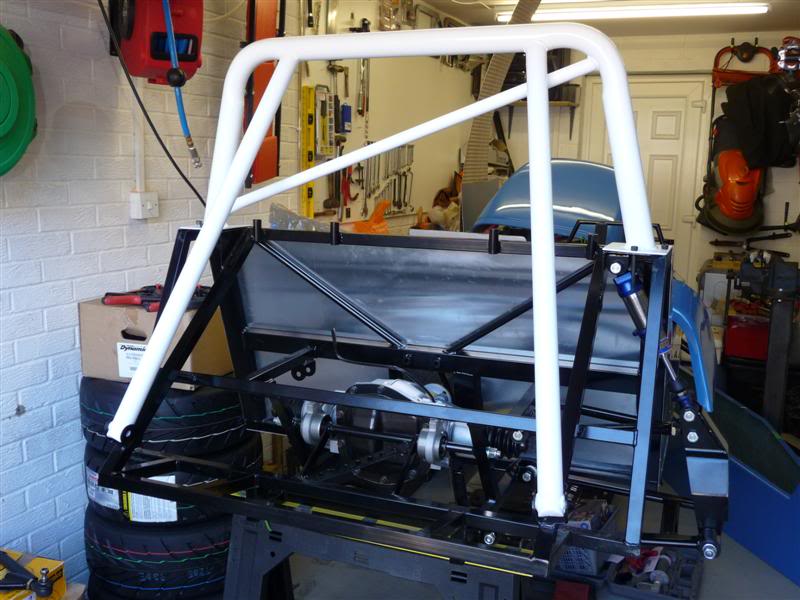
Aye it's starting to take shape now, hopefully I'll give it enough attention next week to have it looking very much like a car
Need to paint the front uprights, rear brake caliper brackets and a few other bits before I can bolt on the suspension, wheels, brakes etc and have a rolling chassis to sit in and make brum brum noises
Dave... having all new parts instead of rusty old bits to play with makes the job so much easier, it really is a lot less worrying than the mk3 was!
30-06-2010, 06:34 PM
#52
10K+ Poster!!
Thread Starter
Some more new parts arrived today
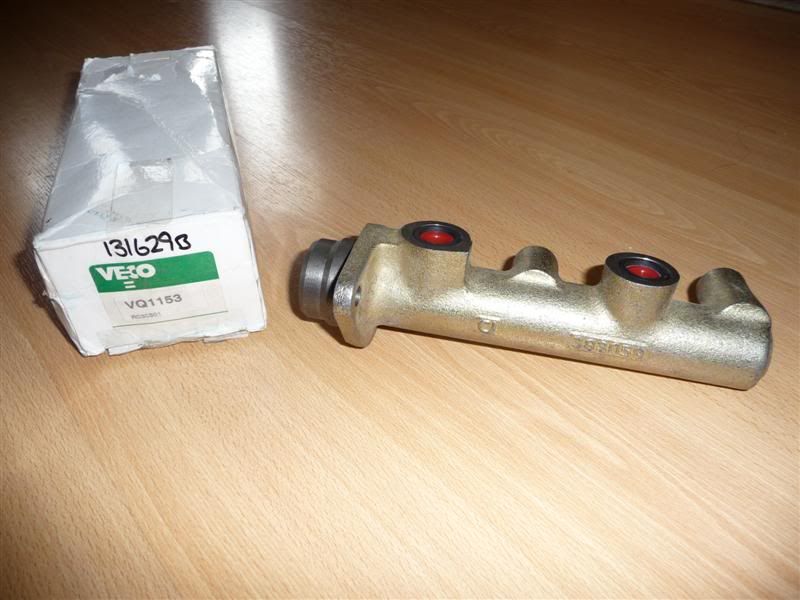
One Sierra master cylinder
A hydraulic switch for the brake lights
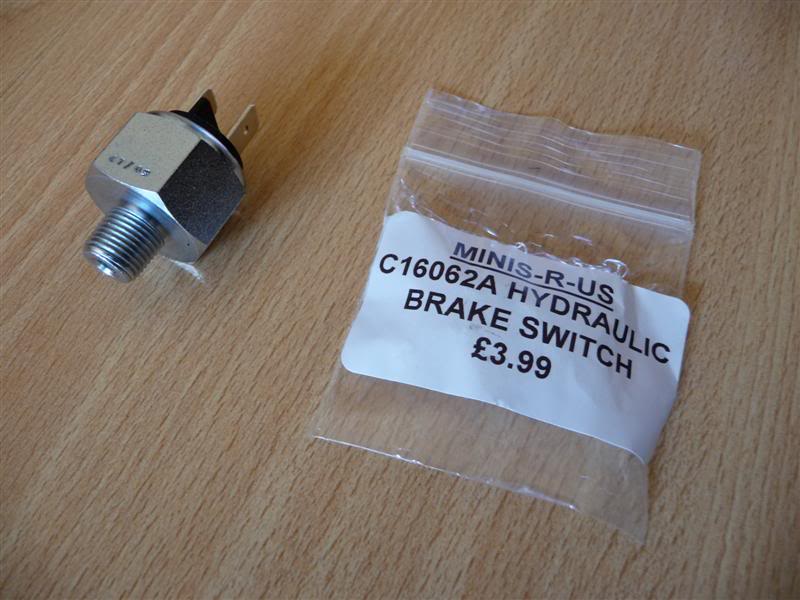
A Freelander rear differential
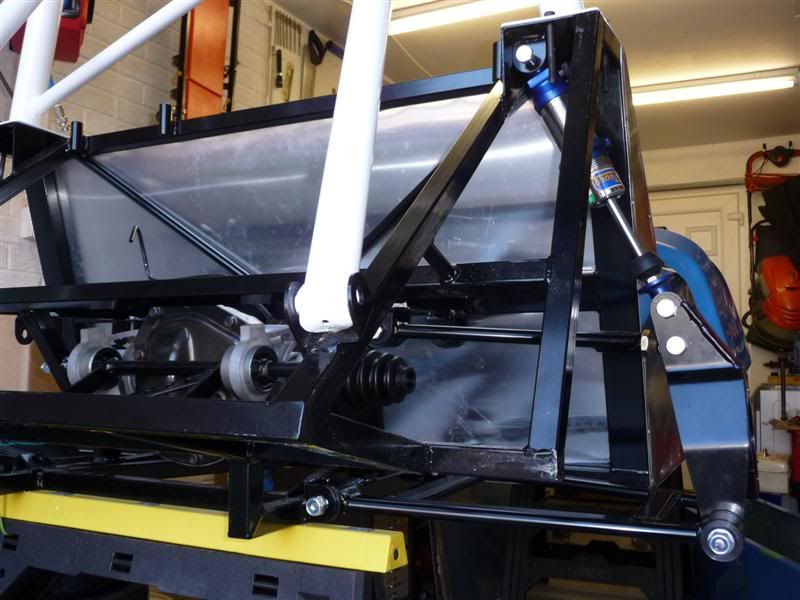
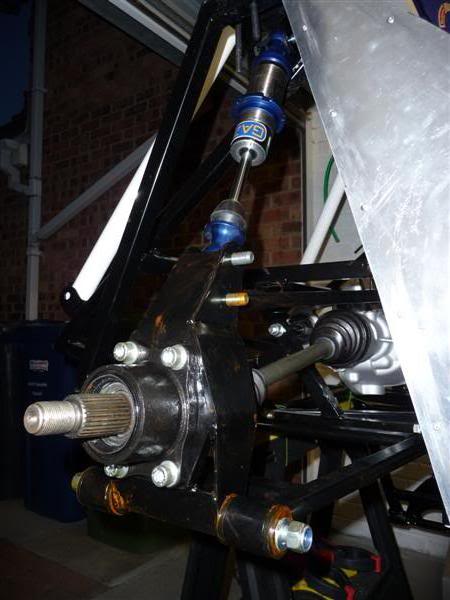
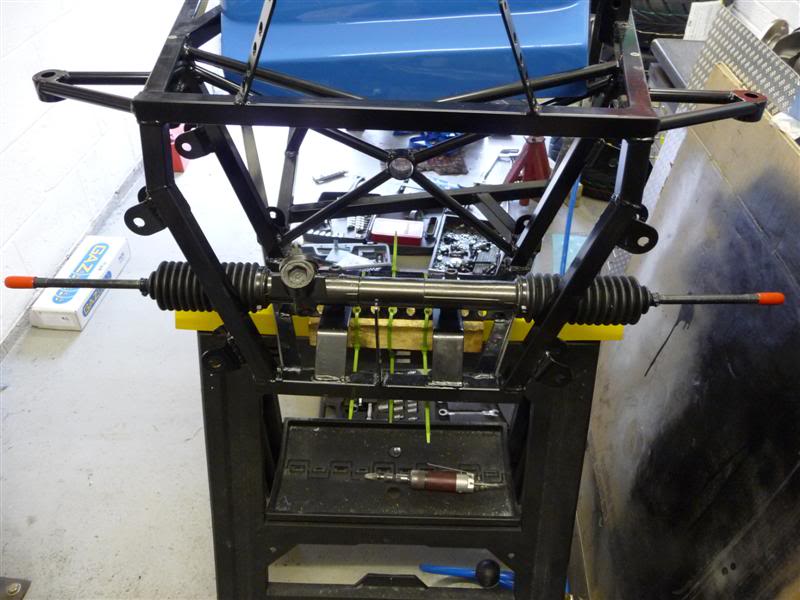
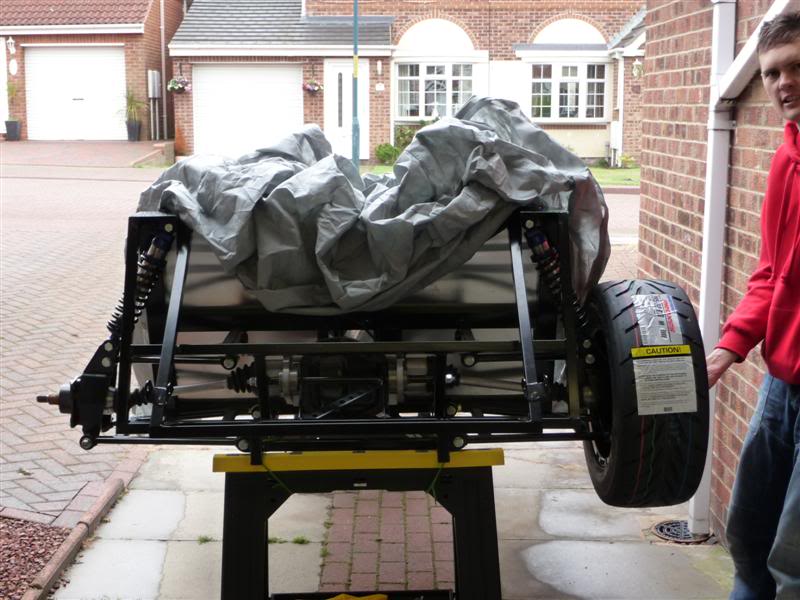
Finally got round to fitting the steering rack and quickly mocked up the suspension to see how it looks
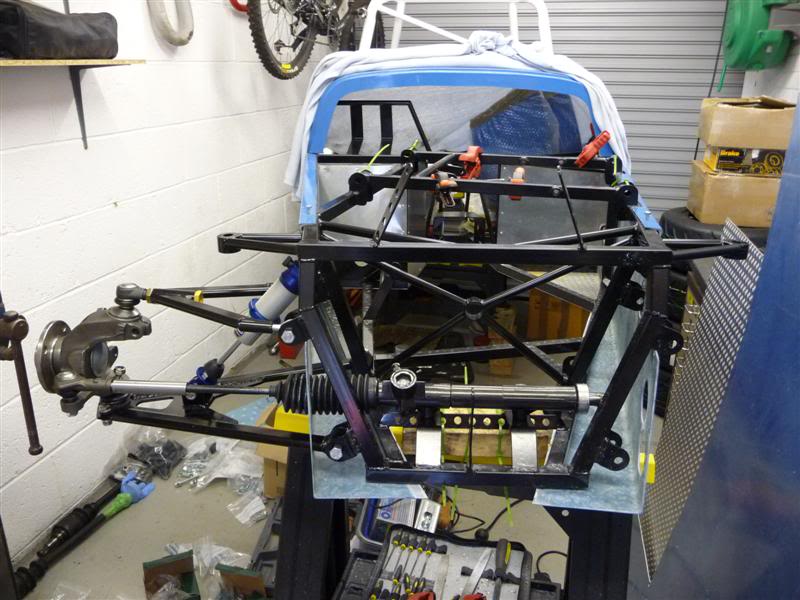
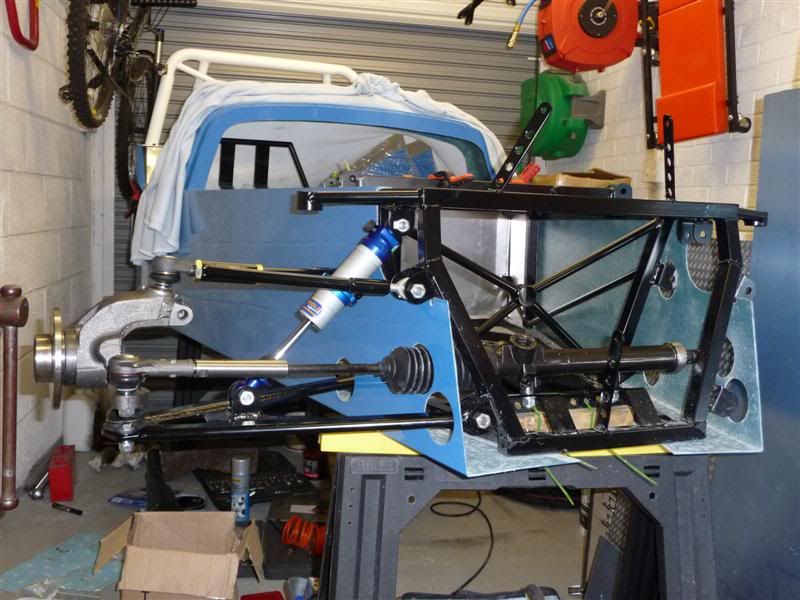
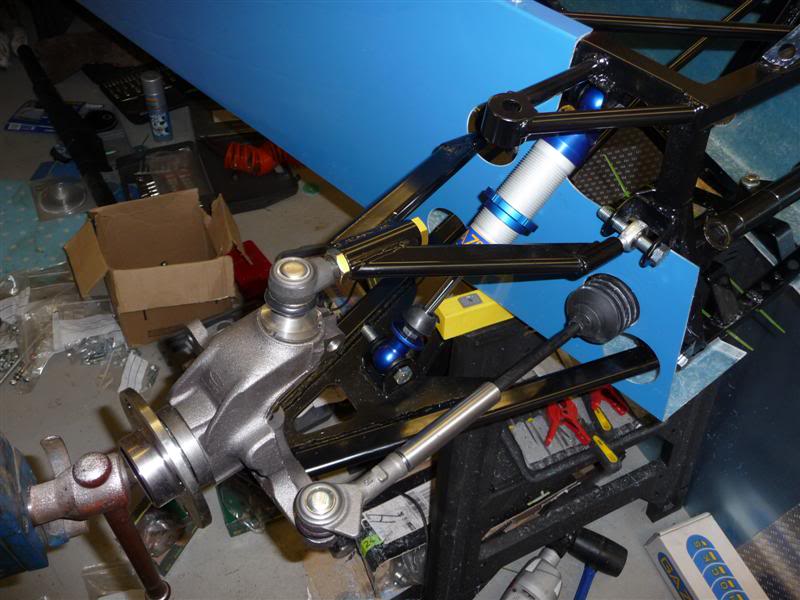
PS Yes I know the track rod end should mount underneath the upright not above like I had it, I only realised after I had taken the photos, doh!
No drama though as nothing is tightened up, and it all needs to come off so I can finish cutting the side panels.
Looking back through those photos really hits home how messy the garage has become, I'll be sorting that out tomorrow too!
One Sierra master cylinder
A hydraulic switch for the brake lights
A Freelander rear differential
Finally got round to fitting the steering rack and quickly mocked up the suspension to see how it looks
PS Yes I know the track rod end should mount underneath the upright not above like I had it, I only realised after I had taken the photos, doh!
No drama though as nothing is tightened up, and it all needs to come off so I can finish cutting the side panels.
Looking back through those photos really hits home how messy the garage has become, I'll be sorting that out tomorrow too!

 01-07-2010, 10:36 AM
#56
10K+ Poster!!
Thread Starter
Cheers for the comments lads 
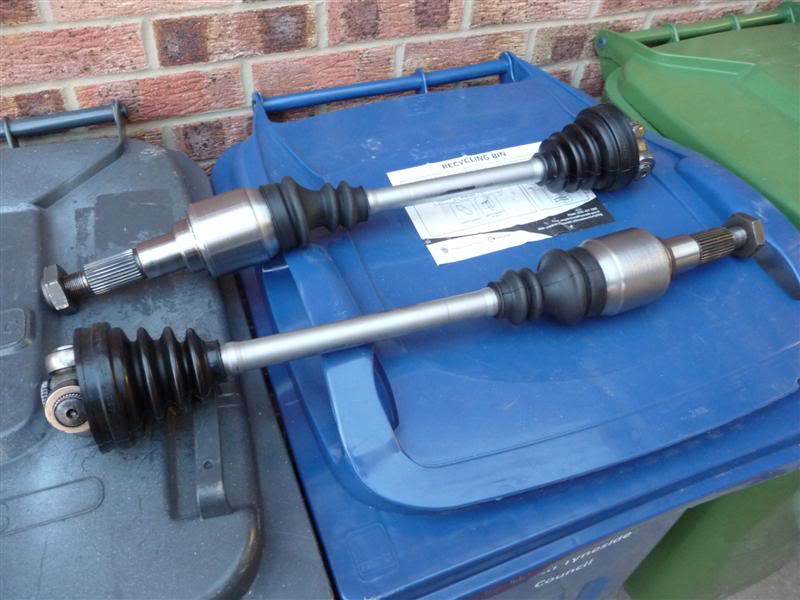
The doorbell went this morning and I was greeted by the posty with a parcel from Mac#1
Two new custom driveshafts and tri-lobe bearings
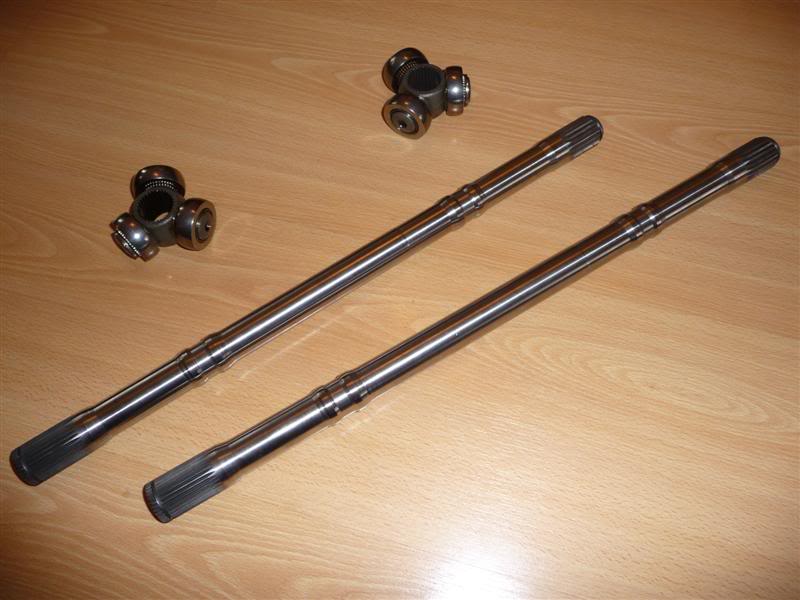
The stockpile of parts is getting really big, it's about time i pulled my finger out and got some of it on the car!
Cheers
The quality looks good to me, you're welcome to come up and have a closer look if you want They're really light too, 1kg per caliper
The doorbell went this morning and I was greeted by the posty with a parcel from Mac#1
Two new custom driveshafts and tri-lobe bearings
The stockpile of parts is getting really big, it's about time i pulled my finger out and got some of it on the car!
The quality looks good to me, you're welcome to come up and have a closer look if you want
Last edited by Red16; 01-07-2010 at 10:37 AM.
01-07-2010, 12:59 PM
#58
10K+ Poster!!
Thread Starter
Here's a link to those Wilwood handbrake calipers from Rally Design
http://www.rallydesign.co.uk/product...ducts_id=11370
03-07-2010, 08:08 AM
#59
10K+ Poster!!
Thread Starter
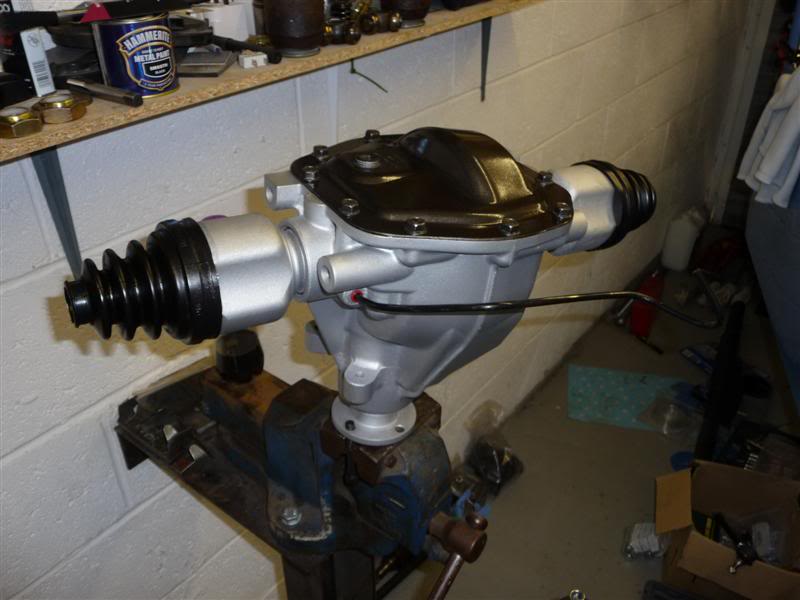
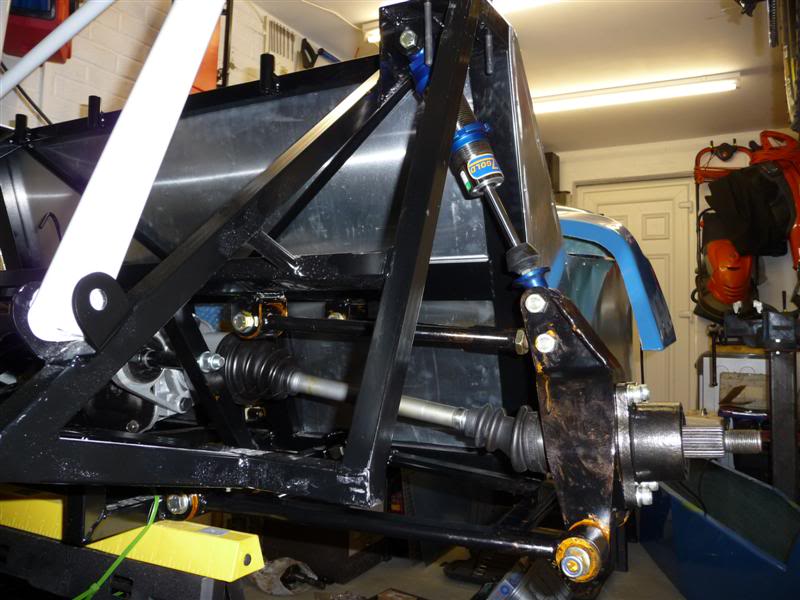
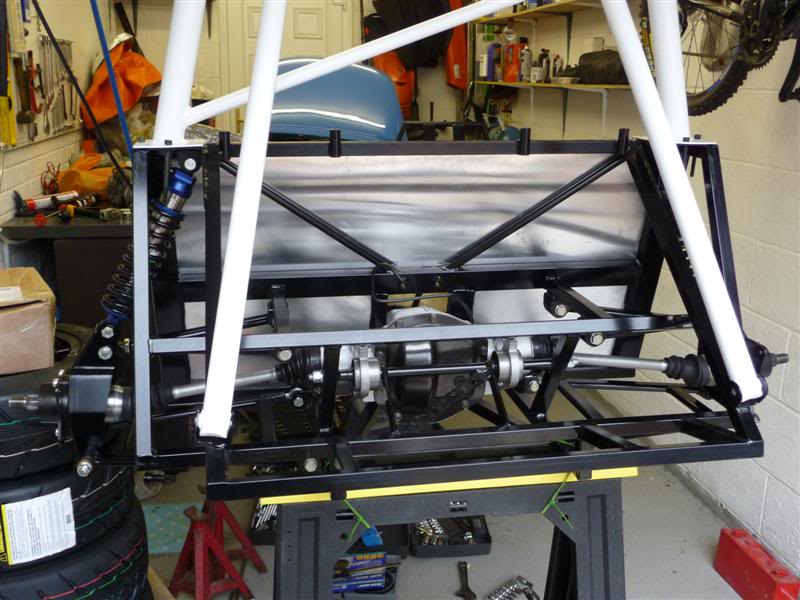
Tried to fit my Freelander rear diff yesterday but didnt realise until it was nearly in the car that the casing needed a little mod, doh!
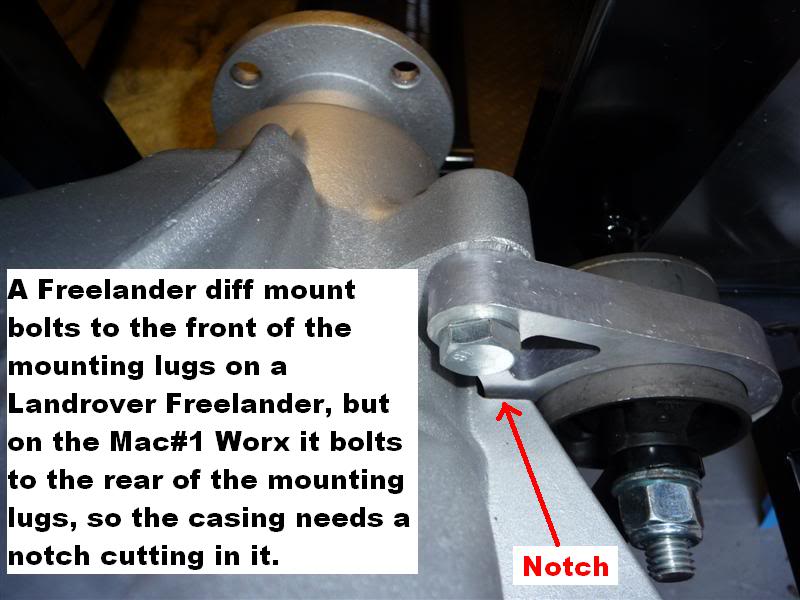
Once the notch was cut out of the casing, the diff bolted into the chassis easily.
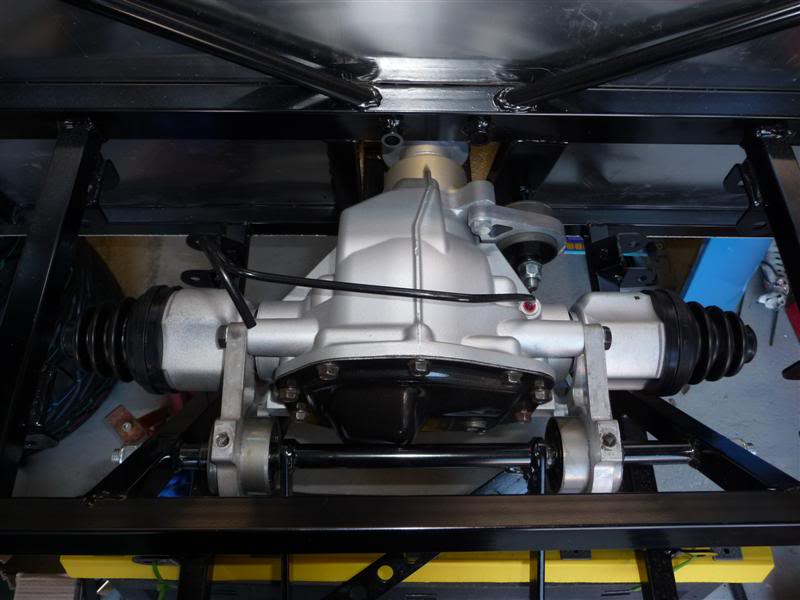
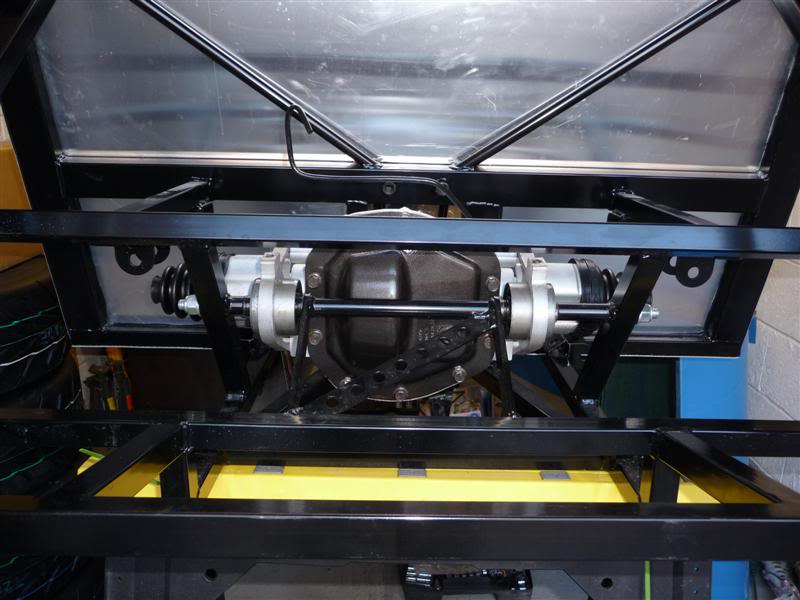
I then set about a quick mock up of the rear suspension, which looks something like this
Once the notch was cut out of the casing, the diff bolted into the chassis easily.
I then set about a quick mock up of the rear suspension, which looks something like this
05-07-2010, 10:38 PM
#60
10K+ Poster!!
Thread Starter
Todays progress went like this...
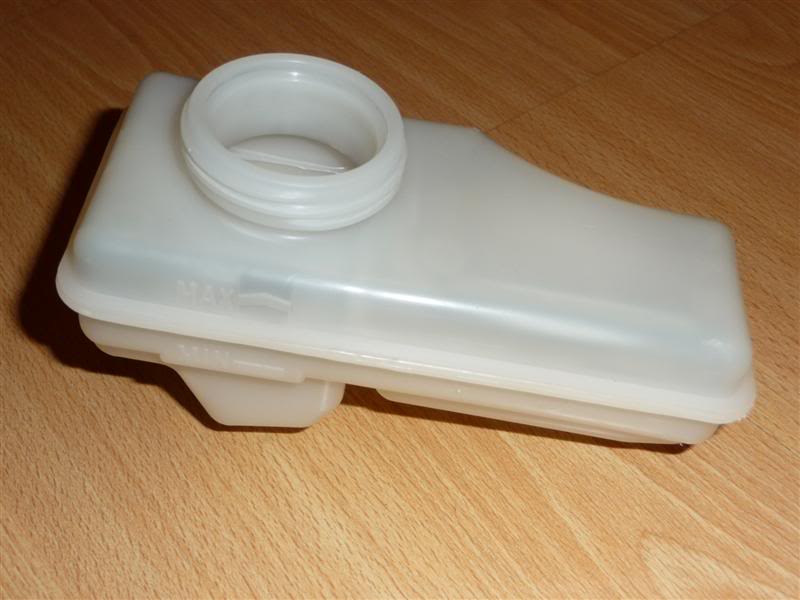
One new Sierra brake fluid reservoir
Driveshafts built up, but still requiring securing around each end of the cv boots
Drivers side driveshaft fitted, suspension assembled with upright, bushes fettled to rotate nice and easily, no squeeks
List of jobs for next time i venture out to the garage...
1. Brake caliper brackets to paint and fit.
2. Copper slip and other crap to wipe from the chassis, it looks filthy in the photos
3. Spring to be fitted to the coilover strut.
4. Couple of nuts/bolts to torque up.
Then the other side can be assembled.
The rear hubs are away being machined to 134mm diameter to allow the rear brake discs to be fitted.
09-07-2010, 08:43 PM
#62
10K+ Poster!!
Thread Starter
Cheers Coley, get one bought
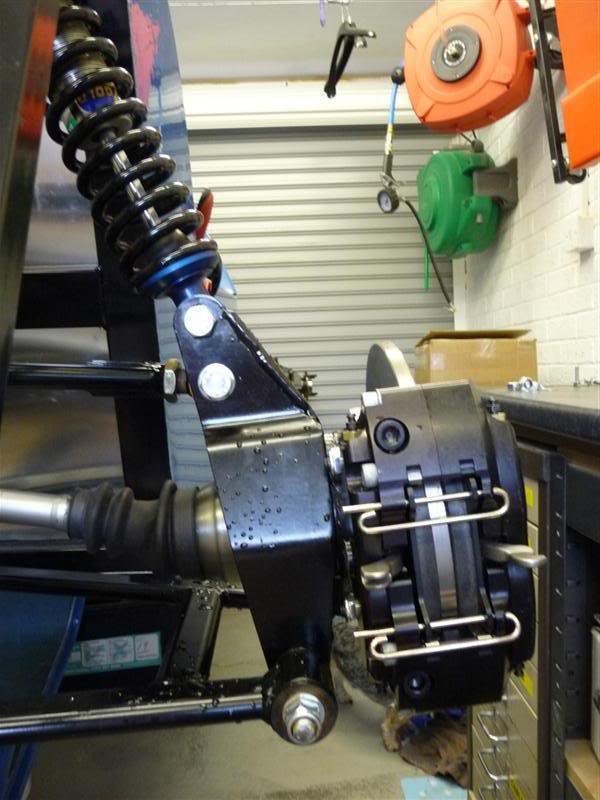
Been assembling the rear end today
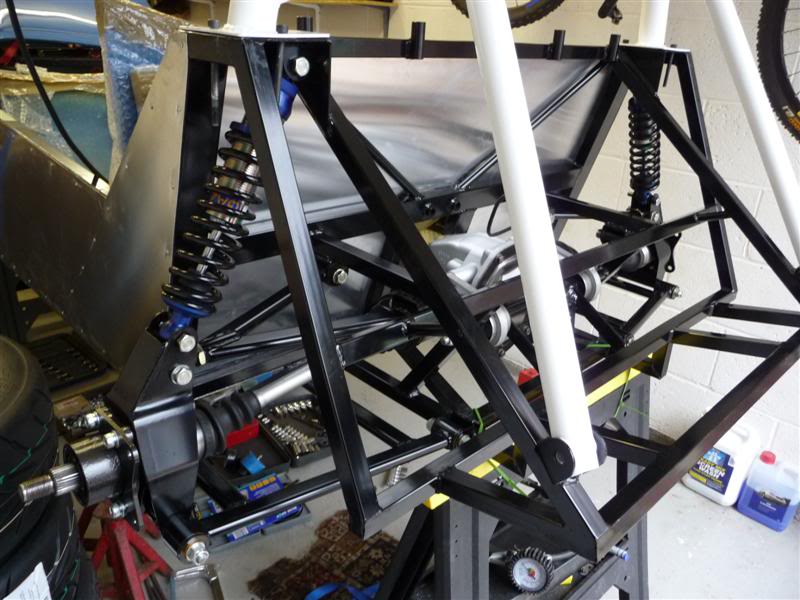
Fitted the brake caliper brackets to the uprights.
Drivers side

Passenger side
Then done a small amount of work to the front end, fitted the arms to the steering rod and secured the rubber boots.
Hoping to get my rear hubs back tomorrow, then the brakes can be fitted.
Been assembling the rear end today
Fitted the brake caliper brackets to the uprights.
Drivers side
Passenger side
Then done a small amount of work to the front end, fitted the arms to the steering rod and secured the rubber boots.
Hoping to get my rear hubs back tomorrow, then the brakes can be fitted.

 11-07-2010, 08:10 PM
#67
10K+ Poster!!
Thread Starter
Cheers for the kind words you lot
Small update of the weekends work, nothing spectacular just a spot of painting, also fitted a set of longer wheel studs to suit the Pro Race 1.2 wheels.
The rear hubs are now back from being machined and are painted but not dry, hence the lack of photos.
Planning on cracking on with the car tomorrow, so should have a more interesting update tomorrow
12-07-2010, 10:42 AM
#68
10K+ Poster!!
Thread Starter
Rear hubs now have the longer wheel studs fitted and a lick of Hammerite Hammered has them looking like this, along with the track rod ends.

 12-07-2010, 07:27 PM
#71
10K+ Poster!!
Thread Starter
Cheers, it's not that difficult, just nuts n bolts
Thanks, glad you like it
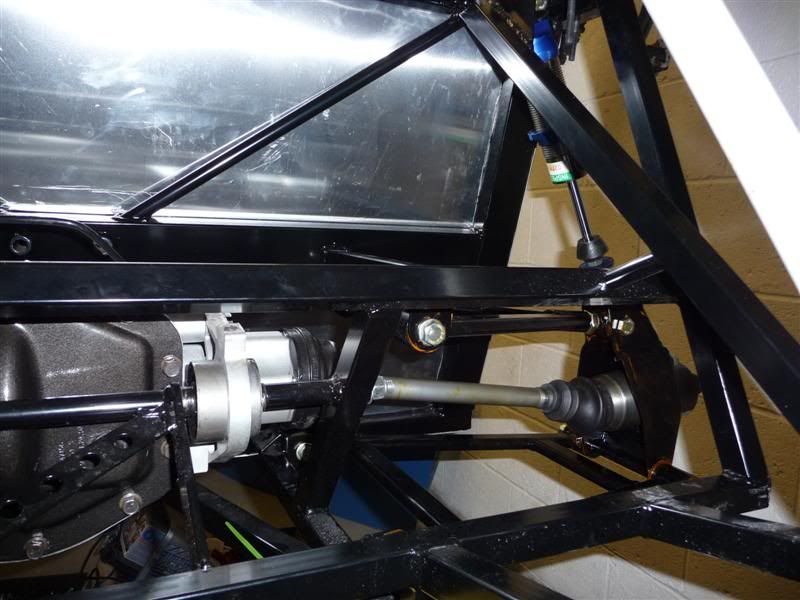
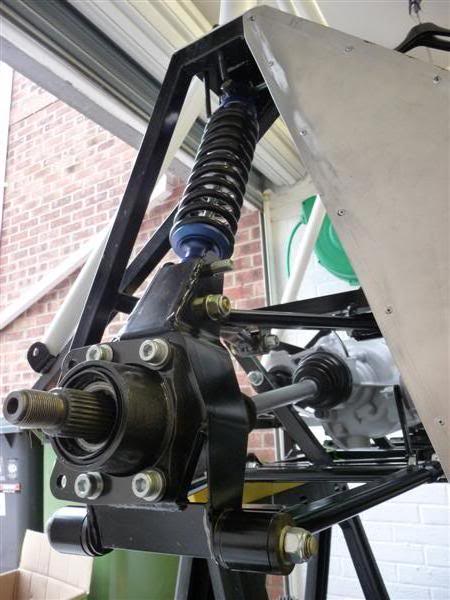
Here's a bit of an update from todays day.
Rear hubs and brake caliper brackets fitted, driveshaft nuts need to be torqued up once the brakes are operational.
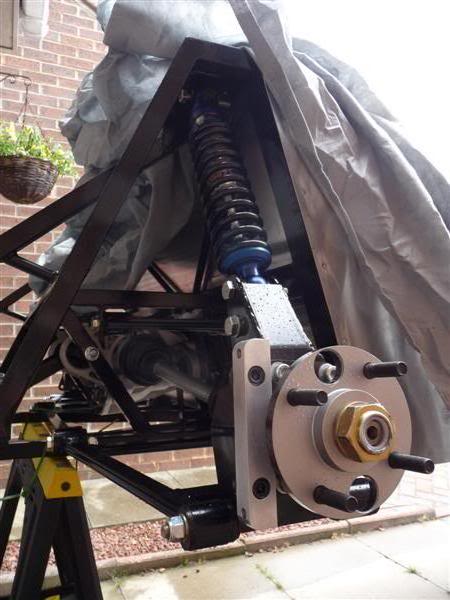
Rear brake discs and calipers fitted and it started to look like this
[IMG]http://img.photobucket.com/albums/0903/Red16/Mac%20Worx%
20RR%20Build/P1020519Medium.jpg[/IMG]
With my mate, Decka, acting as a temporary wheel nut a wheel was tried on the back, starting to look quite wide now
The side panels were trimmed for the final time, or so i thought, i now think i'll merge the steering rack hole with the front lower wishbone hole, as most people do.
The passenger side front suspension was then built up

Drivers side

Took the nose cone off to fit it in the garage, need to move my vice stand to get the car further back... job for another day
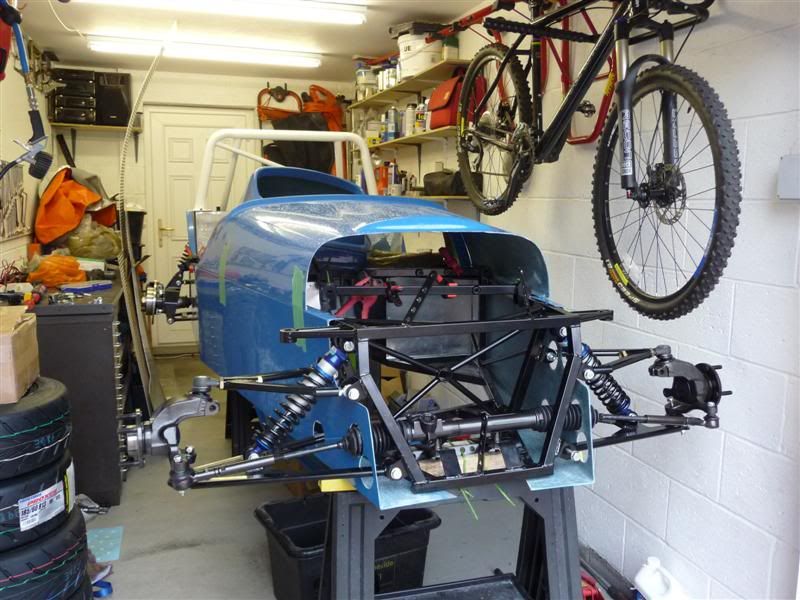
Thanks to Decka for the assistance today, I'm dead happy with the kit, it's really starting to look like a car now
Thanks, glad you like it
Here's a bit of an update from todays day.
Rear hubs and brake caliper brackets fitted, driveshaft nuts need to be torqued up once the brakes are operational.
Rear brake discs and calipers fitted and it started to look like this
[IMG]http://img.photobucket.com/albums/0903/Red16/Mac%20Worx%
20RR%20Build/P1020519Medium.jpg[/IMG]
With my mate, Decka, acting as a temporary wheel nut a wheel was tried on the back, starting to look quite wide now
The side panels were trimmed for the final time, or so i thought, i now think i'll merge the steering rack hole with the front lower wishbone hole, as most people do.
The passenger side front suspension was then built up
Drivers side
Took the nose cone off to fit it in the garage, need to move my vice stand to get the car further back... job for another day
Thanks to Decka for the assistance today, I'm dead happy with the kit, it's really starting to look like a car now

 12-07-2010, 11:20 PM
#74
10K+ Poster!!
Thread Starter
Cheers mate
A big garage would make life a lot easier (and i could have a lathe and milling machine) but it's not a necessity, mines actually starting to feel bigger now the parts are beginning to go onto the car.
13-07-2010, 08:23 PM
#76
10K+ Poster!!
Thread Starter
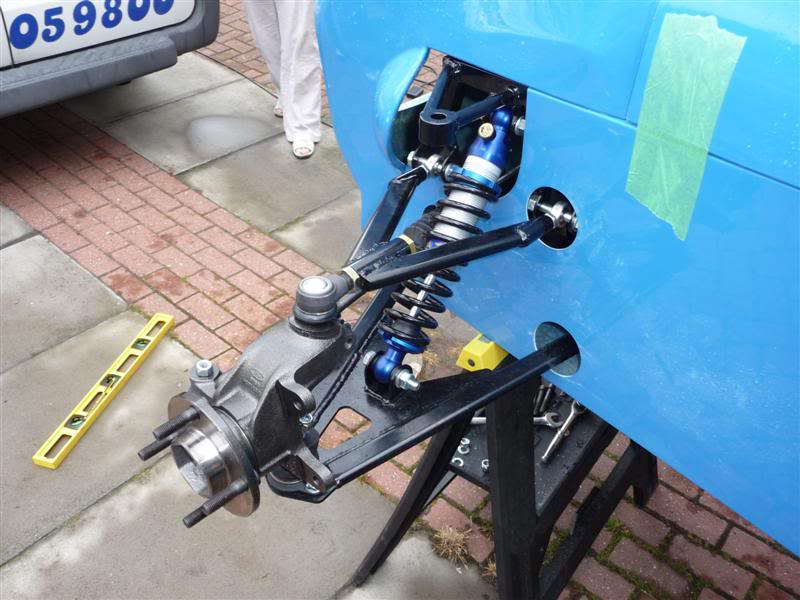
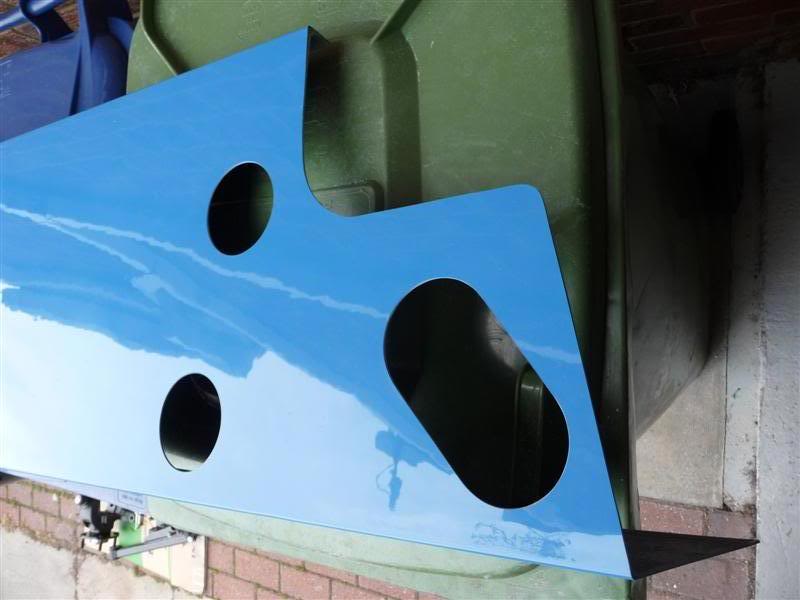
This afternoon i took the suspension off the front of the car and decided to do the final trimming to the side panels
Before
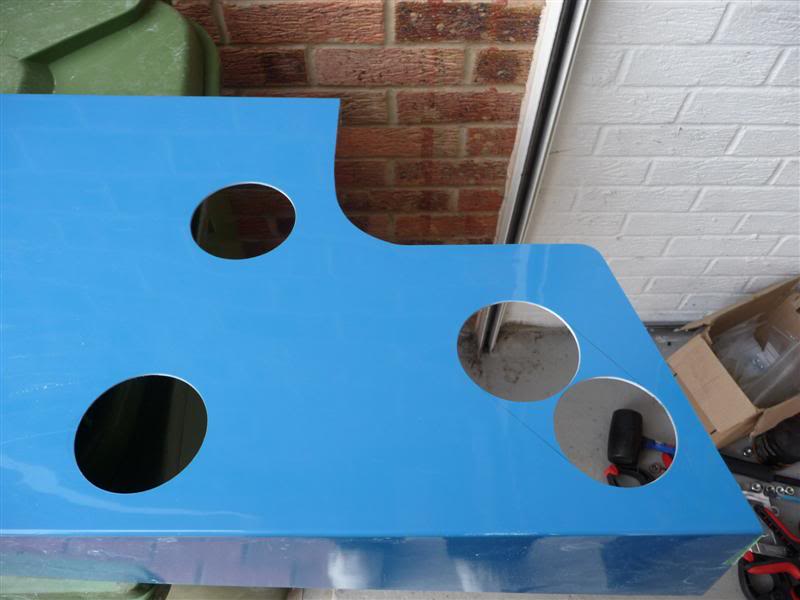
After
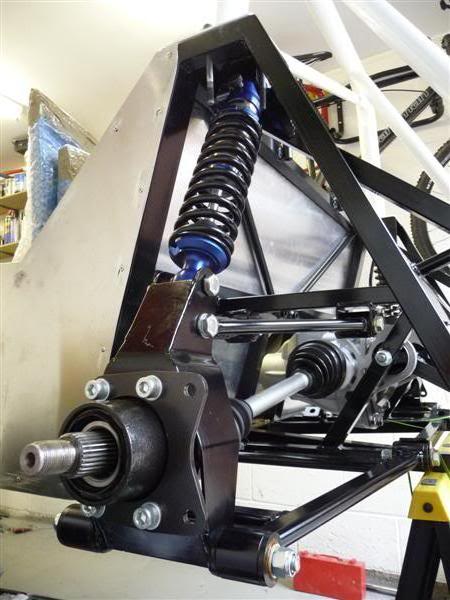
All the steering/suspension fitted back to the car again. The washers in the upper wishbone mounting brackets are temporary until i get some bushes knocked up.
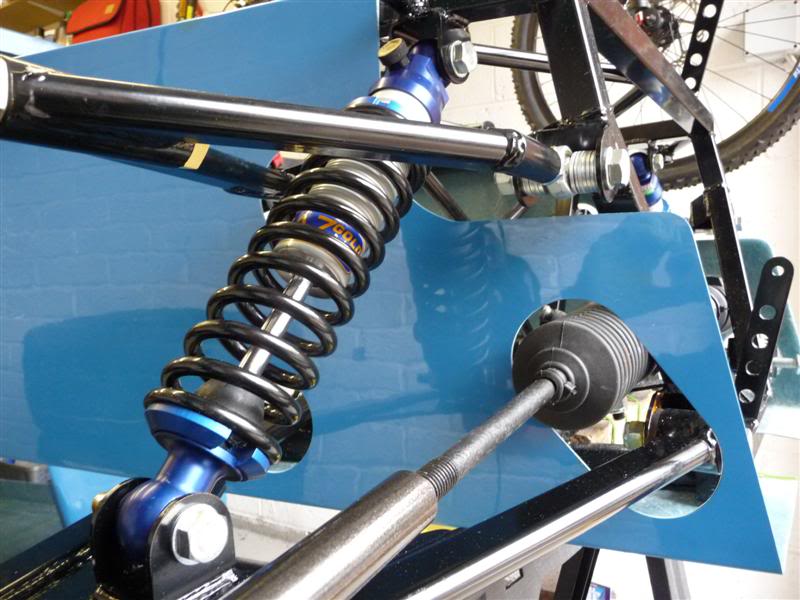
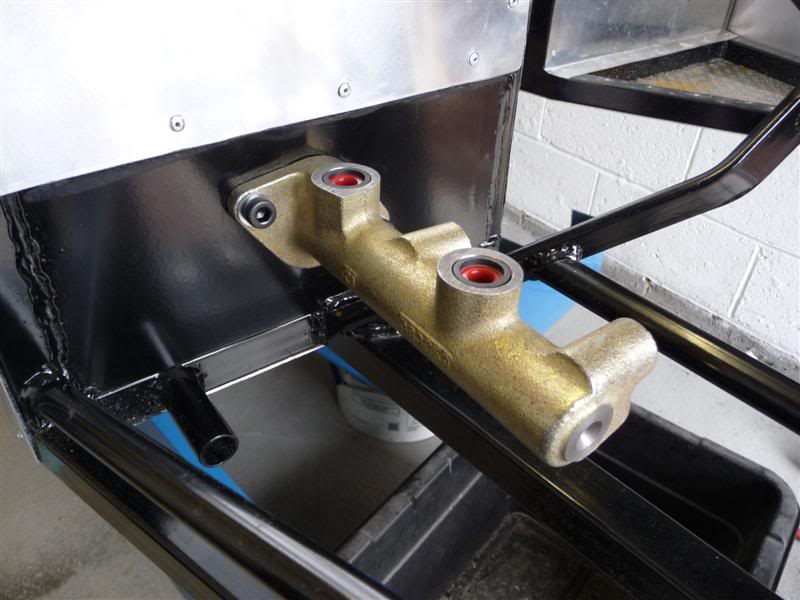
I done a quick little job while the side panel was off and fitted the master cylinder.
 15-07-2010, 10:00 PM
#80
Too many posts.. I need a life!!
Join Date: Nov 2006
Posts: 731
Likes: 0
Received 0 Likes
on
0 Posts