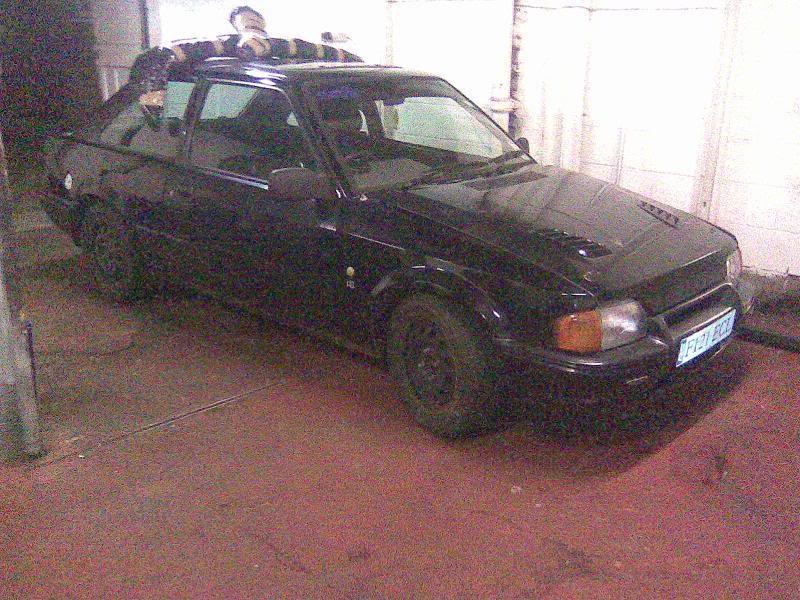
f reg mk4 escort fwd into mk3 cosworth powerd rear wheel drive
 01-06-2009, 04:17 PM
#1
Too many posts.. I need a life!!
Thread Starter
iTrader: (1)

Join Date: Oct 2003
Location: gt yarmouth, norfolk
Posts: 820
Likes: 0
Received 0 Likes
on
0 Posts
allways wanted 1 of these & a few months ago i brought back 1 of my old escort rs's & a rolling cosworth shell & thought what the heck lets have a go lol.
was planning on building a rough mk4 pinto's track weapon but things have changed & its all goin old school mk3 & cosworth powerd! (as they do)
right i have loadsssssssss of pics of this car & its now oin 2 take me about 2 hrs 2 try & get em in teh right order so here we go...............
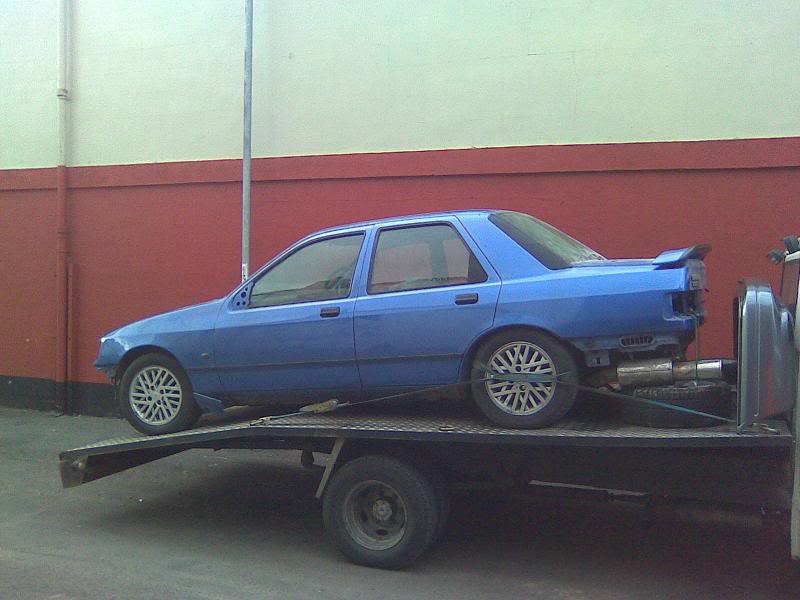
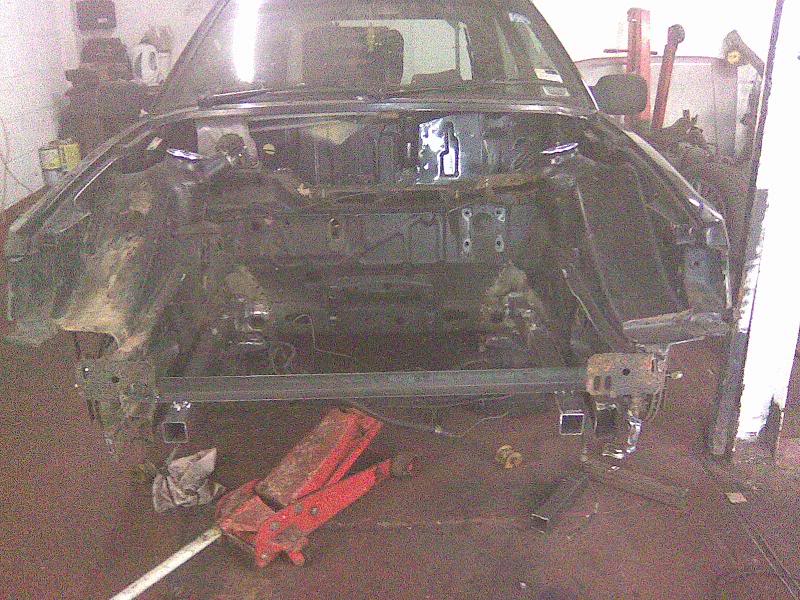
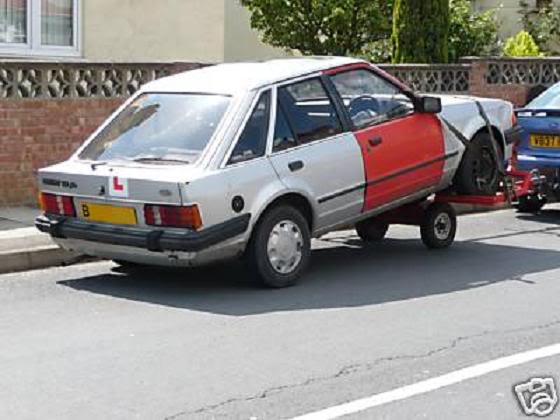
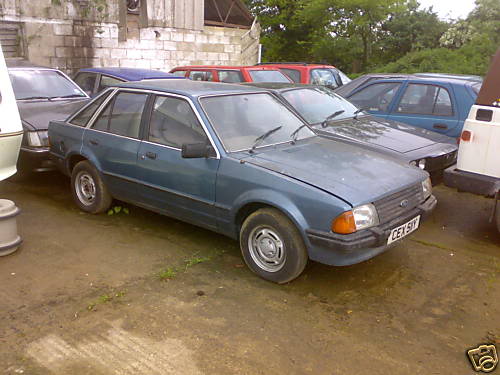
the donor saff
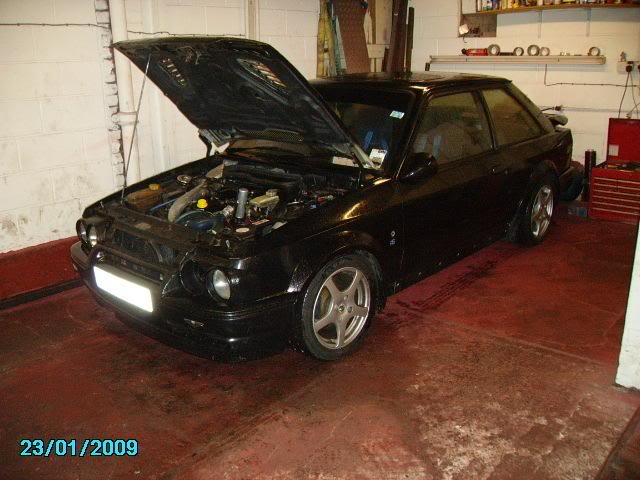
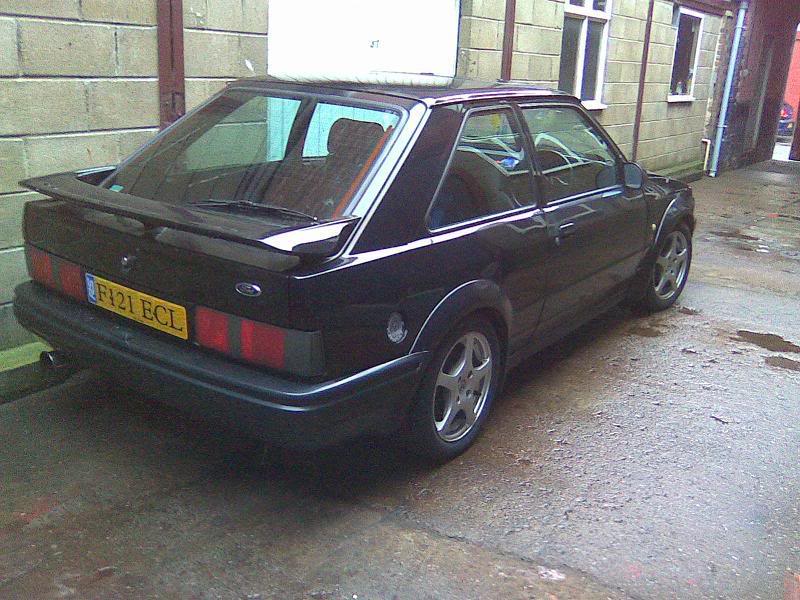
the donor rs before....
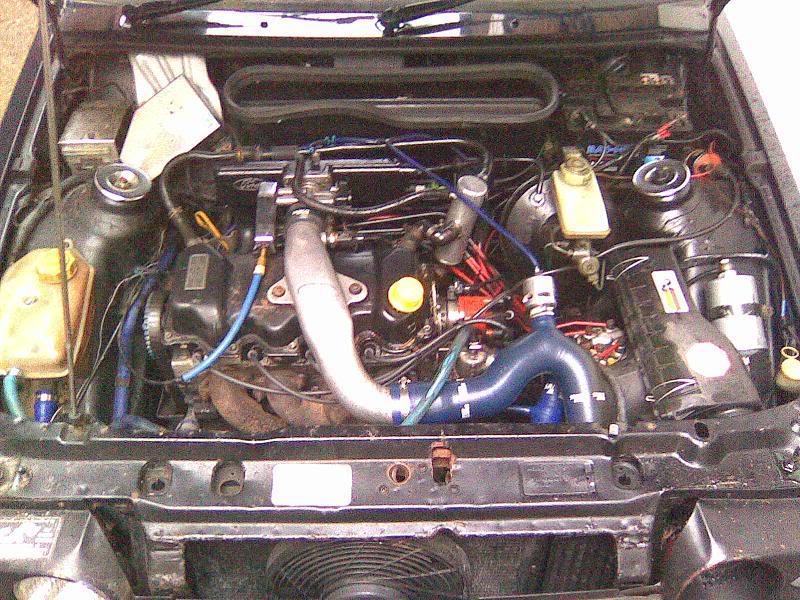
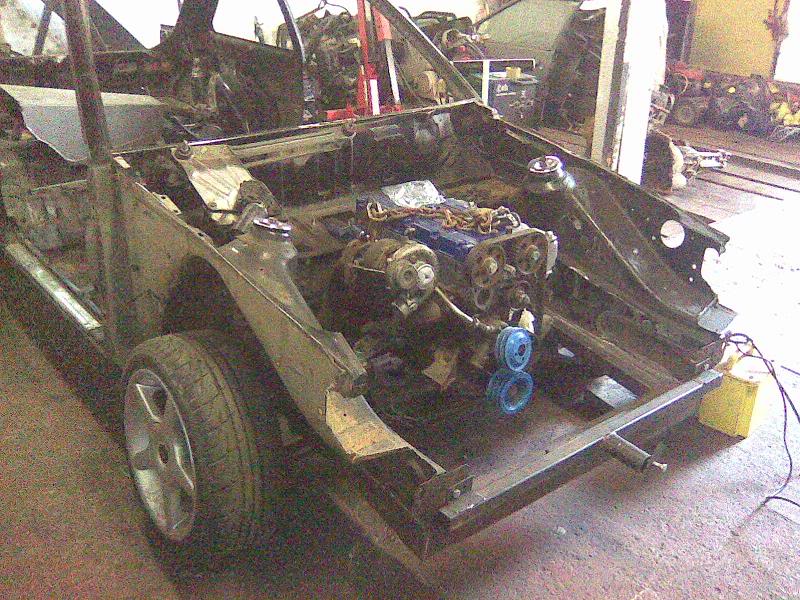
raped of all the goodies & rdy 2 the big chop up
my plan was not 2 cut the whole floor out like most but mount the front & rear beds into the escort shell:
bed offerd up in standard escort bay
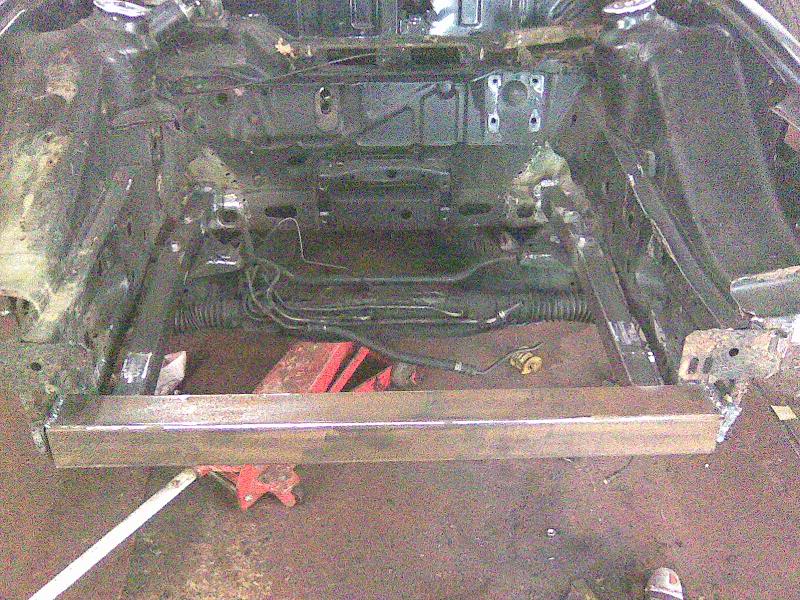
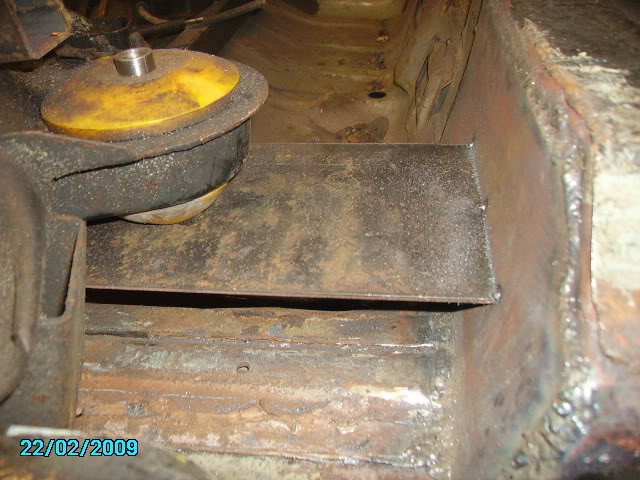
bed hits the part of escort chassis
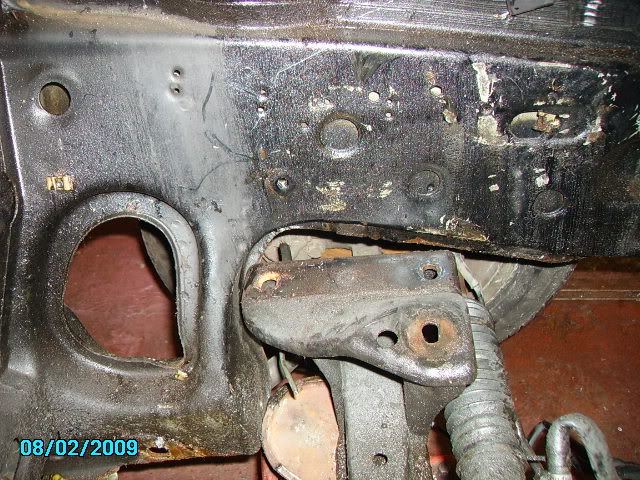
roll bar mounts lined up onto chassis rails thou
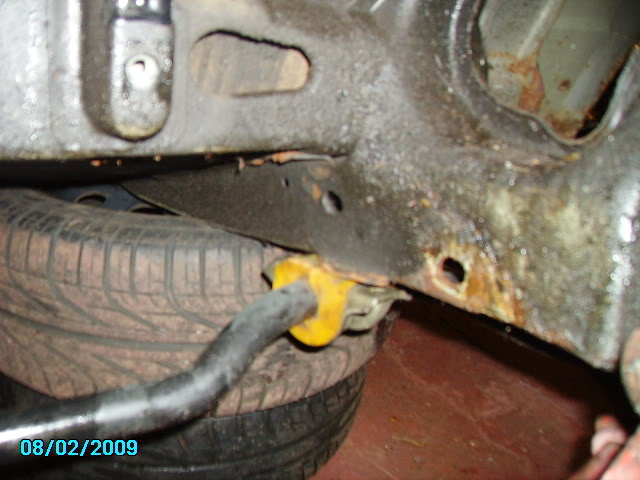
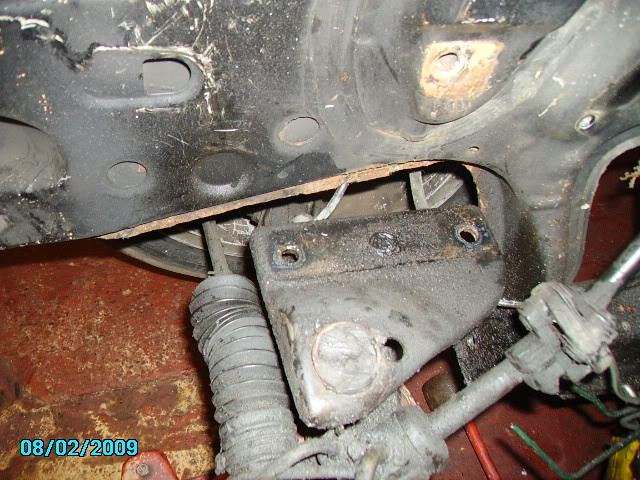
bed hanging on legs (wheel/bed need to go further back but chassis in way)

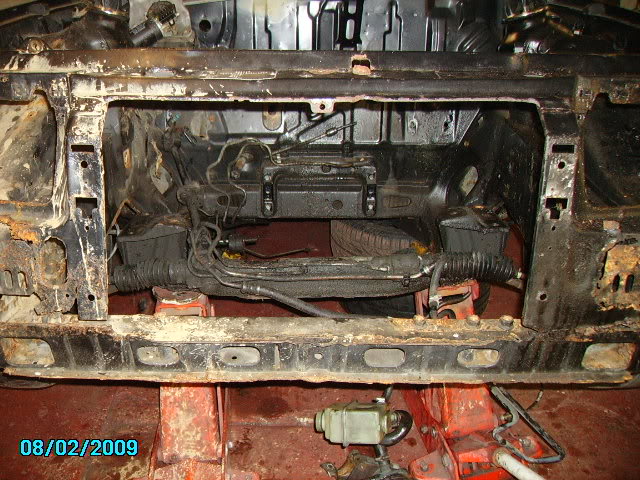
cut the old front panel out of way to get in there & inspect
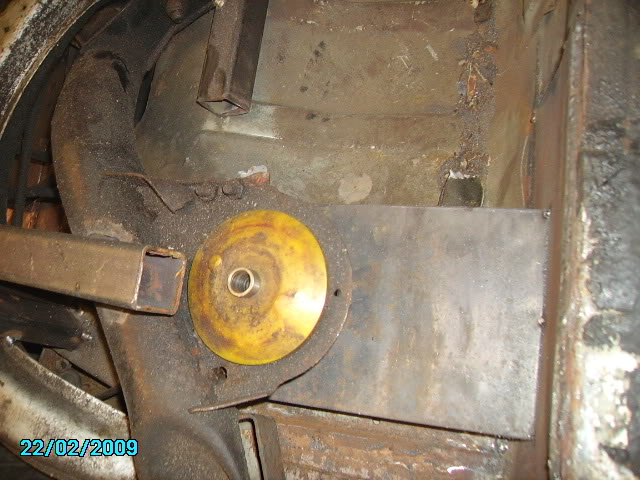
chassis getting in the way is no longer a problem! lol
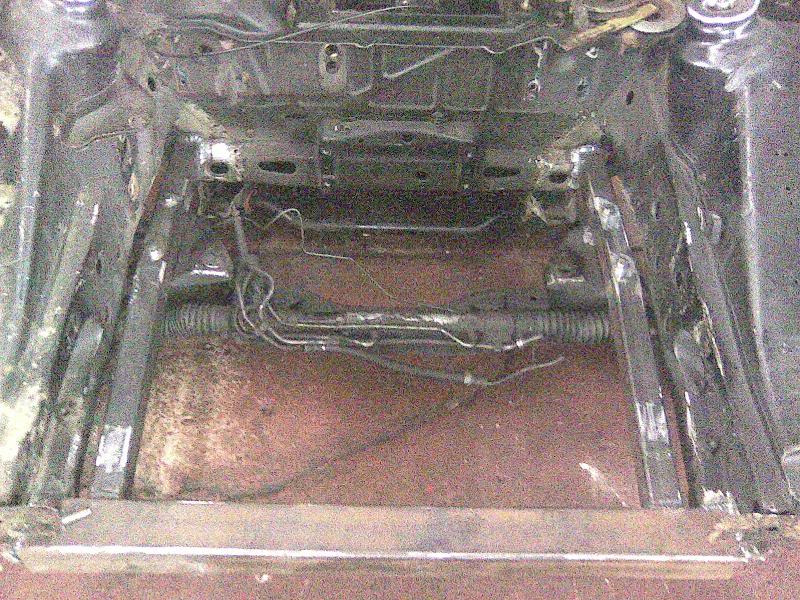
measure up & tacked a jig in holding bed where it wants 2 be

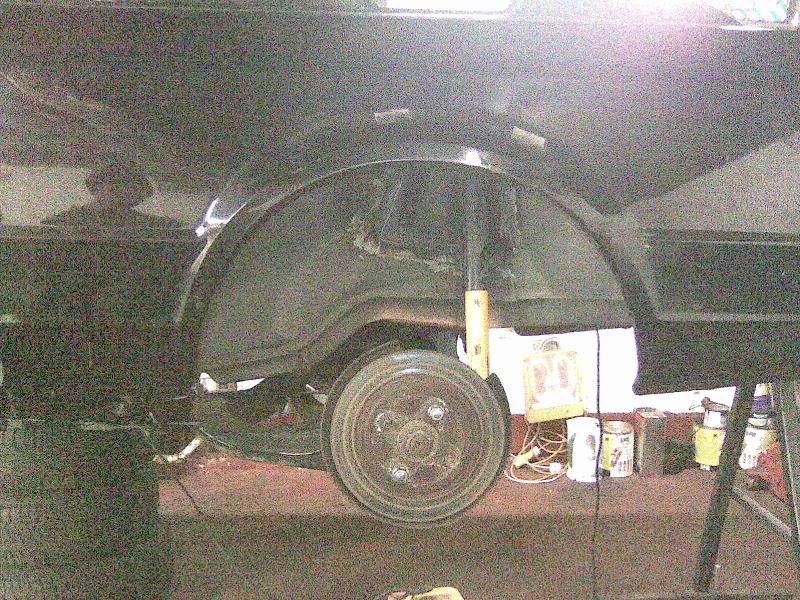
wheels jiged in central in arch
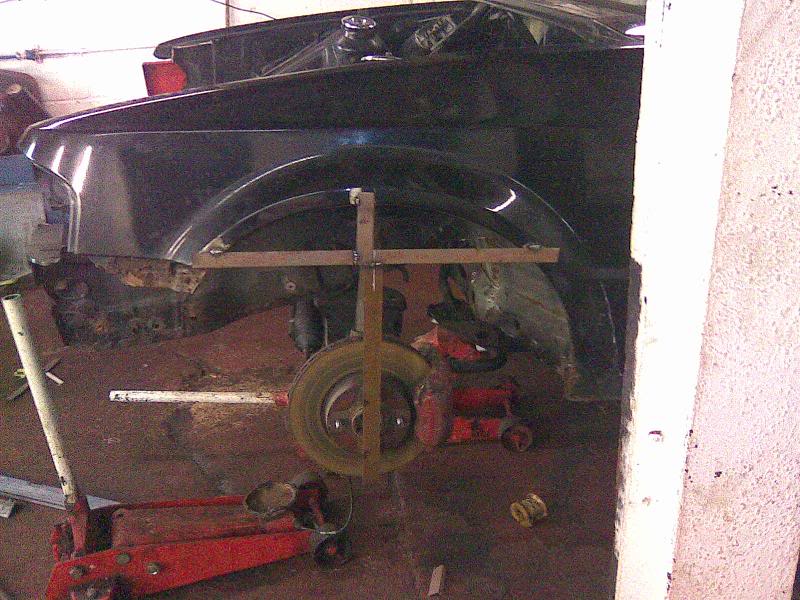
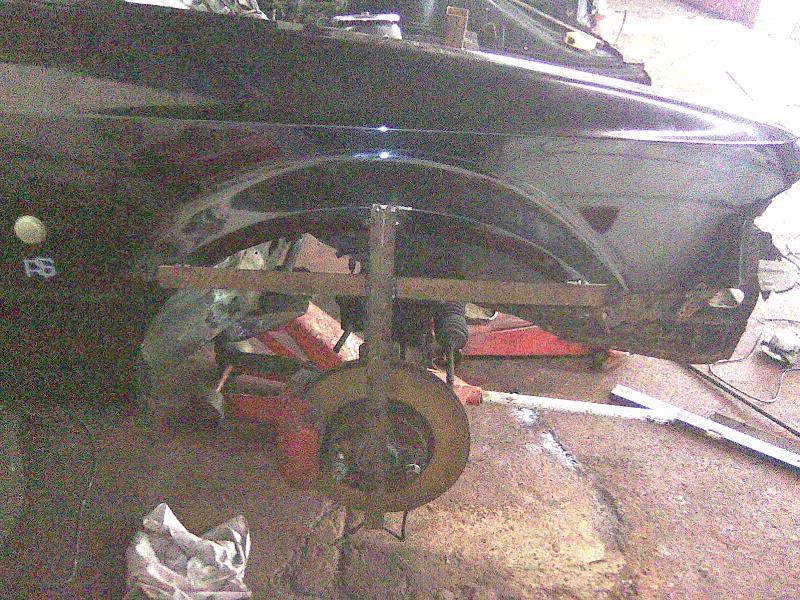
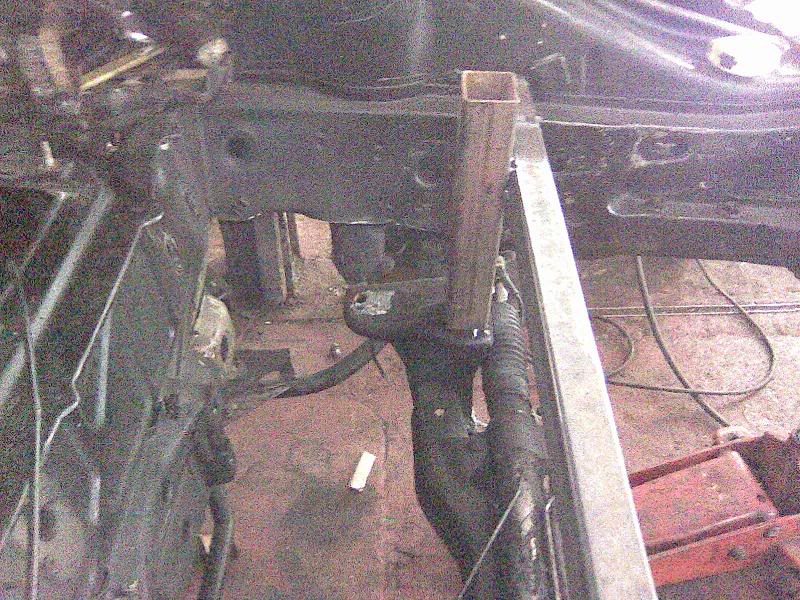
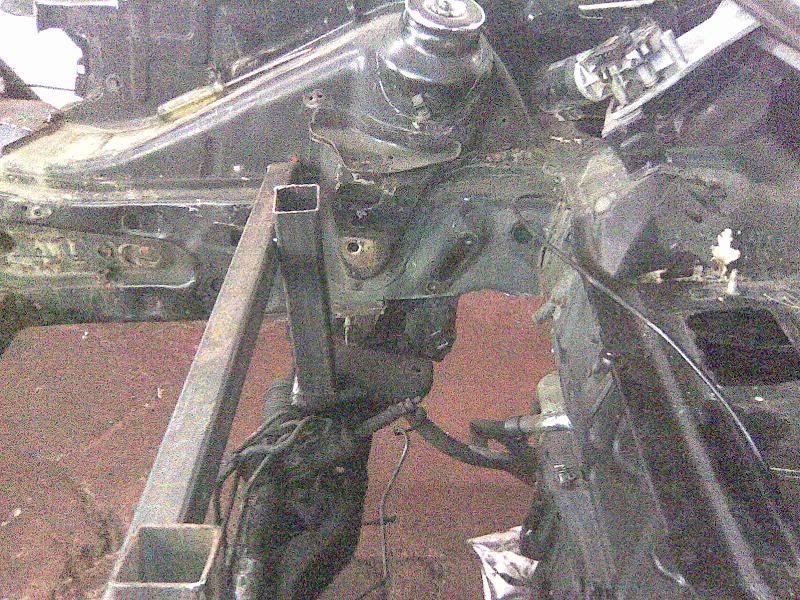
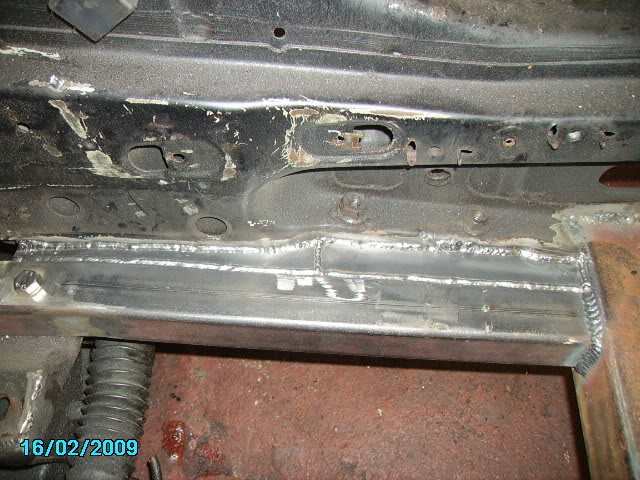
new chassis rail to mount bed to
trimmed up to meet chassis at bulkhead
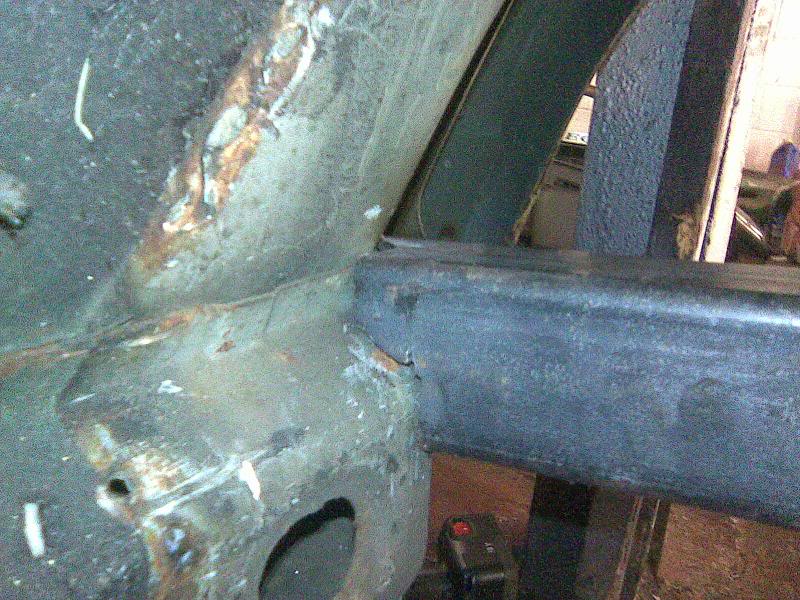
layed in position in bay

drilled 4 tubeing for bed mounts
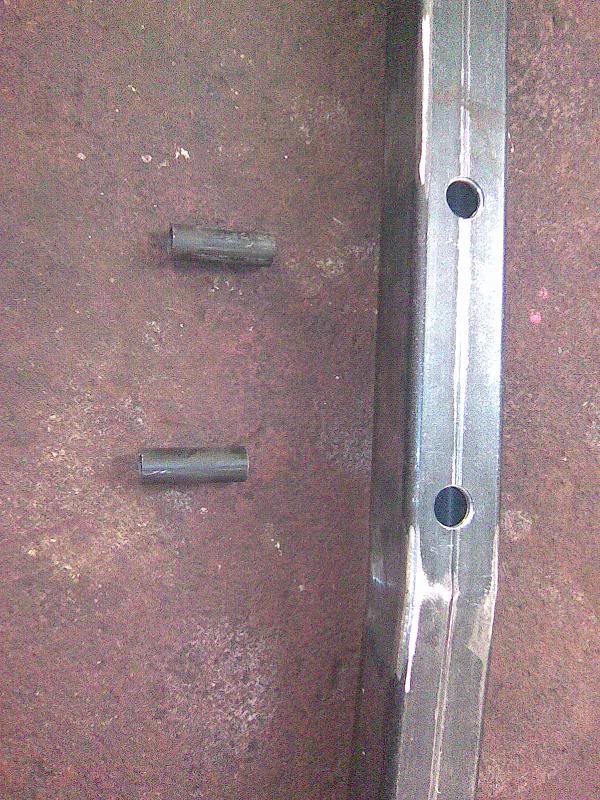
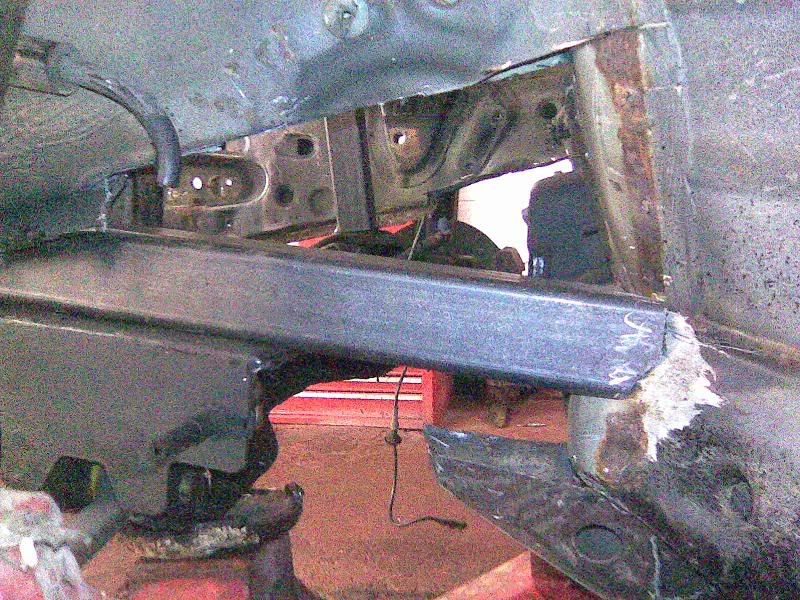
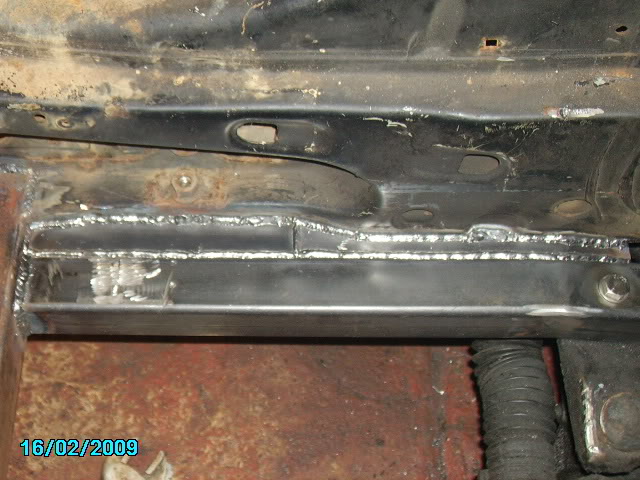
tubed
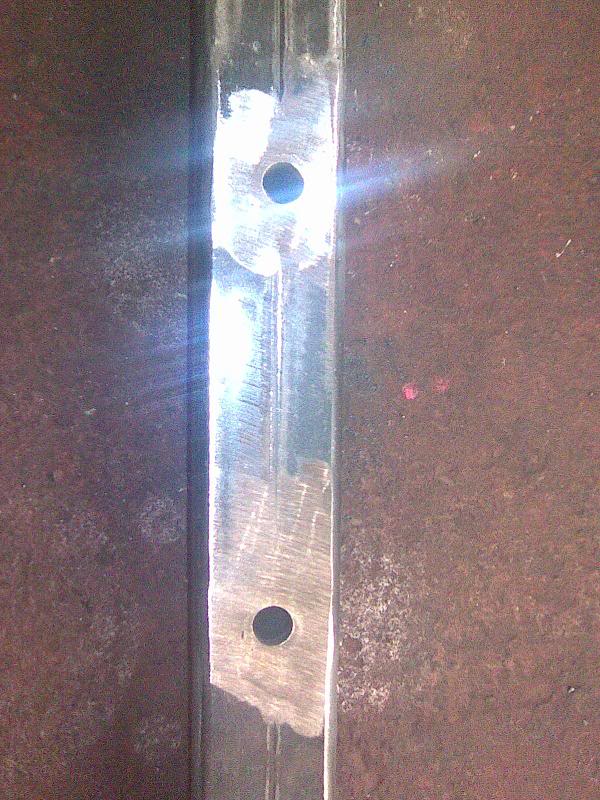
welded in at bulkhead
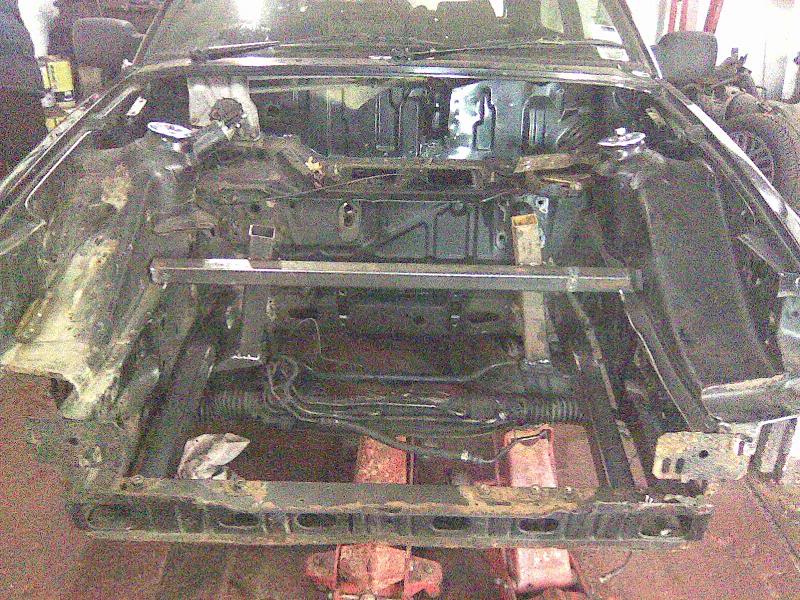
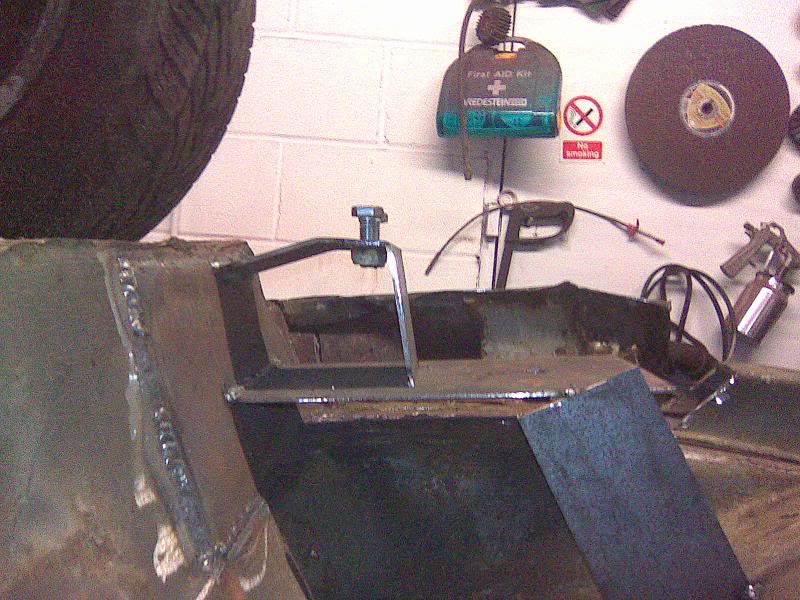
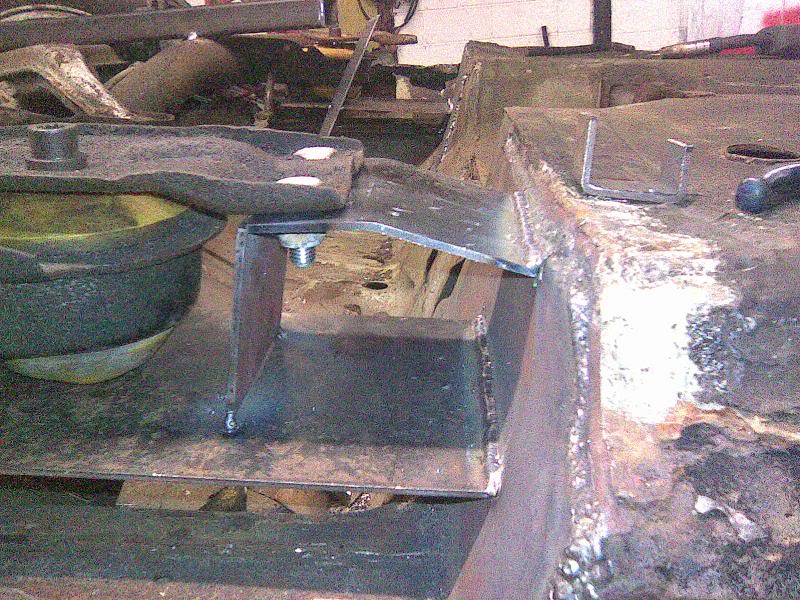
new bed mounts jiged in at front & old rotten crossmember off
new beefy crossmember in
antirollbar bolted onto chassis
wheel alinement after
welding/tieing new chassis into old chassis
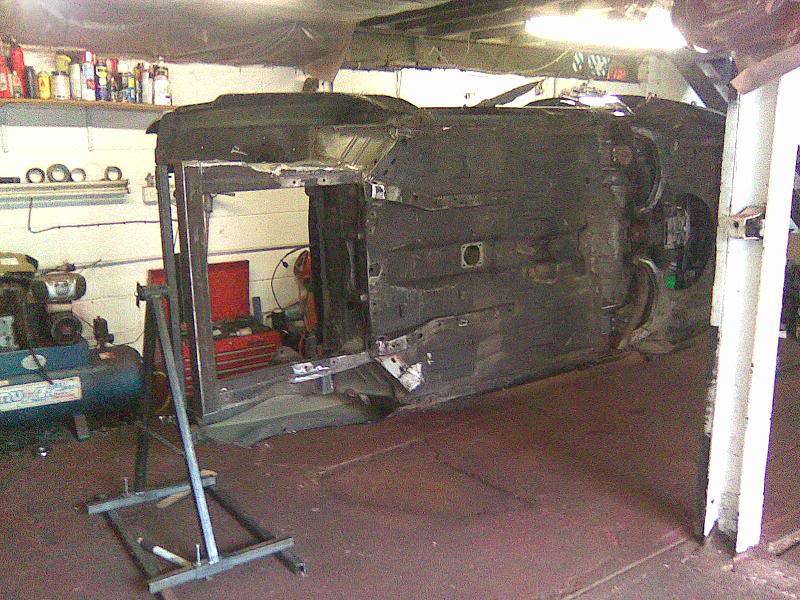
upside down it goes

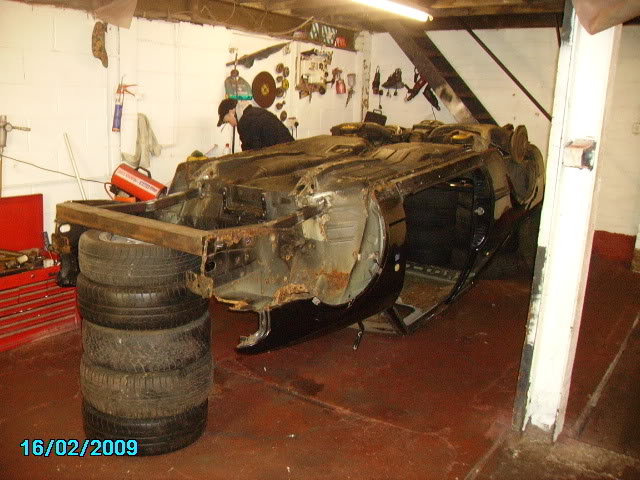
rear beam offerd up & wheel well removed
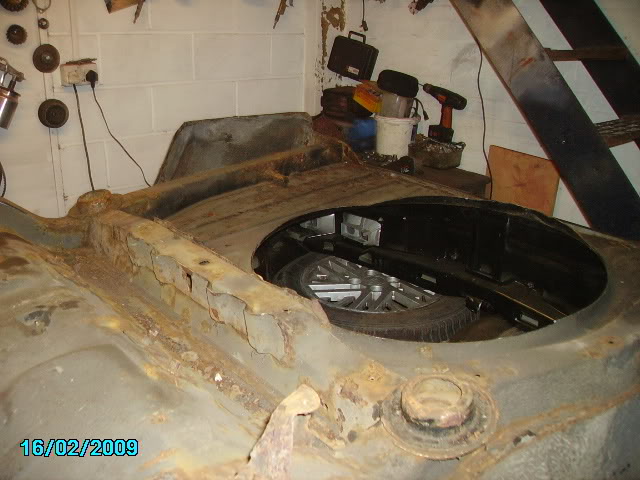
rear chassis rails cut out
looks like im getting there now (not lol) rear chassis crossmember removed
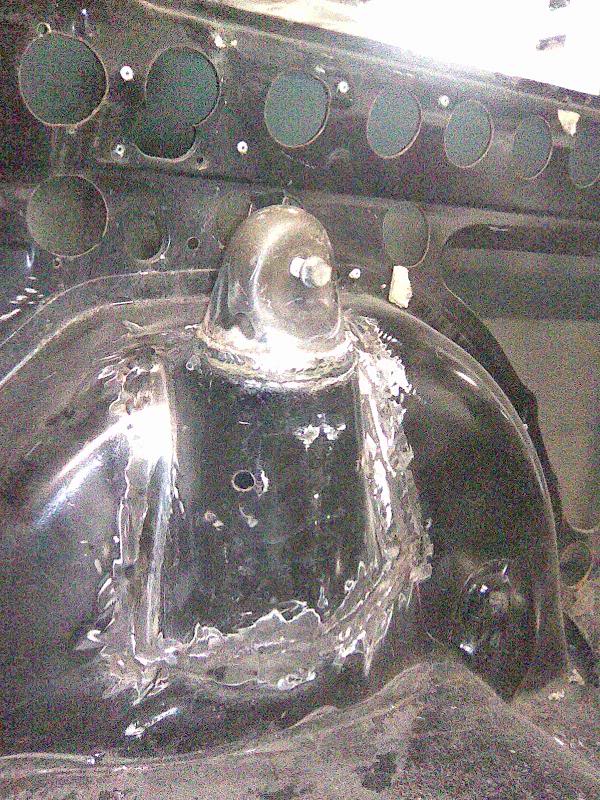
rear spring mount cup removed
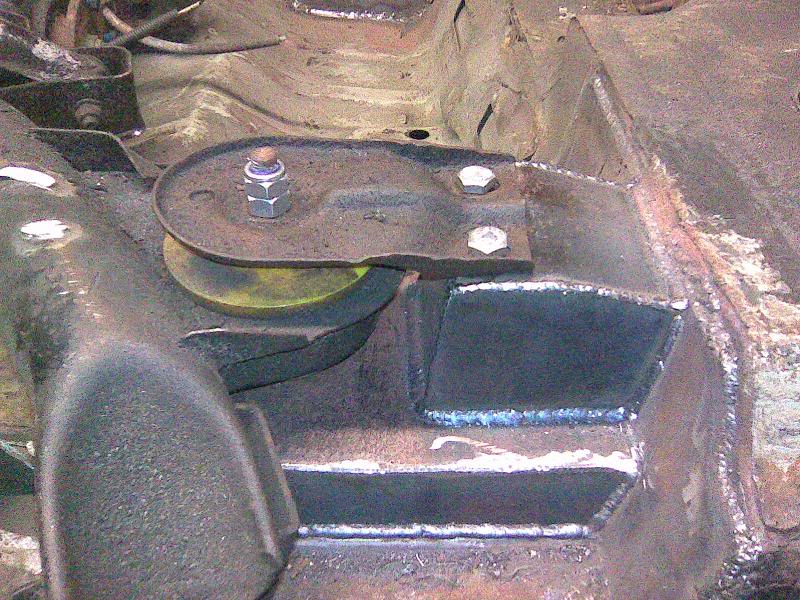
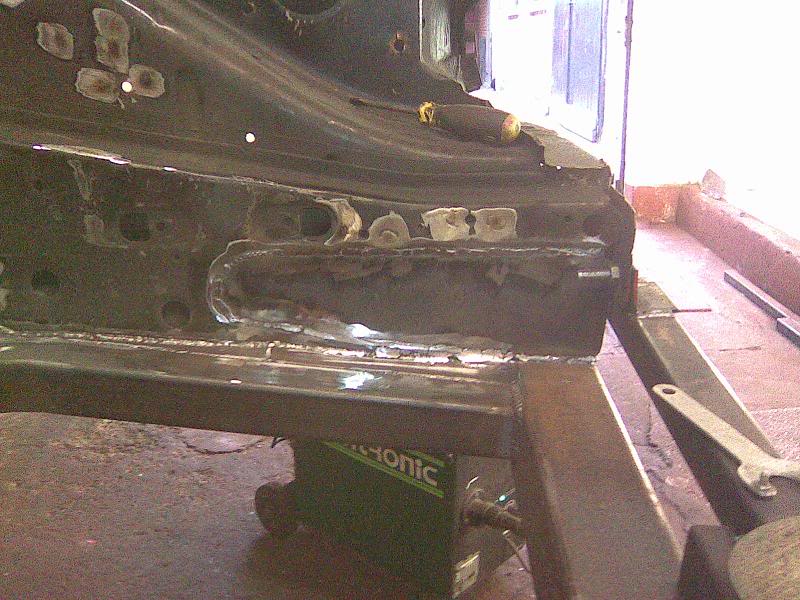
& re-inforced up nice & thick
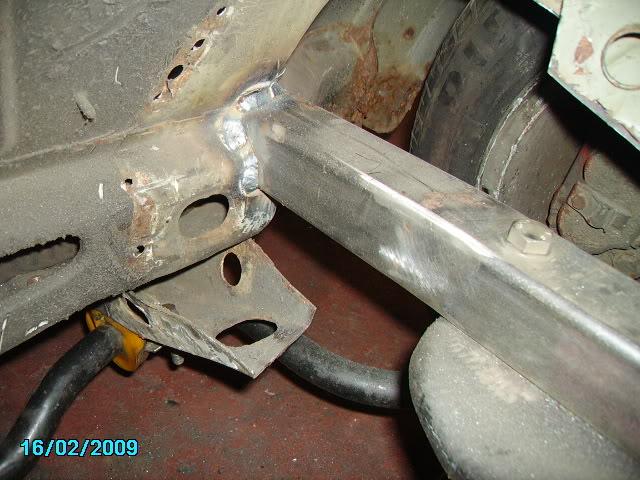
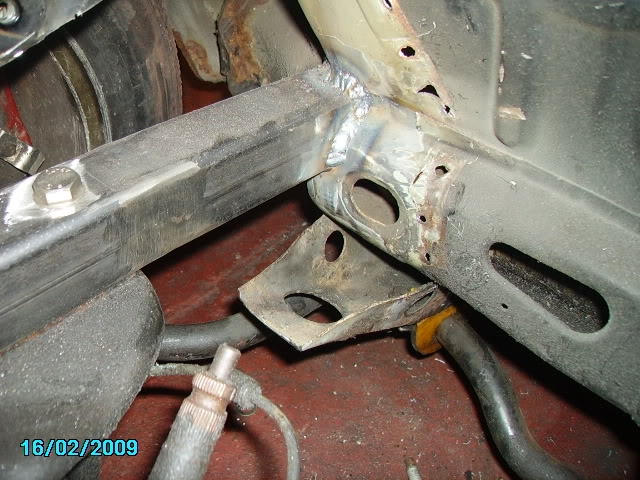
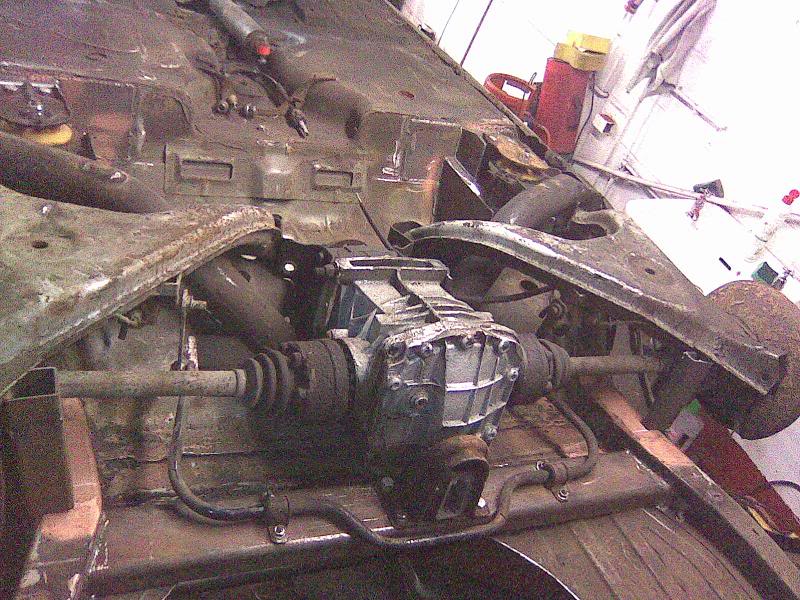
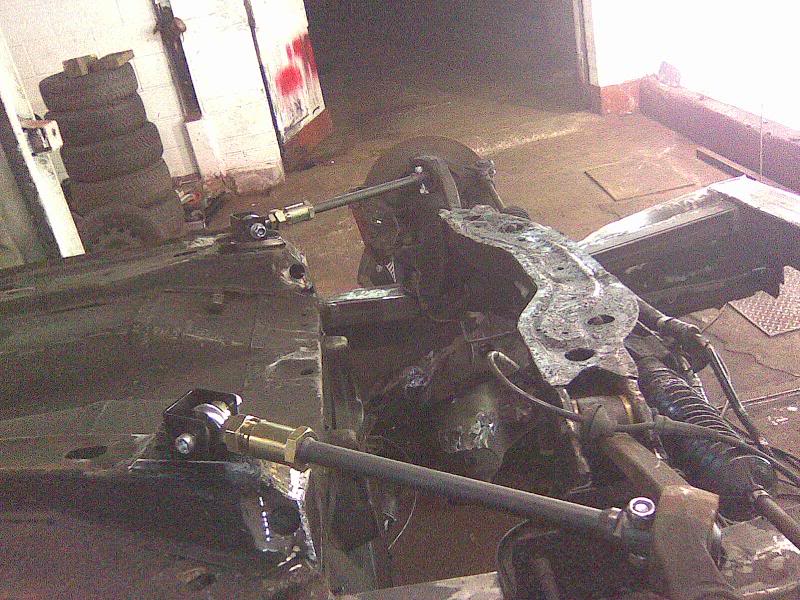
rear subframed all jigged up & on
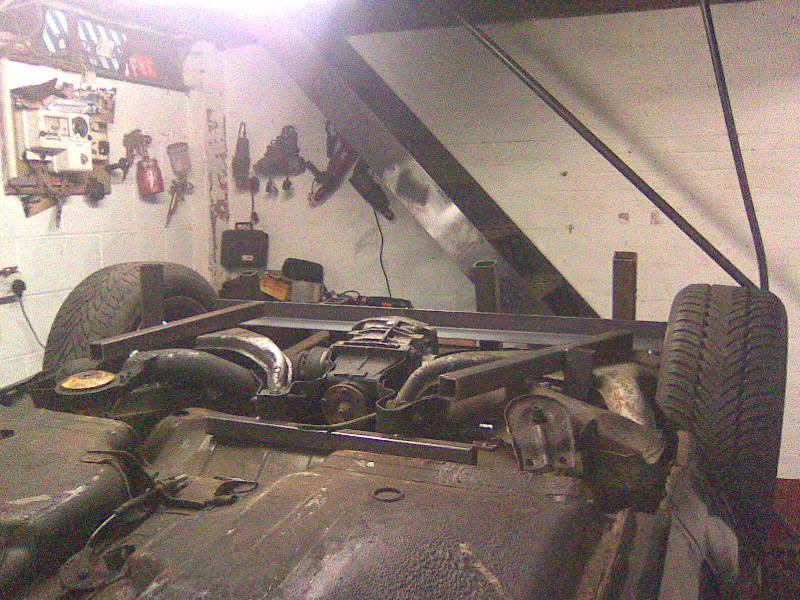
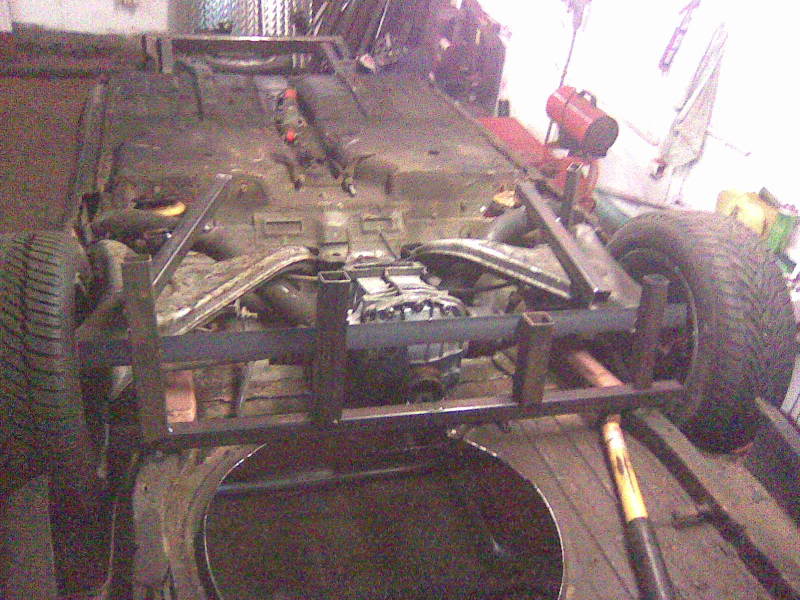
thick rear subframe mounting plates
makeing mountings
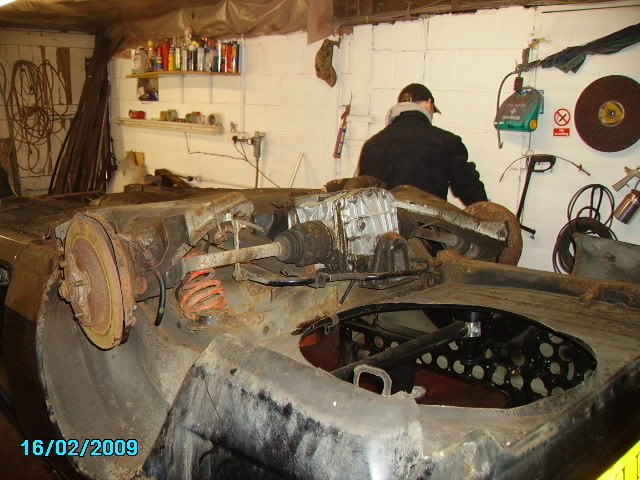
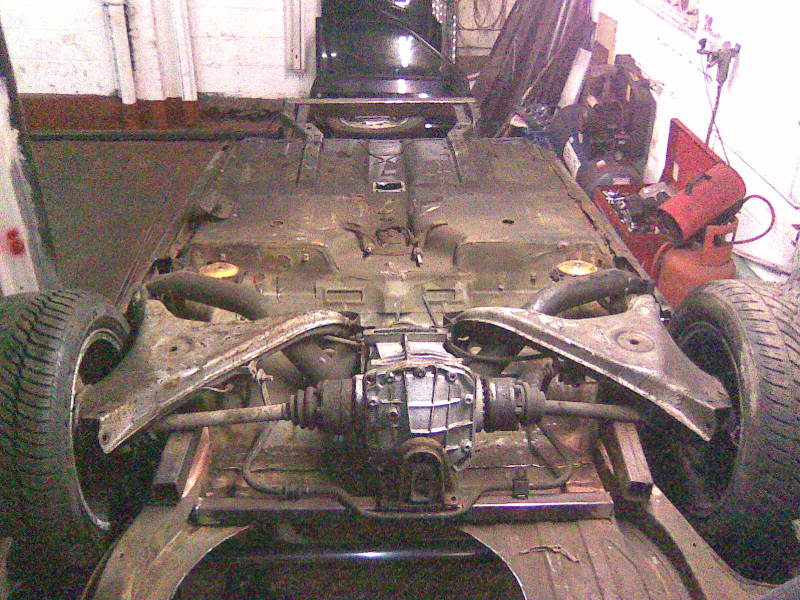
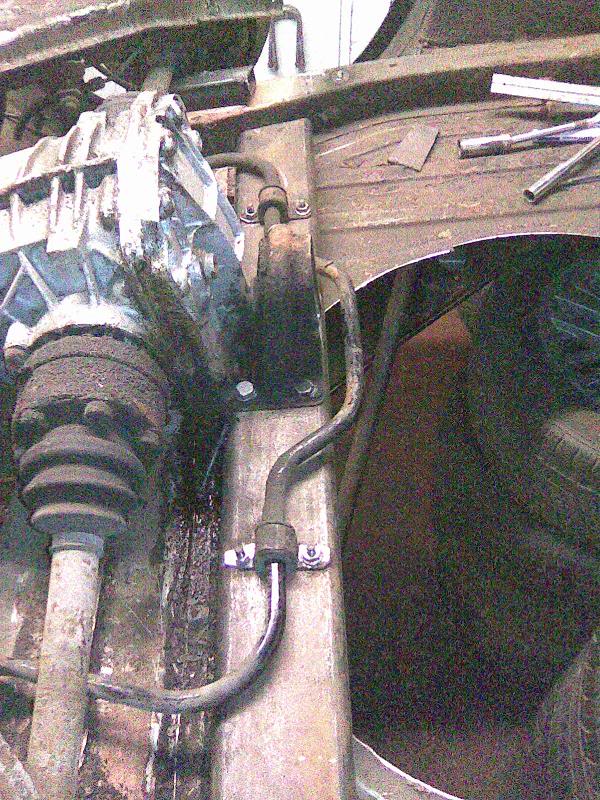
rear axle bolted onto new mounting
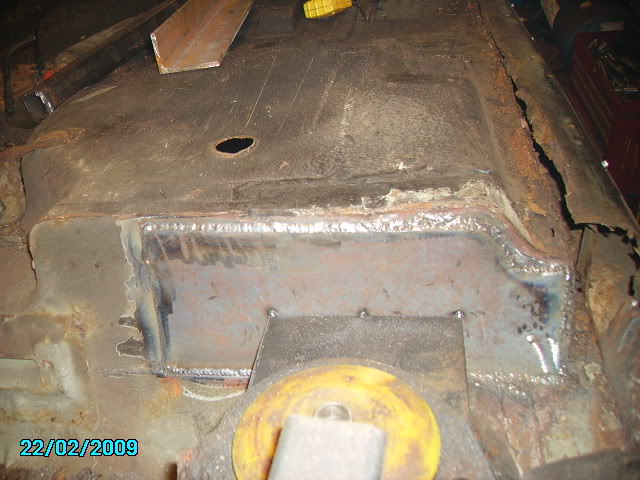
old rear chassis crossmember removed
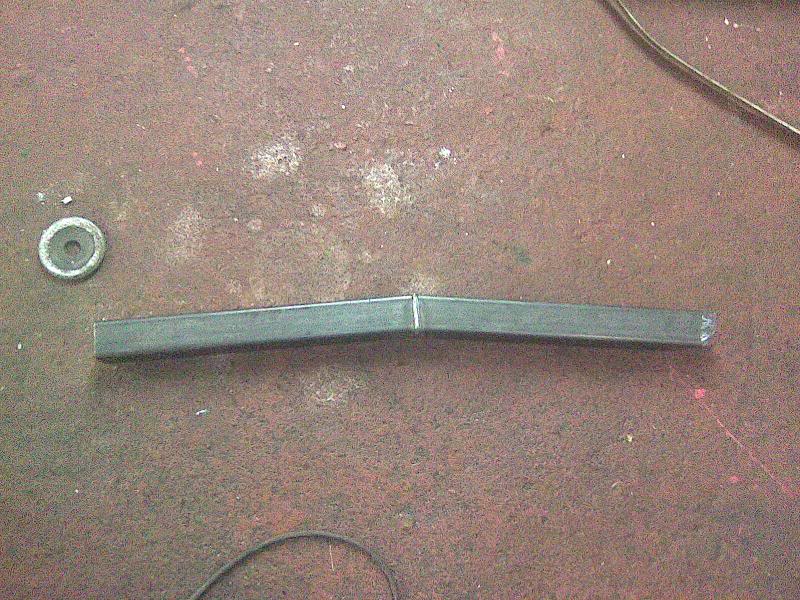
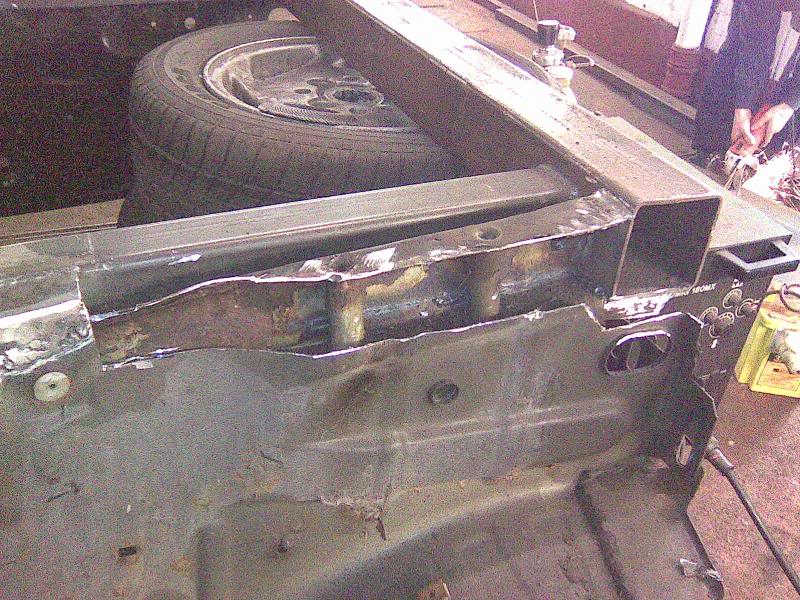
new daddy 1
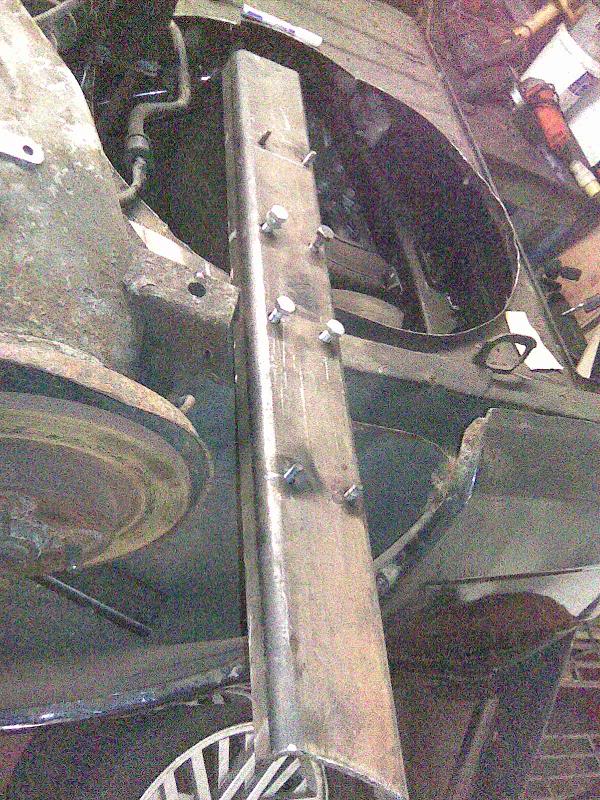
drilled, nuts welded on underside & offerd up

all bolts on ok
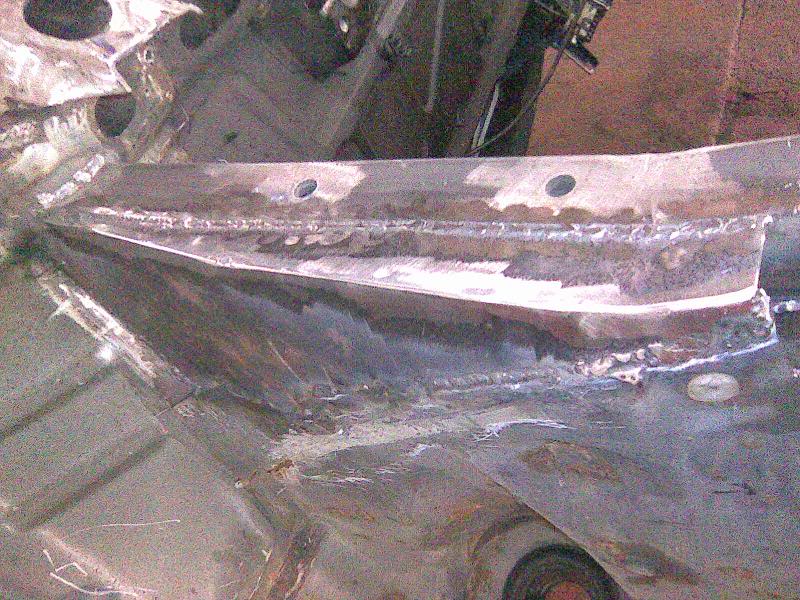
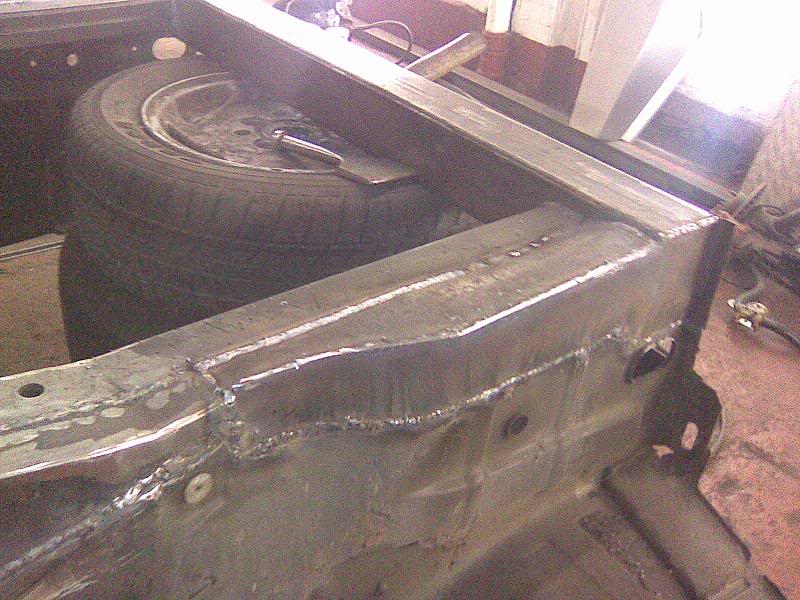
welded in
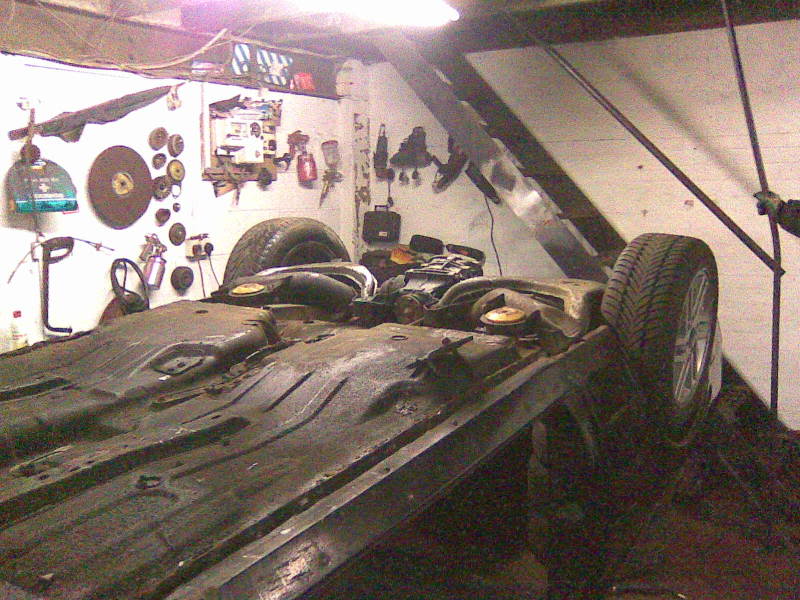
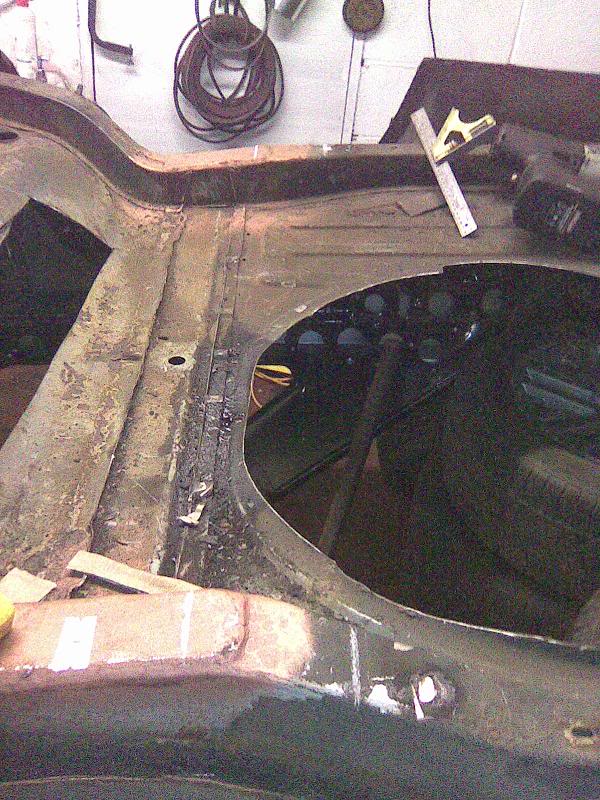
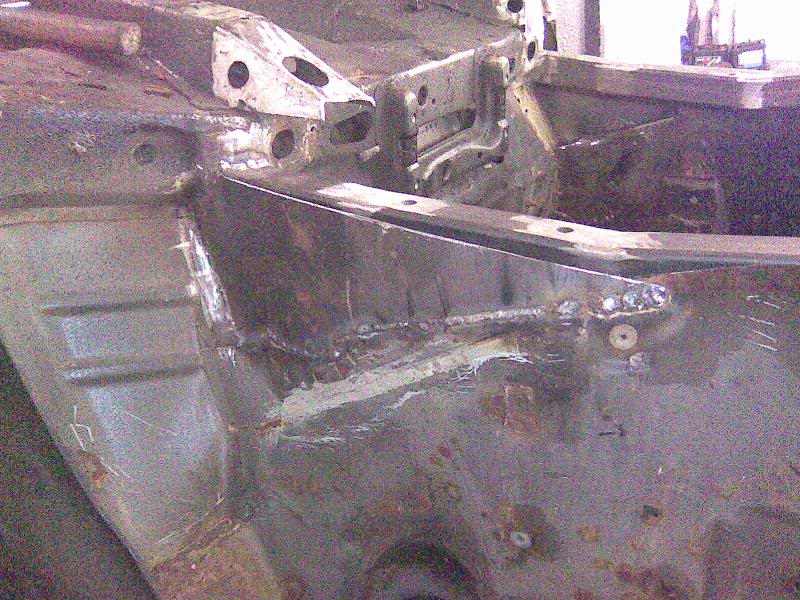
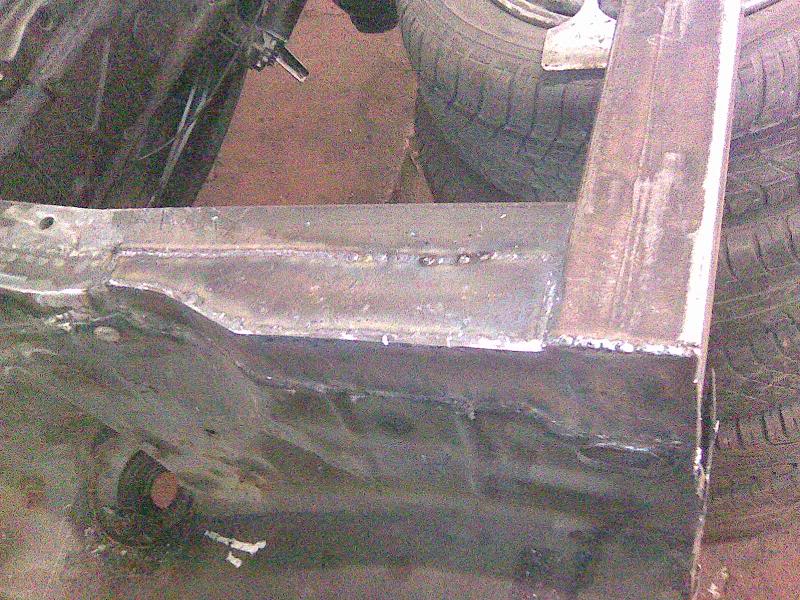
new thick rear inner sills & base/floor plate inbetween
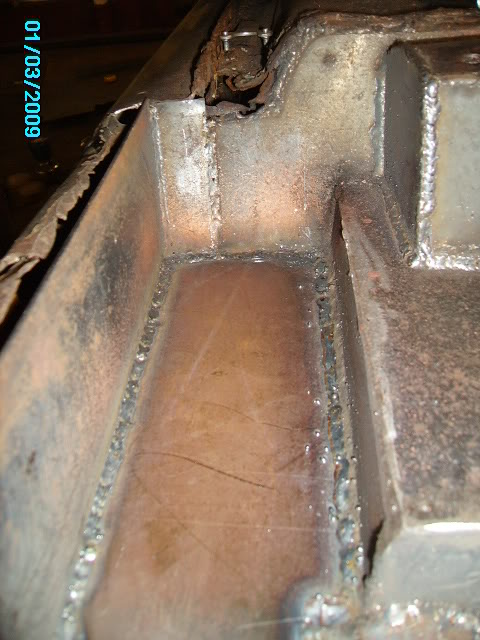
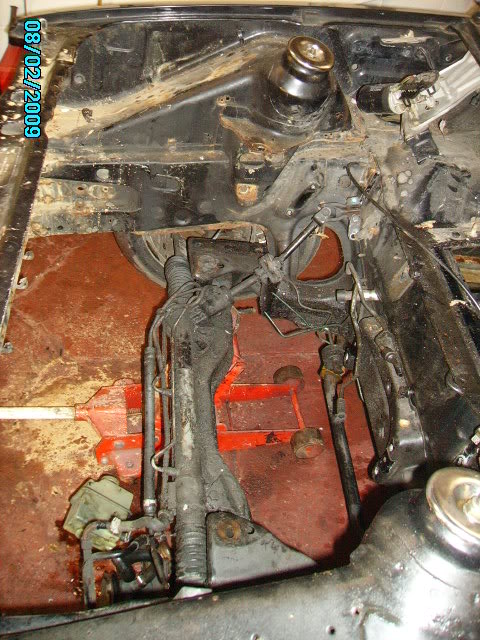
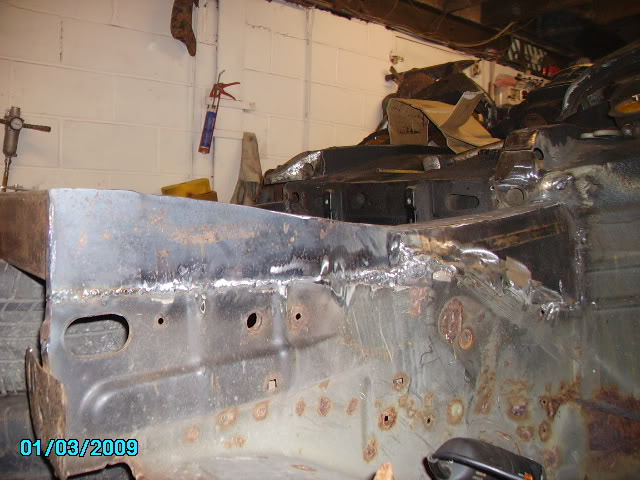
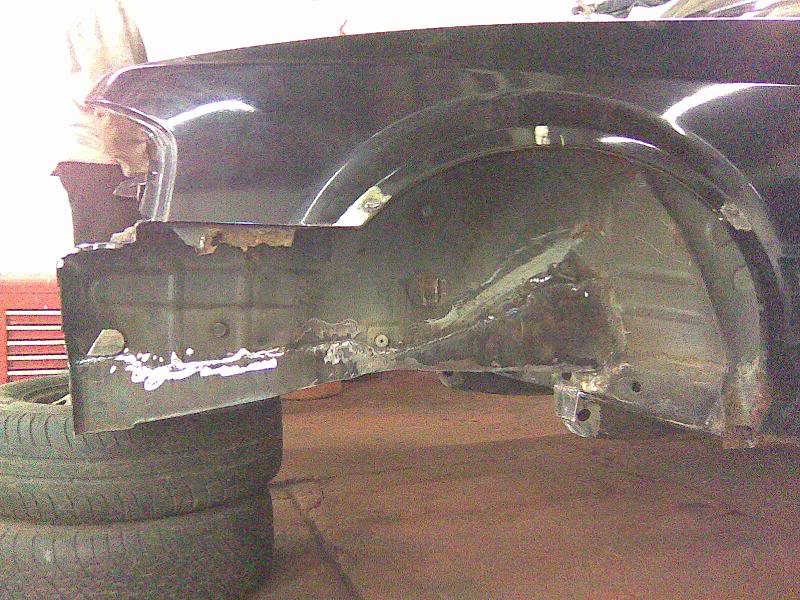
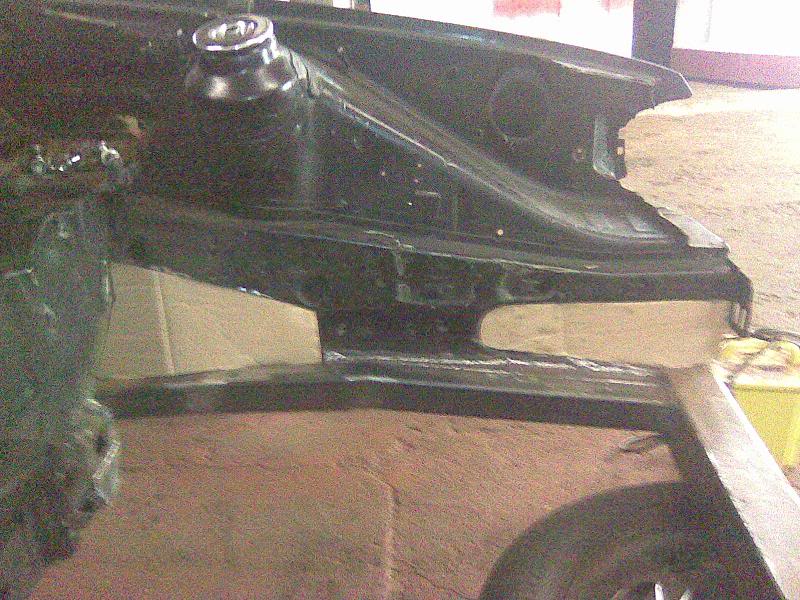
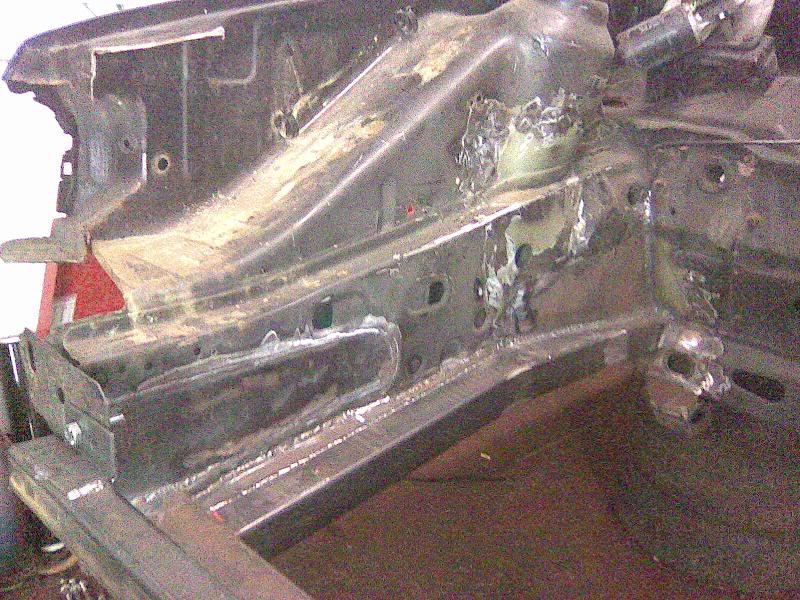
back to do abit more on front from underside as still looks like this from inner arch!!!!!
here we go:
done & now the drivers side
both sides all done
cut front chassis back & capped end off (not sure on this yet)
car back over
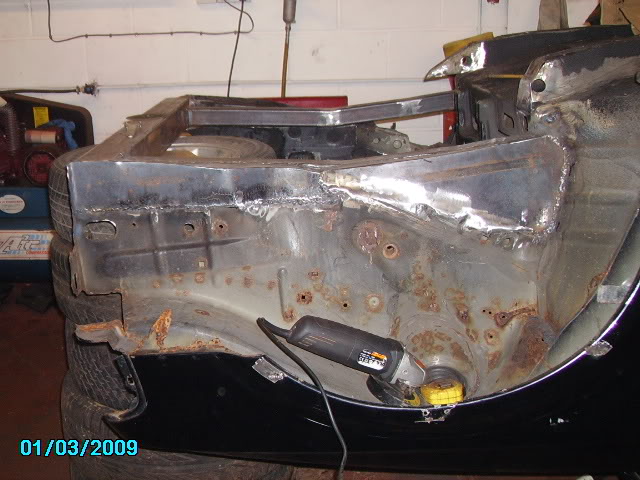
back into the bay to tidy up/ cap in lower innerwings
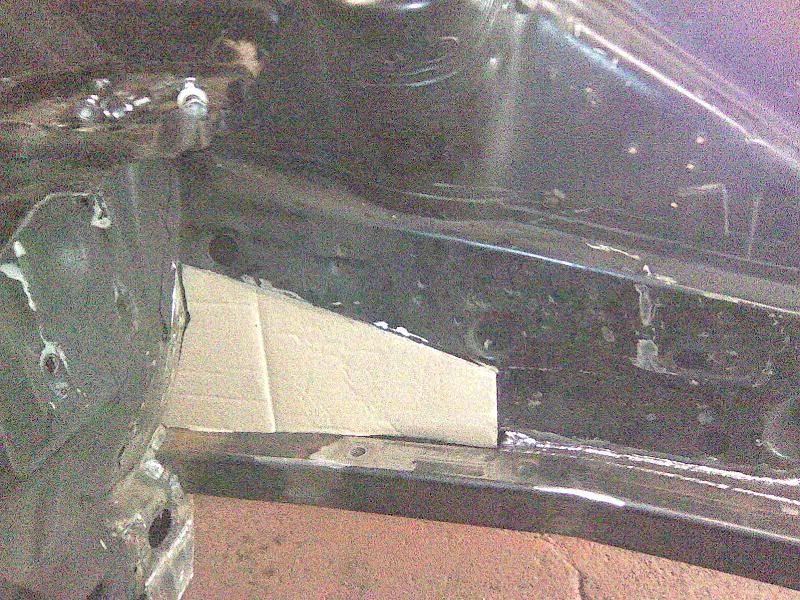
gotta love carboard templates, they fit so nice lol
plates cut & welded in flush
as u can see i have smoothed over the front innerwing section where the rollbar used to bolt in as this is no longer needed
brought a rollover jog to make life easier
other lower innerwing done
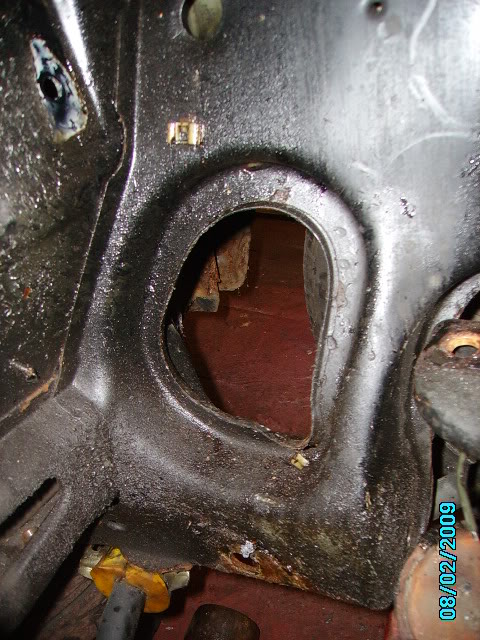
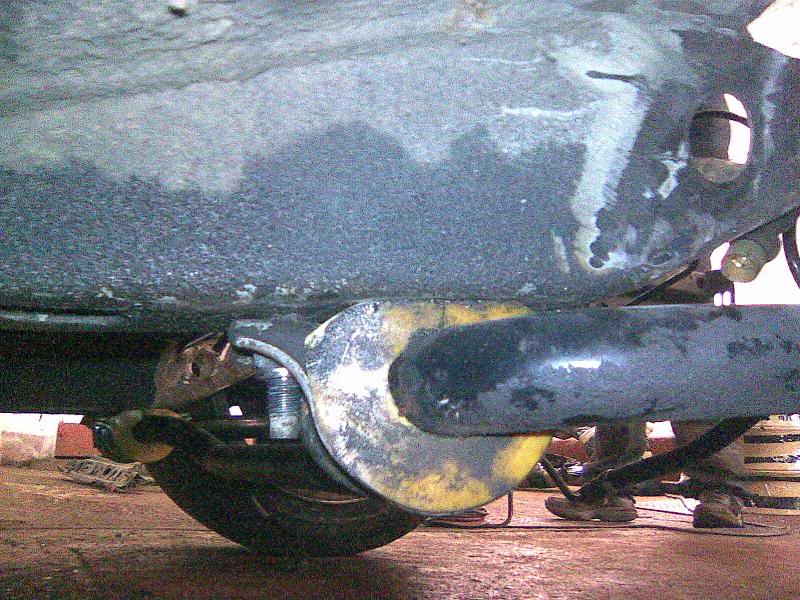
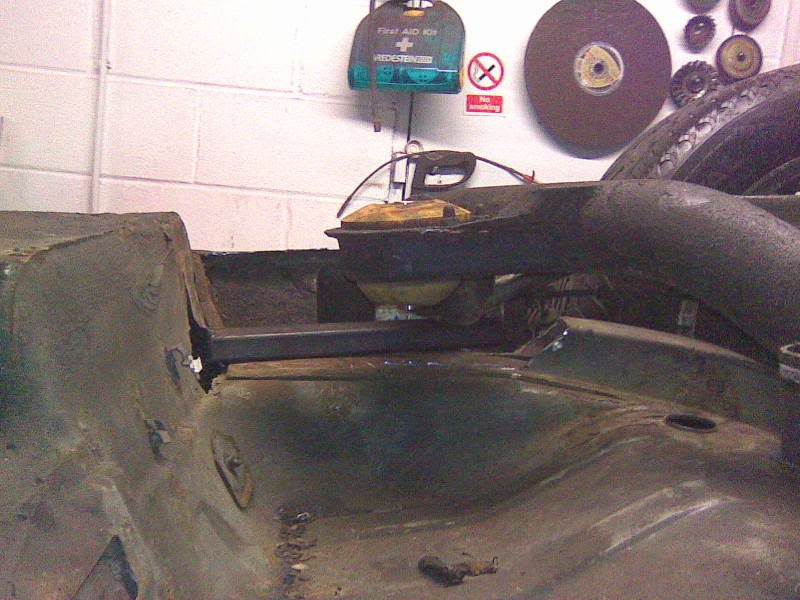
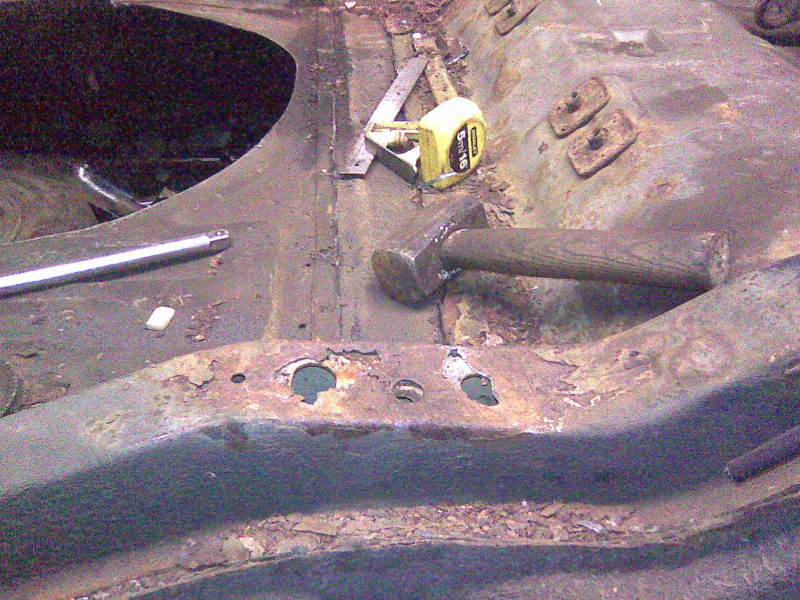
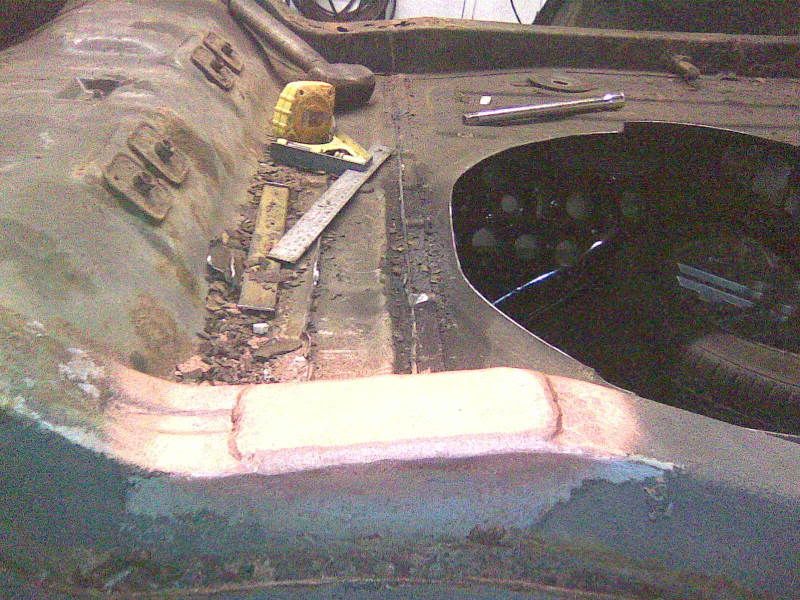
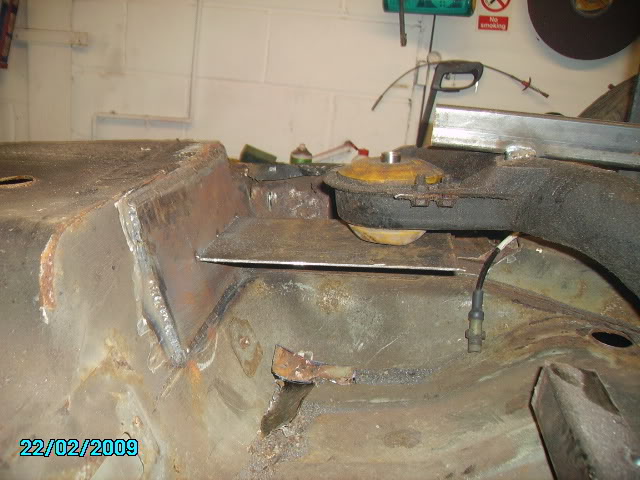
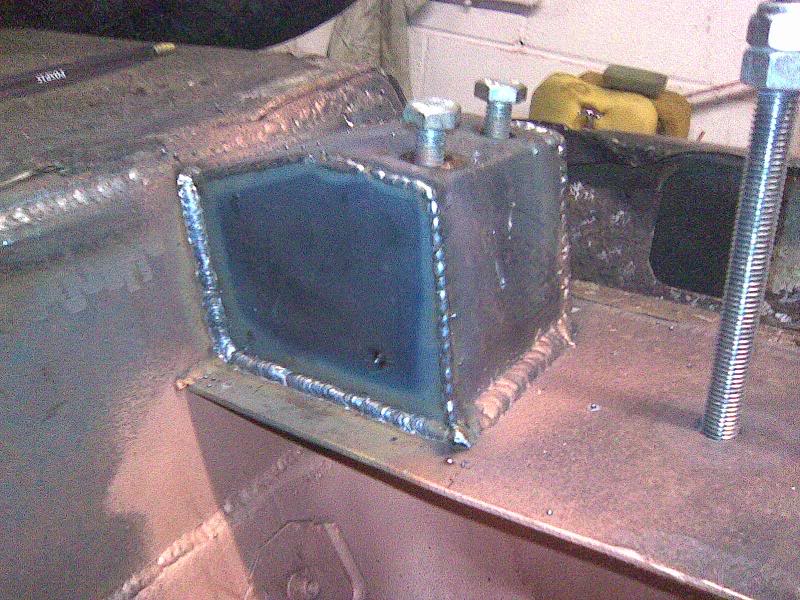
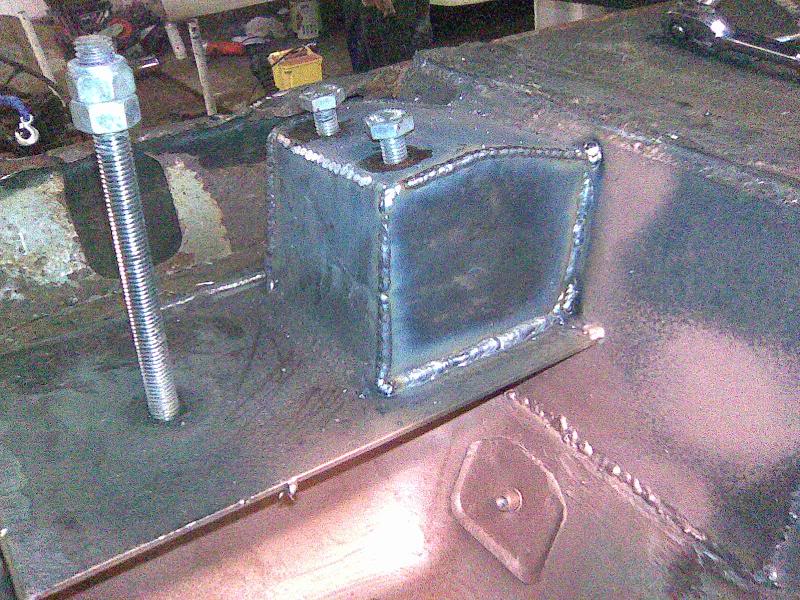
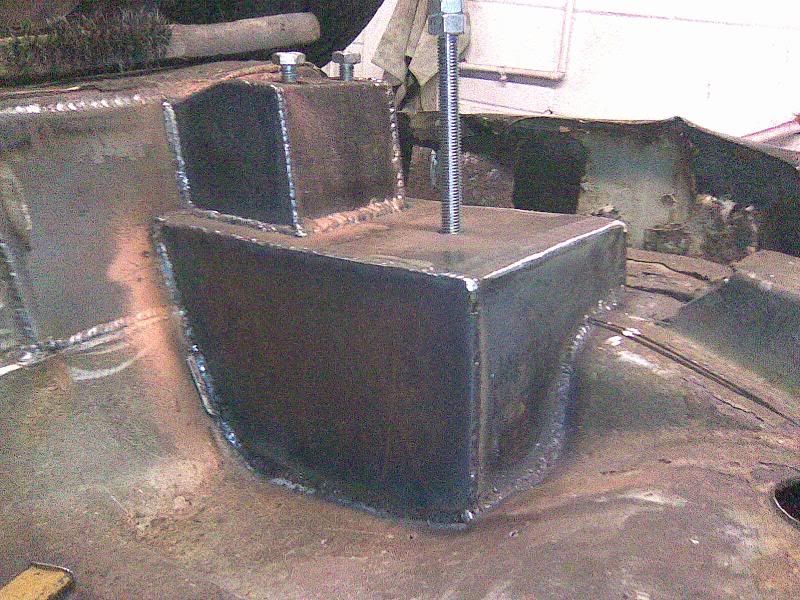
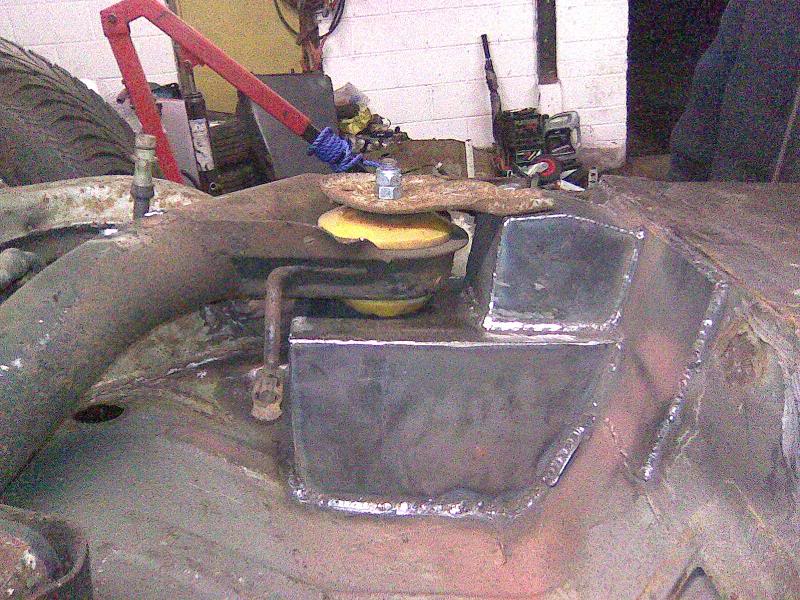
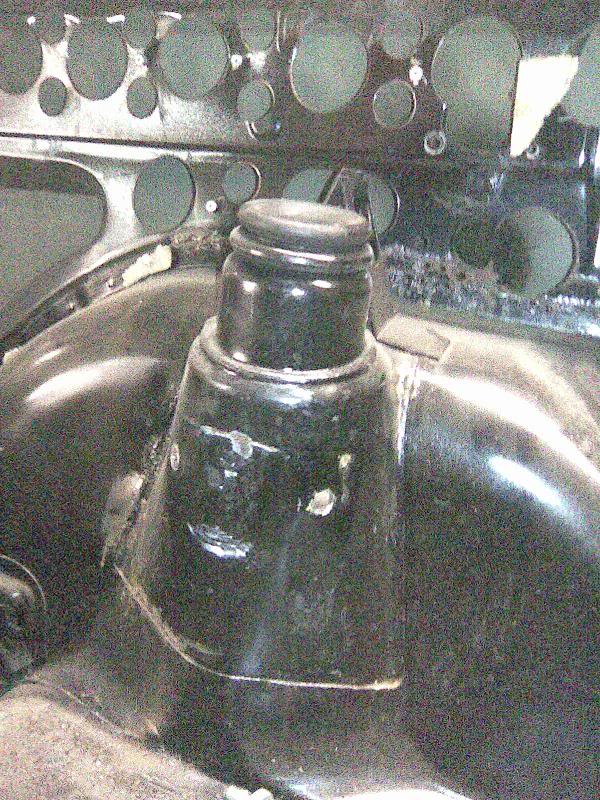
next: rear shock mountings
before:
dureing (moved back & top section changed for sierra):
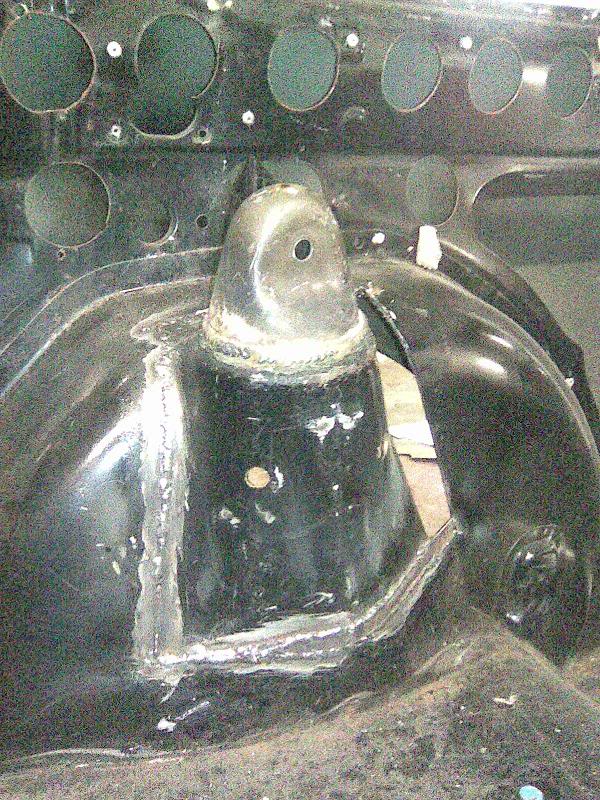
after:
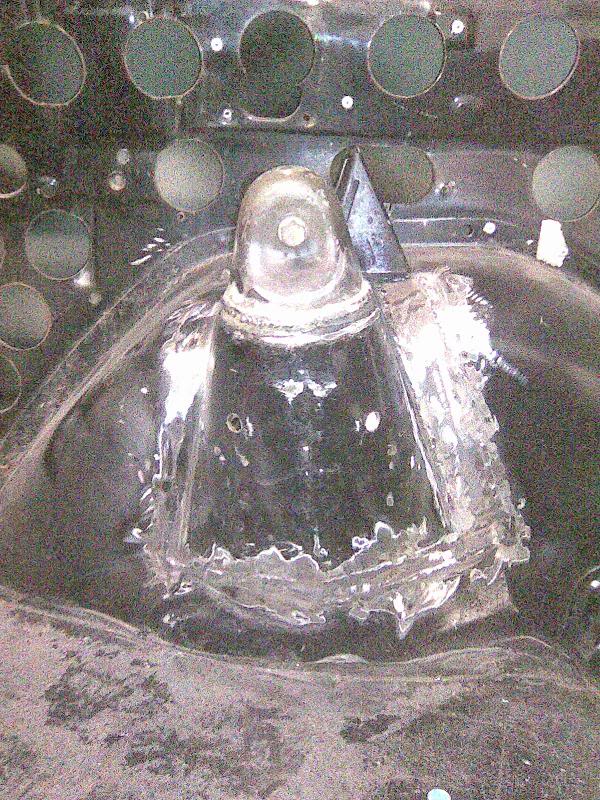
rear shock mounted
change of plan & rollbar has been scrapped & replaced with new compression strut kit
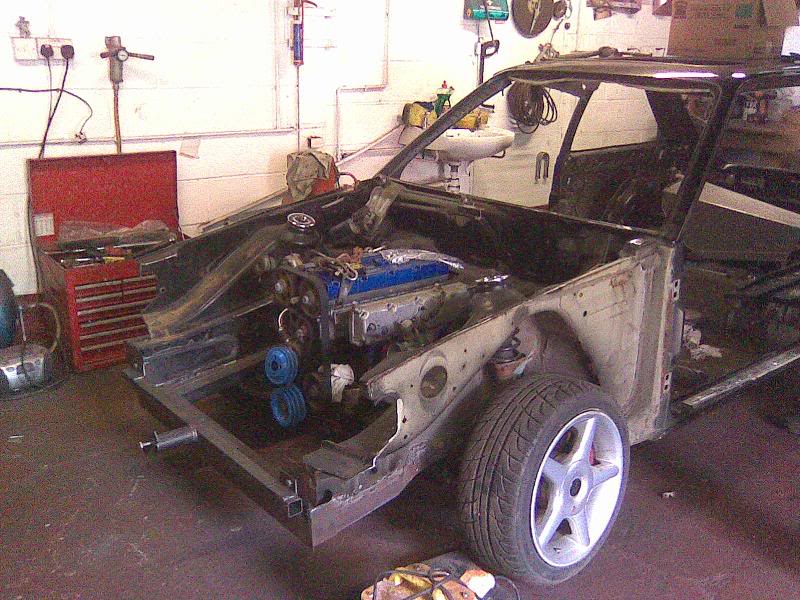
front end all bolted up & inplace
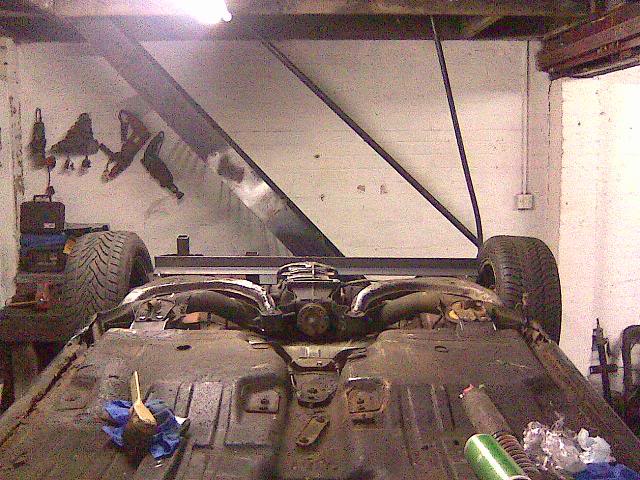
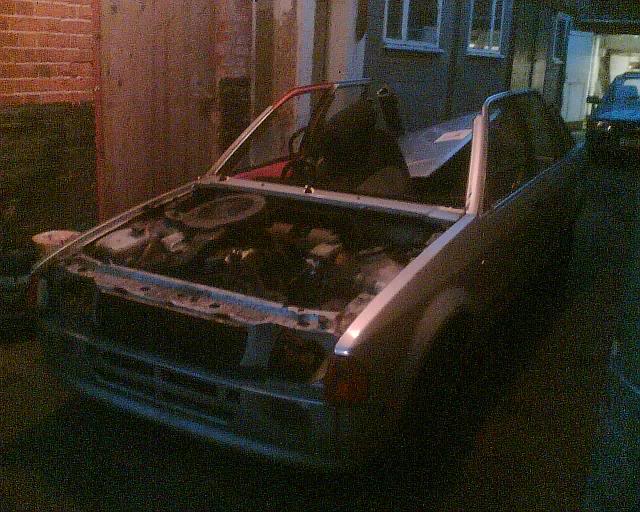
car back on all 4 wheels now rwd
mock up with a dead pinto
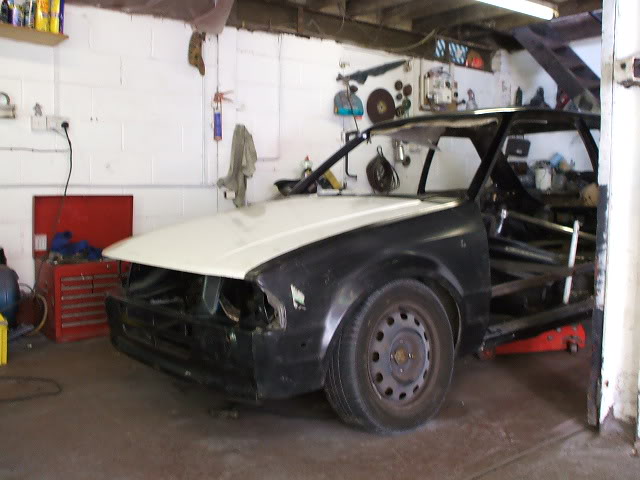
mk3 escort bonnet fitted (this is where things/plans changed)
brought rs500 colller for my cossie & tryed it in the front Mmmmmm.....
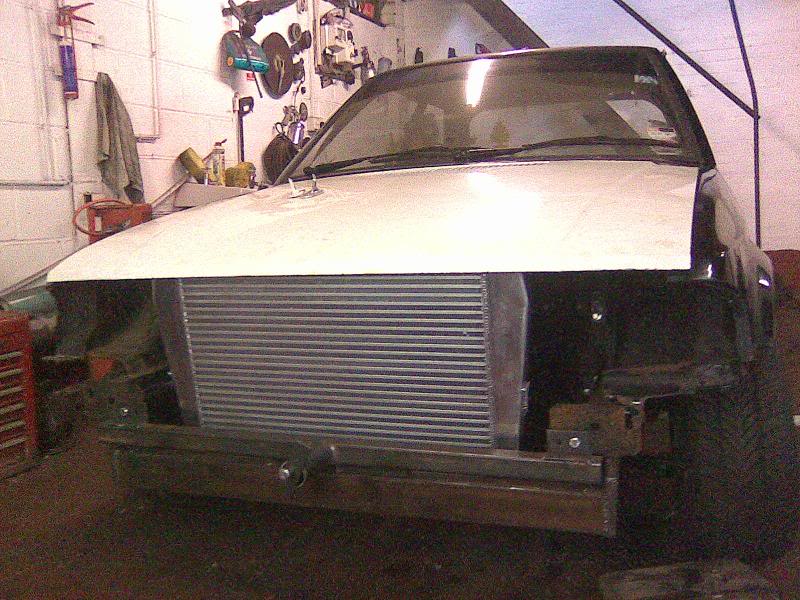
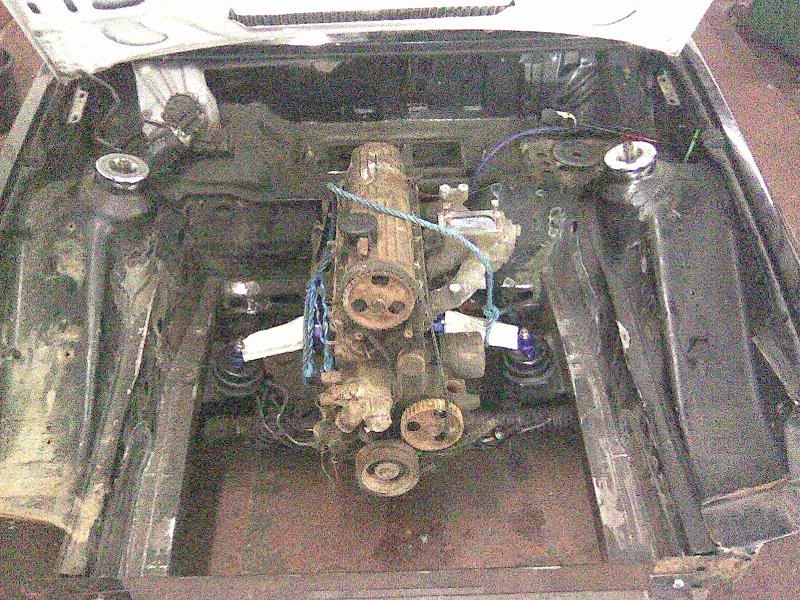
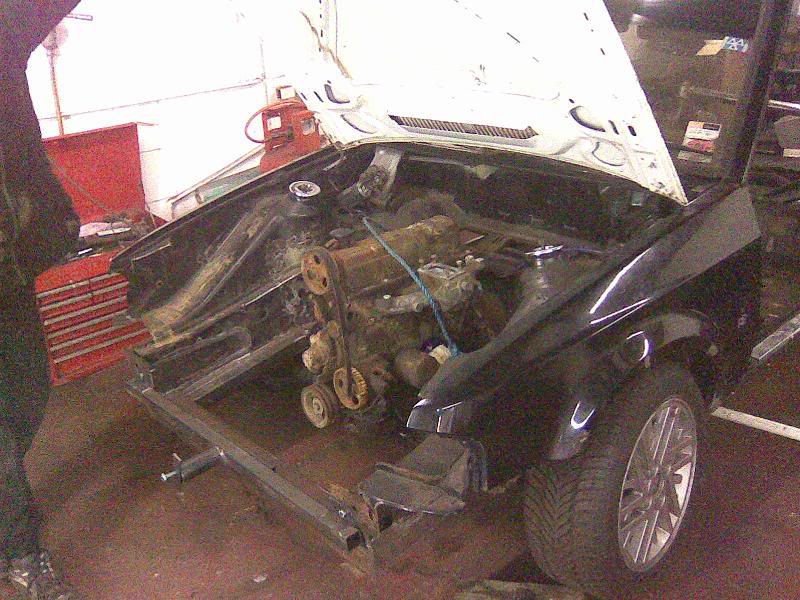
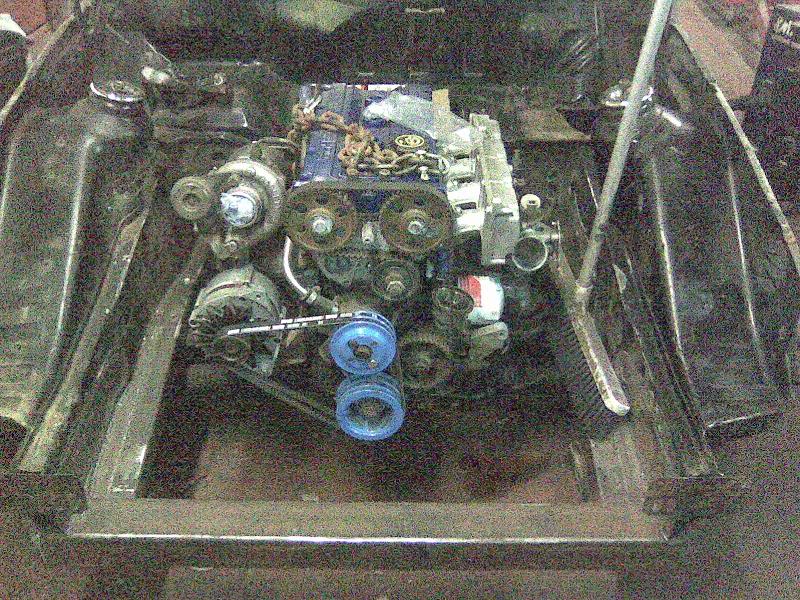
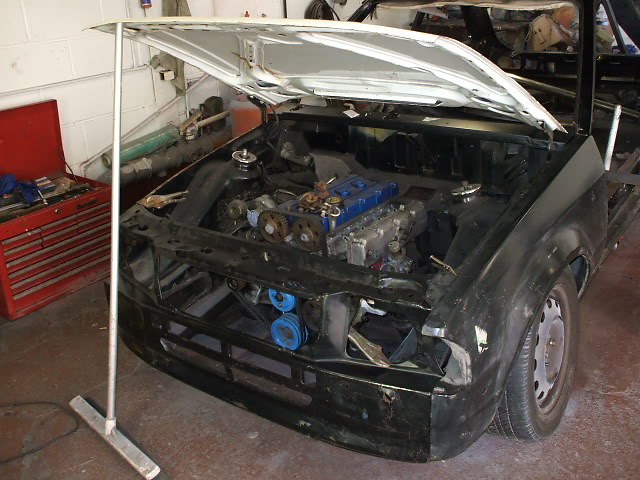
next time i opend the bonnet this was in place (200 block cosowrth)
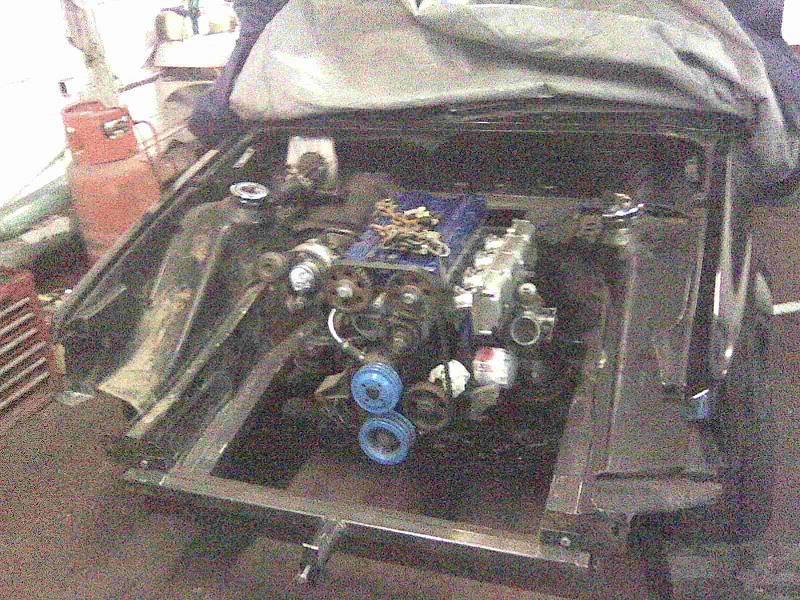
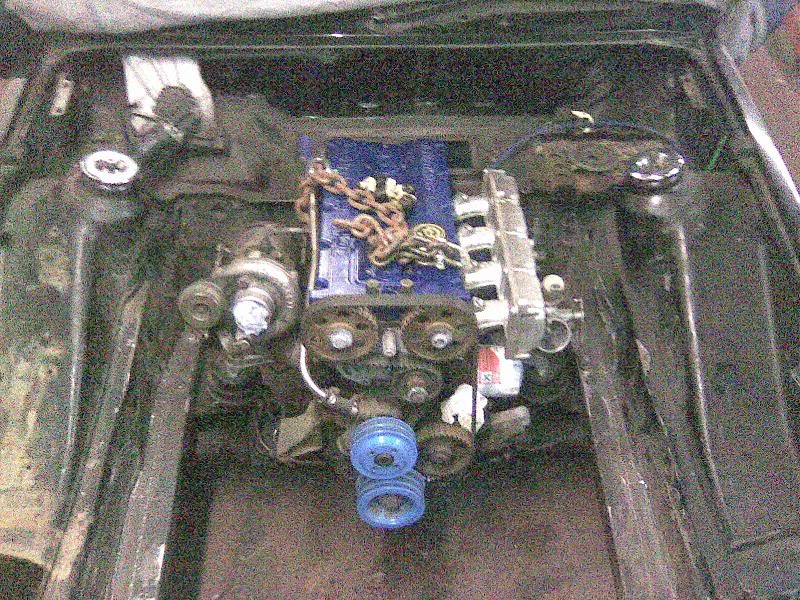
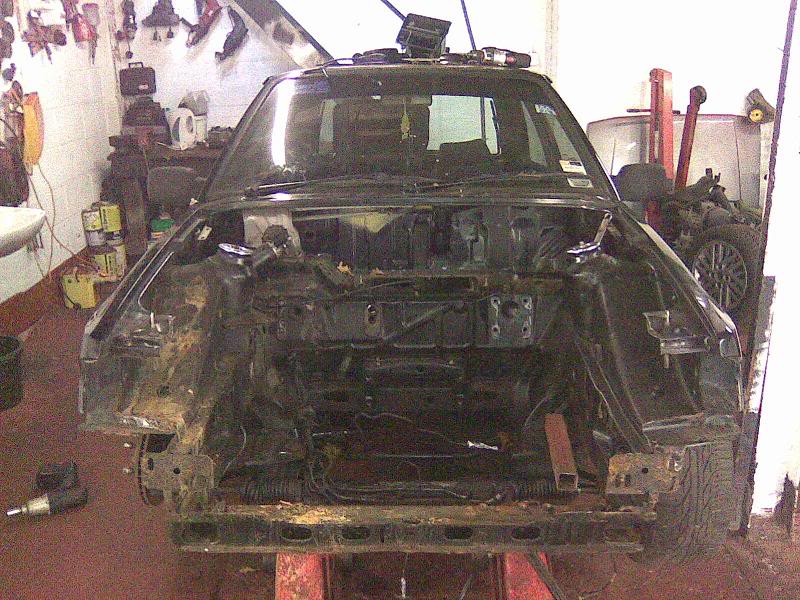
off comes the front end rdy for the mk3 to replace it
off to london to collect a donor car
alternator turns up with new belts so now fitted

stripped the mk3:
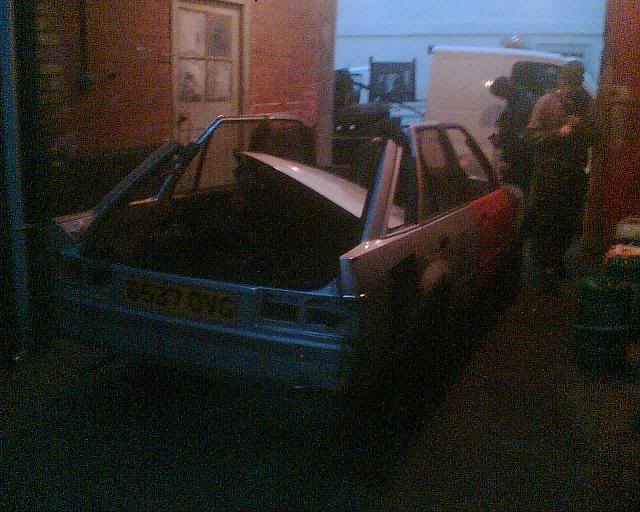
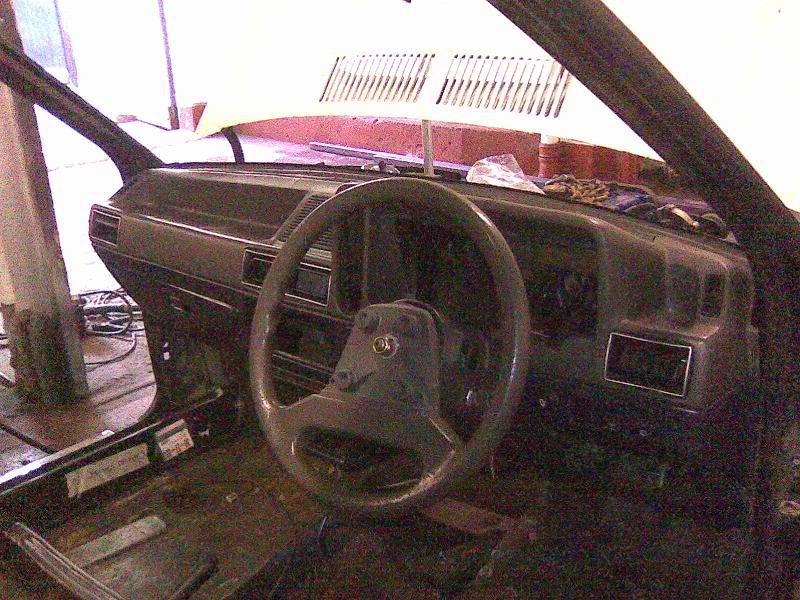
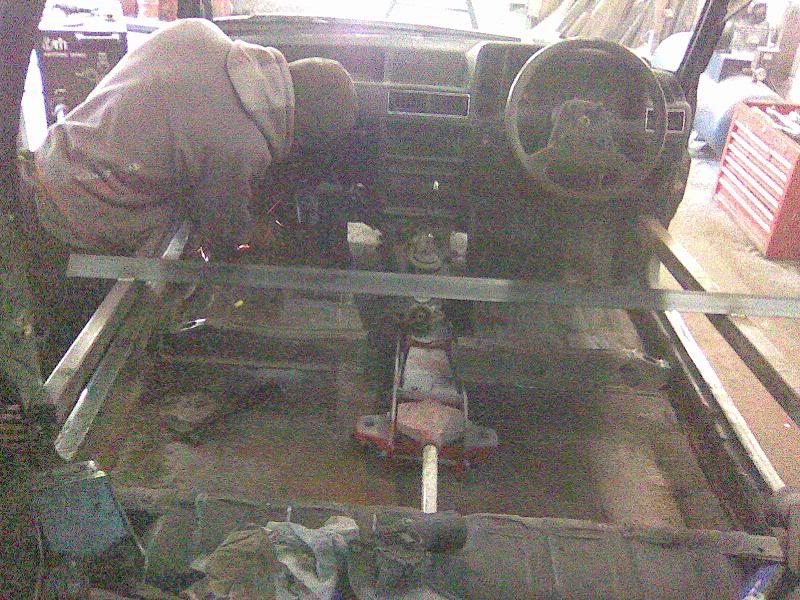
moved bulkhead dash mountings & now mk3 dash bolts in allround

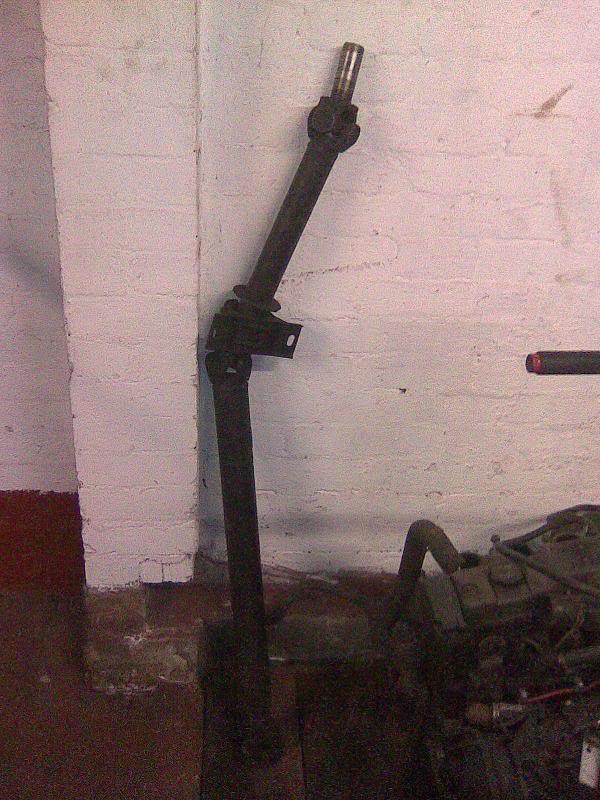
made new steering set up & kept original sierra coloum relase joint
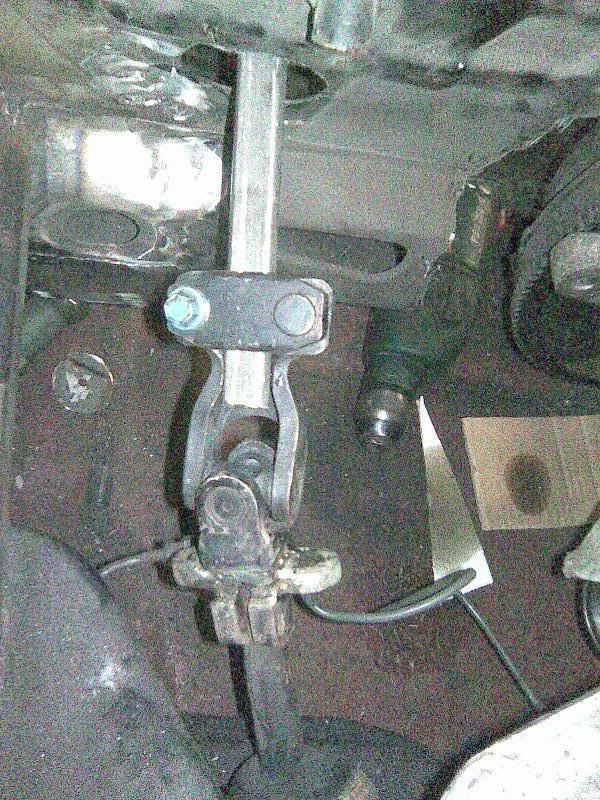
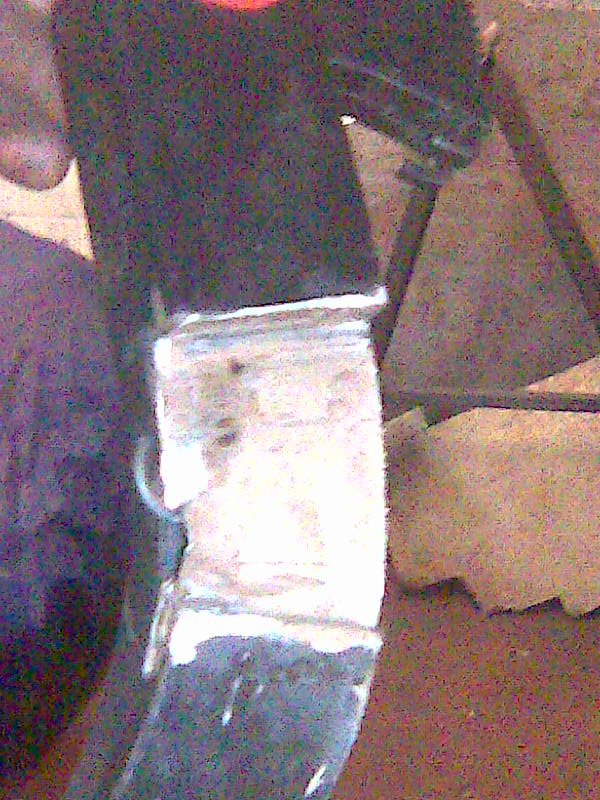
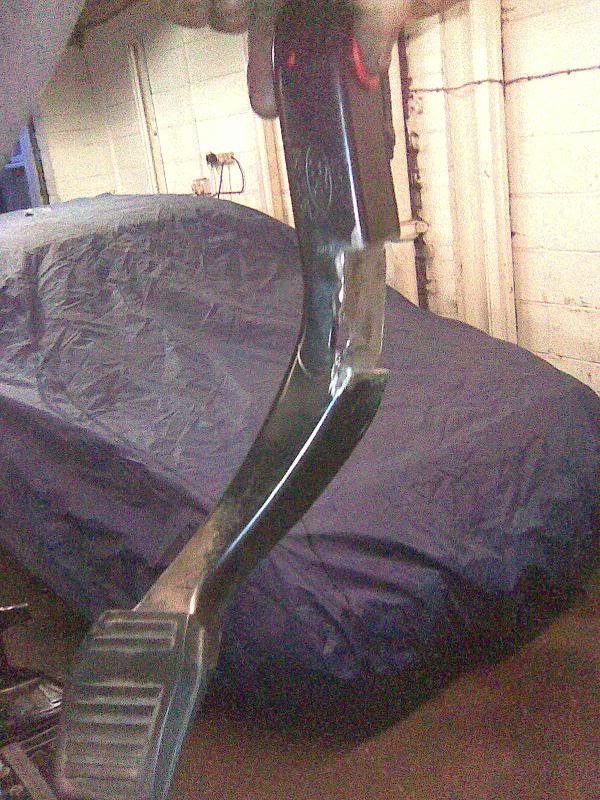
was close 2 clutch pedal so modded this with a resess
now car is rolling & steering
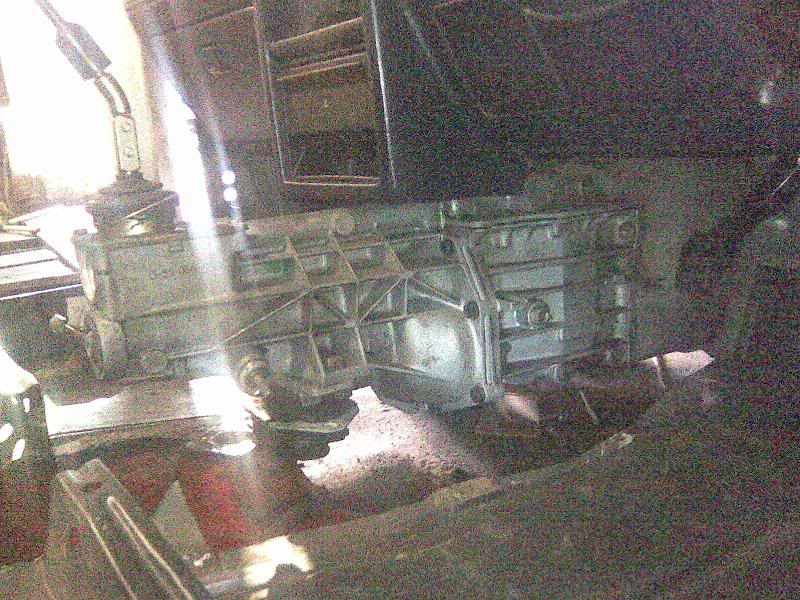
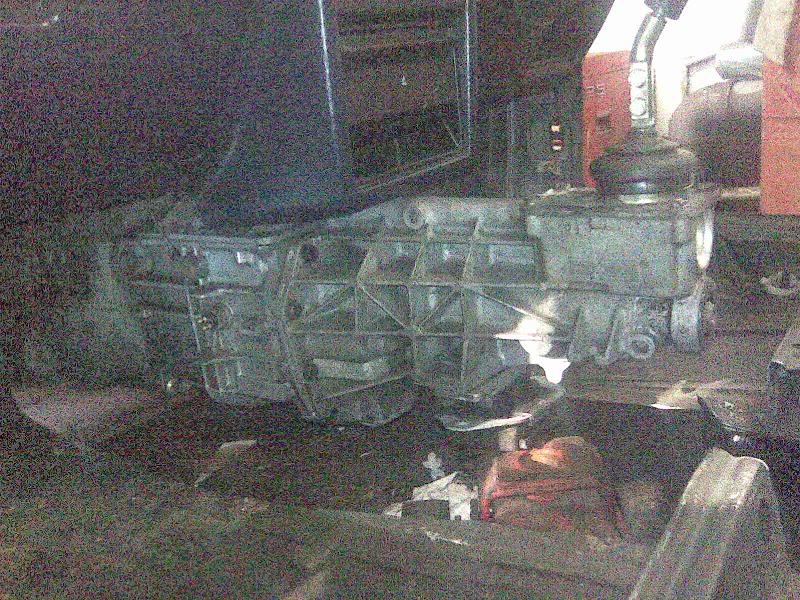
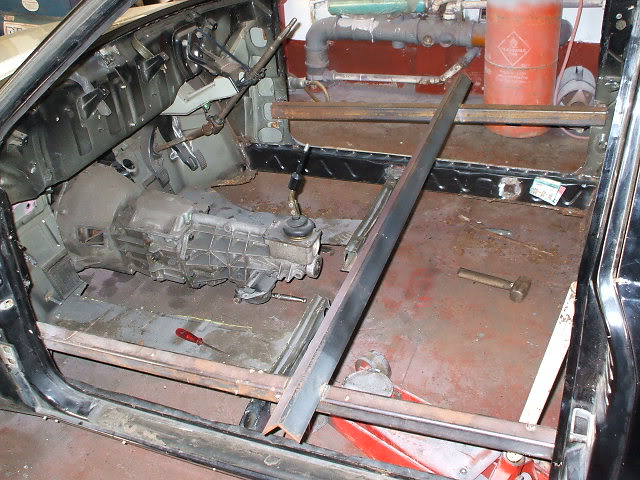
gearbox was next thing 2 turn up
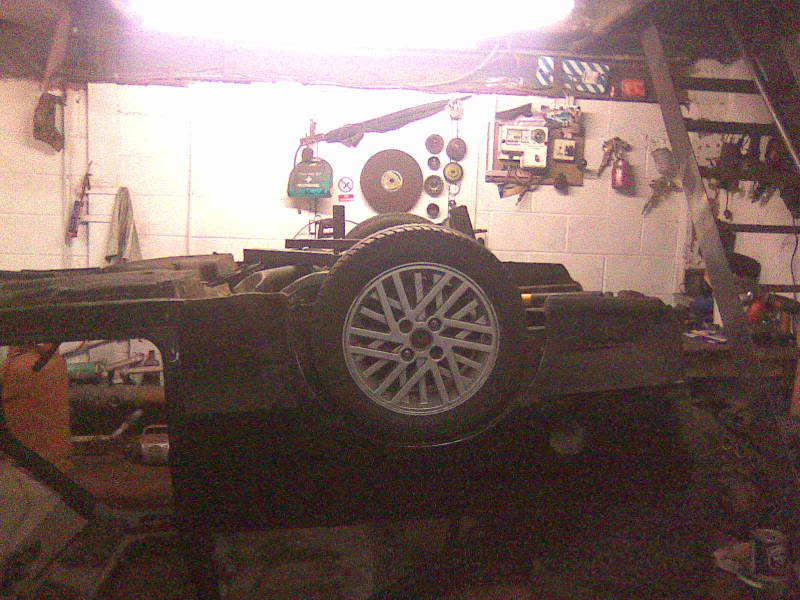
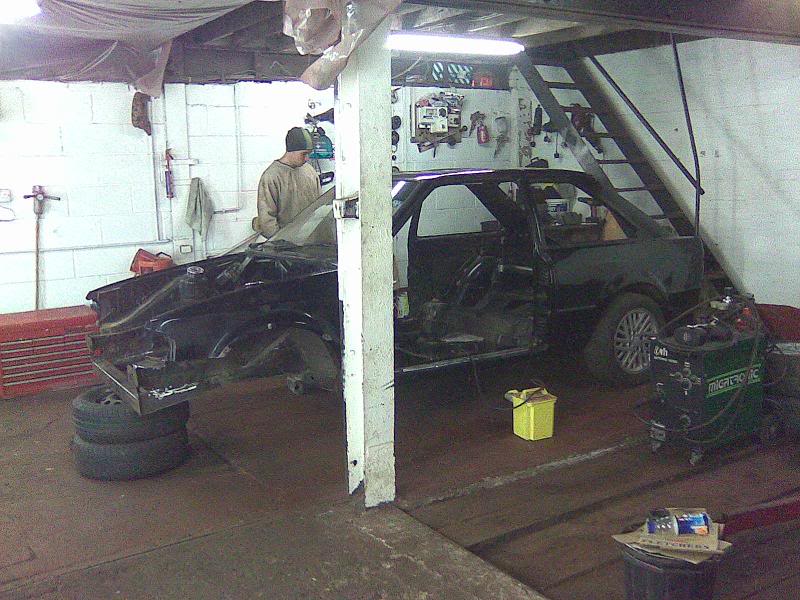
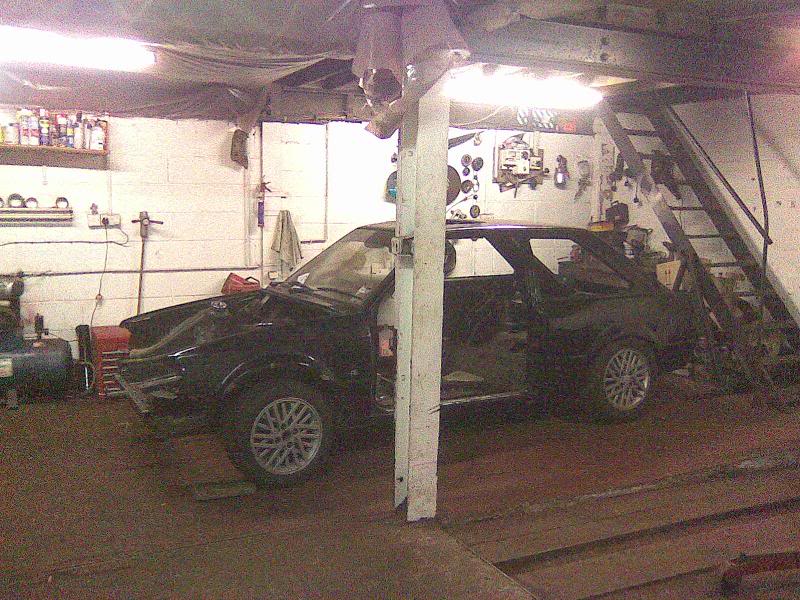
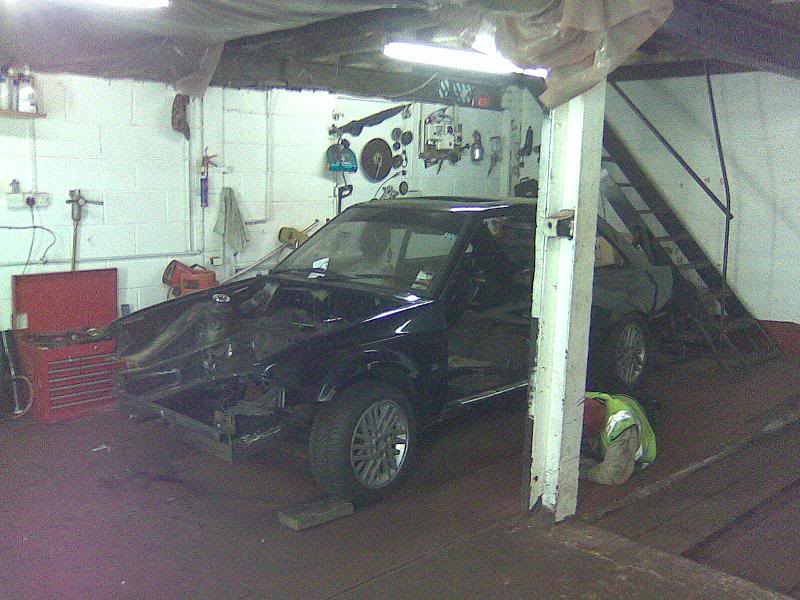
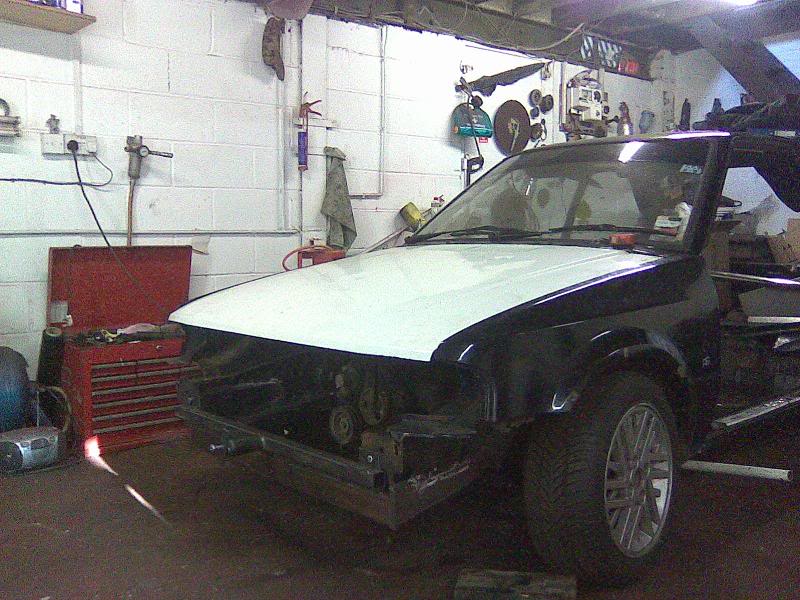
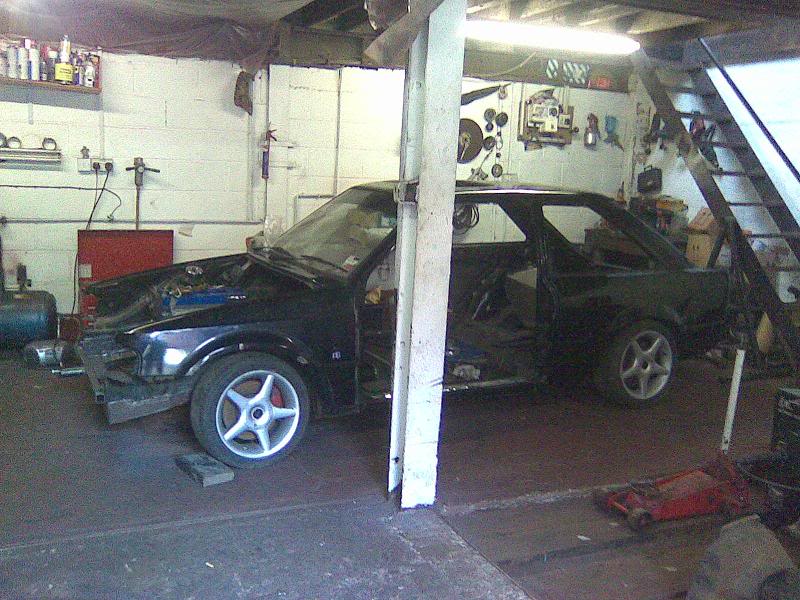
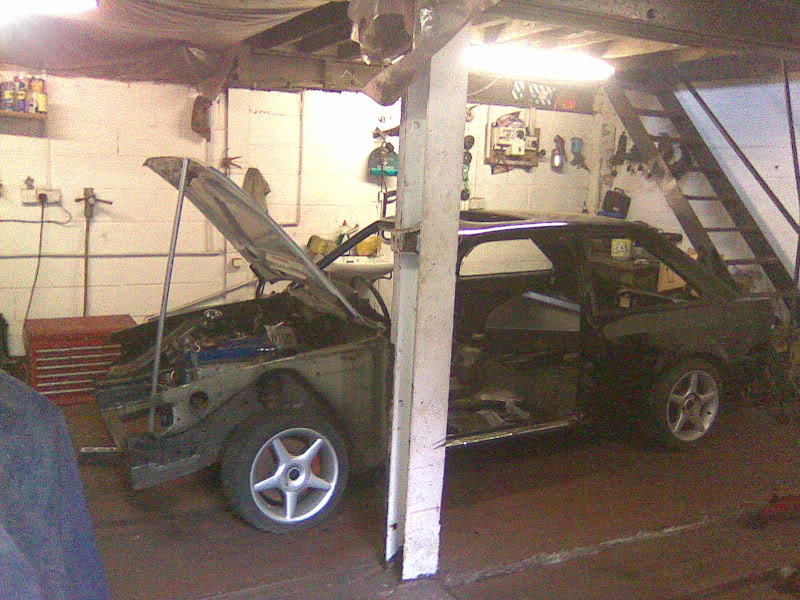
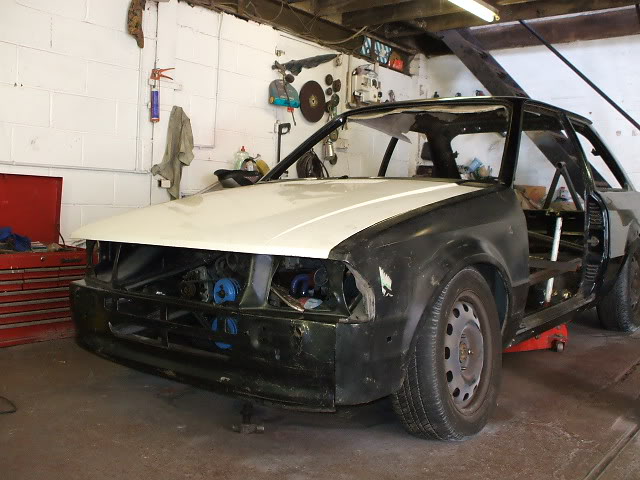
few pics of how car sits
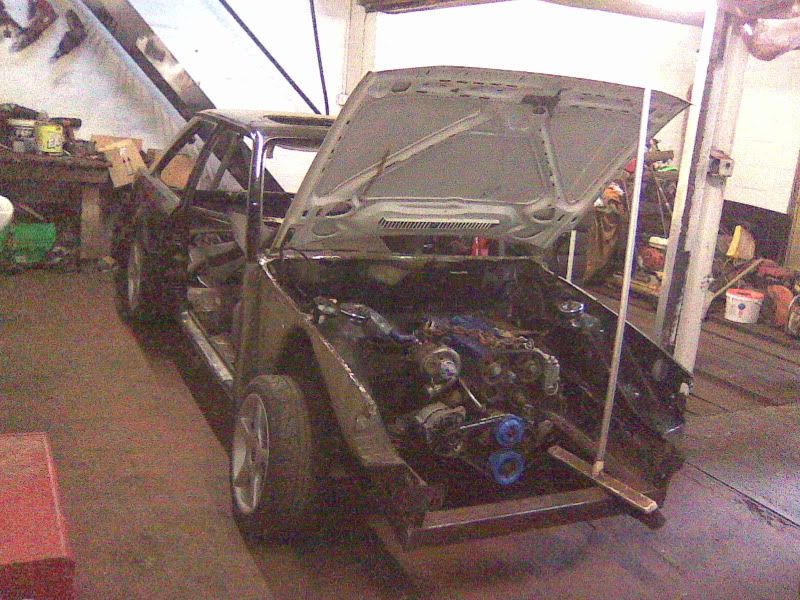
few more bits turned up:
t5 prop
2wd manifold (as engine is/was 4wd set up)
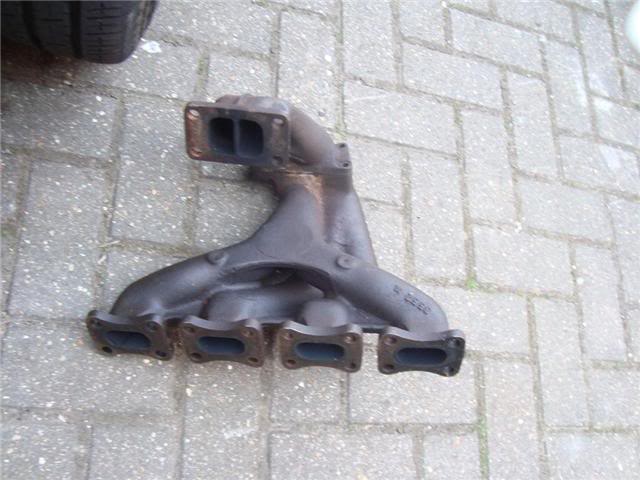
s/s downpipe
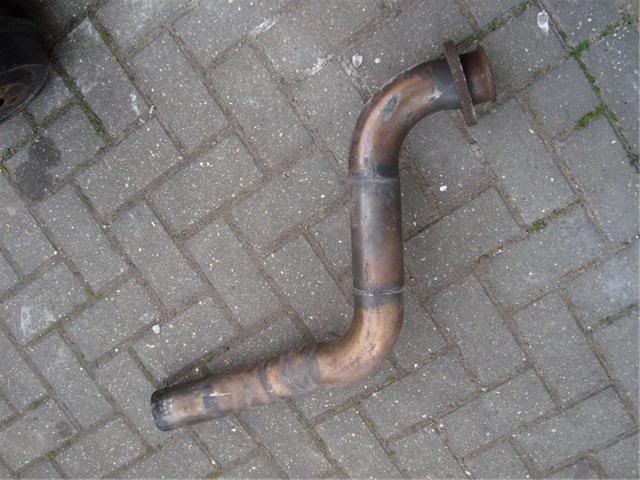
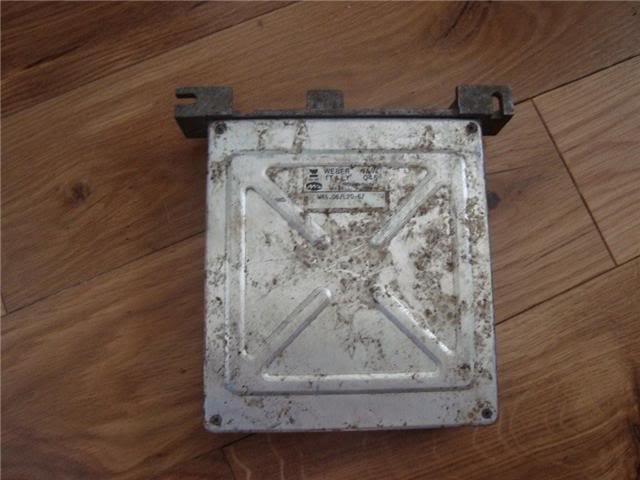
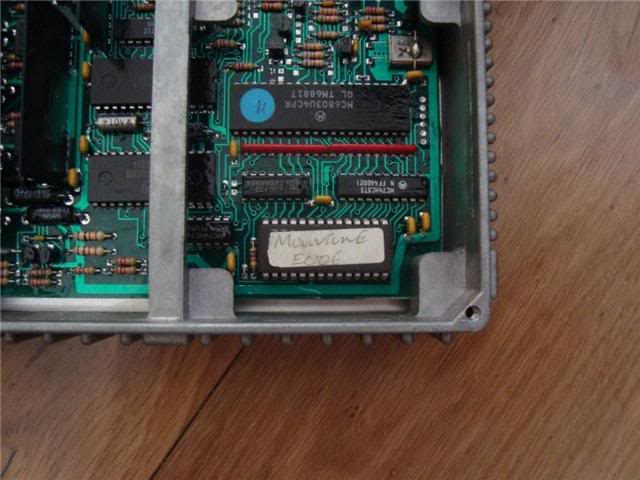
chipped ecu (montune e006 any 1 have any info???)
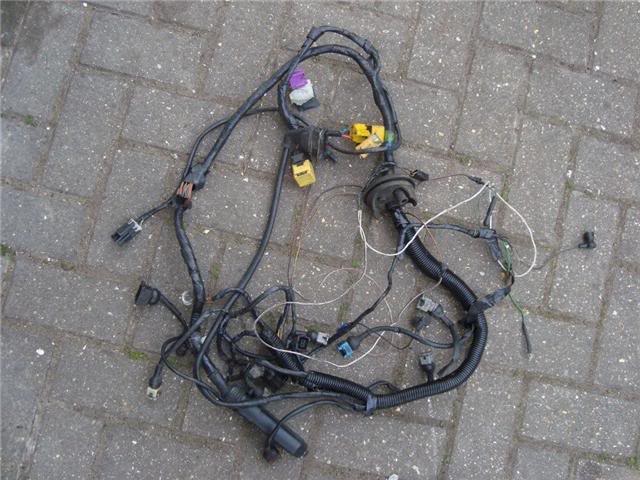
2wd engine loom
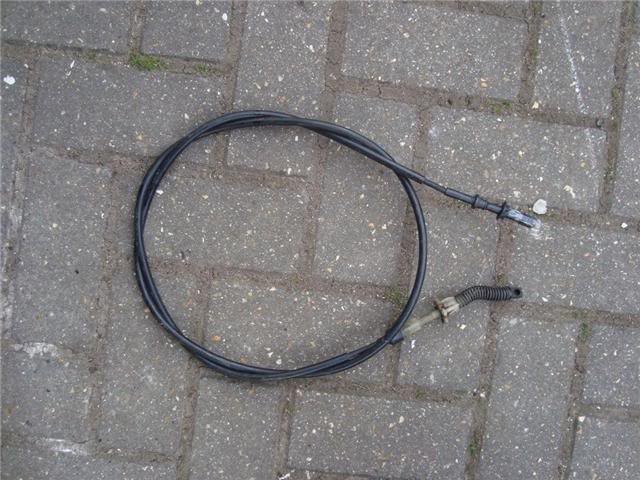
throttle cable & grp a coil
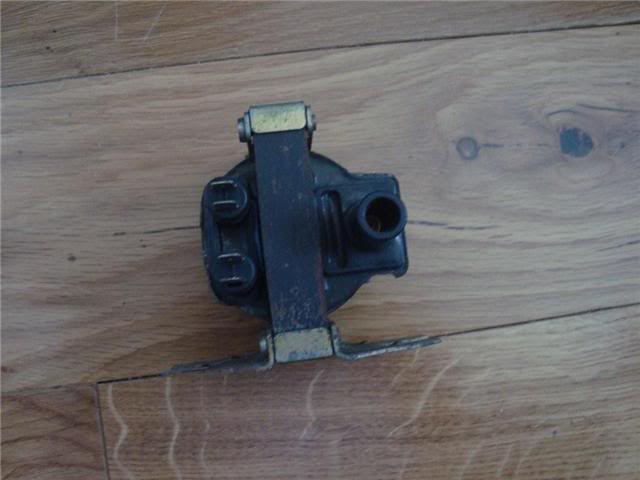
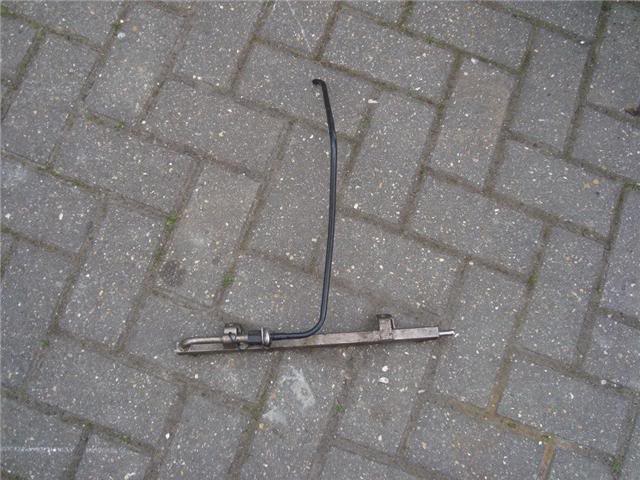
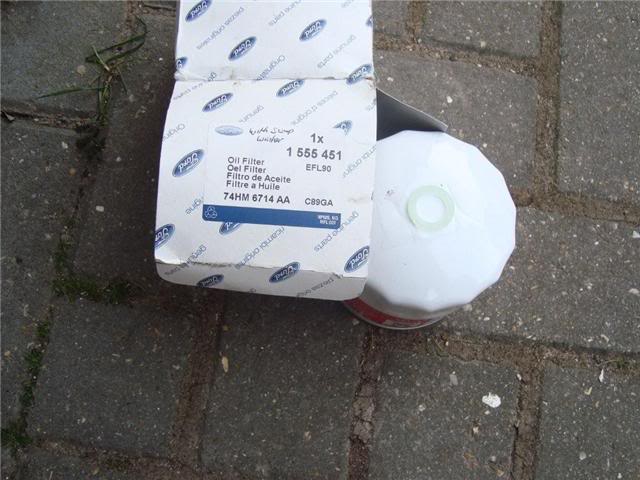
2wd fuel rail & new ford oil filter
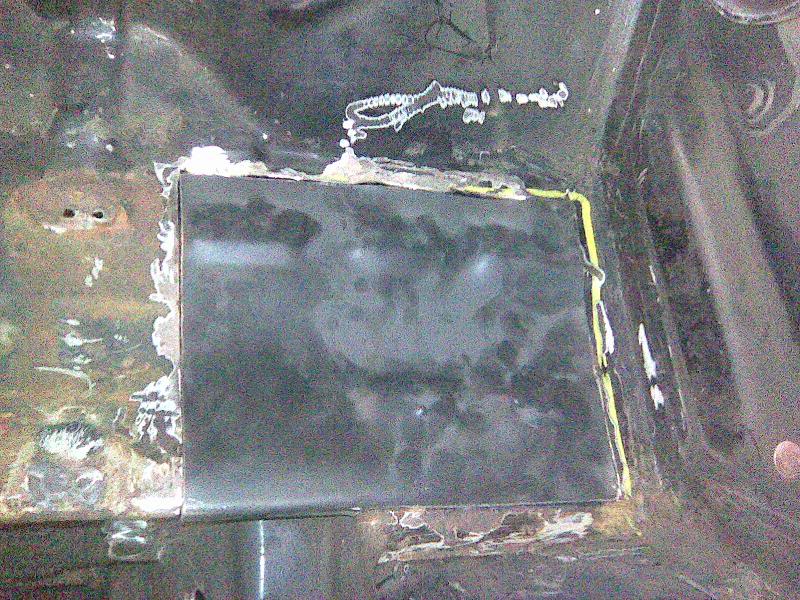
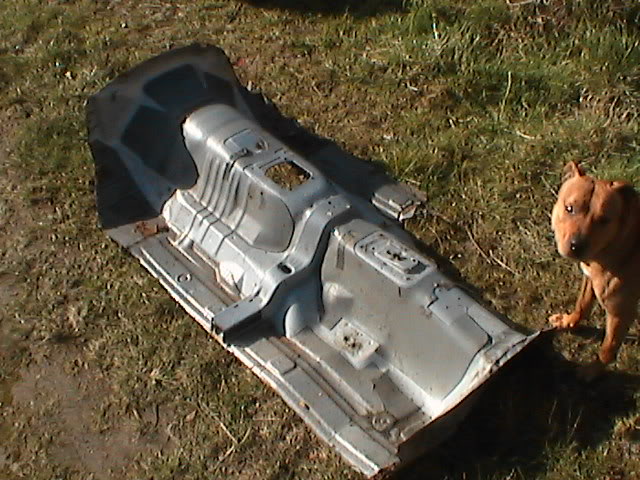
battery tray was tatty on unerside so out it comes
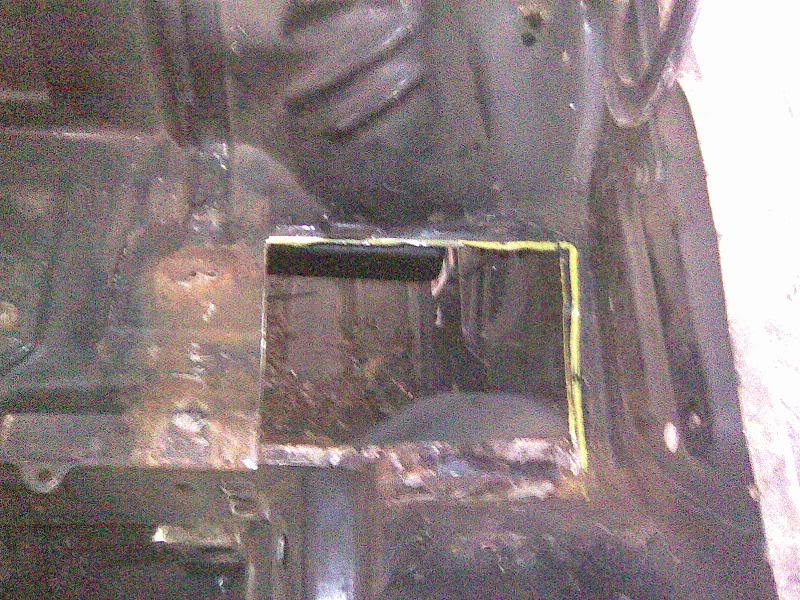
new 1 trimmed up & welded in
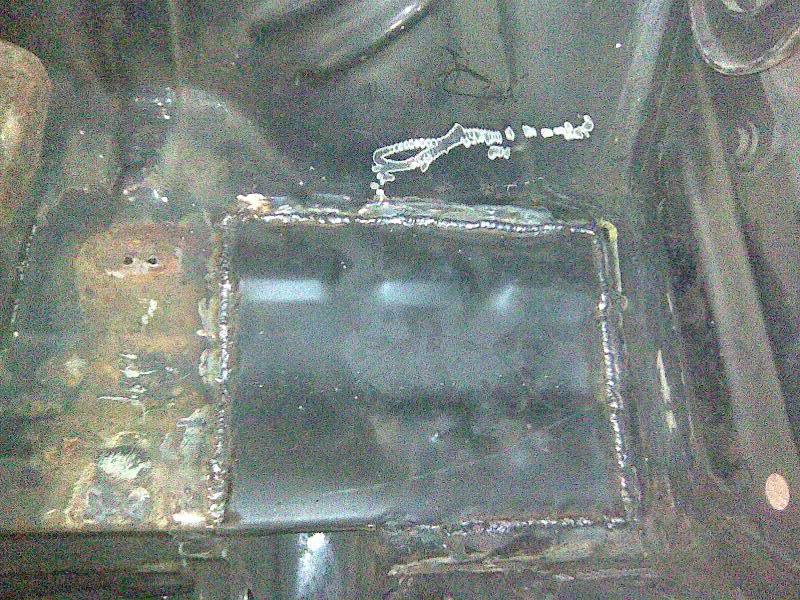
ground down & primed
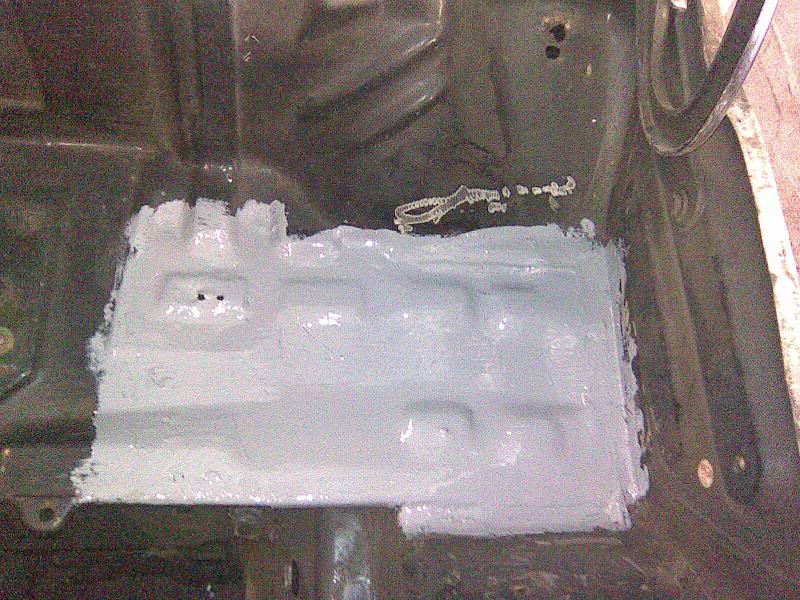
new tray fitted on the top (looks like its never ben touched)
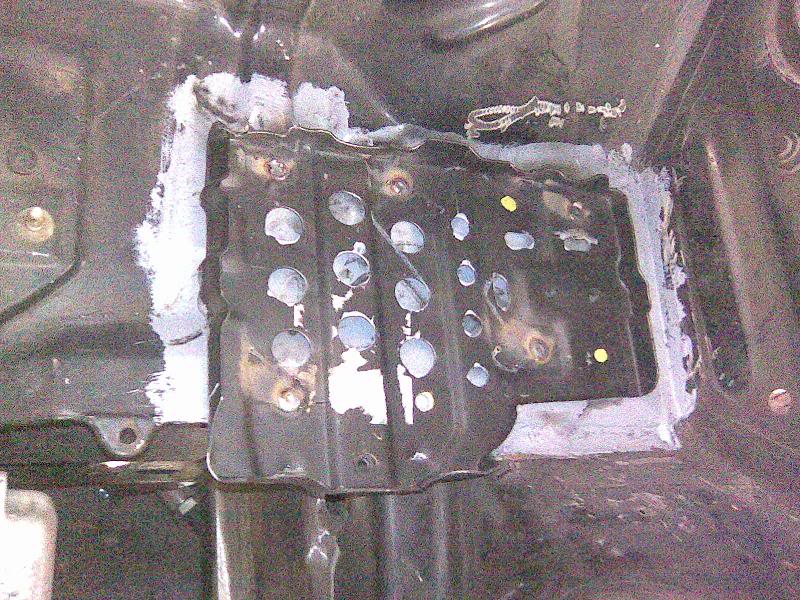
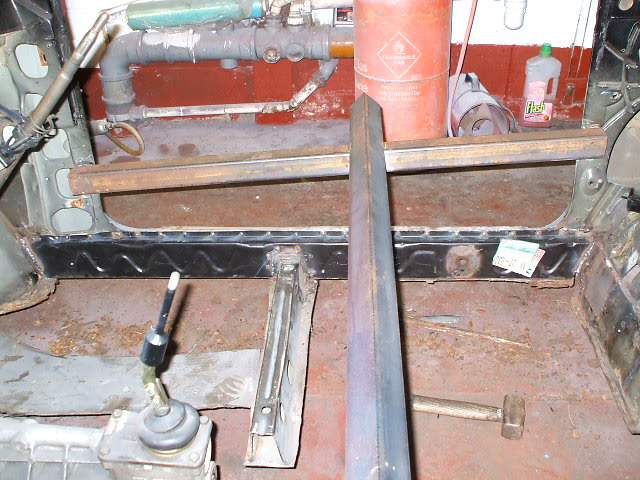
next thing is the tunnel/floors
before:
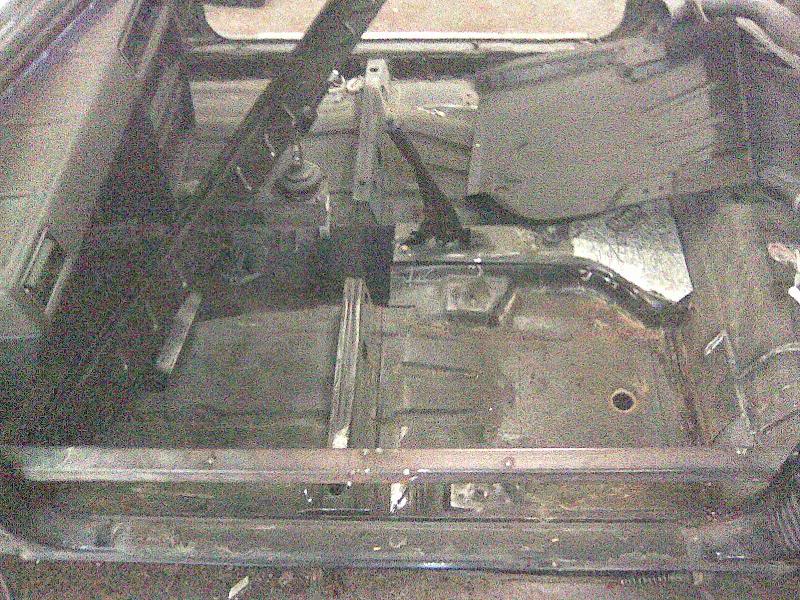
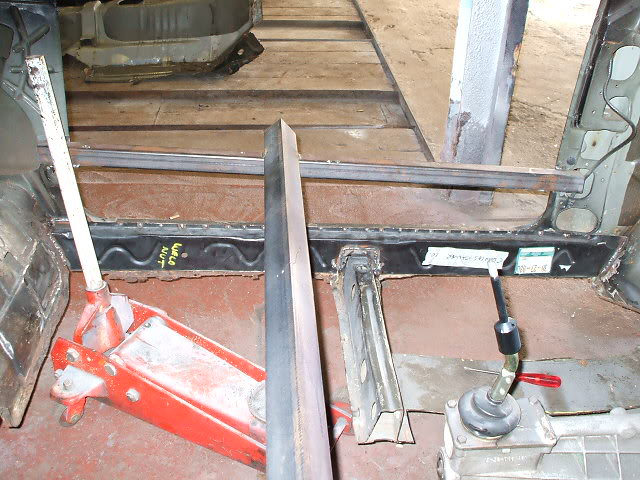
passenger side inner sill off (rot)
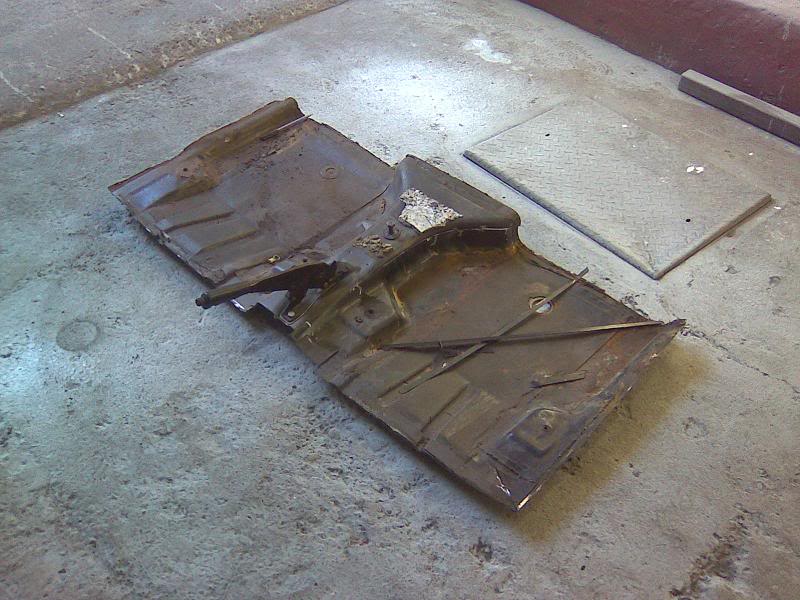
rear floors out
pics have been crappy due to being phone pics but got new digi cam 2day & took a few
all floors out
new drivers side innersill on
new passengers innersill fitted
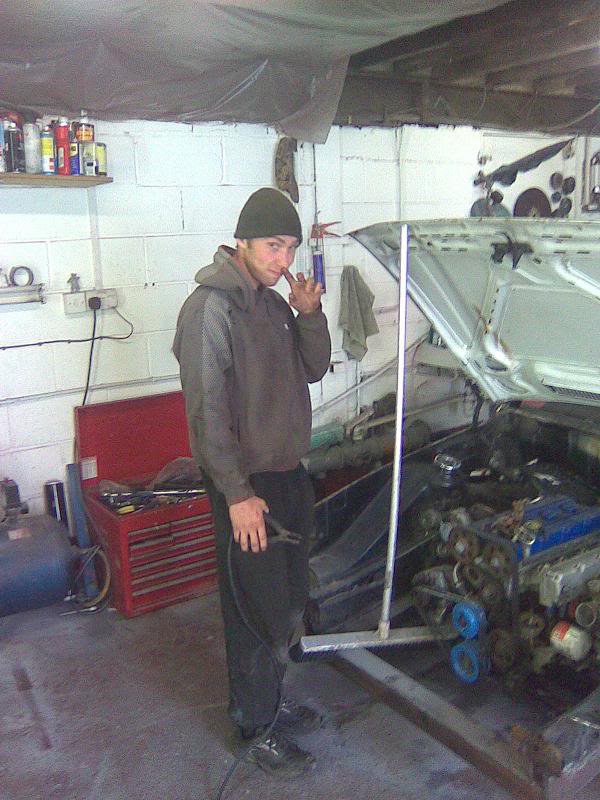
found this random pic of my mate who's been giveing me a hand (good old boy)
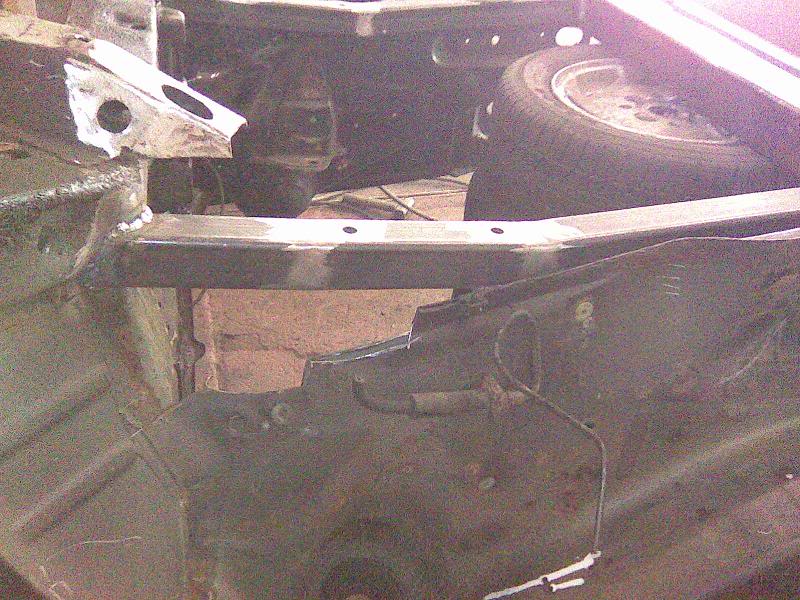
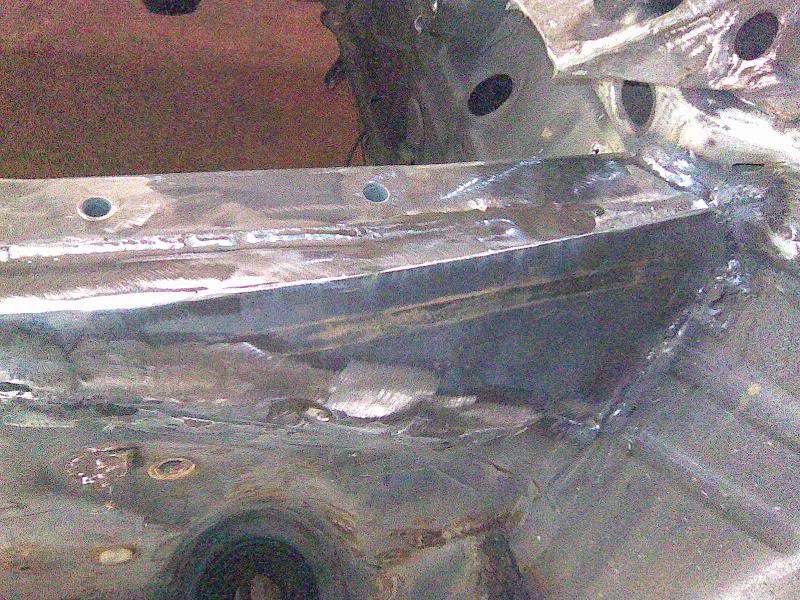
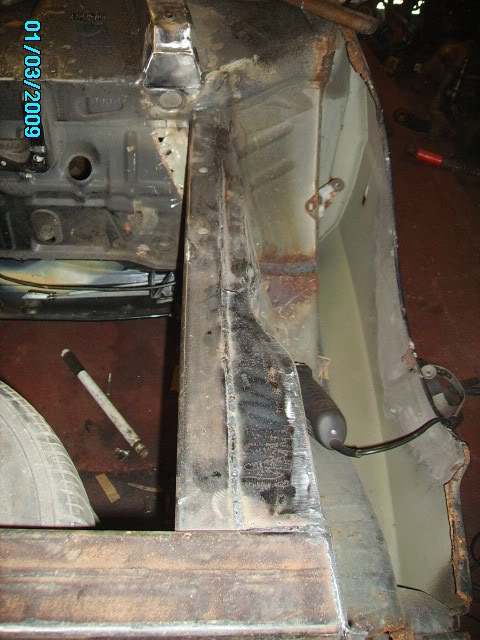
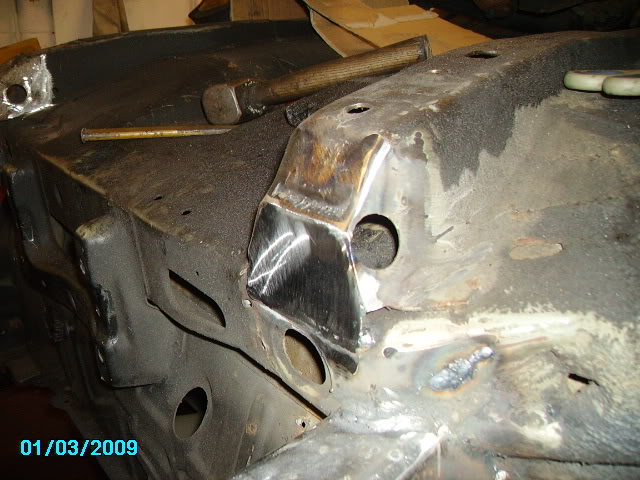
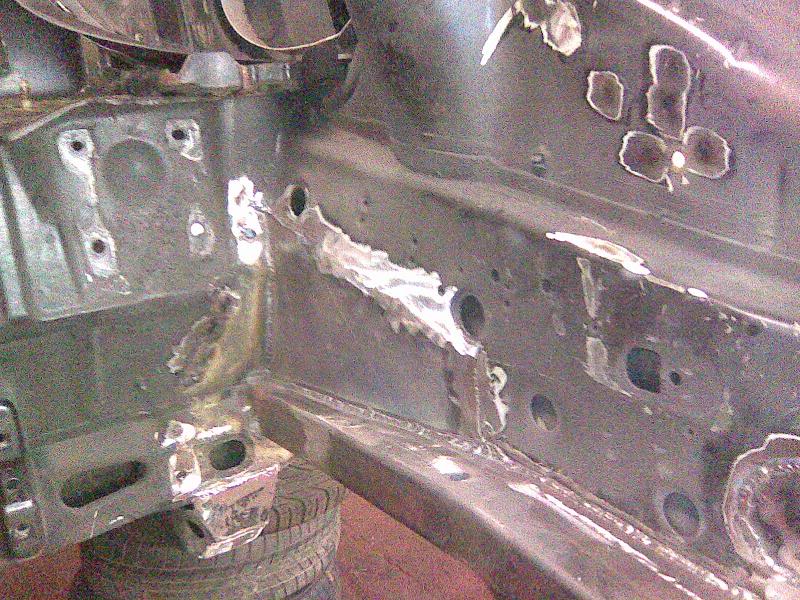
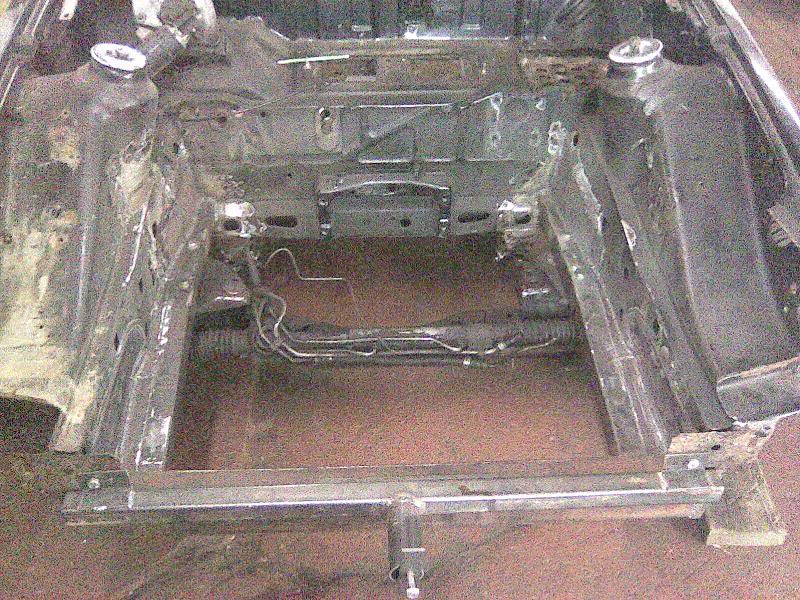
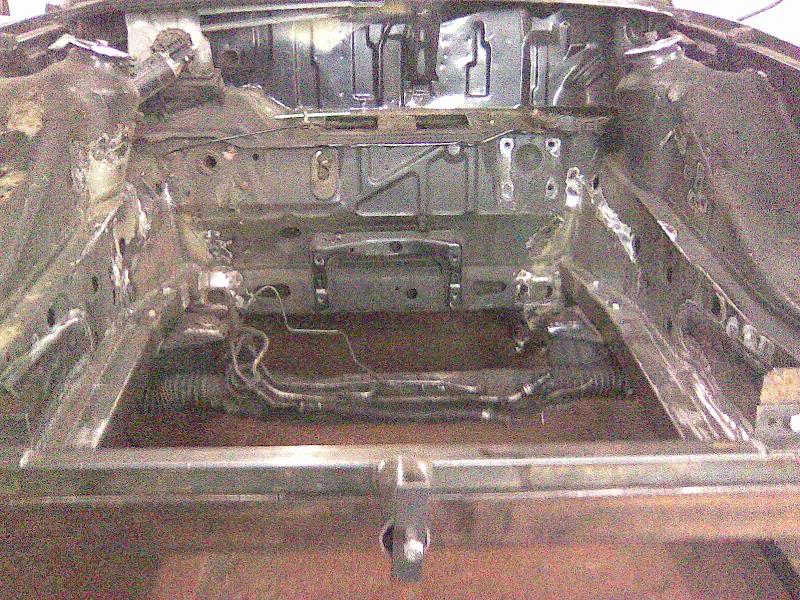
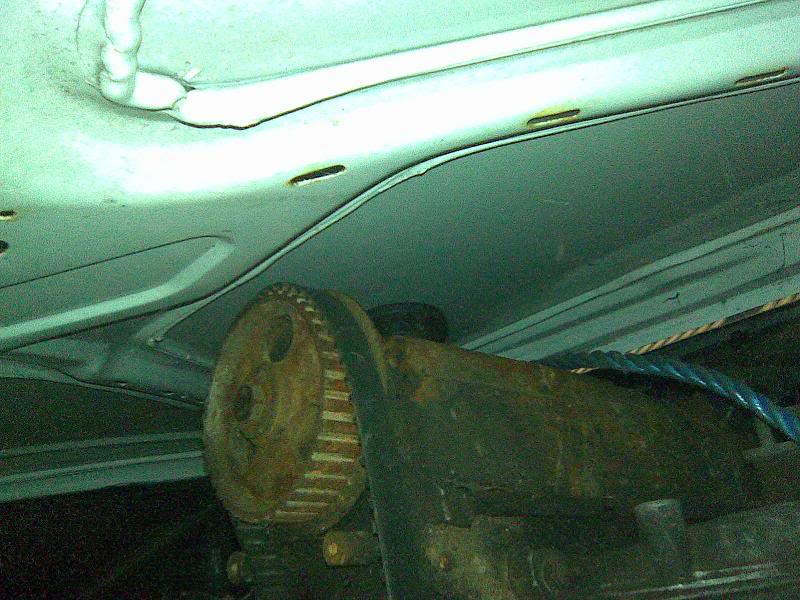
pic of front crossmember/chassis to show how its been done (this all being smoothed in)
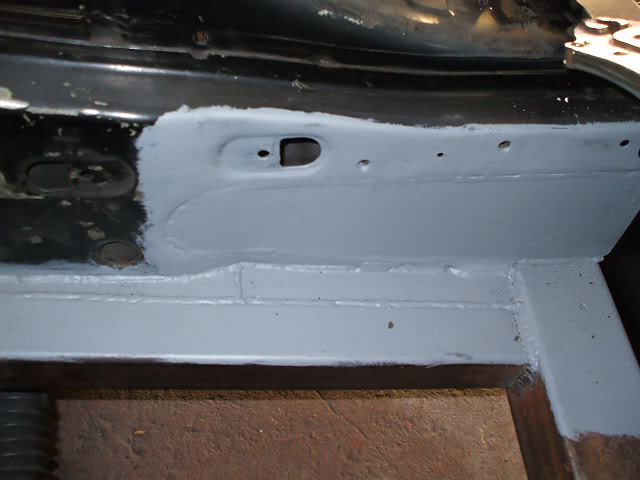
went to classic ford show at weekend & found myself a new front end (2 wings, scutlle panel & complete front panel)
also sent a mate to pick this up for me from jano at oddkid creations
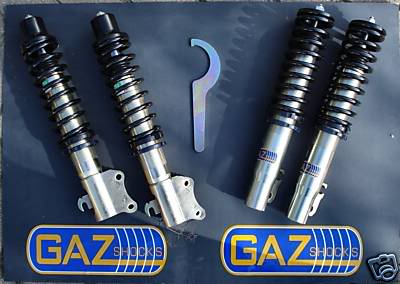
& brought myself a set of these last nite
thats as far as ive got, plan is to get tunnel trimmed up & in, 4x new floor pans fitted along with 2x new sills & the weld front end panels on then start paneling up the rear & do abit more as plenty more 2 do.
was planning on building a rough mk4 pinto's track weapon but things have changed & its all goin old school mk3 & cosworth powerd! (as they do)
right i have loadsssssssss of pics of this car & its now oin 2 take me about 2 hrs 2 try & get em in teh right order so here we go...............
the donor saff
the donor rs before....
raped of all the goodies & rdy 2 the big chop up
my plan was not 2 cut the whole floor out like most but mount the front & rear beds into the escort shell:
bed offerd up in standard escort bay
bed hits the part of escort chassis
roll bar mounts lined up onto chassis rails thou
bed hanging on legs (wheel/bed need to go further back but chassis in way)
cut the old front panel out of way to get in there & inspect
chassis getting in the way is no longer a problem! lol
measure up & tacked a jig in holding bed where it wants 2 be
wheels jiged in central in arch
new chassis rail to mount bed to
trimmed up to meet chassis at bulkhead
layed in position in bay
drilled 4 tubeing for bed mounts
tubed
welded in at bulkhead
new bed mounts jiged in at front & old rotten crossmember off
new beefy crossmember in
antirollbar bolted onto chassis
wheel alinement after
welding/tieing new chassis into old chassis
upside down it goes
rear beam offerd up & wheel well removed
rear chassis rails cut out
looks like im getting there now (not lol) rear chassis crossmember removed
rear spring mount cup removed
& re-inforced up nice & thick
rear subframed all jigged up & on
thick rear subframe mounting plates
makeing mountings
rear axle bolted onto new mounting
old rear chassis crossmember removed
new daddy 1
drilled, nuts welded on underside & offerd up
all bolts on ok
welded in
new thick rear inner sills & base/floor plate inbetween
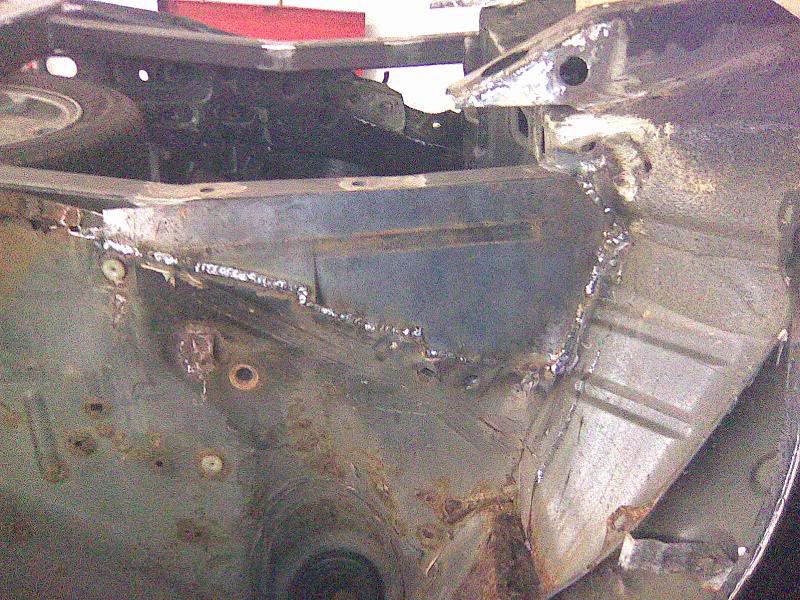
back to do abit more on front from underside as still looks like this from inner arch!!!!!
here we go:
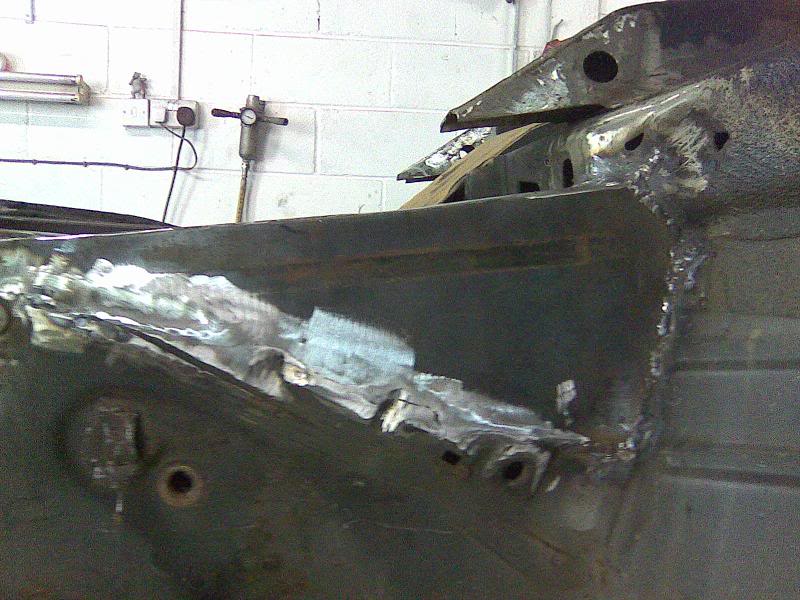
done & now the drivers side
both sides all done
cut front chassis back & capped end off (not sure on this yet)
car back over
back into the bay to tidy up/ cap in lower innerwings
gotta love carboard templates, they fit so nice lol
plates cut & welded in flush
as u can see i have smoothed over the front innerwing section where the rollbar used to bolt in as this is no longer needed
brought a rollover jog to make life easier
other lower innerwing done
next: rear shock mountings
before:
dureing (moved back & top section changed for sierra):
after:
rear shock mounted
change of plan & rollbar has been scrapped & replaced with new compression strut kit
front end all bolted up & inplace
car back on all 4 wheels now rwd
mock up with a dead pinto
mk3 escort bonnet fitted (this is where things/plans changed)
brought rs500 colller for my cossie & tryed it in the front Mmmmmm.....
next time i opend the bonnet this was in place (200 block cosowrth)
off comes the front end rdy for the mk3 to replace it
off to london to collect a donor car
alternator turns up with new belts so now fitted
stripped the mk3:
moved bulkhead dash mountings & now mk3 dash bolts in allround
made new steering set up & kept original sierra coloum relase joint
was close 2 clutch pedal so modded this with a resess
now car is rolling & steering
gearbox was next thing 2 turn up
few pics of how car sits
few more bits turned up:
t5 prop
2wd manifold (as engine is/was 4wd set up)
s/s downpipe
chipped ecu (montune e006 any 1 have any info???)
2wd engine loom
throttle cable & grp a coil
2wd fuel rail & new ford oil filter
battery tray was tatty on unerside so out it comes
new 1 trimmed up & welded in
ground down & primed
new tray fitted on the top (looks like its never ben touched)
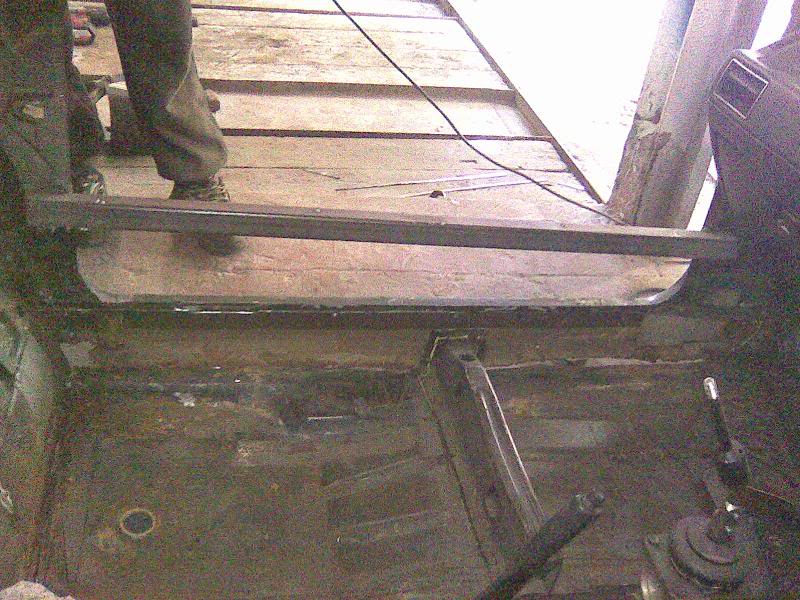
next thing is the tunnel/floors
before:
passenger side inner sill off (rot)
rear floors out
pics have been crappy due to being phone pics but got new digi cam 2day & took a few
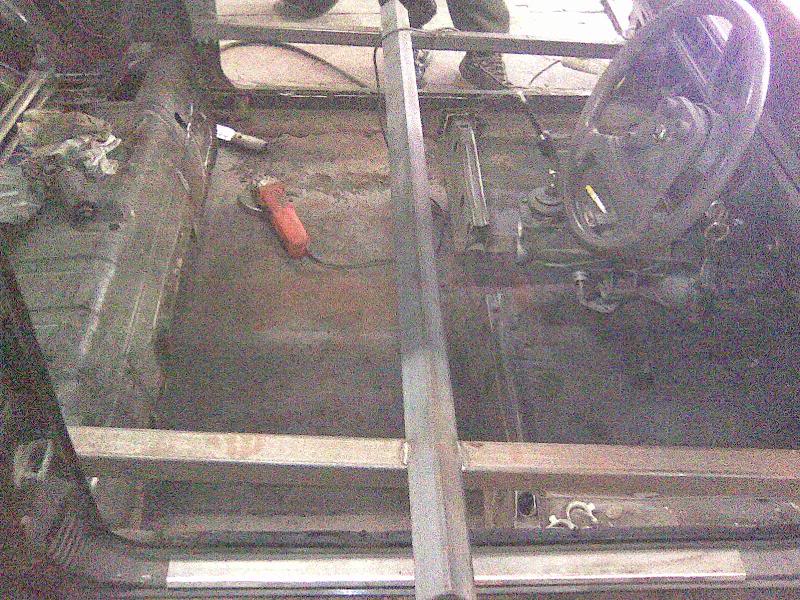
all floors out
new drivers side innersill on
new passengers innersill fitted
found this random pic of my mate who's been giveing me a hand (good old boy)
pic of front crossmember/chassis to show how its been done (this all being smoothed in)
went to classic ford show at weekend & found myself a new front end (2 wings, scutlle panel & complete front panel)
also sent a mate to pick this up for me from jano at oddkid creations
& brought myself a set of these last nite
thats as far as ive got, plan is to get tunnel trimmed up & in, 4x new floor pans fitted along with 2x new sills & the weld front end panels on then start paneling up the rear & do abit more as plenty more 2 do.
Last edited by lockesRSparts; 01-06-2009 at 05:37 PM.


Trending Topics
01-06-2009, 05:51 PM
#8
Too many posts.. I need a life!!
Thread Starter
iTrader: (1)
Join Date: Oct 2003
Location: gt yarmouth, norfolk
Posts: 820
Likes: 0
Received 0 Likes
on
0 Posts
oh i did buy this mk3 aswell the other day as it was local & scrap money, throwing it over a mates yard just incase i need any clips/screw for the rebuild
need 2 crack on as havnt done anything in past 3 weeks as work keep sending me away & this weekend went 2 santapod, maybe this weekend will see the tunnel & maybe floors in (se what the mrs says 1st lol)
oh & before any1 asks yes this will be a sleeper, orderd brand new front & rear lights & new "ORANGE" indicators & new "L" bumpers today & car is goin white inside.out & underside
enjoy
01-06-2009, 06:32 PM
#11
PassionFord Post Troll
iTrader: (2)

Join Date: May 2004
Location: luton
Posts: 2,952
Likes: 0
Received 0 Likes
on
0 Posts
have you not needed to modify the front strut tops/inner wings atall,im starting this conversion soon aswell so any measurements and pointers would be greatly appreciated,mine will be 4wd though
01-06-2009, 06:40 PM
#12
Too many posts.. I need a life!!
Thread Starter
iTrader: (1)
Join Date: Oct 2003
Location: gt yarmouth, norfolk
Posts: 820
Likes: 0
Received 0 Likes
on
0 Posts
no ive brought a full set of gaz coilovers

coilovers will fit straight into the escort inerwings, the legs that are on it are just bodged up old escort/siera legs to set everythin up but could be used if wanted. (sierra cups to big for escort innerwings)
its a case of get the grinder out & trim away slowly till things fit nice & then get everything squared up.
if u measure up the front & rear beds & try tack everything solid/square in place then it makes life easier as u only have 2 line up 1 solid square unit instad of it flopping about everywhere giveing u a headache!
where u based?
Last edited by lockesRSparts; 01-06-2009 at 06:42 PM.
01-06-2009, 06:51 PM
#13
PassionFord Post Troll
iTrader: (2)
Join Date: May 2004
Location: luton
Posts: 2,952
Likes: 0
Received 0 Likes
on
0 Posts
i live in luton mate,is there not a lot of positive camber on the front then using the escort inner wings,so do you reckon if i just tack weld the rear arms to the rear beam to hold them square that will make things easier,the trouble with the front is im going 4wd so the front crossmember is ally so will have to figure out making some brackets to hold that in place
01-06-2009, 06:58 PM
#14
Too many posts.. I need a life!!
Thread Starter
iTrader: (1)
Join Date: Oct 2003
Location: gt yarmouth, norfolk
Posts: 820
Likes: 0
Received 0 Likes
on
0 Posts
yer this is what i done, ive opted for adjustable front compression struts & will go for adjustable tca's so i can move the front wheels just about anywhere i want
 01-06-2009, 07:18 PM
#16
PassionFord Post Troll
iTrader: (2)
Join Date: May 2004
Location: luton
Posts: 2,952
Likes: 0
Received 0 Likes
on
0 Posts
fair enough i might go for a similar setup at somepoint,would it be best to jig up the rear arms and rear beam while they are still on the sierra so that they have got weight on them at least that way they will be in an easier location to line them up the rear wheels in the rear arches,how did you get the rear shock mounts in location did you make up some little jigs for those aswell,this is all very much appreciated mate sorry for the questions but your pics are the best detailed and pretty much exactly the same as the way im going to do mine aswell
01-06-2009, 07:55 PM
#19
Too many posts.. I need a life!!
Thread Starter
iTrader: (1)
Join Date: Oct 2003
Location: gt yarmouth, norfolk
Posts: 820
Likes: 0
Received 0 Likes
on
0 Posts
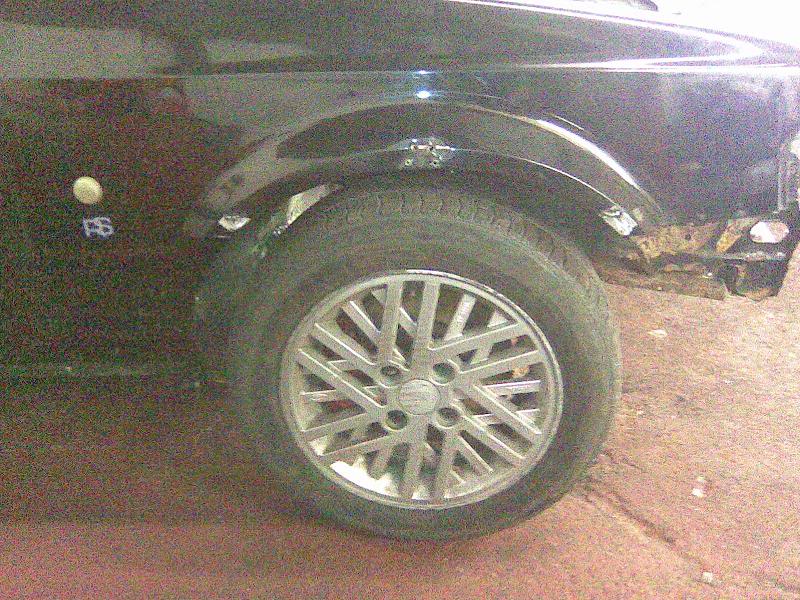
will look like a mint 1.3 l mk3 escort (& will be badged as 1), only mods from exterior will be 3" exhaust, lowerd on 15inch wheels with 45 profile tyres (cant fit any smaller cos of brakes).
i have 15inch steels fitted at but might go for comp's or rs500 rims but these will be the last thing i buy/do
interior will be rs1600i cos its comfy & doesnt look too differnt to a standard interior to the untrained eye (but every1 knows what recaros are)
Last edited by lockesRSparts; 01-06-2009 at 07:57 PM.
01-06-2009, 08:20 PM
#21
Advanced PassionFord User

thats a great project you got on the go there mate i have beening thinking about doing something like this for a while now. i don't know whether to do a mk4 esc cabriolet or mk5 cabriolet with escort cosworth bumpers , skirts and arches
i have beening thinking about doing something like this for a while now. i don't know whether to do a mk4 esc cabriolet or mk5 cabriolet with escort cosworth bumpers , skirts and arches
Last edited by BIL N KEL; 01-06-2009 at 08:21 PM.
 01-06-2009, 09:00 PM
#23
Too many posts.. I need a life!!
Thread Starter
iTrader: (1)
Join Date: Oct 2003
Location: gt yarmouth, norfolk
Posts: 820
Likes: 0
Received 0 Likes
on
0 Posts
yes & unlike most i have tired to post as many pics as possible to show how its been done to help or inspire others.
& will keep posting pics up, better pics now i have a digi cam again lol
there is a few ways of cutting corners on doin it this way if u wanted & allthou it might drive right it would never look right, ive tried to keep it looking original bodywork wise, under the bay & under the car
& will keep posting pics up, better pics now i have a digi cam again lol
there is a few ways of cutting corners on doin it this way if u wanted & allthou it might drive right it would never look right, ive tried to keep it looking original bodywork wise, under the bay & under the car
01-06-2009, 09:07 PM
#24
Tortoisespeed Racing
Join Date: Apr 2009
Location: Blackburn Lancs
Posts: 18
Likes: 0
Received 0 Likes
on
0 Posts
Hi
Excellent project, I got my 4x4 Sierra last Tuesday and the Bonus I already had. My plan was to drive them together fast enough to make the conversion, welding the remains together.Your way may however be better. Good luck.
Excellent project, I got my 4x4 Sierra last Tuesday and the Bonus I already had. My plan was to drive them together fast enough to make the conversion, welding the remains together.
Your way may however be better. Good luck.


 02-06-2009, 05:21 PM
#30
I've found that life I needed.. It's HERE!!
Join Date: Sep 2007
Location: derby
Posts: 998
Likes: 0
Received 0 Likes
on
0 Posts
i think the way your doin it looks easier that just chopping the whole floor out,i think you will inspire alot of people.i might even be tempted.
02-06-2009, 06:17 PM
#31
Too many posts.. I need a life!!
Thread Starter
iTrader: (1)
Join Date: Oct 2003
Location: gt yarmouth, norfolk
Posts: 820
Likes: 0
Received 0 Likes
on
0 Posts
yes as i spke 2 a chap who cut & shut the floor pan & he said its a nightmare job & it has taken him months just fabricating brackets to fit wiper motor etc.......
this way u keep all original escort innerwings which i think look better & no nasty weling across bulkhead etc........
but........... be warned this is still allot of hard work!
this way u keep all original escort innerwings which i think look better & no nasty weling across bulkhead etc........
but........... be warned this is still allot of hard work!
02-06-2009, 07:26 PM
#32
Advanced PassionFord User

I don't belive it. Your doing the same as i'm working on.
Didn't want to go down the "fit a sierra floor" route either. Not cut into the rear chassis though just removed the part the link bar goes onto and the cross member part.
Looks good
Didn't want to go down the "fit a sierra floor" route either. Not cut into the rear chassis though just removed the part the link bar goes onto and the cross member part.
Looks good
02-06-2009, 08:15 PM
#33
I've found that life I needed.. It's HERE!!
iTrader: (3)
Join Date: Oct 2007
Location: Kent
Posts: 1,459
Likes: 0
Received 0 Likes
on
0 Posts
very impressed. if i hadn't just spent all my money on a saff cos i would have been tempted to rwd my mk6 escort after reading this top work can't wait to see it finished.
good luck,
Phil
good luck,
Phil

 03-06-2009, 07:50 PM
#39
Too many posts.. I need a life!!

Join Date: Jul 2007
Location: stockton-on-tees
Posts: 798
Likes: 0
Received 0 Likes
on
0 Posts
rob ive just look at this 2 and thought the same as you .