Mercury Grey Minter #2 Now for sale!!!
 29-04-2009, 10:12 PM
#1
I've found that life I needed.. It's HERE!!
Thread Starter
Join Date: Dec 2006
Location: oxford
Posts: 1,374
Likes: 0
Received 0 Likes
on
0 Posts
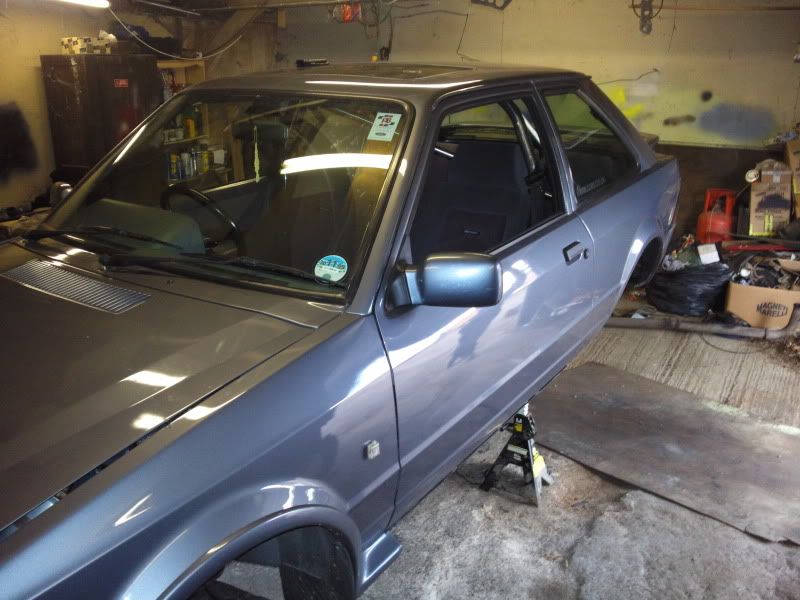
As some of you may know my car got reversed into over a month ago and damaged the passengers door. The insurance company finally decided to pull there finger out and authorise the repairs. So I have started stripping the whole car as it is all gonna get resprayed to freshen it up.
Here are the pics of when I first built it.


And here is waht damage was sustained when my next door neighbour reversed into her at half 5 in the morning.

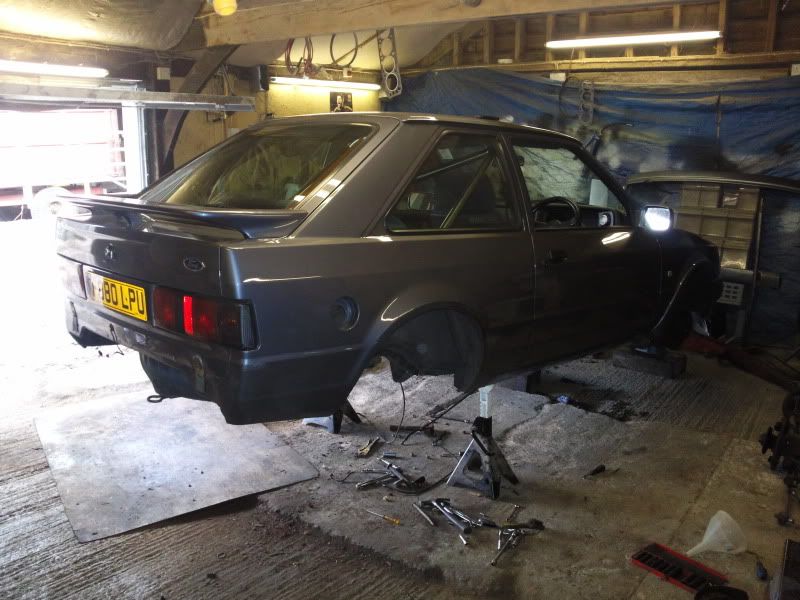
So it was into the workshop today to start stripping her down plan is to get the whole car resprayed by the insurance and then i will be completing an entire underside restoration and a new set of wheels which I have already sourced many thanks to "puss" at Central day, 17" OZ Superleggera.
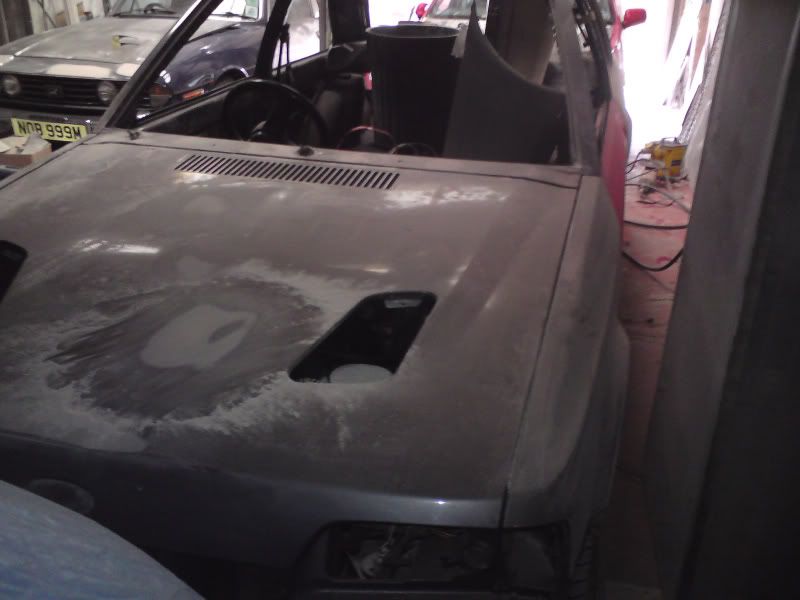
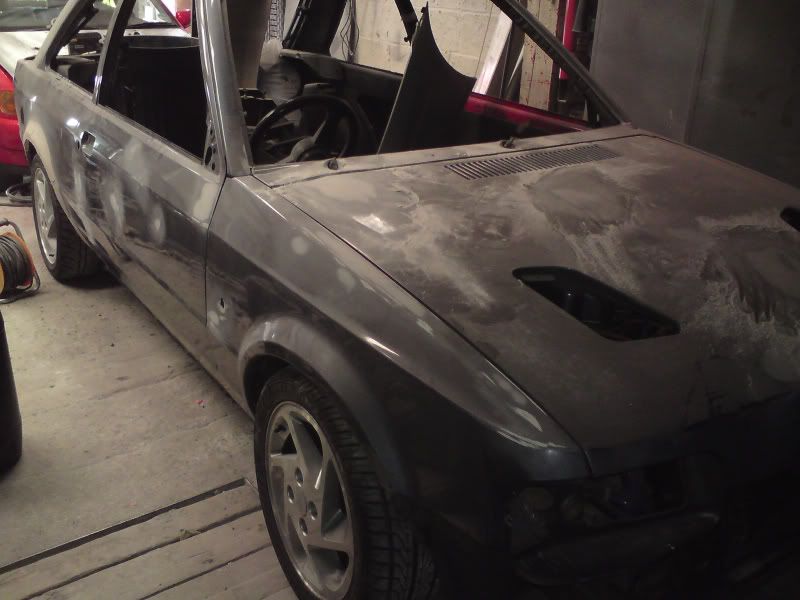
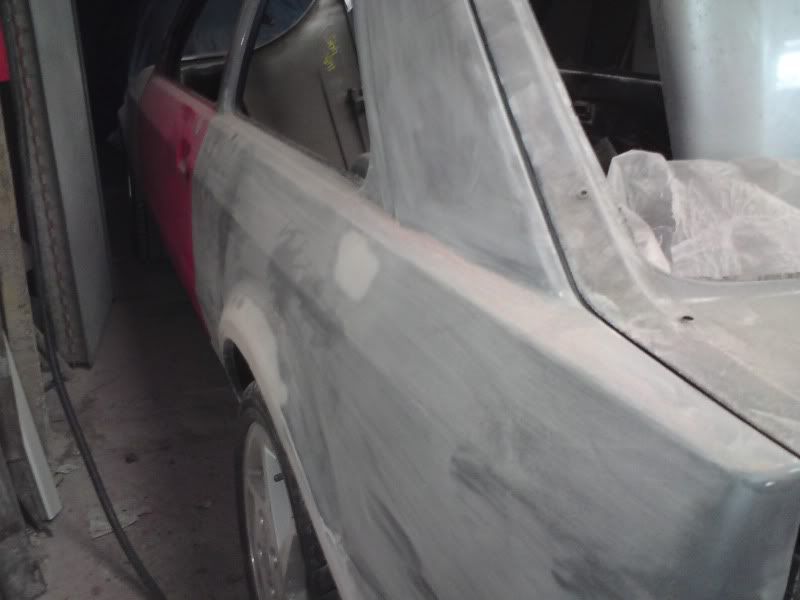
Here are the pics from the workshop before i tore her to bits ready for spraying.


I must admit that the car is one of the cleaner cars on the road and looked very well before the bump but there was always bits when i polished it that knarked me off:
Sunroof:

Passengers Wing:

Drivers Wing:

Spoiler:

Rear Number Plate Surround:

Just noticed this behind the front windscreen:

And obviously the Door:

Im aiming to have all this completed within two weeks so be prepared for regualr updates i hope as long as the garage dont hold me up.
I will upload more photos of the strip down 2moro.
Let me know your thoughts.
Here are the pics of when I first built it.
And here is waht damage was sustained when my next door neighbour reversed into her at half 5 in the morning.
So it was into the workshop today to start stripping her down plan is to get the whole car resprayed by the insurance and then i will be completing an entire underside restoration and a new set of wheels which I have already sourced many thanks to "puss" at Central day, 17" OZ Superleggera.
Here are the pics from the workshop before i tore her to bits ready for spraying.
I must admit that the car is one of the cleaner cars on the road and looked very well before the bump but there was always bits when i polished it that knarked me off:
Sunroof:
Passengers Wing:
Drivers Wing:
Spoiler:
Rear Number Plate Surround:
Just noticed this behind the front windscreen:
And obviously the Door:
Im aiming to have all this completed within two weeks so be prepared for regualr updates i hope as long as the garage dont hold me up.
I will upload more photos of the strip down 2moro.
Let me know your thoughts.
Last edited by drsrst2zvh; 13-01-2011 at 11:09 AM.


 01-05-2009, 09:37 PM
#4
I've found that life I needed.. It's HERE!!
Thread Starter
Join Date: Dec 2006
Location: oxford
Posts: 1,374
Likes: 0
Received 0 Likes
on
0 Posts
Well headed up to my workshop today to continue with the strip down. I removed the dash and the rear door cards and the rear interior plastics. I also stripped down all of the tailgate and removed the spoiler.
Here are the pics of the removed bits:
Dashboard removed

Door removed

Spoiler Removed surprisingly easy

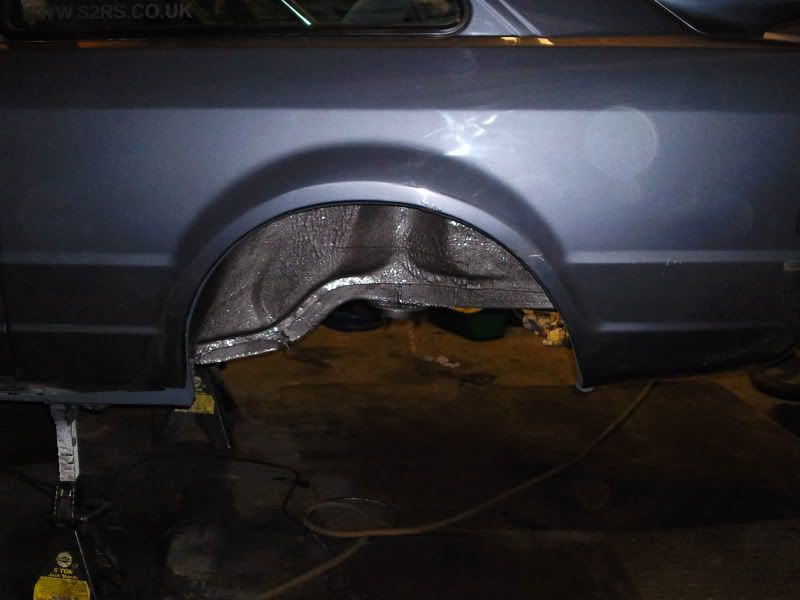
Now for the not so positive i knew this was going to happen but didnt realise just how far gone they were, Rear Arches!!! Ill let the pictures do the talking.
Passengers Arch


Driver arch oh dear!!!!


Once i removed the arches i was that devastated i locked the garage and went home. lol!
Need to order some rear arches and then go from there.
Here are the pics of the removed bits:
Dashboard removed
Door removed
Spoiler Removed surprisingly easy
Now for the not so positive i knew this was going to happen but didnt realise just how far gone they were, Rear Arches!!! Ill let the pictures do the talking.
Passengers Arch
Driver arch oh dear!!!!
Once i removed the arches i was that devastated i locked the garage and went home. lol!
Need to order some rear arches and then go from there.
 02-05-2009, 07:24 AM
#6
Part of the Furniture

Join Date: Feb 2007
Location: Dunfermline
Posts: 181
Likes: 0
Received 0 Likes
on
0 Posts
A weekend and it should all be sorted there. Looks like you'll have to replace the inner arches too, like on mine -
Last edited by Ke1th; 12-10-2009 at 08:02 PM.
05-05-2009, 09:13 PM
#7
I've found that life I needed.. It's HERE!!
Thread Starter
Join Date: Dec 2006
Location: oxford
Posts: 1,374
Likes: 0
Received 0 Likes
on
0 Posts
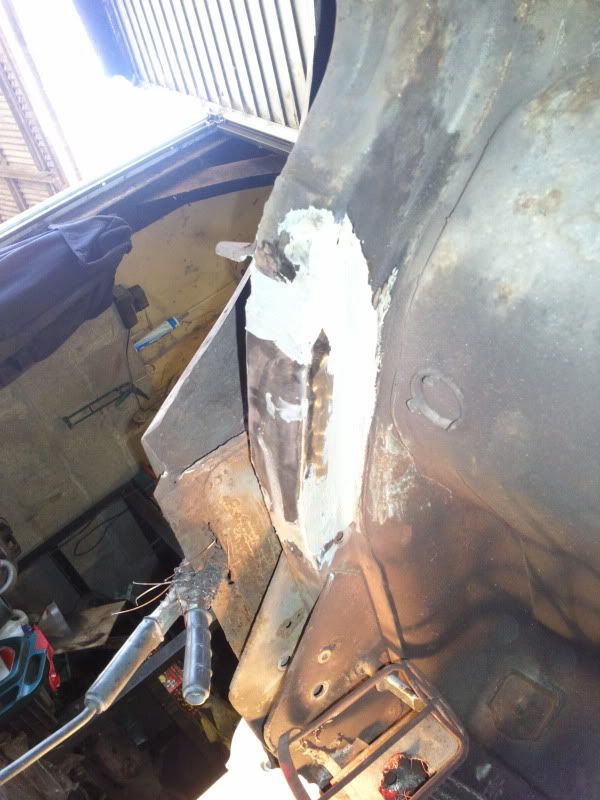
Well started off today by driving all the way to LMC panels in wiltshire to collect my new panels.
Started off by cutting out the rot from the passengers rear arch this is the better of the two:

This is the bottom part of the arch repaired:

And this is the top part repaired i decided it was easier just to repair the parts that need it rather than replacing the whole panel as it wasnt a great non oe part.

And a picture of the whole arch only one more to go now:

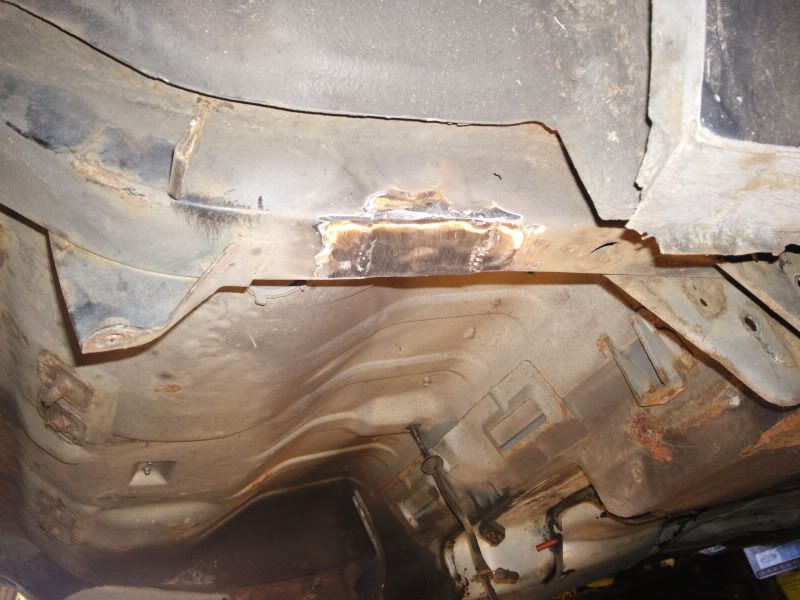
The rear floor pans were slightly gone but not far enough to deserve new floor pans so they have been repaired.
This is the drivers side:
Before:

After:

And the passengers:
Before:

After:

Its slowly getting there. Another update will be done 2moro when i can hopefully say my car is rot free PLEASE!
Started off by cutting out the rot from the passengers rear arch this is the better of the two:
This is the bottom part of the arch repaired:
And this is the top part repaired i decided it was easier just to repair the parts that need it rather than replacing the whole panel as it wasnt a great non oe part.
And a picture of the whole arch only one more to go now:
The rear floor pans were slightly gone but not far enough to deserve new floor pans so they have been repaired.
This is the drivers side:
Before:
After:
And the passengers:
Before:
After:
Its slowly getting there. Another update will be done 2moro when i can hopefully say my car is rot free PLEASE!
Trending Topics
06-05-2009, 03:08 PM
#8
I've found that life I needed.. It's HERE!!
Thread Starter
Join Date: Dec 2006
Location: oxford
Posts: 1,374
Likes: 0
Received 0 Likes
on
0 Posts
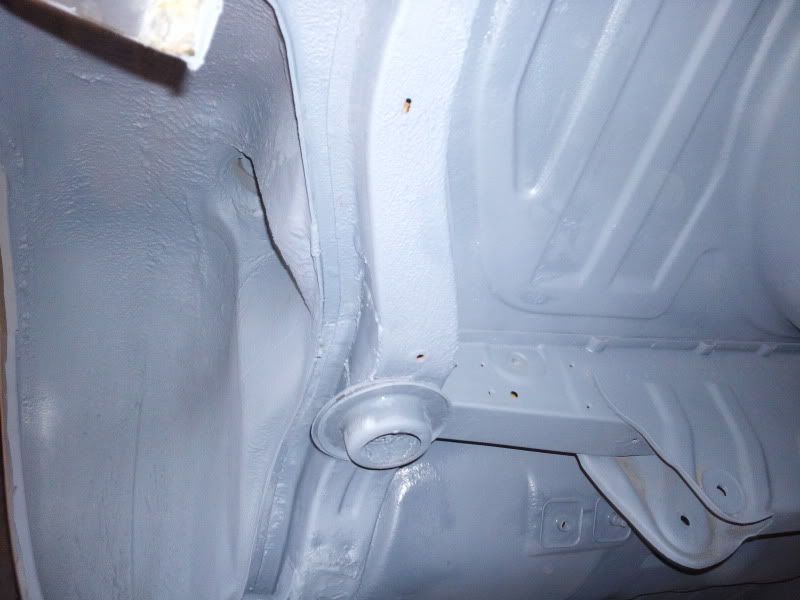
Started off nice and early this morning to finish off the rear arches. the drivers side was far worse than the passengers but im glad its finally done car will be going to the body shop later today or first thing in the morning.
Pics:


Bottom repaired:

And the finished article:

Ill update once its back from the body shop.
Pics:
Bottom repaired:
And the finished article:
Ill update once its back from the body shop.
 07-05-2009, 08:16 PM
#11
I've found that life I needed.. It's HERE!!
Thread Starter
Join Date: Dec 2006
Location: oxford
Posts: 1,374
Likes: 0
Received 0 Likes
on
0 Posts
Finally got the car out of the workshop and taken down to the paint shop. Was a little windy driving it mind you though.

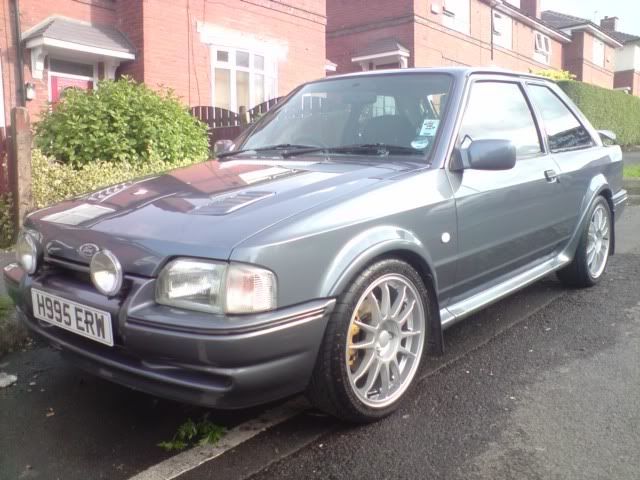
Wont be long till shes wearing some brand new mercury grey!
Wont be long till shes wearing some brand new mercury grey!
 28-05-2009, 08:11 PM
#17
I've found that life I needed.. It's HERE!!
Thread Starter
Join Date: Dec 2006
Location: oxford
Posts: 1,374
Likes: 0
Received 0 Likes
on
0 Posts
Well the Call finally came yesterday morning that the car was ready for collection. So off i popped with my mate Jim to collect the car.
Here it is after just being loaded on the car:


And the dent behind the number plate, What dent???

The arches were rotten, not anymore:

So as soon as i got it back to the workshop i was like a kid at xmas i could not wait to get my new rims on:

so i started to build the rear end back up started off with the boot putting all the tailgate together and the rear lights bumper and numberplate.

Then i started to put the glass back in started with the drivers quarter glass, then passengers and then both screens and the sunroof(nightmare):


And here she is all water tight again

Then as ever i got to involved and forgot to take photos whoops! But here is the front completely rebuilt:
Here is the interior all fully finished and i dont know how i done it but when i was finshed putting the interior back in i wasn't left with any screws!!!

Obviously needs a bloody good valet but i was running out of time and as i got work at 5 in the morning thought i best leave it.
The last job of the day was to put all my new badges back on so brand new ford badges and a new boot decal thanks to "stickerpaul".

Thats how i left it all thats left now is to fit the bodykit and spoiler if i can get the rusted screws out form the sills!!!!
Here it is after just being loaded on the car:
And the dent behind the number plate, What dent???
The arches were rotten, not anymore:
So as soon as i got it back to the workshop i was like a kid at xmas i could not wait to get my new rims on:
so i started to build the rear end back up started off with the boot putting all the tailgate together and the rear lights bumper and numberplate.
Then i started to put the glass back in started with the drivers quarter glass, then passengers and then both screens and the sunroof(nightmare):
And here she is all water tight again
Then as ever i got to involved and forgot to take photos whoops! But here is the front completely rebuilt:
Here is the interior all fully finished and i dont know how i done it but when i was finshed putting the interior back in i wasn't left with any screws!!!
Obviously needs a bloody good valet but i was running out of time and as i got work at 5 in the morning thought i best leave it.
The last job of the day was to put all my new badges back on so brand new ford badges and a new boot decal thanks to "stickerpaul".
Thats how i left it all thats left now is to fit the bodykit and spoiler if i can get the rusted screws out form the sills!!!!


 17-06-2009, 05:22 PM
#26
I've found that life I needed.. It's HERE!!
Thread Starter
Join Date: Dec 2006
Location: oxford
Posts: 1,374
Likes: 0
Received 0 Likes
on
0 Posts
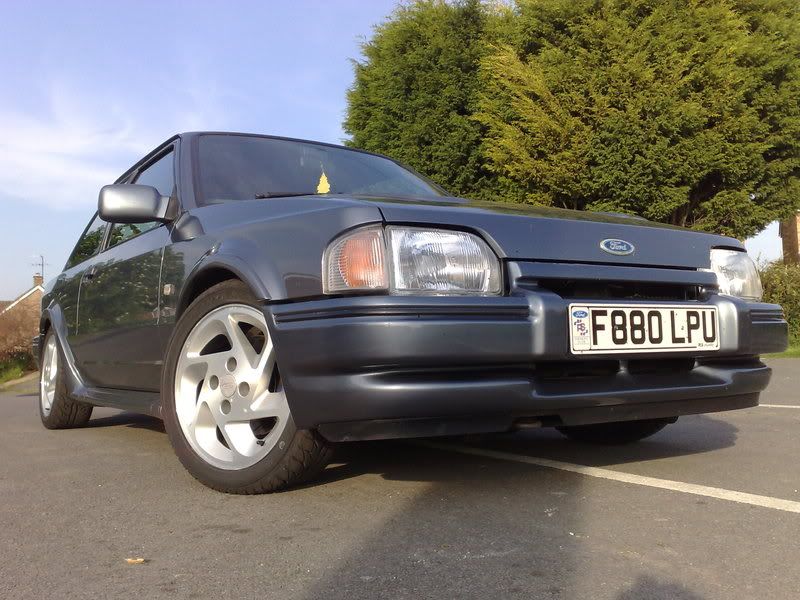
Finally got my car back together all the kit fitted properly no bodging on with silicone or sealer done a proper mint job using captive nuts and bolts for the skirts and some proper tape for the arches. Here she is:


and then i was driving it back from work when i accelerated off the roundabout and the gearbox was extremely poorly!!!


Luckily got myself a decent 1.8d box and had to change the clutch at the same time so now shes all good. only gotta refit the cage and the mud flaps a decent valet and shes done and more than likely for sale.
Let me know your thoughts.
and then i was driving it back from work when i accelerated off the roundabout and the gearbox was extremely poorly!!!
Luckily got myself a decent 1.8d box and had to change the clutch at the same time so now shes all good. only gotta refit the cage and the mud flaps a decent valet and shes done and more than likely for sale.
Let me know your thoughts.
17-06-2009, 05:51 PM
#27
Looks really well now, will be a shame to sell after all this hard work and getting the car the way you've always wanted it, Give it 2 weeks after the sale you will want another, then you'll have to part with a fair few k to buy one as good, just ride the storm and keep it you know it makes sense.
10-10-2009, 01:22 PM
#28
I've found that life I needed.. It's HERE!!
Thread Starter
Join Date: Dec 2006
Location: oxford
Posts: 1,374
Likes: 0
Received 0 Likes
on
0 Posts
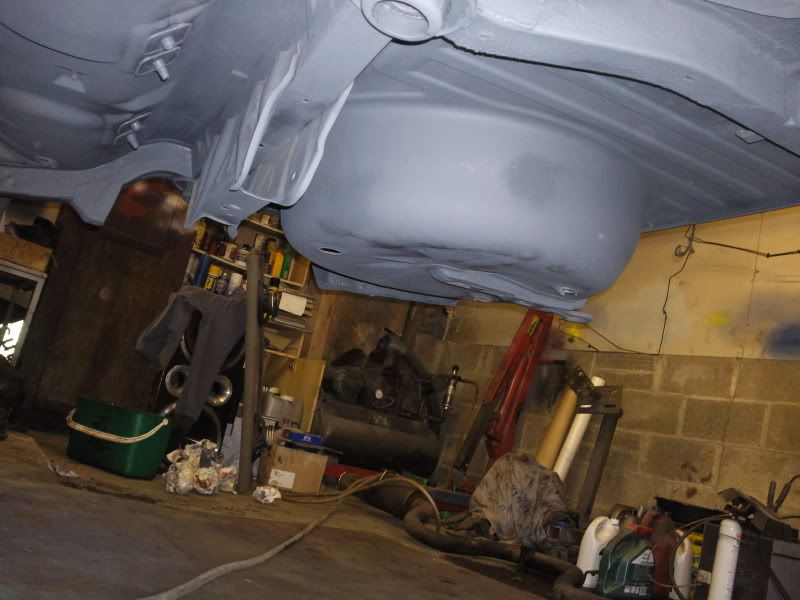
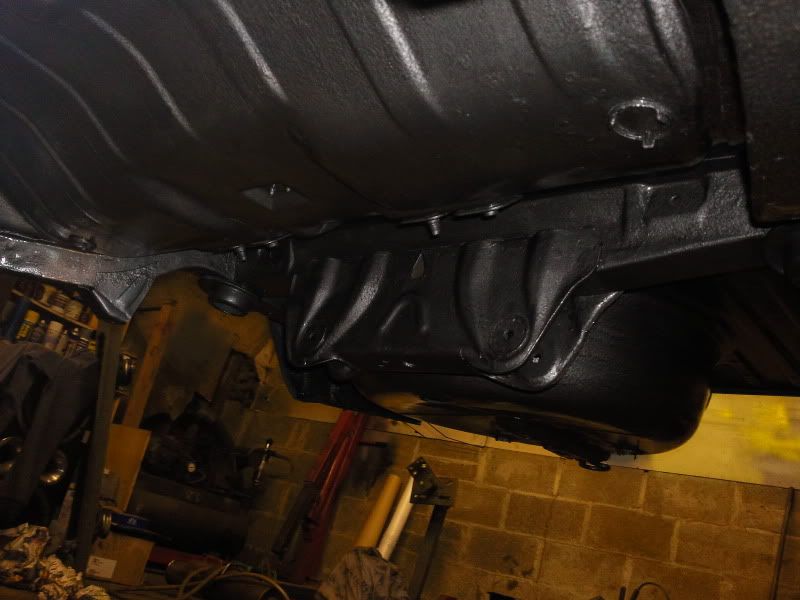
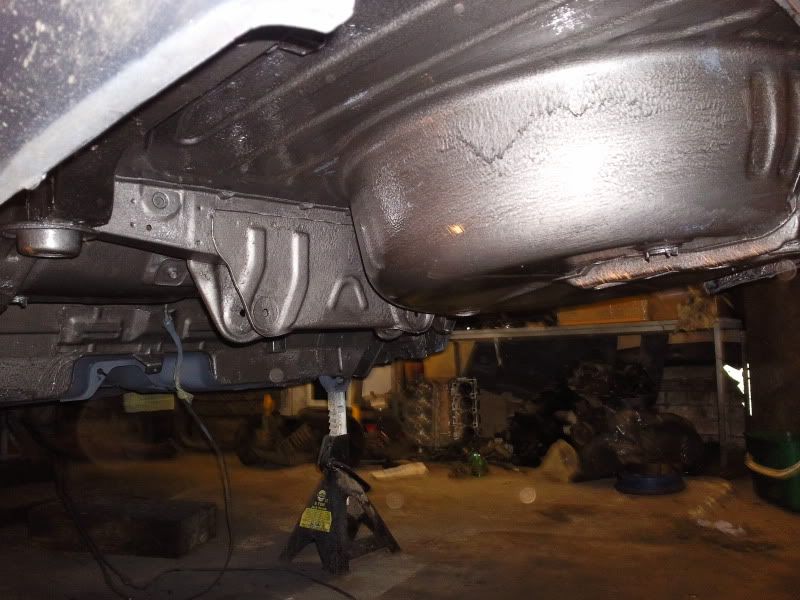
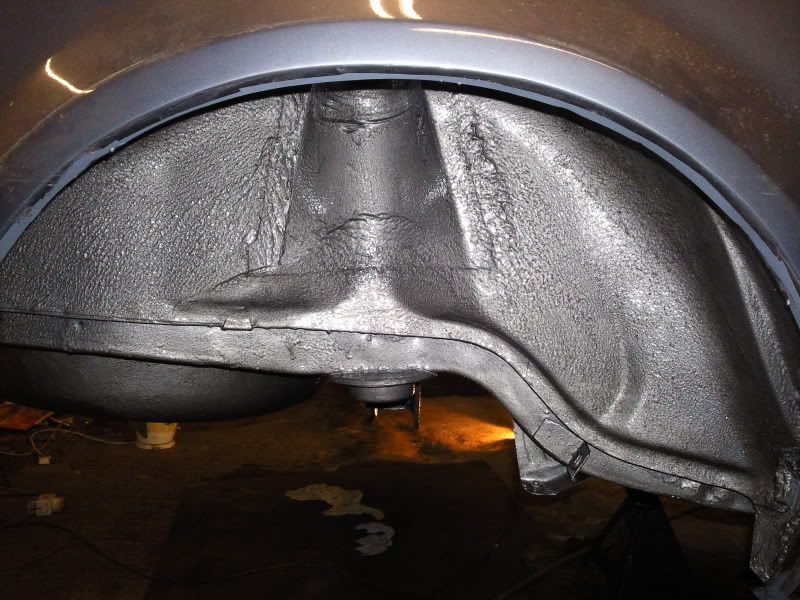
Well the time has come to make a decision and ive chosen to remove the car from being for sale and keep it. Underside resto and then a new zvh engine with a bigger turbo and cossie management over the winter, Ive got 2 weeks off now so thought i'd start the underside now to protect it for when the damp weather comes, so off we go and start to get the underside looking as good as the top does, so here goes,
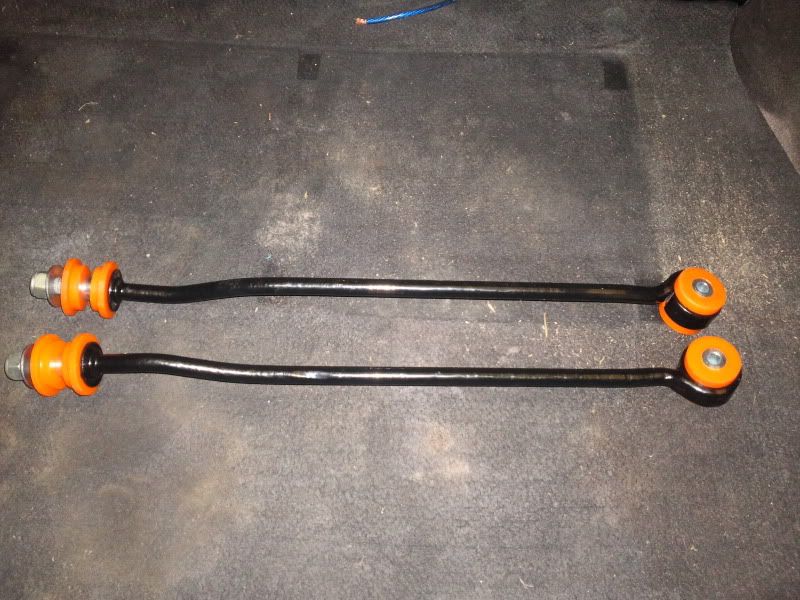
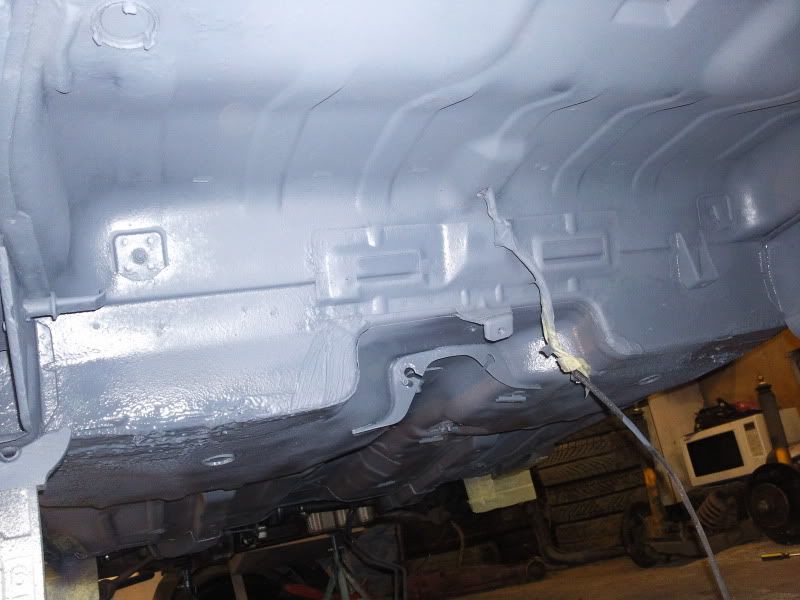
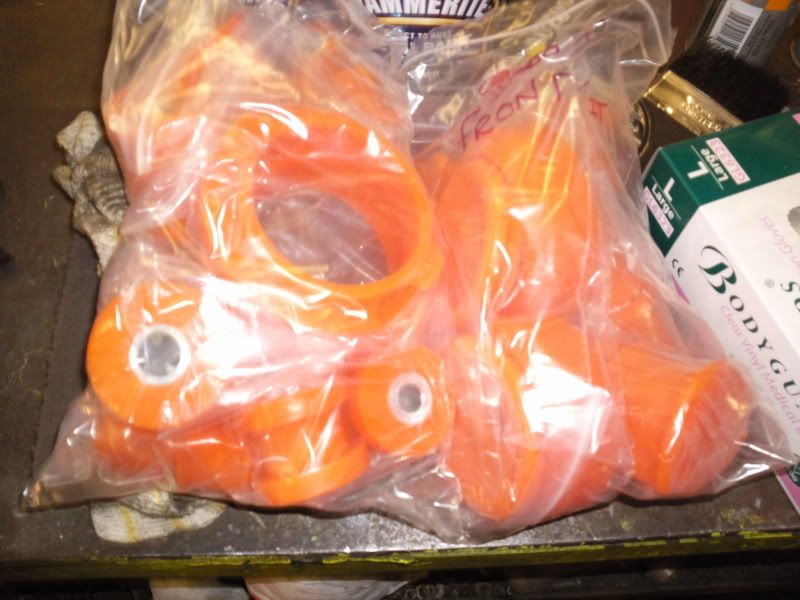
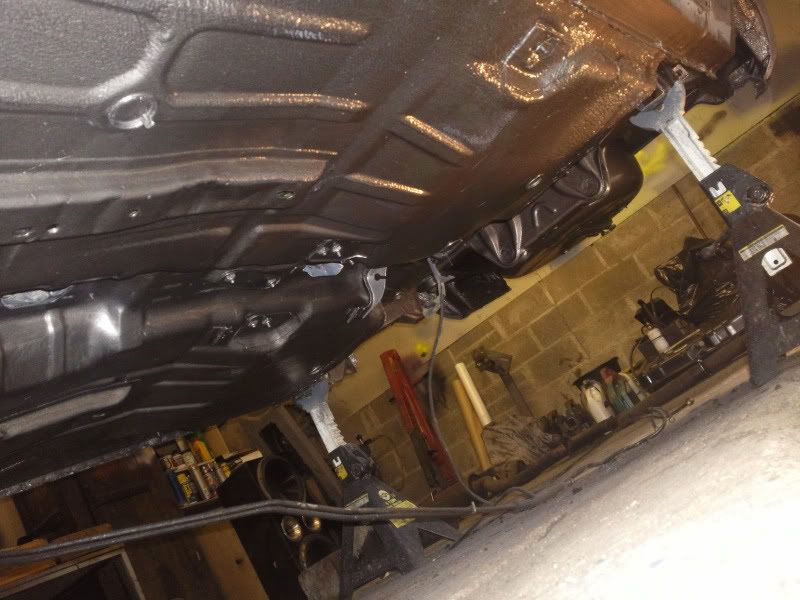
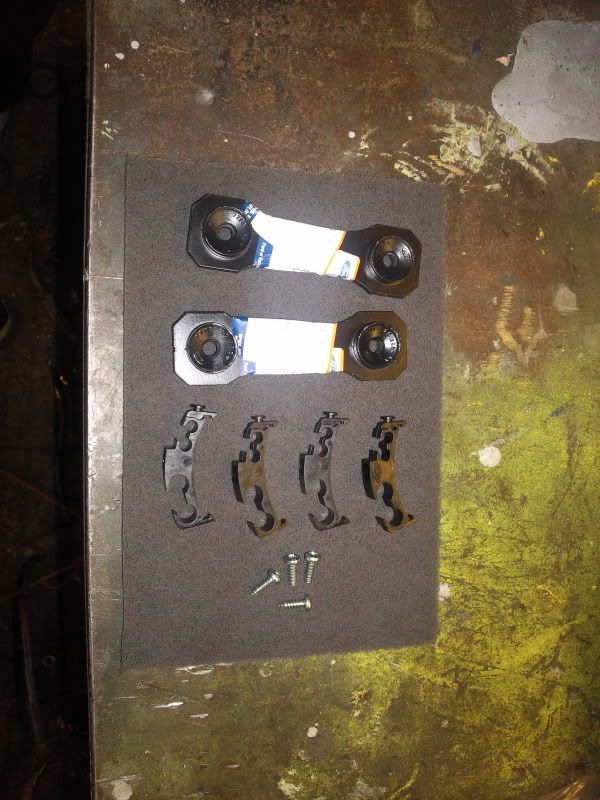
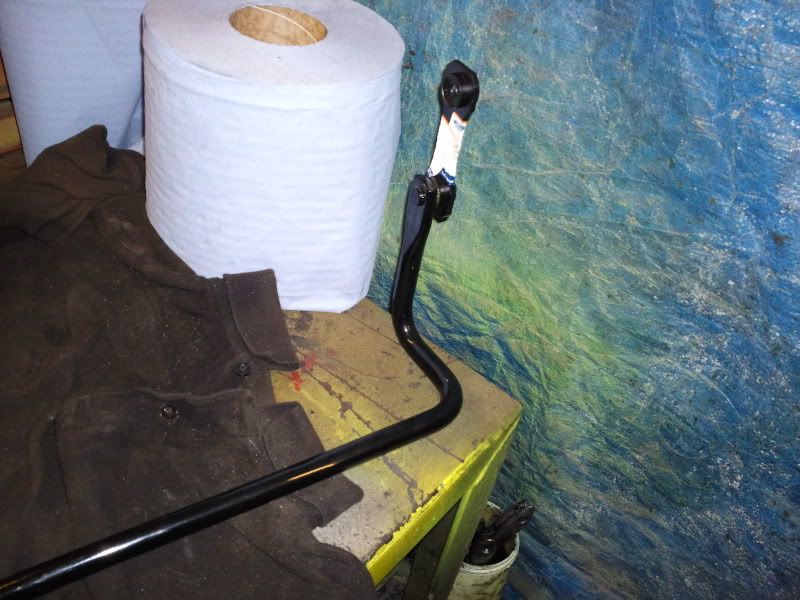
Started off by jacking the car up as high as we could with some decent axel stands, then we set to stripping all the bits off and sorting out what was just gonna be cleaned and sprayed and what was going off to the powder coaters. I have already got a spare set of front hubs, anti roll bar and drive shafts etc from a donar car so i can leave the front pretty much complete till the bits come back then just a straight swap over which saves some room. Ordered a full set of powerflex bushes as the standard 20 year old rubbers where definately showing there age, also ordered some new drop link bars that go from the wishbone to the rear anti roll bar plus some new fuel and brake pipe clips and screws from ford.

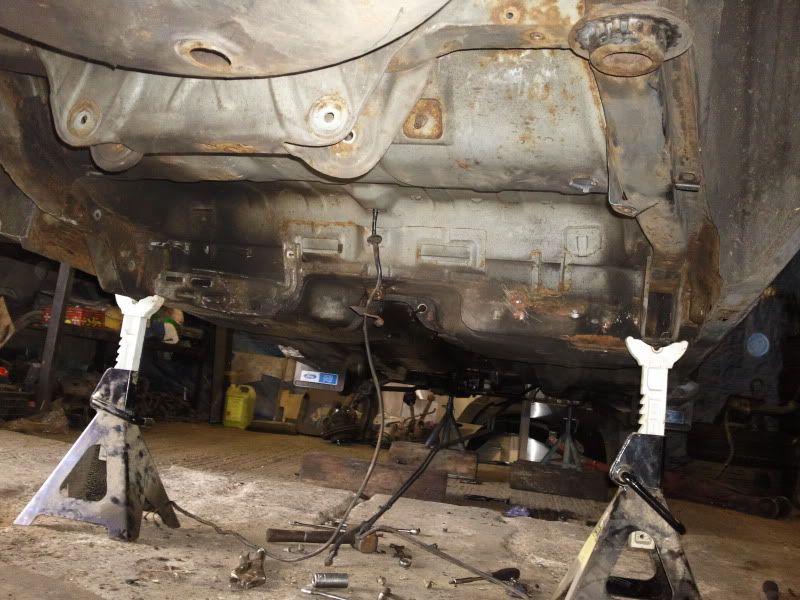
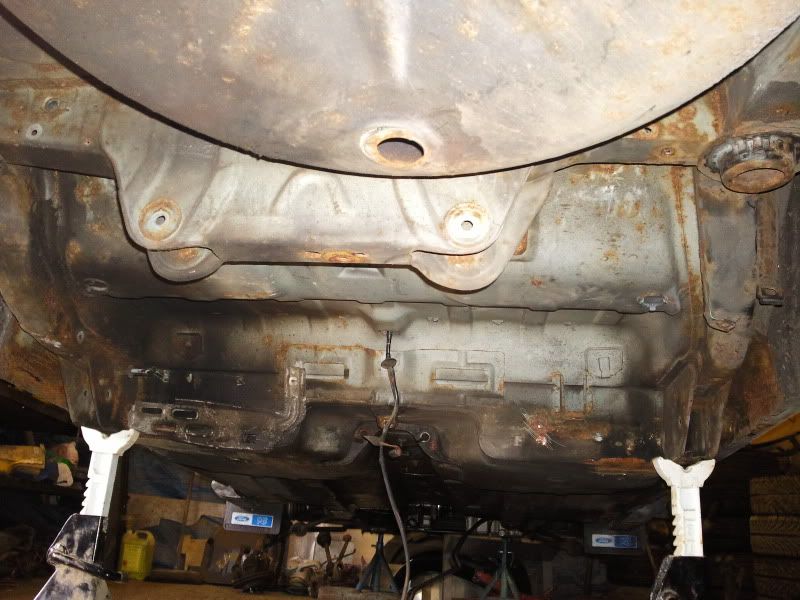
So as you can see we've stripped the underside and the next job is to wire wheel/sand the underside to clean and key it up, once that is done i will treat the areas of light surface rust ready for a good coat of overpaintable stonechip or sealer, then paint on the colour. Managed to get the spare wheel whell all sanded along with the chassis rails and the pass floor pan cleaned up with some degreaser but forgot to get any pics of that as i was in a rush to get back home to play football. Needs a tiny bit of welding on the chassis rail and just were the sill comes down and meets the inner sill, so well happy with that really considering what some rst's are like nowa days, to be honest i've found it to be a labour of love so far really as i know its gonna protect the car for years to come and look the bollox plus make it worth alot more, well i hope so anyway, whats your thoughts people i know its just pics of a stripped rst at the minute but ?
few randoms,
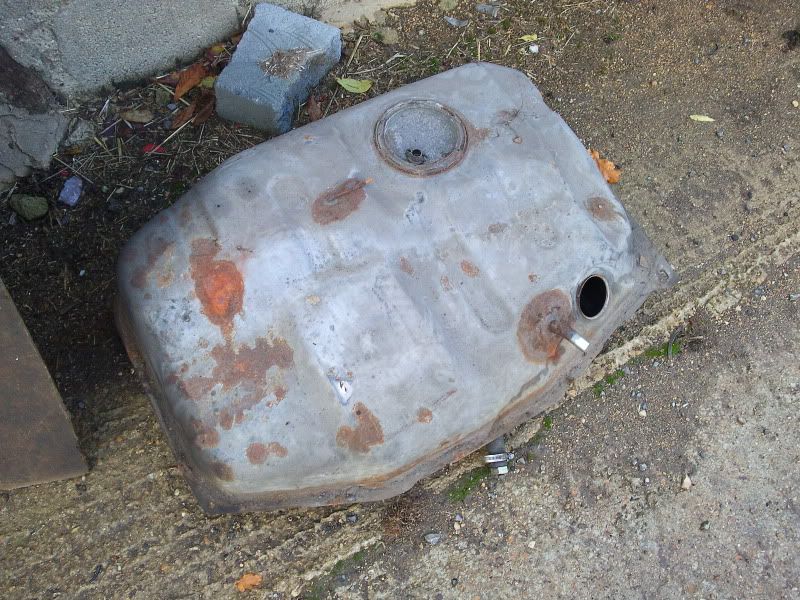
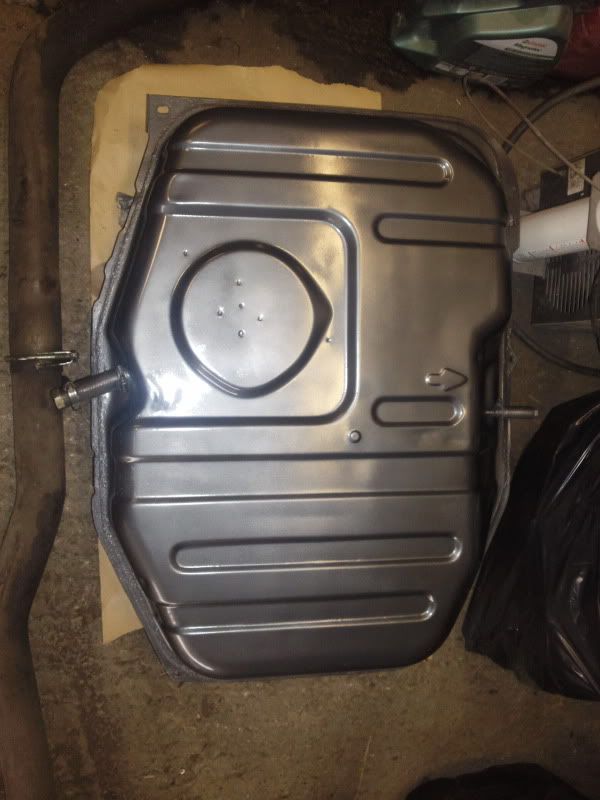
fuel tank will be sanded, etch'd tehn painted polaris grey
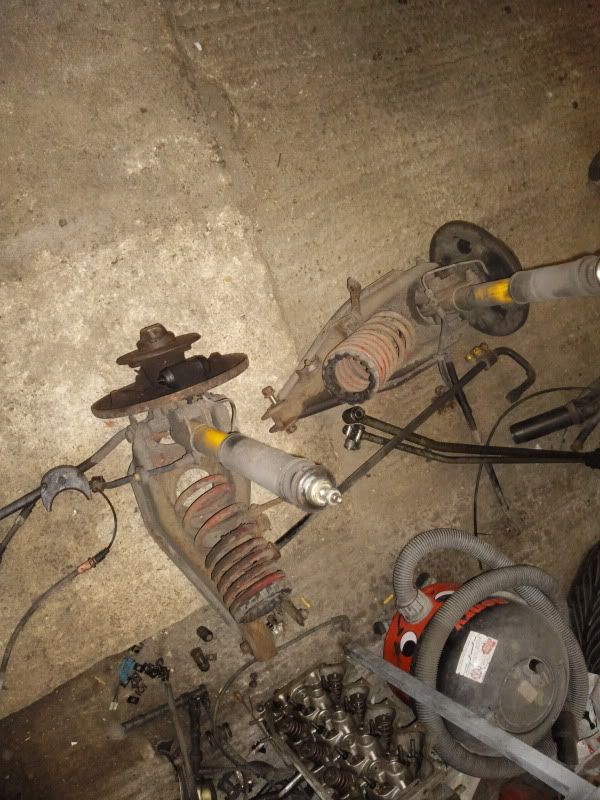
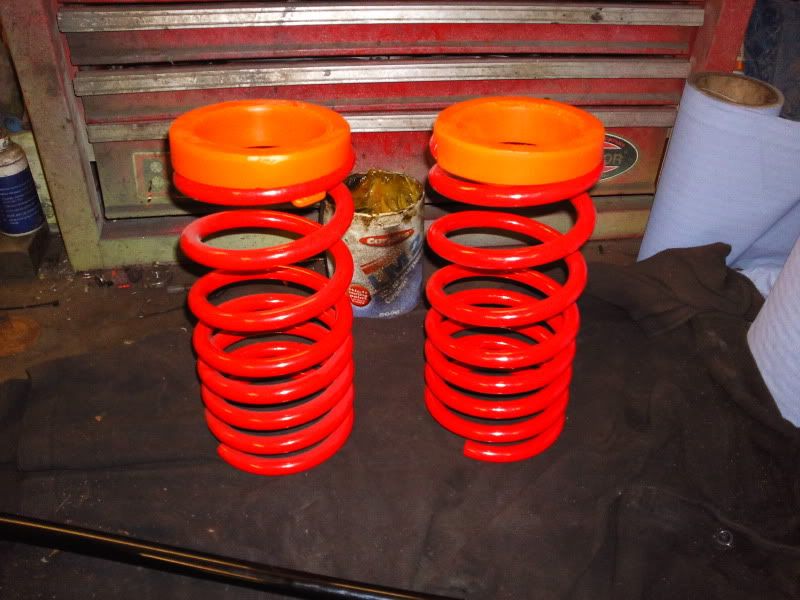
The rear suspension ready to be stipped down and sent off to powder coaters
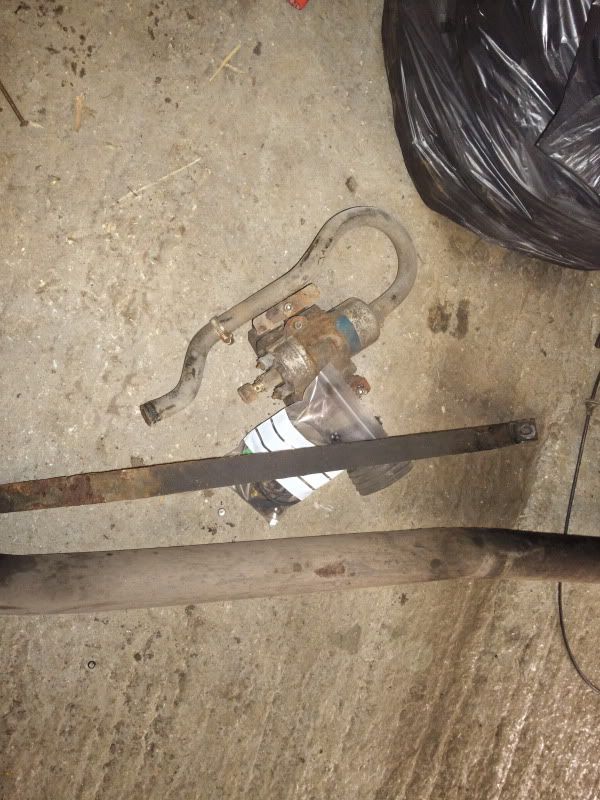
Fuel pump cradle is well past it so im gonna get a nice new black one from auto specialist's
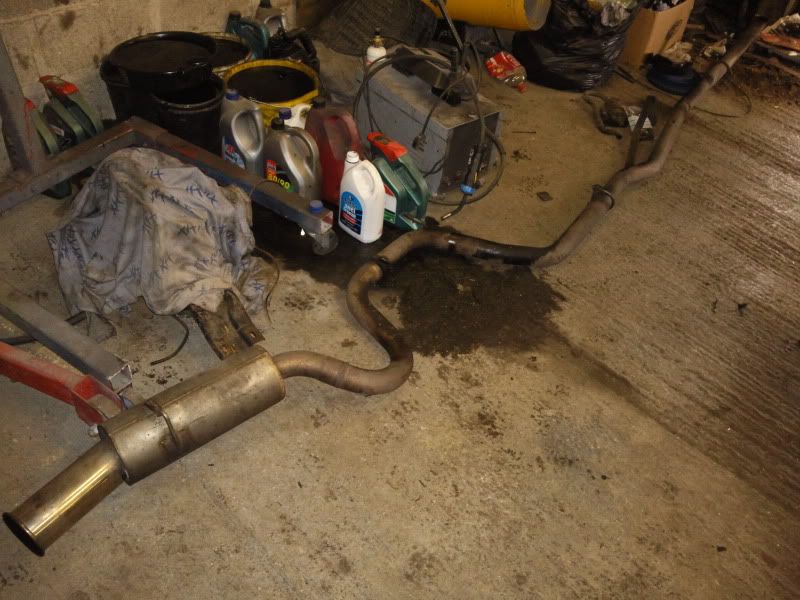
This is going to take alot of auto sol and elbow grease
Started off by jacking the car up as high as we could with some decent axel stands, then we set to stripping all the bits off and sorting out what was just gonna be cleaned and sprayed and what was going off to the powder coaters. I have already got a spare set of front hubs, anti roll bar and drive shafts etc from a donar car so i can leave the front pretty much complete till the bits come back then just a straight swap over which saves some room. Ordered a full set of powerflex bushes as the standard 20 year old rubbers where definately showing there age, also ordered some new drop link bars that go from the wishbone to the rear anti roll bar plus some new fuel and brake pipe clips and screws from ford.
So as you can see we've stripped the underside and the next job is to wire wheel/sand the underside to clean and key it up, once that is done i will treat the areas of light surface rust ready for a good coat of overpaintable stonechip or sealer, then paint on the colour. Managed to get the spare wheel whell all sanded along with the chassis rails and the pass floor pan cleaned up with some degreaser but forgot to get any pics of that as i was in a rush to get back home to play football. Needs a tiny bit of welding on the chassis rail and just were the sill comes down and meets the inner sill, so well happy with that really considering what some rst's are like nowa days, to be honest i've found it to be a labour of love so far really as i know its gonna protect the car for years to come and look the bollox plus make it worth alot more, well i hope so anyway, whats your thoughts people i know its just pics of a stripped rst at the minute but ?
few randoms,
fuel tank will be sanded, etch'd tehn painted polaris grey
The rear suspension ready to be stipped down and sent off to powder coaters
Fuel pump cradle is well past it so im gonna get a nice new black one from auto specialist's
This is going to take alot of auto sol and elbow grease
12-10-2009, 07:11 PM
#30
Got a bit more done today, after the hours and hours of cleaning and sanding it was time for the fun part. Got the sealer all sprayed on and then the first coat of hammered grey, few bits missed but the light was getting poor and a second coat will be applied anyway,
The 2 rust parts taken care of
Sealer on

First coat of paint

All the new bushes turnt up today also
The 2 rust parts taken care of
Sealer on
First coat of paint
All the new bushes turnt up today also
14-10-2009, 05:32 PM
#33
I've found that life I needed.. It's HERE!!
Thread Starter
Join Date: Dec 2006
Location: oxford
Posts: 1,374
Likes: 0
Received 0 Likes
on
0 Posts
Another Update:
Finally got all the floor finished and to be honest it looks much better than i expected it would.
Also sanded back the tank and painted it Polaris grey.
Brake pipes done in Modena Green
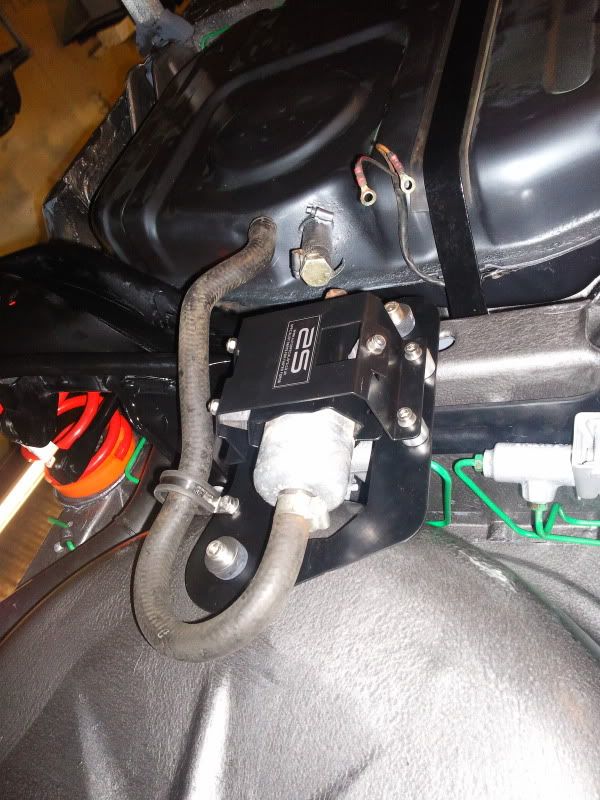
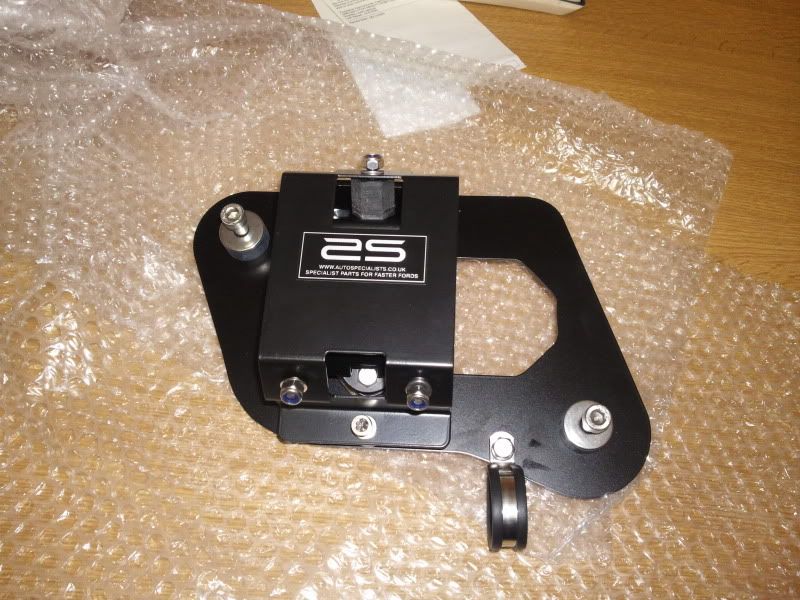
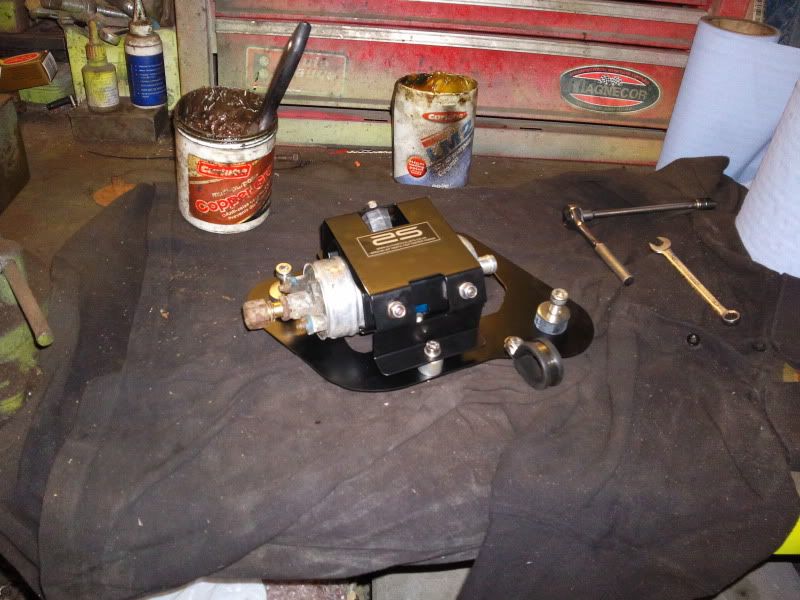
New Fuel pump bracket arrived from autospecialists, well worth the money IMHO.
And also picked these up from ford today after a few people said they were obsolete and the clips cost me a total of 53p each, yet ppl still selling them on ebay in sets of 6 for �12+P+P.(JOKE)
Got a phone cxall today aswell saying that my parts are ready to collect from the powder coaters so hopefully a big update will be posted tomorrow night.
Let me know your thoughts.
Finally got all the floor finished and to be honest it looks much better than i expected it would.
Also sanded back the tank and painted it Polaris grey.
Brake pipes done in Modena Green
New Fuel pump bracket arrived from autospecialists, well worth the money IMHO.
And also picked these up from ford today after a few people said they were obsolete and the clips cost me a total of 53p each, yet ppl still selling them on ebay in sets of 6 for �12+P+P.(JOKE)
Got a phone cxall today aswell saying that my parts are ready to collect from the powder coaters so hopefully a big update will be posted tomorrow night.
Let me know your thoughts.

 15-10-2009, 06:34 PM
#38
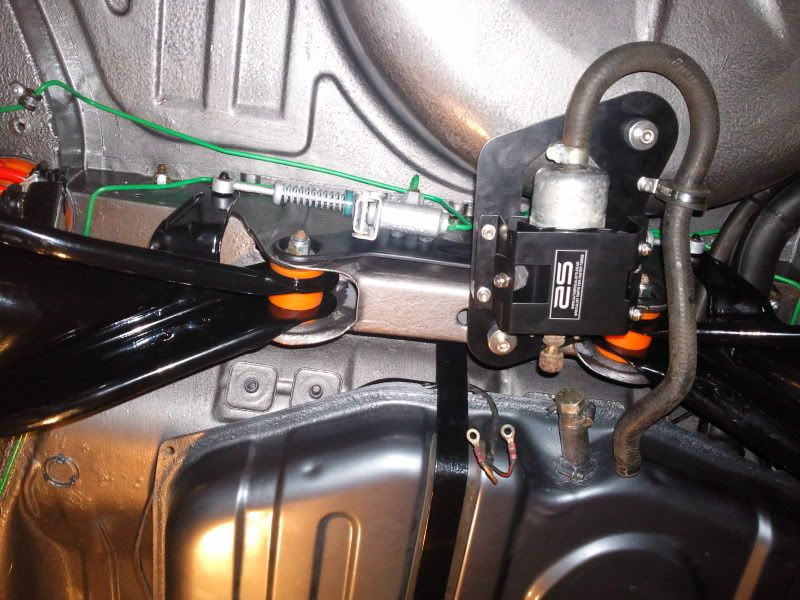
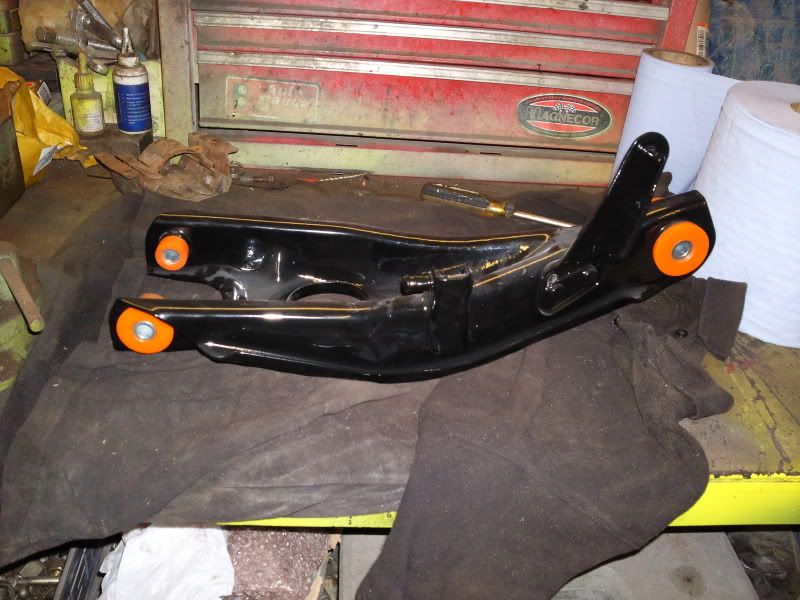
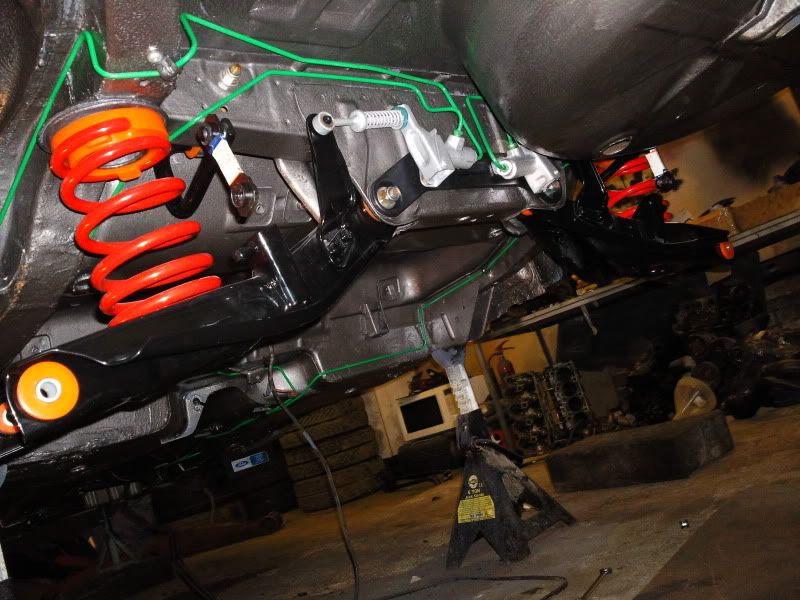
Right had a busy day today, went and picked the bro's bits up from the powder coaters and what a good job they have done and a very quick turn around (1 day),
Few pics of the powder coated bits that i fitted the new bushes to,
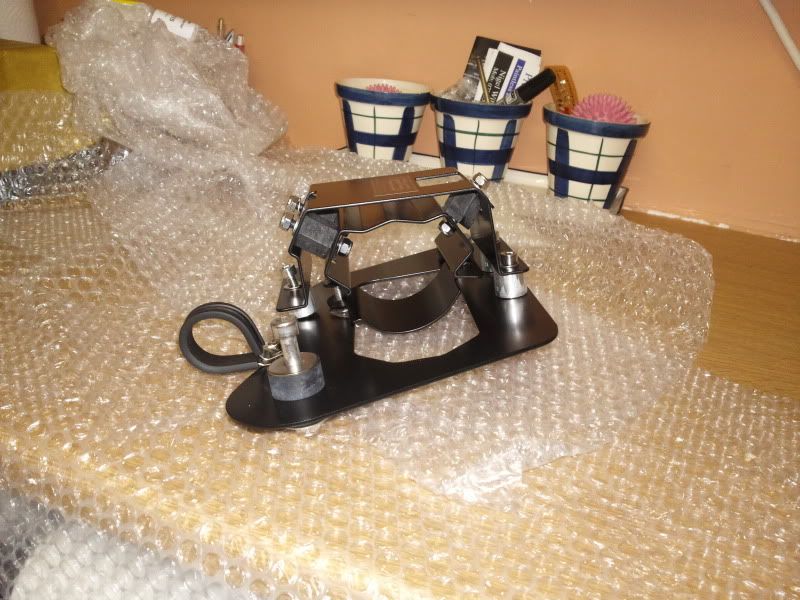
Fuel pump fitted in its new housing,
Few randoms of the shiny bits all bolted up,
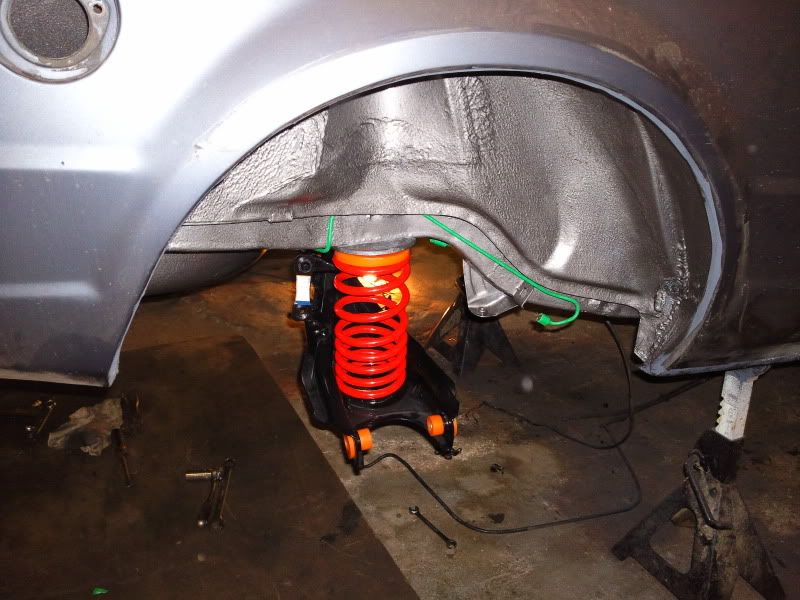
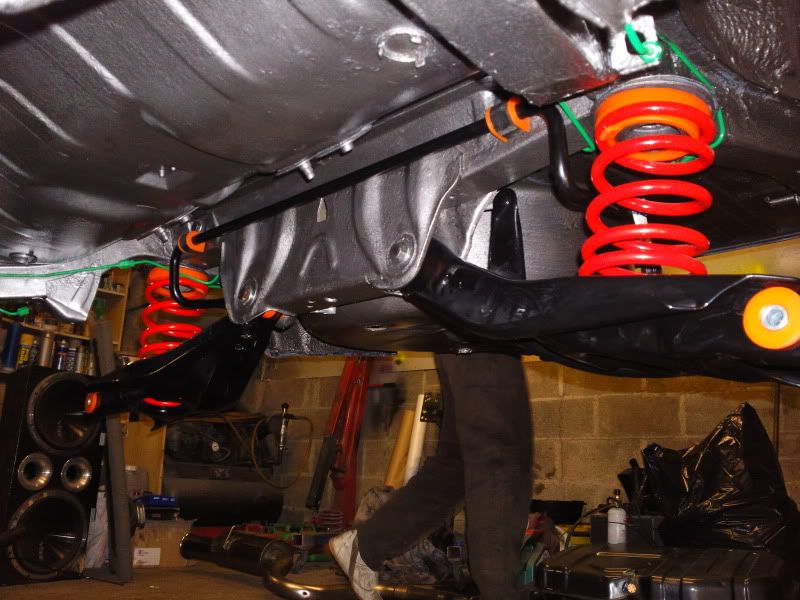
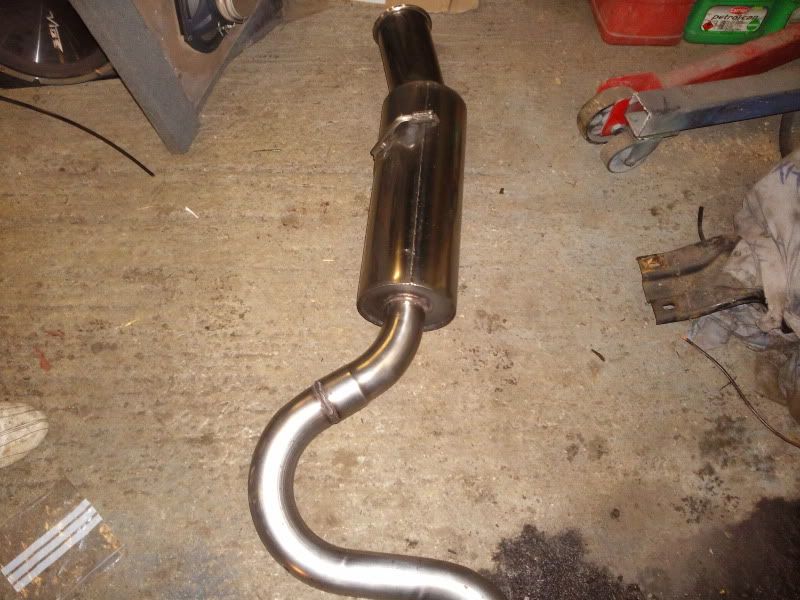
Then made a start on the exhaust, what a job this is gonna be
Few pics of the powder coated bits that i fitted the new bushes to,
Fuel pump fitted in its new housing,
Few randoms of the shiny bits all bolted up,
Then made a start on the exhaust, what a job this is gonna be
Last edited by coswurv; 15-10-2009 at 06:35 PM.