BEEFY'S s1 cos- tues 1-5-2012 Project now for sale , breaking -


 told ya you dont need to put loads on... i give up.
 .... K


 06-09-2010, 06:48 PM
#1368
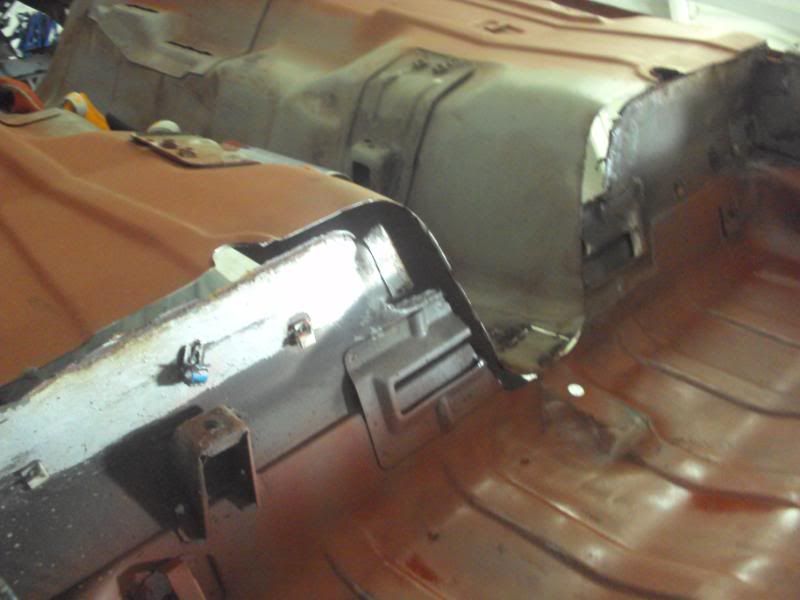
ok peeps so bk on with the car up wenns today ,
decided to crack on with the rear end of the car and get it cleaned up ,
from this
bit of wire brushing later
unfortunatley by this point the 2nd had boot fair jobbie grinder i bought got rather hot and started smoking lol , so put it to one side

as im after the clean unclutterd look for the underside of the car ive decided to remove the mk three exhaust hanger and brake pipe brackets ect , as there will be going all braided with new p clips ,

started on removing the stock mk 3 spring platforms
as you can see theres some rut built up in there over the years , so this will be replated like new
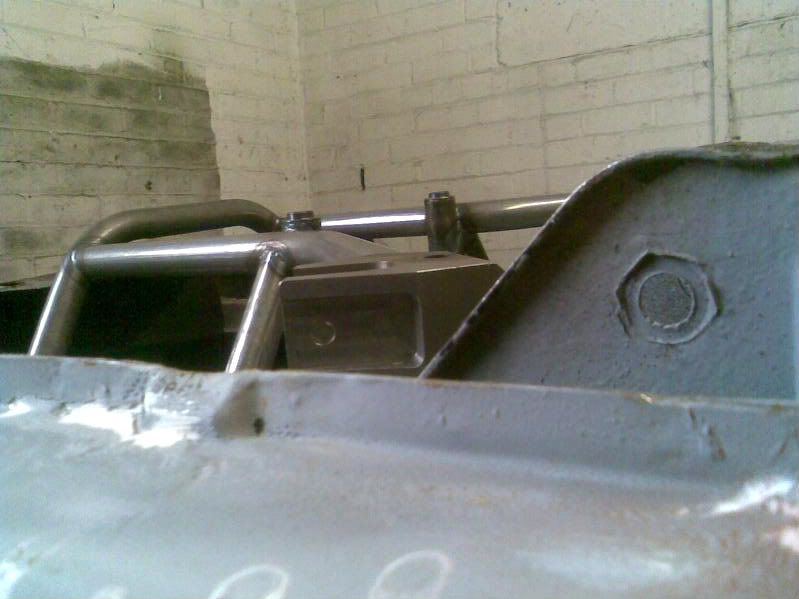
with the grinder totally out of action i decided to have another look at the cradel location on the rear of the car , with it now totally upside down it was eaiser to get a better idea of how it will sit
obviously with one of these never fitted to a mk three and not having any refrence measurements or loaction dimensions had to have a gud think about how ill get it where it needs to be ......
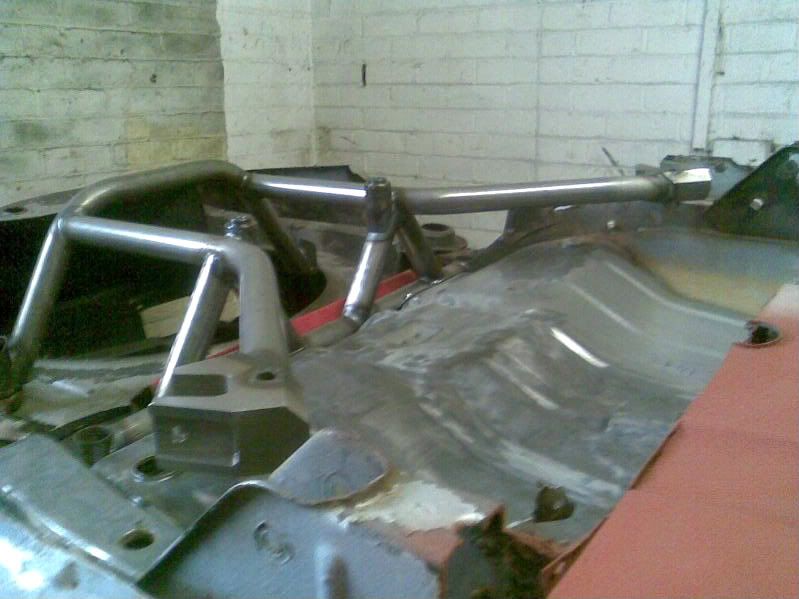
so i slipped a section of box between the floor and cradle
as you can see from the pic even now the front arms sit lower than the stock mk 3 rear tie bar brackets ,obv at this point it may need to go higher
but as for loacting the cradle square in the car , the main way when using a stock beam would be to use the center point of the hub and measure it and center it in the wheel arch , so with that theroy in mind and having a escos on the lift for a visual guide the plan is to work out a centerline thru the cradel in relation to a centerline thru the center of the hub flanges then knowing this tack a bar on the cradle and use that bar to center in the wheel arch ,
if my theorys right it should place the cradle perfectly and still leave me room for adjustment on the link and tie arms .
can then do the same for the centerline running thru the tunnel to get the left n right correct by working the centerline thru the differental and prop flange , the laser a line thru the center of the tunnel to postion it both ways
well thats the theroy , was just similar to the same way we used to set out window systems i used to fit lol ,
so , new grinder purchased tonight , ill be back up there tomorrow to crack on cleaning all the rest of the rear up , hopfully i can get special k to pop up with me one day this week and take a look at where the boot floor going to get cut out ,
beef
decided to crack on with the rear end of the car and get it cleaned up ,
from this
bit of wire brushing later
unfortunatley by this point the 2nd had boot fair jobbie grinder i bought got rather hot and started smoking lol , so put it to one side
as im after the clean unclutterd look for the underside of the car ive decided to remove the mk three exhaust hanger and brake pipe brackets ect , as there will be going all braided with new p clips ,
started on removing the stock mk 3 spring platforms
as you can see theres some rut built up in there over the years , so this will be replated like new
with the grinder totally out of action i decided to have another look at the cradel location on the rear of the car , with it now totally upside down it was eaiser to get a better idea of how it will sit
obviously with one of these never fitted to a mk three and not having any refrence measurements or loaction dimensions had to have a gud think about how ill get it where it needs to be ......
so i slipped a section of box between the floor and cradle
as you can see from the pic even now the front arms sit lower than the stock mk 3 rear tie bar brackets ,obv at this point it may need to go higher
but as for loacting the cradle square in the car , the main way when using a stock beam would be to use the center point of the hub and measure it and center it in the wheel arch , so with that theroy in mind and having a escos on the lift for a visual guide the plan is to work out a centerline thru the cradel in relation to a centerline thru the center of the hub flanges then knowing this tack a bar on the cradle and use that bar to center in the wheel arch ,
if my theorys right it should place the cradle perfectly and still leave me room for adjustment on the link and tie arms .
can then do the same for the centerline running thru the tunnel to get the left n right correct by working the centerline thru the differental and prop flange , the laser a line thru the center of the tunnel to postion it both ways
well thats the theroy , was just similar to the same way we used to set out window systems i used to fit lol ,
so , new grinder purchased tonight , ill be back up there tomorrow to crack on cleaning all the rest of the rear up , hopfully i can get special k to pop up with me one day this week and take a look at where the boot floor going to get cut out ,
beef
06-09-2010, 06:59 PM
#1370
if you've figured out which rims you want to use beef, stick them in the arches first to give you a true indication of where stuff can go in the end, then work backwards
no point in having everything set up and then not being able to put some snazzy rims on it because they won't fit into the arches
if you are struggling to get to grips with where things go, use an old broom handle with a big blob of expanding foam on the end to simulate the diff and prop at least it's not going to be heavy and cumbersome to shift abot to get into the correct position
no point in having everything set up and then not being able to put some snazzy rims on it because they won't fit into the arches
if you are struggling to get to grips with where things go, use an old broom handle with a big blob of expanding foam on the end to simulate the diff and prop
at least it's not going to be heavy and cumbersome to shift abot to get into the correct position
06-09-2010, 07:08 PM
#1371
the amount of adjustement the link arms have will be ample mate ,
this is to center the cradle itself ,
if you imagine both driveshafts mounted on the diff and sitting in a straight line you would use a centerline thru the diff and the center of the shafts and then center that in the wheel arch ,
its alot harder to explain lol without diagrams , but bear with me cos tomorrow im going to pick up some box and start working it out lol
06-09-2010, 07:30 PM
#1372
Lucifer II - 666
Nice to see you working on it again 


 06-09-2010, 09:23 PM
#1382
yeah i know mark ,
but looking at wenns escos , the driveshafts are in a straight line from the diff to the hub , not angled , if you get me
like from hub to hud seems 1 straight line ..........????
im hoping my complete cradle is almost completed
ideally if i can get the measurements off mark the set out idea ive posted above will let me get it set within 10 mm of its position ,
that will be enough to figure out if the rear seat base needs modification to clear the cradle
Last edited by -beefy-; 06-09-2010 at 09:33 PM.
06-09-2010, 09:27 PM
#1383
in the inlet side i basically went to the gasket size mate , and flowed the intake trumpet with it bolted on to get a smooth flow ,
inside the ports i havent went that big , more just tiding up and removing all the rough casting and straightening up the flow of the ports a little more
karls going to give it a bit more going over as i was paranoid if hit the water jackets lol + we got some diffrent profile arbor bits to try out
ill try and have another look at it this week and get a few better pics with my digi cam mate
for my spec i dont need huge pots mate , just cleaned up to aid gasflow
Last edited by -beefy-; 06-09-2010 at 09:29 PM.
06-09-2010, 10:54 PM
#1387
10K+ Poster!!

 11-09-2010, 04:40 PM
#1390
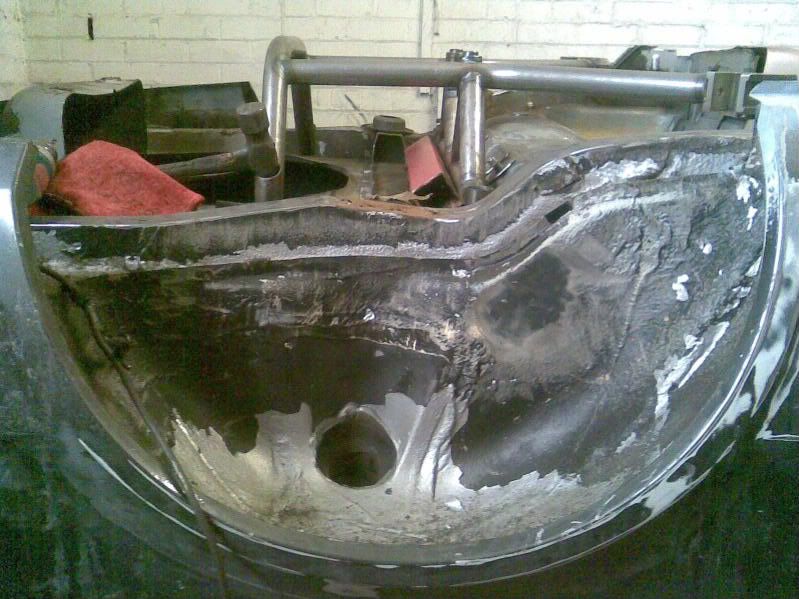
well , the battle of the factory sealer is almost won lol !!
as the car will be having all new sealer and underside paint ohh and new custom rear turrets lol , it was time to crack on with the rear inner wheelarches
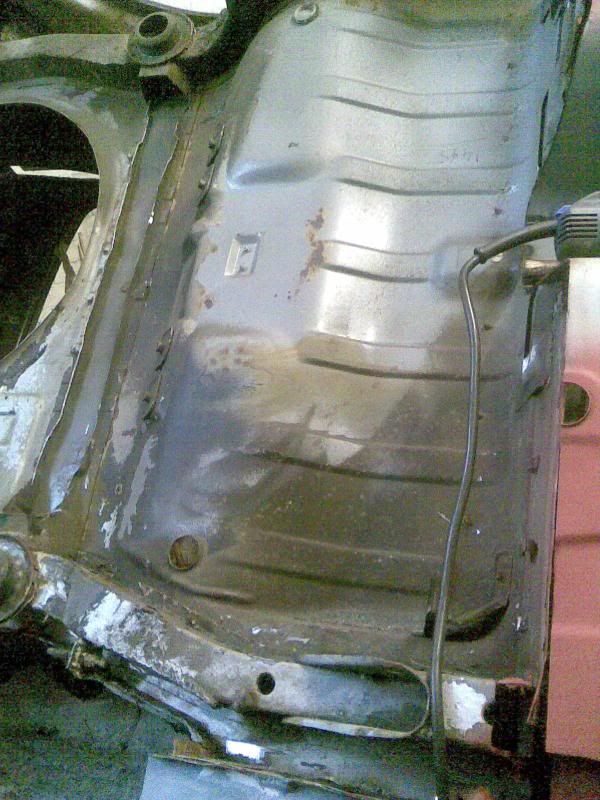
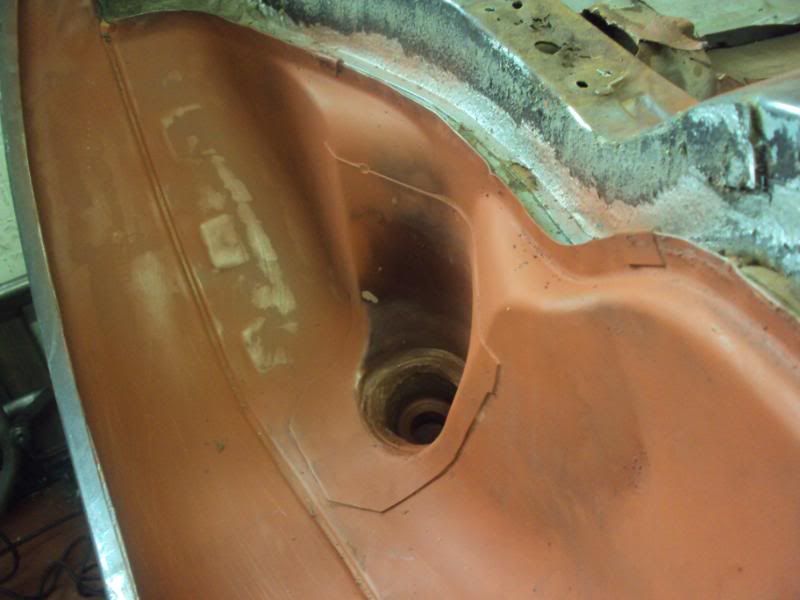
so what a factory sealed inner tub looked like ,
and a serious wire brushing , and scotch off with thinners , coat of red oxide later
and made a start on the other ,
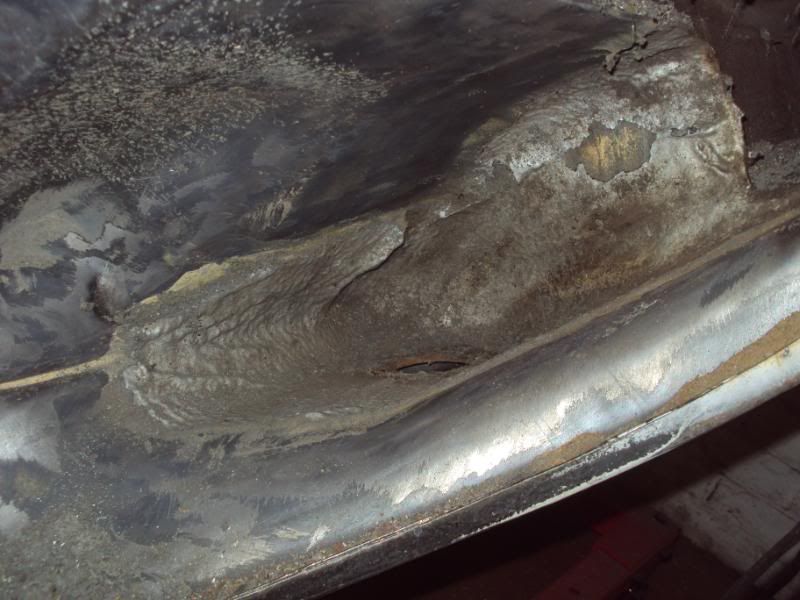
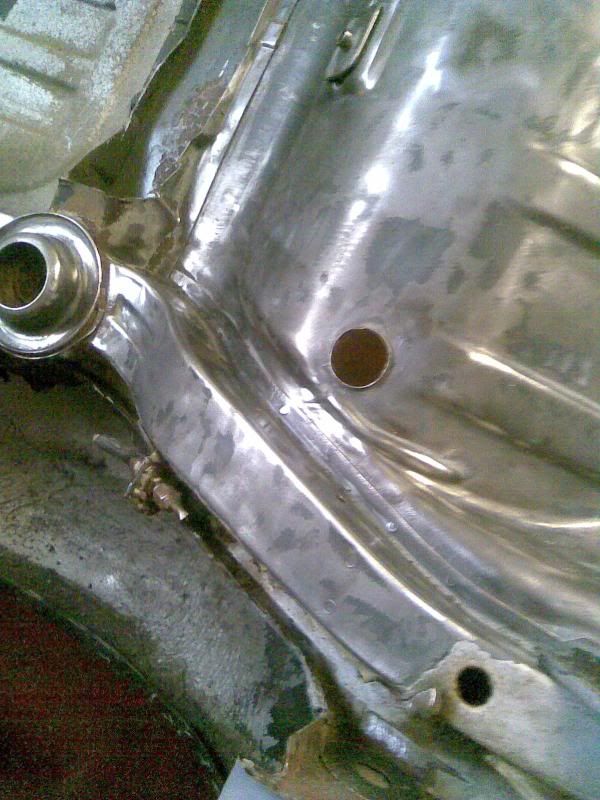
its all done just needing the area where the filler neck is finishing off , couldnt get in with the grinder so it will be heat gun and scraper
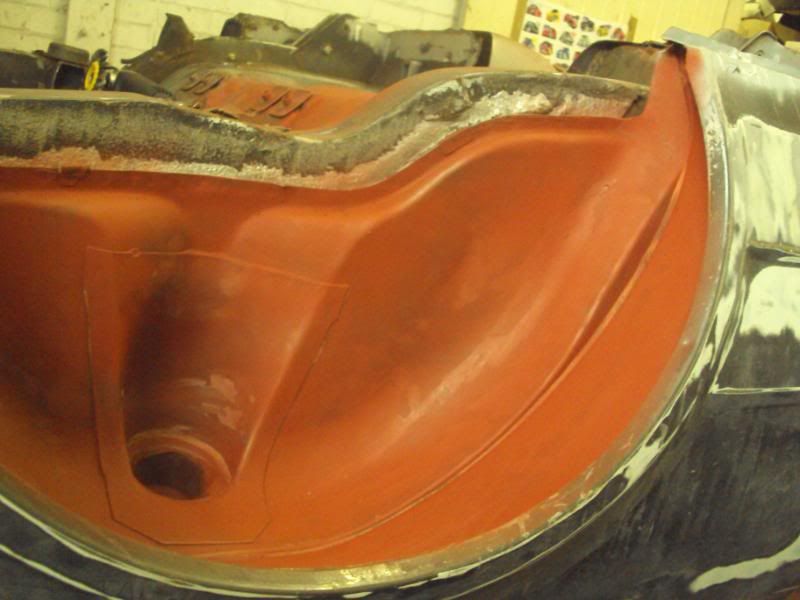
also cleaned up the floorpan area where the rear seats are , no point cleaning any further back as the boot floor is getting replaced ,
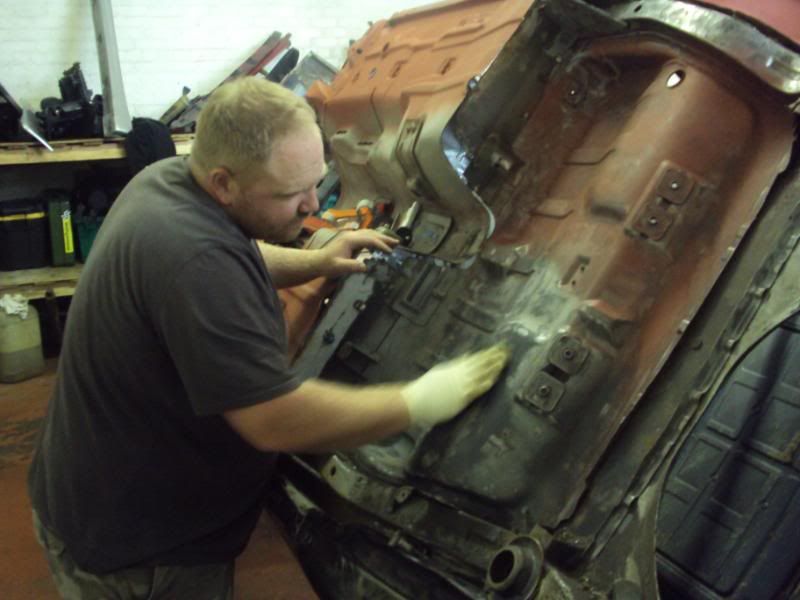
any sealer on here was removed and then cleaned with thinners and a scotch pad
then a light coat of red , to protect ,
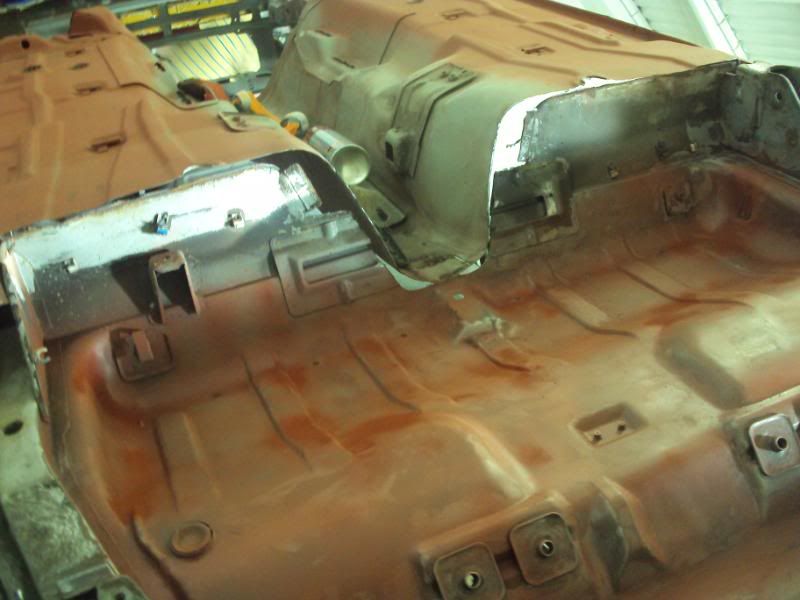
you can see here the area where the sierra floor meets what was left of the mk 3 floor ,
the section thats not red , will be cut out and a new section with swaged lines fitted when it gets to specials ,
had to cut the cleaning short as said id spend a bit of time with the wench , so ill get up to the unit tomorrow hopefully , and make a start on cleaning up some of the other areas ,
beef
as the car will be having all new sealer and underside paint ohh and new custom rear turrets lol , it was time to crack on with the rear inner wheelarches
so what a factory sealed inner tub looked like ,
and a serious wire brushing , and scotch off with thinners , coat of red oxide later
and made a start on the other ,
its all done just needing the area where the filler neck is finishing off , couldnt get in with the grinder so it will be heat gun and scraper
also cleaned up the floorpan area where the rear seats are , no point cleaning any further back as the boot floor is getting replaced ,
any sealer on here was removed and then cleaned with thinners and a scotch pad
then a light coat of red , to protect ,
you can see here the area where the sierra floor meets what was left of the mk 3 floor ,
the section thats not red , will be cut out and a new section with swaged lines fitted when it gets to specials ,
had to cut the cleaning short as said id spend a bit of time with the wench , so ill get up to the unit tomorrow hopefully , and make a start on cleaning up some of the other areas ,
beef
11-09-2010, 05:27 PM
#1393
Regular Contributor
Good stuff, its good to get stuck right in there and get it all minted up, even if you do have a rotadolly and gloves! And dont give your missus so much stick she knows about YBs and shit
 11-09-2010, 06:02 PM
#1395
patience is what counts in making a good car into a great car mate ,
it could of been slapped together , coverd in spray sealer and built by now , but id never be happy with it , and it wouldnt upset anyone in concourse that way
the end results all in the preparation !!!!!!!
it could of been slapped together , coverd in spray sealer and built by now , but id never be happy with it , and it wouldnt upset anyone in concourse that way
the end results all in the preparation !!!!!!!
11-09-2010, 09:37 PM
#1399
Advanced PassionFord User

Beefy, Stick a diff in the cradle and you will find the diff/driveshaft centre line. You then need to work out the height for the wheel.
Not sure if those front holes on that cradle are the same point as the sierra beam?
When we did younge's mk4 the beam mounts needed to go where mk4 rear tie mount went, so off it came.
By chance a piece of 50x75 box section allowed the beam to sit just right.
Some pics of it going in. Hope it helps


Finished mounts


Not sure if those front holes on that cradle are the same point as the sierra beam?
When we did younge's mk4 the beam mounts needed to go where mk4 rear tie mount went, so off it came.
By chance a piece of 50x75 box section allowed the beam to sit just right.
Some pics of it going in. Hope it helps
Finished mounts