
area six jwrc fiesta (urban myth)**NEW PROJECT ** a little update 1/1/16


 07-04-2012, 08:23 PM
#523
Regular Contributor
Join Date: Aug 2011
Location: Warrington
Posts: 266
Likes: 0
Received 0 Likes
on
0 Posts
Keep up the good work looking beltin  been to MK MOTORSPORT an the things he manufactures is top notch an top fella an ordered just about everything for mine
07-04-2012, 10:02 PM
#524
I've found that life I needed.. It's HERE!!

Join Date: May 2007
Location: ballymoney co"antrim northern ireland
Posts: 1,092
Likes: 0
Received 3 Likes
on
3 Posts
very nice project , your makeing a nice job of the shell work your self .
thats a nice list of parts you have collected up to.
look forwards to the up dates , keep up the good work .
thanks steven
thats a nice list of parts you have collected up to.
look forwards to the up dates , keep up the good work .
thanks steven
08-04-2012, 12:03 PM
#525
Advanced PassionFord User
Thread Starter
thanks steven , love your car and also your escort , i thought you was mad for breaking that but i can see why you did as your fiesta will be a real beast
cheers paul

 19-05-2012, 07:15 PM
#527
Advanced PassionFord User
Thread Starter
little update , as the weather has been that crap hardly any fabrication has been done to the body shell so ive been working on bits in the shed ive also been buying some parts for the car.
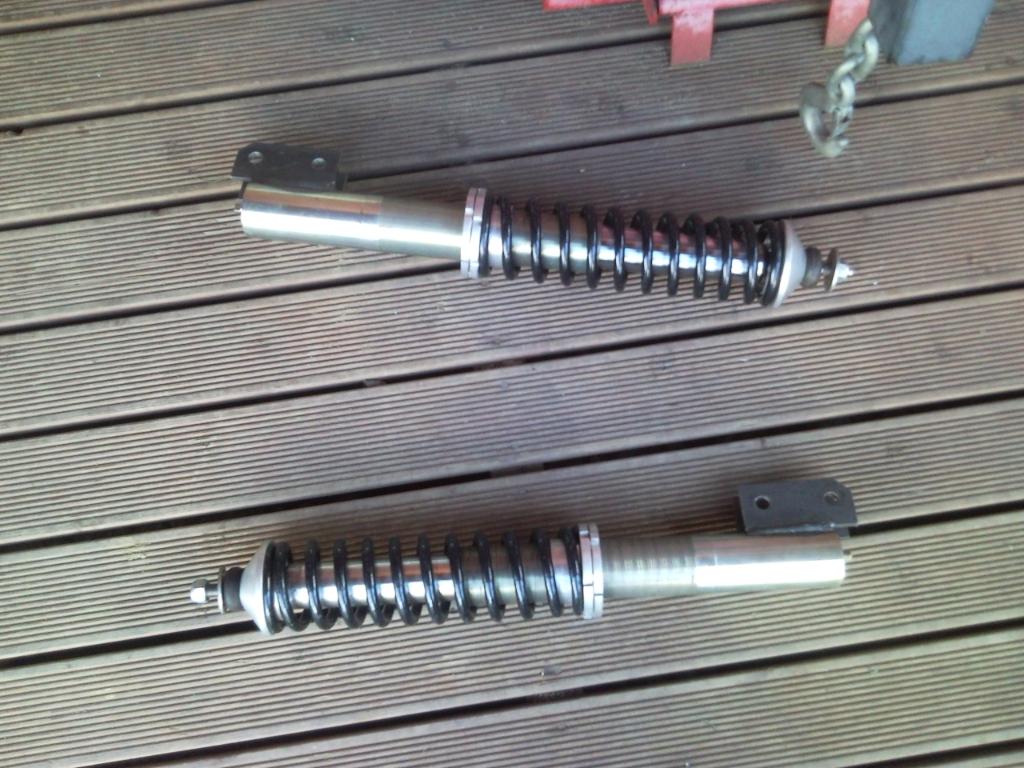
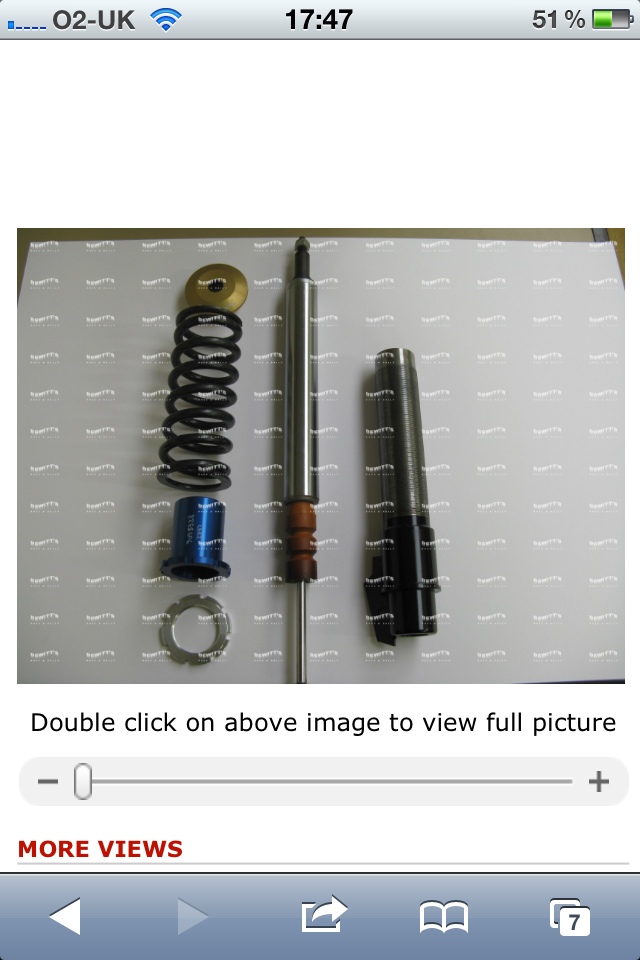
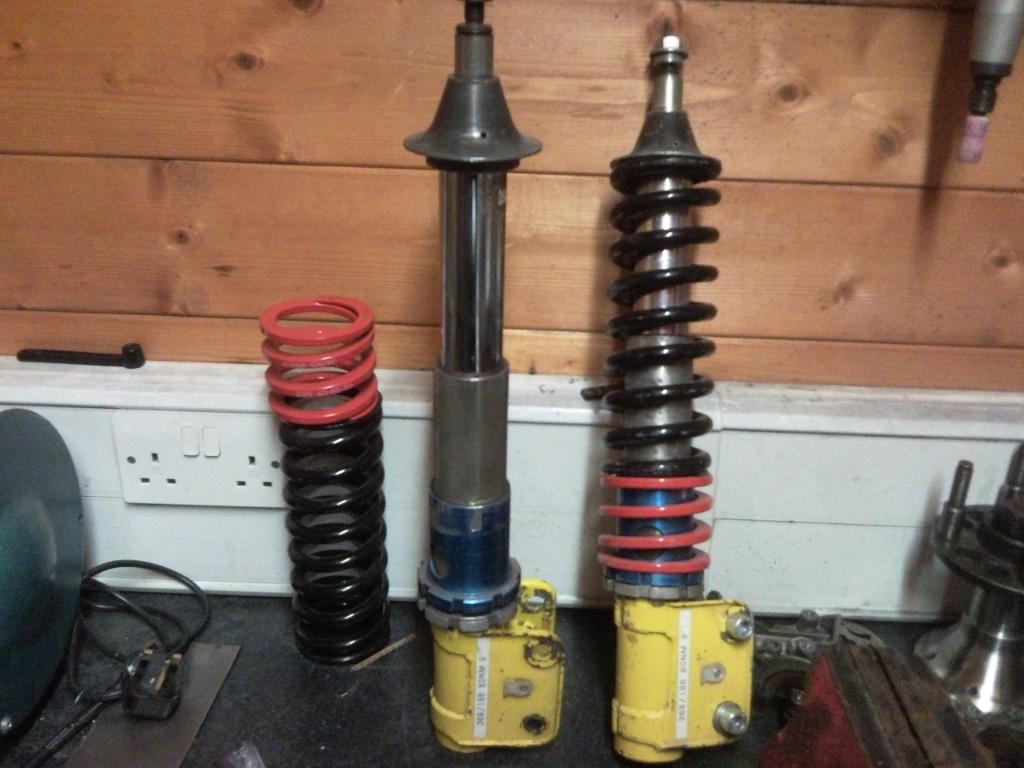
first was a set of bilsteins that had custom mounts fitted but not what i wanted but i got them for a fair price
next was to buy all the steering column components
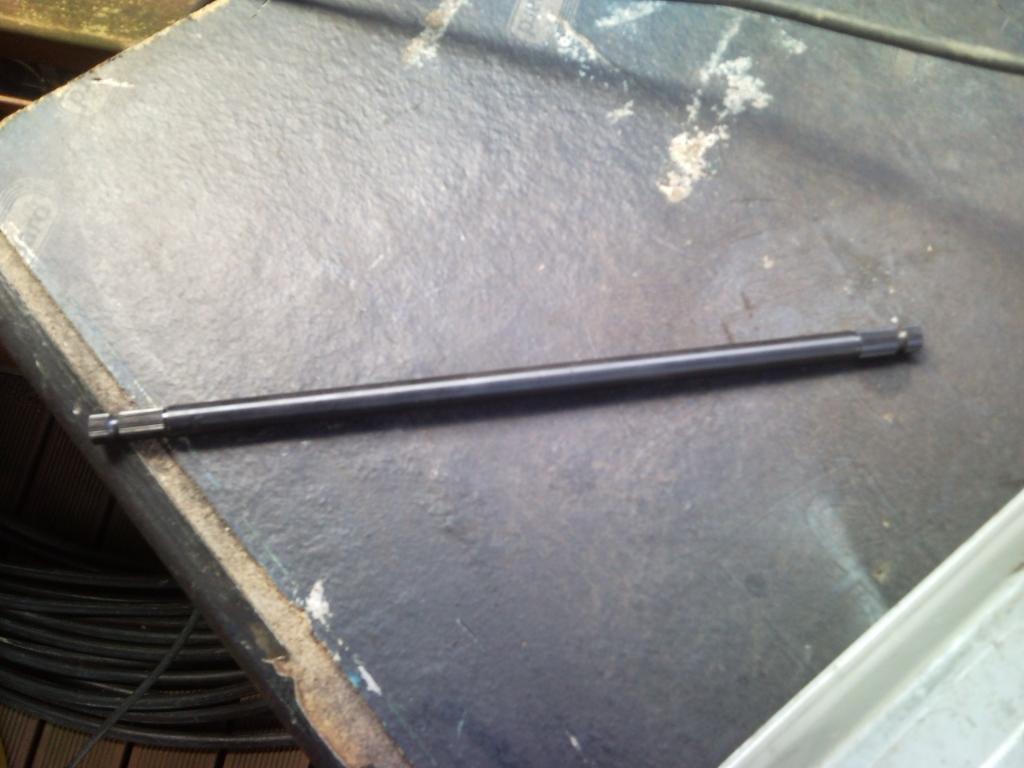
splined shafts
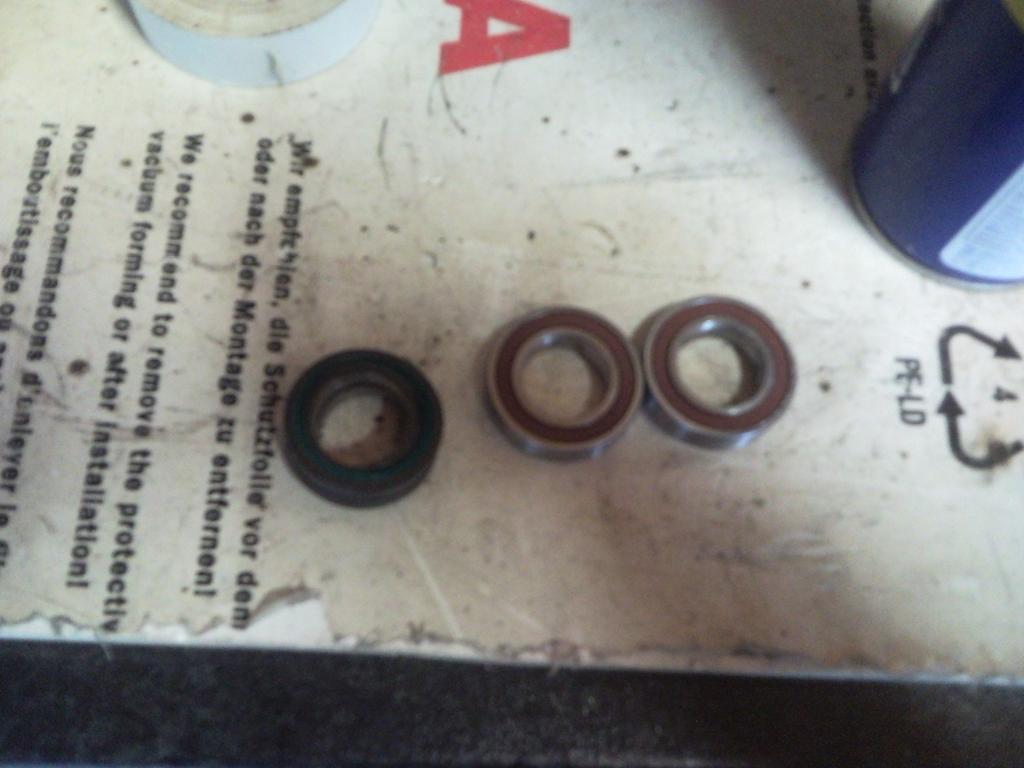
2 roller bearings and 1 spherical bearing
cds 20mm tubing 3.2mm wall thickness
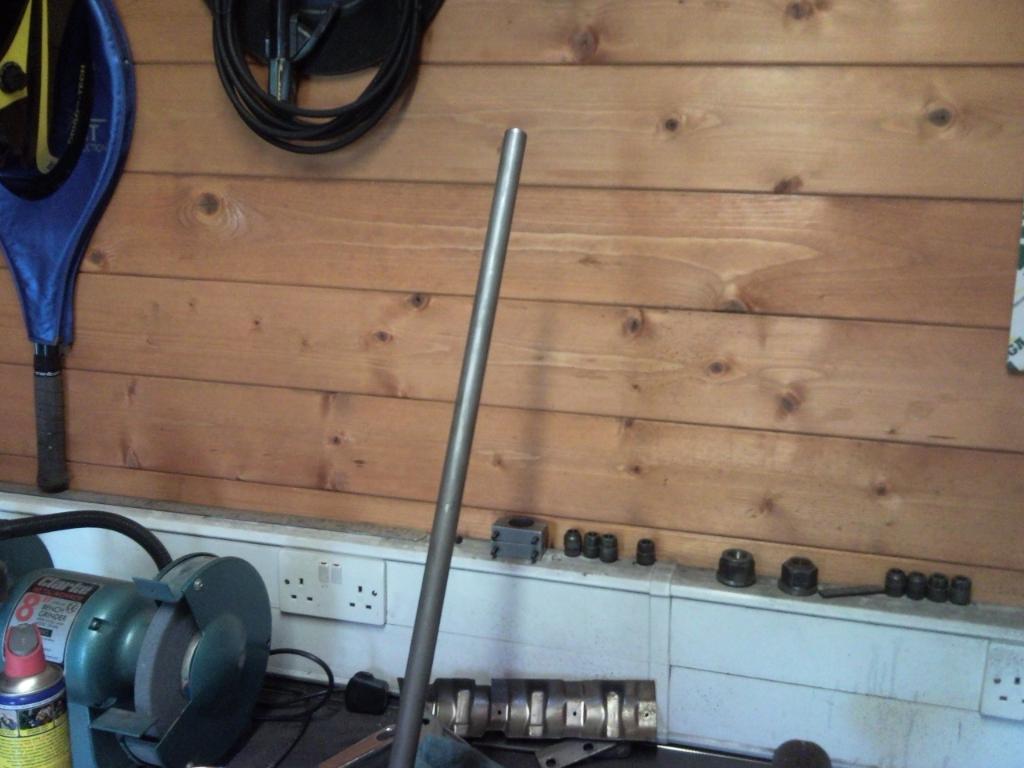
cds 50mm tubing 2mm wall thickness
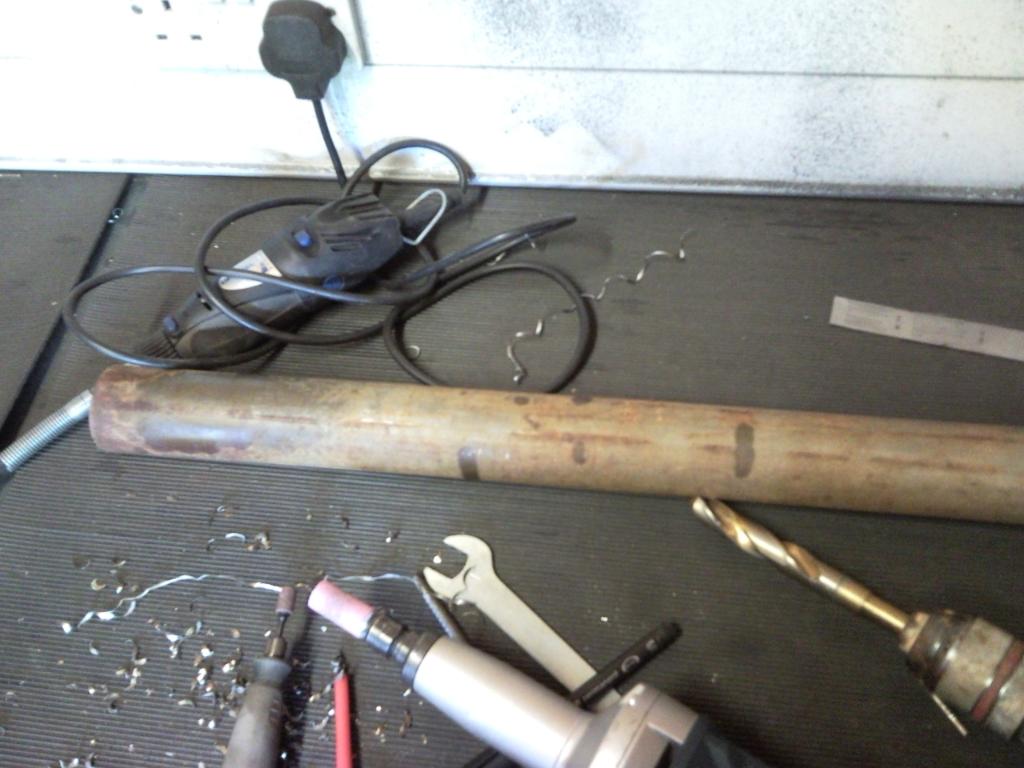
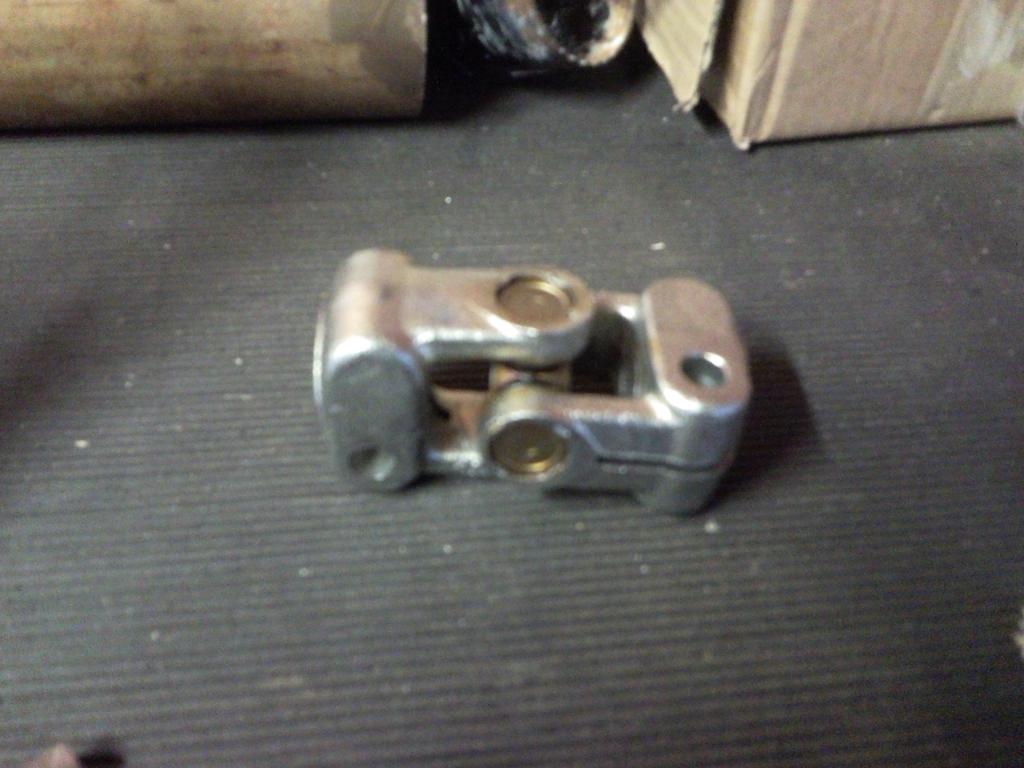
univeral joint
also got a new rubber donut for the rear prop
so on to the fabrication of the steering column
the 20mm cds tube needed machining out 1mm which a drill did the job to except the splined shaft
before
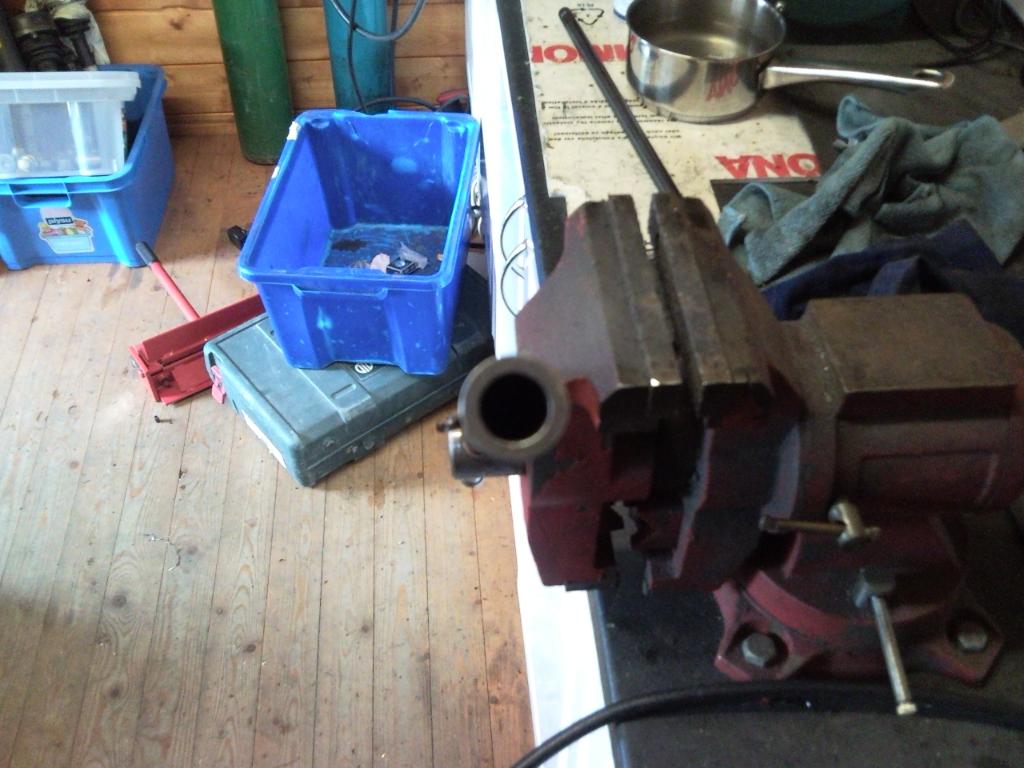
after
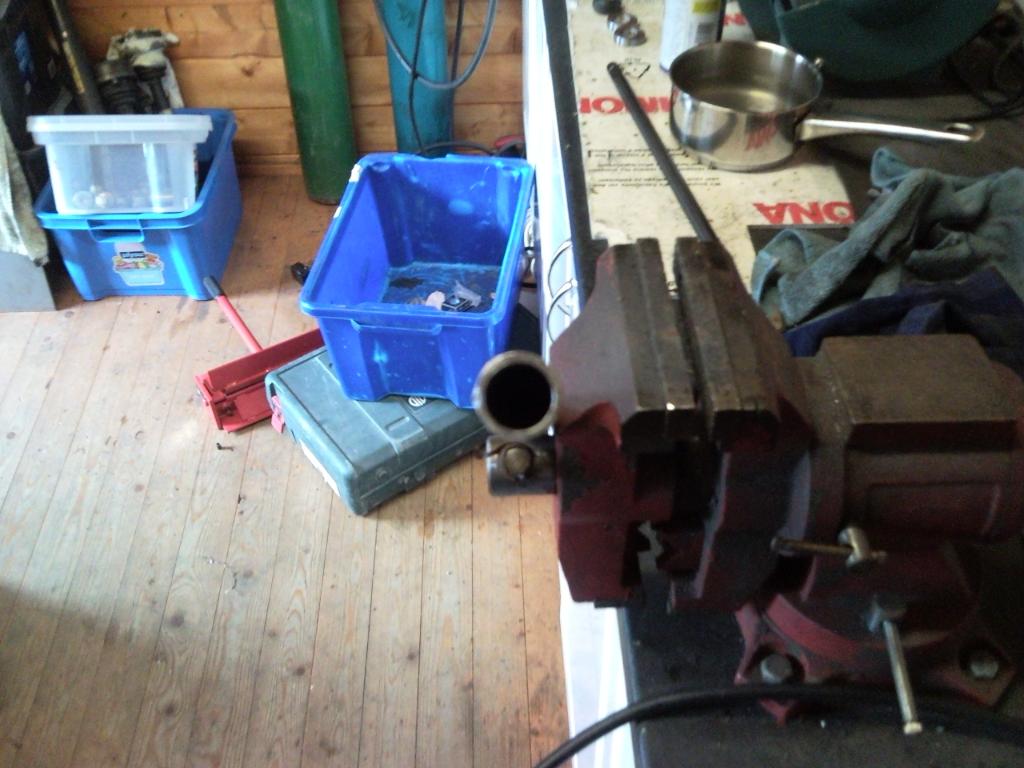
the tube can now except the splined shaft
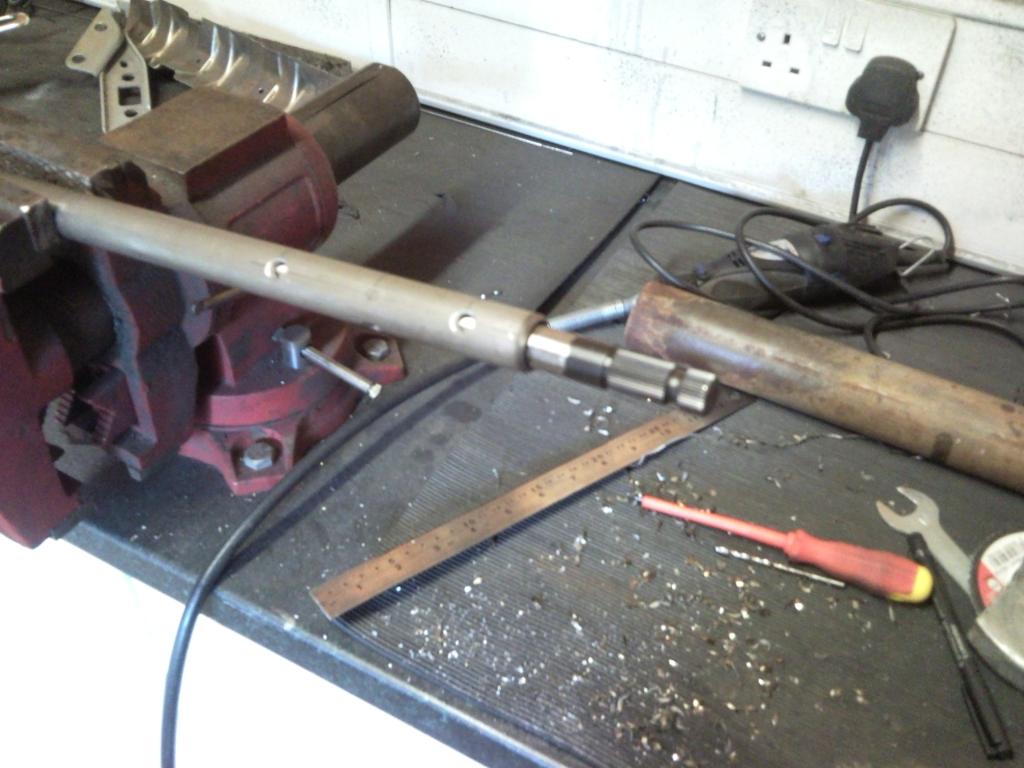
splined shaft cut in half
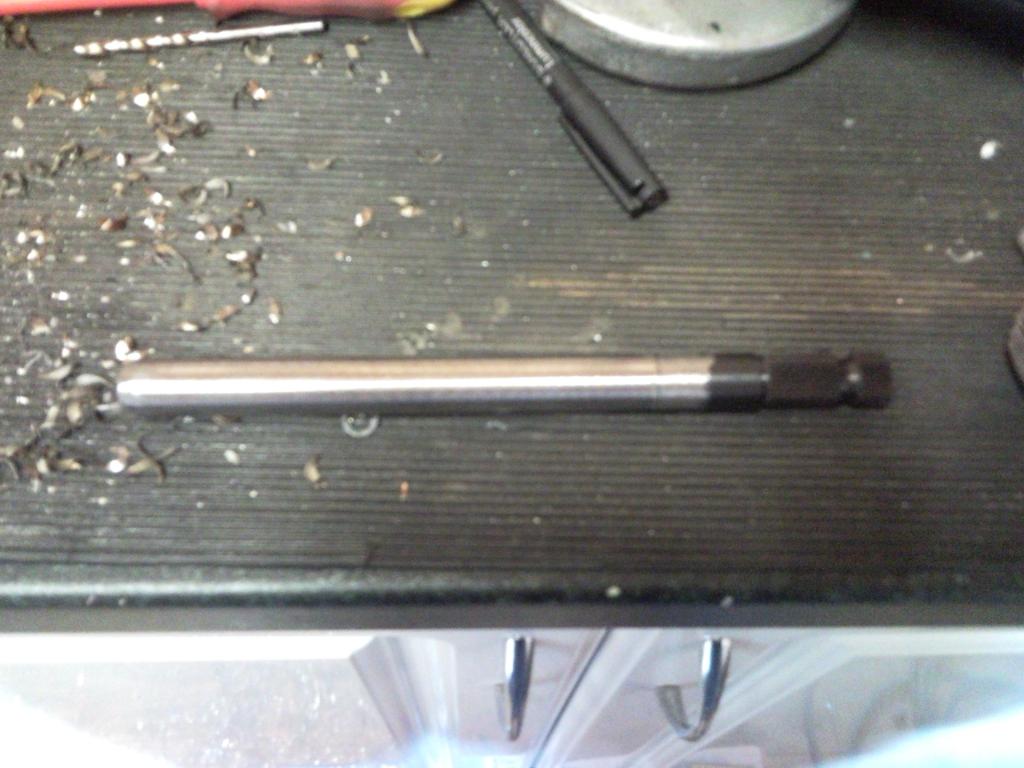
cds tube drilled for plug welding to add strenght to the steering shaft
splined shaft mounted ready for welding

plug welded and double welded around the tube
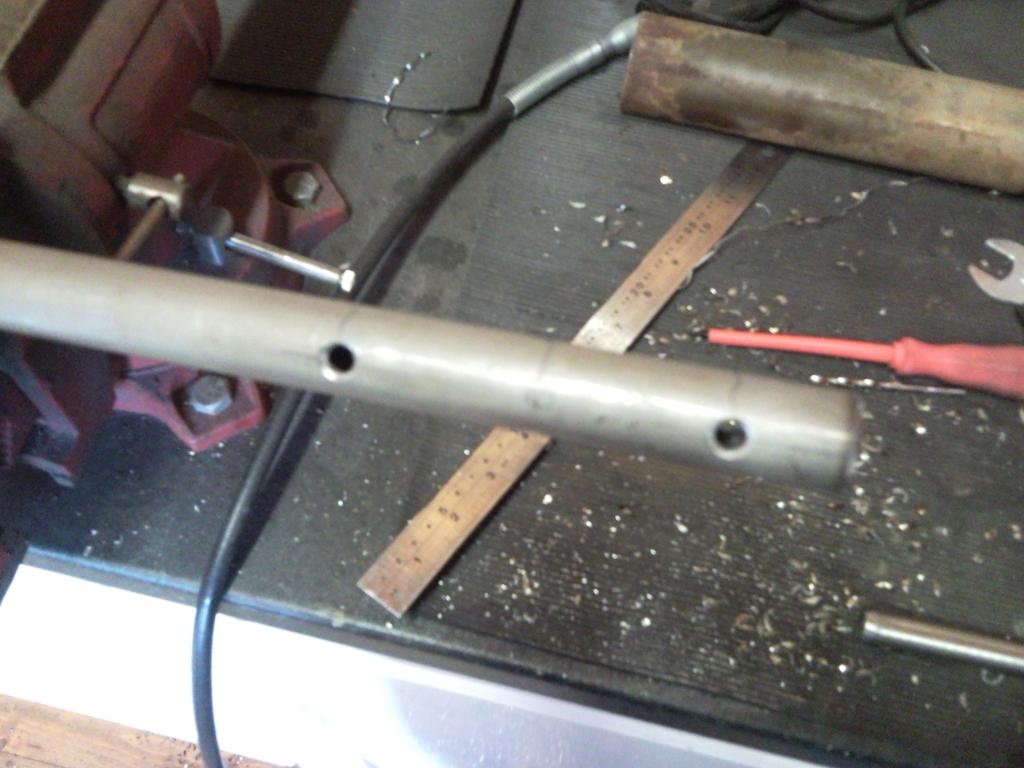
next was to clean the 50mm tube and mark the holes
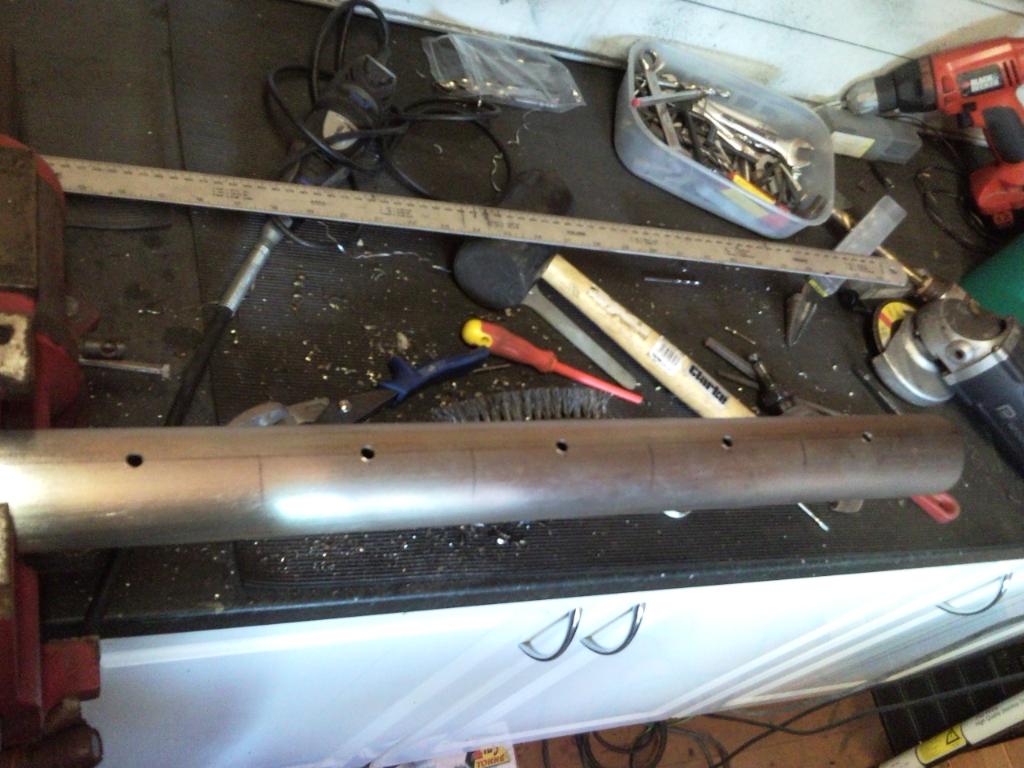
32mm hole saw at the ready , first of many holes
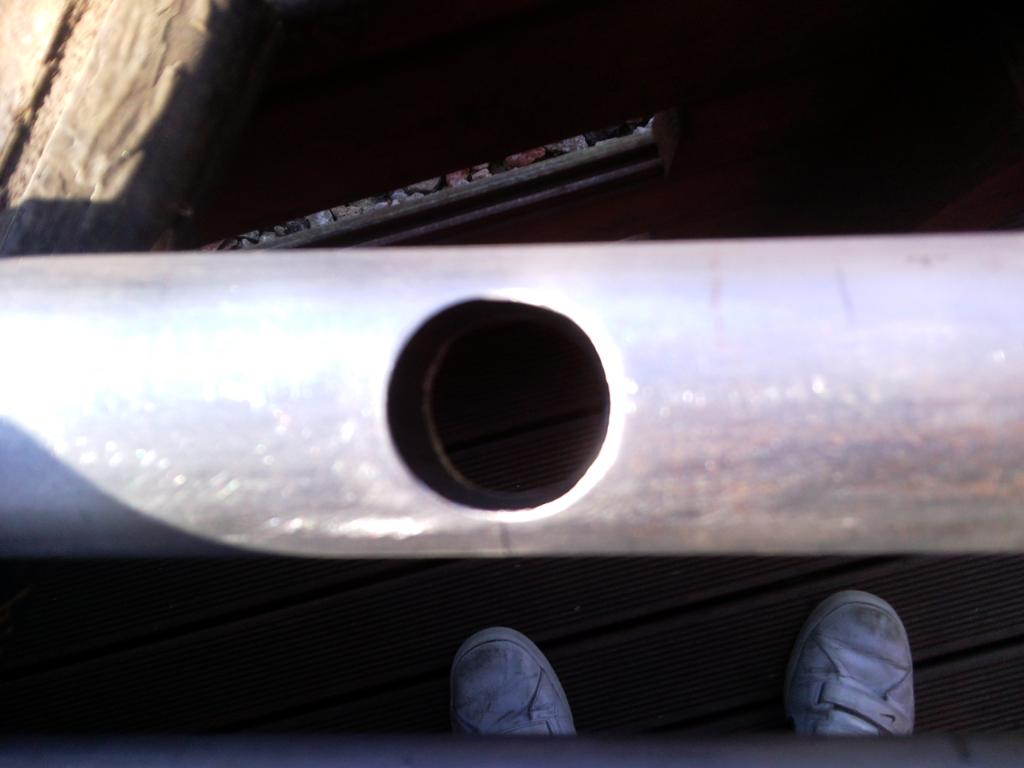
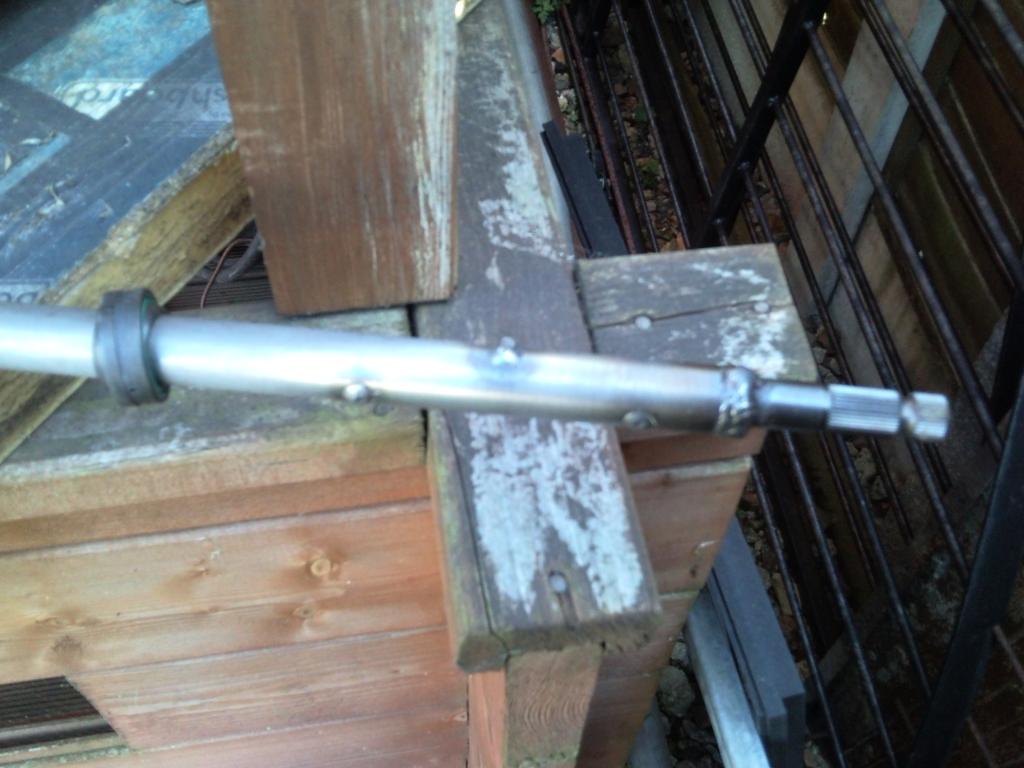
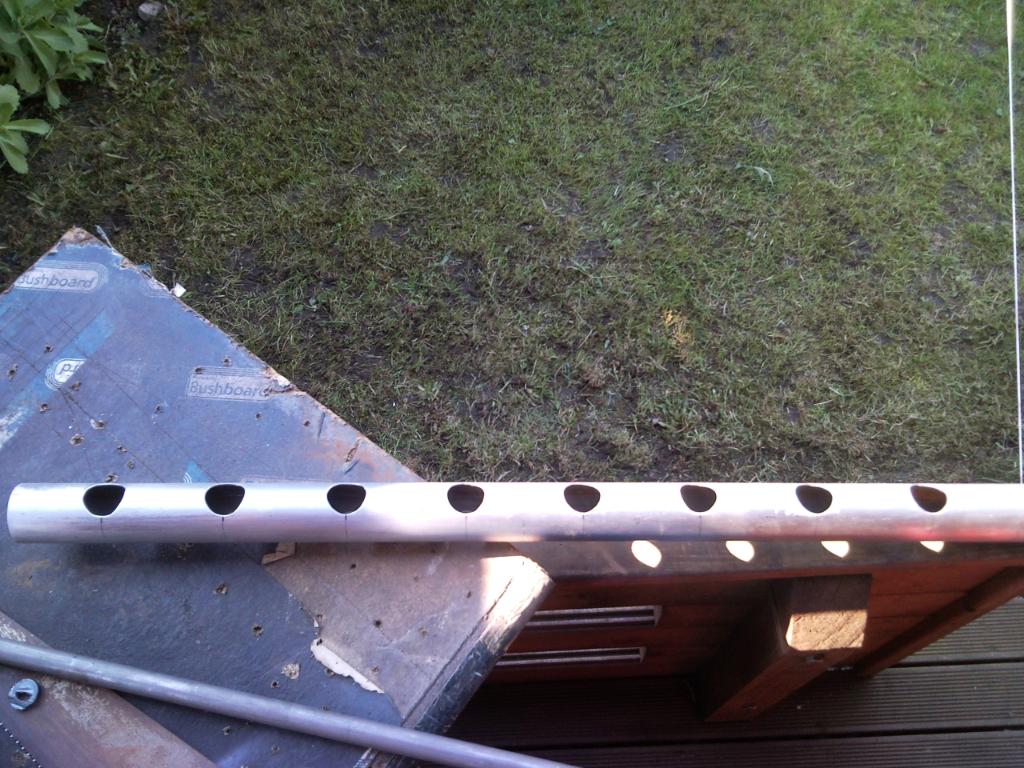
many holes later
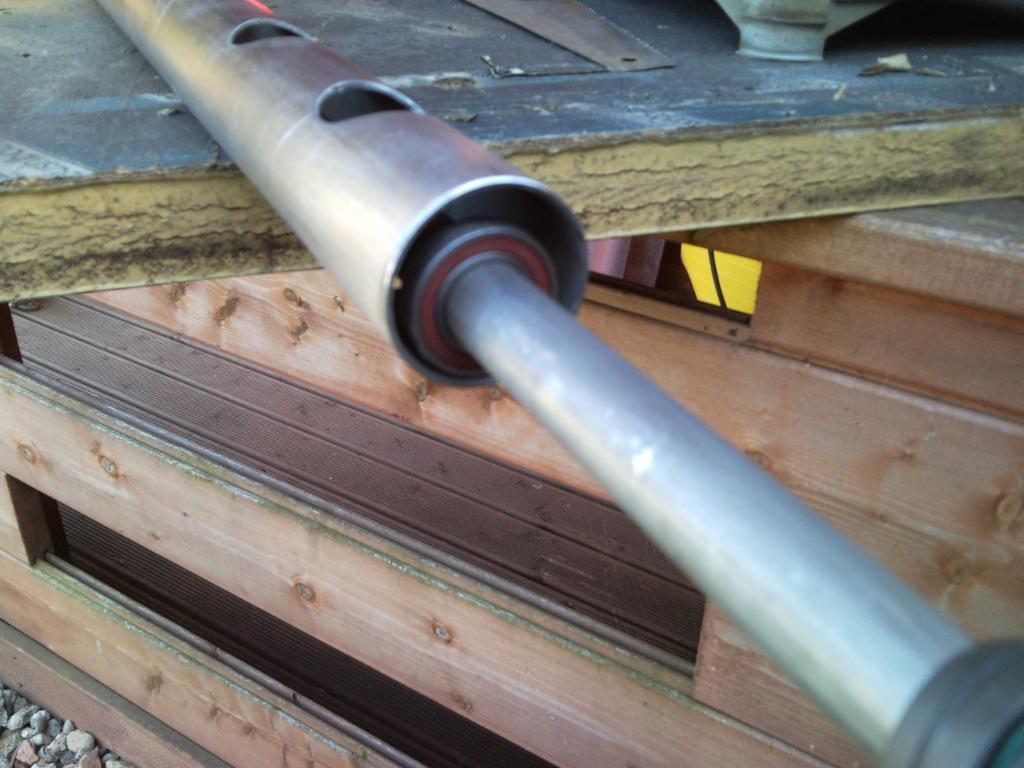
shaft mount in outer column
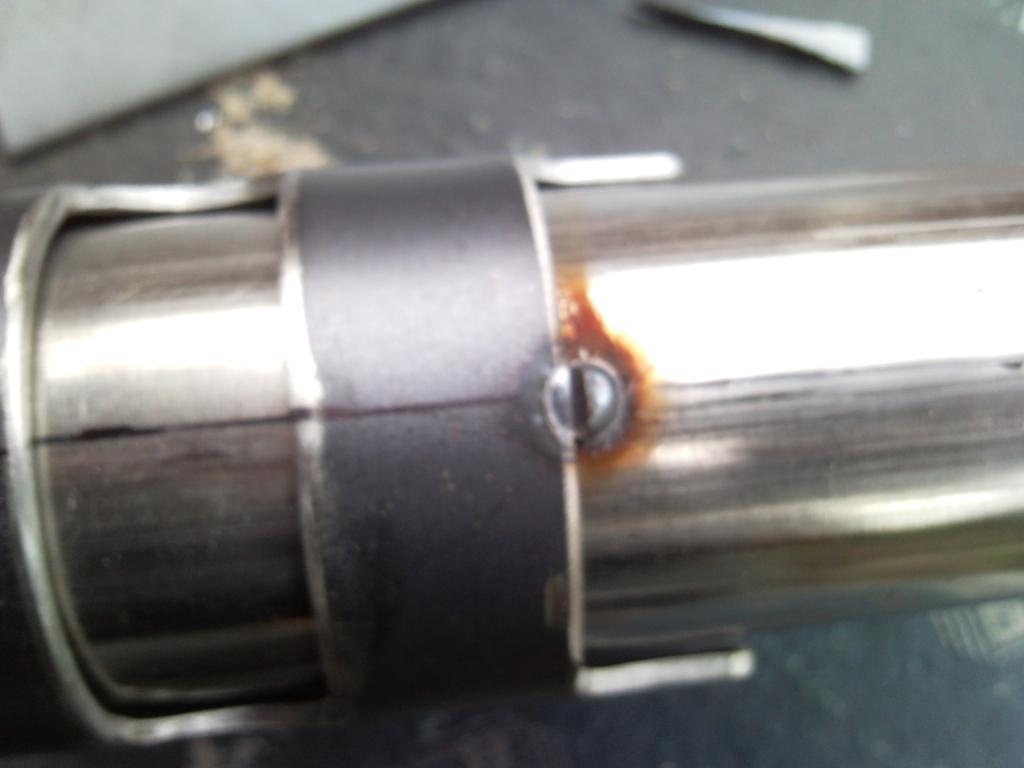
next was to mount the rear anti roll bar but i was abit limited with space so decided to use the front anti roll bar brackets that i dont need now as the wrc crossmember already has the arb mounts welded on to it. slightly modded by cutting some lugs off
ready to be welded on , cleaned the area for welding
welded on nice and neat

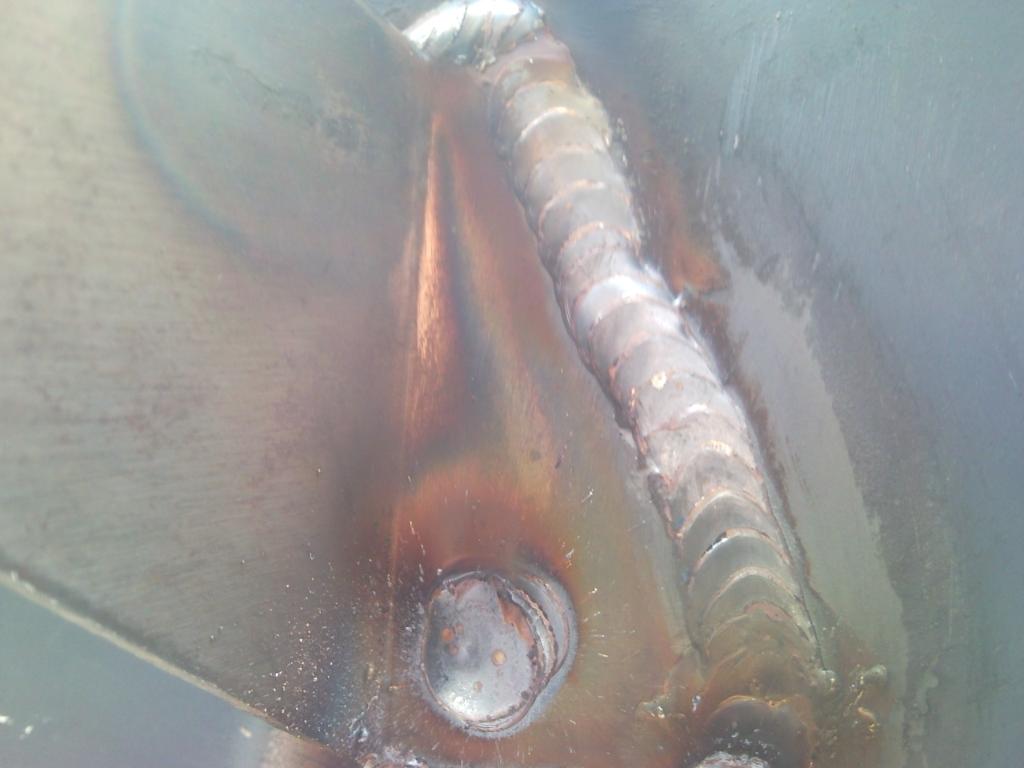
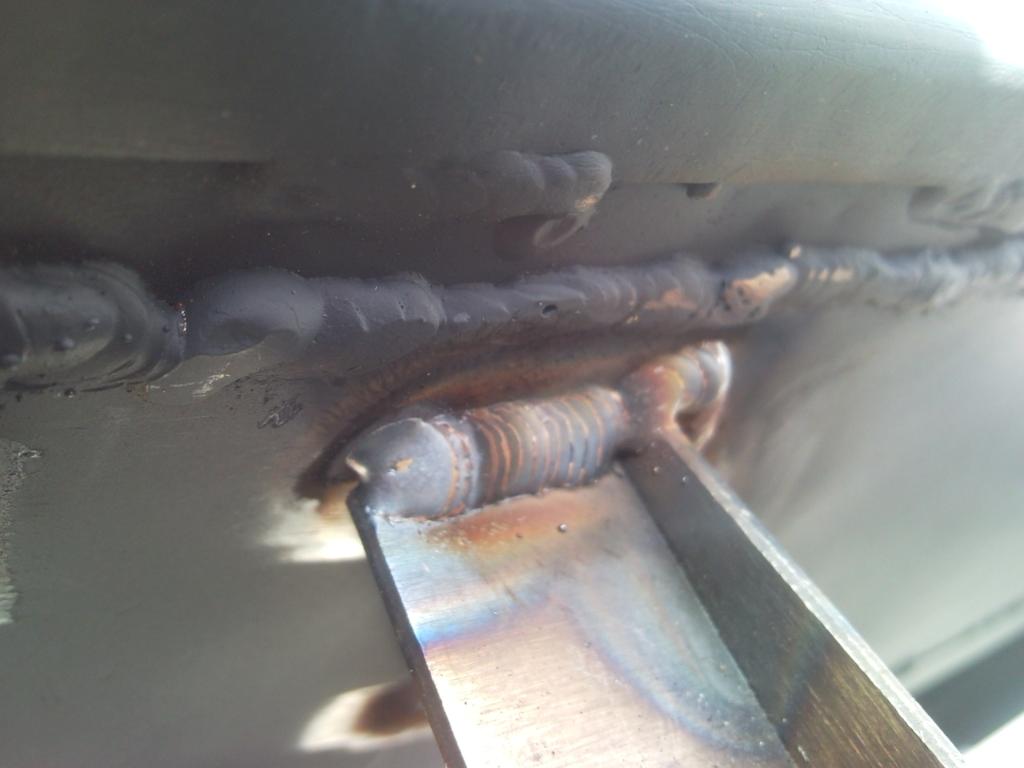
anti roll bar all mounted up
drop link central with with turret tower
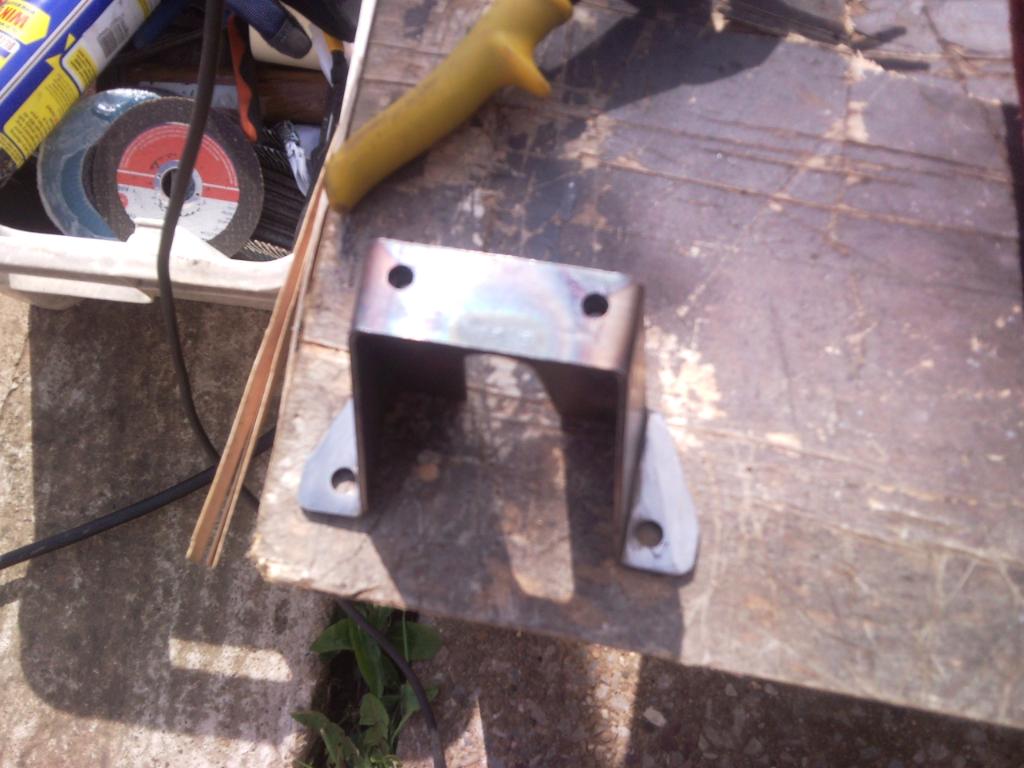
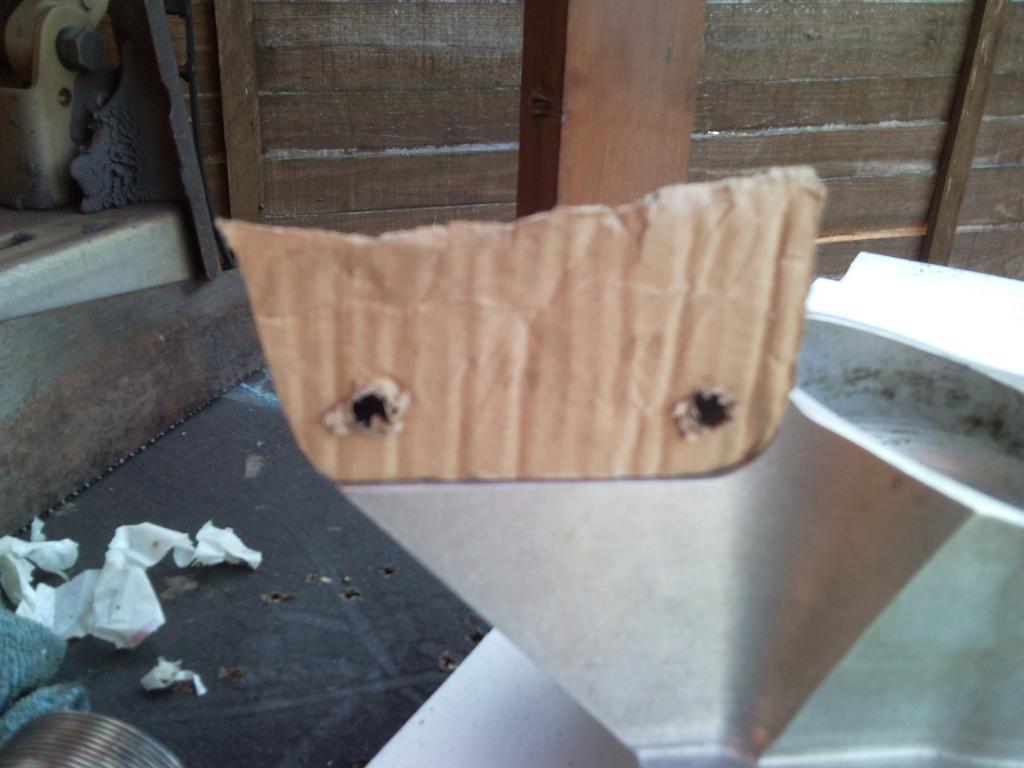
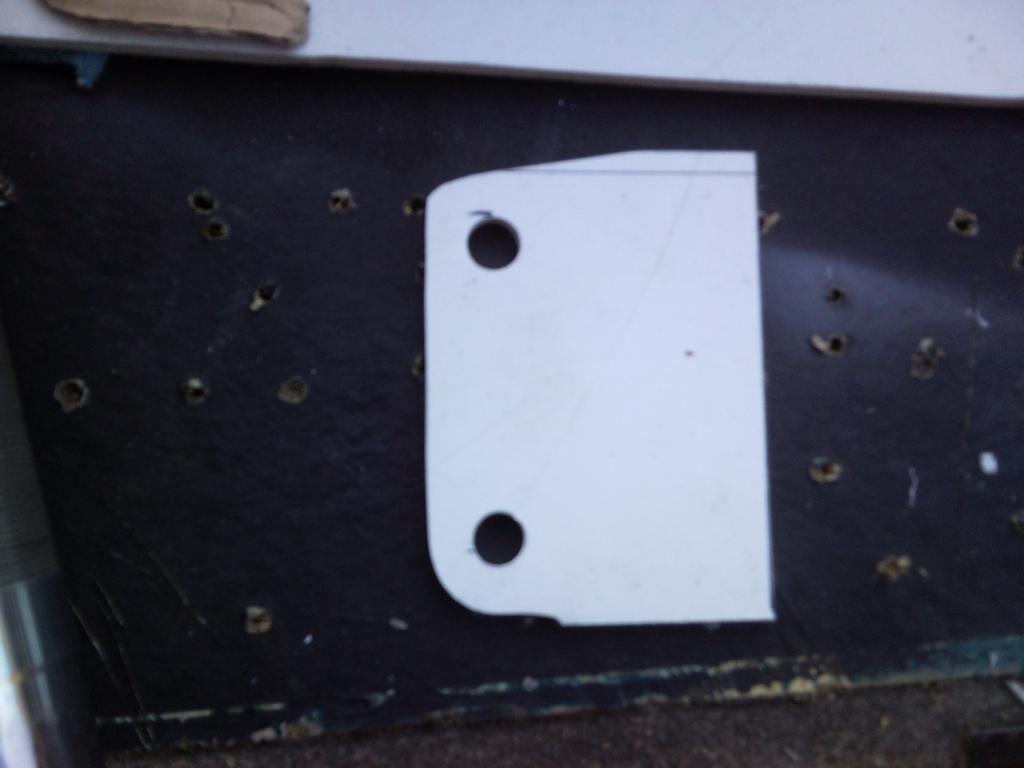
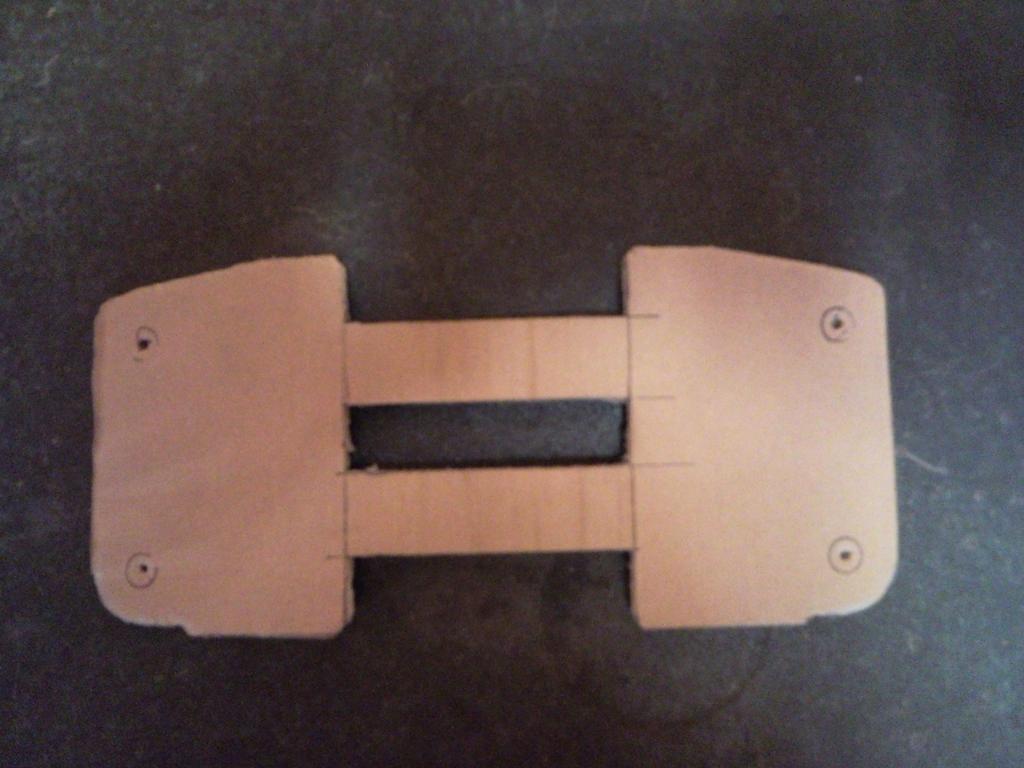
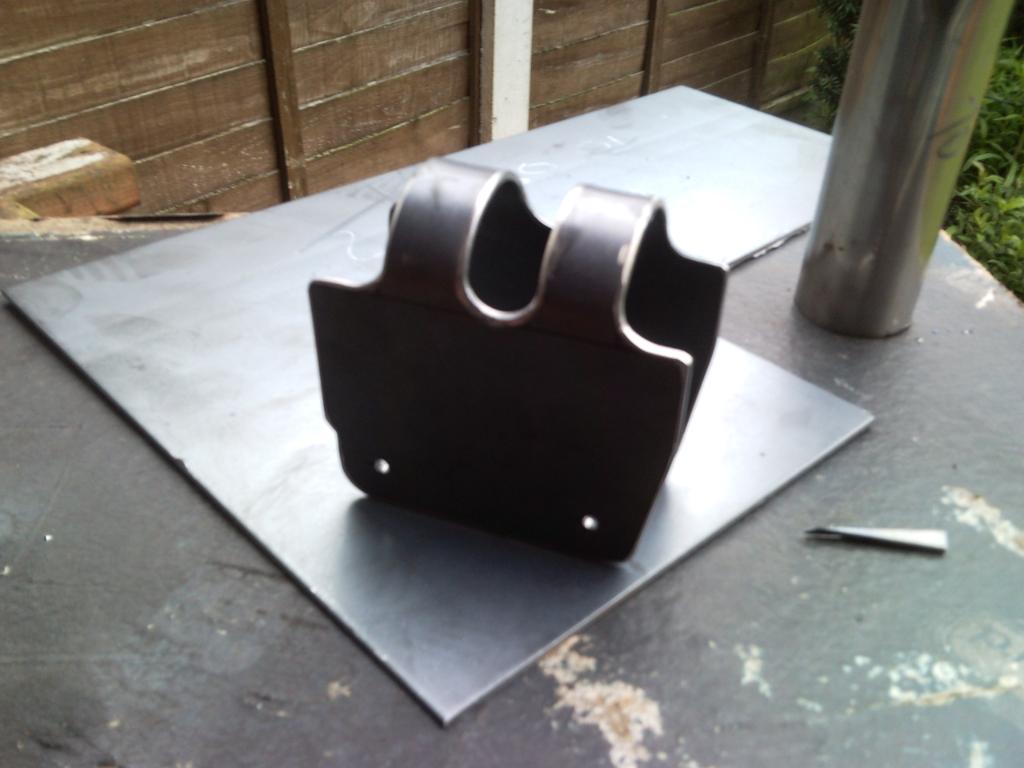
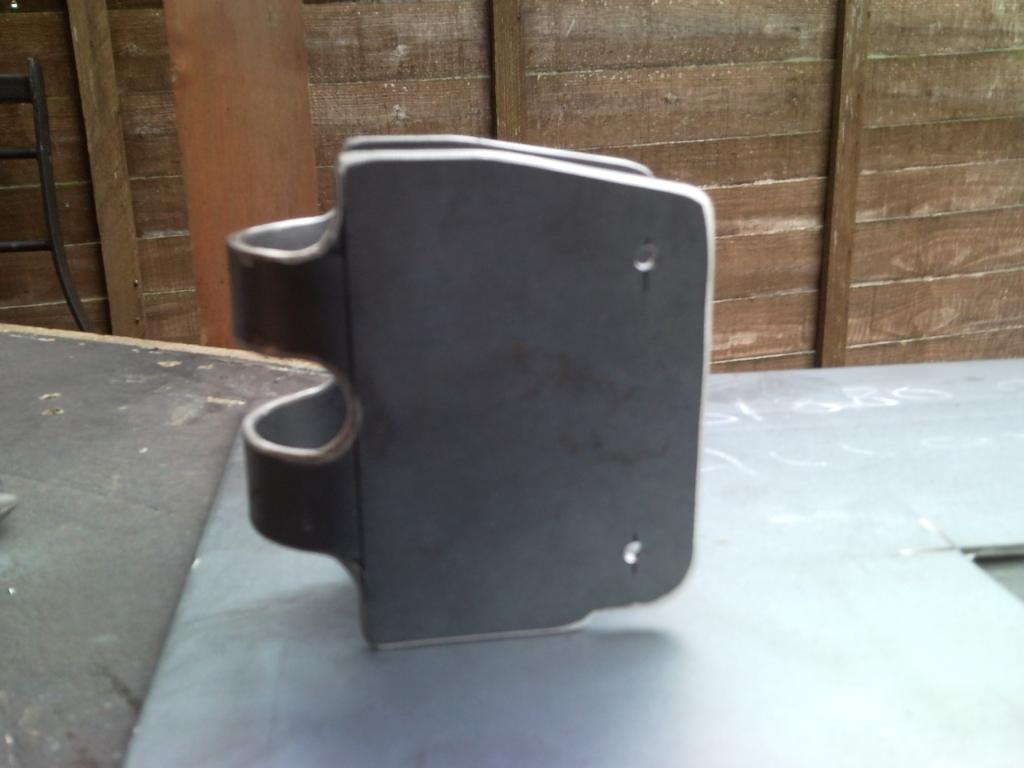
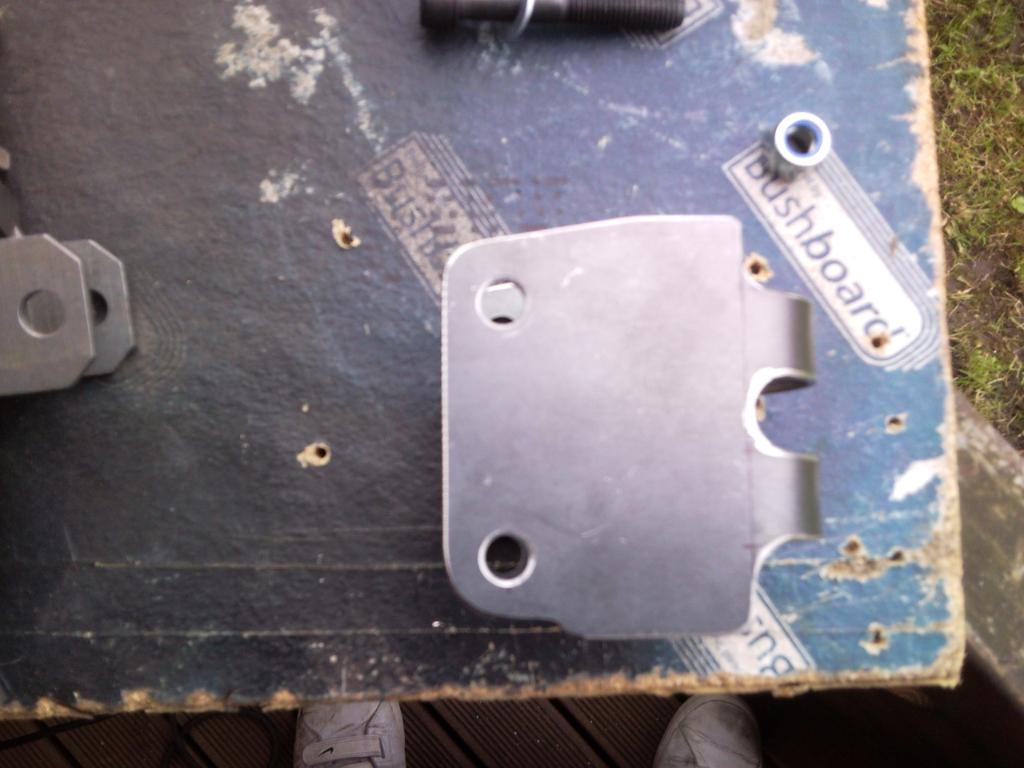
i decided that the rear anti roll bar brackets needed streghtening inside the car as the floor is only 1mm thick and could flex under load from the roll bar working , these are the strenghtening plates i made
cardboard template
metal copy
holes drilled
bent and swaged the holes
welded in to the car
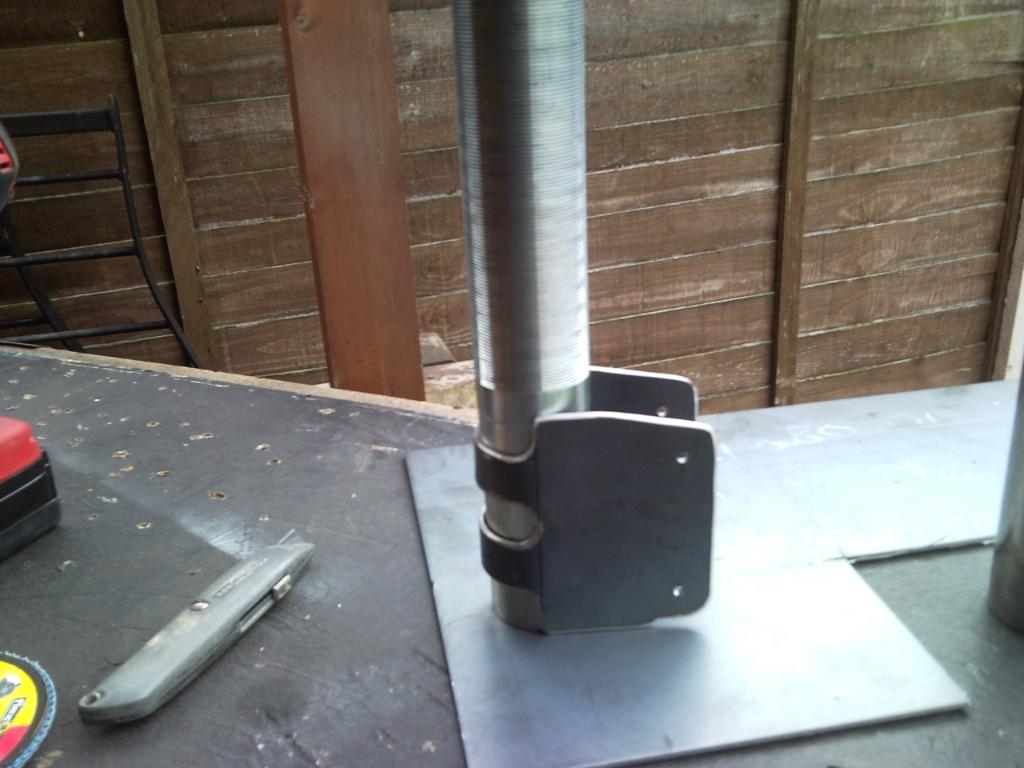
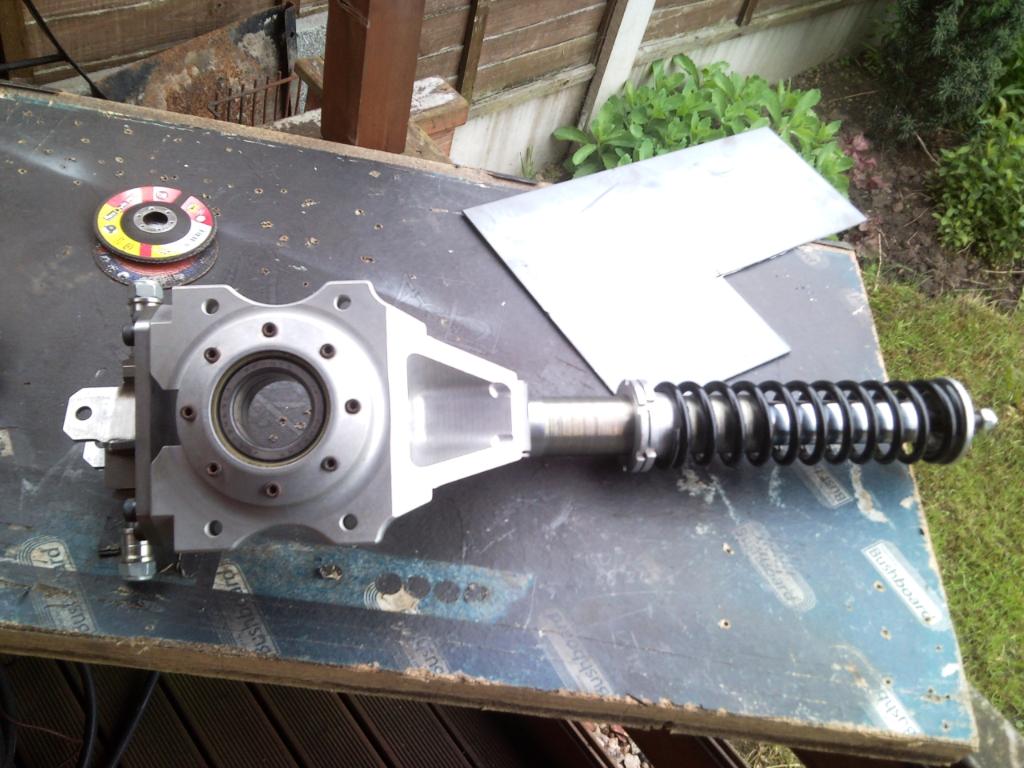
next was to modify the bilstein cases for wrc fitment to fit my billet uprights
orginal mounts
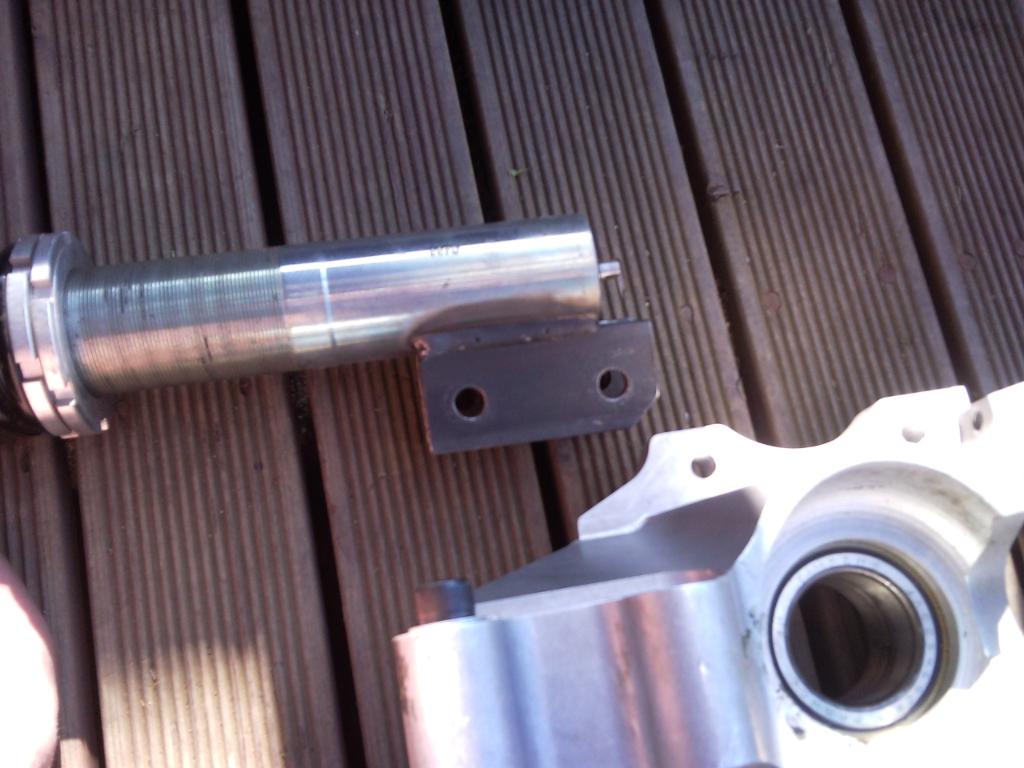
far to narrow for the wrc uprights
cut off orginal mounts and cleaned up

this is the shape we wanted

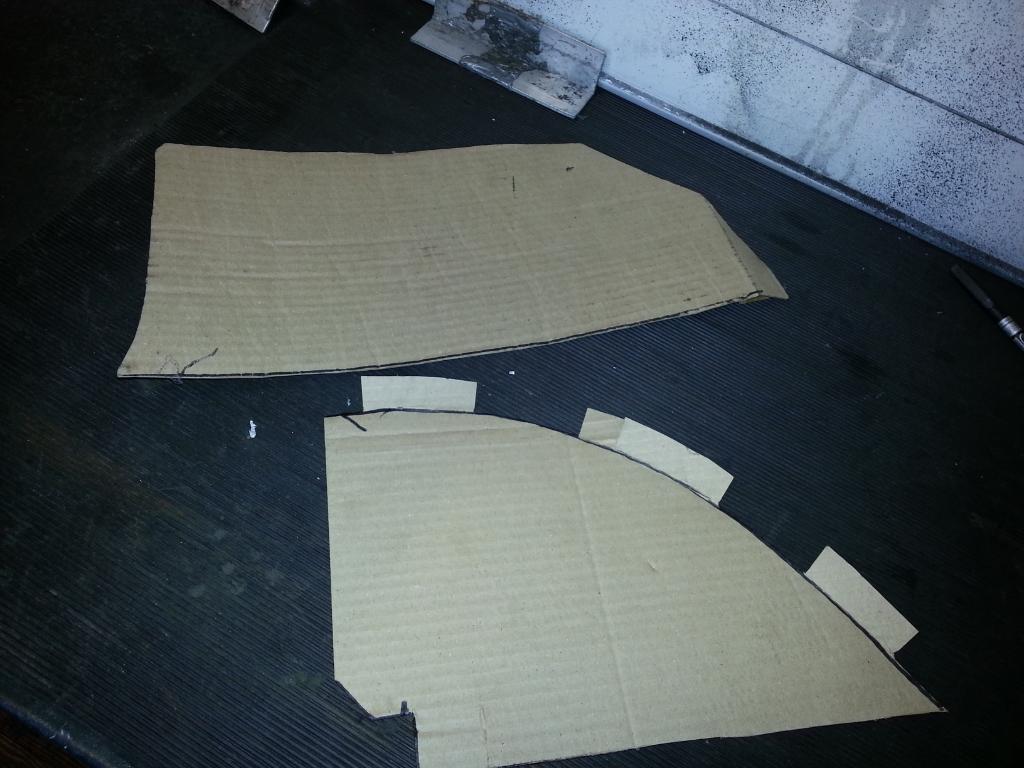
cardboard template
then a hard template out of foamex
a bit of measuring and working out and a double template with wrap around straps like the orginal bilstein wrc cases
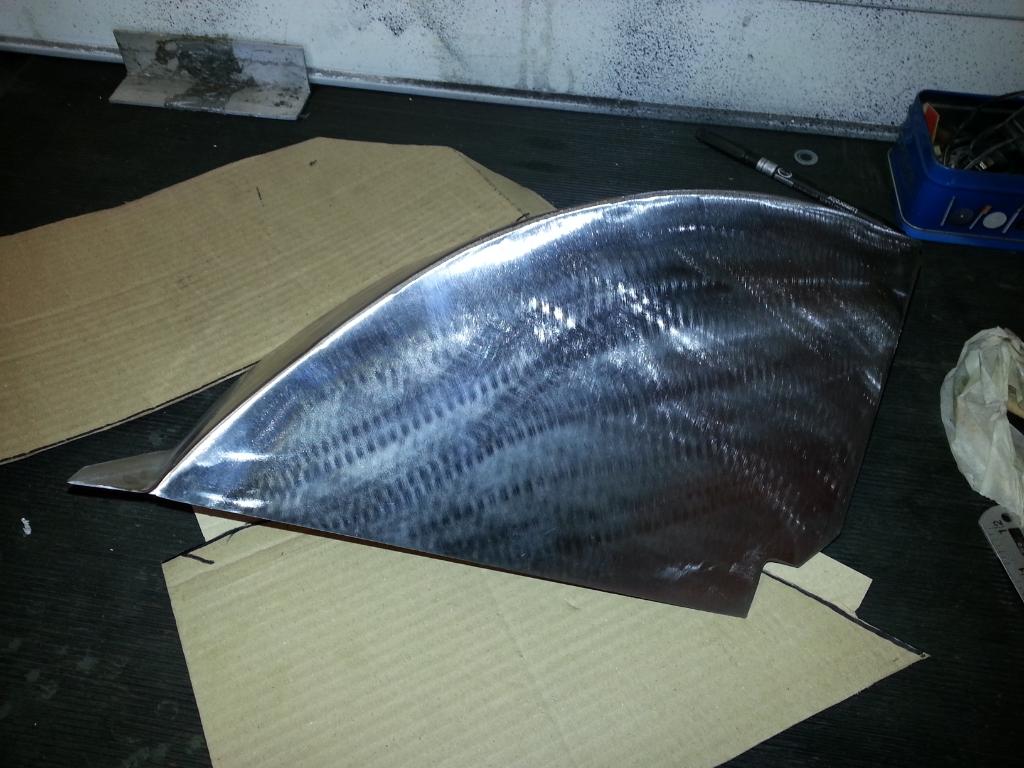
metal template

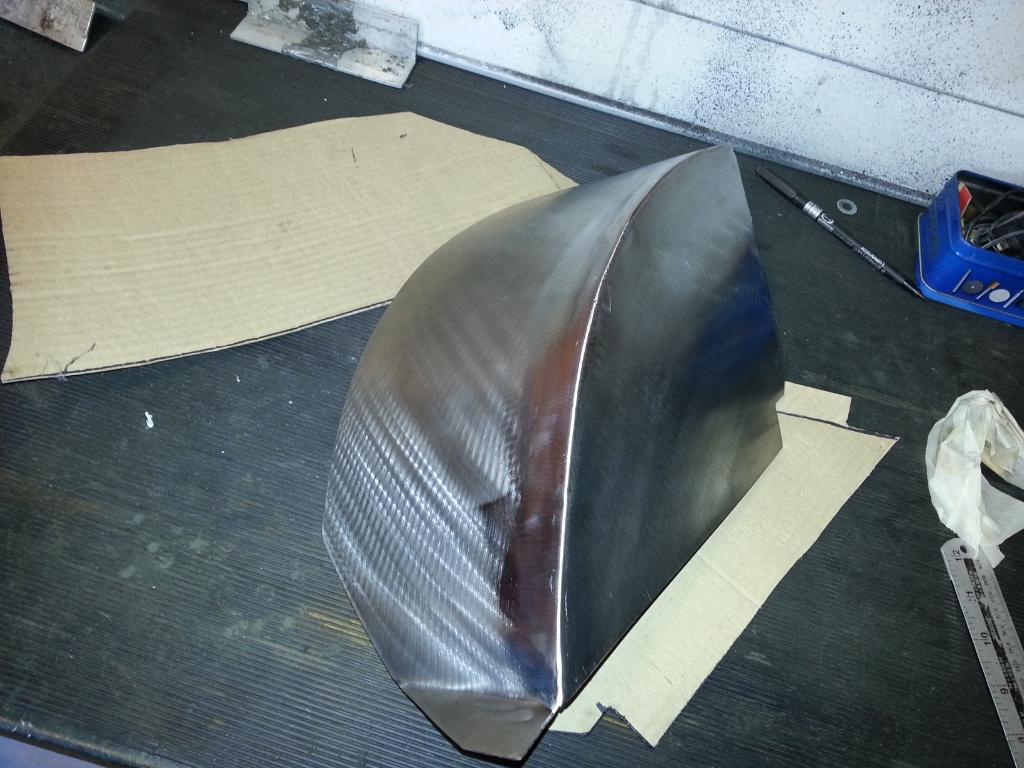
tack weld the metal template to a 50mm tube and heated with a heatgun , i didnt think it would work as the metal was 3mm thick but it did
starting to heat and bend
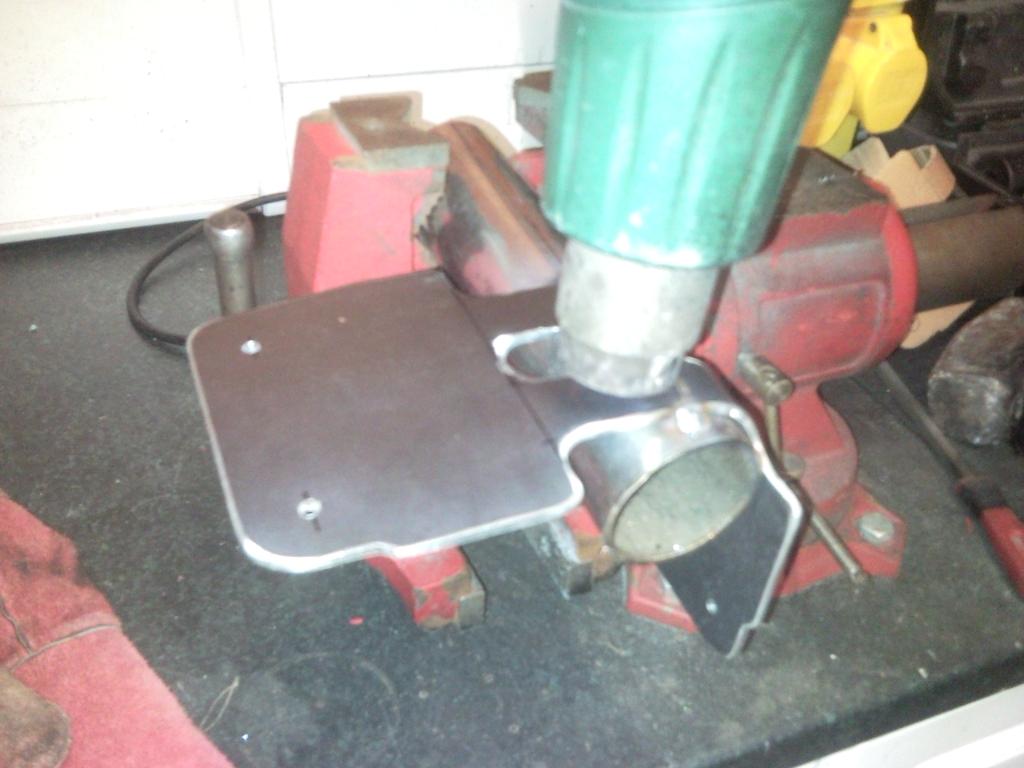

fully bent around the tube
cut tack welds off and hey presto
holes then drilled to 12mm
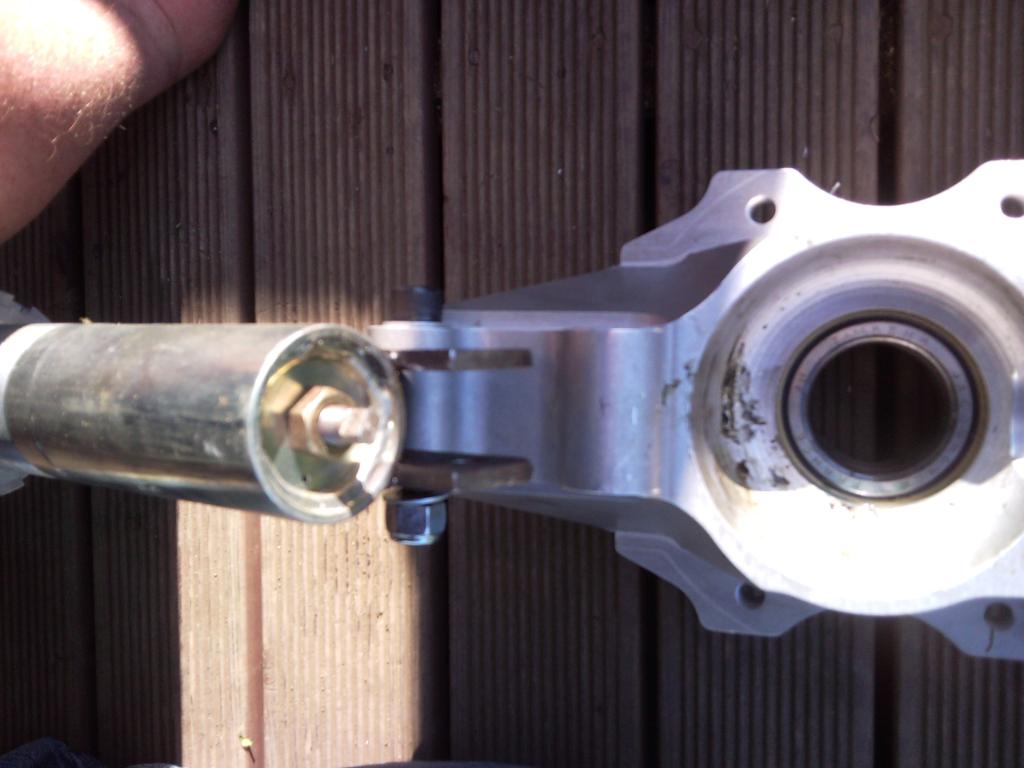
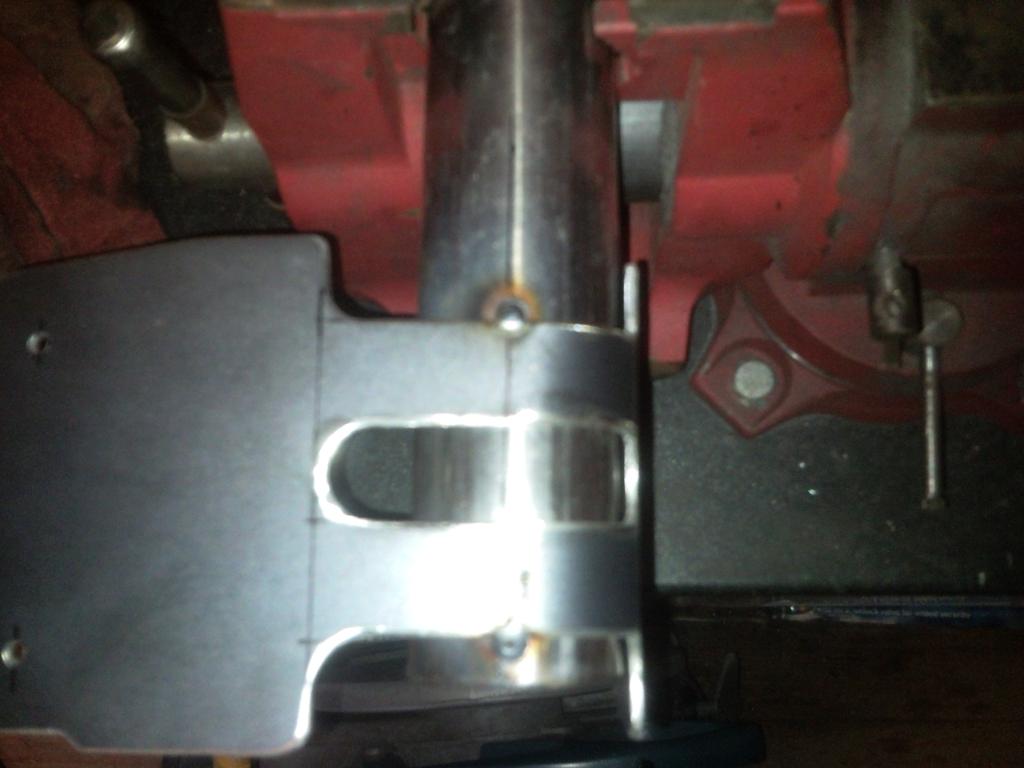
then tried on to the bilstein strut
then fitted to wrc upright
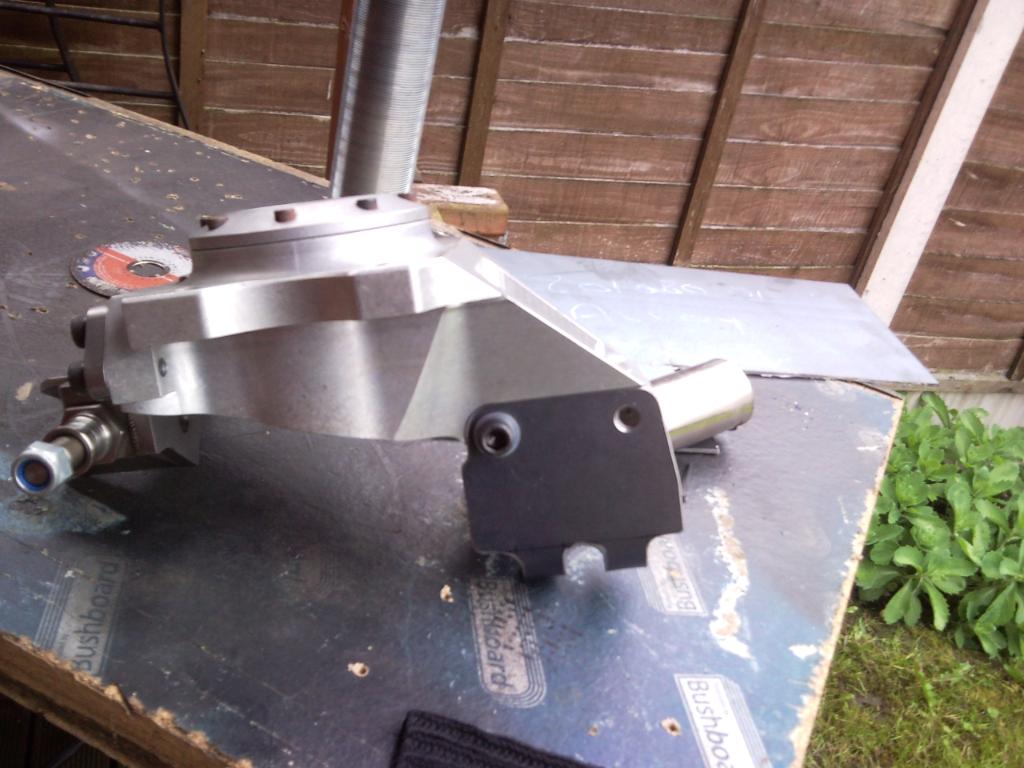
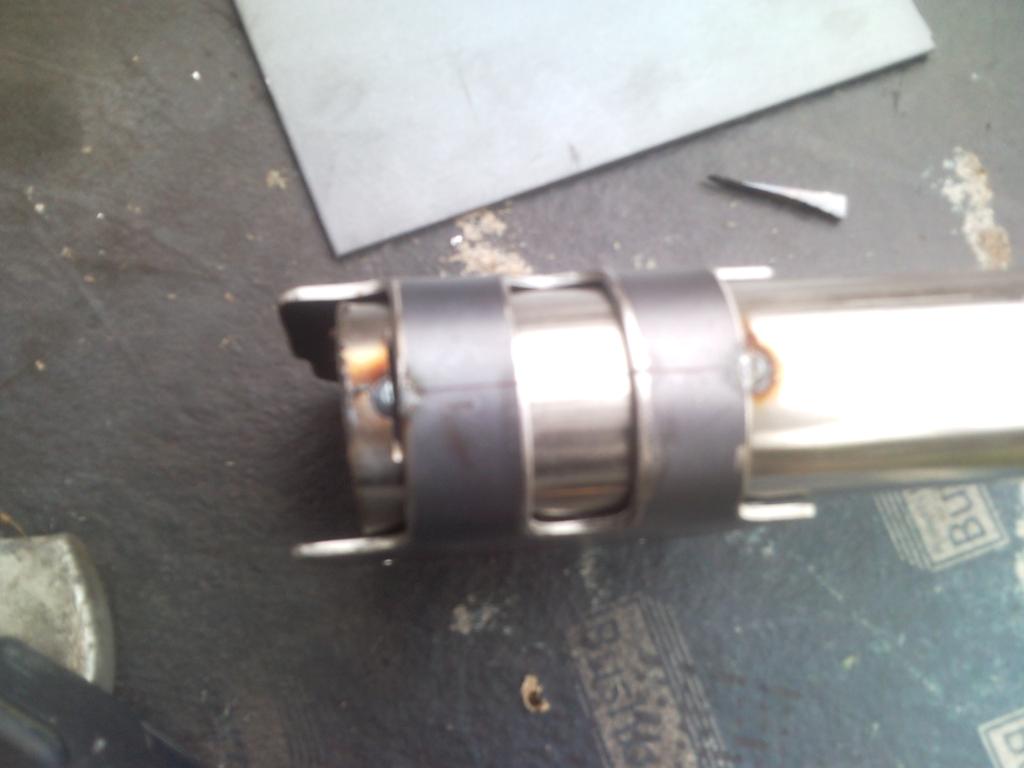
then welded on to the strut case and built back up
full strut and wrc upright bolt together
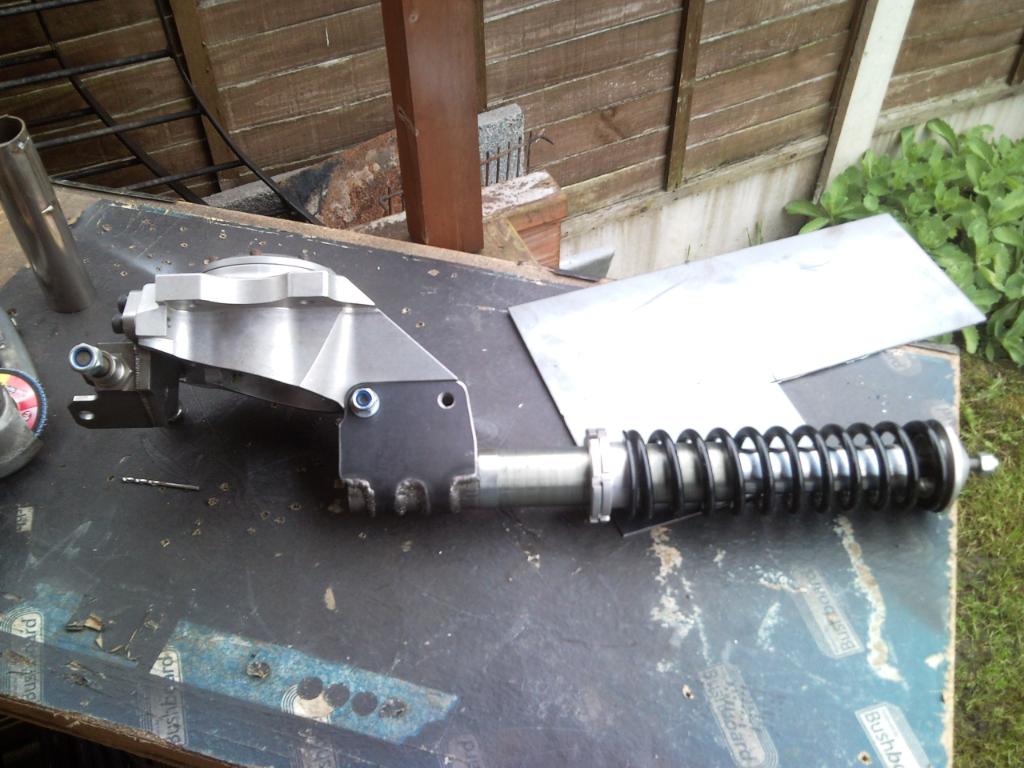
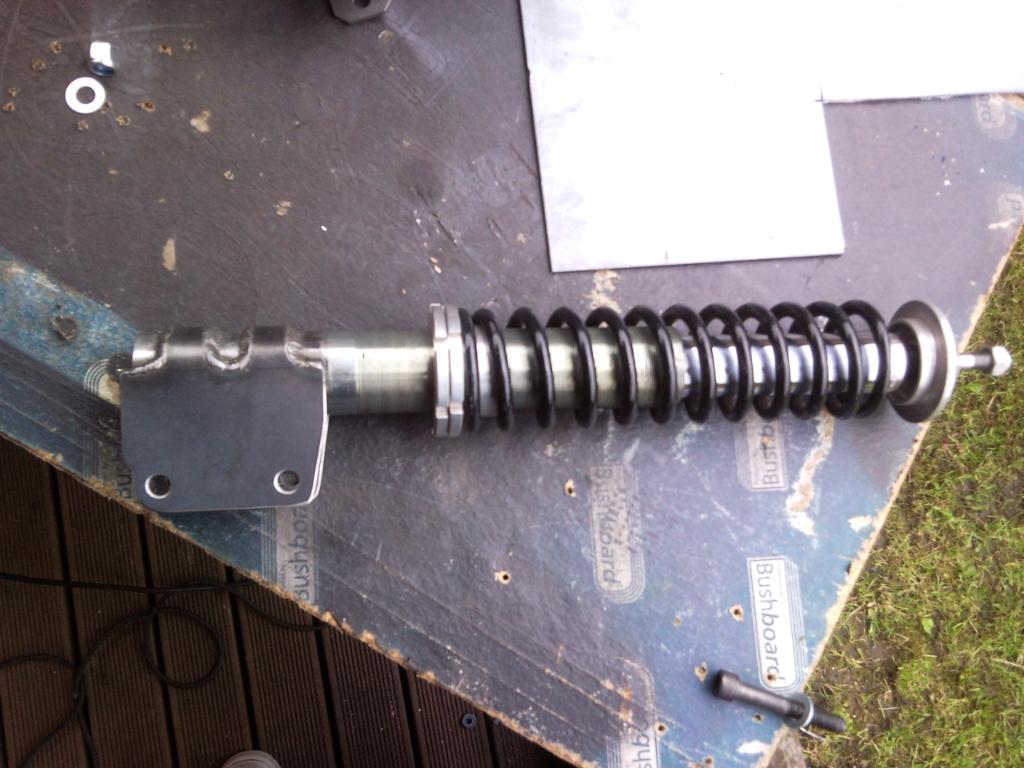
strut leg straight
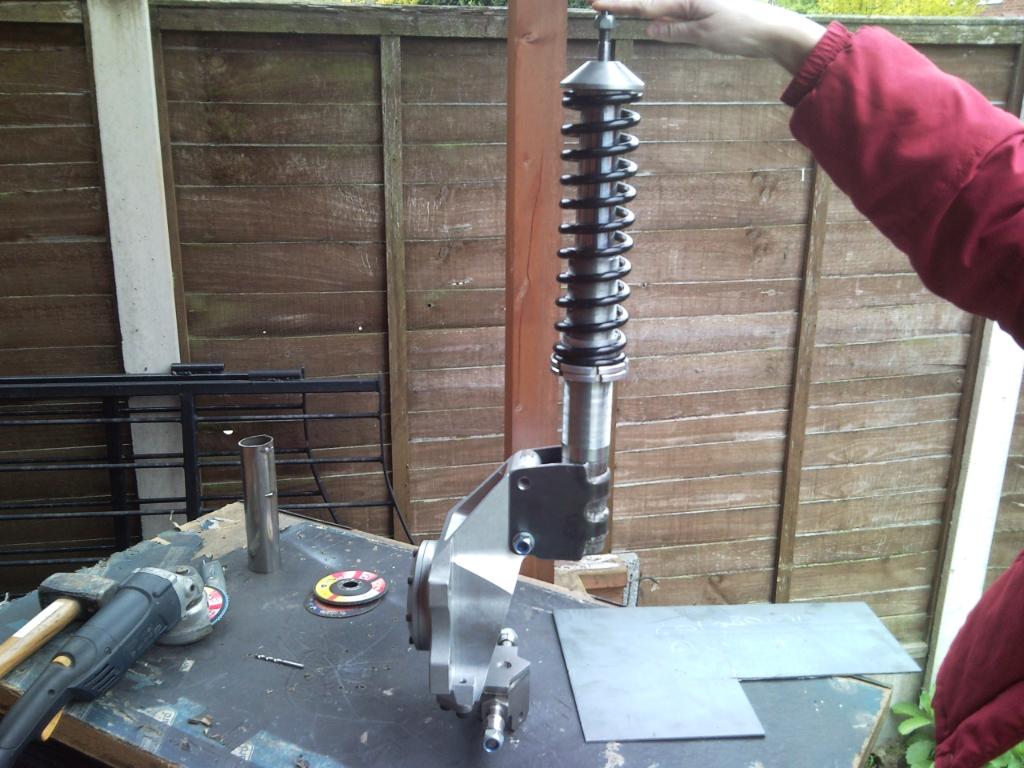
what strut leg could go to with offset washers
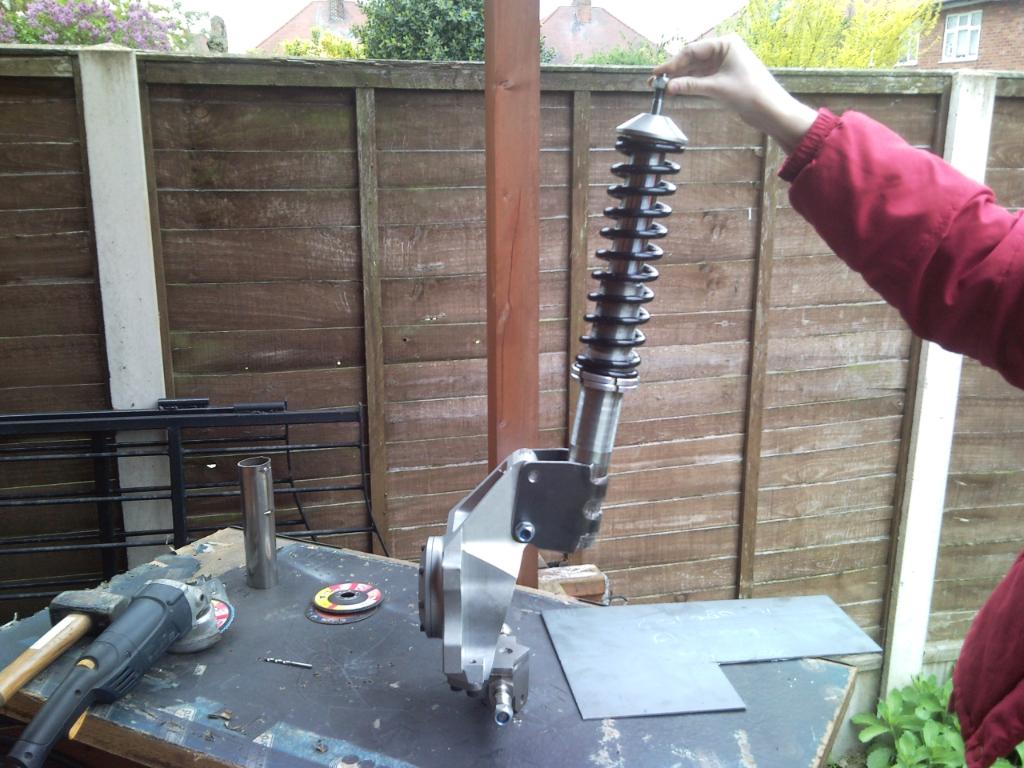
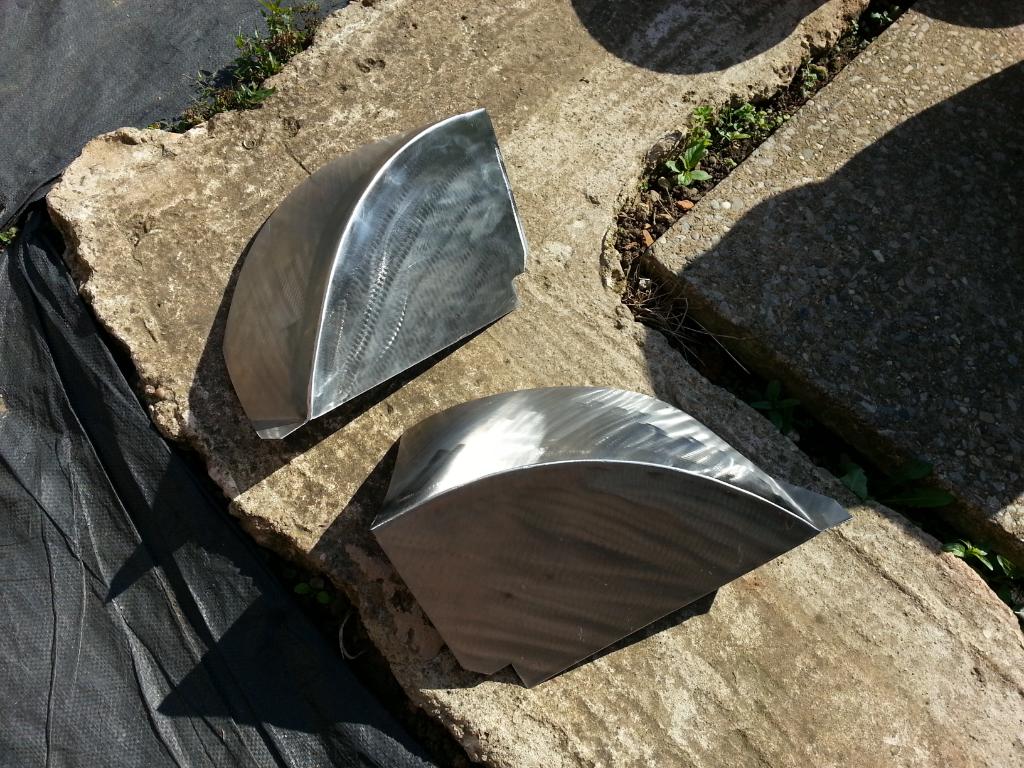
second one finished just needs building back up

and all finished both together

iam still waiting for mk to finish my hubs off and collect them soon so i can then start building the rear end up , i got some more work for mk aswell like engine mounts and gearbox mounts and some trick ohlins suspension so hopefully more updates soon , if the weathers ok there maybe some tomoz but i wont hold my breath.
anyway thanks for looking
cheers paul
first was a set of bilsteins that had custom mounts fitted but not what i wanted but i got them for a fair price
next was to buy all the steering column components
splined shafts
2 roller bearings and 1 spherical bearing
cds 20mm tubing 3.2mm wall thickness
cds 50mm tubing 2mm wall thickness
univeral joint
also got a new rubber donut for the rear prop
so on to the fabrication of the steering column
the 20mm cds tube needed machining out 1mm which a drill did the job to except the splined shaft
before
after
the tube can now except the splined shaft
splined shaft cut in half
cds tube drilled for plug welding to add strenght to the steering shaft
splined shaft mounted ready for welding
plug welded and double welded around the tube
next was to clean the 50mm tube and mark the holes
32mm hole saw at the ready , first of many holes
many holes later
shaft mount in outer column
next was to mount the rear anti roll bar but i was abit limited with space so decided to use the front anti roll bar brackets that i dont need now as the wrc crossmember already has the arb mounts welded on to it. slightly modded by cutting some lugs off
ready to be welded on , cleaned the area for welding
welded on nice and neat
anti roll bar all mounted up
drop link central with with turret tower
i decided that the rear anti roll bar brackets needed streghtening inside the car as the floor is only 1mm thick and could flex under load from the roll bar working , these are the strenghtening plates i made
cardboard template
metal copy
holes drilled
bent and swaged the holes
welded in to the car
next was to modify the bilstein cases for wrc fitment to fit my billet uprights
orginal mounts
far to narrow for the wrc uprights
cut off orginal mounts and cleaned up
this is the shape we wanted
cardboard template
then a hard template out of foamex
a bit of measuring and working out and a double template with wrap around straps like the orginal bilstein wrc cases
metal template
tack weld the metal template to a 50mm tube and heated with a heatgun , i didnt think it would work as the metal was 3mm thick but it did
starting to heat and bend
fully bent around the tube
cut tack welds off and hey presto
holes then drilled to 12mm
then tried on to the bilstein strut
then fitted to wrc upright
then welded on to the strut case and built back up
full strut and wrc upright bolt together
strut leg straight
what strut leg could go to with offset washers
second one finished just needs building back up
and all finished both together
iam still waiting for mk to finish my hubs off and collect them soon so i can then start building the rear end up , i got some more work for mk aswell like engine mounts and gearbox mounts and some trick ohlins suspension so hopefully more updates soon , if the weathers ok there maybe some tomoz but i wont hold my breath.
anyway thanks for looking
cheers paul
 19-05-2012, 09:15 PM
#530
Advanced PassionFord User
Thread Starter
thanks for the kind comments
cheers paul
 20-05-2012, 04:08 PM
#534
Advanced PassionFord User
Thread Starter
mk there is no rubber seal in the bottom just 2 bronze guides , one at the top and one half way down
no there is no risk as the whole inserts comes out so your just welding the cases .
 05-08-2012, 10:38 PM
#542
Advanced PassionFord User
Thread Starter
right another little update as again been so busy its been unreal and the weather been really shit down derby way on so i just havent got the car uncovered as its just aint worth the risk even thou its rusty as fuck lol.
first i found a really good set of grpa bilsteins that iam going to use to mock up the front end , not bad as they have brand new springs and inserts
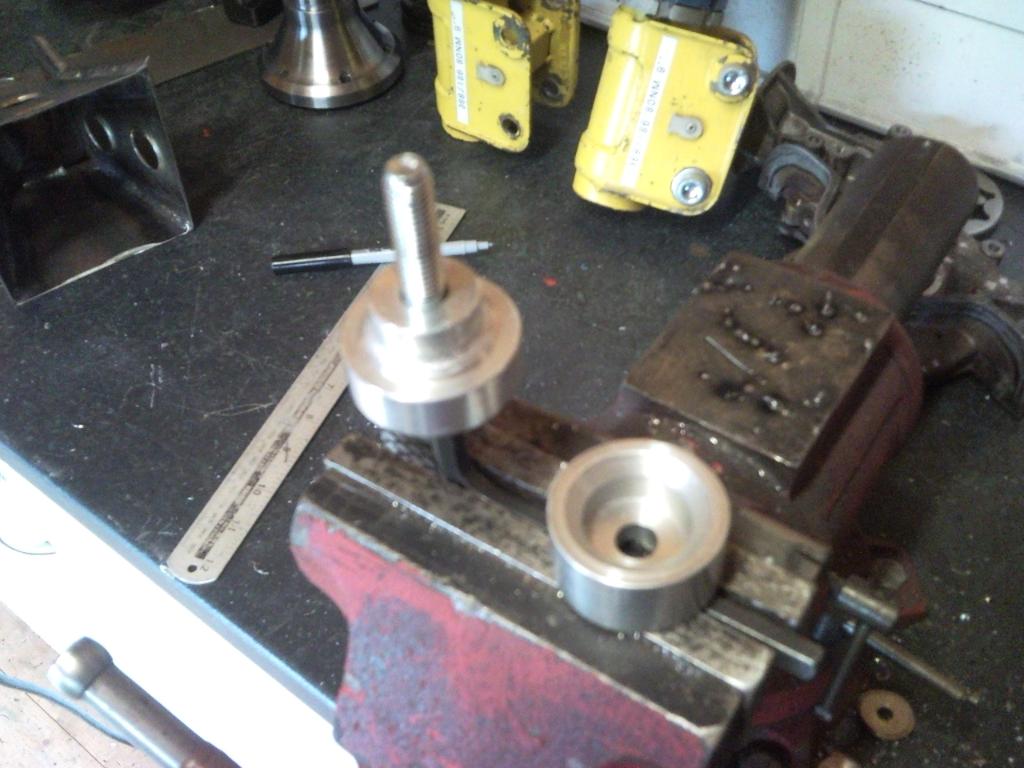
next on the list was to get mk motorsport to make me x2 brand new drive flanges to wrc spec and to fit mk bearings in his upright and to make me x2 brand new drive flanges to 4x4 spec but also to fit mk uprights , mk has machined them up but is having trouble getting them splined but hopefully they should be done in the next month or two. so as i needed to get the rear end all built up and rolling to see if the wheels are ok etc i got mk to turn the drive flange down and stub shafts to fit mk bearings . mk also kindly cleaned them up for me so cheers for that mark
stub flange
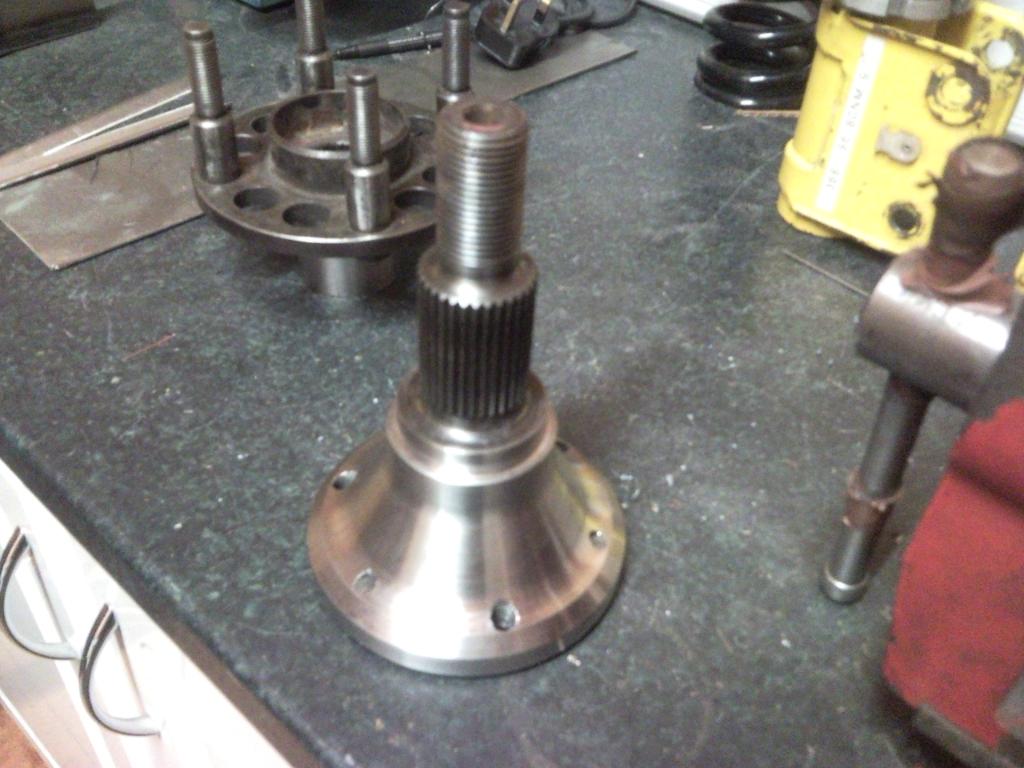
drive flange
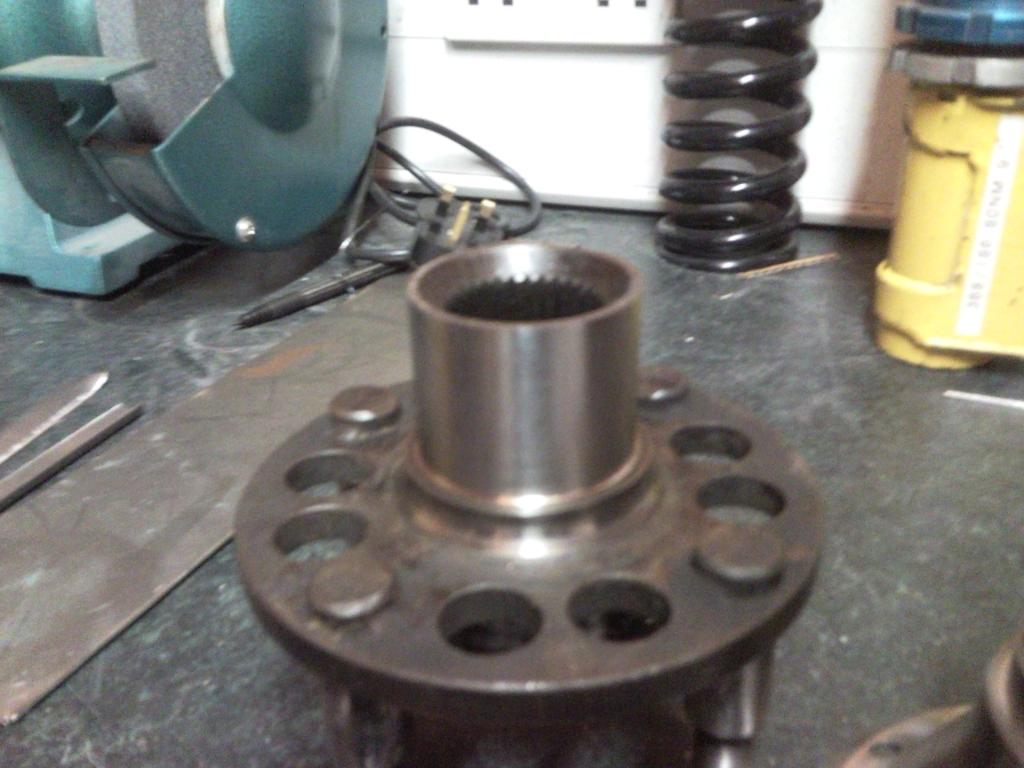
and both together
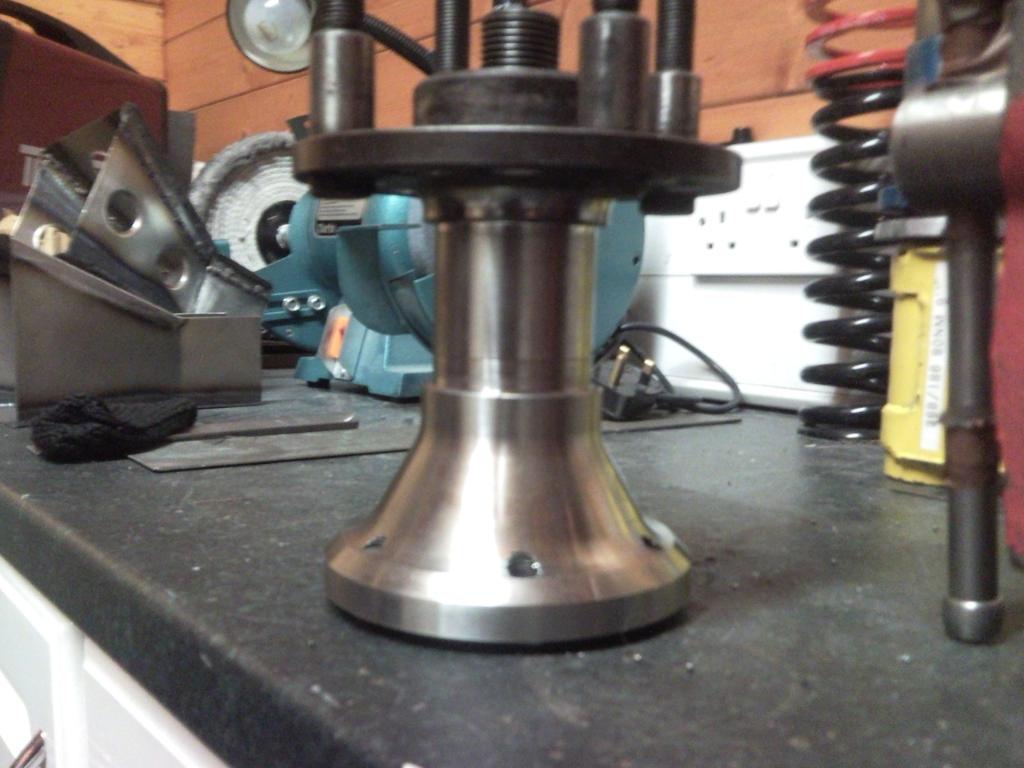
and all built up into the upright
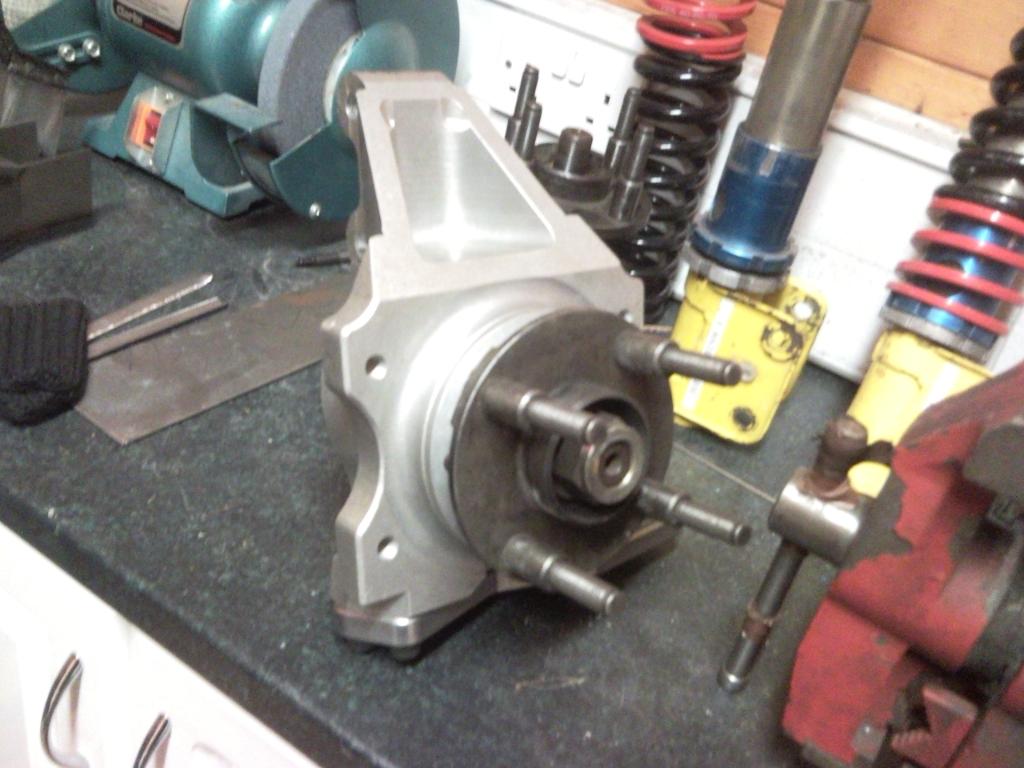
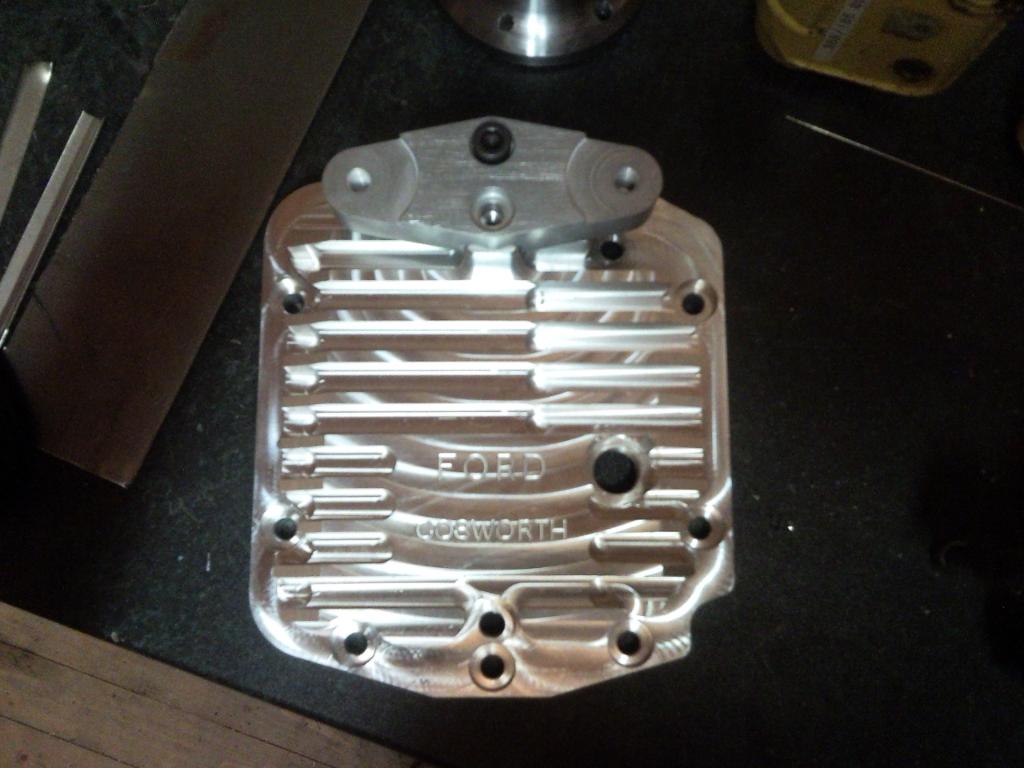
mark had forgot that i was using a 2wd rear diff and made me a 4x4 diff cover so he quickly machined me a 2wd diff cover up so i could collect when i collected my drive flanges
nice new shinny cover
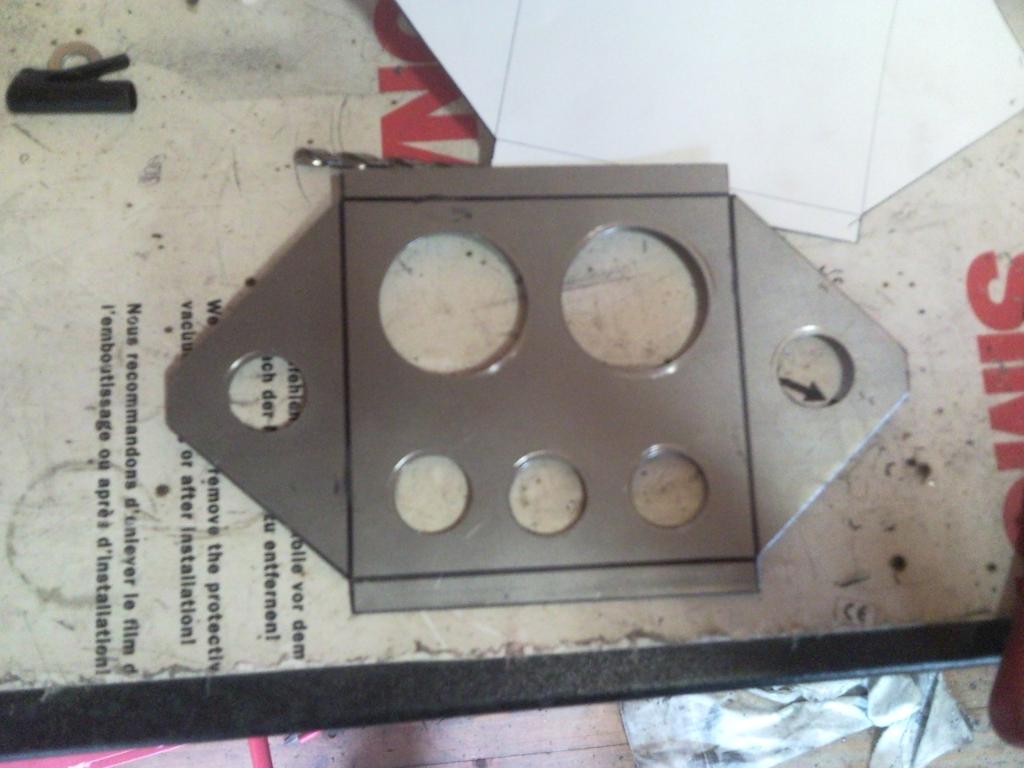
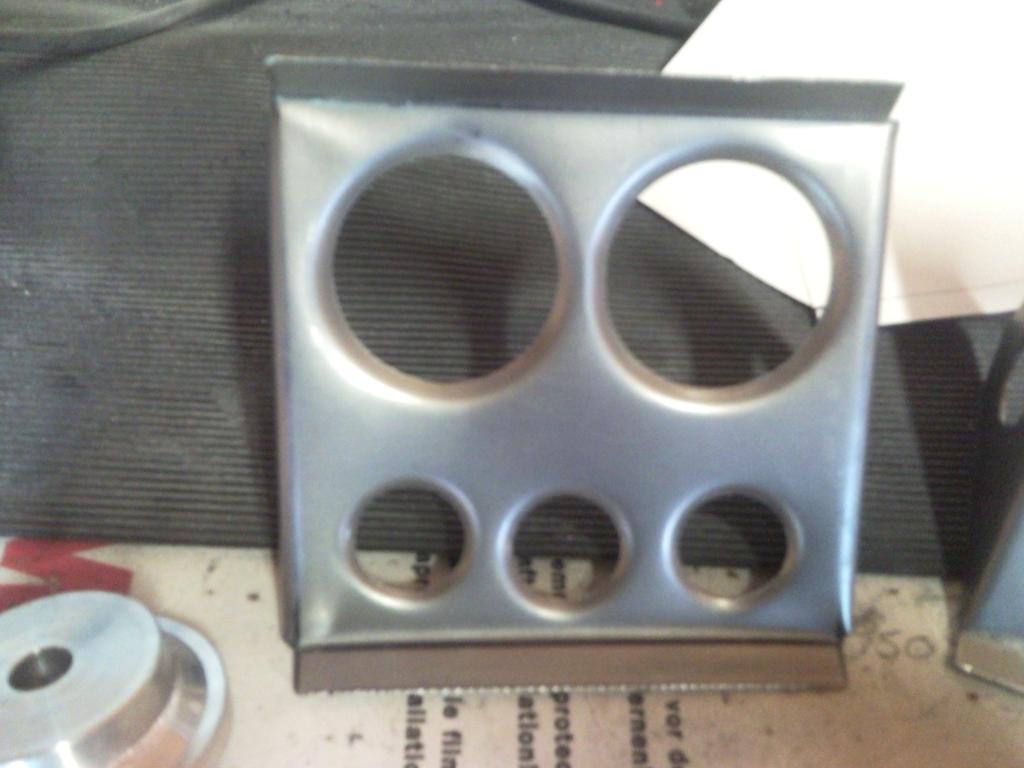
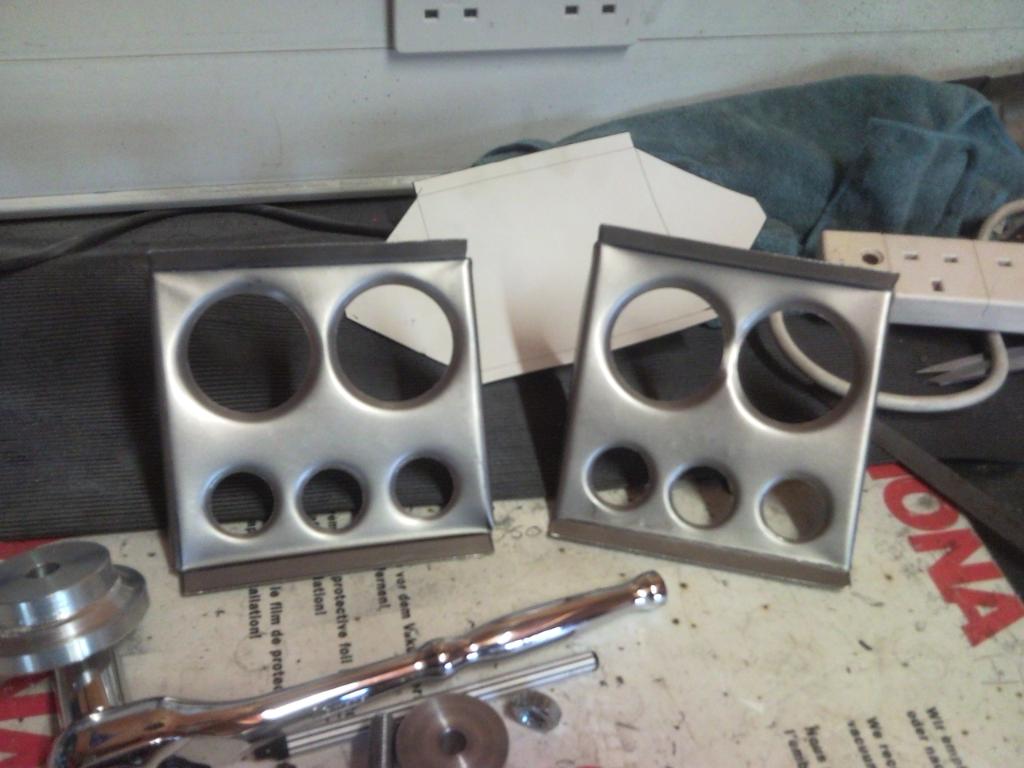
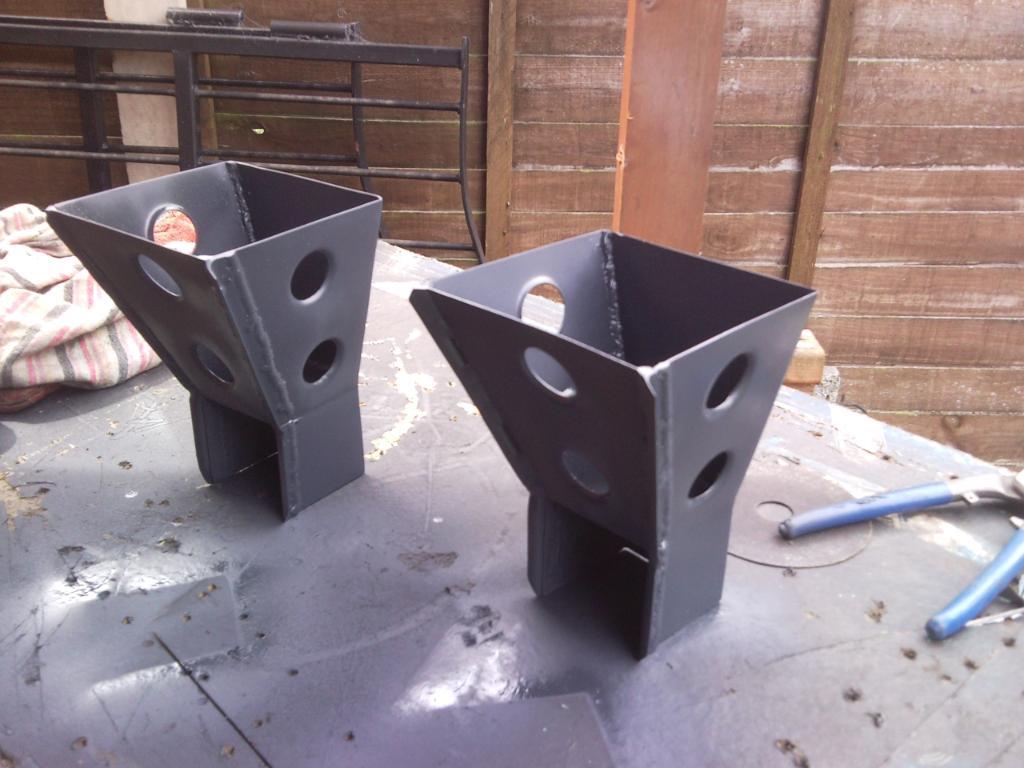
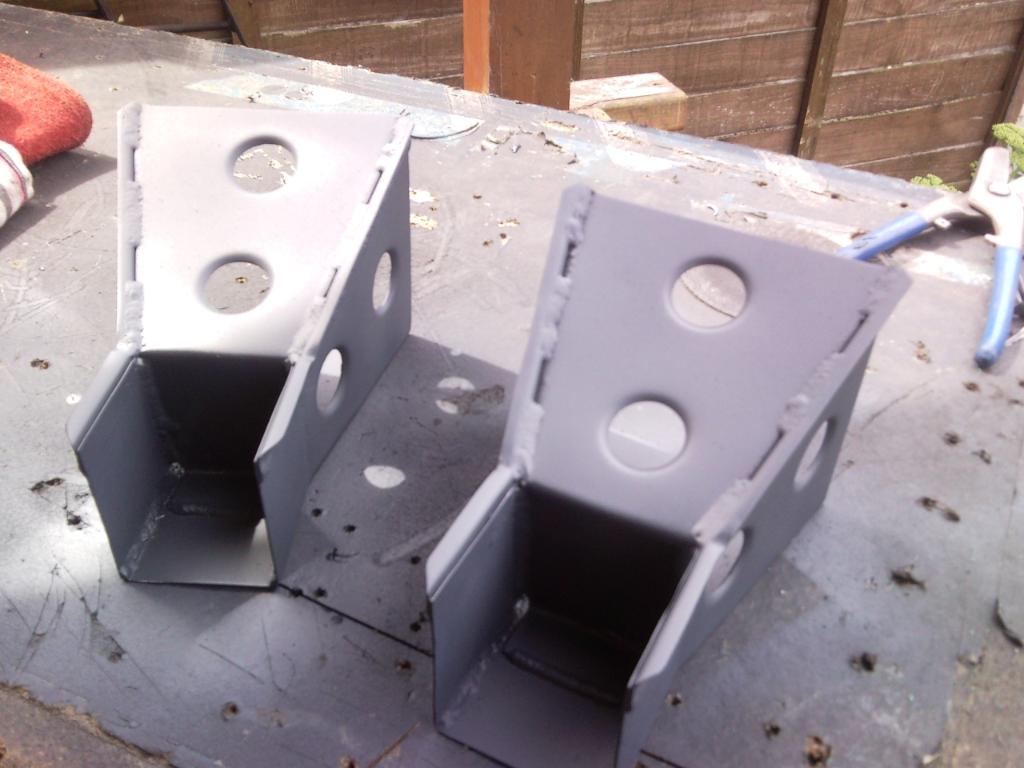
also looking at the engine i noticed when i was playing with the front diff the engine wants lifting up and inch if i can as even thou iam running a remote diff and a dry sump the drive shaft would need to go through the sump and i dont want that so thats a job to do. i would want new engine mounts so thats what i got on with today as again it was pissing it down on and off all day
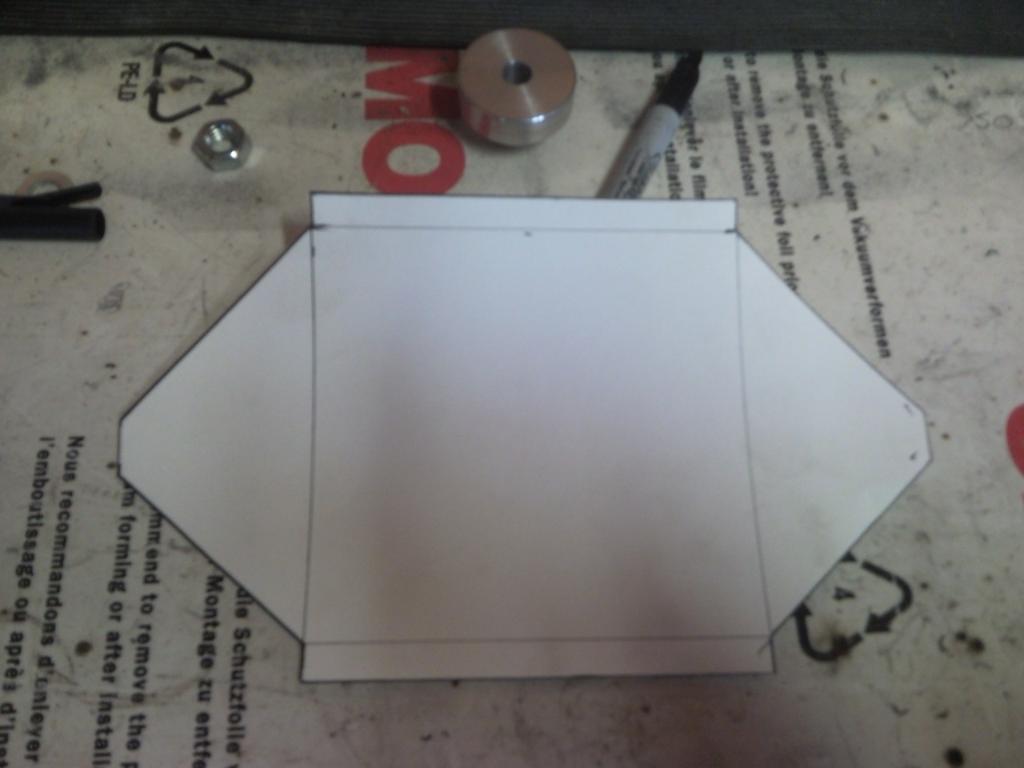
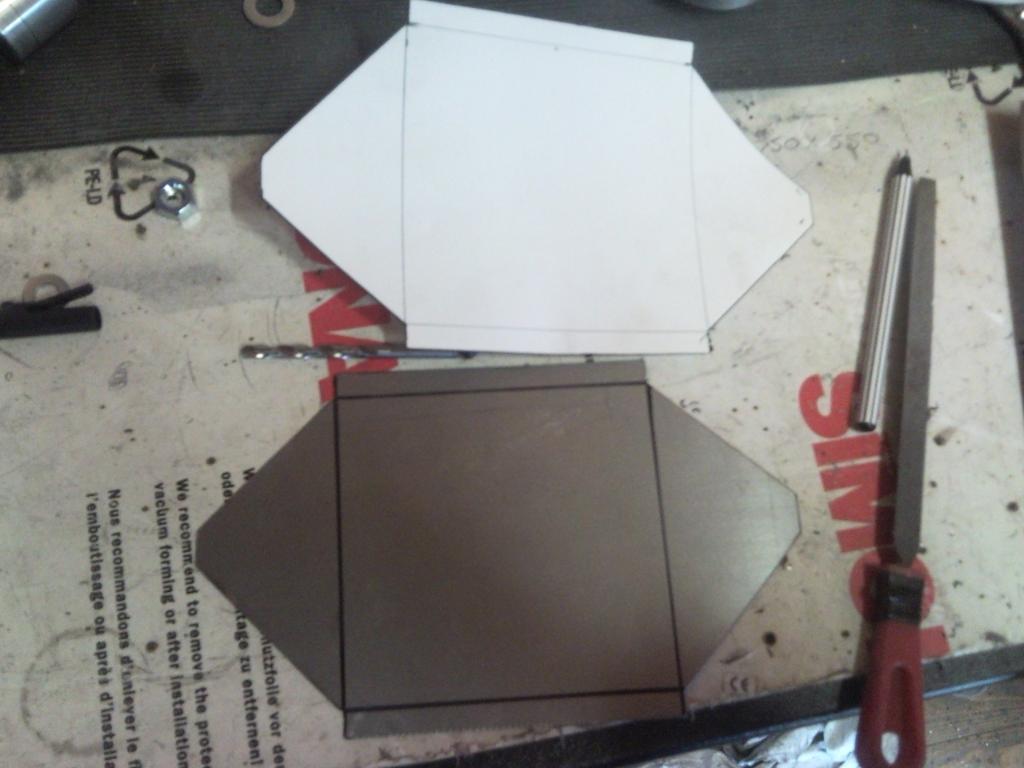
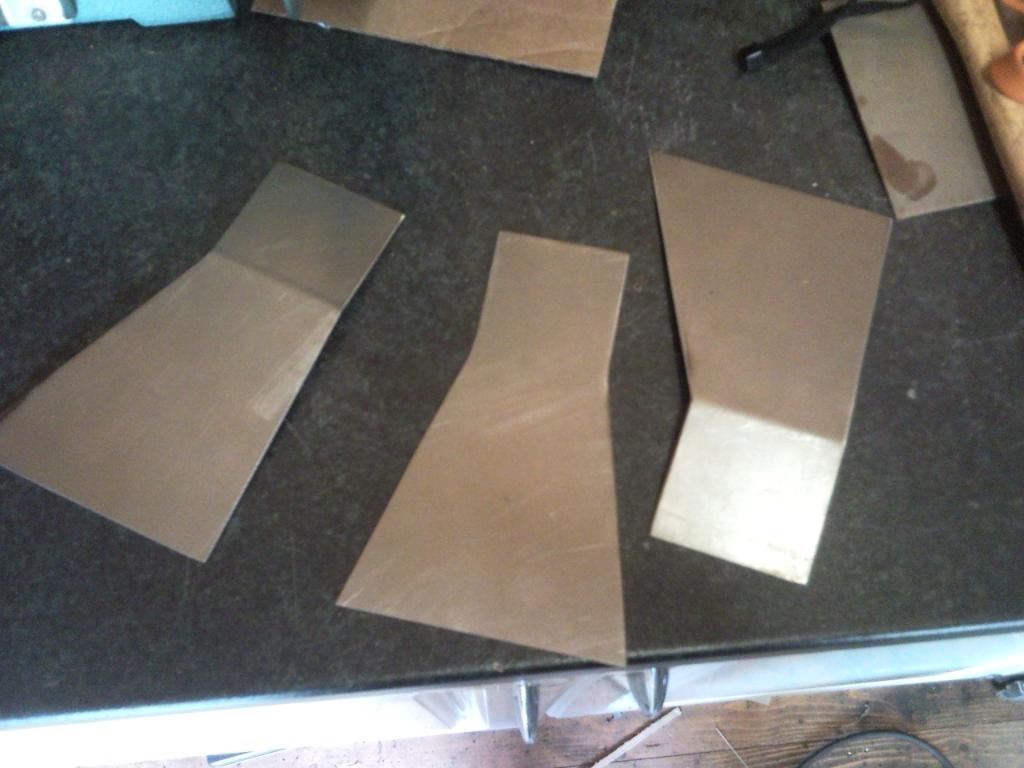
card board templates

made in metal
all tig welded up
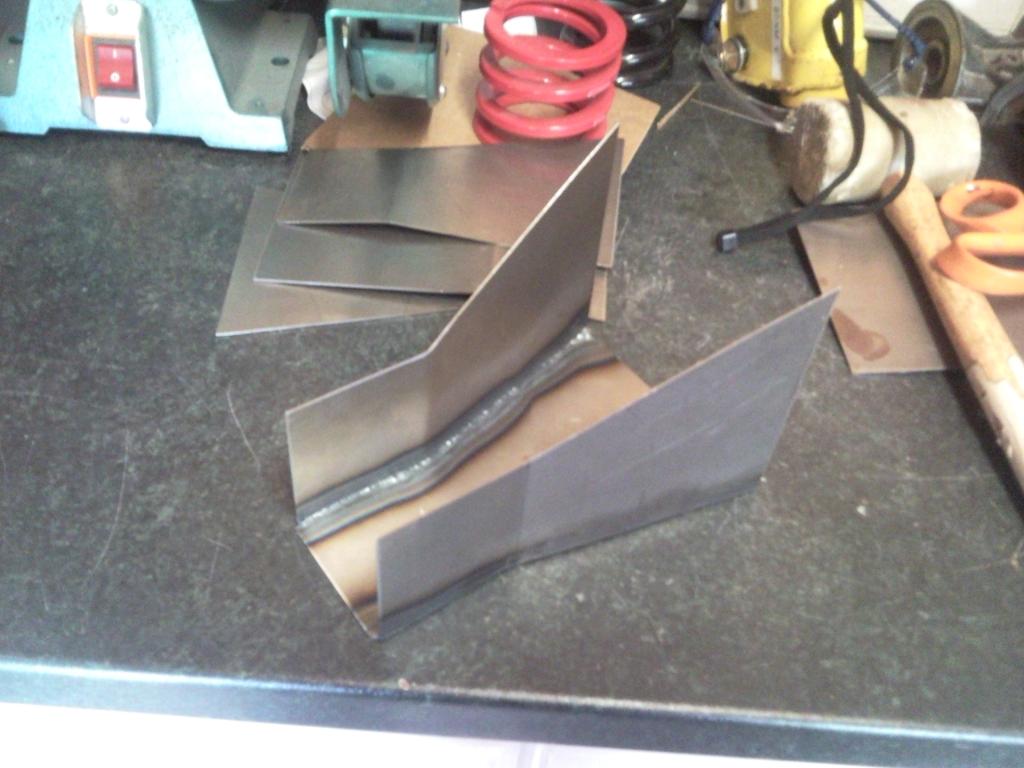
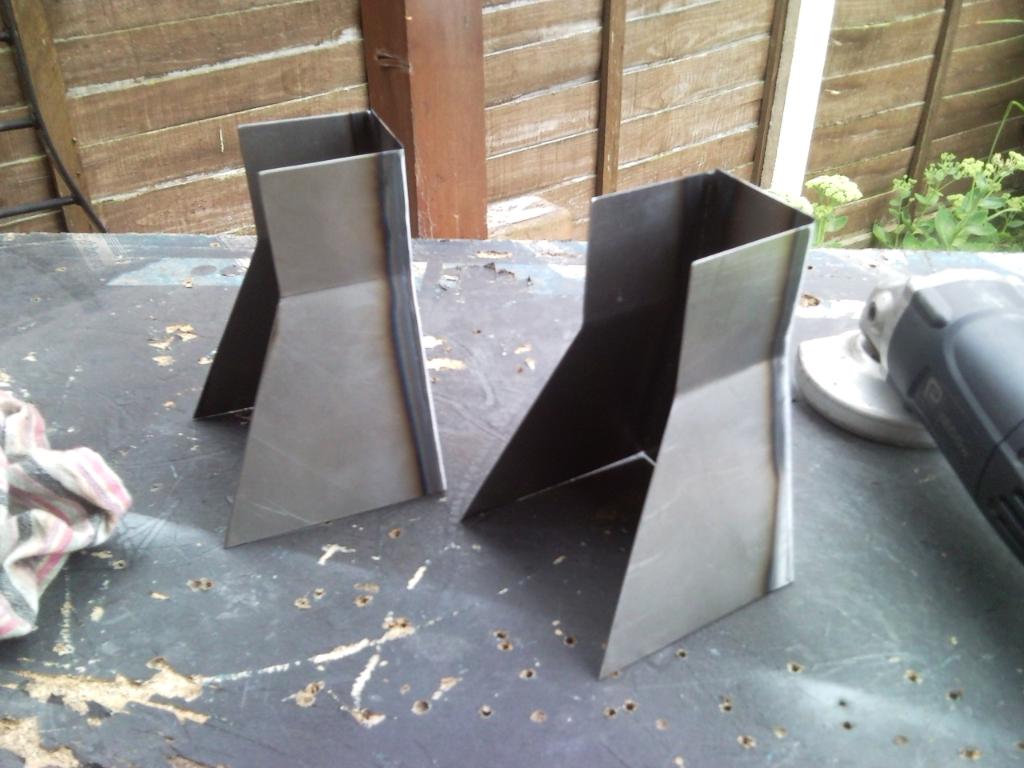
2 made up with lids on
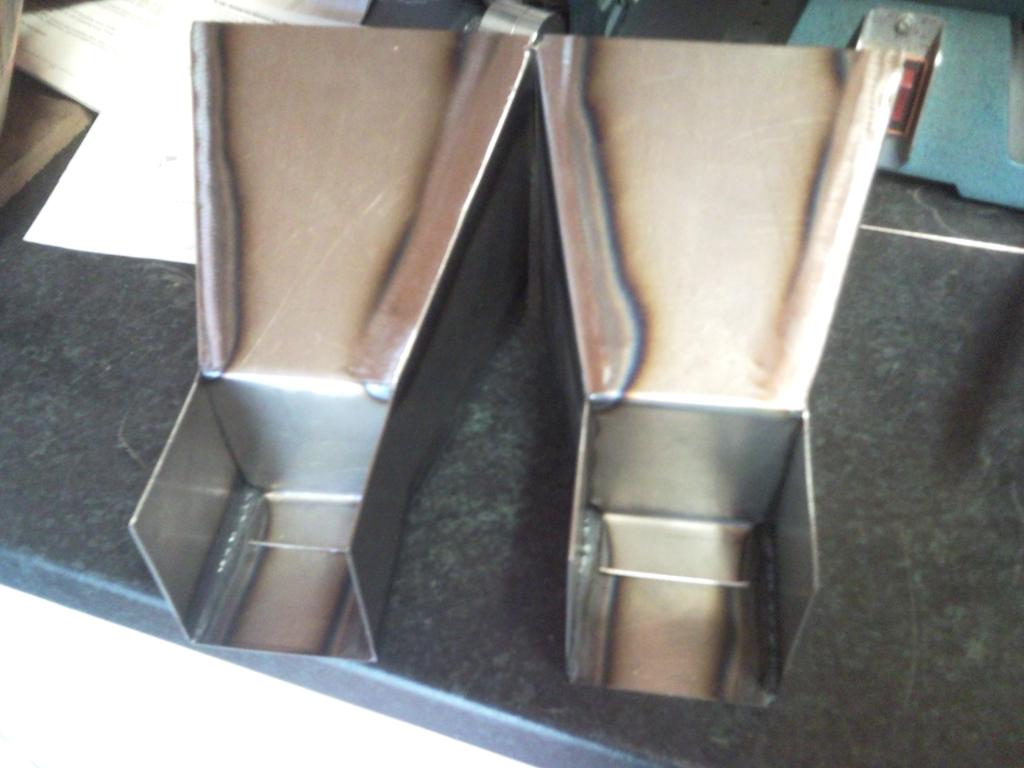
edging strip to add strenght

edging strip on and migged for strenght along with the insides also to add a bit more meat
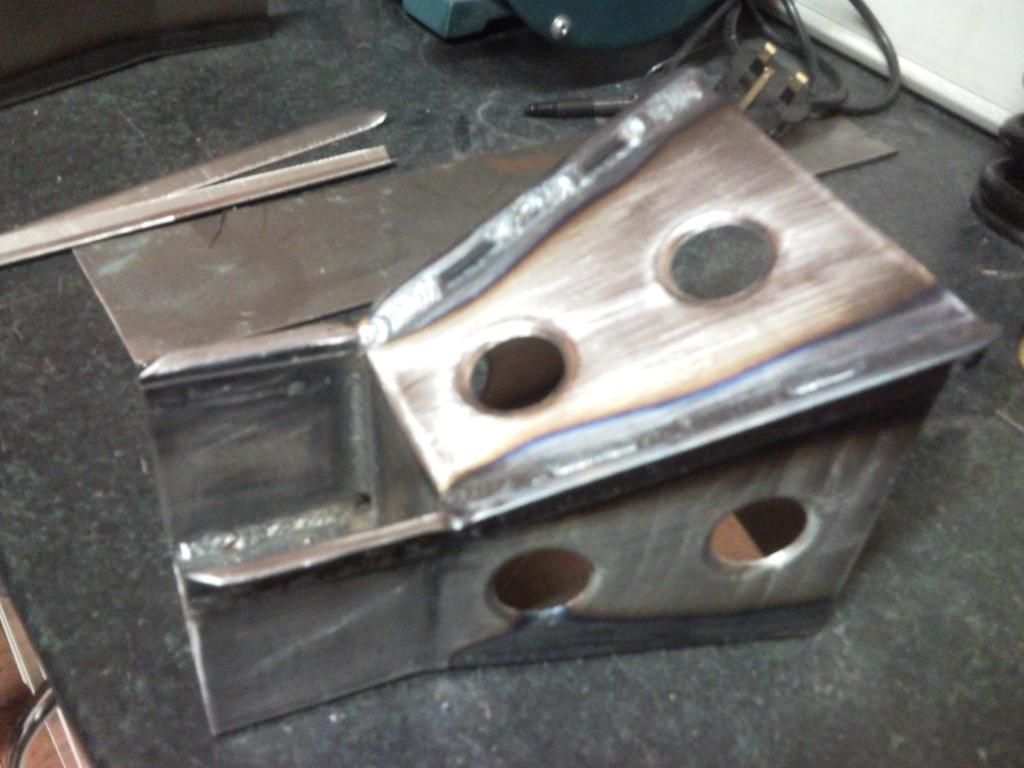
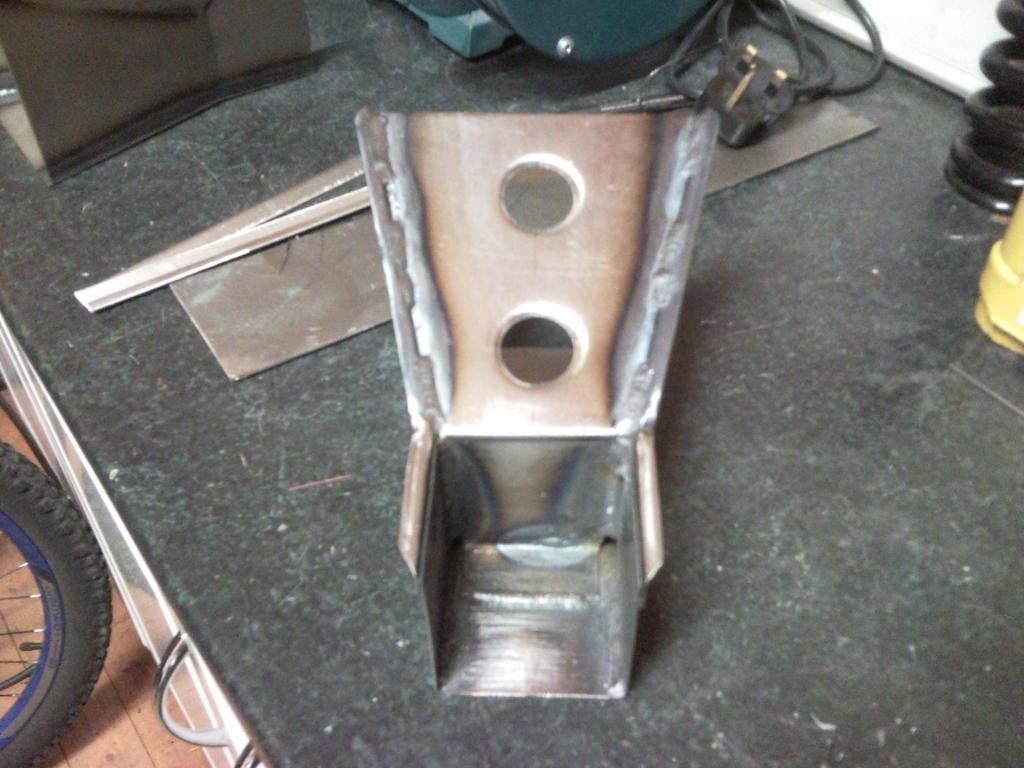
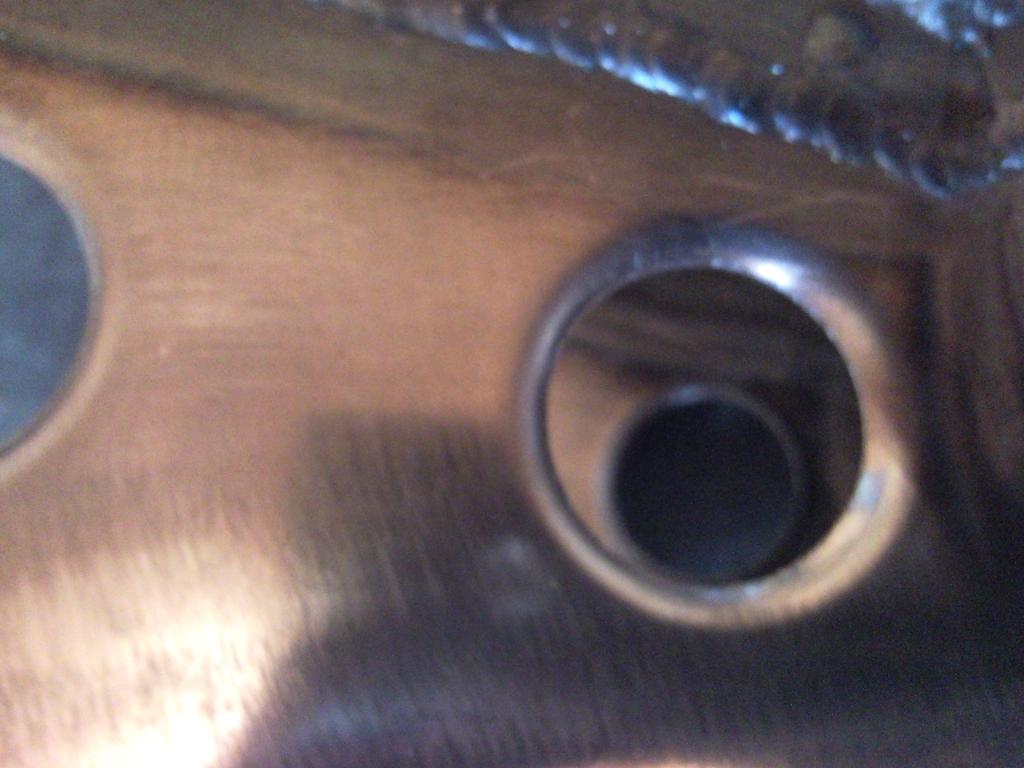
holes drilled into the top and sides
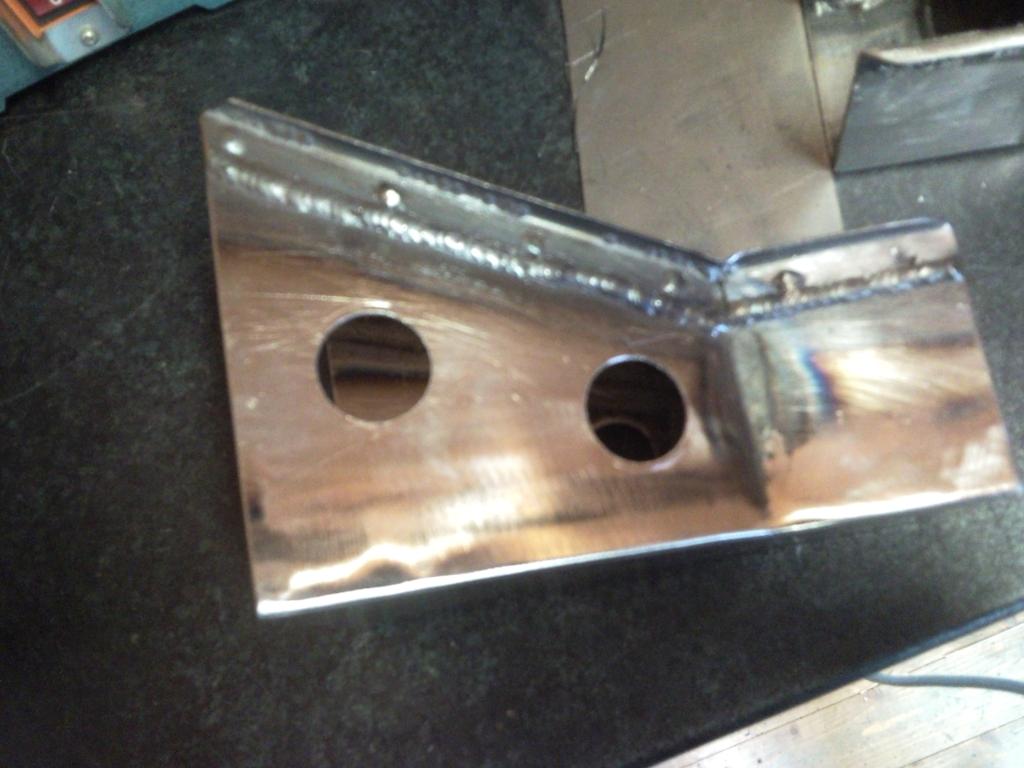
swaging tool
holes swaged up
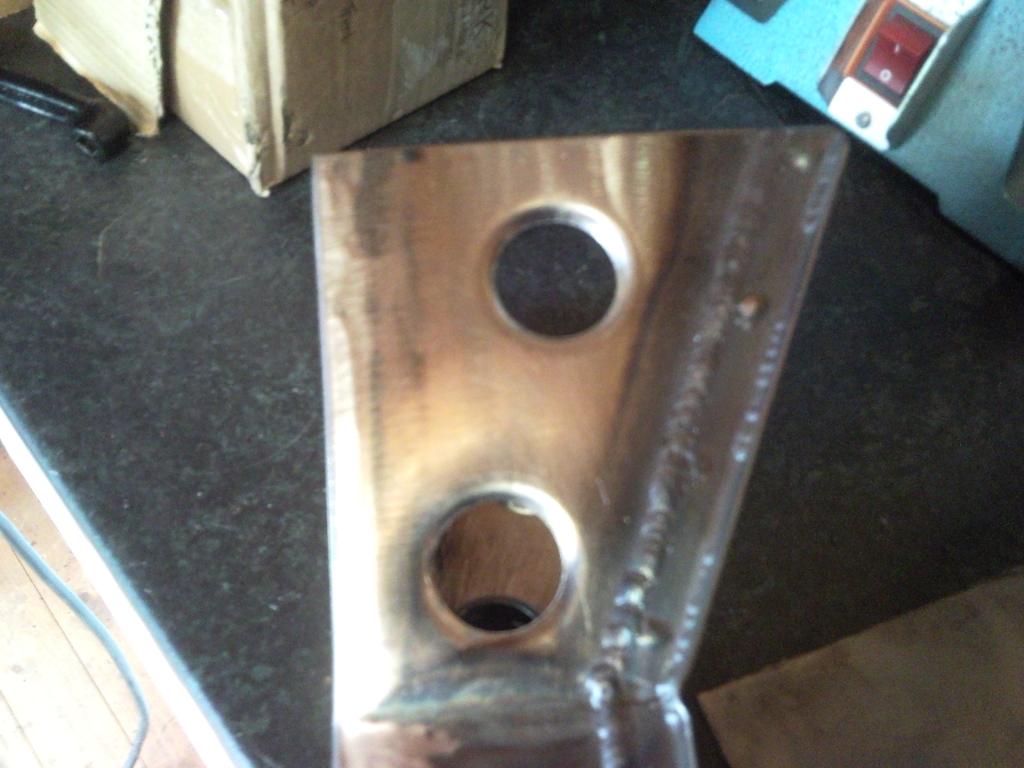
all cleaned and primed up
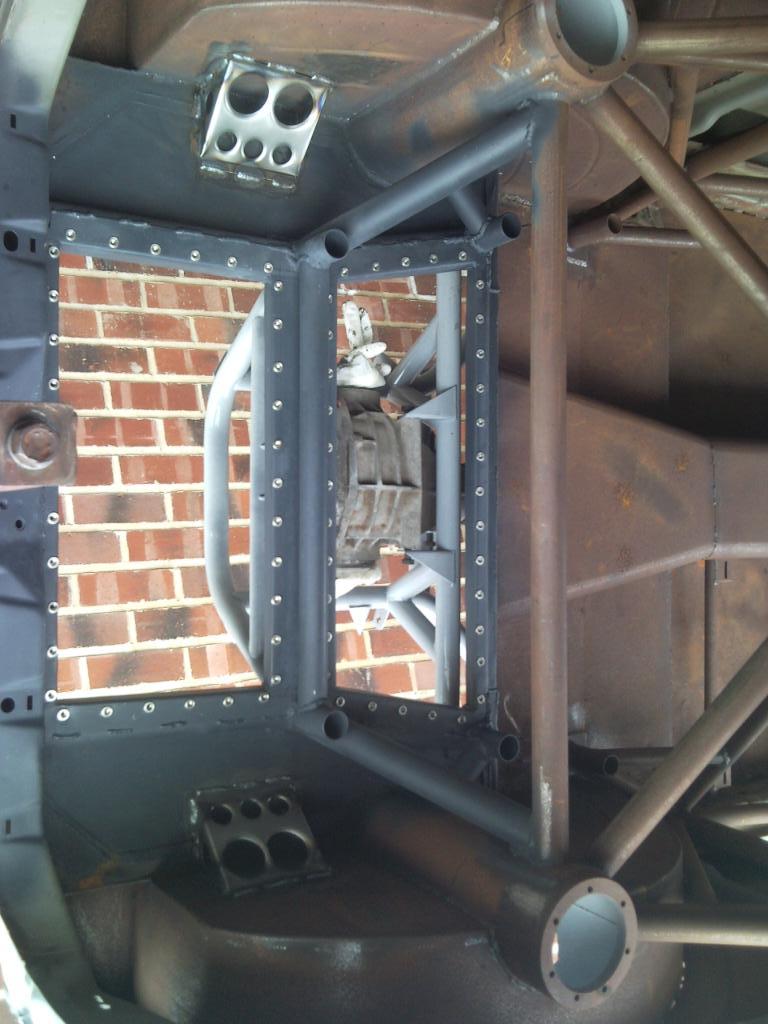
hopefully get the rear end all built up now which for me is a milestone and if the good weather comes back i might get more done
thanks for looking
cheers paul
first i found a really good set of grpa bilsteins that iam going to use to mock up the front end , not bad as they have brand new springs and inserts
next on the list was to get mk motorsport to make me x2 brand new drive flanges to wrc spec and to fit mk bearings in his upright and to make me x2 brand new drive flanges to 4x4 spec but also to fit mk uprights , mk has machined them up but is having trouble getting them splined but hopefully they should be done in the next month or two. so as i needed to get the rear end all built up and rolling to see if the wheels are ok etc i got mk to turn the drive flange down and stub shafts to fit mk bearings . mk also kindly cleaned them up for me so cheers for that mark
stub flange
drive flange
and both together
and all built up into the upright
mark had forgot that i was using a 2wd rear diff and made me a 4x4 diff cover so he quickly machined me a 2wd diff cover up so i could collect when i collected my drive flanges
nice new shinny cover
also looking at the engine i noticed when i was playing with the front diff the engine wants lifting up and inch if i can as even thou iam running a remote diff and a dry sump the drive shaft would need to go through the sump and i dont want that so thats a job to do. i would want new engine mounts so thats what i got on with today as again it was pissing it down on and off all day
card board templates
made in metal
all tig welded up
2 made up with lids on
edging strip to add strenght
edging strip on and migged for strenght along with the insides also to add a bit more meat
holes drilled into the top and sides
swaging tool
holes swaged up
all cleaned and primed up
hopefully get the rear end all built up now which for me is a milestone and if the good weather comes back i might get more done
thanks for looking
cheers paul
05-08-2012, 11:45 PM
#545
Advanced PassionFord User
Thread Starter
 30-09-2012, 11:37 PM
#549
Advanced PassionFord User
Thread Starter
a little update , been waiting for some parts off mk motorsports to get the car rolling but hes also waiting on them so hopefully they will arrive soon as i know mark is a top guy .
ive been trying to do as much as possible before winter really sets in and tbh i really wanted it painted by christmas but i know that its never going to happen as when you build a car like this nothing is never as simply as it seems lol
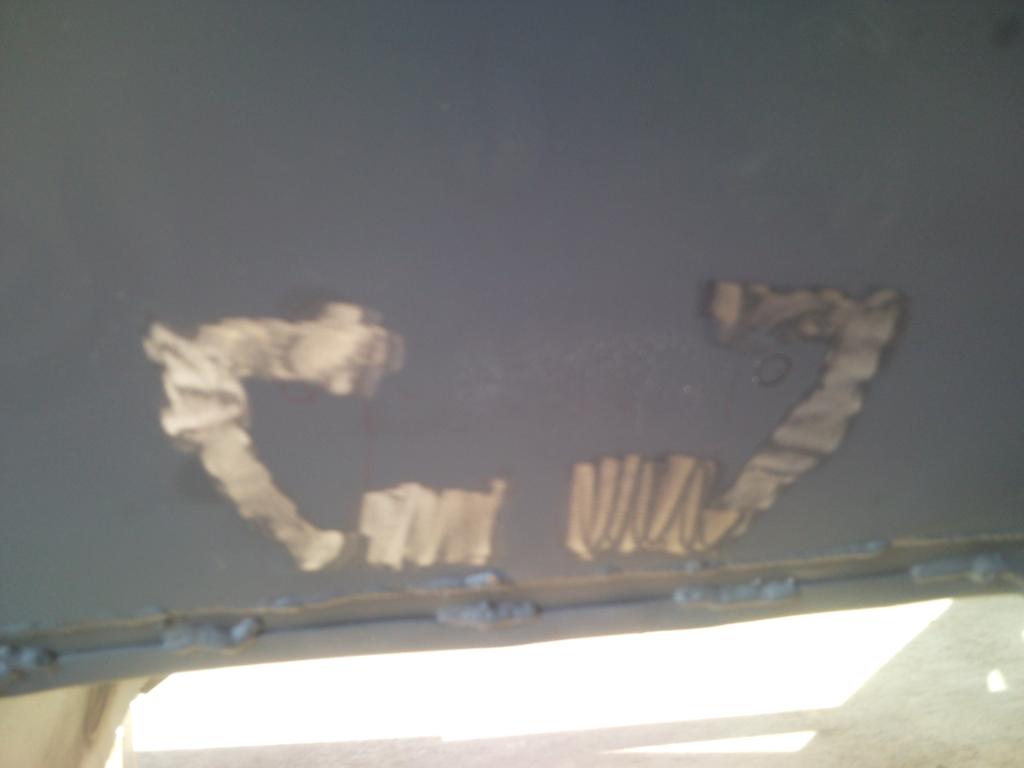
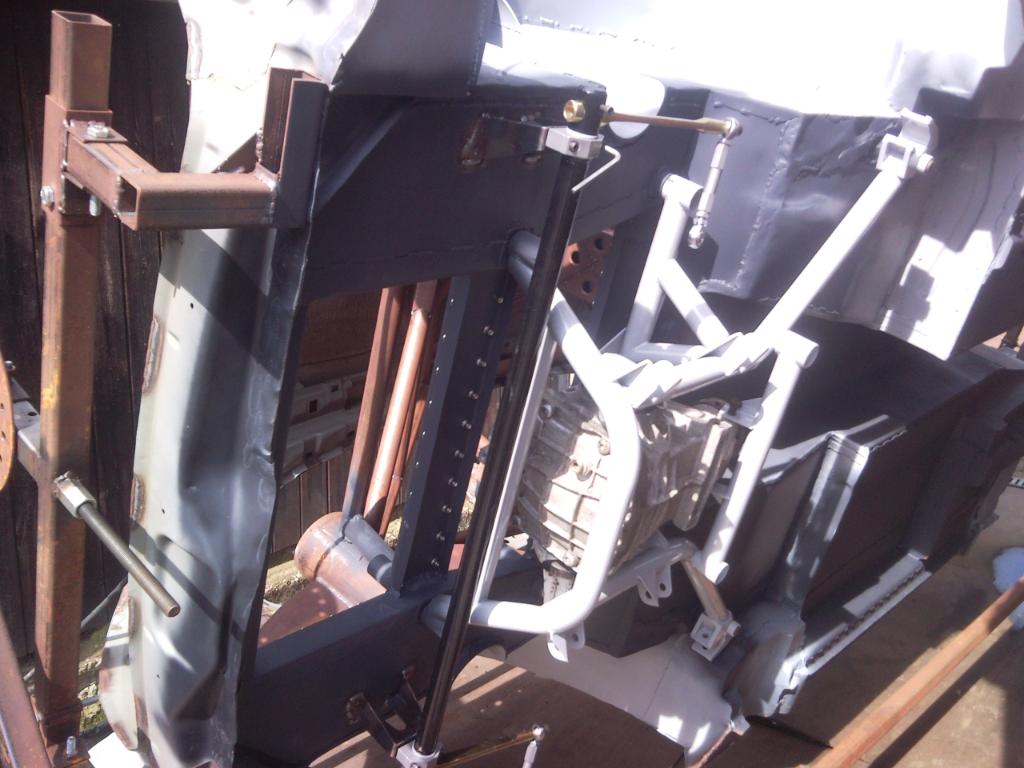
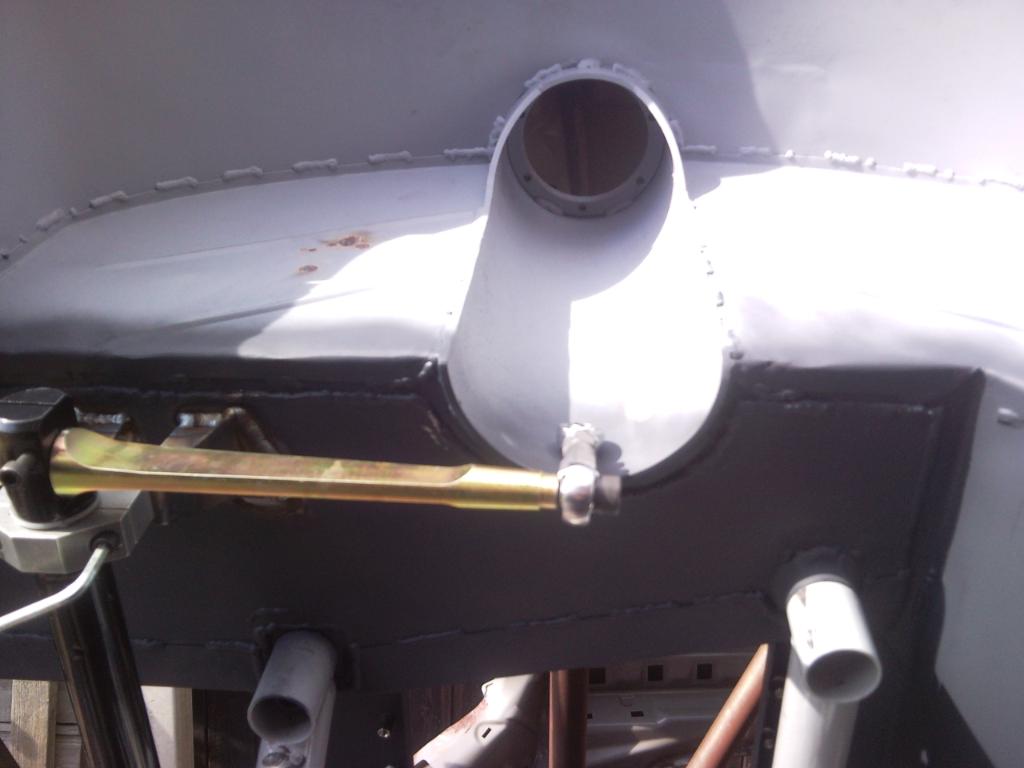
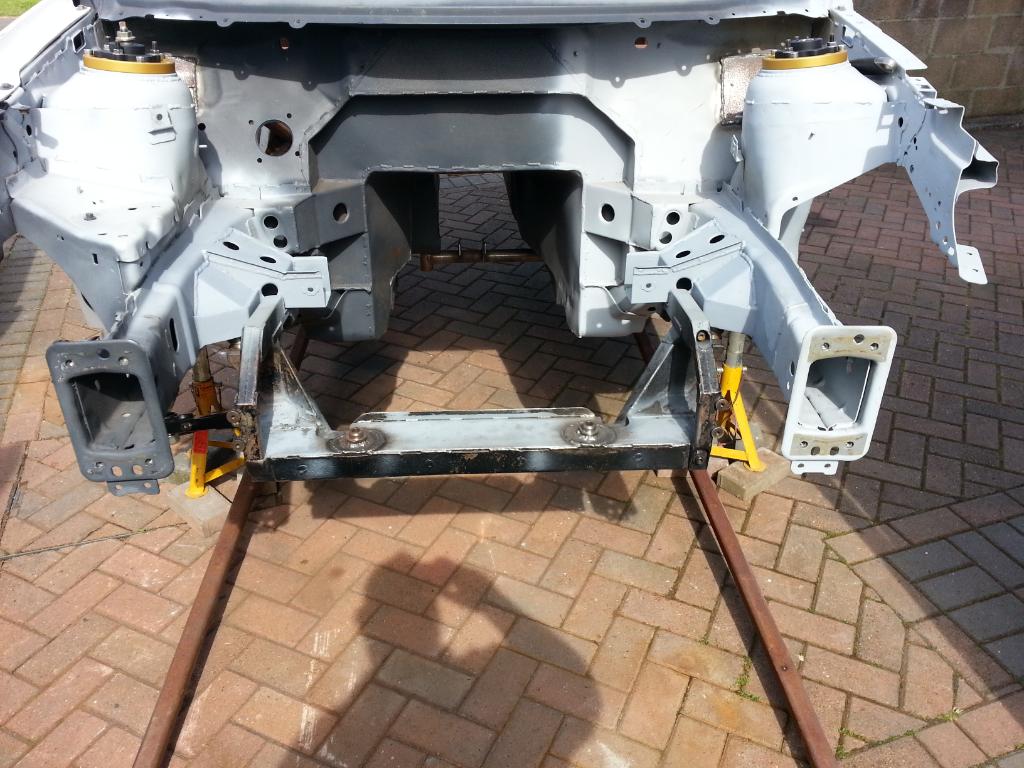
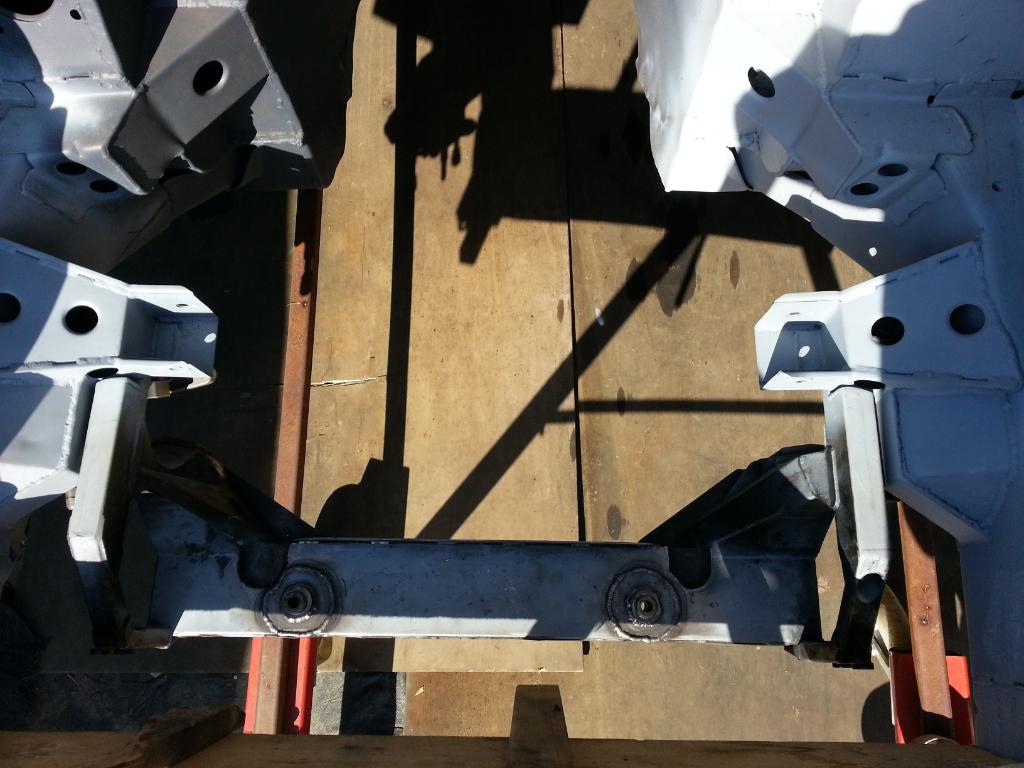
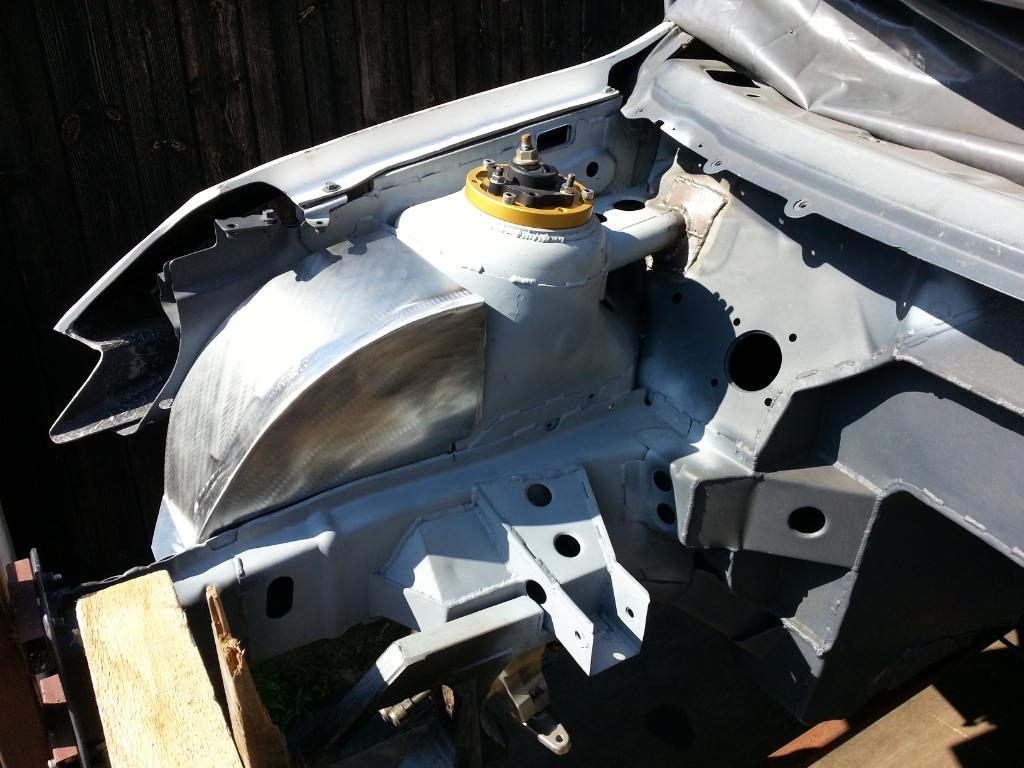
anyway been busy working out how to fit the wrc crossmember and mount it to the chassis legs so it looks nice and tidy , i had to make a box section with 4 threaded bushes then fully weld them to the chassis legs , i used the big block of wood to stop the chassis legs twisting during welding

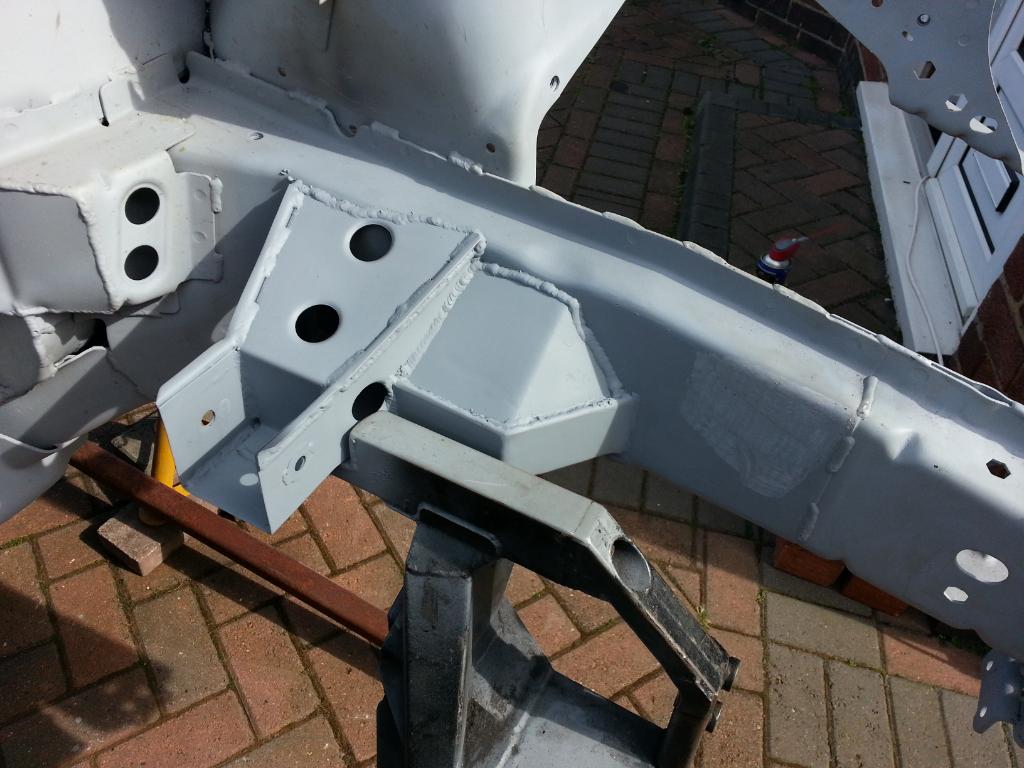
wrc crossmember fully fitted
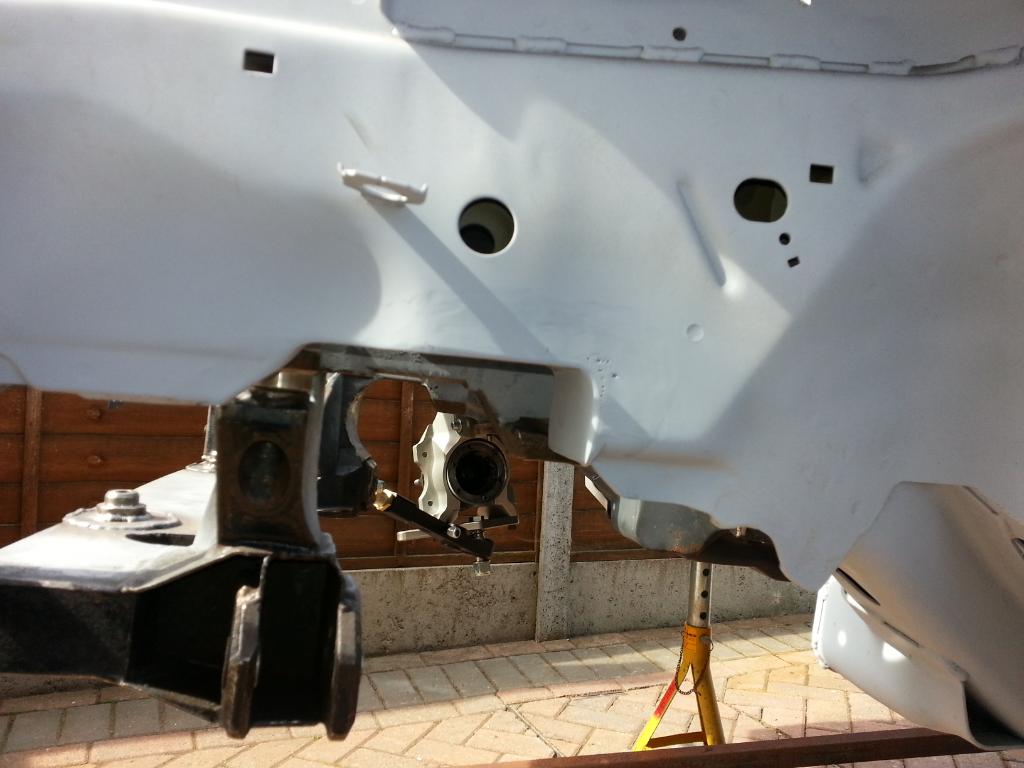
next on the list was to trim the chassis legs to allow the driveshafts to fit with room as it was very close and i wasnt happy so cut out a lump and plated with 3mm thick metal so it nice and strong
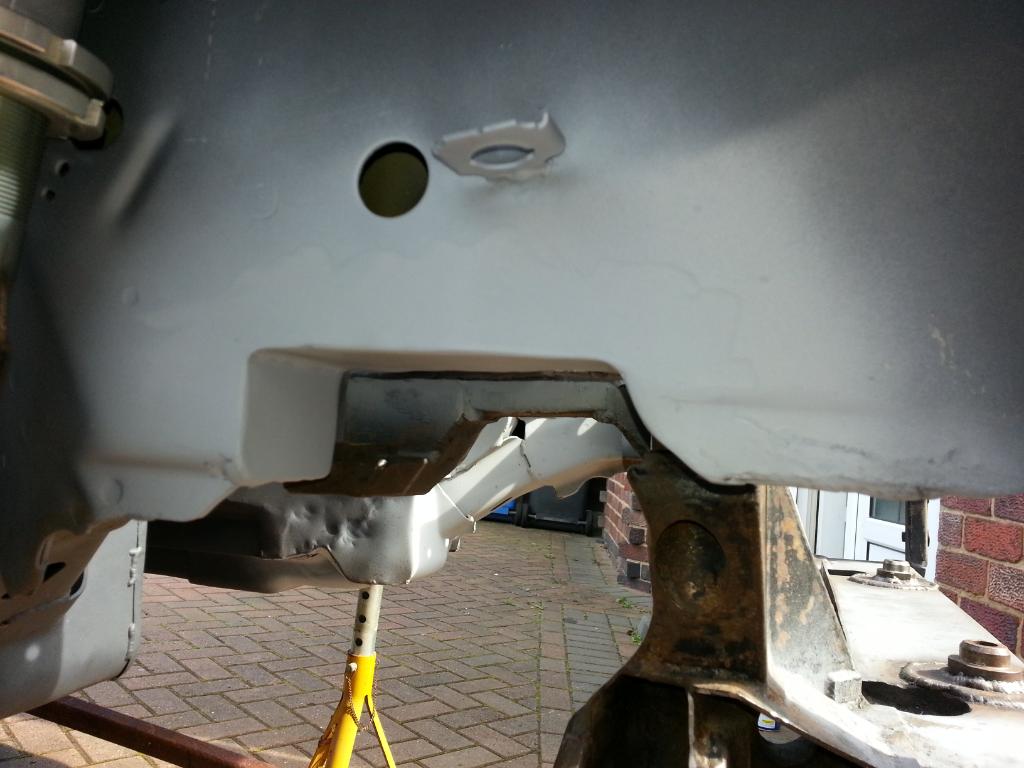
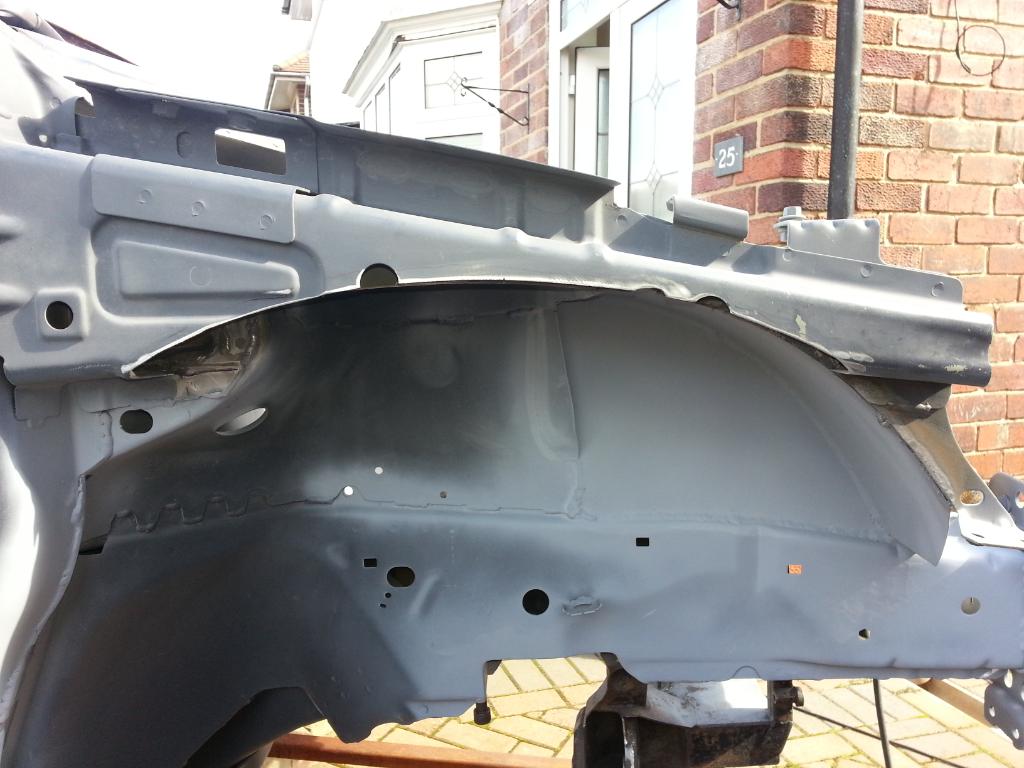
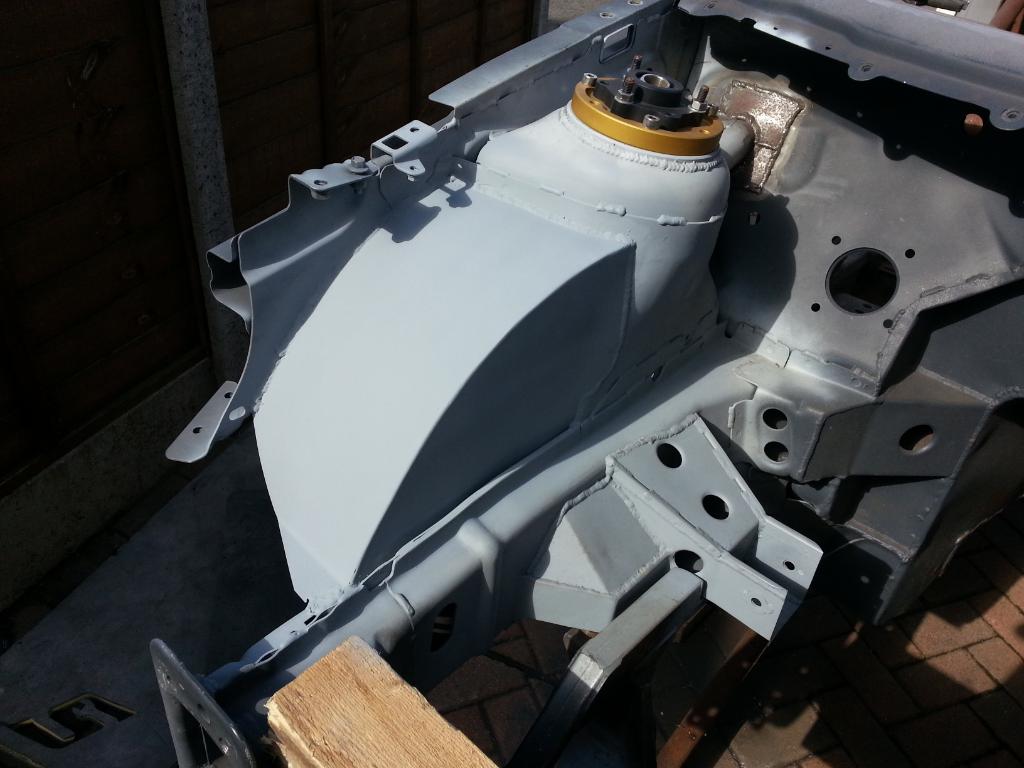
i fitted all the suspension to the car and jacked the wheel up so i got the ride height correct with nice equal gaps around the front wing and found because iam running 18x8 alloys with 40mm tyres that i had massive inner wheels arch problems in that i had an inch before the tyre would rub on the inner arch so out came the angle ginder again and cut out all the metalthat i didnt need , i also decided to make some mini wheel tubs for the fronts and this allowed me to follow the arc of the wheel to get a nice shape.
metal work cut ready for welding

cardboard template for the wheel tubs
made in metal
both tubs made
test fitted to the car after some trimming


wheel tubs up welded up and primed
i didnt get chance to take to many pics so i will take some more and hopefully there will be more update soon
thanks for looking
cheers paul
ive been trying to do as much as possible before winter really sets in and tbh i really wanted it painted by christmas but i know that its never going to happen as when you build a car like this nothing is never as simply as it seems lol
anyway been busy working out how to fit the wrc crossmember and mount it to the chassis legs so it looks nice and tidy , i had to make a box section with 4 threaded bushes then fully weld them to the chassis legs , i used the big block of wood to stop the chassis legs twisting during welding
wrc crossmember fully fitted
next on the list was to trim the chassis legs to allow the driveshafts to fit with room as it was very close and i wasnt happy so cut out a lump and plated with 3mm thick metal so it nice and strong
i fitted all the suspension to the car and jacked the wheel up so i got the ride height correct with nice equal gaps around the front wing and found because iam running 18x8 alloys with 40mm tyres that i had massive inner wheels arch problems in that i had an inch before the tyre would rub on the inner arch so out came the angle ginder again and cut out all the metalthat i didnt need , i also decided to make some mini wheel tubs for the fronts and this allowed me to follow the arc of the wheel to get a nice shape.
metal work cut ready for welding
cardboard template for the wheel tubs
made in metal
both tubs made
test fitted to the car after some trimming
wheel tubs up welded up and primed
i didnt get chance to take to many pics so i will take some more and hopefully there will be more update soon
thanks for looking
cheers paul
 01-10-2012, 07:34 PM
#555
I've found that life I needed.. It's HERE!!
Join Date: May 2007
Location: ballymoney co"antrim northern ireland
Posts: 1,092
Likes: 0
Received 3 Likes
on
3 Posts
looking good paul, your prity handy with this fab work mate .
how did you work out the right hight to mount your x member mounts ect to have the pick up point correct . i am just interested .
thanks steven
how did you work out the right hight to mount your x member mounts ect to have the pick up point correct . i am just interested .
thanks steven

 17-03-2013, 07:55 PM
#559
Advanced PassionFord User
Thread Starter
a little update , the weather has been really shite and not touched the car since before christmas and work has really got busy so been working all hours to try and gather more money for the car and its been a bonus doing the overtime with the weather being crap.
i have been buying some parts like the hydraulic handbrake , controller unit for the corse power steering that i will be using , comp brake rose jointed track rod ends , a manual ford sierra steering rack that will be fitted with quaife internals.
ive got new extended front drive shafts from automotive unlimited.
ive also been to see mk motorsport today to order my front and rear ap brake kits with marks custom made bells which he said that hes going to make them look like motor bike bells in terms of design so that should be interesting and also bracket etc to fit the billet uprights , iam having black calipers with gold brackets and bells so they should match the rest of the componets ive got. mark is also sleeveing the front drive flanges so i should be able to actually bolt everything up to see if ive got any problems when they are completed.
the 5 mins ive spent down the shed worked out well as iam running a remote front diff set up like ag motorsport did on his focus so without having a part made to fit the crossshaft in i decided to use the cossie sump pan and fittings so cut the sump pan up and ground down all the sides etc and ended up with a ideal piece of equipment to use for the remote diff . it will be strenghtened and have a plate welded to it so it can be bolted to the wrc crossmember.
i have no pics yet but will down load some in the middle of next week and mark from mk motorsport said he will update with pictures of the drive flanges and brakes.
thanks for looking
cheers paul
i have been buying some parts like the hydraulic handbrake , controller unit for the corse power steering that i will be using , comp brake rose jointed track rod ends , a manual ford sierra steering rack that will be fitted with quaife internals.
ive got new extended front drive shafts from automotive unlimited.
ive also been to see mk motorsport today to order my front and rear ap brake kits with marks custom made bells which he said that hes going to make them look like motor bike bells in terms of design so that should be interesting and also bracket etc to fit the billet uprights , iam having black calipers with gold brackets and bells so they should match the rest of the componets ive got. mark is also sleeveing the front drive flanges so i should be able to actually bolt everything up to see if ive got any problems when they are completed.
the 5 mins ive spent down the shed worked out well as iam running a remote front diff set up like ag motorsport did on his focus so without having a part made to fit the crossshaft in i decided to use the cossie sump pan and fittings so cut the sump pan up and ground down all the sides etc and ended up with a ideal piece of equipment to use for the remote diff
i have no pics yet but will down load some in the middle of next week and mark from mk motorsport said he will update with pictures of the drive flanges and brakes.
thanks for looking
cheers paul
17-03-2013, 08:20 PM
#560
Good to hear things are still happening Paul
What is your reason for remote mounting the front diff mate?
Will you not going to run into any issues remote mounting the front diff if the engine is in the standard position? Are you going to be dry sump? i have only ever seen it done to a yb set up up Andrew's old car and that engine was mounted a lot further back in the bay and is the reason for going remote front diff i believe? obviously a bonus being able to easily change/remove diff or engine independently, i may be wrong though so interested to see it all done
Last edited by M K; 17-03-2013 at 08:25 PM.