
area six jwrc fiesta (urban myth)**NEW PROJECT ** a little update 1/1/16
 25-08-2011, 06:41 PM
#481
Advanced PassionFord User
Thread Starter
time for a little update yeh!!!
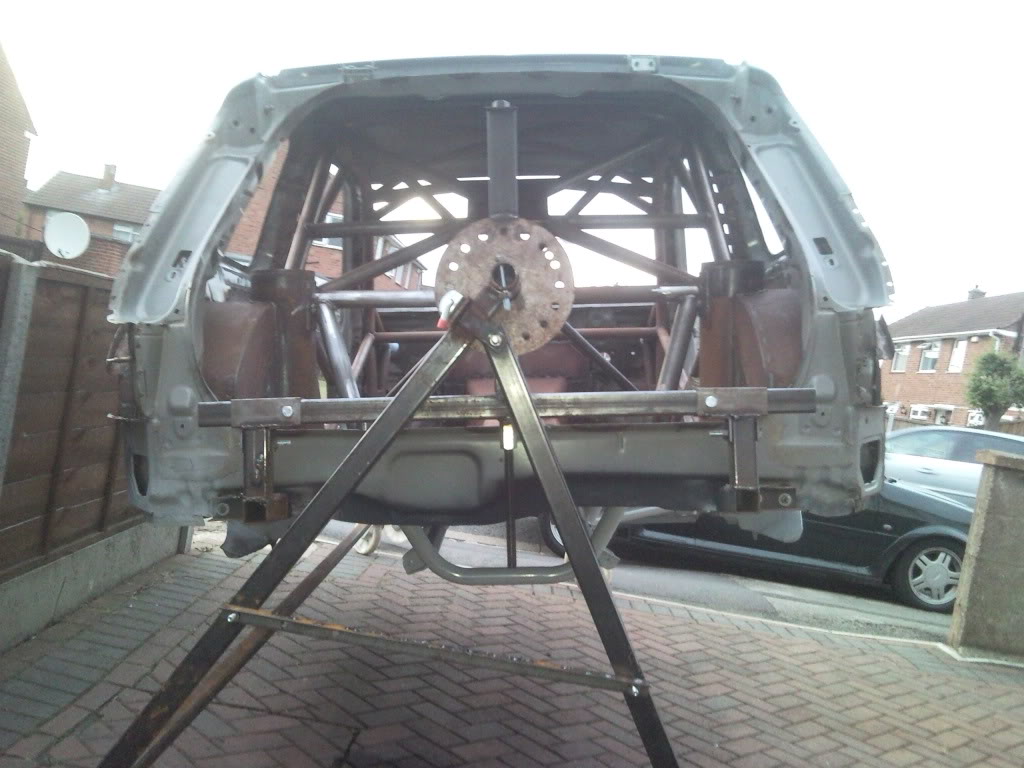
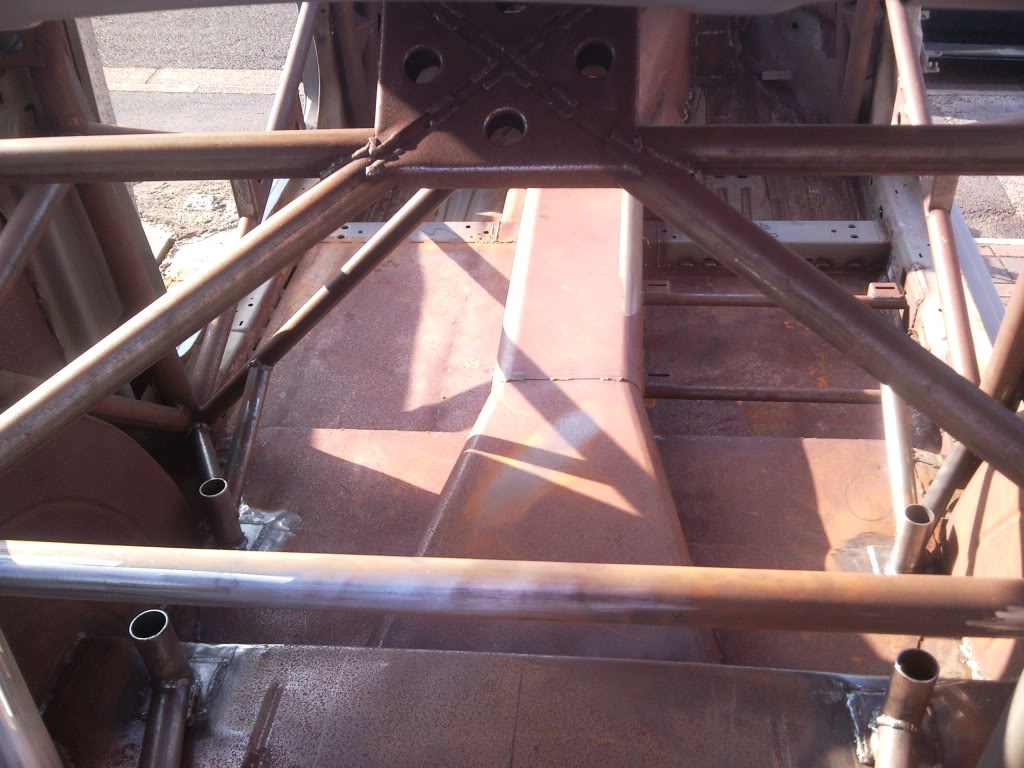
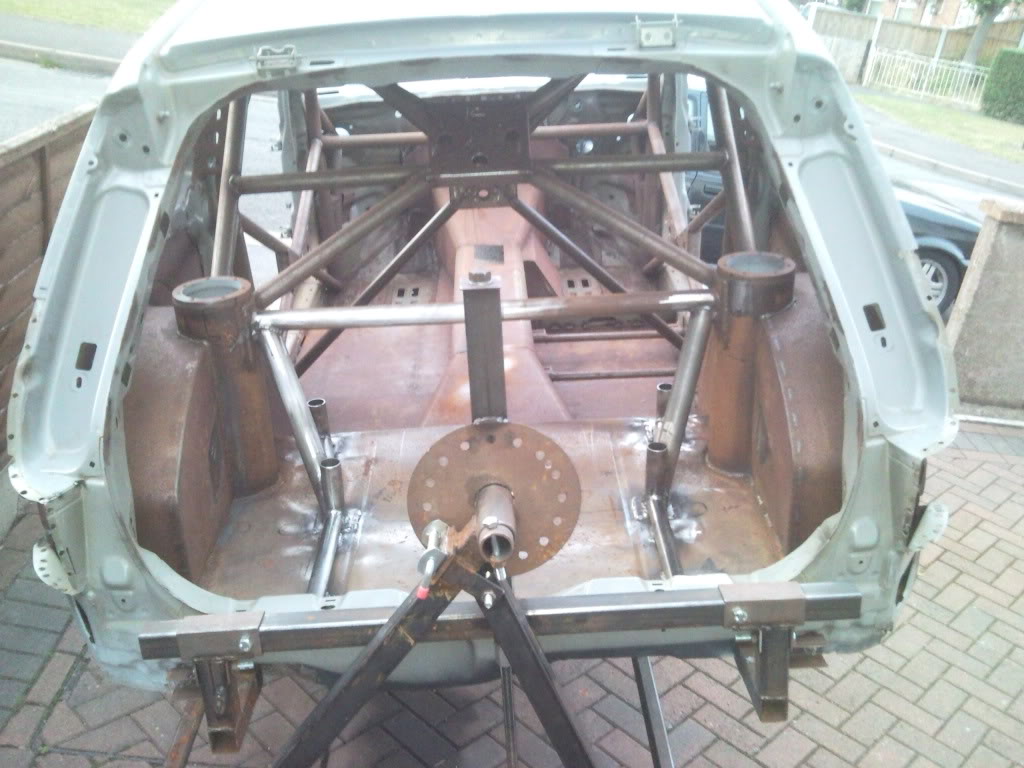
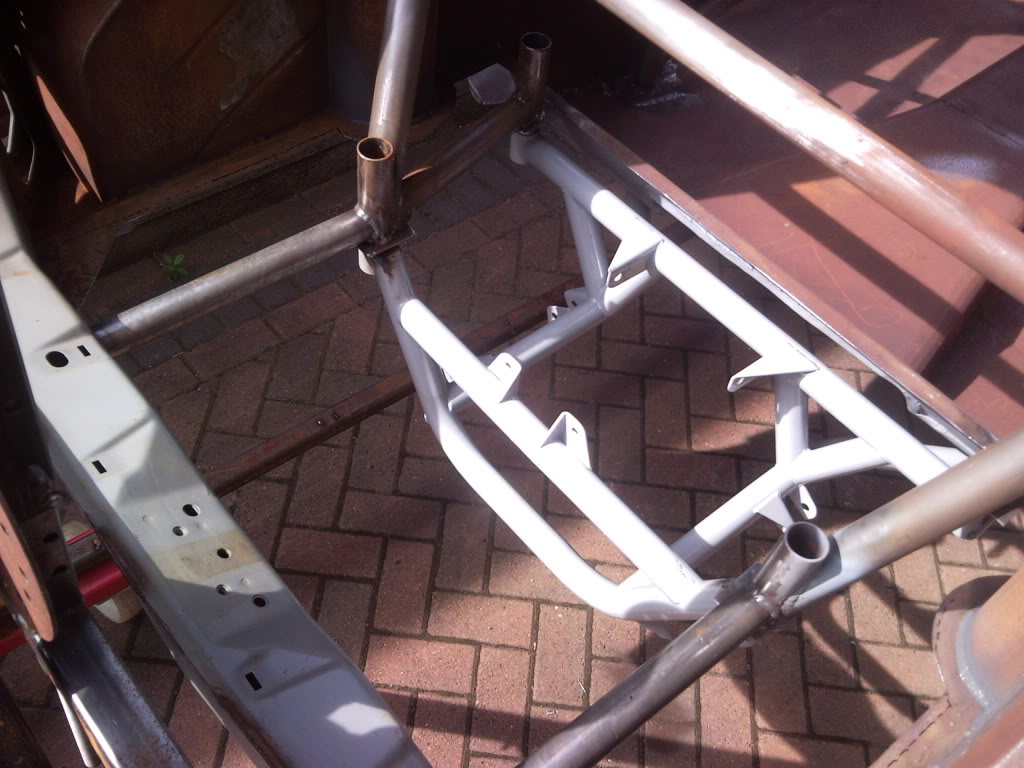
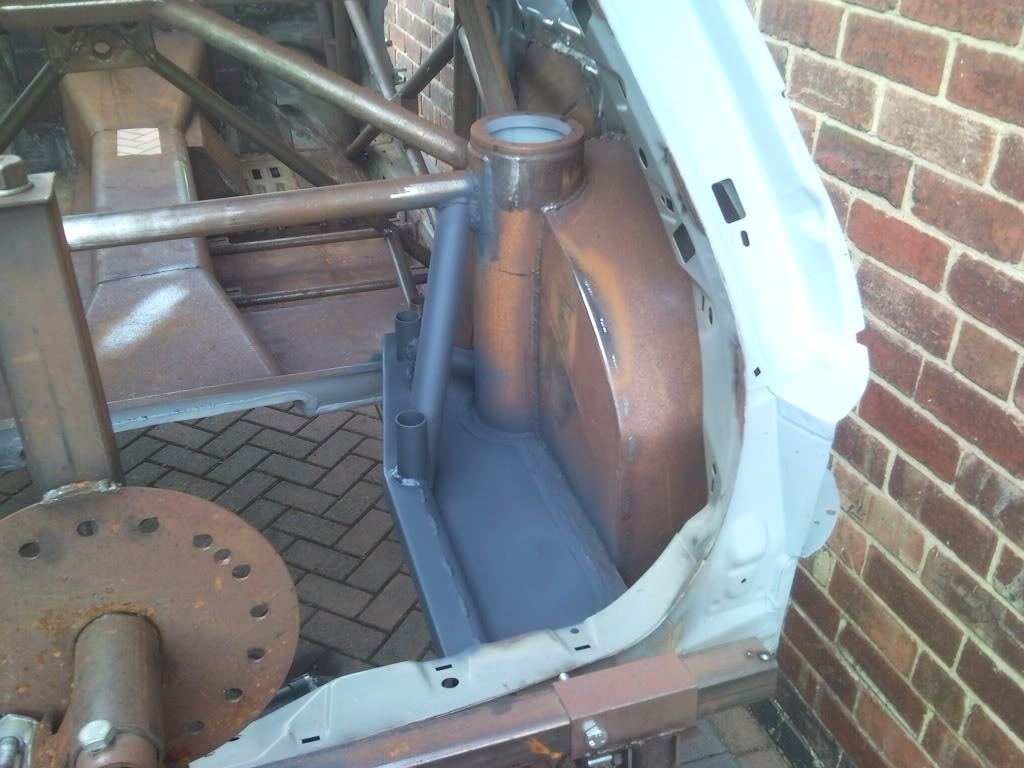
right first of all i finally got a few spare hours to have a go at getting the rear wrc spec cradle fitted and mocked up so i could then tie it to the rollcage etc , well to say it was abit of a handful to do this on the spit is an understatement but i finally got the right position and drive shaft angles that mk motorsport helped me with so i could could start cutting the holes in the floor so the stubs mk made me could then be cut to lenght and start being joined up. the first hurdle was the wrc cradle front arms was hitting the floor pan so this was modded the same on both sides
i didnt take pictures along the way as my phone was on charge so heres a load of pics
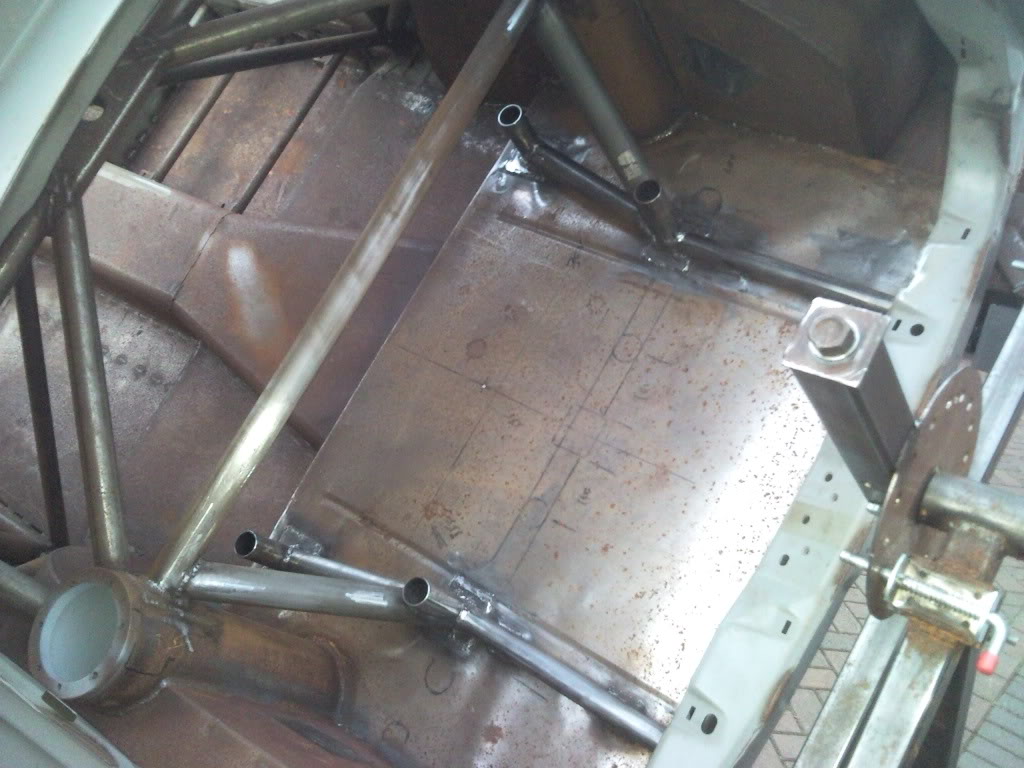
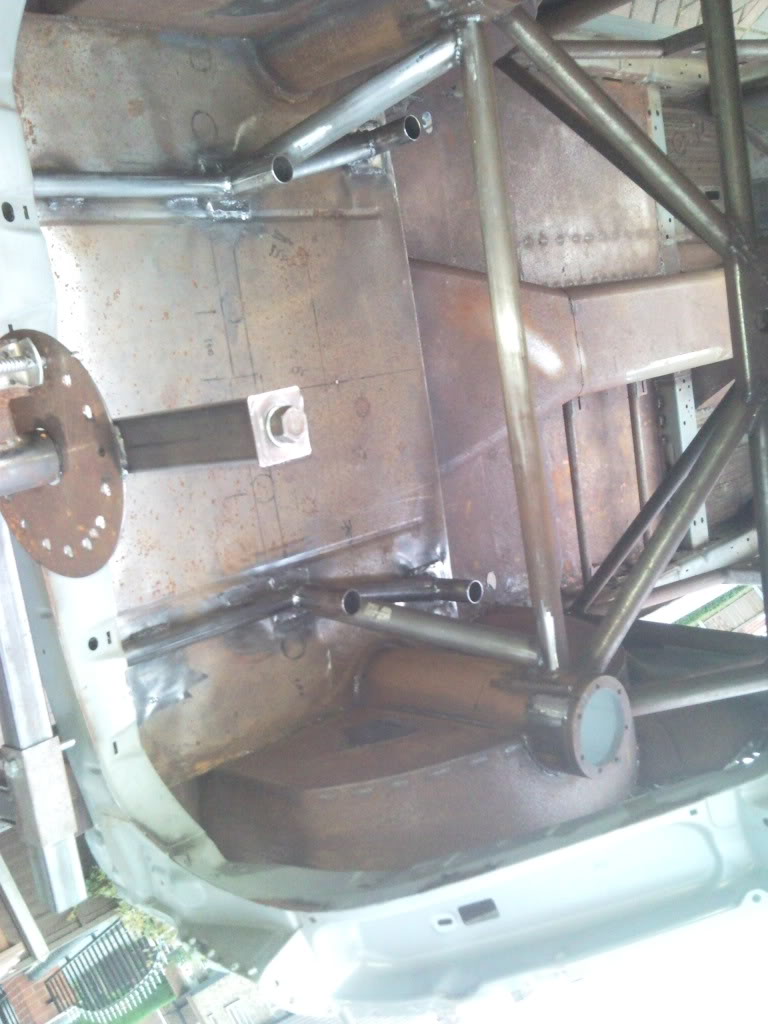

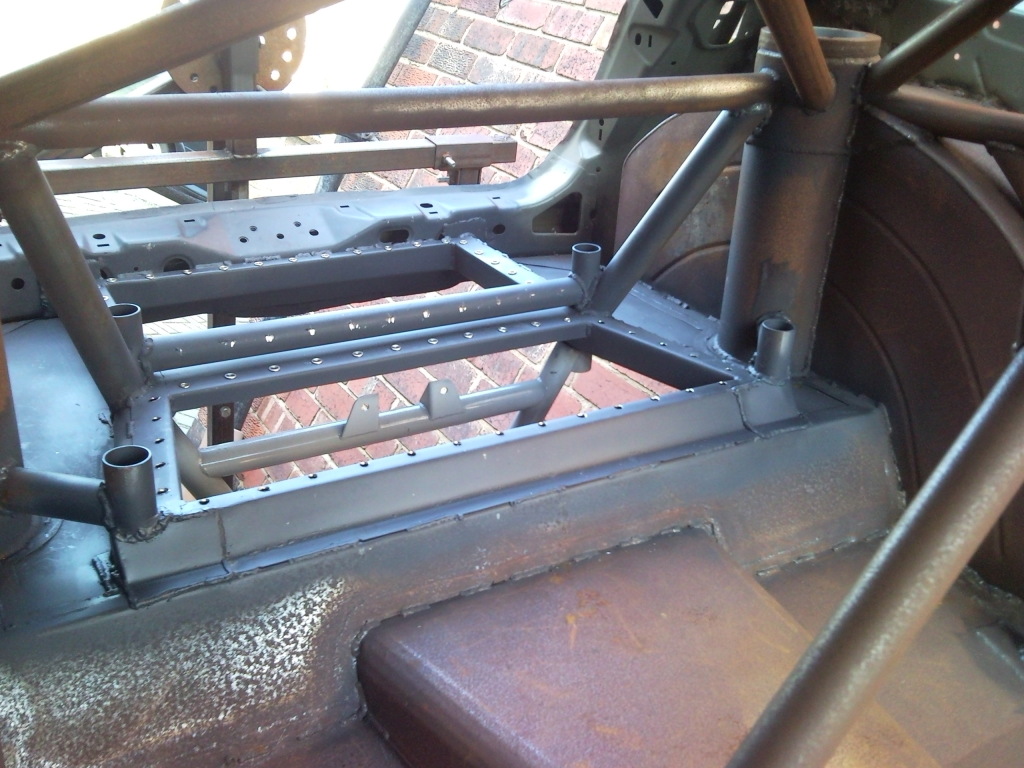
cradle all mocked up and ready to be welded in
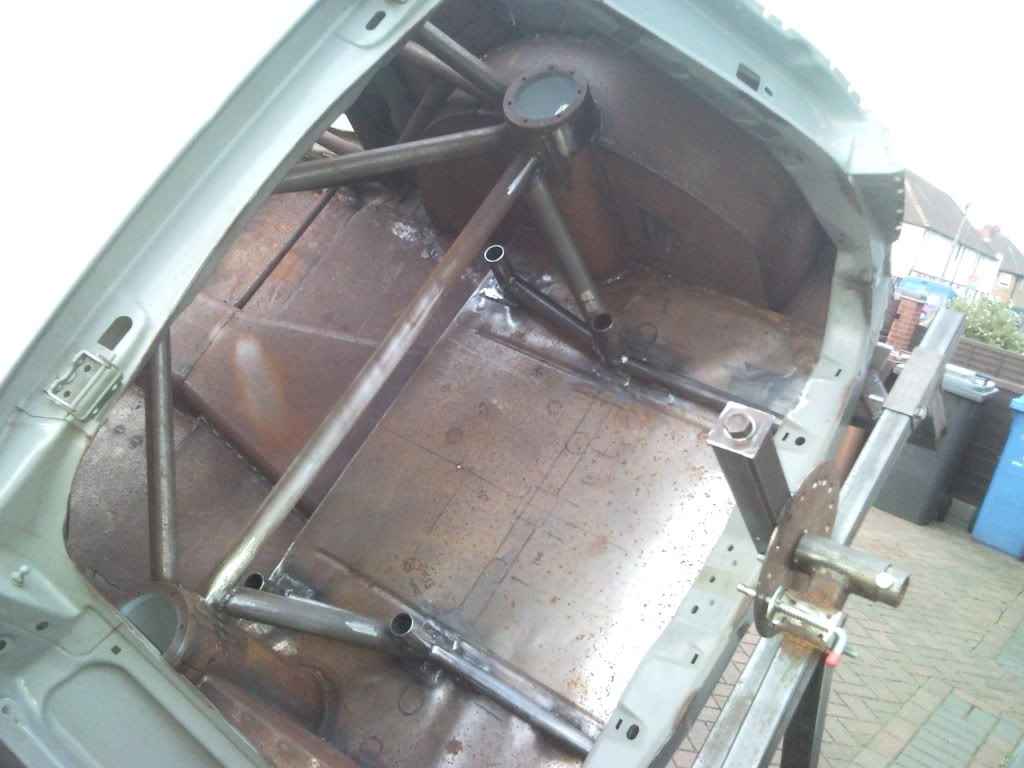
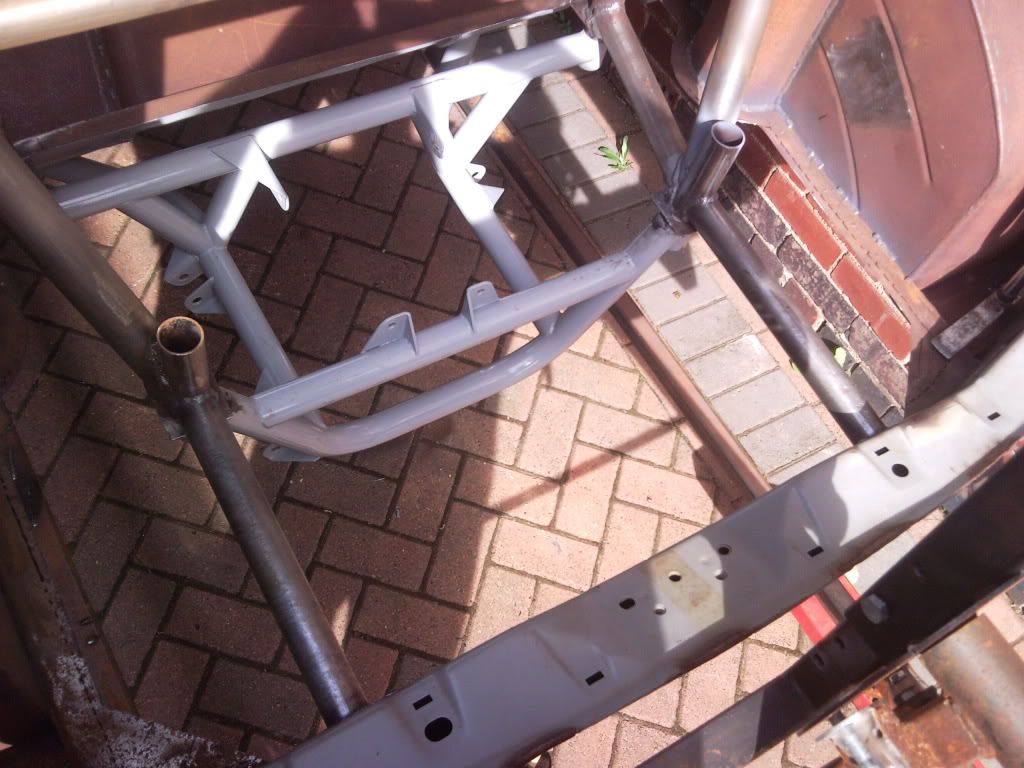
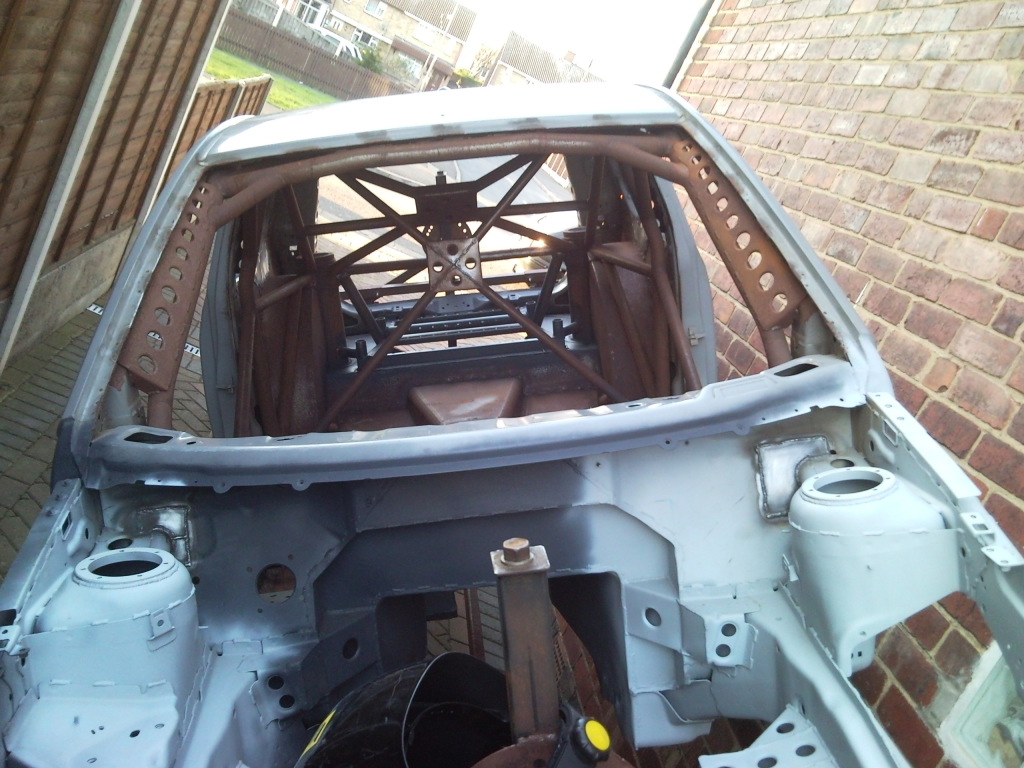
cradle all tied in and level , in this picture the car is not level so dont worry lol
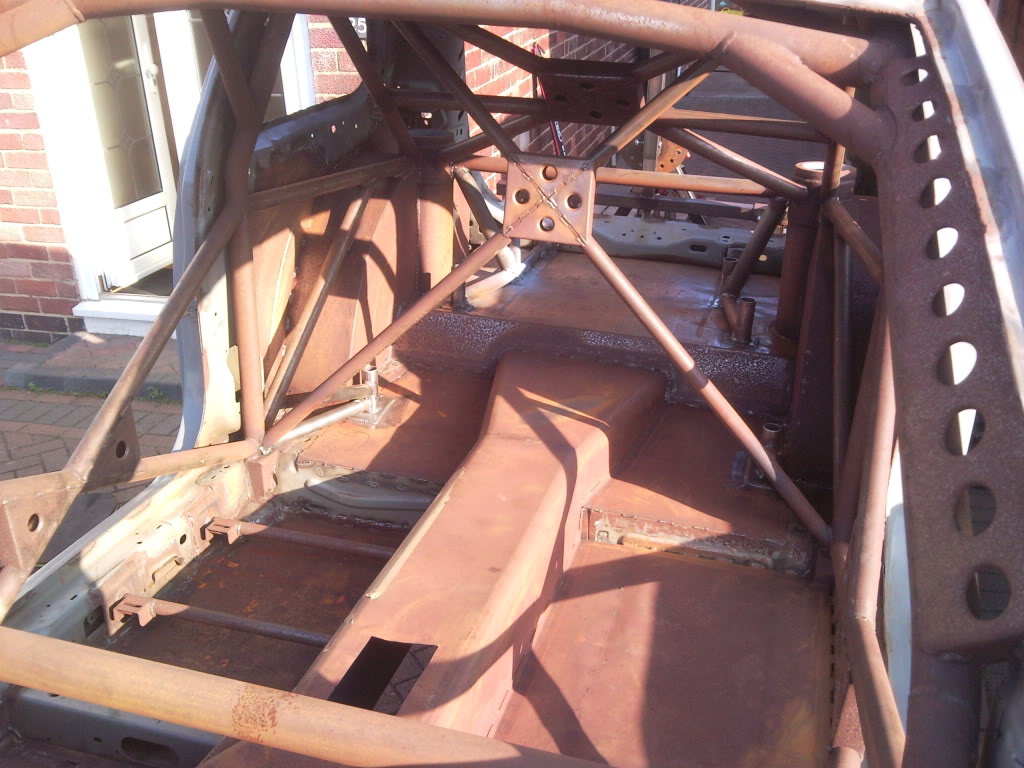
the rear of the cage is just the basic tie points but will be finished off nicely and i think there maybe a radiator going in so the boot floor will be cut at some point

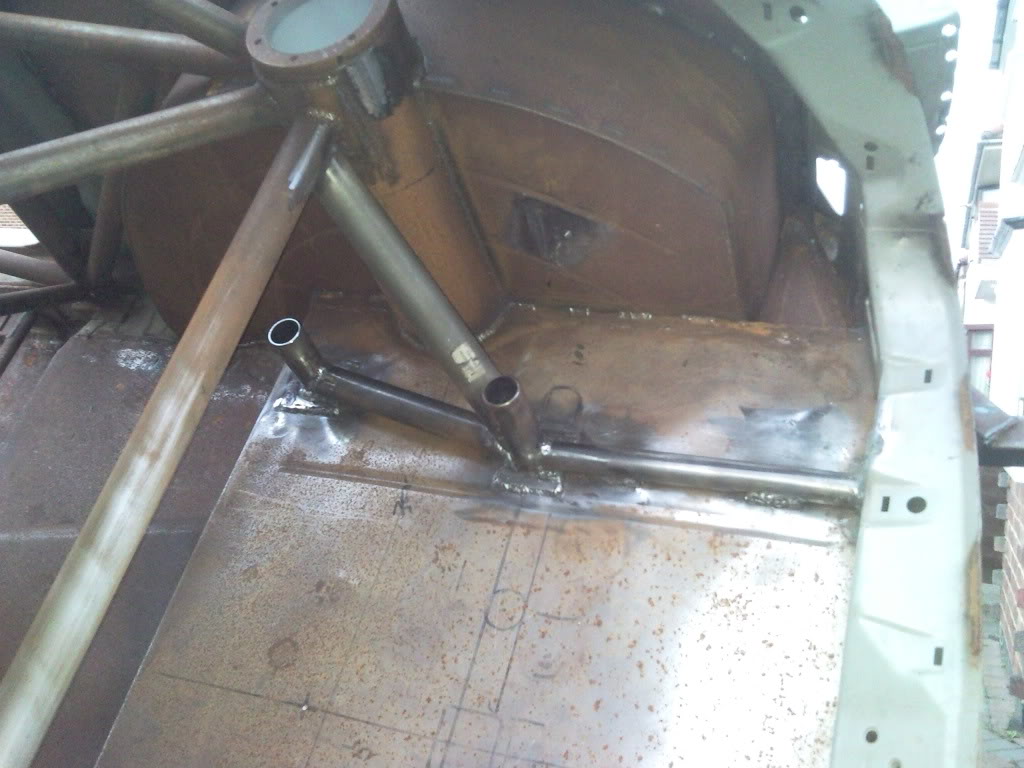
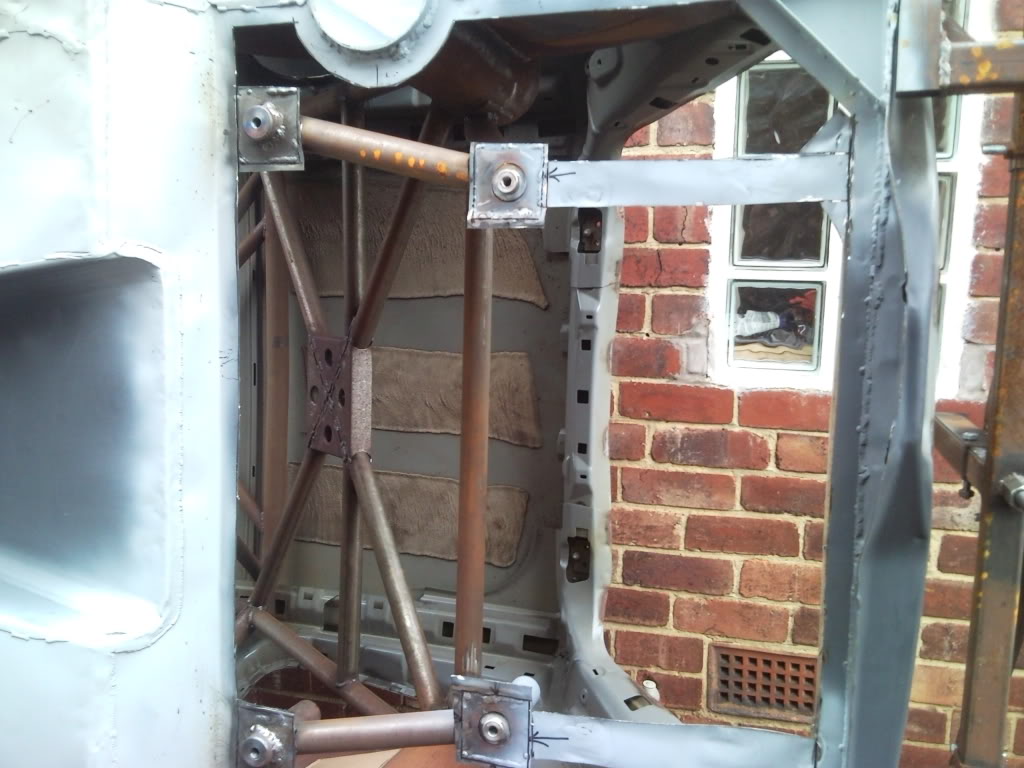
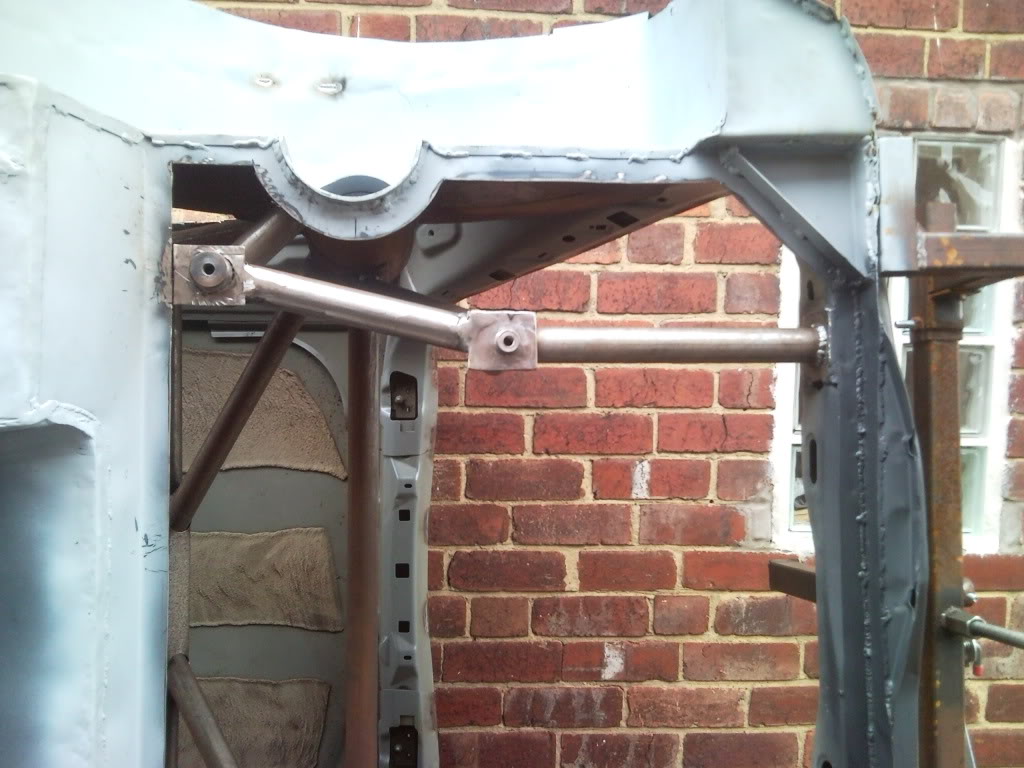
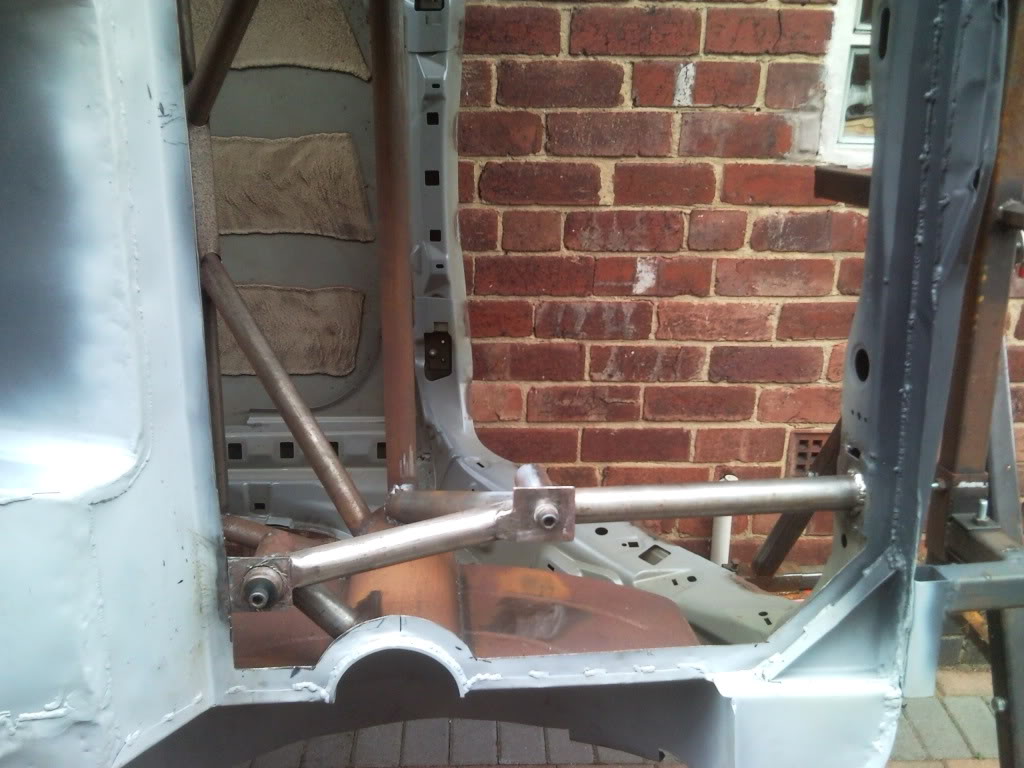
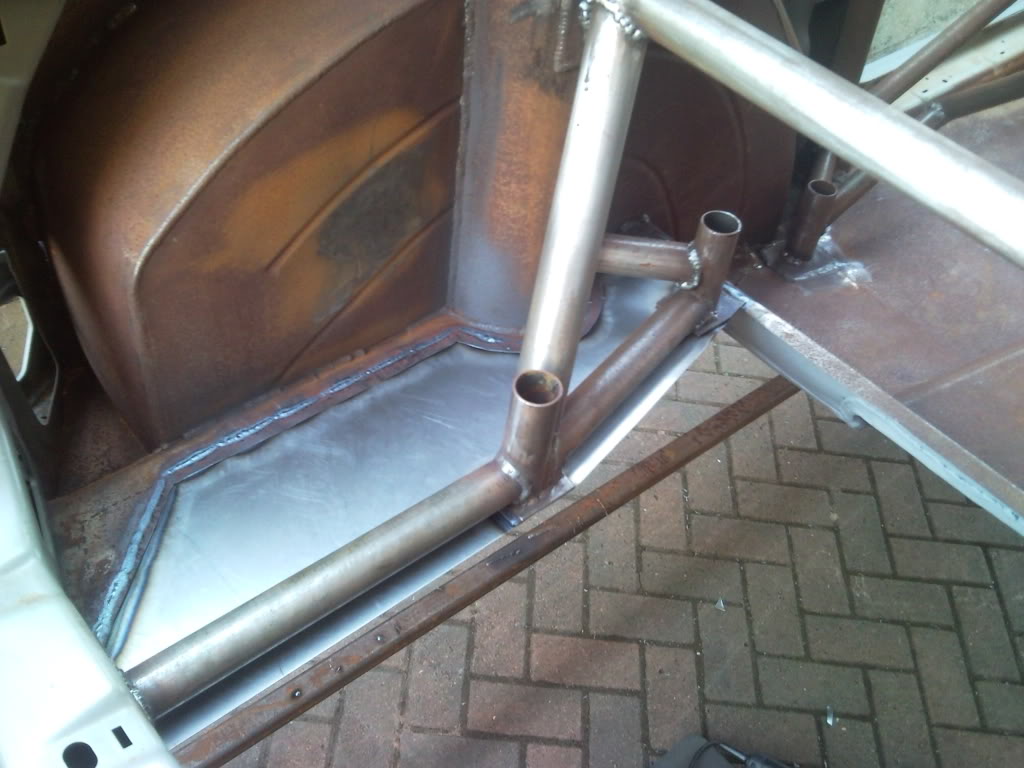
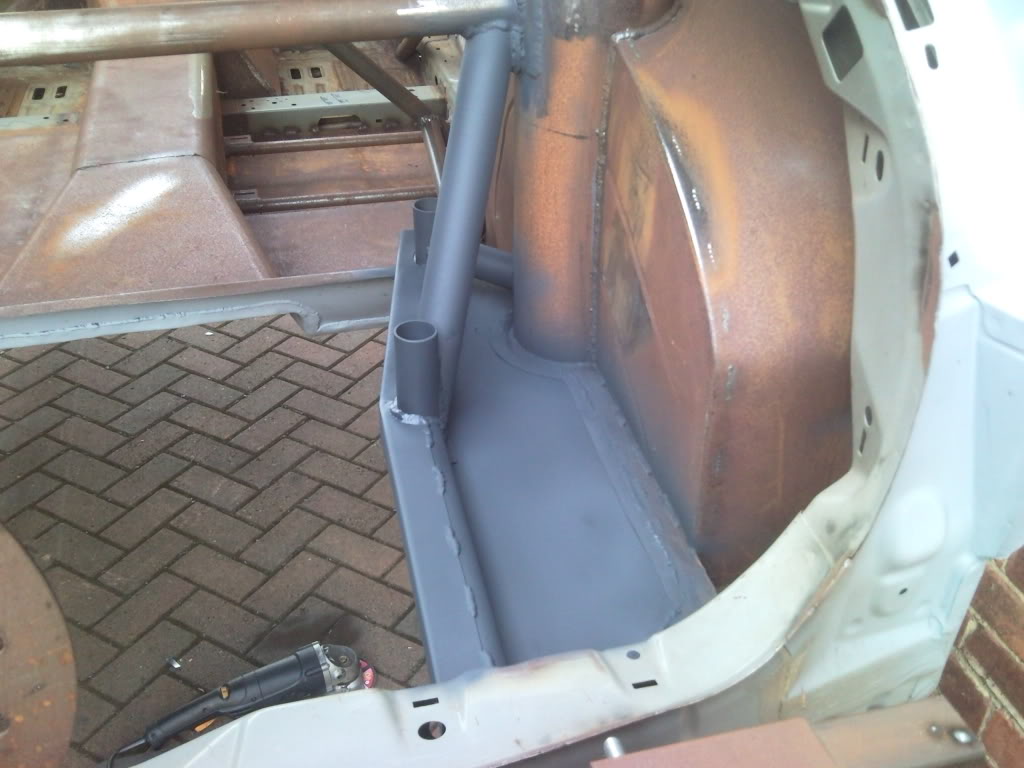
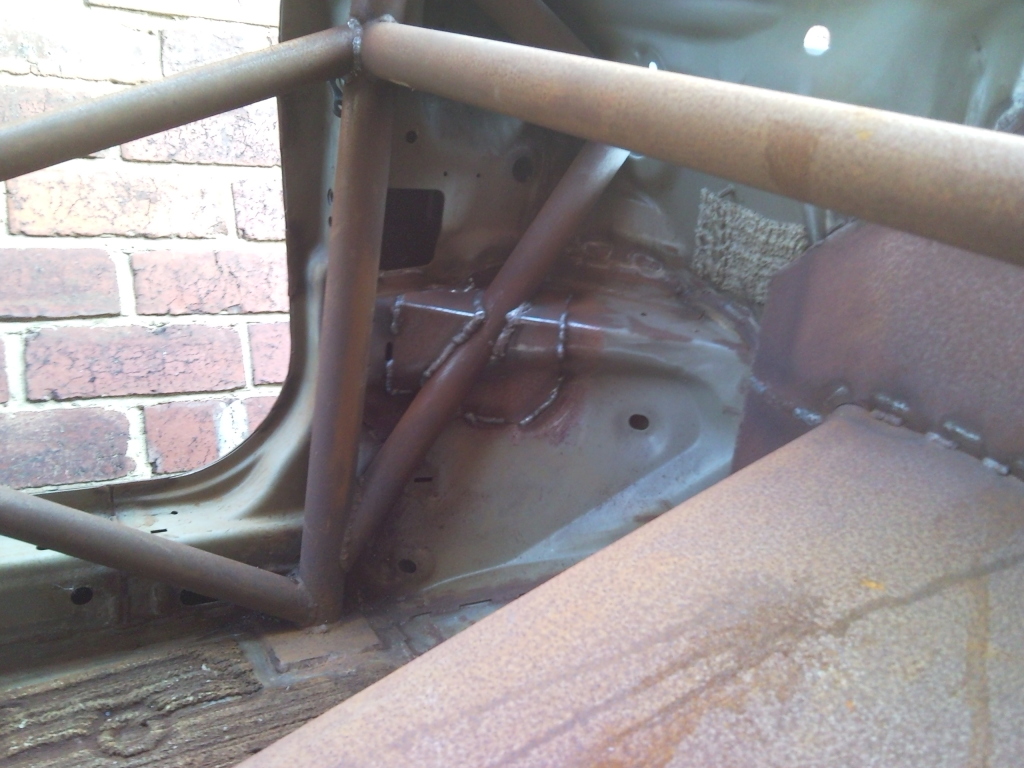
i then started to tie the front arms of the cradle into the rollcage
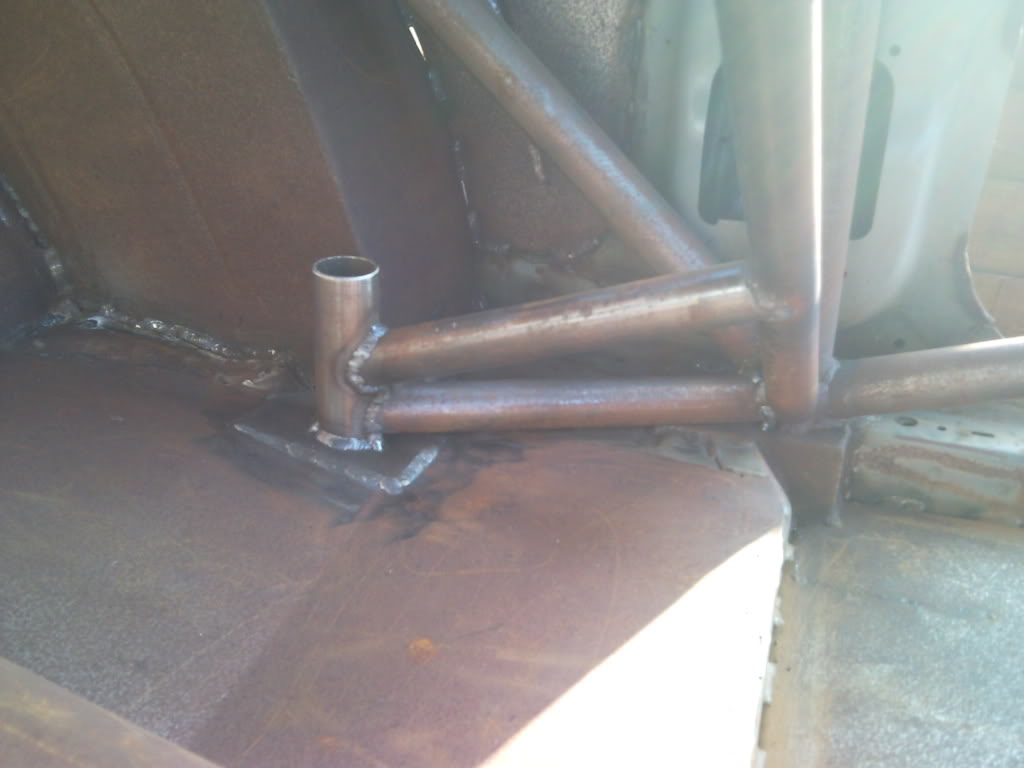
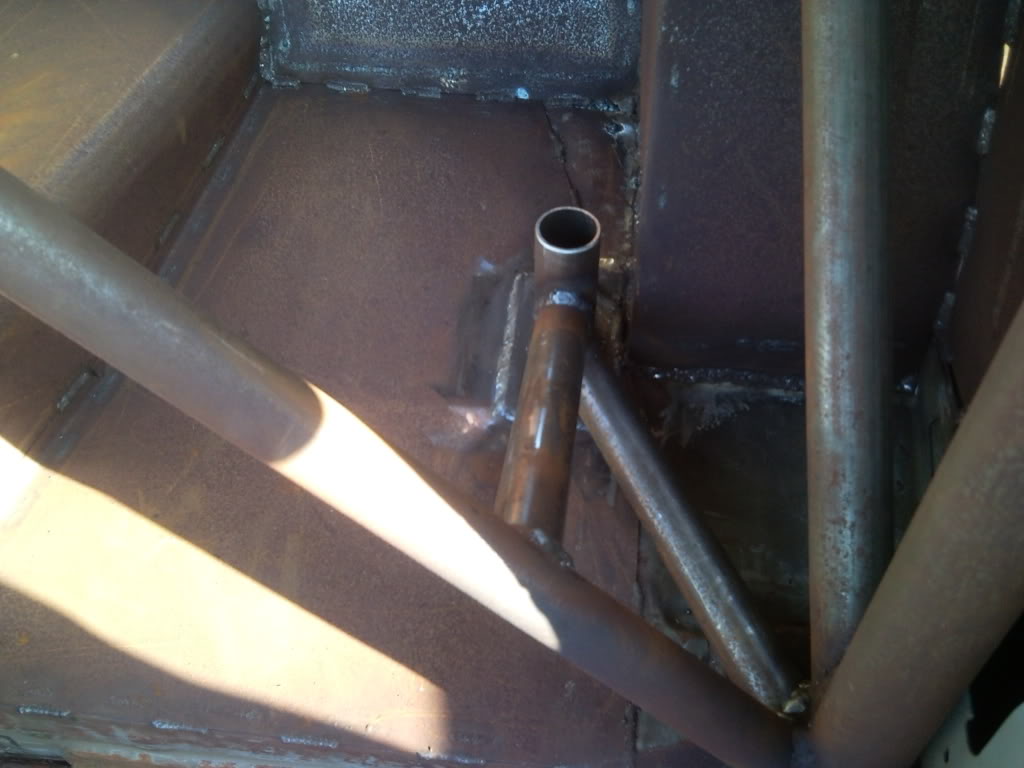

both sides completed
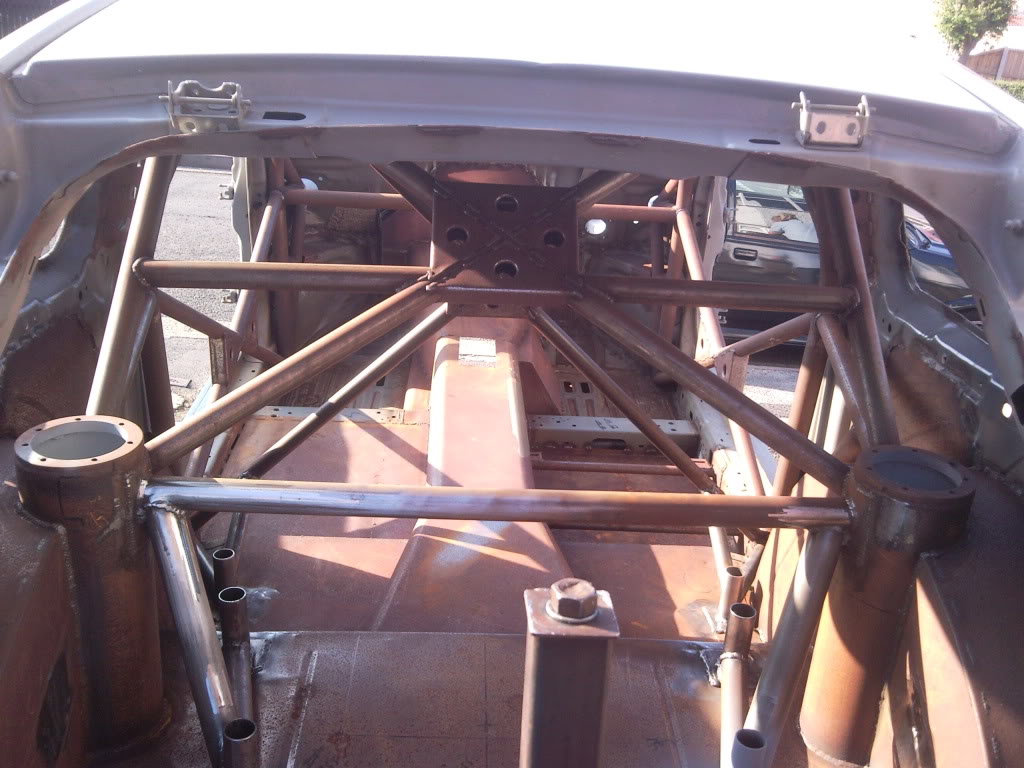
the cradle is now fully in and bolted and comes off nice and easy
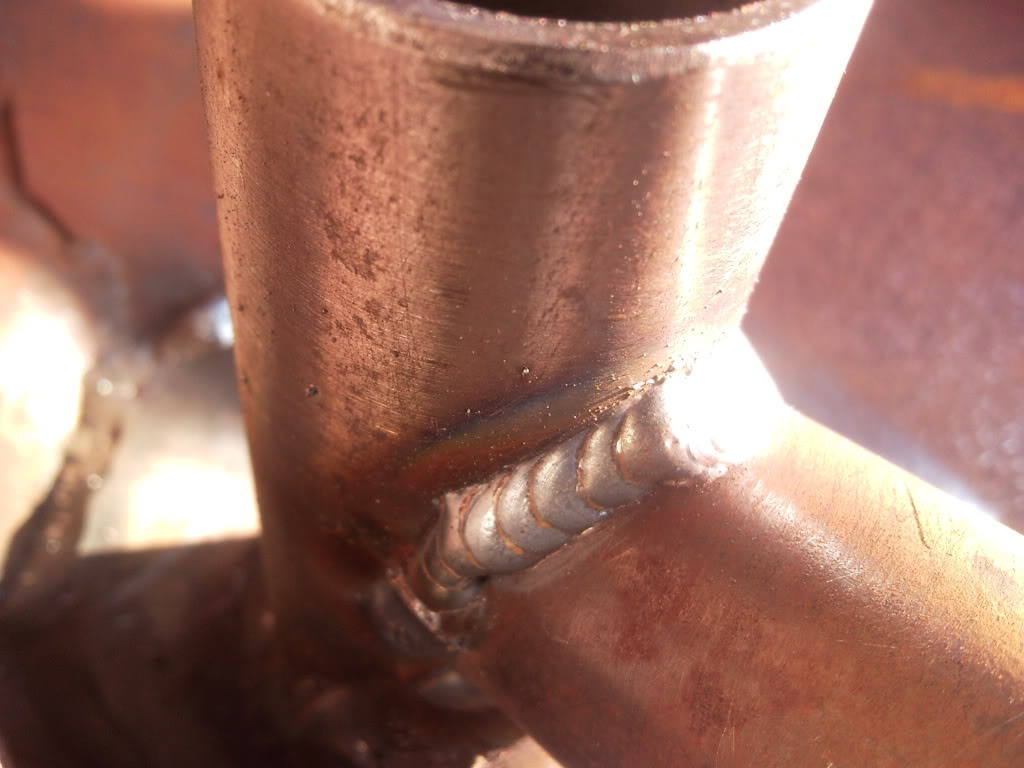
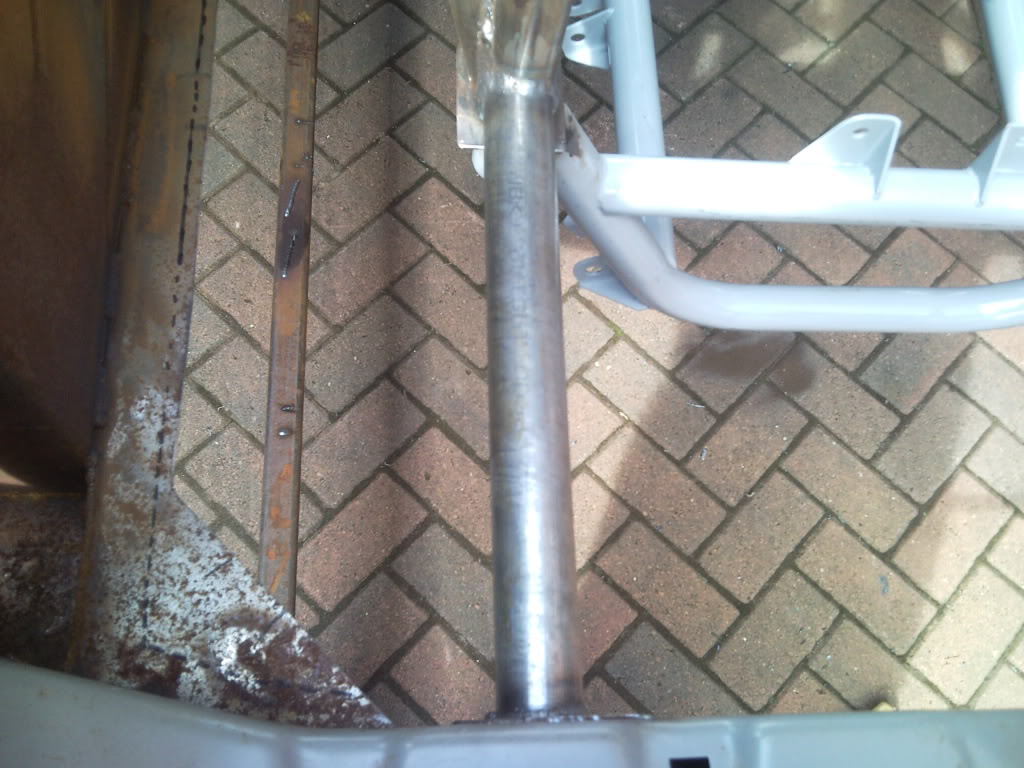
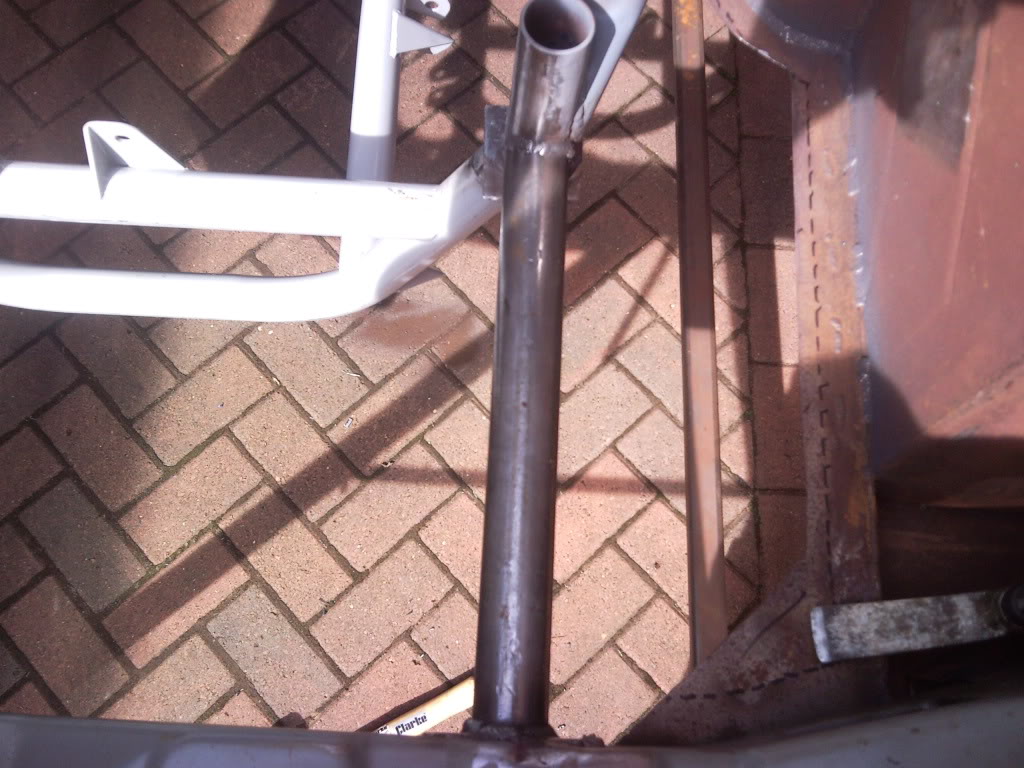
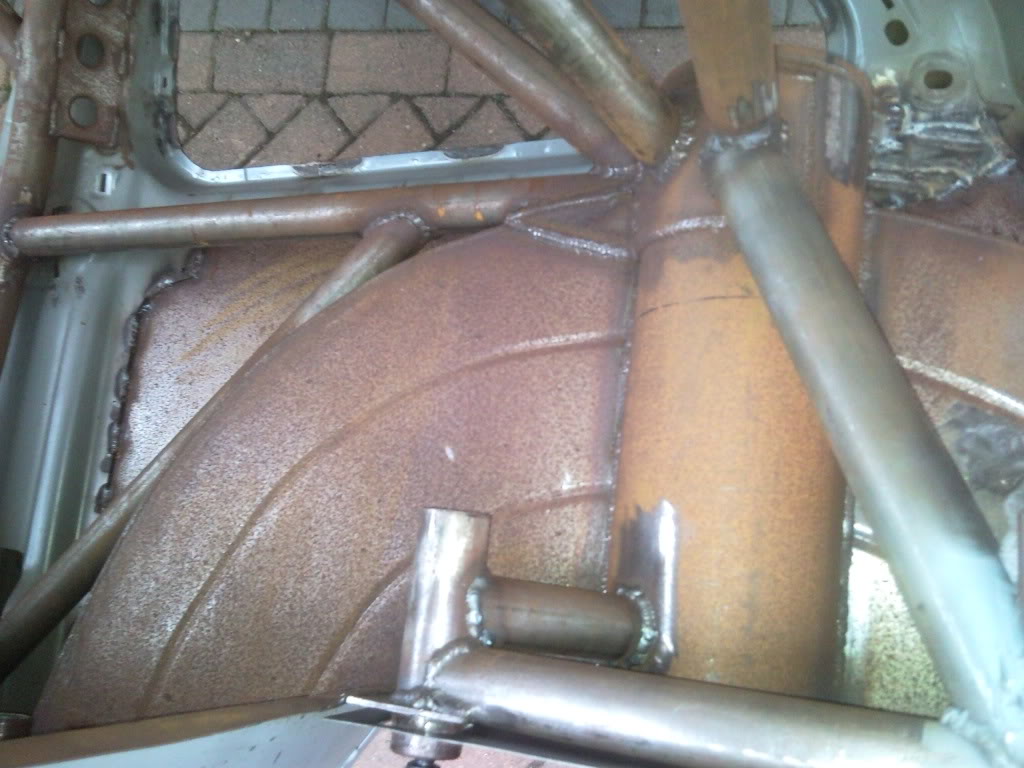
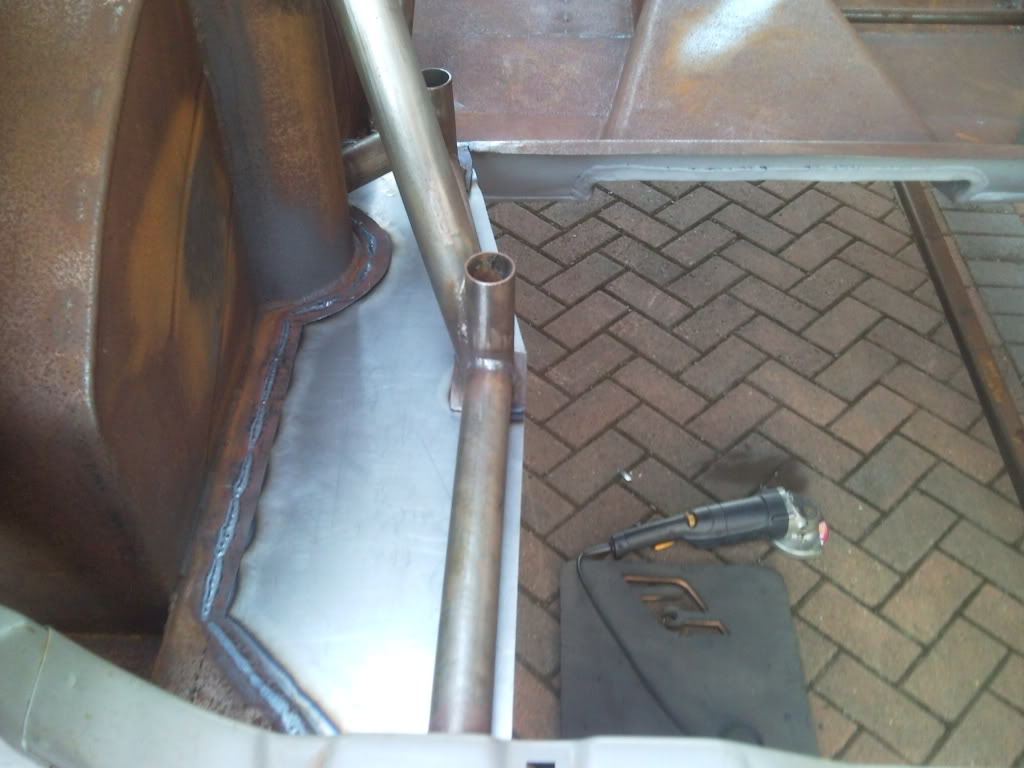
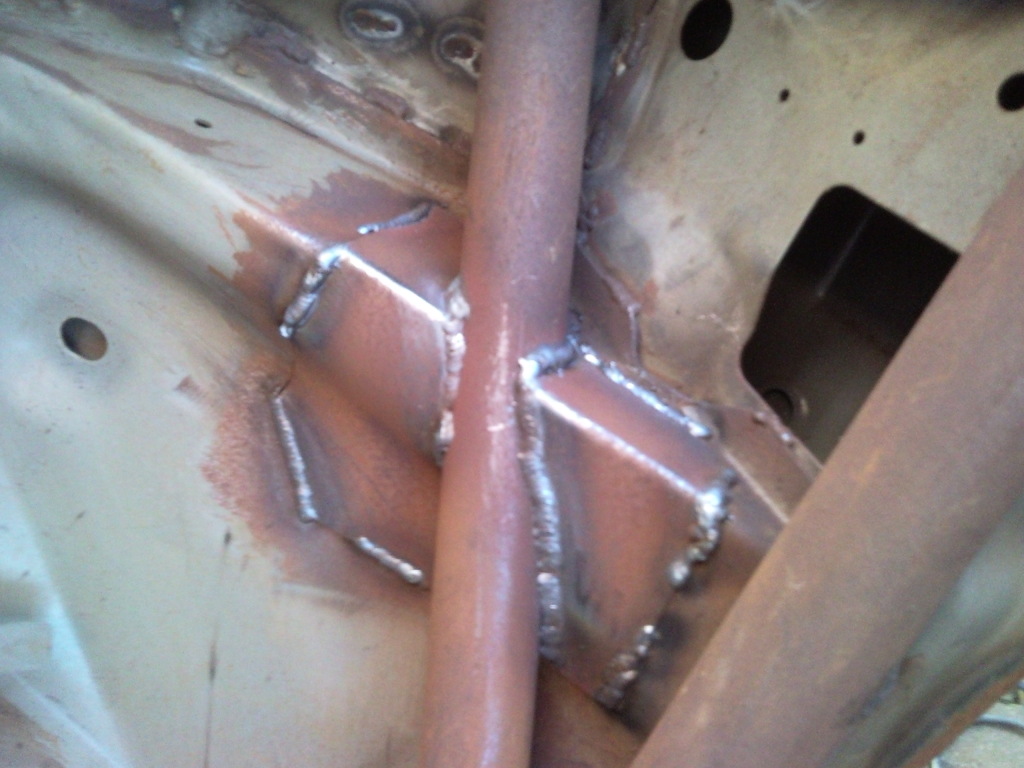
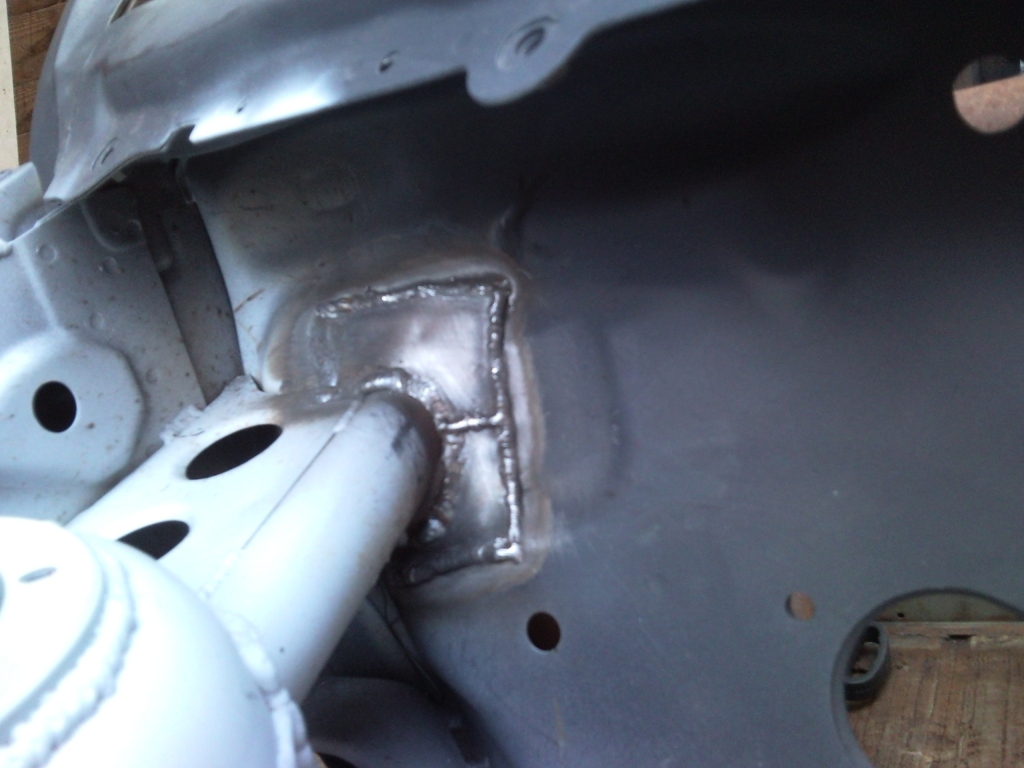
and a shot of some nice welding
finally ive been collecting some more parts for the build
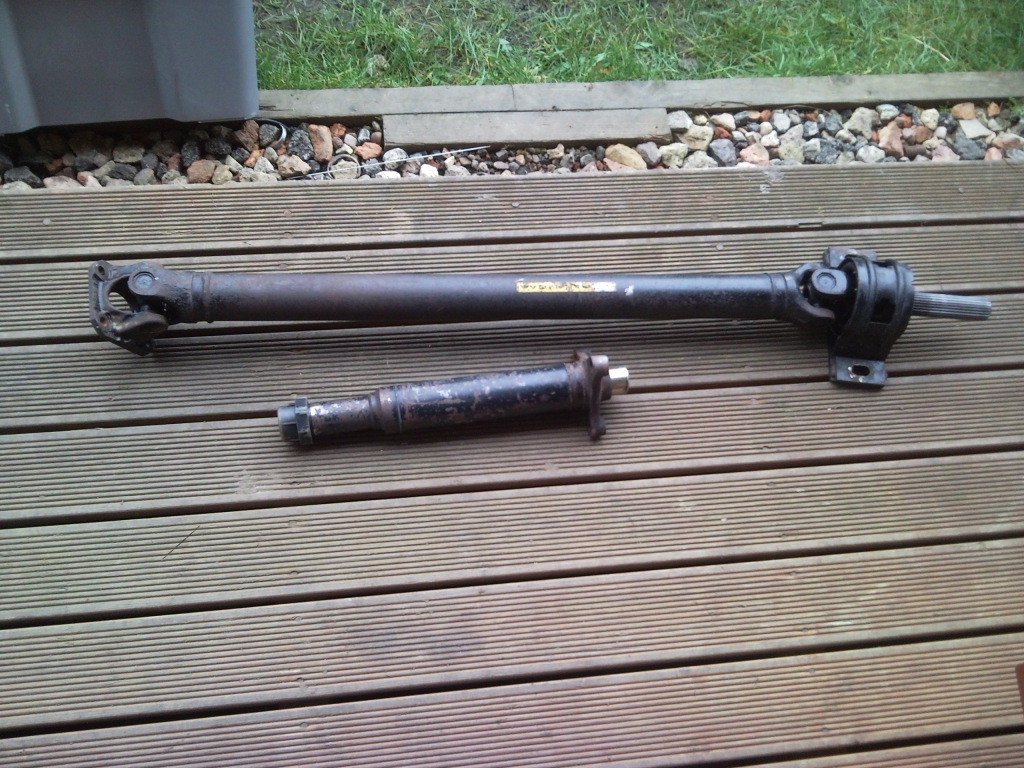
nearly new front prop

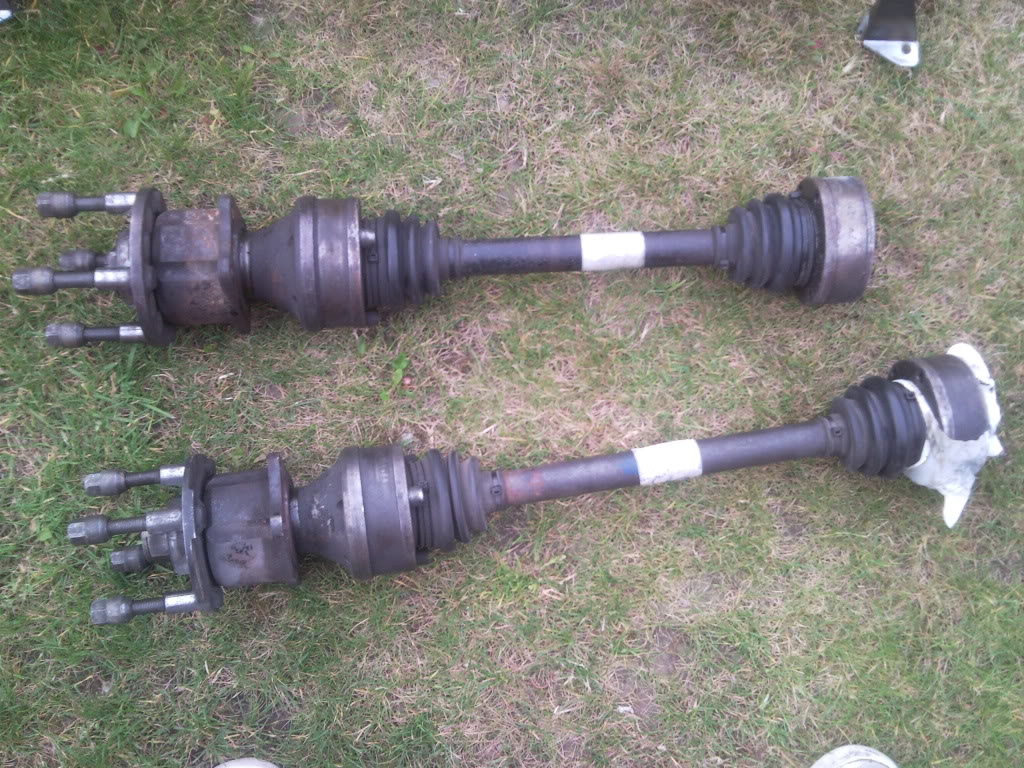
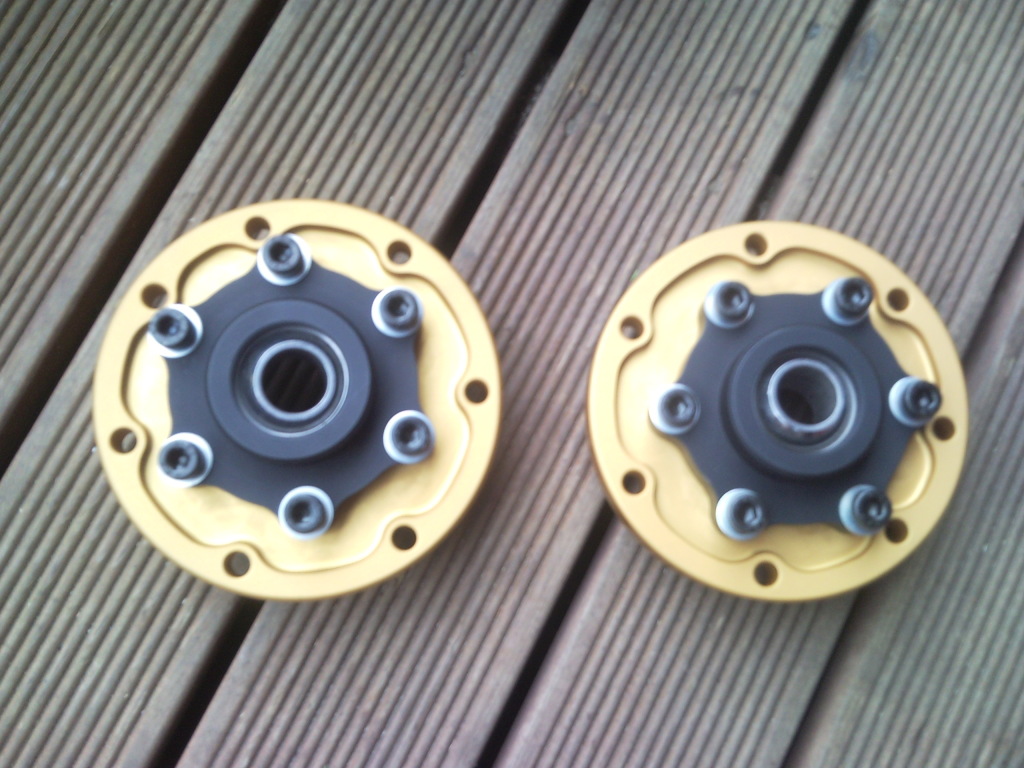
wrc drive shafts with flanges and hubs
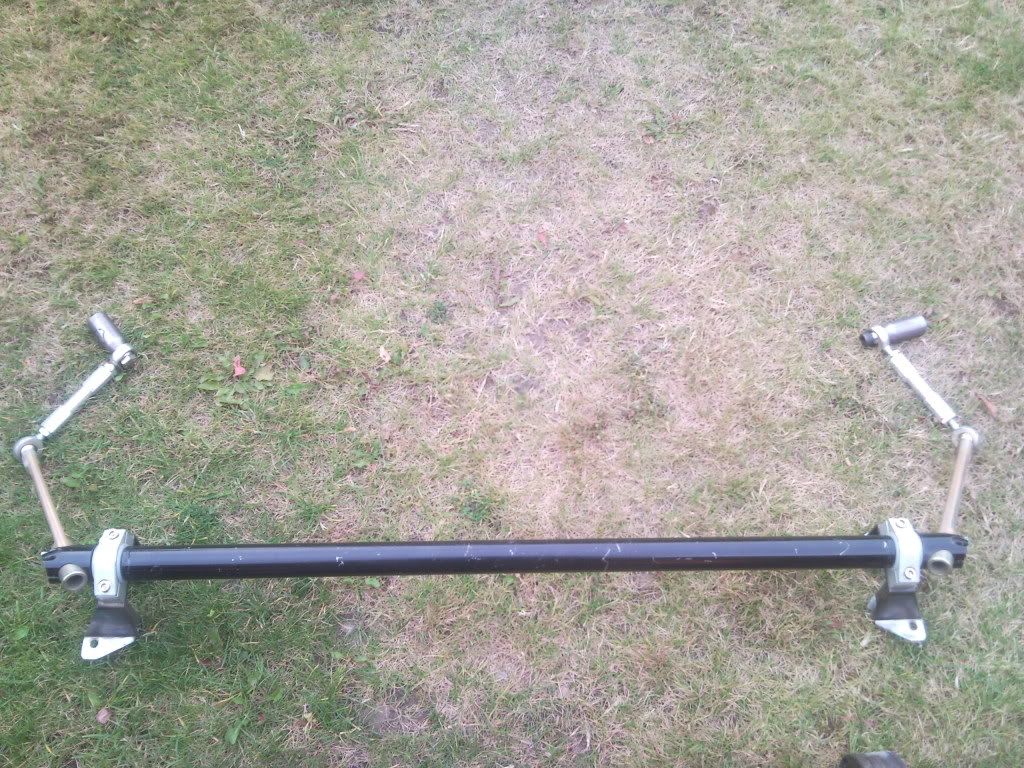
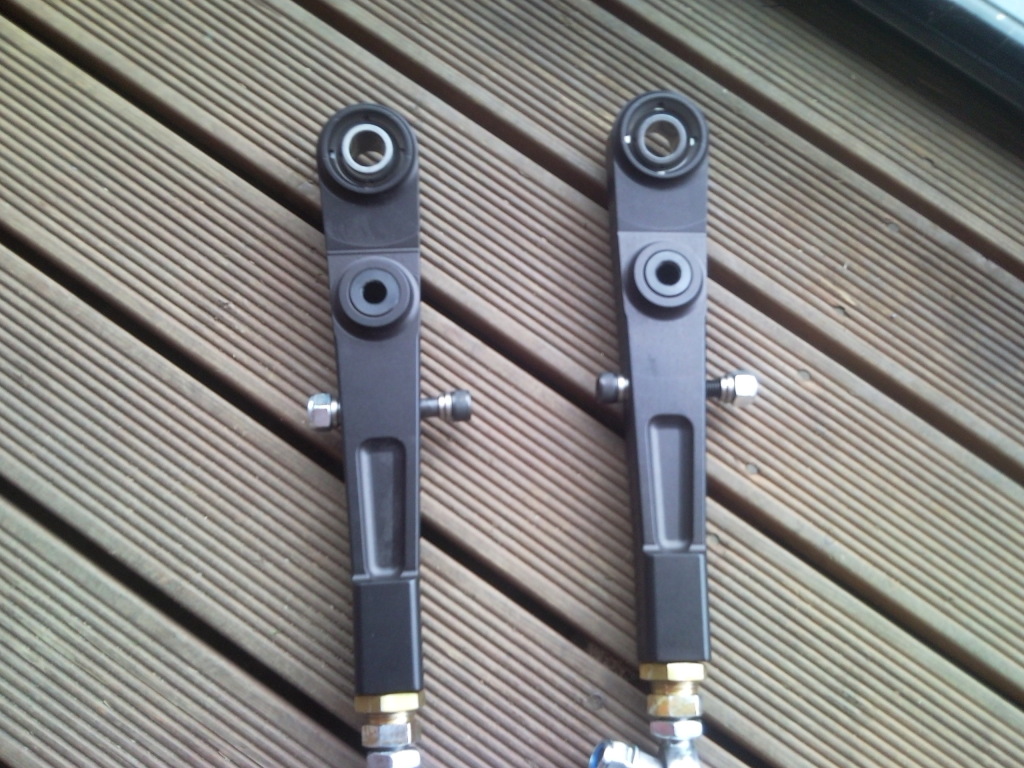
and finally a brand new wrc front antiroll bar kit which i got from tim who breaking his escort cosworth for �380 so half price
i will try and update soon but again iam really busy at work and i cant afford to turn the money down
thanks for looking cheers paul
right first of all i finally got a few spare hours to have a go at getting the rear wrc spec cradle fitted and mocked up so i could then tie it to the rollcage etc , well to say it was abit of a handful to do this on the spit is an understatement but i finally got the right position and drive shaft angles that mk motorsport helped me with so i could could start cutting the holes in the floor so the stubs mk made me could then be cut to lenght and start being joined up. the first hurdle was the wrc cradle front arms was hitting the floor pan so this was modded the same on both sides
i didnt take pictures along the way as my phone was on charge so heres a load of pics
cradle all mocked up and ready to be welded in
cradle all tied in and level , in this picture the car is not level so dont worry lol
the rear of the cage is just the basic tie points but will be finished off nicely and i think there maybe a radiator going in so the boot floor will be cut at some point
i then started to tie the front arms of the cradle into the rollcage
both sides completed
the cradle is now fully in and bolted and comes off nice and easy
and a shot of some nice welding
finally ive been collecting some more parts for the build
nearly new front prop
wrc drive shafts with flanges and hubs
and finally a brand new wrc front antiroll bar kit which i got from tim who breaking his escort cosworth for �380 so half price
i will try and update soon but again iam really busy at work and i cant afford to turn the money down
thanks for looking cheers paul


 25-08-2011, 10:01 PM
#488
Advanced PassionFord User
Thread Starter
 06-09-2011, 09:03 PM
#490
Advanced PassionFord User
Thread Starter
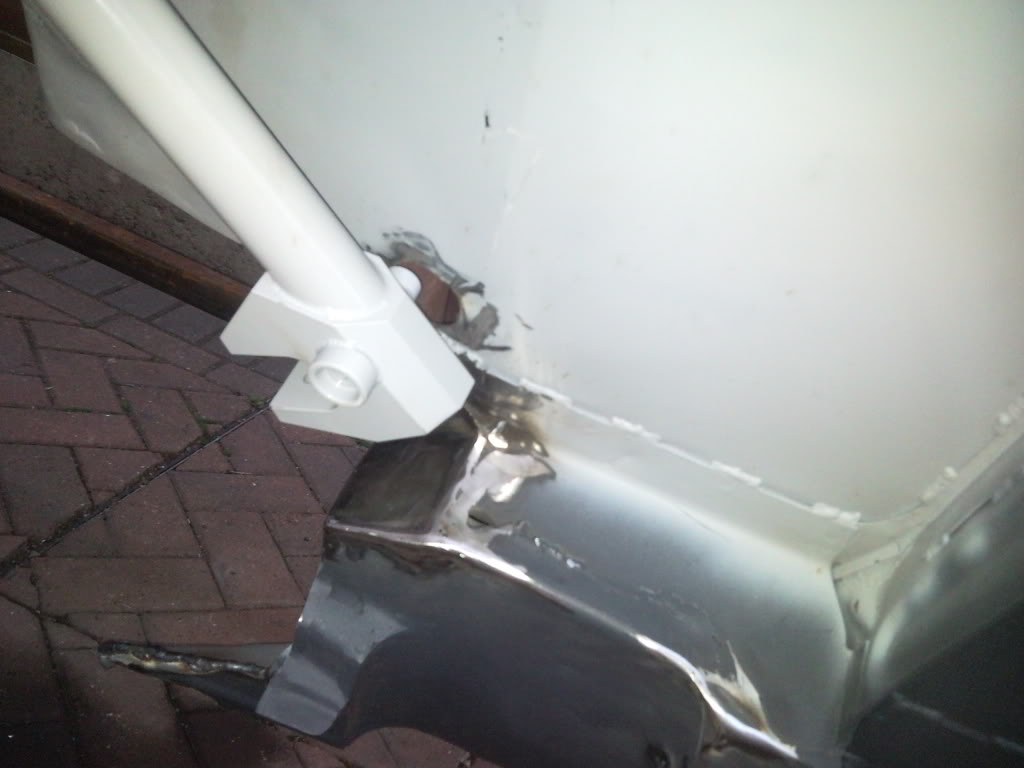
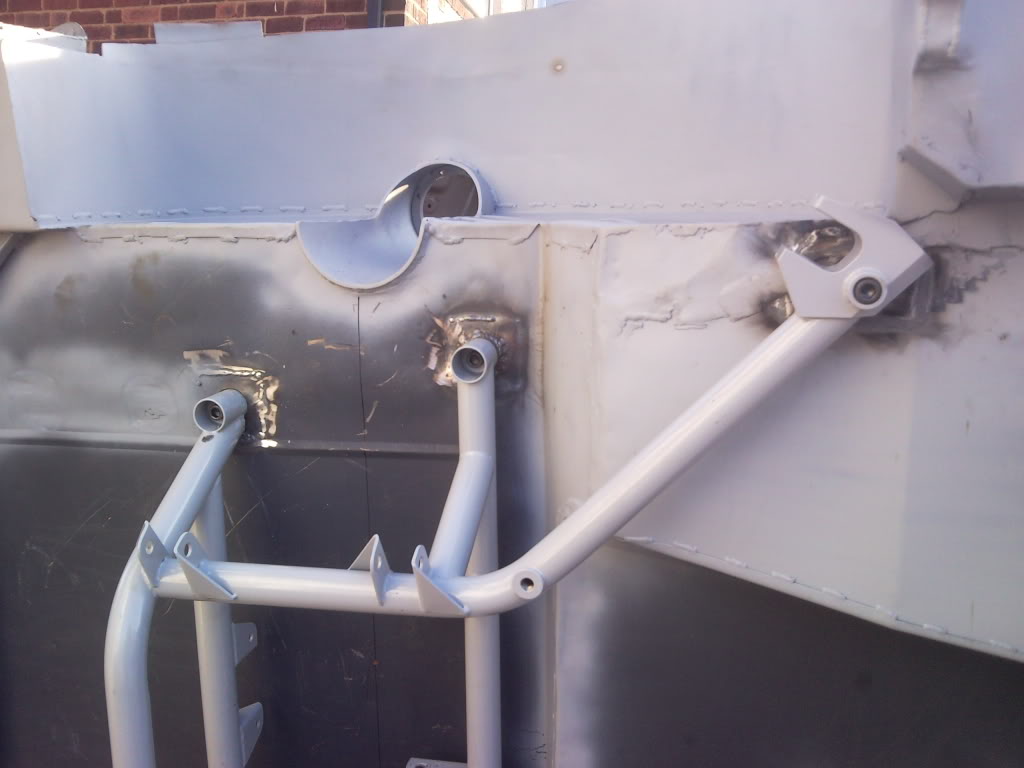
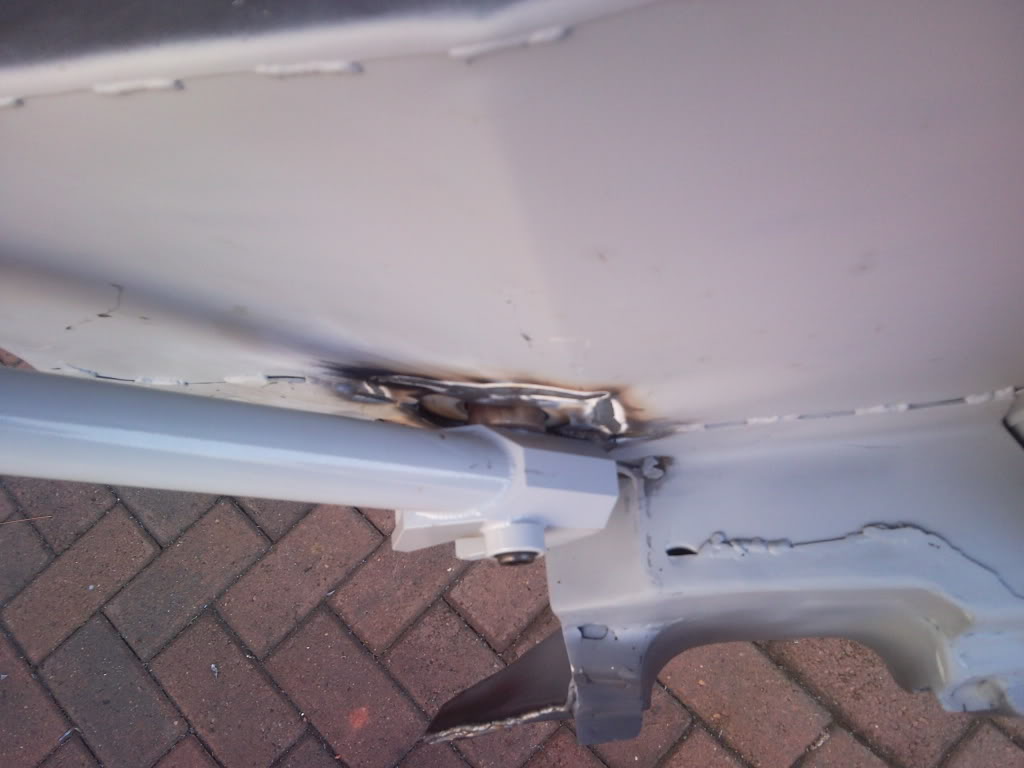
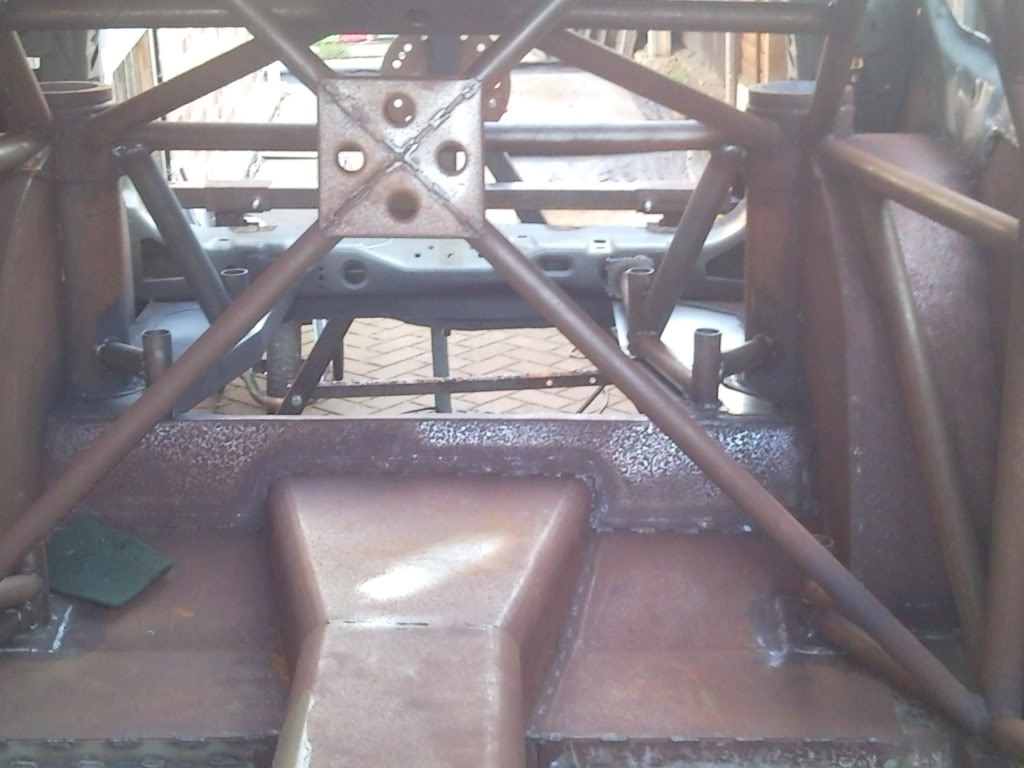
just a small update , i wasnt very happy with the boot floor as i rippled it a little by welding at to a high temperture and the diff sat only about 5mm below the boot floor and with movement (probably a tiny amount) i was worried they might come in contact with each other so on friday night i thought about what i could do ie cut a small section out above the diff and make a box then thought no as i like things to be nice looking aswell as being practical , then went to bed , saturday morning woke up about 8ish and got the tools out ready to do the smallish mod then i realised that id caught
andy escos disease
nooooooooooooooooooooooooooooooooooooooooooooooooo oooooooooooo
this what the boot floor looked like
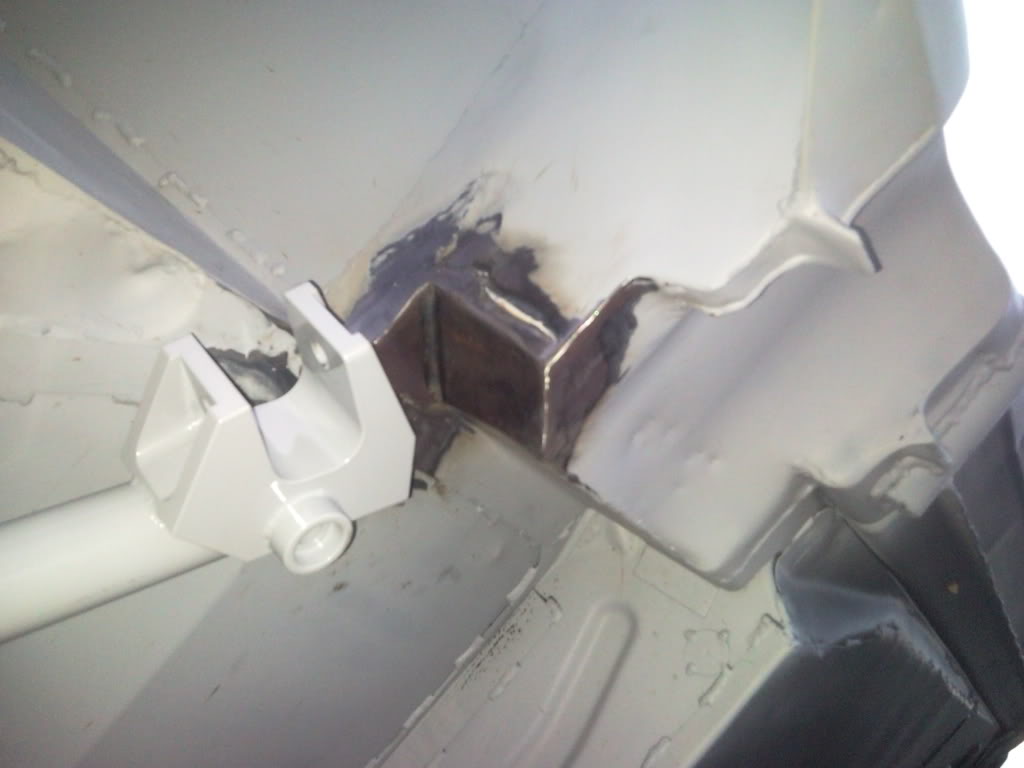
and this is what i ended up with lol , talk about moving backwards lol
and after everything was cleaned ready for new floor with a twist , i can see a cradle
also placed my order with mk motorsport for the following
wrc rear anti rollbar kit
wrc billet tca
wrc billet comp struts
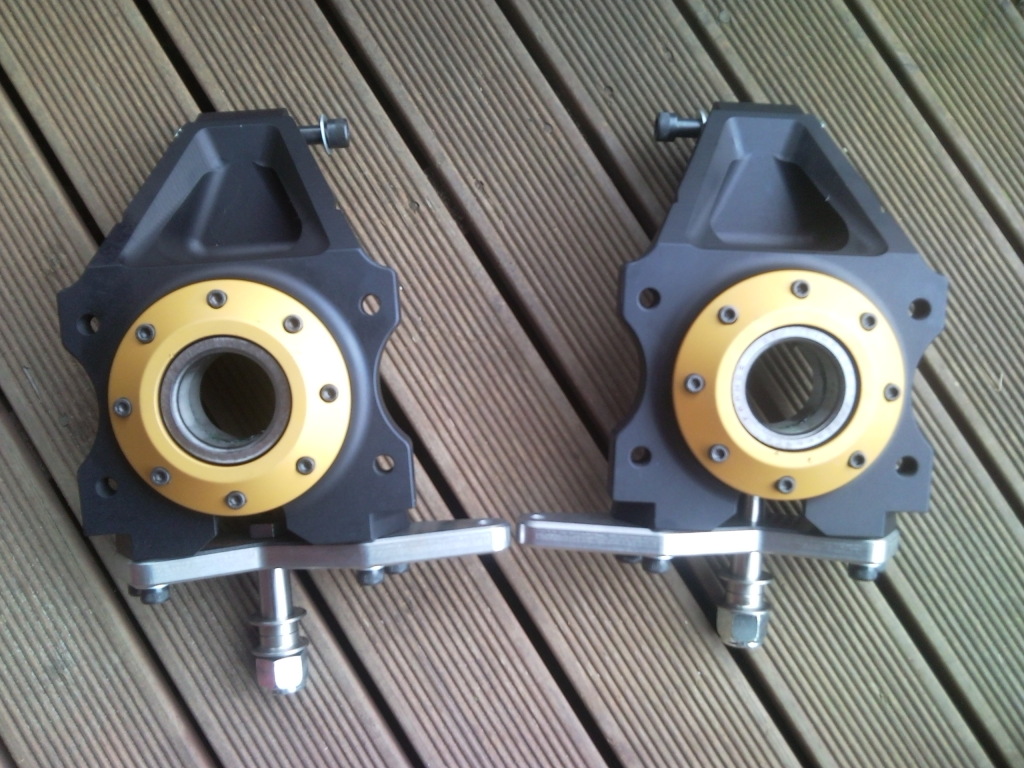
wrc billet upright
wrc bearings
wrc front steering arms
wrc top mounts
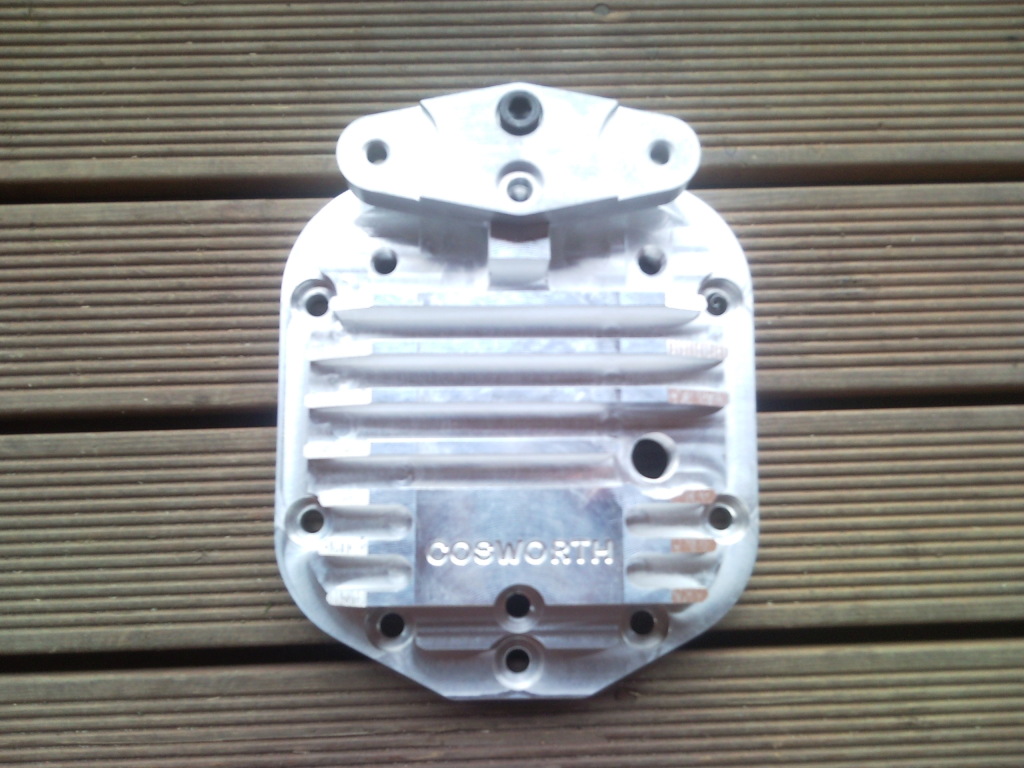
billet rear diff cover
marks machining down my wrc hubs and drive flanges
marks sleeving a pair of front hubs for me aswell
so i will look forward to seeing these as they will all be anodised and in my colour and i will use my plain pair for mocking up to save them from being scratched etc.
hopefully more parts will be turning up soon so i will update as and when
cheers paul
p.s sorry andy i had too
andy escos disease
nooooooooooooooooooooooooooooooooooooooooooooooooo oooooooooooo
this what the boot floor looked like
and this is what i ended up with lol , talk about moving backwards lol
and after everything was cleaned ready for new floor with a twist , i can see a cradle
also placed my order with mk motorsport for the following
wrc rear anti rollbar kit
wrc billet tca
wrc billet comp struts
wrc billet upright
wrc bearings
wrc front steering arms
wrc top mounts
billet rear diff cover
marks machining down my wrc hubs and drive flanges
marks sleeving a pair of front hubs for me aswell
so i will look forward to seeing these as they will all be anodised and in my colour and i will use my plain pair for mocking up to save them from being scratched etc.
hopefully more parts will be turning up soon so i will update as and when
cheers paul
p.s sorry andy i had too
06-09-2011, 10:59 PM
#491
just a small update , i wasnt very happy with the boot floor as i rippled it a little by welding at to a high temperture and the diff sat only about 5mm below the boot floor and with movement (probably a tiny amount) i was worried they might come in contact with each other so on friday night i thought about what i could do ie cut a small section out above the diff and make a box then thought no as i like things to be nice looking aswell as being practical , then went to bed , saturday morning woke up about 8ish and got the tools out ready to do the smallish mod then i realised that id caught
andy escos disease
cheers paul
p.s sorry andy i had too
andy escos disease
cheers paul
p.s sorry andy i had too
HA HA LOLFPMSL
if your not 100% happy with the metal work now is the time to do it again good progress mate its good to see you cracking on with it .ps lovely shopping list
 06-09-2011, 11:12 PM
#492
Advanced PassionFord User
Thread Starter
nice shopping list but not nice bank balance
as for bead blasting my work mates brother works for a company that does trains etc and went down last week and he said he will bead blast and prime the whole car for �250 cash
cheers paul
07-09-2011, 05:03 AM
#493
Look good Paul ,
That's an expensive shopping list I know as I have just
Bought all that as well lol
1 thing though, out of the rear 4 mounting
Points on the cradle, the 2 in the boot floor area nearest the front of the car, I would tie them into the cage at another point, they only appear to be attached by that single horizontal bar, another bar up the the rear brace would be better imo then it's tied in at 2 point so it can't flex, worth doing now before the new floor
Great stuff all the same
That's an expensive shopping list
I know as I have justBought all that as well lol
1 thing though, out of the rear 4 mounting
Points on the cradle, the 2 in the boot floor area nearest the front of the car, I would tie them into the cage at another point, they only appear to be attached by that single horizontal bar, another bar up the the rear brace would be better imo then it's tied in at 2 point so it can't flex, worth doing now before the new floor
Great stuff all the same


 07-09-2011, 05:15 PM
#497
Advanced PassionFord User
Thread Starter
Look good Paul ,
That's an expensive shopping list I know as I have just
Bought all that as well lol
1 thing though, out of the rear 4 mounting
Points on the cradle, the 2 in the boot floor area nearest the front of the car, I would tie them into the cage at another point, they only appear to be attached by that single horizontal bar, another bar up the the rear brace would be better imo then it's tied in at 2 point so it can't flex, worth doing now before the new floor
Great stuff all the same
That's an expensive shopping list
I know as I have justBought all that as well lol
1 thing though, out of the rear 4 mounting
Points on the cradle, the 2 in the boot floor area nearest the front of the car, I would tie them into the cage at another point, they only appear to be attached by that single horizontal bar, another bar up the the rear brace would be better imo then it's tied in at 2 point so it can't flex, worth doing now before the new floor
Great stuff all the same
sorry if ive jedi mind tricked everyone to thinking that the rear of the cage was finished as it is , thats my fault for not saying it wasnt finished lol and the front set of cage bars will be finished off i just didnt have time , i just want it to look smart so iam considering my options where to tie them to.
thanks for the imput thou lads as sometimes peeps dont realise what there doing and how much strenght is needed when you cut most of the car up
so hopefully if the weather holds up then there might be some news at the weekend.cheers paul
 06-10-2011, 11:17 PM
#500
Advanced PassionFord User
Thread Starter
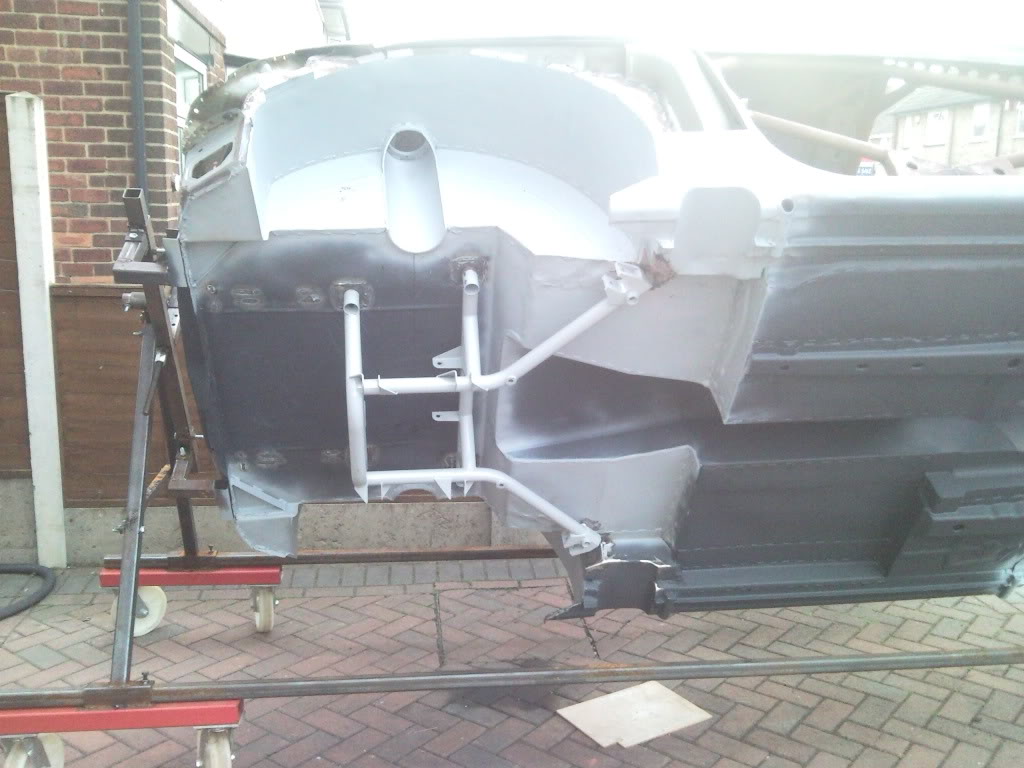
hello , ive got a free minute at last to do a little update , not much but iam nearly the on the rear end so i can forget all the major bit and finish some easy parts.
all parts cleaned up and rear bars to boot refabricated and welded in nice and neatly
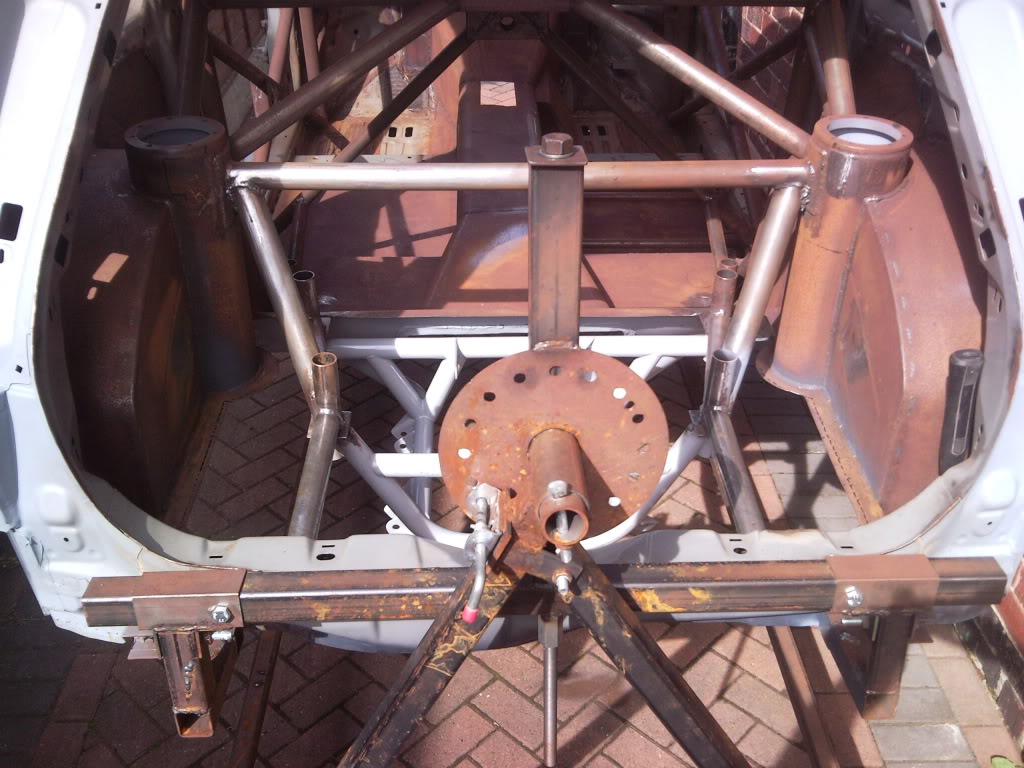
you can see the middle mounts for the cradle have been mounted onto the turrets as they are 5mm thick so lots of strenght
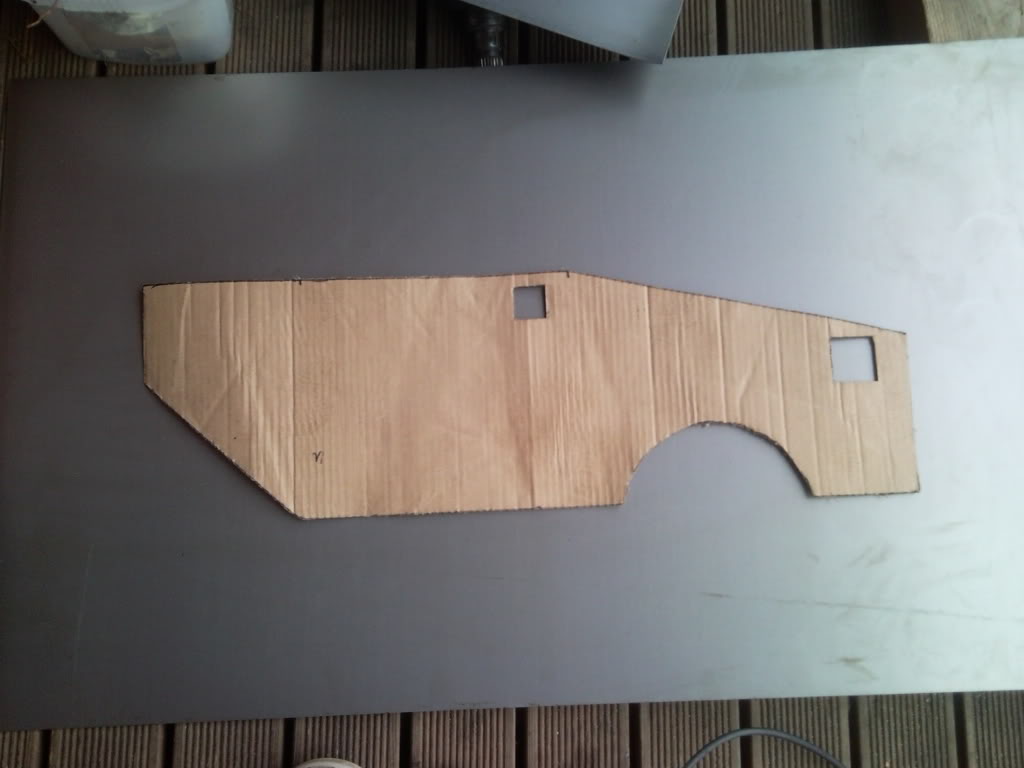
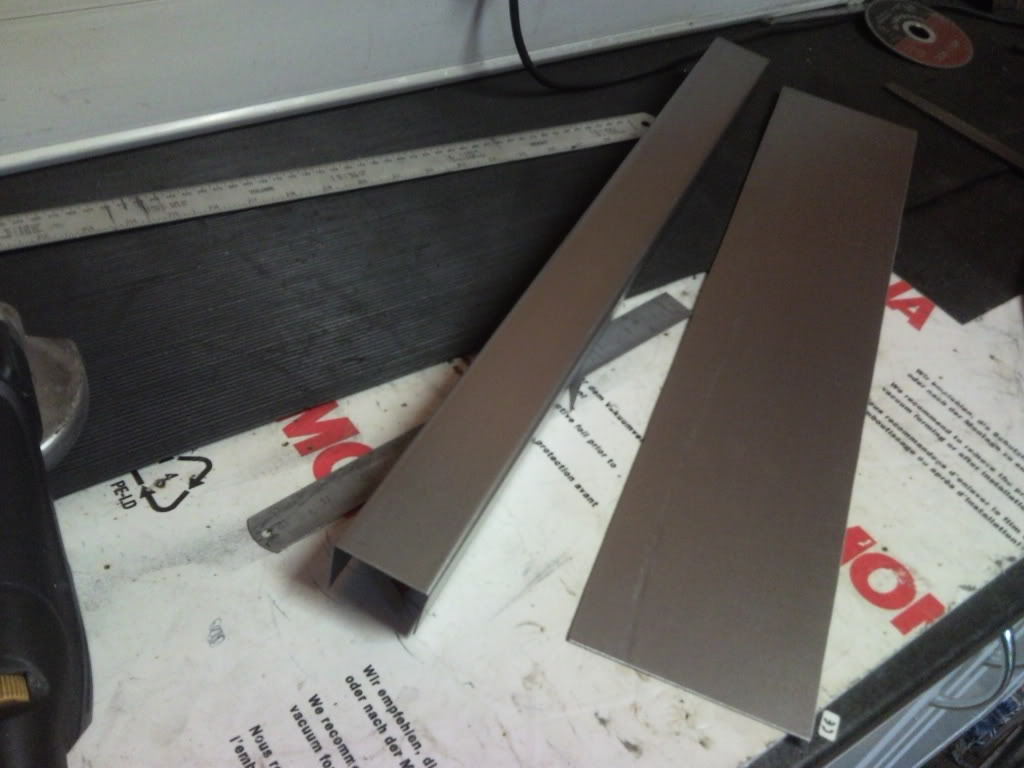
i then started to make the boot floor templates from cardboard then replicated then from steel
cardboard items
metal items , both sides done
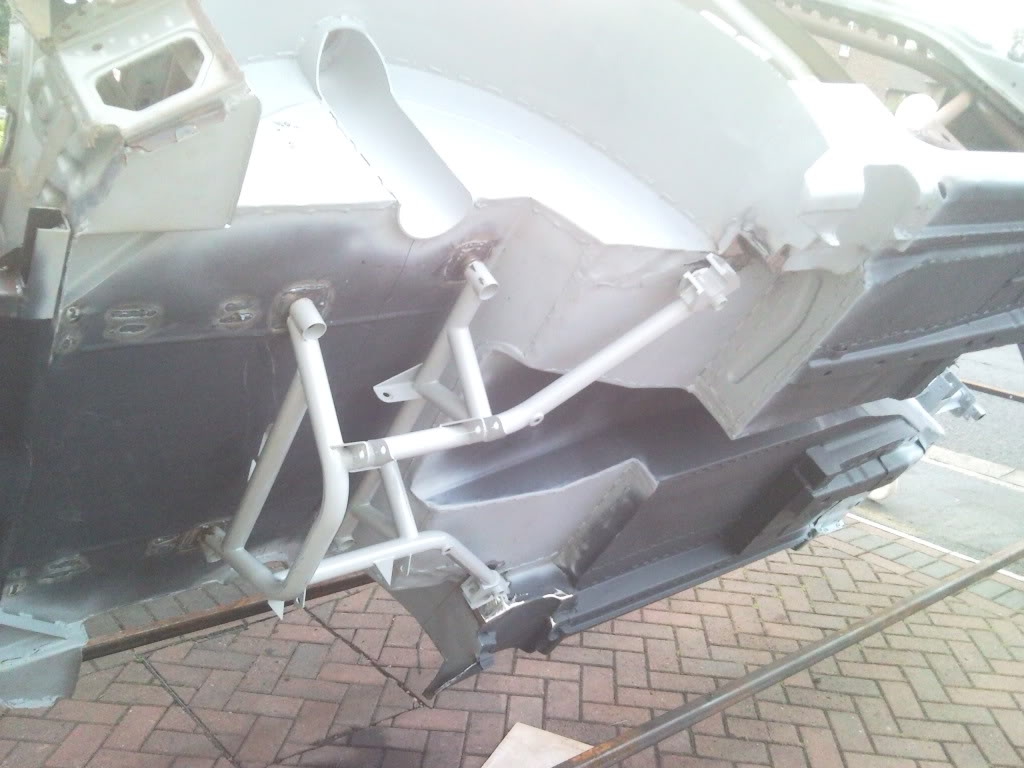
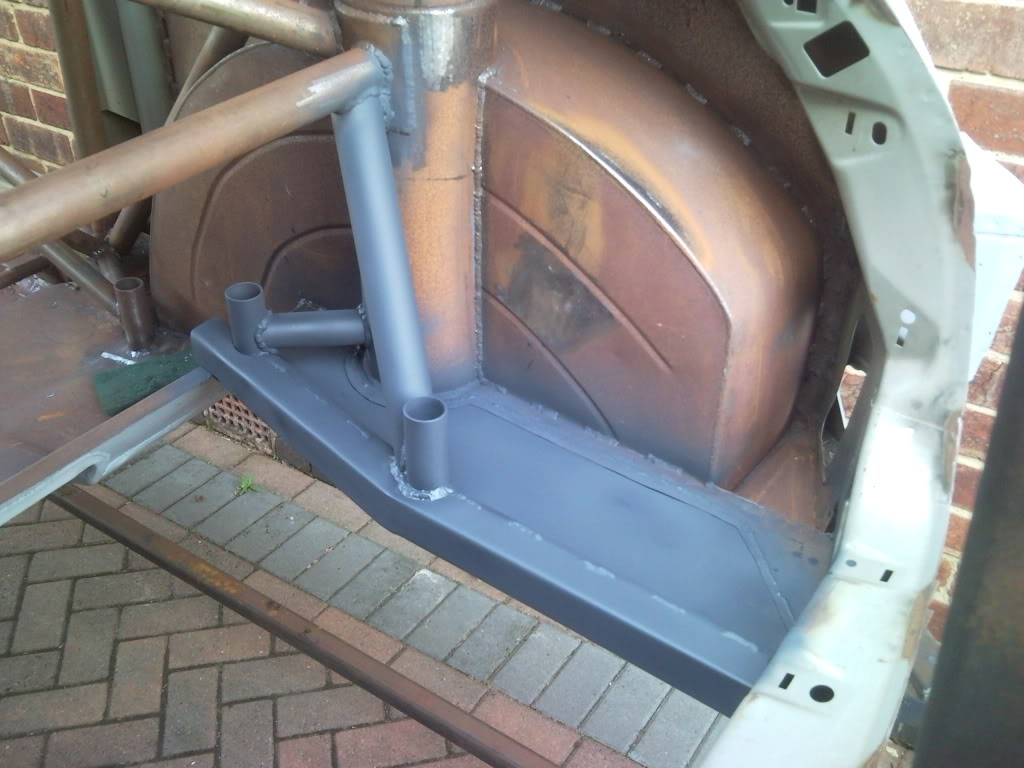
next on the list was to build the square boxing to fit around the cage and provide me with a neat edge so i can drill rivnuts and mount the carbon boot floor plus ive raised the boot floor up 2 inch for moor clearance.

next was to weld the floor panel in
one side done with boxing fitted , its starting to take shape now

you can just see both boot floor panels welded in
i never got to take any pics of both sides finished but will take some soon as it started raining
thanks for looking and yes ive still got the cage to finish off lol
cheers paul
all parts cleaned up and rear bars to boot refabricated and welded in nice and neatly
you can see the middle mounts for the cradle have been mounted onto the turrets as they are 5mm thick so lots of strenght
i then started to make the boot floor templates from cardboard then replicated then from steel
cardboard items
metal items , both sides done
next on the list was to build the square boxing to fit around the cage and provide me with a neat edge so i can drill rivnuts and mount the carbon boot floor plus ive raised the boot floor up 2 inch for moor clearance.
next was to weld the floor panel in
one side done with boxing fitted , its starting to take shape now
you can just see both boot floor panels welded in
i never got to take any pics of both sides finished but will take some soon as it started raining
thanks for looking and yes ive still got the cage to finish off lol
cheers paul
07-10-2011, 03:36 AM
#502
Too many posts.. I need a life!!
Join Date: Aug 2003
Location: Norway
Posts: 517
Likes: 0
Received 0 Likes
on
0 Posts
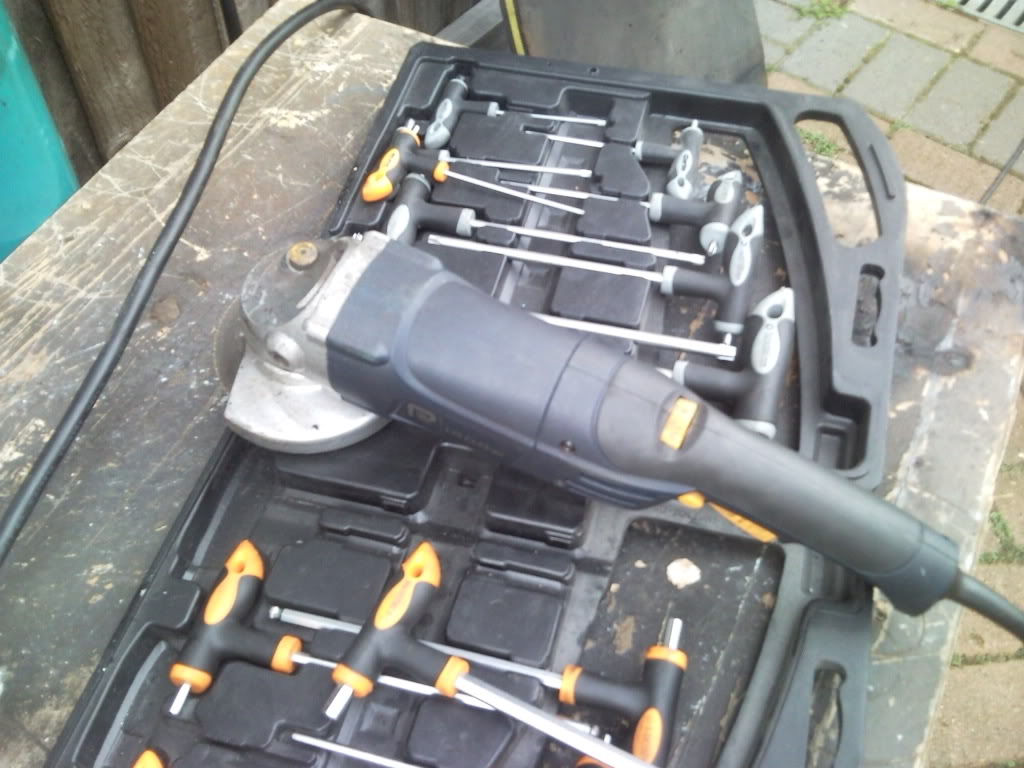
Nice to see a proper new project again, as everybody knows , a proper project involves using a grinder, ALOT !!! 
Last edited by Zzz...Zzz; 07-10-2011 at 03:38 AM.
07-10-2011, 04:28 PM
#506
10K+ Poster!!

Looks bloody excellent !
Suprised the turrets need to be 5mm thick though, I looked at some proper grp 4 ones the other day and they even made a point about theirs being the thickest and they can't of been anymore than a few mm !
Can't wait to see how it looks painted, going to be a stunning car.
Suprised the turrets need to be 5mm thick though, I looked at some proper grp 4 ones the other day and they even made a point about theirs being the thickest and they can't of been anymore than a few mm !
Can't wait to see how it looks painted, going to be a stunning car.
07-10-2011, 09:51 PM
#507
Advanced PassionFord User
Thread Starter
cheers lads for the comments
mark as iam running the wrc rear cradle the diff sat very close to the boot floor so i decided to raise this up and then thought about having a removable floor to access the rear diff cooler , the diff itself and possibly fitting the rad in the boot.
andy its going to be along way away until the cars painted mate lol
the turrets are made from engineering tube with half the side cut out and these will be the last things to fold in an accident as they are 5mm wall thickness lol
cheers paul
31-12-2011, 08:00 AM
#508
Part of the Furniture
Join Date: Mar 2006
Location: Norway
Posts: 189
Likes: 0
Received 0 Likes
on
0 Posts
no probs mate thats what we are here for , hopefully to help each other out. right it all depends on what you want and how much money you got!
first the cheap way:-
use the escort cossie front sub frame as this has engine mounts , diff mounts , steering rack mounts , track control arms and all you would need to do is fabricate some mounts to the chassis legs so you can bolt the subframe up , front end done using all escort cossie bits ( if you using the cossie engine then no probs , major probs if your using the zetec with diff mounts/ sump and drive shafts and the height of the engine as regaurds to sump etc as the cossie drive shafts run through the cossie sump so you would have to get something made )

the more expensive way:-
make a custom front subframe (cradle)out of cds tubing that bolts up to chassis and make custom mount for the steering rack , track control arms , the diff , custom anti roll bars (if your using them) with this set up you can mount anything anywhere to suit your needs , again if your using the cossie engine then there should not be a prob as again the drive shaft run through the sump . however if your using the zetec engine (like iam) then this again allows you to mount any thing anywhere including the block which is the major problem. i have mounted it to the chassis legs which moves the engine higher up and futher back in the engine bay for better weight distribution and so i can mount the diff remotely . with the engine higher in the bay and the dry sump that iam going to fit i should have good clearance for the drive shafts. so i would be able to undo 4 fixing points and the whole front end should come off ( subframe , escort cossie rack , tca , antiroll bar , front diff with drive shafts while the engine still in position
and the rack i think i will use either escort cossie or fiesta as to be honest i need to have a measure up and see whats what
mines going to be like ag motorsports focus

hope this helps mate
cheers paul
first the cheap way:-
use the escort cossie front sub frame as this has engine mounts , diff mounts , steering rack mounts , track control arms and all you would need to do is fabricate some mounts to the chassis legs so you can bolt the subframe up , front end done using all escort cossie bits ( if you using the cossie engine then no probs , major probs if your using the zetec with diff mounts/ sump and drive shafts and the height of the engine as regaurds to sump etc as the cossie drive shafts run through the cossie sump so you would have to get something made )
the more expensive way:-
make a custom front subframe (cradle)out of cds tubing that bolts up to chassis and make custom mount for the steering rack , track control arms , the diff , custom anti roll bars (if your using them) with this set up you can mount anything anywhere to suit your needs , again if your using the cossie engine then there should not be a prob as again the drive shaft run through the sump . however if your using the zetec engine (like iam) then this again allows you to mount any thing anywhere including the block which is the major problem. i have mounted it to the chassis legs which moves the engine higher up and futher back in the engine bay for better weight distribution and so i can mount the diff remotely . with the engine higher in the bay and the dry sump that iam going to fit i should have good clearance for the drive shafts. so i would be able to undo 4 fixing points and the whole front end should come off ( subframe , escort cossie rack , tca , antiroll bar , front diff with drive shafts while the engine still in position
and the rack i think i will use either escort cossie or fiesta as to be honest i need to have a measure up and see whats what
mines going to be like ag motorsports focus
hope this helps mate
cheers paul
where did u get the cradle from? im building zetec with 4x4 in a escort s2 with sierra floor, i want to have dry sump like yur having, but i need a cradle fixing all this, anyone building this?
31-12-2011, 09:56 AM
#509
Advanced PassionFord User
Thread Starter
31-12-2011, 02:19 PM
#510
Part of the Furniture
Join Date: Mar 2006
Location: Norway
Posts: 189
Likes: 0
Received 0 Likes
on
0 Posts
I have sent him PM


 10-02-2012, 05:35 PM
#515
Advanced PassionFord User
Thread Starter

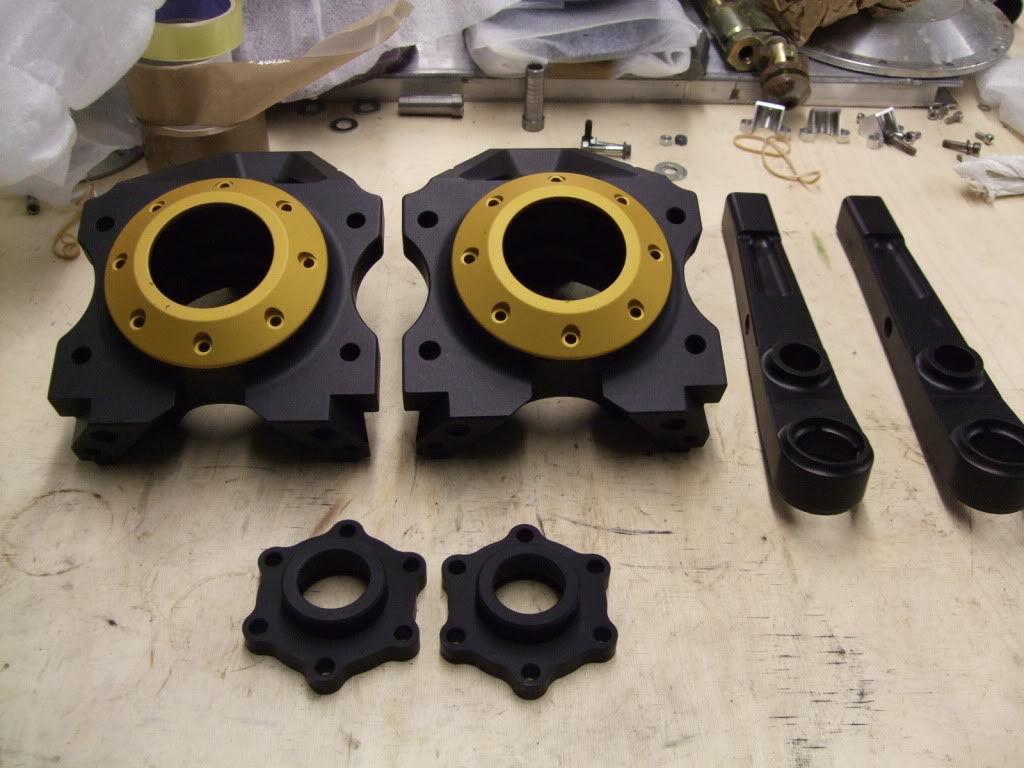
wow they look amazing as always mark , i think i also have a good taste in colours an the black and gold look fanastic.
i look forward to seeing more updates of the other parts ive ordered.
hopefully a big update soon when ive spent a few hours on the car
cheers paul
07-04-2012, 05:11 PM
#517
Advanced PassionFord User
Thread Starter
time for a little update , it is little but cost me a arm and a leg but its all going to be worth it in the end.
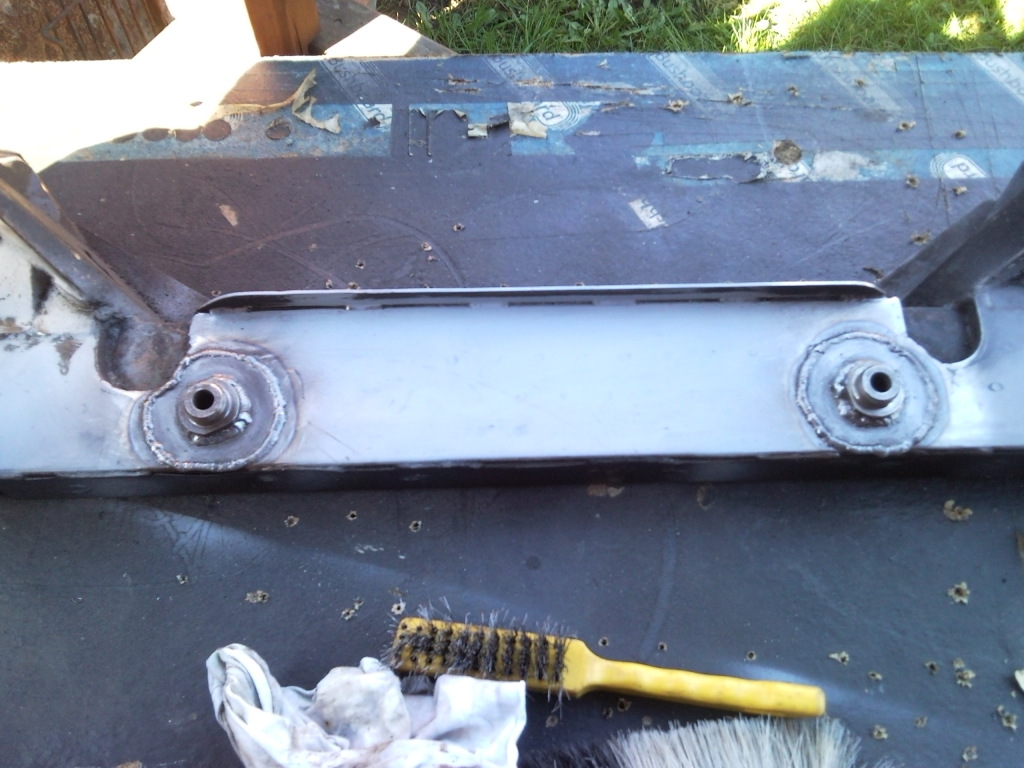
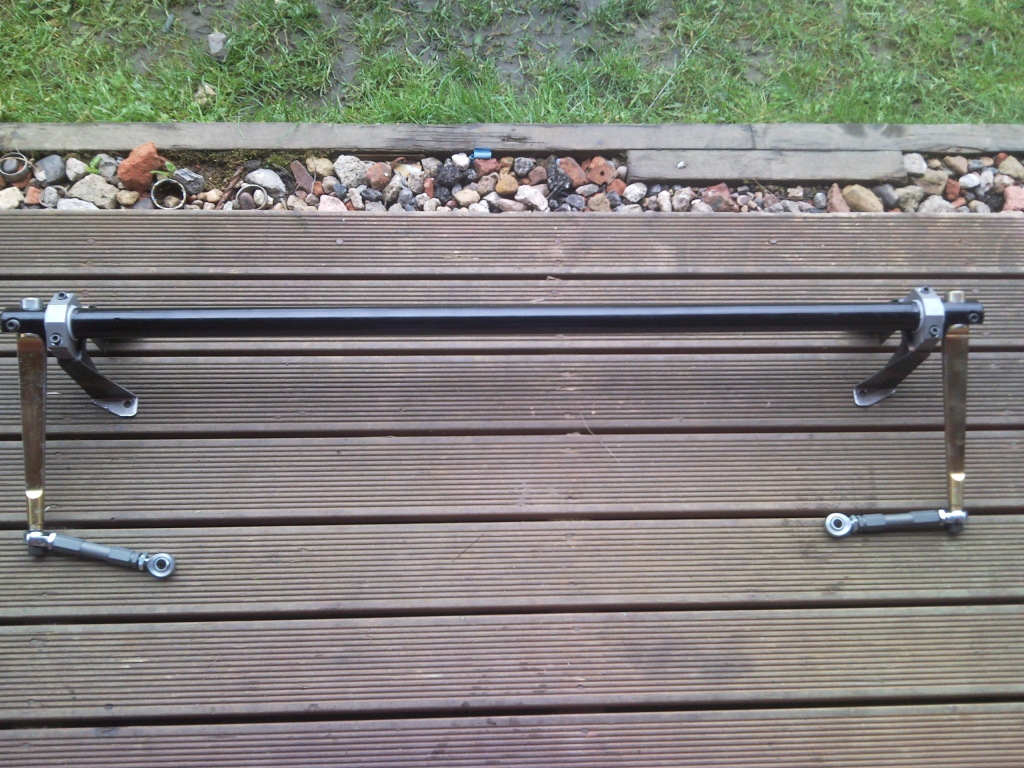
right first things first , i purchased a genuine wrc front cross member from mt motorsport its in very good condition considering its been on a rally car and a few bit needed tidying up which was no real problem to sort so here goes.
genuine wrc crossmember
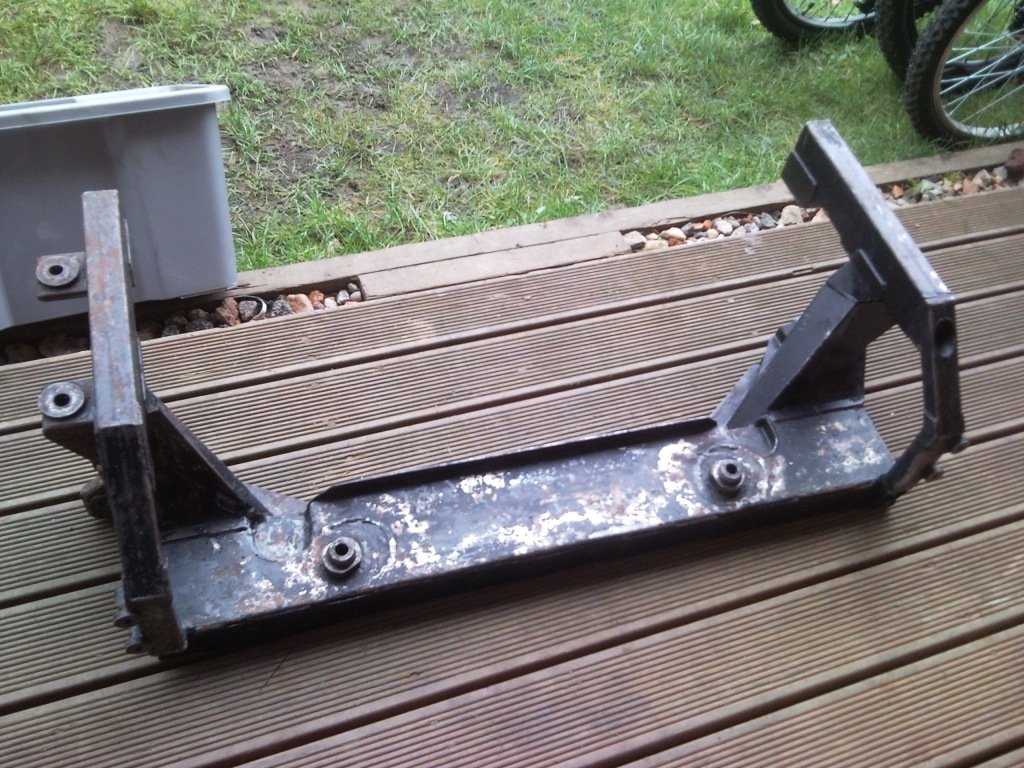
what the steering rack mounts looked like , abit tatty
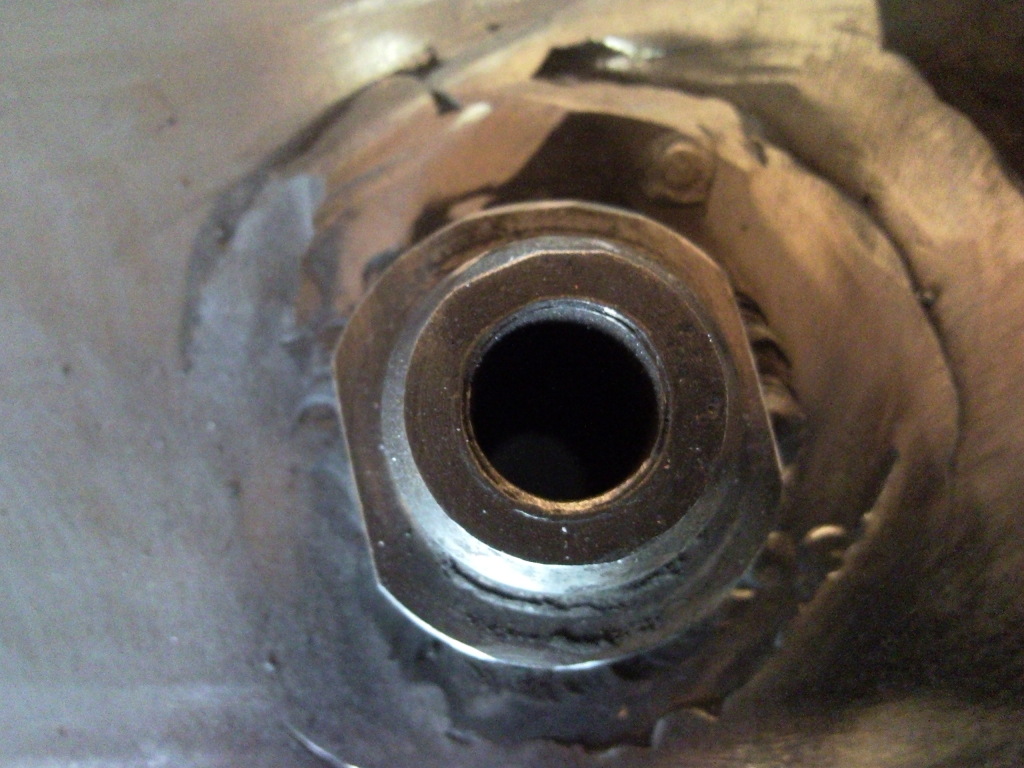
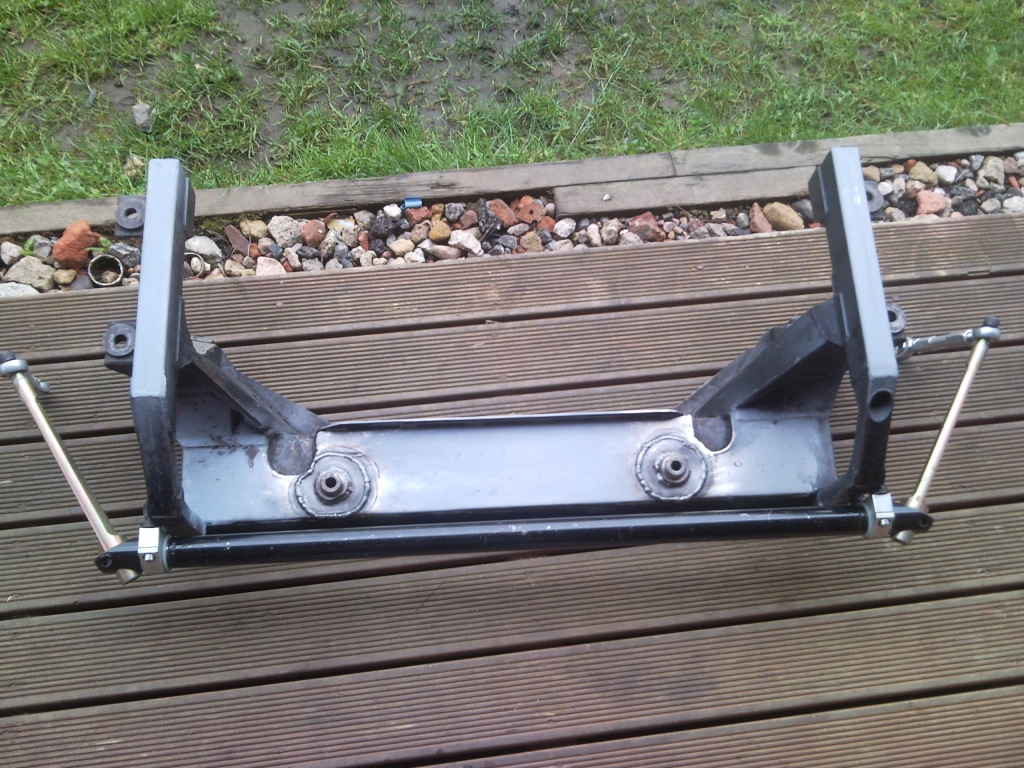
round disc made to cover the steering rack mounts
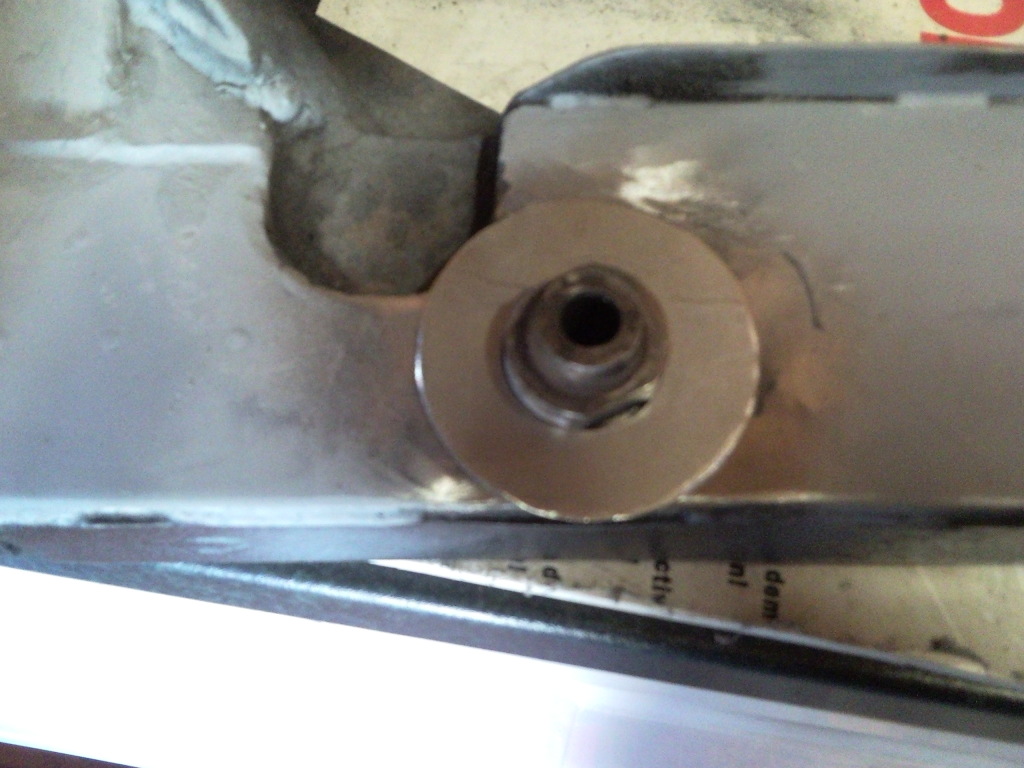
one side all welded up
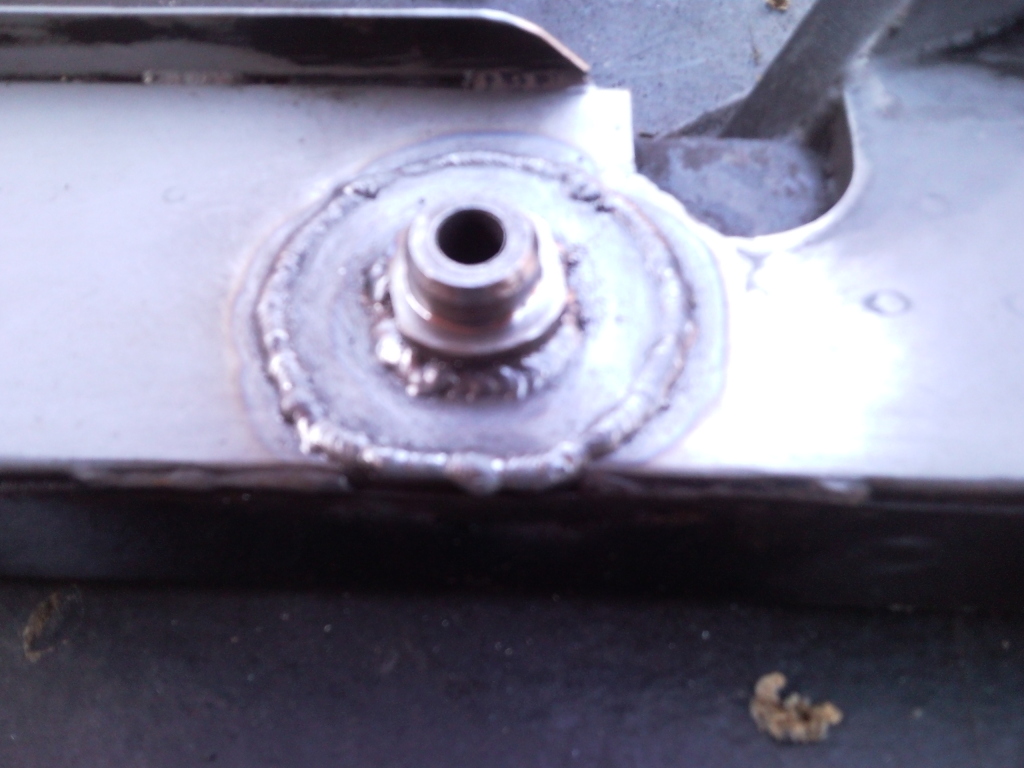
both sides welded up nice and neat
next was to order a rear prop 4x4 also from mt motorsport , just like to say a thanks to him for a great fast service , highly recommended for parts
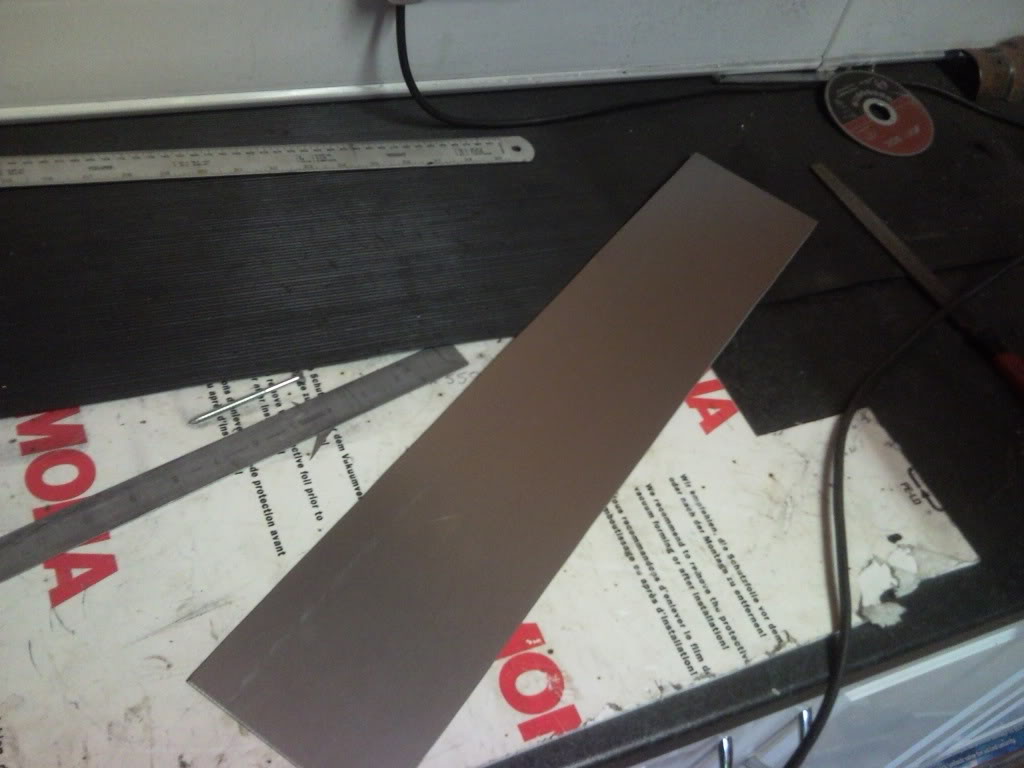
next was on to the shell loads of little bits to be done but with the weather being shit and looking after my niece as my sisters not very well its been hard to find time and tbh she comes before any car . so the last time i updated i had cut the boot floor out and was making the removable carbon fibre boot floors so i will let the pics do the talking
boot floor all marked out and rivnuts inserted (stainless steel)
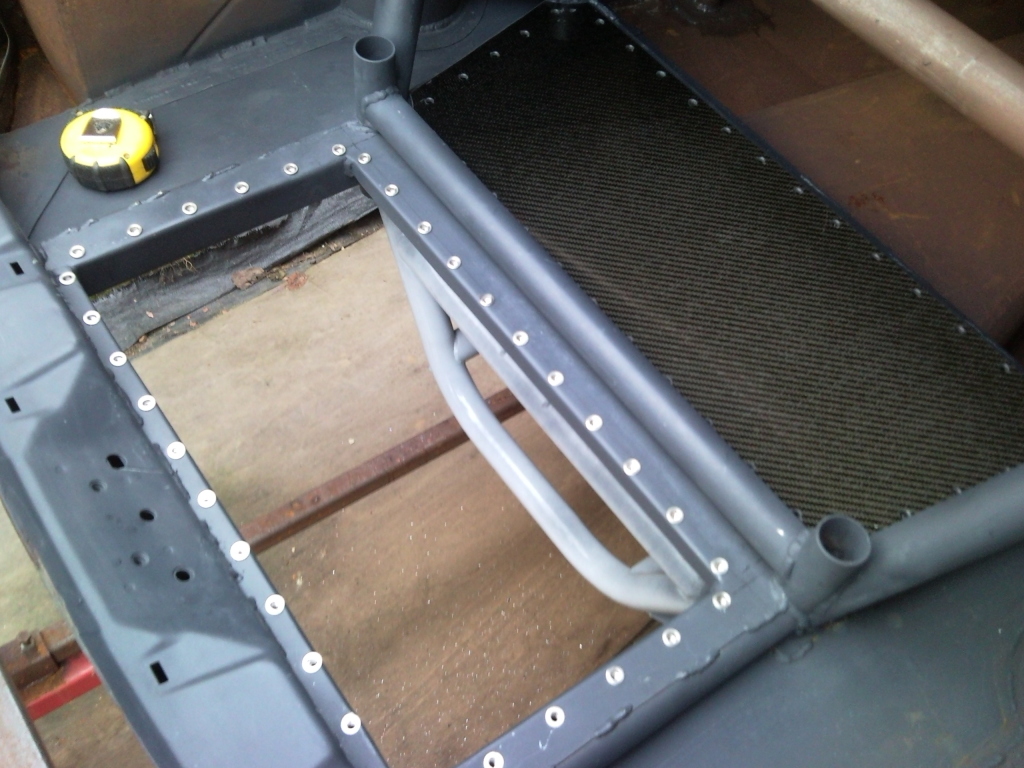
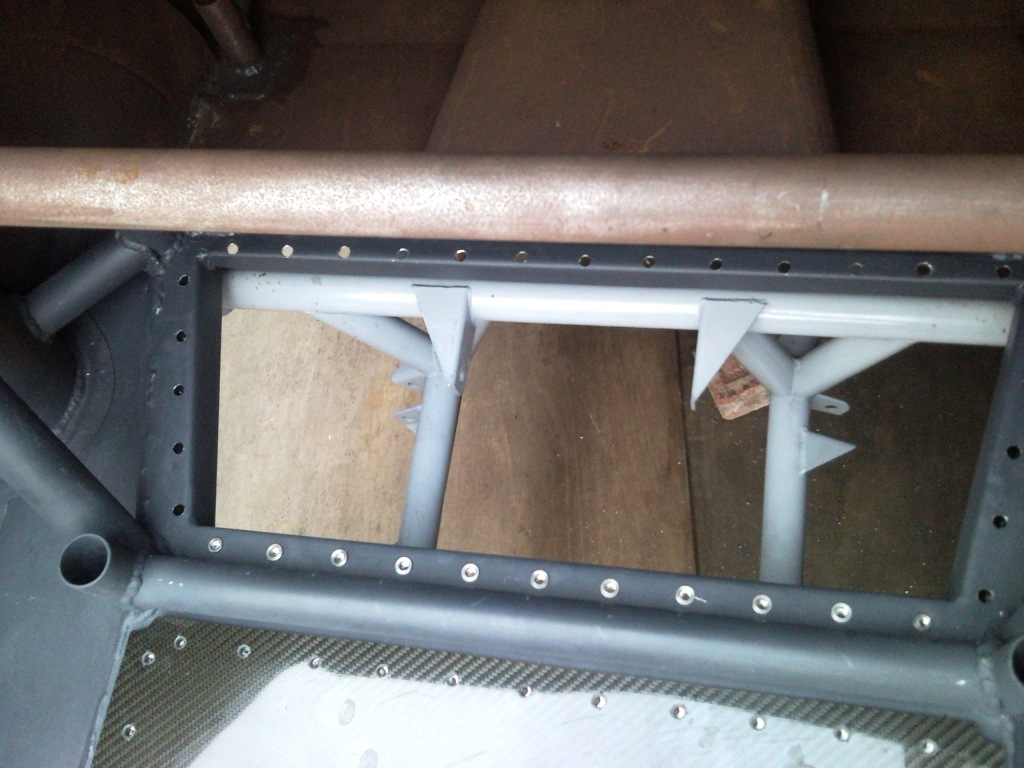
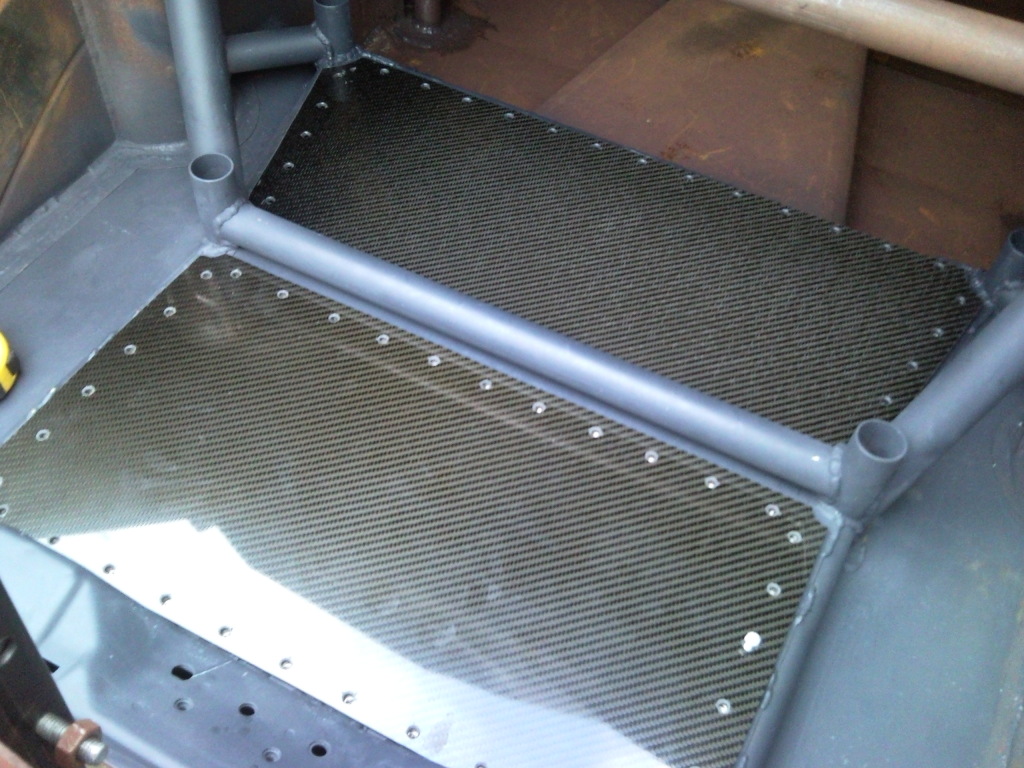
and the carbon fibre boot floor panels front and rear

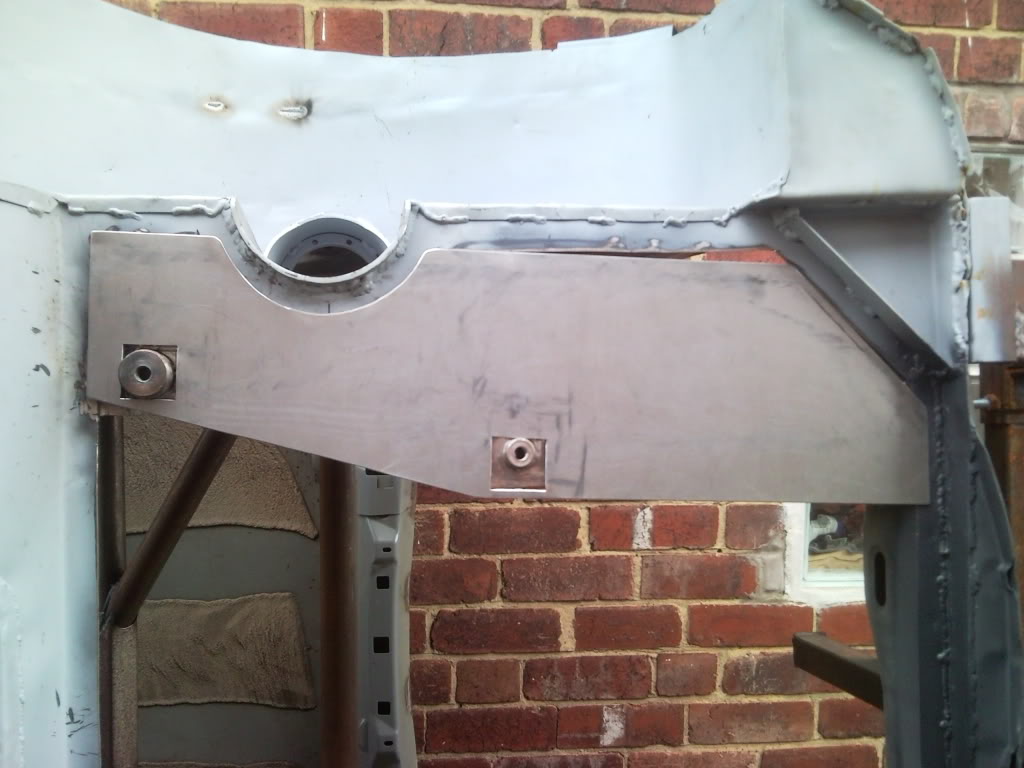
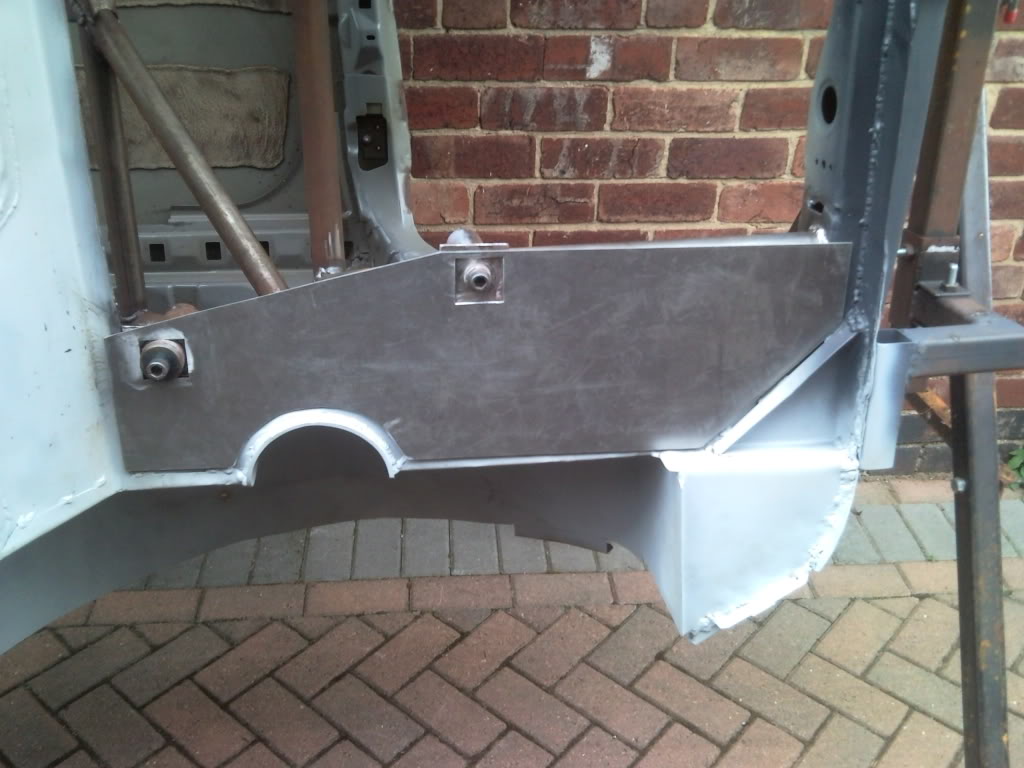
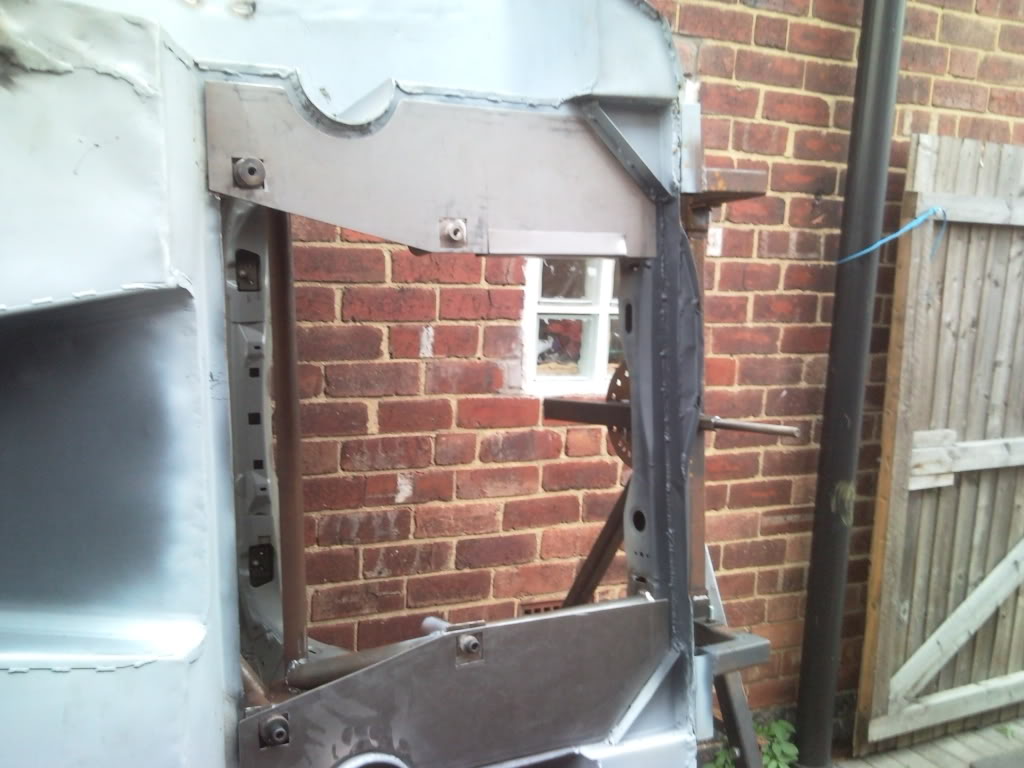
next on the list was to weld up some plates around the front of the cage
next was welding plates around the front rollcage in the firewall

both sides done
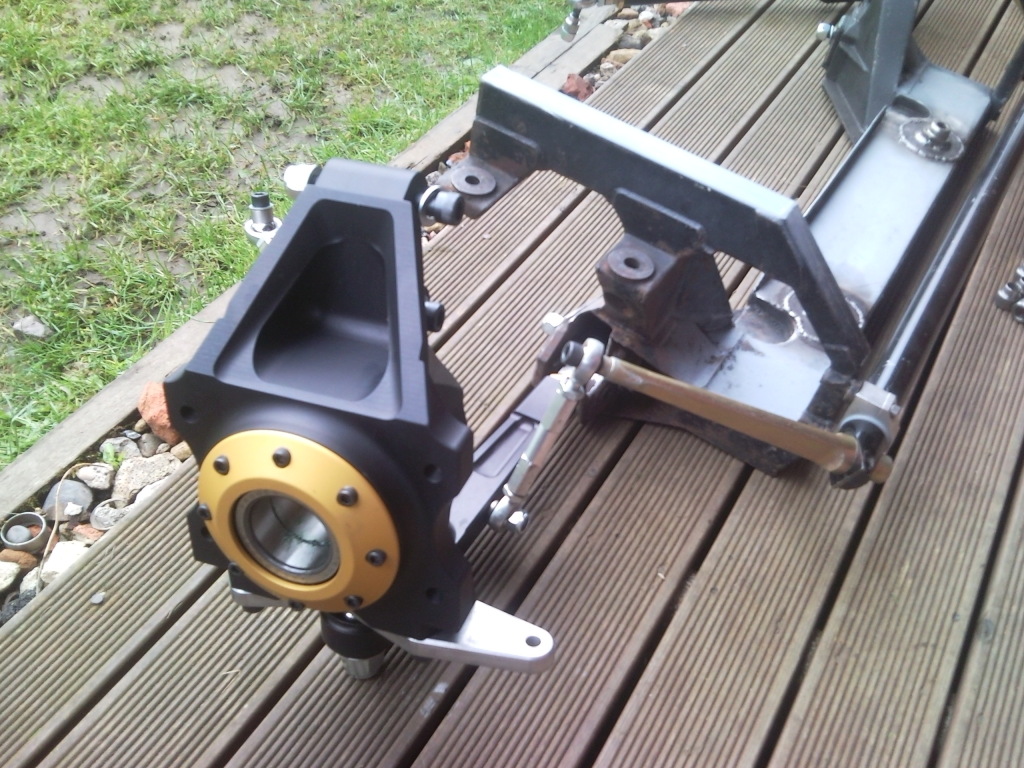
then it was a trip down to mk motorsports to pick up my new parts , and as always with marks parts they were fantastic and with some nice anodising and powdercoating. i think the colour combo will work very well throughout the car and with some trick suspension coming soon also mk motorsport the gold and black will be brill.
the parts order was
x2 wrc tcas
x2 compression struts
x2 wheel bearings
x2 steering arms
x1 rear antiroll bar kit
x1 billet rear diff cover
x2 wrc top mounts
top mounts
tcas
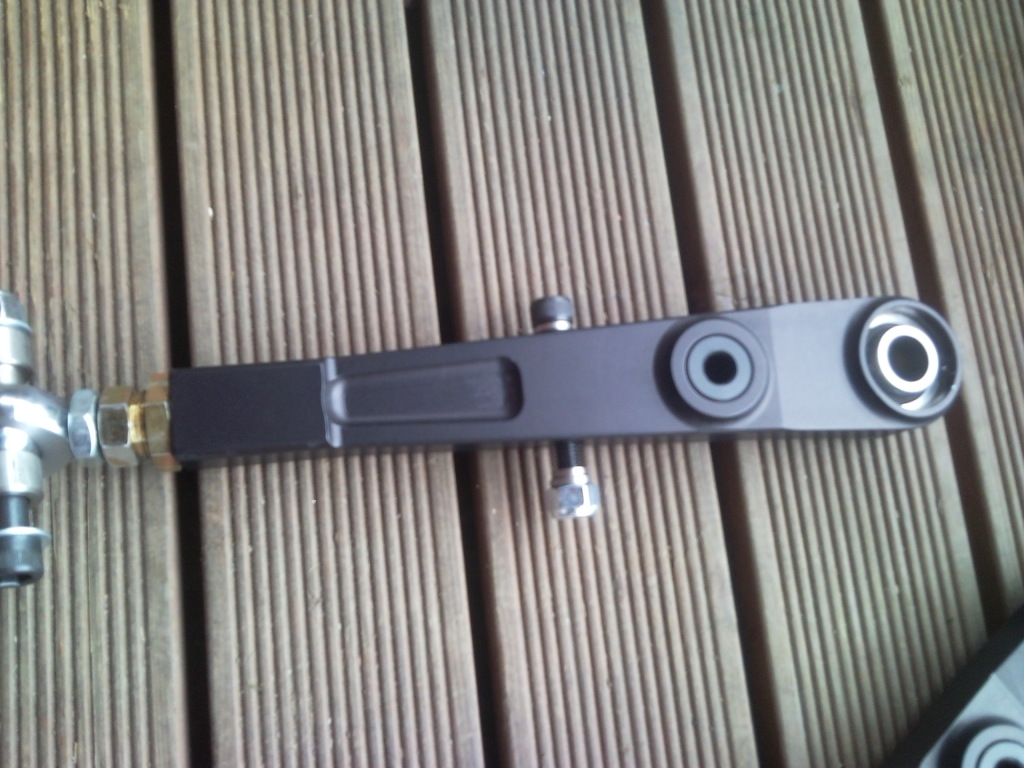
steering arms
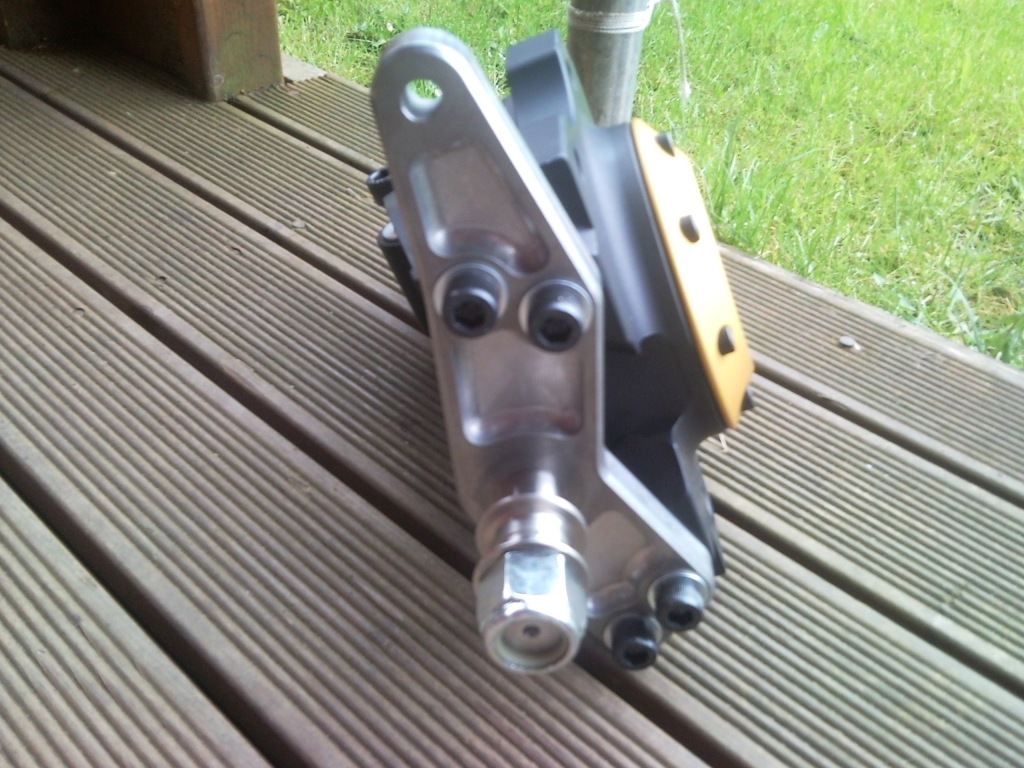
uprights , bearings etc
billet diff cover
rear antiroll bar
compression struts

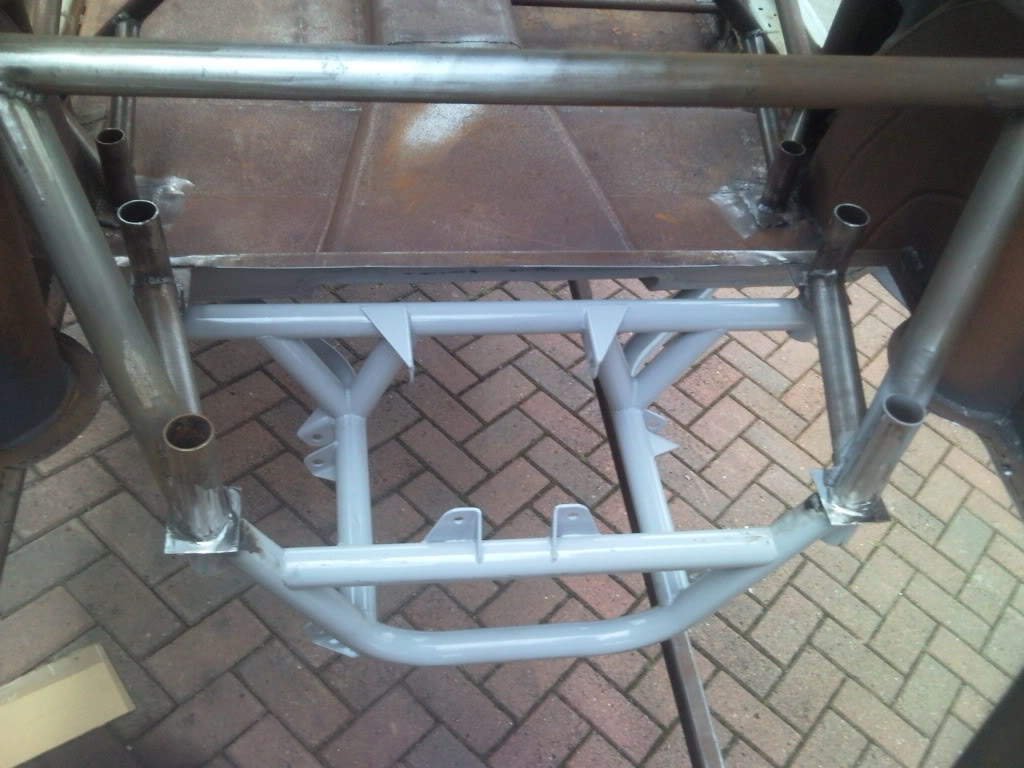
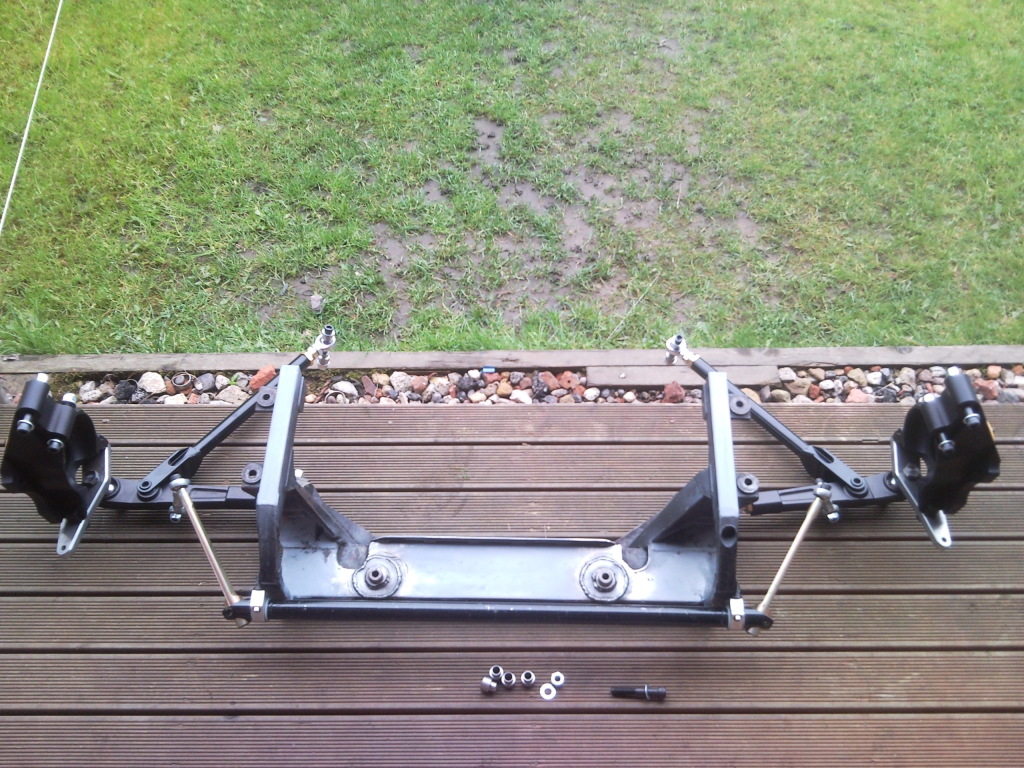
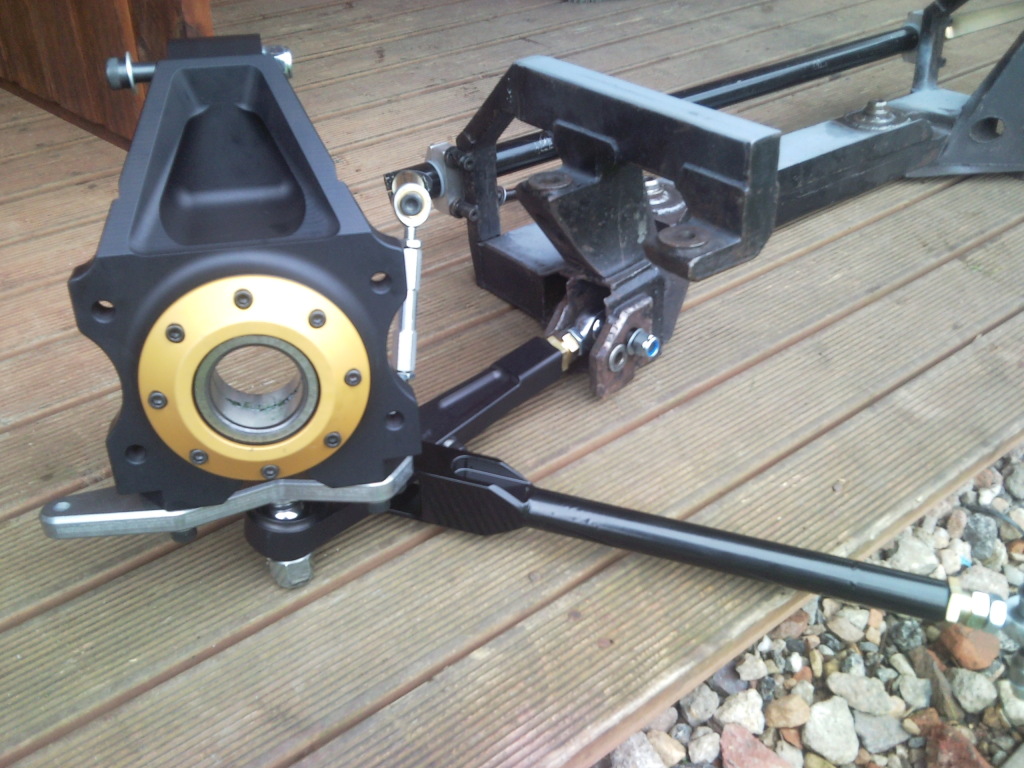
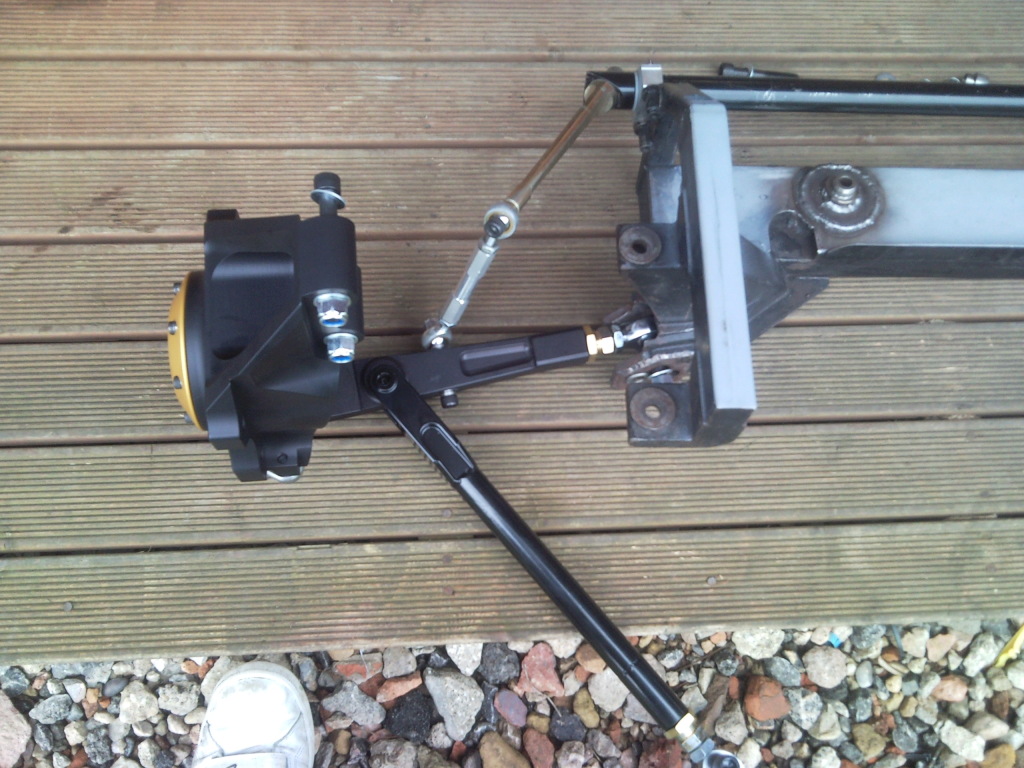
and a couple of pictures of the whole front end all fitted together ready to be fitted and custom mounted to the chassis legs when the weather picks up a little
antiroll bar fitted to the wrc crossmember
front end all fitted up
thats all for now and thanks for looking , hopefully more to come soon
cheers paul
right first things first , i purchased a genuine wrc front cross member from mt motorsport its in very good condition considering its been on a rally car and a few bit needed tidying up which was no real problem to sort so here goes.
genuine wrc crossmember
what the steering rack mounts looked like , abit tatty
round disc made to cover the steering rack mounts
one side all welded up
both sides welded up nice and neat
next was to order a rear prop 4x4 also from mt motorsport , just like to say a thanks to him for a great fast service , highly recommended for parts
next was on to the shell loads of little bits to be done but with the weather being shit and looking after my niece as my sisters not very well its been hard to find time and tbh she comes before any car . so the last time i updated i had cut the boot floor out and was making the removable carbon fibre boot floors so i will let the pics do the talking
boot floor all marked out and rivnuts inserted (stainless steel)
and the carbon fibre boot floor panels front and rear
next on the list was to weld up some plates around the front of the cage
next was welding plates around the front rollcage in the firewall
both sides done
then it was a trip down to mk motorsports to pick up my new parts , and as always with marks parts they were fantastic and with some nice anodising and powdercoating. i think the colour combo will work very well throughout the car and with some trick suspension coming soon also mk motorsport the gold and black will be brill.
the parts order was
x2 wrc tcas
x2 compression struts
x2 wheel bearings
x2 steering arms
x1 rear antiroll bar kit
x1 billet rear diff cover
x2 wrc top mounts
top mounts
tcas
steering arms
uprights , bearings etc
billet diff cover
rear antiroll bar
compression struts
and a couple of pictures of the whole front end all fitted together ready to be fitted and custom mounted to the chassis legs when the weather picks up a little
antiroll bar fitted to the wrc crossmember
front end all fitted up
thats all for now and thanks for looking , hopefully more to come soon
cheers paul
07-04-2012, 05:54 PM
#520
Advanced PassionFord User
Thread Starter
hoping to see mark in 2 weeks to get my new hubs , drive flanges and give him another list
cheers paul