T26 WRC - "RE-IMAGINED" 550bhp+ Prodrive S8 WRC

 09-09-2010, 10:39 PM
#282
Boost Junkie
Thread Starter
Not much to update this at the moment. Im waiting to get my sump back as thats been away being baffled. Also waiting on my modified AVCS line and other parts to be zinc coated. Once these are on i can go ahead and fit up all the timing assembly.
Also wonding if i should bother buying the Cosworth/RCM anti skip belt guide or not?
�40 for jewellery or function?
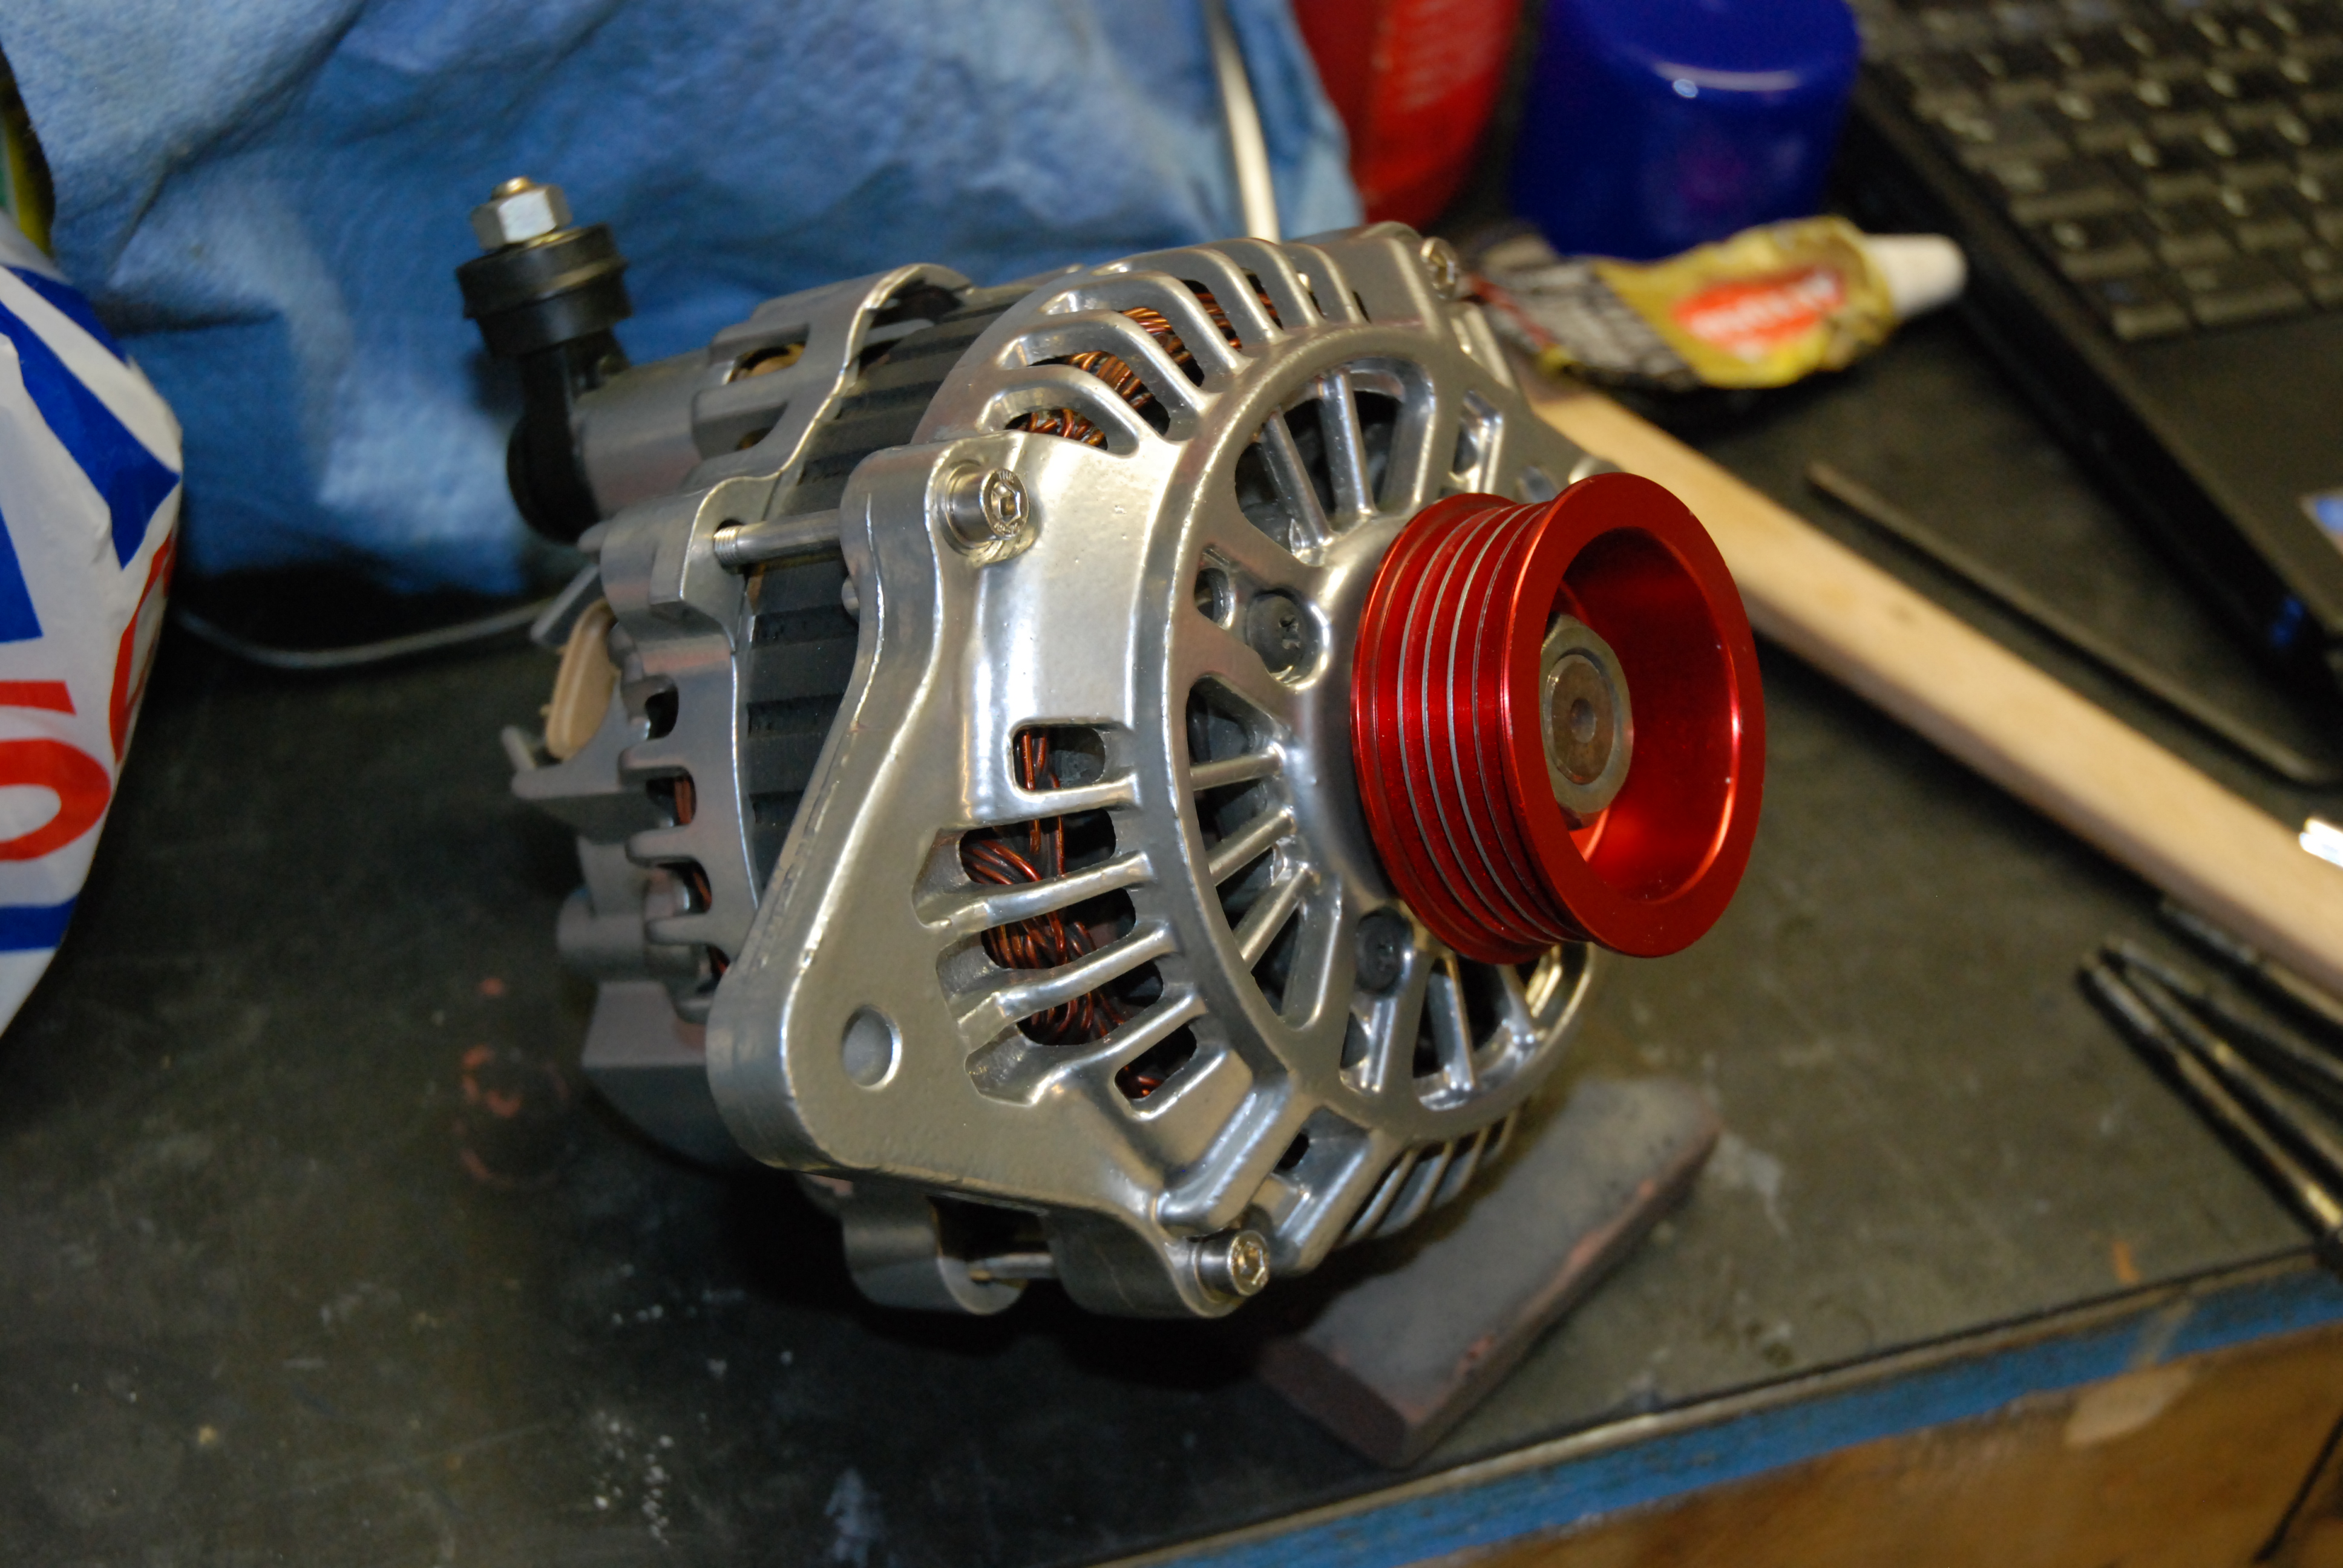
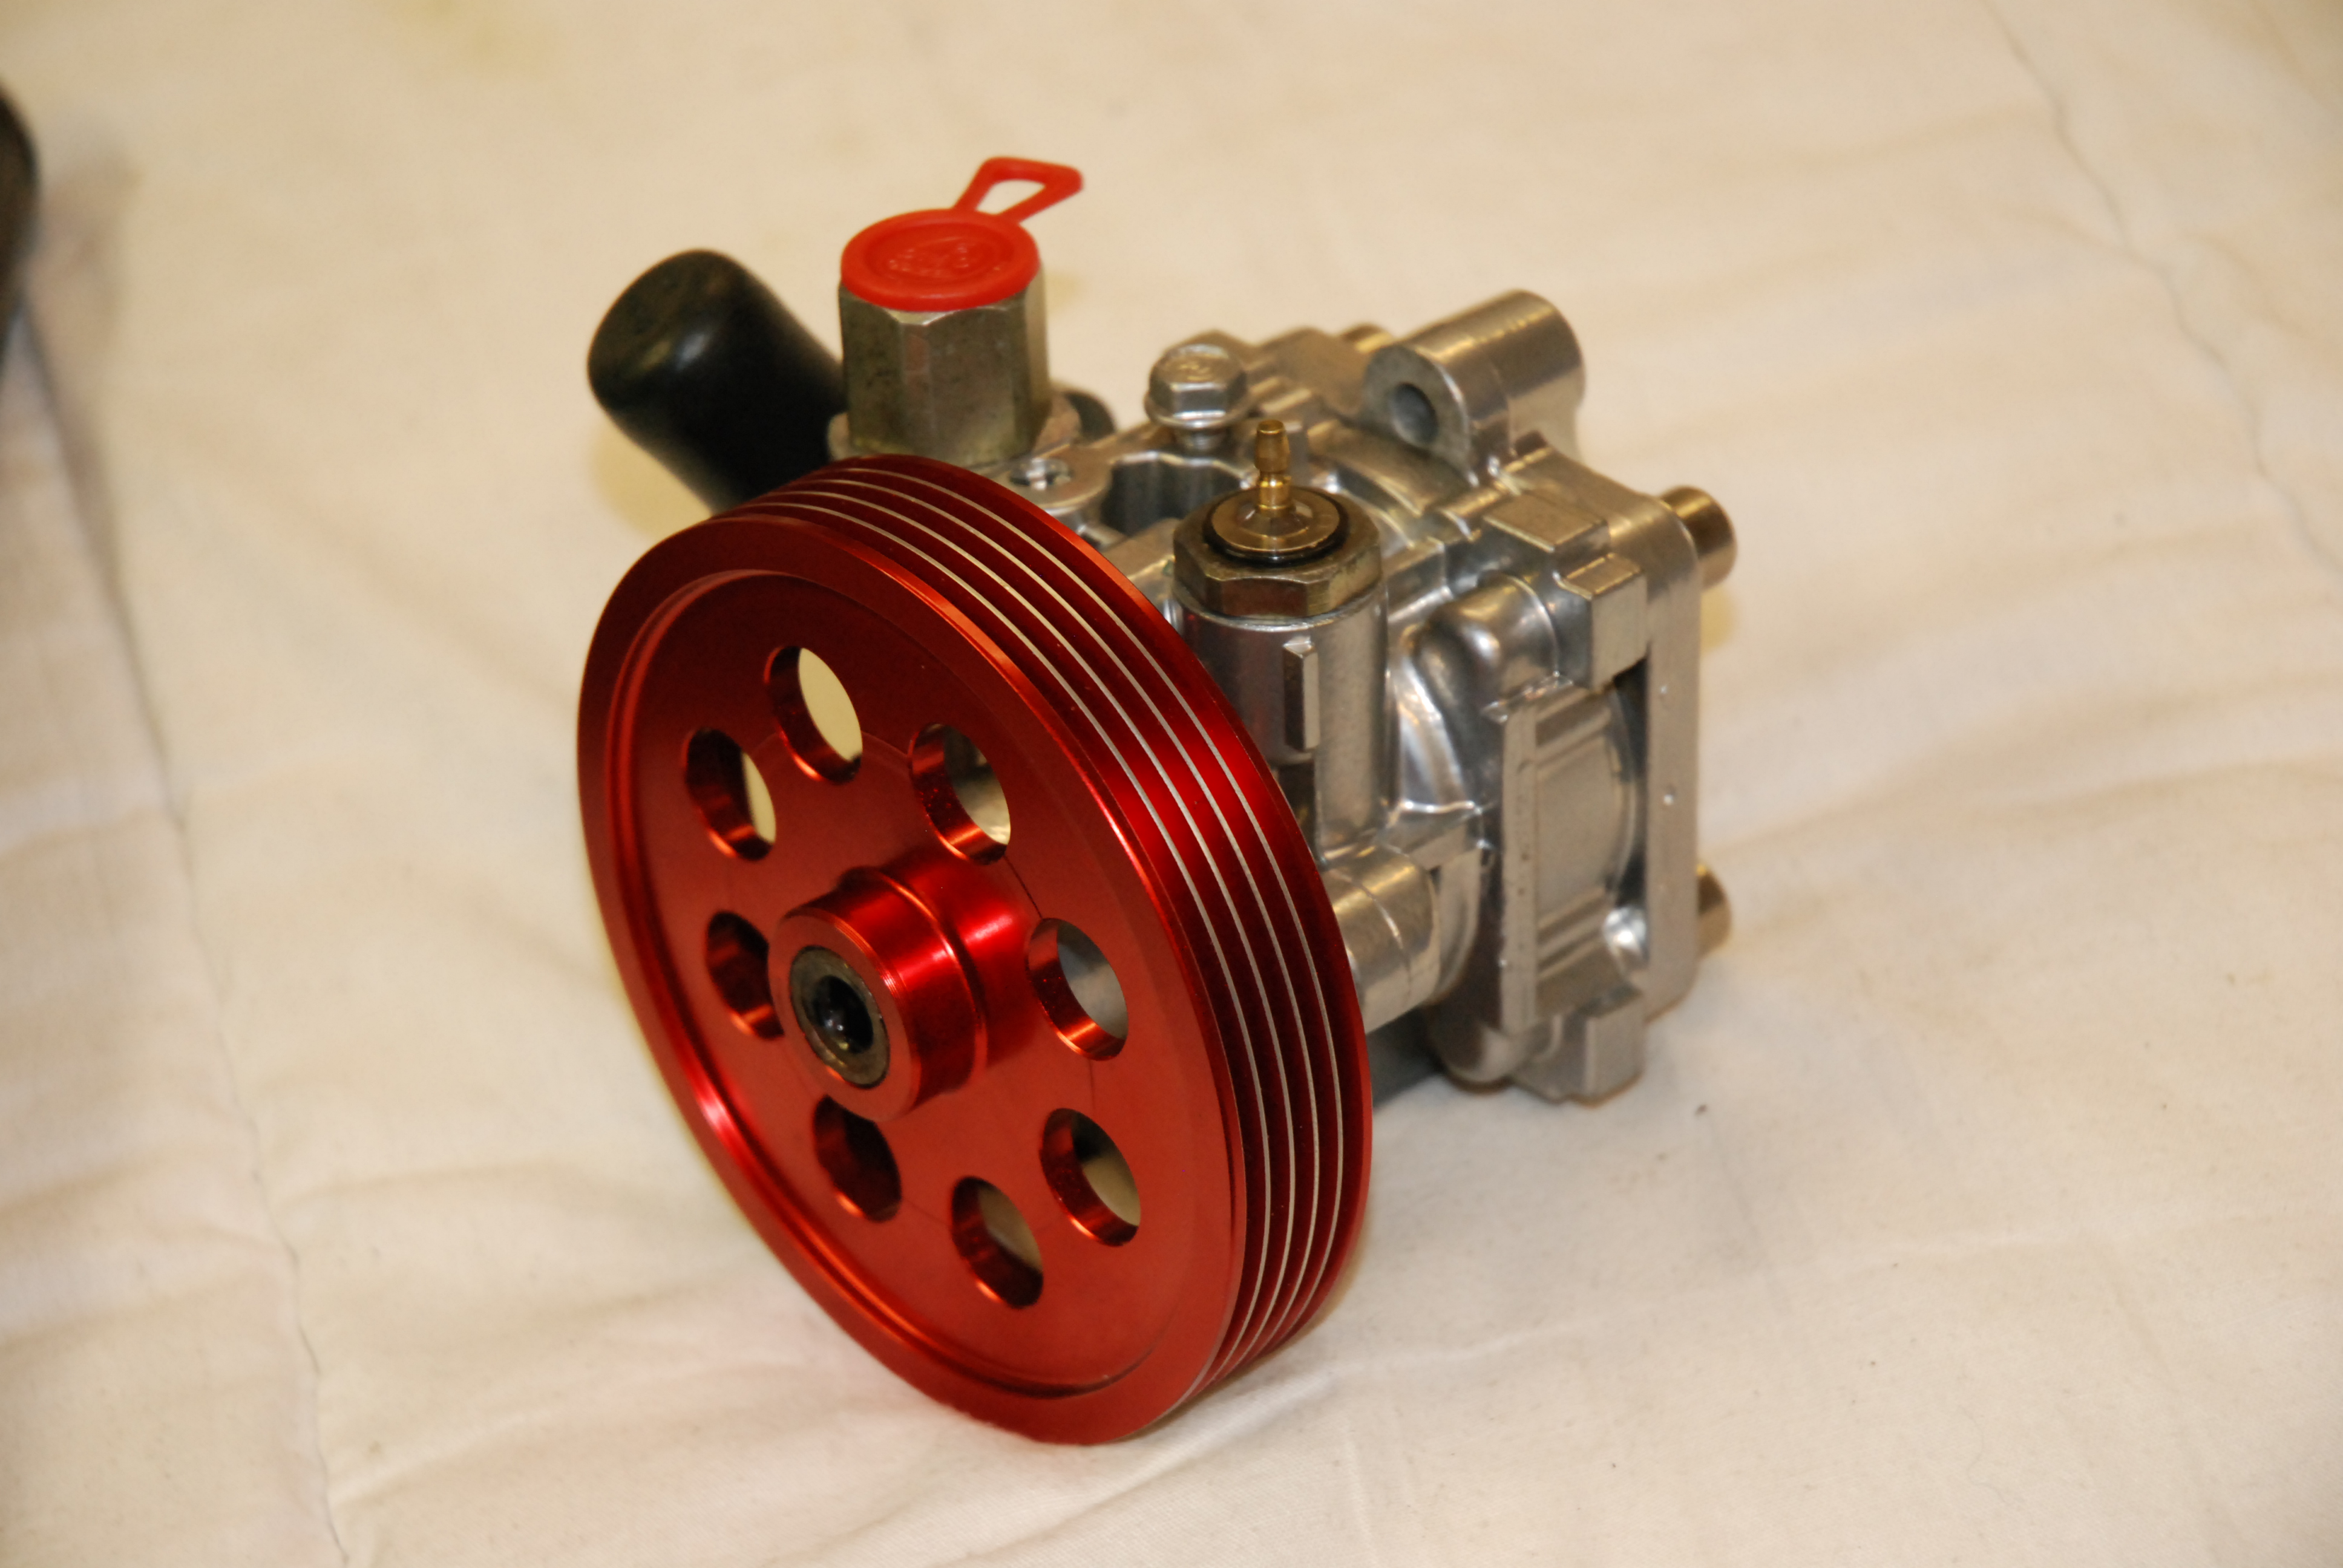
In the meantime ive fitted up some of the water, breather lines and reassembled the alternator and PAS pump. Both look rather nice all powdercoated up
Also wonding if i should bother buying the Cosworth/RCM anti skip belt guide or not?
�40 for jewellery or function?
In the meantime ive fitted up some of the water, breather lines and reassembled the alternator and PAS pump. Both look rather nice all powdercoated up
 10-09-2010, 03:30 AM
#285
Boost Junkie
Thread Starter
Cheers guys, much appreciated from you Fordys
As said, im a bit stuck till i get more parts back, but heres the rebuilt alternator and PAS pump.
As said, im a bit stuck till i get more parts back, but heres the rebuilt alternator and PAS pump.
15-09-2010, 10:50 PM
#286
Boost Junkie
Thread Starter
Well not much to update. I should get my oil pan back tomorrow and i picked up some other modified pipes etc tonight so these will be droped of to be plated tomorrow also.
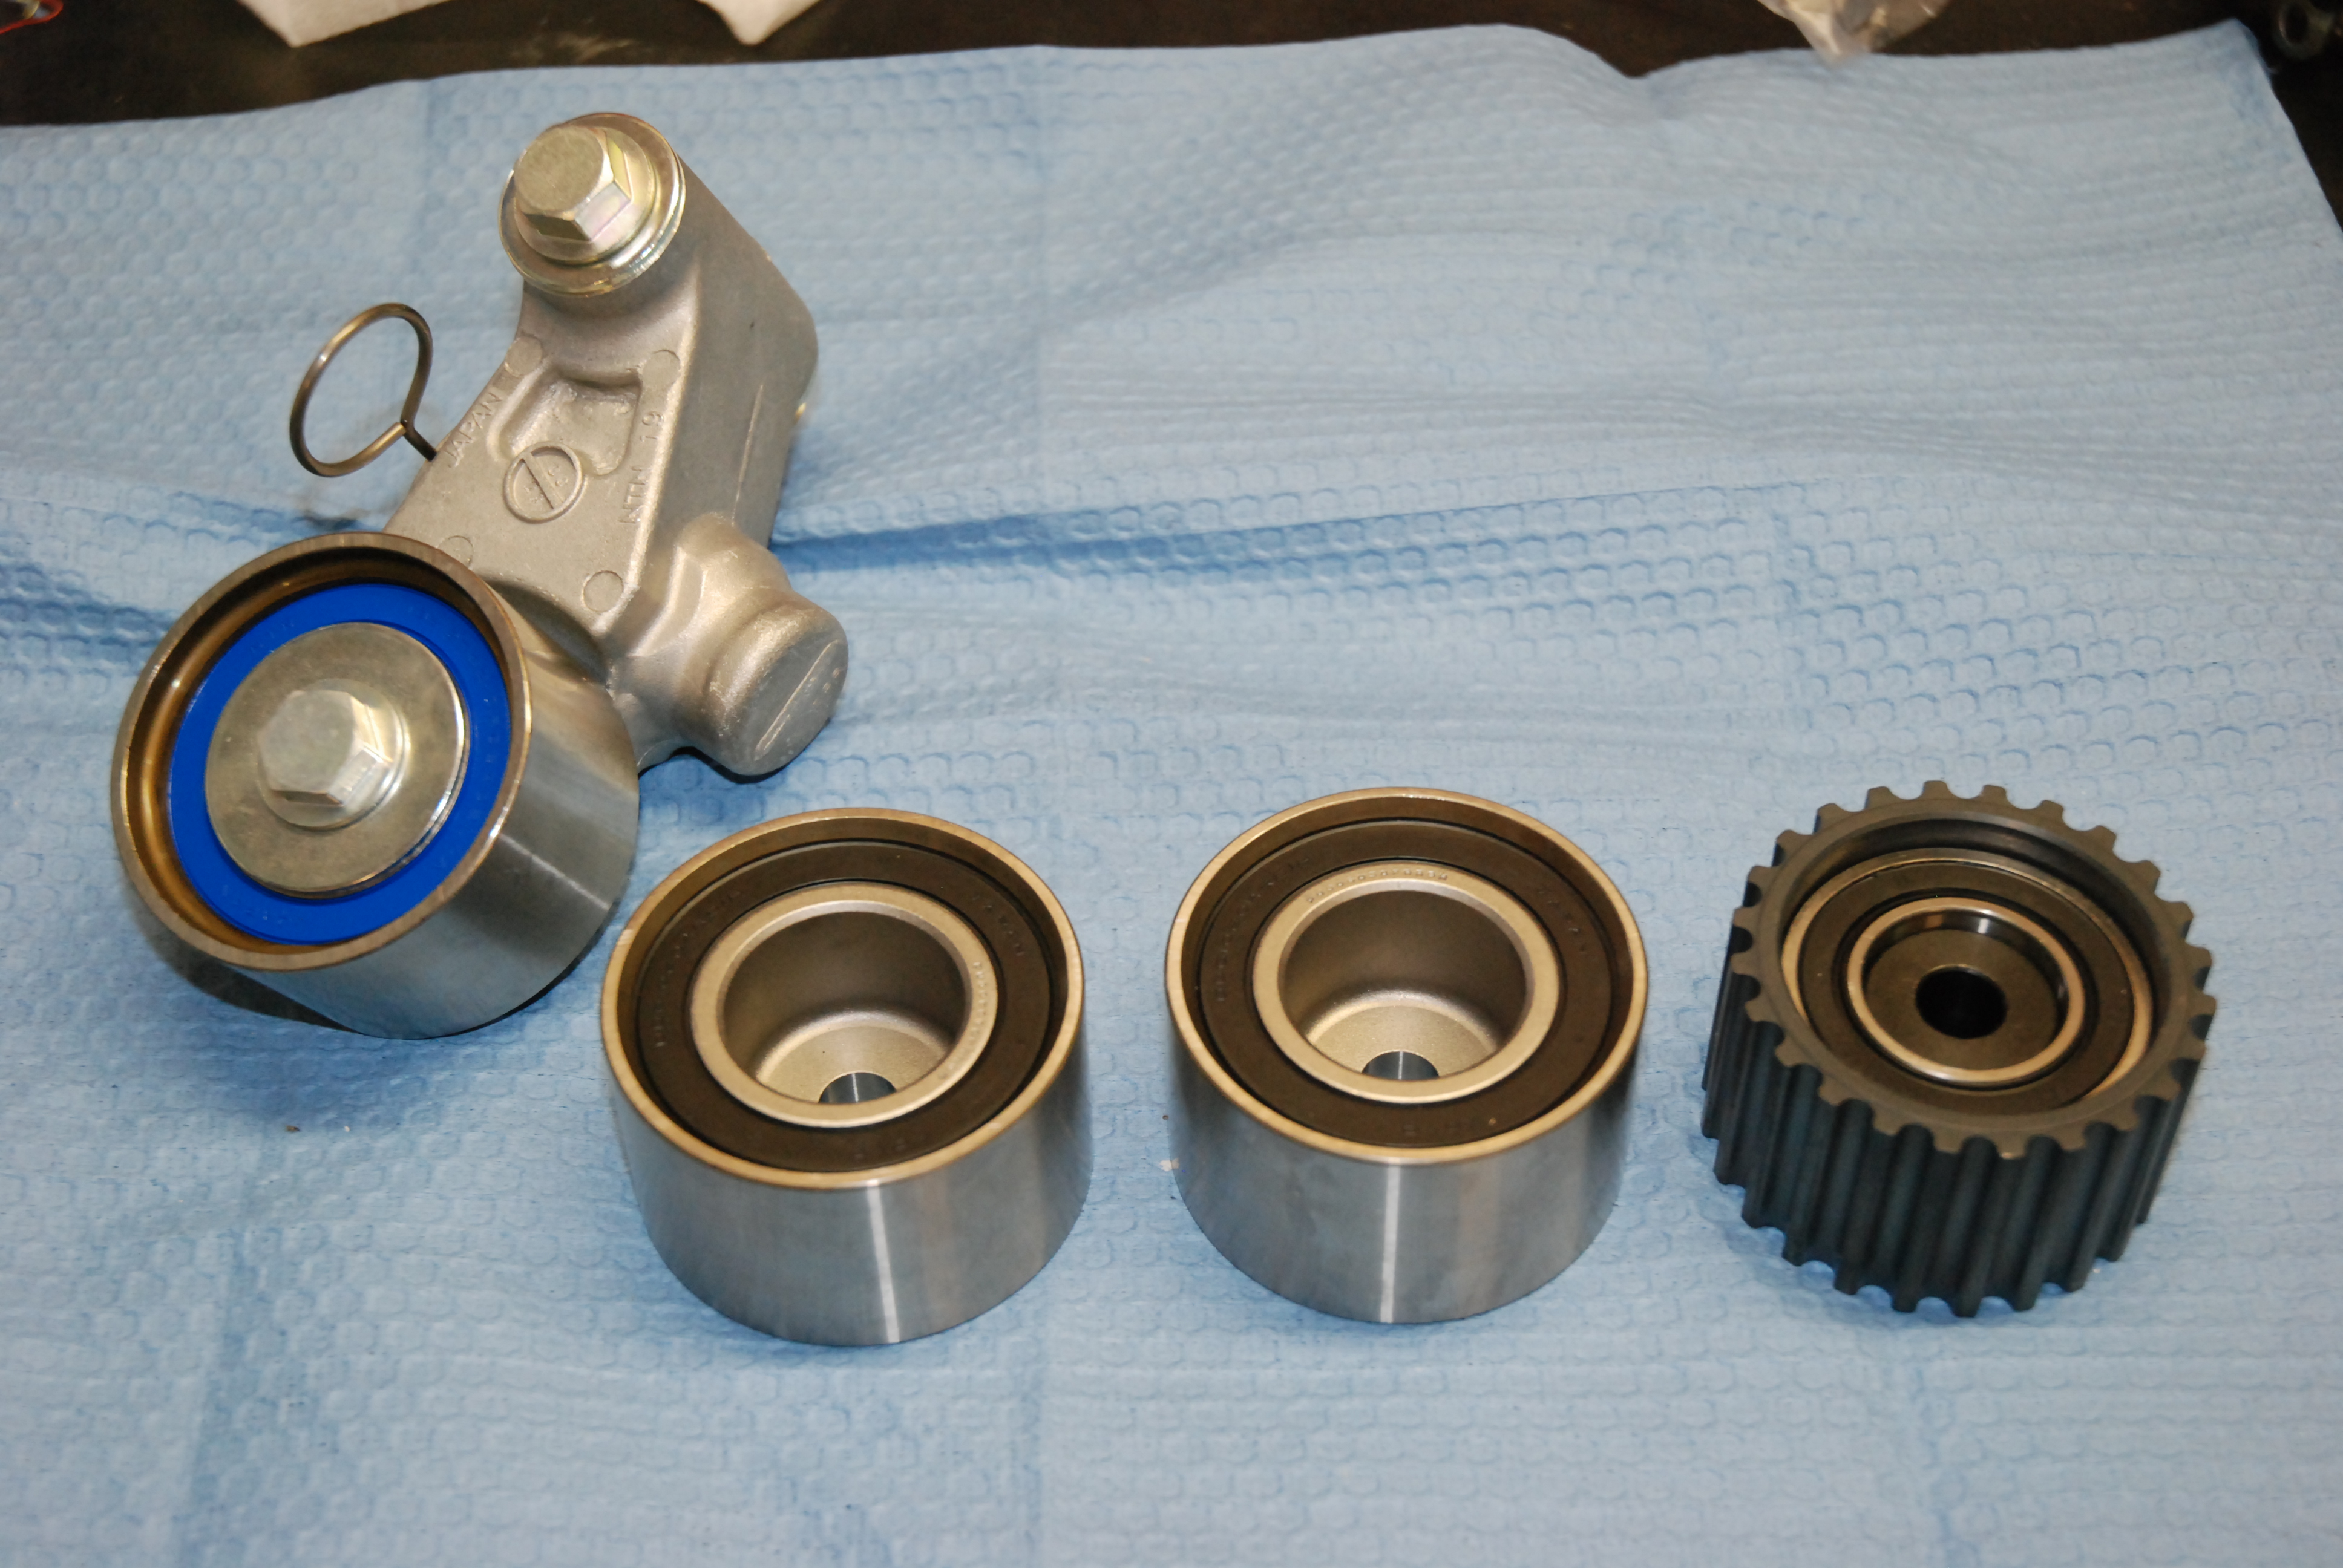
In the meantime ive had a delivery of a full set of timing idlers (cheers Alyn @ As Performance - top service as always)
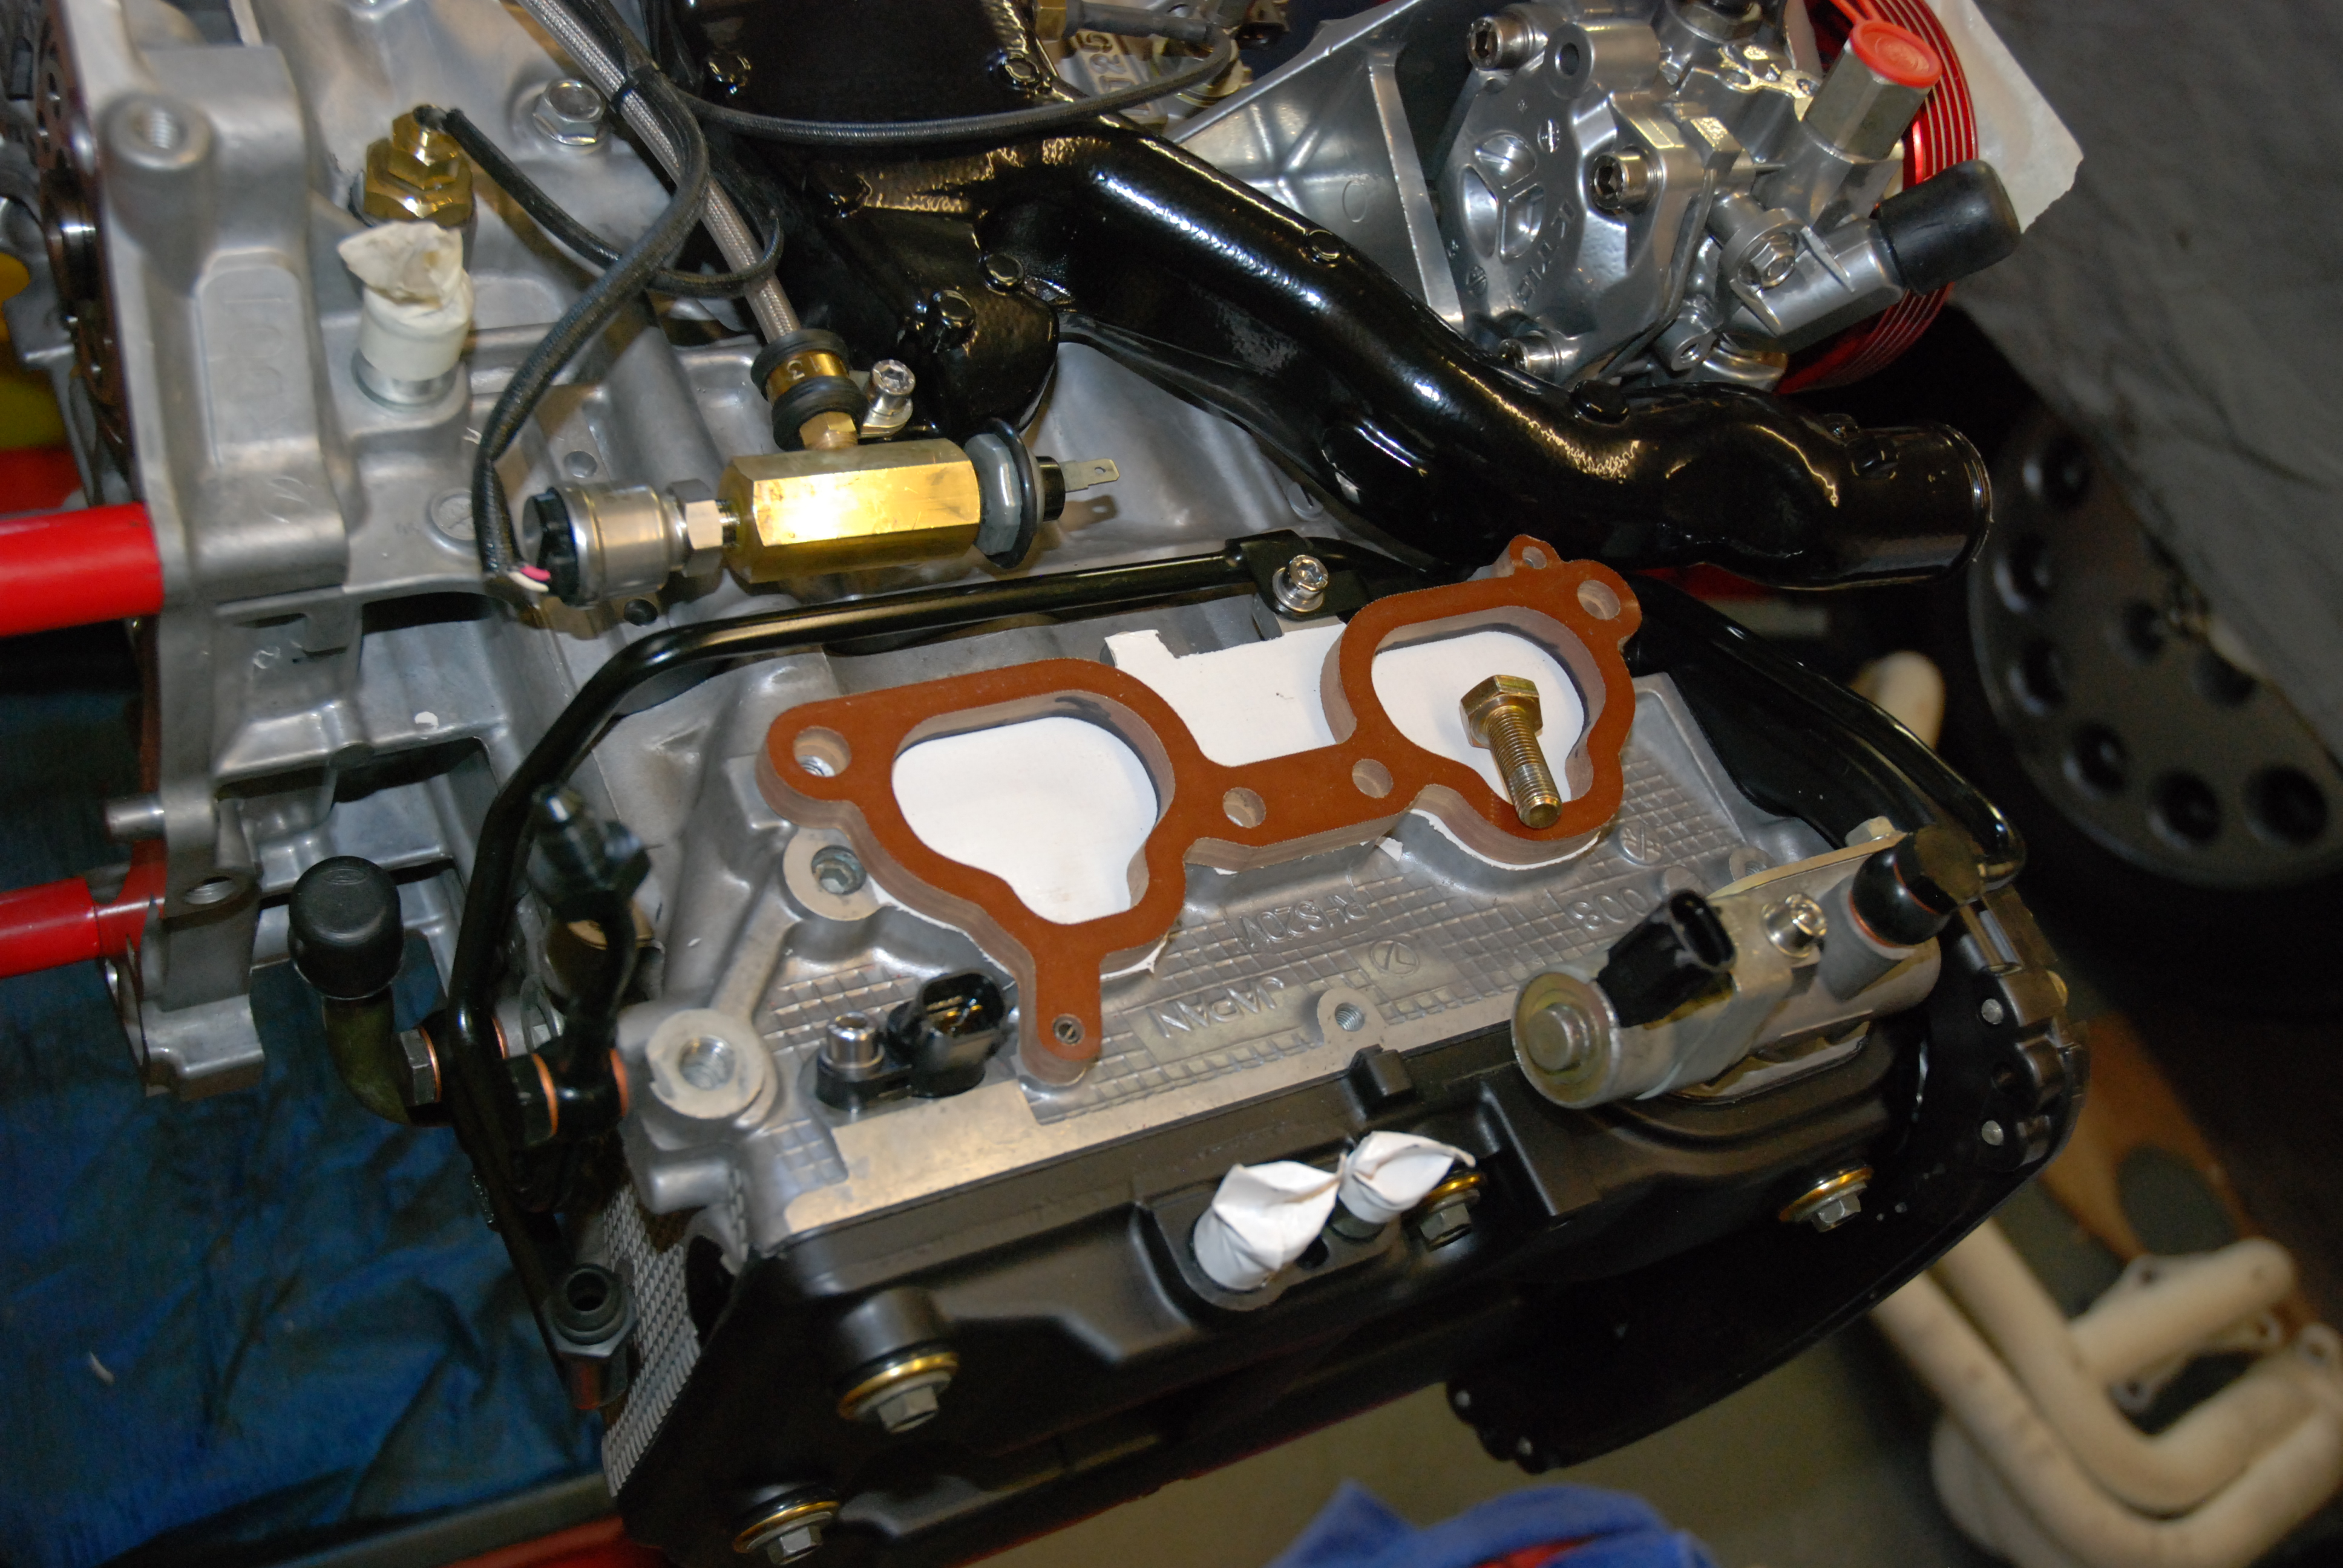
Drilled/tapped my X-over pipe to take the Defi water temp sender.
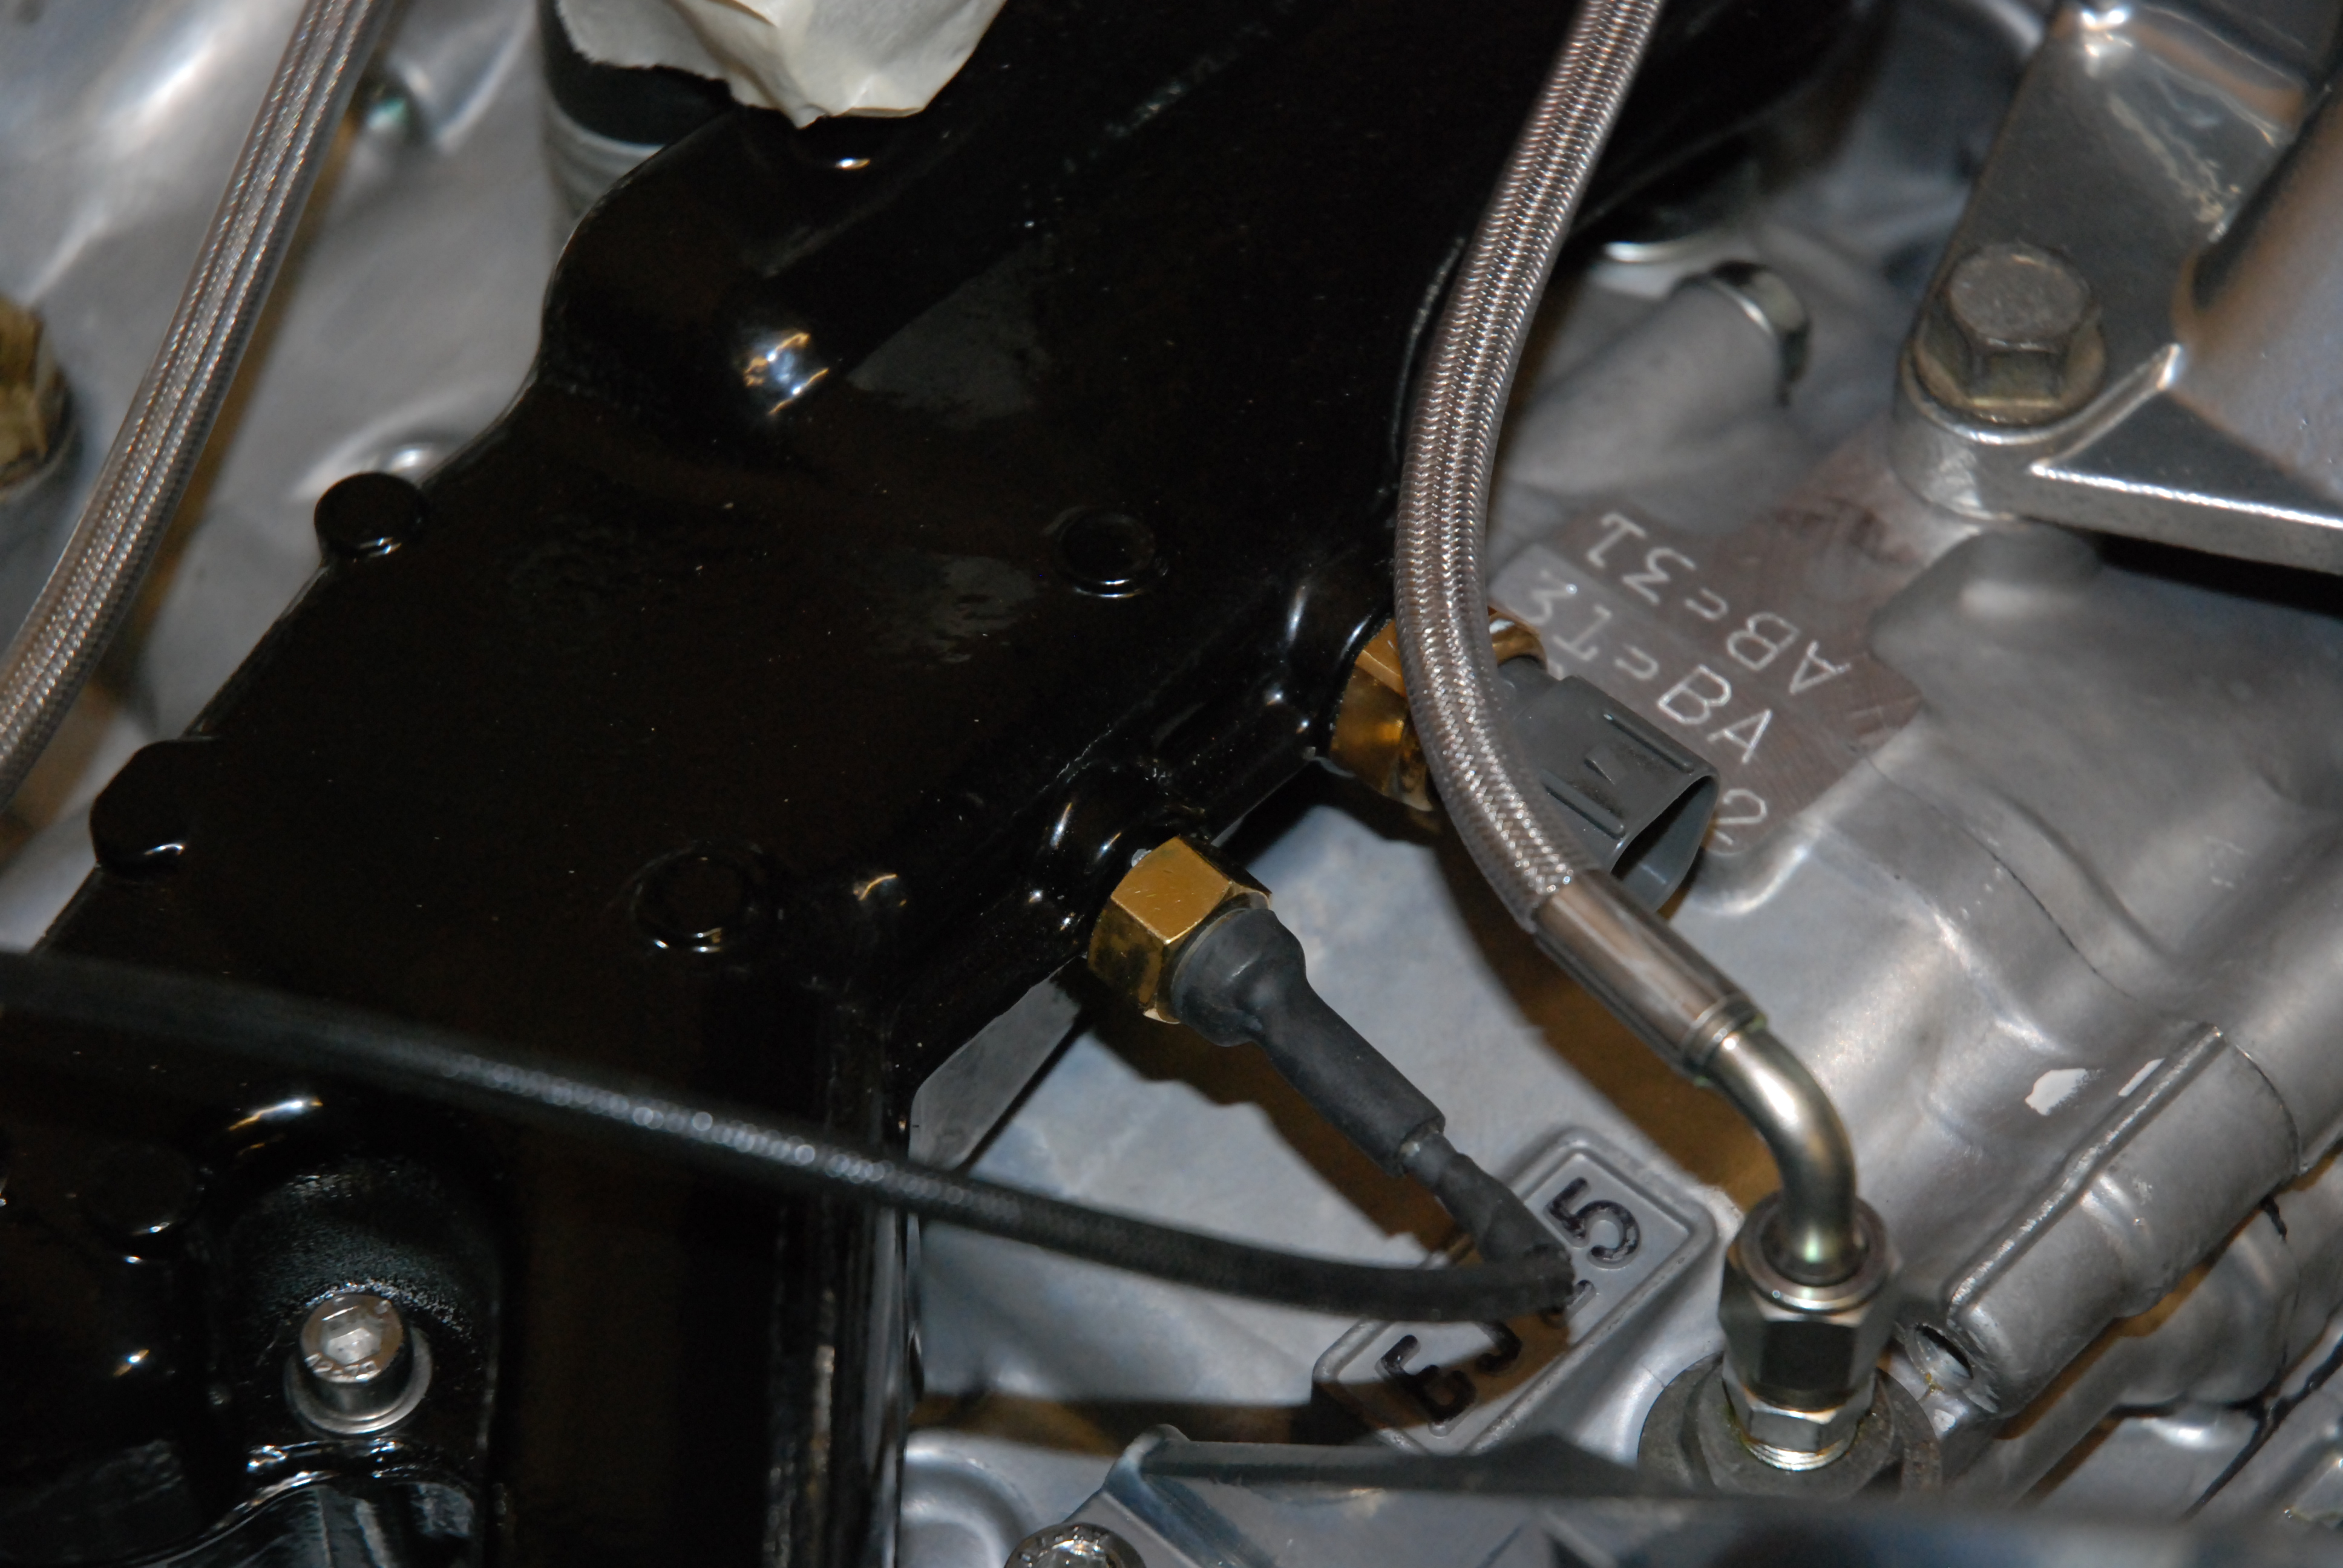
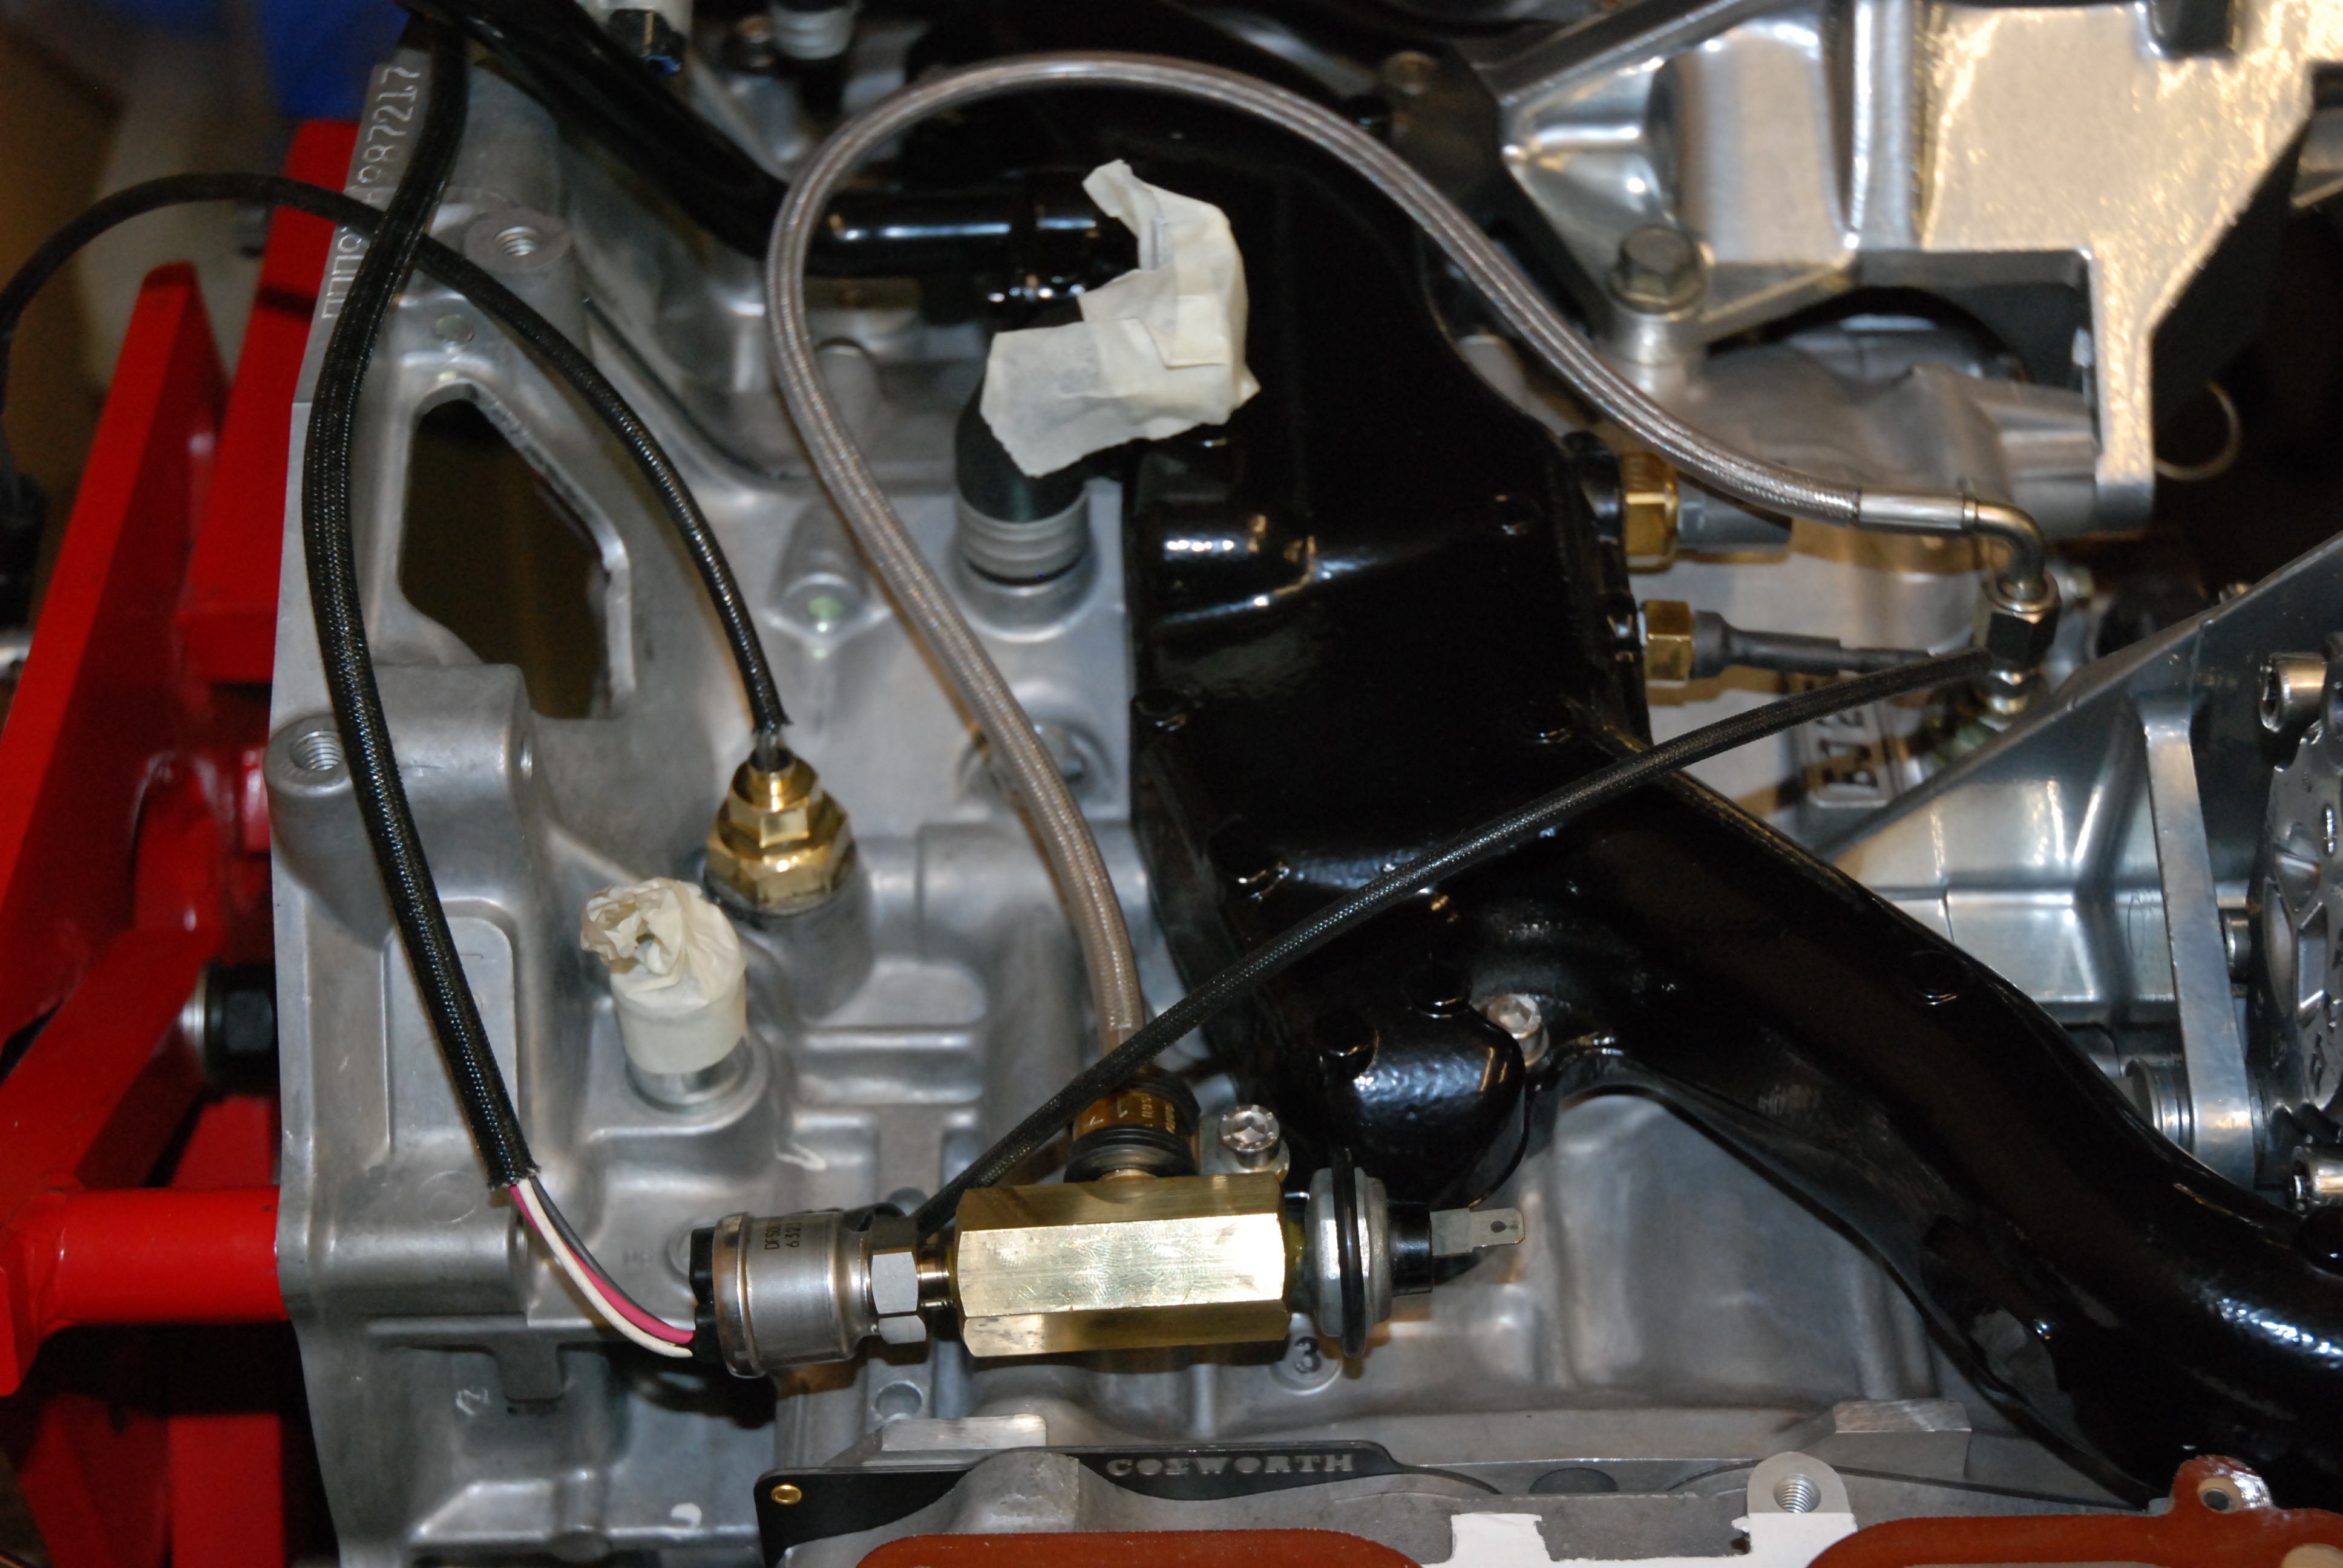
Made up a feed/take off for the Defi oil pressure sender and retain the OEM oil press switch.
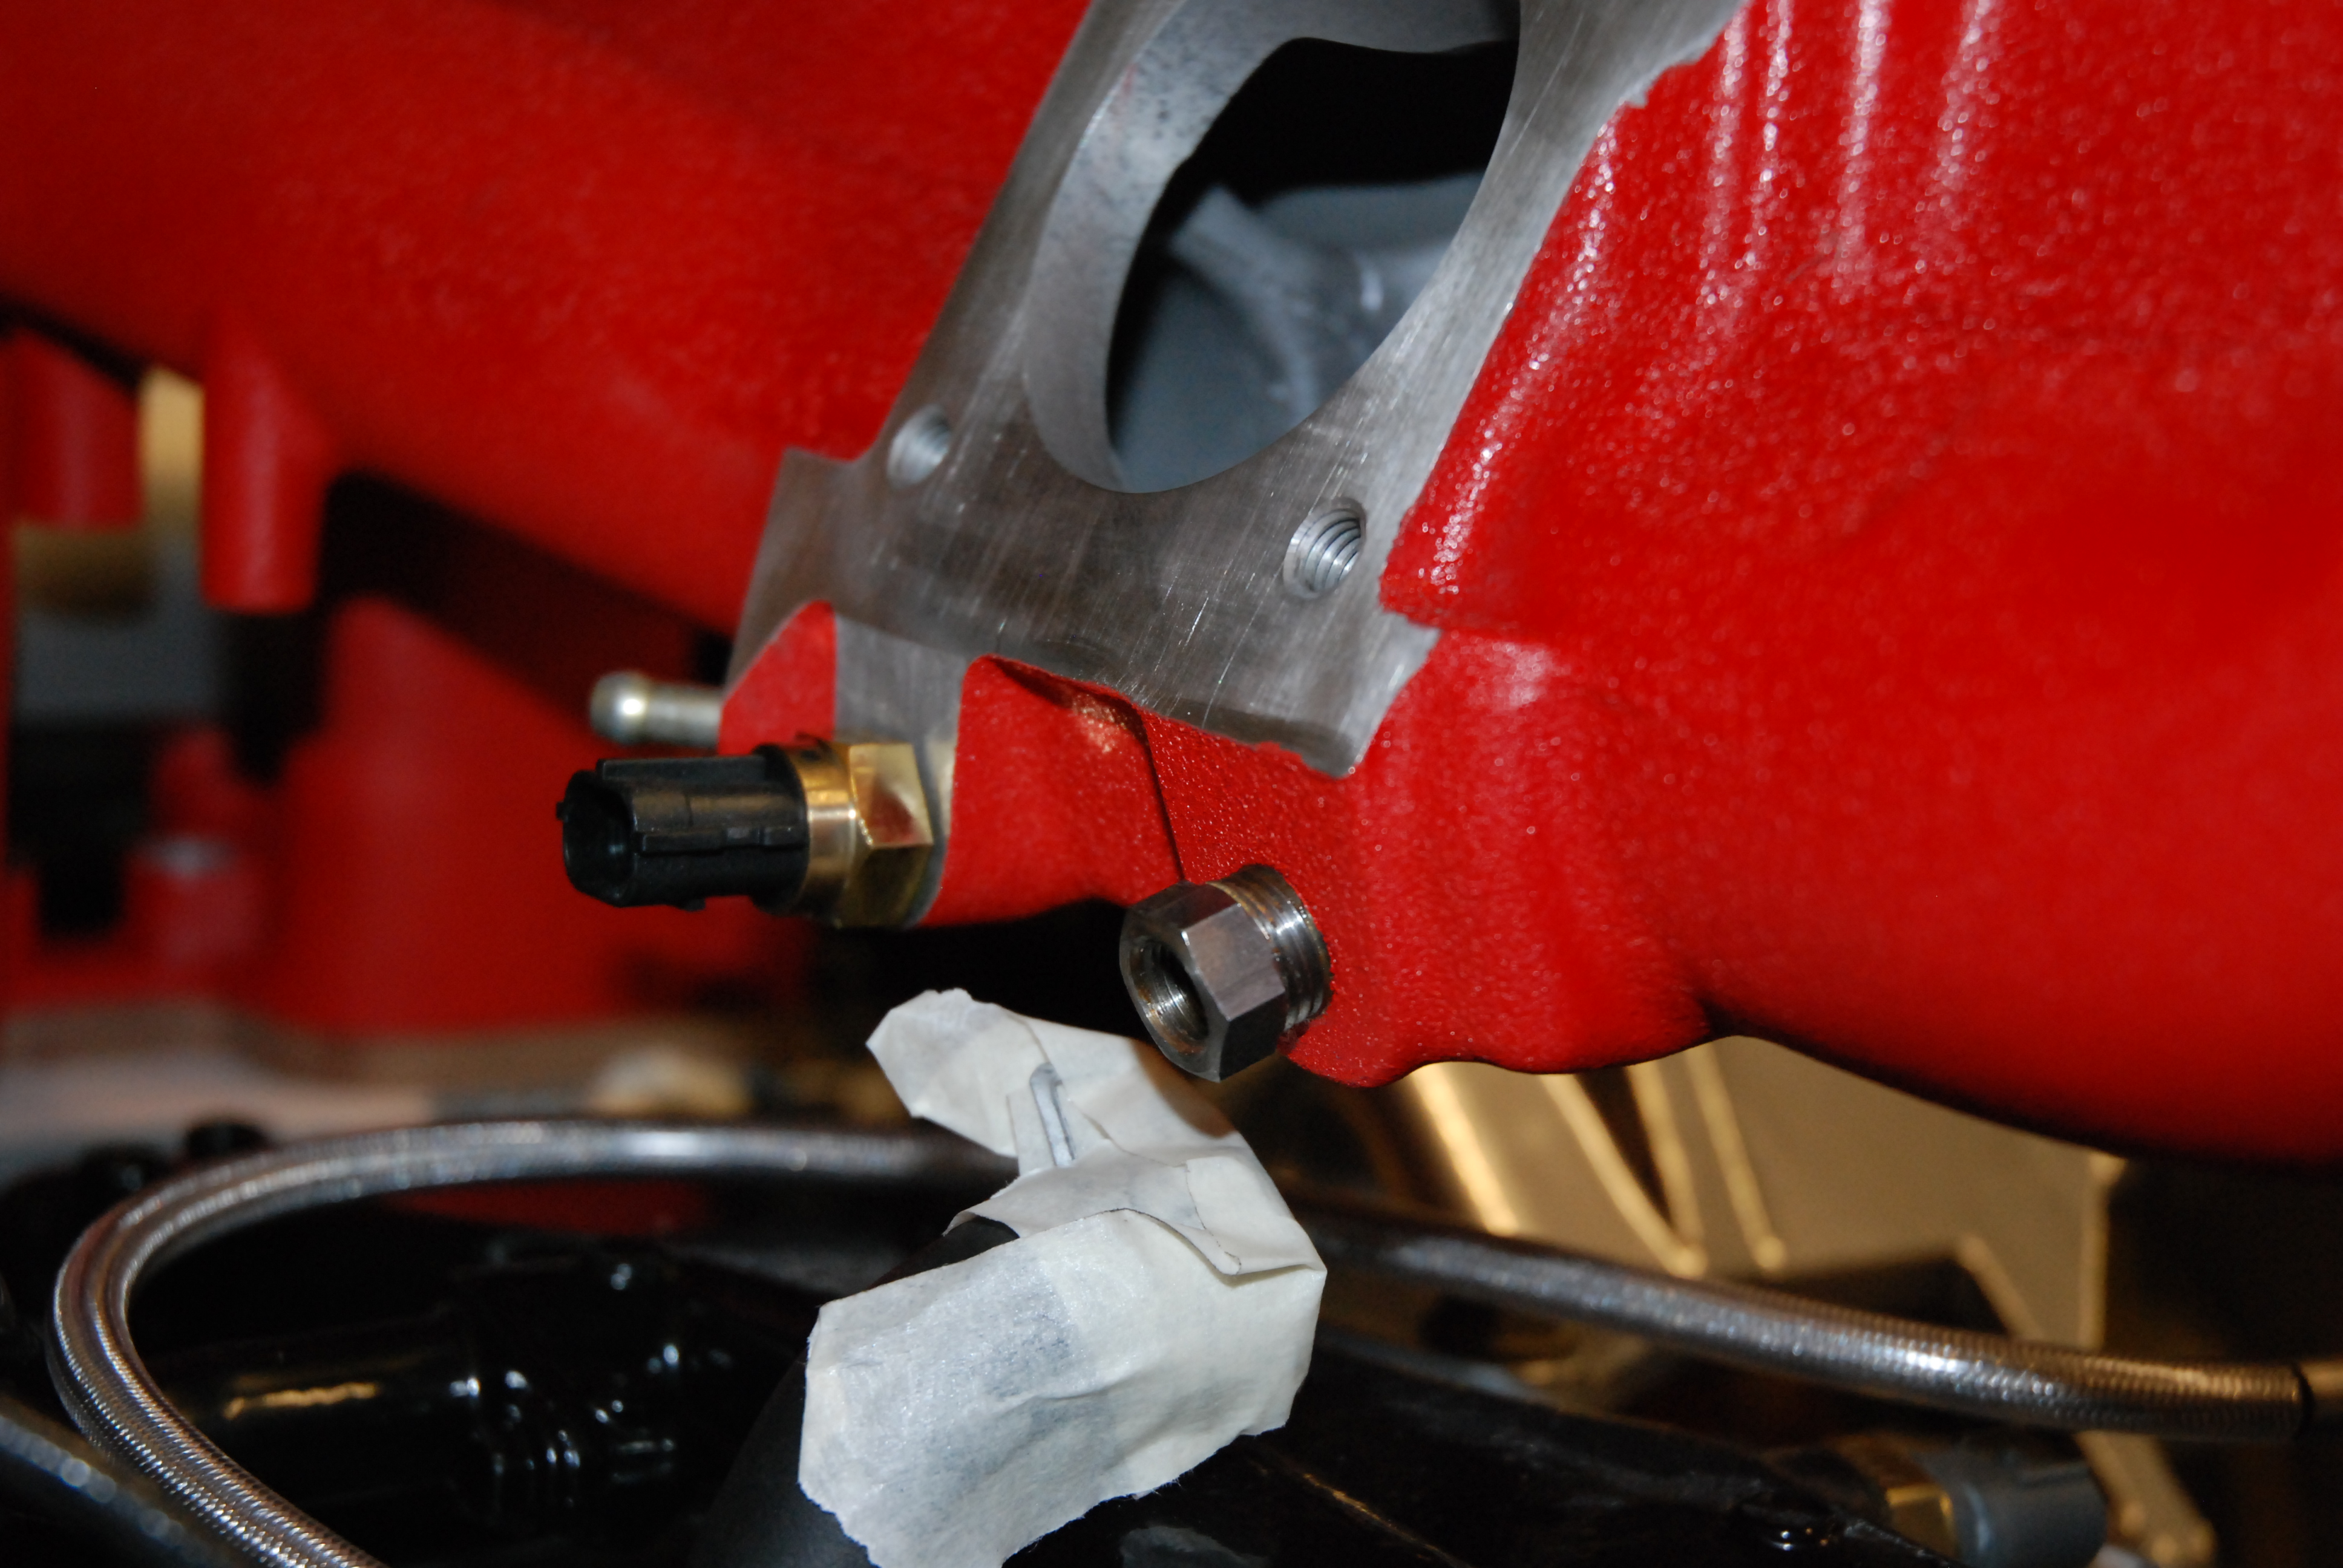
Made up a boss to take my air charge temp sensor that replaces the OEM PCV valve that will no longer be used.
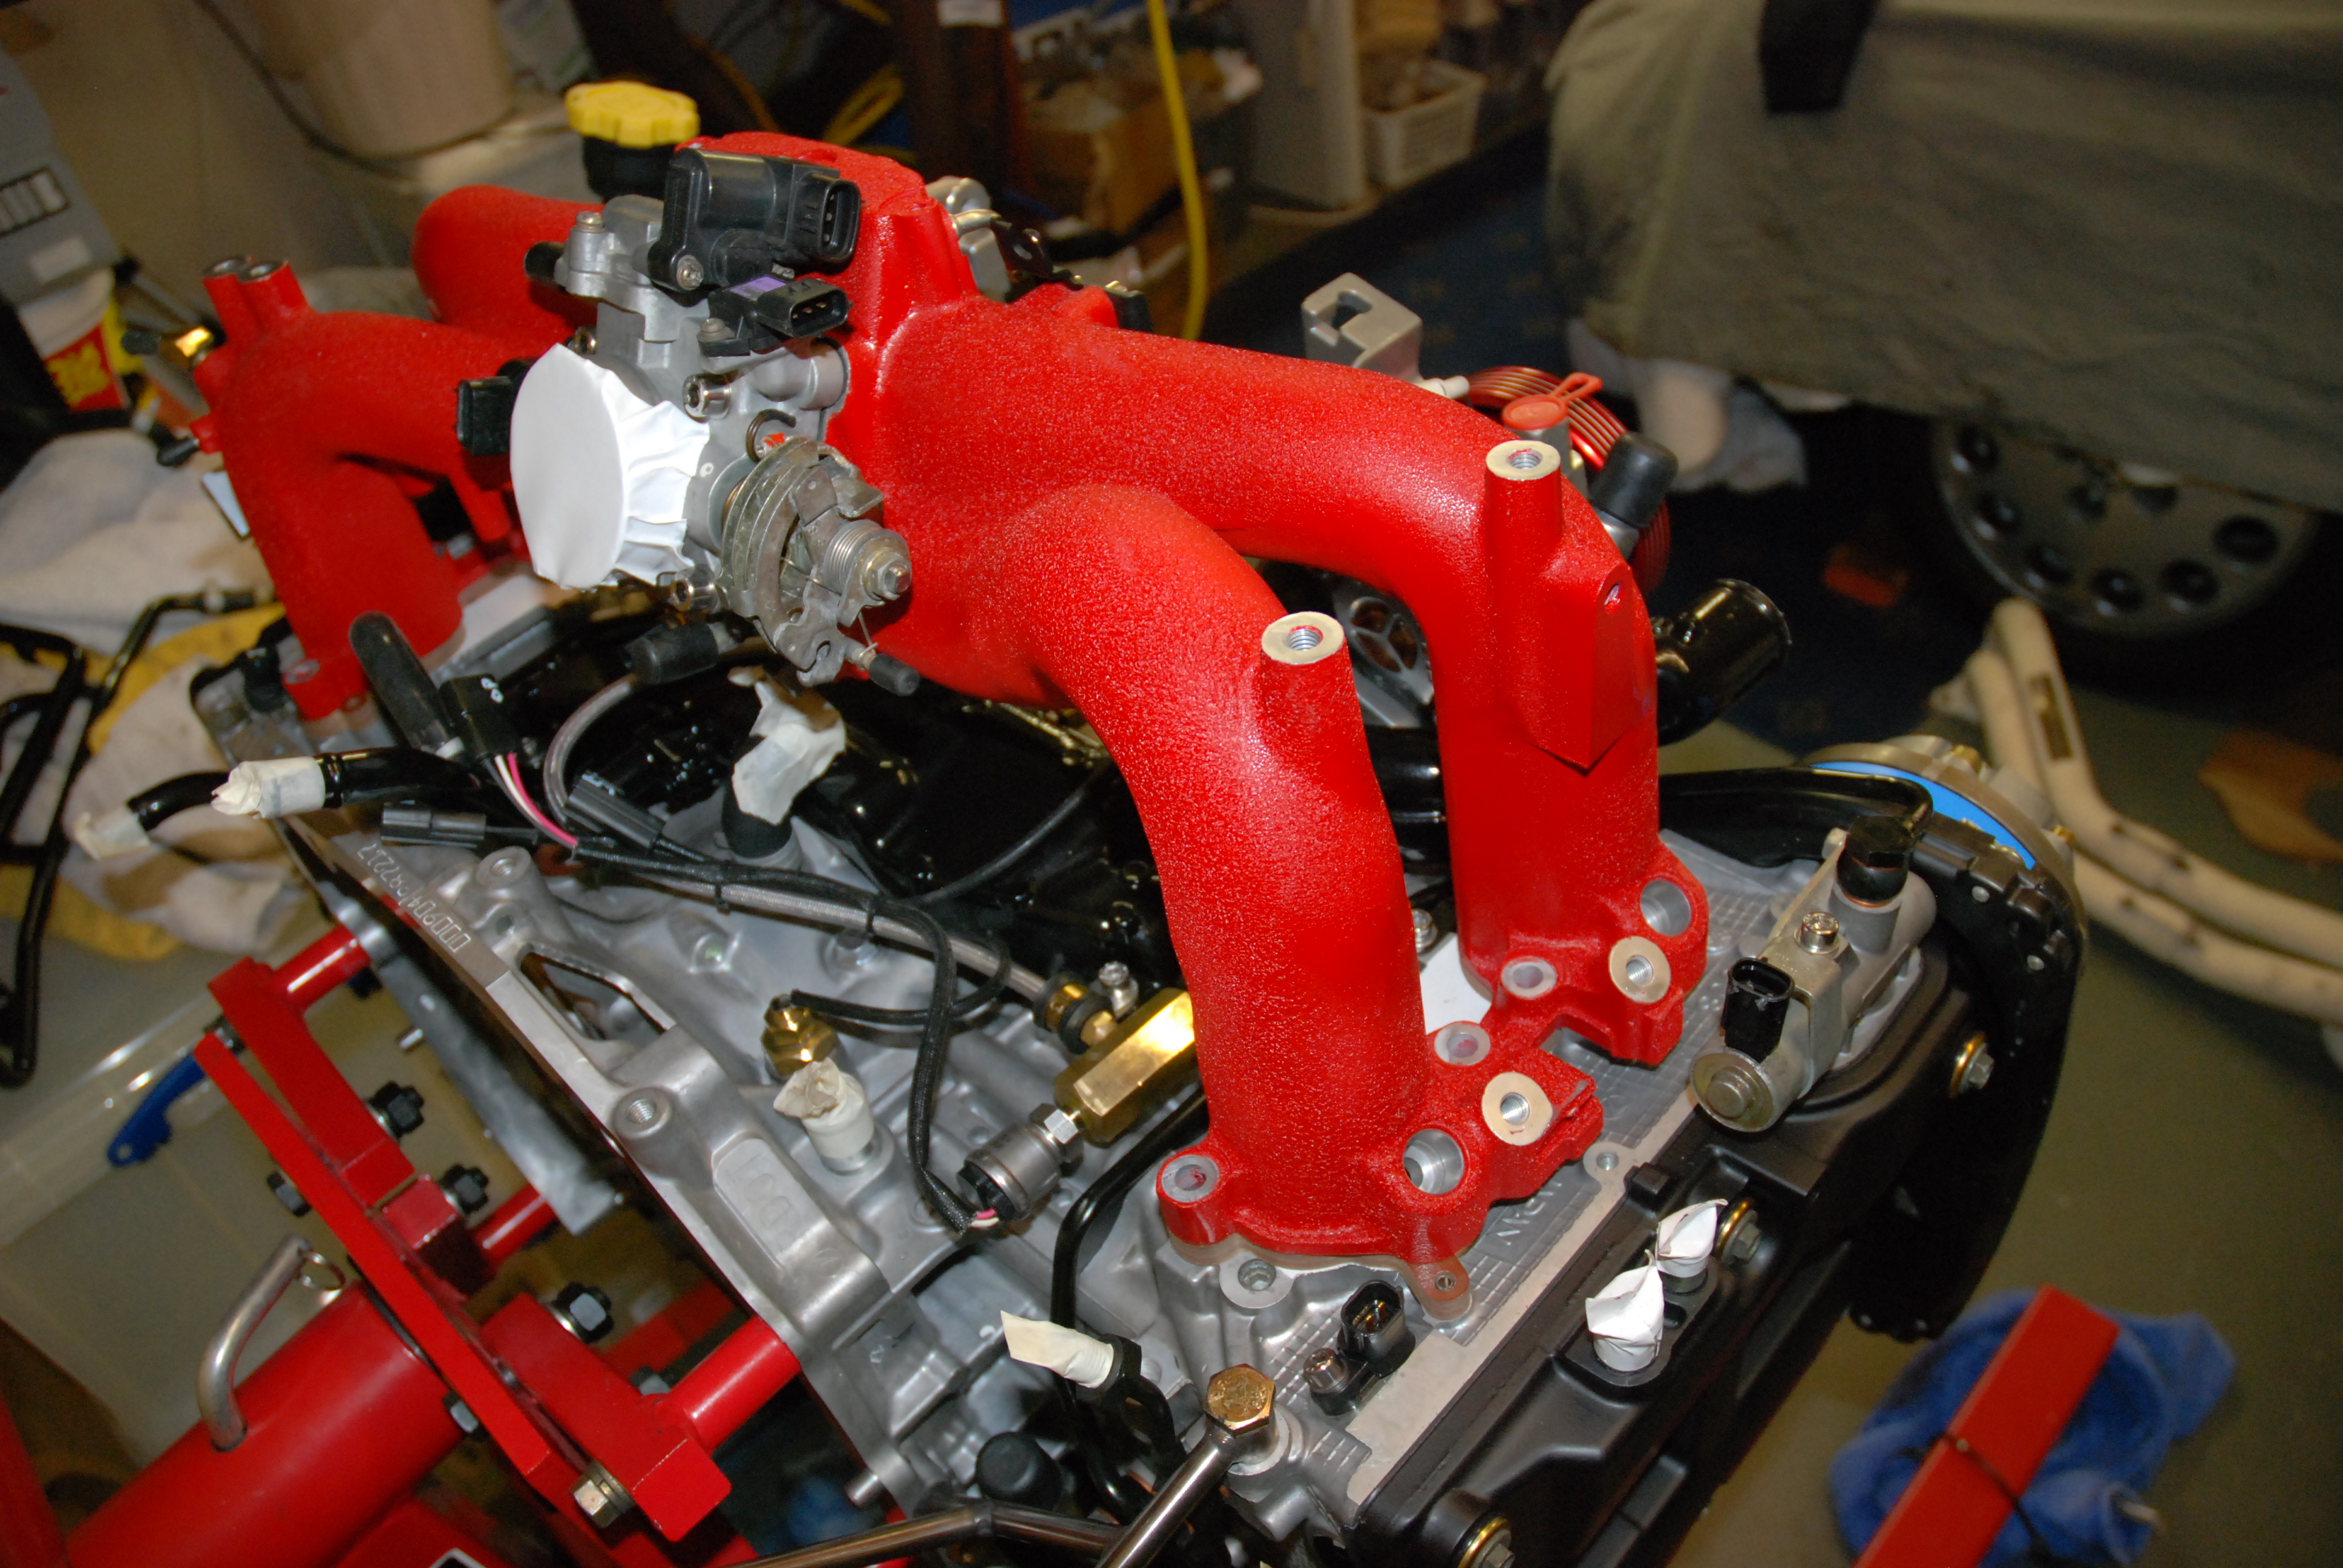
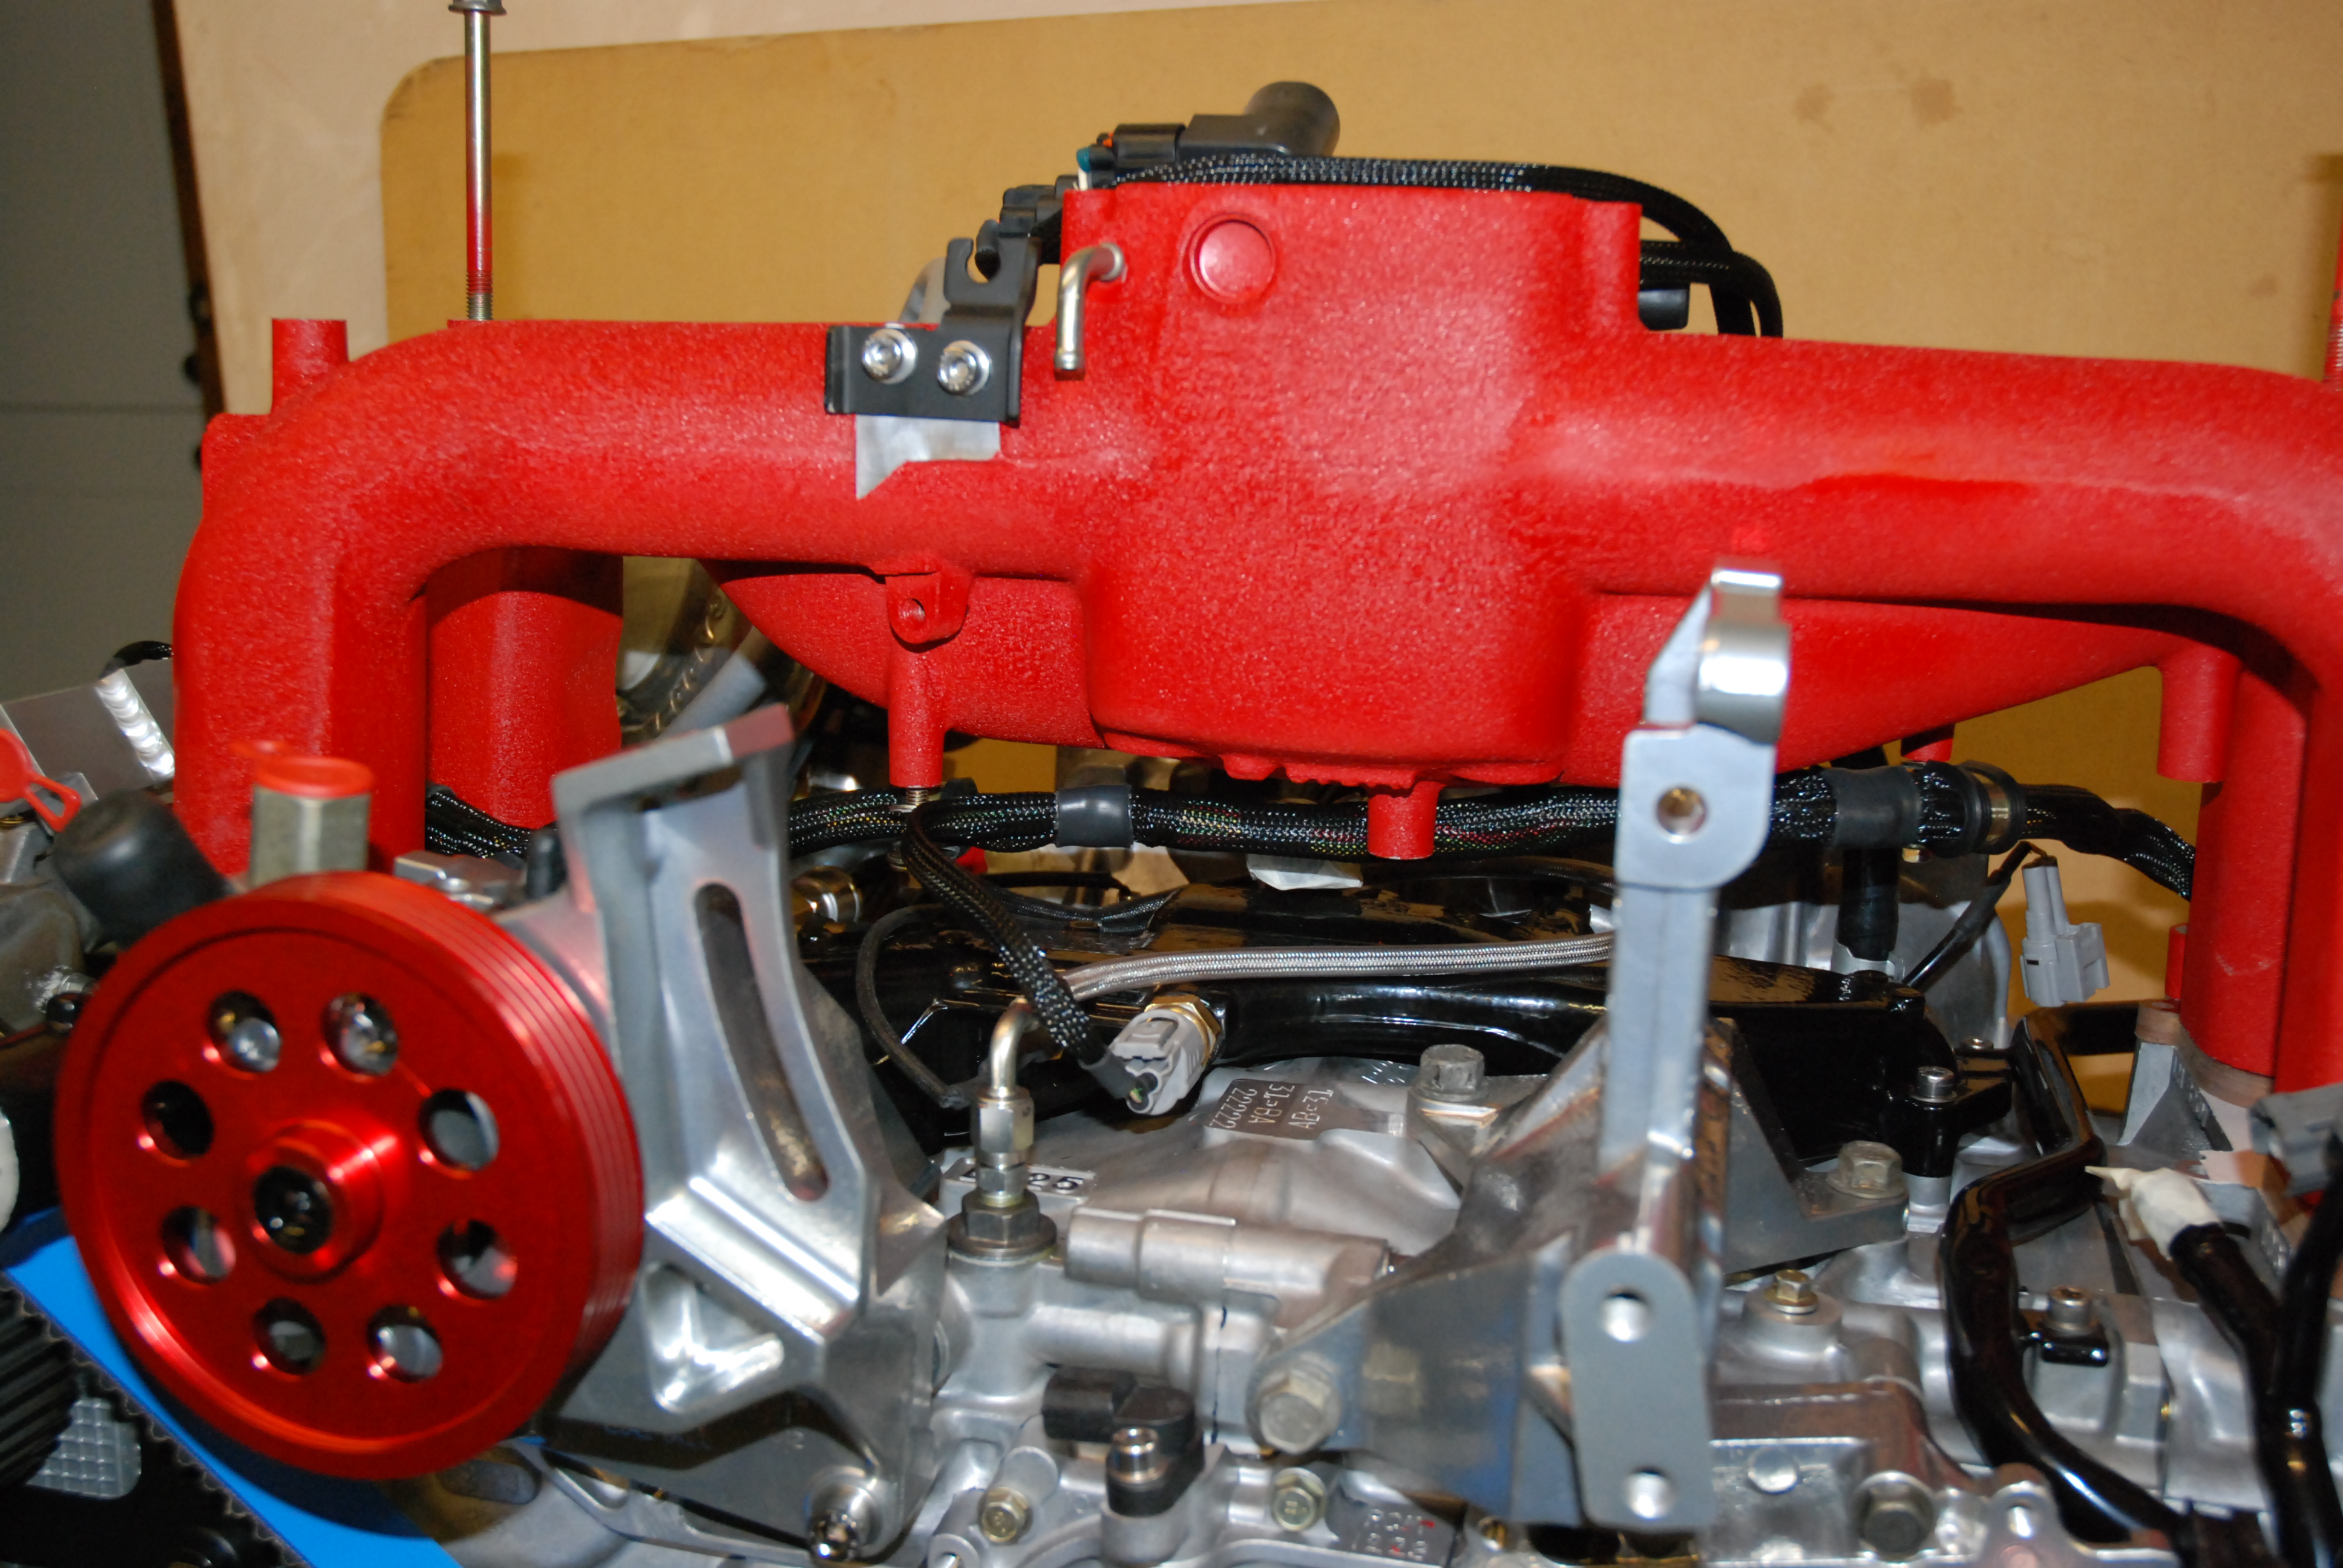
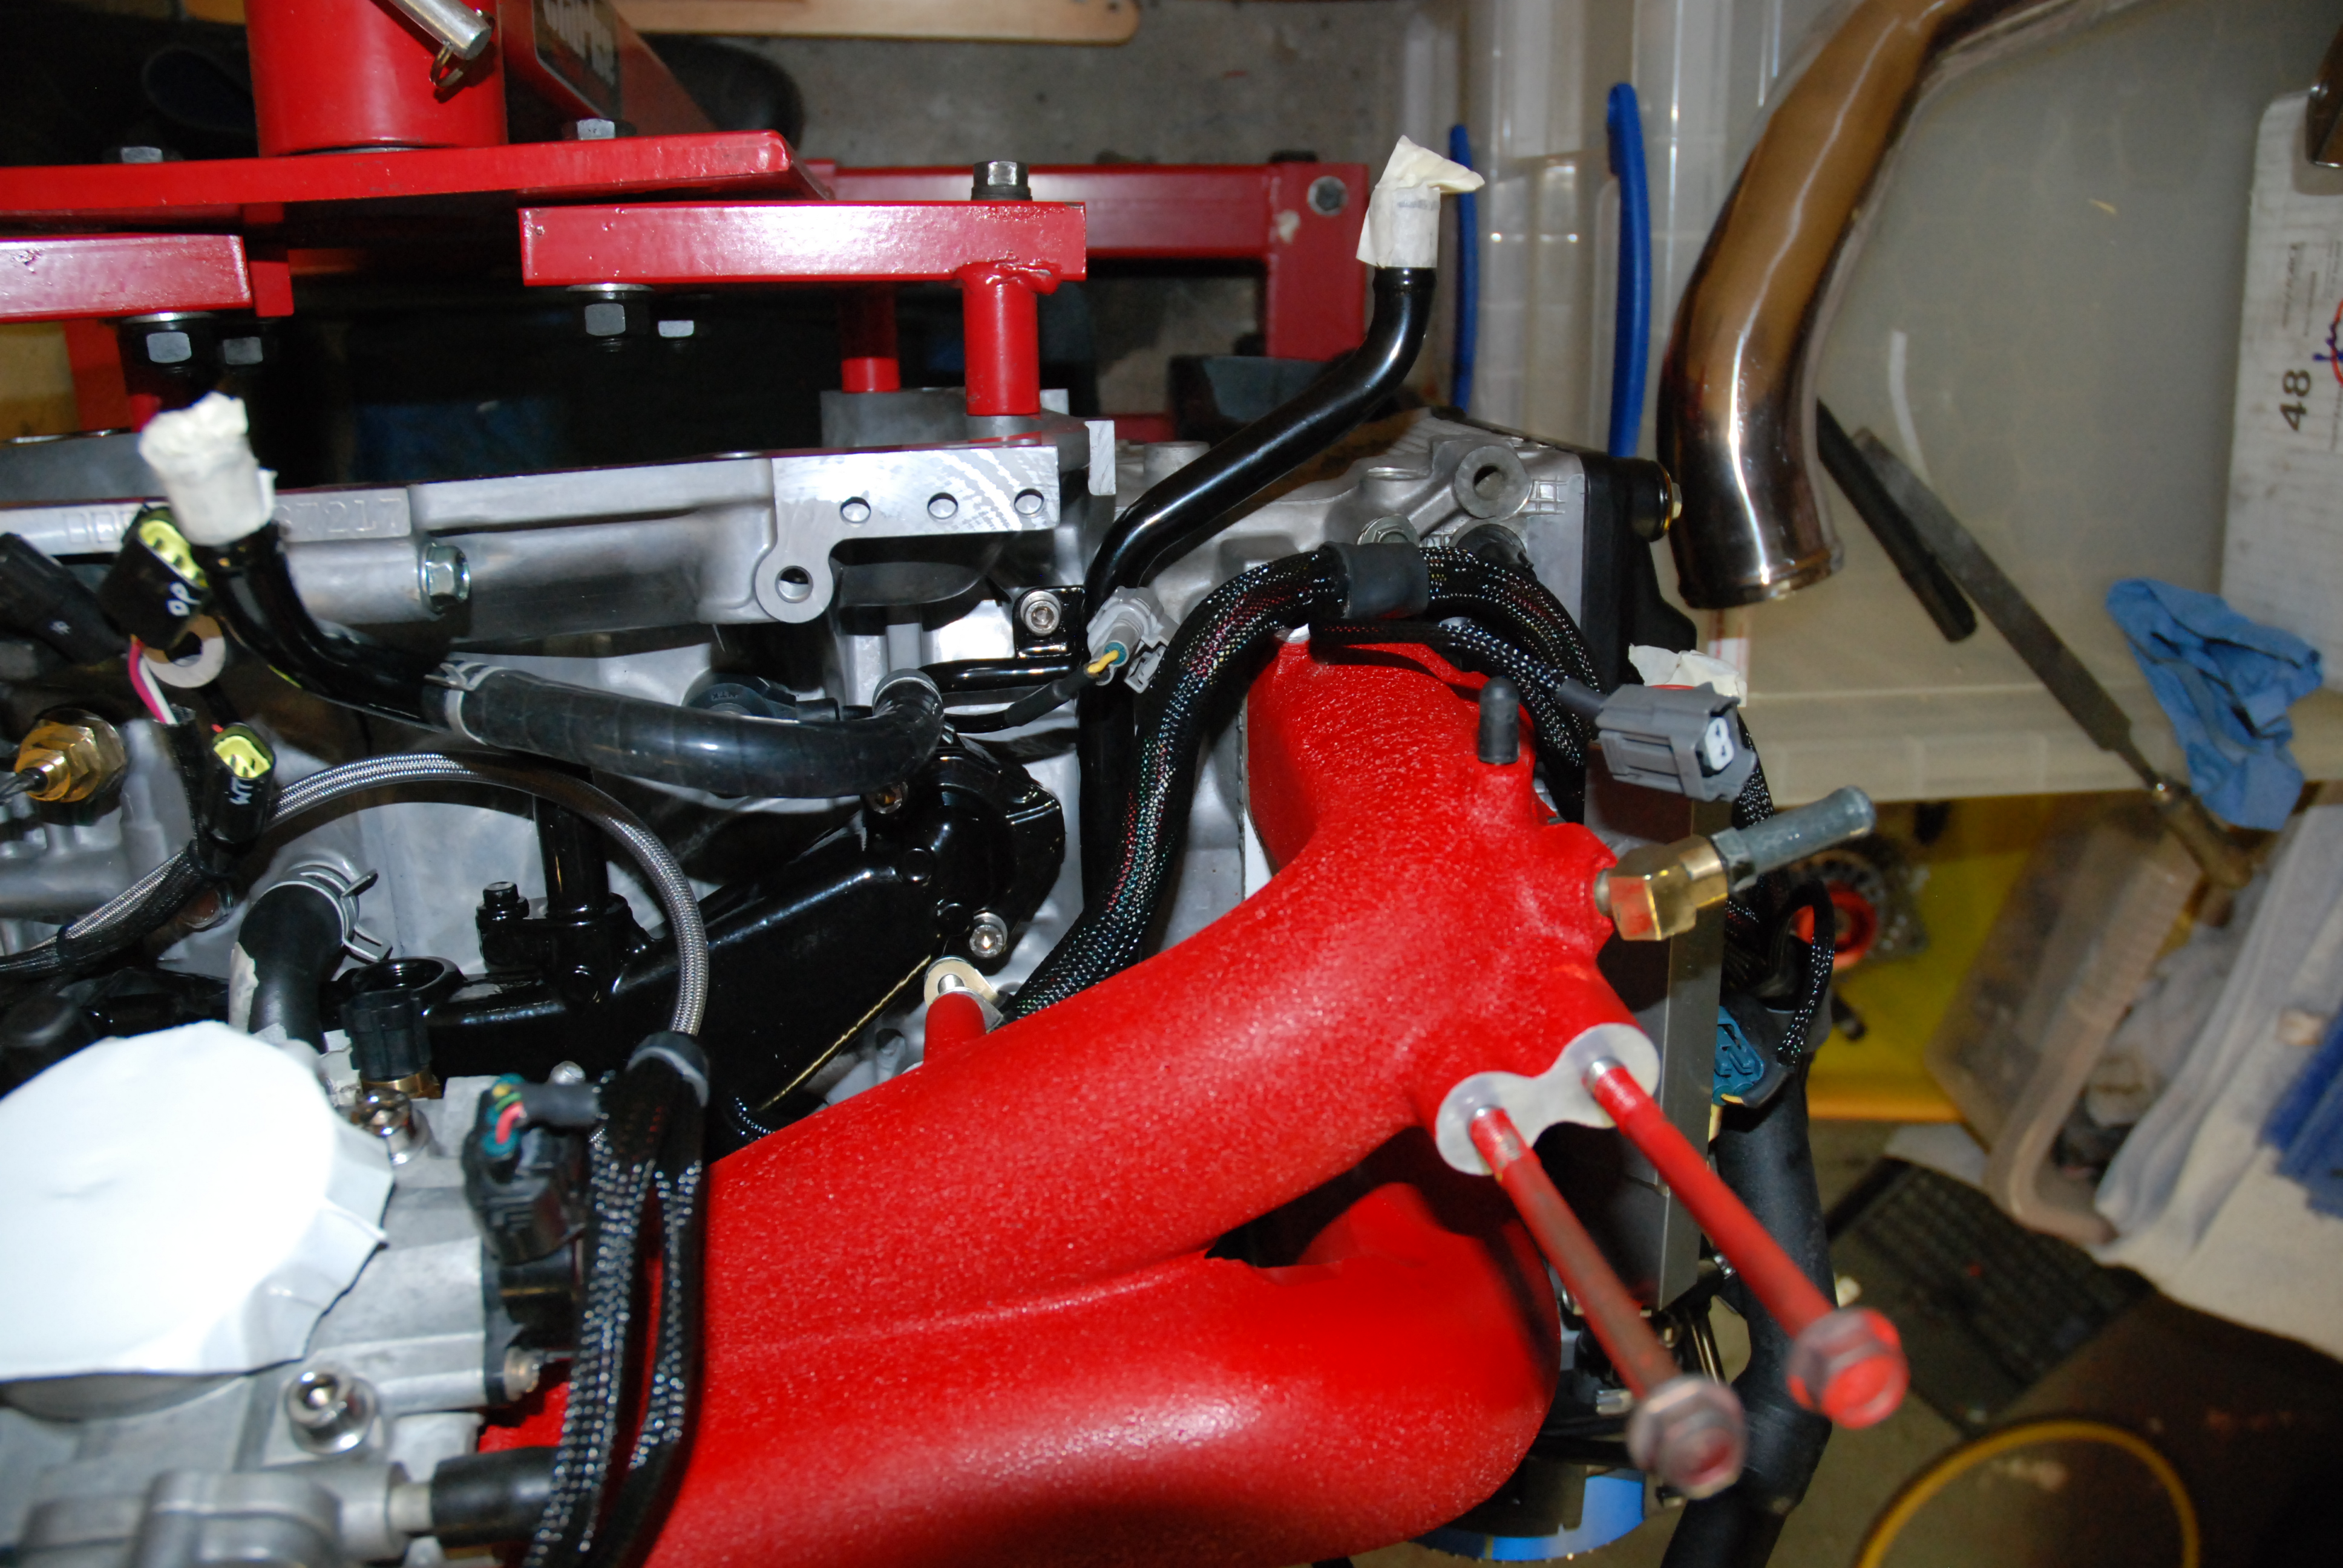
Removed almost all bosses from the manifold and refinished in wrinkle red (original VHT shade)
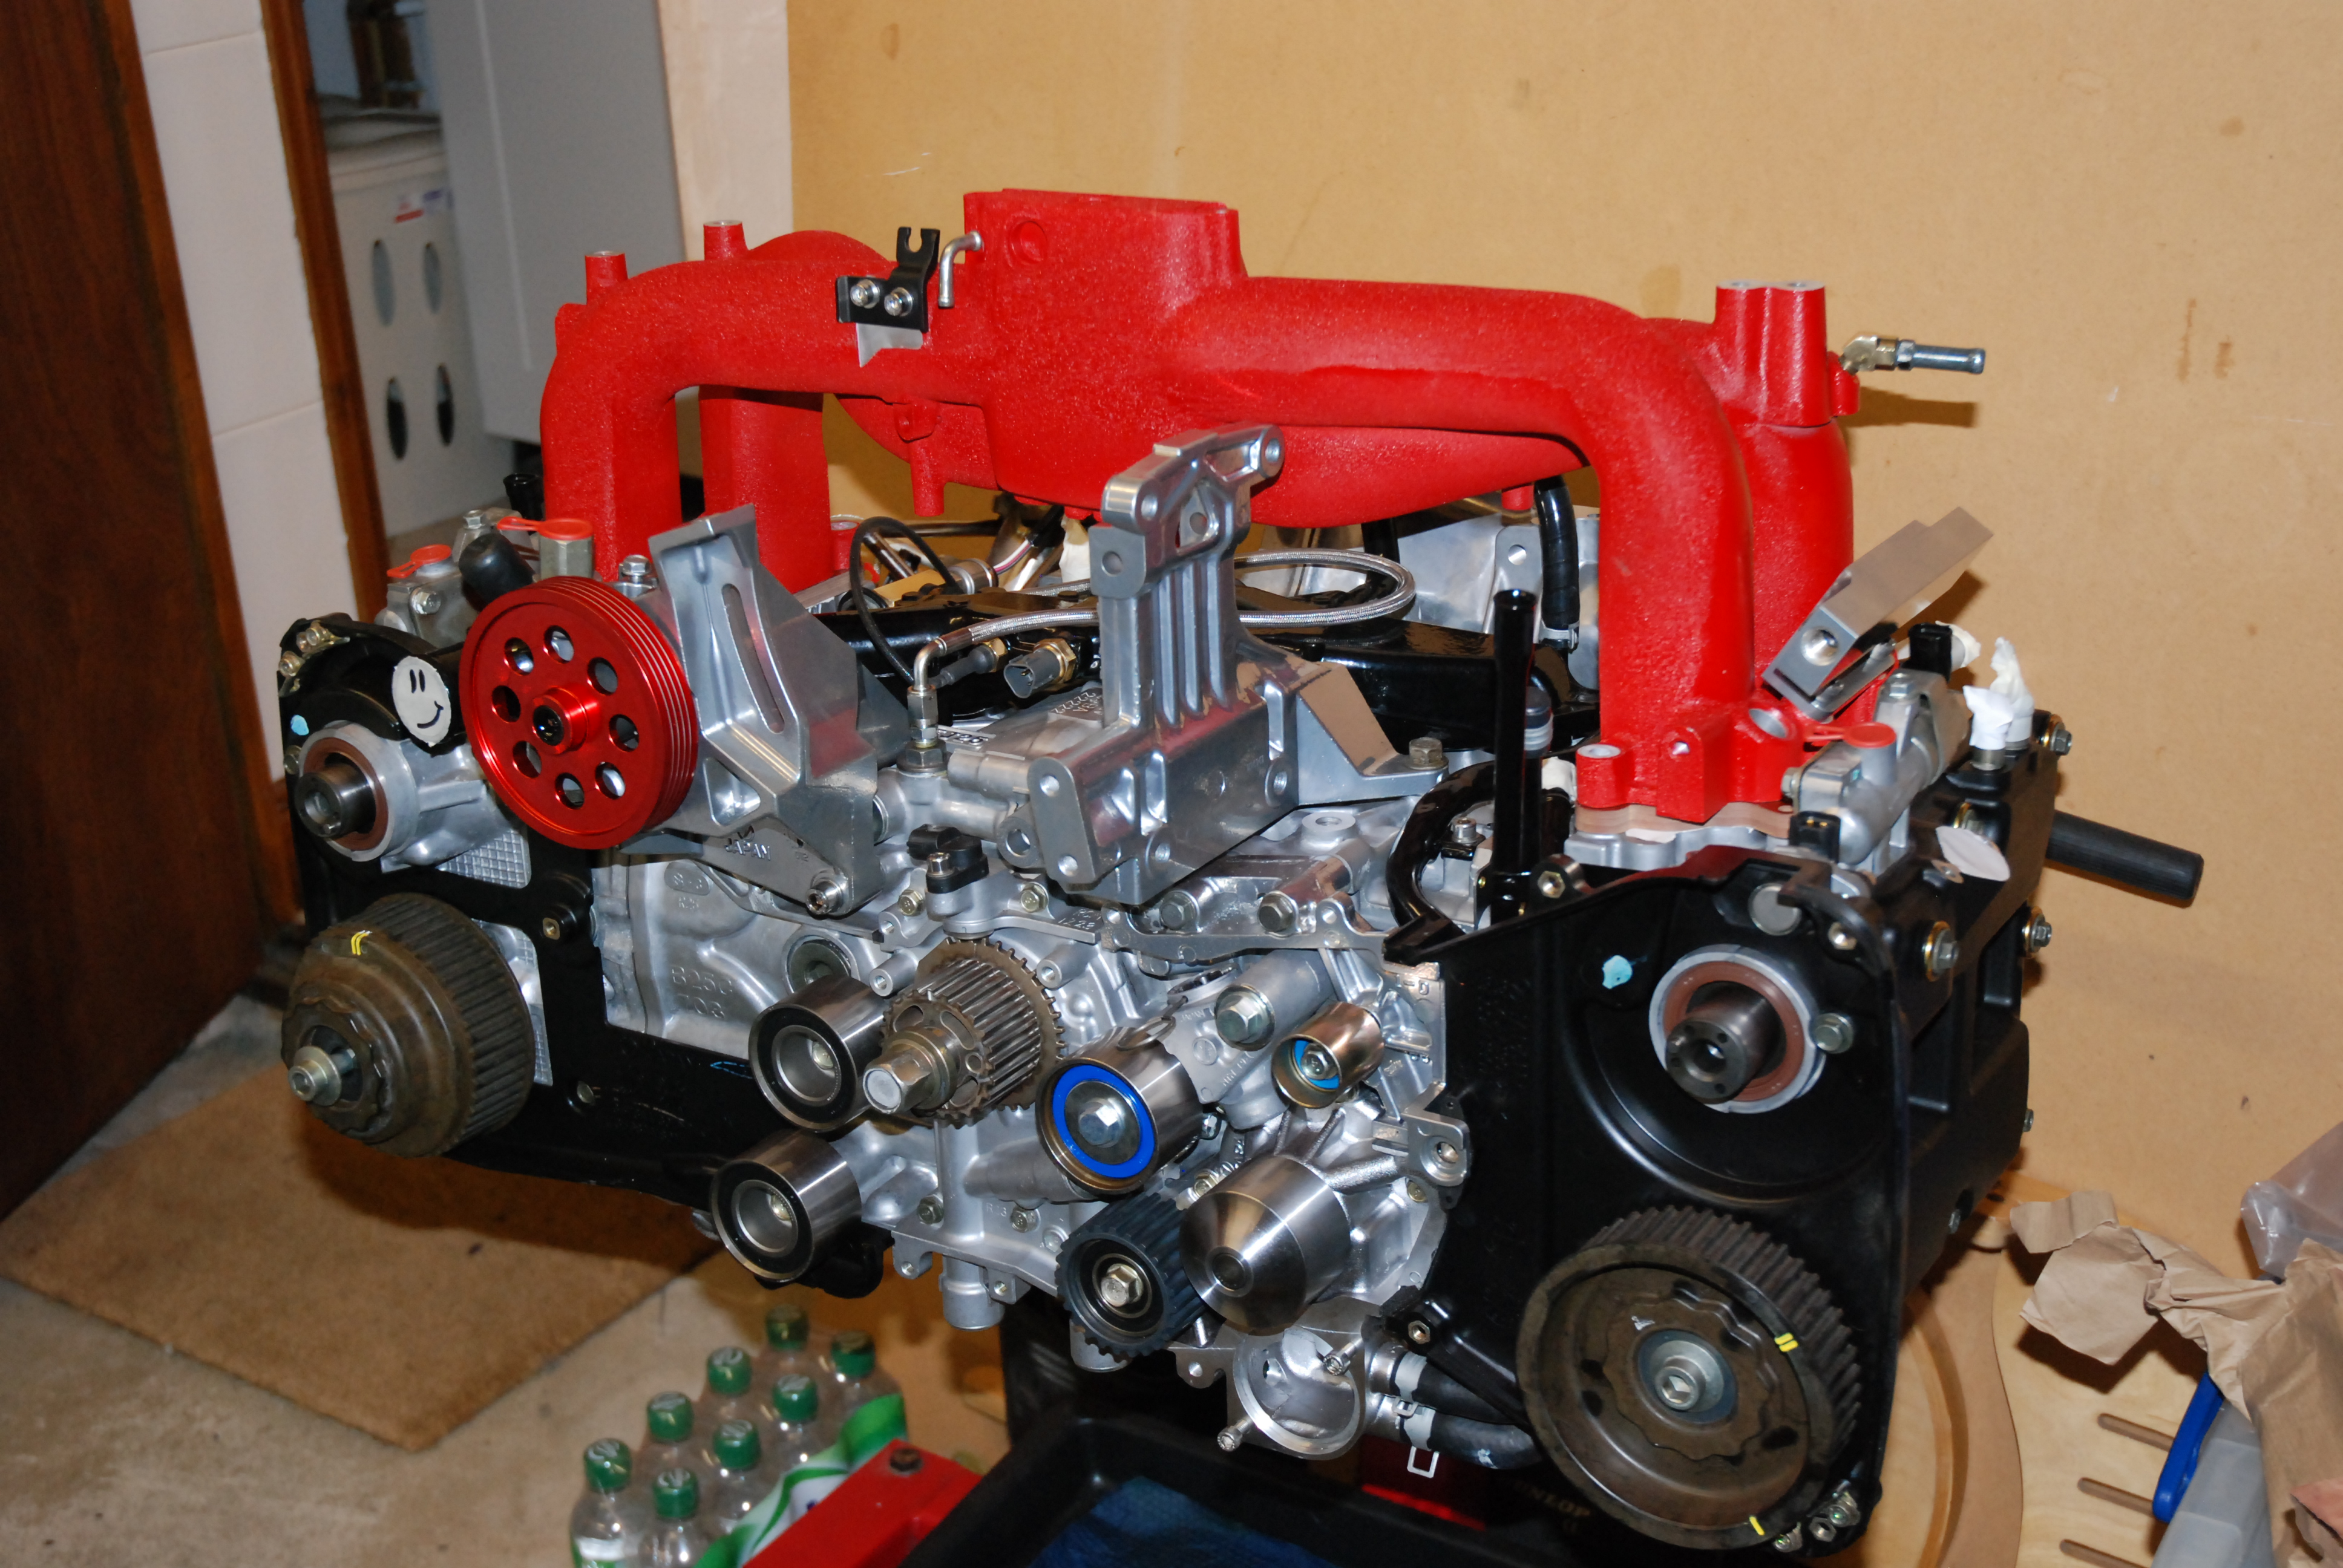
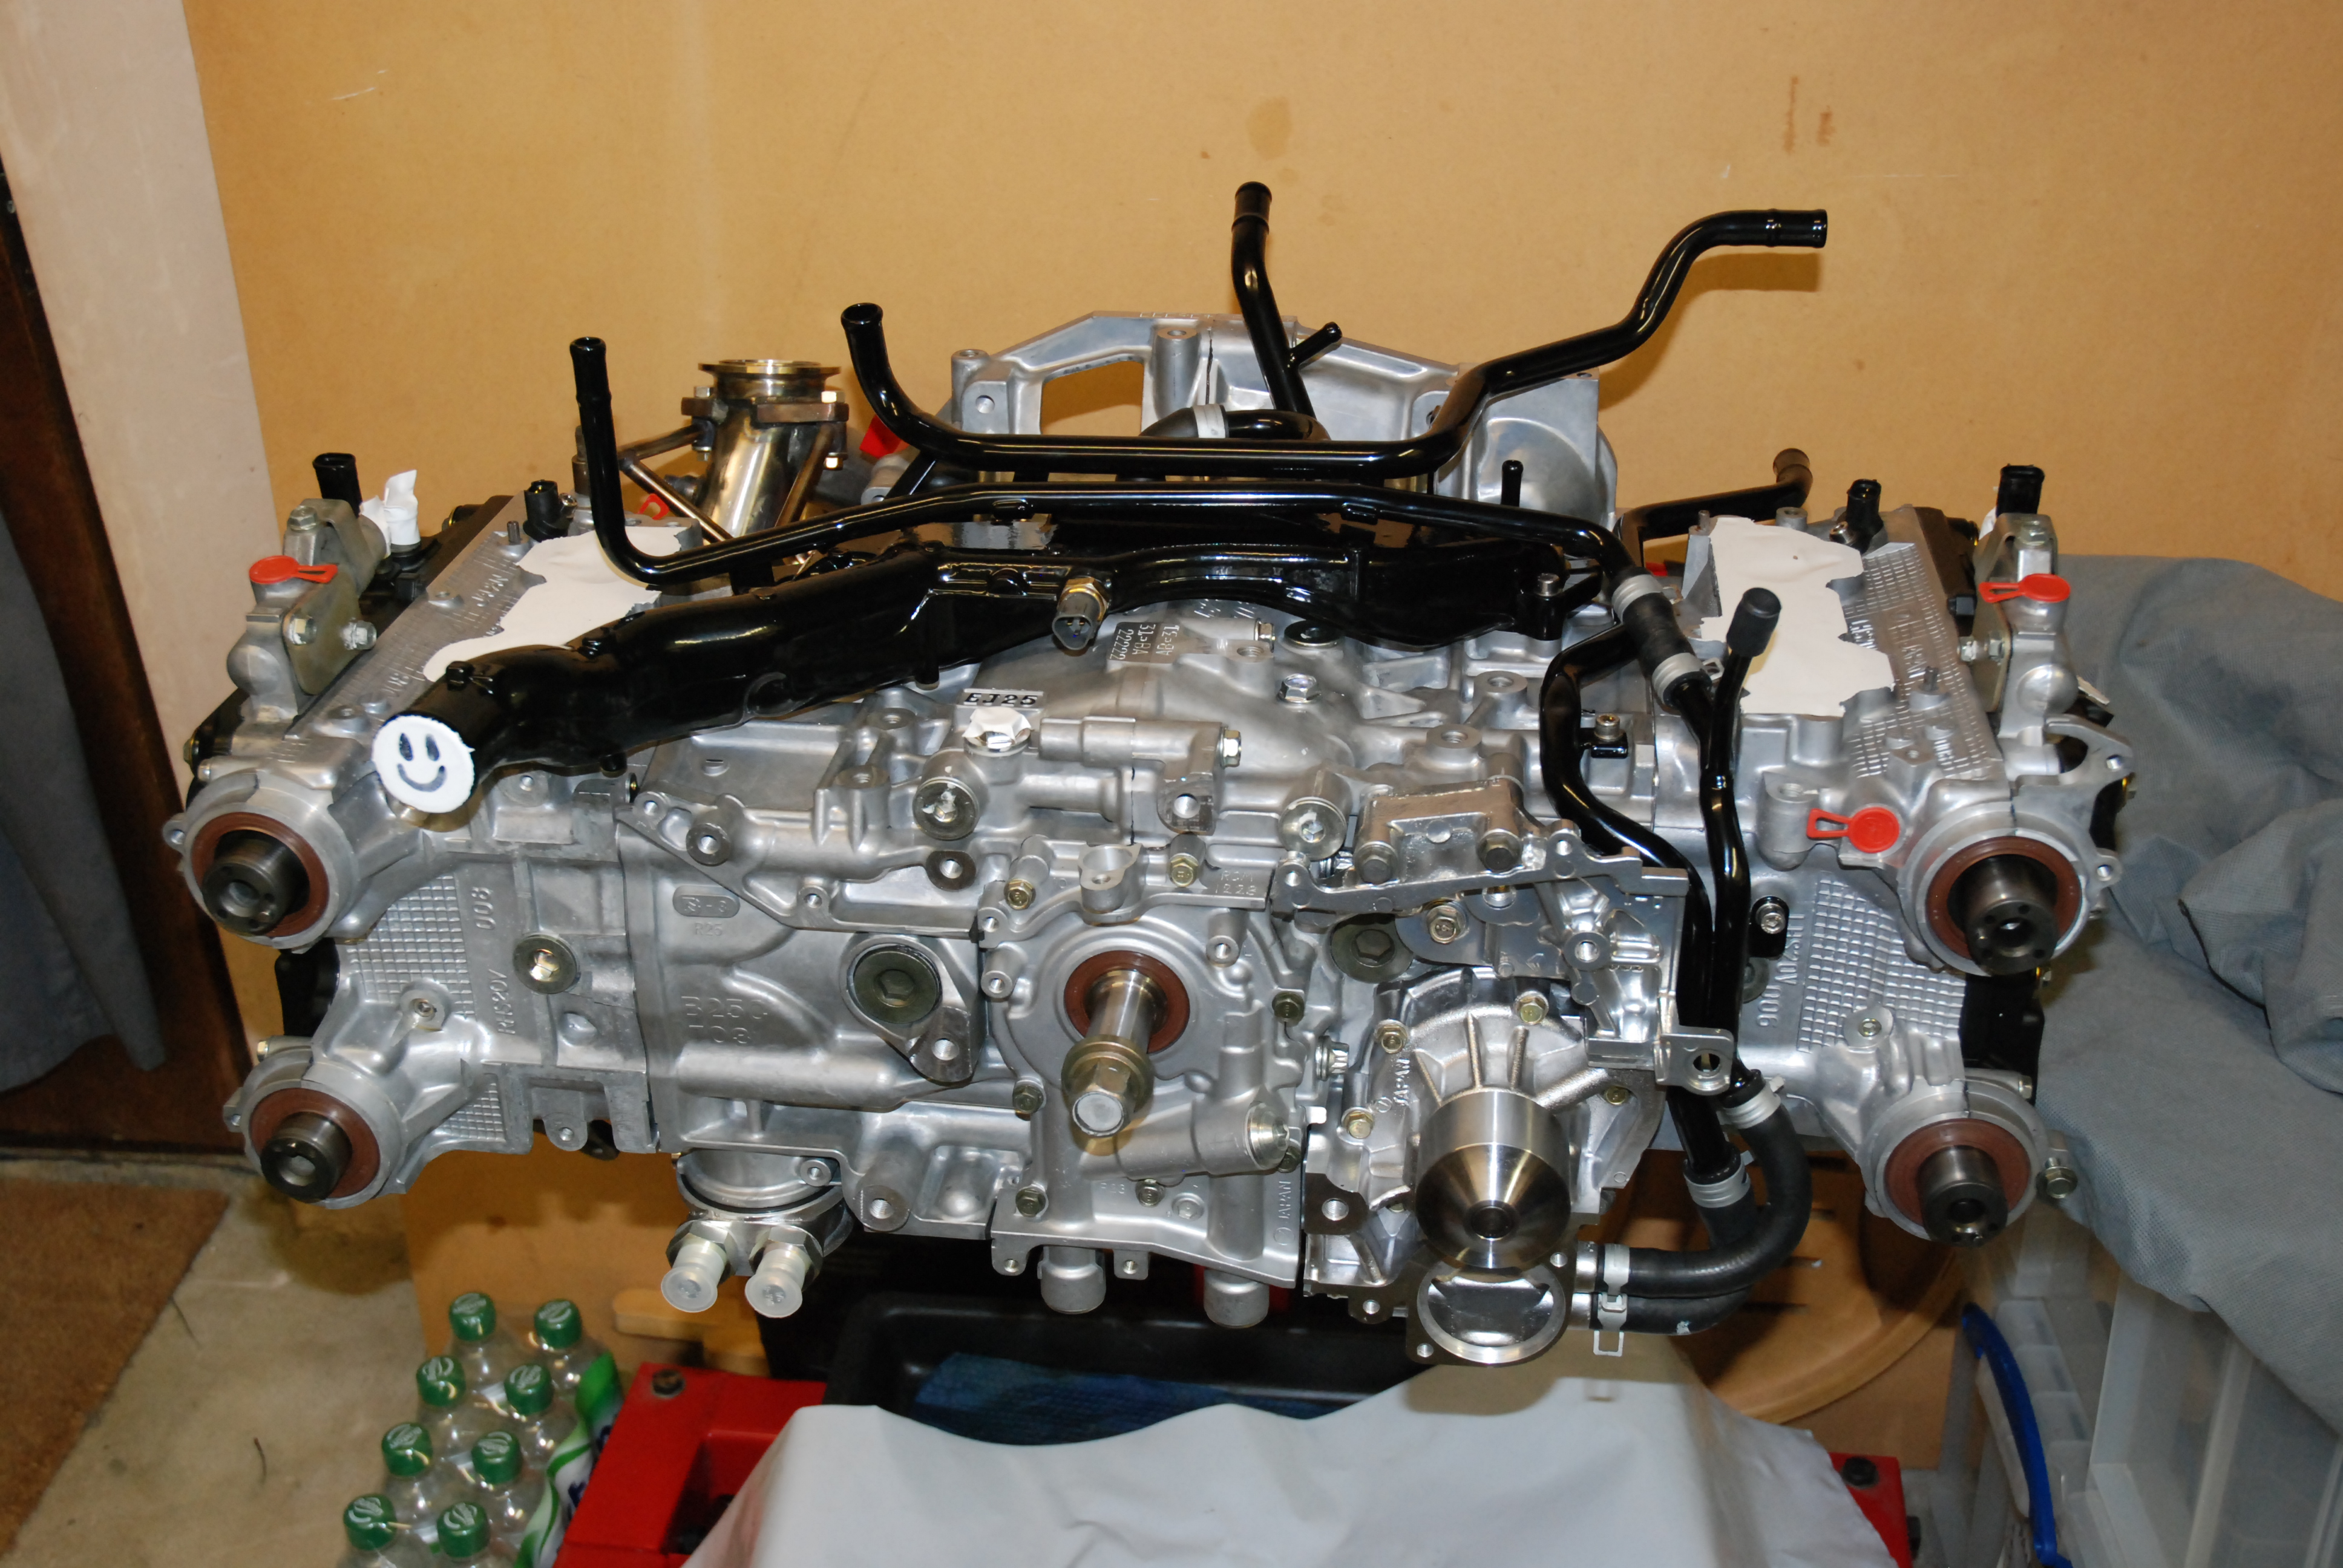
Generally mocking stuff up. Some of the above parts are loose assy untill i get the pipeworkl back. As soon as the modified pipes come back from plating i can progresss quite alot more
In the meantime ive had a delivery of a full set of timing idlers (cheers Alyn @ As Performance - top service as always)
Drilled/tapped my X-over pipe to take the Defi water temp sender.
Made up a feed/take off for the Defi oil pressure sender and retain the OEM oil press switch.
Made up a boss to take my air charge temp sensor that replaces the OEM PCV valve that will no longer be used.
Removed almost all bosses from the manifold and refinished in wrinkle red (original VHT shade)
Generally mocking stuff up. Some of the above parts are loose assy untill i get the pipeworkl back. As soon as the modified pipes come back from plating i can progresss quite alot more
16-09-2010, 05:02 AM
#288
Boost Junkie
Thread Starter
Jonny its VHT wrinkle red part number SP204. Its avaliable on eBay and frost.co.uk.
Its also available in black.
http://cgi.ebay.co.uk/VHT-RED-WRINKL...item3a5576f0ba
Although notice i said this is the old shade, its darker than the new formula. VHT changed the formula approx 2 years ago and its now a much more orange/red.
Having looked at it though as i base coated this manifold in the new shade, that if you didnt have the 2 colours side by side then the new shade would still look fine.
Get some and try it out, works best with heat too, so get the hairdryer on it.
Hope that helps
16-09-2010, 08:43 AM
#290
10K+ Poster!!

Jonny its VHT wrinkle red part number SP204. Its avaliable on eBay and frost.co.uk.
Its also available in black.
http://cgi.ebay.co.uk/VHT-RED-WRINKL...item3a5576f0ba
Although notice i said this is the old shade, its darker than the new formula. VHT changed the formula approx 2 years ago and its now a much more orange/red.
Having looked at it though as i base coated this manifold in the new shade, that if you didnt have the 2 colours side by side then the new shade would still look fine.
Get some and try it out, works best with heat too, so get the hairdryer on it.
Hope that helps
Its also available in black.
http://cgi.ebay.co.uk/VHT-RED-WRINKL...item3a5576f0ba
Although notice i said this is the old shade, its darker than the new formula. VHT changed the formula approx 2 years ago and its now a much more orange/red.
Having looked at it though as i base coated this manifold in the new shade, that if you didnt have the 2 colours side by side then the new shade would still look fine.
Get some and try it out, works best with heat too, so get the hairdryer on it.
Hope that helps

 17-09-2010, 07:41 PM
#292
Boost Junkie
Thread Starter
Okay i feel i have a more healthy size update for you guys today, so heres part one.
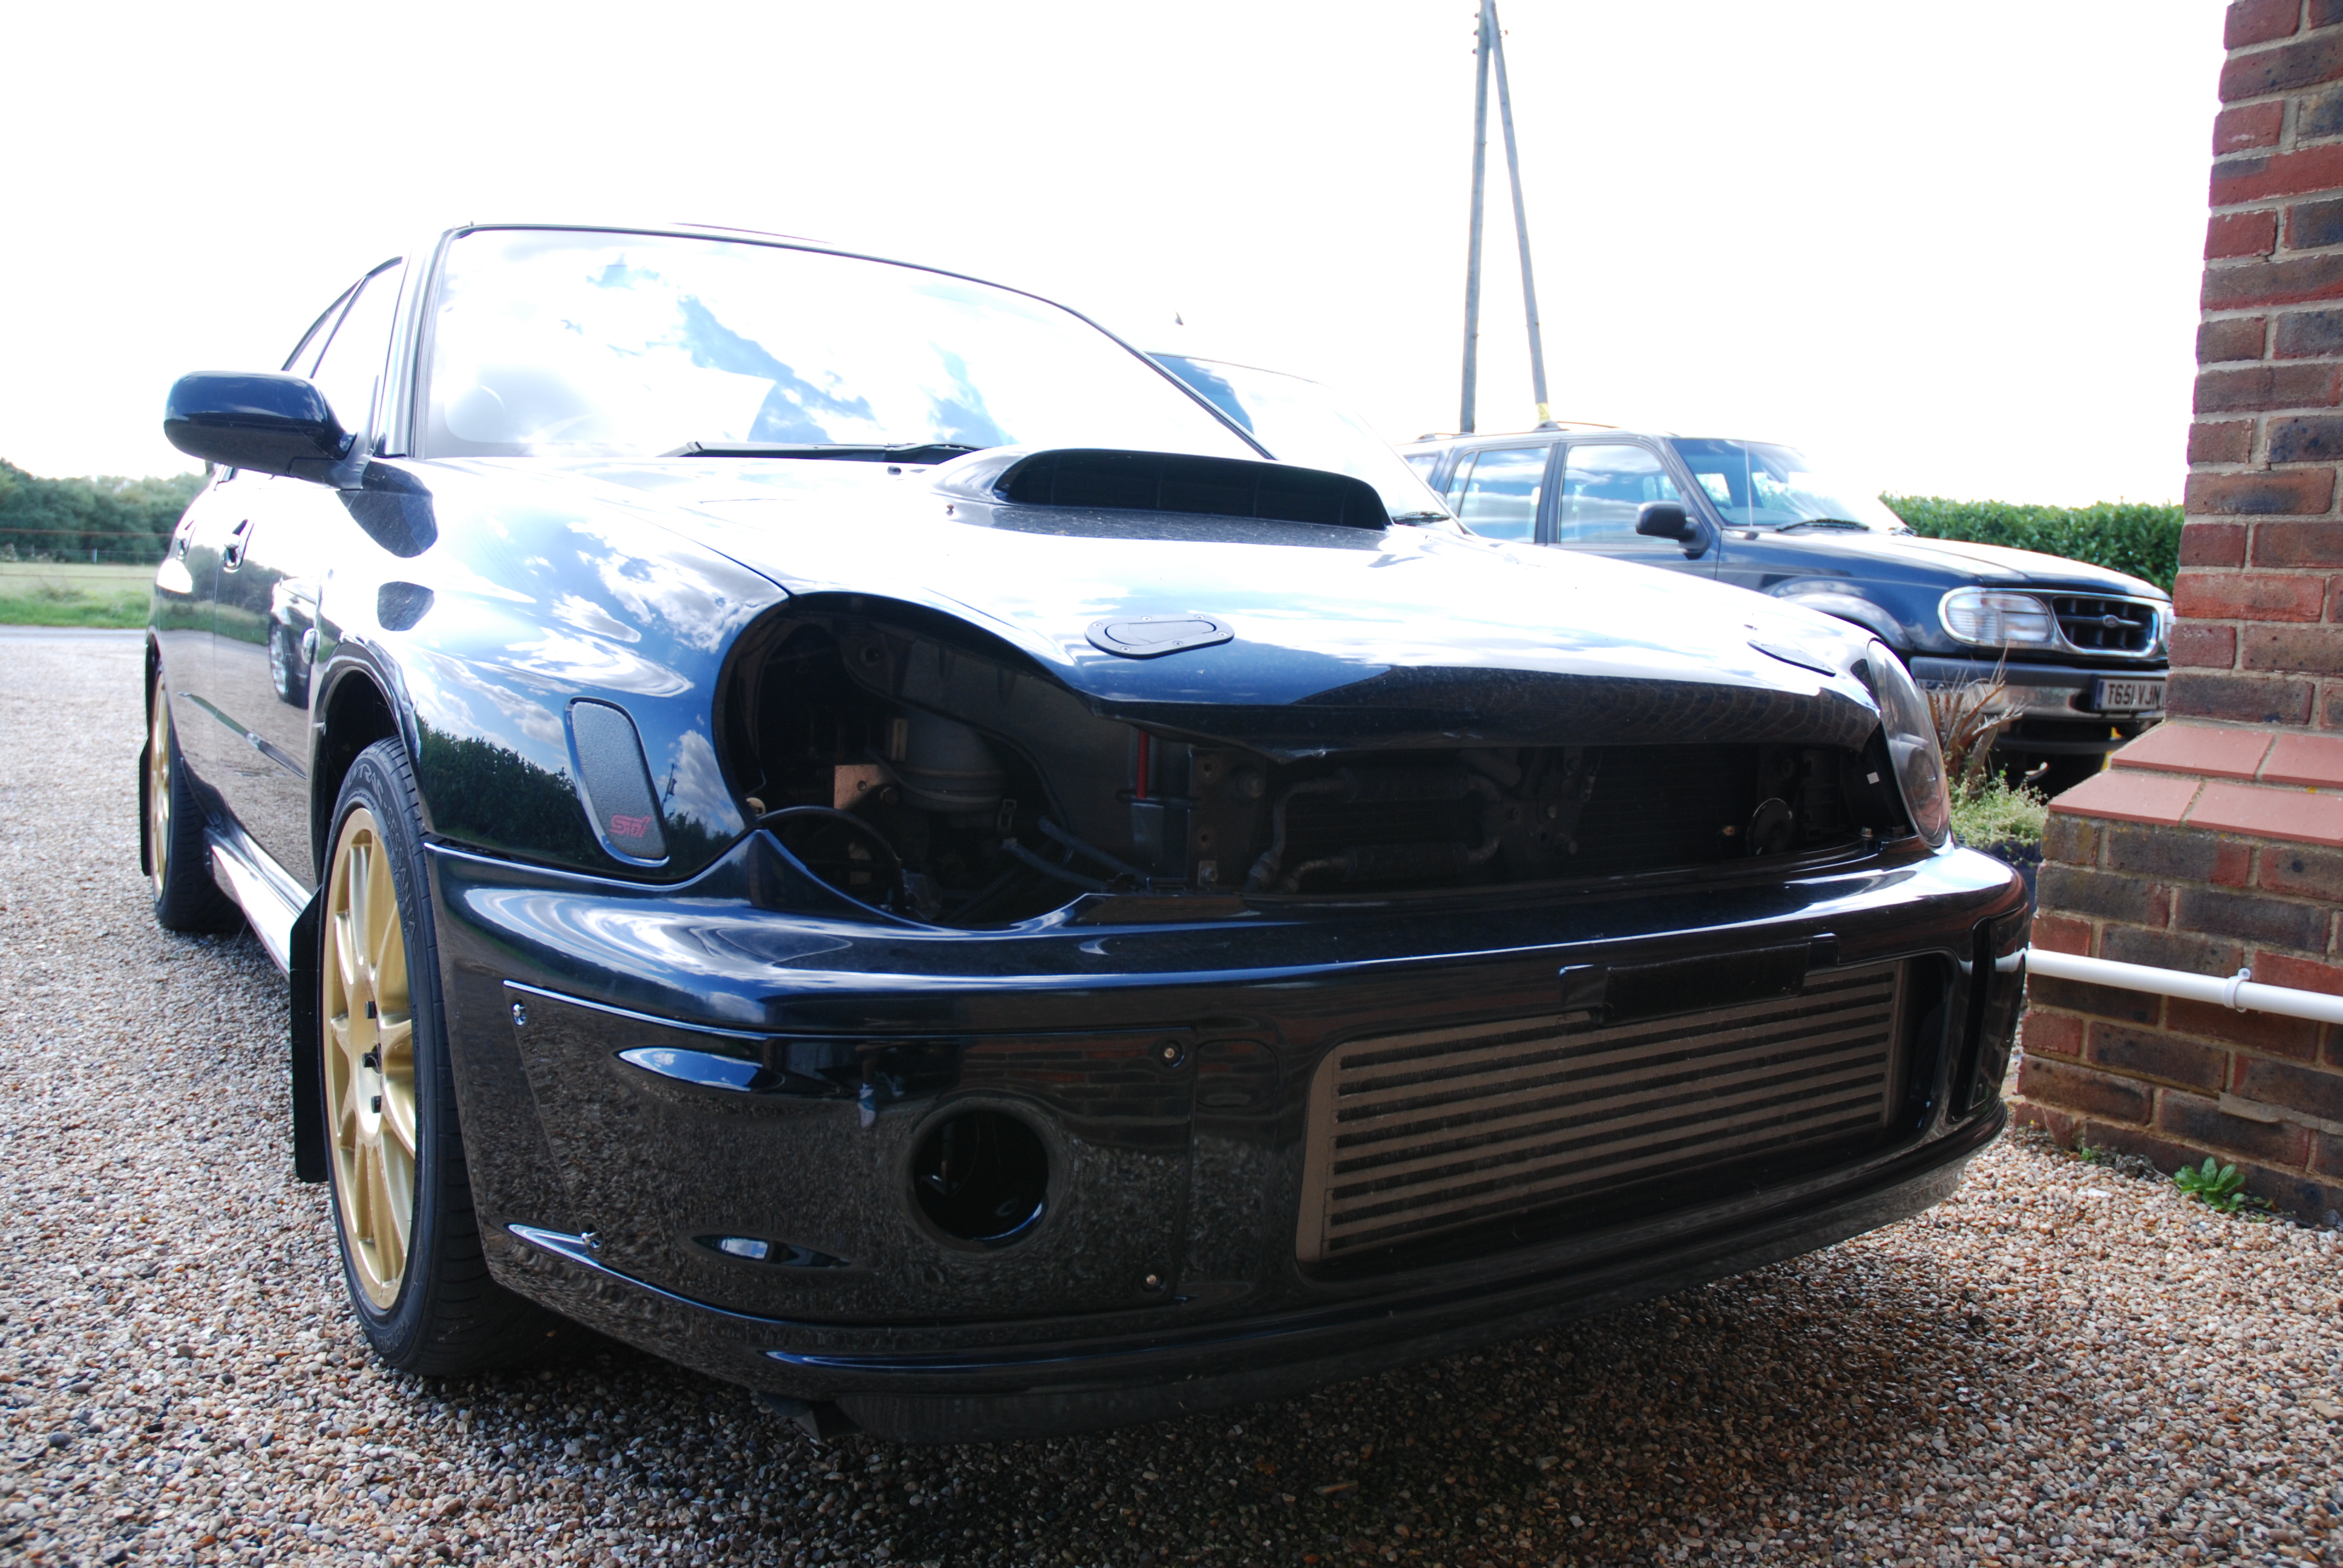
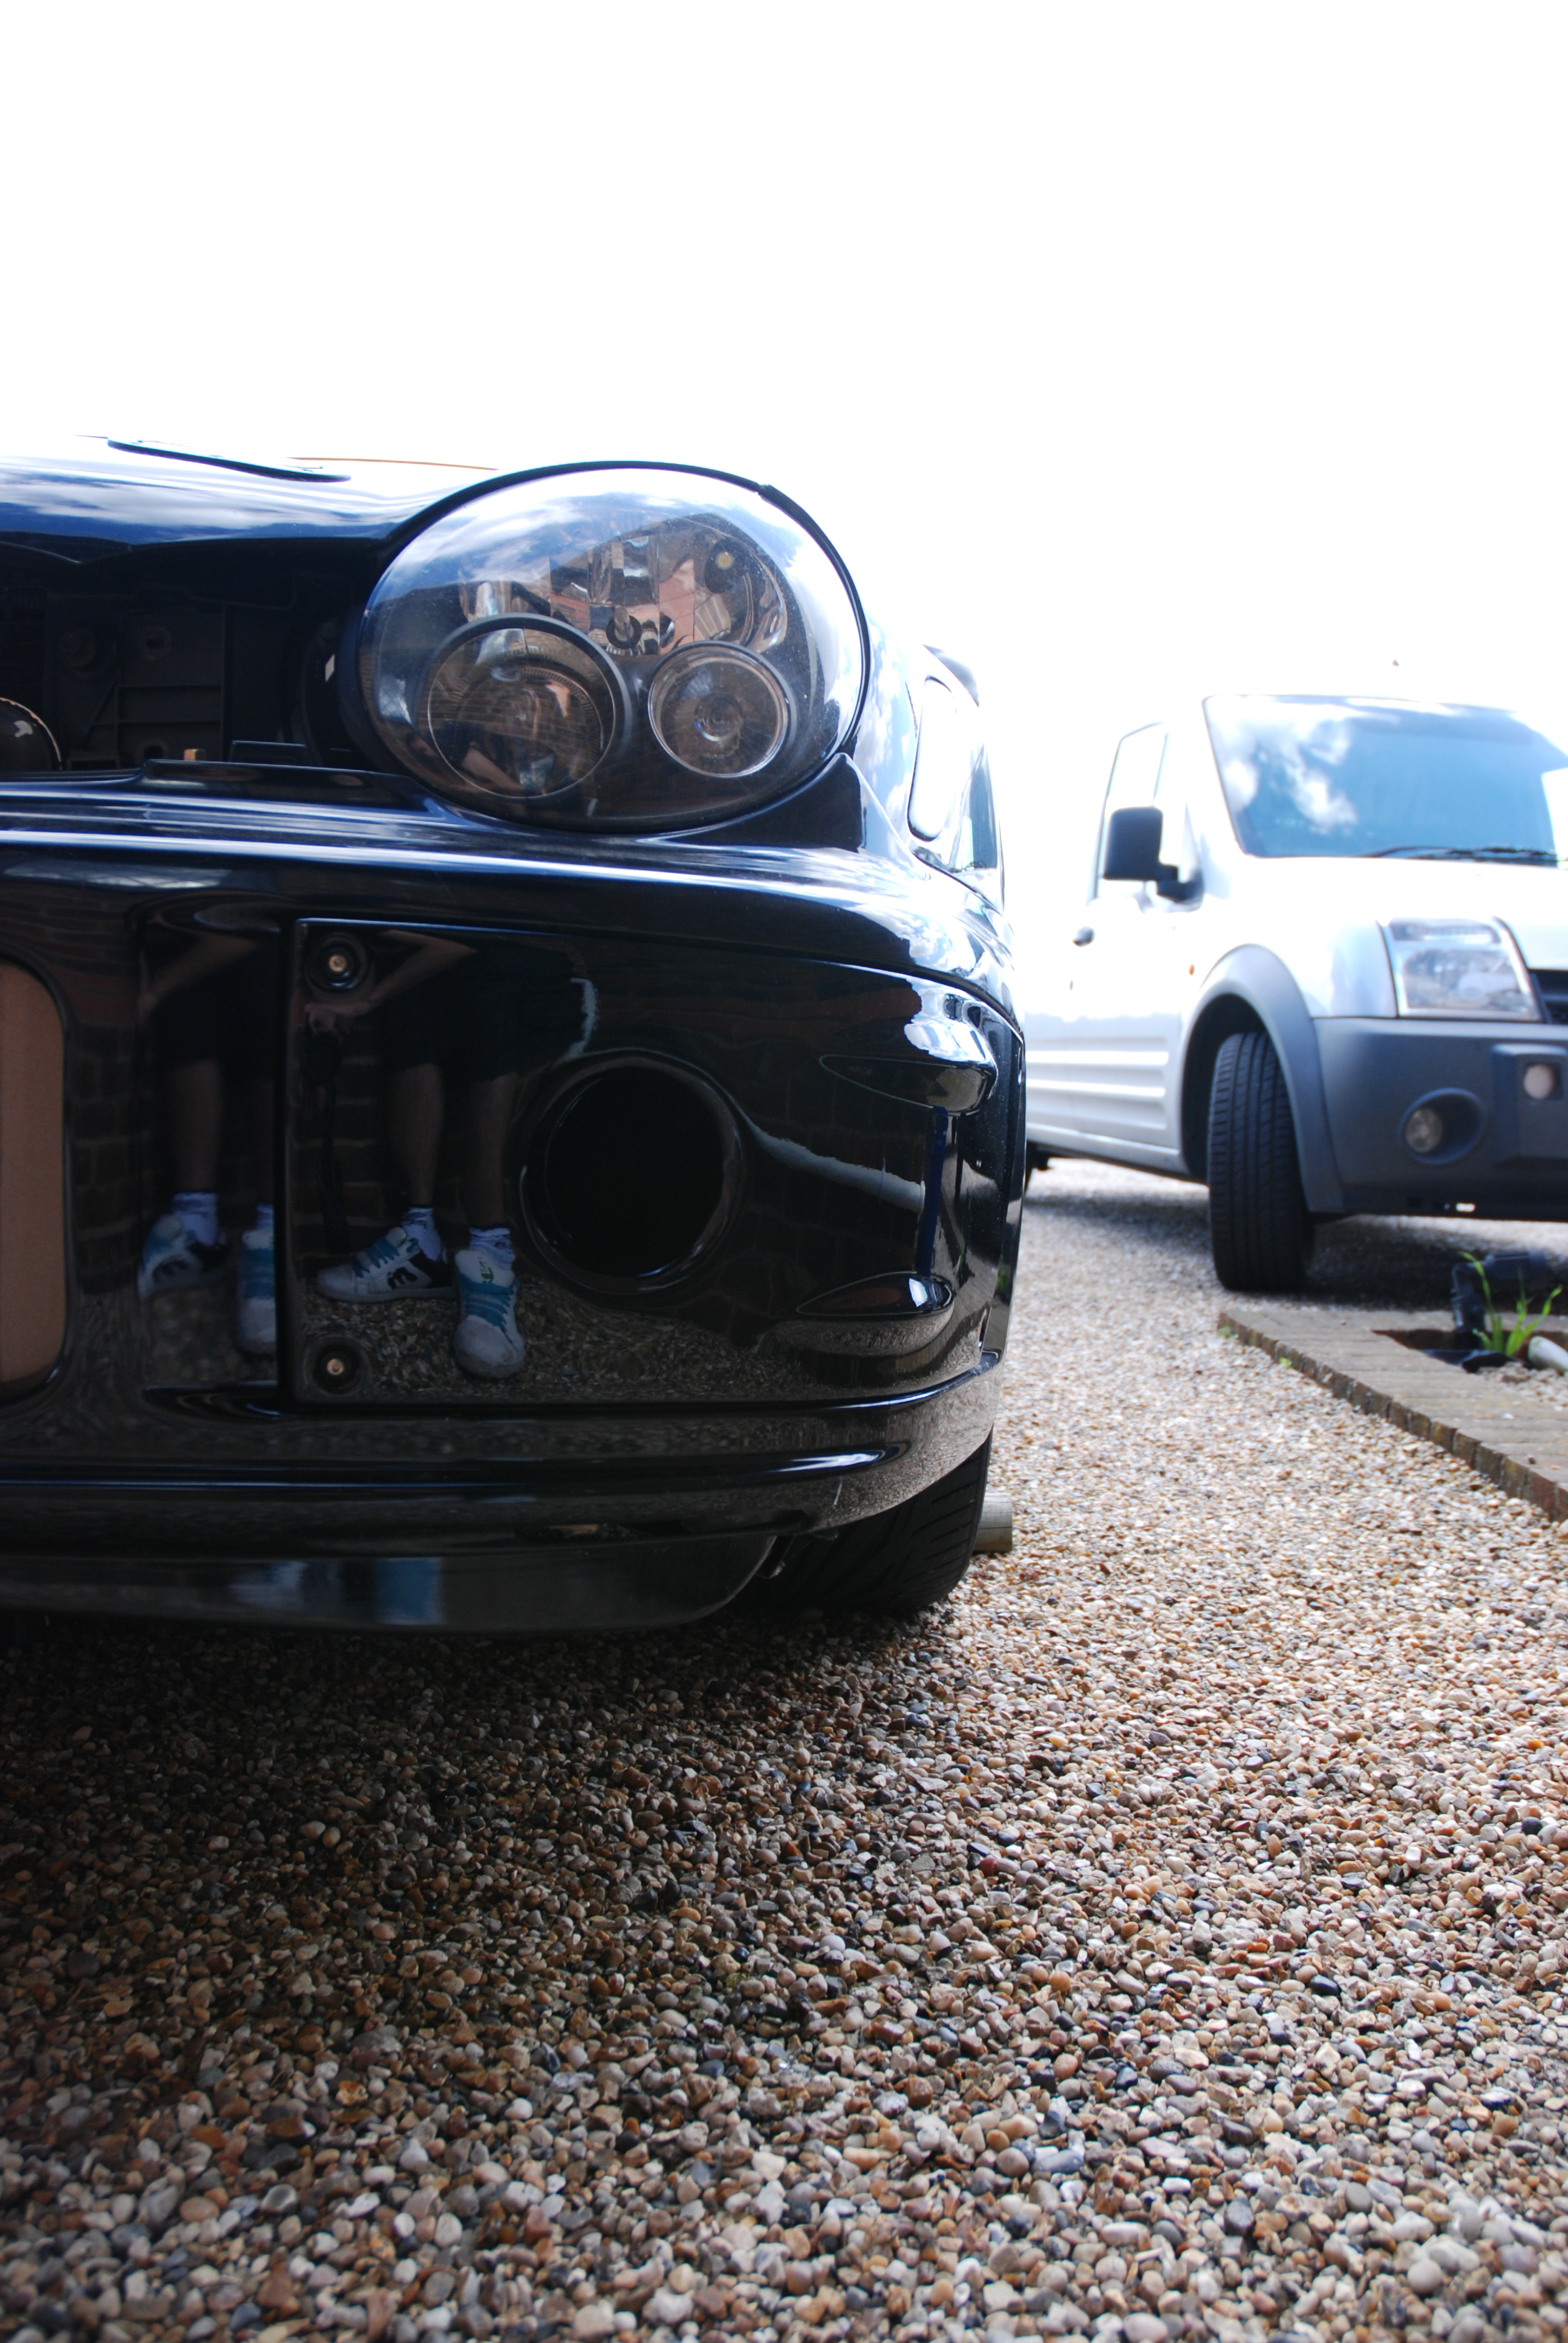
You may remember me having fitted a 76mm itake trumpet into my OS fog cover about 5 years ago now. I wanted to do the same on the NS in order to feed the oil cooler. However this time i wanted to try and have a more OEM look so wanted to have the bellmouth intakes but wanted them to look stock.
So i enlisted a friend of mine at work who makes prototype body fabrications etc and he said he could make them up for me.
Well today he delivered these to me, and what a great job he has done too.
He is also going to make me a shroud for my oil cooler so im looking forward to seeing that soon
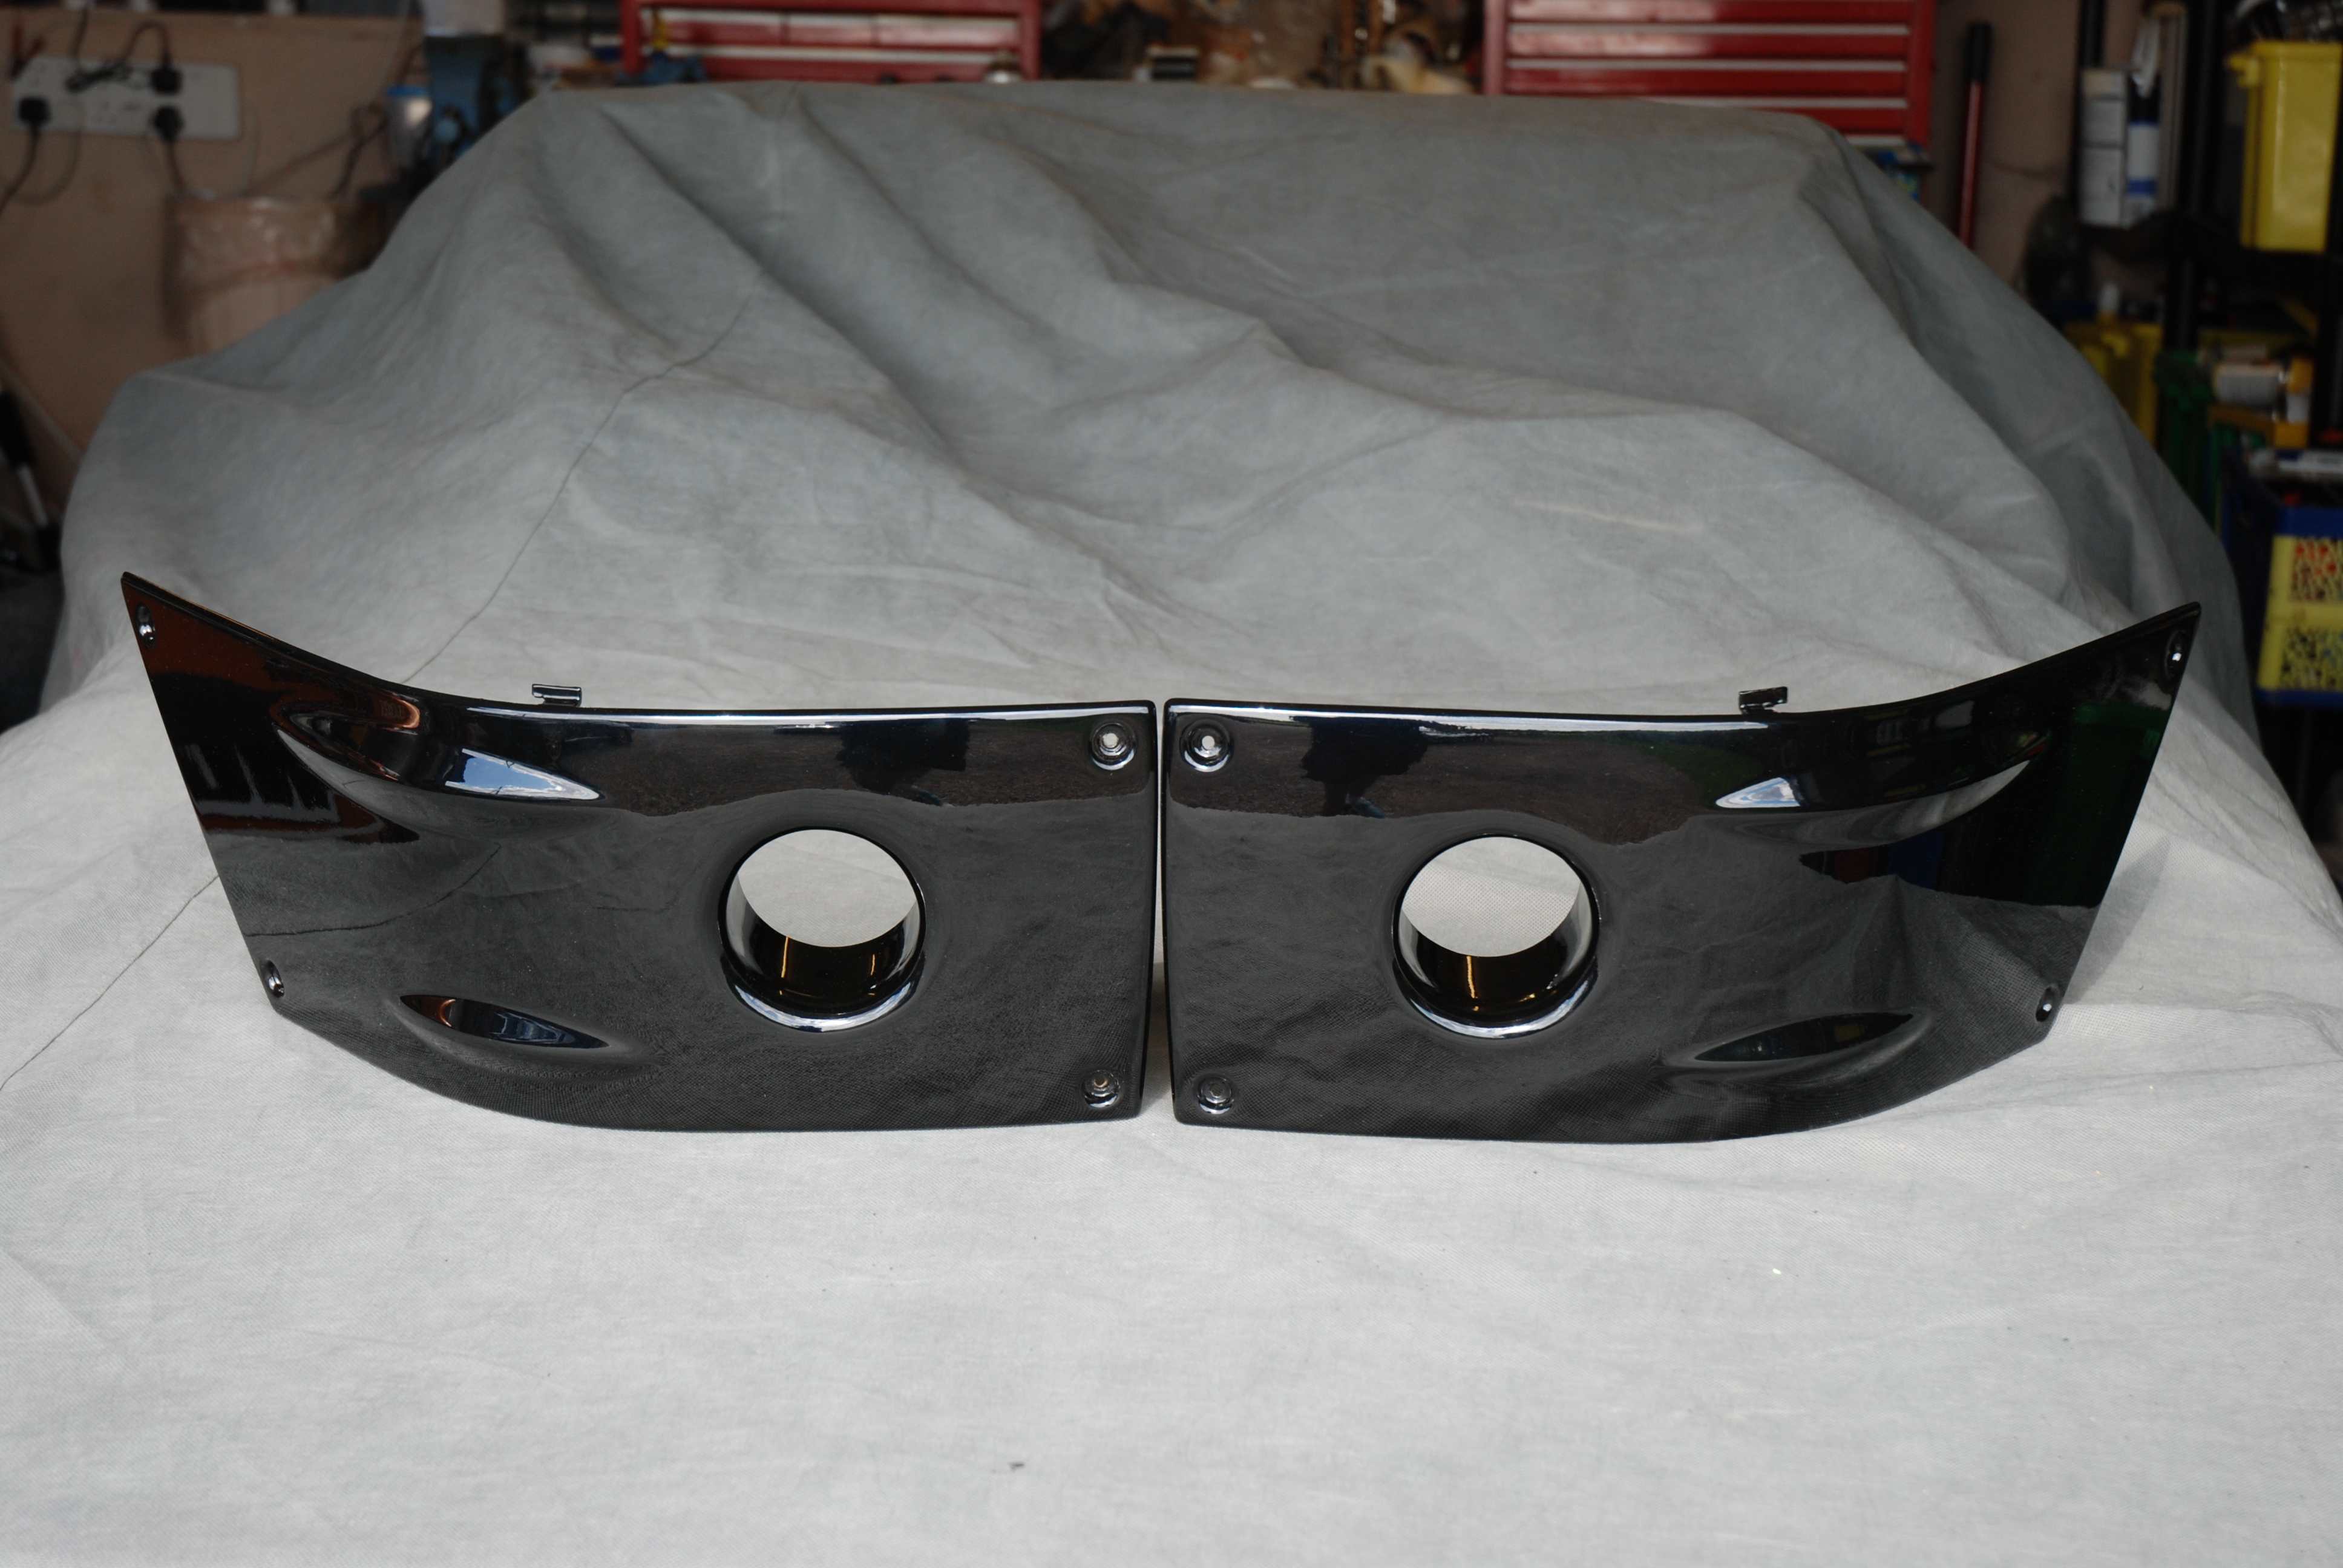
 17-09-2010, 08:23 PM
#294
Boost Junkie
Thread Starter
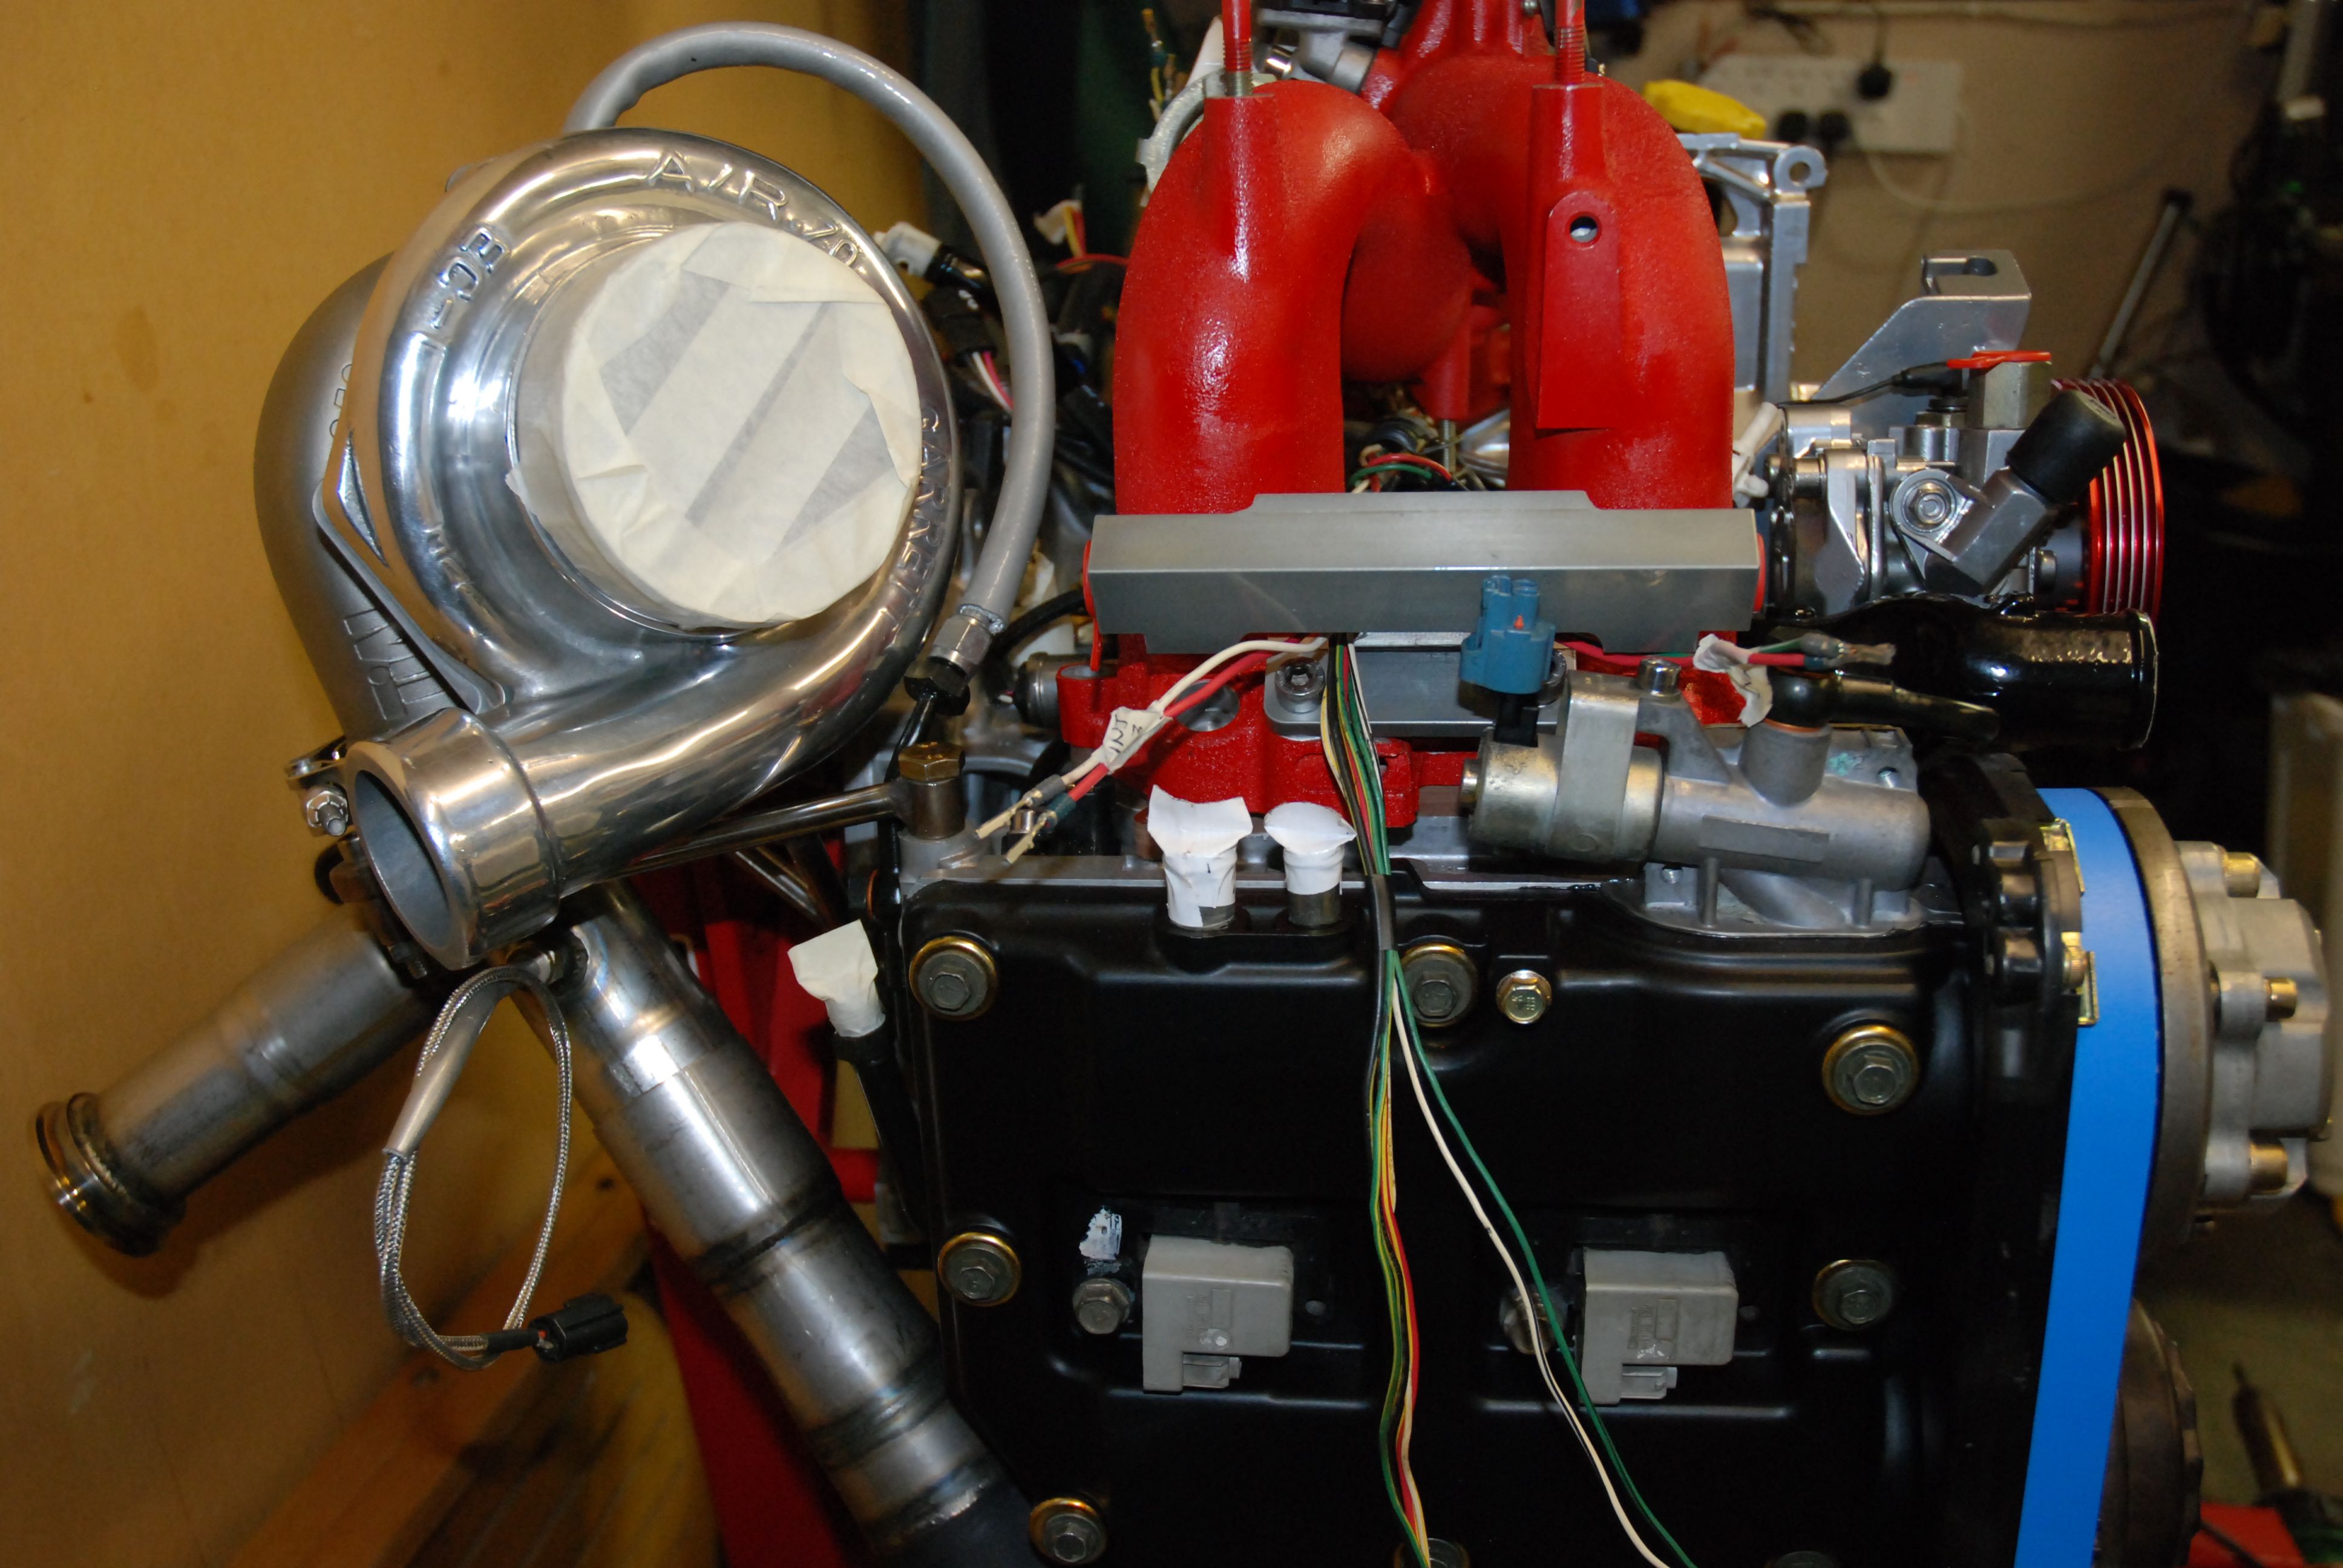
I took some parts to be zinc coated yesterday and i told the guys there that i wanted them done double quick. Sure enough they called me at 1pm today to say i could collect them.
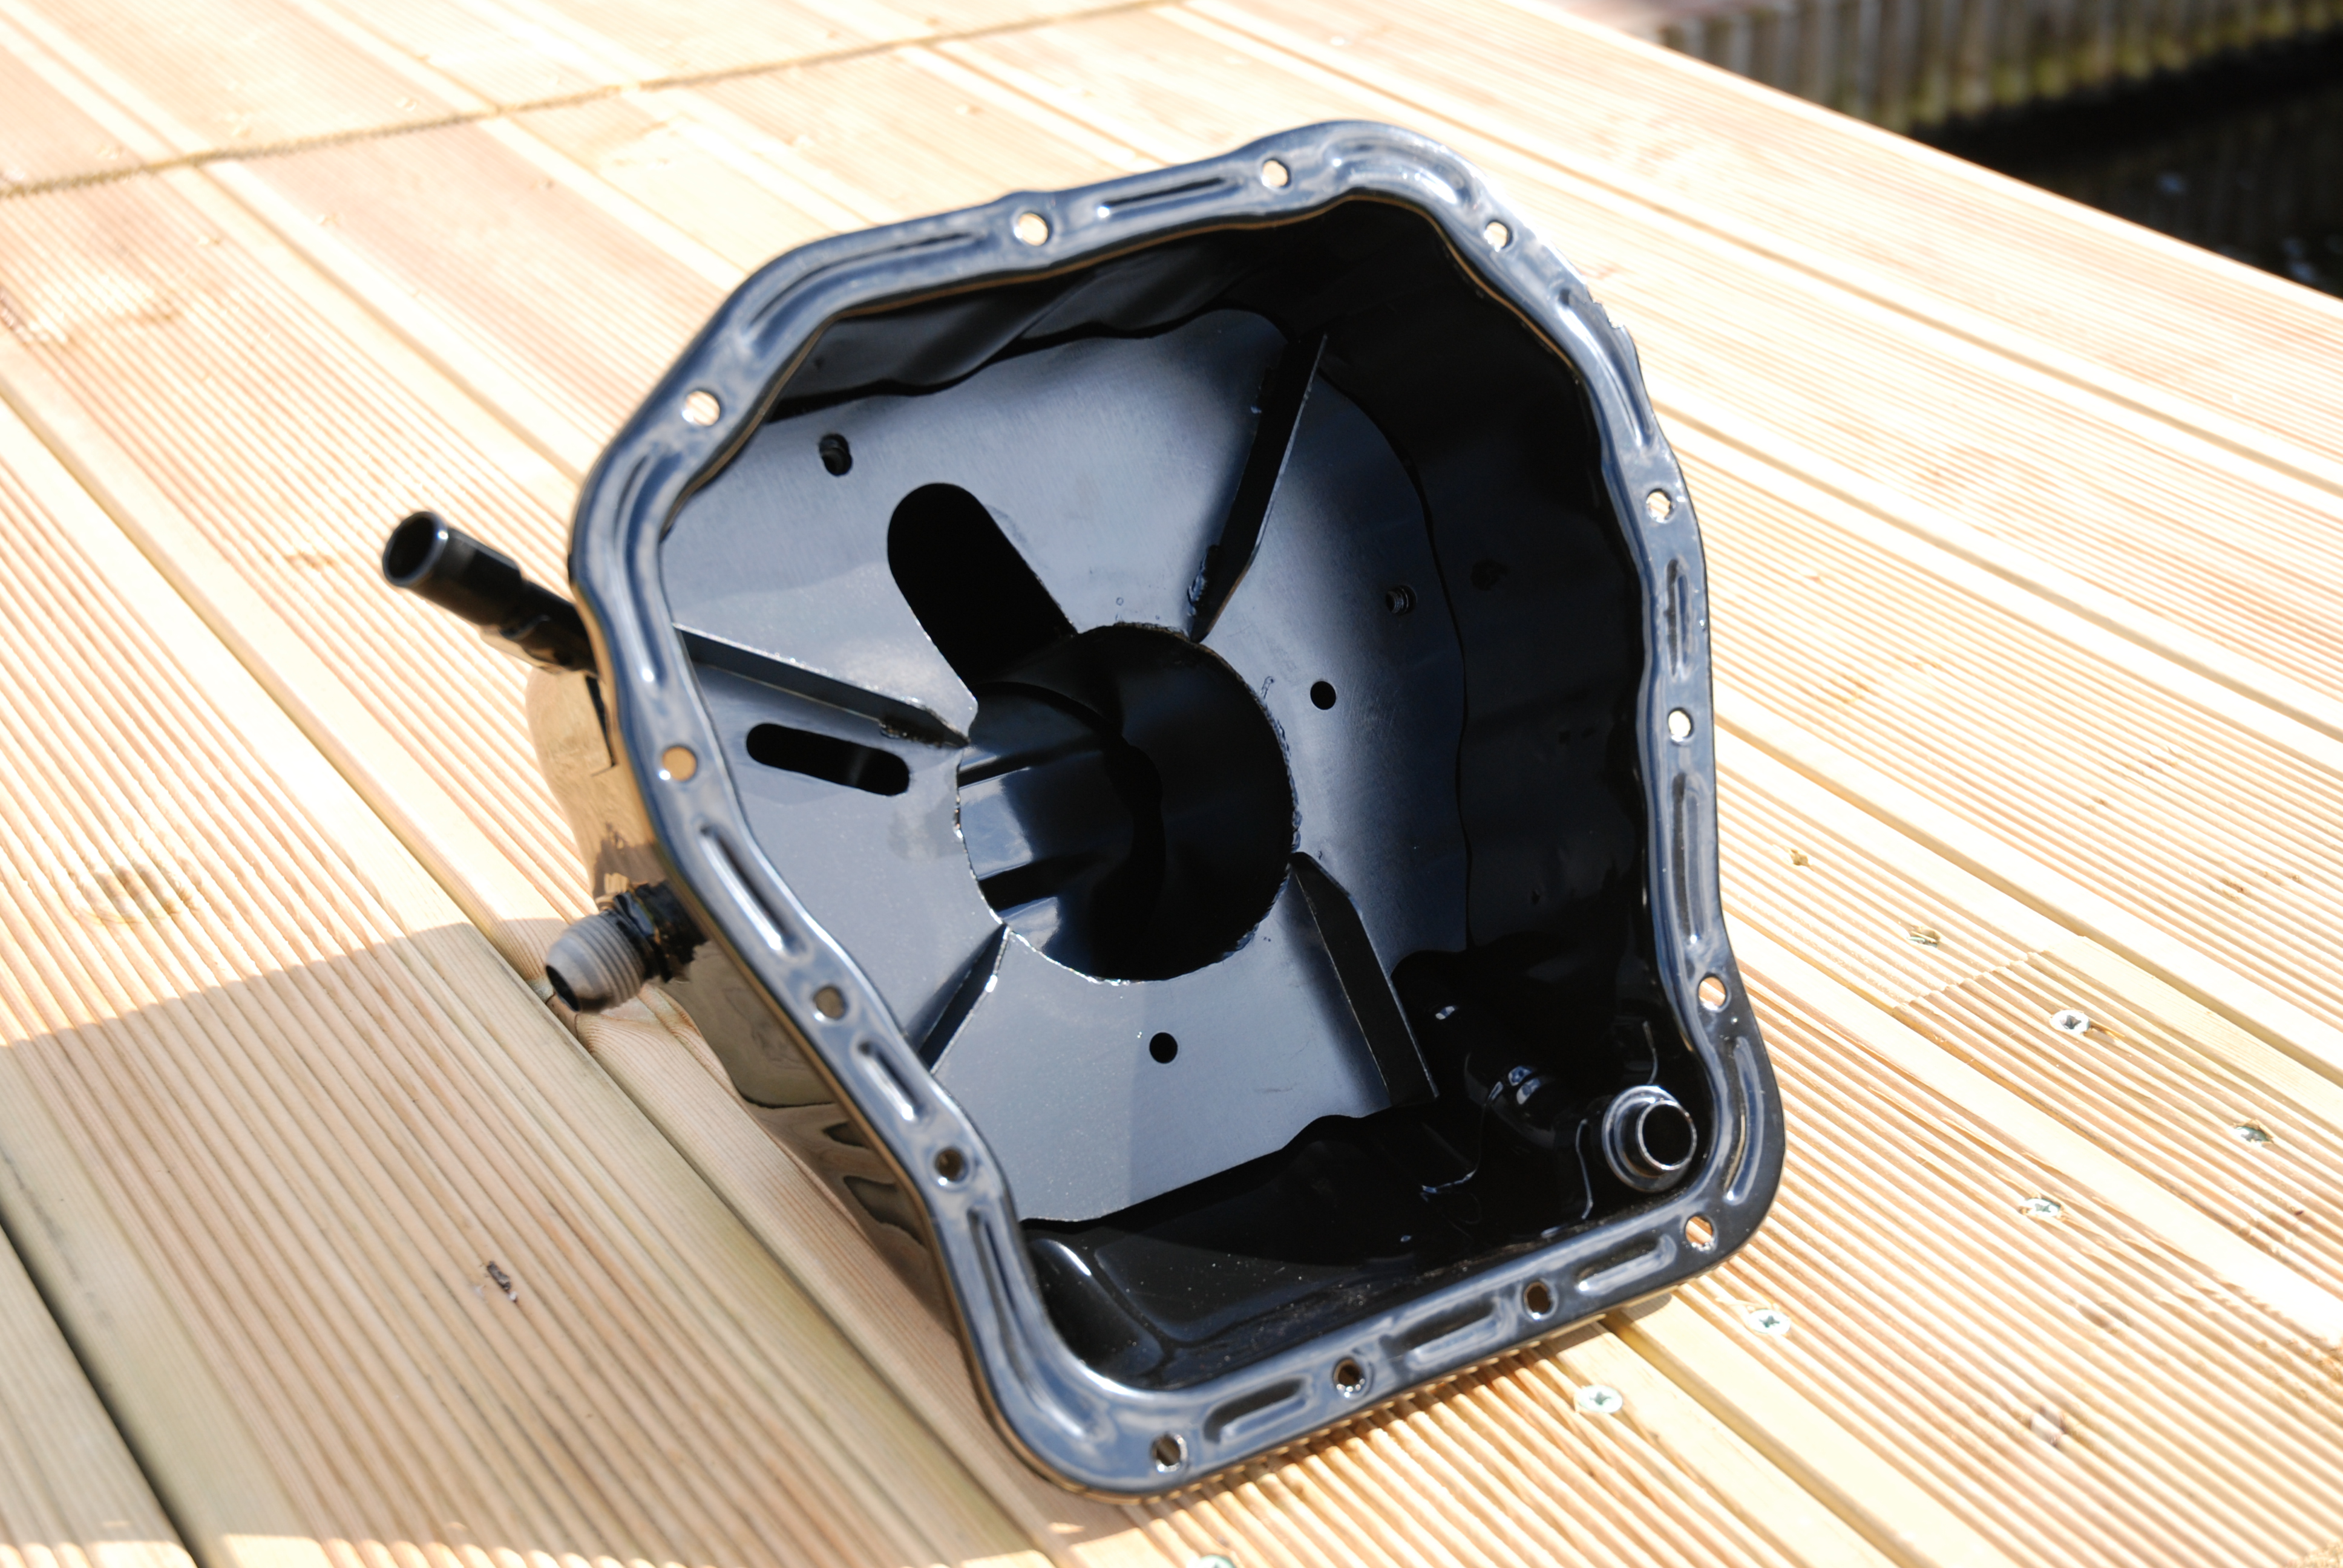
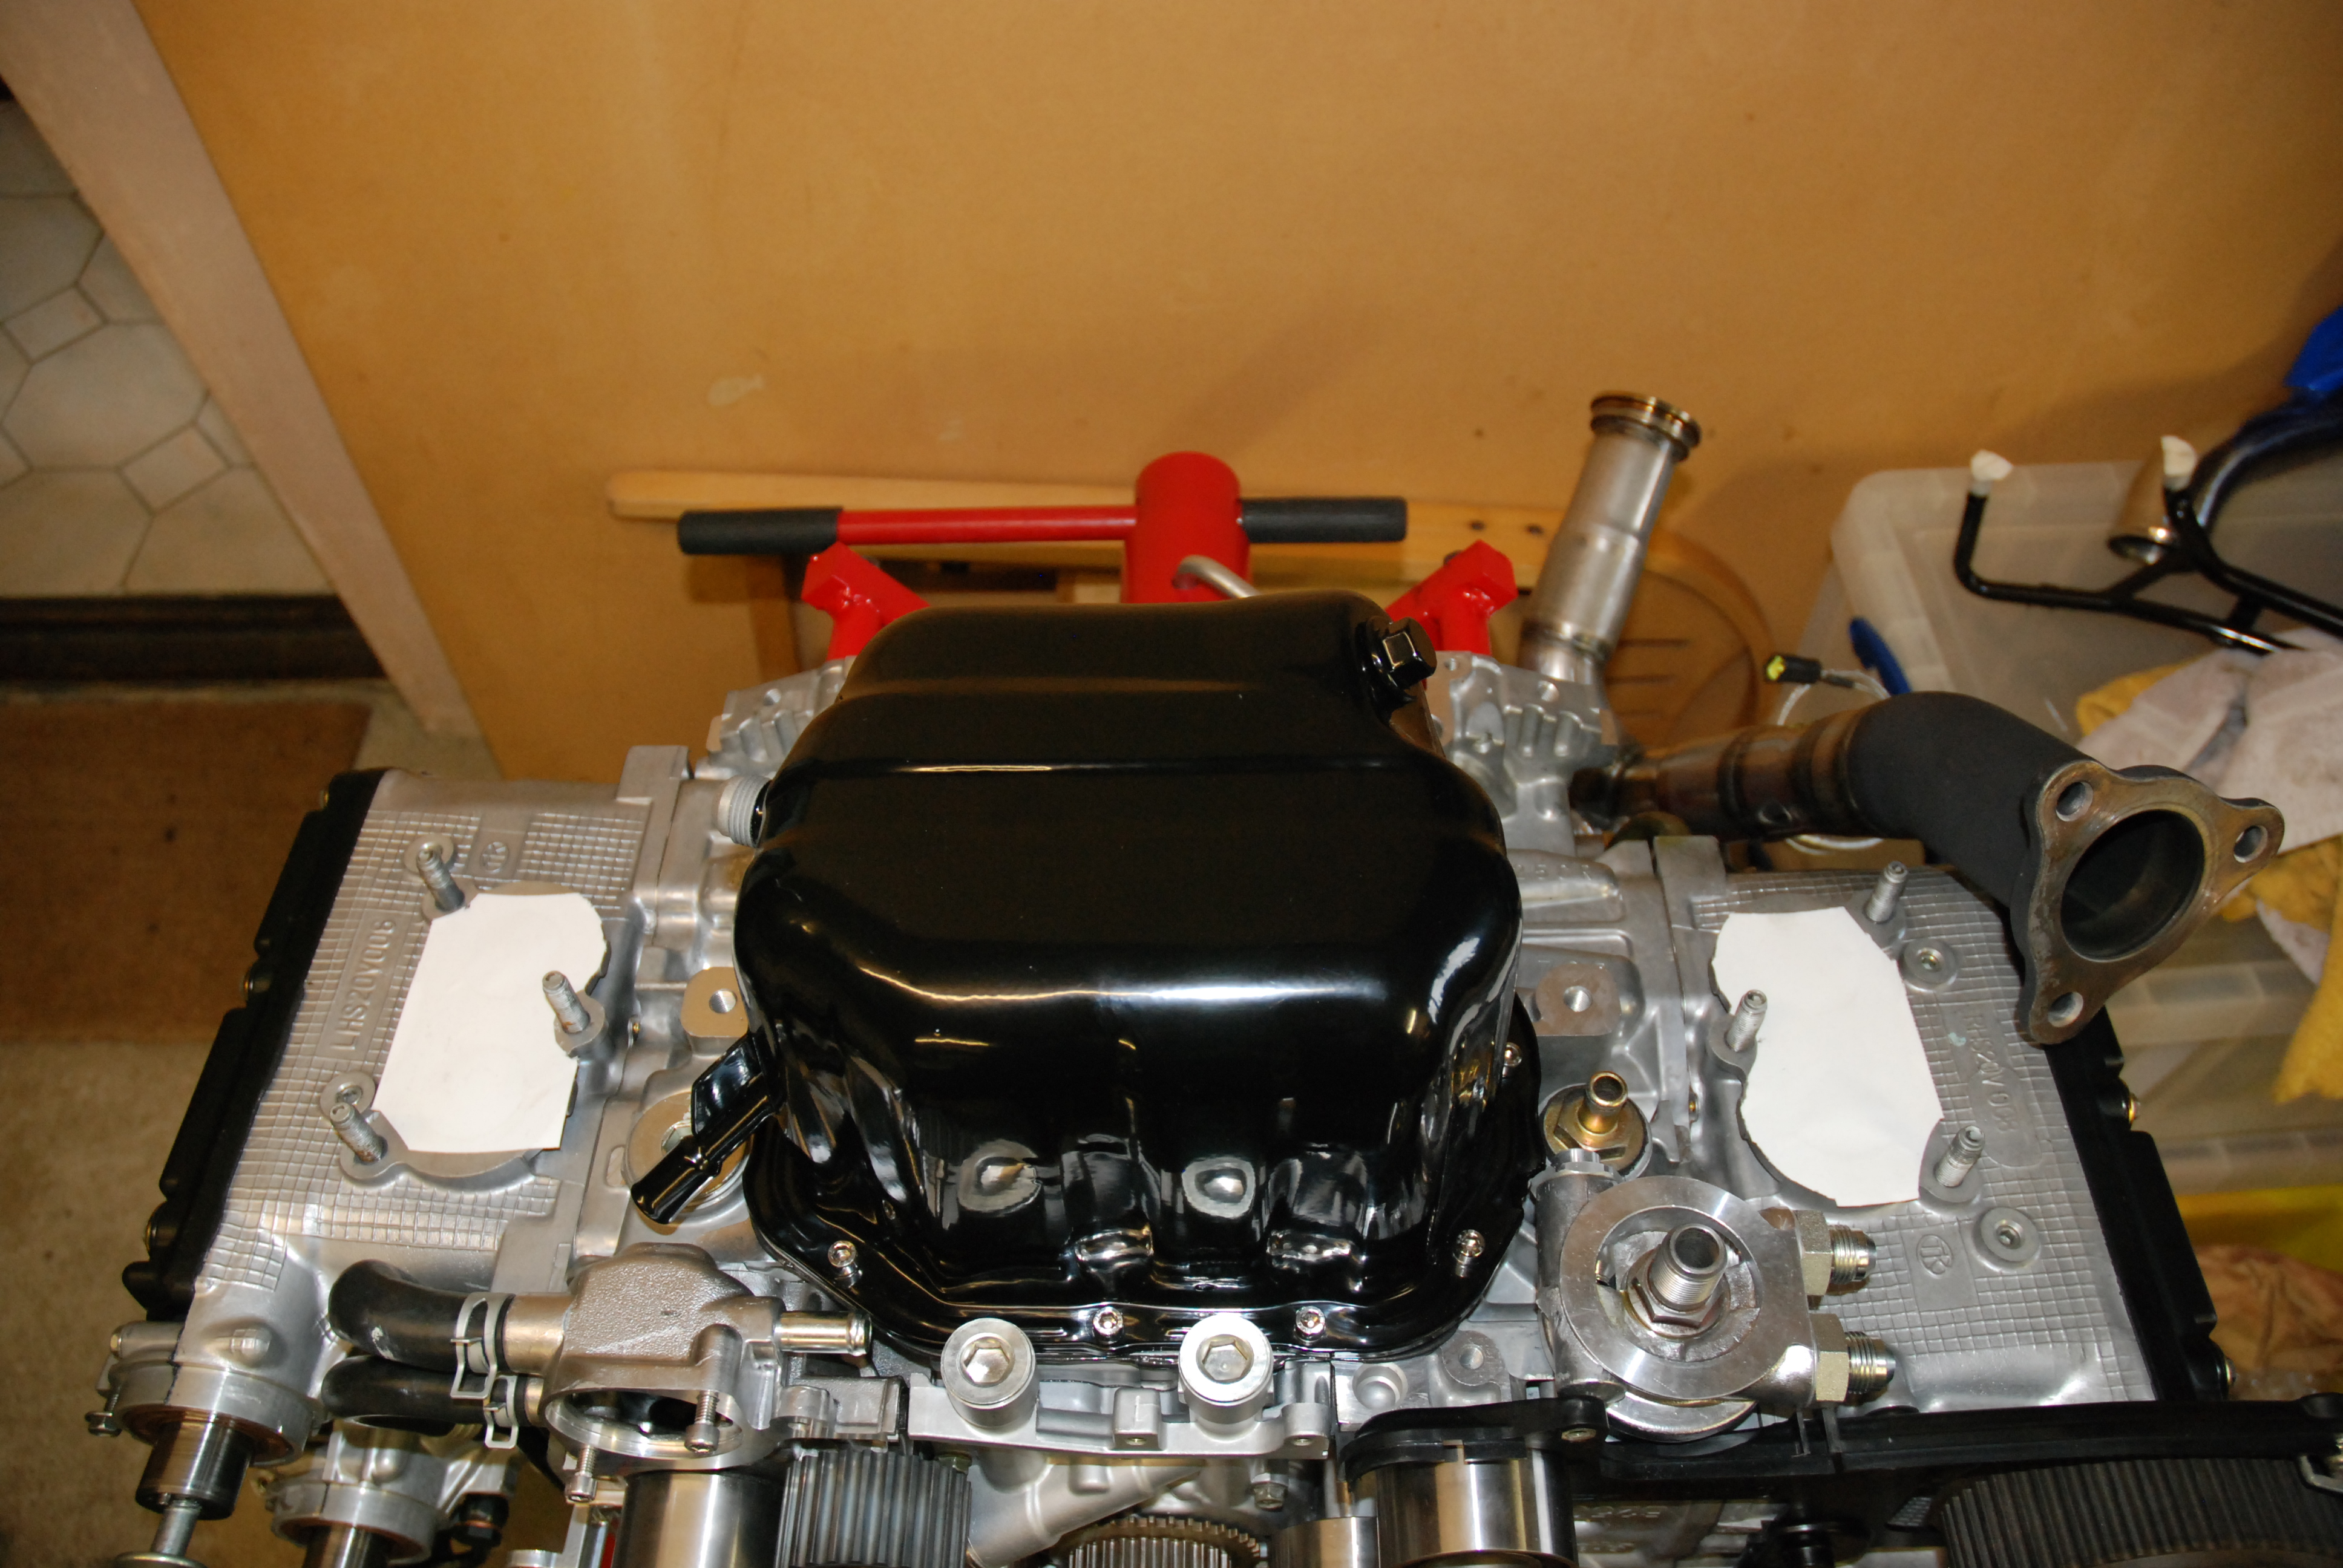
The black zinc came up real nice. Heres my pan with baffle in black zinc and gloss black powdercoated outer case
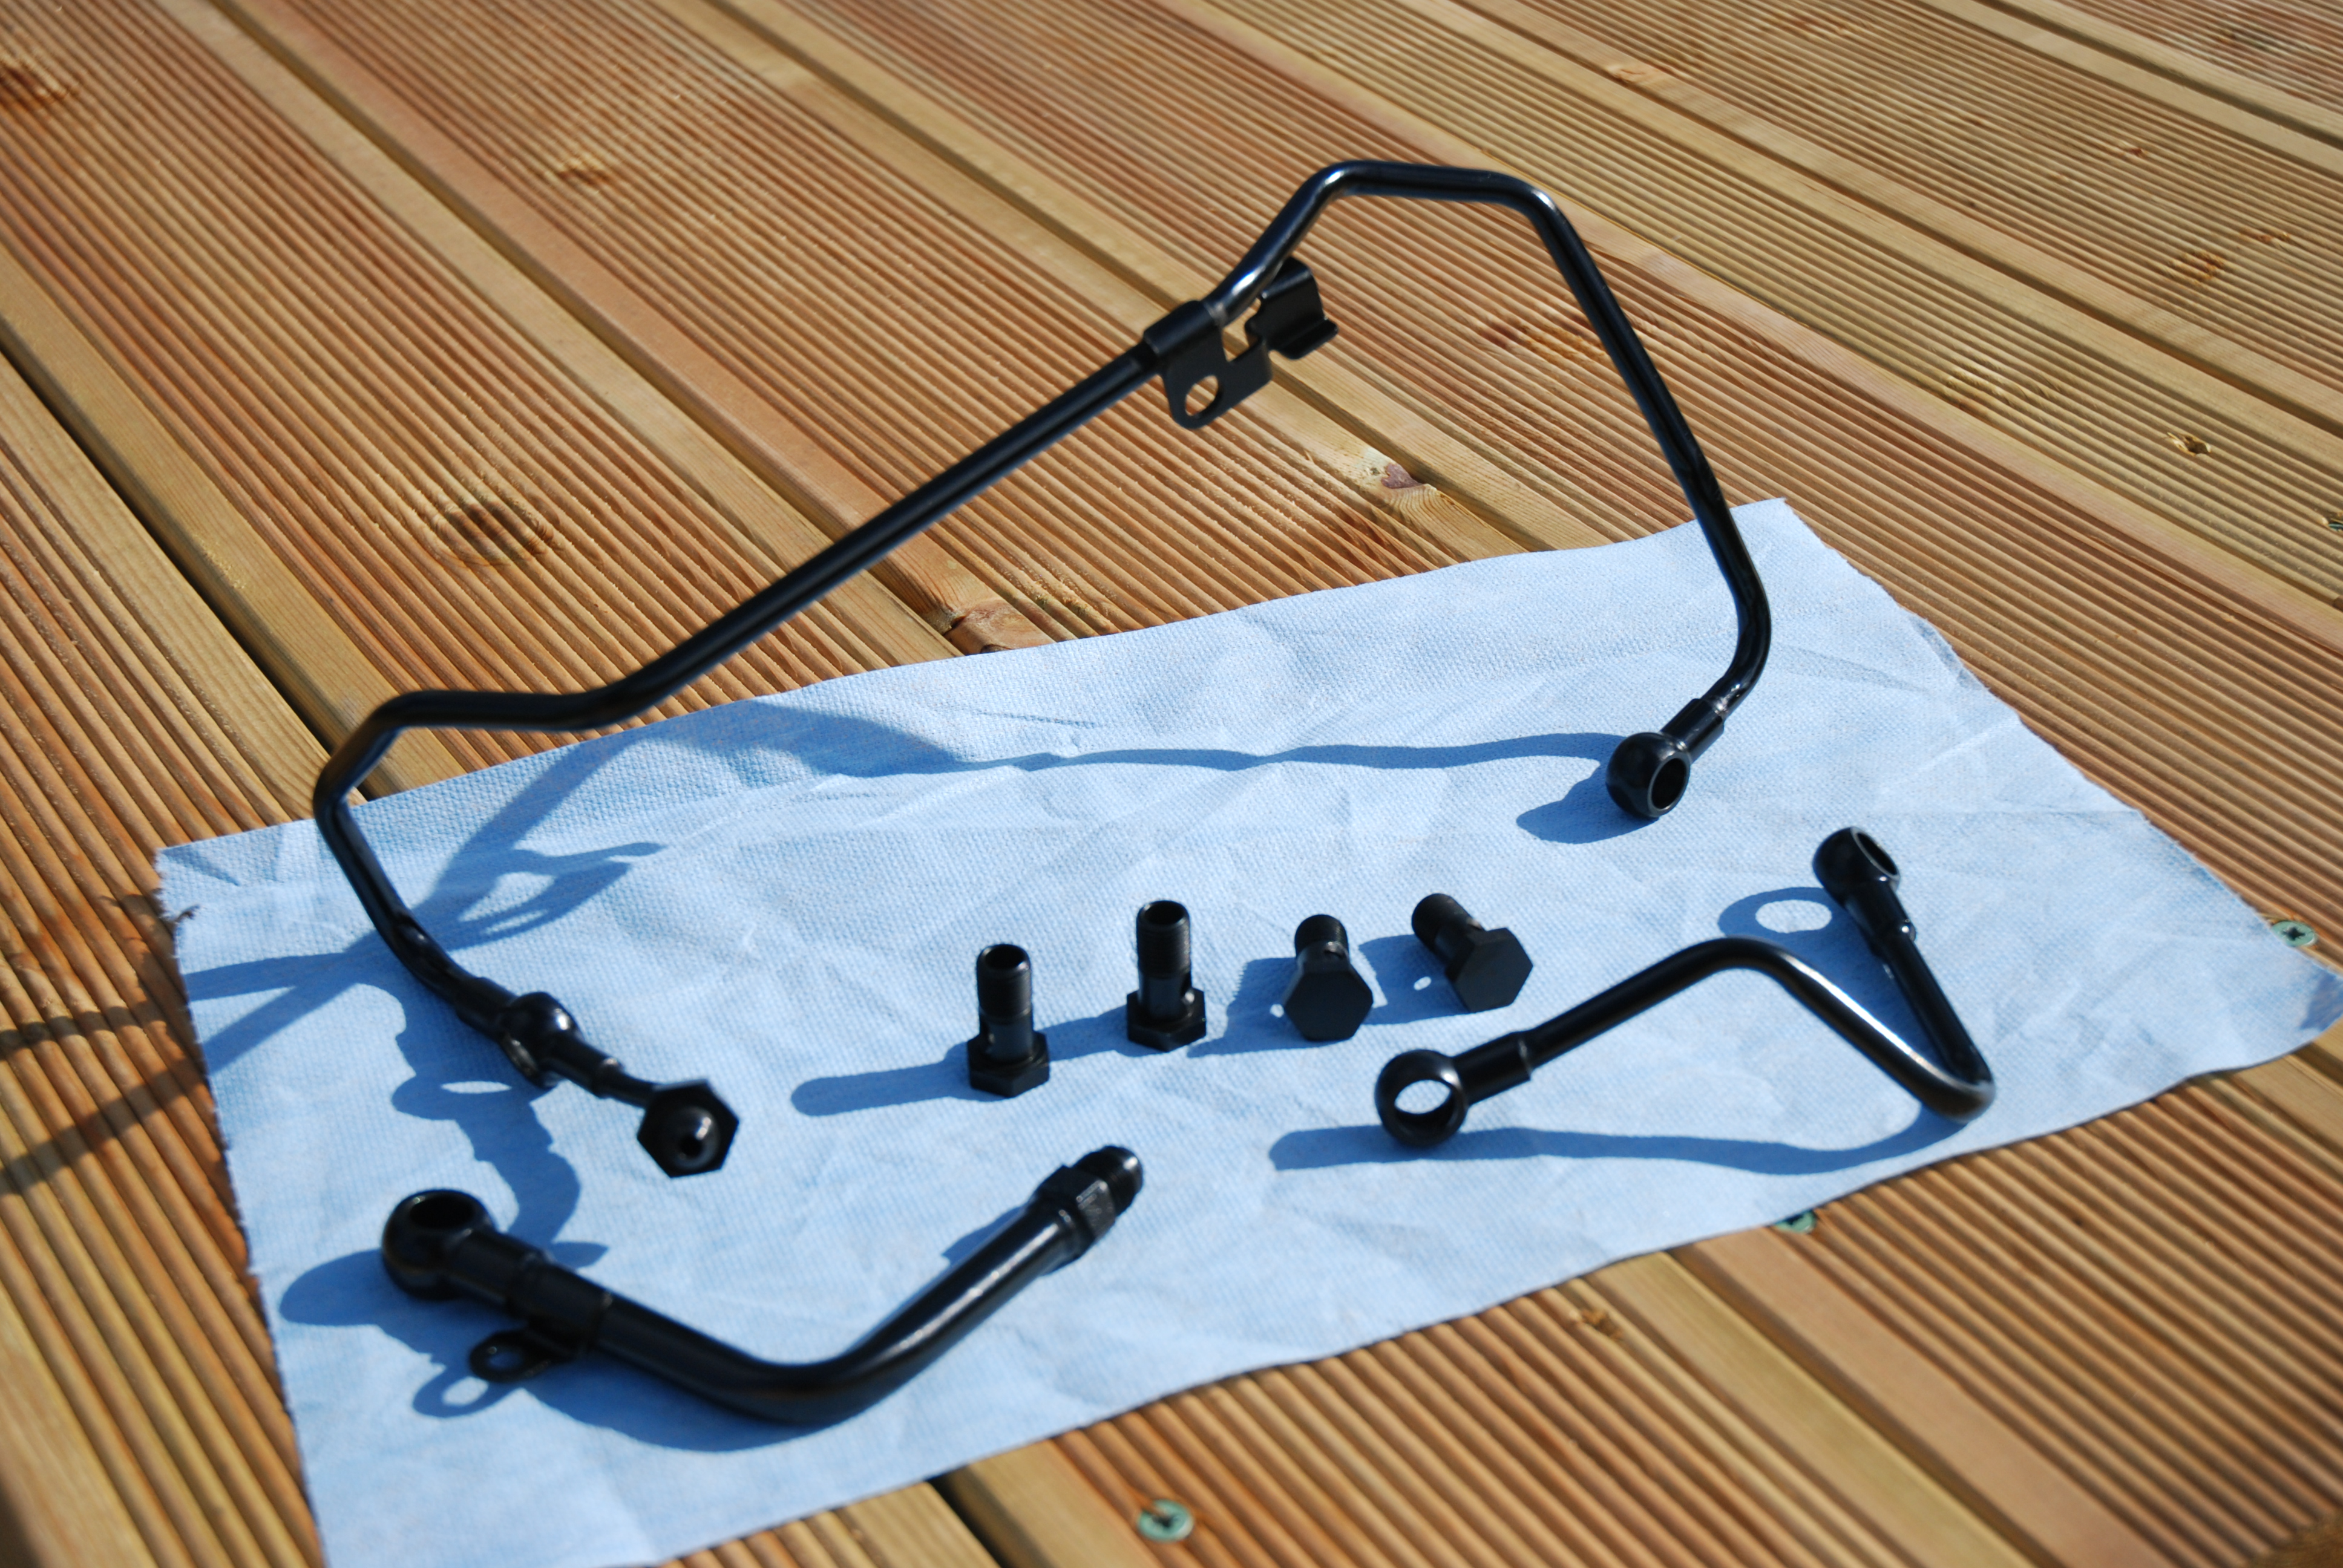
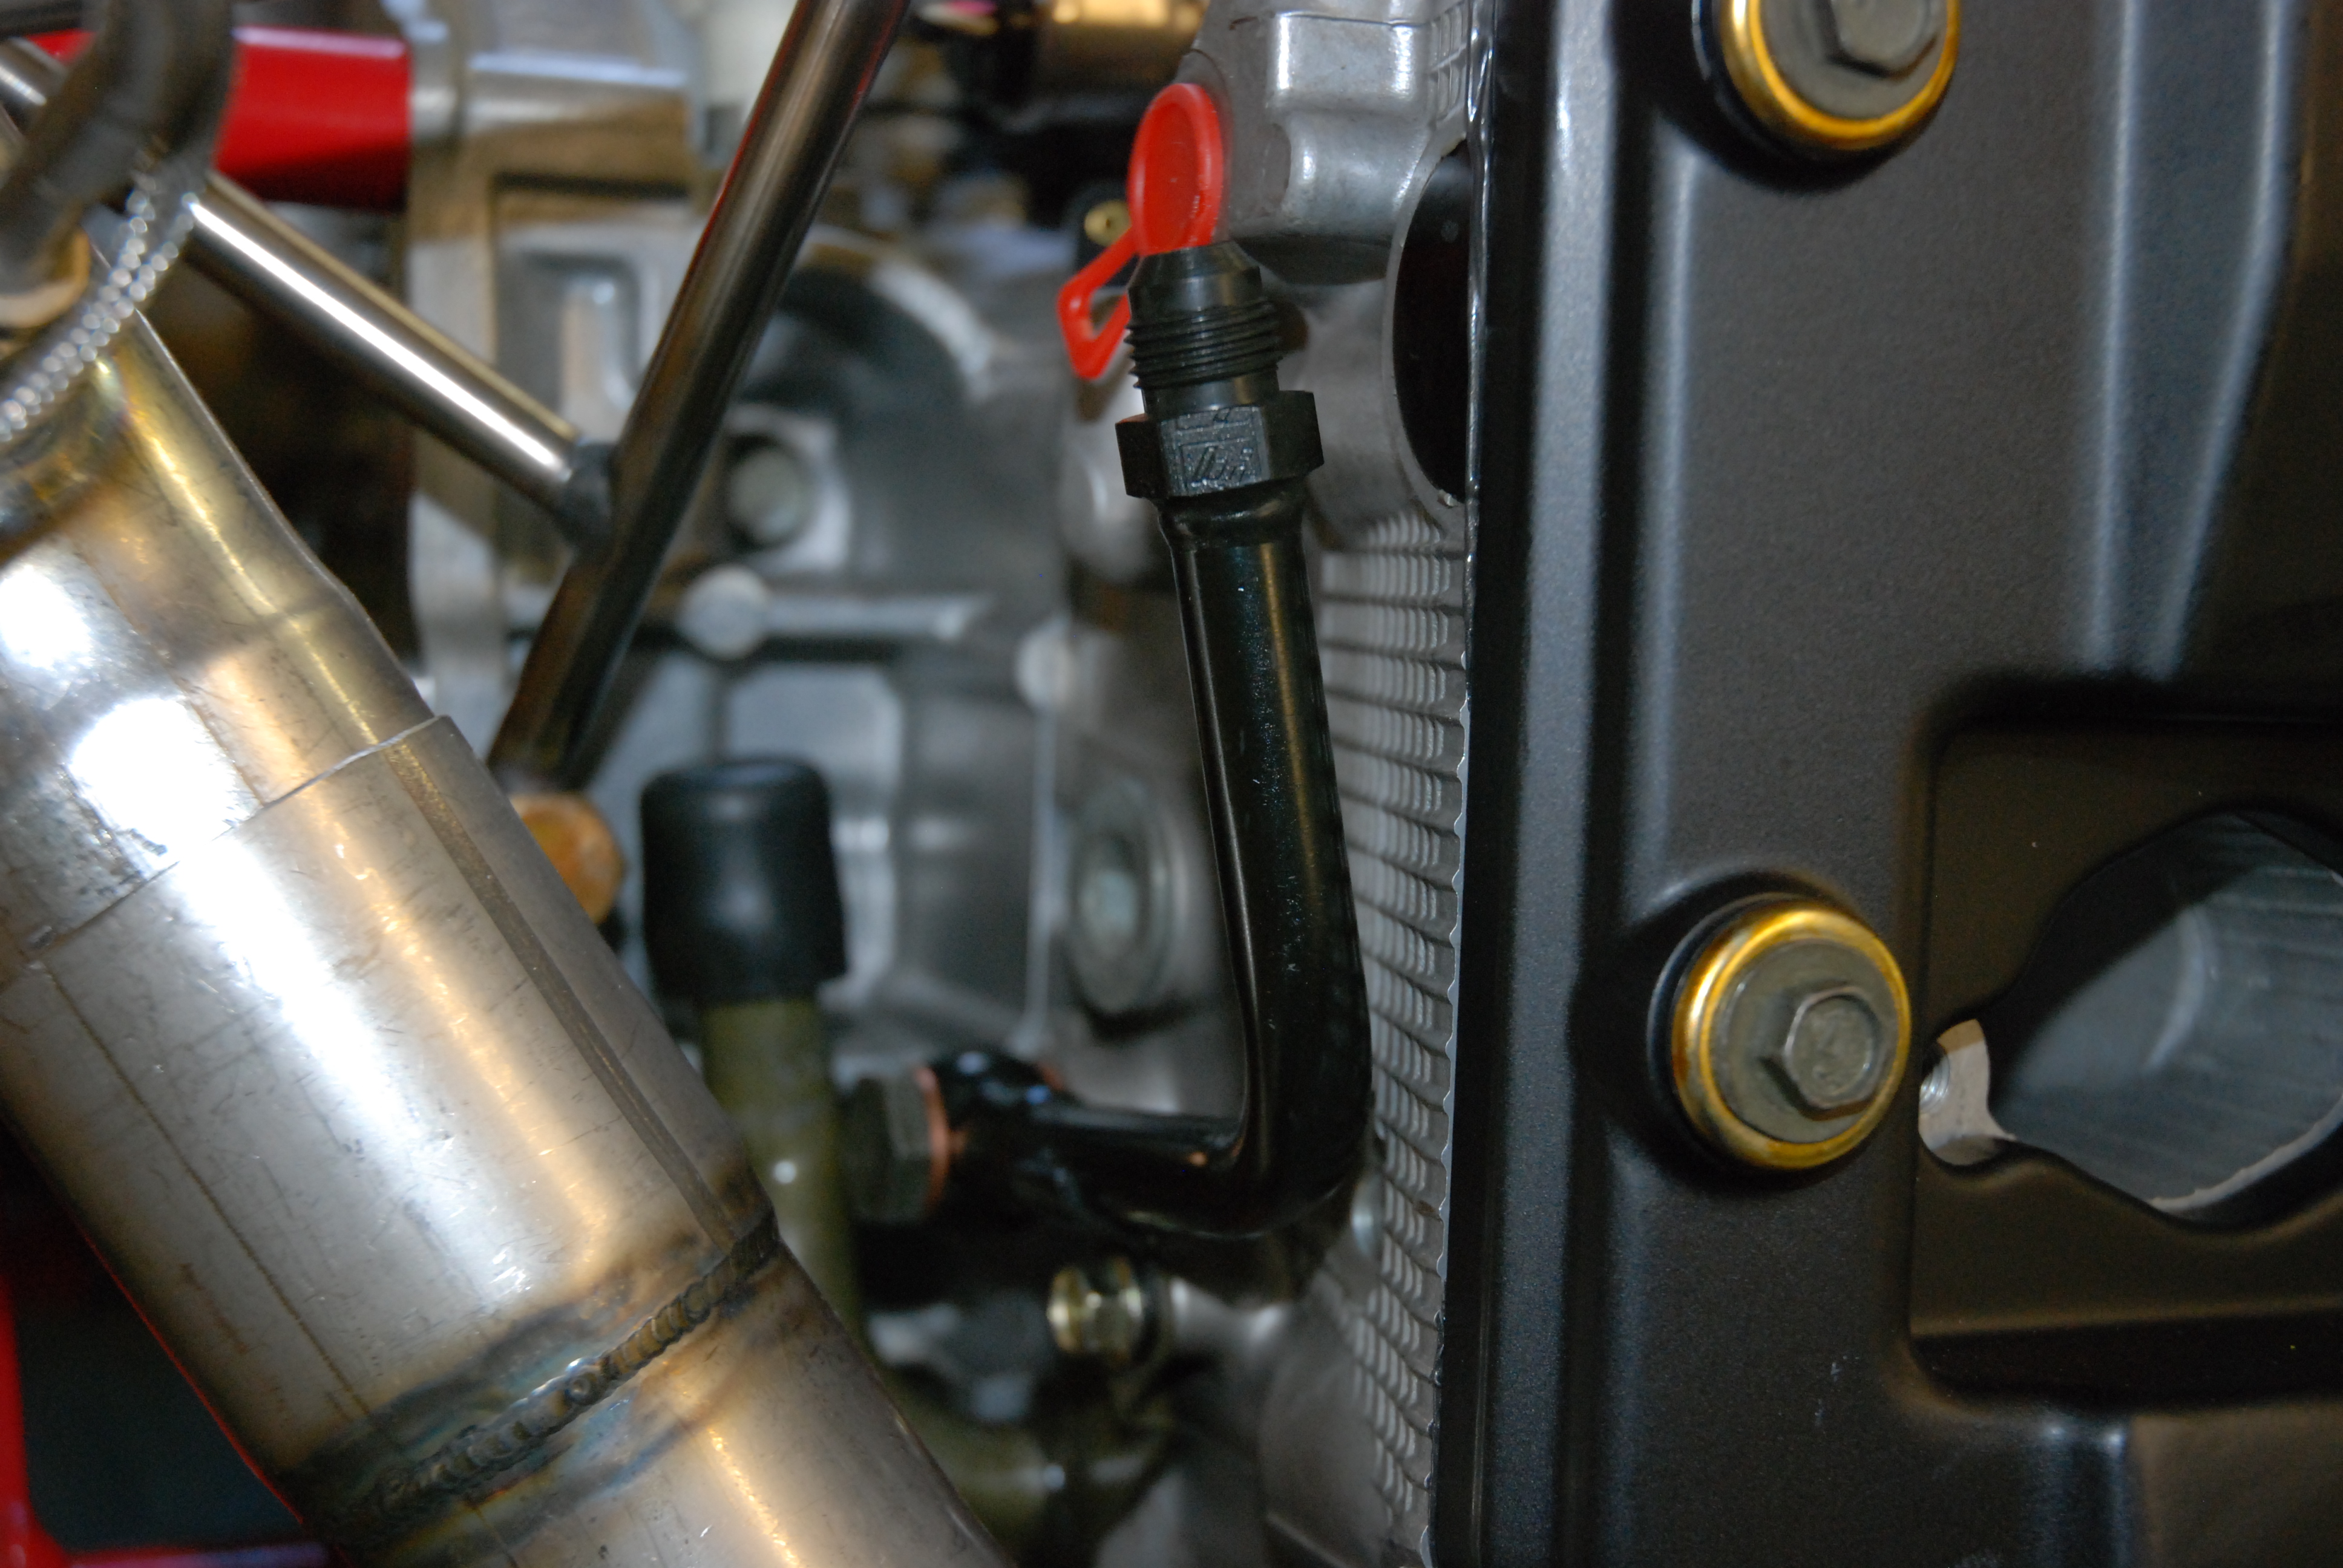
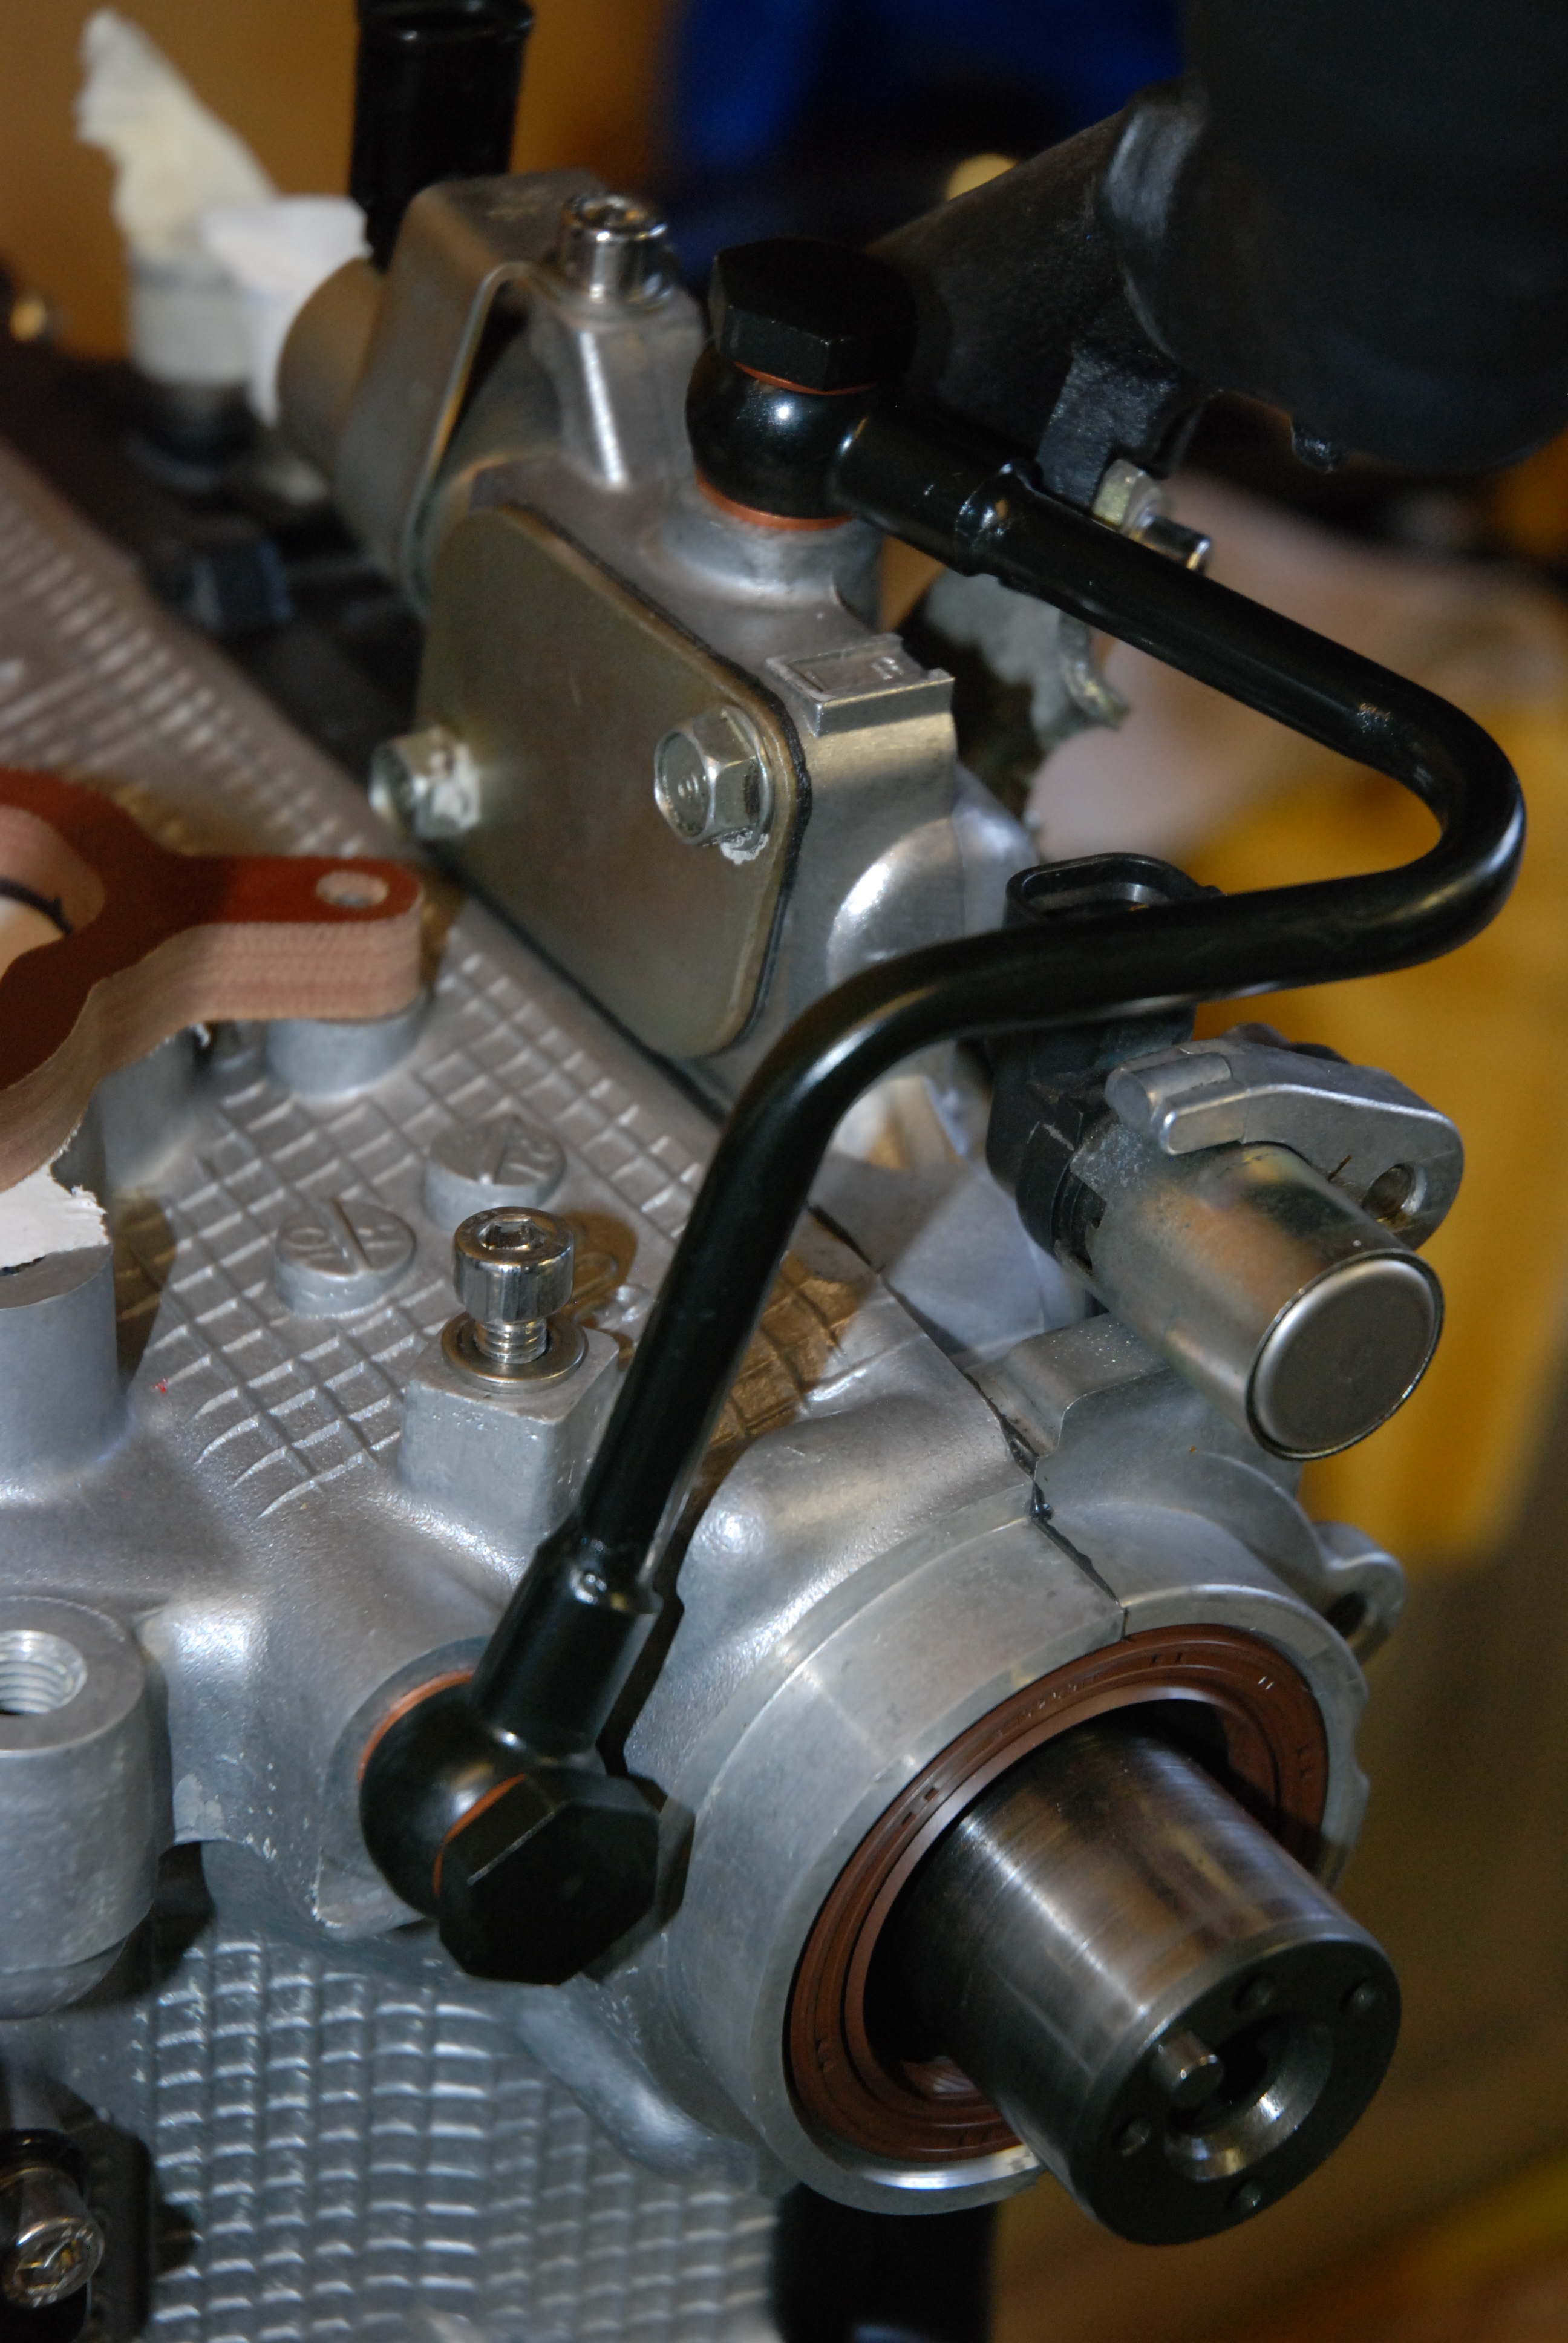
AVCS lines modified for turbo oil feed and modified water feed with AN fittings also in black zinc.
Lines all fitted up.
Cosworth windage tray and oil pickup fitted.
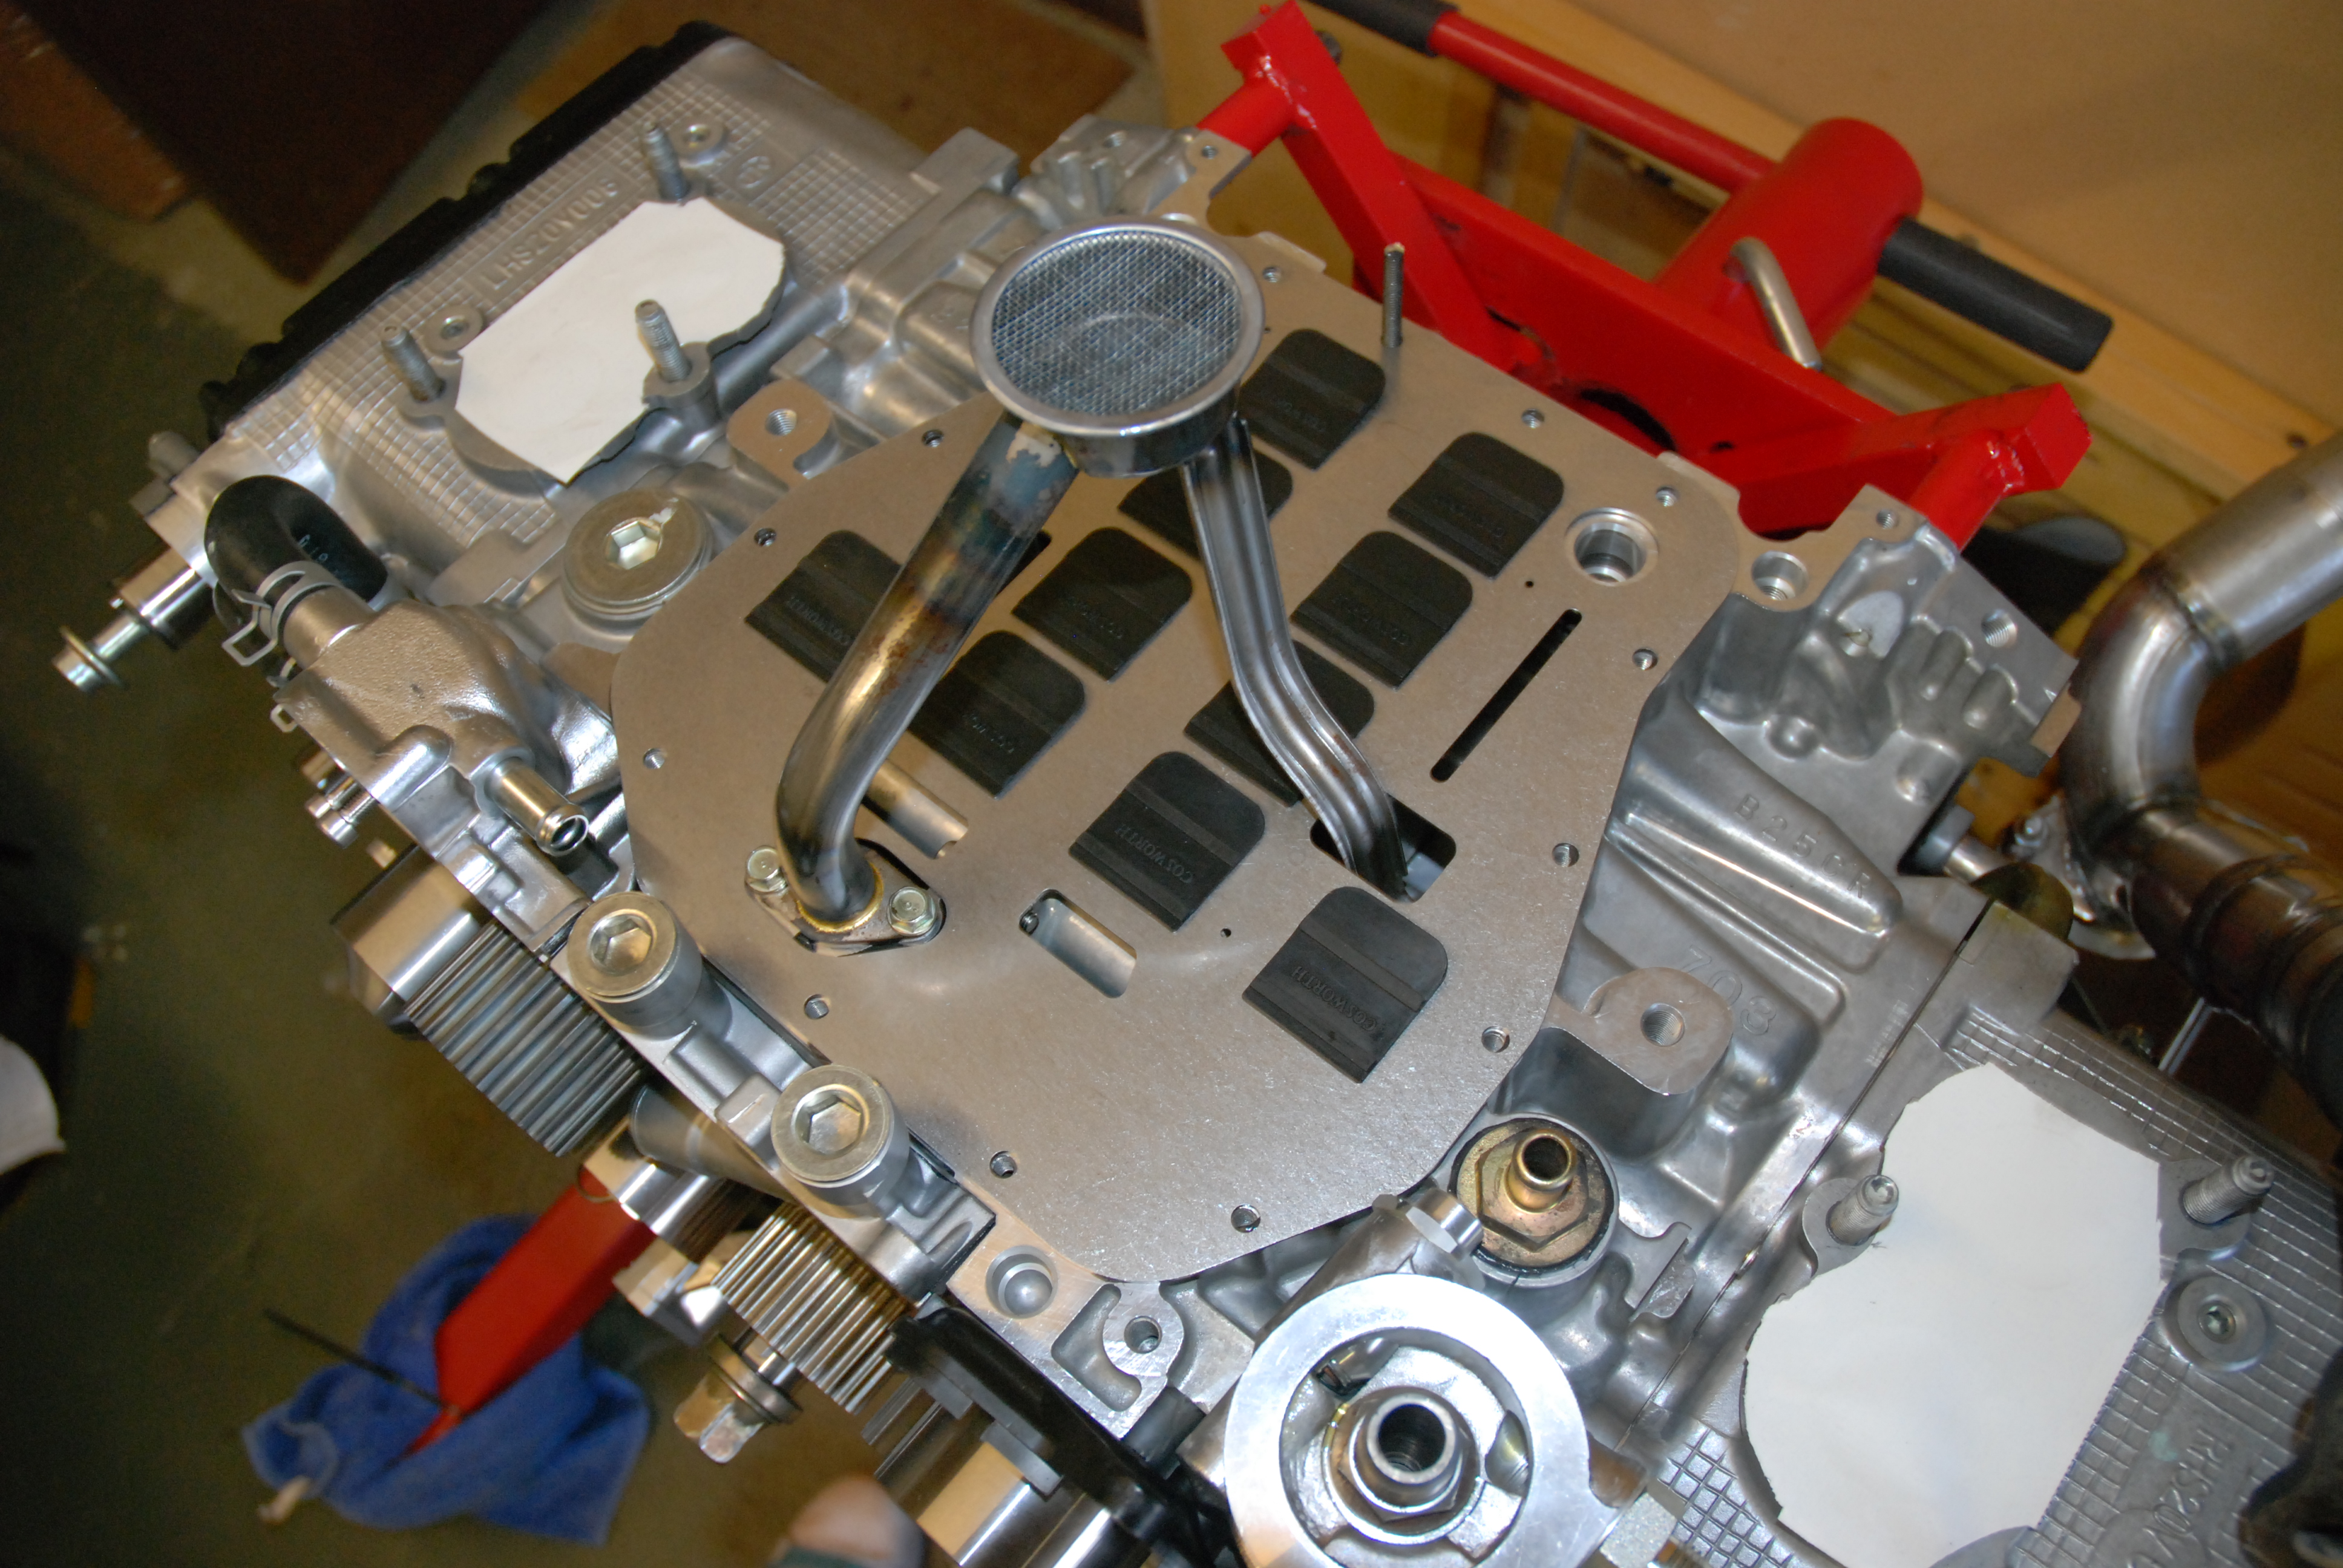
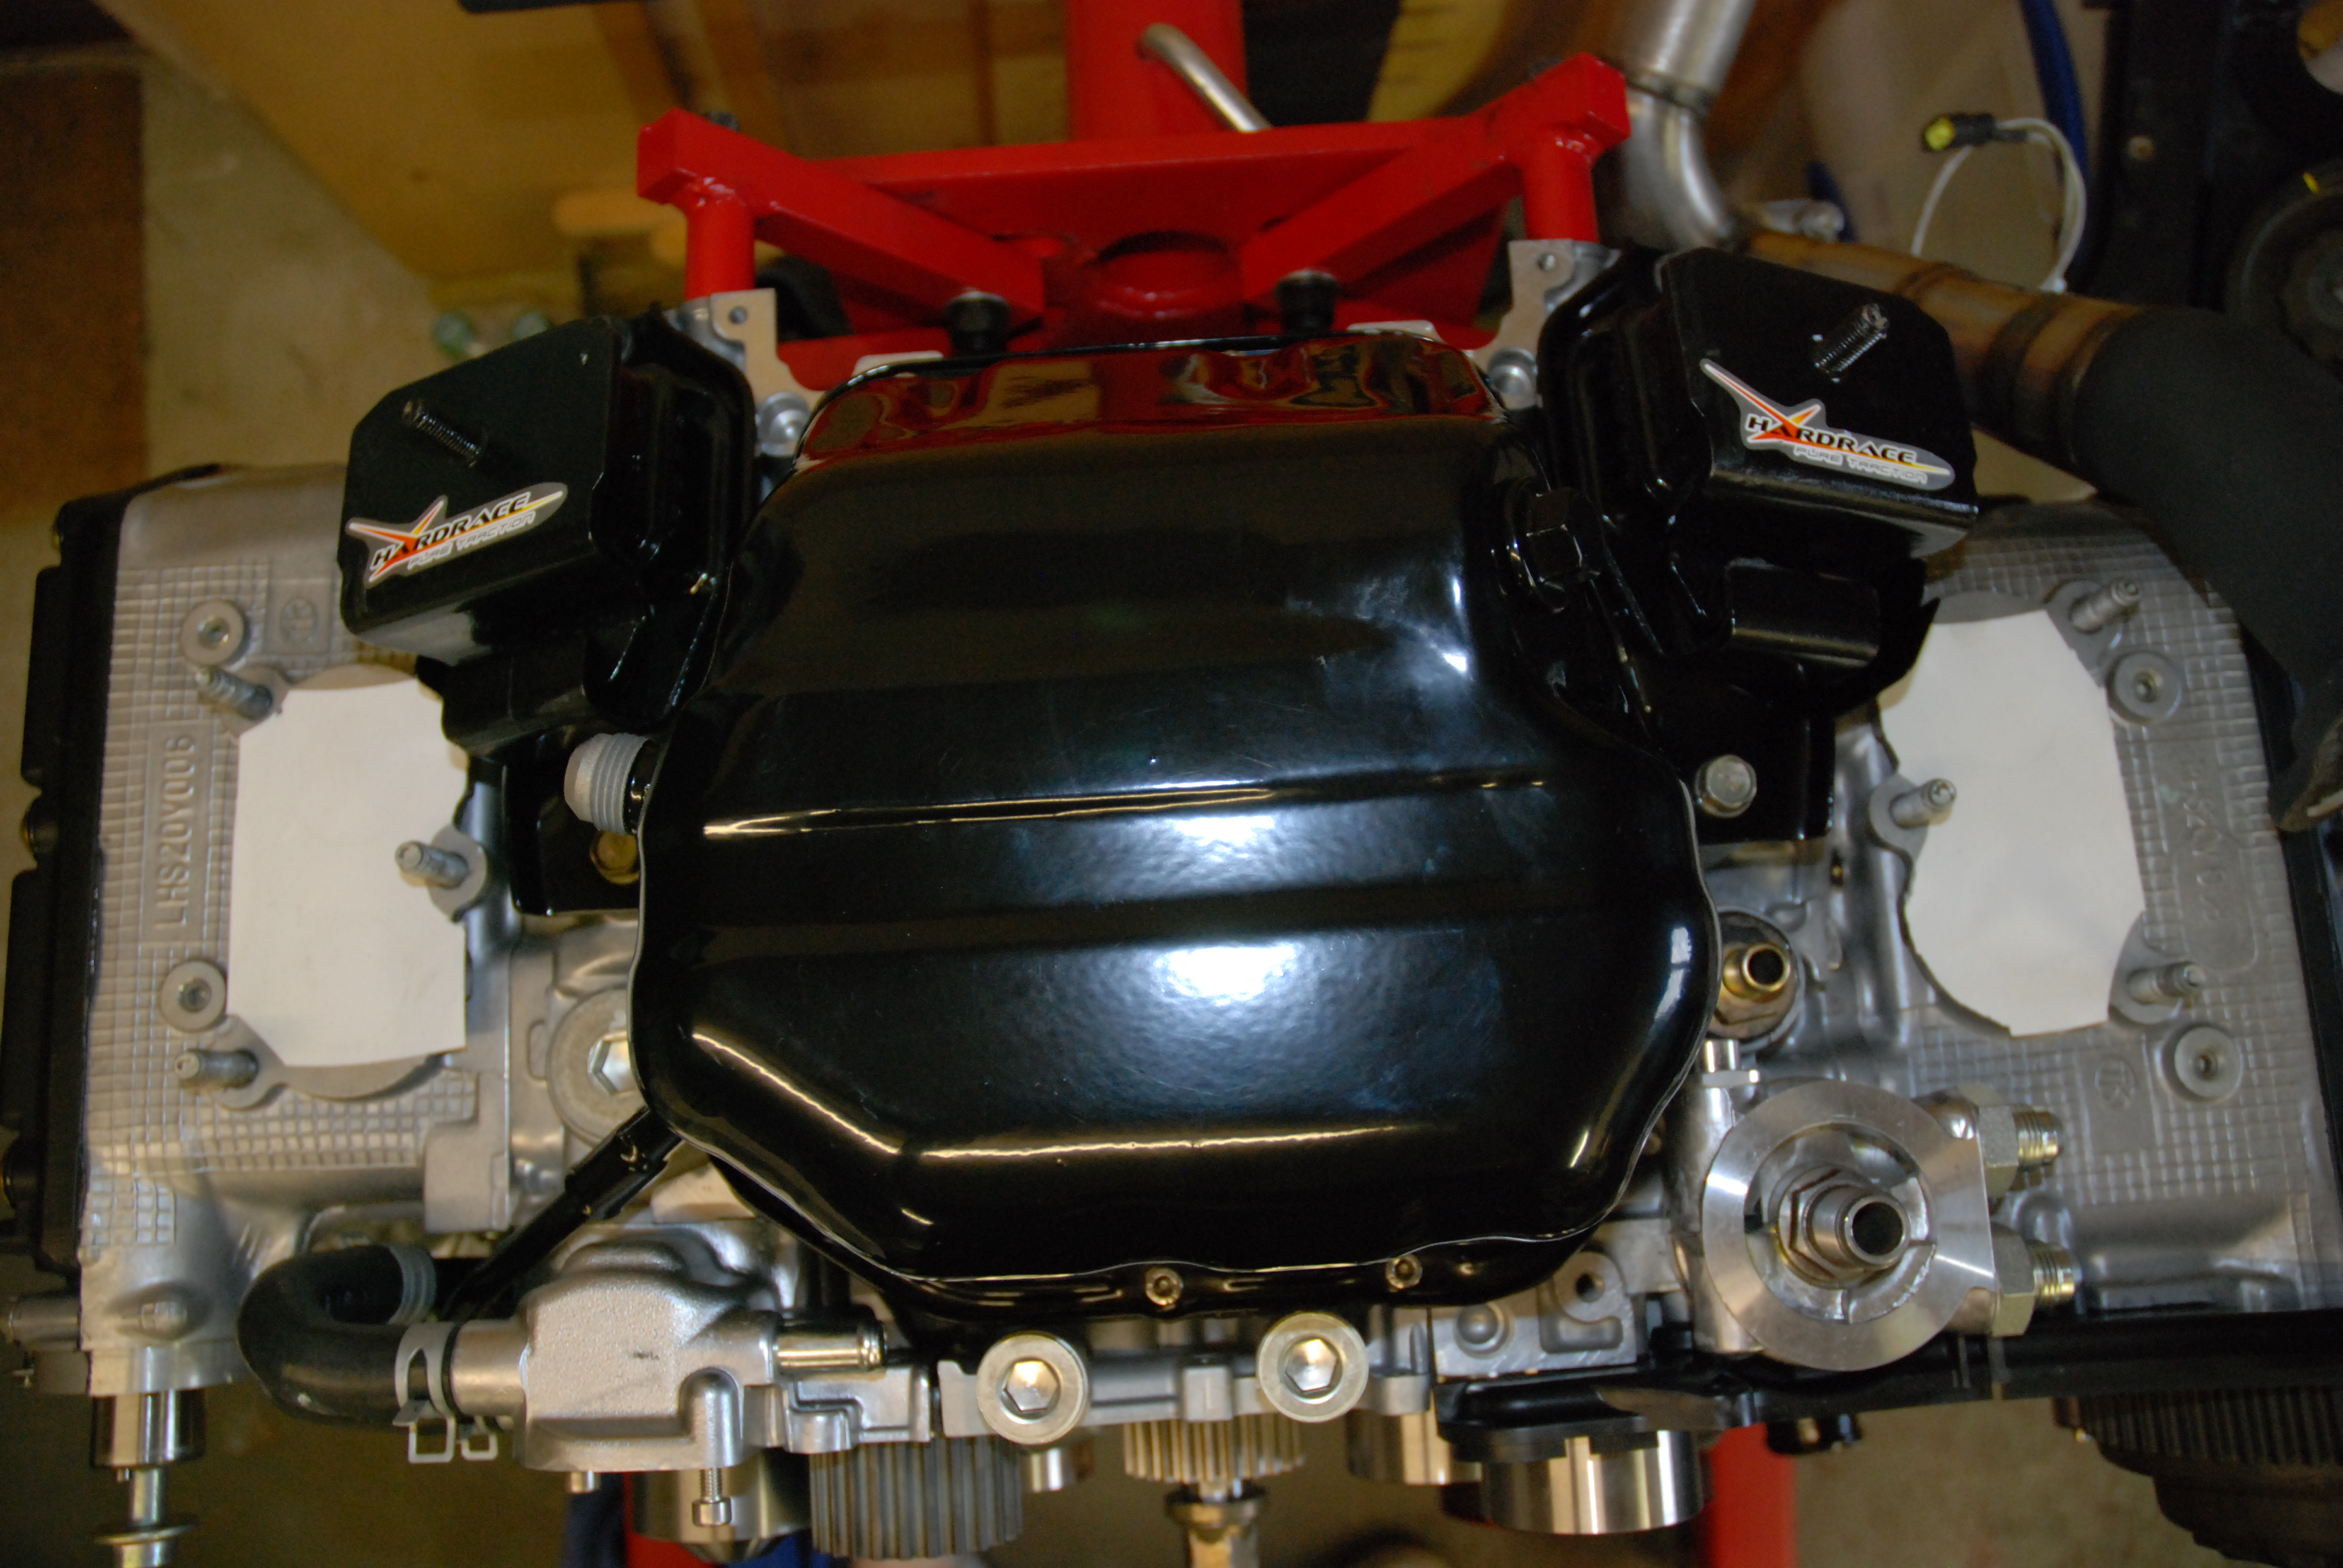
Then on goes the oil pan
Then new Apex engine mounts
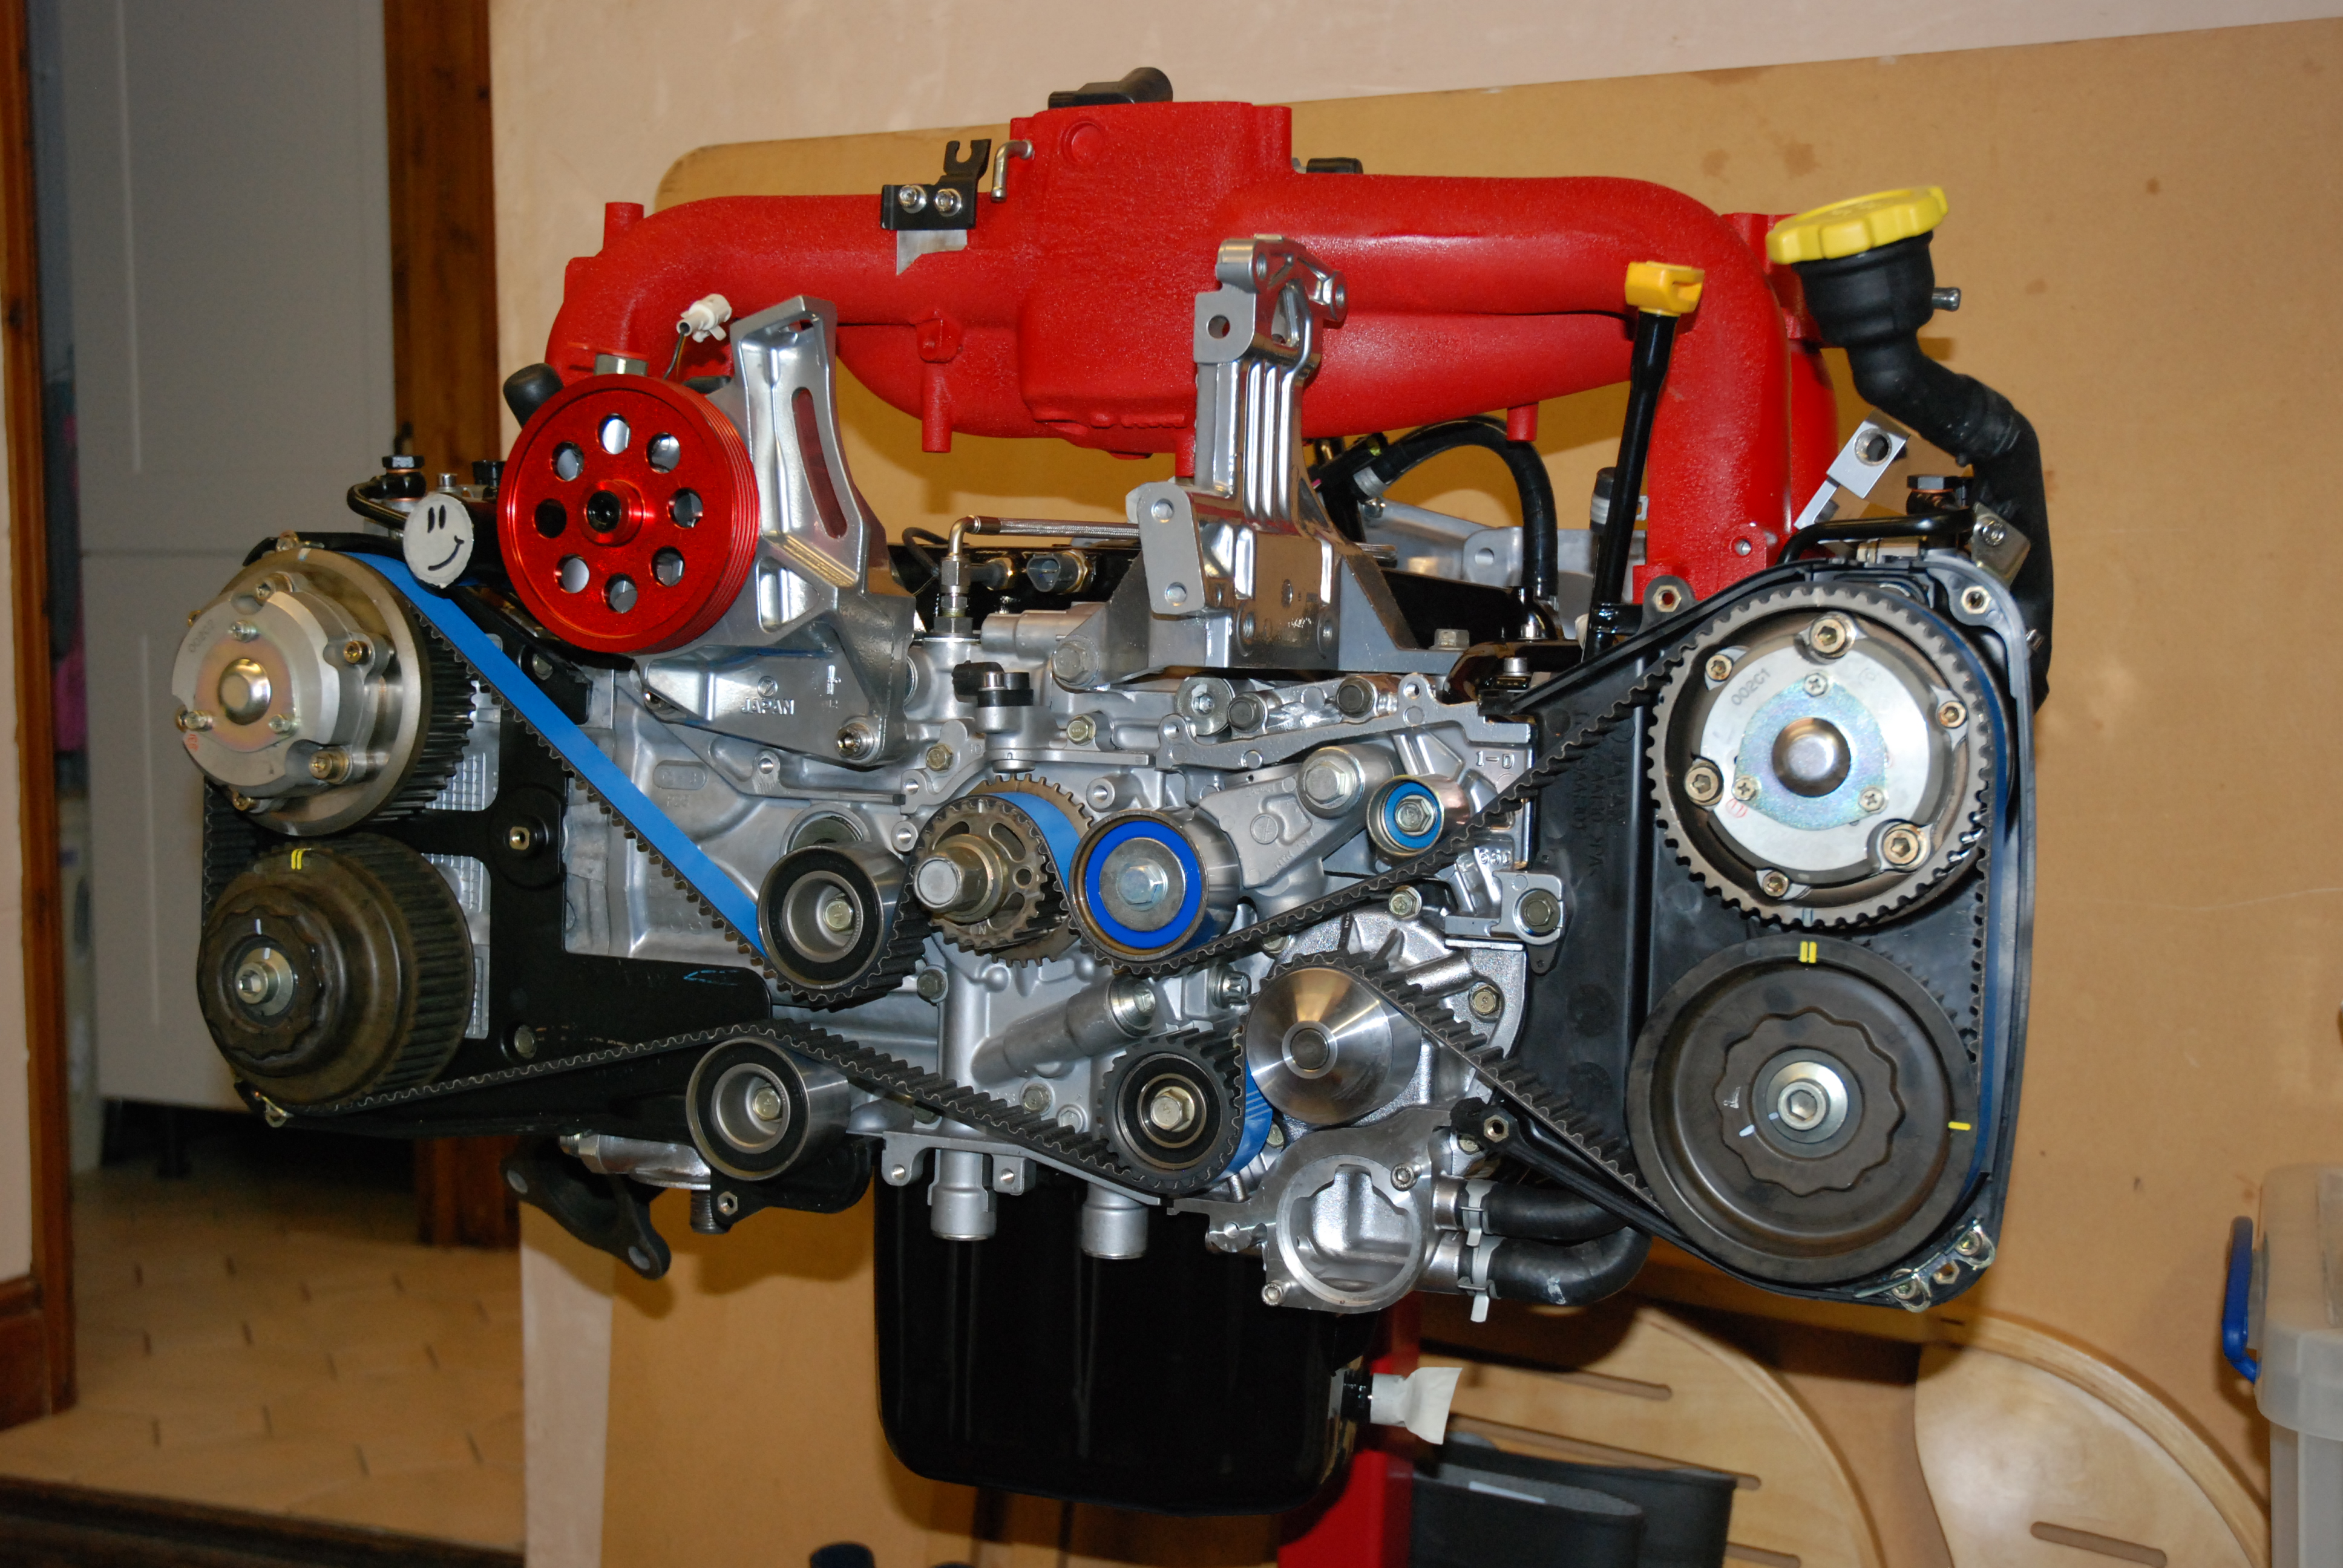
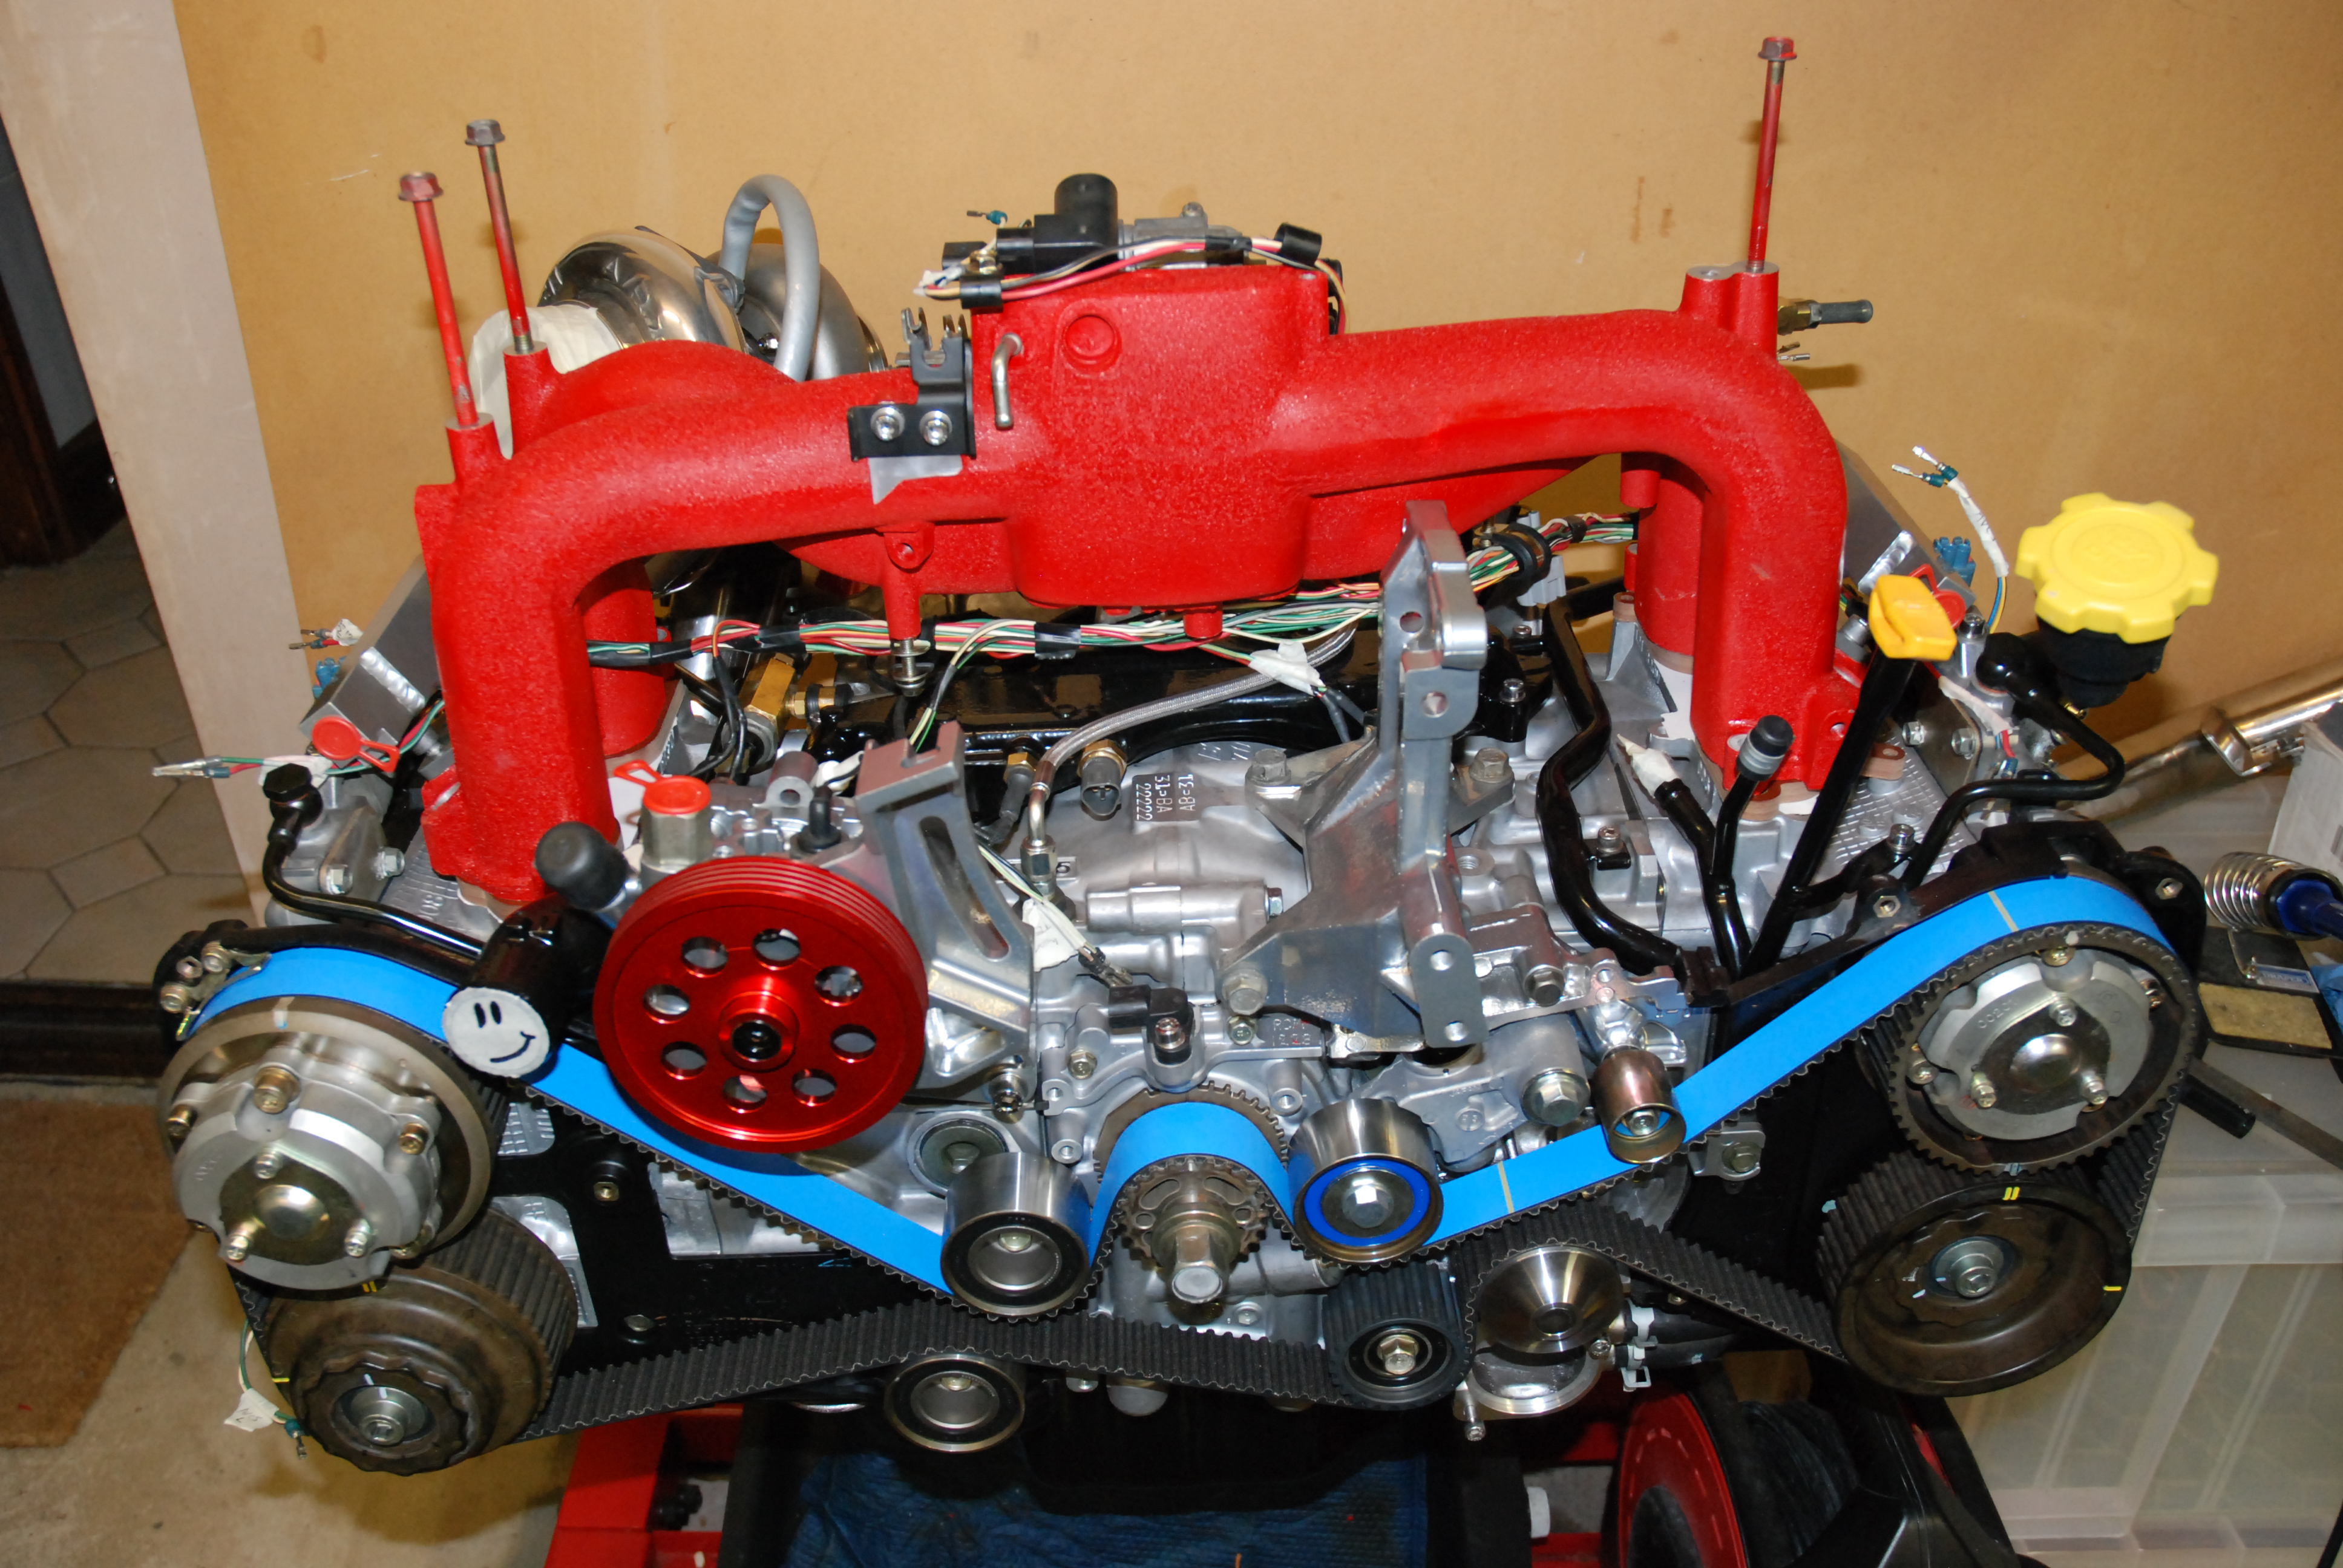
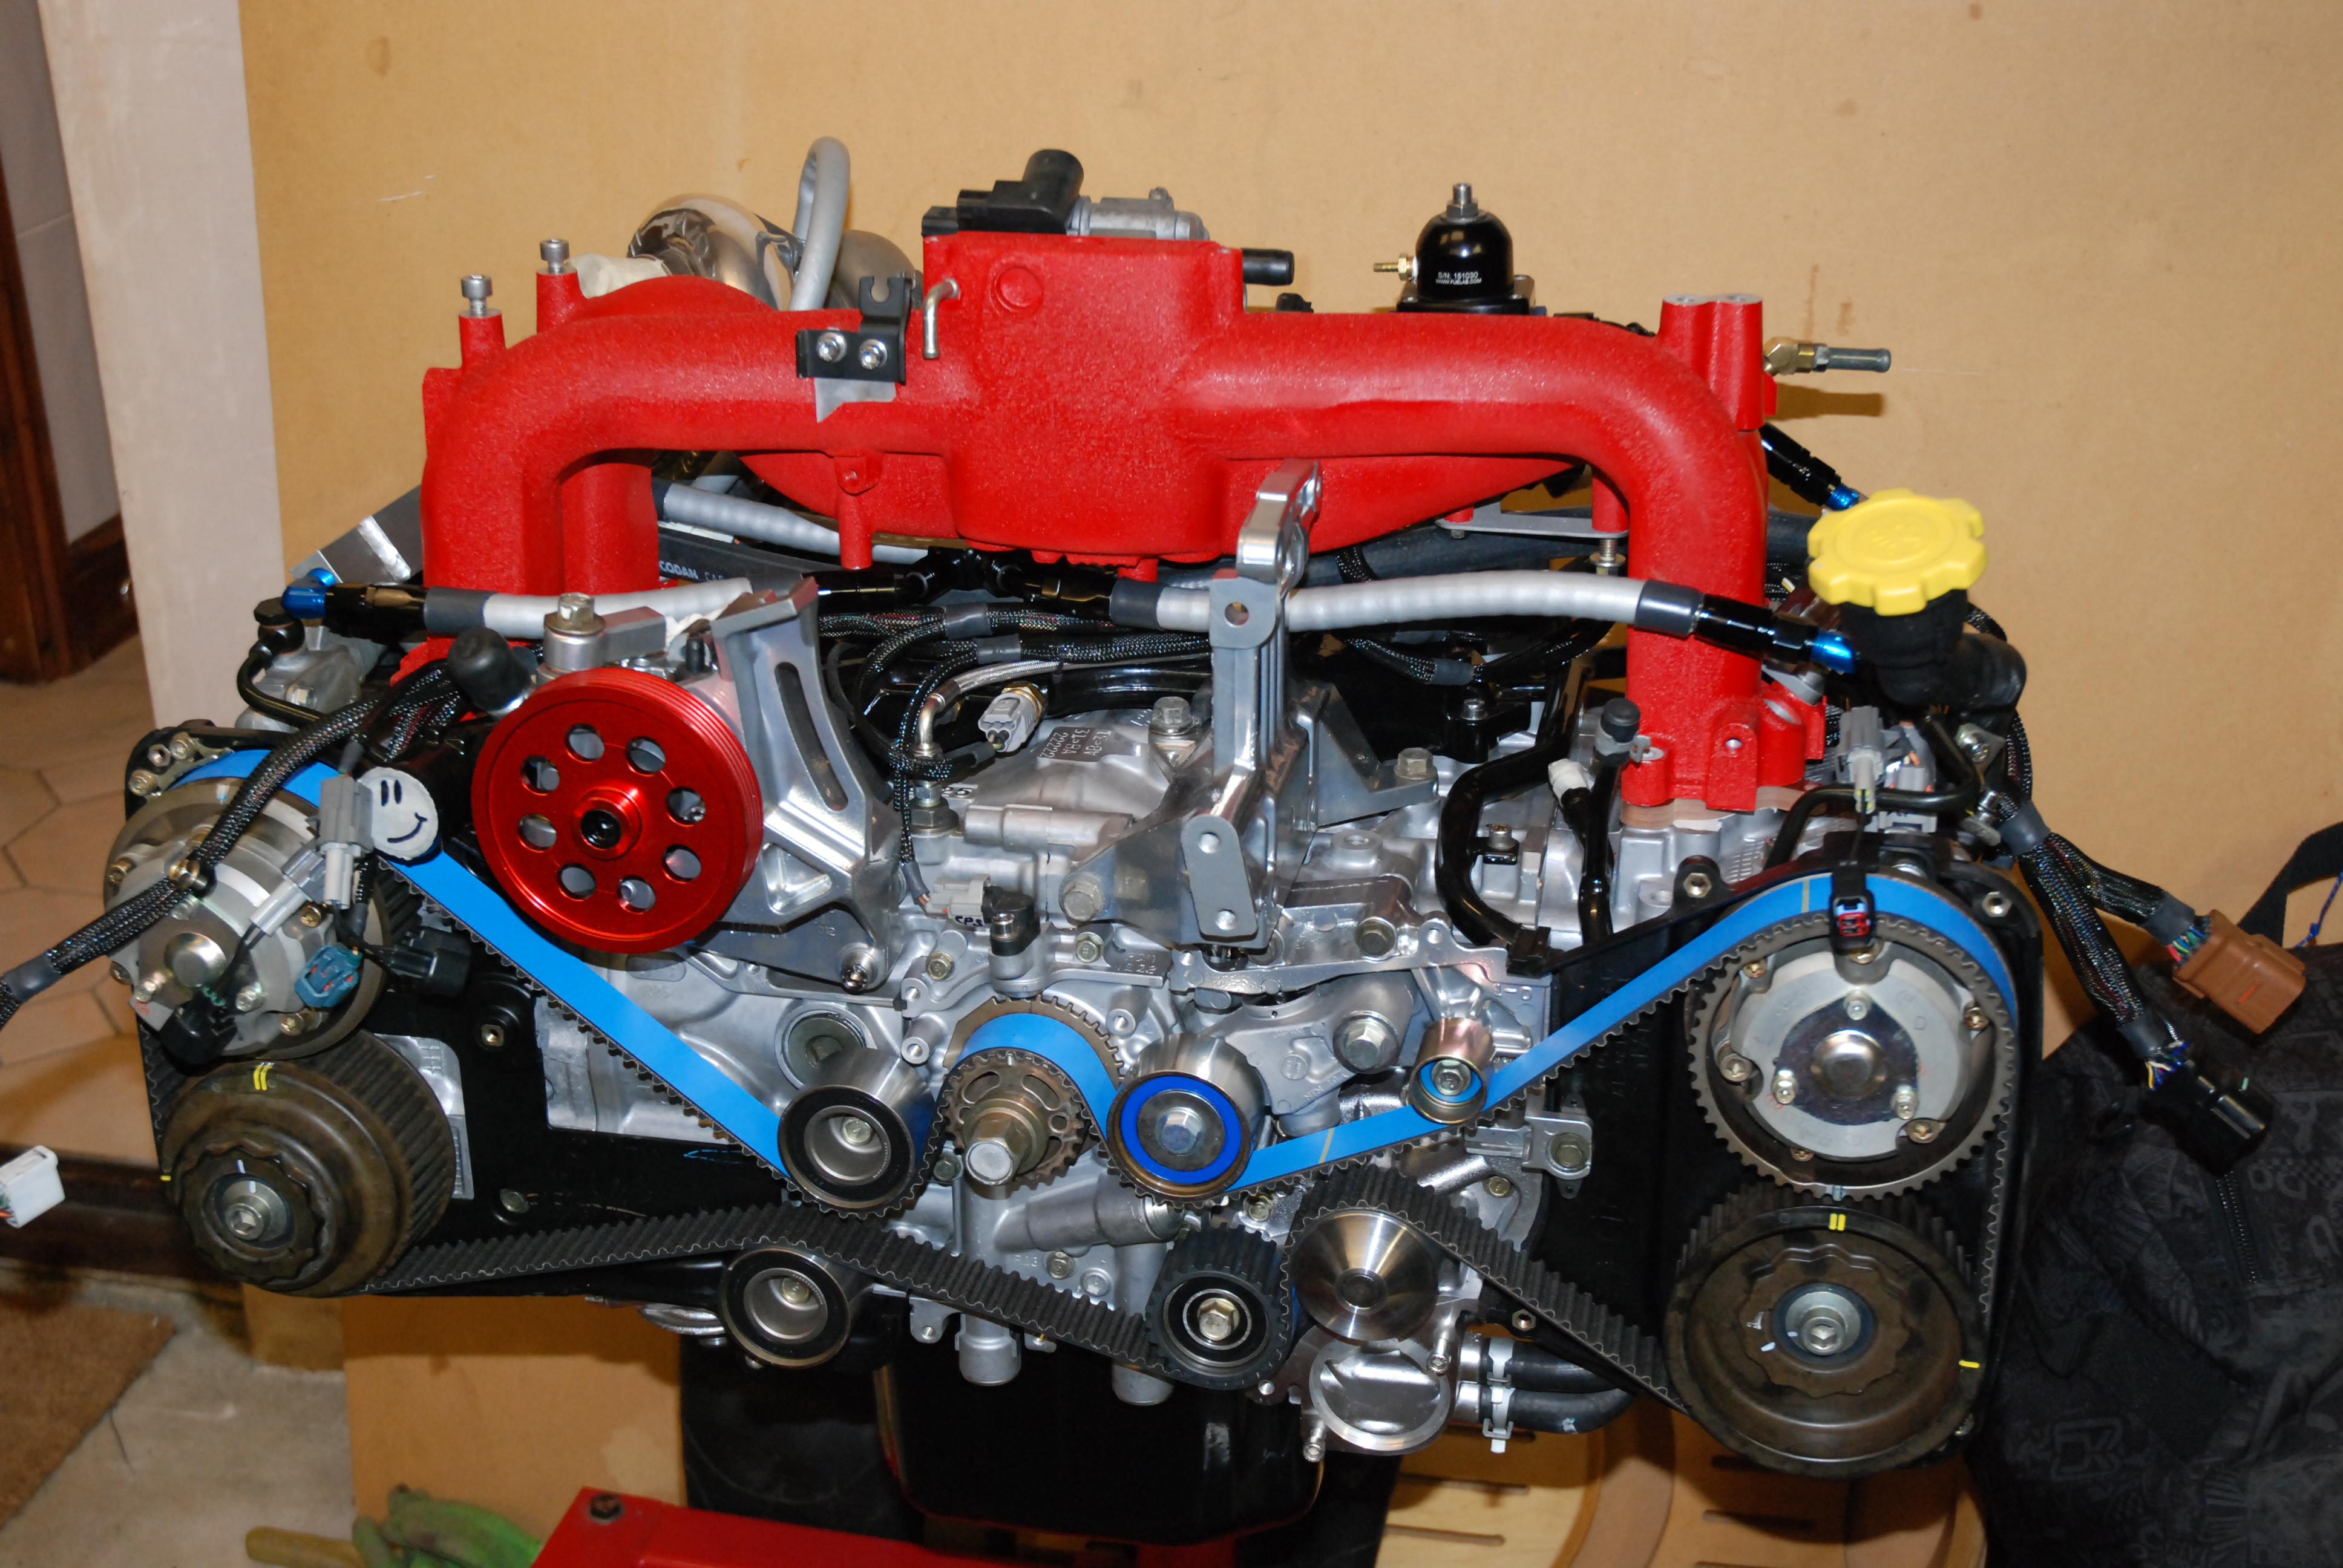
With the AVCS lines finally fitted i could get the timing covers on, fit the sprockets and get her all timed up. Kevlar belts are damn tight but go on with a little push.
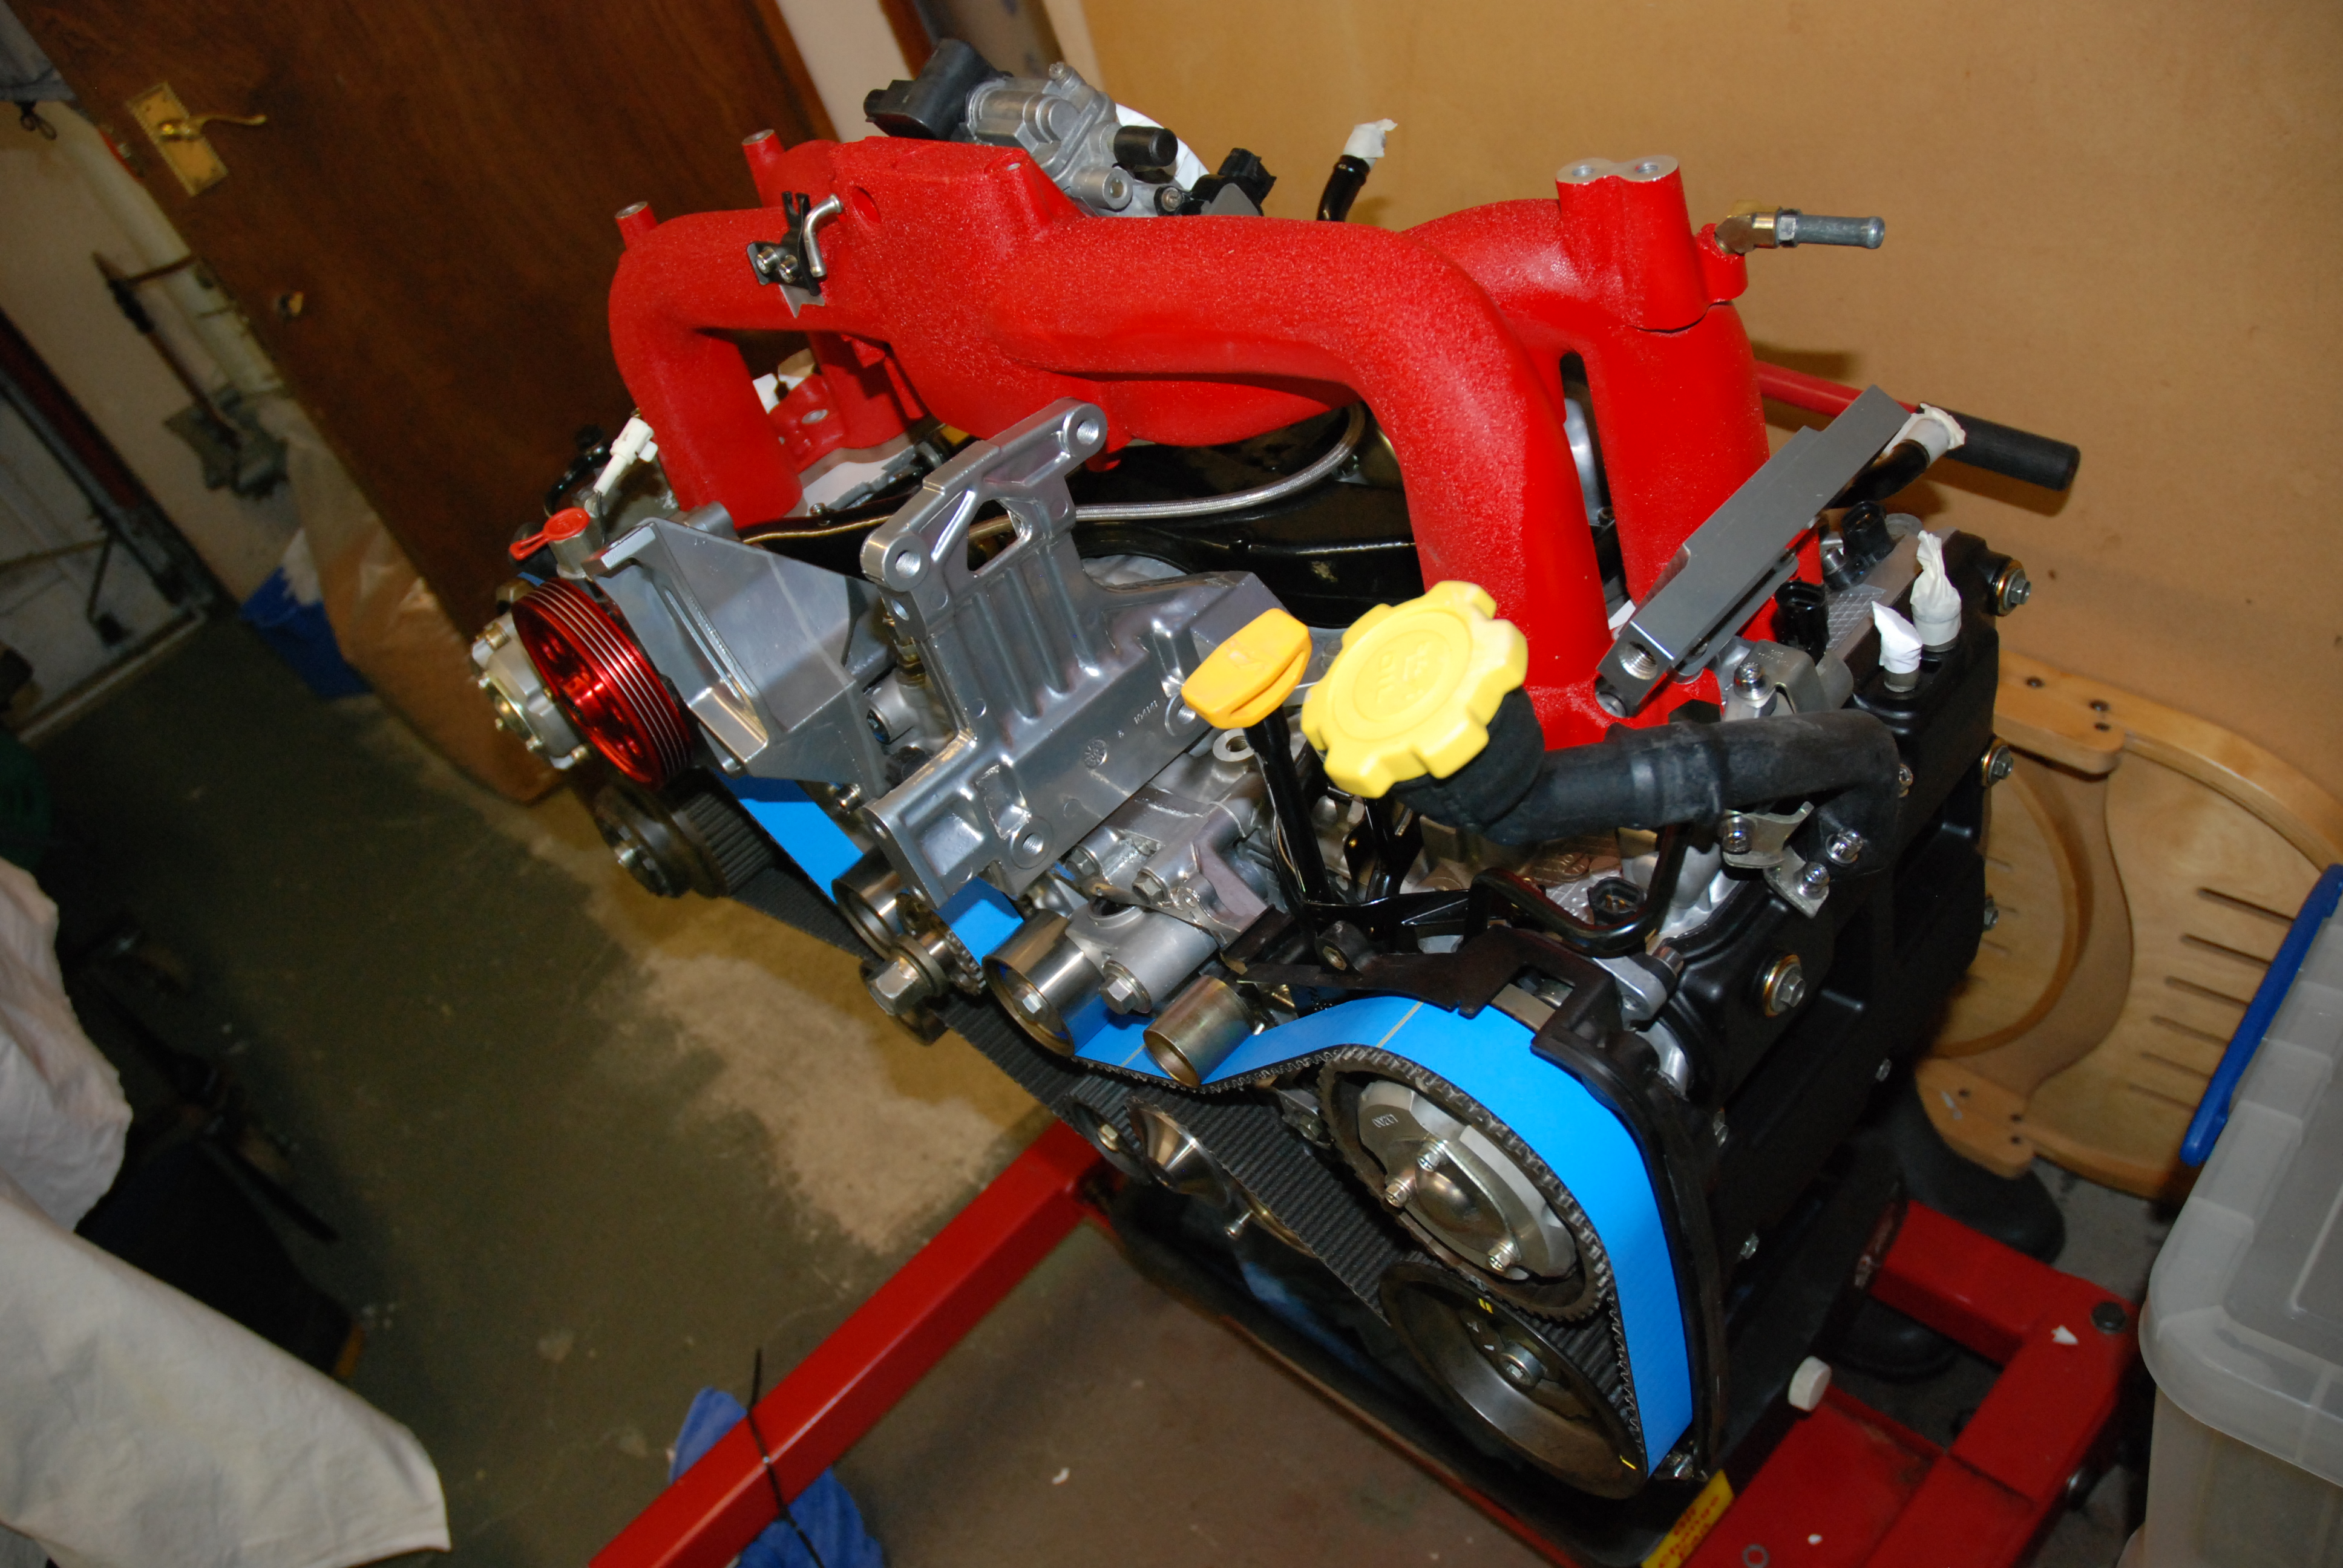
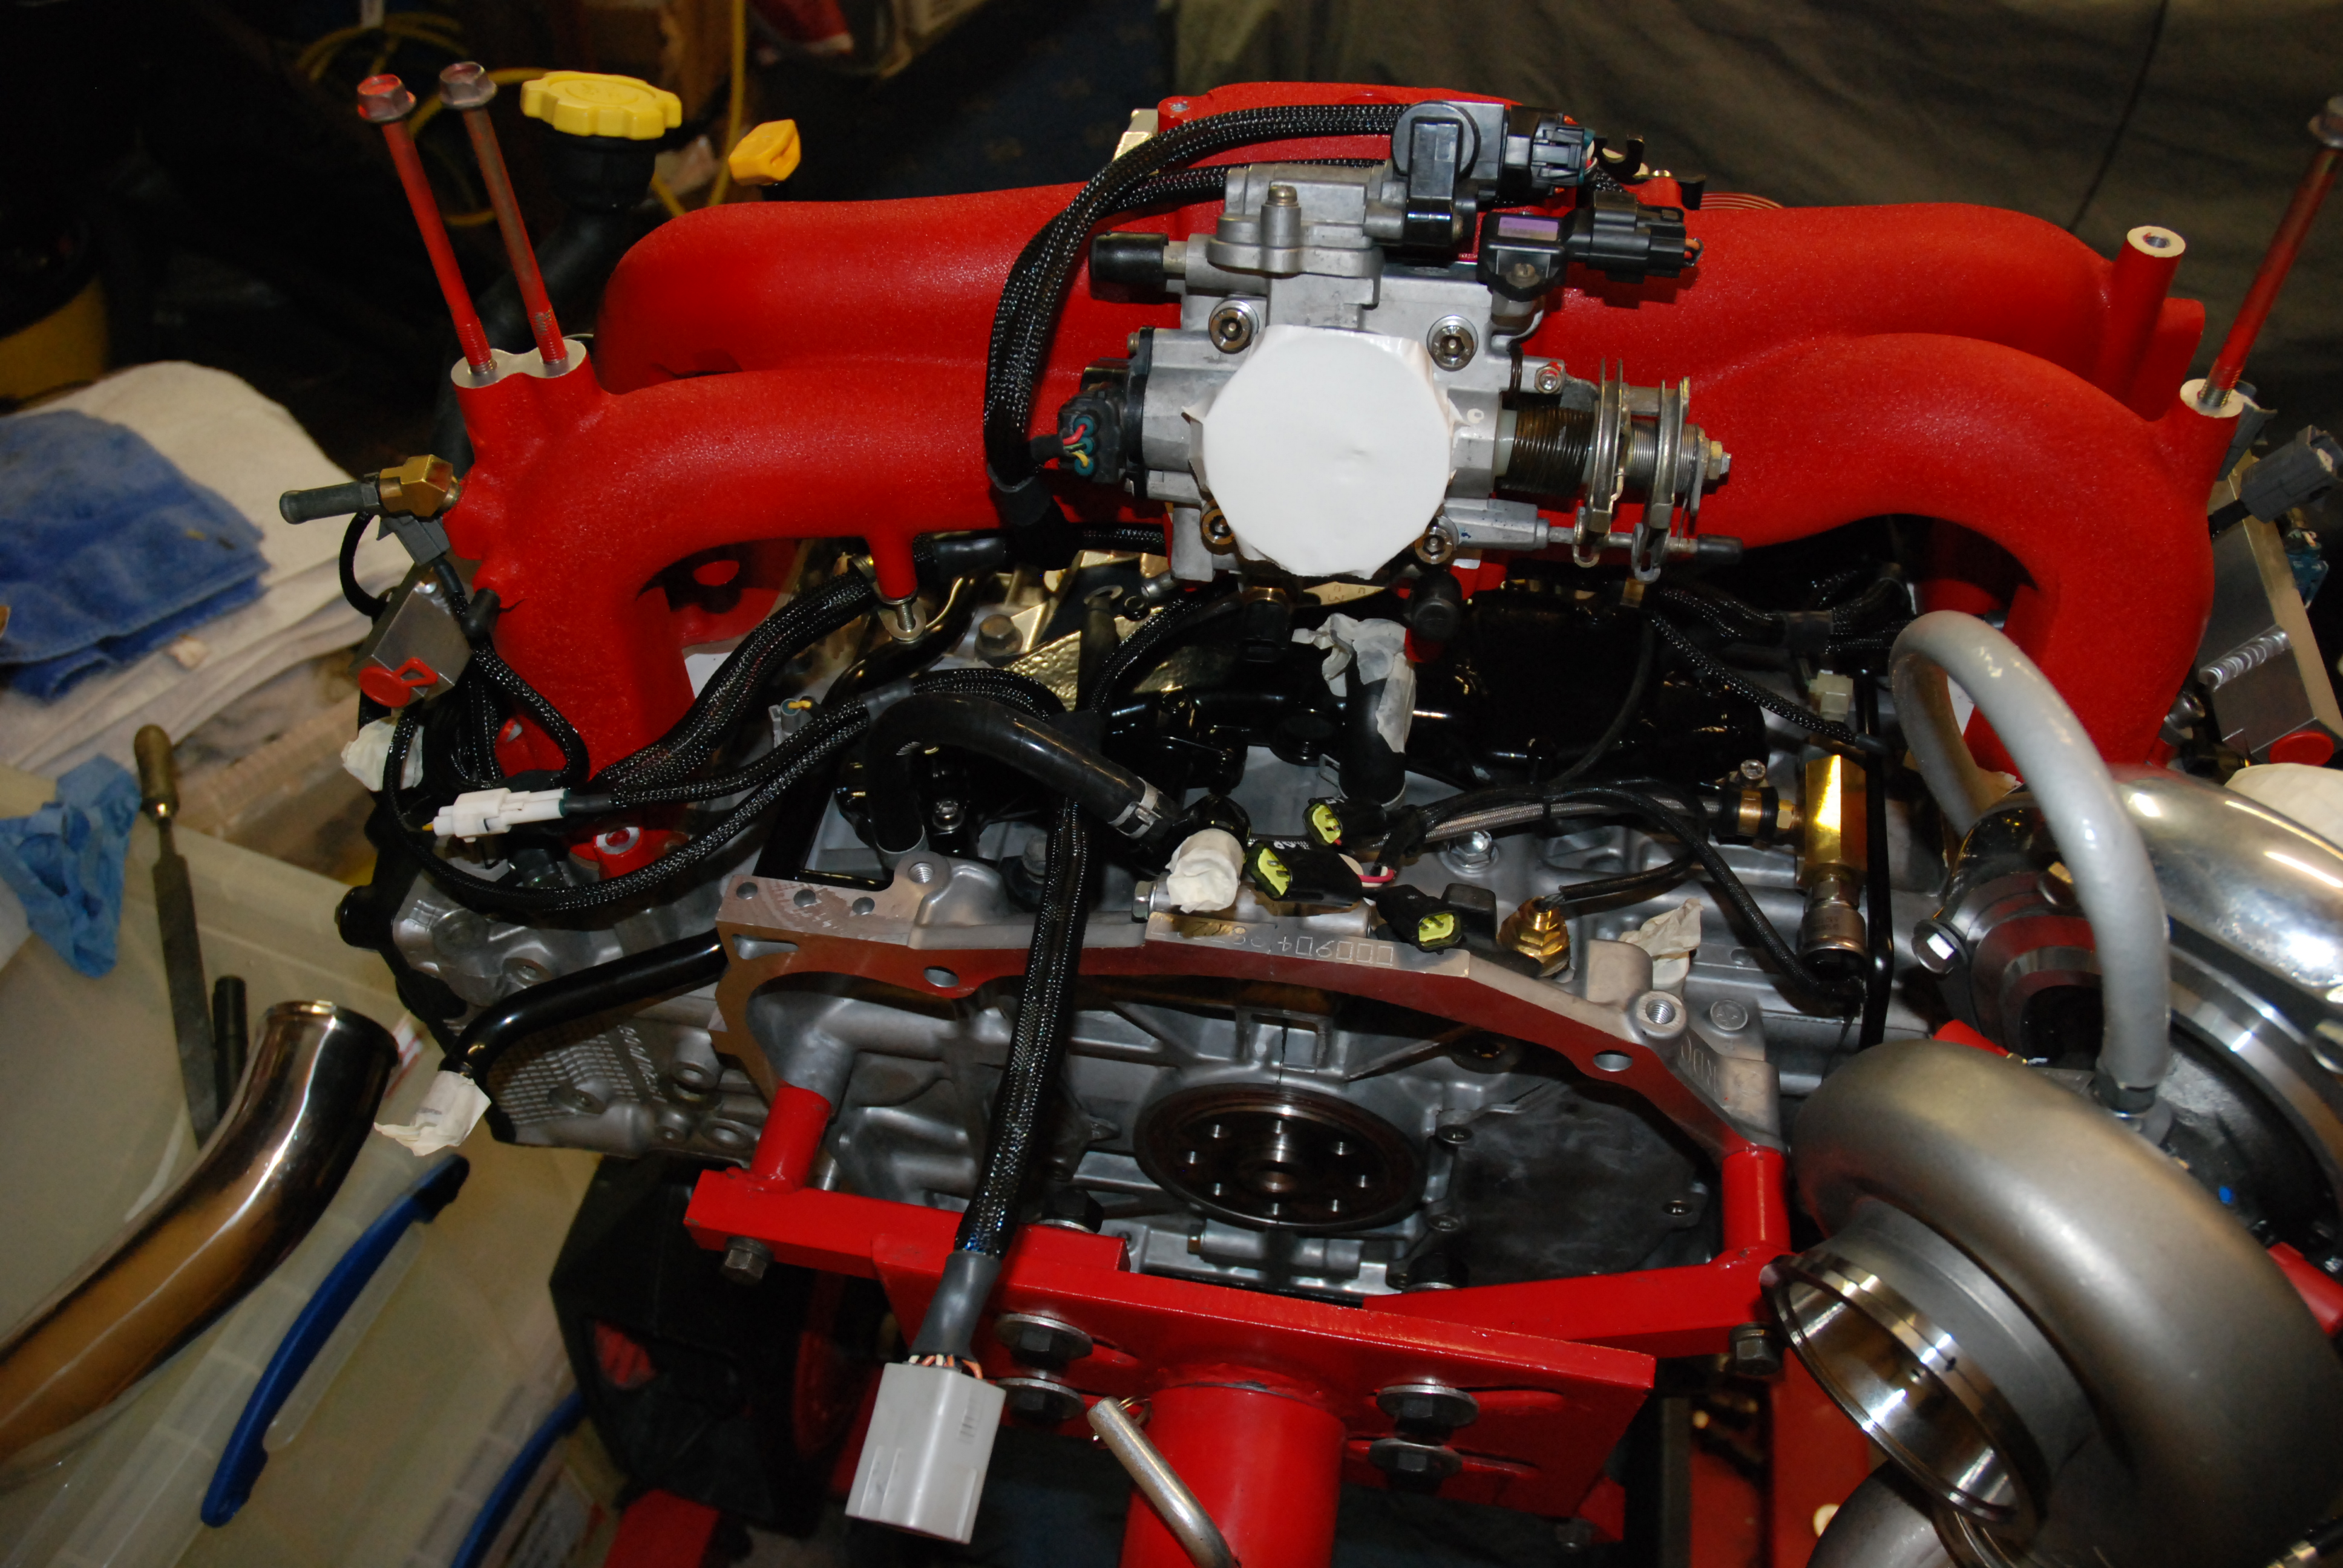
As i left it tonight, im waiting for an RCM belt guide to come through then the timing covers can go on. Hopefully get some more done tomorrow. But with the intake manifold rested on its starting to look quite smart and like an engine again
The black zinc came up real nice. Heres my pan with baffle in black zinc and gloss black powdercoated outer case
AVCS lines modified for turbo oil feed and modified water feed with AN fittings also in black zinc.
Lines all fitted up.
Cosworth windage tray and oil pickup fitted.
Then on goes the oil pan
Then new Apex engine mounts
With the AVCS lines finally fitted i could get the timing covers on, fit the sprockets and get her all timed up. Kevlar belts are damn tight but go on with a little push.
As i left it tonight, im waiting for an RCM belt guide to come through then the timing covers can go on. Hopefully get some more done tomorrow. But with the intake manifold rested on its starting to look quite smart and like an engine again
17-09-2010, 09:47 PM
#296
Boost Junkie
Thread Starter
Lol, it is bastard expensive Rob.
My cossie could have been a million bhp with what this thing has cost me. I just hope the bloody thing works lol
My cossie could have been a million bhp with what this thing has cost me. I just hope the bloody thing works lol

 .good to see u still around and carrying on with it
19-09-2010, 11:53 PM
.good to see u still around and carrying on with it
19-09-2010, 11:53 PM
#299
Boost Junkie
Thread Starter
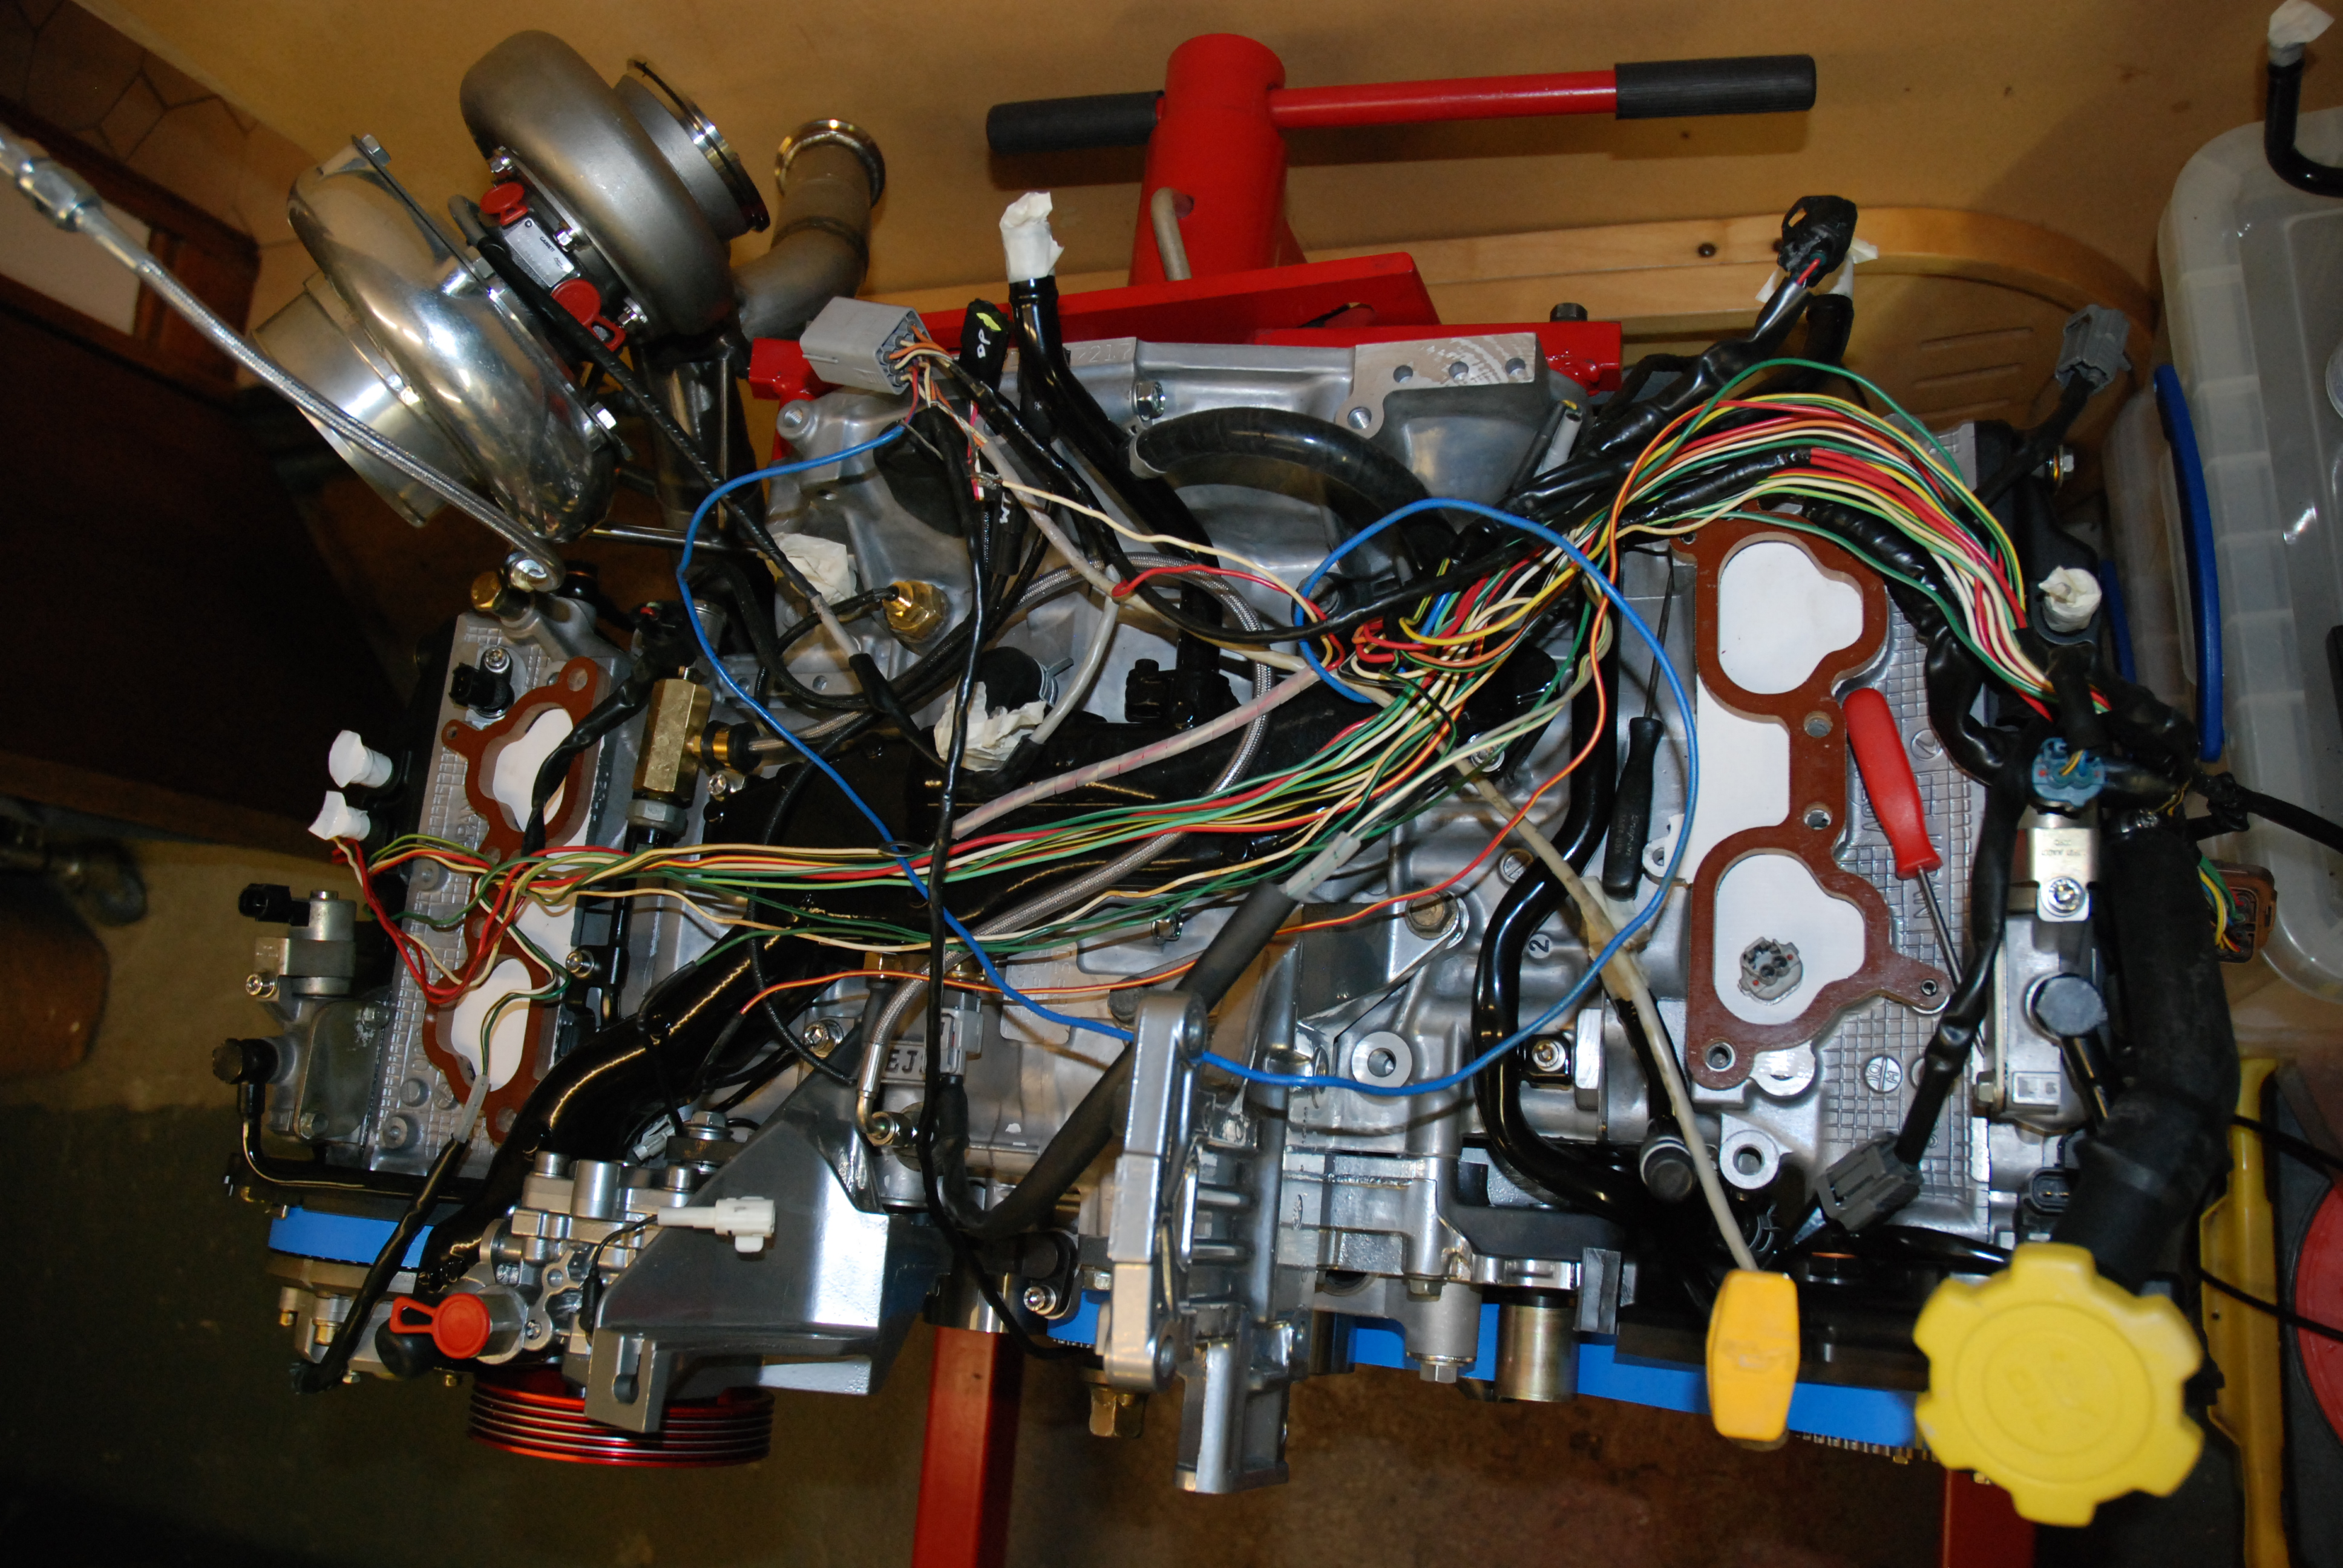
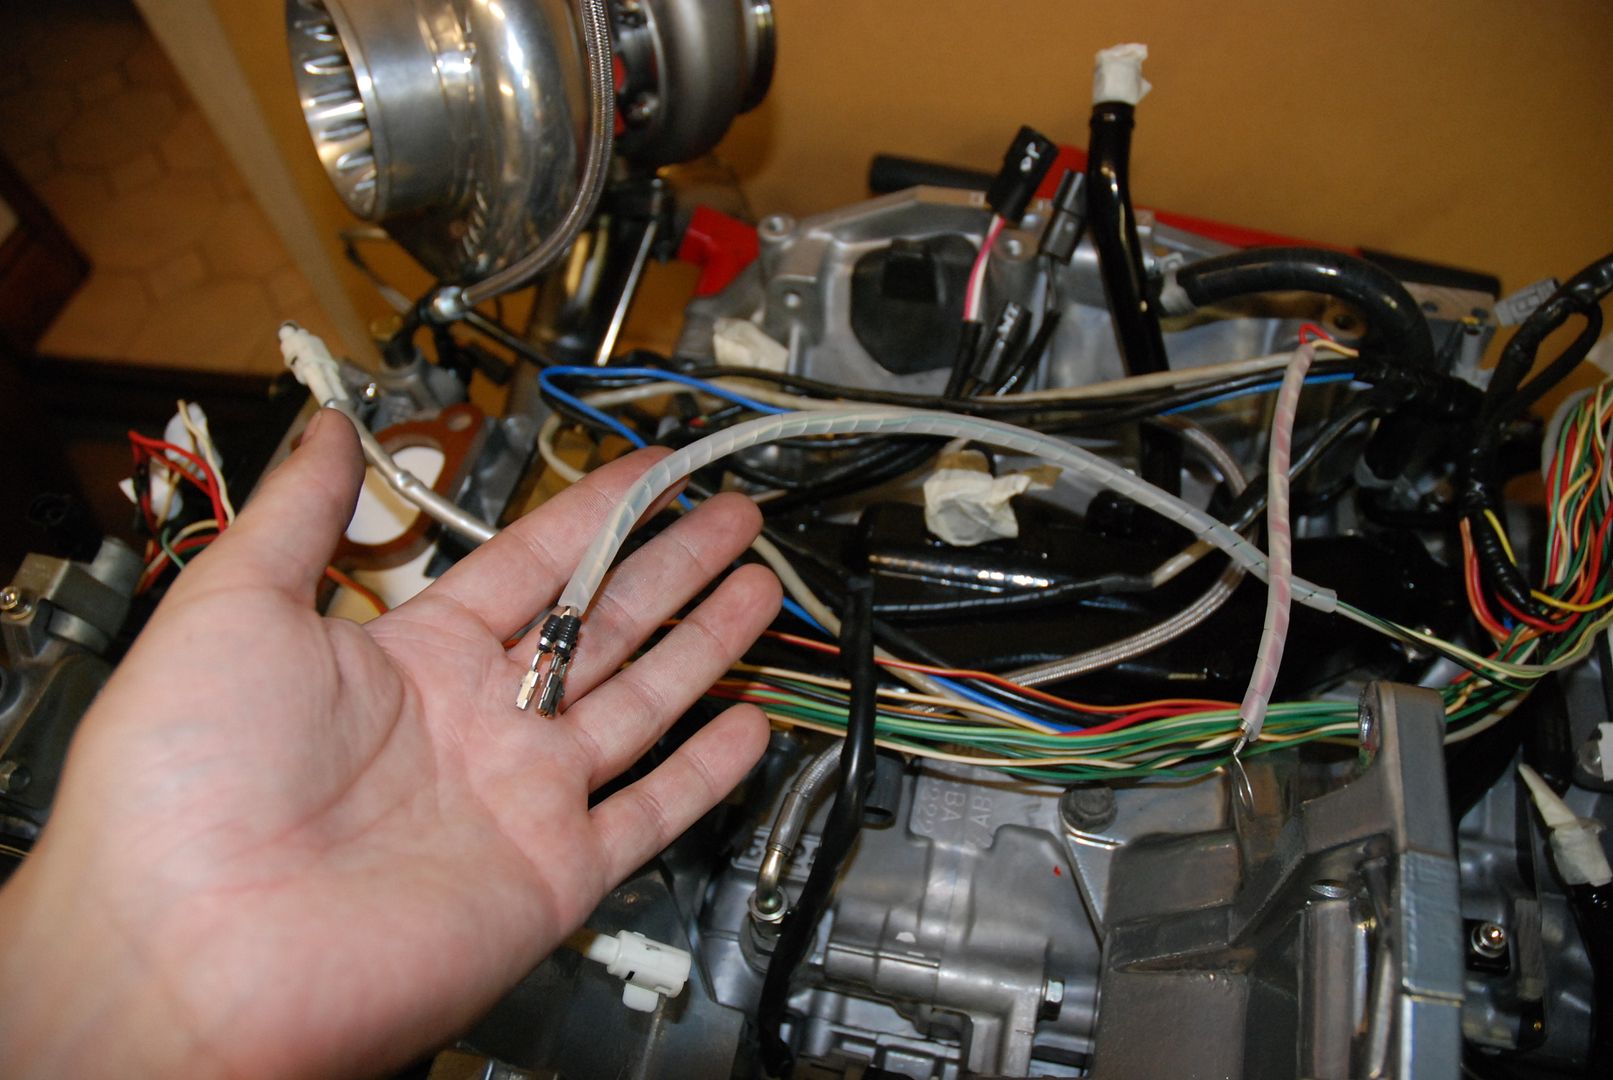
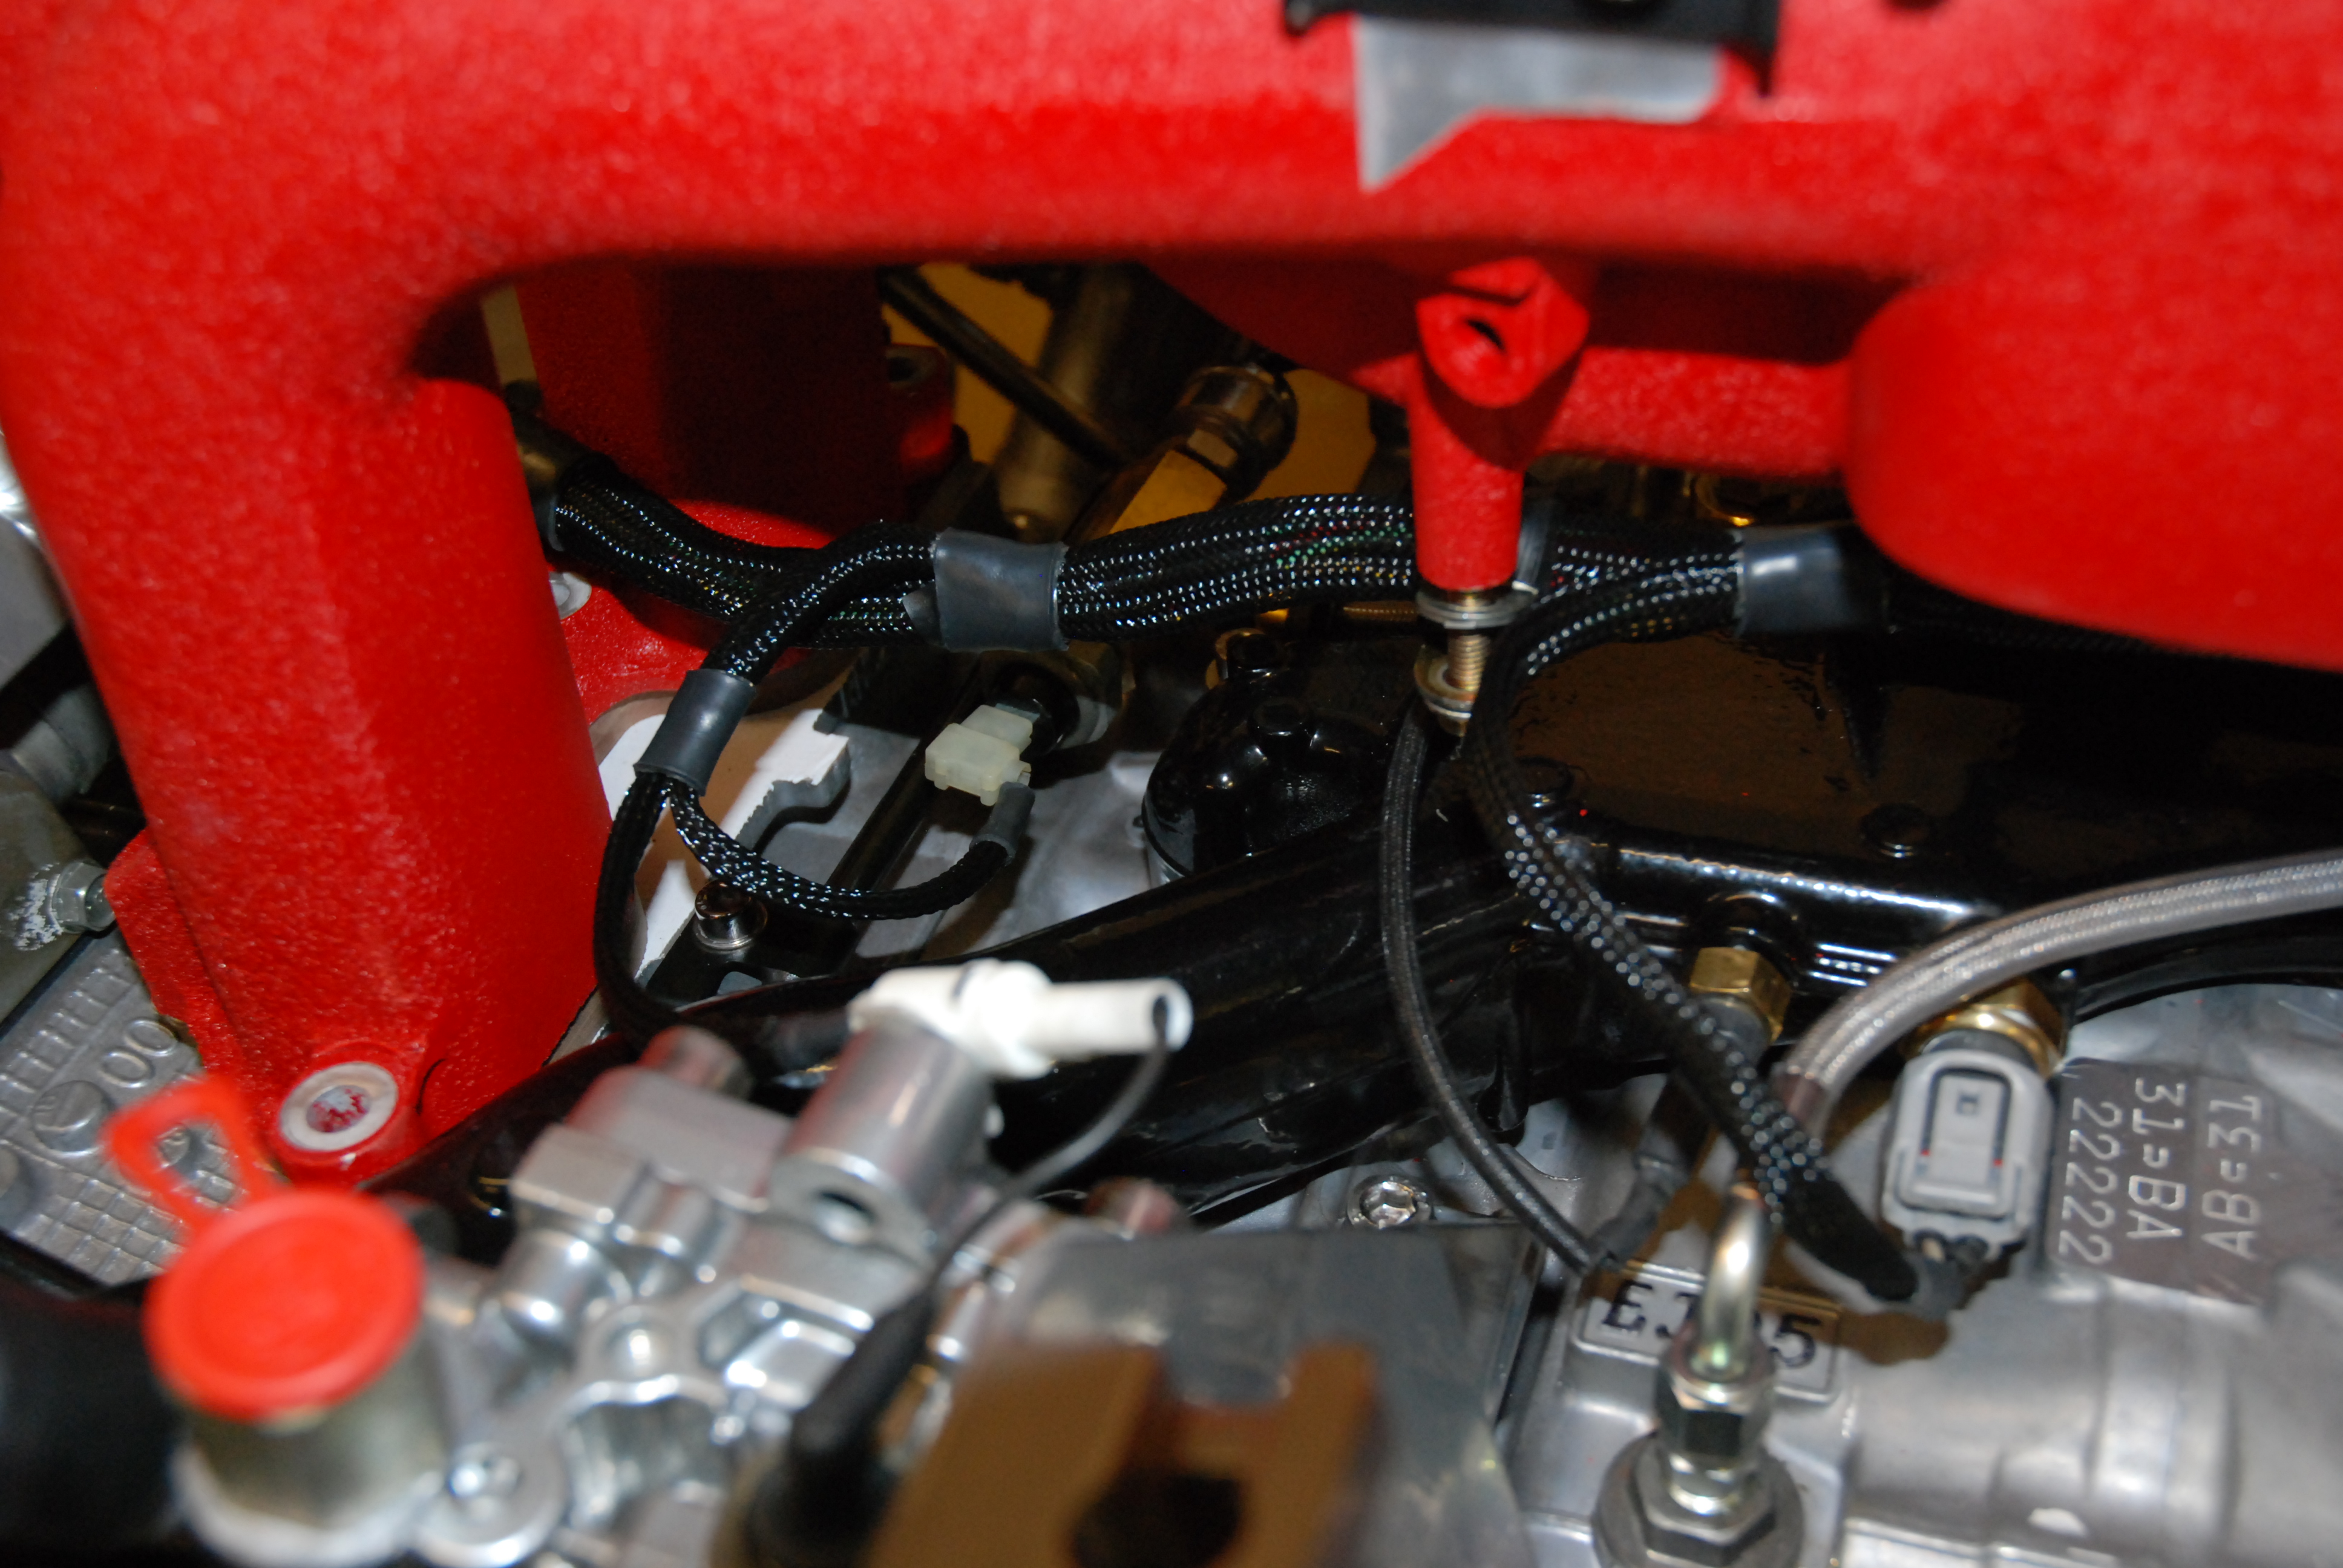
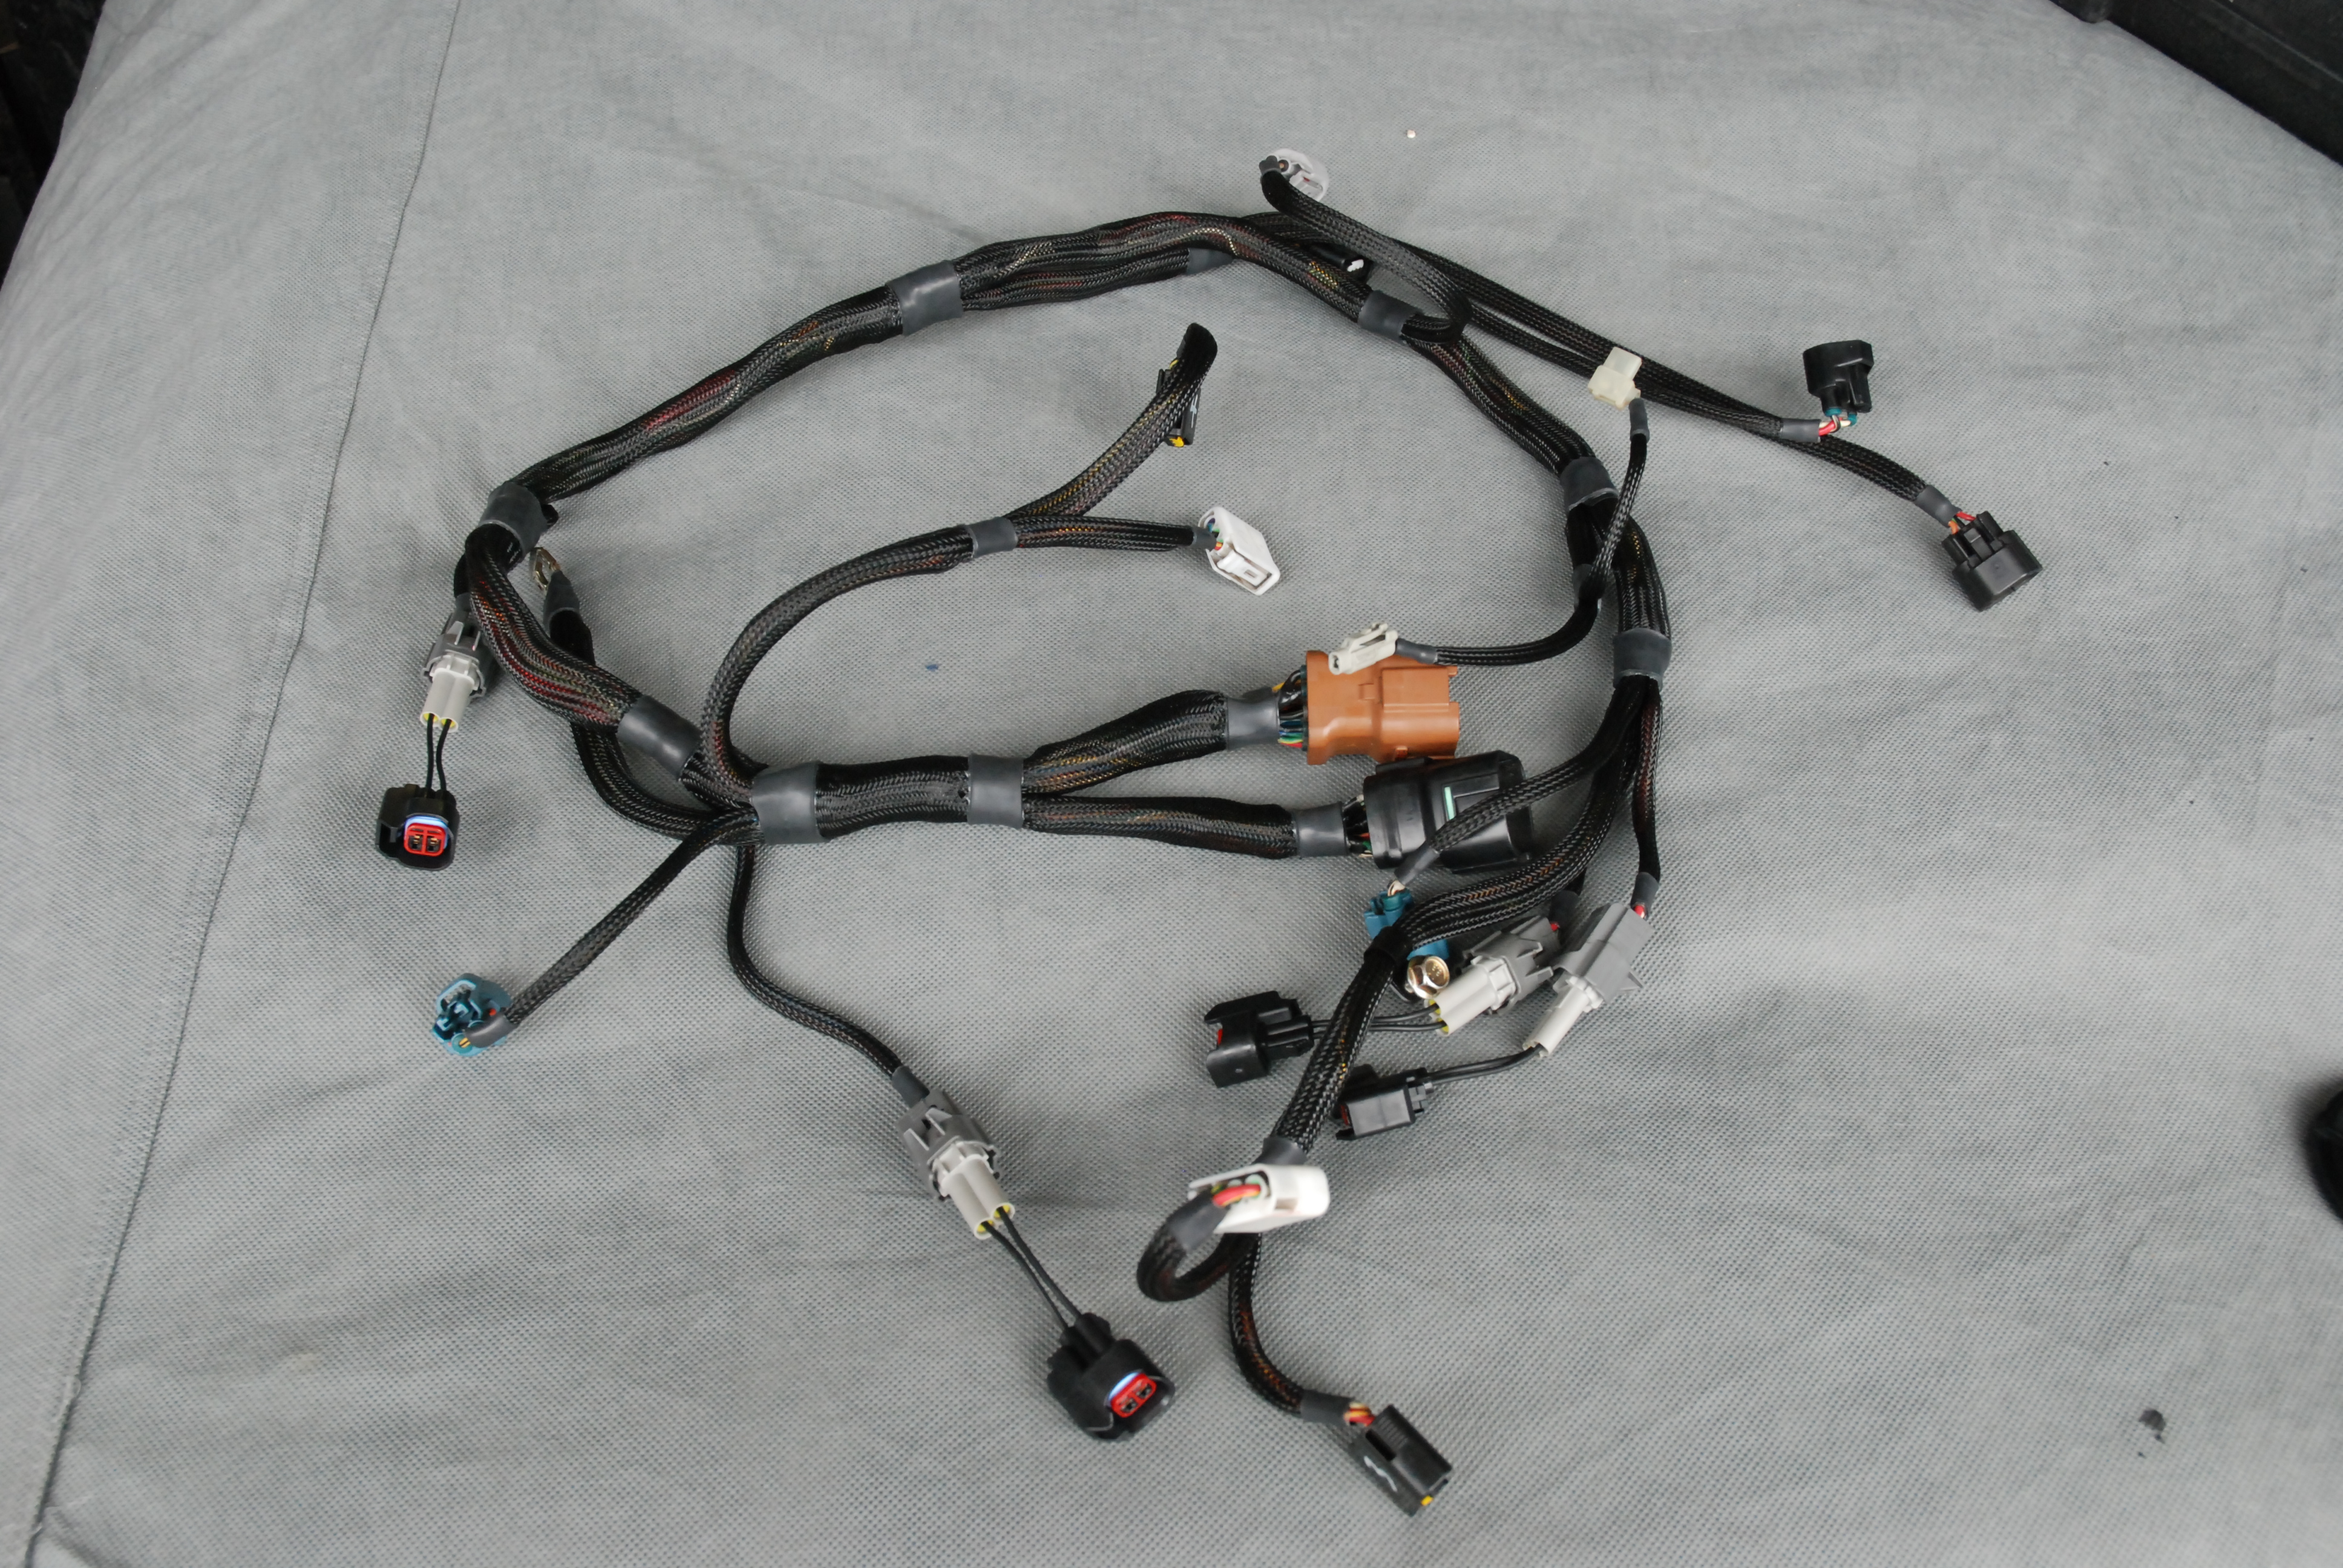
I started to fit the engine loom the other night and it wasnt long before i thought how awful it makes the engine look. Subaru made a right shambles of a job when creating a nice routing for it.
So not happy with it making my motor look horrid, i decided to completely unpick the whole loom and reroute sections, lengthene sections and shorten others.
Its not a pretty job
So not happy with it making my motor look horrid, i decided to completely unpick the whole loom and reroute sections, lengthene sections and shorten others.
Its not a pretty job
20-09-2010, 12:09 AM
#300

I get the impression that this car's a keeper Frayz... 
Little touches here and there that make the difference mate and your car is full of them... always enjoy keeping up with the progress on it, interesting to see how you get on with the custom (tucked?) loom idea too.
Cheers,
Grant
Little touches here and there that make the difference mate and your car is full of them... always enjoy keeping up with the progress on it, interesting to see how you get on with the custom (tucked?) loom idea too.
Cheers,
Grant
20-09-2010, 12:21 AM
#301
Boost Junkie
Thread Starter
Cheers Grant,
I dont think i will achieve a tucked loom. Well not what i concider to be a tucked loom. Like the VW boys do. Unless i have a full motorsport loom made exactly for my motor but im not prepared to go that far. I just want to route it all as neat as i can with what i have.
In the impreza bay its almost impossible to hide the loom. I just want it to look neat on my motor and not an eyesore like it is at the mo lol.
21-09-2010, 04:00 AM
#302
Boost Junkie
Thread Starter
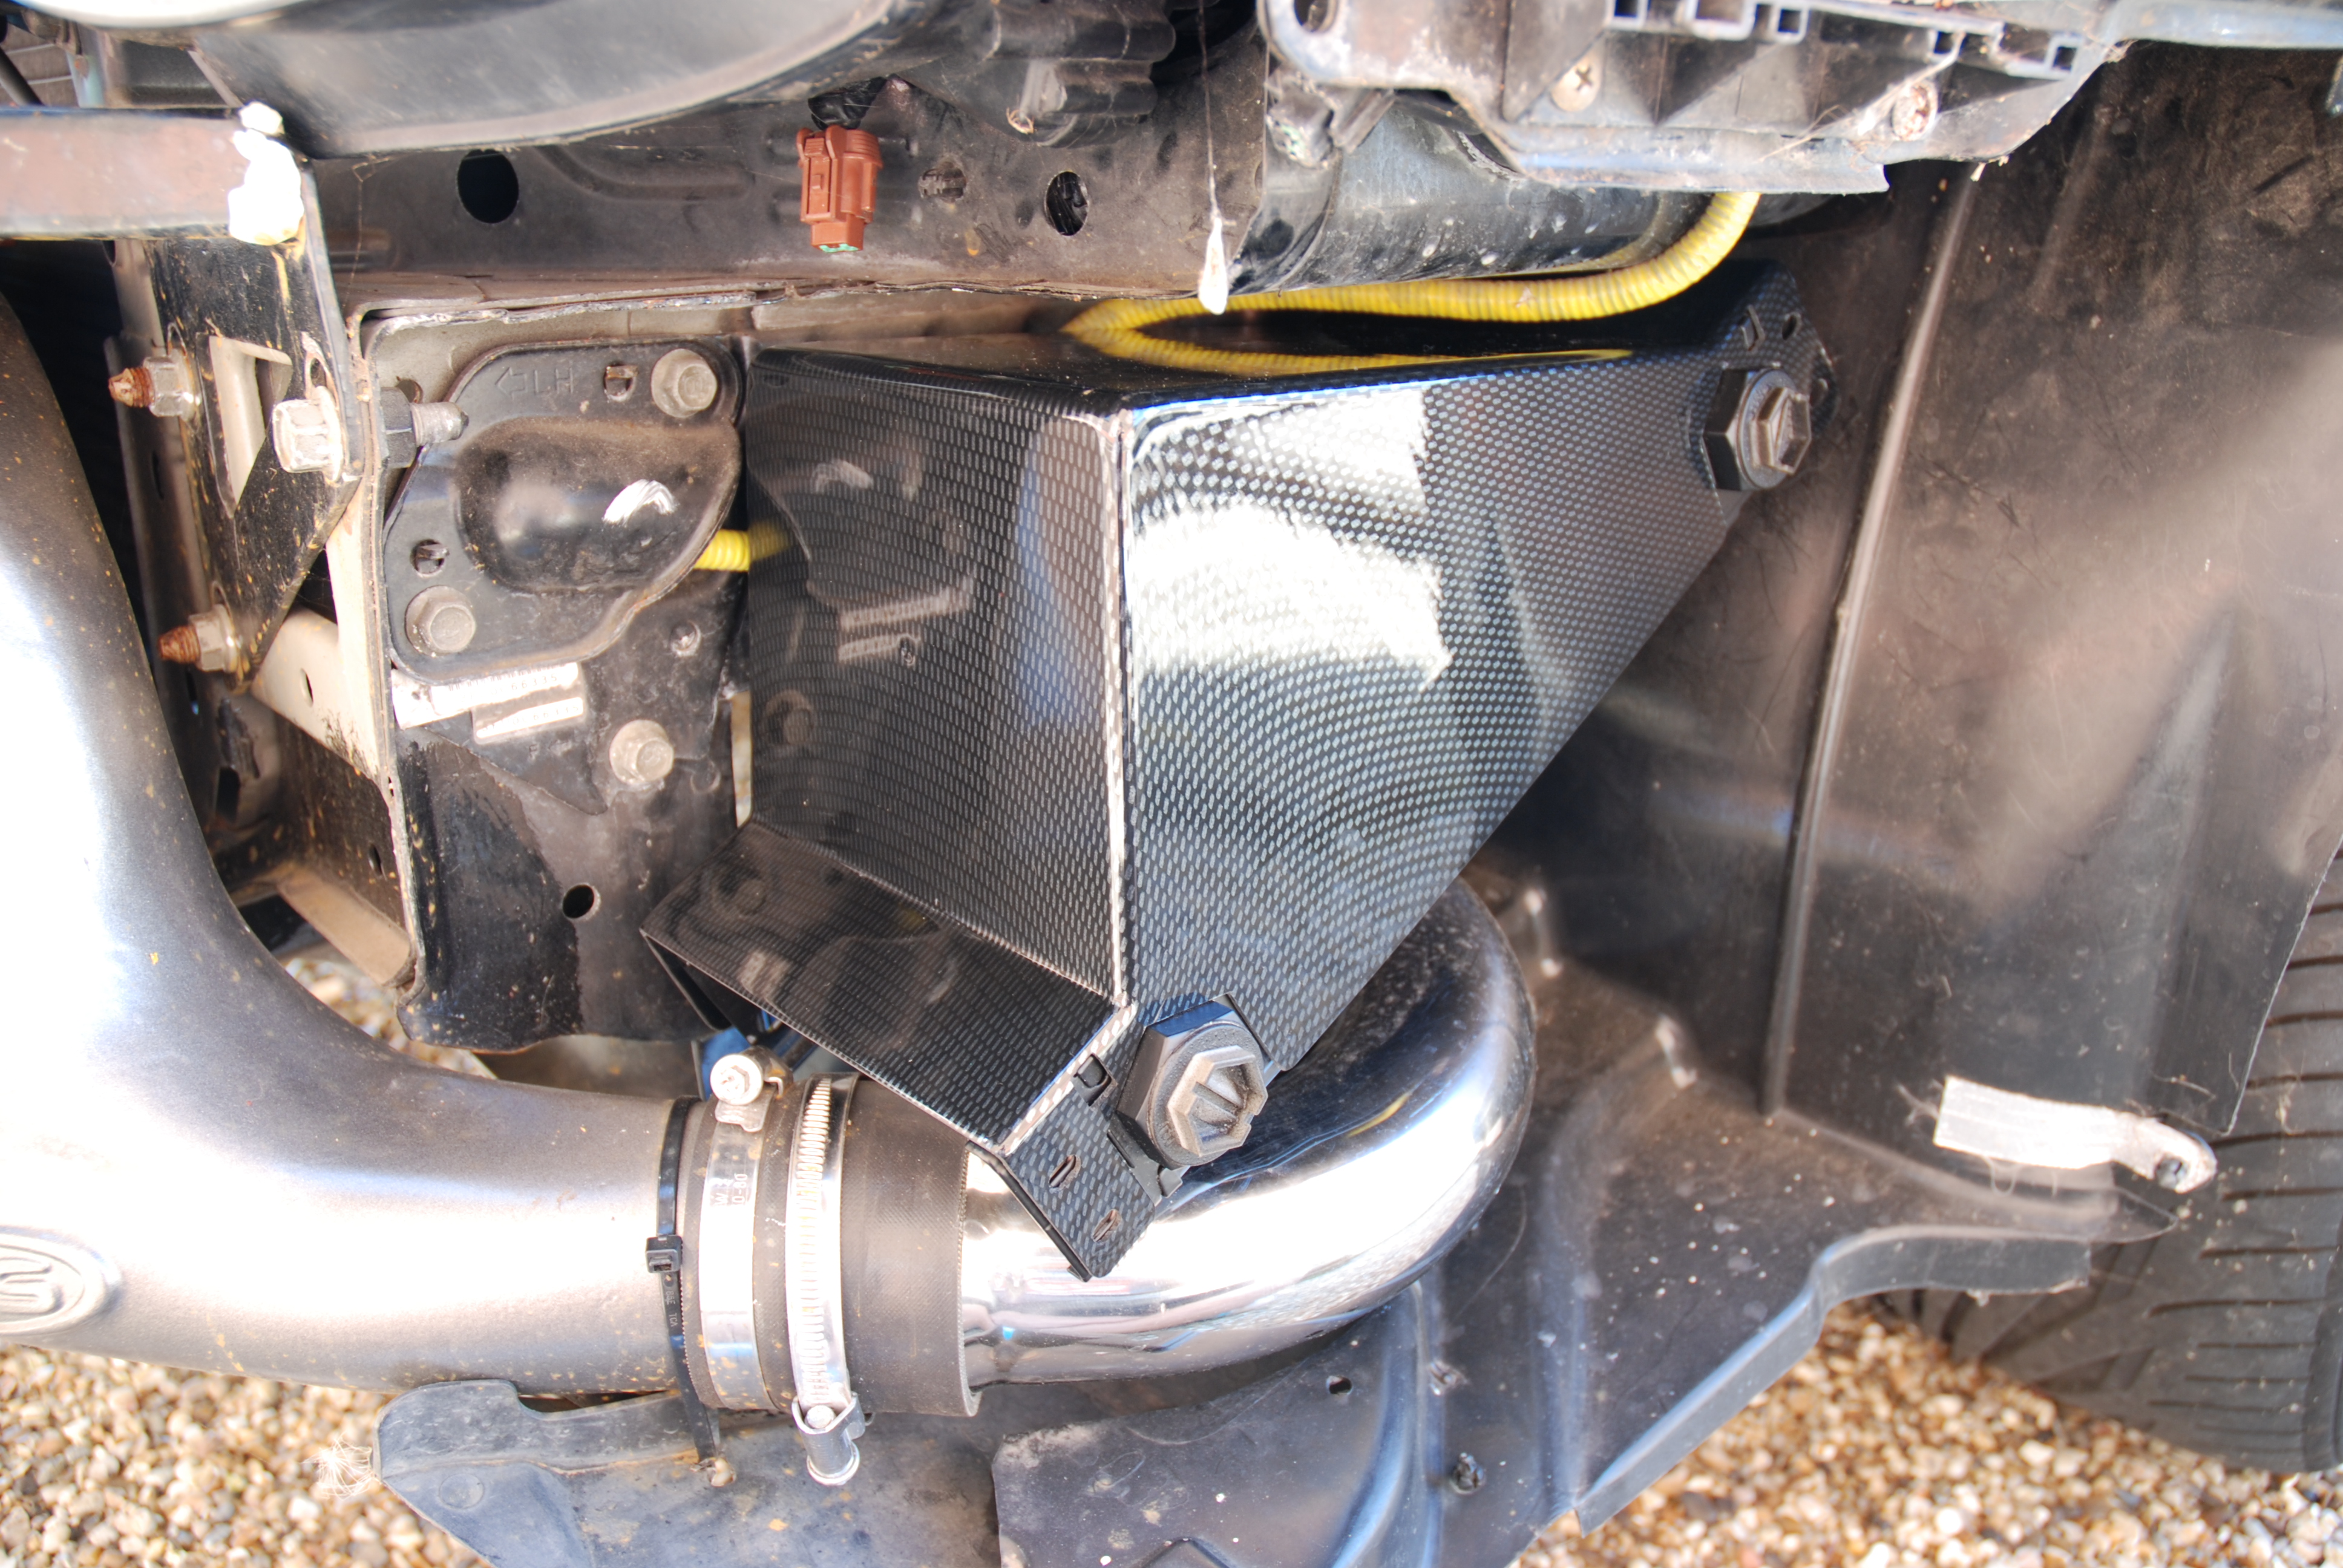
As you know I enlisted the help of my friend Ian to modify my foglamp covers to intake ducts. Well he did a super job of those and today he brought me another gift.
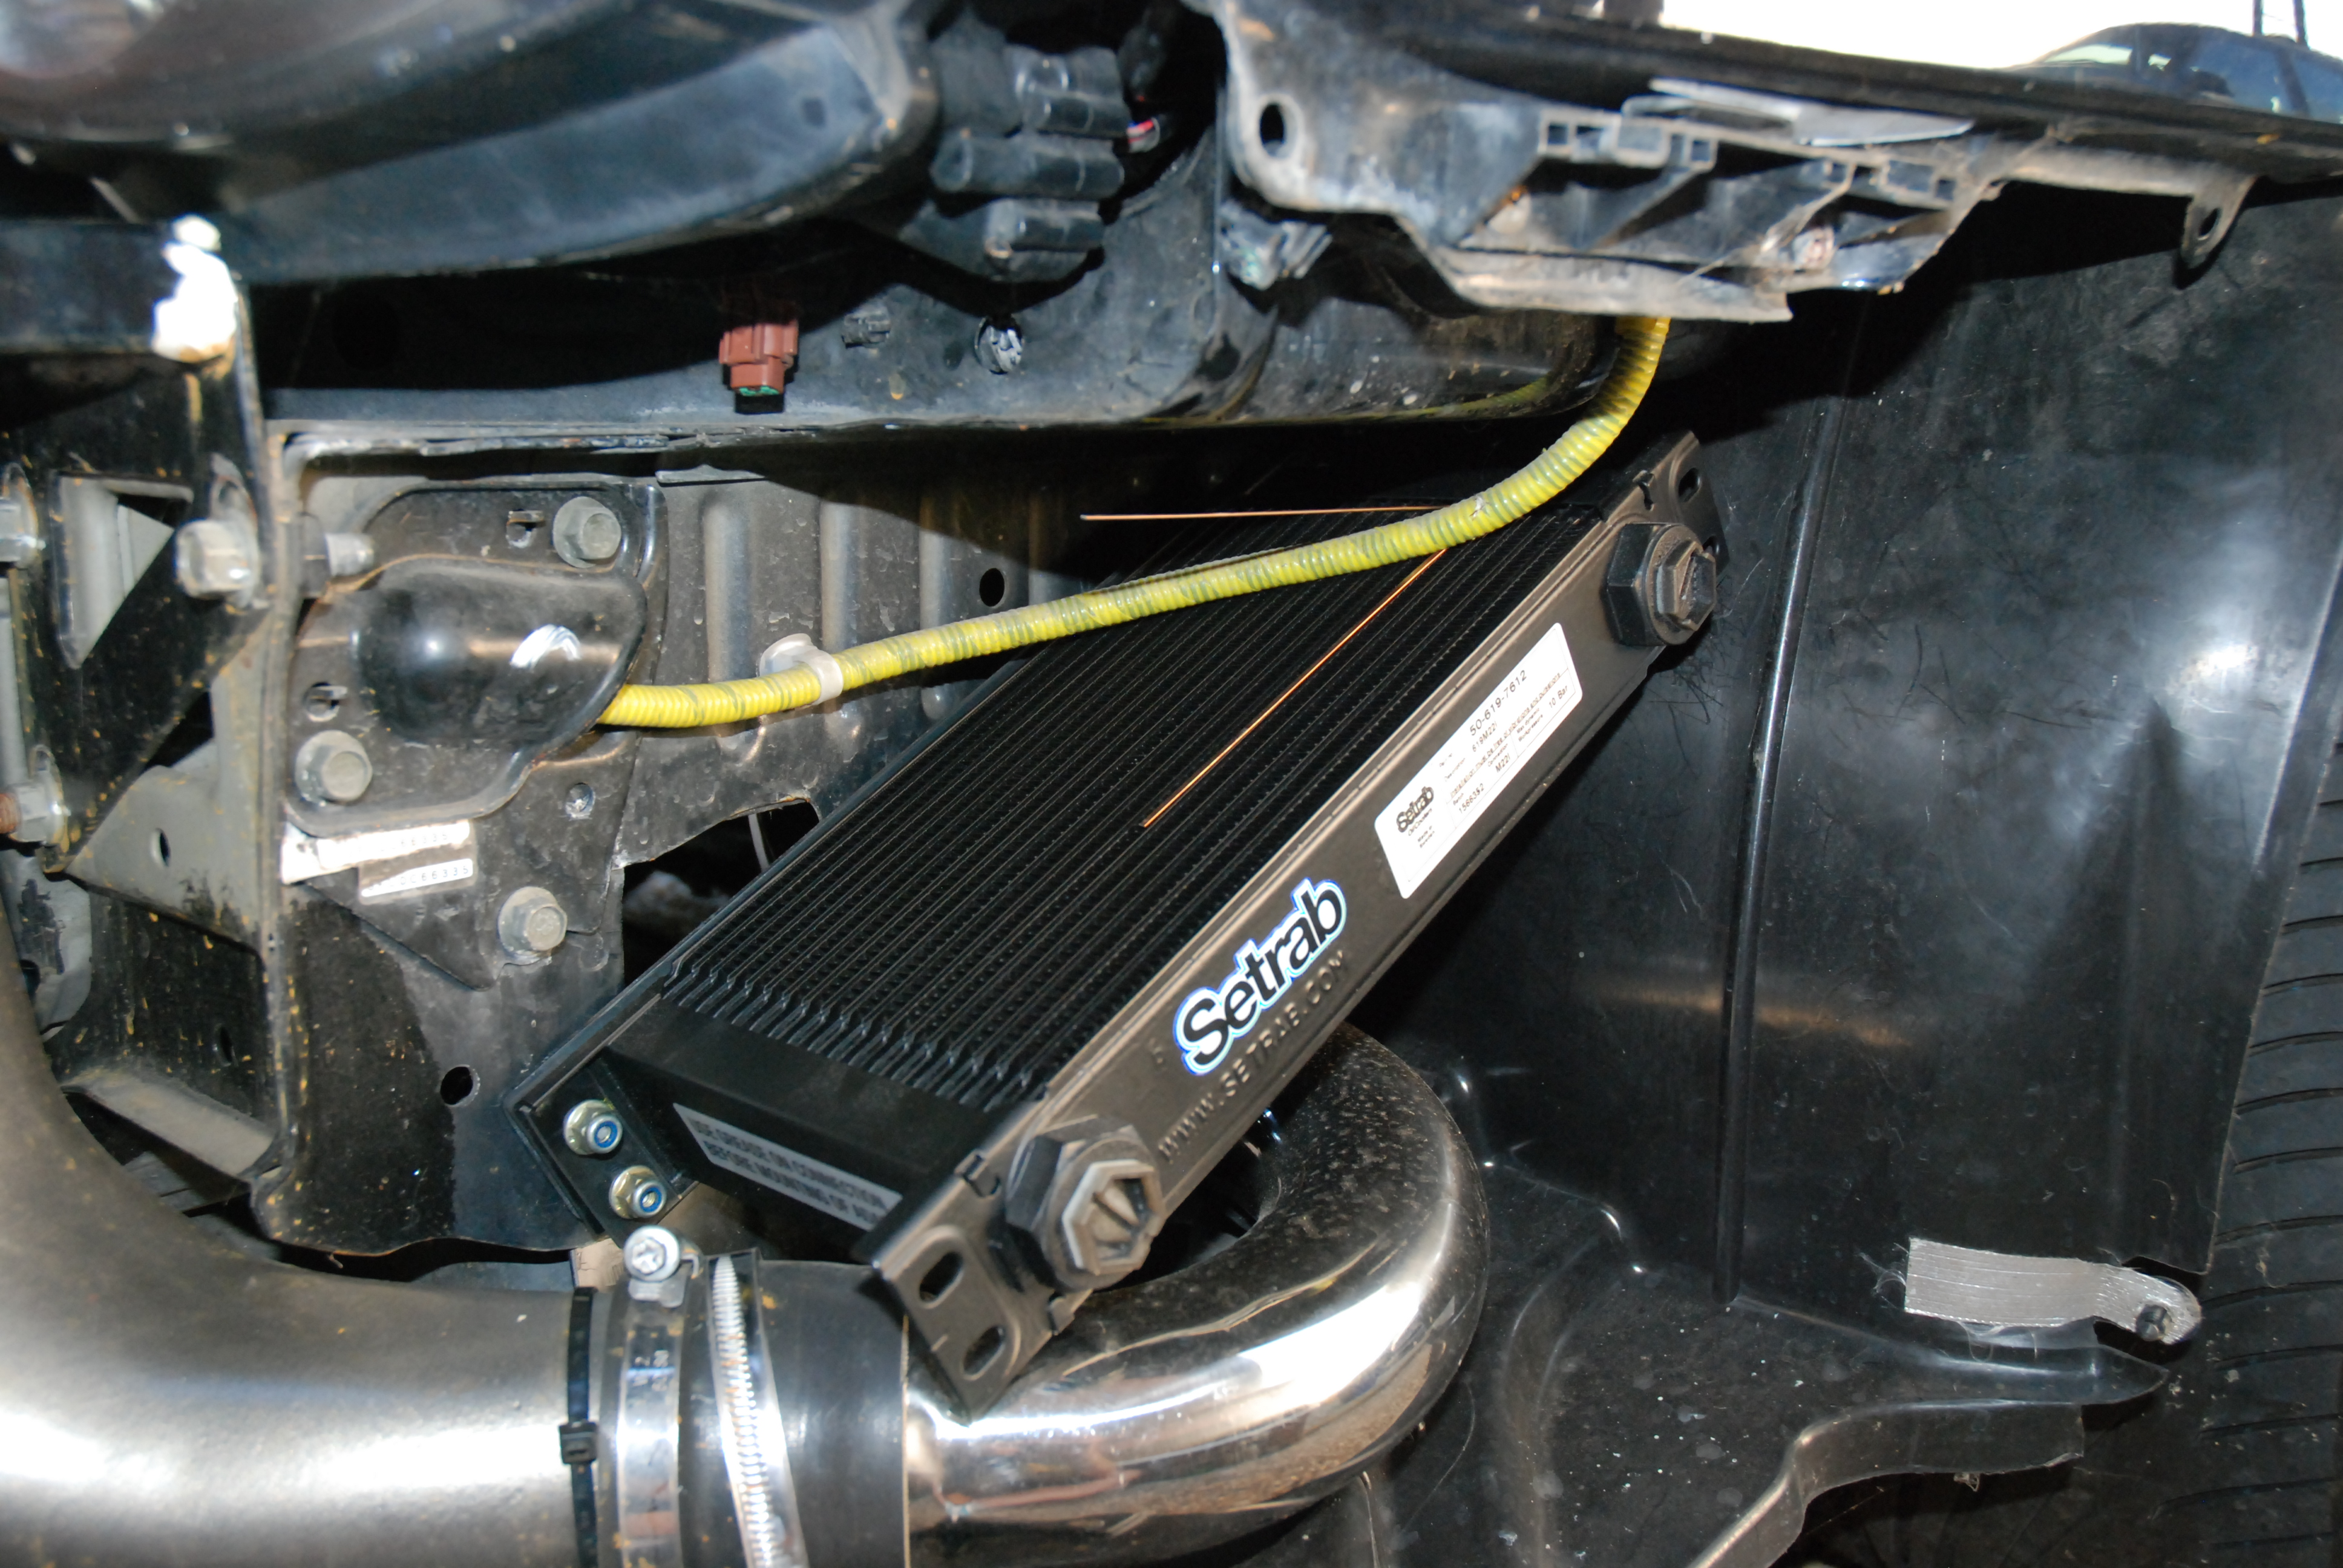
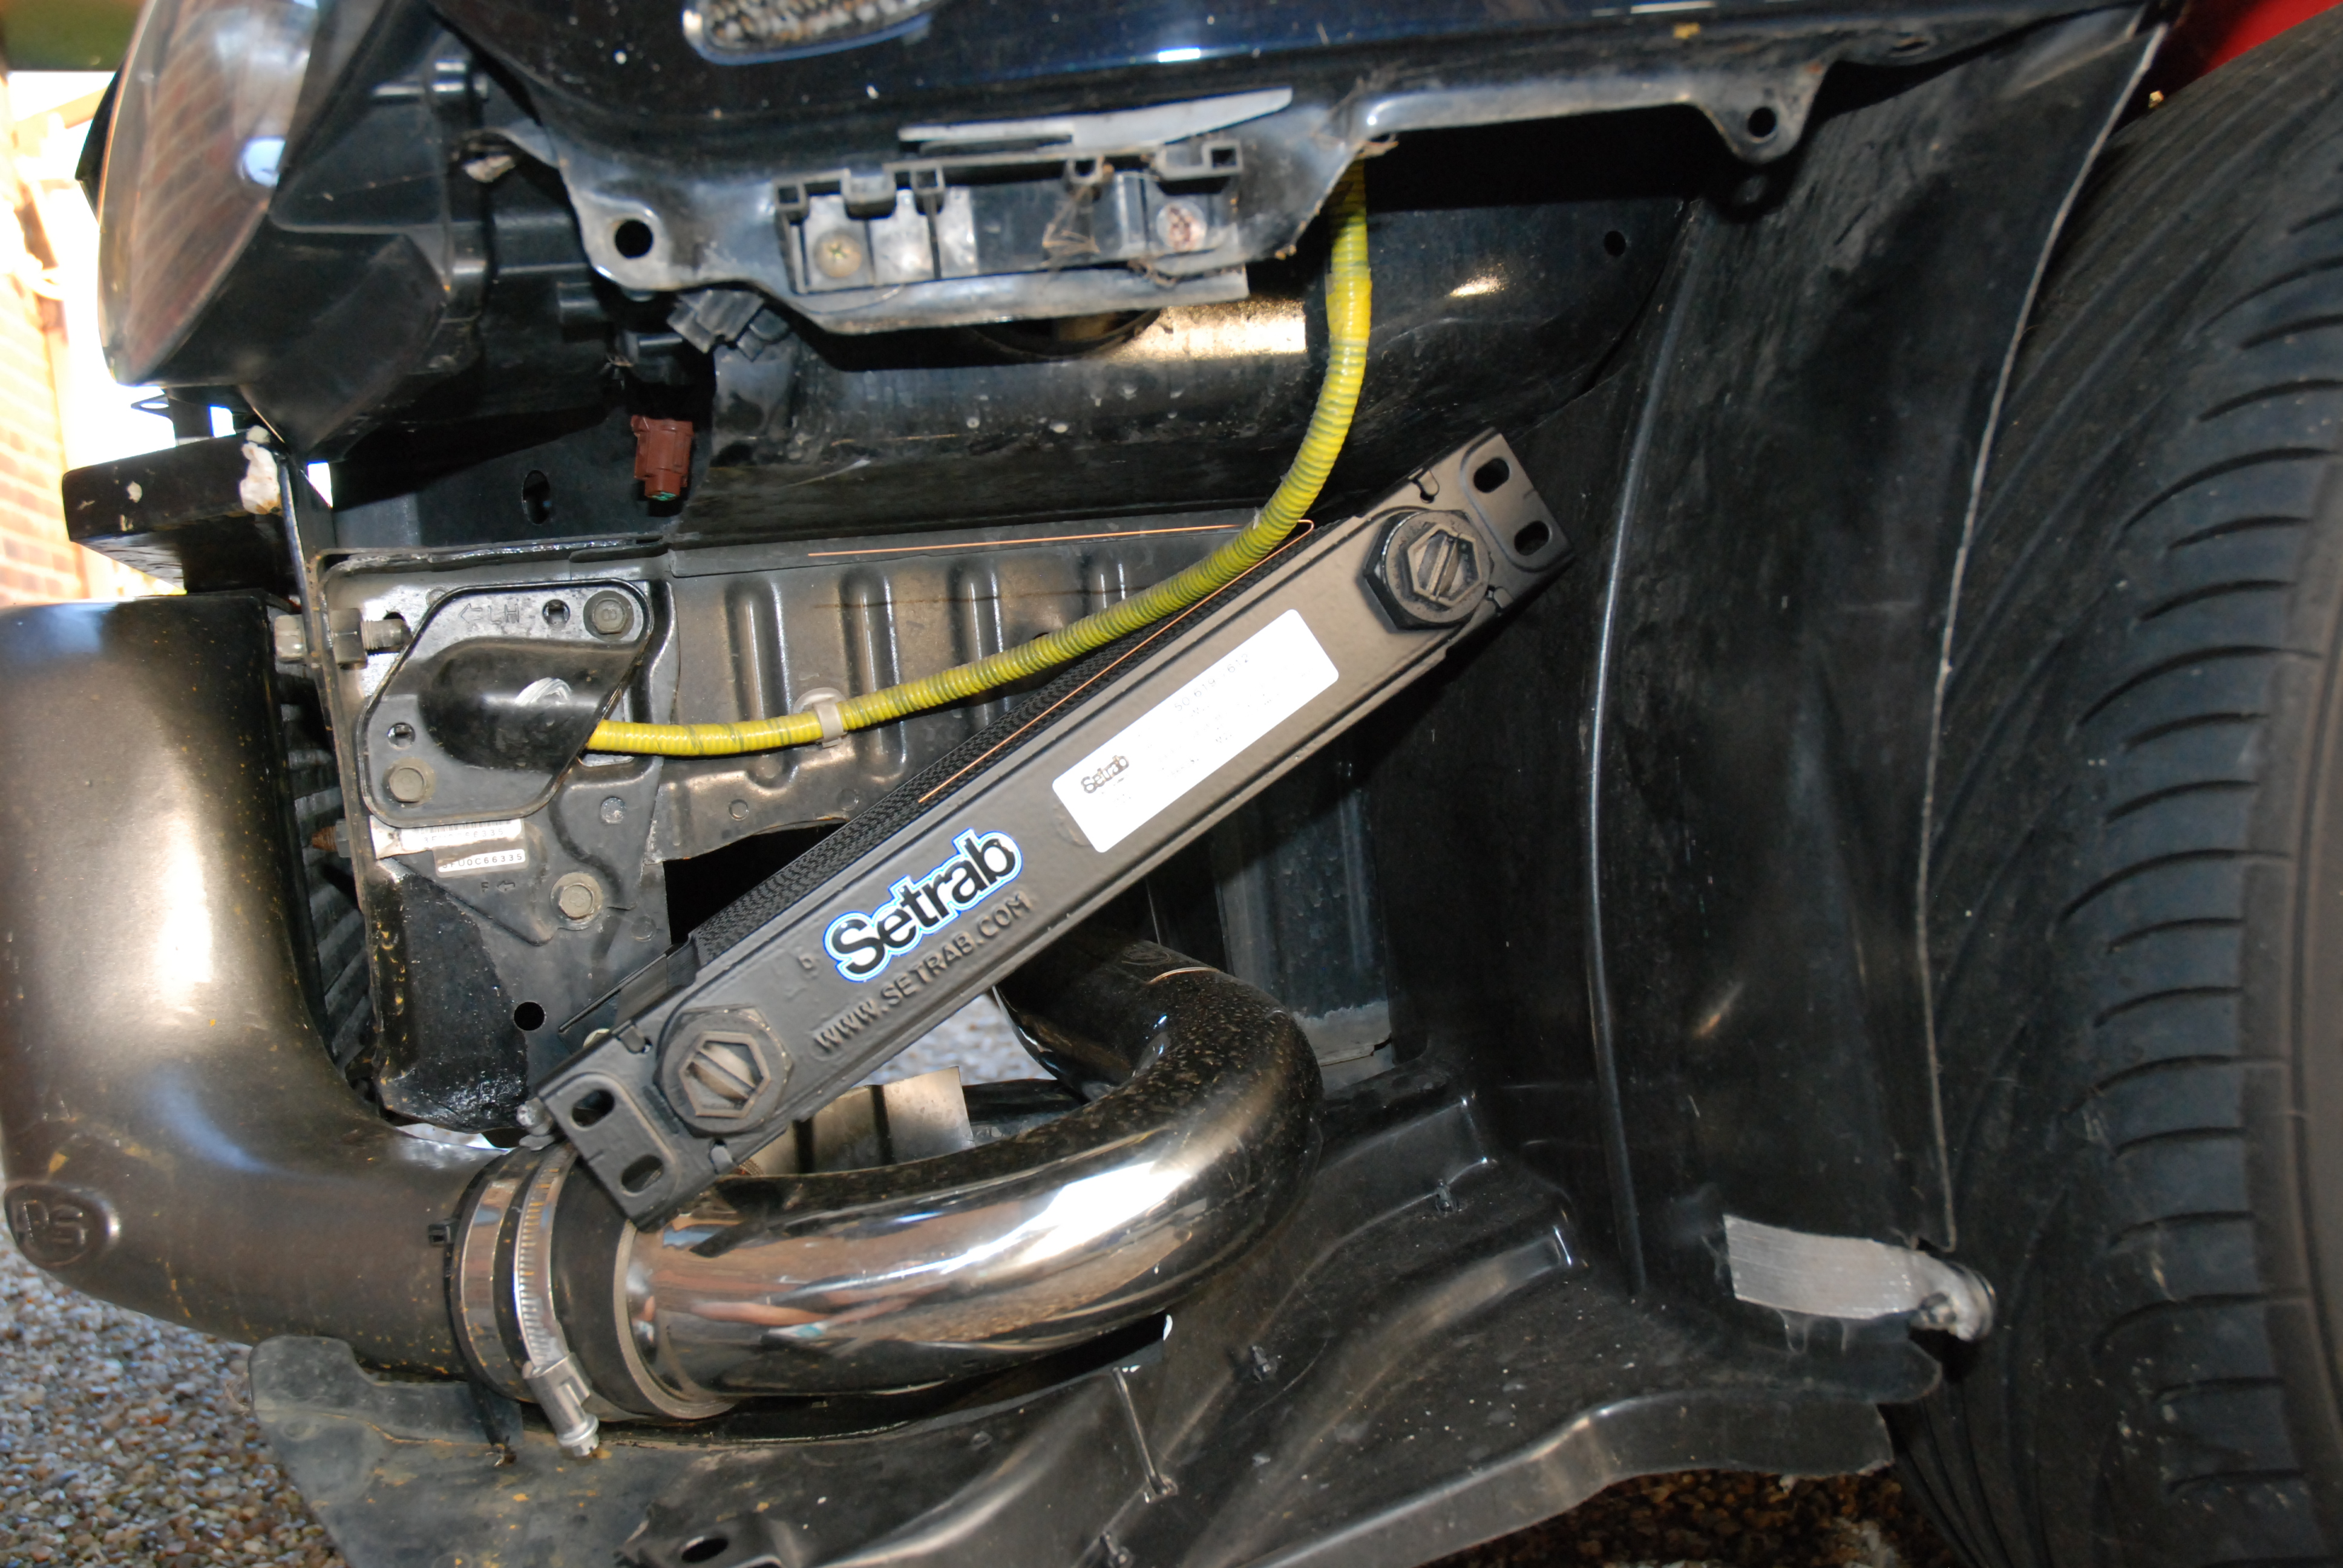
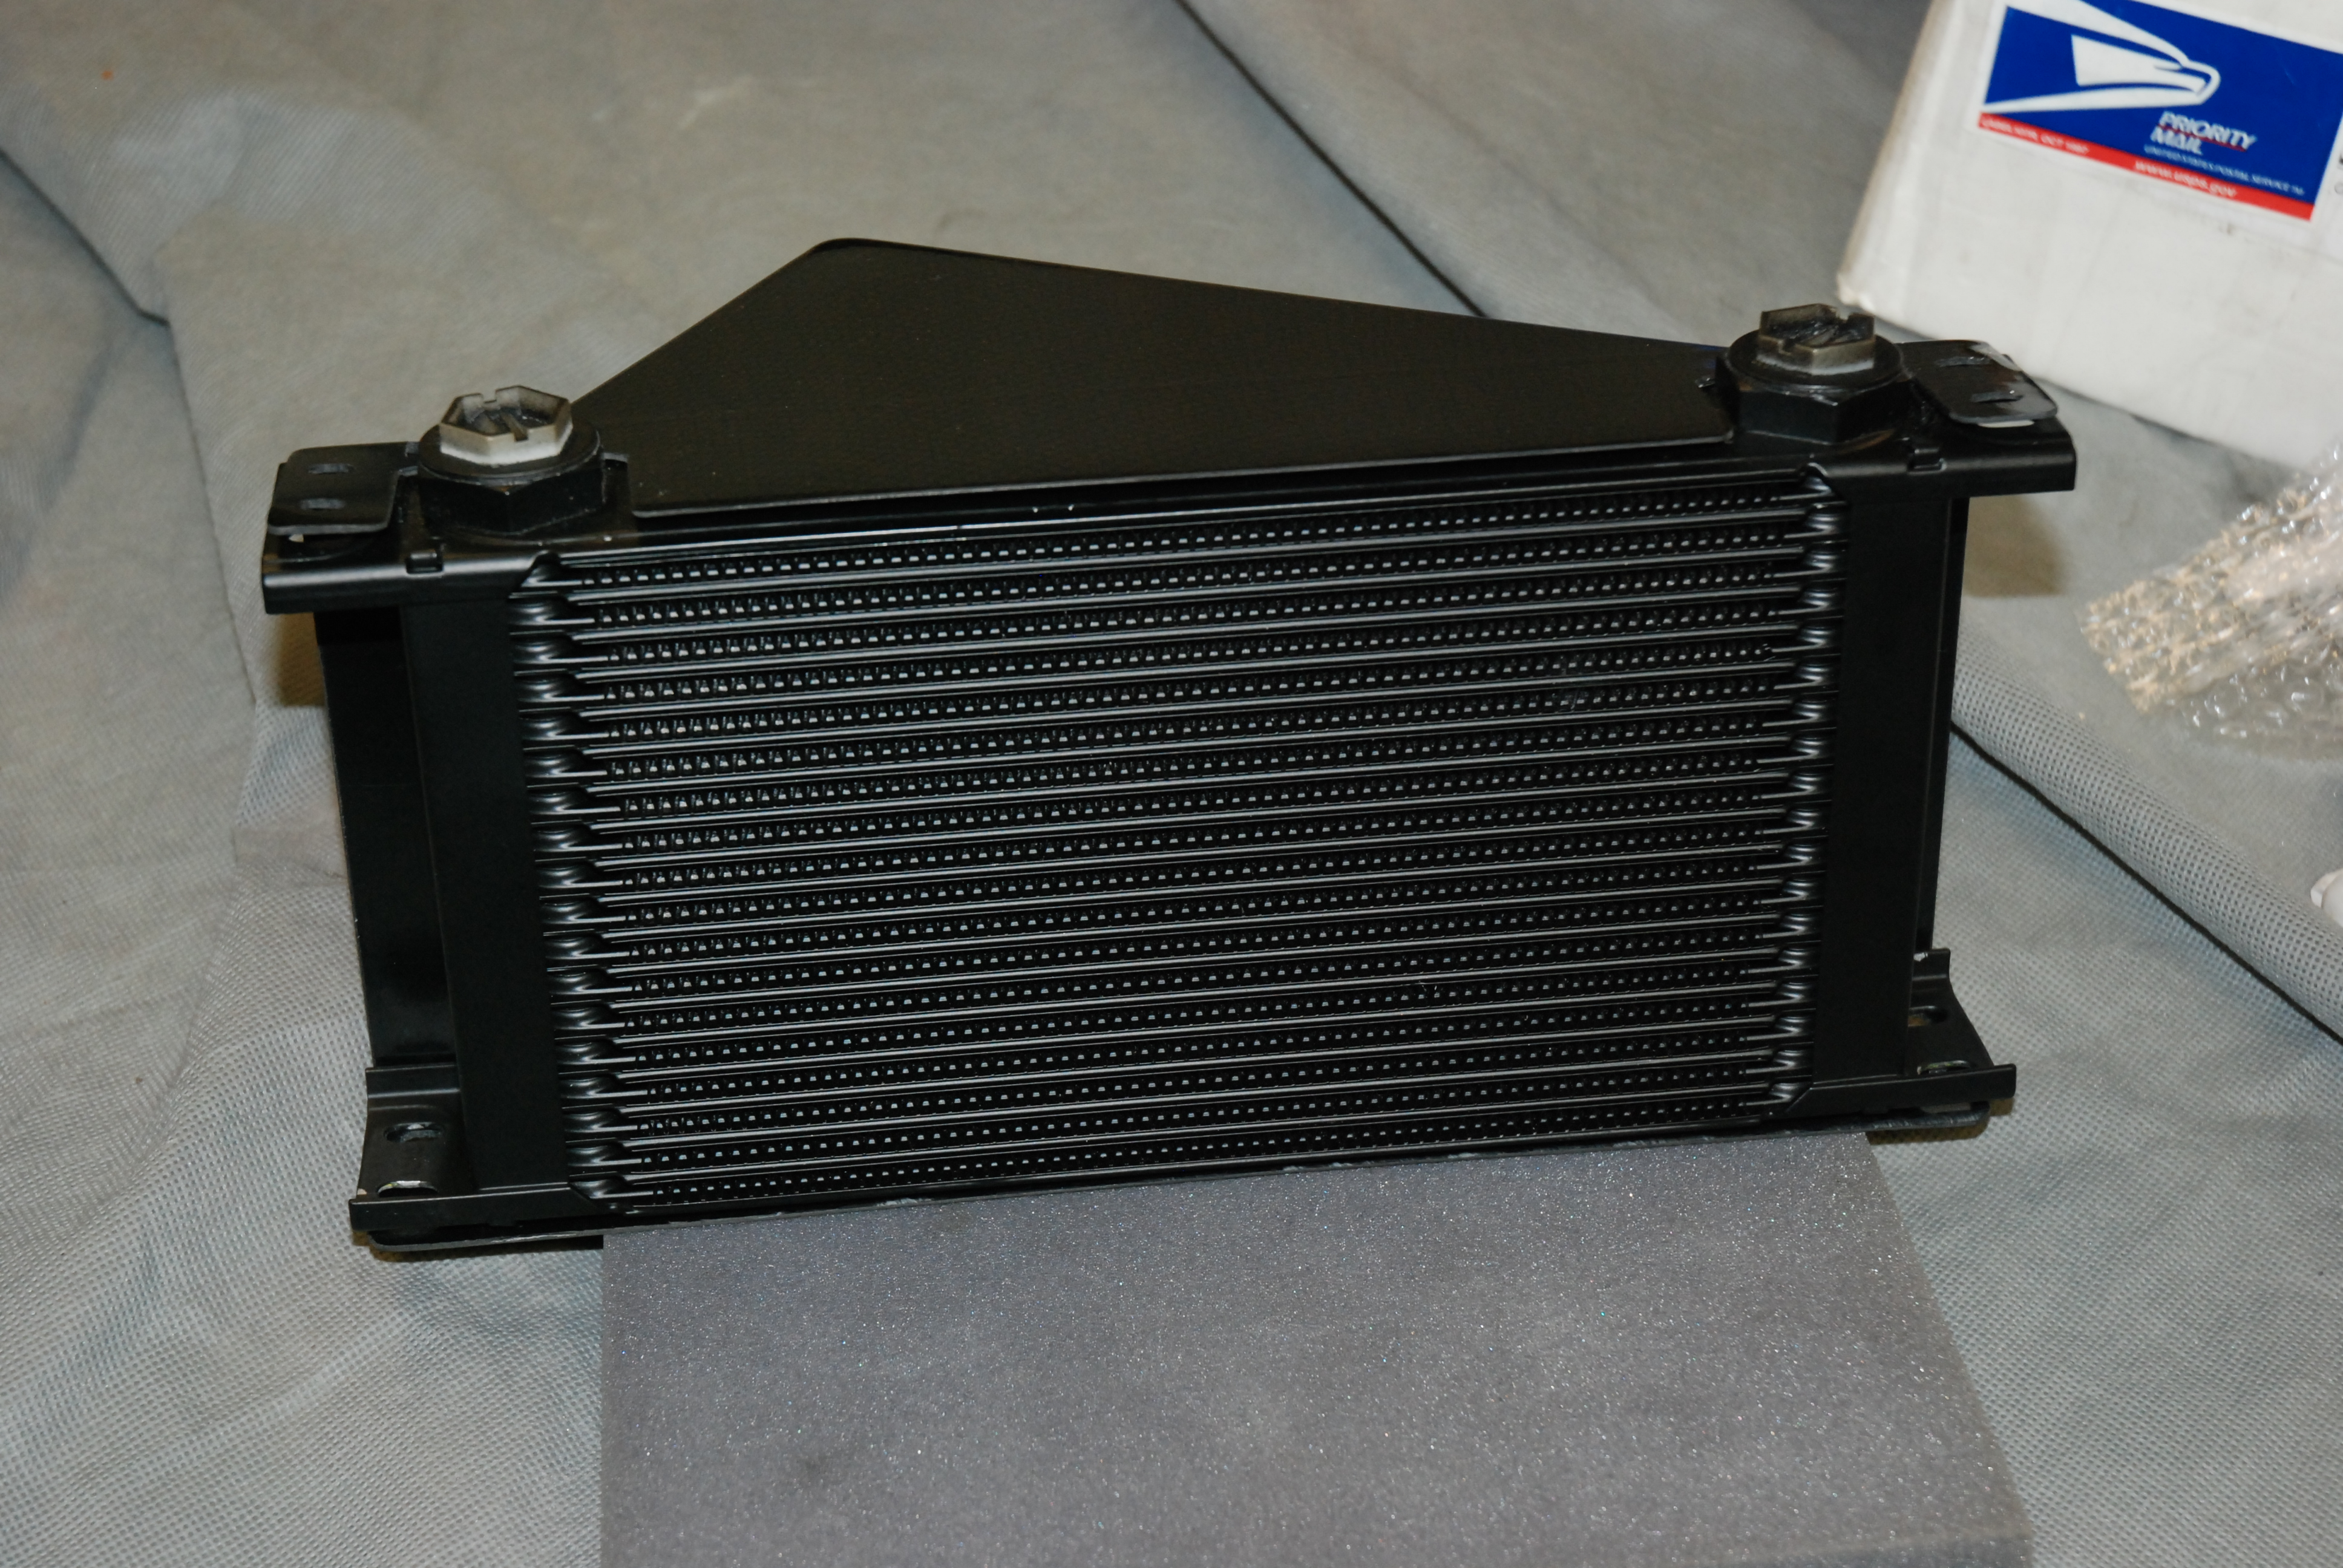
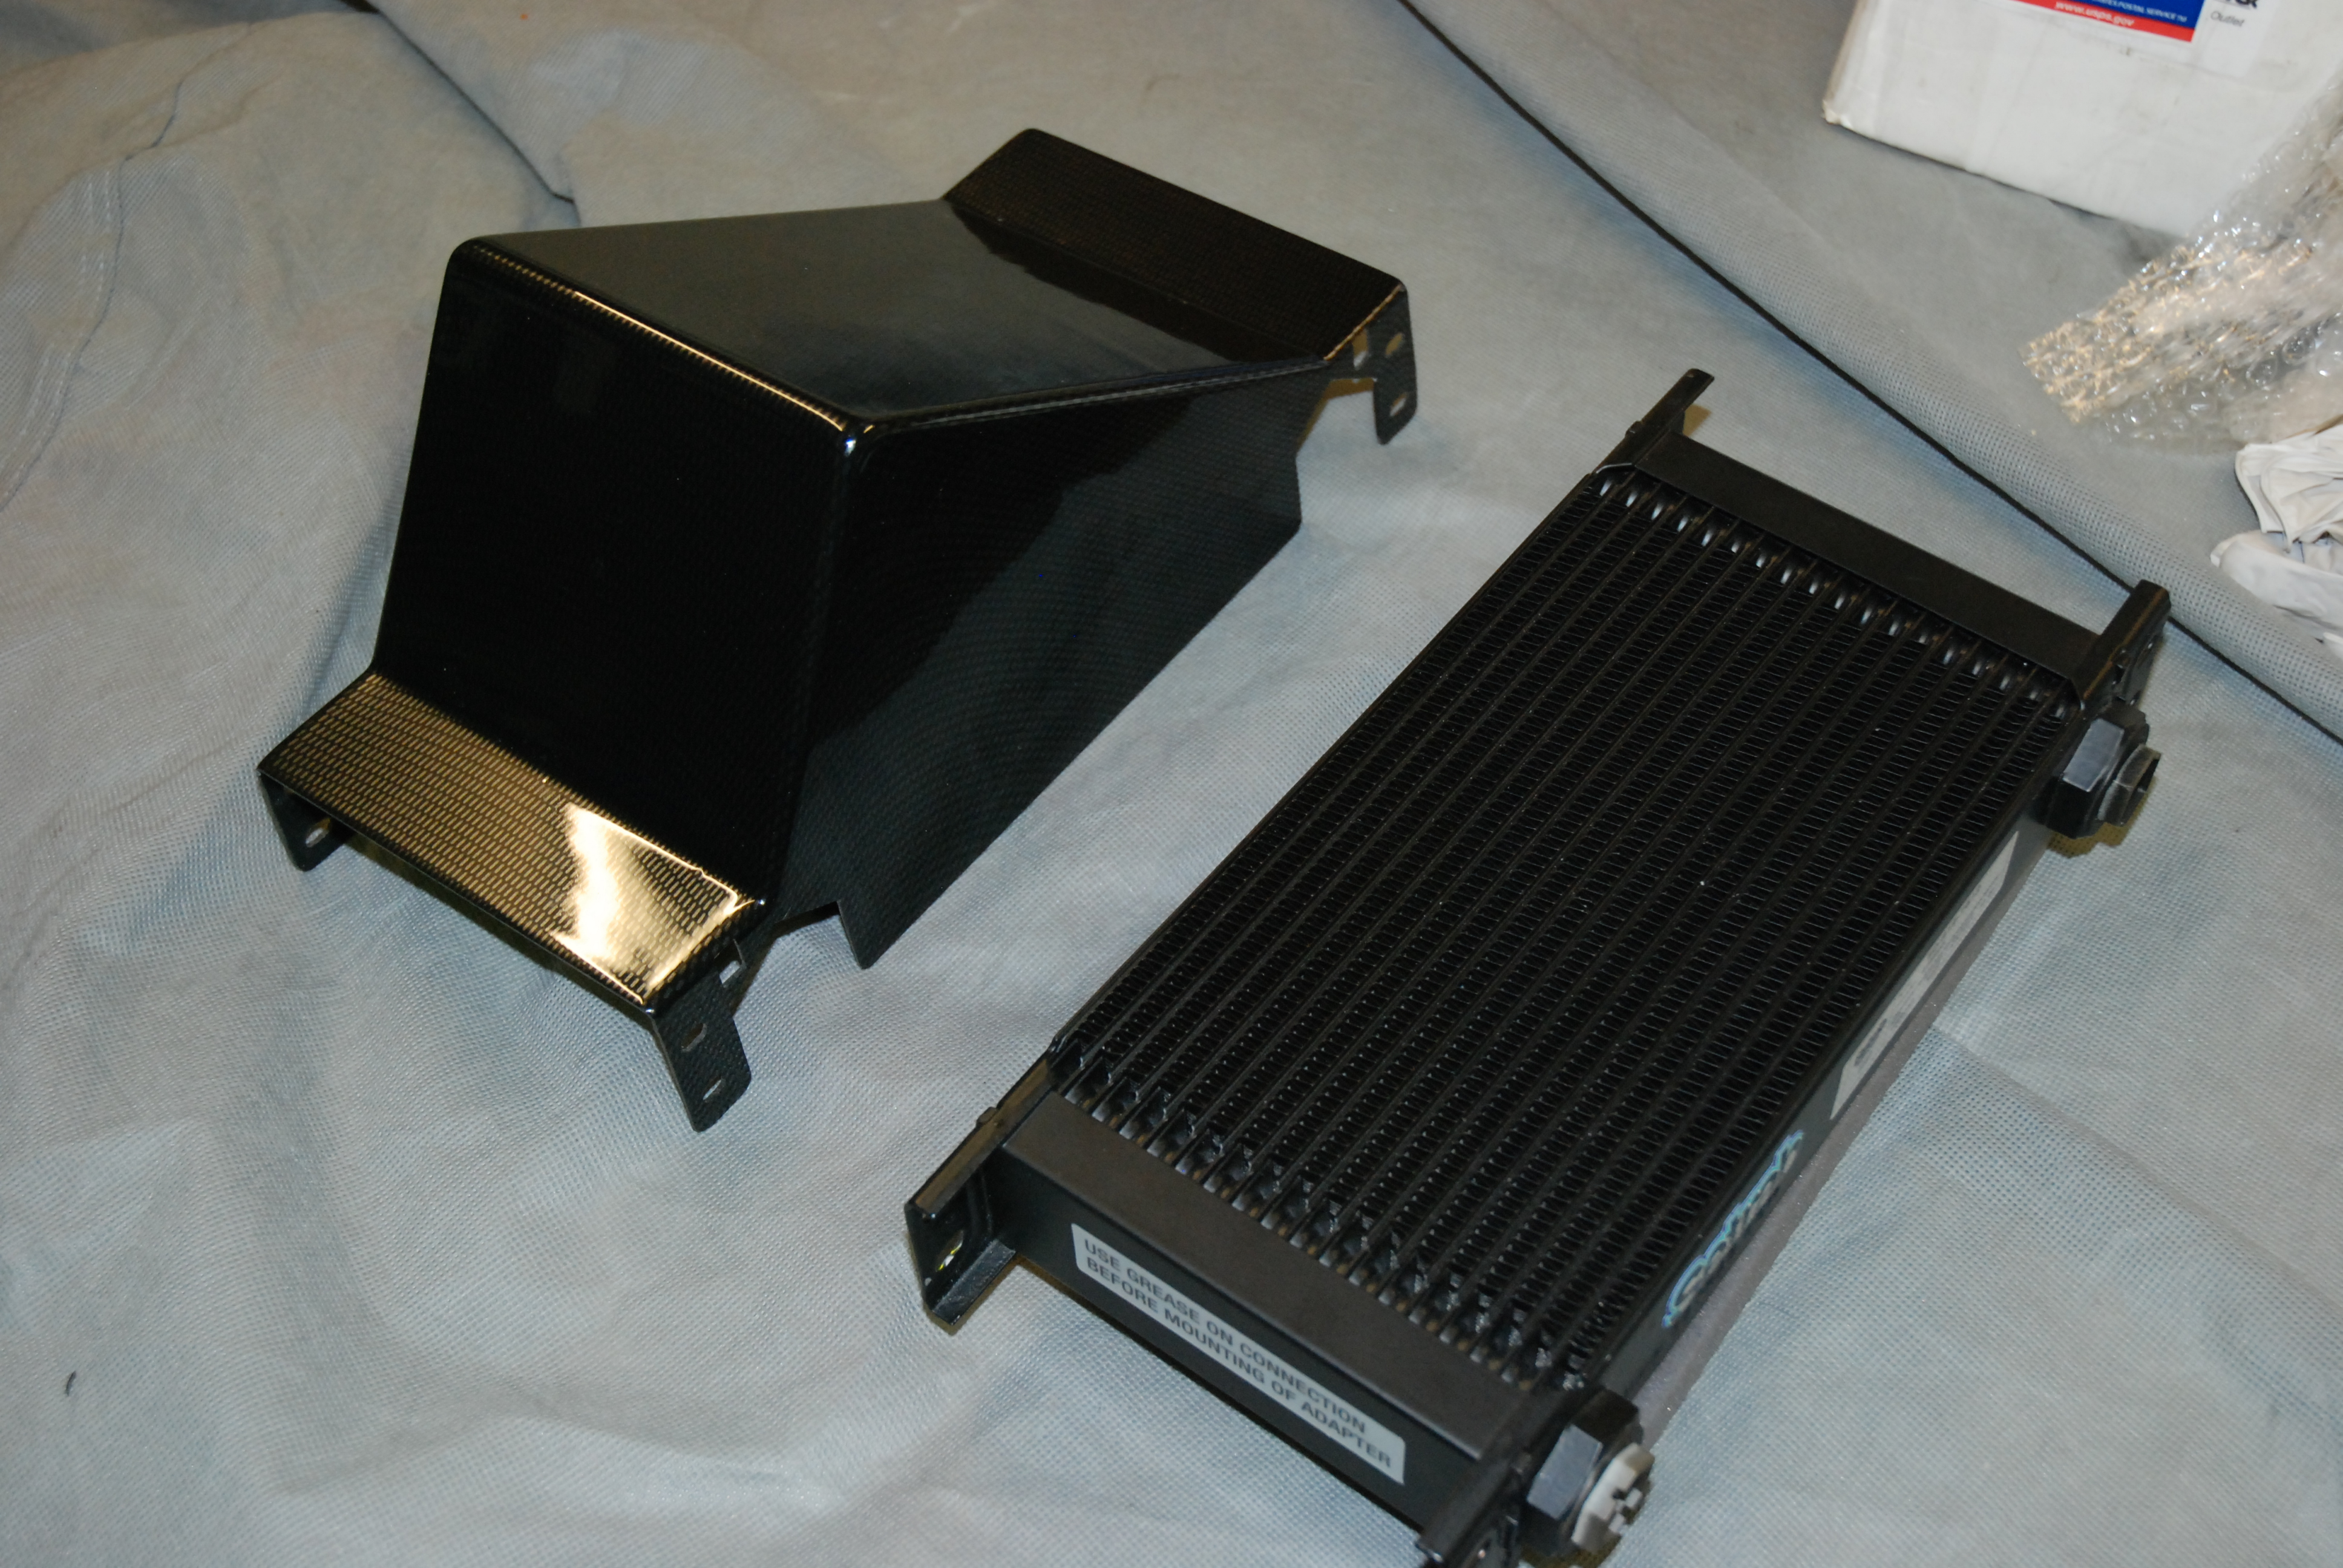
He has made me a duct to fit my 19 row setrab oil cooler. This is a tight fit over my oil cooler and will force feed the core from one of the foglamp cover ducts.
This will now be mocked up in place and then i can cut a hole in the front (square section)to run a hose into the duct from the ram-air ports at the front of the car.
He even managed to form it from some funky carbon effect plastic. Cheers fella, youre a star.
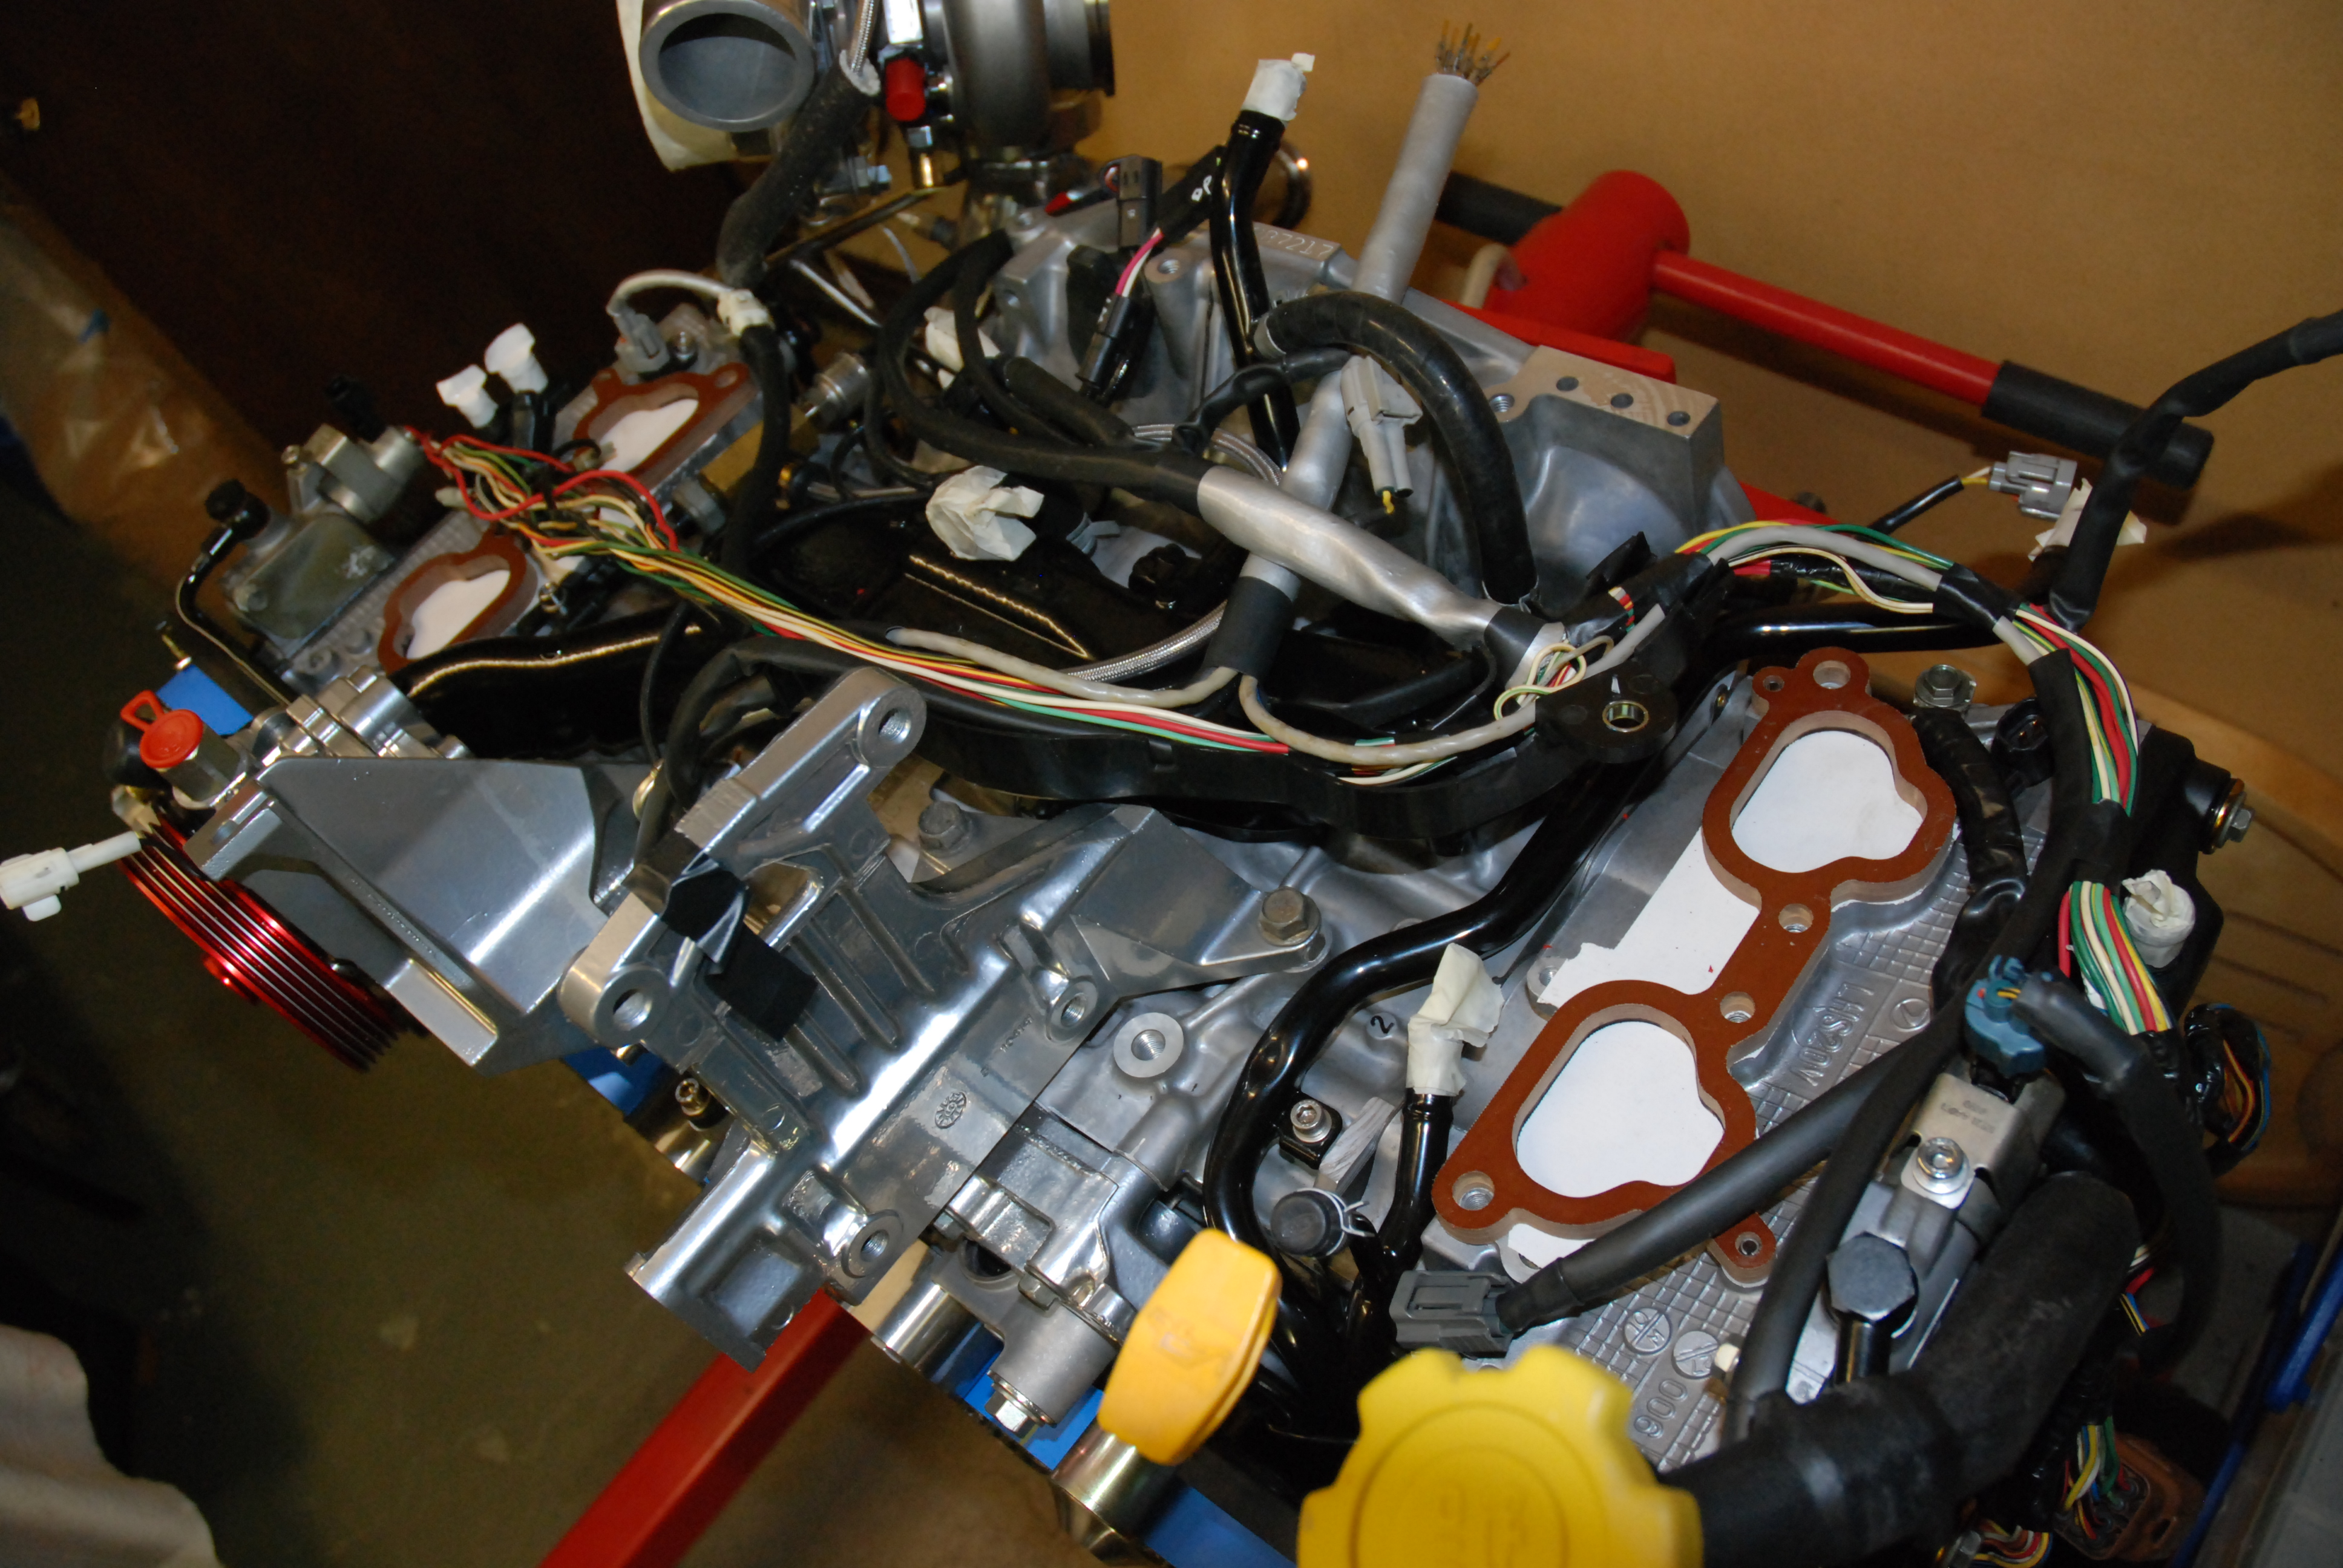
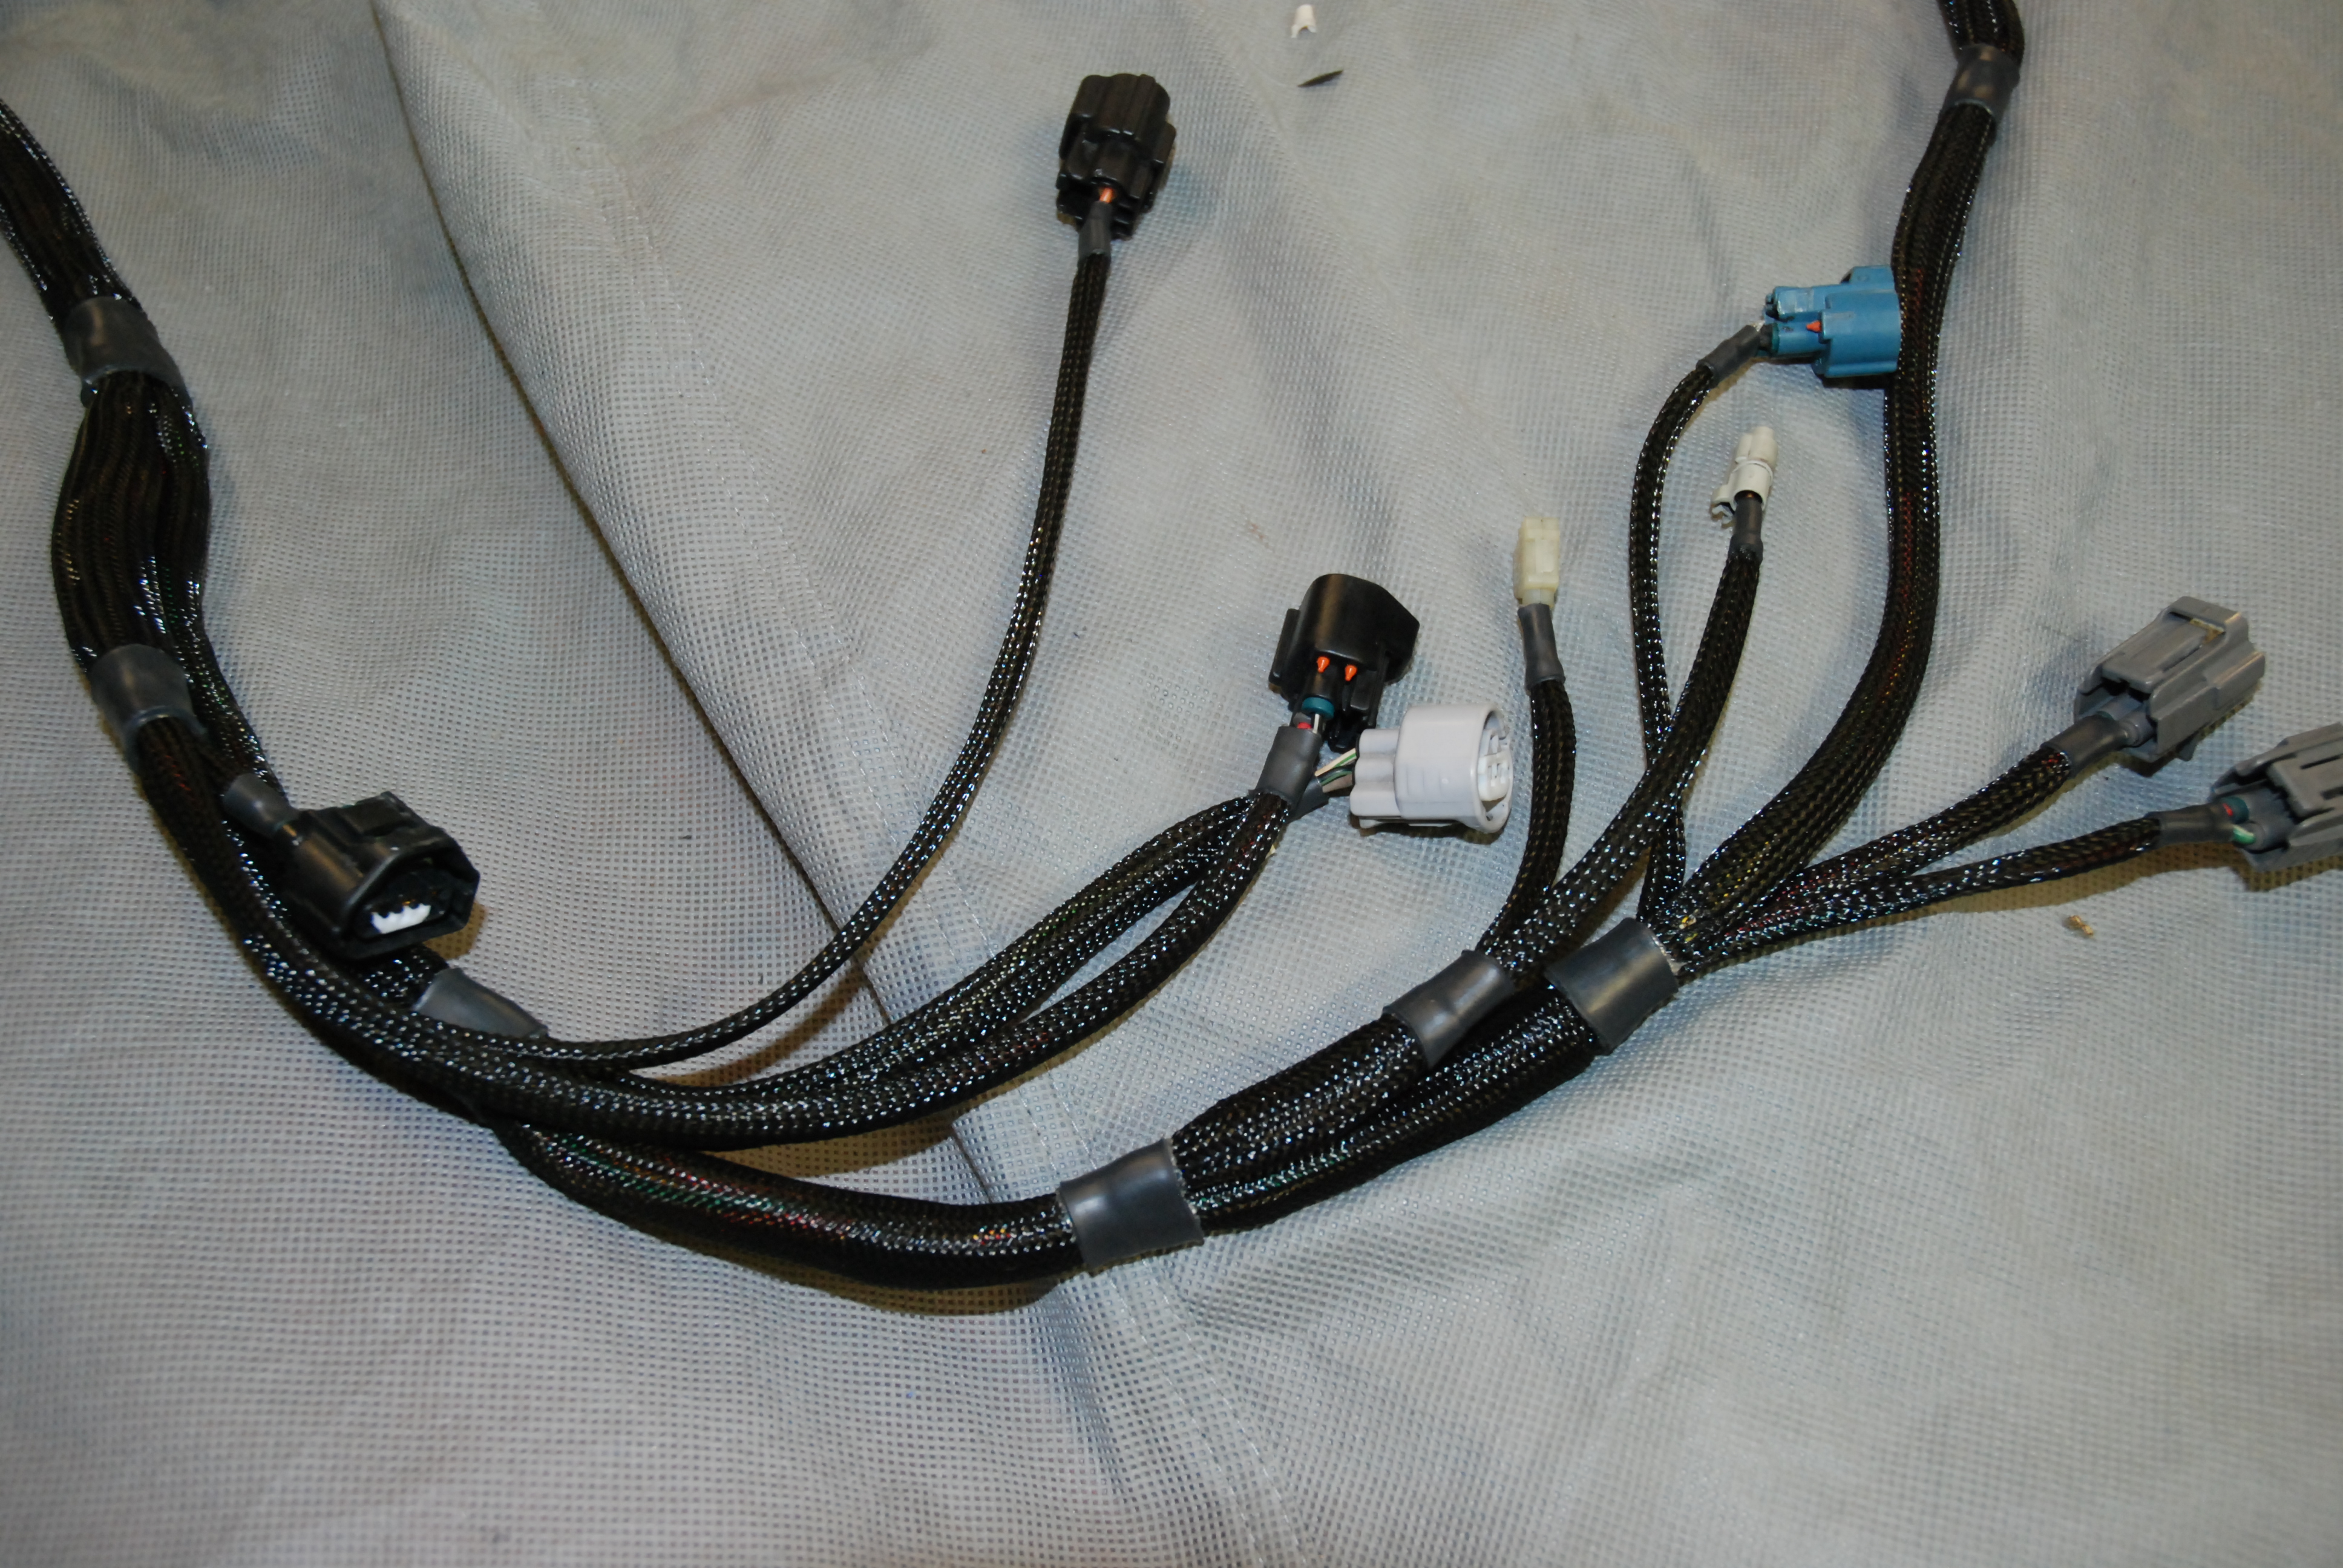
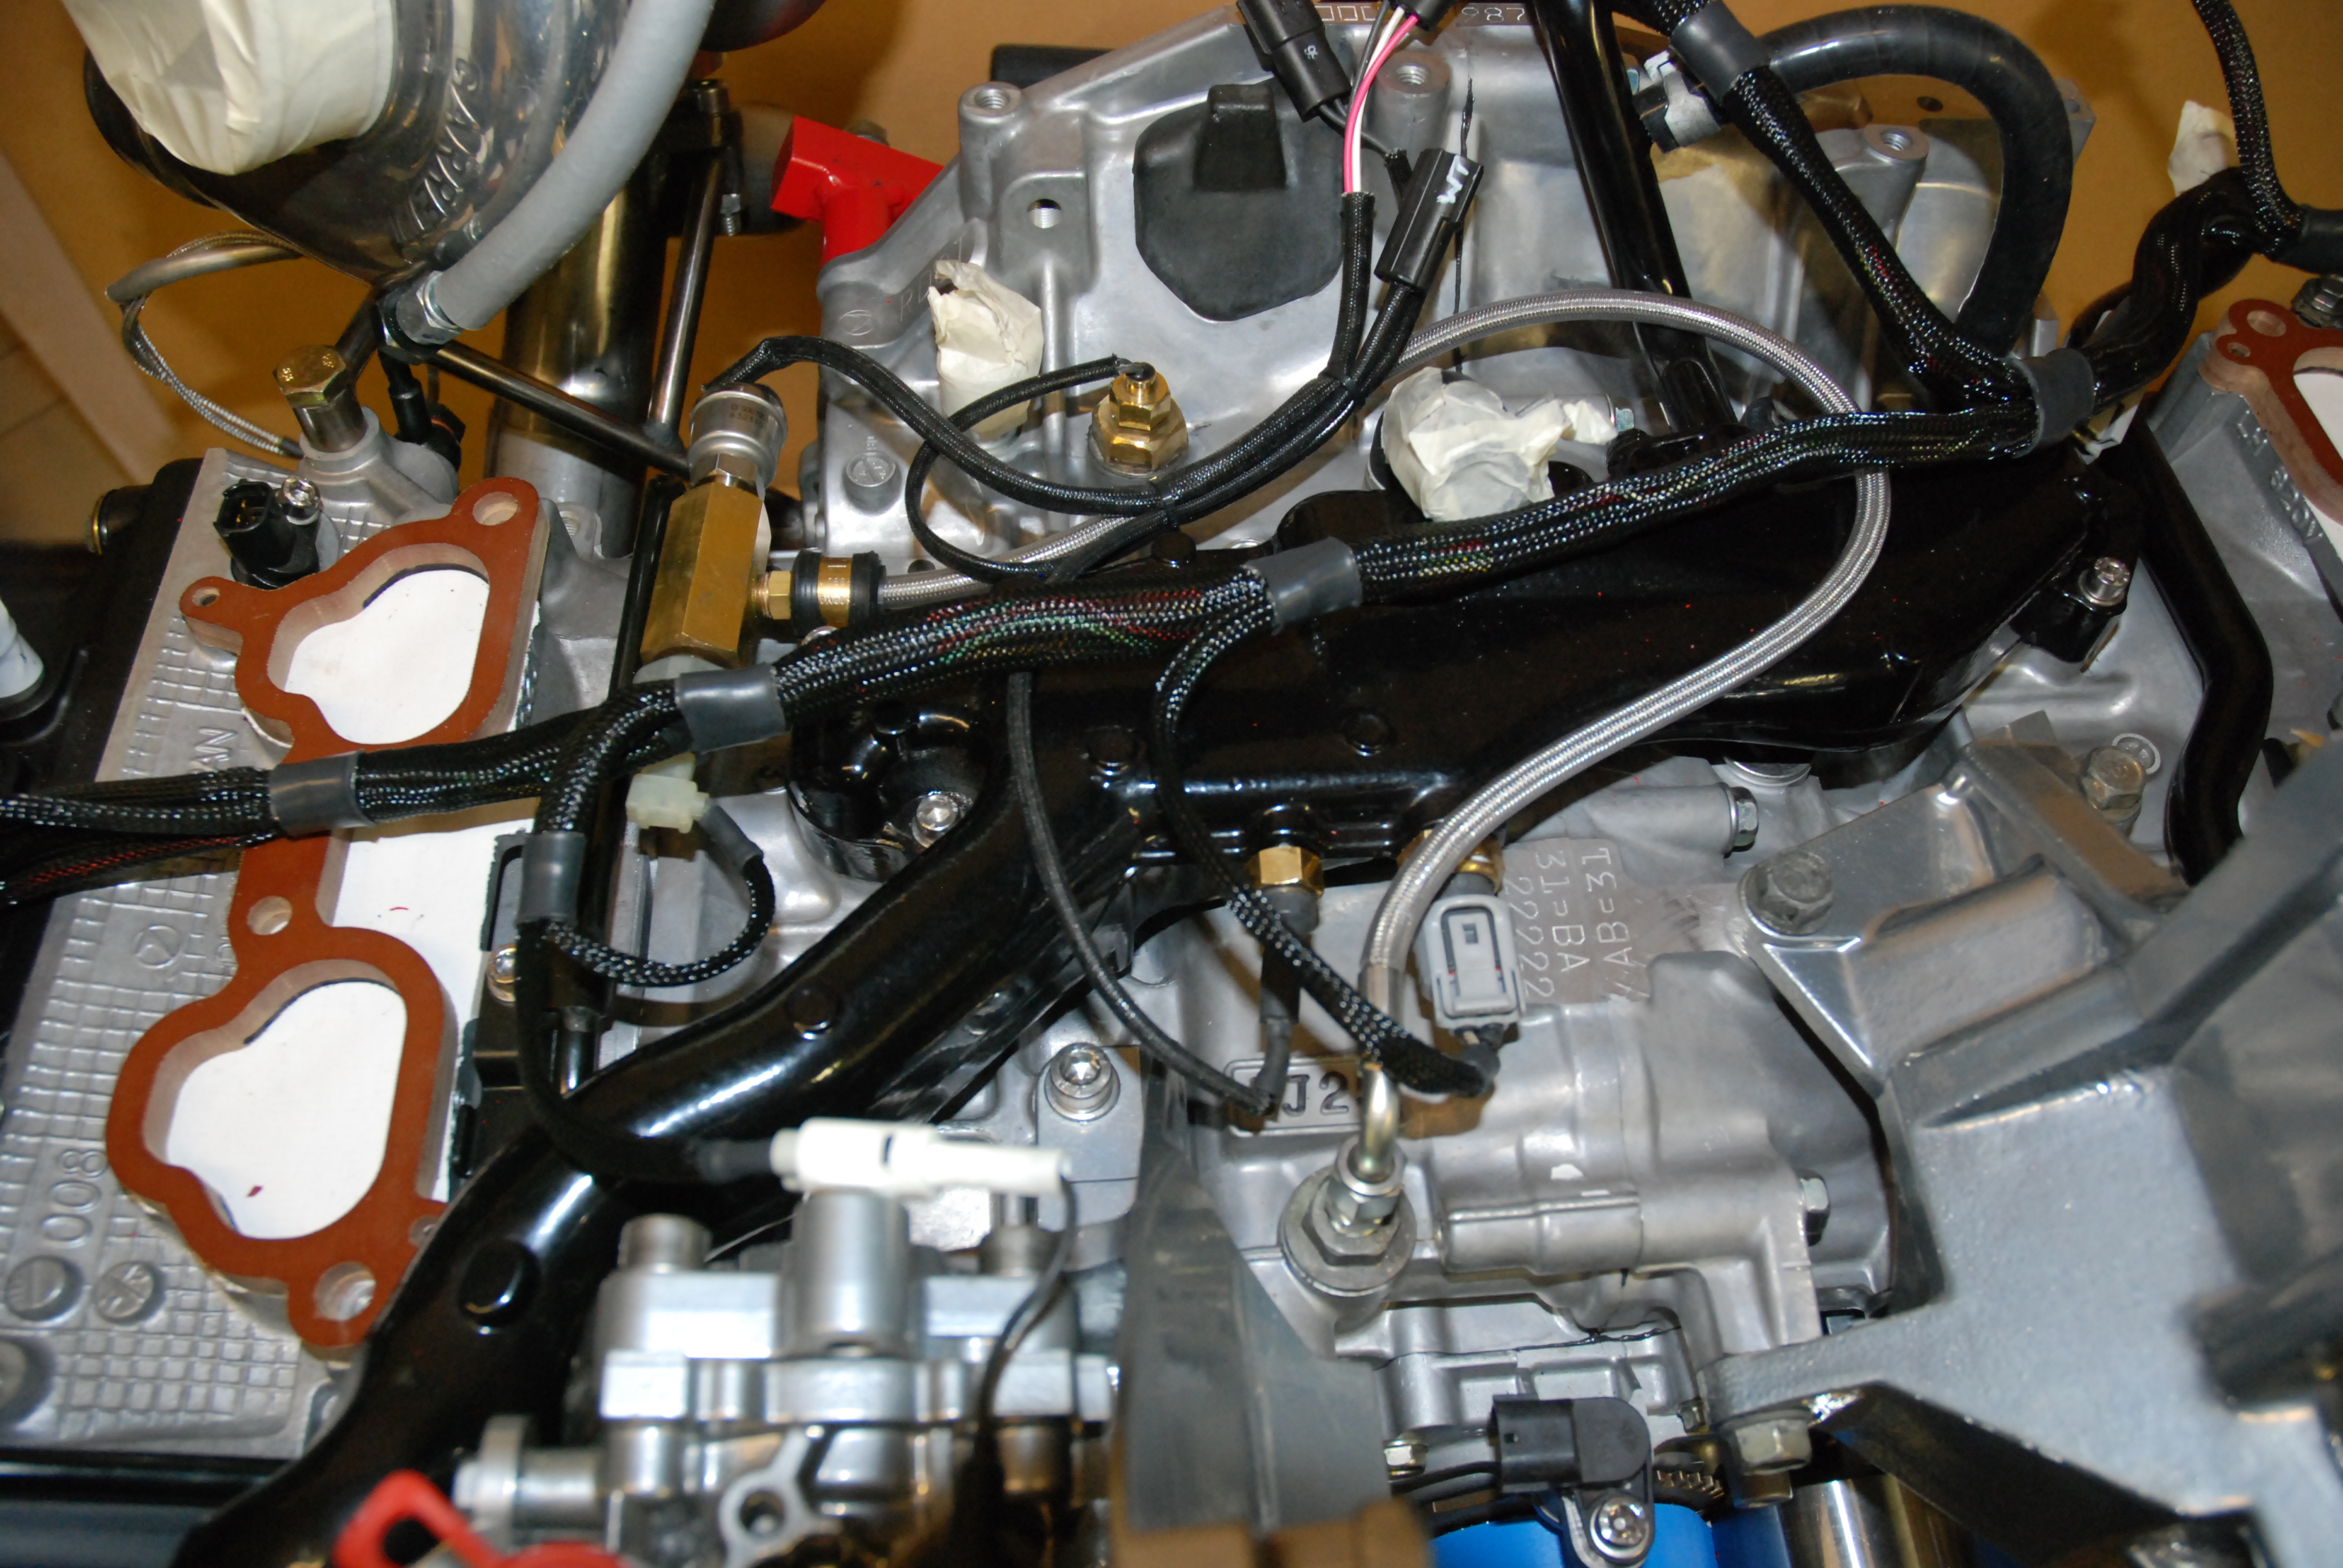
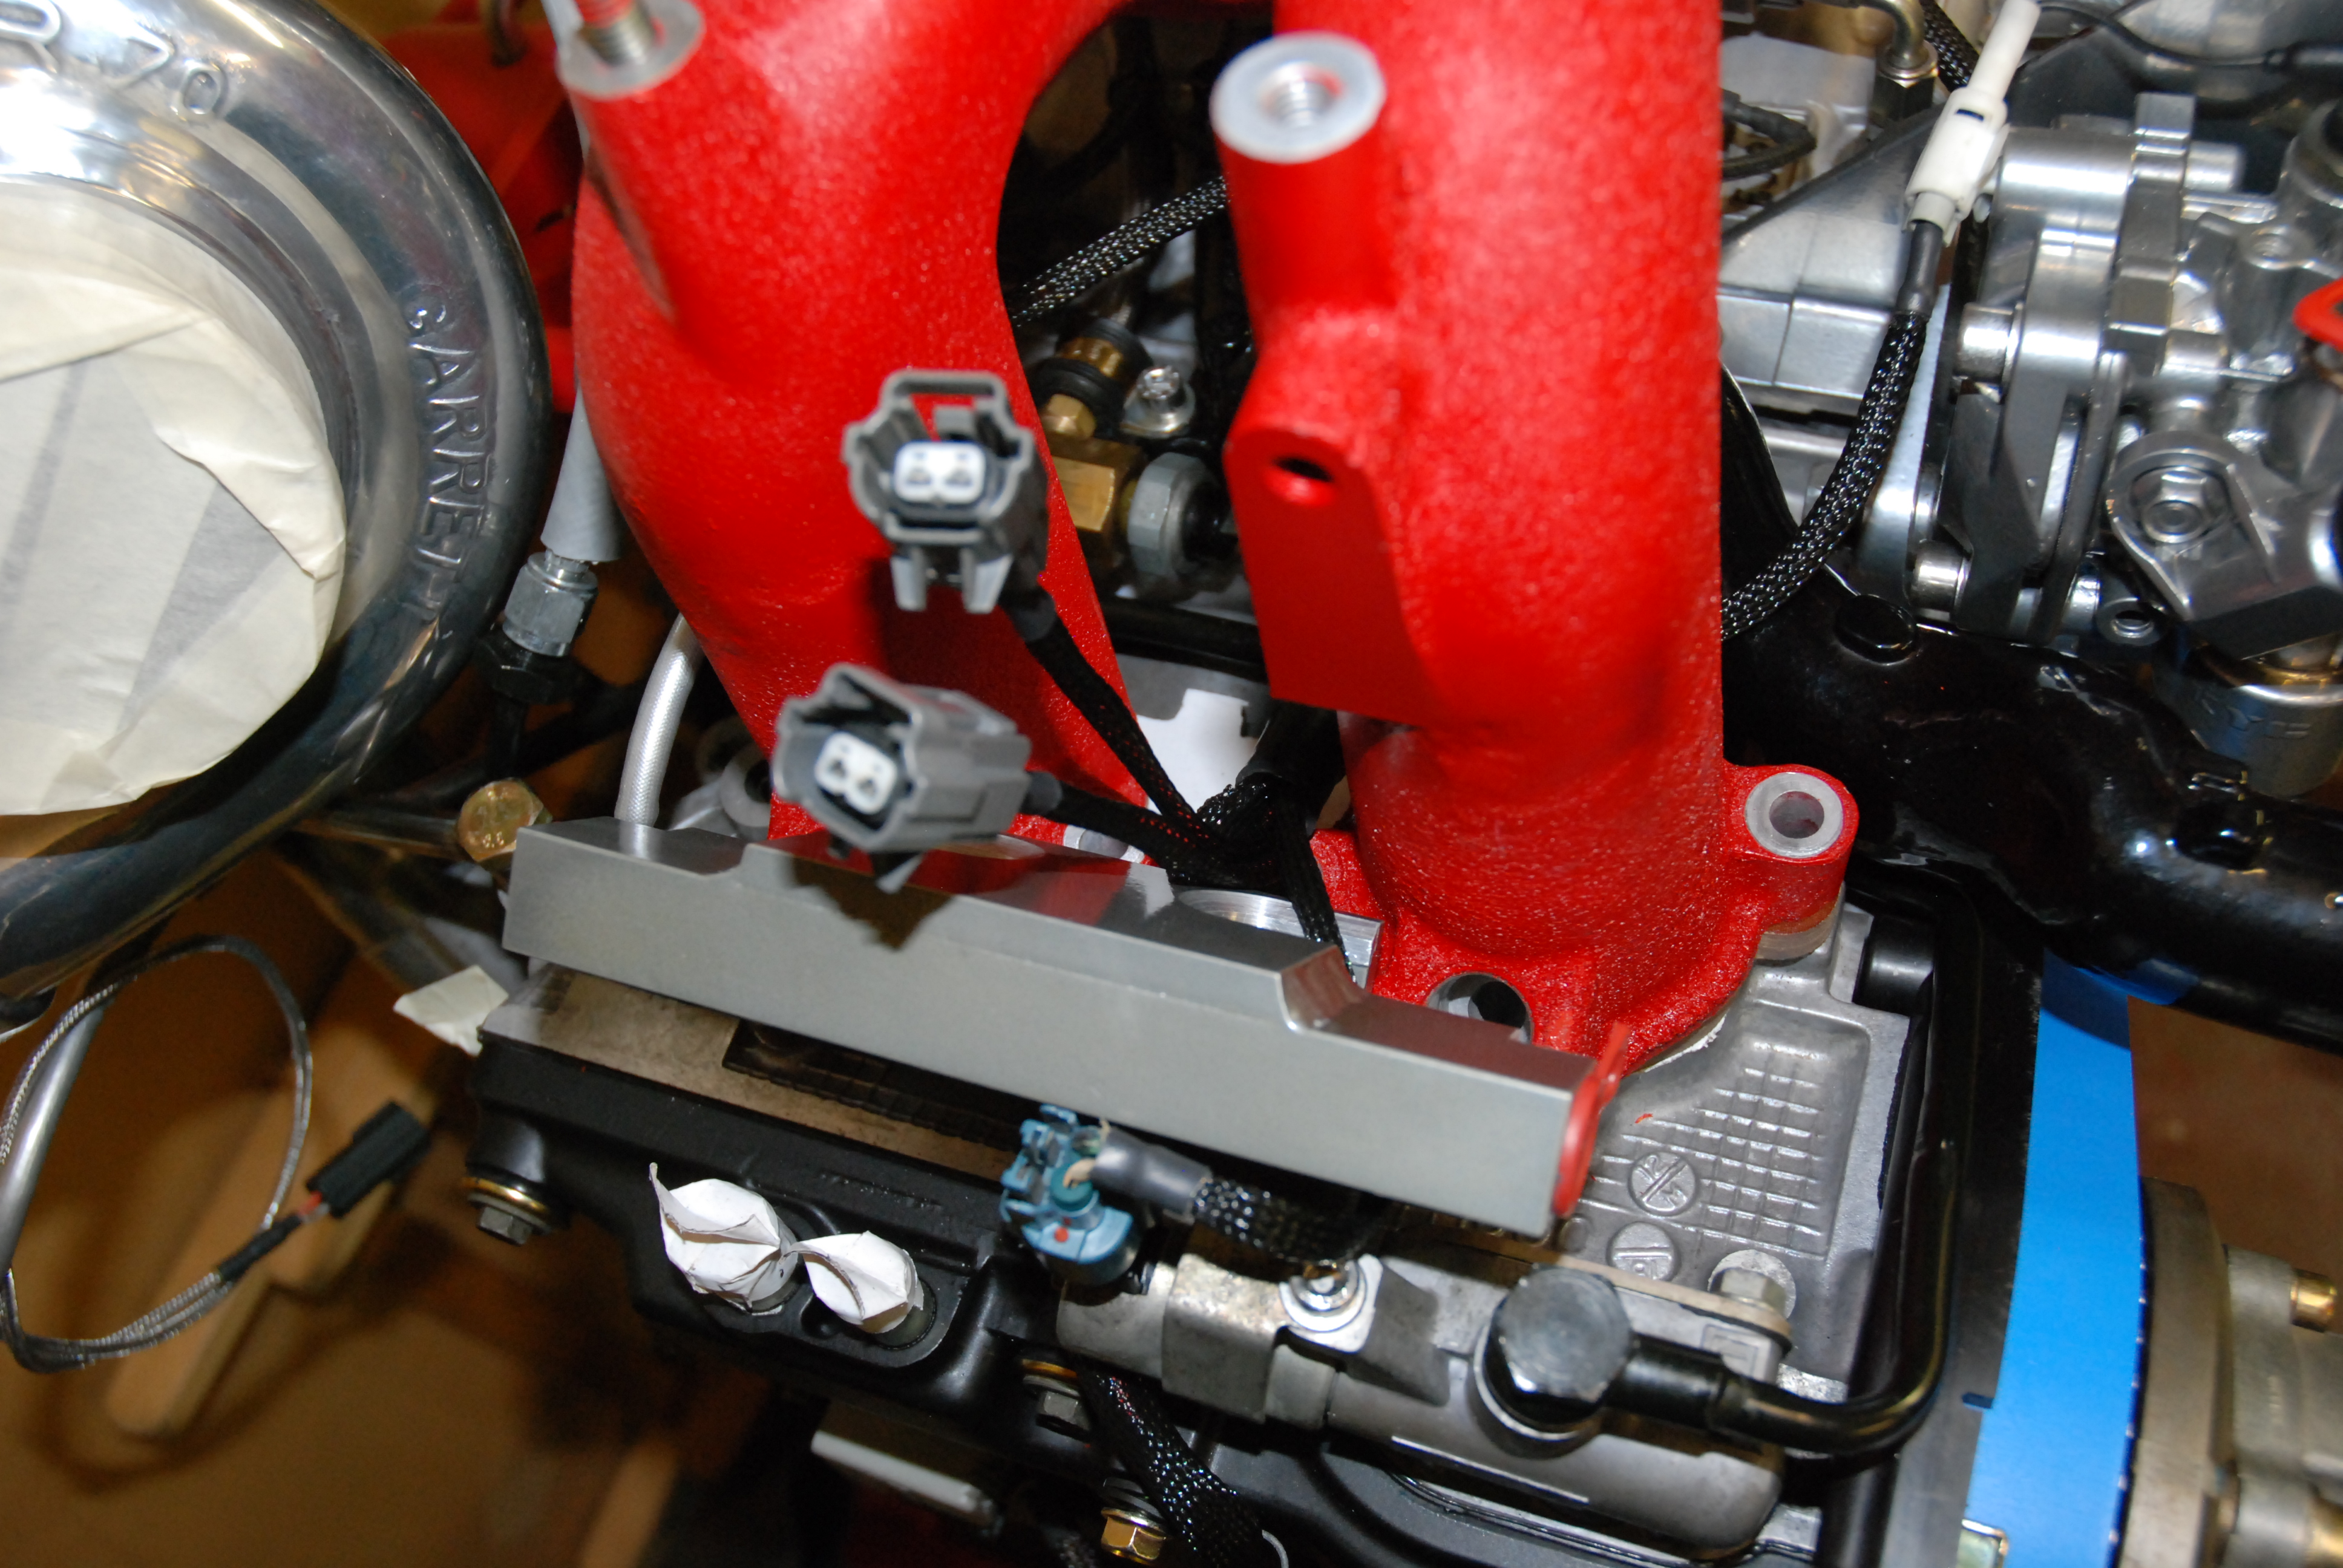
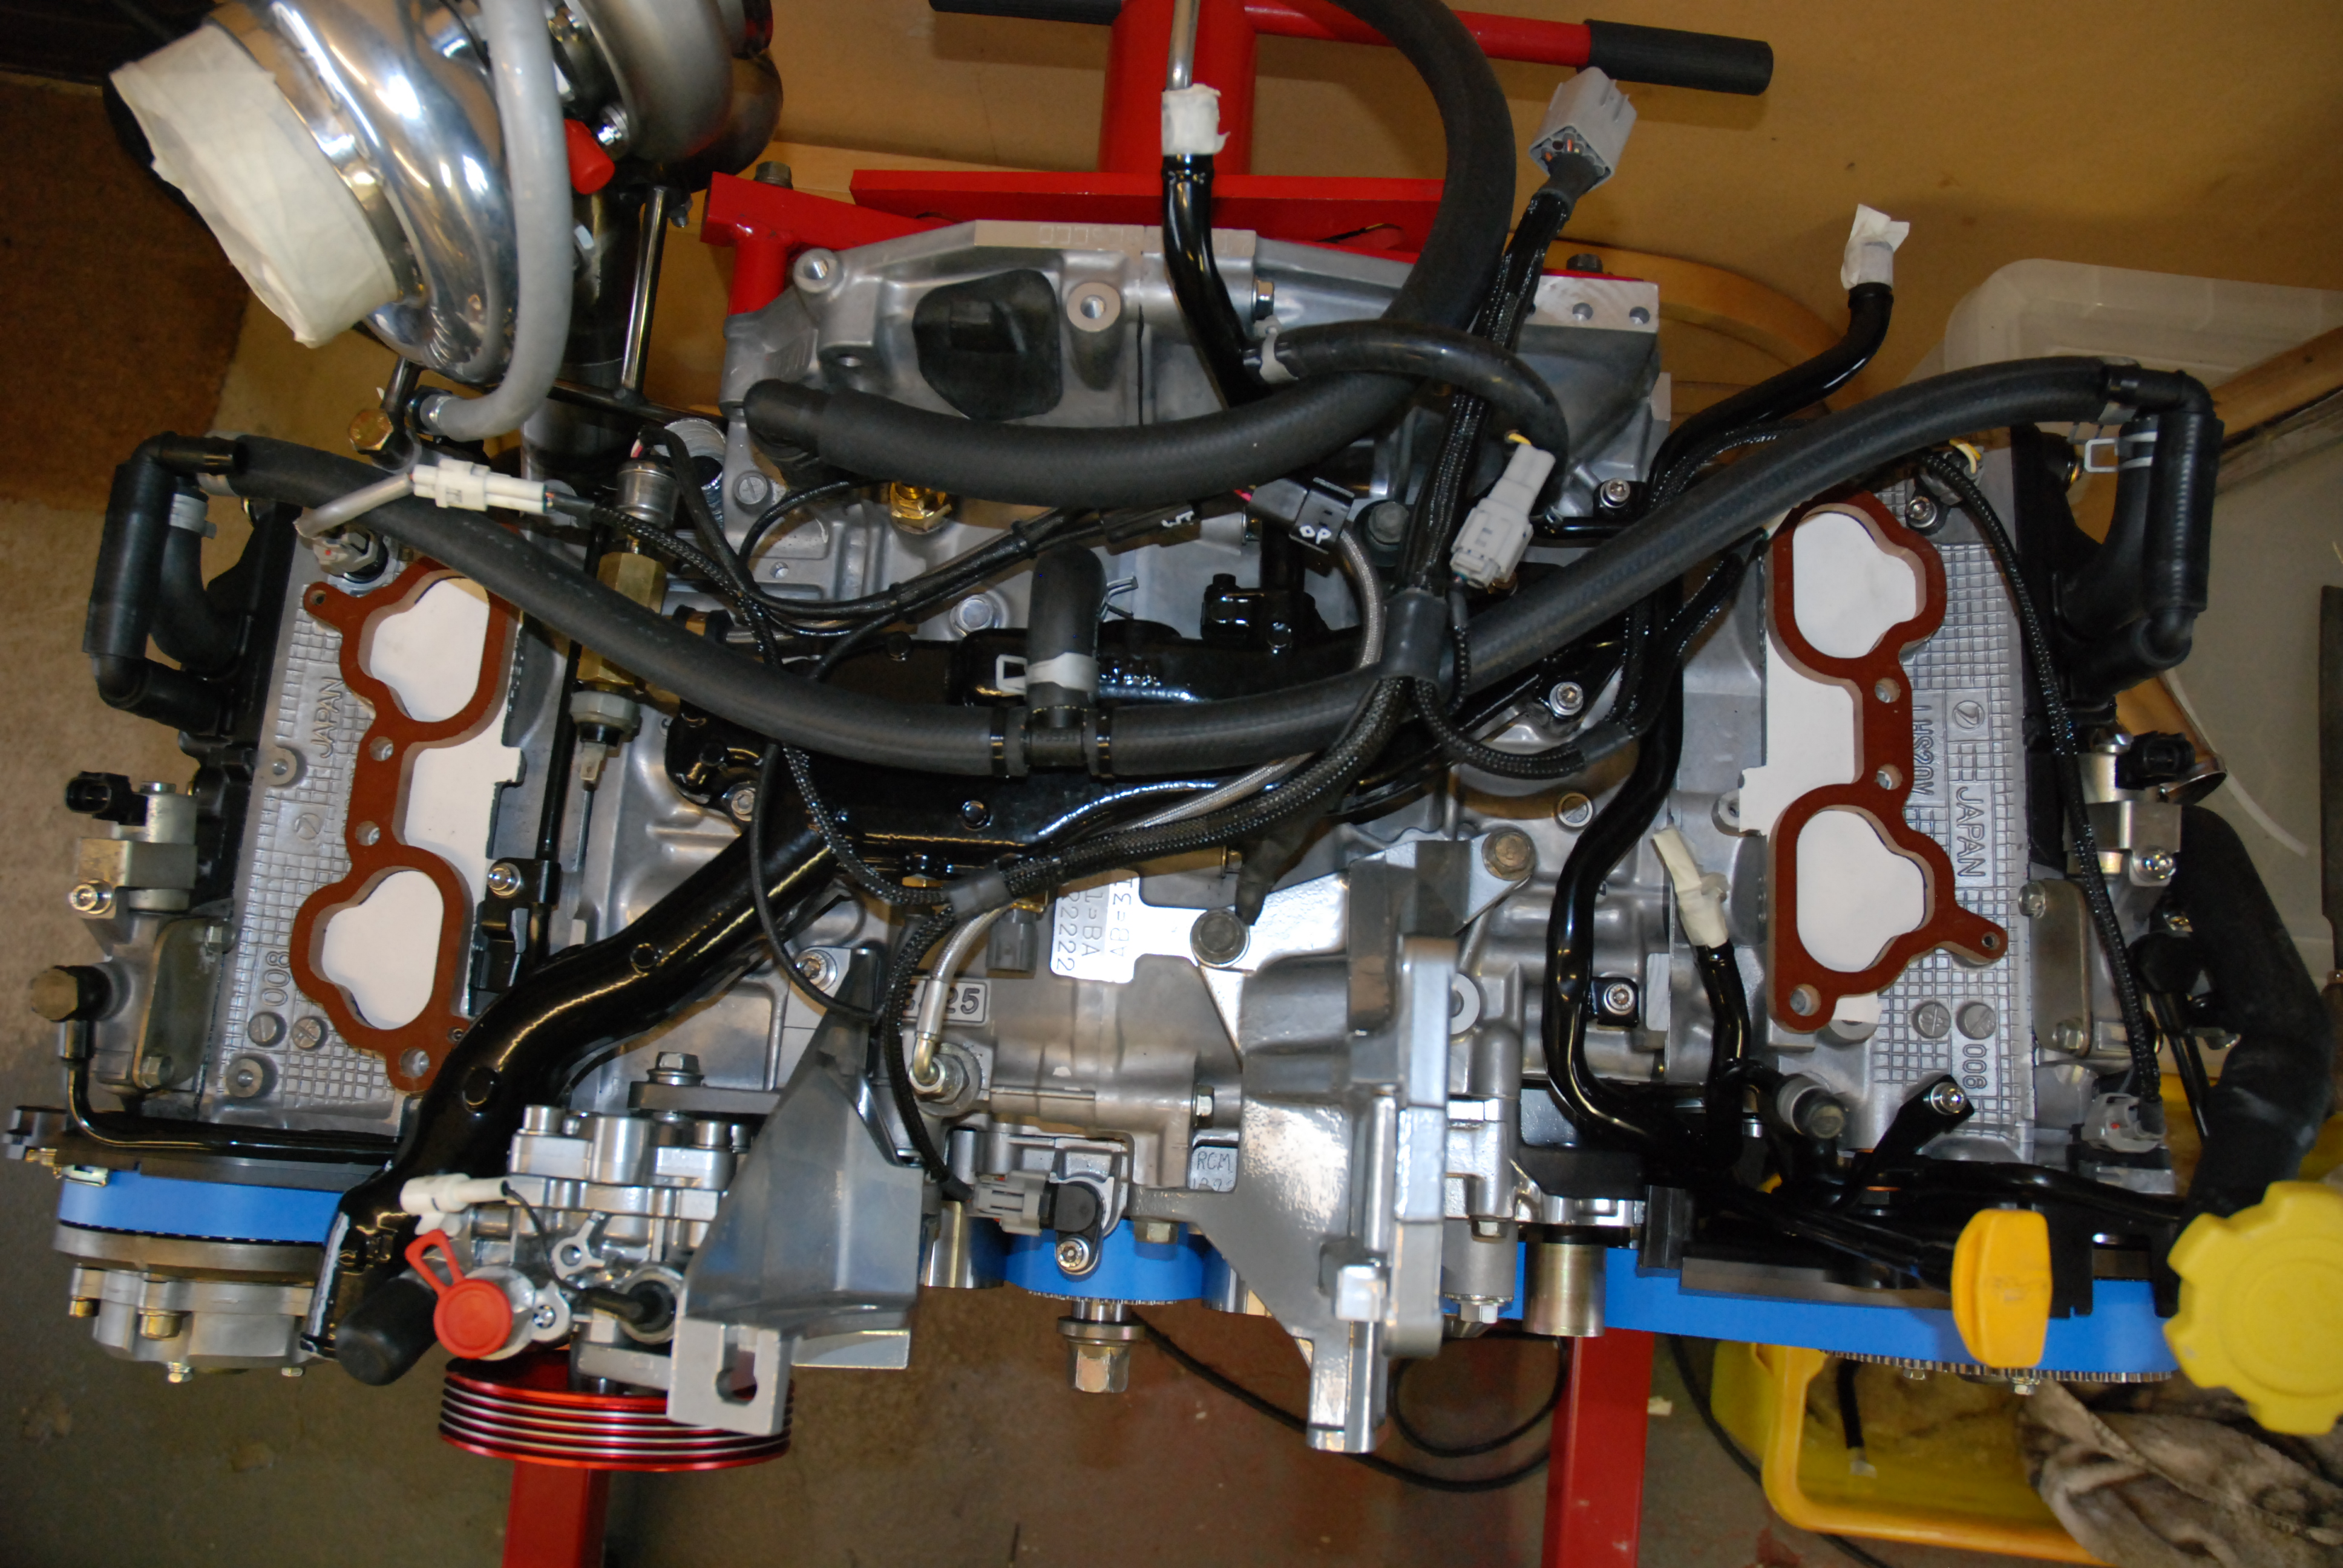
And as for the engine harness, well i decided it was awful in stock form so heres how it looks right now. lol. Im spiral wrapping all take offs and then sleeving them.
Looks horrid at the moment but i have faith it will look pretty neat once complete

He has made me a duct to fit my 19 row setrab oil cooler. This is a tight fit over my oil cooler and will force feed the core from one of the foglamp cover ducts.
This will now be mocked up in place and then i can cut a hole in the front (square section)to run a hose into the duct from the ram-air ports at the front of the car.
He even managed to form it from some funky carbon effect plastic. Cheers fella, youre a star.
And as for the engine harness, well i decided it was awful in stock form so heres how it looks right now. lol. Im spiral wrapping all take offs and then sleeving them.
Looks horrid at the moment but i have faith it will look pretty neat once complete
 22-09-2010, 03:53 AM
#304
Boost Junkie
Thread Starter
Cheers Carlo
Oil cooler duct tried in for size. I think i measured that about right. Lol
Need to cut the hole in the front once its all bracketed in.
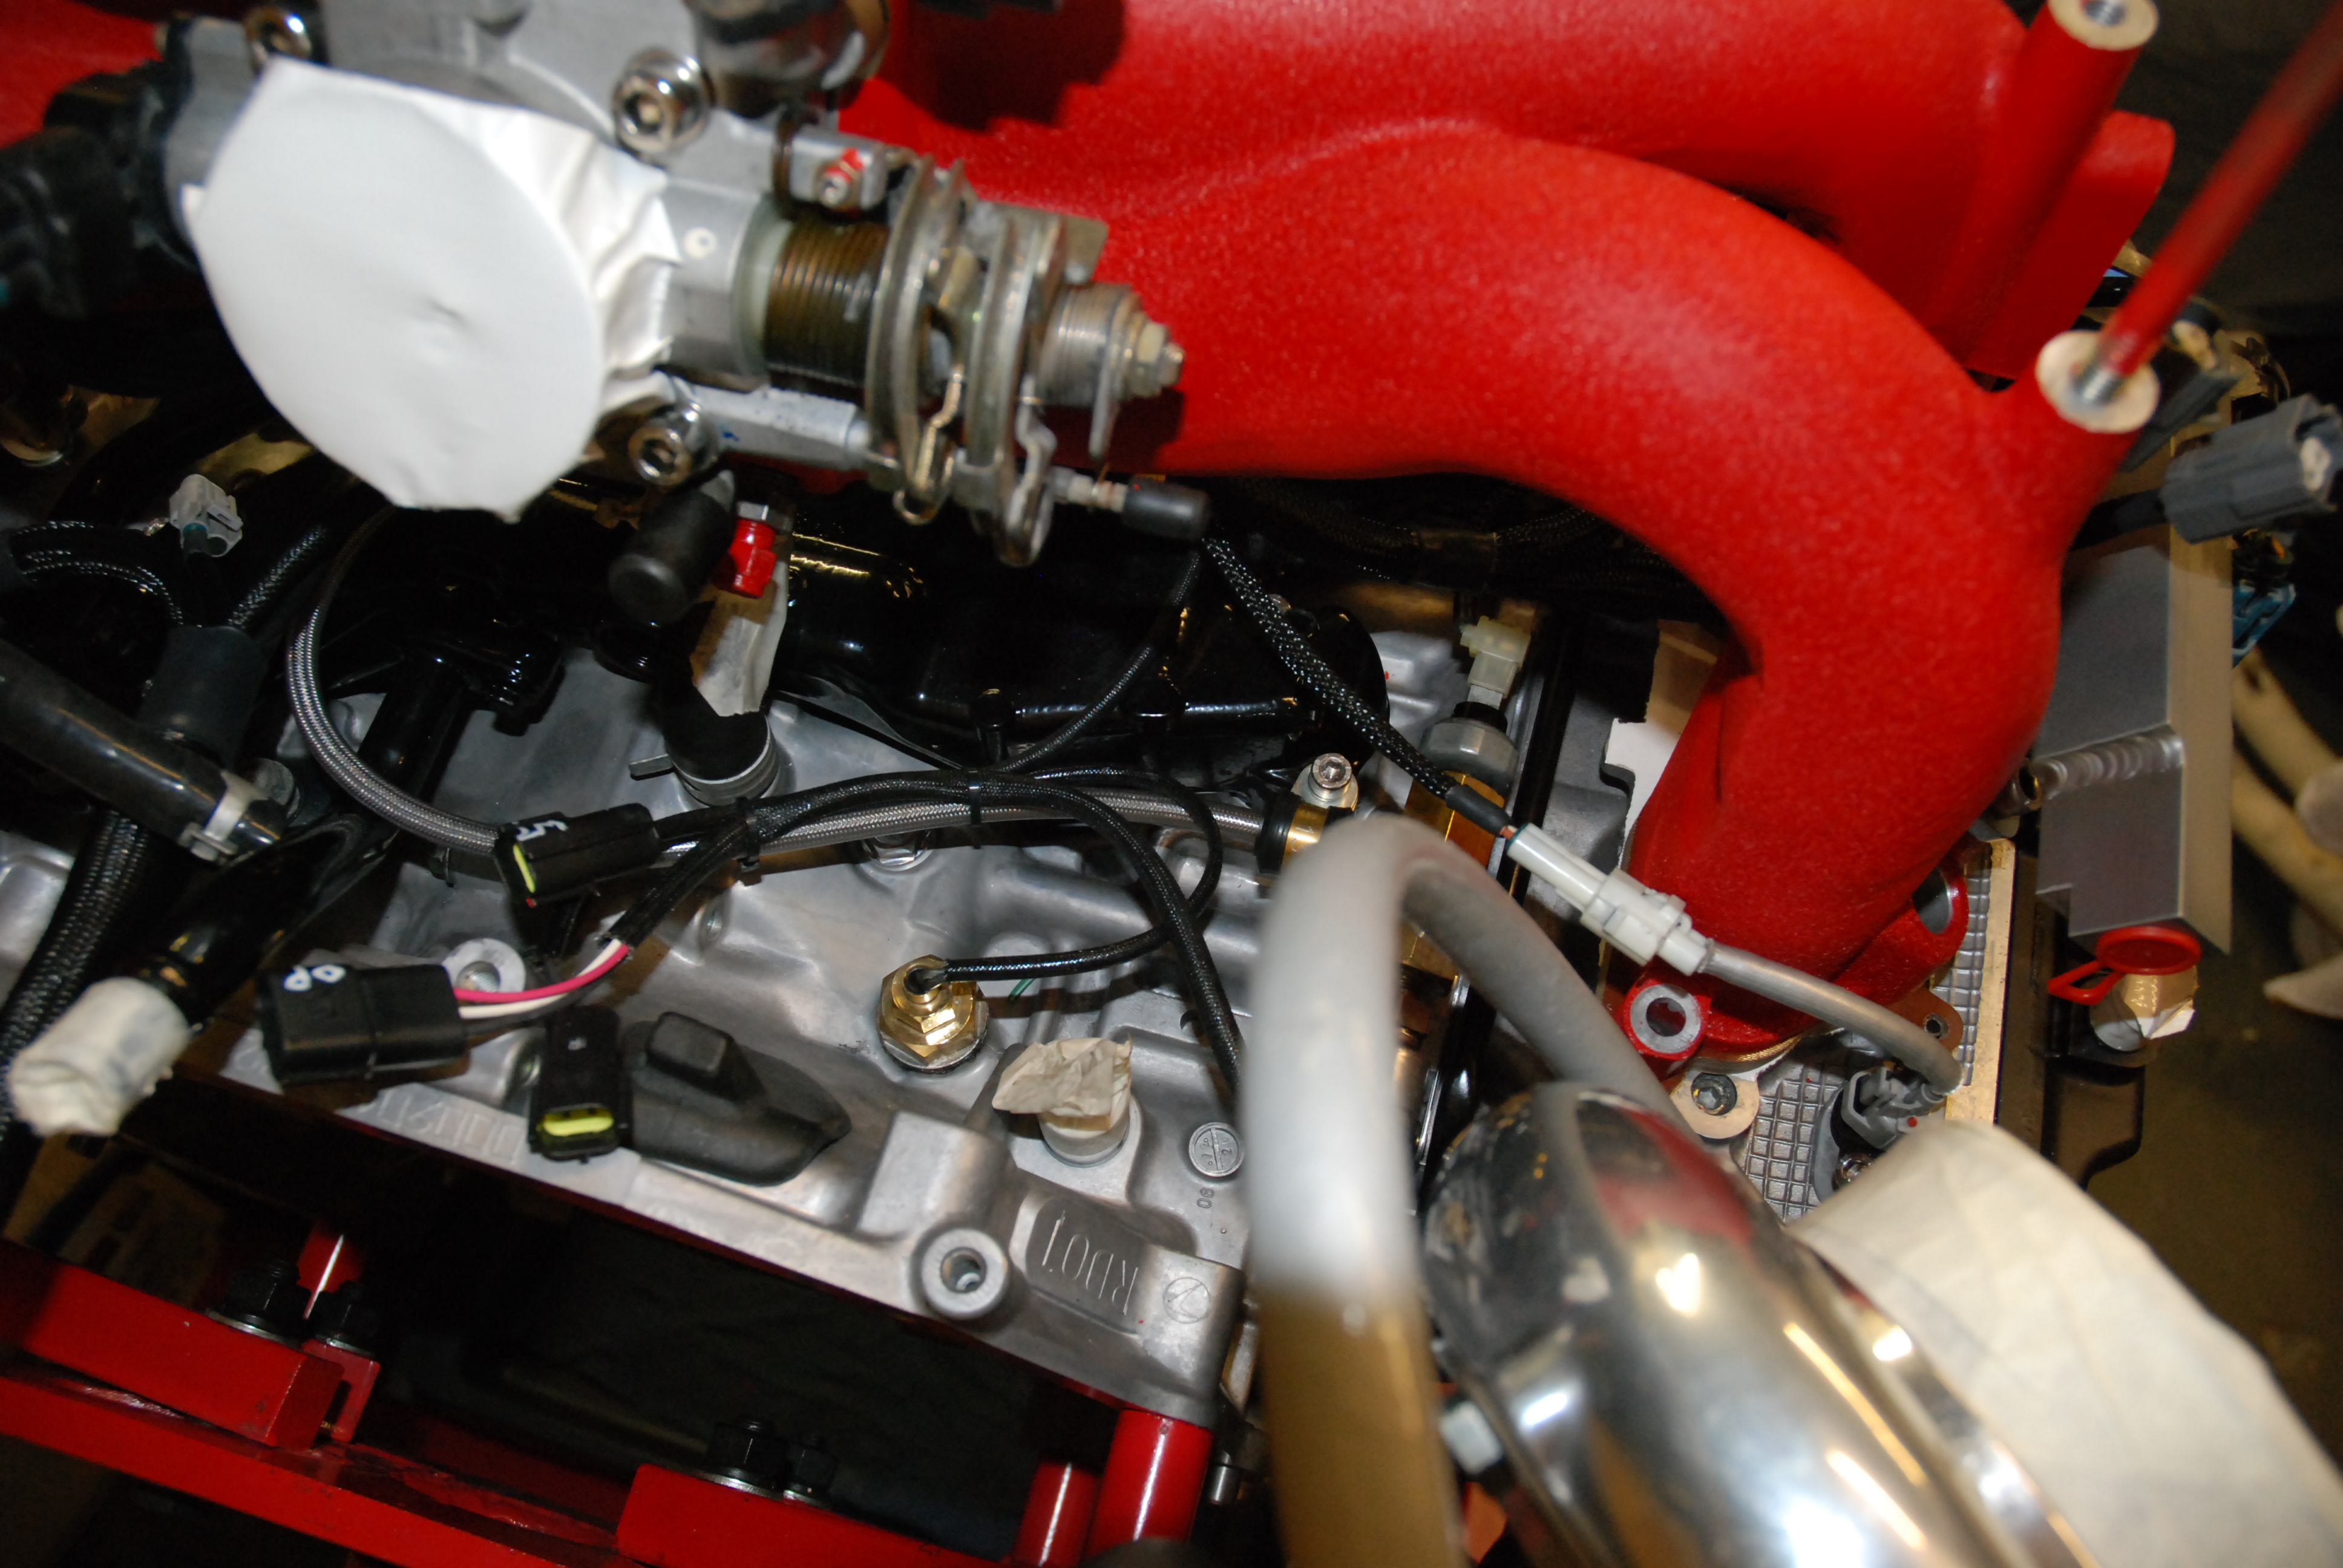
Loom starting to take some shape now.
Oil cooler duct tried in for size. I think i measured that about right. Lol
Need to cut the hole in the front once its all bracketed in.
Loom starting to take some shape now.
 27-09-2010, 11:36 PM
#306
Boost Junkie
Thread Starter
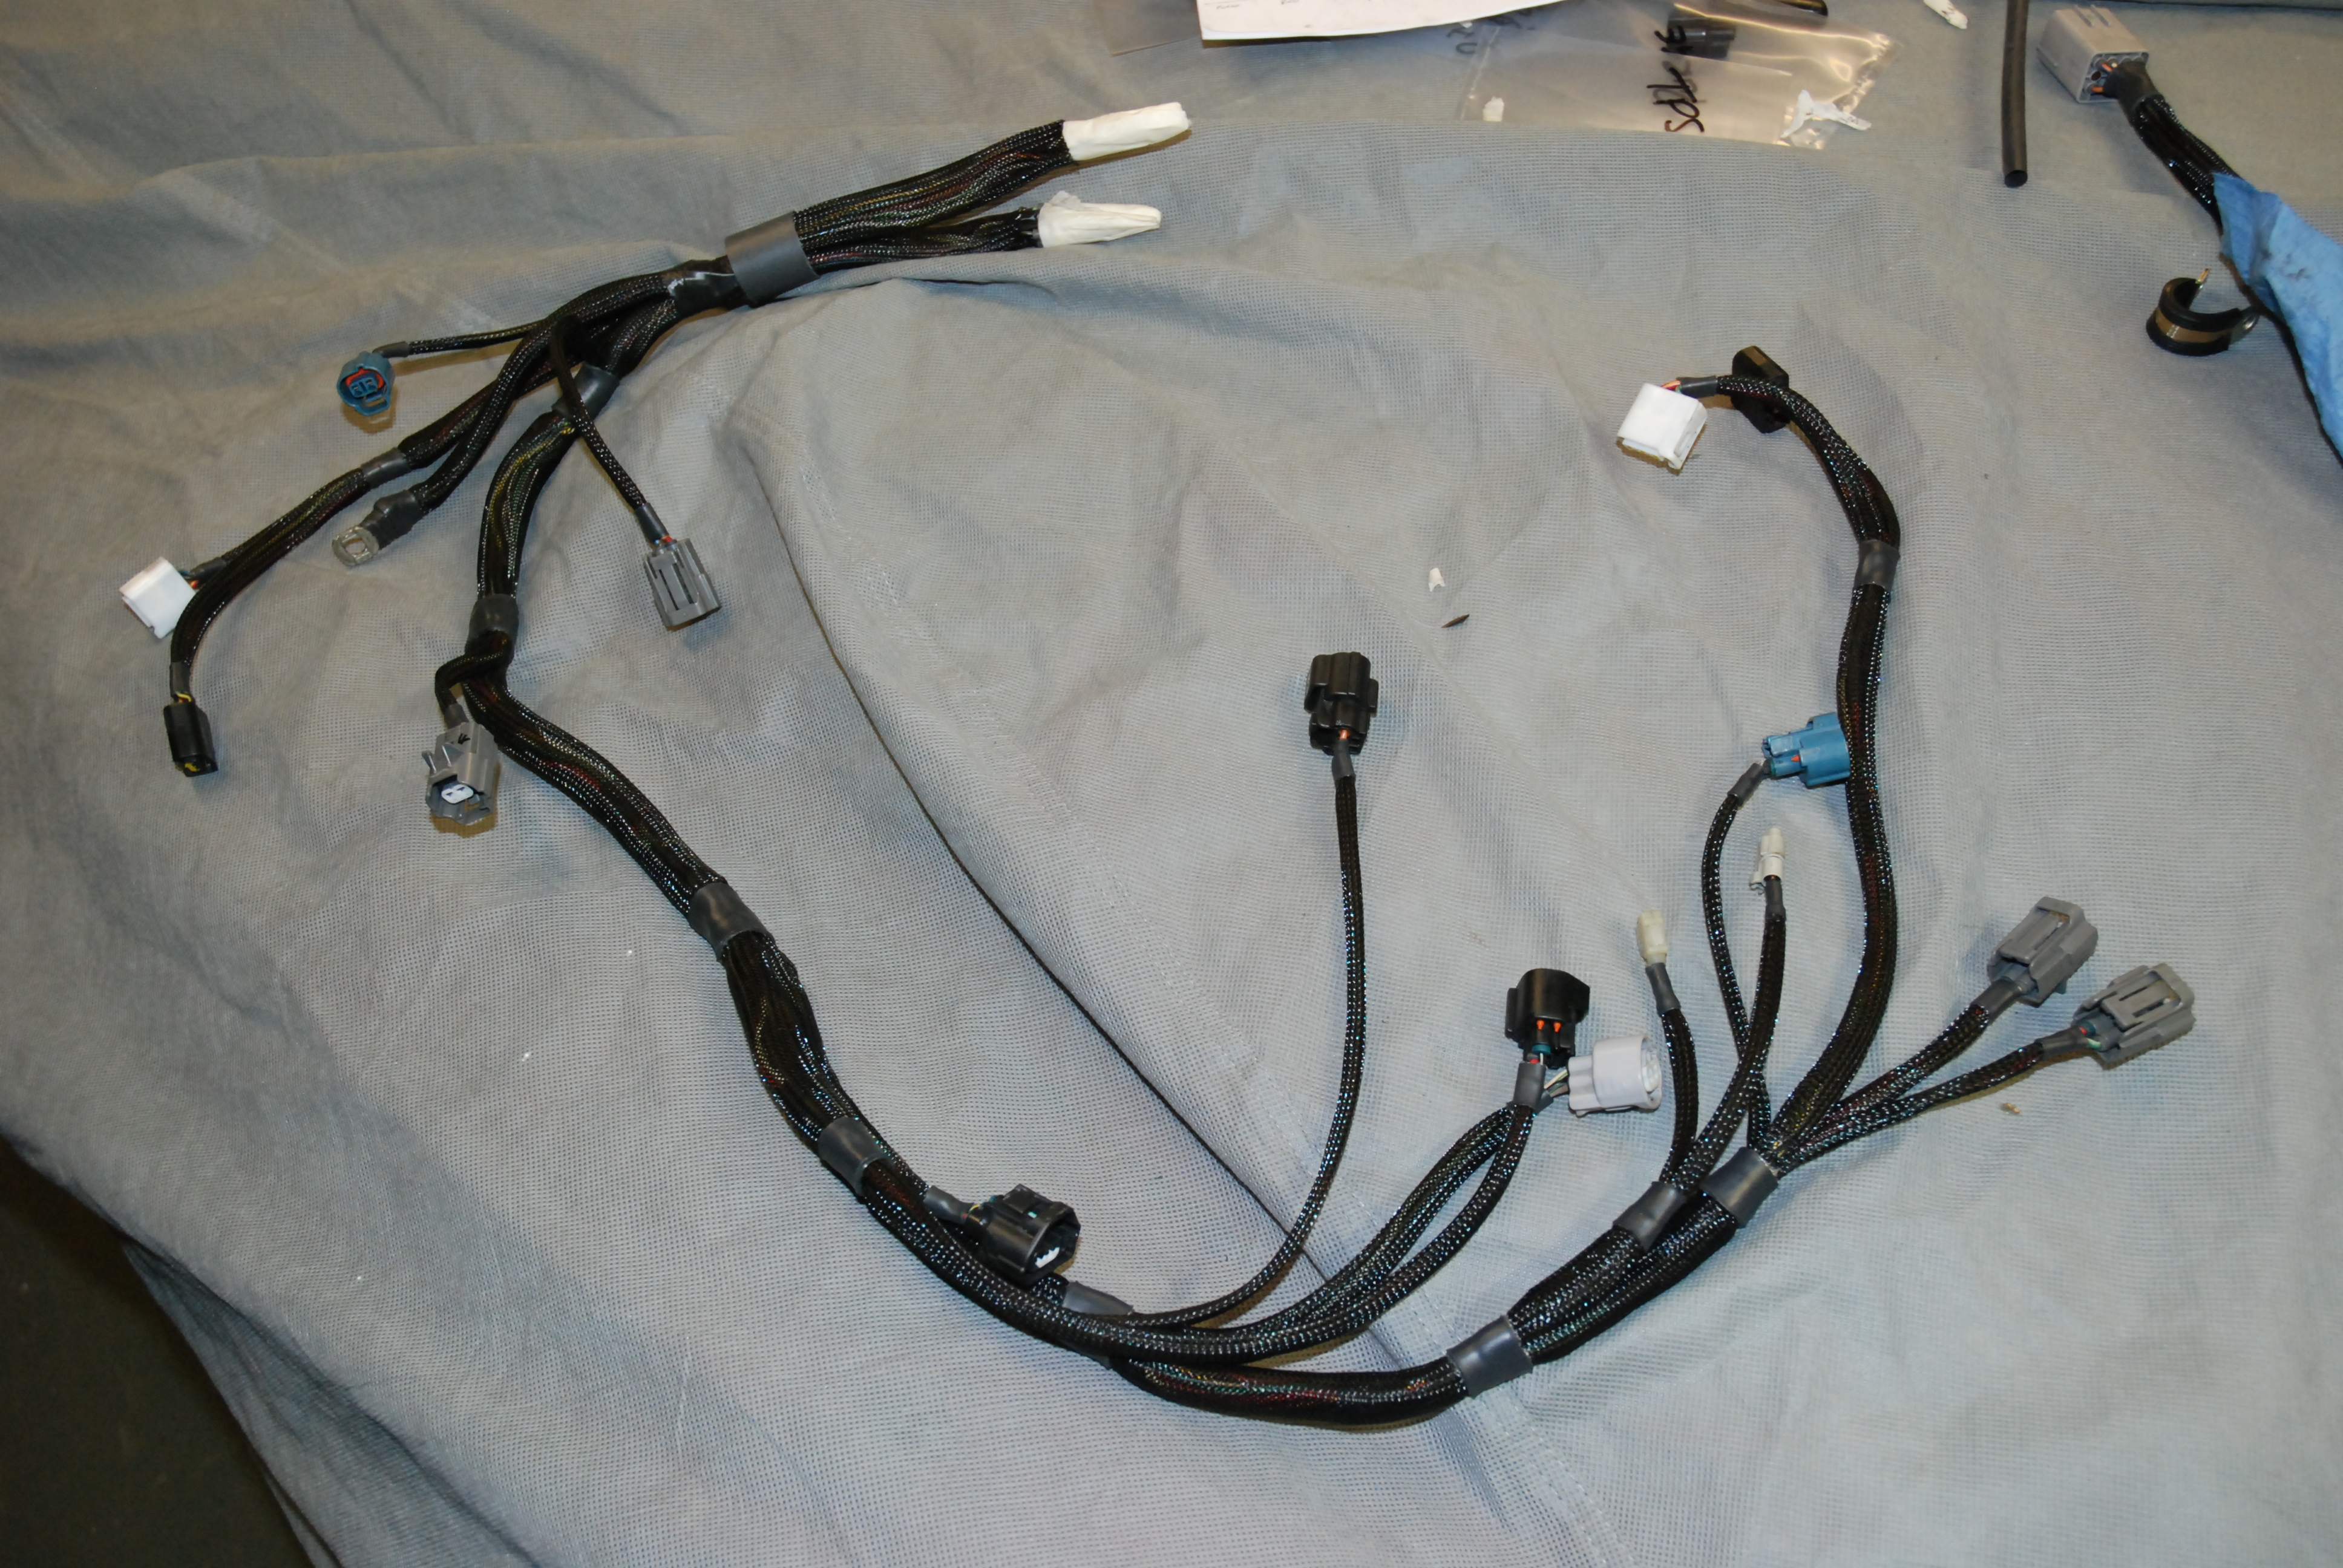
Been quiet a few days now guys.
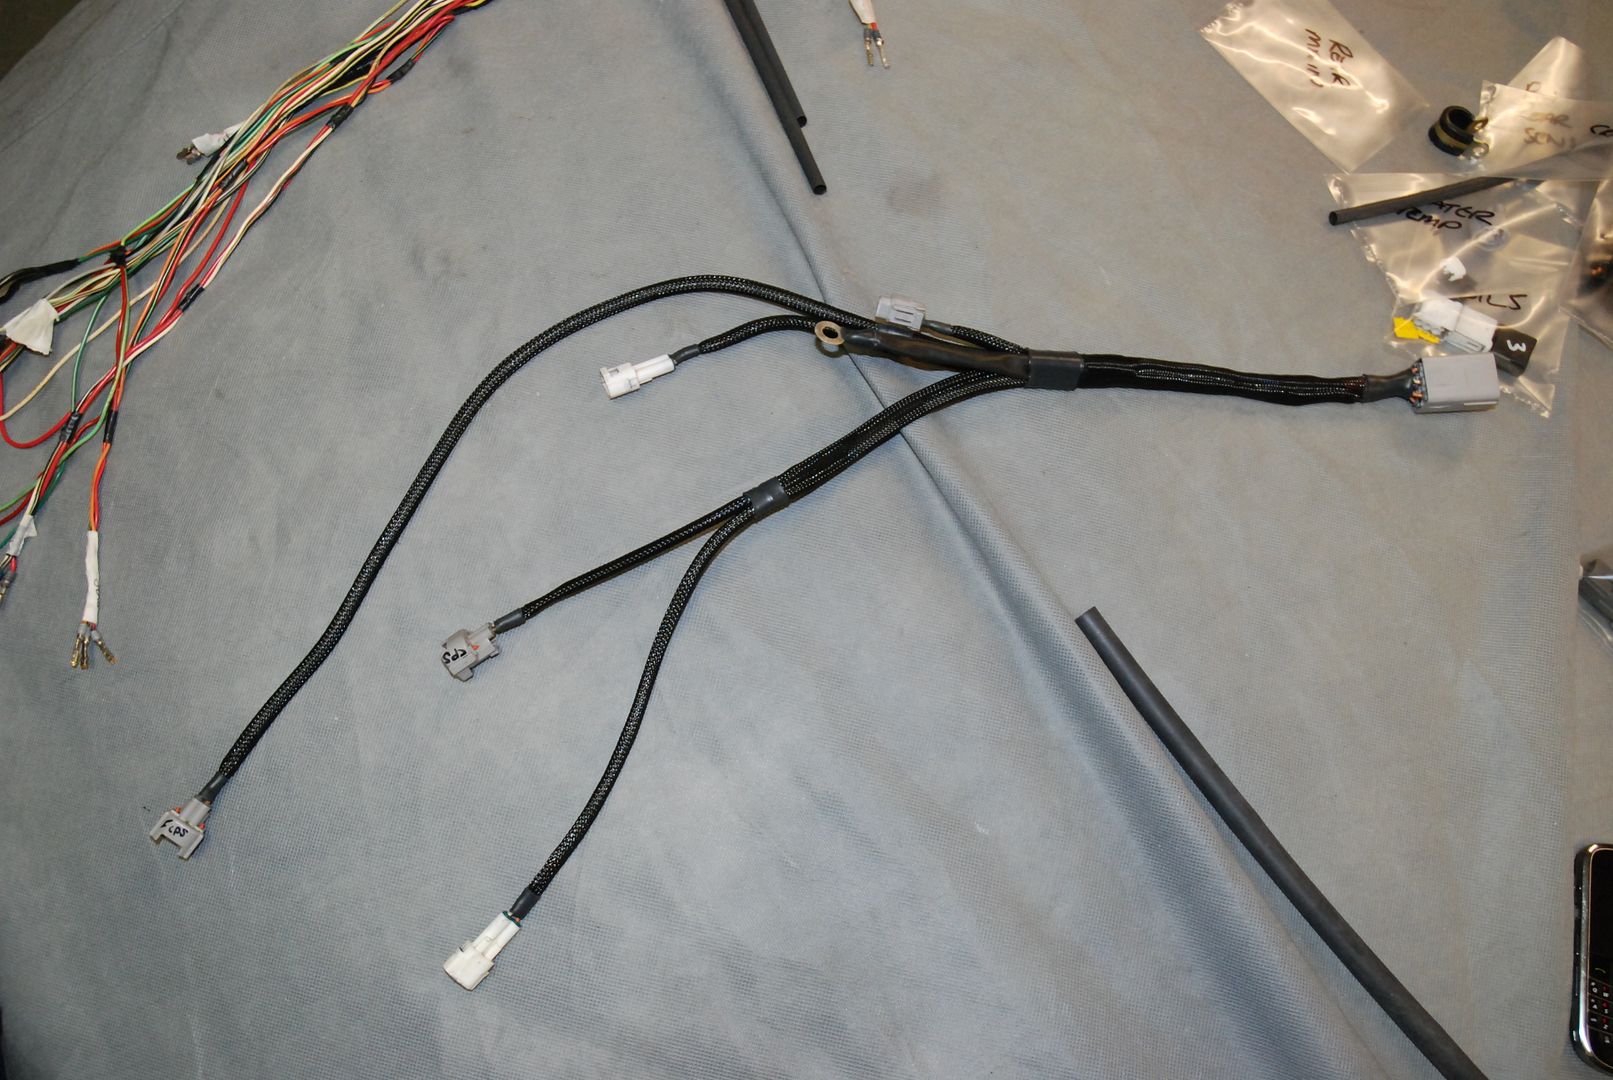
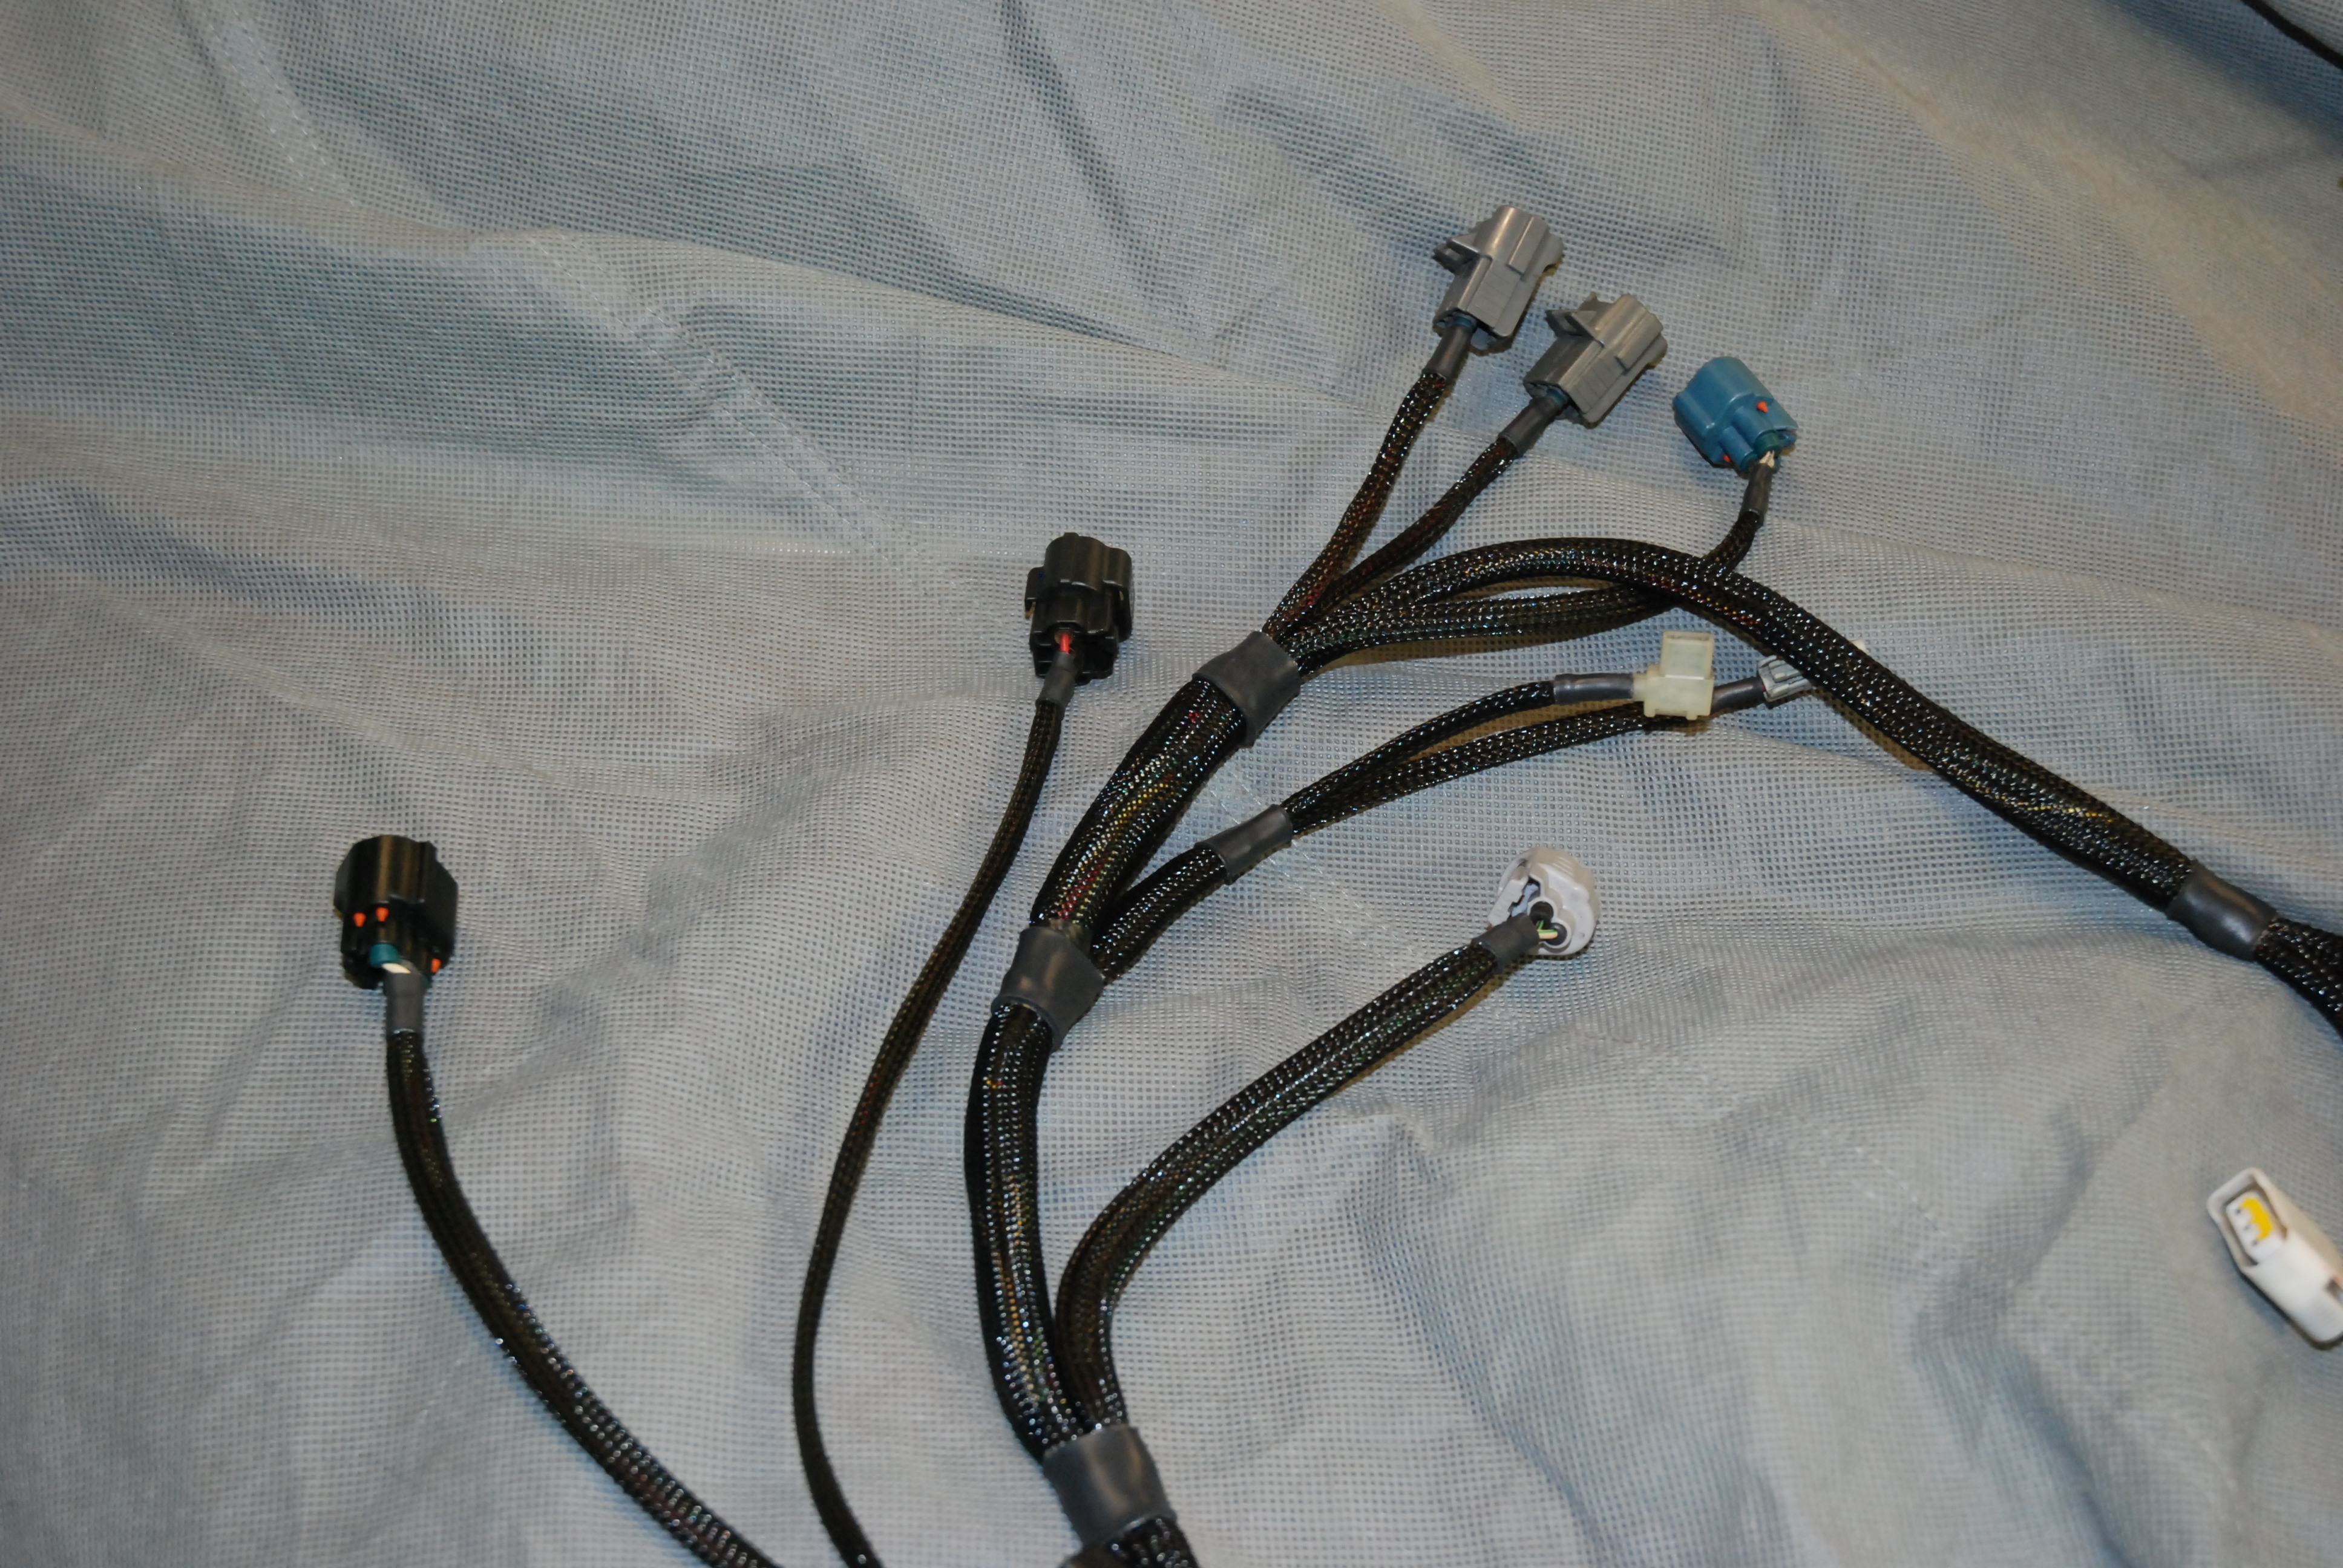
Basically i got 99% of the engine harness done. But i still wasnt quite happy with it so decided to tear it all back and start again. So i am now mid way through my 2nd time at doing it and im now really pleased with how its turning out.
I have made a small sub assembly harness up just for the cam/crank sensors, this i have finished.
It was much neater to do this and take the plug over the gearbox as it keeps everything around the turboside much much neater.
The main harness is now almost complete and ready for sleeving. I have done away with the stock harness gutter and its all looking much neater.
Im really liking the new look.
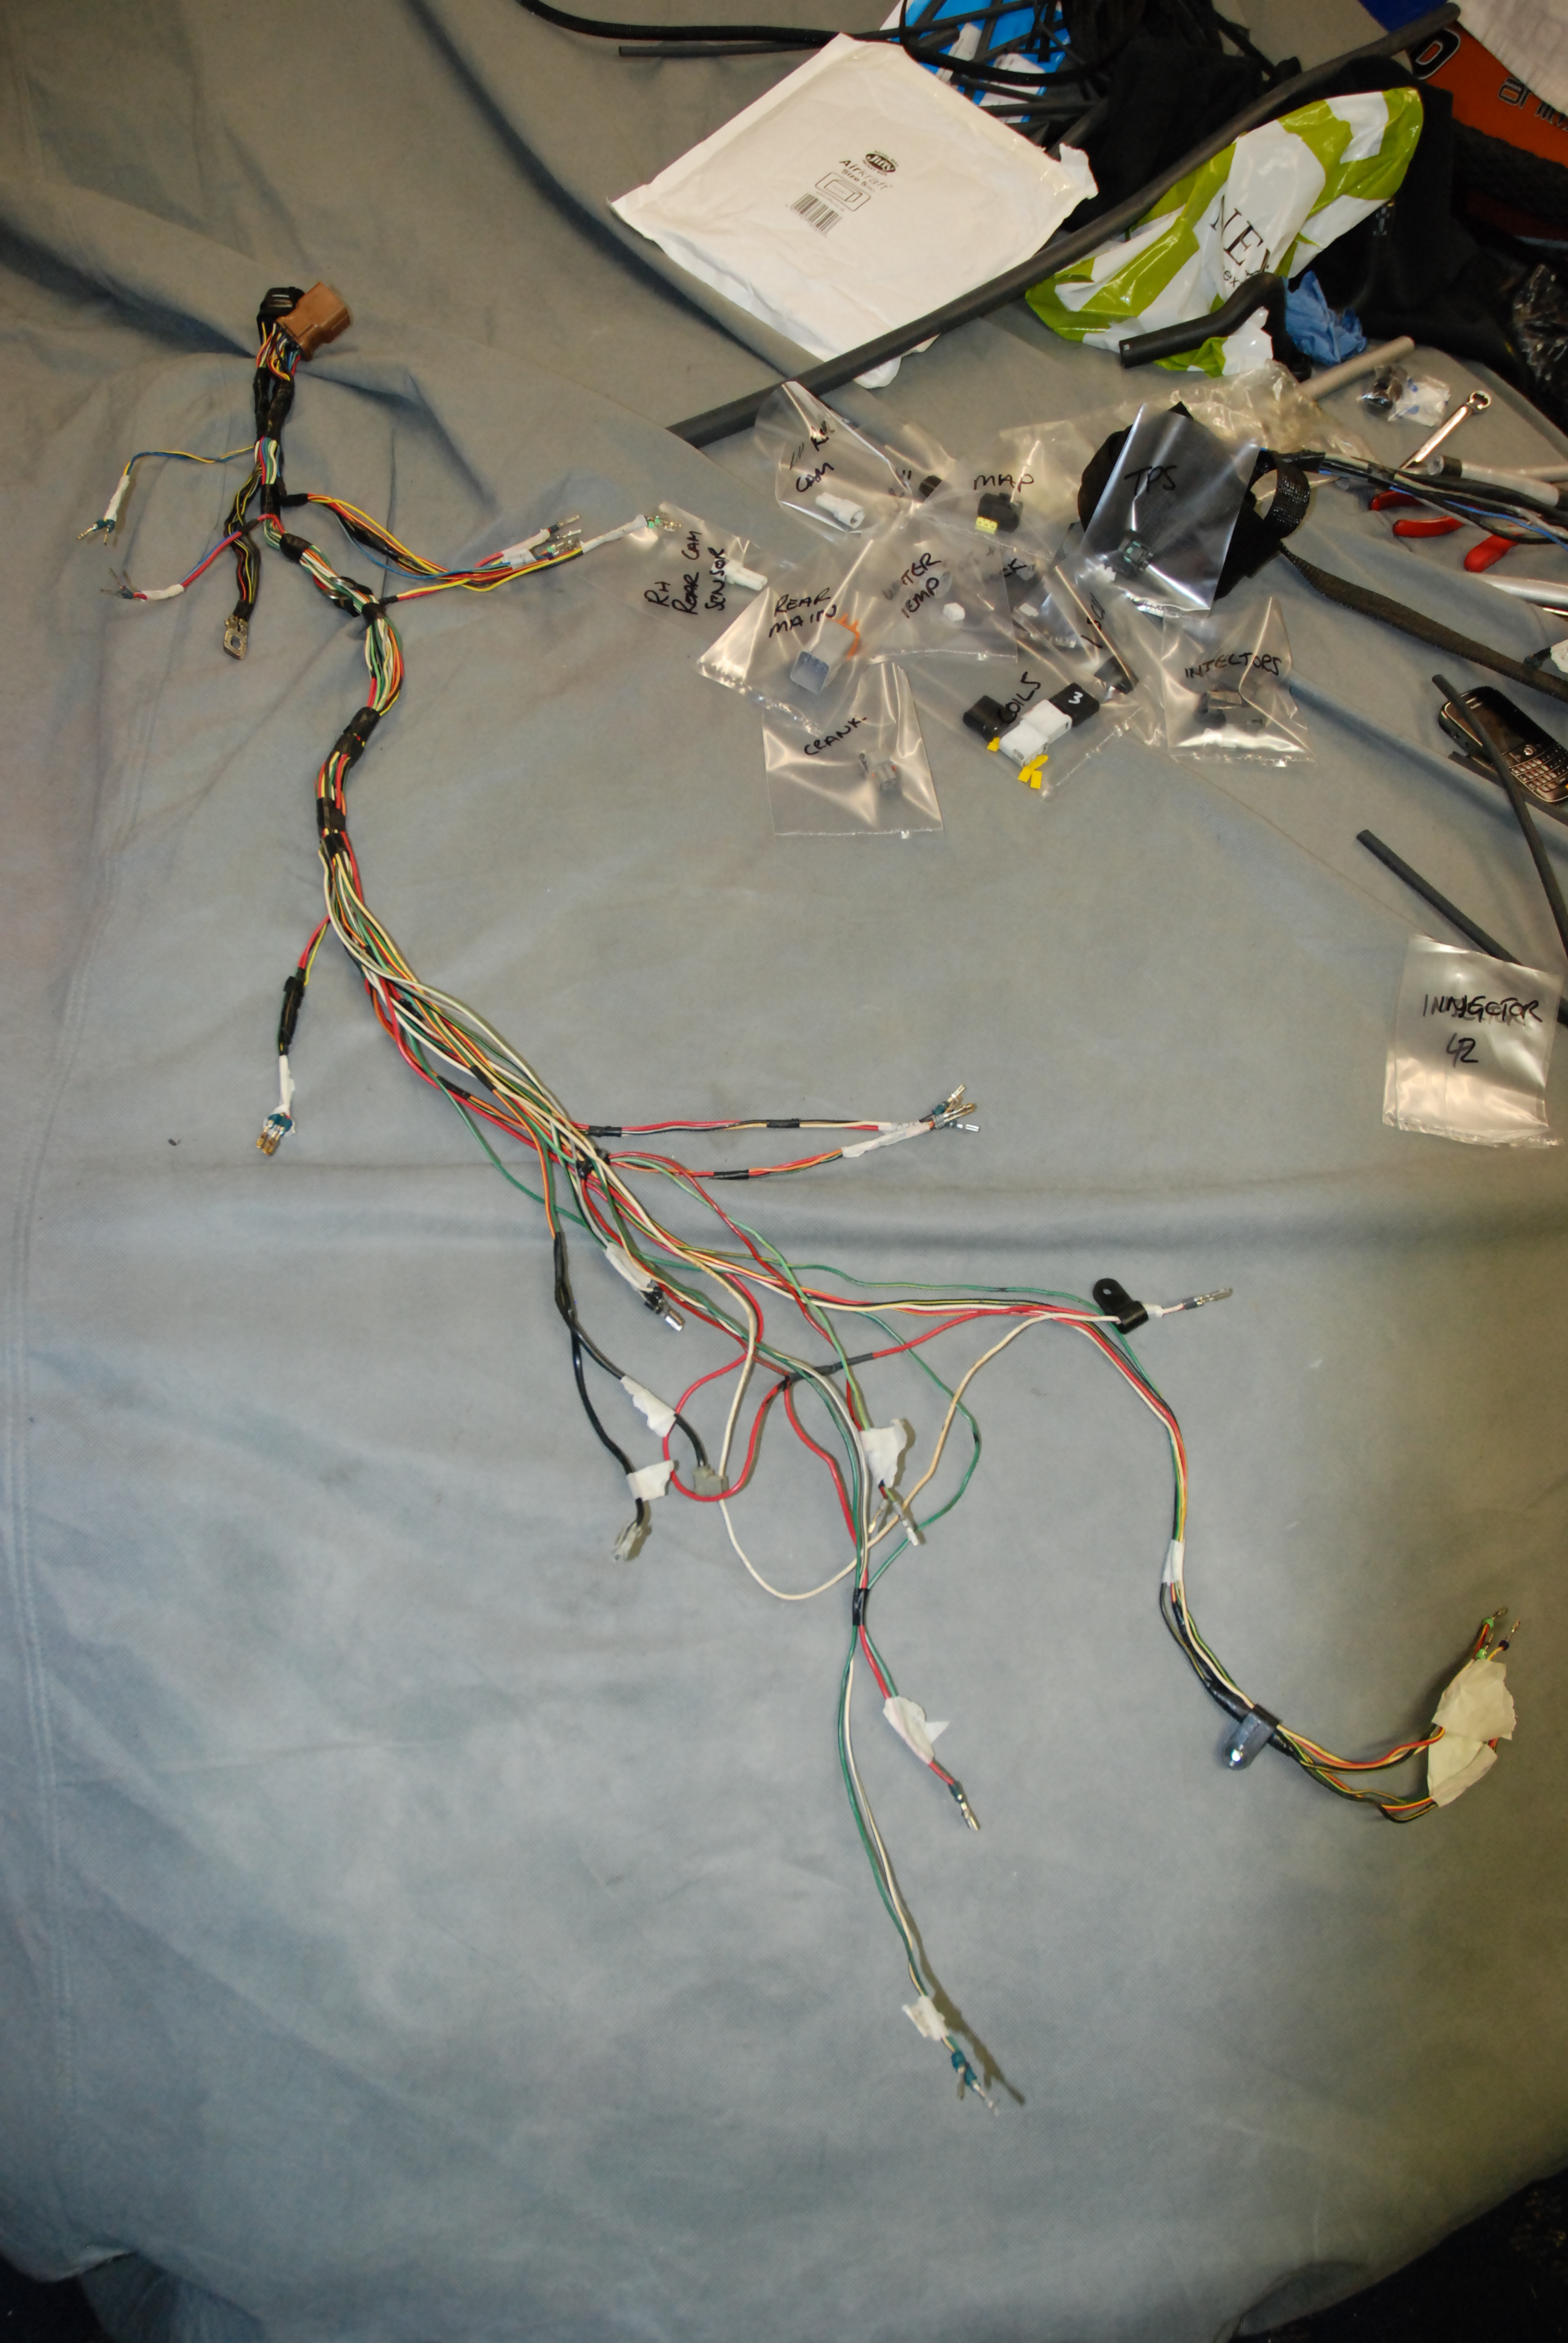
28-09-2010, 11:02 PM
#307
Boost Junkie
Thread Starter
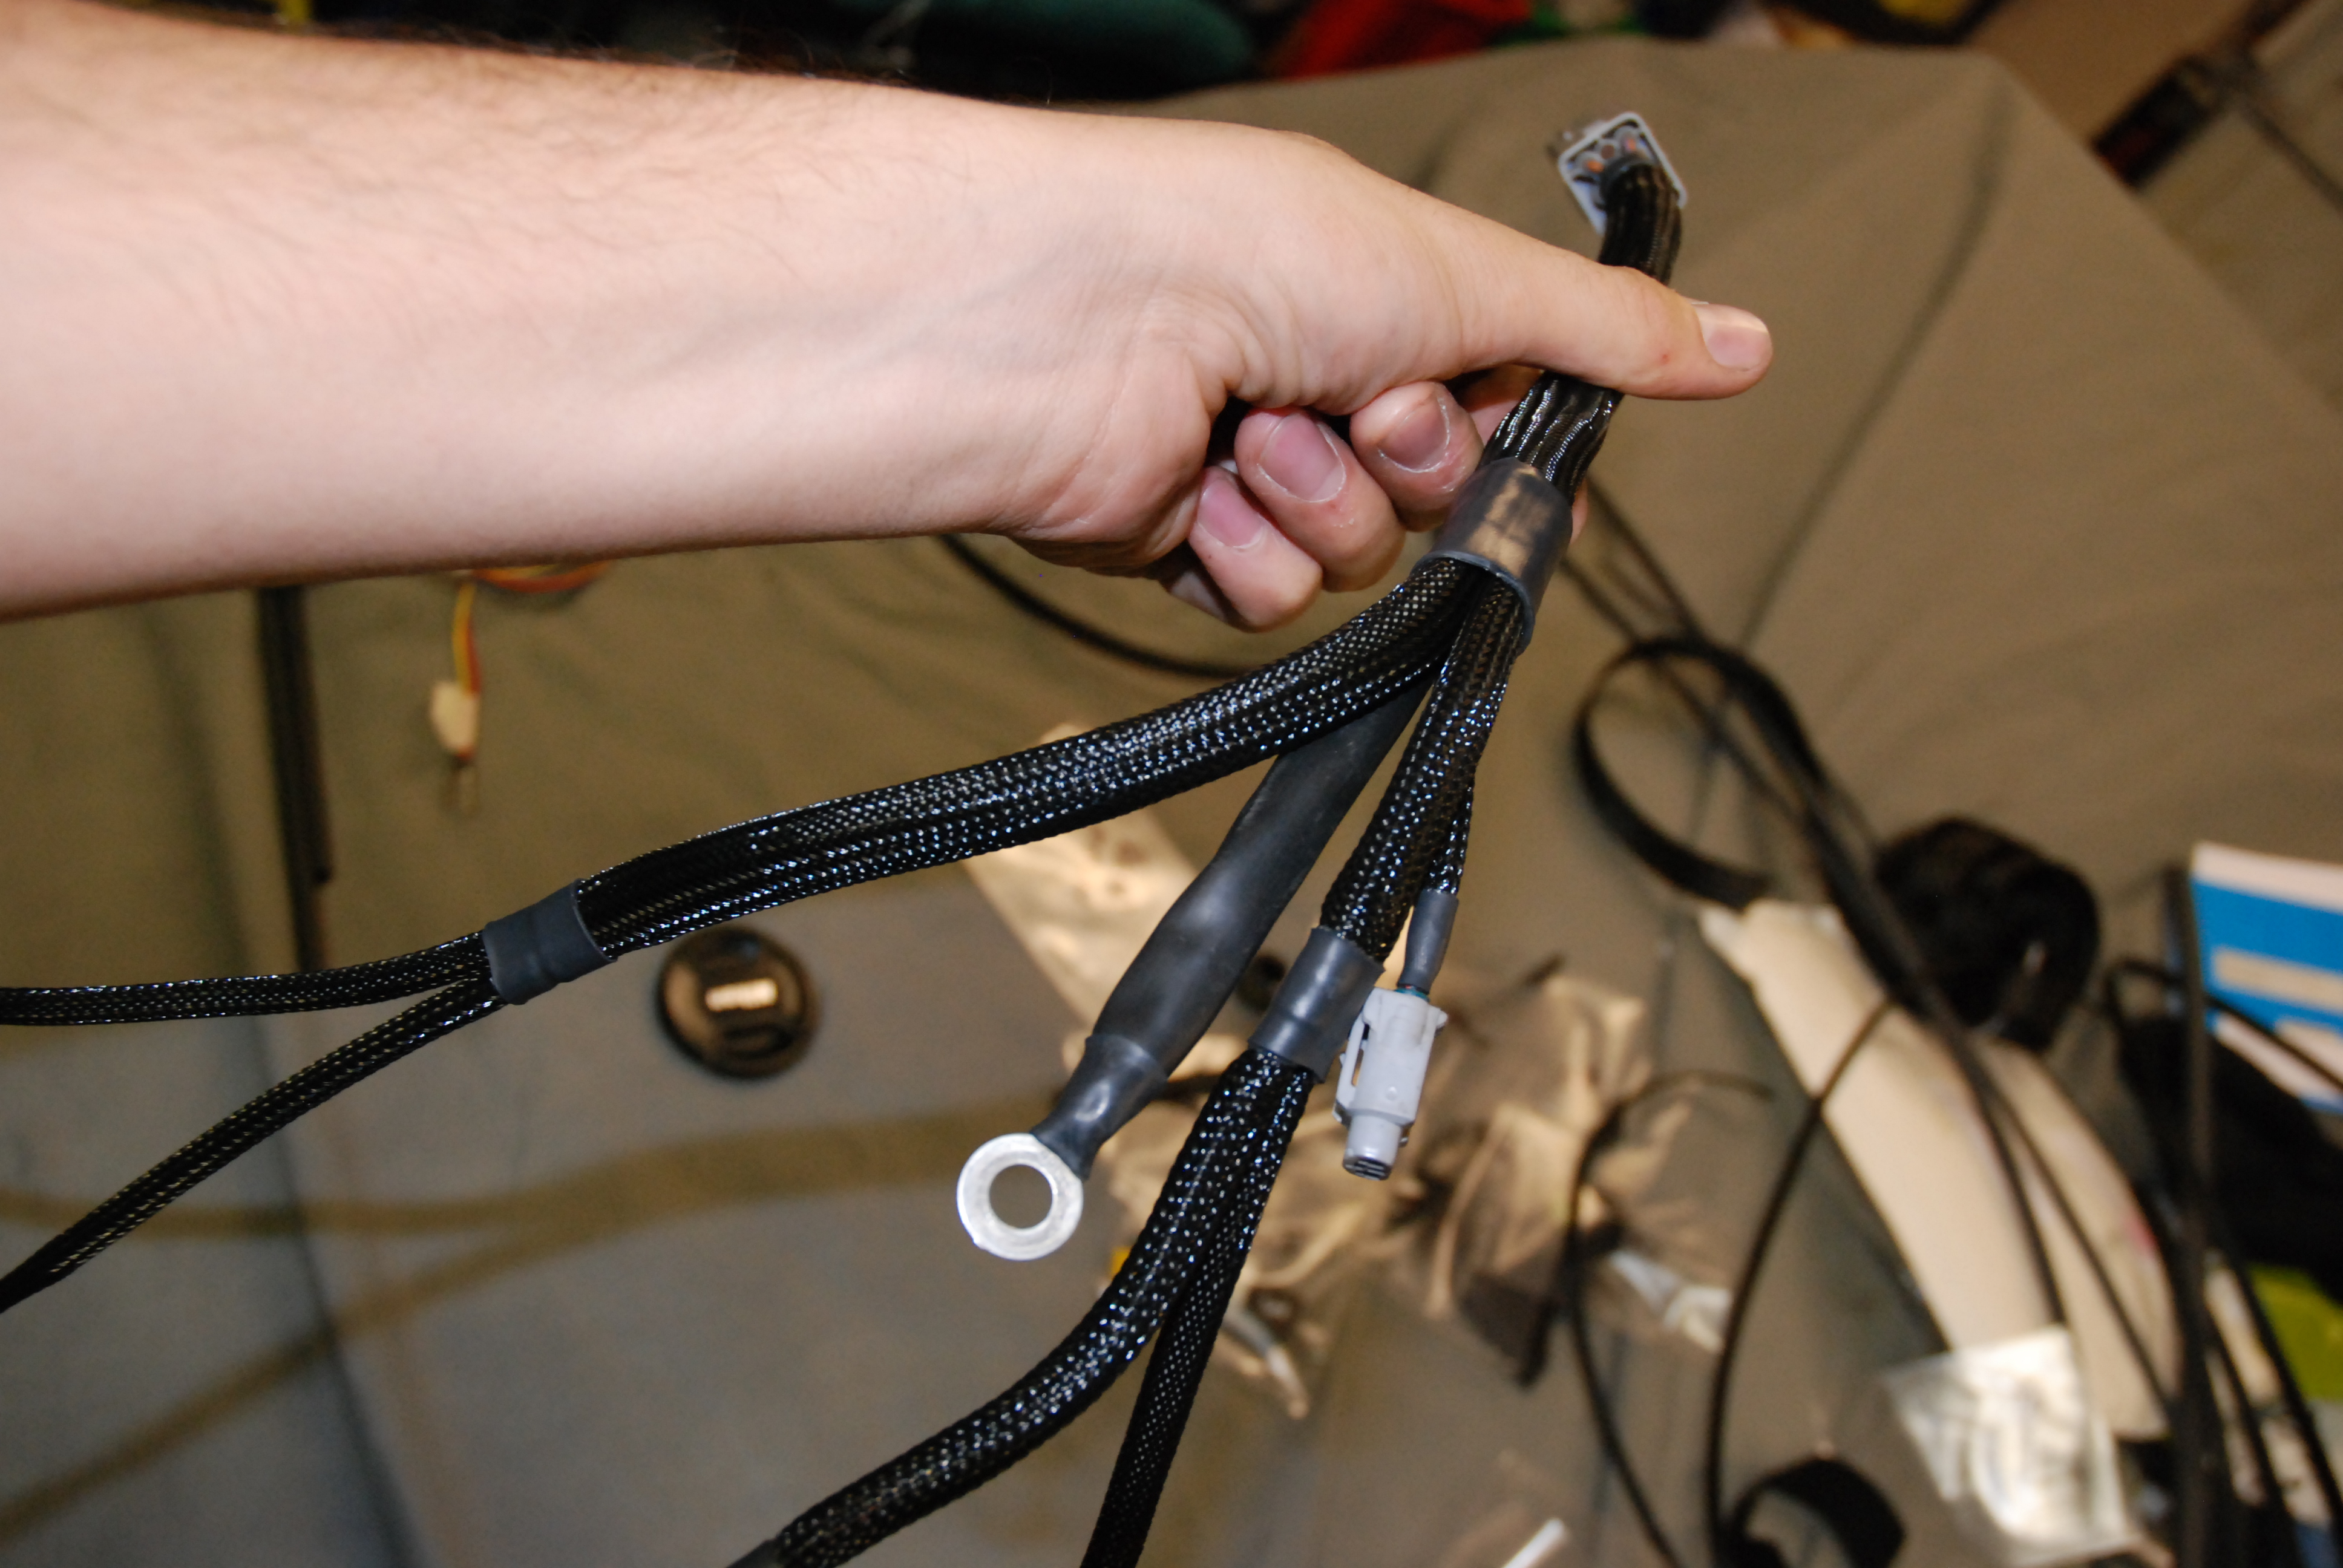
Okay guys, i ran out of large heatshrink on the last few joins so i'll get some more of this tomorrow. Other than that the new harness is pretty much complete.
I laid it on just loose and so far it seems to fit good. I need to add P-clips and zip ties etc when it gets fitted for real. Admittedly im no expert loom builder or electrician but so far so good.
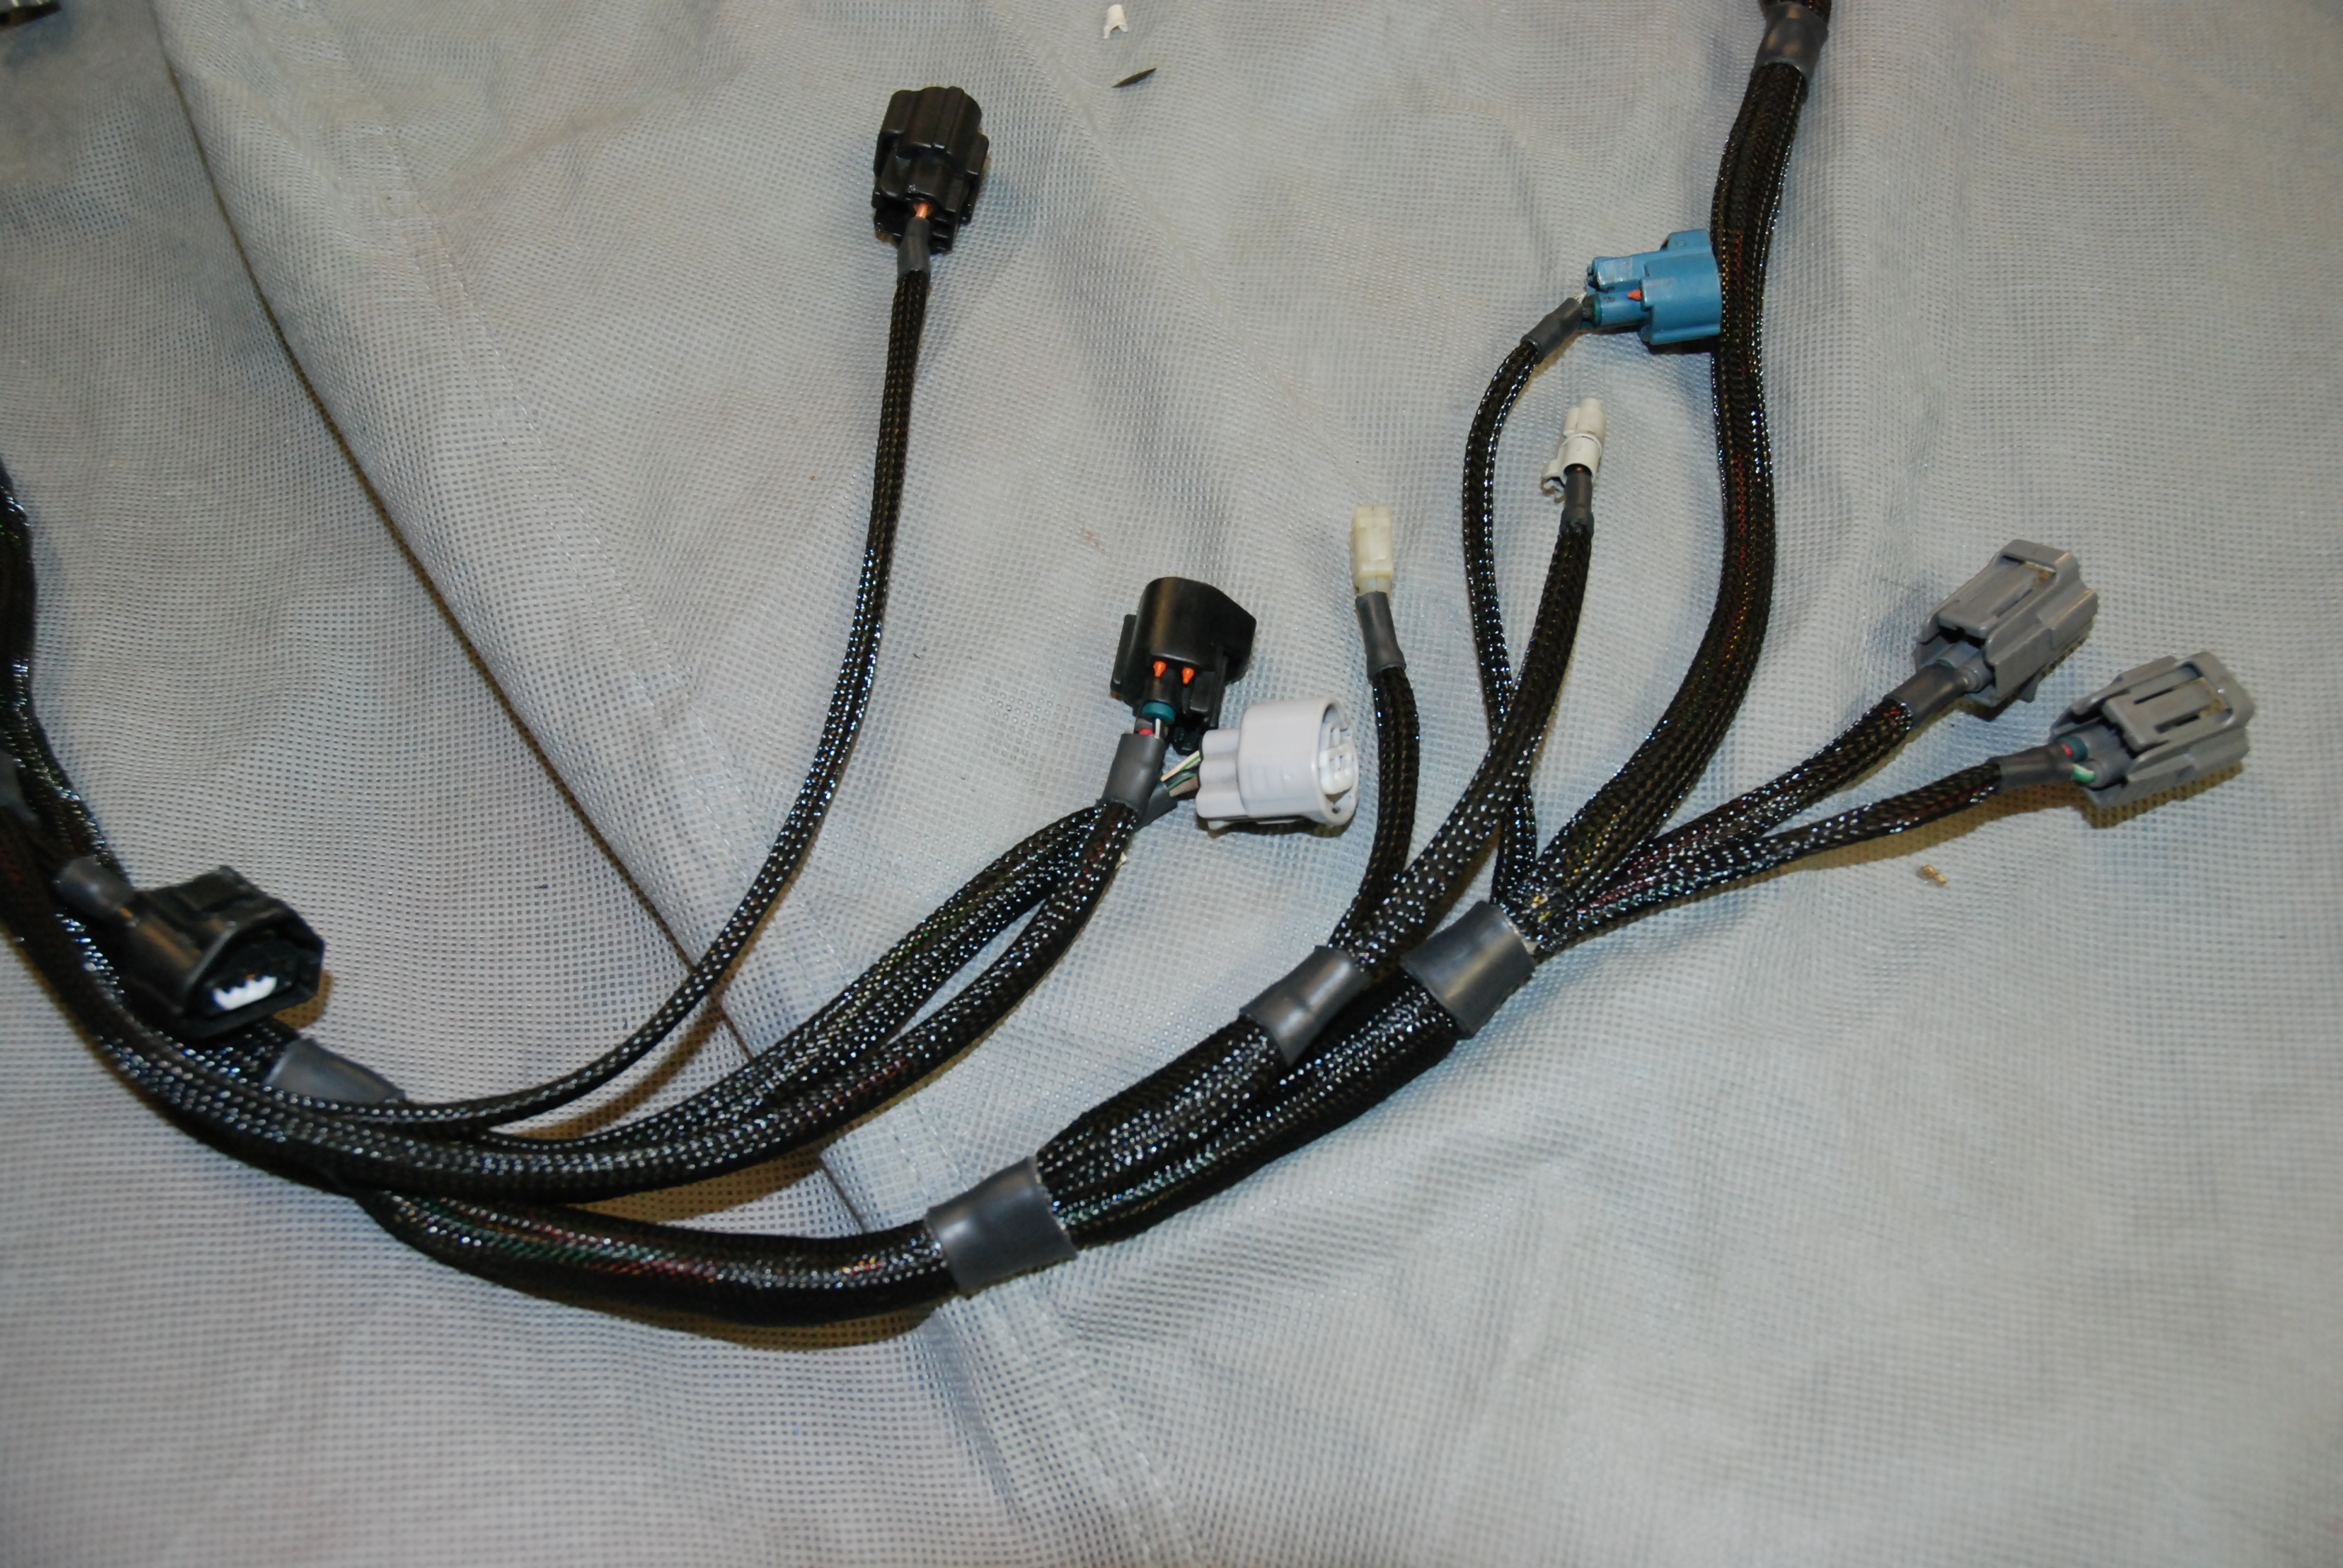
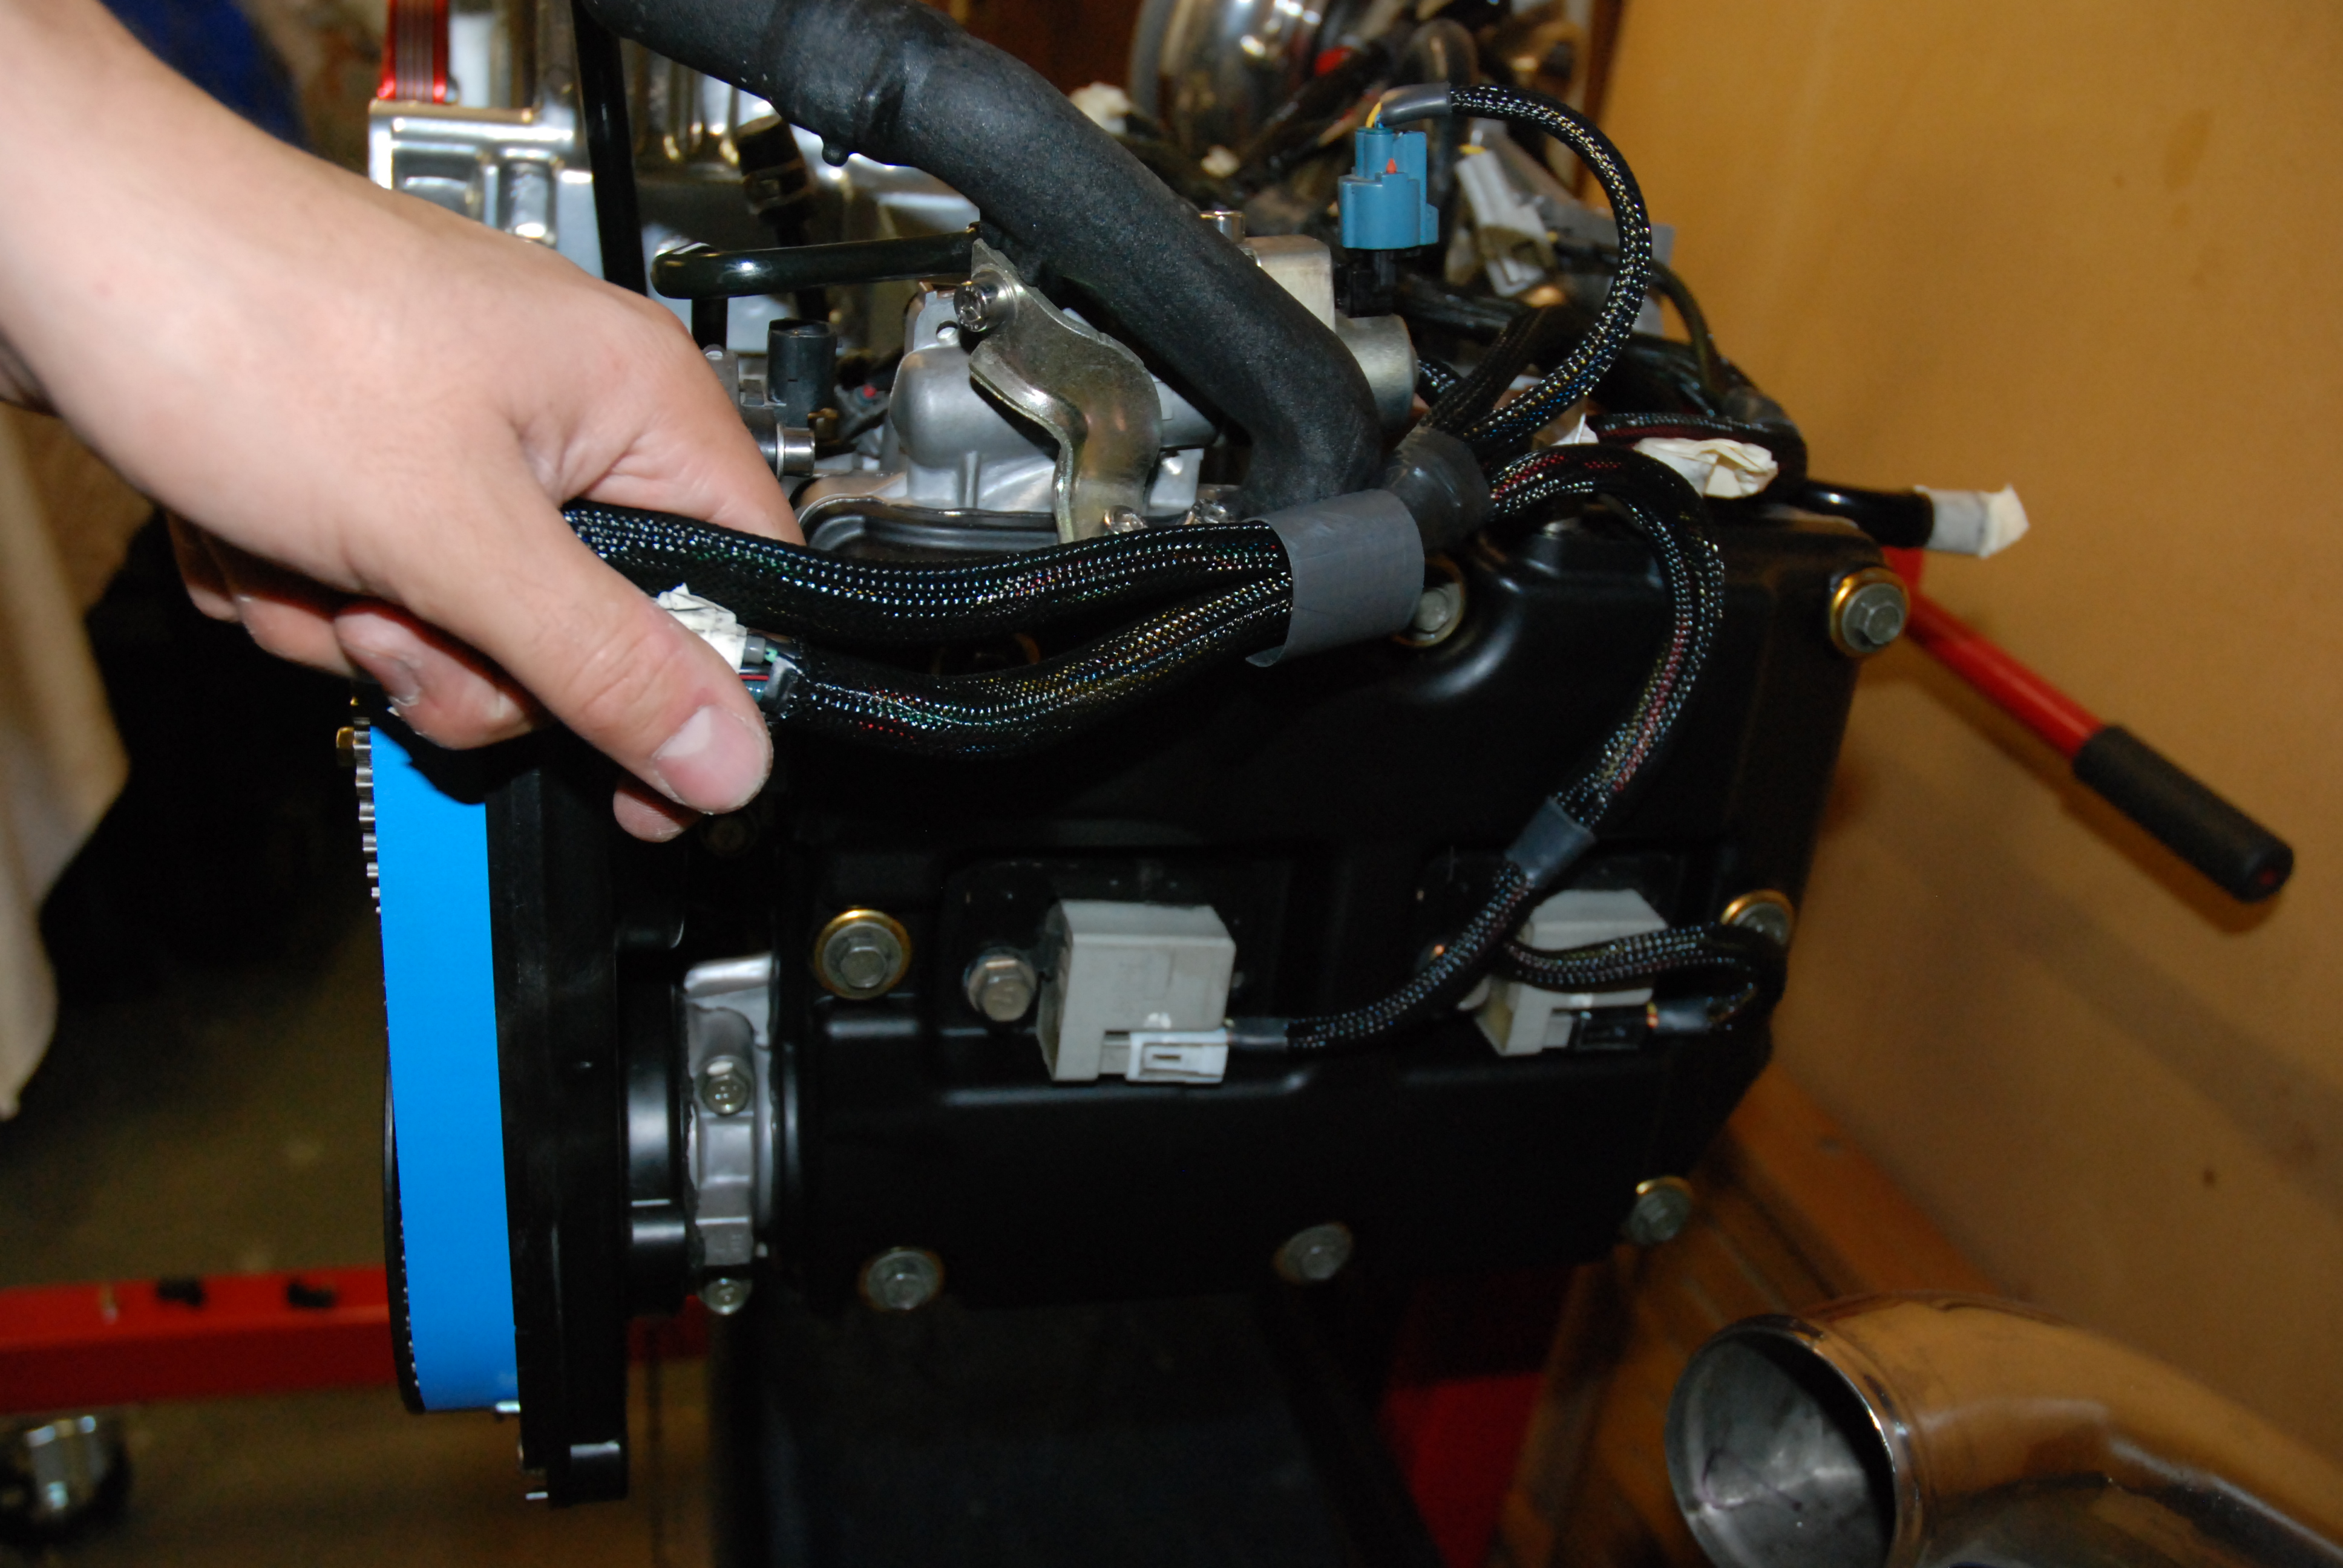
I laid it on just loose and so far it seems to fit good. I need to add P-clips and zip ties etc when it gets fitted for real. Admittedly im no expert loom builder or electrician but so far so good.
06-10-2010, 11:11 AM
#308
Boost Junkie
Thread Starter
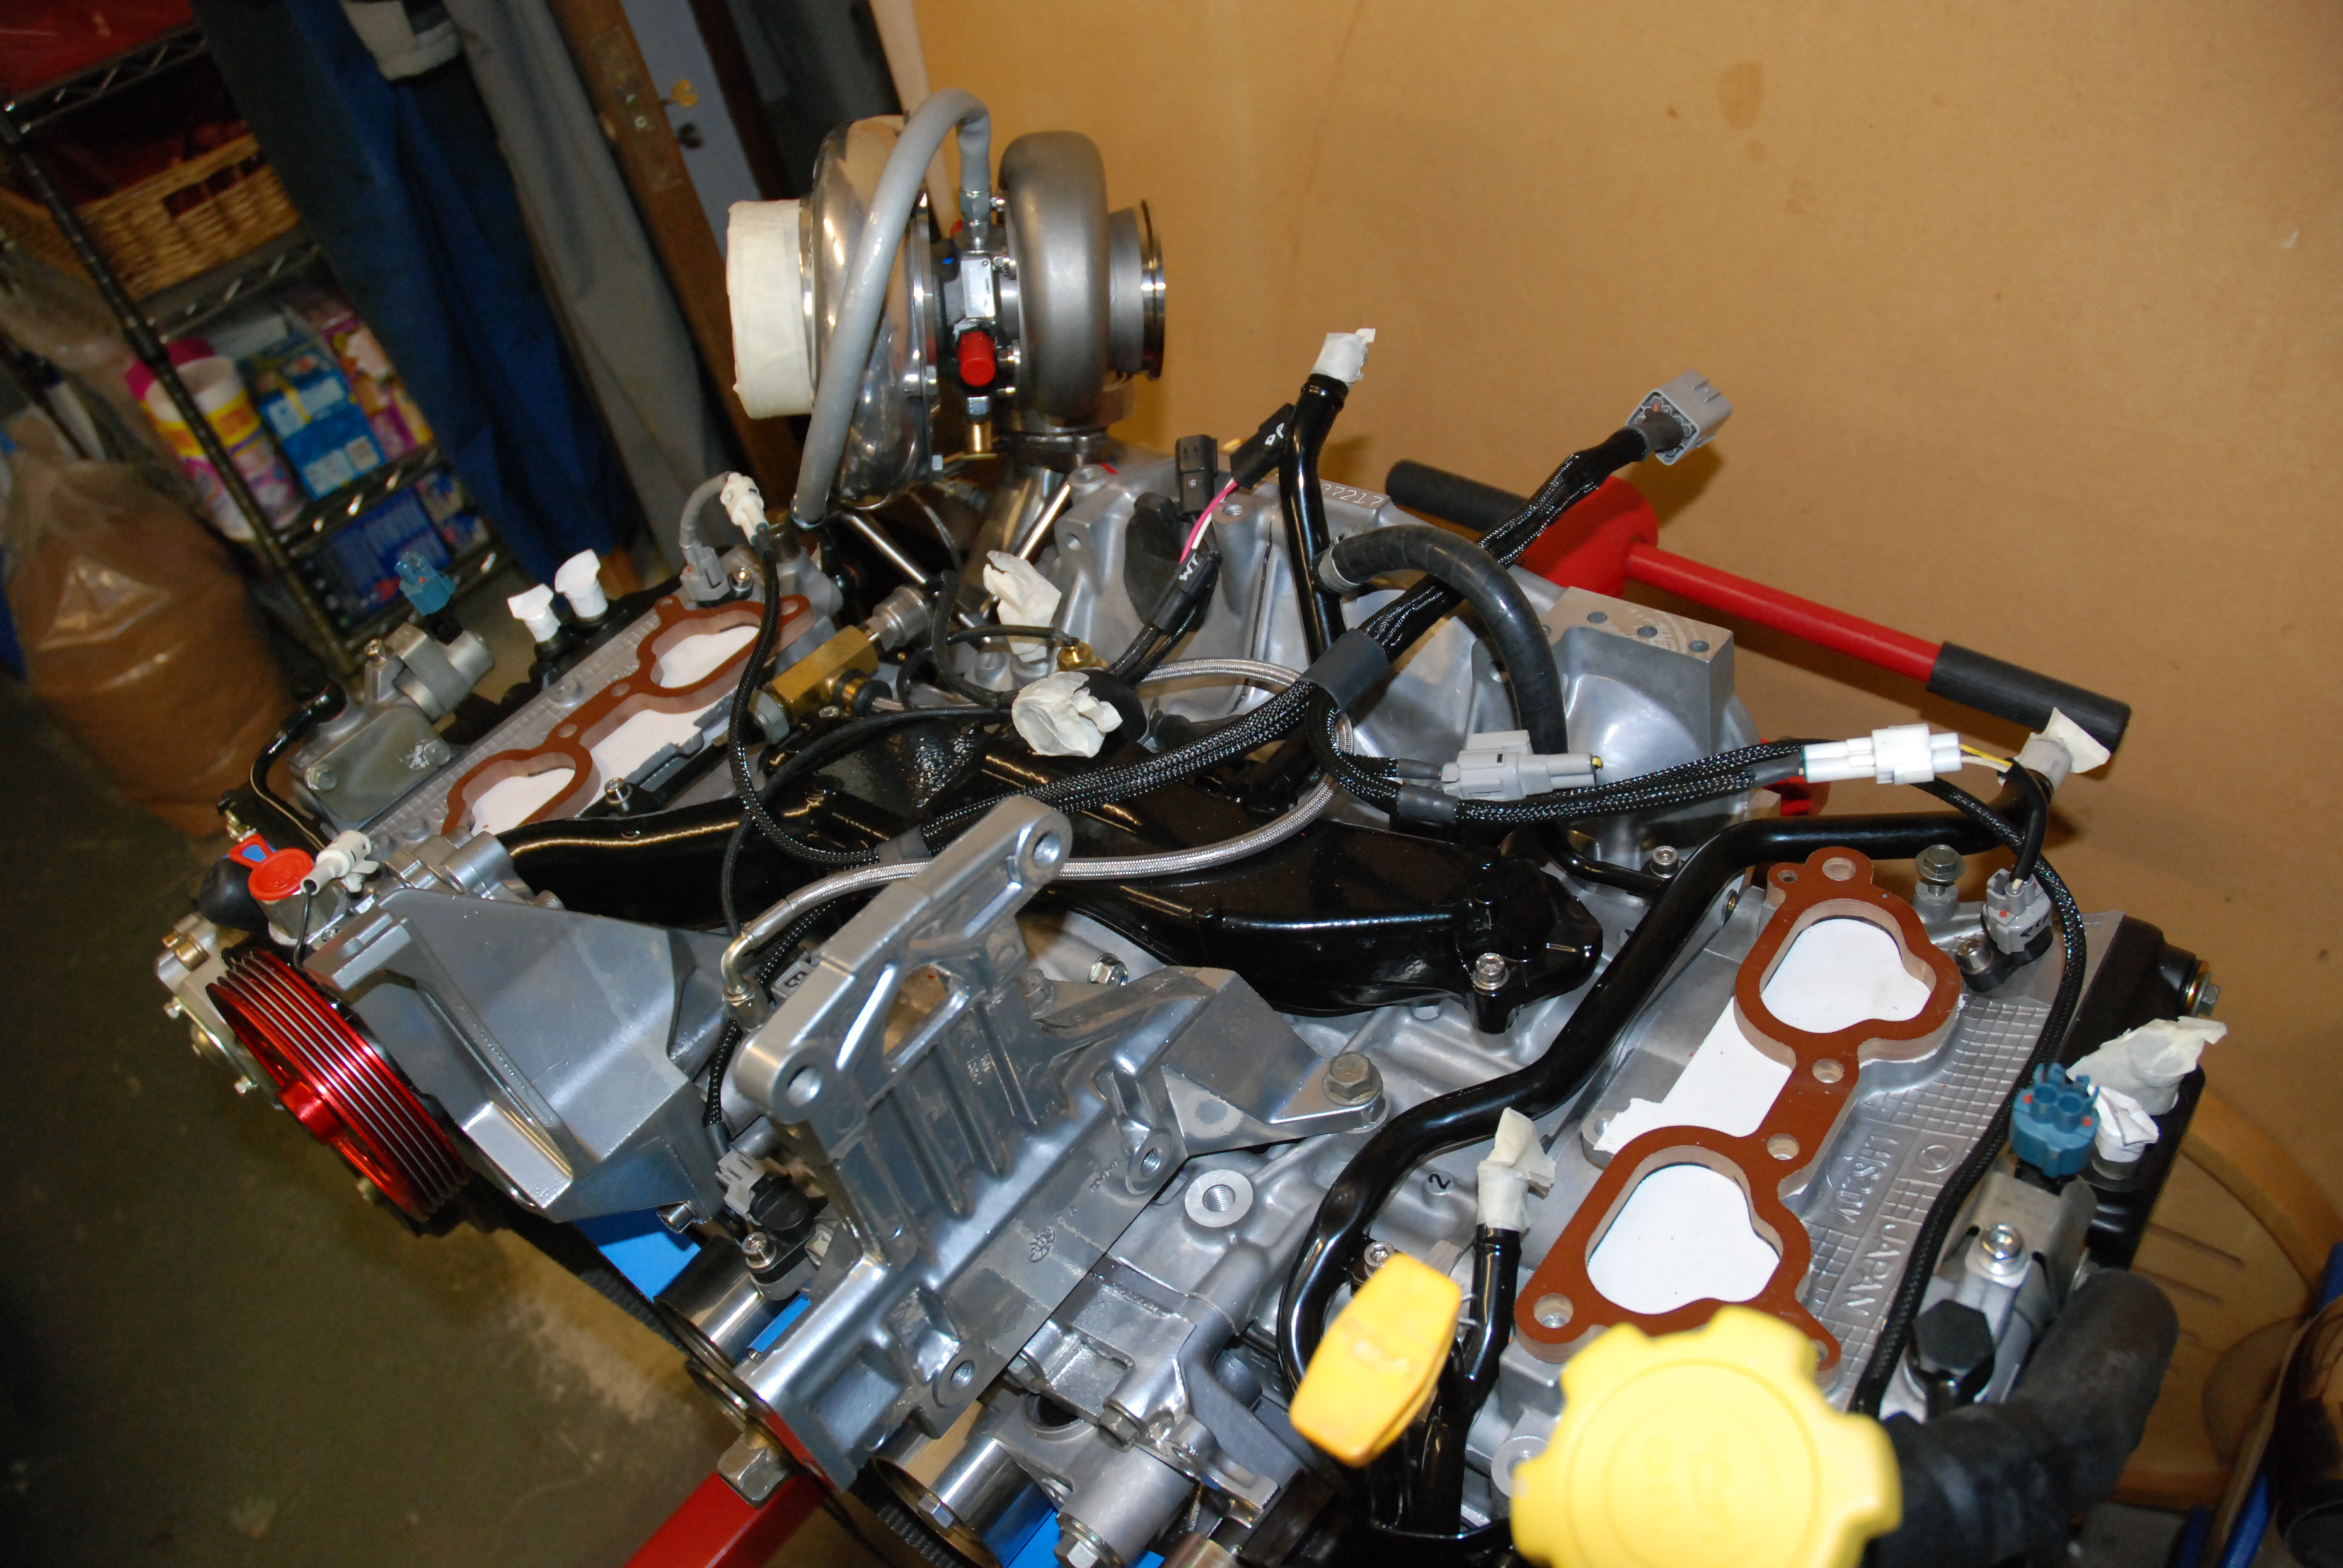
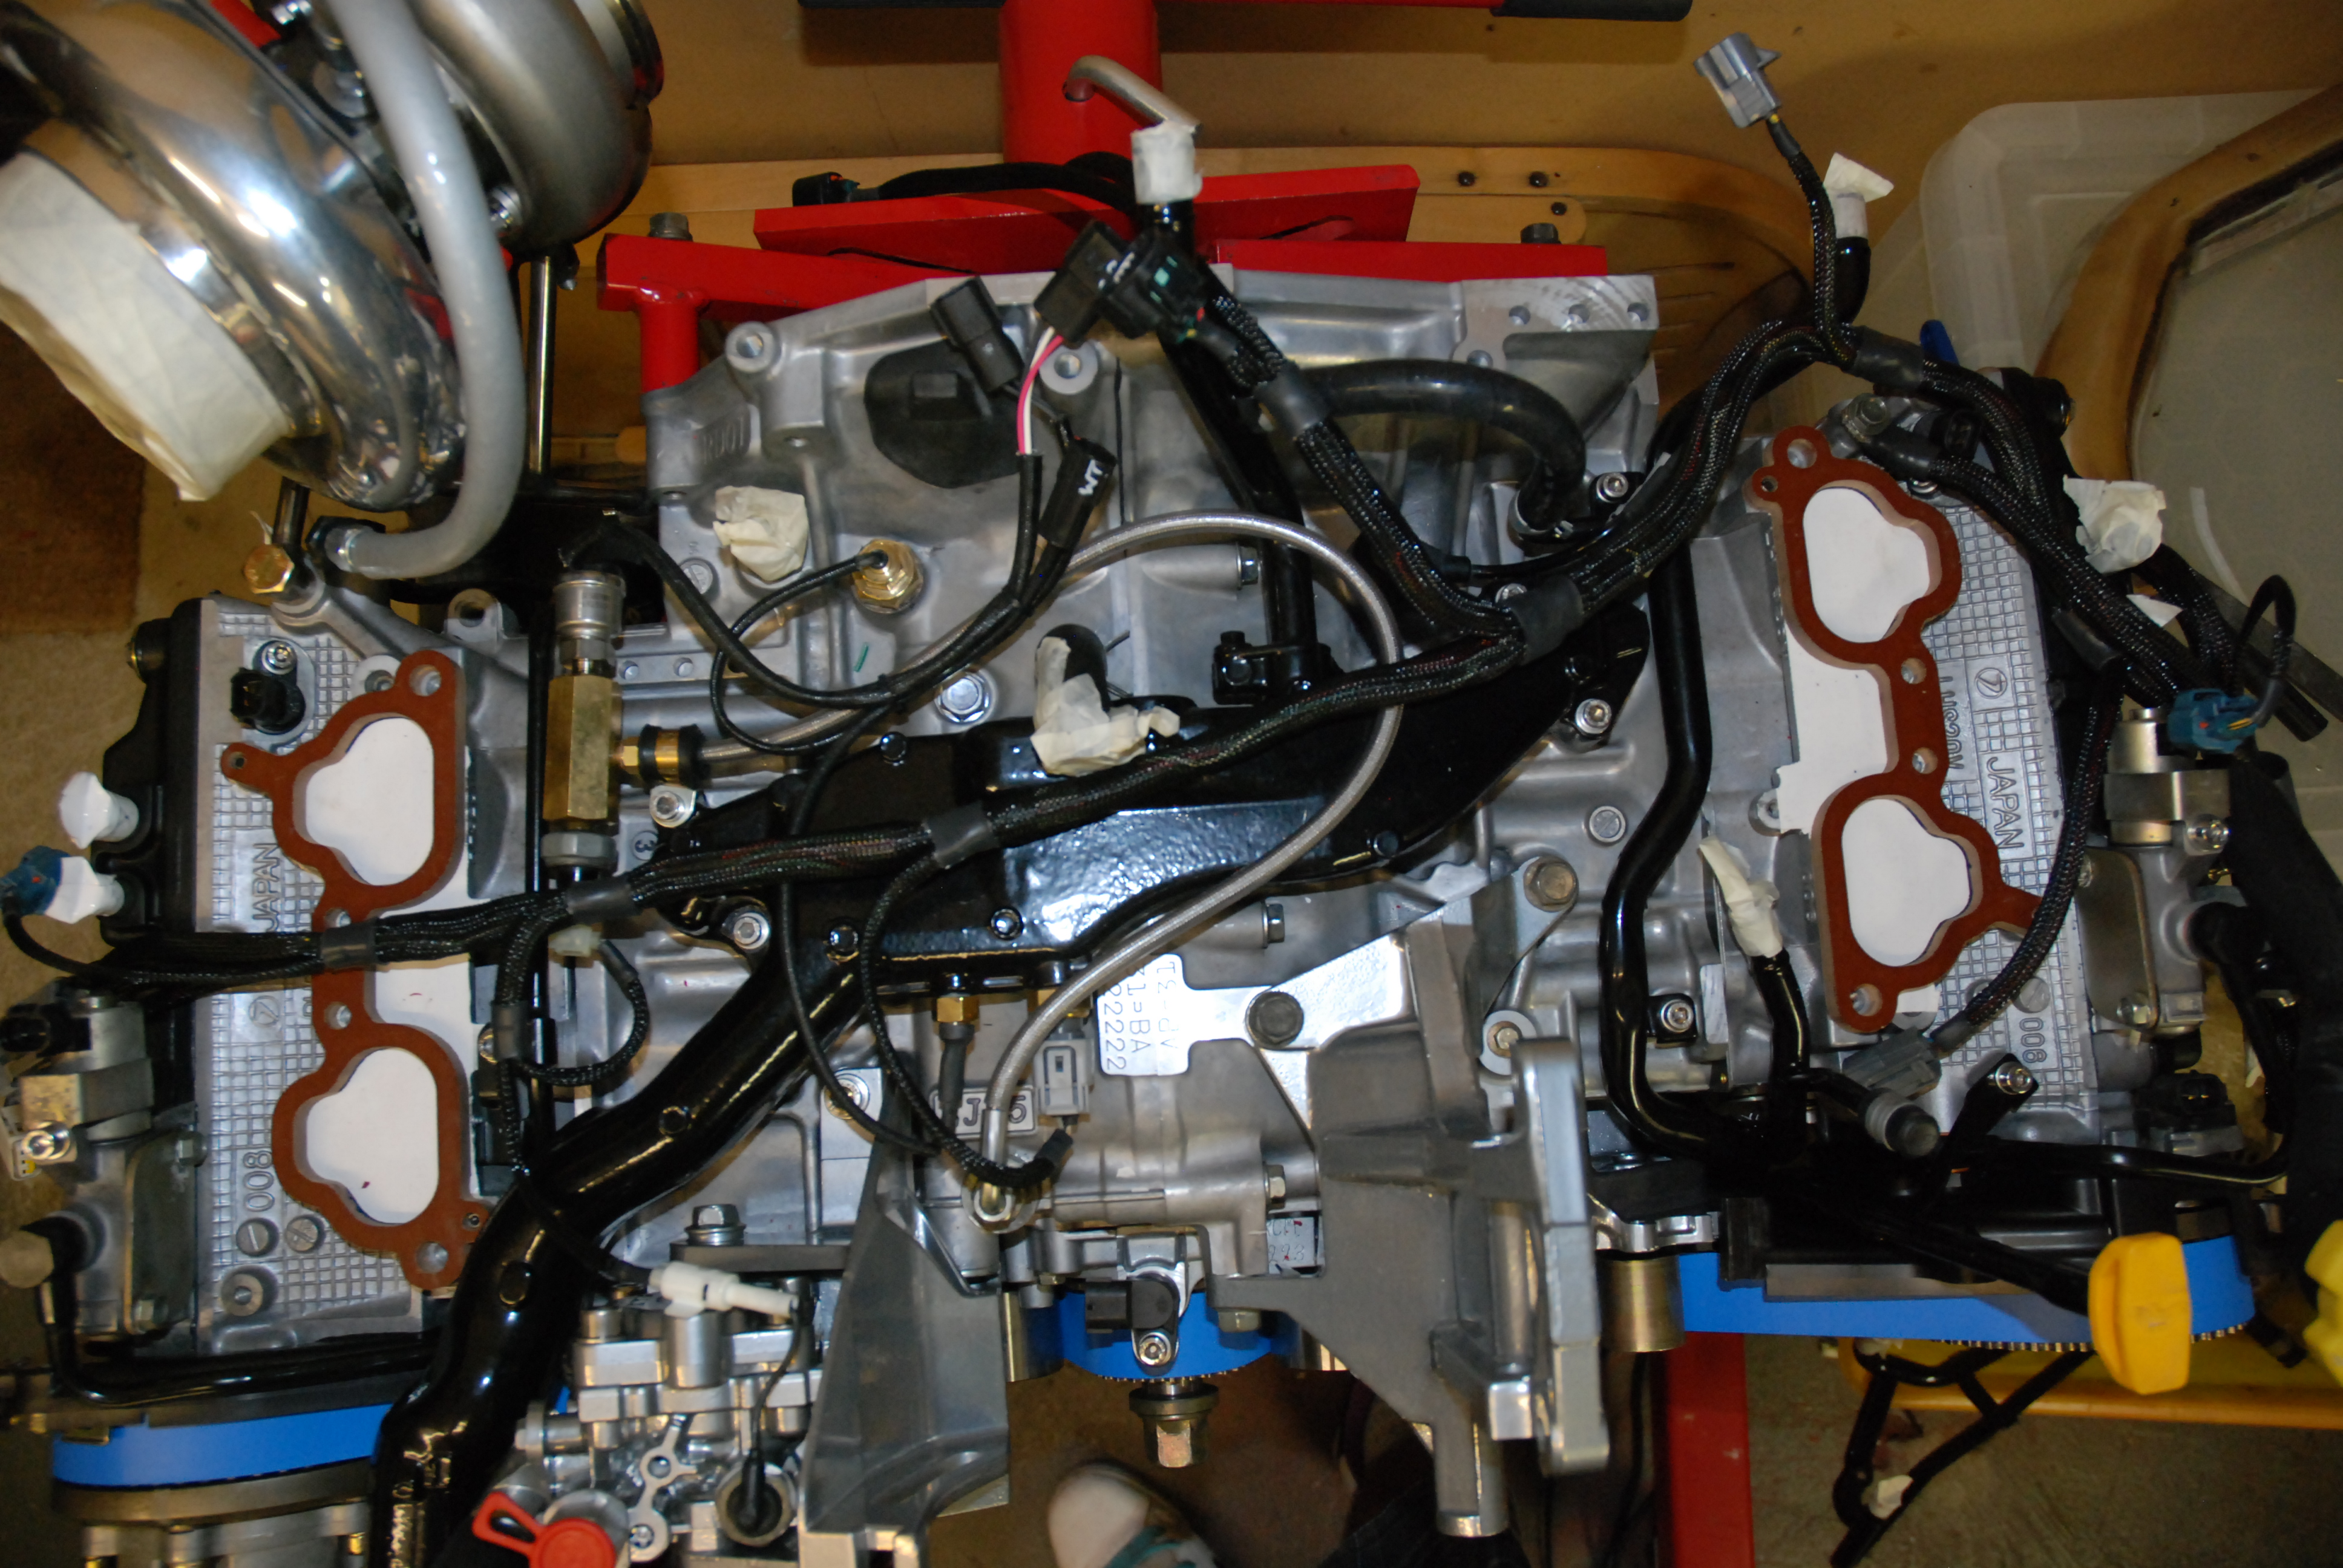
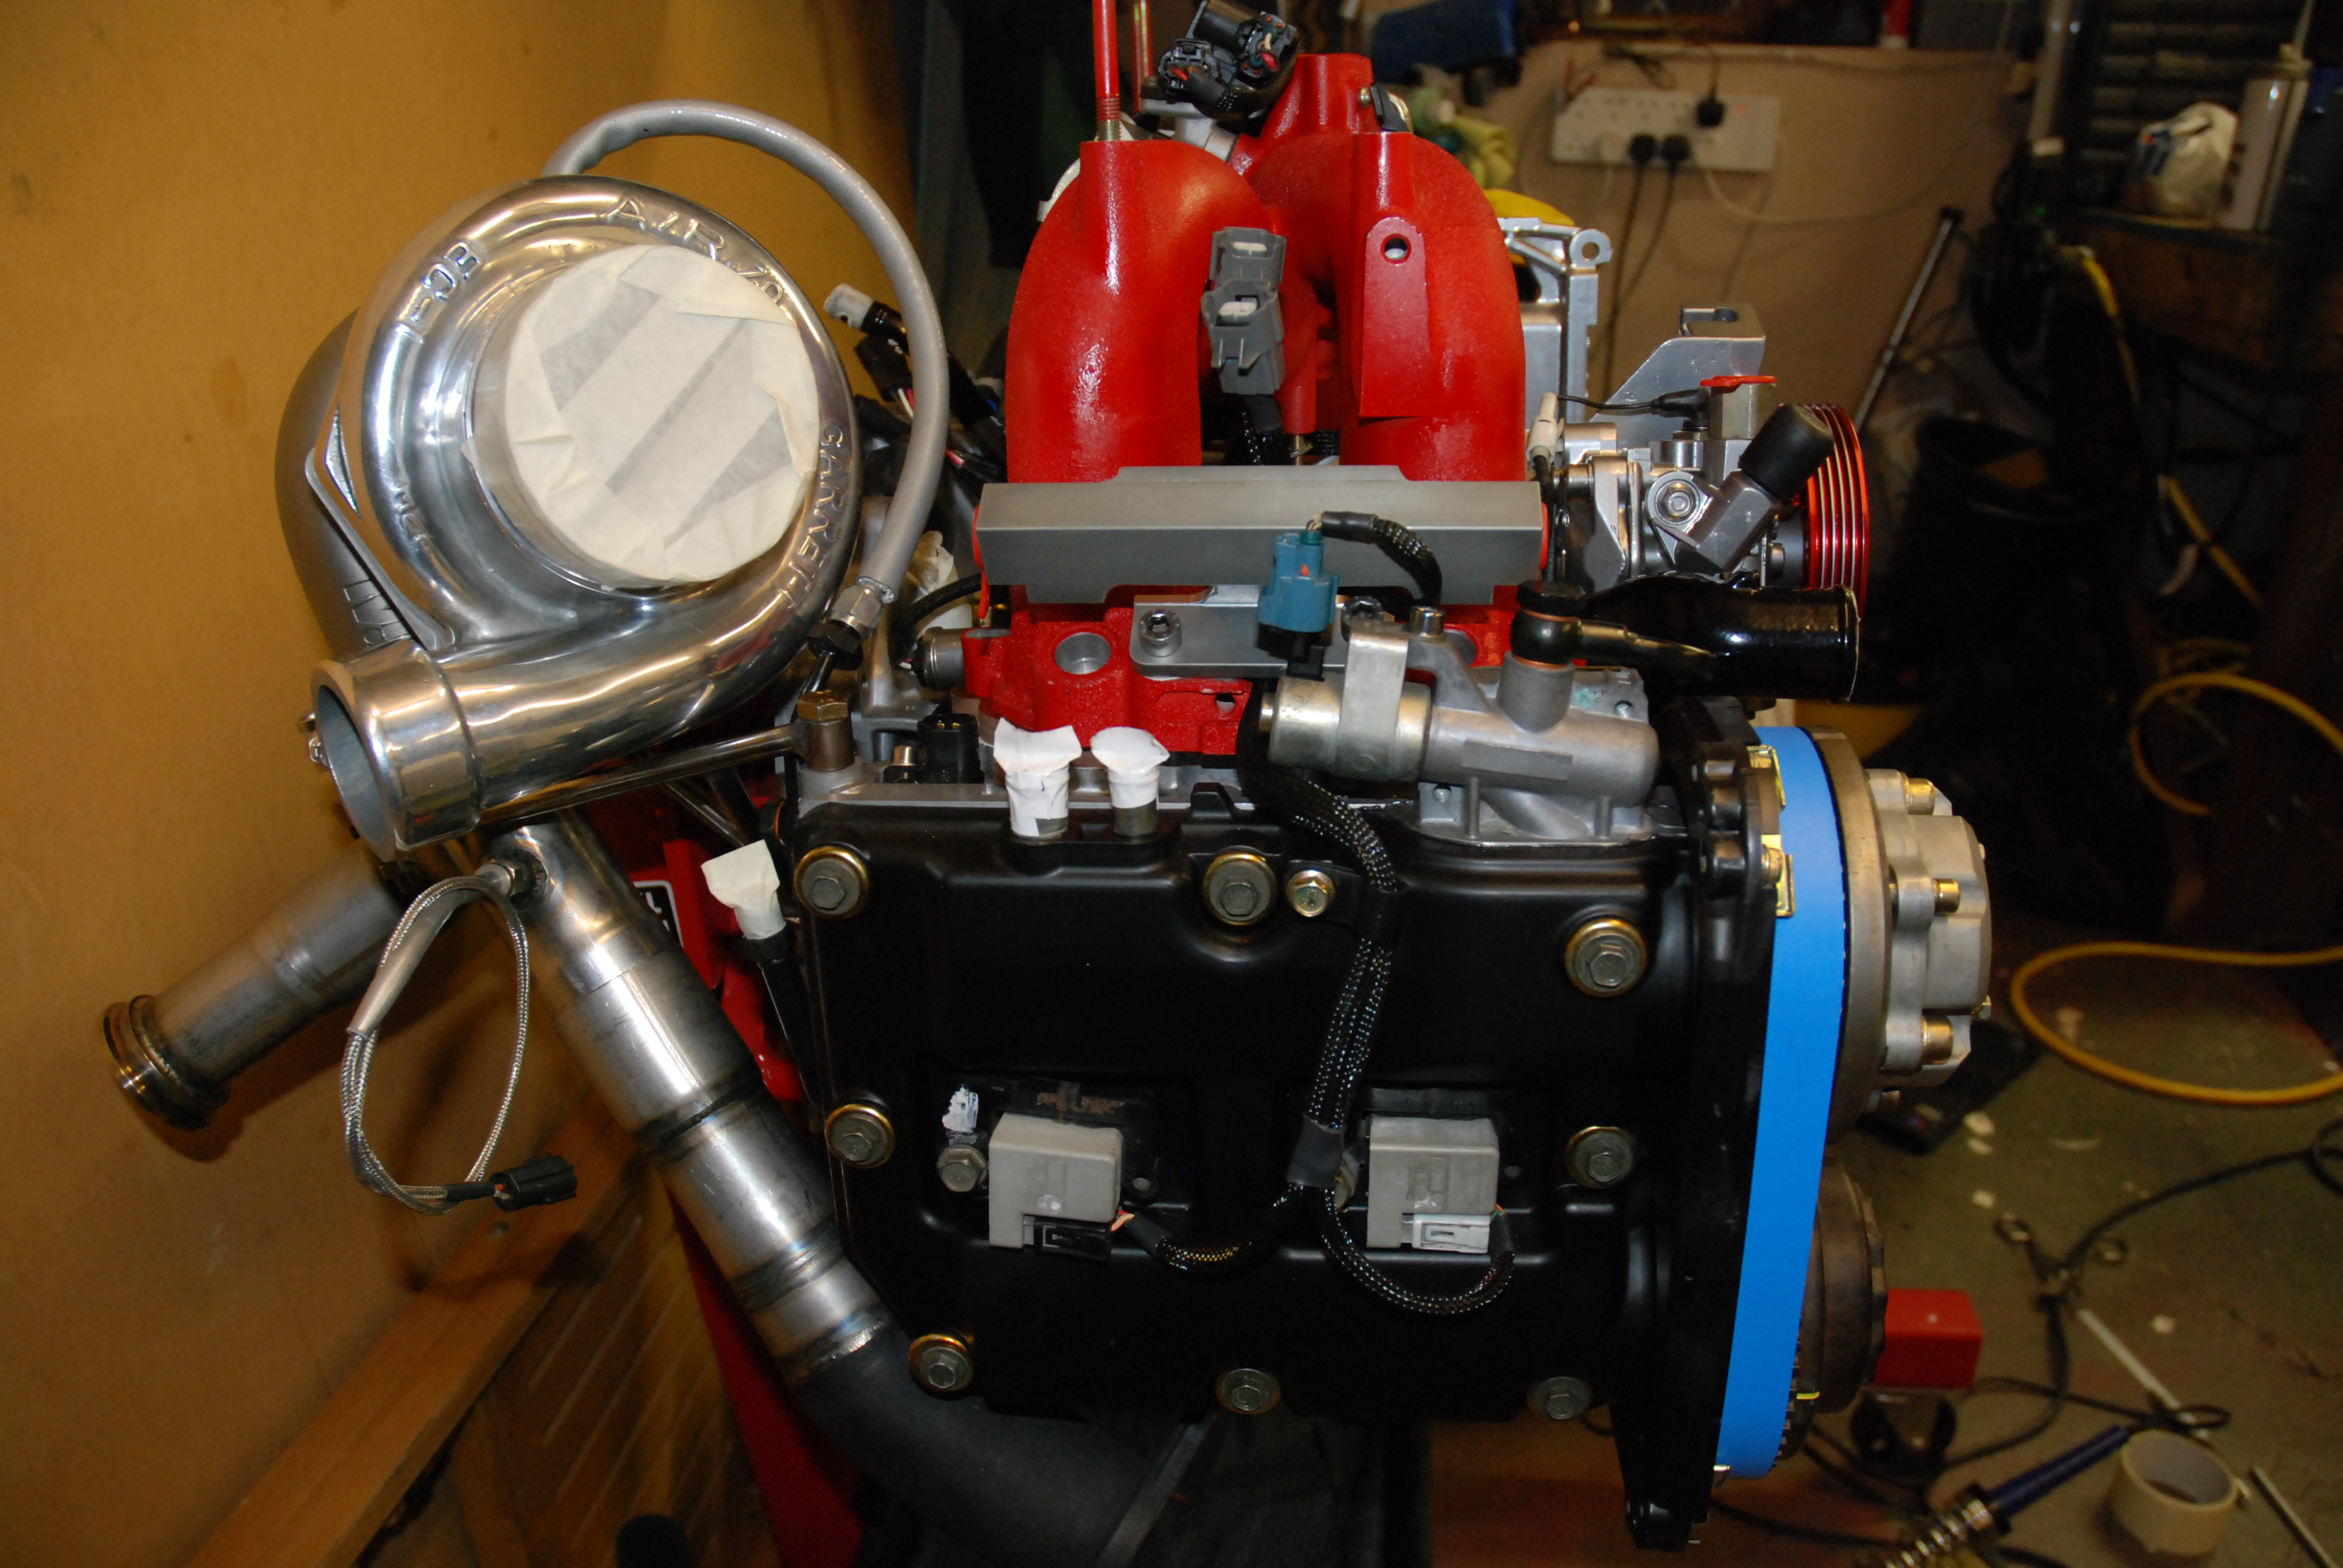
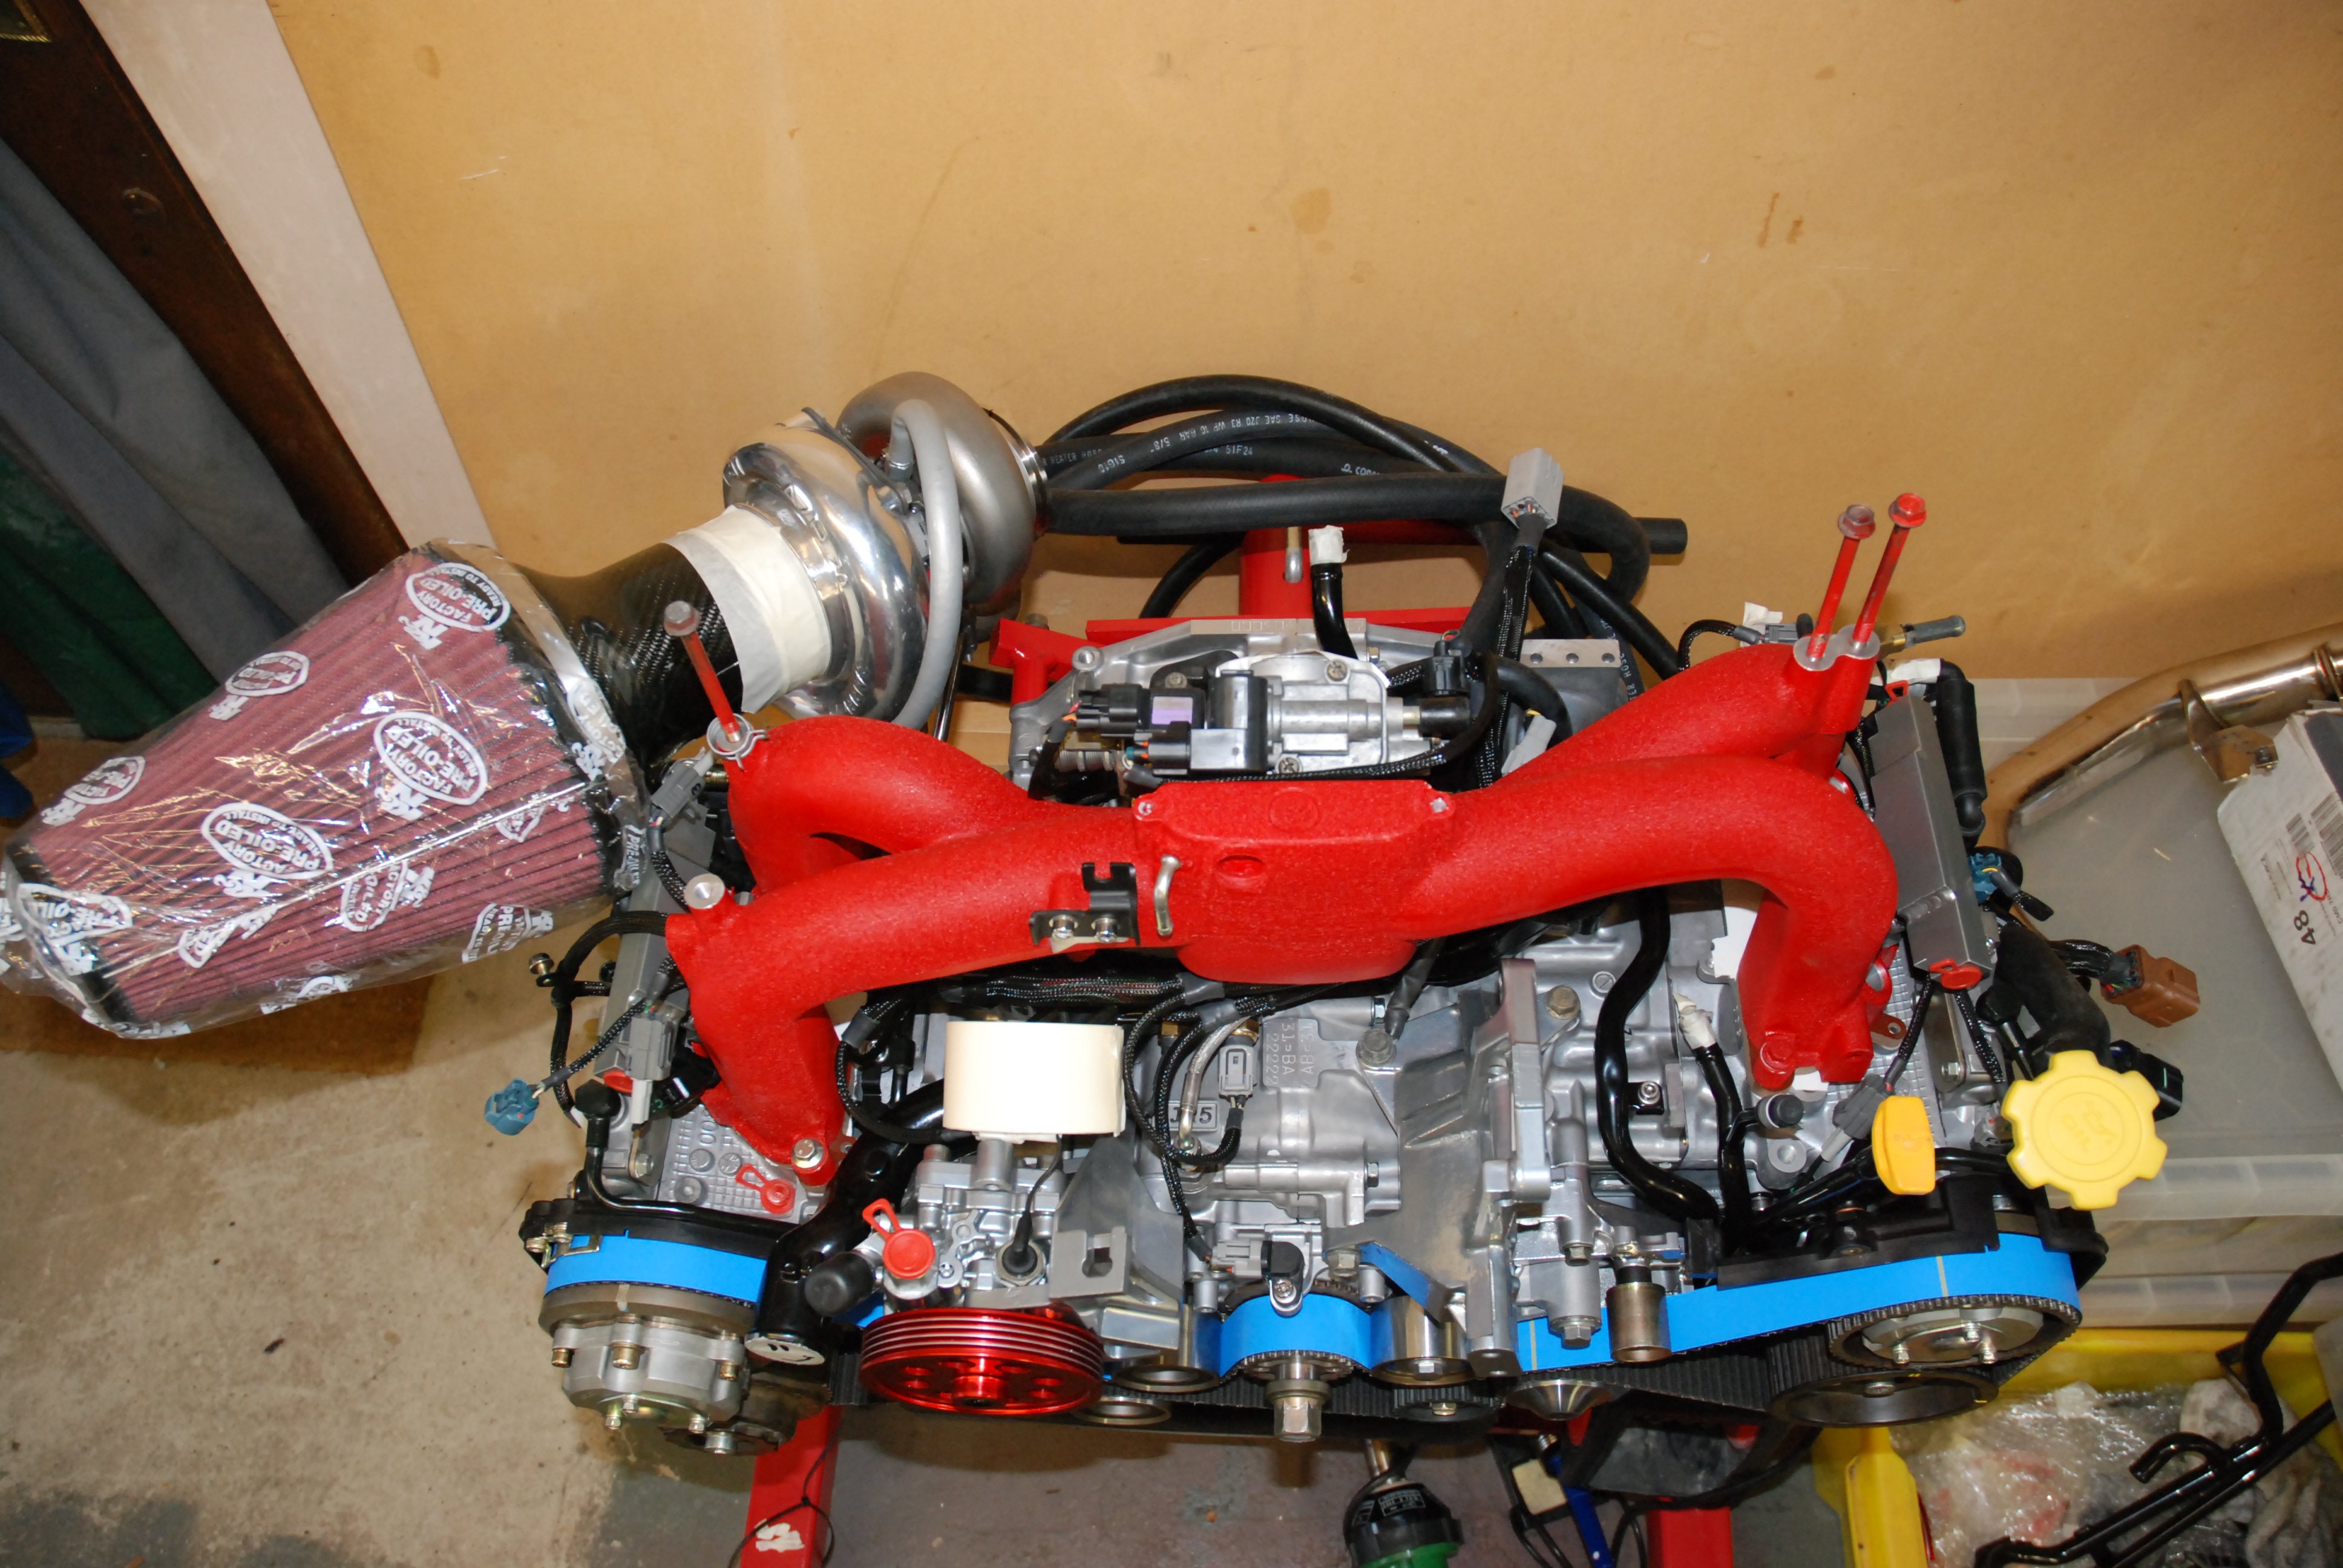
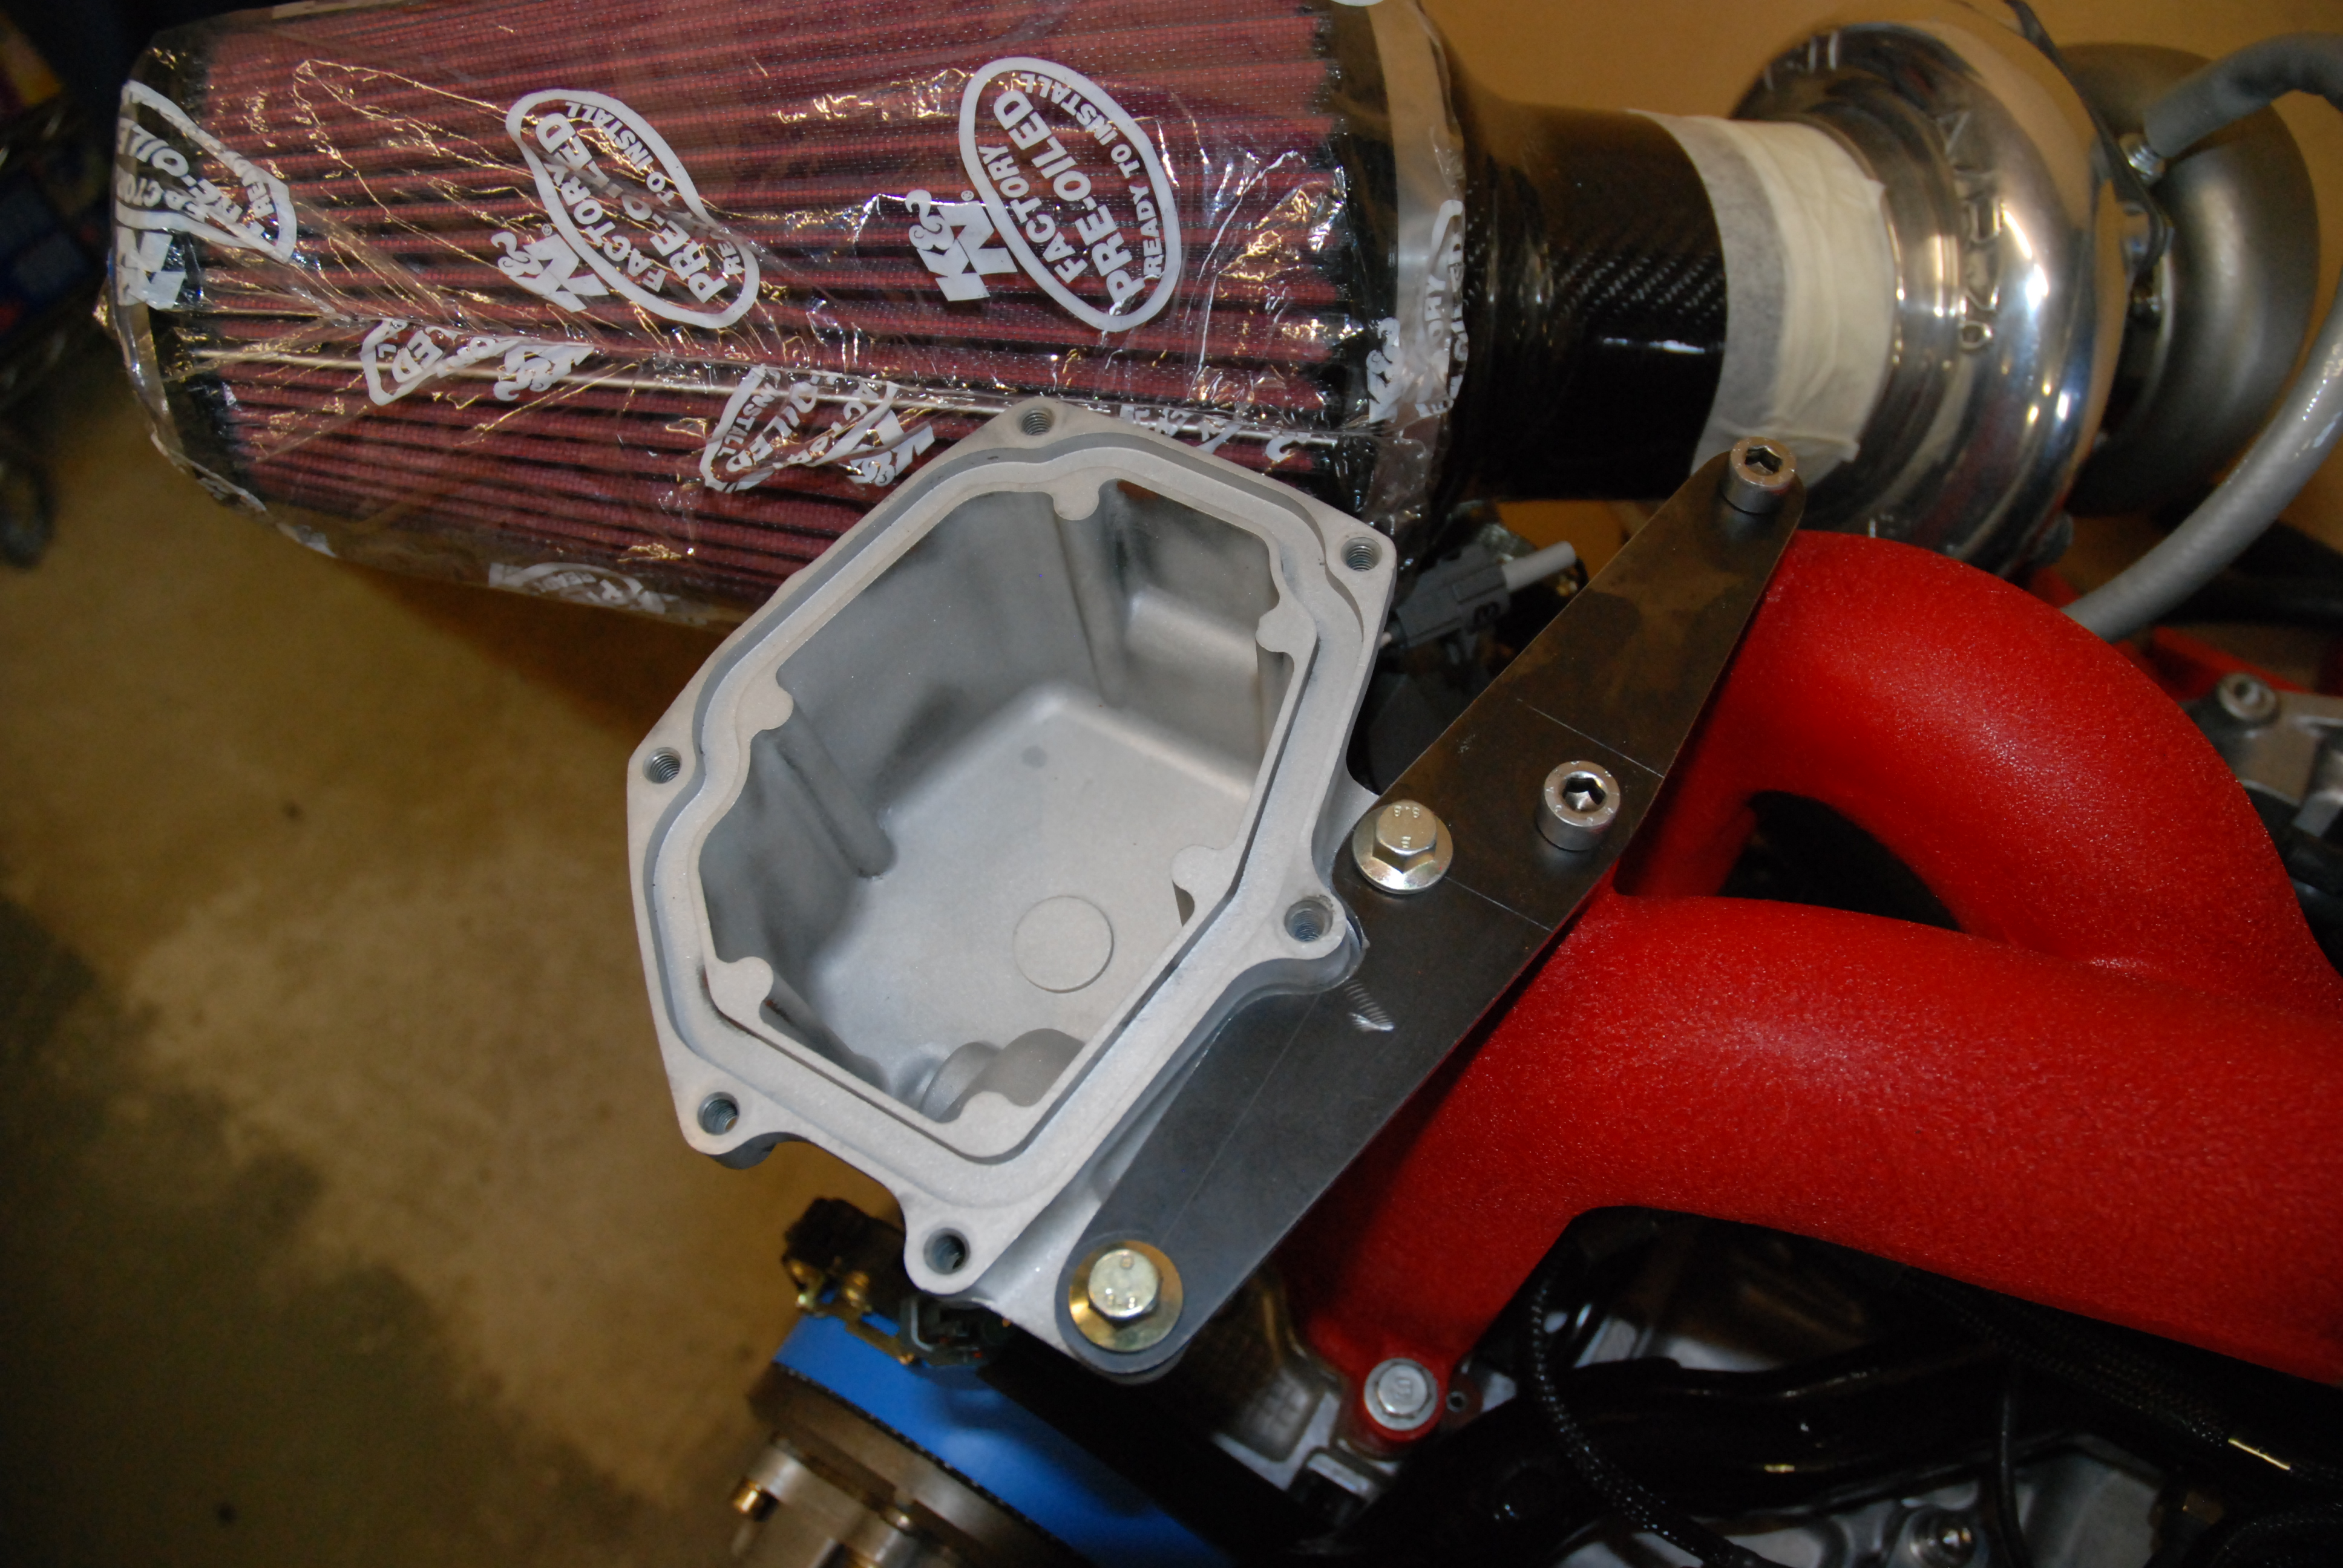
Finished the harness off guys and started making up the breather pipework. I need to get a couple more fittings for the breather and then i can get the manifold finally bolted up. Then i can clip all the haness and pipework in place, then make up my fuel lines.
Also dummy fitted my filter to check how much i have to move the header tank.
Things are starting to look interesting
Knocked up a header tank relocation bracket. RCM inspired and fits quite nice.
Another item to be chucked in the powdercoat box haha.
Funds are slowing progress, but im doing what i can
06-10-2010, 09:31 PM
#309
10K+ Poster!!

 06-10-2010, 10:14 PM
#311
Boost Junkie
Thread Starter
All my stuff came from here guys. Awesome service. All my stuff always arrived next day
http://www.vehicle-wiring-products.e...e/homepage.php
http://www.vehicle-wiring-products.e...e/homepage.php
 06-10-2010, 10:29 PM
#313
Boost Junkie
Thread Starter
Ordered my first lot of fuel fittings today too chaps so i can get the fuel system started. Then i can look at getting the motor dropped back in the bay and get some tanks made up
07-10-2010, 07:55 AM
#314
Spanner monkey
Looking real tidy Frayz, Just ordered some black wrinkle black for my rocker cover and inlet!
Love the oil cooler scoop. How's Ian doing anyway, not spoke to him for ages. If i lived closer, i'd have loads of bits for him to make lol. Gonna put a decent size battery in the boot and get rid of this kids 12v ride on battery, make a nice enclosed air filter box with direct feed from the n/s bumper scoop!!
Say hello to the build bay lads for me. Cheers.
07-10-2010, 11:44 AM
#315
Boost Junkie
Thread Starter
Looking real tidy Frayz, Just ordered some black wrinkle black for my rocker cover and inlet!
Love the oil cooler scoop. How's Ian doing anyway, not spoke to him for ages. If i lived closer, i'd have loads of bits for him to make lol. Gonna put a decent size battery in the boot and get rid of this kids 12v ride on battery, make a nice enclosed air filter box with direct feed from the n/s bumper scoop!!
Say hello to the build bay lads for me. Cheers.
Love the oil cooler scoop. How's Ian doing anyway, not spoke to him for ages. If i lived closer, i'd have loads of bits for him to make lol. Gonna put a decent size battery in the boot and get rid of this kids 12v ride on battery, make a nice enclosed air filter box with direct feed from the n/s bumper scoop!!
Say hello to the build bay lads for me. Cheers.
Ello gorgeous, how are ya?
Yeah Ians cool, he's always helping me with stuff. He's too talented to waste doing the day to day gear.
Get some pics up of the heve-ho, always interested to see what youre up to. When its build i'll come up and see you, it'll need some running in miles anyway
08-10-2010, 12:13 AM
#316
Boost Junkie
Thread Starter
Well proto #1 has been made of the RCM style inner wing insert. Its a slightly different style than the RCM one. Its deeper and will take a larger dia cold air feed, mine will be 83mm fed direct from one of the foglamp covers.
This proto is to my original drawing and does not yet have a feed to it.
I'll fit this first just as an insert and then make any changes that are required before adding the air feed in the bottom. Huge thanks to Ian for knocking this up double quick. I only gave him a drawing yesterday
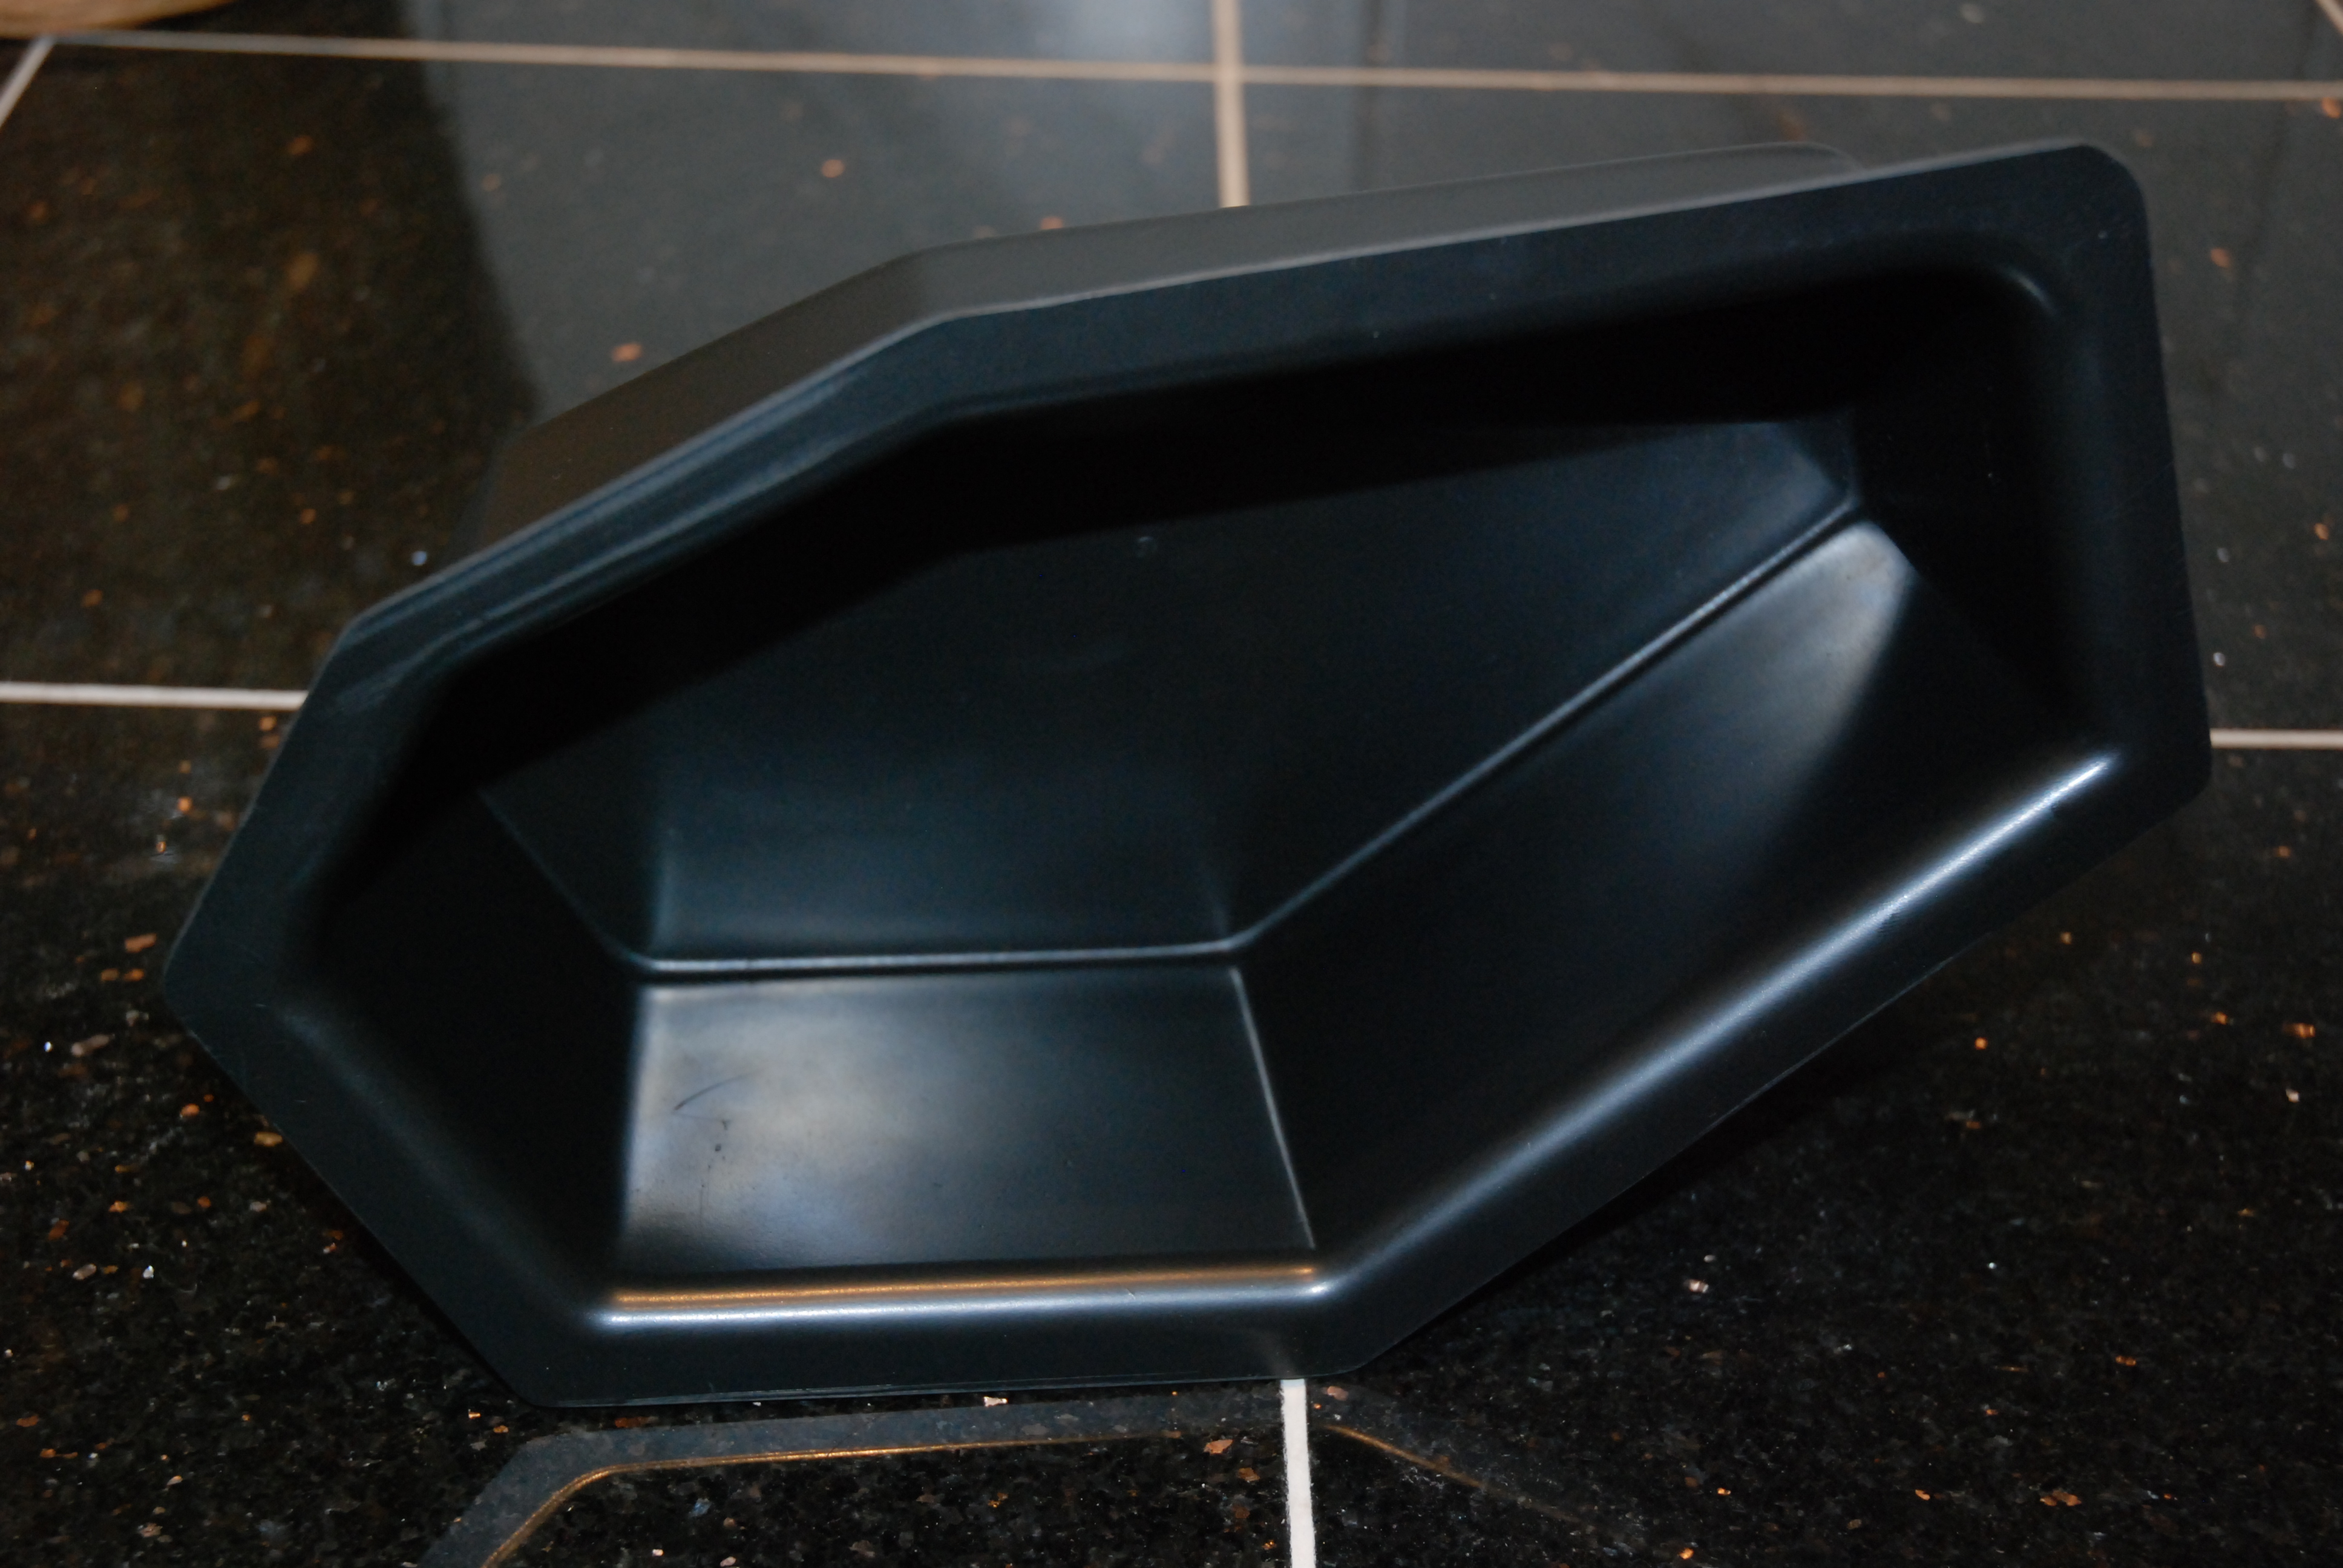

Also another bracket that needs making... "can ya guess what it is yet?"
This proto is to my original drawing and does not yet have a feed to it.
I'll fit this first just as an insert and then make any changes that are required before adding the air feed in the bottom. Huge thanks to Ian for knocking this up double quick. I only gave him a drawing yesterday
Also another bracket that needs making... "can ya guess what it is yet?"
09-10-2010, 01:42 PM
#317
Boost Junkie
Thread Starter
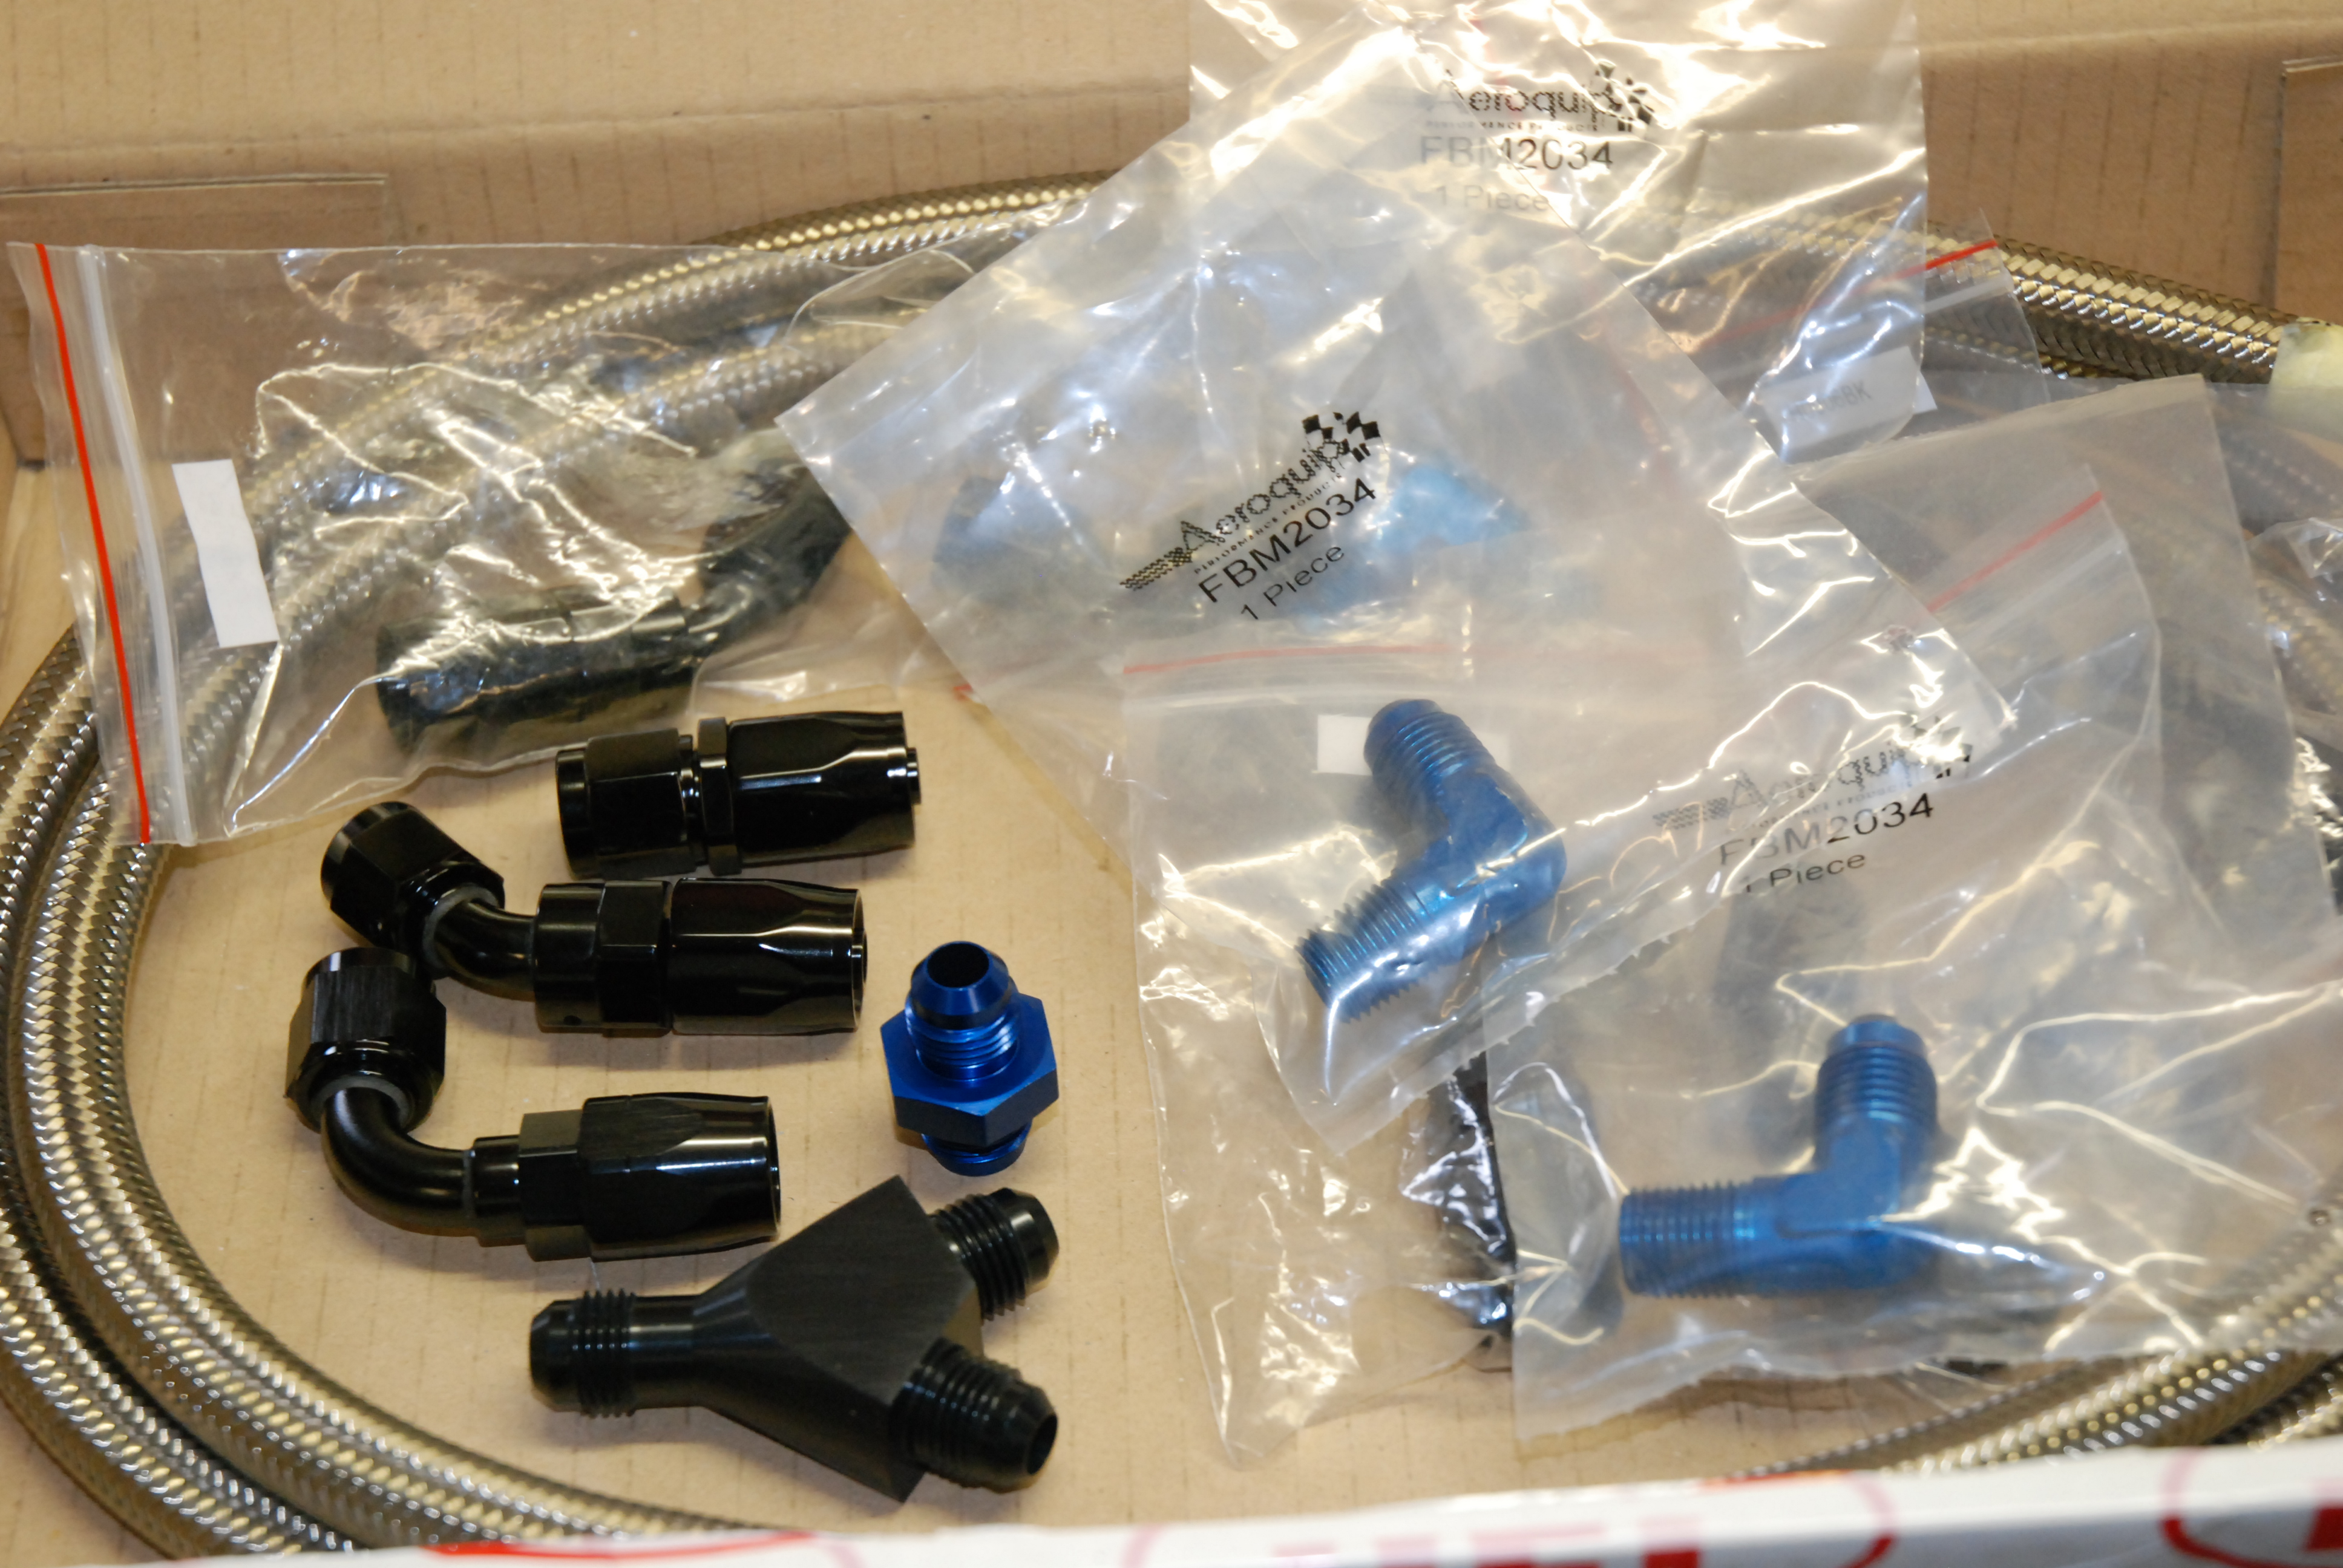
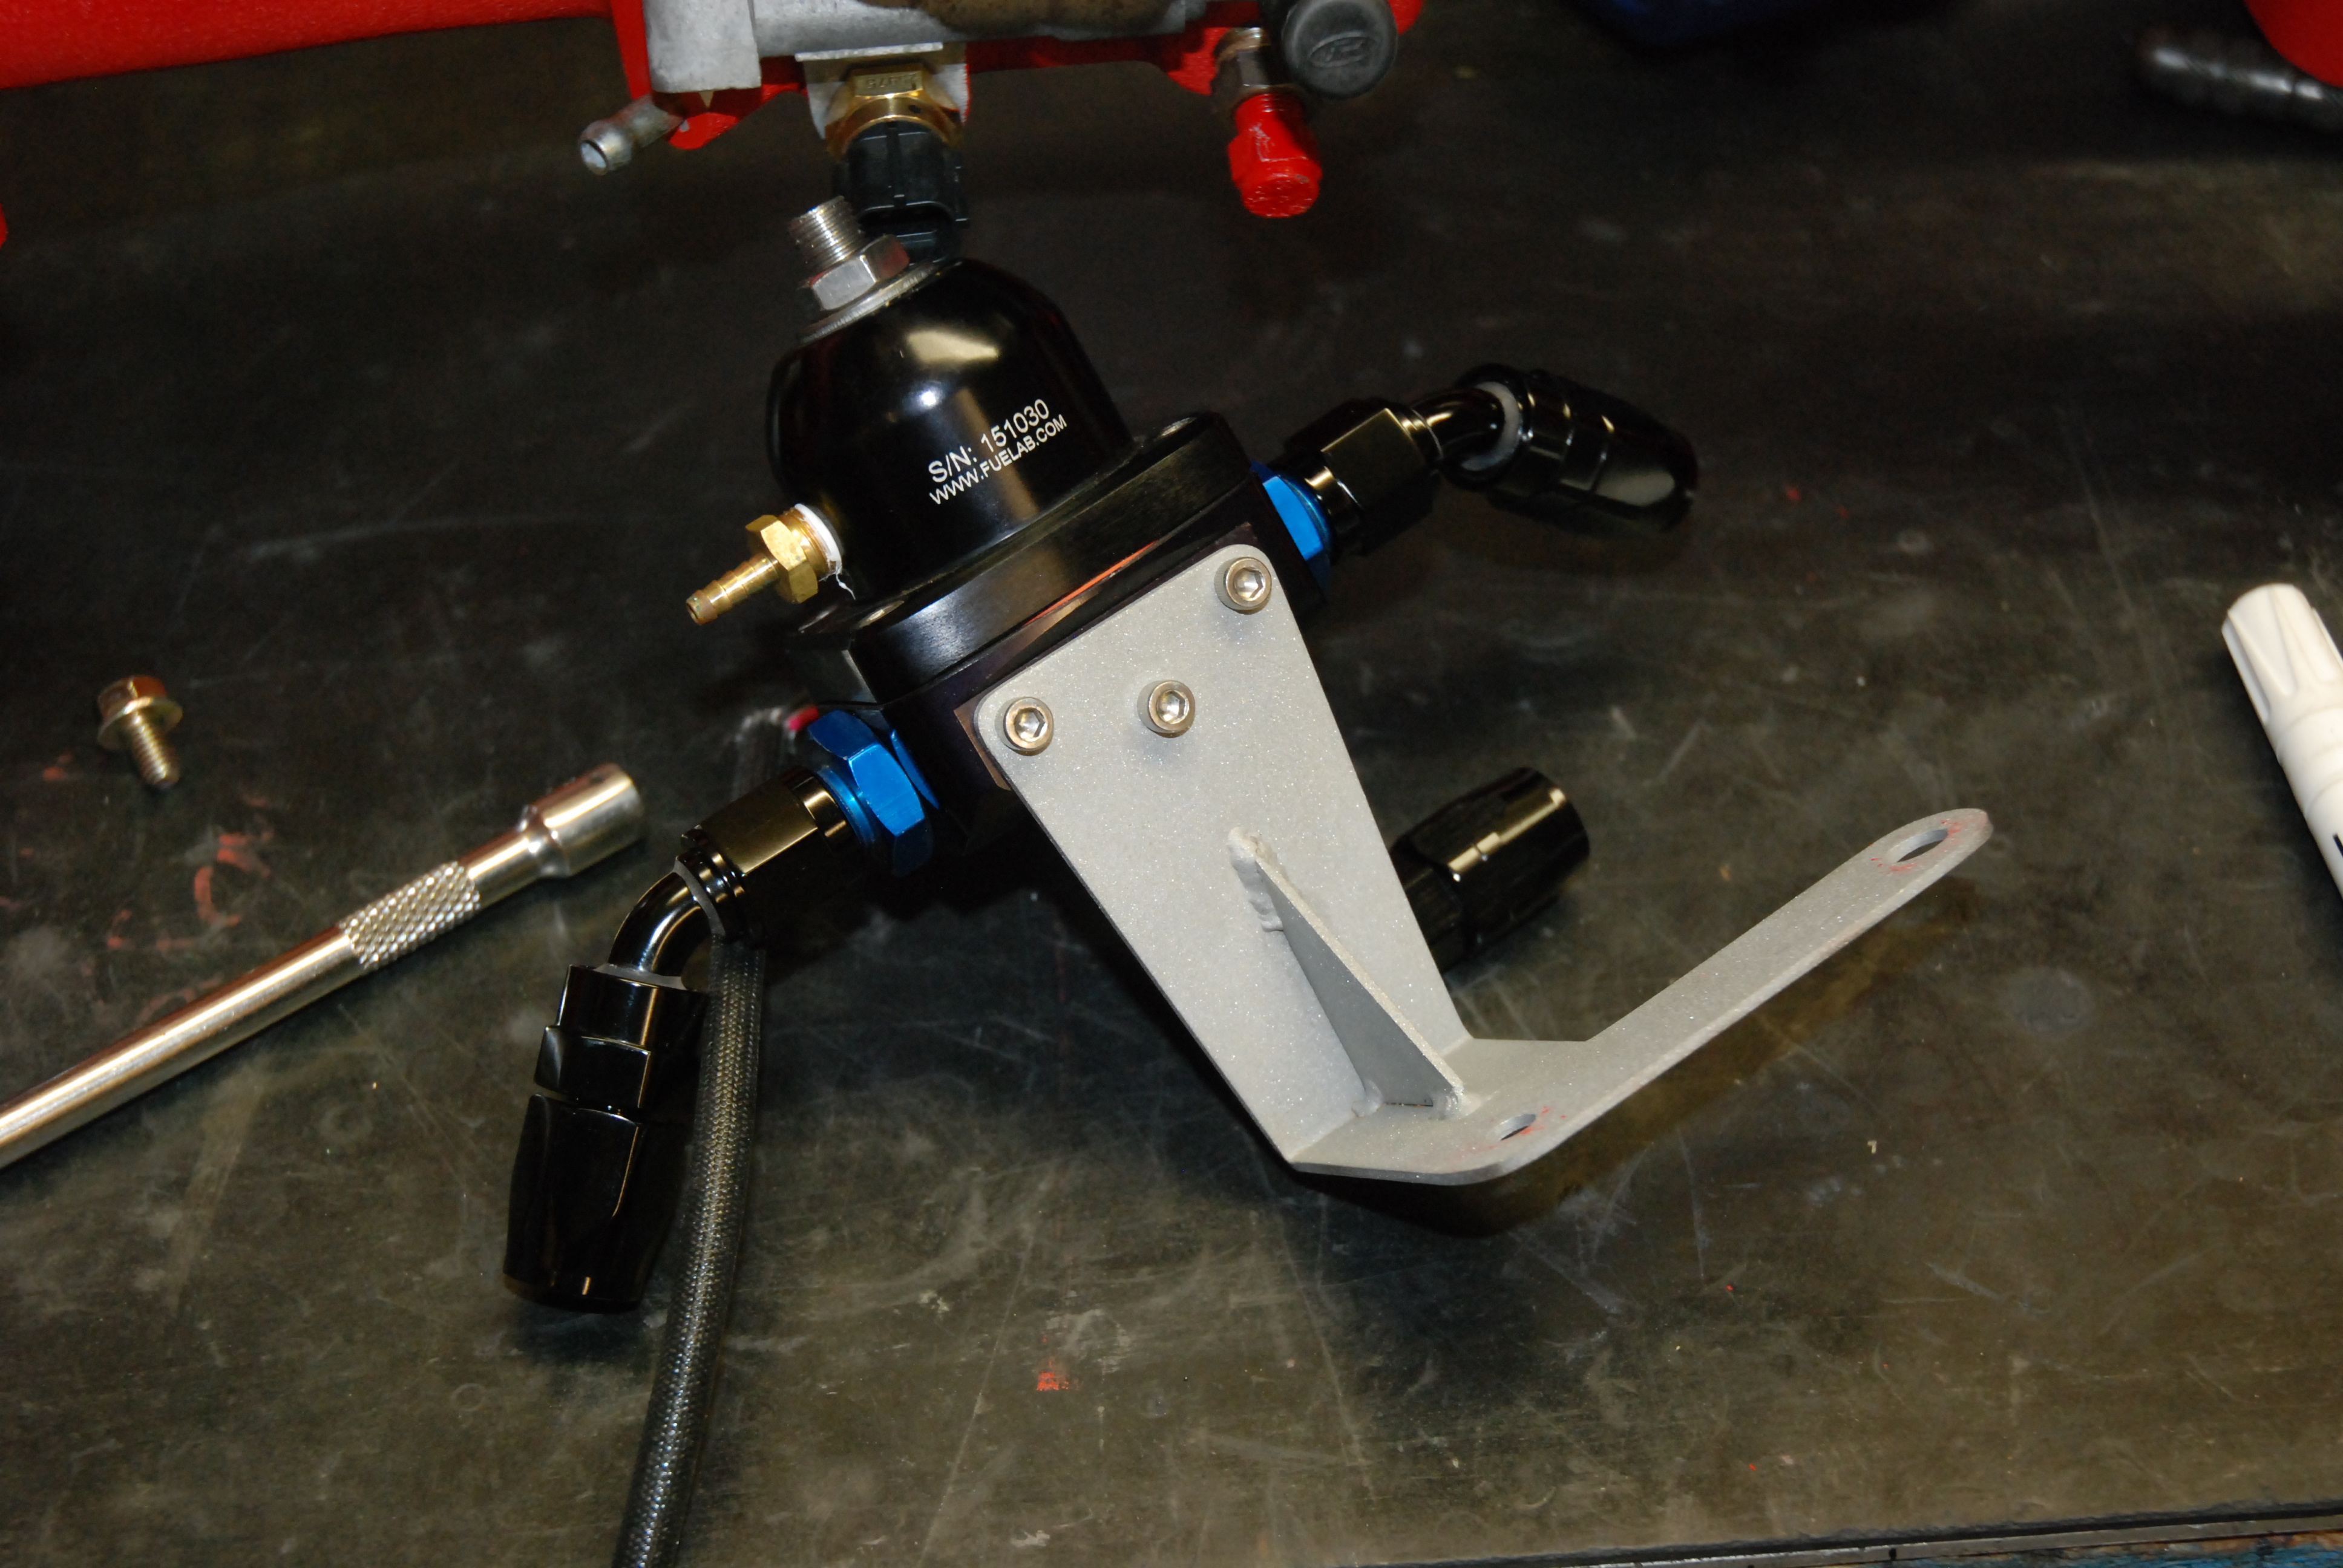
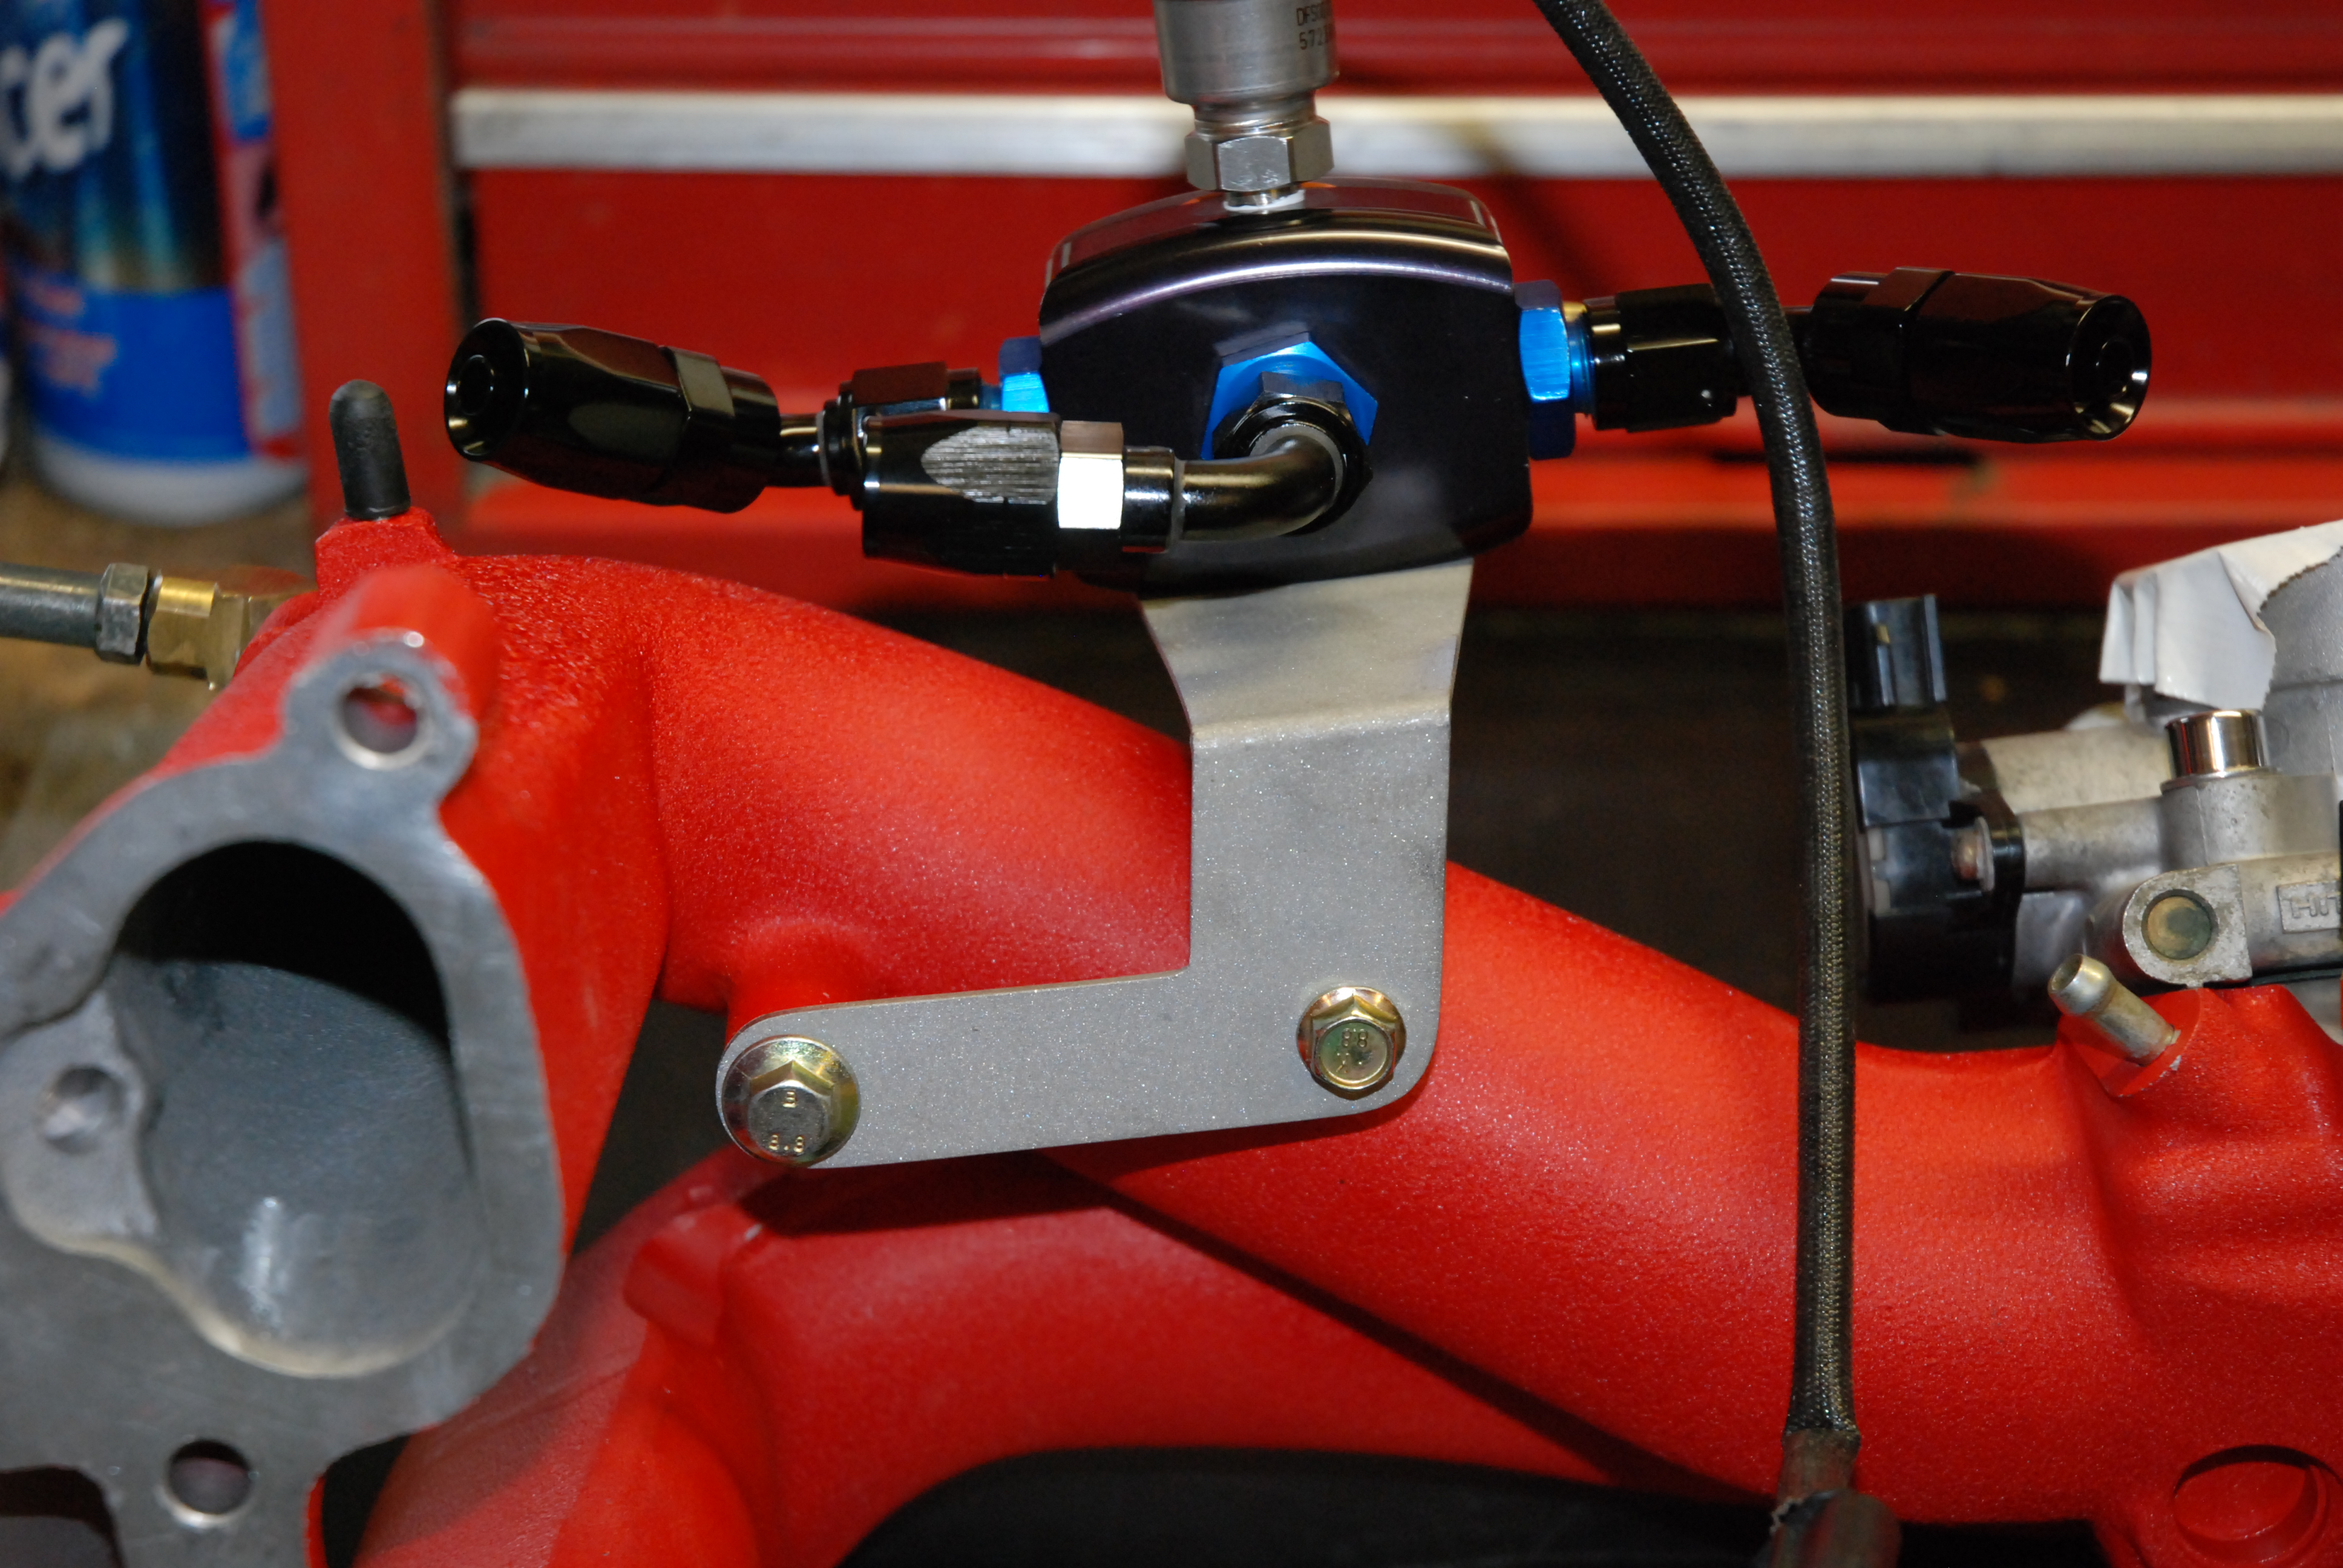
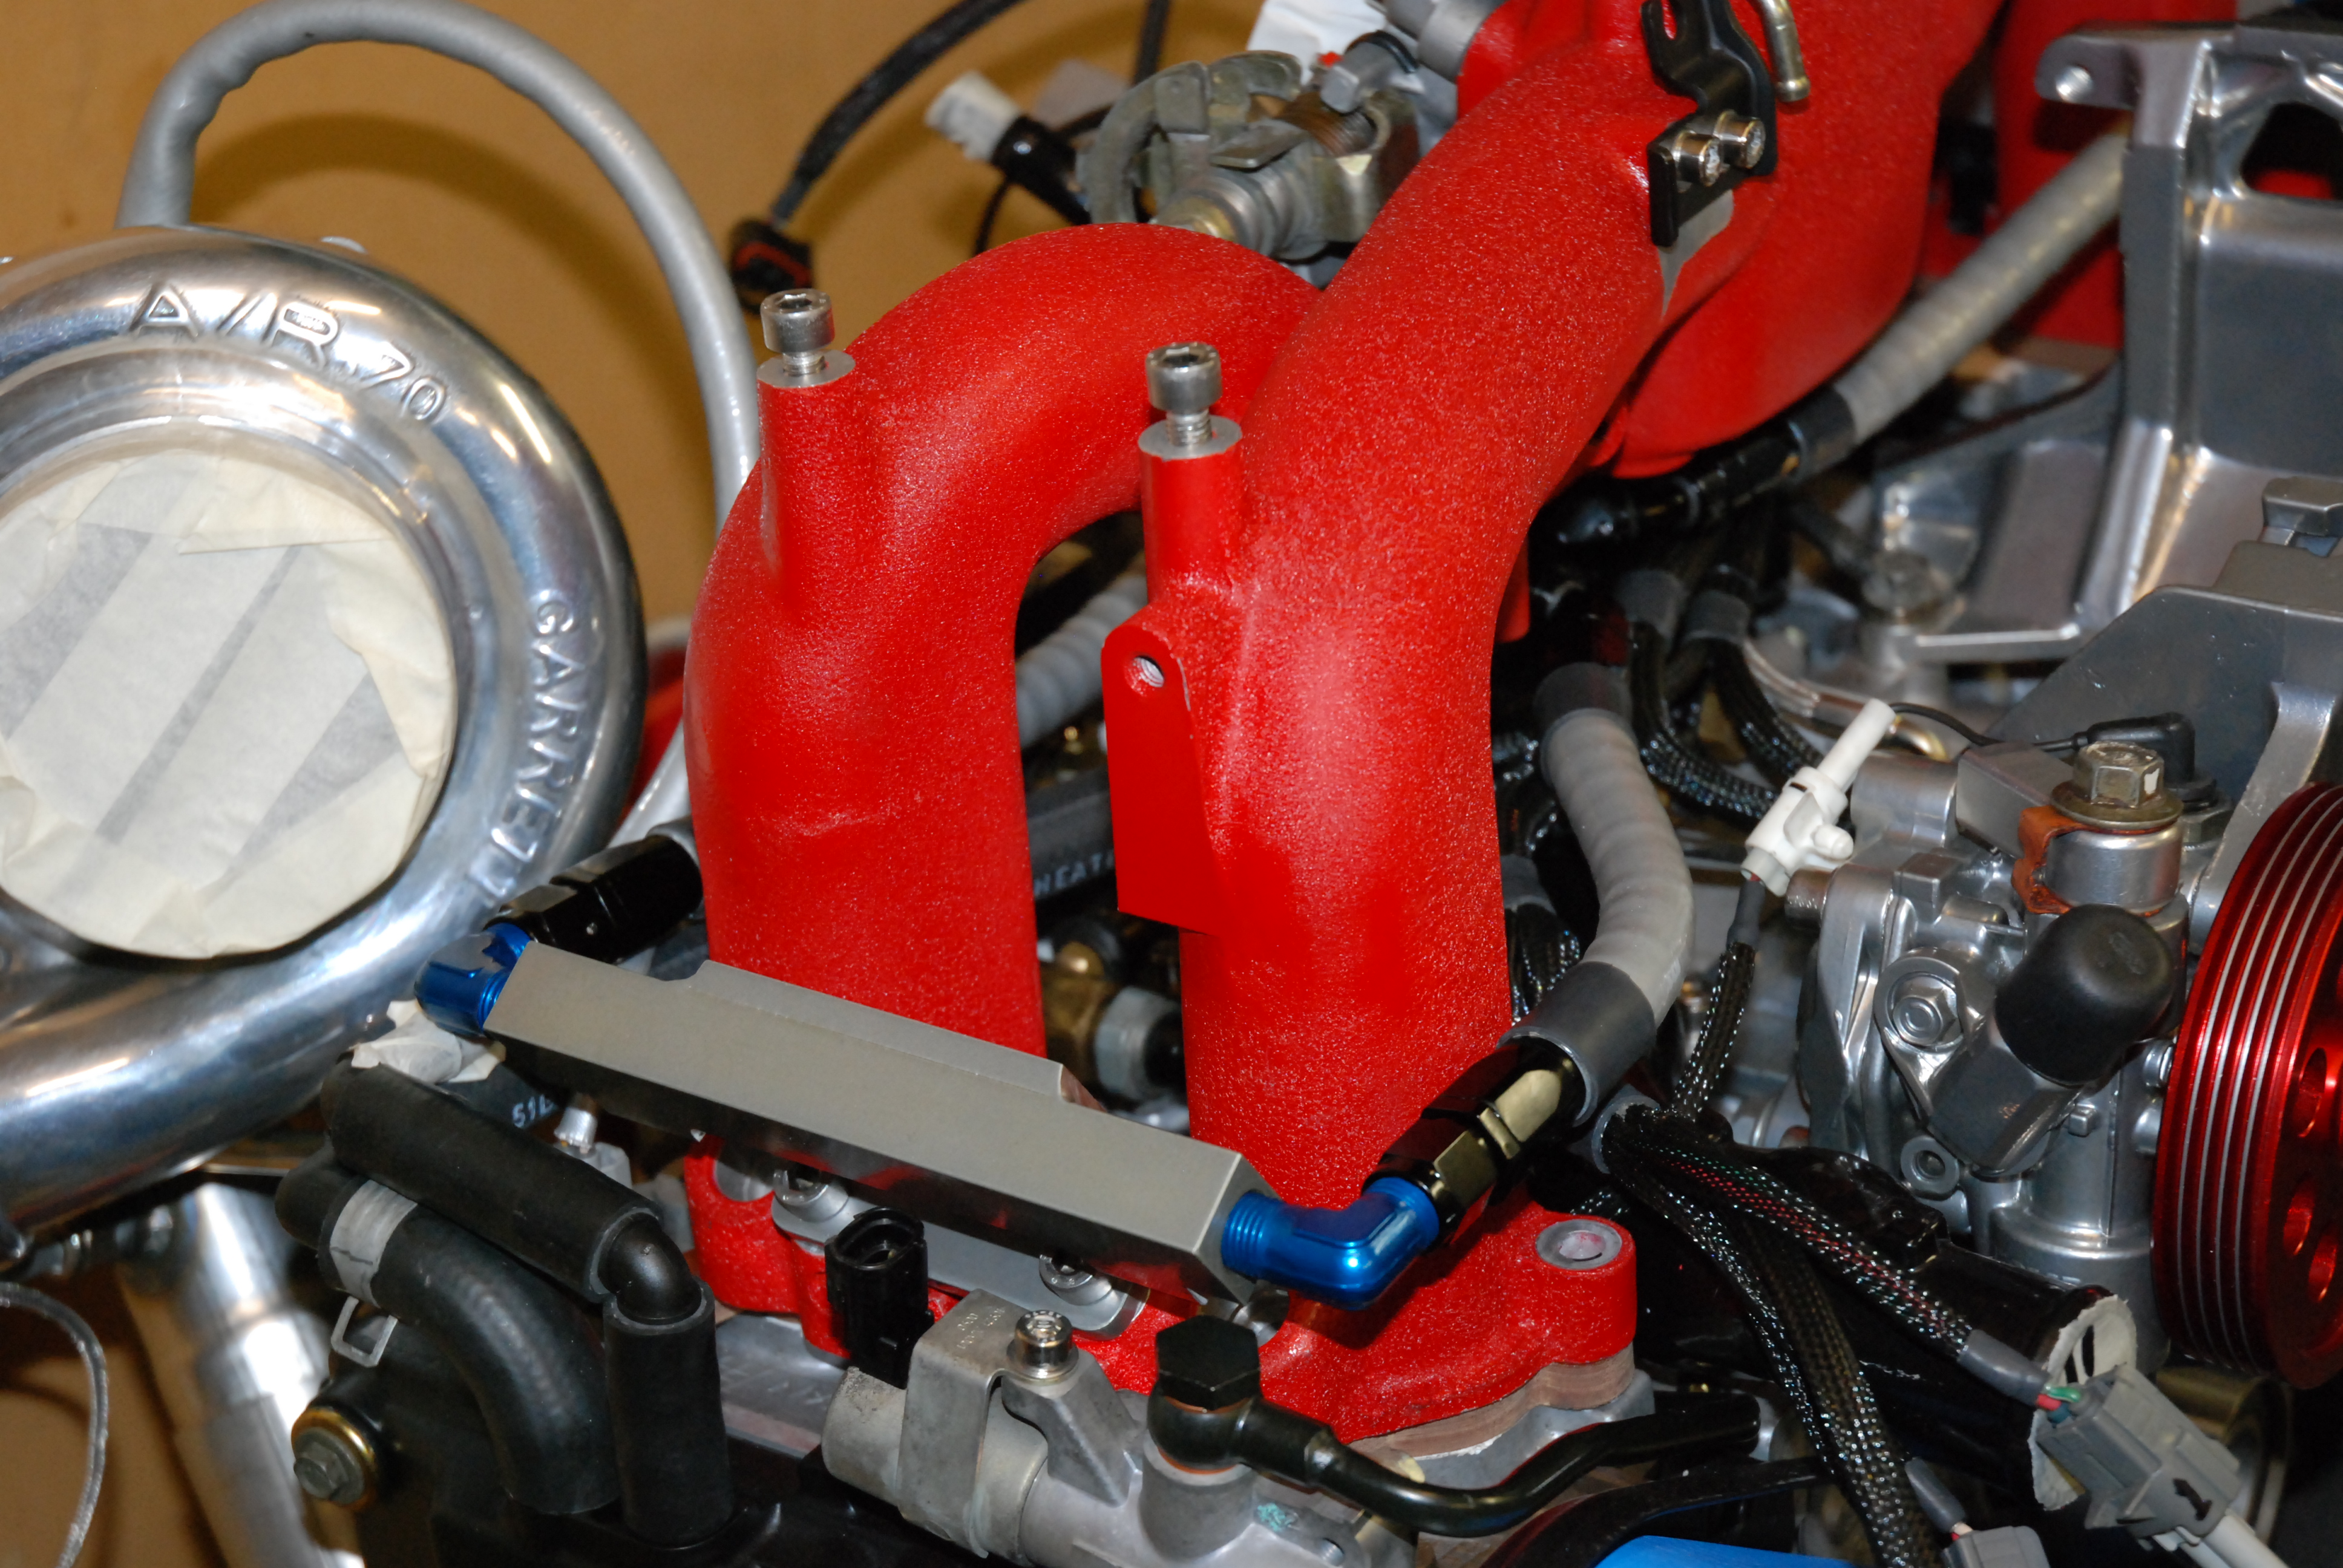
Double quick turnaround from Ben @ Hel Performance ensured my hose and fittings arrived for the weekend. The ones in blue are only available in blue at the moment so they will more than likely be taken to be re anodized in black to match the rest.
Oh remember that bracket?
Well now my regulator has a home
Oh remember that bracket?
Well now my regulator has a home
09-10-2010, 03:16 PM
#318
Boost Junkie
Thread Starter
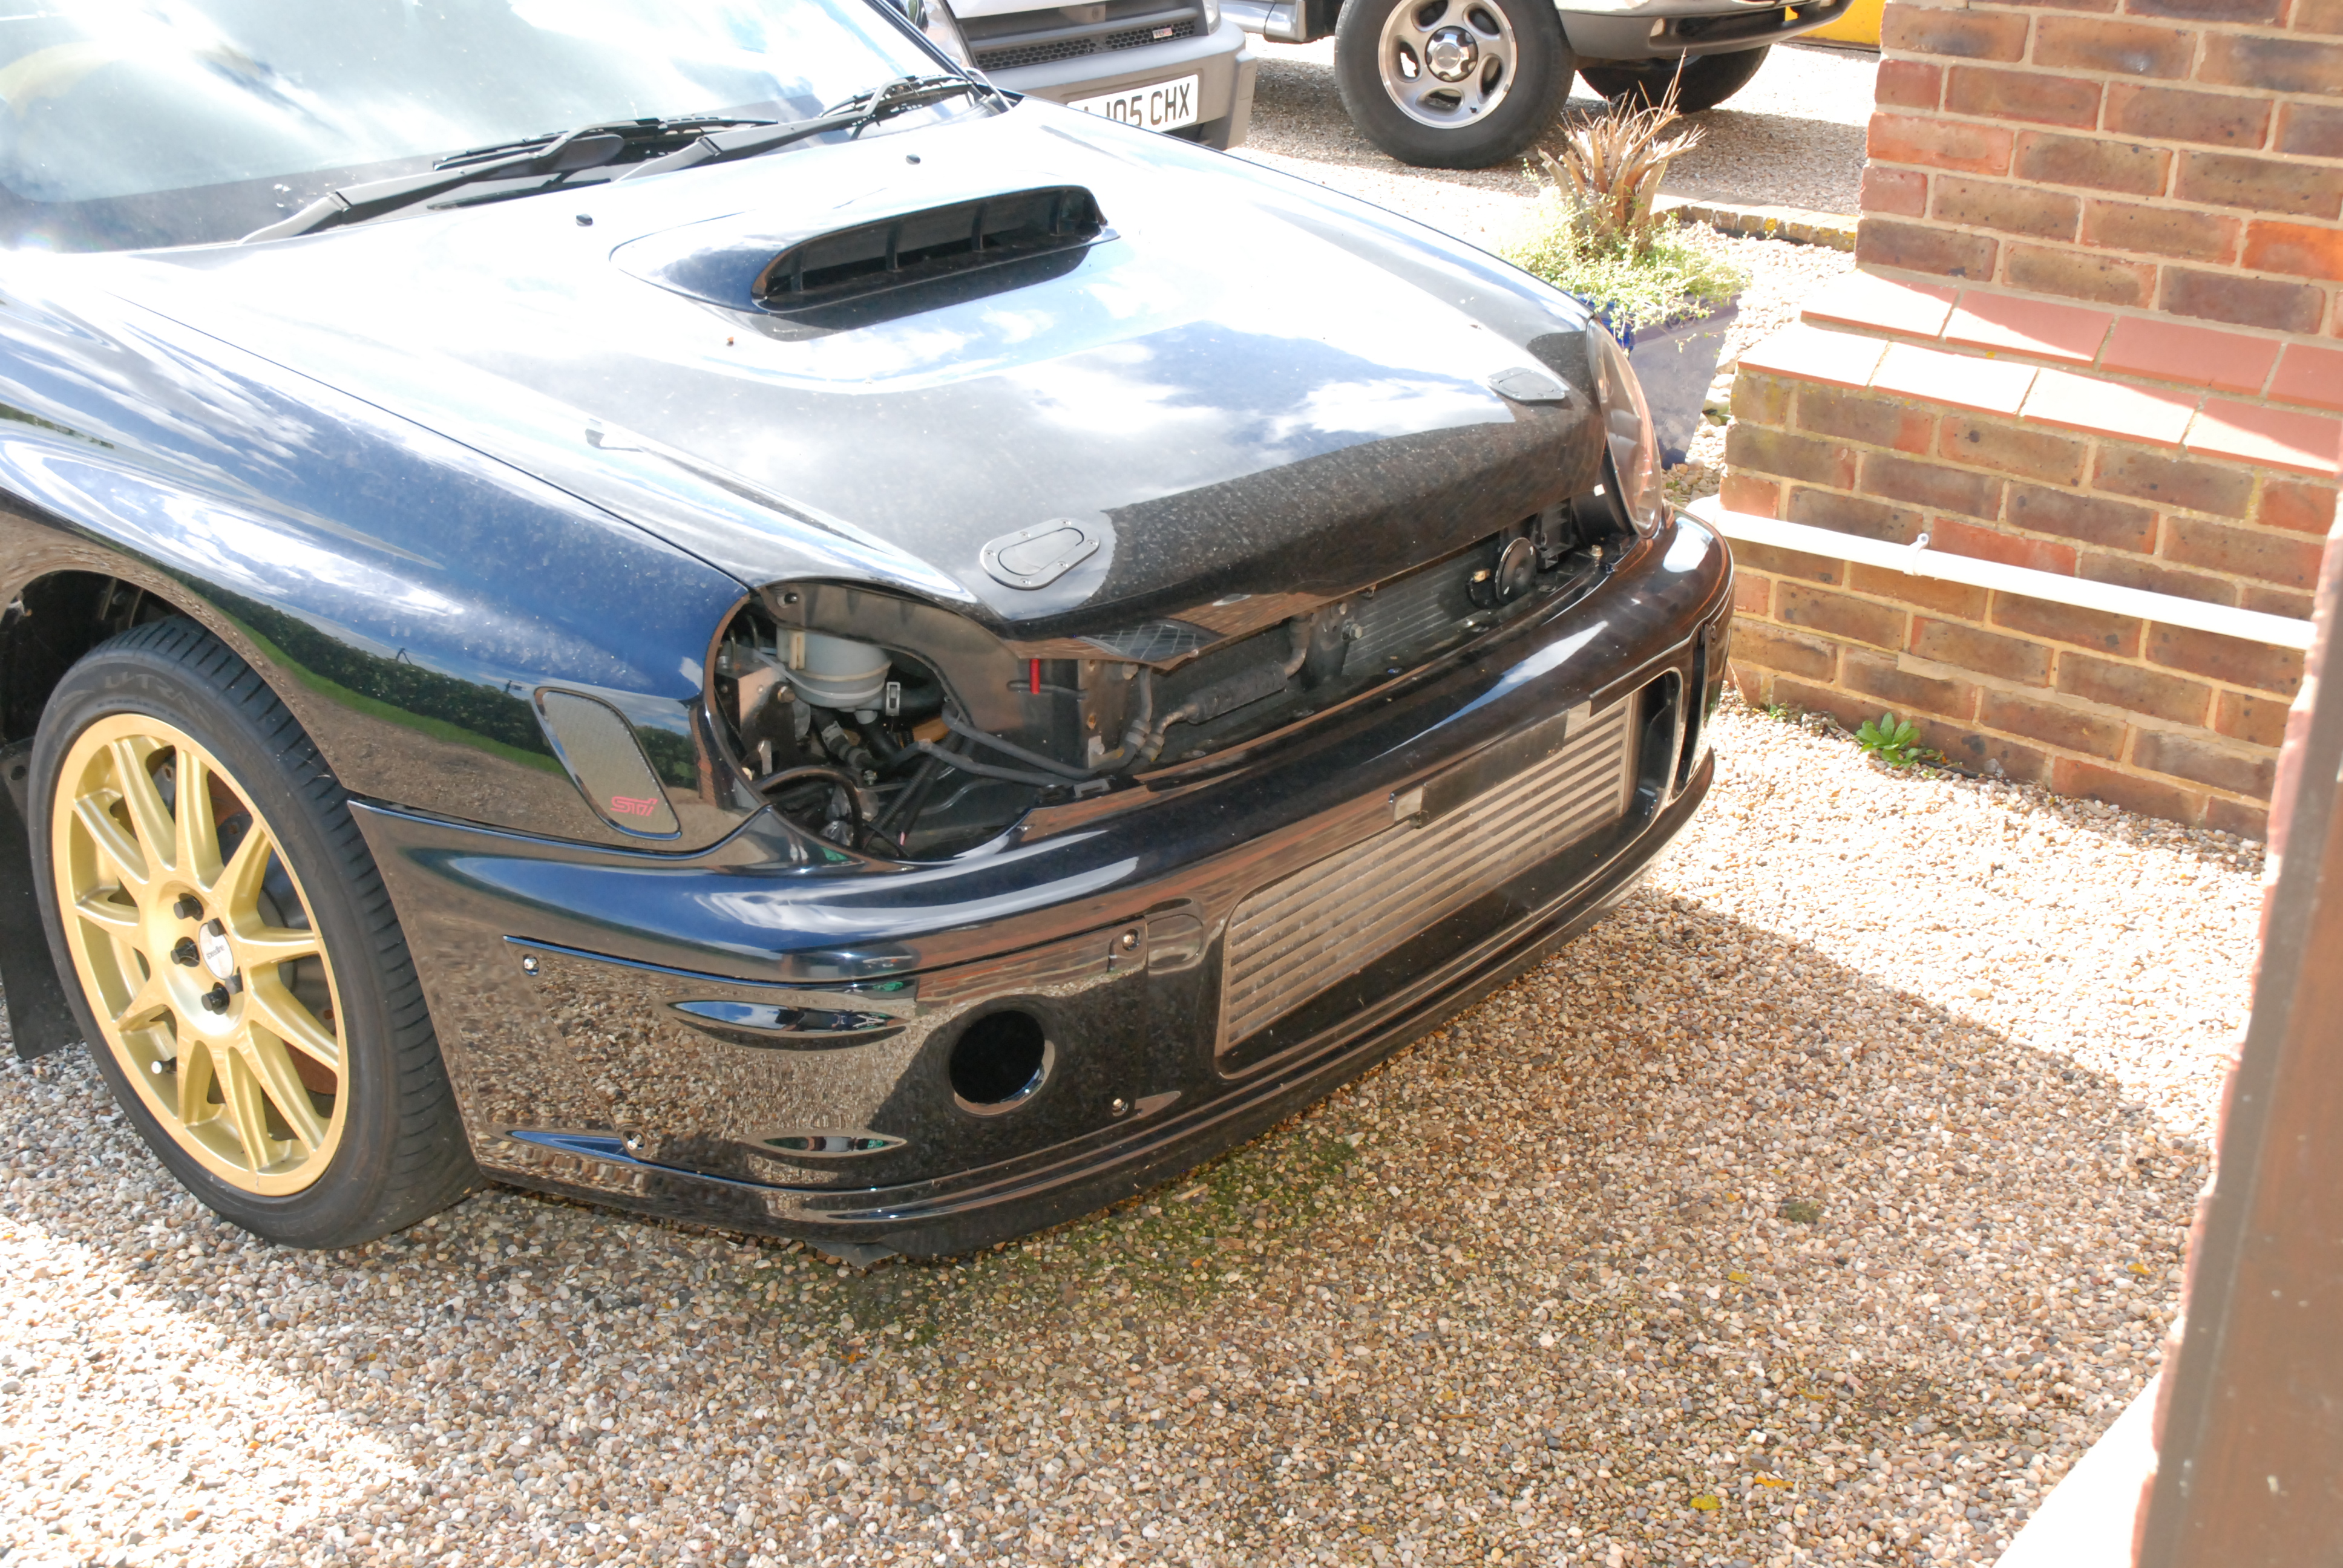
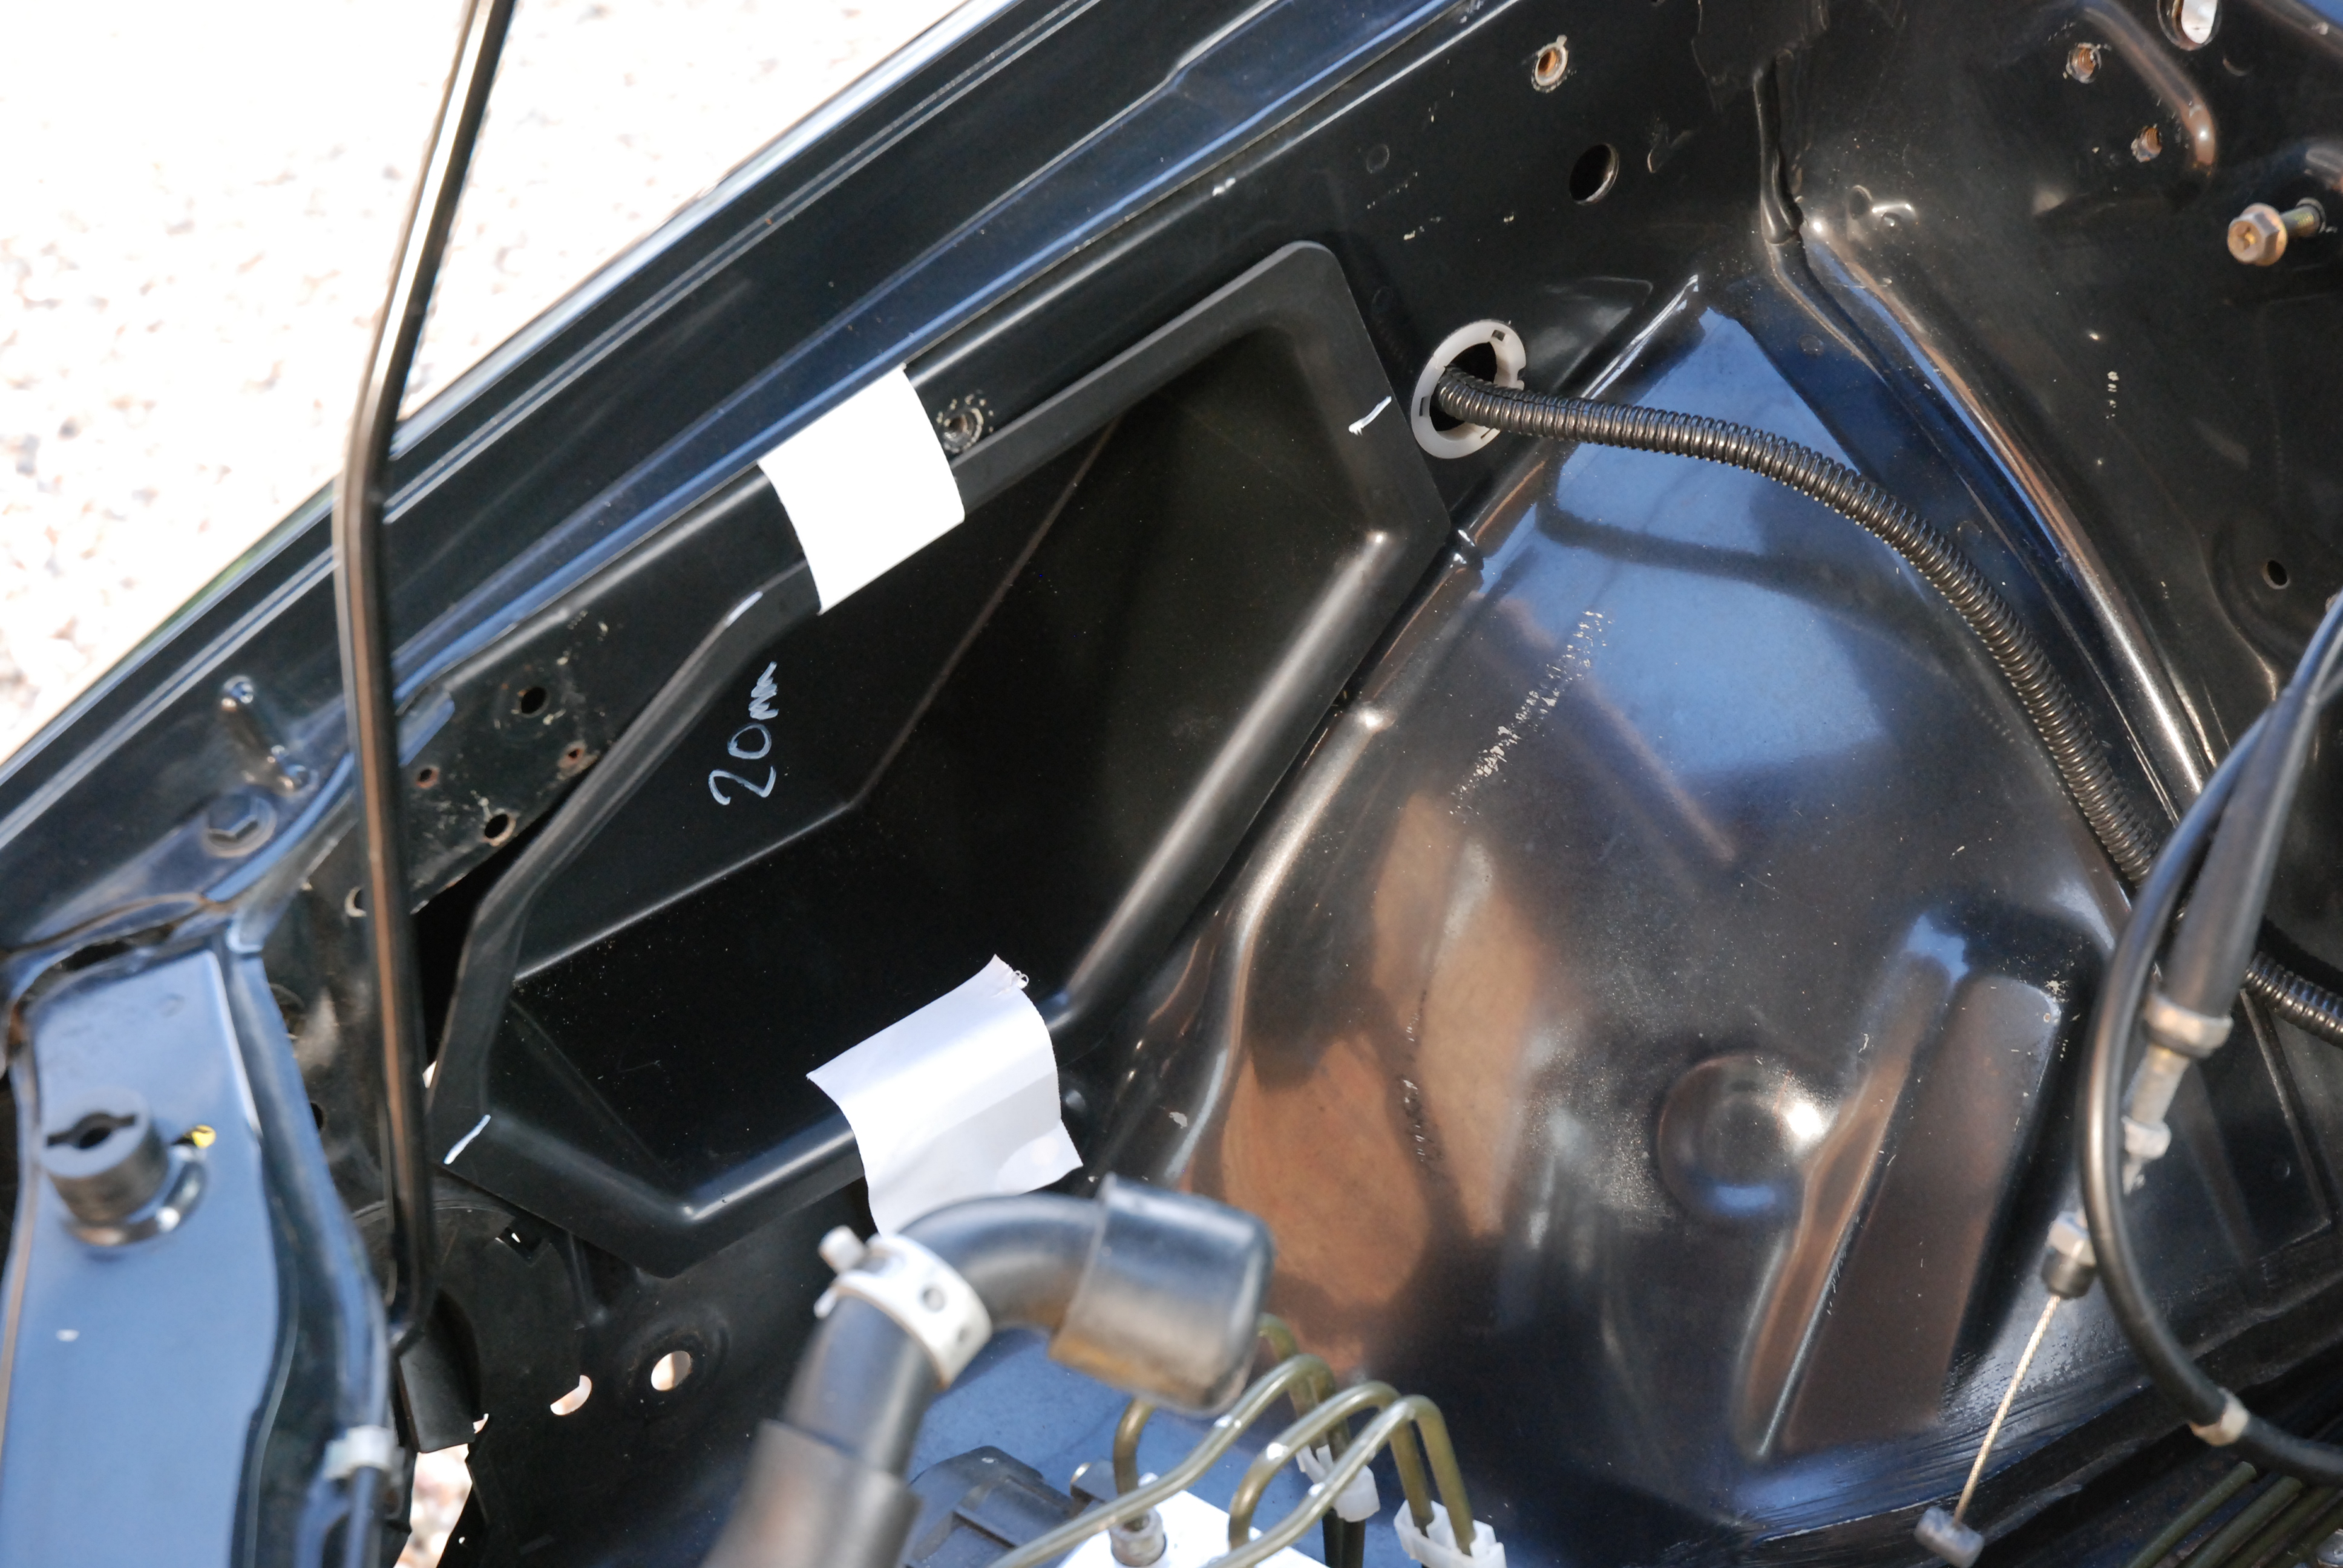
Ive dummy fitted the proto wing insert today and over all im absolutely delighted with it. It does need some slight alterations, one of which will be to make it taller by approx 20mm. But even just resting it in there with tape you can see it will fit excellent once finished.
I think this is the most exciting thing on the car in ages. Once proto #2 is made we can get the air feed right.
What do you think guys?

I think this is the most exciting thing on the car in ages. Once proto #2 is made we can get the air feed right.
What do you think guys?
09-10-2010, 09:05 PM
#319
Boost Junkie
Thread Starter
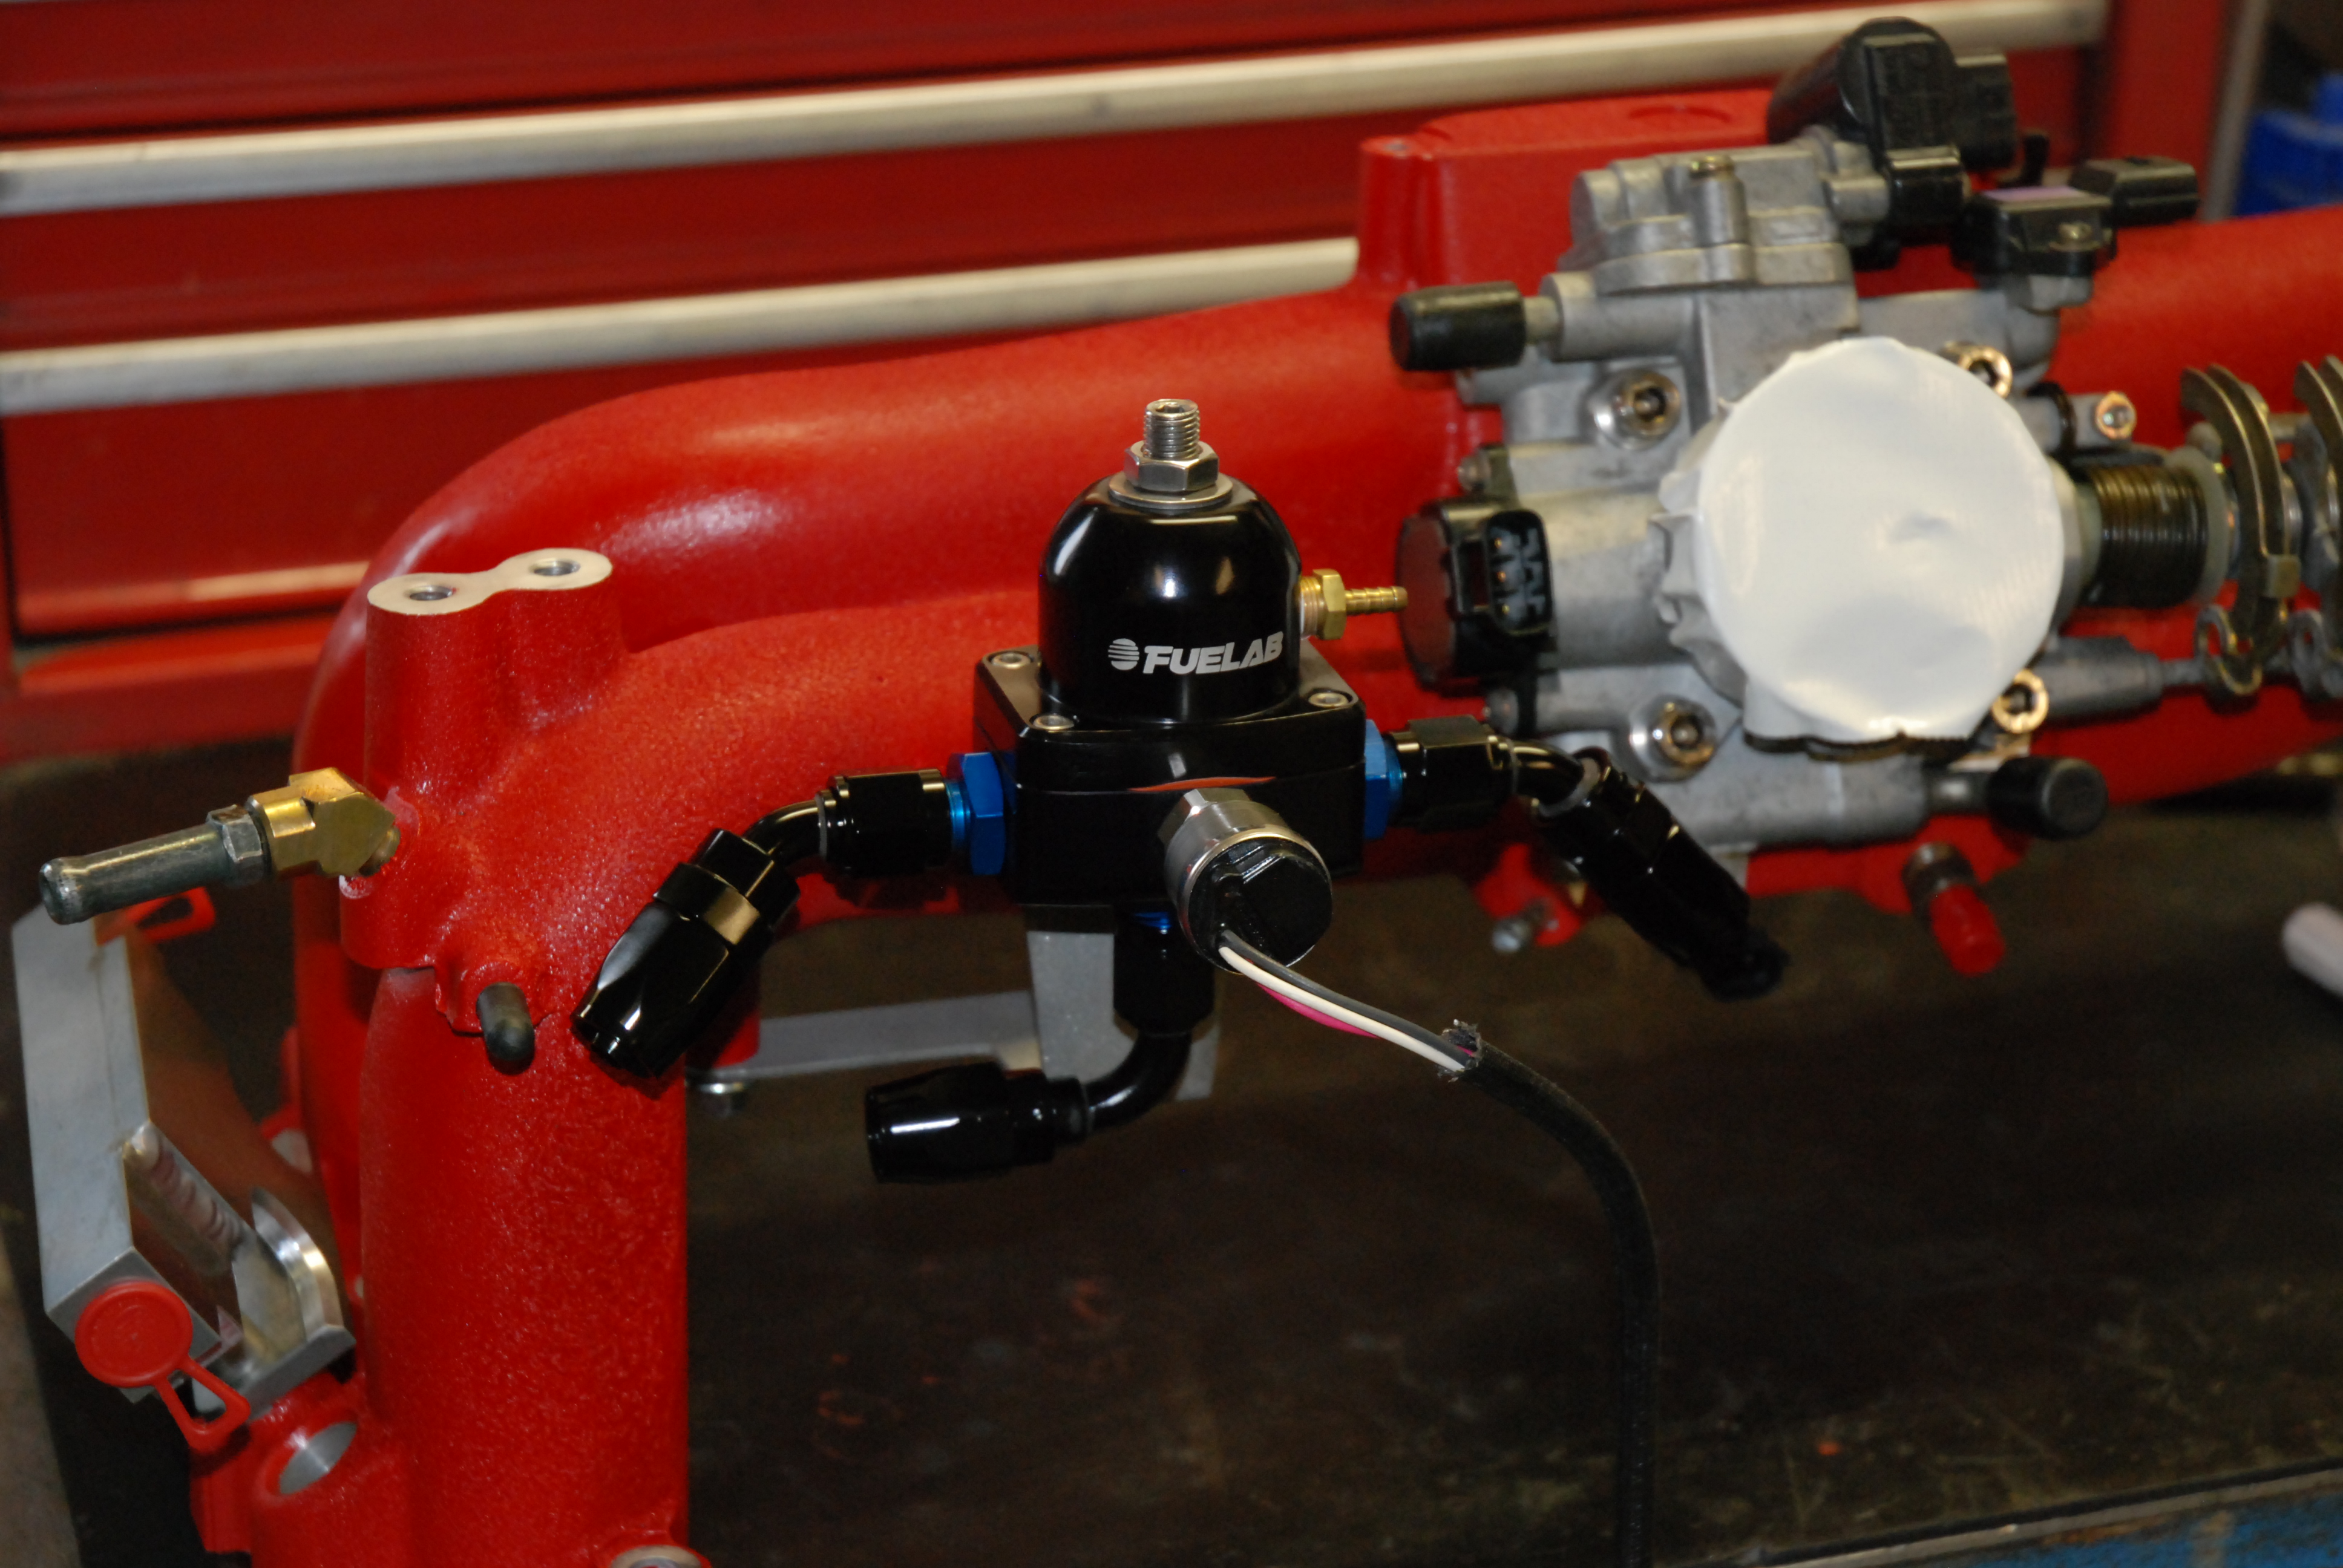
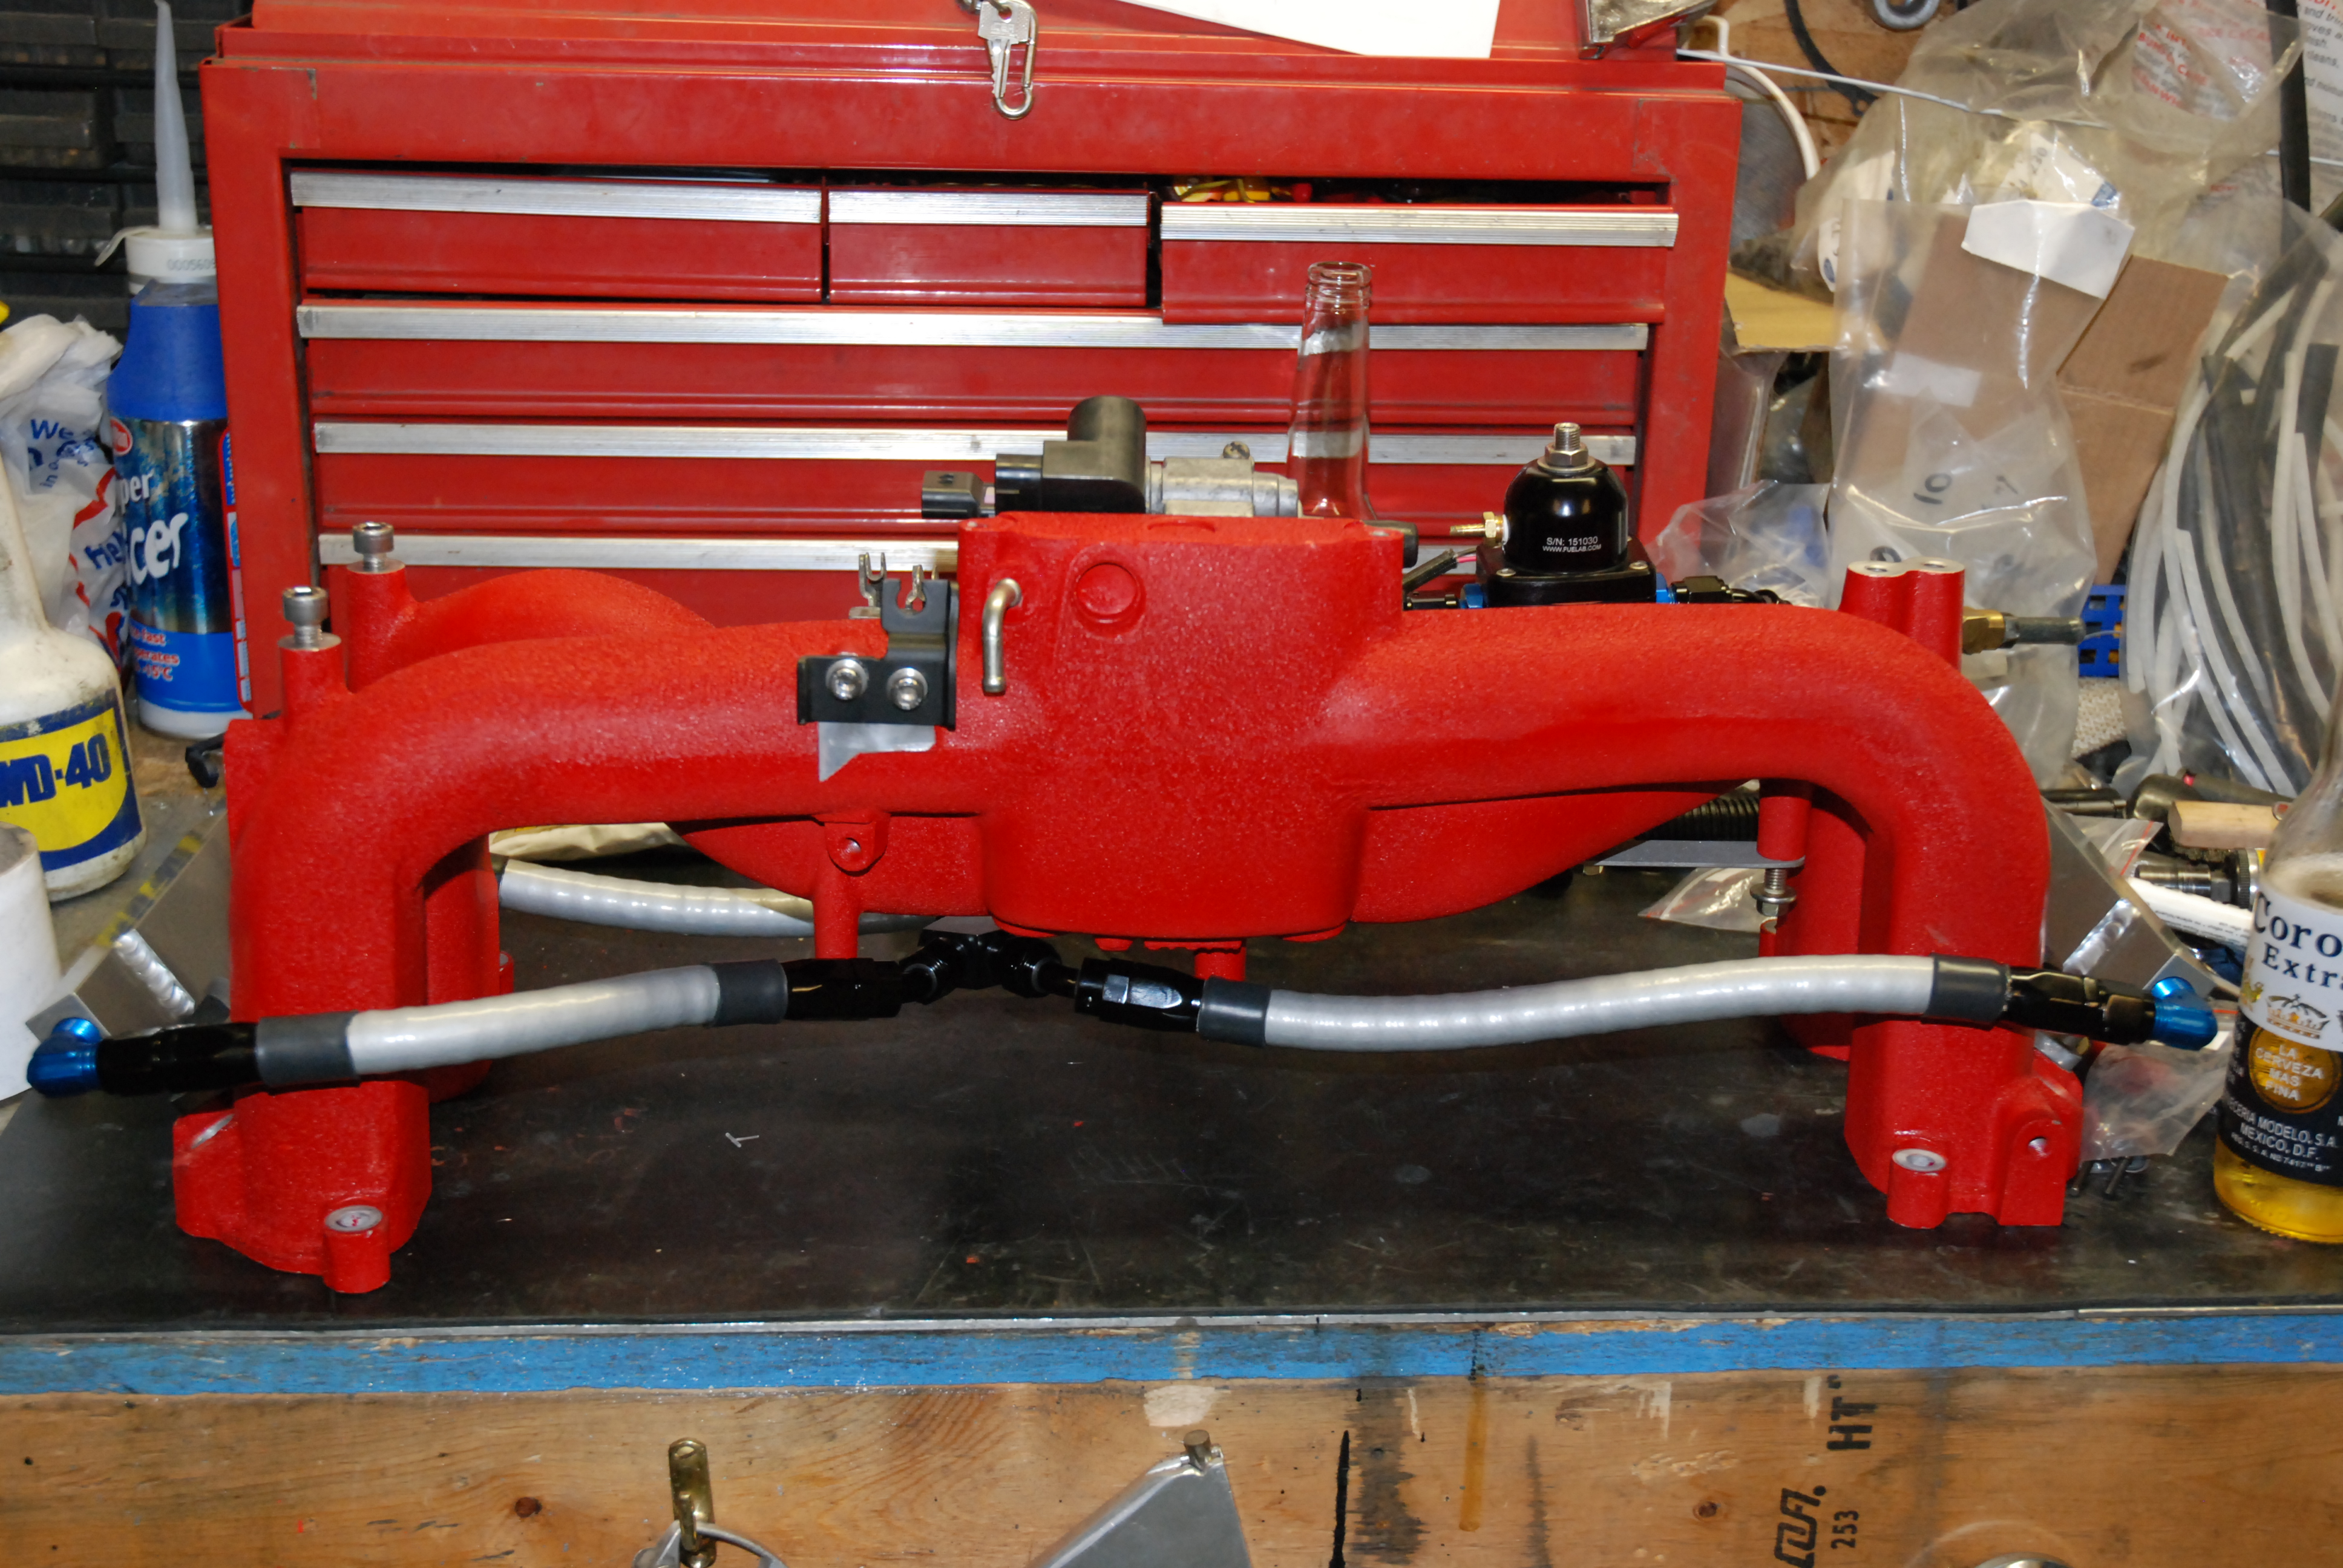
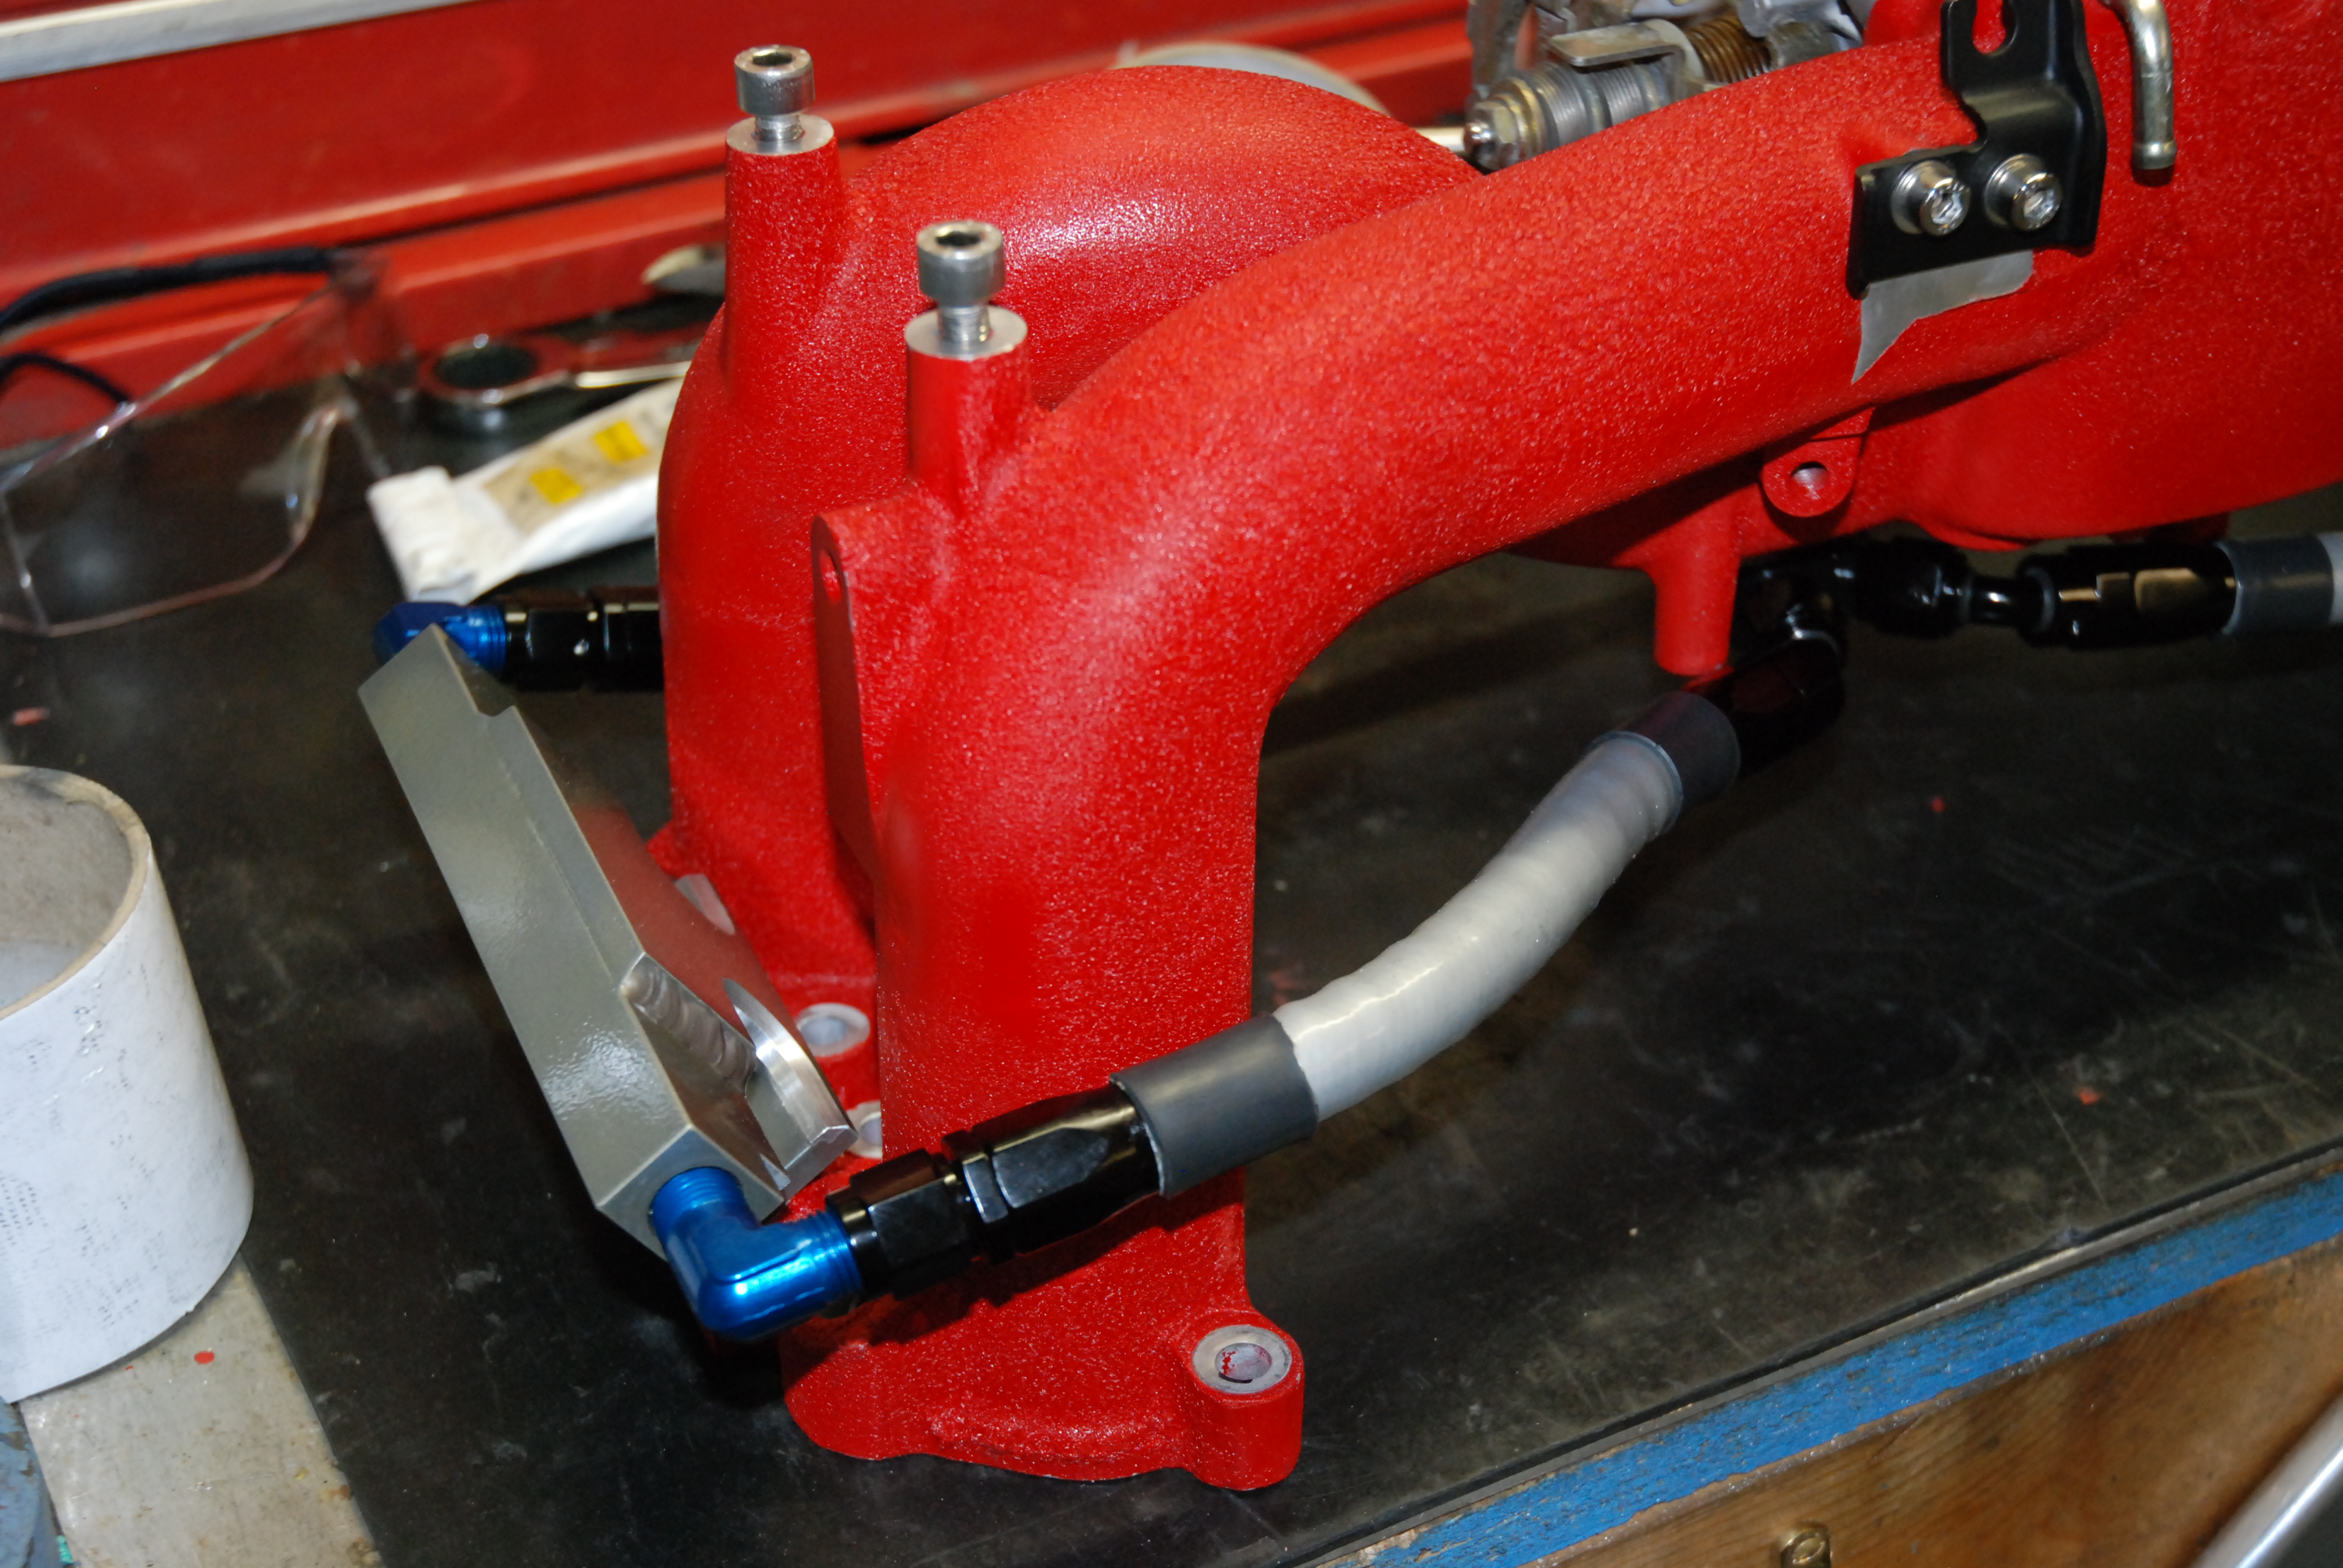
Made up most of the fuel lines for the parallel setup tonight. The small line im not happy with which will be redone (thats why its not Nomex covered).
Amazing how time consuming making these up is.
I was dead set on getting the blue fittings anodised black but now im 50:50.
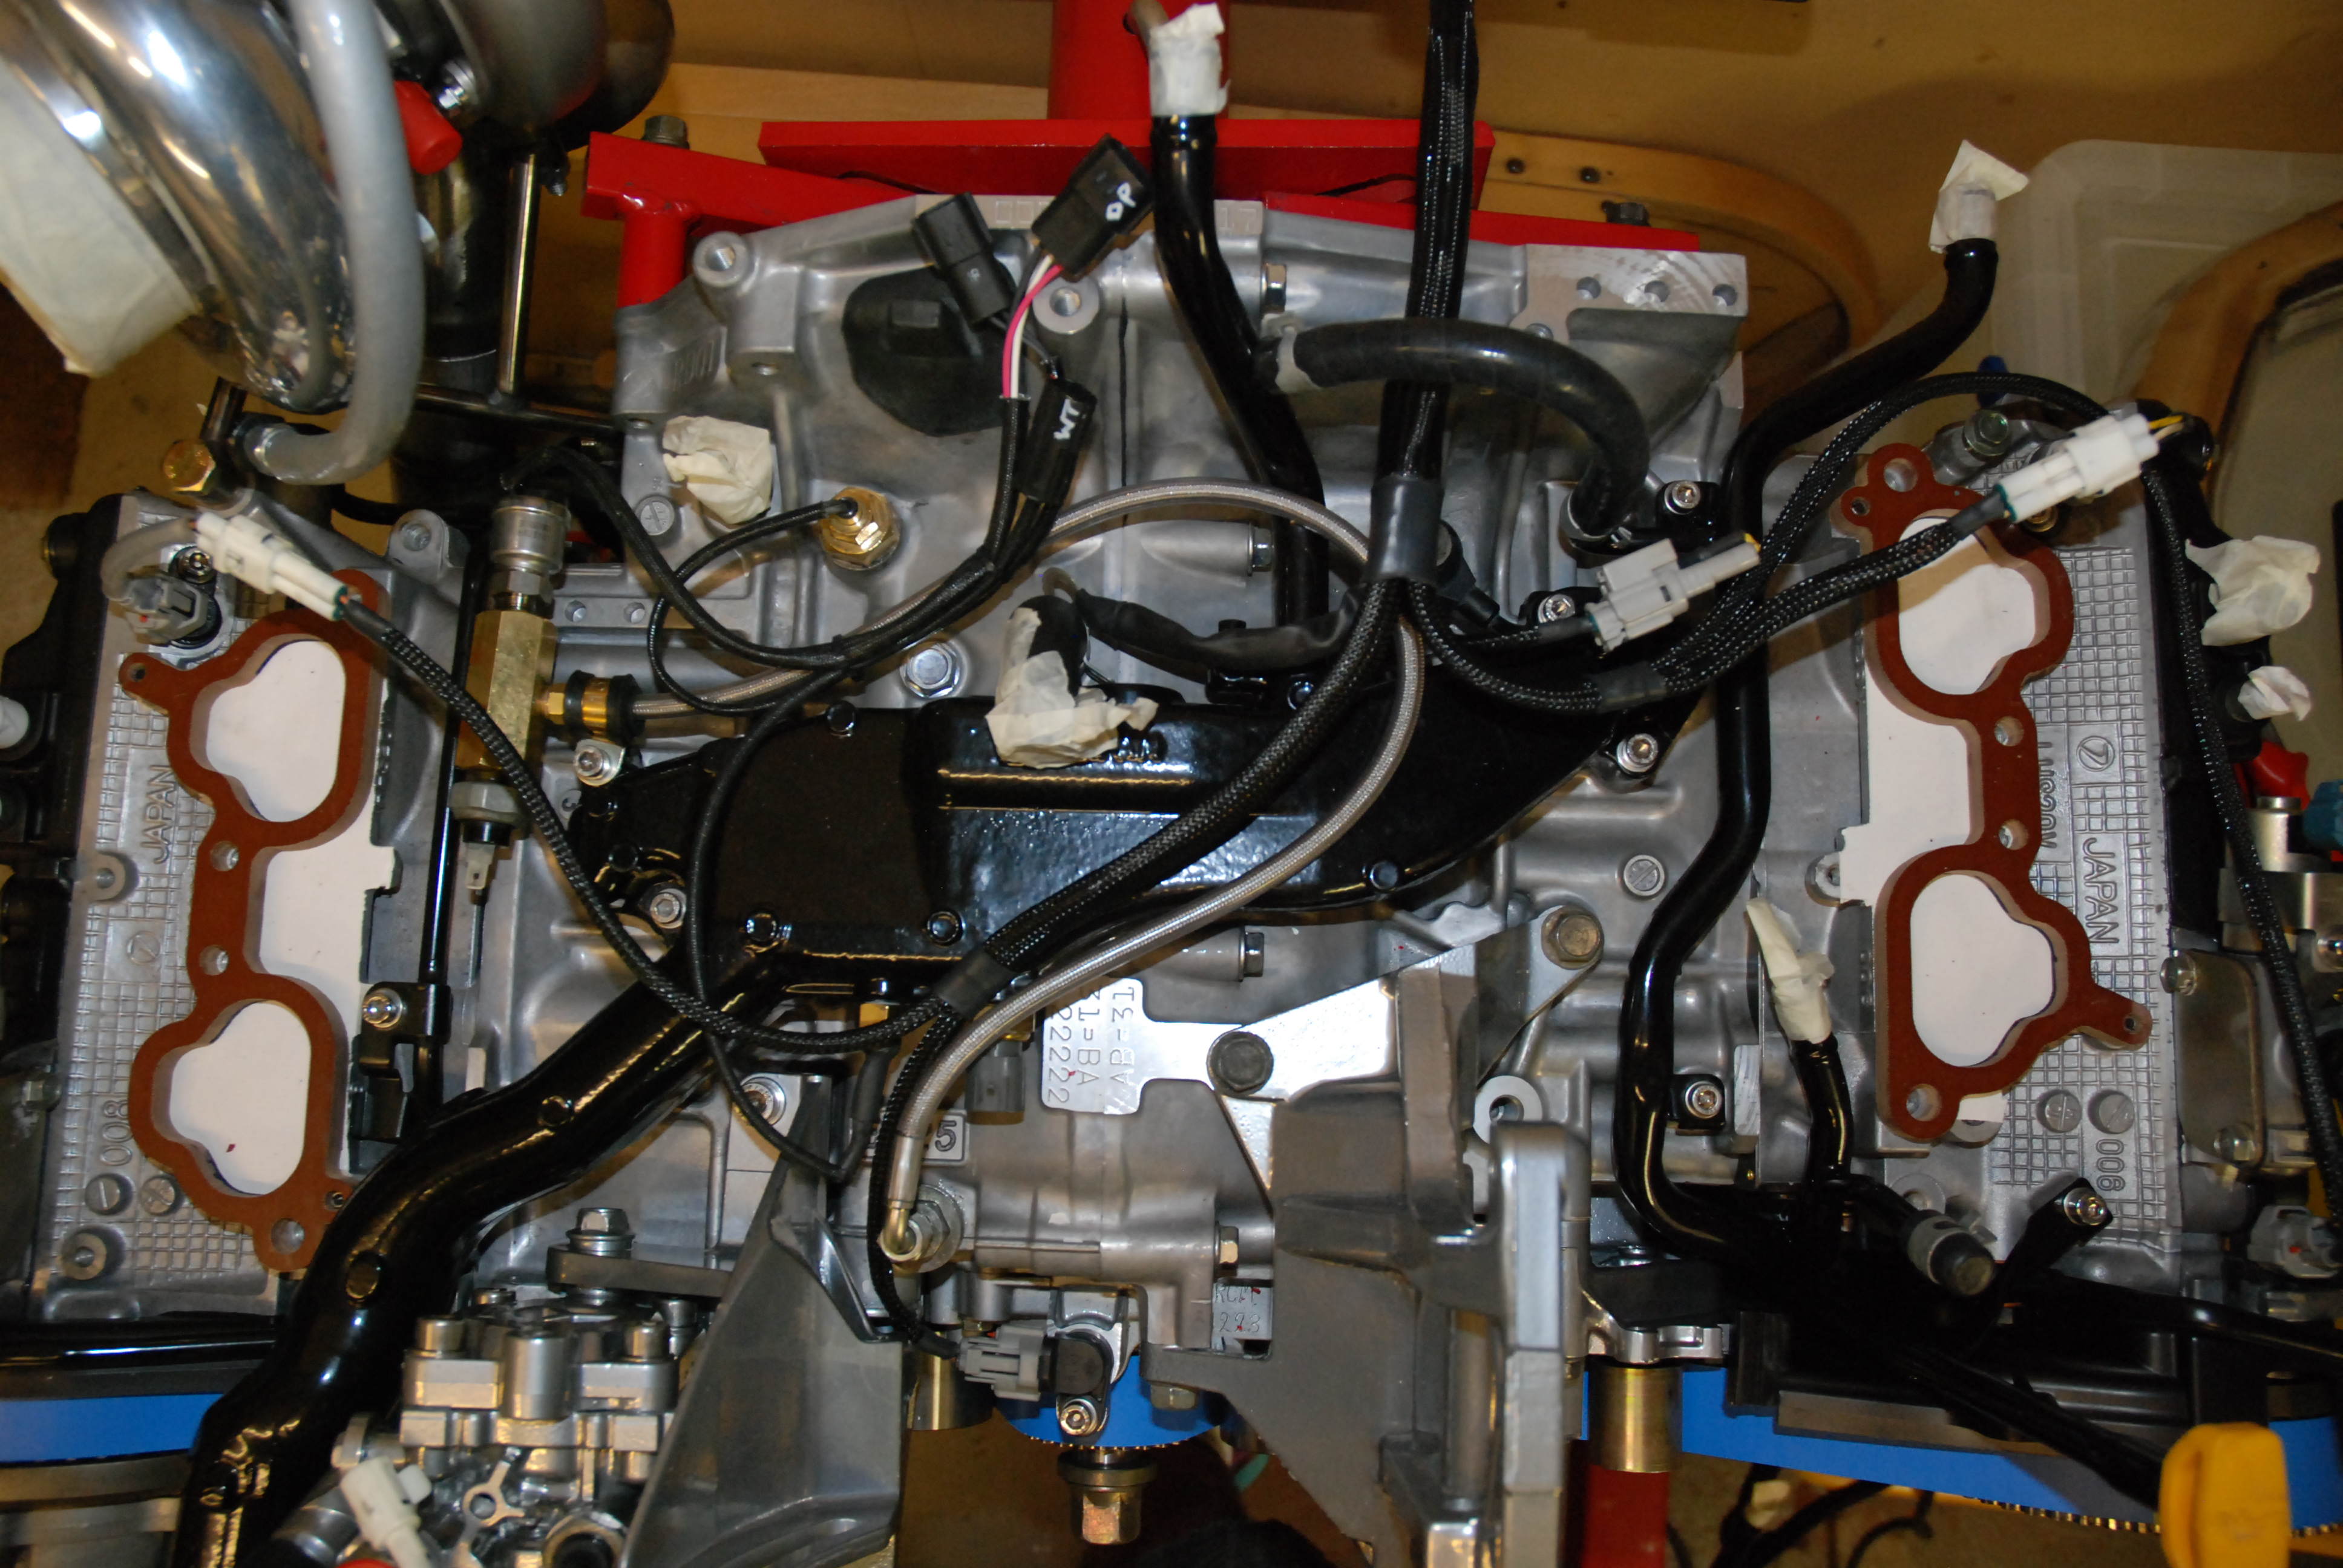
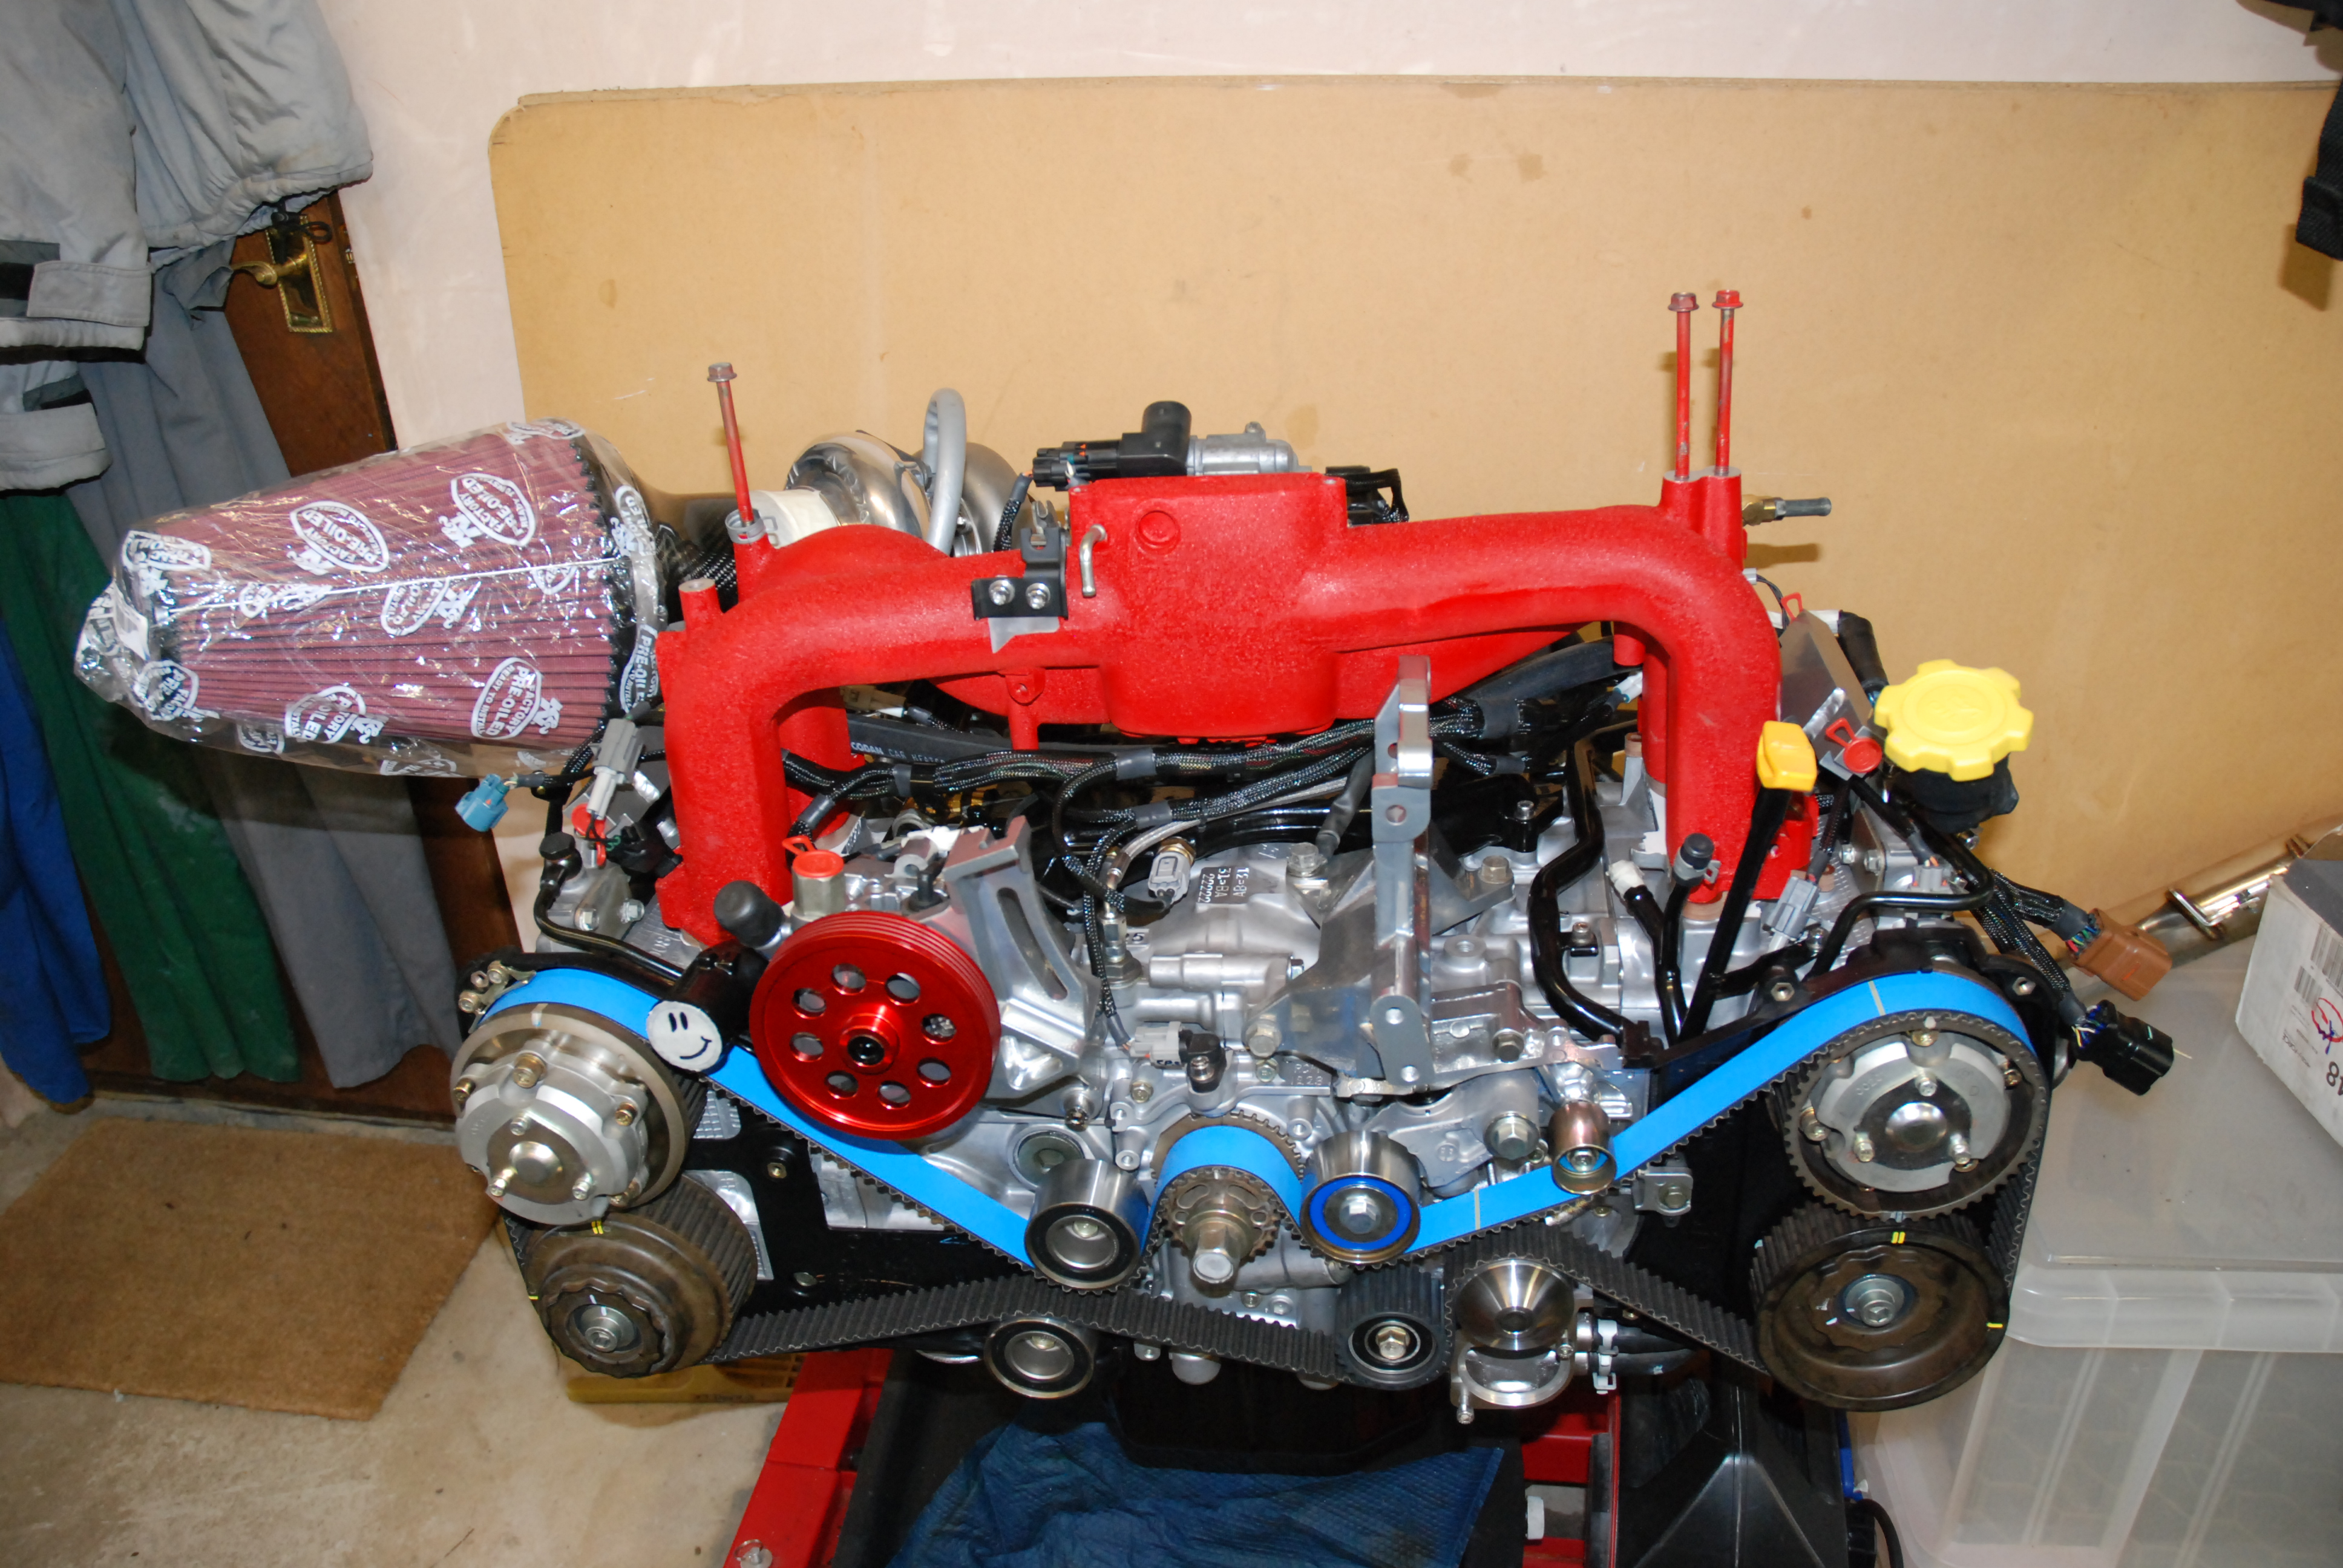
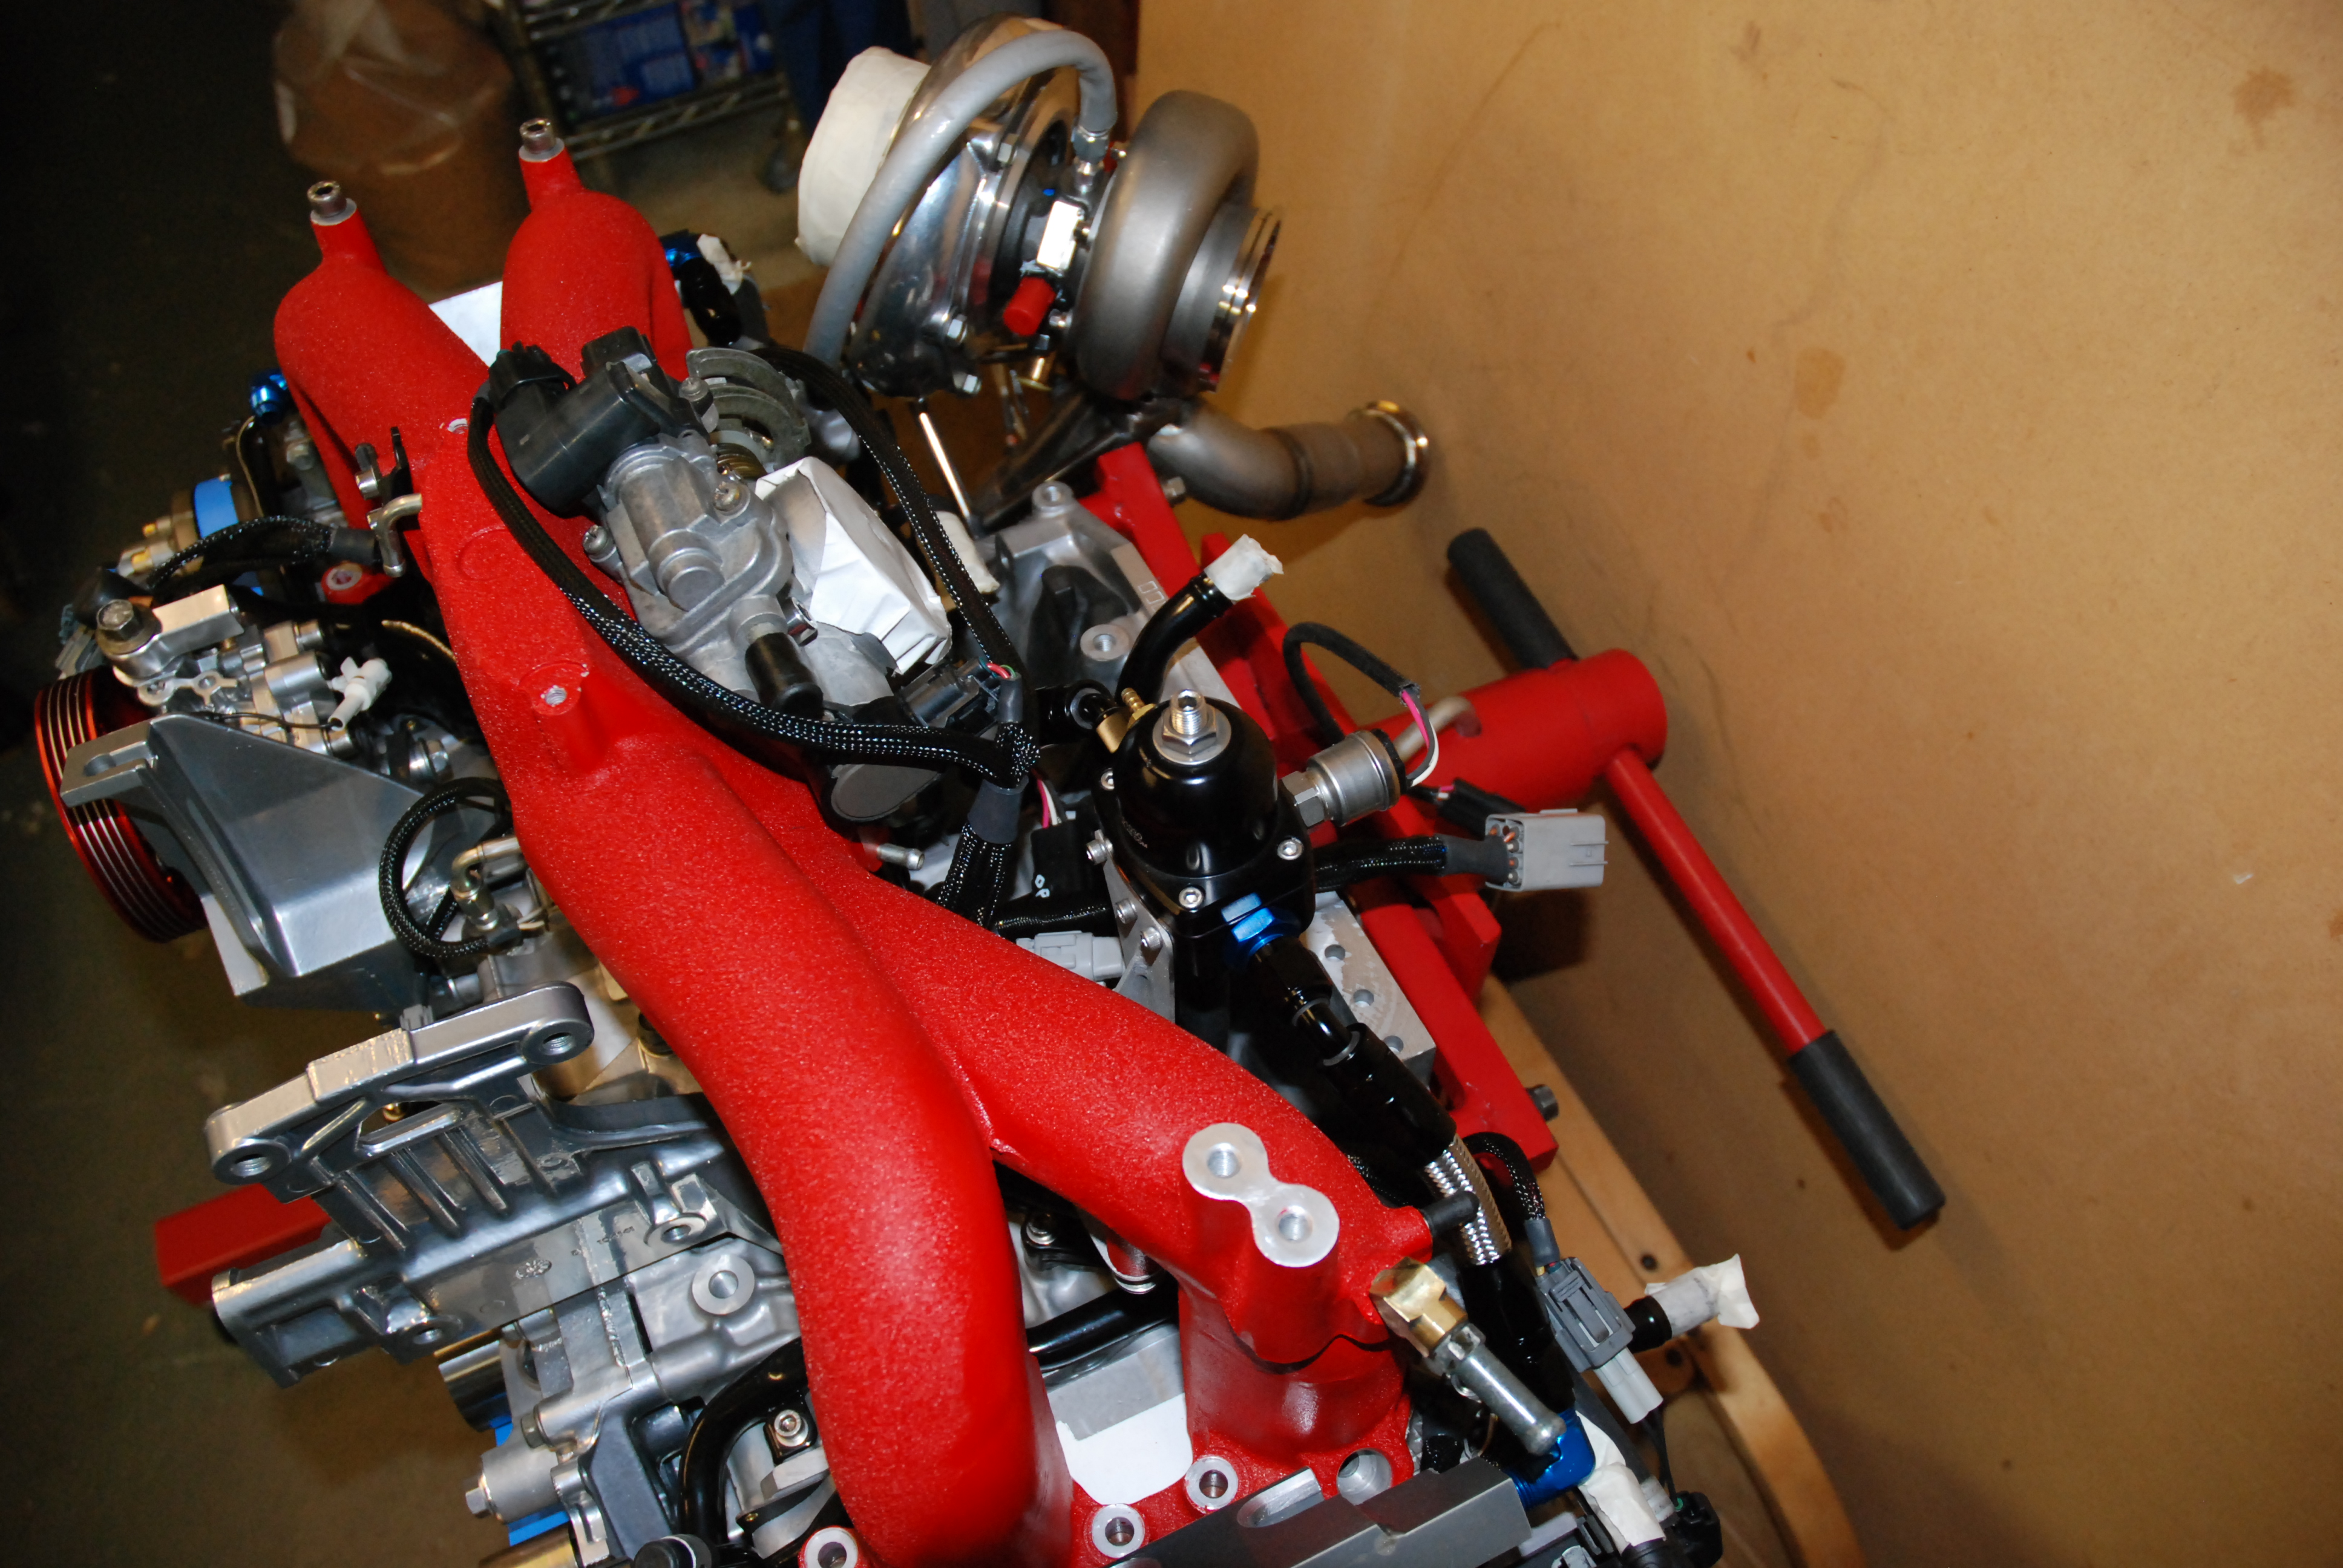
All requires clipping in place and tightening up but i think looks alright at the mo. Once these are complete. The engine is nearing completion and wont be far away from being dropped back into the car.
Exciting stuff eh?

Amazing how time consuming making these up is.
I was dead set on getting the blue fittings anodised black but now im 50:50.
All requires clipping in place and tightening up but i think looks alright at the mo. Once these are complete. The engine is nearing completion and wont be far away from being dropped back into the car.
Exciting stuff eh?