my xr3i project long over due update of the re-rebuild
 24-04-2007, 07:13 PM
#1
I've found that life I needed.. It's HERE!!
Thread Starter

Join Date: May 2006
Location: Just down the road from brunters
Posts: 1,460
Likes: 0
Received 2 Likes
on
2 Posts
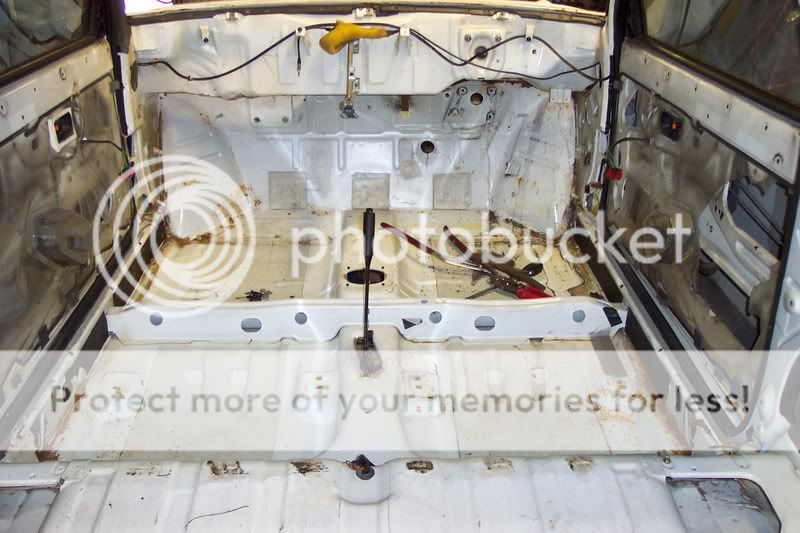
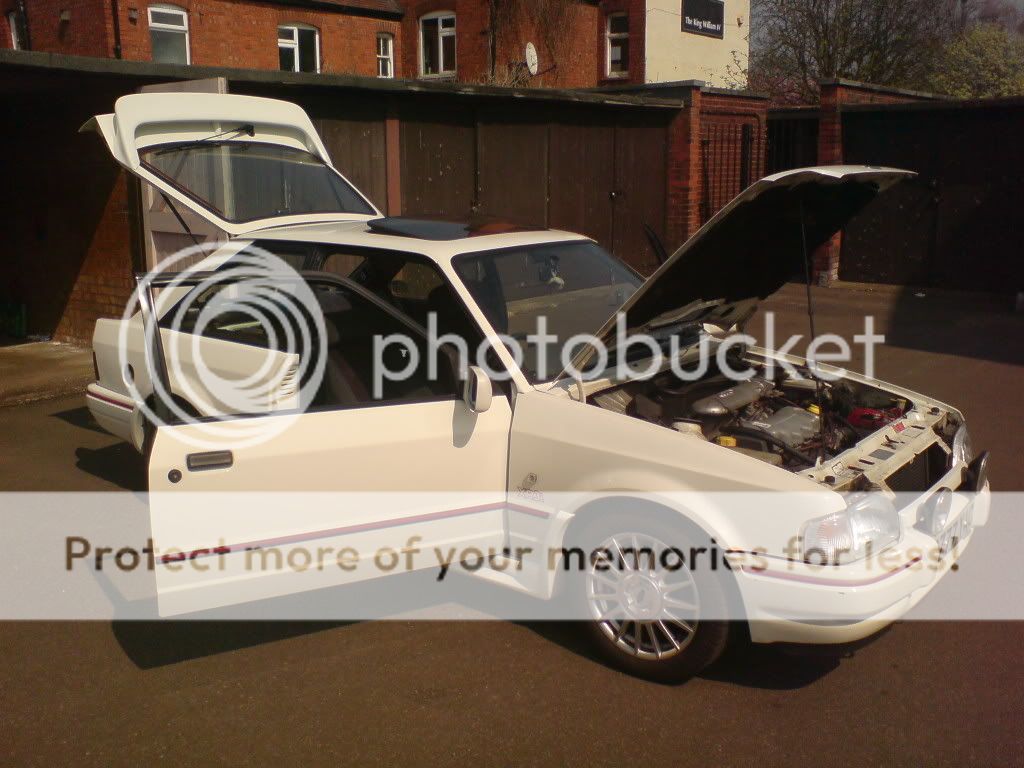
hi there every one this is my first resto (probably not the last) and its going to be abit of a learning curve.ive not yet decided how far im going to take it yet i think ill decide once i start putting bits back.I shall start with a few pictures of how the car was before i took it off the road.


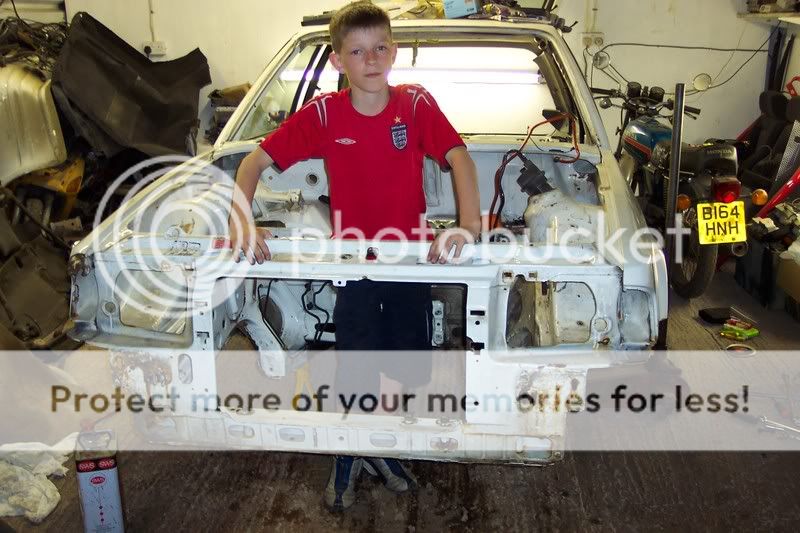
your going to have to use your imagination abit until i work out how to put pictures off my phone on to the pc because i keep forgeting to pick the camera up on the way out the door,but after three weekends stripping and abit of cleaning this is what she looks like now.
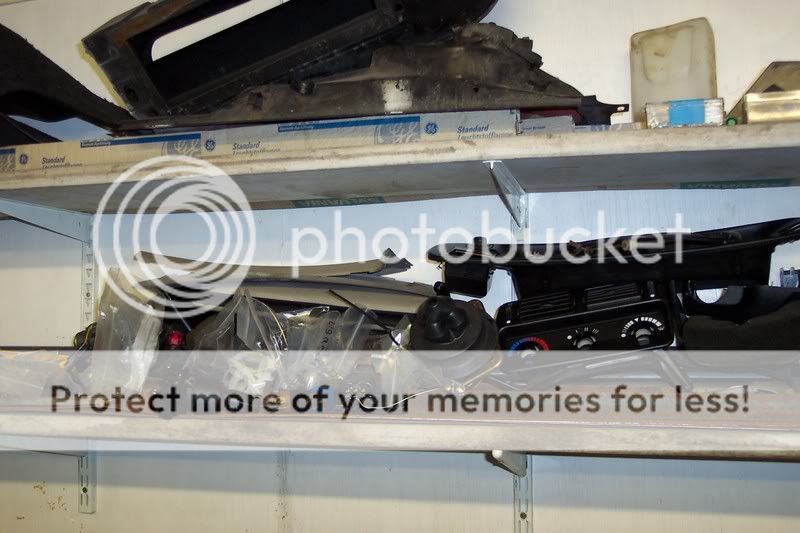
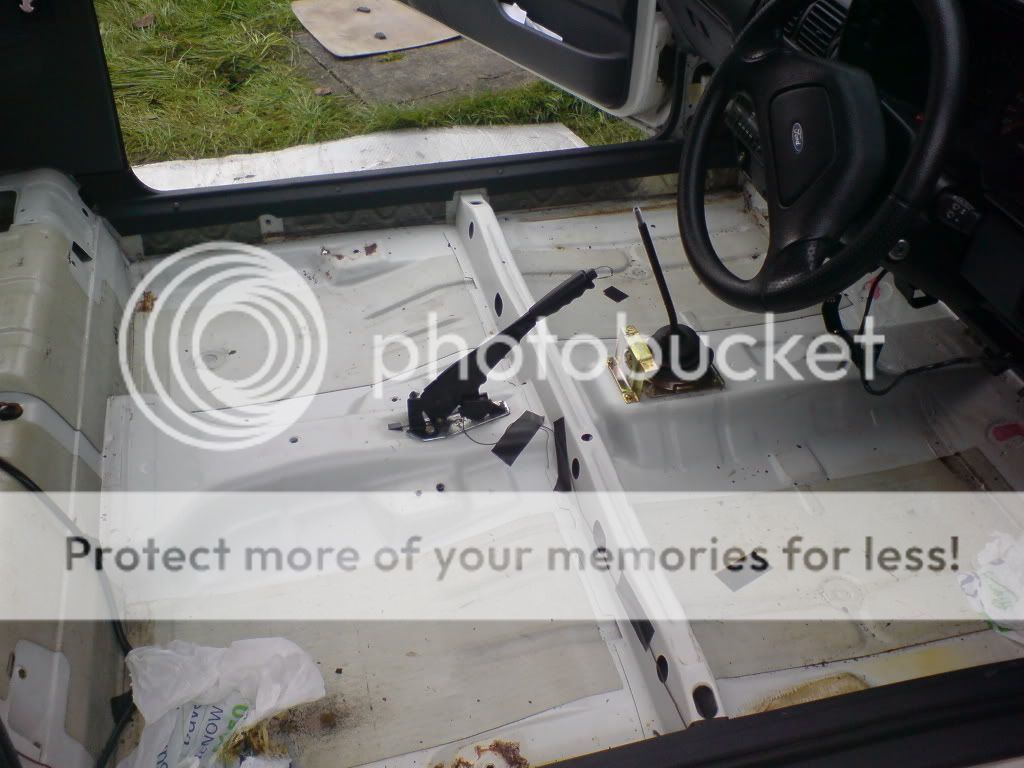
A quick picture of the interior
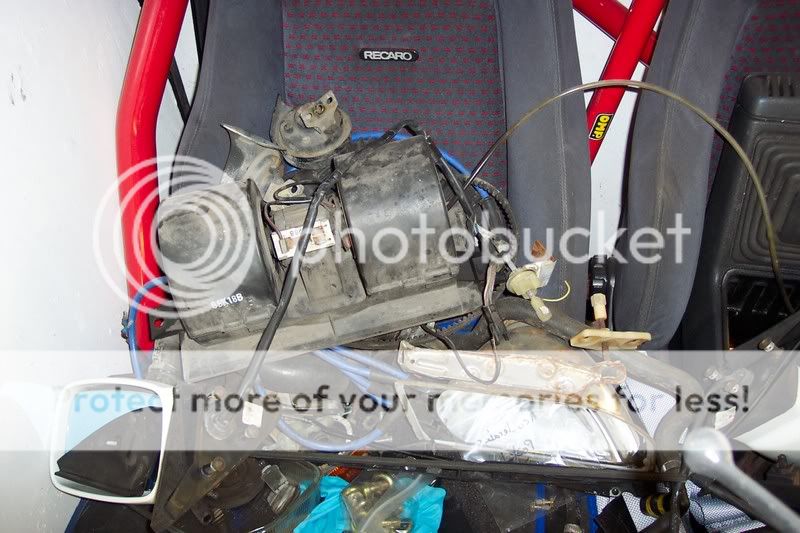
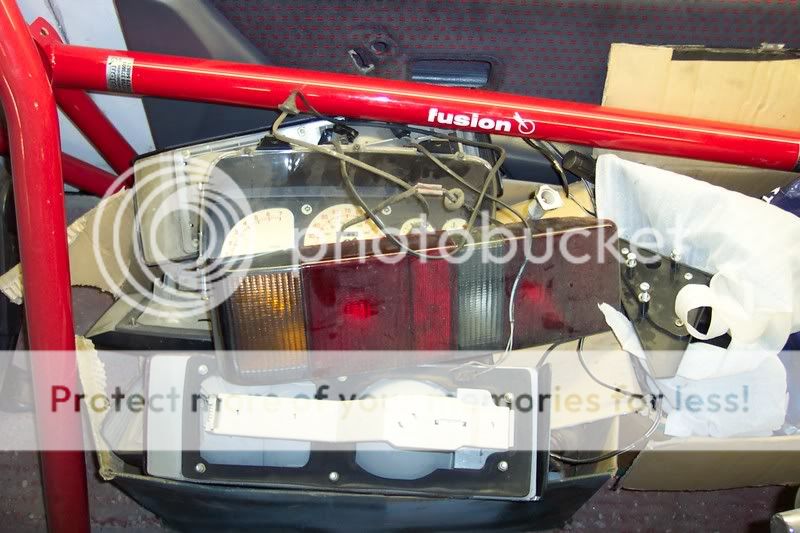
A few of the interior and a few other bits and bobs
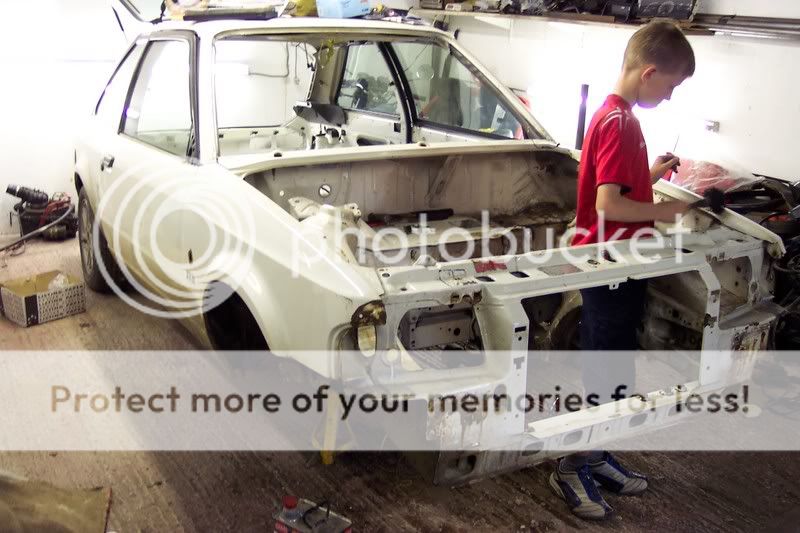
Right now were on to the exterior you'll have to excuse my little brother he insisted on being in one of the photos
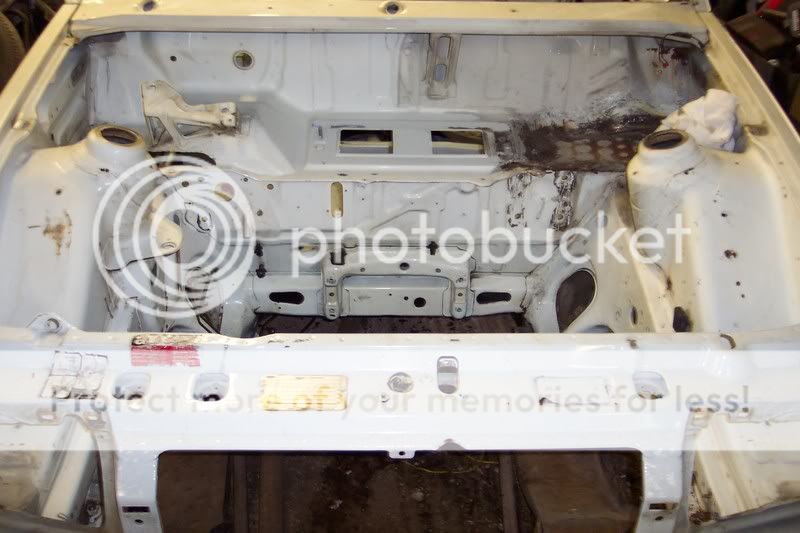
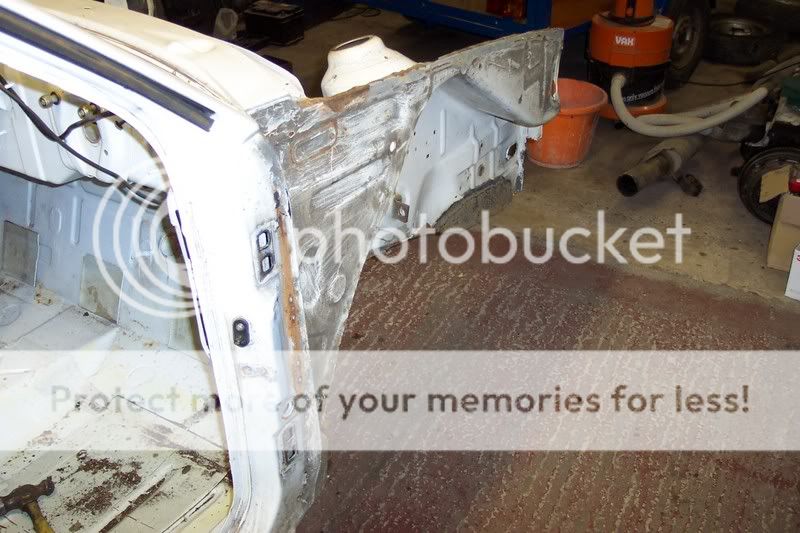
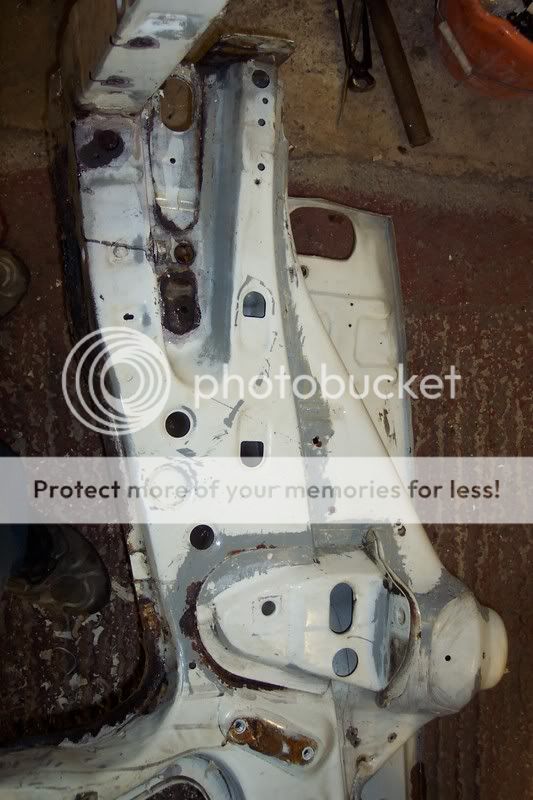
now heres a few that might make some people wince i thought the battery tray looked abit suspect when i bought the car but it was solid so i thought wot the hell,after scrapping what can only be described as a mixture of stone chip and sealant this is what was underneath it.
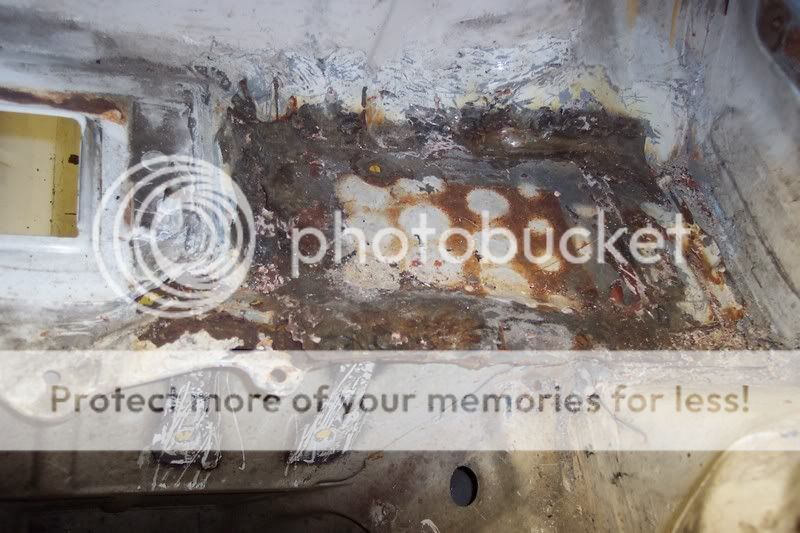
And this is what the fuse box looks like after my step dads cut the rot out to get it ready for welding
thats about it for the time being until the weekend and i can get back up the unit to do abit more and take some photos of the bits ive been collecting to go on the car hope you like them so far and comments are more that welcome.
Cheers mark.
your going to have to use your imagination abit until i work out how to put pictures off my phone on to the pc because i keep forgeting to pick the camera up on the way out the door,but after three weekends stripping and abit of cleaning this is what she looks like now.
A quick picture of the interior
A few of the interior and a few other bits and bobs
Right now were on to the exterior you'll have to excuse my little brother he insisted on being in one of the photos
now heres a few that might make some people wince i thought the battery tray looked abit suspect when i bought the car but it was solid so i thought wot the hell,after scrapping what can only be described as a mixture of stone chip and sealant this is what was underneath it.
And this is what the fuse box looks like after my step dads cut the rot out to get it ready for welding
thats about it for the time being until the weekend and i can get back up the unit to do abit more and take some photos of the bits ive been collecting to go on the car hope you like them so far and comments are more that welcome.
Cheers mark.
Last edited by xrmalin; 18-12-2010 at 06:49 PM.


 24-04-2007, 08:39 PM
#6
Part of the Furniture
Join Date: Nov 2006
Location: coventry
Posts: 192
Likes: 0
Received 0 Likes
on
0 Posts
Originally Posted by TeamGiroUnit
good to see another '3i on here.. good luck with it bud and keep the pix coming.. 
what he said hope its coming along well ....
wanna sell the cage
what he said hope its coming along well ....
wanna sell the cage
25-04-2007, 05:14 PM
#7
I've found that life I needed.. It's HERE!!
Thread Starter
Join Date: May 2006
Location: Just down the road from brunters
Posts: 1,460
Likes: 0
Received 2 Likes
on
2 Posts
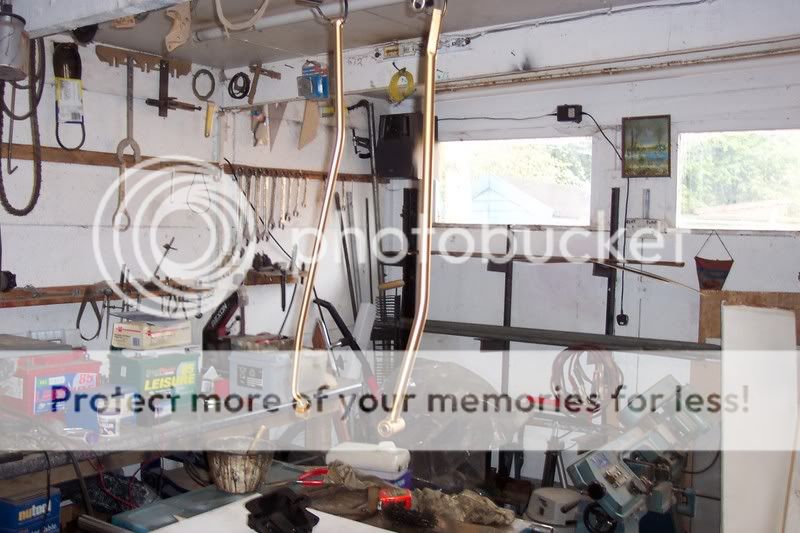
Cheers for the coments so far lads.
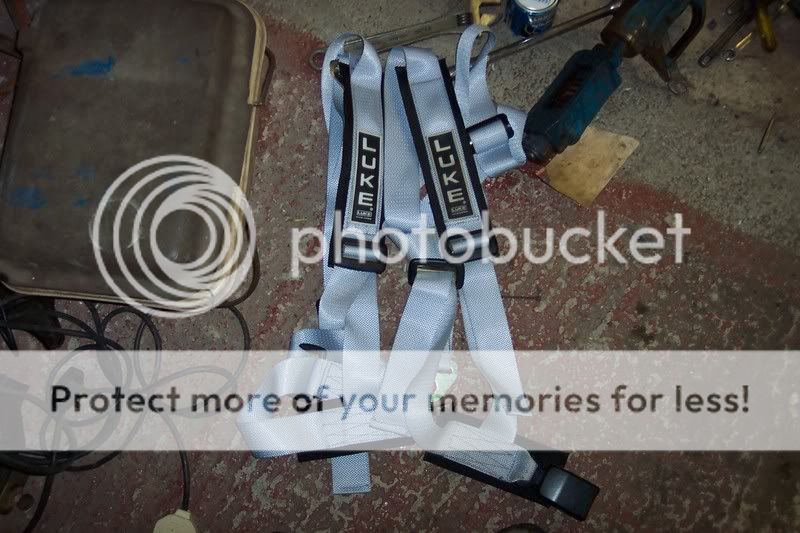
The cage was an ebay bargain brand new with the motorsport certificate
�46 to buy it and a drive to the middle of nowhere up a hill in wales to collect which cost me �20 in diesel in my stepdads car.
The cage was an ebay bargain brand new with the motorsport certificate
�46 to buy it and a drive to the middle of nowhere up a hill in wales to collect which cost me �20 in diesel in my stepdads car.
Trending Topics
26-04-2007, 05:15 PM
#9
I've found that life I needed.. It's HERE!!
Thread Starter
Join Date: May 2006
Location: Just down the road from brunters
Posts: 1,460
Likes: 0
Received 2 Likes
on
2 Posts
just had the word back my new wings and slam panel should be arriveing early next week and the battery tray repair panel should be with me by the end of week wooohoooooo
26-04-2007, 05:42 PM
#10
Too many posts.. I need a life!!

Join Date: Jul 2006
Location: Norfolk
Posts: 581
Likes: 0
Received 0 Likes
on
0 Posts
Nice project m8 I recon you will get carried away and fall out with your bank manager before you finish it Its suprising what you can spend in a resto project keep up the good work and you will have a top motor
I recon you will get carried away and fall out with your bank manager before you finish it Its suprising what you can spend in a resto project keep up the good work and you will have a top motor
 27-04-2007, 04:18 PM
#13
I've found that life I needed.. It's HERE!!
Thread Starter
Join Date: May 2006
Location: Just down the road from brunters
Posts: 1,460
Likes: 0
Received 2 Likes
on
2 Posts
rs nutta
ive got them sat on a shelf at the side of the unit ive got a turbo bonnet aswell i bought the bumbers,kit and bonnet all of the same bloke �56 for the lot
Im abit unsure about putting the bonnet on though because at the end of the day it started as an xr and i want to keep it as one so i dont want to make it look too much like a turbo ill see how i feel when its time for paint.
27-04-2007, 07:21 PM
#15
I've found that life I needed.. It's HERE!!
Thread Starter
Join Date: May 2006
Location: Just down the road from brunters
Posts: 1,460
Likes: 0
Received 2 Likes
on
2 Posts
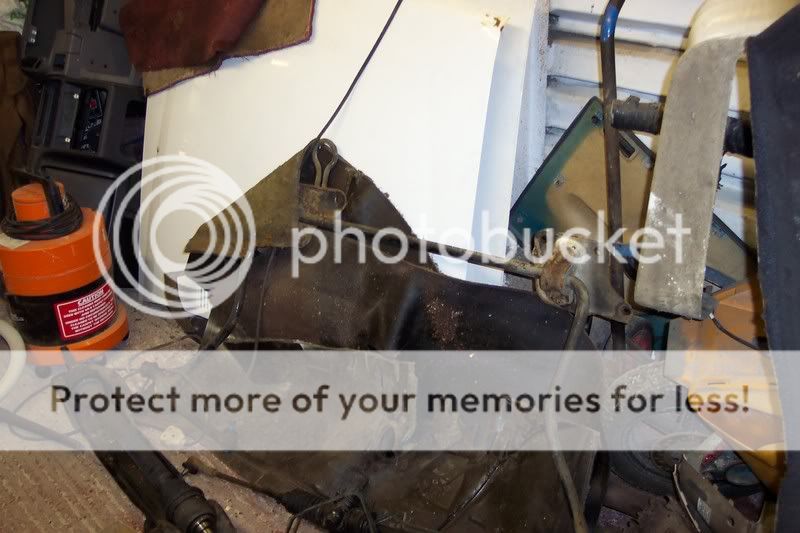
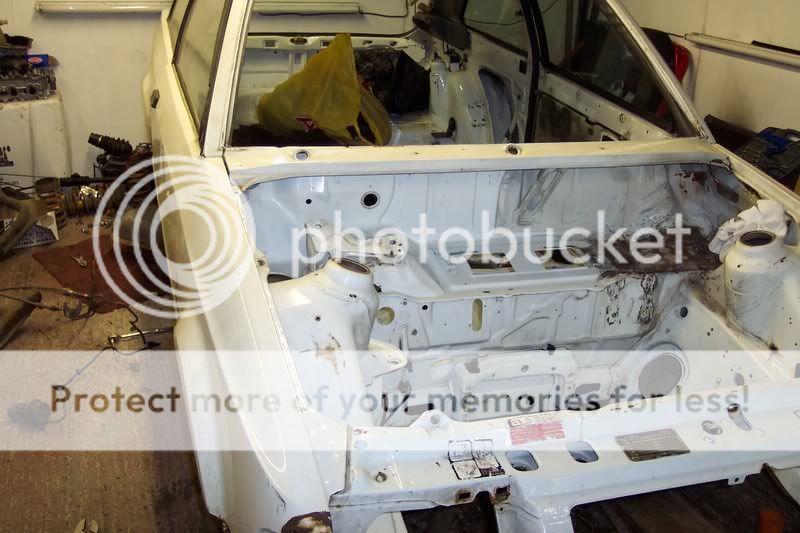
i poped into the unit tonight on my way home from work so i could take some more pictures first up is the other side of the battery tray & i cant belive some one payed to have this done.
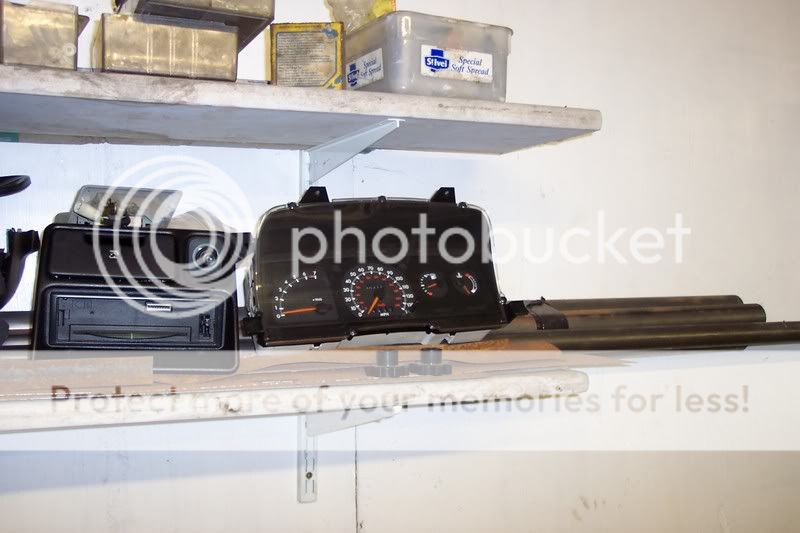
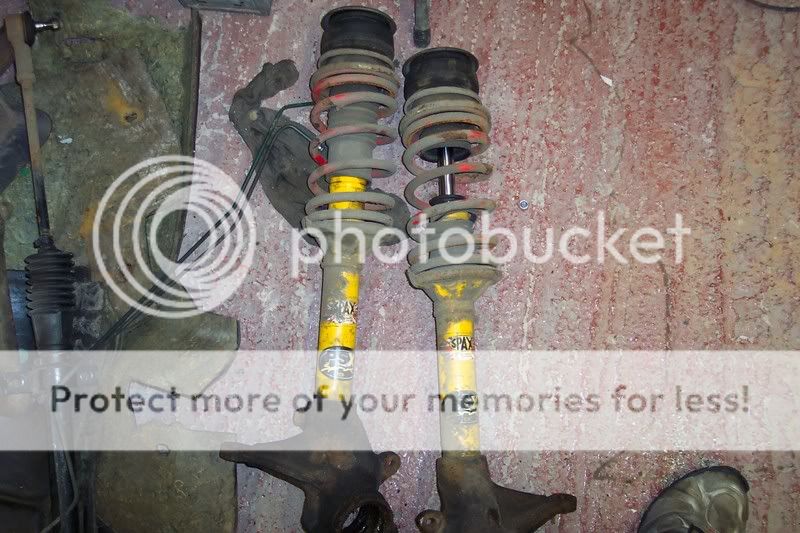
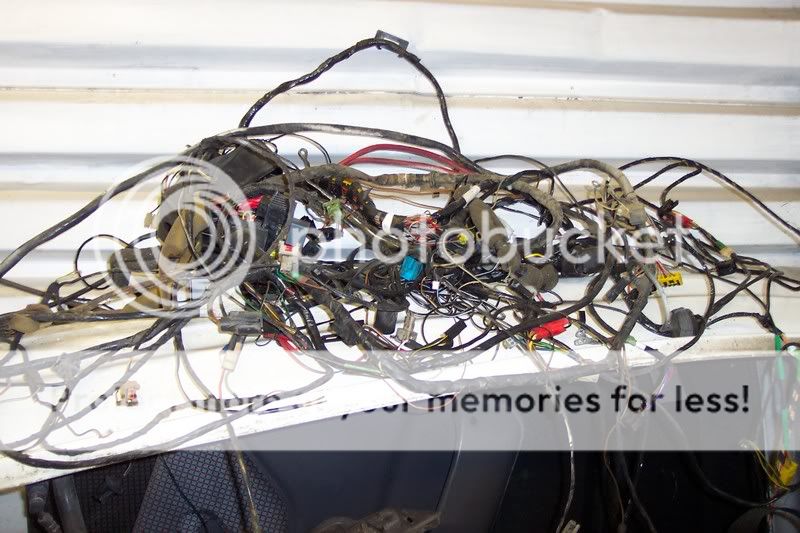
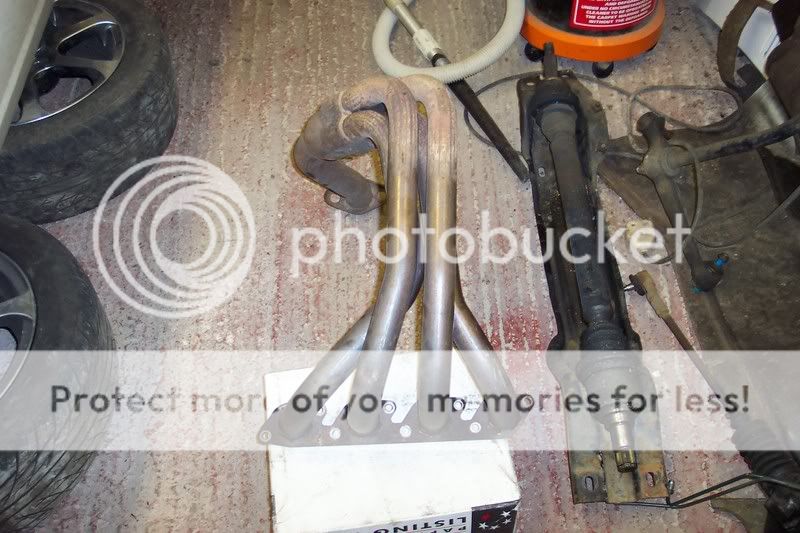
now a few more of the bits ive been taking off
does any one know if you can get the spax adjustable stickers as i want to take these ones off to repaint them ?
my wireing loom
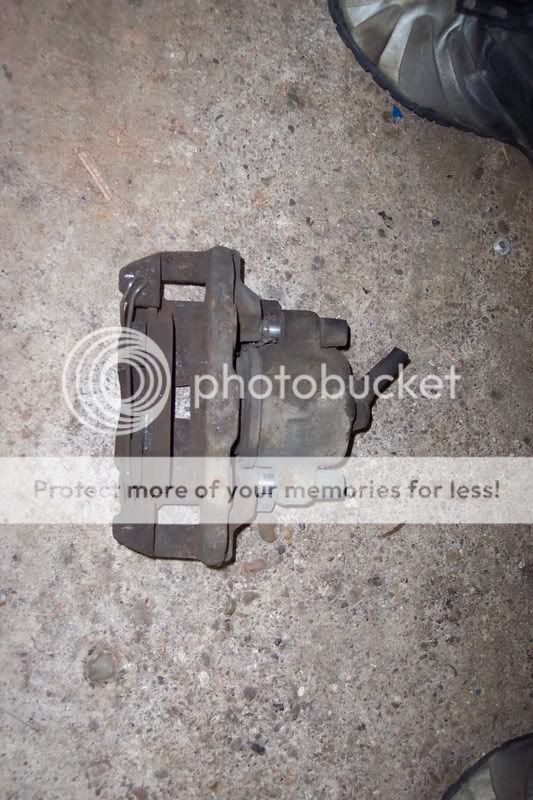
series 2 brakes coming off
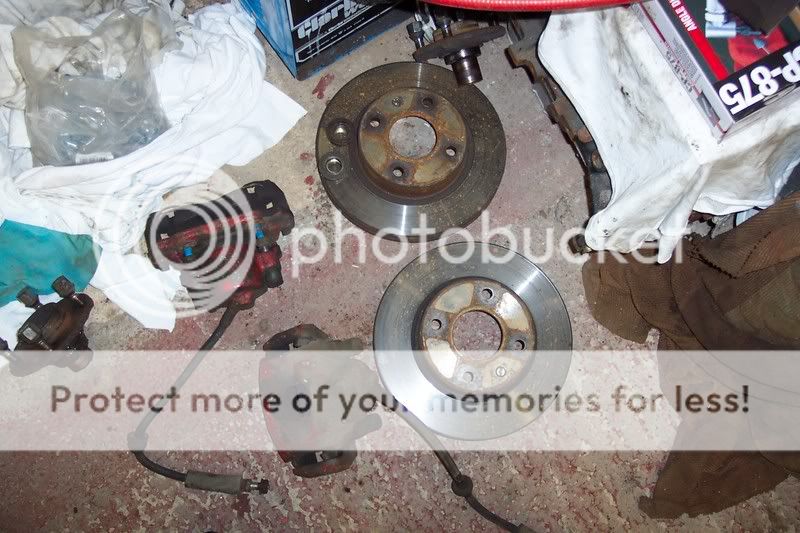
cossie 4x4 going on
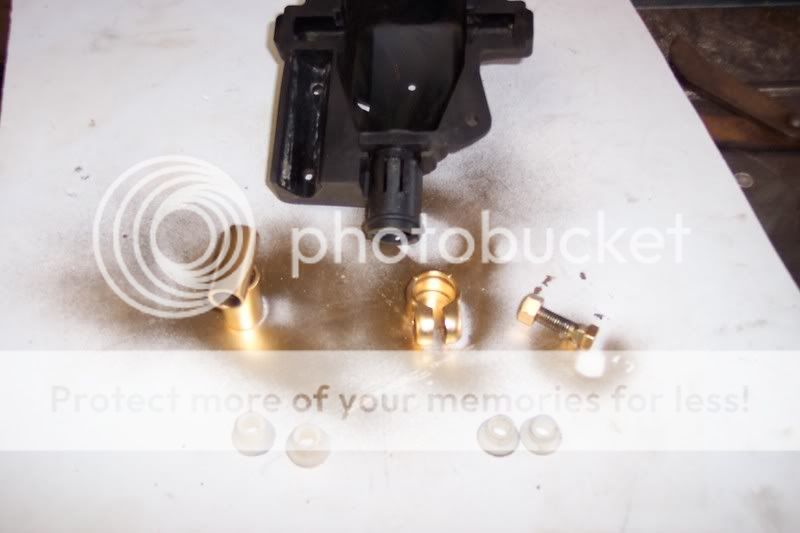
now afew goodies going in/on along with the roll cage and recaros

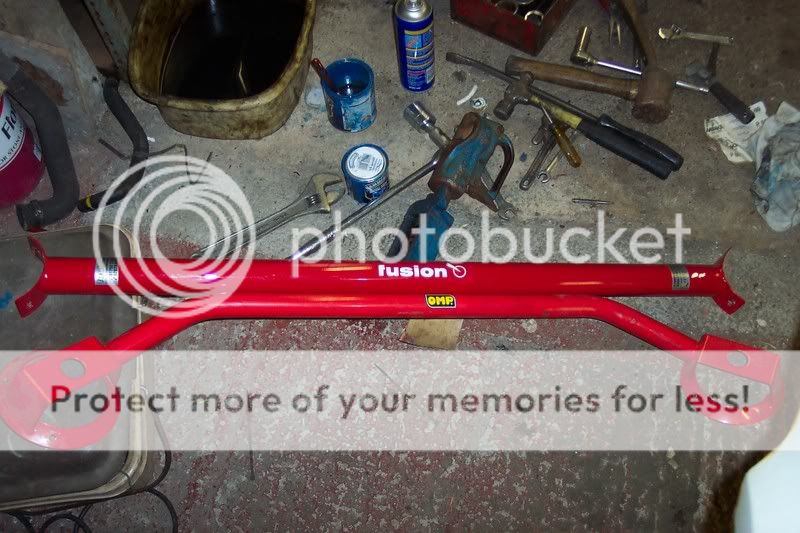
and the centre piece a 1.8 all steal bottom end
i know im getting ahead of myself painting stuff already but my stepdad turned me some new nylon bushes for the gear linkage (the ones on the left) at work today so i thought i'd give the rest a lick of paint.
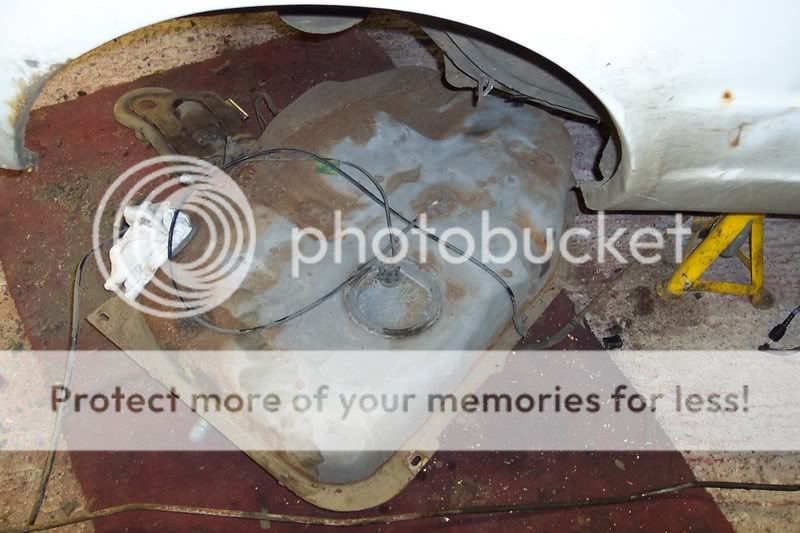
thats it until tomorrow where the plan is to finish cleaning the engine bay and drop the fuel tank out hope you like them so far.
mark
now a few more of the bits ive been taking off
does any one know if you can get the spax adjustable stickers as i want to take these ones off to repaint them ?
my wireing loom
series 2 brakes coming off
cossie 4x4 going on
now afew goodies going in/on along with the roll cage and recaros
and the centre piece a 1.8 all steal bottom end
i know im getting ahead of myself painting stuff already but my stepdad turned me some new nylon bushes for the gear linkage (the ones on the left) at work today so i thought i'd give the rest a lick of paint.
thats it until tomorrow where the plan is to finish cleaning the engine bay and drop the fuel tank out hope you like them so far.
mark
28-04-2007, 04:39 PM
#16
I've found that life I needed.. It's HERE!!
Thread Starter
Join Date: May 2006
Location: Just down the road from brunters
Posts: 1,460
Likes: 0
Received 2 Likes
on
2 Posts
finished the first cleaning up of the engine bay except the battery tray
ive also got the fuel tank and after much messing about the fuel pump
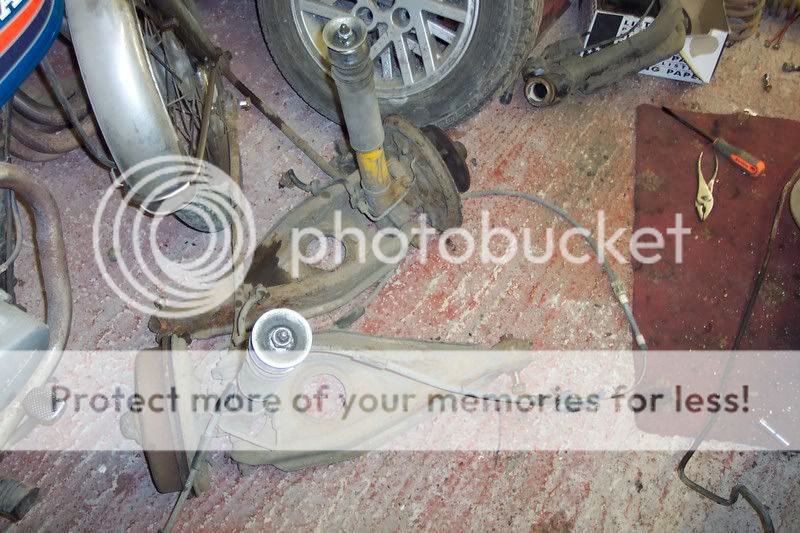
and the rear suspension
thats it for the time being,mark.
ive also got the fuel tank and after much messing about the fuel pump
and the rear suspension
thats it for the time being,mark.
29-04-2007, 10:46 AM
#18
Grey Mk4 Early XR3I

Originally Posted by xrmalin
rs nutta
ive got them sat on a shelf at the side of the unit ive got a turbo bonnet aswell i bought the bumbers,kit and bonnet all of the same bloke �56 for the lot
Im abit unsure about putting the bonnet on though because at the end of the day it started as an xr and i want to keep it as one so i dont want to make it look too much like a turbo ill see how i feel when its time for paint.
ive got them sat on a shelf at the side of the unit ive got a turbo bonnet aswell i bought the bumbers,kit and bonnet all of the same bloke �56 for the lot
Im abit unsure about putting the bonnet on though because at the end of the day it started as an xr and i want to keep it as one so i dont want to make it look too much like a turbo ill see how i feel when its time for paint.
BUT on the poitn of xr's made to rs reps if u put either and original xr3i sticker on or an after market one or even chrome lettering saying xr3i then u dont have to worry about people saying itss an rs.........
30-04-2007, 05:37 PM
#19
I've found that life I needed.. It's HERE!!
Thread Starter
Join Date: May 2006
Location: Just down the road from brunters
Posts: 1,460
Likes: 0
Received 2 Likes
on
2 Posts
Cheers for the comments so far ive still got some bits i cant get to yet as there under a mountain of other stuff i'll put some pics up when i can.
On the badges i was thinking of just getting some stickers made up to put in the rear quater windows nice and big so its not confused with an rs.
ive just got more cleaning up to do now underneath now but i'll take some before and after photos.
cheers mark.
On the badges i was thinking of just getting some stickers made up to put in the rear quater windows nice and big so its not confused with an rs.
ive just got more cleaning up to do now underneath now but i'll take some before and after photos.
cheers mark.
09-05-2007, 07:07 PM
#20
I've found that life I needed.. It's HERE!!
Thread Starter
Join Date: May 2006
Location: Just down the road from brunters
Posts: 1,460
Likes: 0
Received 2 Likes
on
2 Posts
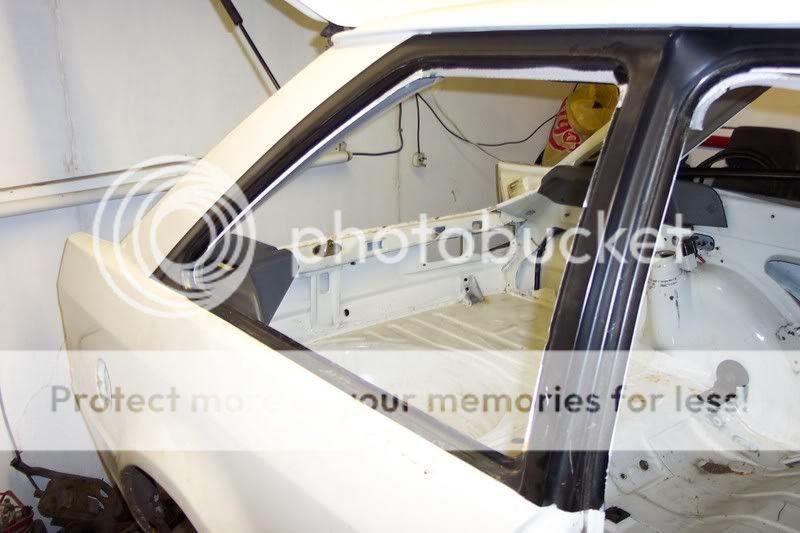
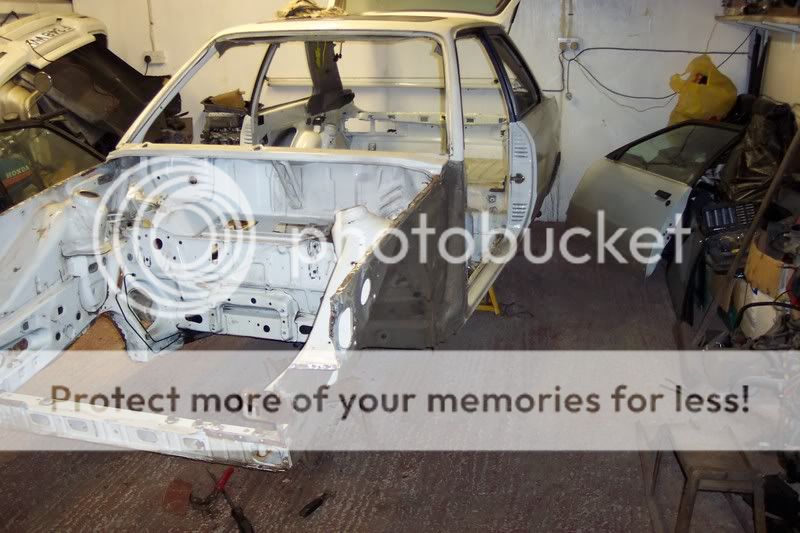
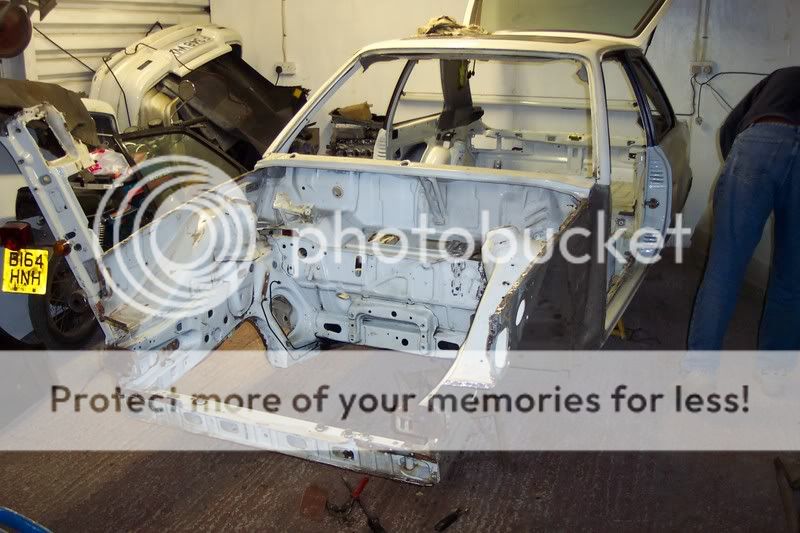
after the long weekend off work this is what she's looking like now
rest of the windows out
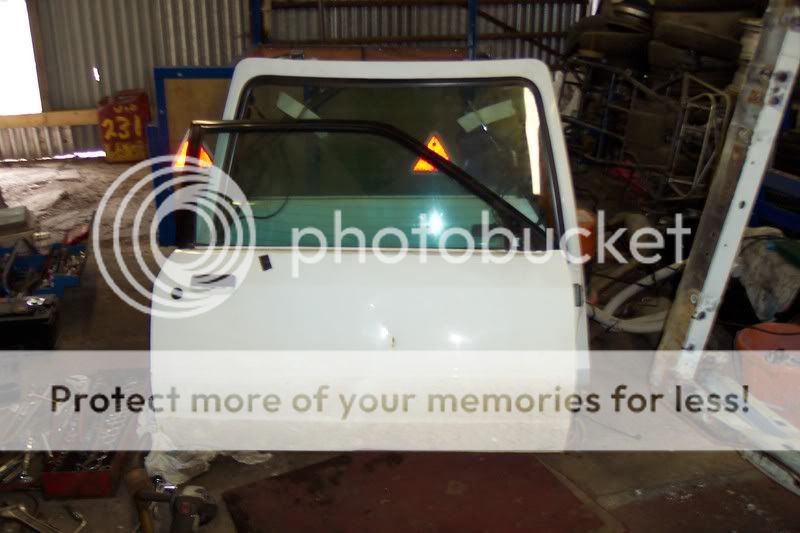
then the doors wings and slam panel
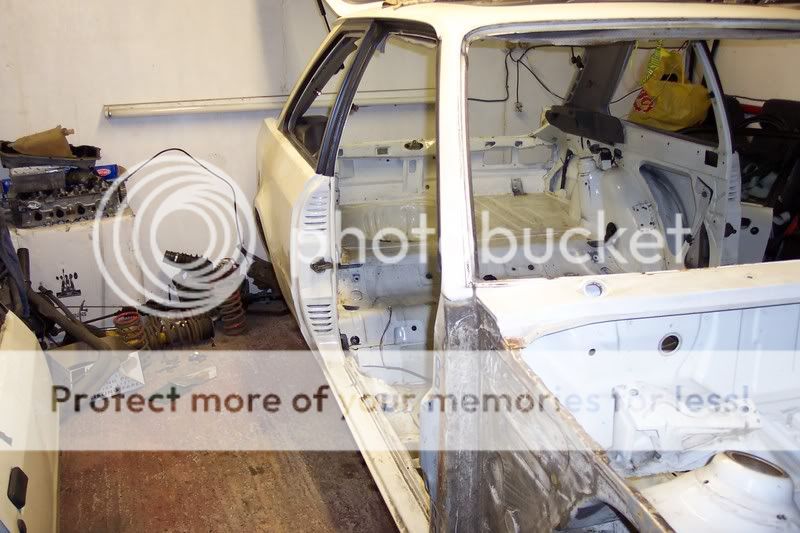
Thats it again for now im still waiting for the battery repair panel to turn up so thats holding me up abit but ive still got plenty of cleaning to be getting on with.
cheers mark.
rest of the windows out
then the doors wings and slam panel
Thats it again for now im still waiting for the battery repair panel to turn up so thats holding me up abit but ive still got plenty of cleaning to be getting on with.
cheers mark.
10-05-2007, 09:57 PM
#21
reppin' passionford hard!

Join Date: Dec 2006
Location: Coventry
Posts: 78
Likes: 0
Received 0 Likes
on
0 Posts
I can tell already she's gonna look good with this amount of effort going in. I would love to take mine back that far and totally gut her but too scared i would not know how the hell to put it all back!! My 3i is currently off the road so i can continue my resto, which doesn't compare with yours should still hopefully look good by the end. A lot of work on mine has gone into the underneath. Will put a link in if you wanna check her out. I may call on ya for some tips once i get back to workin on her!
DeanO Xr3 CoV
DeanO Xr3 CoV
12-05-2007, 01:41 PM
#24
I've found that life I needed.. It's HERE!!
Thread Starter
Join Date: May 2006
Location: Just down the road from brunters
Posts: 1,460
Likes: 0
Received 2 Likes
on
2 Posts
DeanO Xr3 CoV
that looks alright mate does stick a link up and ill have a butchers.
about the remembering where things go ive a couple of secret weapons.
1 being ive got another 3i thats my daily driver which im going to use if i get stuck on any thing and the others my stepdad who has been a mechanic for nearly 35 years and he worked for a bloke back in the day when these were new reshelling them.
Tonyt1t
i want a turbo aswell but as they say good things come to those who wait,my plan is cut my teeth on a n/a engine because they can be more forgiving when you getting some thing wrong.
ive took some more pictures of what we've been doing today so ill try and get them posted up later today or tomorrow
cheers mark.
13-05-2007, 01:29 PM
#25
I've found that life I needed.. It's HERE!!
Thread Starter
Join Date: May 2006
Location: Just down the road from brunters
Posts: 1,460
Likes: 0
Received 2 Likes
on
2 Posts
finaly got round to taking the tailgate off yesterday so that in a pile with one of the doors
then i started taking the seam sealer off in the engine bay
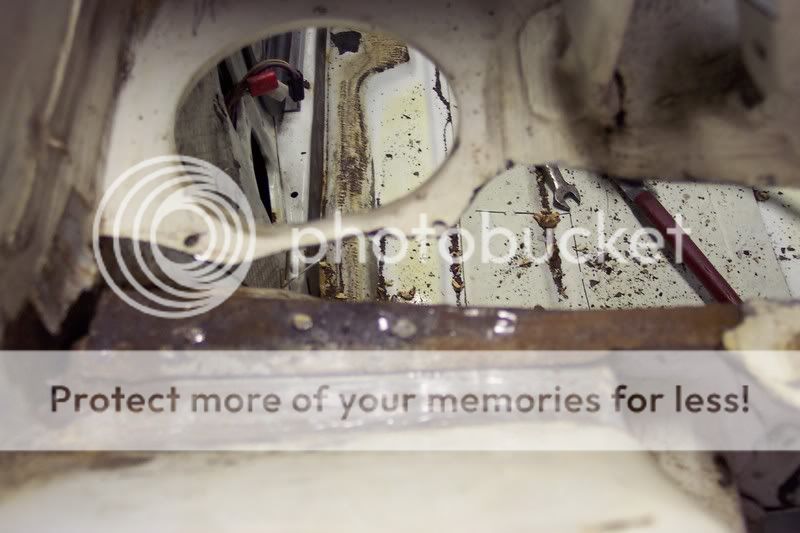
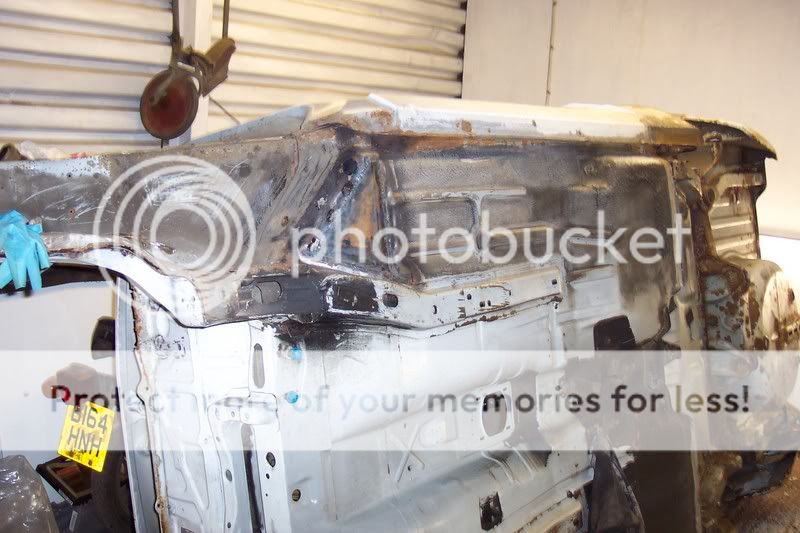
then we decided to do this..........................

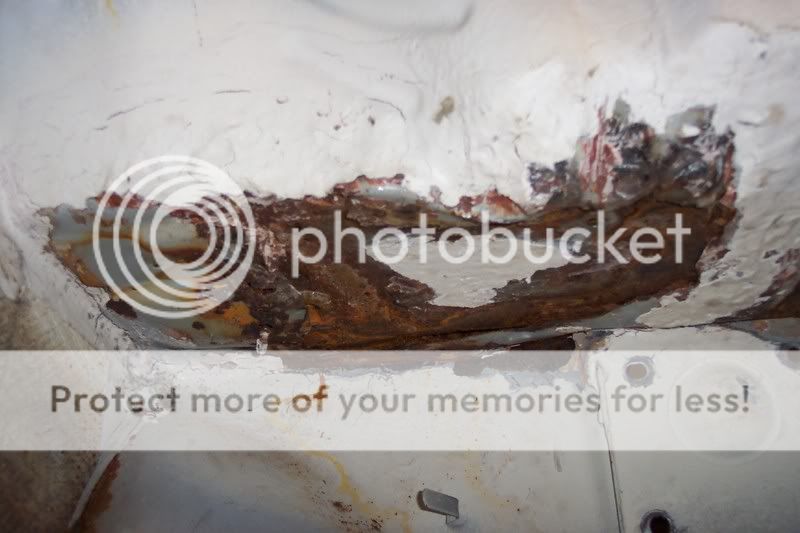
and this is what weve found
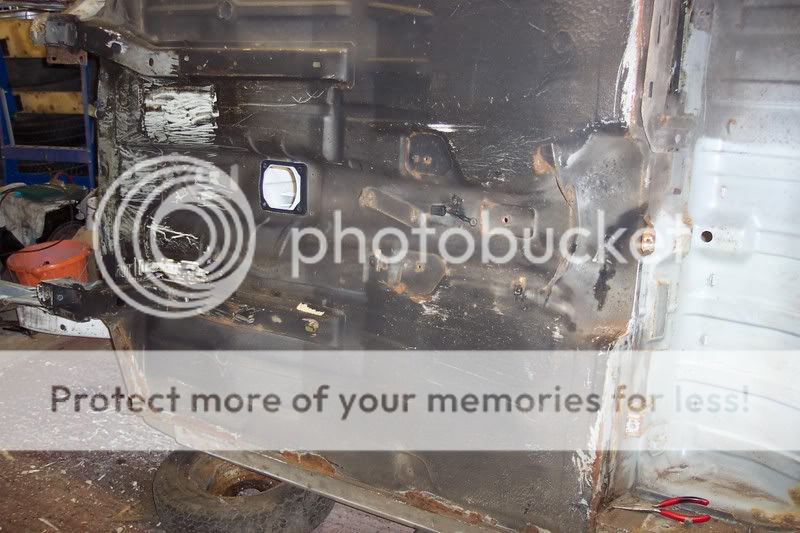
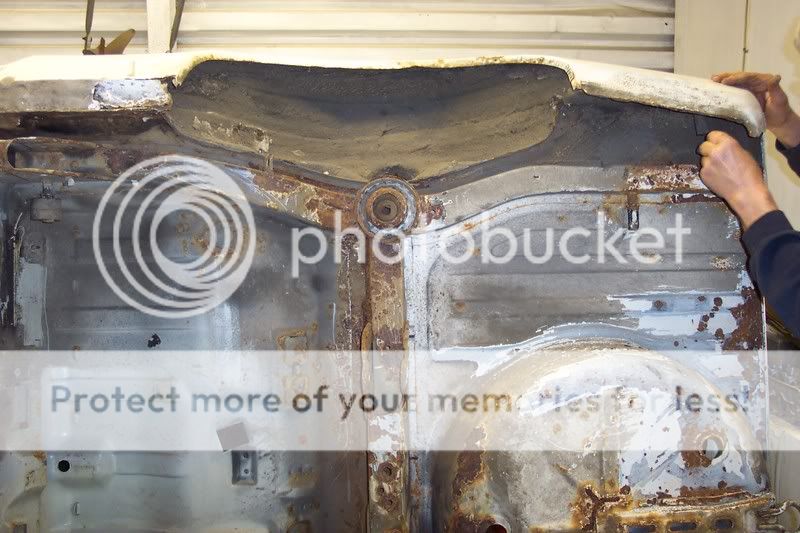
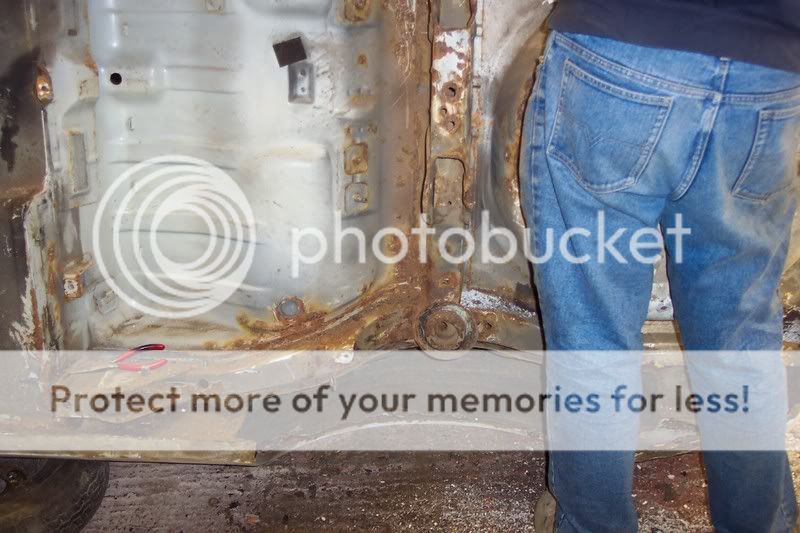
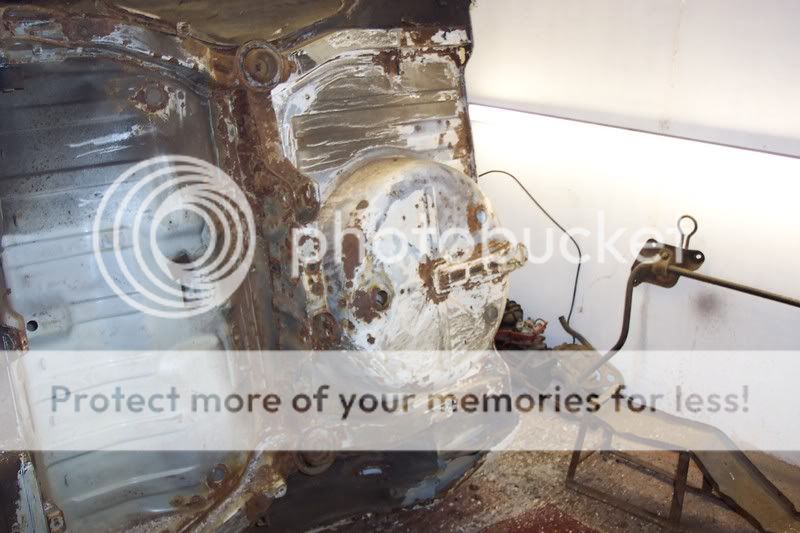
this is what the bootfloor looks like after 2 hours with a scrapper so i think im going to be busy doing that for the nxt week or so.
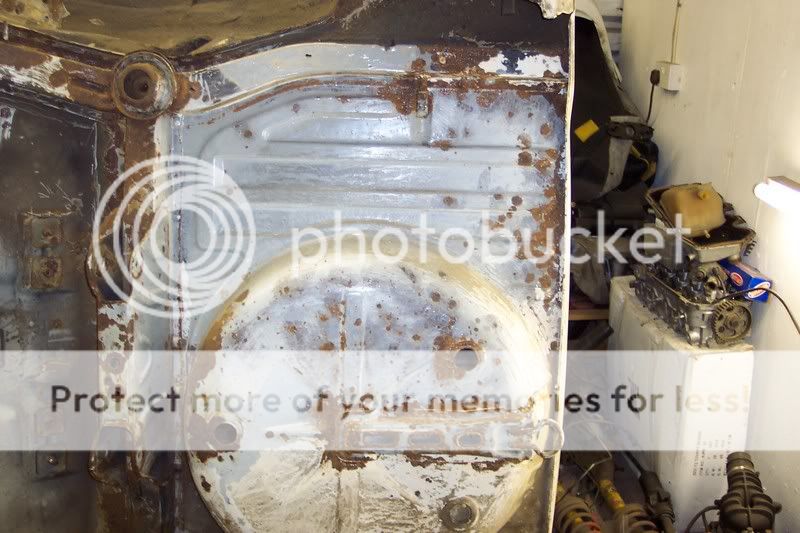
hope you like them cheers mark.
then i started taking the seam sealer off in the engine bay
then we decided to do this..........................
and this is what weve found
this is what the bootfloor looks like after 2 hours with a scrapper so i think im going to be busy doing that for the nxt week or so.
hope you like them cheers mark.
13-05-2007, 02:37 PM
#26
Grey Mk4 Early XR3I
ouch poorly car hope tis got some pillows under the side else its will have dents galour  good luck with it tho mate luckily mines a minty mint one
13-05-2007, 05:13 PM
#27
reppin' passionford hard!
Join Date: Dec 2006
Location: Coventry
Posts: 78
Likes: 0
Received 0 Likes
on
0 Posts
Whoah man what have you done there??? Is that the whole cab flipped on its side?!! Crazy, but at the same time more practical than what i do, well for sorting out the underneath. As you can see i do my resto work outside, on ramps onda floor, getting my face covered in black crap! After Uni finishes(roll on 1st of June) i'll be bak on it. Heres my thread so far, did this quite a while ago so need to set-up a proper one like yours, few random images in there.
https://passionford.com/forum/viewto...73ccff2ac4d8ba
My battery tray and fuse panel leak aswell, just a crap design really! I think i'm gonna try a short cut on mine and use fibreglass, just can't be arsed with welding! Think if i do that, then paint it up, should be ok. Also gonna channel the water away along the top of the wing where's theres a small lip. Thinking along the lines of silicone sealant running the length of the wing. The rubber bonnet rests that sit in that lip are why the water falls in those trays, so i gonna chop a chunk out so it can run off.
14-05-2007, 05:27 PM
#28
I've found that life I needed.. It's HERE!!
Thread Starter
Join Date: May 2006
Location: Just down the road from brunters
Posts: 1,460
Likes: 0
Received 2 Likes
on
2 Posts
Tonyt1t
its got some horse hair sheets under it now that ive got from work that was just a trial go to see if we could do it by ourselves,besides it already had a big dent in that rear quatre from some one reversing in to it and driveing off.
DeanO Xr3 CoV
we were going to go the do it on ramps way but thought f**k it lets see if we can roll it over.
all of the worst bits of rot have had repair panels made for them already im just waiting for some co2 for the welder then we can start putting some of them on,most of that you can see in the pictures is onlt surface rust that will come off with the grinder.
cheersd mark.
14-05-2007, 08:45 PM
#29
reppin' passionford hard!
Join Date: Dec 2006
Location: Coventry
Posts: 78
Likes: 0
Received 0 Likes
on
0 Posts
Yea a lot of that surface stuff will come off with a good brushing with the old Wire brush or grinder. I only got the wire brush so doing it all the hard way! Get some rust treatment on her, then underseal or Hammerite, unless you doing a complete shell re-spray? How long has this lot took you so far? Is it very easy to remove the glass? I am thinking of taking the door glass and rubbers out cuz ther is some bubbling coming thru. Thinkin of literally black hammeriting it to keep the rust away! The smooth stuff dries nice, i painted the backs of my rear seats (visible in the boot) in white. Will look nice once its all done and the install is finished to match. I gonna Hammerite all the insdie of the floor on mine aswell once the patches that have been welded in are filled etc.
14-05-2007, 10:00 PM
#31
Care Free.......
Originally Posted by DeanO Xr3 CoV
My battery tray and fuse panel leak aswell, just a crap design really! I think i'm gonna try a short cut on mine and use fibreglass, just can't be arsed with welding! Think if i do that, then paint it up, should be ok. Also gonna channel the water away along the top of the wing where's theres a small lip. Thinking along the lines of silicone sealant running the length of the wing. The rubber bonnet rests that sit in that lip are why the water falls in those trays, so i gonna chop a chunk out so it can run off.
15-05-2007, 05:28 PM
#32
I've found that life I needed.. It's HERE!!
Thread Starter
Join Date: May 2006
Location: Just down the road from brunters
Posts: 1,460
Likes: 0
Received 2 Likes
on
2 Posts
i popped in the unit on my way home from work yesterday to have a look and my stepdad had the welding set out starting to put some of the repair panels on but i didnt have the camera with me & i forgot to pick it up again this morning so you'll have to wait for some more photos.
Turbo-Beal
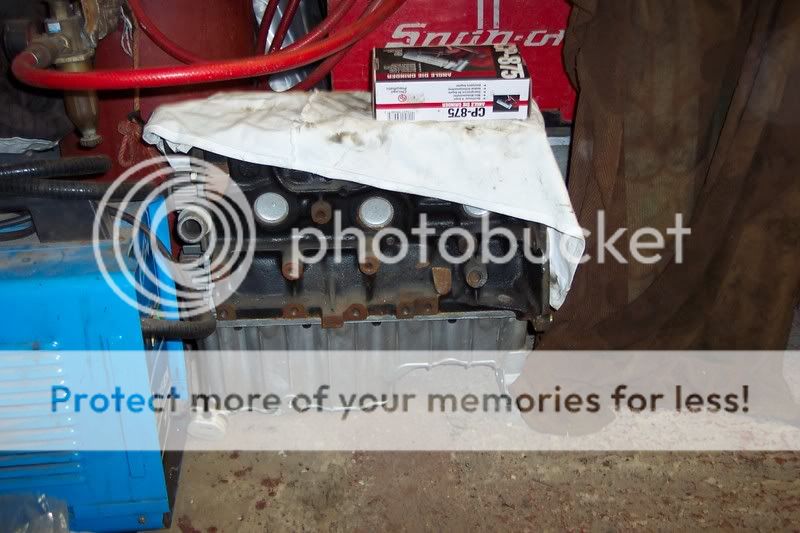
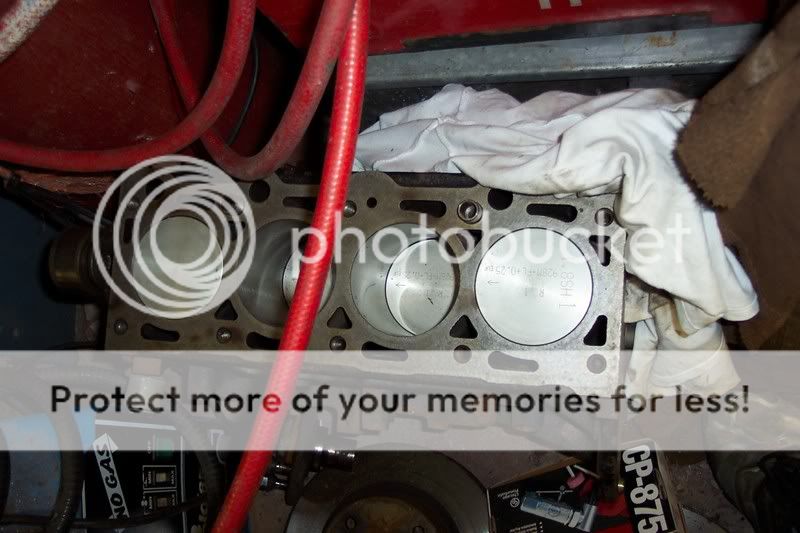
ebay does come up trumps some times your never going to guess how much it cost me,it was bought with no picture so i didnt know what to expect when i collected it its brand new never been run........
�180 is what i payed
to say i was chuffed is an understatement
Turbo-Beal
ebay does come up trumps some times your never going to guess how much it cost me,it was bought with no picture so i didnt know what to expect when i collected it its brand new never been run........
�180 is what i payed
to say i was chuffed is an understatement
26-05-2007, 02:49 PM
#33
I've found that life I needed.. It's HERE!!
Thread Starter
Join Date: May 2006
Location: Just down the road from brunters
Posts: 1,460
Likes: 0
Received 2 Likes
on
2 Posts
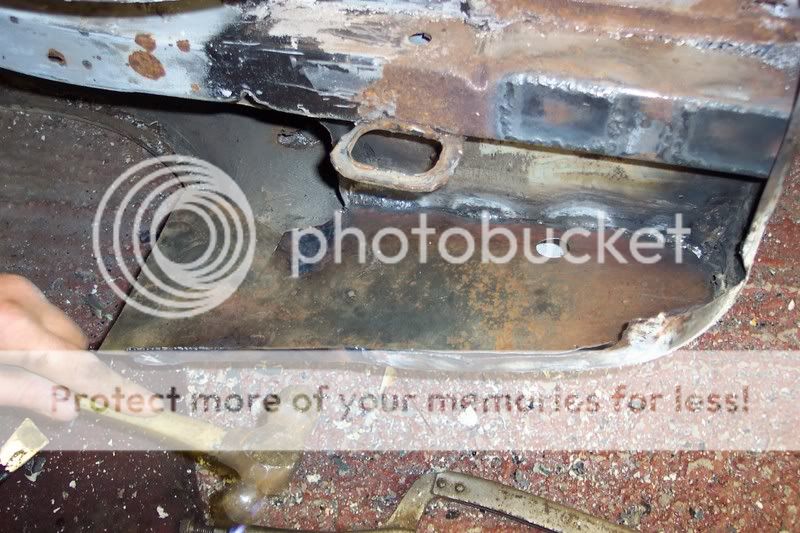
Ive not had a chance to update for a while so here goes,all bar a couple of the repair panels are on heres mystepdad doing one note the holes been put back in fior the drain,
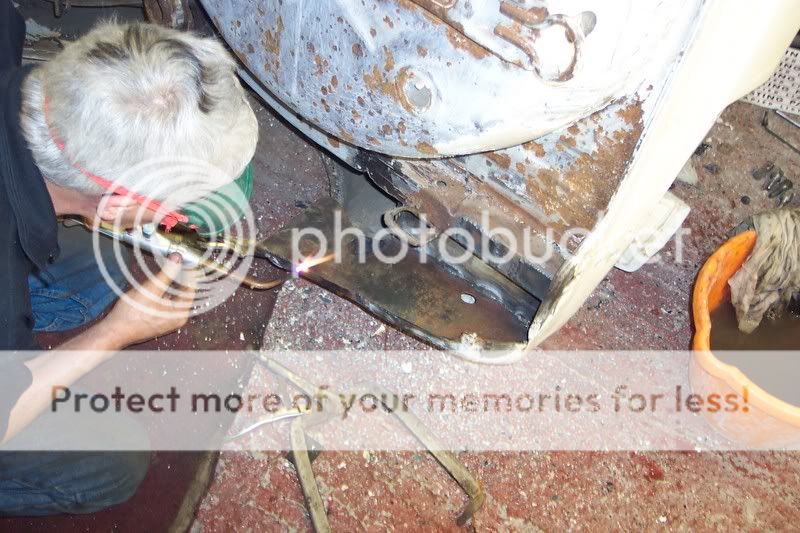
and part way through
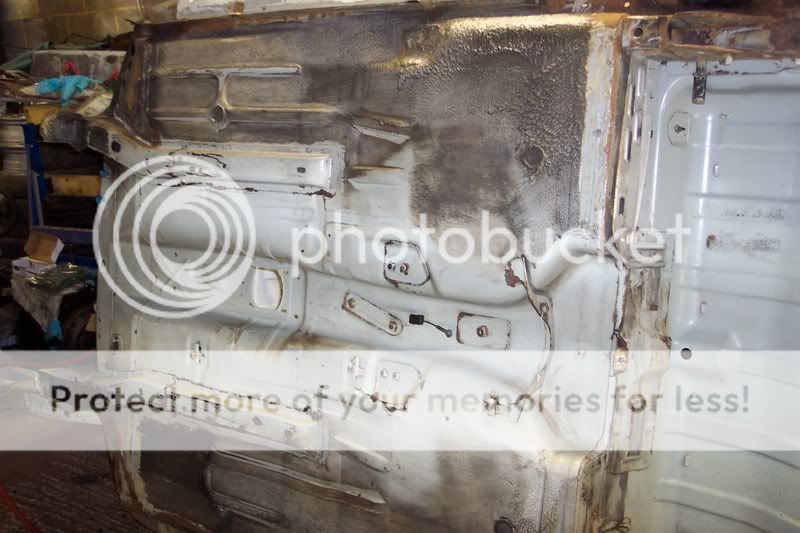
ive finished degreasing the underside bearing in mind it did look like this
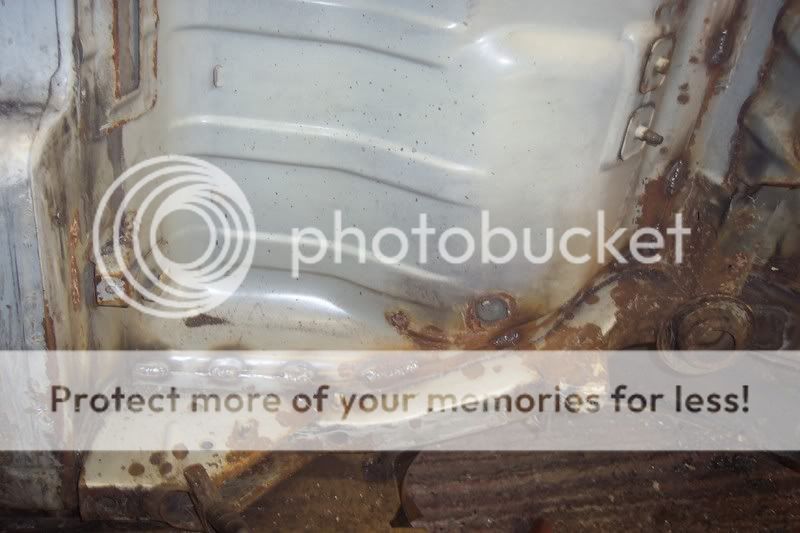
it now looks like this
weve also nearly finished the seam welding underneath ive only got one pick for now as the camera batteries died we've added a couple of bracing plates from the front chassis rails.
and this one is of the damage caused by rolling it over a dent not even the size of a 5p peice and i think that was only because the floor isnt flat

thats all ive got for the time being but were hoping to have pretty much finished the welding and be well into the prep work for the paint underneath by the end of the weekend hope you like and keep letting me know what you think.
Cheers mark.
and part way through
ive finished degreasing the underside bearing in mind it did look like this
it now looks like this
weve also nearly finished the seam welding underneath ive only got one pick for now as the camera batteries died we've added a couple of bracing plates from the front chassis rails.
and this one is of the damage caused by rolling it over a dent not even the size of a 5p peice and i think that was only because the floor isnt flat
thats all ive got for the time being but were hoping to have pretty much finished the welding and be well into the prep work for the paint underneath by the end of the weekend hope you like and keep letting me know what you think.
Cheers mark.
26-05-2007, 05:15 PM
#35
Too many posts.. I need a life!!
Join Date: Jul 2006
Location: Norfolk
Posts: 581
Likes: 0
Received 0 Likes
on
0 Posts
Originally Posted by xrmalin
i popped in the unit on my way home from work yesterday to have a look and my stepdad had the welding set out starting to put some of the repair panels on but i didnt have the camera with me & i forgot to pick it up again this morning so you'll have to wait for some more photos.
Turbo-Beal
ebay does come up trumps some times your never going to guess how much it cost me,it was bought with no picture so i didnt know what to expect when i collected it its brand new never been run........
�180 is what i payed
to say i was chuffed is an understatement
Turbo-Beal
ebay does come up trumps some times your never going to guess how much it cost me,it was bought with no picture so i didnt know what to expect when i collected it its brand new never been run........
�180 is what i payed
to say i was chuffed is an understatement
 Fooking hell thats one awsome price. Does it have forged pistons rods and crank?
28-05-2007, 02:27 PM
Fooking hell thats one awsome price. Does it have forged pistons rods and crank?
28-05-2007, 02:27 PM
#36
I've found that life I needed.. It's HERE!!
Thread Starter
Join Date: May 2006
Location: Just down the road from brunters
Posts: 1,460
Likes: 0
Received 2 Likes
on
2 Posts
From what the bloke i bought it off he said he made it as strong as he could because he was going to put it into an rs1600i but he had the car stolen whilst the engine was being built so it just got stuck in the shed and forgoten about.
About 95% of the weldings now finished so we should be ready for paint for next weekend then ive just got to wait for the new tank and fuel lines to arrive
should be some more pictures later i forgot to bring the camera back with me again lol
Cheers mark.
About 95% of the weldings now finished so we should be ready for paint for next weekend then ive just got to wait for the new tank and fuel lines to arrive
should be some more pictures later i forgot to bring the camera back with me again lol
Cheers mark.
 28-05-2007, 03:33 PM
#38
I've found that life I needed.. It's HERE!!

Join Date: Sep 2005
Location: Sheppey, Kent
Posts: 1,051
Likes: 0
Received 0 Likes
on
0 Posts
Thinking of rolling my car on its side like that, would make it so much easyier in the long run than having to work under it!! 
Looking mate, keep the updates coming!!
Looking mate, keep the updates coming!!
29-05-2007, 05:53 PM
#39
I've found that life I needed.. It's HERE!!
Thread Starter
Join Date: May 2006
Location: Just down the road from brunters
Posts: 1,460
Likes: 0
Received 2 Likes
on
2 Posts
Turbo Pez
i wouldn't recomend just turning it over we've got all the doors and tailgate off which weighs a ton to stop it being to heavy,also because the front wings are off theres nothing to bend i reckon if they were still on they would of been bent right in.
My stepdads got the week off work so im going to stop off at the unit on my way home to see how far he's got,there was talk last night of getting the first coat of underseal on so ill keep every one posted
Cheers mark.
29-05-2007, 08:54 PM
#40
I've found that life I needed.. It's HERE!!
Join Date: Sep 2005
Location: Sheppey, Kent
Posts: 1,051
Likes: 0
Received 0 Likes
on
0 Posts
Originally Posted by xrmalin
Turbo Pez
i wouldn't recomend just turning it over we've got all the doors and tailgate off which weighs a ton to stop it being to heavy,also because the front wings are off theres nothing to bend i reckon if they were still on they would of been bent right in.
My stepdads got the week off work so im going to stop off at the unit on my way home to see how far he's got,there was talk last night of getting the first coat of underseal on so ill keep every one posted
Cheers mark.
i wouldn't recomend just turning it over we've got all the doors and tailgate off which weighs a ton to stop it being to heavy,also because the front wings are off theres nothing to bend i reckon if they were still on they would of been bent right in.
My stepdads got the week off work so im going to stop off at the unit on my way home to see how far he's got,there was talk last night of getting the first coat of underseal on so ill keep every one posted
Cheers mark.