My DIY 19" Dare V4 Wheel Refurb, 12 pics how to ....
 13-02-2008, 11:22 AM
#1
PassionFord Regular
Thread Starter

Join Date: Jun 2003
Location: WaterFORD Ireland
Posts: 400
Likes: 0
Received 0 Likes
on
0 Posts
As my alloys were fairly shabby and I had already bought another set which I liked but not as much as the old ones I decided to give it a go to see how a DIY refurb would go. It would have cost me 80 pounds / 120 euros per wheel plus p+p which would have worked out around 370 pounds / 550 euro for the set :bigcry: which is not far off twice what I paid for the new 19's 

Anyway I start by removing the weights and valves and giving the rims a good clean.
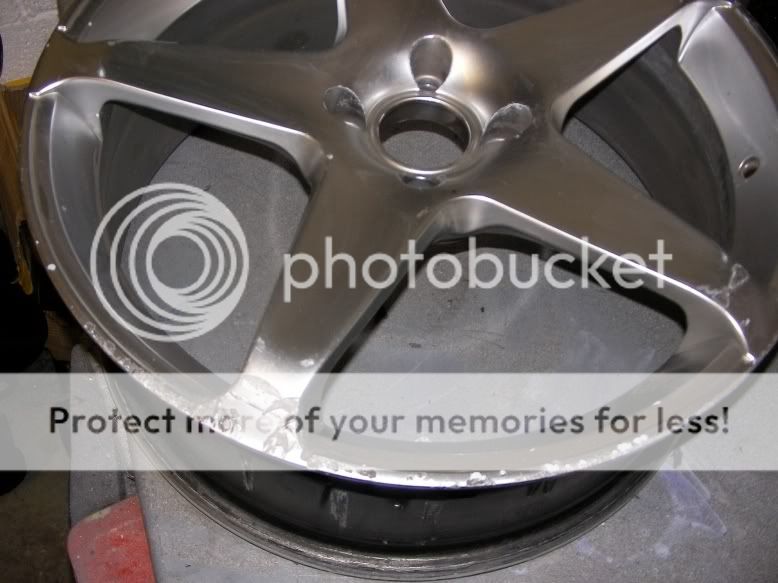
Gave the whole rim, front and back a good sanding and using a dremel on the badly kurbed and scuffed areas.
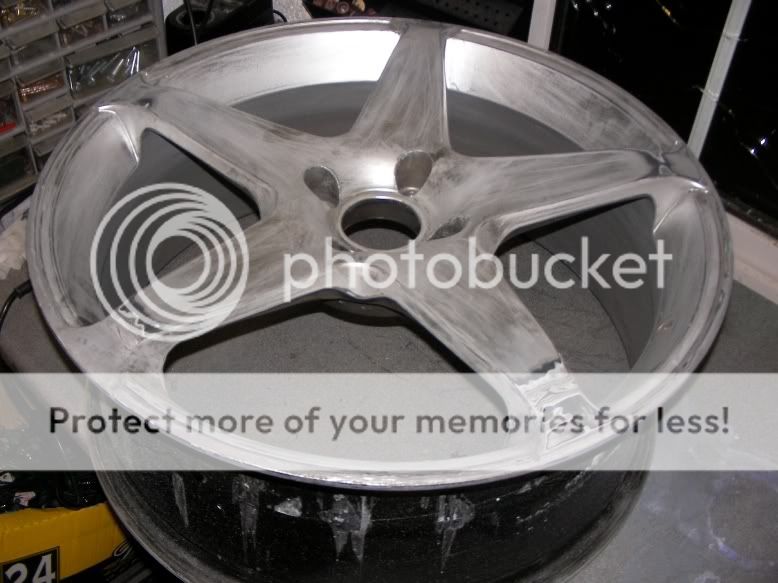
All damaged areas primed and sanded repeatedly until got to this stage.
Repair work on fully primered wheel.

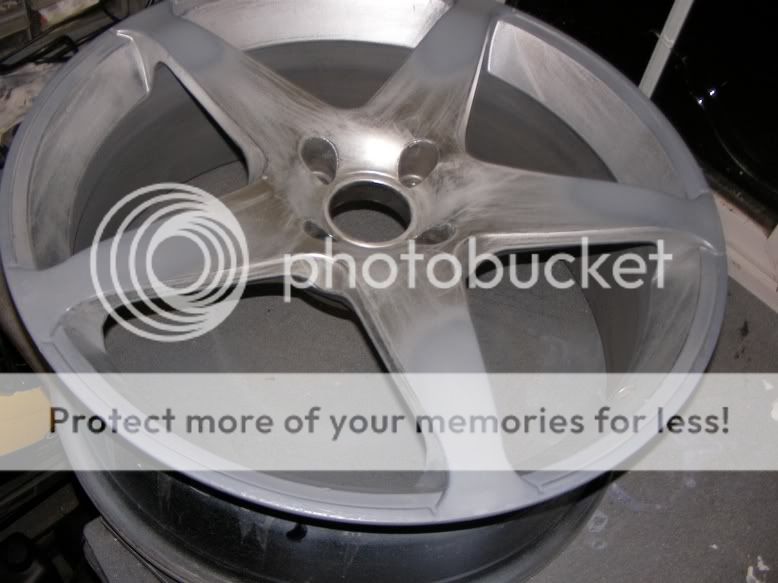
Final coat of primer. The primer I used was a good quality AKZO high build professional type.

First coat of Ford Nimbus Grey. I could only get the small aresol tins of this, 150ml double concentrate, I bought 8 tins of this reckoning on 2 per wheel.

Whole rim gets coated.

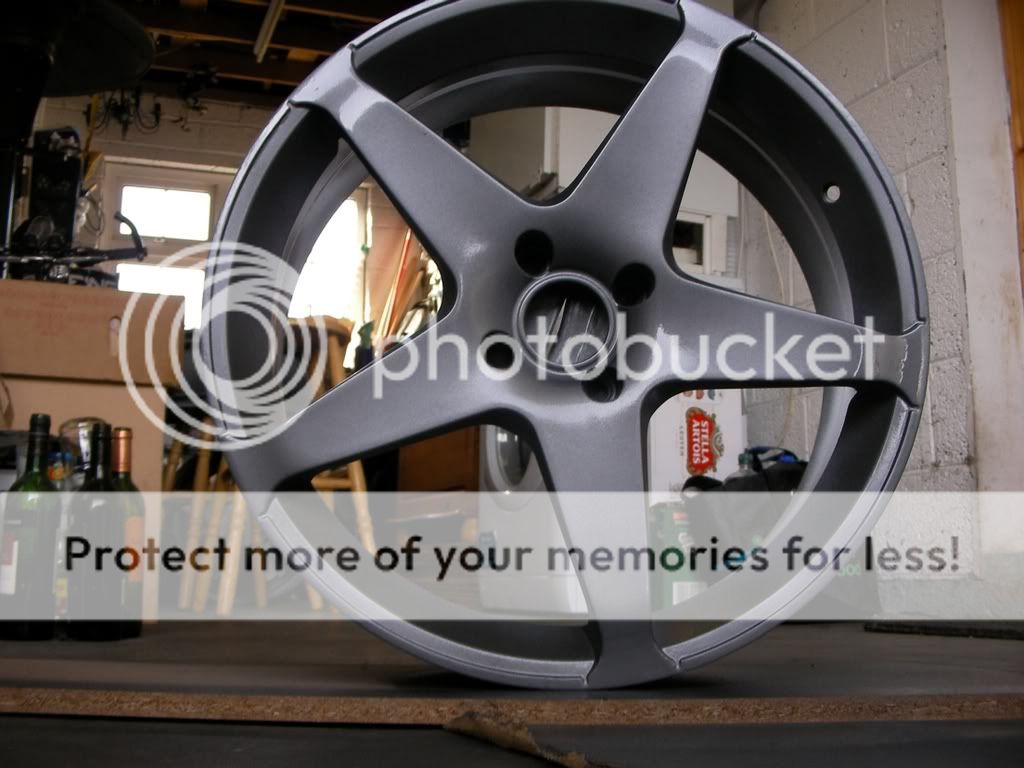
2nd coat of lovely antrachite .... yum yum starting to look good I think ....
Lacquer and more lacquer, bought 4 large 500ml tins, again good quality.
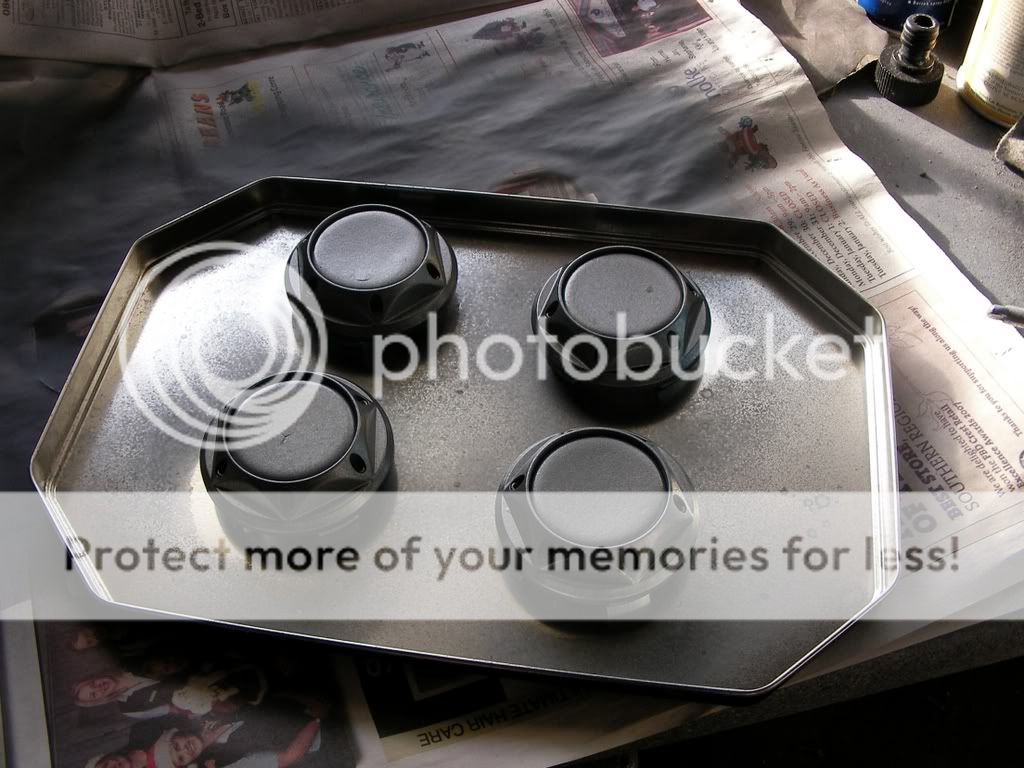
Centers all done, have new Ford emblems to go on.
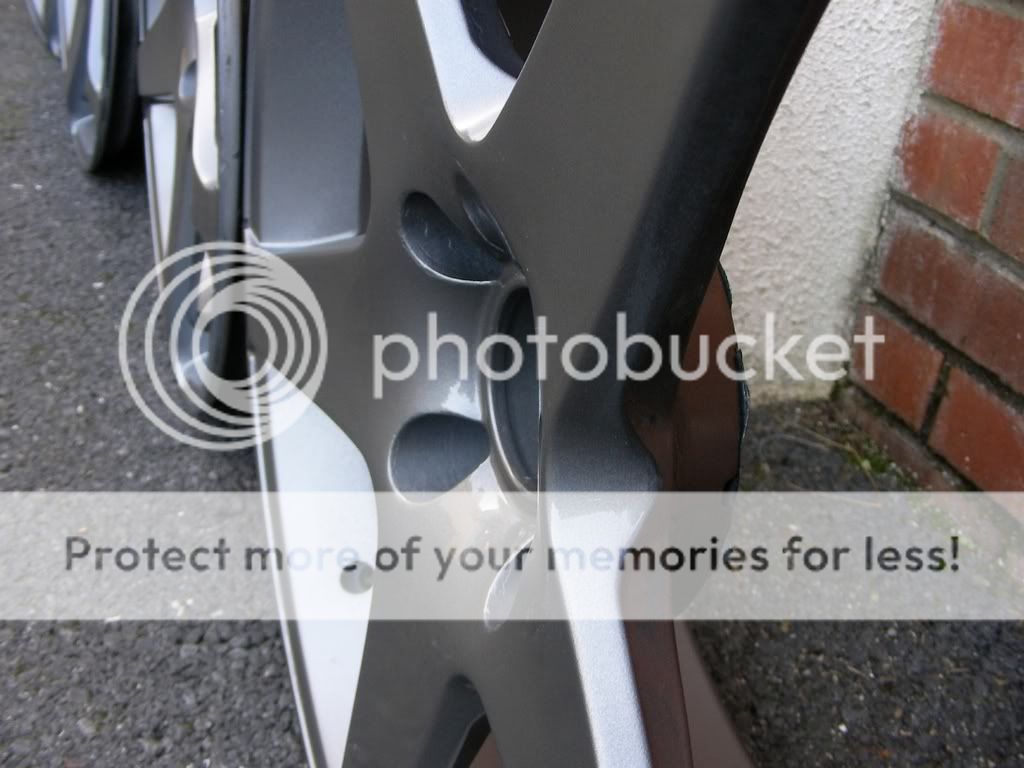
close up inspection
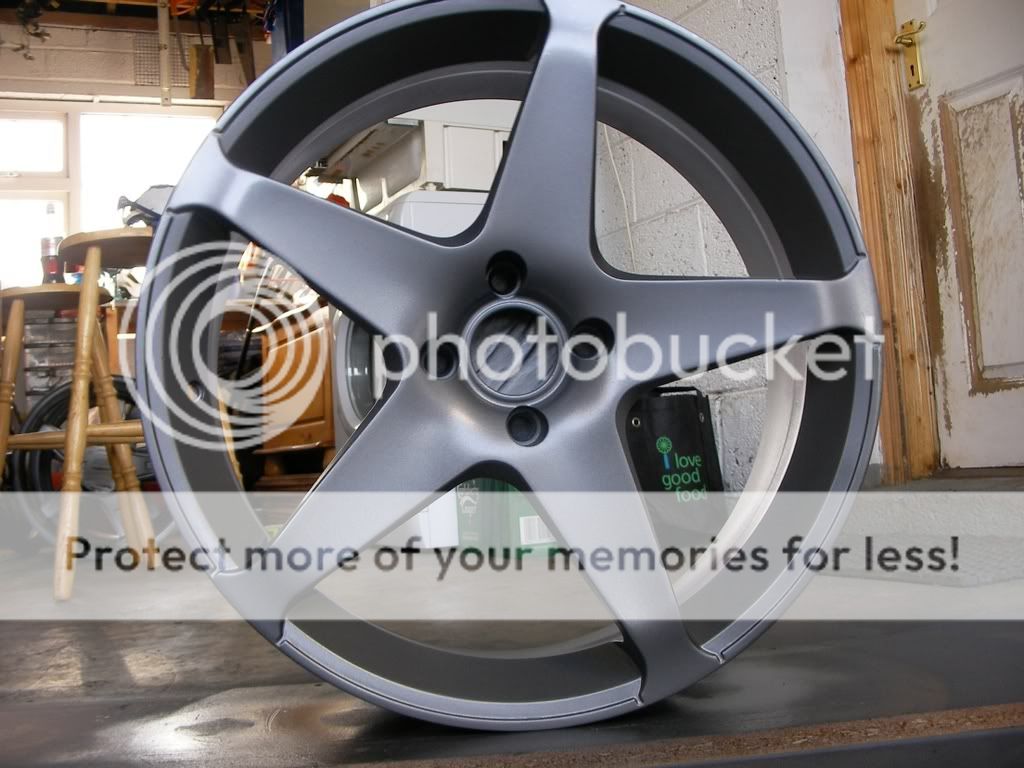
Next day after drying overnight in the warm kitchen .... sorry hon !

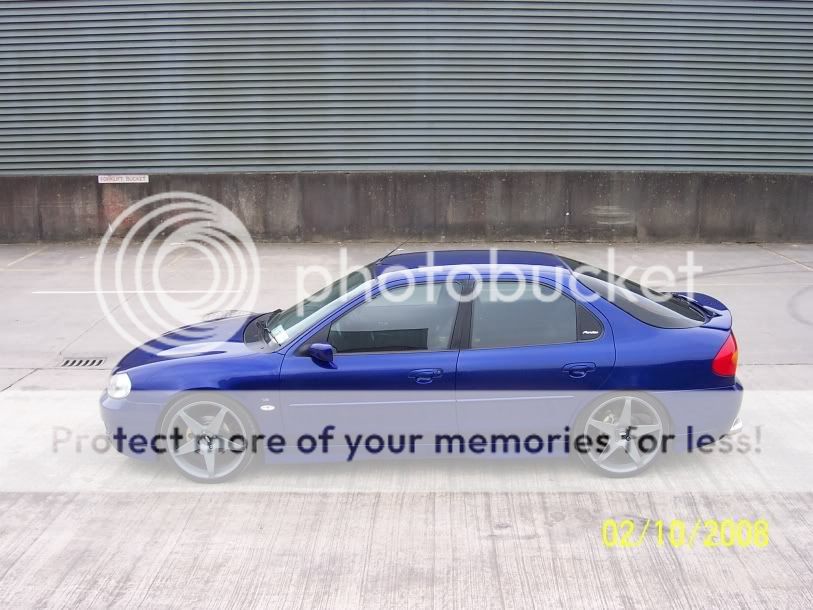
Finally got around to washing the car and got out for a few snaps

Overall cost for primer, paint and lacquer 65 pounds / 100 euros. Now I just have to hope that they weather well and hopefully they will. The guys at the tyre place who were putting the tyres on were surprised it was a DIY job. Also on the positive side, if they get damaged I can repair them myself
Anyway I start by removing the weights and valves and giving the rims a good clean.
Gave the whole rim, front and back a good sanding and using a dremel on the badly kurbed and scuffed areas.
All damaged areas primed and sanded repeatedly until got to this stage.
Repair work on fully primered wheel.
Final coat of primer. The primer I used was a good quality AKZO high build professional type.
First coat of Ford Nimbus Grey. I could only get the small aresol tins of this, 150ml double concentrate, I bought 8 tins of this reckoning on 2 per wheel.
Whole rim gets coated.
2nd coat of lovely antrachite .... yum yum starting to look good I think ....
Lacquer and more lacquer, bought 4 large 500ml tins, again good quality.
Centers all done, have new Ford emblems to go on.
close up inspection
Next day after drying overnight in the warm kitchen .... sorry hon !
Finally got around to washing the car and got out for a few snaps
Overall cost for primer, paint and lacquer 65 pounds / 100 euros. Now I just have to hope that they weather well and hopefully they will. The guys at the tyre place who were putting the tyres on were surprised it was a DIY job. Also on the positive side, if they get damaged I can repair them myself

 13-02-2008, 06:37 PM
#3
Football Cwazy
Join Date: Oct 2004
Location: Redditch, Worcestershire
Posts: 9,553
Likes: 0
Received 0 Likes
on
0 Posts
very impressive indeed 
i quite fancy having a go myself lol....where did you get the paint from?
and did you just go straight to lacquer with no polishing or smoothing?
the finish looks very smooth for aerosol cans?
i quite fancy having a go myself lol....where did you get the paint from?
and did you just go straight to lacquer with no polishing or smoothing?
the finish looks very smooth for aerosol cans?
 13-02-2008, 07:57 PM
#6
PassionFord Regular
Thread Starter
Join Date: Jun 2003
Location: WaterFORD Ireland
Posts: 400
Likes: 0
Received 0 Likes
on
0 Posts
Thanks for the comments lads, to answer Martin, the paint is just Hycote concentrated stuff and the lacquer is Hycote too, both aerosols. There was no sanding or flattening between paint coats and none between paint and lacquer. The lacquer actually goes on within half an hour of the final top paint coat for a better finish not when its totally dry. The amount of prep with the primer is the key and then several light coats of paint and several more light coats lacquer does the trick. 
14-02-2008, 08:06 AM
#7
Football Cwazy
Join Date: Oct 2004
Location: Redditch, Worcestershire
Posts: 9,553
Likes: 0
Received 0 Likes
on
0 Posts
Originally Posted by BrianEscCos
Thanks for the comments lads, to answer Martin, the paint is just Hycote concentrated stuff and the lacquer is Hycote too, both aerosols. There was no sanding or flattening between paint coats and none between paint and lacquer. The lacquer actually goes on within half an hour of the final top paint coat for a better finish not when its totally dry. The amount of prep with the primer is the key and then several light coats of paint and several more light coats lacquer does the trick.
Trending Topics
16-02-2008, 10:56 AM
#8
I'm Finding My Feet Here Now

Join Date: Nov 2007
Posts: 116
Likes: 0
Received 0 Likes
on
0 Posts
i think you have done a good job there mate, i have done a few rims in my time to. (painter lol) with aerosols and with a spray gun. you can get the same outcome with both.... but like you have said brian all there is to it is making sure the prepperation is good then if your handy with a can or spray gun your wheels will come out stunning. your wheels look really mint so up too you!
up too you!

 21-02-2008, 09:04 AM
#10
PassionFord Regular
Thread Starter
Join Date: Jun 2003
Location: WaterFORD Ireland
Posts: 400
Likes: 0
Received 0 Likes
on
0 Posts
Thanks for all that lads, one of the best things is if I damage one I'll be able to fix it fairly handy as long as I dont break it in half Nothing worse than waiting for the first kerb / pothole encounter 
one of the best things is if I damage one I'll be able to fix it fairly handy as long as I dont break it in half Nothing worse than waiting for the first kerb / pothole encounter

Thread
Thread Starter
Forum
Replies
Last Post
borboyous
Cars for Sale
6
22-08-2015 11:17 AM
bassboy
Pictures, video & Photoshop Forum
8
08-08-2015 10:21 AM