Fitting Door Mouldings... Sorted!
#1
Thread Starter
I've found that life I needed.. It's HERE!!
iTrader: (20)
Joined: Dec 2004
Posts: 1,454
Likes: 1
From: West Sussex
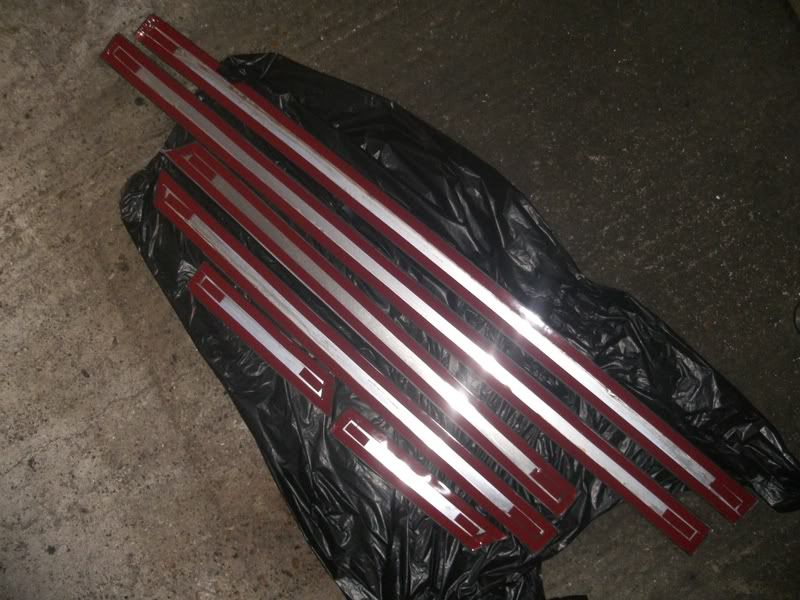
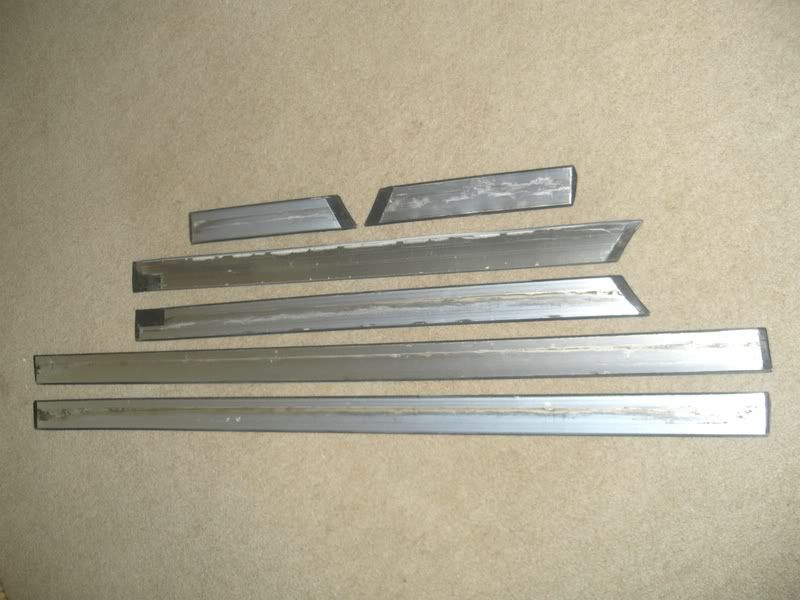
Right, i've cleaned up the backs of the door mouldings ready to be put back on but want to know what the best sticky strips to use are, where to get them from, and any tips on how to fit them (using tape to help them take etc etc) ???
Also, my n/s front wing one has a couple of ripples on the upper edge now... has anyone found a cure apart from renewing it?!

Also, my n/s front wing one has a couple of ripples on the upper edge now... has anyone found a cure apart from renewing it?!

Last edited by Simmo; 12-07-2008 at 03:08 PM.
#3
My front wing ones has a ripple from where it was refitted many moons ago. THey also need to be heated when they're removed - otherwise they ripple because they're removed with uneven force, which damages the plastic.
The advice I've had is that they need to be heated up, so they're a little more pliable, which will help stick them down flat - heating the door along where the moulding will go will also help a little. Obviosuly make sure it's perfectly clean along there or they'll just fall off.
I'm not sure how to cure the ripple though - I've just ignored it.
Last edited by cozmeister; 03-07-2008 at 12:57 PM.
#4
tie a piece of string to the front and rear of your car that runs along the top of the existing mouldings to make sure they are all level?? the ripples and the metal inserts in the moulding itself and is very hard to get rid of??
#6
Thread Starter
I've found that life I needed.. It's HERE!!
iTrader: (20)
Joined: Dec 2004
Posts: 1,454
Likes: 1
From: West Sussex
Thanks for the replies guys!
Matt, is that just the normal 3M tape for holding the moulding on the door while the sticky strips take?... or can you use that for the actual mounting of them?...
Anyone know where to get the sticky felt-like strips from?
Matt, is that just the normal 3M tape for holding the moulding on the door while the sticky strips take?... or can you use that for the actual mounting of them?...
Anyone know where to get the sticky felt-like strips from?
#7
I think this is the stuff i used all i did was apply this to the door mouldings first and then fitted them on to the doors , easy as that!!
http://cgi.ebay.co.uk/4-rolls-3m-dou...d=p3286.c0.m14
http://cgi.ebay.co.uk/4-rolls-3m-dou...d=p3286.c0.m14
Trending Topics
#8
Thread Starter
I've found that life I needed.. It's HERE!!
iTrader: (20)
Joined: Dec 2004
Posts: 1,454
Likes: 1
From: West Sussex
I think this is the stuff i used all i did was apply this to the door mouldings first and then fitted them on to the doors , easy as that!!
http://cgi.ebay.co.uk/4-rolls-3m-dou...d=p3286.c0.m14
http://cgi.ebay.co.uk/4-rolls-3m-dou...d=p3286.c0.m14
Just wanna make sure I do it properly once...
#9

you only need to clamp/ tape down things like tiger seal
#10
Wipe the area first with a degreaser/thinners/panel wipe etc if you want them to stay there.
The foam backed sticky tape is known as BODY TAPE, cheap enough from car shops etc.
Put the strip in a bucket of boiling water for 10 minutes first they will then go on flat.
You can use LOCTITE 5900 5910 to stick on as well, don't need a lot, have stuck spoilers on with this works perfect.
tabetha
The foam backed sticky tape is known as BODY TAPE, cheap enough from car shops etc.
Put the strip in a bucket of boiling water for 10 minutes first they will then go on flat.
You can use LOCTITE 5900 5910 to stick on as well, don't need a lot, have stuck spoilers on with this works perfect.
tabetha
#11
Thread Starter
I've found that life I needed.. It's HERE!!
iTrader: (20)
Joined: Dec 2004
Posts: 1,454
Likes: 1
From: West Sussex
Right, all sorted now... thanks for all the replies!!! 
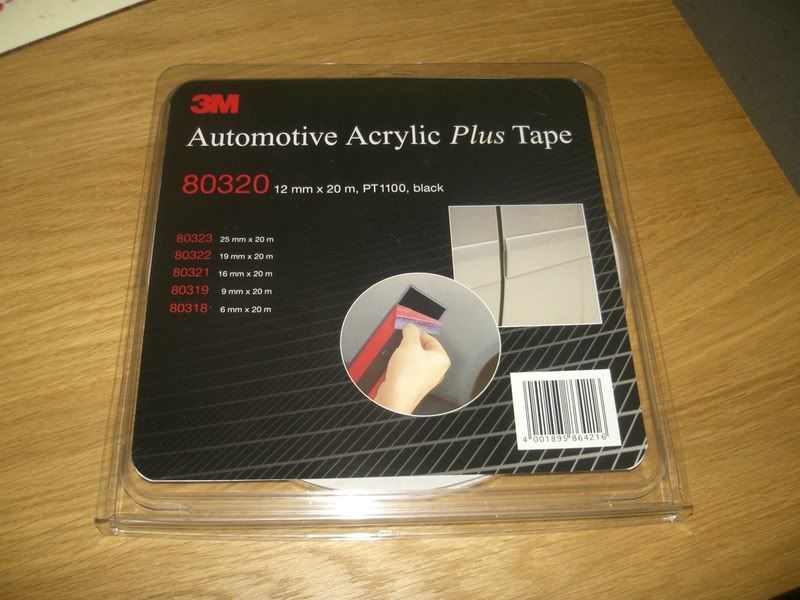
Got some pukka 3M Acrylic 12mm foam tape and although its bloody expensive it's the danglies... you only get one chance to put them on straight though it's soooo strong!!!
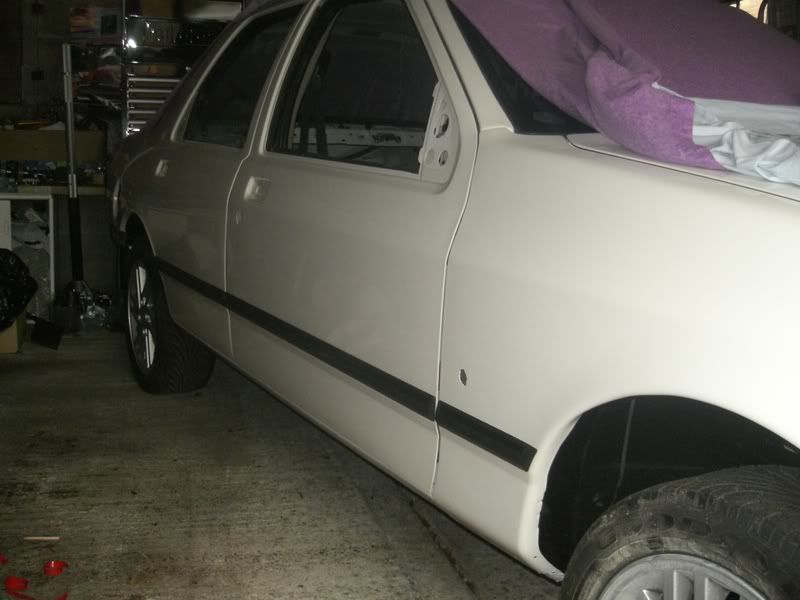
Anyway they're all on now... not 100% perfect but they'll do for me...


Got some pukka 3M Acrylic 12mm foam tape and although its bloody expensive it's the danglies... you only get one chance to put them on straight though it's soooo strong!!!

Anyway they're all on now... not 100% perfect but they'll do for me...


#15
Thread Starter
I've found that life I needed.. It's HERE!!
iTrader: (20)
Joined: Dec 2004
Posts: 1,454
Likes: 1
From: West Sussex
As with everything it seems preparation is the key... made sure ALL the old tape/glue was removed from the backs (used some standard thinners and they just peeled off, more or less after a bit of a soak) so they were nice and clean and flat, you don't want to have to put tape over old tape!!!

Bought some proper 3M Acrylic tape (20m x 12mm). Expensive at £33 + VAT but worth it and you only need about 7m-ish so you'll have loads left over... gonna be selling some of mine to a mate who wants to do his! Lay it on as close to the edges as possible with extra on the ends where they normally start curling and press down hard (see pic earlier in thread)...

You need to make sure the paintwork's nice and clean too, fortunately i've just had bodywork done so they were perfect... I just used an LCD tv cleaning cloth to remove the dust!!!
Then I just fit them by eye... but the tape's so feckin strong you only get one chance to get them in the right place really!!! I lined each one up so it ran along the top of the body swage line and marked with a faint pencil line.
It was suggested above about gently heating strips up to help them go on flat but I didn't bother, the tape's strong enough to pull the curled edges in (and I had a dream I heated them up and the tape all melted in a gooey mess!!! ).
).
They're not 100% perfect but I think they look ok when looking from the normal standing level, but I need to get it outside and look at it properly!!!


Bought some proper 3M Acrylic tape (20m x 12mm). Expensive at £33 + VAT but worth it and you only need about 7m-ish so you'll have loads left over... gonna be selling some of mine to a mate who wants to do his! Lay it on as close to the edges as possible with extra on the ends where they normally start curling and press down hard (see pic earlier in thread)...

You need to make sure the paintwork's nice and clean too, fortunately i've just had bodywork done so they were perfect... I just used an LCD tv cleaning cloth to remove the dust!!!
Then I just fit them by eye... but the tape's so feckin strong you only get one chance to get them in the right place really!!!
 I lined each one up so it ran along the top of the body swage line and marked with a faint pencil line.
It was suggested above about gently heating strips up to help them go on flat but I didn't bother, the tape's strong enough to pull the curled edges in (and I had a dream I heated them up and the tape all melted in a gooey mess!!!
 ).
).They're not 100% perfect but I think they look ok when looking from the normal standing level, but I need to get it outside and look at it properly!!!

Thread
Thread Starter
Forum
Replies
Last Post
borboyous
Cars & Parts Wanted.
1
14-08-2015 07:51 PM
saph in dorset
General Car Related Discussion.
0
14-08-2015 11:10 AM
COSWORLD
General Car Related Discussion.
0
14-08-2015 08:40 AM
track.focus'd
Restorations, Rebuilds & Projects.
26
12-08-2015 06:53 PM


