
rear beam removal


Thread Starter
Wahay!! I've lost my Virginity!!
Joined: Feb 2011
Posts: 62
Likes: 0
From: didcot
has anyone done, or know of, a rear beam removal guide? im toying with the idea to do a proper refurb, was just looking for some reading material to see whats involved and whether its likely i can do it. thanks in advance.

PassionFord Post Troll
Joined: Aug 2005
Posts: 3,094
Likes: 3
From: Under the car :cry:
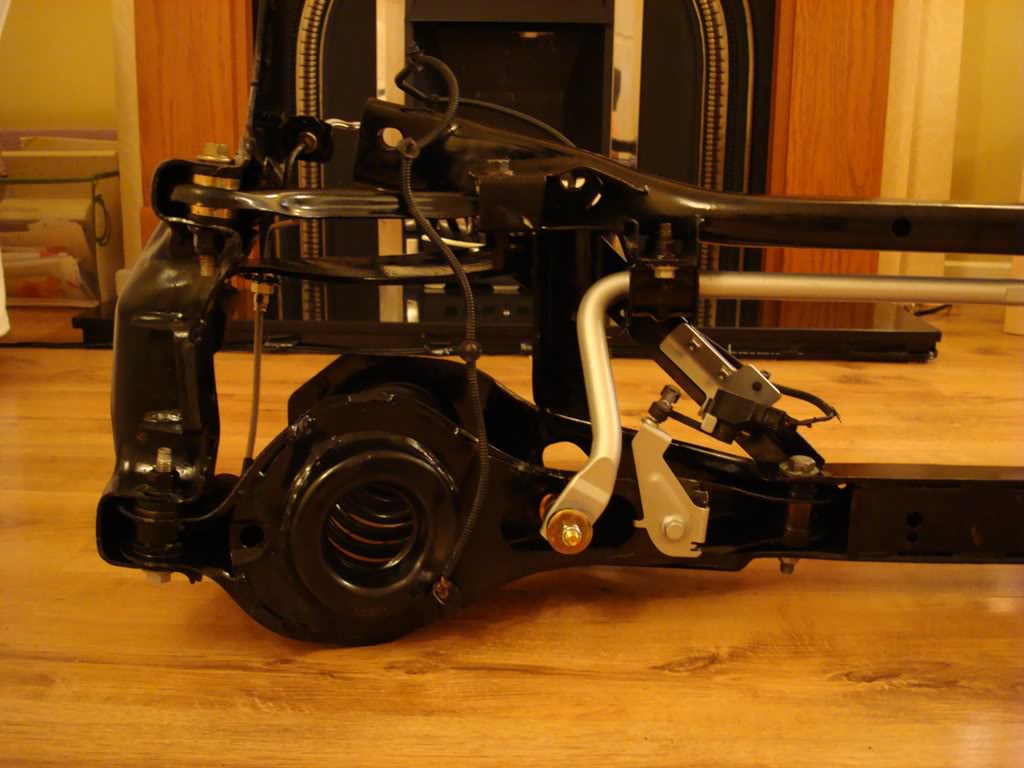
piss easy mate i've done it on my mk1 2l zetec (rear discs)
1. disconnect abs sensors, brake flexi hoses and handbrake cables including the little bolts securing them to the trailing arms.
2. remove shocks. little nut at top, 13 or 15mm iirc bolt on the bottom
3. remove the 4 bolts tucked under the body honding the big bush end of the trailing arms.
4. now your left with the 4 or 6 (think its 6) subframe bolts. remove them and the whole rear suspension drops out, subframe and all.
haynes manual is usefull if you get stuck.
the tricky bit is removing all the suspension arms. they often need cutting out (carefully if you want to retain the arms for fitting poly bushes) as the bolts sieze into the bushes. consiquently when you undo the bolt you end up tearing the bush apart.
if any work ever needs doing on the rear suspension the easiest way of doing it is to drop the whole lot as it makes FAR better access if you need to carefully cut bolts etc.
PassionFord Post Troll
Joined: Aug 2005
Posts: 3,094
Likes: 3
From: Under the car :cry:
i used to do that, now i just jack up the whole back end in one go with one jack under the centre of the subframe. then put the axle stands under the sills.
its not hard at all to get it off. just depends on how much of a strip down you intend to do. if you strip the whole thing i'd budget new poly bushes. ford bushes are dear and only come already pressed into the arms. for instance the lower spring cup arms are �125 each from ford.
its not hard at all to get it off. just depends on how much of a strip down you intend to do. if you strip the whole thing i'd budget new poly bushes. ford bushes are dear and only come already pressed into the arms. for instance the lower spring cup arms are �125 each from ford.
Thread Starter
Wahay!! I've lost my Virginity!!
Joined: Feb 2011
Posts: 62
Likes: 0
From: didcot
ive tried axel stands on the sills before and bent the sills - not happy about that!!
basically im thinking about what i might like to do with the car over the course of the next year. after originally saying i wouldnt im going to modify it now. not heavily, just the exhaust and coilover route. ive seen that the exhaust is tricky to get off and id quite like to do a full refurb on the rear beam - so thats 2 birds with 1 stone. if im taking the beam apart then id do the bushes at the same time, 3 birds. and put it all back together with new coilovers, 4 birds.
things is though, i dont want to be bodging things and certainly dont want to be breaking, cutting or snapping things to do it. if its just nuts and bolts i could probably manage but if its more complicated then probably not. the chap at the garage said he'd help with bushes and stuff if i can get the beam off.
I've found that life I needed.. It's HERE!!
iTrader: (1)
Joined: Feb 2008
Posts: 1,274
Likes: 2
From: Leicester
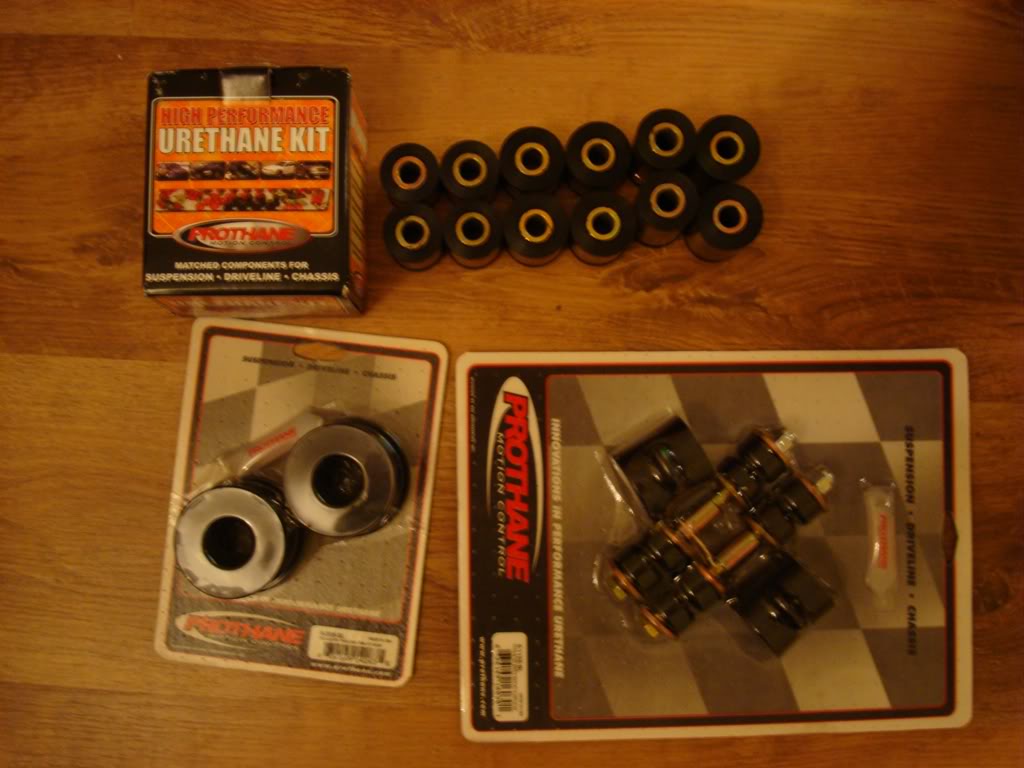
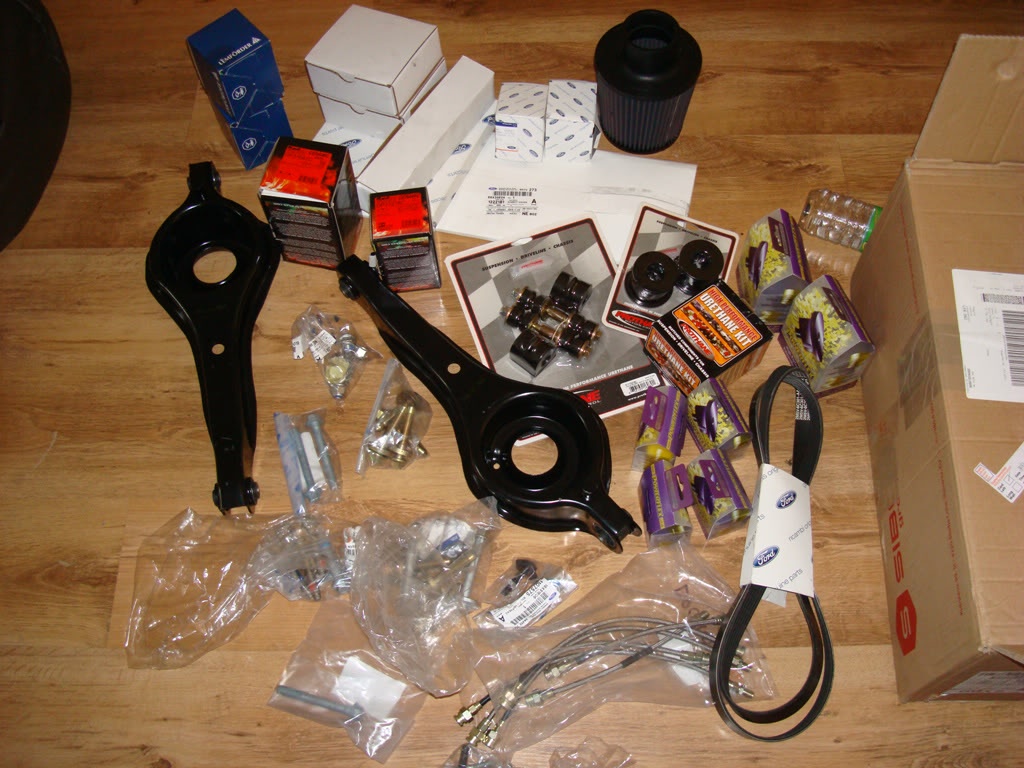
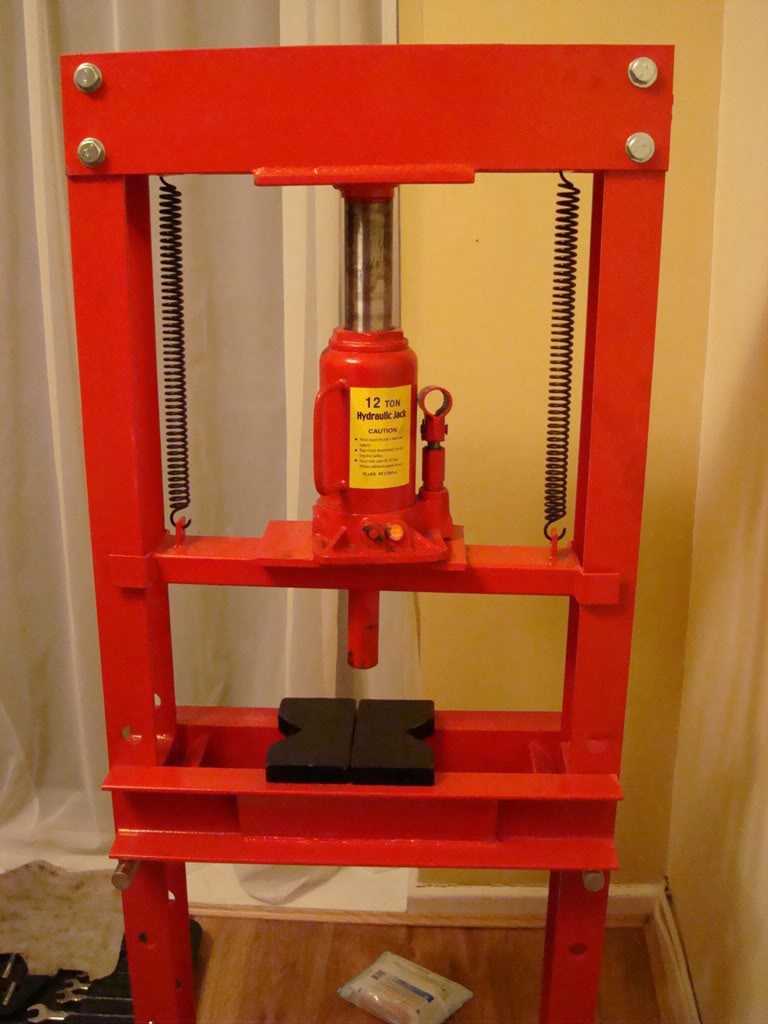
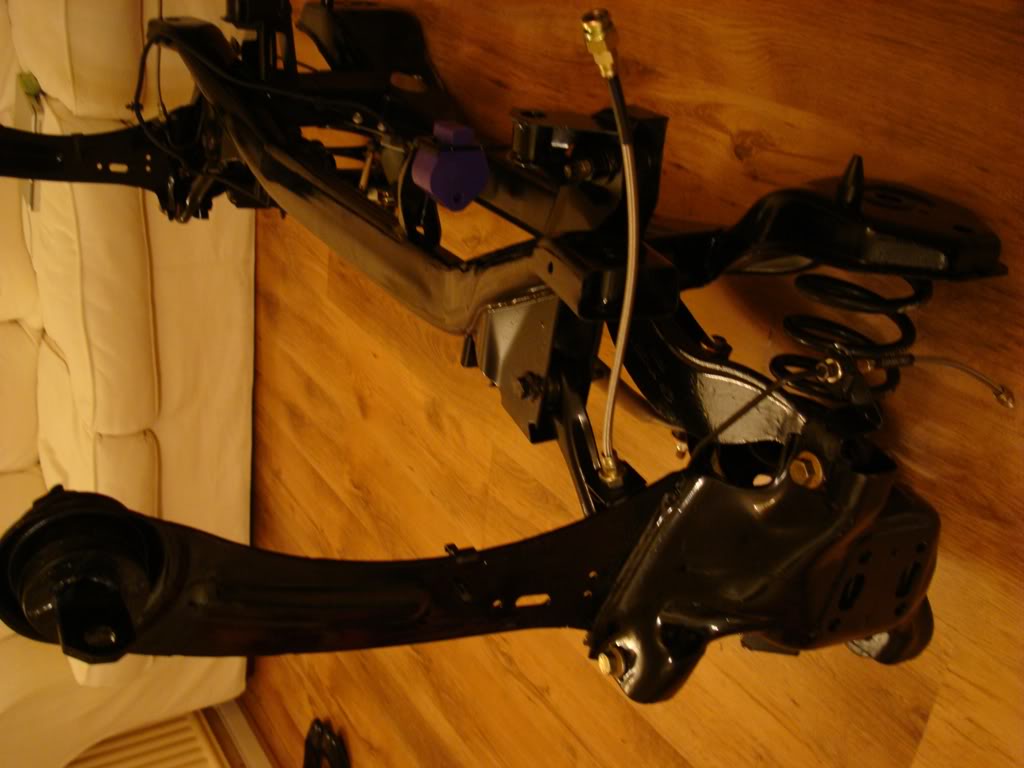
I have done this, complete removal strip down and rebuild with new polybushes from the states, new nuts and bolts the lot, i had to literally cut the lower control arms off, sheared off a couple of welded nuts and had a bloody hard time stripping it down, took me a good few days with just the subframe on the garage floor carfully cutting with a dremel and angle grinder to get the parts off. I then went and purchased cheap lower arms but realised that they were missing vital plates for strength and the bracketry for the xenon headlamp level adjuster sensor so i had to get plates welded. I wont lie it was a right PITA, i needed a 12ton press too so bought one of these. If you buy new control arms get them from ford if you have Xenon headlamps as i have not seen a cheap set that is correct, same for the front control arms one of these too has to be right for a ST170 with Xenons.
You have been warned lol
I have loads of pictures of my restoration i can post.
You have been warned lol
I have loads of pictures of my restoration i can post.
Trending Topics
Thread Starter
Wahay!! I've lost my Virginity!!
Joined: Feb 2011
Posts: 62
Likes: 0
From: didcot
I have done this, complete removal strip down and rebuild with new polybushes from the states, new nuts and bolts the lot, i had to literally cut the lower control arms off, sheared off a couple of welded nuts and had a bloody hard time stripping it down, took me a good few days with just the subframe on the garage floor carfully cutting with a dremel and angle grinder to get the parts off. I then went and purchased cheap lower arms but realised that they were missing vital plates for strength and the bracketry for the xenon headlamp level adjuster sensor so i had to get plates welded. I wont lie it was a right PITA, i needed a 12ton press too so bought one of these. If you buy new control arms get them from ford if you have Xenon headlamps as i have not seen a cheap set that is correct, same for the front control arms one of these too has to be right for a ST170 with Xenons.
You have been warned lol
I have loads of pictures of my restoration i can post.
You have been warned lol
I have loads of pictures of my restoration i can post.
yikes, that puts me off!! if you dont mind putting some pics up id like to have a look.
PassionFord Post Troll
Joined: Aug 2005
Posts: 3,094
Likes: 3
From: Under the car :cry:
true it doesn't compare to a full on resto and if i had my way i'd strip off both front and rear beams and send them for acid dip and paint dip but thats not gonna happen on mine.

Thread Starter
Wahay!! I've lost my Virginity!!
Joined: Feb 2011
Posts: 62
Likes: 0
From: didcot
the sills are fine and the position is correct AFAIK (could be wrong though).
i'll have to think on it a bit more and do some more research before i decide whether to attempt it or not.
i'll have to think on it a bit more and do some more research before i decide whether to attempt it or not.
I've found that life I needed.. It's HERE!!
iTrader: (1)
Joined: Feb 2008
Posts: 1,274
Likes: 2
From: Leicester
Rusty Old Subframe
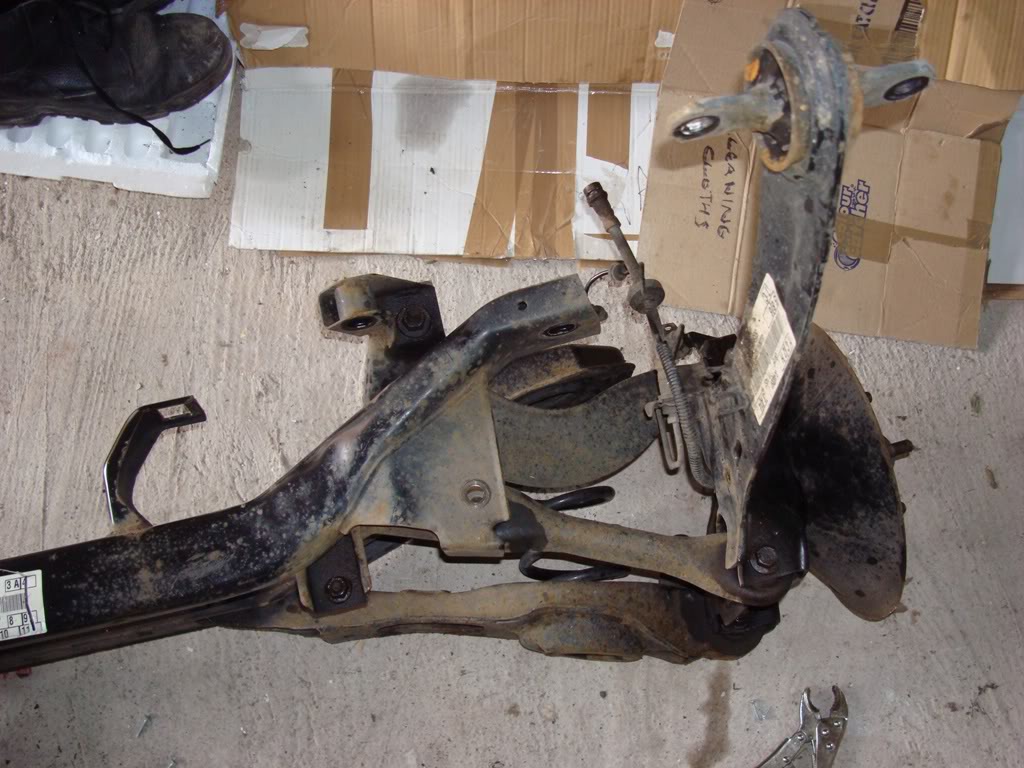
More Rust
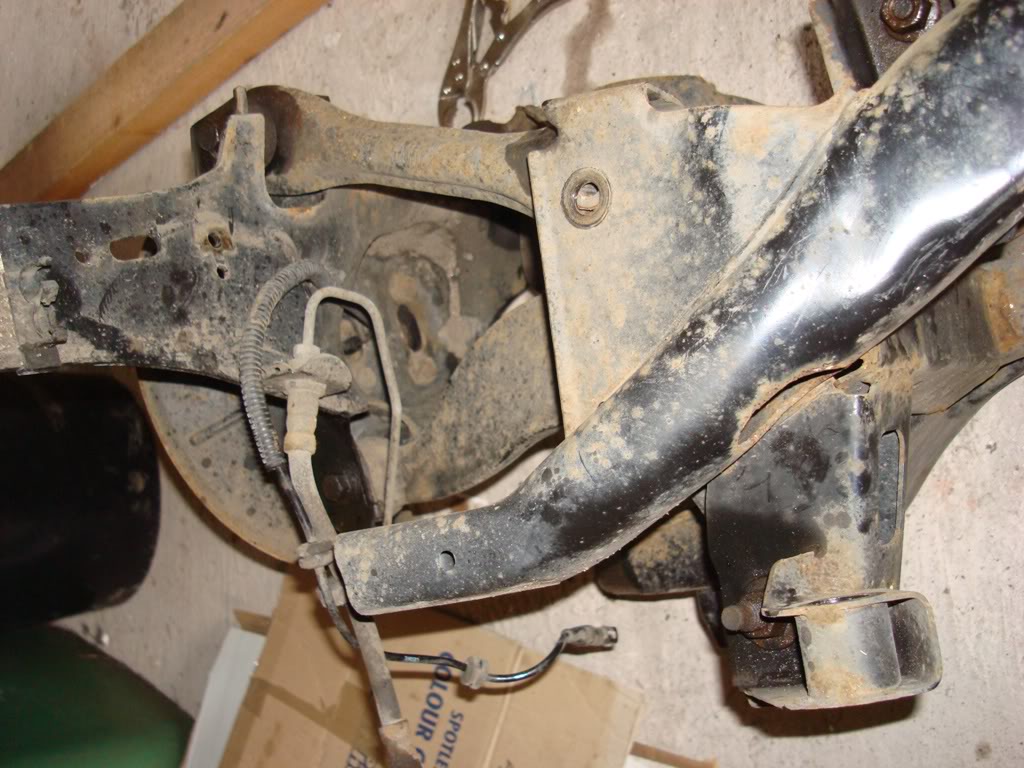
Horrid Rust
Strip Down Begun

Regular MOT fail these ones
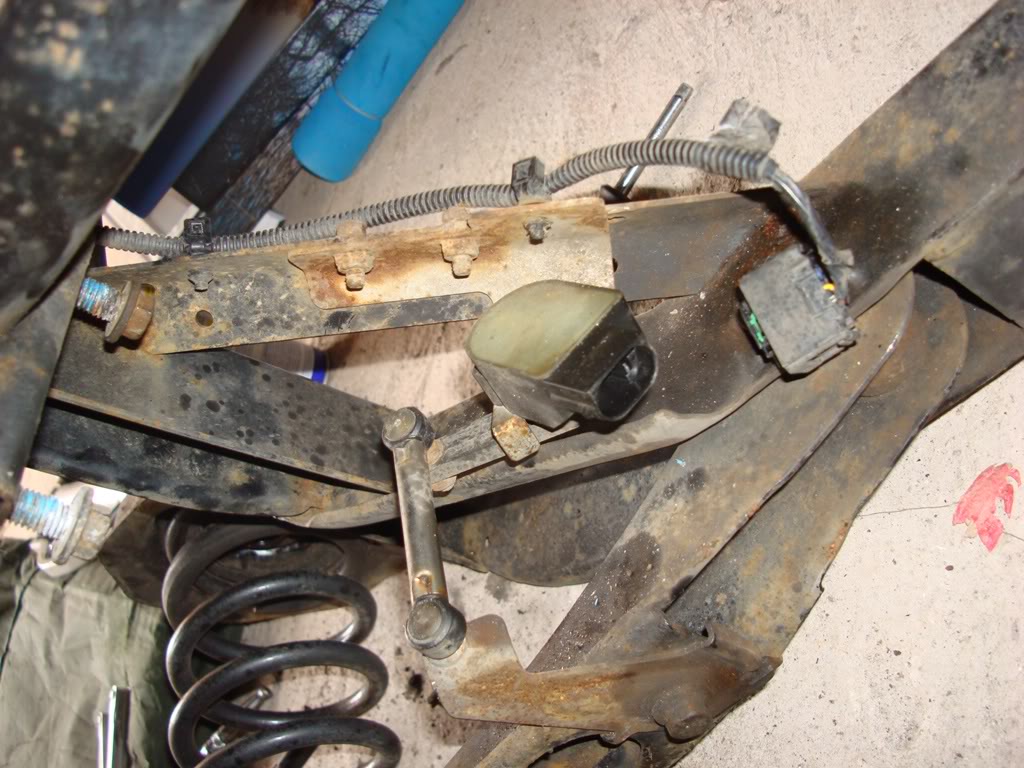
New Bushes
Cheapo Arms required Modification
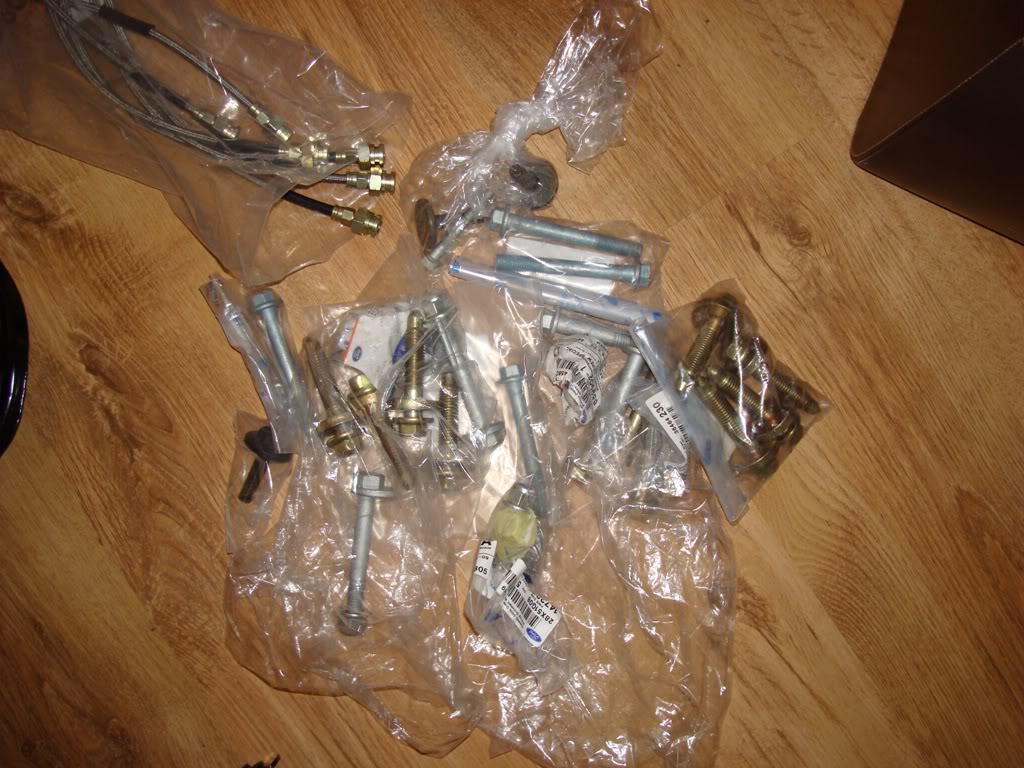
Parts
Ford Bolts
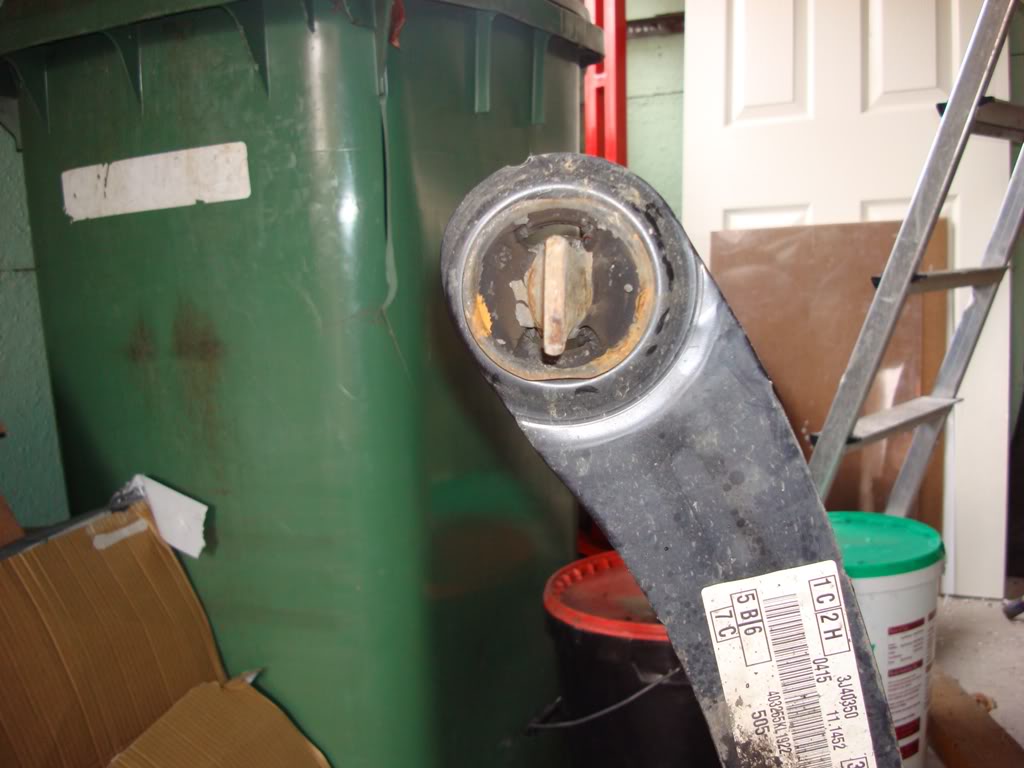
Thats Better
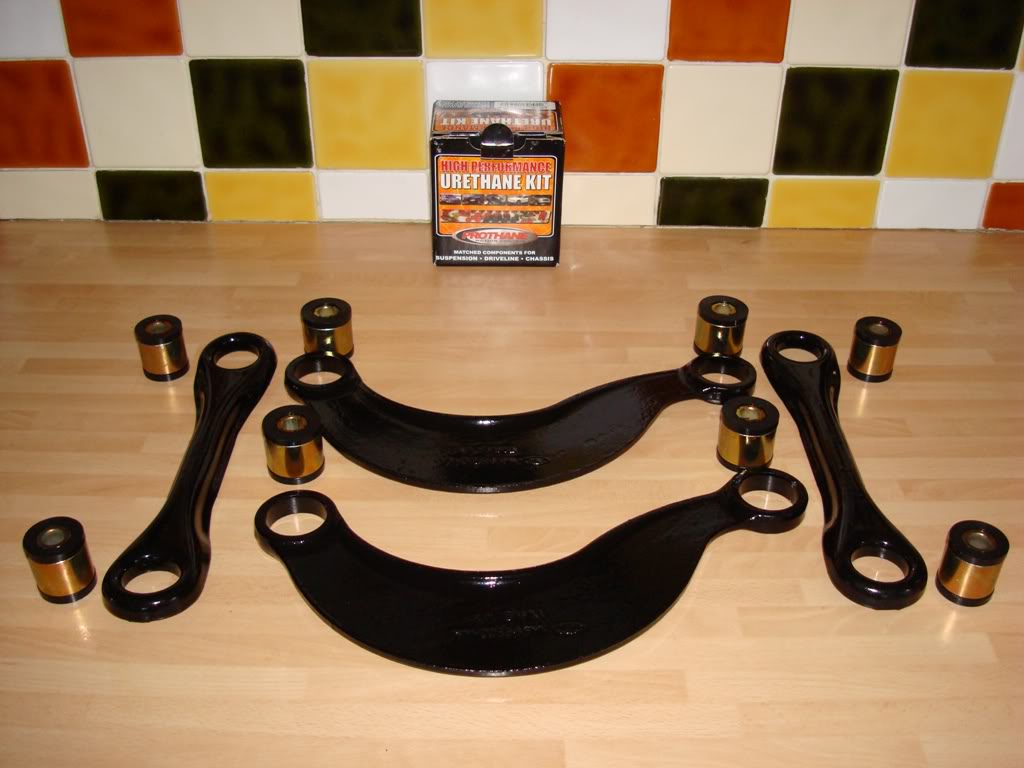
You need a press
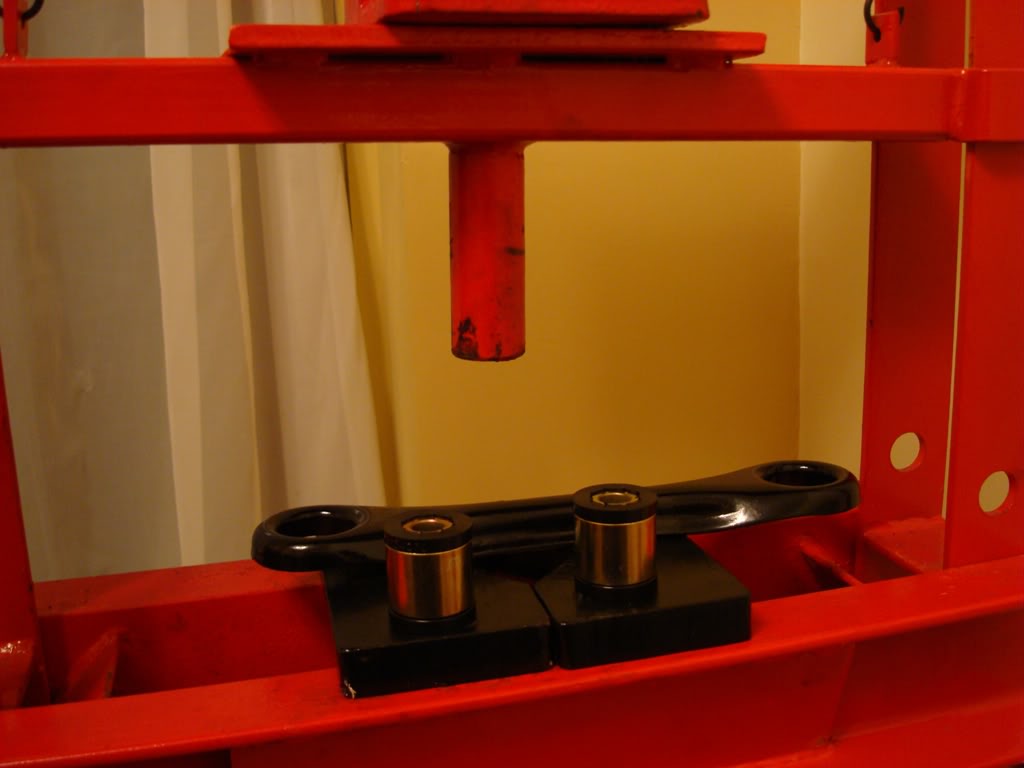
Sleeves have to be pressed in central
Done
Thank You Press
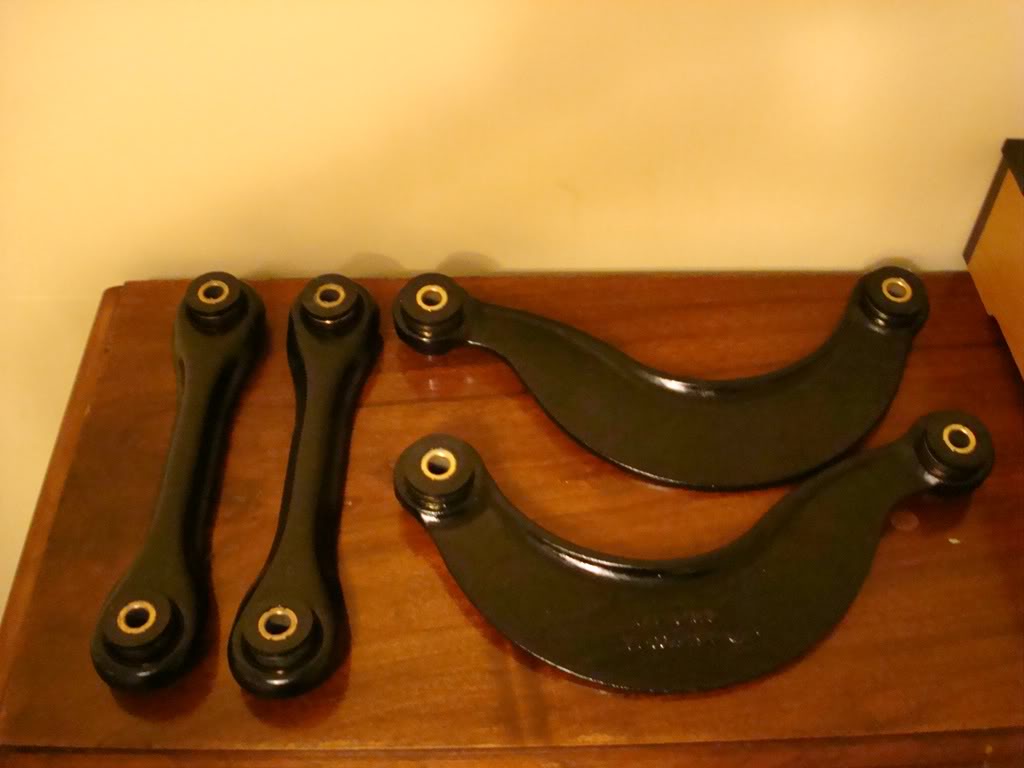
More Bits finished
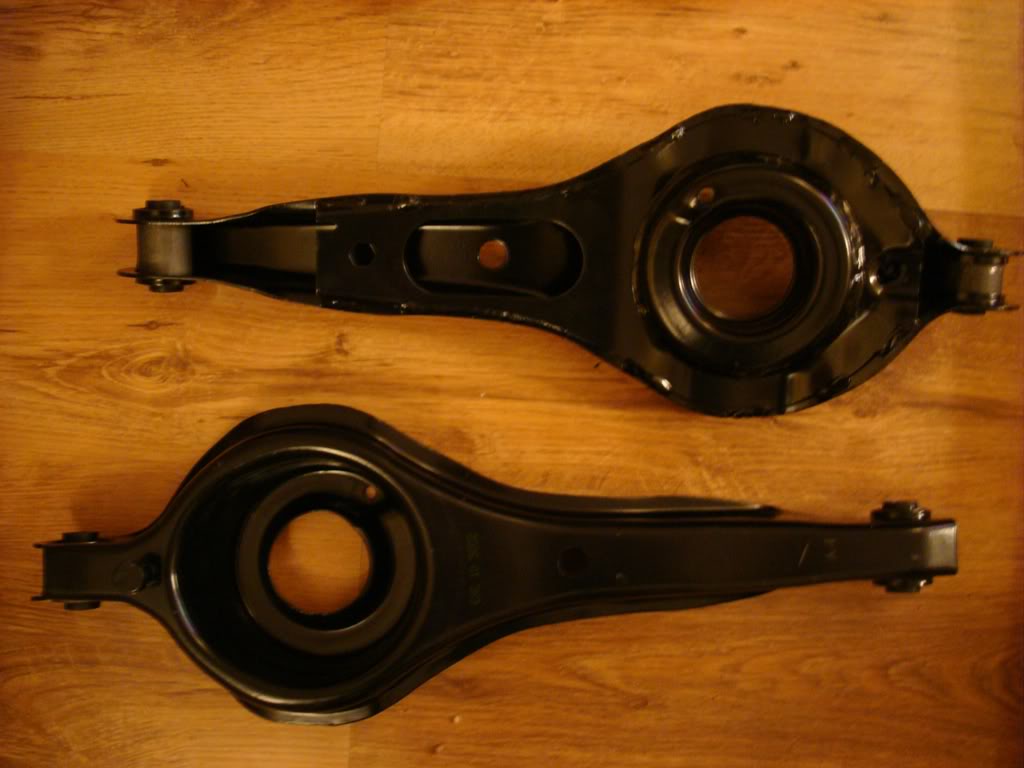
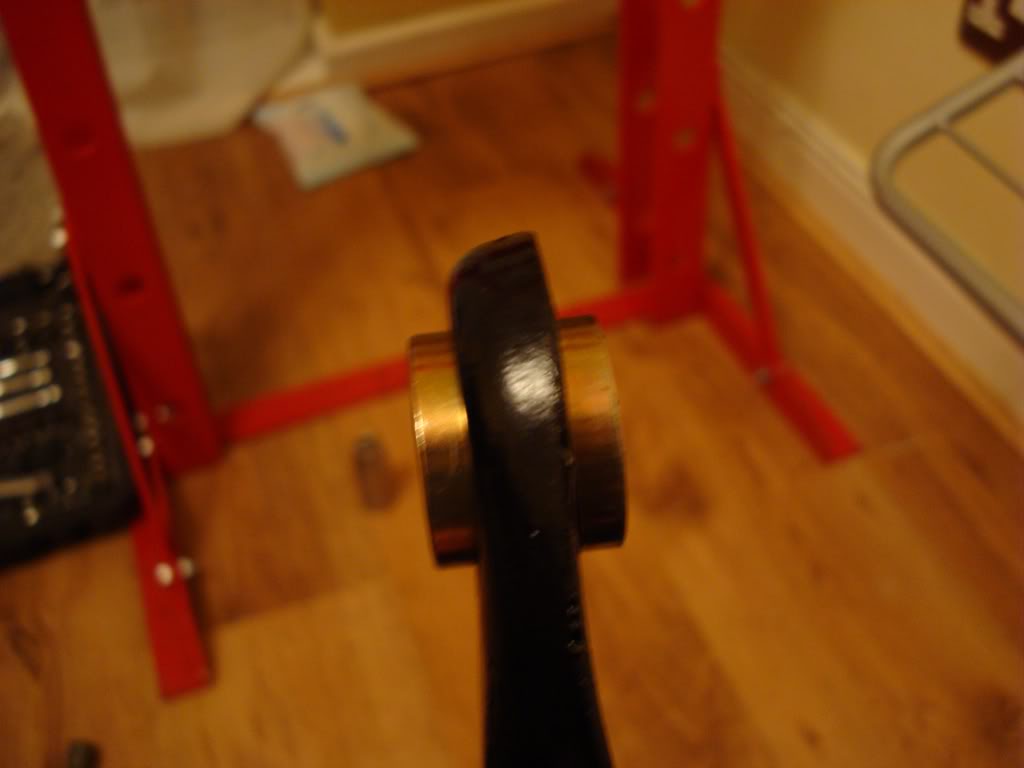
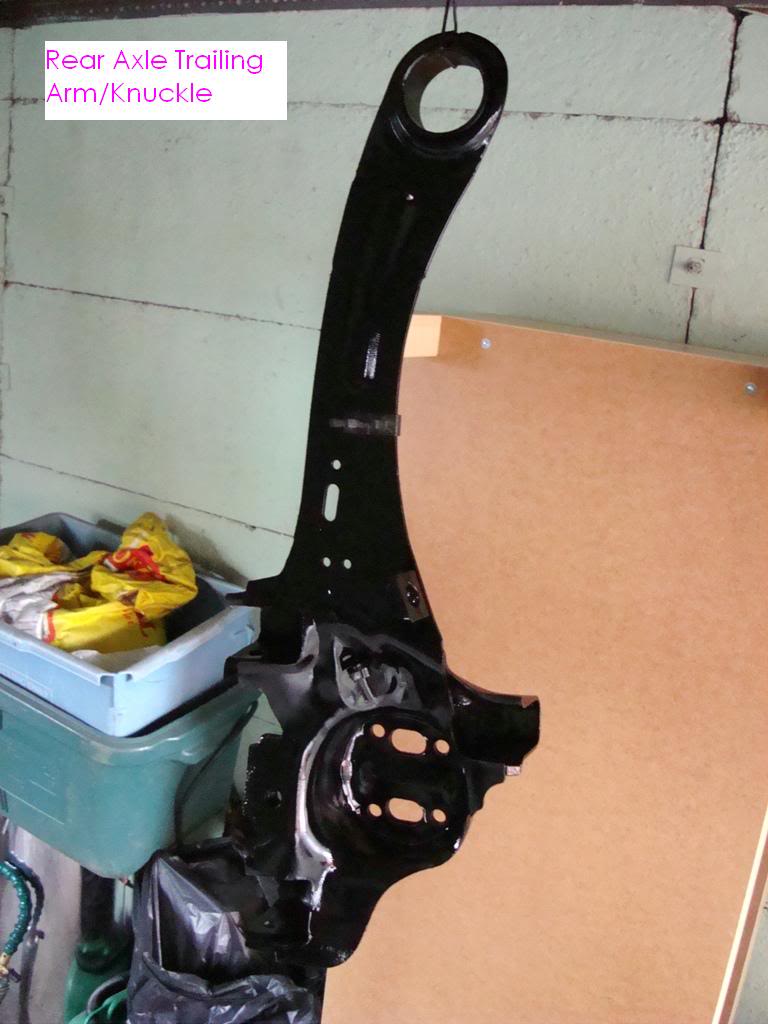
Trailing Arms, the text is because i was going to write a guide but never got round to it.
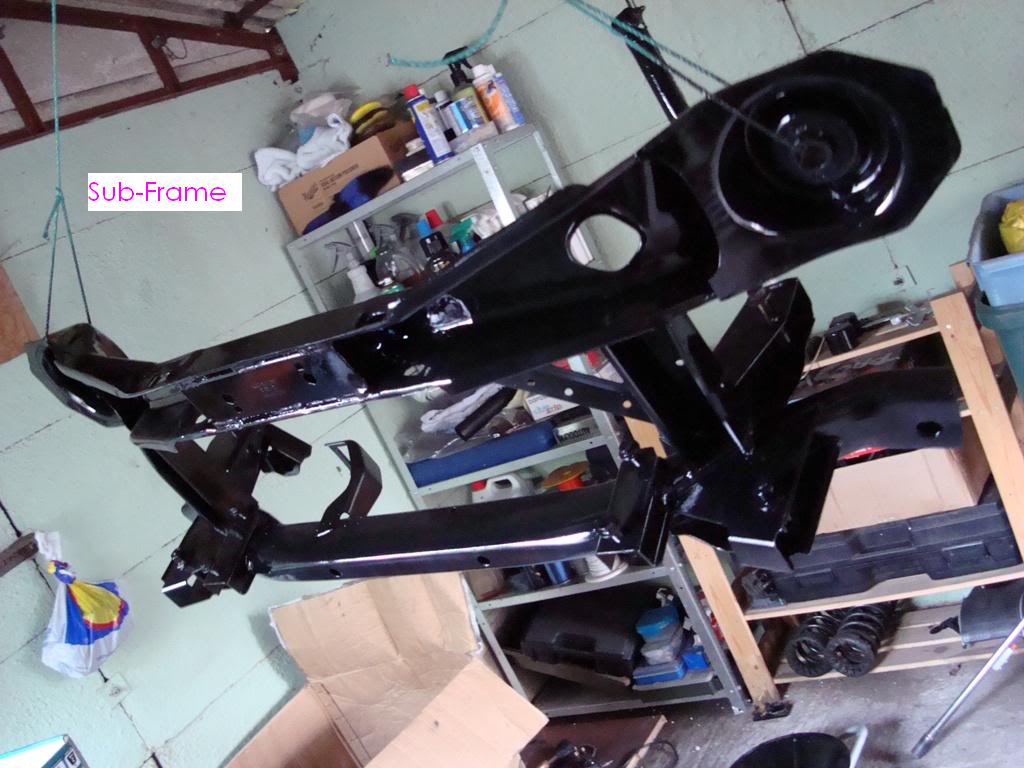
The Big Bit
All back together again
Yes the missus allows me to work in the lounge
More Rust
Horrid Rust
Strip Down Begun
Regular MOT fail these ones
New Bushes
Cheapo Arms required Modification
Parts
Ford Bolts
Thats Better
You need a press
Sleeves have to be pressed in central
Done
Thank You Press
More Bits finished
Trailing Arms, the text is because i was going to write a guide but never got round to it.
The Big Bit
All back together again
Yes the missus allows me to work in the lounge
I've found that life I needed.. It's HERE!!
iTrader: (1)
Joined: Feb 2008
Posts: 1,274
Likes: 2
From: Leicester
Because i had to cut them into little tiny pieces to get them off the subframe.
When the bolts sieze up in the bushes you will eventually tear the bush away from the arm trying to undo the dam things, your then left with a bush attached to a bolt and no way of undoing the bolts the only solution was to cut them off piece by piece lol
So i bought new arms and pressed out the brand new bushes and replaced them with polybushes.
You have to be super careful with these bushes as you can easily deform the seat for the bush sleeve, if you deform the seat the new sleeve will literally drop right through the hole instead of being a friction fit. I did this and had to tack weld the outer sleeves for the bushes to the arm. You have to be very cleaver with what you use to press the bushes out to not deform the arms.
Last edited by Sp3no; Apr 12, 2011 at 02:49 PM.
PassionFord Post Troll
Joined: Aug 2005
Posts: 3,094
Likes: 3
From: Under the car :cry:
i know its a bit late now sp3no but for getting the old bushes out i'd sugest buring the rubber out so your left with just the sleeve and then cut a notch in the sleeve. it will help to not deform the arm any more than it already is from the factory.
if i had an air saw and a press i'd do all my bushes in a heart beat. an angle grinder just cant get into the intricate little spaces to cut the old bolts!
if i had an air saw and a press i'd do all my bushes in a heart beat. an angle grinder just cant get into the intricate little spaces to cut the old bolts!
I've found that life I needed.. It's HERE!!
iTrader: (1)
Joined: Feb 2008
Posts: 1,274
Likes: 2
From: Leicester
I burnt out the rear blade bushes, the stuff a burn bush leaves behind is minging it gets everywhere and smells incredibly toxic. The problems i had with the press bending the arms and stretching the holes was when putting the out sleeves back into the lower control arms, as the sleeve goes through the hole the friction is enough to pull the outer parts towards the inner part, its really tricky to get something between the arm to preven this as due to the shape of the arm it pushes anything you put in there back out again. It hard to explain, it is doable but i fucked it up basically lol

Too many posts.. I need a life!!
Joined: May 2008
Posts: 591
Likes: 1
From: In The Garage
Sp3no - how much was the press and where from if you dont mind me asking? Nice job on your rear subframe by the way, looks fantastic. Oh, and where did your bush kit come from?

Thread
Thread Starter
Forum
Replies
Last Post
Focosmitch
Ford Focus RS Parts for Sale.
1
Jun 2, 2016 06:46 PM
Focosmitch
Ford RS Cosworth Parts for Sale
36
Oct 9, 2015 07:38 PM
155lee
Cars & Parts Wanted.
4
Sep 14, 2015 07:37 PM
atm
General Car Related Discussion.
1
Sep 1, 2015 04:56 PM