s1400 ford ka rally car
 18-09-2013, 01:15 PM
#1
15000
Thread Starter

hi guys
been viewing many projects on this forum for a while so though i would share mine with you guys too
just something i am doing in my spare time for a friend / workmate
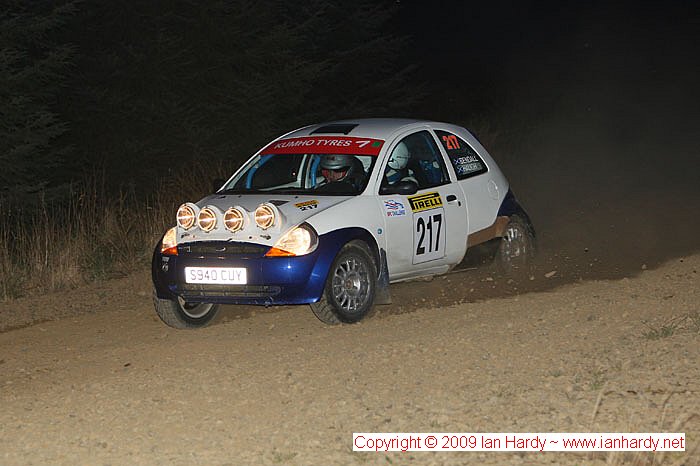
the car was built by chris birbecks and used by luke pinder
it was quite a well specced car
-puma 1400 kit car engine ( basically de stroked 1700 , designed and built by swindon race engines originally )
-pectal t2
-ricardo 6 speed dog box
-s1600 4 pot alcons 304 mm discs
- ka challenge proflex coilovers
- puma bias pedal box
- the rest was standard ka challenge spec
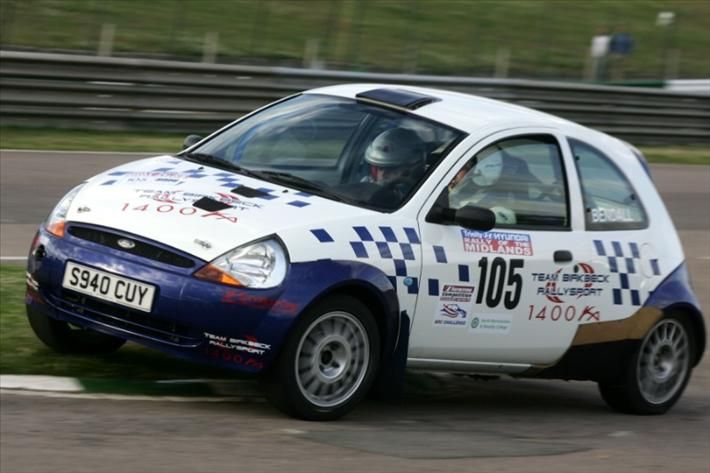
since my friend has converted it to a sadev 5 peed sequential gearbox from fiesta r2 due to poor reliability of 6 speed ricardo
also converted it from standard puma inlet manifold to throttle bodies for better drivability
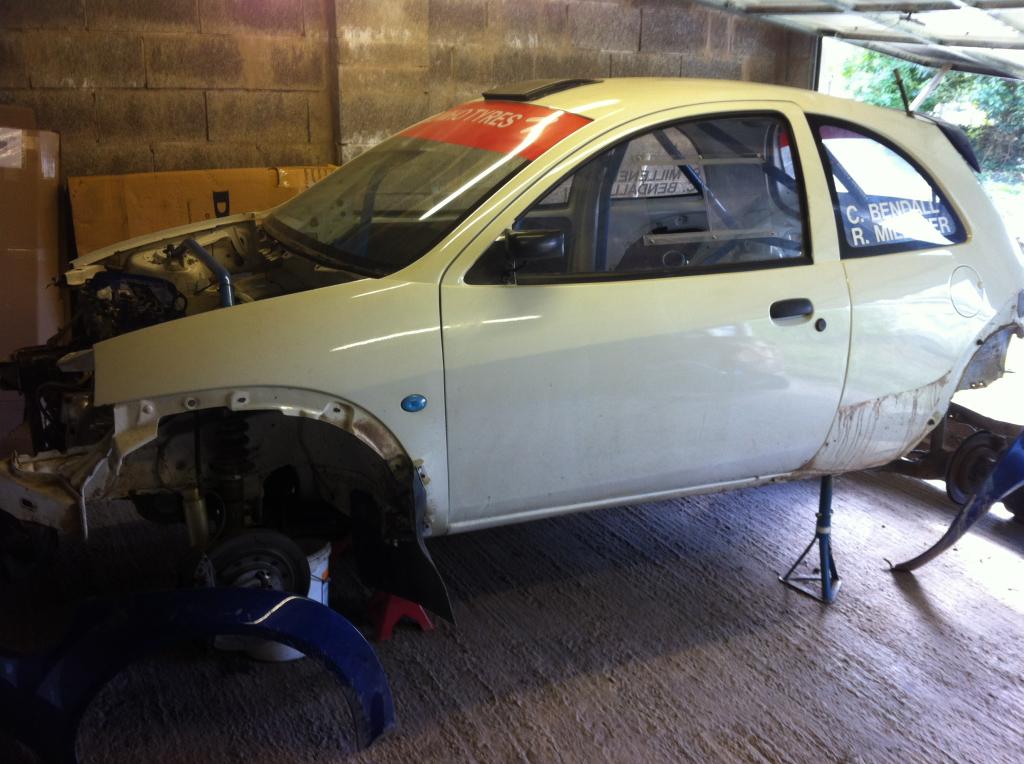
it had a few niggles and issues and had not been properly rebuilt for a while so i offered to help out
and as it normally does it has kinda got of hand !!!

first jobs i was asked to do
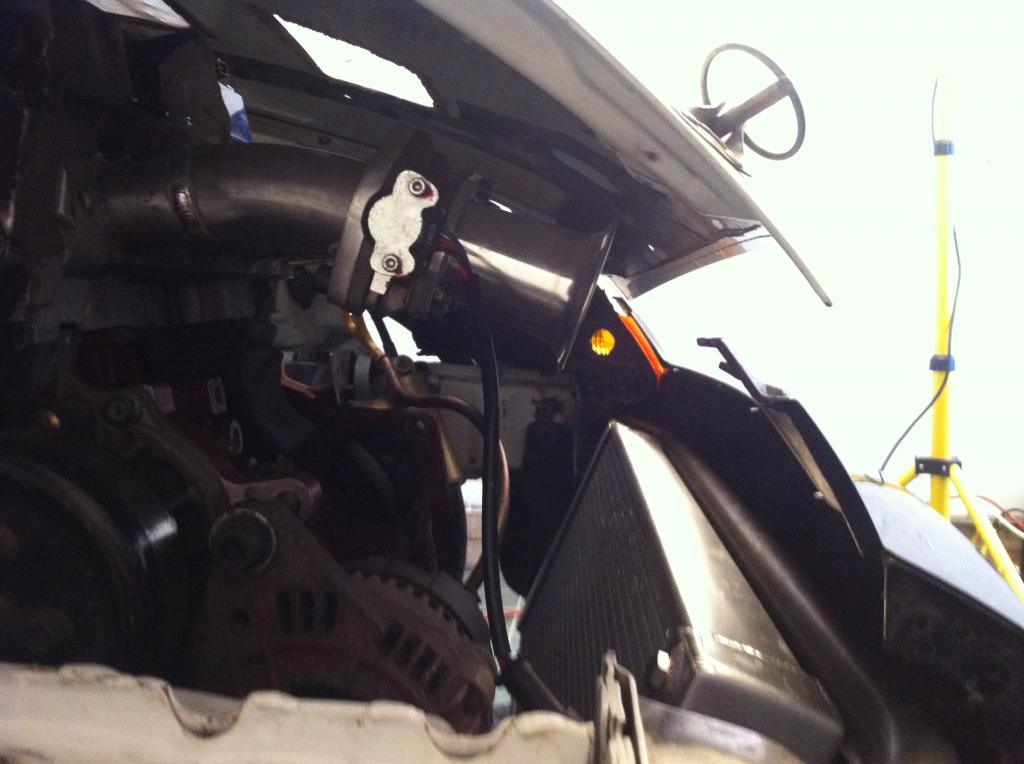
- make an airbox as it was on those terrible individual foam trumpet filters and when you closed the bonnet it basically blocked the trumpets
- also sort re occurring electrical issues
but everywhere i looked it had been bodged or thrown together
things like handbrake sticking on as no bushes or bearing in base
battery moved into boot but used original wires so a bare connection under bonnet
cheap box section seat mounts with nut and bolts holding seat to it
and the list just goes on and on and most of the things were done by a supposed professional rally prep company
i seen some shocking things in my 12 years of working in the motorsport industry but i still get surprised by lack of care or attention to detail
i will add more photo s soon
been viewing many projects on this forum for a while so though i would share mine with you guys too
just something i am doing in my spare time for a friend / workmate
the car was built by chris birbecks and used by luke pinder
it was quite a well specced car
-puma 1400 kit car engine ( basically de stroked 1700 , designed and built by swindon race engines originally )
-pectal t2
-ricardo 6 speed dog box
-s1600 4 pot alcons 304 mm discs
- ka challenge proflex coilovers
- puma bias pedal box
- the rest was standard ka challenge spec
since my friend has converted it to a sadev 5 peed sequential gearbox from fiesta r2 due to poor reliability of 6 speed ricardo
also converted it from standard puma inlet manifold to throttle bodies for better drivability
it had a few niggles and issues and had not been properly rebuilt for a while so i offered to help out
and as it normally does it has kinda got of hand !!!


first jobs i was asked to do
- make an airbox as it was on those terrible individual foam trumpet filters and when you closed the bonnet it basically blocked the trumpets
- also sort re occurring electrical issues
but everywhere i looked it had been bodged or thrown together
things like handbrake sticking on as no bushes or bearing in base
battery moved into boot but used original wires so a bare connection under bonnet
cheap box section seat mounts with nut and bolts holding seat to it
and the list just goes on and on and most of the things were done by a supposed professional rally prep company
i seen some shocking things in my 12 years of working in the motorsport industry but i still get surprised by lack of care or attention to detail
i will add more photo s soon

The following users liked this post:
Clunster (12-02-2023)
18-09-2013, 07:24 PM
#3
10K+ Poster!!

Looks awesome  Will keep an eye out for updates.
Will keep an eye out for updates.
19-09-2013, 07:02 AM
#5
15000
Thread Starter
19-09-2013, 07:13 AM
#6
19-09-2013, 08:51 AM
#7
Wahay!! I've lost my Virginity!!

Join Date: Mar 2011
Location: somewhere
Posts: 70
Likes: 0
Received 0 Likes
on
0 Posts
hi guys
been viewing many projects on this forum for a while so though i would share mine with you guys too
just something i am doing in my spare time for a friend / workmate
the car was built by chris birbecks and used by luke pinder
it was quite a well specced car
-puma 1400 kit car engine ( basically de stroked 1700 , designed and built by swindon race engines originally )
-pectal t2
-ricardo 6 speed dog box
-s1600 4 pot alcons 304 mm discs
- ka challenge proflex coilovers
- puma bias pedal box
- the rest was standard ka challenge spec
since my friend has converted it to a sadev 5 peed sequential gearbox from fiesta r2 due to poor reliability of 6 speed ricardo
also converted it from standard puma inlet manifold to throttle bodies for better drivability
it had a few niggles and issues and had not been properly rebuilt for a while so i offered to help out
and as it normally does it has kinda got of hand !!!
first jobs i was asked to do
- make an airbox as it was on those terrible individual foam trumpet filters and when you closed the bonnet it basically blocked the trumpets
- also sort re occurring electrical issues
but everywhere i looked it had been bodged or thrown together
things like handbrake sticking on as no bushes or bearing in base
battery moved into boot but used original wires so a bare connection under bonnet
cheap box section seat mounts with nut and bolts holding seat to it
and the list just goes on and on and most of the things were done by a supposed professional rally prep company
i seen some shocking things in my 12 years of working in the motorsport industry but i still get surprised by lack of care or attention to detail
i will add more photo s soon
I've knownChris Birkbeck for 20 years and have worked on several of his customers cars that he has farmed out to other companies to fix problems that his staff can't fix or have cocked up.
Steve
Trending Topics
19-09-2013, 09:53 PM
#8
15000
Thread Starter
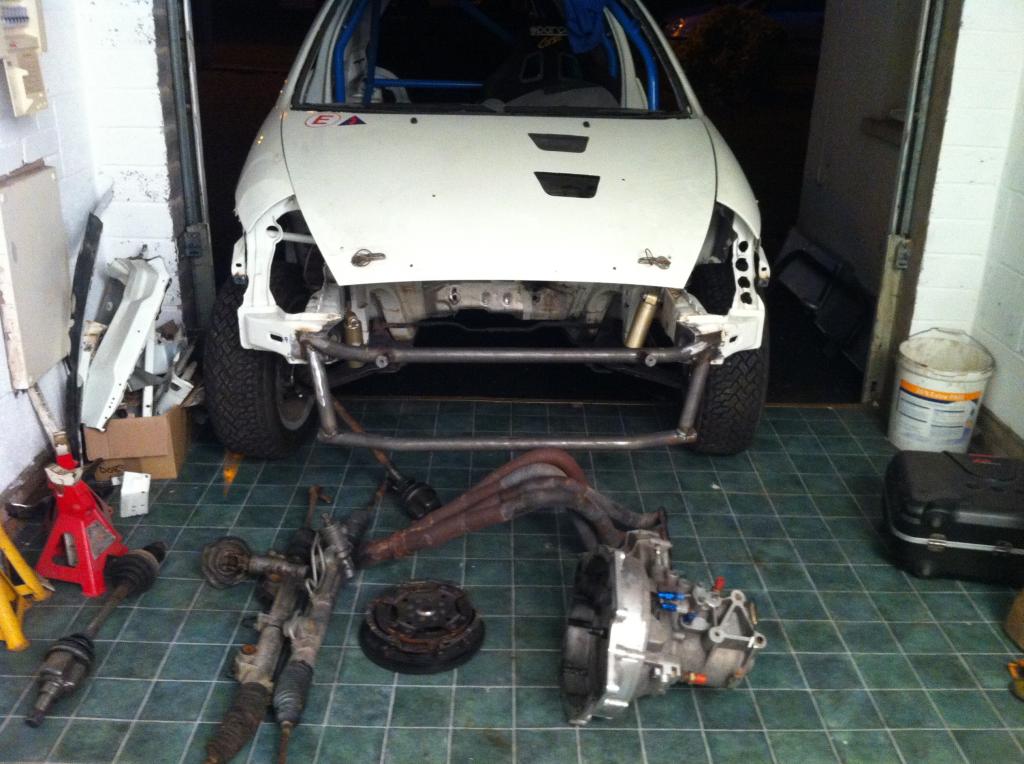
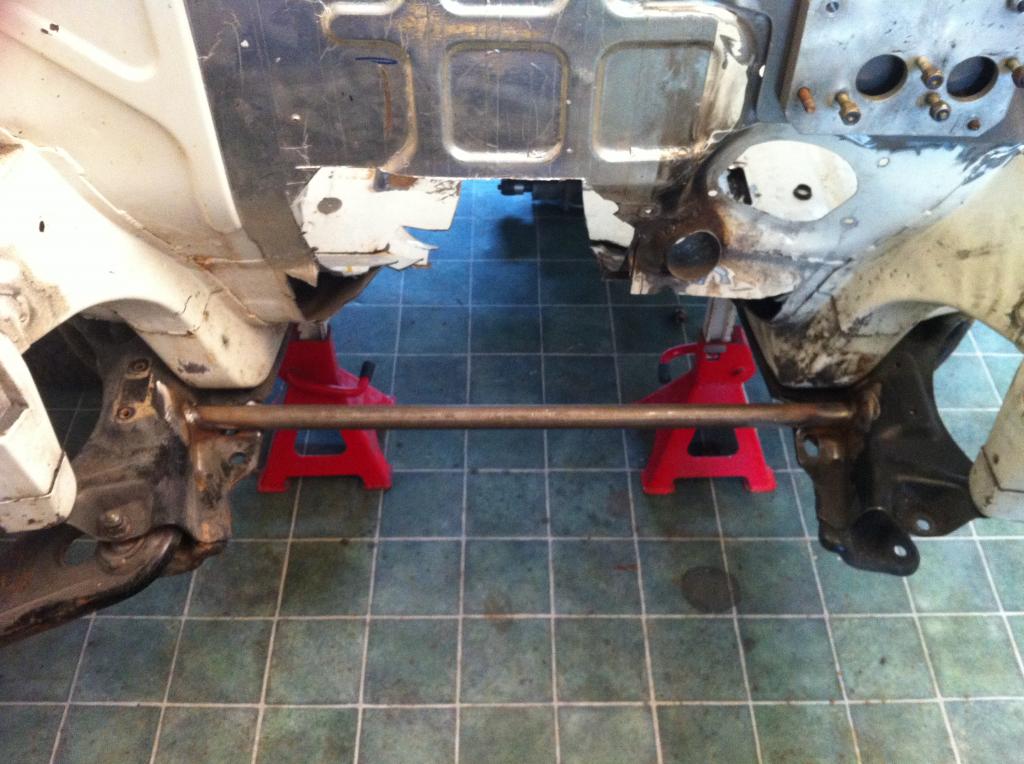
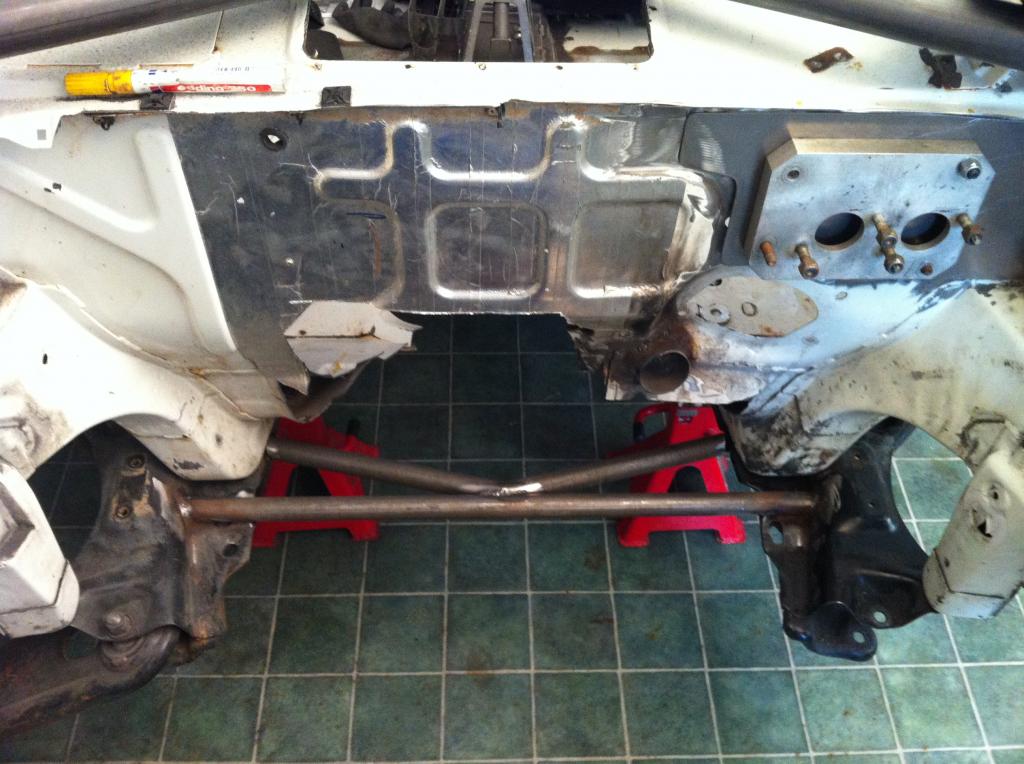
well im not sure whos responsible for the issues so cant really point the finger
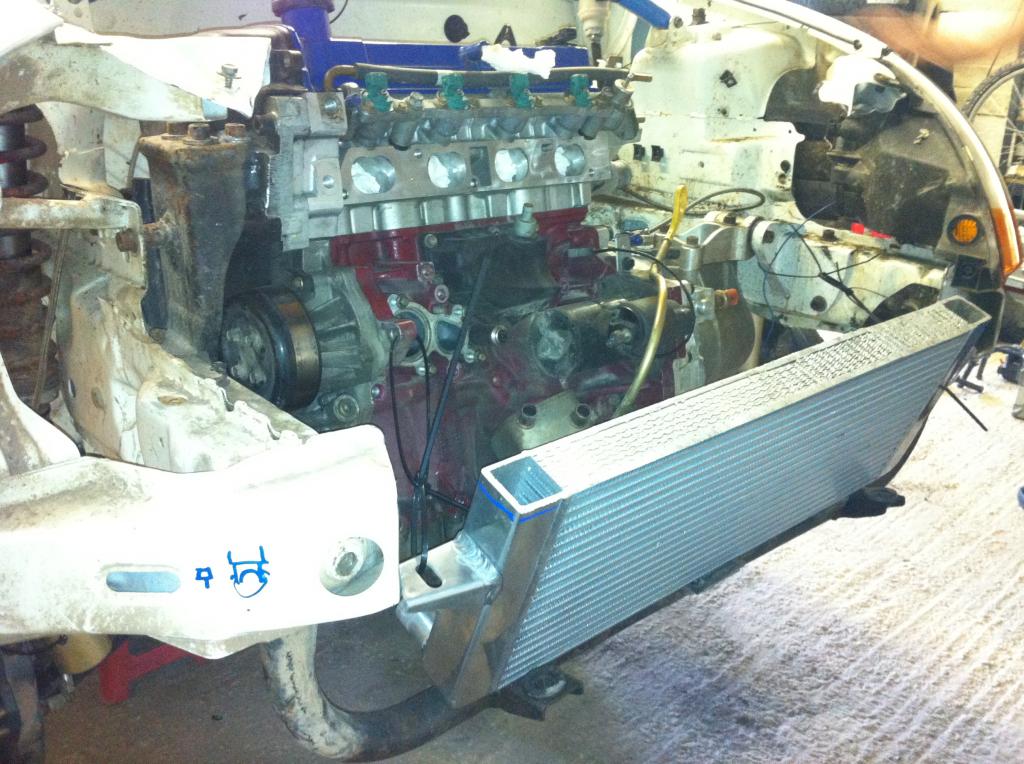
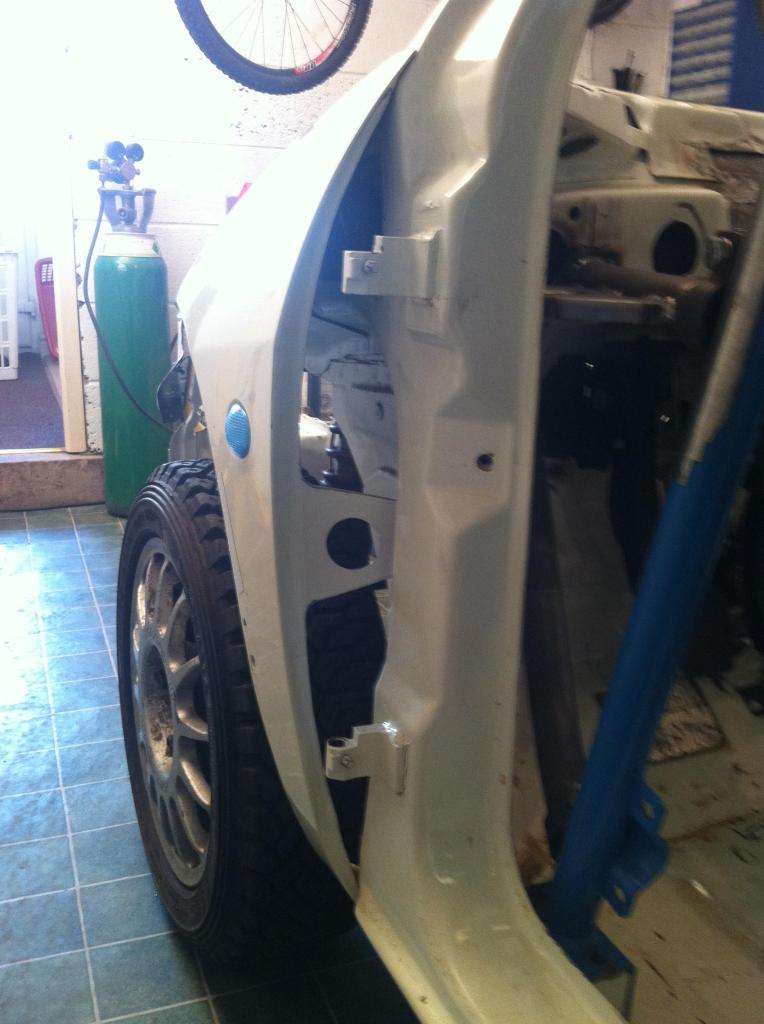
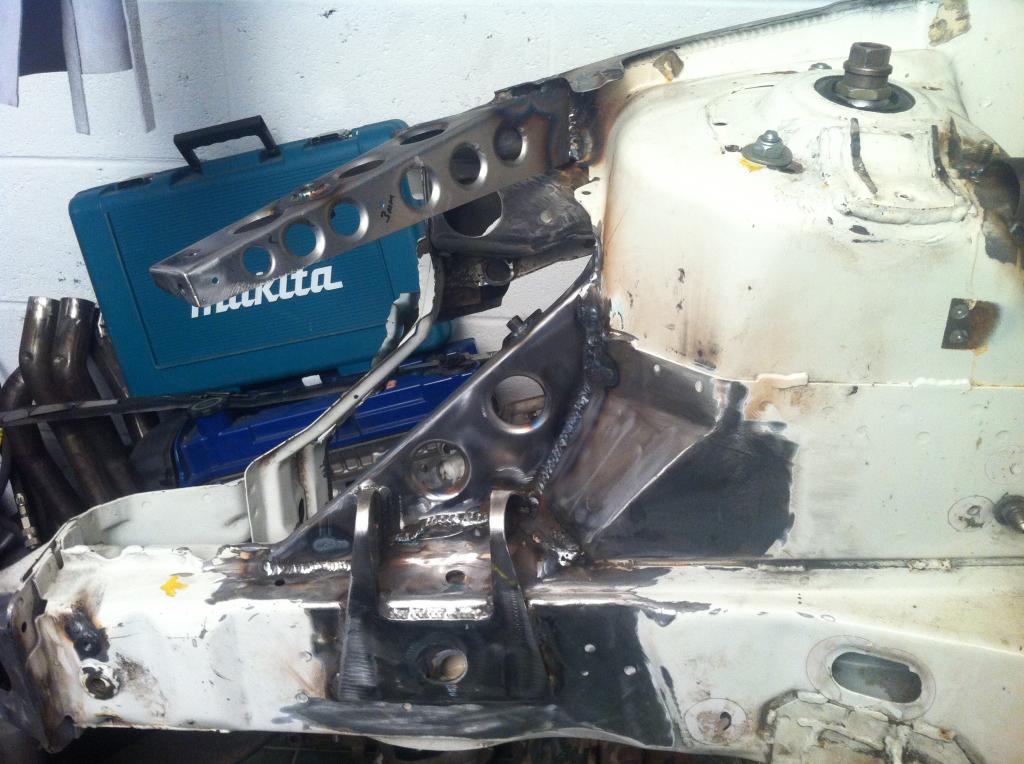
here are some shots of it being stripped
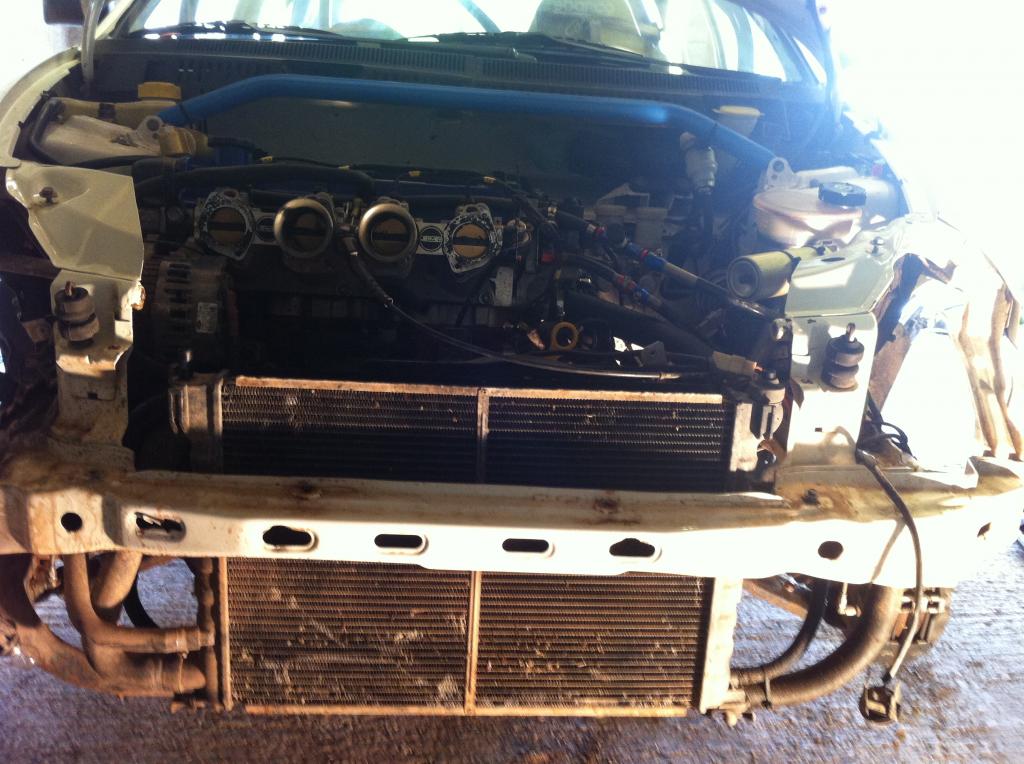
and this was the clearance between trumpets and bonnet

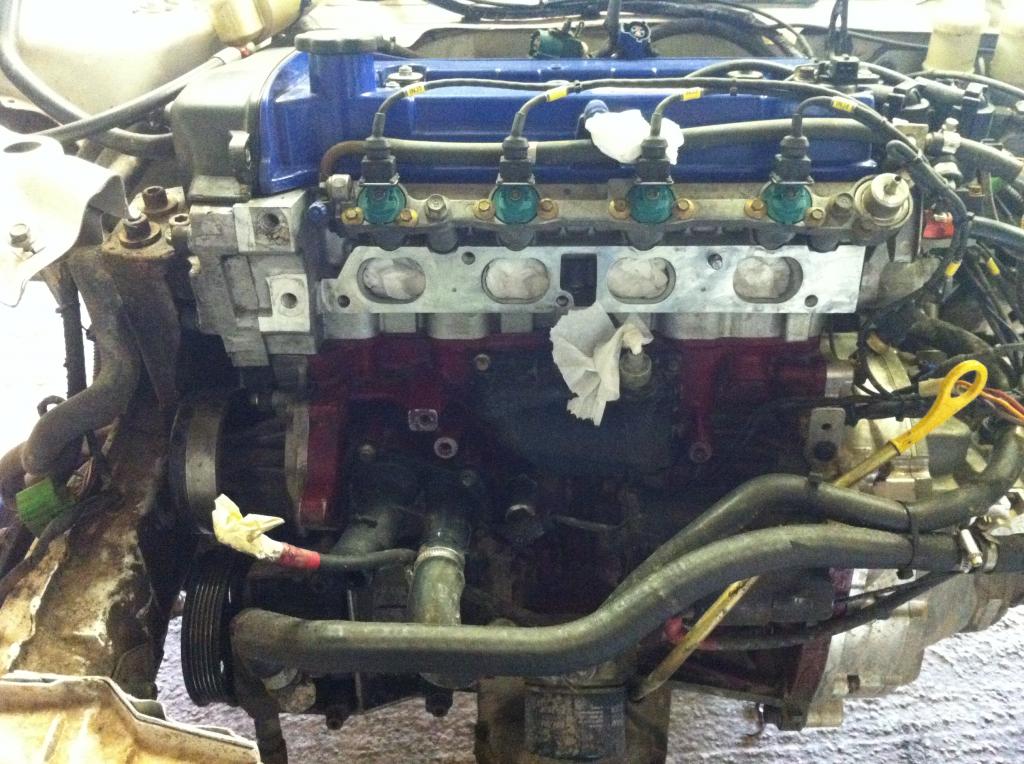
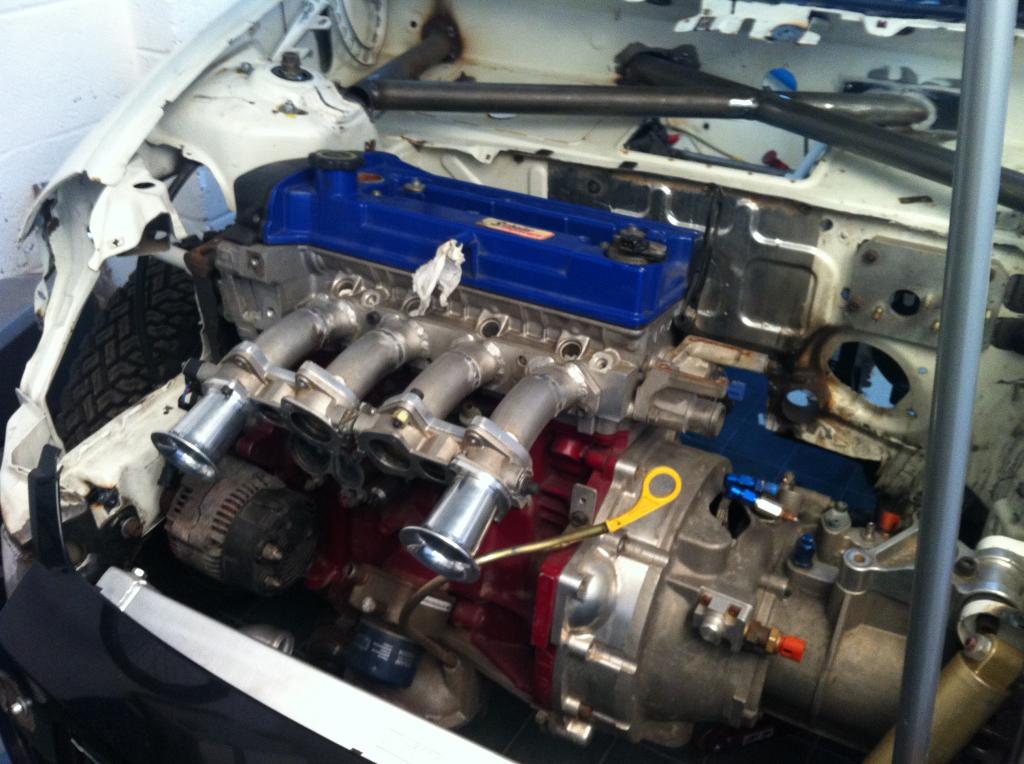
as you can see the inlet manifold gave clearance over alternator but it was shaped like a periscope and was full of silicone gasket so it must of flowed very poorly also can see steel trumpets !!! and spacers

so i then i decided i would have to strip it right back and start again
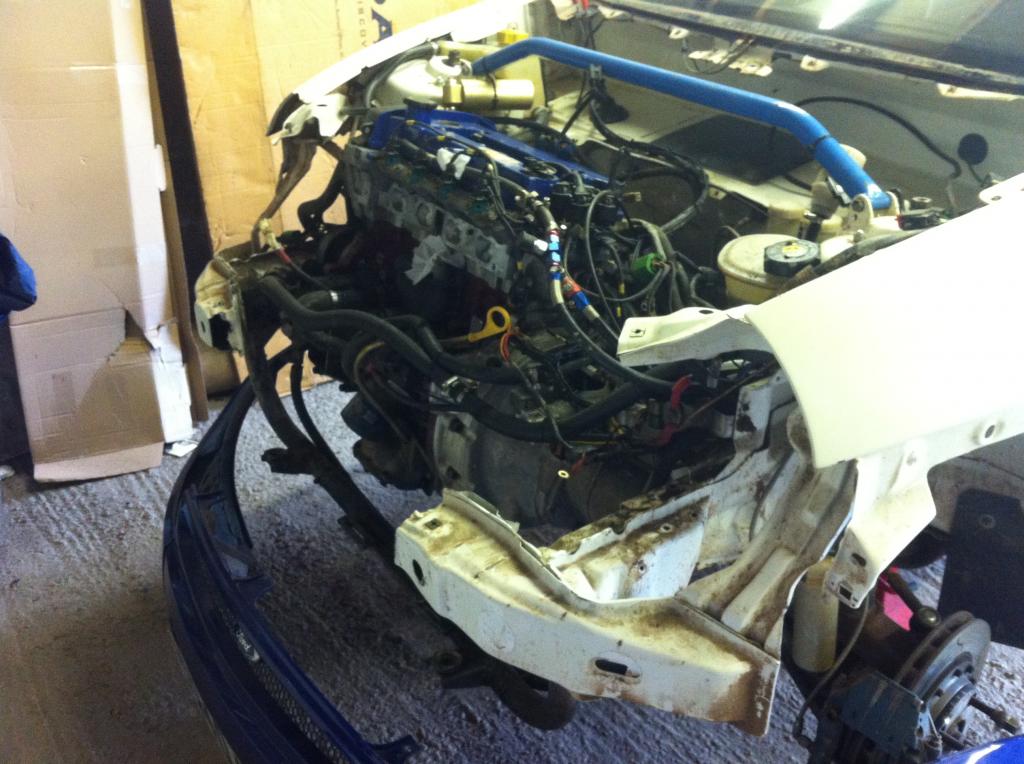
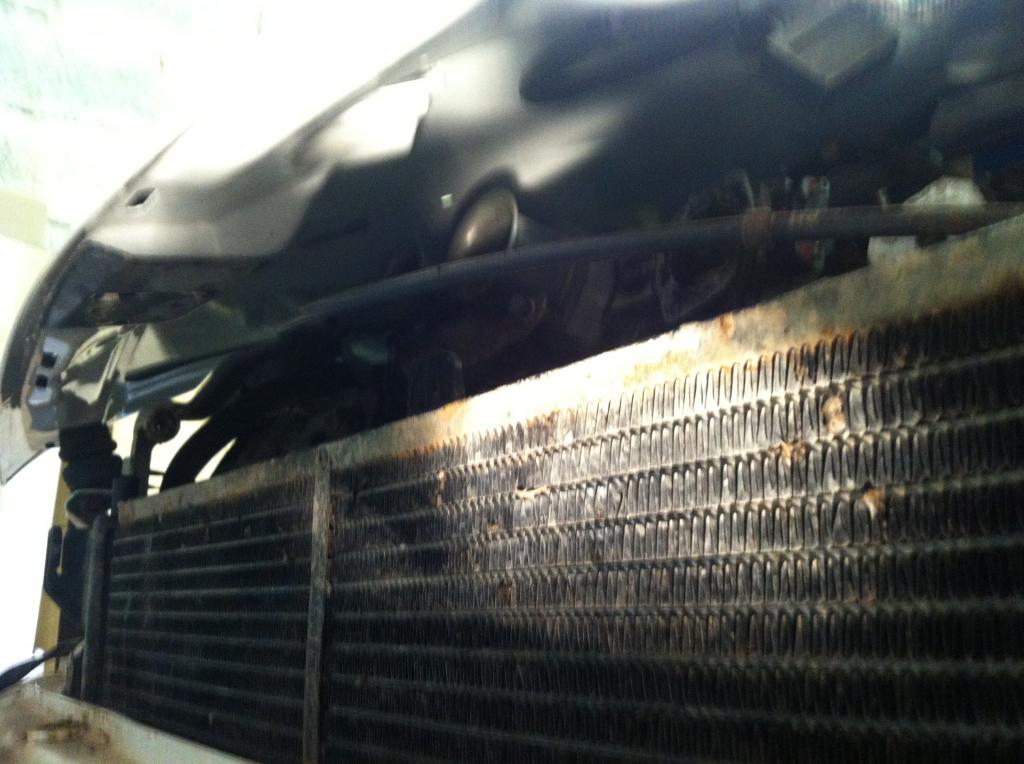
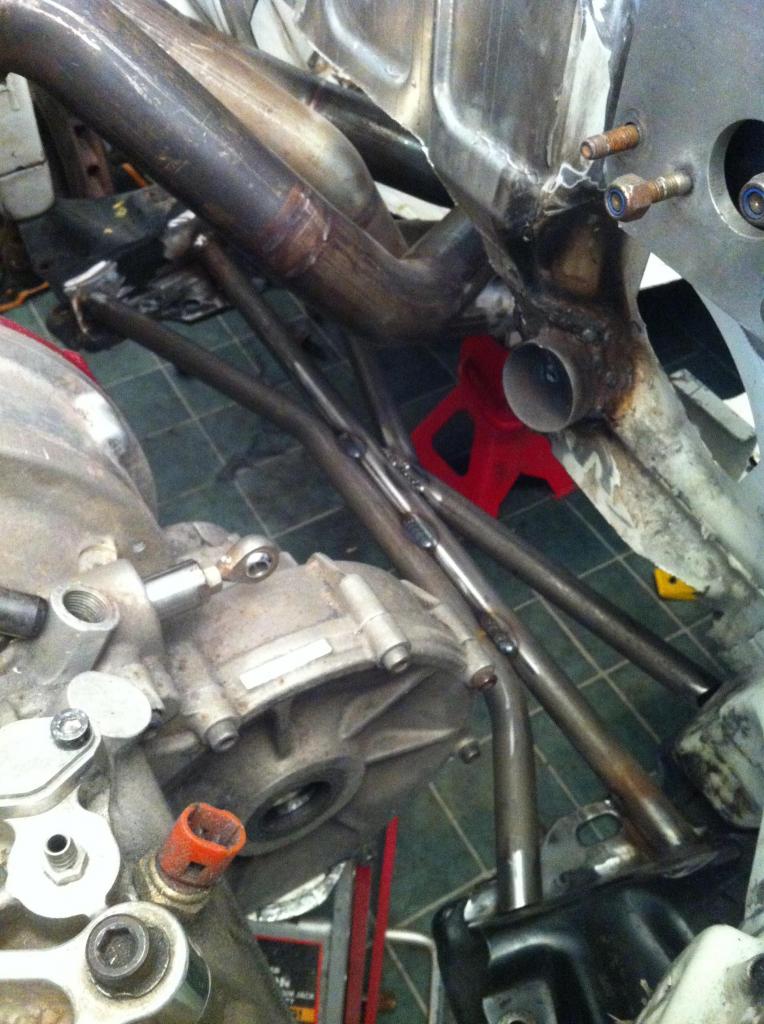
removed the radiator and cut the front panel off
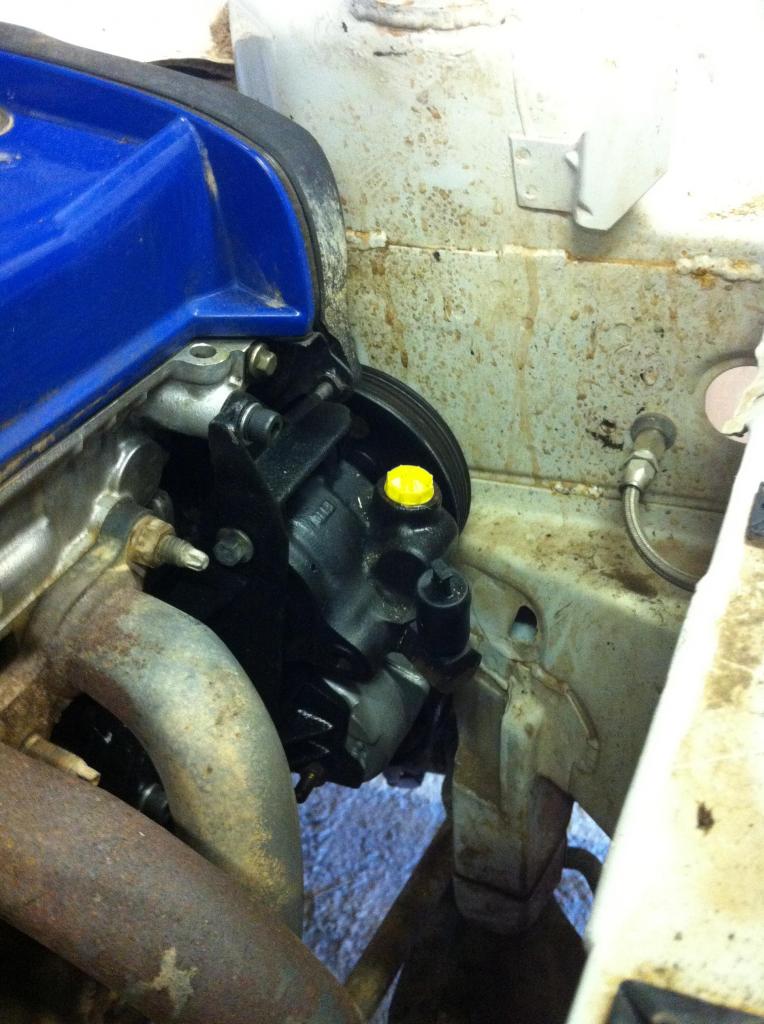
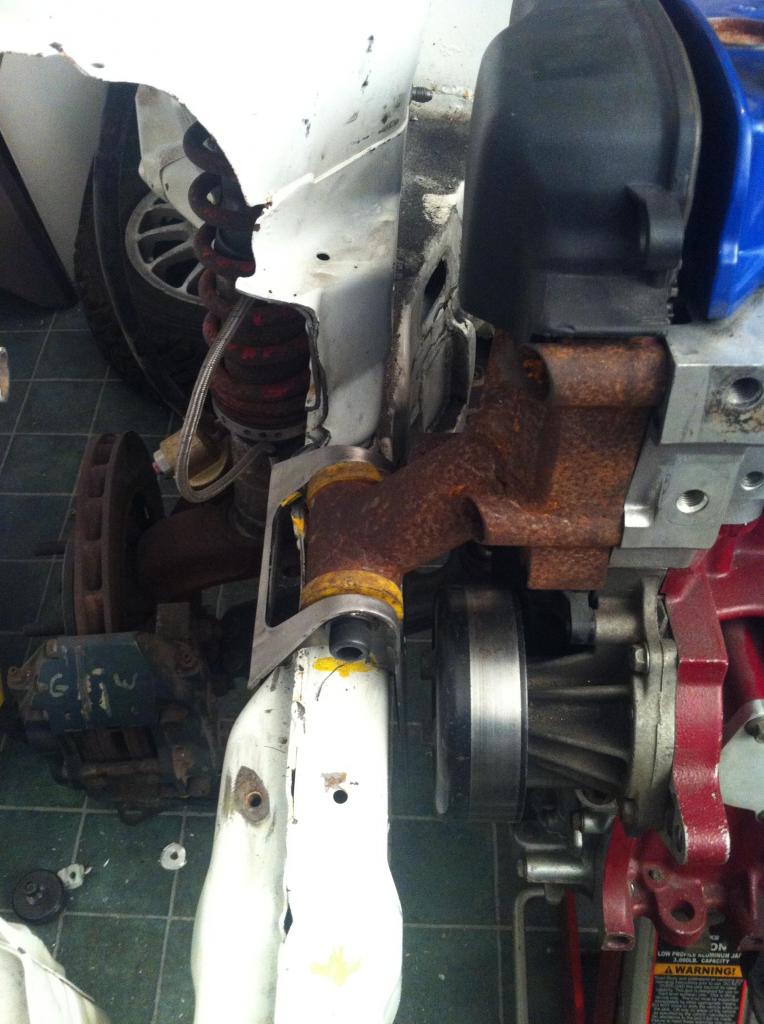
nice pas pump feed pipe going right across engine bay with a joiner in the middle
check out the solid engine mount but gearbox was on polyurethane bushes
puma s1600 engine and box was solid mounted but you just end up welding up cracks in the shell so that has to go
i need to relocate alternator as it was in the way of a different inlet
at this point i tried jenvey direct to head bodies but also hit the bonnet so i started to design my own manifold
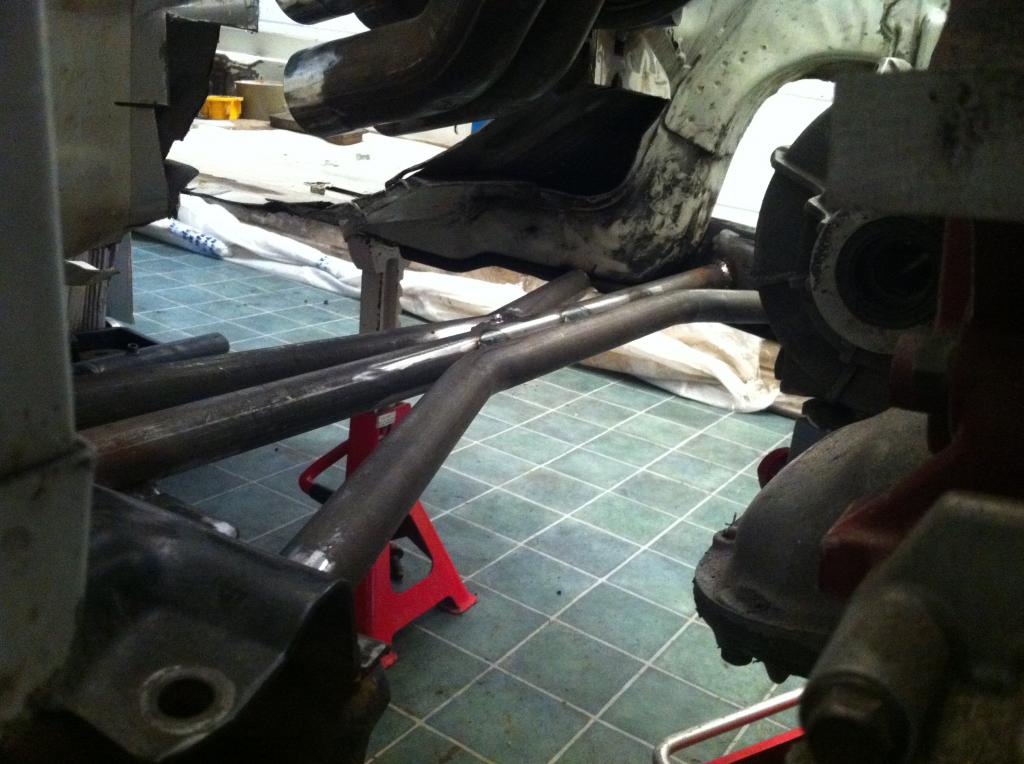
i found i could use a air con model pas bracket which relocated pump to the rear of the engine so now i can fit the alternator lower gaining space for manifold and decent air box
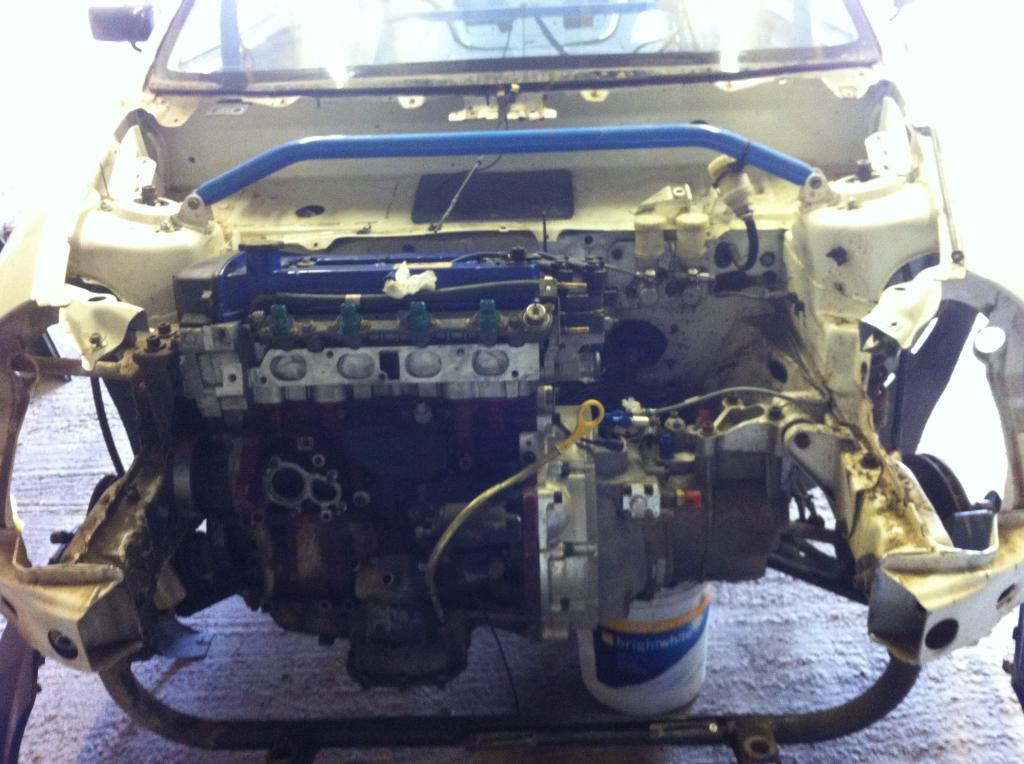
engine bay cleared of crap
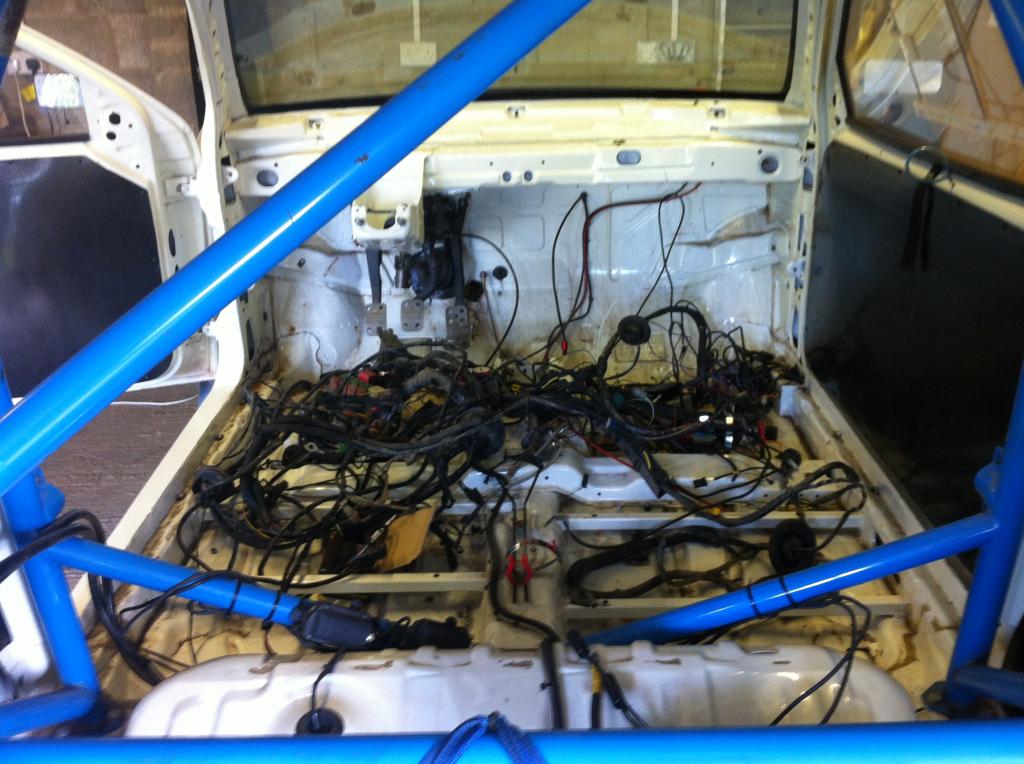
well i dont have many pictures of inside before it was stripped but it had full dash and wires everywhere , everything was nut and bolted and a pain to remove
these photos are from last year and now its in my own garage and a lot has changed but i will slowly upload more pictures and show progress
here are some shots of it being stripped


and this was the clearance between trumpets and bonnet


as you can see the inlet manifold gave clearance over alternator but it was shaped like a periscope and was full of silicone gasket so it must of flowed very poorly also can see steel trumpets !!! and spacers

so i then i decided i would have to strip it right back and start again
removed the radiator and cut the front panel off

nice pas pump feed pipe going right across engine bay with a joiner in the middle


check out the solid engine mount but gearbox was on polyurethane bushes
puma s1600 engine and box was solid mounted but you just end up welding up cracks in the shell so that has to go
i need to relocate alternator as it was in the way of a different inlet
at this point i tried jenvey direct to head bodies but also hit the bonnet so i started to design my own manifold
i found i could use a air con model pas bracket which relocated pump to the rear of the engine so now i can fit the alternator lower gaining space for manifold and decent air box

engine bay cleared of crap

well i dont have many pictures of inside before it was stripped but it had full dash and wires everywhere , everything was nut and bolted and a pain to remove

these photos are from last year and now its in my own garage and a lot has changed but i will slowly upload more pictures and show progress
22-09-2013, 09:16 PM
#11
15000
Thread Starter
So
at this point the owner decided that we would
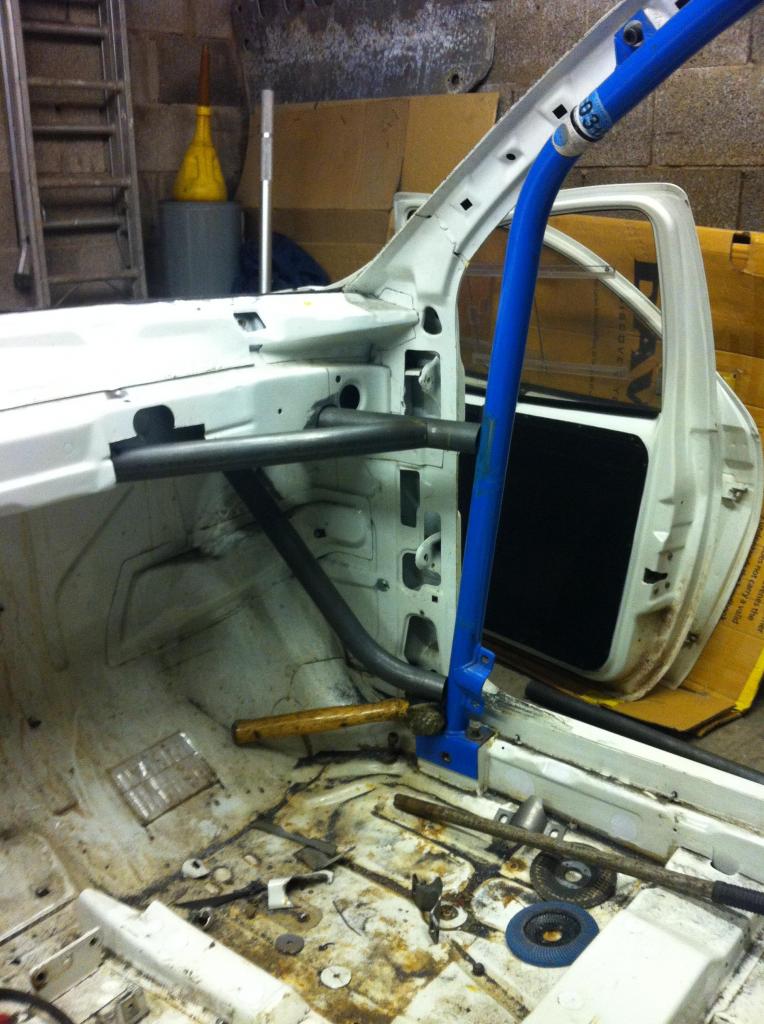
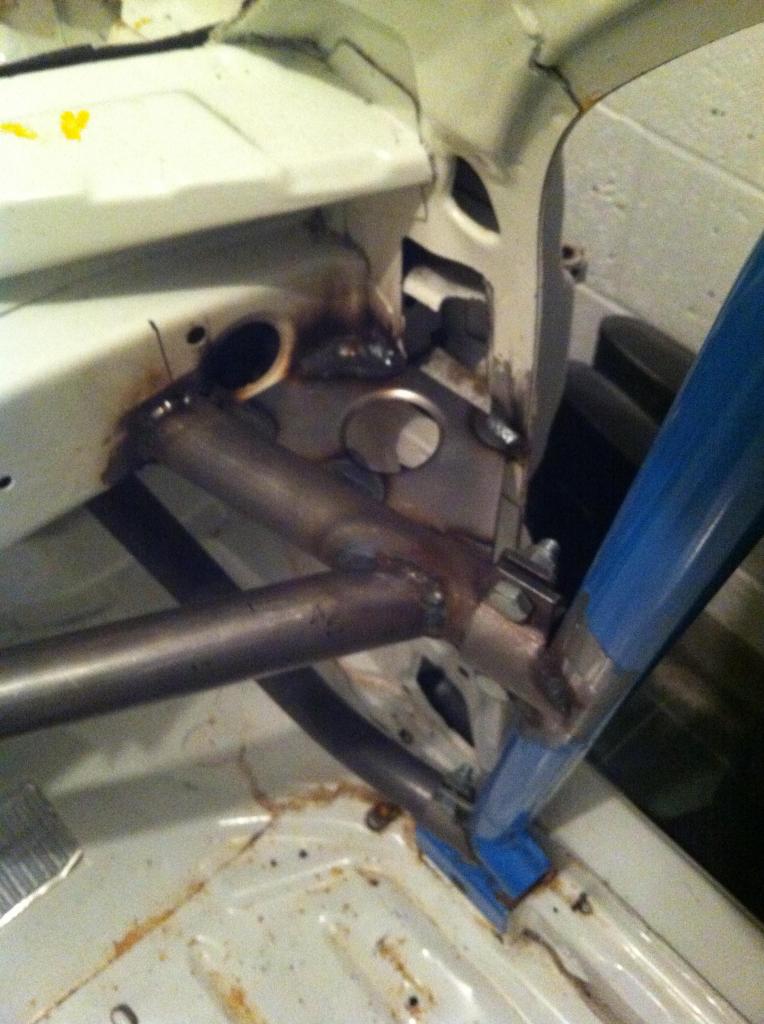
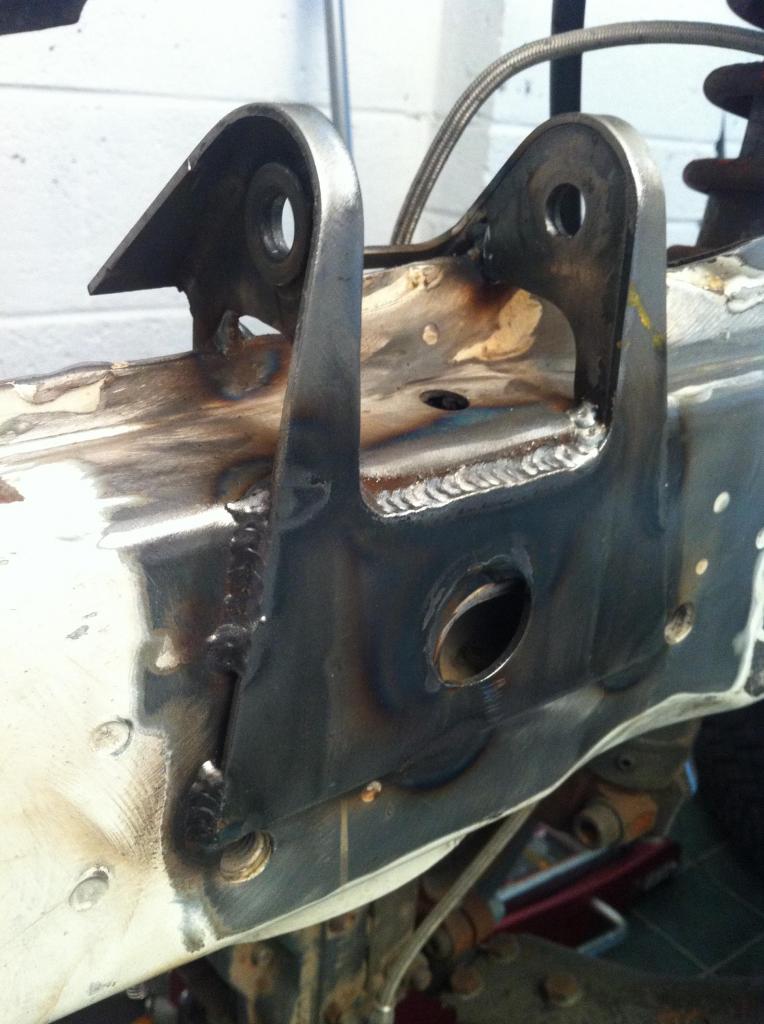
-stiffen up the front end ( which is notoriously weak ) but didnt want to go full weld in cage at that point so some additions instead
-improve driving position as steering column was too high and far away and seat to high
-improve gear change
-improve cooling package
-improve engine and incorporated a new air box but not having hole in bonnet and be able to still use lamp pod
-loss weight
-re-wire
so first up , he bought a cheap cosworth alloy radiator from ebay , which i was shocked how heavy it was and that it was cast including the core !!! cheap and nasty but just bought to cut up and mock up
then on to the front end

so as you can see in the last picture the massive sadev standard gear lever that weighs alot , as he was complaining of poor gear change we changed to a fiesta r2 gear stick as it about 50% lighter and the ratio is different and as this is what the gearbox is out of, it made sense to use the same lever ratio the gearbox was designed for
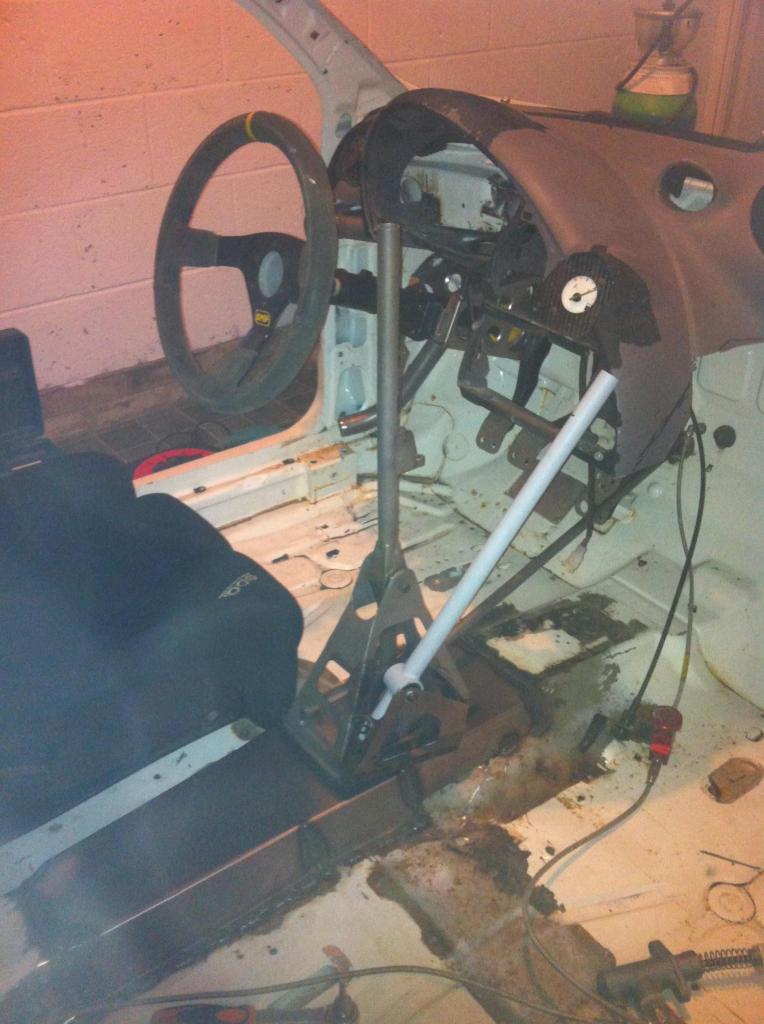
also you can see the crapy steering column mount which needed a bolt on dash support to give it strength , so my plan was to remove dash bar as it weighed a ton and make a new mount that moved the column , made it adjustable and didnt need a bar to support it
new spec
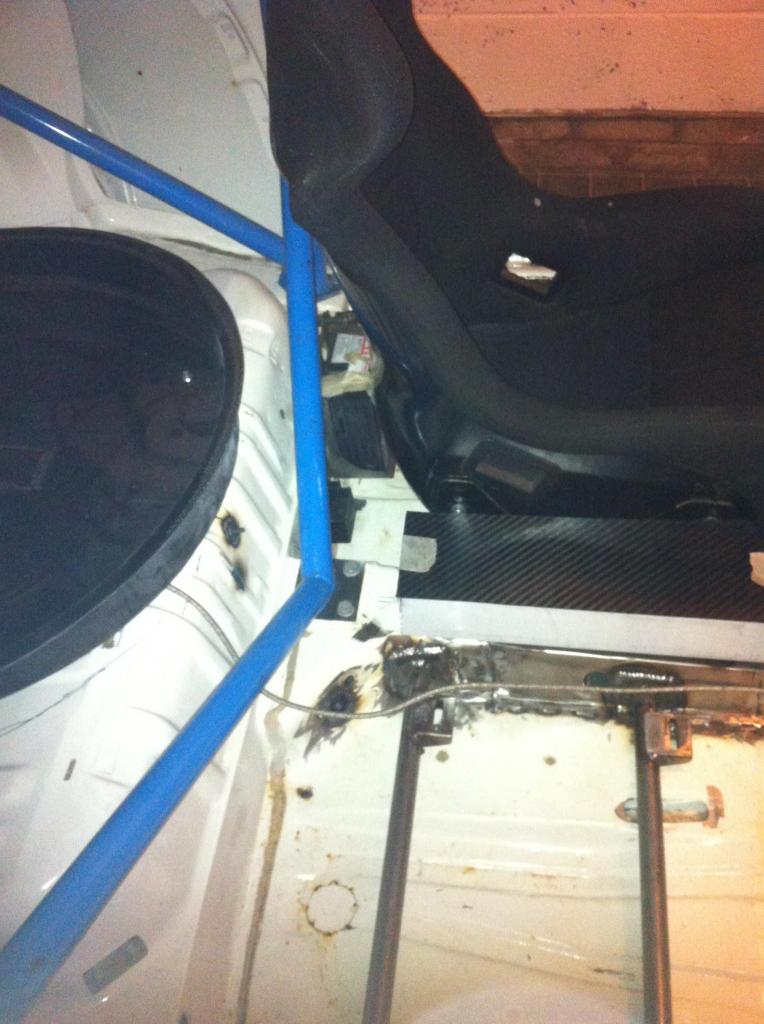
then on to the seat mounts , bit of lightening first original seat boxes removed
and better gear stick mount
quick mock up
cut down dash
well that will do for today think we are up to jan 2013
at this point the owner decided that we would
-stiffen up the front end ( which is notoriously weak ) but didnt want to go full weld in cage at that point so some additions instead
-improve driving position as steering column was too high and far away and seat to high
-improve gear change
-improve cooling package
-improve engine and incorporated a new air box but not having hole in bonnet and be able to still use lamp pod
-loss weight
-re-wire
so first up , he bought a cheap cosworth alloy radiator from ebay , which i was shocked how heavy it was and that it was cast including the core !!! cheap and nasty but just bought to cut up and mock up

then on to the front end


so as you can see in the last picture the massive sadev standard gear lever that weighs alot , as he was complaining of poor gear change we changed to a fiesta r2 gear stick as it about 50% lighter and the ratio is different and as this is what the gearbox is out of, it made sense to use the same lever ratio the gearbox was designed for
also you can see the crapy steering column mount which needed a bolt on dash support to give it strength , so my plan was to remove dash bar as it weighed a ton and make a new mount that moved the column , made it adjustable and didnt need a bar to support it

new spec


then on to the seat mounts , bit of lightening first original seat boxes removed

and better gear stick mount

quick mock up

cut down dash


well that will do for today think we are up to jan 2013
23-09-2013, 04:44 PM
#13
10K+ Poster!!
Looks great! Nice fabrication work.
23-09-2013, 10:11 PM
#15
15000
Thread Starter
so bit more of a catch up
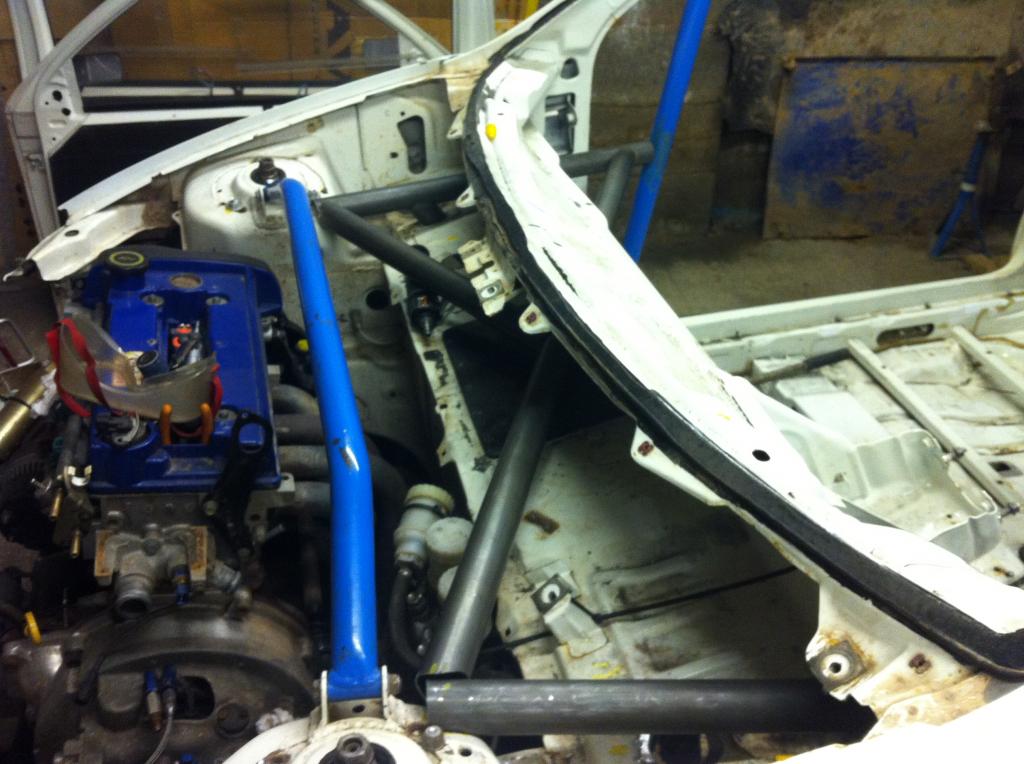
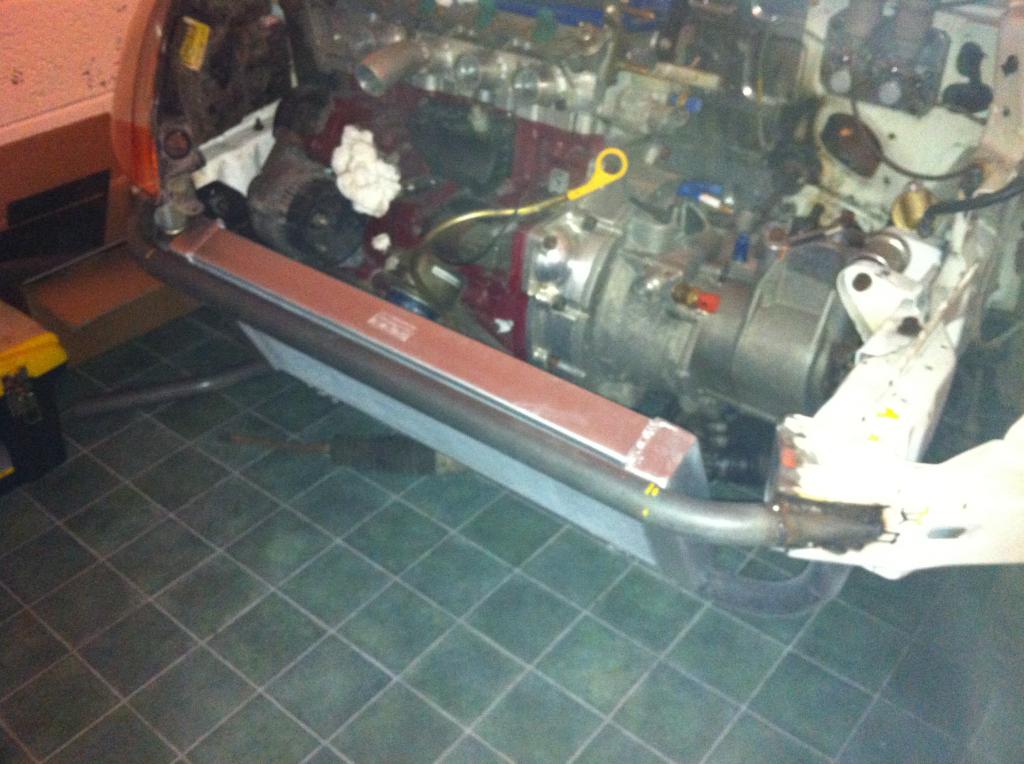
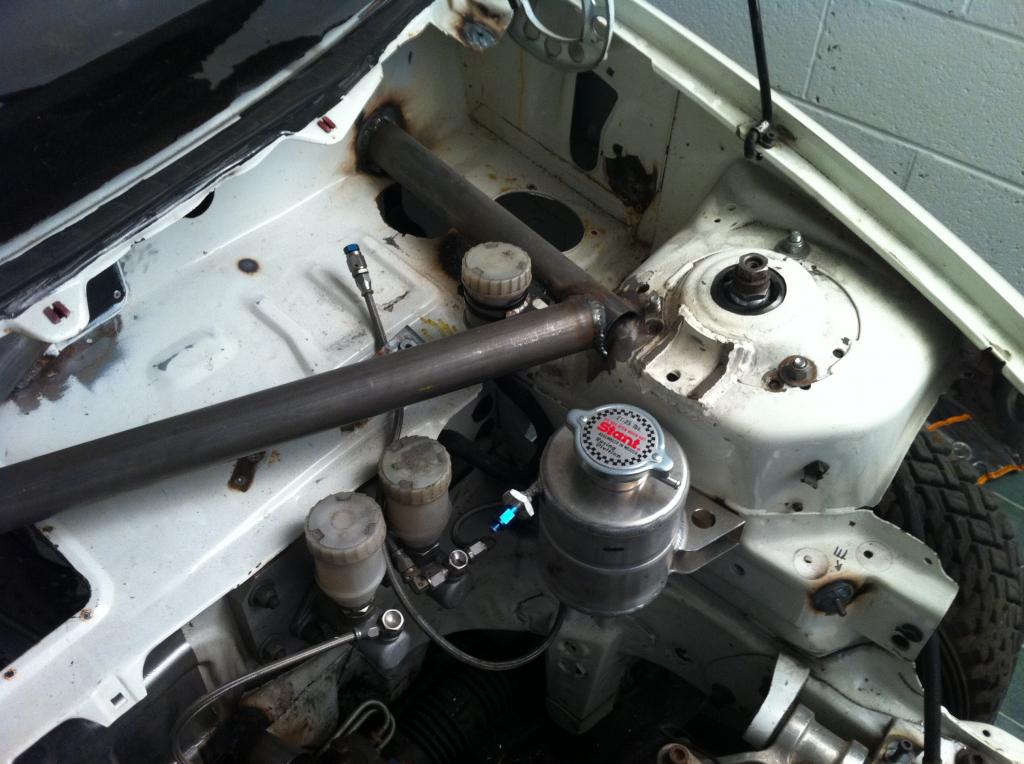
so heres the modified front panel and pro alloy made us a radiator to our dimensions with out pipes as i will weld these on later
so then i wanted to finish off the rest of the front panel from this
to this
designed to mount headlamp , bonnet pin and damper canister saddles
then to lower front bar to mount sump guard which in turn will hold bottom of bumper also centre of the bumper
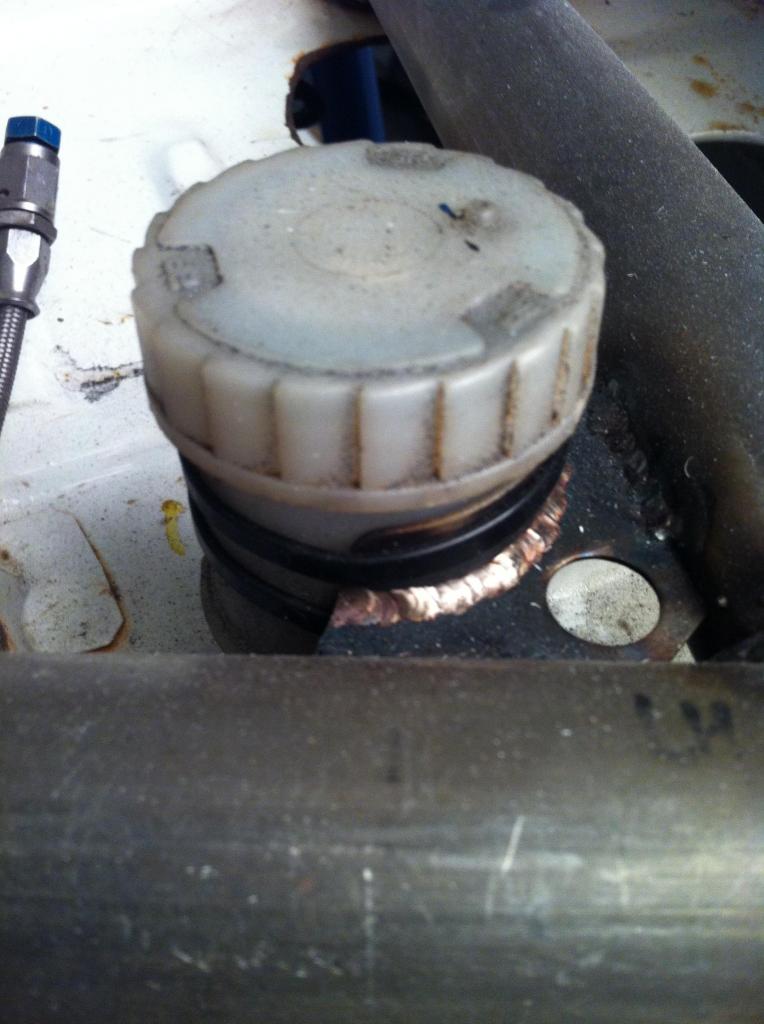
also fitted bosses/brackets to mount varies things , like my shortened header tank ,earth studs and clutch reservoir etc
engine is in and out all the time to mock up but only take s 5 min to fit
bit of lightening
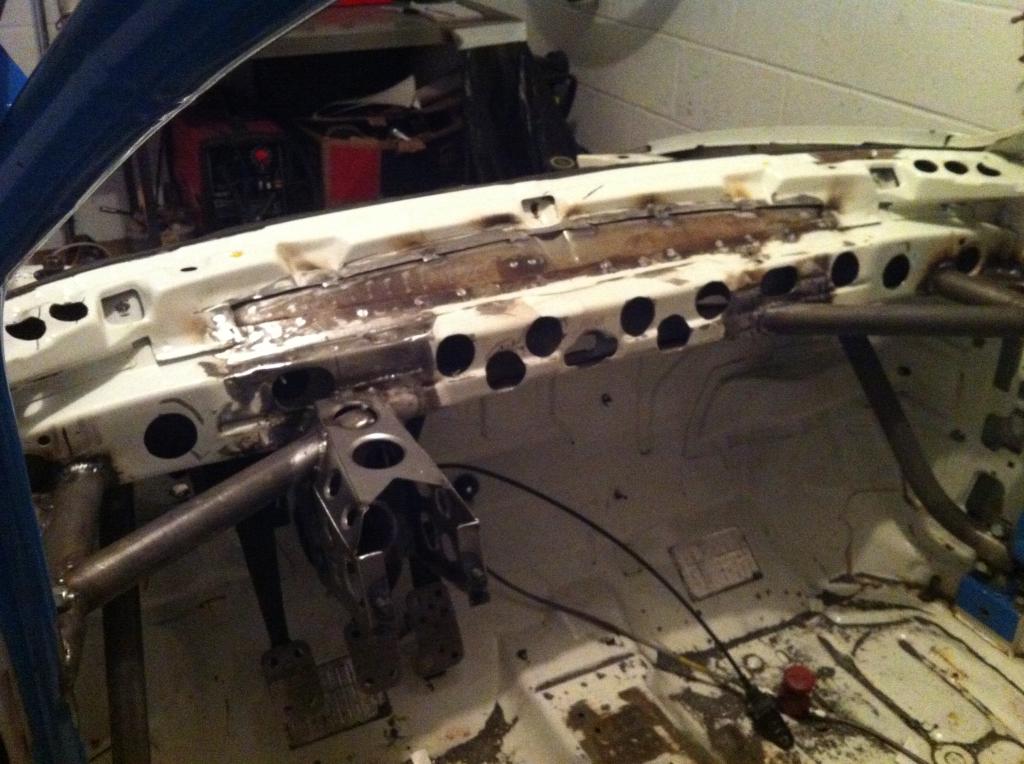
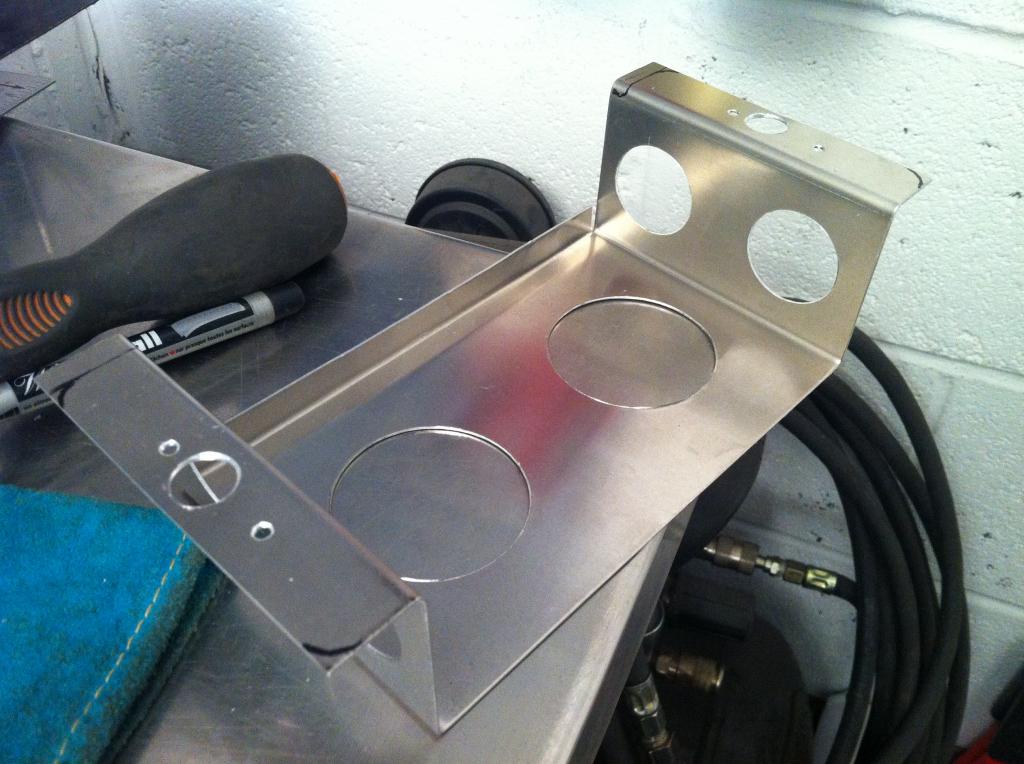
and back inside mounts for smaller battery , master relay ( cut off , isolator ) and new switch panel fuse box( aka the coffin )
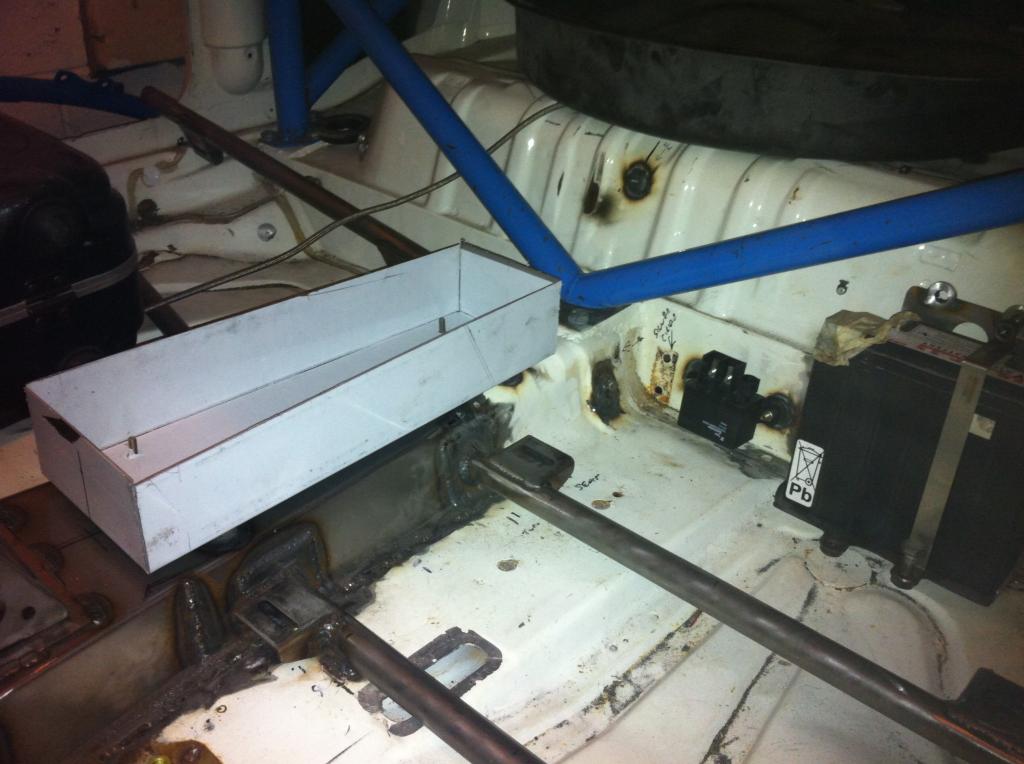
and new tray to hold engine ecu and gearbox ecu , fitted with slide latches for easy removal
well thats enough for tonight
so heres the modified front panel and pro alloy made us a radiator to our dimensions with out pipes as i will weld these on later

so then i wanted to finish off the rest of the front panel from this

to this

designed to mount headlamp , bonnet pin and damper canister saddles
then to lower front bar to mount sump guard which in turn will hold bottom of bumper also centre of the bumper

also fitted bosses/brackets to mount varies things , like my shortened header tank ,earth studs and clutch reservoir etc


engine is in and out all the time to mock up but only take s 5 min to fit

bit of lightening


and back inside mounts for smaller battery , master relay ( cut off , isolator ) and new switch panel fuse box( aka the coffin )


and new tray to hold engine ecu and gearbox ecu , fitted with slide latches for easy removal

well thats enough for tonight
29-09-2013, 08:20 PM
#18
15000
Thread Starter
back again
hope im not boring you guys , without turbos etc
deal with turbo cars all the time at work , so a n/a screamer is a joy to work with
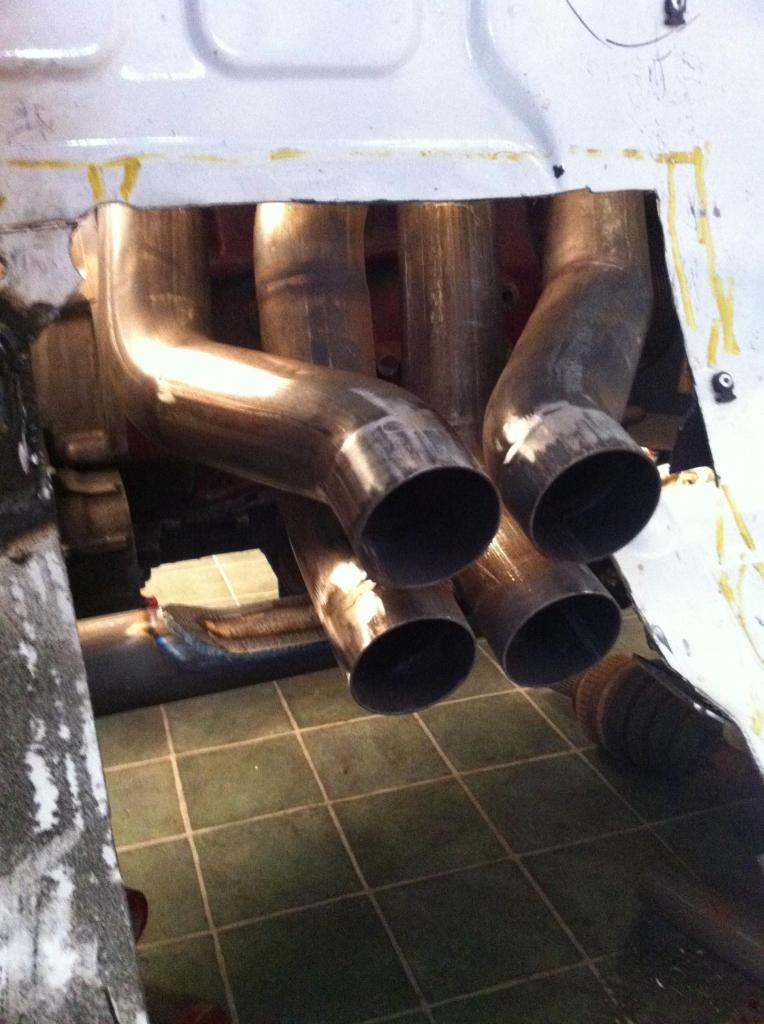
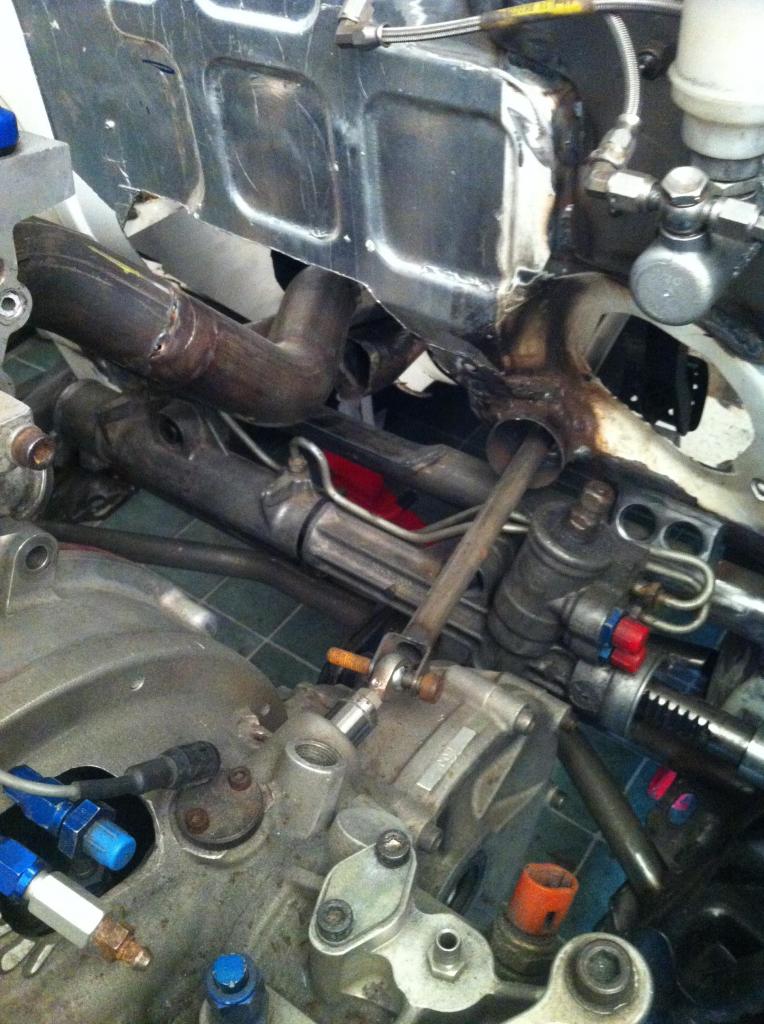
ok so clearance between exhaust and driveshaft was about feck all and manifold was a bit tired so i got a used fiesta r2 manifold on the cheap
which is much nicer i just have to change the collector to suit a 1400
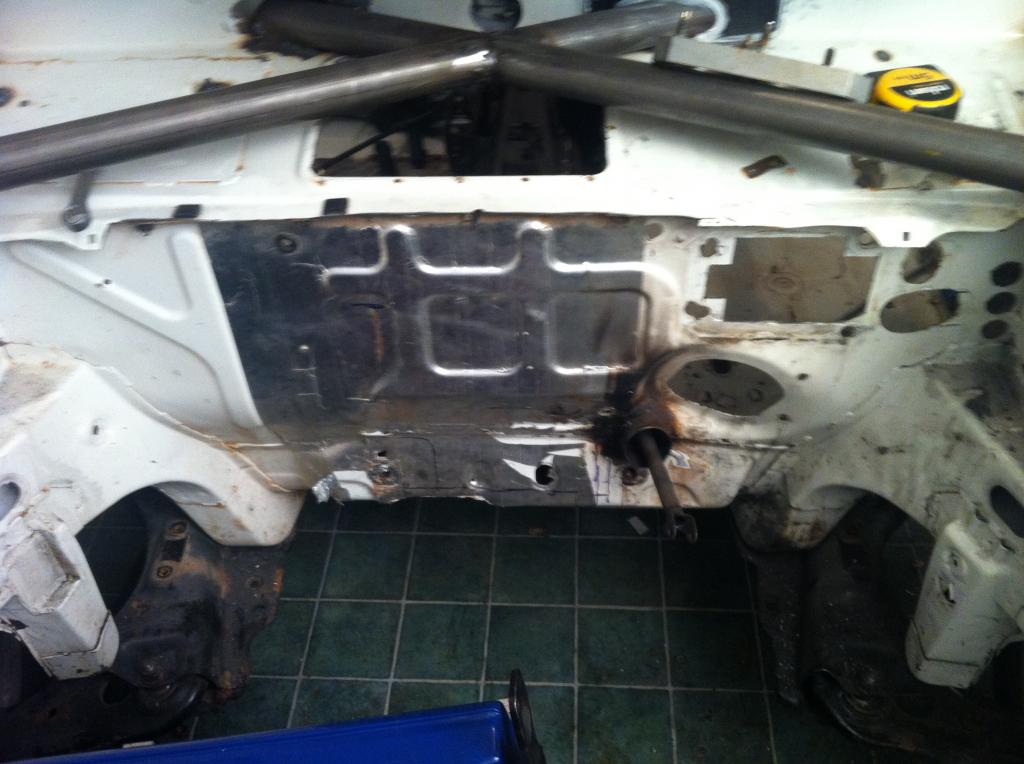
however to fit this i need to modify the bulkhead a touch
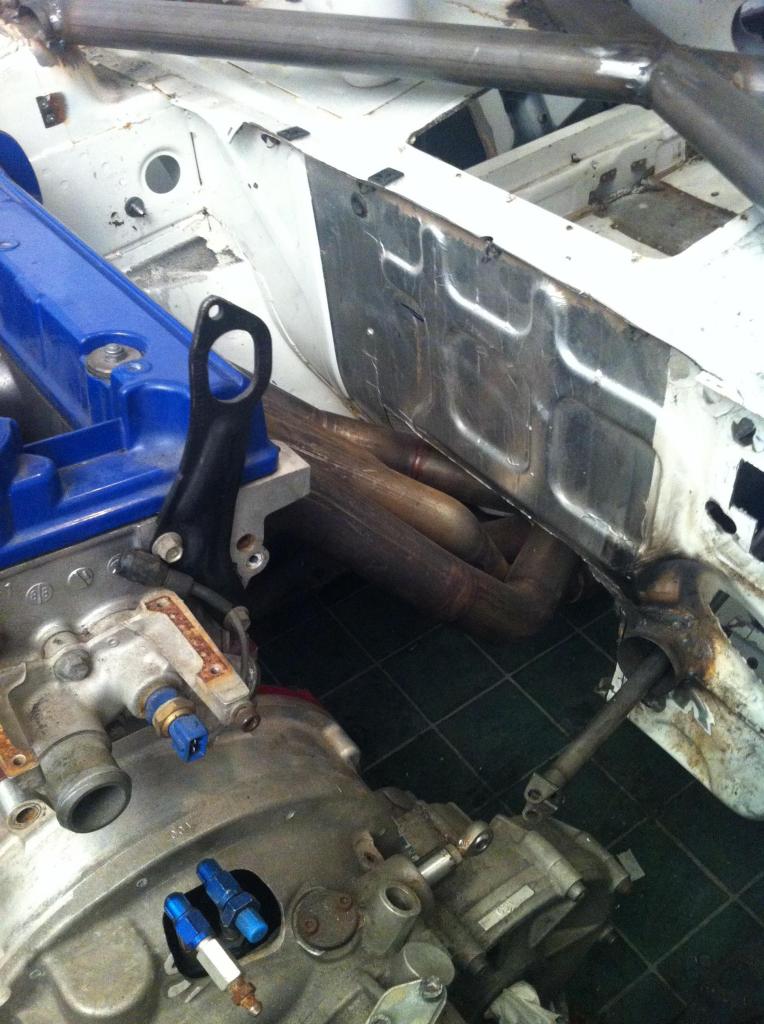
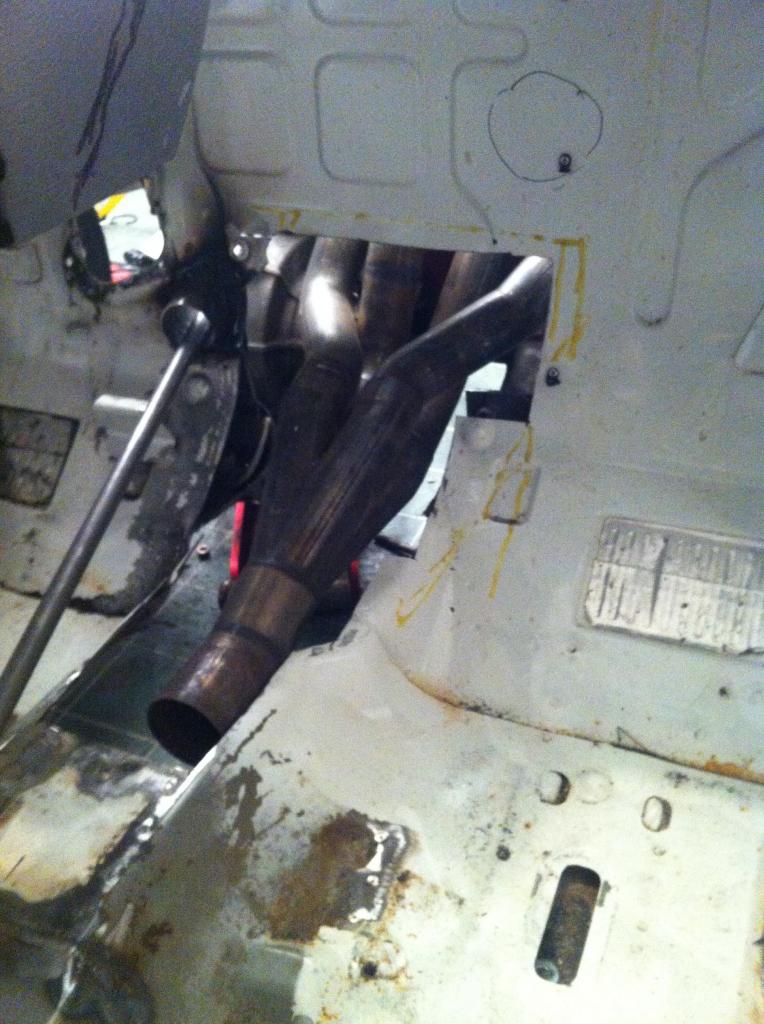
collector removed
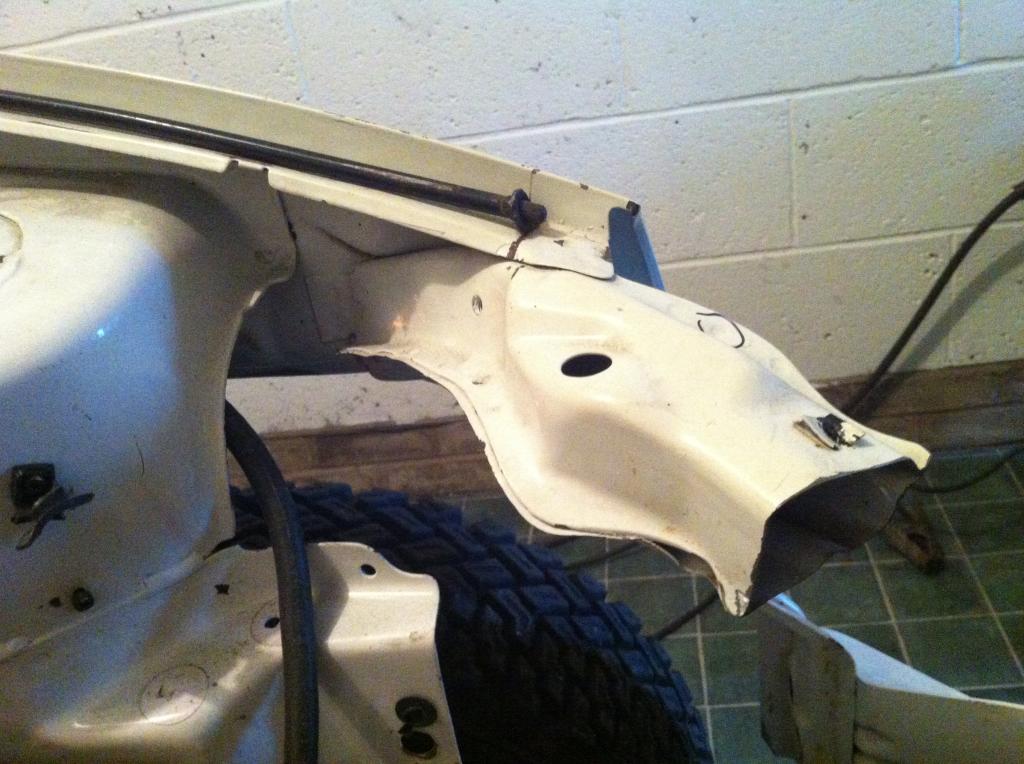
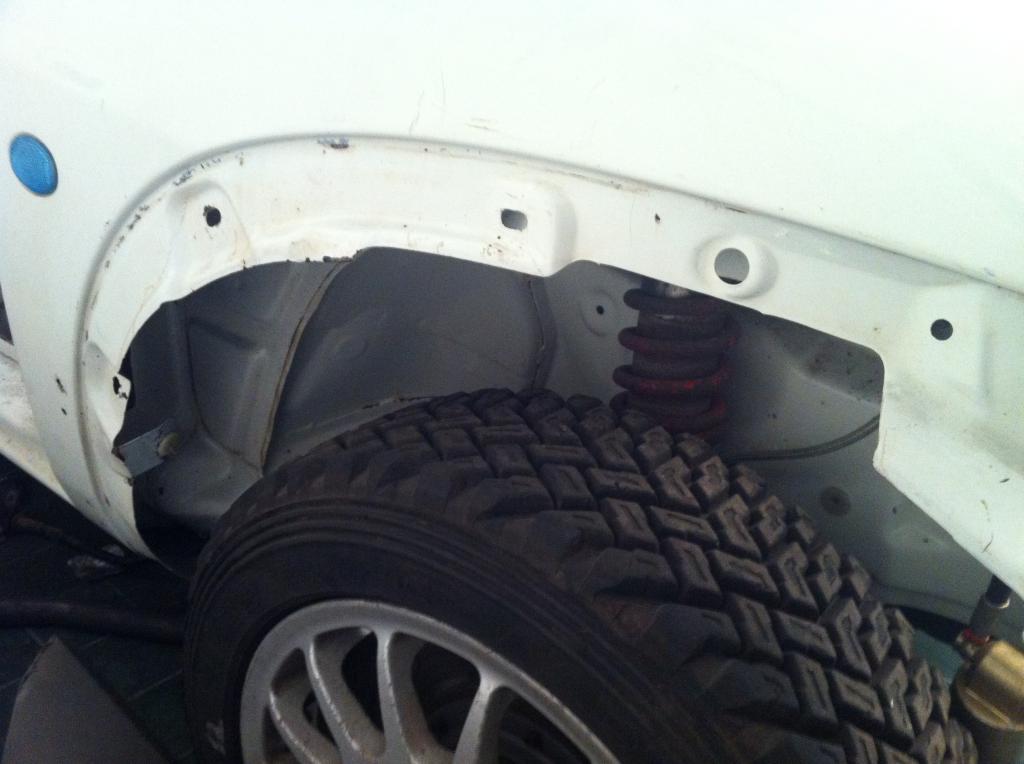
on to the front wings , first off make them bolt on instead on weld on .
if anyone has used a ka in competition the wheel arches are a nightmare , fall off because crapy plastic clips , if you want to remove them properly it takes about 4 million hours ,
so wheel arches had to be mounted alot better
from this
to this
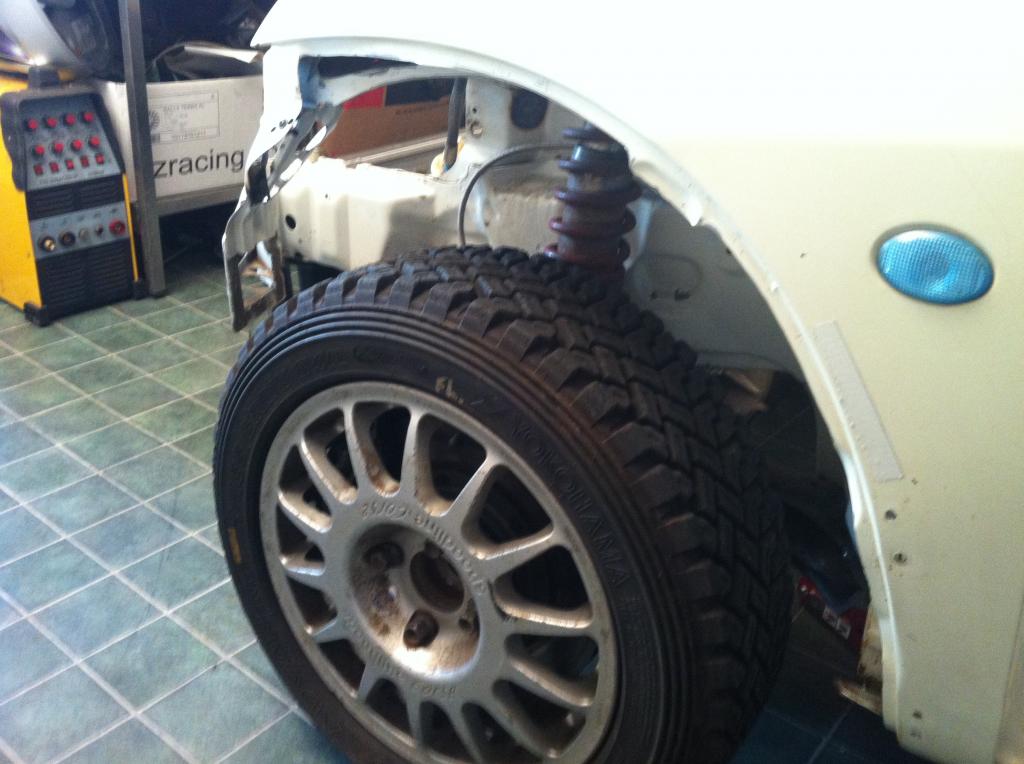
as you can see a lot more clearance for the wheel which is good because she gonna be a bit wider track !!!
hope im not boring you guys , without turbos etc
deal with turbo cars all the time at work , so a n/a screamer is a joy to work with
ok so clearance between exhaust and driveshaft was about feck all and manifold was a bit tired so i got a used fiesta r2 manifold on the cheap
which is much nicer i just have to change the collector to suit a 1400
however to fit this i need to modify the bulkhead a touch


collector removed

on to the front wings , first off make them bolt on instead on weld on .
if anyone has used a ka in competition the wheel arches are a nightmare , fall off because crapy plastic clips , if you want to remove them properly it takes about 4 million hours ,
so wheel arches had to be mounted alot better
from this


to this


as you can see a lot more clearance for the wheel which is good because she gonna be a bit wider track !!!

 07-11-2013, 09:30 PM
#21
15000
Thread Starter
well been flat out with work and other things
so had no time for showing this project
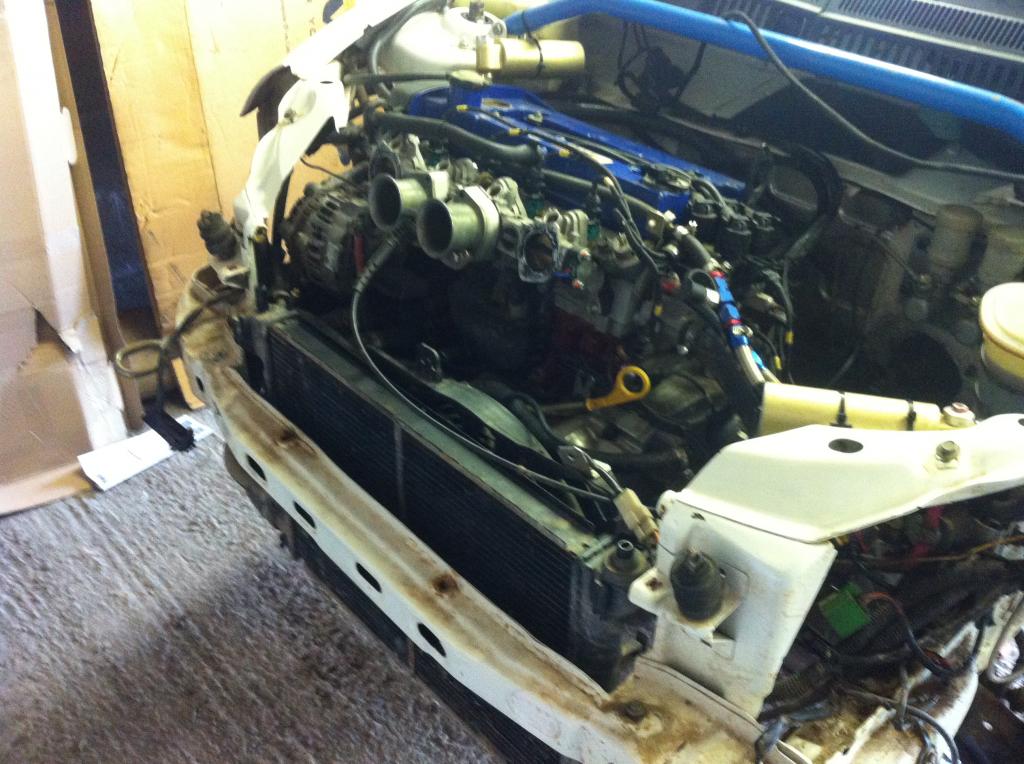
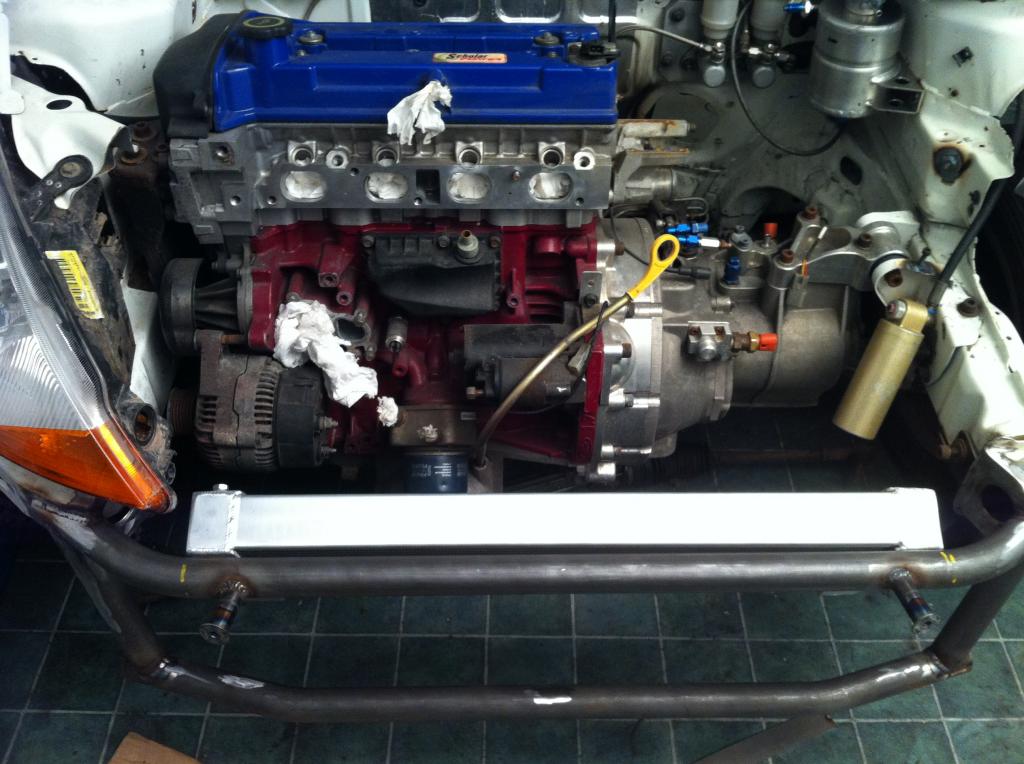
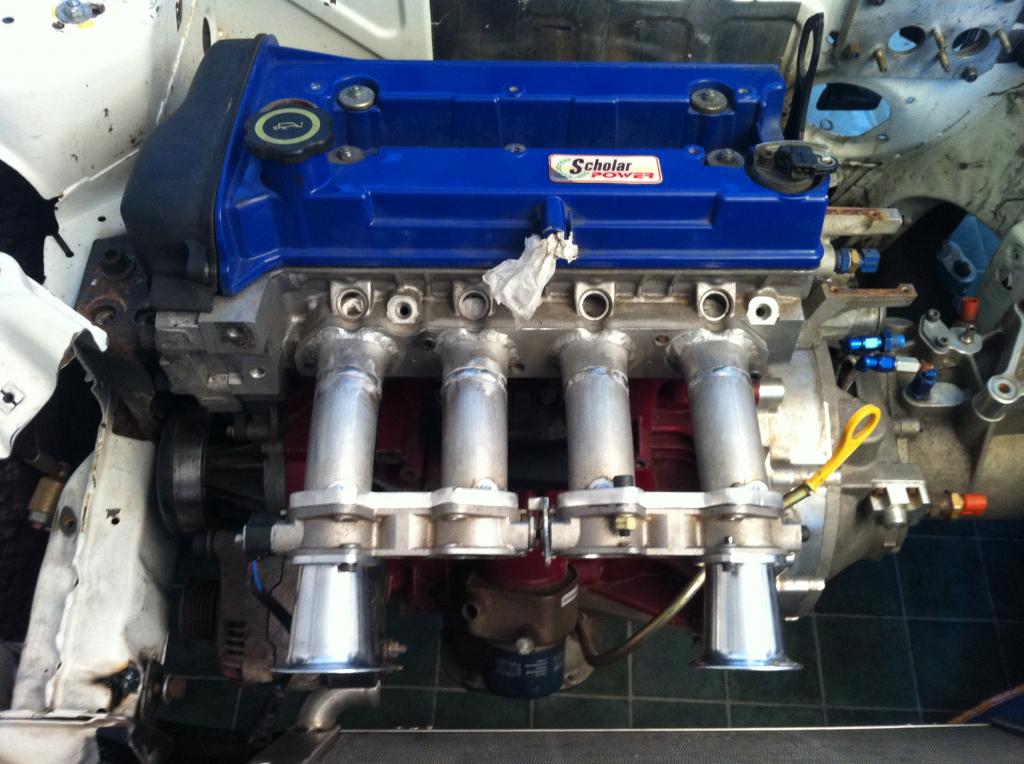
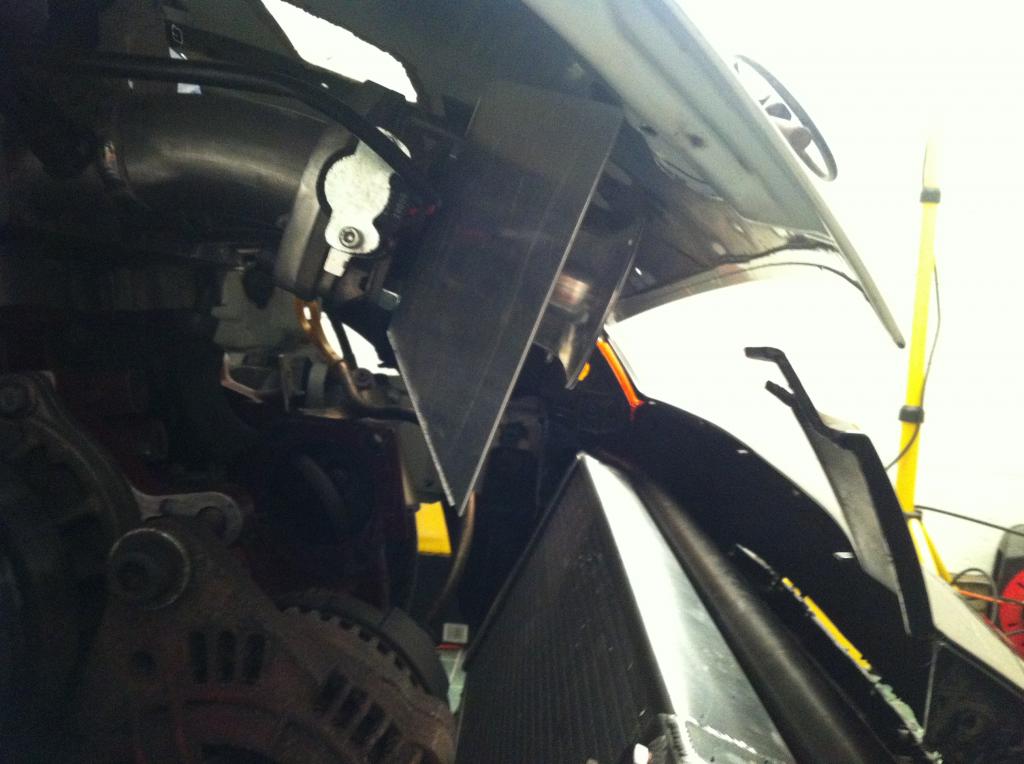
so inlet manifold !!
so no chance of airbox or any decent flow
there was nothing on the market that fitted , jenvey direct to heads needed a hole in the bonnet , which was a no go with lampod
so i decided to make my own , after getting some flanges i need to form the tube to match the head .
so i made a die at work and pressed the alloy tube on it and it formed the shape of the head port
then i designed a bend as there was nothing on the shelf and got is specially bent which was quite expensive as it is alloy
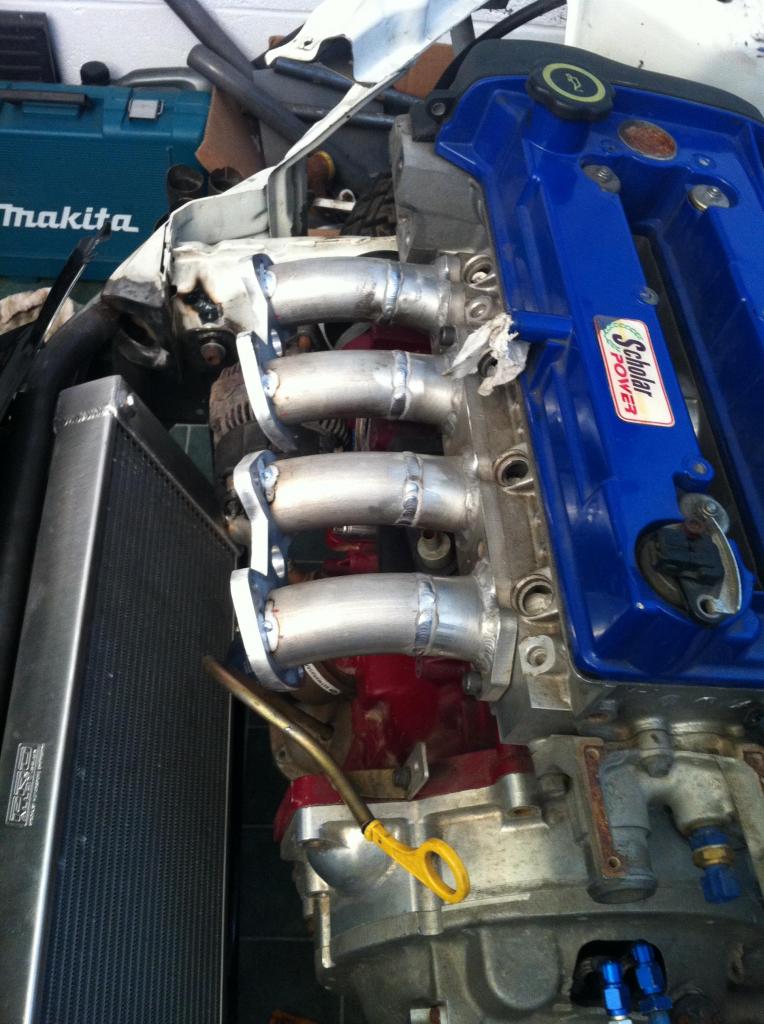
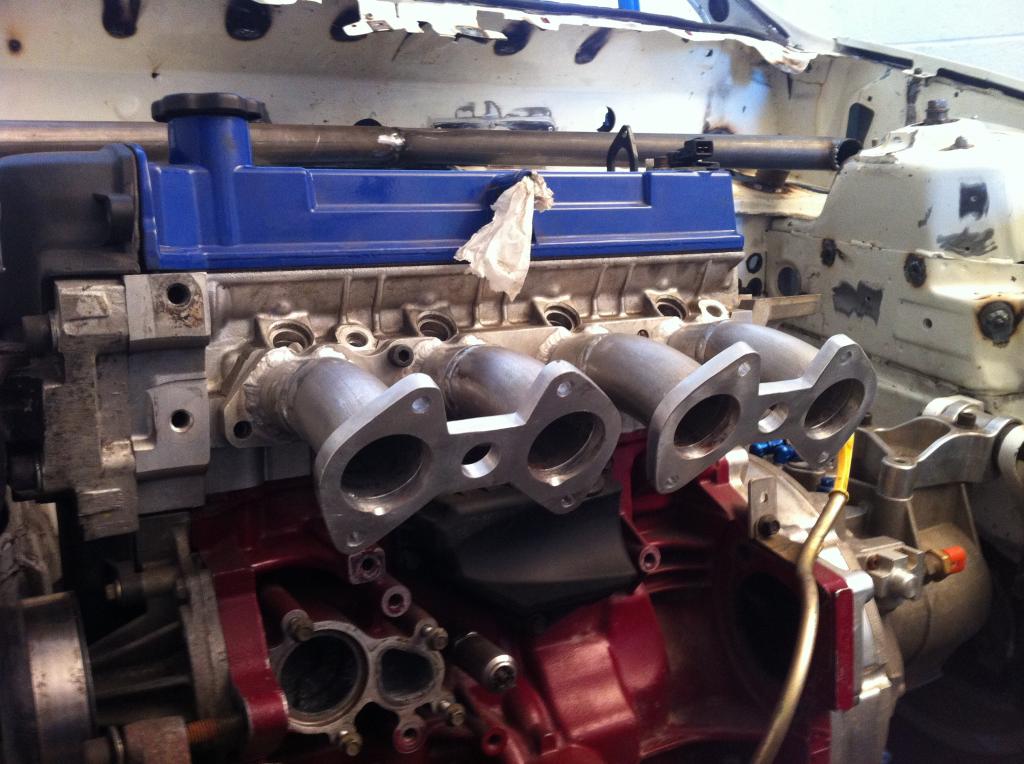
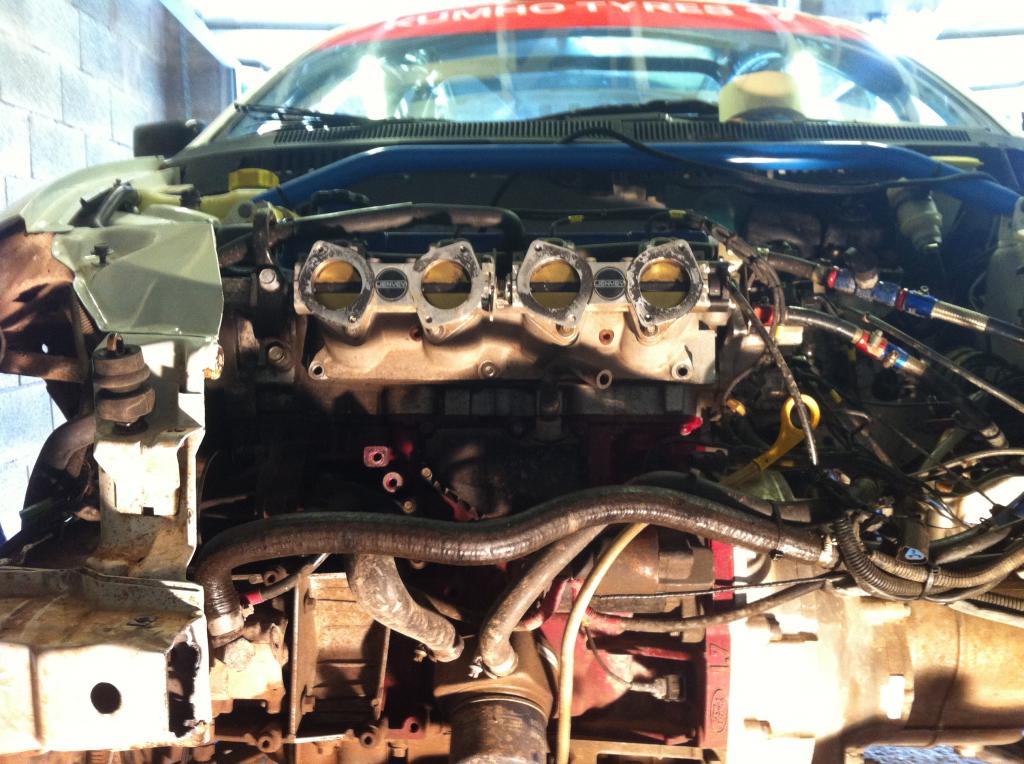
then used the same throttle bodies to keep cost down
not the engine mount on this pic
not ideal but much better than before
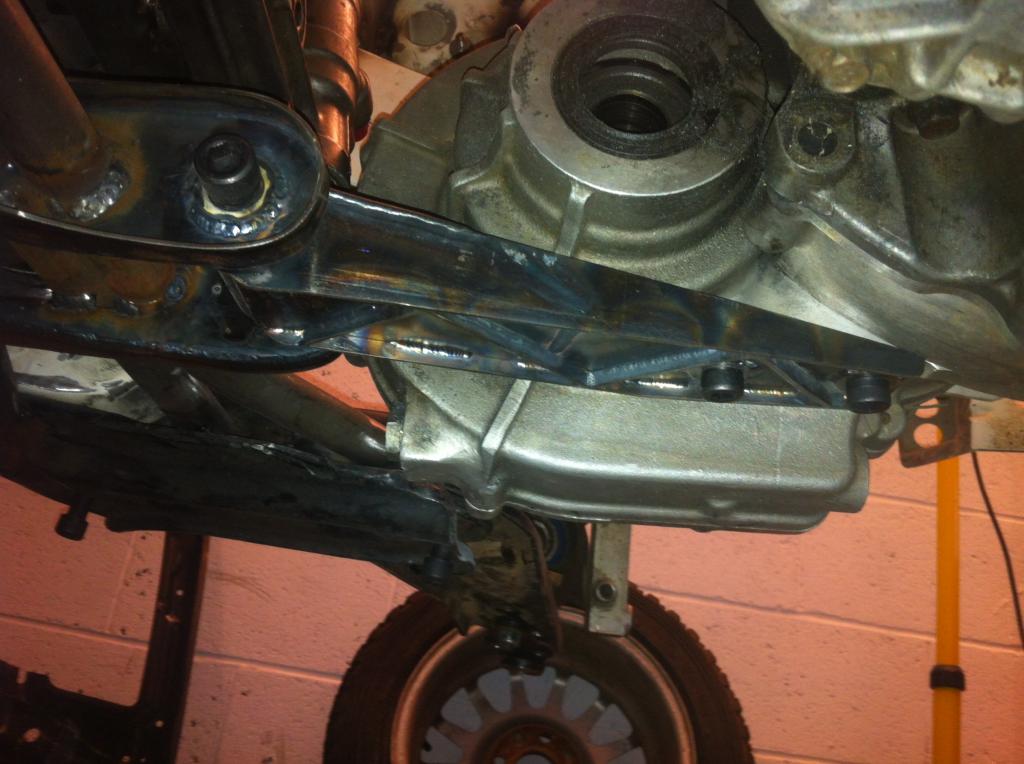
back to the engine mount
was huge and was solid , and had cracks from stress already so i found a mount i made about 10 years ago which fits
so now need to in fill and strengthen the leg and add a mount for the inner wheel arch liner
that will do for tonight
so had no time for showing this project
so inlet manifold !!
so no chance of airbox or any decent flow
there was nothing on the market that fitted , jenvey direct to heads needed a hole in the bonnet , which was a no go with lampod
so i decided to make my own , after getting some flanges i need to form the tube to match the head .
so i made a die at work and pressed the alloy tube on it and it formed the shape of the head port
then i designed a bend as there was nothing on the shelf and got is specially bent which was quite expensive as it is alloy


then used the same throttle bodies to keep cost down

not the engine mount on this pic

not ideal but much better than before

back to the engine mount
was huge and was solid , and had cracks from stress already so i found a mount i made about 10 years ago which fits


so now need to in fill and strengthen the leg and add a mount for the inner wheel arch liner


that will do for tonight
08-11-2013, 12:09 PM
#22
10K+ Poster!!
Great updates!
08-11-2013, 03:51 PM
#23
Wahay!! I've lost my Virginity!!

Join Date: Sep 2010
Location: Devon
Posts: 72
Likes: 0
Received 0 Likes
on
0 Posts
As i said before alot of time and skill gone into this.
Just goes to show how much work goes into a good rally car.
Makes my Fiesta look like childs play.lol
Just goes to show how much work goes into a good rally car.
Makes my Fiesta look like childs play.lol
09-11-2013, 11:06 AM
#26
15000
Thread Starter
so a little more to show
the front inner edge of the bonnet has a large reinforcement where the catch latches on which takes up alot of space , which i want for the airbox
so i thought i would try something we had a new bonnet with a slight dent in so got it for a tenner . i removed the outer skin and then went about lightening the inner frame and shortening it too
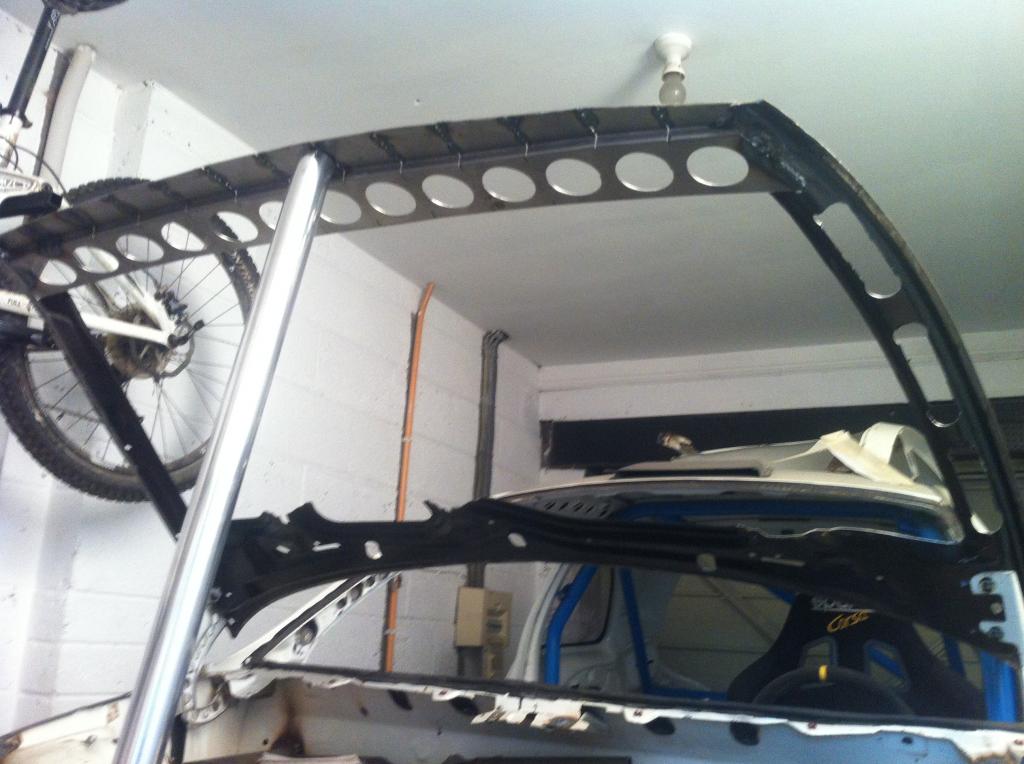
i then made a new reinforcement and cut it and bent it to the shape of the skin and welded all the cuts so it is curved like the original , not finished yet needs a tidy up
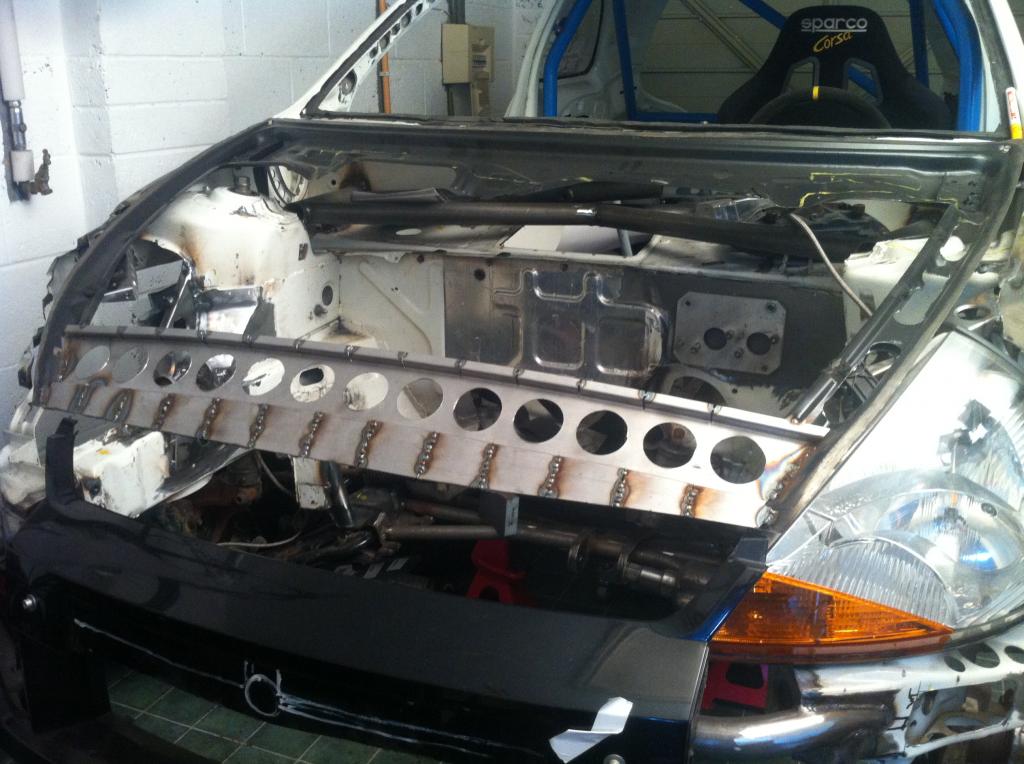
now there is a larger opening for the airbox !!
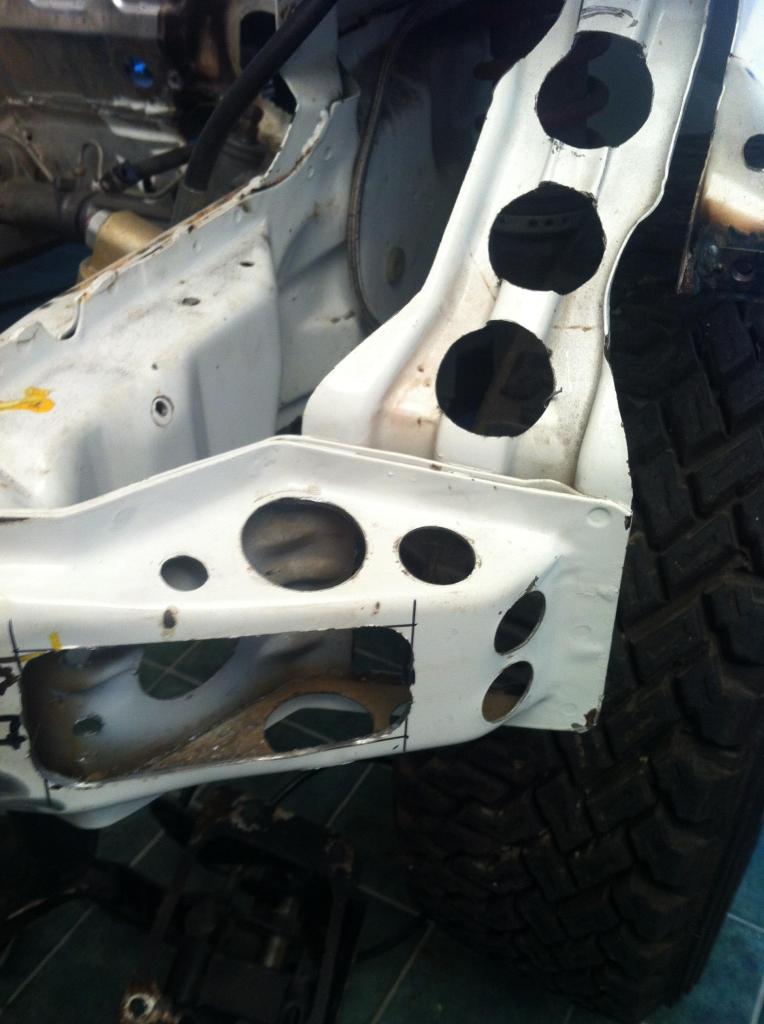
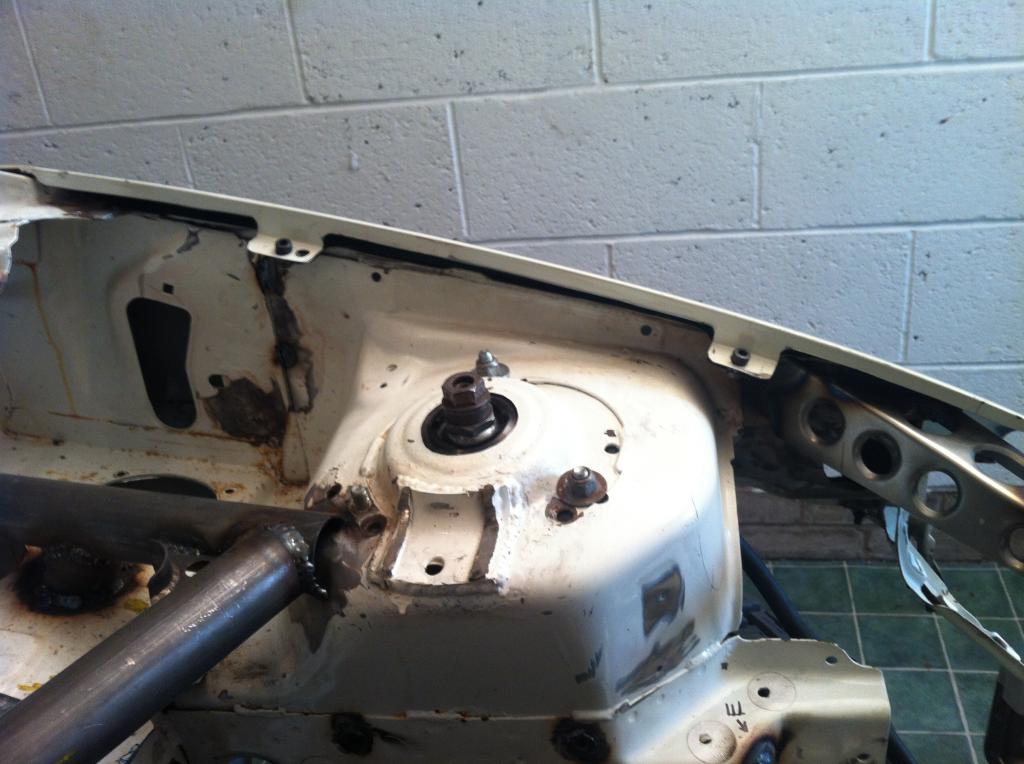
now on to the front suspension
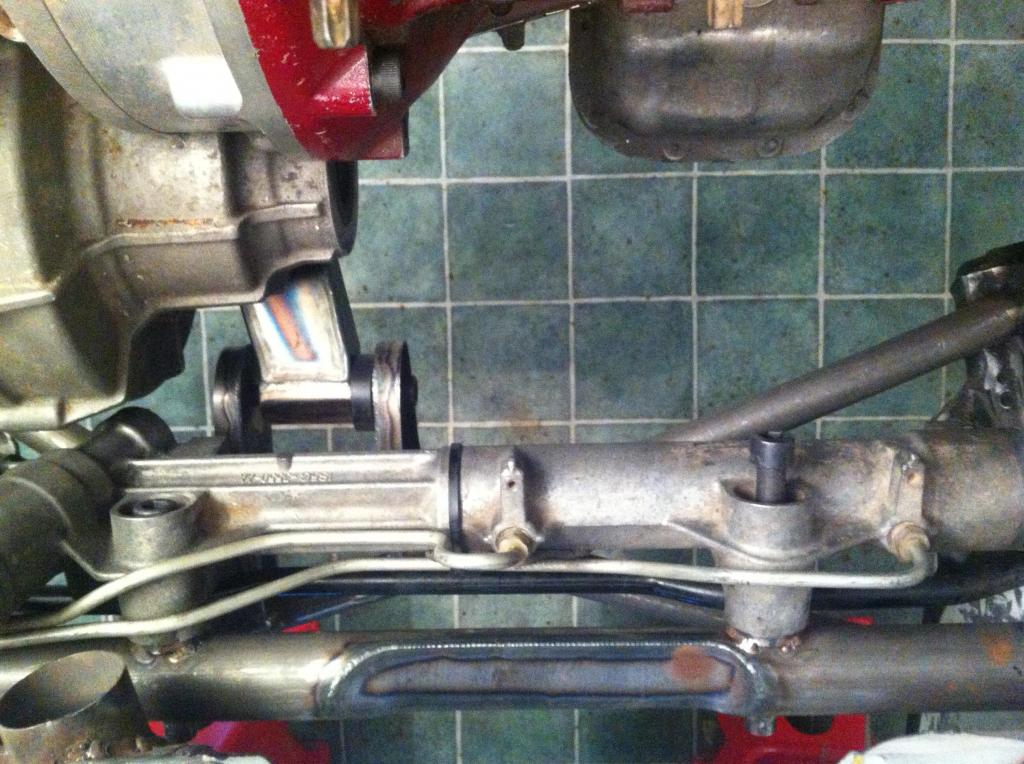
well it not ideal on the front limited travel , quite weak and turrets not in best location , if you lower the car you soon run out of damper travel before the body gets low . this ka runs 15 in gravel tyres which is half the problem but the brakes are to big for anything smaller and i dont think me colleague wants to change the brakes !!
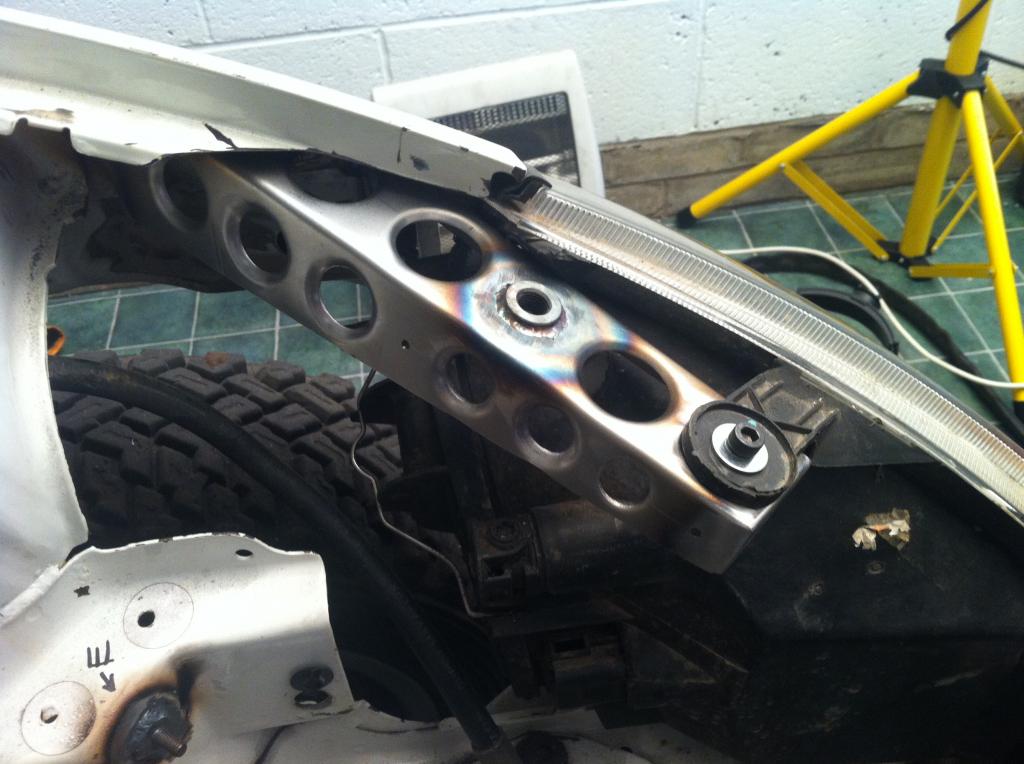
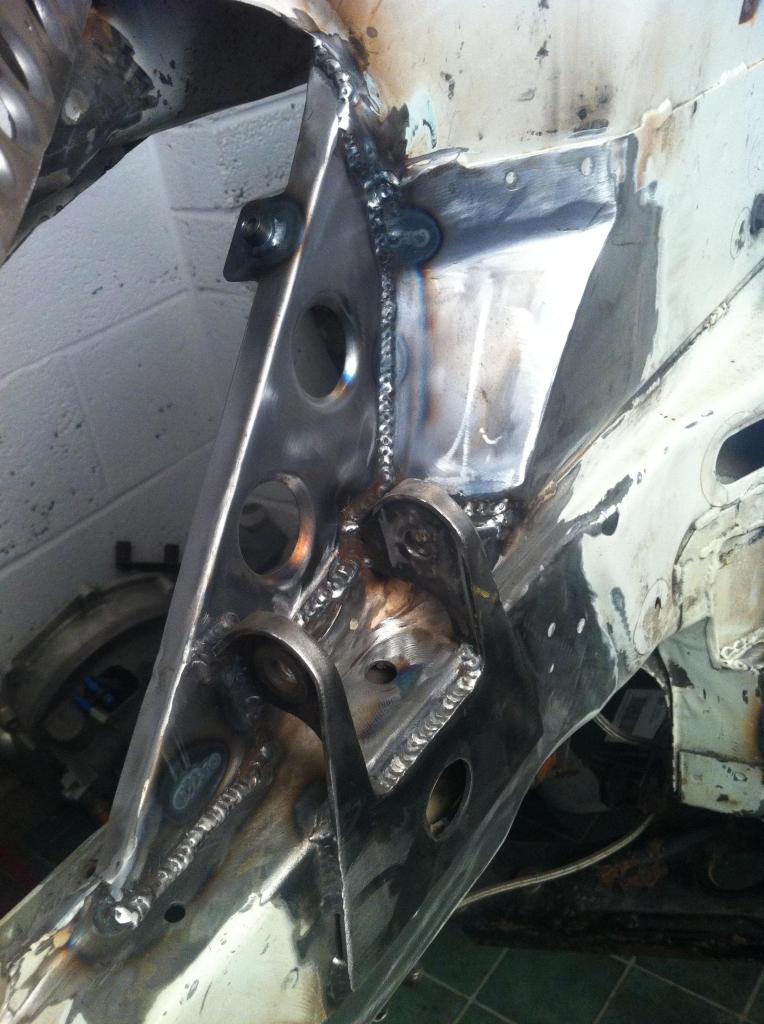
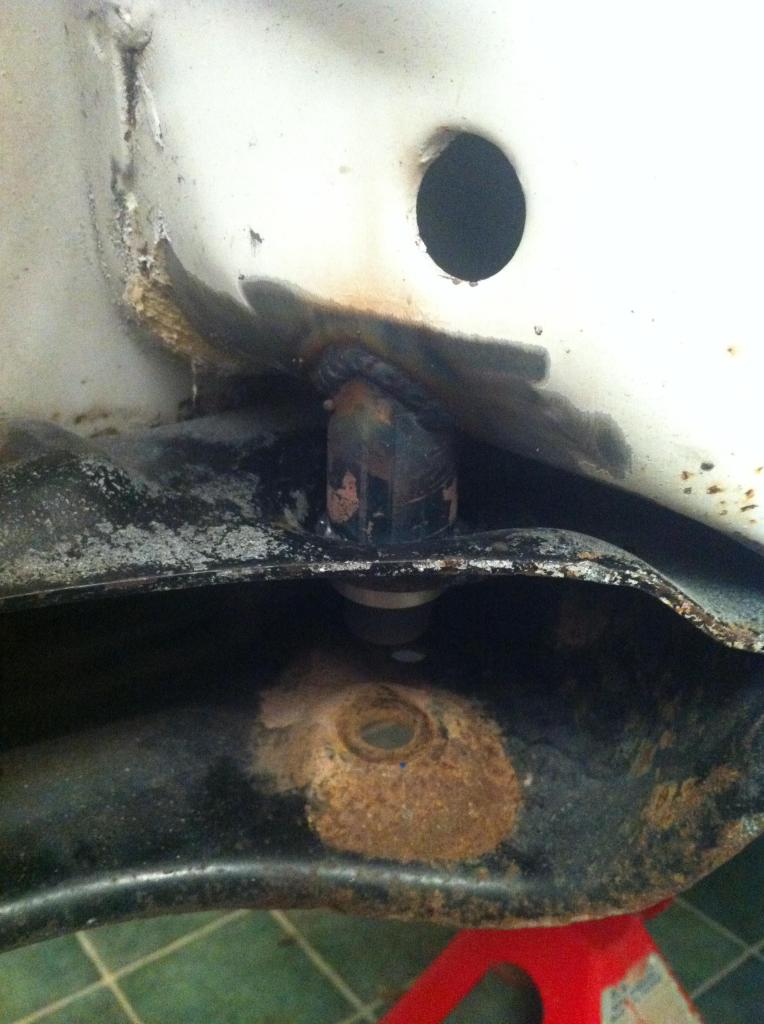
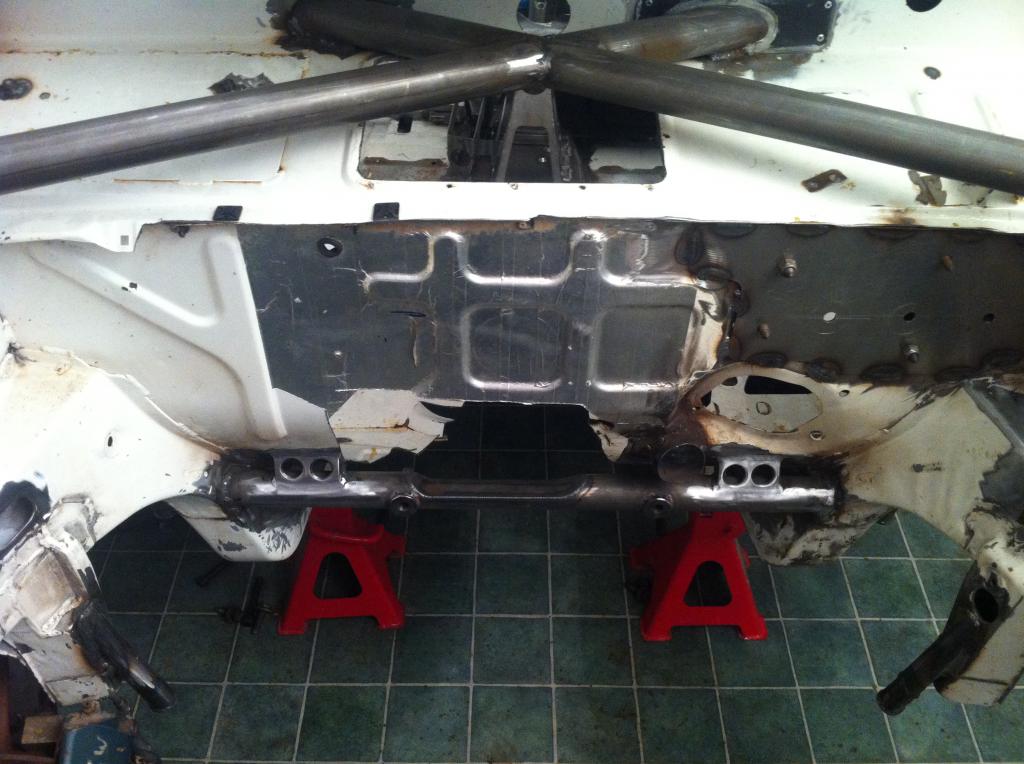
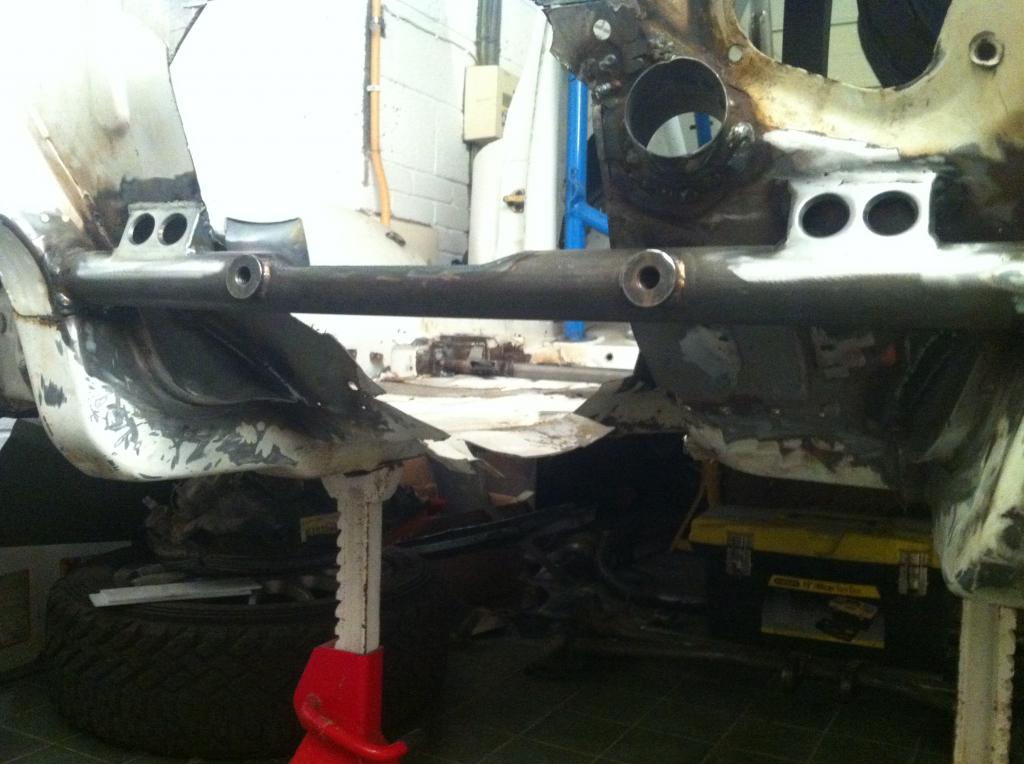
so there is no subframe as such just 2 individual wishbone carriers , so i wanted to strengthen these and also bring the gearbox rear mount closer to the gearbox as the original is massive and comes from the body which makes it very long

now the wishbones are bolted in with a nut and bolt , which is total shite and when there is a force transmitted up the wishbone to the mount it can flex
so i wanted to make it use a boss and i wanted to transmit the force into the shell which will make it much stronger
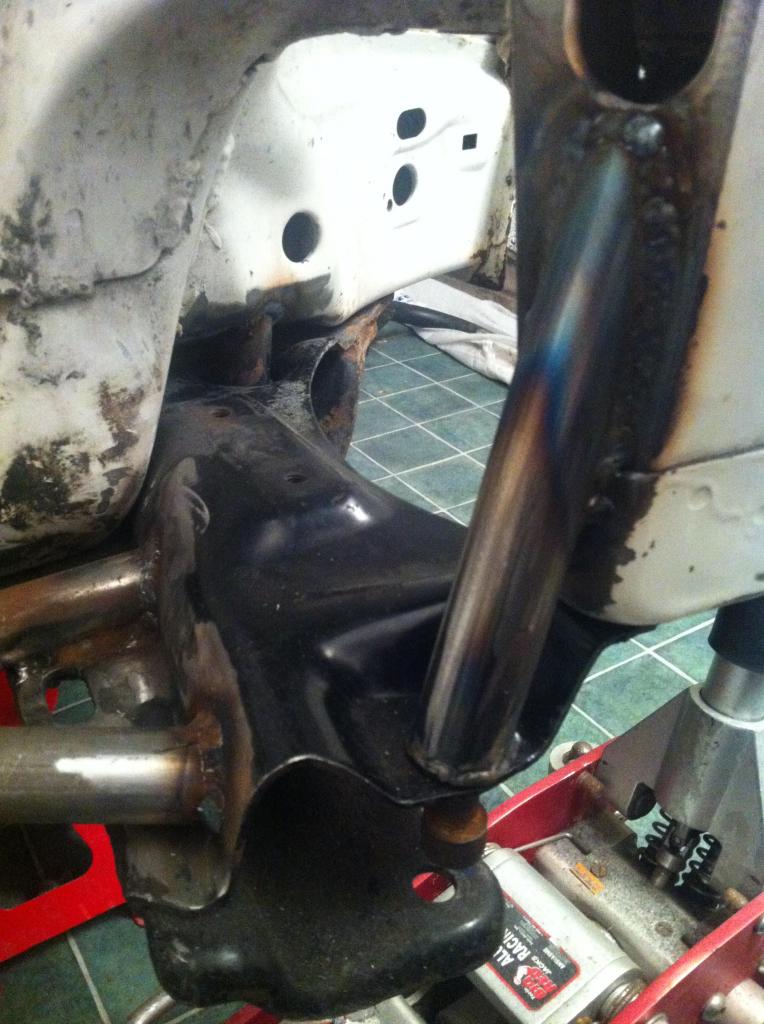
on to the gearbox mount i cut the original and used this as a jig
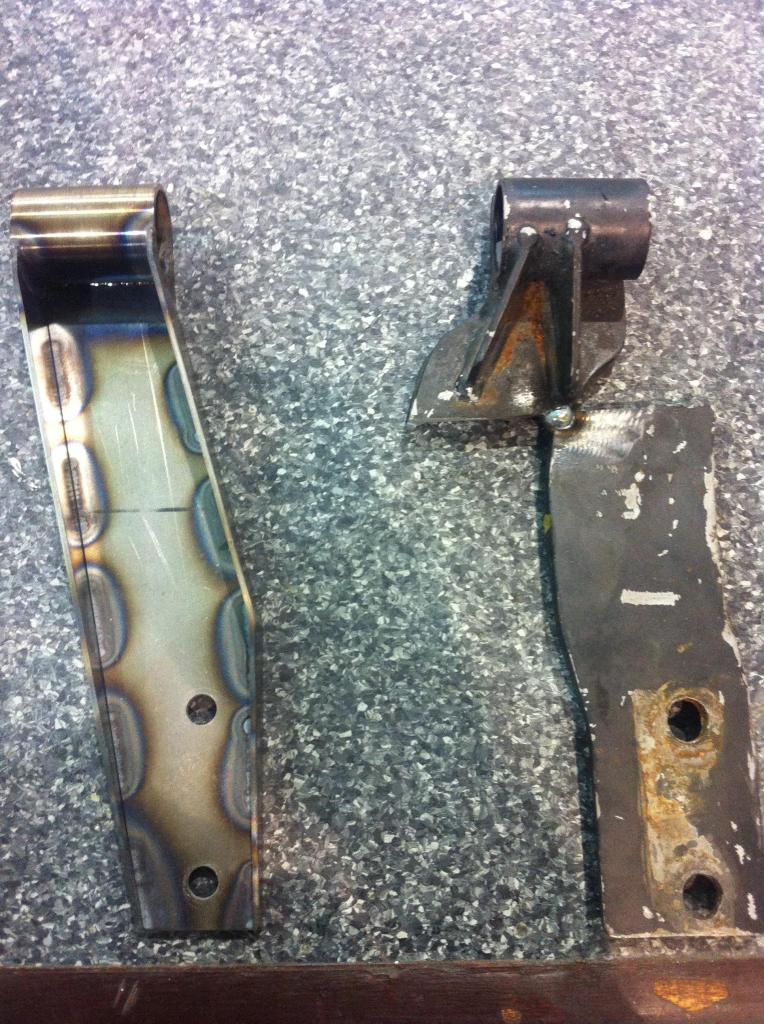
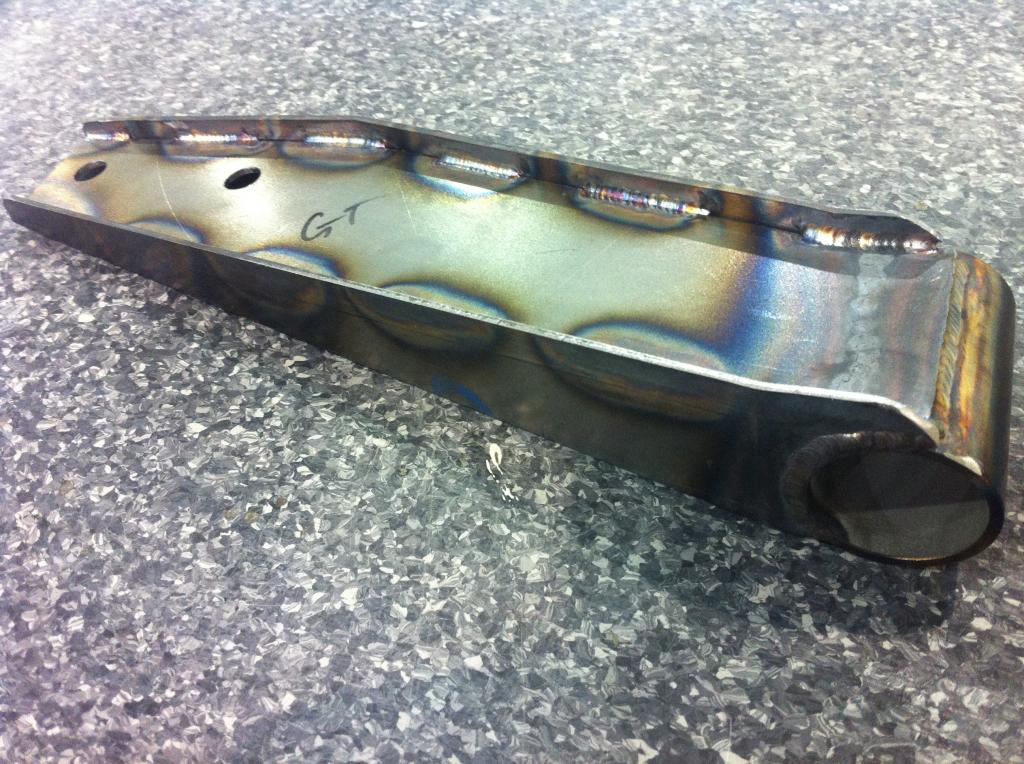
then back in with the engine and box hold it in position and make the mount on the subframe
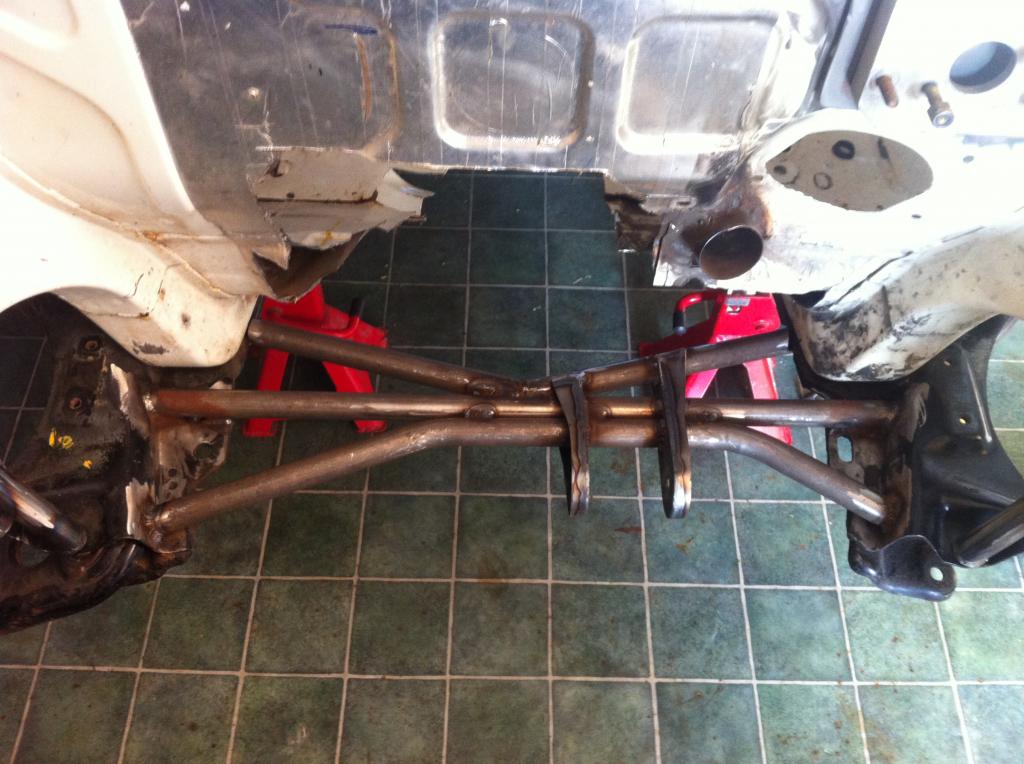
thats it for the moment
the front inner edge of the bonnet has a large reinforcement where the catch latches on which takes up alot of space , which i want for the airbox

so i thought i would try something we had a new bonnet with a slight dent in so got it for a tenner . i removed the outer skin and then went about lightening the inner frame and shortening it too

i then made a new reinforcement and cut it and bent it to the shape of the skin and welded all the cuts so it is curved like the original , not finished yet needs a tidy up

now there is a larger opening for the airbox !!
now on to the front suspension
well it not ideal on the front limited travel , quite weak and turrets not in best location , if you lower the car you soon run out of damper travel before the body gets low . this ka runs 15 in gravel tyres which is half the problem but the brakes are to big for anything smaller and i dont think me colleague wants to change the brakes !!
so there is no subframe as such just 2 individual wishbone carriers , so i wanted to strengthen these and also bring the gearbox rear mount closer to the gearbox as the original is massive and comes from the body which makes it very long


now the wishbones are bolted in with a nut and bolt , which is total shite and when there is a force transmitted up the wishbone to the mount it can flex
so i wanted to make it use a boss and i wanted to transmit the force into the shell which will make it much stronger


on to the gearbox mount i cut the original and used this as a jig


then back in with the engine and box hold it in position and make the mount on the subframe


thats it for the moment

 21-11-2013, 07:23 PM
#35
15000
Thread Starter
21-11-2013, 07:44 PM
#36
Virgin

Join Date: Nov 2013
Location: Wales
Posts: 7
Likes: 0
Received 0 Likes
on
0 Posts
21-11-2013, 09:20 PM
#38
15000
Thread Starter
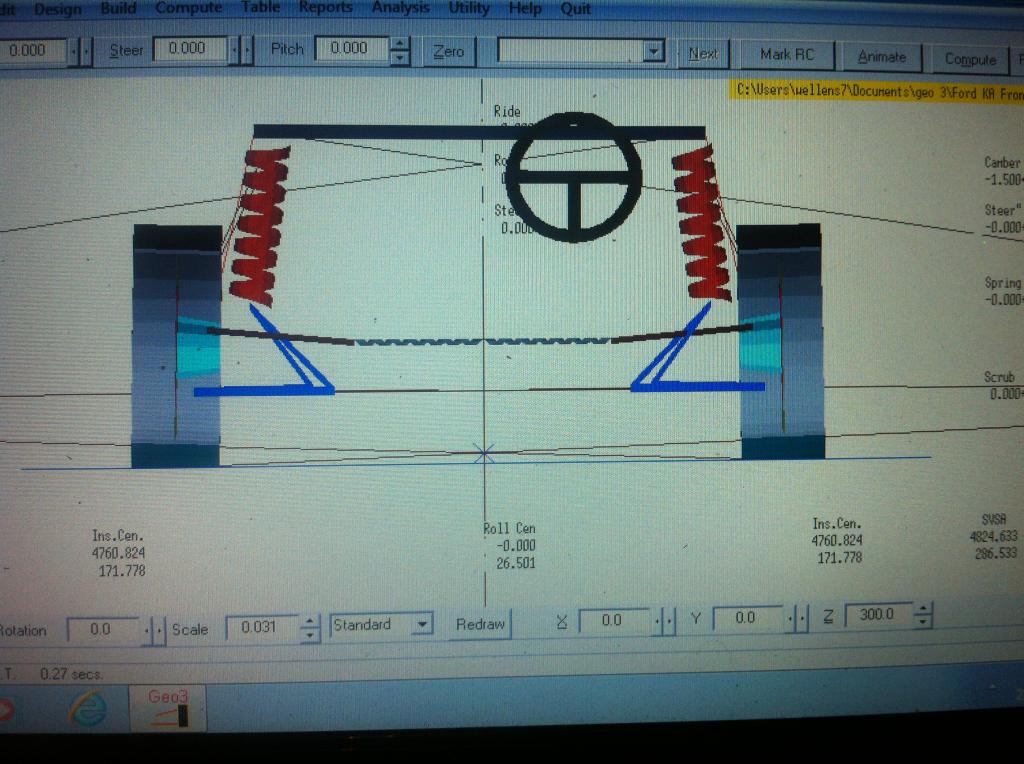
so as there are some issues with the standard ka geometry on the front
i decided to measure all the major points and put them in to a computer program and see what the craic was
and to see if things could be improved which they can !!
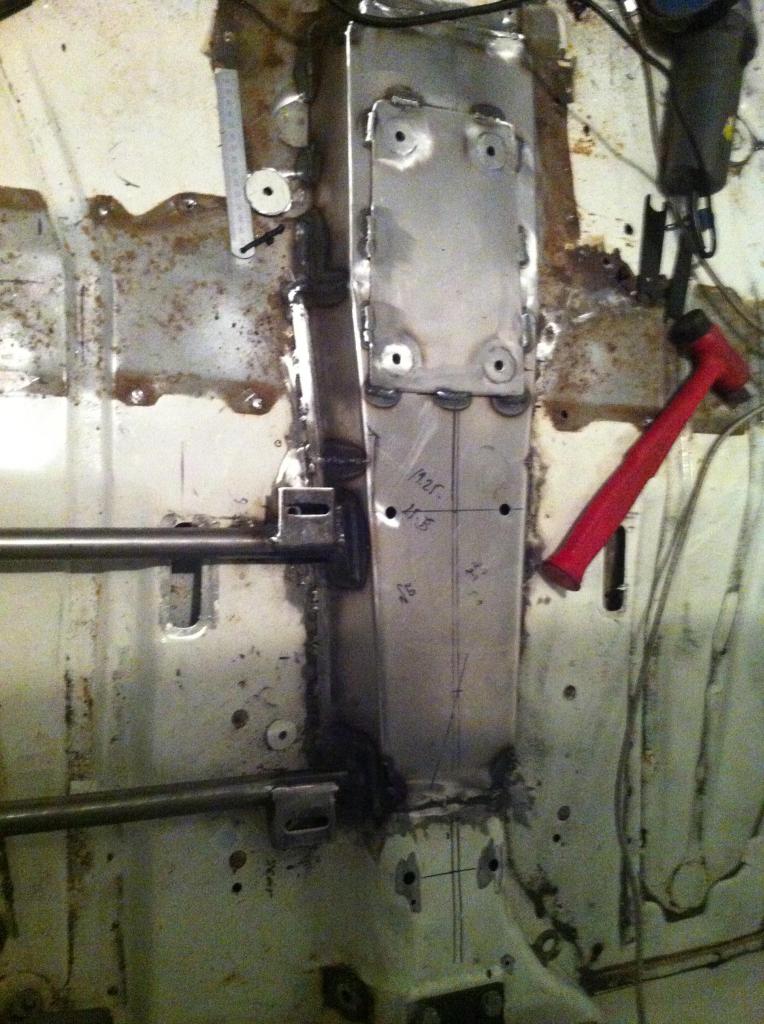
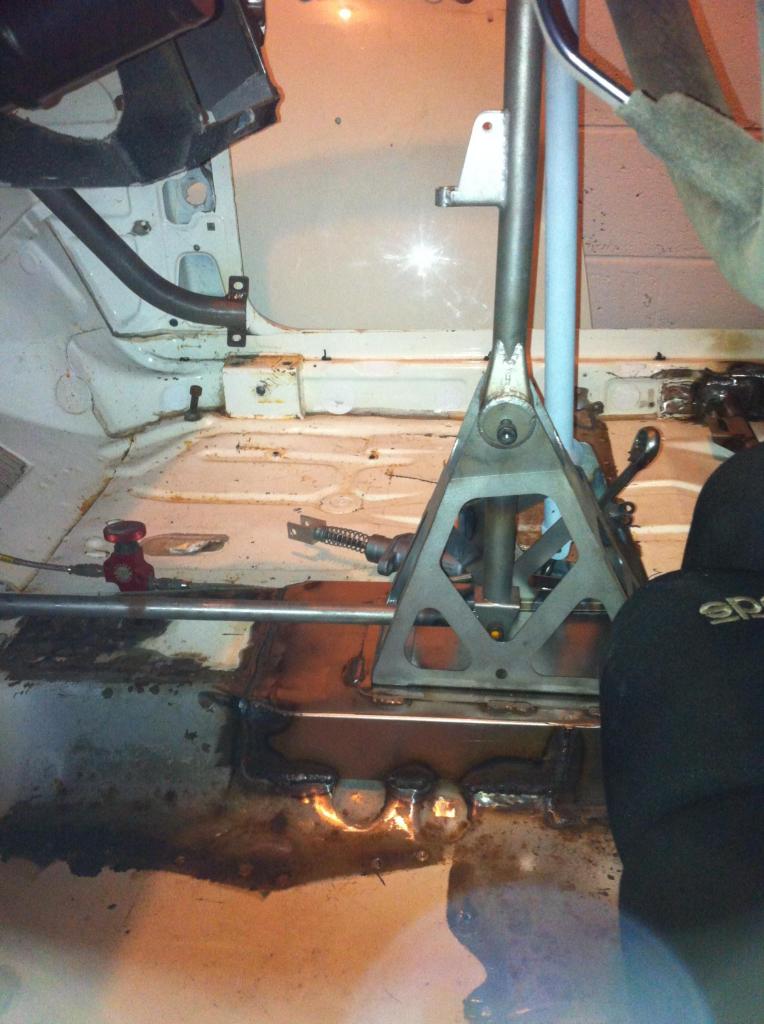
so as some have noticed the steering rack mounts have been removed , due to the new exhaust manifold
then i made a bar to mount the rack and moved it very slightly to get the best position for bumpsteer
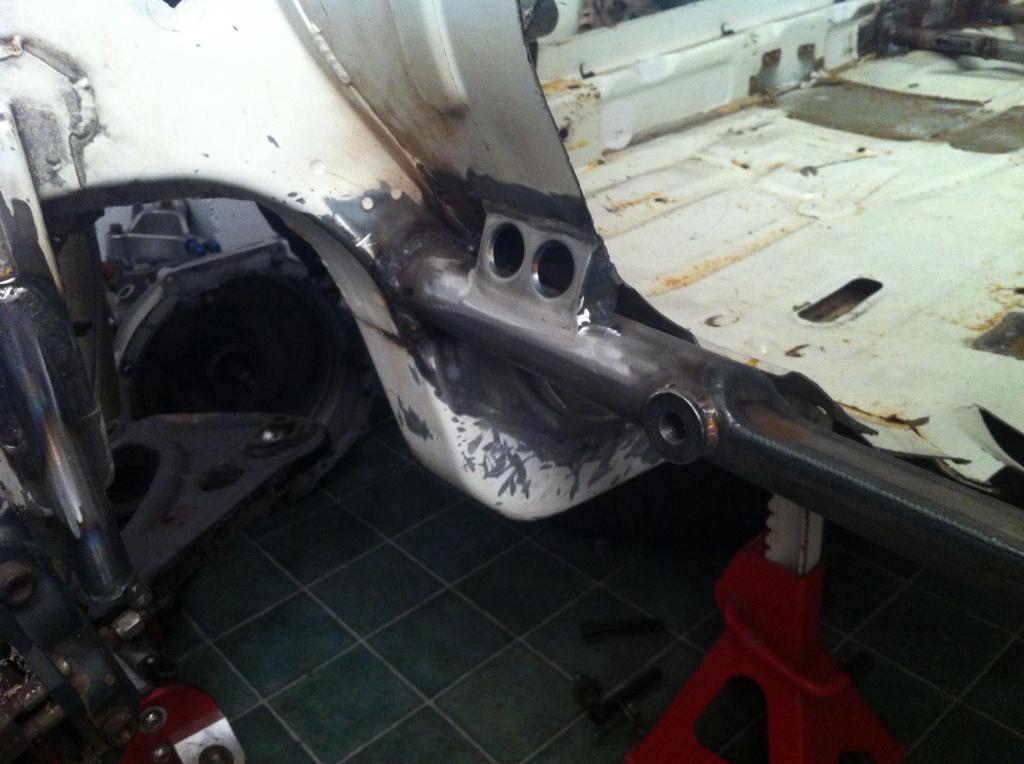
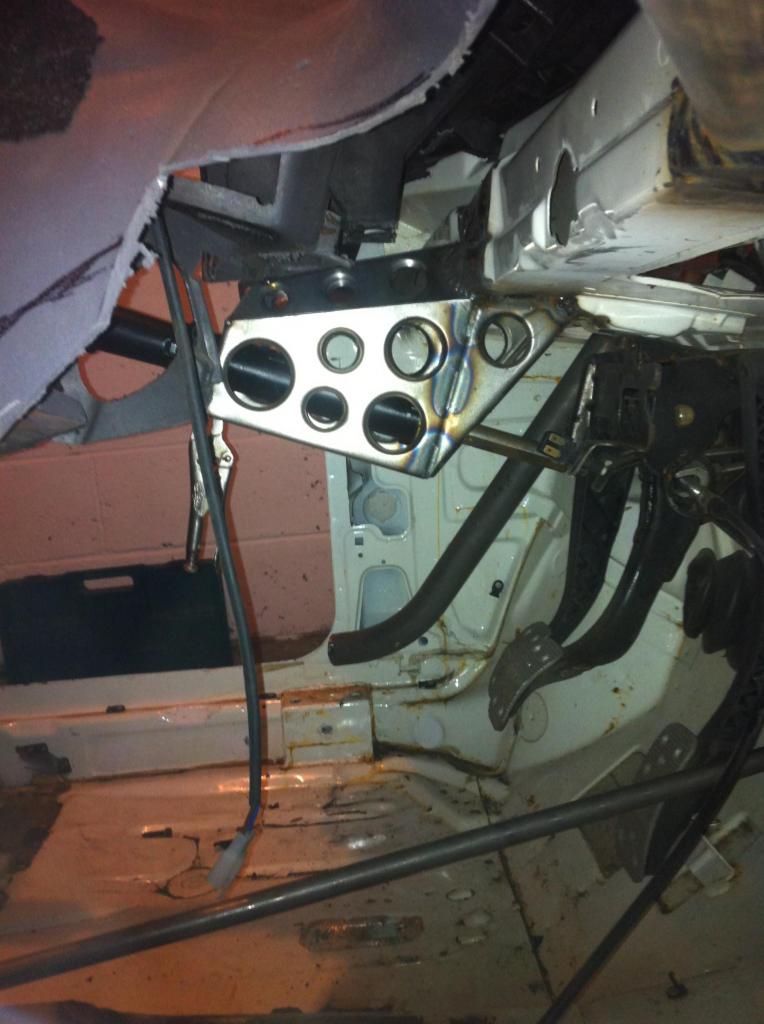
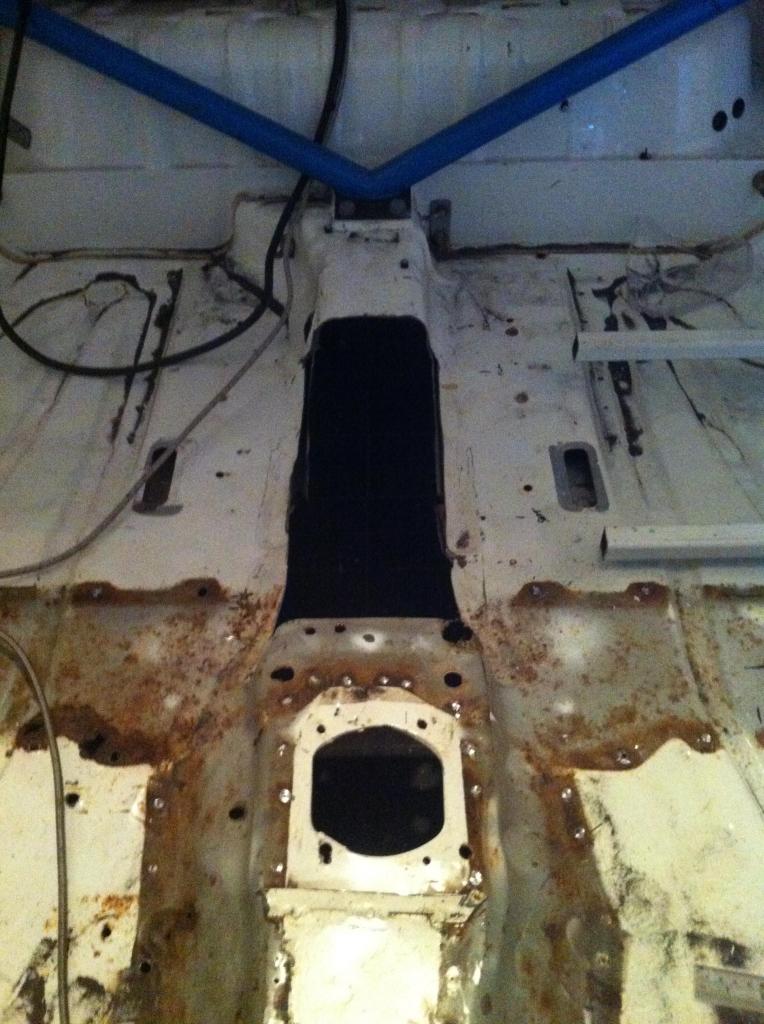
also i tidied up the lhd chassis leg and matched it to the other side . and get rid of unwanted hole brackets etc

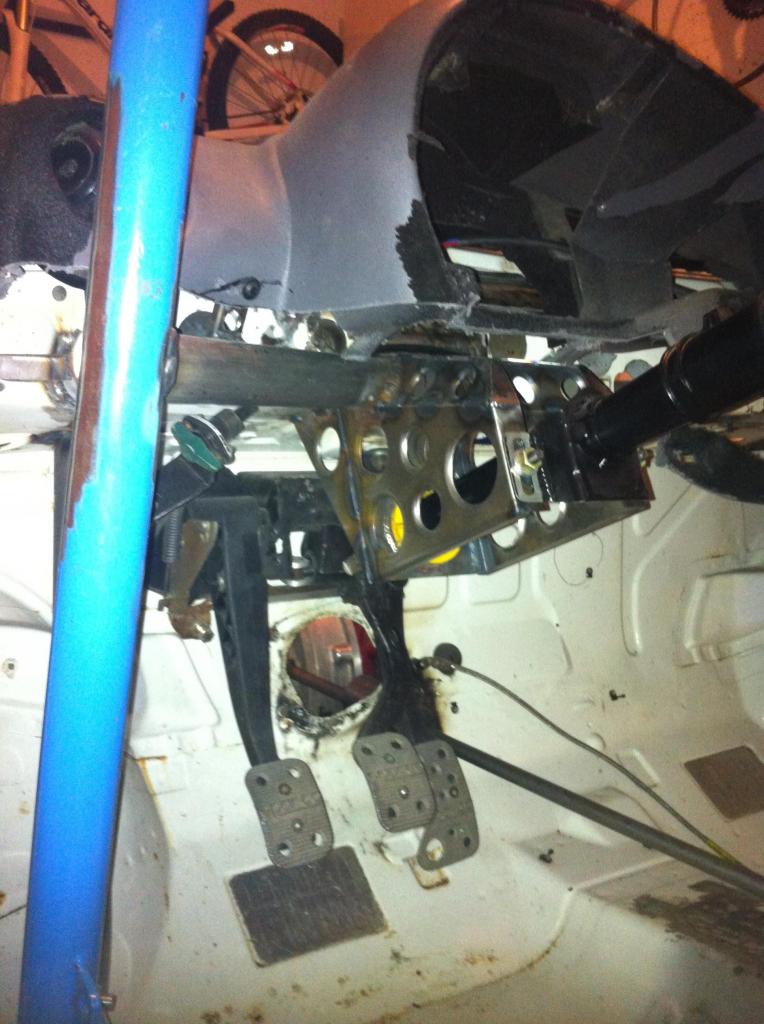
also the bulkhead was full of holes where the s1600 pedal box was fitted so i wanted to repair and strengthen this
and also i need to redesign the pedal box as it a bit average !
i decided to measure all the major points and put them in to a computer program and see what the craic was
and to see if things could be improved which they can !!
so as some have noticed the steering rack mounts have been removed , due to the new exhaust manifold
then i made a bar to mount the rack and moved it very slightly to get the best position for bumpsteer


also i tidied up the lhd chassis leg and matched it to the other side . and get rid of unwanted hole brackets etc

also the bulkhead was full of holes where the s1600 pedal box was fitted so i wanted to repair and strengthen this
and also i need to redesign the pedal box as it a bit average !
22-11-2013, 05:33 AM
#40
PassionFord Post Whore!!

Join Date: Nov 2006
Location: .
Posts: 3,538
Likes: 0
Received 0 Likes
on
0 Posts
Brilliant thread, some really impressive work going into this! Well impressed!
Bet this little car will show some much more powerful machinery a clean pair of heels.
Look fwd to more pics.
Bet this little car will show some much more powerful machinery a clean pair of heels.
Look fwd to more pics.