
V8 Sierra 2WD


Thread Starter


Joined: May 2003
Posts: 4,110
Likes: 171
From: Essex
Still very time consuming though, no way I could make any money out of it with the equipment I have at work !
Wheels have been painted the correct colour


Can't believe the amount of black wheels at the wheel recon place waiting for collection by blind people


Last edited by Mark V8; Dec 3, 2016 at 09:12 PM.
Thanks mate, it would be much easier to make a second one.
Still very time consuming though, no way I could make any money out of it with the equipment
Wheels have been painted the correct colour

Can't believe the amount of black wheels at the wheel recon place waiting for collection by blind people
Still very time consuming though, no way I could make any money out of it with the equipment
Wheels have been painted the correct colour
Can't believe the amount of black wheels at the wheel recon place waiting for collection by blind people
Looking good.

Thread Starter
Joined: May 2003
Posts: 4,110
Likes: 171
From: Essex
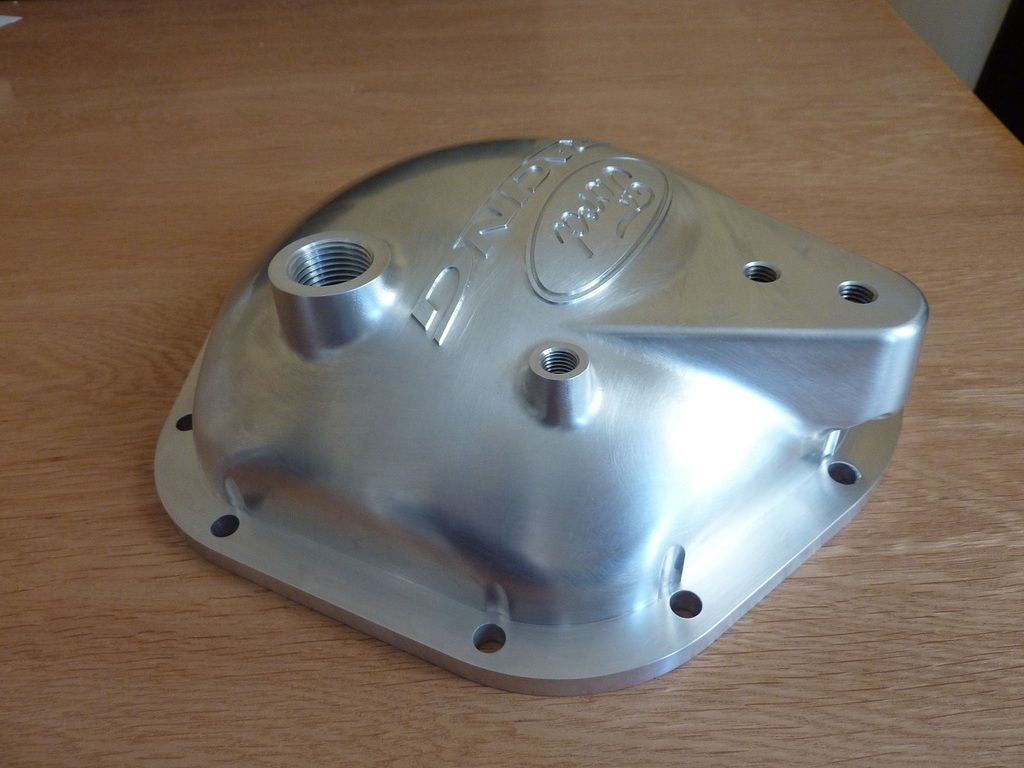
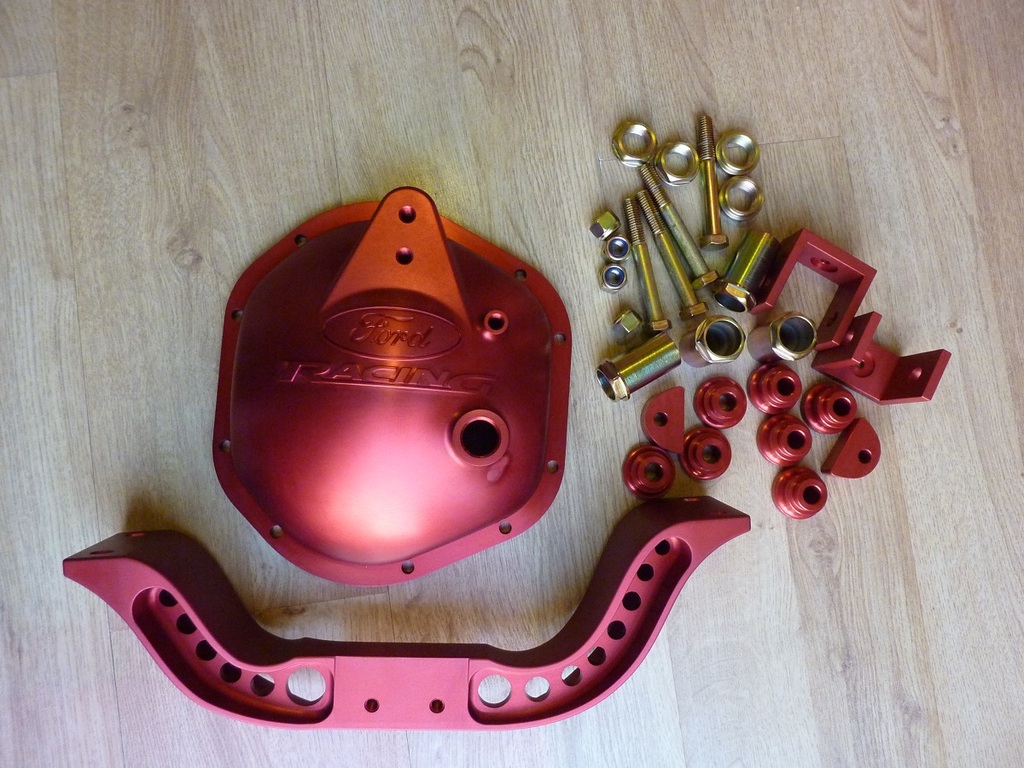
Finally finished bullshitting the outside of the diff cover, just need to get it anodised now...
Now looking at how to sort out drive shafts, might try and adapt these Jag bits to take the standard Cossie ones.


Now looking at how to sort out drive shafts, might try and adapt these Jag bits to take the standard Cossie ones.

Last edited by Mark V8; Jul 25, 2017 at 07:16 PM.

Thread Starter
Joined: May 2003
Posts: 4,110
Likes: 171
From: Essex
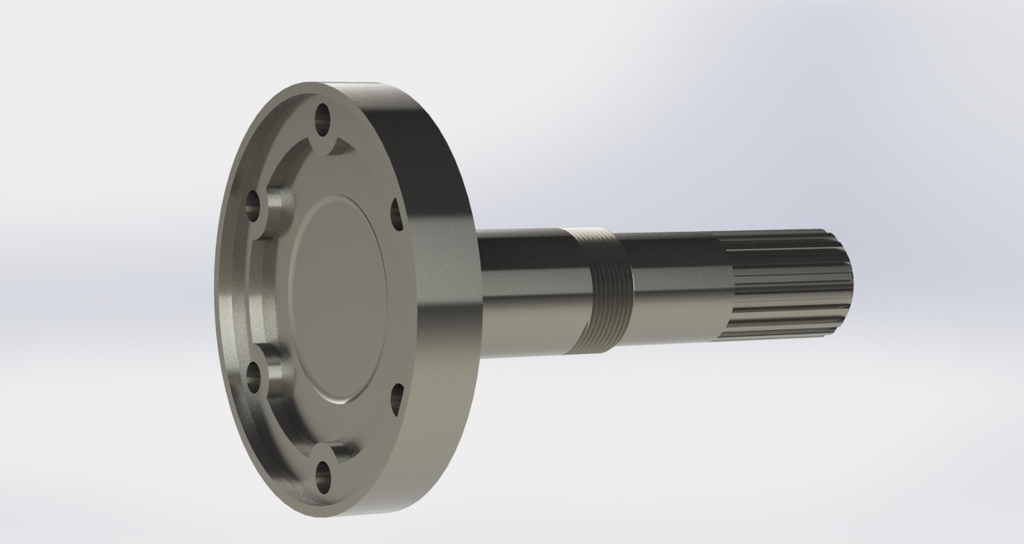
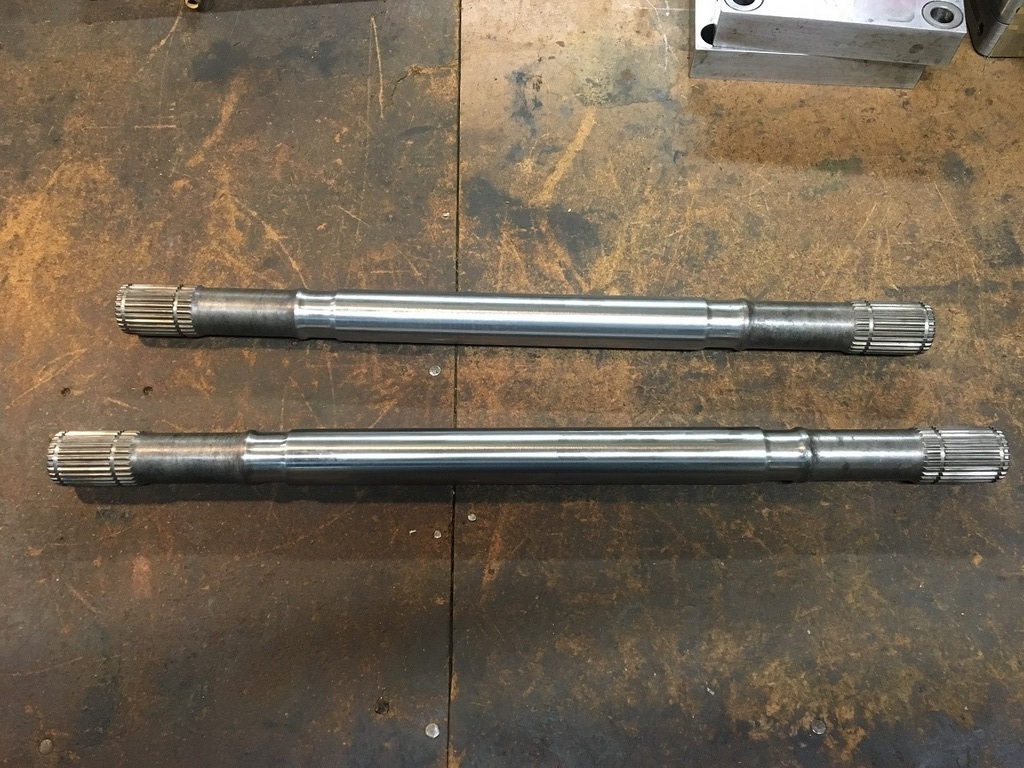
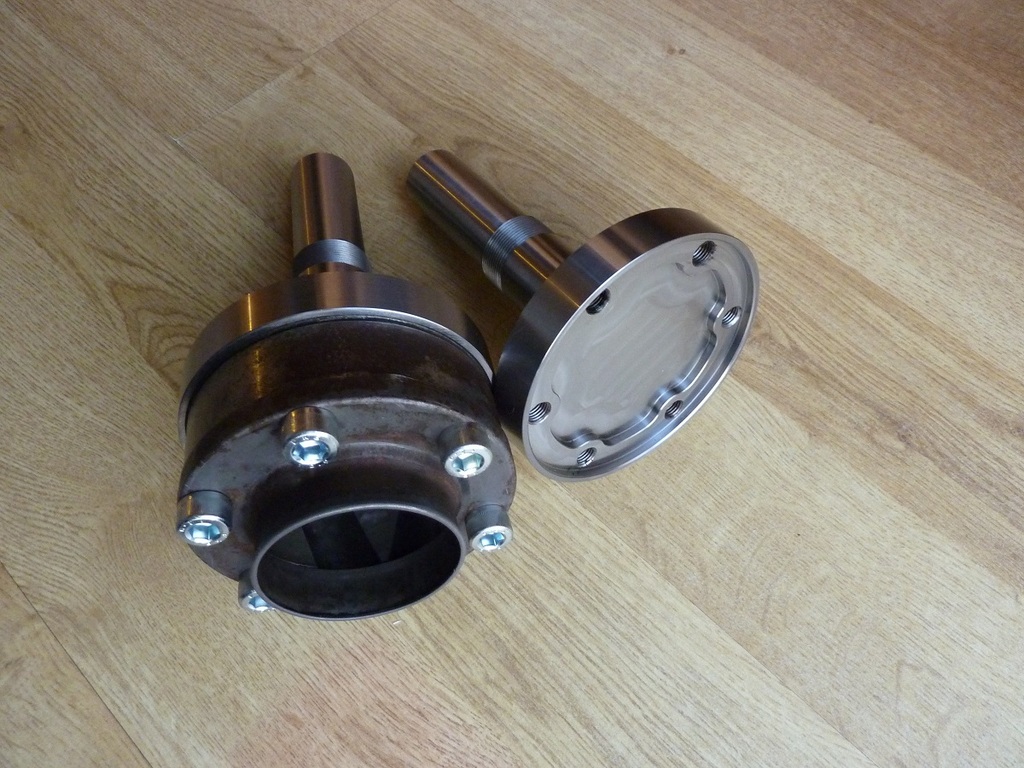
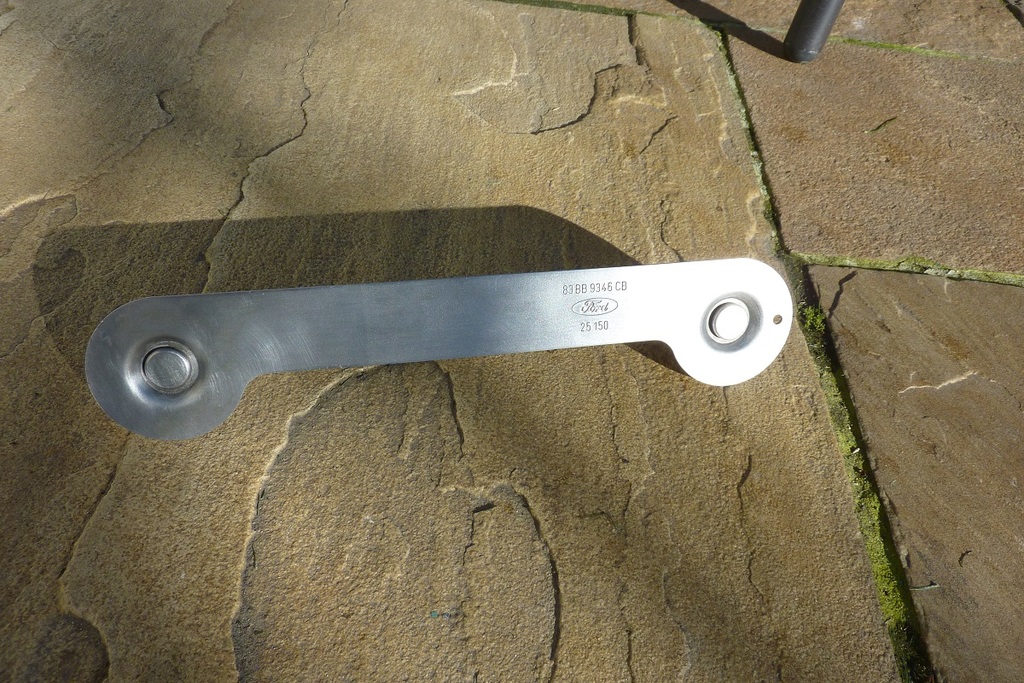
I don't like the look of the off the shelf drive shafts to fit Jag diff, plus they are expensive at over �800 !
My cunning plan will probably save me bugger all as the steel cost �200
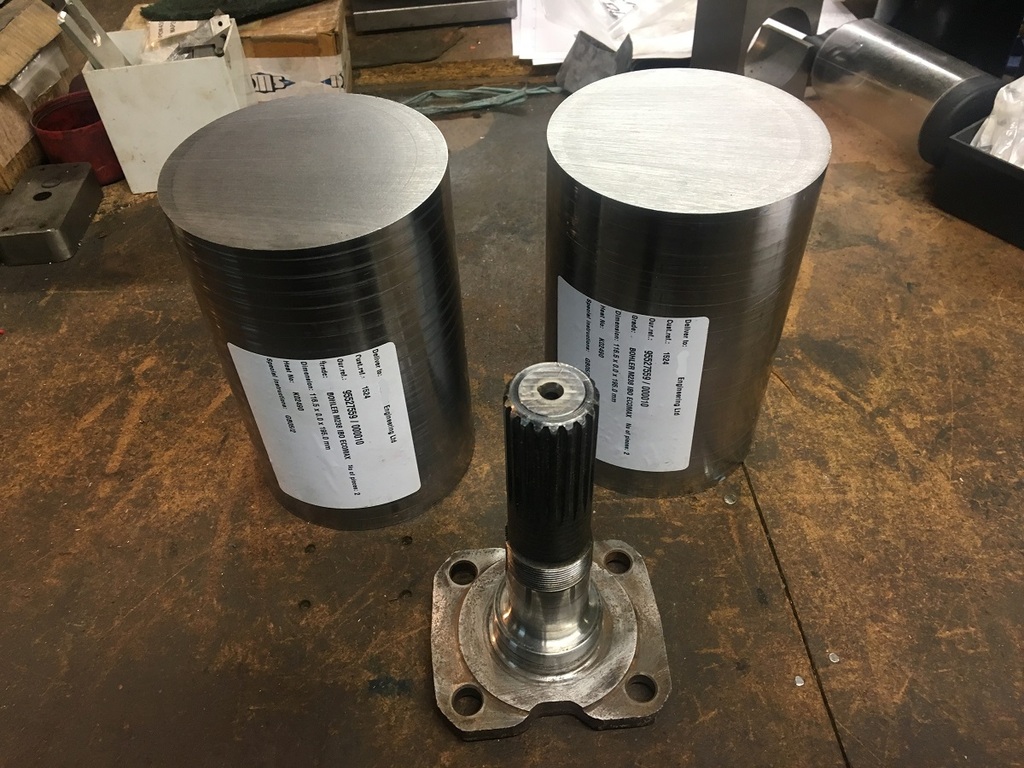
Bohler M238 DIN 1.2738 pre hardened with approx. 150,000 psi tensile strength
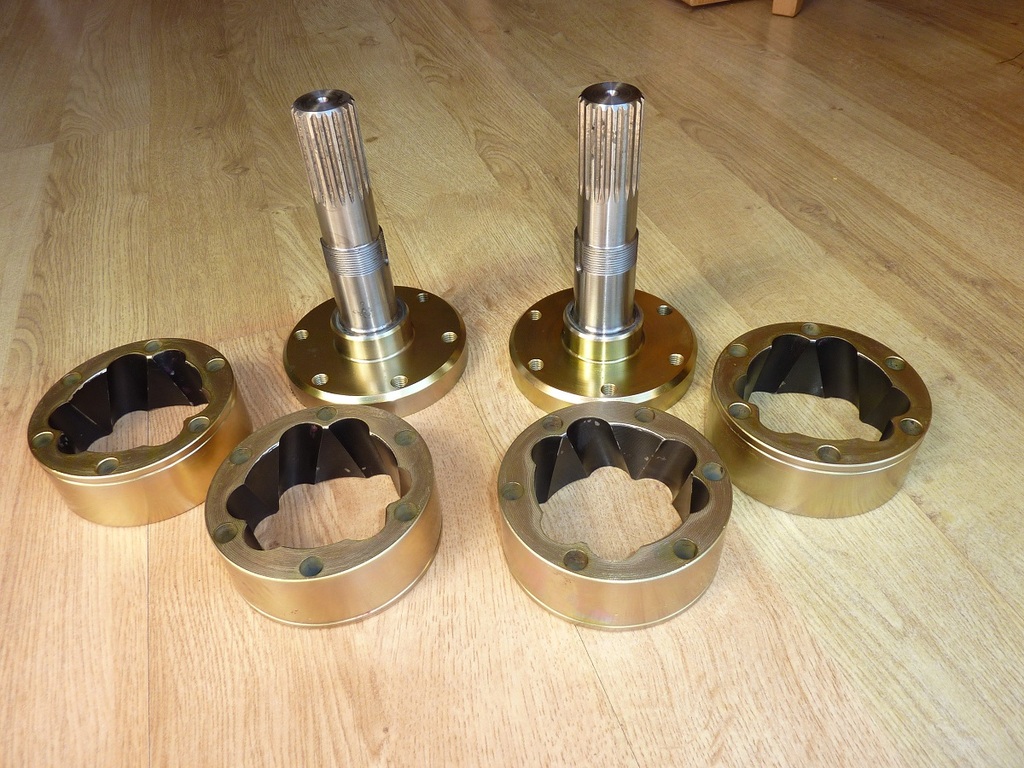
Should look like this when machined, although the splines turned out to be a pain in the arse to figure out and cost me more cash for a form cutter.
My cunning plan will probably save me bugger all as the steel cost �200

Bohler M238 DIN 1.2738 pre hardened with approx. 150,000 psi tensile strength
Should look like this when machined, although the splines turned out to be a pain in the arse to figure out and cost me more cash for a form cutter.

Thread Starter
Joined: May 2003
Posts: 4,110
Likes: 171
From: Essex
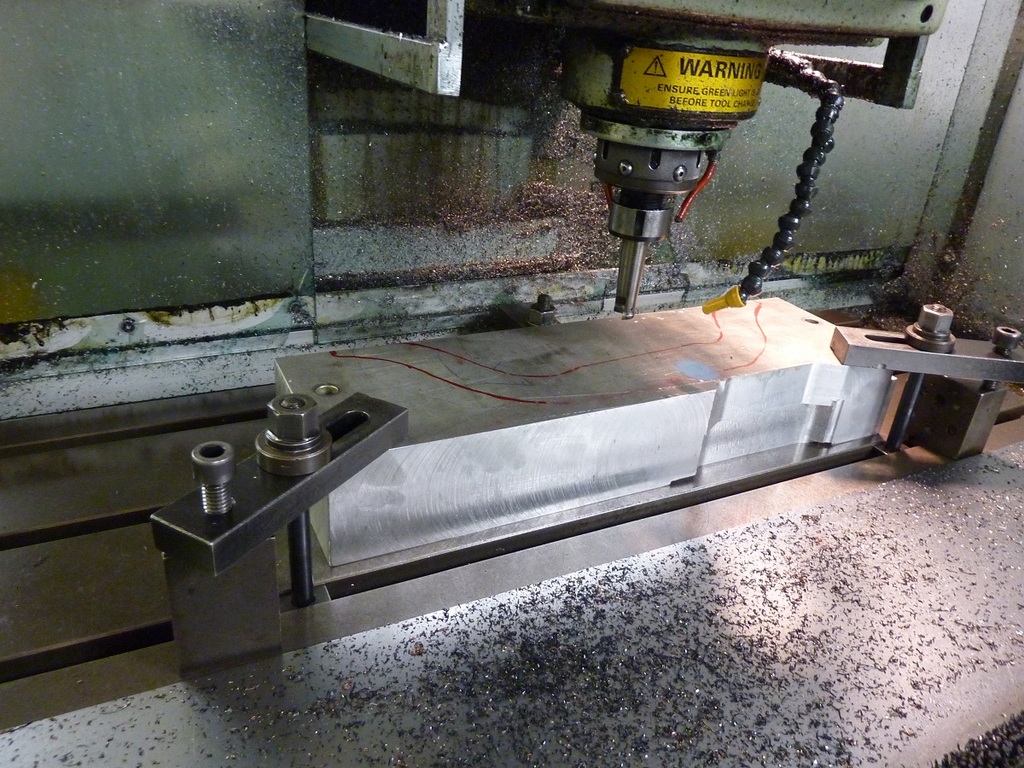
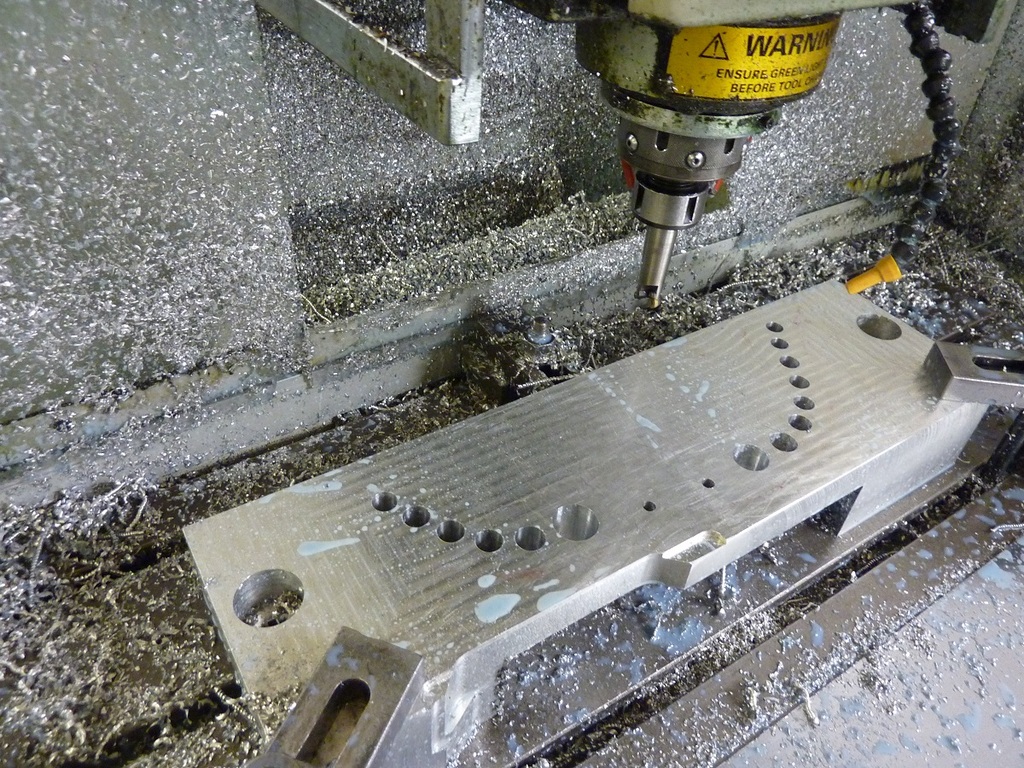
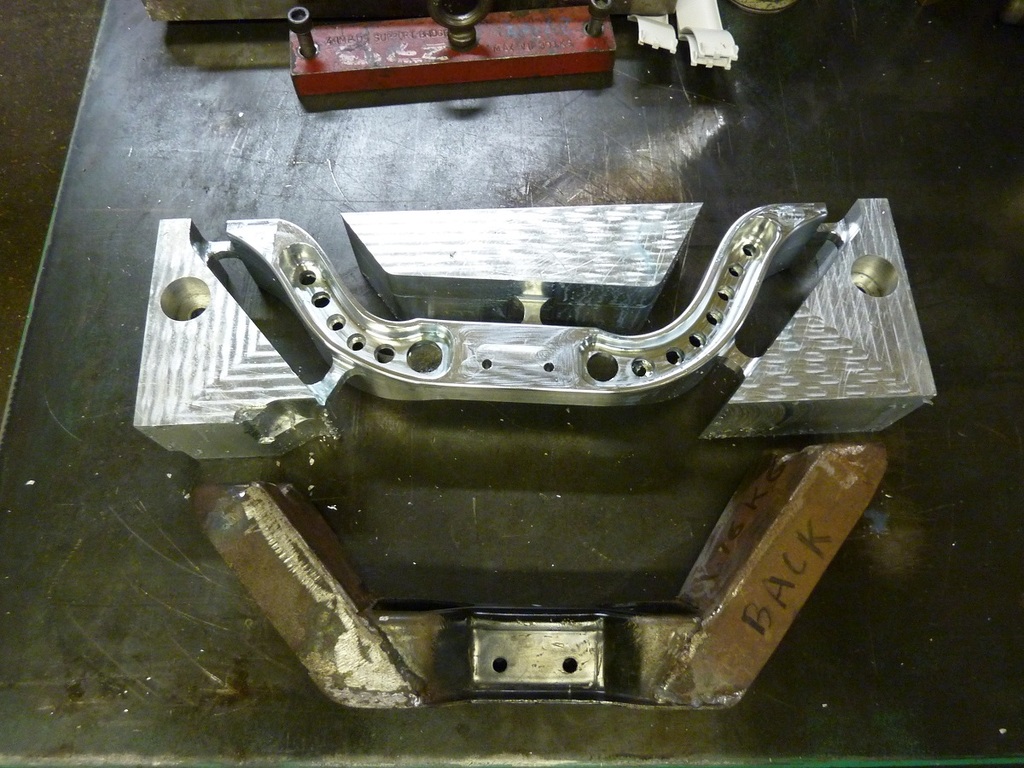
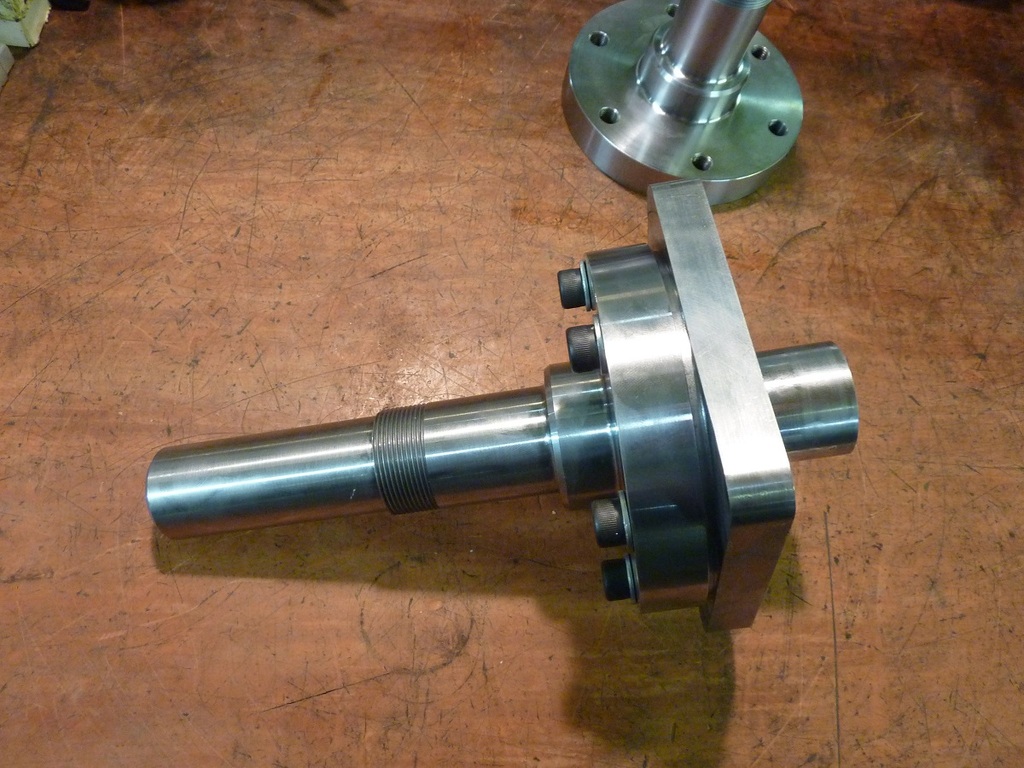
Not done anything with the stub axles, but have gone into work over Christmas to make a new gearbox cross member.
Push start button ad bugger off for a few hours
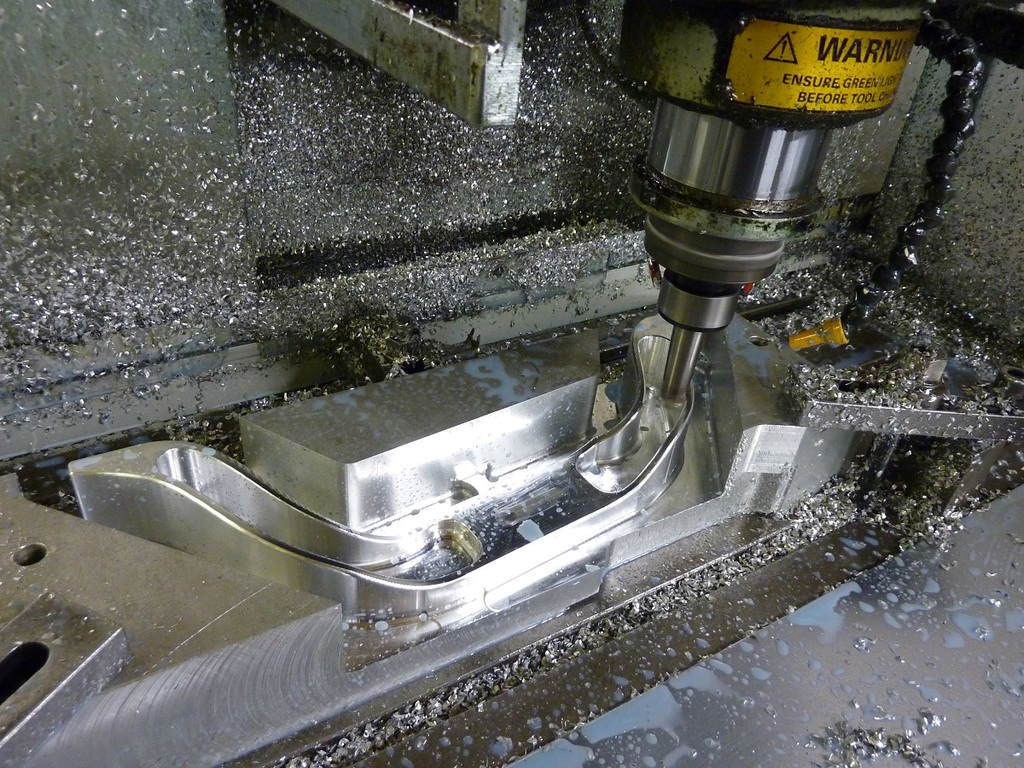
Flipped over to do other side
Bugger off again for a few hours
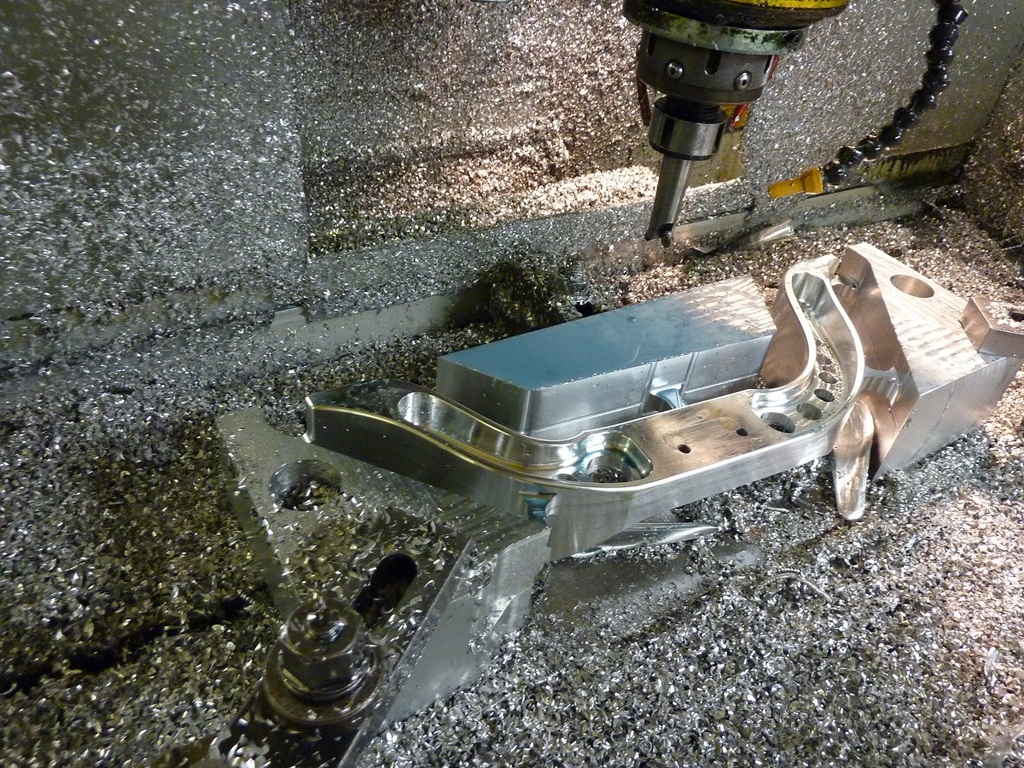
Needs chopping out from supporting scrap material and some more machining, but looks nicer and weighs less than the fabricated one.

Push start button ad bugger off for a few hours

Flipped over to do other side

Bugger off again for a few hours

Needs chopping out from supporting scrap material and some more machining, but looks nicer and weighs less than the fabricated one.


Thread Starter
Joined: May 2003
Posts: 4,110
Likes: 171
From: Essex
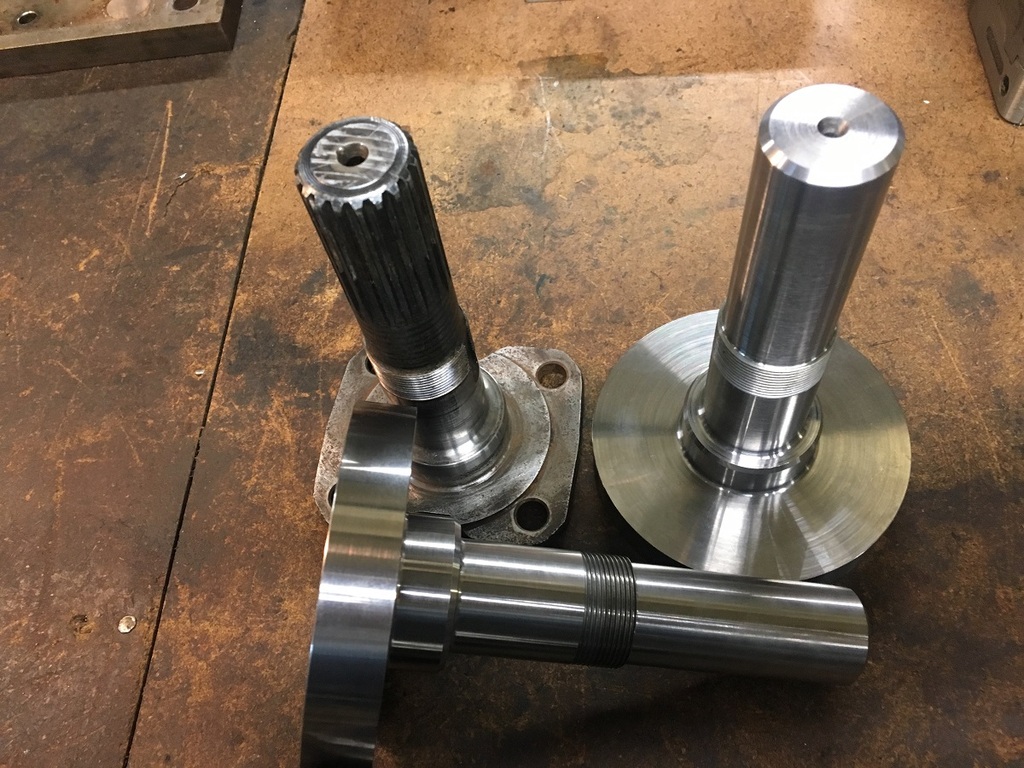
Confession time 
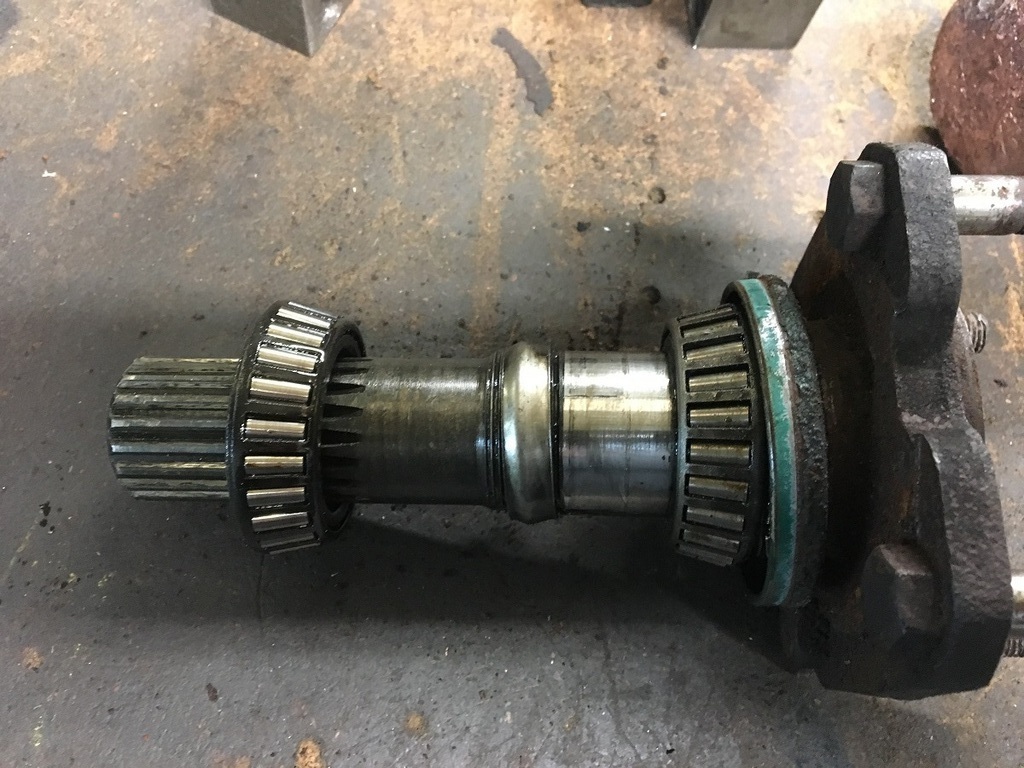
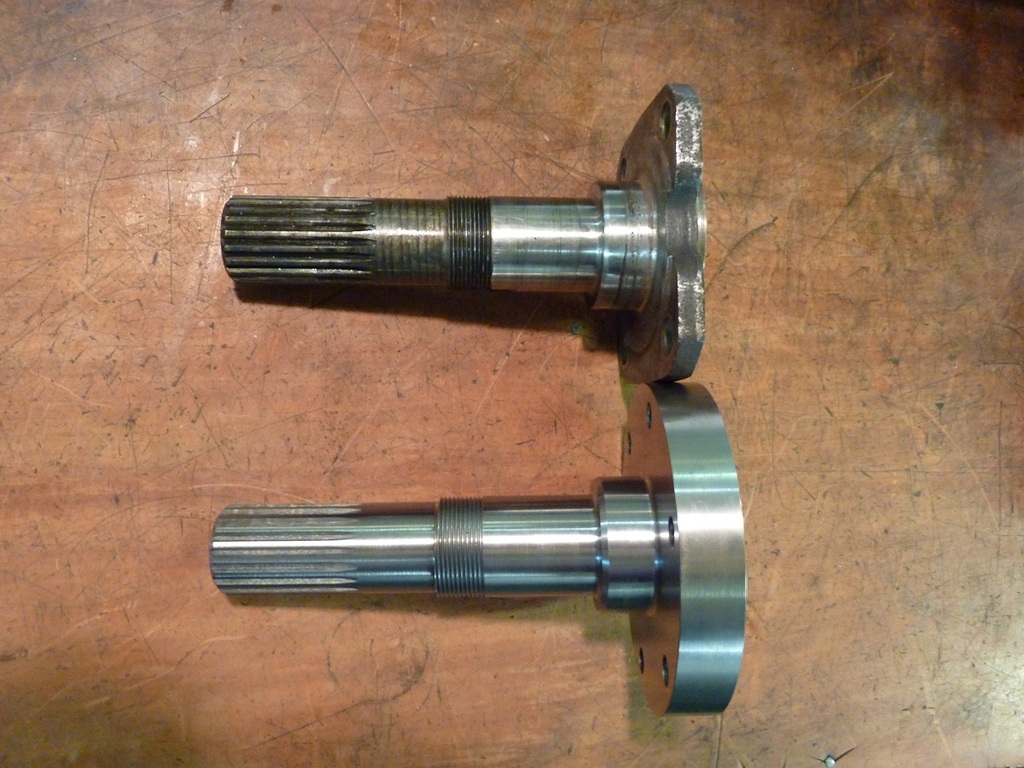
Our lathe at work is pretty ropey and to turn the stub axles would have taken an age, so I got a guy up the road to turn them on a CNC lathe for a bit of cash in hand.
Results of the cheating are back.
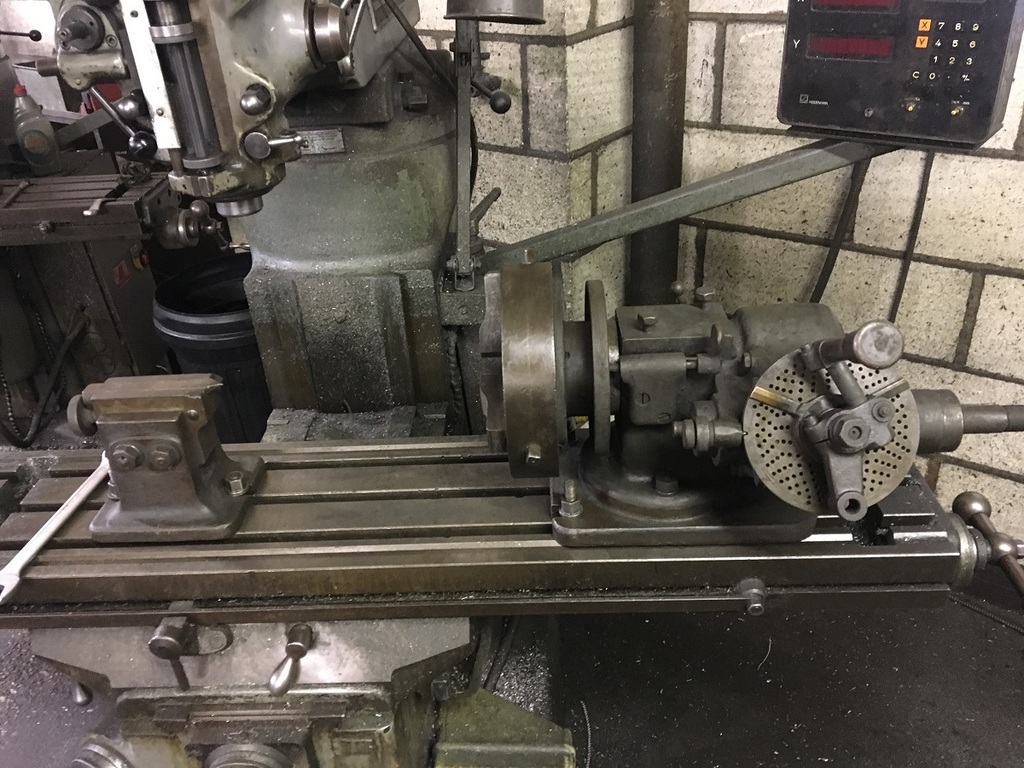
I now need to cut the splines using a dividing head on a milling machine, problem being our best dividing head is too small to hold the flange on the stub axle.
Round the back of the big surface grinder was a bigger one that has been left there for at east 20 years untouched !
Dragged it out for a look.

After a fair bit of time cleaning and oiling.
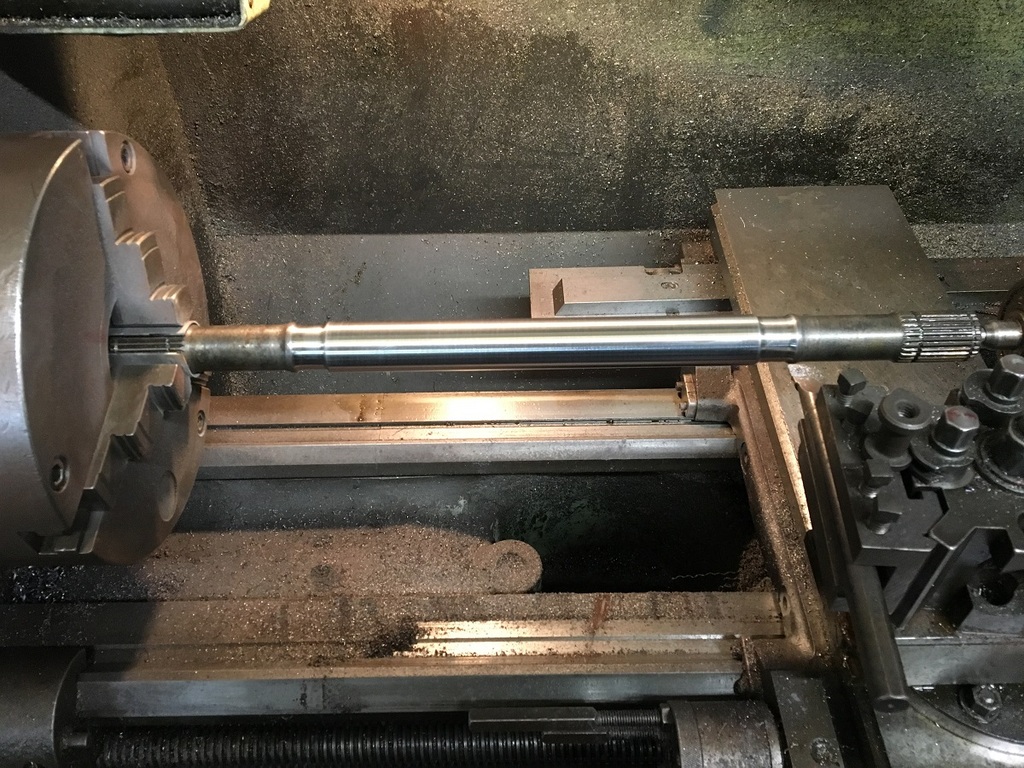
Not got any further than that with stub axles as was skimming the rust off drive shafts on lathe at the same time.
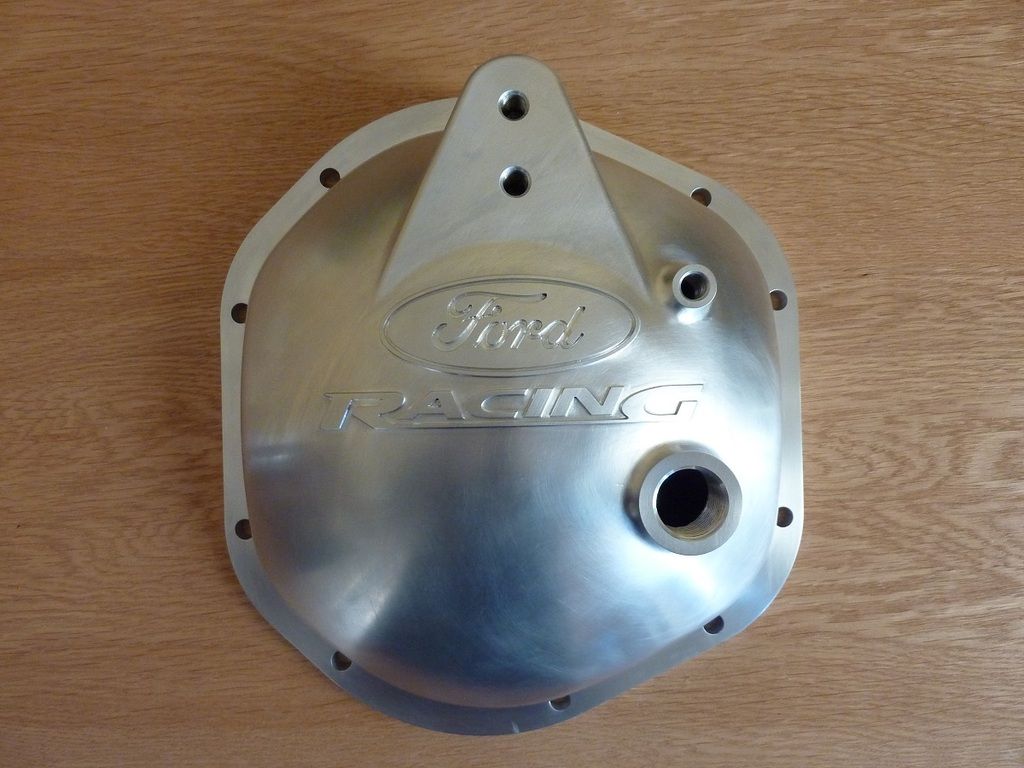
Also got my bits back from anodisers, unfortunately the weld shows on the diff cover and I'm going to try and find an oil fill sticker to hide it up.
Anyone know where I can get custom high temperature stickers made ?
I want one that follows the curve of the radius on the oil fill hole...
Our lathe at work is pretty ropey and to turn the stub axles would have taken an age, so I got a guy up the road to turn them on a CNC lathe for a bit of cash in hand.
Results of the cheating are back.

I now need to cut the splines using a dividing head on a milling machine, problem being our best dividing head is too small to hold the flange on the stub axle.
Round the back of the big surface grinder was a bigger one that has been left there for at east 20 years untouched !
Dragged it out for a look.

After a fair bit of time cleaning and oiling.

Not got any further than that with stub axles as was skimming the rust off drive shafts on lathe at the same time.


Also got my bits back from anodisers, unfortunately the weld shows on the diff cover and I'm going to try and find an oil fill sticker to hide it up.

Anyone know where I can get custom high temperature stickers made ?
I want one that follows the curve of the radius on the oil fill hole...


Thread Starter
Joined: May 2003
Posts: 4,110
Likes: 171
From: Essex
All that time pissing about cleaning the old dividing head was wasted 
I need to cut 19 splines, the dividing head needs the correct hole circle to do the divisions and this one does not have it, also there are no spares
Only option is to machine the bit where the drive shaft fits, then make an adaptor to fix the stub axle to the small dividing head that does have the correct hole circles !
I need 2 turns and 2 holes on a 19 hole circle to get the divisions correct.
Another Saturday at work sorting the drive shaft fixings...
I want to get the damn thing sat on its wheels this year so it looks more like a real car !
I need to cut 19 splines, the dividing head needs the correct hole circle to do the divisions and this one does not have it, also there are no spares
Only option is to machine the bit where the drive shaft fits, then make an adaptor to fix the stub axle to the small dividing head that does have the correct hole circles !
I need 2 turns and 2 holes on a 19 hole circle to get the divisions correct.
Another Saturday at work sorting the drive shaft fixings...


I want to get the damn thing sat on its wheels this year so it looks more like a real car !
Thread Starter
Joined: May 2003
Posts: 4,110
Likes: 171
From: Essex
Another Saturday at work...
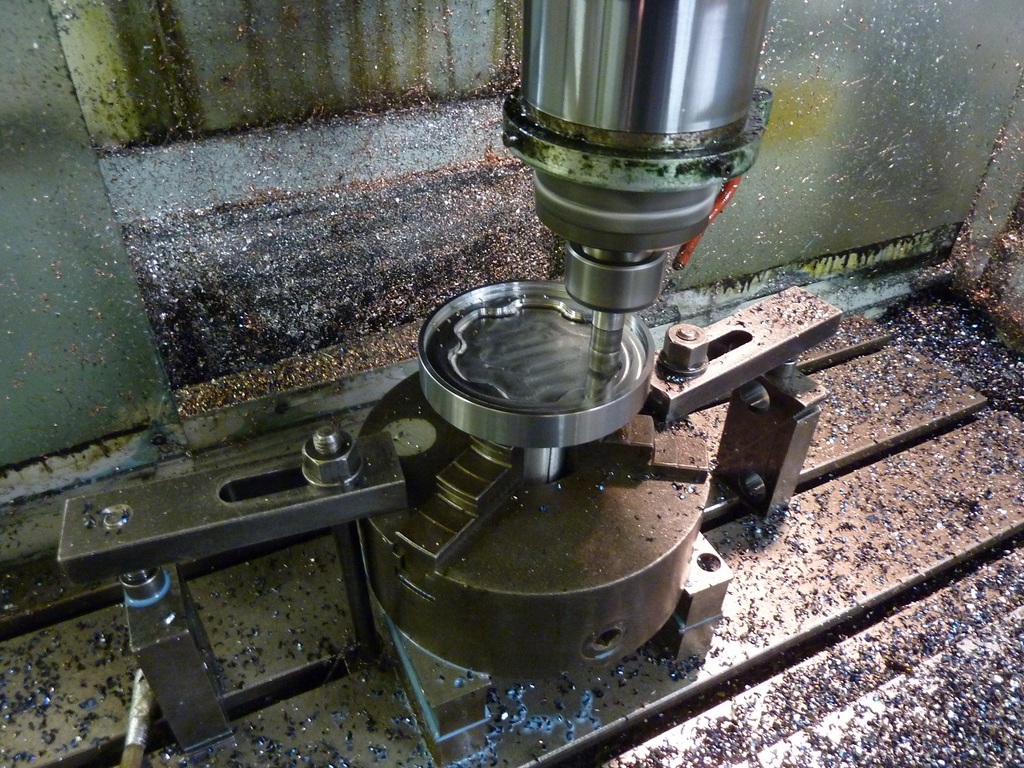
Stub axle bolted to adaptor so it fits in dividing head
Form cutter for splines I had to get specially made

This bit took many hours to do the pair and get the size spot on

All done apart from slot for locking tab.
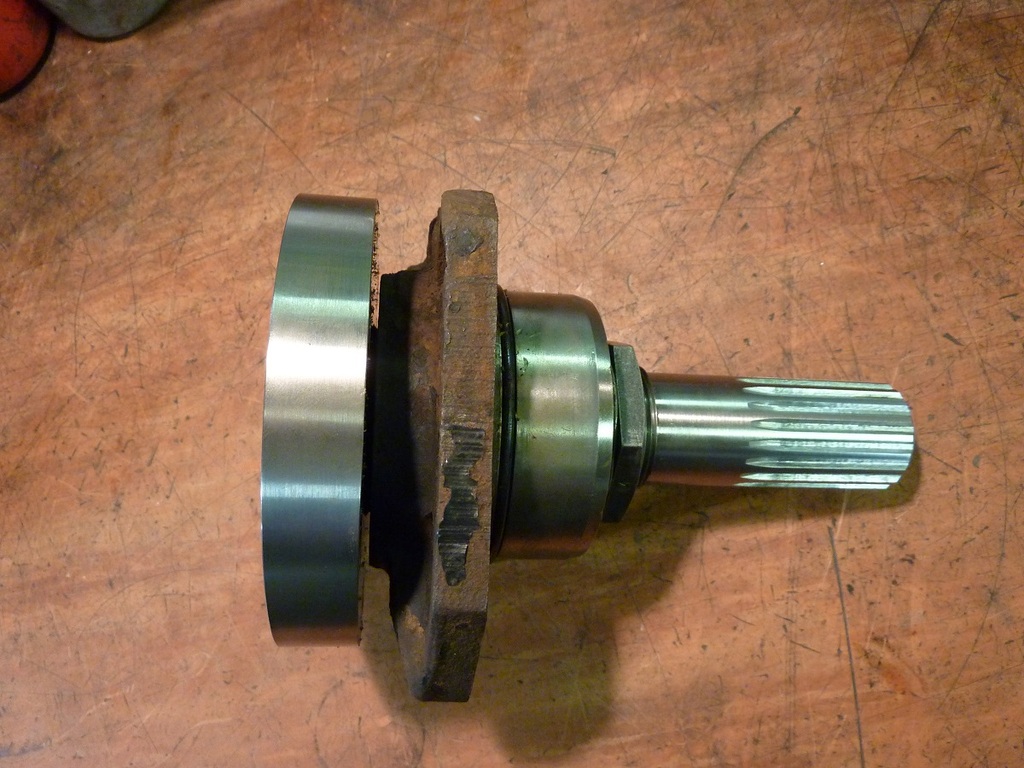
I had enough at this point and buggered off home, the slots can wait for another day
Stub axle bolted to adaptor so it fits in dividing head

Form cutter for splines I had to get specially made

This bit took many hours to do the pair and get the size spot on

All done apart from slot for locking tab.


I had enough at this point and buggered off home, the slots can wait for another day
Thread Starter
Joined: May 2003
Posts: 4,110
Likes: 171
From: Essex
I tried to figure out the profile and gave up
Sent off the Jag stub axle to CR Tools and they sorted it all out for me

http://www.crtoolsuk.com/cutting-tools-sheffield/
Thread Starter
Joined: May 2003
Posts: 4,110
Likes: 171
From: Essex


Thread Starter
Joined: May 2003
Posts: 4,110
Likes: 171
From: Essex
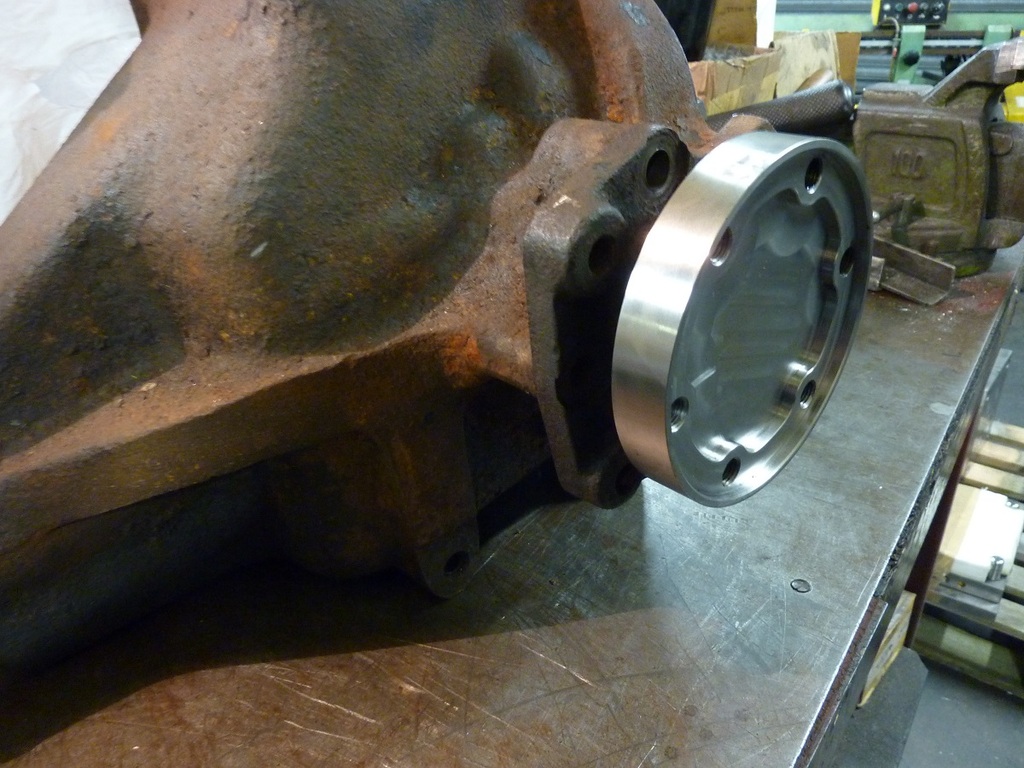
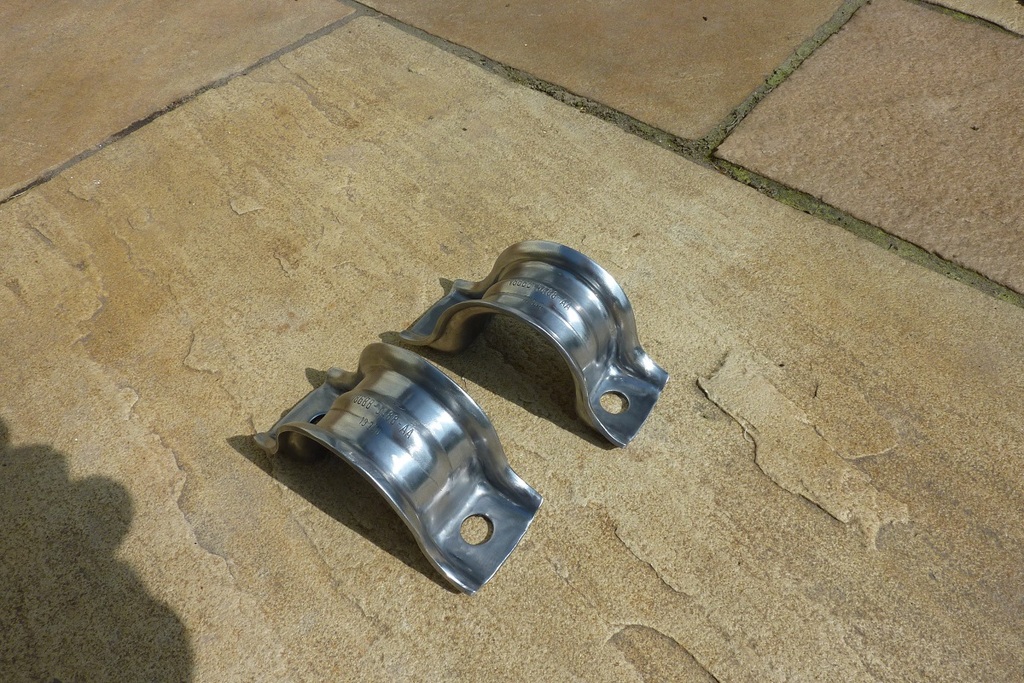
The bolts have to be fitted before shaft goes in carrier.

Added some more clearance for inside of joint.

If I push the shaft in as far as it will go I still get a witness mark from the grease - fingers crossed there is enough clearance !


Thread Starter
Joined: May 2003
Posts: 4,110
Likes: 171
From: Essex
Cleaning bits in citric acid, stuff works wonders and cleans off old zinc plate as well as rust.
Dried and wire brushed before going in polishing gadget.
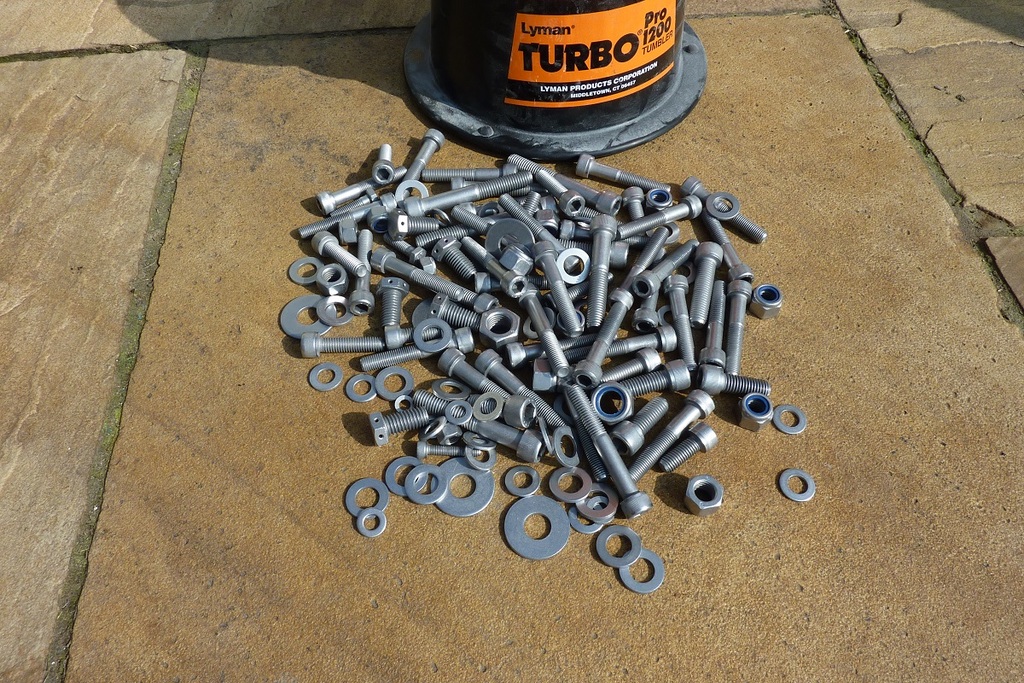
All gone for plating now. should be back this week.
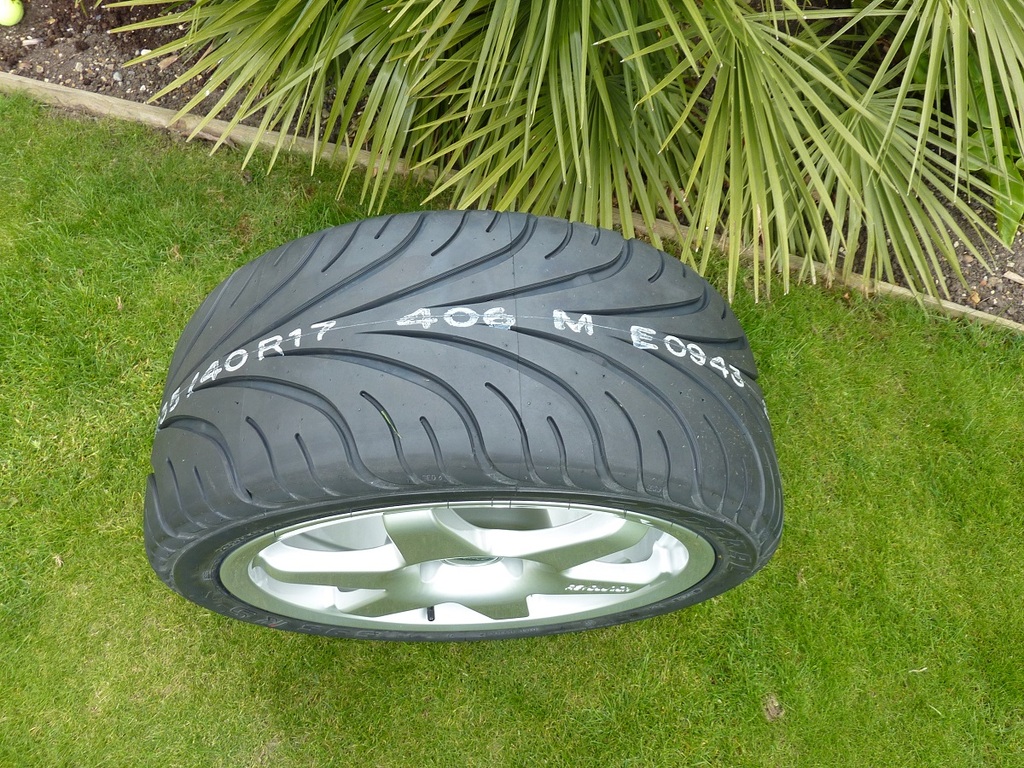
Not sure if my rear arches are going to like the 235 rear tyres
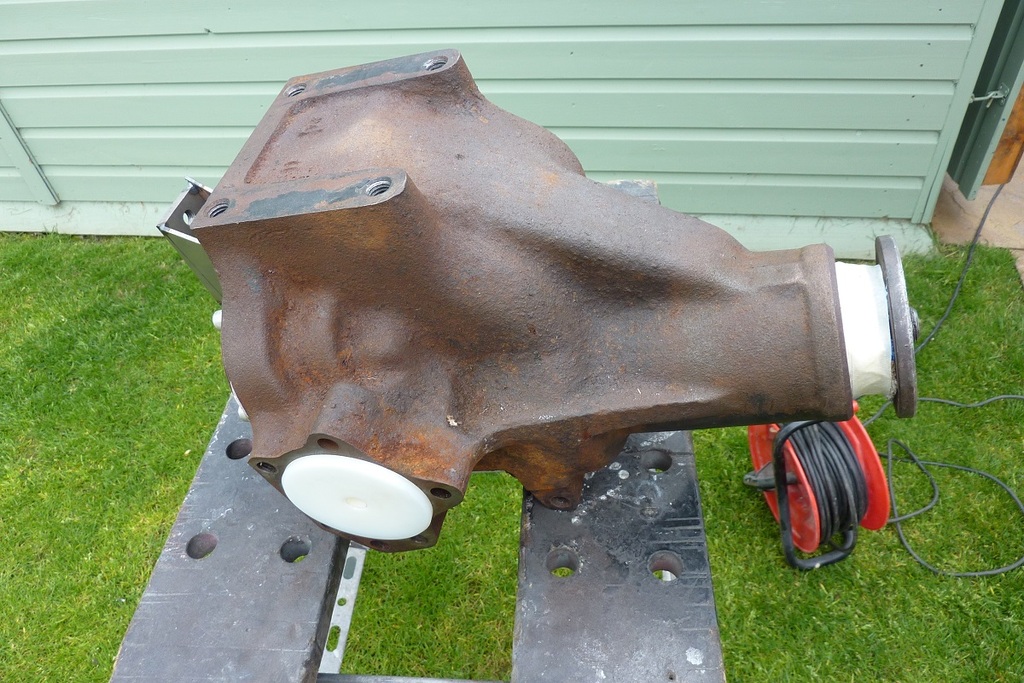
Spent the day getting covered in crap cleaning the rear diff up.
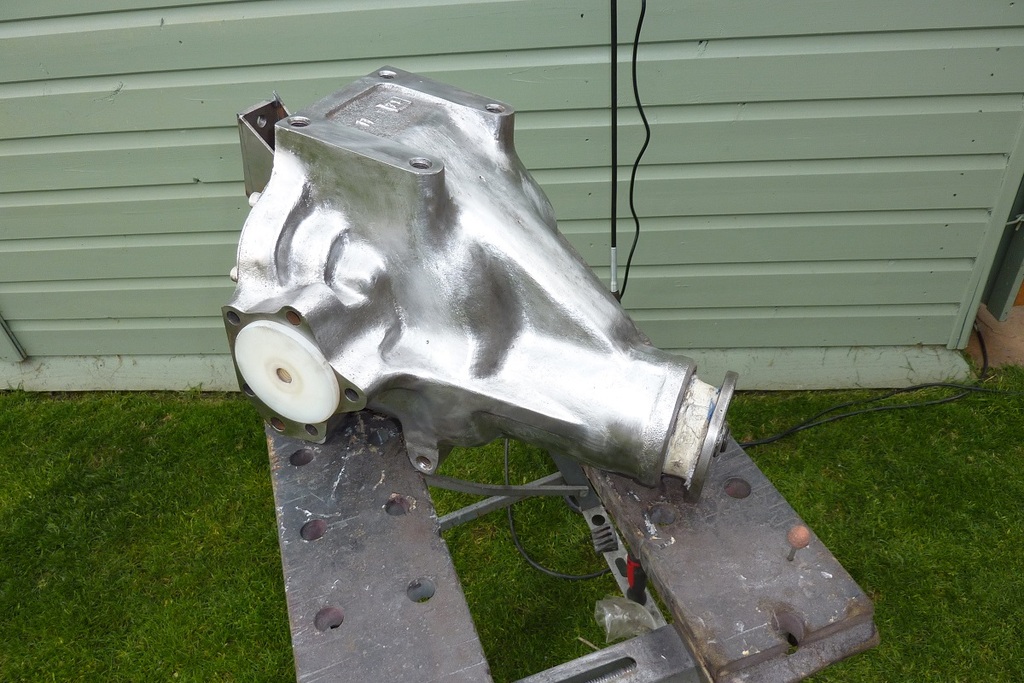
Hoping to get some epoxy on it next weekend if the weather is dry before it goes off for rebuild.

Dried and wire brushed before going in polishing gadget.


All gone for plating now. should be back this week.
Not sure if my rear arches are going to like the 235 rear tyres

Spent the day getting covered in crap cleaning the rear diff up.


Hoping to get some epoxy on it next weekend if the weather is dry before it goes off for rebuild.
Last edited by Mark V8; May 13, 2017 at 04:54 PM.
Looking good Mark. I do a similar process with the bolts prior to plating.
Soak in deox C
Dry off and wire wheel on the bench grinder
Some parts get soda blasted at work and then plating.
Gives and nice even result.
I would have epoxyed the diff that day by next week it might be a little ginger........
Soak in deox C
Dry off and wire wheel on the bench grinder
Some parts get soda blasted at work and then plating.
Gives and nice even result.
I would have epoxyed the diff that day by next week it might be a little ginger........
Thread Starter
Joined: May 2003
Posts: 4,110
Likes: 171
From: Essex
Went down the shed to check this morning and rust had started coming out of the pores / pits in the surface of the cast iron
Attacked it with Kurust all over

I'll wire wheel it all again and with luck the Kurust will have stopped the leaching !
Should be good to go
Thread Starter
Joined: May 2003
Posts: 4,110
Likes: 171
From: Essex
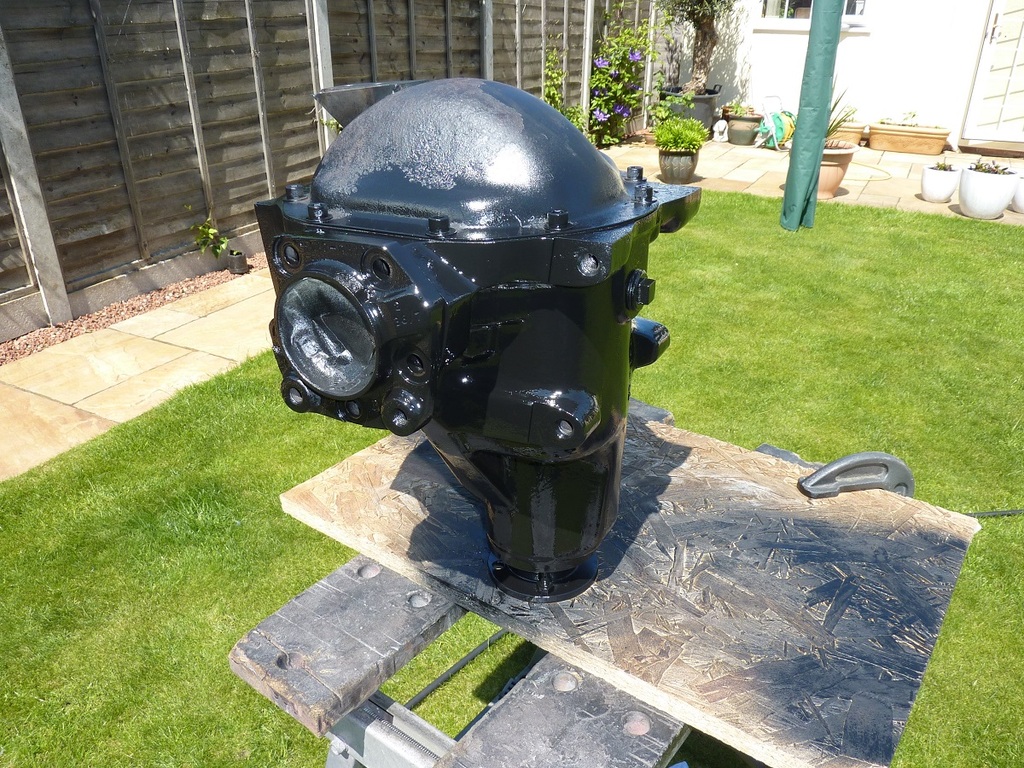
Wire wheeled the diff back to bare metal again and sprayed it with epoxy.
Took it over to a Jag axle specialist on Mersea island for check over / rebuild - going to take 5 to 6 weeks as the guy is really busy.
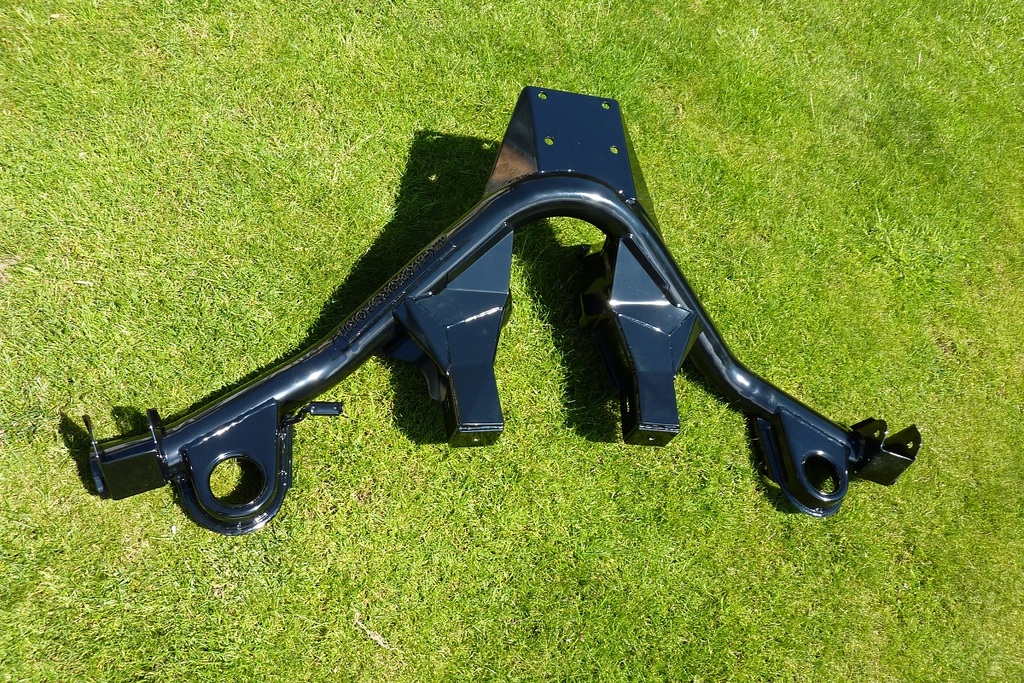
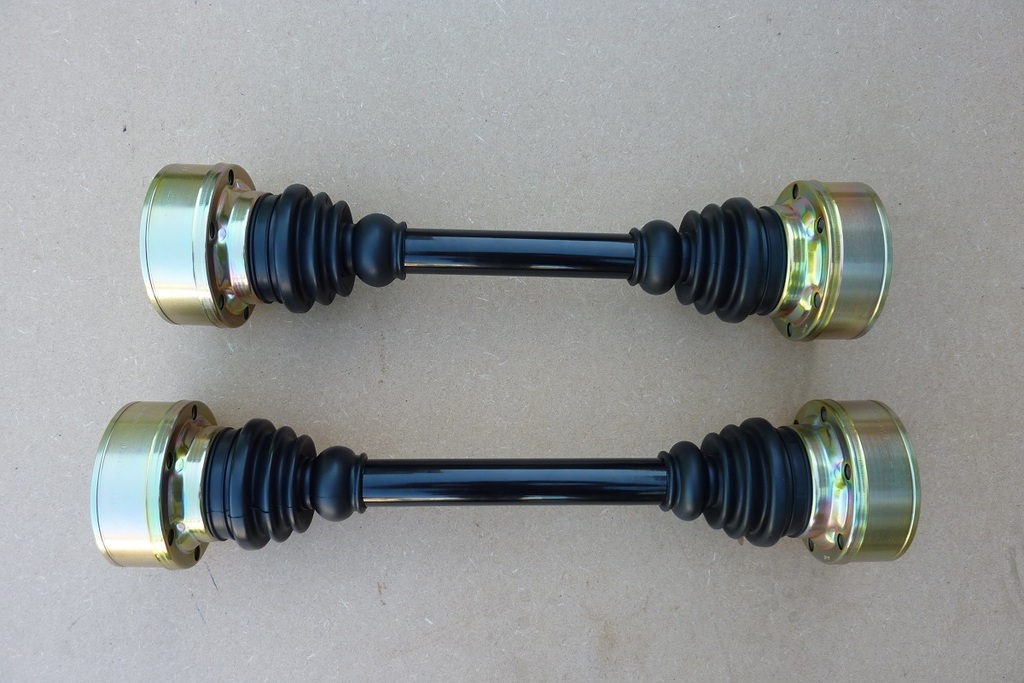
Got the beam, trailing arms and drive shafts powder coated
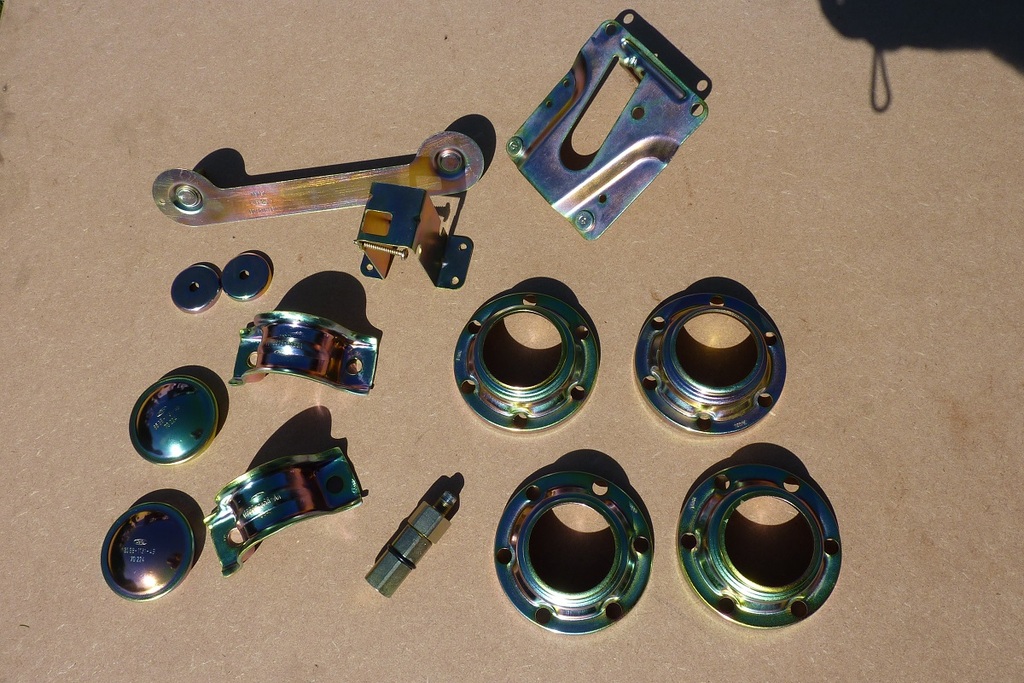
Loads of zinc plating, got the platers to mask off parts that would cause issues with bearing fit.
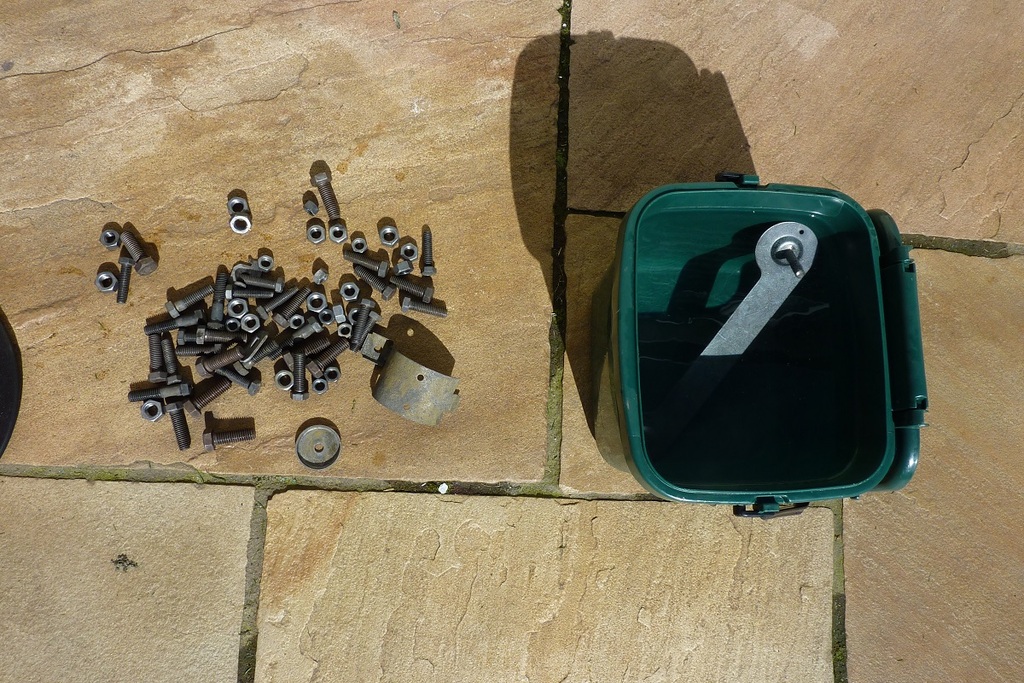
Spent the afternoon assembling drive shafts, buggered up one of the stainless gaiter clips and gave up until I get some more !
Took it over to a Jag axle specialist on Mersea island for check over / rebuild - going to take 5 to 6 weeks as the guy is really busy.

Got the beam, trailing arms and drive shafts powder coated

Loads of zinc plating, got the platers to mask off parts that would cause issues with bearing fit.


Spent the afternoon assembling drive shafts, buggered up one of the stainless gaiter clips and gave up until I get some more !
