
MonK-E's ST170 Project

Thread Starter
I'm Finding My Feet Here Now
Joined: Dec 2017
Posts: 124
Likes: 13
From: East Sussex
Hi all, I haven't been round here long but i thought id just jump in with a project. It will be a nice long term one that I'll try and keep updated regularly.
I've previously built a supercharged mk4 golf and a couple of turbo projects. if anyone is interested, let me know and I'll post up some pics.
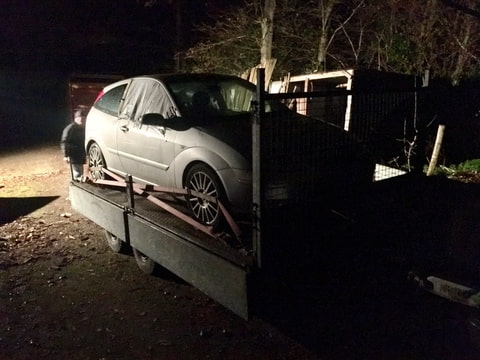
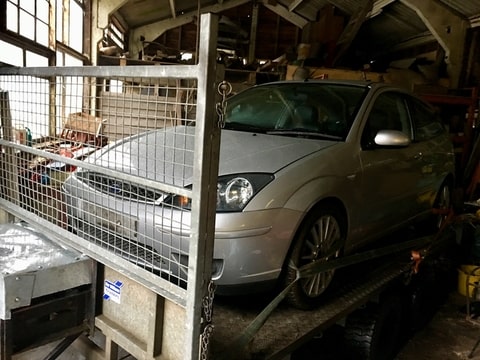
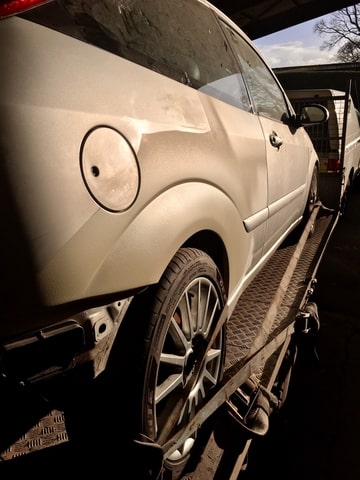
I felt like getting away from the vag scene and wanted to go with something that handles straight out of the box. So i went out and picked up a fairly battered st170 for �450, its only done just under 80k miles but it has a smashed drivers window, 3 bald tyres, a completely dead battery, the EML is on and dents all over it.
The person I bought it of was kind enough to give me the door glass he got from the scrappy to replace it.
It was a nice easy job.
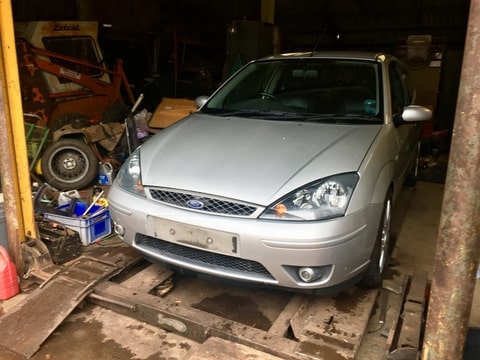
Then got her straight on a 4 post ramp to go through a fair bit and see exactly how much fun I'm in for
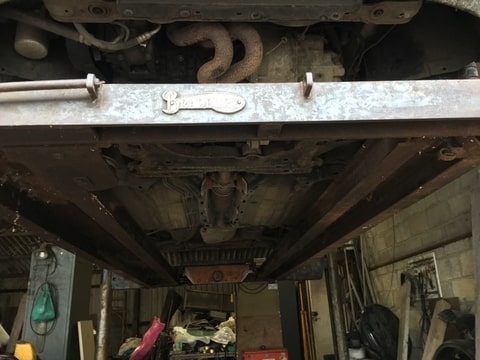
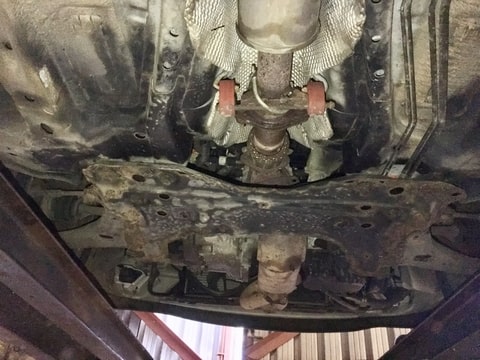
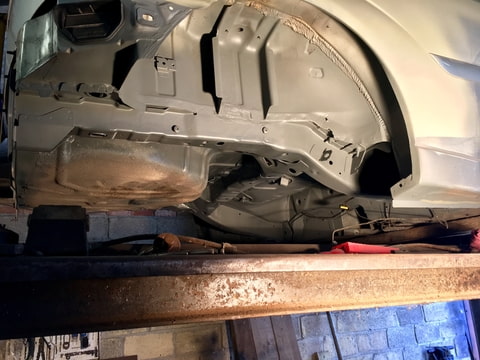
A few bits of bodgery gone on but nothing too bad. plenty of surface rust to sort out as to be expected from a car of this age and a bit of rot round the inner arch liner.
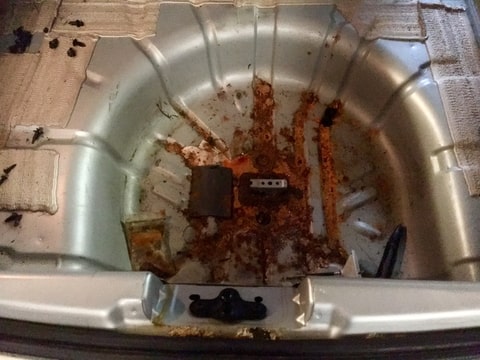
Emptied out the boot and found the spare wheel mount has almost disintegrated haha
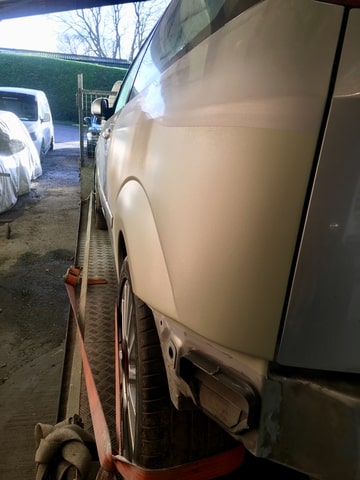
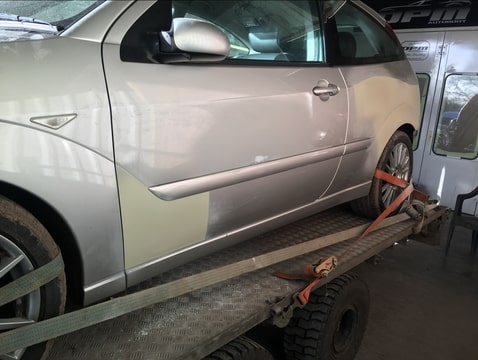
Then onto the out side damage
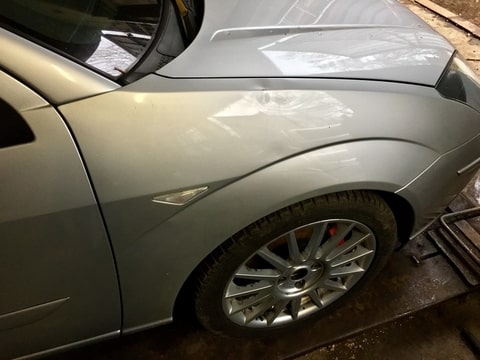
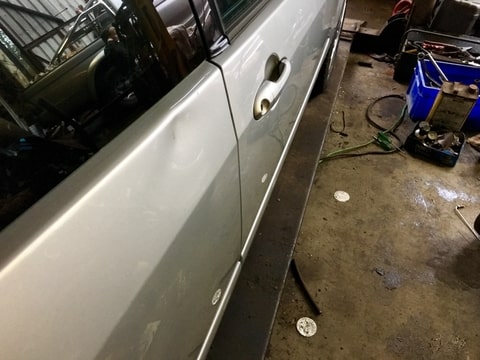
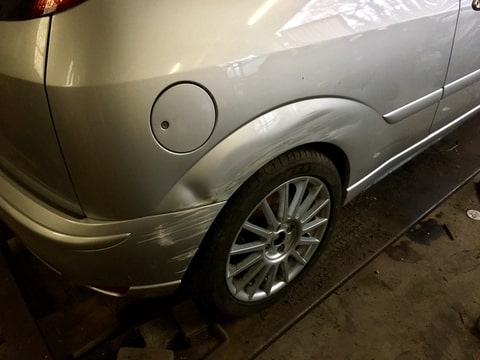
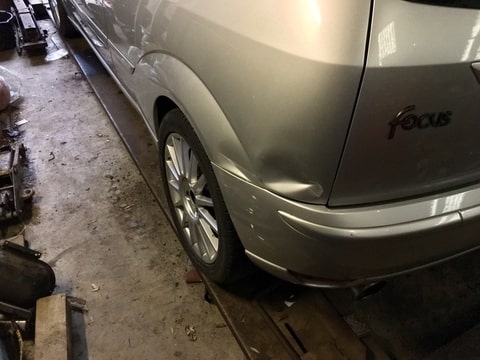
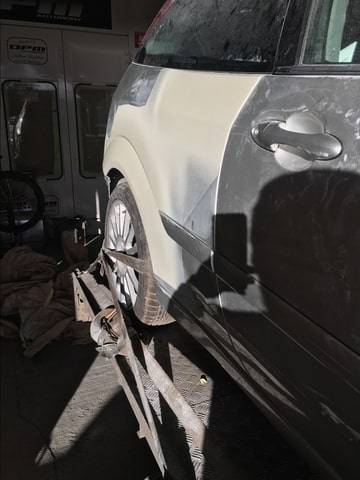
The front wing I'll just replace. but all the other dents are going to have to be pulled out. luckily my cousin has a body shop so I have pulled out some of the interior to be able to get to a couple of spots
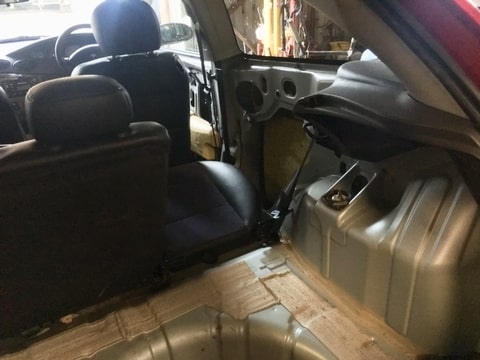
Then loaded her back up on the trailer ready to get the dents pulled out tomorrow. my cousin has told me because I'm a cheap skate he'll show me how to do one then its up to me to do the rest. Fair play, could be fun. or it might come back far worse hahaha.

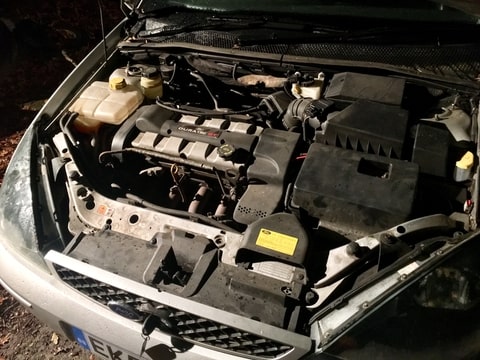
Oh yeah before I forget I did the little trick with the trip meter and found out the EML was just the battery voltage low code. So I put another battery on and all is spot on, fires up straight away all gauges reading normal
I've previously built a supercharged mk4 golf and a couple of turbo projects. if anyone is interested, let me know and I'll post up some pics.
I felt like getting away from the vag scene and wanted to go with something that handles straight out of the box. So i went out and picked up a fairly battered st170 for �450, its only done just under 80k miles but it has a smashed drivers window, 3 bald tyres, a completely dead battery, the EML is on and dents all over it.
The person I bought it of was kind enough to give me the door glass he got from the scrappy to replace it.
It was a nice easy job.
Then got her straight on a 4 post ramp to go through a fair bit and see exactly how much fun I'm in for
A few bits of bodgery gone on but nothing too bad. plenty of surface rust to sort out as to be expected from a car of this age and a bit of rot round the inner arch liner.
Emptied out the boot and found the spare wheel mount has almost disintegrated haha
Then onto the out side damage
The front wing I'll just replace. but all the other dents are going to have to be pulled out. luckily my cousin has a body shop so I have pulled out some of the interior to be able to get to a couple of spots
Then loaded her back up on the trailer ready to get the dents pulled out tomorrow. my cousin has told me because I'm a cheap skate he'll show me how to do one then its up to me to do the rest. Fair play, could be fun. or it might come back far worse hahaha.
Oh yeah before I forget I did the little trick with the trip meter and found out the EML was just the battery voltage low code. So I put another battery on and all is spot on, fires up straight away all gauges reading normal
Thread Starter
I'm Finding My Feet Here Now
Joined: Dec 2017
Posts: 124
Likes: 13
From: East Sussex
I spent a few days at my cousins bodyshop. It was awesome fun and a learning experience, I even got to play with a rs500 he's got in at the moment.
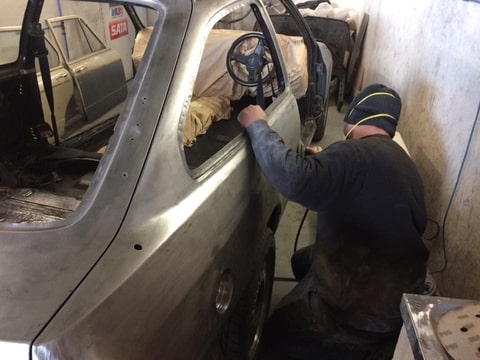
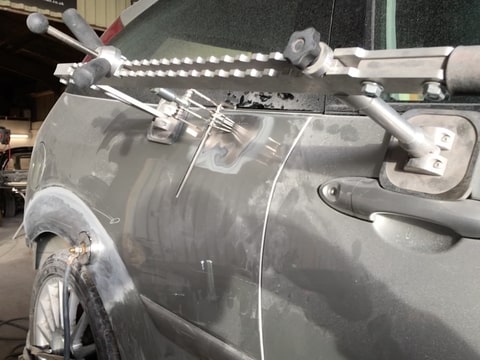
Any way on to the ST170, first job was to clean a line where the crease is so you can tack little keys and pull the dent using a super impressive tool. I was initially quite sceptical of this but it turns out to be blinding.
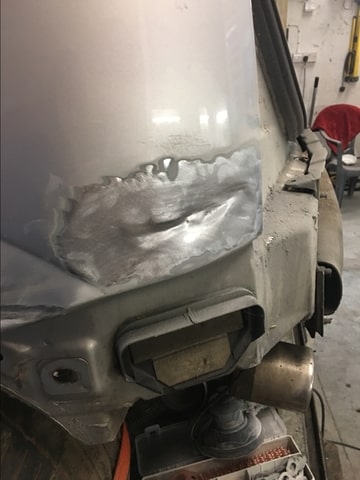
I was quite made up with how that corner came out to be honest. even though it took me nearly all day (saying that I've never done this sort of body work before)
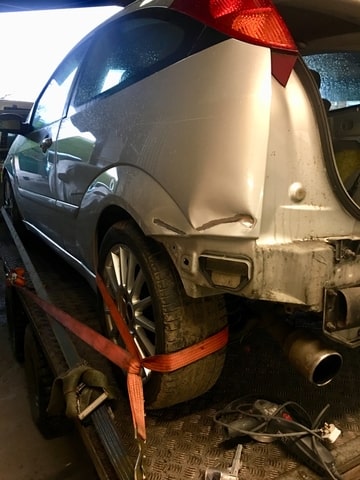
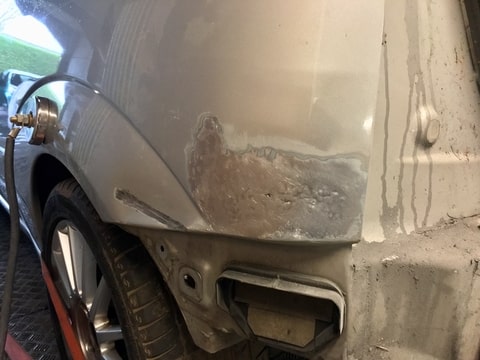
Then onto the other side

If you take a look at the earlier pics of this side you can see the arch was nearly flat. It took some work to pull it back out inch by inch working round the arch. very surprised to be able to get the shape back.
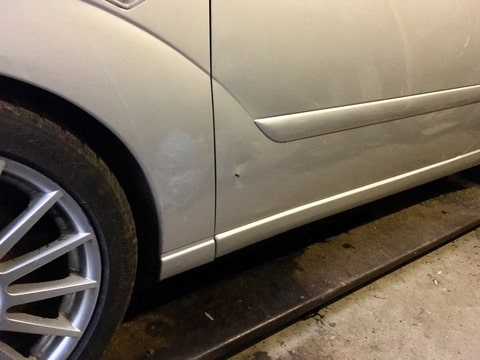
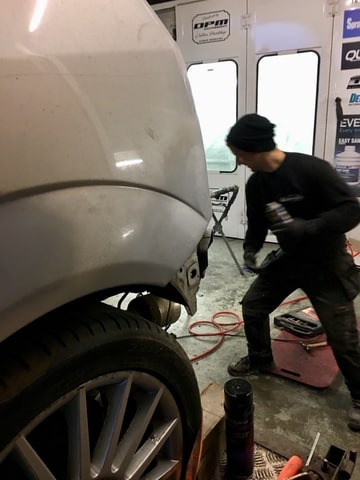
Then onto the dent below the side window

A quick skim using his finest finishing filler
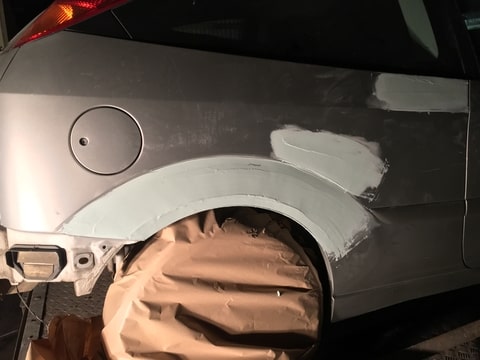
and fun sanding it all back
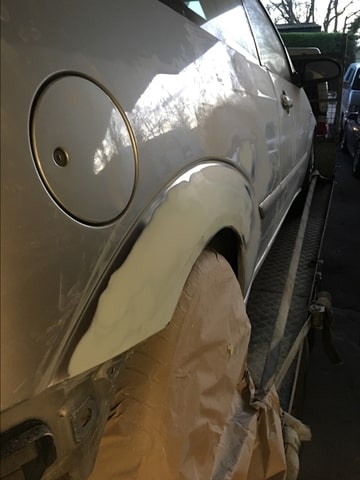
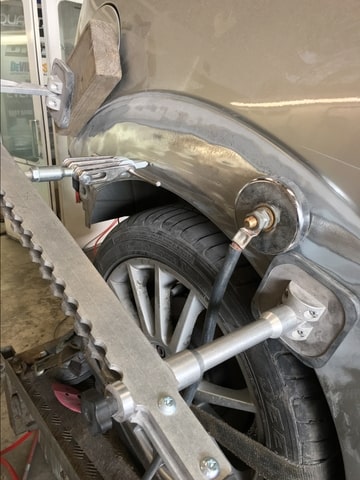
Then 3 coats of high build primer
I missed one dent at the bottom of the door that Ill go back to before it eventually gets a full coat of primer. also the front drivers side wing I will just replace, rather than pulling and filling them.
After all this back to the workshop for a play with the back end
Any way on to the ST170, first job was to clean a line where the crease is so you can tack little keys and pull the dent using a super impressive tool. I was initially quite sceptical of this but it turns out to be blinding.
I was quite made up with how that corner came out to be honest. even though it took me nearly all day (saying that I've never done this sort of body work before)
Then onto the other side
If you take a look at the earlier pics of this side you can see the arch was nearly flat. It took some work to pull it back out inch by inch working round the arch. very surprised to be able to get the shape back.
Then onto the dent below the side window
A quick skim using his finest finishing filler
and fun sanding it all back
Then 3 coats of high build primer
I missed one dent at the bottom of the door that Ill go back to before it eventually gets a full coat of primer. also the front drivers side wing I will just replace, rather than pulling and filling them.
After all this back to the workshop for a play with the back end
Thread Starter
I'm Finding My Feet Here Now
Joined: Dec 2017
Posts: 124
Likes: 13
From: East Sussex
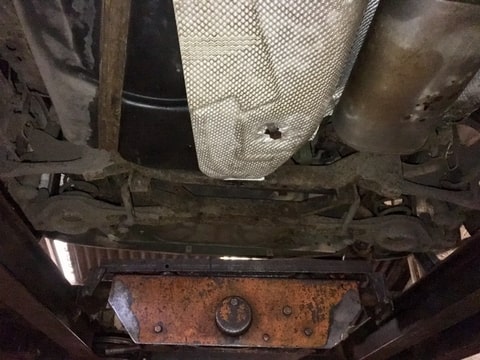
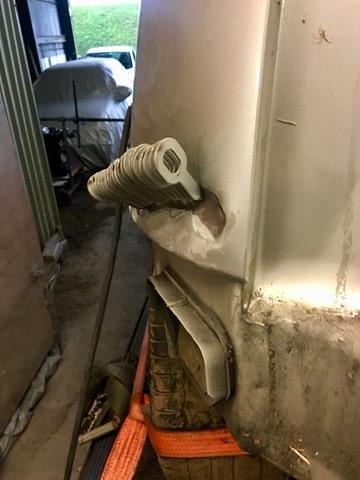
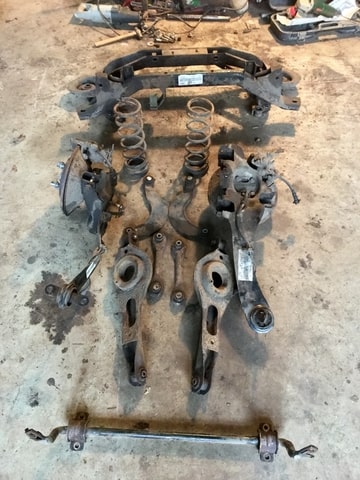
I whipped the wheels off on the ramp and started loosening the rear subframe
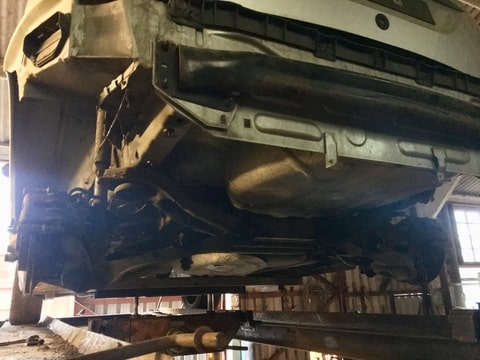
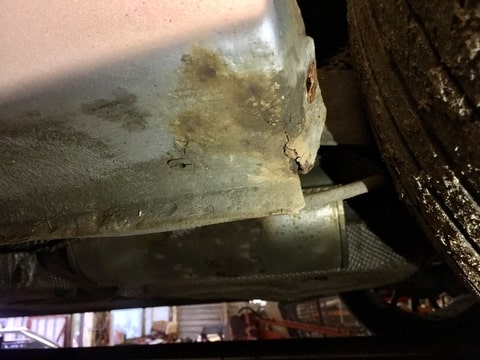
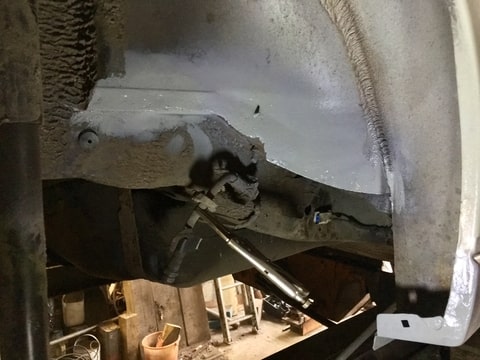
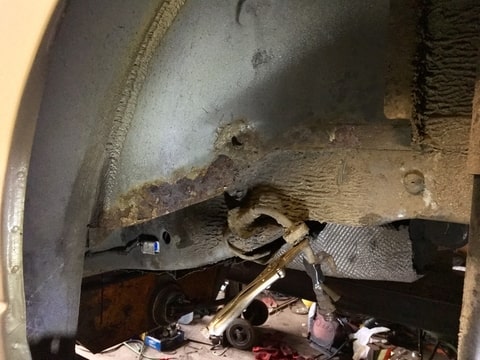
once that was off I decided id take another look at the split in the bottom of the passenger side rear wheel arch.
Turns out its not just split, its a bit rot.
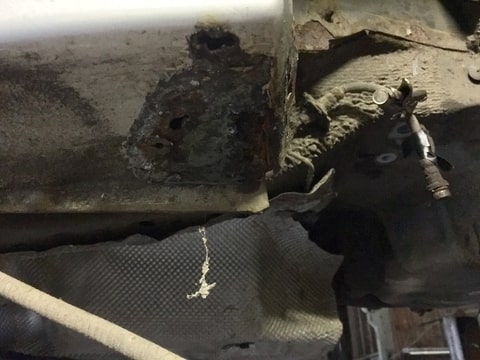
nothing to do but cut it out
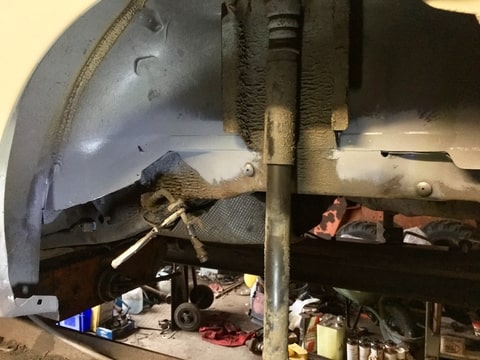
I made up a little plate, I even cut the square little hole for the plastic bung that I don't know what its for. Then welded it in and primed it.
Hopefully tomorrow ill have a look at the subframe and start cleaning it up.
once that was off I decided id take another look at the split in the bottom of the passenger side rear wheel arch.
Turns out its not just split, its a bit rot.
nothing to do but cut it out
I made up a little plate, I even cut the square little hole for the plastic bung that I don't know what its for. Then welded it in and primed it.
Hopefully tomorrow ill have a look at the subframe and start cleaning it up.
Thread Starter
I'm Finding My Feet Here Now
Joined: Dec 2017
Posts: 124
Likes: 13
From: East Sussex
Cheers,
Amazing bits of kit to be honest. no idea what my cousin paid for it but its well worth its weight it gold.
Haha plenty of plans and not deep enough pockets as always.
So far its to sort all the underside out, respray then turbo conversion. Depending on how that goes i might forge another zetec and aim for a bit more if i'm allowed.
luckily I can TIG weld and have the use of a half decked out machine shop so I'll be doing all the fabrication myself which will keep a lot of the cost in check.
Skint
Joined: Jun 2012
Posts: 514
Likes: 49
From: Stoke on Trent
tidy bit of bodywork that is!
it's actually fairly clean underneath that is (minus the wheel well) - perfect excuse to cut it out and make it flat boot though
be sure to take the rear arch liner carpets out and check for rust there before comitting yourself any more. Sills are a common thing on them, but looks like you've caught yours in good time
EML will no doubt either be a lambda problem or the IMRC module..... again common issues.
Trending Topics
Advanced PassionFord User


Joined: Oct 2012
Posts: 1,738
Likes: 149
From: South Coast
Looking really good so far, and so glad another ST170 has/is being saved. Top quality work as well.
As Rowe said, check behind the rear arch linings and if okay, treat that area, as they are well known for rusting there (like mine was).
As Rowe said, check behind the rear arch linings and if okay, treat that area, as they are well known for rusting there (like mine was).
Thread Starter
I'm Finding My Feet Here Now
Joined: Dec 2017
Posts: 124
Likes: 13
From: East Sussex
Cheers buds,
I had a closer look at the inner rear wheel arches and they are a bit scabby. So I�ve sorted those, I�ll update more when I get home
Rowe, that�s not a bad idea about the rear flat floor. I was thinking of trying to save it though. I�ll have a think about it and see when it comes to sorting that section out.
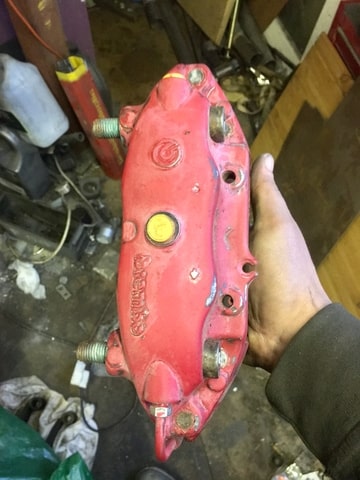
Just a random question to any one passing by. Do you know if brembo GT junior�s off a old leon cupra R fit the st hubs. I just have a set laying about so it would be nice to use them.
Obviously the discs won�t fit as they are 5 bolt, but that shouldn�t be to much of a issue
I had a closer look at the inner rear wheel arches and they are a bit scabby. So I�ve sorted those, I�ll update more when I get home
Rowe, that�s not a bad idea about the rear flat floor. I was thinking of trying to save it though. I�ll have a think about it and see when it comes to sorting that section out.
Just a random question to any one passing by. Do you know if brembo GT junior�s off a old leon cupra R fit the st hubs. I just have a set laying about so it would be nice to use them.
Obviously the discs won�t fit as they are 5 bolt, but that shouldn�t be to much of a issue

Advanced PassionFord User
Joined: May 2011
Posts: 2,419
Likes: 272
From: God knows!
The focus rs uses a brenbo caliper so I cant see why not. Anything can be made to fit. It’ll be the offset on the disc that will be the thing to sort. Then make a bracket to suit. One of the lads on here will know how
Thread Starter
I'm Finding My Feet Here Now
Joined: Dec 2017
Posts: 124
Likes: 13
From: East Sussex
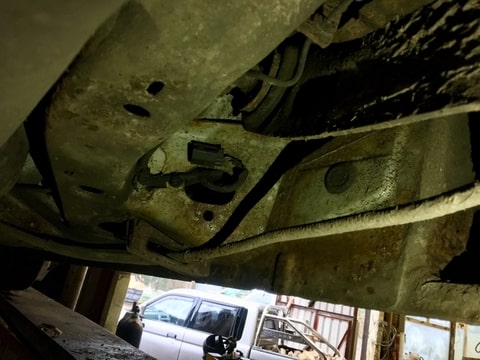
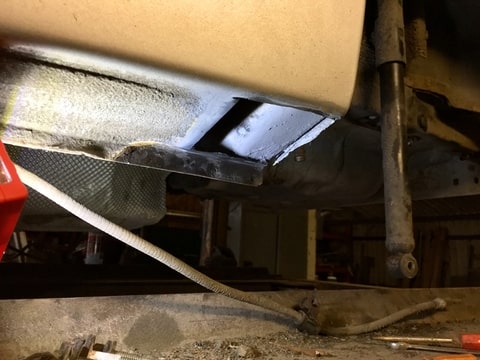
Little update, as mentioned the inner rear wheel arches were a bit scabby. So I cleaned them up with the wirebrush on the angle grinder. Then gave them a quick coat of primer.
Looks like I�ve caught it just in time, much more and I would of been cutting holes in the arches and welding plates there too. Later on once I have the fuel tank out I�ll go over the whole underside and paint any patches that are starting to corrode. Then I�ll underseal and waxoyl certain sections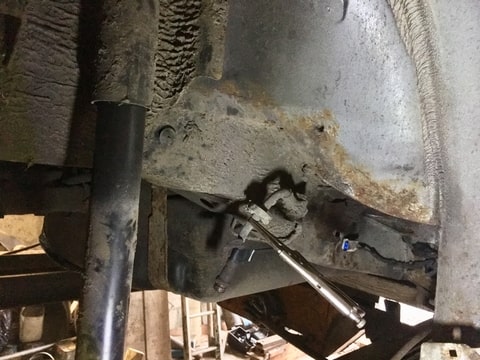
 I had a quick look at the calliper carriers. It looks like I�ll have to make my own as these won�t fit. No biggie just another part that�s added to the big list of what needs fabricating.Turns out the rs brembo�s are a bit different. Same design of calliper just a different type of mounting.
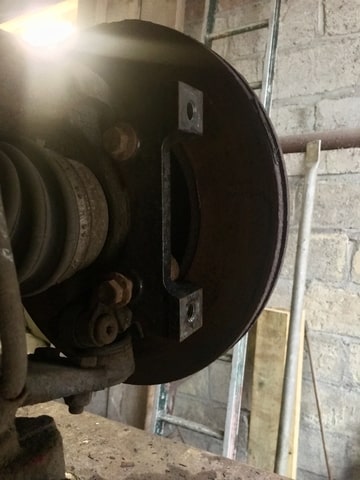
 Well I�m back to work tomorrow, so it�ll be the weekend before I get to play with the car again 😢
Looks like I�ve caught it just in time, much more and I would of been cutting holes in the arches and welding plates there too. Later on once I have the fuel tank out I�ll go over the whole underside and paint any patches that are starting to corrode. Then I�ll underseal and waxoyl certain sections
I had a quick look at the calliper carriers. It looks like I�ll have to make my own as these won�t fit. No biggie just another part that�s added to the big list of what needs fabricating.Turns out the rs brembo�s are a bit different. Same design of calliper just a different type of mounting. Well I�m back to work tomorrow, so it�ll be the weekend before I get to play with the car again 😢
Thread Starter
I'm Finding My Feet Here Now
Joined: Dec 2017
Posts: 124
Likes: 13
From: East Sussex
Yeah hopefully if I cure all these little bits like this it’ll stay a nice car for years to come once I’ve finished with it.
Are the front arches prone to the same? Or is it because of the silly felt rear arch liners.
Thinking about those I might clean them up and waxoyl the inside face of them to make them a bit more waterproof and not hold water against the body. Is there anything else to do to help prevent this happening again in a few years time

Advanced PassionFord User
Joined: Oct 2012
Posts: 1,738
Likes: 149
From: South Coast
Nice looking work, and a good save on the rear aches, both of mine were rotten, and needed a little bit of work. I've actually never checked the fronts, but it is plastic lining isn't it.
Skint
Joined: Jun 2012
Posts: 514
Likes: 49
From: Stoke on Trent
Cheers buds,
I had a closer look at the inner rear wheel arches and they are a bit scabby. So I�ve sorted those, I�ll update more when I get home
Rowe, that�s not a bad idea about the rear flat floor. I was thinking of trying to save it though. I�ll have a think about it and see when it comes to sorting that section out.
Just a random question to any one passing by. Do you know if brembo GT junior�s off a old leon cupra R fit the st hubs. I just have a set laying about so it would be nice to use them.
Obviously the discs won�t fit as they are 5 bolt, but that shouldn�t be to much of a issue
as has been mentioned, the mk1 RS uses brembo callipers as standard. I've seen a few lads convert their 170's to RS callipers up front, but they have to space the disc away from the hub to clear the balljoint (RS knuckles are slightly different because of the wider track)
If you could sort a bracket that utilises the RS disc that'll save any headaches

Regular Contributor
Joined: Aug 2011
Posts: 300
Likes: 52
From: Dorset
Yes , the black count on here has down the RS Brembo conversion, and I have the bits to do mine too, although if I could source some disks that didn't need spacing that would be easier 
We still have to use a fitting bracket though....But they are easy to get from the bay of Eees
We still have to use a fitting bracket though....But they are easy to get from the bay of Eees
Thread Starter
I'm Finding My Feet Here Now
Joined: Dec 2017
Posts: 124
Likes: 13
From: East Sussex
I managed to do a little bit this weekend, not much though as everyone wanted my help, so many distractions.
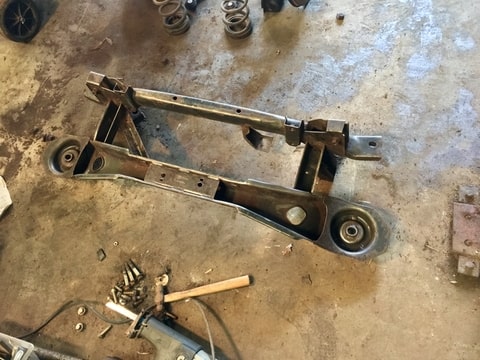
Started pulling the subframe apart, well cutting it apart it seems a fairly common practice with these or so i have read.

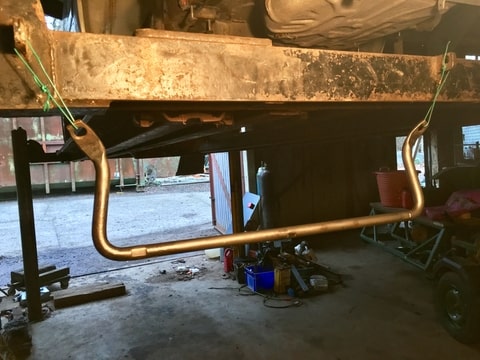
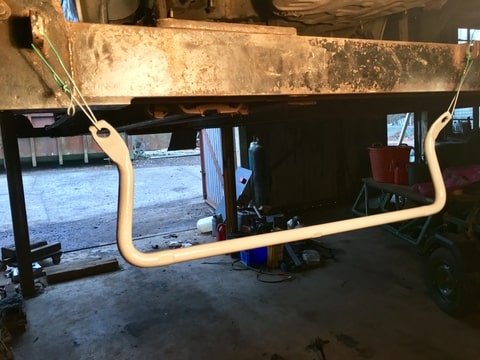
Then went on to cleaning the arb up and giving it a quick coat of primer
And for a cheap laugh I gave it some boost

Started pulling the subframe apart, well cutting it apart
Then went on to cleaning the arb up and giving it a quick coat of primer
And for a cheap laugh I gave it some boost
Thread Starter
I'm Finding My Feet Here Now
Joined: Dec 2017
Posts: 124
Likes: 13
From: East Sussex
as has been mentioned, the mk1 RS uses brembo callipers as standard. I've seen a few lads convert their 170's to RS callipers up front, but they have to space the disc away from the hub to clear the balljoint (RS knuckles are slightly different because of the wider track)
If you could sort a bracket that utilises the RS disc that'll save any headaches
If you could sort a bracket that utilises the RS disc that'll save any headaches
A set of rs disks with 5mm universal spacers behind them and a set of slightly longer wheel studs should do the trick. Then it'll just be a case of fabricating a set of caliper hangers, which shouldn't be too much hassle
Thread Starter
I'm Finding My Feet Here Now
Joined: Dec 2017
Posts: 124
Likes: 13
From: East Sussex
yeah seems I have been lucky with this. seen a few pics of what can happen to them
") not so great. still if i run some seam sealer round them then underseal or waxoyl them it should keep the dreaded rot away for a few years to come. really must remind myself to pop the front arch liners out and have a good look there, just in case there are little patches to clean up and treat.
not so great. still if i run some seam sealer round them then underseal or waxoyl them it should keep the dreaded rot away for a few years to come. really must remind myself to pop the front arch liners out and have a good look there, just in case there are little patches to clean up and treat.

Joined: Jul 2006
Posts: 62,772
Likes: 1,052
From: Darlington county durham
Cool project. I used to have a ST170. There a cracking car. Nice to see one being saved. Check the floor where the back seat belts bolt too. My wife's 53 reg focus was rotten around this area.
Thread Starter
I'm Finding My Feet Here Now
Joined: Dec 2017
Posts: 124
Likes: 13
From: East Sussex
Cheers, I’ll double check the rear seatbelt mounts at the weekend. I know the drivers side rear mount is fine as I pulled the back seat out on that side. But I’ll definitely check the other side as well now.
I actually quite like that these are under rated to be honest, it makes it that bit better once nicely modified.
I done a similar thing with an old Mk4 golf 2.0 8v although everyone said that car just plain sucked until I tweaked it.
I tore the whole thing apart freshened up the engine with a blower off a merc clk200, wmi, fmic and a few choice bits lol
Thread Starter
I'm Finding My Feet Here Now
Joined: Dec 2017
Posts: 124
Likes: 13
From: East Sussex
Hahaha fair play.
I found it to be a bit swings and roundabouts with my littlen. If the weather is good a 5dr is best. If it’s raining I prefer a 3dr as you can climb in the back and keep dry.
Nothing worse than trying to put a kid in a 5dr with rain going down the back of your neck haha
I found it to be a bit swings and roundabouts with my littlen. If the weather is good a 5dr is best. If it’s raining I prefer a 3dr as you can climb in the back and keep dry.
Nothing worse than trying to put a kid in a 5dr with rain going down the back of your neck haha
Thread Starter
I'm Finding My Feet Here Now
Joined: Dec 2017
Posts: 124
Likes: 13
From: East Sussex
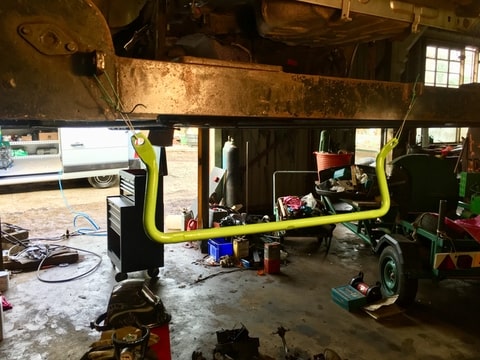
finaly got round to painting the arb. Not sure on the colour yet or how it’ll go with the final colour of the car.
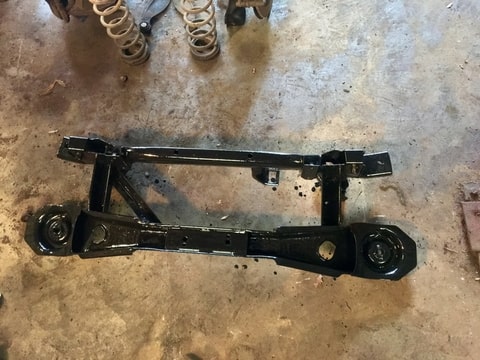
Then then went on to cleaning the sub frame and giving one side a lick of paint
also thought I’d paint my toolbox while the paints were out. Quite like a bit of satin black


Thread Starter
I'm Finding My Feet Here Now
Joined: Dec 2017
Posts: 124
Likes: 13
From: East Sussex
Thanks for the offer bud, but for the time being I’m going to keep stock suspension components until she’s up and running so I can get a proper feel for the chassis. Then decide where improvements are needed
Thread Starter
I'm Finding My Feet Here Now
Joined: Dec 2017
Posts: 124
Likes: 13
From: East Sussex
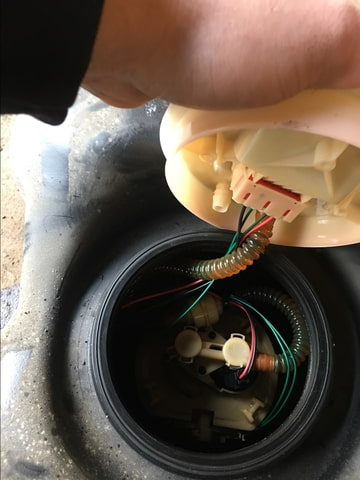
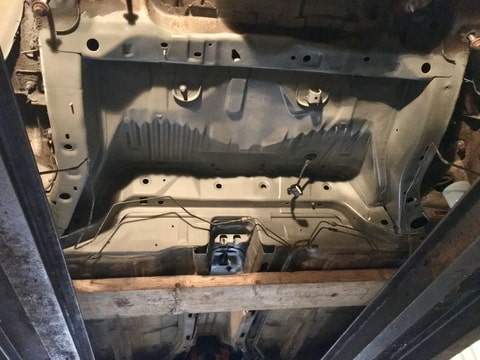
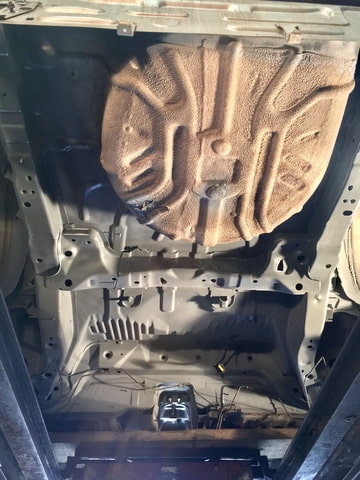
I’ve now pulled the fuel tank out.
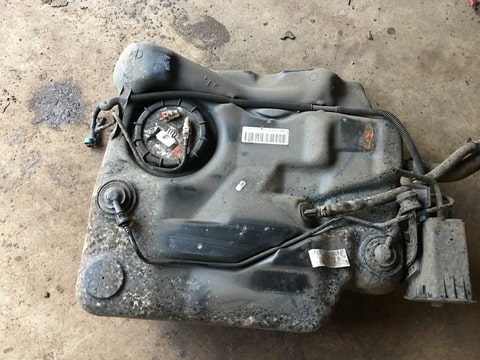
ive noticed that the st170 has a returnless fuel system. Which is no good to me what so ever, so looks like I’ll have to retrofit one as it’ll make life a lot more simple later on when it comes to mapping in a turbo on a standalone ecu.
Good news is that the pump cover has a return line blanked off, just nothing to connect it to inside.
Shouldnt be a problem though as I’ll just connect a pipe to the under side of the cover and dangle it down in the tank
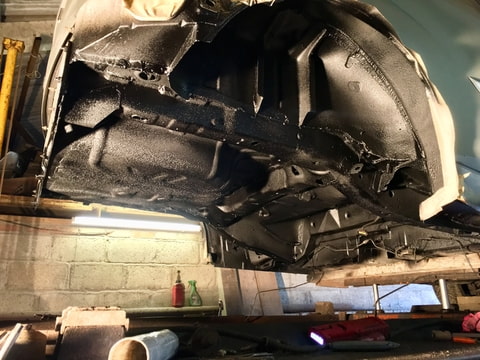
after looking under the car I think it’s about time I started some of this surface rust off.
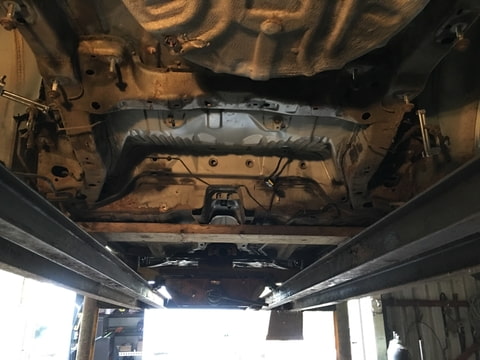
ive made a bit of a start. Lots of wire brush on a 4” grinder work, all good fun though
puffed a bit of zinc primer on the patches I’ve done. Once I’ve done the whole rear end I’ll go round it with some seamsealer.

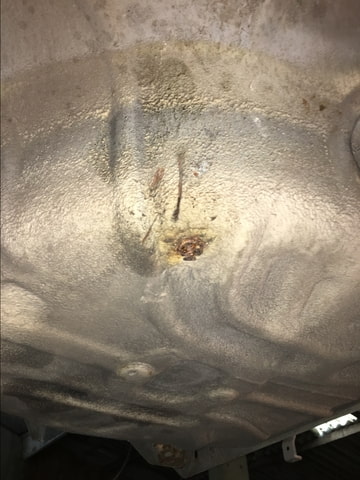
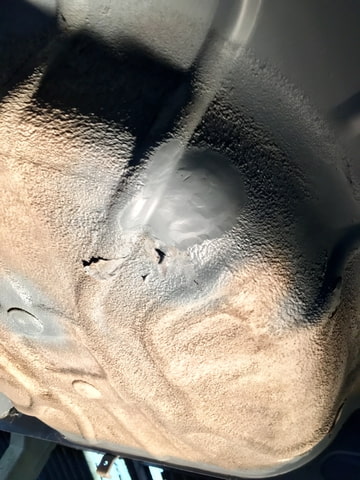
one other thing I’ve noticed is at some point someone has got a bit happy with a cutting disc, most likely to cut a joiner or something in the exhaust and didn’t realise they was also cutting into the space saver well. Not that it’s hard to repair but it really is making me think I might flat floor the boot.
im also having second thoughts about the use of the car once she’s up and running again.
I don’t really need a daily as I have a work van and the Mrs has her own car. So maybe a more track orientated car would fit the bill a bit more. Dunno yet have to think some and way it up in my head
ive noticed that the st170 has a returnless fuel system. Which is no good to me what so ever, so looks like I’ll have to retrofit one as it’ll make life a lot more simple later on when it comes to mapping in a turbo on a standalone ecu.
Good news is that the pump cover has a return line blanked off, just nothing to connect it to inside.
Shouldnt be a problem though as I’ll just connect a pipe to the under side of the cover and dangle it down in the tank
after looking under the car I think it’s about time I started some of this surface rust off.
ive made a bit of a start. Lots of wire brush on a 4” grinder work, all good fun though
puffed a bit of zinc primer on the patches I’ve done. Once I’ve done the whole rear end I’ll go round it with some seamsealer.
one other thing I’ve noticed is at some point someone has got a bit happy with a cutting disc, most likely to cut a joiner or something in the exhaust and didn’t realise they was also cutting into the space saver well. Not that it’s hard to repair but it really is making me think I might flat floor the boot.
im also having second thoughts about the use of the car once she’s up and running again.
I don’t really need a daily as I have a work van and the Mrs has her own car. So maybe a more track orientated car would fit the bill a bit more. Dunno yet have to think some and way it up in my head
Thread Starter
I'm Finding My Feet Here Now
Joined: Dec 2017
Posts: 124
Likes: 13
From: East Sussex
Thread Starter
I'm Finding My Feet Here Now
Joined: Dec 2017
Posts: 124
Likes: 13
From: East Sussex
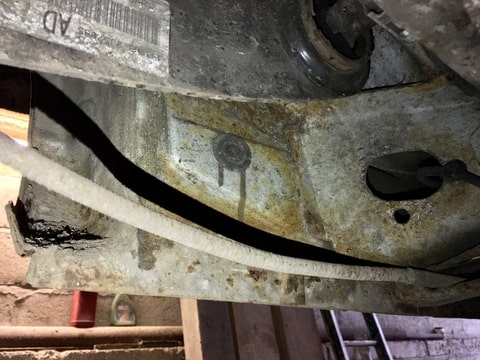
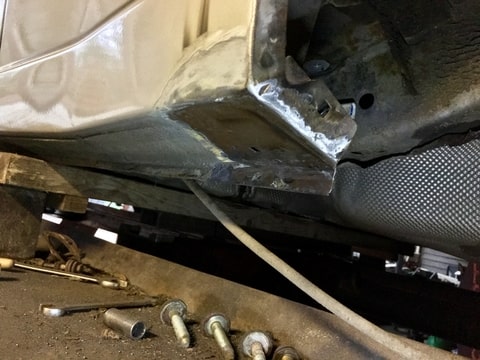
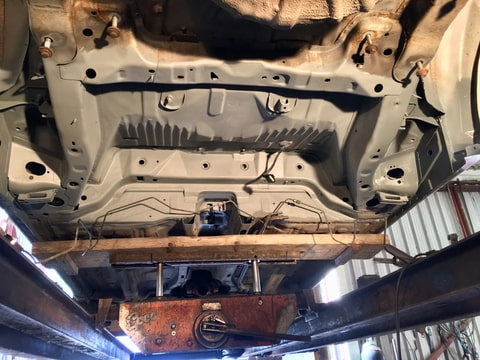
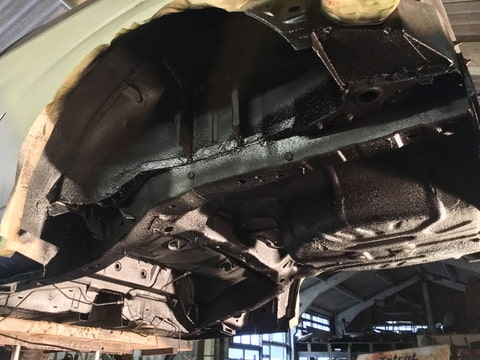
I decided to keep the wheel well so I welded up the cut marks
finished cleaning the underside of the rear and primed the rest
also finished cleaning the rear wheel arches a bit better and primed them
Then went over all the seams with seamsealer
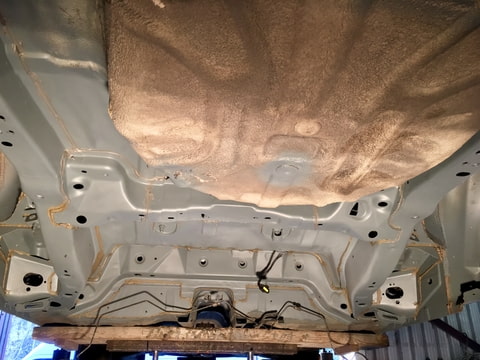
should be able to get a good coat of underseal on tomorrow once the sealer has hardened
finished cleaning the underside of the rear and primed the rest
also finished cleaning the rear wheel arches a bit better and primed them
Then went over all the seams with seamsealer
should be able to get a good coat of underseal on tomorrow once the sealer has hardened
Thread Starter
I'm Finding My Feet Here Now
Joined: Dec 2017
Posts: 124
Likes: 13
From: East Sussex
Hopefully it will
im also going to run a few cans of waxoyl up through the holes in the chassis rails and sils. So it should be well protected from the good ole British elements. That and I’ll hopefully be keeping it locked away in a garage when not in use.
im also going to run a few cans of waxoyl up through the holes in the chassis rails and sils. So it should be well protected from the good ole British elements. That and I’ll hopefully be keeping it locked away in a garage when not in use.
Thread Starter
I'm Finding My Feet Here Now
Joined: Dec 2017
Posts: 124
Likes: 13
From: East Sussex
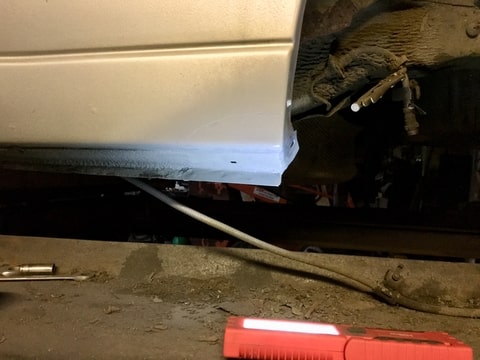
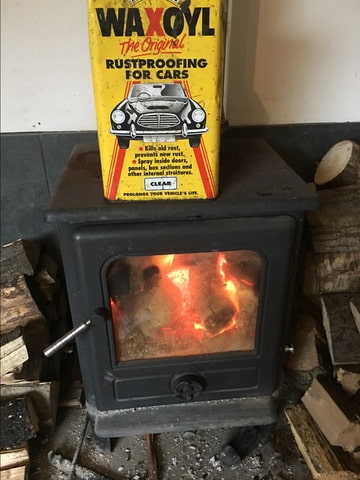
Stuck a can of waxoyl on the wood burner, literally the best way to thin it down to be able spray with out the gun clogging up and blowing the can across the workshop
I filled the chassis rails and sils up with waxoyl and undersealed the back end and wheel arches.
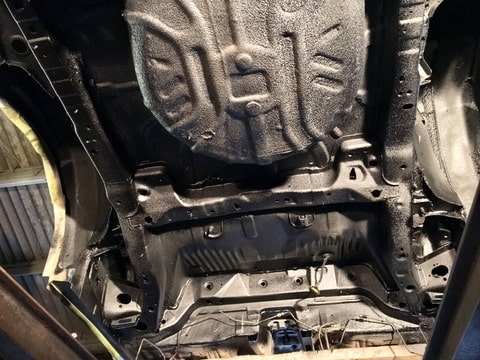
Fingers crossed the back end is well rust protected for a fair few years to come now
I filled the chassis rails and sils up with waxoyl and undersealed the back end and wheel arches.
Fingers crossed the back end is well rust protected for a fair few years to come now