


Mk2 Escort RS2000 resto.


Thread Starter
Tin Basher
Joined: Mar 2011
Posts: 81
Likes: 0
From: Chelmsford
 Mk2 Escort RS2000 resto.
Hi,
After being made redundant in 2009 in decided to start working for myself. Lucky I already had a workshop that I used to tinker about in doing my own projects so I was all set. I rebuilt a few engines for people and done the odd service here and there then In August 2010 I was asked to restore an Mk2 Escort RS2000 custom, which was described as being one step away from being broken for spares.
This particular vehicle had been brought as a project to restore by the pervious owner but unfortunately due to other commitments he never found the time to give it the attention it needed. So for some fourteen years this car stood under a lean-to with the passenger side exposed to the elements before the current owner stumbled across it and decided to bring it back to its former glory.
I hope you enjoy the pictures
Arrival
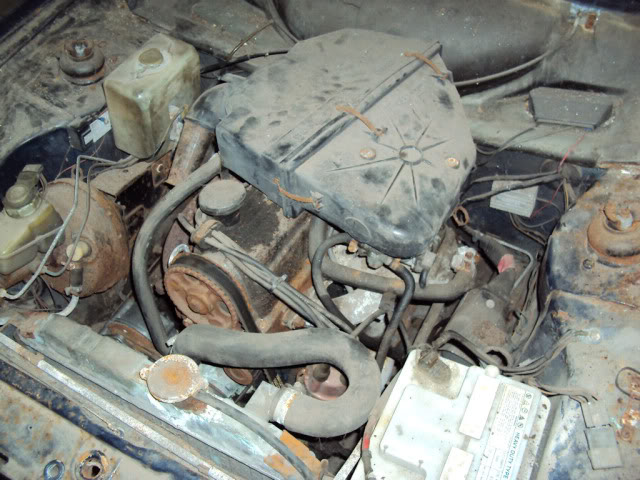
I took delivery of the RS2000 Custom. It arrived on the back of a transporters and at first glance didn’t look to bad so it was pushed into the workshop for a closer inspection.
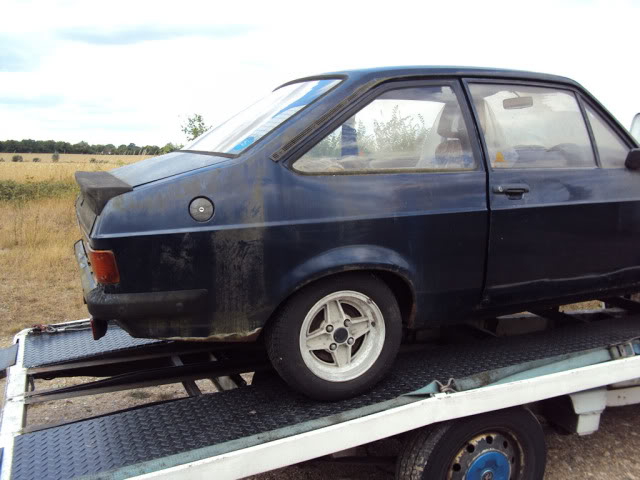
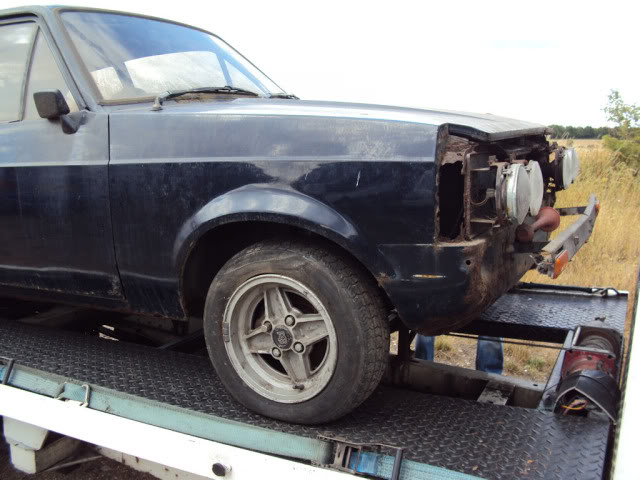
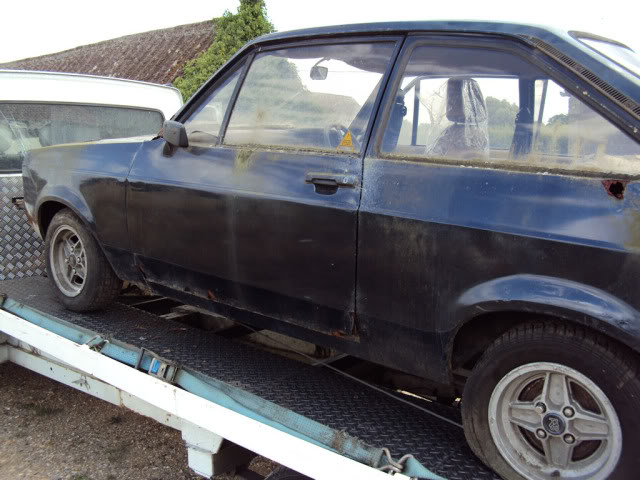
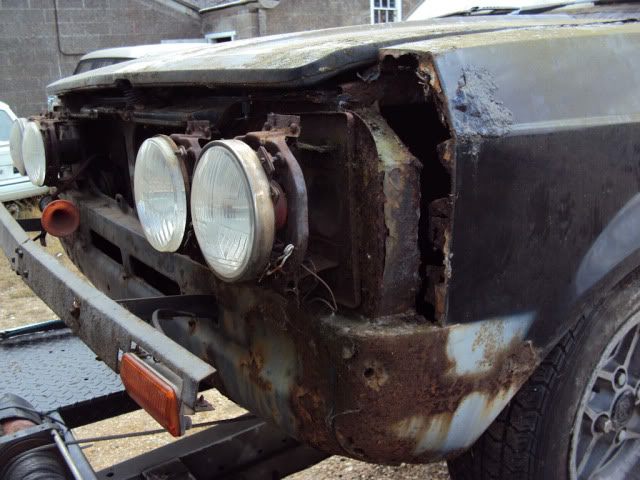
Initial inspection
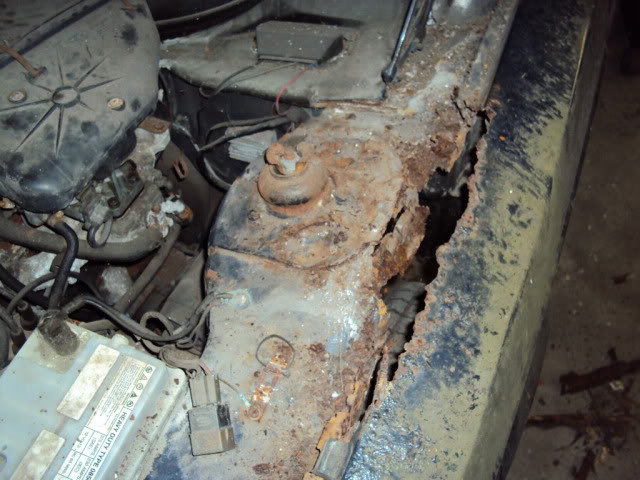
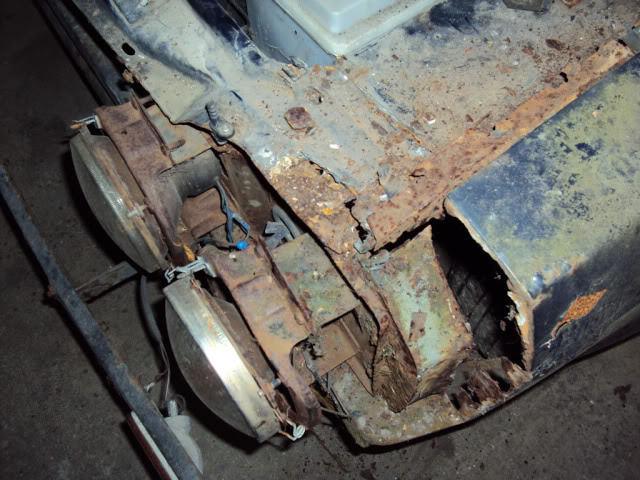
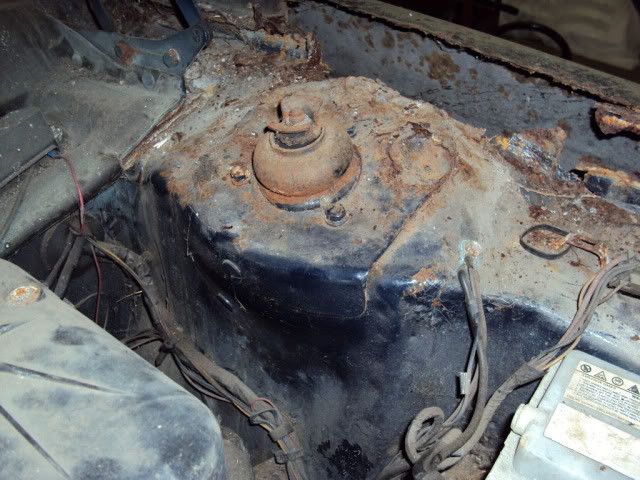
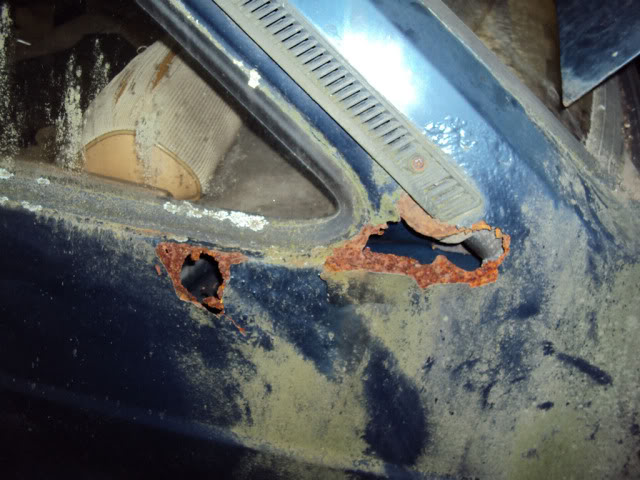
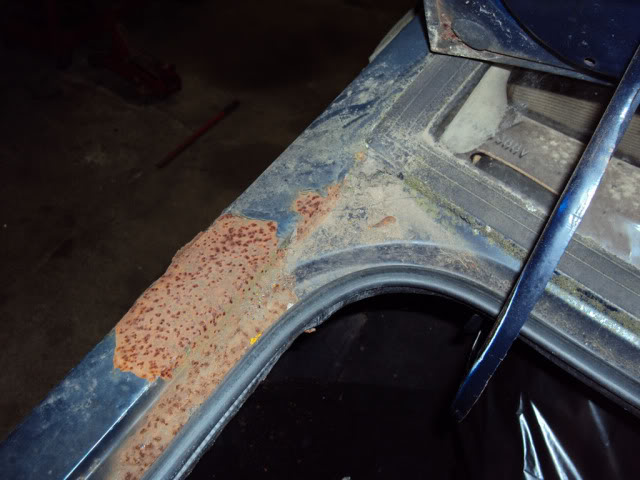
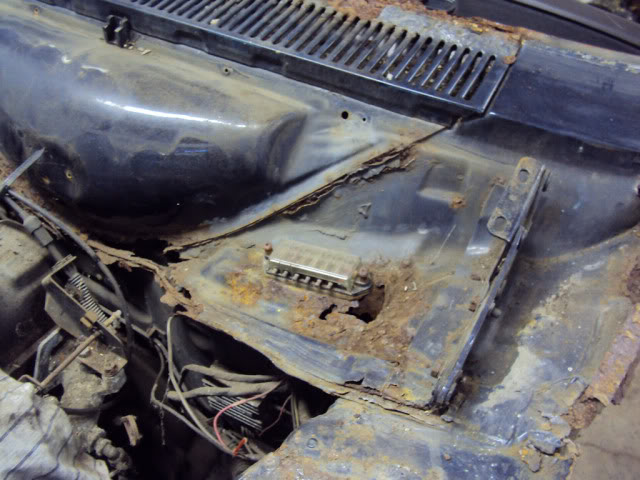
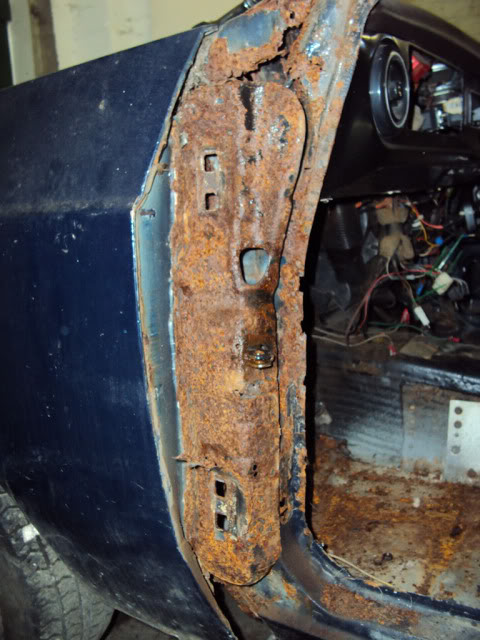
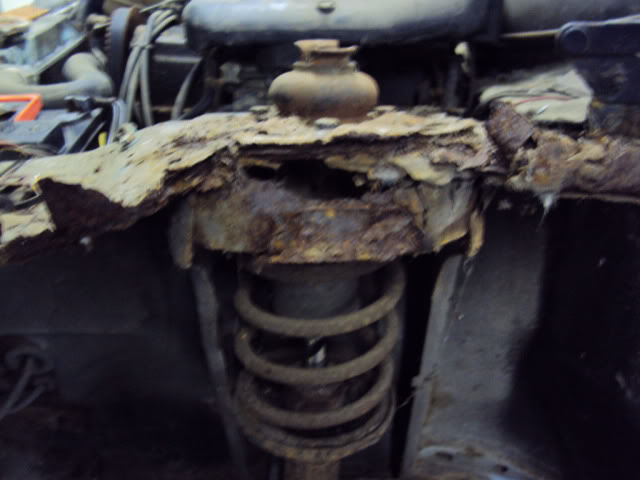
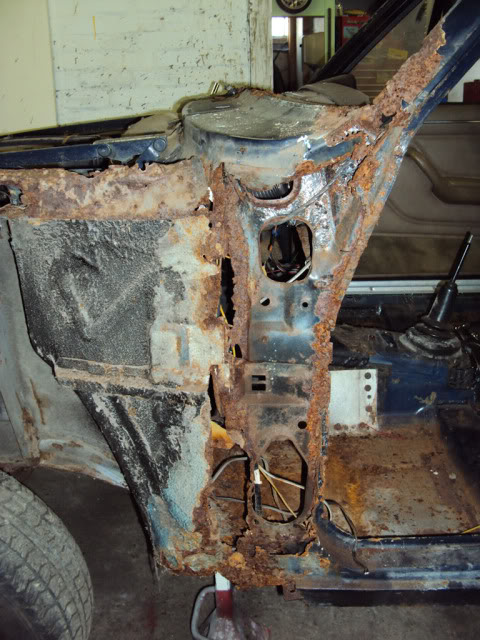
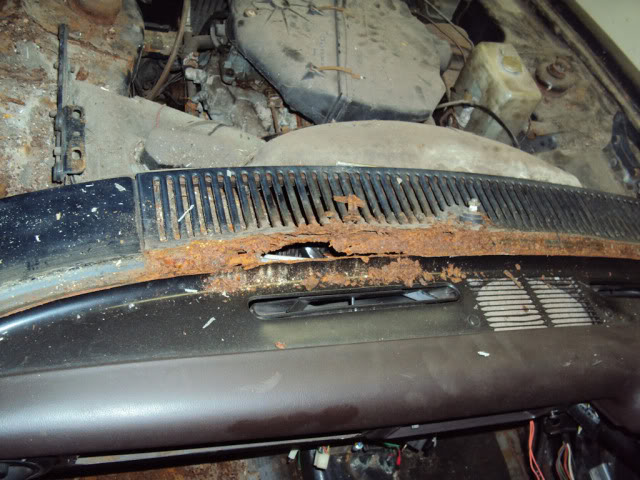
Once under the lights of the workshop it was easy to see which side of the car had seen fourteen winters and fourteen summers. I removed some of the outer panels to find the shell was in bad shape with the worst of the rust on the passenger side but lucky the chassis rails were in surprisingly good condition. After I report my findings I was given the go a head to start work but I could see that this was going to be a major restoration inside and out.
Strip out
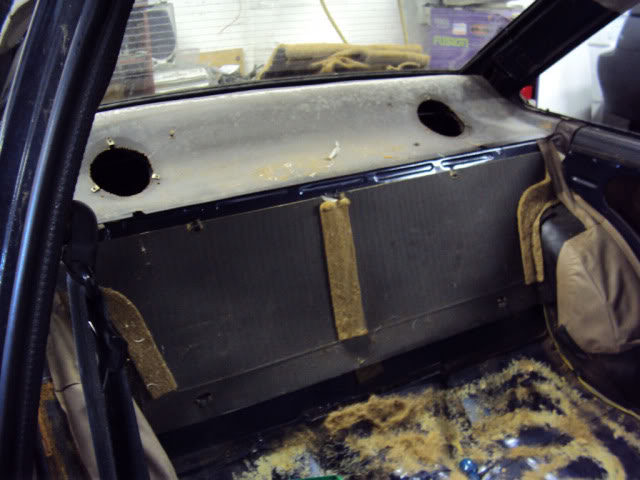
The vehicle arrived at the workshop has a complete car and with a boot full of spare parts the pervious owner had collected over the years but had never fitted. The escort was stripped down to a bare shell and a list of replacement panels and parts was made.
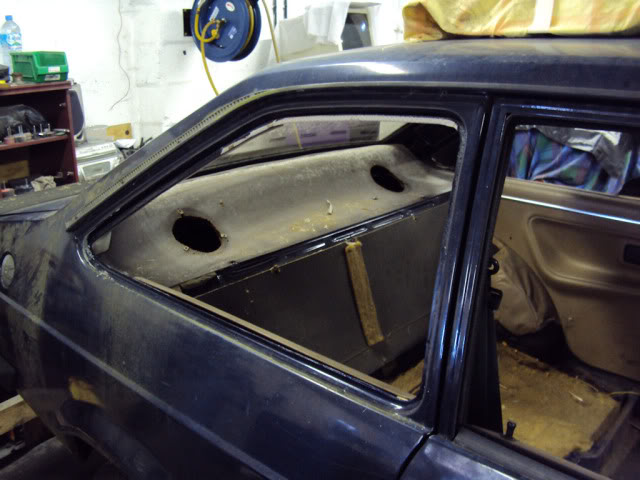
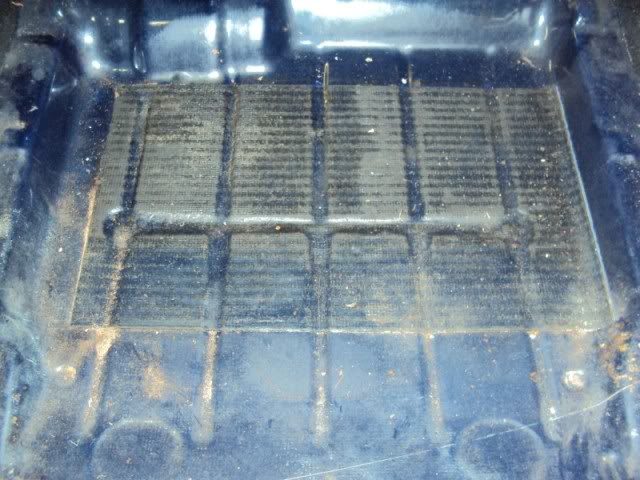
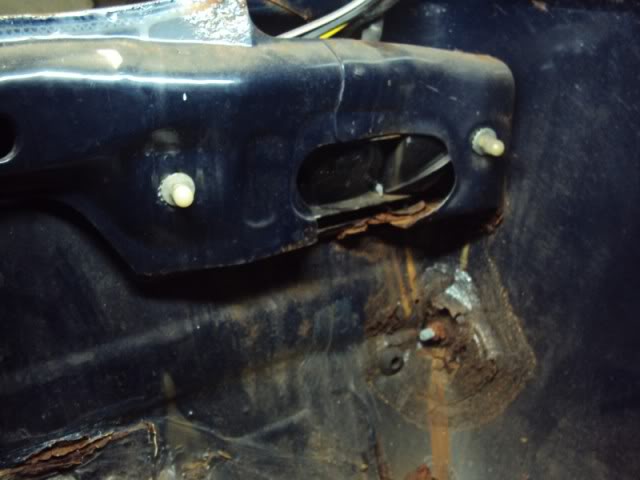
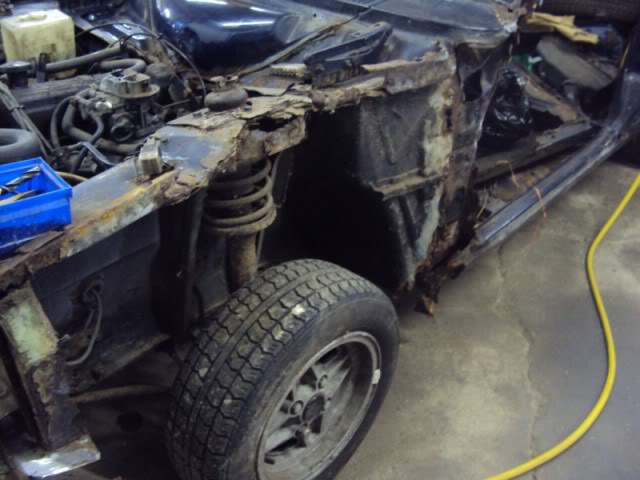
Engine Bay
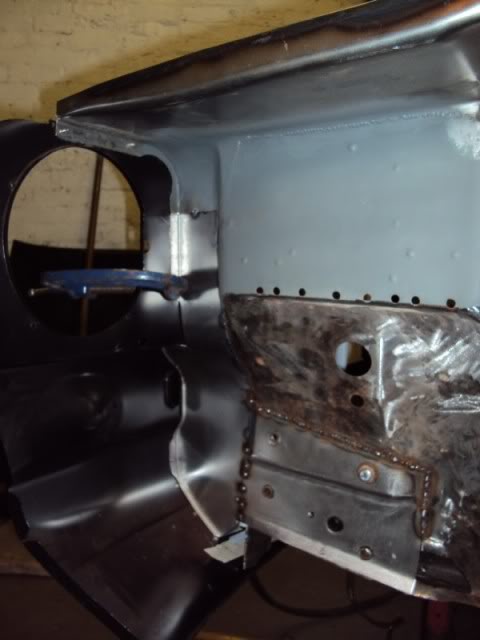
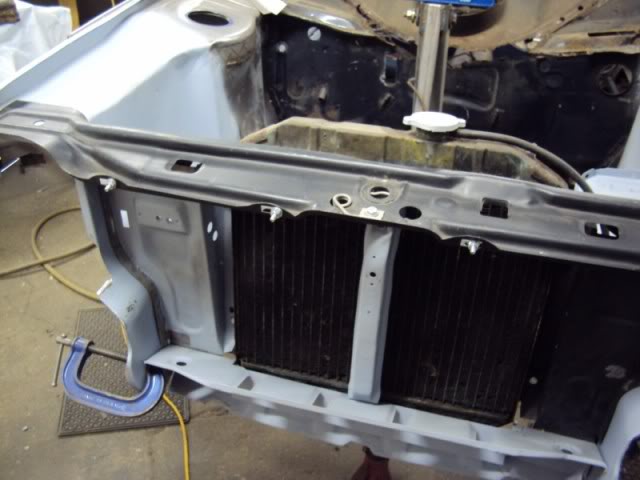
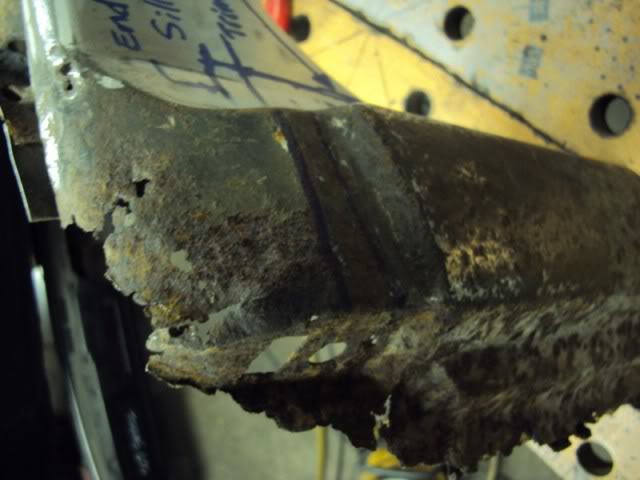
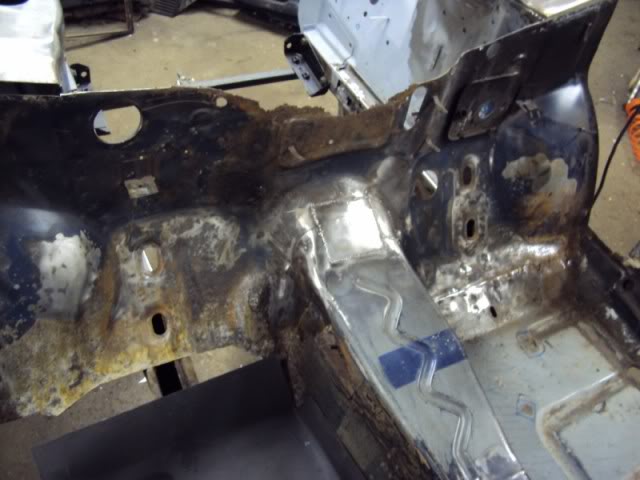
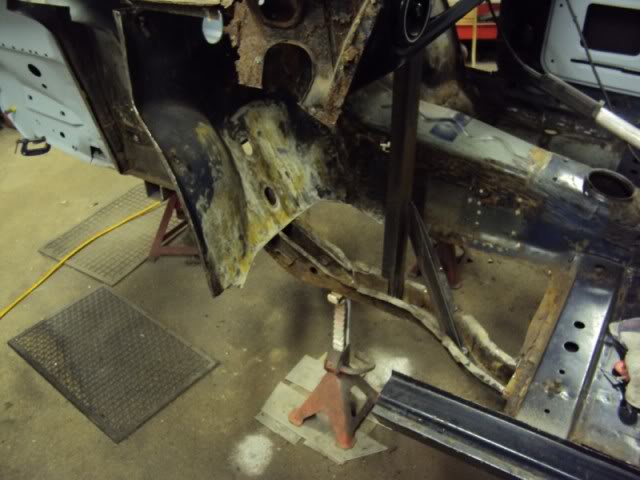
It was decided that the engine bay was the worst part of the vehicle so that’s where I started. Due to the availability/lead time of some panels I would have to replace what I could with new panels and fabricate the rest. I removed the wings, front panel, slam panel, battery tray, radiator mounts and front cross member. Apart from the tops and front edges the inner wings seemed to be in good condition so replacement tops panels were ordered.
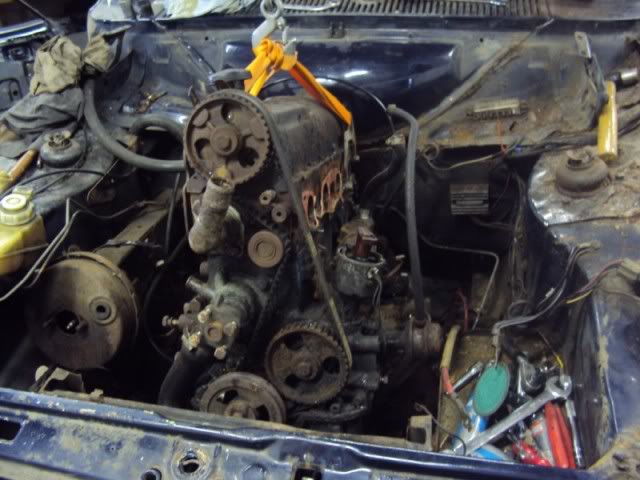
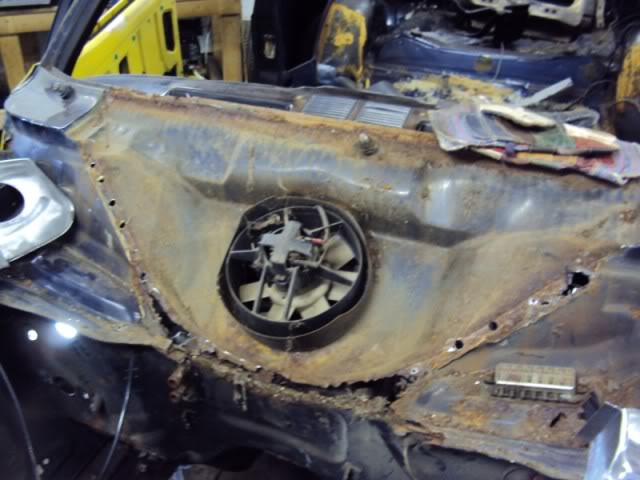
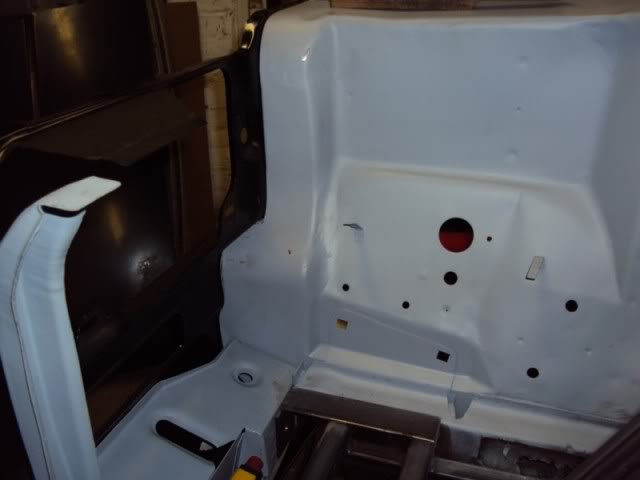
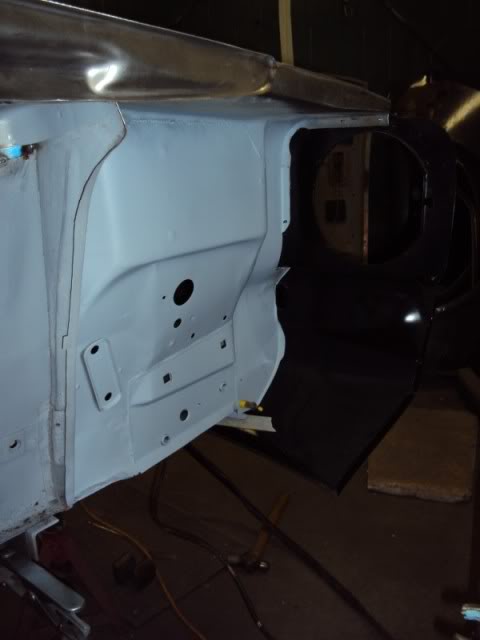
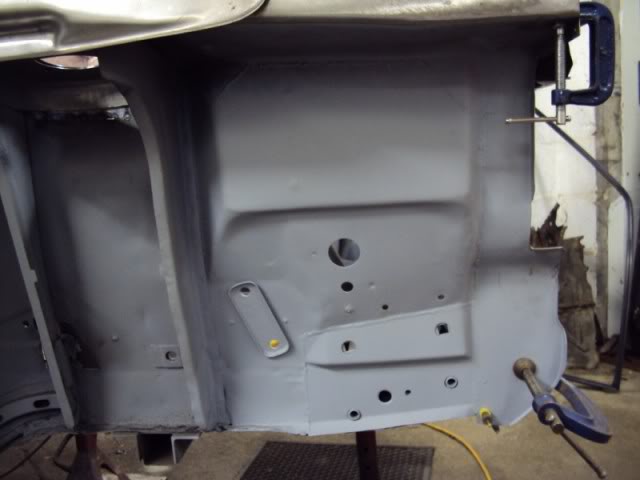
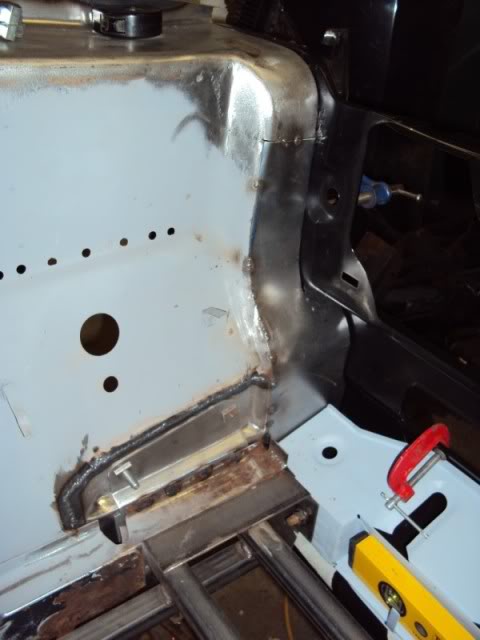
The front suspension mounts and chassis rails also looked serviceable but sadly this could not be said for the bulkhead. The top of the bulkhead on the passenger side had rusted through and the drivers side had some poor repair work carried out at some stage this will require and new or second-hand panel.
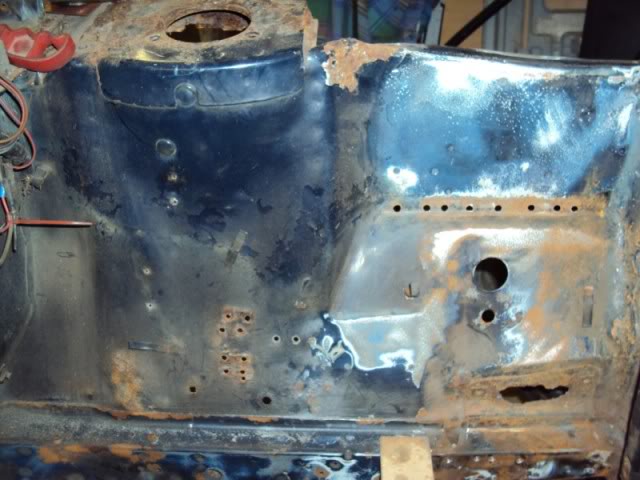
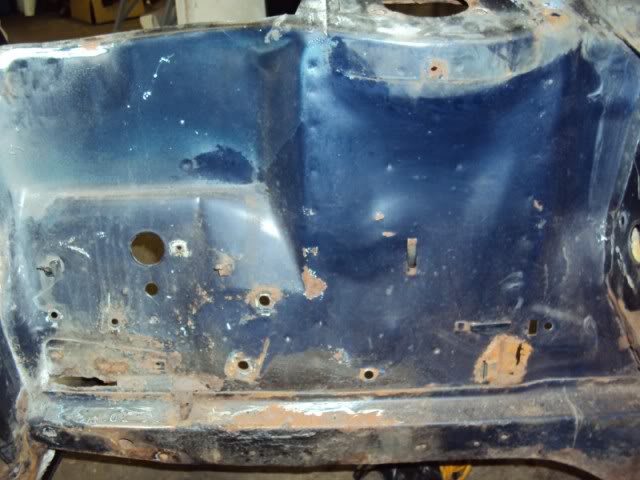
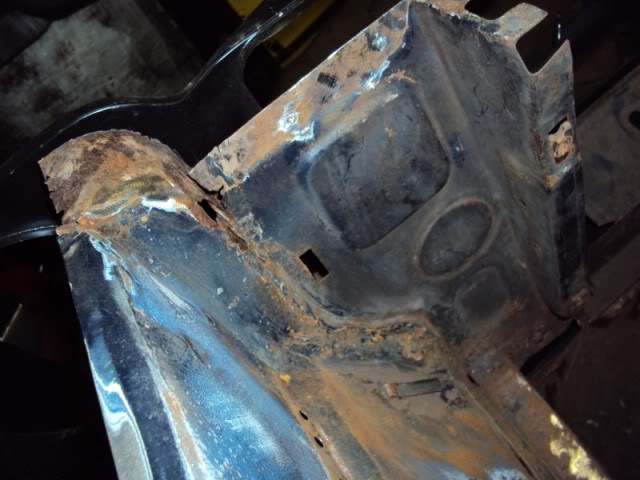
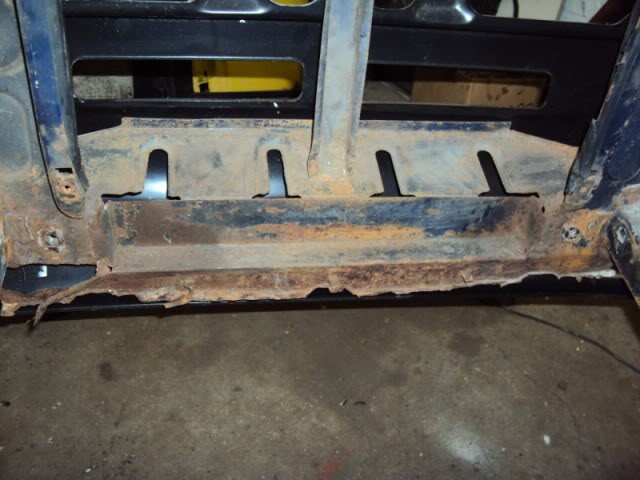
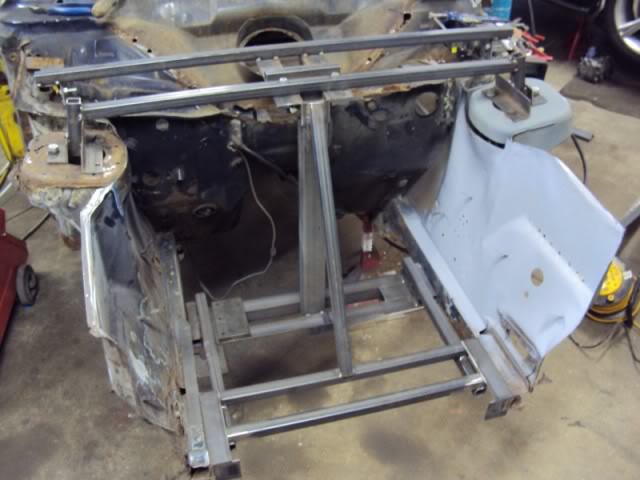
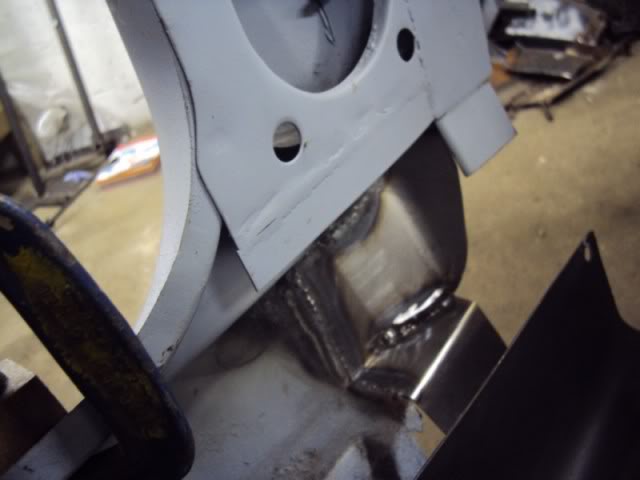
Once all the old panels where removed a jig was made to relocate all the new panels and hold everything square.
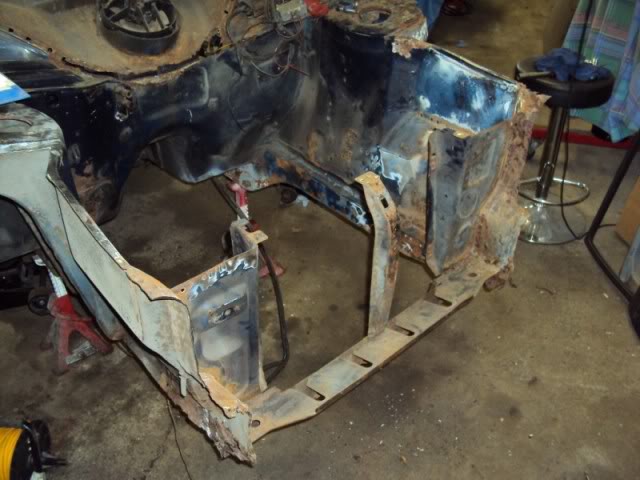
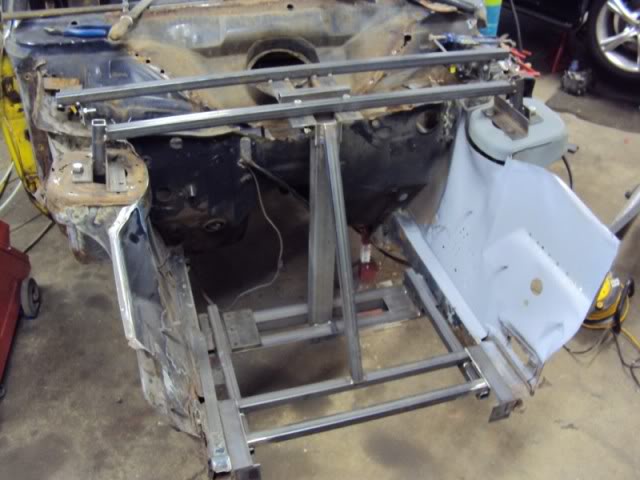
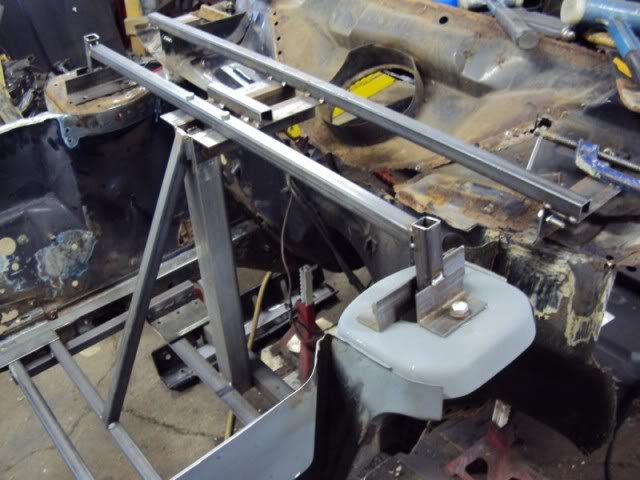
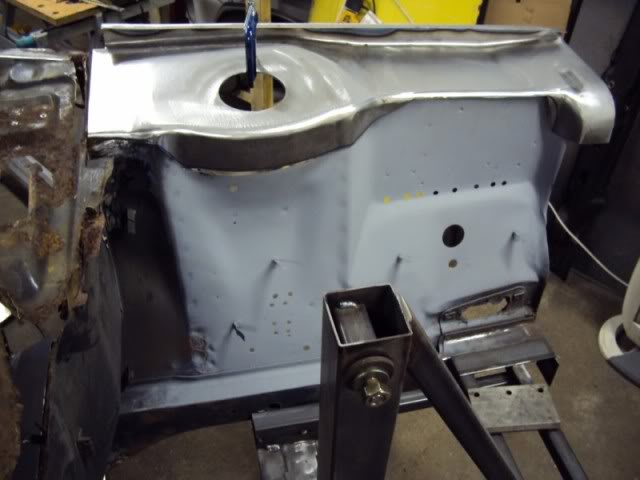
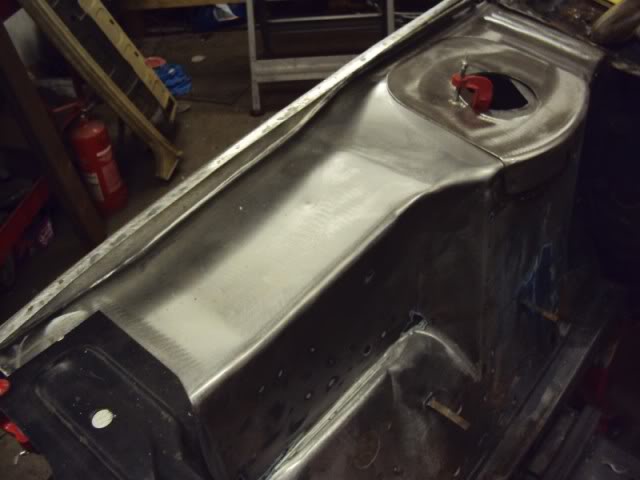
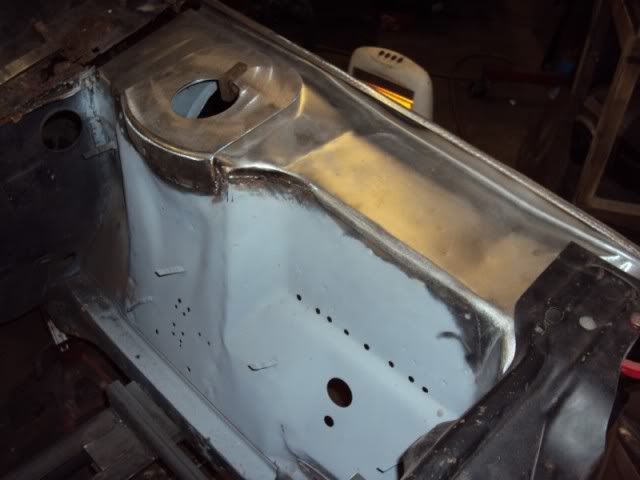
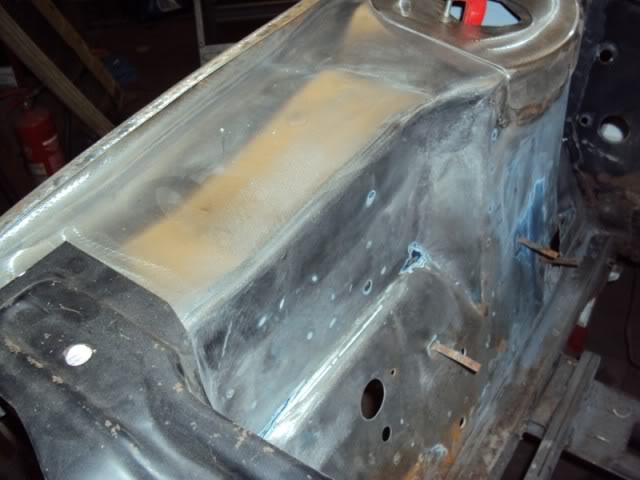
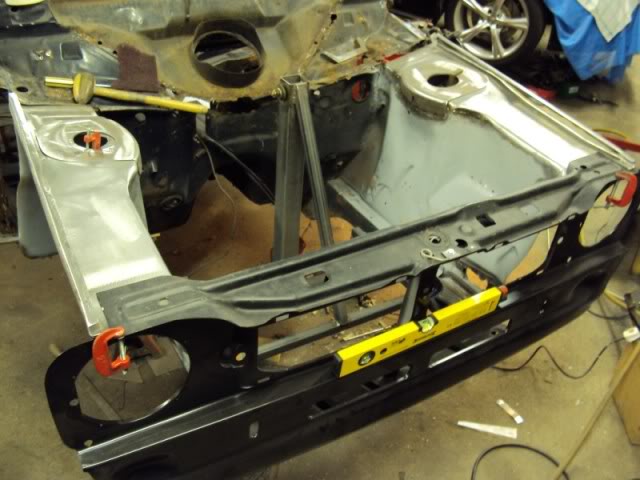
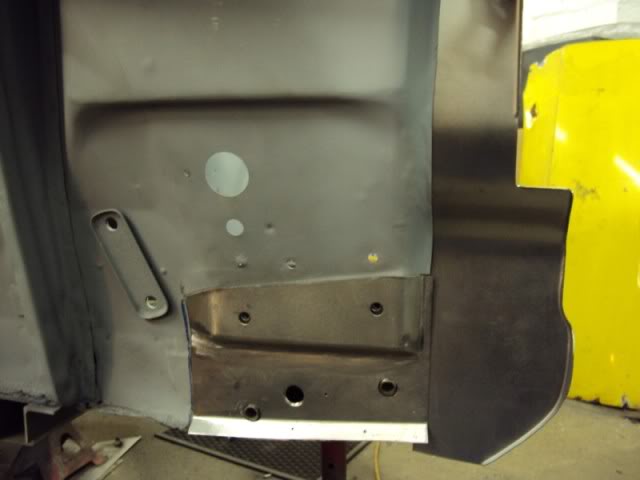
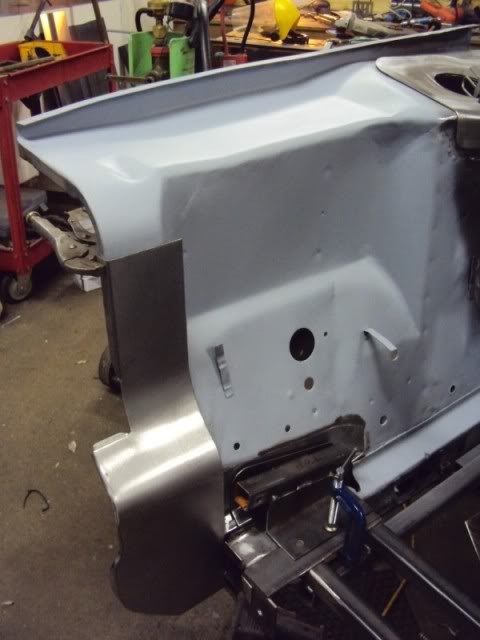
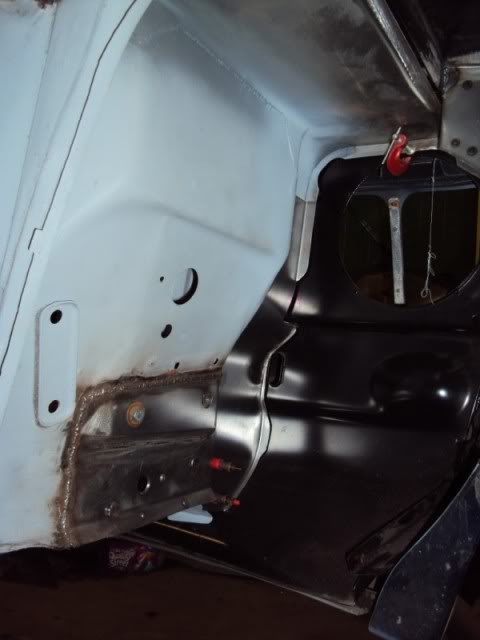
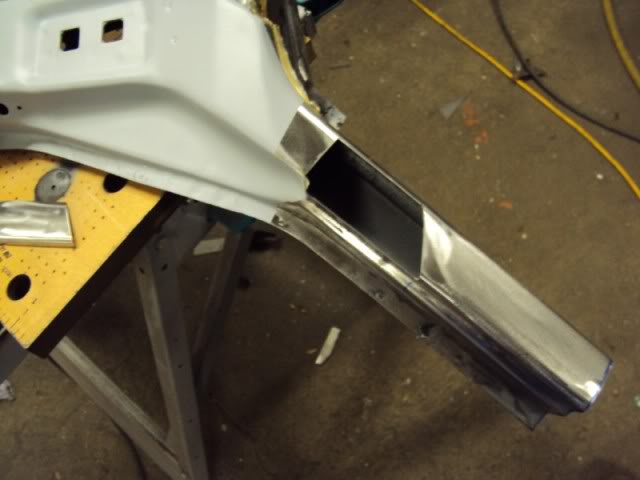
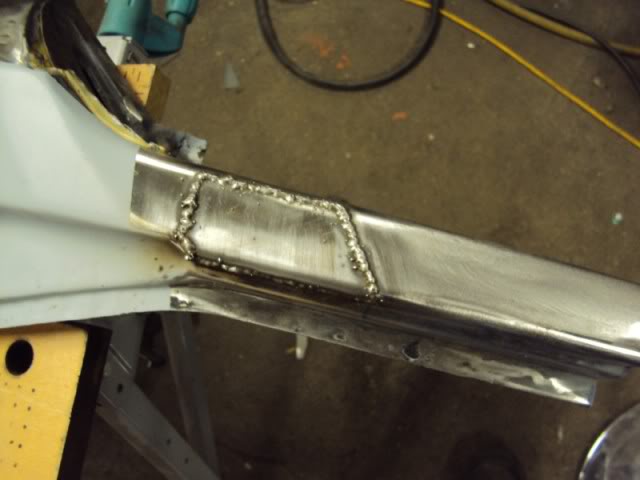
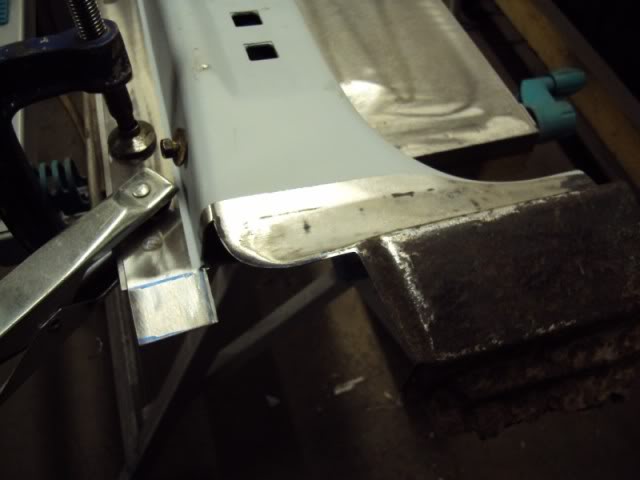
Front bumper mounting lugs and front edges patterns were produce using my CAD system. The patterns were transferred to mild steel cut out, formed and welded into position.
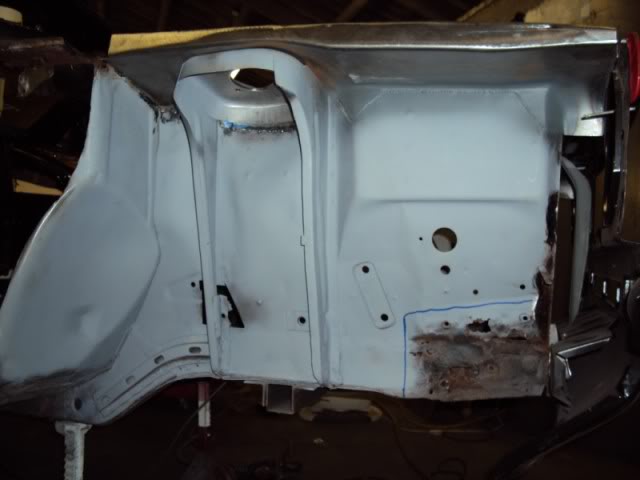
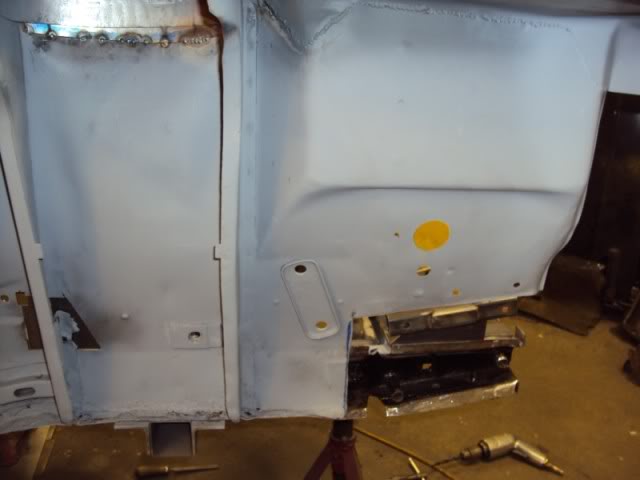
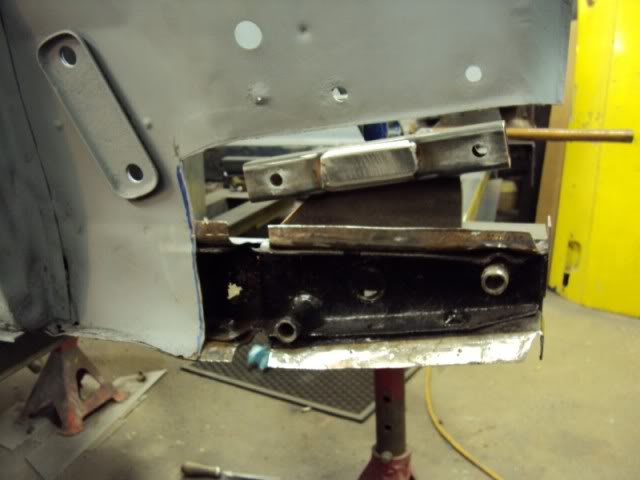
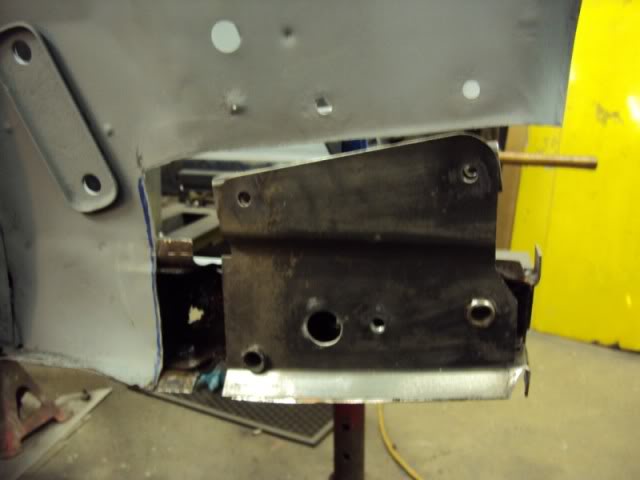
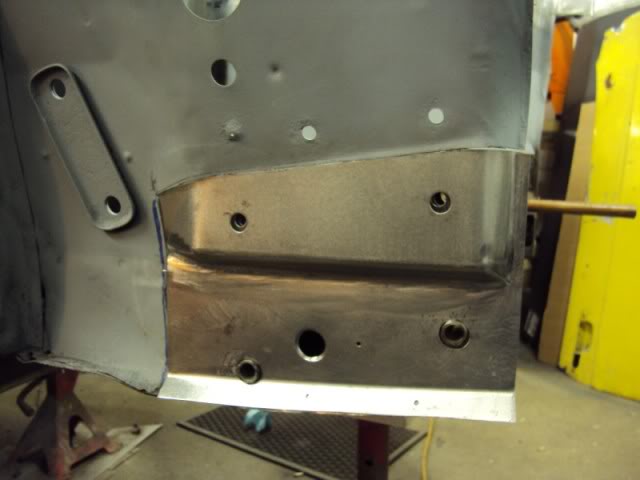
more to follow...
After being made redundant in 2009 in decided to start working for myself. Lucky I already had a workshop that I used to tinker about in doing my own projects so I was all set. I rebuilt a few engines for people and done the odd service here and there then In August 2010 I was asked to restore an Mk2 Escort RS2000 custom, which was described as being one step away from being broken for spares.
This particular vehicle had been brought as a project to restore by the pervious owner but unfortunately due to other commitments he never found the time to give it the attention it needed. So for some fourteen years this car stood under a lean-to with the passenger side exposed to the elements before the current owner stumbled across it and decided to bring it back to its former glory.
I hope you enjoy the pictures
Arrival
I took delivery of the RS2000 Custom. It arrived on the back of a transporters and at first glance didn’t look to bad so it was pushed into the workshop for a closer inspection.
Initial inspection
Once under the lights of the workshop it was easy to see which side of the car had seen fourteen winters and fourteen summers. I removed some of the outer panels to find the shell was in bad shape with the worst of the rust on the passenger side but lucky the chassis rails were in surprisingly good condition. After I report my findings I was given the go a head to start work but I could see that this was going to be a major restoration inside and out.
Strip out
The vehicle arrived at the workshop has a complete car and with a boot full of spare parts the pervious owner had collected over the years but had never fitted. The escort was stripped down to a bare shell and a list of replacement panels and parts was made.
Engine Bay
It was decided that the engine bay was the worst part of the vehicle so that’s where I started. Due to the availability/lead time of some panels I would have to replace what I could with new panels and fabricate the rest. I removed the wings, front panel, slam panel, battery tray, radiator mounts and front cross member. Apart from the tops and front edges the inner wings seemed to be in good condition so replacement tops panels were ordered.
The front suspension mounts and chassis rails also looked serviceable but sadly this could not be said for the bulkhead. The top of the bulkhead on the passenger side had rusted through and the drivers side had some poor repair work carried out at some stage this will require and new or second-hand panel.
Once all the old panels where removed a jig was made to relocate all the new panels and hold everything square.
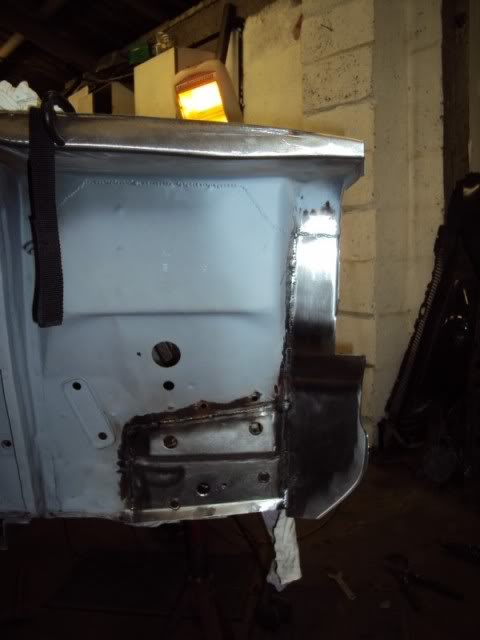
Front bumper mounting lugs and front edges patterns were produce using my CAD system. The patterns were transferred to mild steel cut out, formed and welded into position.
more to follow...
Thread Starter
Tin Basher
Joined: Mar 2011
Posts: 81
Likes: 0
From: Chelmsford
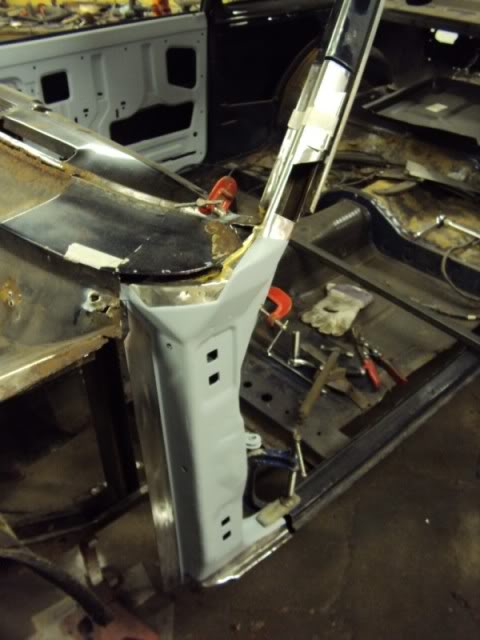
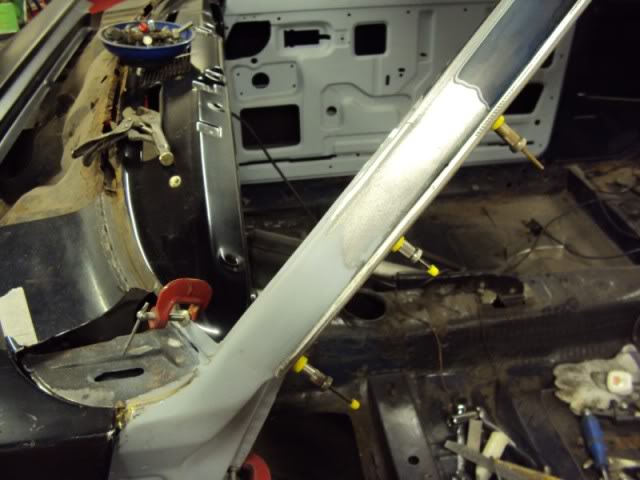
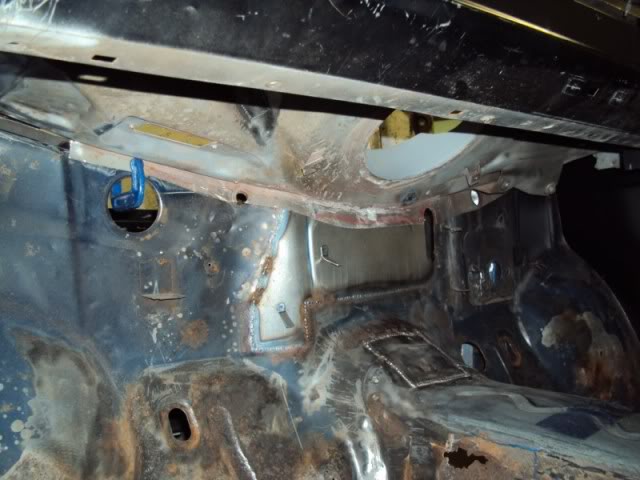
Next was to remove the bulkhead top panel and start patching the bulkhead and gearbox tunnel. I wanted to make it look as original as possible and not like a patchwork quilt.
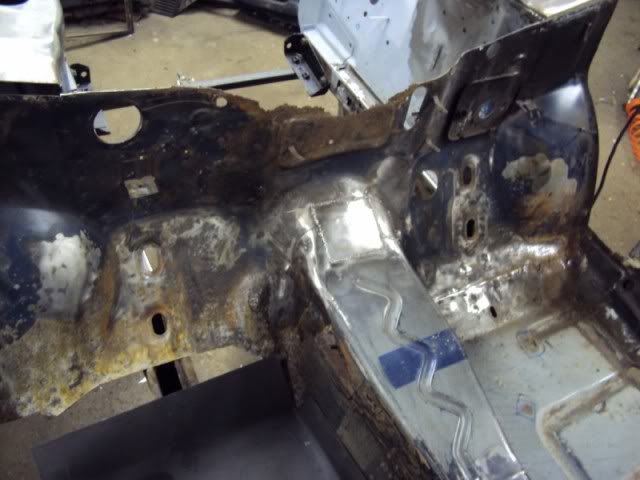
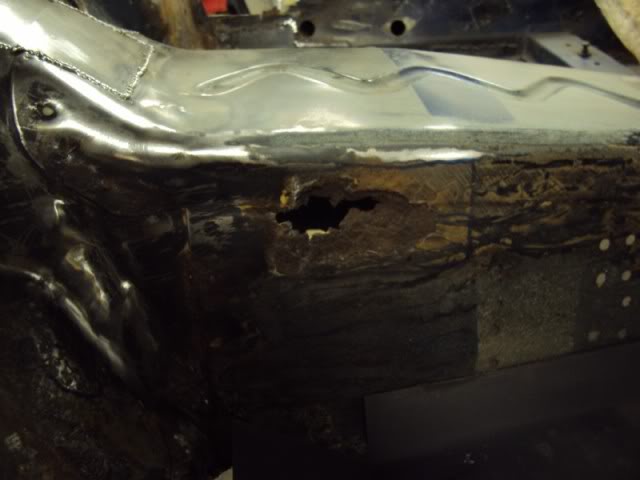
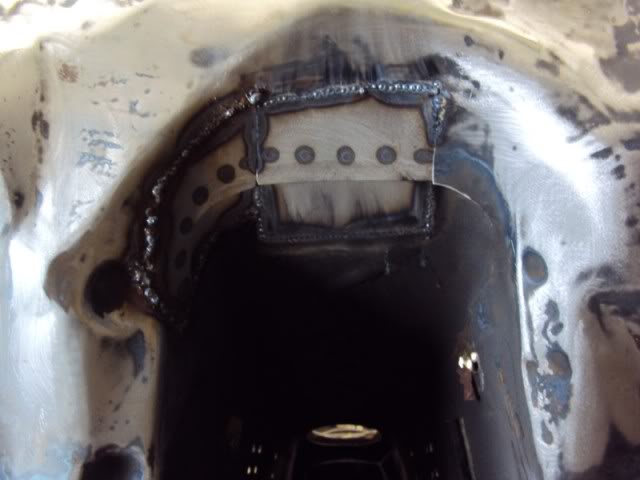
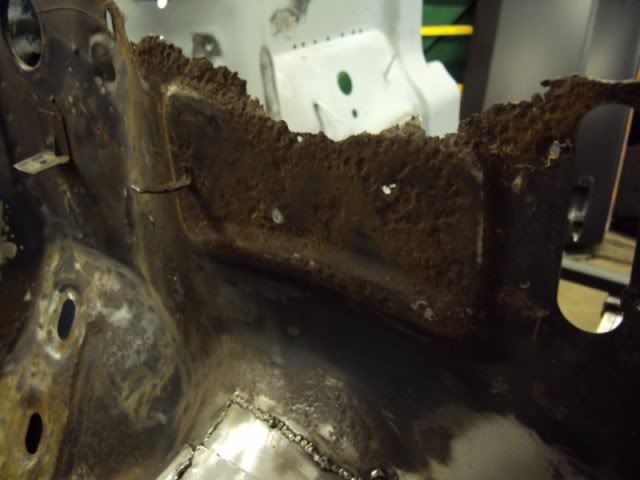
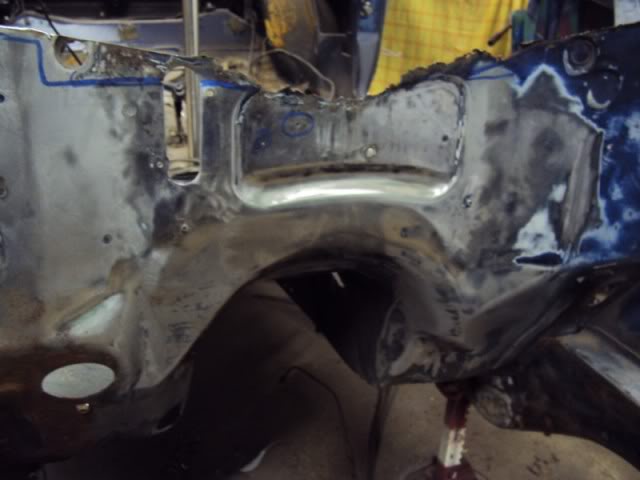
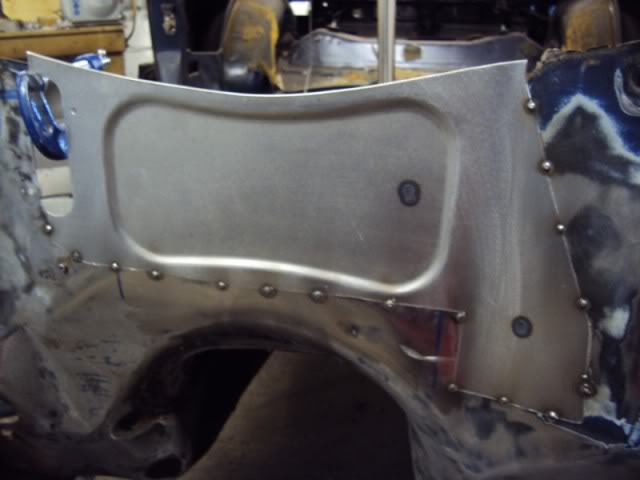
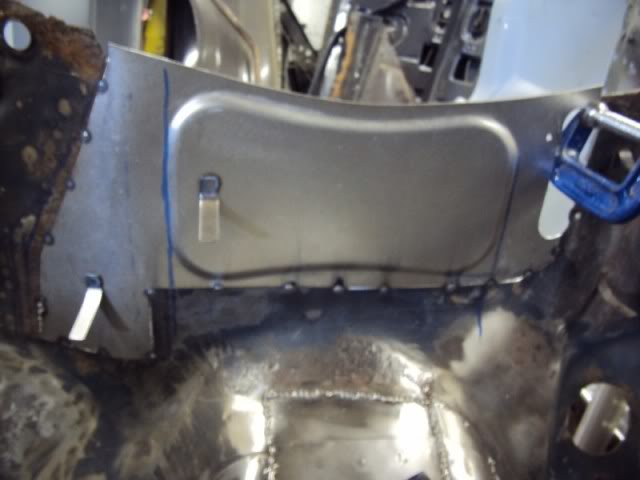
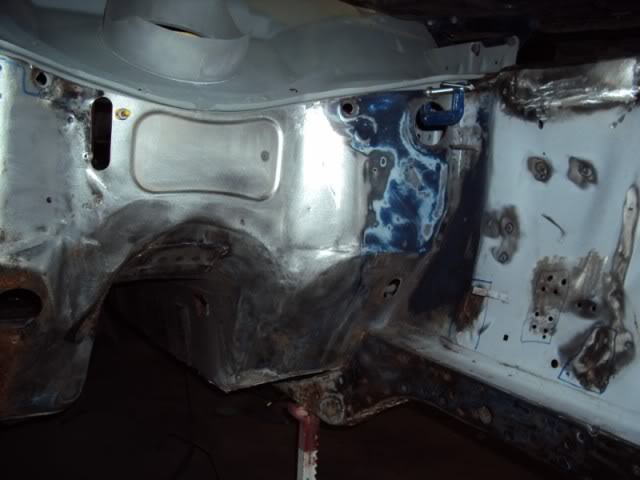
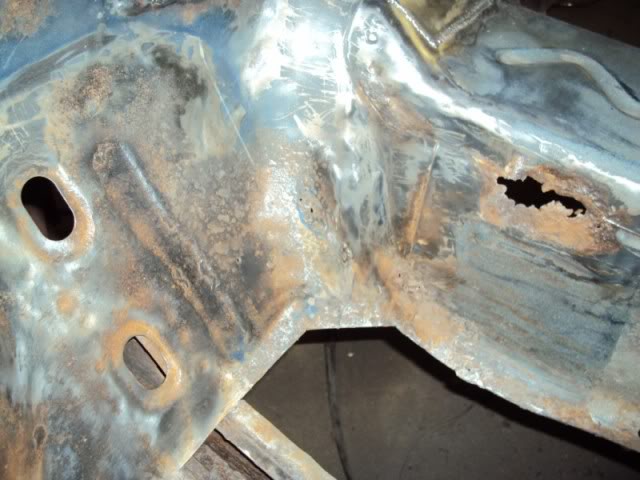
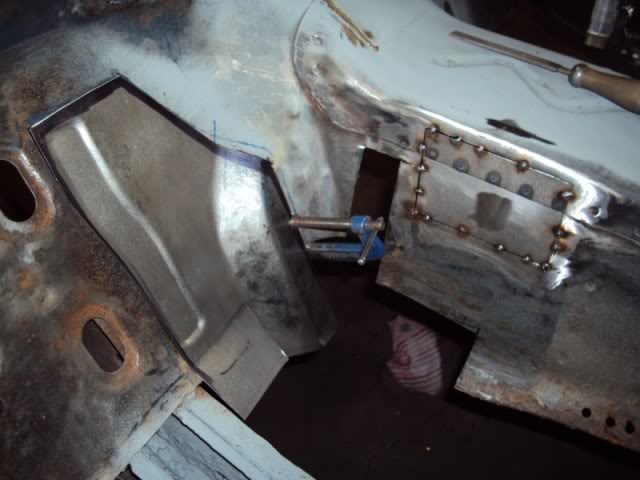
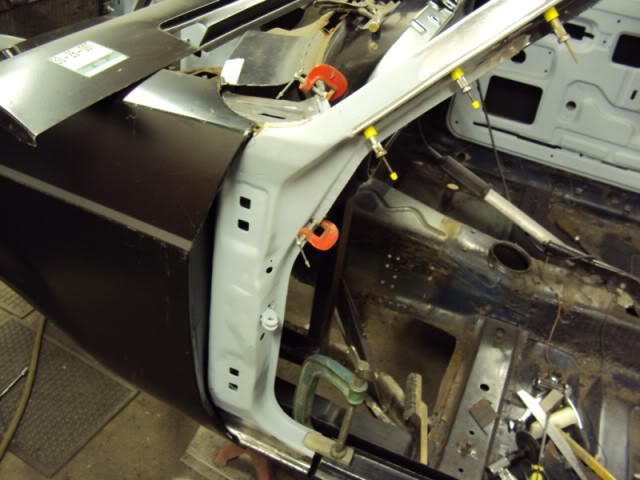
A goodish bulkhead top panel was found but needed a lot of prep work to fit.
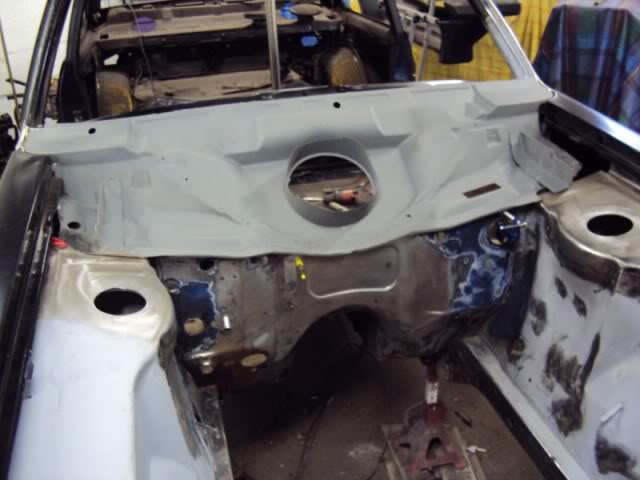
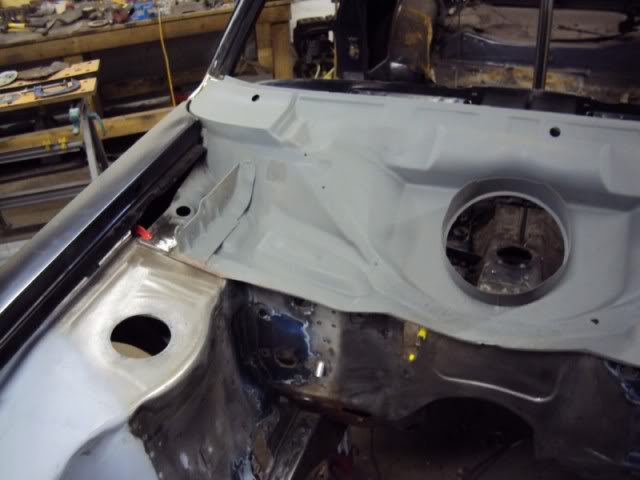
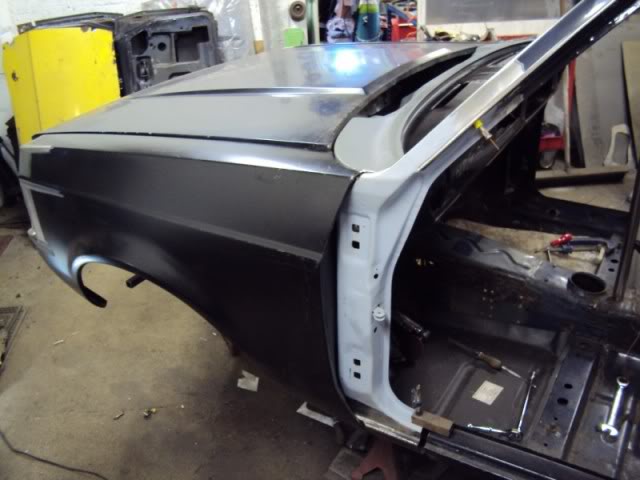
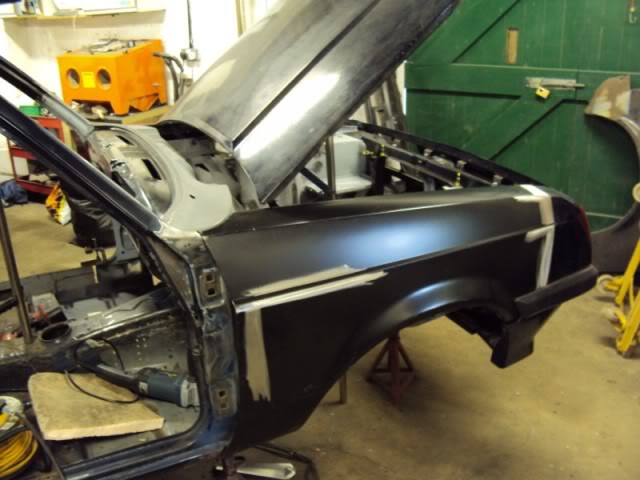
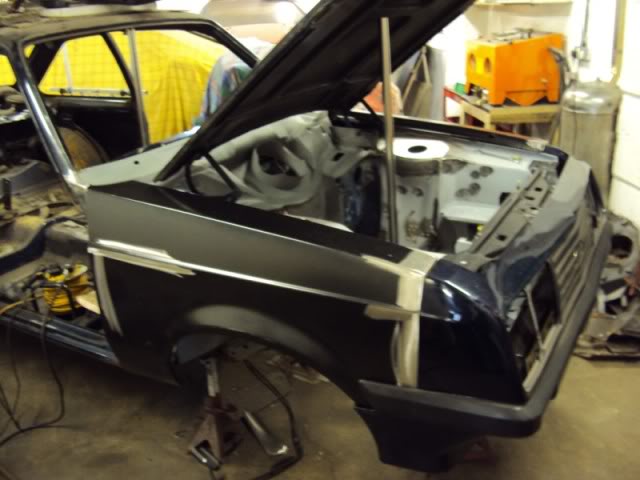
Then a test fit of the outer panels just to make sure everything is still straight.
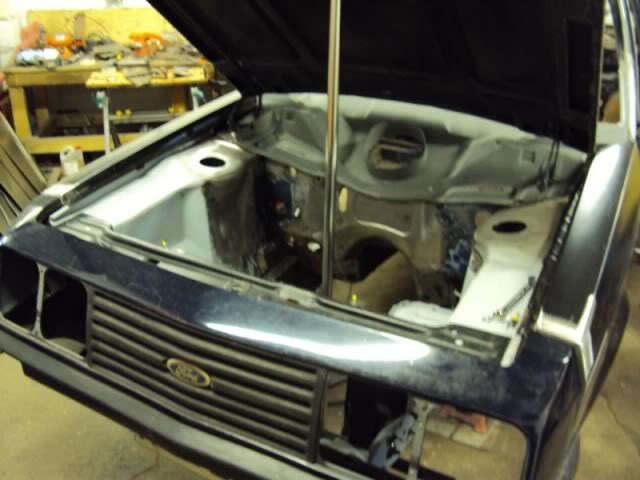
A goodish bulkhead top panel was found but needed a lot of prep work to fit.
Then a test fit of the outer panels just to make sure everything is still straight.
Thread Starter
Tin Basher
Joined: Mar 2011
Posts: 81
Likes: 0
From: Chelmsford
Bit more done today.
The bulkhead supplied was cut from a donor so some repair work was need on the edges and then it was welded into place.
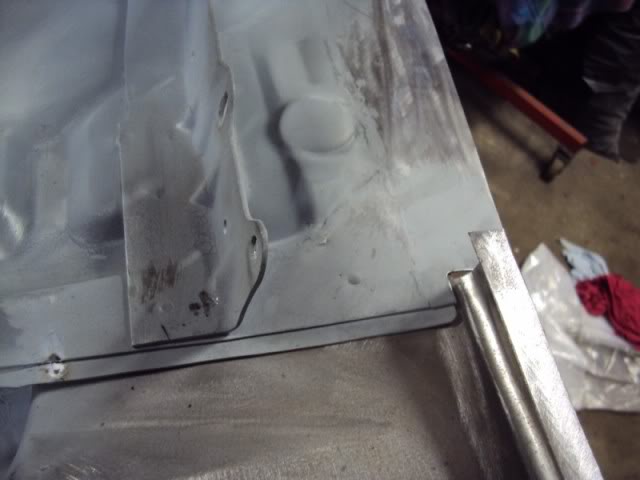
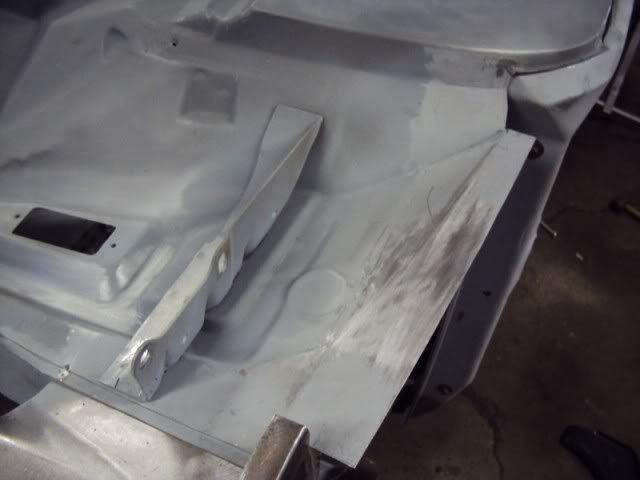
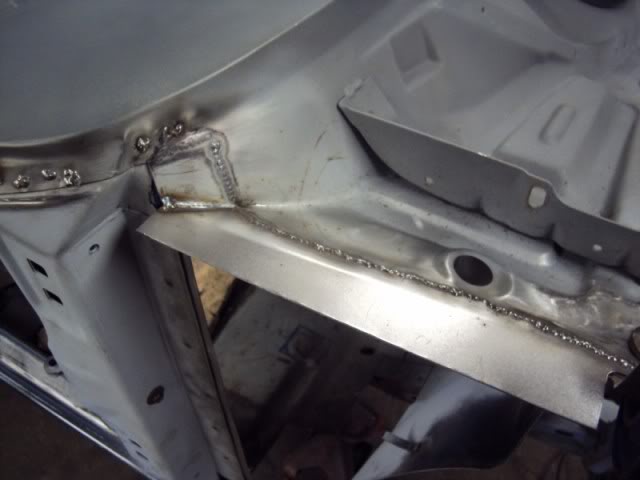
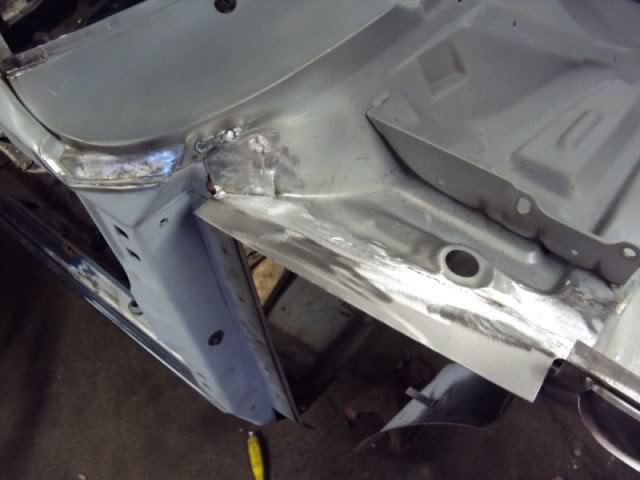
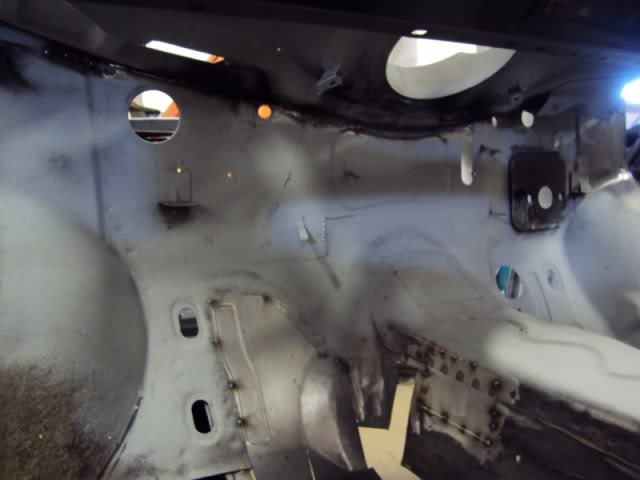
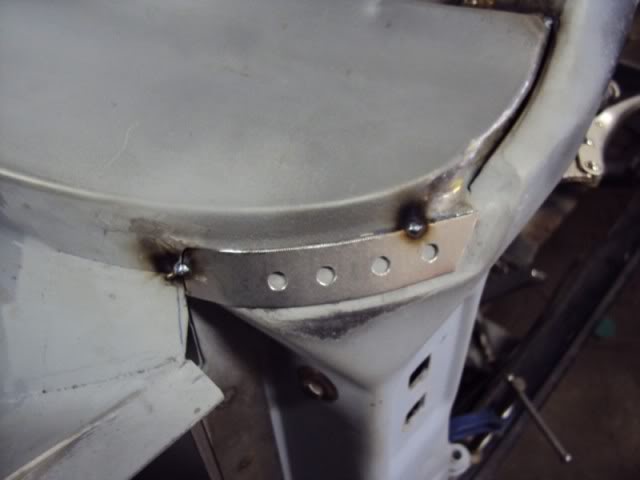
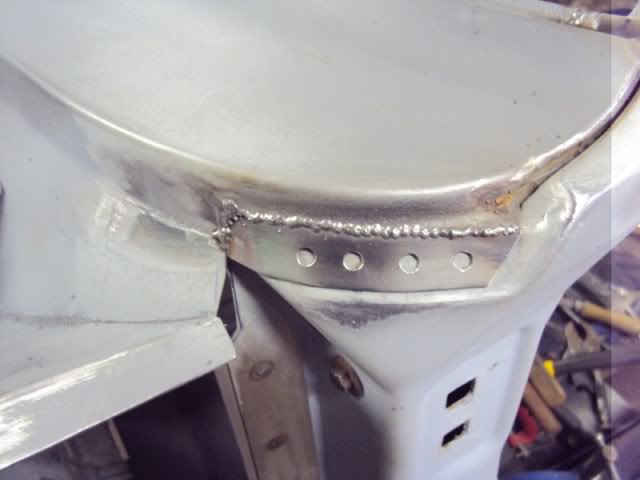
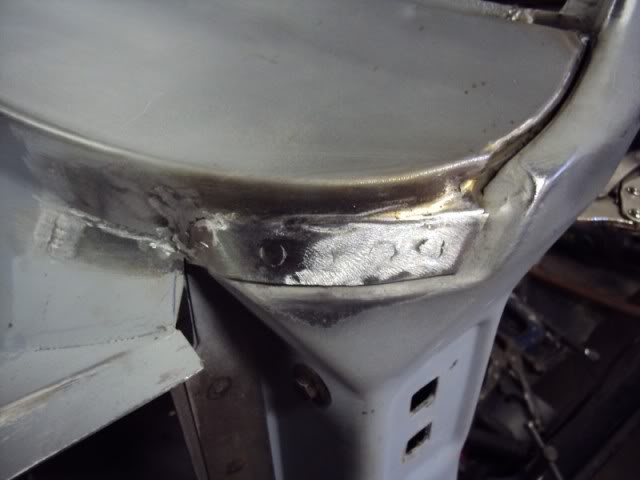
Test fitted the bulkhead splash panels a found that one was shorter than the other! More work…
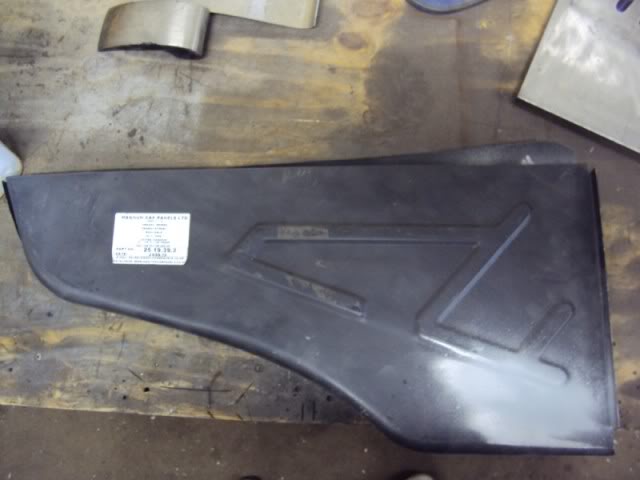
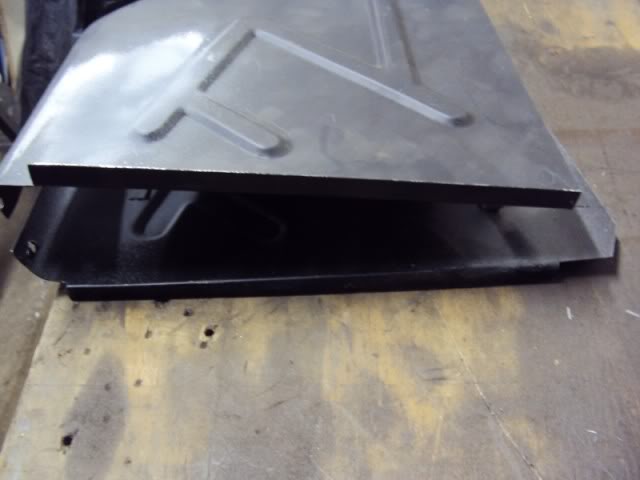
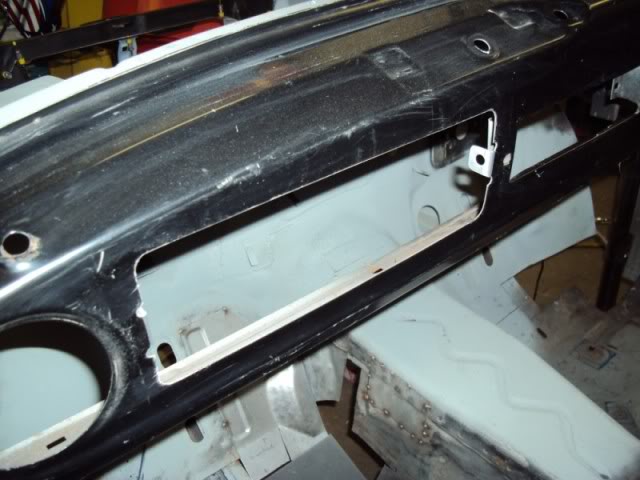
Lucky the donor bulkhead supplied had a dashboard in good condition still attached but because it was out of a ‘lesser’ Mk2 I had to cut out a hole for the glove box. lol
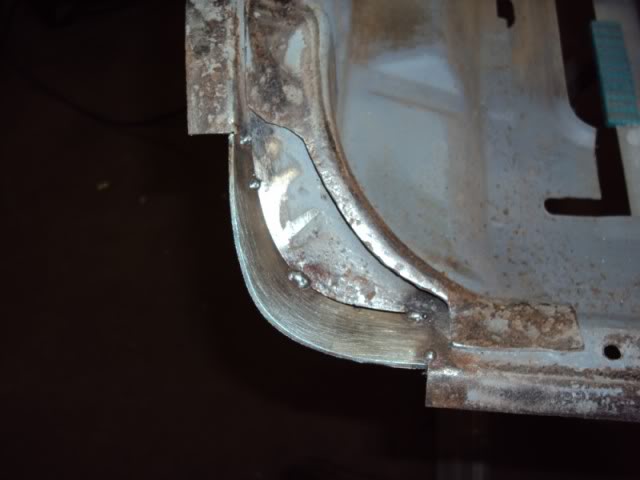
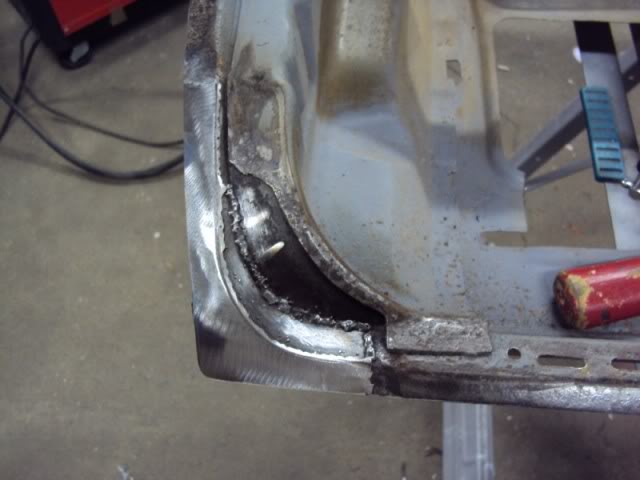
Finished of by making a corner patch for the passenger floor.
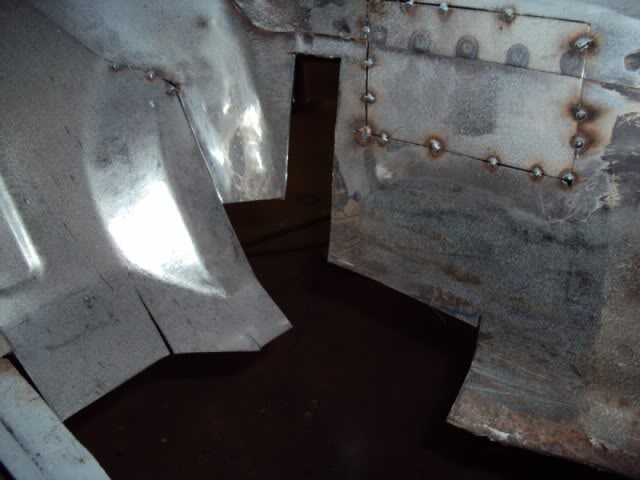
The bulkhead supplied was cut from a donor so some repair work was need on the edges and then it was welded into place.
Test fitted the bulkhead splash panels a found that one was shorter than the other! More work…
Lucky the donor bulkhead supplied had a dashboard in good condition still attached but because it was out of a ‘lesser’ Mk2 I had to cut out a hole for the glove box. lol
Finished of by making a corner patch for the passenger floor.
Thread Starter
Tin Basher
Joined: Mar 2011
Posts: 81
Likes: 0
From: Chelmsford
Bit more rust replacement management…
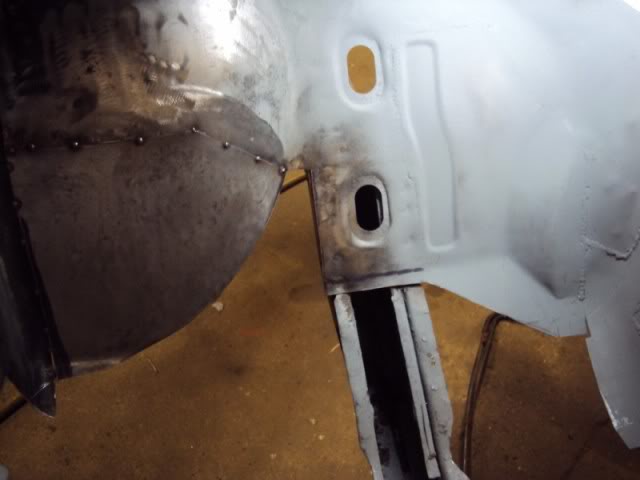
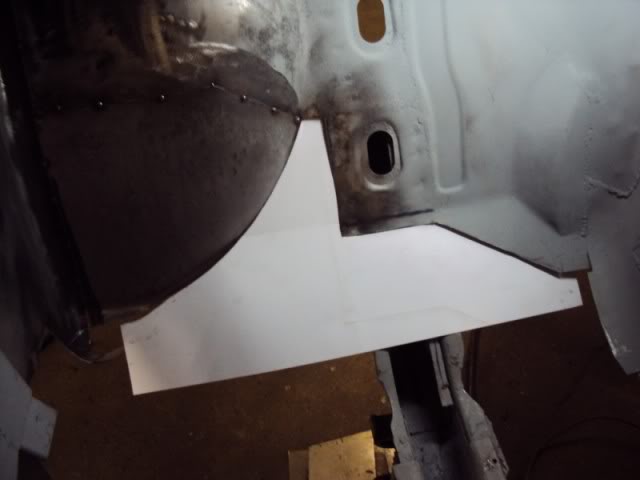
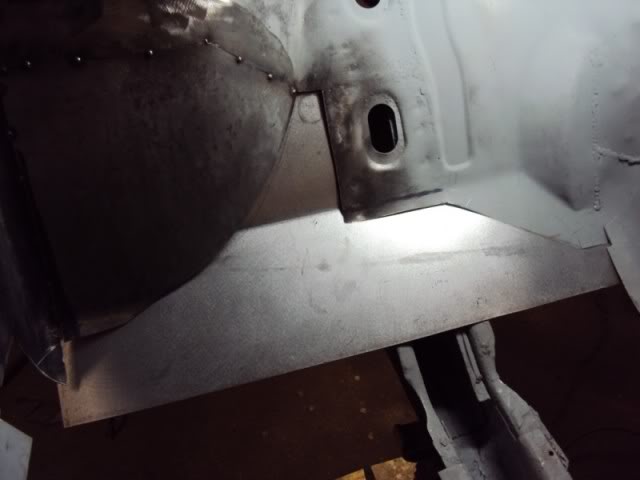
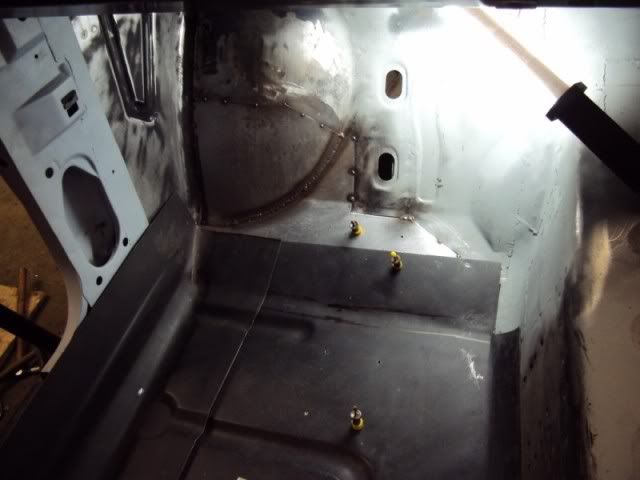
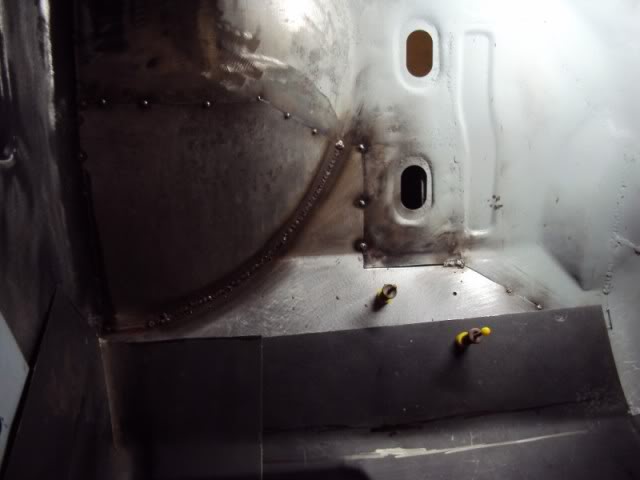
Fitted the corner patch for the passenger floor. Still needs a bit of grinding..
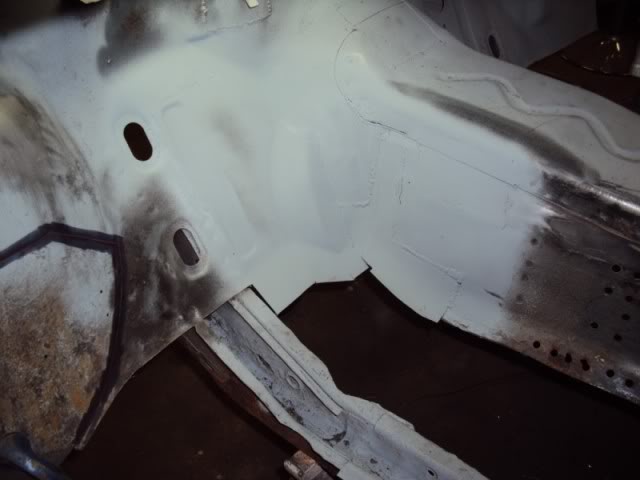
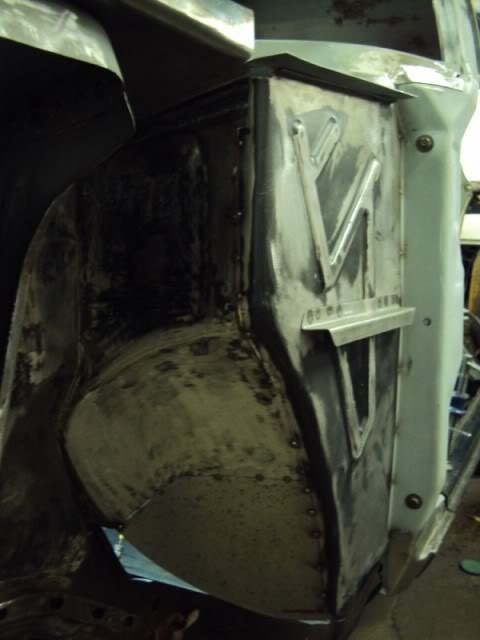
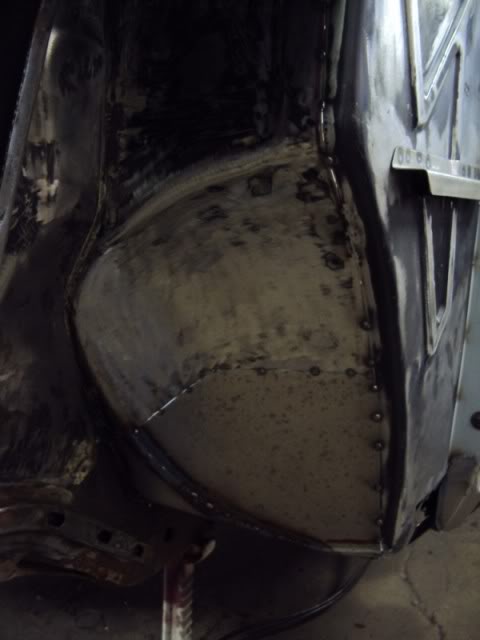
More patch work. The passenger side of the bulkhead was really bad.
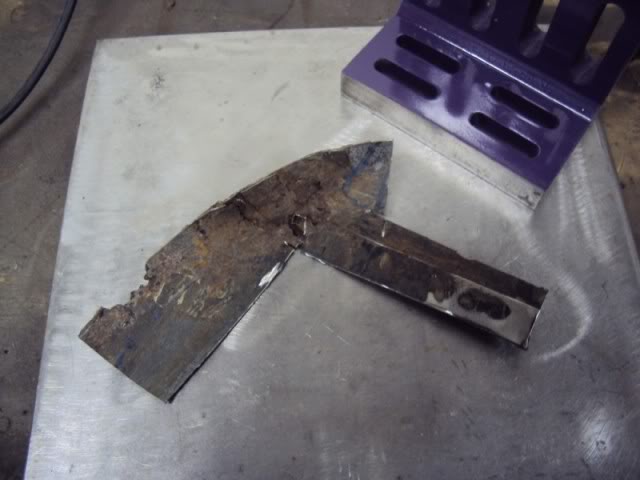
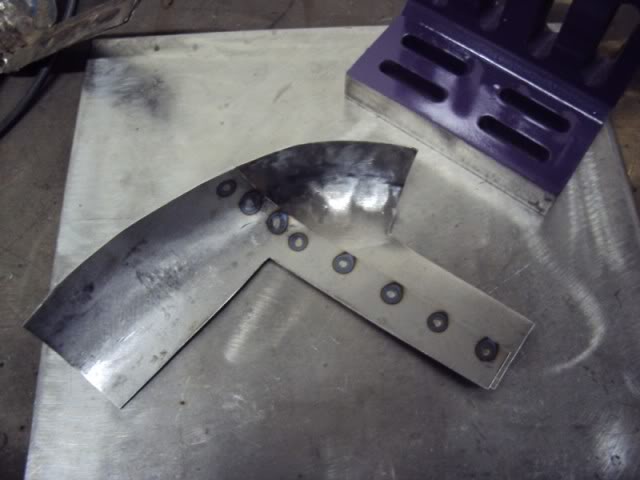
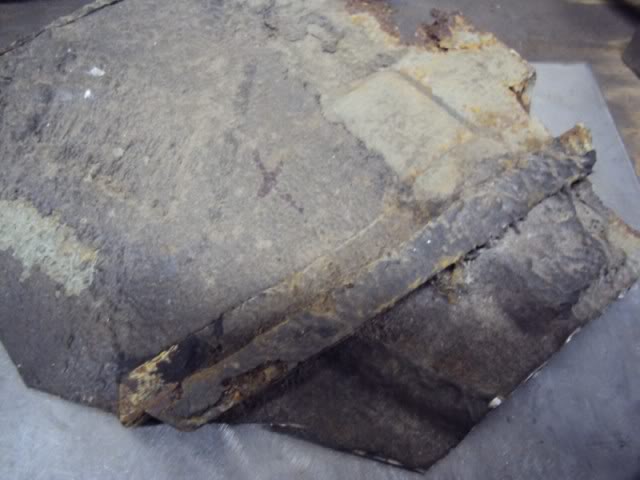
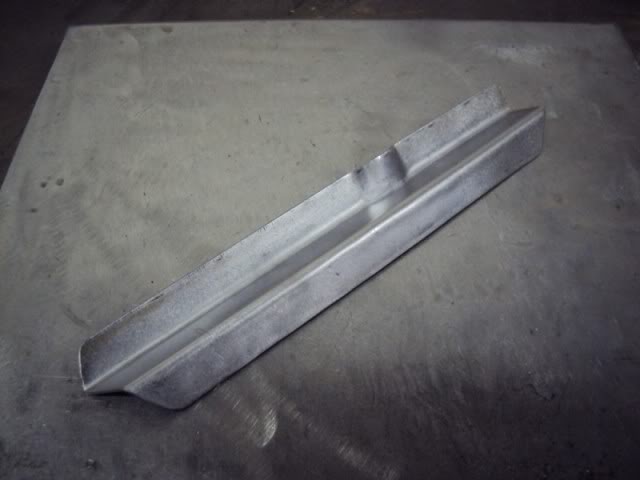
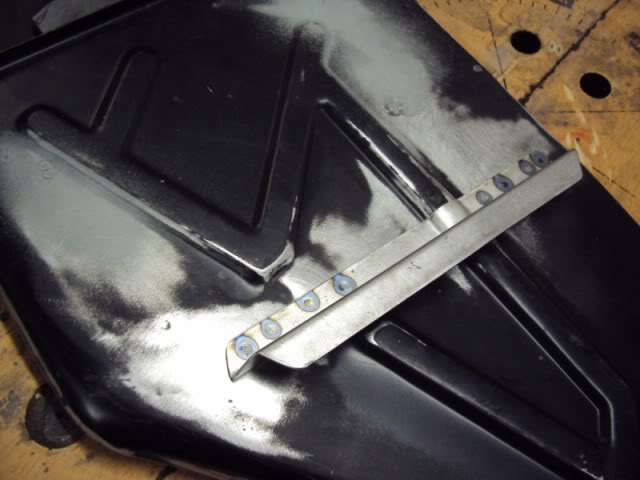
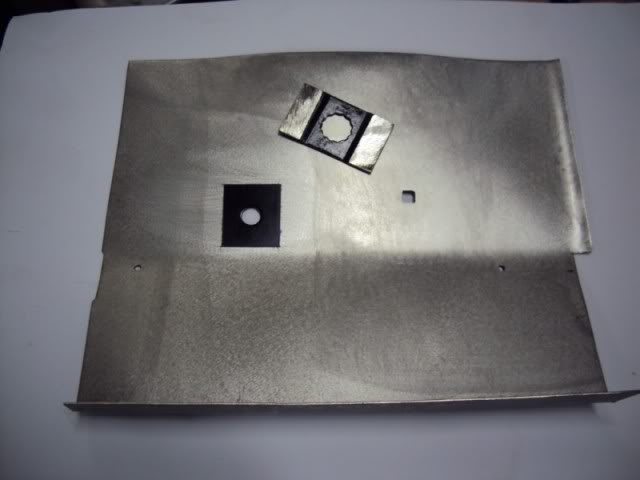
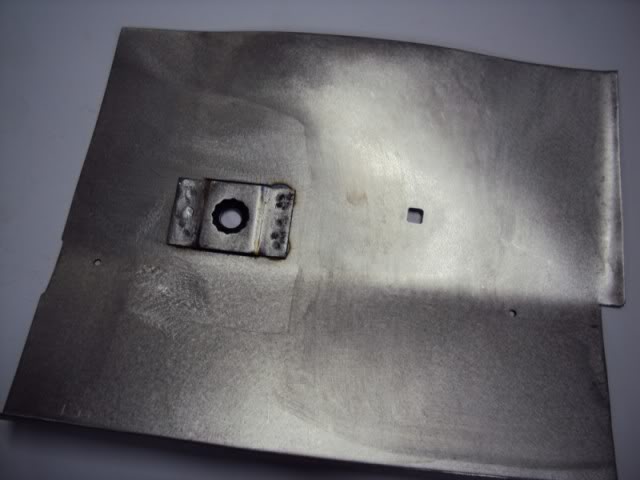
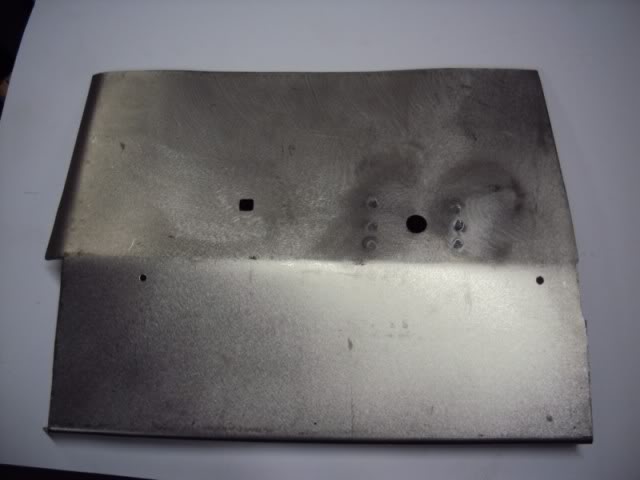
Couldn’t find anyone supplying the ‘Z’ section reinforcing brackets that attach to the bulkhead splash shields so made my own…
Old one
New one
Spot-welded to the panel
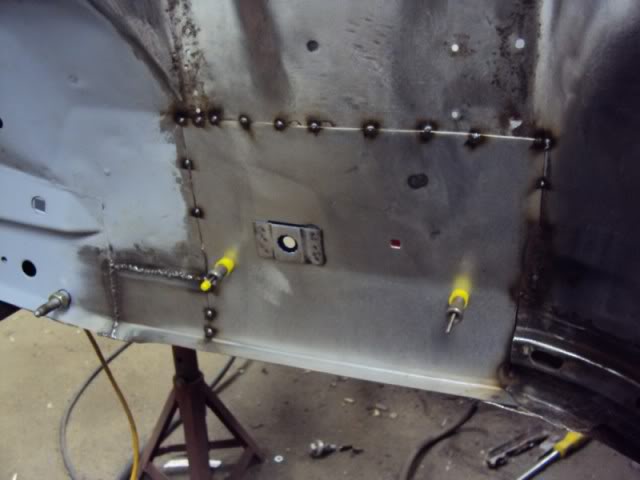
Panel cut in and tack welded into position
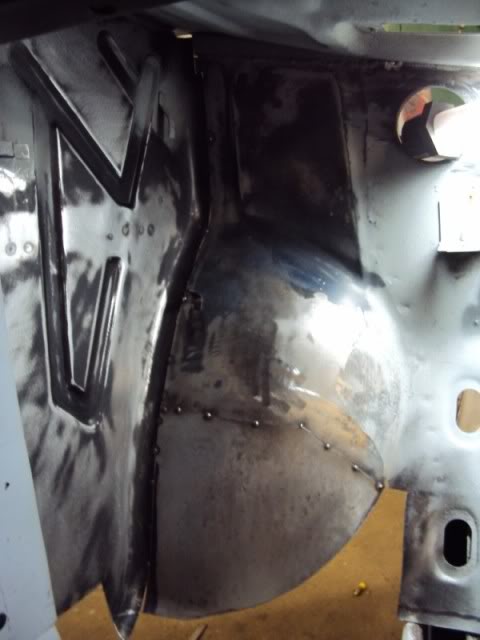
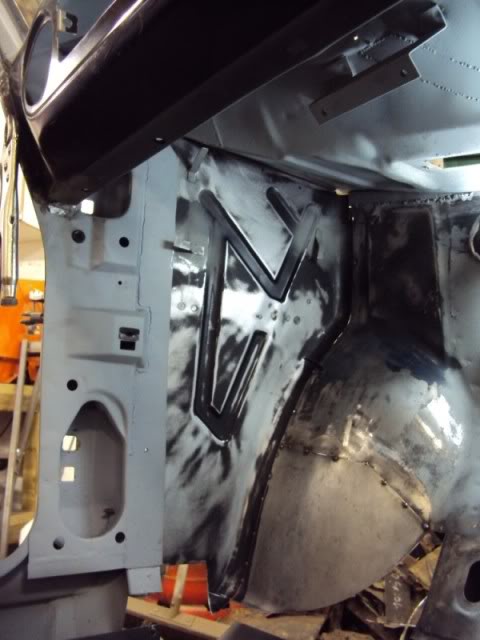
one more patch to make tomorrow to finish the passenger side.
Fitted the corner patch for the passenger floor. Still needs a bit of grinding..
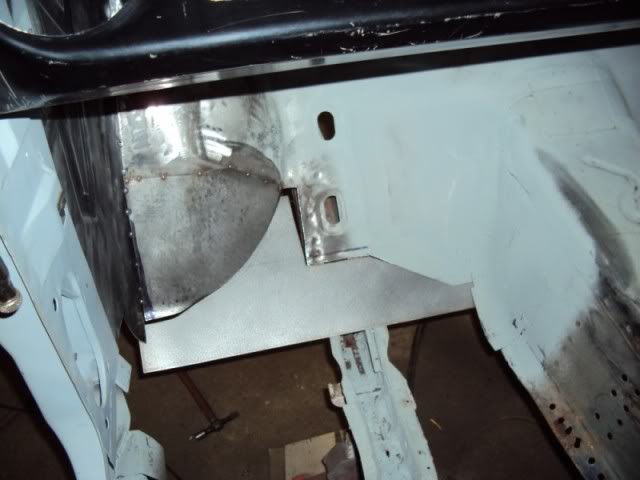
More patch work. The passenger side of the bulkhead was really bad.
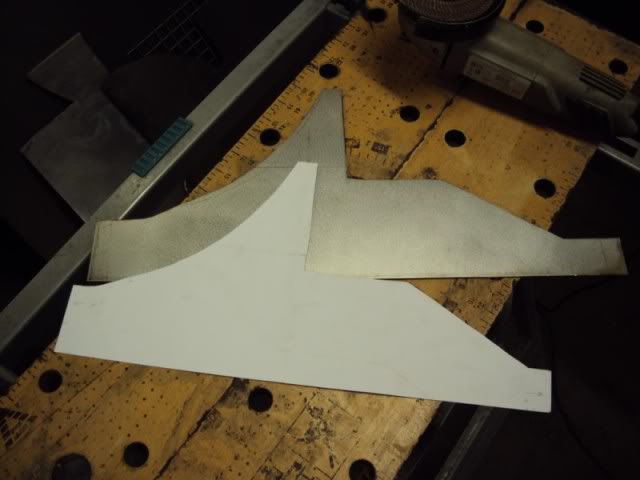
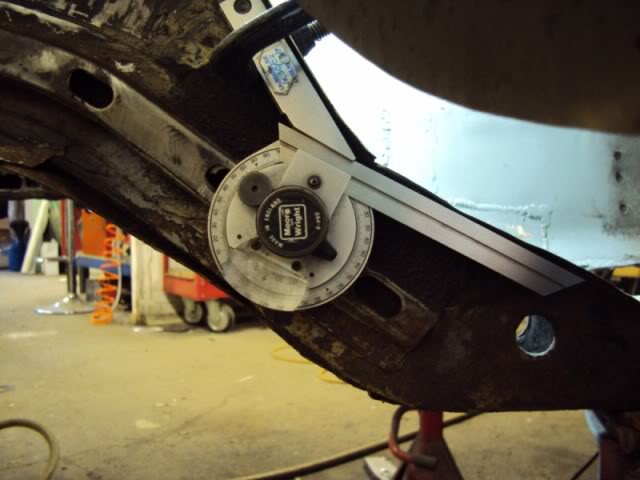
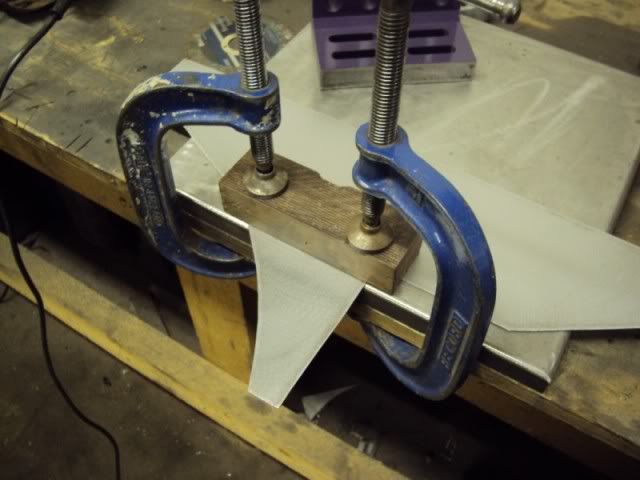
Couldn’t find anyone supplying the ‘Z’ section reinforcing brackets that attach to the bulkhead splash shields so made my own…
Old one
New one
Spot-welded to the panel
Panel cut in and tack welded into position
one more patch to make tomorrow to finish the passenger side.

Trending Topics
Thread Starter
Tin Basher
Joined: Mar 2011
Posts: 81
Likes: 0
From: Chelmsford

Thread Starter
Tin Basher
Joined: Mar 2011
Posts: 81
Likes: 0
From: Chelmsford
Bit more done to the old girl.
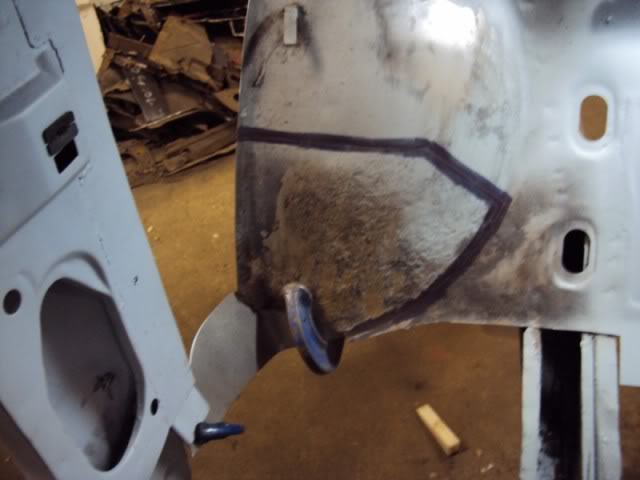
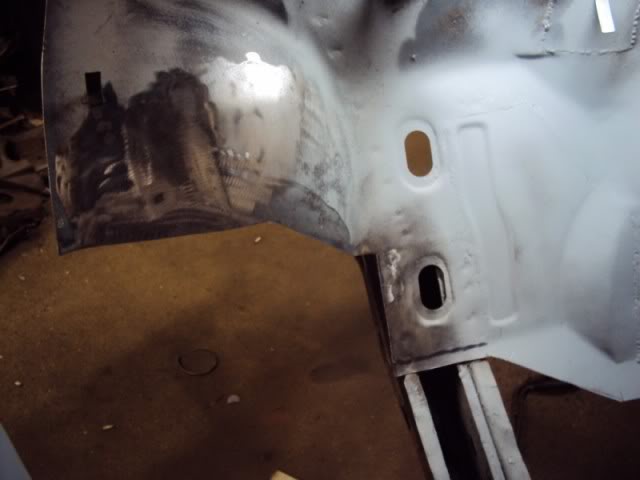
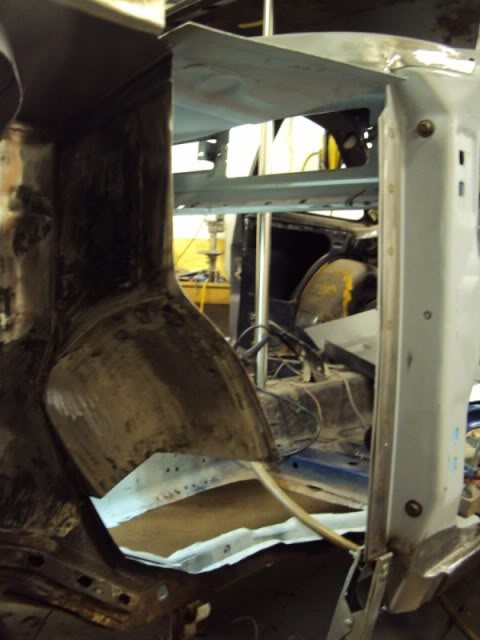
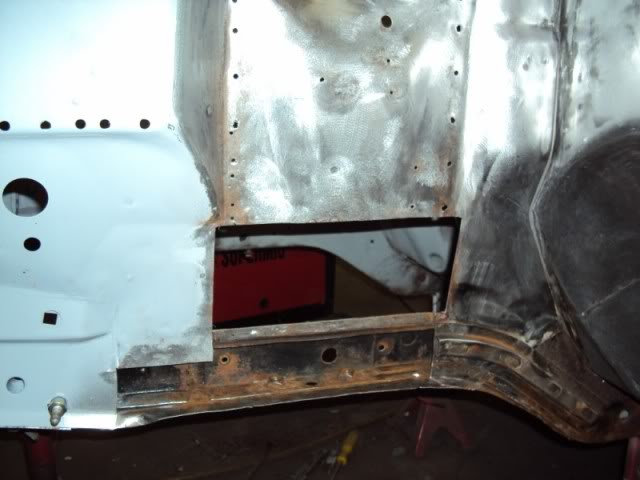
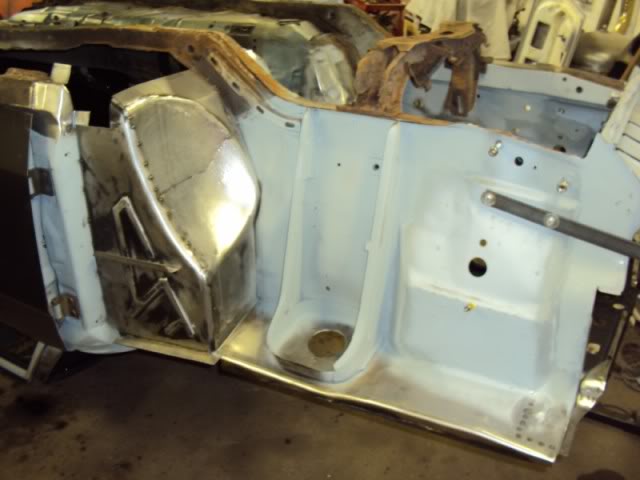
A bit of a rethink on the near side inner wing. On first inspection of the near side suspension struts all seemed salvageable but after dressing the inner wing to remove some dents it was found that the reinforcing plates fitted to the bottom of the struts had rusted beyond repair and sections of the inner wing needed attention so quickest way would be to remove the lot and replace with new steel.
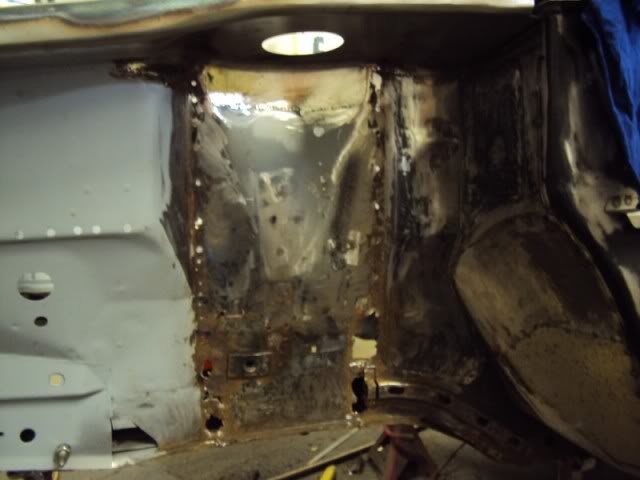
I decided to remove a large section of the inner which got rid of most of the rust and a load of unwanted holes someone had drilled to mount an alarm system. Luckily the chassis rail and all its inner strengtheners were in good shape.
Rust treatment
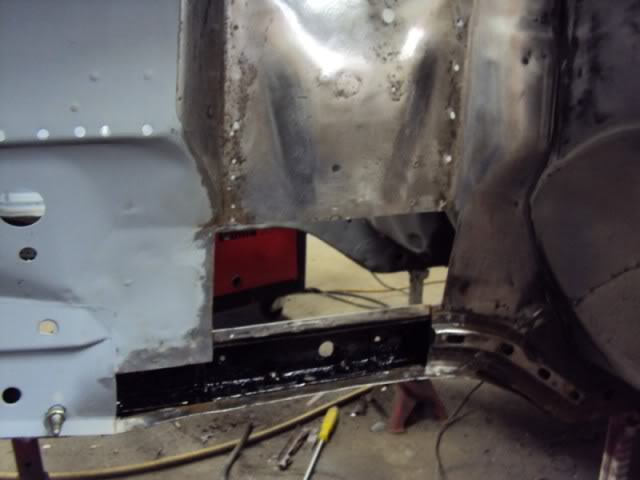
More patches…
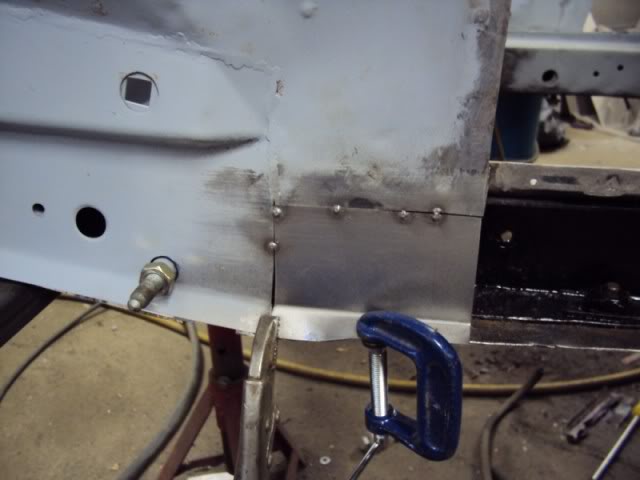
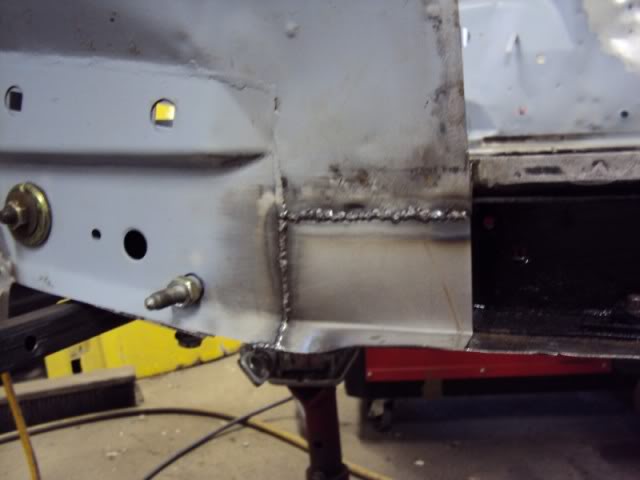
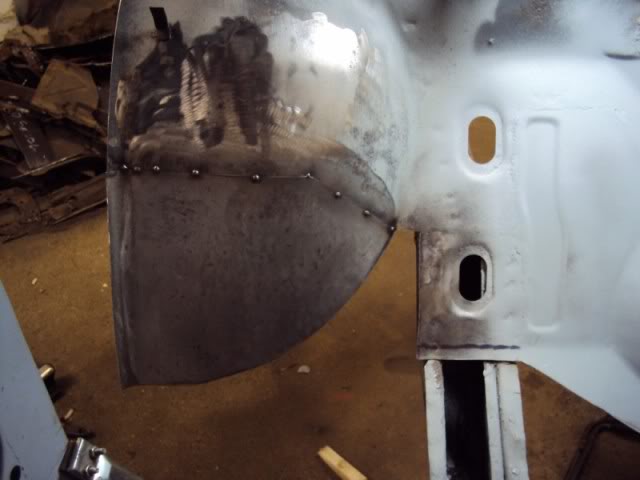
Had to put a bit a form into the next patch to match the inner wing profile.
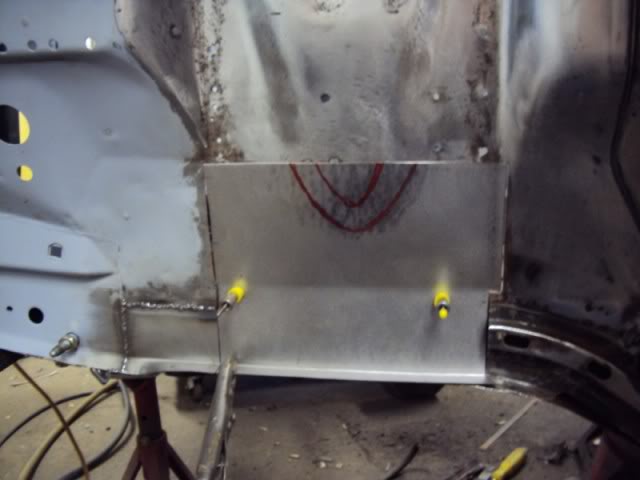
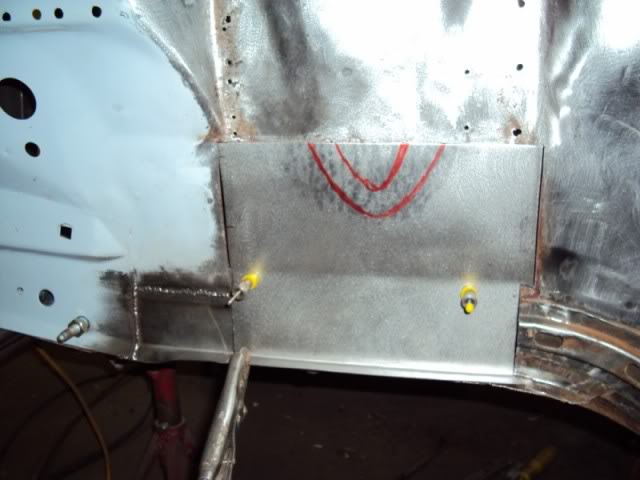
Finished of by drilling the holes of the brake lines and a little paint to stop the rust before spot welding.
Finally tack welded in place.
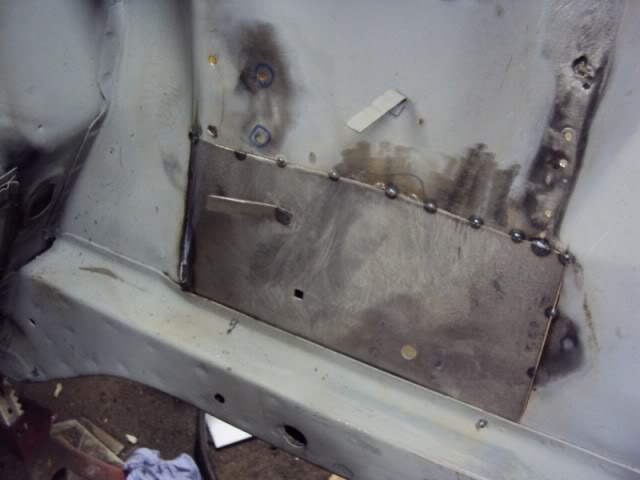
Tomorrows job is to fit the new struts…
A bit of a rethink on the near side inner wing. On first inspection of the near side suspension struts all seemed salvageable but after dressing the inner wing to remove some dents it was found that the reinforcing plates fitted to the bottom of the struts had rusted beyond repair and sections of the inner wing needed attention so quickest way would be to remove the lot and replace with new steel.
I decided to remove a large section of the inner which got rid of most of the rust and a load of unwanted holes someone had drilled to mount an alarm system. Luckily the chassis rail and all its inner strengtheners were in good shape.
Rust treatment
More patches…
Had to put a bit a form into the next patch to match the inner wing profile.
Finished of by drilling the holes of the brake lines and a little paint to stop the rust before spot welding.
Finally tack welded in place.
Tomorrows job is to fit the new struts…
Thread Starter
Tin Basher
Joined: Mar 2011
Posts: 81
Likes: 0
From: Chelmsford
Had a bit of a mission fitting the new struts and reinforcement angles today so its been a long day. First thing was to tidy up the struts themselves i.e getting rid of the ripples on the flanges.
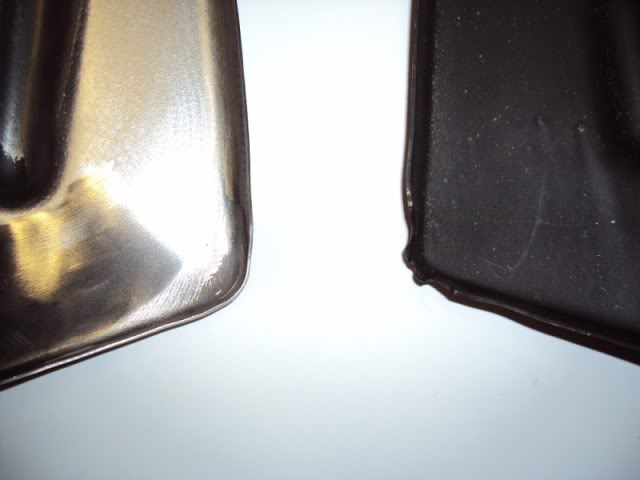
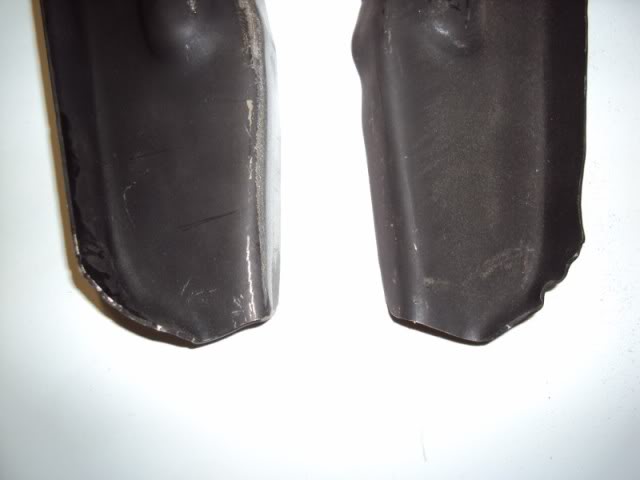
Then getting the struts to fit the profile of the inner wing and making the reinforcement angles to fit the struts.
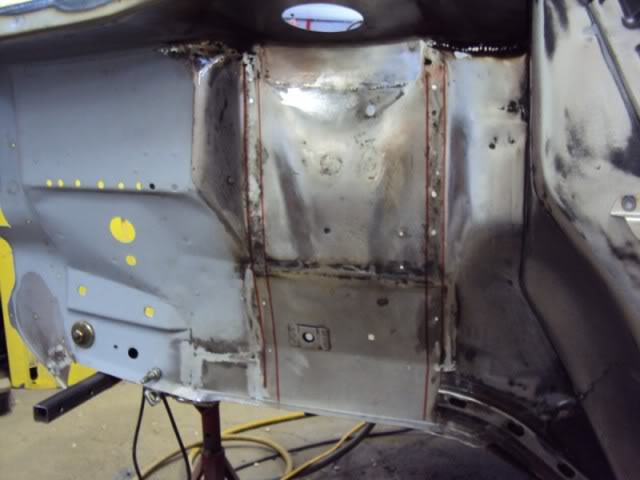
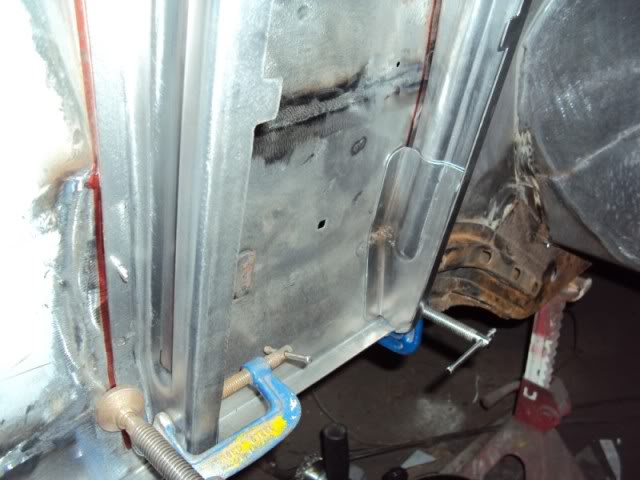
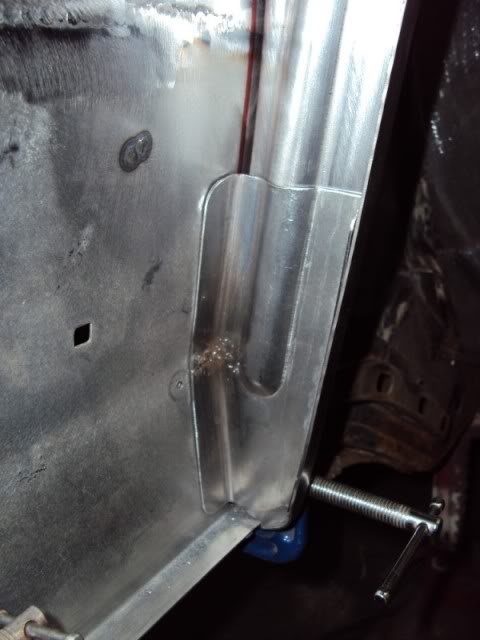
Then spot weld the whole assembly together.
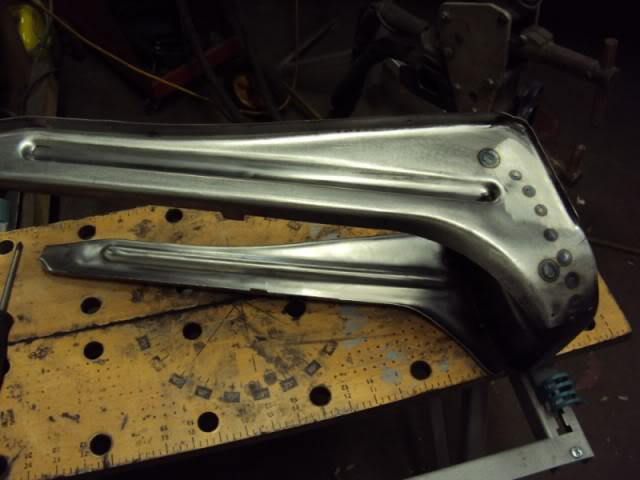
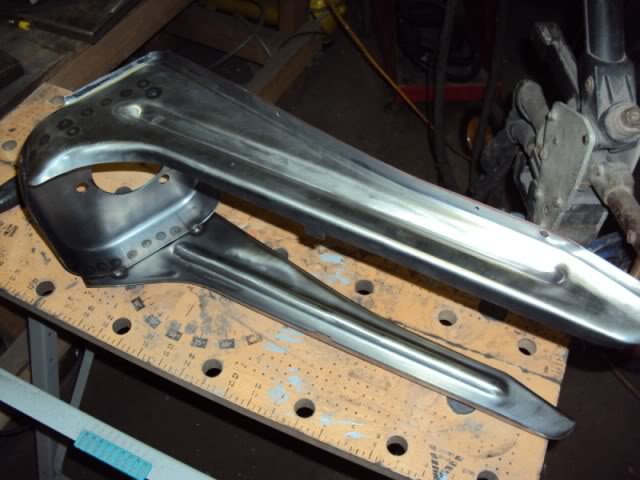
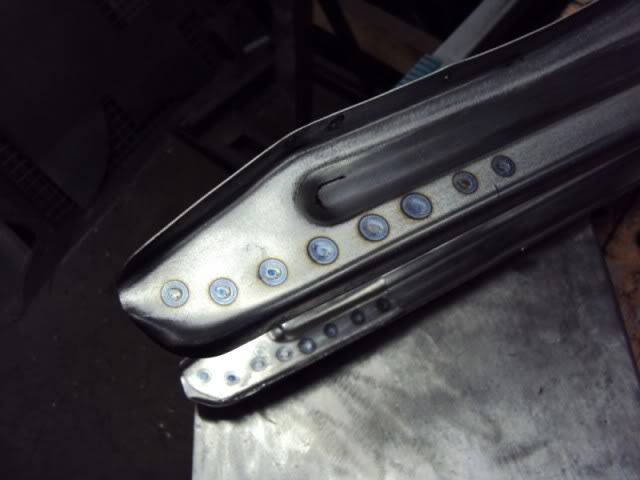
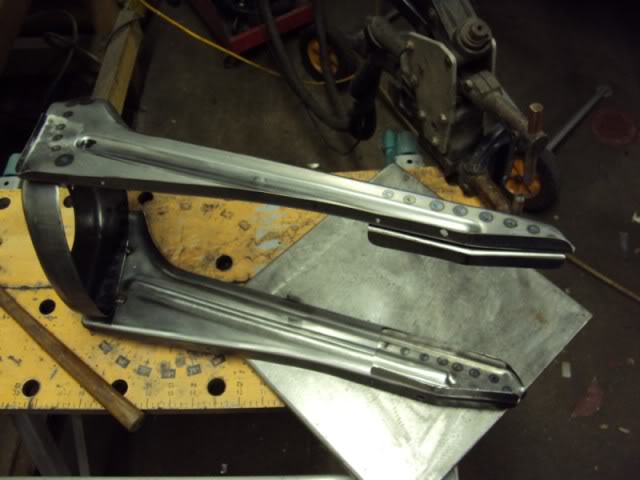
Then fitted into place ready to weld to the car.
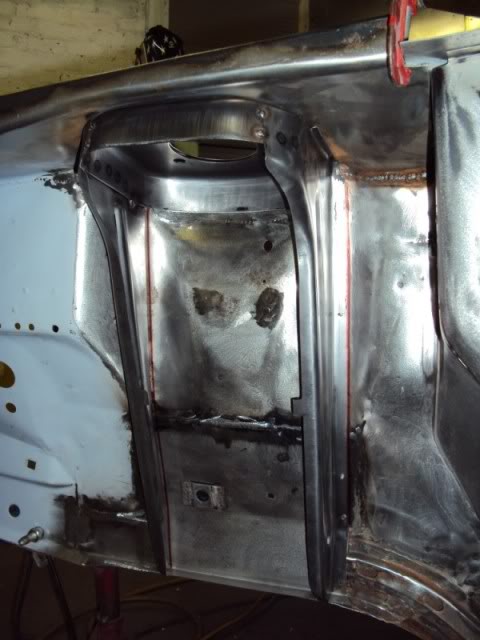
Then getting the struts to fit the profile of the inner wing and making the reinforcement angles to fit the struts.
Then spot weld the whole assembly together.
Then fitted into place ready to weld to the car.
Thread Starter
Tin Basher
Joined: Mar 2011
Posts: 81
Likes: 0
From: Chelmsford
Took a few weeks off from the Mk2 resto to catch up with some other work I needed to finish so now that’s all done lets get this Mk2 back on the road.
Finished of the n/s/f suspension strut and completes the work on that side of the engine bay.
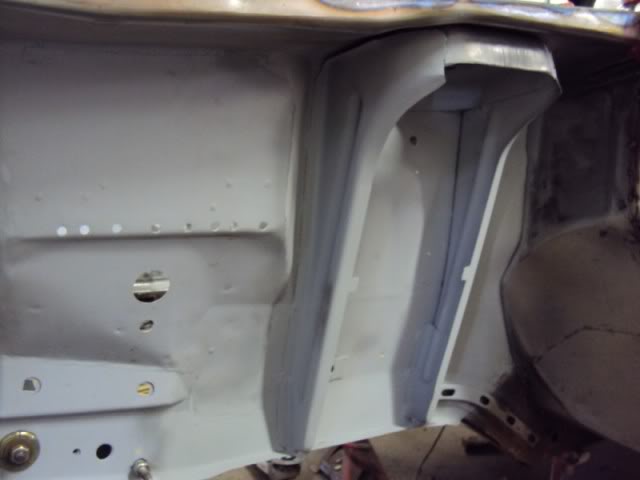
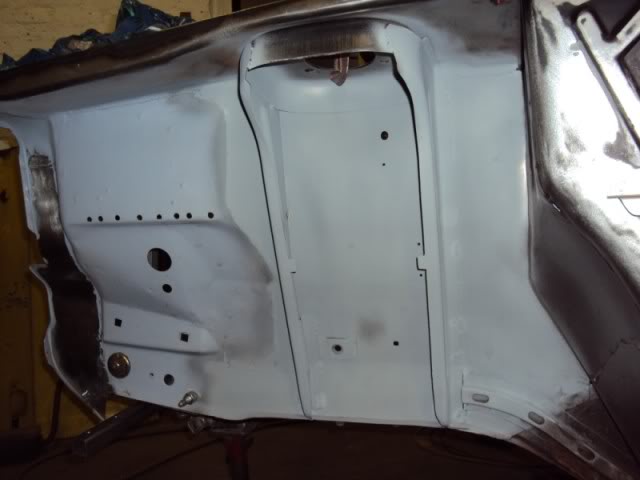
Now for the other side. I cut out some sections of rust in the inner wing and found the inner chassis rail strengthening was in poor condition so all this had to be replaced.
I made the replacement strengtheners from 16 SWG steel, bent a flange on each edge and welded it in.
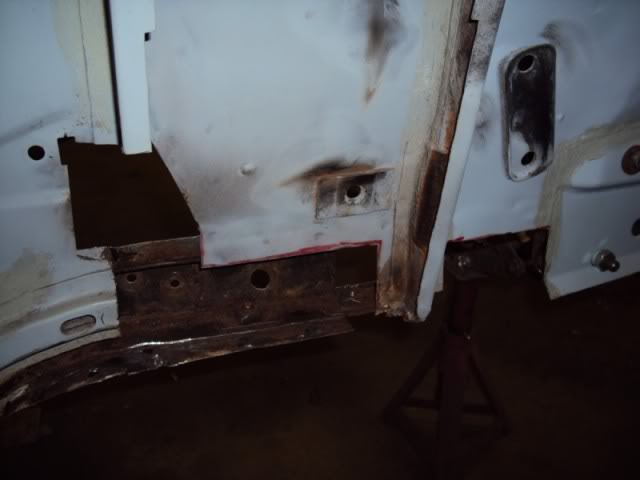
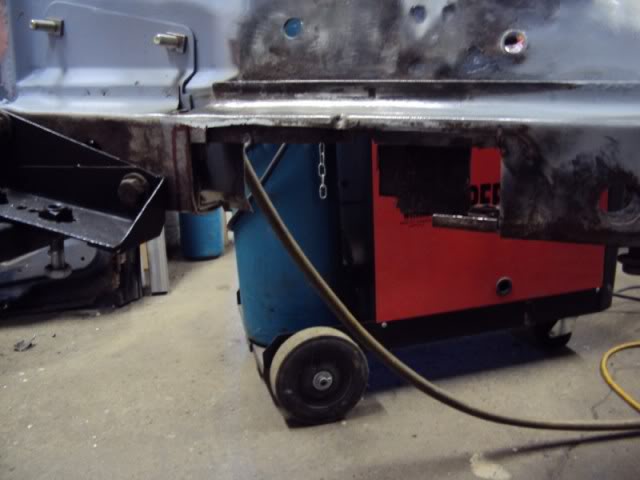
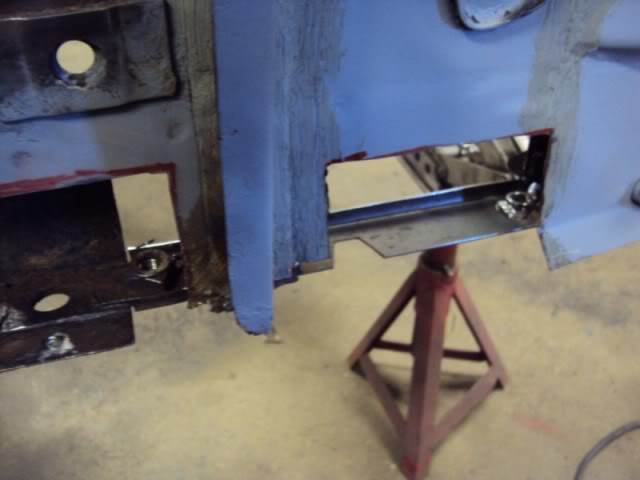
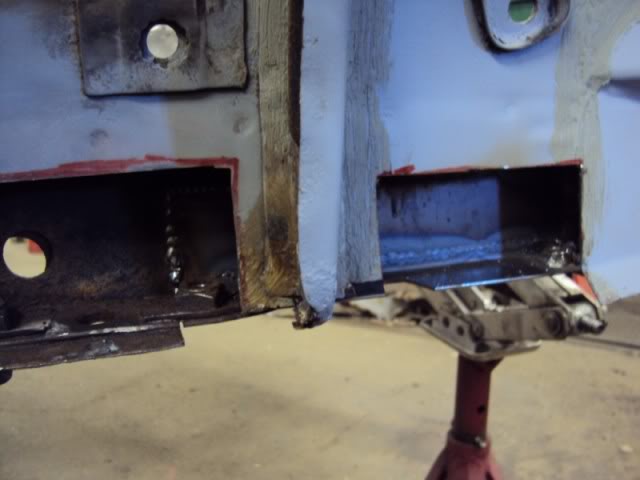
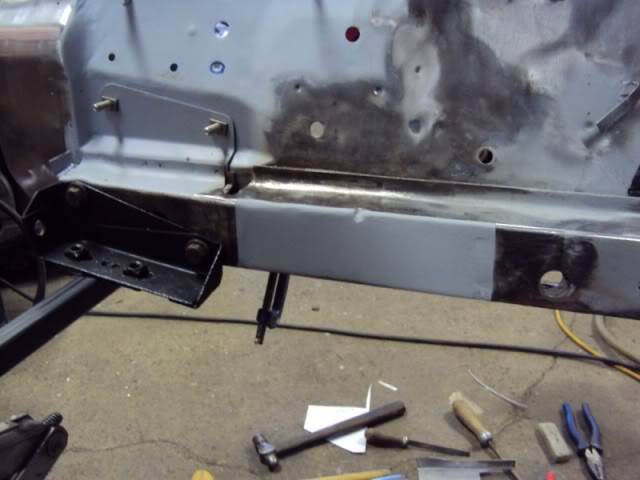
then repaired the inner wing.
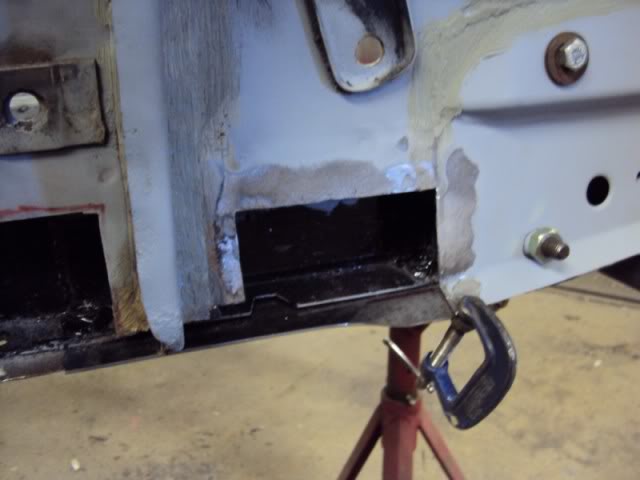
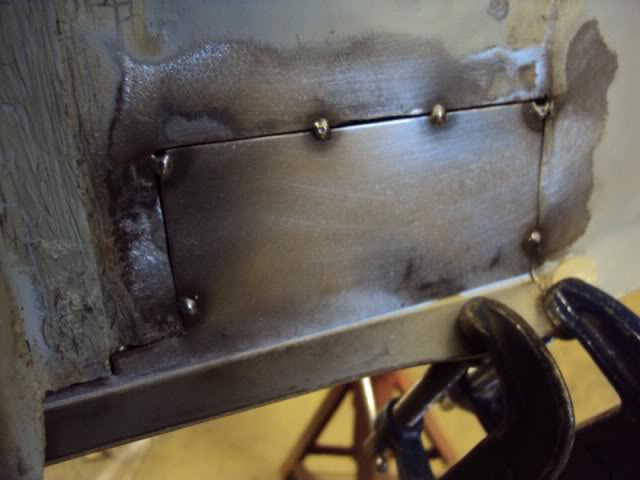
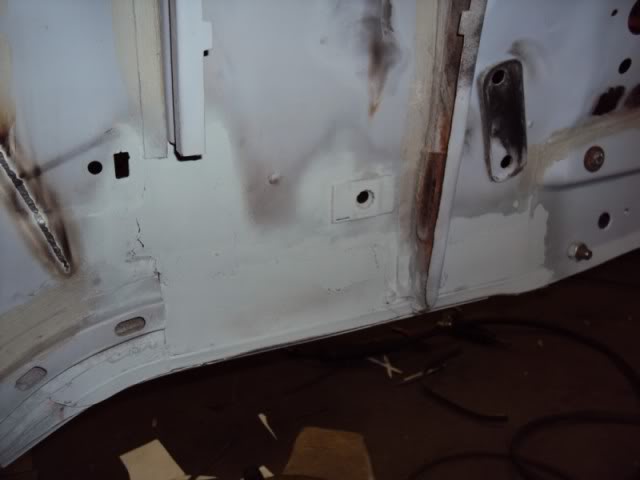
The body strengthening kit turned up in the post so I made a start fitting the parts.
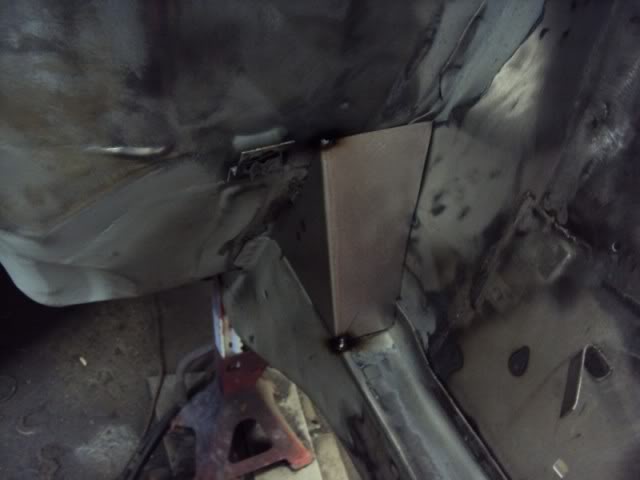
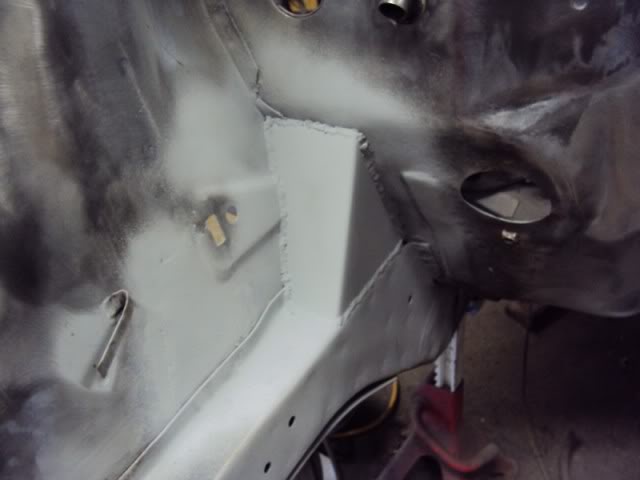
The old girl is really coming together now and the shell has regained its structural strength so the next job will be to weld the front end on and mount the shell on the rollover jig so I can start on the floors.
The primer, etch primer, stone guard etc has been ordered together with 5 litres of midnight blue. I am really looking forward to seeing the car in paint.
Finished of the n/s/f suspension strut and completes the work on that side of the engine bay.
Now for the other side. I cut out some sections of rust in the inner wing and found the inner chassis rail strengthening was in poor condition so all this had to be replaced.
I made the replacement strengtheners from 16 SWG steel, bent a flange on each edge and welded it in.
then repaired the inner wing.
The body strengthening kit turned up in the post so I made a start fitting the parts.
The old girl is really coming together now and the shell has regained its structural strength so the next job will be to weld the front end on and mount the shell on the rollover jig so I can start on the floors.
The primer, etch primer, stone guard etc has been ordered together with 5 litres of midnight blue. I am really looking forward to seeing the car in paint.
Thread Starter
Tin Basher
Joined: Mar 2011
Posts: 81
Likes: 0
From: Chelmsford
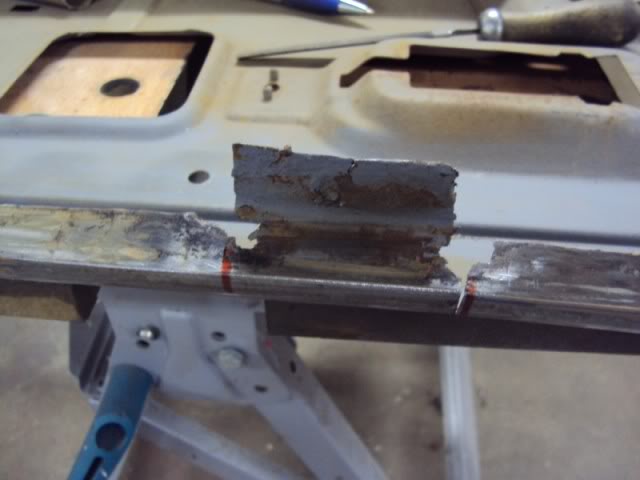
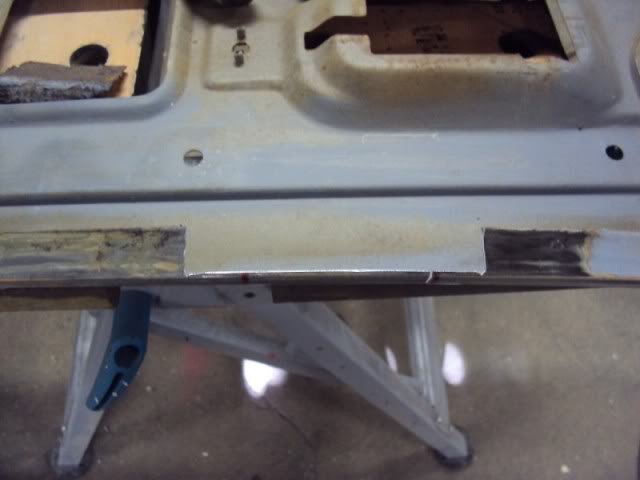
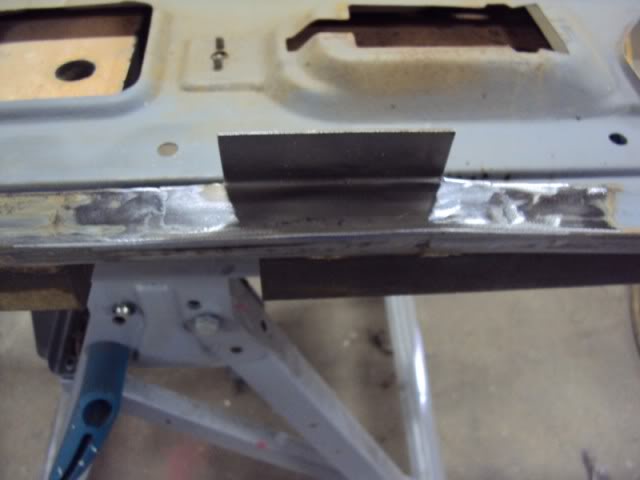
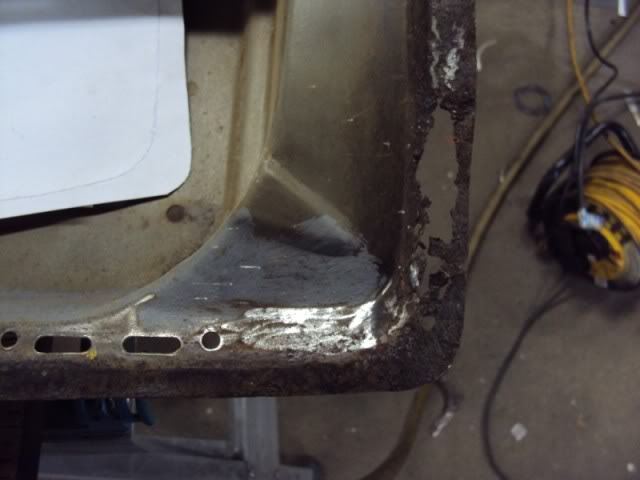
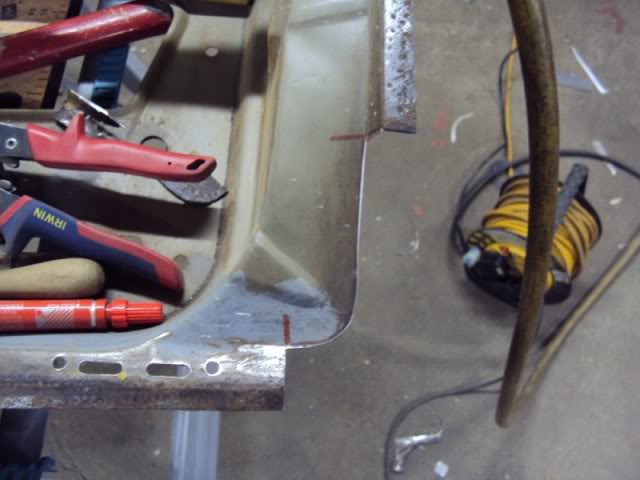
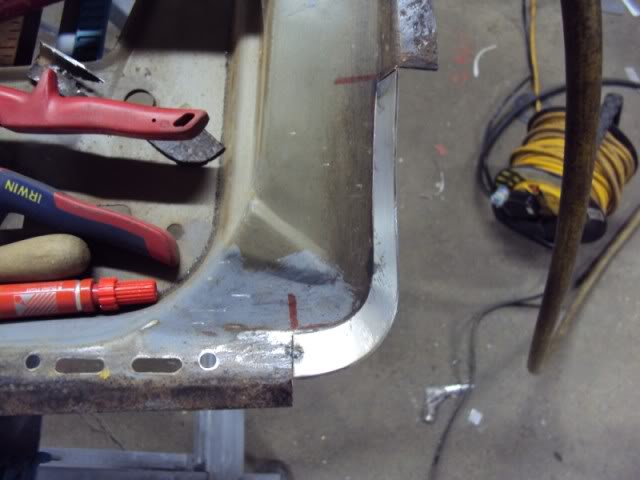
Quick update on the RS2000 resto. This week I have been concentrating on getting the metal work finished on the bonnet, boot and doors. The boot has been replaced with a good second hand part, which only needed a small dent removing and a quick DA down. The bonnet need a bit more work mainly around the inner frame and the underside of the bonnet skin. The driver’s door has been replaced with a second hand part, which needed the bottom corners repairing, and a new door skin fitted (forgot to take any pictures). The passenger door has been replaced the second hand part also but needed a little more TLC.
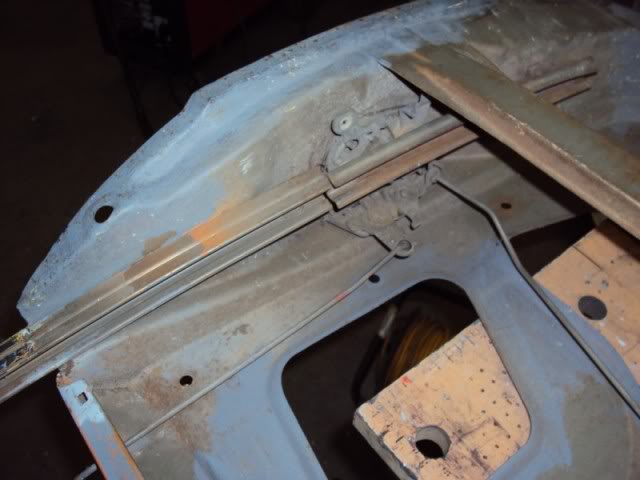
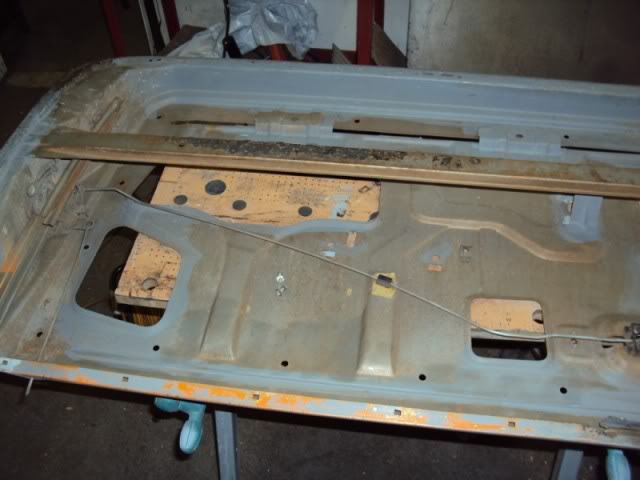
Seems this door had a nice coat of white paint on it but unfortunately it was the kind of paint you would put on your skirting boards not on your car!
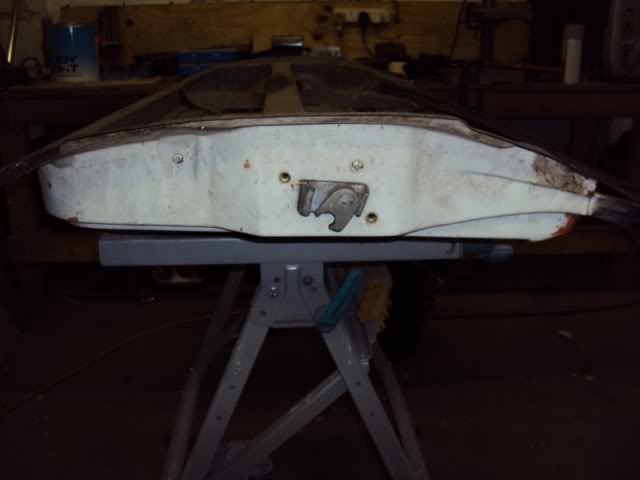
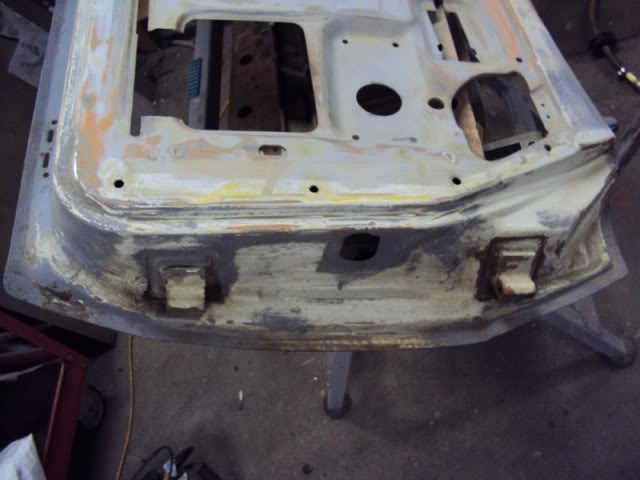
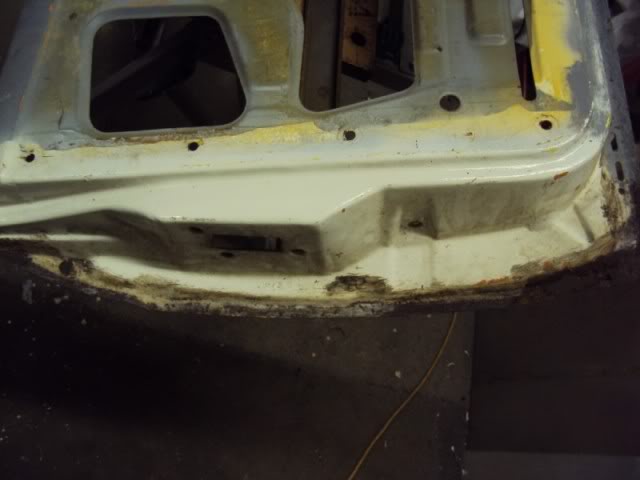
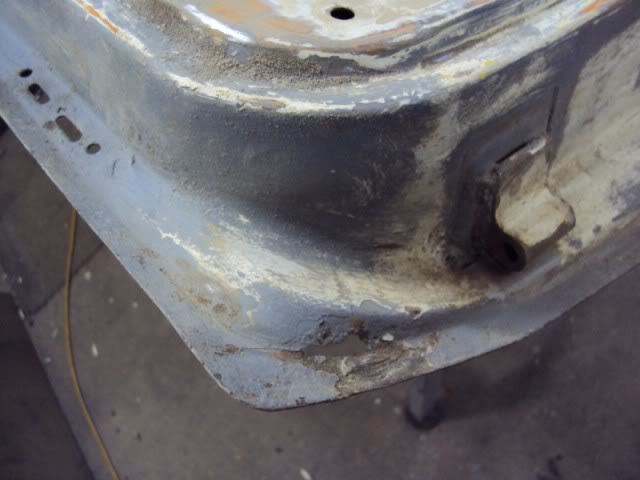
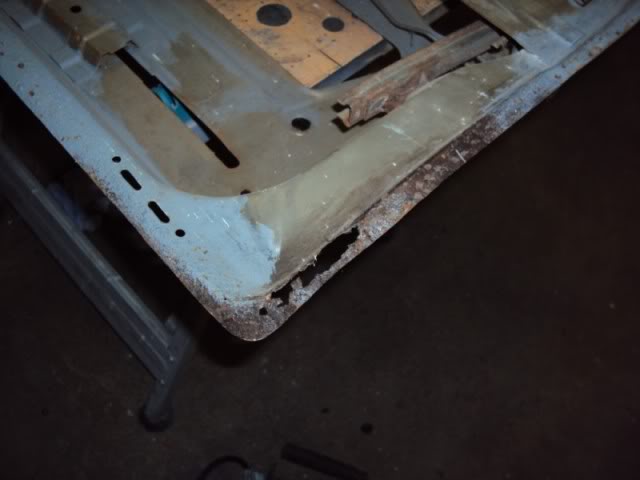
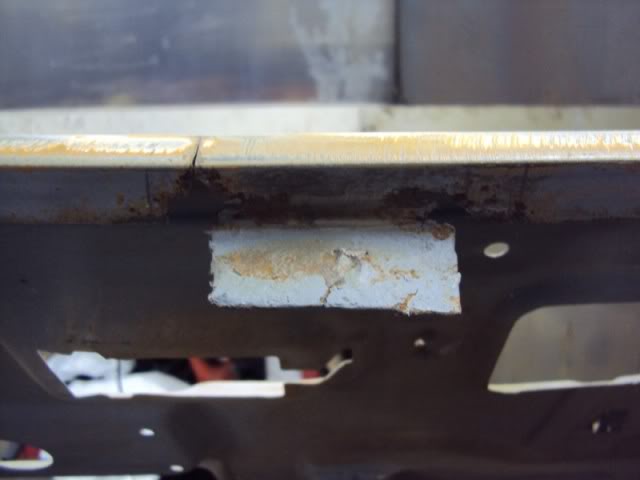
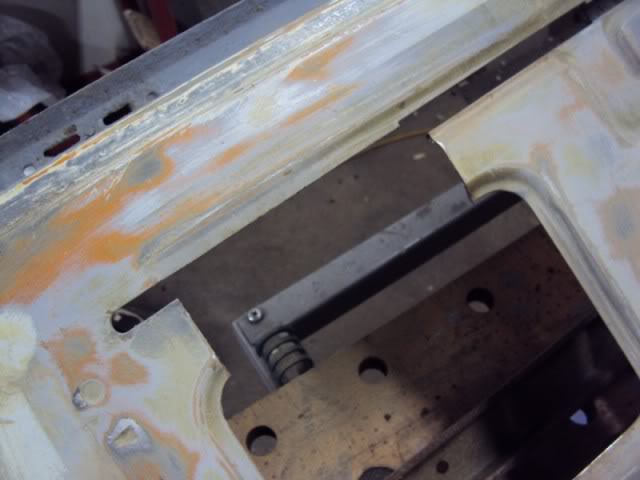
The repairs..
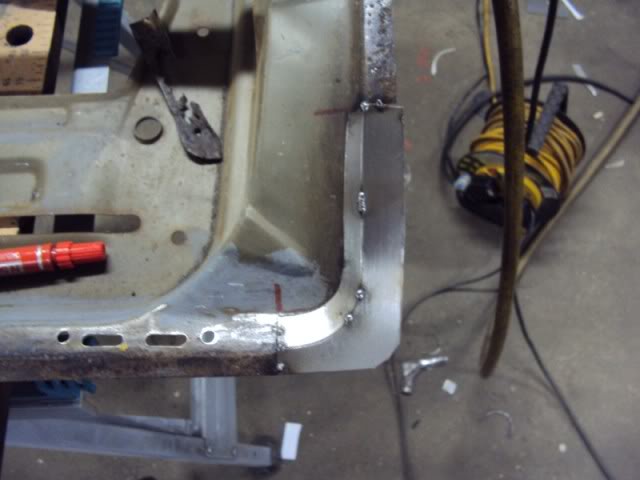
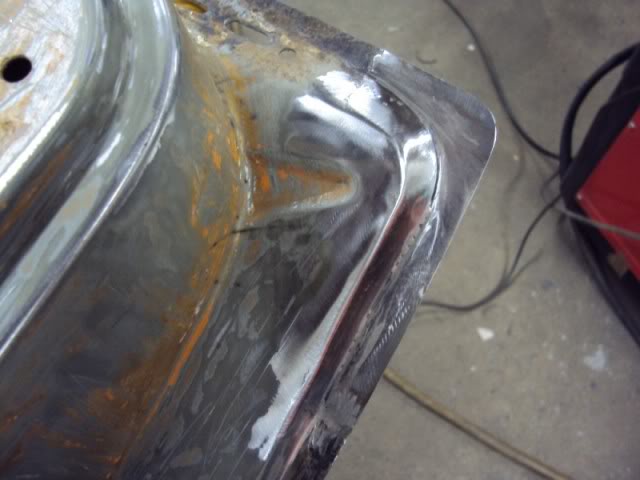
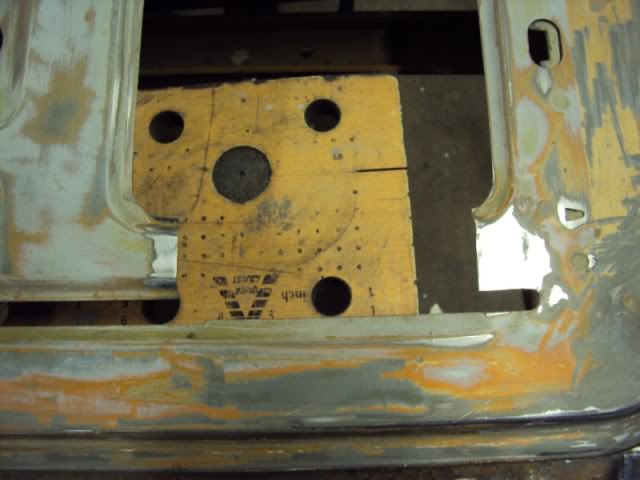
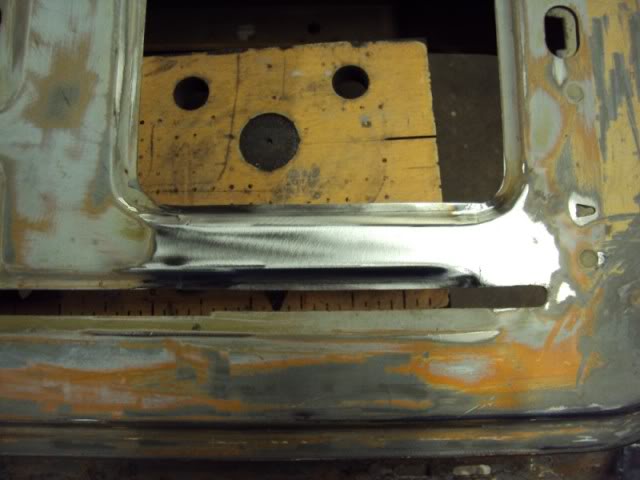
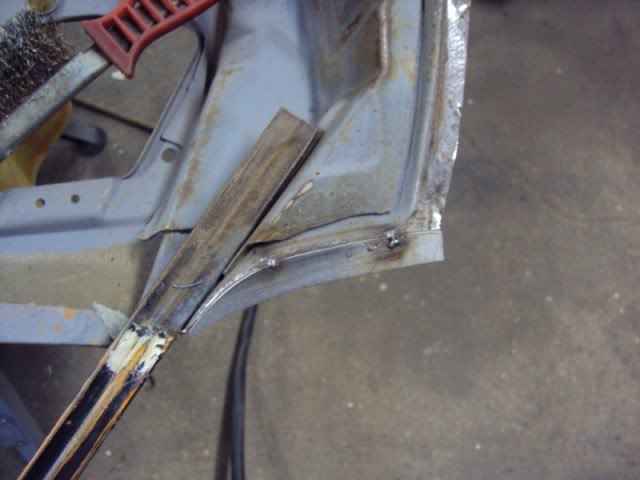
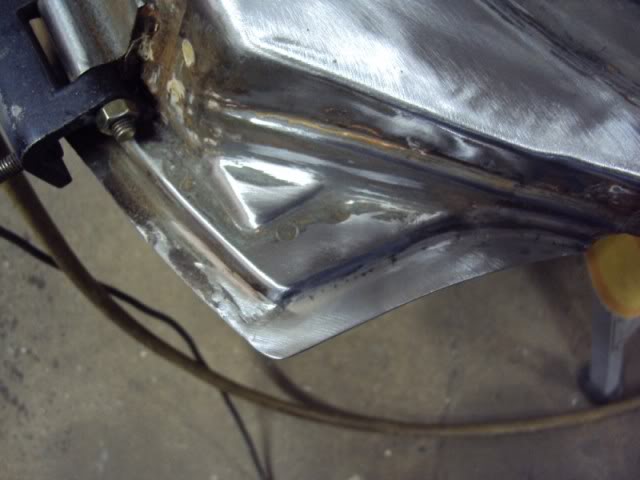
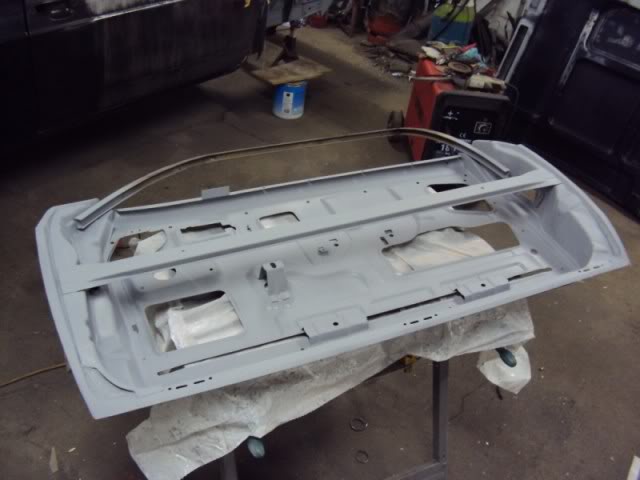
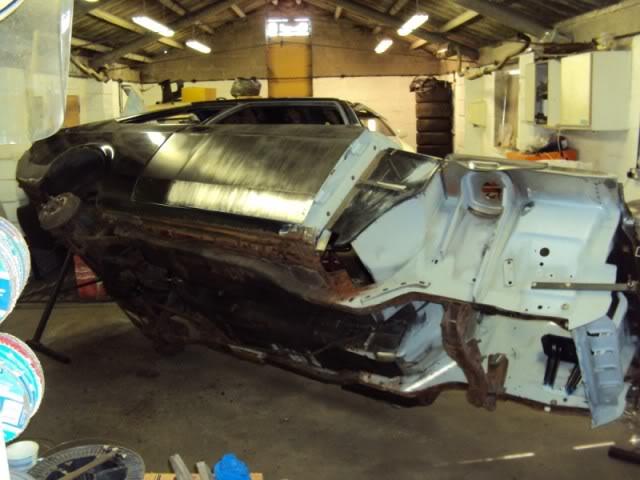
Put the car on the rollover jig so will be starting the underside next week…
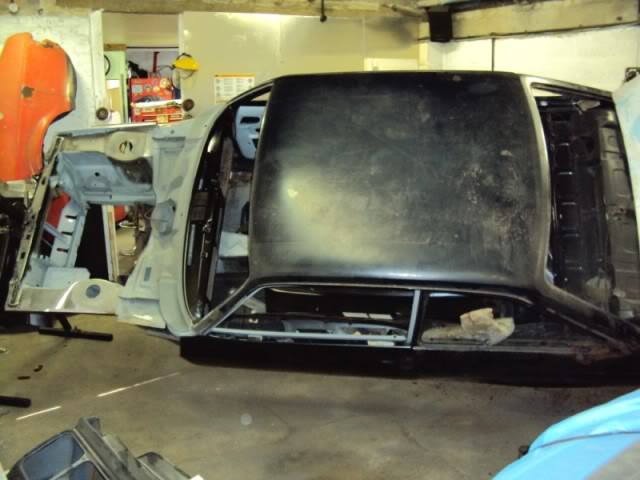
Seems this door had a nice coat of white paint on it but unfortunately it was the kind of paint you would put on your skirting boards not on your car!
The repairs..
Put the car on the rollover jig so will be starting the underside next week…

 Wow your fab work is top notch. Never be out of a job, great progress lets see some more







Wye Valley Hardcore
Joined: May 2005
Posts: 4,283
Likes: 30
From: Hereford/Colchester
Now that's some good work. Nice to see some proper parts being accurately measured, cut, bent and formed rather than just random patches of metal welded and hammered in. Keep it up.

Advanced PassionFord User
Joined: Aug 2003
Posts: 1,544
Likes: 10
Some very nice work there pal, post it on http://bbs.rallyesportescorts.co.uk/ , will go down a treat on there mate.

Thread Starter
Tin Basher
Joined: Mar 2011
Posts: 81
Likes: 0
From: Chelmsford
Some very nice work there pal, post it on http://bbs.rallyesportescorts.co.uk/ , will go down a treat on there mate.




Thread Starter
Tin Basher
Joined: Mar 2011
Posts: 81
Likes: 0
From: Chelmsford
I'm a time served aircraft and fine limit sheet metal worker by trade so its good i can put my skills to rebuilding these cars.
thanks chap
thanks chap


the bodge police be aware
Joined: Dec 2009
Posts: 124
Likes: 0
From: norfolk
cant believe how rotten this was, you have got amazing skills to tackle this!!! the quality of work is amazing hats off to you mate on a job well done!! cant wait for more updates ill be watching on progress.


Irregular Poster
Joined: Feb 2006
Posts: 2,602
Likes: 28
From: Northern Ireland
well respected mate and fair fucks for taking on that bundle of shite!
Thread Starter
Tin Basher
Joined: Mar 2011
Posts: 81
Likes: 0
From: Chelmsford
Thanks chaps
Thread Starter
Tin Basher
Joined: Mar 2011
Posts: 81
Likes: 0
From: Chelmsford

Thread Starter
Tin Basher
Joined: Mar 2011
Posts: 81
Likes: 0
From: Chelmsford
Been working on the underside of the RS this week. I found a few holes but nothing too major (he says!!!).
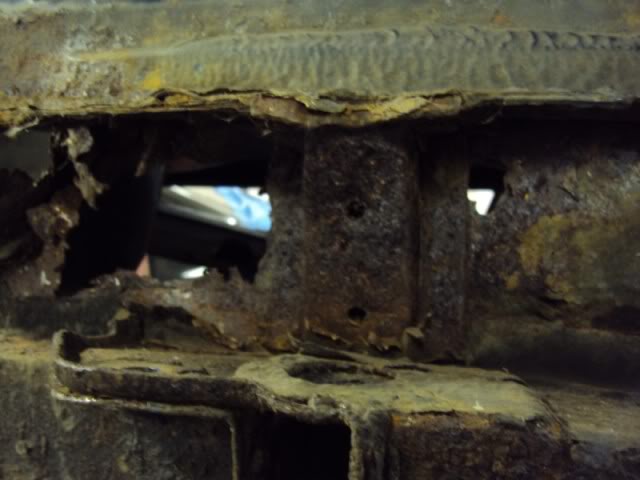
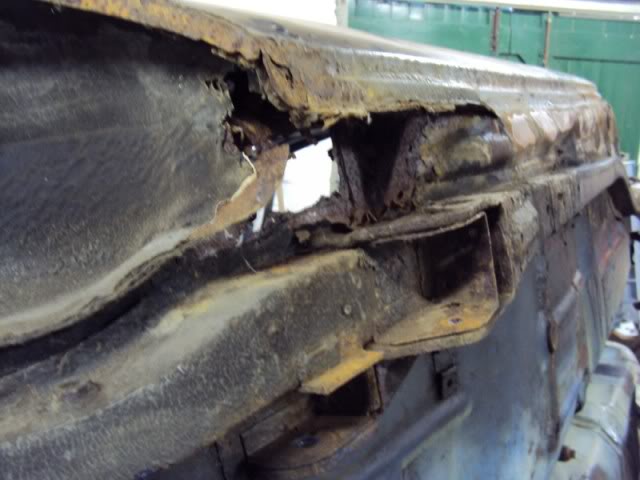
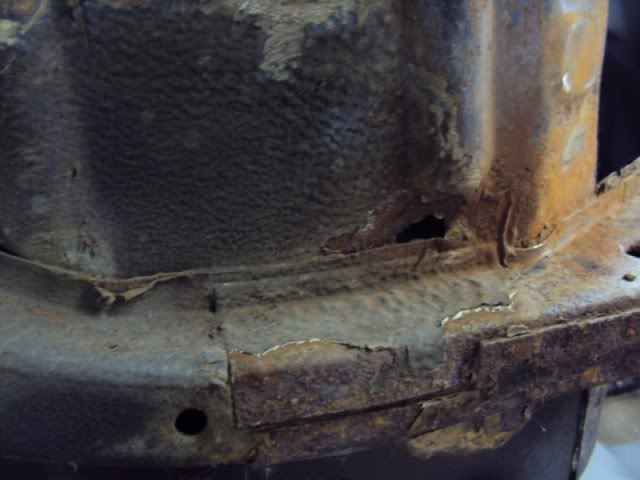
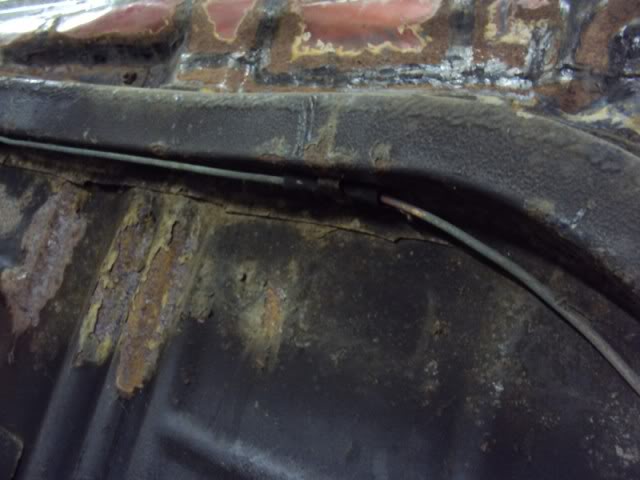
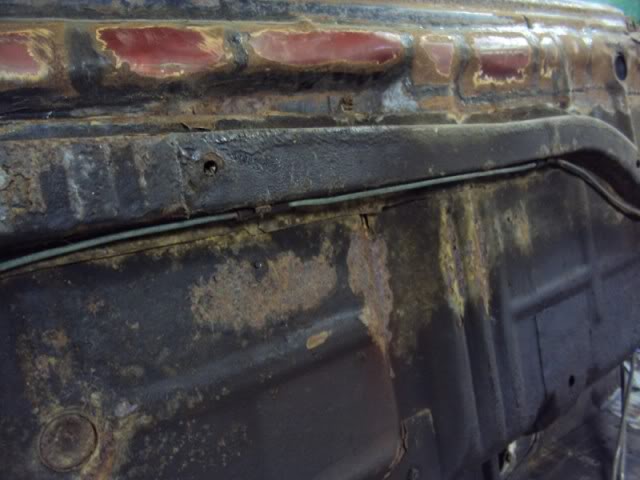
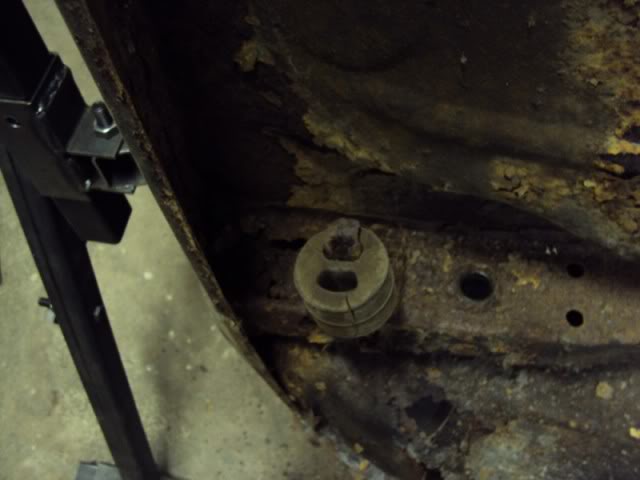
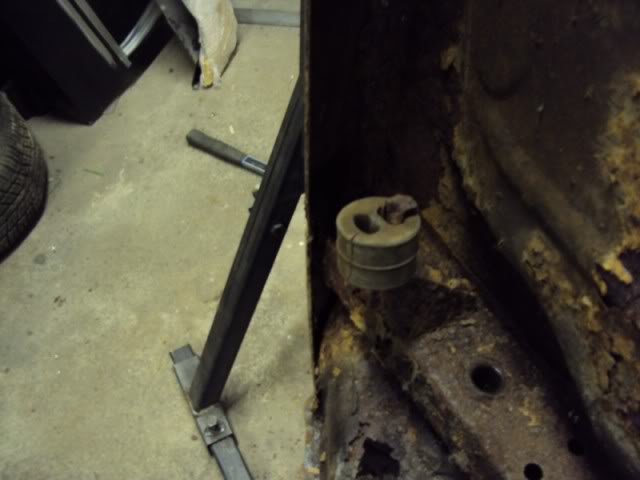
so first job was to degrease the underside.
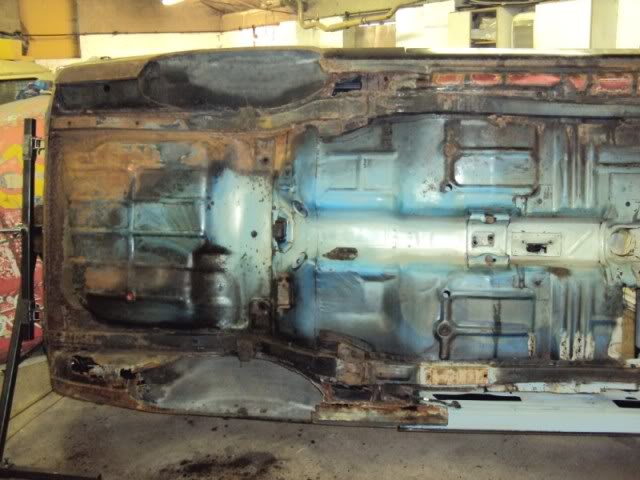
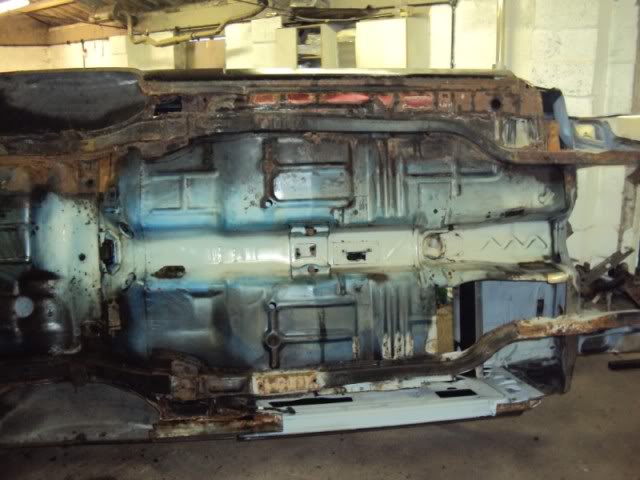
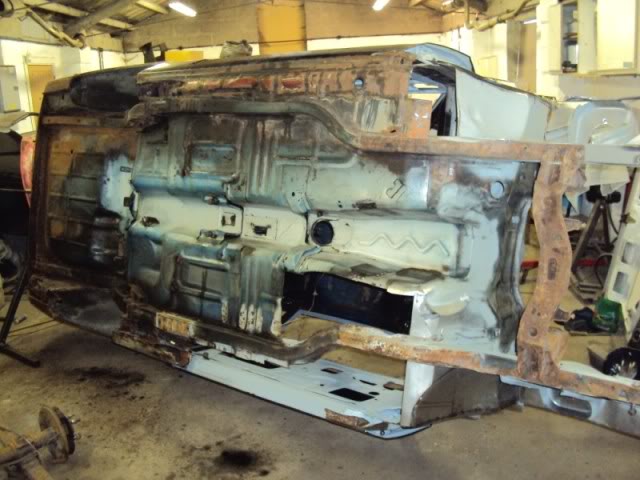
After a good clean we can see that the underside is in fairly good shape considering how the car was before so a bit of good news there. There are some minor repairs to do by the spring hangers on both sides and replace a few sections of chassis rail but all in all not as bad as it could have been.
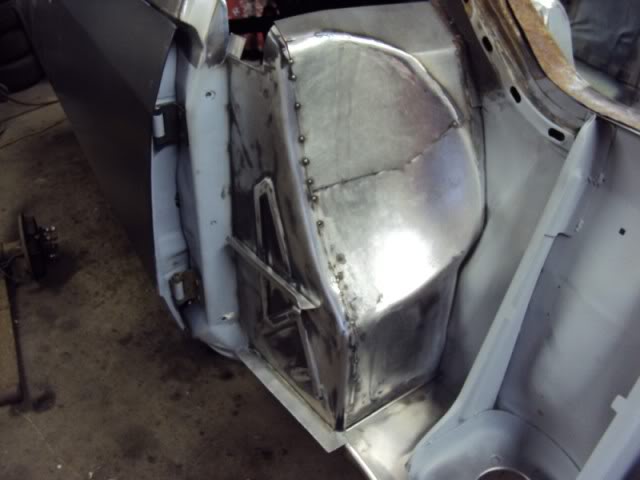
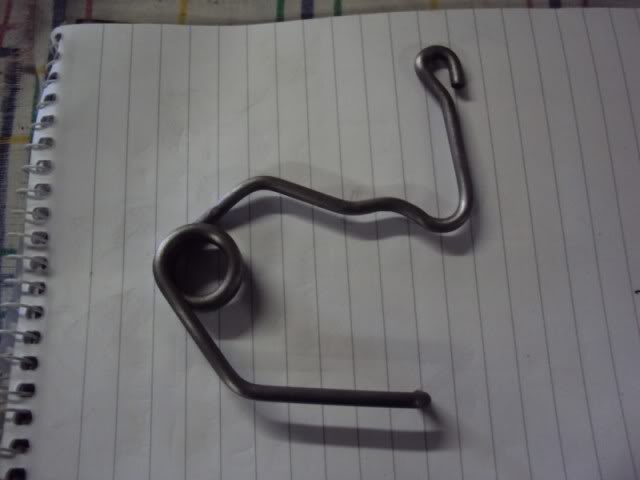
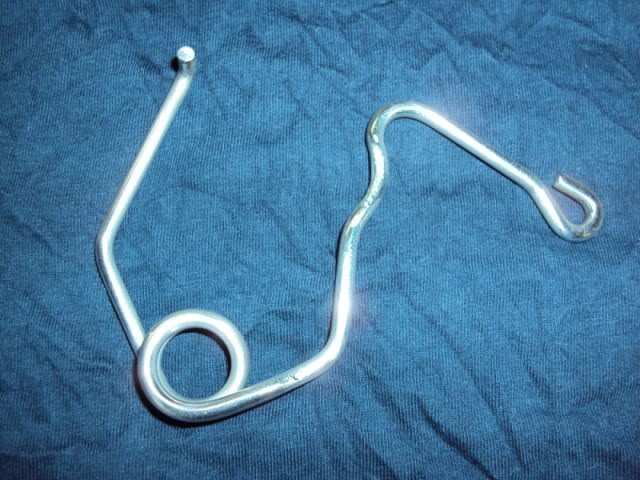
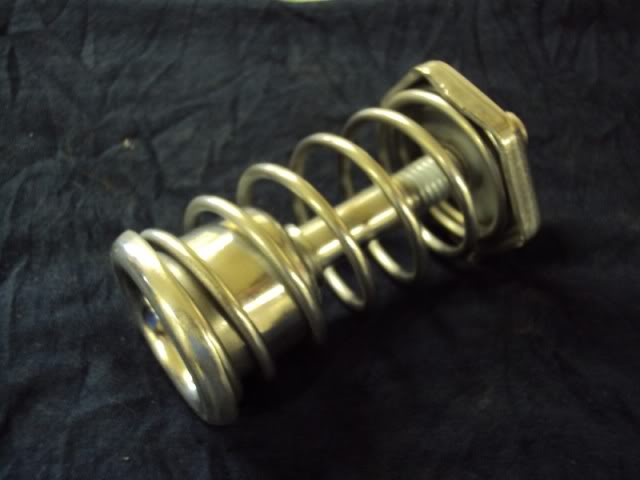
I brought a plating kit a few years ago so I thought I would see if I could clean up a few bits what do you think?
so first job was to degrease the underside.
After a good clean we can see that the underside is in fairly good shape considering how the car was before so a bit of good news there. There are some minor repairs to do by the spring hangers on both sides and replace a few sections of chassis rail but all in all not as bad as it could have been.
I brought a plating kit a few years ago so I thought I would see if I could clean up a few bits what do you think?


Thread Starter
Tin Basher
Joined: Mar 2011
Posts: 81
Likes: 0
From: Chelmsford