
Mk2 Escort RS2000 resto.
 15-05-2011, 06:31 PM
#41
Tin Basher
Thread Starter
Thanks

 22-05-2011, 12:23 PM
#42
Tin Basher
Thread Starter
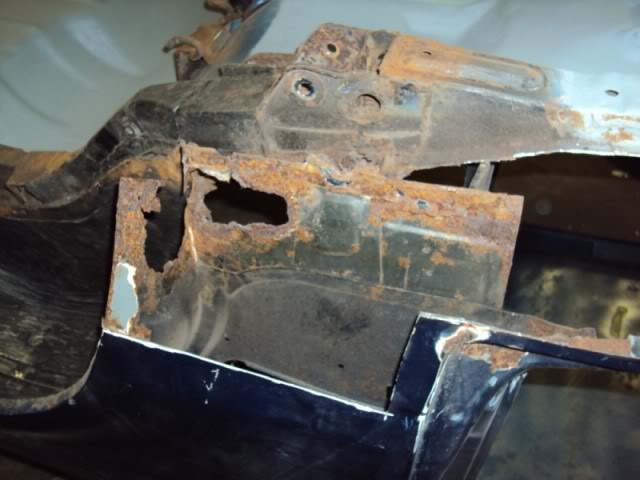
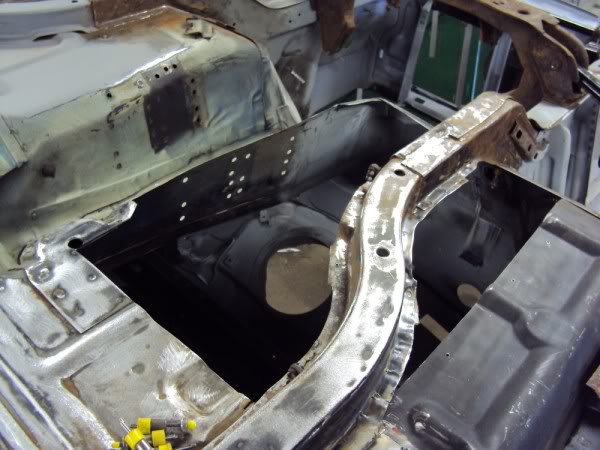
This week has been spent working on the floor pan of the RS. After removing the surface rust from the floor pan and chassis rails we finally got down to some solid steel. This was then treated with a rust treatment, the odd hole patched and then etched primed ready for the stone guard. Next was to start on the passenger floor pan and inner sill. Unfortunately the inner sill and front floor repair panels were brought with the view to repair the floor rather than rebuild (i.e. the repair panels that are designed to be fitted over the seat rail) but like life things change so we have to make the most of what we got lol.
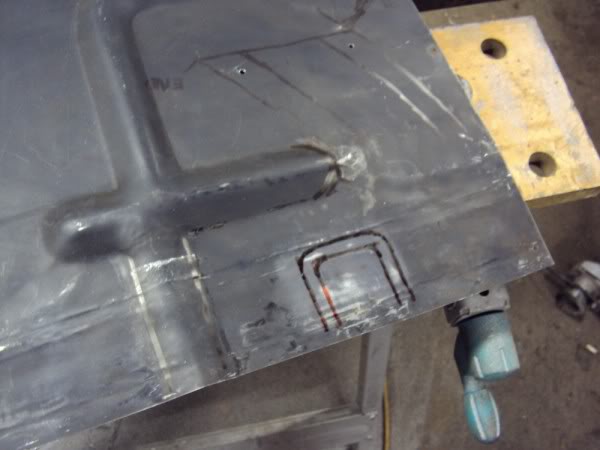
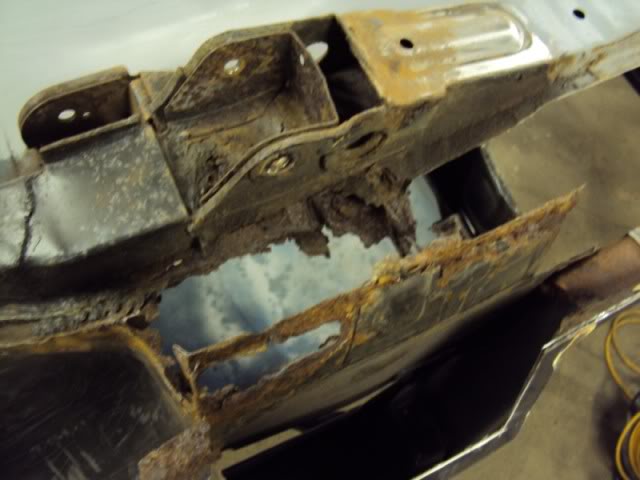
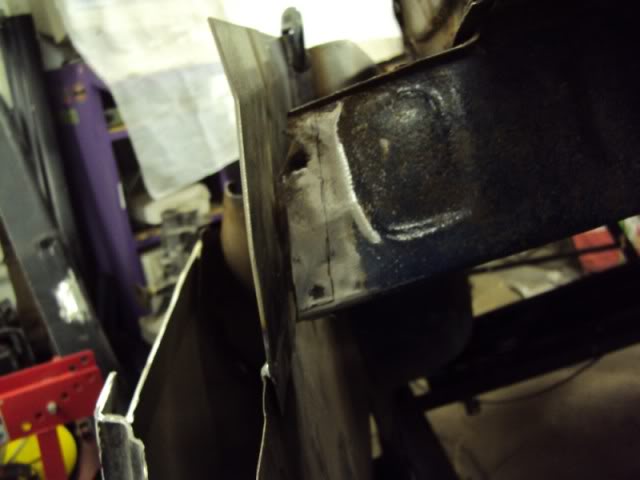
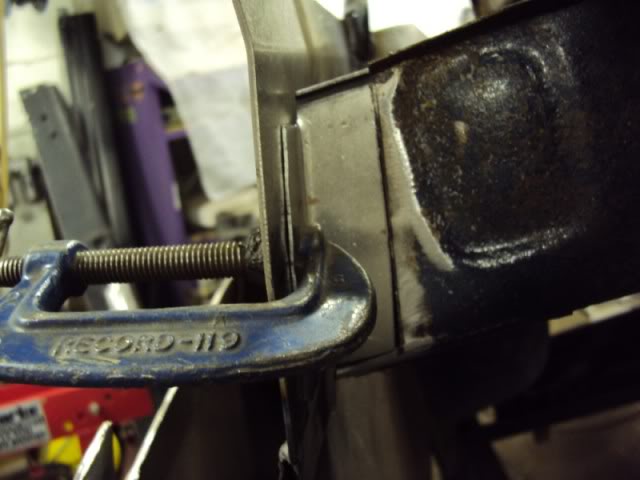
First I flatten out the flanges of the inner sill and front floor repair panels that were meant to fit around the seat rail and removed the old seat rail from the car. Next I pinned the inner sill to a length of box section to give the panel some rigidity then G clamped it to the A post and rear quarter and started welding the cut out.
Made a patch to fill in the hole in the inner sill.
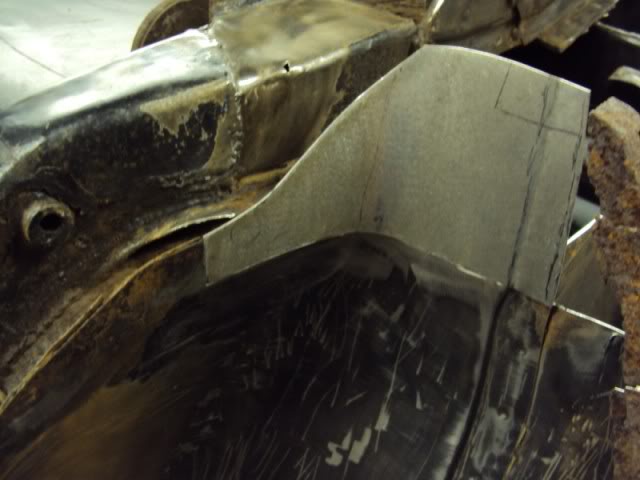
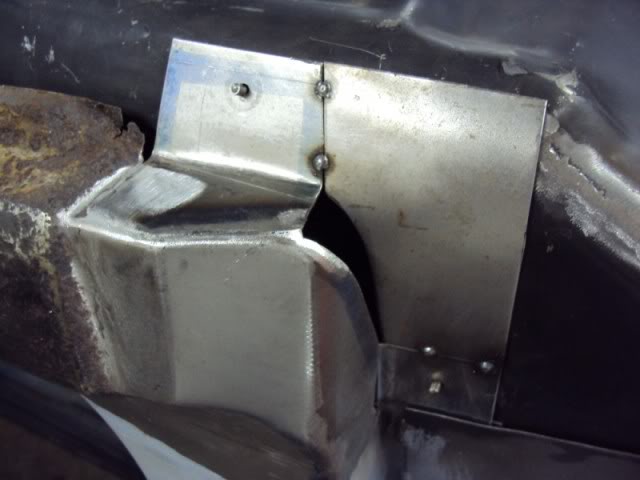
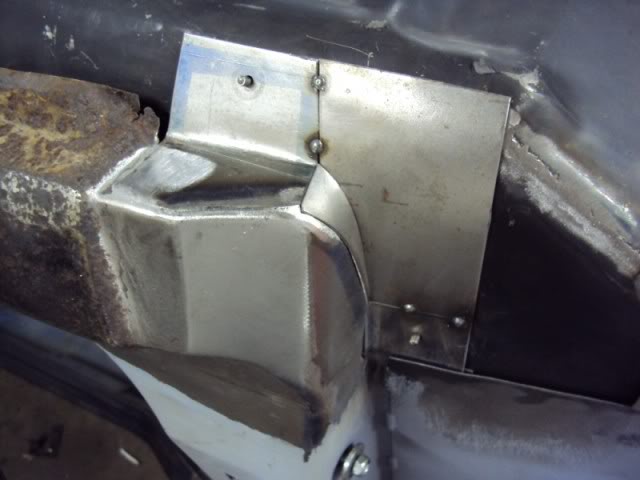
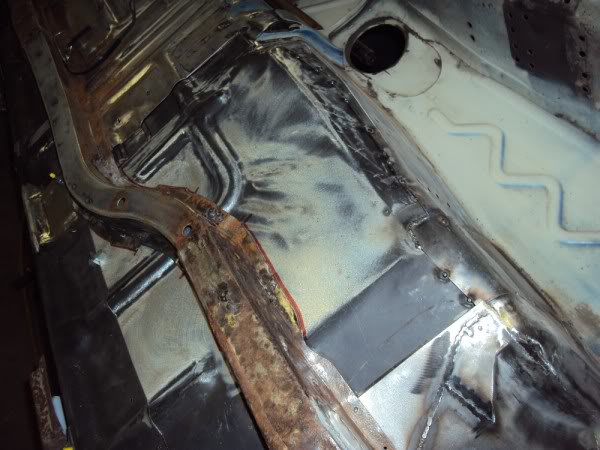
Next I adjusted the front floor pan to fit, trimmed the bulkhead side and extend the swages in the floor pan.
should get some more pictures up next week…
First I flatten out the flanges of the inner sill and front floor repair panels that were meant to fit around the seat rail and removed the old seat rail from the car. Next I pinned the inner sill to a length of box section to give the panel some rigidity then G clamped it to the A post and rear quarter and started welding the cut out.
Made a patch to fill in the hole in the inner sill.
Next I adjusted the front floor pan to fit, trimmed the bulkhead side and extend the swages in the floor pan.
should get some more pictures up next week…
27-05-2011, 06:52 AM
#44
Tin Basher
Thread Starter
Thanks
Martin

 28-05-2011, 04:35 PM
#52
Tin Basher
Thread Starter
It all depends on the repair to be honest. 90% of the repair work done on this RS is butt welded but there are places where I wanted to keep the joints looking factory so some are overlapped and stitch welded in places where I couldn�t get my spot welder in. i.e. where the bulkhead side shields meet the A post.
I don�t want to open up a can of worms here but in my opinion if your just repairing a car to get it through its next mot then its quicker to overlap but when you�re restoring a car to its former glory its best to butt weld.
I don�t want to open up a can of worms here but in my opinion if your just repairing a car to get it through its next mot then its quicker to overlap but when you�re restoring a car to its former glory its best to butt weld.
 28-05-2011, 09:32 PM
#56
Too many posts.. I need a life!!
Would you not be quicker building one of these from scratch 
alot of work but lots of Superb work been done so far
Keep it up mate and more pics !!!
alot of work but lots of Superb work been done so far
Keep it up mate and more pics !!!
28-05-2011, 09:58 PM
#57
Tin Basher
Thread Starter
28-05-2011, 10:00 PM
#58
Tin Basher
Thread Starter
28-05-2011, 10:48 PM
#59
Part of the Furniture

Join Date: Mar 2011
Location: wigan
Posts: 166
Likes: 0
Received 0 Likes
on
0 Posts
It all depends on the repair to be honest. 90% of the repair work done on this RS is butt welded but there are places where I wanted to keep the joints looking factory so some are overlapped and stitch welded in places where I couldn�t get my spot welder in. i.e. where the bulkhead side shields meet the A post.
I don�t want to open up a can of worms here but in my opinion if your just repairing a car to get it through its next mot then its quicker to overlap but when you�re restoring a car to its former glory its best to butt weld.
29-05-2011, 07:58 AM
#60
PassionFord Post Whore!!
iTrader: (2)

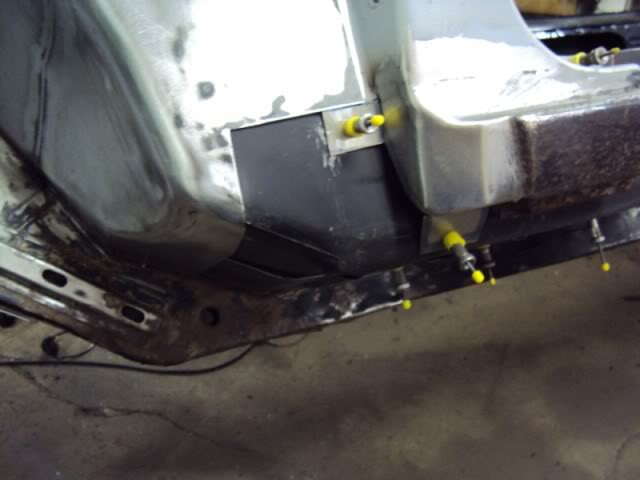
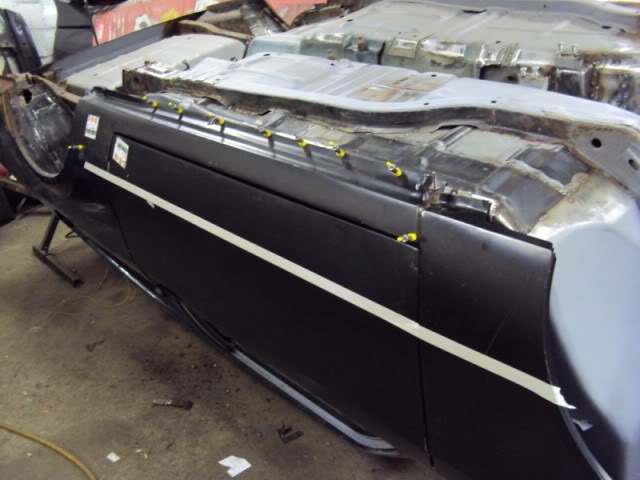
Hi there how do you use the yellow clamps (are they spring loaded / magnetic? )
What are they called?
They look like you have to drill a pilot hole then push them in and they hold your panel till taked in then after there taken out you plug mig the holes up ?
Cheers David
What are they called?
They look like you have to drill a pilot hole then push them in and they hold your panel till taked in then after there taken out you plug mig the holes up ?
Cheers David
29-05-2011, 10:11 AM
#62
Tin Basher
Thread Starter
Hi there how do you use the yellow clamps (are they spring loaded / magnetic? )
What are they called?
They look like you have to drill a pilot hole then push them in and they hold your panel till taked in then after there taken out you plug mig the holes up ?
Cheers David
What are they called?
They look like you have to drill a pilot hole then push them in and they hold your panel till taked in then after there taken out you plug mig the holes up ?
Cheers David
I have, shall we say acquired a few over the years
http://cgi.ebay.co.uk/10-X-1-8-SCREW-SKIN-PINS-AIRCRAFT-TOOLS-NEW-/160586904369?pt=UK_Hand_Tools_Equipment&hash=item2 563b9b331
a bit pricey but the pictures should give you an idea how they work

 04-06-2011, 04:50 PM
#65
Tin Basher
Thread Starter
04-06-2011, 05:38 PM
#66
Tin Basher
Thread Starter
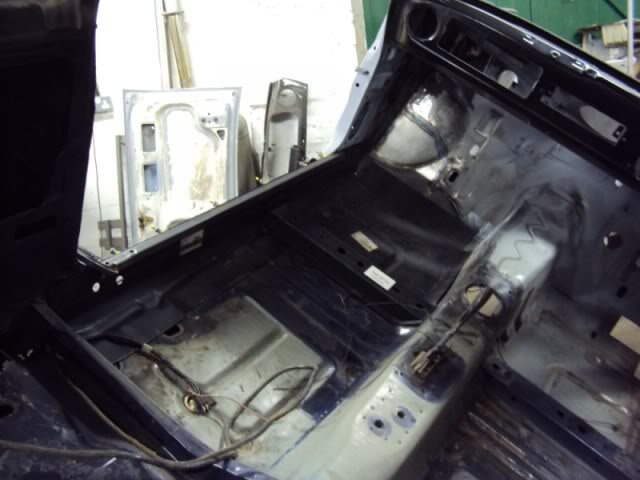
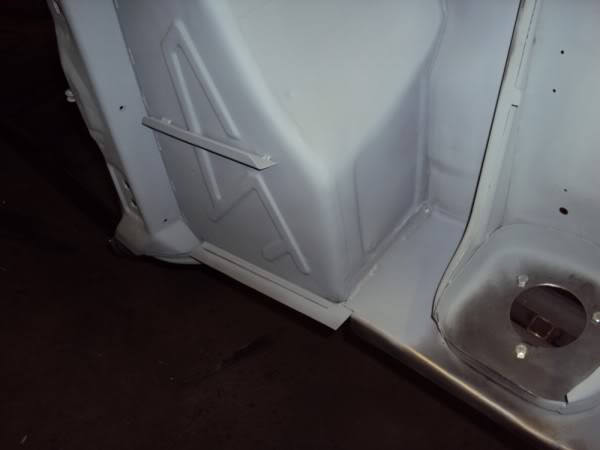
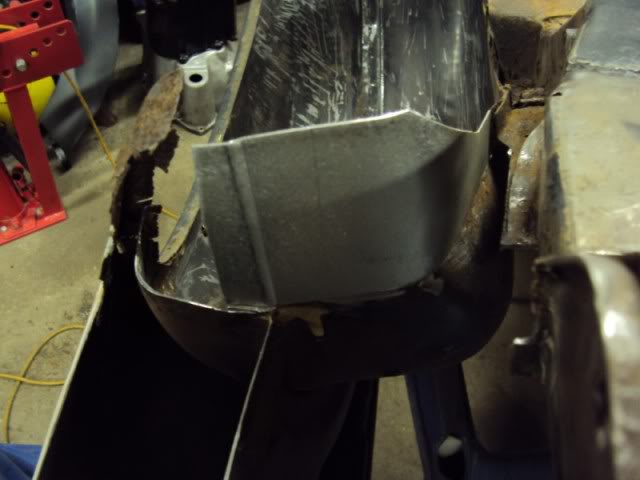
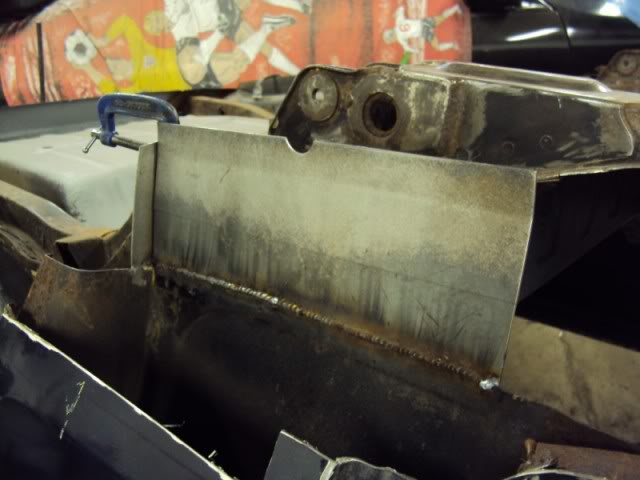
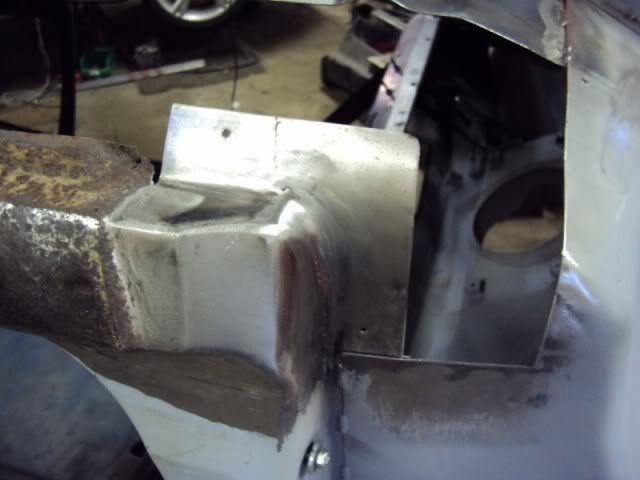
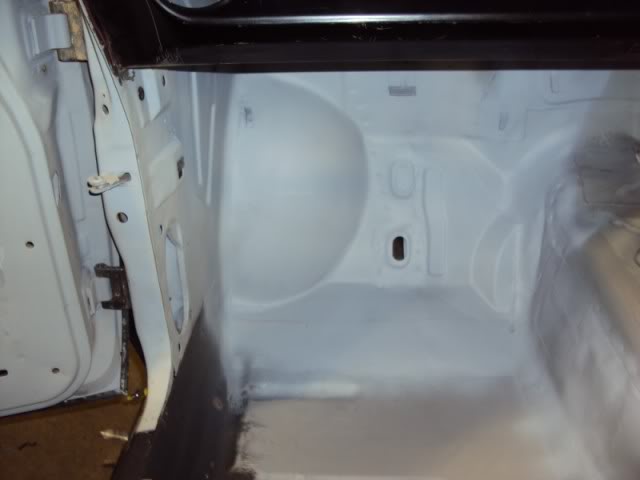
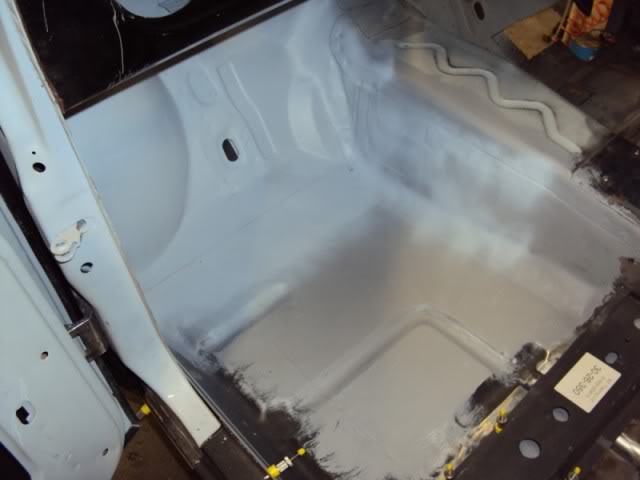
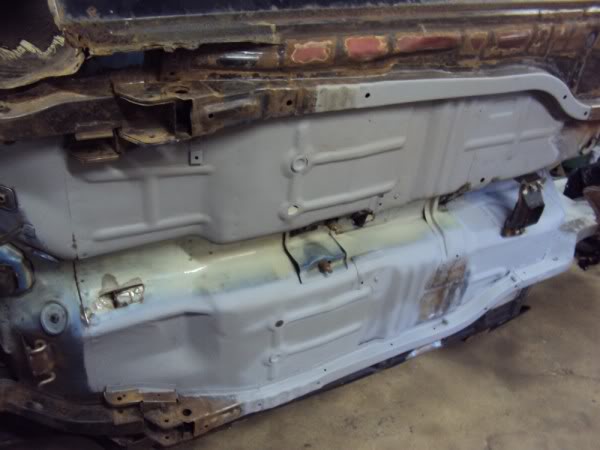
Do kids ever go to school? Had my son most of the week so didn’t get much done. Few more pictures of the re worked floor pan.
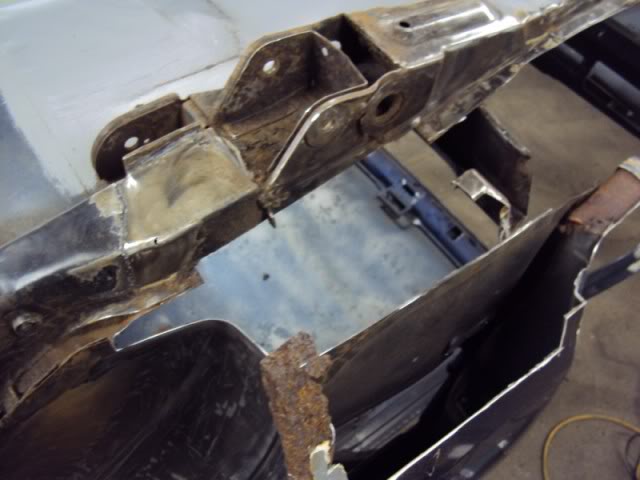
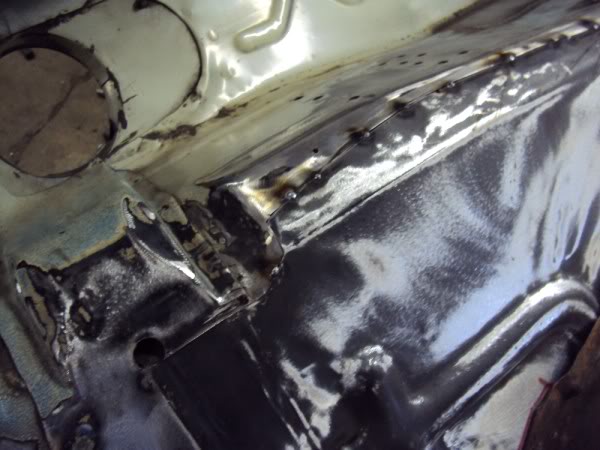
Then welded into place.


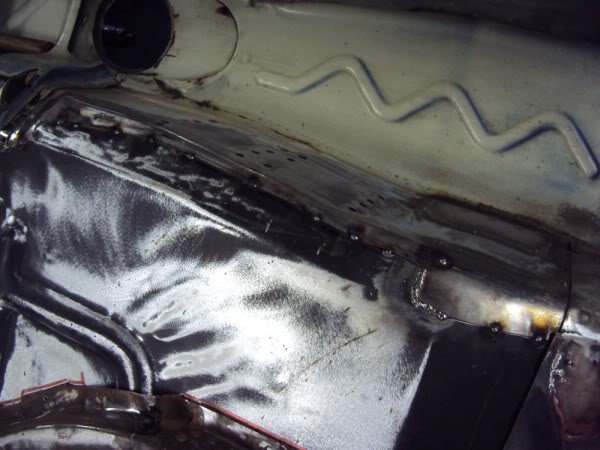


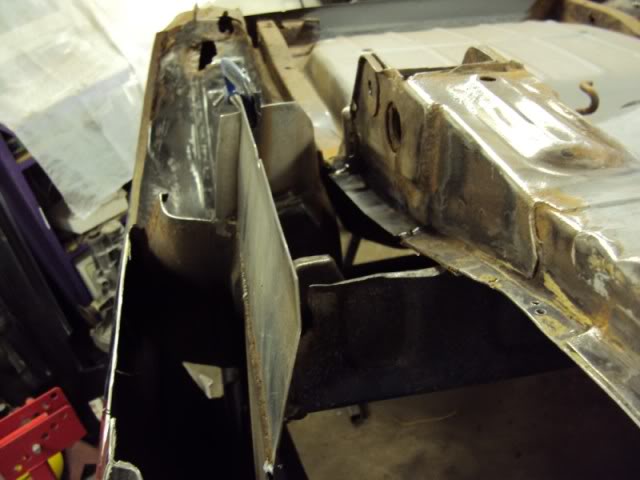
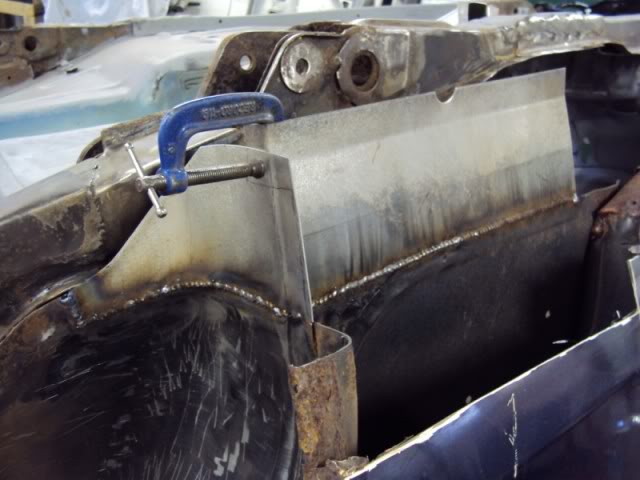
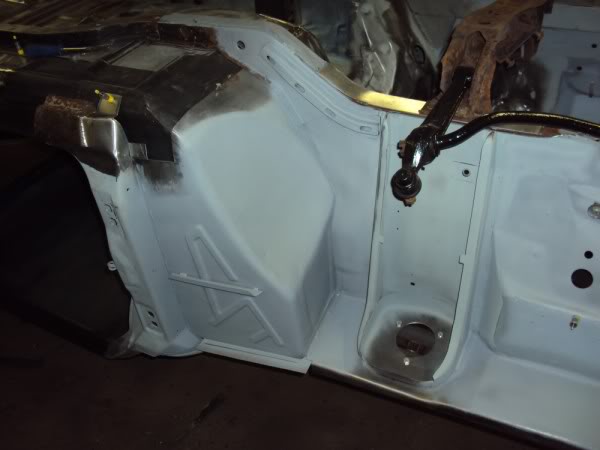
Finished of welding the bulkhead side shields and primed.

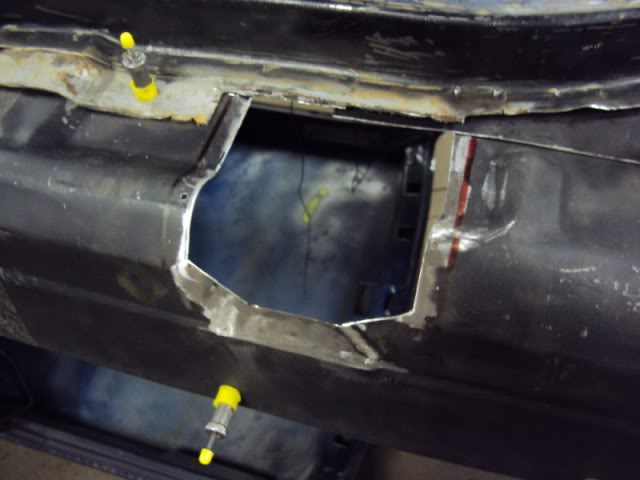
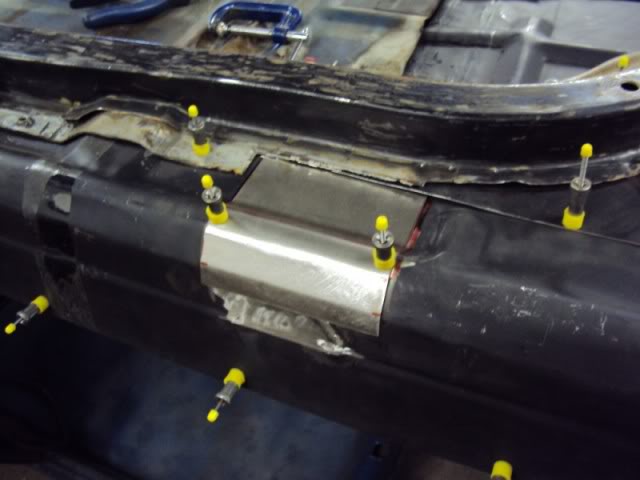
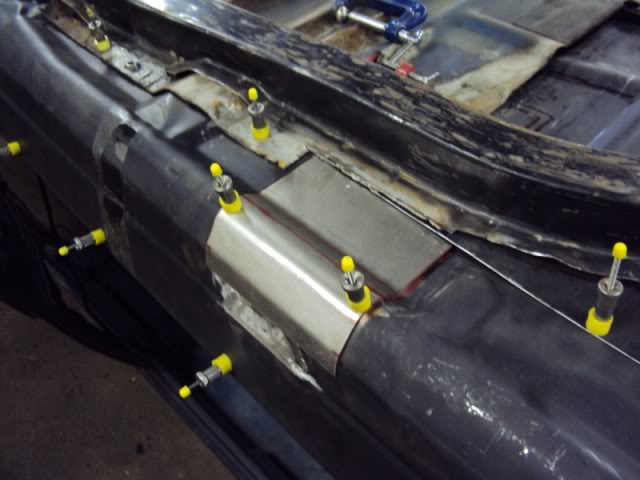
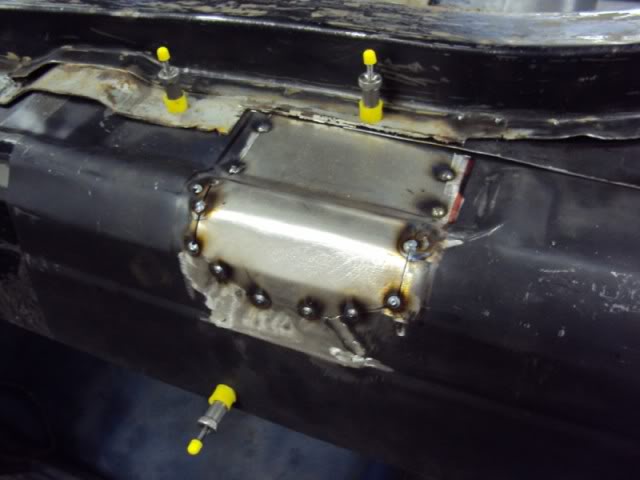
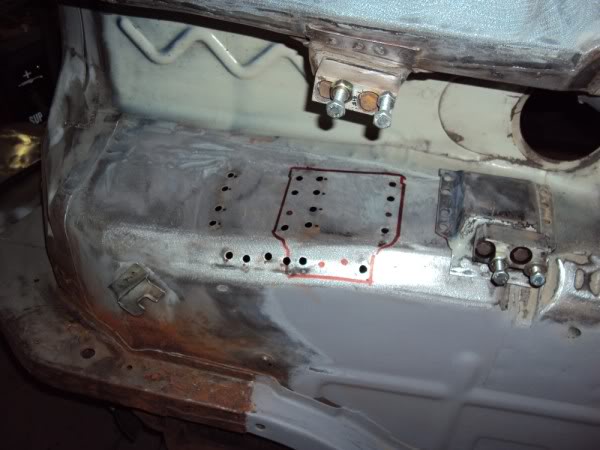
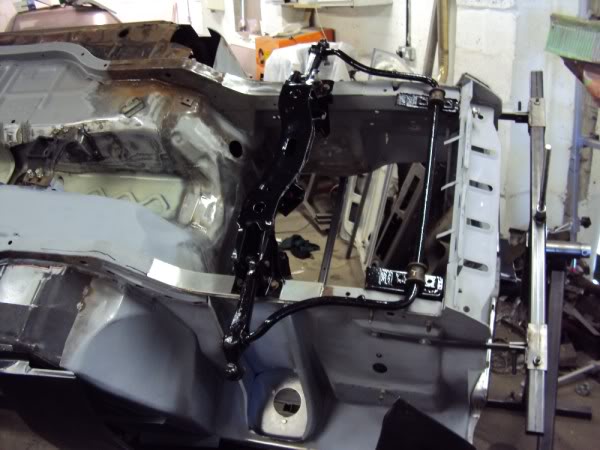
This car had a five-speed box fitted so the gearbox mounts have been drilled off and the mounts moved back and bolted back in. Unfortunately the holds left were only covered with some kind of heavy-duty tape so might explain why the passenger floor was so bad. Anyway the mounts are welded in now and the hole filled.
Little tip for anyone needing to fill holes in thin steel with a mig welder. Get yourself a piece of copper (thinker the better) and lay this behind the hole to be filled. Then just use your mig as usually to fill the hole. You will find it a lot easer.

Also new cross member arrived so I had to bolt it in and take a picture lol

Then welded into place.
Finished of welding the bulkhead side shields and primed.
This car had a five-speed box fitted so the gearbox mounts have been drilled off and the mounts moved back and bolted back in. Unfortunately the holds left were only covered with some kind of heavy-duty tape so might explain why the passenger floor was so bad. Anyway the mounts are welded in now and the hole filled.
Little tip for anyone needing to fill holes in thin steel with a mig welder. Get yourself a piece of copper (thinker the better) and lay this behind the hole to be filled. Then just use your mig as usually to fill the hole. You will find it a lot easer.
Also new cross member arrived so I had to bolt it in and take a picture lol
Last edited by redwizz; 04-06-2011 at 06:04 PM.

 18-06-2011, 08:04 PM
#74
Tin Basher
Thread Starter
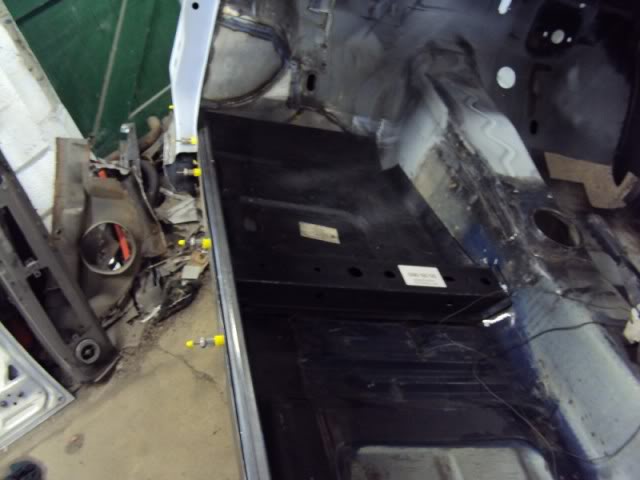
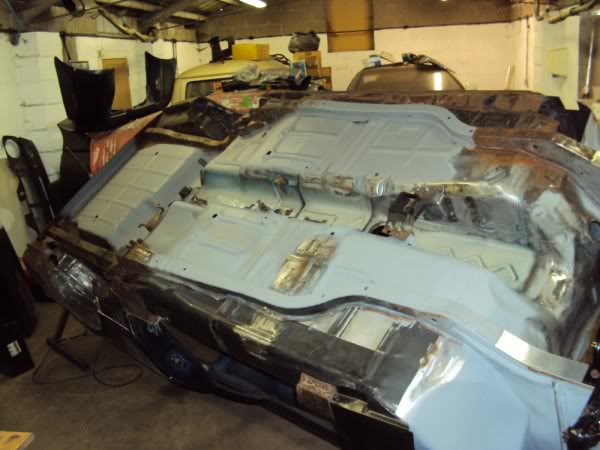
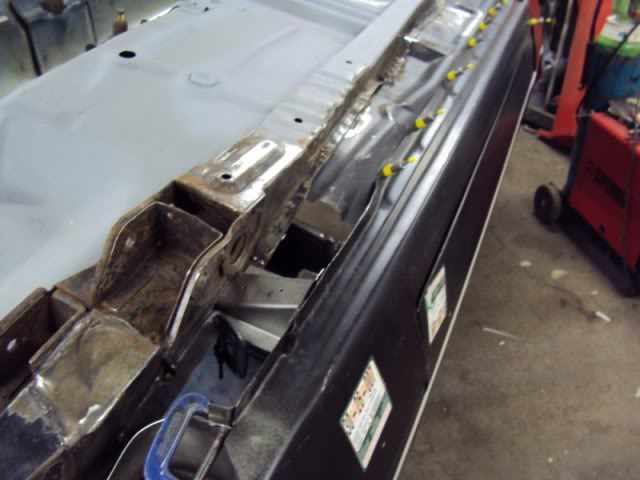
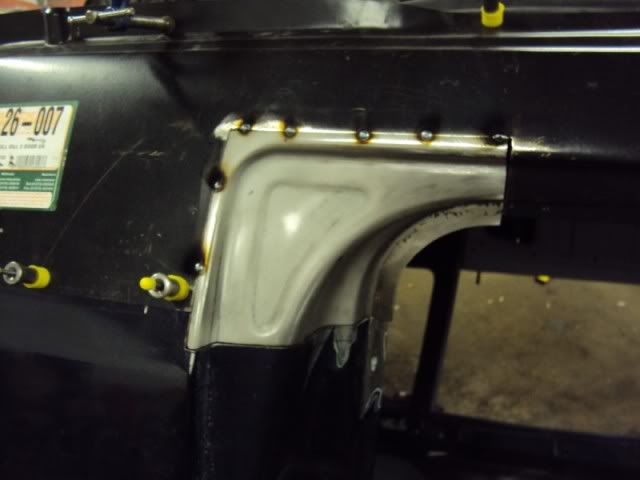
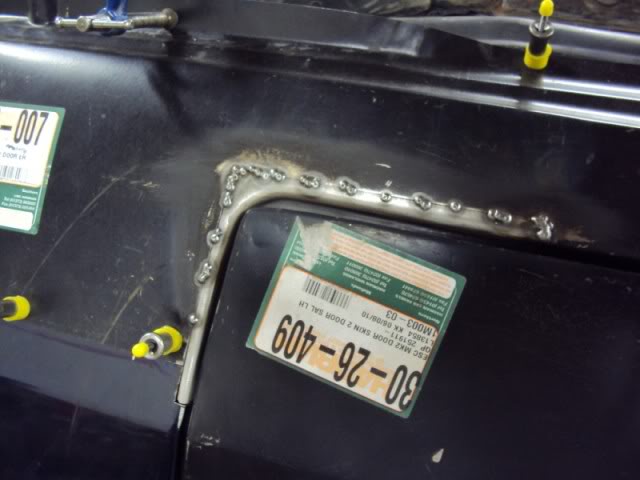
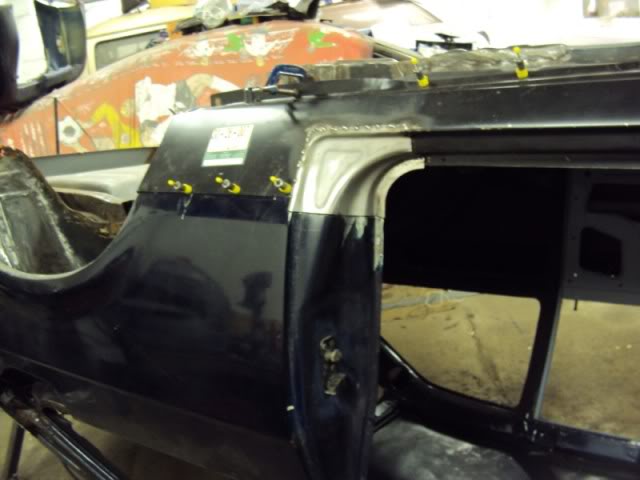
Some more progress on the RS mainly on the passenger side. Again the chassis rails are good so it�s mainly floors and sills. Had to make most of the parts apart from the rear door aperture infill that was cut of a donor panel.
Enjoy the pictures..
What weld ?

Enjoy the pictures..
What weld ?
 19-06-2011, 07:01 PM
#77
Tin Basher
Thread Starter
19-06-2011, 09:14 PM
#79
15000
Join Date: Mar 2011
Location: bristol
Posts: 20
Likes: 0
Received 0 Likes
on
0 Posts
[quote=redwizz;5490328]Do kids ever go to school? Had my son most of the week so didn�t get much done. Few more pictures of the re worked floor pan.

Then welded into place.


Finished of welding the bulkhead side shields and primed.

This car had a five-speed box fitted so the gearbox mounts have been drilled off and the mounts moved back and bolted back in. Unfortunately the holds left were only covered with some kind of heavy-duty tape so might explain why the passenger floor was so bad. Anyway the mounts are welded in now and the hole filled.
Little tip for anyone needing to fill holes in thin steel with a mig welder. Get yourself a piece of copper (thinker the better) and lay this behind the hole to be filled. Then just use your mig as usually to fill the hole. You will find it a lot easer.


Also new cross member arrived so I had to bolt it in and take a picture lol
amazing work on the rs take my hat off to you i also see a dub in the background is it a bay or a split ? undergoing the same sort of treatment ?
Then welded into place.
Finished of welding the bulkhead side shields and primed.
This car had a five-speed box fitted so the gearbox mounts have been drilled off and the mounts moved back and bolted back in. Unfortunately the holds left were only covered with some kind of heavy-duty tape so might explain why the passenger floor was so bad. Anyway the mounts are welded in now and the hole filled.
Little tip for anyone needing to fill holes in thin steel with a mig welder. Get yourself a piece of copper (thinker the better) and lay this behind the hole to be filled. Then just use your mig as usually to fill the hole. You will find it a lot easer.
Also new cross member arrived so I had to bolt it in and take a picture lol
amazing work on the rs take my hat off to you i also see a dub in the background is it a bay or a split ? undergoing the same sort of treatment ?