MK3 fiesta project - 2.1 zetec turbo - 358bhp-365ftlb for now


 08-07-2010, 09:01 PM
#163
PassionFord Regular
Thread Starter

Join Date: Aug 2003
Posts: 457
Likes: 0
Received 0 Likes
on
0 Posts
thanks for the comments
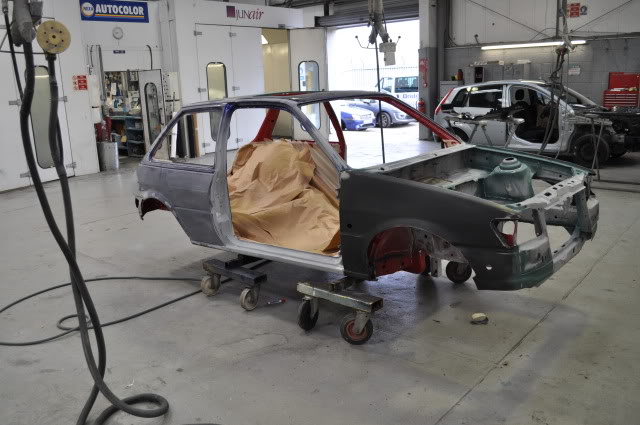
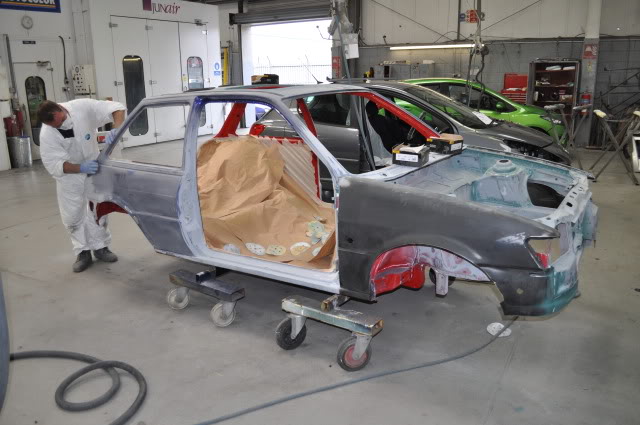
well its time to take the fiesta off the car spit,
so the next idea
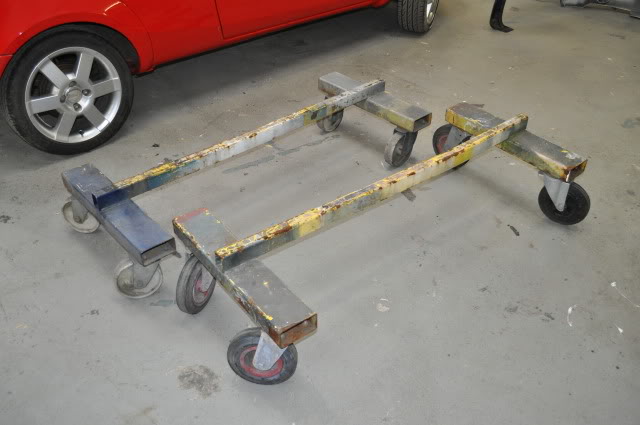
should bring the car down to a better level to be painted, plus easy to move around!
all new bits to change over to manual clutch rachet adjustment
should help with the 4-paddle clutch
as my plans have grown for the engine, which has been all built up ready ages ago at ian howells
i'm going for one of his inlet manifolds, pectel t2 ford motorsport ecu, also ian has played around with my new turbo aswell
so with the new plans a better map sensor is needed,
so gone for a new cossie 3bar map sensor
well its time to take the fiesta off the car spit,
so the next idea
should bring the car down to a better level to be painted, plus easy to move around!
all new bits to change over to manual clutch rachet adjustment
should help with the 4-paddle clutch
as my plans have grown for the engine, which has been all built up ready ages ago at ian howells
i'm going for one of his inlet manifolds, pectel t2 ford motorsport ecu, also ian has played around with my new turbo aswell
so with the new plans a better map sensor is needed,
so gone for a new cossie 3bar map sensor
Last edited by RS_Rob; 06-09-2010 at 09:07 PM.
 09-07-2010, 06:31 AM
#166
PassionFord Regular
Thread Starter
Join Date: Aug 2003
Posts: 457
Likes: 0
Received 0 Likes
on
0 Posts
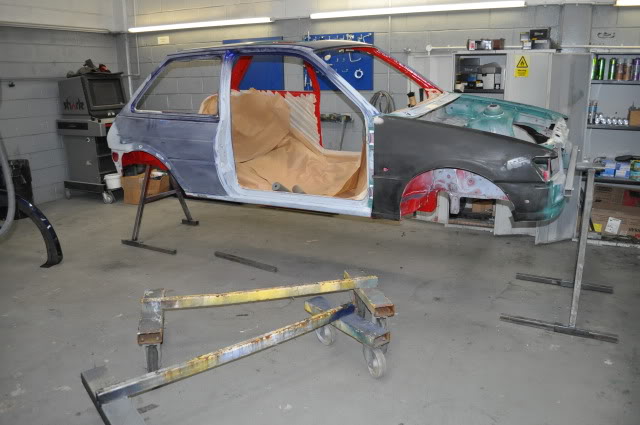
heres the fiesta on her new wheels ready for a final prep
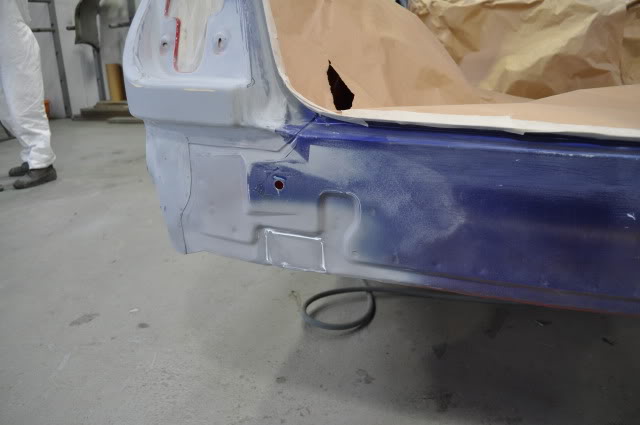
when the rear spit was extended to bolt inside the rear chassis legs from the rear panel
two holes were cut, so welded a plate and sealed up
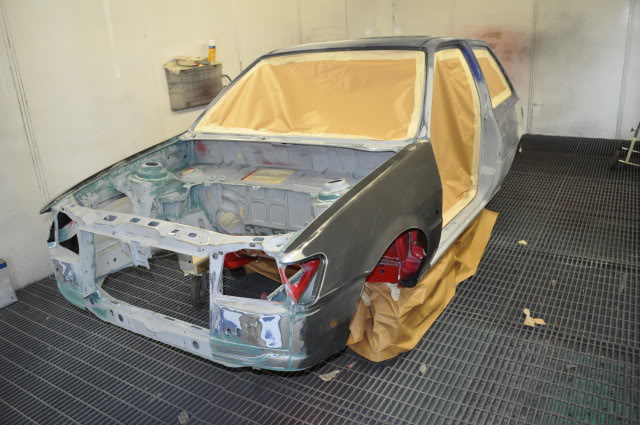
engine bay after being prepped with various grade sanding discs
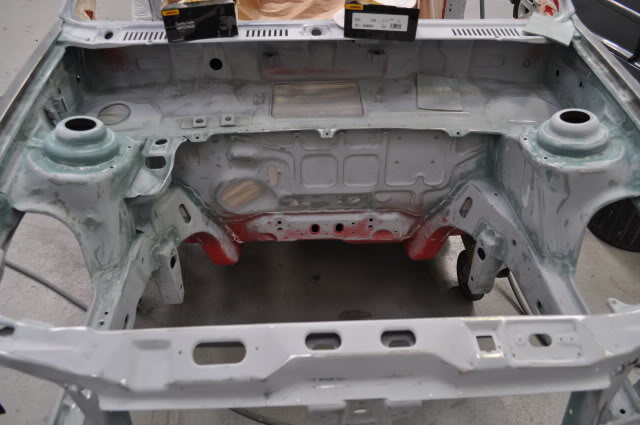
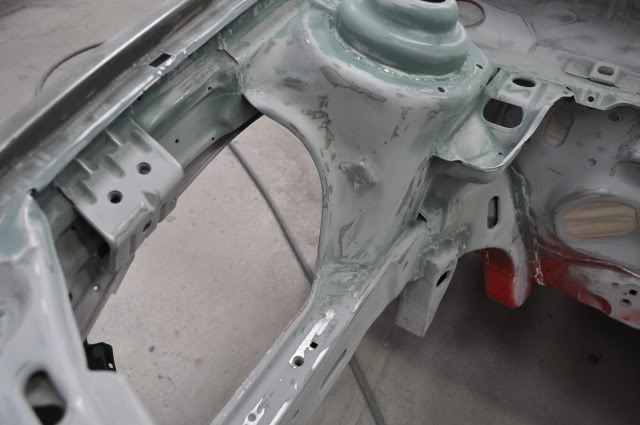
andrew finishing off the final prep
in the spray booth after all dust being blown off and masking from inside began

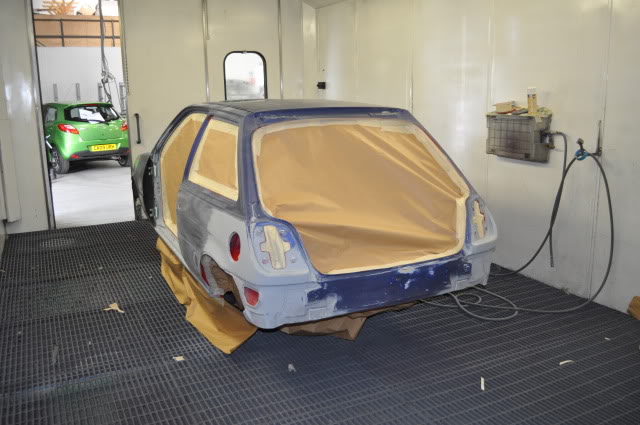
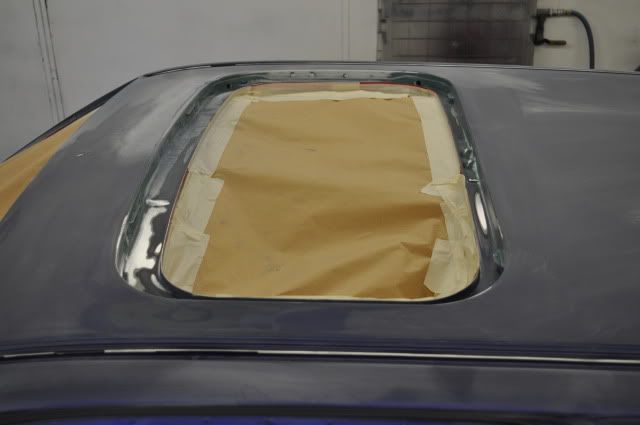
even the sunroof is done from inside to make sure everything gets good coverage
here she is ready for the morning, where she'll have a few tack rags before the final wet primer will be applied
the floor underneath has been covered up to stop overspray aswell
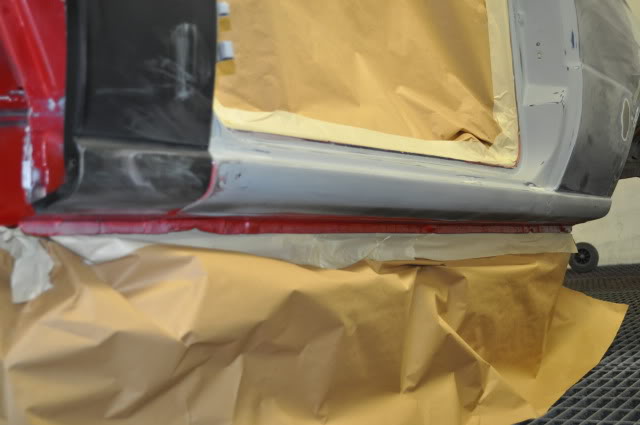
a closer look at leaving the outer side of the sill out for painting
when the rear spit was extended to bolt inside the rear chassis legs from the rear panel
two holes were cut, so welded a plate and sealed up
engine bay after being prepped with various grade sanding discs
andrew finishing off the final prep
in the spray booth after all dust being blown off and masking from inside began
even the sunroof is done from inside to make sure everything gets good coverage
here she is ready for the morning, where she'll have a few tack rags before the final wet primer will be applied
the floor underneath has been covered up to stop overspray aswell
a closer look at leaving the outer side of the sill out for painting
Last edited by RS_Rob; 06-09-2010 at 09:08 PM.

 Whats the green rs having done
09-07-2010, 04:42 PM
Whats the green rs having done
09-07-2010, 04:42 PM
#170
Lucifer II - 666
09-07-2010, 04:51 PM
#171
PassionFord Post Whore!!

Join Date: Jan 2005
Location: Westhoughton Bolton
Posts: 4,186
Likes: 0
Received 0 Likes
on
0 Posts
absolutley awsome work, been reading this thread most the day and the work and the time thats gone into it is amazing i cant wait to see it all built back up again!
09-07-2010, 07:27 PM
#173
PassionFord Regular
Thread Starter
Join Date: Aug 2003
Posts: 457
Likes: 0
Received 0 Likes
on
0 Posts
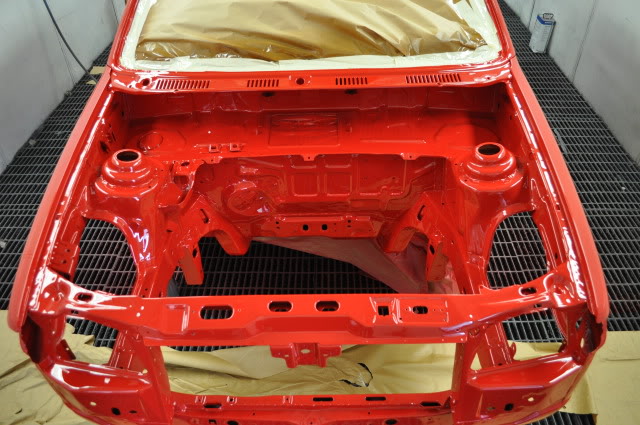
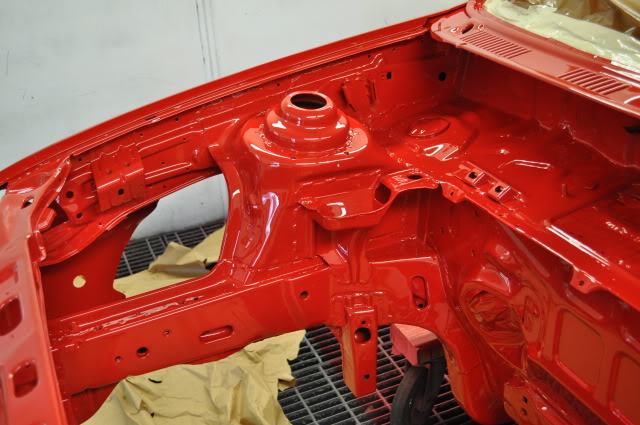
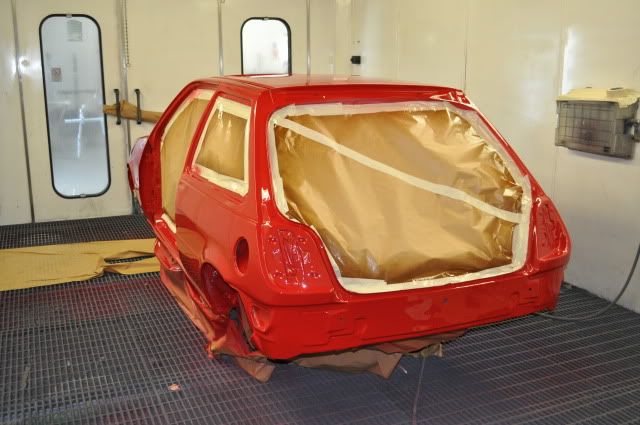
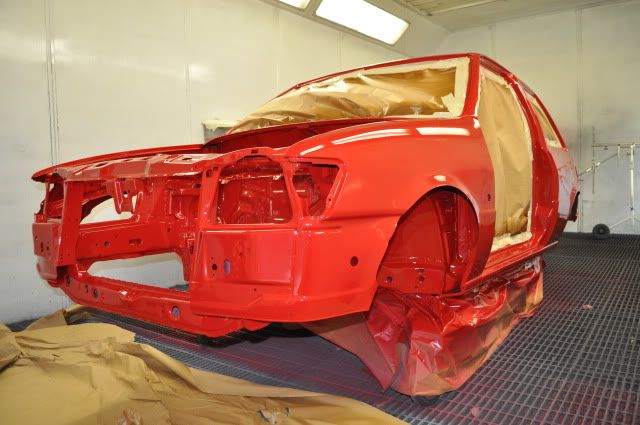
ok some pictures i've been looking forward to taking for quite some time,
it finally looks worth all the hard work, NO REGRETS
heres the combination mix for ferrari rosso corsa red before it gets stirred

it was painted with base and one coat of laquer then baked, then hand flatted back before having another two coats of laquer
a massive thanks to the paint team in work, as they did the final prep and adrian did the paintwork today!
they've really outdone themselves today in my eyes
i'll leave the picture say the rest
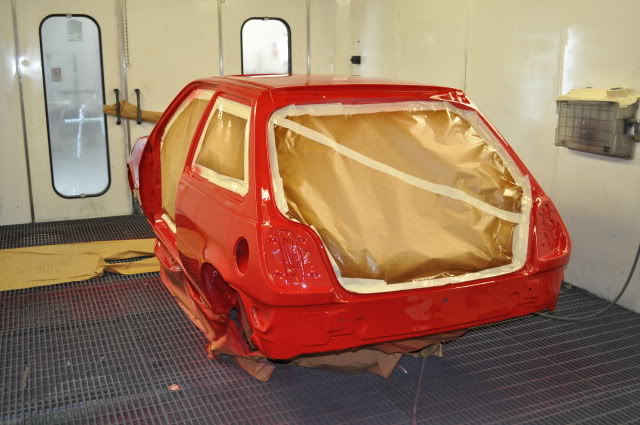
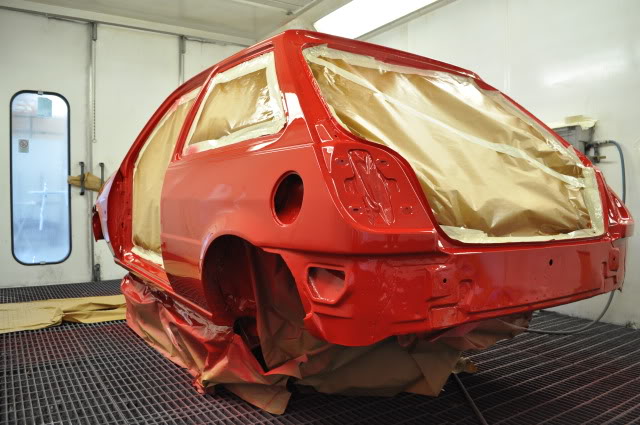
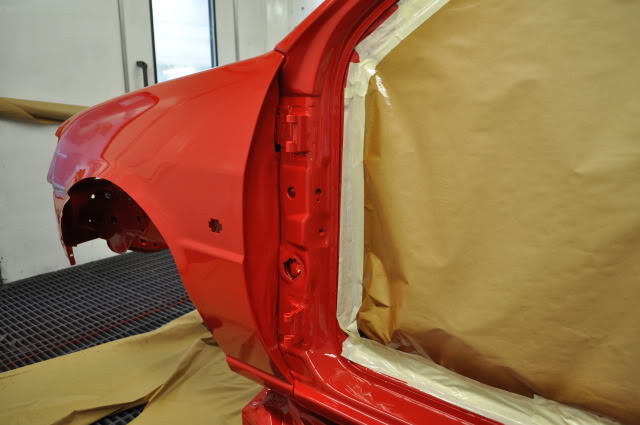

the engine bay really does it for me
it finally looks worth all the hard work, NO REGRETS
heres the combination mix for ferrari rosso corsa red before it gets stirred
it was painted with base and one coat of laquer then baked, then hand flatted back before having another two coats of laquer
a massive thanks to the paint team in work, as they did the final prep and adrian did the paintwork today!
they've really outdone themselves today in my eyes
i'll leave the picture say the rest
the engine bay really does it for me
Last edited by RS_Rob; 06-09-2010 at 09:10 PM.
11-07-2010, 02:17 PM
#174
Advanced PassionFord User
wow , that looks shit hot , even though we build engines and make everything race inspired , painting a car is still my favourite part of any build , how it transforms a rusty old car into something total different with just a bit of prep and paint
brilliant
cheers paul
soz mate forgot to reply about the harness , no i havent got one you could borrow mate but i would of lent you one if i had .
my harness was fine on the dyno anyway as harvey looks after stuff like that as iam sure he wouldnt want you to say he damaged it. are you still wanting a harness ?
what power you after then
19-07-2010, 06:37 AM
#176
PassionFord Regular
Thread Starter
Join Date: Aug 2003
Posts: 457
Likes: 0
Received 0 Likes
on
0 Posts
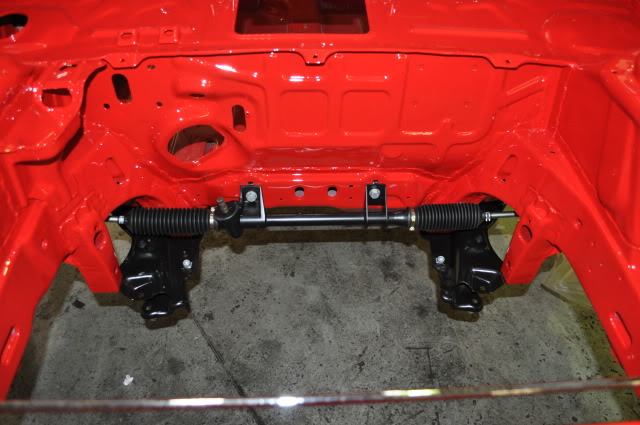
time to start rebuilding,
looking at the fiesta turbo steering rack one of the tie rods, seemed very loose
so bought a new kit for both sides,
old
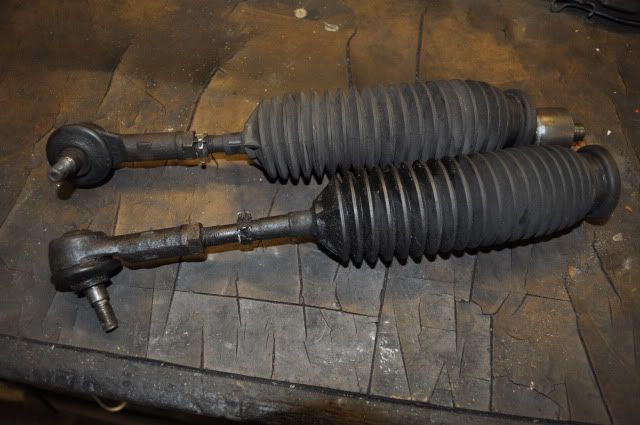
new
while changing them i scotched the main body and gave it a few coats of satin matt black
fitted in the bay, happy with the finish
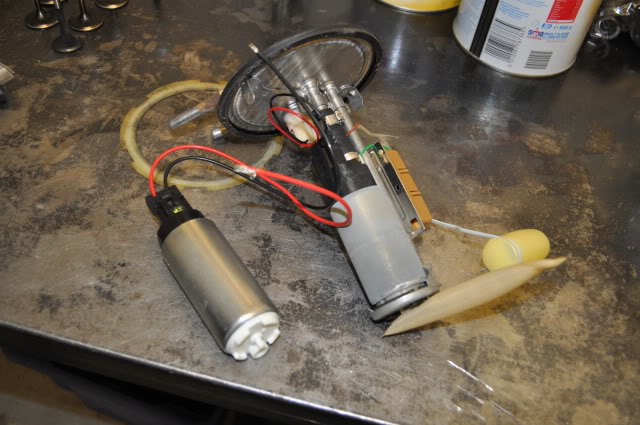
last weekend i went to see my engine builder, area six / ian howell
the main reason was to have my fuel pump uprated
so ian has installed a pump from an evo, rated between 450-500bhp (not that i'll ever be that powerfull)
new pump on the left, to be fitted to the standard 1600 zetec fuel sender/pump unit on the right
brought my skimmed flywheel home, as it wont be used on the harvey gibbs engine dyno

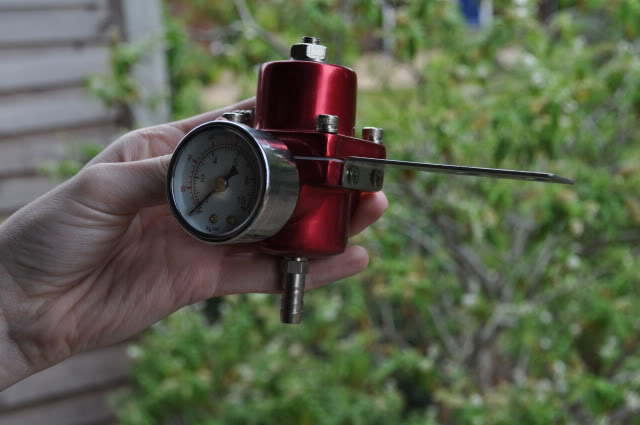
got myself a new fuel pressure reg from ian aswell
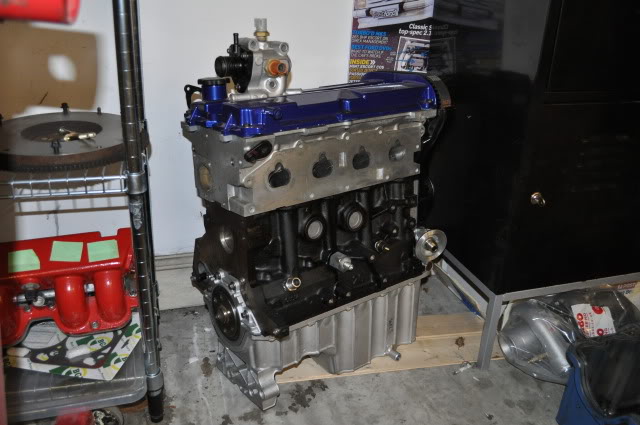
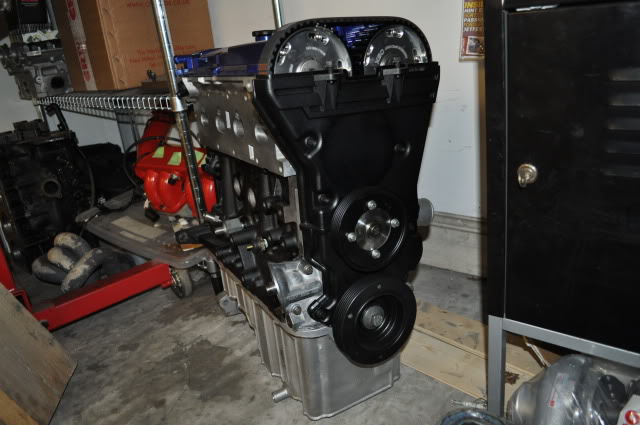
also my engine was there with the old cam cover on
aswell as a new sump with oil return on the back for the planned oil breather setup
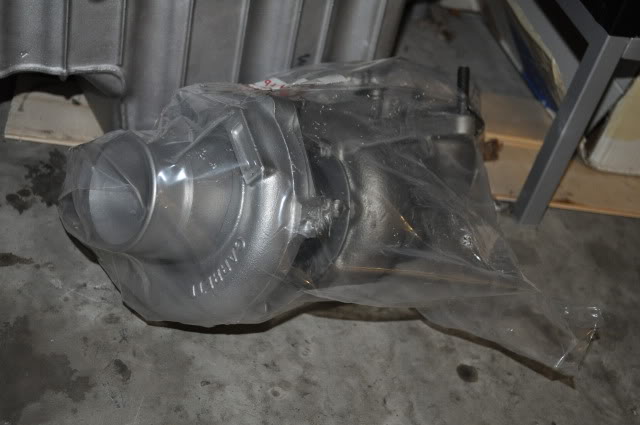
my new t38
looking at the fiesta turbo steering rack one of the tie rods, seemed very loose
so bought a new kit for both sides,
old
new
while changing them i scotched the main body and gave it a few coats of satin matt black
fitted in the bay, happy with the finish
last weekend i went to see my engine builder, area six / ian howell
the main reason was to have my fuel pump uprated
so ian has installed a pump from an evo, rated between 450-500bhp (not that i'll ever be that powerfull)
new pump on the left, to be fitted to the standard 1600 zetec fuel sender/pump unit on the right
brought my skimmed flywheel home, as it wont be used on the harvey gibbs engine dyno
got myself a new fuel pressure reg from ian aswell
also my engine was there with the old cam cover on
aswell as a new sump with oil return on the back for the planned oil breather setup
my new t38

 09-08-2010, 08:24 PM
#183
PassionFord Regular
Thread Starter
Join Date: Aug 2003
Posts: 457
Likes: 0
Received 0 Likes
on
0 Posts
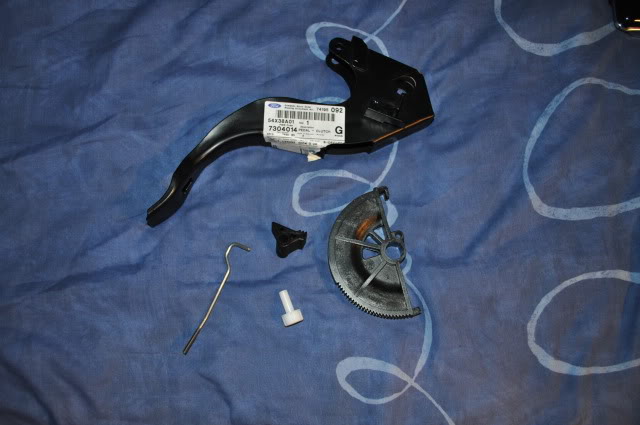
ok thought it was time to catch up with the progress
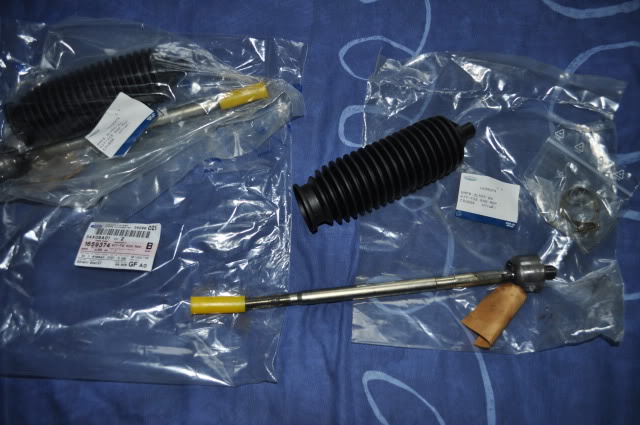
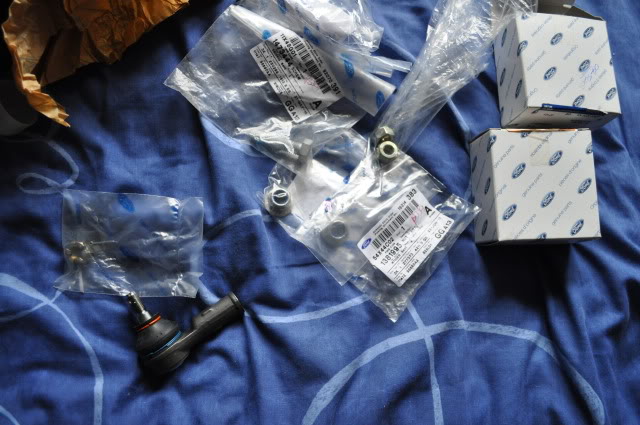
to finish off the steering i bought some new track rod ends
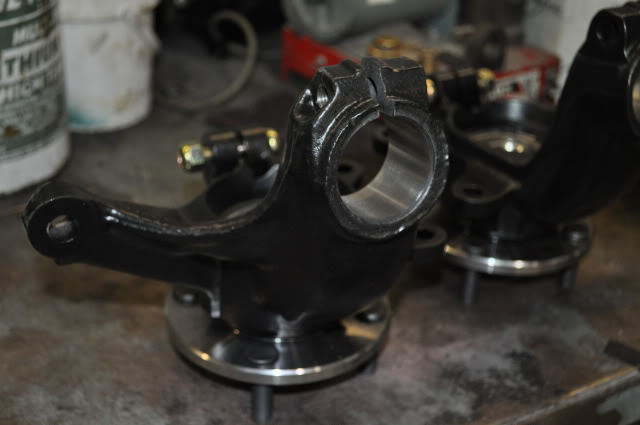
also had to clean some the hubs where the powder coating is'nt supposed to be,
with a purple scotch wheel it was'nt too much of a problem
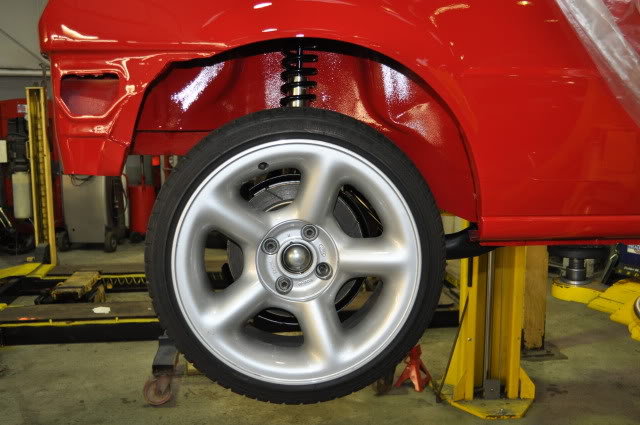
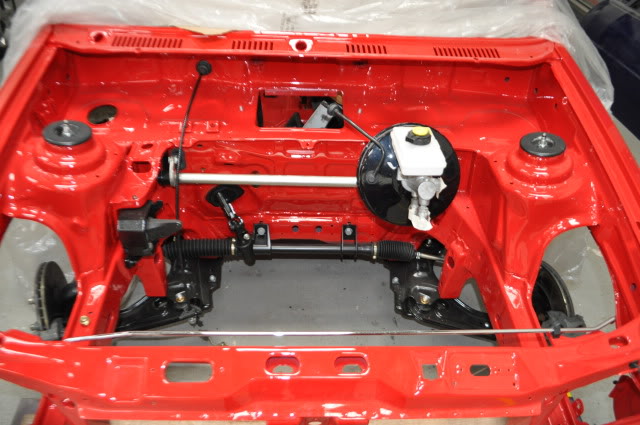
which allowed me to fit the coilovers to the hubs
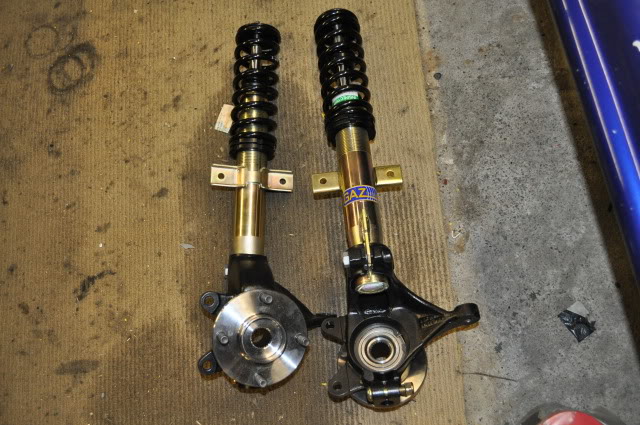
and on the car
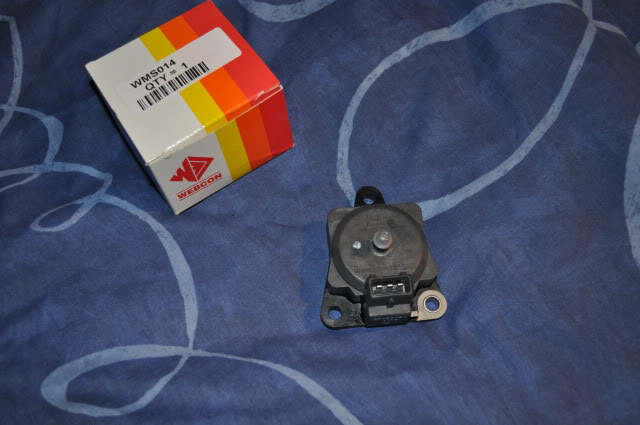
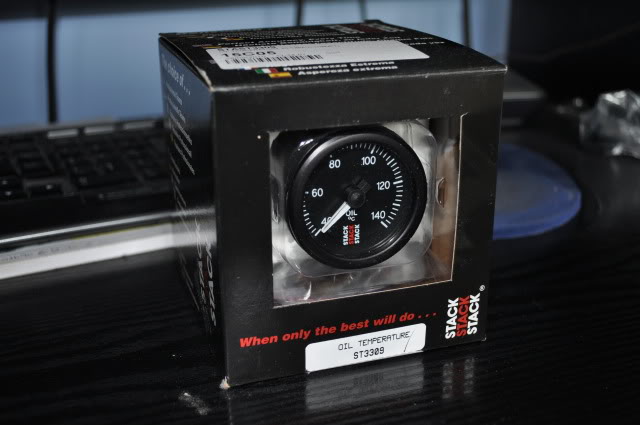
been buying some gauges as its the perfect time to fit the sensors to the engine
the oil temp sensor is either to be fitted to the sump or sump plug
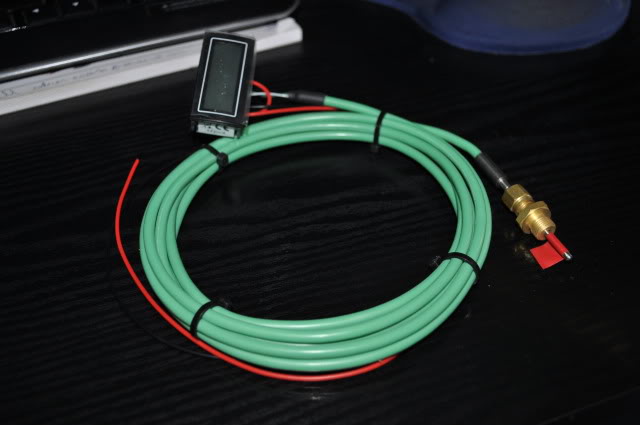
act sensor from R&B motorsport to help me keep an eye on the inlet temps
the new inlet manifold will be drilled and tapped to take the sensor for this
to finish off the steering i bought some new track rod ends
also had to clean some the hubs where the powder coating is'nt supposed to be,
with a purple scotch wheel it was'nt too much of a problem
which allowed me to fit the coilovers to the hubs
and on the car
been buying some gauges as its the perfect time to fit the sensors to the engine
the oil temp sensor is either to be fitted to the sump or sump plug
act sensor from R&B motorsport to help me keep an eye on the inlet temps
the new inlet manifold will be drilled and tapped to take the sensor for this
Last edited by RS_Rob; 06-09-2010 at 09:12 PM.
09-08-2010, 09:47 PM
#185
PassionFord Regular
Thread Starter
Join Date: Aug 2003
Posts: 457
Likes: 0
Received 0 Likes
on
0 Posts
been spraying with satin matt black again
suspension tops
metal bracket that goes around the heater pipes in the engine bay
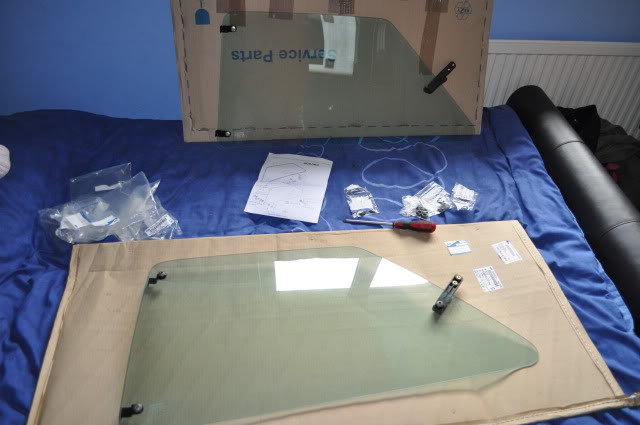
also put the rear windows together with all the new fixings
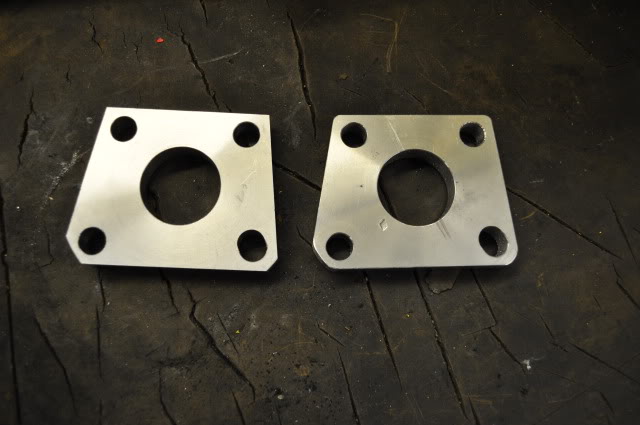
the old man finished making my rear hub spacers, so i filed all the edges then
(before on the left, after filing on the right)
after scotching them up, they had a coat of laquer to stop them looking grotty after time
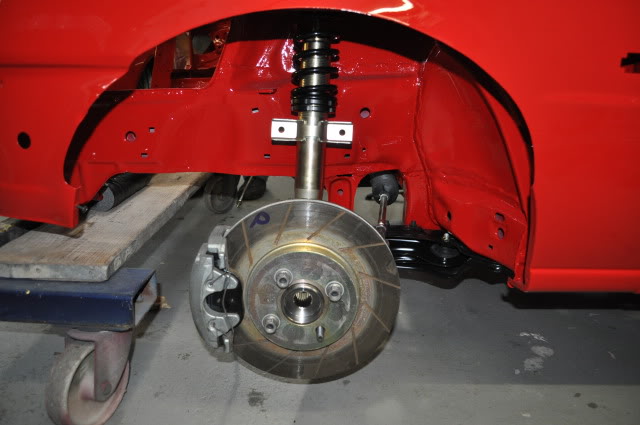
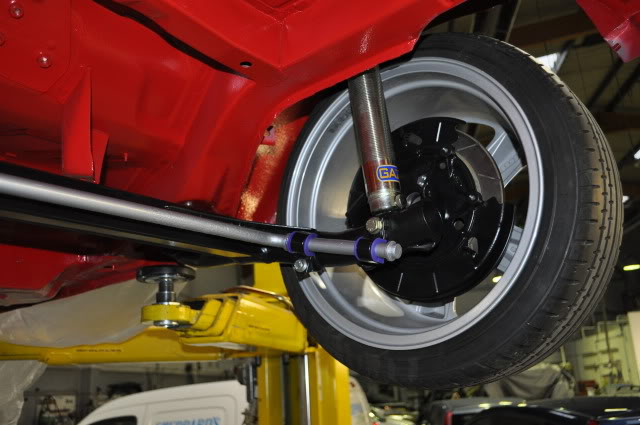
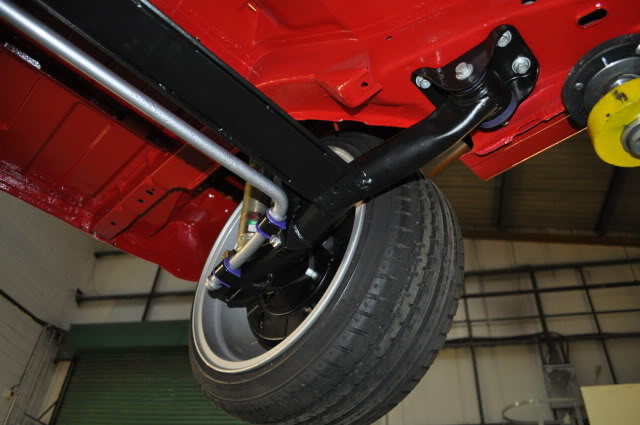
got the rear beam / suspension / brakes together and bolted on the car
although i have two arb brackets on the wrong way around
suspension tops
metal bracket that goes around the heater pipes in the engine bay
also put the rear windows together with all the new fixings
the old man finished making my rear hub spacers, so i filed all the edges then
(before on the left, after filing on the right)
after scotching them up, they had a coat of laquer to stop them looking grotty after time
got the rear beam / suspension / brakes together and bolted on the car
although i have two arb brackets on the wrong way around


 27-08-2010, 11:00 AM
#193
Too many posts.. I need a life!!
iTrader: (1)
Join Date: May 2010
Location: U.K
Posts: 680
Likes: 0
Received 0 Likes
on
0 Posts
fair play mate thats mint see your preatty local to me will have to meet up and convoy to a show or something when both our cars are finished
top work
chris
top work
chris


 30-08-2010, 09:07 PM
#199
PassionFord Regular
Thread Starter
Join Date: Aug 2003
Posts: 457
Likes: 0
Received 0 Likes
on
0 Posts
had some bits to do to the heater box,
renewed the foam gasket
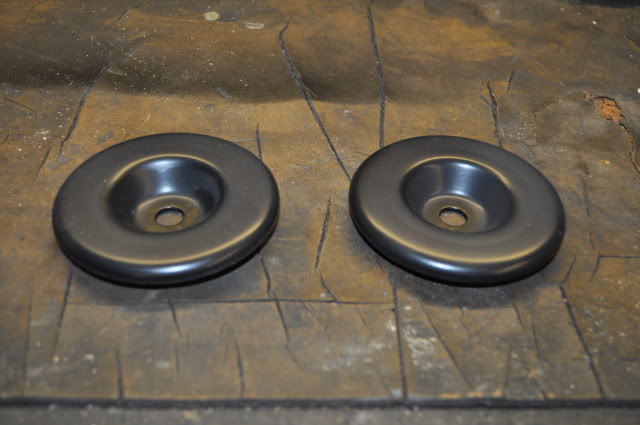
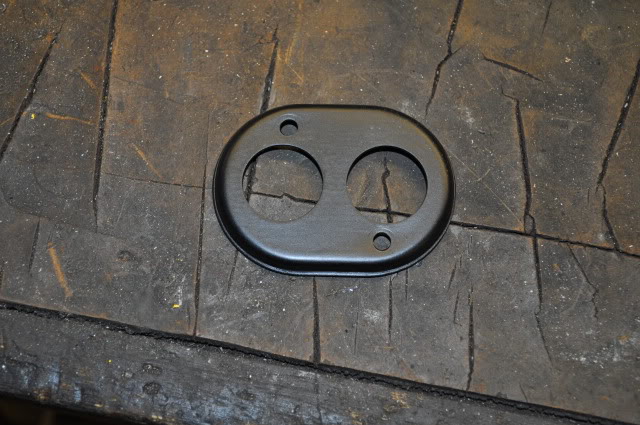
also as i have three gauges in the centre grill on the dash,
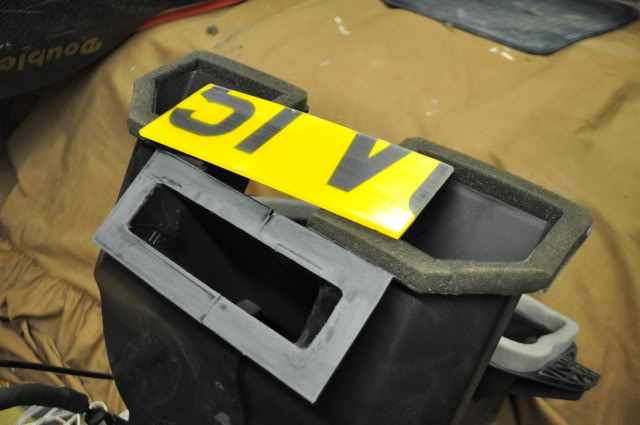
i'm blocking this up, so cut up an old numberplate to do the job
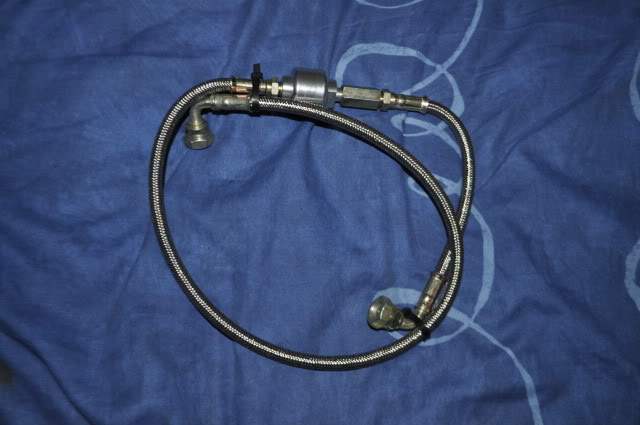
got myself a nice turbo oil feed pipe with extra pre-turbo filter
put the new rear engine mount on and put new bolts on where the front engine mount would be after cleaning the threads out first
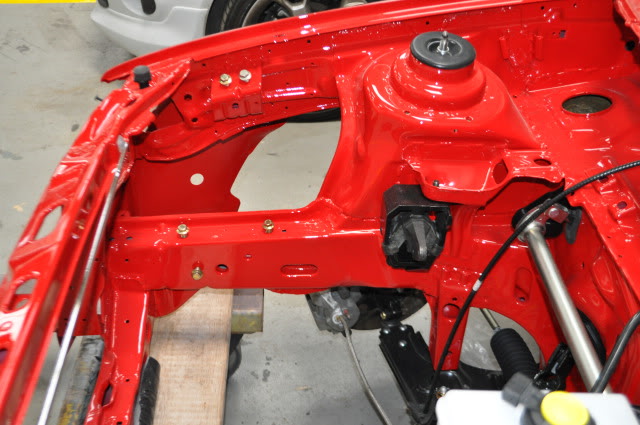
how the engine bay is looking at the moment with the brake servo/master cylinder on
renewed the foam gasket
also as i have three gauges in the centre grill on the dash,
i'm blocking this up, so cut up an old numberplate to do the job
got myself a nice turbo oil feed pipe with extra pre-turbo filter
put the new rear engine mount on and put new bolts on where the front engine mount would be after cleaning the threads out first
how the engine bay is looking at the moment with the brake servo/master cylinder on
Last edited by RS_Rob; 06-09-2010 at 09:13 PM.
01-09-2010, 10:06 AM
#200
15000

Join Date: Aug 2010
Location: Cape Town
Posts: 26
Likes: 0
Received 0 Likes
on
0 Posts
ok some pictures i've been looking forward to taking for quite some time,
it finally looks worth all the hard work, NO REGRETS
heres the combination mix for ferrari rosso corsa red before it gets stirred

it was painted with base and one coat of laquer then baked, then hand flatted back before having another two coats of laquer
a massive thanks to the paint team in work, as they did the final prep and adrian did the paintwork today!
they've really outdone themselves today in my eyes
i'll leave the picture say the rest


the engine bay really does it for me


it finally looks worth all the hard work, NO REGRETS
heres the combination mix for ferrari rosso corsa red before it gets stirred
it was painted with base and one coat of laquer then baked, then hand flatted back before having another two coats of laquer
a massive thanks to the paint team in work, as they did the final prep and adrian did the paintwork today!
they've really outdone themselves today in my eyes
i'll leave the picture say the rest
the engine bay really does it for me
Nice work dude.