MK3 fiesta project - 2.1 zetec turbo - 358bhp-365ftlb for now
 18-03-2010, 10:12 PM
#1
PassionFord Regular
Thread Starter

Join Date: Aug 2003
Posts: 457
Likes: 0
Received 0 Likes
on
0 Posts
i've been a member of this site for years,
now feel its time to show my project with you lot, so bear with me while i get it up to date!
so i might aswell start at the beginning
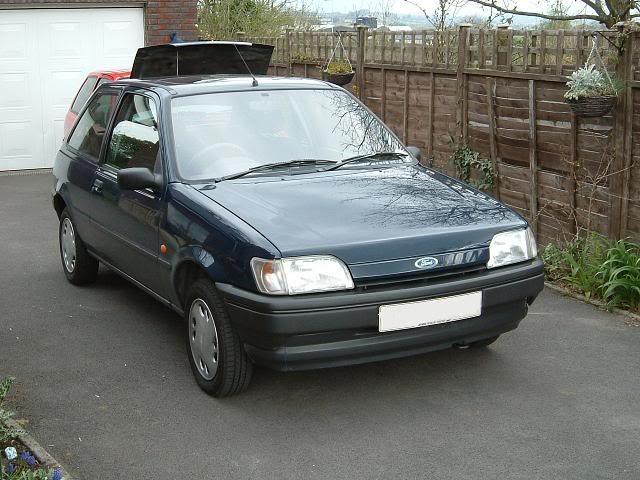
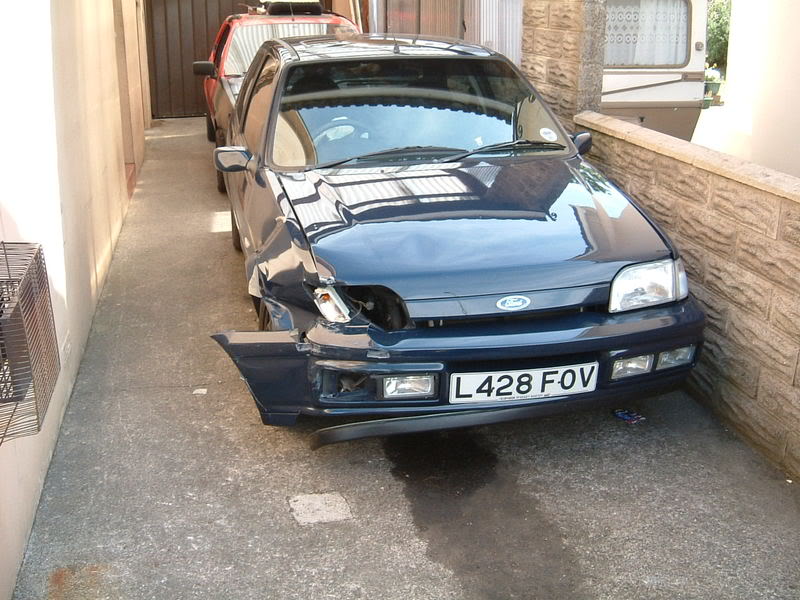
My first car, which gave me the ford bug and got me into the trouble i'm now haha
mk3 fiesta 1.1 LX which was standard until i had it

this came to an end after an accident, chassis leg was bent so called it a day
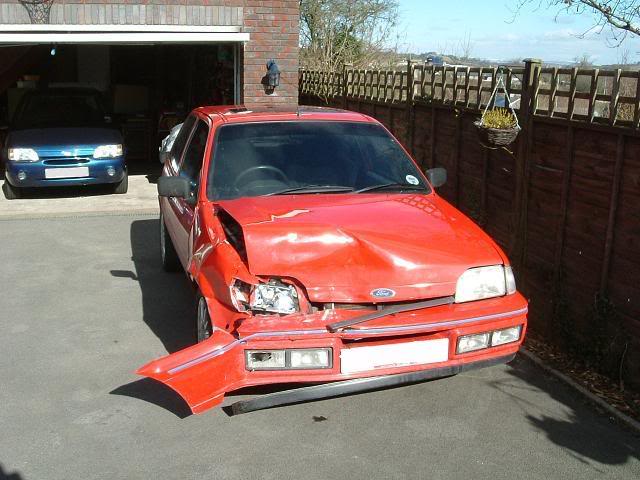
so progressed onto the second fiesta in the shape of a 1.3 and was incredibly clean
went for the FRST/xr2i kit again
after a stupid girl run a red light at a crossroads this came to an end aswell
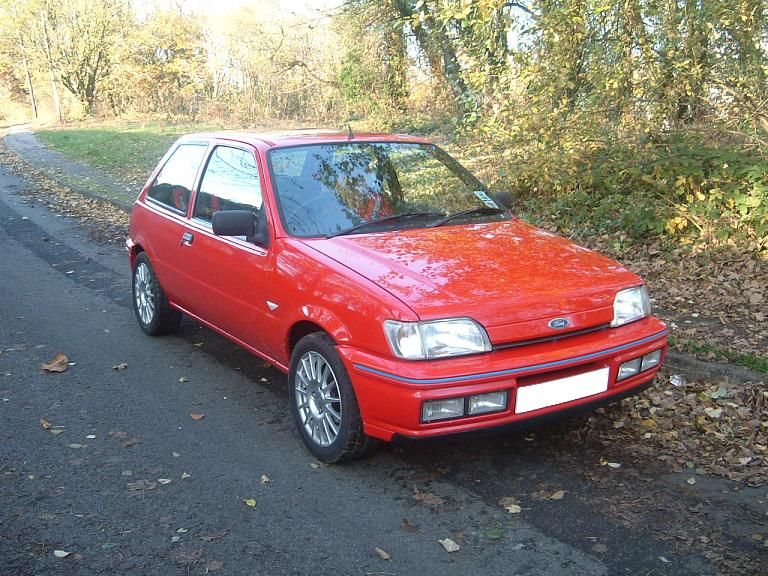
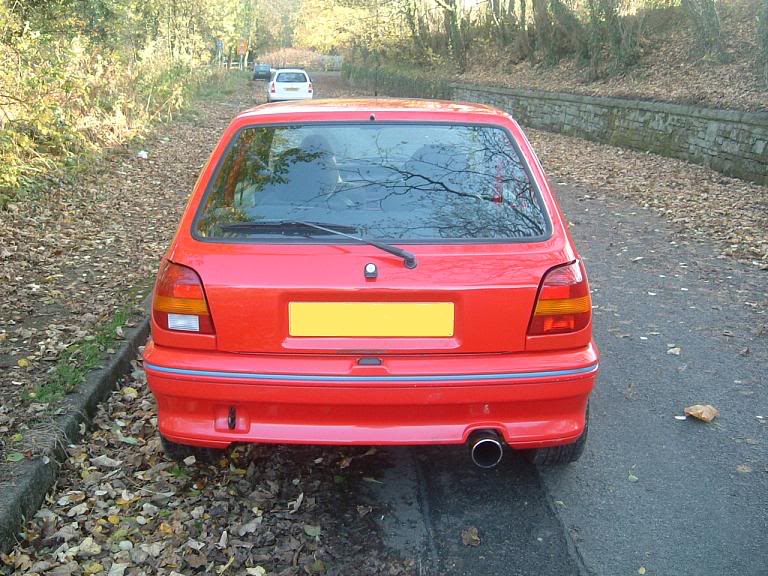
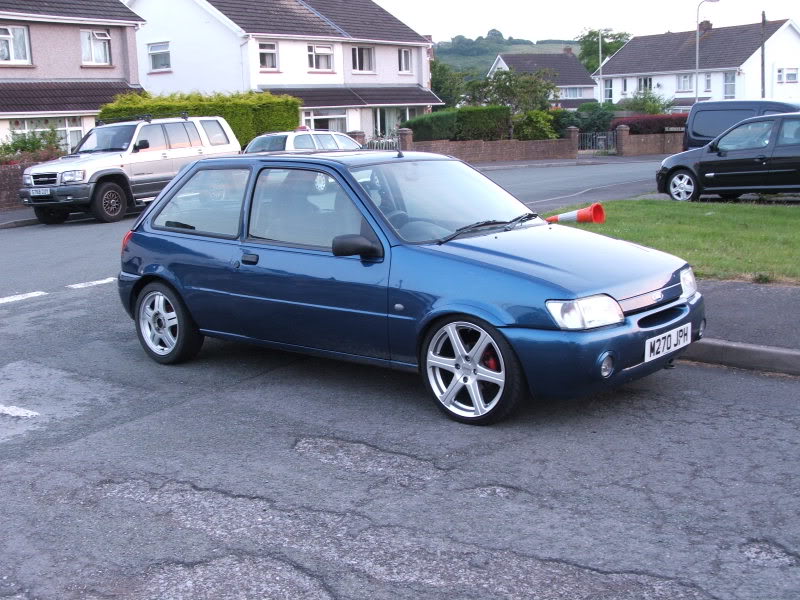
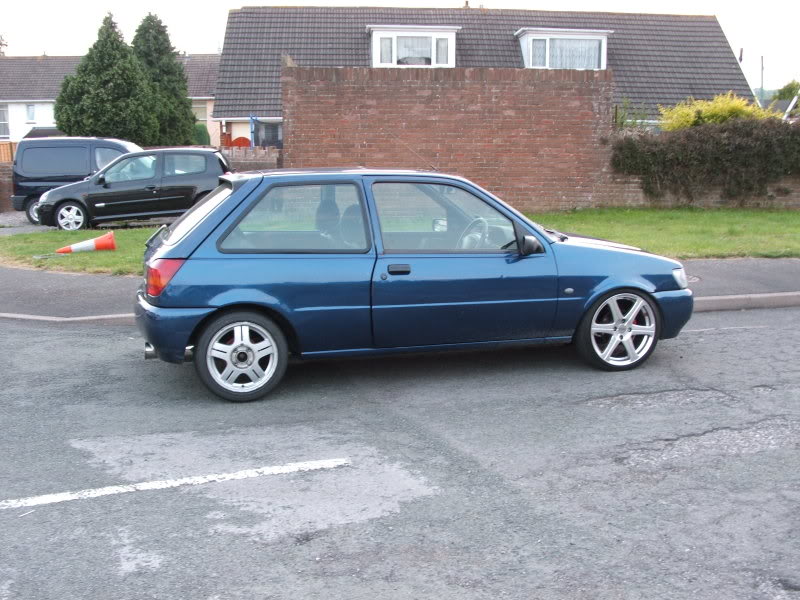
next up was my current fiesta (quite a dog but still bought it for some reason)
1.6si
went through different stages (lowered 40mm, different wheels)
17inch lenso's
15inch rs2000 wheels, took the mondeo estate spoiler off
some avo coilovers
also went through different stages with the engine,
1.6 zetec e
then 105ps 1.8 zetec e
and finally made it rs1800 spec with cams, ecu, maf sensor and throttlebody

during the time of having the car,
i collected many bodyparts ready for my plans
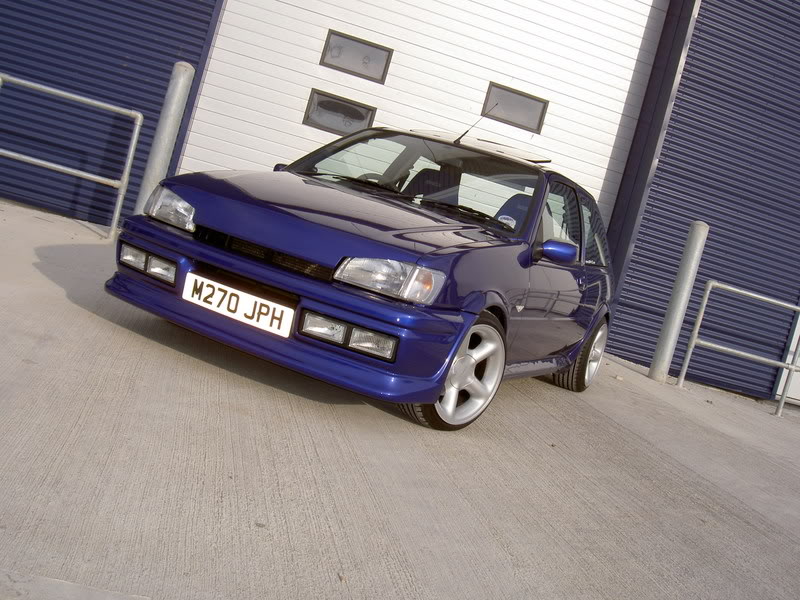
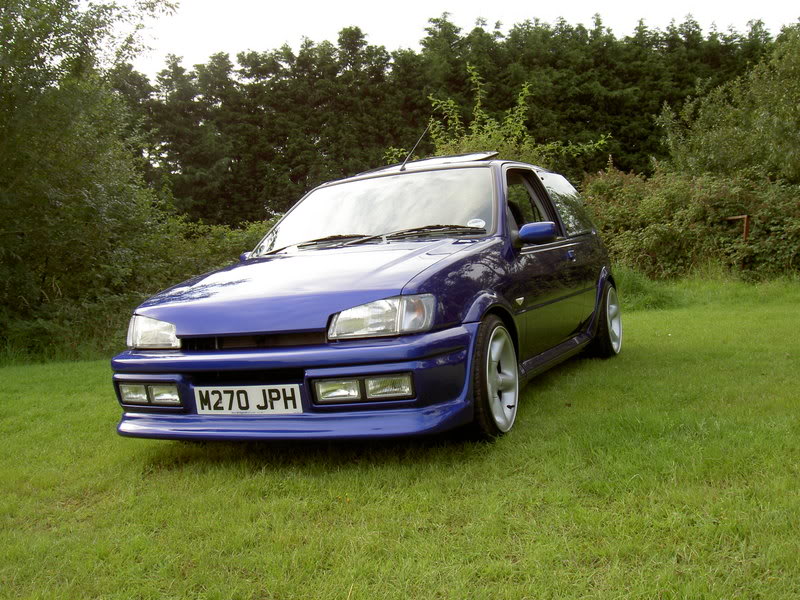
Fiesta turbo front bumper
zetec s rear bumper
smooth boot
new fords drivers side rear quarter
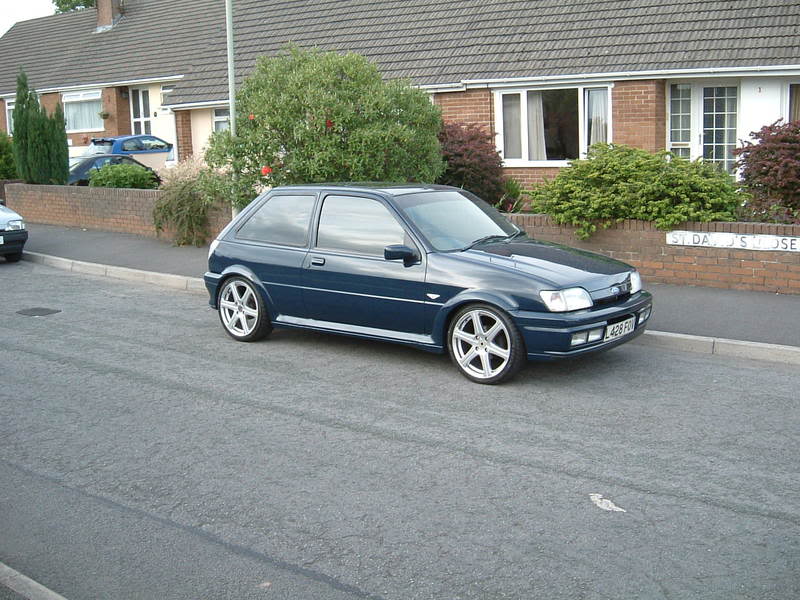
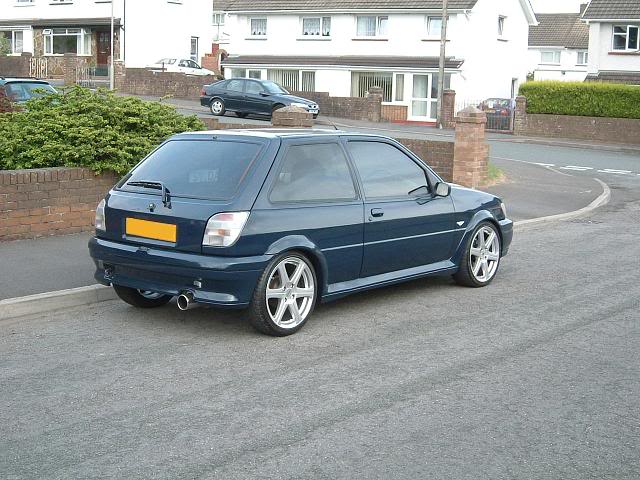
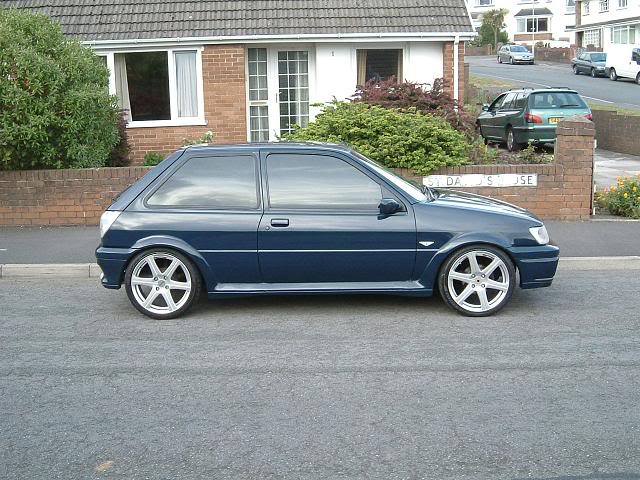
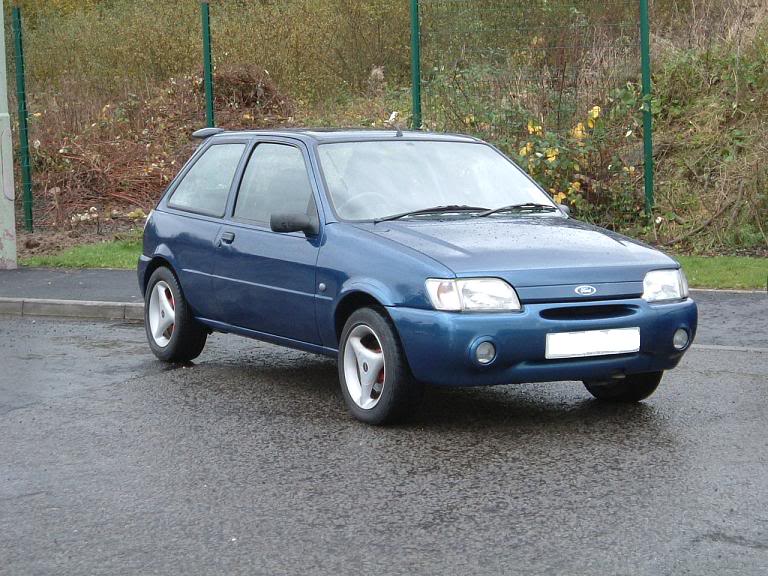
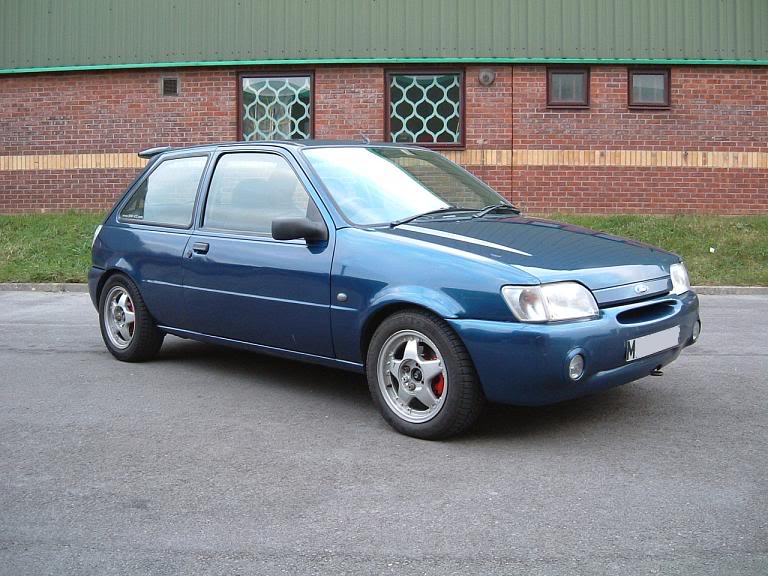
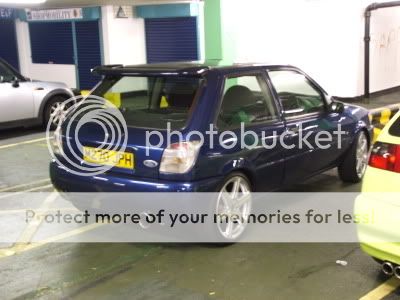
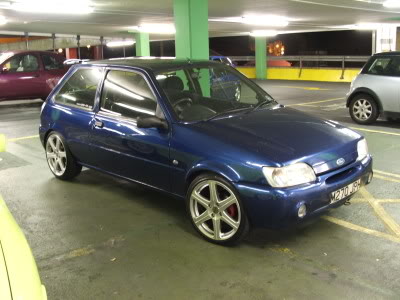
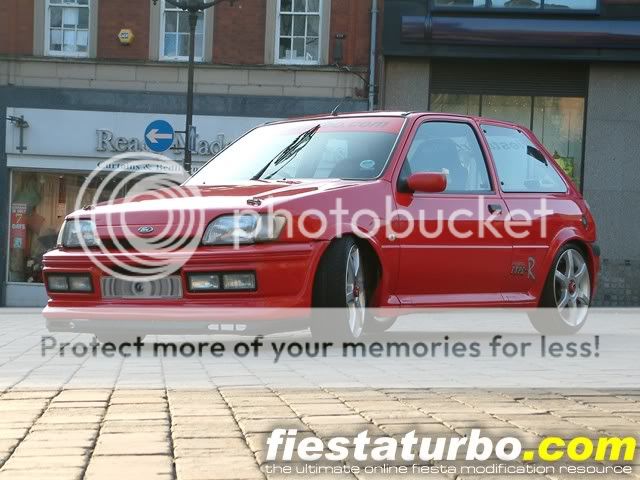
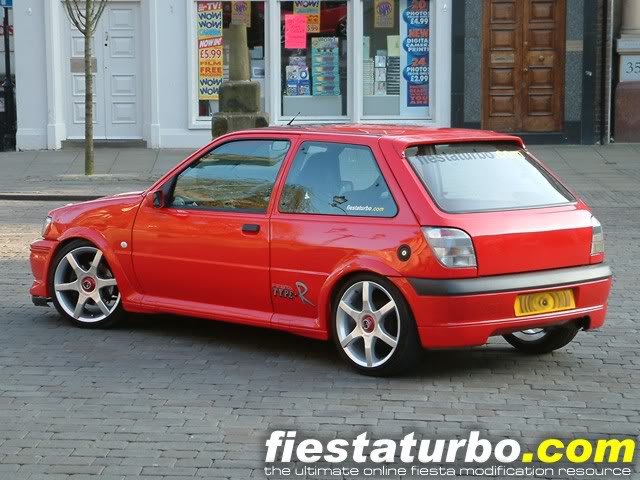
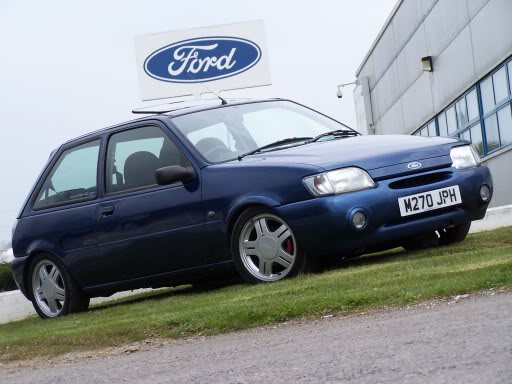
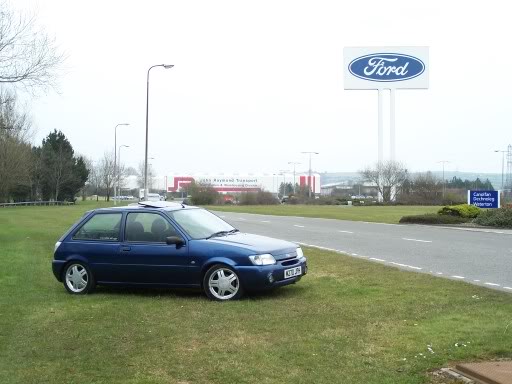
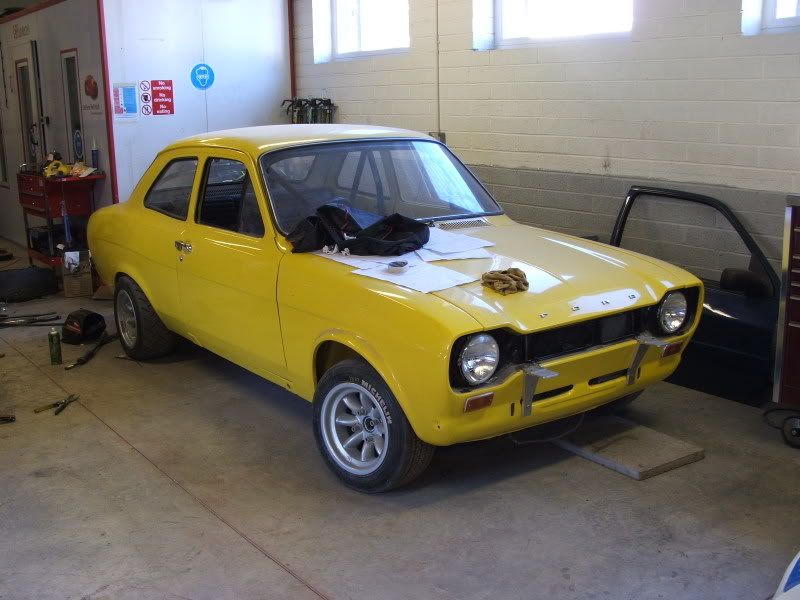
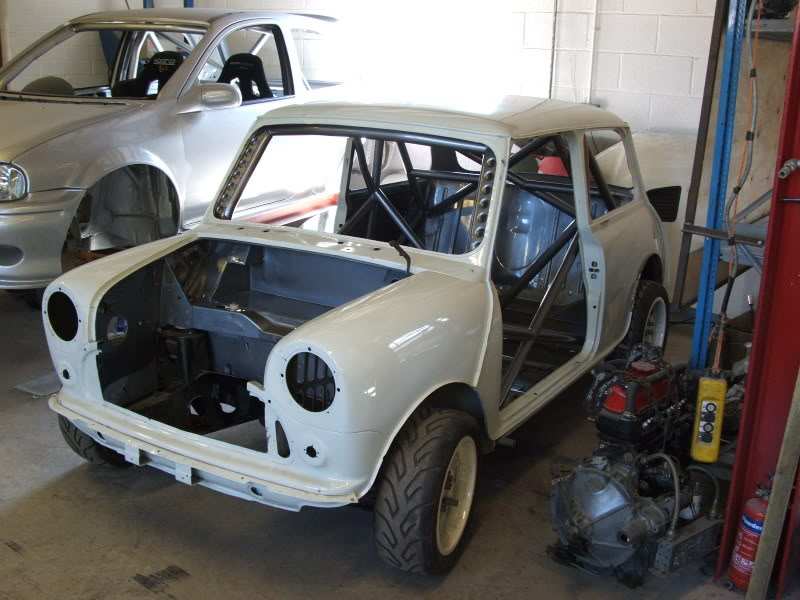
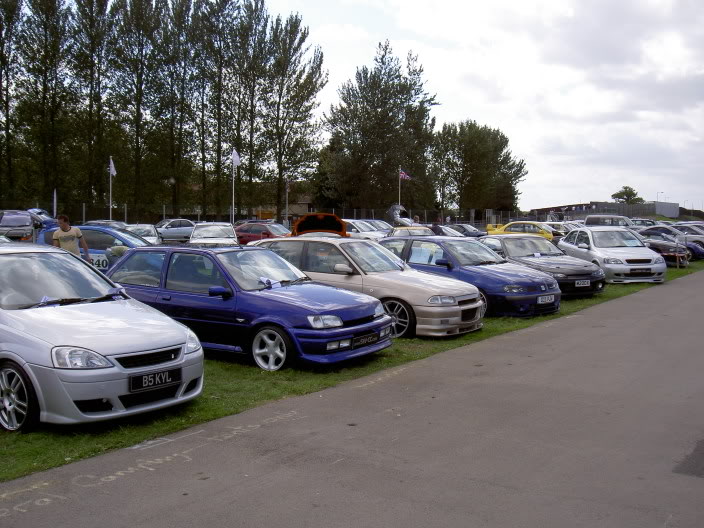
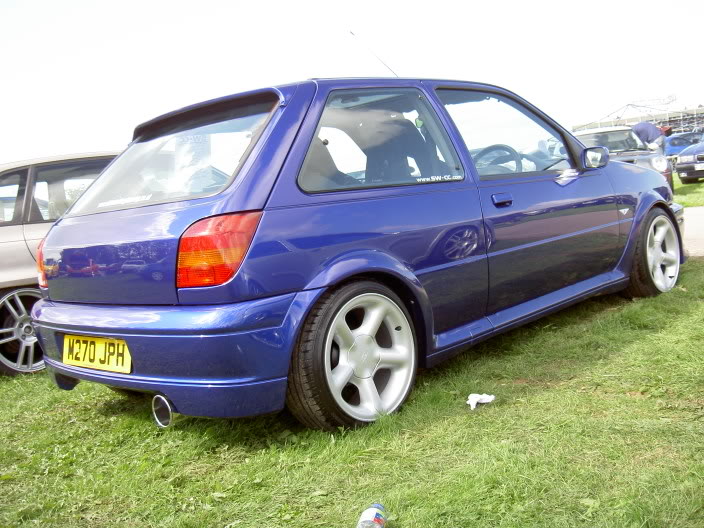
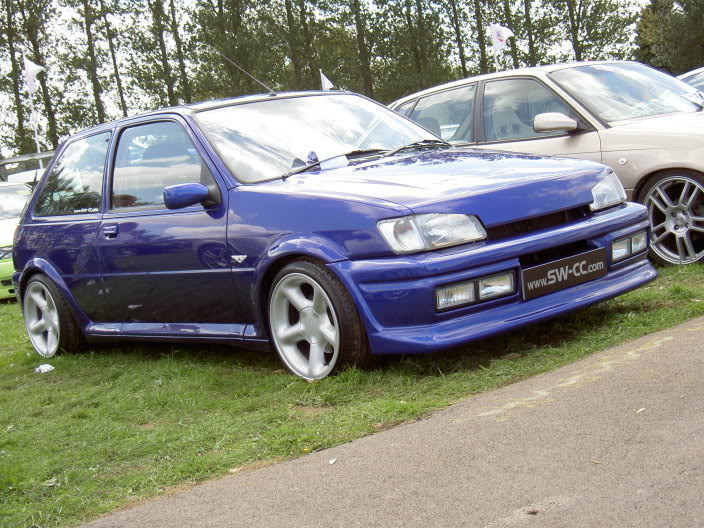
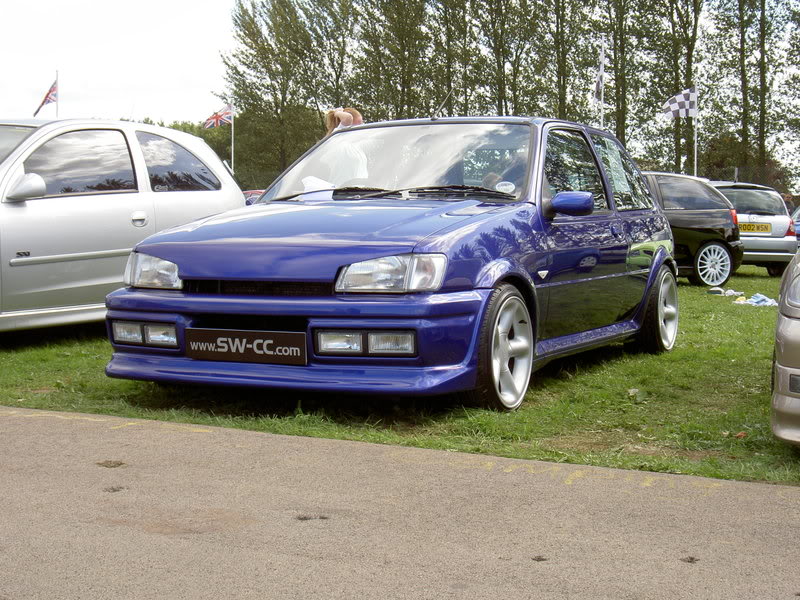
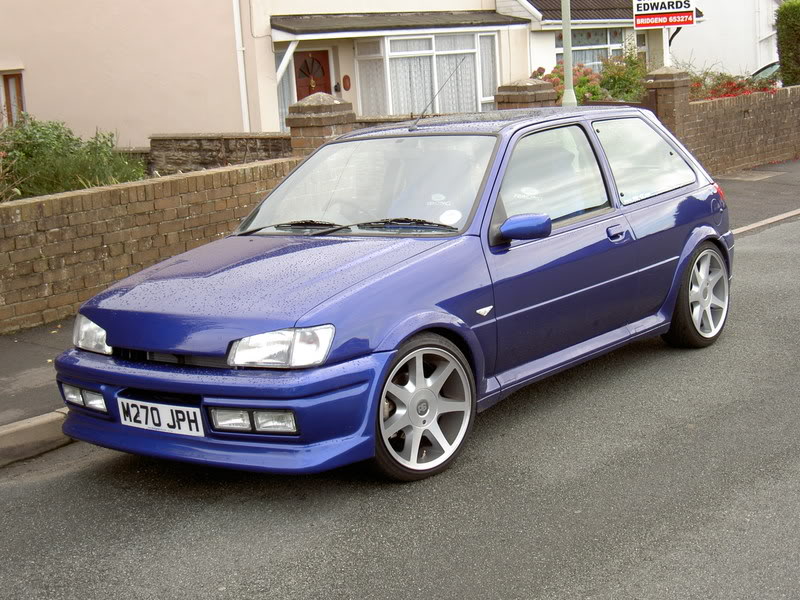
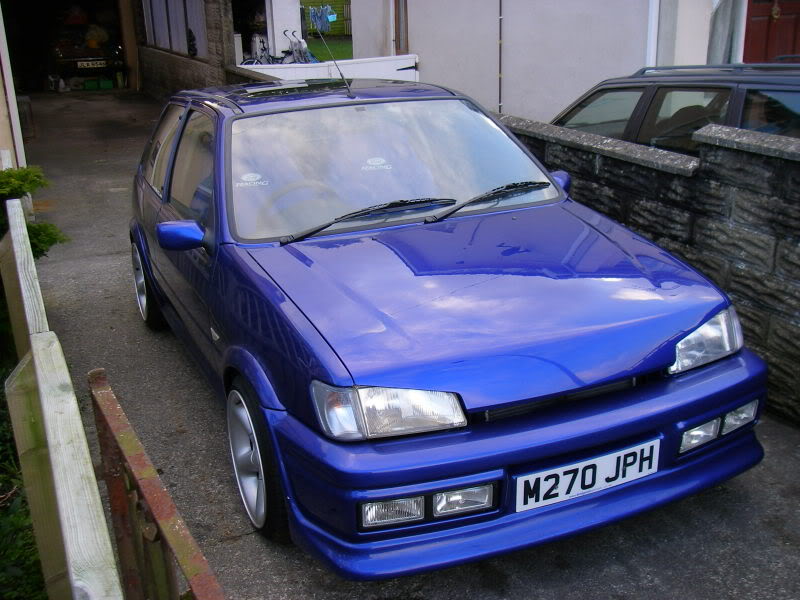
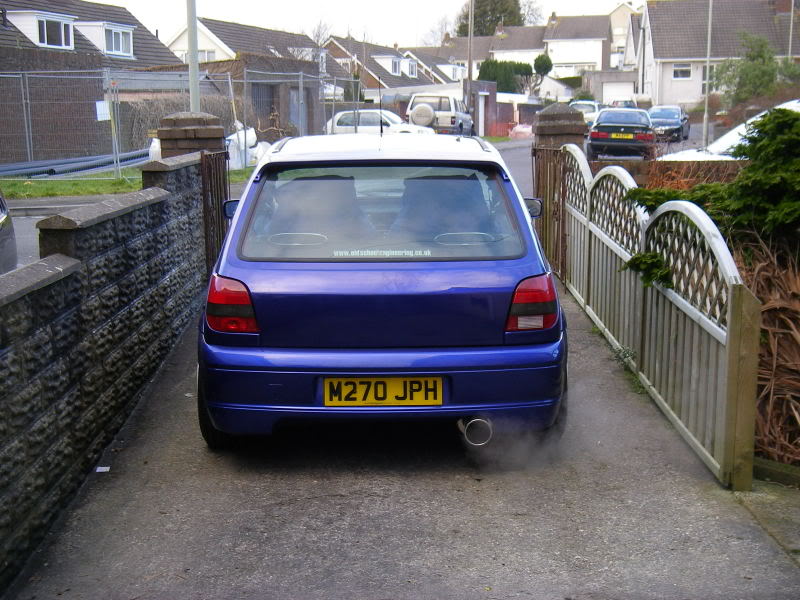
heres the pictures which inspired me with my plans
execpt i'll have different wheels,
different colour etc

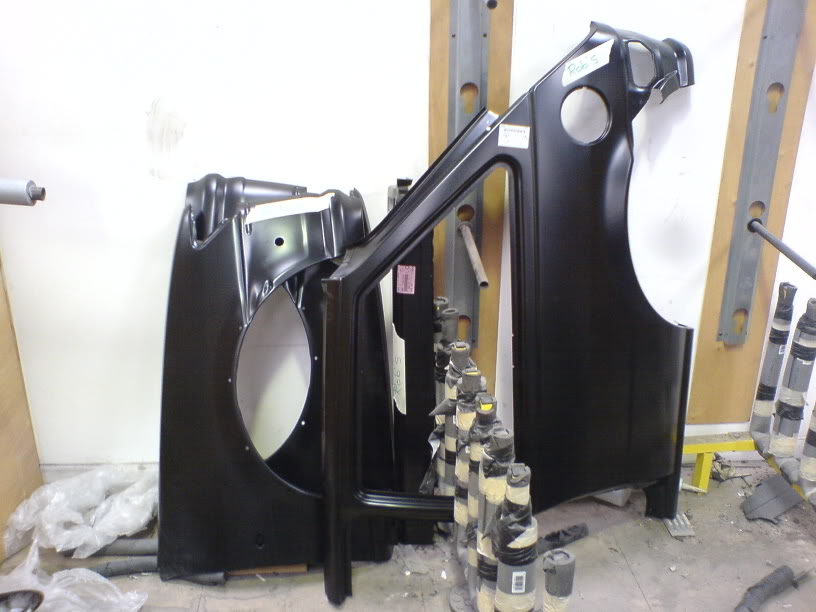
then i started working in ford parts dept, started renewing things in more depth
heres some pics showing old and new parts next to eachother
first the top mounts, (just a little worn)
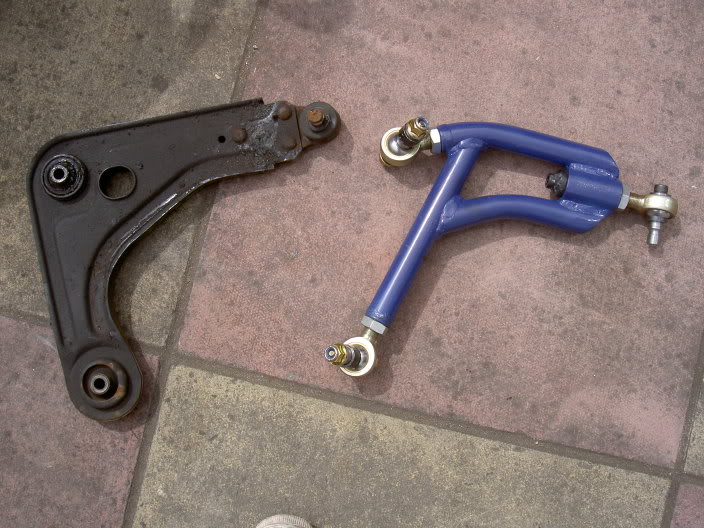
the lower arms (zoo motorsport)
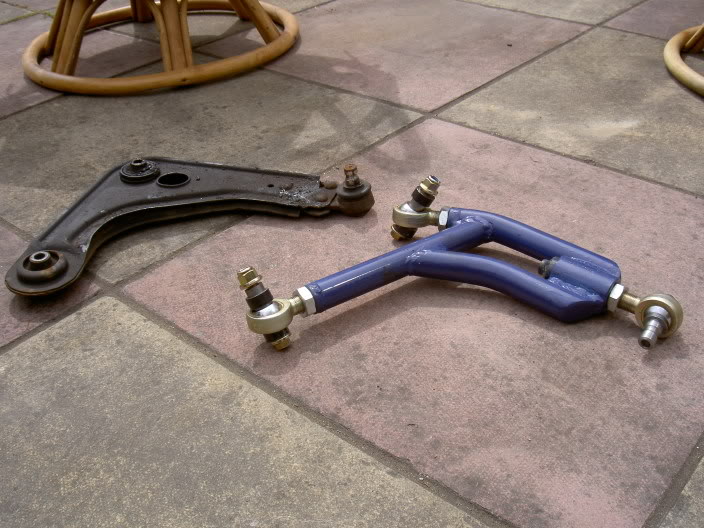
some pictures after finishing work one day, as my ford dealer is close to the bridgend engine factory
started collecting new ford panels in work
fitted uprated gearbox mounts (old vs new)
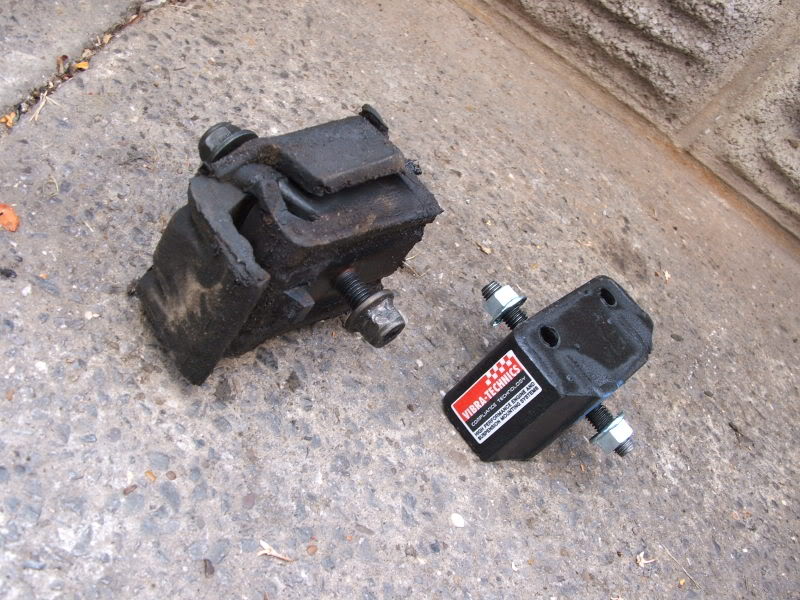
more new parts

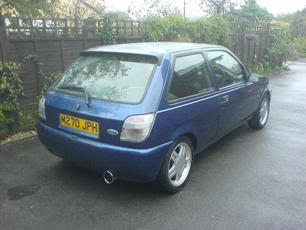
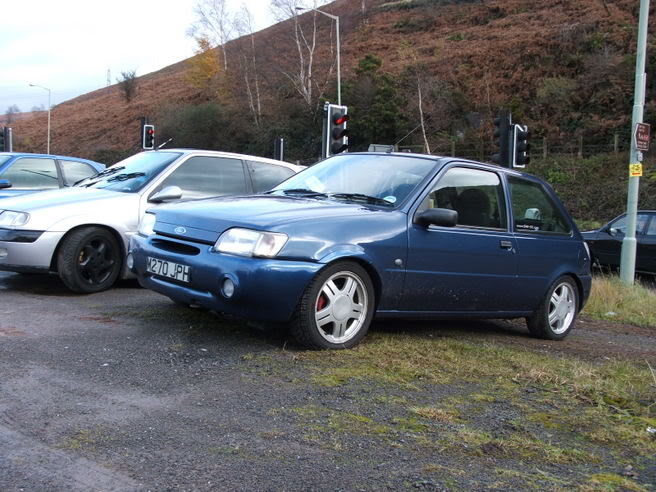
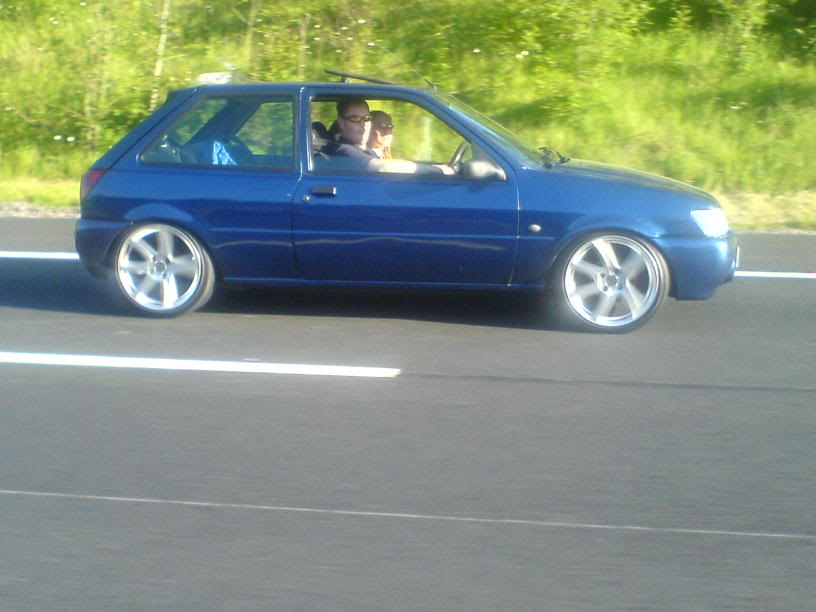
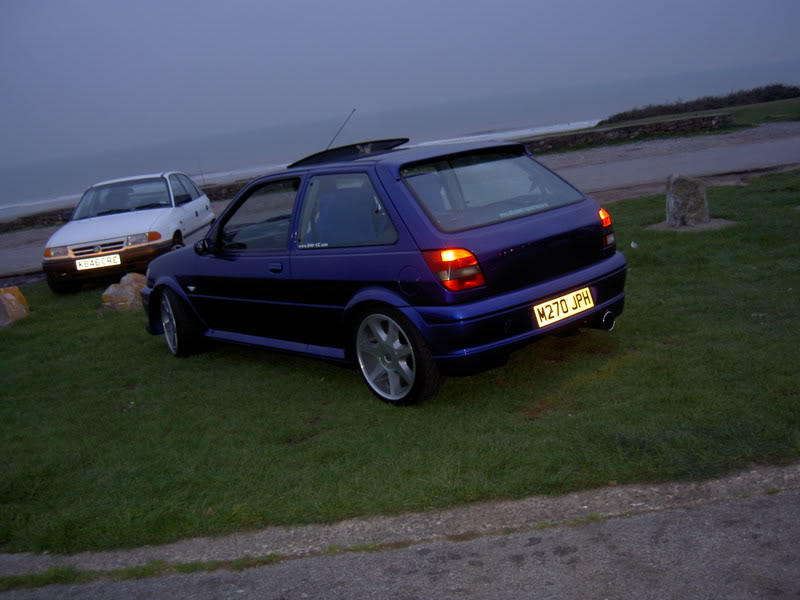
a mate took a pic on the motorway before i started stripping the car for the bodyshop
was slammed low on the 17's at the time
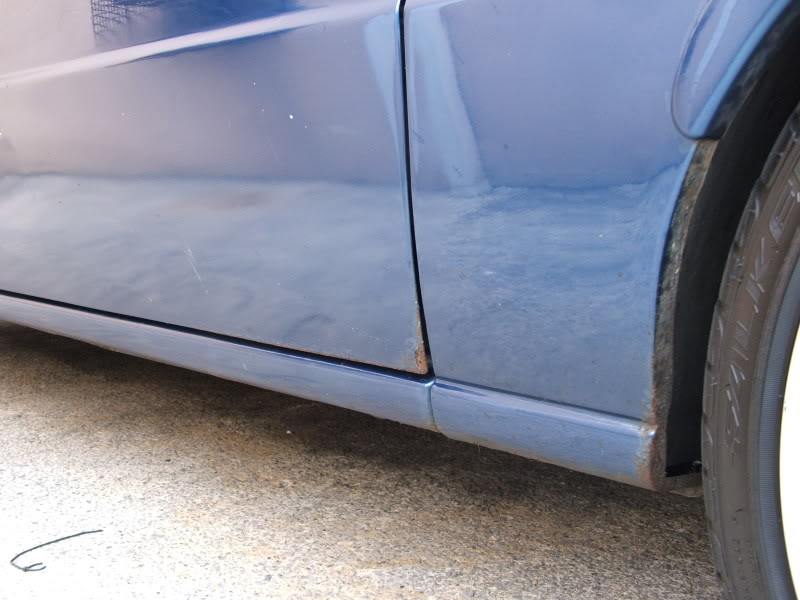
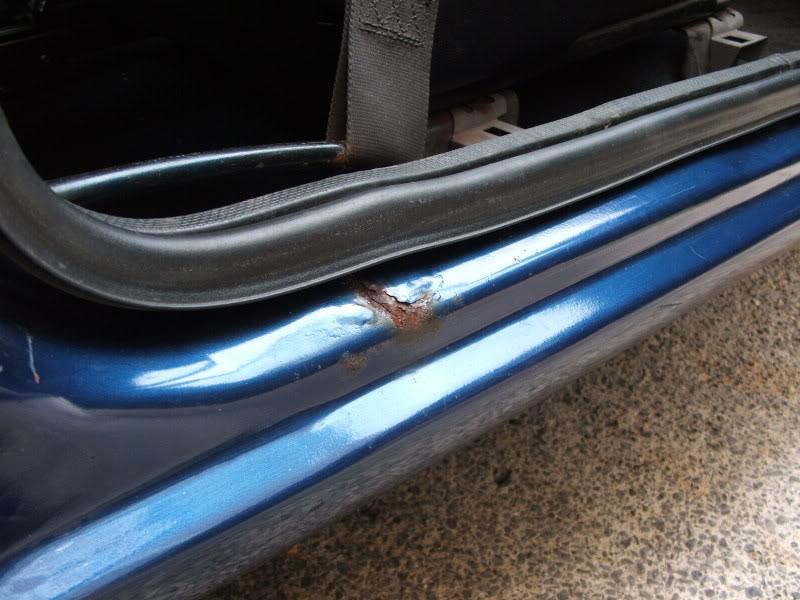
the reason why i wanted so many panels changed,
the rear quarter was full of filler and no real shape to it,
rust on the lip of arch,
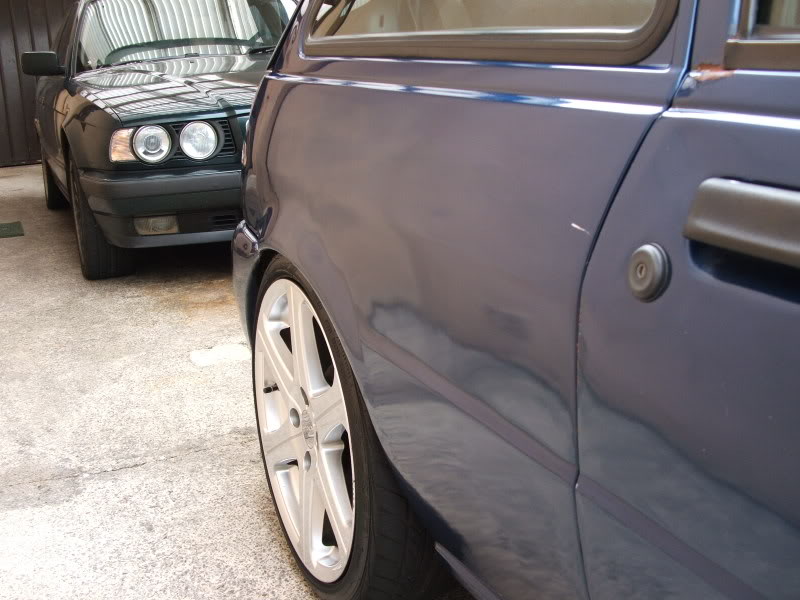

scabby bits on the bottom of the door and wing
now feel its time to show my project with you lot, so bear with me while i get it up to date!
so i might aswell start at the beginning
My first car, which gave me the ford bug and got me into the trouble i'm now haha
mk3 fiesta 1.1 LX which was standard until i had it
this came to an end after an accident, chassis leg was bent so called it a day
so progressed onto the second fiesta in the shape of a 1.3 and was incredibly clean
went for the FRST/xr2i kit again
after a stupid girl run a red light at a crossroads this came to an end aswell
next up was my current fiesta (quite a dog but still bought it for some reason)
1.6si
went through different stages (lowered 40mm, different wheels)
17inch lenso's
15inch rs2000 wheels, took the mondeo estate spoiler off
some avo coilovers
also went through different stages with the engine,
1.6 zetec e
then 105ps 1.8 zetec e
and finally made it rs1800 spec with cams, ecu, maf sensor and throttlebody
during the time of having the car,
i collected many bodyparts ready for my plans
Fiesta turbo front bumper
zetec s rear bumper
smooth boot
new fords drivers side rear quarter
heres the pictures which inspired me with my plans
execpt i'll have different wheels,
different colour etc
then i started working in ford parts dept, started renewing things in more depth
heres some pics showing old and new parts next to eachother
first the top mounts, (just a little worn)
the lower arms (zoo motorsport)
some pictures after finishing work one day, as my ford dealer is close to the bridgend engine factory
started collecting new ford panels in work
fitted uprated gearbox mounts (old vs new)
more new parts
a mate took a pic on the motorway before i started stripping the car for the bodyshop
was slammed low on the 17's at the time
the reason why i wanted so many panels changed,
the rear quarter was full of filler and no real shape to it,
rust on the lip of arch,
scabby bits on the bottom of the door and wing
Last edited by RS_Rob; 03-05-2011 at 07:51 PM.

 18-03-2010, 10:18 PM
#3
PassionFord Regular
Thread Starter
Join Date: Aug 2003
Posts: 457
Likes: 0
Received 0 Likes
on
0 Posts
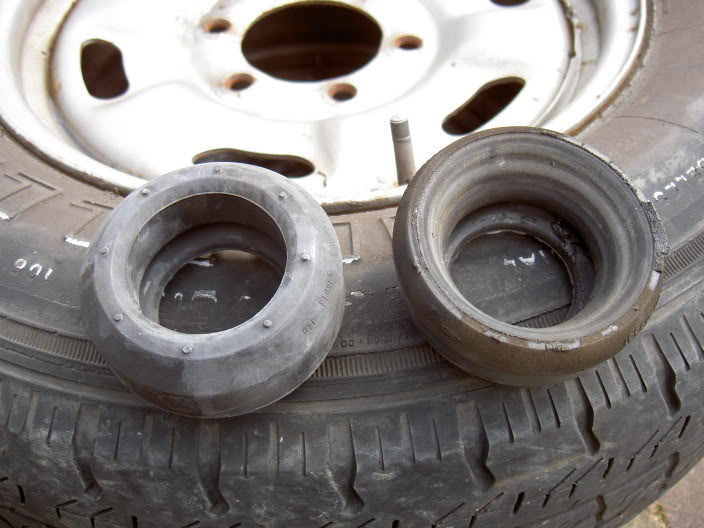
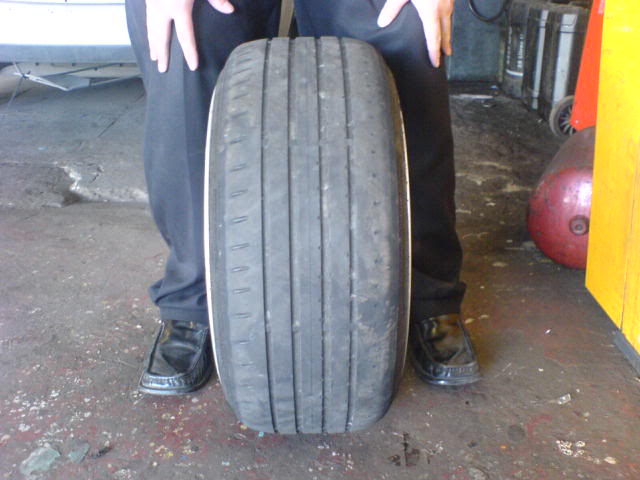
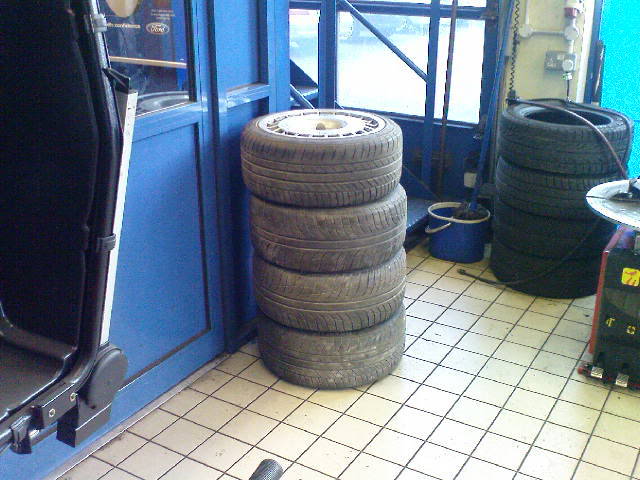
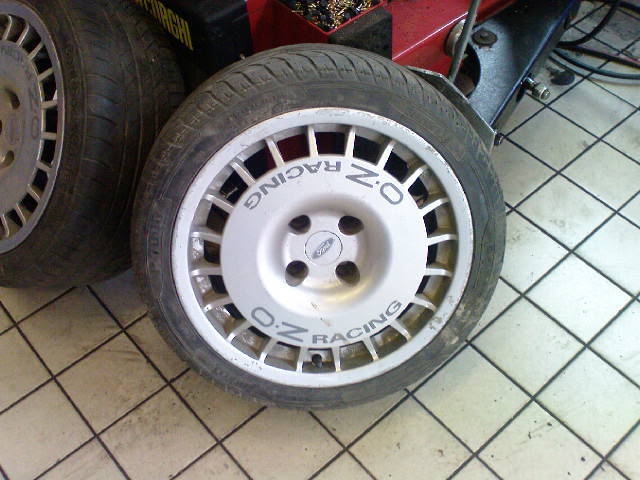
had some brand new wheels, which i tried with a different tyre size
their stretched but not too bad either, so ordered new tyres that size
heres a pic to show them fitted,
their stretched but not too bad either, so ordered new tyres that size
heres a pic to show them fitted,
18-03-2010, 10:21 PM
#4
PassionFord Regular
Thread Starter
Join Date: Aug 2003
Posts: 457
Likes: 0
Received 0 Likes
on
0 Posts
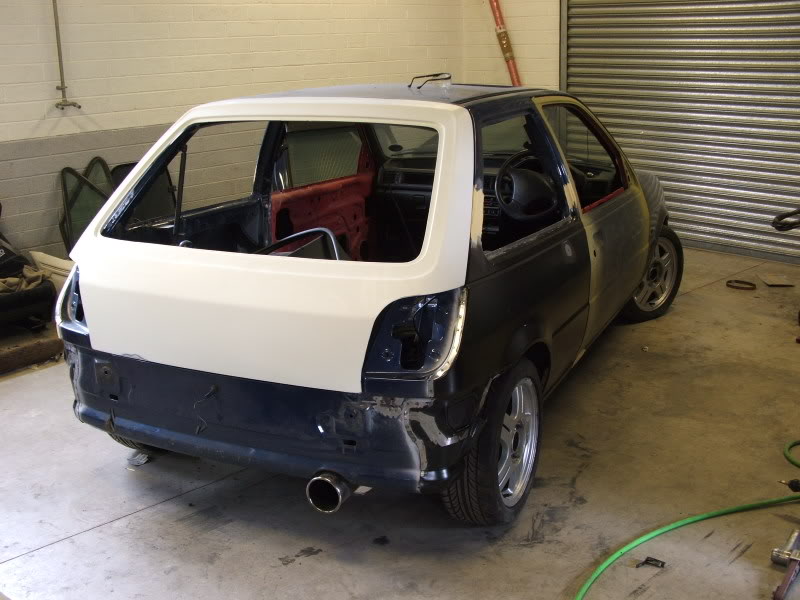
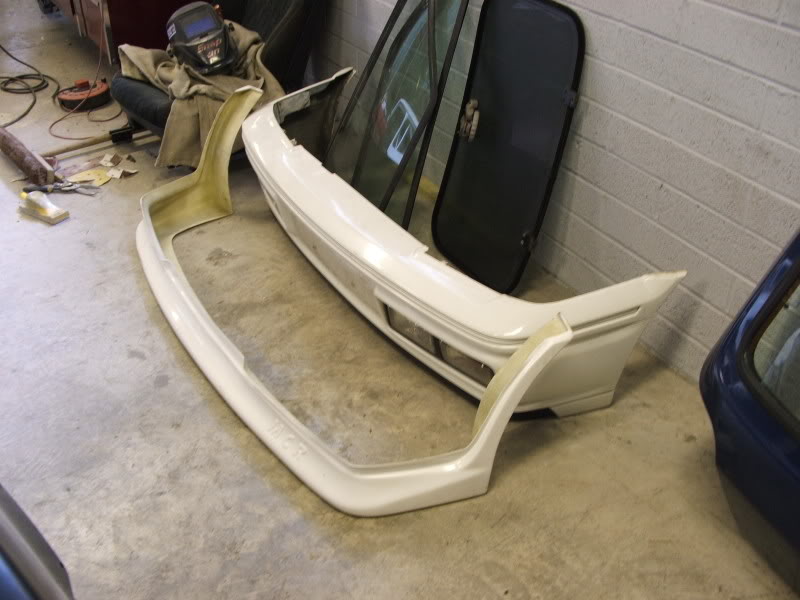
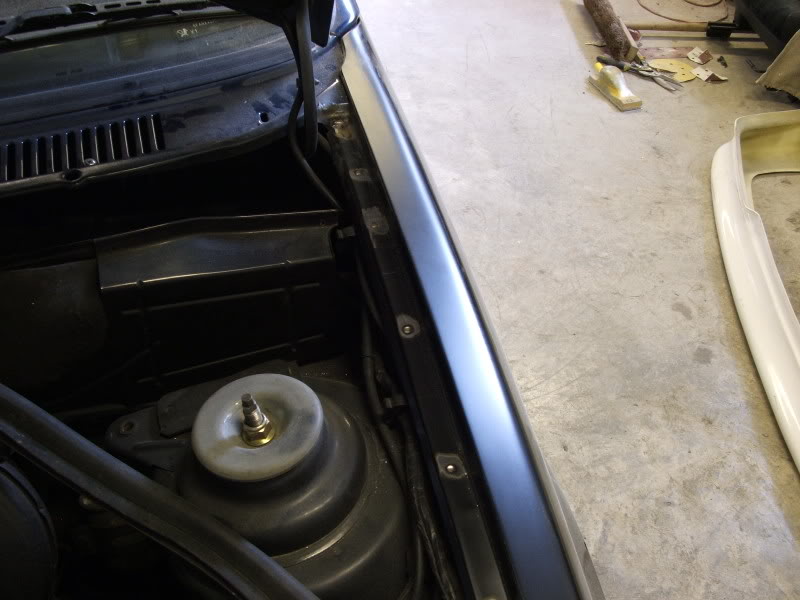
work started in the bodyshop, you can see all the new panels trial fitted
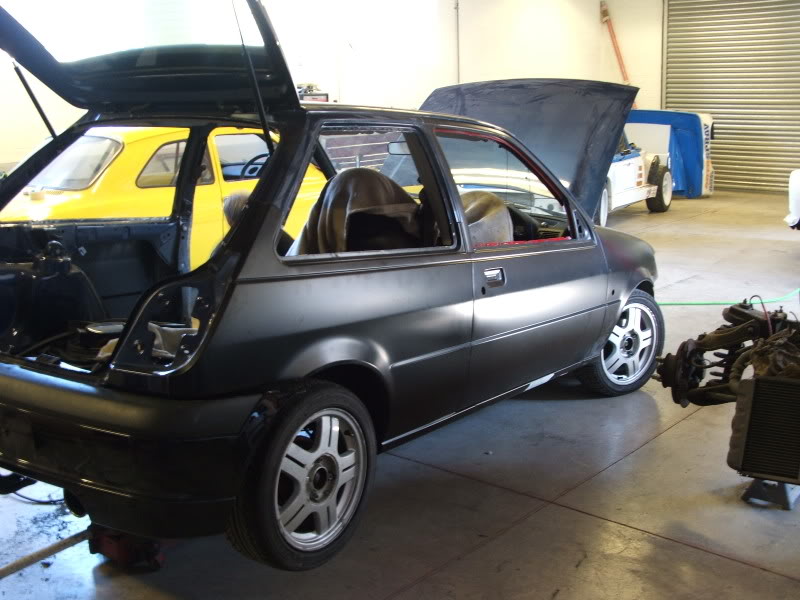
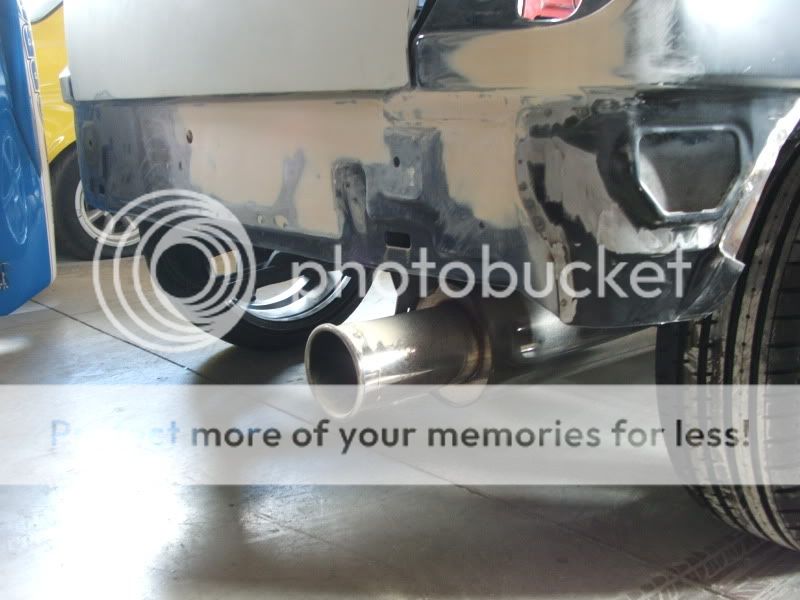
heres the zetec s rear bumper on just to get a slight idea,
had to have the rear towing eye taken off for this fit, you can see how much the exhaust is inside the bumper,
this will have to be brought out more
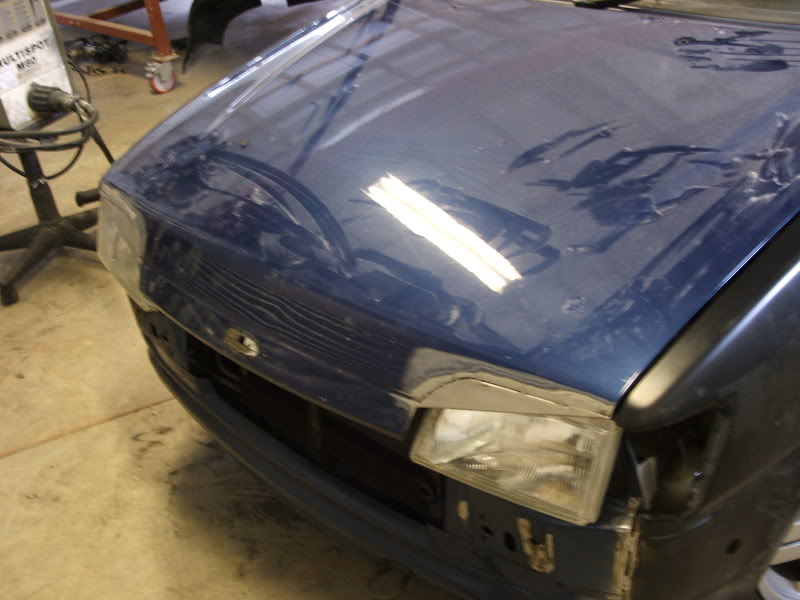
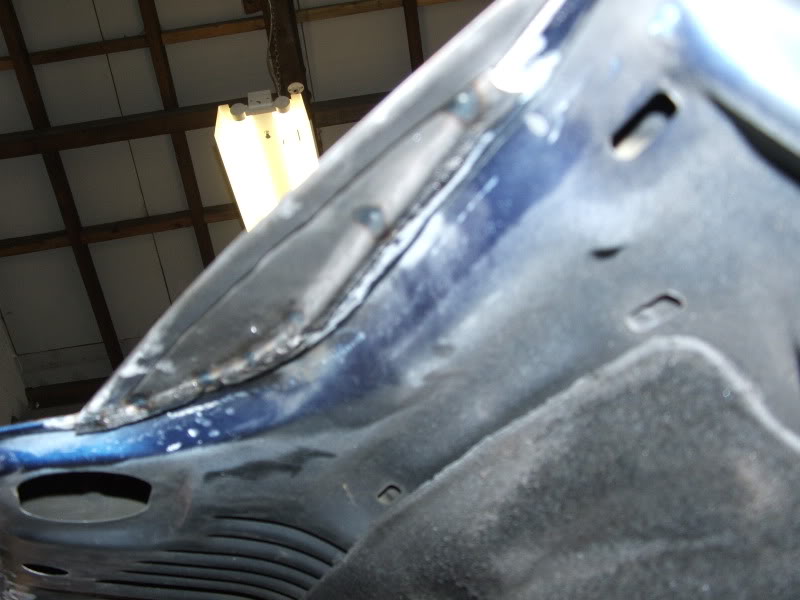
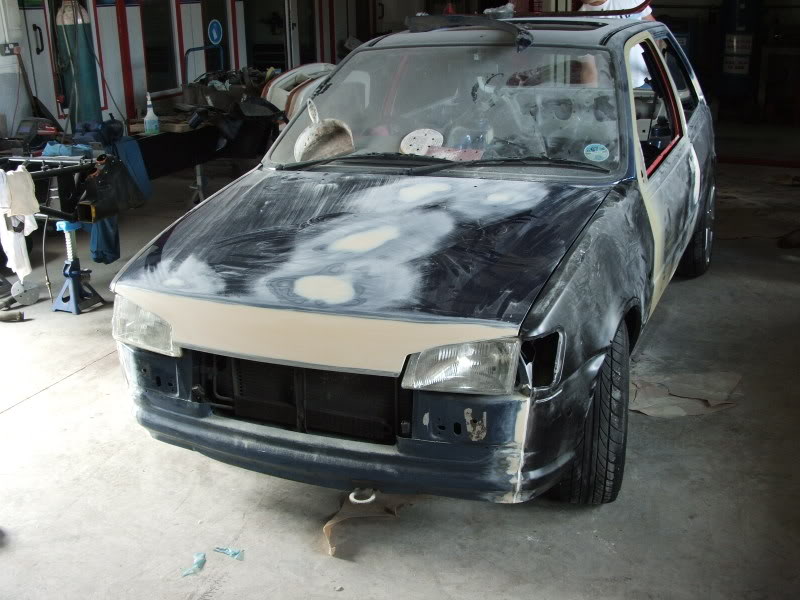
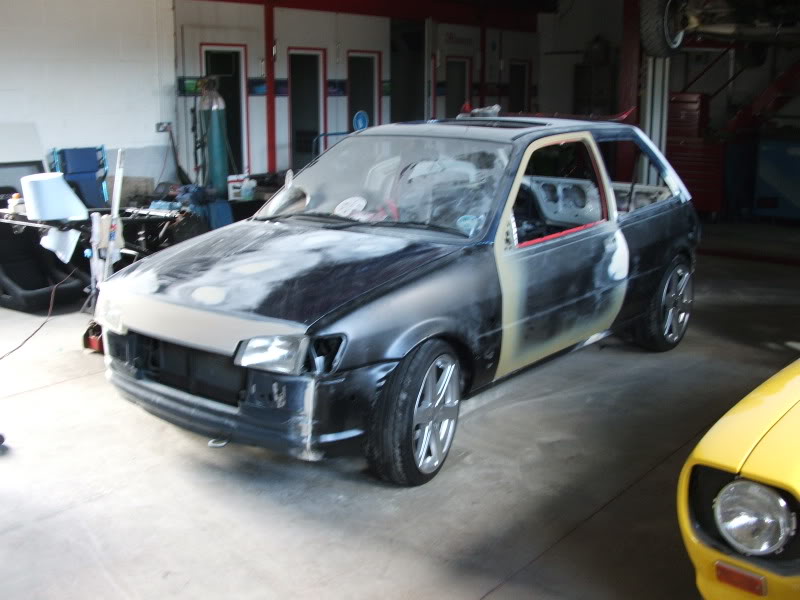
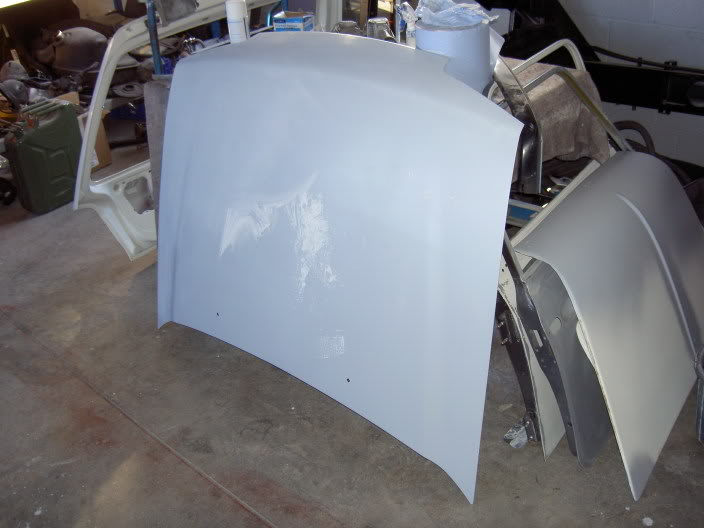
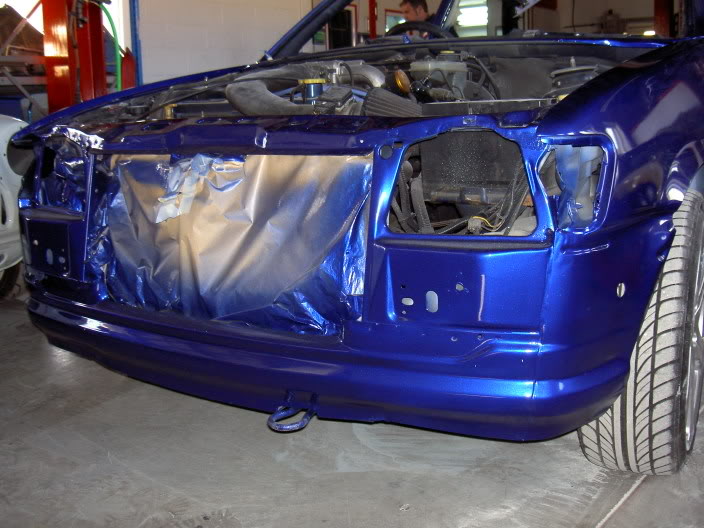
heres the current state of the bonnet, not a full on bad boy as i think they're are bit ott

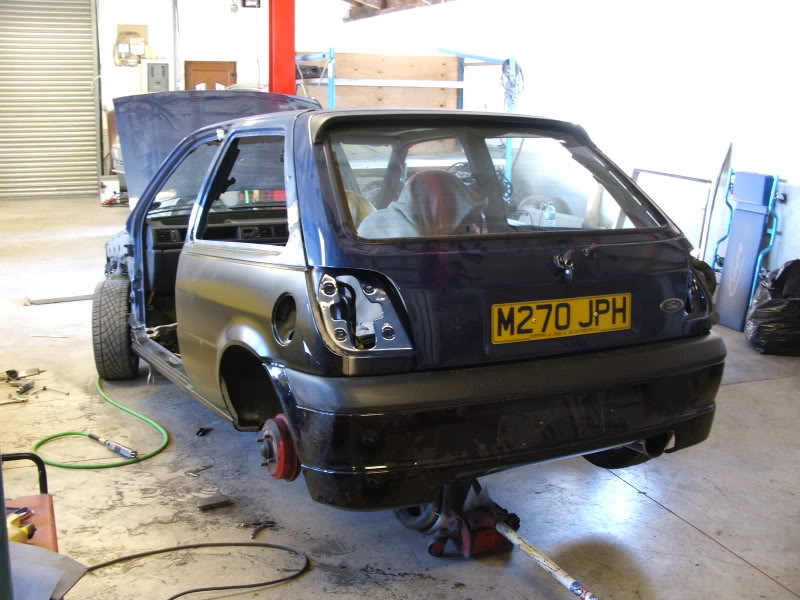
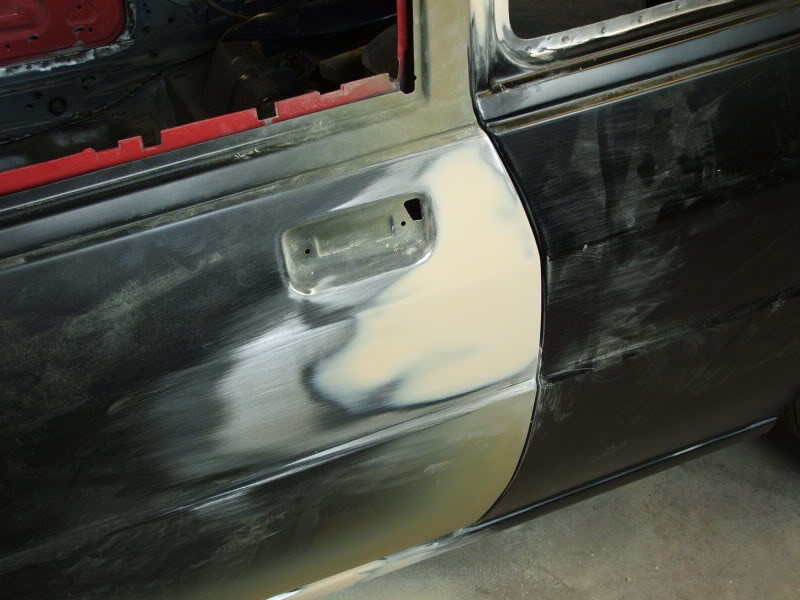
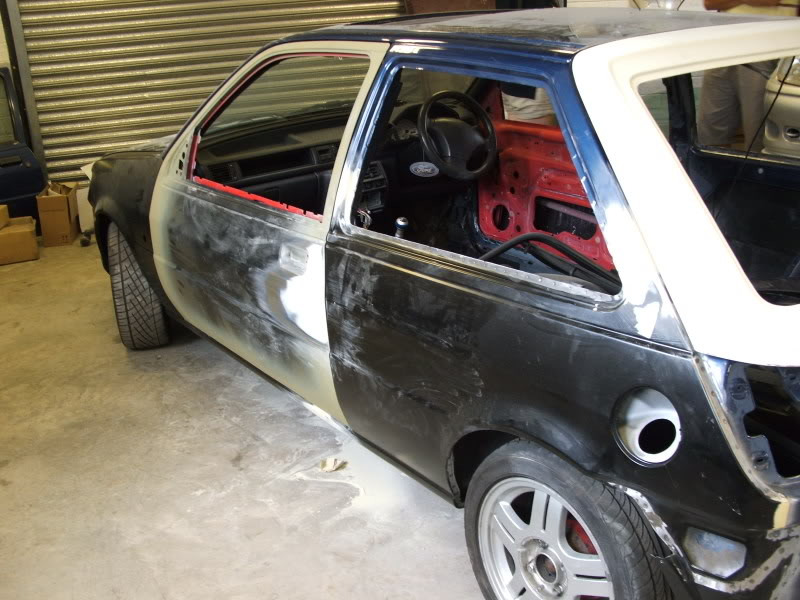
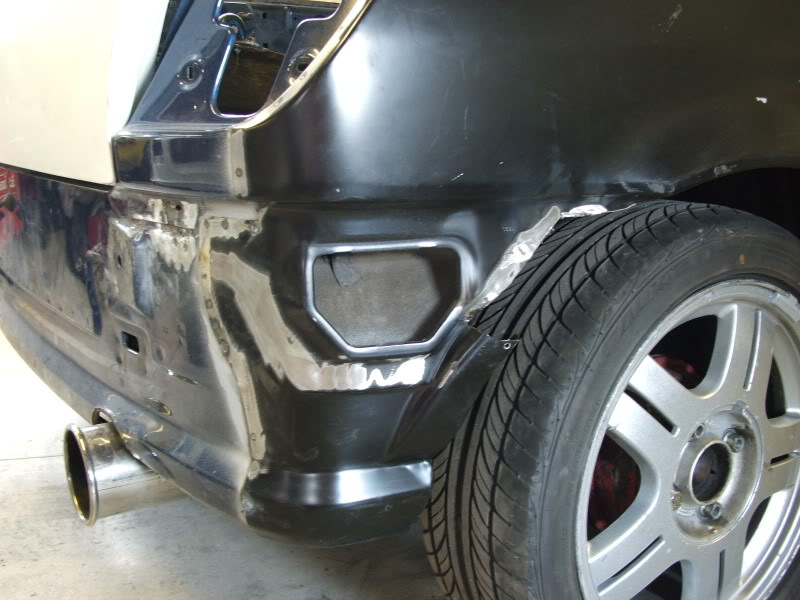
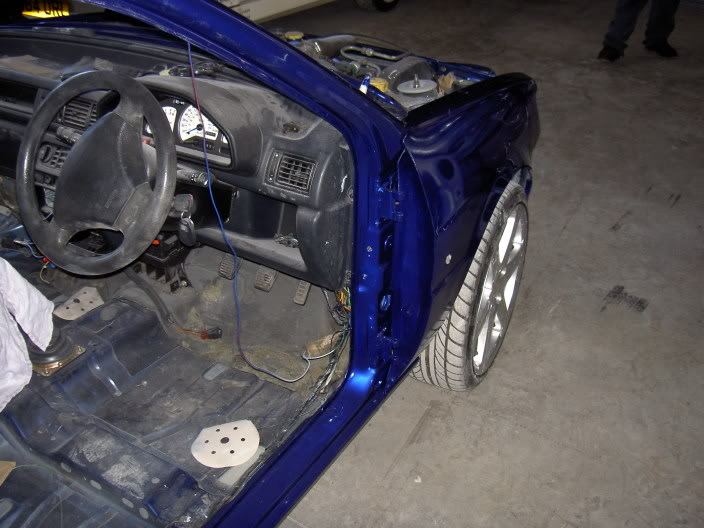
heres the passenger side, was still being finished off but you can see more,
was a small patch on the inner arch with a bit of rust, thats been sorted,
suprisingly enough tho was told how clean and good the actual shell is for a fiesta,
despite the condtion that the outside of it was in, the inside is good and solid
as you can see the rear arch has a gap missing, this was removed as this part is always a pain with big wheels on fiesta's, when i had the car 17's before this was heavily grinded back and was still close,
so now its being done properly its all gone
the rear arch is also rolled and folded like on the mk5 fiesta zetec s, so no need for arch trimming
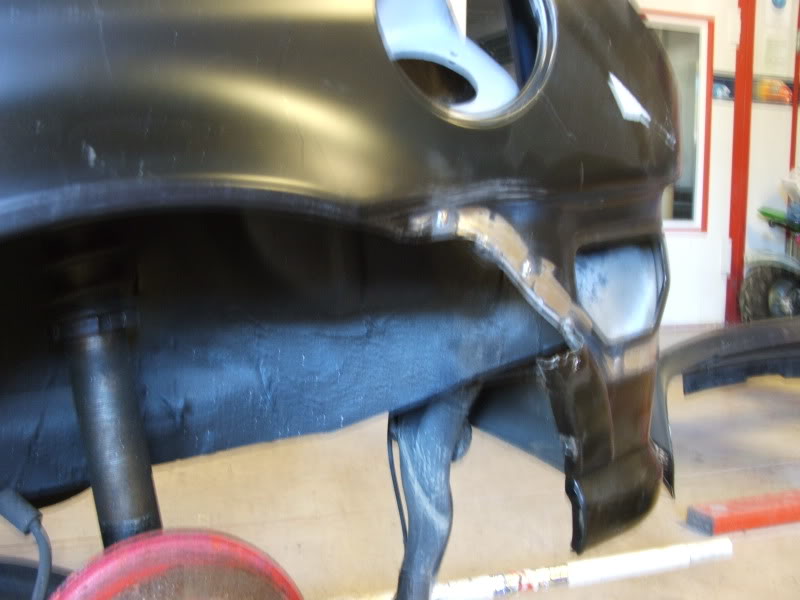
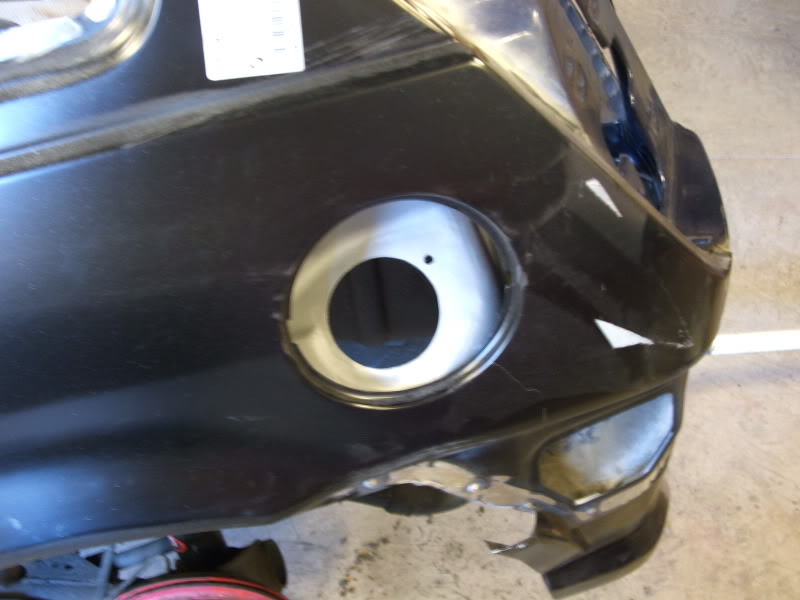
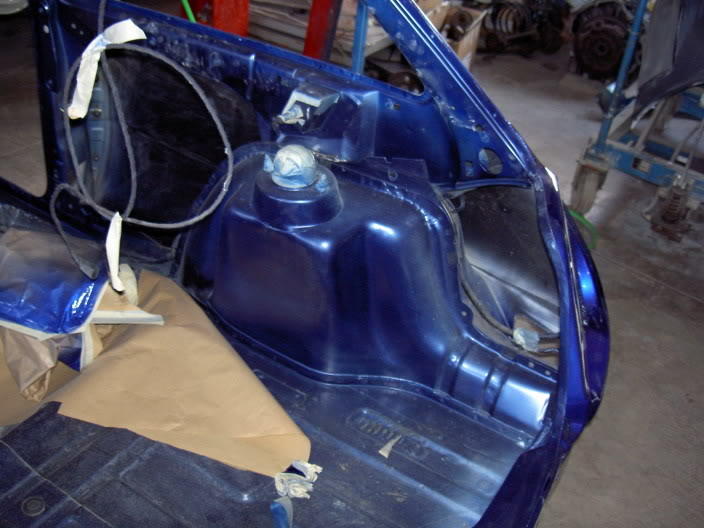
the filler cap kneck had the start of a scab of rust also, so thats been cut out and sorted as you can see in primer,
heres an overall pic of the fez with eddie working on it,
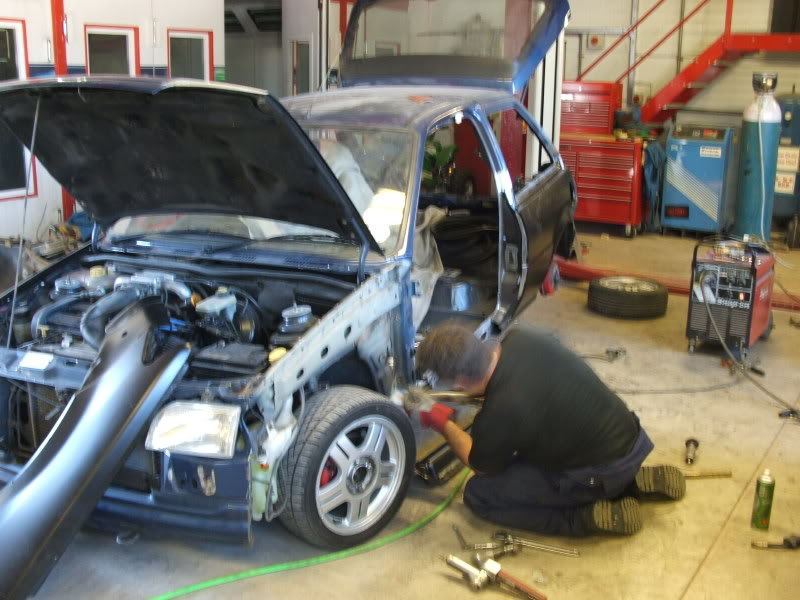
and a few other cars there which show their workmanship, including the custom exhaust they made
heres the zetec s rear bumper on just to get a slight idea,
had to have the rear towing eye taken off for this fit, you can see how much the exhaust is inside the bumper,
this will have to be brought out more
heres the current state of the bonnet, not a full on bad boy as i think they're are bit ott
heres the passenger side, was still being finished off but you can see more,
was a small patch on the inner arch with a bit of rust, thats been sorted,
suprisingly enough tho was told how clean and good the actual shell is for a fiesta,
despite the condtion that the outside of it was in, the inside is good and solid
as you can see the rear arch has a gap missing, this was removed as this part is always a pain with big wheels on fiesta's, when i had the car 17's before this was heavily grinded back and was still close,
so now its being done properly its all gone
the rear arch is also rolled and folded like on the mk5 fiesta zetec s, so no need for arch trimming
the filler cap kneck had the start of a scab of rust also, so thats been cut out and sorted as you can see in primer,
heres an overall pic of the fez with eddie working on it,
and a few other cars there which show their workmanship, including the custom exhaust they made
18-03-2010, 10:27 PM
#5
PassionFord Regular
Thread Starter
Join Date: Aug 2003
Posts: 457
Likes: 0
Received 0 Likes
on
0 Posts
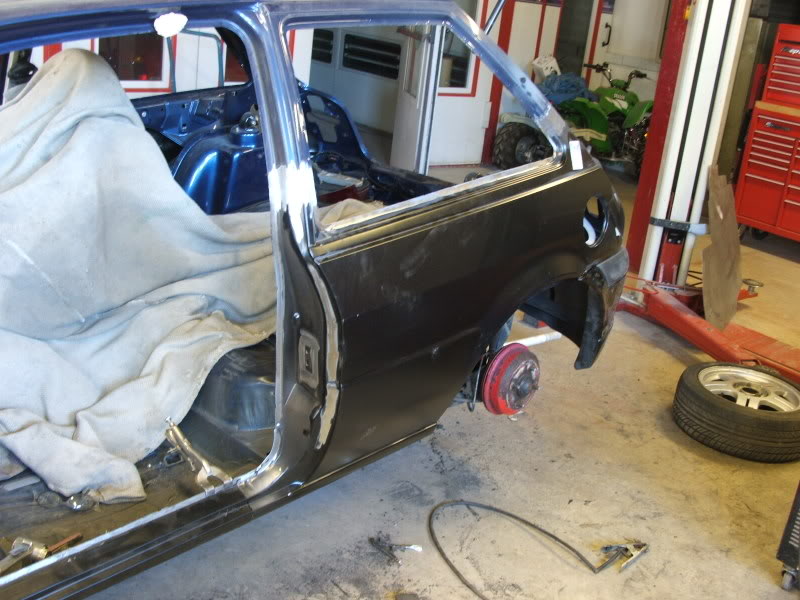
the smoothed boot trial fit, been rubbed down and checked for imprefections
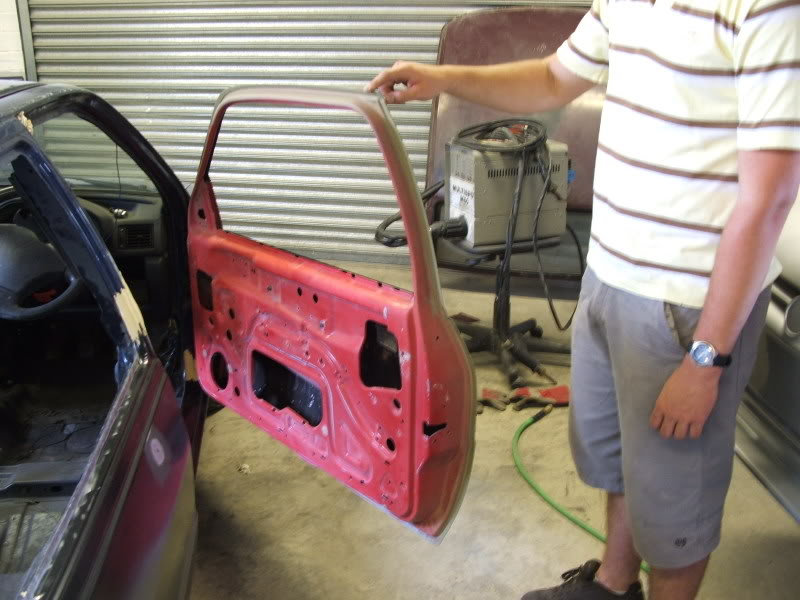
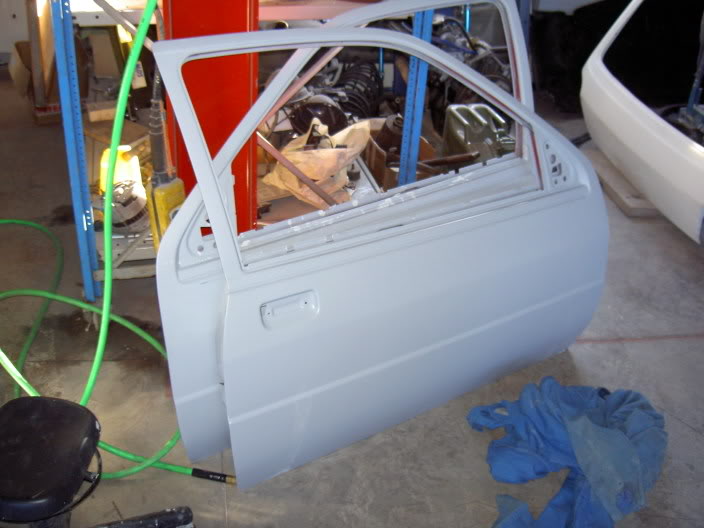
mmmmmm smooth delocked doors!!
euro style
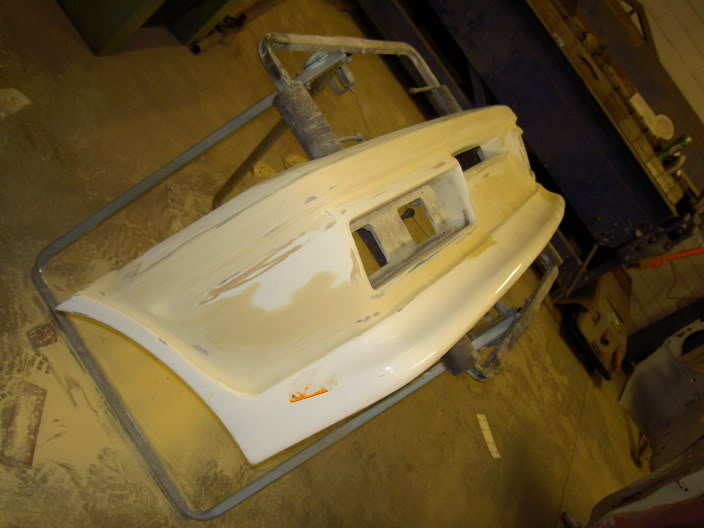
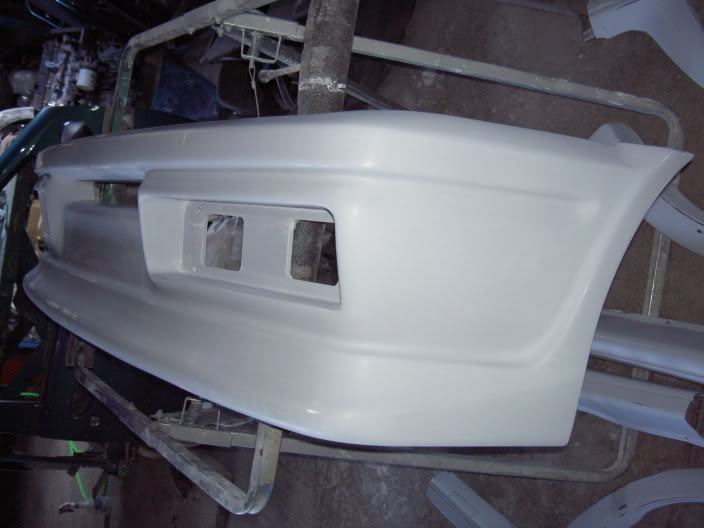
my front bumper and splitter
thats going to be done this week, involves alot of cutting, smoothing etc
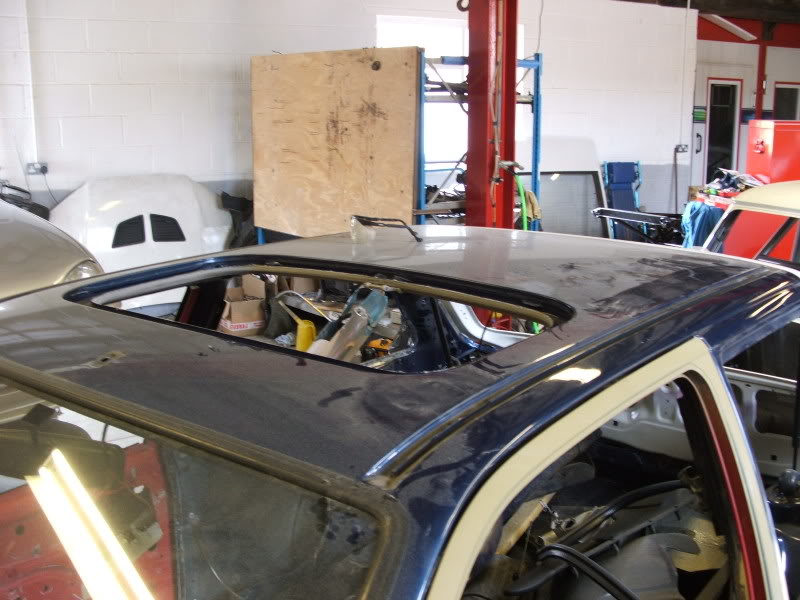
sunroof and weather strip out ready and inspected for any rust,
but looking real clean fair play to the fez
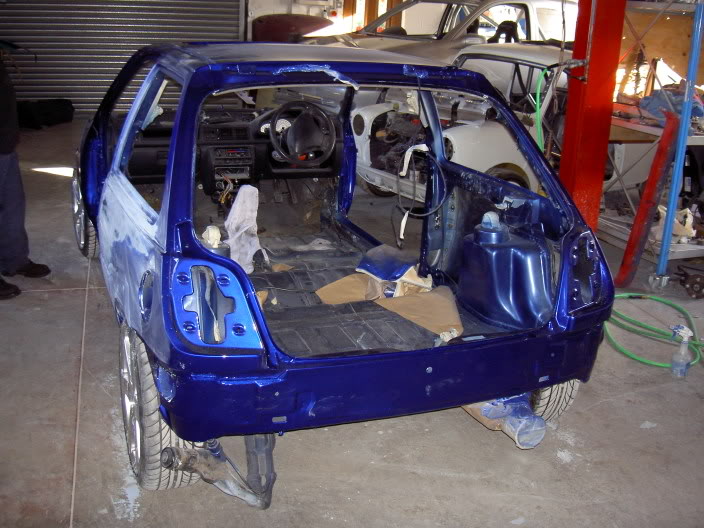
overall pic of the car, as you can see primer inside the doors, all panels have been properly spot welded in the appropriate places like the window frame, inside the front wings, door shuts etc
spot welds on the wings
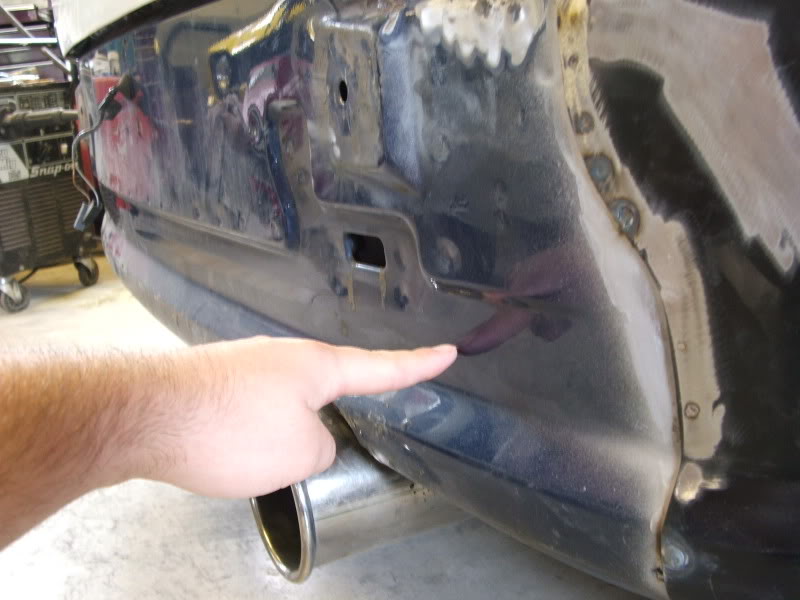
this is the other side of the bad boy, as you can see its metal folded properly to give that neat edge etc
other rear arch with cut out for large wheels,
the rear valance is being trimmed up to my finger, will get rid of rust easier lol
also will give more clearance to move my exhaust to suit the new bumper better
this part thats being cut off wont be seen with the bumper on, only really seen on the lower spec fiesta's so does'nt make a difference wether its there or not,
inside of doors prepped, wow the doors feel amazing to open and close compared to before, feels really effortless now
other rear arch with lip rolled back and folded and sealed to help clearance and prevent rust as much as possible, the second pic shows its thin


mmmmmm smooth delocked doors!!
euro style
my front bumper and splitter
thats going to be done this week, involves alot of cutting, smoothing etc
sunroof and weather strip out ready and inspected for any rust,
but looking real clean fair play to the fez
overall pic of the car, as you can see primer inside the doors, all panels have been properly spot welded in the appropriate places like the window frame, inside the front wings, door shuts etc
spot welds on the wings
this is the other side of the bad boy, as you can see its metal folded properly to give that neat edge etc
other rear arch with cut out for large wheels,
the rear valance is being trimmed up to my finger, will get rid of rust easier lol
also will give more clearance to move my exhaust to suit the new bumper better
this part thats being cut off wont be seen with the bumper on, only really seen on the lower spec fiesta's so does'nt make a difference wether its there or not,
inside of doors prepped, wow the doors feel amazing to open and close compared to before, feels really effortless now
other rear arch with lip rolled back and folded and sealed to help clearance and prevent rust as much as possible, the second pic shows its thin
Last edited by RS_Rob; 04-10-2010 at 08:50 PM.
18-03-2010, 10:32 PM
#6
PassionFord Regular
Thread Starter
Join Date: Aug 2003
Posts: 457
Likes: 0
Received 0 Likes
on
0 Posts
heres the bonnet in a better state, small repairs and the euro bad boy is done, quite happy with how this turned out, must admit had second thoughts when it had only just been welded,
heres the back panel trimmed like i mentioned in the last update,
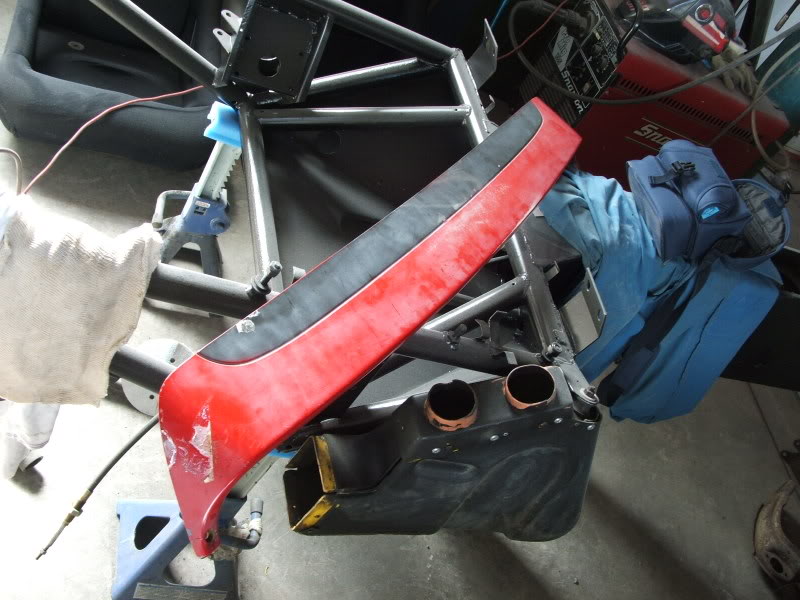
heres the turbo spoiler which i took up with me, bought this from a guy on fiestaturbo.com
heres the splitter, its been trimmed, riveted and screwed on and fibreglass etc over the top, not finished yet but looks good already
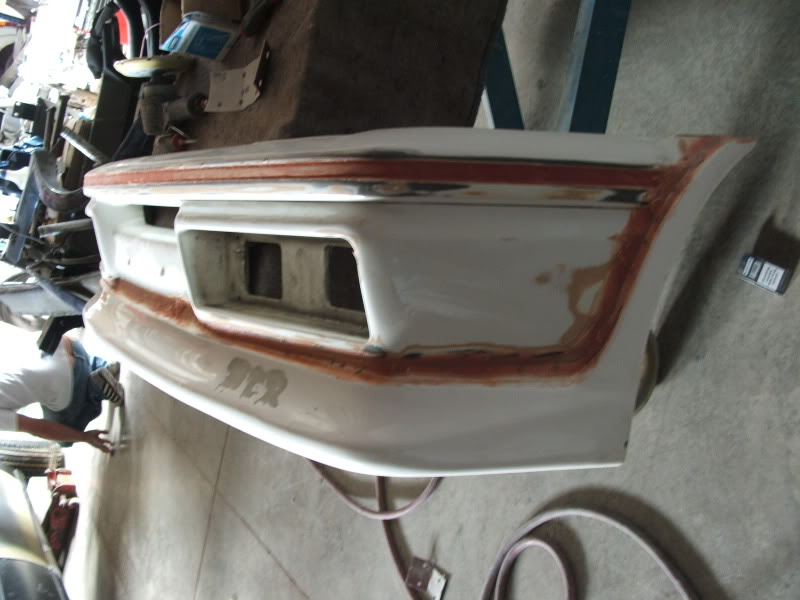
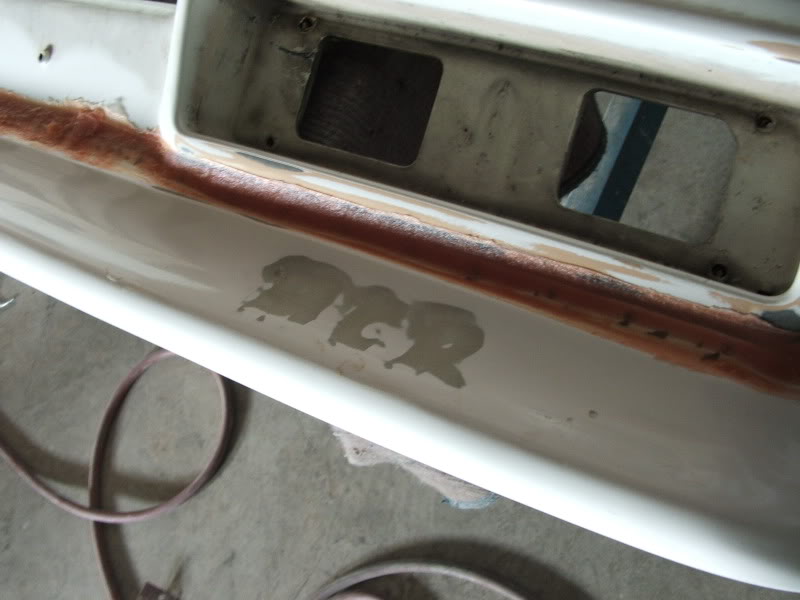
heres the mcr logo being sanded back and smoothed over
heres the seam for the rear panels, had this smoothed aswell,

a close up of the bonnet

overall pic of the car, put my 17's on as someone might be buying the rs2000 rims off me, not sure yet tho so took them off anyway,

heres the back panel trimmed like i mentioned in the last update,
heres the turbo spoiler which i took up with me, bought this from a guy on fiestaturbo.com
heres the splitter, its been trimmed, riveted and screwed on and fibreglass etc over the top, not finished yet but looks good already
heres the mcr logo being sanded back and smoothed over
heres the seam for the rear panels, had this smoothed aswell,
a close up of the bonnet
overall pic of the car, put my 17's on as someone might be buying the rs2000 rims off me, not sure yet tho so took them off anyway,
18-03-2010, 10:35 PM
#7
PassionFord Regular
Thread Starter
Join Date: Aug 2003
Posts: 457
Likes: 0
Received 0 Likes
on
0 Posts
a few more quick pics
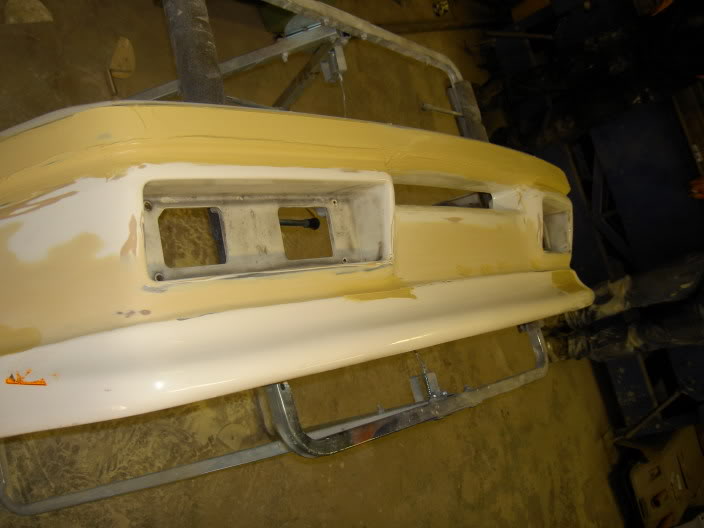
firstly my bumper when i got up there, having some fresh filler on there, but can really see the shape coming now and workmanship being put into it

then it was rubbed down after looking around the car while i was there
panels in primer and flatted back (felt like glass fair play)
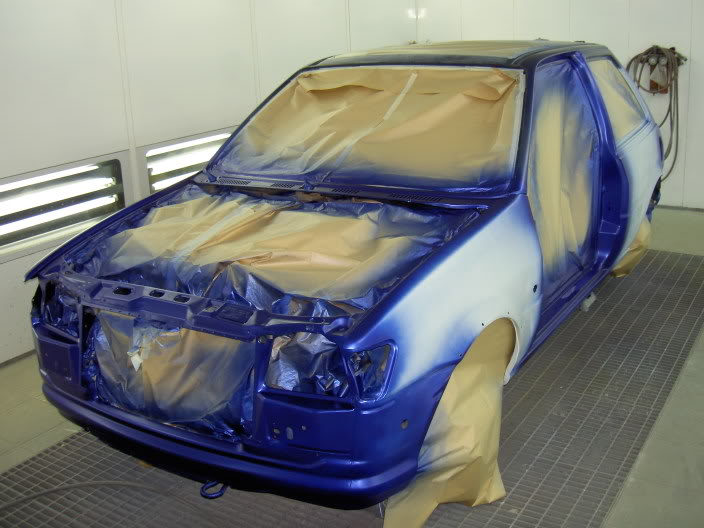
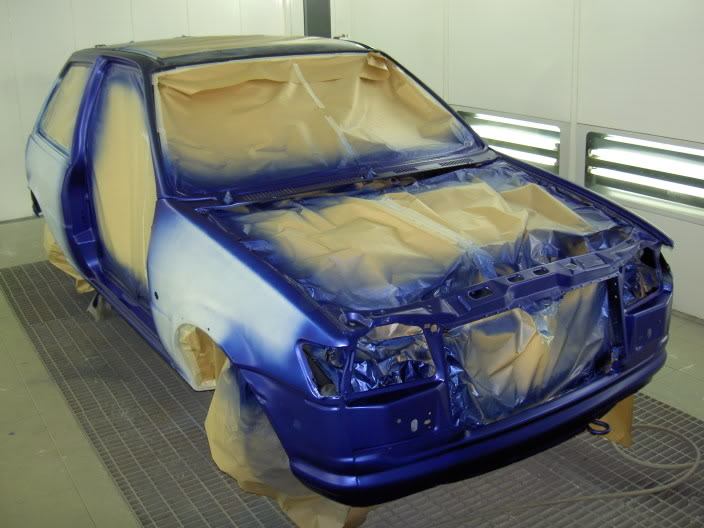
here she is in the spray booth, with wheels off on axel stands
she's had some primer all over and sprayed inside the doors and boot,
its only had some base sprayed on it, so this is'nt how the colour will look when finished
firstly my bumper when i got up there, having some fresh filler on there, but can really see the shape coming now and workmanship being put into it
then it was rubbed down after looking around the car while i was there
panels in primer and flatted back (felt like glass fair play)
here she is in the spray booth, with wheels off on axel stands
she's had some primer all over and sprayed inside the doors and boot,
its only had some base sprayed on it, so this is'nt how the colour will look when finished
Trending Topics
18-03-2010, 10:40 PM
#8
PassionFord Regular
Thread Starter
Join Date: Aug 2003
Posts: 457
Likes: 0
Received 0 Likes
on
0 Posts
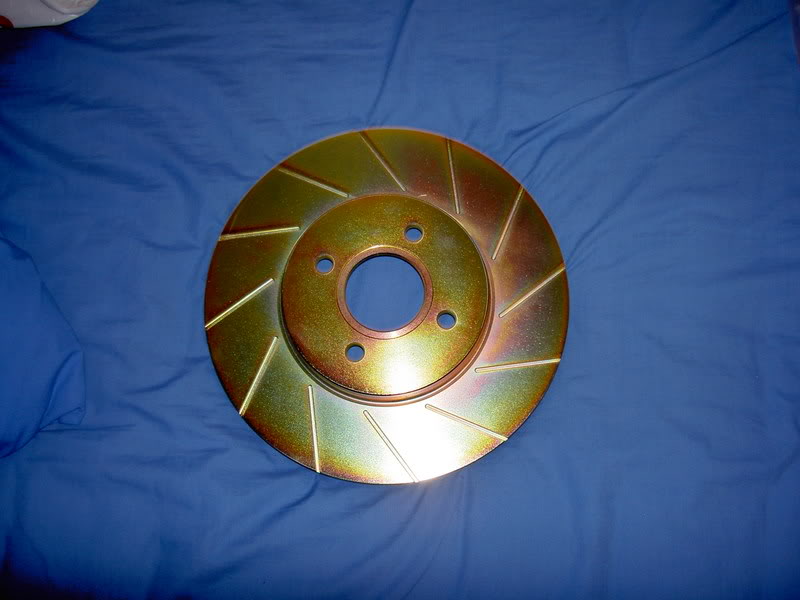
had my grooved disc's zinc cadium plated,
heres the bumper finished and in primer, really happy with the outcome, the workmanship is awesome,

heres a random pic of the sideskirts and arches which have been rubbed down and sprayed in primer, the jacking point covers have been glued in so they wont be going anywhere,
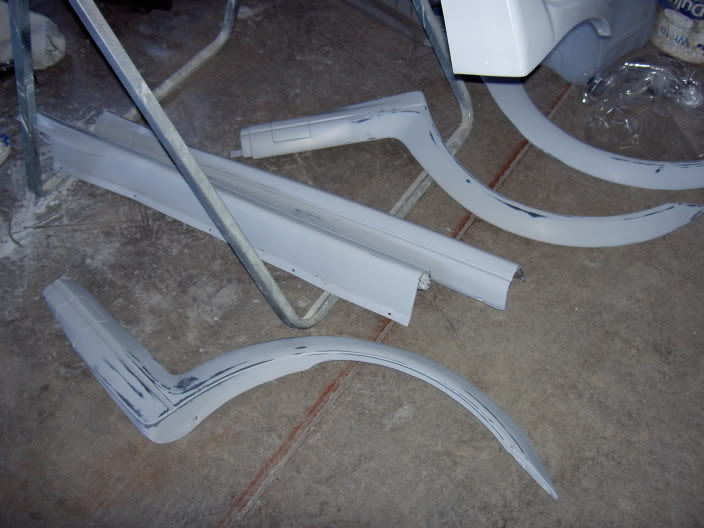
was originally going to have them smoothed in, but time has gone on and it would make a things awkward as they would have be smoothed once on the car because the kit flex's alot/maybe crack,
also the boys wanted new paint under the kit,
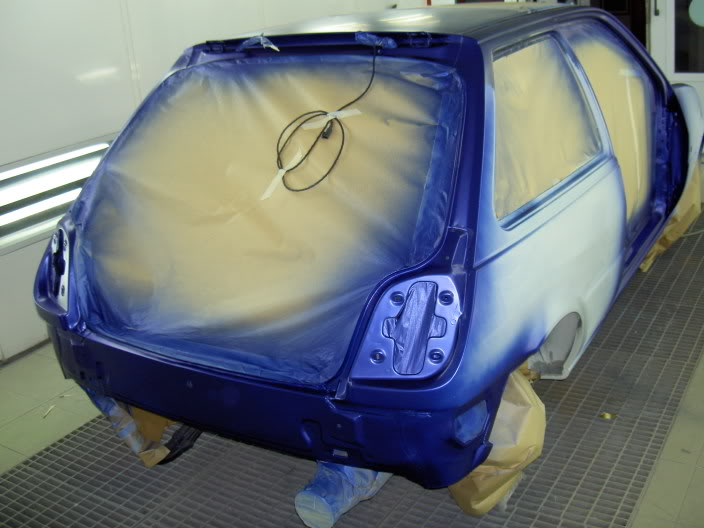
so that explains why only the front wing has been sprayed, because i decided to forget the idea, on the plus side the colour is bloody lovely and i could'nt be more pleased as these are only rough coats of paint,
can already see the pearle and metallic in it, not really captured in my pics
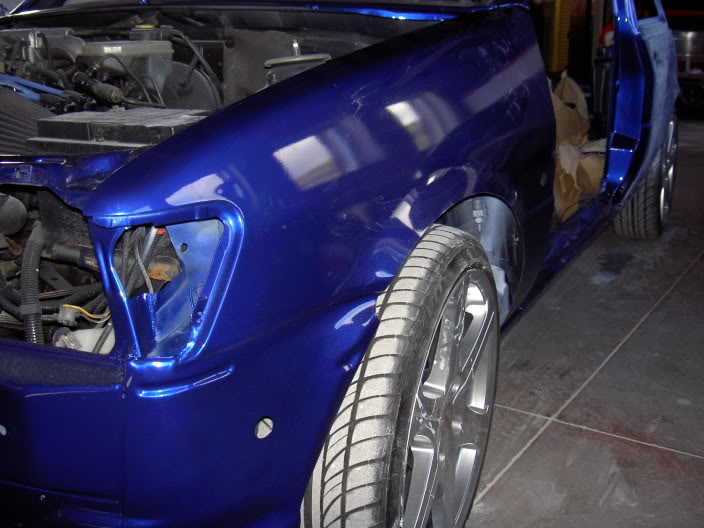
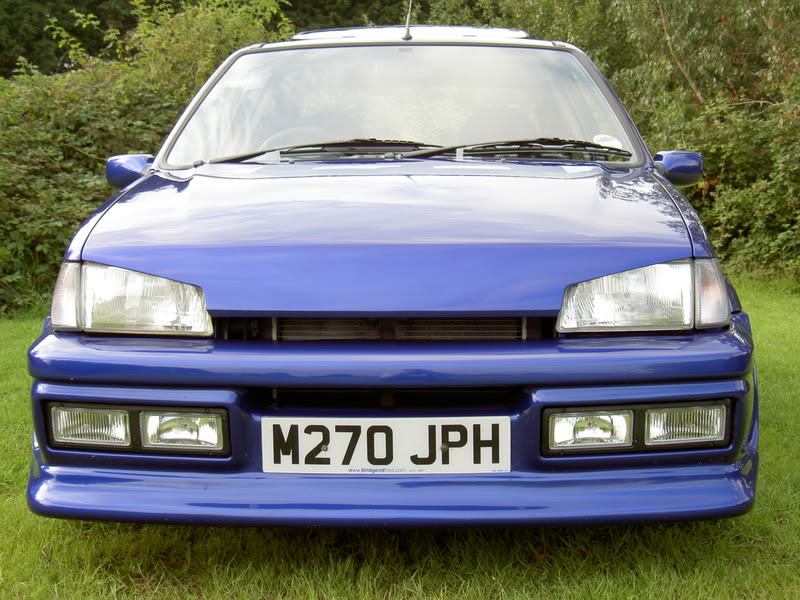
a shot of the front showing the colour
a close up of the arch, most of the lip has been cut back for the big wheels, also the frst arches are cut back the same, a little more towards the front is to be taken off, meaning i'll be loosing the top bumper mount point totally, so going to make a new mount further inside the bumper
heres some more pics around the car
tried taking a pic to capture the flake etc, just does'nt do it justice

heres the bumper finished and in primer, really happy with the outcome, the workmanship is awesome,
heres a random pic of the sideskirts and arches which have been rubbed down and sprayed in primer, the jacking point covers have been glued in so they wont be going anywhere,
was originally going to have them smoothed in, but time has gone on and it would make a things awkward as they would have be smoothed once on the car because the kit flex's alot/maybe crack,
also the boys wanted new paint under the kit,
so that explains why only the front wing has been sprayed, because i decided to forget the idea, on the plus side the colour is bloody lovely and i could'nt be more pleased as these are only rough coats of paint,
can already see the pearle and metallic in it, not really captured in my pics
a shot of the front showing the colour
a close up of the arch, most of the lip has been cut back for the big wheels, also the frst arches are cut back the same, a little more towards the front is to be taken off, meaning i'll be loosing the top bumper mount point totally, so going to make a new mount further inside the bumper
heres some more pics around the car
tried taking a pic to capture the flake etc, just does'nt do it justice
 18-03-2010, 10:43 PM
#10
PassionFord Regular
Thread Starter
Join Date: Aug 2003
Posts: 457
Likes: 0
Received 0 Likes
on
0 Posts
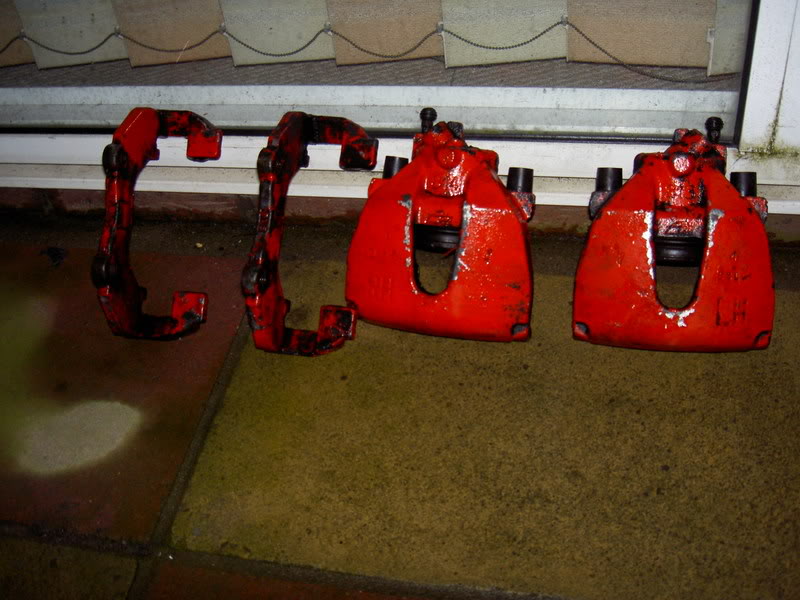
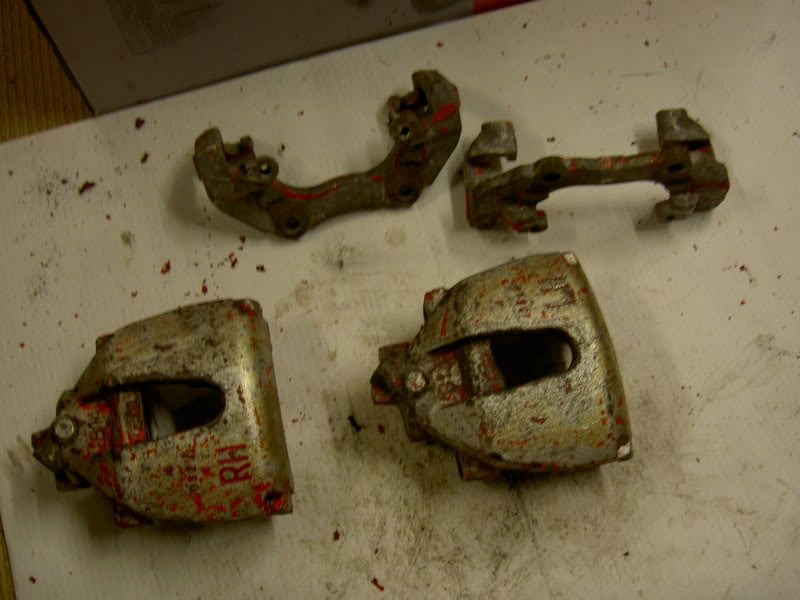
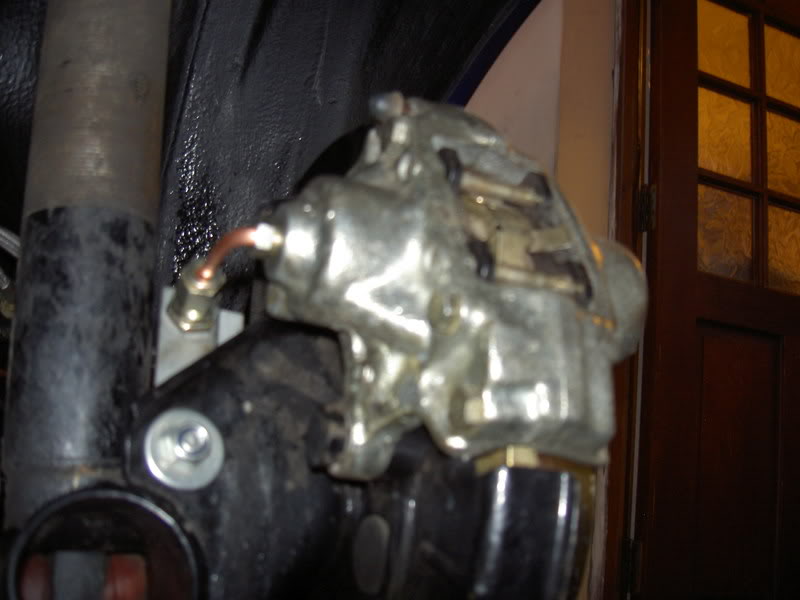
my brake calipers from an escort cosworth 4x4,
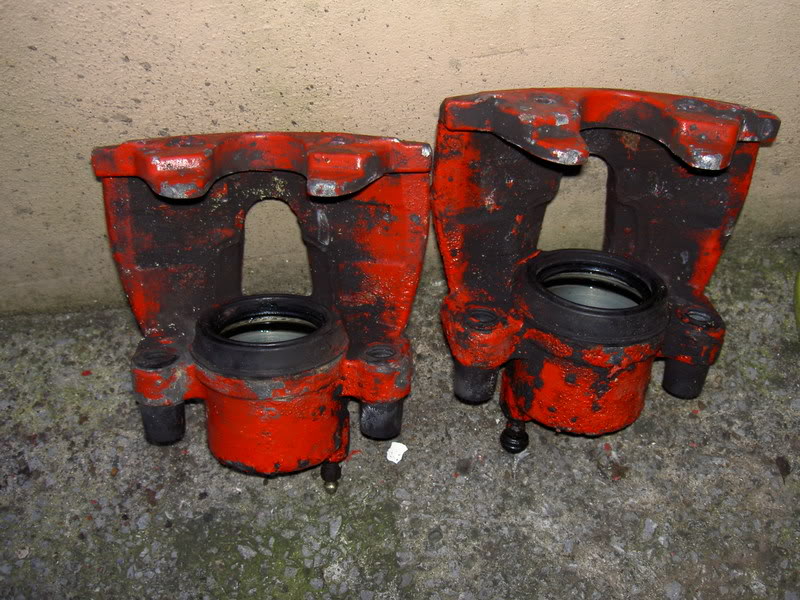
heres a few pics of how mine are currently looking before stripping them down for a refurb
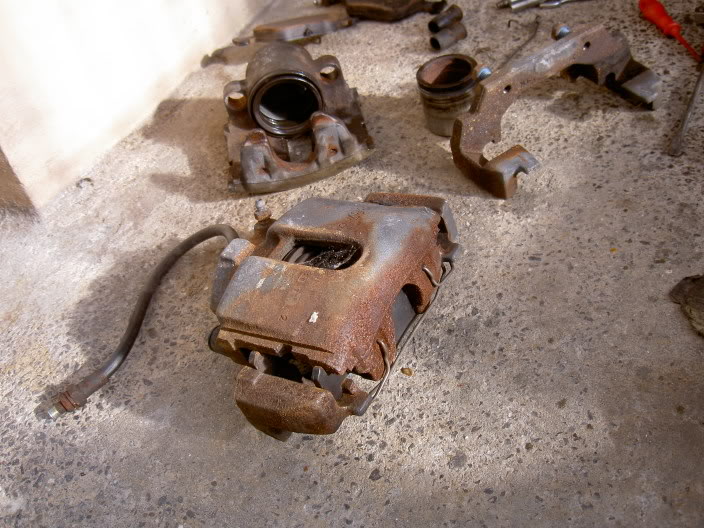
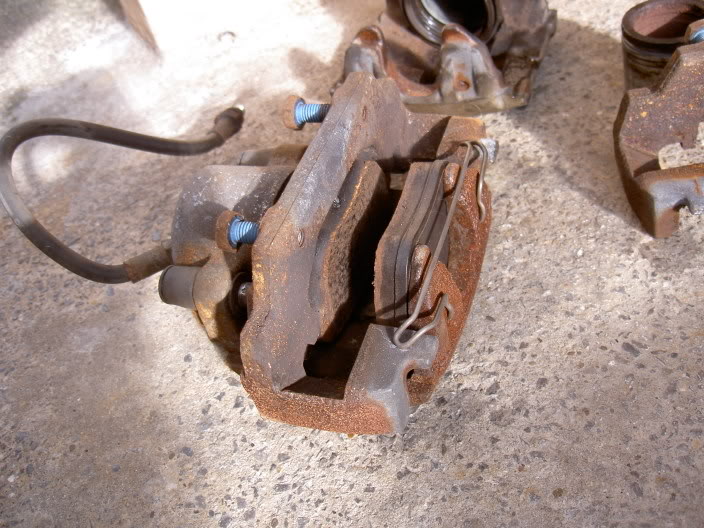
in this pic you can see i've got the piston out and carrier off,
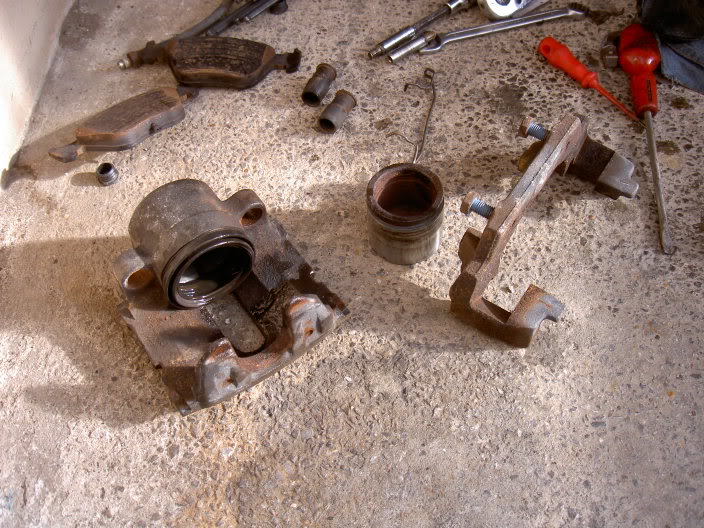
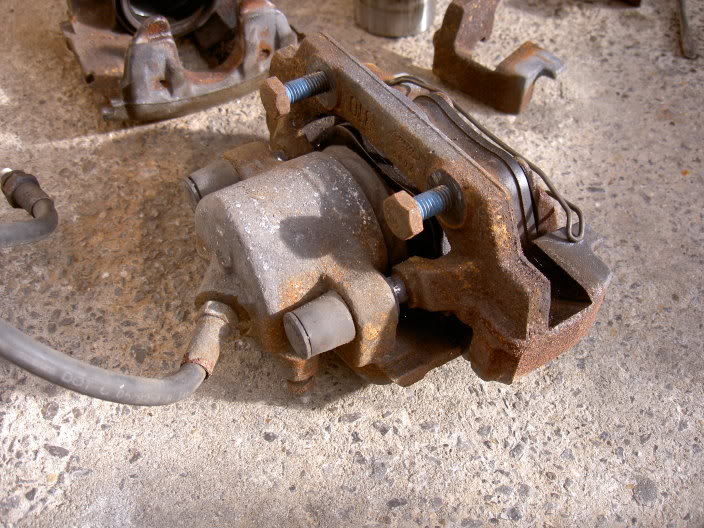
heres the dust seal off
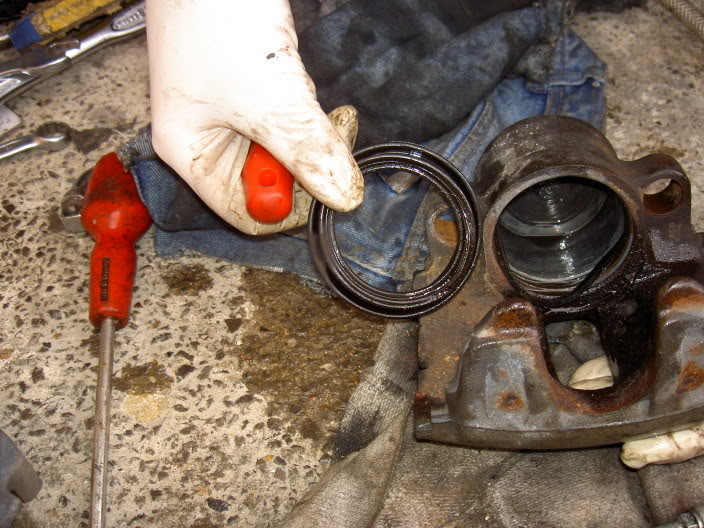
heres the piston seal, all coming off though
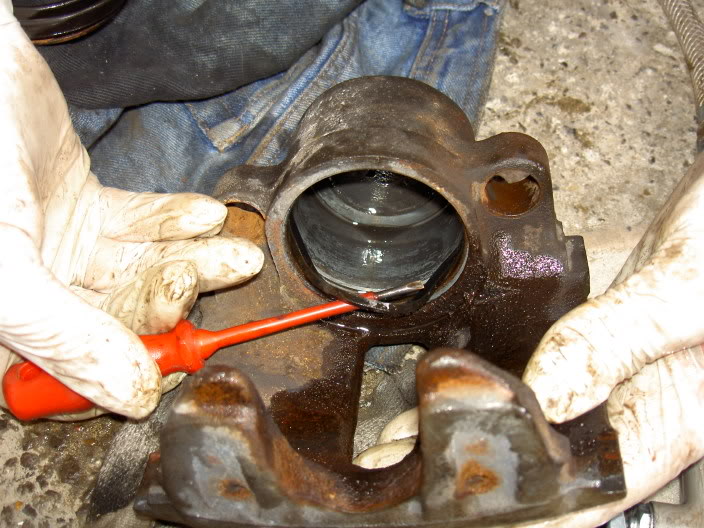
looking to have the calipers shot blast back to a nice clean metal, then i'll have the calipers plated and then put back together with new seals etc, hopefully looking alot better
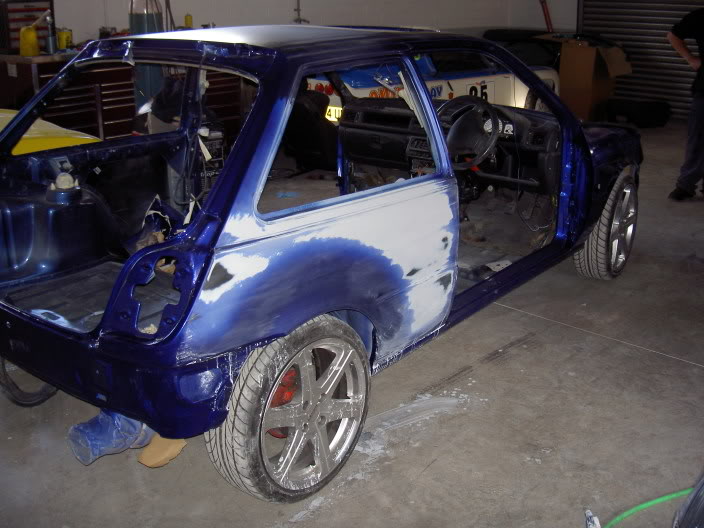
well update on the bodshop side of things aswell,
its all painted except for the door handles, mirrors and spoiler
side skirts and arches are on aswell,
currently being flatted back and polished
the finish from the gun is amazing and i'm suprised their even flatting and polishing it at all,
theres no bits in the paint and feels amazing, also no orange peely effect,
heres a few pics of how mine are currently looking before stripping them down for a refurb
in this pic you can see i've got the piston out and carrier off,
heres the dust seal off
heres the piston seal, all coming off though
looking to have the calipers shot blast back to a nice clean metal, then i'll have the calipers plated and then put back together with new seals etc, hopefully looking alot better
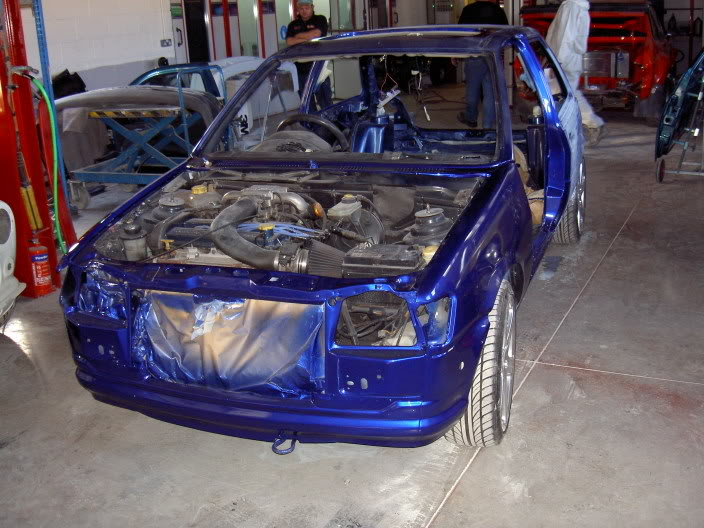
well update on the bodshop side of things aswell,
its all painted except for the door handles, mirrors and spoiler
side skirts and arches are on aswell,
currently being flatted back and polished
the finish from the gun is amazing and i'm suprised their even flatting and polishing it at all,
theres no bits in the paint and feels amazing, also no orange peely effect,
 18-03-2010, 10:46 PM
#12
PassionFord Regular
Thread Starter
Join Date: Aug 2003
Posts: 457
Likes: 0
Received 0 Likes
on
0 Posts
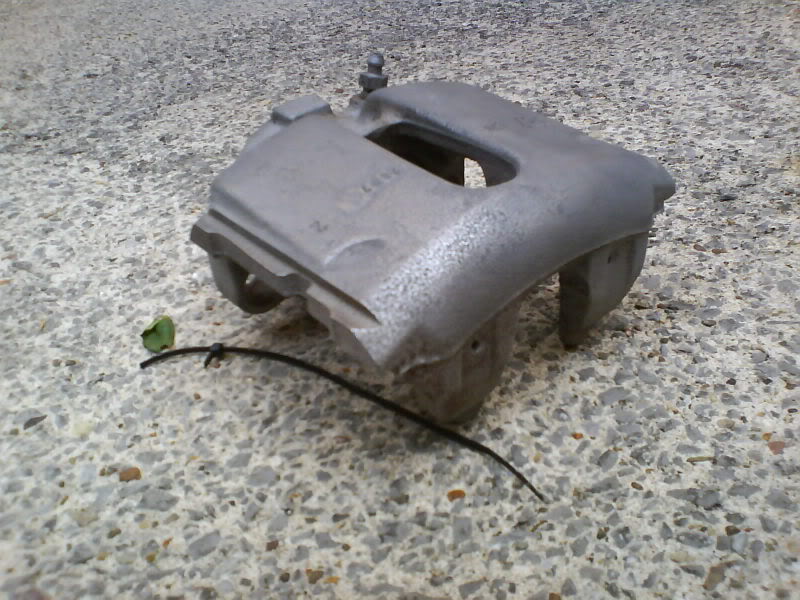
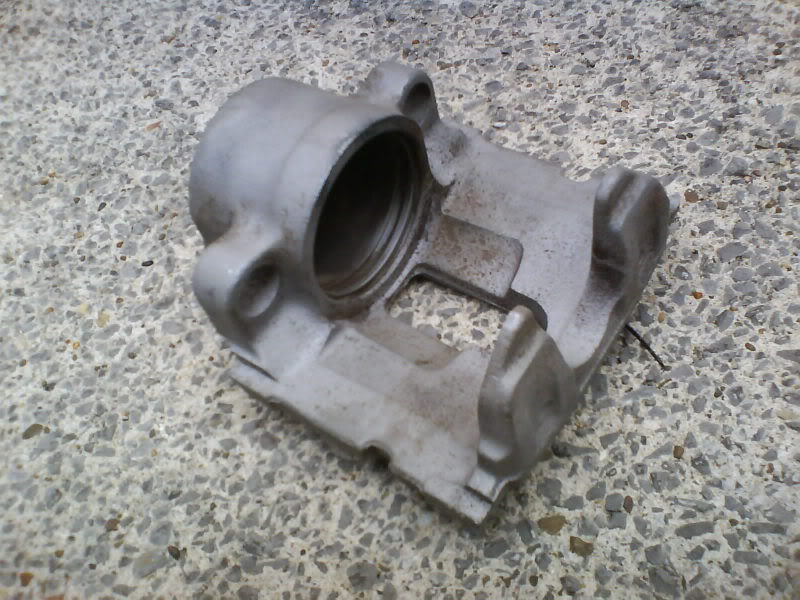
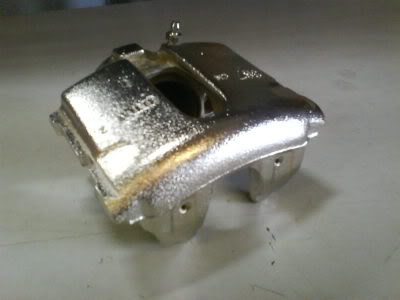
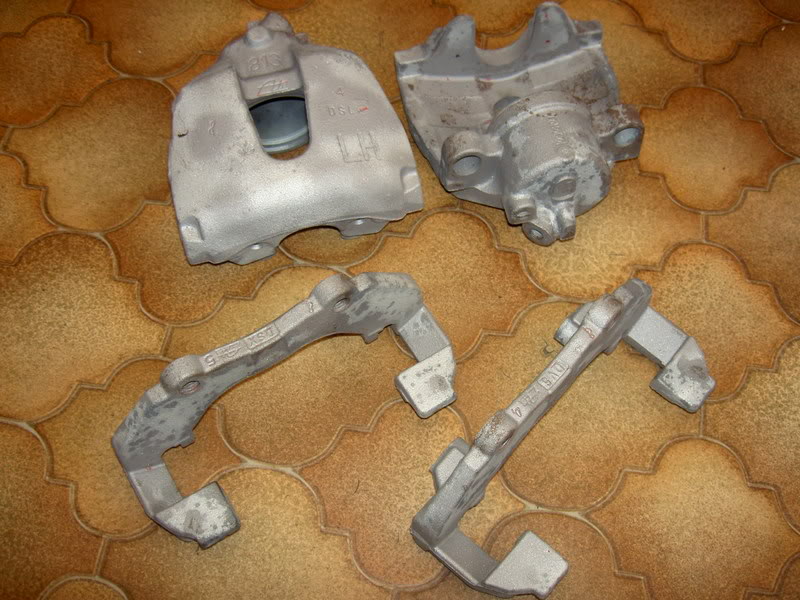
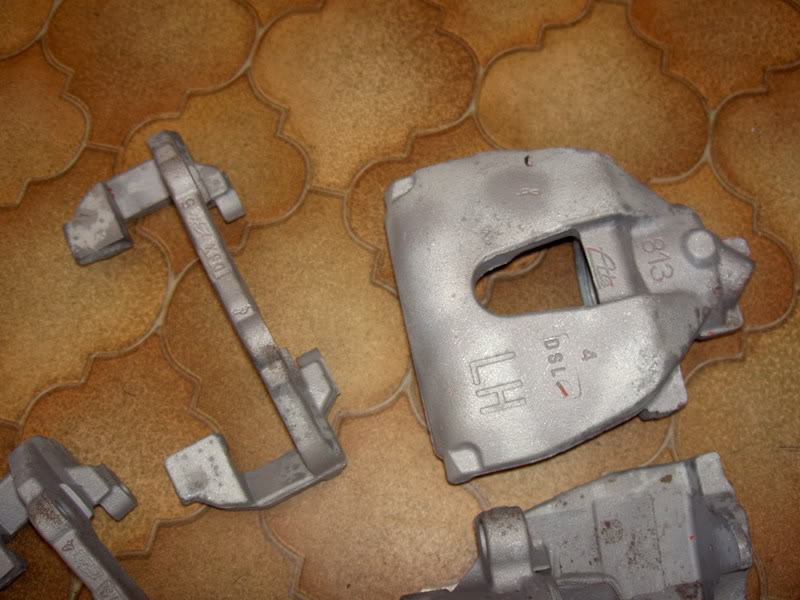
had my calipers back from being shot blast,
as you can see a massive difference,
few pics below to show the difference,
dropped them off to the platers today aswell, so should be having them back on friday
their being nickle plated, should have a nice finish to them
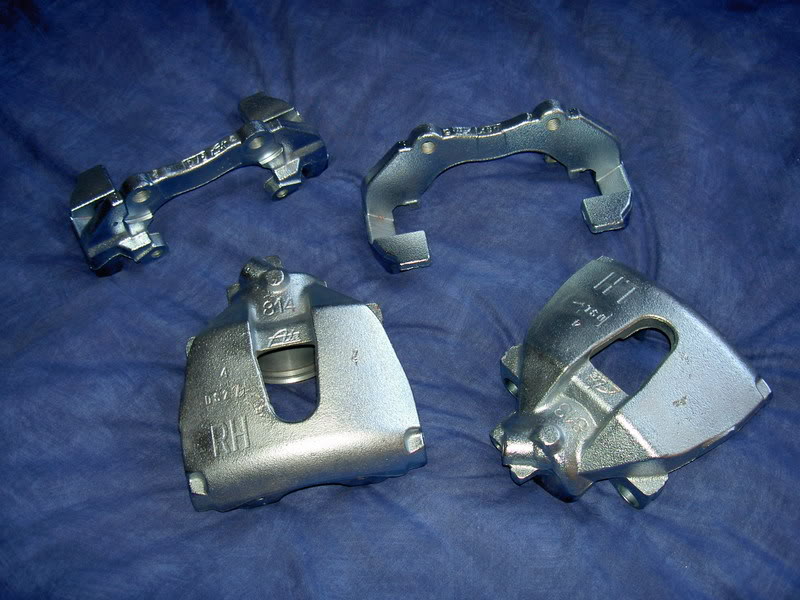
got my brake calipers and carriers back from the platers,
really happy with the result
only a quick pic from the camera fone at the mo, but you get the idea
the car is basically done, except i've dropped some fiesta turbo rear quarter opening windows off to be put on aswell,
also the exhaust still needs to be extended, rear number plate lights to be sorted,
(mk 3 fez only comes with one single light, mk5 fez which the bumper is from has two lights with totally different connectors to my original)
and also the bodyshop wants to give it one more good cut back and polish
as you can see a massive difference,
few pics below to show the difference,
dropped them off to the platers today aswell, so should be having them back on friday
their being nickle plated, should have a nice finish to them
got my brake calipers and carriers back from the platers,
really happy with the result
only a quick pic from the camera fone at the mo, but you get the idea
the car is basically done, except i've dropped some fiesta turbo rear quarter opening windows off to be put on aswell,
also the exhaust still needs to be extended, rear number plate lights to be sorted,
(mk 3 fez only comes with one single light, mk5 fez which the bumper is from has two lights with totally different connectors to my original)
and also the bodyshop wants to give it one more good cut back and polish
18-03-2010, 10:50 PM
#13
PassionFord Regular
Thread Starter
Join Date: Aug 2003
Posts: 457
Likes: 0
Received 0 Likes
on
0 Posts
well she's home thanks to the great help of a good mate
not in any order as the progress has been thick and fast since she's back
firstly the engine looking really manky, but also old bonnet stay
a new chrome item to update, my first bit of bling for the engine

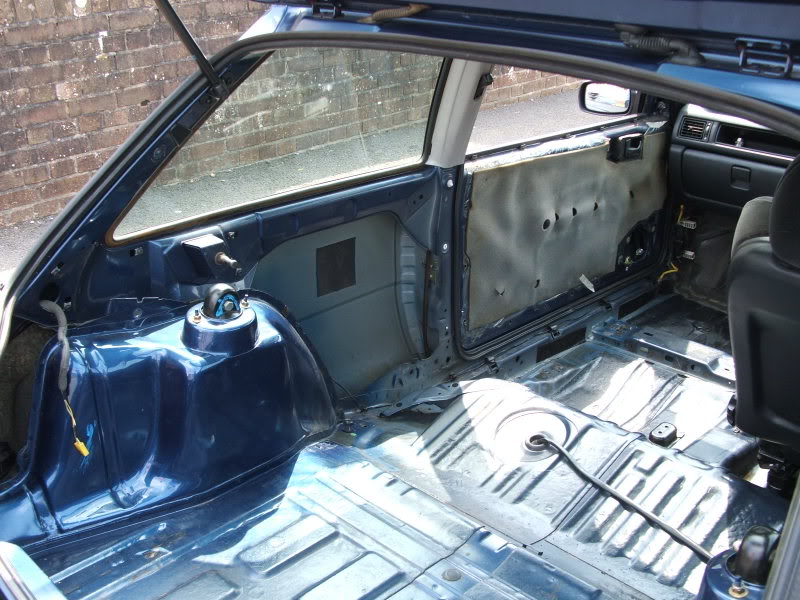
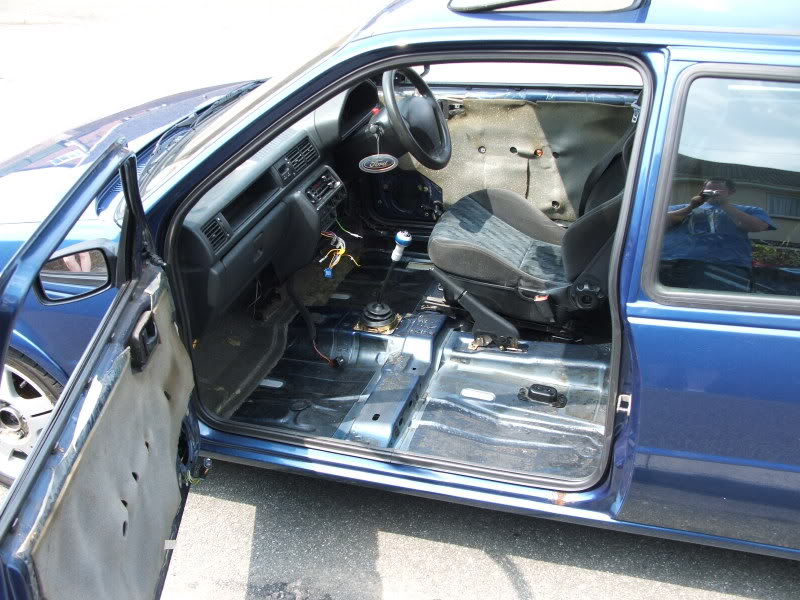
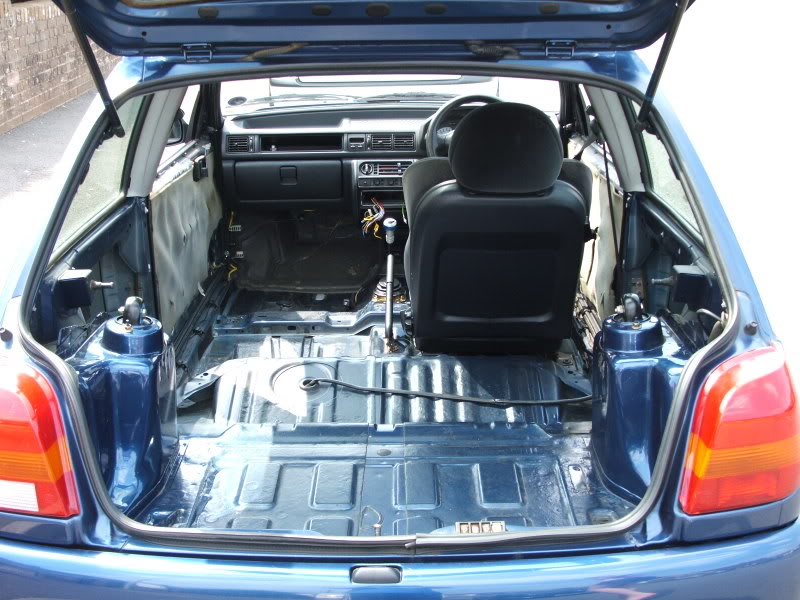
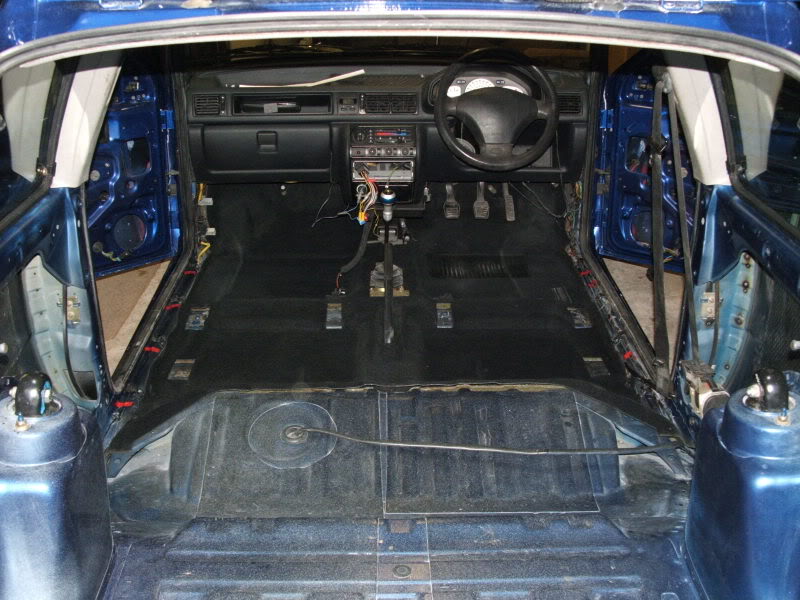
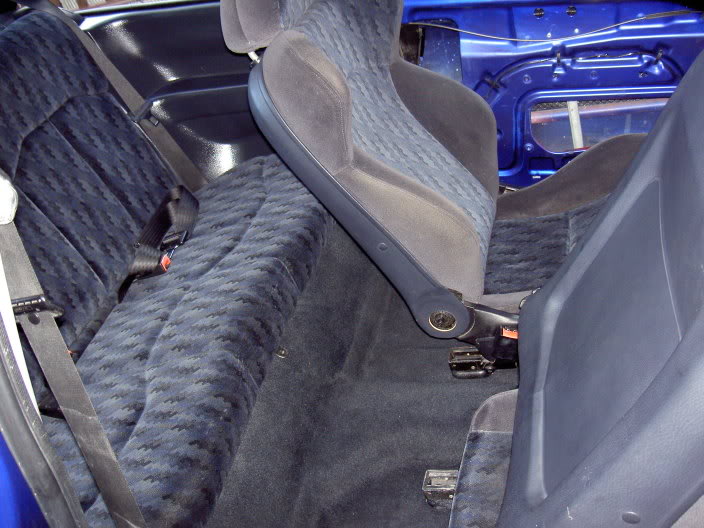
nice bare interior
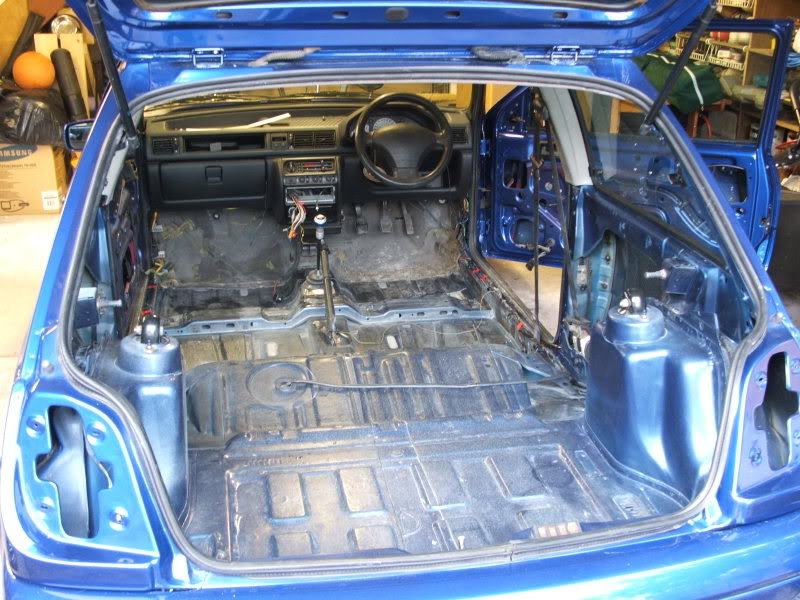
new insulation for under the carpet as the old one was wrecked after an accident with oil in the rear footwell,
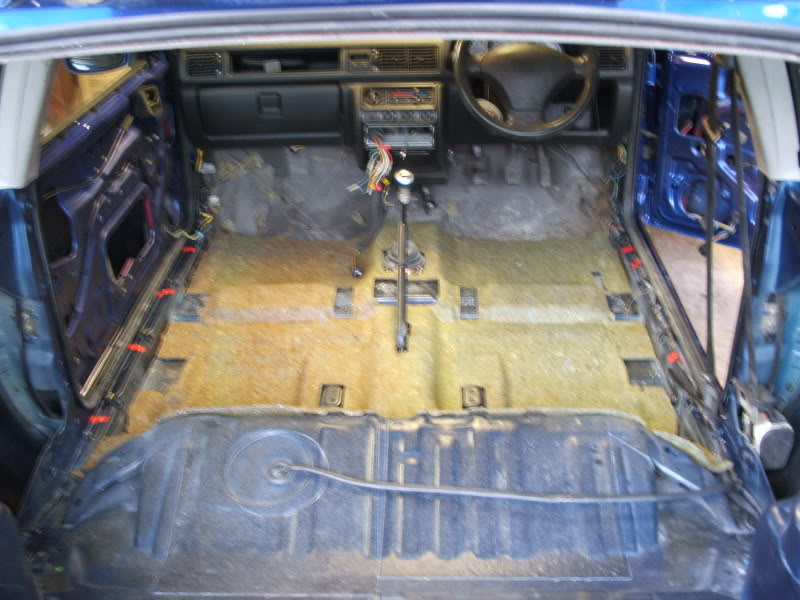
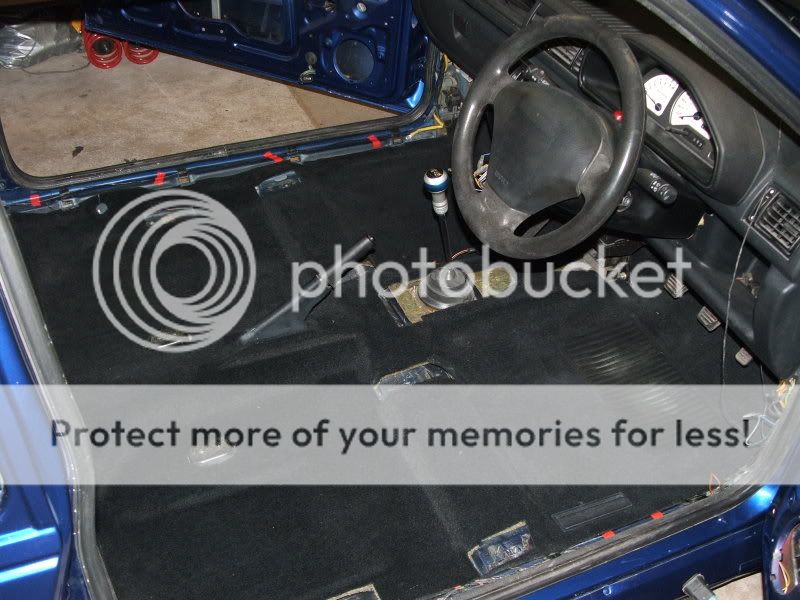
fresh carpet lol, steam cleaned it to get the oil out, came out really well
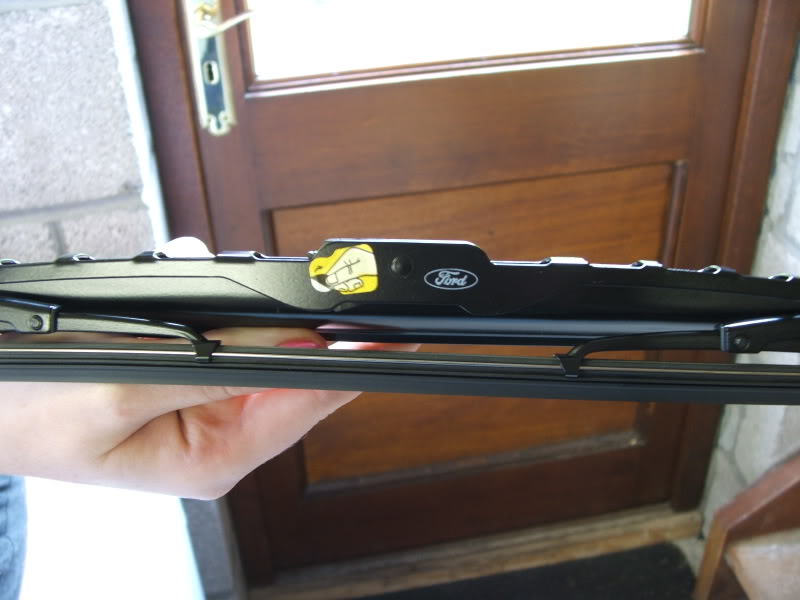
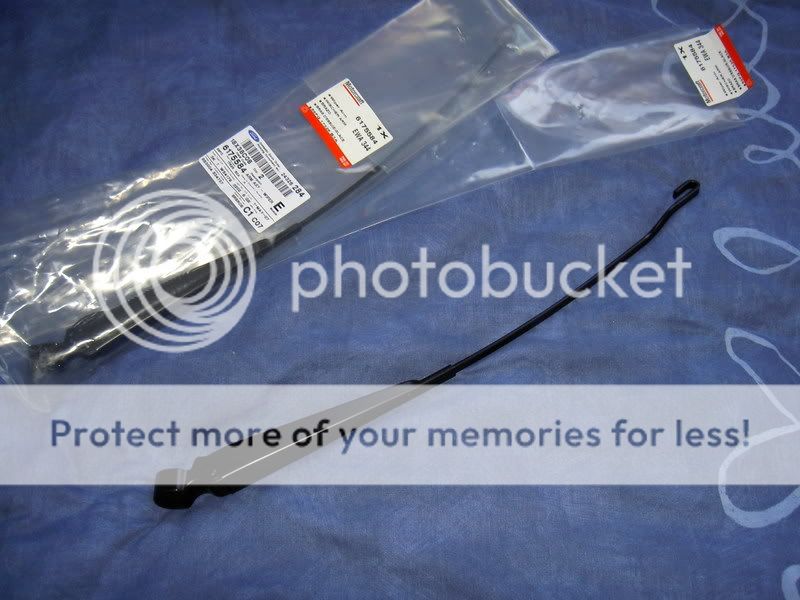
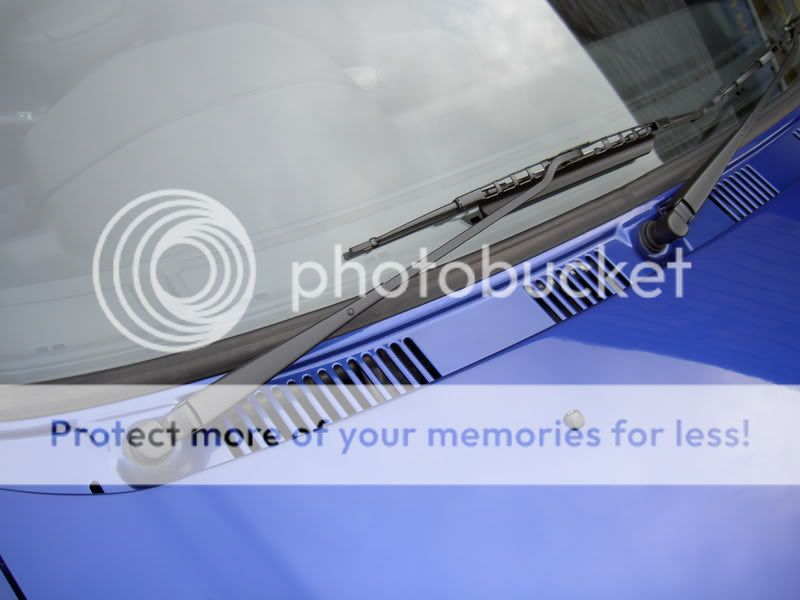
new ford wipers to go with the new windscreen
got the sunroof out for a good clean, full of dust etc
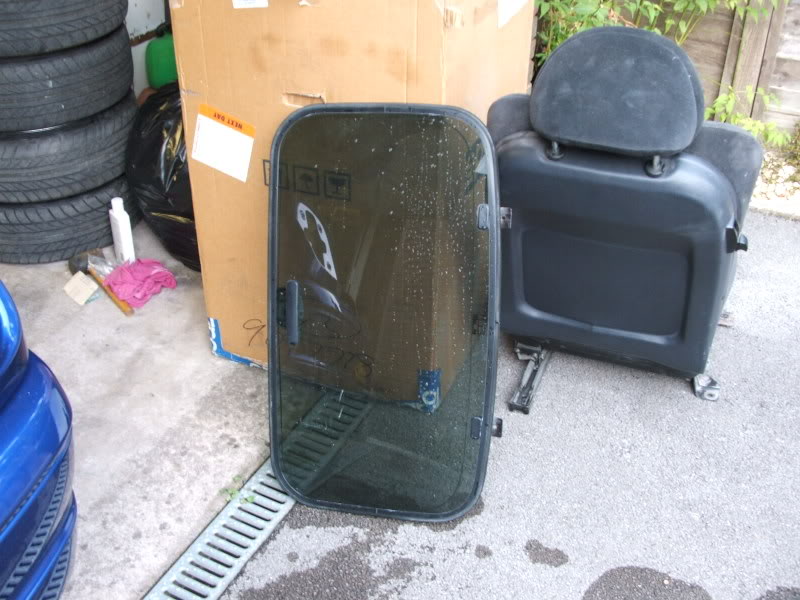
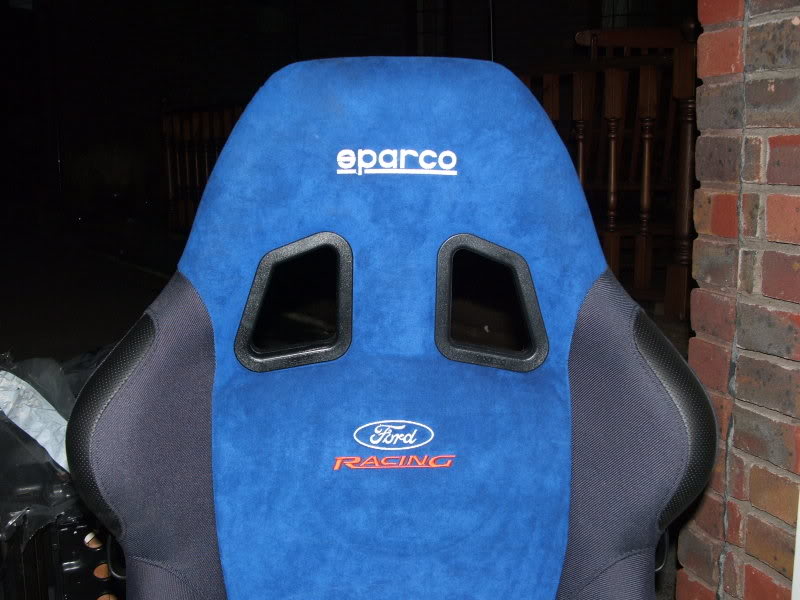
sneek pic of the brand new seats to be going in
not in any order as the progress has been thick and fast since she's back
firstly the engine looking really manky, but also old bonnet stay
a new chrome item to update, my first bit of bling for the engine
nice bare interior
new insulation for under the carpet as the old one was wrecked after an accident with oil in the rear footwell,
fresh carpet lol, steam cleaned it to get the oil out, came out really well
new ford wipers to go with the new windscreen
got the sunroof out for a good clean, full of dust etc
sneek pic of the brand new seats to be going in
18-03-2010, 10:54 PM
#14
PassionFord Regular
Thread Starter
Join Date: Aug 2003
Posts: 457
Likes: 0
Received 0 Likes
on
0 Posts
mainly cleaning and putting things back together in this update
half cleaned, half not just shows how dirty it got in the bodyshop etc
the dirty side
the clean side lol
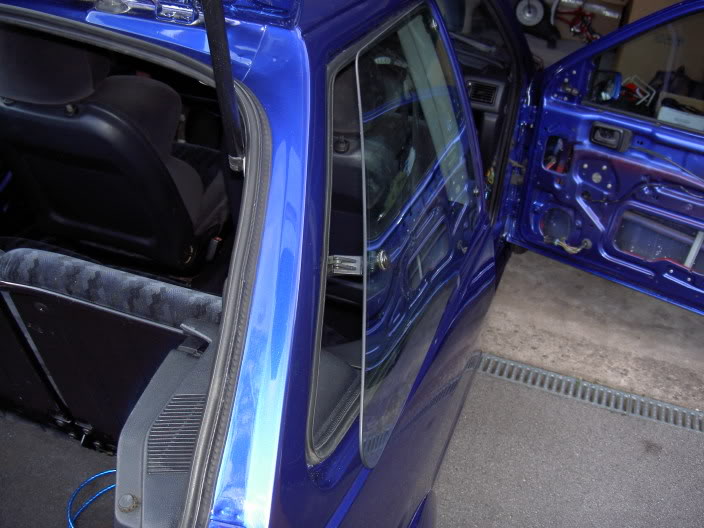
the fiesta turbo rear quarter opening windows, really love these,
big improvement on the fixed rear window with big chunky seals
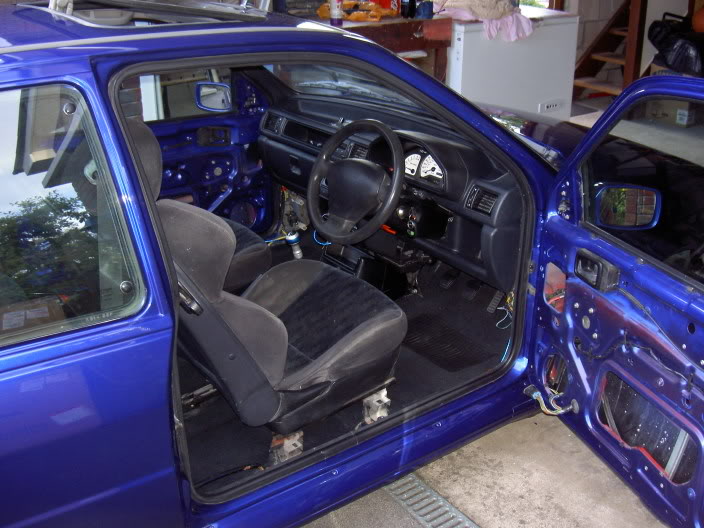
the interior starting to look normal again but a bit cleaner aswell

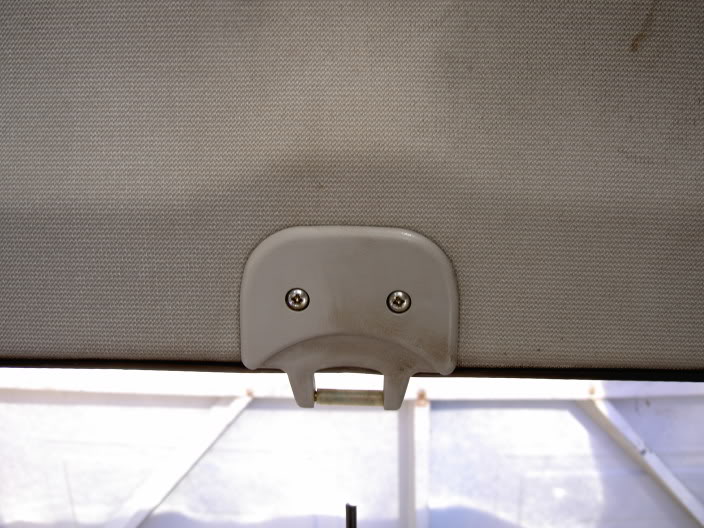
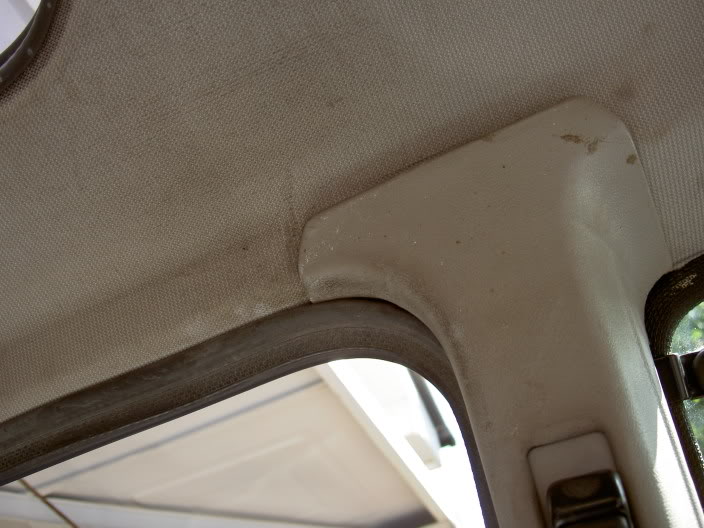
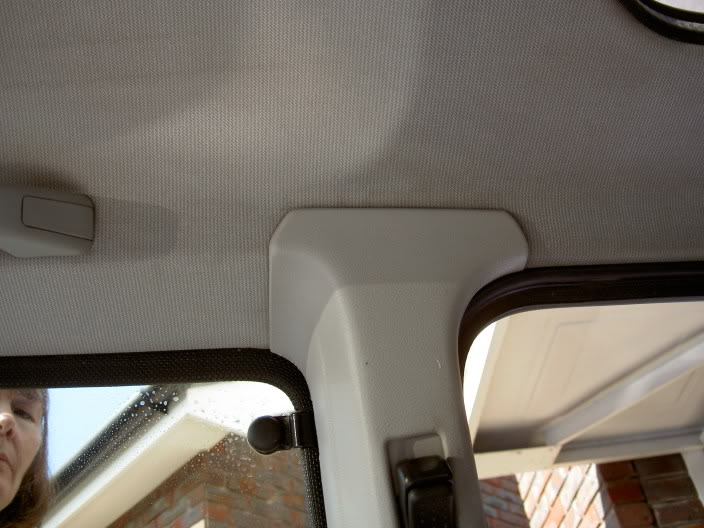
heres a pic the c pillar trim, obviously with the rear opening windows in the hinges would stop this going on,
but on the back of it, was how to cut it to give the hinges room,
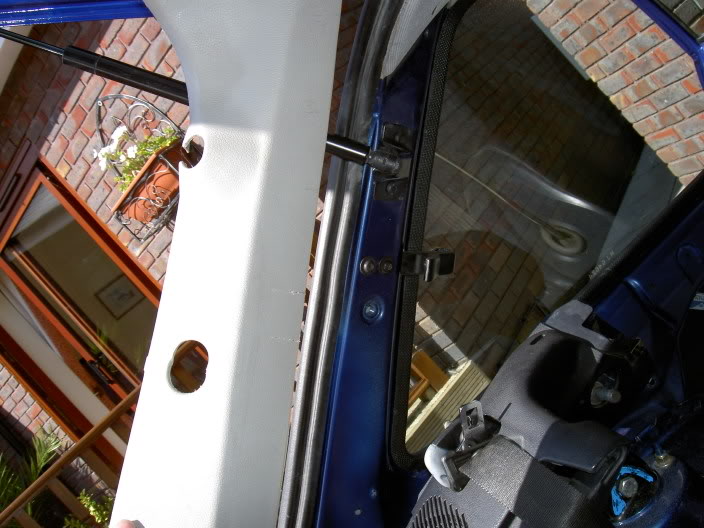
heres the back of it

heres the seats back in for the mot, then i'll put the new front seats in after
big thanks to my mum for helping with the cleaning as i was putting the interior back in
for the mot i've bought a brand new cat and lamda sensor,
went to change this over to discover i've been given the wrong cat by the factors
the hole for the lamda sensor is on the wrong side so the lamda sensor wont go in as the alternator is too close,
so this means i wont be able to mot the thing on tuesday morning like planned,
well she flew the MOT and all taxed up for another year
was such a good feeling driving her again after such a long time
looking forward to trax, got loads of pics to show, more to be taken at trax
half cleaned, half not just shows how dirty it got in the bodyshop etc
the dirty side
the clean side lol
the fiesta turbo rear quarter opening windows, really love these,
big improvement on the fixed rear window with big chunky seals
the interior starting to look normal again but a bit cleaner aswell
heres a pic the c pillar trim, obviously with the rear opening windows in the hinges would stop this going on,
but on the back of it, was how to cut it to give the hinges room,
heres the back of it
heres the seats back in for the mot, then i'll put the new front seats in after
big thanks to my mum for helping with the cleaning as i was putting the interior back in
for the mot i've bought a brand new cat and lamda sensor,
went to change this over to discover i've been given the wrong cat by the factors
the hole for the lamda sensor is on the wrong side so the lamda sensor wont go in as the alternator is too close,
so this means i wont be able to mot the thing on tuesday morning like planned,
well she flew the MOT and all taxed up for another year
was such a good feeling driving her again after such a long time
looking forward to trax, got loads of pics to show, more to be taken at trax
Last edited by RS_Rob; 18-03-2010 at 10:55 PM.
18-03-2010, 10:57 PM
#15
PassionFord Regular
Thread Starter
Join Date: Aug 2003
Posts: 457
Likes: 0
Received 0 Likes
on
0 Posts
right its the monday morning after trax, got quite alot of updates to show
so i'll start at the beginning, the last few things i did before trax after the mot,
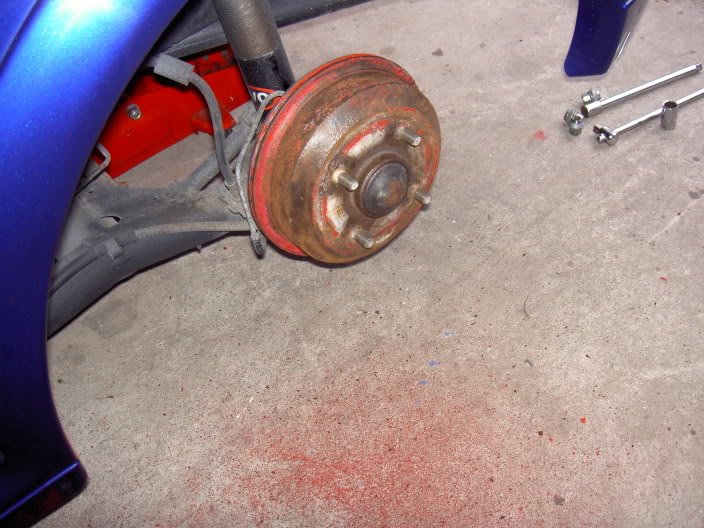
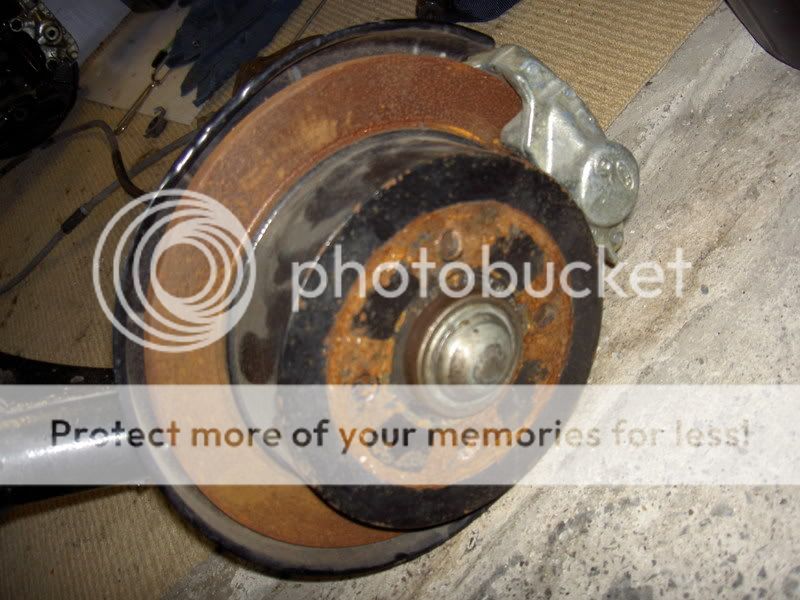
ever since i've had the car, the rear drums were badly painted red,
something i've been meaning to sort for some time,
so took the wheels off and had a wire brush on a drill,
couple of mins later they looked like this
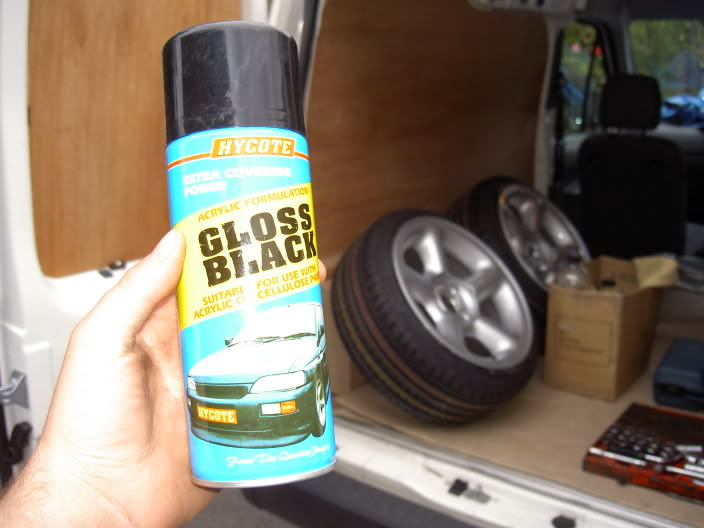
then with a spray of some black paint as in pic below,
(notice the cossie on the paint can and my new cossie wheels in the backround)
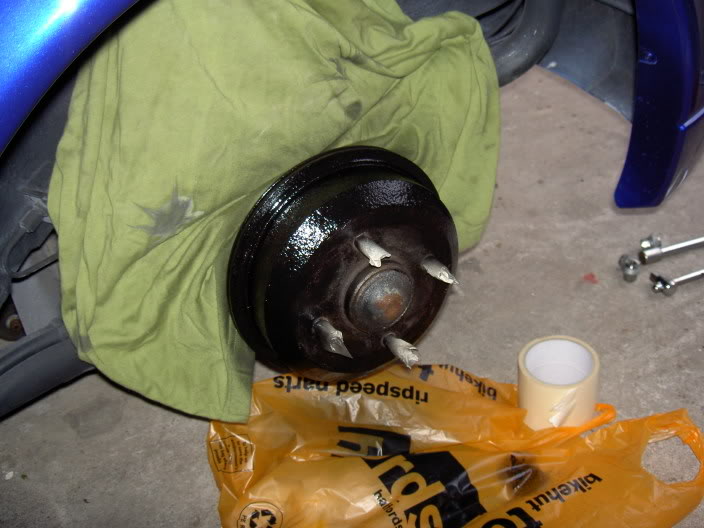
the end result, alot more tidy, subtle and does'nt stand out,
job done
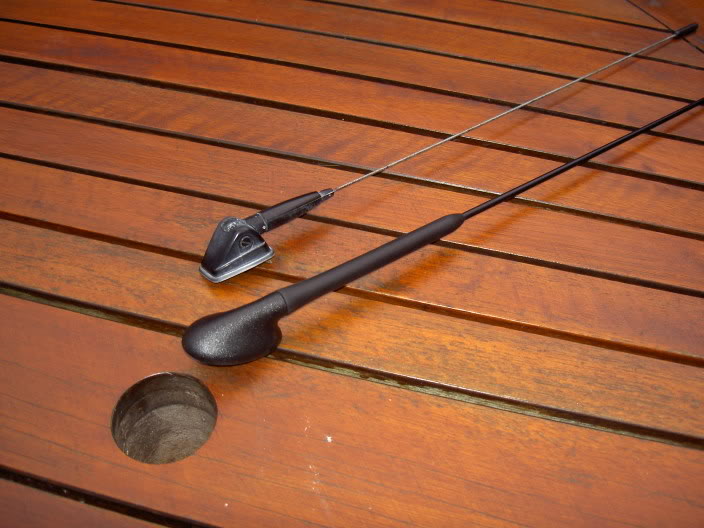
the next thing was the aerial, looked very dated etc and did'nt go with the rest of the car's styling,
so keeping with the ford theme, i bought one from a mk5 fiesta
in the pic below shows comparison of the old one on the left and new one on the right
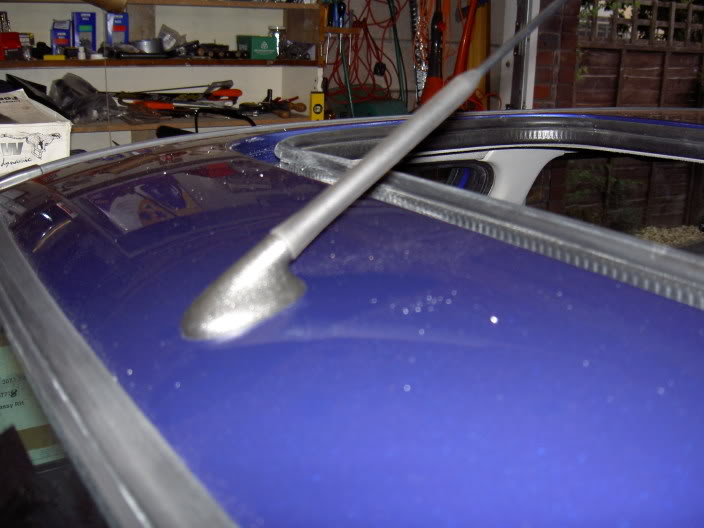
and on the car
next to do was the brakes and new front spots and fogs
so i'll start at the beginning, the last few things i did before trax after the mot,
ever since i've had the car, the rear drums were badly painted red,
something i've been meaning to sort for some time,
so took the wheels off and had a wire brush on a drill,
couple of mins later they looked like this
then with a spray of some black paint as in pic below,
(notice the cossie on the paint can and my new cossie wheels in the backround)
the end result, alot more tidy, subtle and does'nt stand out,
job done
the next thing was the aerial, looked very dated etc and did'nt go with the rest of the car's styling,
so keeping with the ford theme, i bought one from a mk5 fiesta
in the pic below shows comparison of the old one on the left and new one on the right
and on the car
next to do was the brakes and new front spots and fogs
18-03-2010, 11:01 PM
#16
PassionFord Regular
Thread Starter
Join Date: Aug 2003
Posts: 457
Likes: 0
Received 0 Likes
on
0 Posts
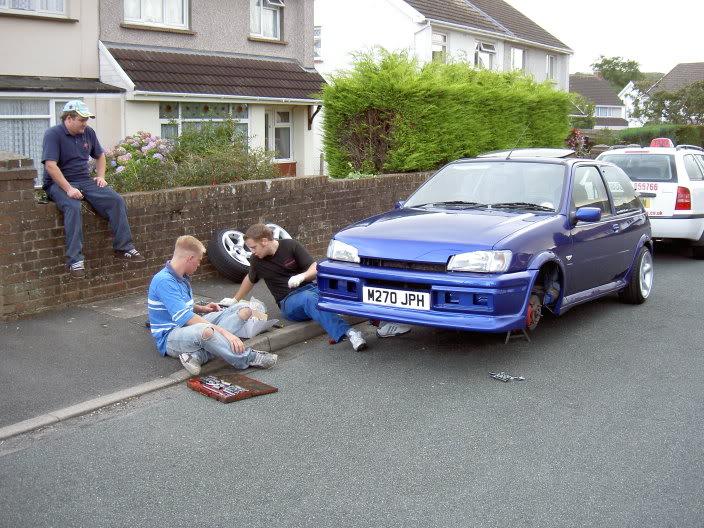
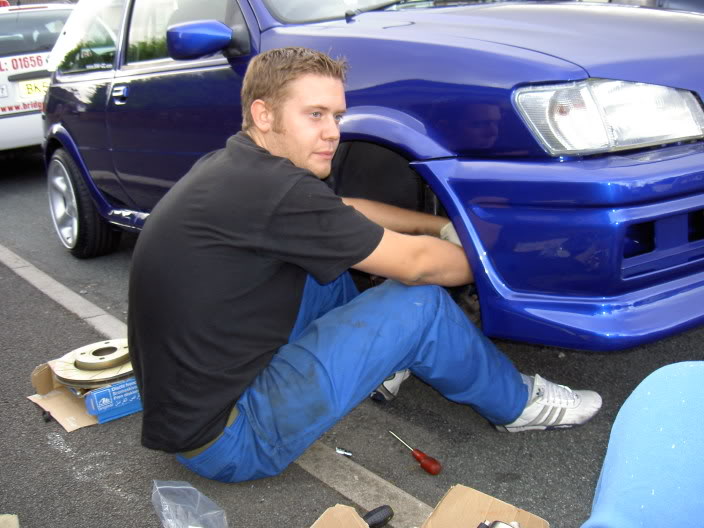
the brakes were done after the mot and tax,
few of the lads from bridgend lot came over for assistance
jacked up, wheels off, boys get started
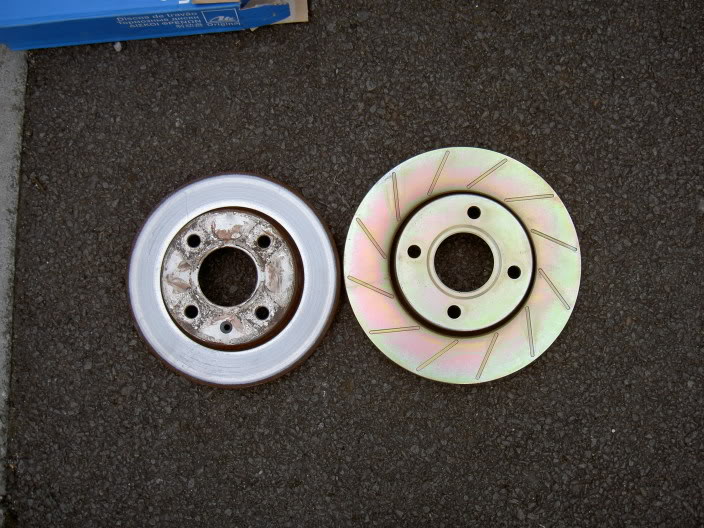
heres the bad part, only now we realised i had the wrong disc's,
cossie disc's are 278mm, these were sadly 260mm
still better than my 240mm disc's currently on the car,
so will be abusing the lad who sold my the brake setup including these wrong disc's
a pic to show the small difference
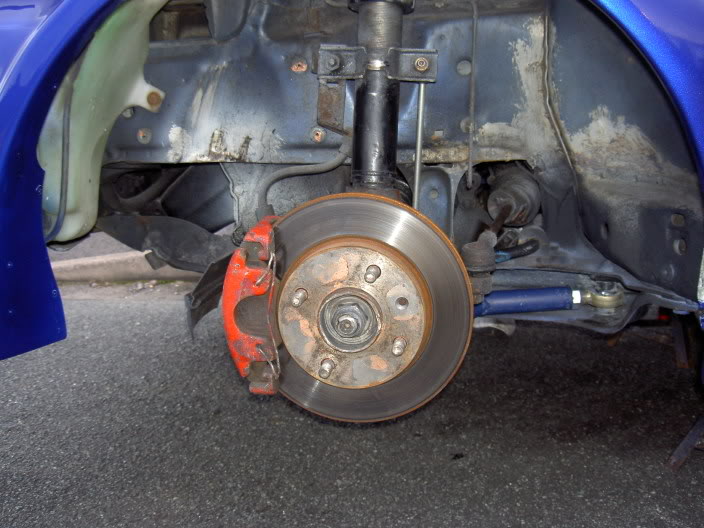
the brakes before
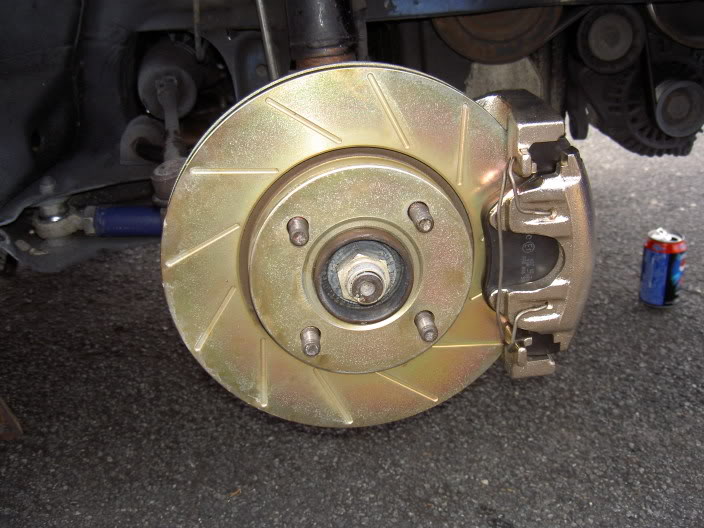
the brakes after
you can see how the disc's are too small for the calipers, but will do for now
next up drain the old brake fluid out, it was blacker than black,
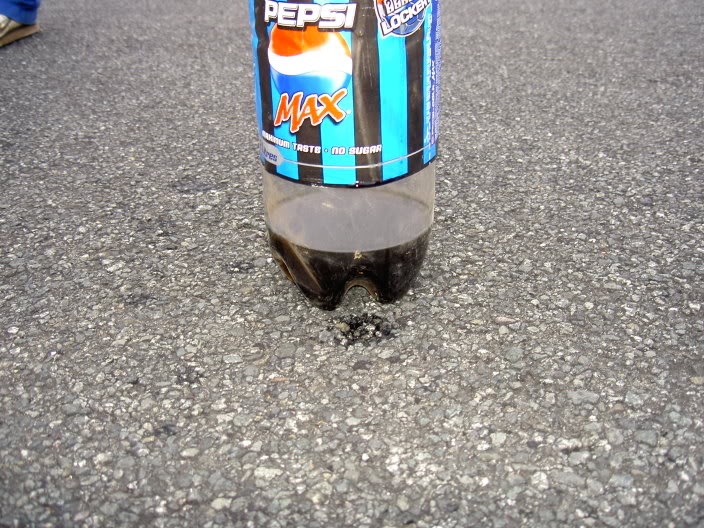
new 5.1 brake fluid
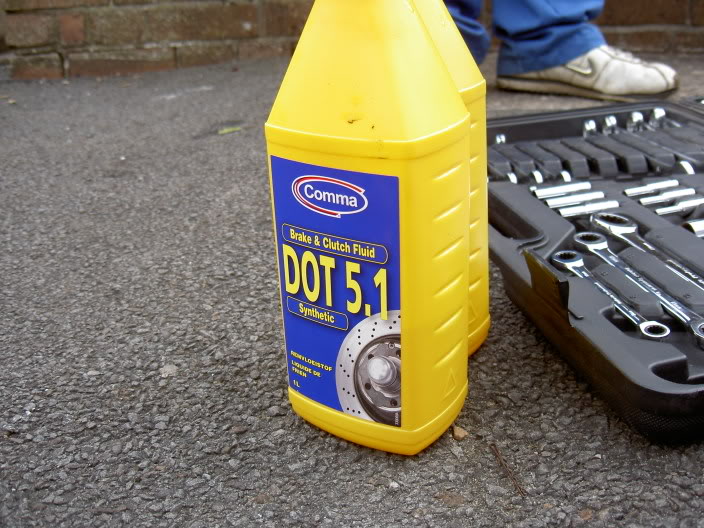
hmmm new fluid
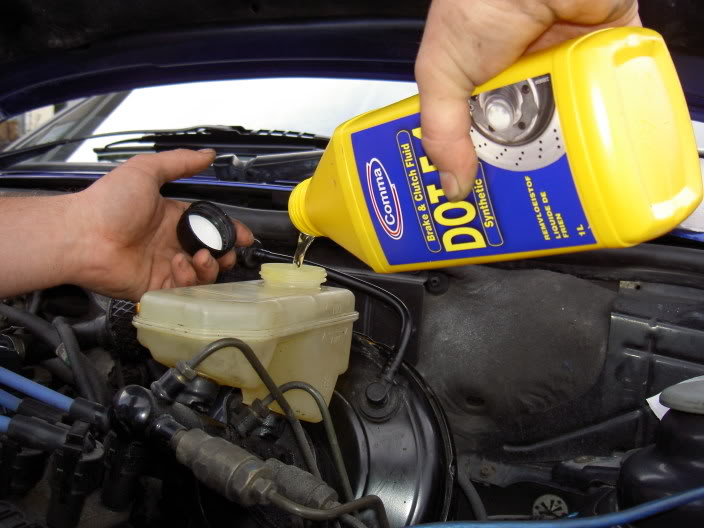
all the brake fluid was bleed completely until it was only the new 5.1 fluid inside,
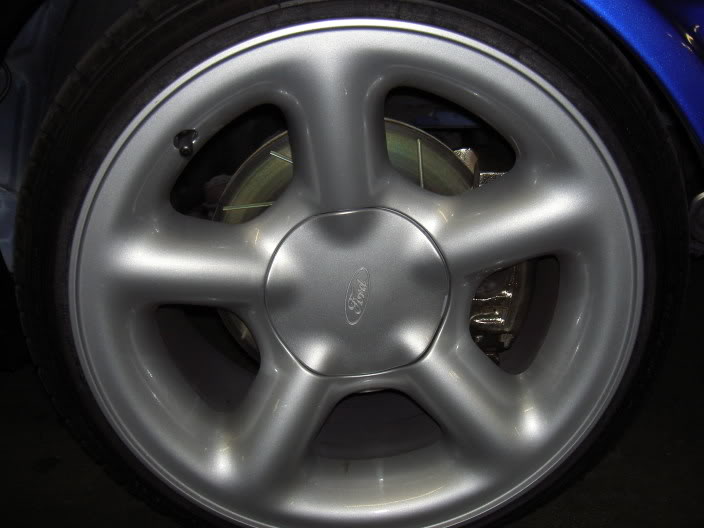
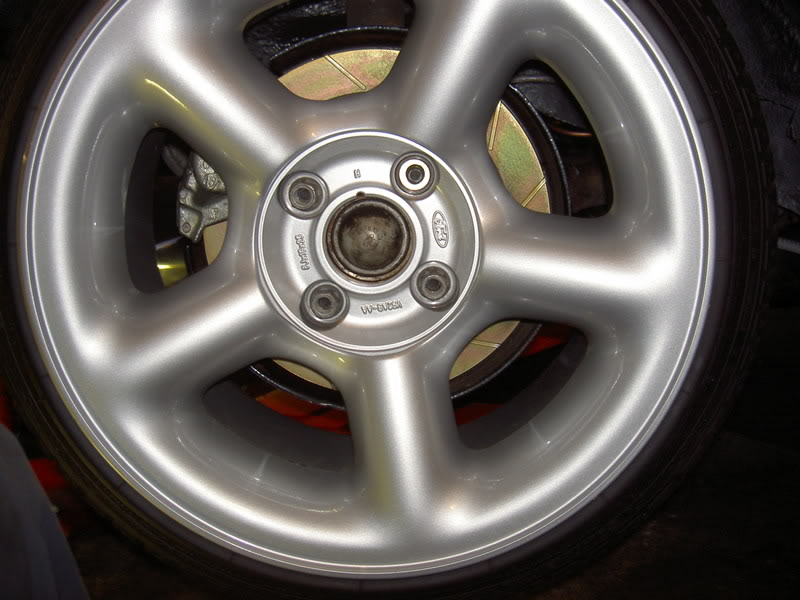
a quick shot to show the brakes behind the wheels, even tho their the wrong disc's,
i'm still happy with the improvement visually, also still much better physically braking
cant wait to see the difference with the proper disc's
few of the lads from bridgend lot came over for assistance
jacked up, wheels off, boys get started
heres the bad part, only now we realised i had the wrong disc's,
cossie disc's are 278mm, these were sadly 260mm
still better than my 240mm disc's currently on the car,
so will be abusing the lad who sold my the brake setup including these wrong disc's
a pic to show the small difference
the brakes before
the brakes after
you can see how the disc's are too small for the calipers, but will do for now
next up drain the old brake fluid out, it was blacker than black,
new 5.1 brake fluid
hmmm new fluid
all the brake fluid was bleed completely until it was only the new 5.1 fluid inside,
a quick shot to show the brakes behind the wheels, even tho their the wrong disc's,
i'm still happy with the improvement visually, also still much better physically braking
cant wait to see the difference with the proper disc's
18-03-2010, 11:03 PM
#17
PassionFord Regular
Thread Starter
Join Date: Aug 2003
Posts: 457
Likes: 0
Received 0 Likes
on
0 Posts
some pics from trax of her currently,
still more to do........
due to the fact of being sold the wrong size disc's,
i've decided i'm going to look into a big disc coversion rather than just buying proper cossie disc's
309mm disc's on floating bells with brackets to extend the current cossie calipers
this is the biggest disc i can fit under the cossie rims
18-03-2010, 11:05 PM
#18
PassionFord Regular
Thread Starter
Join Date: Aug 2003
Posts: 457
Likes: 0
Received 0 Likes
on
0 Posts
well loads of hard work went into this mod,
took all of .......... 5 mins lol
here she is before
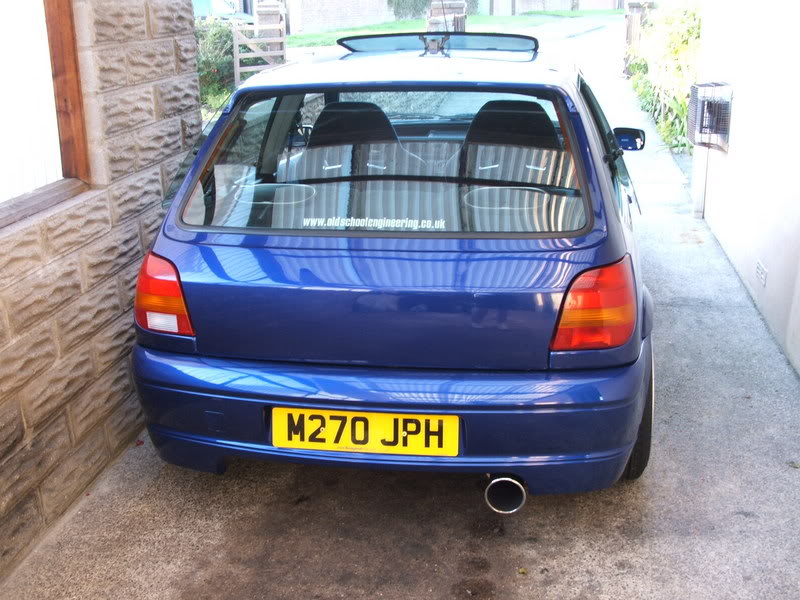
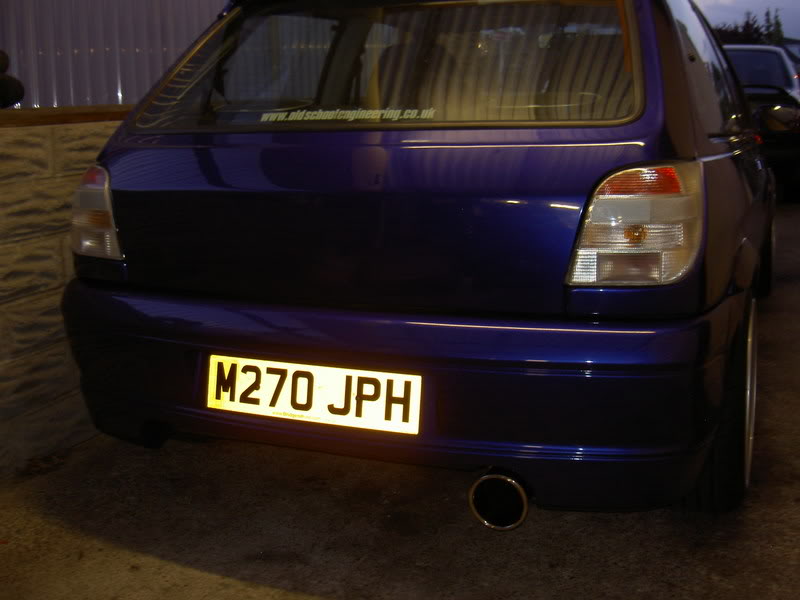
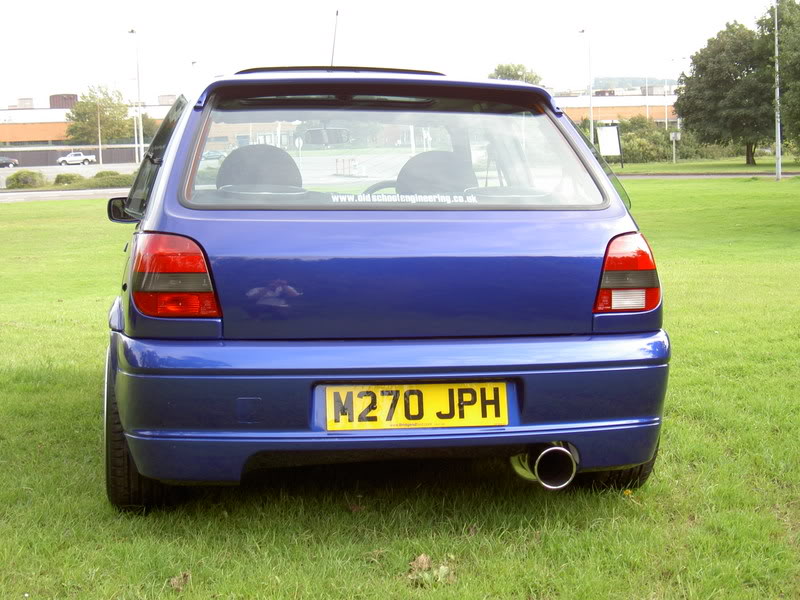
and after with her new german rear lights on
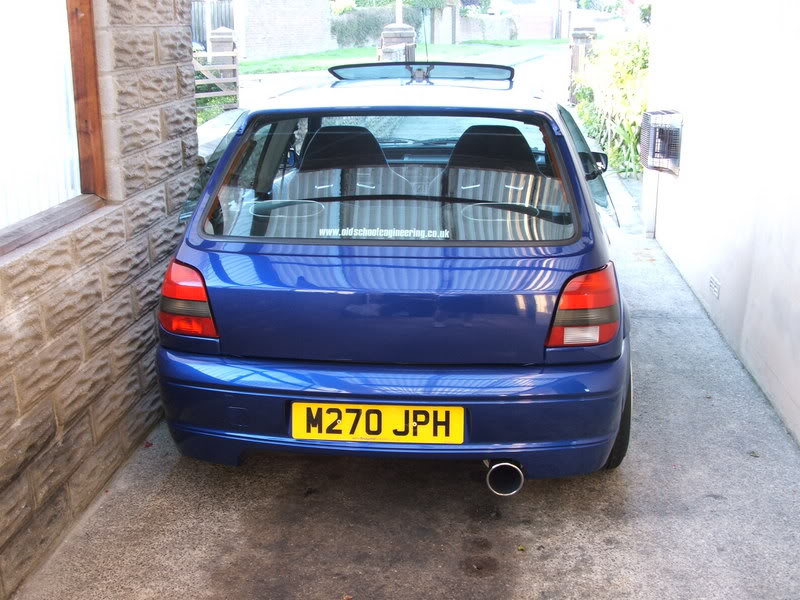
definutely prefer this look, gives it more of a euro feel to it and the rear lights are'nt as common
real happy with them
took all of .......... 5 mins lol
here she is before
and after with her new german rear lights on
definutely prefer this look, gives it more of a euro feel to it and the rear lights are'nt as common
real happy with them
18-03-2010, 11:08 PM
#19
PassionFord Regular
Thread Starter
Join Date: Aug 2003
Posts: 457
Likes: 0
Received 0 Likes
on
0 Posts
well its been a while since trax and the progress has been slow,
but nether the less been enjoying the car with its new look,
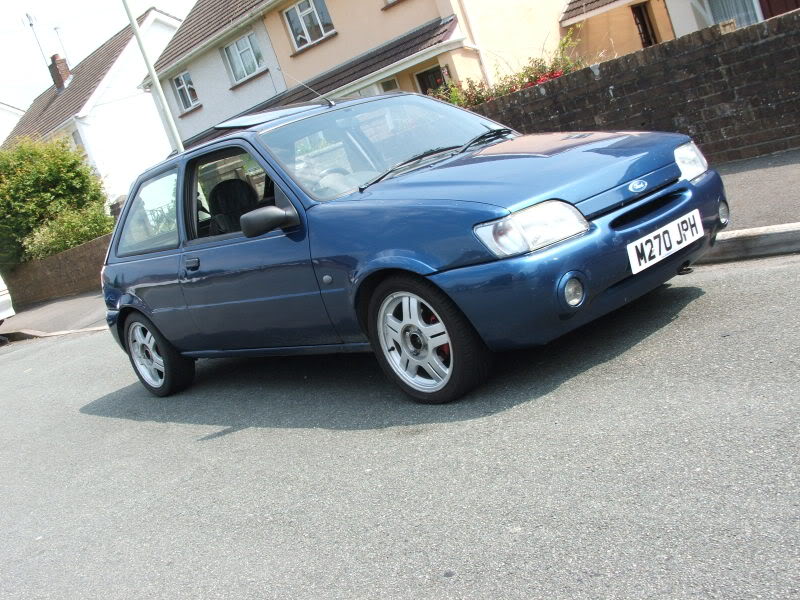
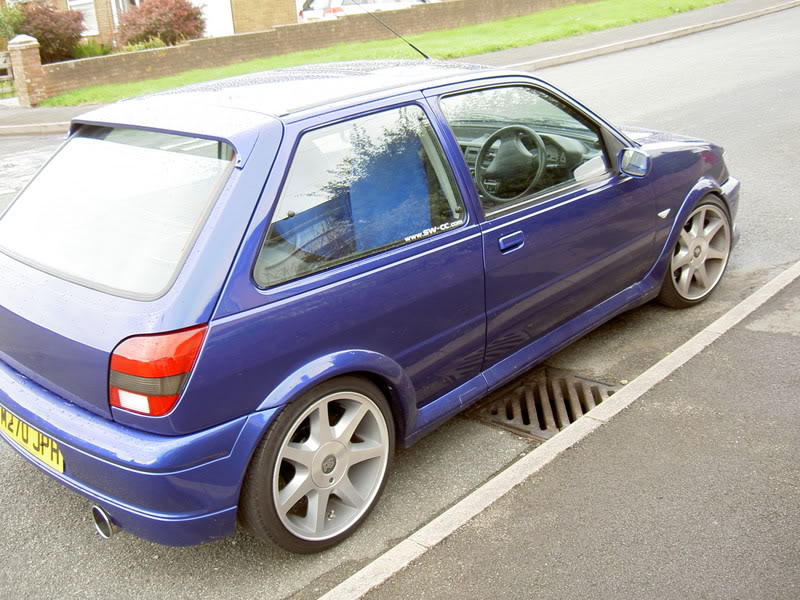
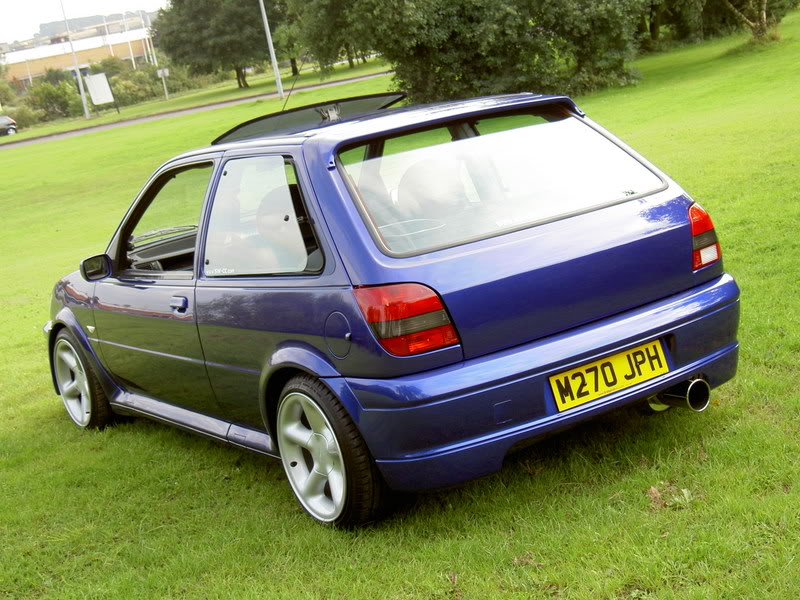
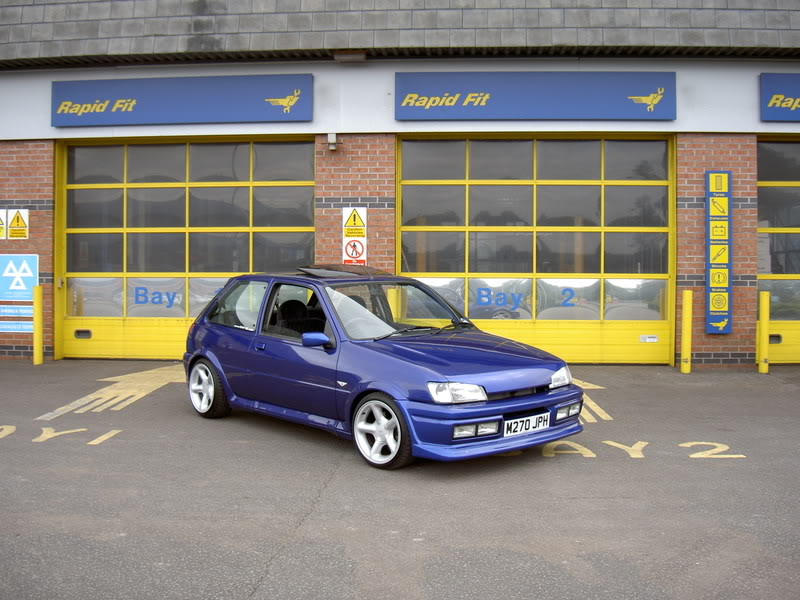
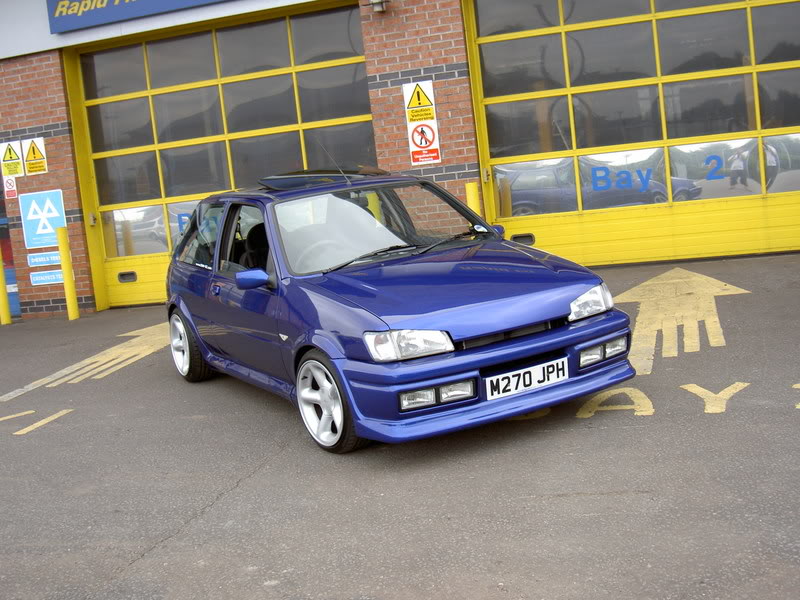
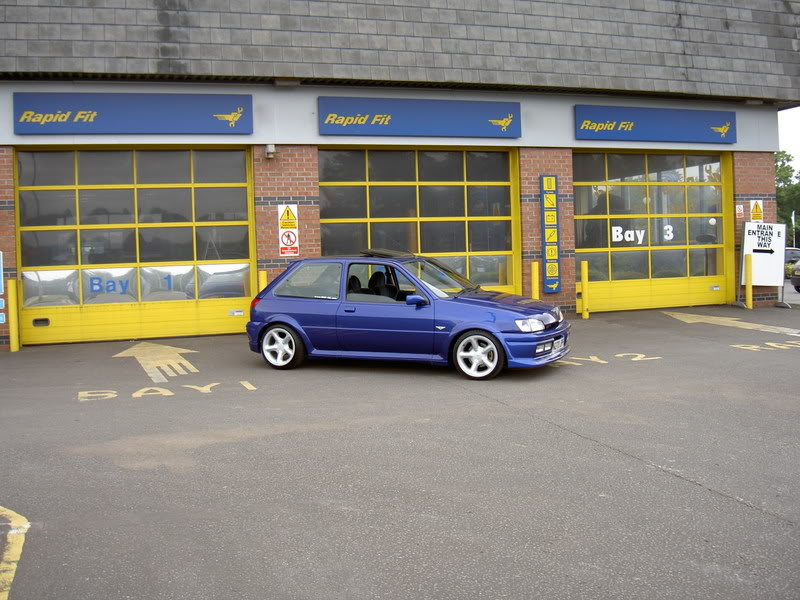
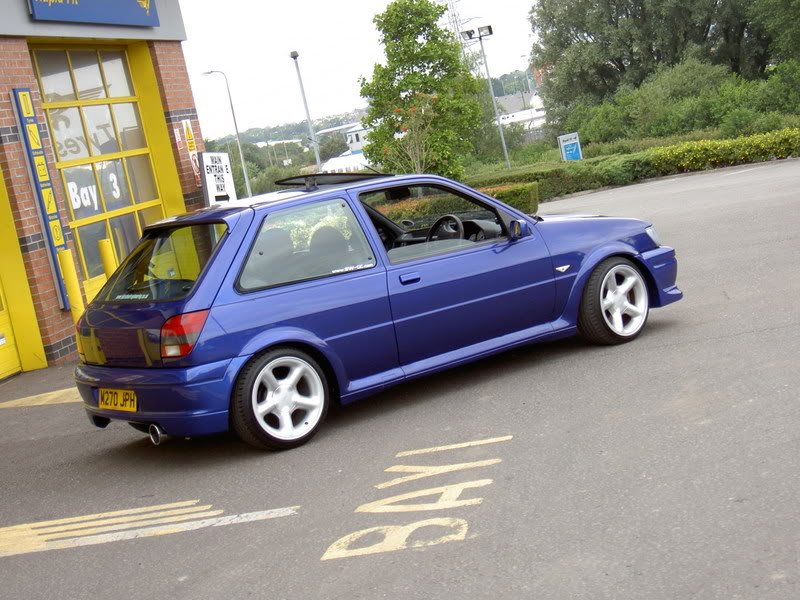
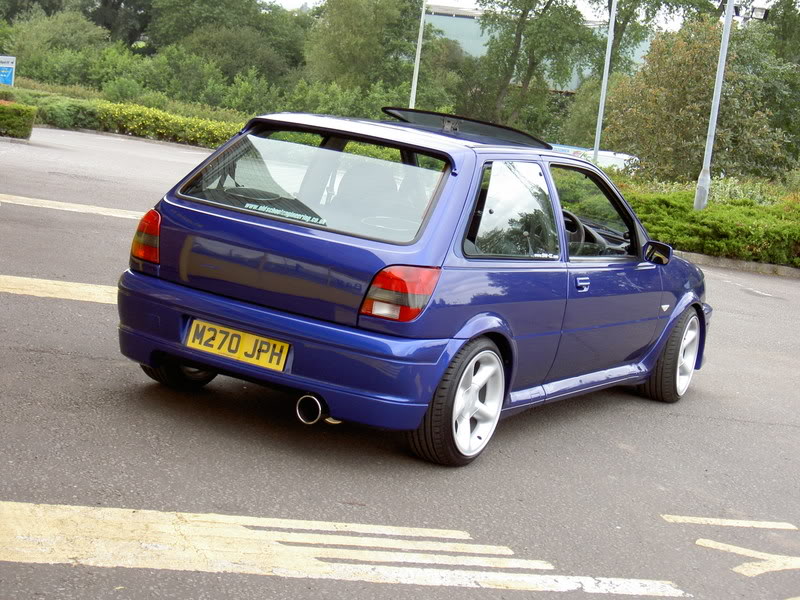
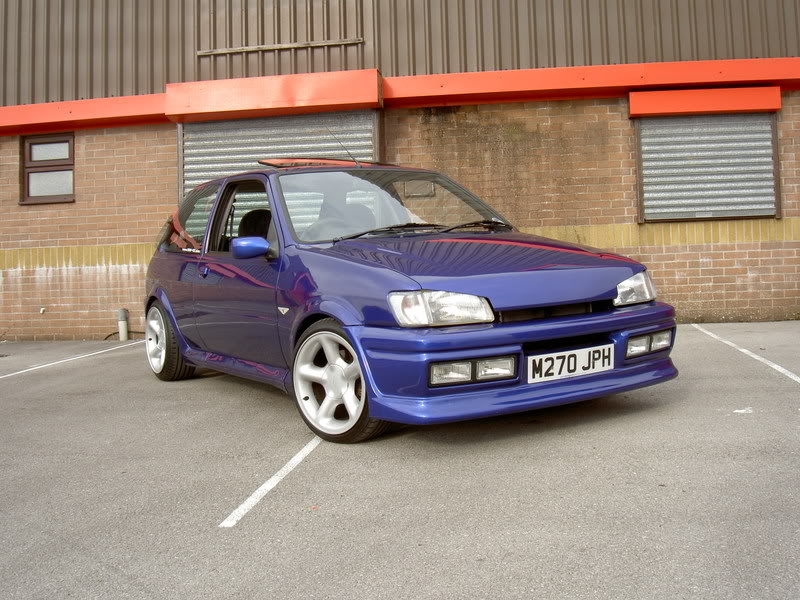
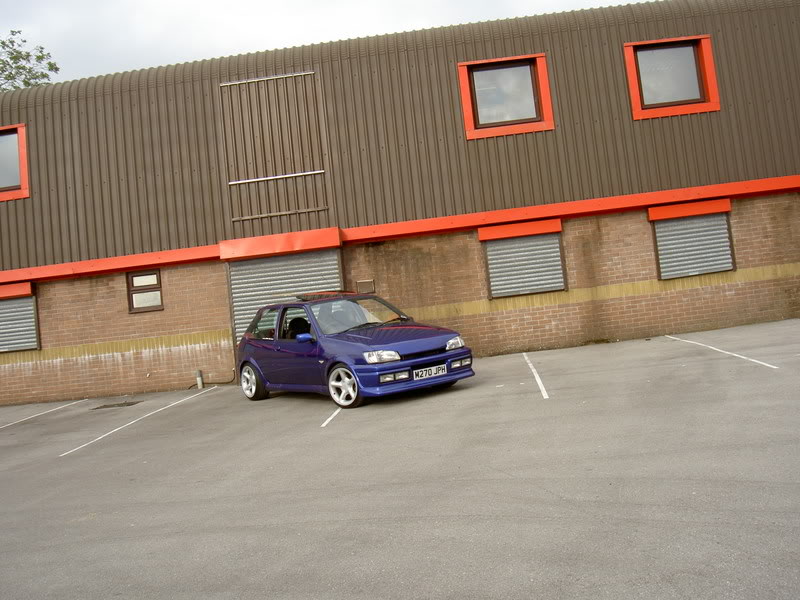
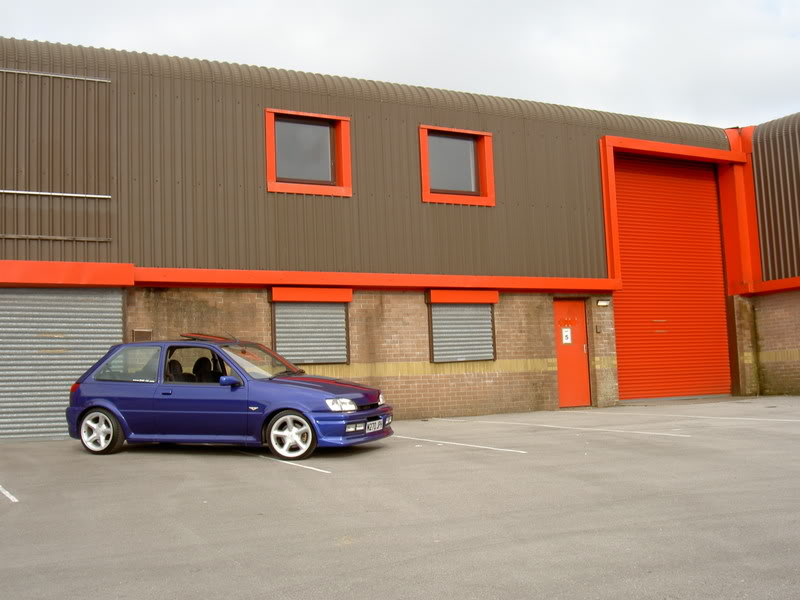
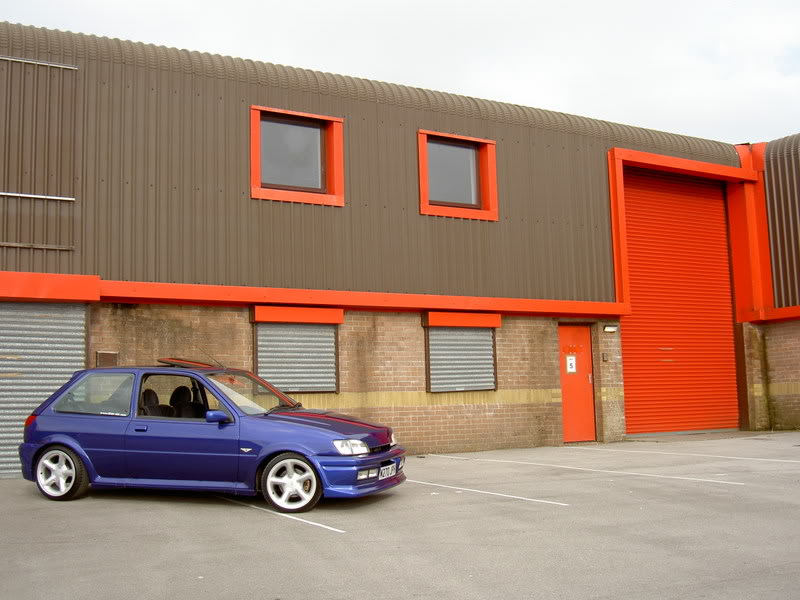
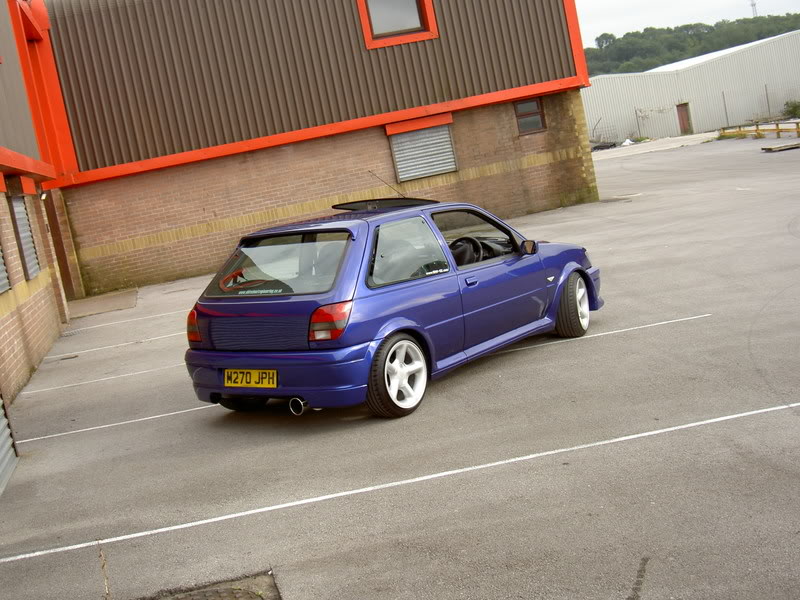
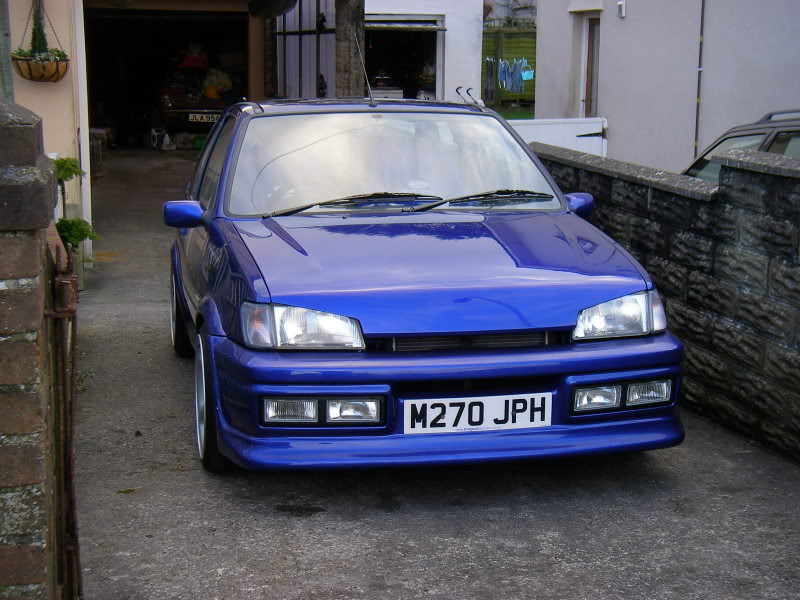
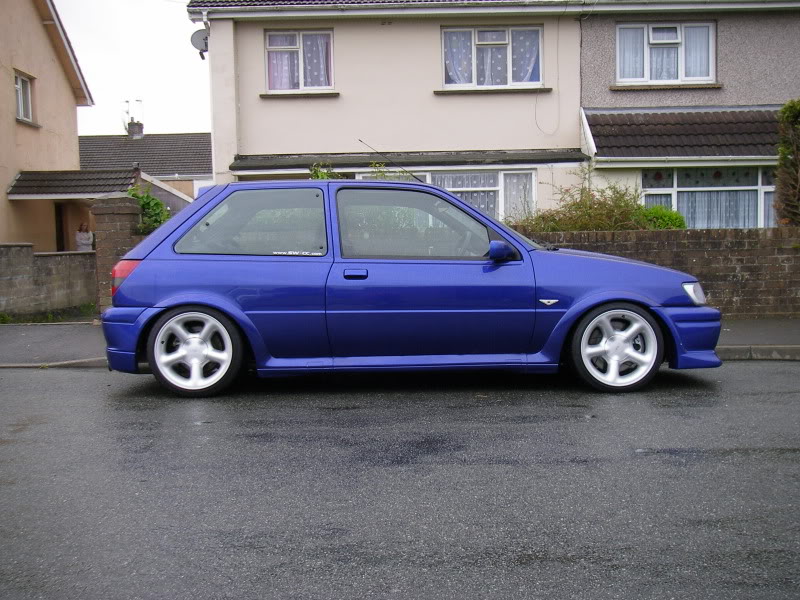
so firstly taken proper pics since trax, lovely location
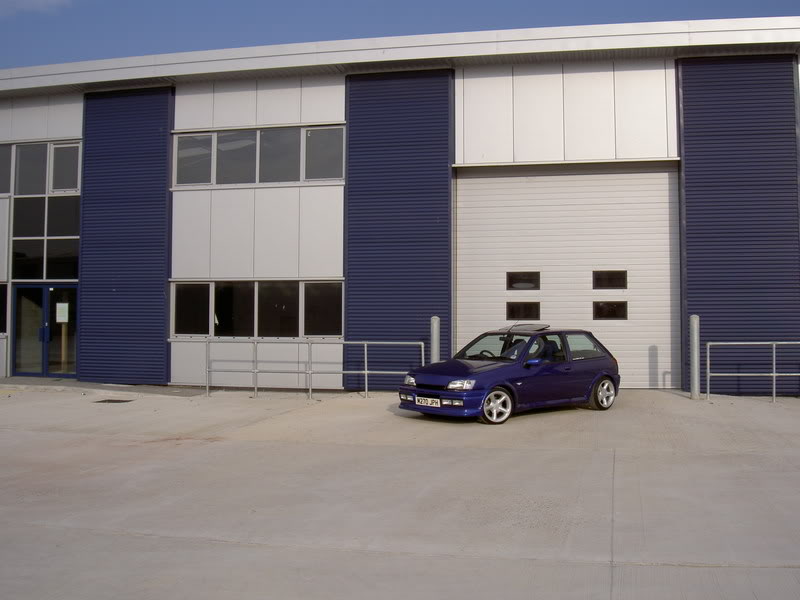
one showing my seats
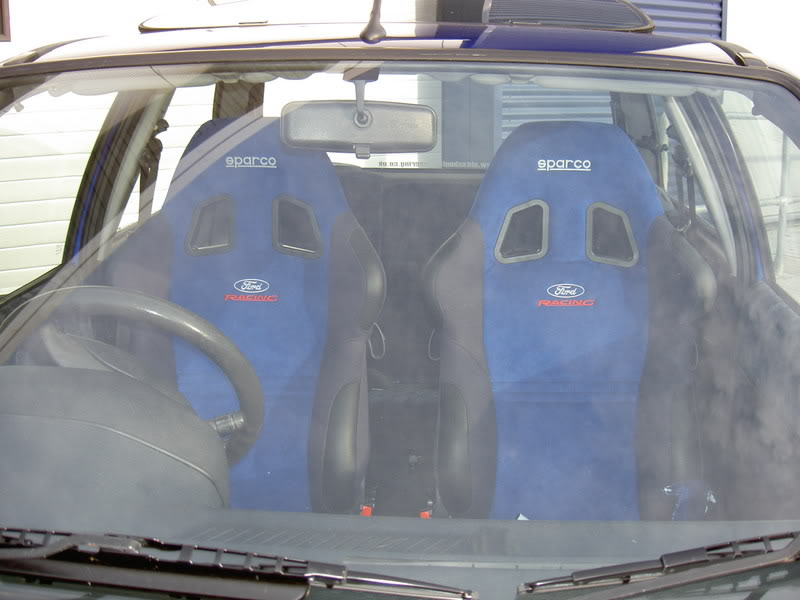
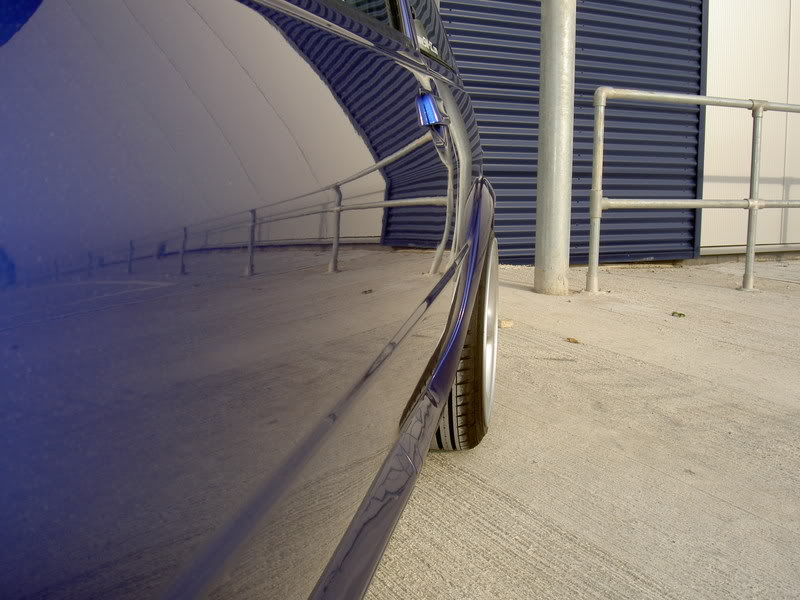
this is my fave, shows the straight panels, width on the wheels and a cracking reflection
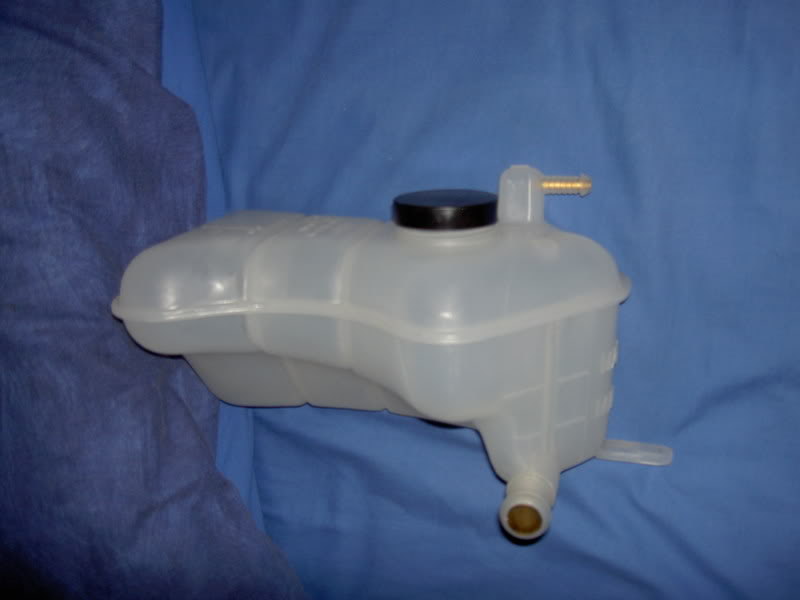
also very soon i should have some silicone hoses etc for the engine bay,
so got two bits ready,
my nice new radiator and header tank

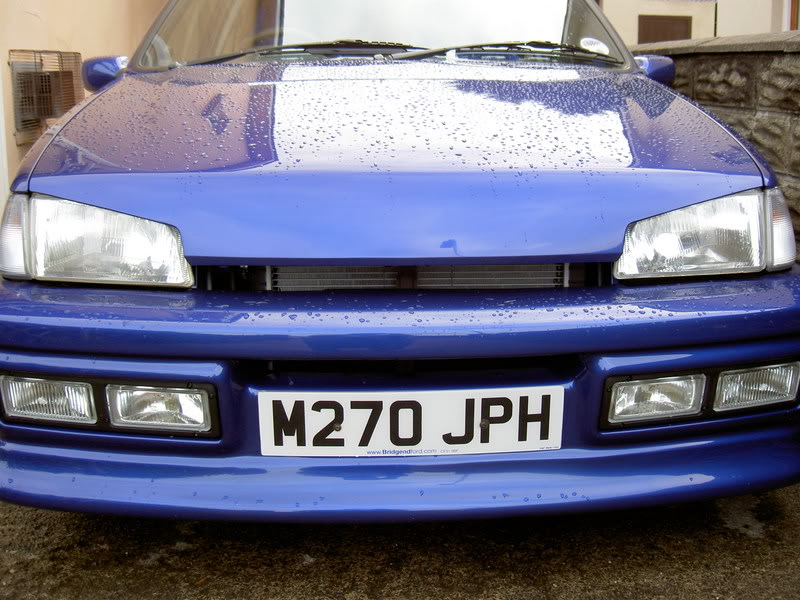
also trimmed the sides of my number plates as they were far too wide,
but kept them legal also, i think the law states you have to have 11mm border around each font
so i've kept 20mm, a little touch but i'm happier so its all good
i'll have proper day light pics soon to show them better,
but for now,
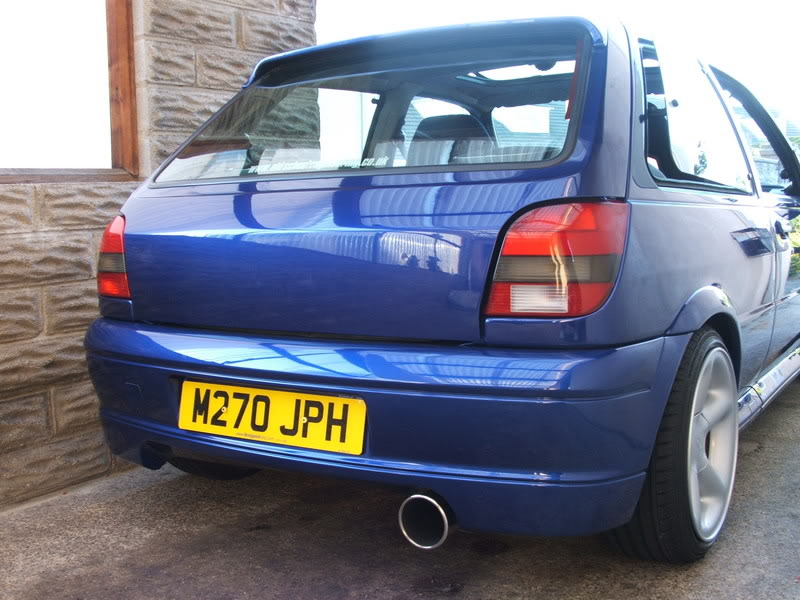
you'll notice i've put the clear rears on, this is because my german rear lights had indicators which shined white, so waiting for some silvatech indicator bulbs
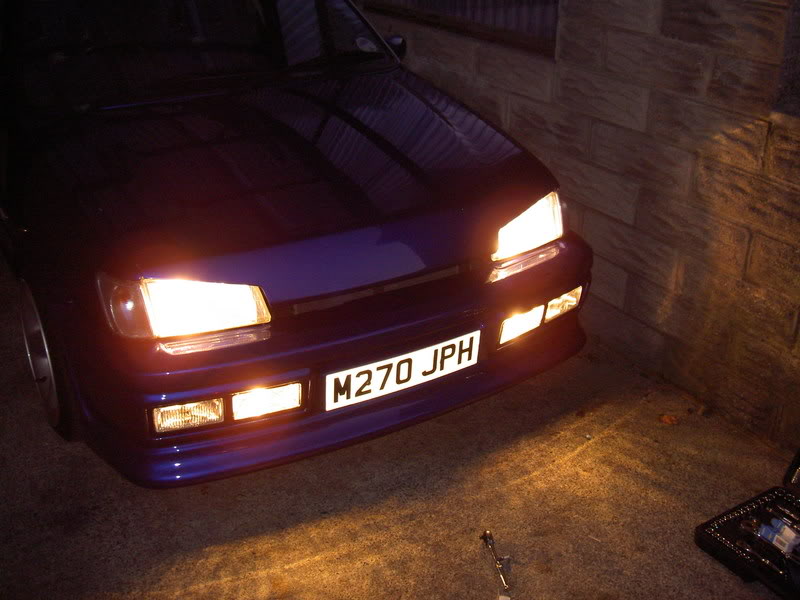
also changed all the bulbs and cleaned all the connections and got my lights on the front bumper working,
was only expecting the fogs to work as i thought the loom was different to the xr2i/frst which also have spot or driving lamps,
but much to my shock, they work, so i'm really chuffed
but nether the less been enjoying the car with its new look,
so firstly taken proper pics since trax, lovely location
one showing my seats
this is my fave, shows the straight panels, width on the wheels and a cracking reflection
also very soon i should have some silicone hoses etc for the engine bay,
so got two bits ready,
my nice new radiator and header tank
also trimmed the sides of my number plates as they were far too wide,
but kept them legal also, i think the law states you have to have 11mm border around each font
so i've kept 20mm, a little touch but i'm happier so its all good
i'll have proper day light pics soon to show them better,
but for now,
you'll notice i've put the clear rears on, this is because my german rear lights had indicators which shined white, so waiting for some silvatech indicator bulbs
also changed all the bulbs and cleaned all the connections and got my lights on the front bumper working,
was only expecting the fogs to work as i thought the loom was different to the xr2i/frst which also have spot or driving lamps,
but much to my shock, they work, so i'm really chuffed
18-03-2010, 11:09 PM
#20
PassionFord Regular
Thread Starter
Join Date: Aug 2003
Posts: 457
Likes: 0
Received 0 Likes
on
0 Posts
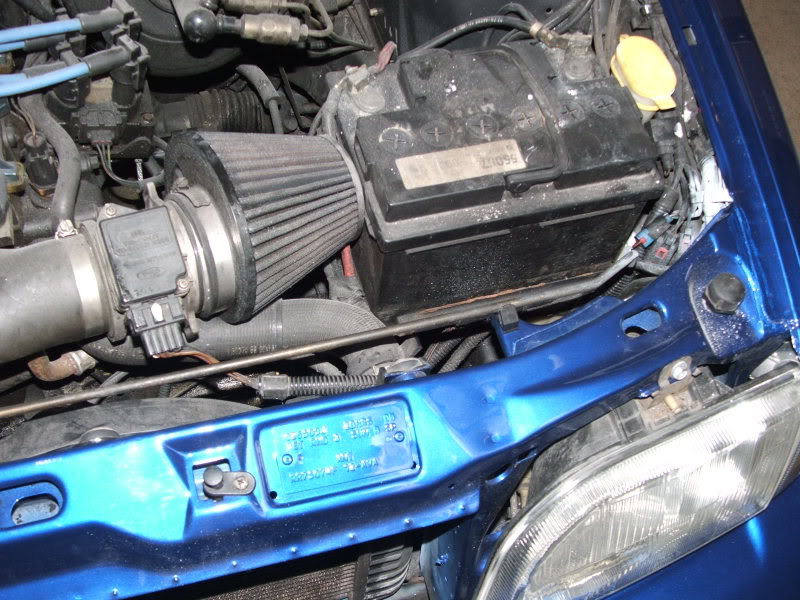
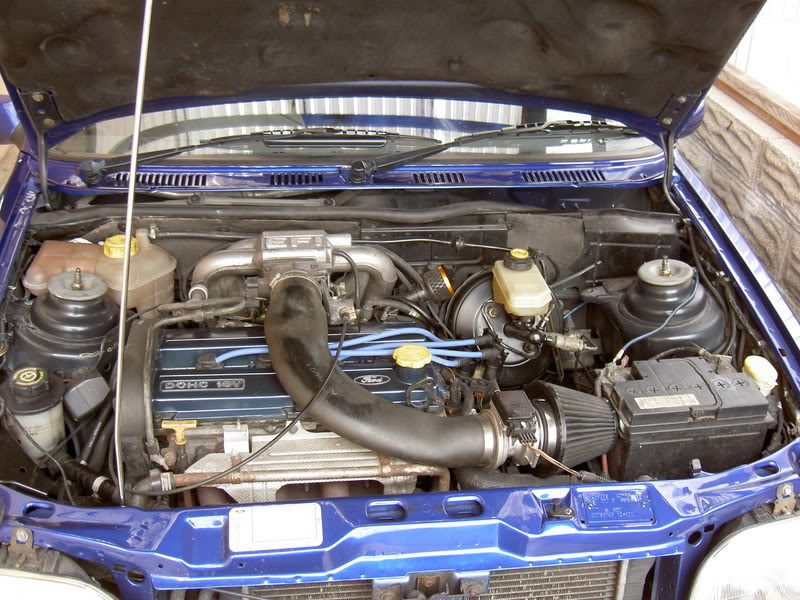
heres how my engine bay has looked for sometime, dirty etc
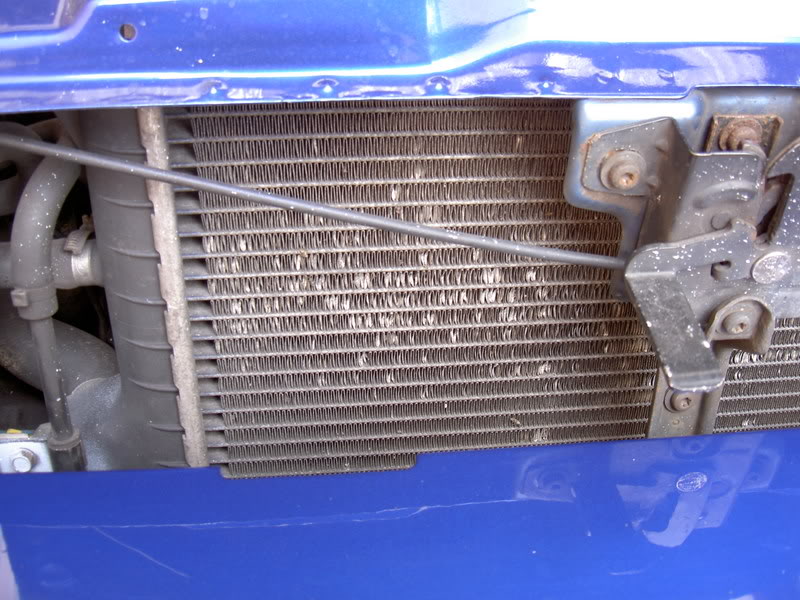
so with a few chrome bits,new hearder tank, rad and hoses
thought i'd make a start
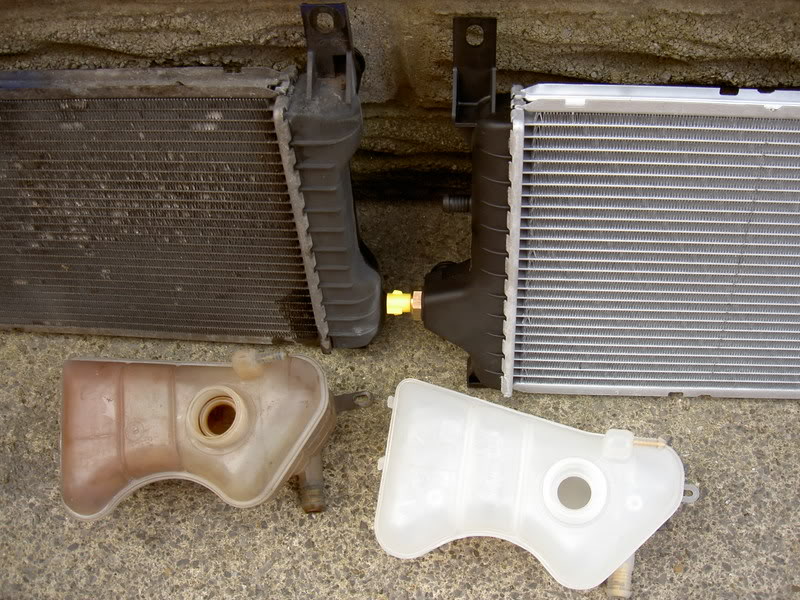
out with the old rad and header tank,
shocking the difference compared to the new
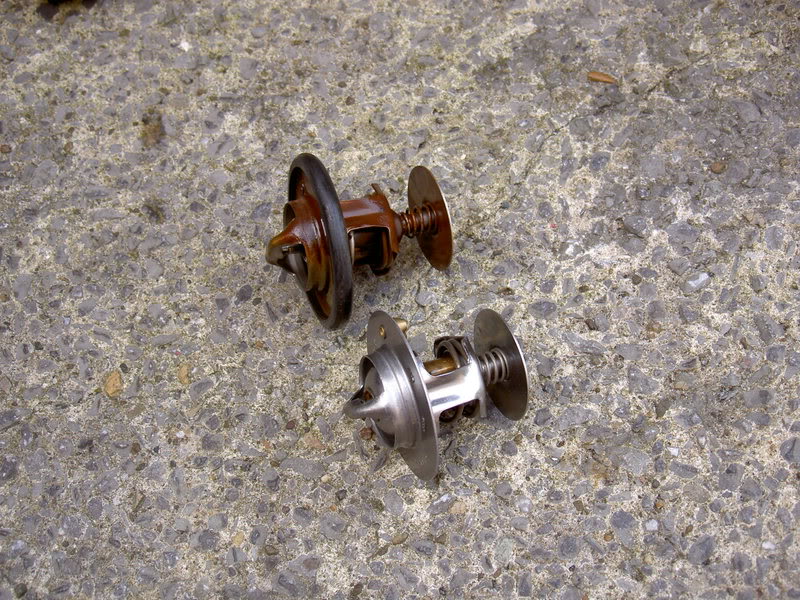
changed the thermo stat aswell for good measure
one of the new hoses on
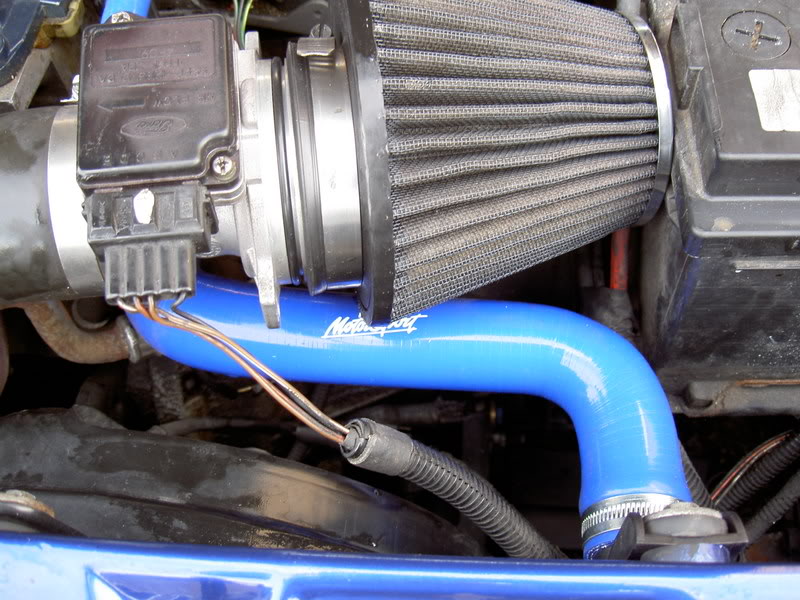
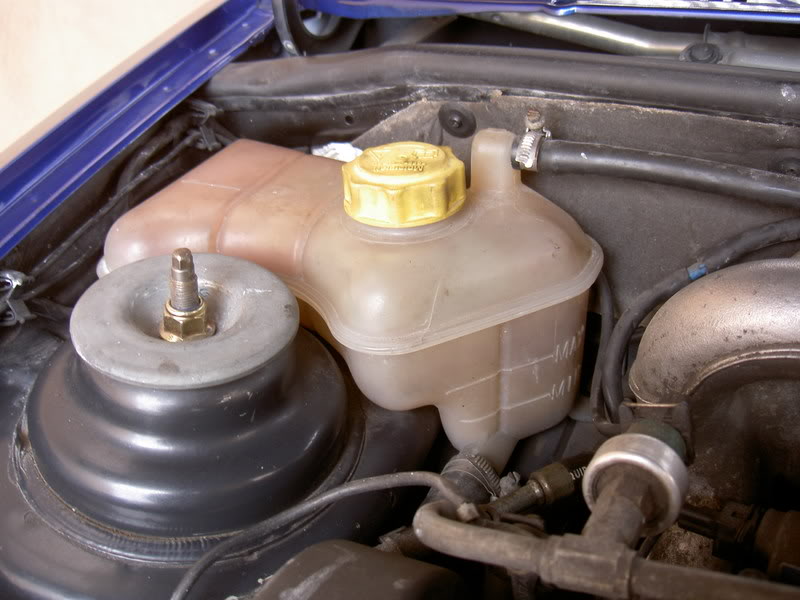
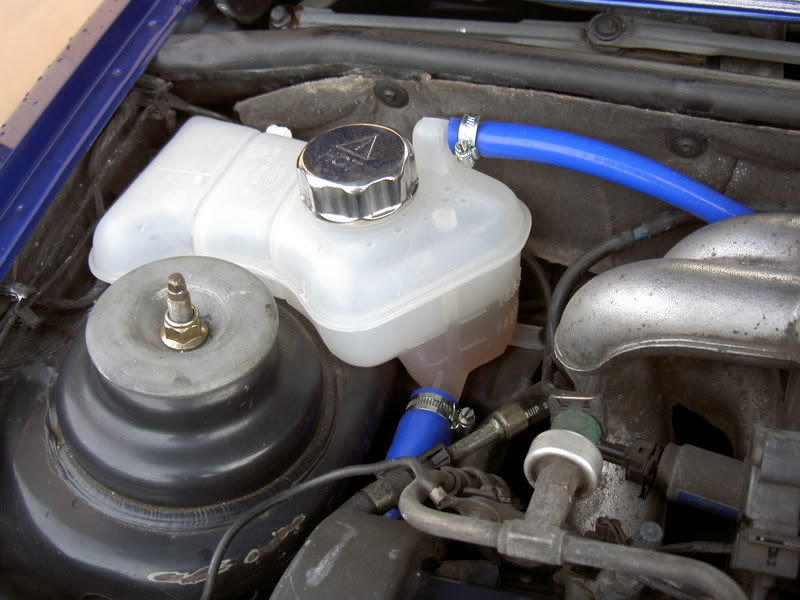
the new header tank with chrome cap and new hoses connected
the overall engine bay, much happier with the new rad
still loads to change and do, like colour coded cam cover etc
but i'm happy with the changes so far
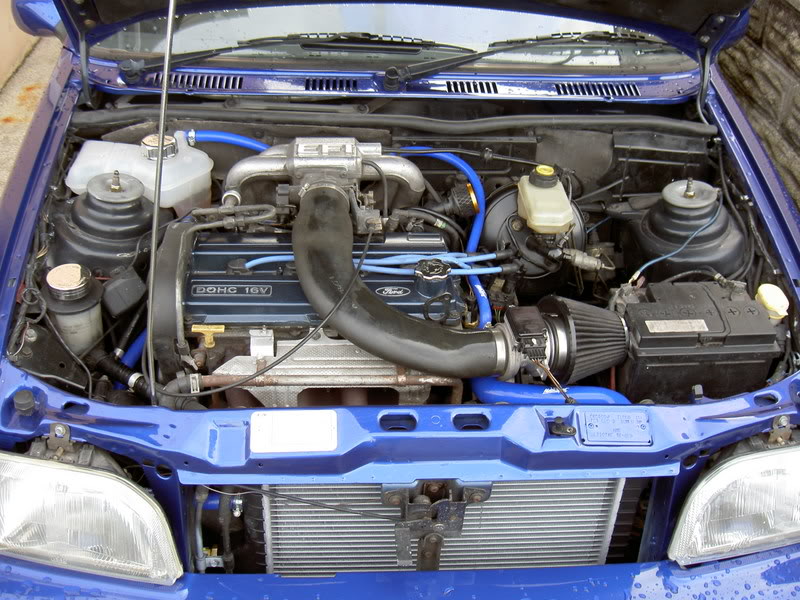
you can even see the rad with the bonnet closed
so with a few chrome bits,new hearder tank, rad and hoses
thought i'd make a start
out with the old rad and header tank,
shocking the difference compared to the new
changed the thermo stat aswell for good measure
one of the new hoses on
the new header tank with chrome cap and new hoses connected
the overall engine bay, much happier with the new rad
still loads to change and do, like colour coded cam cover etc
but i'm happy with the changes so far
you can even see the rad with the bonnet closed
18-03-2010, 11:11 PM
#21
PassionFord Regular
Thread Starter
Join Date: Aug 2003
Posts: 457
Likes: 0
Received 0 Likes
on
0 Posts
got some other pics,
decided i'd try some different wheels for a change
diamond cut RS 7's
bit dark in the first two

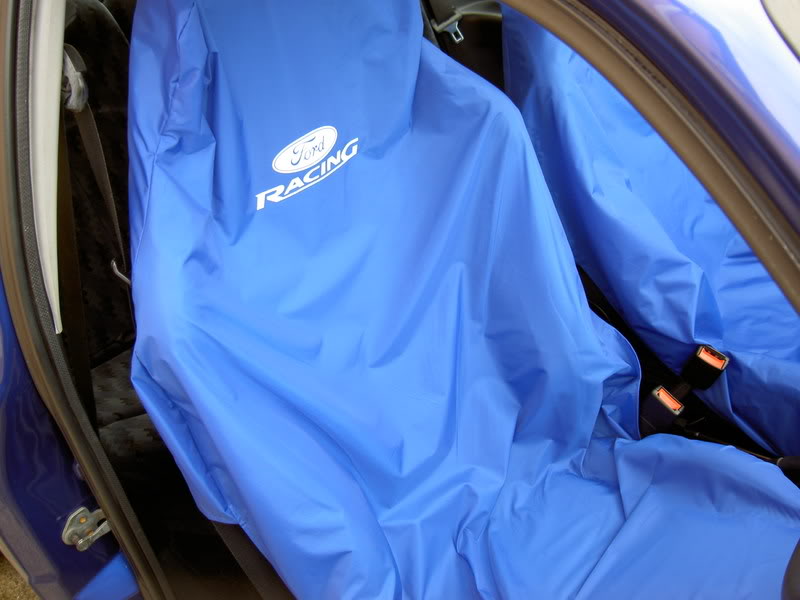
also got some seat covers to help look after the puma racing seats
decided i'd try some different wheels for a change
diamond cut RS 7's
bit dark in the first two
also got some seat covers to help look after the puma racing seats
18-03-2010, 11:13 PM
#22
PassionFord Regular
Thread Starter
Join Date: Aug 2003
Posts: 457
Likes: 0
Received 0 Likes
on
0 Posts
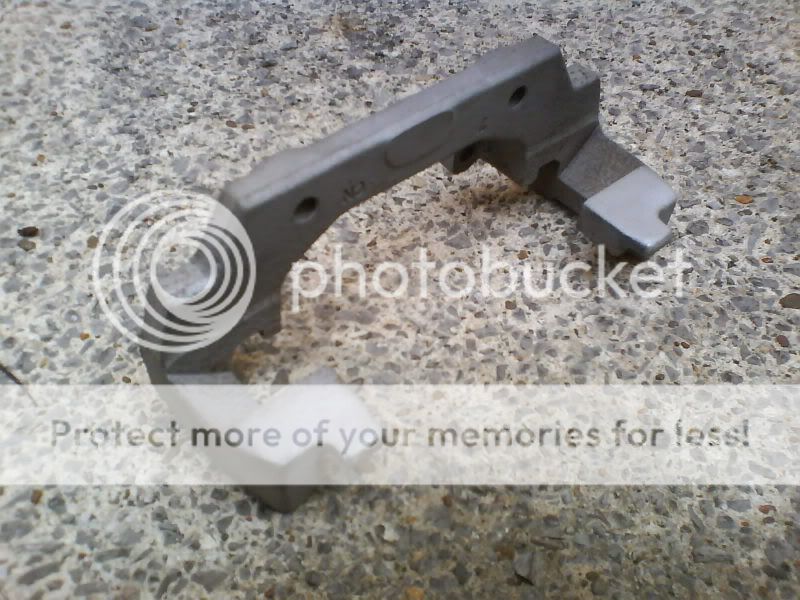
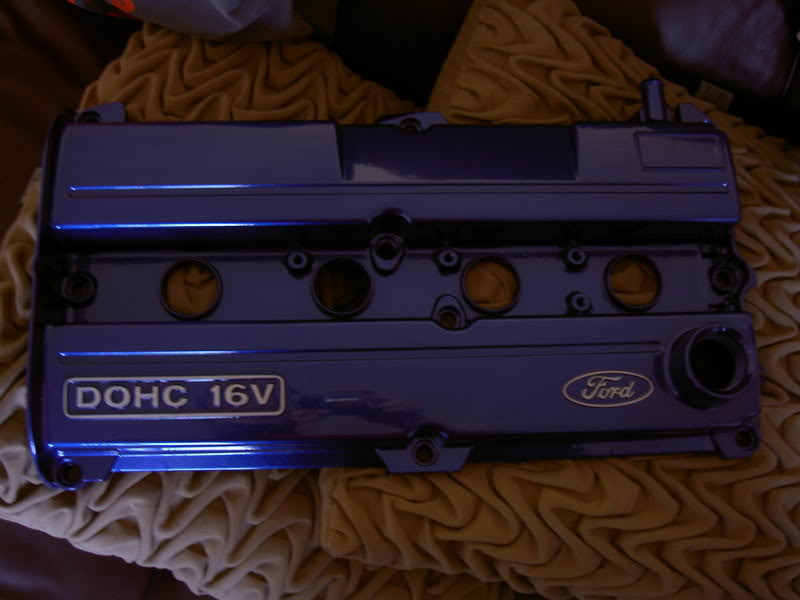
firstly my new cam cover, not fitted yet waiting for the new engine to fit it to
sprayed electric blue the same as my car, with the qwords polished and then laquered
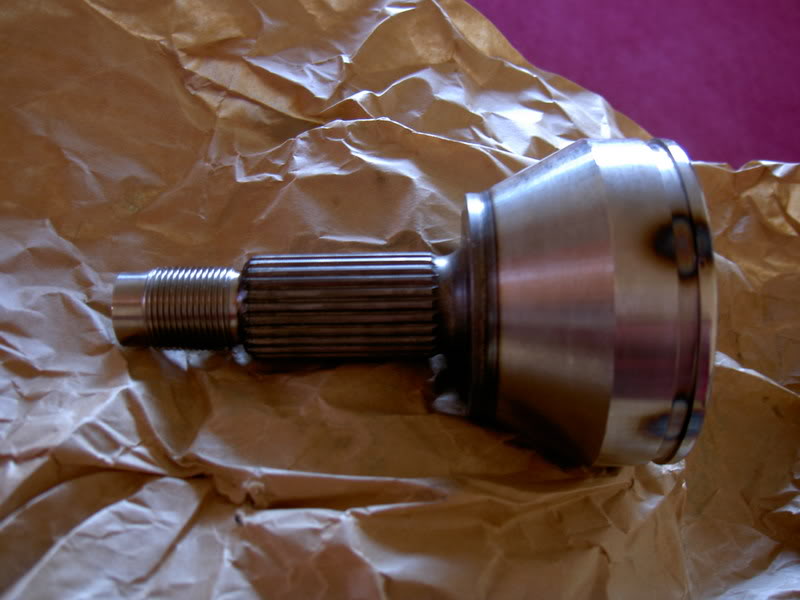
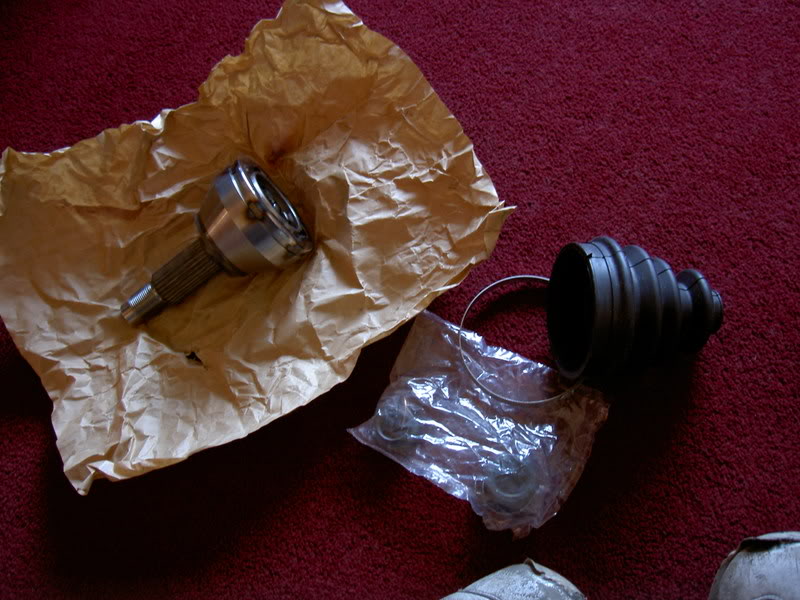
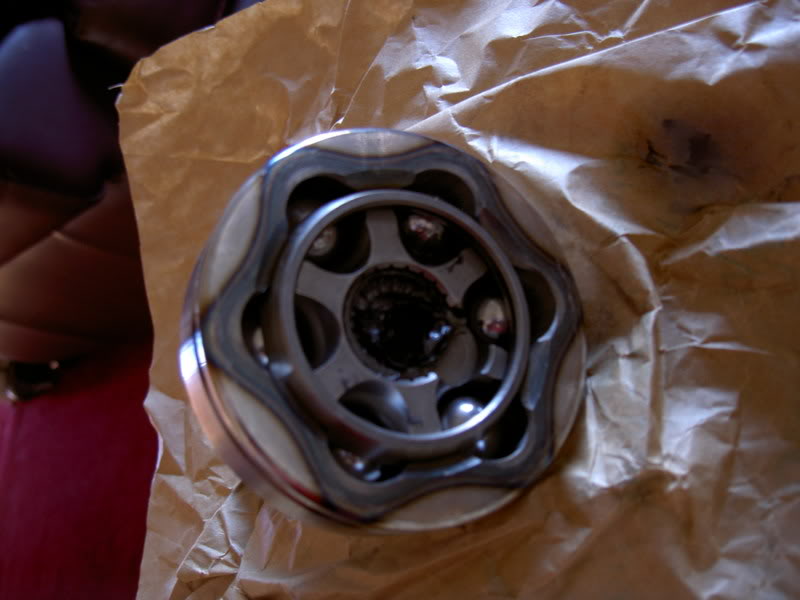
i bought new outer cv joint kits from fords as i had some problems with mine,
this was a job for the old man to fit lol
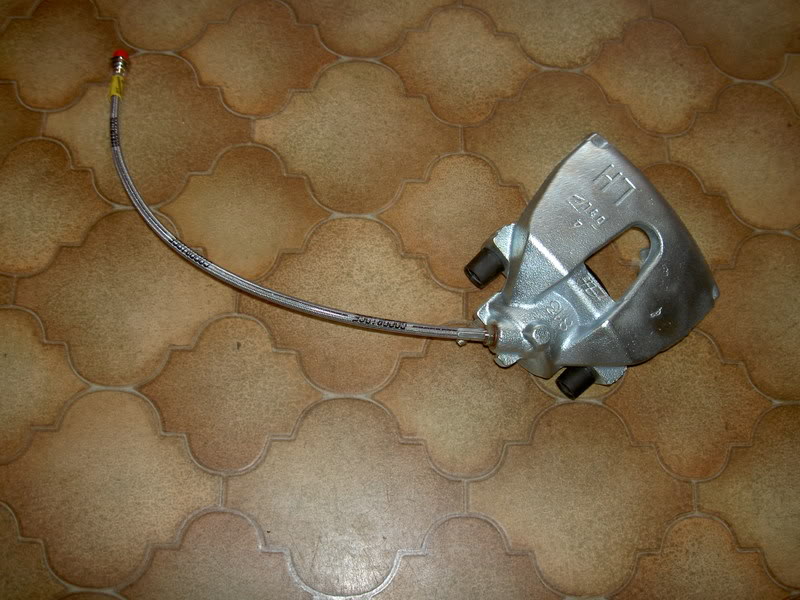
heres my st170 calipers after giving them a clean, even tho it does'nt look like it,
i then stripped them down and used some paint stripper to get the old paint off
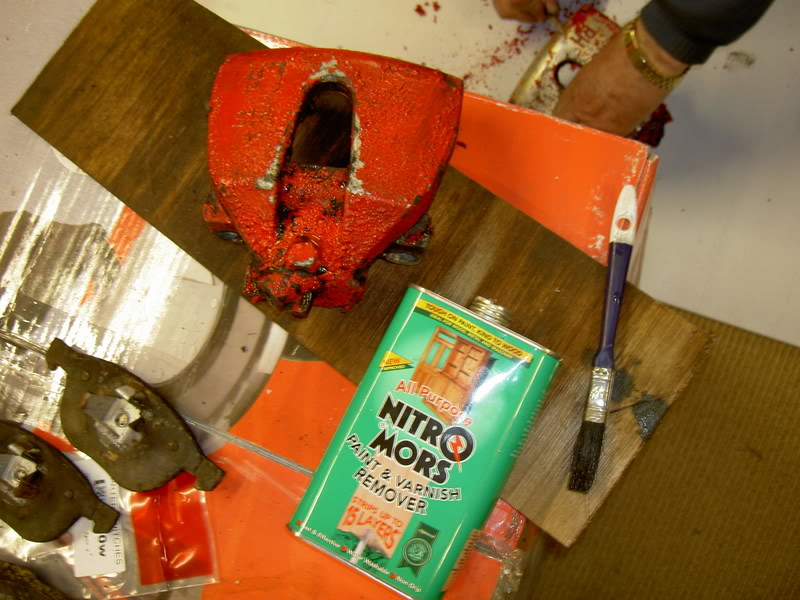
heres the paint bubbling nicely, ready to scrape off
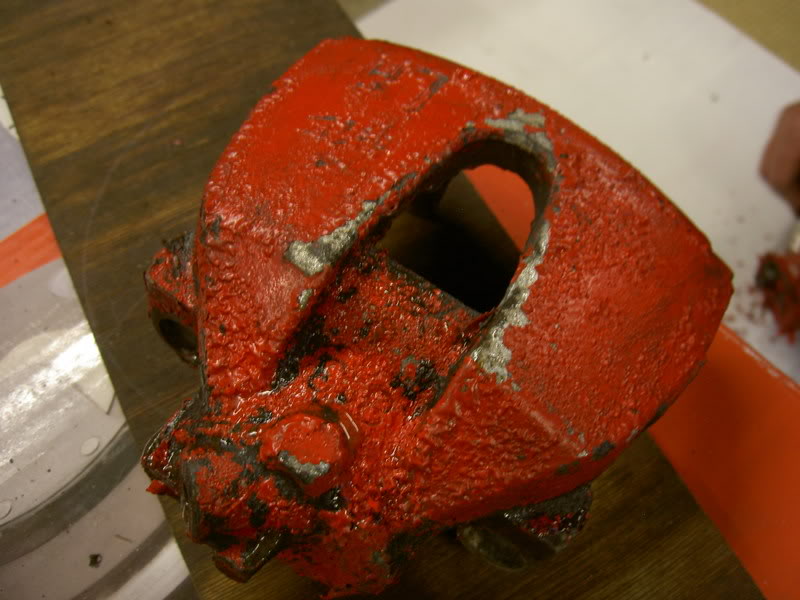
heres the finished items as far as paint stripper goes
here they are after being shotblast aswell to get all the nooks and crannies
and the finshed items dipped in silver zinc plating
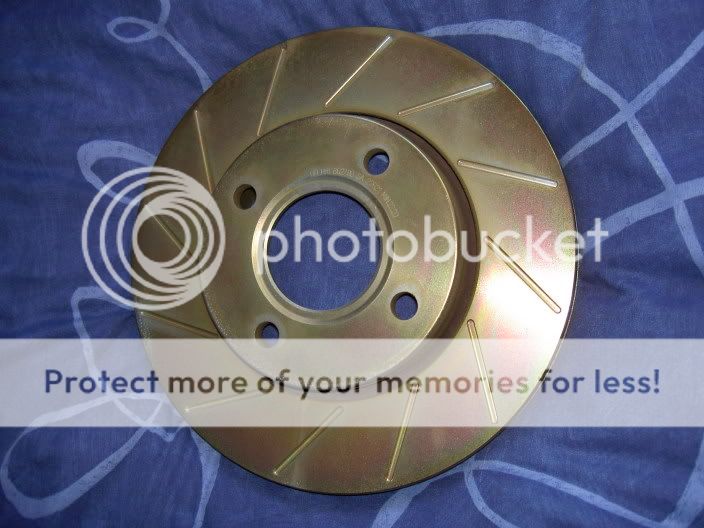
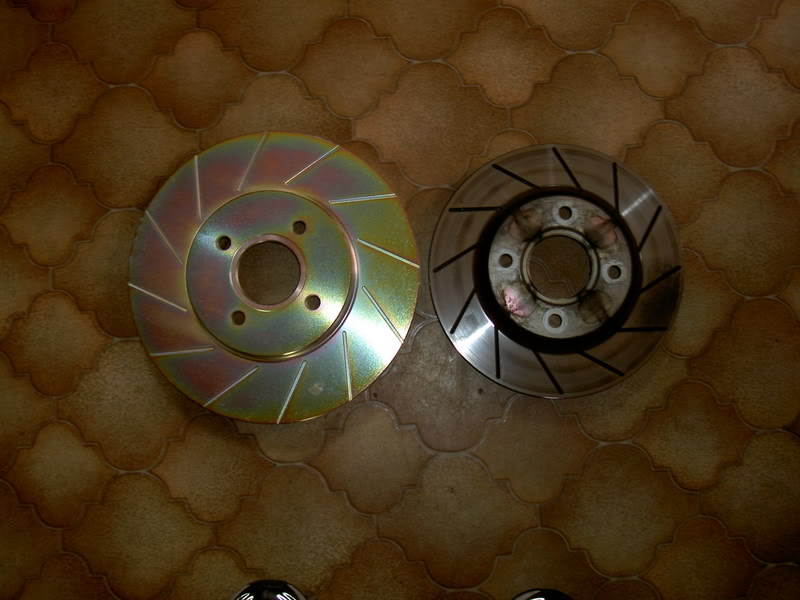
the 300mm discs grooved by my old man (cheers gimp)
and zinc plated again
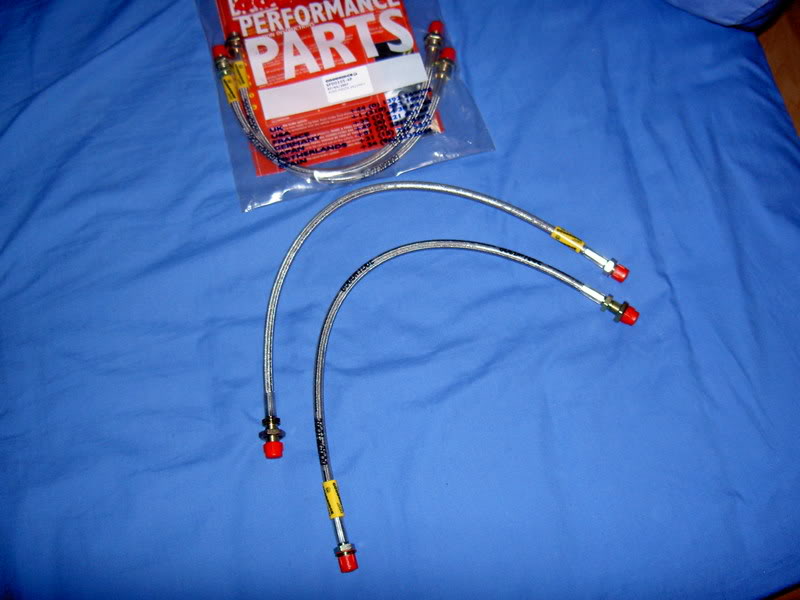
new braided hoses, as i never got round to fitting the last set, as i sold them to a mate to help him out
my new custom clear pulley cover

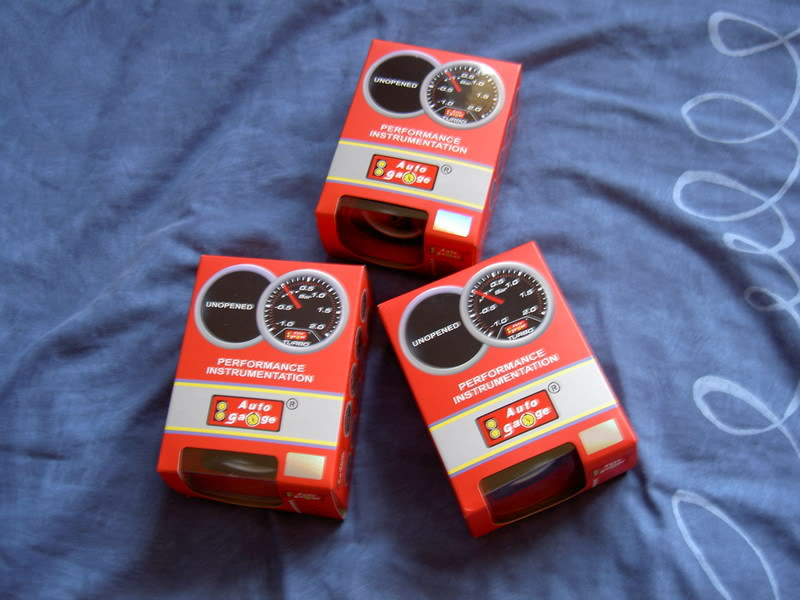
some smoked face gauges i'm collecting to britghten the dash up, and keep an eye on levels more accurately
new rear engine mount, to be changed when the new engine goes in

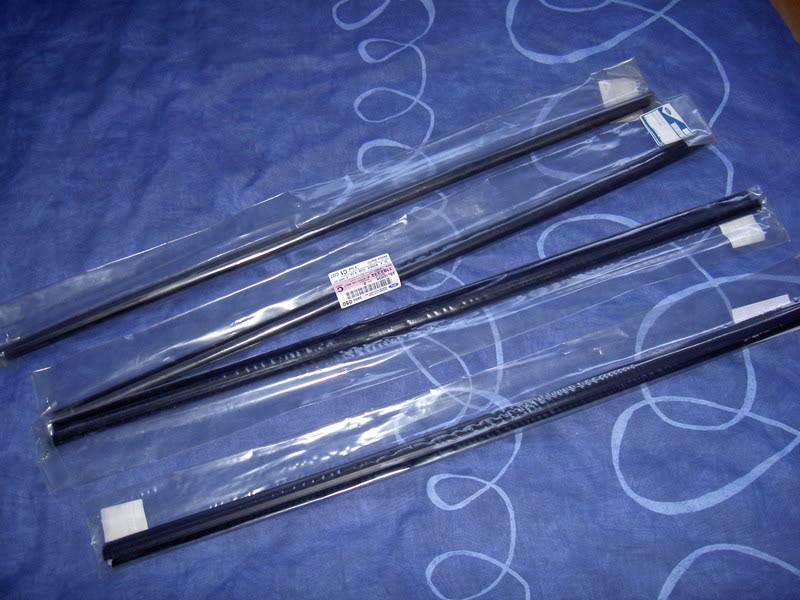
new scrape mouldings/weatherstrip for the tops of the doors,
i'm trying to make sure i replace even the little touches to help the car look clean
again new wiper arms as my look a bit manky after being on the car for many years lol
sprayed electric blue the same as my car, with the qwords polished and then laquered
i bought new outer cv joint kits from fords as i had some problems with mine,
this was a job for the old man to fit lol
heres my st170 calipers after giving them a clean, even tho it does'nt look like it,
i then stripped them down and used some paint stripper to get the old paint off
heres the paint bubbling nicely, ready to scrape off
heres the finished items as far as paint stripper goes
here they are after being shotblast aswell to get all the nooks and crannies
and the finshed items dipped in silver zinc plating
the 300mm discs grooved by my old man (cheers gimp)
and zinc plated again
new braided hoses, as i never got round to fitting the last set, as i sold them to a mate to help him out
my new custom clear pulley cover
some smoked face gauges i'm collecting to britghten the dash up, and keep an eye on levels more accurately
new rear engine mount, to be changed when the new engine goes in
new scrape mouldings/weatherstrip for the tops of the doors,
i'm trying to make sure i replace even the little touches to help the car look clean
again new wiper arms as my look a bit manky after being on the car for many years lol
18-03-2010, 11:14 PM
#23
PassionFord Regular
Thread Starter
Join Date: Aug 2003
Posts: 457
Likes: 0
Received 0 Likes
on
0 Posts
another little update of more goodies
seen as though i've got the 300mm st170 brakes for the front,
i decided to go for an escort rs2000 rear brake setup,
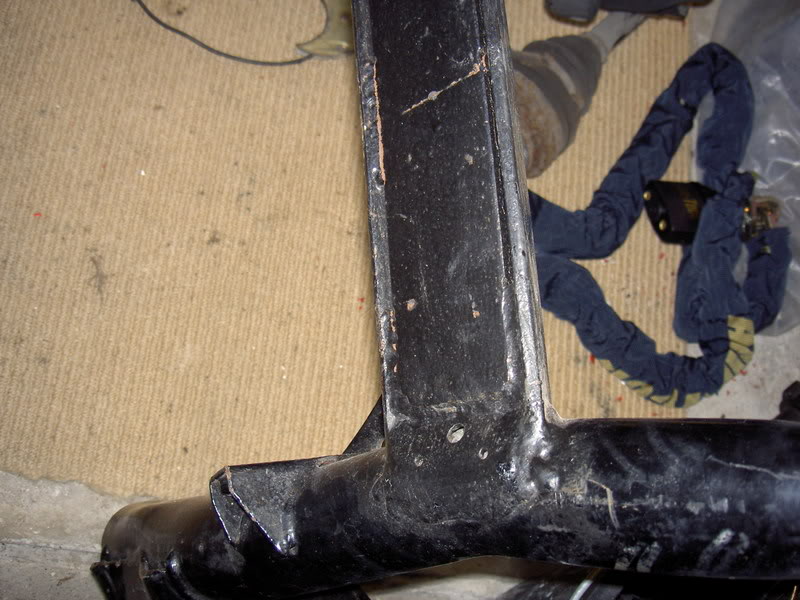
270mm disc/drum setup, when i went to pick these up i ended up coming home with the rear beam aswell
its an uprated beam which has a plate sitch welded across the lower section of the beam which is normally hollow,
will have comparison pics later on, also theres polybushes where the rear beam mounts to the chassic
so should help tighten up the feel of the back end of the fez
heres some pics for now
seen as though i've got the 300mm st170 brakes for the front,
i decided to go for an escort rs2000 rear brake setup,
270mm disc/drum setup, when i went to pick these up i ended up coming home with the rear beam aswell
its an uprated beam which has a plate sitch welded across the lower section of the beam which is normally hollow,
will have comparison pics later on, also theres polybushes where the rear beam mounts to the chassic
so should help tighten up the feel of the back end of the fez
heres some pics for now
18-03-2010, 11:15 PM
#24
PassionFord Regular
Thread Starter
Join Date: Aug 2003
Posts: 457
Likes: 0
Received 0 Likes
on
0 Posts
well thought i'd do another update, nothing to exciting but progress never the less
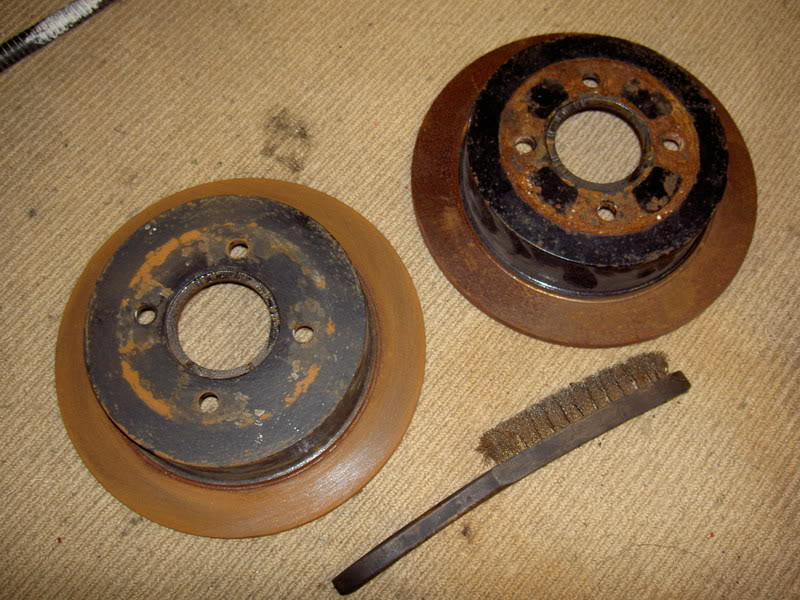
took the rear discs off my rear beam, lots of surface rust but no wear on them, look near new condition, unfortunately have been painted black
so off them came and gave them a going over with the wire brush
you can see the difference in the pic below of before and after
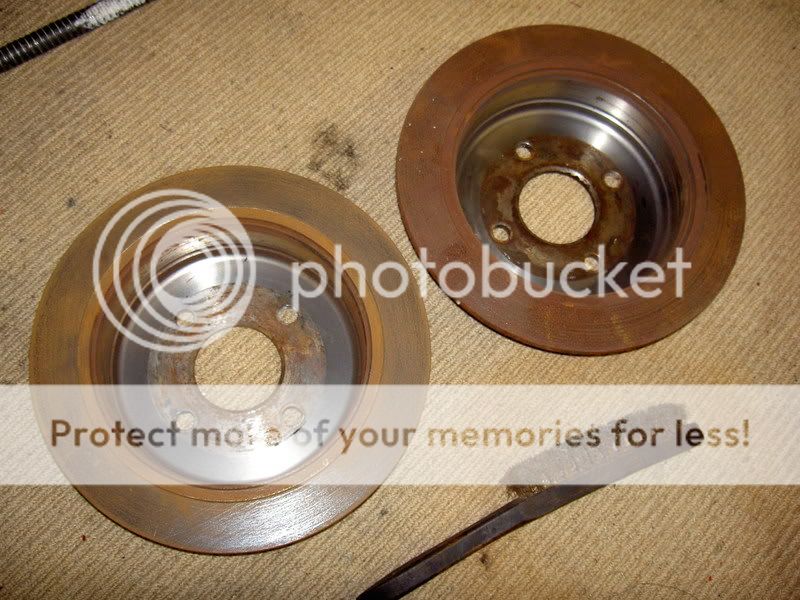
and the other side of the disc's before and after having a rub down with the wire brush
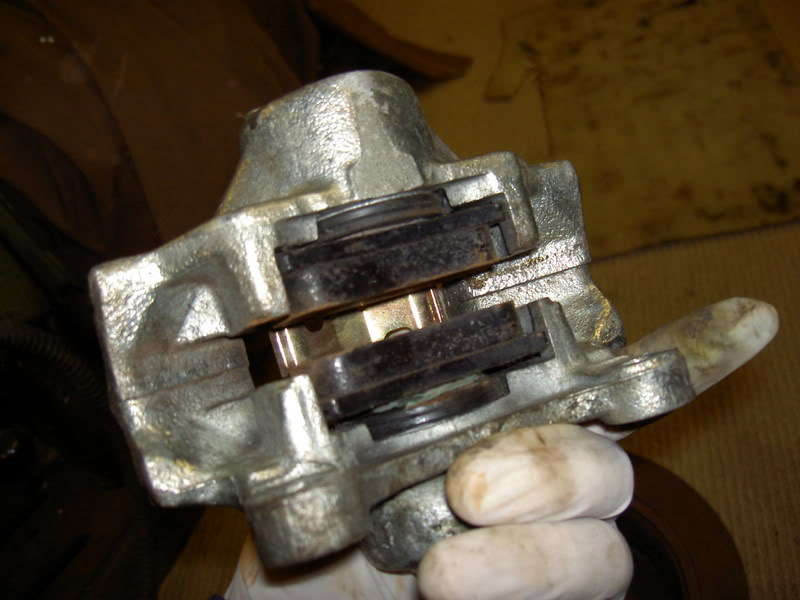
while the calipers were off thought i'd show some better pics of the two pot calipers, undecided about having these dipped in cadium plating like my other calipers as these are in top nick anyways????
pic from the top
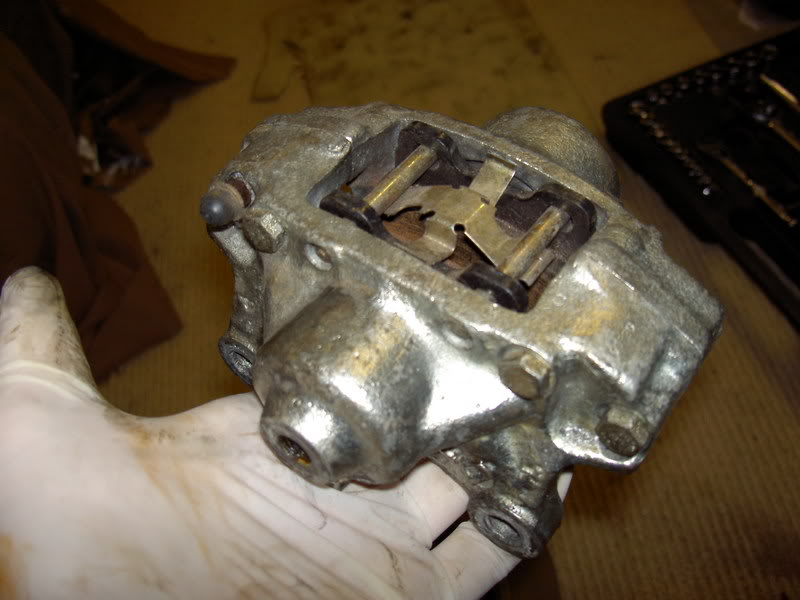
and a pic of the underneath
then the old man took my discs to work and grooved them, also sanded the paint off the discs
the results
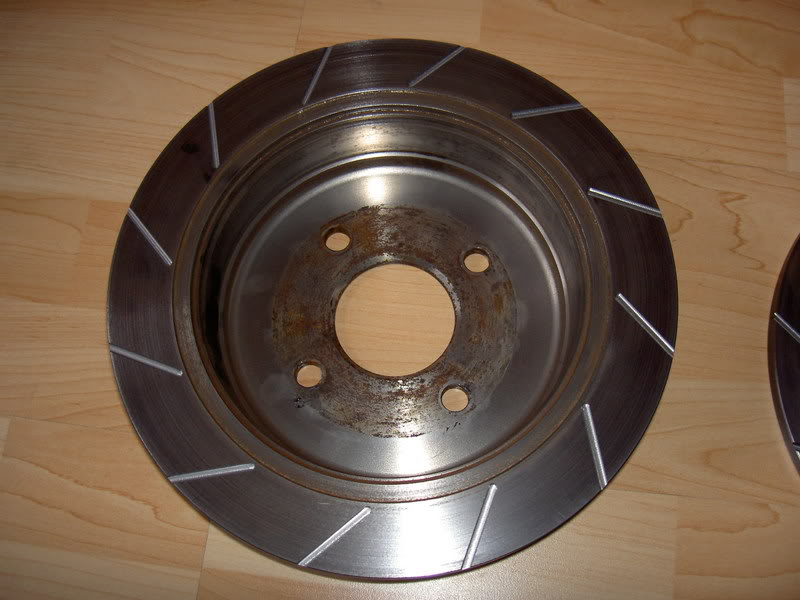
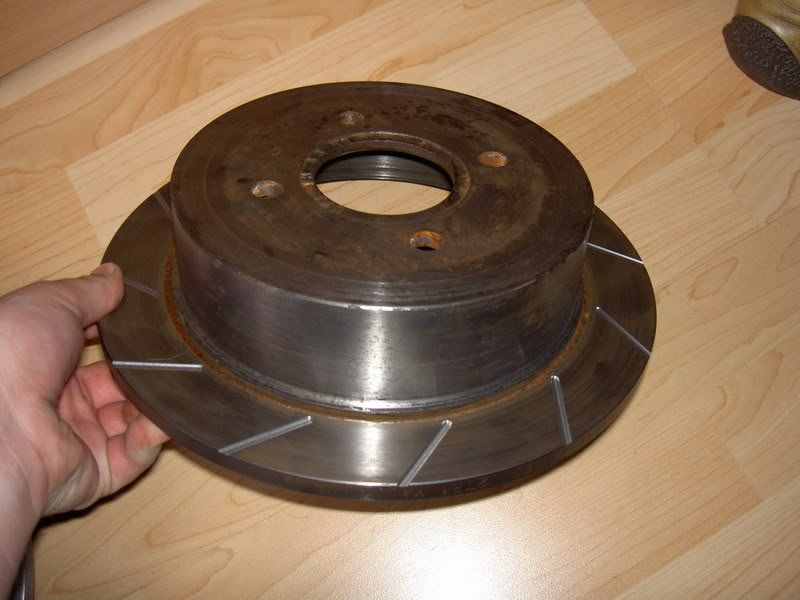
and two more pics to show the width of the discs as the drum part of the rear brakes is in the middle
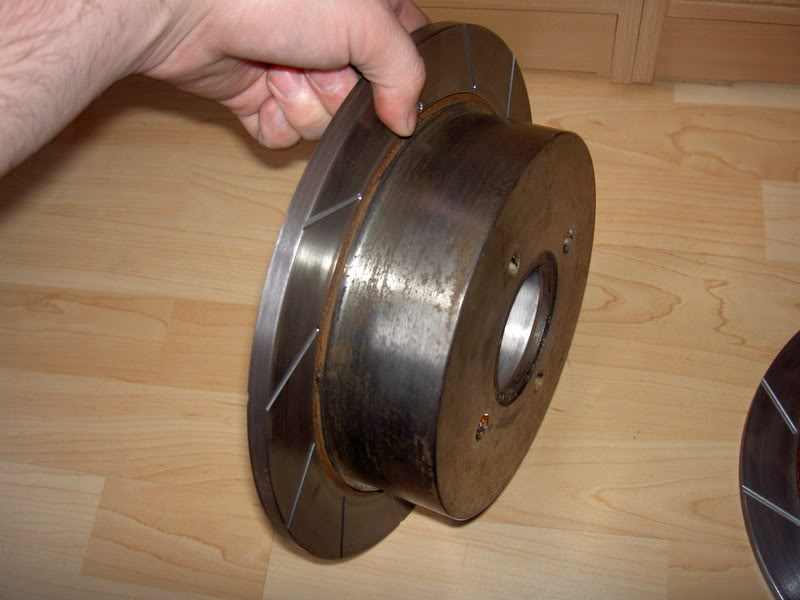
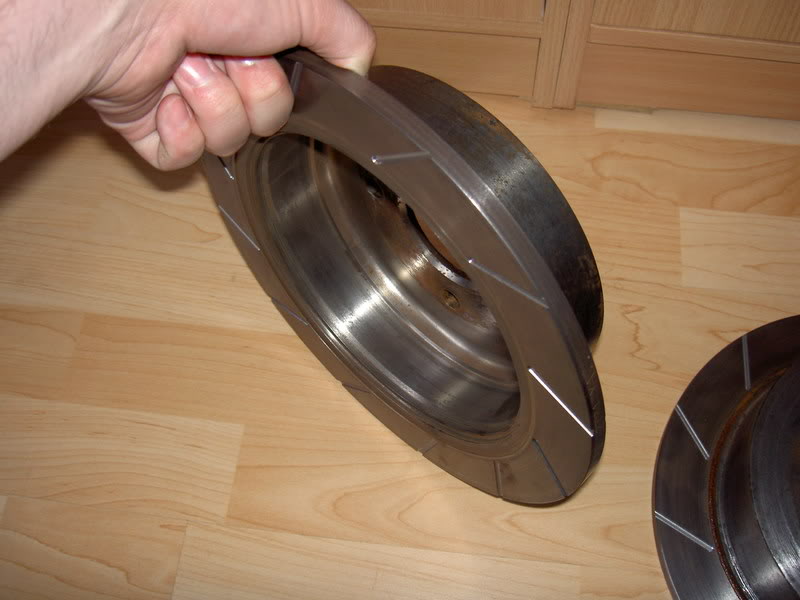
going to get these dipped in zinc and thats it then, no more pics of disc's being grooved lol
thanks again dad,
things to do at the moment are:-
-repaint the bigger escort brake servo
-repaint the uprated rear beam
-and make a start on stripping back the old underseal under the fez
took the rear discs off my rear beam, lots of surface rust but no wear on them, look near new condition, unfortunately have been painted black
so off them came and gave them a going over with the wire brush
you can see the difference in the pic below of before and after
and the other side of the disc's before and after having a rub down with the wire brush
while the calipers were off thought i'd show some better pics of the two pot calipers, undecided about having these dipped in cadium plating like my other calipers as these are in top nick anyways????
pic from the top
and a pic of the underneath
then the old man took my discs to work and grooved them, also sanded the paint off the discs
the results
and two more pics to show the width of the discs as the drum part of the rear brakes is in the middle
going to get these dipped in zinc and thats it then, no more pics of disc's being grooved lol
thanks again dad,
things to do at the moment are:-
-repaint the bigger escort brake servo
-repaint the uprated rear beam
-and make a start on stripping back the old underseal under the fez
18-03-2010, 11:15 PM
#25
PassionFord Regular
Thread Starter
Join Date: Aug 2003
Posts: 457
Likes: 0
Received 0 Likes
on
0 Posts
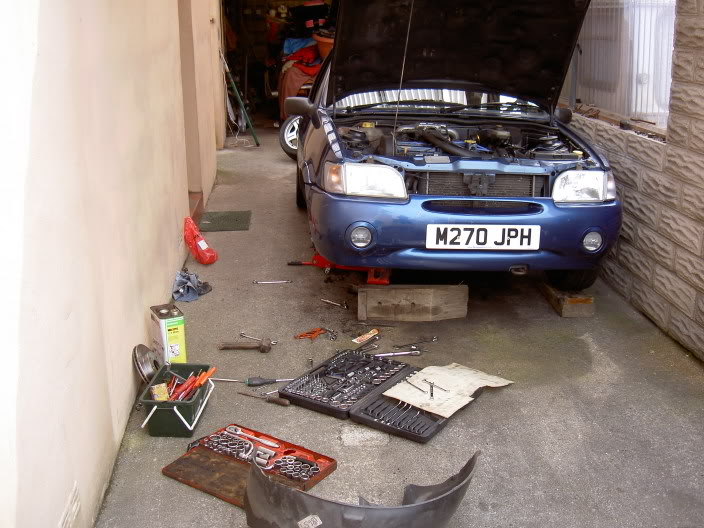
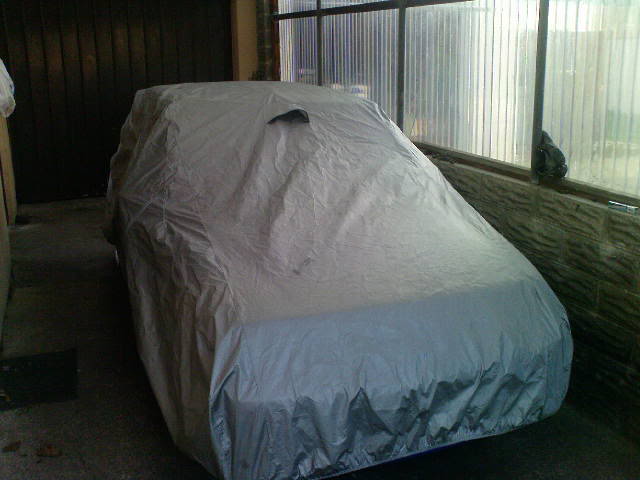
well for quite a few months now i've had my runaround, to help keep my fez in good nick after all the effort i put into her at the bodyshop,
so she's been under the car port for sometime,
while i'm saving for parts for the next phase of mods
anyway, went for a spin and took some pics in different locations
hope you like some of them (took quite a few but heres some of them)

so she's been under the car port for sometime,
while i'm saving for parts for the next phase of mods
anyway, went for a spin and took some pics in different locations
hope you like some of them (took quite a few but heres some of them)
18-03-2010, 11:17 PM
#26
PassionFord Regular
Thread Starter
Join Date: Aug 2003
Posts: 457
Likes: 0
Received 0 Likes
on
0 Posts
not sure if i showed a pic of my new wiper arms,
the old ones were badly faded, not something i just wanted to paint black
so bought new ones from work, i'm very pleased anyway even if no ones else notices lol
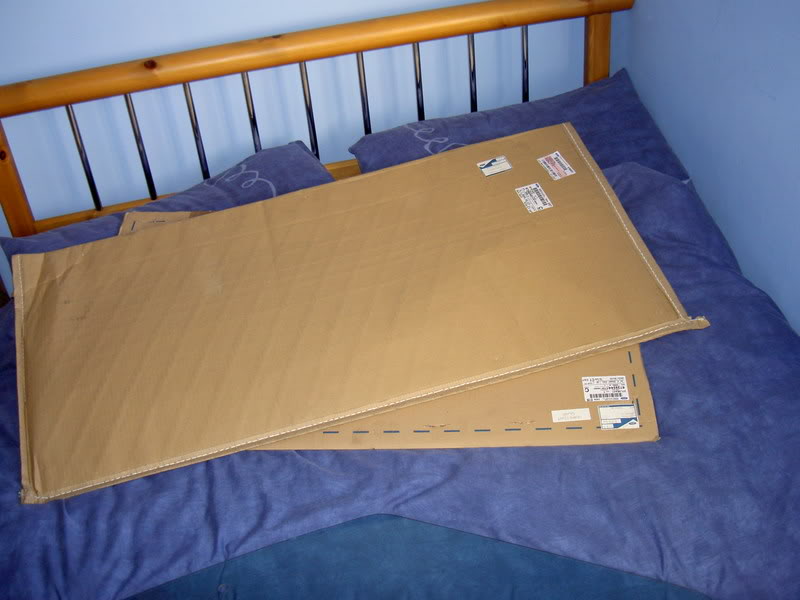
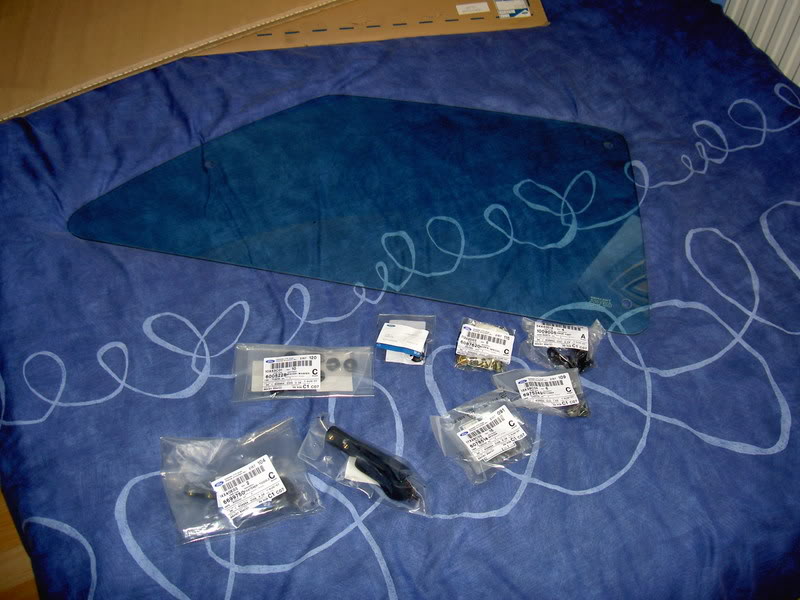
also bought new rear opening windows as i'm not happy with the second hand ones i bought,
all new glass, nuts, washers, hinges, clips and caps etc
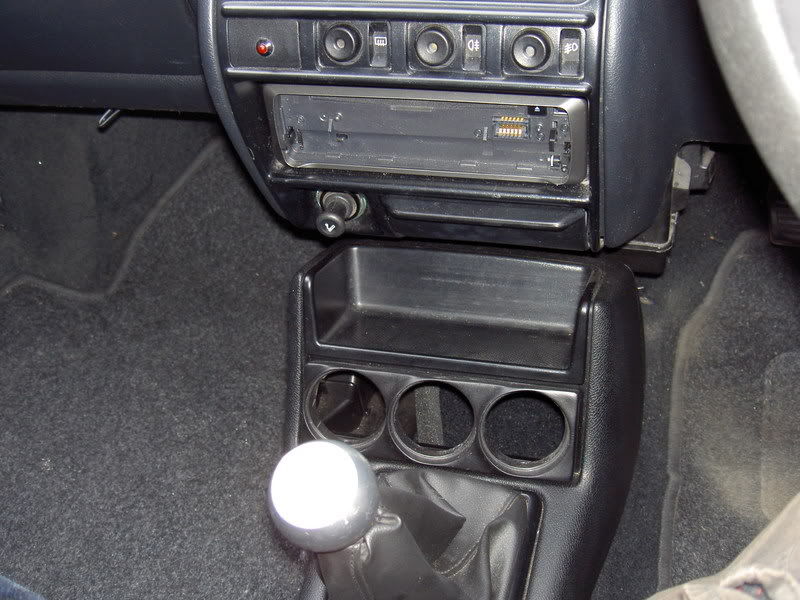
also took the bottom tray out of my centre console and tried a gauge pod there,
not sure yet,
the old ones were badly faded, not something i just wanted to paint black
so bought new ones from work, i'm very pleased anyway even if no ones else notices lol
also bought new rear opening windows as i'm not happy with the second hand ones i bought,
all new glass, nuts, washers, hinges, clips and caps etc
also took the bottom tray out of my centre console and tried a gauge pod there,
not sure yet,
18-03-2010, 11:18 PM
#27
PassionFord Regular
Thread Starter
Join Date: Aug 2003
Posts: 457
Likes: 0
Received 0 Likes
on
0 Posts
well made a start on putting the front brakes on today,
had them ready for some time, so put the seals and braided hoses on
then i took the old brakes off, well not old only a year since they were refurbed and only done 5k lol
new disc next to the old disc (remembering these old disc's made the original Si discs look silly aswell )
actually heres the 260mm disc's next to the original SI disc

heres the new 300mm disc next to the old 260mm
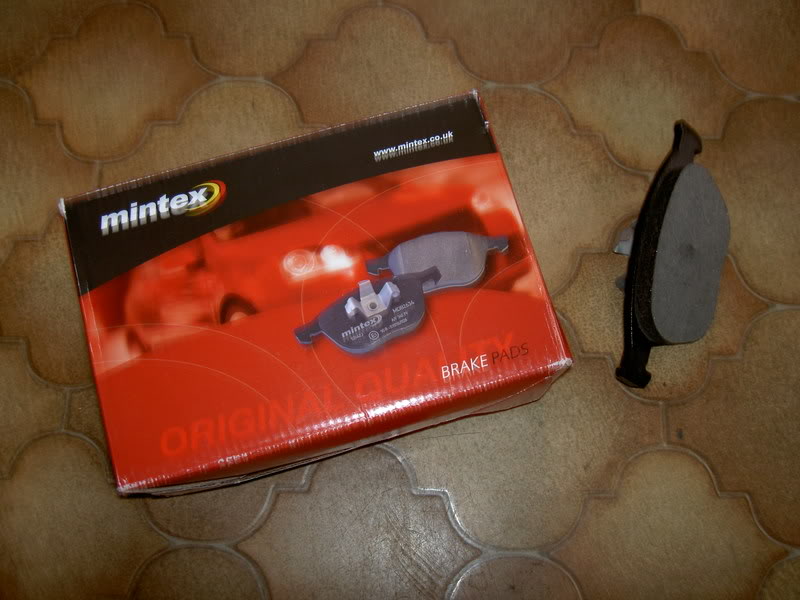
mintex brake pads aswell, nothing special but still mintex nether the less
heres a quick pic of the new brake setup for now, really cant explain how much bigger they seem aswell as bloody heavy hehehe

here they are behind the wheel, much happier with the appearance of the st170 setup,
yet to do the otherside so have'nt tried them out yet!
ALSO
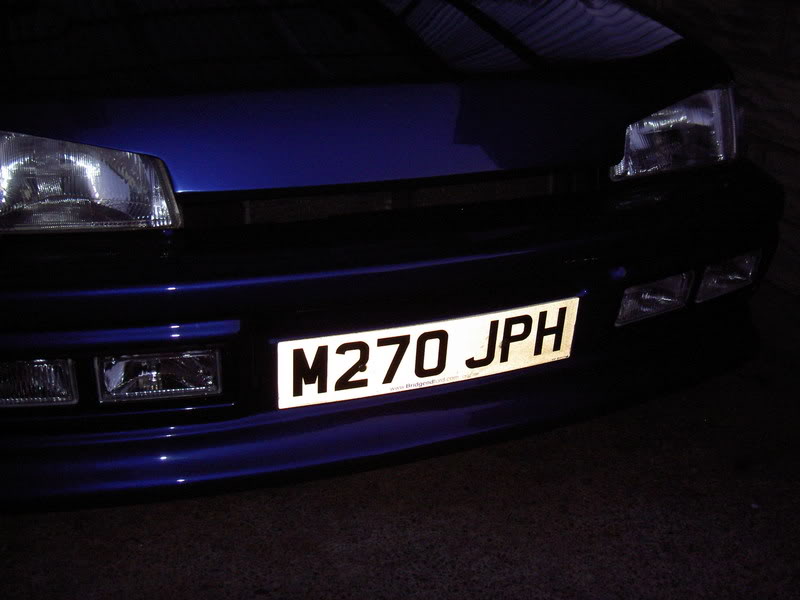
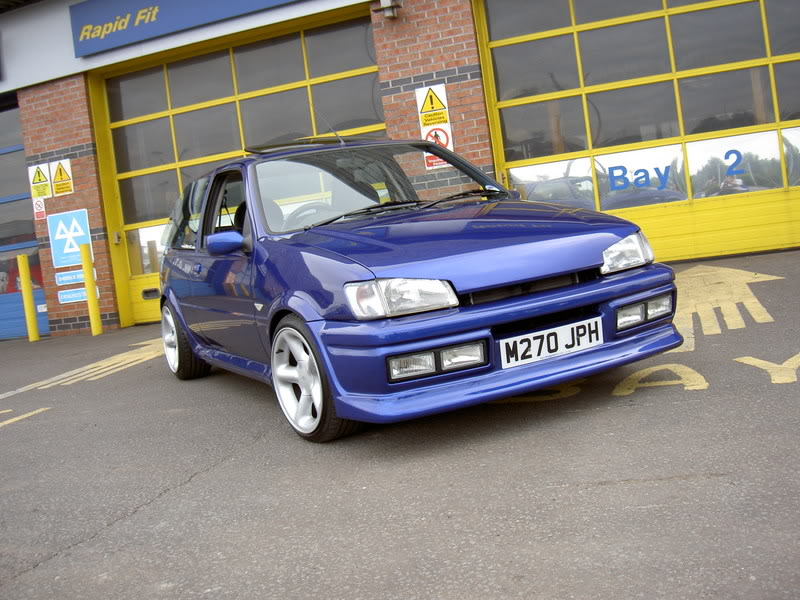
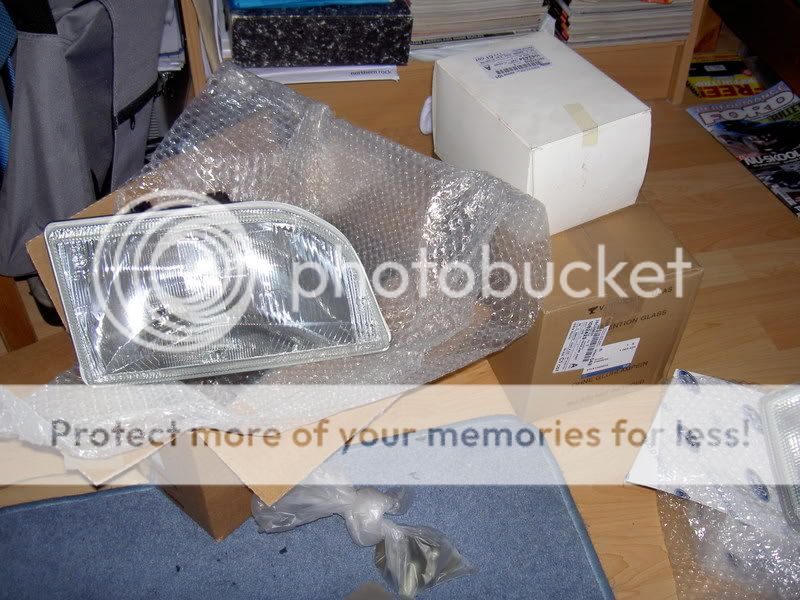
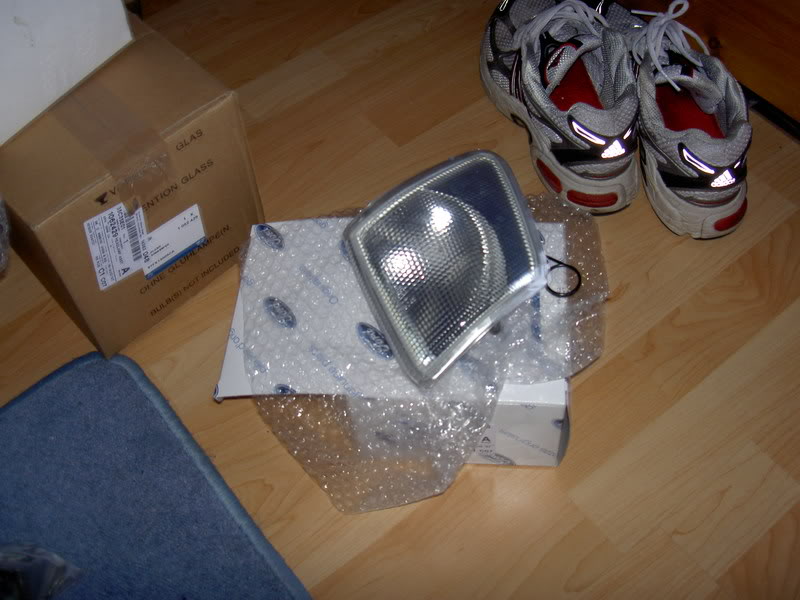
got myself some new headlights and front indicators, just more touches to help the car look really clean
suprised at the difference of the new ones, you just dont realise how bogging the original standard lights get...
anyway pics as always
had them ready for some time, so put the seals and braided hoses on
then i took the old brakes off, well not old only a year since they were refurbed and only done 5k lol
new disc next to the old disc (remembering these old disc's made the original Si discs look silly aswell )
actually heres the 260mm disc's next to the original SI disc
heres the new 300mm disc next to the old 260mm
mintex brake pads aswell, nothing special but still mintex nether the less
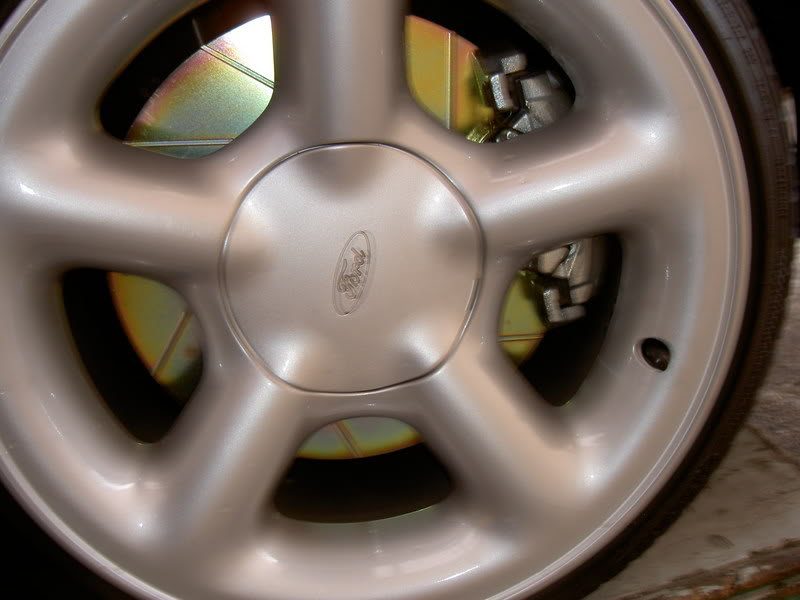
heres a quick pic of the new brake setup for now, really cant explain how much bigger they seem aswell as bloody heavy hehehe
here they are behind the wheel, much happier with the appearance of the st170 setup,
yet to do the otherside so have'nt tried them out yet!
ALSO
got myself some new headlights and front indicators, just more touches to help the car look really clean
suprised at the difference of the new ones, you just dont realise how bogging the original standard lights get...
anyway pics as always
18-03-2010, 11:20 PM
#28
PassionFord Regular
Thread Starter
Join Date: Aug 2003
Posts: 457
Likes: 0
Received 0 Likes
on
0 Posts
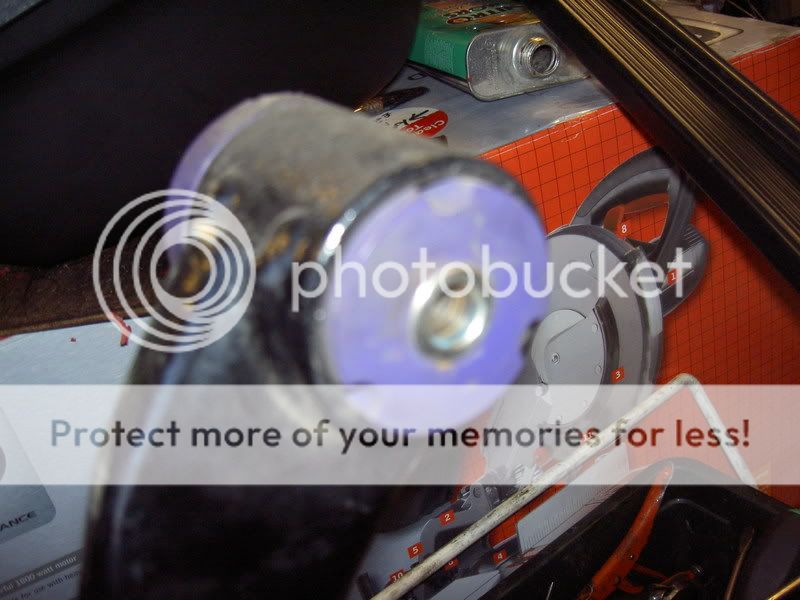
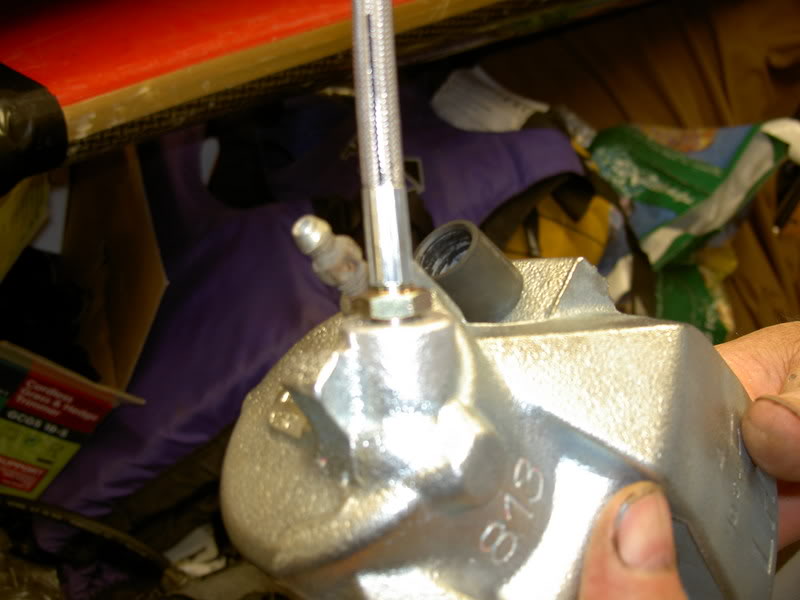
well after putting the new bigger front brakes on,
noticed they were weeping slightly where the brake hose connects to the caliper,
after closer inspection the thread on the end of the braided hose was'nt long enough
as it looked like it was screwed in fully, but the end of the connection was'nt fully making contact inside the caliper
heres the offending thread

so we ground the surrounding metal around where the hose connects the caliper so that the thread could screw in fully, making a better connection and not leaking any fluid
forgot to take a before pic, but heres the connection after, as you can see the thread shows room to screw in a bit more when infact its up tight inside, no more leaking
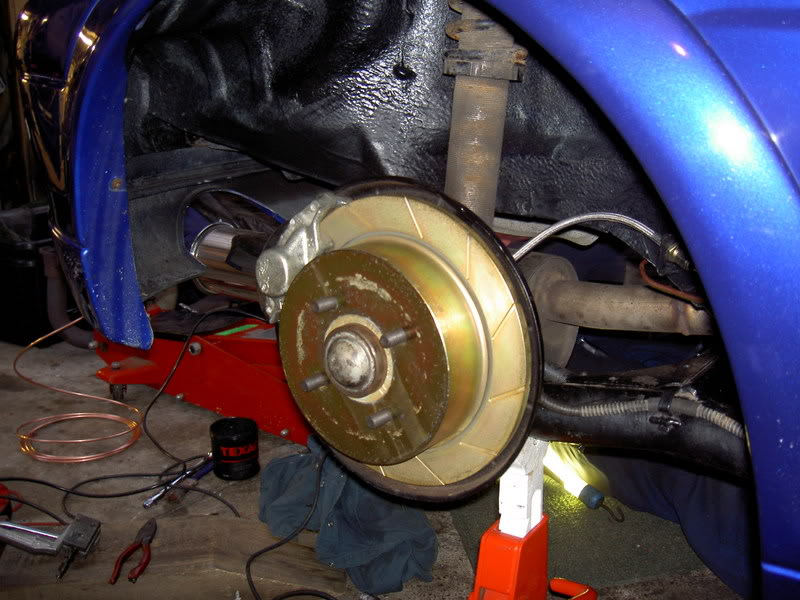
heres a pic of the new beam and rear disc's on
was'nt happy with the rear brake lines so replaced them with new copper lines my old man made up, with new braided hoses to connect to the rear calipers
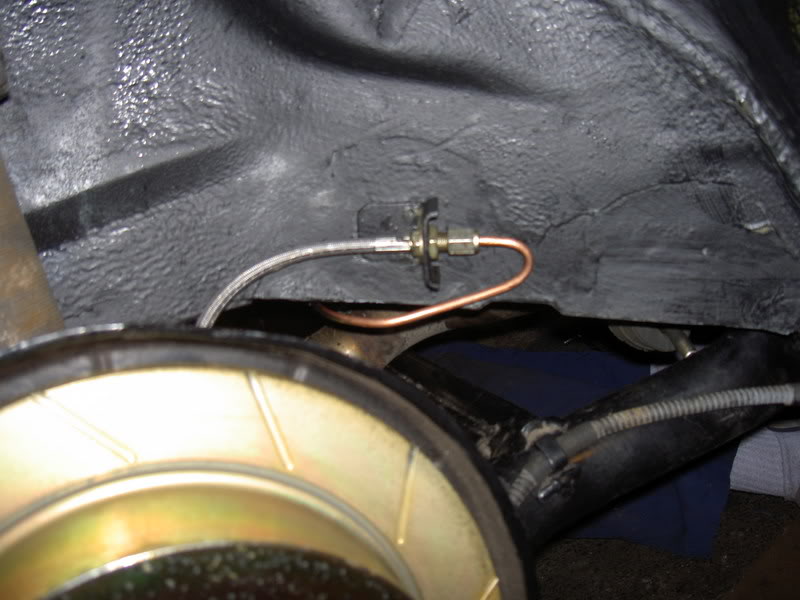
had to make brackets to secure the hoses to the rear beam,
also to make sure the hoses dont rub on anything like the shocks etc,
used a small amount of copper pipe as these braided hoses were made for a mk3 fiesta which has drums, not disc's as none of them came out of the factory with them. bracket works well tho
and heres what the disc's look like quickly behind the wheels
(alot nicer than horrible old drums)
will have some new up to date pics after eurofest hopefully as the fiesta passed the mot this morning
noticed they were weeping slightly where the brake hose connects to the caliper,
after closer inspection the thread on the end of the braided hose was'nt long enough
as it looked like it was screwed in fully, but the end of the connection was'nt fully making contact inside the caliper
heres the offending thread
so we ground the surrounding metal around where the hose connects the caliper so that the thread could screw in fully, making a better connection and not leaking any fluid
forgot to take a before pic, but heres the connection after, as you can see the thread shows room to screw in a bit more when infact its up tight inside, no more leaking
heres a pic of the new beam and rear disc's on
was'nt happy with the rear brake lines so replaced them with new copper lines my old man made up, with new braided hoses to connect to the rear calipers
had to make brackets to secure the hoses to the rear beam,
also to make sure the hoses dont rub on anything like the shocks etc,
used a small amount of copper pipe as these braided hoses were made for a mk3 fiesta which has drums, not disc's as none of them came out of the factory with them. bracket works well tho
and heres what the disc's look like quickly behind the wheels
(alot nicer than horrible old drums)
will have some new up to date pics after eurofest hopefully as the fiesta passed the mot this morning
18-03-2010, 11:20 PM
#29
PassionFord Regular
Thread Starter
Join Date: Aug 2003
Posts: 457
Likes: 0
Received 0 Likes
on
0 Posts
well heres where the fez has been for some time...............................
hibernating from this nasty weather
also saving for new toys
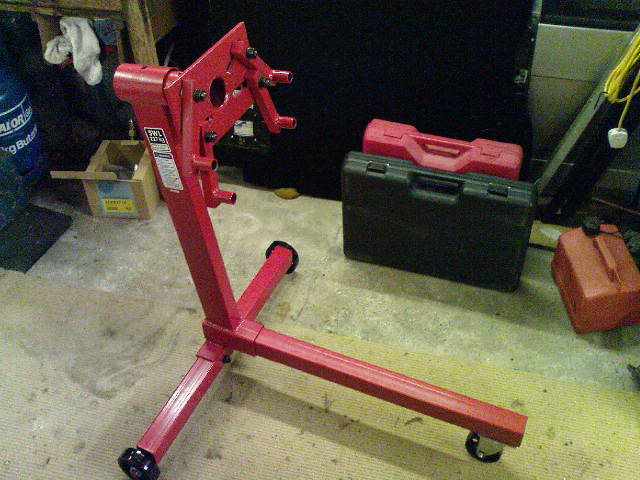
something to start the ball rolling in that direction
a nice new shiny engine stand
hibernating from this nasty weather
also saving for new toys
something to start the ball rolling in that direction
a nice new shiny engine stand
18-03-2010, 11:21 PM
#30
PassionFord Regular
Thread Starter
Join Date: Aug 2003
Posts: 457
Likes: 0
Received 0 Likes
on
0 Posts
well she's still covered up but to show she's not forgotten i've aquired some new rimage!!
escort cosworth monte carlo wheels
still 16 x 8
sorry the pics are crap, was taken in work,
plan is to have them refurbed exactly the same so they still look original
escort cosworth monte carlo wheels
still 16 x 8
sorry the pics are crap, was taken in work,
plan is to have them refurbed exactly the same so they still look original
18-03-2010, 11:23 PM
#31
PassionFord Regular
Thread Starter
Join Date: Aug 2003
Posts: 457
Likes: 0
Received 0 Likes
on
0 Posts
jan 2009
well its been quite sometime, kind of lost the love a little for the fez,
but this weekend made the most of the good weather on saturday,
started her over with the coil pack disconnected a few times to get the oil moving around,
then reconnected the coilpack and she started first time,
gave her a wash and dry, listened to the stereo aswell haha
really found the love again
some pics as per usual to show she's still alive
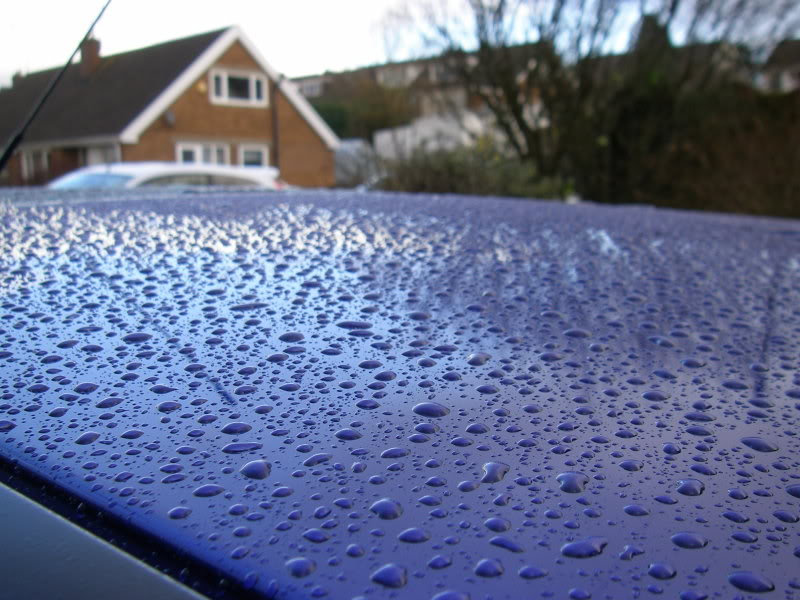
some beading shots, as before i tucked her away about a year or two ago, she had a damn good polish
a small vid just for the hell of it

well its been quite sometime, kind of lost the love a little for the fez,
but this weekend made the most of the good weather on saturday,
started her over with the coil pack disconnected a few times to get the oil moving around,
then reconnected the coilpack and she started first time,
gave her a wash and dry, listened to the stereo aswell haha
really found the love again
some pics as per usual to show she's still alive
some beading shots, as before i tucked her away about a year or two ago, she had a damn good polish
a small vid just for the hell of it
18-03-2010, 11:24 PM
#32
PassionFord Regular
Thread Starter
Join Date: Aug 2003
Posts: 457
Likes: 0
Received 0 Likes
on
0 Posts
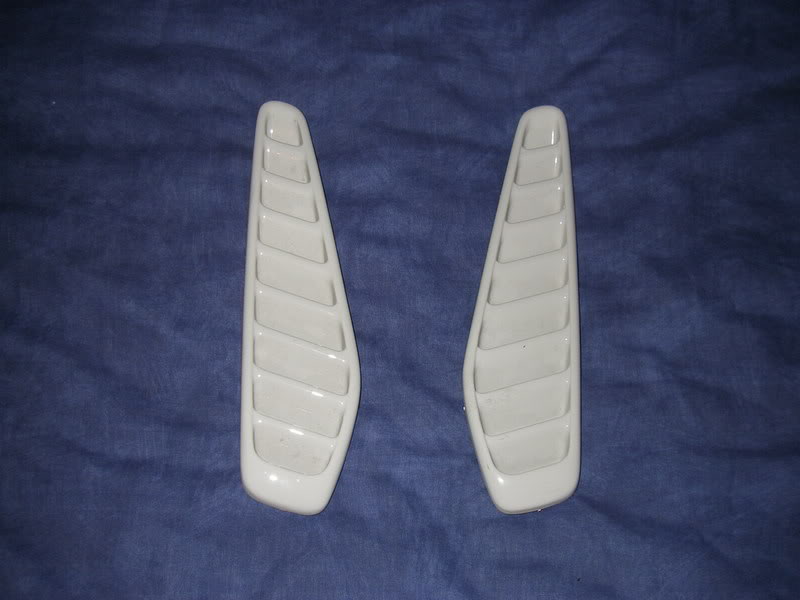
recently been pricing up things i want for the fiesta
always fancied an original fiesta turbo bonnet,
but after pricing the parts the bonnet itself is a very reasonable price
yet the vents are �95 +vat EACH
so found a mint second hand set for �30 delivered
will be ordering a new bonnet to go with these soon
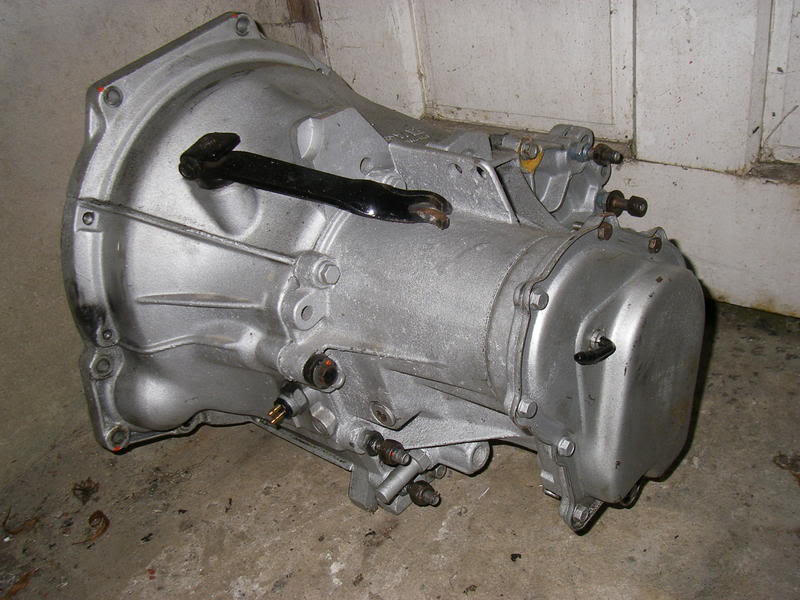
also got myself a CTS stage 2+ gearbox
basically its a fully rebuilt and strengthened BC gearbox
with ib5 internals as their stronger with bigger mainshaft bearings aswell
Quaife atb limited slip diff
all oil galleries are opened up and smoothed
gearset is shot-peened
this is the choice of gearbox for the big powered zetec turbo boys
so it will easily cope with my power
always fancied an original fiesta turbo bonnet,
but after pricing the parts the bonnet itself is a very reasonable price
yet the vents are �95 +vat EACH
so found a mint second hand set for �30 delivered
will be ordering a new bonnet to go with these soon
also got myself a CTS stage 2+ gearbox
basically its a fully rebuilt and strengthened BC gearbox
with ib5 internals as their stronger with bigger mainshaft bearings aswell
Quaife atb limited slip diff
all oil galleries are opened up and smoothed
gearset is shot-peened
this is the choice of gearbox for the big powered zetec turbo boys
so it will easily cope with my power
18-03-2010, 11:26 PM
#33
PassionFord Regular
Thread Starter
Join Date: Aug 2003
Posts: 457
Likes: 0
Received 0 Likes
on
0 Posts
well since my 106 xsi track car has sold, i've decided to have the fiesta back on the road, she flew the MOT this morning, so going to use her for the next couple of weeks before i start the next phase of work
so she's insured, mot'd and tax'd woohoo
few quick pics of her in the workshop
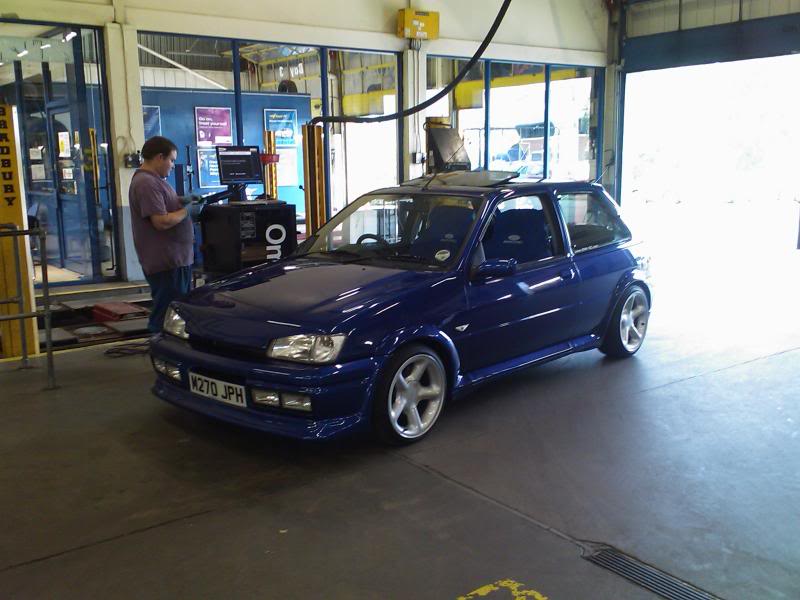
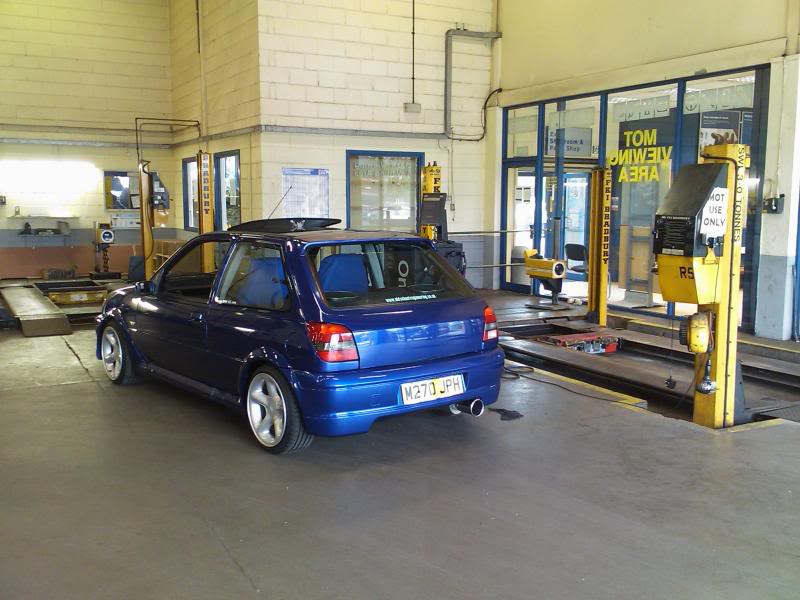
so she's insured, mot'd and tax'd woohoo
few quick pics of her in the workshop
18-03-2010, 11:27 PM
#34
PassionFord Regular
Thread Starter
Join Date: Aug 2003
Posts: 457
Likes: 0
Received 0 Likes
on
0 Posts
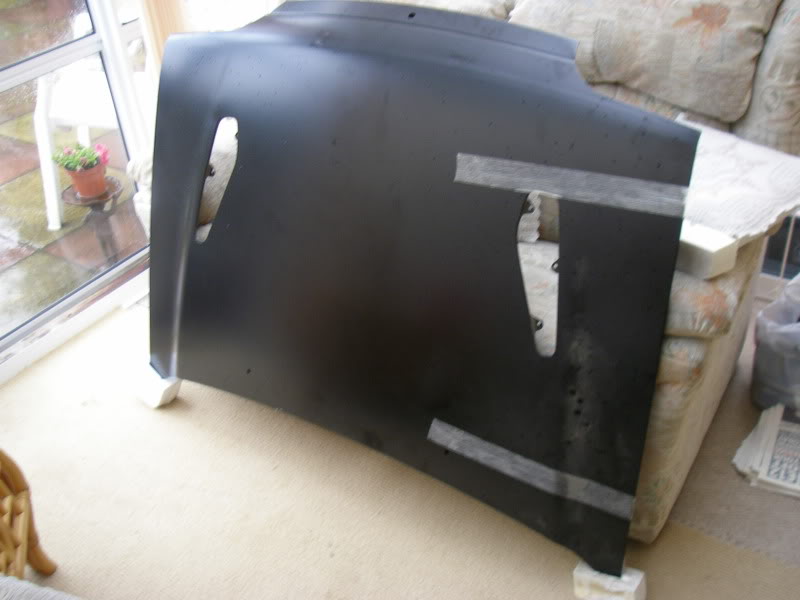
to add to my collection of parts
i've bought my self a brand spanking new fiesta turbo bonnet,
they are no longer available from fords,
so when this popped up for sale i jumped at the chance
a quick road trip with a good mate and this was home in my possesion
quick picture below
i've bought my self a brand spanking new fiesta turbo bonnet,
they are no longer available from fords,
so when this popped up for sale i jumped at the chance
a quick road trip with a good mate and this was home in my possesion
quick picture below
18-03-2010, 11:28 PM
#35
PassionFord Regular
Thread Starter
Join Date: Aug 2003
Posts: 457
Likes: 0
Received 0 Likes
on
0 Posts
well starting to get into things with this car again, i've got something else on the go at the moment aswell,
but will update her when thats done
so something else thats been on the "TO DO" list for sometime
when i changed the rear drums for the rear disc/drum option from an mk5 escort rs2000
it made the rear track of the car alot more narrow, which is annoying as i used to love the
wheels sticking out of the arches
so looking to make some rear axel spacers to bring the wheels back out of the arches
mainly for show, but it must affect the handling somehow
anyway the bolt pattern is different from my mk6 fiesta, so going to make these spacers from scratch
to get some idea of how much i need to space them i've played with normal spacers to see how much is needed
heres a pic with no spacer
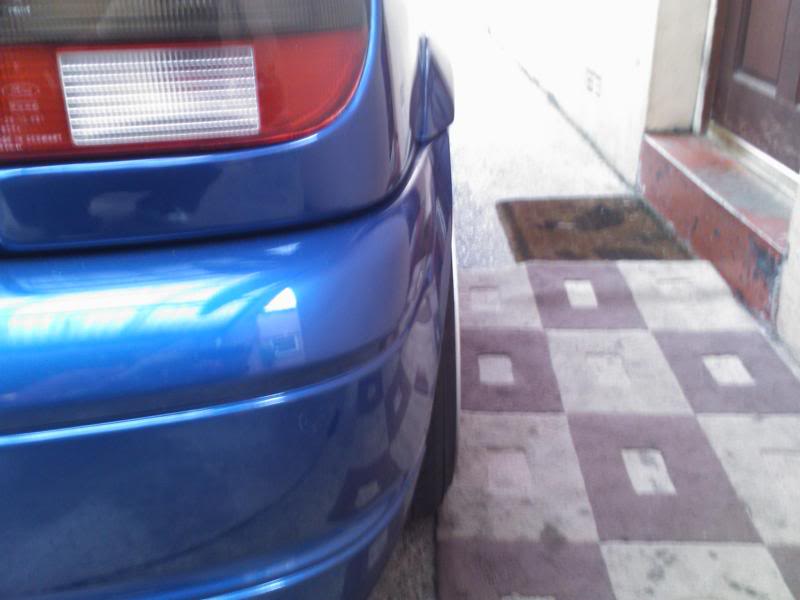
heres a pic with a 10mm spacer on, looks alot better but still after a bit more
so thinking 13-15mm

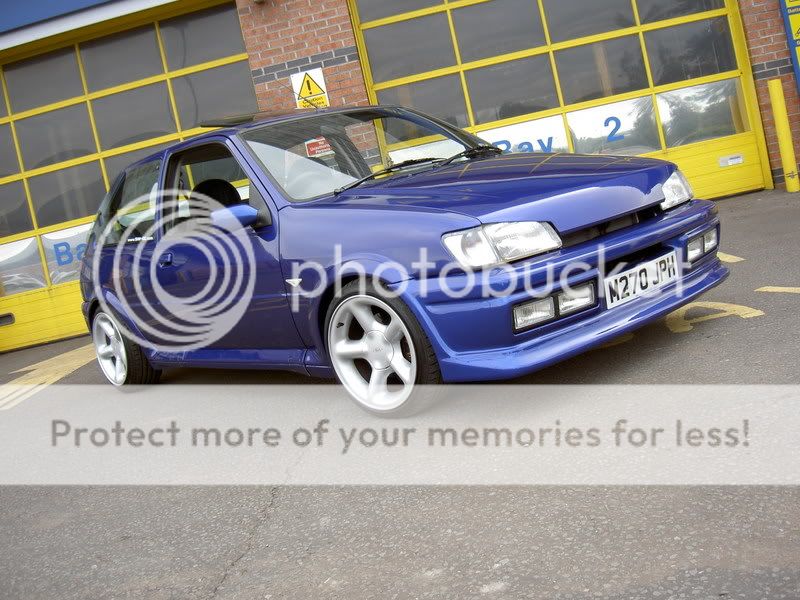
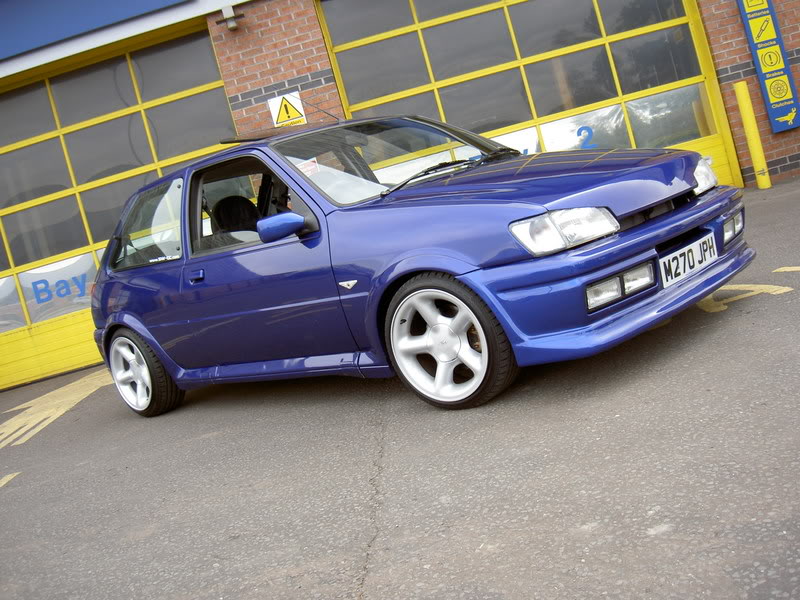
while i've been messing about, i thought i'd wind the coilovers down aswell, something i've been meaning to do since it came out of the bodyshop about 2-3 years ago lol (where does the time go???)
heres some pics of the new lowness!

but will update her when thats done
so something else thats been on the "TO DO" list for sometime
when i changed the rear drums for the rear disc/drum option from an mk5 escort rs2000
it made the rear track of the car alot more narrow, which is annoying as i used to love the
wheels sticking out of the arches
so looking to make some rear axel spacers to bring the wheels back out of the arches
mainly for show, but it must affect the handling somehow
anyway the bolt pattern is different from my mk6 fiesta, so going to make these spacers from scratch
to get some idea of how much i need to space them i've played with normal spacers to see how much is needed
heres a pic with no spacer
heres a pic with a 10mm spacer on, looks alot better but still after a bit more
so thinking 13-15mm
while i've been messing about, i thought i'd wind the coilovers down aswell, something i've been meaning to do since it came out of the bodyshop about 2-3 years ago lol (where does the time go???)
heres some pics of the new lowness!
18-03-2010, 11:30 PM
#36
PassionFord Regular
Thread Starter
Join Date: Aug 2003
Posts: 457
Likes: 0
Received 0 Likes
on
0 Posts
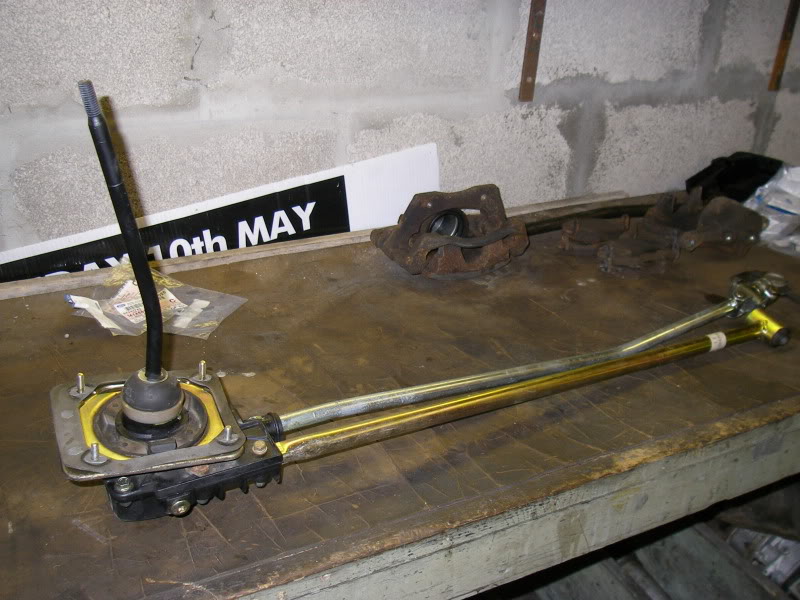
about a year before having the bodywork restored i bought an expensive B&M quickshift
thinking it would solve my gear change problems as it was like porridge
but it was just soo tight between gears i've never really liked it
so out it came
got hold of a good condition standard gear selector as their no longer available complete for my car in fords
printed off a diagram from work, so i could mark off what needed replacing
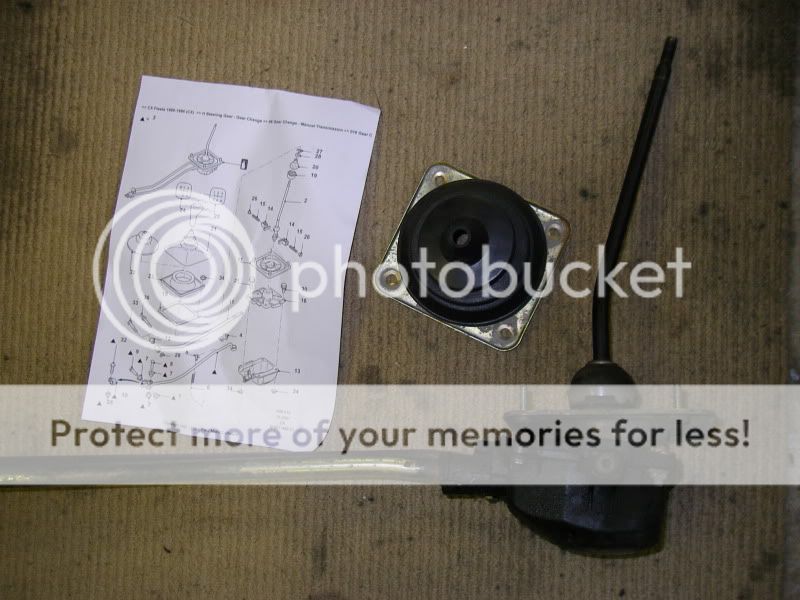
opened it up and marked what i wanted on the diagram after cleaning all the grease off the parts,
so i could check how worn the bits were
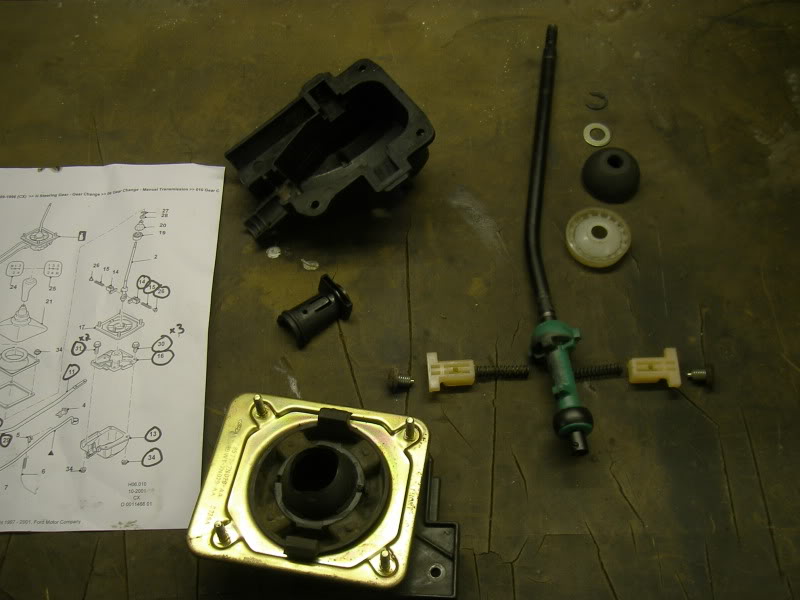
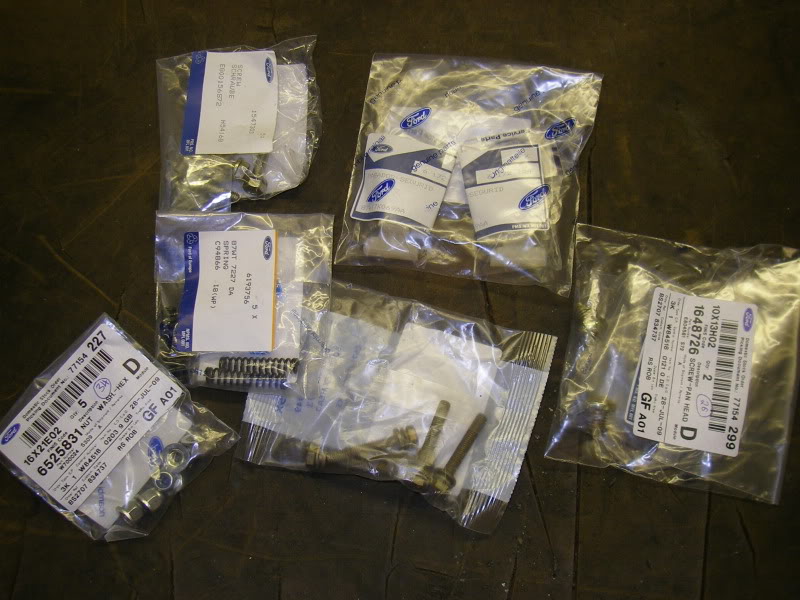
new parts (springs, clips, screws and nuts)
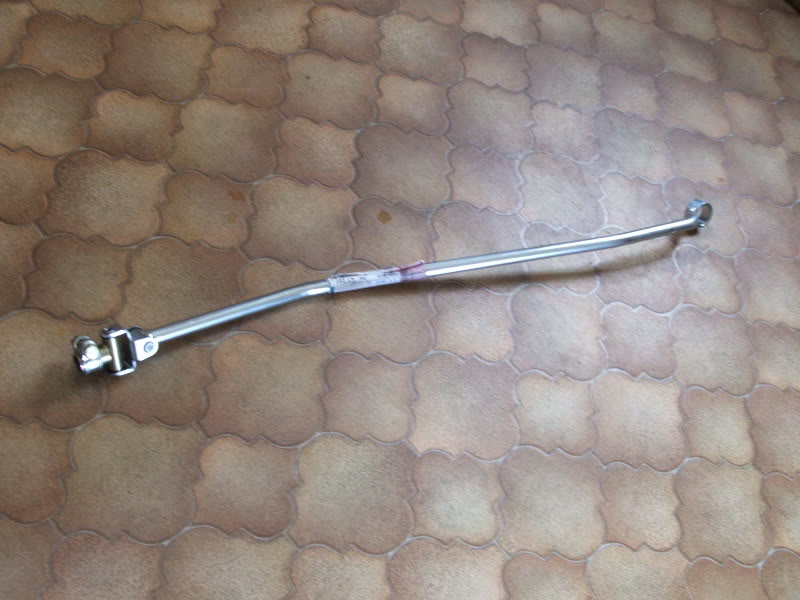
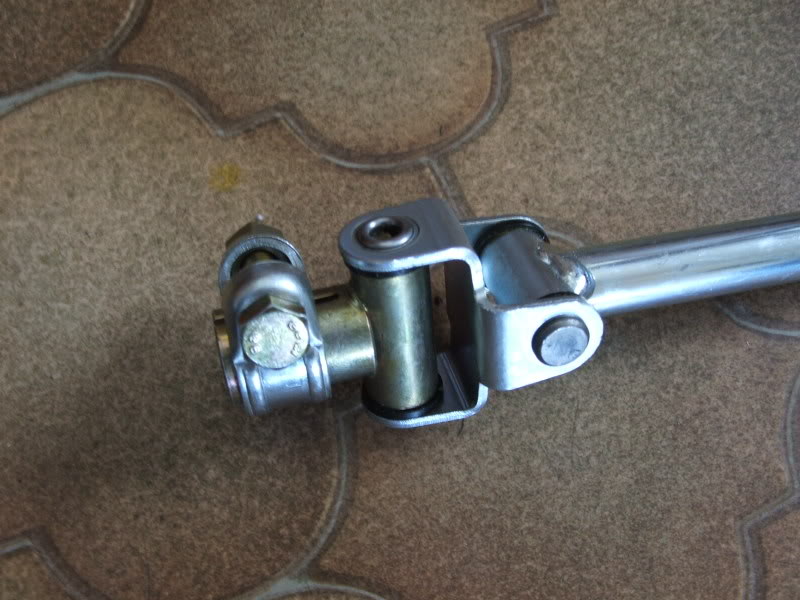
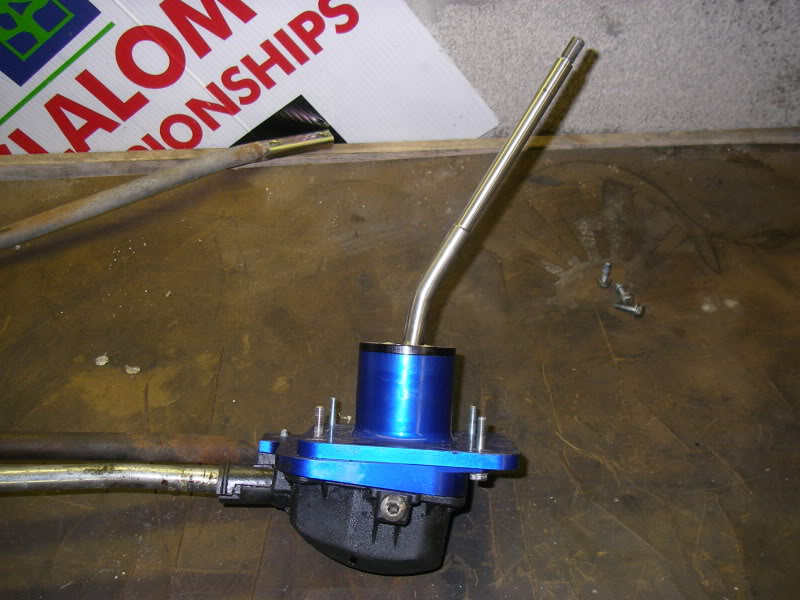
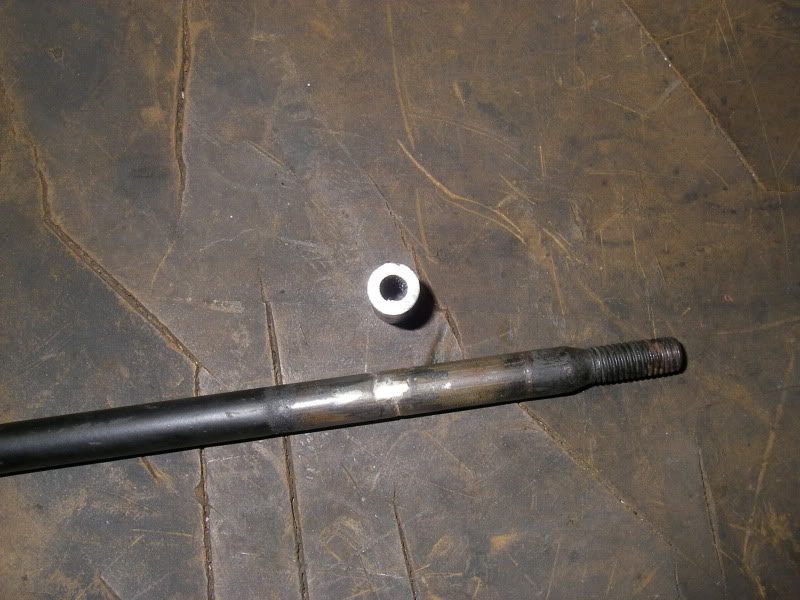
while waiting for the parts to arrive, we decided to shorten the gear stick a little
because its hollow, a small rod was machined to fit inside the two cut halves and then braised
i gave this some primer and a few coats of matt black after
you can see the piece i cut out, not massive but i did'nt want it OTT
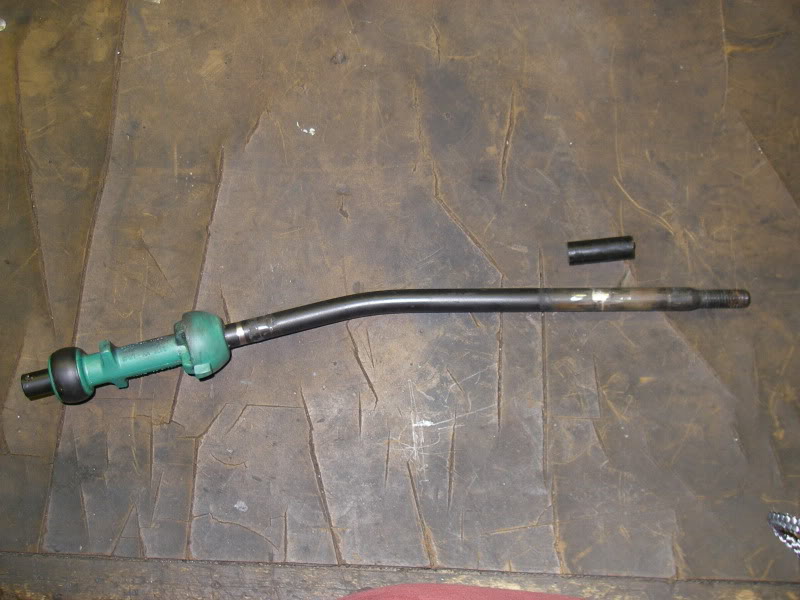
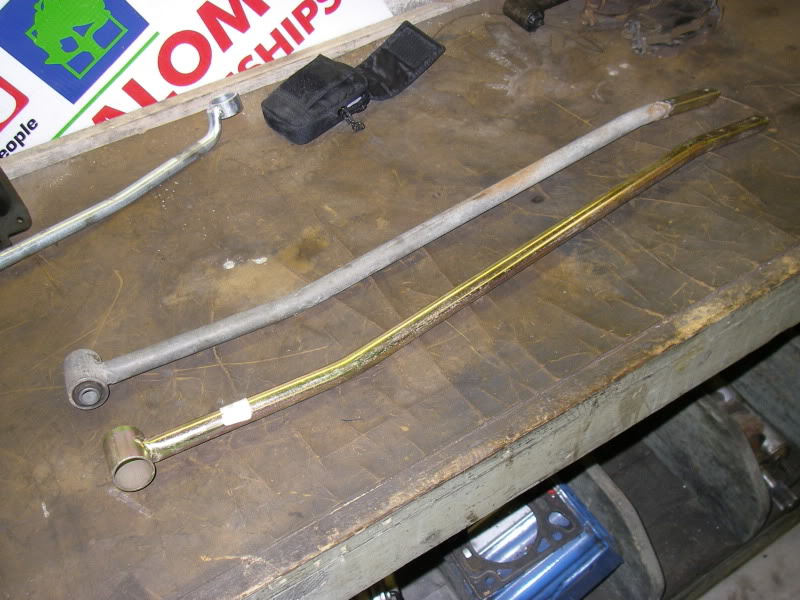
as my selecting rod is still like new i decided to buy the stabilizer bar aswell
old one after being cleaned up next to the new one
had to buy a new bush aswell as it did'nt come with it
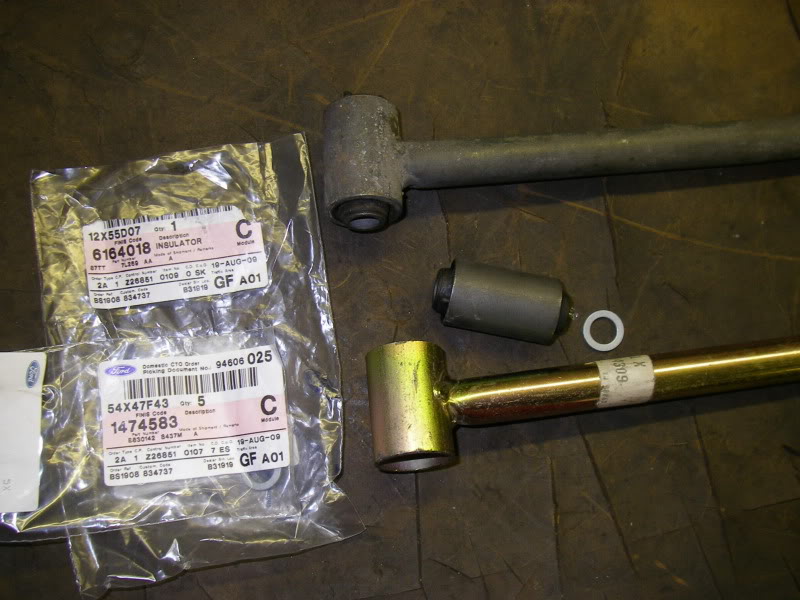
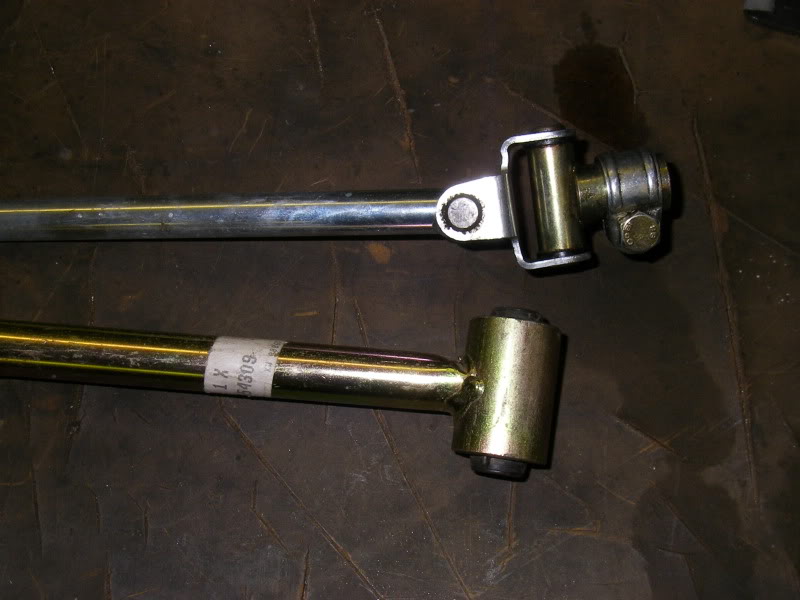
new bush fitted and next to the still looking new selector bar/link
and all back together with new grease in the appropriate places
thinking it would solve my gear change problems as it was like porridge
but it was just soo tight between gears i've never really liked it
so out it came
got hold of a good condition standard gear selector as their no longer available complete for my car in fords
printed off a diagram from work, so i could mark off what needed replacing
opened it up and marked what i wanted on the diagram after cleaning all the grease off the parts,
so i could check how worn the bits were
new parts (springs, clips, screws and nuts)
while waiting for the parts to arrive, we decided to shorten the gear stick a little
because its hollow, a small rod was machined to fit inside the two cut halves and then braised
i gave this some primer and a few coats of matt black after
you can see the piece i cut out, not massive but i did'nt want it OTT
as my selecting rod is still like new i decided to buy the stabilizer bar aswell
old one after being cleaned up next to the new one
had to buy a new bush aswell as it did'nt come with it
new bush fitted and next to the still looking new selector bar/link
and all back together with new grease in the appropriate places
18-03-2010, 11:31 PM
#37
PassionFord Regular
Thread Starter
Join Date: Aug 2003
Posts: 457
Likes: 0
Received 0 Likes
on
0 Posts
update
i've fitted the newly refurbed gear selector yesterday and i'm very happy with the difference now
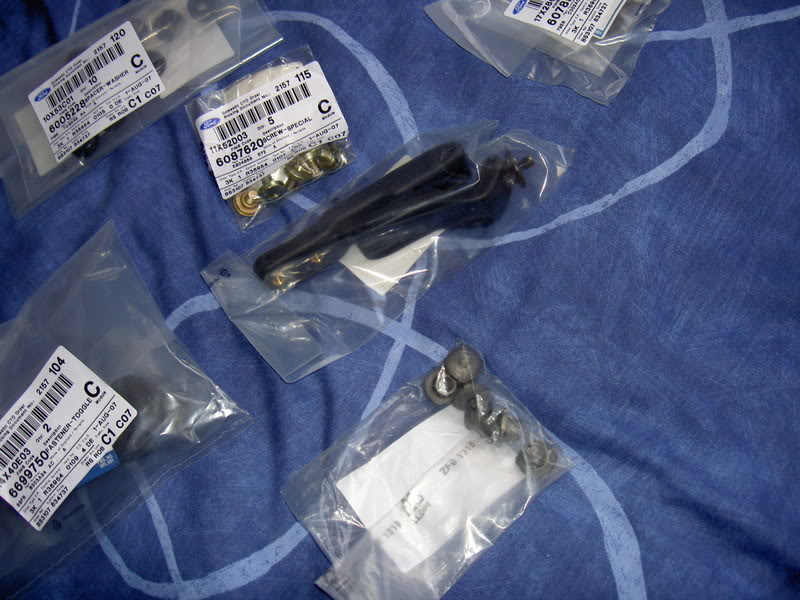
been buying in work again aswell,
this time its new seat belts and the bars that secure the belt near the floor of the car
also new grommets
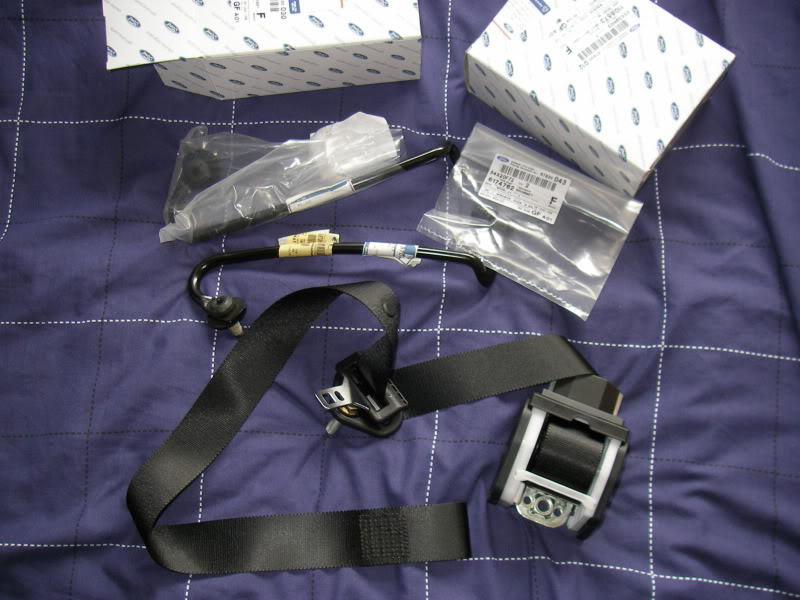
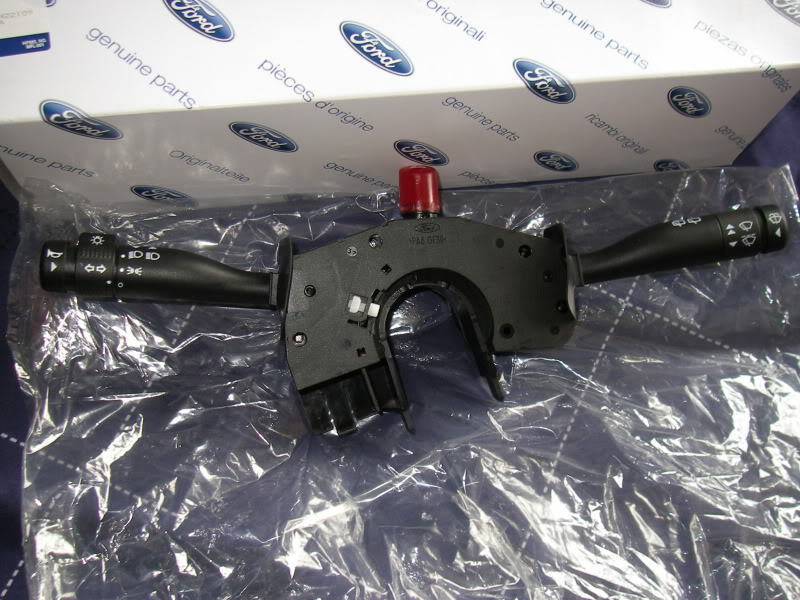
also got a new indicator/wipers/lights stalk as mine is worn
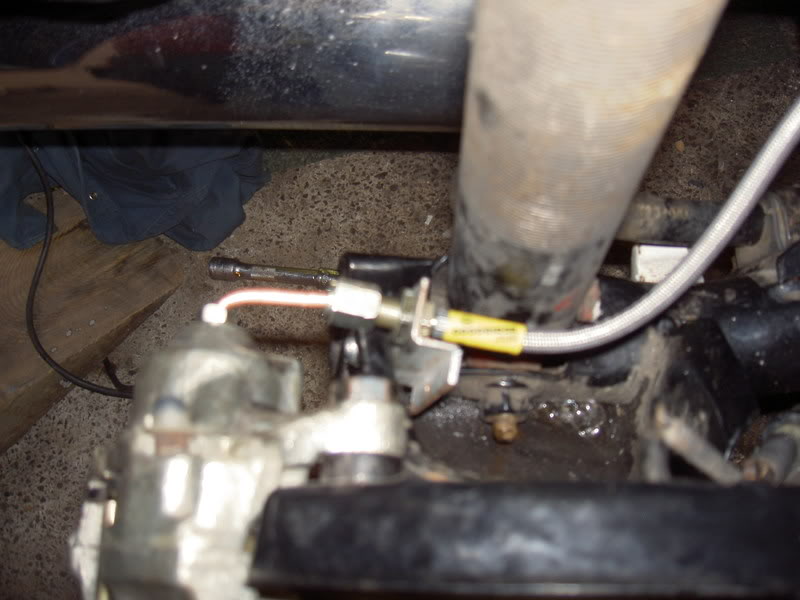
also got myself a brake master cylinder from a mk5/6 escort
its bigger than the current fiesta one, because i've got the 300mm front discs and 270mm rear discs
i've lost a bit of feel in the brake pedal, so hopefully this will sort that as its more up for the job!
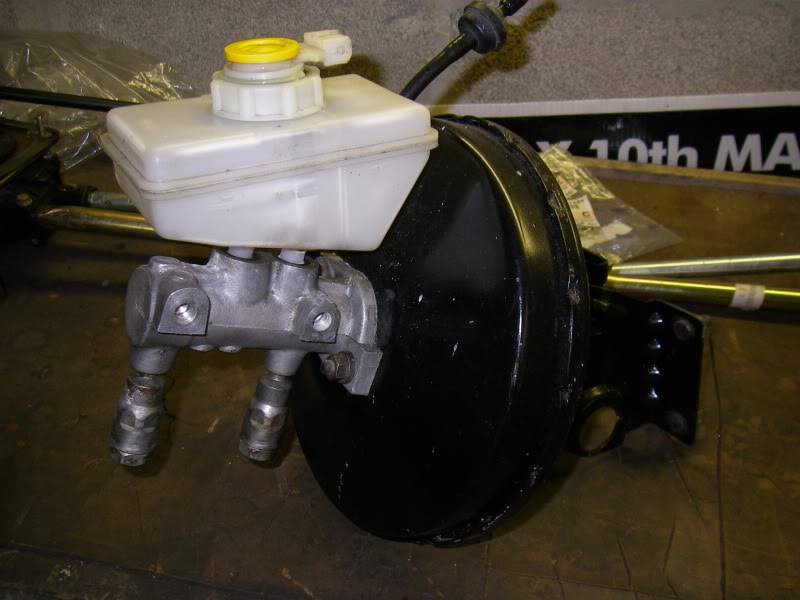
its already got the fiesta mounting brackets and the connecting rod has been shortened aswell
so it should be a direct fit apart from the brake lines fitment
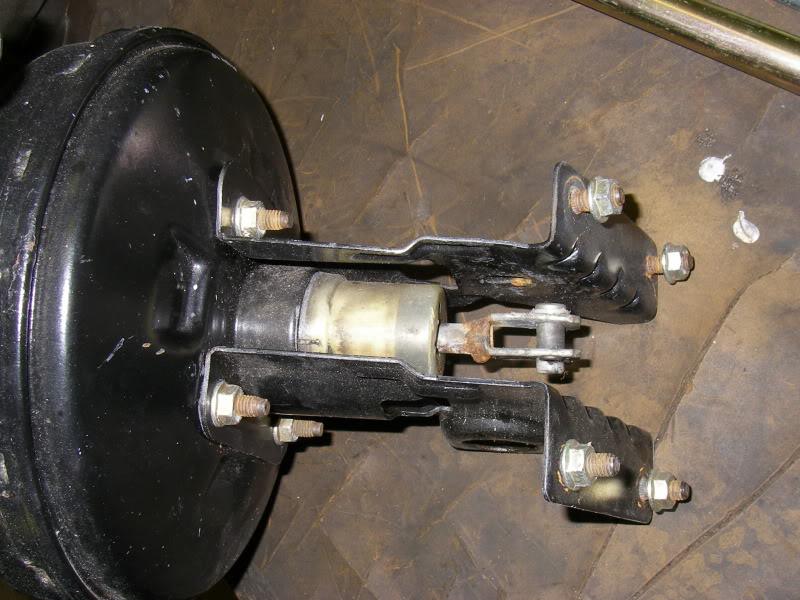
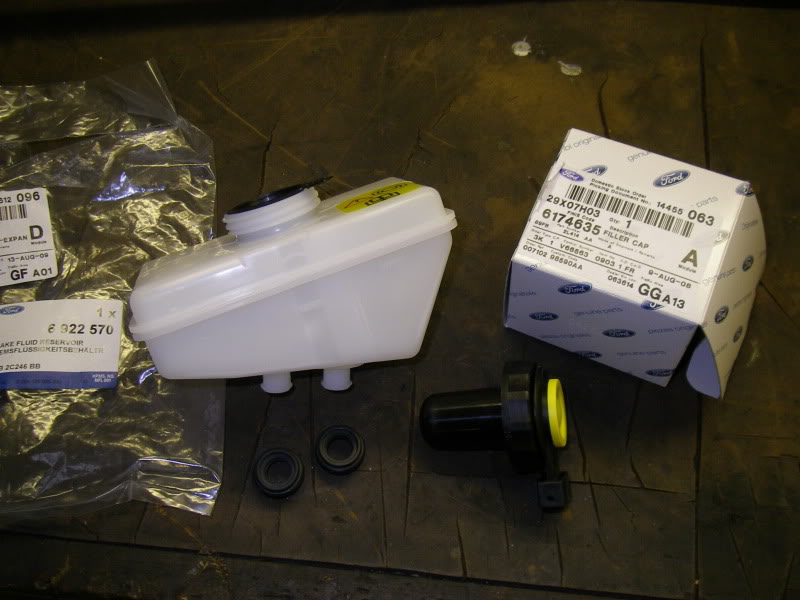
also bought a new brake reservoir and cap for the new master cylinder
i've fitted the newly refurbed gear selector yesterday and i'm very happy with the difference now
been buying in work again aswell,
this time its new seat belts and the bars that secure the belt near the floor of the car
also new grommets
also got a new indicator/wipers/lights stalk as mine is worn
also got myself a brake master cylinder from a mk5/6 escort
its bigger than the current fiesta one, because i've got the 300mm front discs and 270mm rear discs
i've lost a bit of feel in the brake pedal, so hopefully this will sort that as its more up for the job!
its already got the fiesta mounting brackets and the connecting rod has been shortened aswell
so it should be a direct fit apart from the brake lines fitment
also bought a new brake reservoir and cap for the new master cylinder
18-03-2010, 11:32 PM
#38
PassionFord Regular
Thread Starter
Join Date: Aug 2003
Posts: 457
Likes: 0
Received 0 Likes
on
0 Posts
right its time to finish the car off
PLANS
- Restore the underneath of the car to a better than factory finish
- Its new engine time
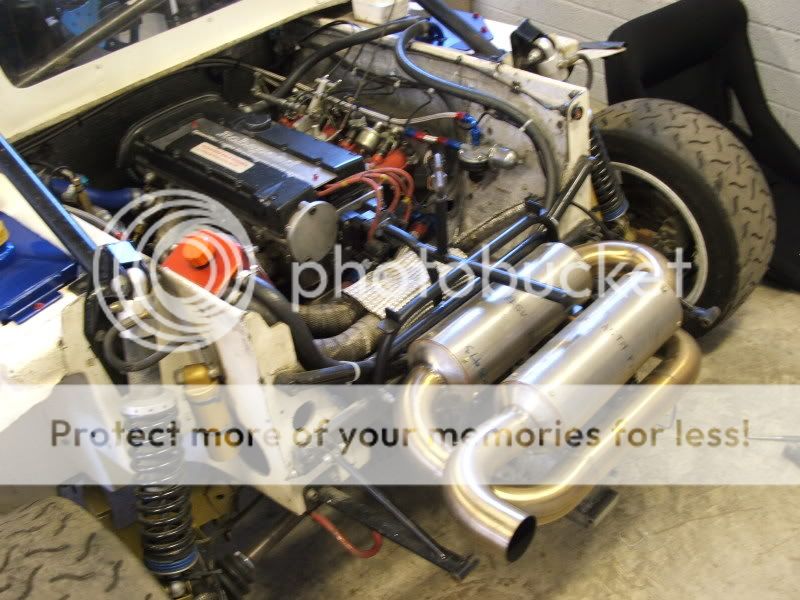
about two years ago i bought an engine from a young lad that had a good engine from a guy called paul johnson
he's famous for a top speed run of 179.9mph (not with this engine)
it was the first zetec turbo that ian howell (fiesta frenzy/area six) made for a customer
2.1 16v zetec turbo
fiesta turbo OFAB managment with loom (including custom Ahmed Bayjoo map)
Ahmed bayjoo Injectors
Ported and Polished IH spec cylinder head
IH spec custom camshafts
forged pistons
Rover M16 Inlet manifold (rare) (not the inferior T16 manifold) which has been extended
Escort RST T3 Exhaust manifold
picture below, as seen in pauls engine bay
since then it was sold to someone else who did'nt end up using it
but now its my turn

so basically i've been in contact with ian howell,
discussed options and prices,
arranged for him to inspect/assess my engine then we will go from there.
we'll be aiming for a genuine 300bhp
PLANS
- Restore the underneath of the car to a better than factory finish
- Its new engine time
about two years ago i bought an engine from a young lad that had a good engine from a guy called paul johnson
he's famous for a top speed run of 179.9mph (not with this engine)
it was the first zetec turbo that ian howell (fiesta frenzy/area six) made for a customer
2.1 16v zetec turbo
fiesta turbo OFAB managment with loom (including custom Ahmed Bayjoo map)
Ahmed bayjoo Injectors
Ported and Polished IH spec cylinder head
IH spec custom camshafts
forged pistons
Rover M16 Inlet manifold (rare) (not the inferior T16 manifold) which has been extended
Escort RST T3 Exhaust manifold
picture below, as seen in pauls engine bay
since then it was sold to someone else who did'nt end up using it
but now its my turn
so basically i've been in contact with ian howell,
discussed options and prices,
arranged for him to inspect/assess my engine then we will go from there.
we'll be aiming for a genuine 300bhp


