MK3 fiesta project - 2.1 zetec turbo - 358bhp-365ftlb for now
 28-03-2010, 06:41 PM
#81
PassionFord Regular
Thread Starter

Join Date: Aug 2003
Posts: 457
Likes: 0
Received 0 Likes
on
0 Posts
well its been a busy week just gone for me,
heres a few updates
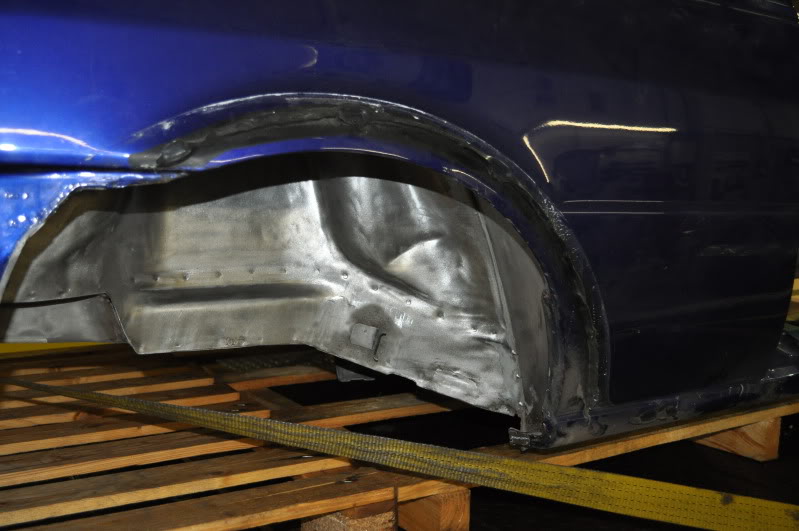
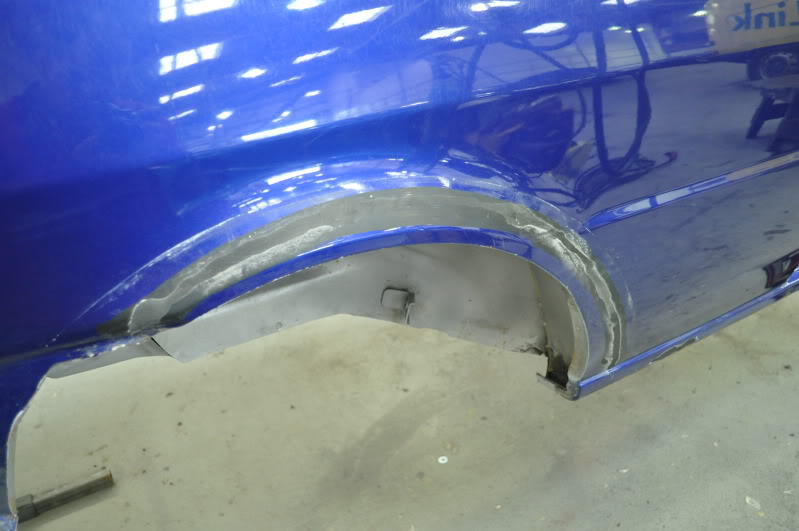
taken the rear arch kit off which was bonded on previously

the sealer still left on the rear quarter
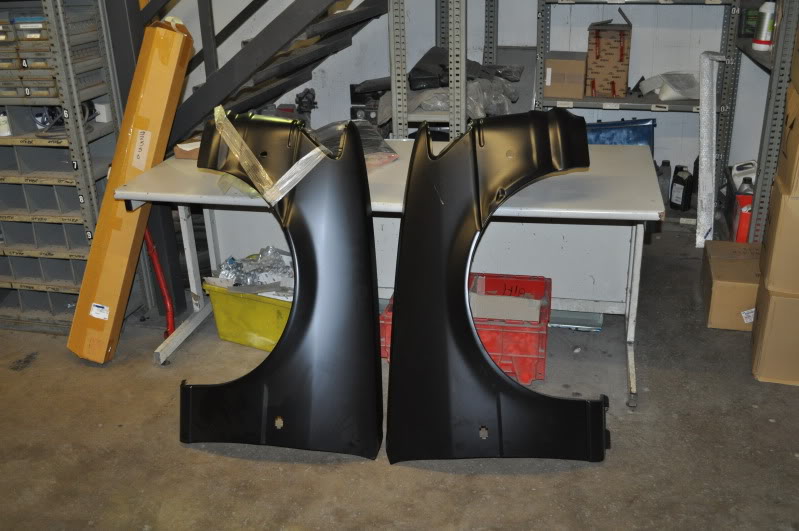
brand new wings arrived
as the shell is going to be seam welded mainly in the front,
the decision was made for it to be taken for a proper shotblasting session as the small kit i'd bought was'nt strong enough to get the sealer out properly to avoid
weld spitting when seam welding
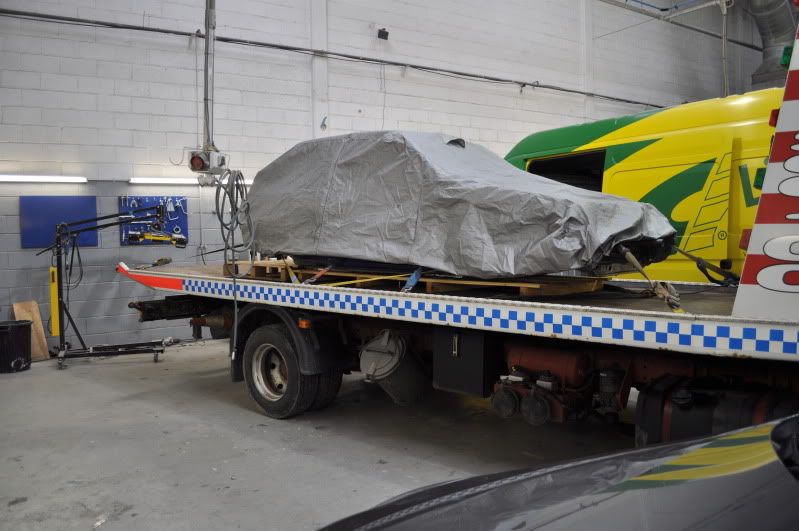
so on the back of the truck the night before
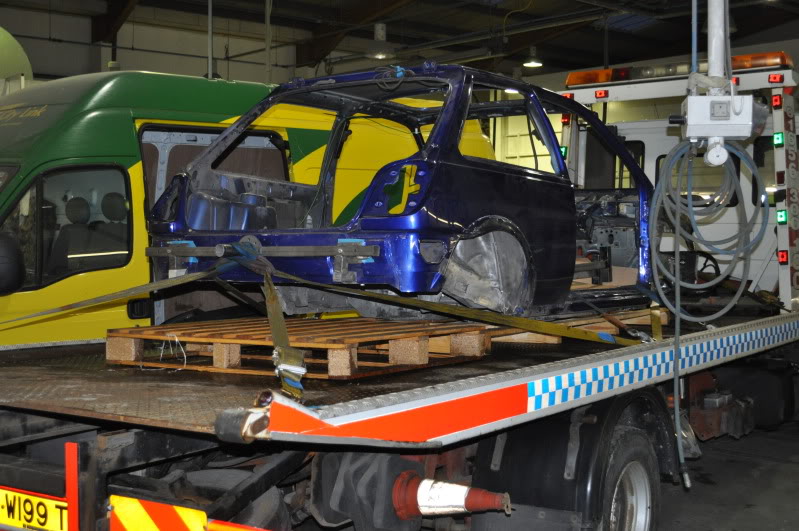
the missus decided to take a picture
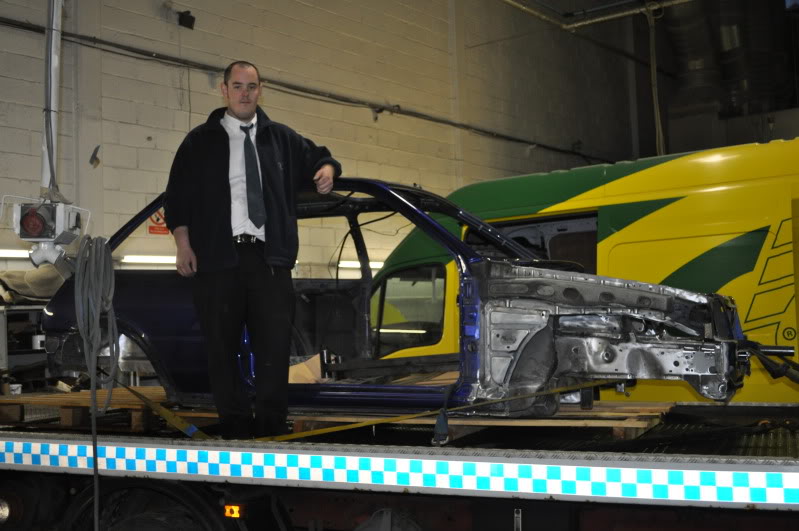
the next early morning ready to go for a trip to be blasted
heres a few updates
taken the rear arch kit off which was bonded on previously
the sealer still left on the rear quarter
brand new wings arrived
as the shell is going to be seam welded mainly in the front,
the decision was made for it to be taken for a proper shotblasting session as the small kit i'd bought was'nt strong enough to get the sealer out properly to avoid
weld spitting when seam welding
so on the back of the truck the night before
the missus decided to take a picture
the next early morning ready to go for a trip to be blasted

 28-03-2010, 06:53 PM
#84
PassionFord Regular
Thread Starter
Join Date: Aug 2003
Posts: 457
Likes: 0
Received 0 Likes
on
0 Posts
so the car was back later the same day,
only problem being the weather was'nt on my side and was raining nicely
this made the journey back very interesting especially when the car cover kept blowing off the back letting the car get wet.
so some time with the airline and new cloth sorted that out!
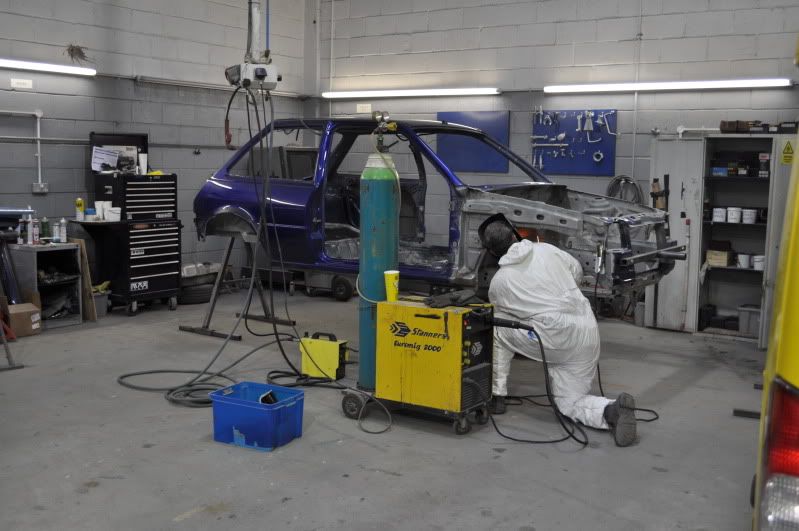
the next night my fabricator decided to crack on now it was clean
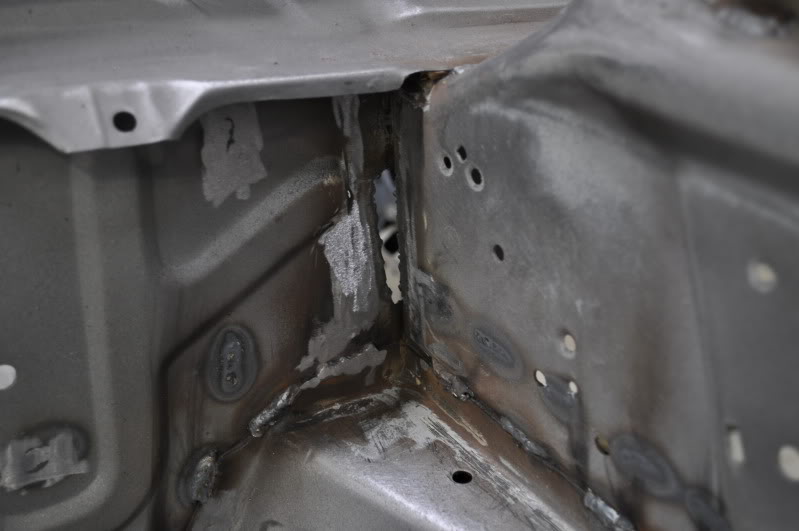
so starting with the plasma cutter he cut out the problem areas of rust
heres some freshly cut holes
this is under the passenger side of the front bulkhead
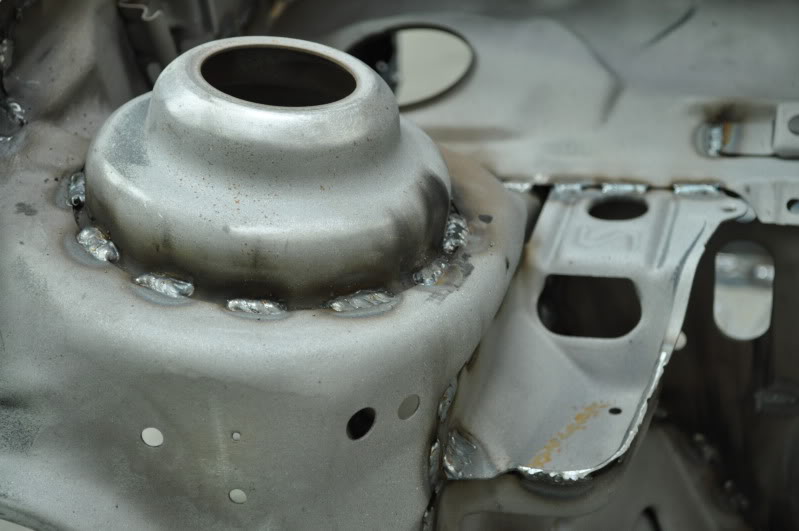
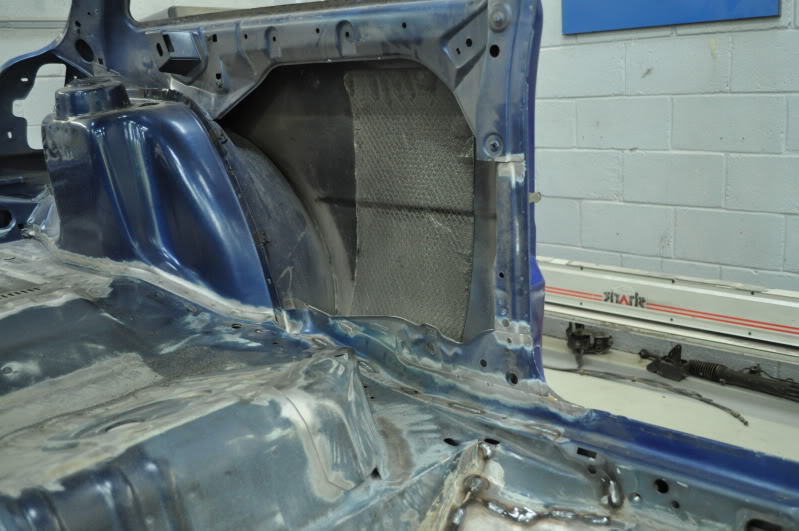
this is the passenger rear turret
the nasty bits
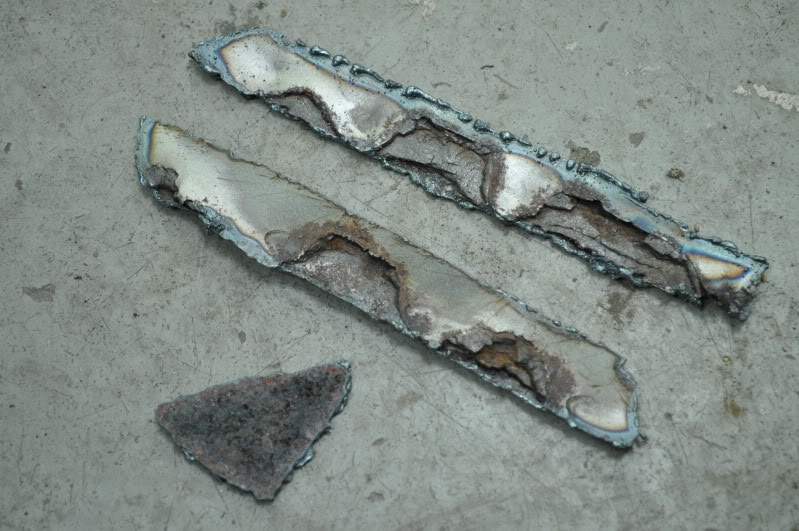
the side showingno major signs of rust
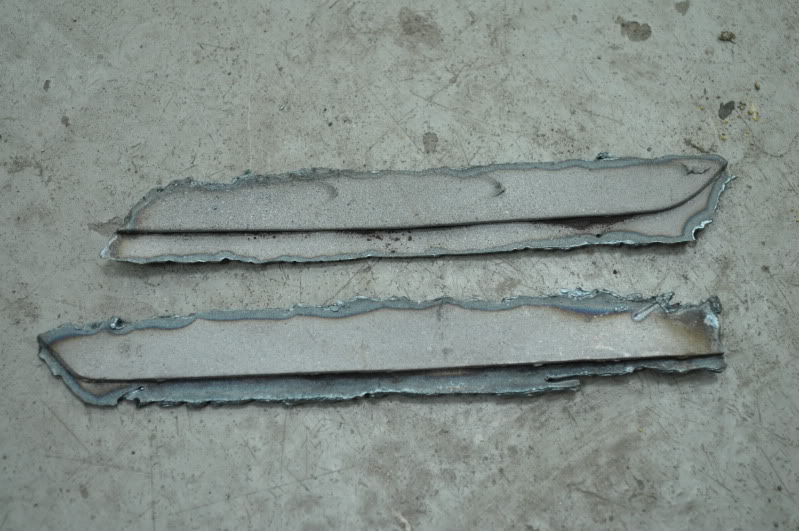
also the start of the seam welding

only problem being the weather was'nt on my side and was raining nicely
this made the journey back very interesting especially when the car cover kept blowing off the back letting the car get wet.
so some time with the airline and new cloth sorted that out!
the next night my fabricator decided to crack on now it was clean
so starting with the plasma cutter he cut out the problem areas of rust
heres some freshly cut holes
this is under the passenger side of the front bulkhead
this is the passenger rear turret
the nasty bits
the side showingno major signs of rust
also the start of the seam welding
28-03-2010, 07:10 PM
#85
PassionFord Regular
Thread Starter
Join Date: Aug 2003
Posts: 457
Likes: 0
Received 0 Likes
on
0 Posts
inside the shell is'nt being left out either
the top of the bulkhead
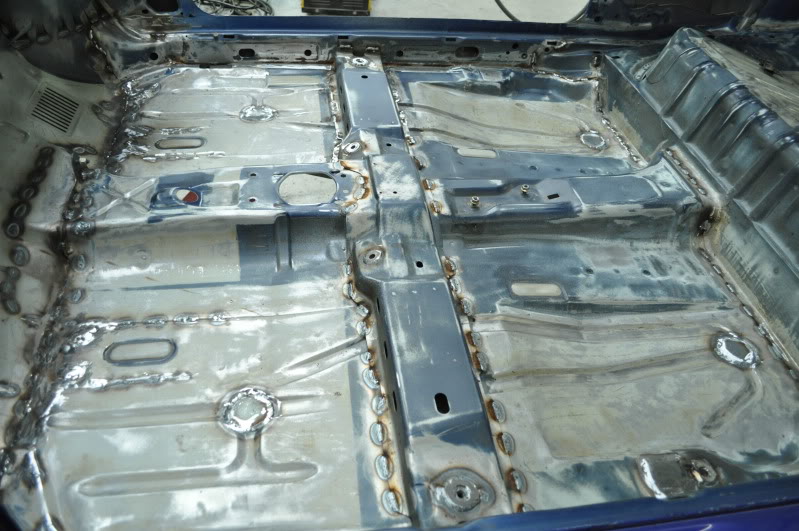
the floor

decided to weld up where the plastic plugs normally go aswell

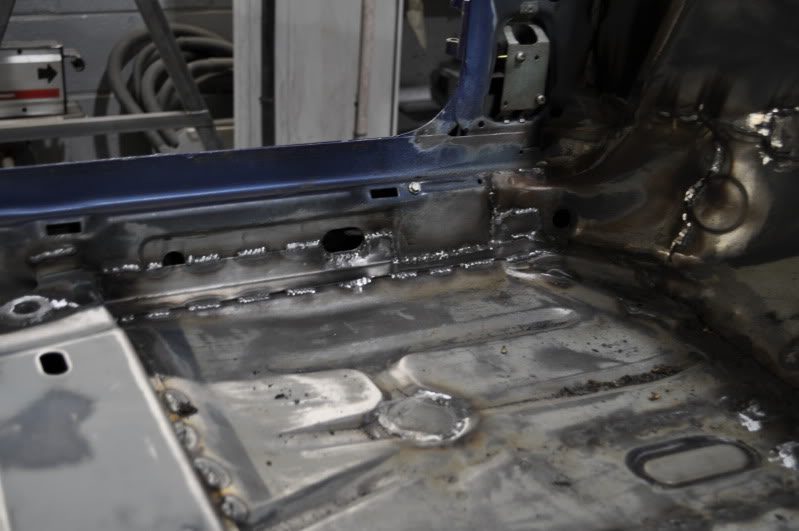
the main support on the floor, even welded a washer to support the seat bolt points which normally fracture
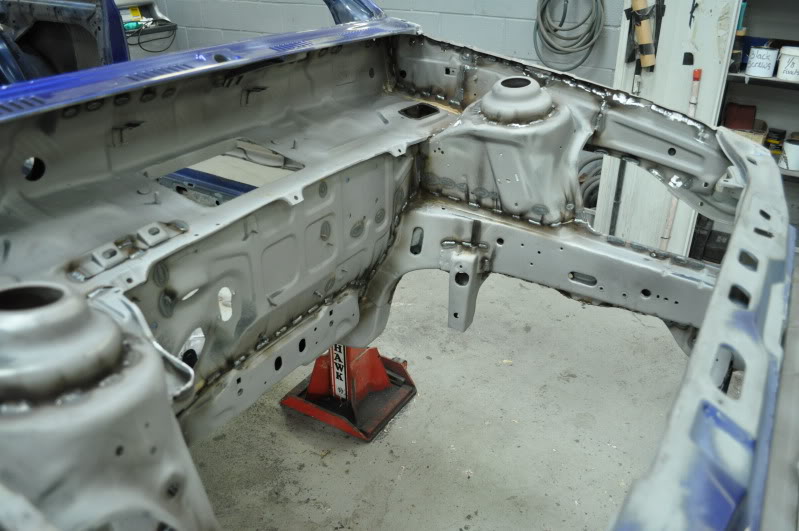
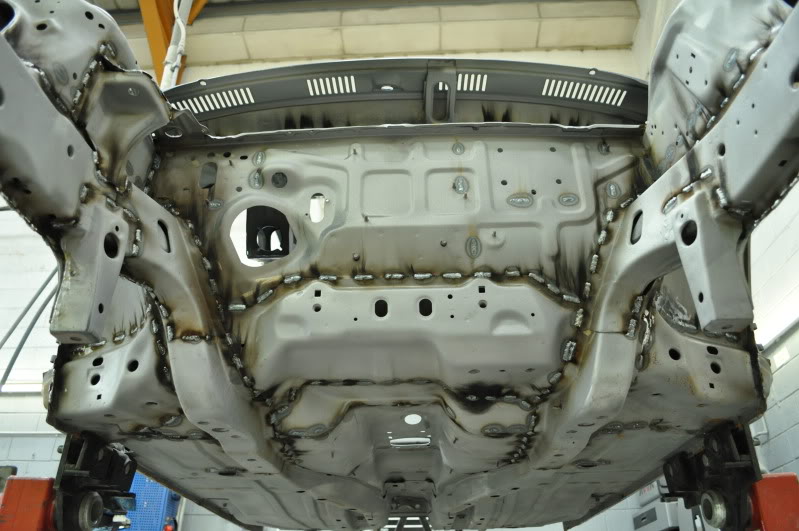
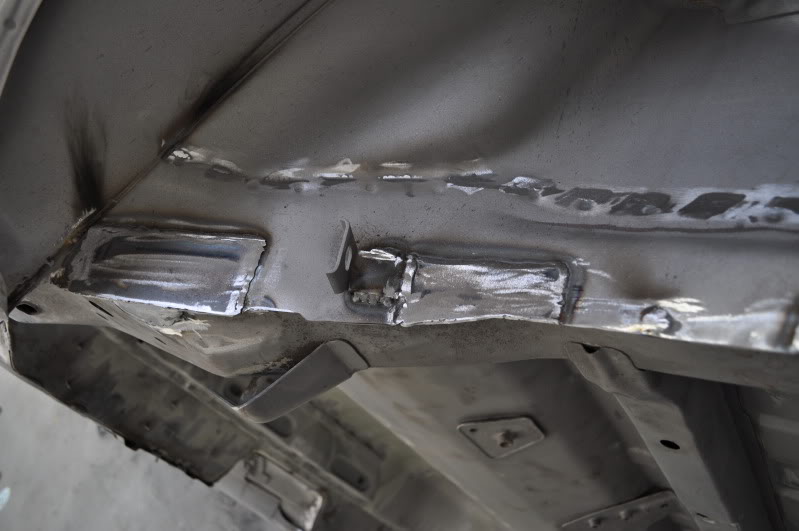
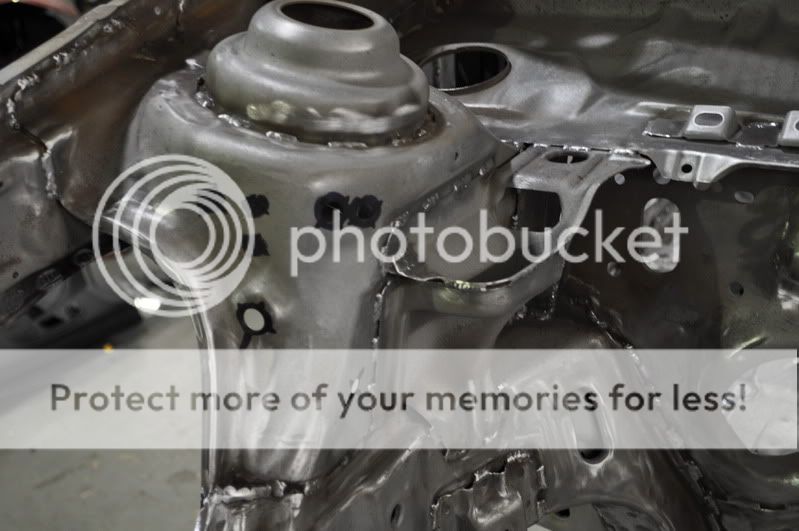
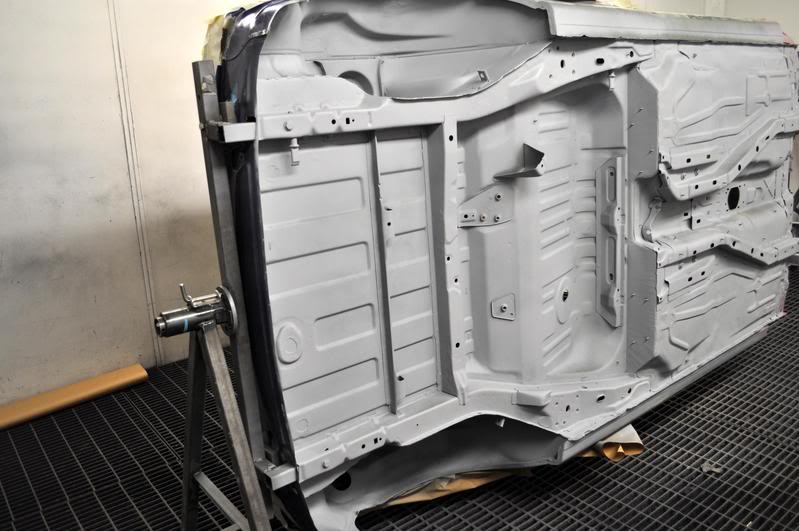
how the engine bay is looking from underneath
close up of the drivers front arch
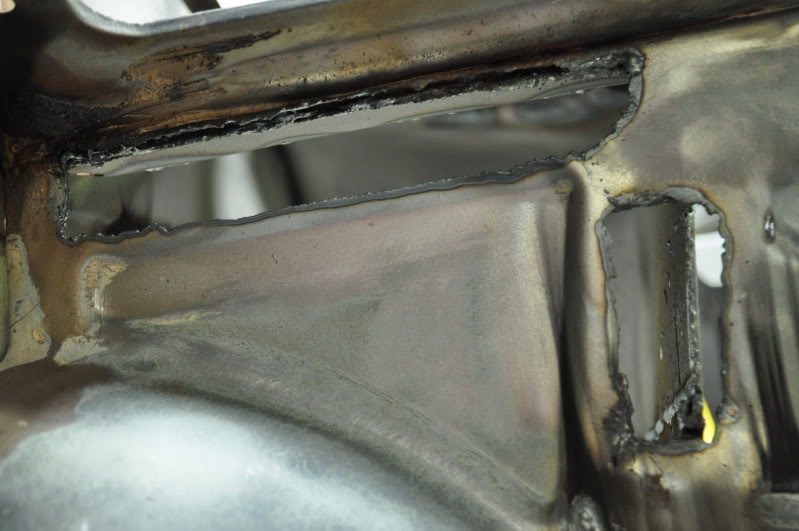
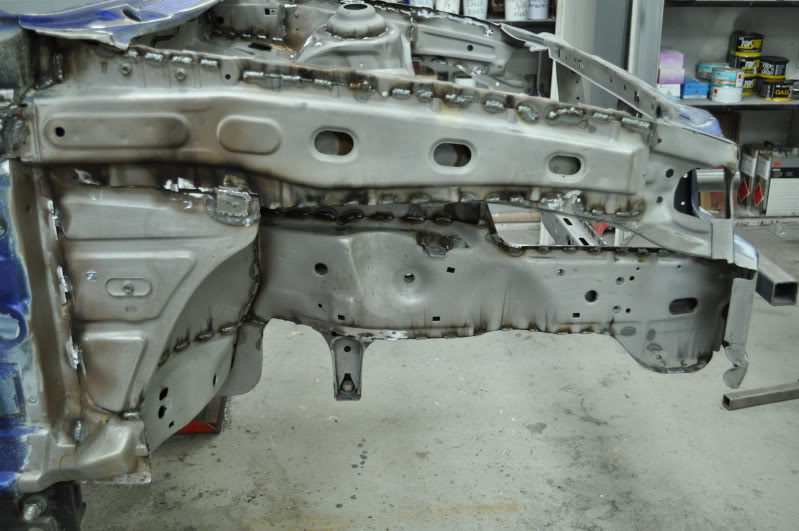
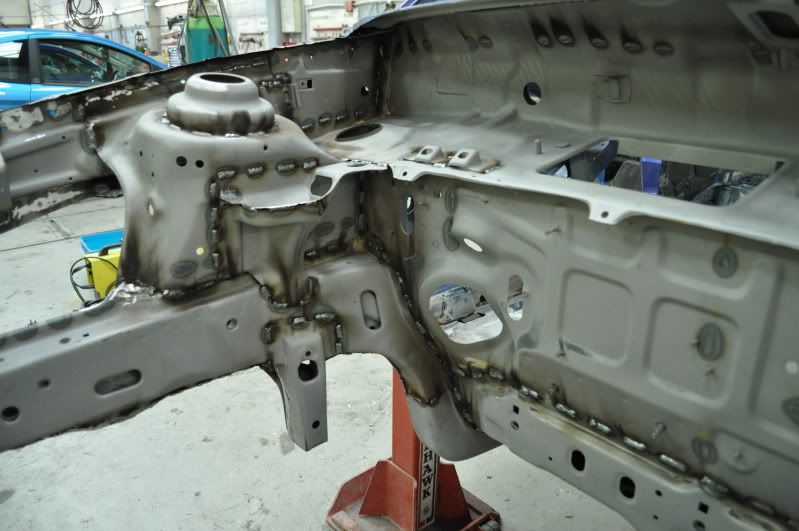
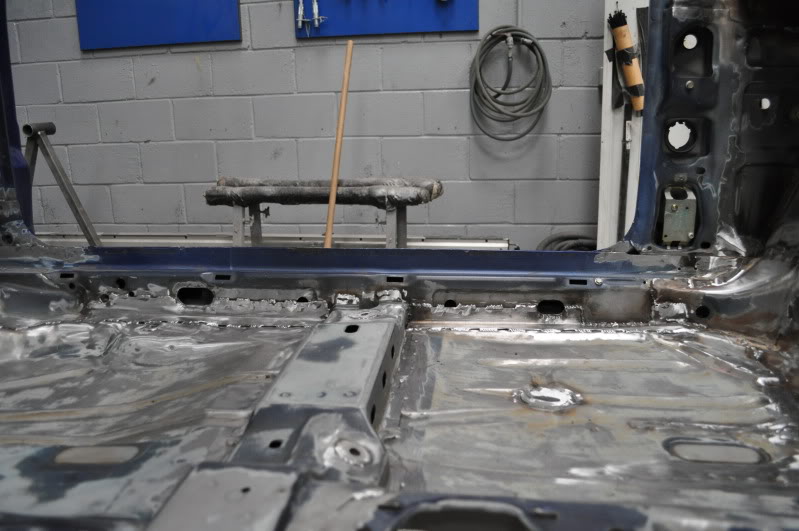
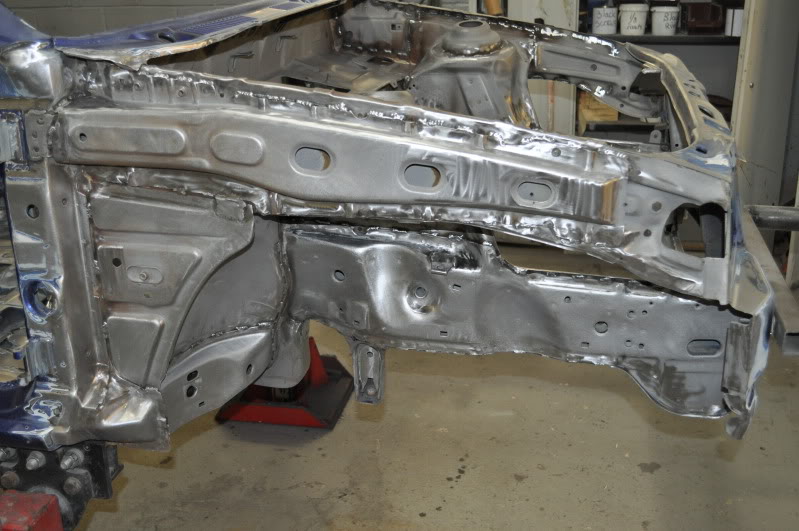
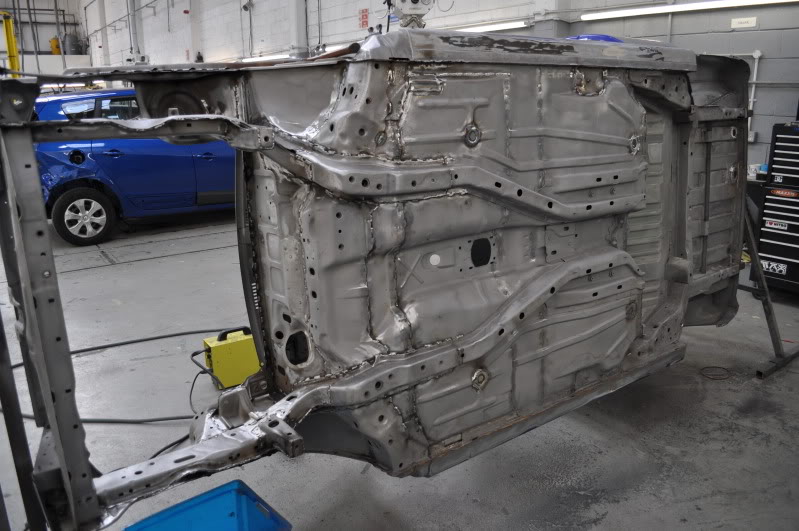
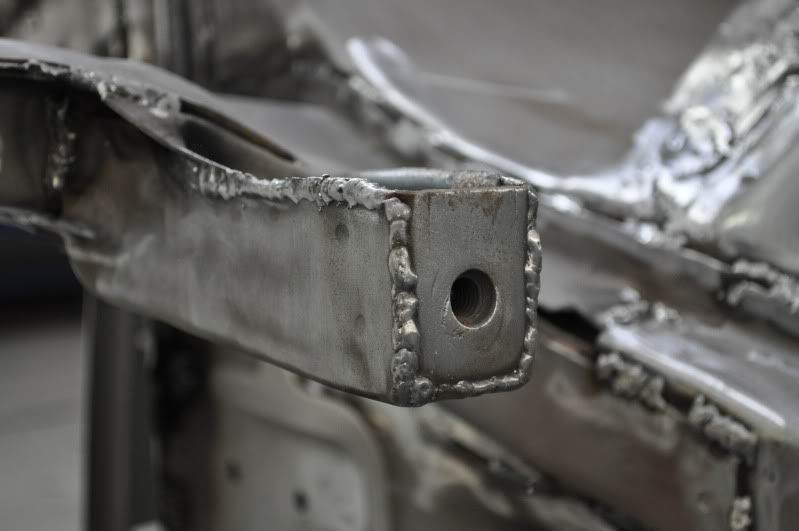
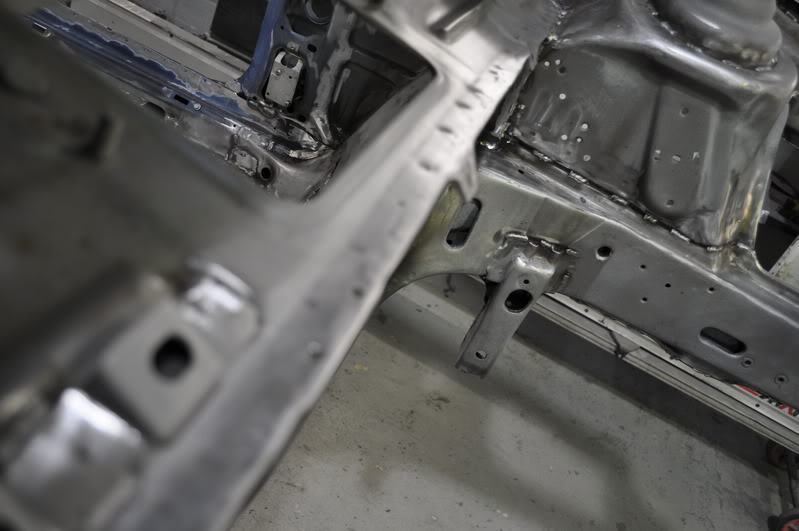
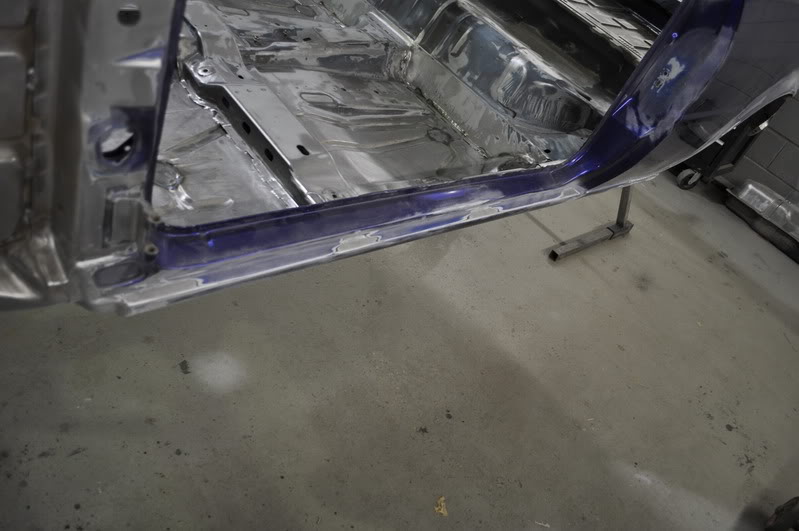
heres a clear picture showing the supports used while welding the front end,
as we did'nt want that much heat going into the shell while being held up by the front and rear of the shell
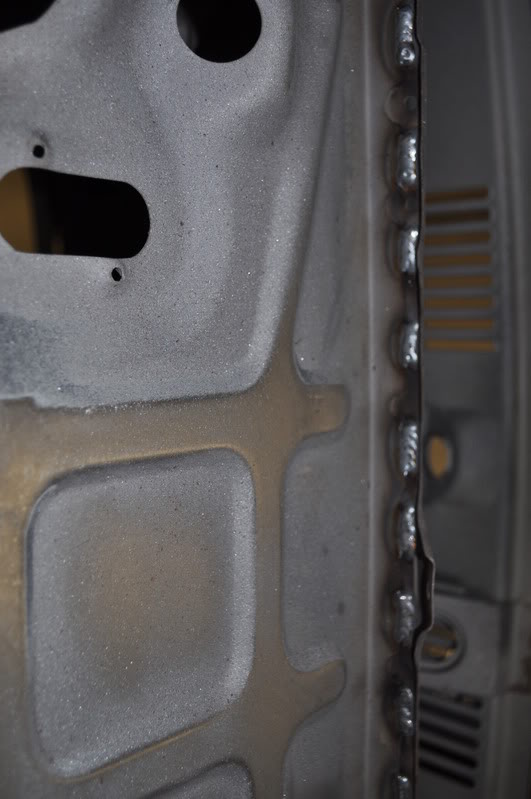
you can see from the seams we intend to seam weld as their back to bare metal
also had the sealer cut off the rear quarters, so the rest can be removed by the fudge wheel
the top of the bulkhead
the floor
decided to weld up where the plastic plugs normally go aswell
the main support on the floor, even welded a washer to support the seat bolt points which normally fracture
how the engine bay is looking from underneath
close up of the drivers front arch
heres a clear picture showing the supports used while welding the front end,
as we did'nt want that much heat going into the shell while being held up by the front and rear of the shell
you can see from the seams we intend to seam weld as their back to bare metal
also had the sealer cut off the rear quarters, so the rest can be removed by the fudge wheel
10-04-2010, 07:32 AM
#88
PassionFord Regular
Thread Starter
Join Date: Aug 2003
Posts: 457
Likes: 0
Received 0 Likes
on
0 Posts
ok time to catch up with a few updates
bought some 1.2mm thick steel which i had bent to my spec
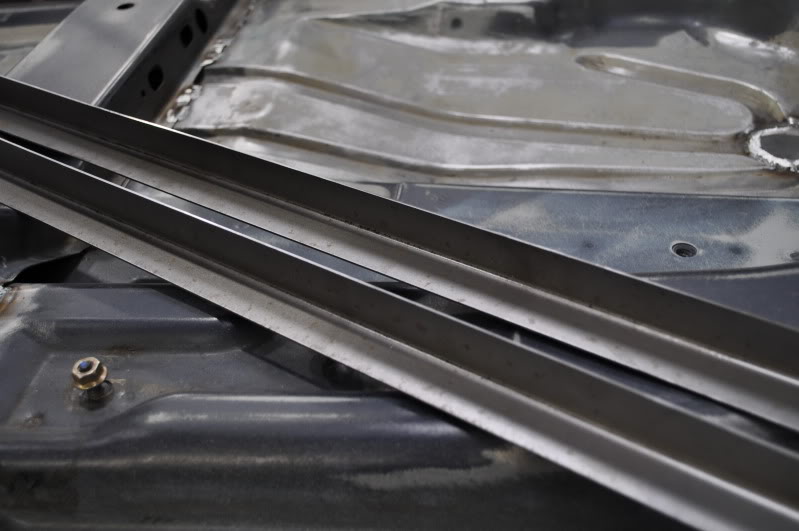
then shaped it to meet the floor and sill inside the shell
which will reinforce greatly
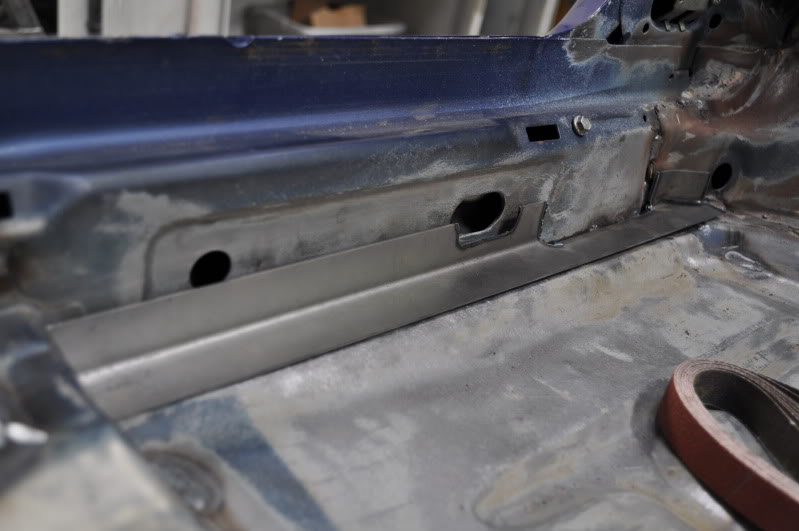
here it is seam welded in postition
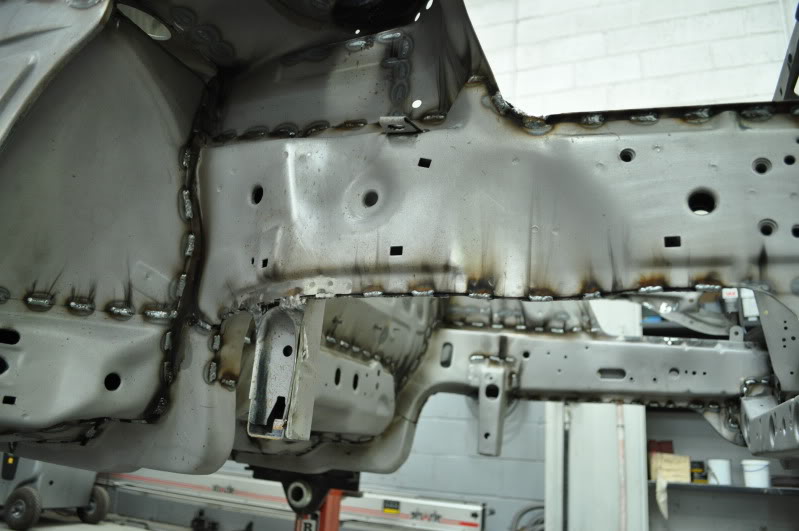
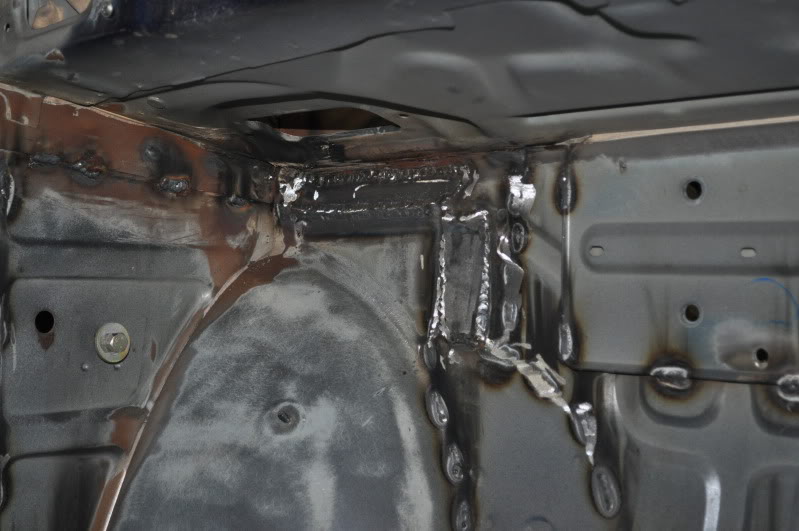
on the inside of the engine bay we used it to reinforce between the chassis leg and bulkhead
and sort the hole made by plasma cutting the grot out
will look like this

on the otherside of the bulkhead its look like this,
ignore the dodgy looking colour its from the gas used for welding
it comes off and will all be sorted before its first coat of etch primer
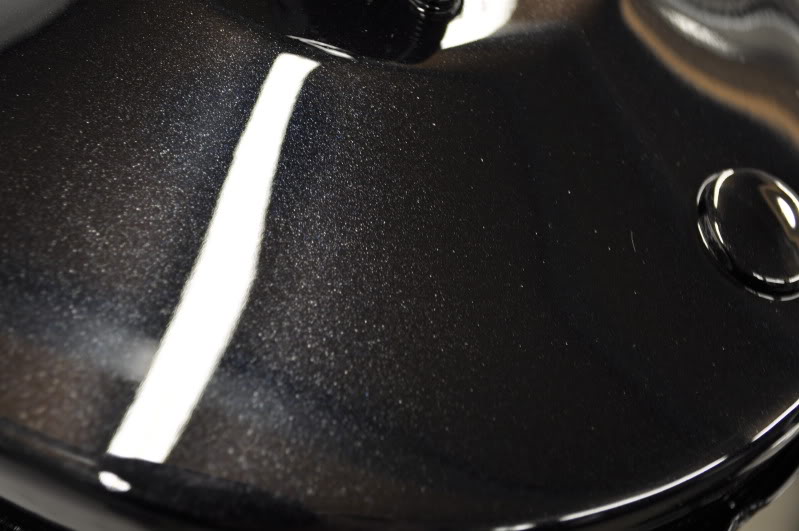
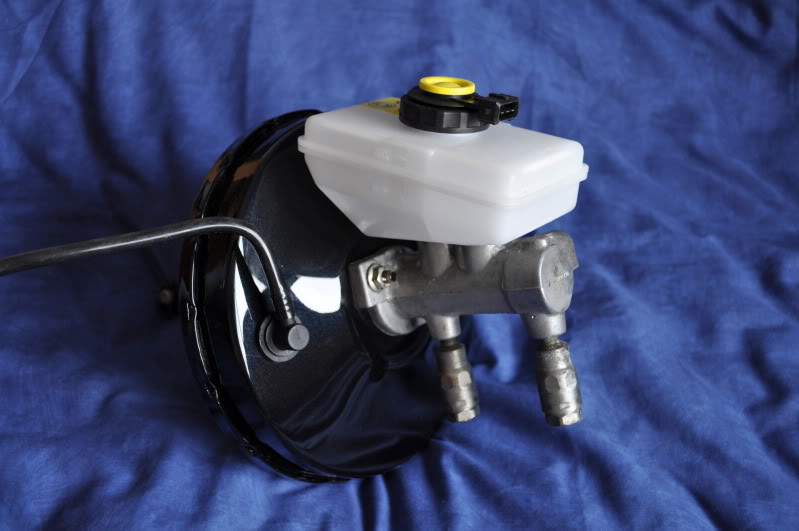
had my bigger master cylinder painted panther black aswell
so will build that back up soon
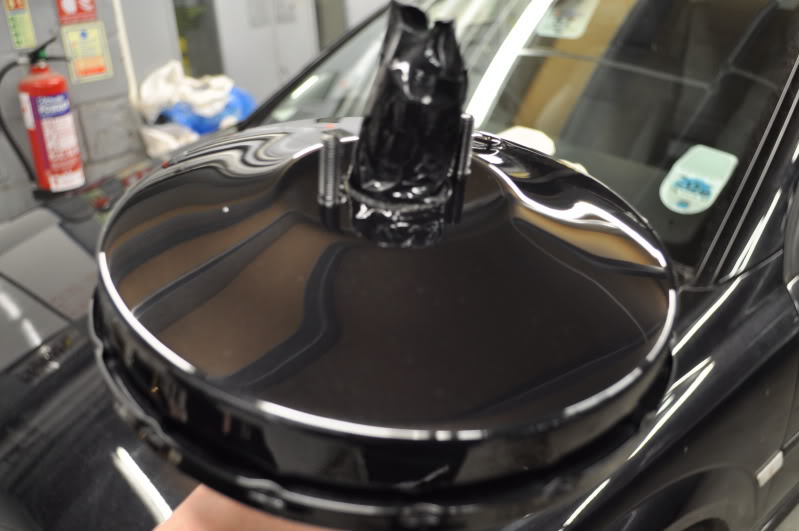
mmm metallic flake
bought some 1.2mm thick steel which i had bent to my spec
then shaped it to meet the floor and sill inside the shell
which will reinforce greatly
here it is seam welded in postition
on the inside of the engine bay we used it to reinforce between the chassis leg and bulkhead
and sort the hole made by plasma cutting the grot out
will look like this
on the otherside of the bulkhead its look like this,
ignore the dodgy looking colour its from the gas used for welding
it comes off and will all be sorted before its first coat of etch primer
had my bigger master cylinder painted panther black aswell
so will build that back up soon
mmm metallic flake
11-04-2010, 10:00 AM
#89
PassionFord Regular
Thread Starter
Join Date: Aug 2003
Posts: 457
Likes: 0
Received 0 Likes
on
0 Posts
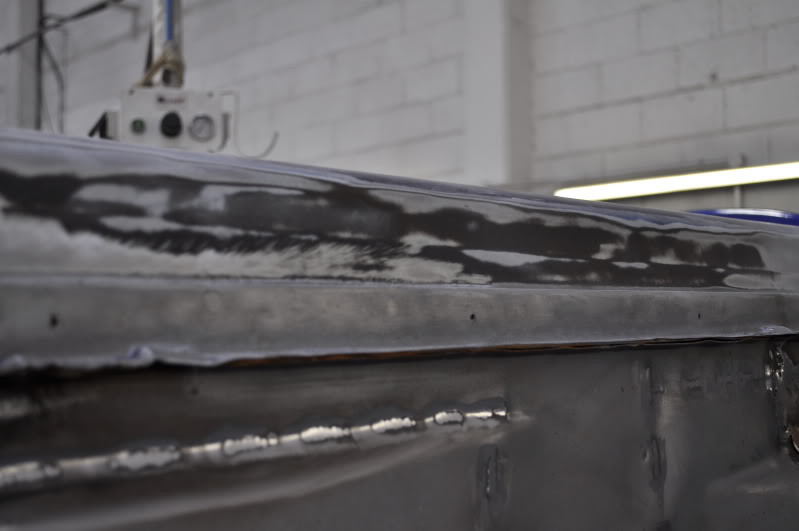
the seam welding has gone back to the rear floor
tidied the welds up a little and buzzed over them with the scotch wheel
the windscreen brackets were looking a rusty, so taken them off aswell
quickly machined the small scabs of rust around the sunroof to see the full extend of the tin worm

more welds cleaned up with the scotch wheel

tidied the welds up a little and buzzed over them with the scotch wheel
the windscreen brackets were looking a rusty, so taken them off aswell
quickly machined the small scabs of rust around the sunroof to see the full extend of the tin worm
more welds cleaned up with the scotch wheel
11-04-2010, 10:12 AM
#90
PassionFord Regular
Thread Starter
Join Date: Aug 2003
Posts: 457
Likes: 0
Received 0 Likes
on
0 Posts
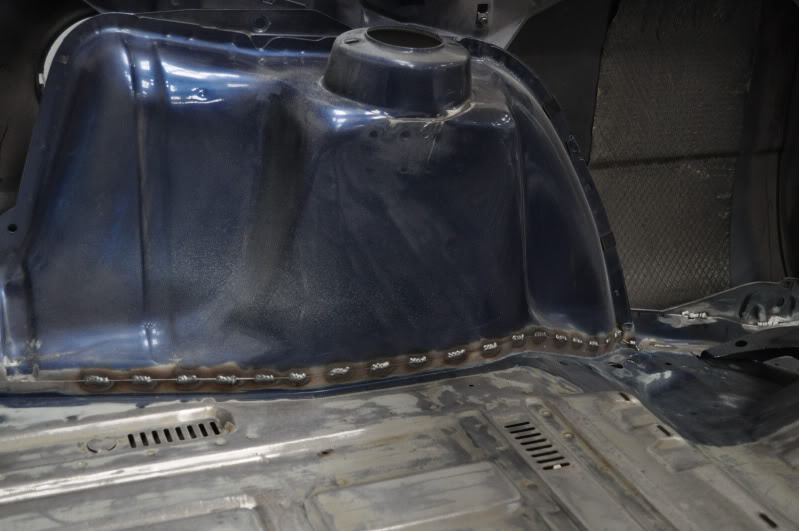
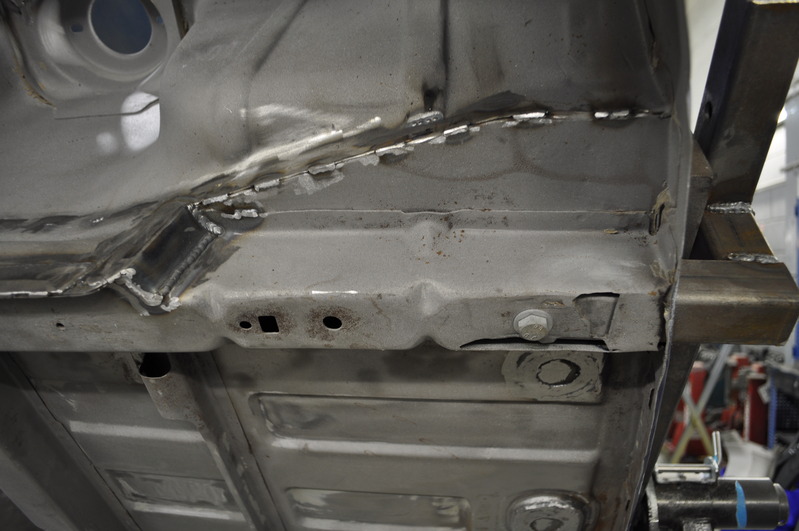
back on its side now for more welding underneath
the welds which have penetrated through when welding inside have been cleaned up
patches replaced where the metal has perforated after shot blasting
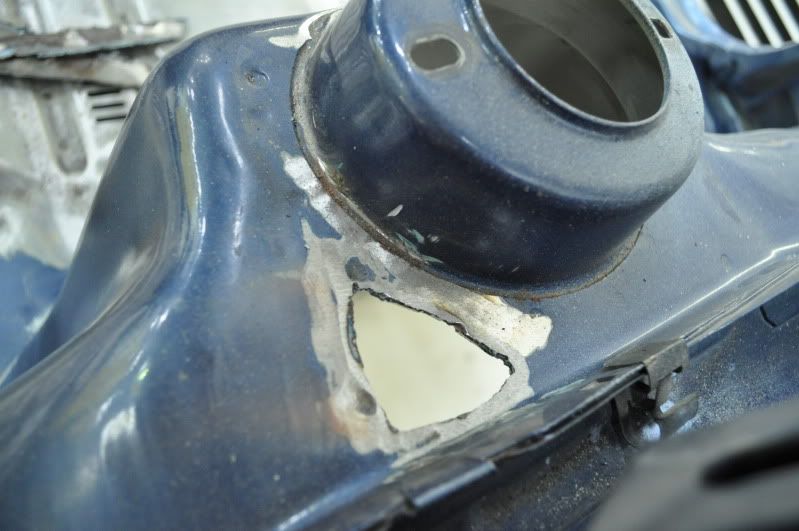
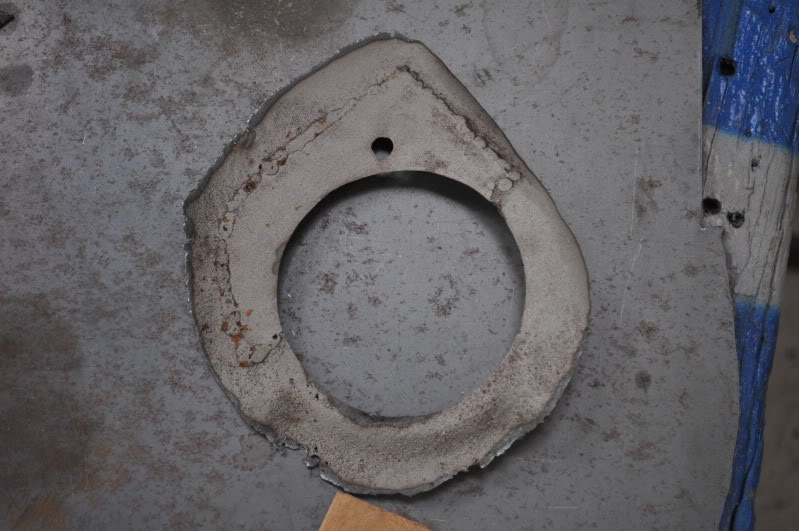
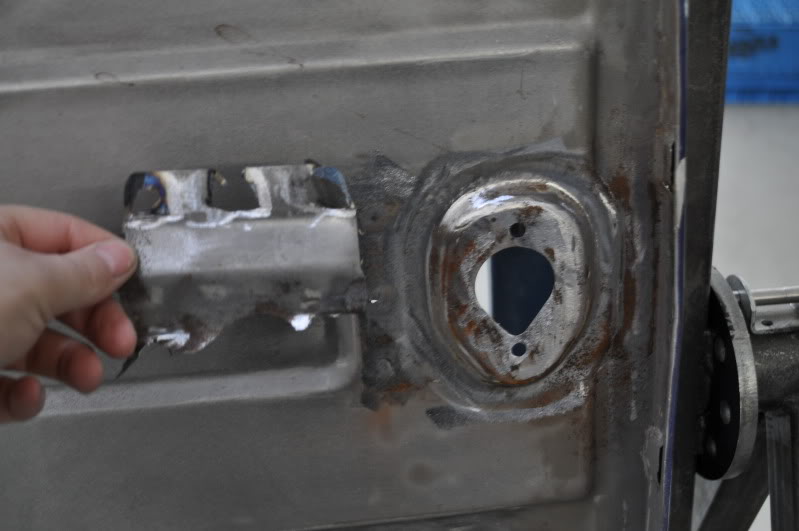
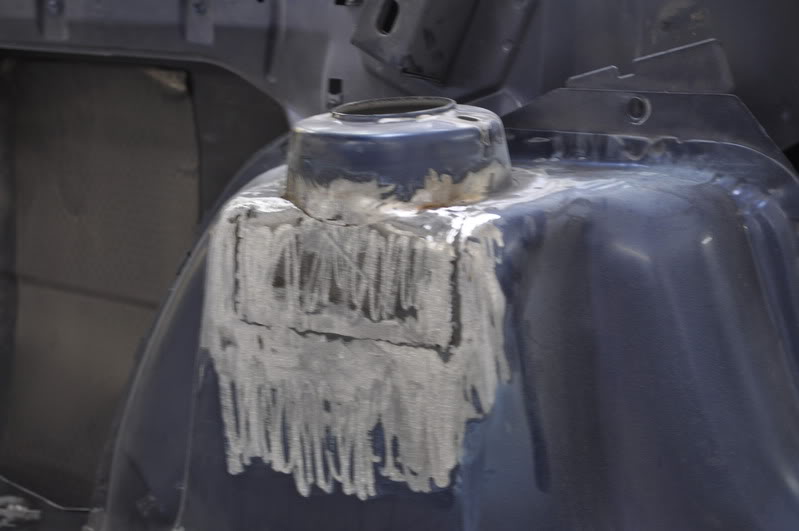
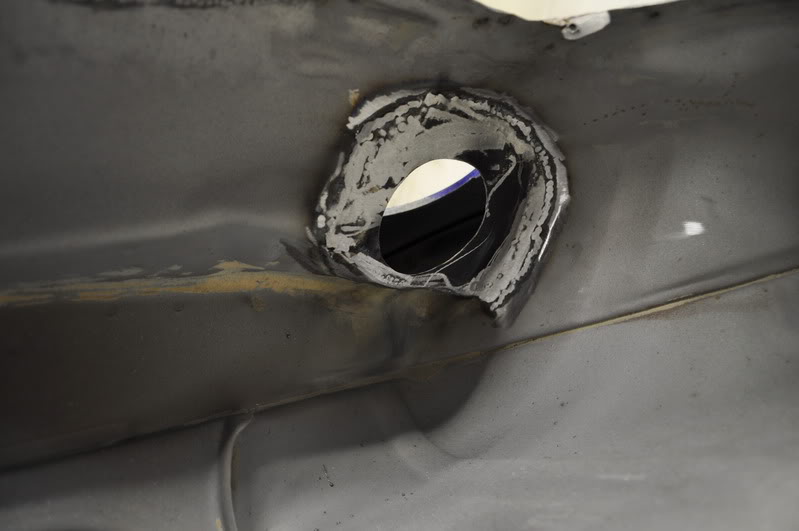
the inner fuel cap area was cleaned up but thin in a few places also
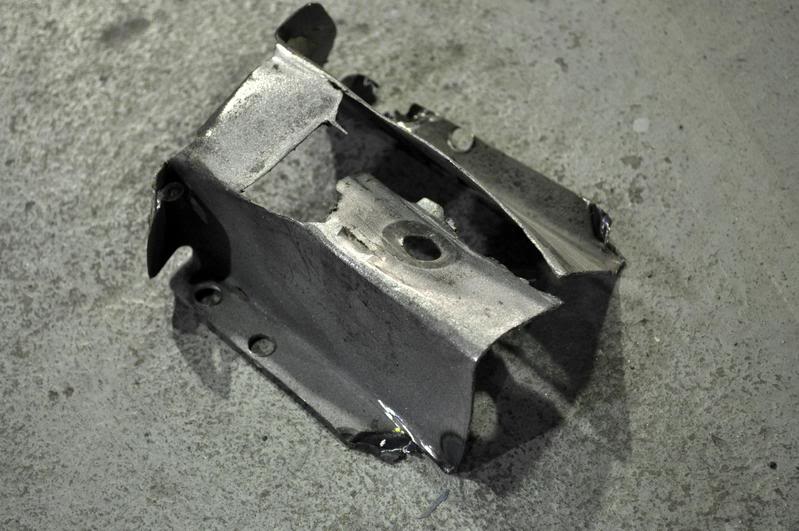
so that was cut out with the plasma cutter
the piece cut out

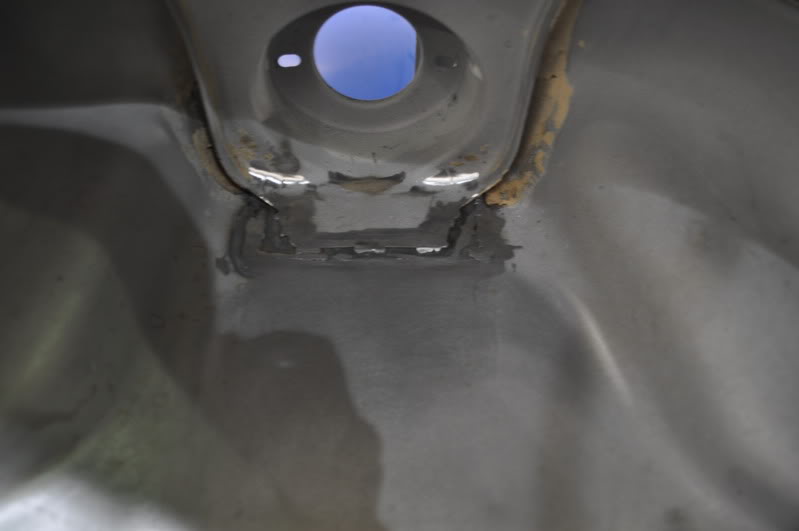
rear suspension turret where we cut out the rot has now had a new peice welded back on
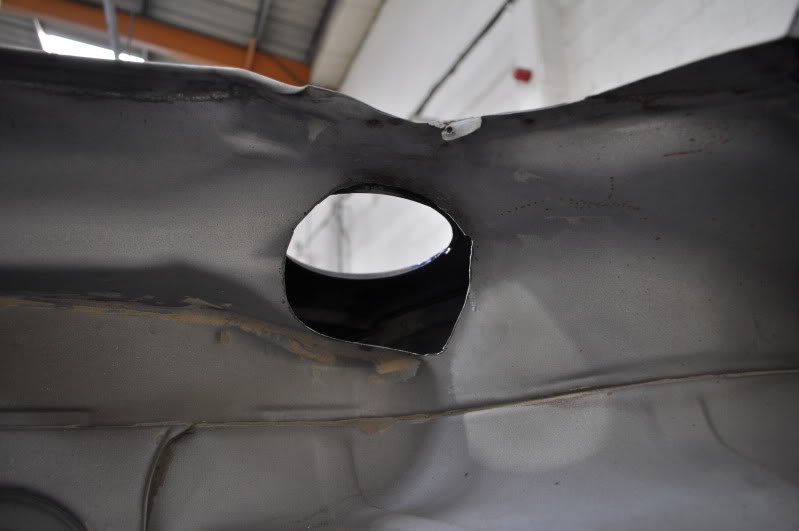
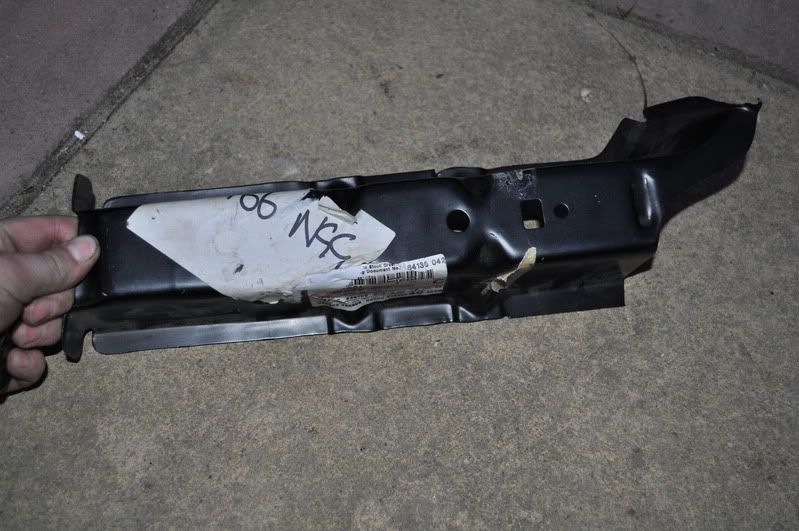
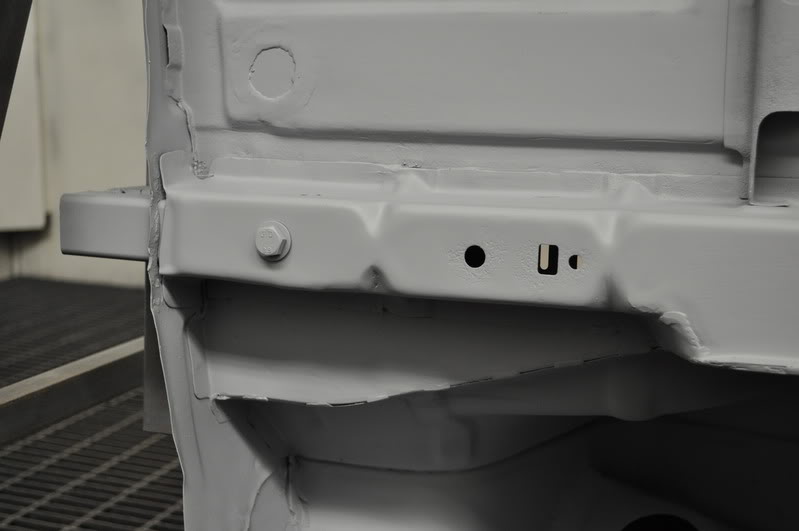
this hole is where the bracket for the spare wheel carrier goes into the boot,
as i've taken all the other bracket off, i want this sealed up
so removed this extra support fords had over the top of it
the welds which have penetrated through when welding inside have been cleaned up
patches replaced where the metal has perforated after shot blasting
the inner fuel cap area was cleaned up but thin in a few places also
so that was cut out with the plasma cutter
the piece cut out
rear suspension turret where we cut out the rot has now had a new peice welded back on
this hole is where the bracket for the spare wheel carrier goes into the boot,
as i've taken all the other bracket off, i want this sealed up
so removed this extra support fords had over the top of it
11-04-2010, 10:15 AM
#91
PassionFord Regular
Thread Starter
Join Date: Aug 2003
Posts: 457
Likes: 0
Received 0 Likes
on
0 Posts
machined the sills back removing any chips in the previous paint etc
part of the front chassis welded up
the master cylinder back together
picked up some parts from the powdercoaters
rear beam, coilpack bracket and front mount
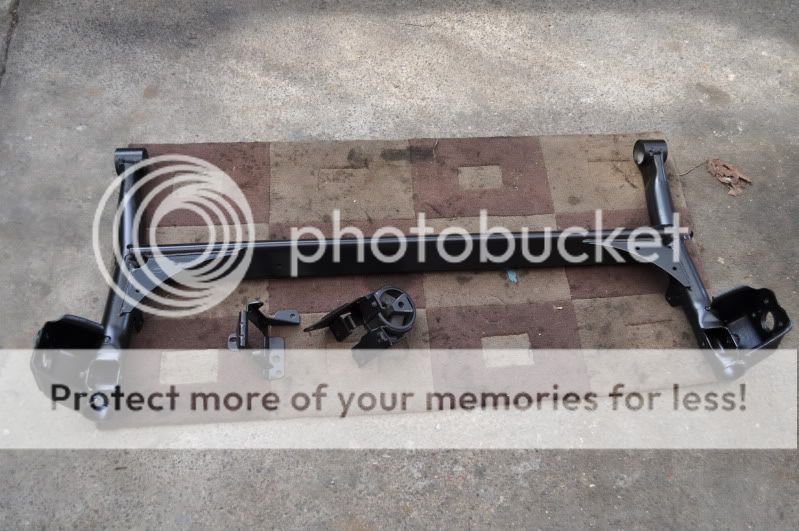
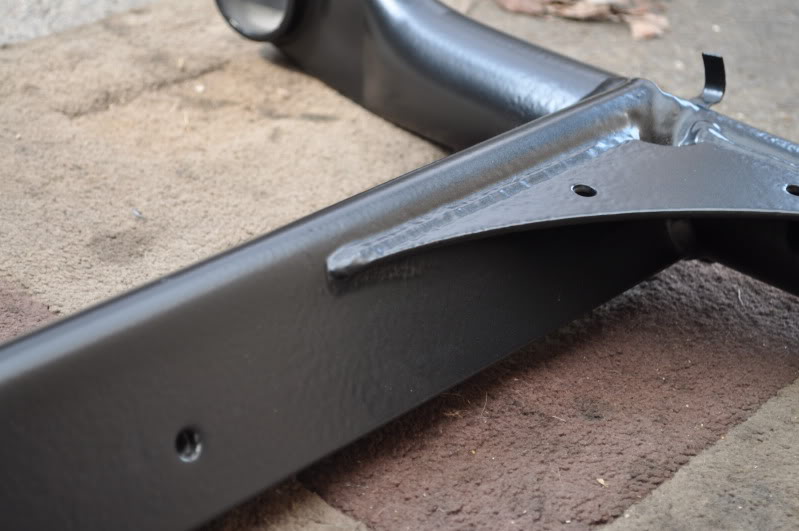
close up of the clean rear beam
now that its back, going to have the old man make up some spacers to make up for the width lost
when converting the rear brakes from drum to disc setup as the wheels sit further in the arch
part of the front chassis welded up
the master cylinder back together
picked up some parts from the powdercoaters
rear beam, coilpack bracket and front mount
close up of the clean rear beam
now that its back, going to have the old man make up some spacers to make up for the width lost
when converting the rear brakes from drum to disc setup as the wheels sit further in the arch
11-04-2010, 06:48 PM
#94
if your using a zetec s rear beam and focus rear discs it pushes the wheels 20mm out, i done the conversion on my fiesta and need to trim the arch trims to stop them hitting the wheels, also if your using racing puma handbrake cables you will need to make brackets for the cables to go in to as the fiesta ones are in the wrong place
11-04-2010, 07:55 PM
#95
COS i'm WORTH it
Join Date: Sep 2008
Location: lost...............!
Posts: 689
Likes: 0
Received 0 Likes
on
0 Posts
inspirational build pal, making me rather embarrassed that i've left my FRST sitting waiting for the good weather 
looking forward to further updates

looking forward to further updates
11-04-2010, 09:30 PM
#96
PassionFord Regular
Thread Starter
Join Date: Aug 2003
Posts: 457
Likes: 0
Received 0 Likes
on
0 Posts
thanks for the nice comments guys really feels like its getting somewhere now!
thanks for that i appreciate your info
its the original rear beam with a plate stitch welded over the hollow section, with rs2000 disc/drum setup which is why the rear wheels have gone in the arch further
uses the rs2000 cable aswell with adapter to take up the slack
if your using a zetec s rear beam and focus rear discs it pushes the wheels 20mm out, i done the conversion on my fiesta and need to trim the arch trims to stop them hitting the wheels, also if your using racing puma handbrake cables you will need to make brackets for the cables to go in to as the fiesta ones are in the wrong place
thanks for that i appreciate your info
its the original rear beam with a plate stitch welded over the hollow section, with rs2000 disc/drum setup which is why the rear wheels have gone in the arch further
uses the rs2000 cable aswell with adapter to take up the slack
16-04-2010, 06:43 AM
#97
PassionFord Regular
Thread Starter
Join Date: Aug 2003
Posts: 457
Likes: 0
Received 0 Likes
on
0 Posts
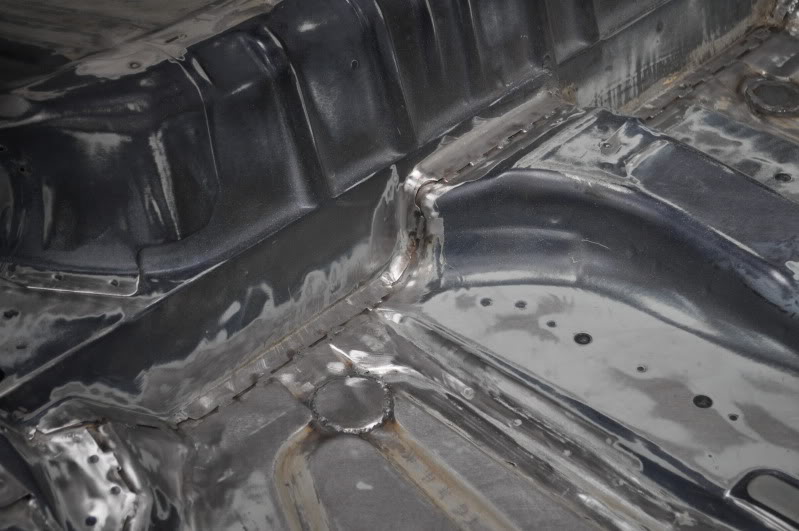
so the boot floor plugs and spare wheel carrier bracket hole have been welded up
the otherside of the welded rear turret passenger side
the rear drivers side turret welded, which i cut quite alot out of
inside view of the same rear turret as above
seam welded along the rear inner panel i trimmed to ensure no strength was lost
you'll notice the hole in the rear chassis leg, its where the rear towing eye was
my fault kept belt sanding to get it dead flat ....... opps (got a new chassis leg on way to sort it)
and the same panel otherside of the car

the fuel filler kneck panel replaced aswell
the otherside of the welded rear turret passenger side
the rear drivers side turret welded, which i cut quite alot out of
inside view of the same rear turret as above
seam welded along the rear inner panel i trimmed to ensure no strength was lost
you'll notice the hole in the rear chassis leg, its where the rear towing eye was
my fault kept belt sanding to get it dead flat ....... opps (got a new chassis leg on way to sort it)
and the same panel otherside of the car
the fuel filler kneck panel replaced aswell
16-04-2010, 06:46 AM
#98
PassionFord Regular
Thread Starter
Join Date: Aug 2003
Posts: 457
Likes: 0
Received 0 Likes
on
0 Posts
onto the engine bay
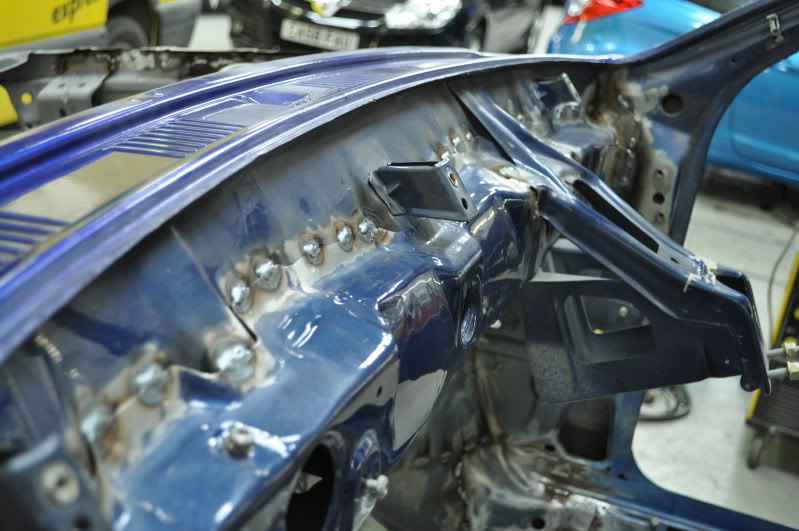
i've circled the holes i want welded up with black pen
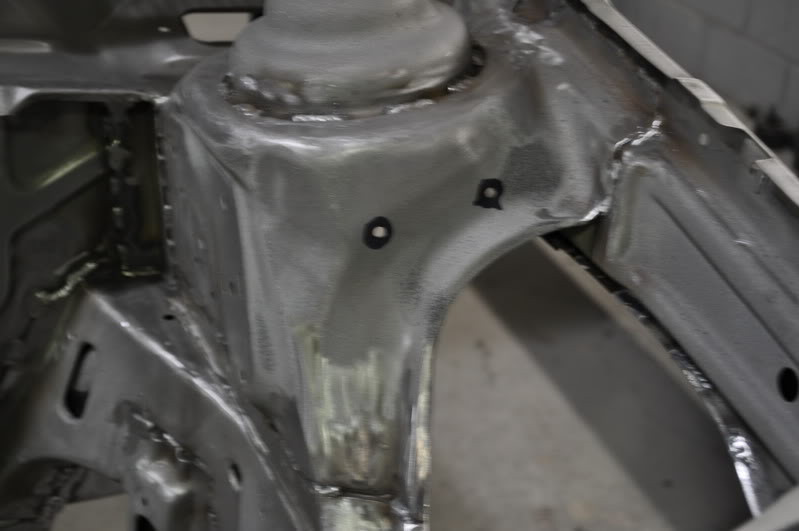
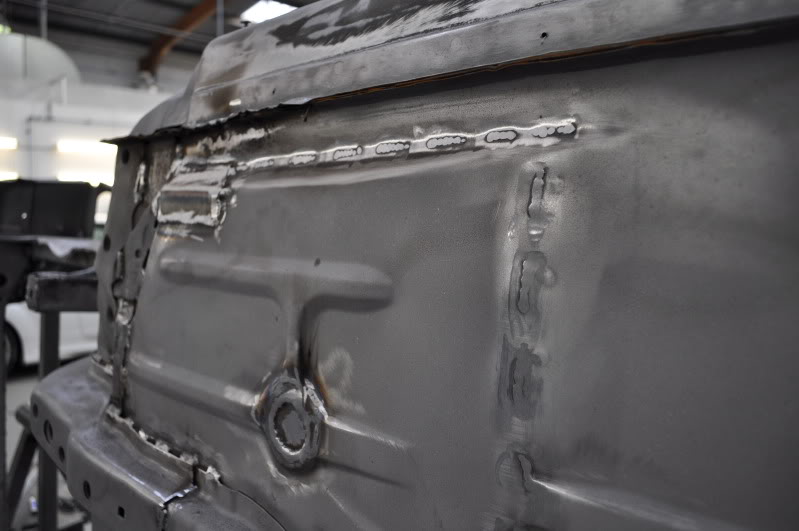
also seam welded along the top of the bulkhead panel
heres the otherside of that panel, after belt sanding and then running over it with a 180grit on the DA
also welded the holes left from the self tappers used to hold the bodykit on previously
after tidying them up and running the DA over them, they blend in nicely
i've circled the holes i want welded up with black pen
also seam welded along the top of the bulkhead panel
heres the otherside of that panel, after belt sanding and then running over it with a 180grit on the DA
also welded the holes left from the self tappers used to hold the bodykit on previously
after tidying them up and running the DA over them, they blend in nicely
24-04-2010, 12:57 PM
#99
PassionFord Regular
Thread Starter
Join Date: Aug 2003
Posts: 457
Likes: 0
Received 0 Likes
on
0 Posts
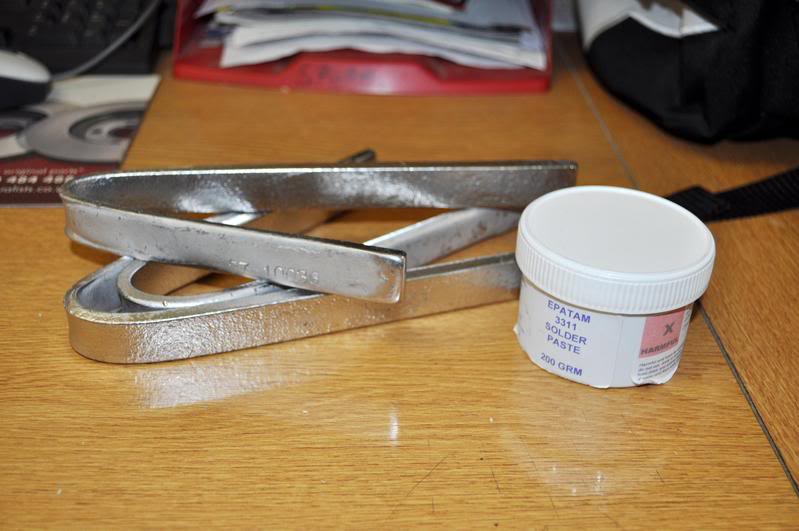
had a delivery in the week,
solder paste and 3 large solder sticks
as some things that need smoothing are going to be lead filled,
as it wont crack or sink like filler
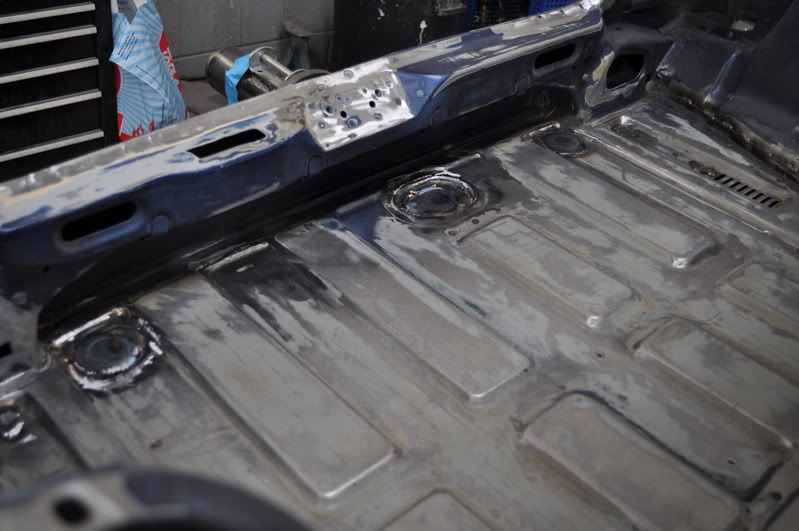
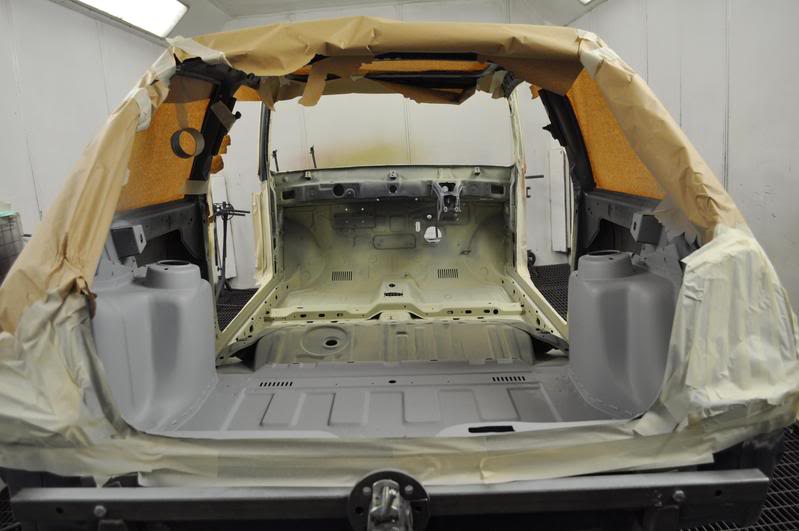
got the car in the booth for two coats of etch primer aswell as 2k primer after that in some places
very happy how the floor is looking now
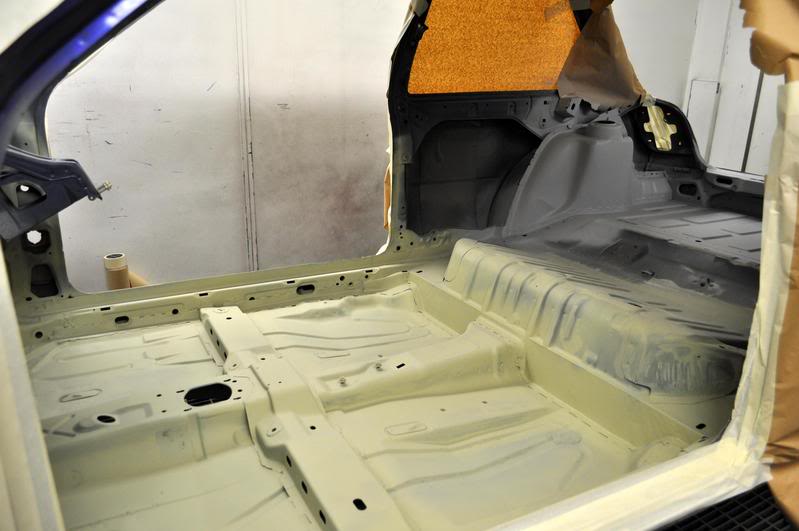
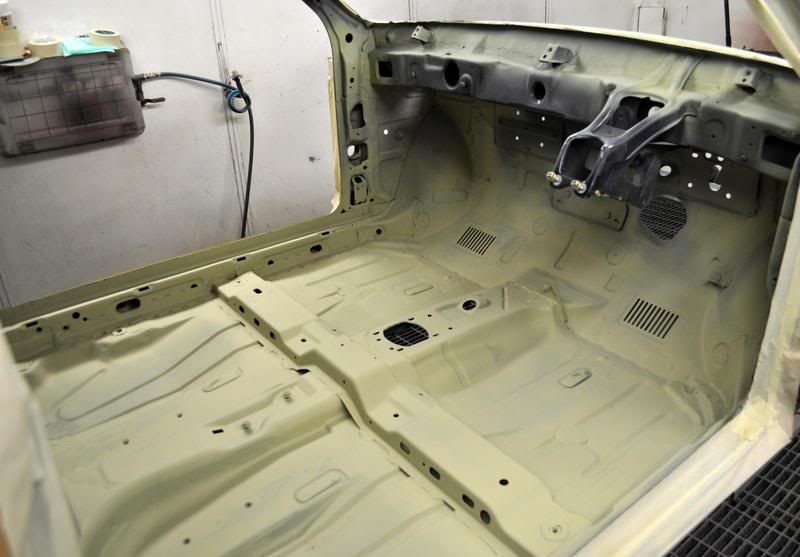
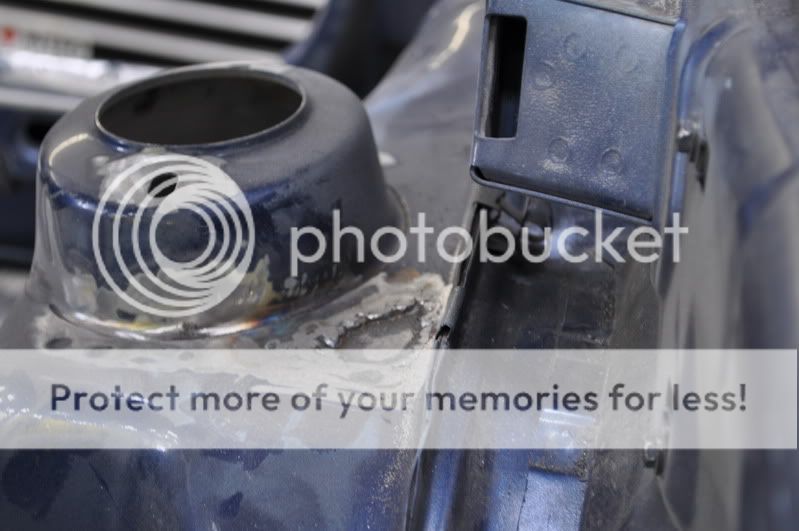
rear turrets looking much better
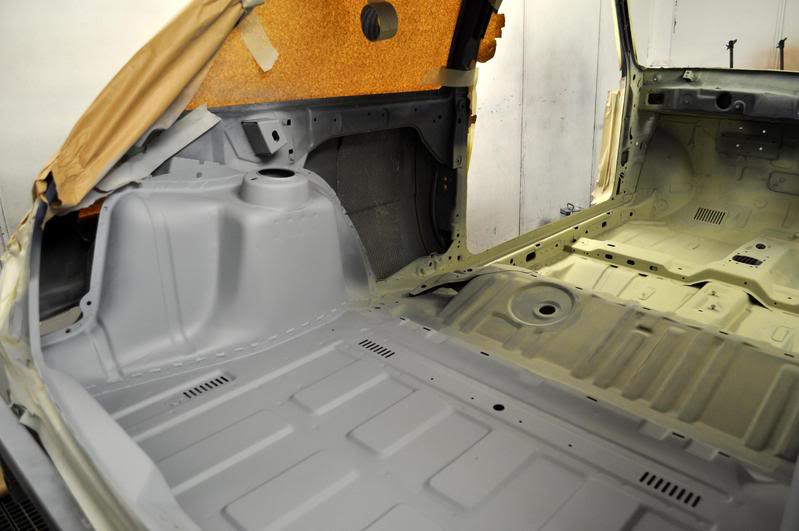
this is the turret which had a fair sized piece cut out
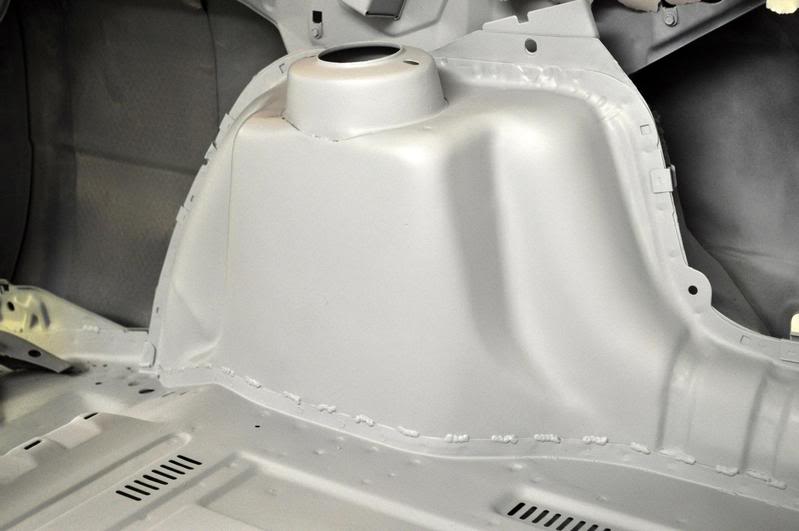
underneath has had some etch primer and 2k primer over the top
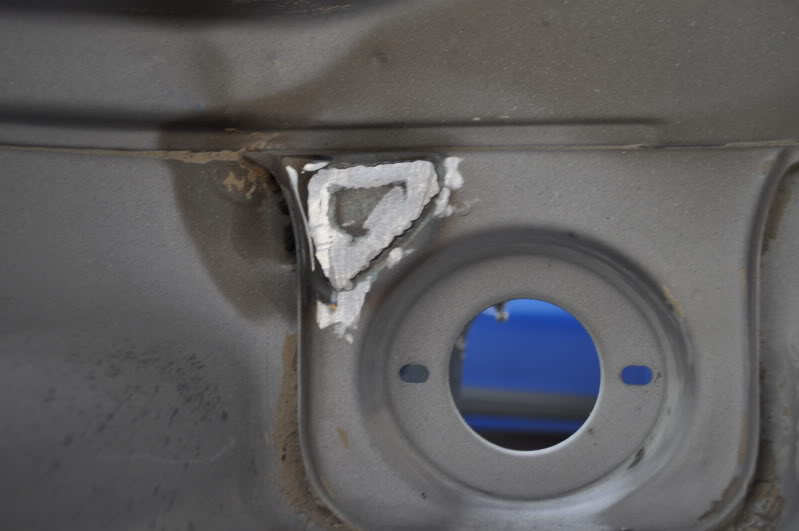
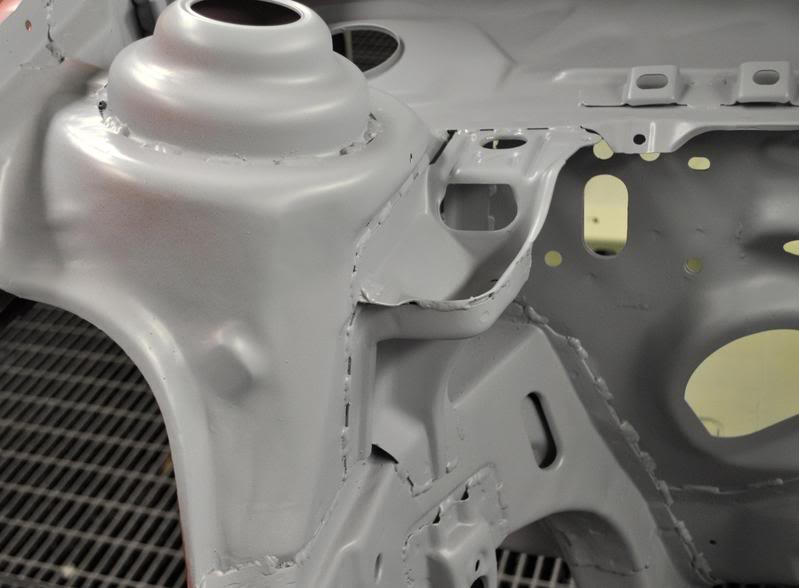
heres the front suspension turret in the engine bay, with holes welded up and smoothed
then primered
solder paste and 3 large solder sticks
as some things that need smoothing are going to be lead filled,
as it wont crack or sink like filler
got the car in the booth for two coats of etch primer aswell as 2k primer after that in some places
very happy how the floor is looking now
rear turrets looking much better
this is the turret which had a fair sized piece cut out
underneath has had some etch primer and 2k primer over the top
heres the front suspension turret in the engine bay, with holes welded up and smoothed
then primered
24-04-2010, 01:12 PM
#100
PassionFord Regular
Thread Starter
Join Date: Aug 2003
Posts: 457
Likes: 0
Received 0 Likes
on
0 Posts
well after messing the rear chassis leg

got hold of a no longer available genuine ford repair panel for the chassis leg
drilled the spot welds and cut the old piece off
here it is after being covered in primer, much better
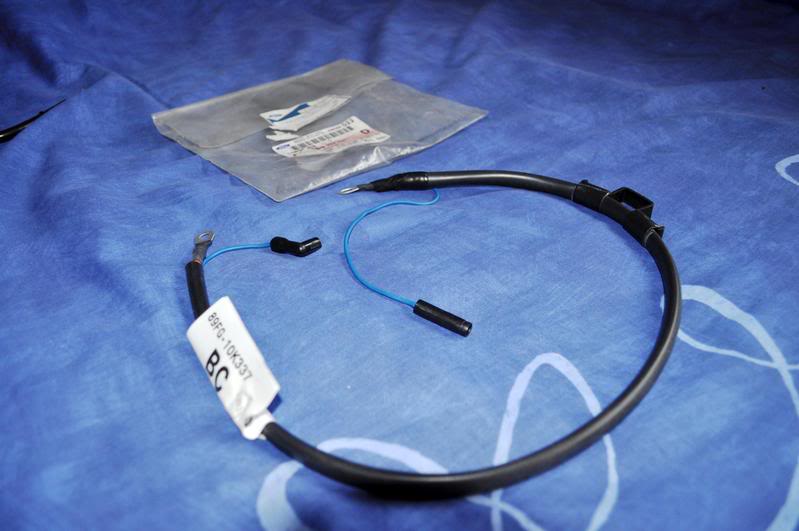
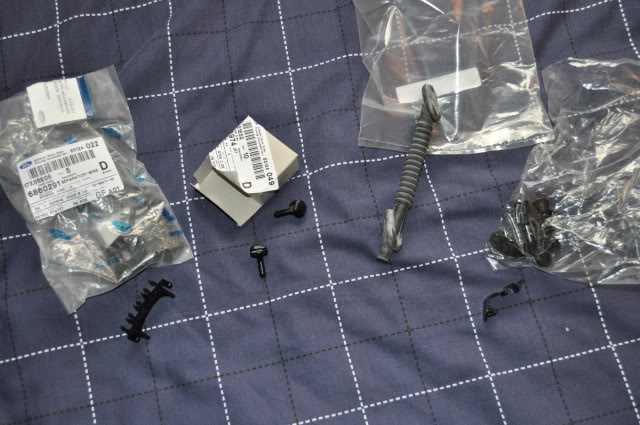
got myself a new fords alternator cable aswell
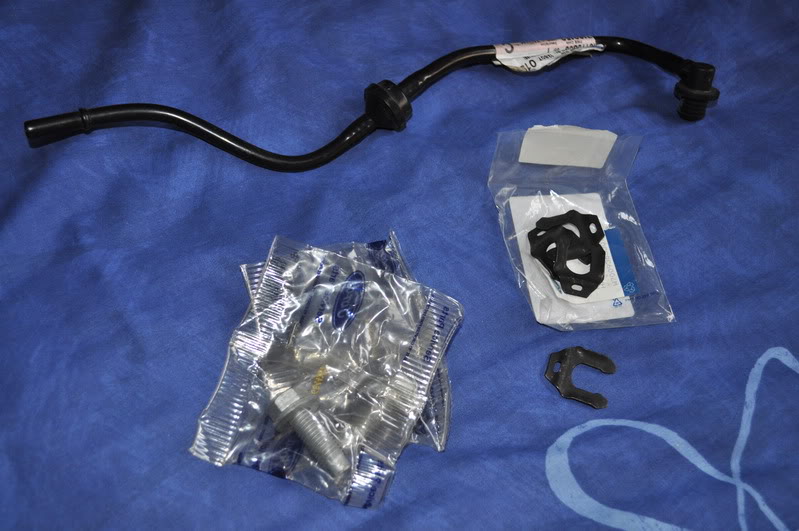
also a new servo pipe, brake line securing clips and non power steering rack bolts
new brackets which hold the sunroof
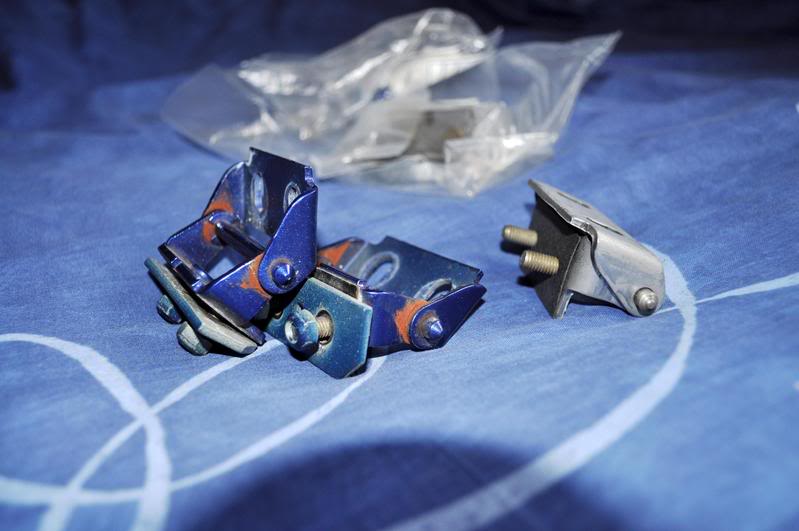
new tailgate hinges next to the old ones,
the old ones hold in what ever position you put them, compared to the new ones which are completely smooth
got hold of a no longer available genuine ford repair panel for the chassis leg
drilled the spot welds and cut the old piece off
here it is after being covered in primer, much better
got myself a new fords alternator cable aswell
also a new servo pipe, brake line securing clips and non power steering rack bolts
new brackets which hold the sunroof
new tailgate hinges next to the old ones,
the old ones hold in what ever position you put them, compared to the new ones which are completely smooth
25-04-2010, 07:45 PM
#101
PassionFord Regular

Join Date: Mar 2008
Location: cardiff
Posts: 357
Likes: 0
Received 0 Likes
on
0 Posts
great work, looks like she will be an animal when finished.
you seem to be a bit of an expert at sourcing no longer serviced items, i've been trying to find a pair of van blanking panels for my mk3 project.
i used to work in the parts dept @ evans halshaw in cardiff, rod there has tried all the usually sources (daventry, Quicks, Perrys) but nothing available, any ideas??? i have the finis codes somewhere.
cheeRS Neil
26-04-2010, 12:38 PM
#102
PassionFord Regular
Thread Starter
Join Date: Aug 2003
Posts: 457
Likes: 0
Received 0 Likes
on
0 Posts
great work, looks like she will be an animal when finished.
you seem to be a bit of an expert at sourcing no longer serviced items, i've been trying to find a pair of van blanking panels for my mk3 project.
i used to work in the parts dept @ evans halshaw in cardiff, rod there has tried all the usually sources (daventry, Quicks, Perrys) but nothing available, any ideas??? i have the finis codes somewhere.
cheeRS Neil
you seem to be a bit of an expert at sourcing no longer serviced items, i've been trying to find a pair of van blanking panels for my mk3 project.
i used to work in the parts dept @ evans halshaw in cardiff, rod there has tried all the usually sources (daventry, Quicks, Perrys) but nothing available, any ideas??? i have the finis codes somewhere.
cheeRS Neil
i work in bridgend ford parts (small world)
 28-04-2010, 09:02 AM
#107
PassionFord Post Whore!!
 Nice work

 Cant wait till i get my 1st RST get my hands dirty
  22-05-2010, 09:05 AM
#113
PassionFord Regular
Thread Starter
Join Date: Aug 2003
Posts: 457
Likes: 0
Received 0 Likes
on
0 Posts
Well its time for a catch up
things have been a bit slow lately due to loosing my enthusiam
but starting to get it back again
after selling quite alot of parts recently to get my funds level back up
mainly things that are no good to me which my change of plans
as basically this car wont look the same as before,
more factory looking with subtle touches
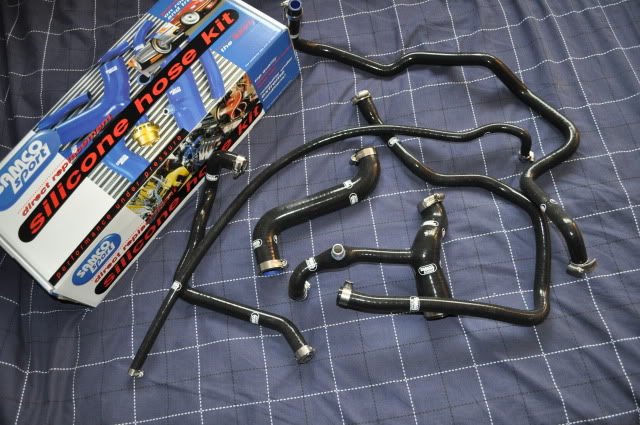
firstly my new black samco hoses for the mk3 fiesta with zetec engine
(the kits only been released a few months ago after all these years)
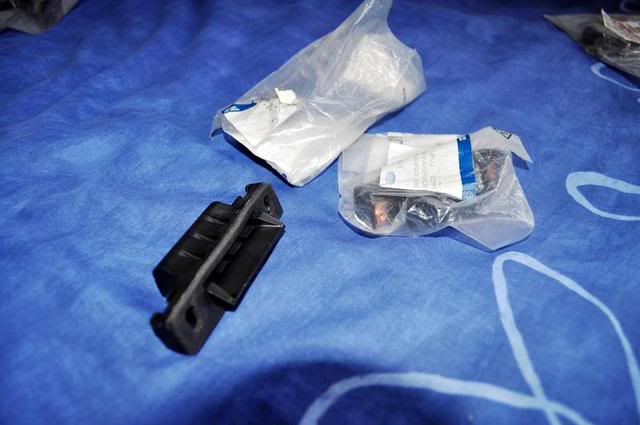
spark lead clip, new washer jets, clips to hold the wiring in the boot, and tailgate grommet
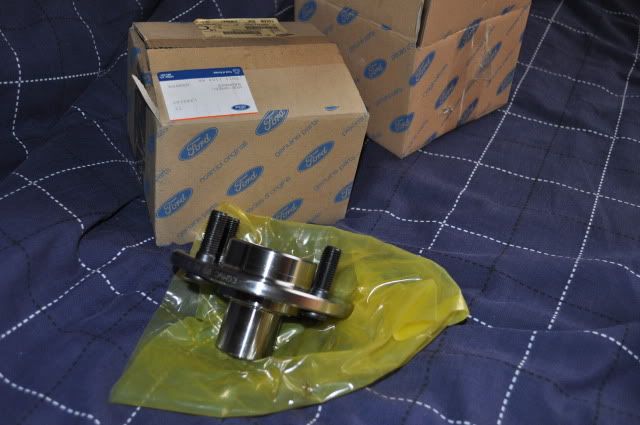
brand new hubs to go with the knuckles i have'nt picked up from the powder coaters yet
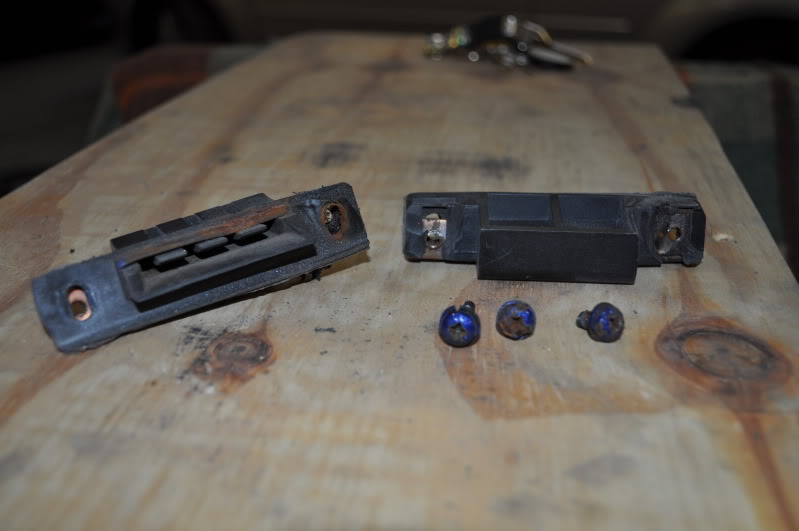
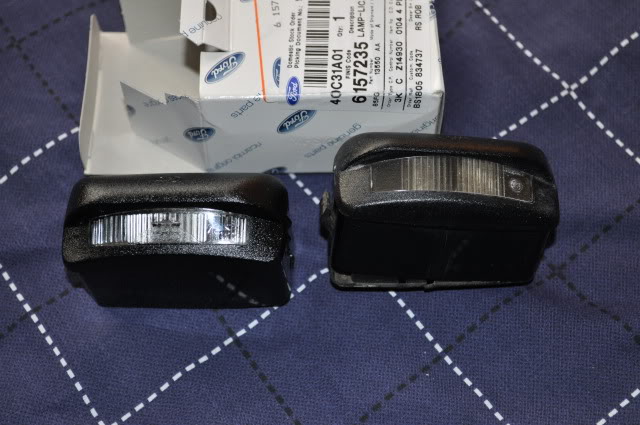
new rear license plate lamp on the left, compared to the old yellow on the right
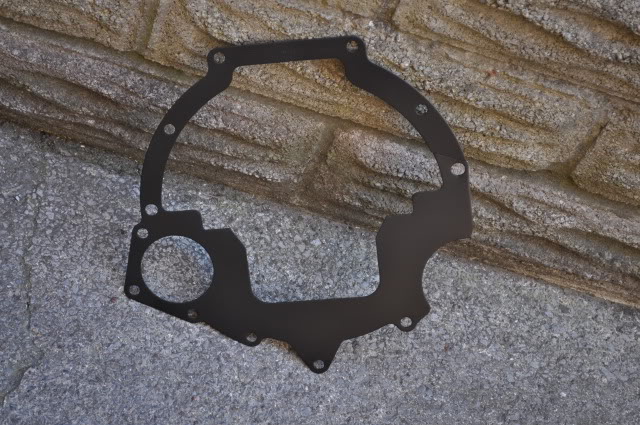
the metal shim that goes between the block and gearbox, no longer available new
so straightened mine up, sanded back to bare metal as it was a little scabby
etch primer and few coats of satin black, JOB DONE
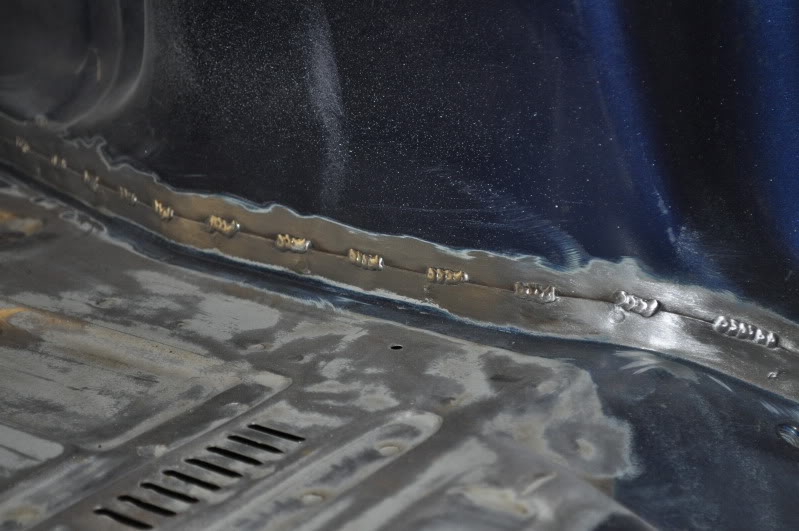
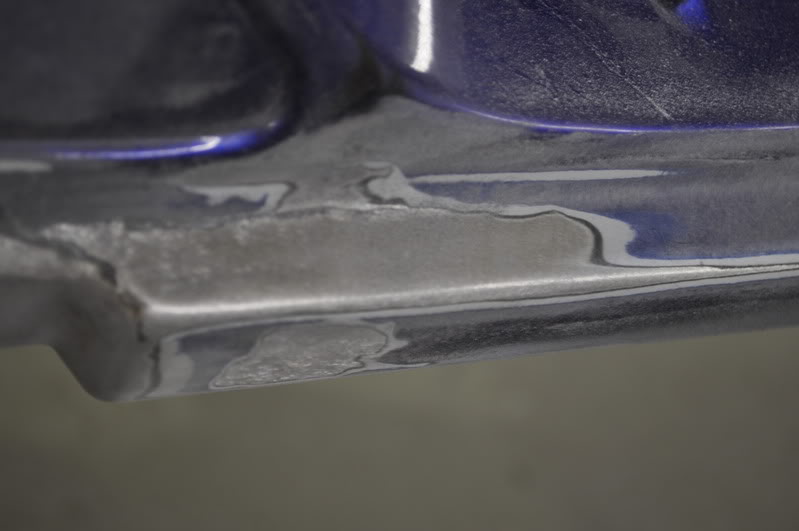
also the panel gap below the rear light i've had lead filled, so basically its slightly flexable and wont crack
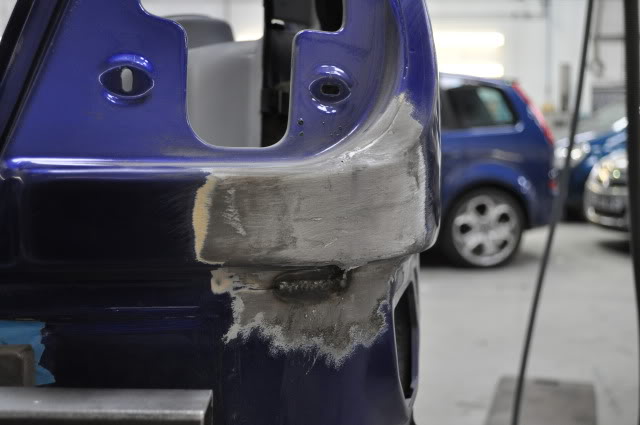
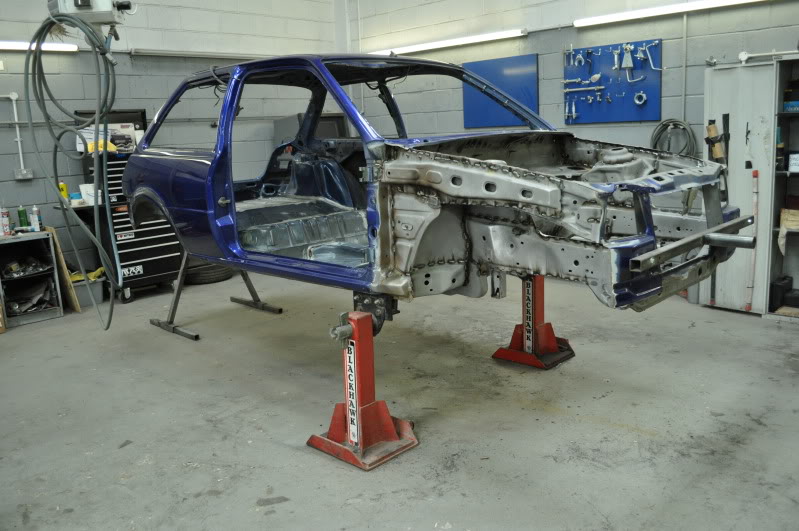
heres how the shell is looking
basically seam sealer is being put on only where its needed and nowhere near as thick as it comes from factory


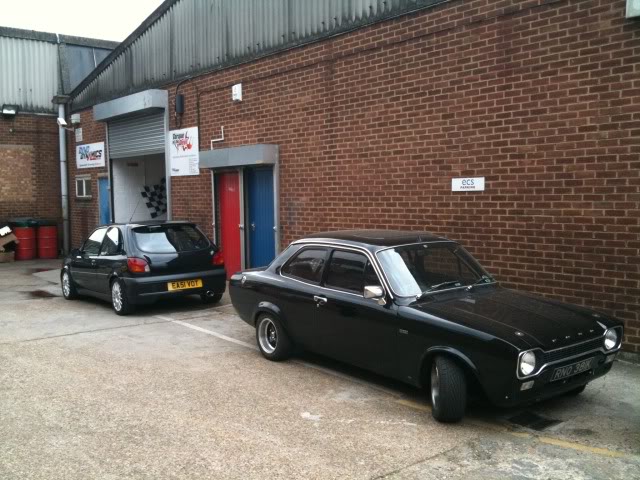
recently while in the london area, i went to see chris todd @ torque of the devil
about mapping, wiring and management
very happy to leave the car with them in the near future
things have been a bit slow lately due to loosing my enthusiam
but starting to get it back again
after selling quite alot of parts recently to get my funds level back up
mainly things that are no good to me which my change of plans
as basically this car wont look the same as before,
more factory looking with subtle touches
firstly my new black samco hoses for the mk3 fiesta with zetec engine
(the kits only been released a few months ago after all these years)
spark lead clip, new washer jets, clips to hold the wiring in the boot, and tailgate grommet
brand new hubs to go with the knuckles i have'nt picked up from the powder coaters yet
new rear license plate lamp on the left, compared to the old yellow on the right
the metal shim that goes between the block and gearbox, no longer available new
so straightened mine up, sanded back to bare metal as it was a little scabby
etch primer and few coats of satin black, JOB DONE
also the panel gap below the rear light i've had lead filled, so basically its slightly flexable and wont crack
heres how the shell is looking
basically seam sealer is being put on only where its needed and nowhere near as thick as it comes from factory
recently while in the london area, i went to see chris todd @ torque of the devil
about mapping, wiring and management
very happy to leave the car with them in the near future
22-05-2010, 10:30 AM
#114
I've found that life I needed.. It's HERE!!
iTrader: (1)

Join Date: Jun 2005
Location: south wales
Posts: 1,153
Likes: 0
Received 0 Likes
on
0 Posts
great progress rob, how ever i would consider taking the fiesta some where else!!! after seeing the mess of a friends corsa after they had mapped it, it melted a piston after 200 miles, used a 20 year old wiring loom and bodged it to fit the omex plug
id recommend dave young @ mech motorsport he loves using omex (there are also near his workshop) he is based in cheltnham, he has mapped about 4-5 of my friends cars including the nova all on various systems mbe, omex 600, emerald k3, megasquirt, dta etc etc
best of luck anyways cant wait to see it
i was always told that lead filling will corrode the metal??? hence why it is not done that much any more??
 29-05-2010, 05:44 PM
#117
PassionFord Regular
Thread Starter
Join Date: Aug 2003
Posts: 457
Likes: 0
Received 0 Likes
on
0 Posts
great progress rob, how ever i would consider taking the fiesta some where else!!! after seeing the mess of a friends corsa after they had mapped it, it melted a piston after 200 miles, used a 20 year old wiring loom and bodged it to fit the omex plug
id recommend dave young @ mech motorsport he loves using omex (there are also near his workshop) he is based in cheltnham, he has mapped about 4-5 of my friends cars including the nova all on various systems mbe, omex 600, emerald k3, megasquirt, dta etc etc
best of luck anyways cant wait to see it
i was always told that lead filling will corrode the metal??? hence why it is not done that much any more??
id recommend dave young @ mech motorsport he loves using omex (there are also near his workshop) he is based in cheltnham, he has mapped about 4-5 of my friends cars including the nova all on various systems mbe, omex 600, emerald k3, megasquirt, dta etc etc
best of luck anyways cant wait to see it
i was always told that lead filling will corrode the metal??? hence why it is not done that much any more??
so after speaking to ian H
i've got some new idea's will post up more soon after a few phone calls
