Project Tango - Fiesta ITB'd Track Car, Caged and Carbon'd
 05-04-2011, 07:28 PM
#121
Regular Contributor
Thread Starter

Wiring has been my latest job as of late! Bit of a headache, but luckily for me, my old man used to be an Autoelectrician, so he knows what he's doing.
I'd opened up the engine loom, and it had looked like this:
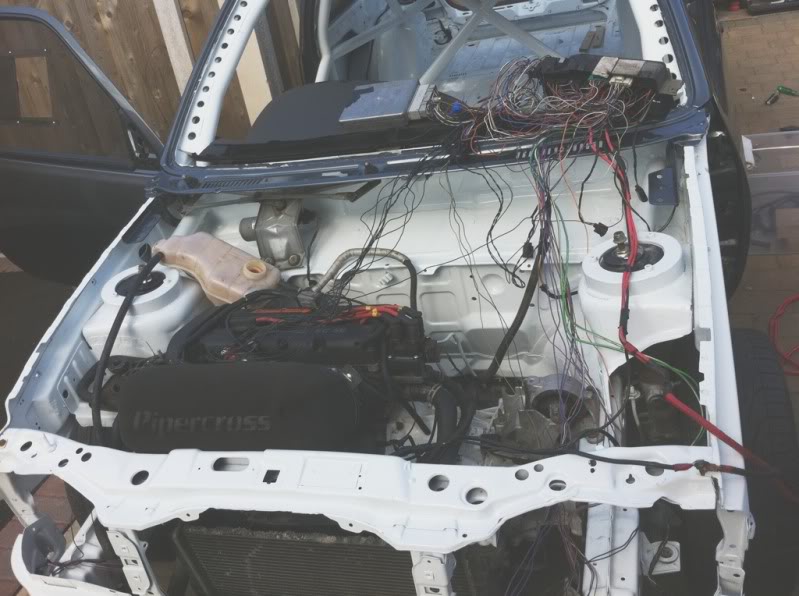
Wires everywhere! But I knew where I was with it.
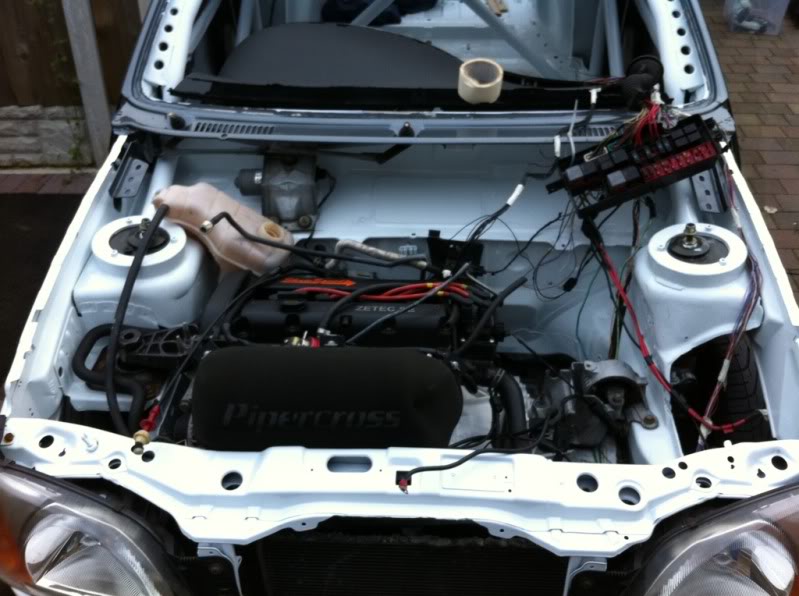
I then tidied it all up, leaving it look like this:
After sorting a bad earth and a dodgy bulb, I was left with this:

Rear lights, front lights, indicators, dash, wipers and washer all working as they should, a huge relief given how much had been removed from the loom.
Tucked her away, and that was it for now!
I'd opened up the engine loom, and it had looked like this:
Wires everywhere! But I knew where I was with it.
I then tidied it all up, leaving it look like this:
After sorting a bad earth and a dodgy bulb, I was left with this:
Rear lights, front lights, indicators, dash, wipers and washer all working as they should, a huge relief given how much had been removed from the loom.
Tucked her away, and that was it for now!
 07-04-2011, 04:49 PM
#122
great project here, its gonna be worth the wait trust me on that! track day weapon is defo what im going with next, alot of inspiration here its making me just want to just chuck in a roll cage and strip out my car!! all the best bud this will car will defo give others a big suprise!!
05-06-2011, 09:04 PM
#124
Regular Contributor
Thread Starter
Right well its been a while since I updated this, but cracked on tonight, needless to say, the car is fighting me!
Dropped the tank to check the fuel lines, add some more fuel and level it off (Due to no filler neck at the moment had to pour fuel in from underneath, so only had around 2 litres in, plus my drive is one a slope and fuel would've been in the front of the tank).
After this tried to get her running, my battery was flat so had to fun it from the Focus, here's a video:
http://s24.photobucket.com/albums/c3...t=ceabb086.mp4
She was turning over, but still dont think I'm getting fuel through, also wasnt getting a spark, so think it may be down to the wiring of the Omex ECU, hopefully not a major one to fix. Maybe another day!
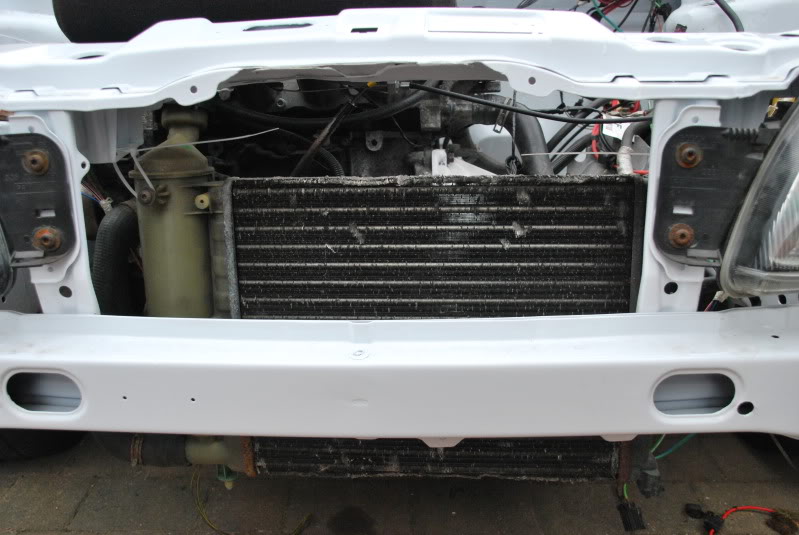
Also decided to crack on with the Saxo rad, after some thinking I mounted it like this, and managed to get all bar one of the hoses to line up fine, I will probably get a longer hose or see about getting the rad modified at some point, but sat in really well. Obviously the cable ties will be replaced with a bracket once I know it works fine, but some pictures are below:
Hose that didnt fit:
And for the rest:

And some pictures of it mounted up to the original hoses:
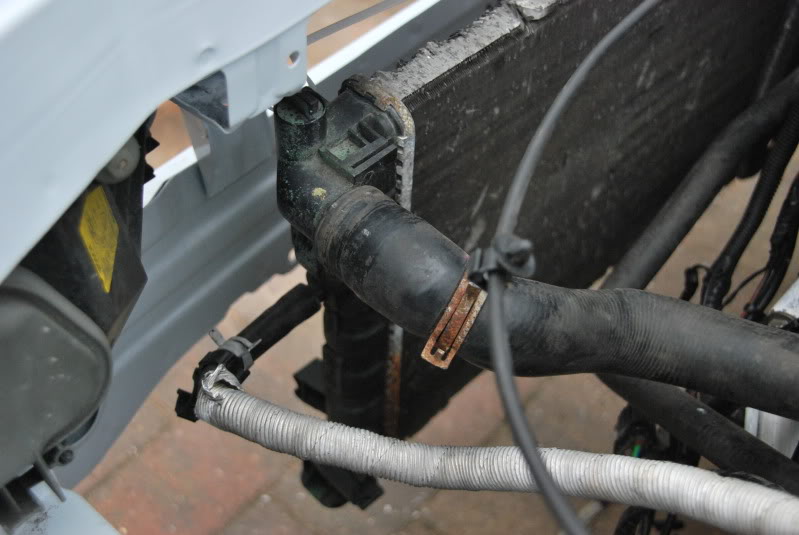

I then modified the one hose that required it, due to me not running a heater matrix, seems a good fit now:

Dropped the tank to check the fuel lines, add some more fuel and level it off (Due to no filler neck at the moment had to pour fuel in from underneath, so only had around 2 litres in, plus my drive is one a slope and fuel would've been in the front of the tank).
After this tried to get her running, my battery was flat so had to fun it from the Focus, here's a video:
http://s24.photobucket.com/albums/c3...t=ceabb086.mp4
She was turning over, but still dont think I'm getting fuel through, also wasnt getting a spark, so think it may be down to the wiring of the Omex ECU, hopefully not a major one to fix. Maybe another day!
Also decided to crack on with the Saxo rad, after some thinking I mounted it like this, and managed to get all bar one of the hoses to line up fine, I will probably get a longer hose or see about getting the rad modified at some point, but sat in really well. Obviously the cable ties will be replaced with a bracket once I know it works fine, but some pictures are below:
Hose that didnt fit:
And for the rest:
And some pictures of it mounted up to the original hoses:
I then modified the one hose that required it, due to me not running a heater matrix, seems a good fit now:
05-06-2011, 09:05 PM
#125
Regular Contributor
Thread Starter
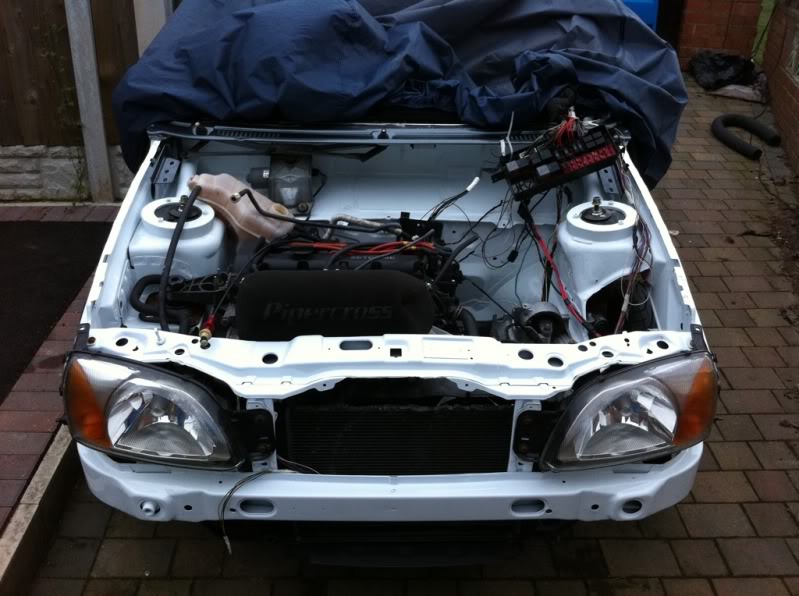
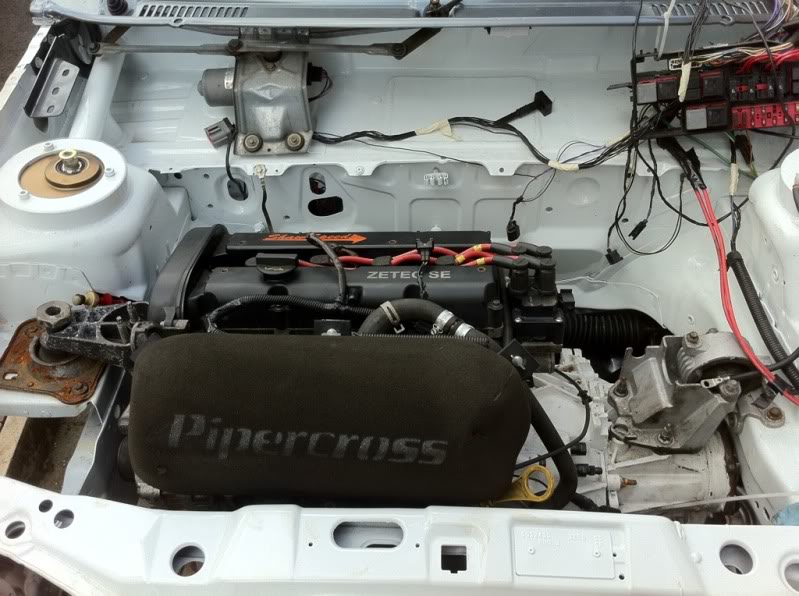
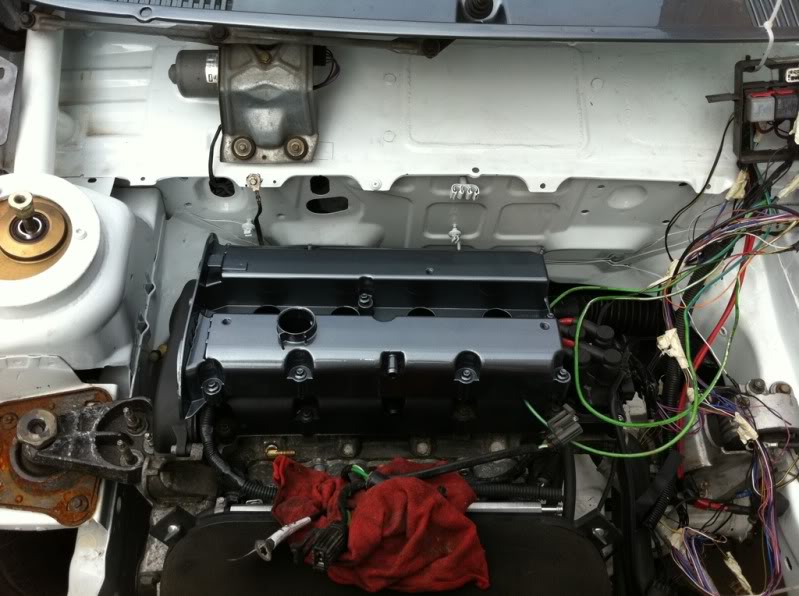
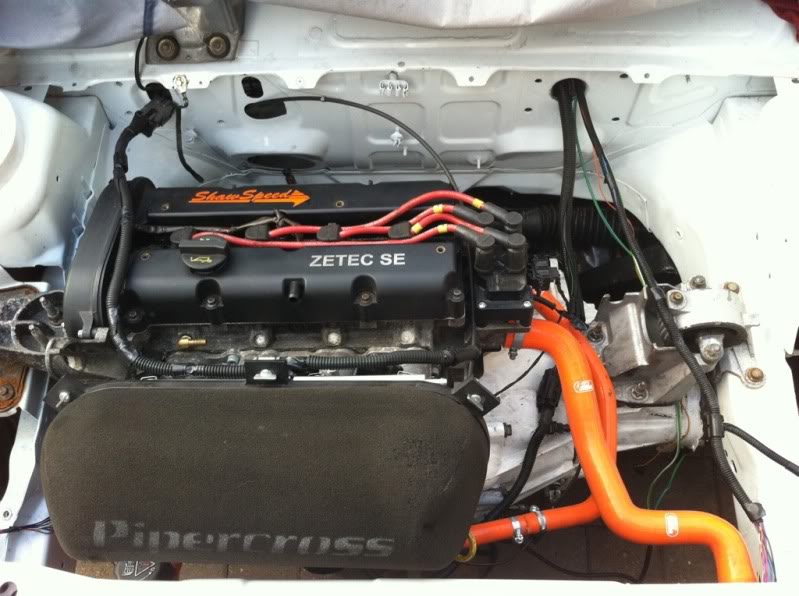
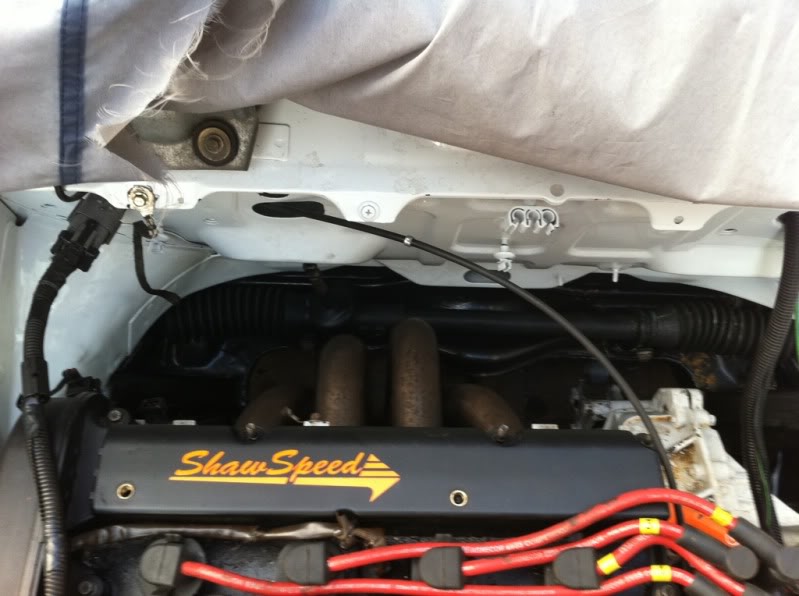
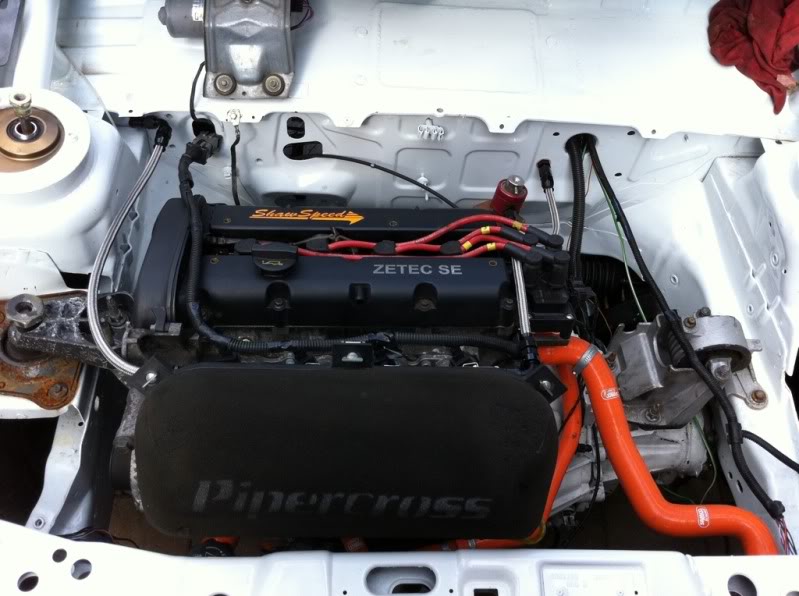
And just a few random shots of the engine bay:
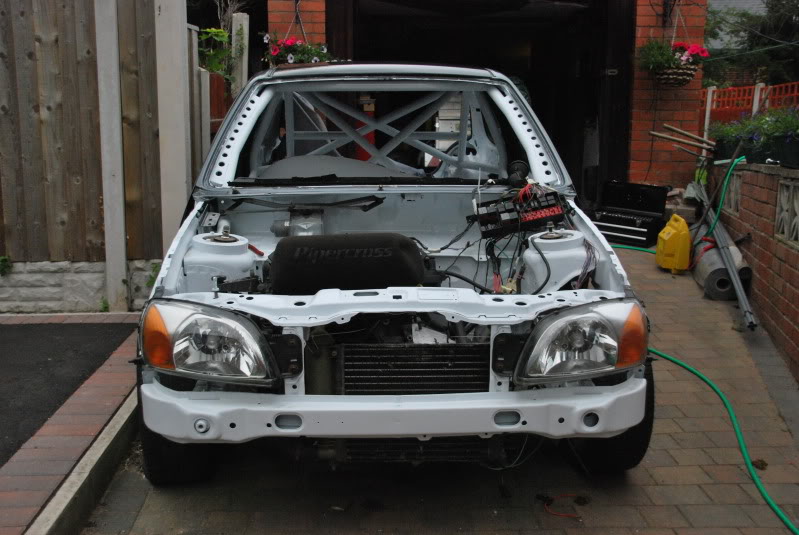
Thats it for now, should be getting the rest of the bodywork back end of this week, so can get it looking car like!
Thanks for reading.
Thats it for now, should be getting the rest of the bodywork back end of this week, so can get it looking car like!
Thanks for reading.
19-06-2011, 09:13 PM
#126
Regular Contributor
Thread Starter
Pulled my finger out tonight and decide to make a start on the underside today, my old man had got hold of a gallon of silver hammerite for me to use, so will be using that, followed by my clear underseal.
So moved the car down the drive and got her in the air:
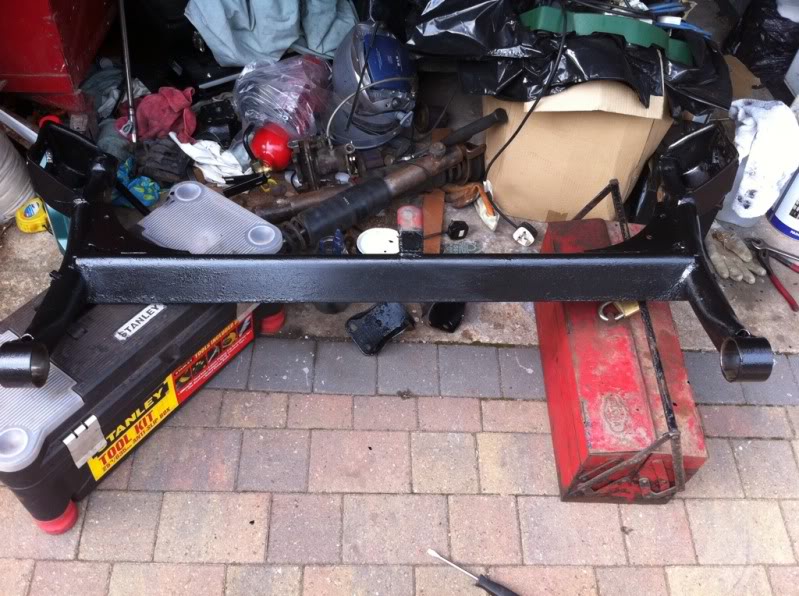
After some wresling, the beam came off, I'll elaborate below:
Brakes off:
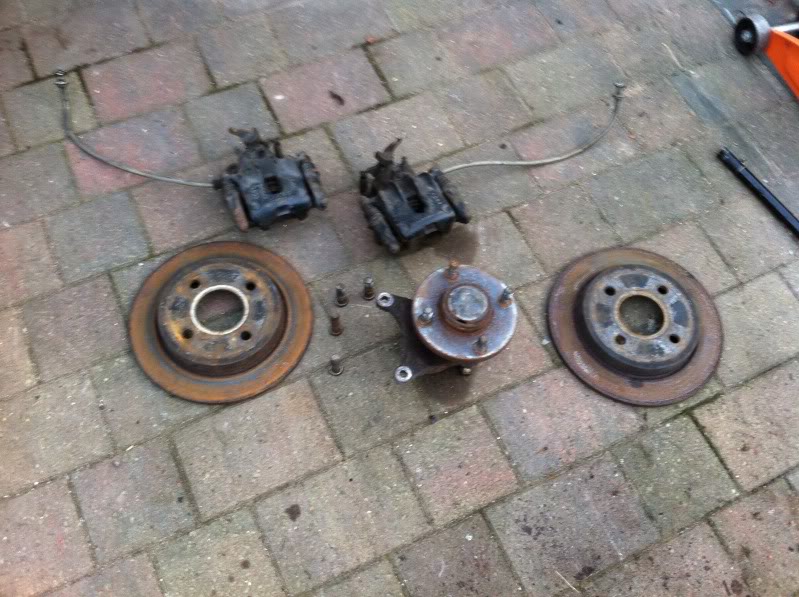
And as she now stands, pictures as requested, poor mind:
Wasnt all easy, in usual fashion, a 30 min job took much longer.
> Roll the car down the drive, became jack up car to remove tank, then tank had fixings stuck.
> Remove tank, try to push the car, rear brakes stuck on.
> Then free'd them up, and front wheel was caught on caliper and jammed on, so had to jack up front to move that.
> Jack kept getting stuck on driveway, after 10 mins car was down the drive.
> After jacking up rear, got airgun hooked up, but wrong adapter, after 10 mins rummaging I found one.
> Go to remove the 17mm nuts on rear shock, no deep 17 1/2.
> Find 17mm 3/8 but no 3/8 to 1/2 adapter.
> Manage to remove nuts with shallow 17mm.
> Cant remove shocks from beam, nuts are jammed on.
> Remove beam with shocks and brakes on, then on to removing the hubs.
> First hub comes off, airline springs leak.
> Sort airleak, remove 2 bolts on hub, 2 others stuck.
> Stuck bolts shear off, so have to sort that next.
> Brakes stuck on and finally got it removed.
2 hours later and I'm done! Hard work, but getting there slowly.
So moved the car down the drive and got her in the air:
After some wresling, the beam came off, I'll elaborate below:
Brakes off:
And as she now stands, pictures as requested, poor mind:
Wasnt all easy, in usual fashion, a 30 min job took much longer.
> Roll the car down the drive, became jack up car to remove tank, then tank had fixings stuck.
> Remove tank, try to push the car, rear brakes stuck on.
> Then free'd them up, and front wheel was caught on caliper and jammed on, so had to jack up front to move that.
> Jack kept getting stuck on driveway, after 10 mins car was down the drive.
> After jacking up rear, got airgun hooked up, but wrong adapter, after 10 mins rummaging I found one.
> Go to remove the 17mm nuts on rear shock, no deep 17 1/2.
> Find 17mm 3/8 but no 3/8 to 1/2 adapter.
> Manage to remove nuts with shallow 17mm.
> Cant remove shocks from beam, nuts are jammed on.
> Remove beam with shocks and brakes on, then on to removing the hubs.
> First hub comes off, airline springs leak.
> Sort airleak, remove 2 bolts on hub, 2 others stuck.
> Stuck bolts shear off, so have to sort that next.
> Brakes stuck on and finally got it removed.
2 hours later and I'm done! Hard work, but getting there slowly.
 27-06-2011, 06:35 PM
#128
Regular Contributor
Thread Starter
Updates!
Finally sorted my fuel lines, will be placing order tonight, once its been checked to confirm everything is right, details of new layout:
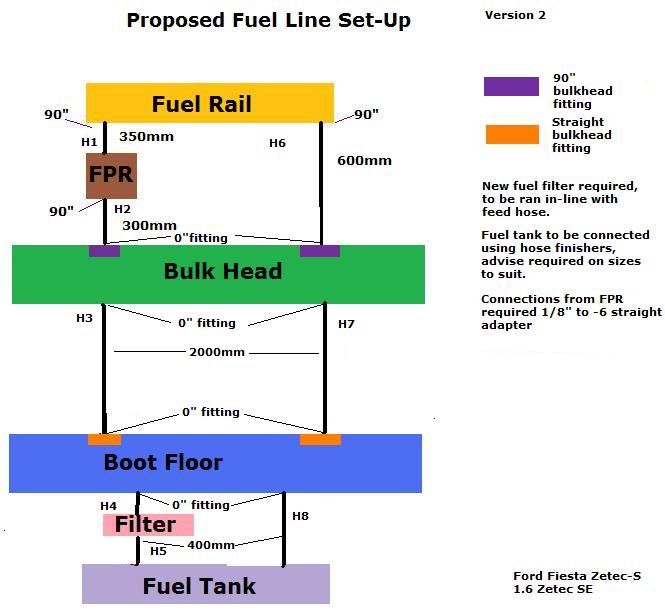
Should be with me in a few days, need to order my -6 fuel rail aswell from Burton Power.
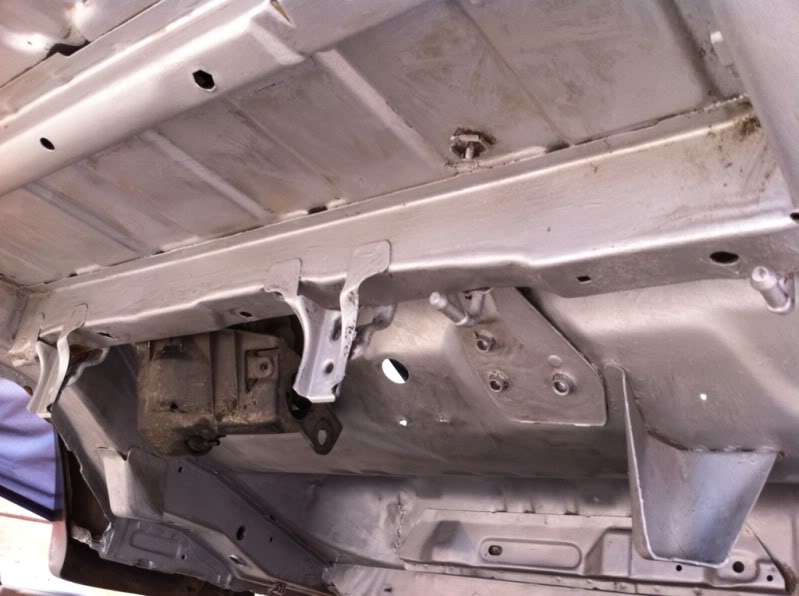
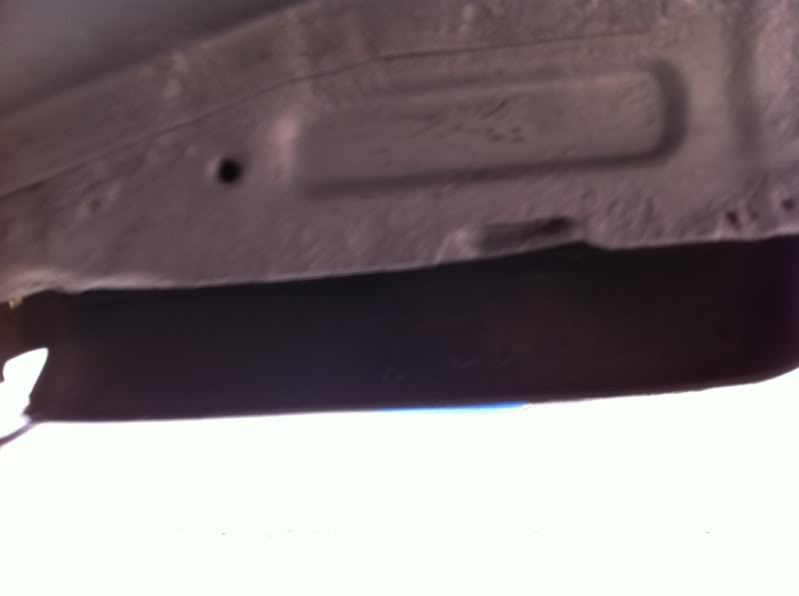
Also had a second crack at the underside of the car, gave it a second coat of paint, now looking much better, a few pictures of where I am upto:
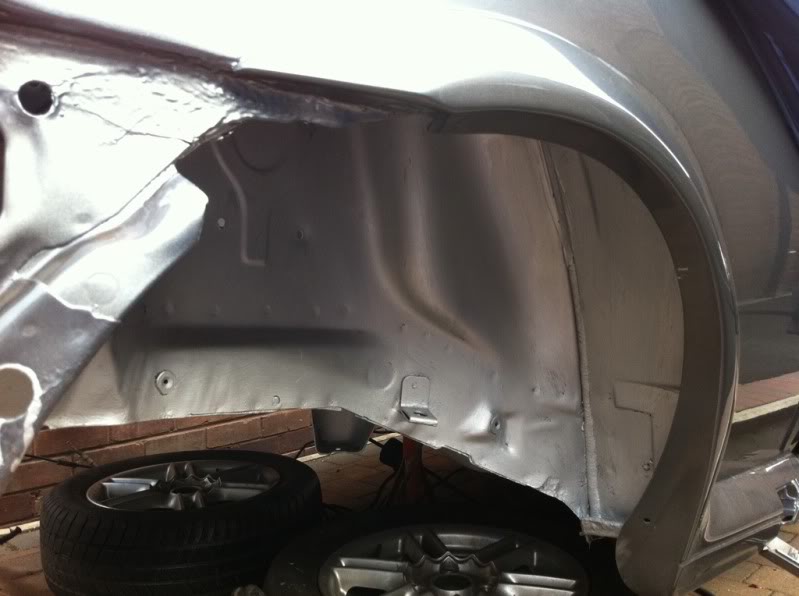
Inside the wheel arch:

Underside:
And the sill:
It will all be getting a second coat, and then the underseal can go on (It's a clear that I will be using).
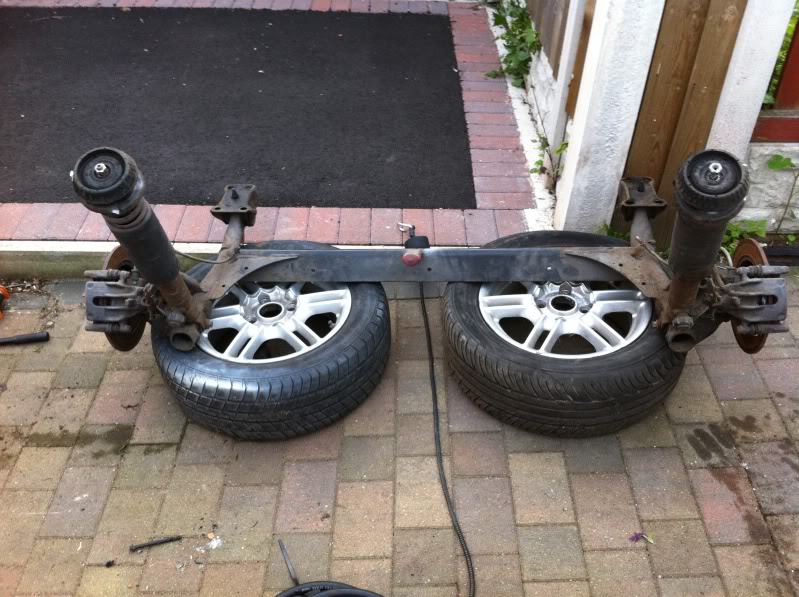
Also made a start on prepping the rear end, cleaned up the rear hubs, and made a start on the beam:
Also ordered a brake rebuild kit for the rears from Big Red, so can get on with that soon, and my caliper paint was ordered. Hopefully have the rear end back on by the end of this week!
Thanks for reading.
Finally sorted my fuel lines, will be placing order tonight, once its been checked to confirm everything is right, details of new layout:
Should be with me in a few days, need to order my -6 fuel rail aswell from Burton Power.
Also had a second crack at the underside of the car, gave it a second coat of paint, now looking much better, a few pictures of where I am upto:
Inside the wheel arch:
Underside:
And the sill:
It will all be getting a second coat, and then the underseal can go on (It's a clear that I will be using).
Also made a start on prepping the rear end, cleaned up the rear hubs, and made a start on the beam:
Also ordered a brake rebuild kit for the rears from Big Red, so can get on with that soon, and my caliper paint was ordered. Hopefully have the rear end back on by the end of this week!
Thanks for reading.
19-08-2011, 06:17 PM
#129
Regular Contributor
Thread Starter
Forgot about this thread, Ive made a fair bit of progress since I last posted, so will get the updates here over the next few days.
Thanks for reading.
Thanks for reading.
22-08-2011, 06:24 PM
#130
Regular Contributor
Thread Starter
Well its been a while since I put any updates on here, but have been moving forward with it all.
Gave the Ledas a quick lick of paint, and then put the rear beam back on:
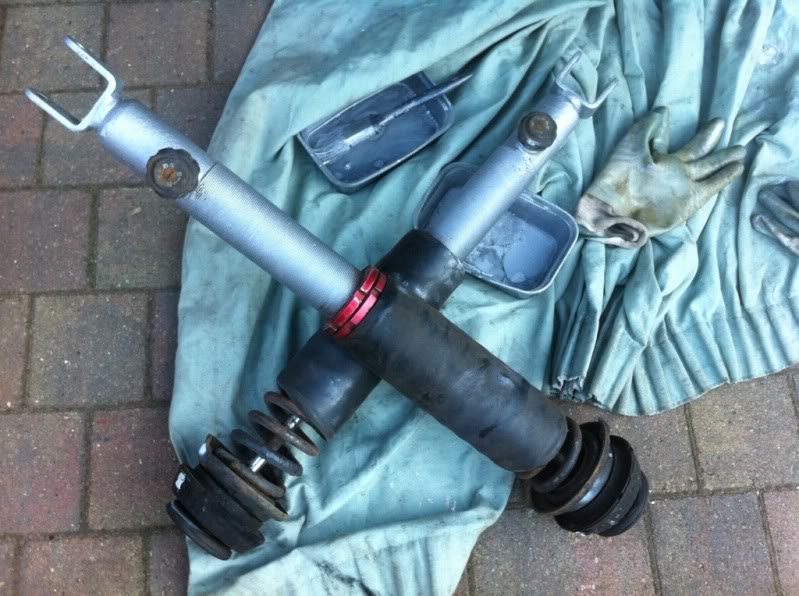
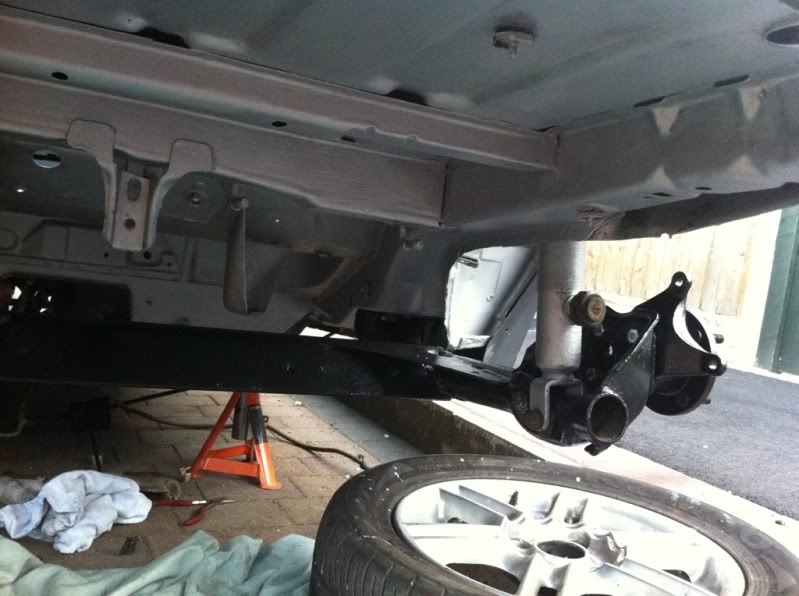
Hubs also refitted:
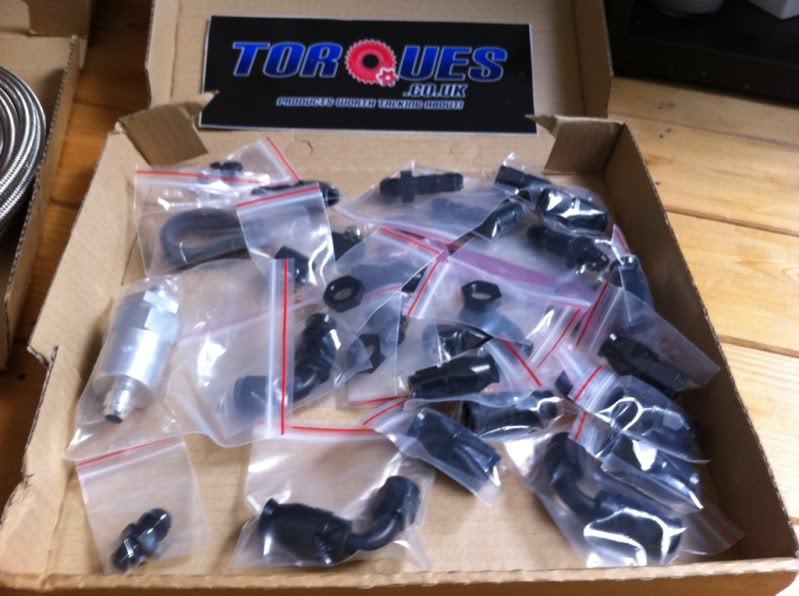
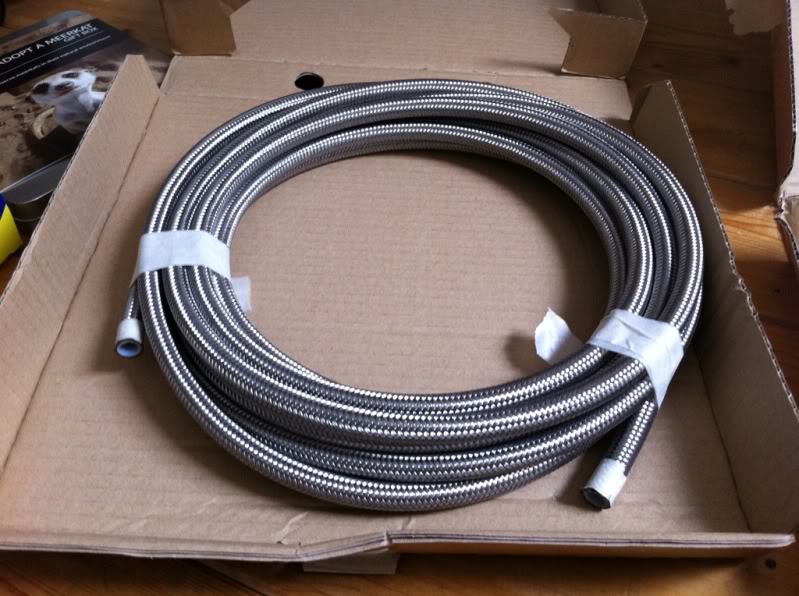
Also recieved my new fuel lines from TorquesUK, -6 in stealth black finish:
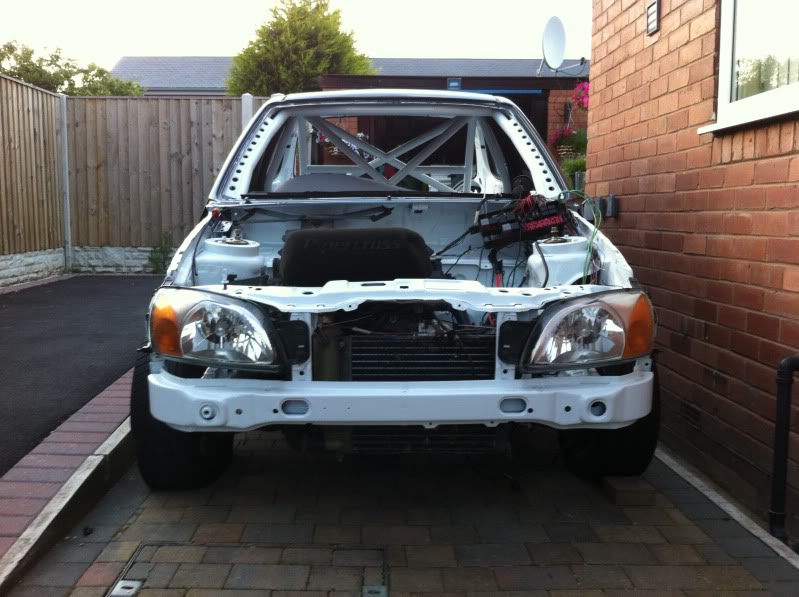
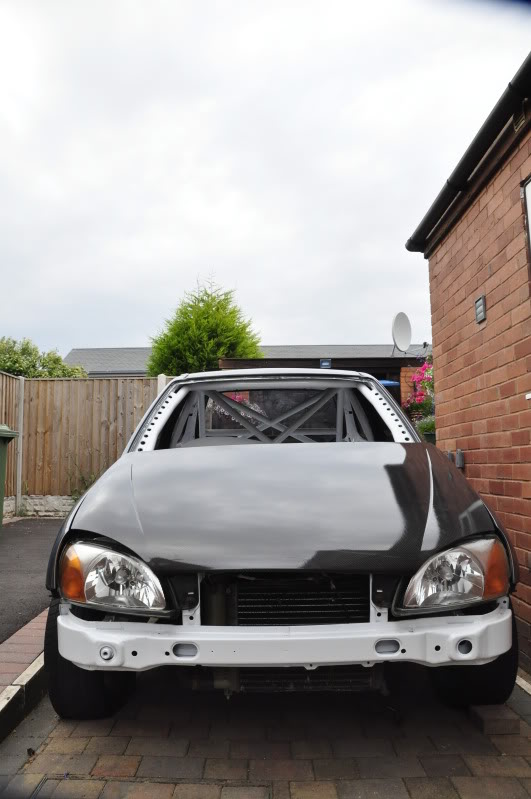
Also put the front end on to have a look at it all:

Gave the Ledas a quick lick of paint, and then put the rear beam back on:
Hubs also refitted:
Also recieved my new fuel lines from TorquesUK, -6 in stealth black finish:
Also put the front end on to have a look at it all:
22-08-2011, 06:28 PM
#131
Regular Contributor
Thread Starter
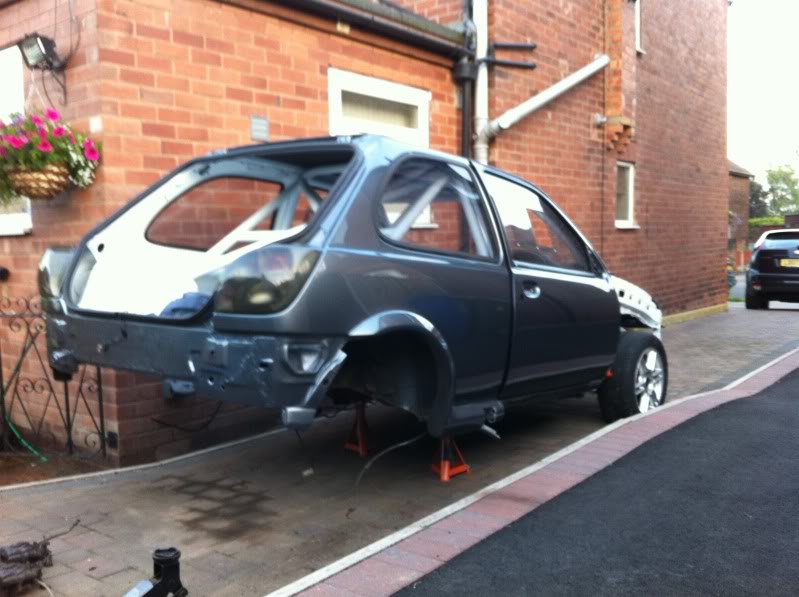
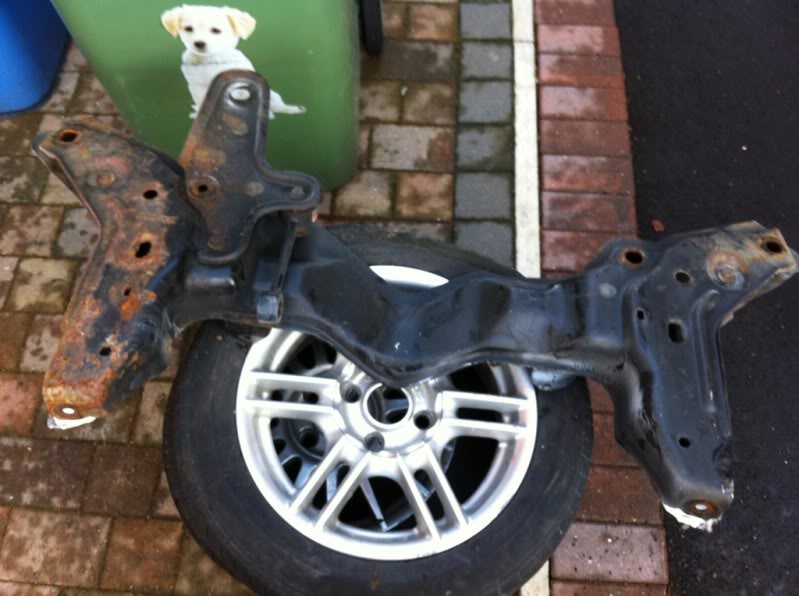
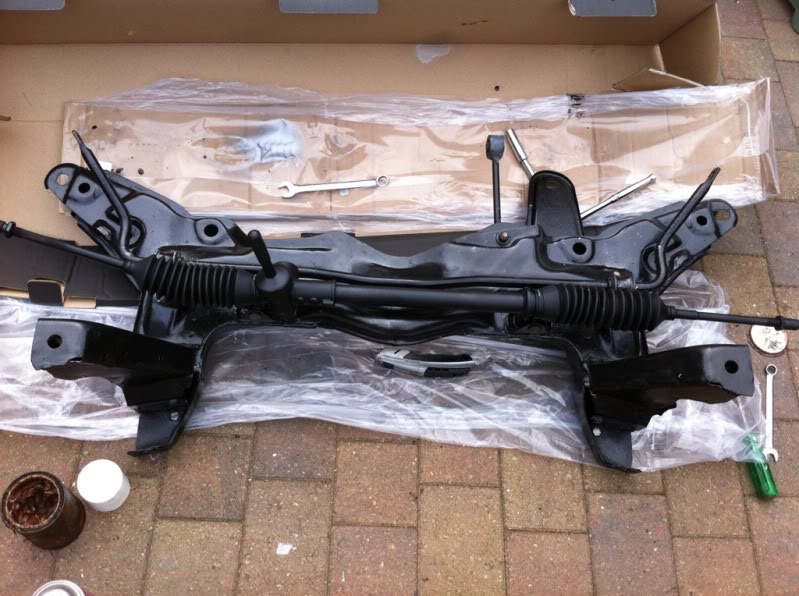
Started to clean up the front end, subframe came off first:

Look rank, when it came off:
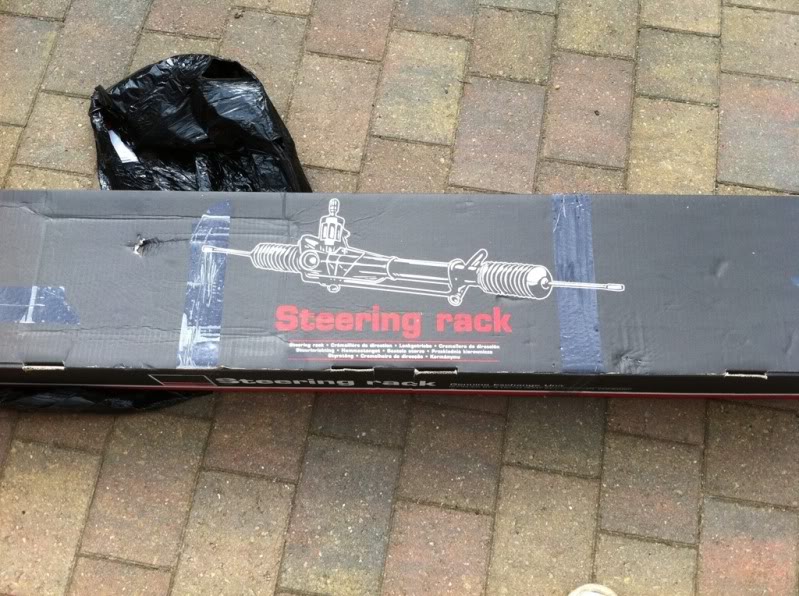
New manual steering rack came out its box, originally had this delivered in Feb 2009!!
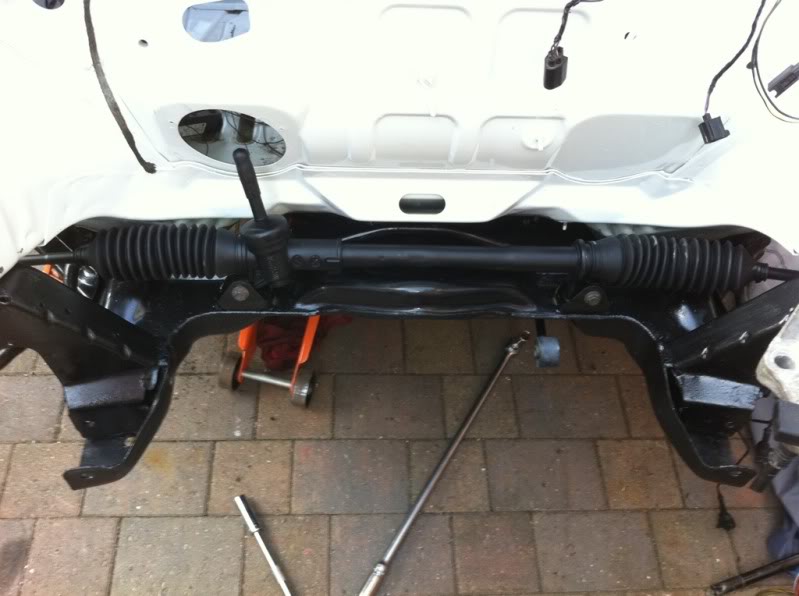
And fitted up ready to go back on:
And fitted back onto the car:
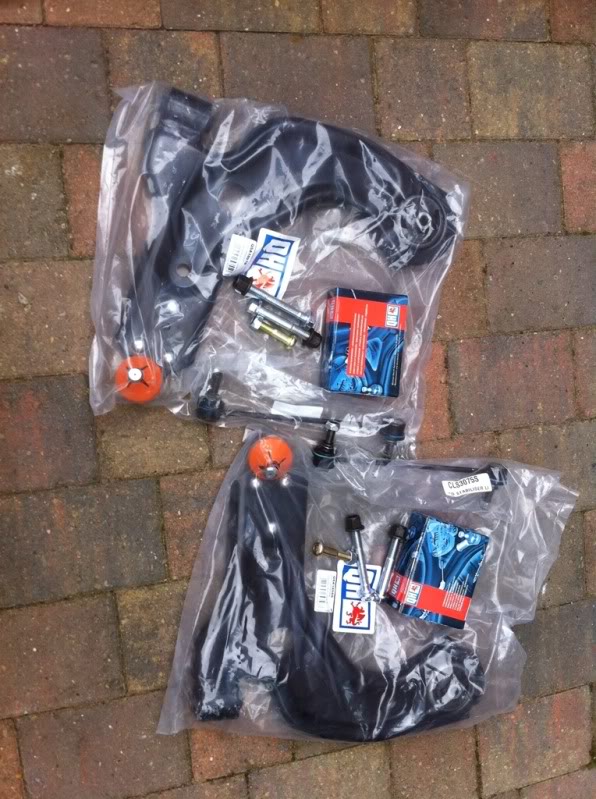
New lower arms, drop links and track rod ends:
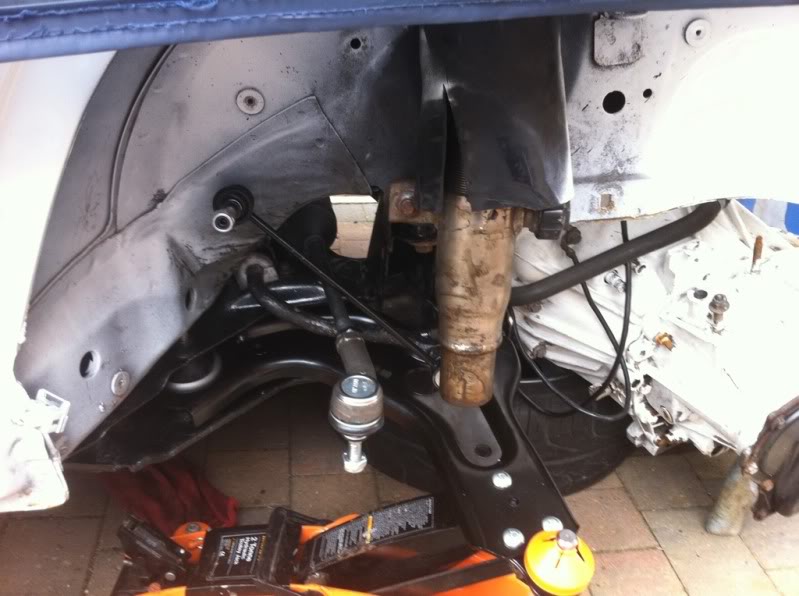
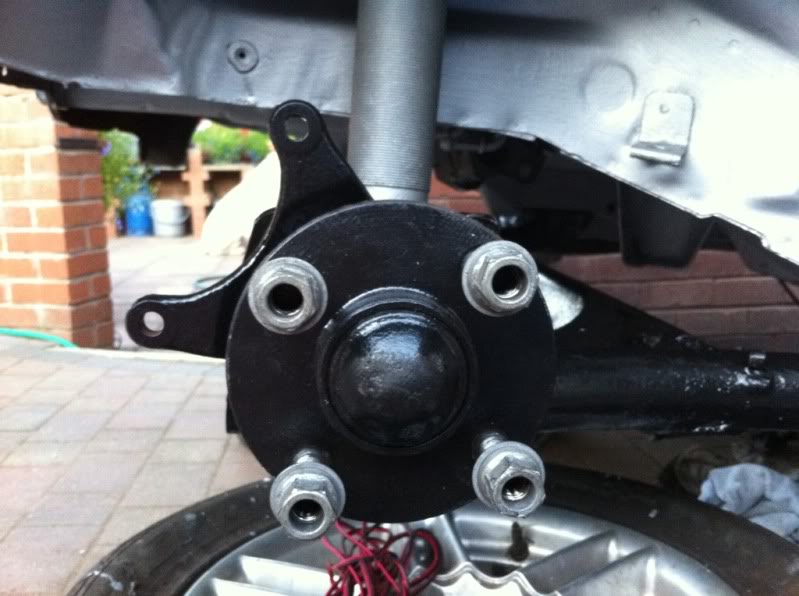
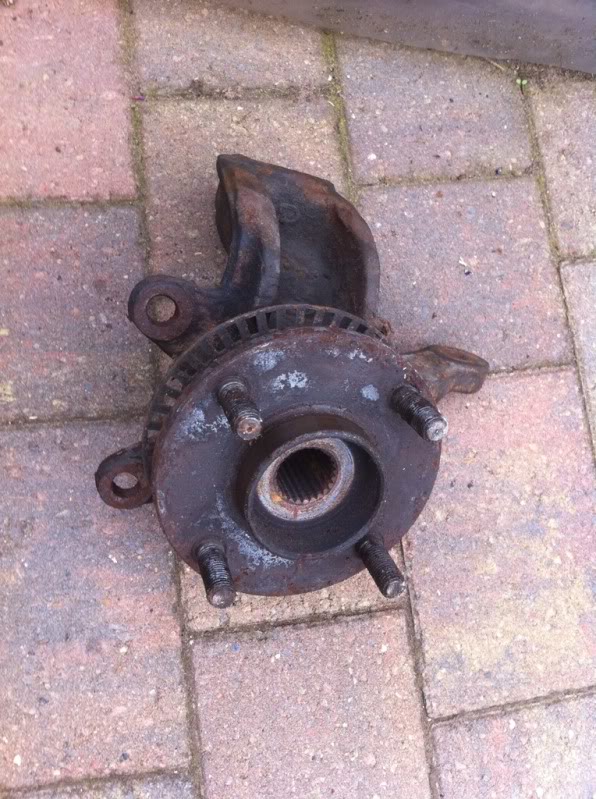
Hubs before refurb:
And fitted back in place:

Look rank, when it came off:
New manual steering rack came out its box, originally had this delivered in Feb 2009!!
And fitted up ready to go back on:
And fitted back onto the car:
New lower arms, drop links and track rod ends:
Hubs before refurb:
And fitted back in place:
22-08-2011, 06:31 PM
#132
Regular Contributor
Thread Starter
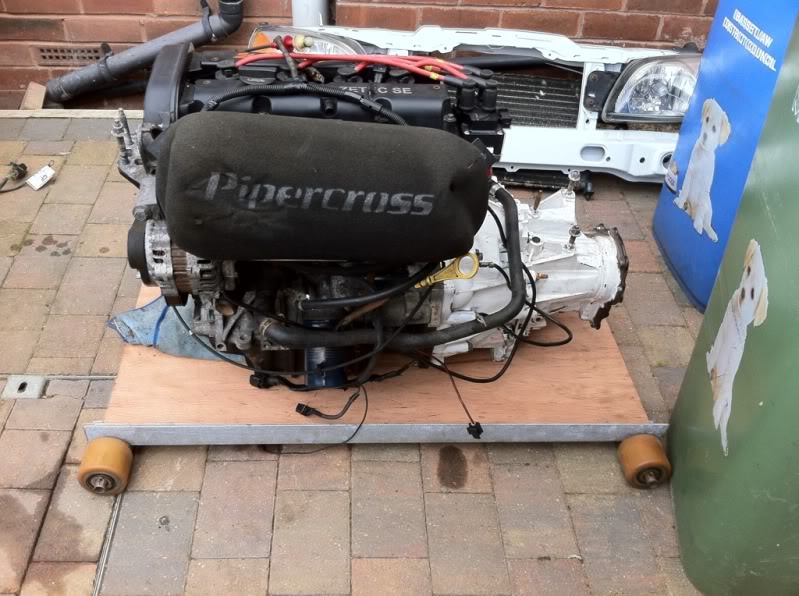
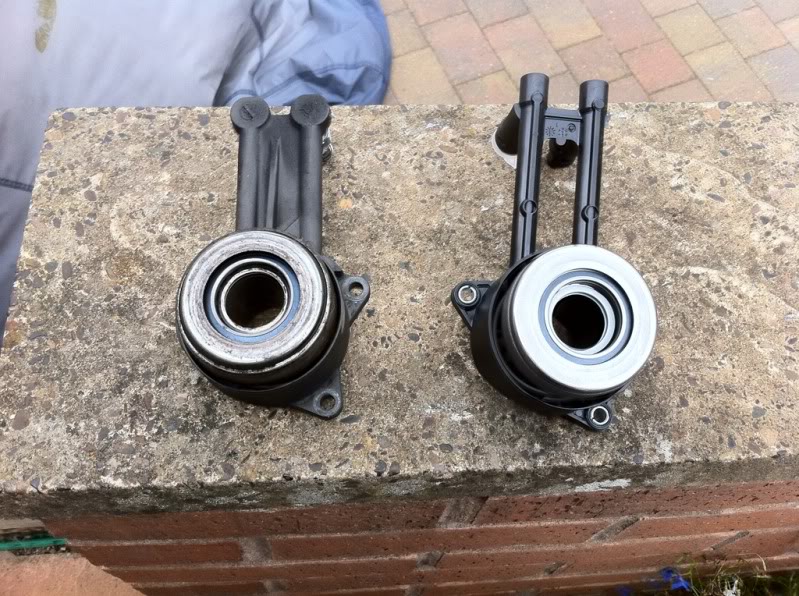
The engine came out for a 4th time for the new slave cylinder to go in, and fit the clutch:
Out
Clutch

Old (left) and new slave (right)
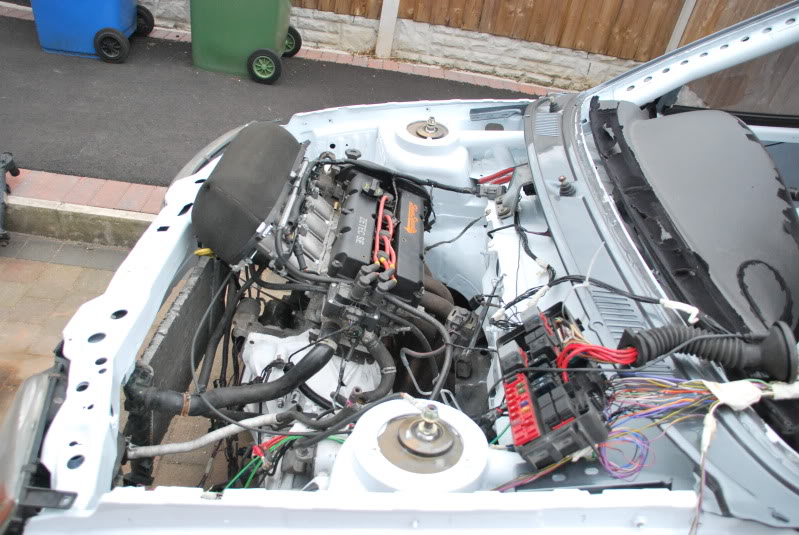
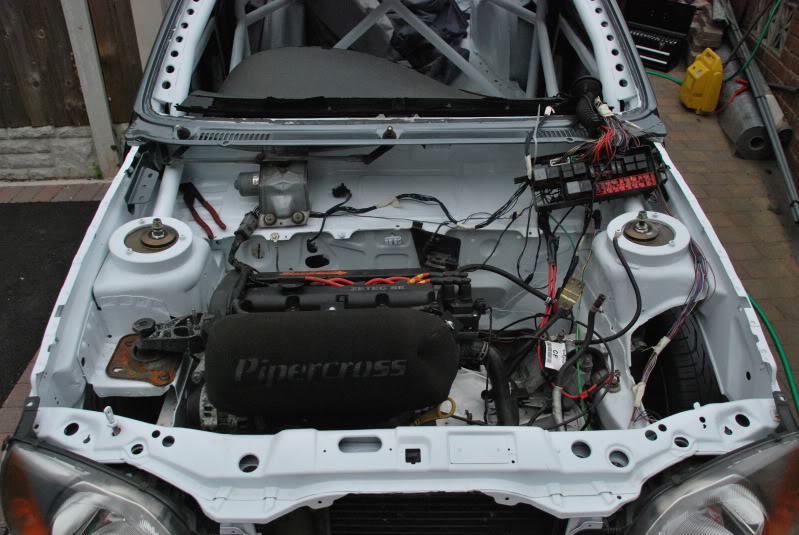
And engine fitted back in, is so easy to do with the bolt on front end, even on my own!
Body coloured rocker cover picked up:
Random front end shot:
Out
Clutch
Old (left) and new slave (right)
And engine fitted back in, is so easy to do with the bolt on front end, even on my own!
Body coloured rocker cover picked up:
Random front end shot:
22-08-2011, 06:36 PM
#133
Regular Contributor
Thread Starter
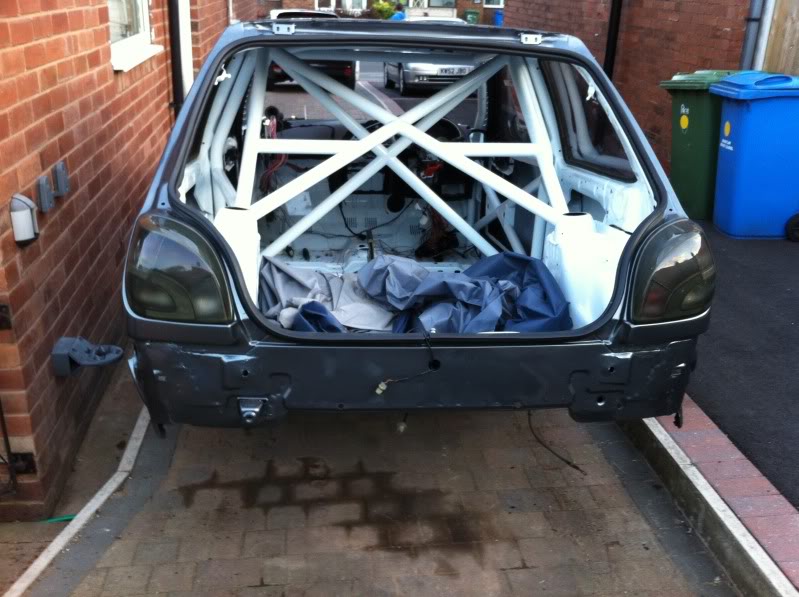
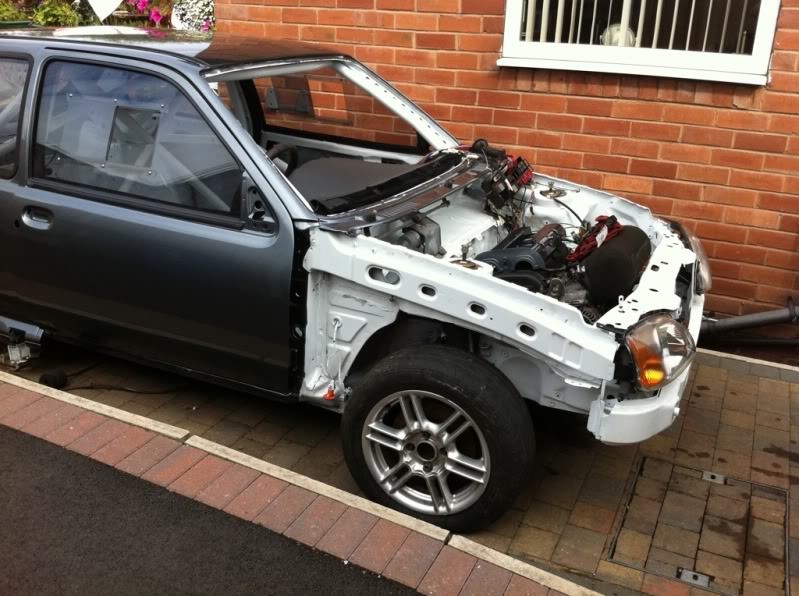
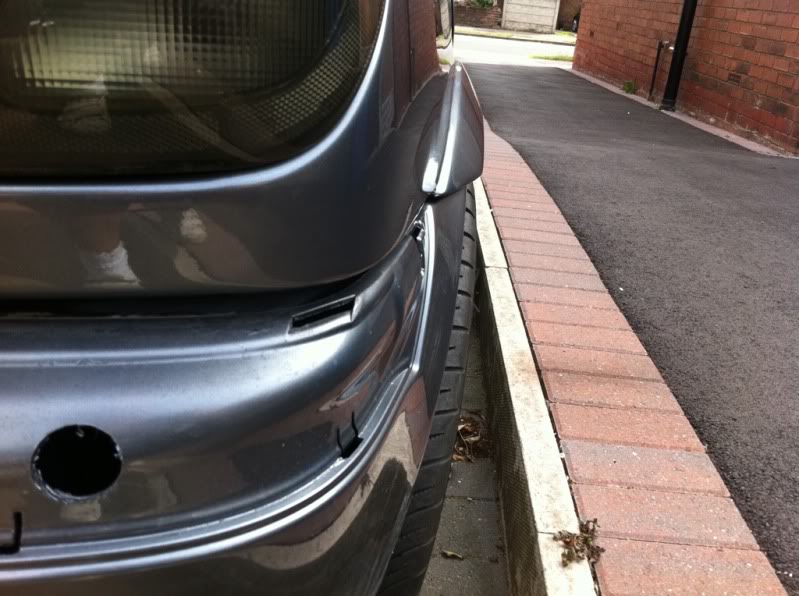
Rear bumper was collected from painters and fitted:
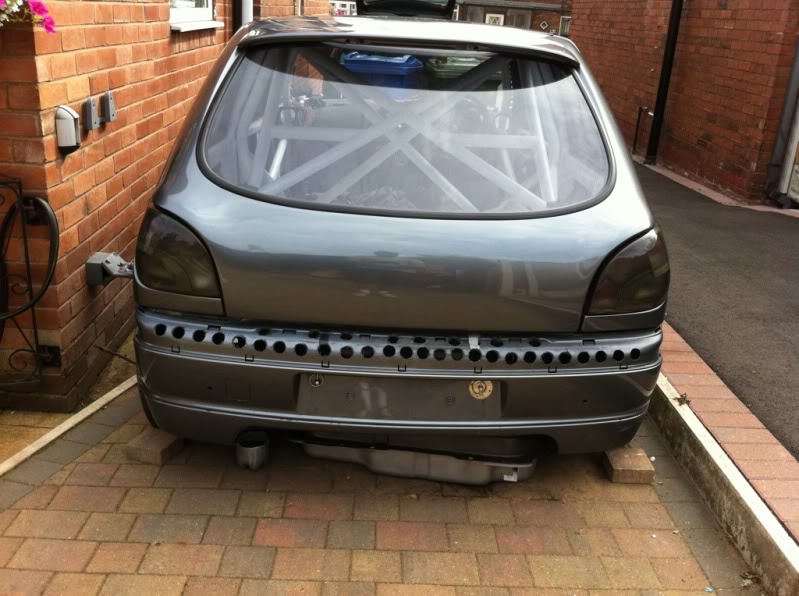
How far the rear arches have been flared:
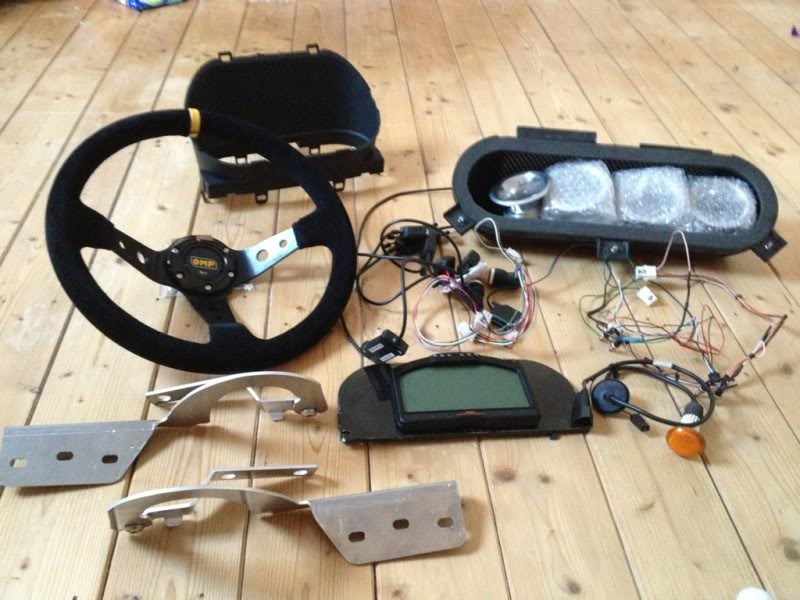
Dash trimmed further, but which should I go with:
Dash 1
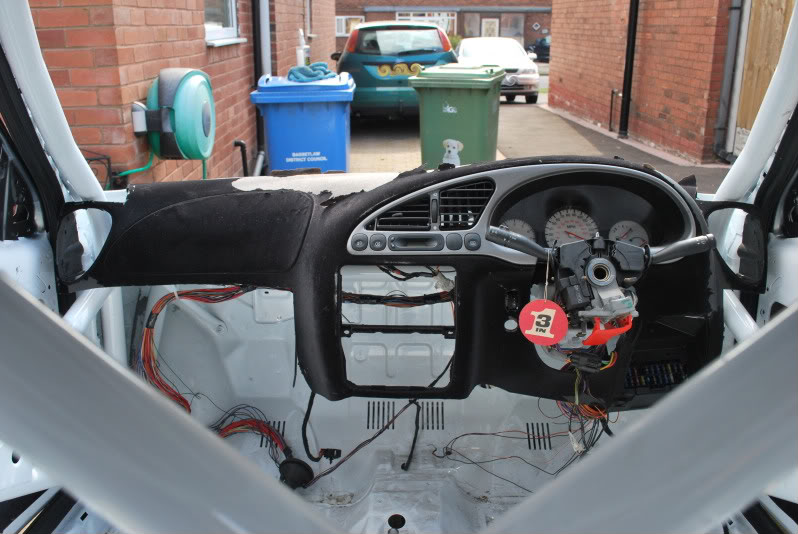
Dash 2
Wiring will be tidied away whichever way I go.
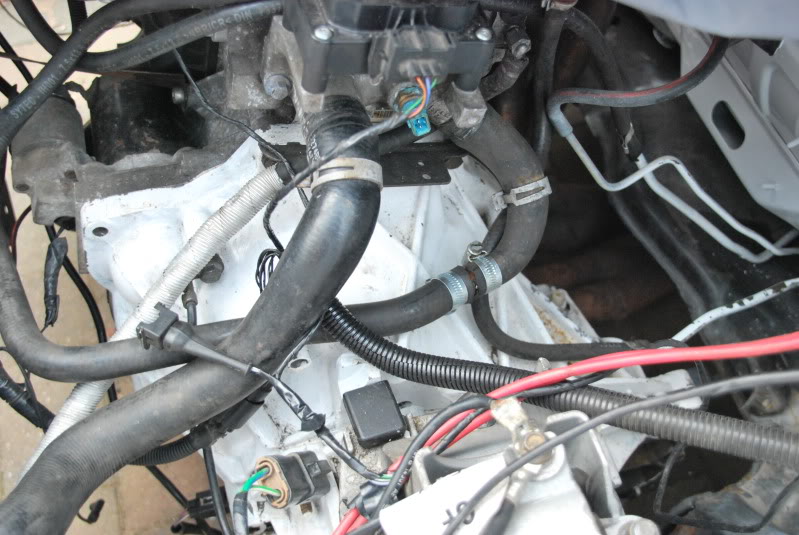
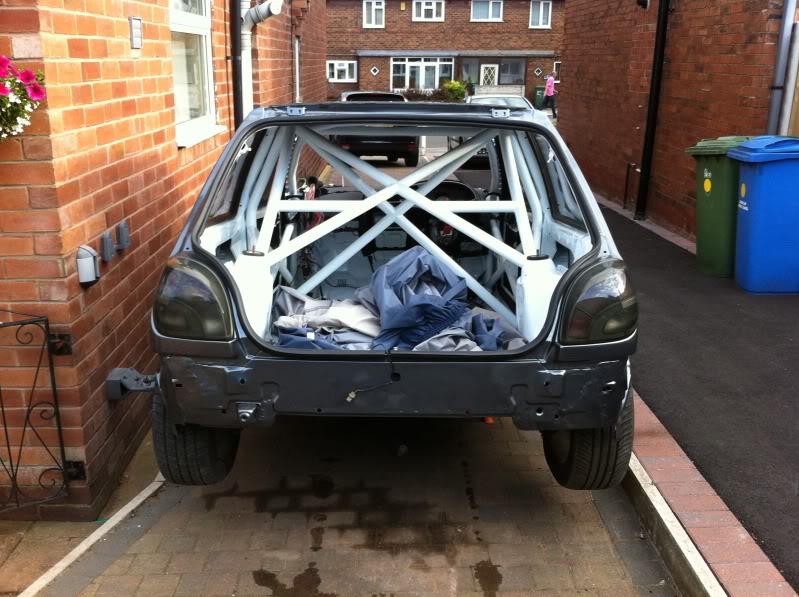
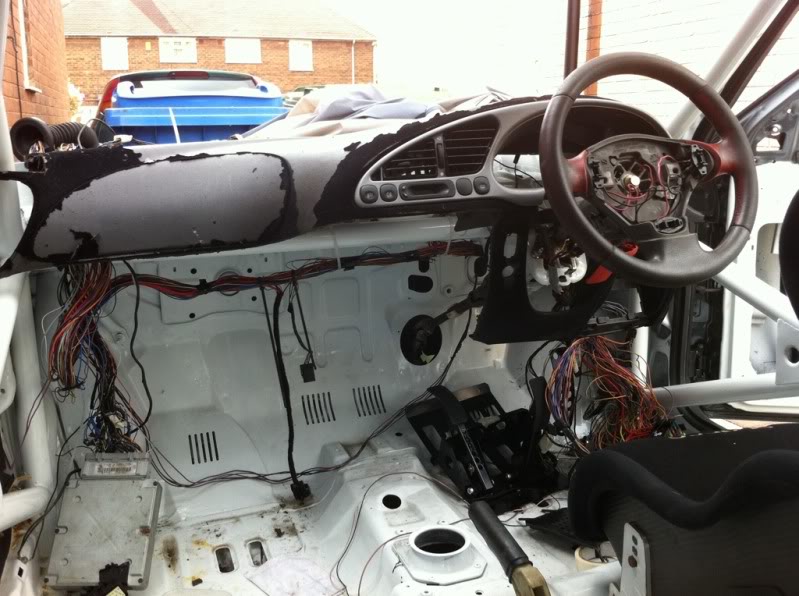
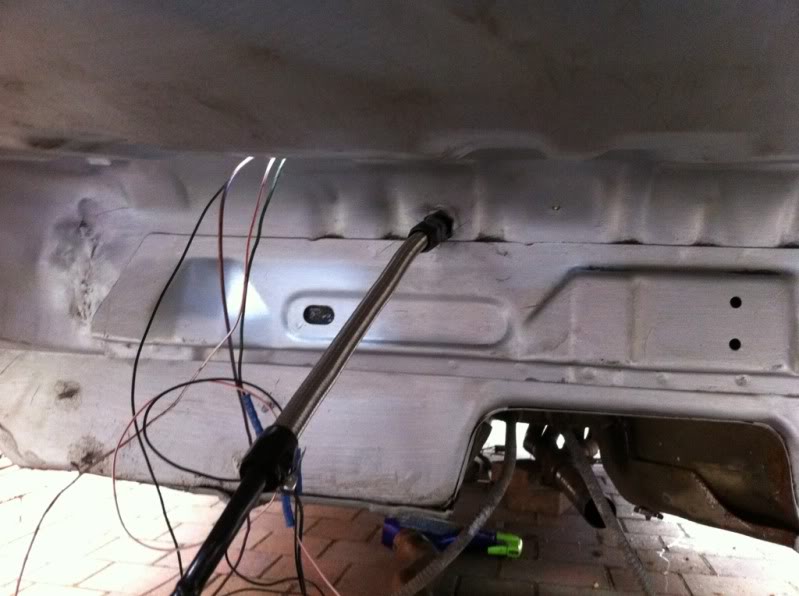
Brings me upto today, I've tackled the wiring again, moved the fusebox inside the car and ran through the bulkhead for lights and EMS:
Ford ECU relocated from passenger footwell, to behind clocks:
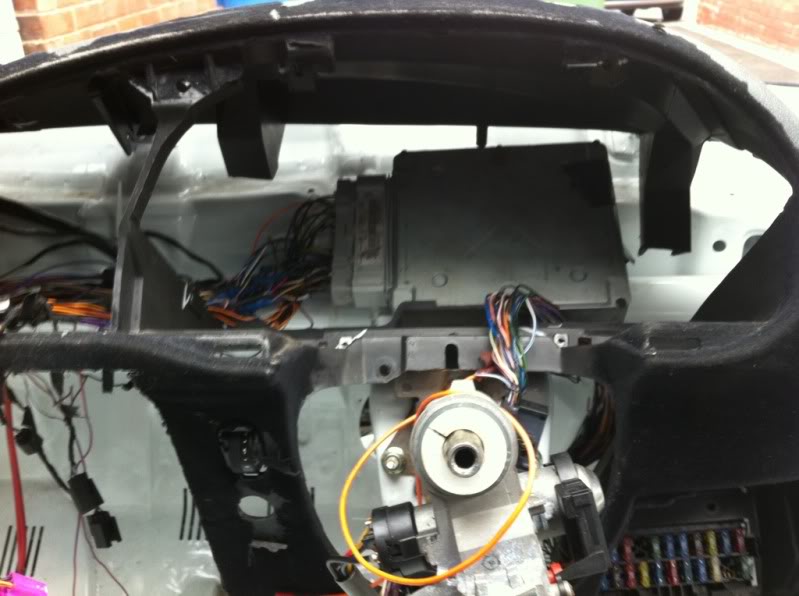
Fusebox from engine bay to under airbag cover:
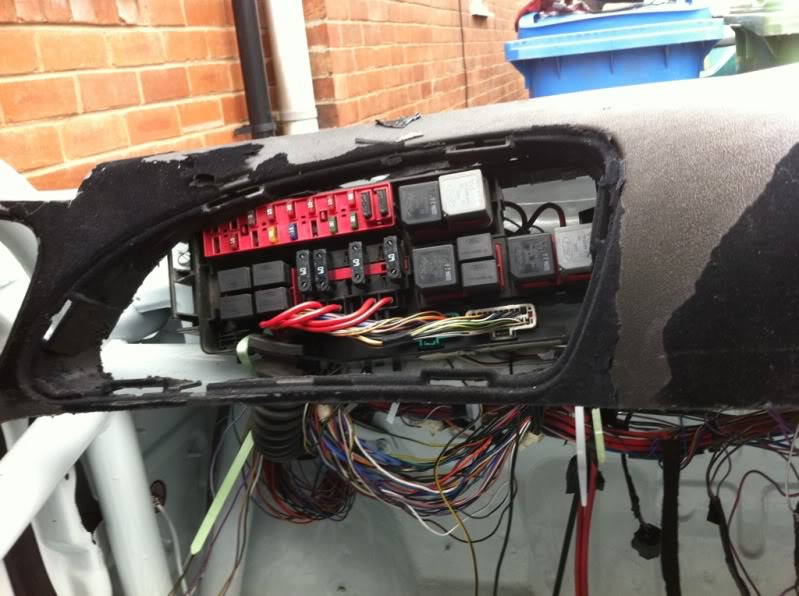
And dashboard fitted back up to conceal wiring:

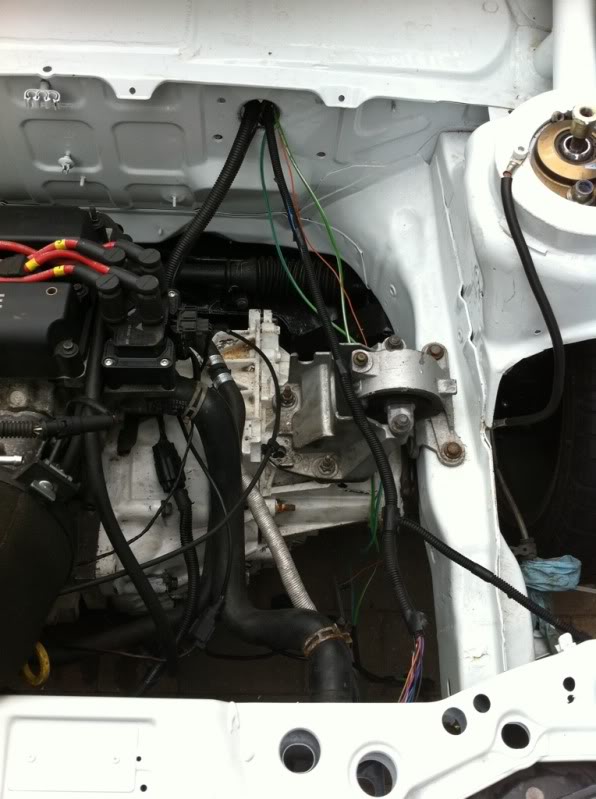
Finally ran some conduit over the wires in engine bay, will tidy it all up once its commisioned and running:
That brings me upto date, thanks for reading.
How far the rear arches have been flared:
Dash trimmed further, but which should I go with:
Dash 1
Dash 2
Wiring will be tidied away whichever way I go.
Brings me upto today, I've tackled the wiring again, moved the fusebox inside the car and ran through the bulkhead for lights and EMS:
Ford ECU relocated from passenger footwell, to behind clocks:
Fusebox from engine bay to under airbag cover:
And dashboard fitted back up to conceal wiring:
Finally ran some conduit over the wires in engine bay, will tidy it all up once its commisioned and running:
That brings me upto date, thanks for reading.
25-08-2011, 09:02 PM
#140
Regular Contributor
Thread Starter
Dash 1 is what I'm more sold on.
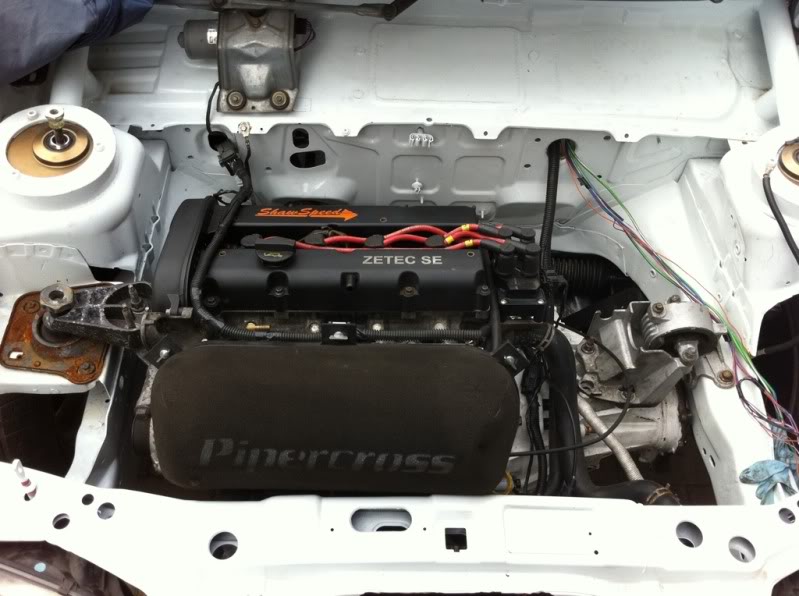
And chip, brief engine spec is:
1.6 Zetec SE
ShawSpeed SS4 cams
ShawSpeed larger valves
Jenvey DTH 42mm ITB's
Pico 330 injectors
Omex 600 ECU
Mikeanics
And chip, brief engine spec is:
1.6 Zetec SE
ShawSpeed SS4 cams
ShawSpeed larger valves
Jenvey DTH 42mm ITB's
Pico 330 injectors
Omex 600 ECU
Mikeanics
25-08-2011, 09:04 PM
#141
Regular Contributor
Thread Starter
Dash 1 is what I'm more sold on.
And chip, brief engine spec is:
1.6 Zetec SE
Standard internals
ShawSpeed SS4 cams
ShawSpeed larger valves
ARP rod bolts
Jenvey DTH 42mm ITB's
Pico 330 injectors
Omex 600 ECU
Ford Racing Puma gearbox
Barra LSD
Mikeanics map
166.6bhp
130ish ft/lb
Should be pretty quick, hoping it should be seeing 60 in less than 6 seconds.
 21-09-2011, 06:04 PM
#143
Regular Contributor
Thread Starter
Few weeks on, time for another update:
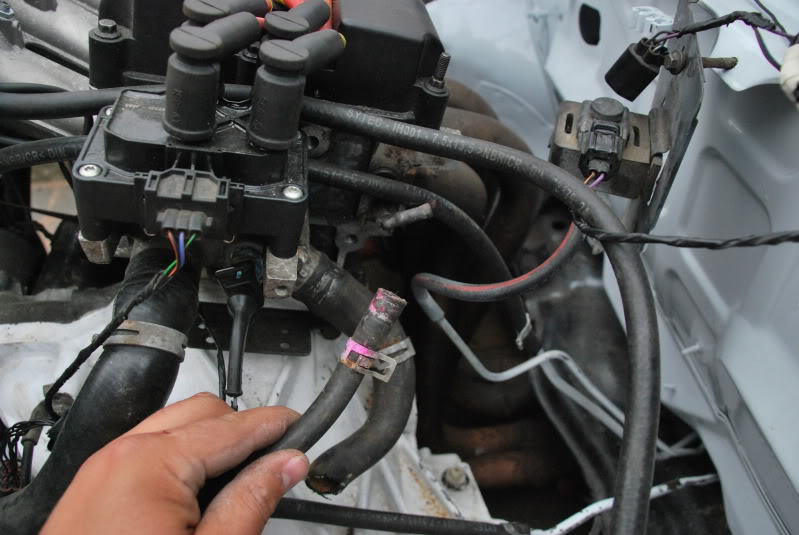
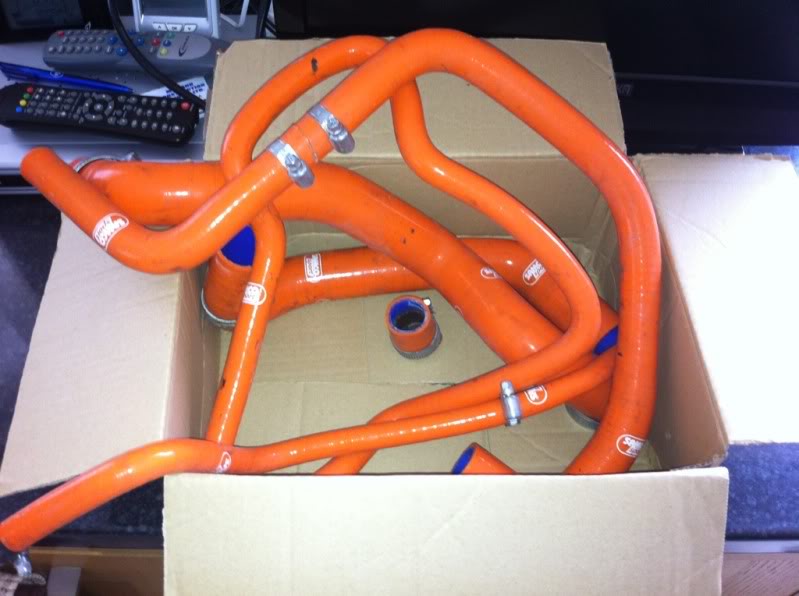
Recieved a delivery the other week, some second hand Samco's. They have been cut by the previous owner, however work for that I need:
Didnt take long to throw them on, need to do a bit of chopping and changing, but I'll get that sorted at a later date:
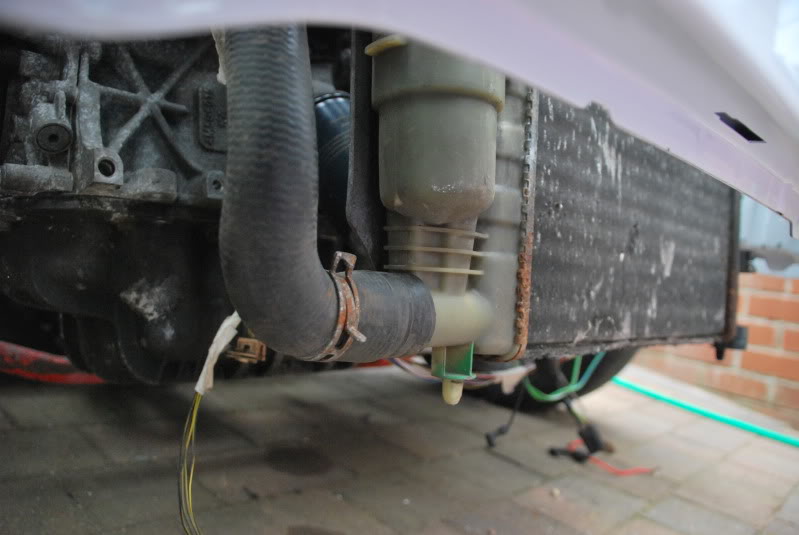
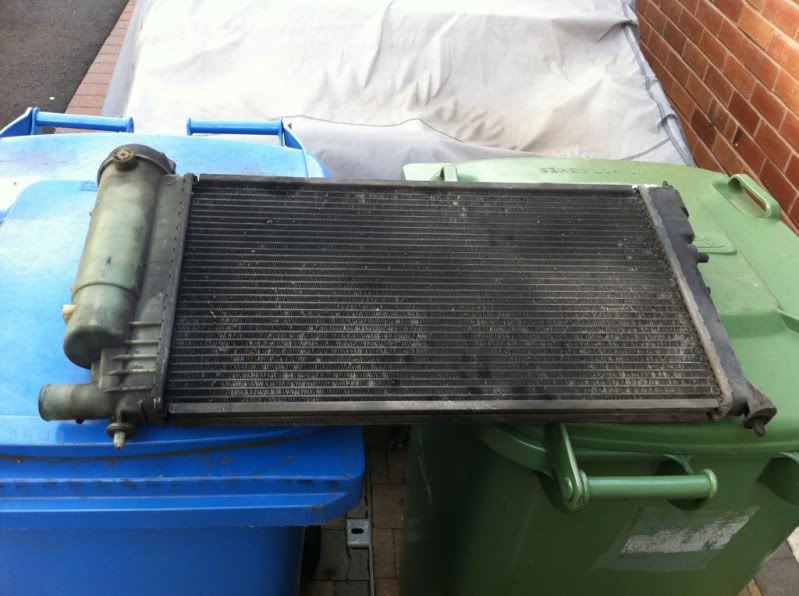
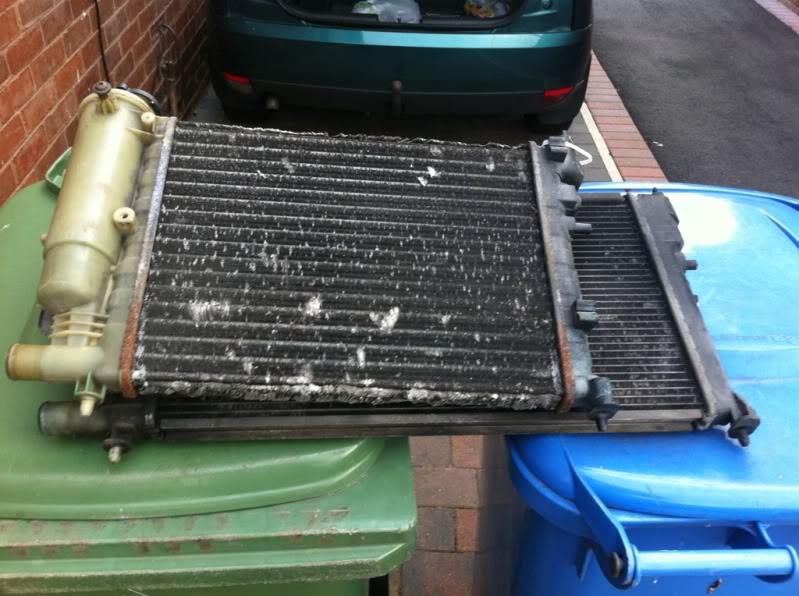
Just prior to fitting the hoses, I'd been to pick up another rad. This time a Saxo VTS one for �8!
Compared to the old one, its alot bigger:

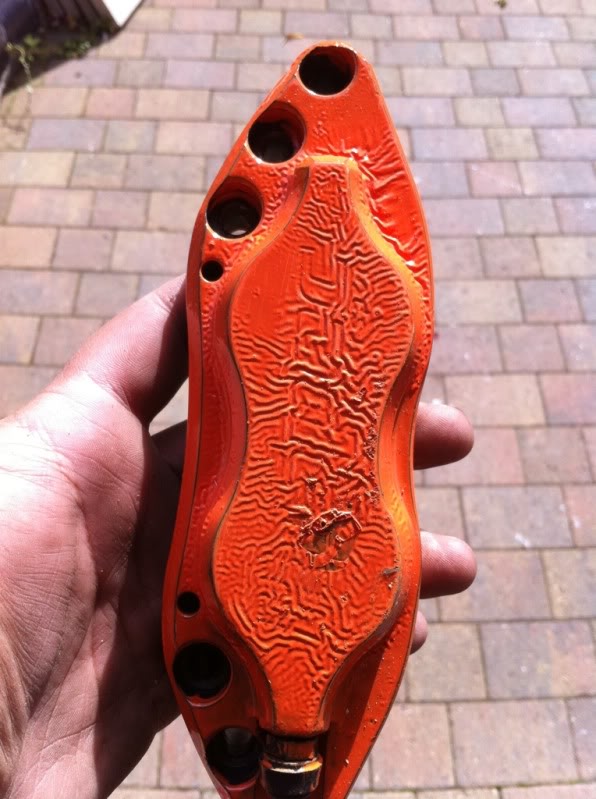
Also made a start painting my calipers:
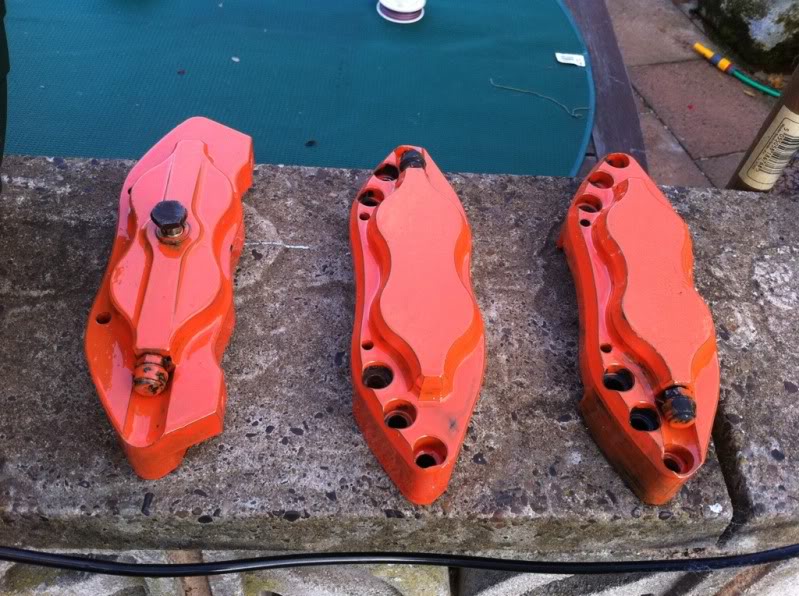
And 2 weeks later, the paint looks like this, which I'm not pleased about. Pretty sure I can paint ok, thats one of the similar jobs on this project:
Recieved a delivery the other week, some second hand Samco's. They have been cut by the previous owner, however work for that I need:
Didnt take long to throw them on, need to do a bit of chopping and changing, but I'll get that sorted at a later date:
Just prior to fitting the hoses, I'd been to pick up another rad. This time a Saxo VTS one for �8!
Compared to the old one, its alot bigger:
Also made a start painting my calipers:
And 2 weeks later, the paint looks like this, which I'm not pleased about. Pretty sure I can paint ok, thats one of the similar jobs on this project:
21-09-2011, 06:08 PM
#144
Regular Contributor
Thread Starter
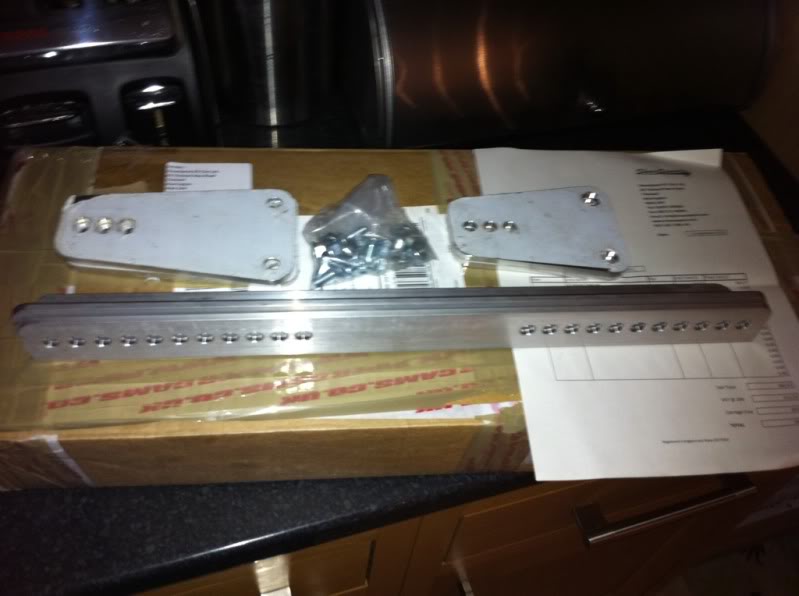
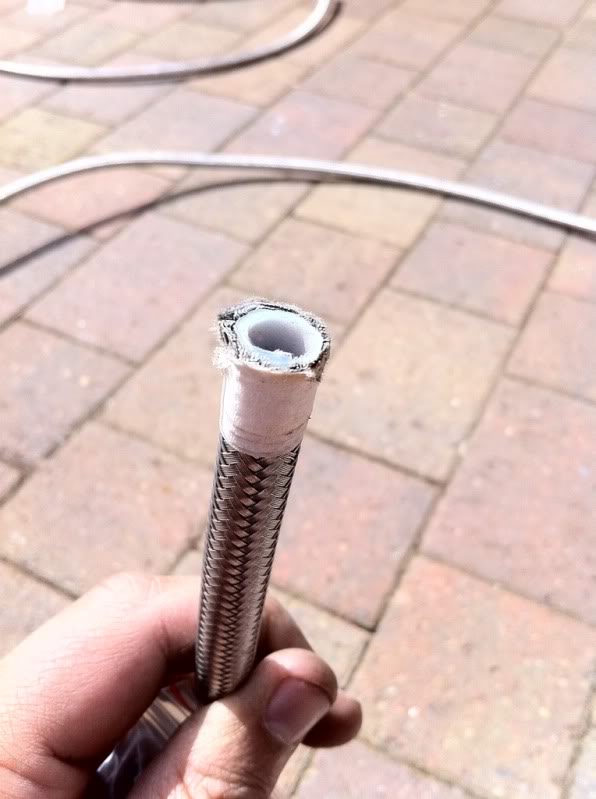
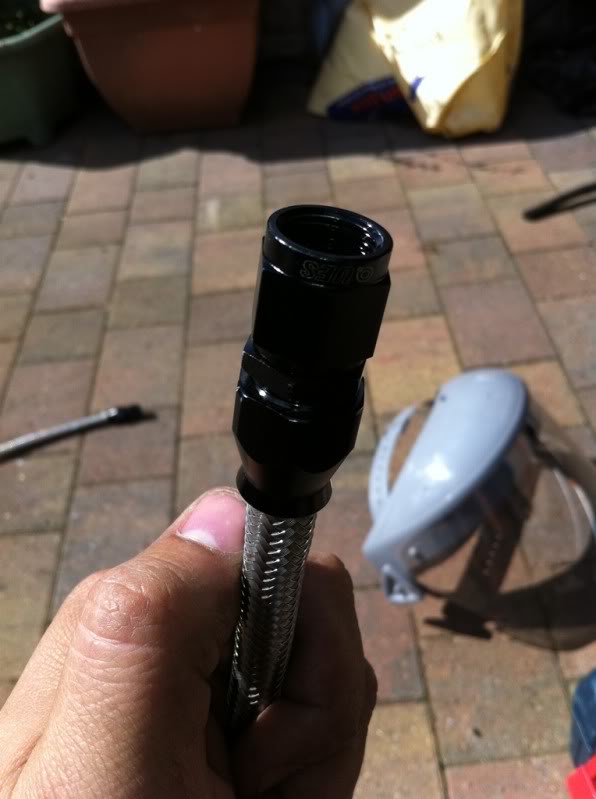
I then ordered a new fuel rail from ShawSpeed so that I could get my fuel lines fitted:
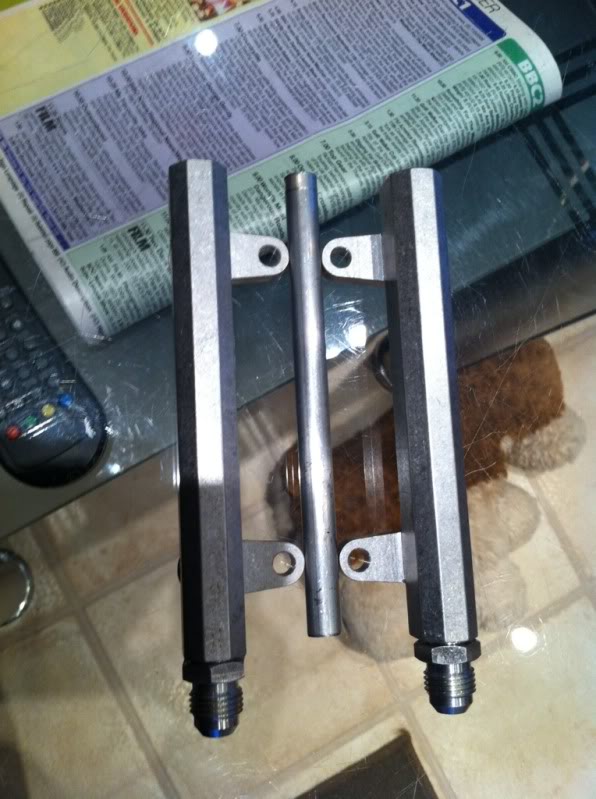
And also recieved my other seat rail at the same time:
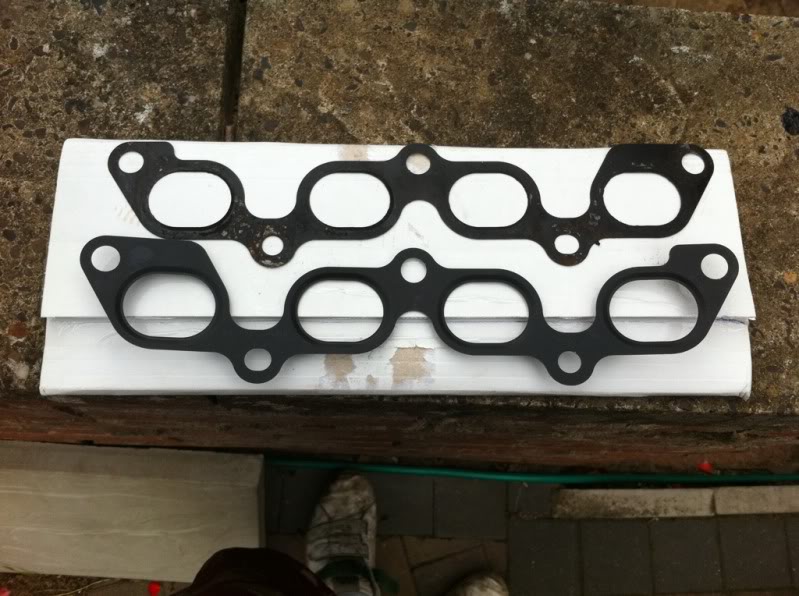
In the mean time I'd put a new manifold gasket on and fitted the exhaust manifold:
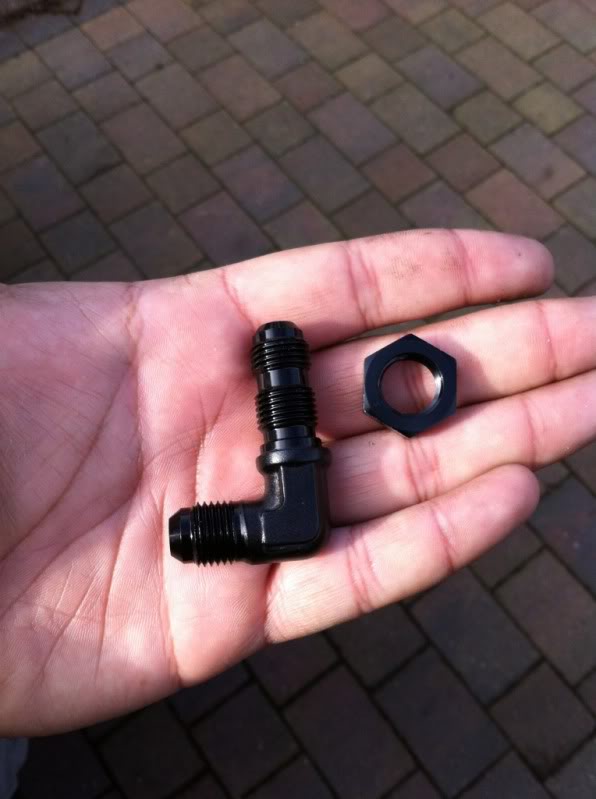
This brings me upto today, where I learnt to plumb fuel lines!
Cut to size:
Fit the collar:
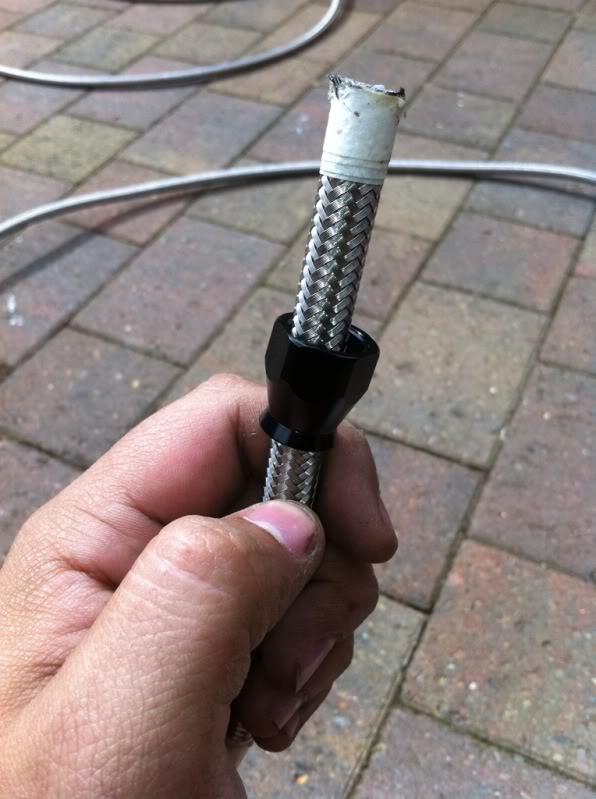
Fit the olive:
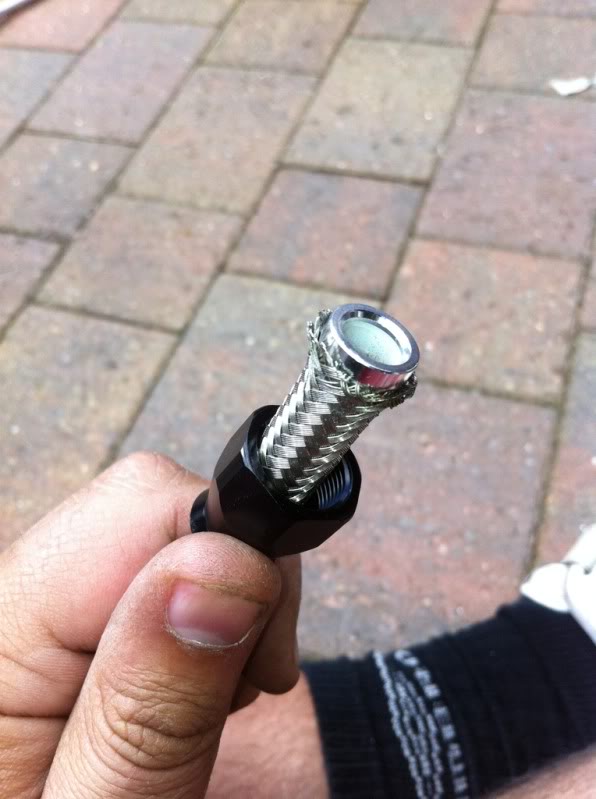
Secure the fitting (this was the hardest bit!):
And also recieved my other seat rail at the same time:
In the mean time I'd put a new manifold gasket on and fitted the exhaust manifold:
This brings me upto today, where I learnt to plumb fuel lines!
Cut to size:
Fit the collar:
Fit the olive:
Secure the fitting (this was the hardest bit!):
21-09-2011, 06:11 PM
#145
Regular Contributor
Thread Starter
And finally to show the lines in place:
Feed:
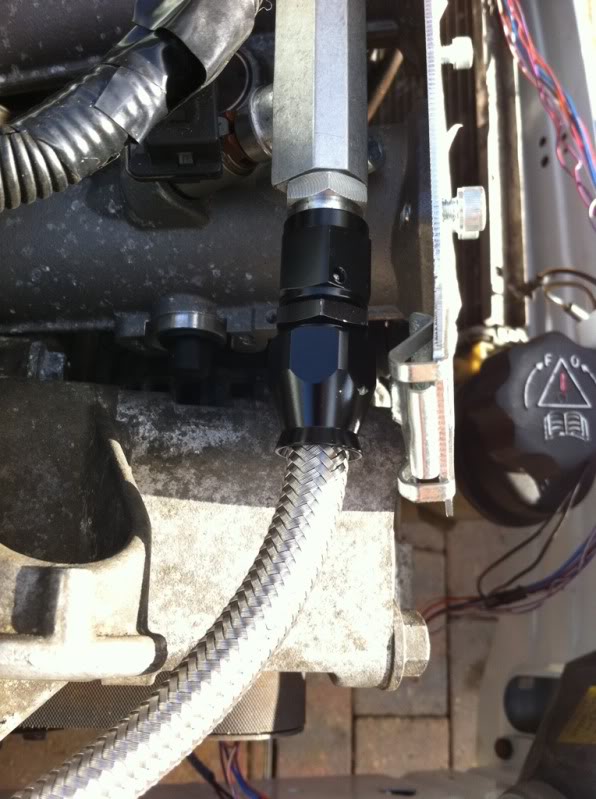
Return to fuel pressure regulator:

Fuel pressure regulator on customer bracket, feeding into the interior of the car:
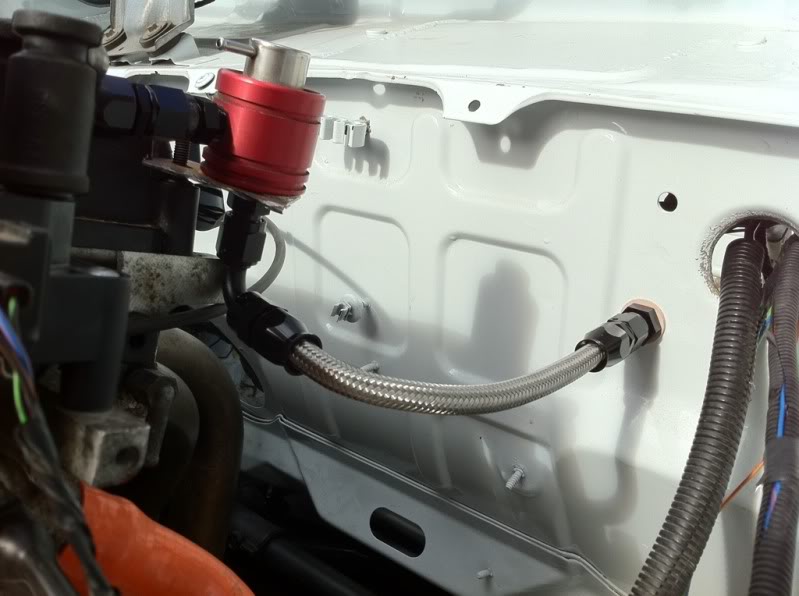
And a few shots of it from above:
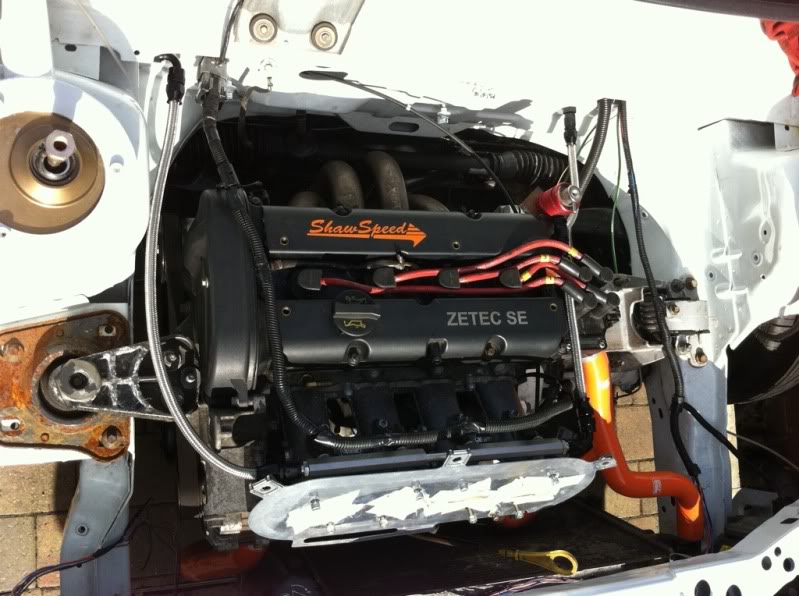
And the bay as it stands, only things left for the engine bay are the resovoirs for the brake cylinders:
Thats where I'm upto. Need to get a windscreen fitted soon, as well as getting the fittings done from the fuel tank, so I can complete the lines. Then get electrics sorted, and get her running!
Feed:
Return to fuel pressure regulator:
Fuel pressure regulator on customer bracket, feeding into the interior of the car:
And a few shots of it from above:
And the bay as it stands, only things left for the engine bay are the resovoirs for the brake cylinders:
Thats where I'm upto. Need to get a windscreen fitted soon, as well as getting the fittings done from the fuel tank, so I can complete the lines. Then get electrics sorted, and get her running!

 22-09-2011, 07:48 PM
#147
Regular Contributor
Thread Starter
Cheers Grant!
You and me both. Once fuel lines are done, it'll be major job 1 done. Then electrics and brakes. After that it should be very much plain sailing...... (I hope)
You and me both. Once fuel lines are done, it'll be major job 1 done. Then electrics and brakes. After that it should be very much plain sailing...... (I hope)
02-11-2011, 08:32 PM
#149
Regular Contributor
Thread Starter
Havent got loads done since last time, but progress is progress.
First of all, the calipers had to be flatted back again, as the paint had not hardened, so after a few hours, they ended up looking like this:
Finished up the lines under the car, and got them fitted, had to wait to get another 90" bulkhead fitting mind:
And then bolted the tank back up:
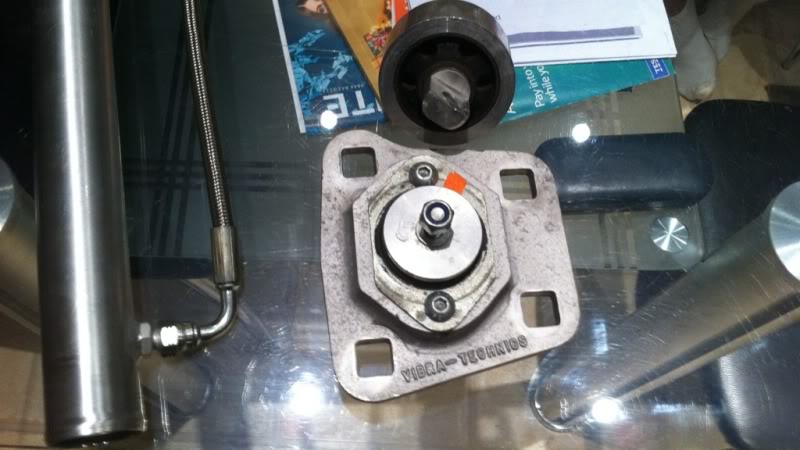
Also picked up some Vibratechnics race spec engine mounts, which will be going on soon:
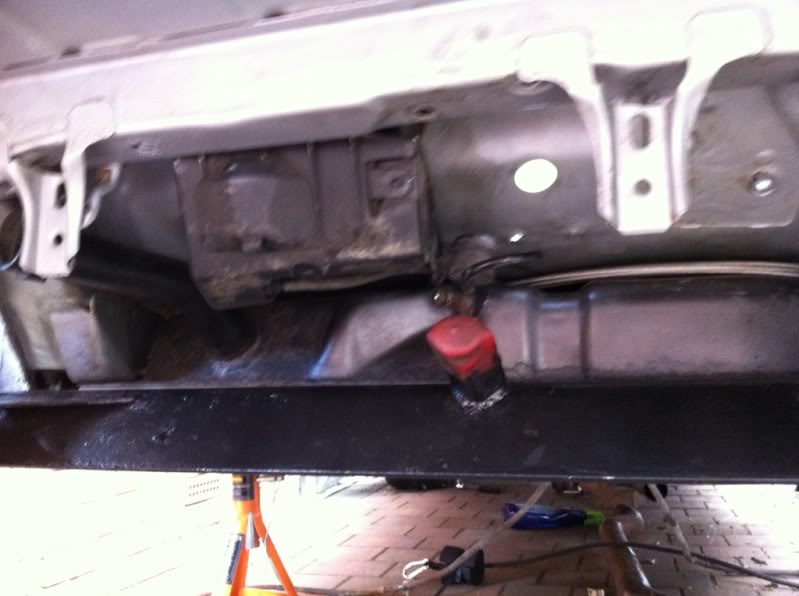
And a fuel filler cap, which I'll mount in the boot floor, had some technicalities to get over with the breather, but about there now:
And also had a windscreen fitted, to keep it watertight. Is a heated one, so will make driving easier without a heating system:

And that brings me upto today. Currently looking to get a house, so money is being spent more sparingley.
First of all, the calipers had to be flatted back again, as the paint had not hardened, so after a few hours, they ended up looking like this:
Finished up the lines under the car, and got them fitted, had to wait to get another 90" bulkhead fitting mind:
And then bolted the tank back up:
Also picked up some Vibratechnics race spec engine mounts, which will be going on soon:
And a fuel filler cap, which I'll mount in the boot floor, had some technicalities to get over with the breather, but about there now:
And also had a windscreen fitted, to keep it watertight. Is a heated one, so will make driving easier without a heating system:
And that brings me upto today. Currently looking to get a house, so money is being spent more sparingley.

 06-07-2012, 06:38 PM
#156
Regular Contributor
Thread Starter
Shock shock, this isn't over, yet.....
Not had time to do more (or couldn't be bothered is more likely)
Thought id have a quick check over some of my "parts to be fitted" pile:
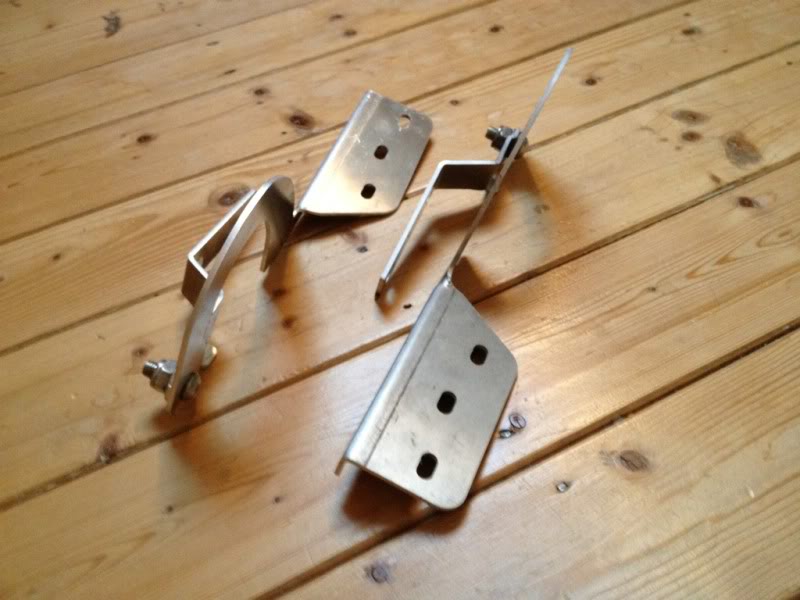
Alloy bonnet hinges, because I can:
Indicator loom, I've misplaced mine:
[IMG]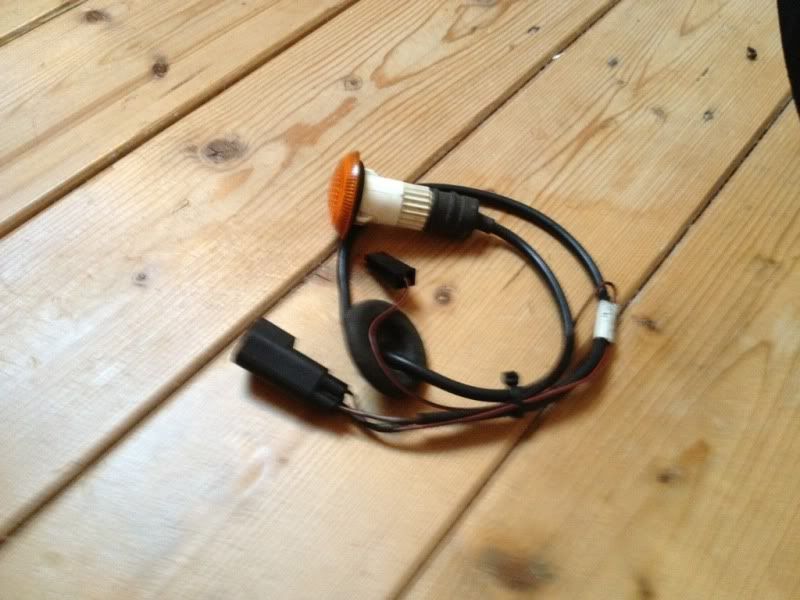 [/IMG]
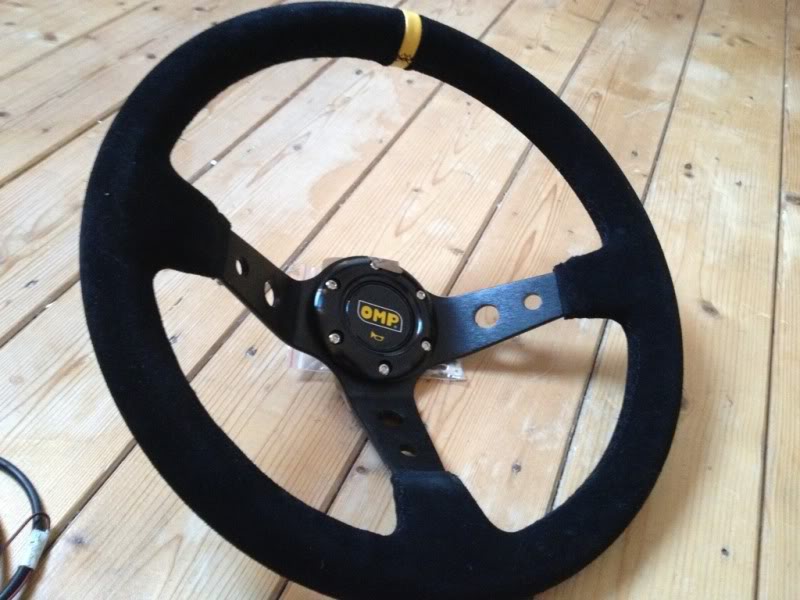
Omp style dished wheel:
Shorter trumpets and sausage filter as I'm not hardcore enough:
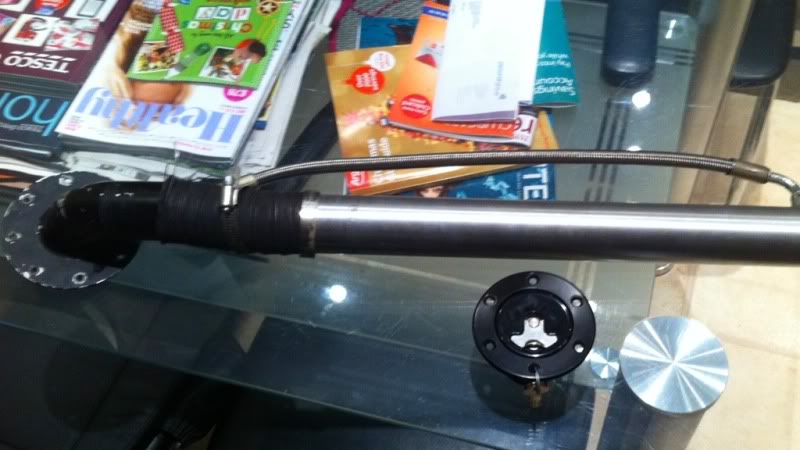
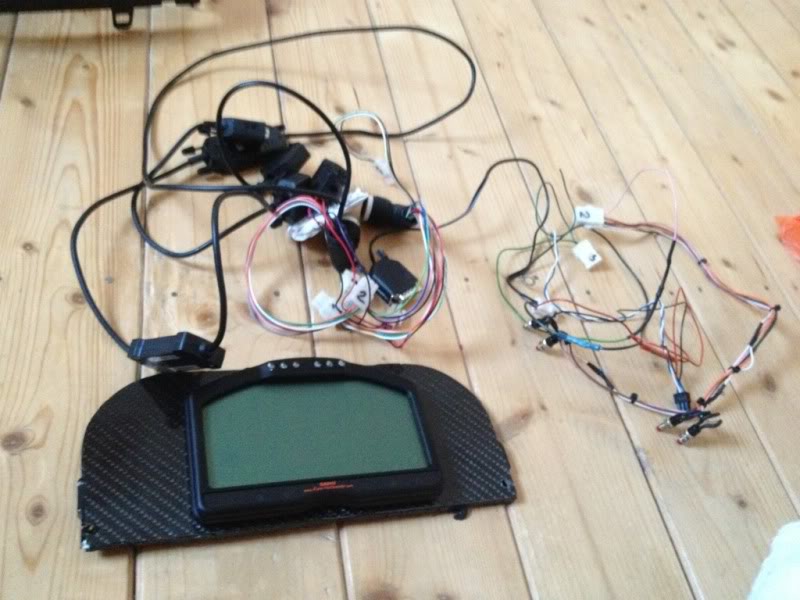
Race Technology Dash 2 with loom:
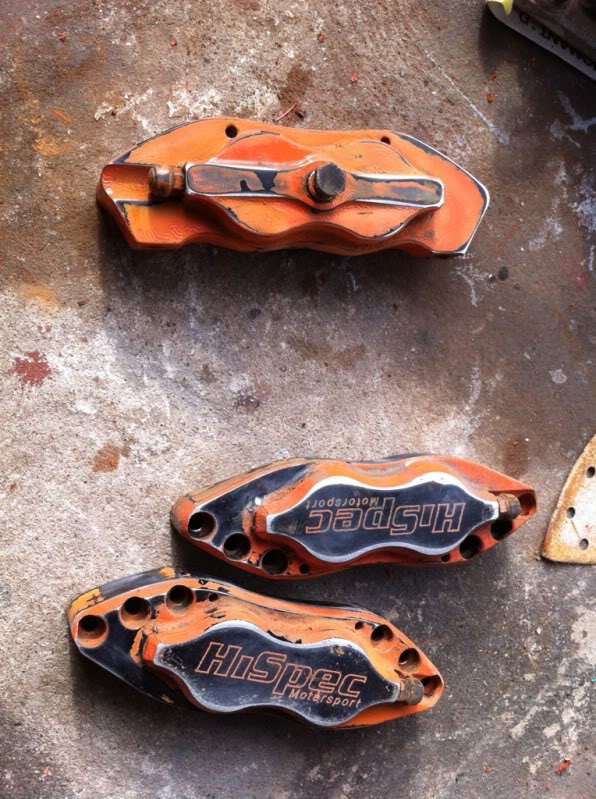
Also got some replacement rear calipers as mine were knackered, full set of vibratechnics engine mounts and countless other bits too.
Might be done for 2014.....
Not had time to do more (or couldn't be bothered is more likely)
Thought id have a quick check over some of my "parts to be fitted" pile:
Alloy bonnet hinges, because I can:
Indicator loom, I've misplaced mine:
[IMG]
[/IMG]Omp style dished wheel:
Shorter trumpets and sausage filter as I'm not hardcore enough:
Race Technology Dash 2 with loom:
Also got some replacement rear calipers as mine were knackered, full set of vibratechnics engine mounts and countless other bits too.
Might be done for 2014.....
 16-10-2012, 08:38 PM
#159
Regular Contributor
Thread Starter
Nothing really to update, sorting a wedding, moving house etc has slowed progress.
Got these back from Poweder coating last week:
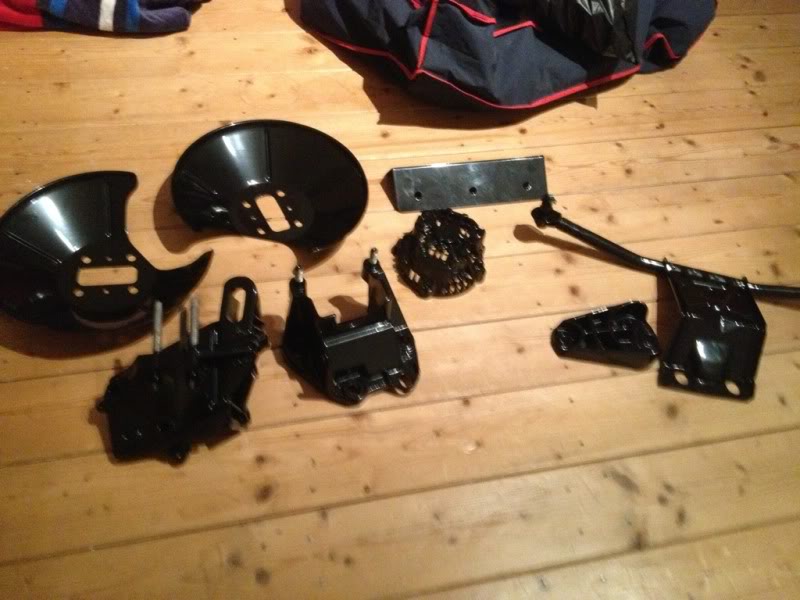
Got these back from Poweder coating last week:
Last edited by Wardy ZS; 16-10-2012 at 08:40 PM.
