E30 328i turbo w/adjustable suspension geometry
#41
Looking very cool mate, i drive a 328i as the daily and the m52 is an exceptional engine.
Food for thought, if your sticking with a plastic inlet manifold (not custom) go for the M50 manifold off of a 325.
If you can get hold on a 330 engine the crank, rods and pistons will go straight in your block giving you a handy 3 litres
There are also a couple of people who prefer to take the turbo round to the inlet side, due to space issues, think they usually use GT30-GT35's as they suit the engine really well (lag wise).
The siemens ECU out of late 36's is also a choice unit for the DIYers as its fully mappable, closed loop and does all adaptation shizzle to get a really nice running motor.
Best of luck mate!
Rob,
#42
Thread Starter
Too many posts.. I need a life!!
Joined: Aug 2005
Posts: 757
Likes: 0
From: Oxfordshire
Cheers mate for the info, I've thought about the inlet side of things and am probably going to end up making a plennum up, otherwise i'd have gone for the 325 M50 one.
It's a good thought on the 330 route, especially for more torque. But I'm in two minds to use the M52 lump as I'm only after 360-400bhp and apparently that can be achieved on a stock M42 engine with a thicker headgasket and some ARP's, and it's a straight swap. Also will improve weight distribution.
It's a good thought on the 330 route, especially for more torque. But I'm in two minds to use the M52 lump as I'm only after 360-400bhp and apparently that can be achieved on a stock M42 engine with a thicker headgasket and some ARP's, and it's a straight swap. Also will improve weight distribution.
#43
mongo - i have loads of e30 325i parts left from my 4dr that i stripped last year. Was tripping over the front struts today complete with discs and calipers 
have front calipers and one rear trailing arm with caliper and disc - coudlnt get the other side off the car and loads of odds and sods.
pm me if you need anything

have front calipers and one rear trailing arm with caliper and disc - coudlnt get the other side off the car and loads of odds and sods.
pm me if you need anything
#45
Noooooo you got to stick with the straight 6 mate! you can get that power from a stock m52 easily! plus it wont be nearly as stressed as a shonky 4 pot 
And a LOT less lag thanks to the extra capacity. There are folks getting nearly 500 brake with the standard 2.8 lump (stock cr, pistons etcetc).
Rob,
And a LOT less lag thanks to the extra capacity. There are folks getting nearly 500 brake with the standard 2.8 lump (stock cr, pistons etcetc).
Rob,
#46
Thread Starter
Too many posts.. I need a life!!
Joined: Aug 2005
Posts: 757
Likes: 0
From: Oxfordshire
Time for an update 
Finished fabricating the rear subframe and trailing arm set-up, which seems to work a treat. Just need to turn up the subframe bushes out of some delrin which is going to happen soon.


Needs a little lick of paint just to tidy it up. I've built up the new LSD with the shafts and prop off of the 325i that I had broken earlier on. Need to turn up the subframe bushes and rebuild the rear braking system, then I can put the rear end set-up on the car.
I've now taken the M52 out of the 7 series and have also started looking at mounting the turbo. I have trial fitted the ebay manifold inverted and should just clear enough after making up an up pipe to convert the T3 flange to TD05. In the pics below you can see the flange clearence and roughly where I'd like the turbo to be mounted.


I have also started to fit the M20 flywheel. Struggling as its fouling on the engine. Have I got to grind a little off of the sump casting?
Lastly I have also started on the fabrication stage of the adjustable front lower arms and am modifying at the moment the front subframe to accept a clevis set-up. Not too much to see at the moment appart for a chopped up subframe.

Did a little more pottering in the workshop last night. Made up some delrin engine mounts

And started to modify the front subframe to raise the roll centre and change over to a clevis set up to take a rose joint.
Chopped out the existing set up

Cut out to form a platform level with the chassis rails

And then welded in plate to re-inforce and for something to weld the clevis to


Thats all for now. Going to do a little more tomorrow night
Had a little more time in the workshop, and I have finished off the front subframe. This time doing the more fiddly bits of fabricating and welding the lower arm mounting points. Lots of measurements checking for allignment etc. all of which were off of the square edges of the subframe which are parralell with the chassis rails.
Firstly made up the clevis/mounting point, this was using some 50x50 box section, drilling holes through the diaganol centres and then cutting off the front face for access on the car.

This was then welded to the cut out sections after allignment and finally bracing was added to the back of the clevis, however not pictured here.

The last thing done was to knock up some rose joint spacers, not all the same length in the pic below as I'm yet to work out how short they need to be.


Also, just gotten back the bits and peices that I haven't been able to turn up, the delrin for the rear subframe bushes, G60 brake disks and the housings for the bottom ball joints
So hopefully I will be able to fit the rear subframe, get the front legs near complete and fabricate the lower arms.
Quick question, on the front lower arms i'm going to fabricate a turn buckle to adjust castor. This turnbuckle isn't going back to the stock location (where the lollypop bushes are mounted) due to ease of component fabrication. Now the question is, should I have the turnbuckle behind the lower arm (like a compression strut) or in front (my logic is that steel is more durable under tension rather than compression). Or will this mess up the geometry elsewhere?
Thanks
Finished fabricating the rear subframe and trailing arm set-up, which seems to work a treat. Just need to turn up the subframe bushes out of some delrin which is going to happen soon.


Needs a little lick of paint just to tidy it up. I've built up the new LSD with the shafts and prop off of the 325i that I had broken earlier on. Need to turn up the subframe bushes and rebuild the rear braking system, then I can put the rear end set-up on the car.
I've now taken the M52 out of the 7 series and have also started looking at mounting the turbo. I have trial fitted the ebay manifold inverted and should just clear enough after making up an up pipe to convert the T3 flange to TD05. In the pics below you can see the flange clearence and roughly where I'd like the turbo to be mounted.


I have also started to fit the M20 flywheel. Struggling as its fouling on the engine. Have I got to grind a little off of the sump casting?
Lastly I have also started on the fabrication stage of the adjustable front lower arms and am modifying at the moment the front subframe to accept a clevis set-up. Not too much to see at the moment appart for a chopped up subframe.

Did a little more pottering in the workshop last night. Made up some delrin engine mounts

And started to modify the front subframe to raise the roll centre and change over to a clevis set up to take a rose joint.
Chopped out the existing set up

Cut out to form a platform level with the chassis rails

And then welded in plate to re-inforce and for something to weld the clevis to


Thats all for now. Going to do a little more tomorrow night
Had a little more time in the workshop, and I have finished off the front subframe. This time doing the more fiddly bits of fabricating and welding the lower arm mounting points. Lots of measurements checking for allignment etc. all of which were off of the square edges of the subframe which are parralell with the chassis rails.
Firstly made up the clevis/mounting point, this was using some 50x50 box section, drilling holes through the diaganol centres and then cutting off the front face for access on the car.

This was then welded to the cut out sections after allignment and finally bracing was added to the back of the clevis, however not pictured here.

The last thing done was to knock up some rose joint spacers, not all the same length in the pic below as I'm yet to work out how short they need to be.


Also, just gotten back the bits and peices that I haven't been able to turn up, the delrin for the rear subframe bushes, G60 brake disks and the housings for the bottom ball joints
So hopefully I will be able to fit the rear subframe, get the front legs near complete and fabricate the lower arms.
Quick question, on the front lower arms i'm going to fabricate a turn buckle to adjust castor. This turnbuckle isn't going back to the stock location (where the lollypop bushes are mounted) due to ease of component fabrication. Now the question is, should I have the turnbuckle behind the lower arm (like a compression strut) or in front (my logic is that steel is more durable under tension rather than compression). Or will this mess up the geometry elsewhere?
Thanks
#49
Thread Starter
Too many posts.. I need a life!!
Joined: Aug 2005
Posts: 757
Likes: 0
From: Oxfordshire
Yeah, decided it's the unstressed way forward. When I look to change engines after this incarnation, i'll put a thicker head gasket on with the head studs and put a holset HX40 on it. Re map it and then flog it on. Should be good for 450bhp plus and return quite a bit of proffit too. Then we can go LS1 baby!
#50
Very nice project mate.
You don't need to modify the sump actually. One model M20 had a spacer under its flywheel, that is comonly ued in this swap. It is number 10 in this scheme:
http://bmwfans.info/parts/catalog/E3...mass_flywheel/
We've bought it directly at the dealer...
You don't need to modify the sump actually. One model M20 had a spacer under its flywheel, that is comonly ued in this swap. It is number 10 in this scheme:
http://bmwfans.info/parts/catalog/E3...mass_flywheel/
We've bought it directly at the dealer...
Last edited by Swamp; 16-10-2010 at 11:22 AM.
#51
Thread Starter
Too many posts.. I need a life!!
Joined: Aug 2005
Posts: 757
Likes: 0
From: Oxfordshire
Ah, it's the same as the spacer on the front of the flywheel, but probably has a larger hole for the spiggot that sticks out of the crank shaft.
Too late now! lol
Too late now! lol
#52
Thread Starter
Too many posts.. I need a life!!
Joined: Aug 2005
Posts: 757
Likes: 0
From: Oxfordshire
Had a spare hour earlier on today, so have fitted the flywheel, clutch, box and starter off of the 325 12v.
Flywheel fitted and torqued up.

Friction plate centred. The lovely people of spec had sent a centring tool with their kit which was really useful.

Pressure plate fitted and torqued. BMW having lovely locating lugs on their flywheel made life easier.

Finally gearbox and starter motor. Problem I had with using the 325 M20 box is that the 4 smalle bolts don't line up with their corresponding holes if they had them at all. I guess this is fine as the 4 larger ones do the majority of the work?

Flywheel fitted and torqued up.

Friction plate centred. The lovely people of spec had sent a centring tool with their kit which was really useful.

Pressure plate fitted and torqued. BMW having lovely locating lugs on their flywheel made life easier.

Finally gearbox and starter motor. Problem I had with using the 325 M20 box is that the 4 smalle bolts don't line up with their corresponding holes if they had them at all. I guess this is fine as the 4 larger ones do the majority of the work?

#54
Thread Starter
Too many posts.. I need a life!!
Joined: Aug 2005
Posts: 757
Likes: 0
From: Oxfordshire
Doing well for project time at the mo! Did a little in the workshop last night, which was making up the rear subframe bushes out of delrin. TBH It's really good stuff to machine and even a complete tule like me can get a half decent finish. I was hoping to press the bushes in as they are, but the delrin really isn't as compressive as i'd first thought, so i'll have to get my man to run the mill down both sides to create a rebate for the little pressed lugs in the bush housing, or file them down lol.


Also started to look at fabricating the new lower arms, which involved pairing off some tube section in the lathe, and organising some solid bar for tapping to M16 for the rose joint. No pics of this though.


Also started to look at fabricating the new lower arms, which involved pairing off some tube section in the lathe, and organising some solid bar for tapping to M16 for the rose joint. No pics of this though.
#58
Thread Starter
Too many posts.. I need a life!!
Joined: Aug 2005
Posts: 757
Likes: 0
From: Oxfordshire
#62
Thread Starter
Too many posts.. I need a life!!
Joined: Aug 2005
Posts: 757
Likes: 0
From: Oxfordshire
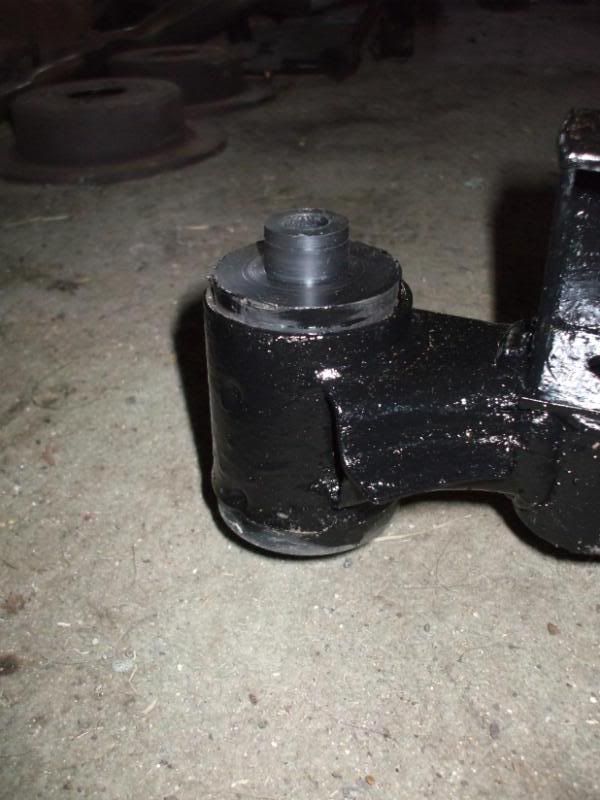
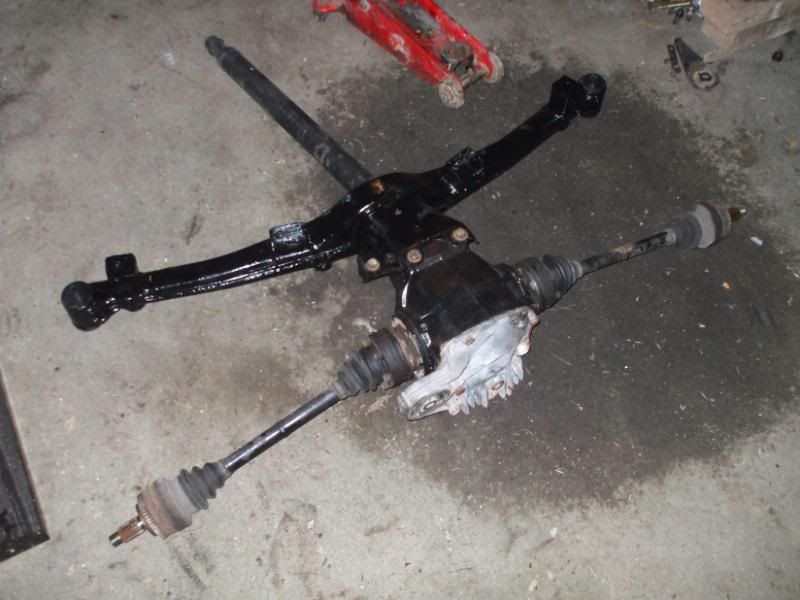
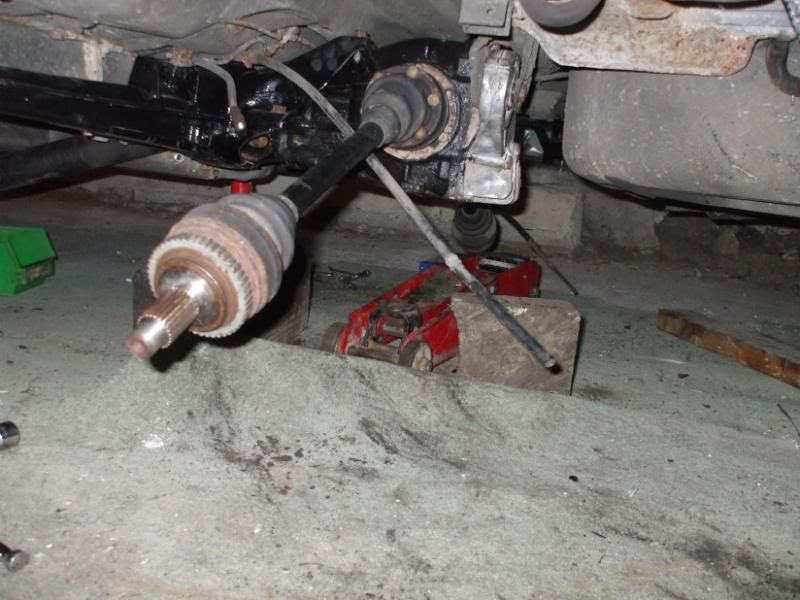
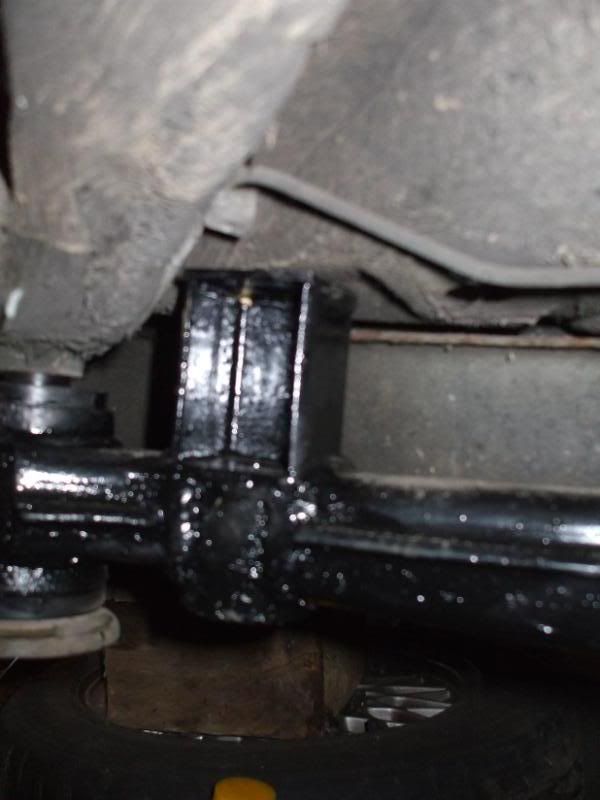
Just spent most of a steady day at work, working and painting up the sub frames and trailing arms. My welding looks way better with a lick of paint. Also just spent half an hour in the work shop and have just done one of the most awkward bloody jobs on the car... Bolting the rear subframe and diff up. It's amaising how weak you are when your led on your back on the floor. Good news is that the delrin bushes are great and fit wonderfully. The bad, is that the roll centre adjustment part of the sub frame clashes with the floor of the car. No big deal, I'll just cut some access windows in the rear bench  Also fitted up the front sub frame just to see what it looked like. No dramas there!
Pressed in delrin bushes
Built up sub frame and diff
Bolted in after half an hour of banging my head on sharp objects
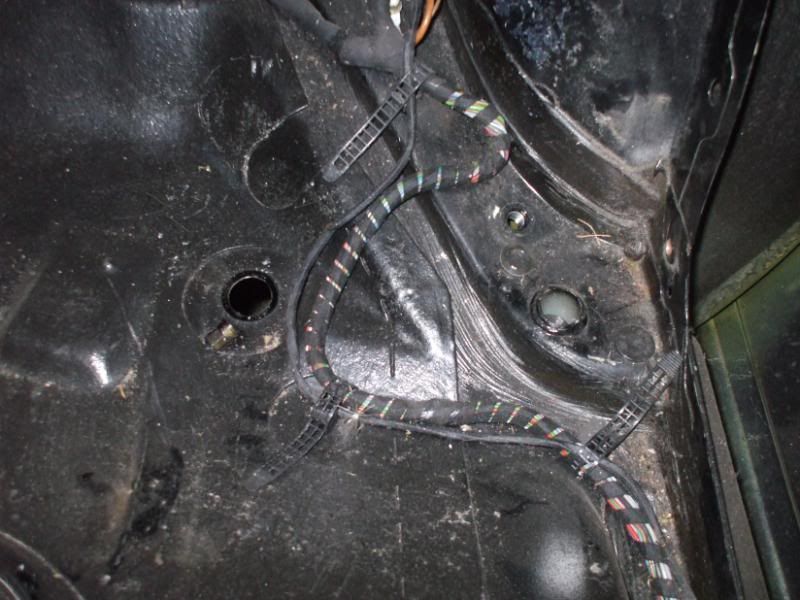
Here you can see the subframe fouling on the chassis, the bush hasn't pulled all the way home
Just to the right of the hole is where I'll have to make an access window
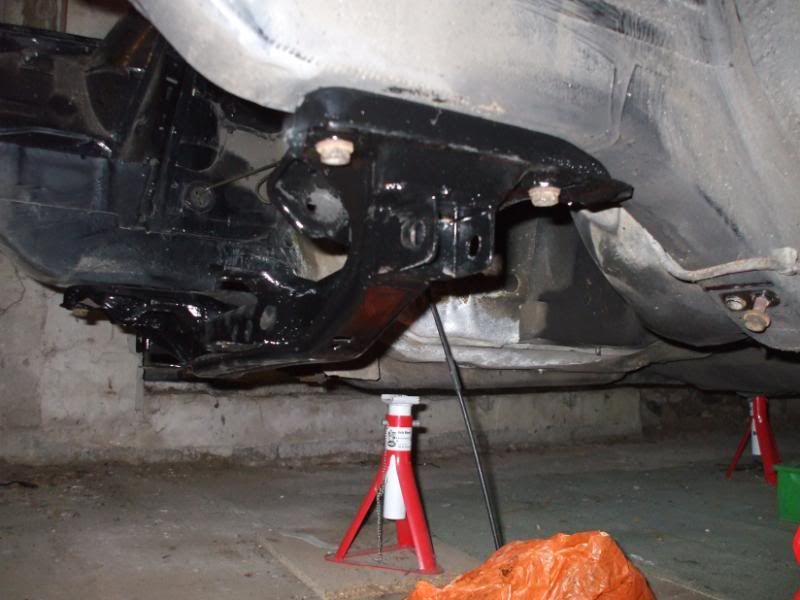
And a quick pic of the front subframe mounted up
Pressed in delrin bushes

Built up sub frame and diff

Bolted in after half an hour of banging my head on sharp objects

Here you can see the subframe fouling on the chassis, the bush hasn't pulled all the way home

Just to the right of the hole is where I'll have to make an access window

And a quick pic of the front subframe mounted up

#63
got the doors, bonnet, bootlid are the only panels i have left.
loads of other odds and sodds.
Speak to Gunni from neverlift.com as he is doing the stock ECU remaps i think
#64
Thread Starter
Too many posts.. I need a life!!
Joined: Aug 2005
Posts: 757
Likes: 0
From: Oxfordshire
Ah Gunni's on E30 zone too, lives just down the road. I'm going to use MS, got a mate who built it for me and is going to put it in the BMW box  Hopefully Chip'll have time to map it.
Have you an indicator stalk?
Have you an indicator stalk?
#65
Thread Starter
Too many posts.. I need a life!!
Joined: Aug 2005
Posts: 757
Likes: 0
From: Oxfordshire
Little update. Have done a few bits and peices, pressed some new bearings in the trailing arms, one of which broke when I pressed the hub into the centre of the bearing, which is odd as it was the second side of the bearing which broke and the other one wen't together fine but feels really notchy/coarse when the hub is spun around. So both need to be replaced.
Good new's is that I have just brought a TIG welder, just a cheap DC inverter one, but it'll be good to get started with and weld stainless etc with too. Bad news that it's going to be a hell of a learning curve.
And finally, I've made a huge ski hatch in the rear bulkhead (for access and welding in the cage), scribed in some box section (for rear turrets) and started hacking up a really quite mint shell to weld into!
I'll get some pics up soon.
Thread
Thread Starter
Forum
Replies
Last Post
JK12
Pictures, video & Photoshop Forum
33
26-04-2021 12:09 PM


