Puma Cosworth restoration/bodge job fix!

 01-11-2012, 05:30 AM
#402
Bit of an update.
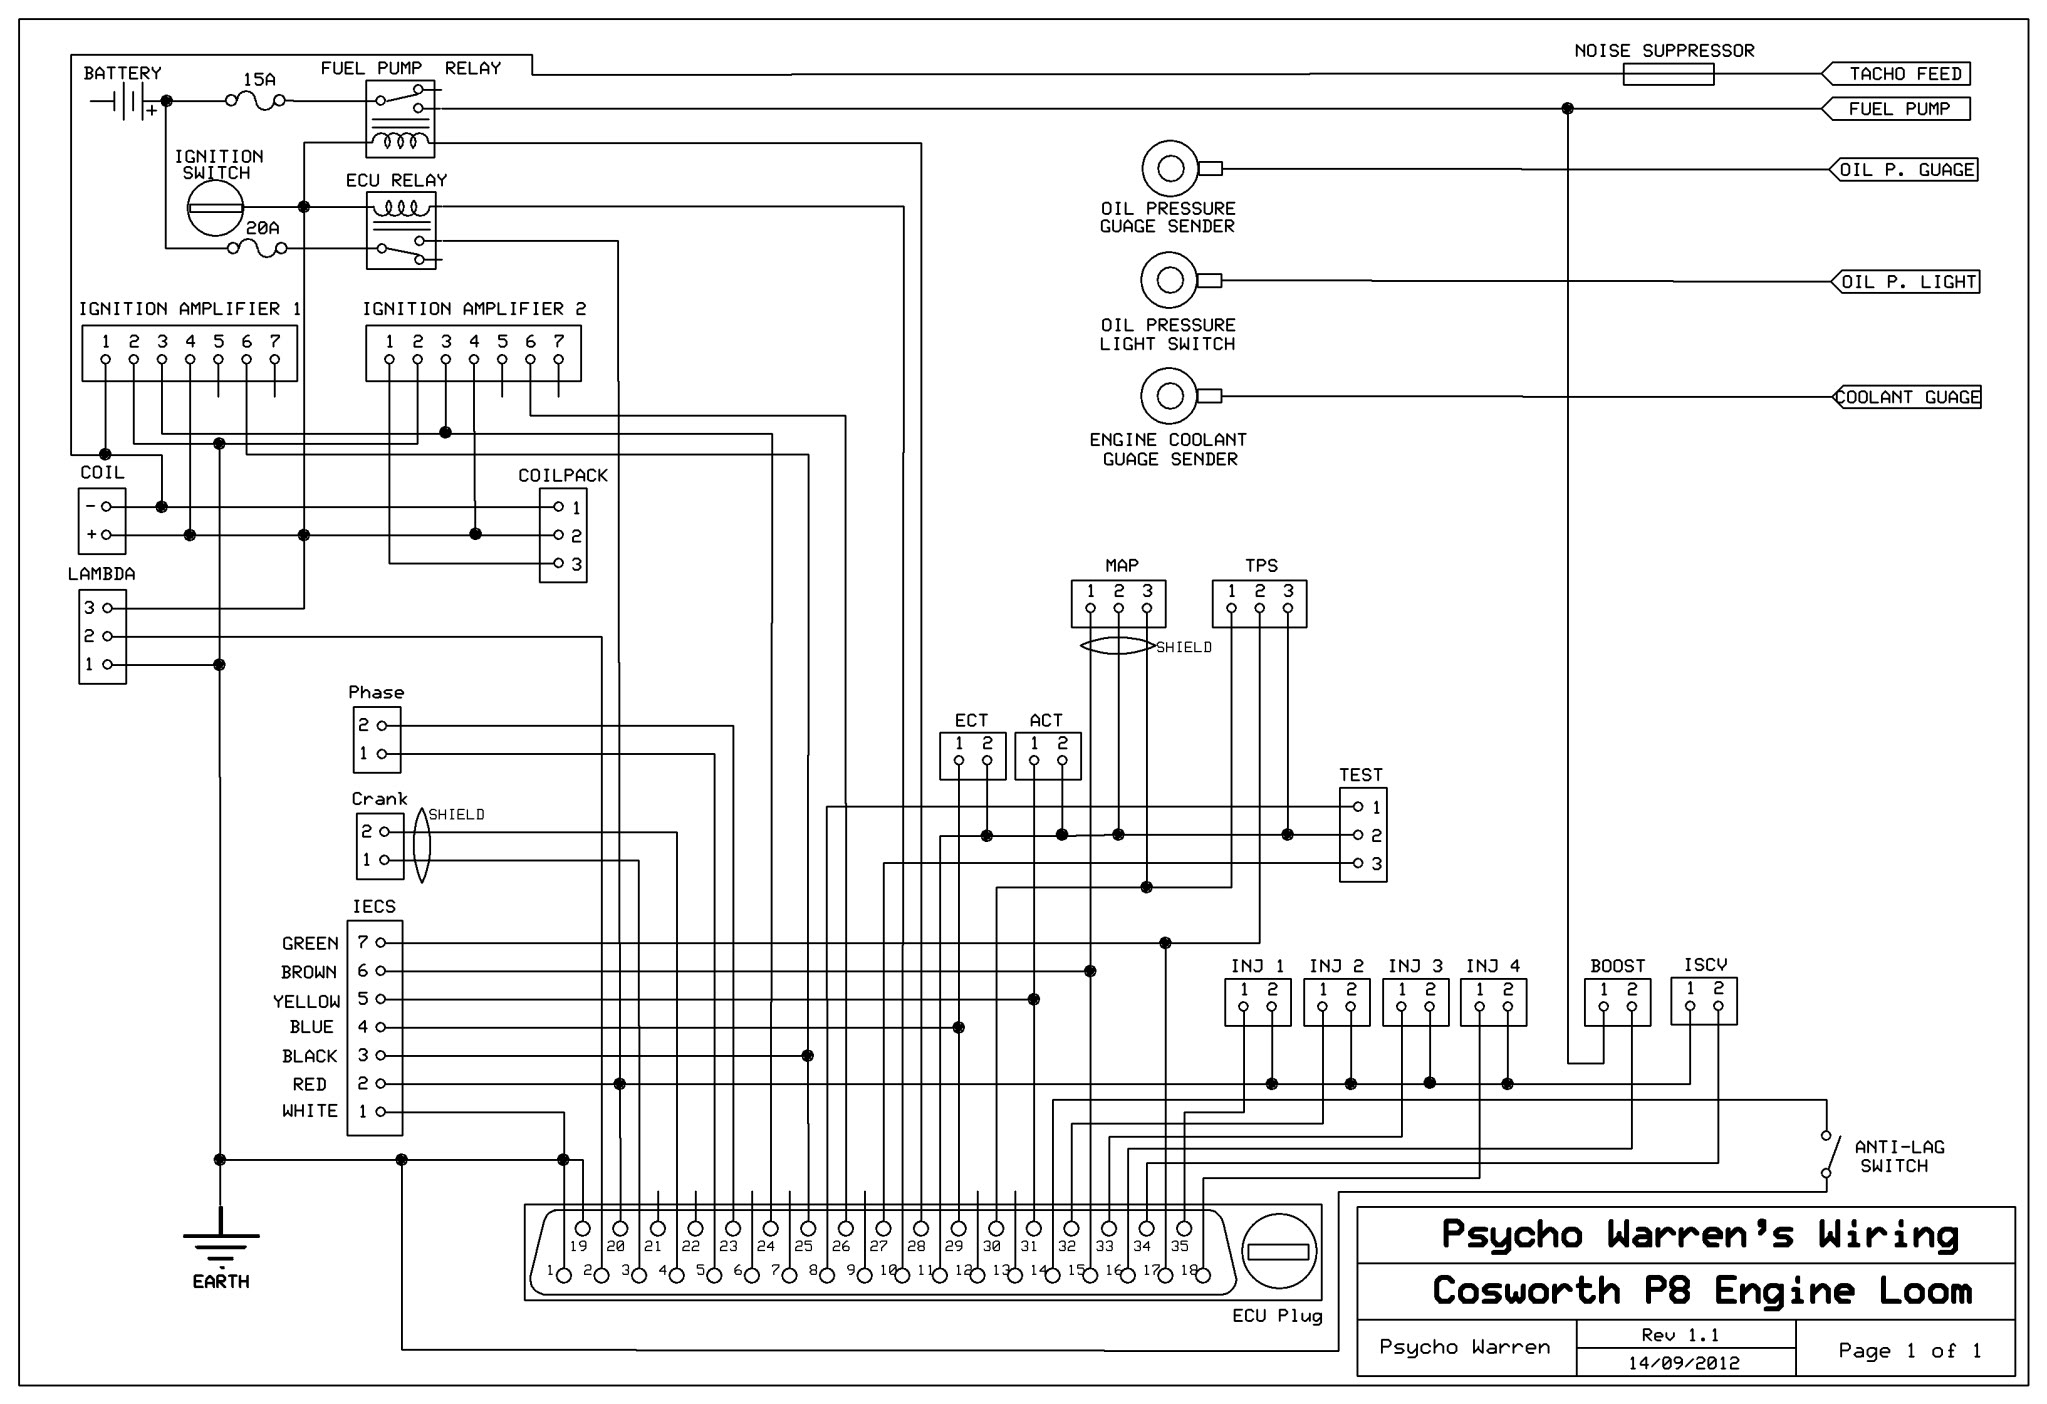
Wanted to replace my ancient sierra engine management loom for a while now so decided to get on with designing my loom. After some advice on here i have a loom design ive settled on.
This is the basic wiring diagram:
 [/QUOTE]
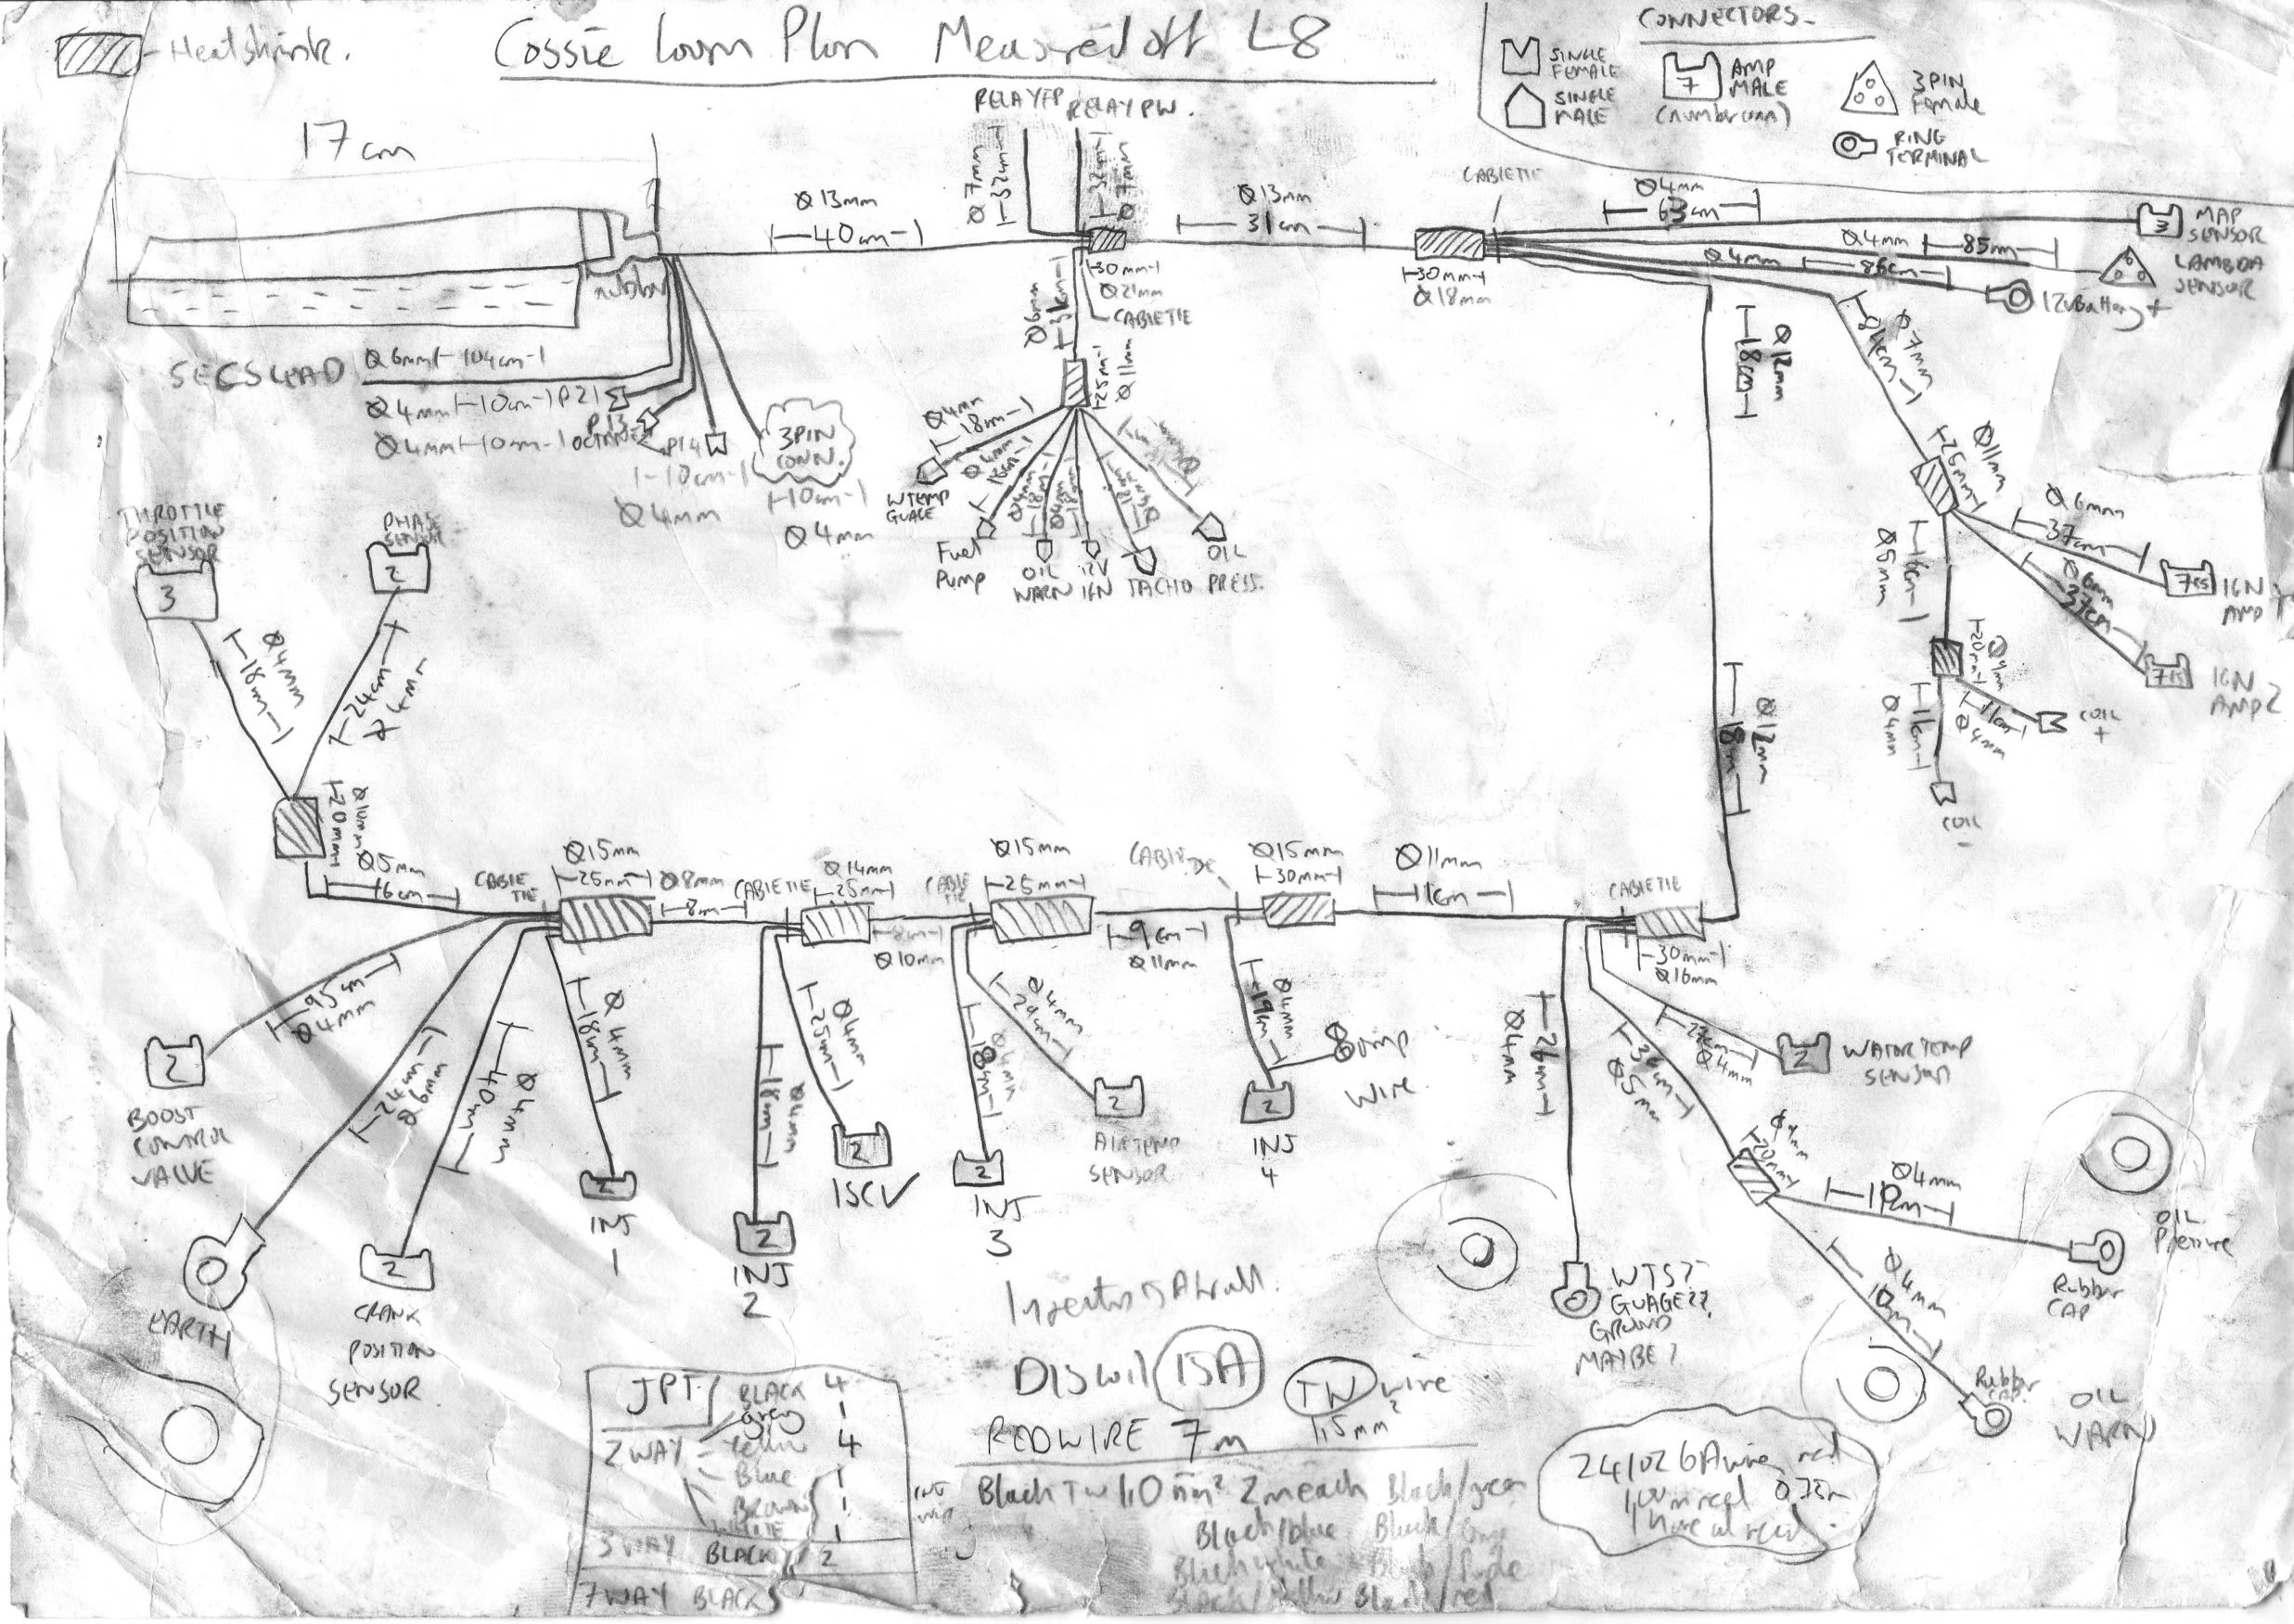
I also measured a loom up and had to design my loom plan and adjust all the distances and branch lengths for my car. here is the sketch!
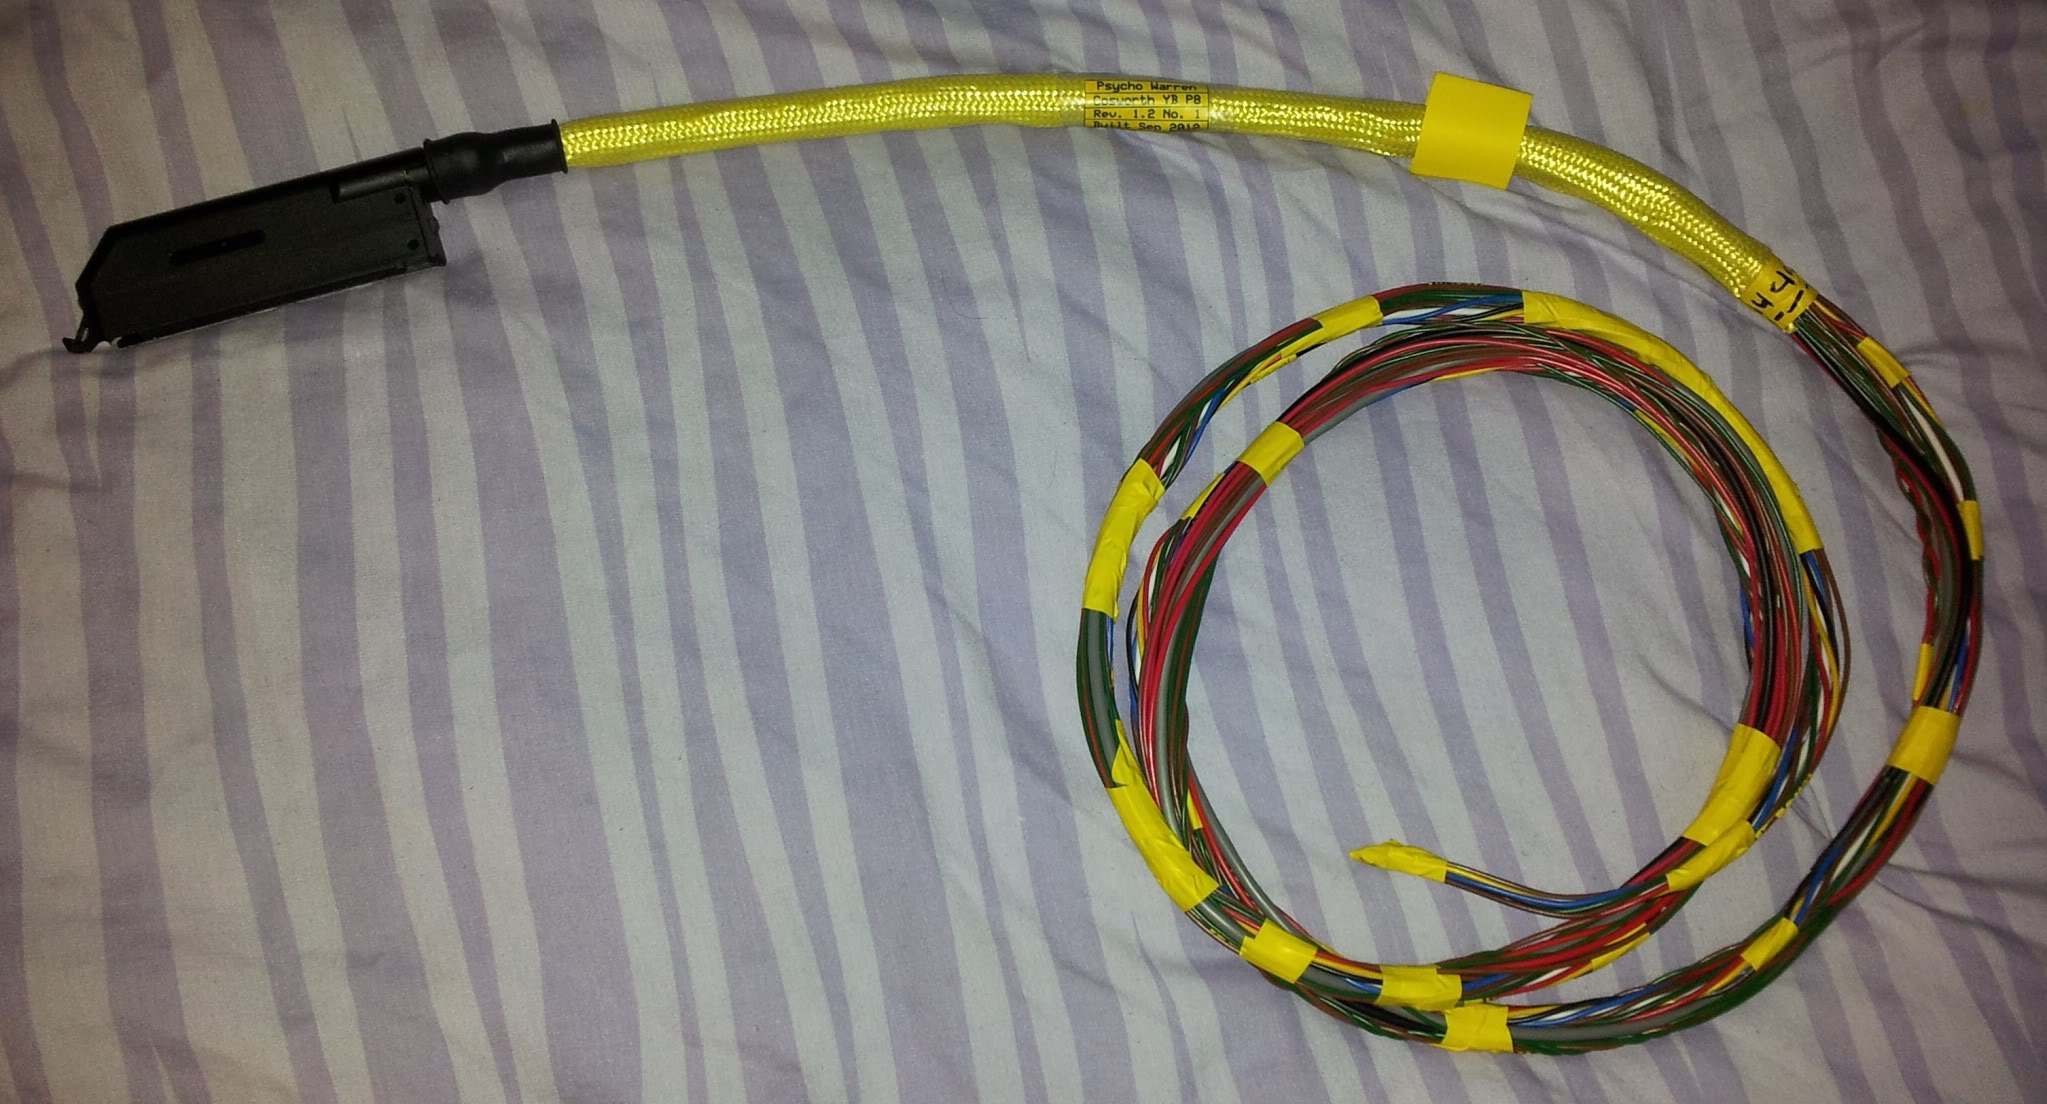
Purchased all the connectors, wiring etc and then made a start on the loom. Done everything that goes in or near the ECU plug. In essence ive done the easy bit
Then carried on down the loom adding the braid and heat shrink as i come to each break out.
I definitely prefer the kevlar braiding to the plastic braiding. More flexible and seems to be stronger gripped at the ends when its secured.
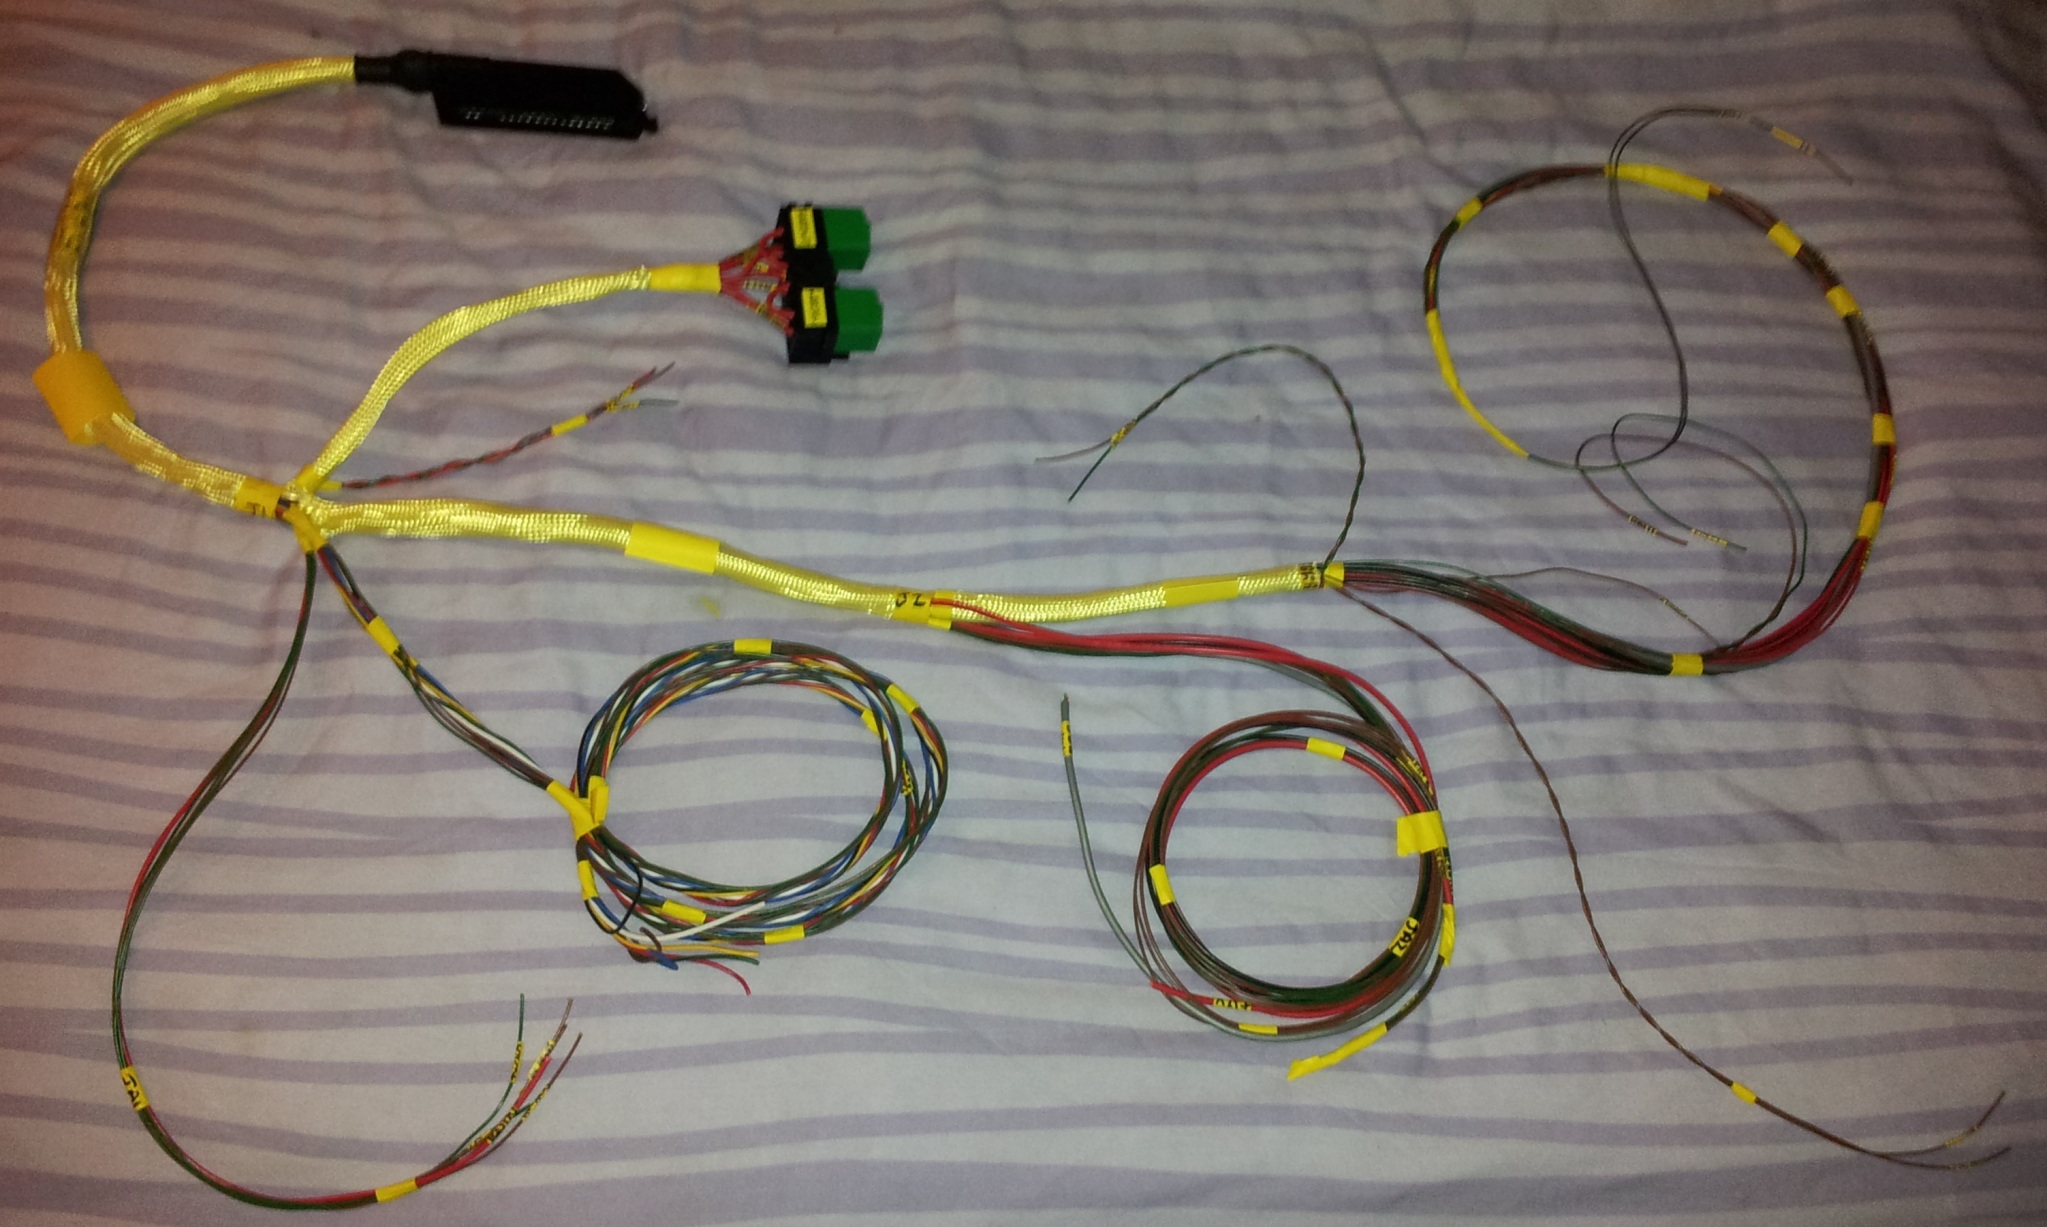
With all the braiding now at the end of the main loom, I started back at the beginning now on all the breakouts.
Completed my first breakout:
its nice to finally start putting on connectors meaning bits of the loom look actually finished.
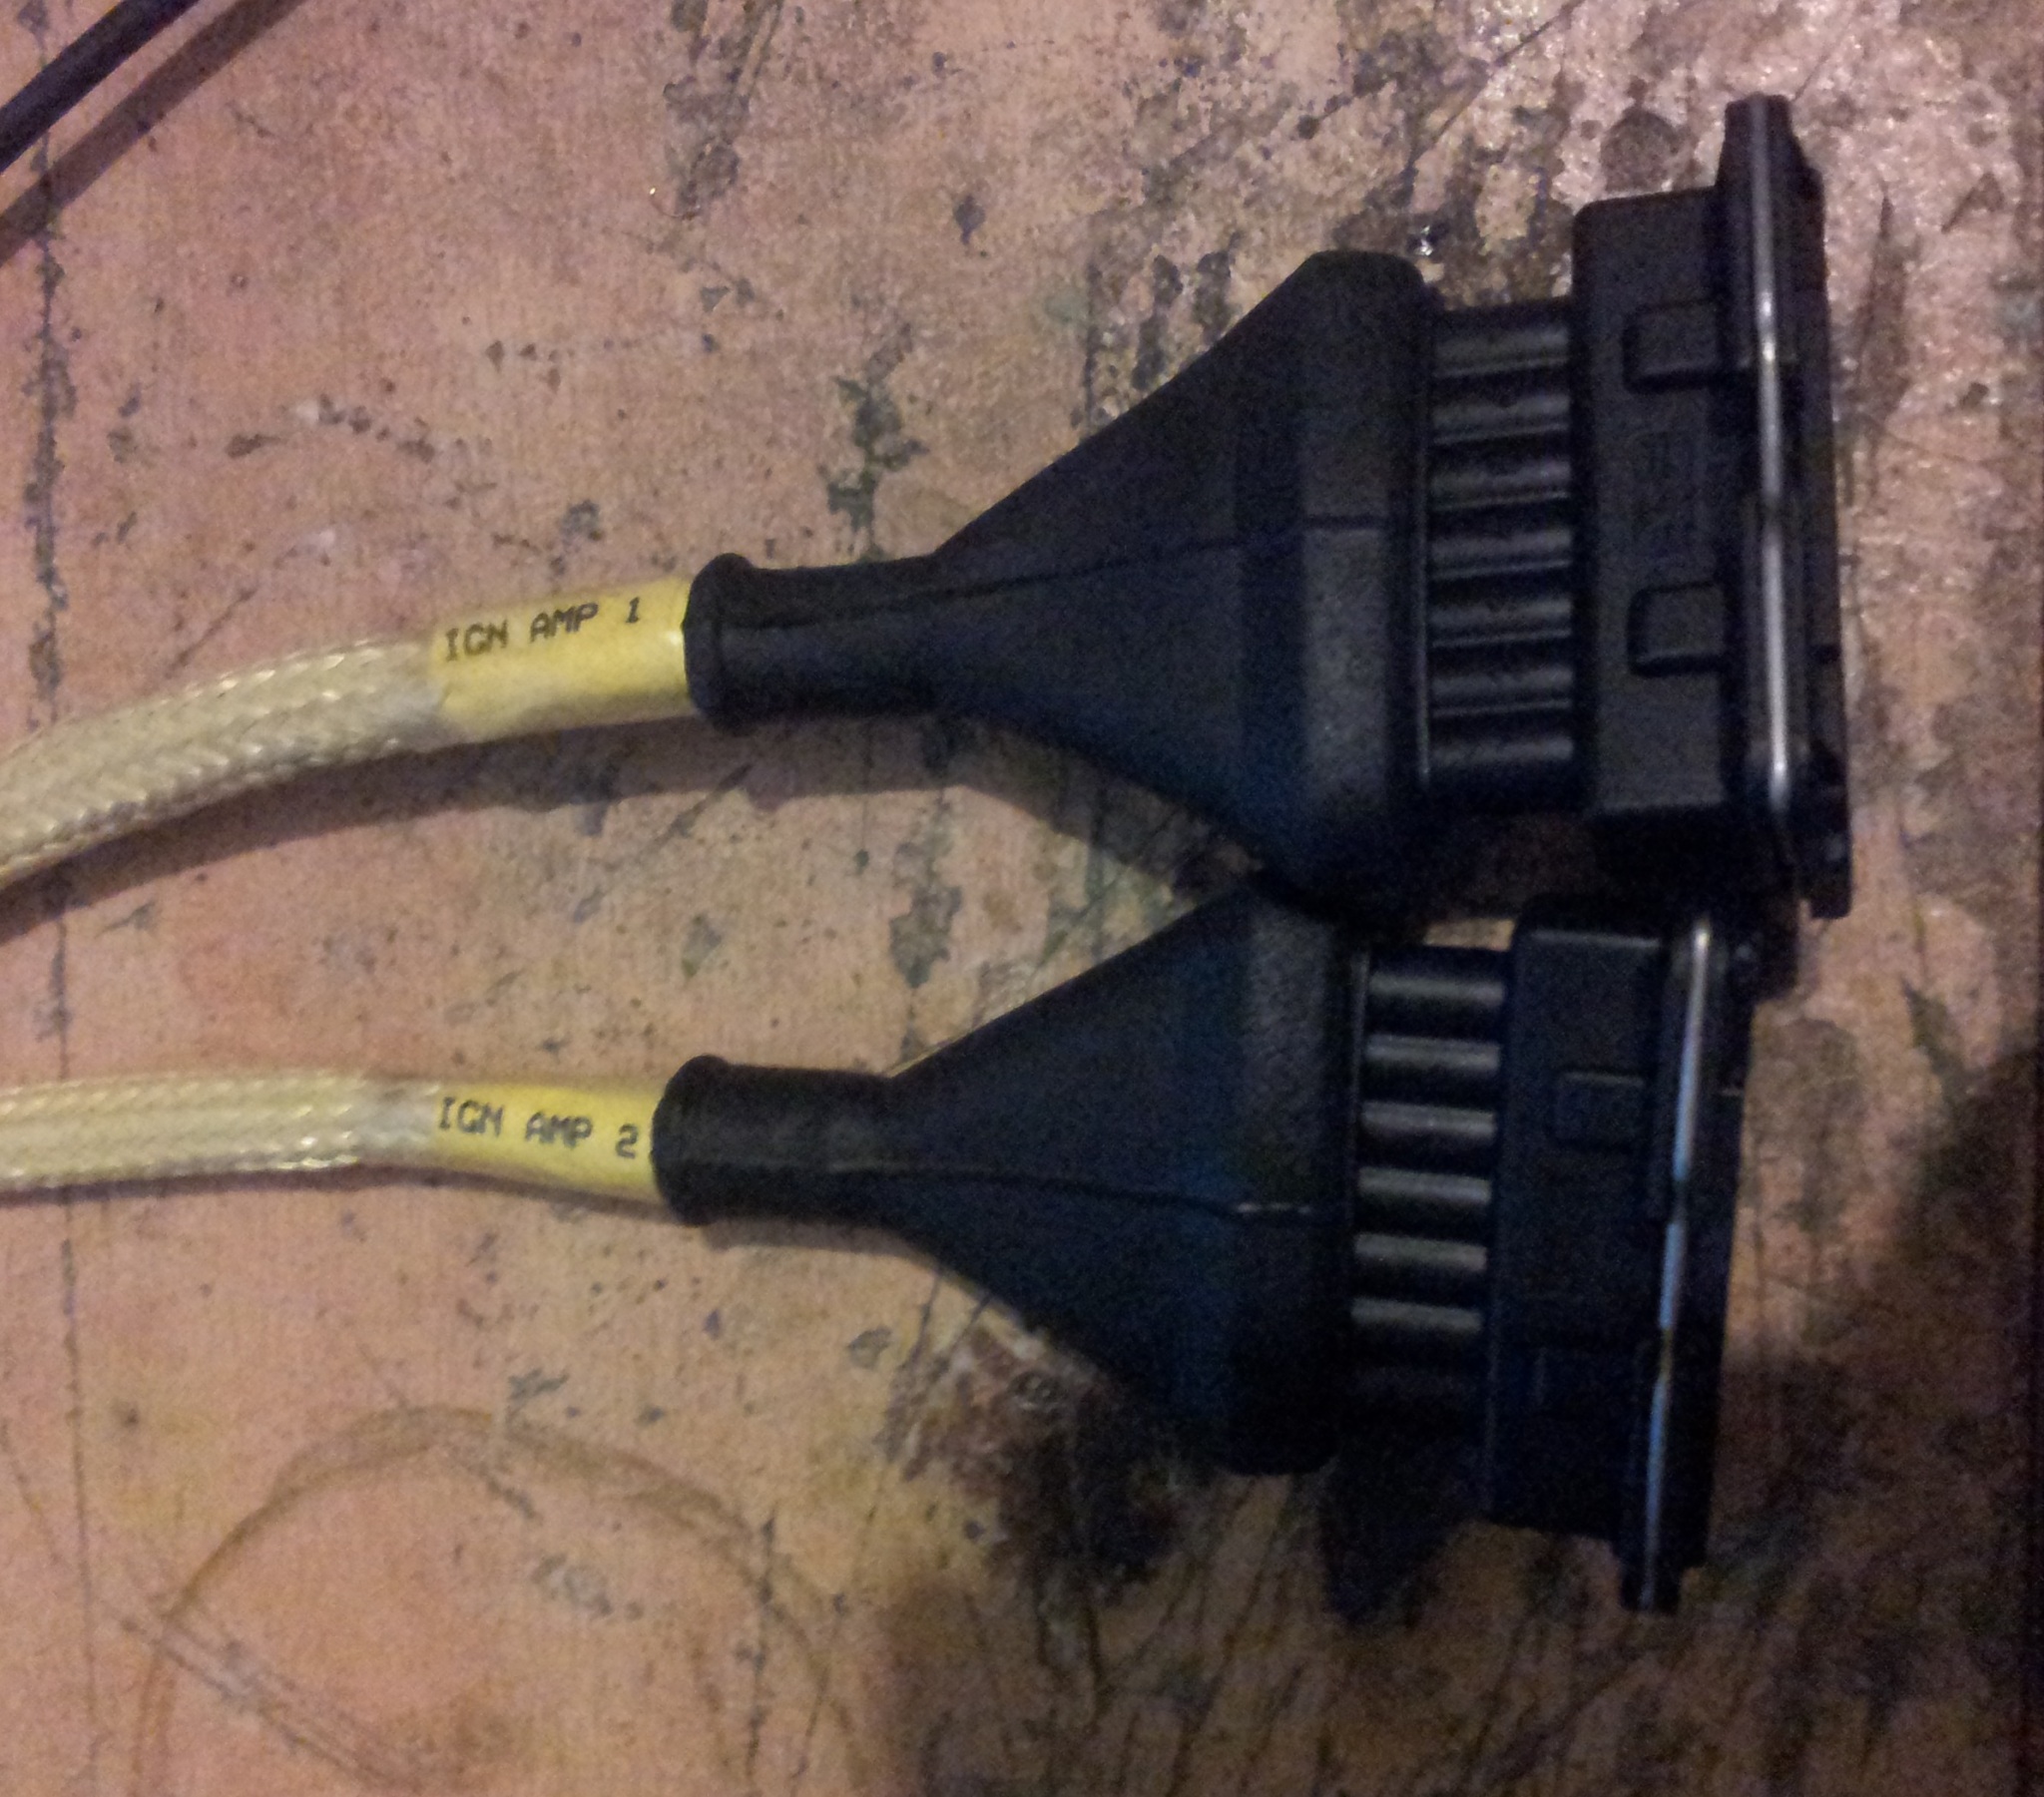
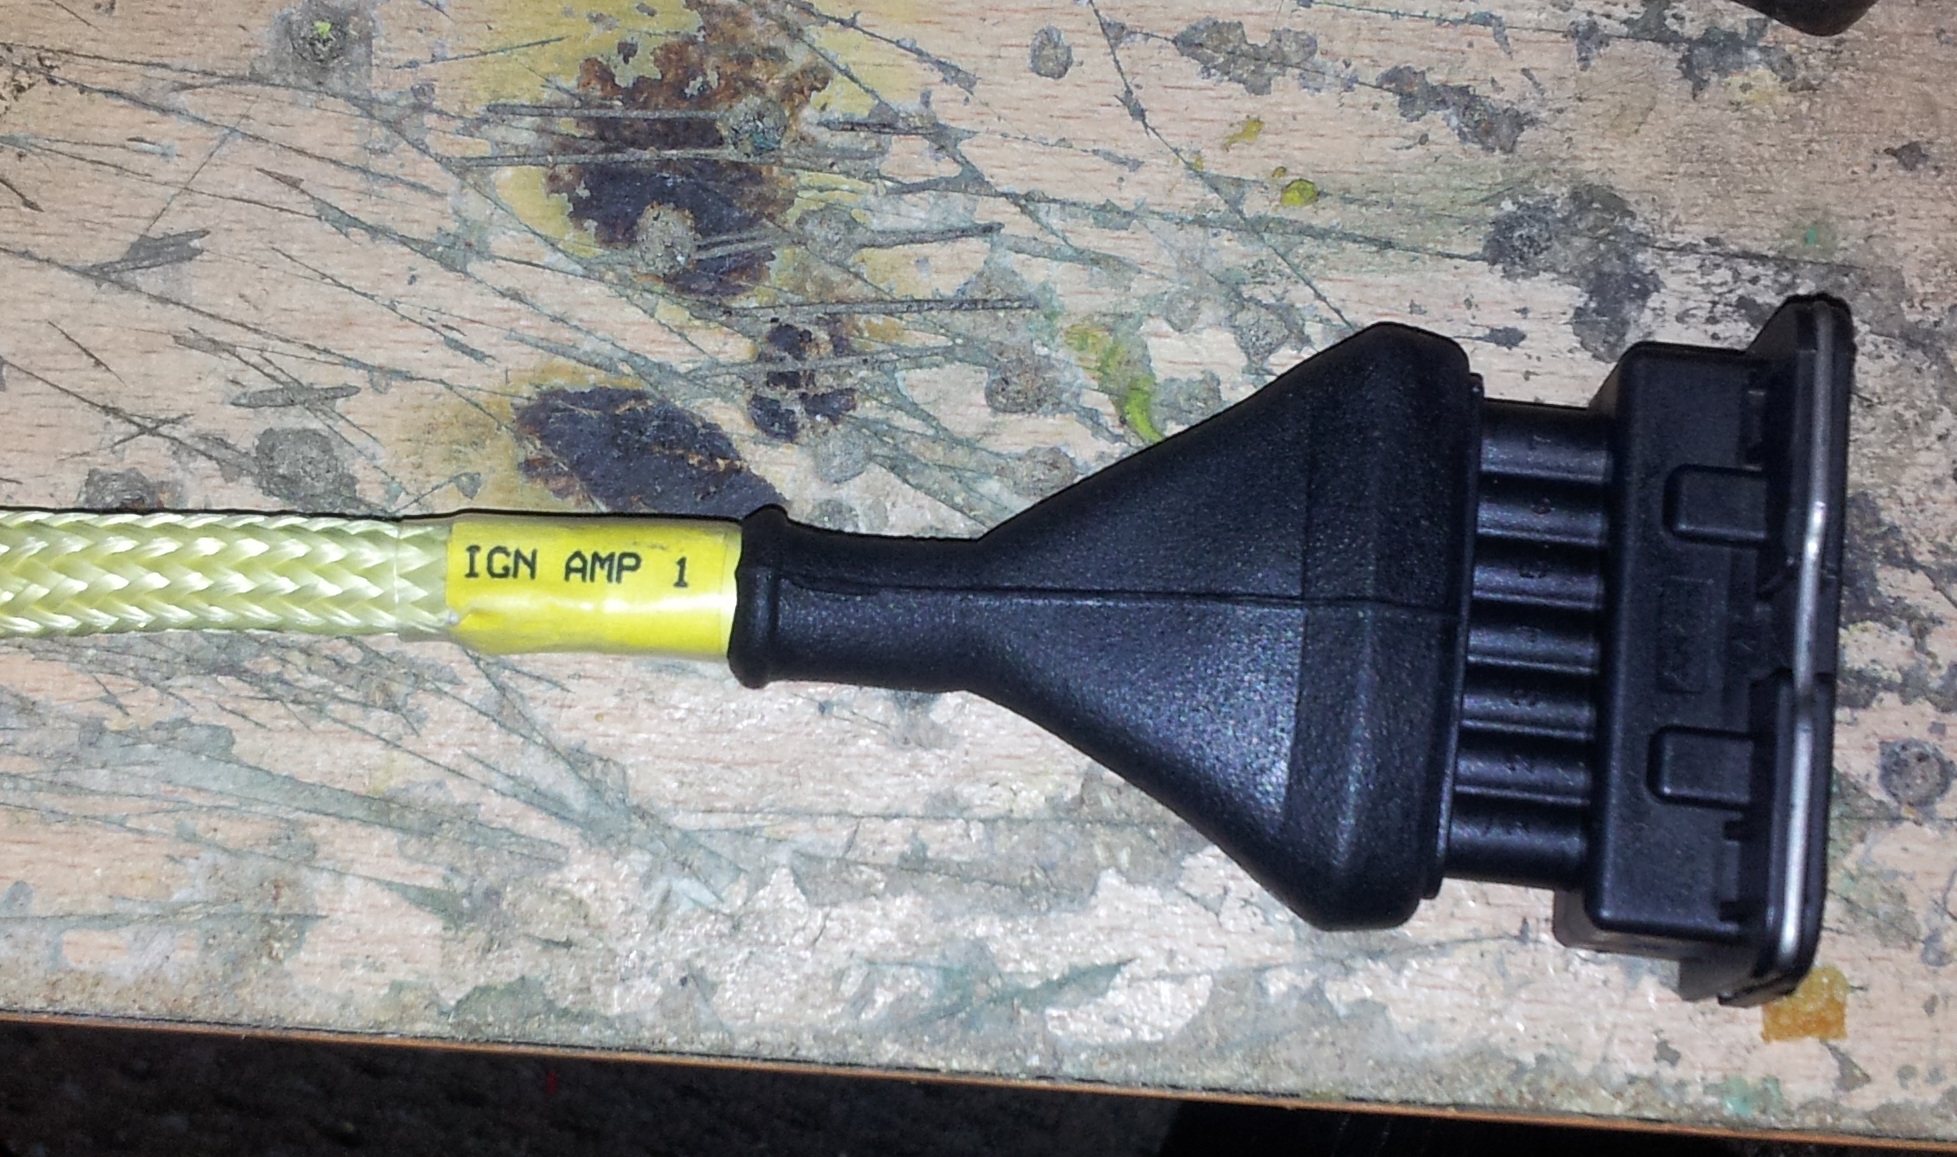
both ignition amps done now. coil/coilpack wire done too with the third wire for coilpack hidden under heatshrink so when i convert i just take off the coil connectors, crimp on the coilpack terminals and connector and job done.
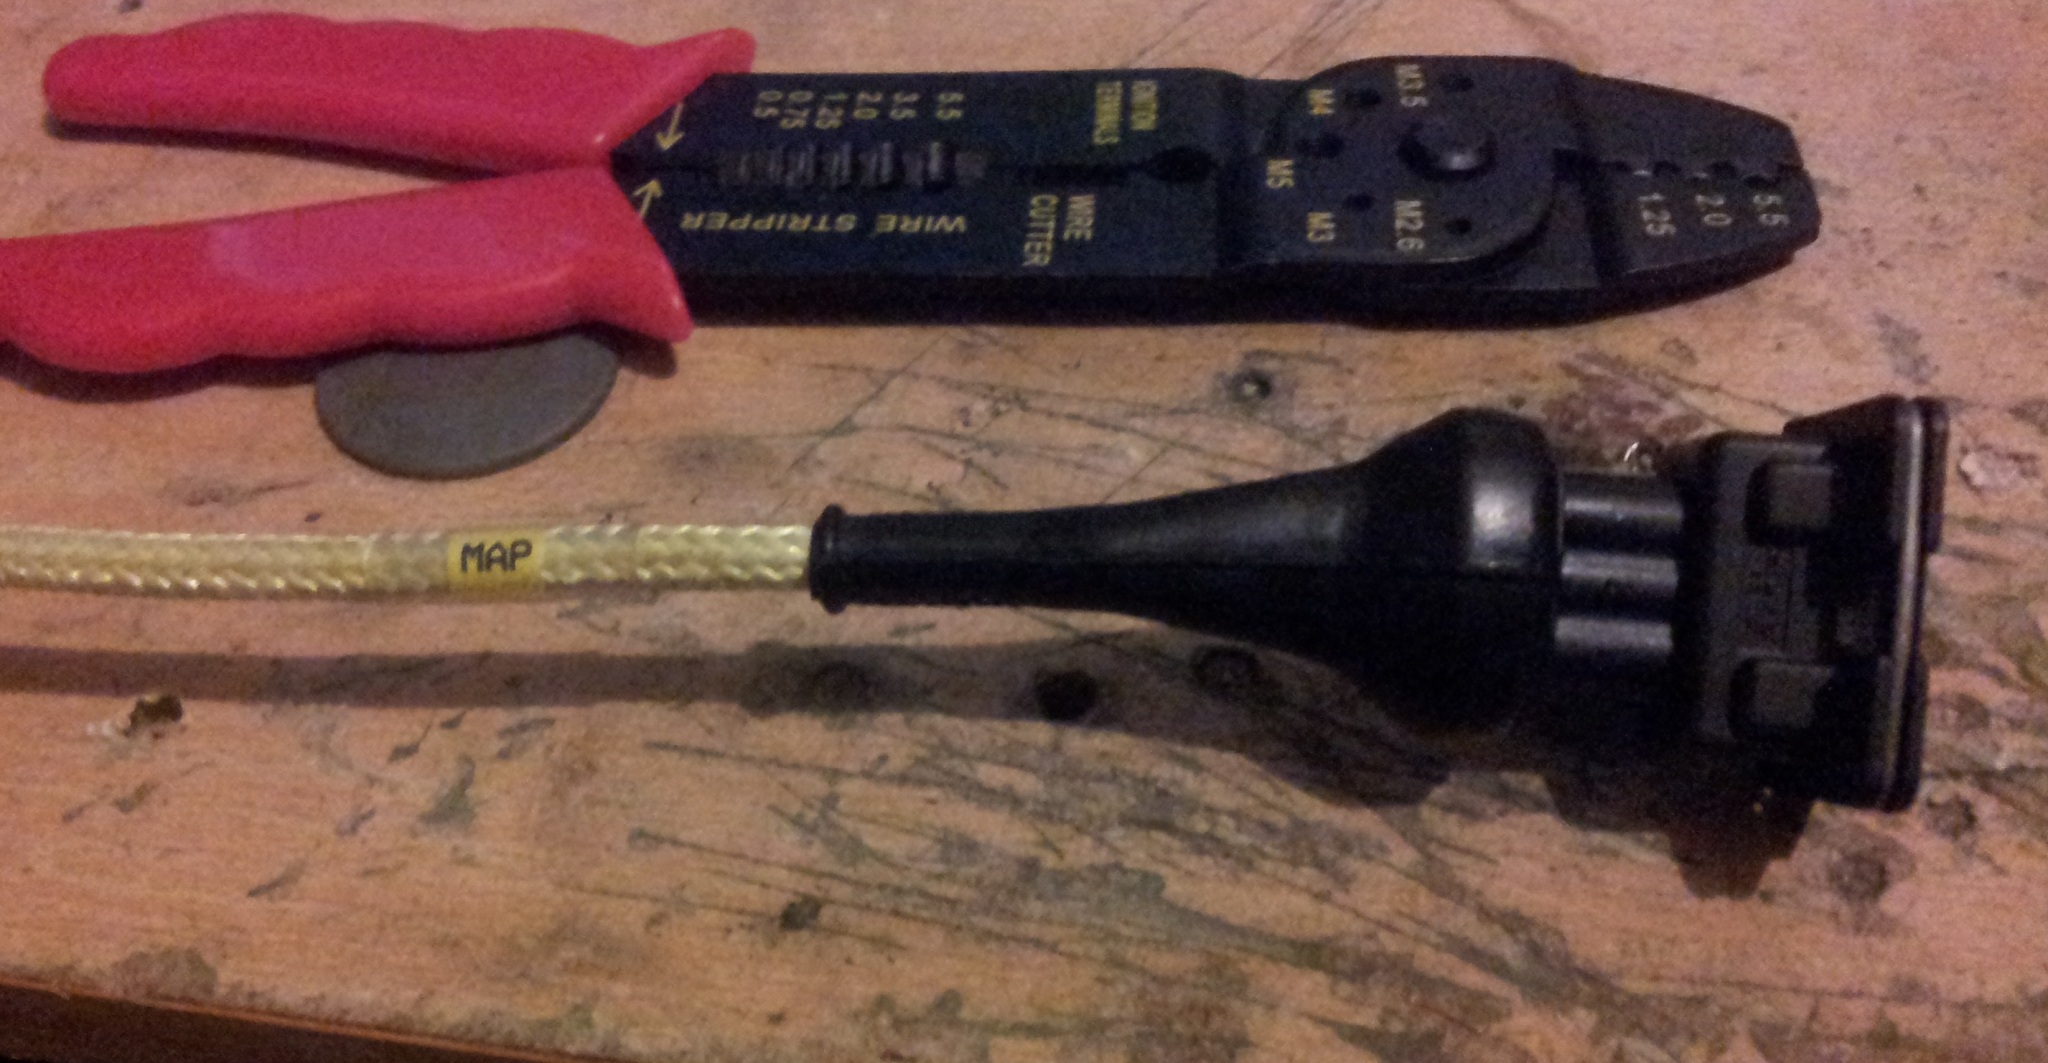
Also done the MAP connector as its big enough for the heat shrink ive got while i wait for the smaller stuff.
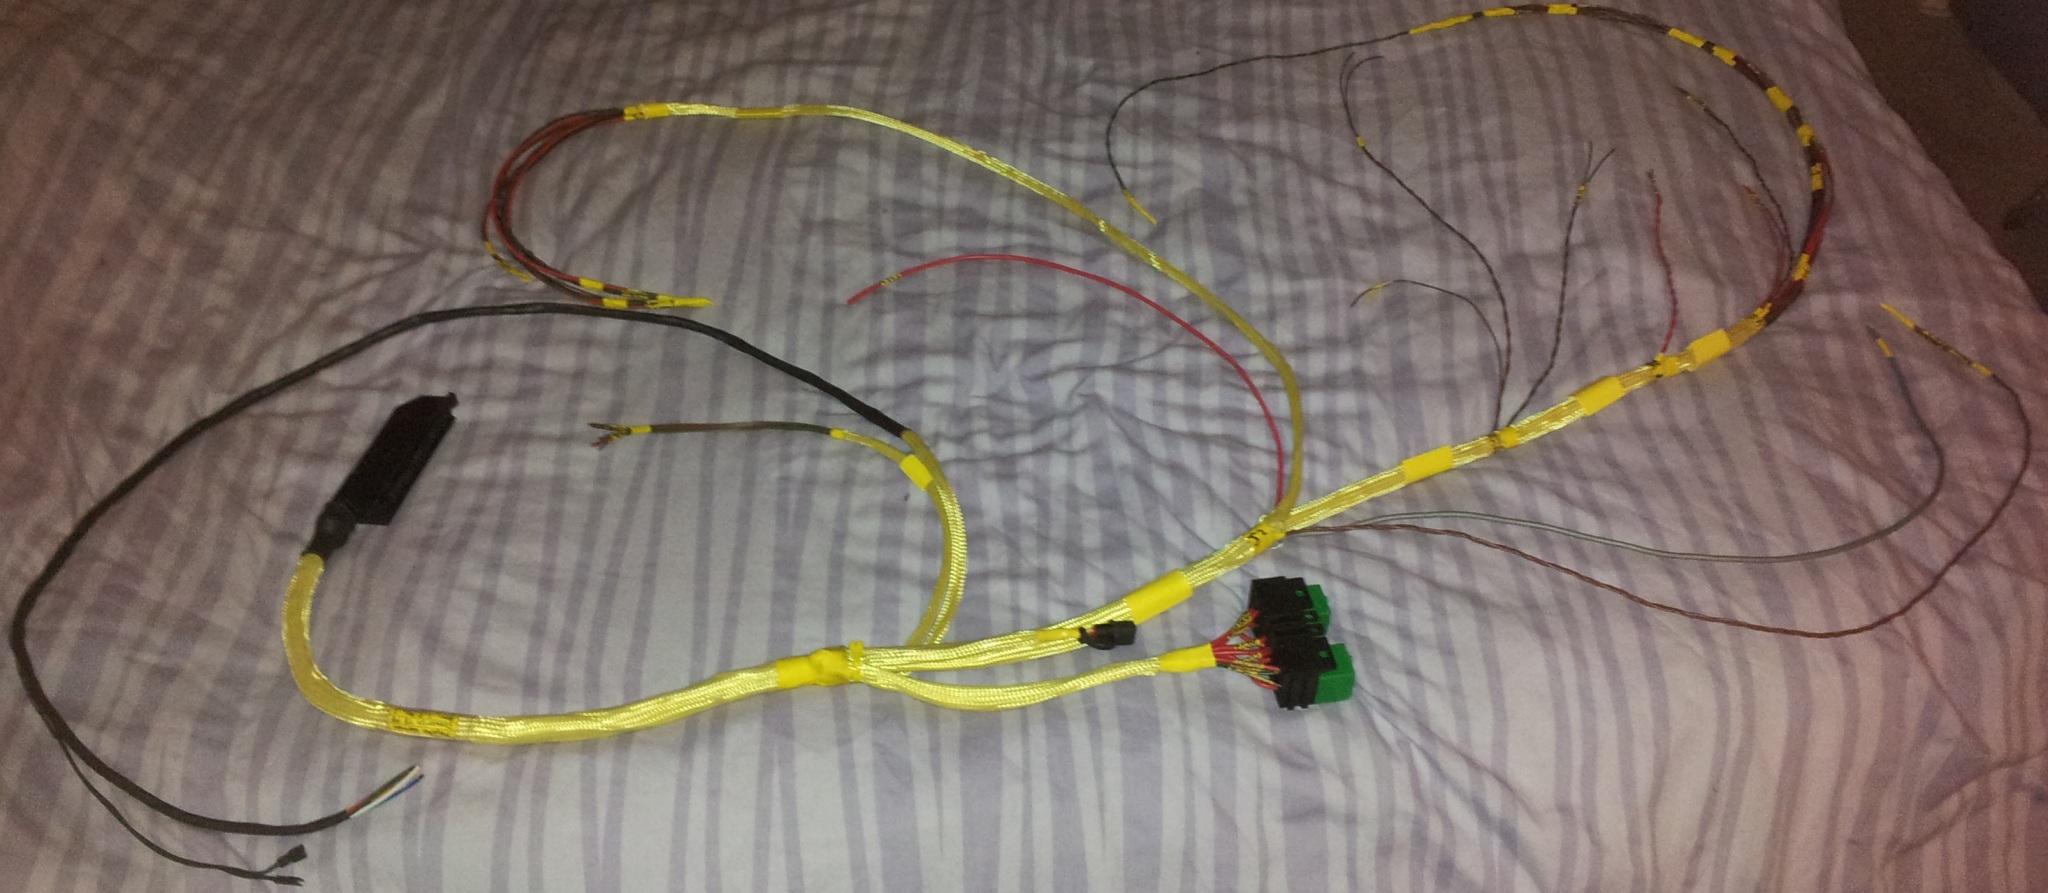
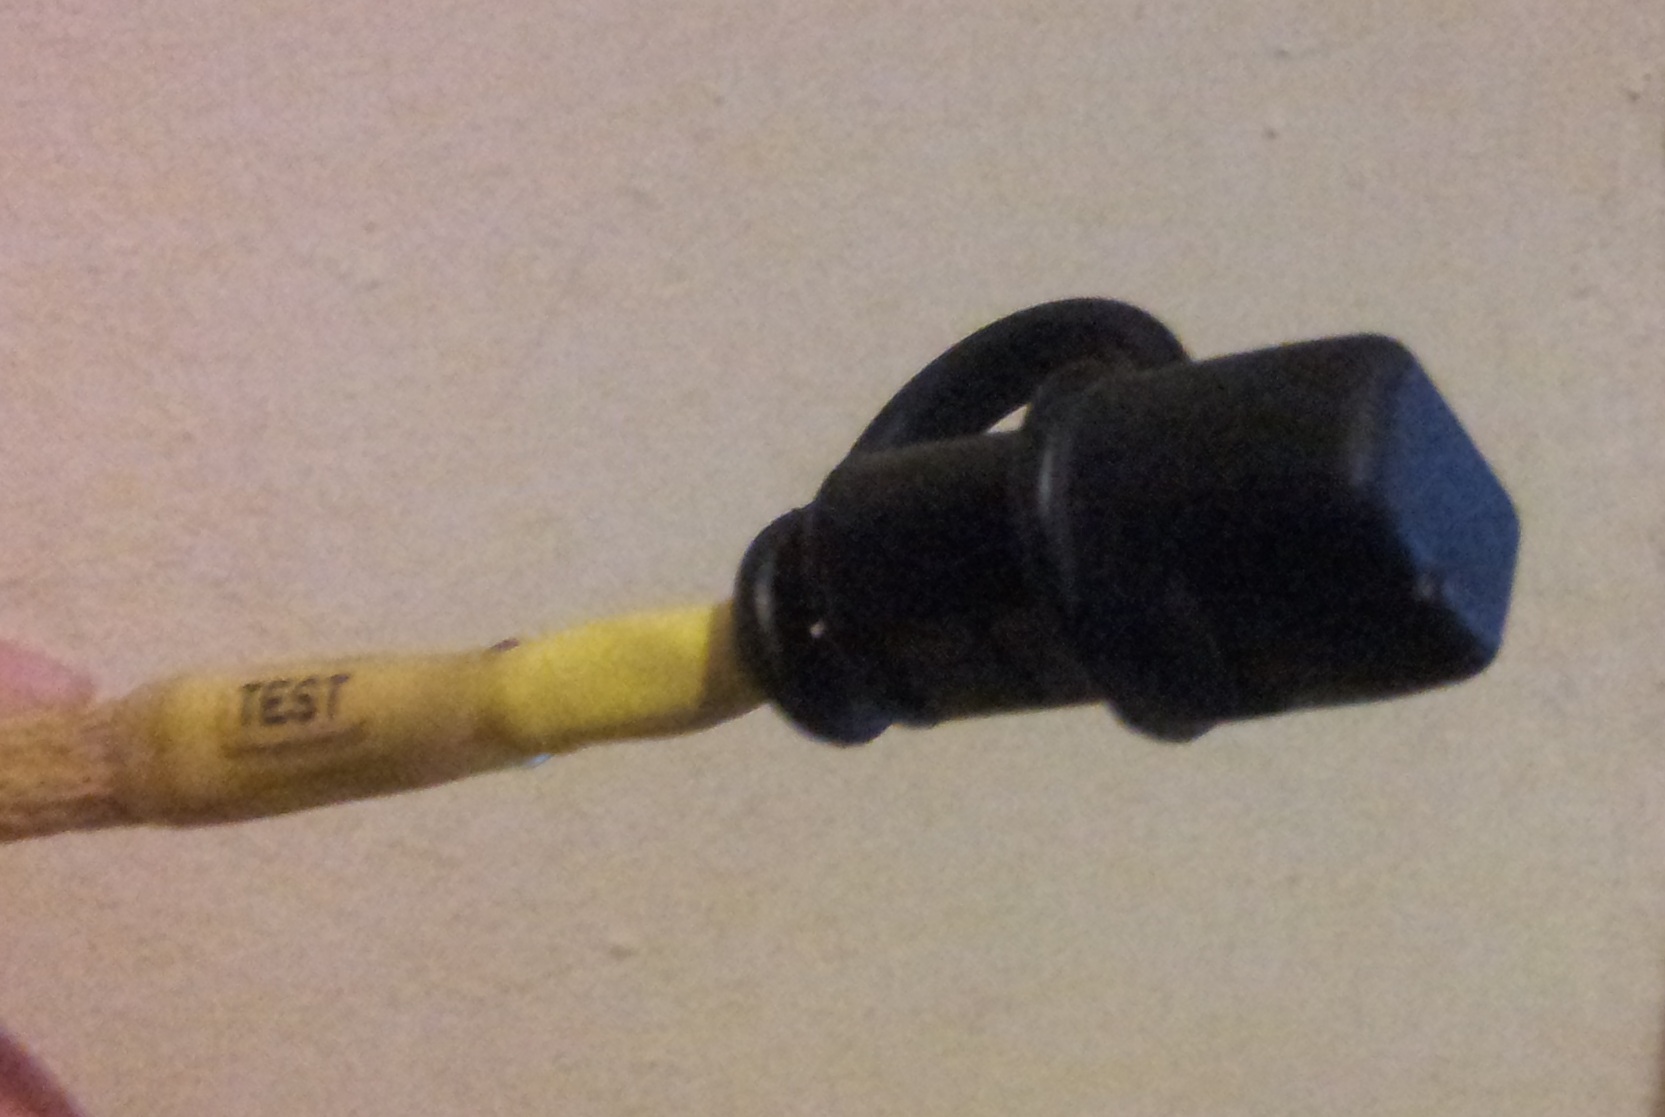
also got some terminals ive been waiting for. The terminals were from a BMW but fit the ford diagnostic plug connector housing i had spare, so now i have the proper connector on my new loom.
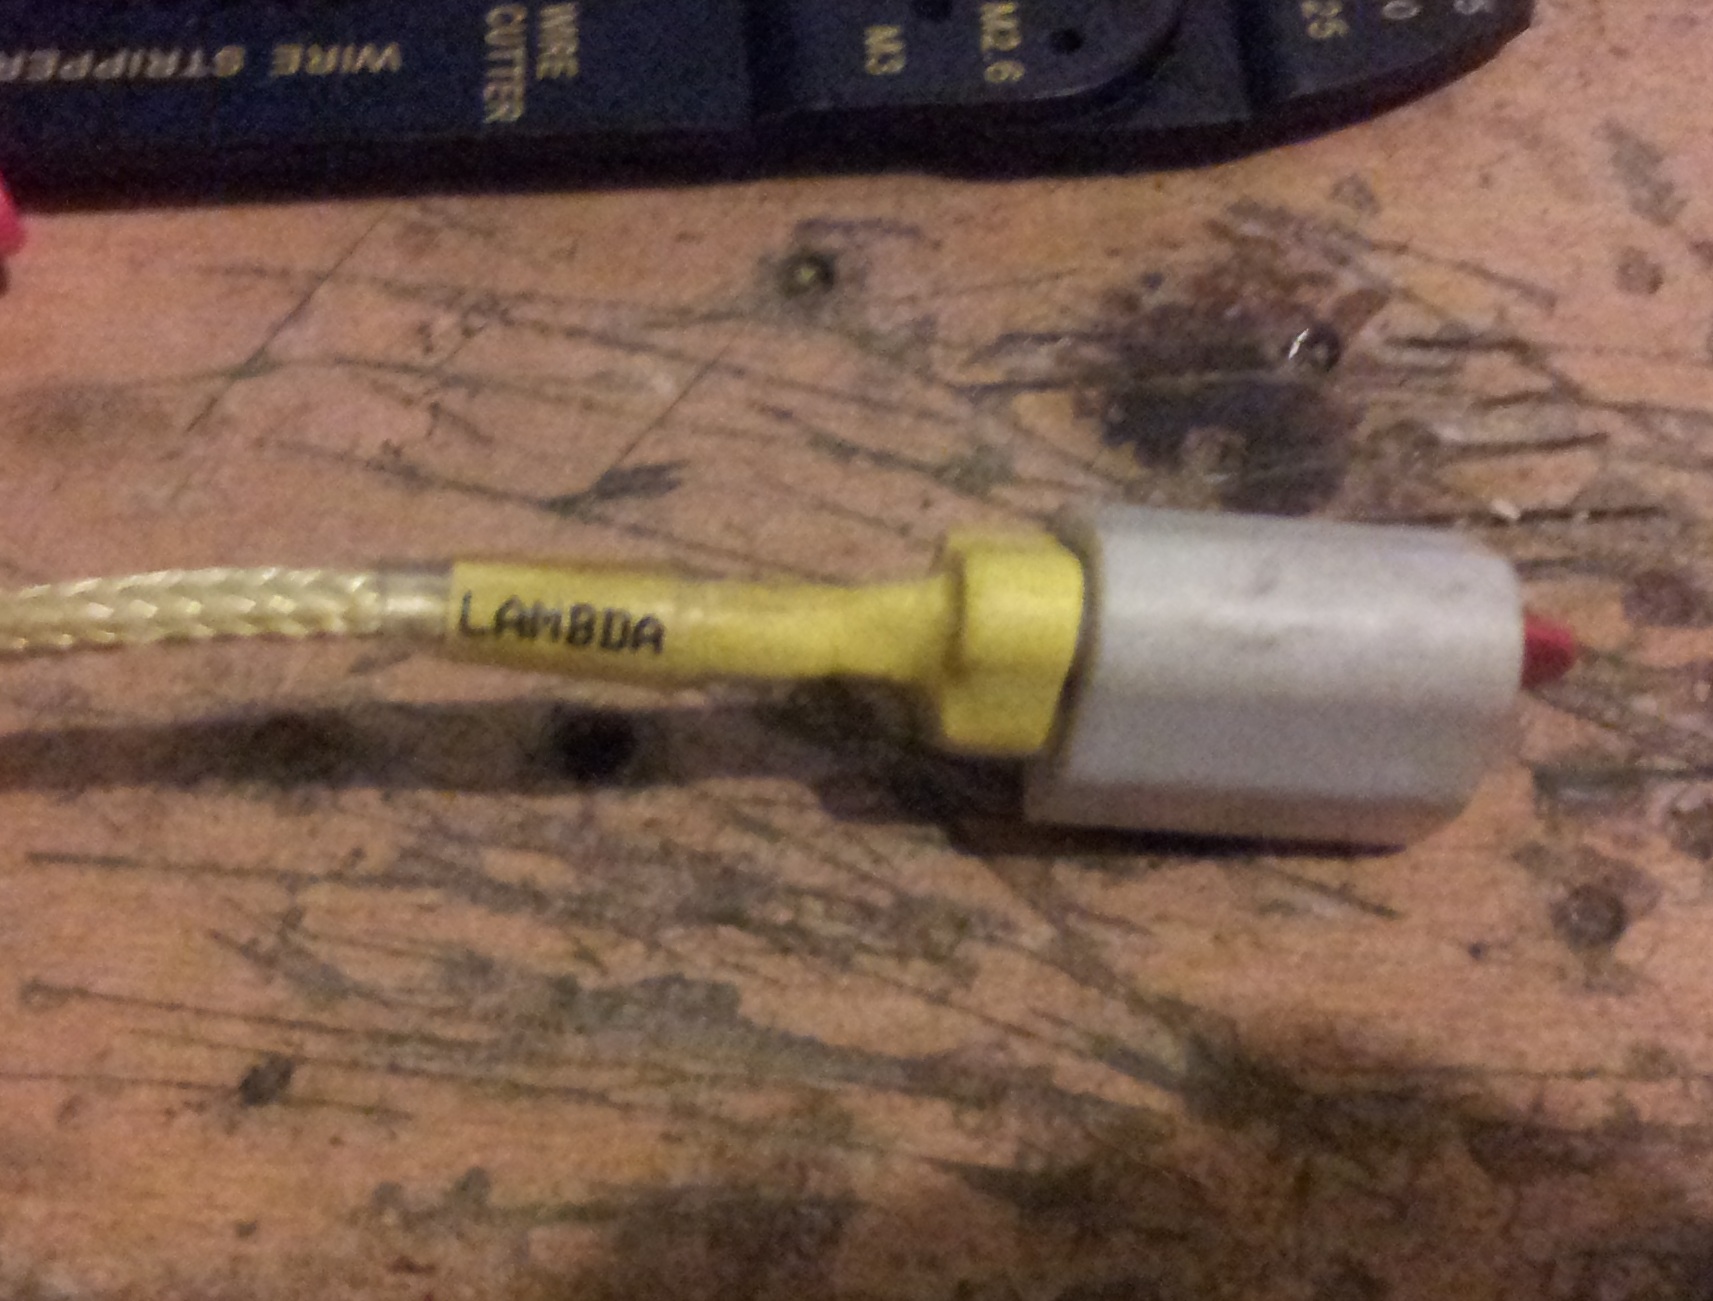
Also got the right connectors for the ford 3 pin LAMBDA connector. Couldnt find new connector housings anywhere so used new terminals and seals in a good secondhand housing. Got a white one to be different to boring black and also have fitted a blanking end cap as i dont have a lambda on the car yet but will do eventually.
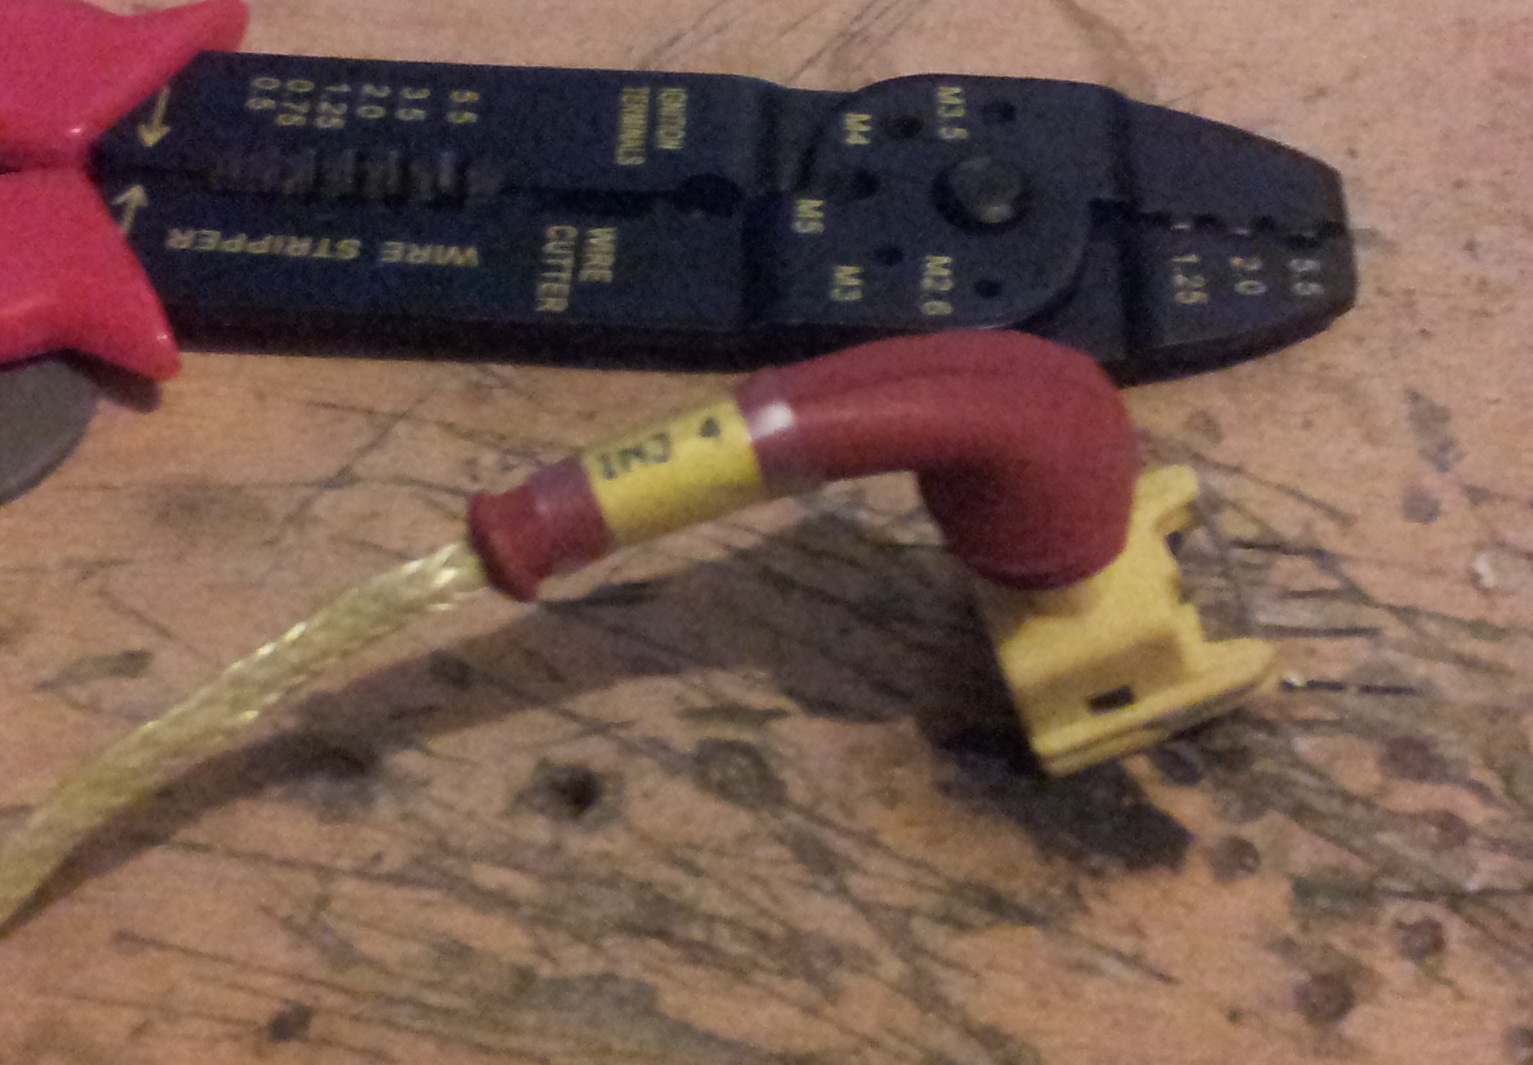
Also done one of the injector housings. Used yellow like ive seen on other looms and also right angle boots (in red!) as i got them free and again not boring black
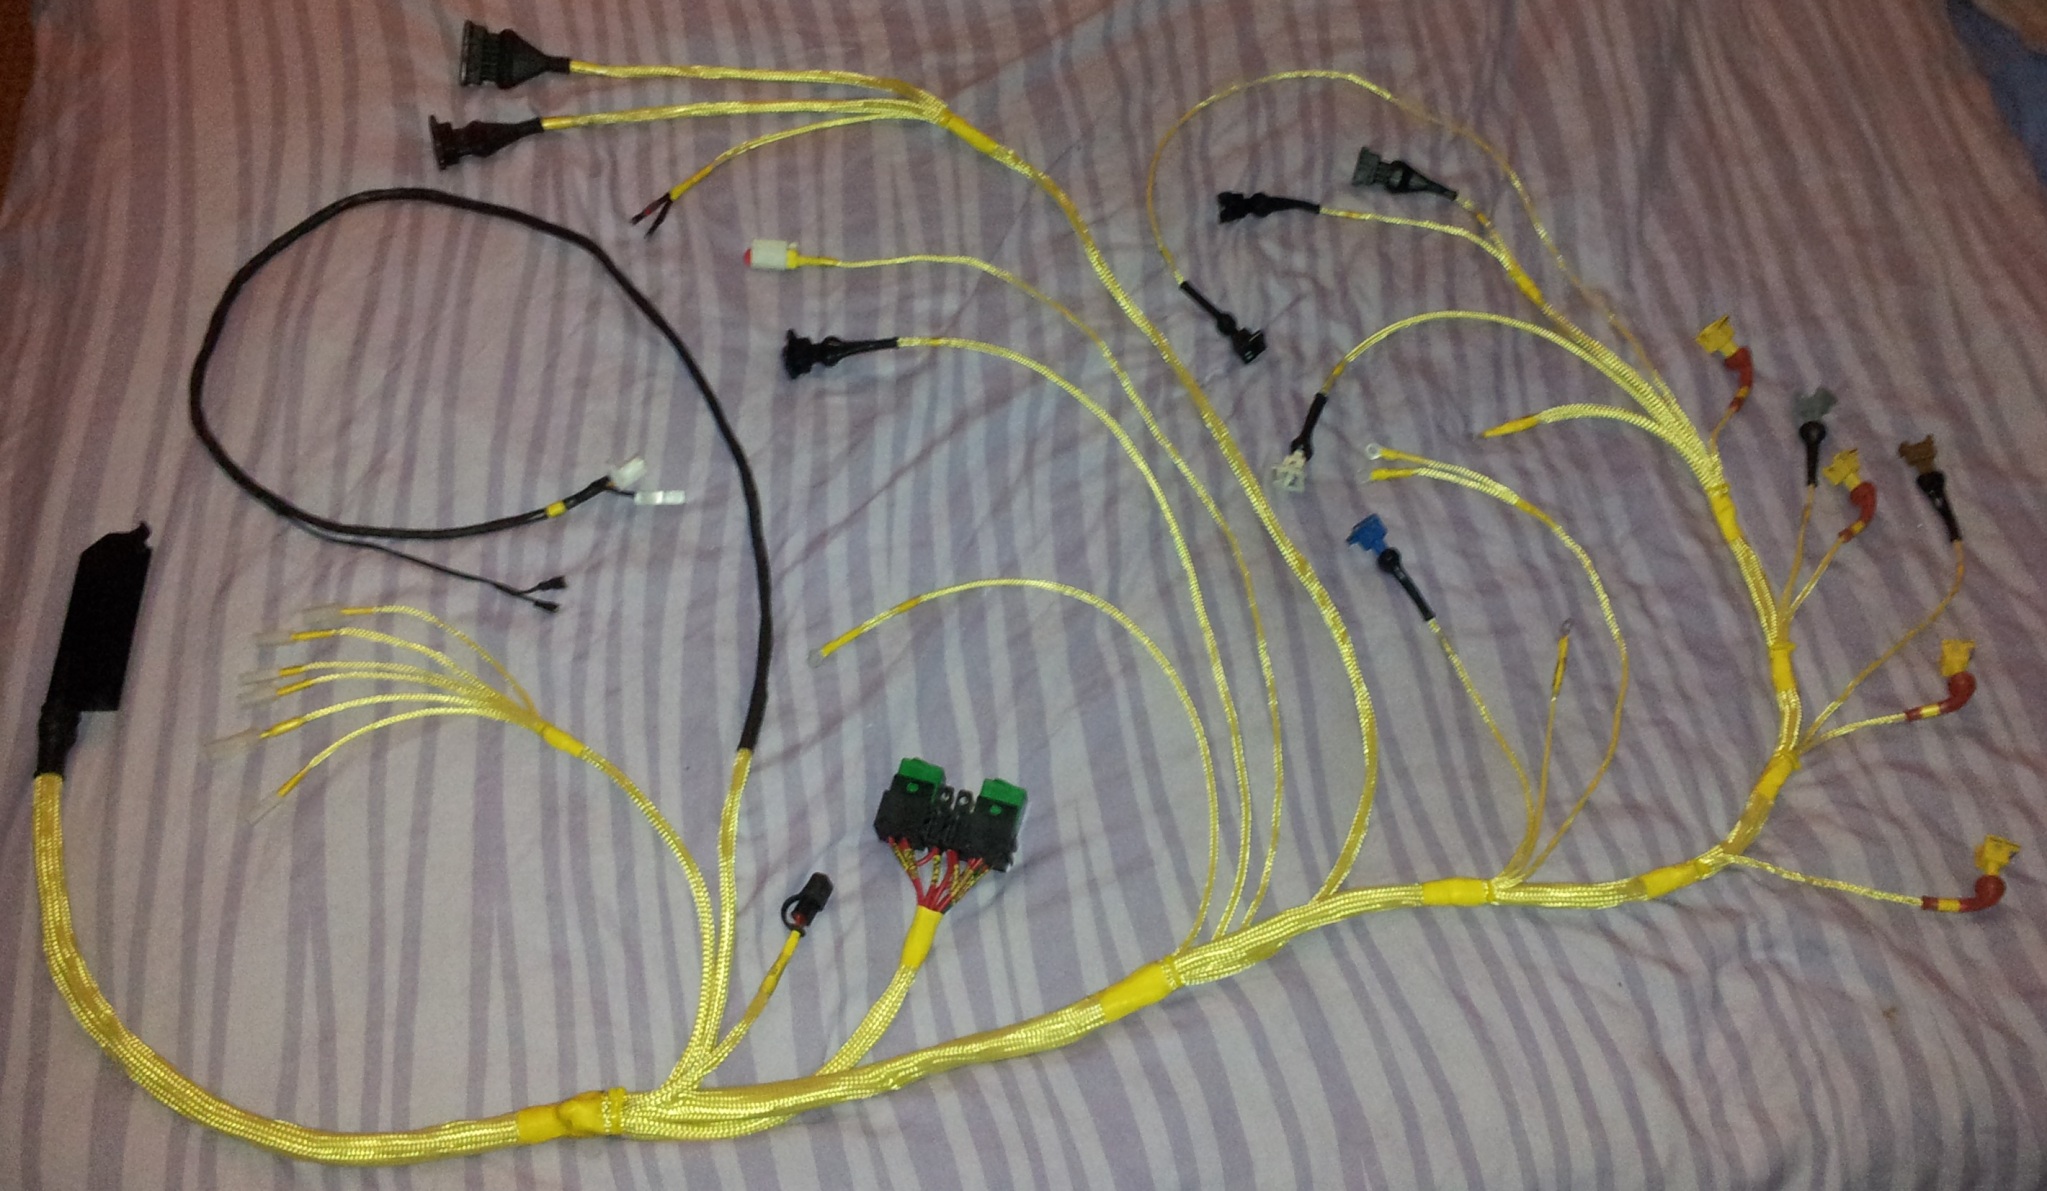
Done a bit more and it finally is beginning to look a bit like a loom now!
Getting neater as i go along and learning tricks to keep things tidy too so if i do a car loom or some small sublooms in the future they will be neater as well.
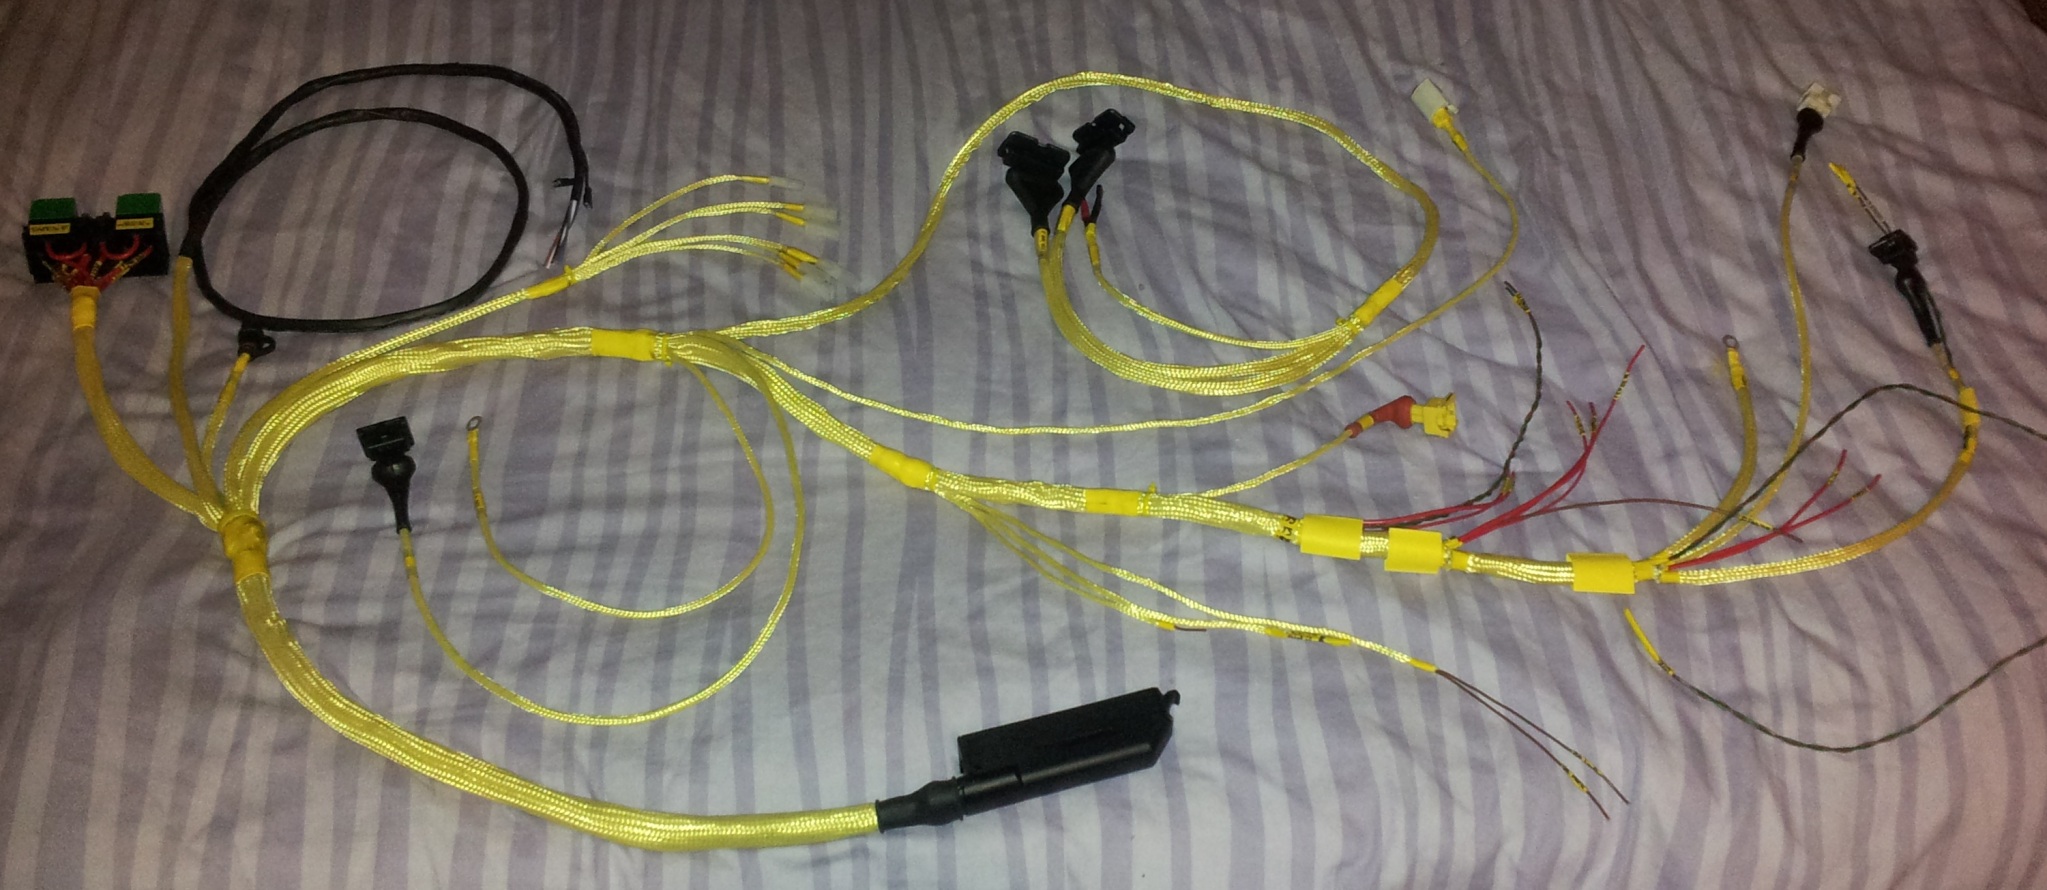
All done!
Wont be fitted for a while yet as i need to make all the other engine bay sublooms as im going for a complete front end rewire when i fit the engine loom.
Also will do a set of testing on the complete wire. Each wire has been checked its going from right pin to right connector, and also resistance checked to make sure i have good connections. next i want to again test every single wire now its assembled including a continuity check with ALL nieghbouring wires to make sure ive not damaged it some place during assembly.
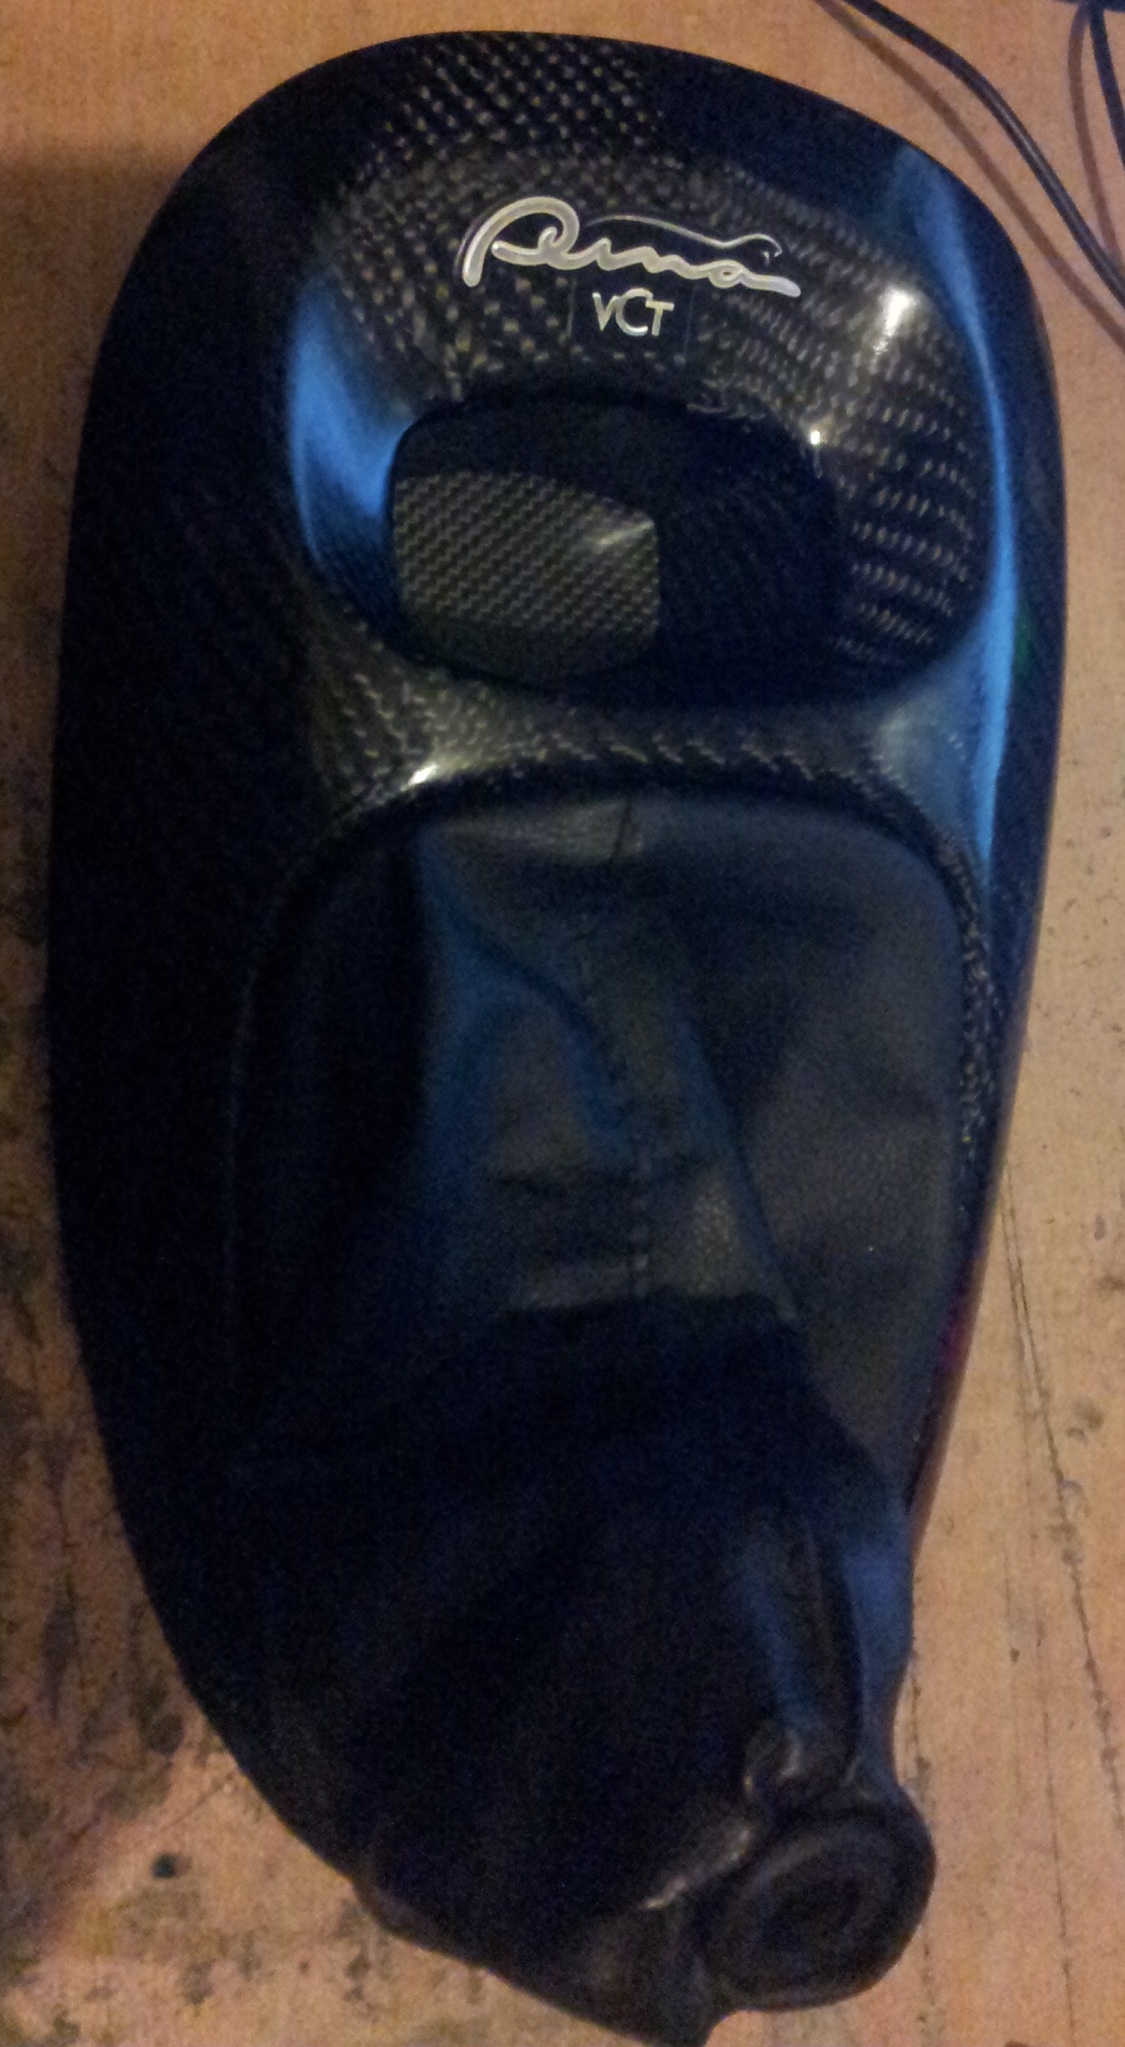
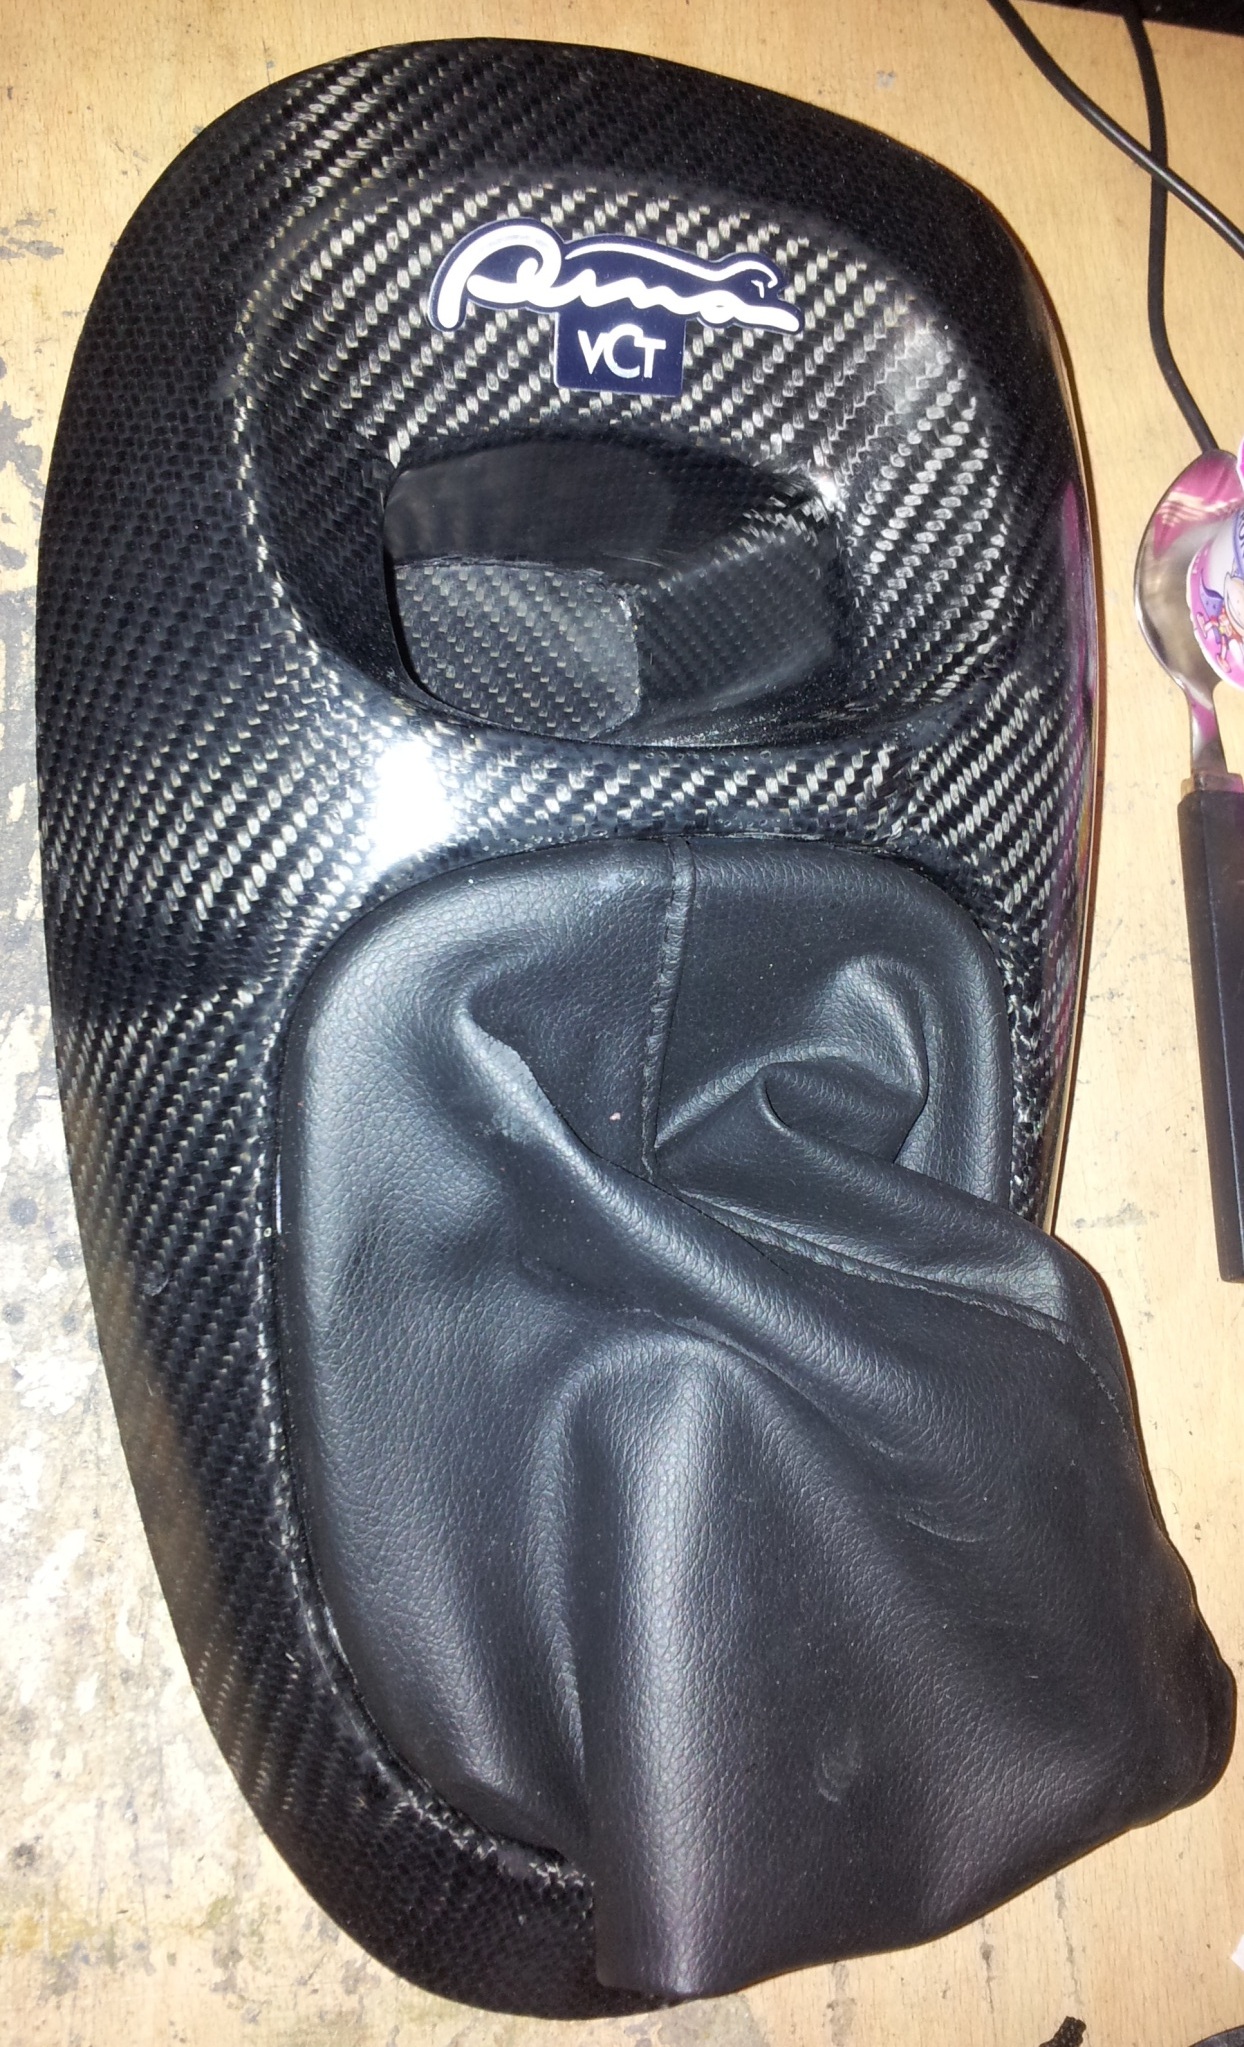
Also fitted the gaitor and puma badge to the gear surround:
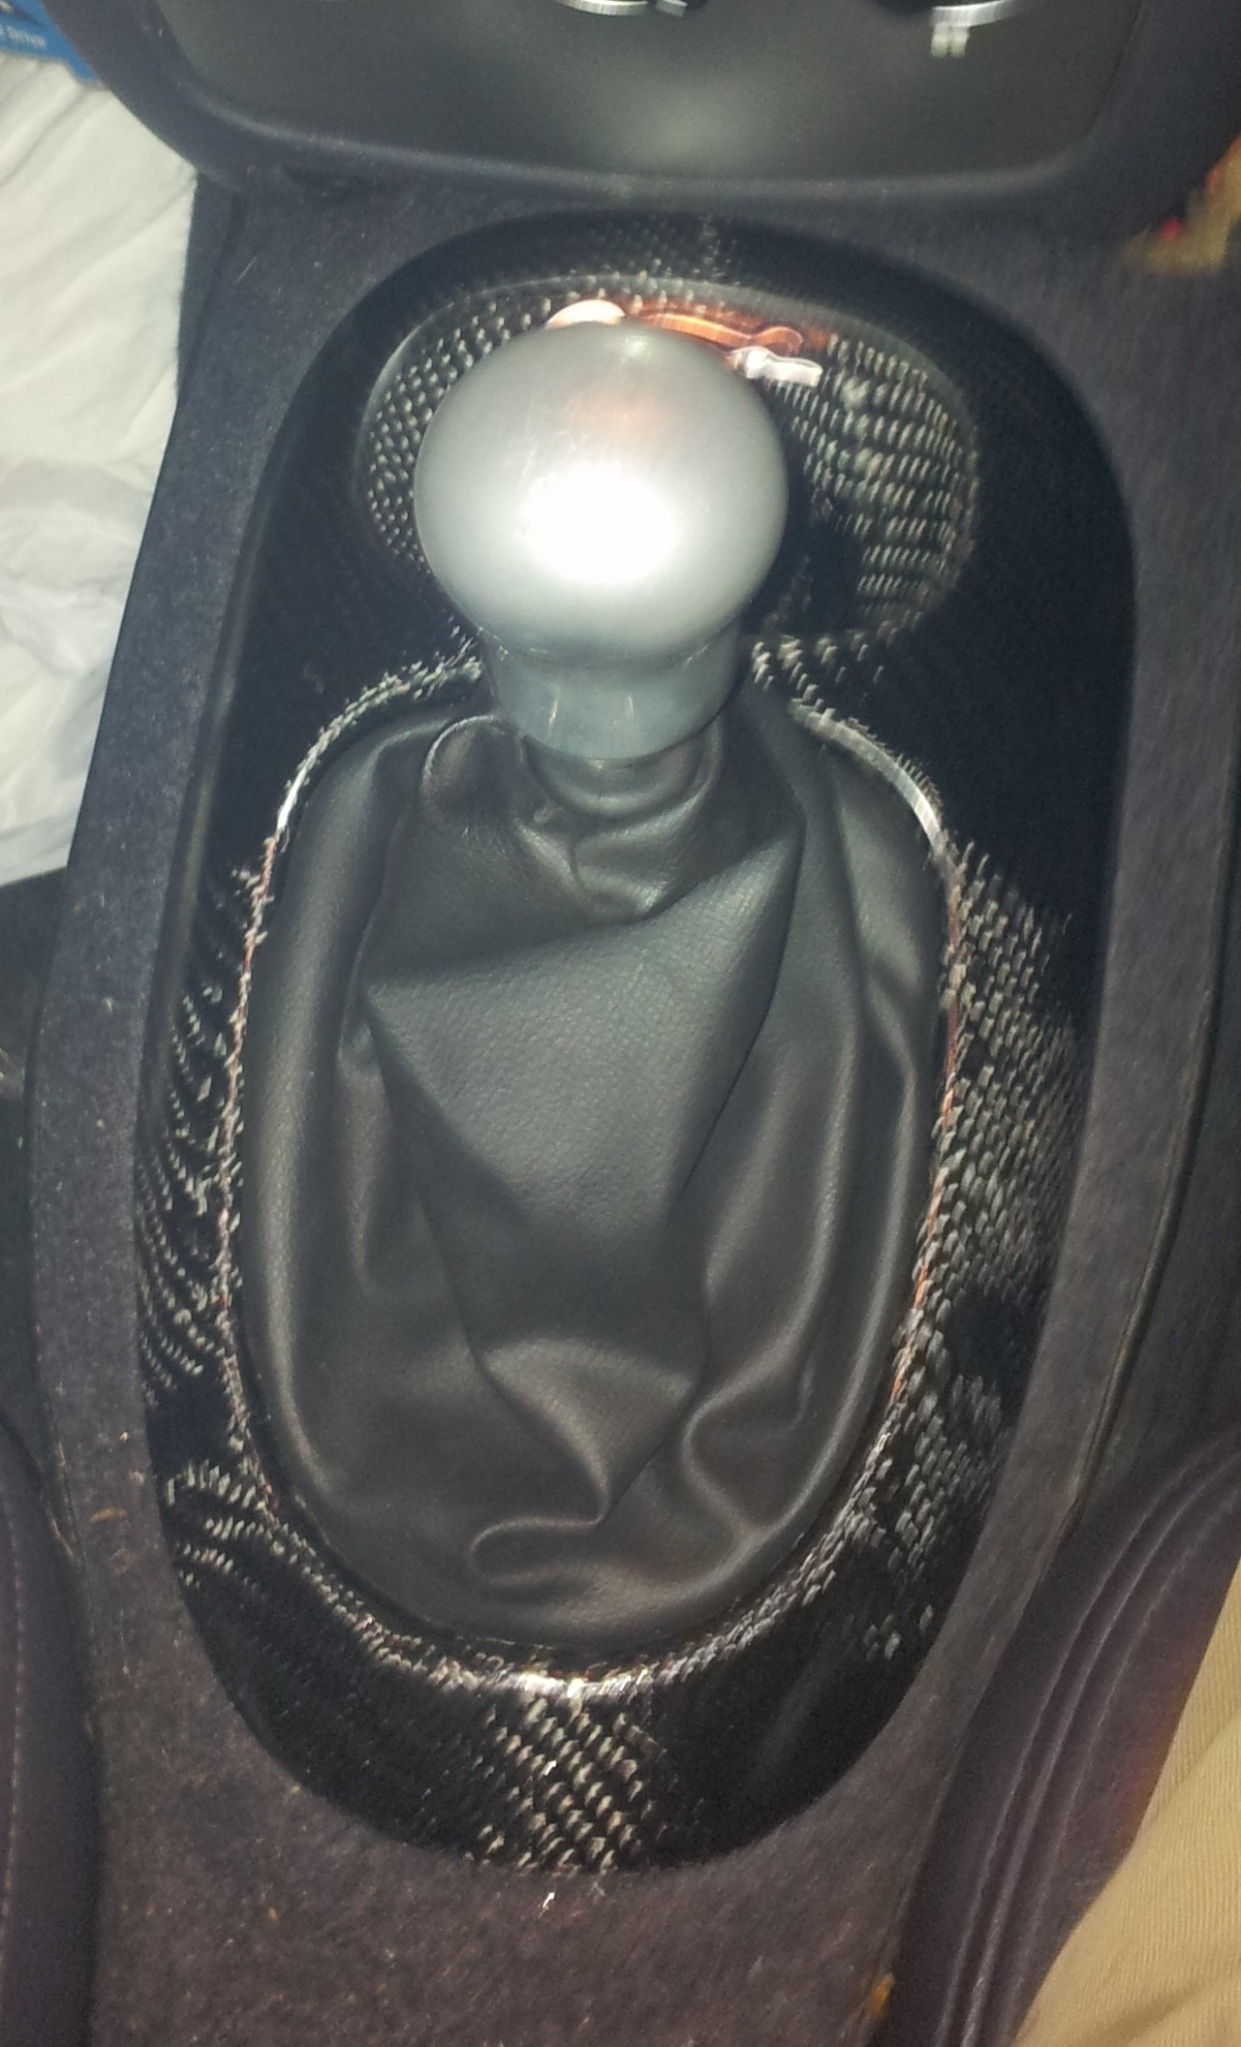
And now fitted into the car and sitting nicely flat against the carpet.
Wanted to replace my ancient sierra engine management loom for a while now so decided to get on with designing my loom. After some advice on here i have a loom design ive settled on.
This is the basic wiring diagram:
[/QUOTE]I also measured a loom up and had to design my loom plan and adjust all the distances and branch lengths for my car. here is the sketch!
Purchased all the connectors, wiring etc and then made a start on the loom. Done everything that goes in or near the ECU plug. In essence ive done the easy bit
Then carried on down the loom adding the braid and heat shrink as i come to each break out.
I definitely prefer the kevlar braiding to the plastic braiding. More flexible and seems to be stronger gripped at the ends when its secured.
With all the braiding now at the end of the main loom, I started back at the beginning now on all the breakouts.
Completed my first breakout:
its nice to finally start putting on connectors meaning bits of the loom look actually finished.
both ignition amps done now. coil/coilpack wire done too with the third wire for coilpack hidden under heatshrink so when i convert i just take off the coil connectors, crimp on the coilpack terminals and connector and job done.
Also done the MAP connector as its big enough for the heat shrink ive got while i wait for the smaller stuff.
also got some terminals ive been waiting for. The terminals were from a BMW but fit the ford diagnostic plug connector housing i had spare, so now i have the proper connector on my new loom.
Also got the right connectors for the ford 3 pin LAMBDA connector. Couldnt find new connector housings anywhere so used new terminals and seals in a good secondhand housing. Got a white one to be different to boring black
and also have fitted a blanking end cap as i dont have a lambda on the car yet but will do eventually.Also done one of the injector housings. Used yellow like ive seen on other looms and also right angle boots (in red!) as i got them free and again not boring black
Done a bit more and it finally is beginning to look a bit like a loom now!
Getting neater as i go along and learning tricks to keep things tidy too so if i do a car loom or some small sublooms in the future they will be neater as well.
All done!
Wont be fitted for a while yet as i need to make all the other engine bay sublooms as im going for a complete front end rewire when i fit the engine loom.
Also will do a set of testing on the complete wire. Each wire has been checked its going from right pin to right connector, and also resistance checked to make sure i have good connections. next i want to again test every single wire now its assembled including a continuity check with ALL nieghbouring wires to make sure ive not damaged it some place during assembly.
Also fitted the gaitor and puma badge to the gear surround:
And now fitted into the car and sitting nicely flat against the carpet.
 01-11-2012, 07:13 PM
#404
Lucifer II - 666
That's an awsome loom mate! well done.
 04-11-2012, 06:27 PM
#407
15000

Join Date: Jul 2010
Location: southend-on-sea
Posts: 43
Likes: 0
Received 0 Likes
on
0 Posts
25-12-2012, 11:19 PM
#408
a christmas day update
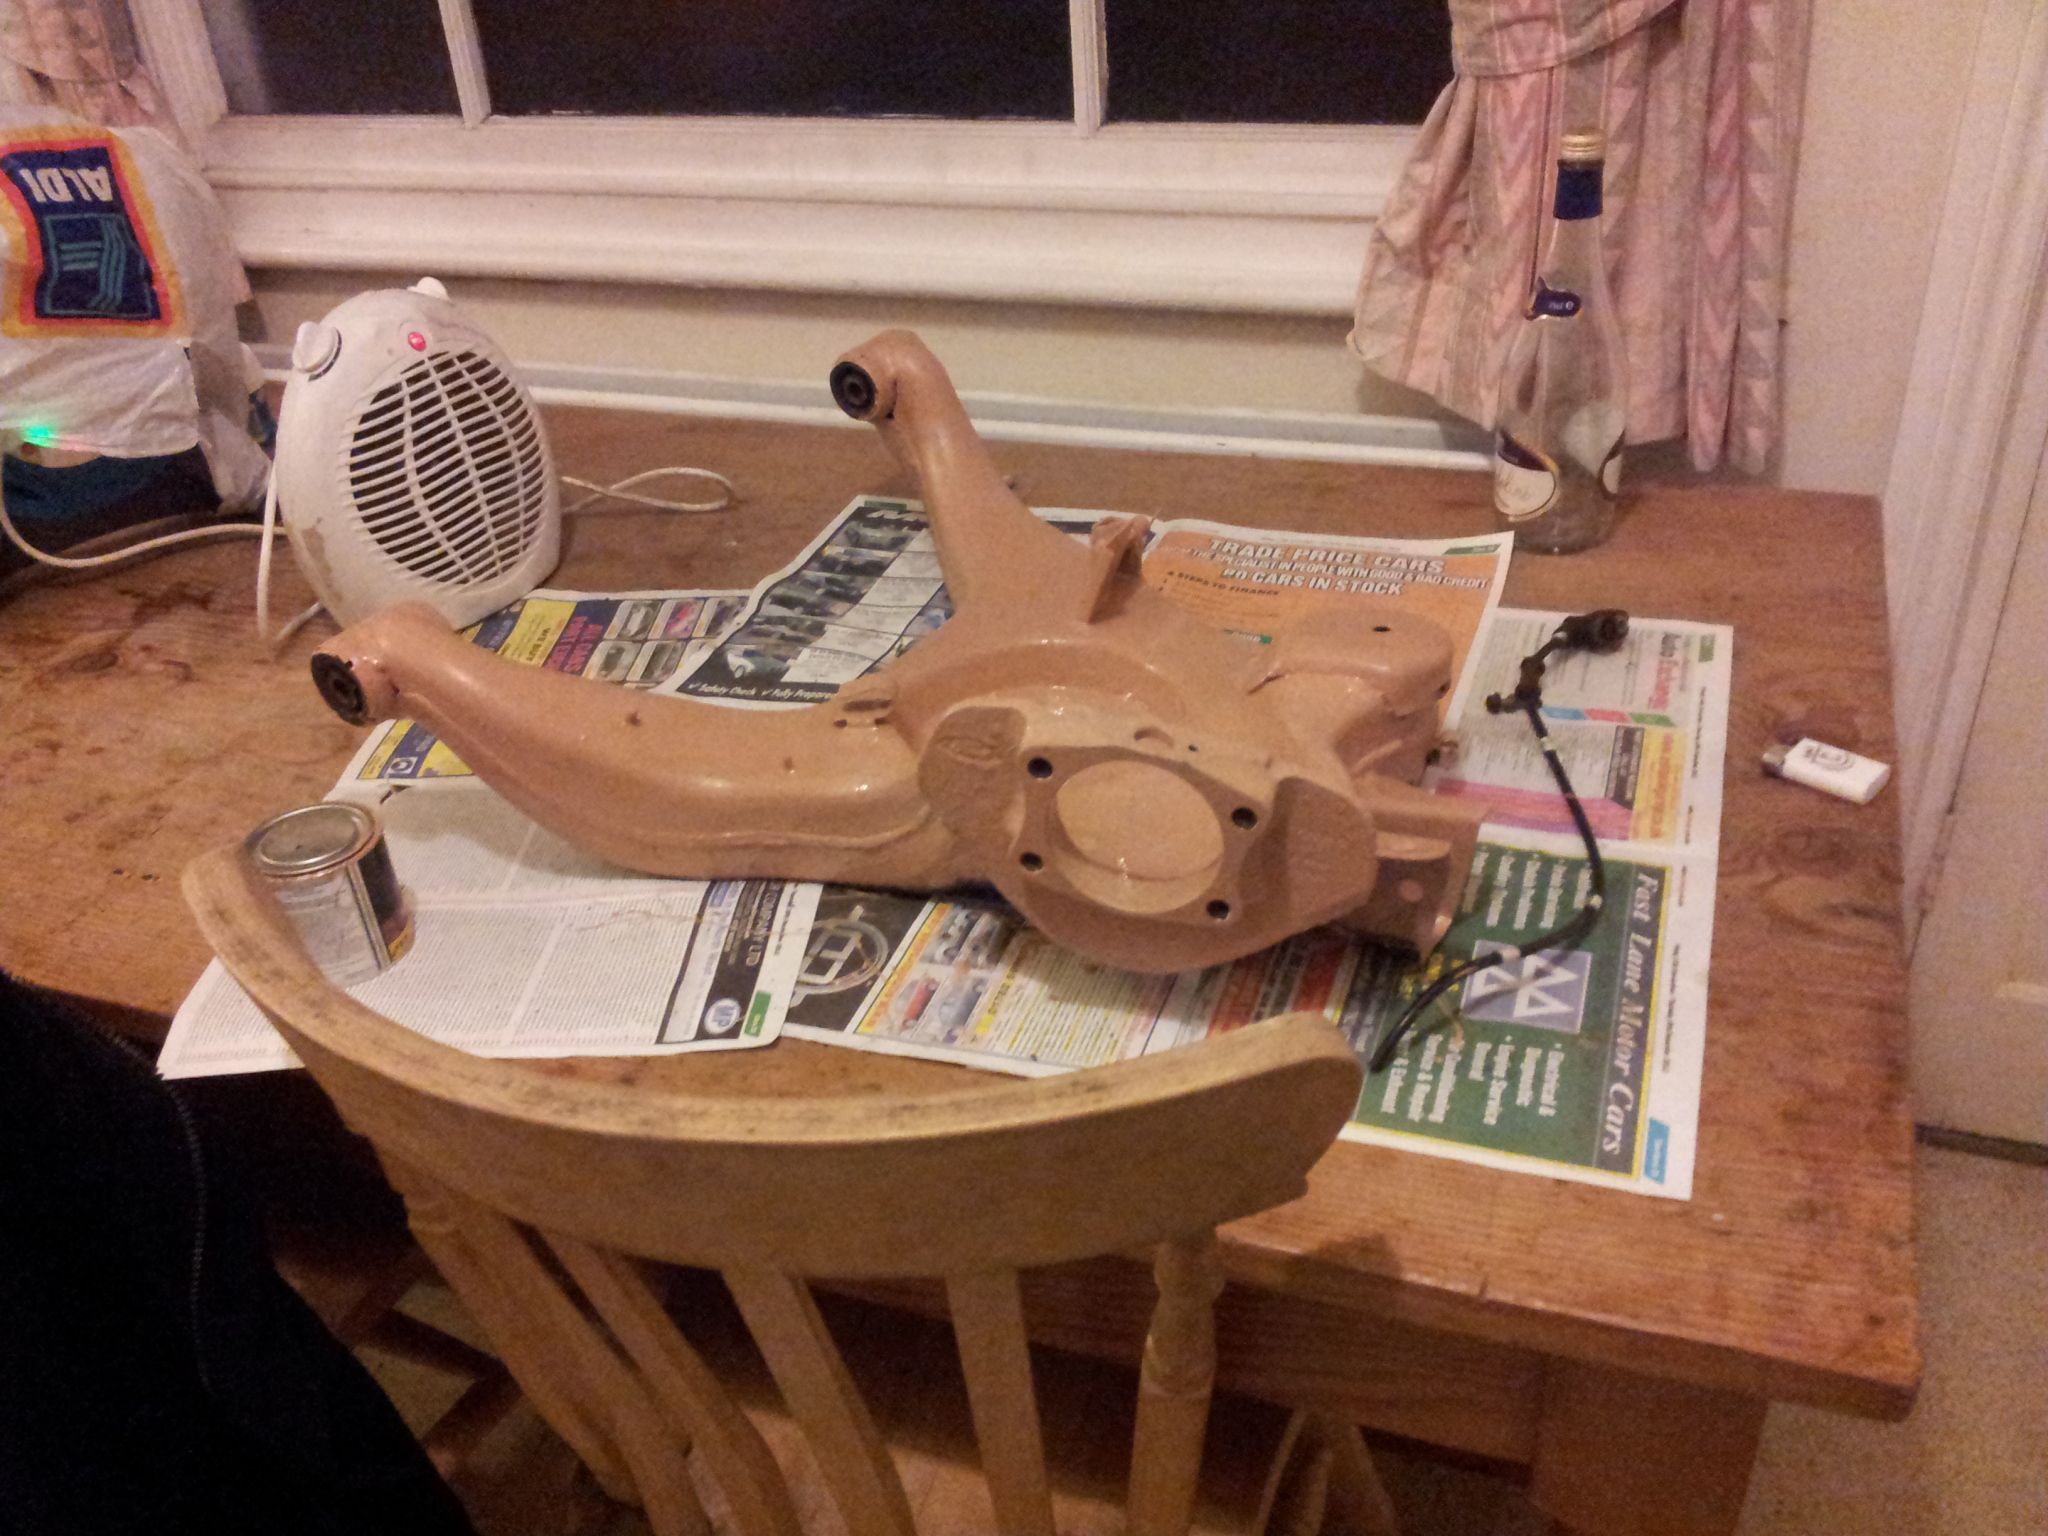
finally got hold of the bits i want from a scorpio rear beam, namely driveshafts and arms. I want these to widen the rear track by 20mm each side as it means i can use matching offset wheels front and rear rather than massive offset on the rear just to fill the arches.
Started with the arms. Stuck them outside and used a load of degreaser on them:

then spent ages cleaning them up and attacking them with a wire brush to get all the rust off. Then ive given them a lick of anti-rust primer.
Just need to dry weather so i can paint them properly.
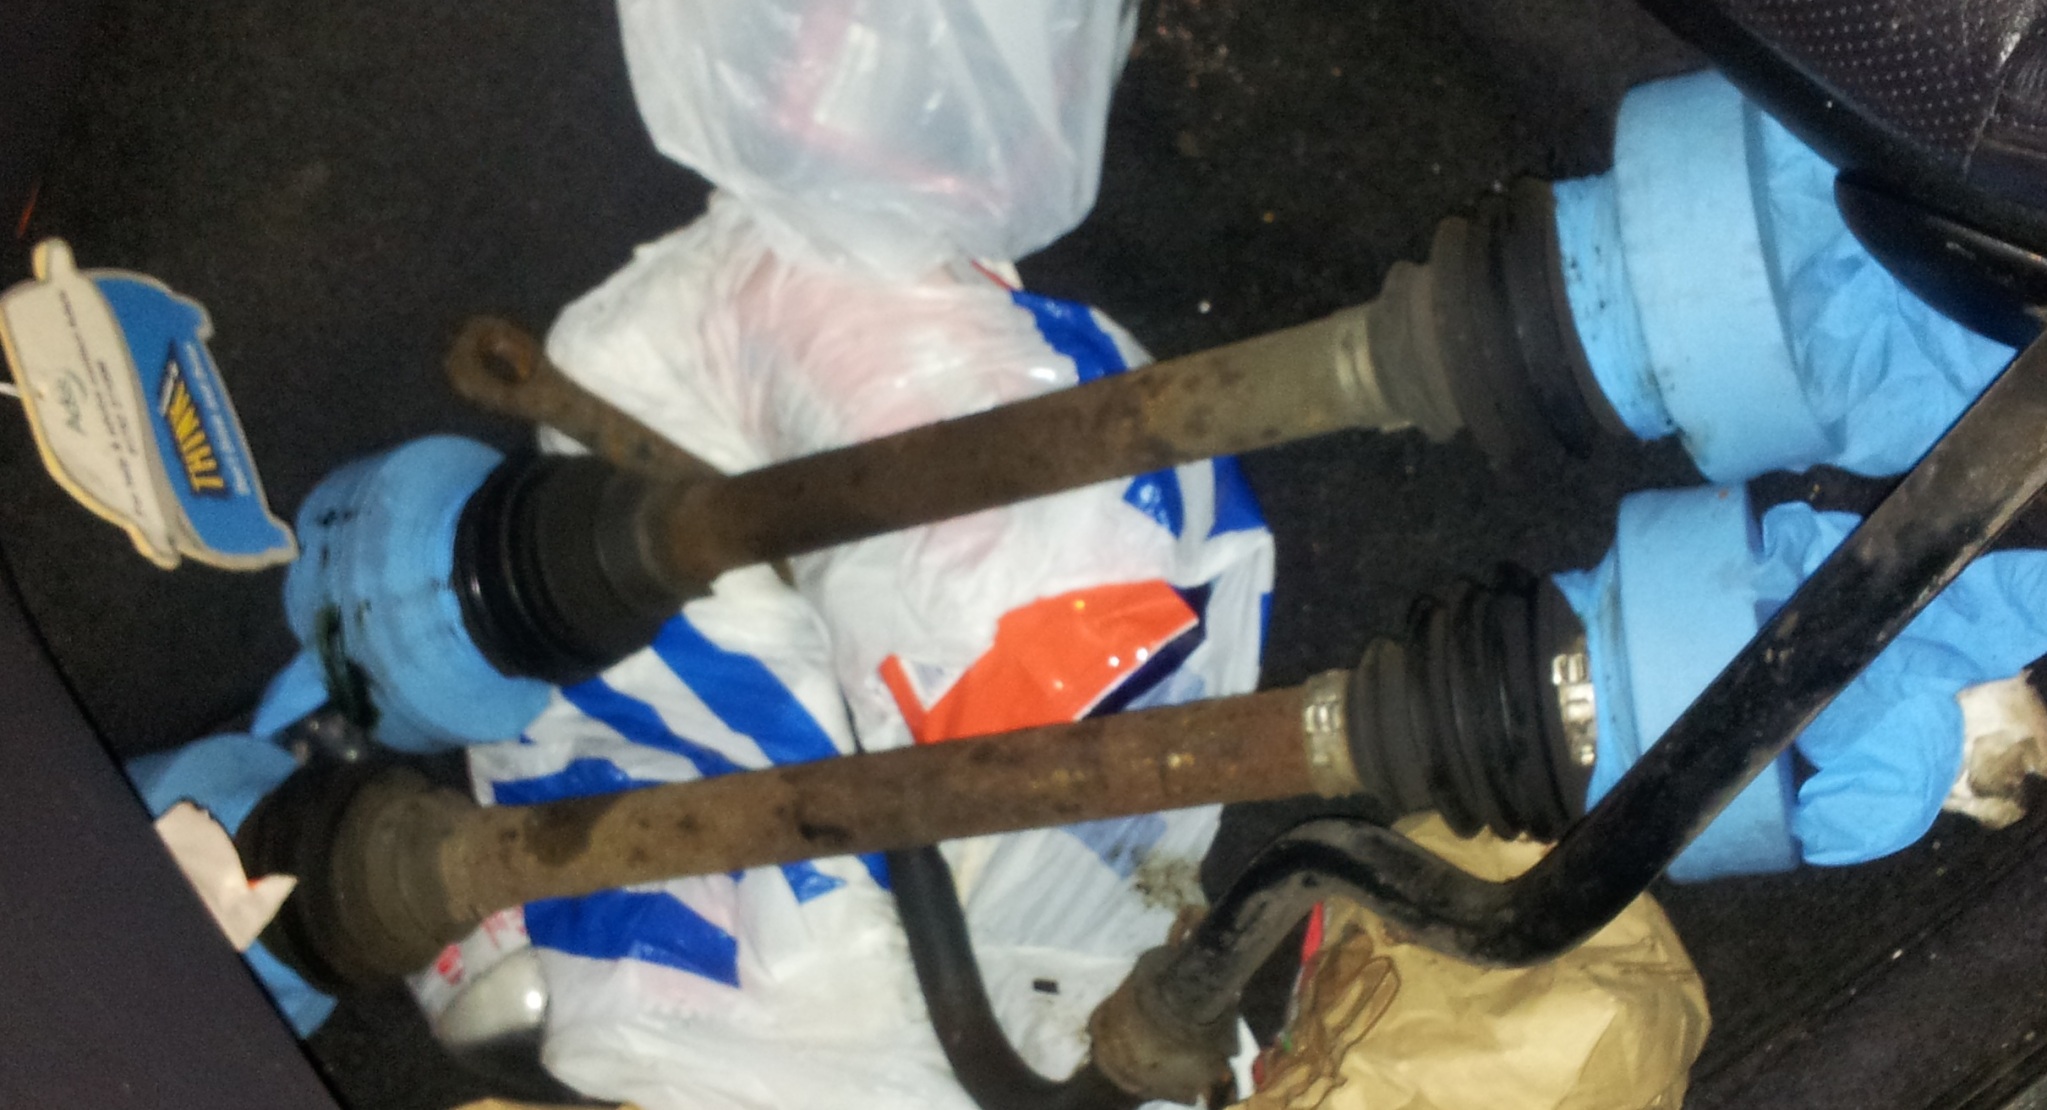
Got the drive shafts:
Just waiting for some concentrated acid to dip them in to remove all the rust. They are just too big for the sandblaster i have access to sadly.
I seperated the stub shafts off as they can be blasted. So into a bucket:
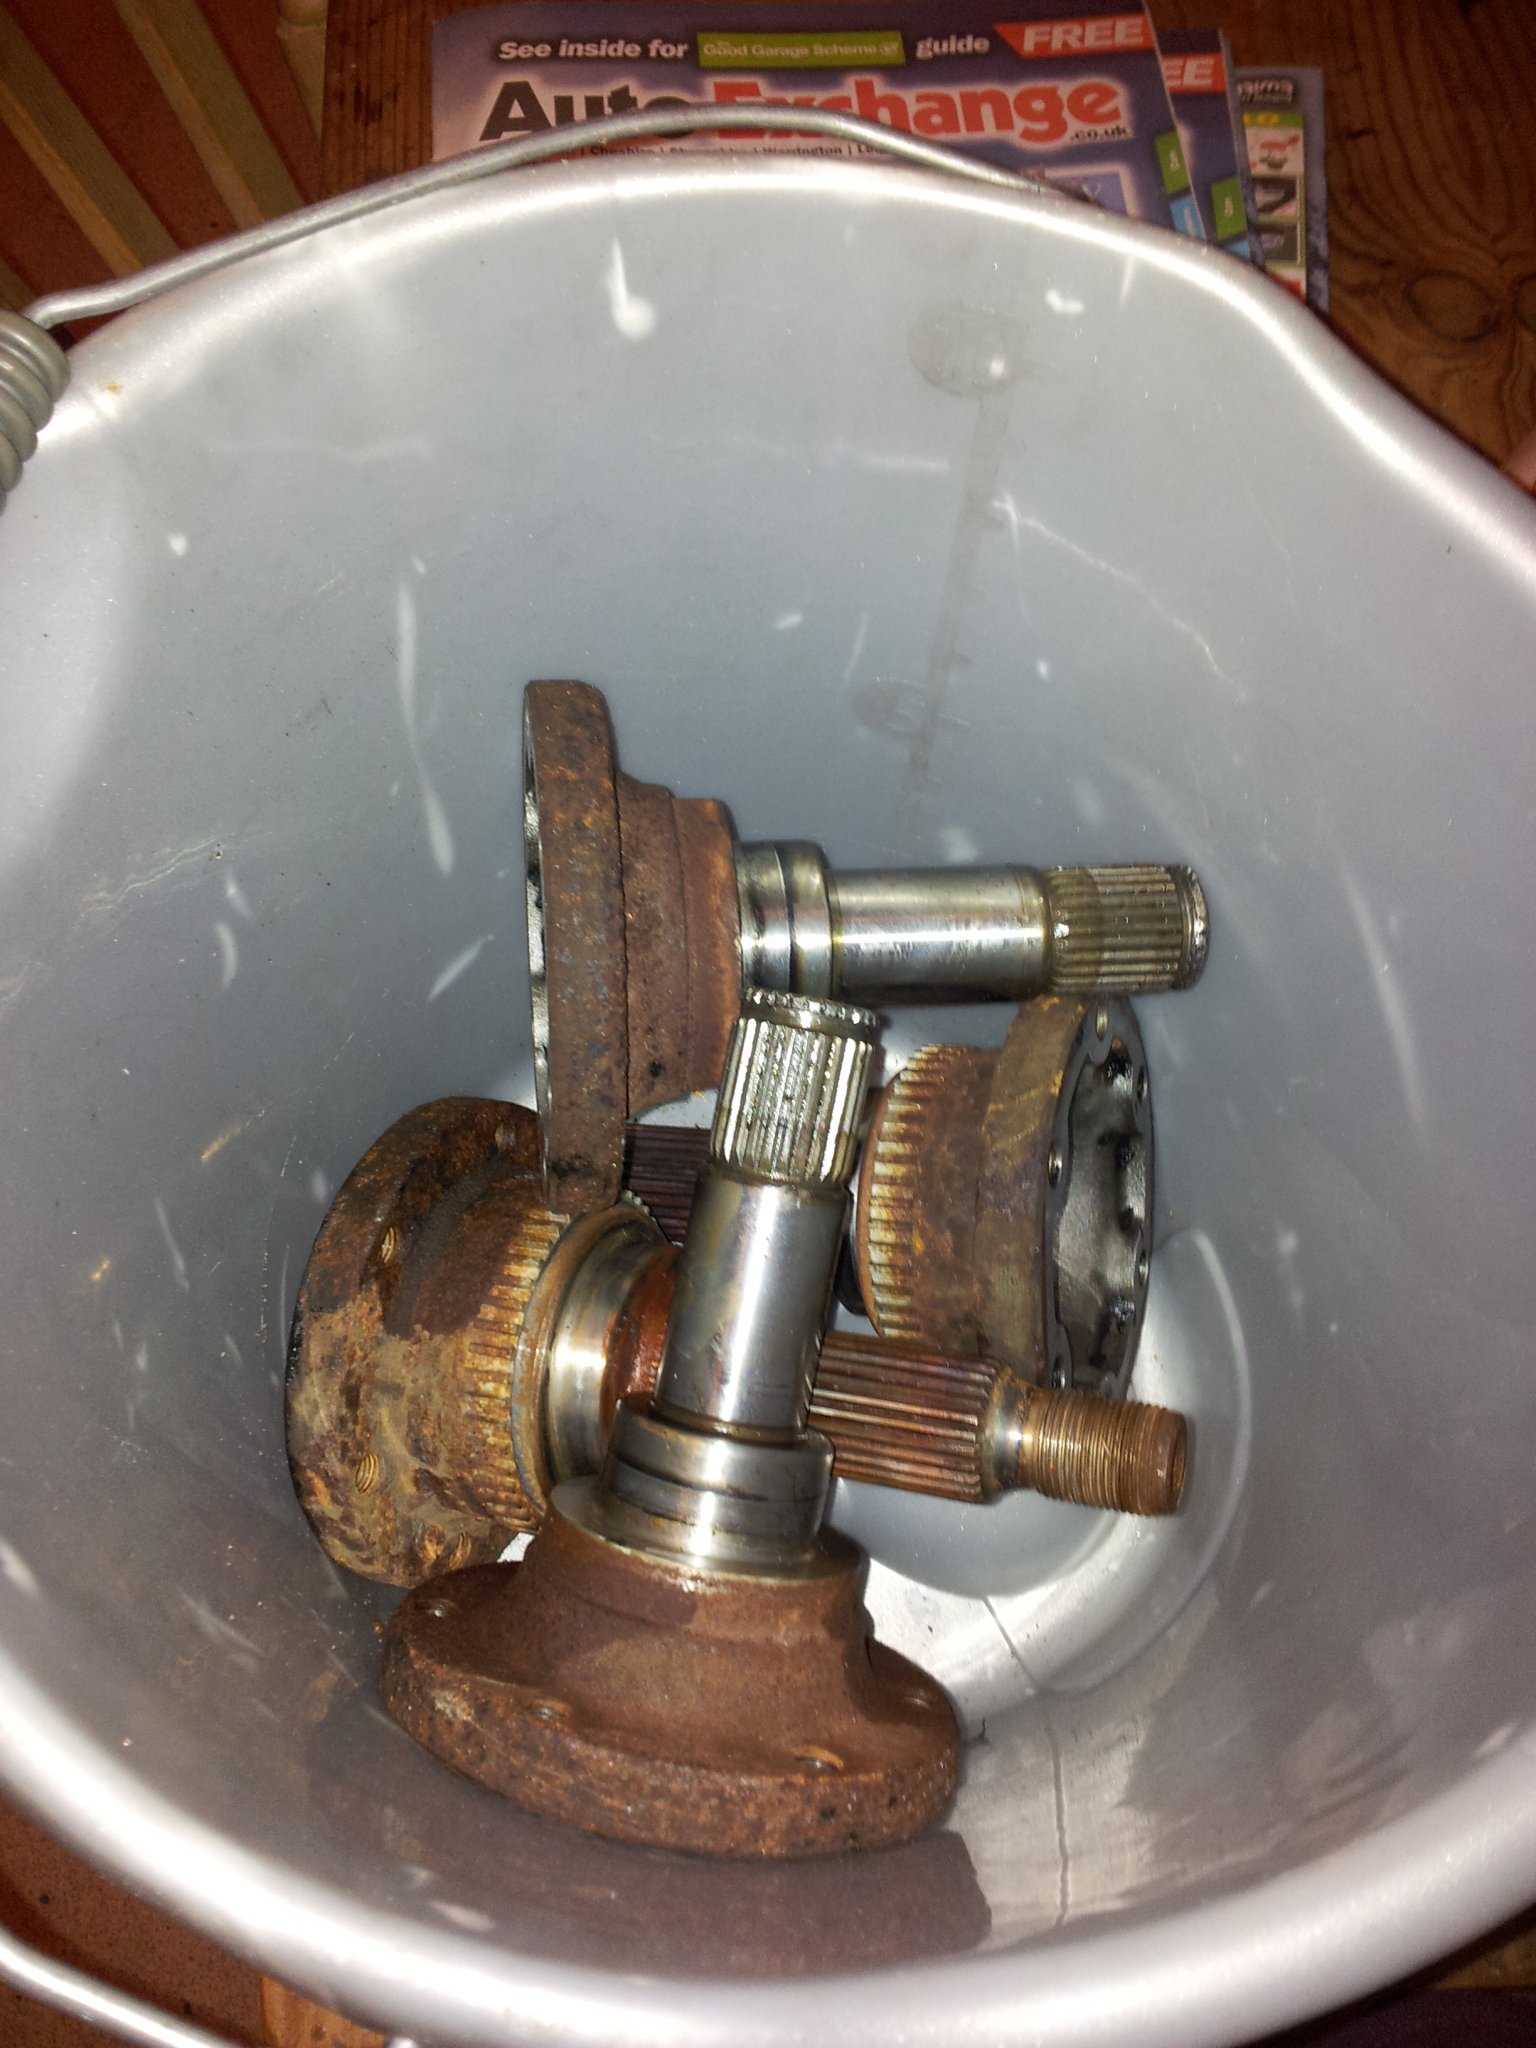
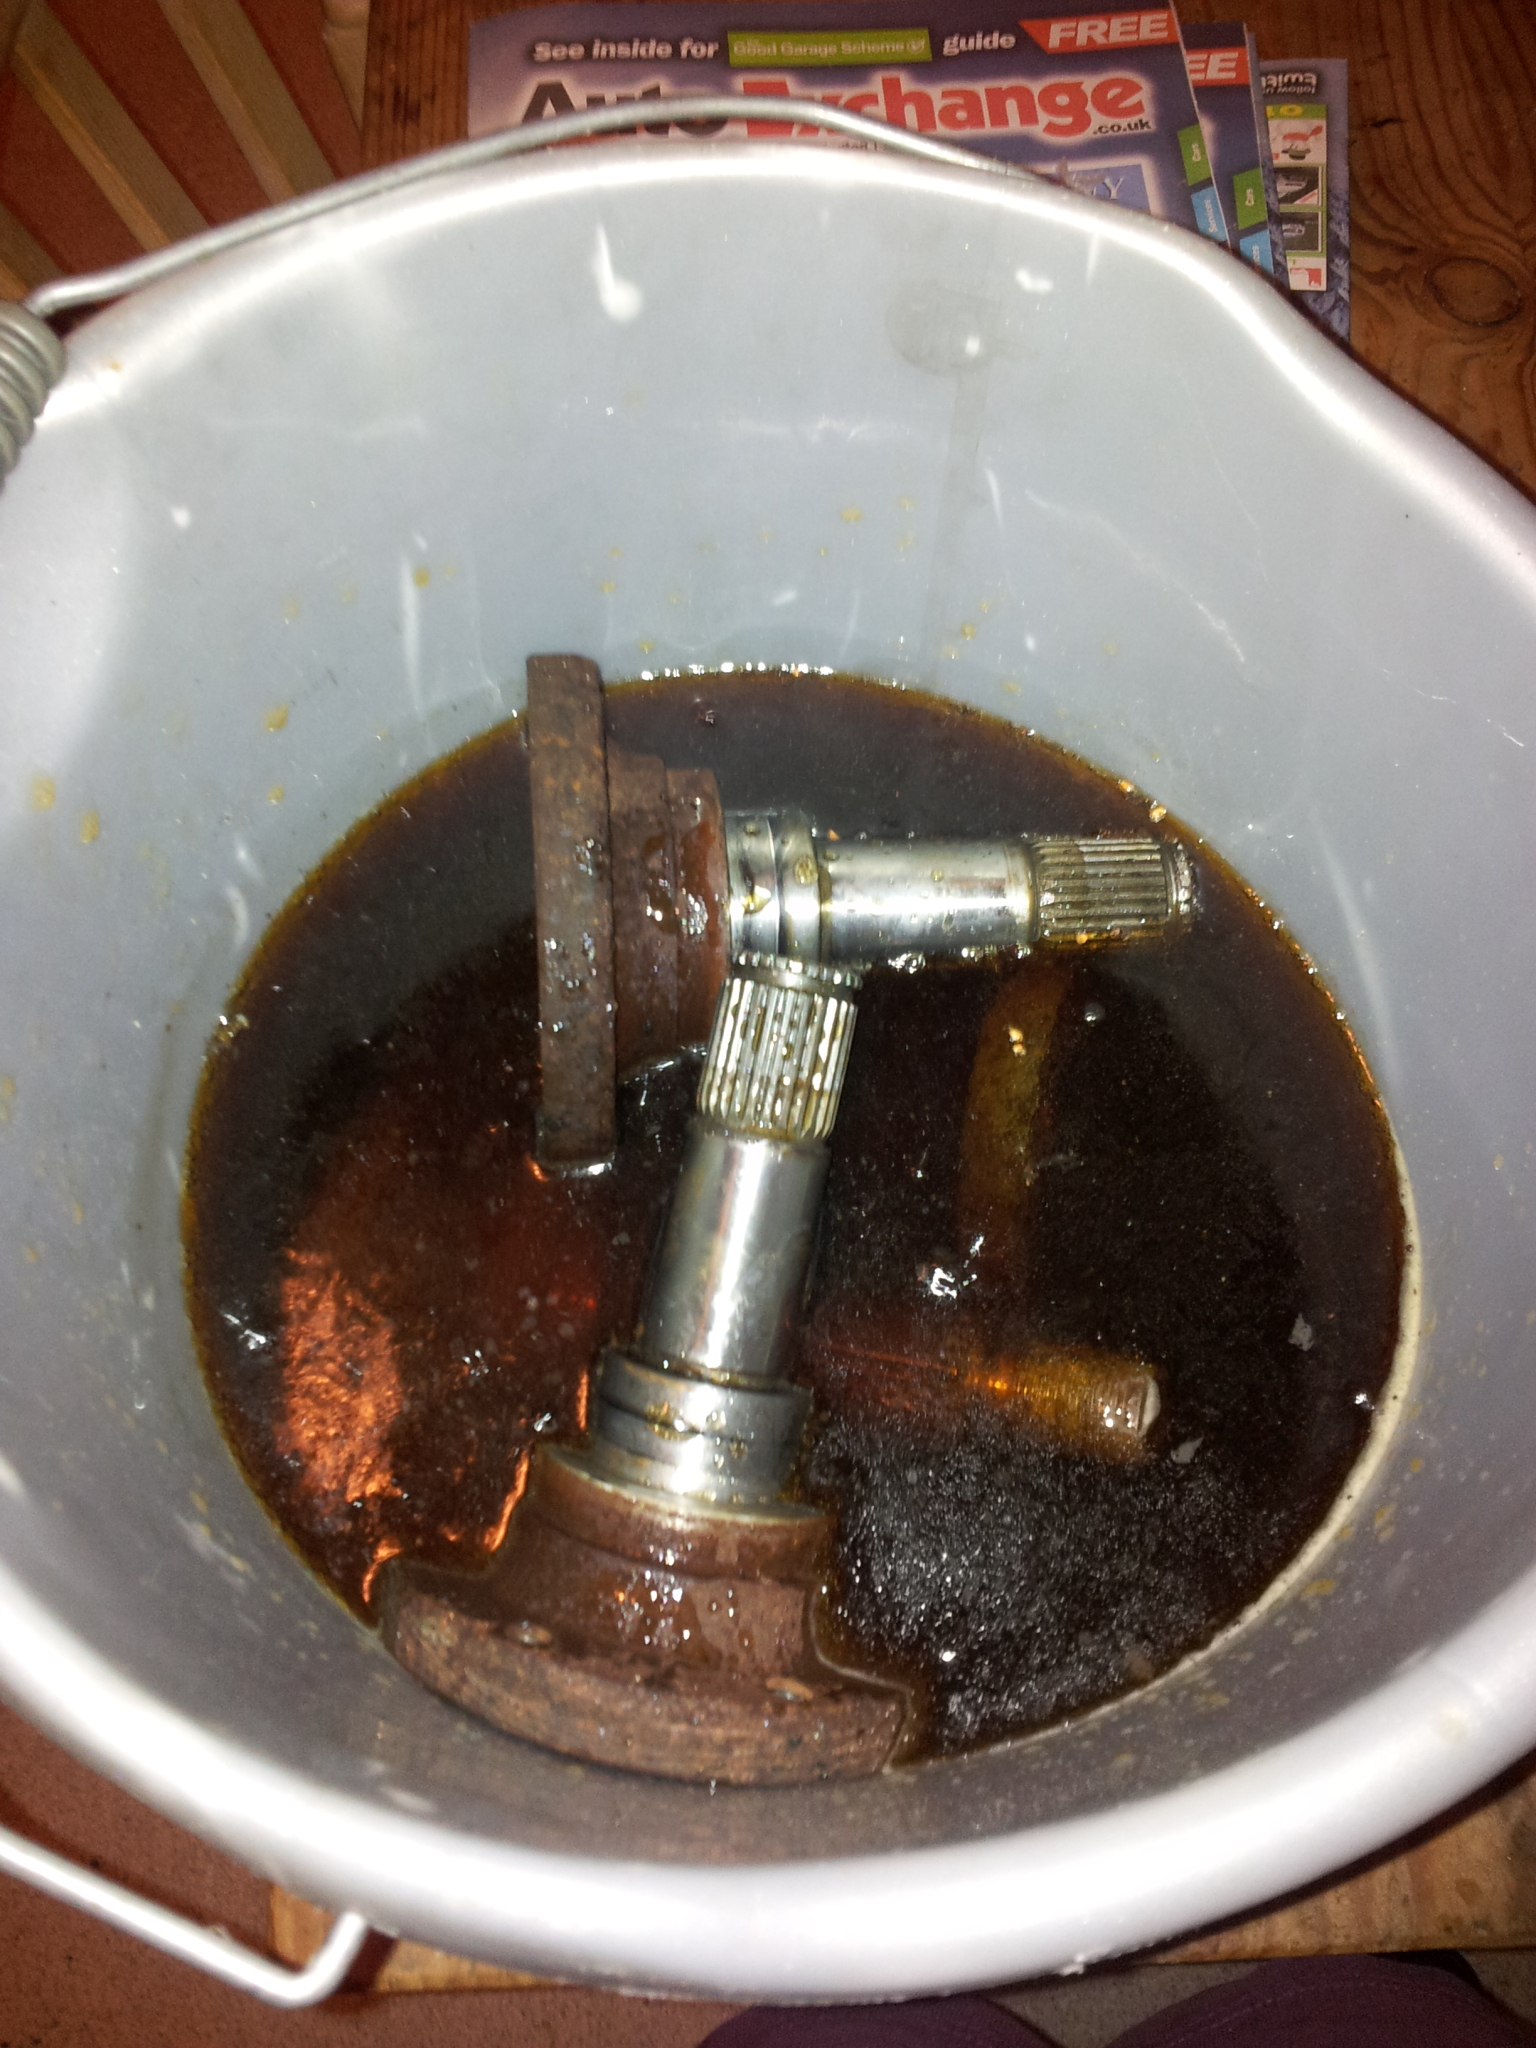
And fill it with coke for a few nights so theres no greases or oils left on them, less sand gets ruined with grease the better.
then off to the blasting cabinet. A before and after comparison photo:
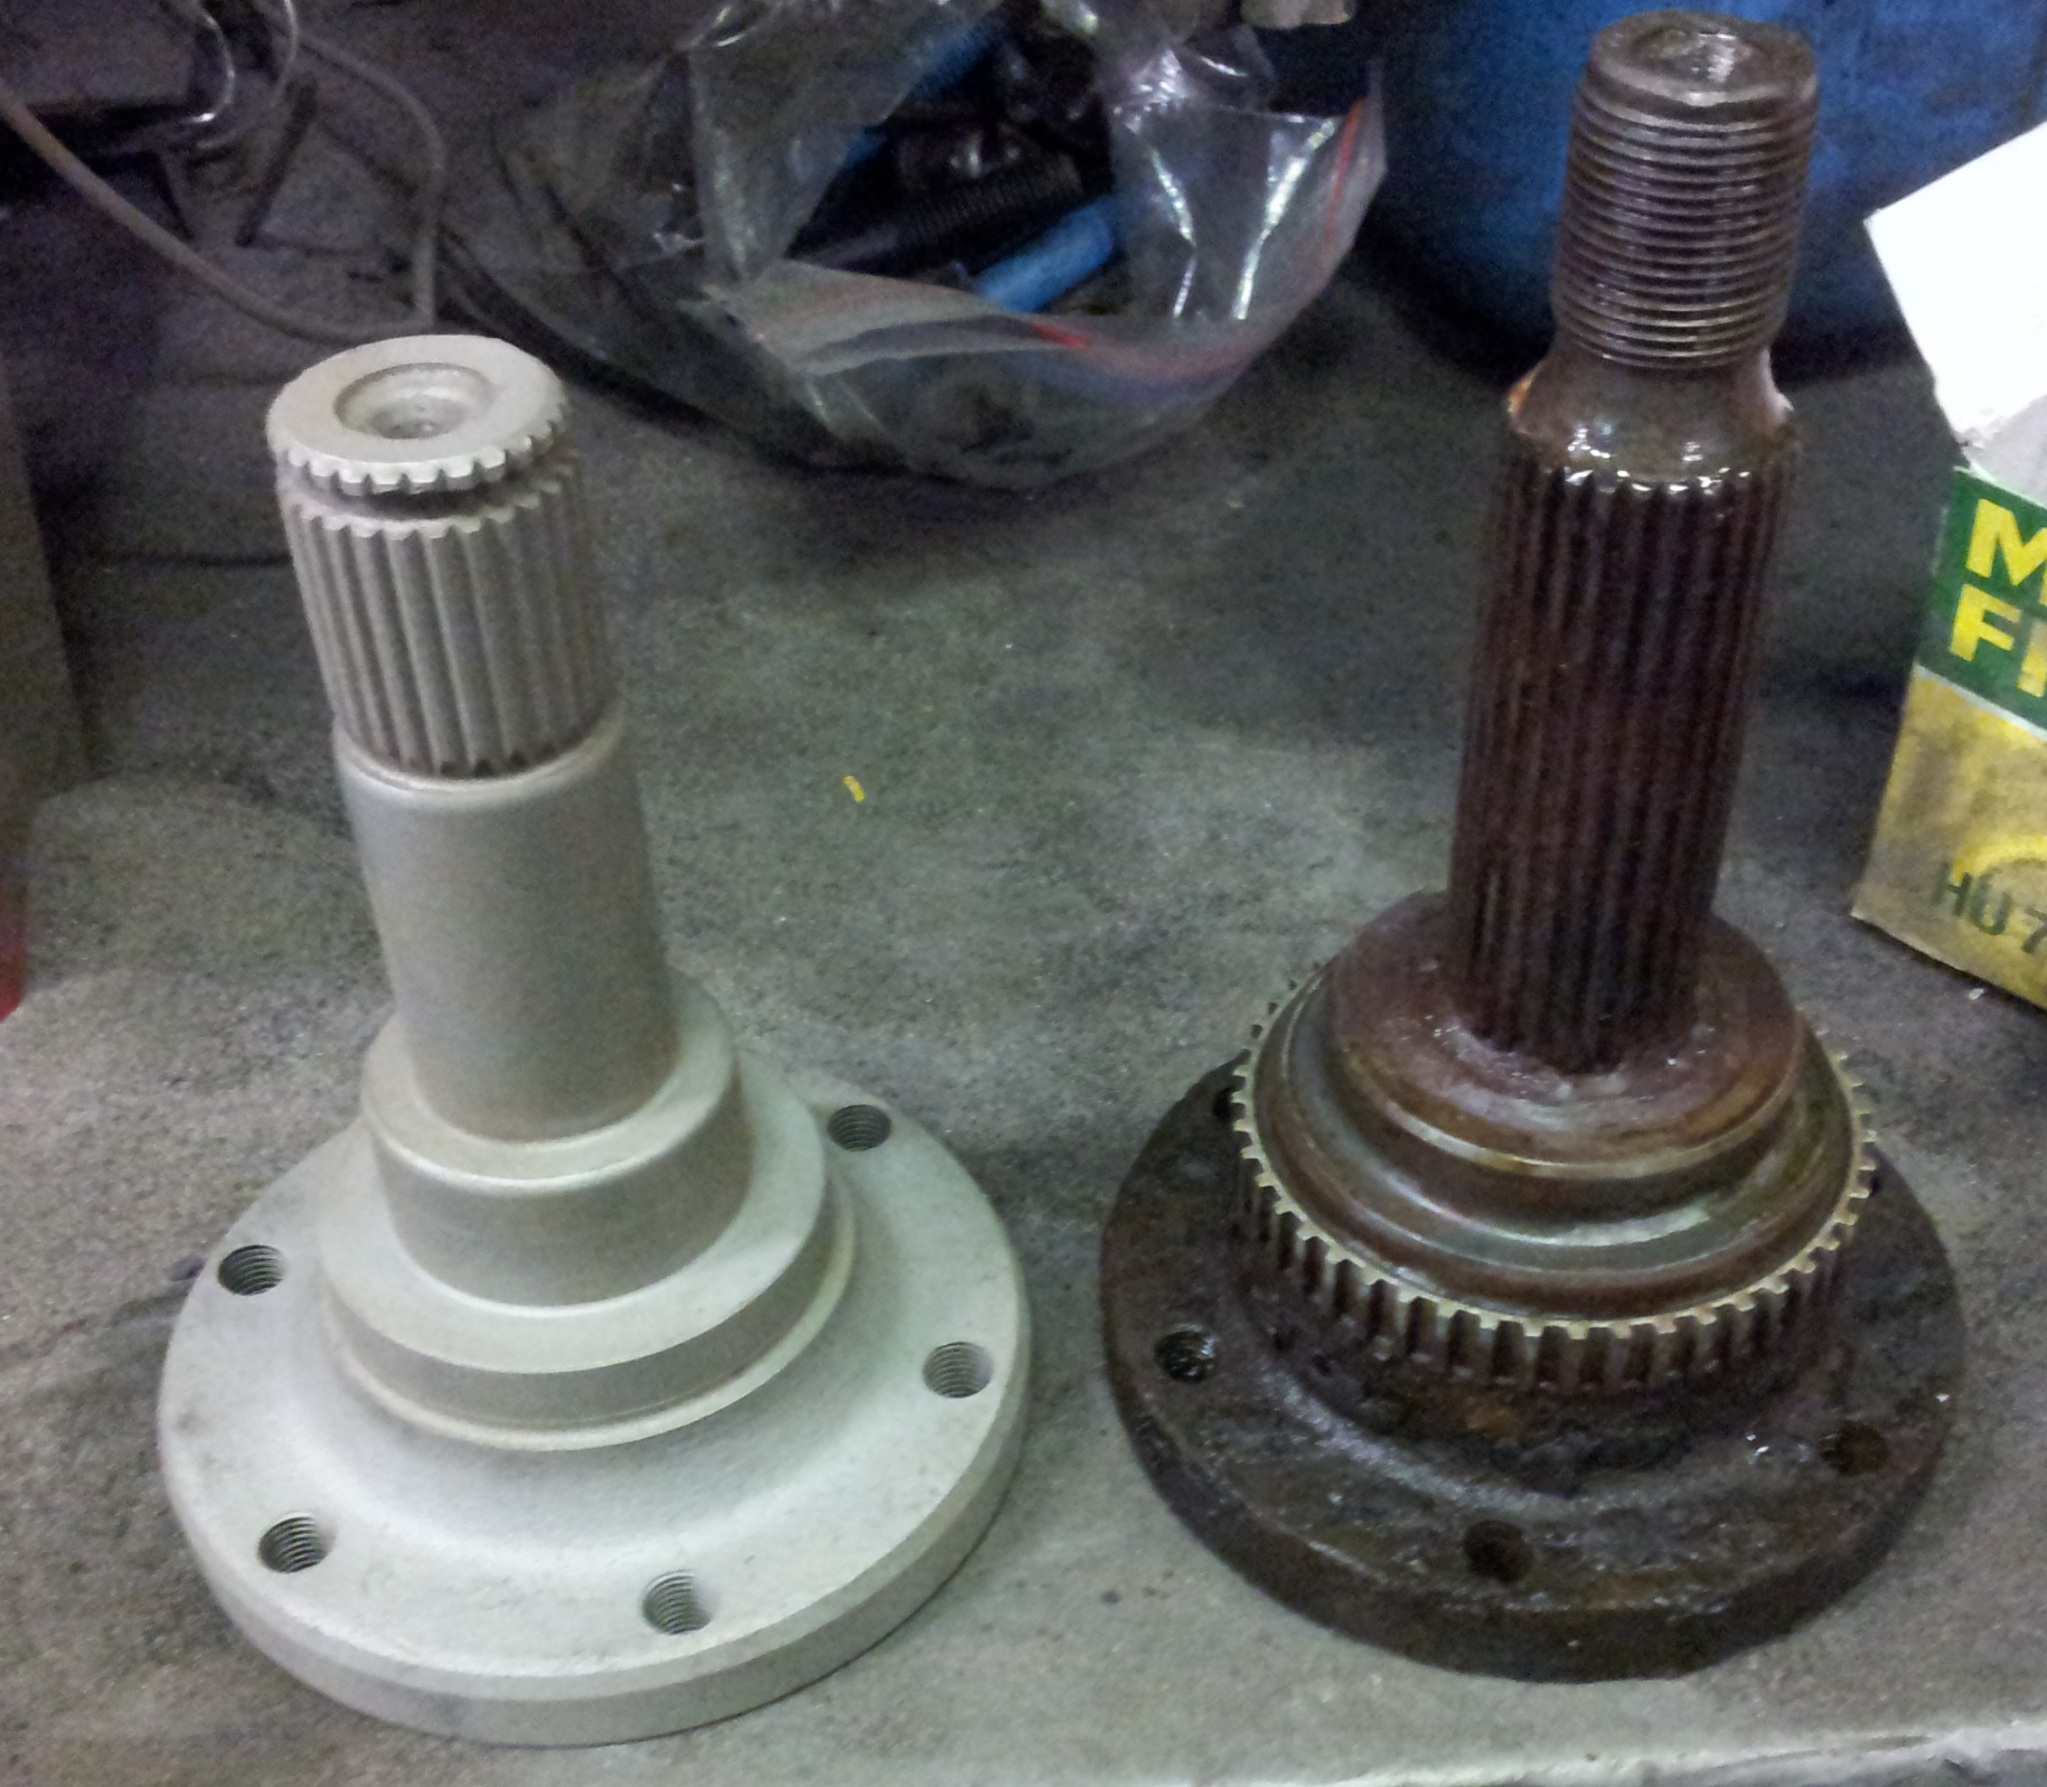
Much better and so much easier than doing it with a wire brush by hand!! Have polished up the bearing and seal surfaces again and primed the exposed bits. Just waiting for some good weather to top coat them!
Also kept the set of beam mounting plates and cleaned them up too. Before and after:
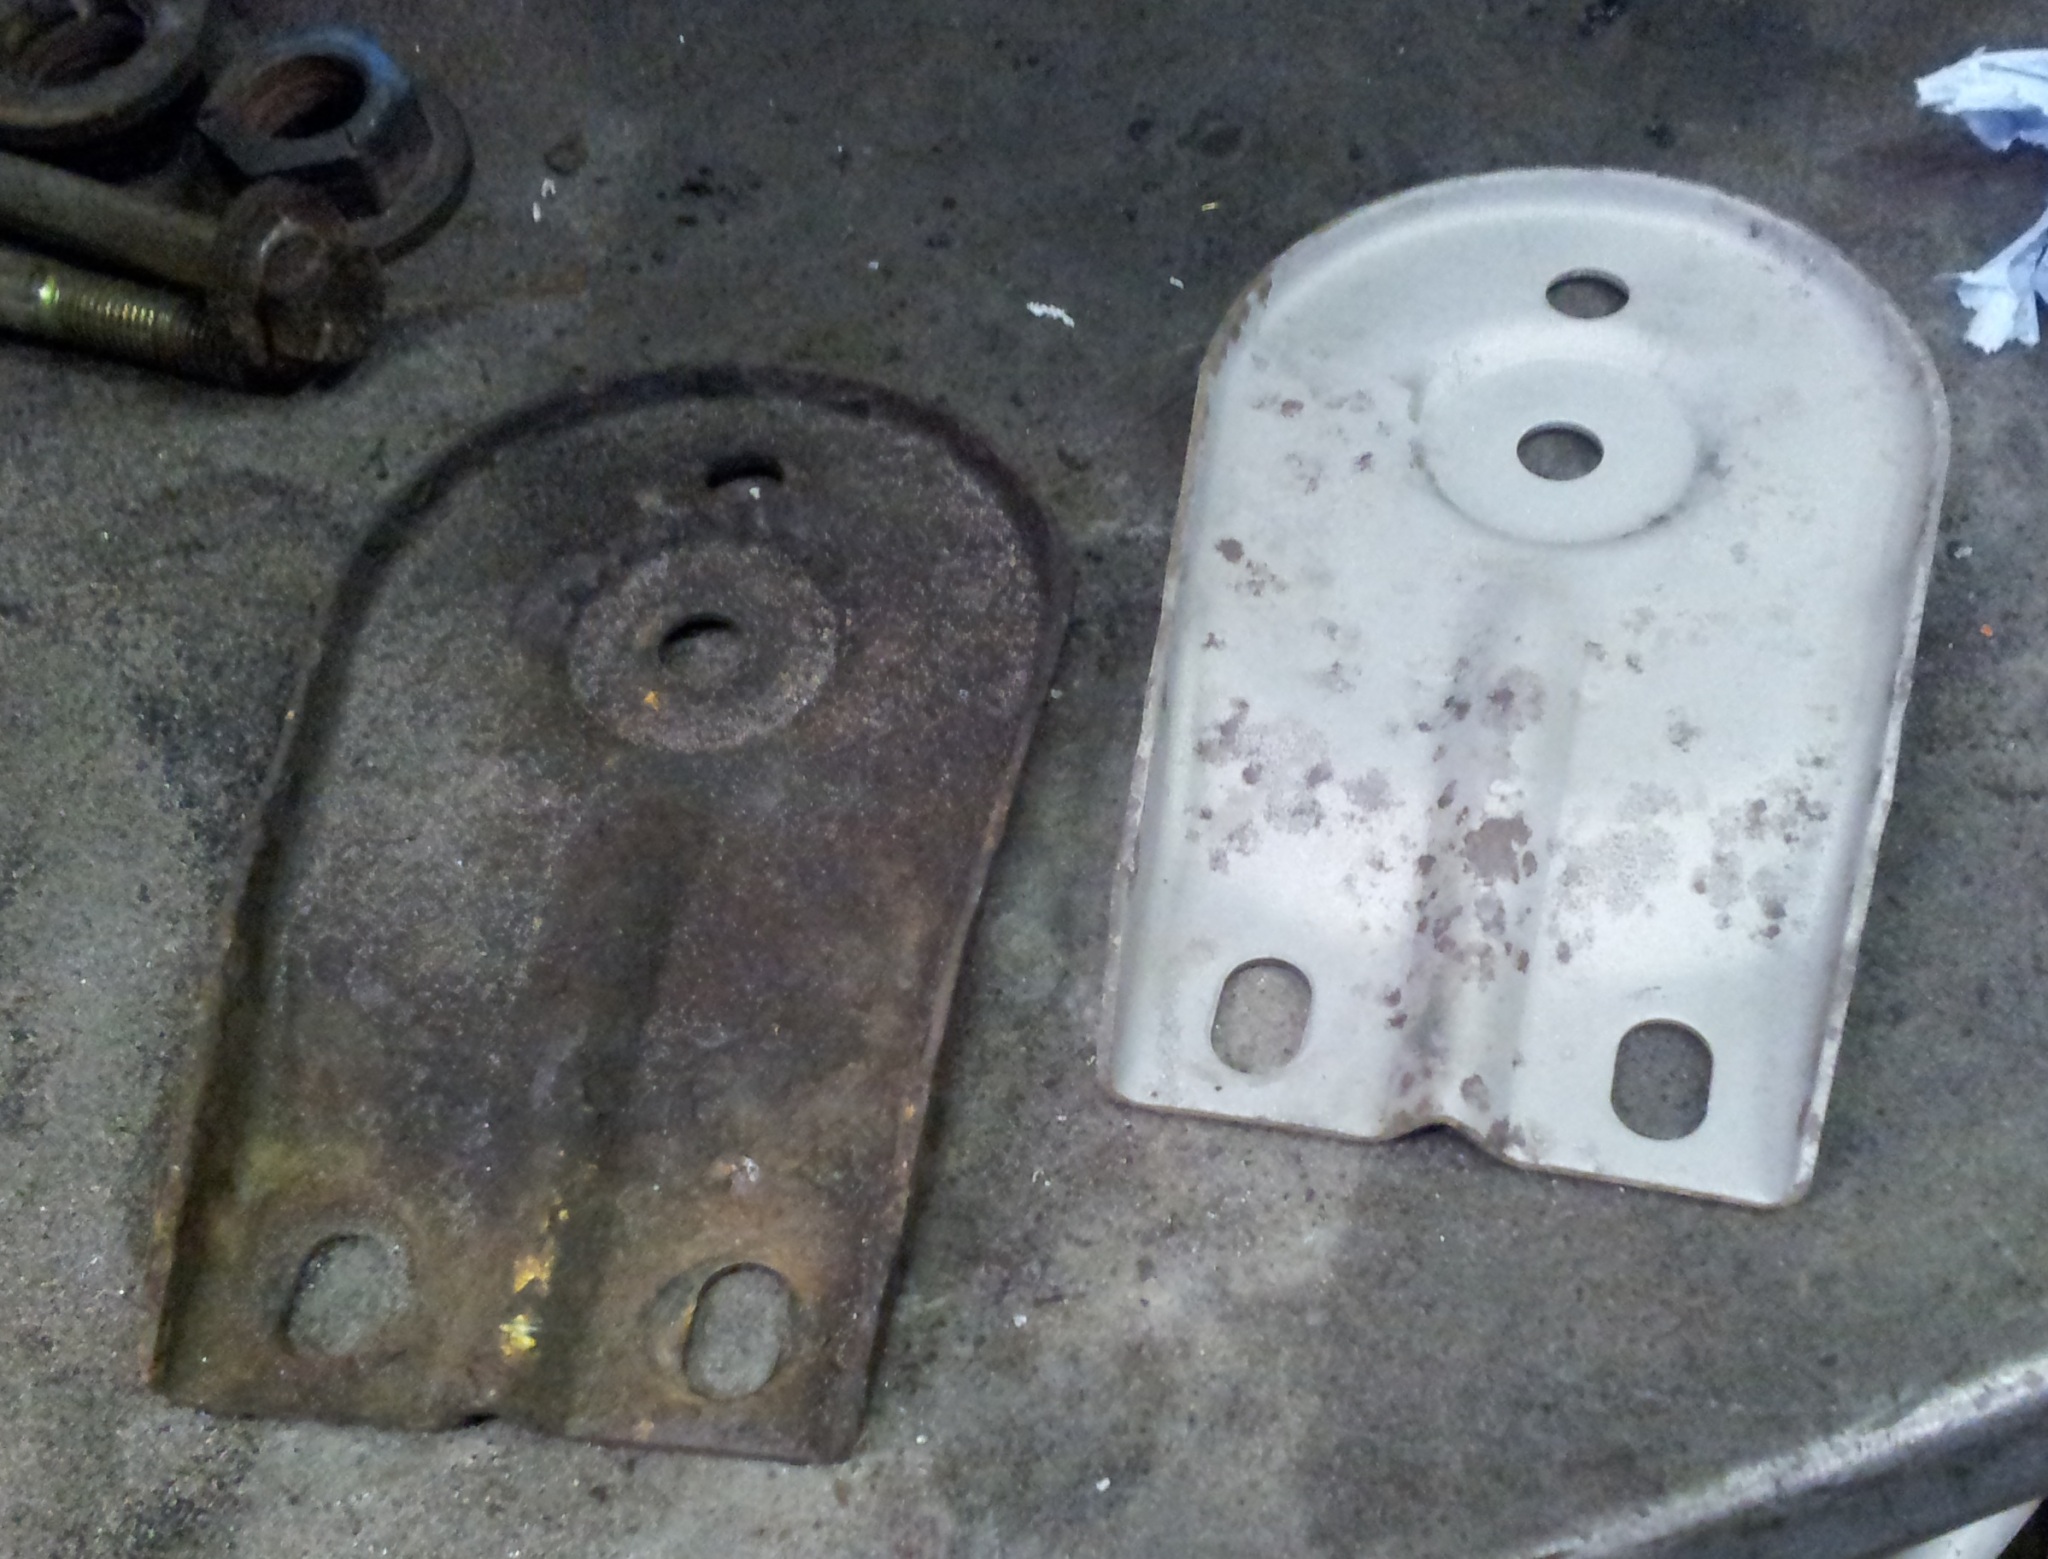
All done including the bolts:
I am developing a bit of a sand blaster addiction!! so is my nose unfortunately cue blowing my nose after a day of blasting and we have:
Black snot
Also been working on a larger washer bottle. The puma bottle is silly tiny and mine has been cut back for 18" wheels so a couple of drives in shit weather and you have to top it up. So i got a fiesta one off my mate jacko. He had cut a bit off for 18" wheels on an FRP.
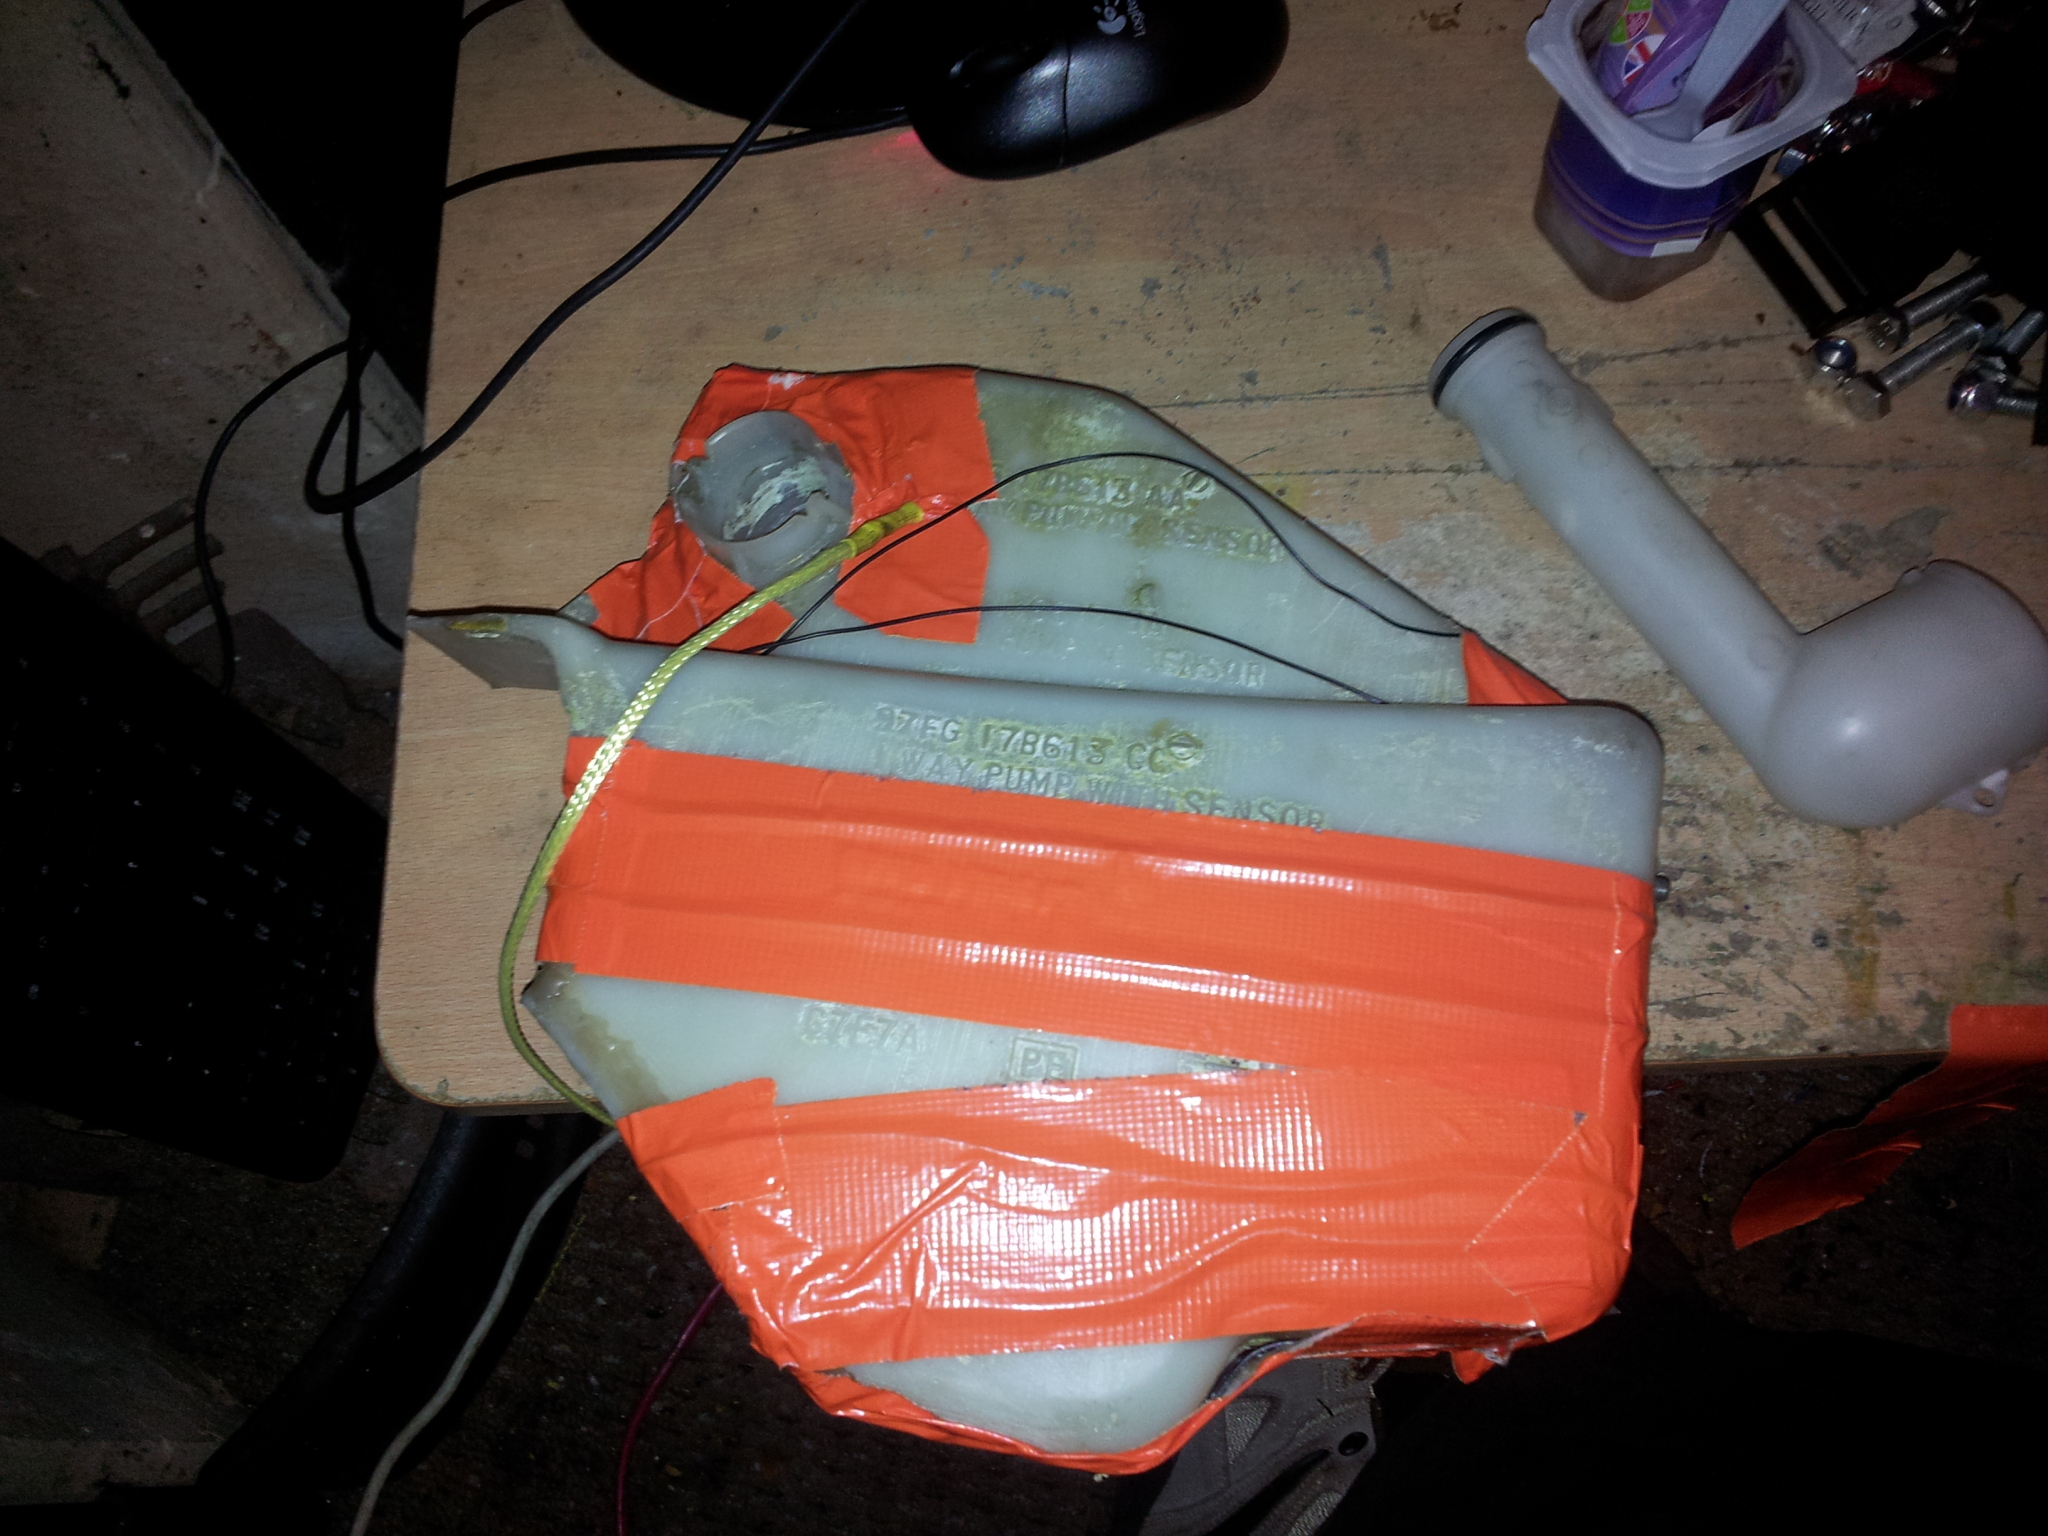
However with bigger arches and a different shape inner wing, i needed to hack some more out to make it fit. So out with the hacksaw:
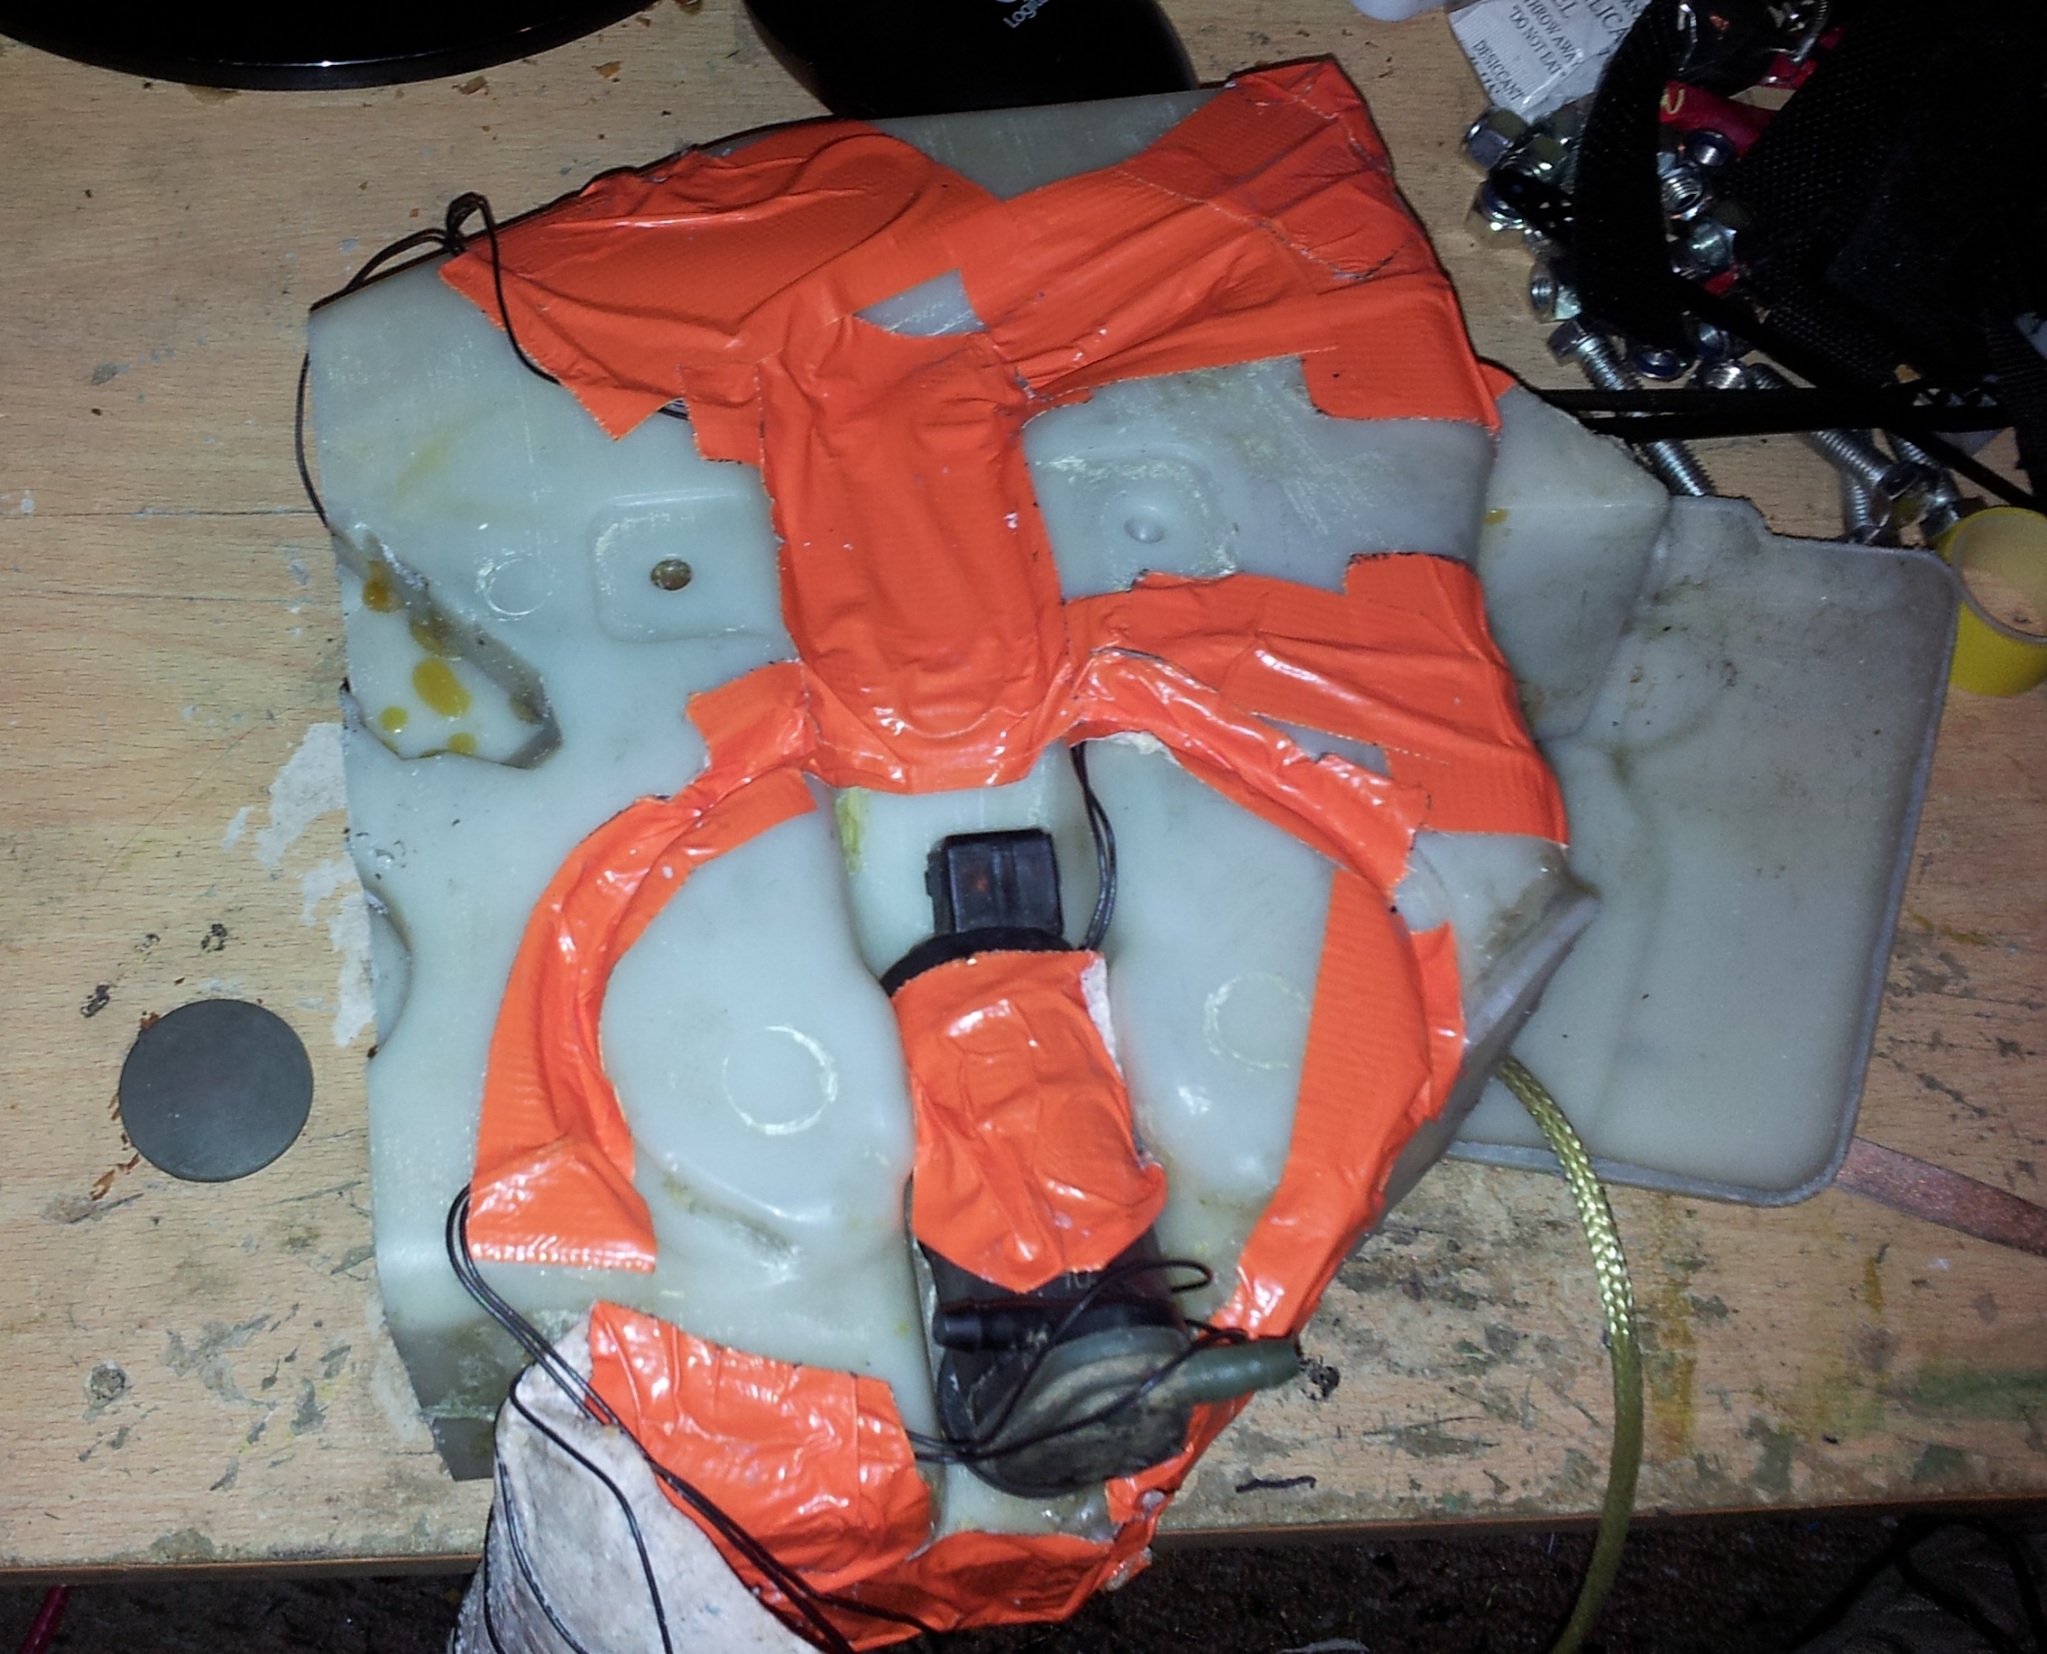
The orange tape is protecting heating element wire i have attached. I always thought heated washer jets were a bit gimmicky as if its a proper cold day it matters not if the jets are heated when all the pipe work and the water tank are frozen up so i have fitted heating wire to the bottle and will do so to the pipework too. its been calculated to draw only 5A and similar set ups achieved 40 degrees celcius so a fire safe temperature yet warm enough to get the job done.
While i was under the arch for the test fitting i checked to see the state of my coilovers. I protected the accessable lower threads with grease then taped over them.
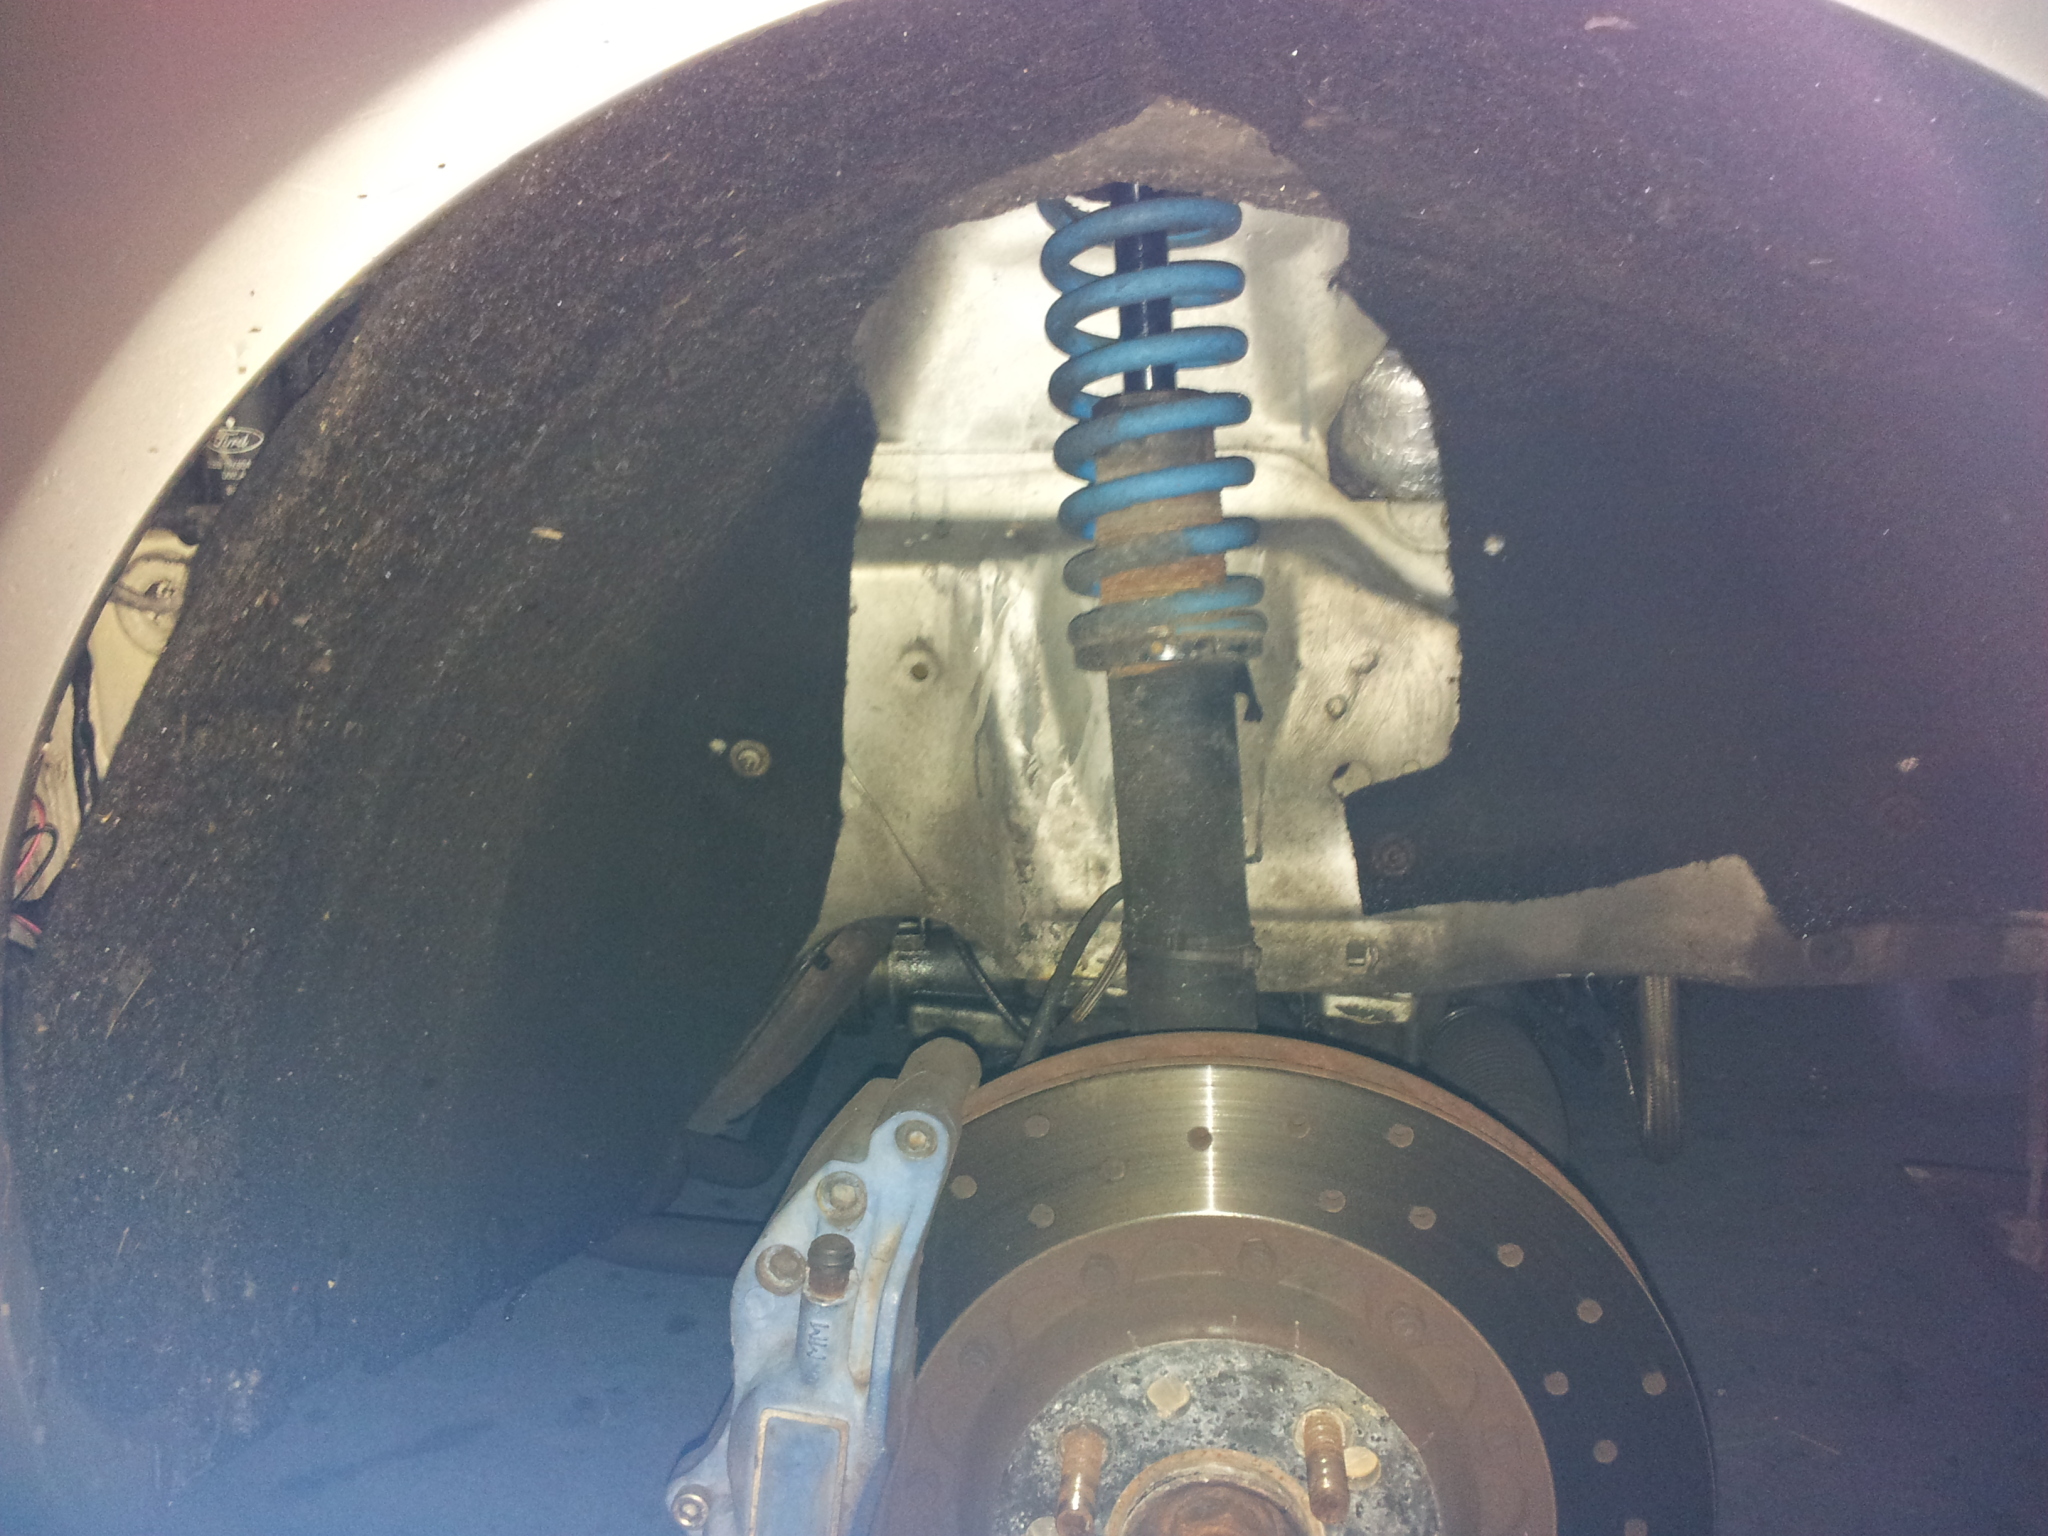
took a bit of tape off and they are as good as new. you can see in the photo how the top threads are nicely corroded so good job i taped the lowers incase i want to lower the car in the future.
finally got hold of the bits i want from a scorpio rear beam, namely driveshafts and arms. I want these to widen the rear track by 20mm each side as it means i can use matching offset wheels front and rear rather than massive offset on the rear just to fill the arches.
Started with the arms. Stuck them outside and used a load of degreaser on them:
then spent ages cleaning them up and attacking them with a wire brush to get all the rust off. Then ive given them a lick of anti-rust primer.
Just need to dry weather so i can paint them properly.
Got the drive shafts:
Just waiting for some concentrated acid to dip them in to remove all the rust. They are just too big for the sandblaster i have access to sadly.
I seperated the stub shafts off as they can be blasted. So into a bucket:
And fill it with coke for a few nights so theres no greases or oils left on them, less sand gets ruined with grease the better.
then off to the blasting cabinet. A before and after comparison photo:
Much better and so much easier than doing it with a wire brush by hand!! Have polished up the bearing and seal surfaces again and primed the exposed bits. Just waiting for some good weather to top coat them!
Also kept the set of beam mounting plates and cleaned them up too. Before and after:
All done including the bolts:
I am developing a bit of a sand blaster addiction!! so is my nose unfortunately
cue blowing my nose after a day of blasting and we have:Black snot
Also been working on a larger washer bottle. The puma bottle is silly tiny and mine has been cut back for 18" wheels so a couple of drives in shit weather and you have to top it up. So i got a fiesta one off my mate jacko. He had cut a bit off for 18" wheels on an FRP.
However with bigger arches and a different shape inner wing, i needed to hack some more out to make it fit. So out with the hacksaw:
The orange tape is protecting heating element wire i have attached. I always thought heated washer jets were a bit gimmicky as if its a proper cold day it matters not if the jets are heated when all the pipe work and the water tank are frozen up so i have fitted heating wire to the bottle and will do so to the pipework too. its been calculated to draw only 5A and similar set ups achieved 40 degrees celcius so a fire safe temperature yet warm enough to get the job done.
While i was under the arch for the test fitting i checked to see the state of my coilovers. I protected the accessable lower threads with grease then taped over them.
took a bit of tape off and they are as good as new. you can see in the photo how the top threads are nicely corroded so good job i taped the lowers incase i want to lower the car in the future.
09-01-2013, 08:38 PM
#411
There is no databus that i can tell.
Will know for sure when i get round to finishing a dummy loom.
Basically all the guages will work as will odeometer on the right digi display, the fuel computer on left digi wont work as it needs fuel usage data from the ecu. however that screen also can show clock, and external temp if you fit a sensor.
09-01-2013, 08:48 PM
#413
been continuing with general tidying up of the drivetrain parts.
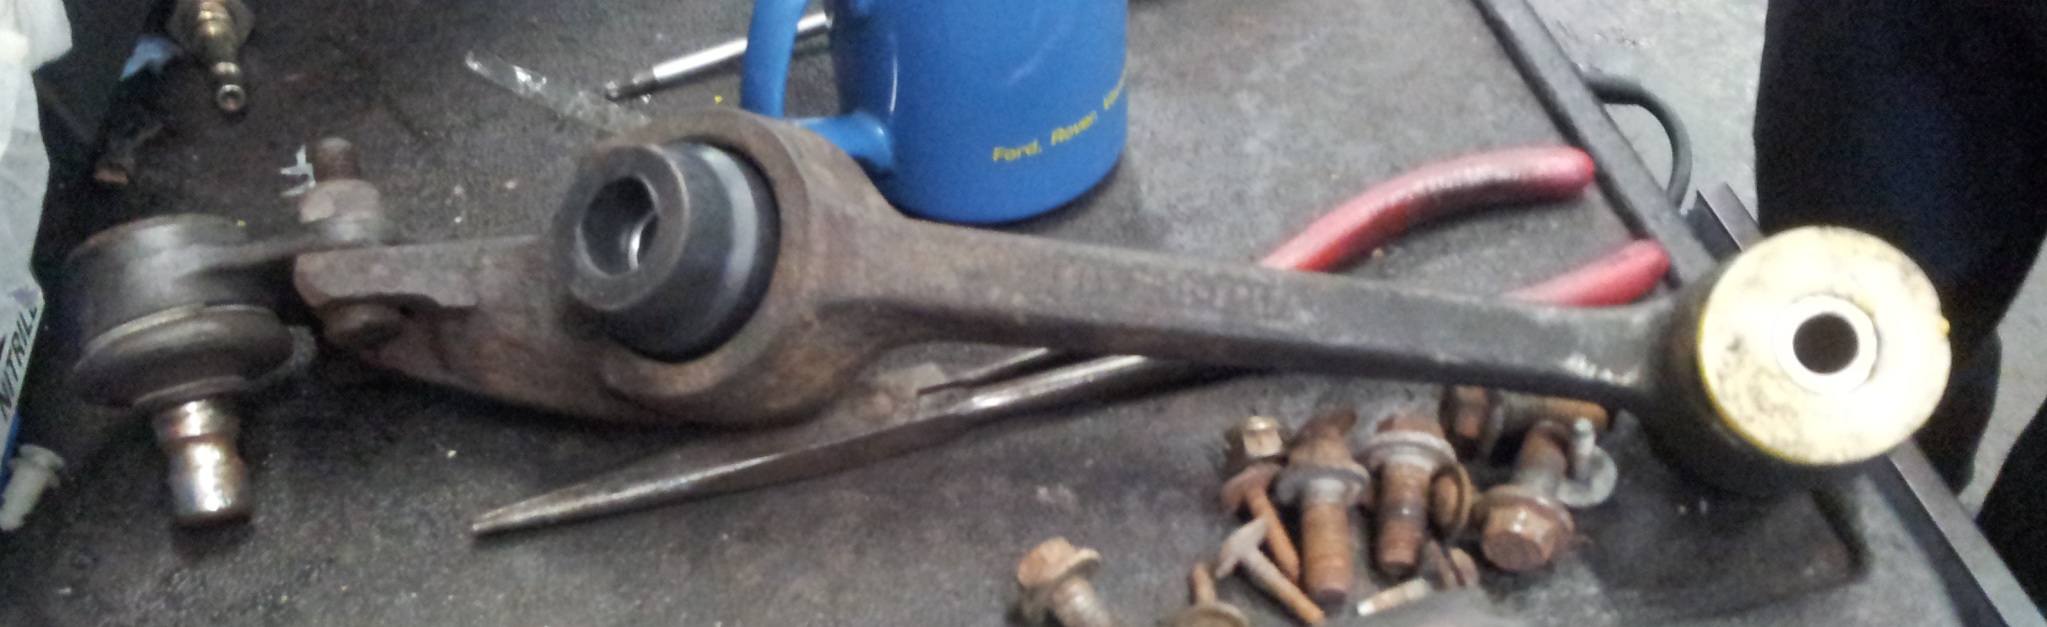
Also took the car to a friends garage so i could have the front bushes replaced as mine were worn out (stoke roads!!).
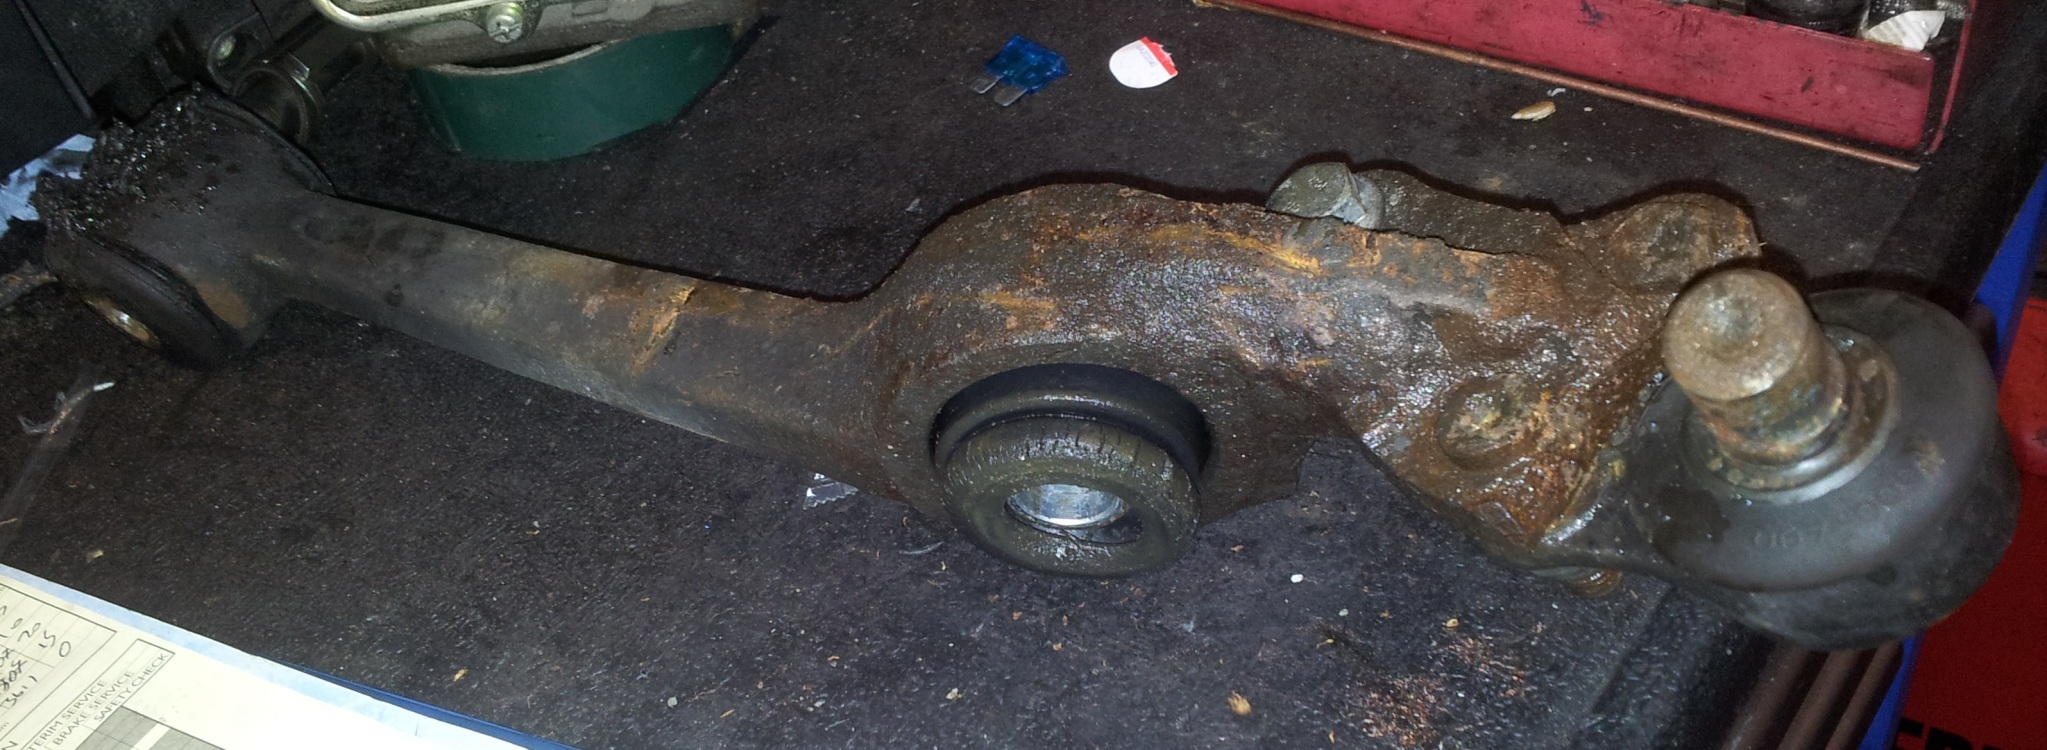
The outer TCA bushes were only a couple years old so didnt last long!!
All replaced:
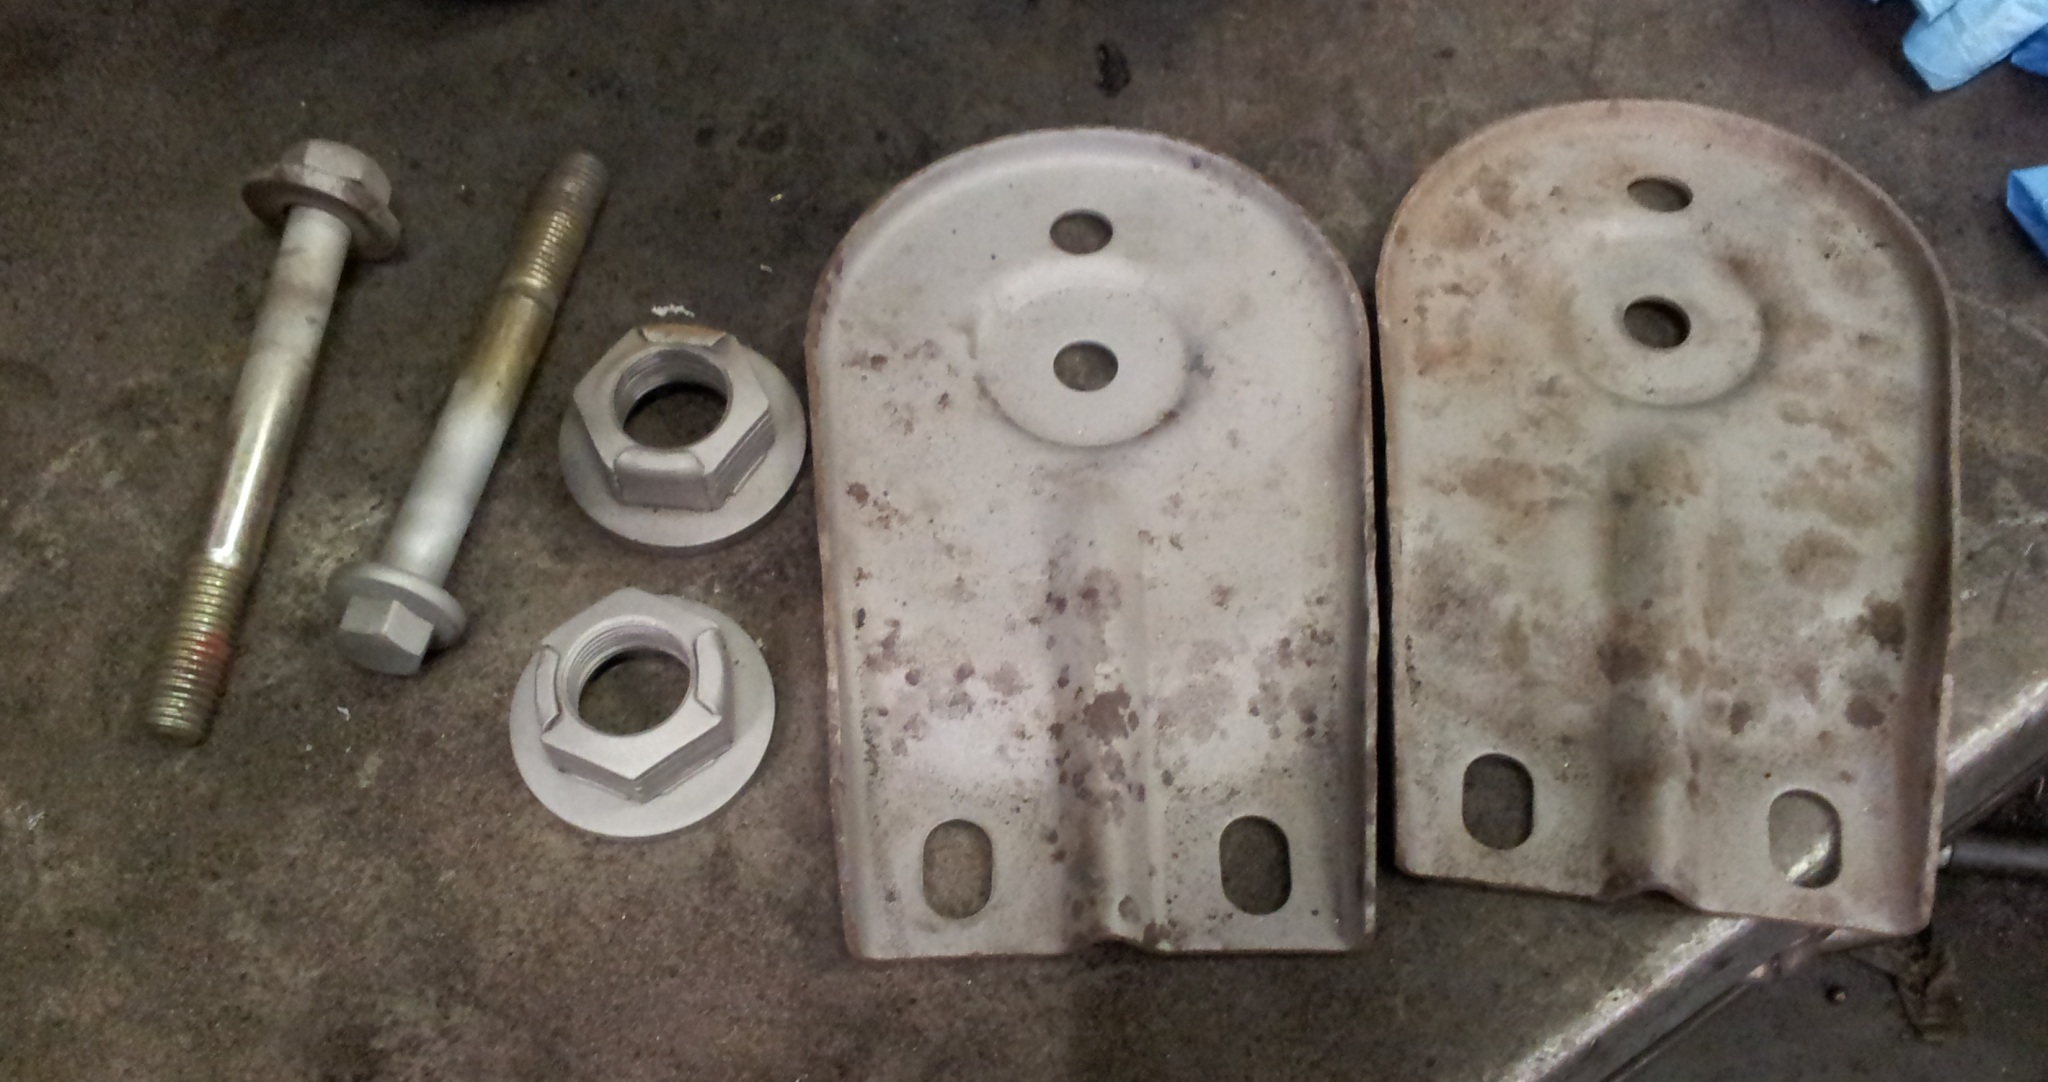
Also thinking of getting my rear turrets cut out and new ones welded in with a more conventional strut top:

I want to use normal escos strut top fittings so i can use a matched set of coilovers all round.
The original puma mount had just been plated over and welded up:
Also on new years day went out up the cat and fiddle in my mates elise
Then had a massive car cleaning session.
one certainly knows how to celebrate the new year in style!
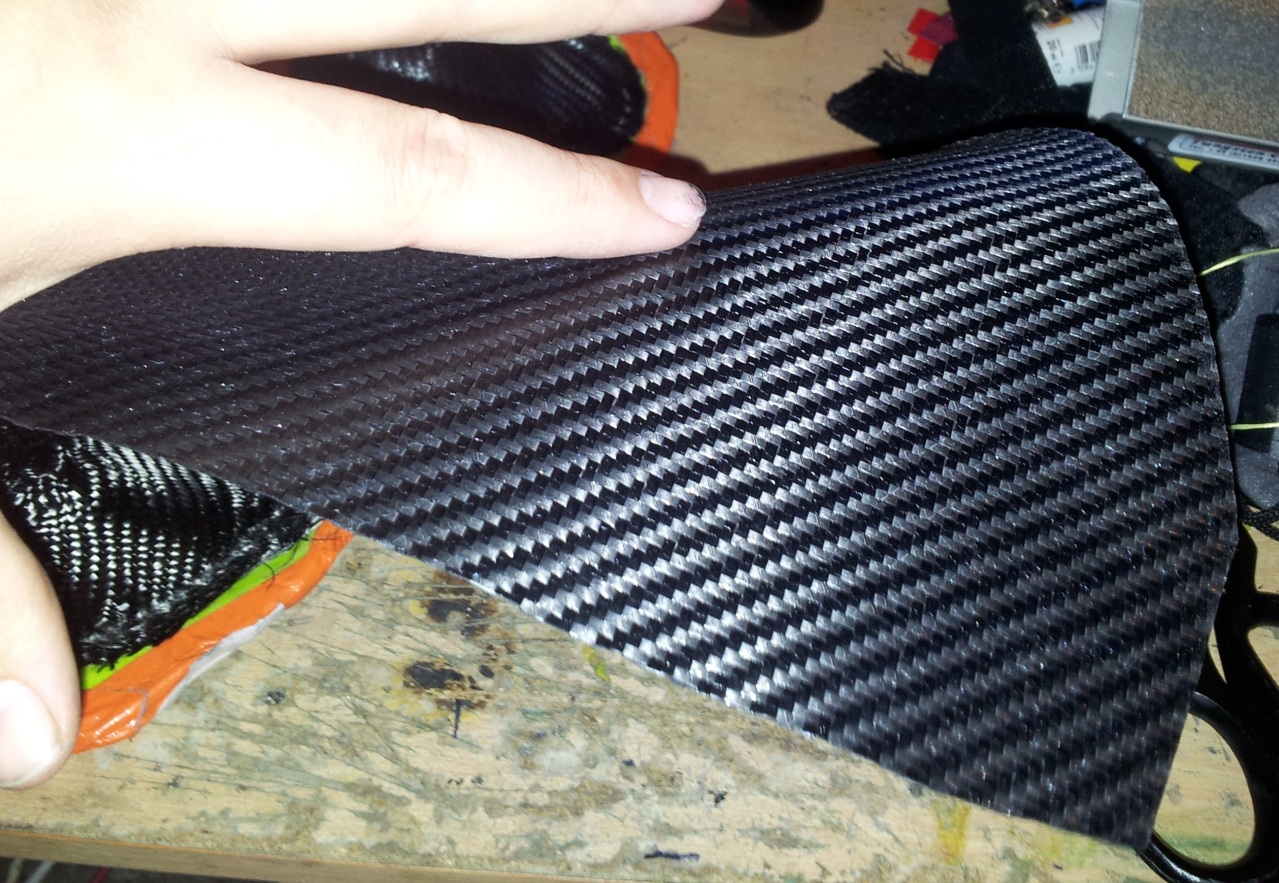
Also had a go at making a NACA duct at work. borrowed thier mould and equipmrnt.
Laid up the pre-preg in the mould:
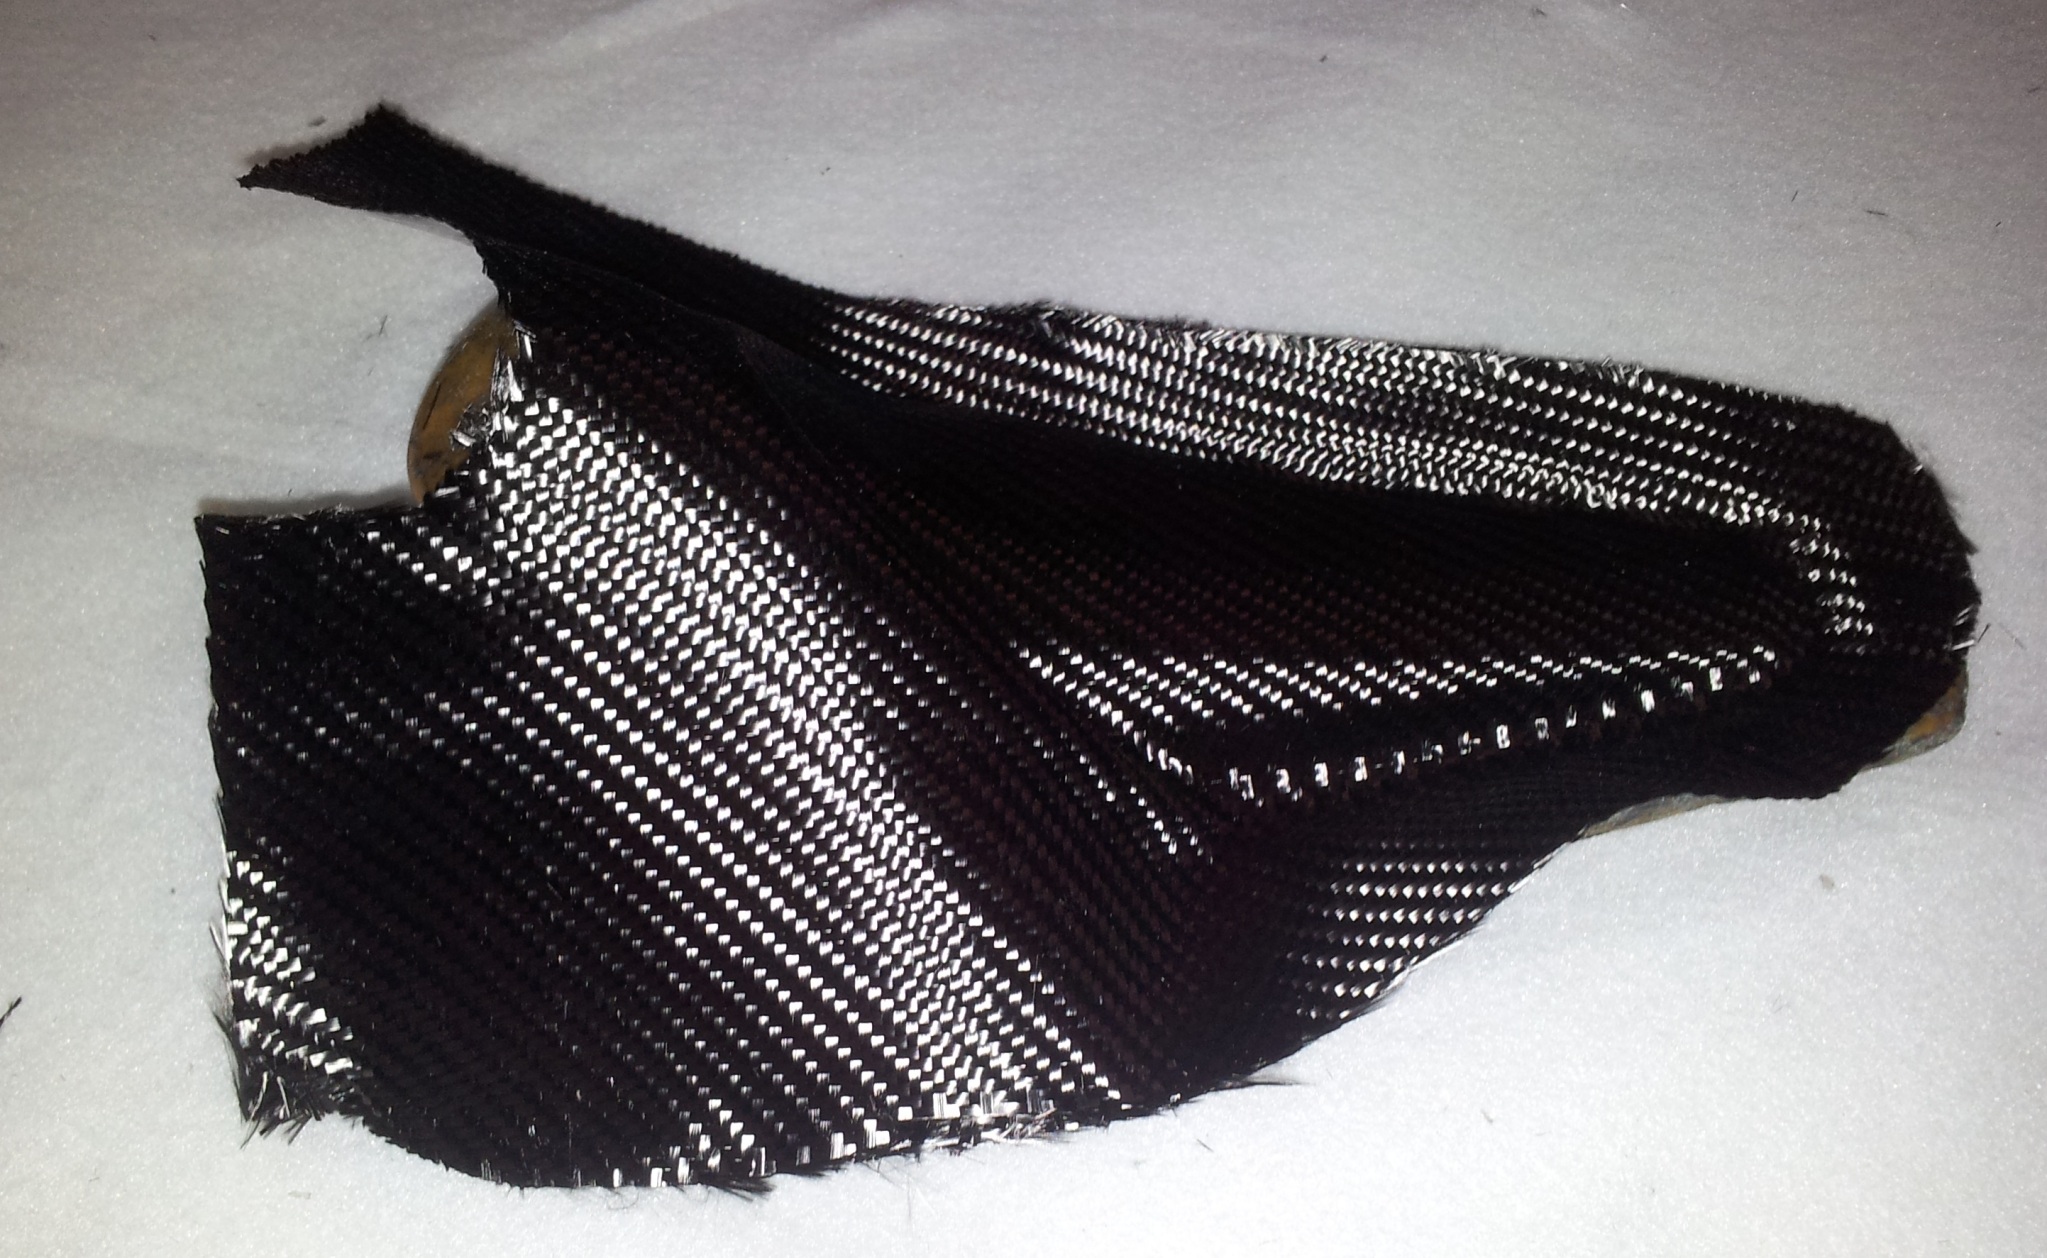
Pre-preg is so much easier for complicated shapes like that. it sticks to the mould so dead easy.
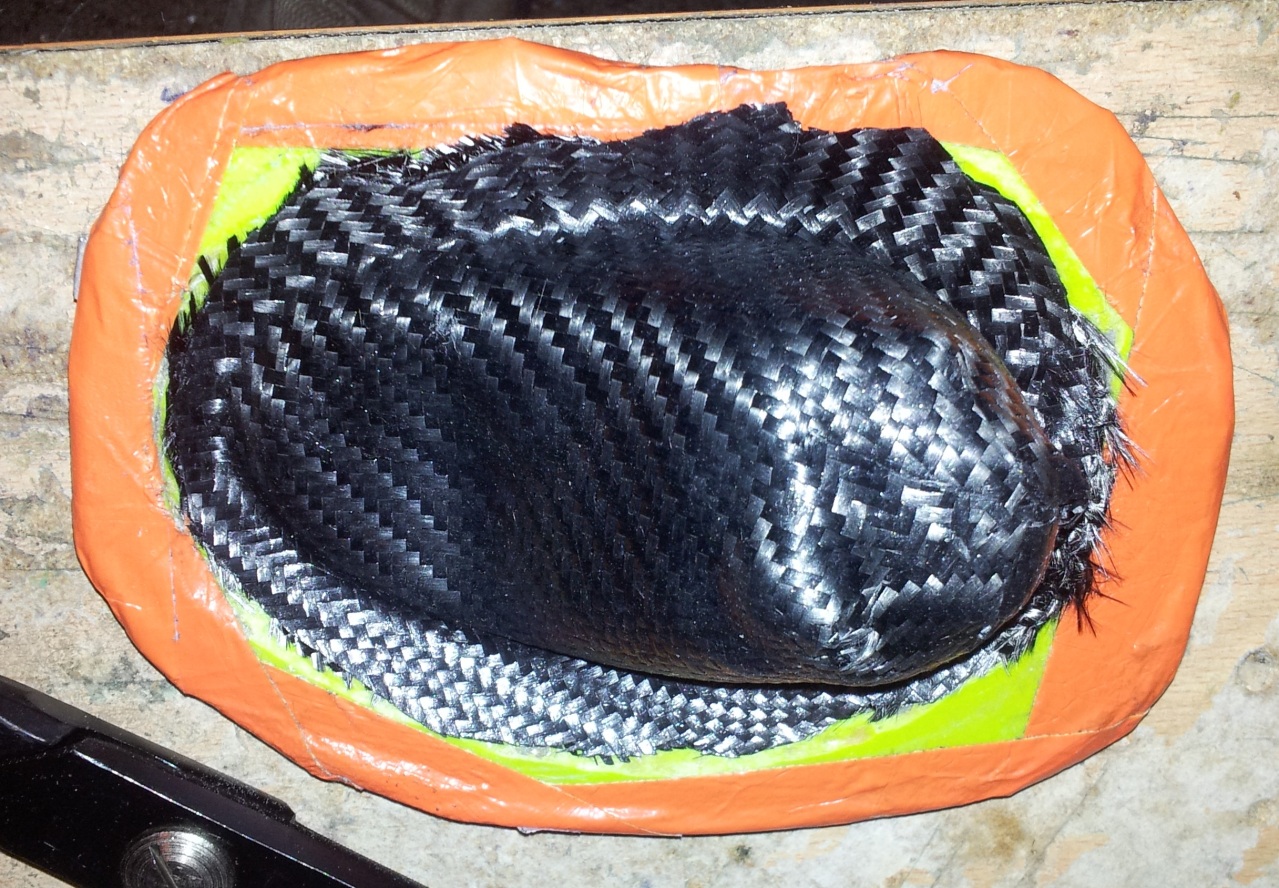
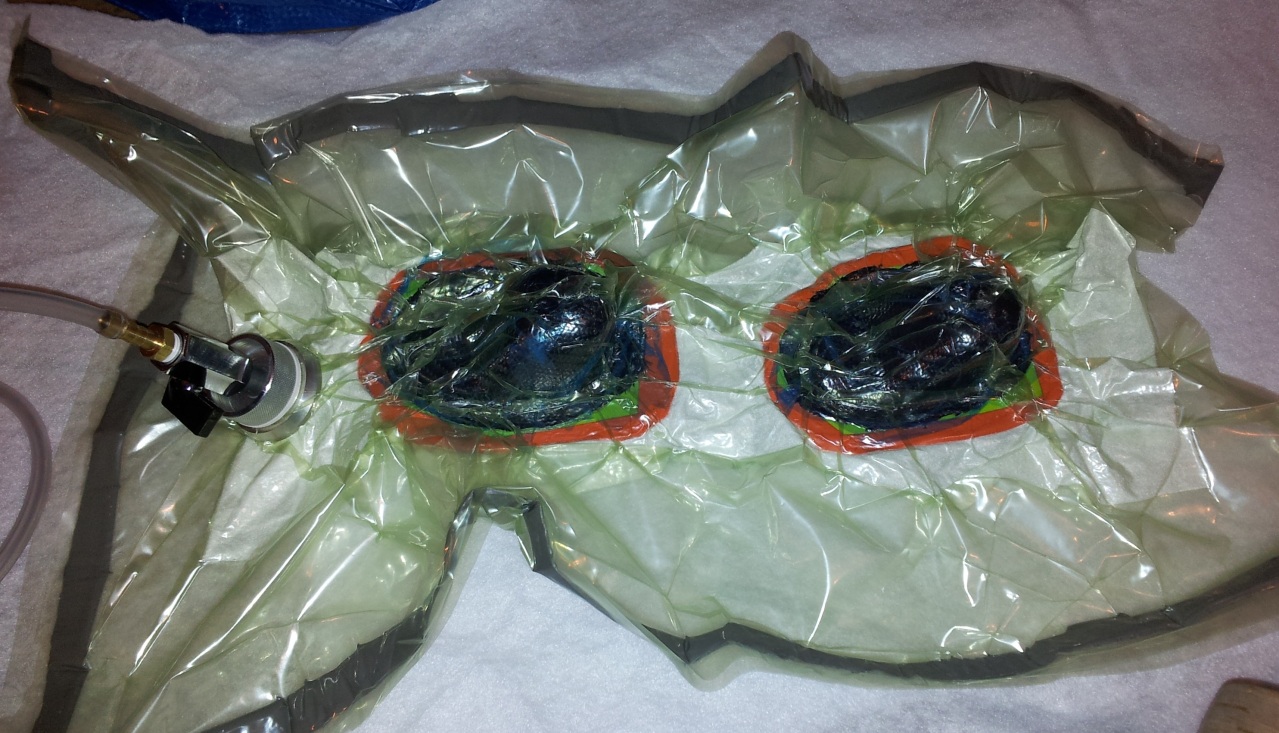
then bagged it up ready to go under pressure:

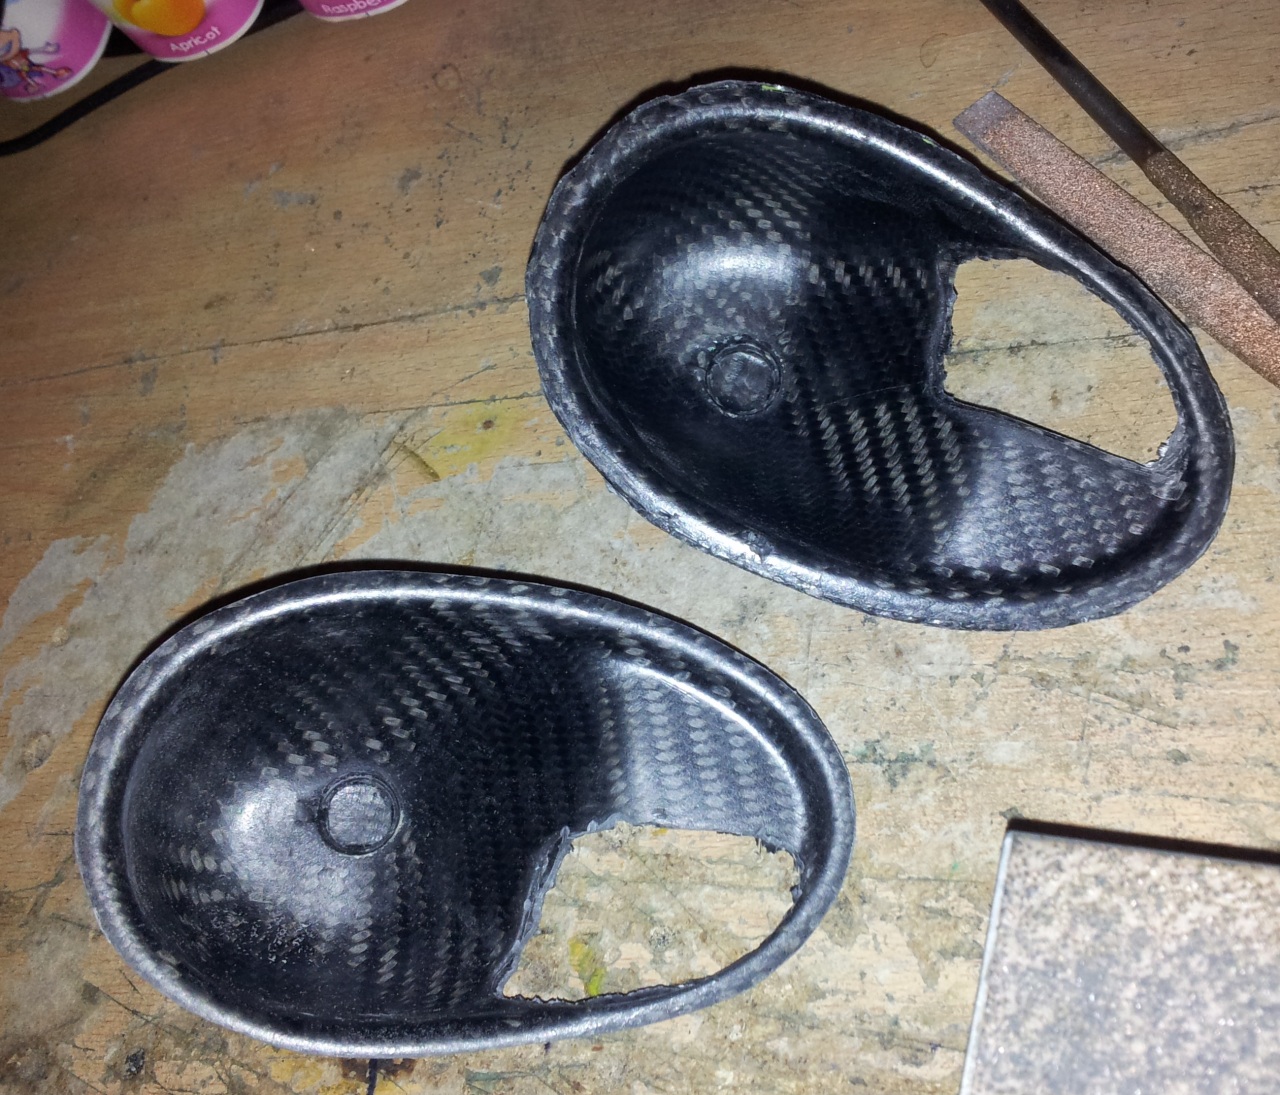
cooked it through the curing cycle and this was the end result:
even the underside looks cool:

Also took the car to a friends garage so i could have the front bushes replaced as mine were worn out (stoke roads!!).
The outer TCA bushes were only a couple years old so didnt last long!!
All replaced:
Also thinking of getting my rear turrets cut out and new ones welded in with a more conventional strut top:
I want to use normal escos strut top fittings so i can use a matched set of coilovers all round.
The original puma mount had just been plated over and welded up:
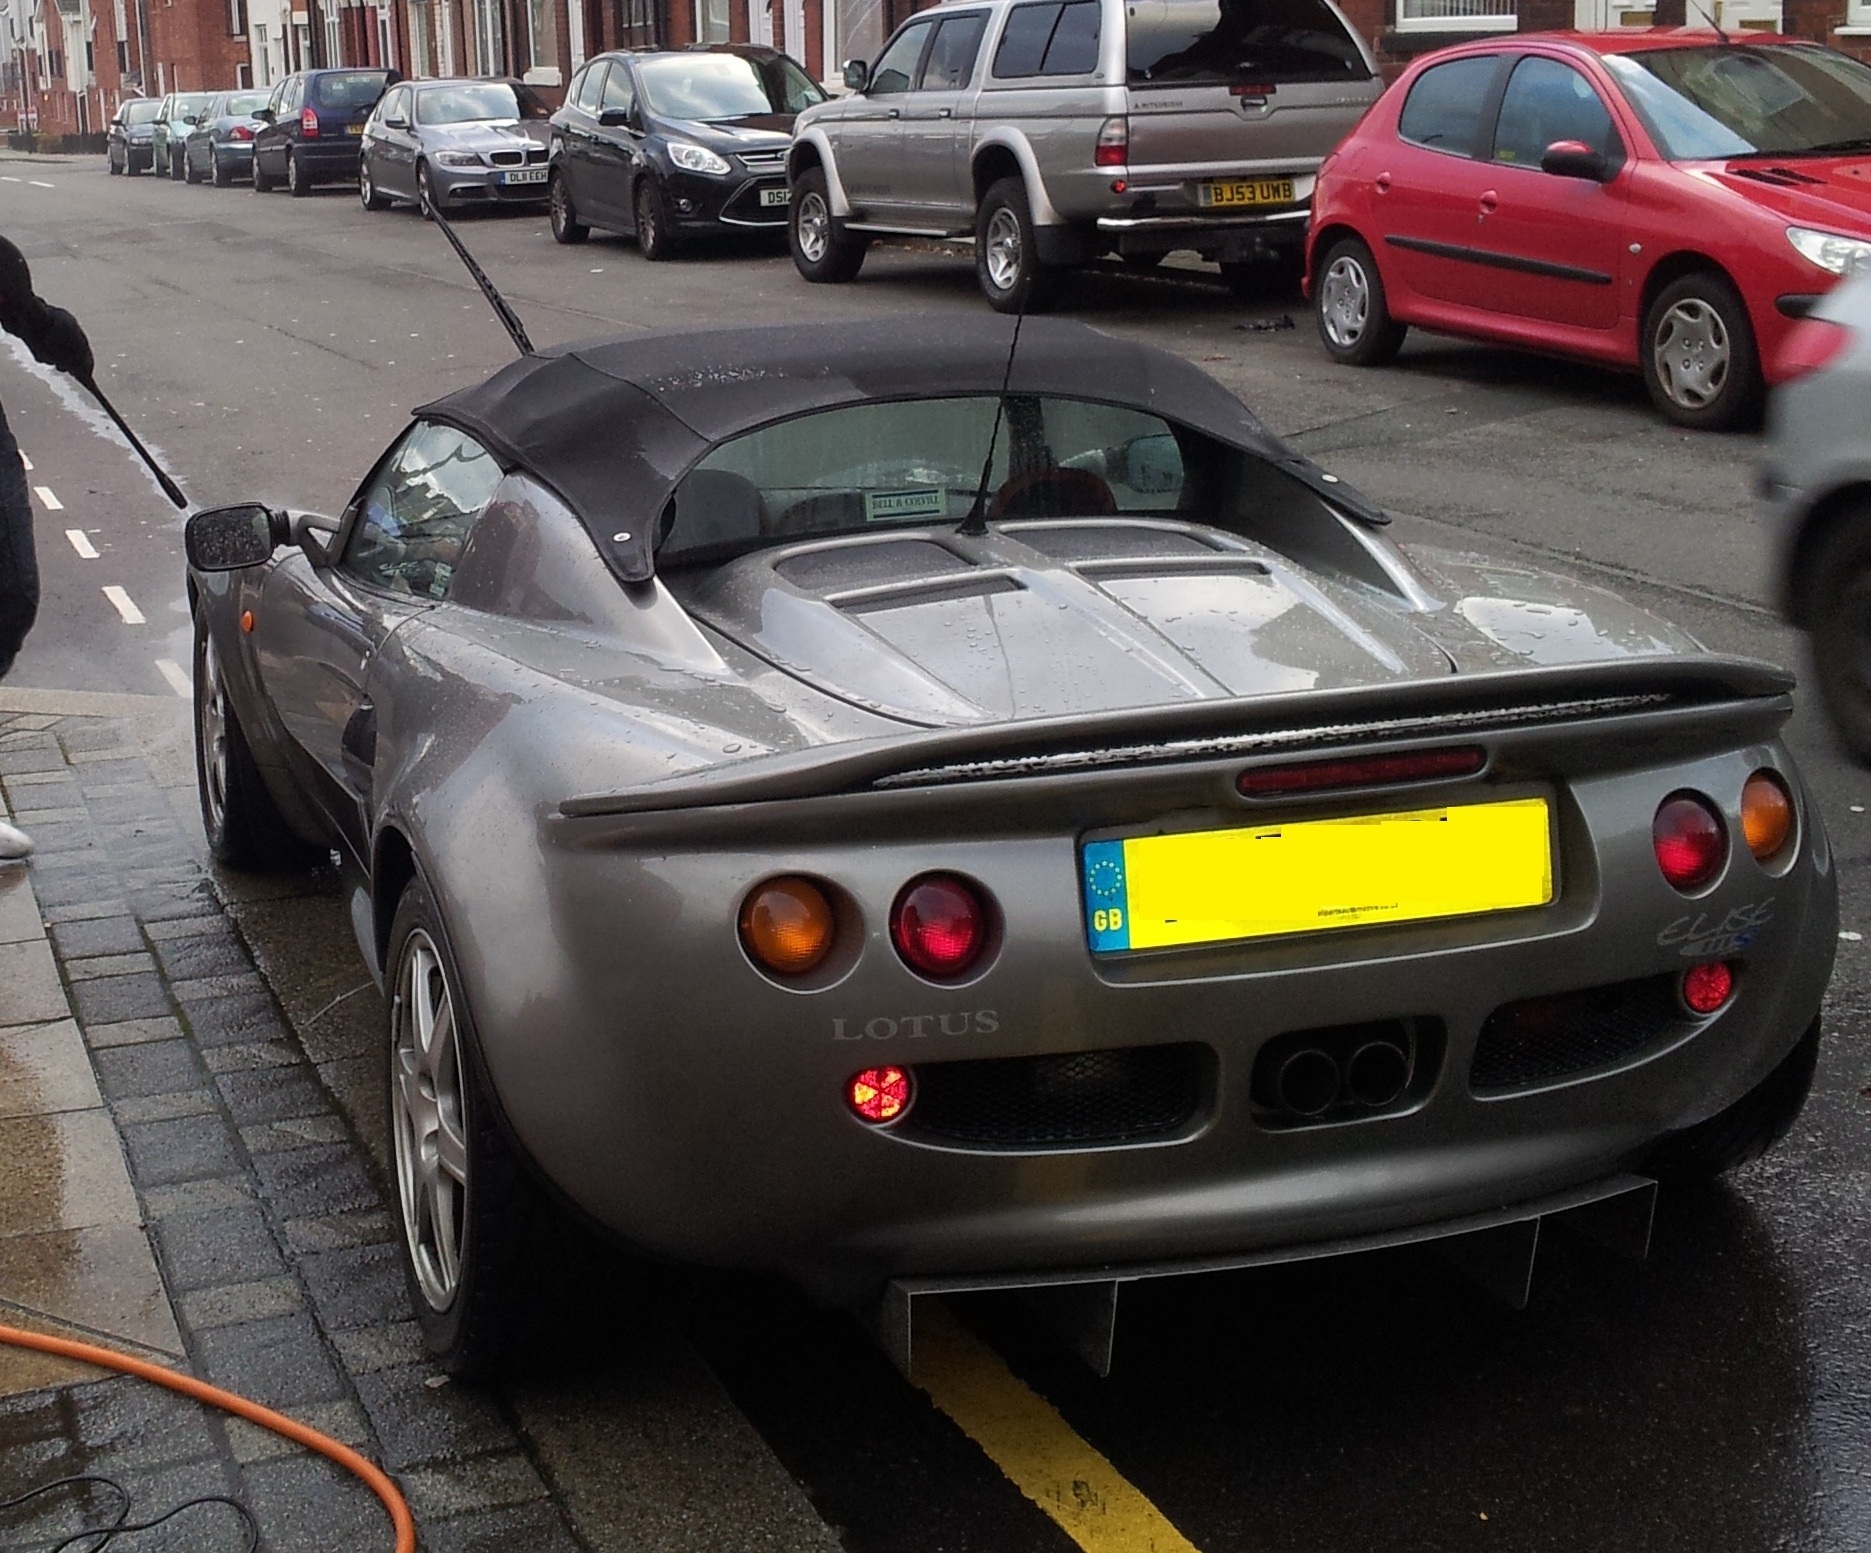
Also on new years day went out up the cat and fiddle in my mates elise
Then had a massive car cleaning session.
one certainly knows how to celebrate the new year in style!
Also had a go at making a NACA duct at work. borrowed thier mould and equipmrnt.
Laid up the pre-preg in the mould:
Pre-preg is so much easier for complicated shapes like that. it sticks to the mould so dead easy.
then bagged it up ready to go under pressure:
cooked it through the curing cycle and this was the end result:
even the underside looks cool:
09-01-2013, 09:31 PM
#414
PassionFord Post Troll
from what I understand from the wiring diagrams, inspecting the circuit board and a bit of work with a multimeter, pretty much all of it.
There is no databus that i can tell.
Will know for sure when i get round to finishing a dummy loom.
Basically all the guages will work as will odeometer on the right digi display, the fuel computer on left digi wont work as it needs fuel usage data from the ecu. however that screen also can show clock, and external temp if you fit a sensor.
12-01-2013, 11:15 PM
#415
Minor update.
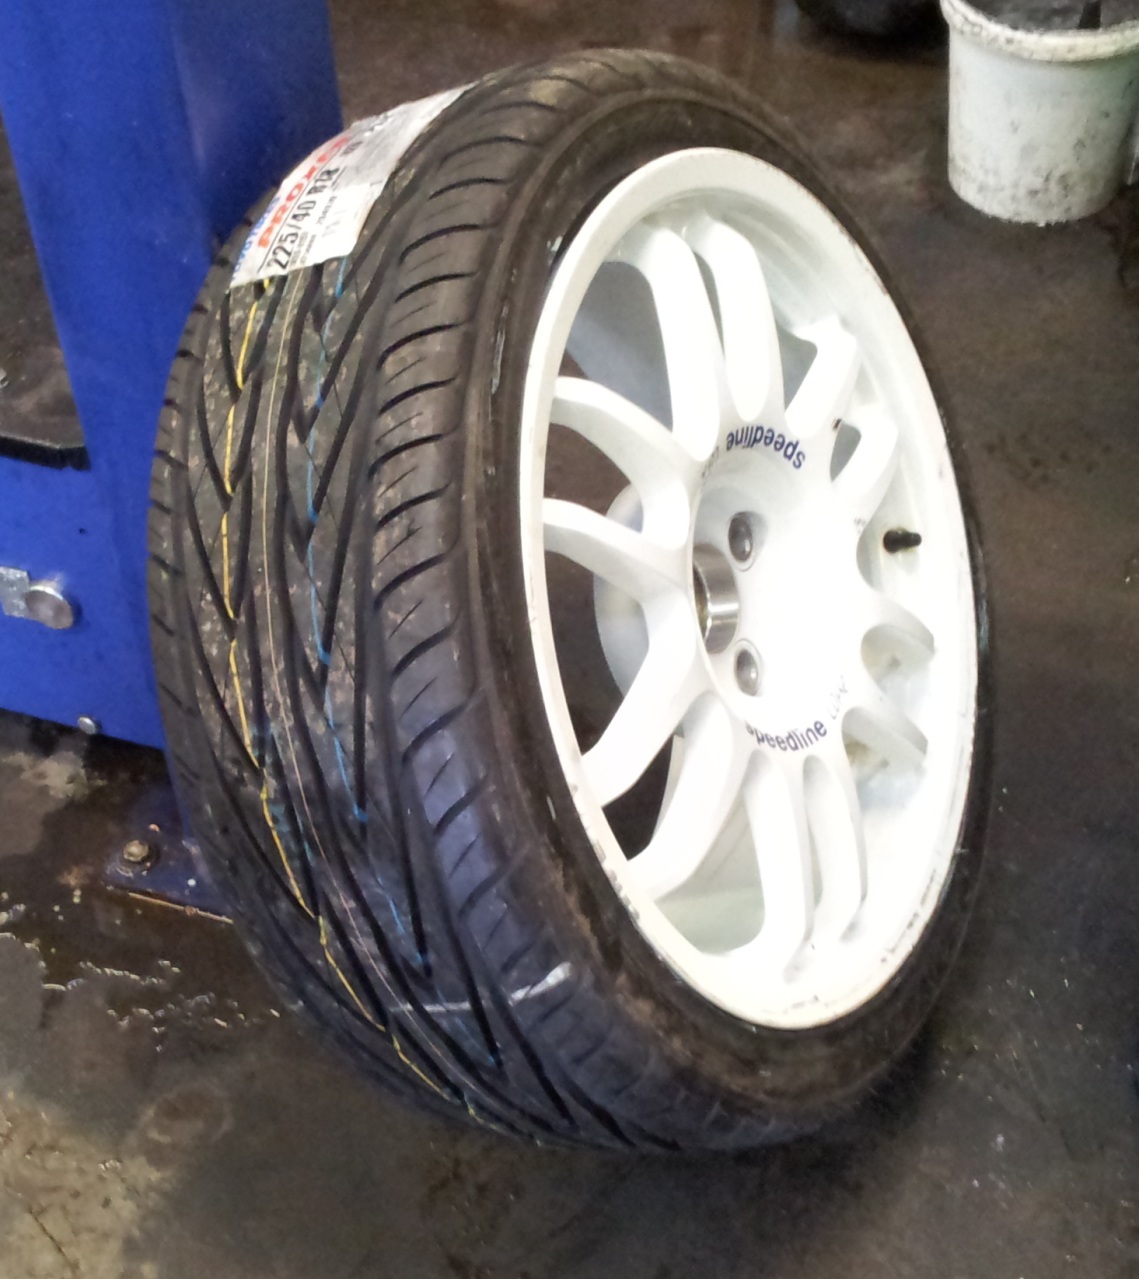
Got some new tyres:
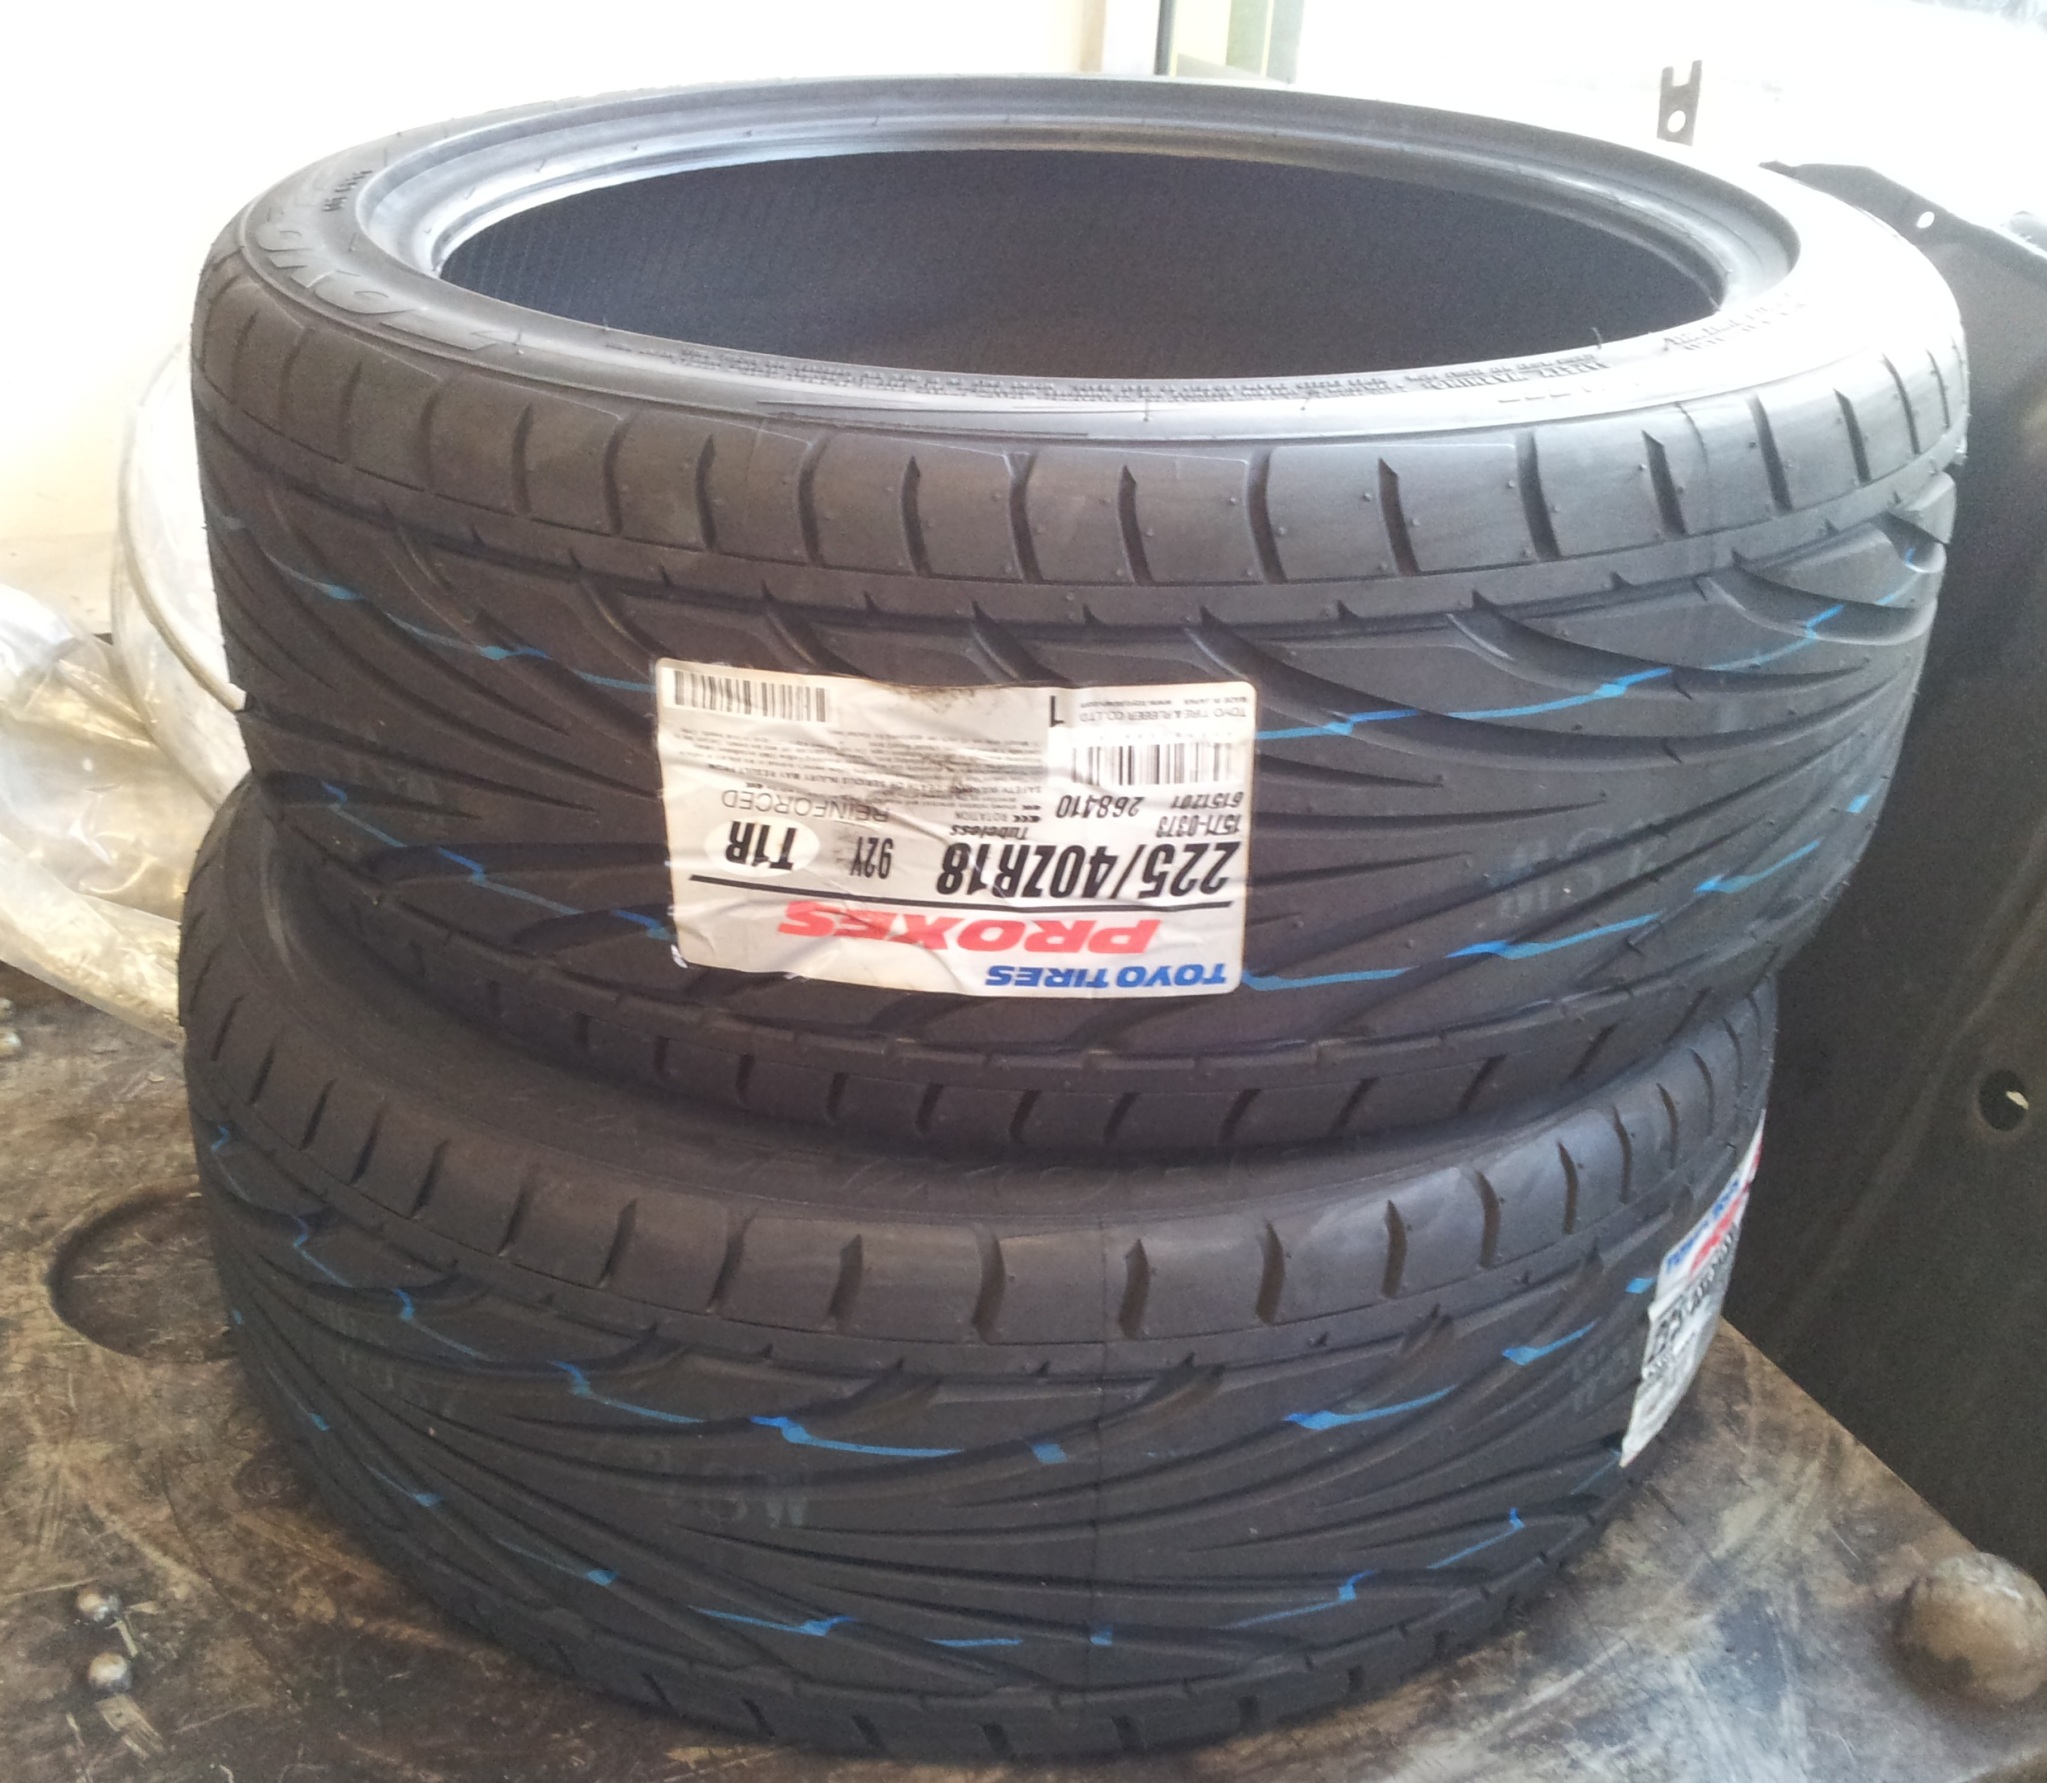
Mucho thanks to Mark Barber for ordering them for me as there were only two left in stock on special offer and not sure if they are getting any more. They will be going on my speedline wheels. When i get paid next I will get more tyres from somewhere and the hubcentric spacers i need with long studs as i am using group A conversion nuts on my wheels.
Also starting to plan how to address my high ACT's. Been something ive been thinking about a while but not got round to it as its not been a priority.
My "group A" cone filter is basically near the exhaust manifold Ive made a heatshield to go on soon and i will also be using heat reflective coated carbon to "box" in the cone filter seperate to the rest of the hot engine bay.
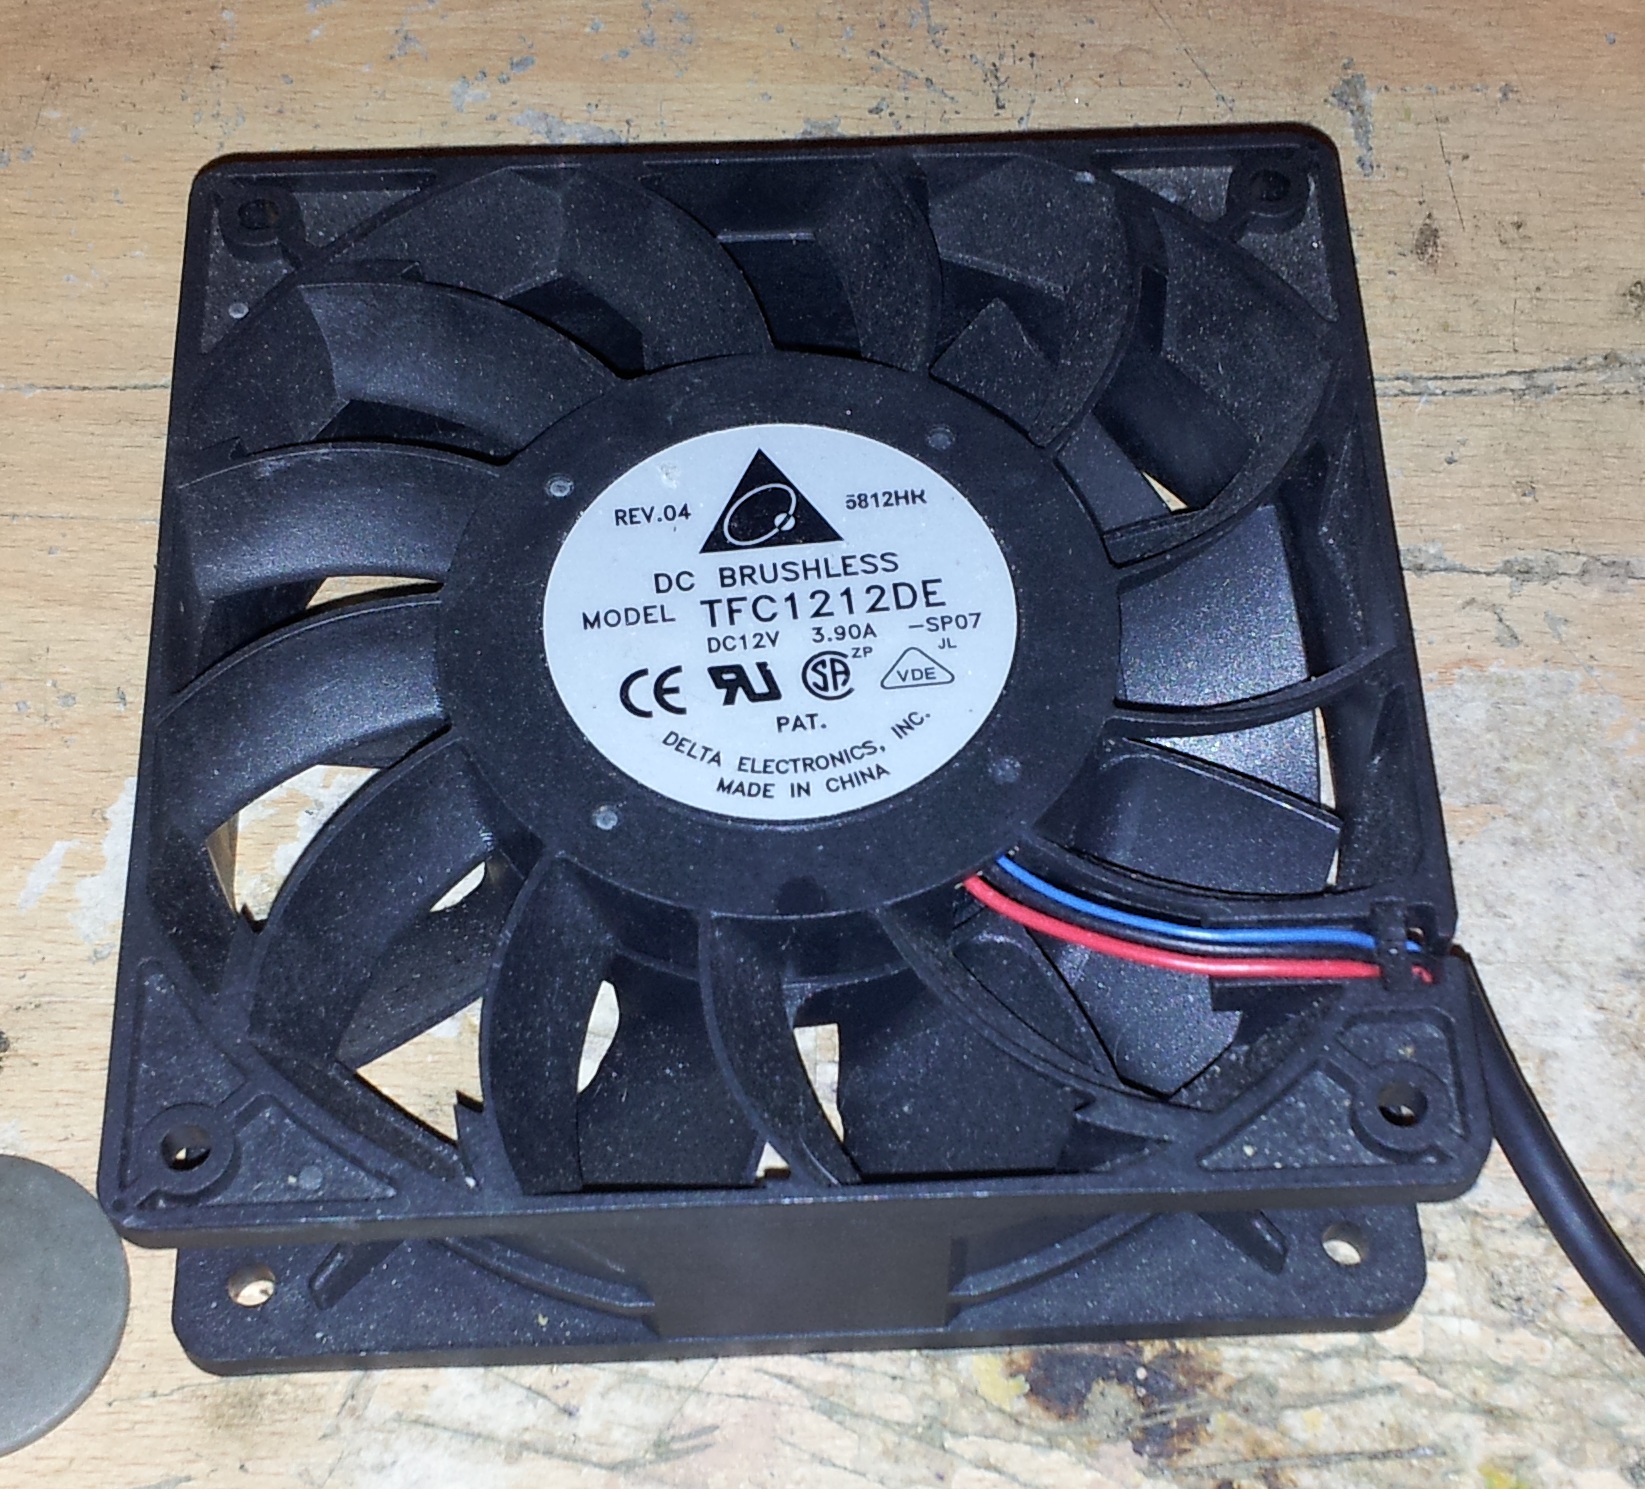
I am also providing two cold feed tubes. one just plain simple duct. The second is fan assisted.
I intend to use a 120mm delta fan - yes thats a computer fan!! Its ip66 rated, sealed bearings etc so will be fine exposed to typical road grime and rain. also designed to work on 12V and draws 4 amps.
It puts out 7133 litres per minute.
a similar sized spal fan pumps out only 5833 litres per minute.
the delta fan cost me �29 from the USA (already have them)
the spal equivilent costs �76 from UK.
I have 3 delta fans.
A rough calculation of a 2 lite engines air consumption can be assumed to be:
Engine capacity x RPM = litres per minute.
2
for a cossie its basically the same as RPM when off boost.
Now very roughly lets take into account boost. The more accurate way would be to use a dyno graph to calculate pressure at a given rpm.
however im just going to use peak rpm and peak boost as worst case.
For my car assuming 7500rpm and 2 bar boost.
that means because the engine runs in vacuum off boost (about -11 to 12 psi) then in effect you are making 3 bar of actual pressure to bring the inlet upto 2 bar positive.
so in effect 3 times atmosphere so therefore 3 times as much air for a given volume give or take.
so my cossie roughly consumes 22500 litres per minute of air. so just over the amount 3 delta fans can deal with.
So in theory I could rig up all 3 fans and give or take be able to flow enough clean air into the air filter box to deal with the maximum air consumption of the engine.
Now im not quite that insane so for the time being im just going to rig up one fan (I have space for all 3 if needs be) with the aim of ensuring lower revs and lower boost levels driving will ensure the engine gets a good amount of fresh air.
I may at a later date add more fans but only dependant on the actual results produced.
So time to get producing parts. I already have some suitable lightweight ducting to use. However i need to create some kind of funnel shaped adaptor to enable me to connect the duct cleanly to the fan.
So take 1 delta fan:
Take some foam modelling block and glue on a tube that matches the internal diameter of the tubing (so it slides over easily), then get busy with the sanding blocks.
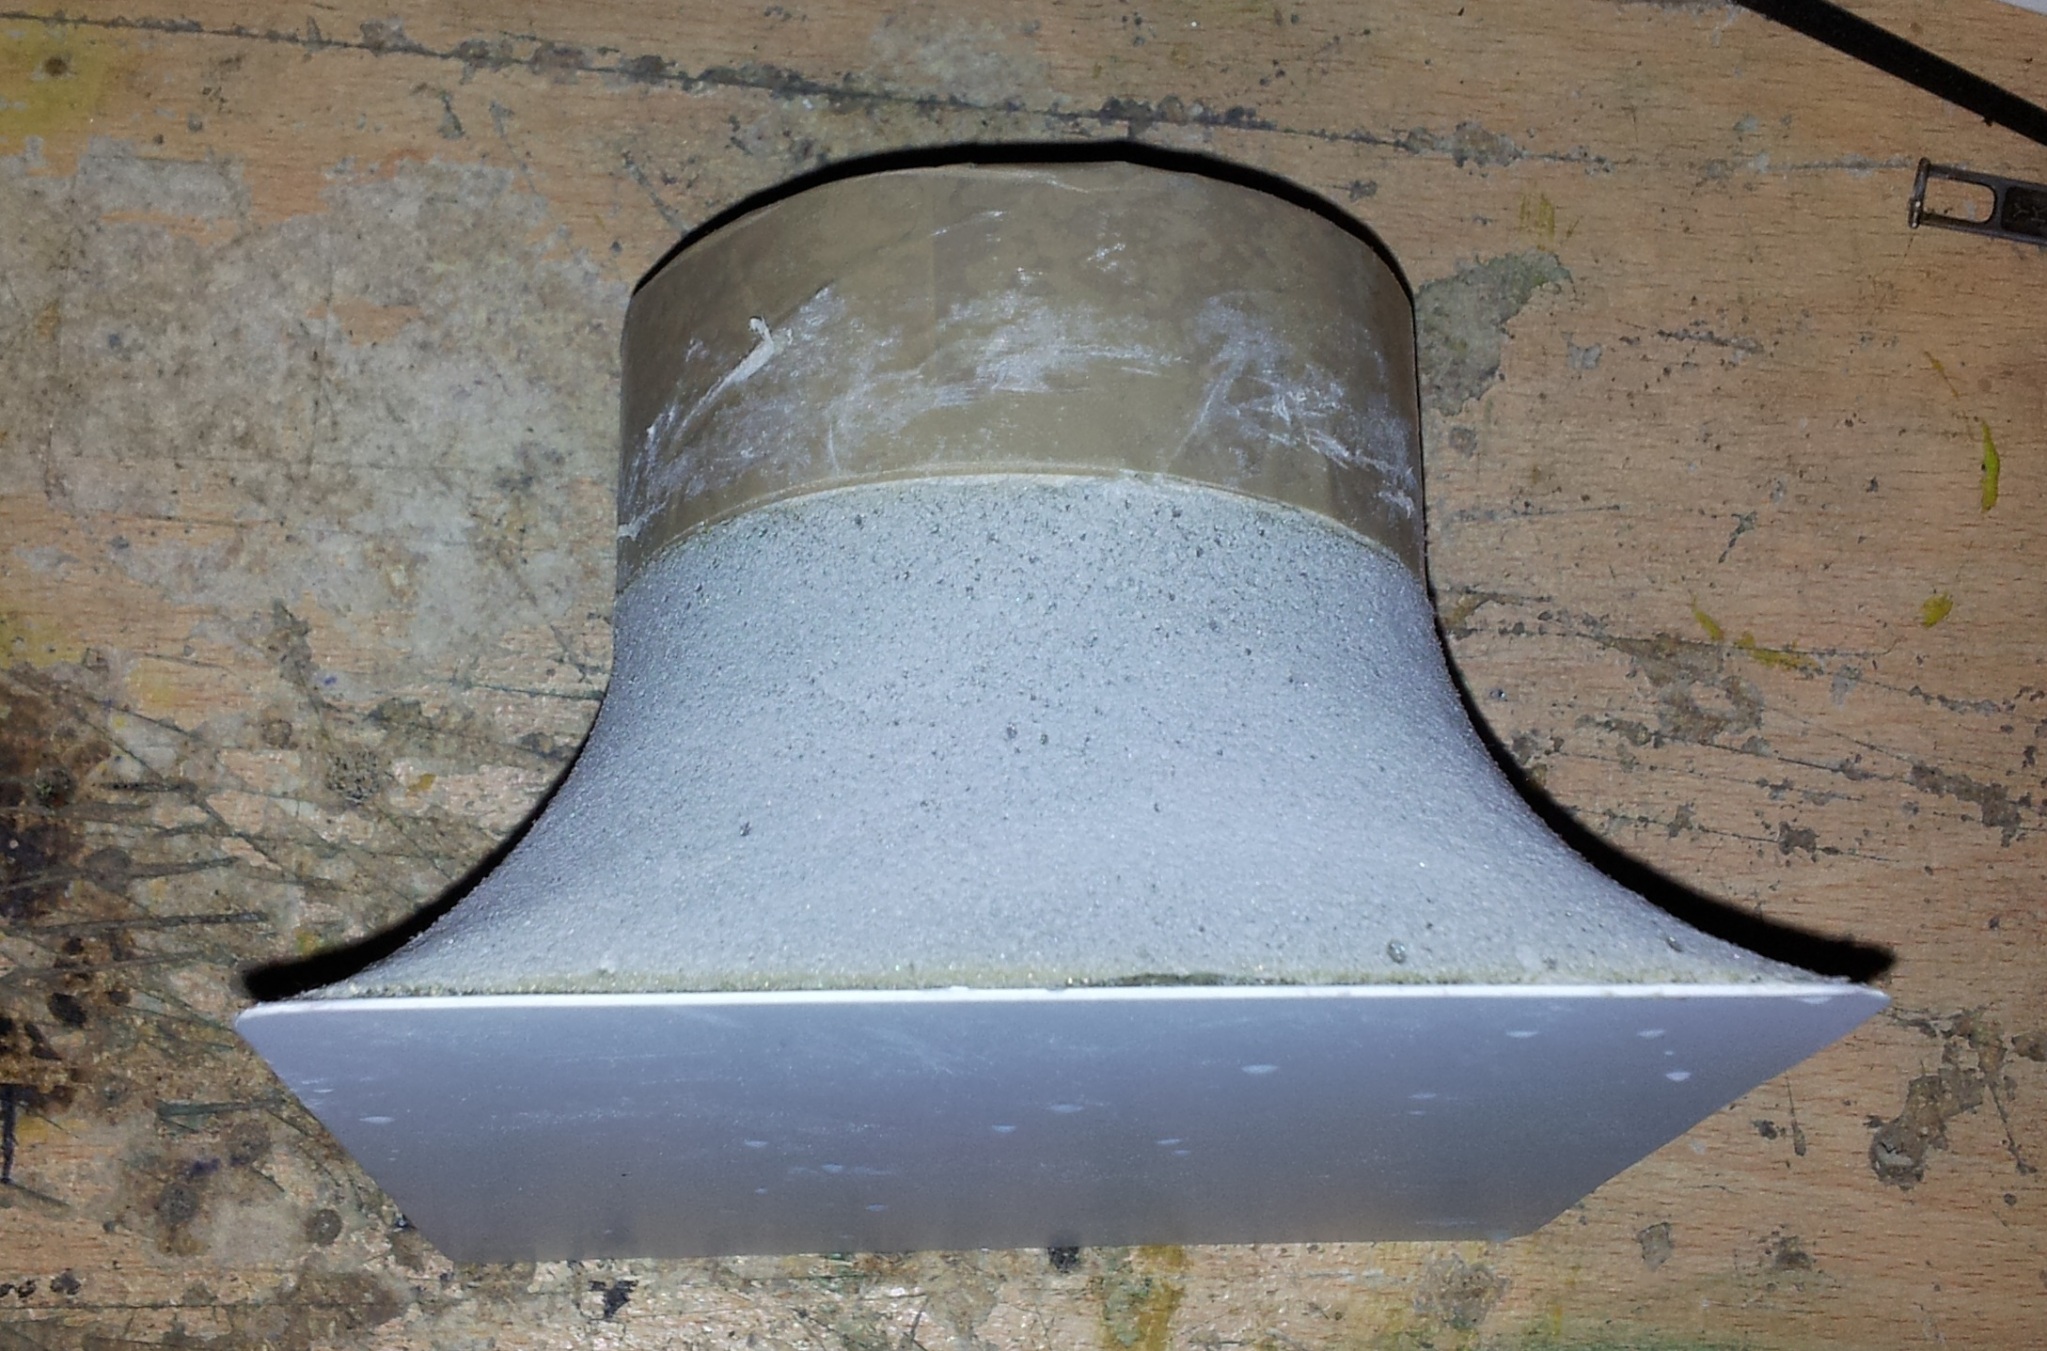
And the end result once i mould an adaptor will be:
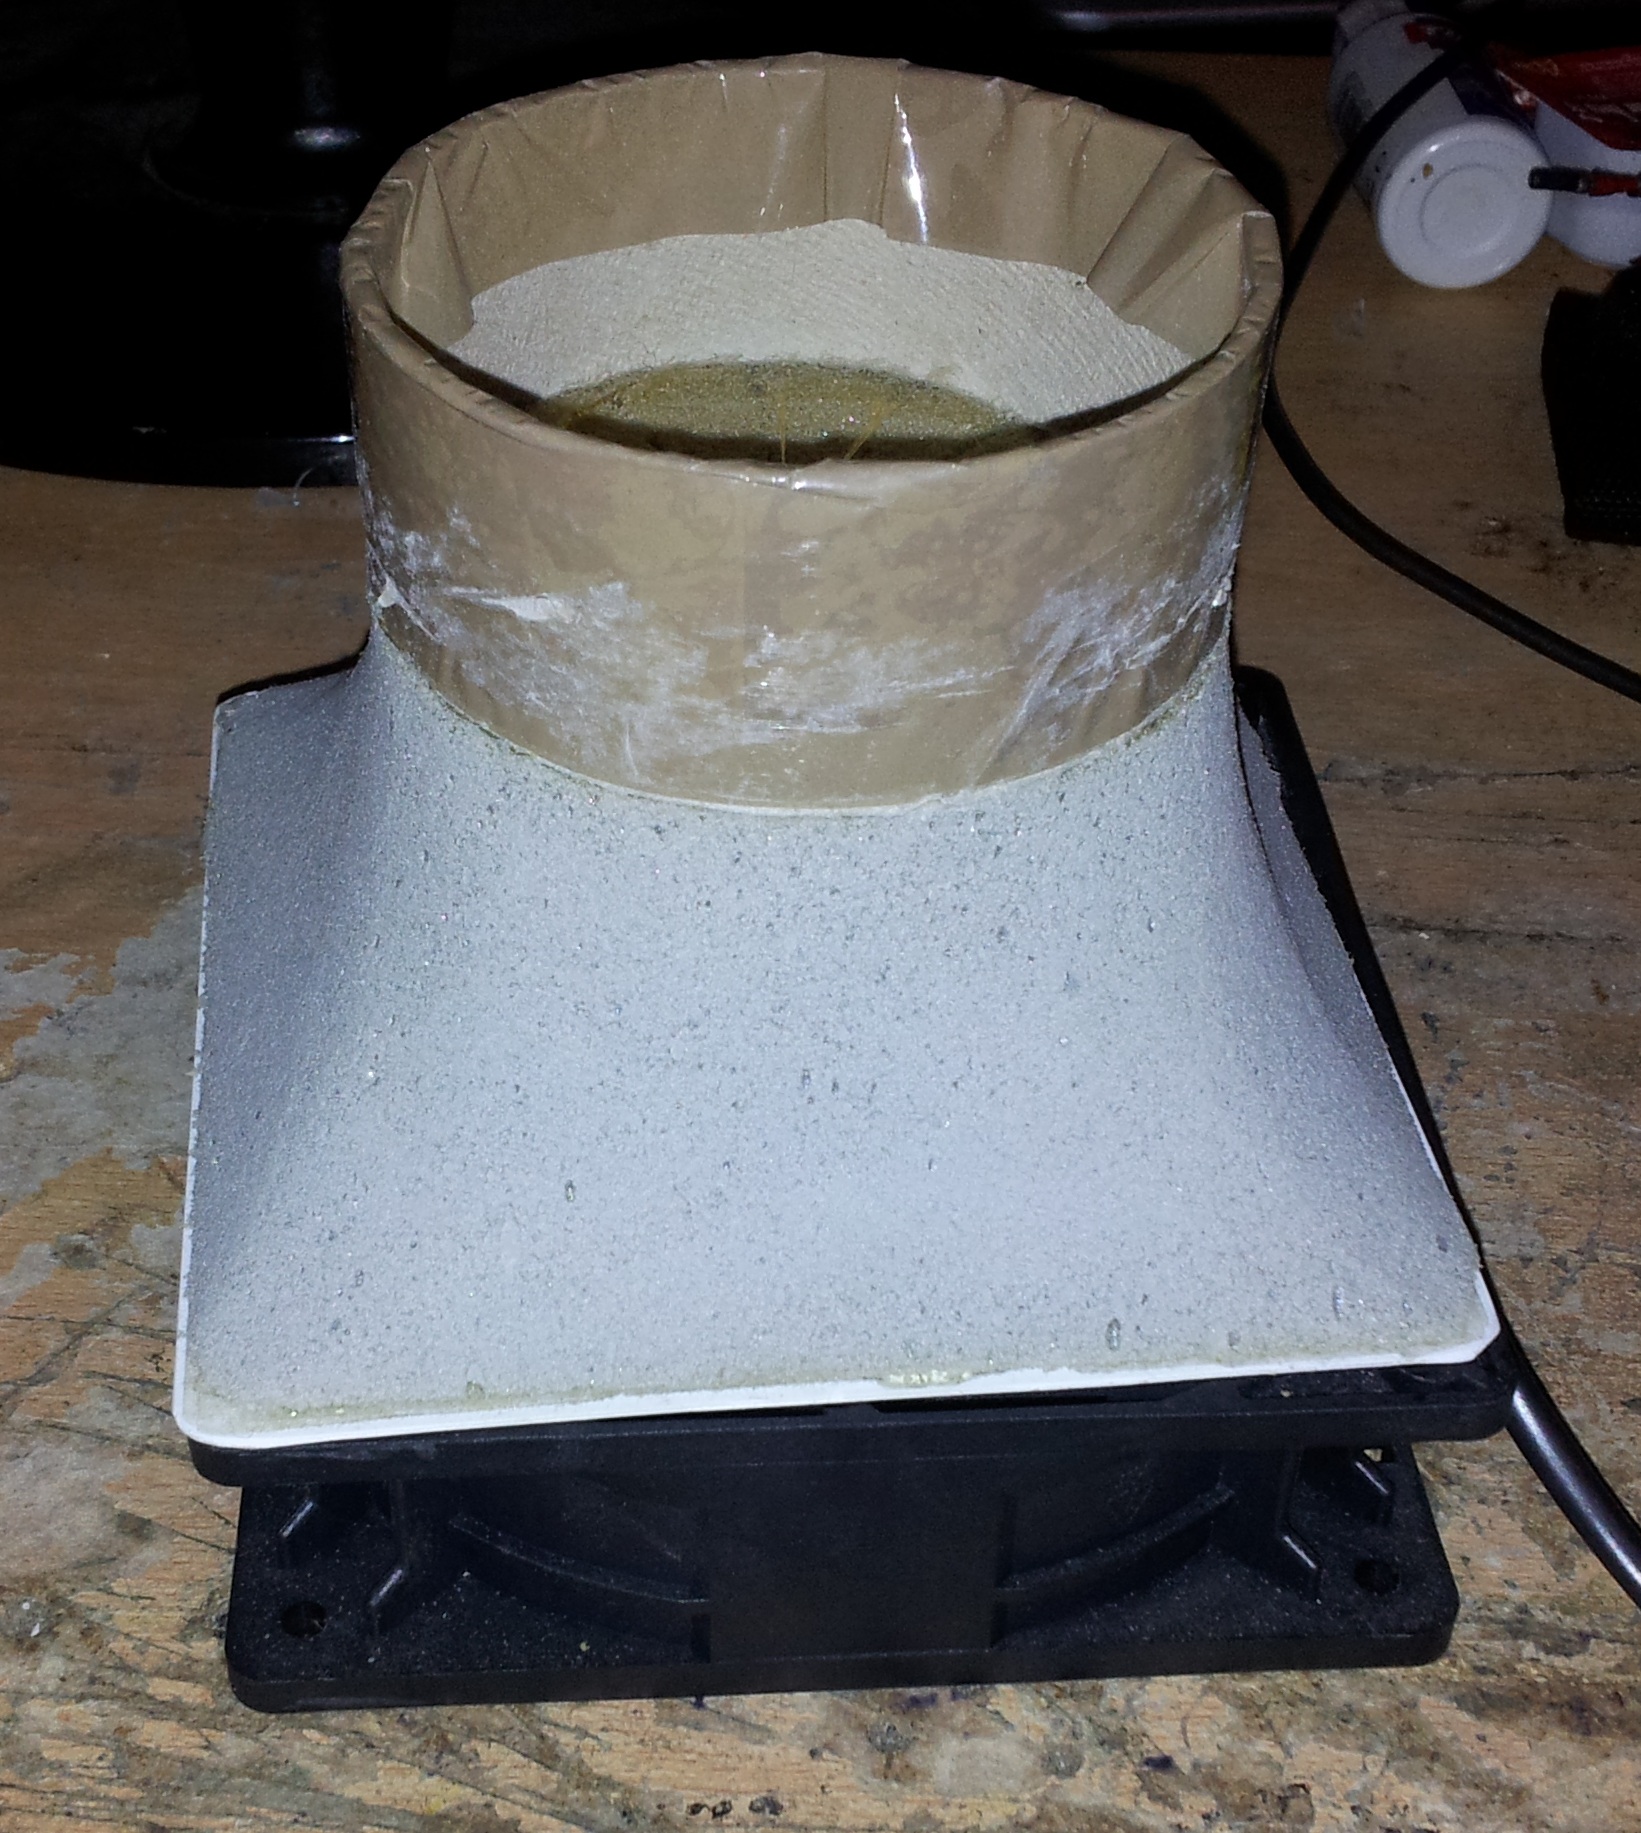
im going to use the foam plug ive made as a rough mould by sealing it and release coating it. i will then wetlay it with carbon. It will be rough and ready but a few minutes with a bit of sand paper and the inside will be nice and smooth.
its going to be hidden so not even going to try to make it look good as its a waste of my time!! Will reserve the fancy moulds and pre-preg for the cosmetically important parts!
Got some new tyres:
Mucho thanks to Mark Barber for ordering them for me as there were only two left in stock on special offer and not sure if they are getting any more. They will be going on my speedline wheels. When i get paid next I will get more tyres from somewhere and the hubcentric spacers i need with long studs as i am using group A conversion nuts on my wheels.
Also starting to plan how to address my high ACT's. Been something ive been thinking about a while but not got round to it as its not been a priority.
My "group A" cone filter is basically near the exhaust manifold
Ive made a heatshield to go on soon and i will also be using heat reflective coated carbon to "box" in the cone filter seperate to the rest of the hot engine bay.I am also providing two cold feed tubes. one just plain simple duct. The second is fan assisted.
I intend to use a 120mm delta fan - yes thats a computer fan!! Its ip66 rated, sealed bearings etc so will be fine exposed to typical road grime and rain. also designed to work on 12V and draws 4 amps.
It puts out 7133 litres per minute.
a similar sized spal fan pumps out only 5833 litres per minute.
the delta fan cost me �29 from the USA (already have them)
the spal equivilent costs �76 from UK.
I have 3 delta fans.
A rough calculation of a 2 lite engines air consumption can be assumed to be:
Engine capacity x RPM = litres per minute.
2
for a cossie its basically the same as RPM when off boost.
Now very roughly lets take into account boost. The more accurate way would be to use a dyno graph to calculate pressure at a given rpm.
however im just going to use peak rpm and peak boost as worst case.
For my car assuming 7500rpm and 2 bar boost.
that means because the engine runs in vacuum off boost (about -11 to 12 psi) then in effect you are making 3 bar of actual pressure to bring the inlet upto 2 bar positive.
so in effect 3 times atmosphere so therefore 3 times as much air for a given volume give or take.
so my cossie roughly consumes 22500 litres per minute of air. so just over the amount 3 delta fans can deal with.
So in theory I could rig up all 3 fans and give or take be able to flow enough clean air into the air filter box to deal with the maximum air consumption of the engine.
Now im not quite that insane so for the time being im just going to rig up one fan (I have space for all 3 if needs be) with the aim of ensuring lower revs and lower boost levels driving will ensure the engine gets a good amount of fresh air.
I may at a later date add more fans but only dependant on the actual results produced.
So time to get producing parts. I already have some suitable lightweight ducting to use. However i need to create some kind of funnel shaped adaptor to enable me to connect the duct cleanly to the fan.
So take 1 delta fan:
Take some foam modelling block and glue on a tube that matches the internal diameter of the tubing (so it slides over easily), then get busy with the sanding blocks.
And the end result once i mould an adaptor will be:
im going to use the foam plug ive made as a rough mould by sealing it and release coating it. i will then wetlay it with carbon. It will be rough and ready but a few minutes with a bit of sand paper and the inside will be nice and smooth.
its going to be hidden so not even going to try to make it look good as its a waste of my time!! Will reserve the fancy moulds and pre-preg for the cosmetically important parts!
12-01-2013, 11:48 PM
#416
Lucifer II - 666
I just bought 2 naca ducts off of Jay, black plastic, yours look ace in carbon!
13-01-2013, 12:28 AM
#418
Lucifer II - 666
No worries mate.
31-01-2013, 10:06 PM
#422
Bit of an update.
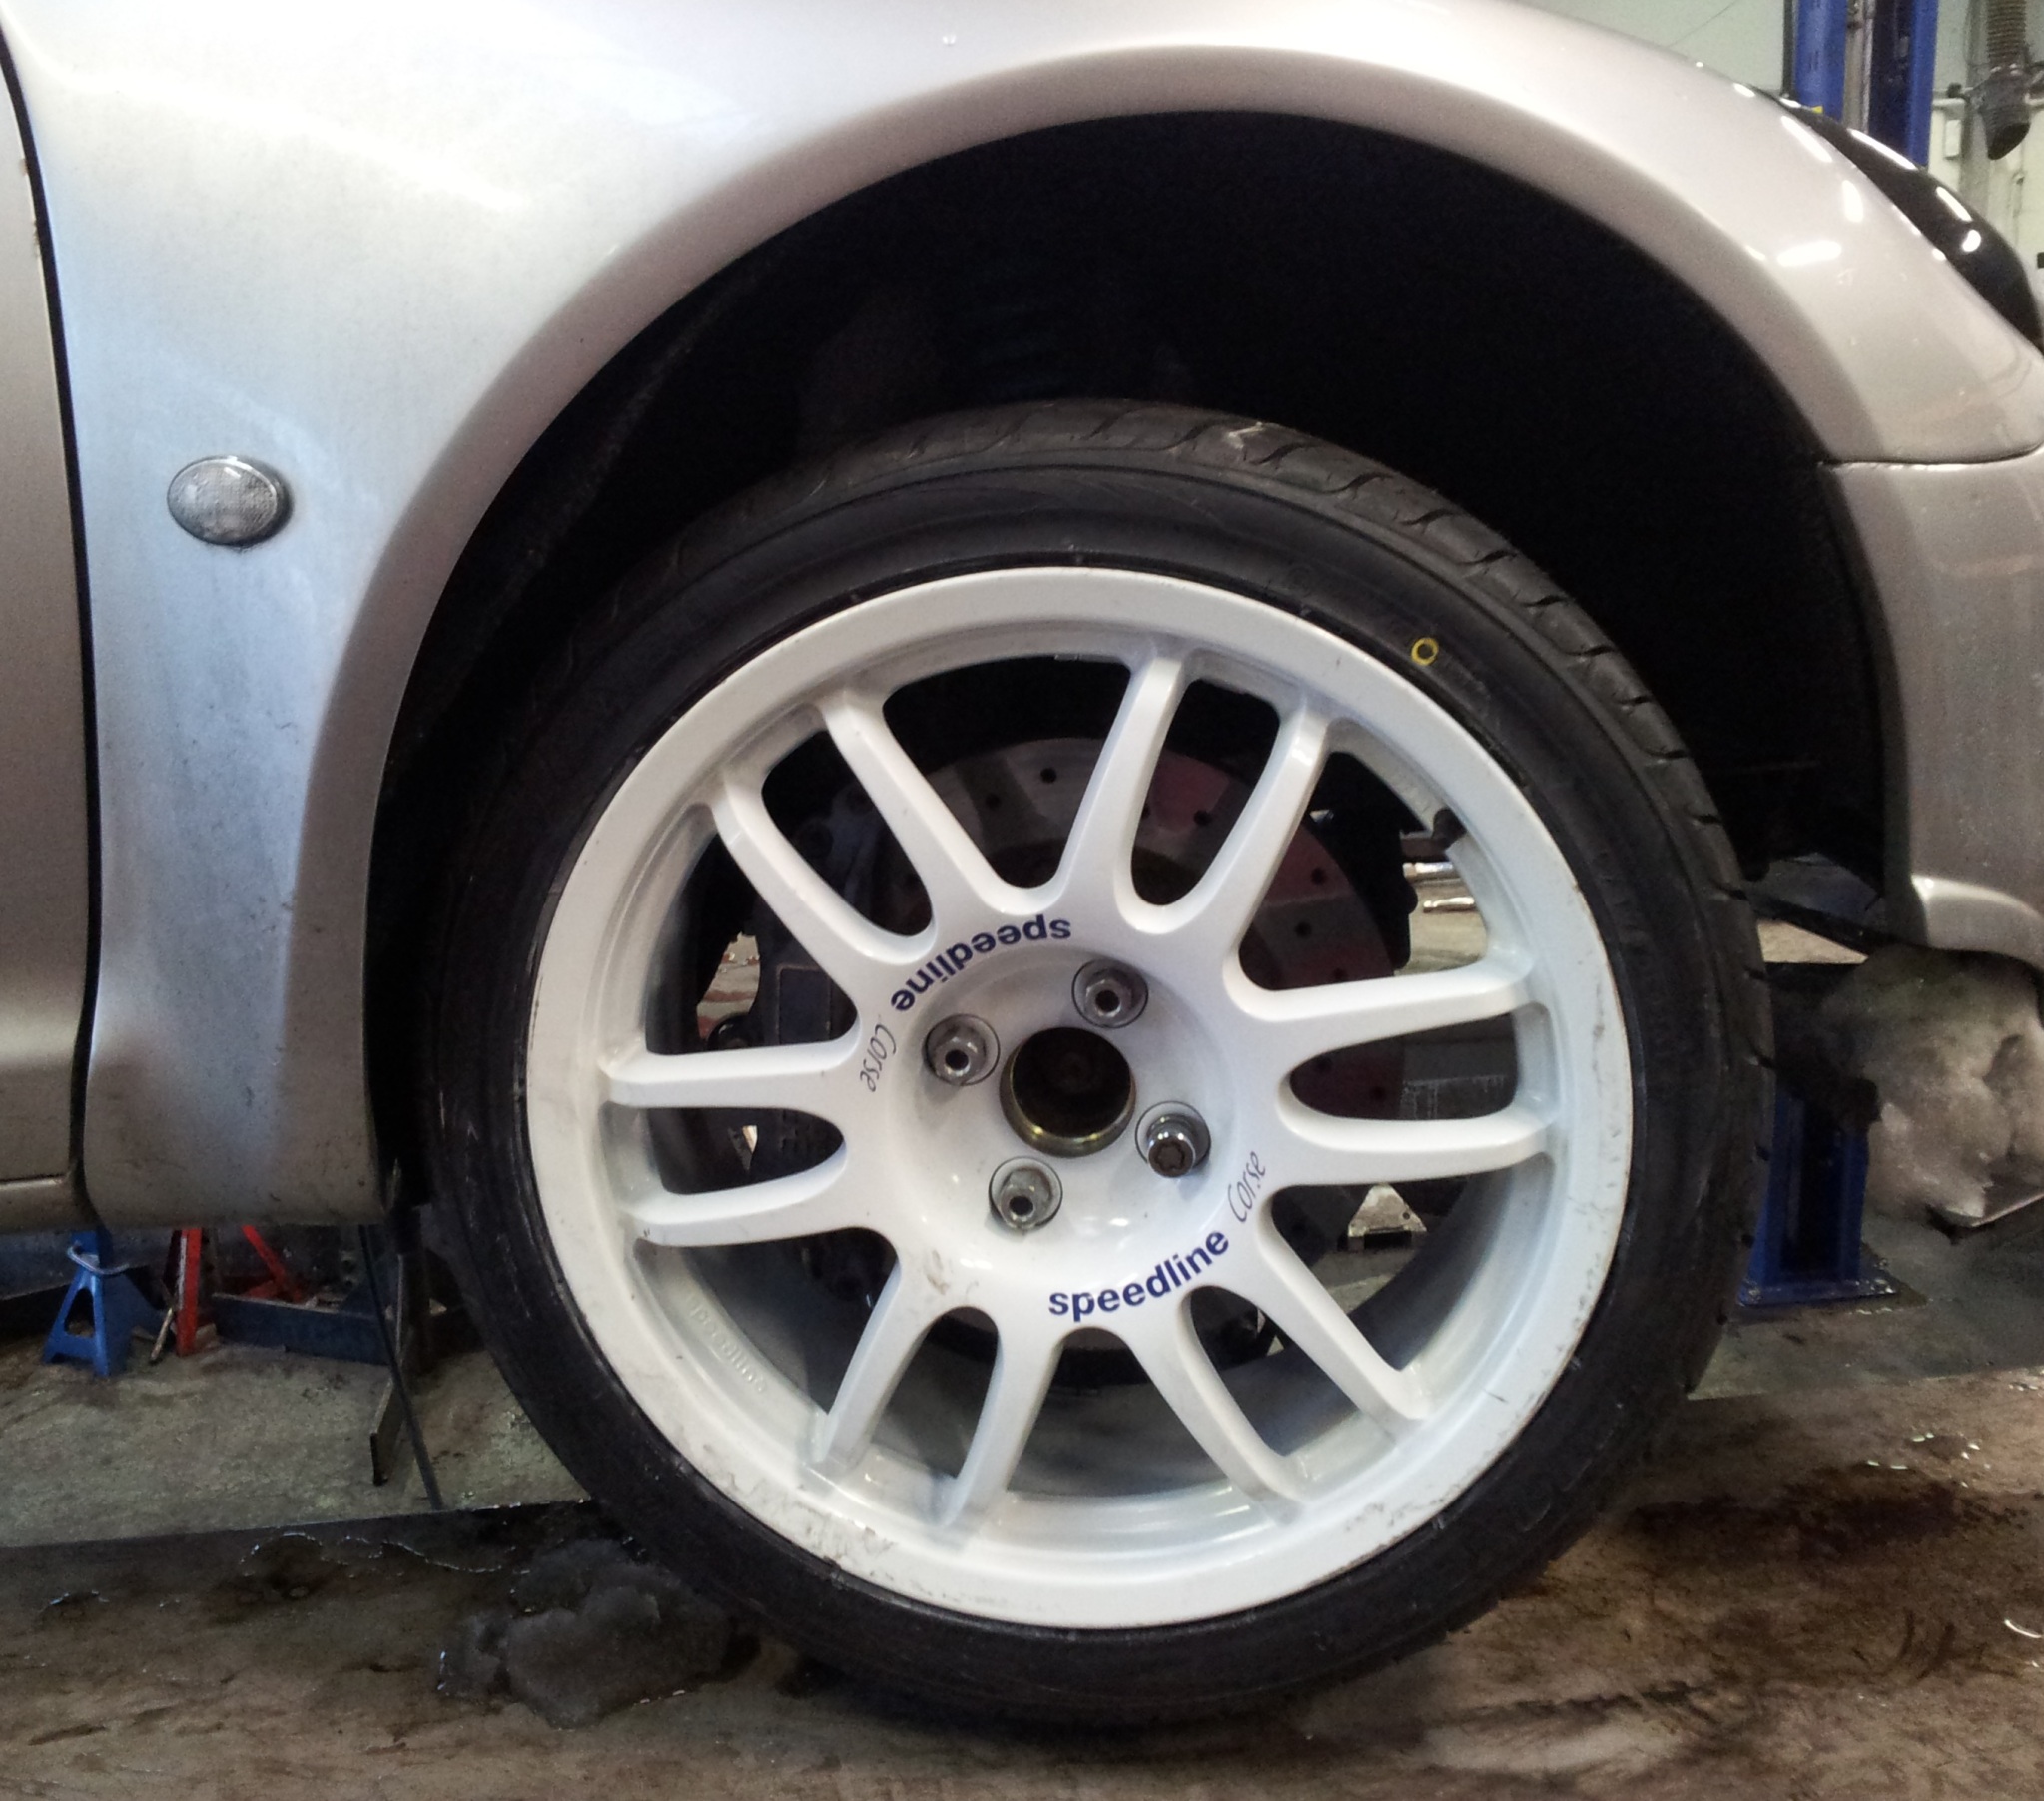
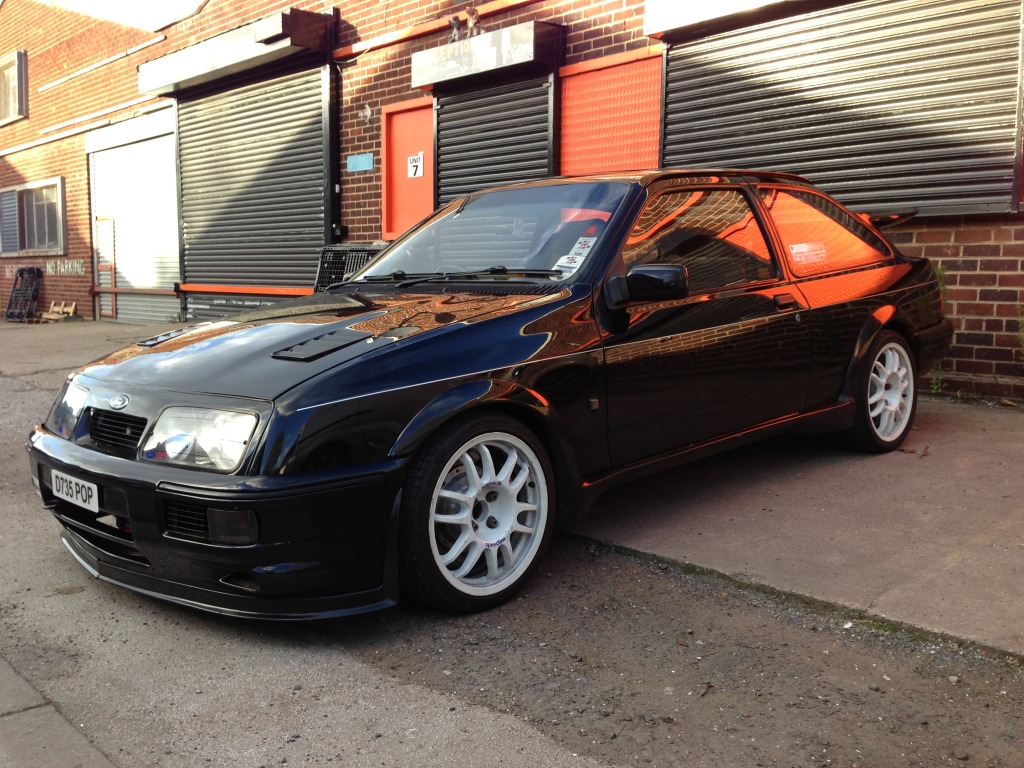
Biggest change is I've finally taken off the RL7's and fitted the speedlines ive had in my basement 2 years! Only just been able to afford 4 new tyres now im working.
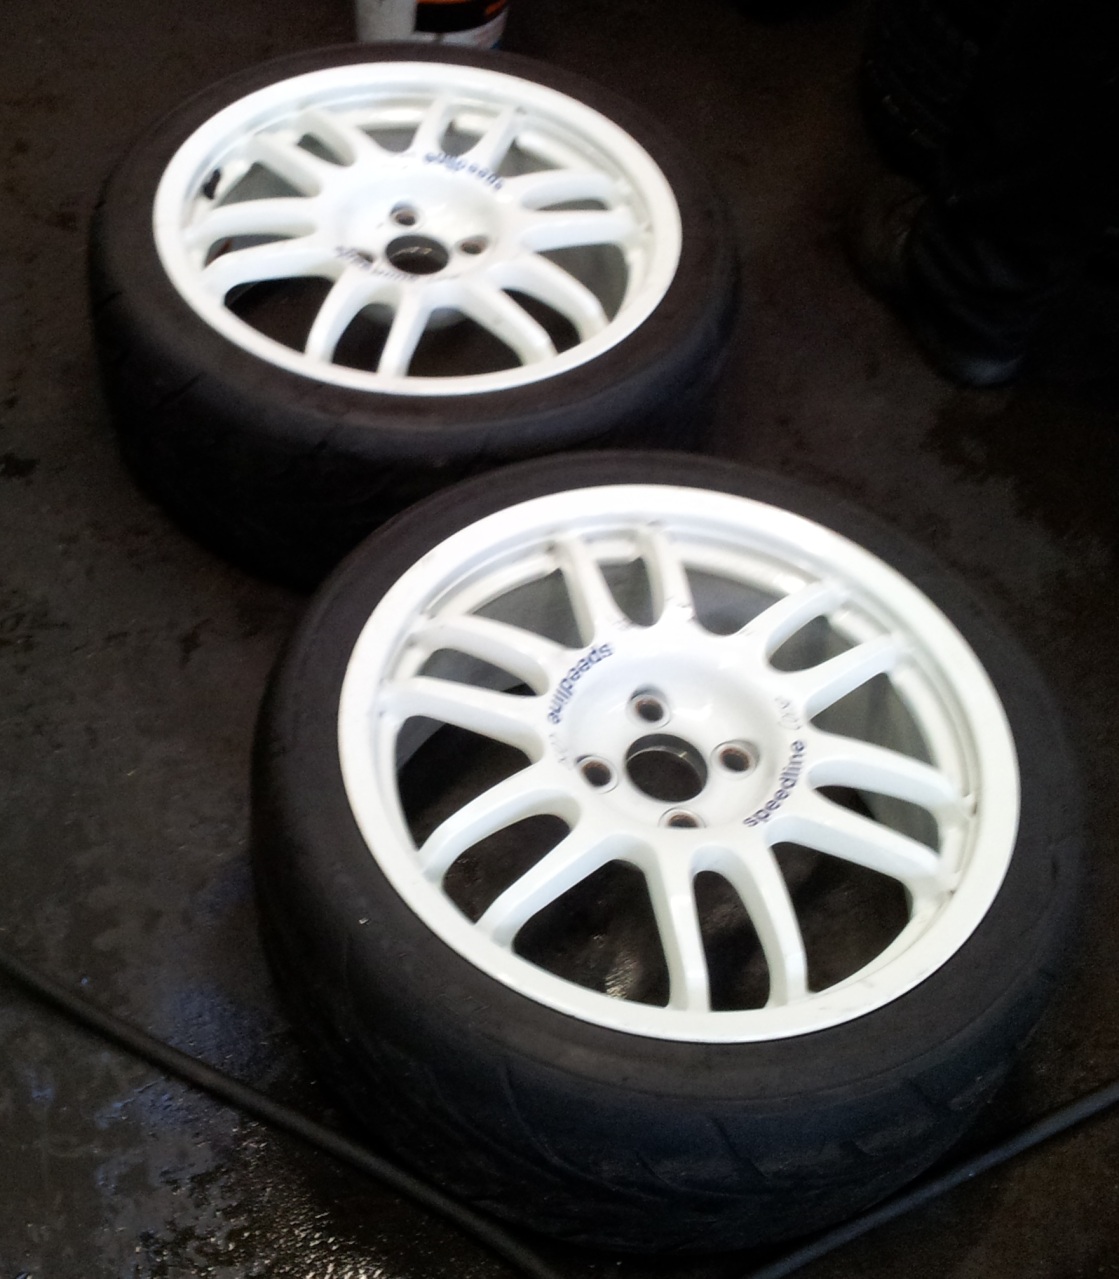
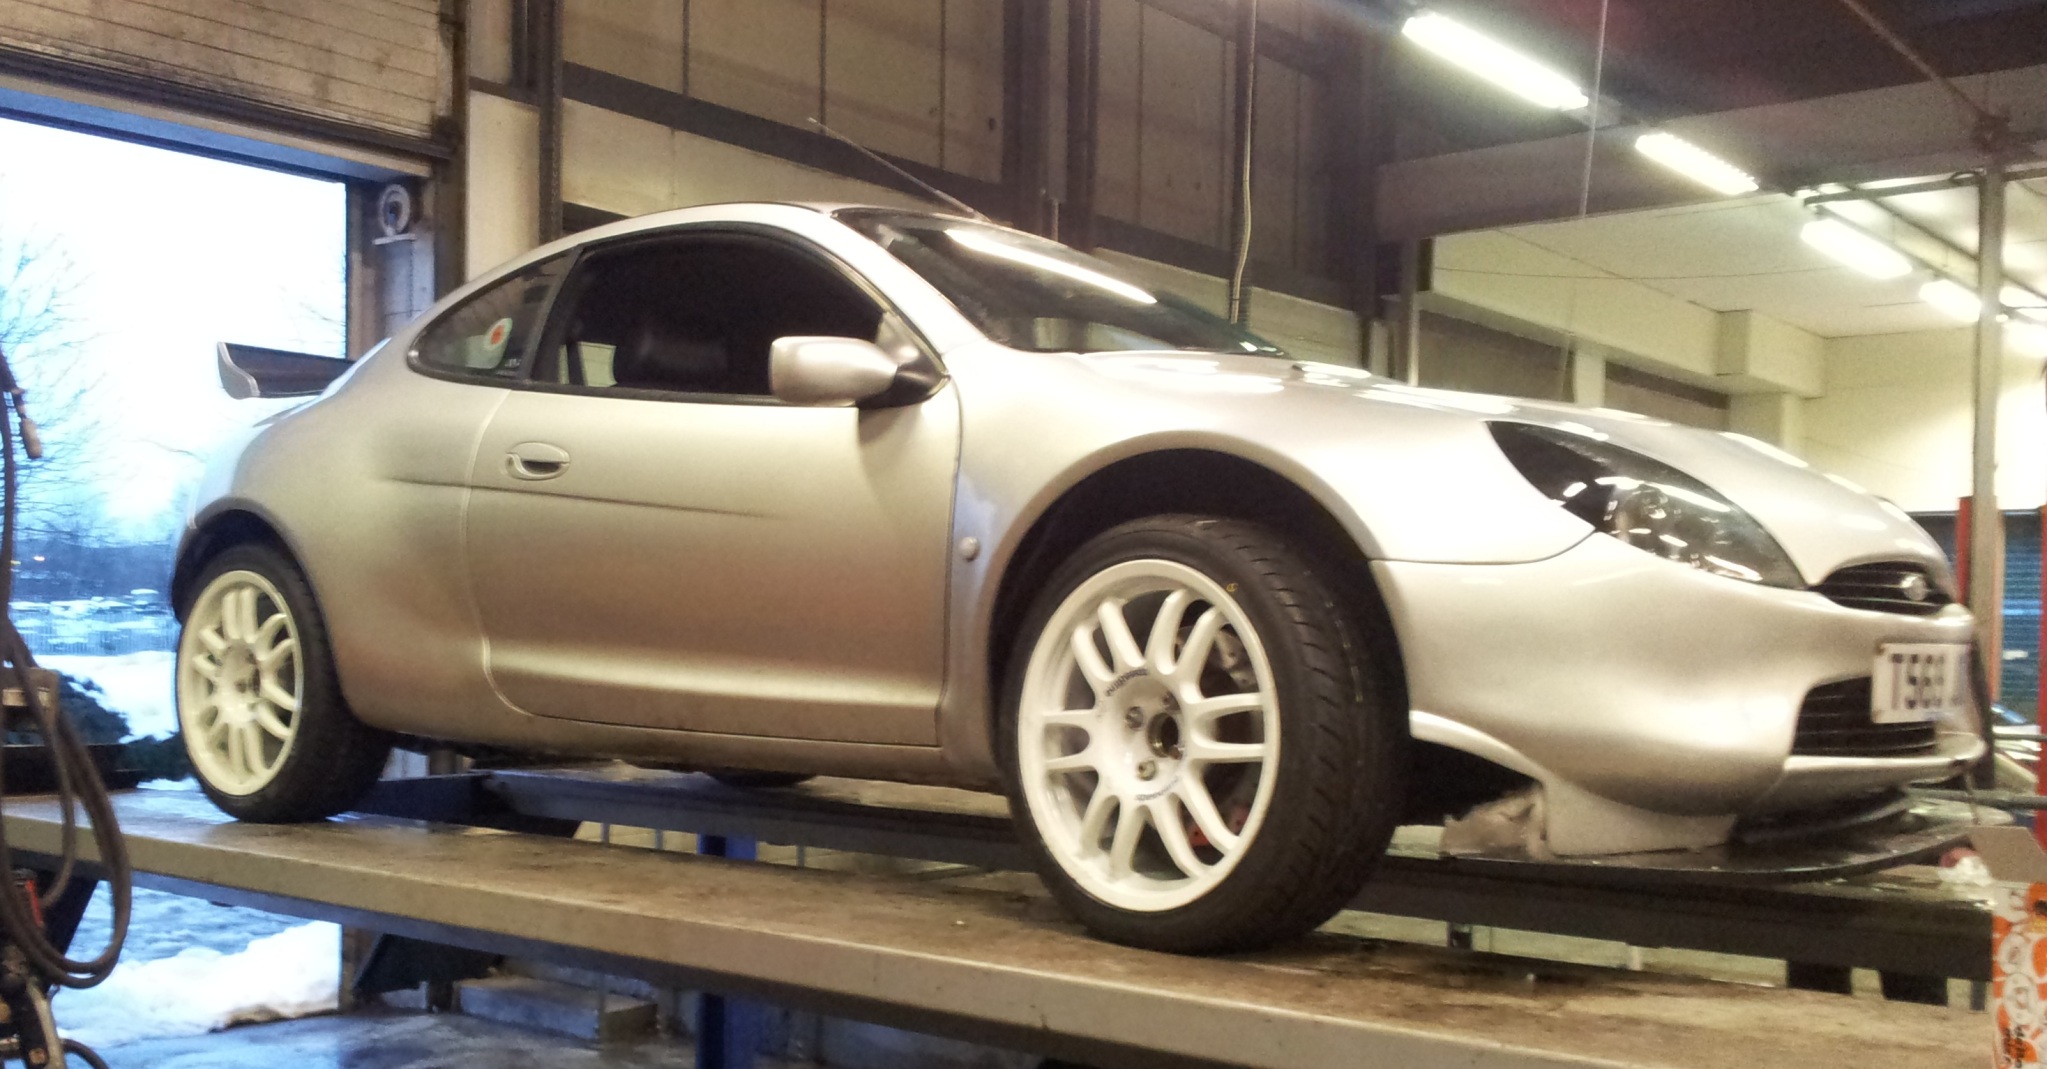
Im sure some wont think white goes with silver, but i couldnt give a damn because long term the car will change colour anyway.
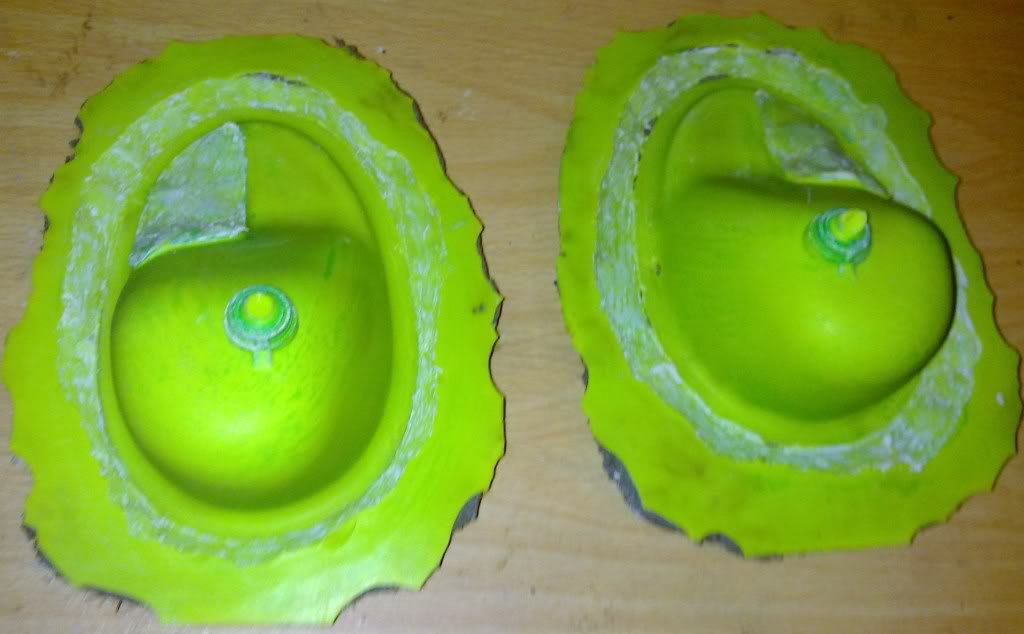
This project was the first one i ever did. The moulds were made a few years ago:
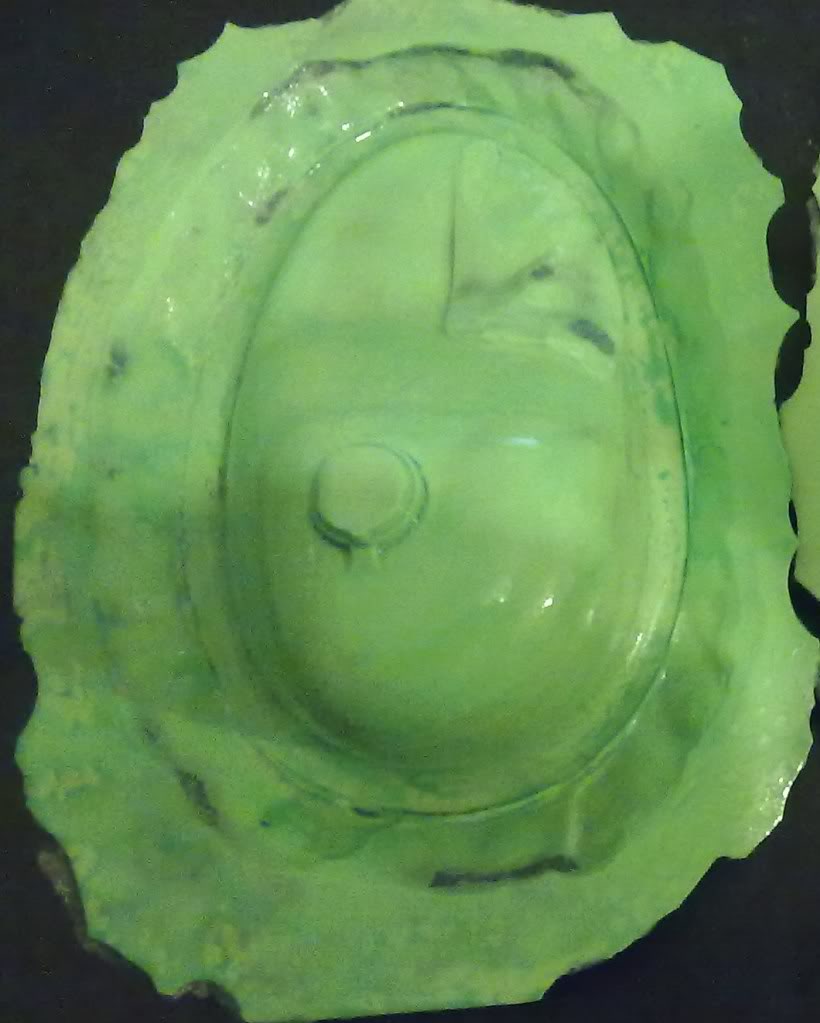
I tried it wetlay and infusion and couldnt get either to work properly.
So instead i moved onto pre-preg. It was sooo much easier to lay up the part:

that was the surface layer.
Made a template for the backing:
You can see how sticky the pre-preg is:
the next layer was then added:
The whole lot was then put in a vacuum bag ready to be cured:
Once cured they were trimmed:
I am well happy with the finish! just a little sanding for smooth edges and it will be ready to fit!
Also decided to get my extinguisher mould out again. Remade it in pre-preg.
Had to post cure the mould to ensure it would work at the required temperature.
The layup is slightly different with the fabric being cut into three sections so there can be a little movement in the tight corners allowing the fabric to fill the space so no bridging.
fully laid up:

Just after i finished with the dremel:

Needs slots cutting out, edges tidying and a polish and its done!
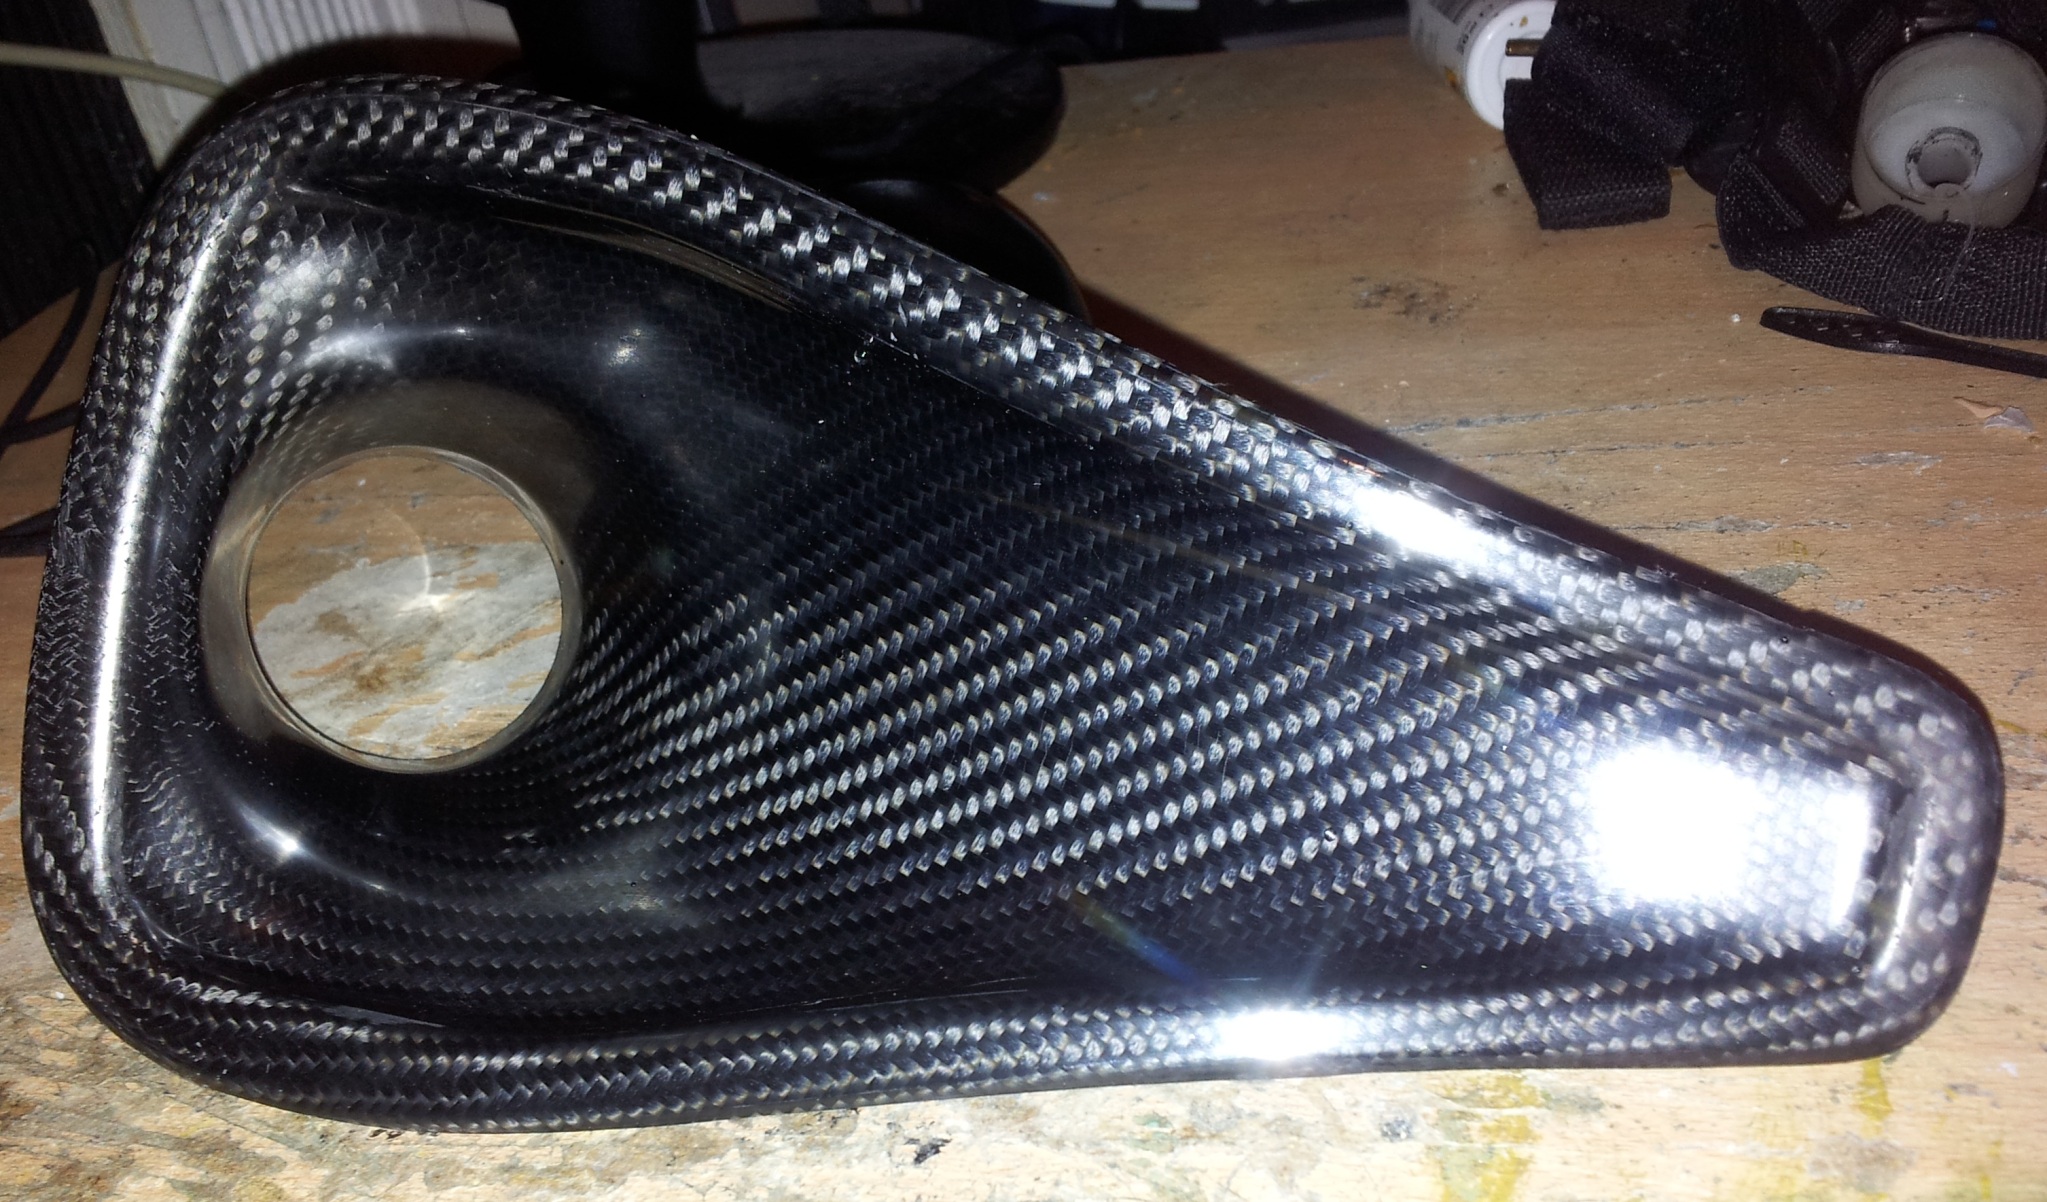
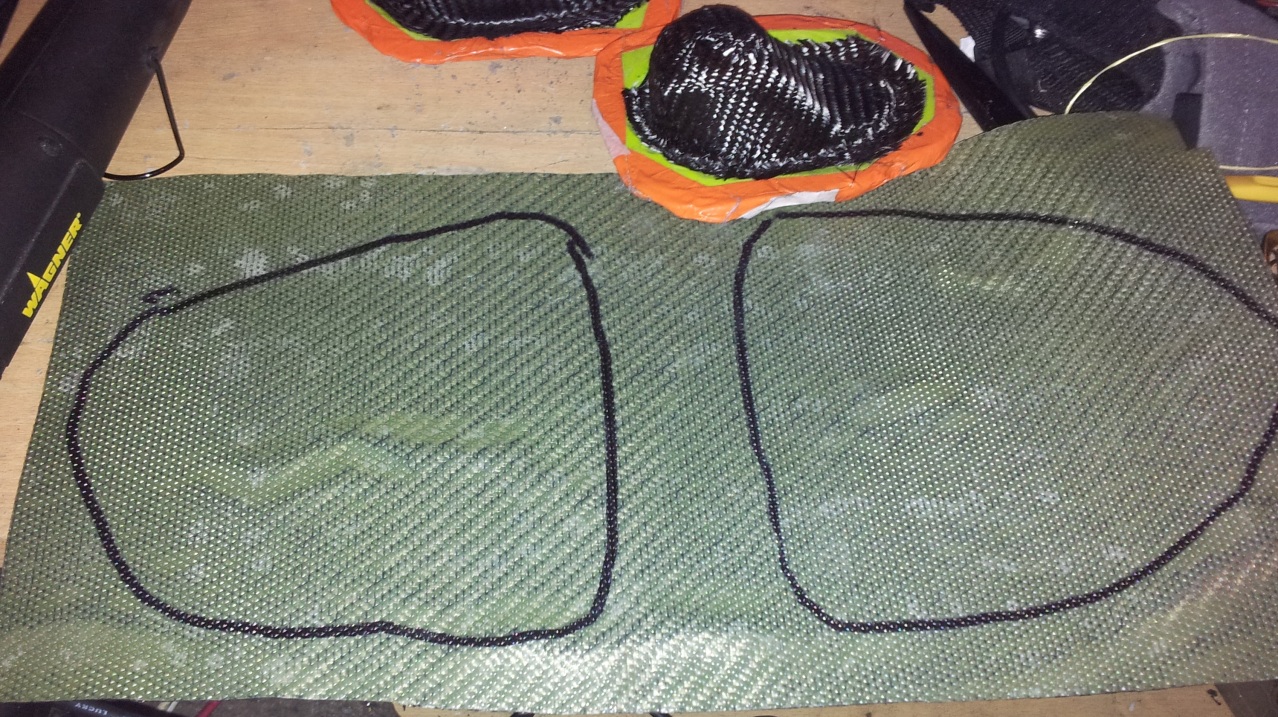
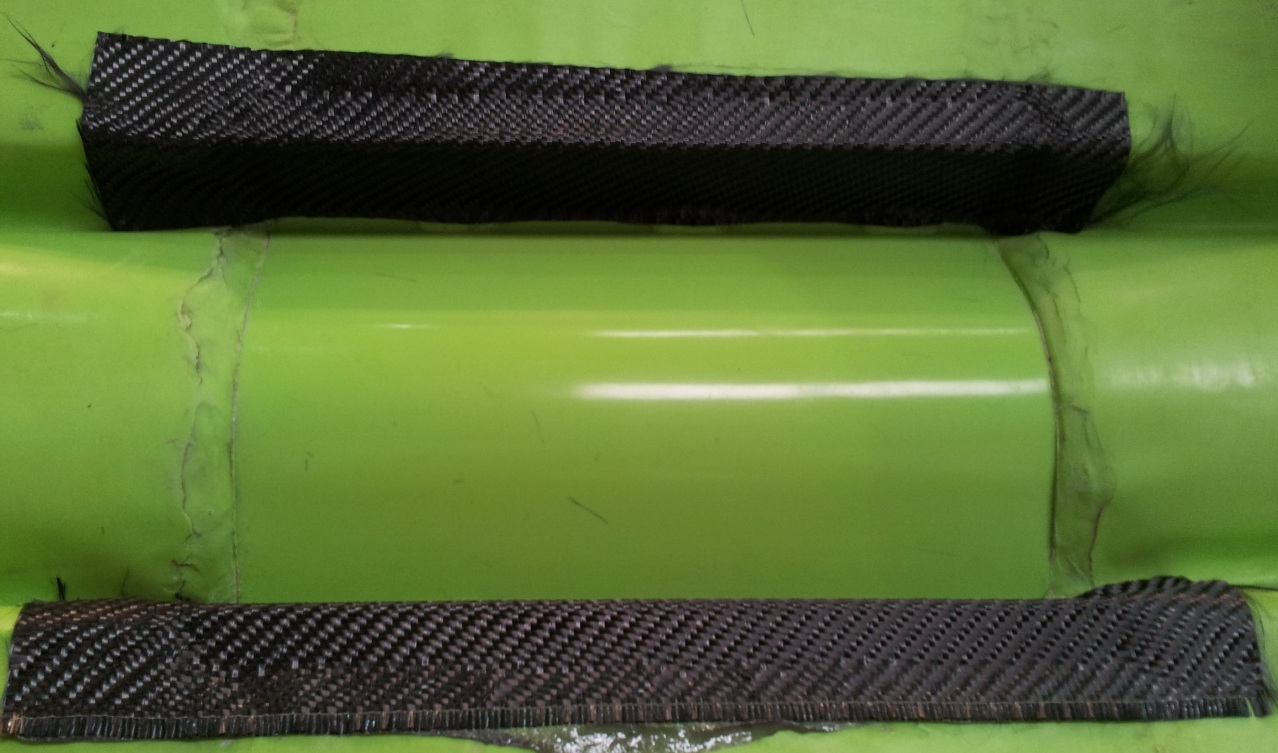
I also did the same with my gear lever surround. Used my previous template measurements to cut some Easypreg Surface layer to the necessary shape:
You can see the shiney surface here:
I then started to carefully lay the pre-preg into the mould:
Notice the tool i borowed to press the fabric right into the tight corners.
once i was happy with the first layer, I used some 400g vari-preg as the backing layer. Its just going in here:
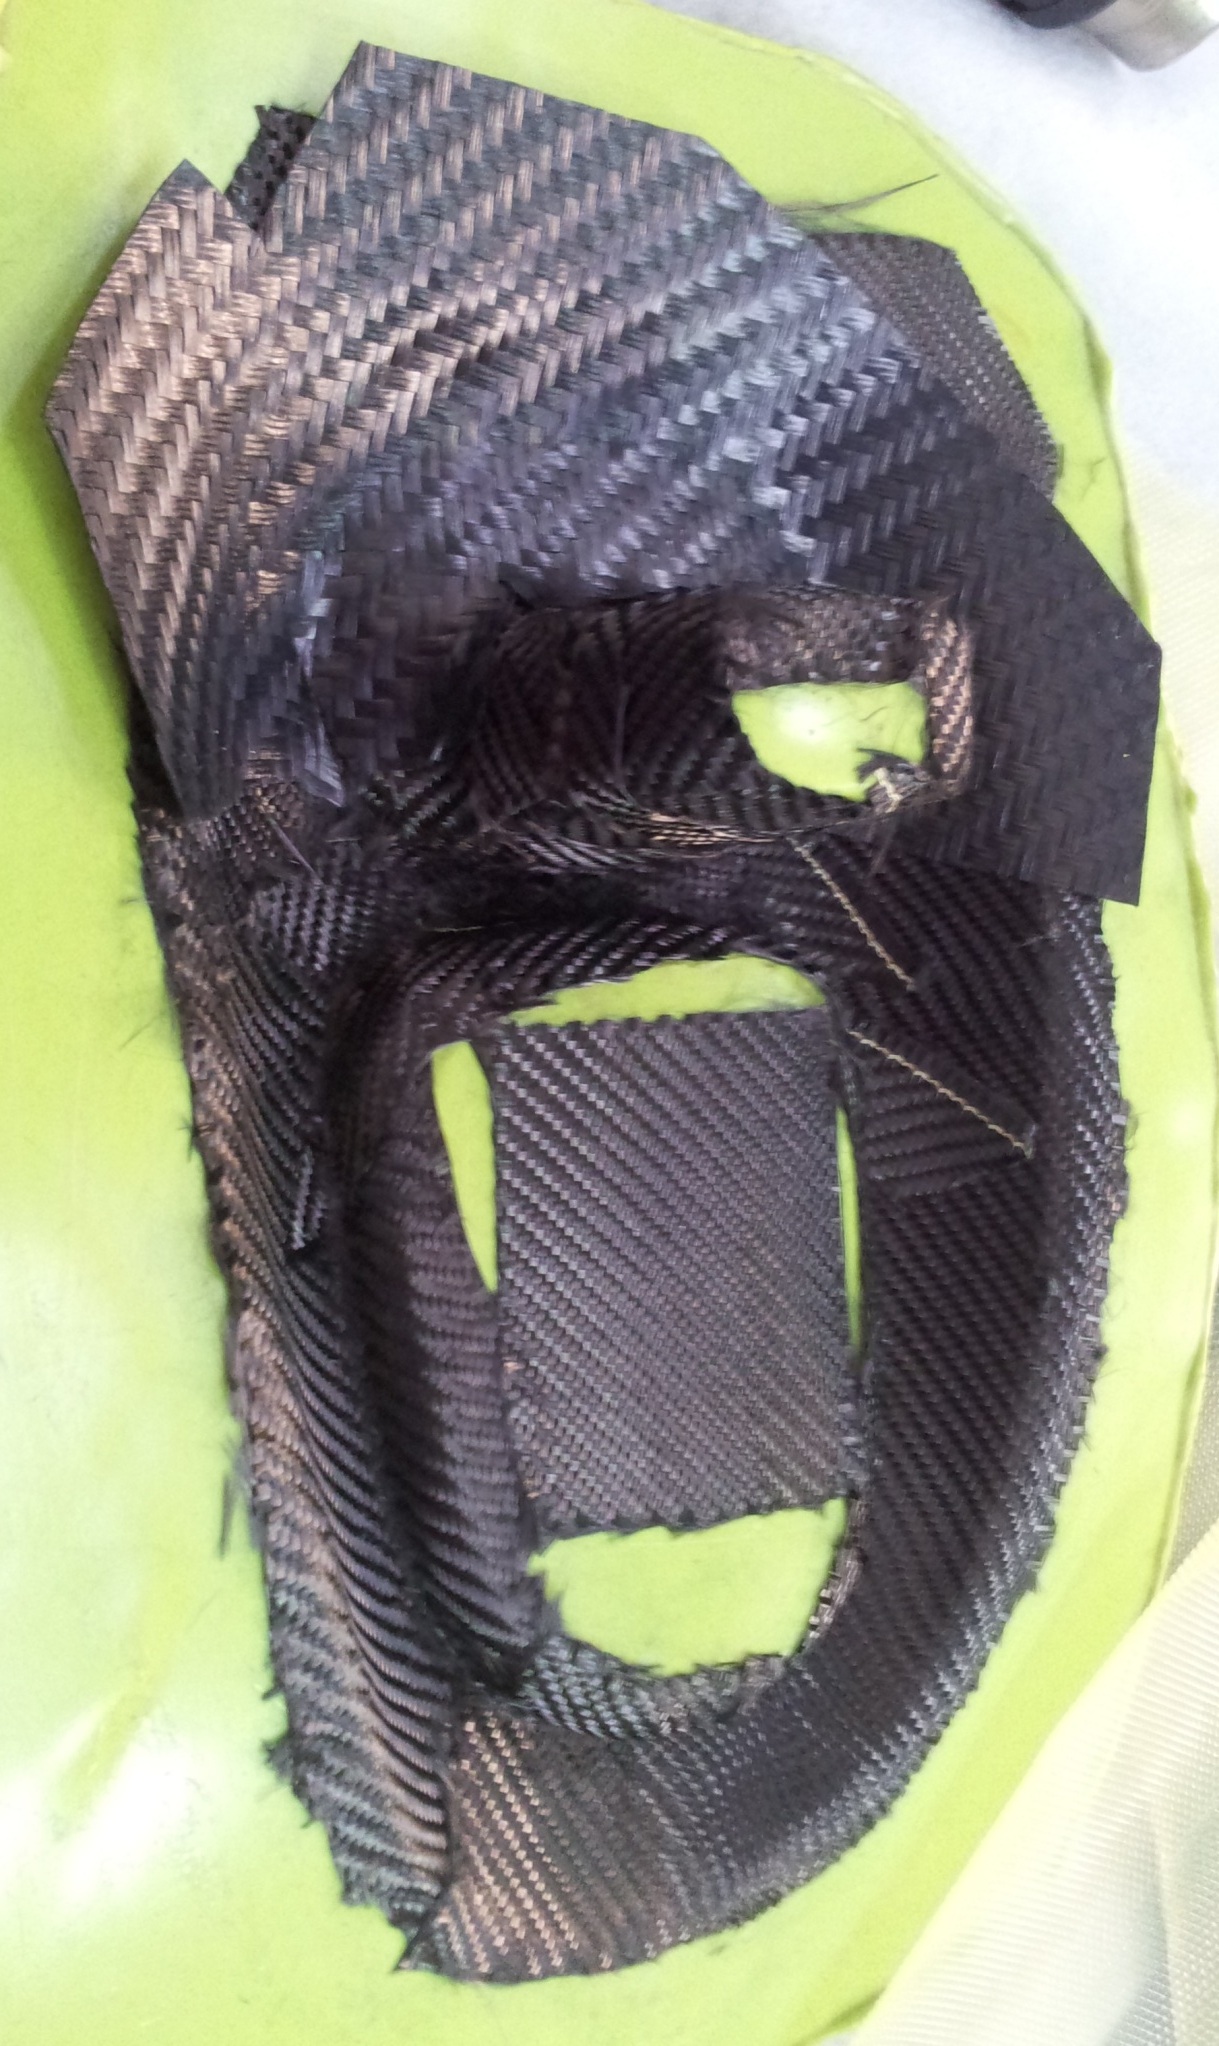
I used some odd shaped offcuts to save wastage and as its a cosmetic trim piece it doesnt matter from a strength issue.
The backing layer all done:
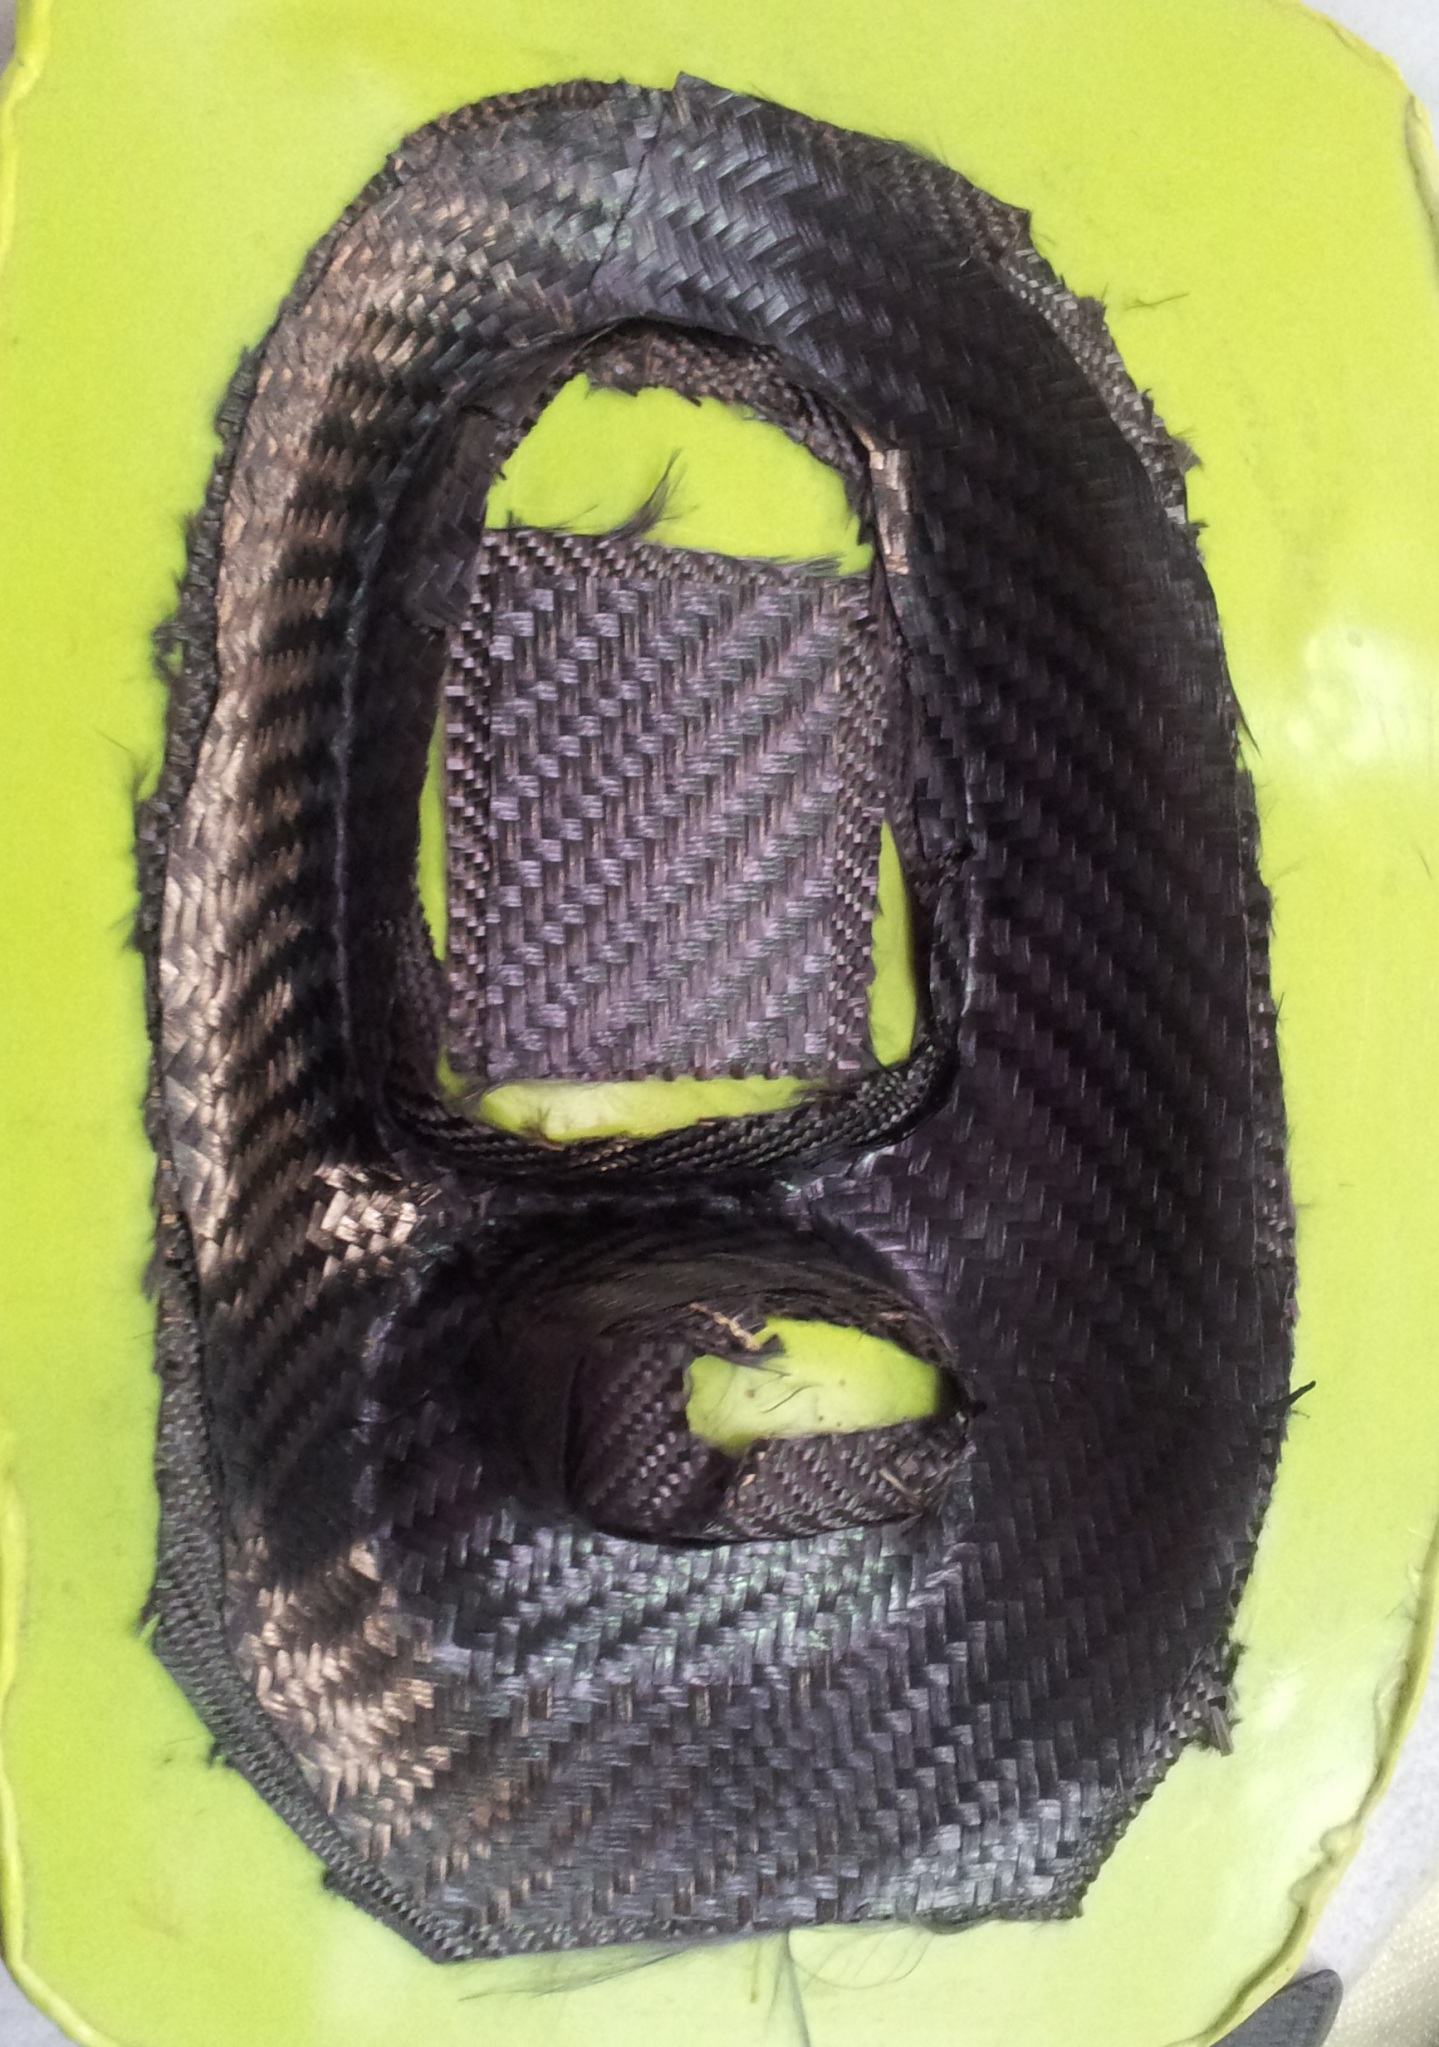
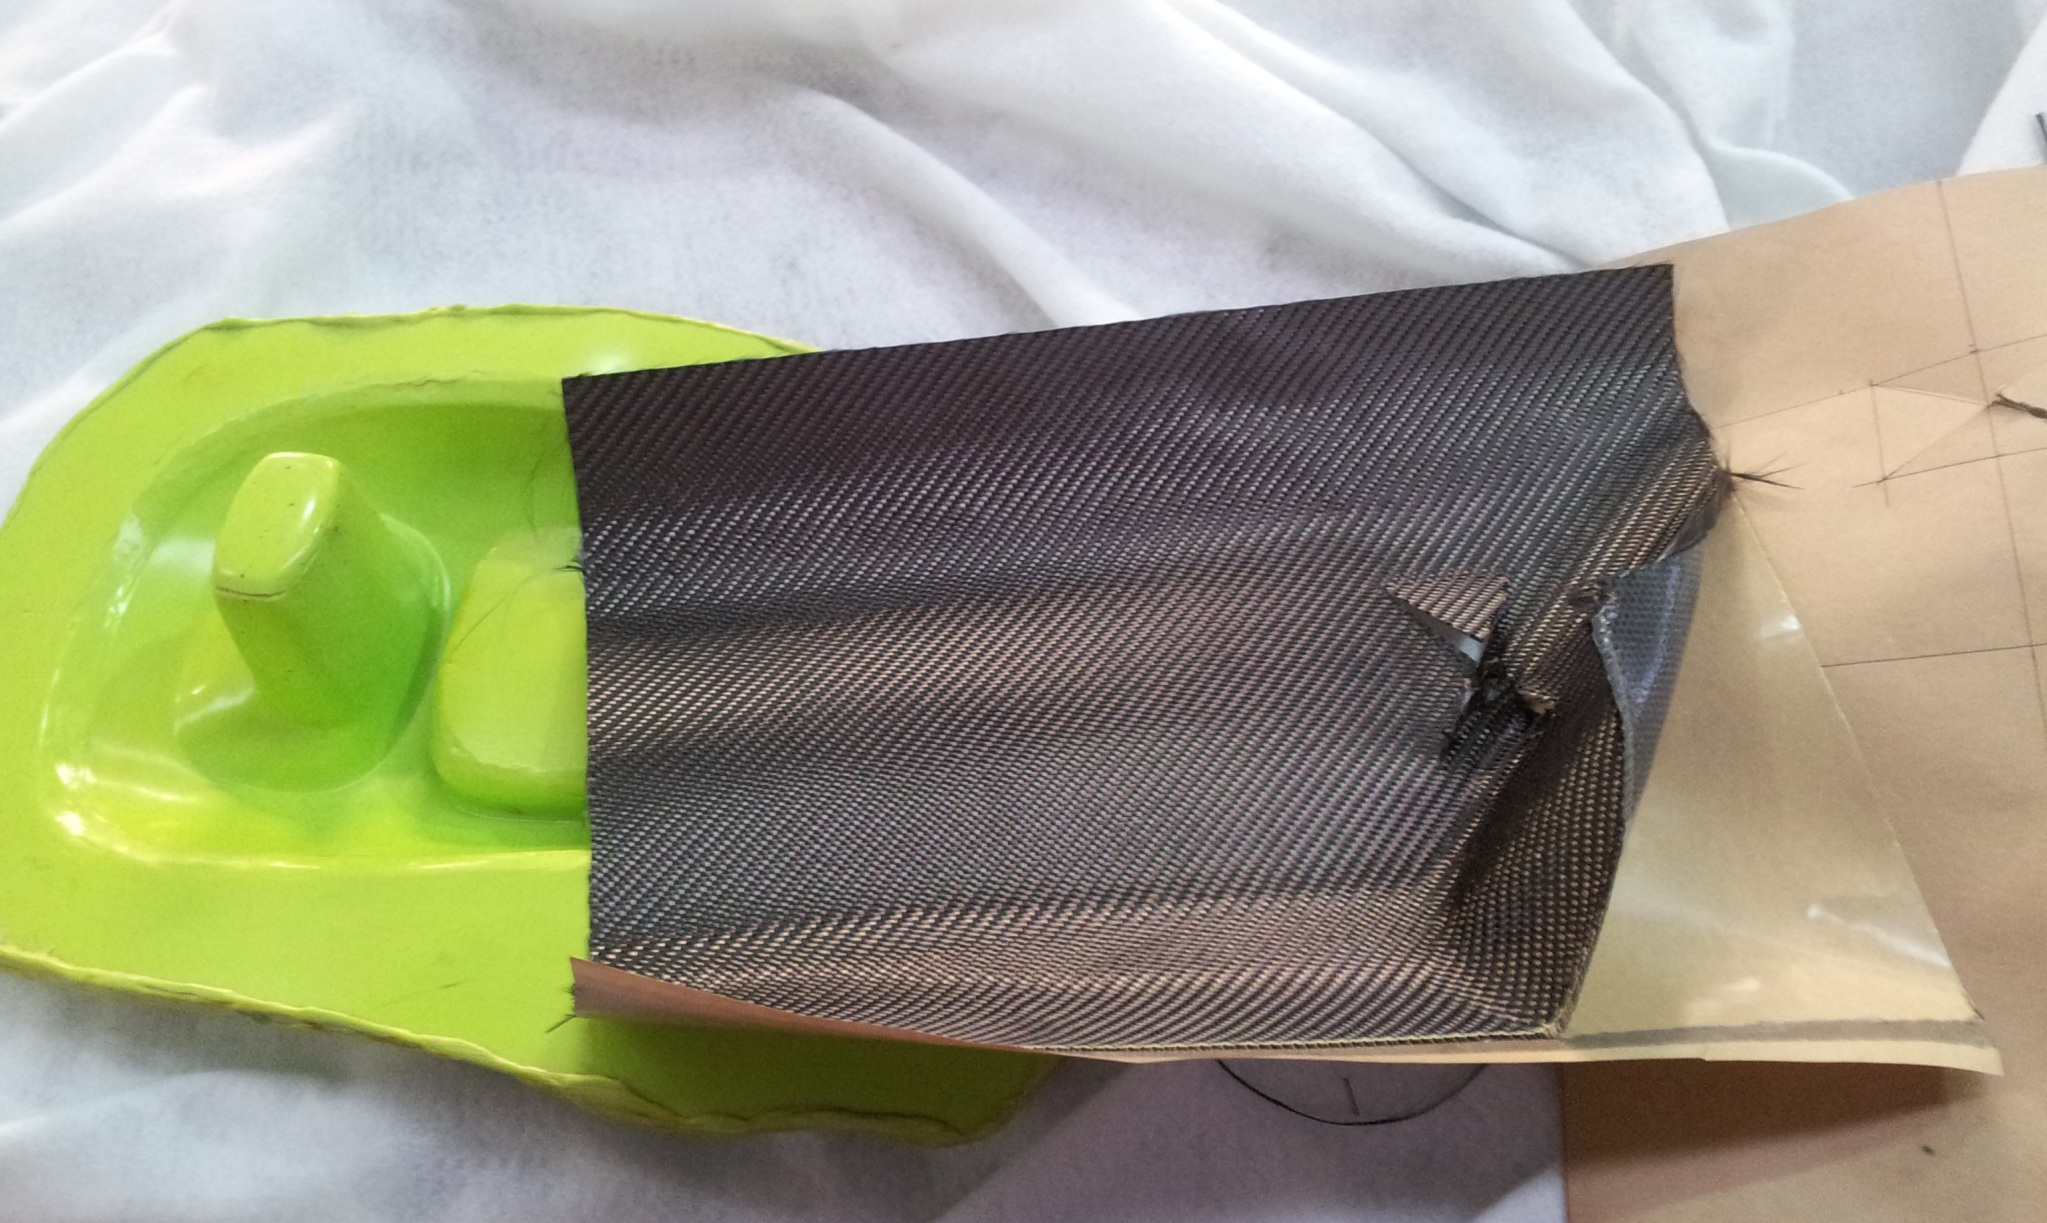
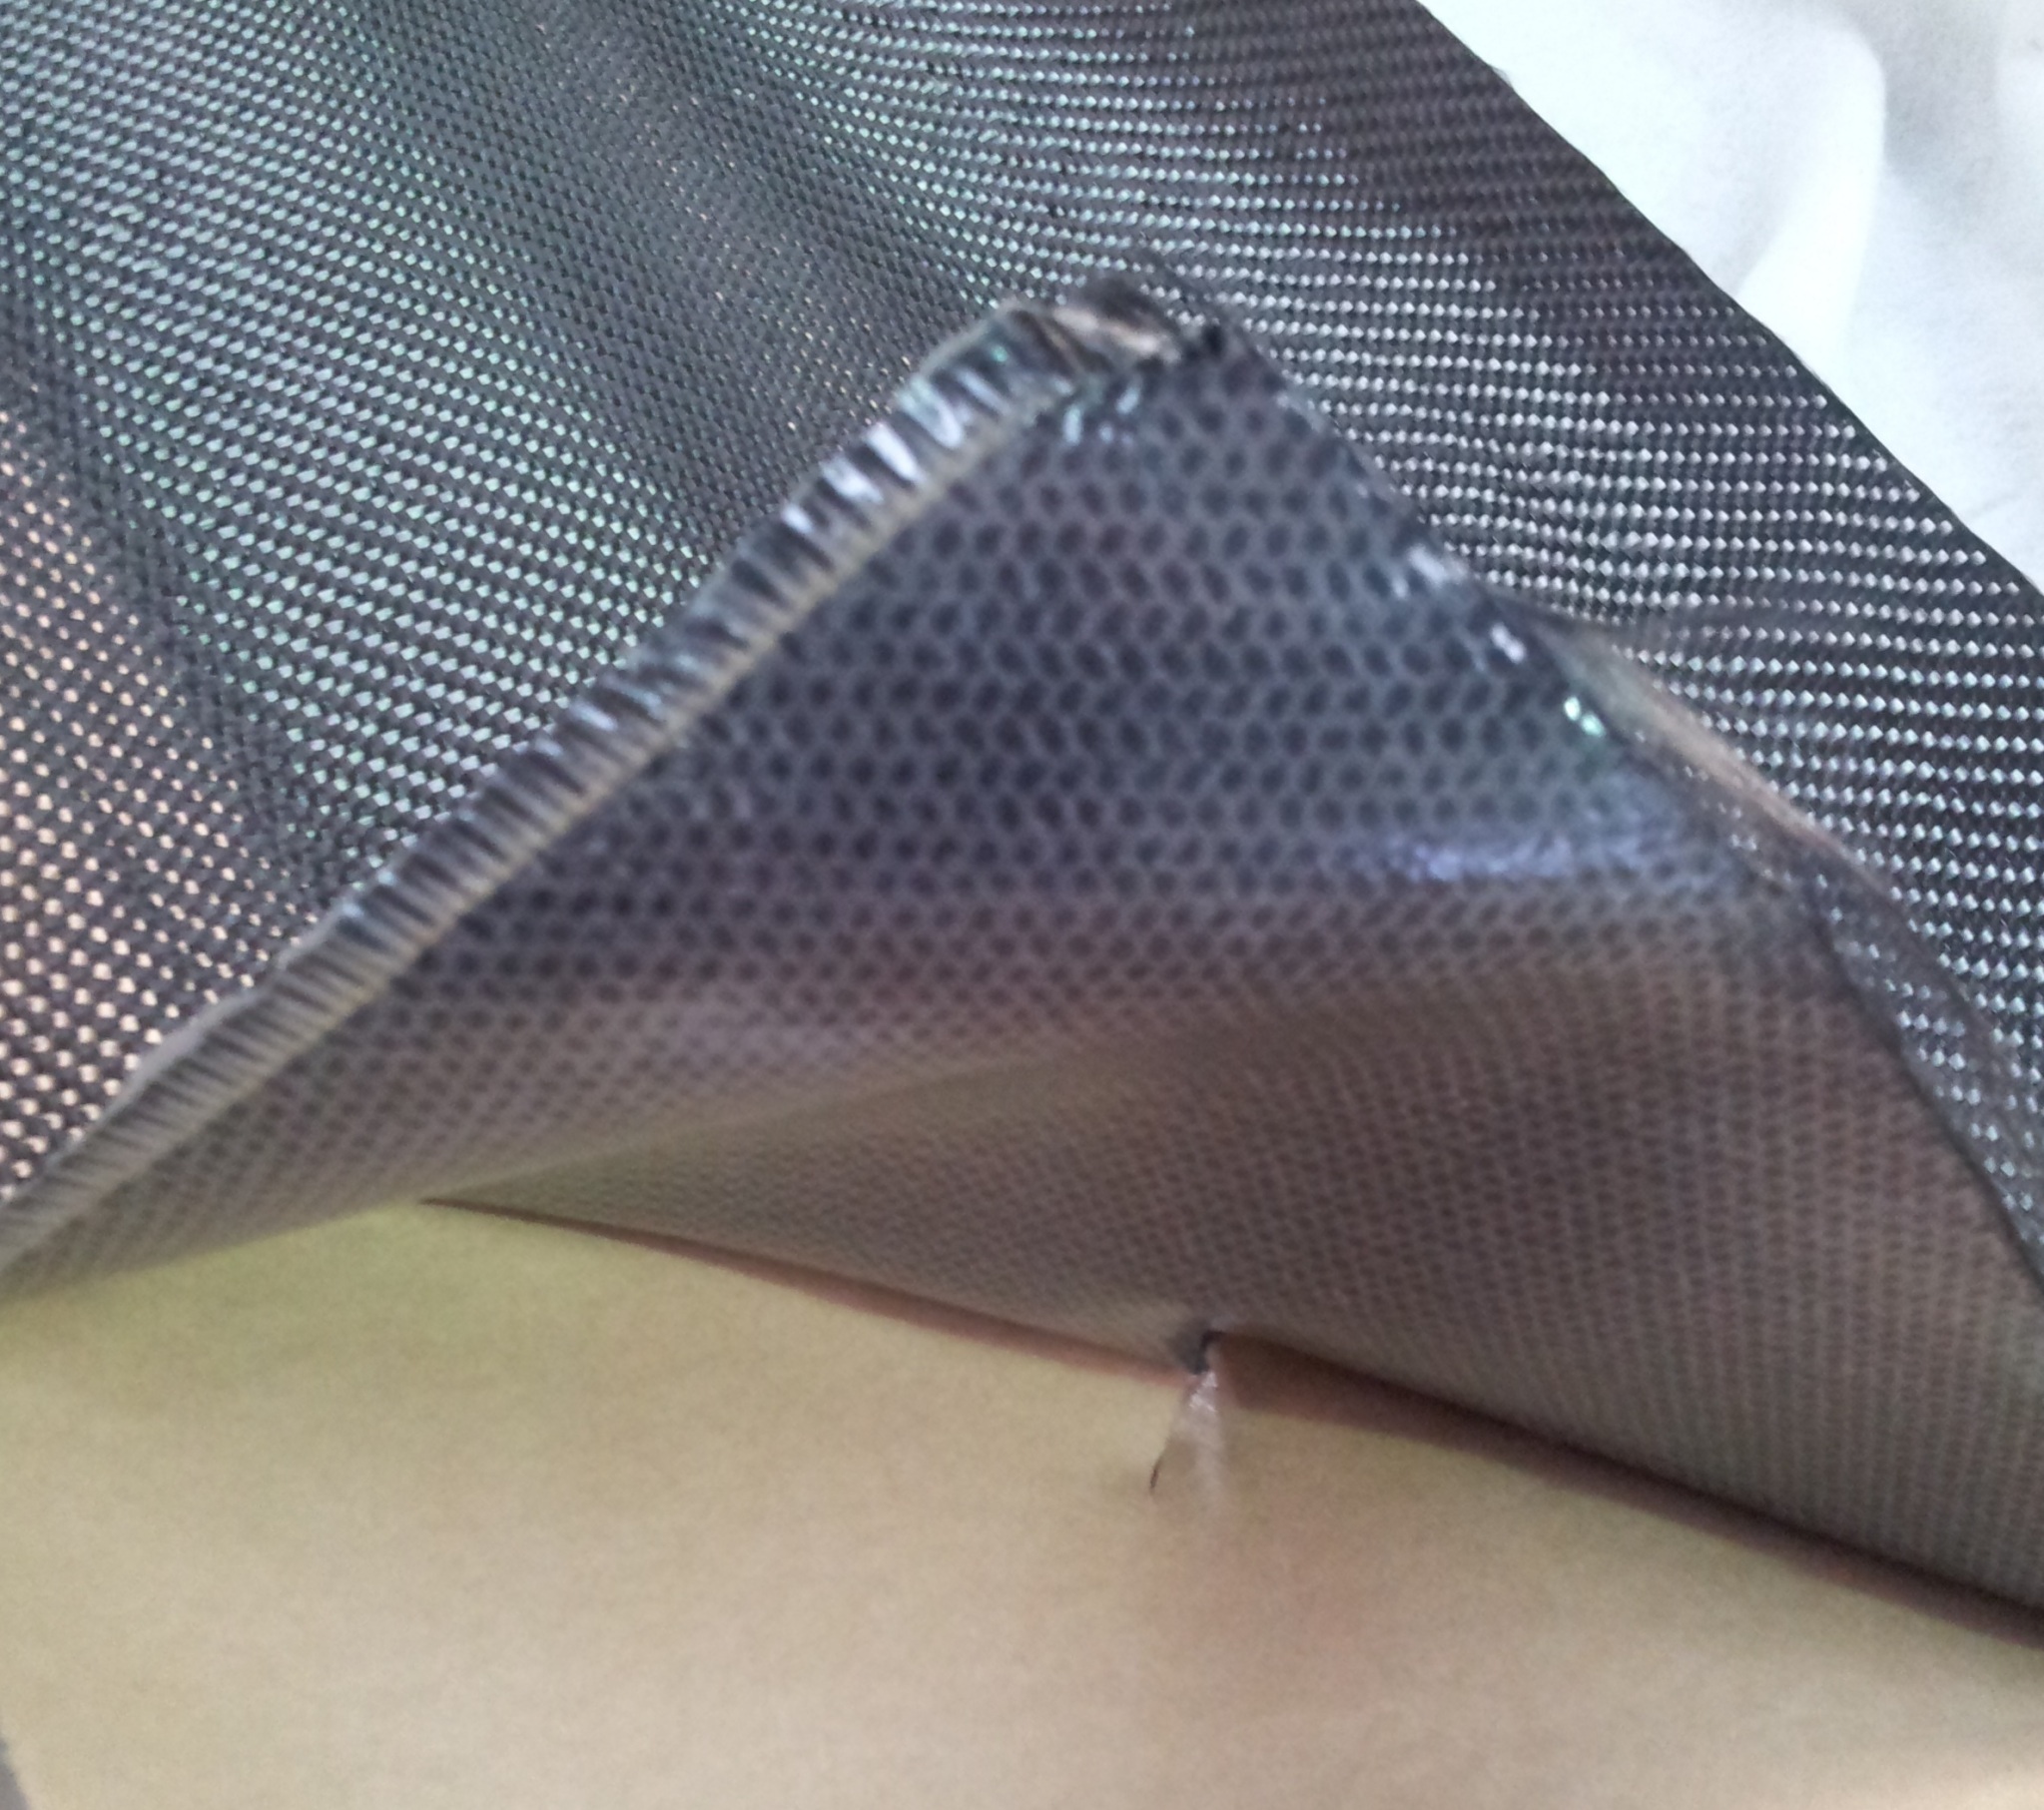
Then it was time to finish the layup and draw a vacuum:
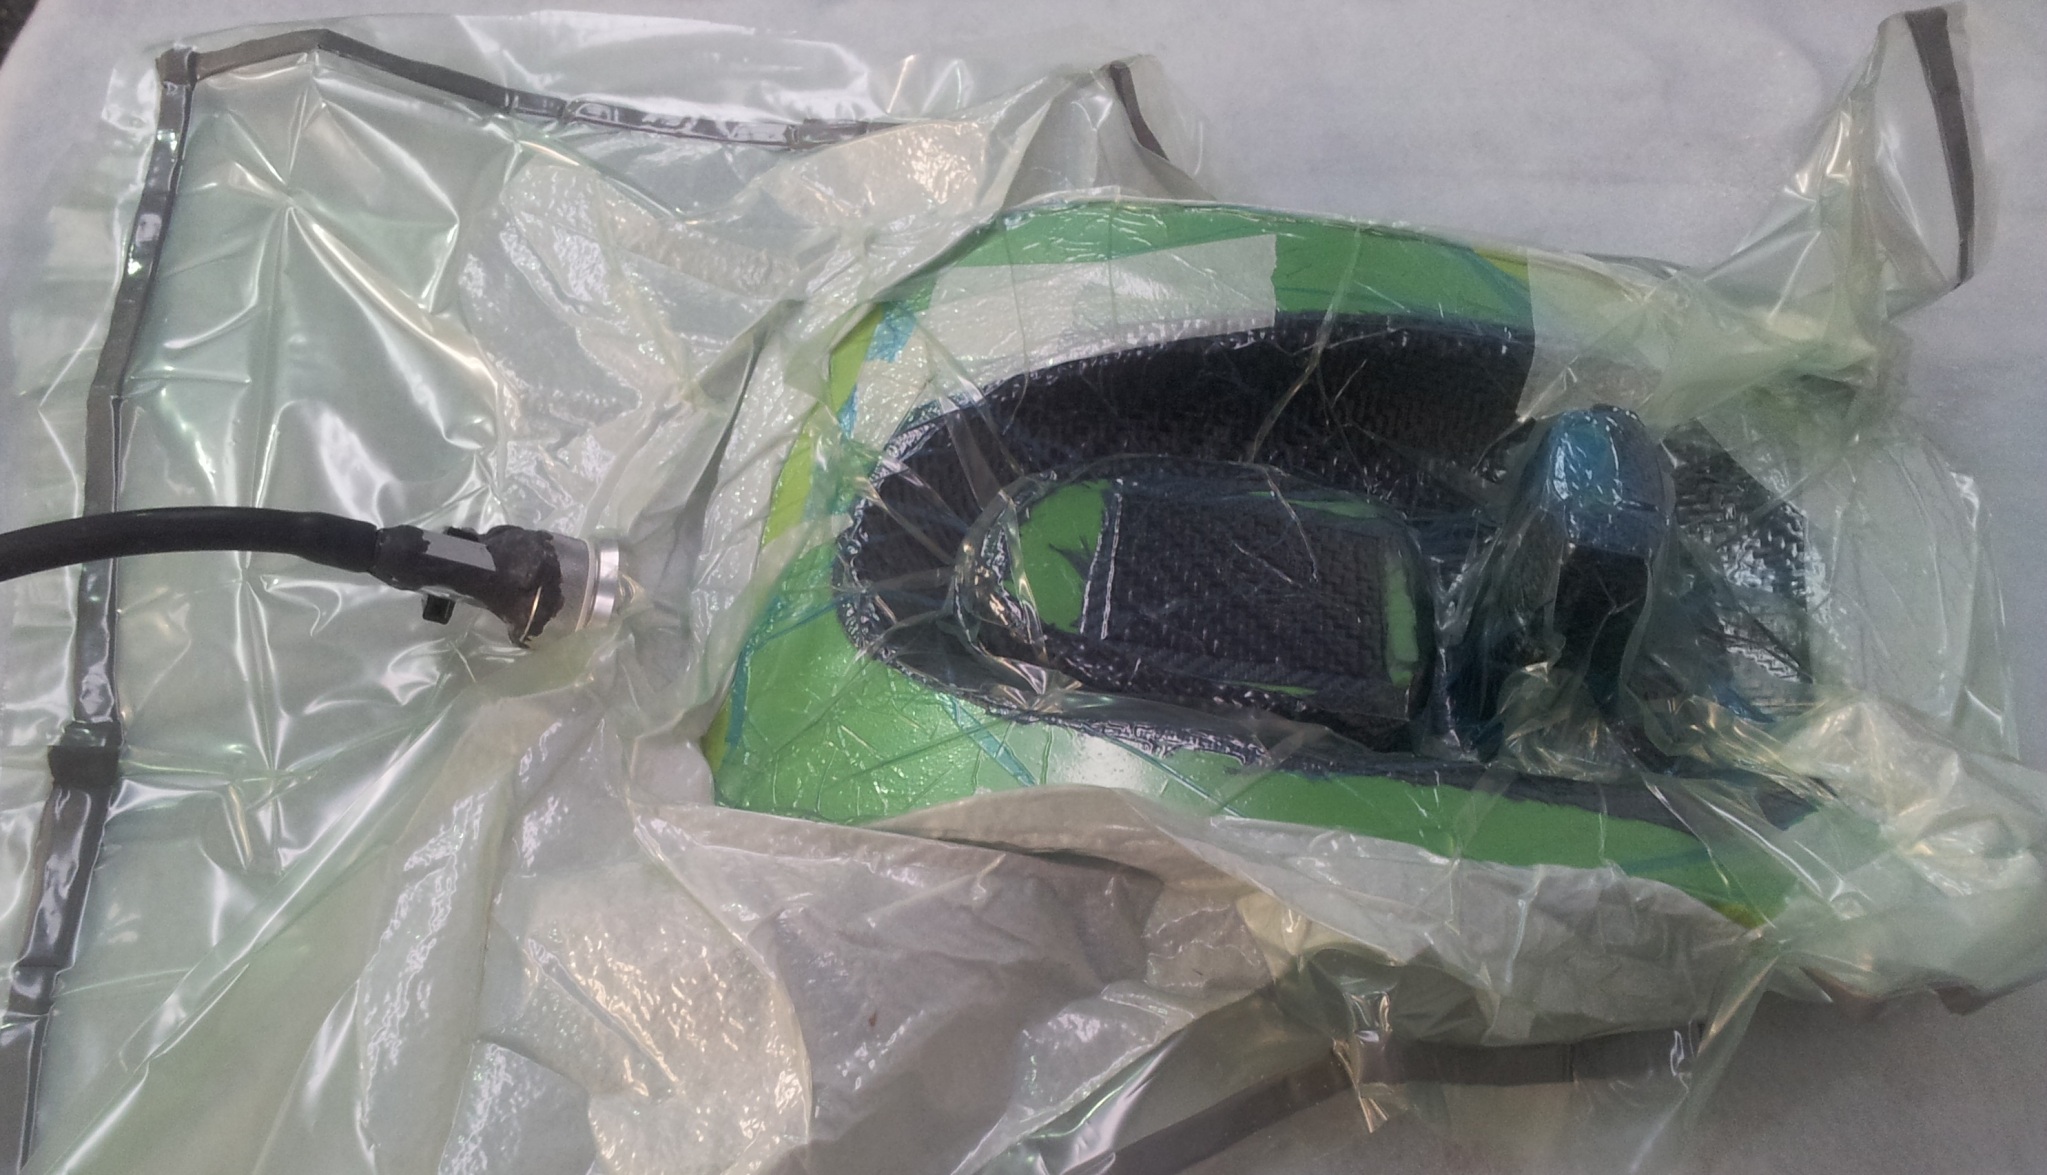
extra care was taken to ensure the bag got into all the tight corners. You dont want bridging as it can ruin the part.
It was then cured under vacuum at 90 degrees over night (over the needed 10 hours).
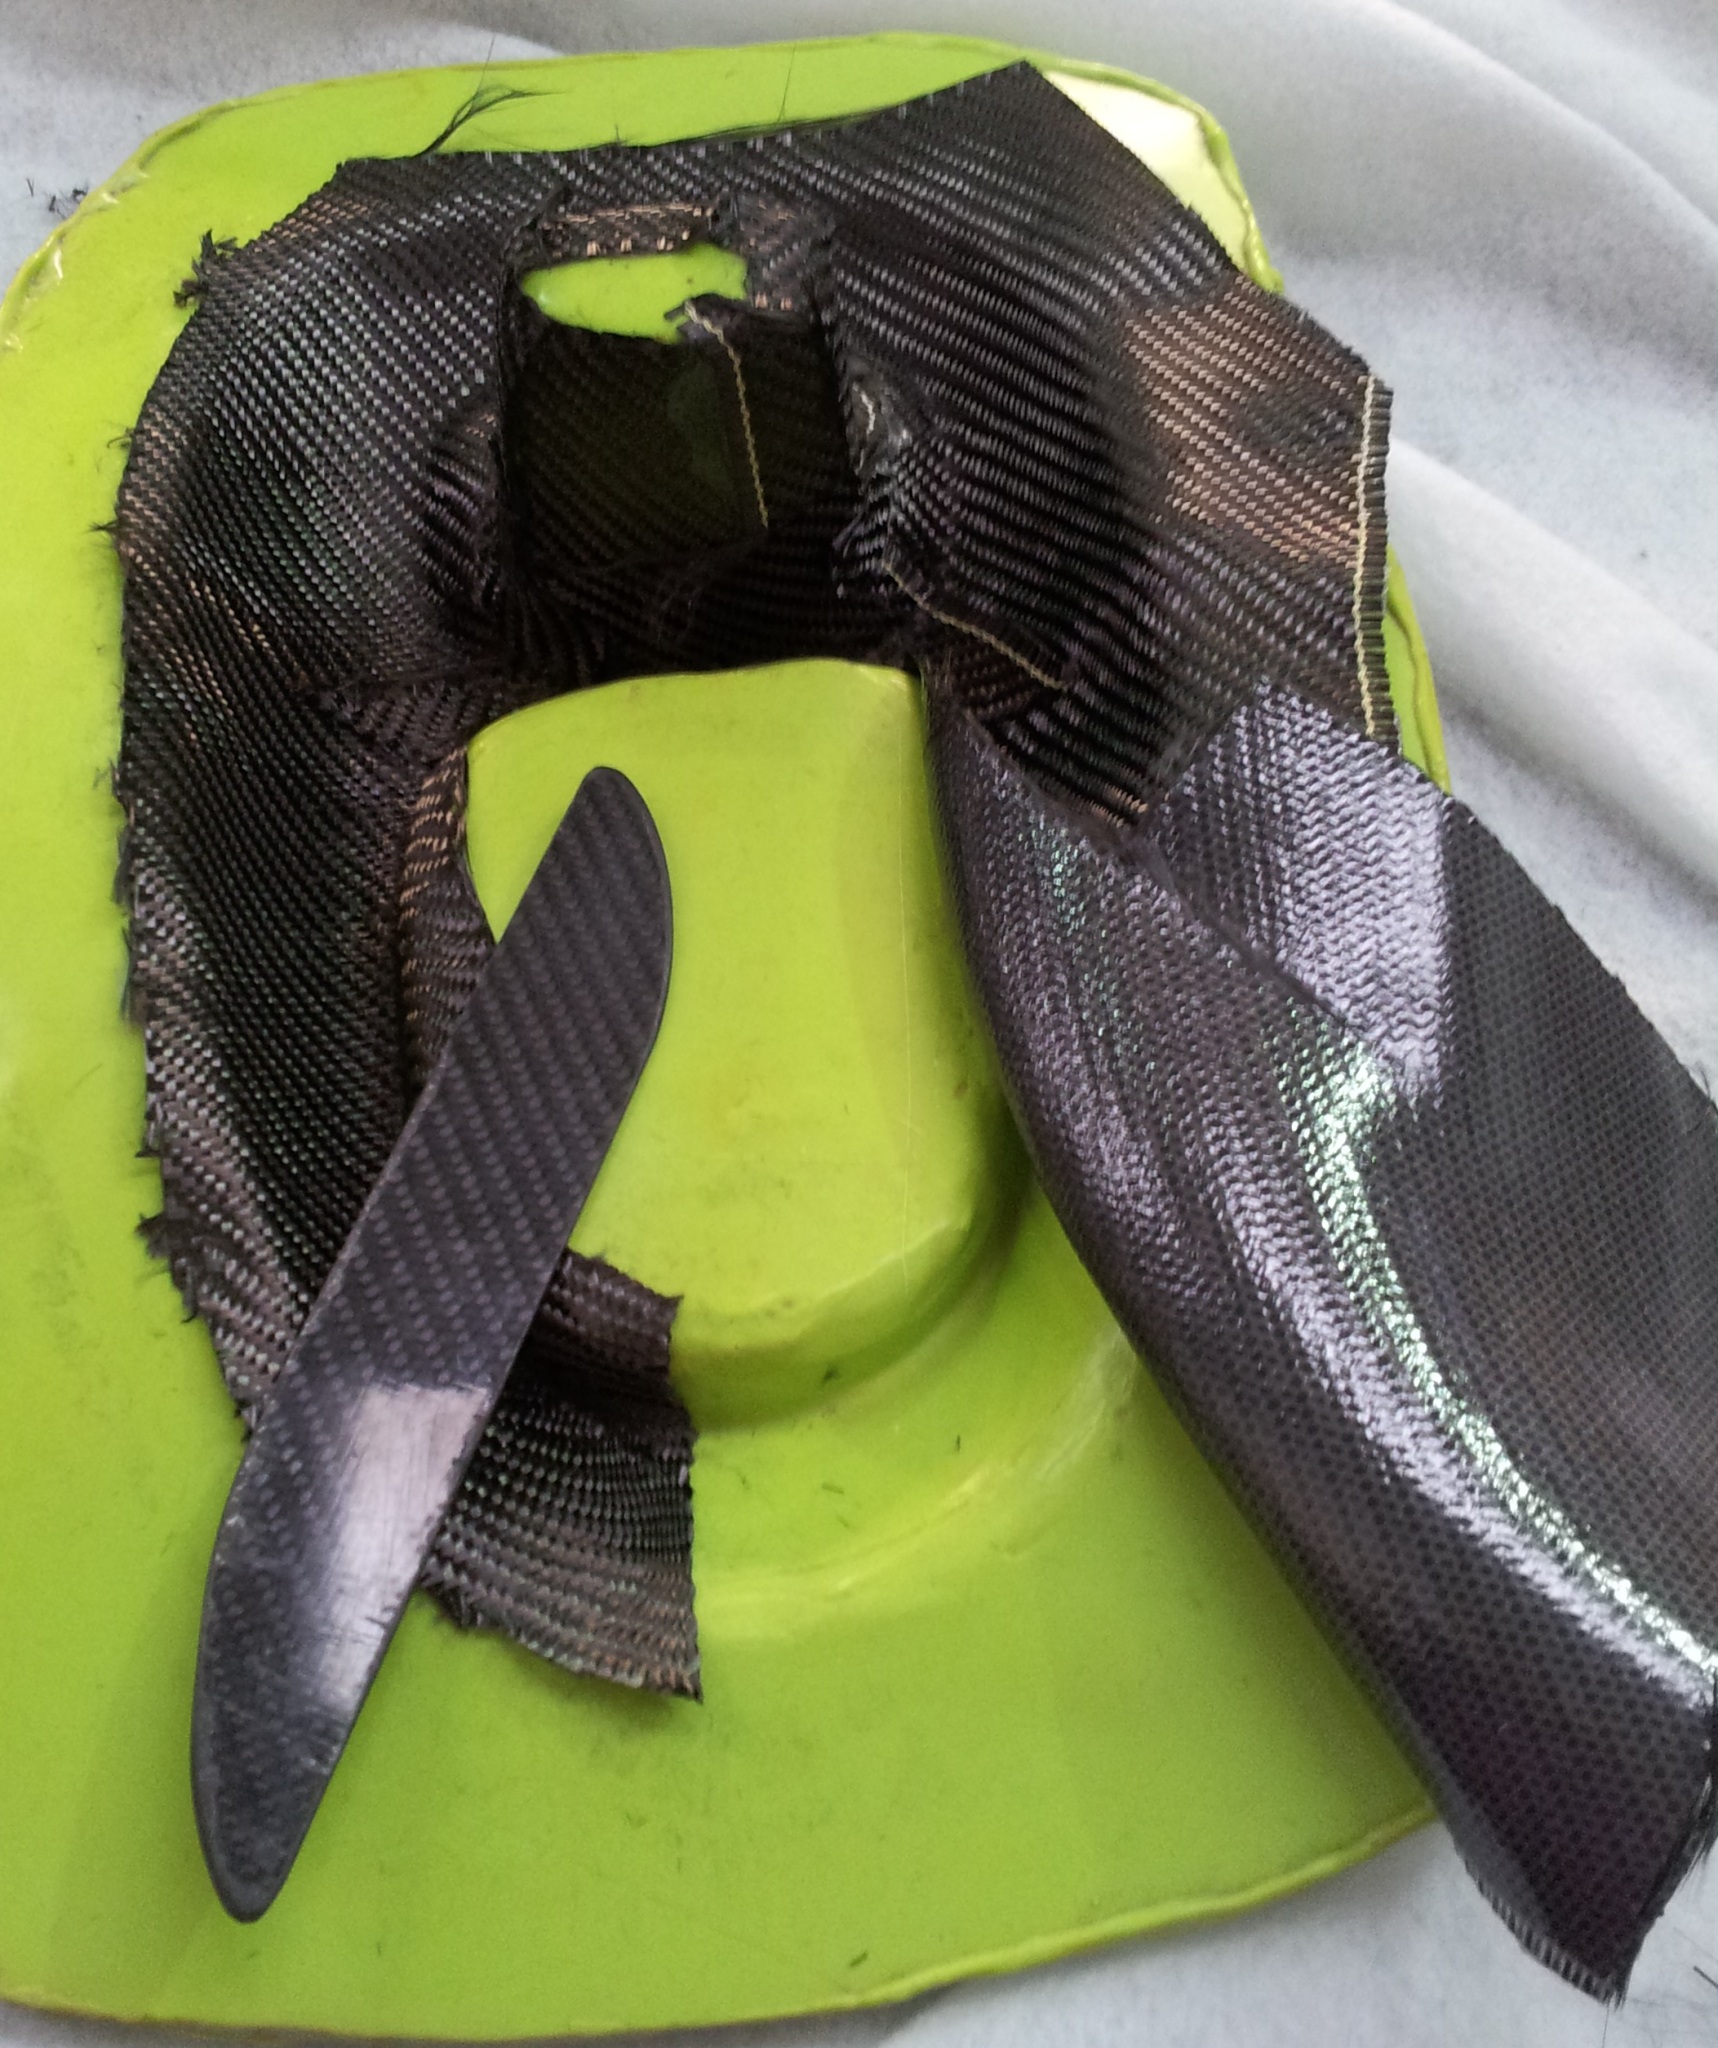
After demoulding and trimming this is the finished part:
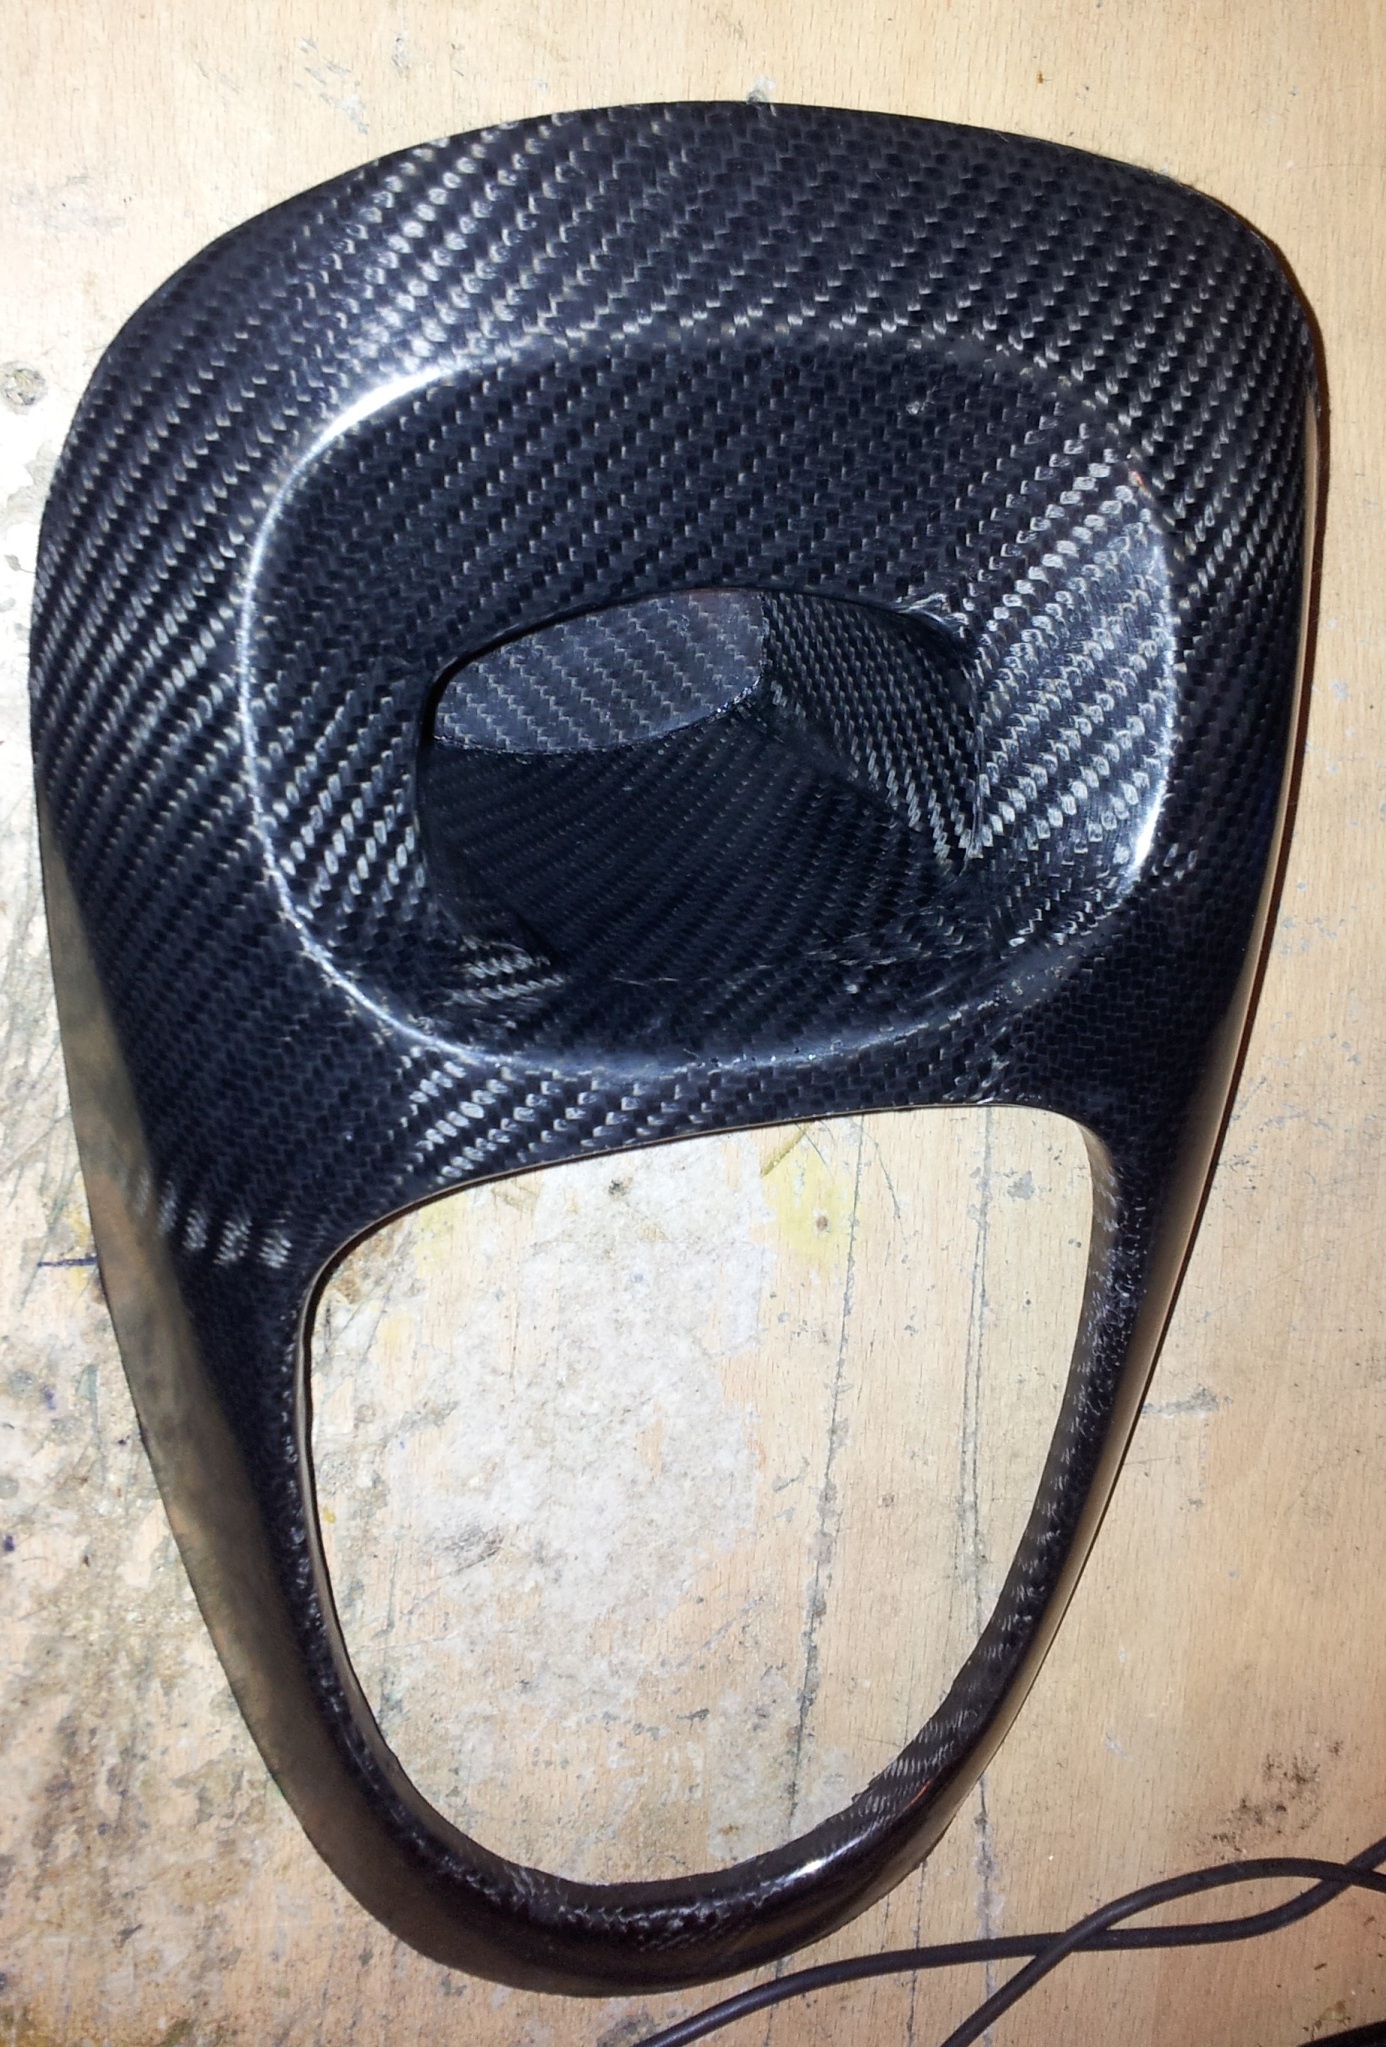
All finished ready to go in a car:
Biggest change is I've finally taken off the RL7's and fitted the speedlines ive had in my basement 2 years! Only just been able to afford 4 new tyres now im working.
Im sure some wont think white goes with silver, but i couldnt give a damn because long term the car will change colour anyway.
This project was the first one i ever did. The moulds were made a few years ago:
I tried it wetlay and infusion and couldnt get either to work properly.
So instead i moved onto pre-preg. It was sooo much easier to lay up the part:
that was the surface layer.
Made a template for the backing:
You can see how sticky the pre-preg is:
the next layer was then added:
The whole lot was then put in a vacuum bag ready to be cured:
Once cured they were trimmed:
I am well happy with the finish! just a little sanding for smooth edges and it will be ready to fit!
Also decided to get my extinguisher mould out again. Remade it in pre-preg.
Had to post cure the mould to ensure it would work at the required temperature.
The layup is slightly different with the fabric being cut into three sections so there can be a little movement in the tight corners allowing the fabric to fill the space so no bridging.
fully laid up:
Just after i finished with the dremel:
Needs slots cutting out, edges tidying and a polish and its done!
I also did the same with my gear lever surround. Used my previous template measurements to cut some Easypreg Surface layer to the necessary shape:
You can see the shiney surface here:
I then started to carefully lay the pre-preg into the mould:
Notice the tool i borowed to press the fabric right into the tight corners.
once i was happy with the first layer, I used some 400g vari-preg as the backing layer. Its just going in here:
I used some odd shaped offcuts to save wastage and as its a cosmetic trim piece it doesnt matter from a strength issue.
The backing layer all done:
Then it was time to finish the layup and draw a vacuum:
extra care was taken to ensure the bag got into all the tight corners. You dont want bridging as it can ruin the part.
It was then cured under vacuum at 90 degrees over night (over the needed 10 hours).
After demoulding and trimming this is the finished part:
All finished ready to go in a car:
 31-01-2013, 11:27 PM
#424
I'm Finding My Feet Here Now

Everybody has the wheels that i like....and i can't even find one set for sale :\
Nice Puma...remember watching a video with this car making huge donuts, if i'm not mistaken
Keep the great job
Nice Puma...remember watching a video with this car making huge donuts, if i'm not mistaken
Keep the great job

 24-02-2013, 09:56 PM
#428
Just a bit of maintenance and repairs at the moment really. Last winter, some mongtard went into the back of me in tescos and drove off. Only damage was to bumper, however it turns out the cunt had deformed my bumper support such that the edge of the bumper rubbed on the fuel tank and has over a year and a bit worn a hole through!
Cue that funny smell of petrol and having to take the tank off to get it repaired!!!
The next thing has been trying to solve the good old cossie oil leaks
My car has a new nickname, the "torrey Canyon" due to the oil slick it leaves everywhere in the rain. I call it the "rust prevention system" rather than an oil leak....
It has been made worse by my cam cover breather hose collapsing and having a kink in it which probably hasnt helped the leaks!! That bit solved it was turning to the leaks.
First of all there were the usual leaks on the front of the engine. Both camseals and the front crank seal have been replaced. 2 out of the 3 were clearly leaking. That solved a lot of the leaks at the front of the engine.
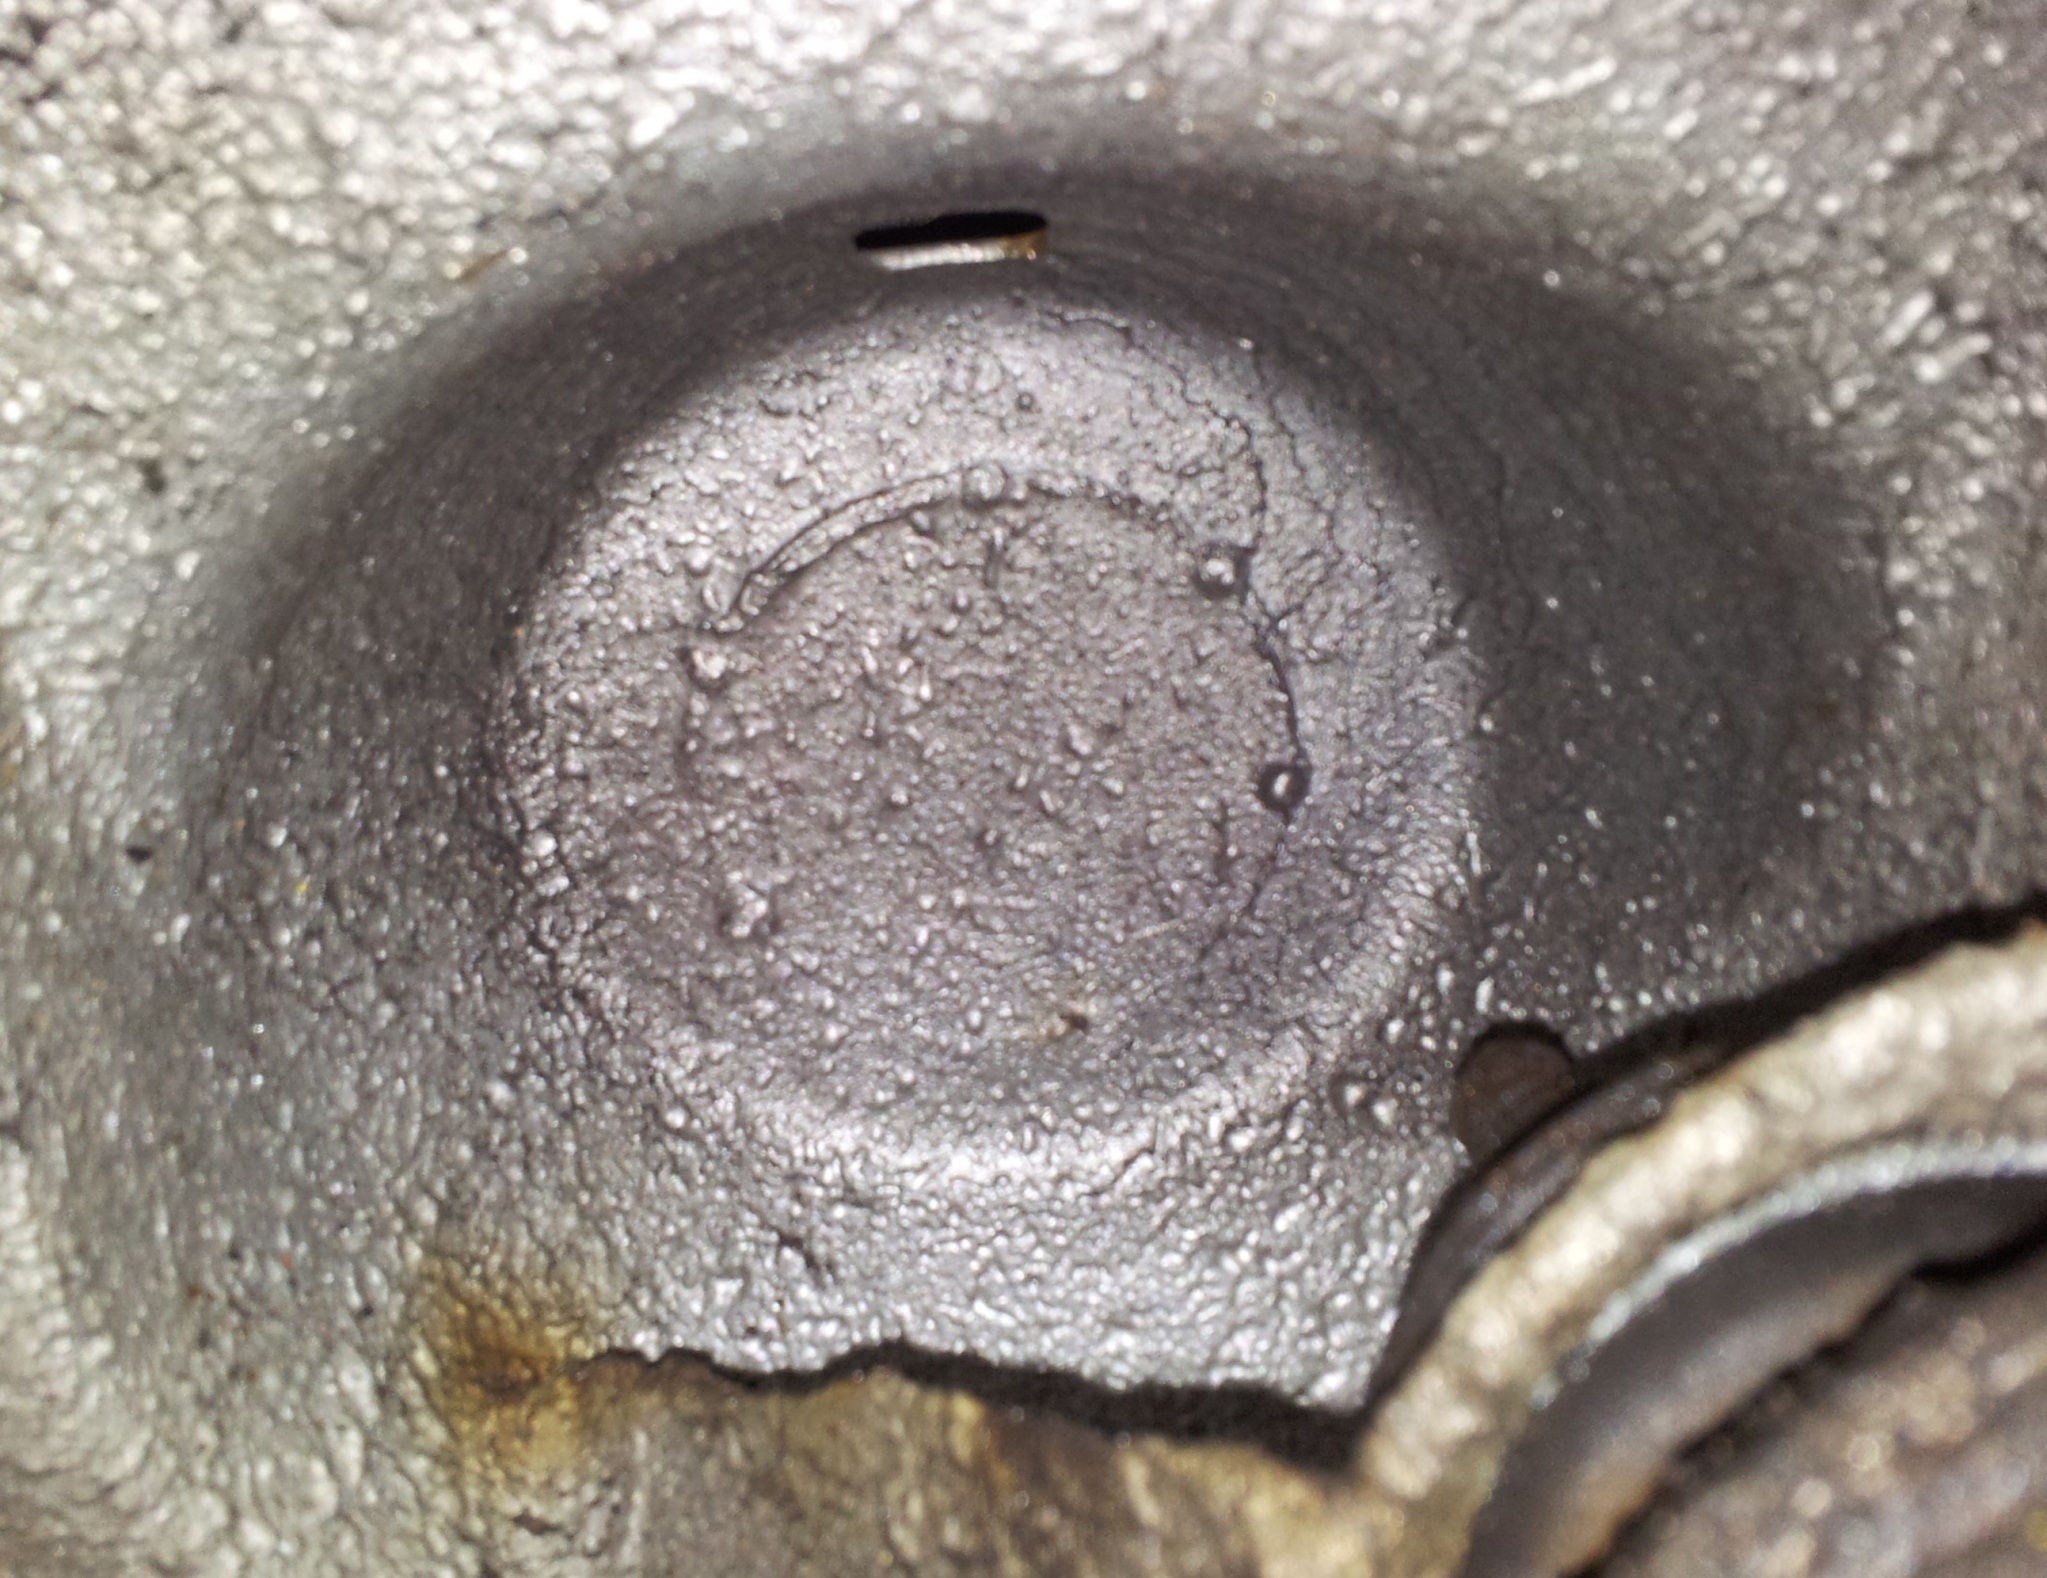
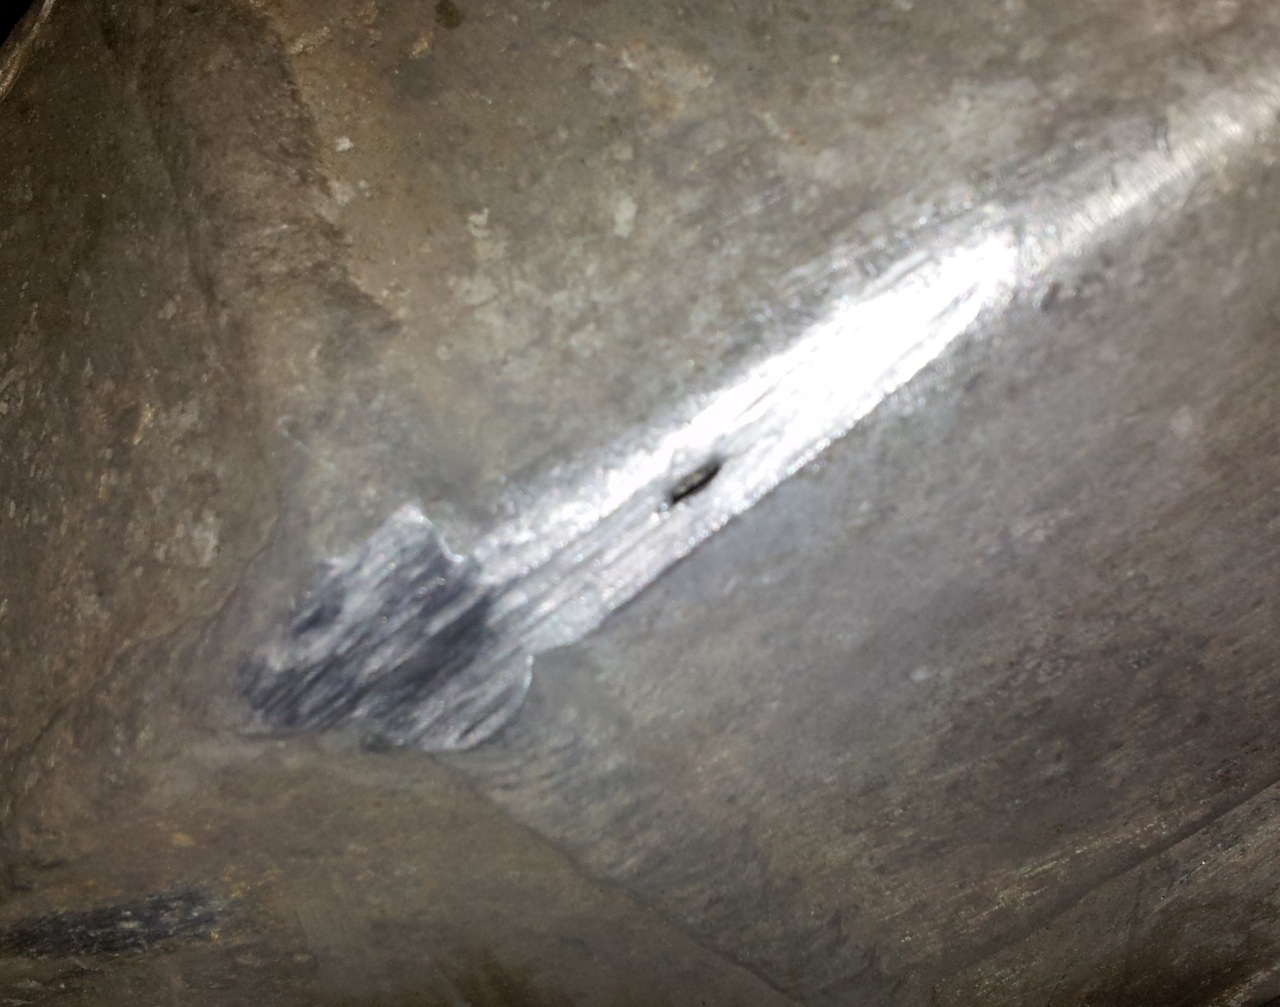
However its still pissing out the camcover as the cam cover seal has come out in places. eg:
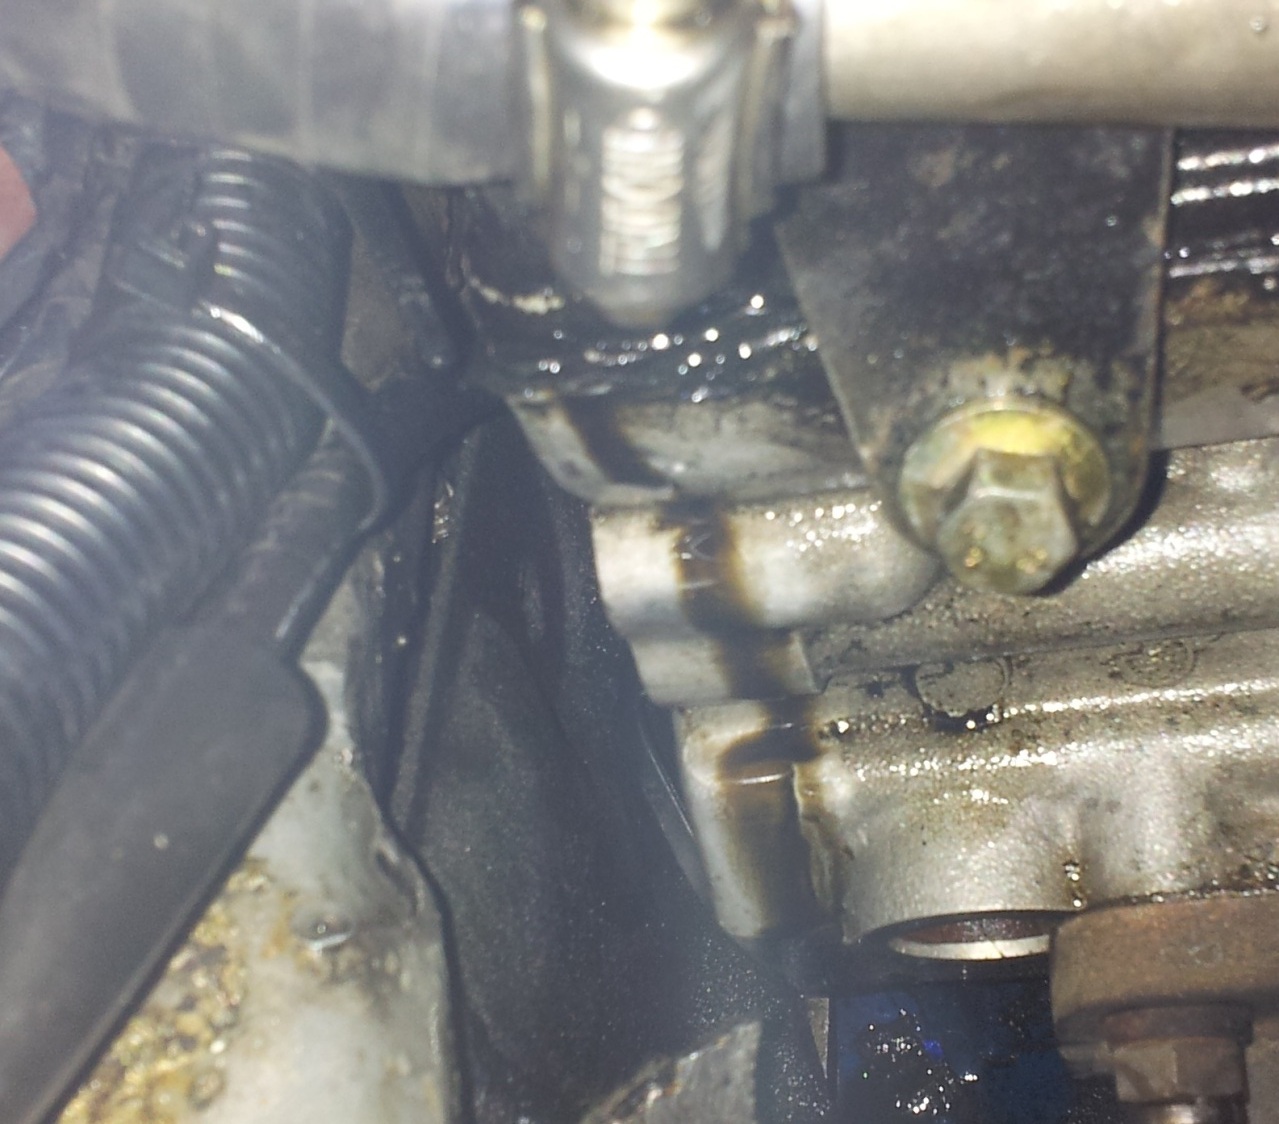
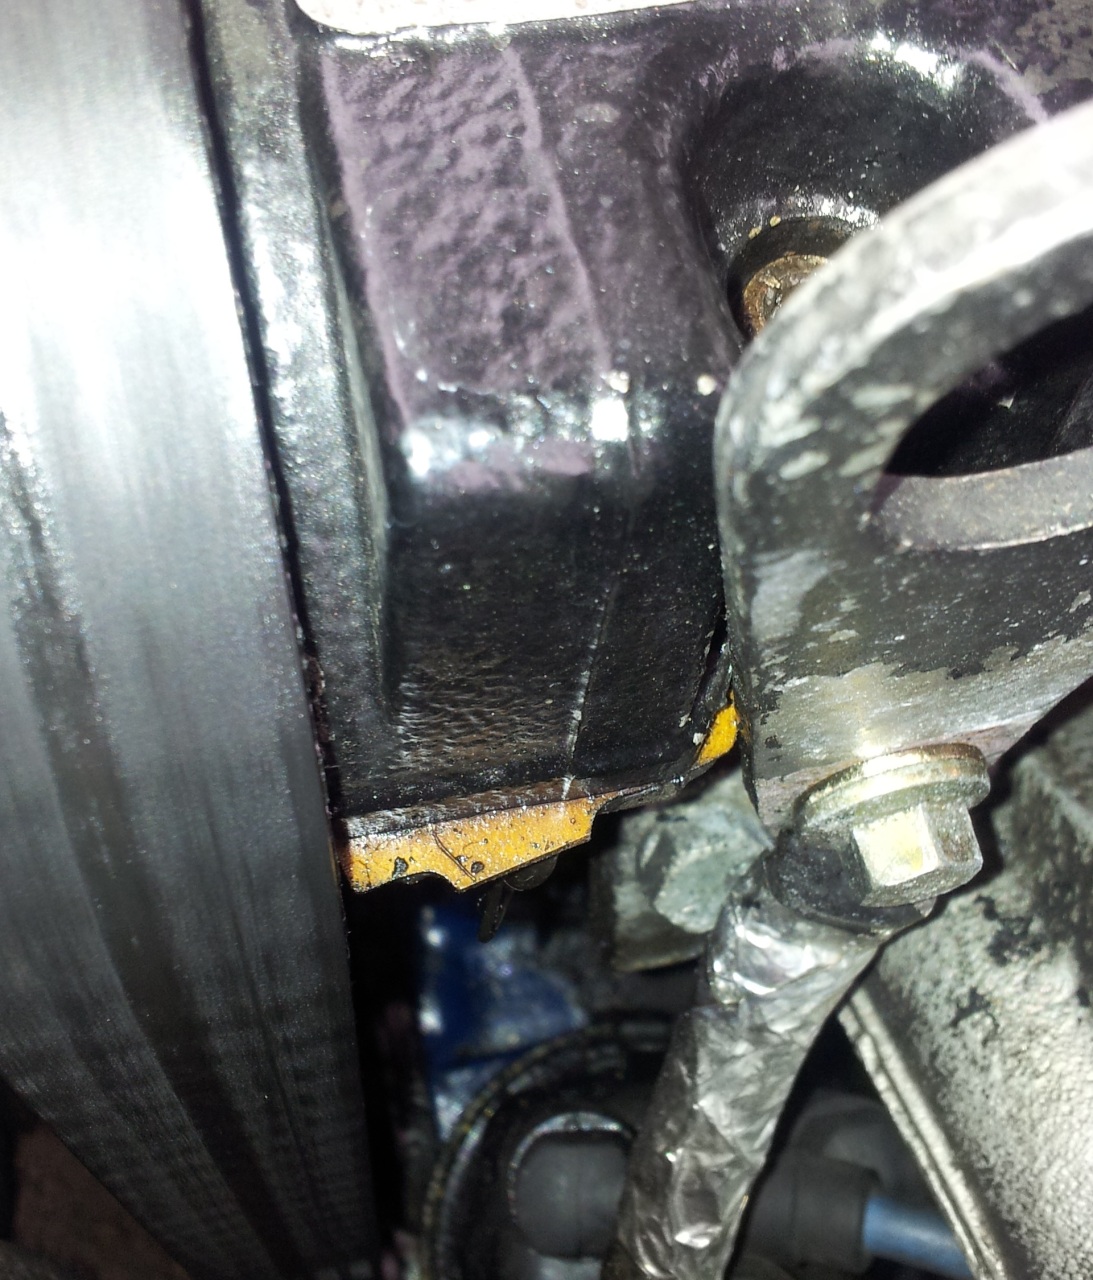
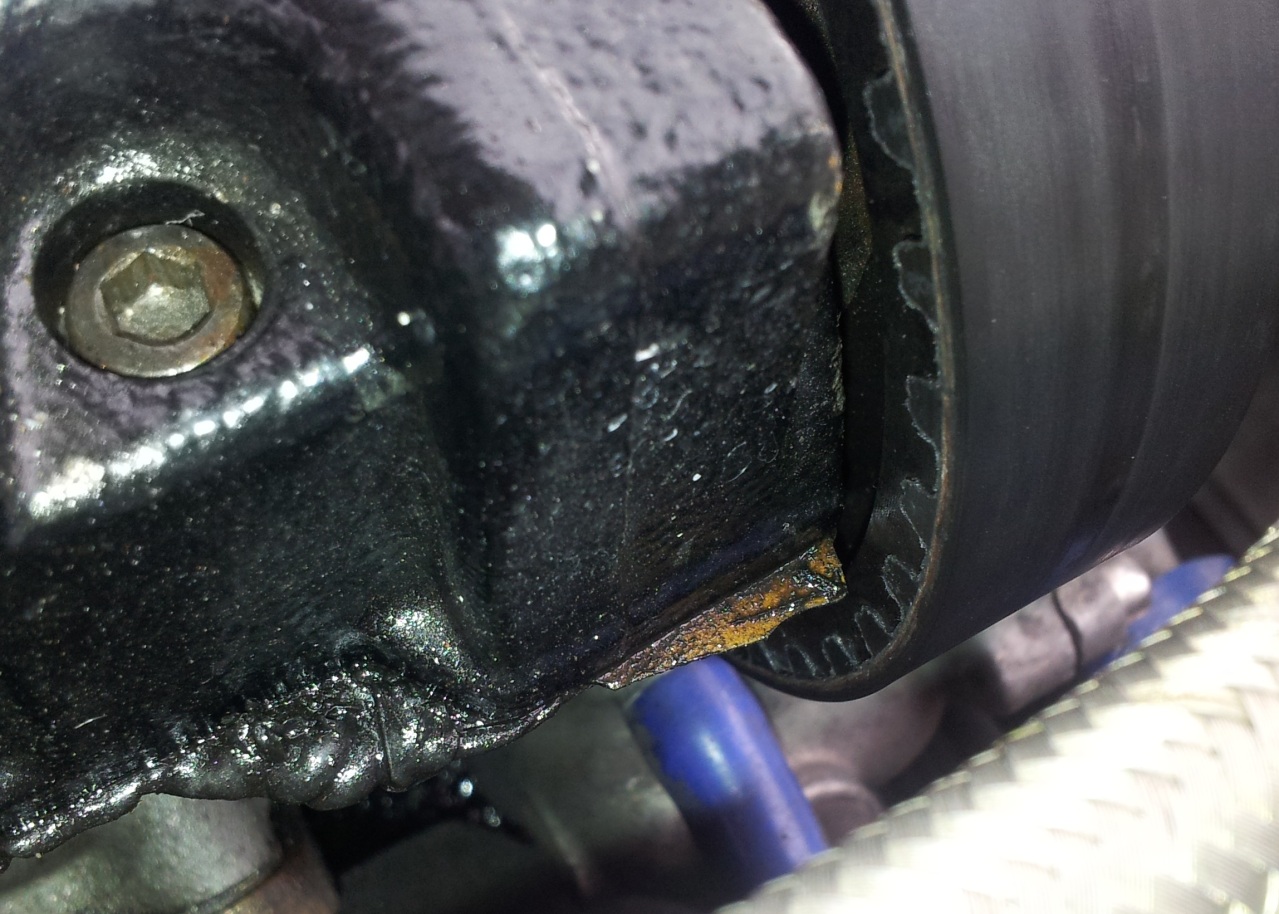
Annoying as the camcover was done last year with a fancy Klinger gasket which are supposed to be good. Got some new seals and bits and bobs on the way.
Hopefully should stop the main oil leaks, especially as my breather system is now breathing!!
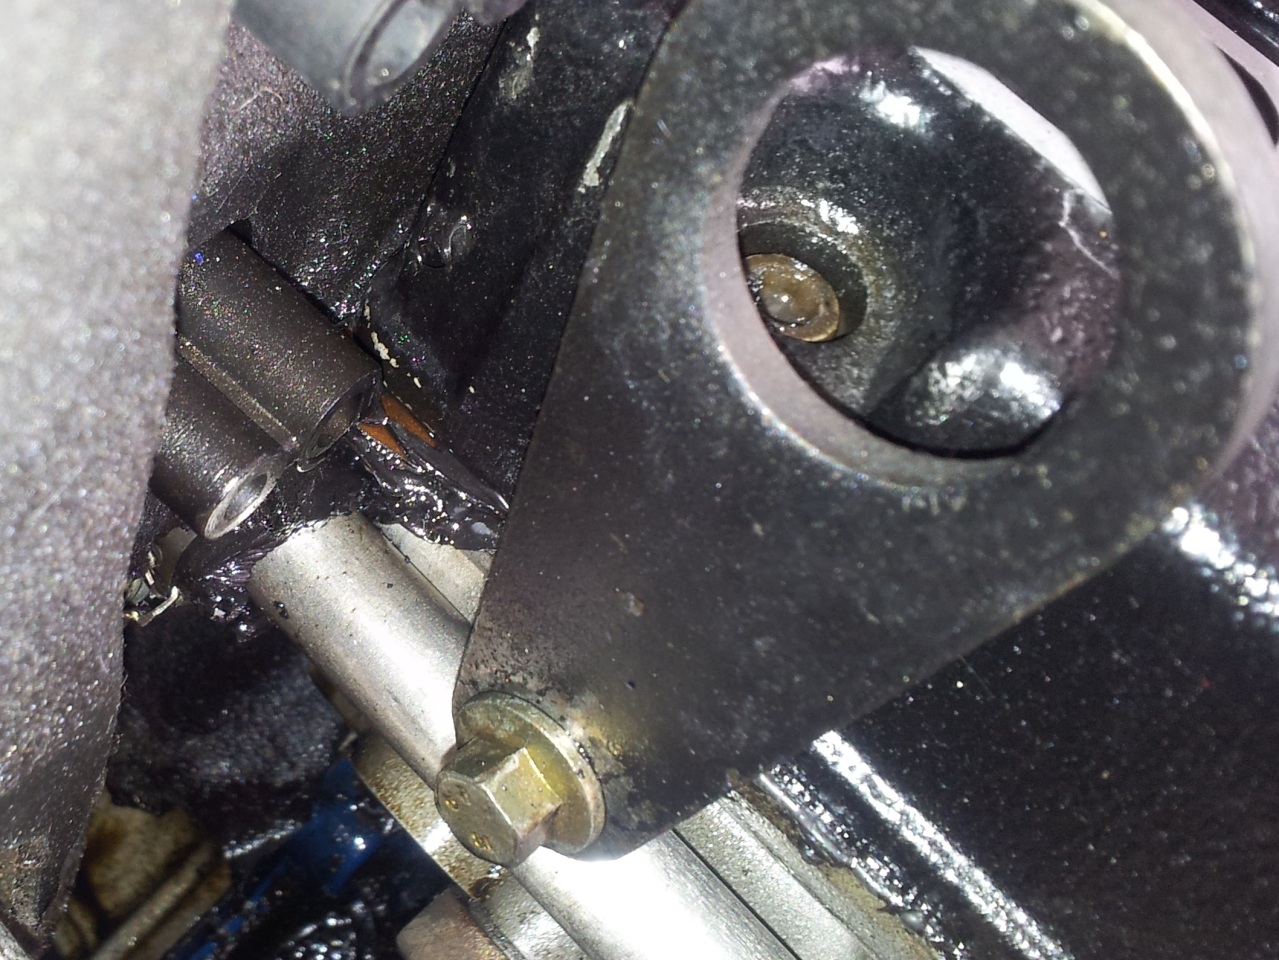
also replaced a heater hose that had been killed by the oil leak with silicone. At the same time i have removed the plastic bulkhead. All it was doing was acting as an oil trap and was hiding a multitude of wiring sins.

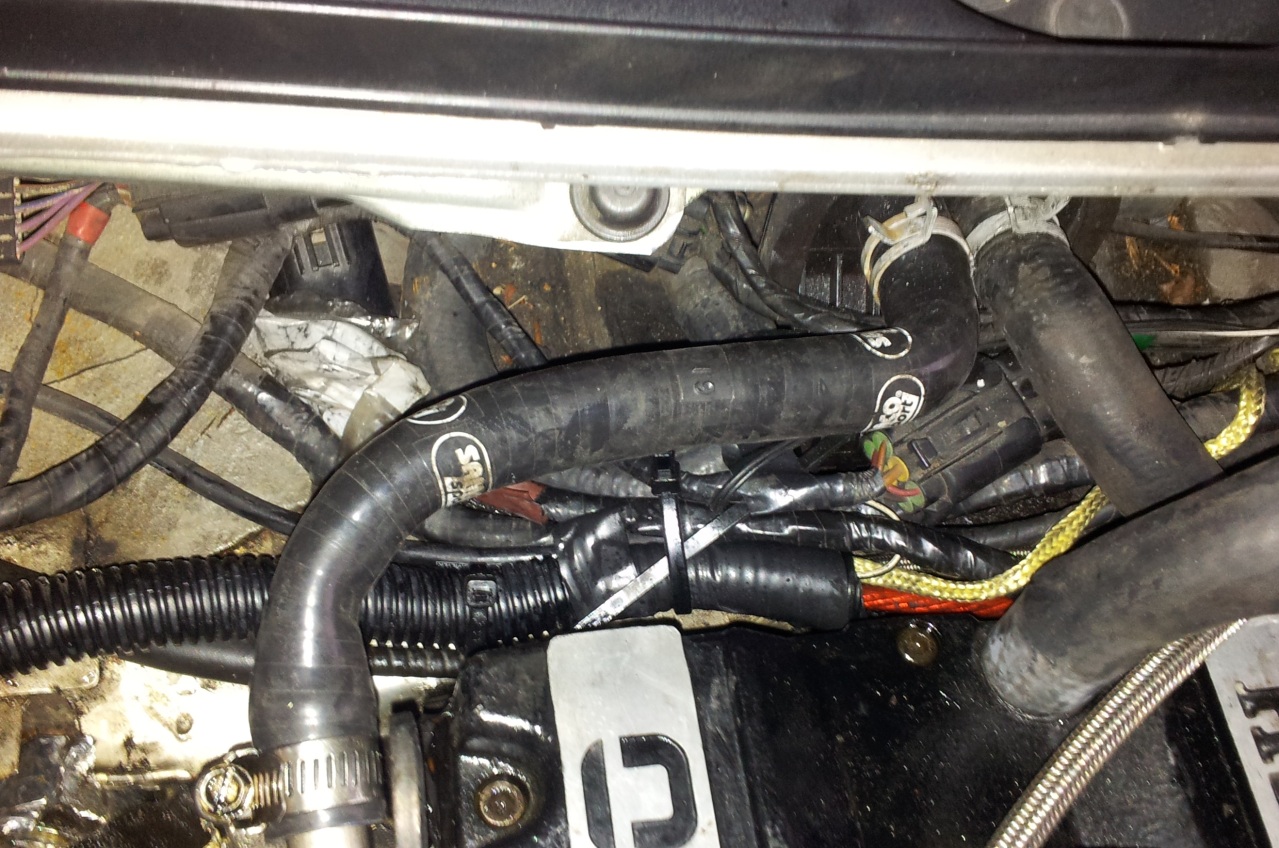
Wiring sins indeed!!! There is so much excess and unused bodged wiring there that it was pushing the plastic bulkhead forward against the back of the block!!!
Ive tied it back as much as i can with cable ties for now but I'm thinking im better off finding a new loom for this car. The more i look at the wiring, the more fucked it is, and thats putting it midly!! So i think i shall aquire a spare puma loom, strip the excess and start from fresh.
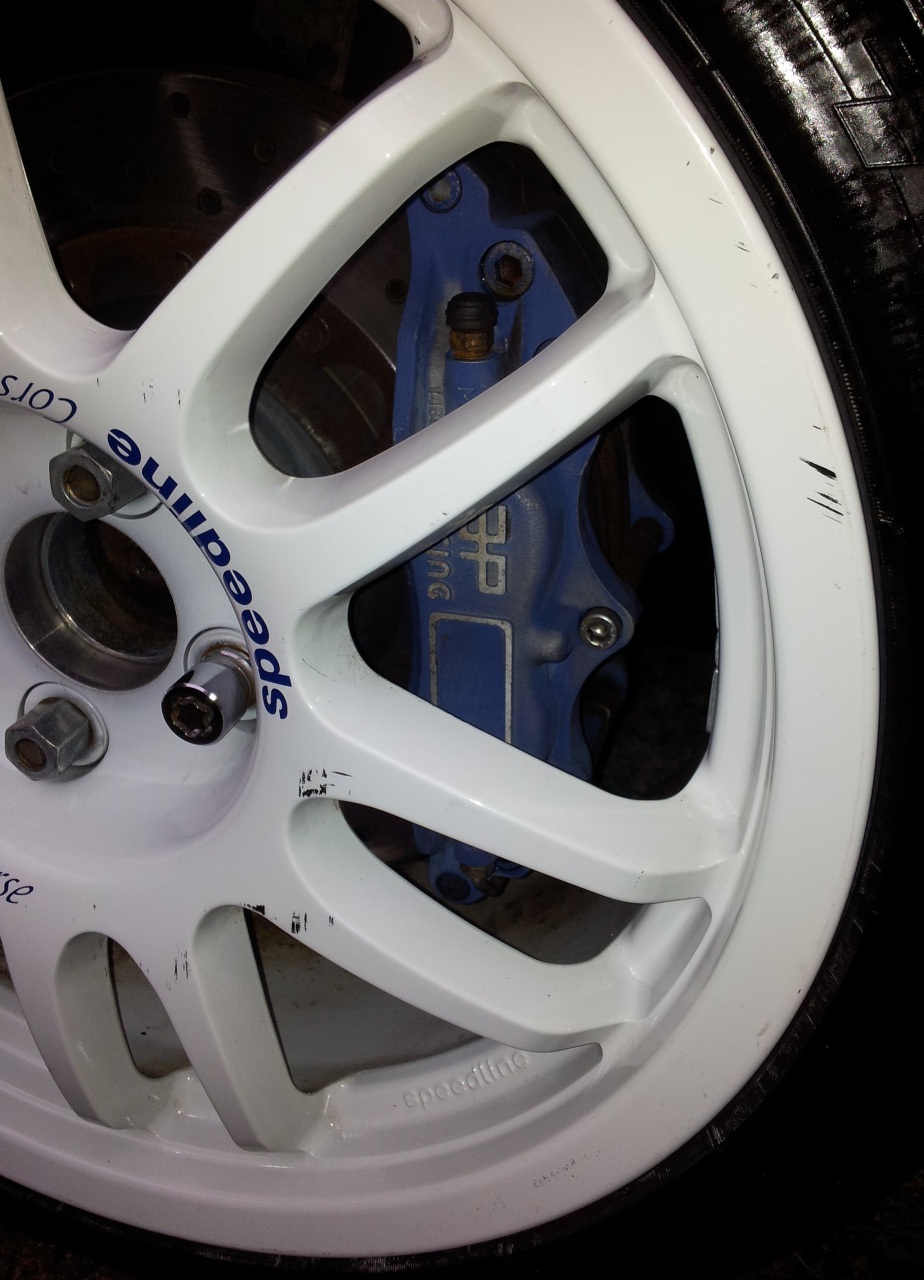
Also cleaned my wheels! White wheels are hard to keep clean!!
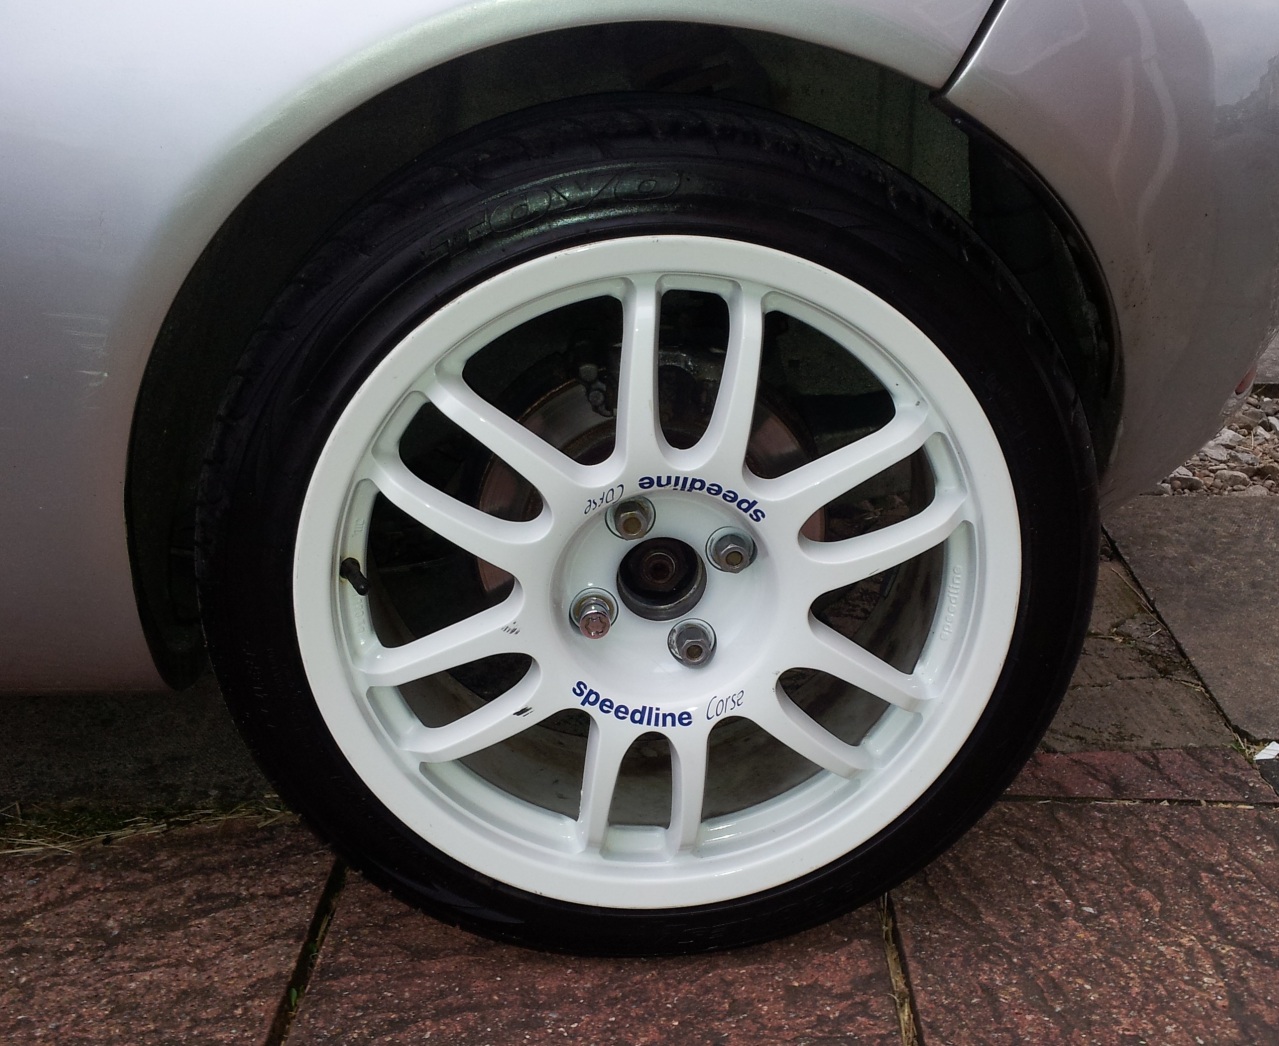
There does seem plenty of space around my AP's with these wheels so plenty of space for future upgrades.
Cue that funny smell of petrol and having to take the tank off to get it repaired!!!
The next thing has been trying to solve the good old cossie oil leaks
My car has a new nickname, the "torrey Canyon" due to the oil slick it leaves everywhere in the rain. I call it the "rust prevention system" rather than an oil leak....
It has been made worse by my cam cover breather hose collapsing and having a kink in it which probably hasnt helped the leaks!! That bit solved it was turning to the leaks.
First of all there were the usual leaks on the front of the engine. Both camseals and the front crank seal have been replaced. 2 out of the 3 were clearly leaking. That solved a lot of the leaks at the front of the engine.
However its still pissing out the camcover as the cam cover seal has come out in places. eg:
Annoying as the camcover was done last year with a fancy Klinger gasket which are supposed to be good. Got some new seals and bits and bobs on the way.
Hopefully should stop the main oil leaks, especially as my breather system is now breathing!!
also replaced a heater hose that had been killed by the oil leak with silicone. At the same time i have removed the plastic bulkhead. All it was doing was acting as an oil trap and was hiding a multitude of wiring sins.
Wiring sins indeed!!! There is so much excess and unused bodged wiring there that it was pushing the plastic bulkhead forward against the back of the block!!!
Ive tied it back as much as i can with cable ties for now but I'm thinking im better off finding a new loom for this car. The more i look at the wiring, the more fucked it is, and thats putting it midly!! So i think i shall aquire a spare puma loom, strip the excess and start from fresh.
Also cleaned my wheels! White wheels are hard to keep clean!!
There does seem plenty of space around my AP's with these wheels so plenty of space for future upgrades.
 26-07-2013, 08:45 PM
#430
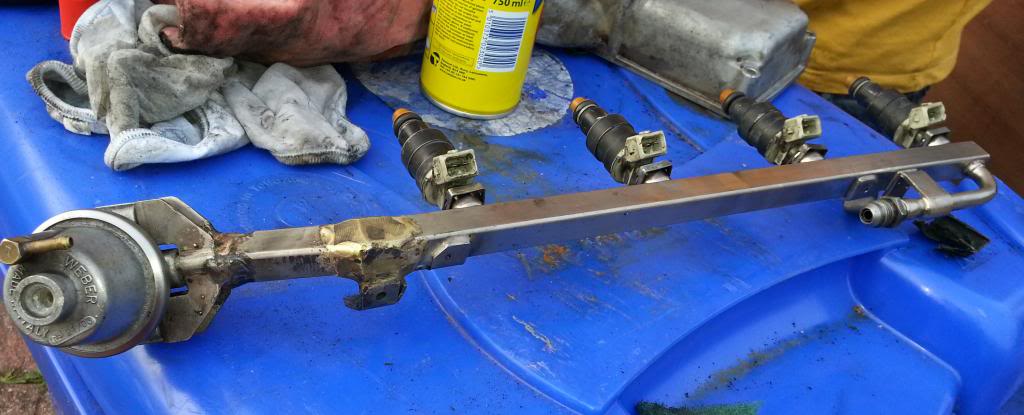
stripped down the inlet manifold to replace leaking gaskets.
Also decided to give it a clean up and get years of dirt off it. Literally used half a can of penetrating oil to loosen the dirt and dissolved it with literally 3 cans of brake cleaner!!
Also removed all the flaking paint off the fuel rail and it looks much better in bare metal:
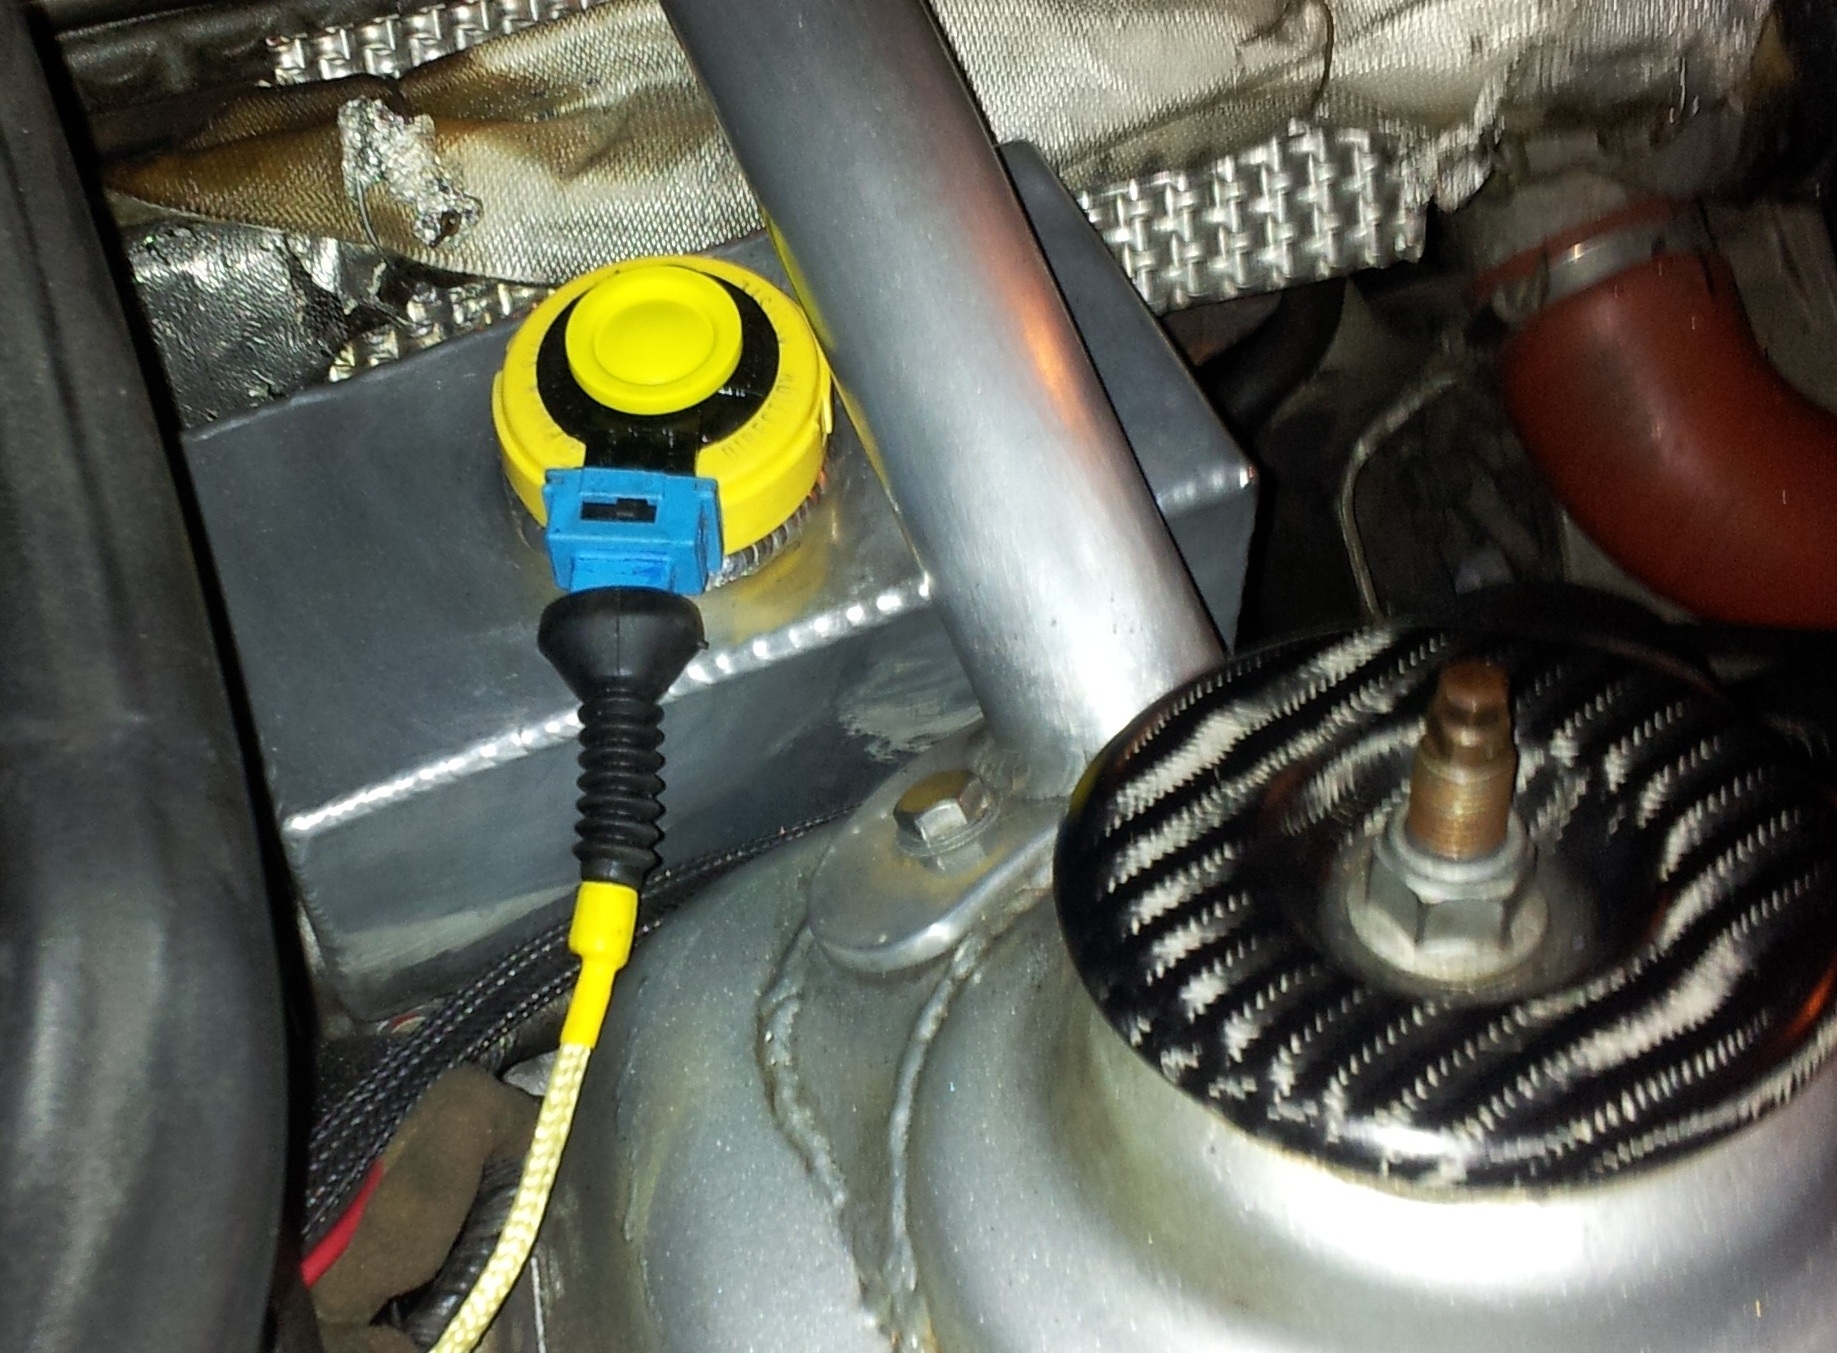
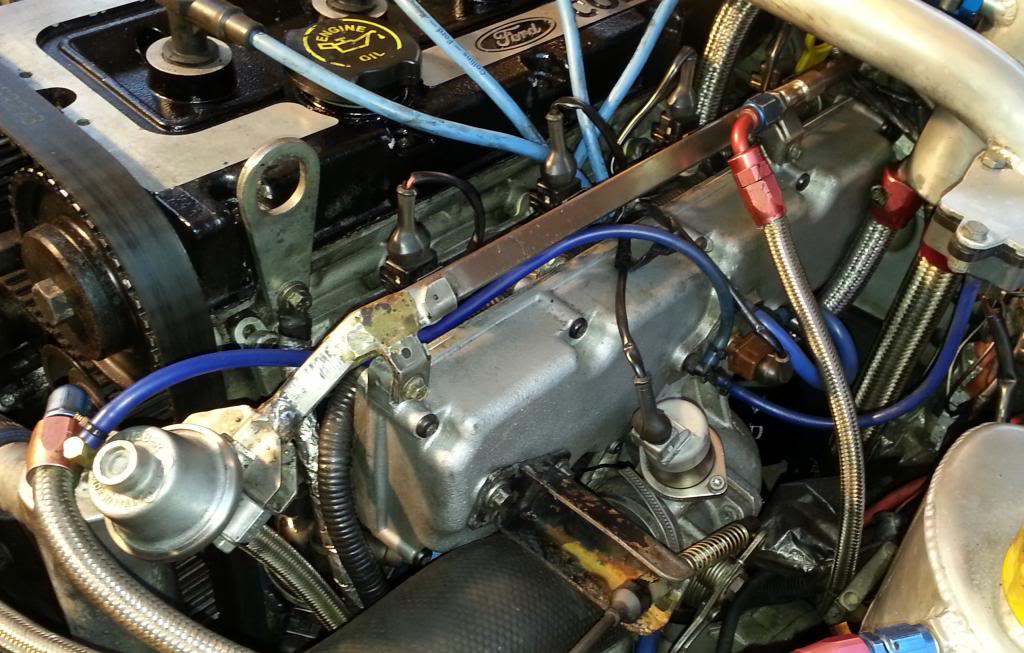
Reassembled everything and hid the wiring away so it looks much neater:
Just the rest of the engine bay to clean now LOL.
Got a lot of bits to fit/make and not enough time!!
Fitted my carbon mud flaps up front:
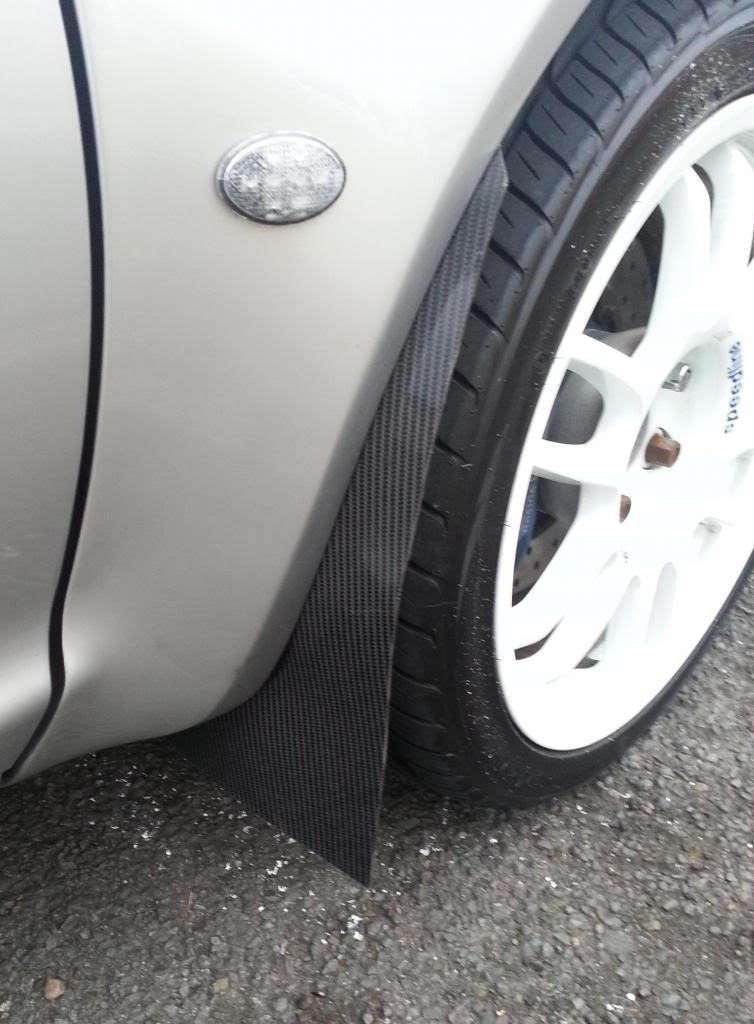
Got rears to make sometime.
My carbon bonnet is finished just need to fit it! Also bought these vents for it:
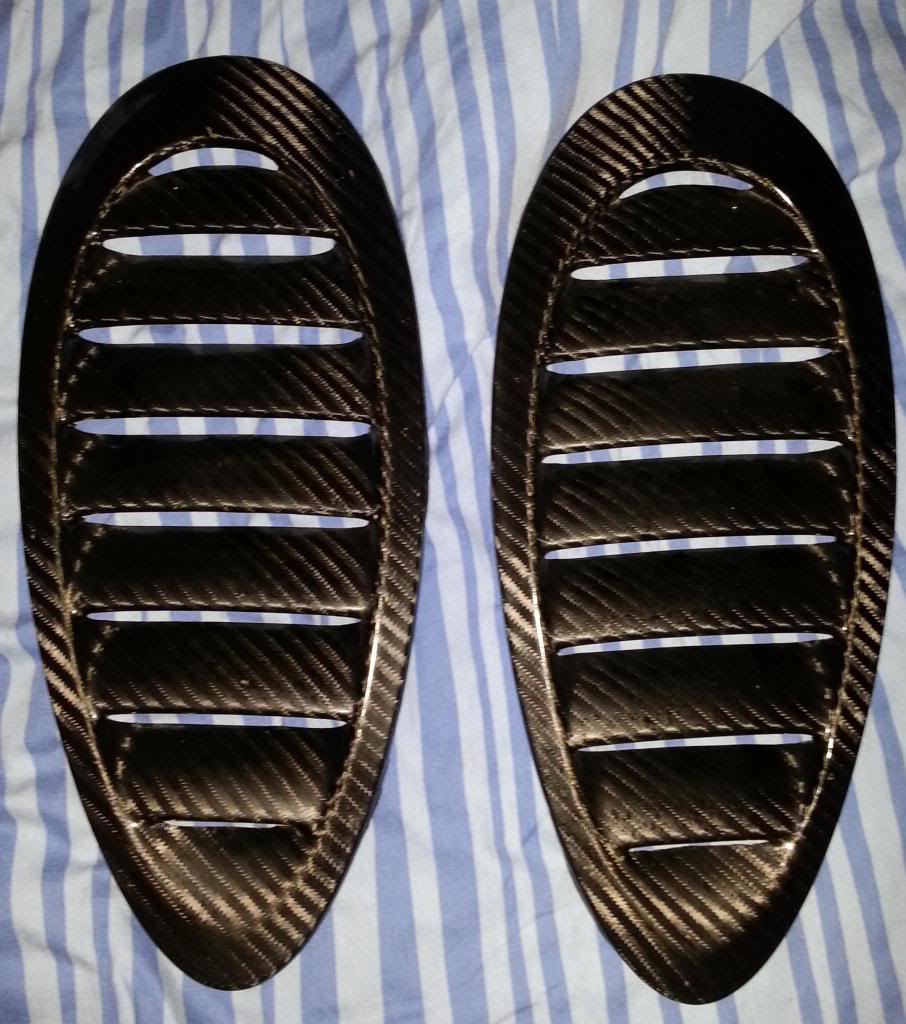
Surprisingly heavy so i will be remoulding them much lighter before fitting the vents in a few weeks.
Started making my carbon seats. want at least 1 fitted before ford fair.
They take a shit load of time to lay up plus i need to modify fiesta mk3.5 seat mounts to fit them.
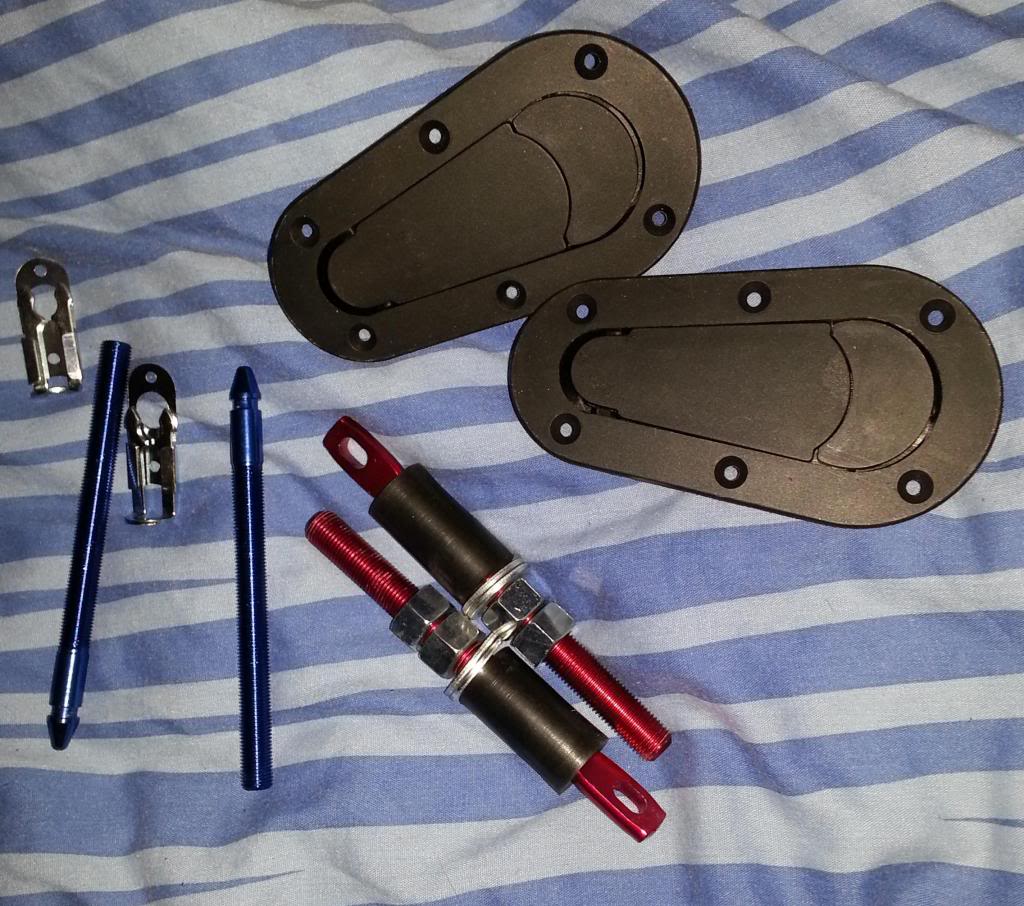
Got some new shiny bits too. fasterners for my new splitter (to be made lol) and the bonnet:
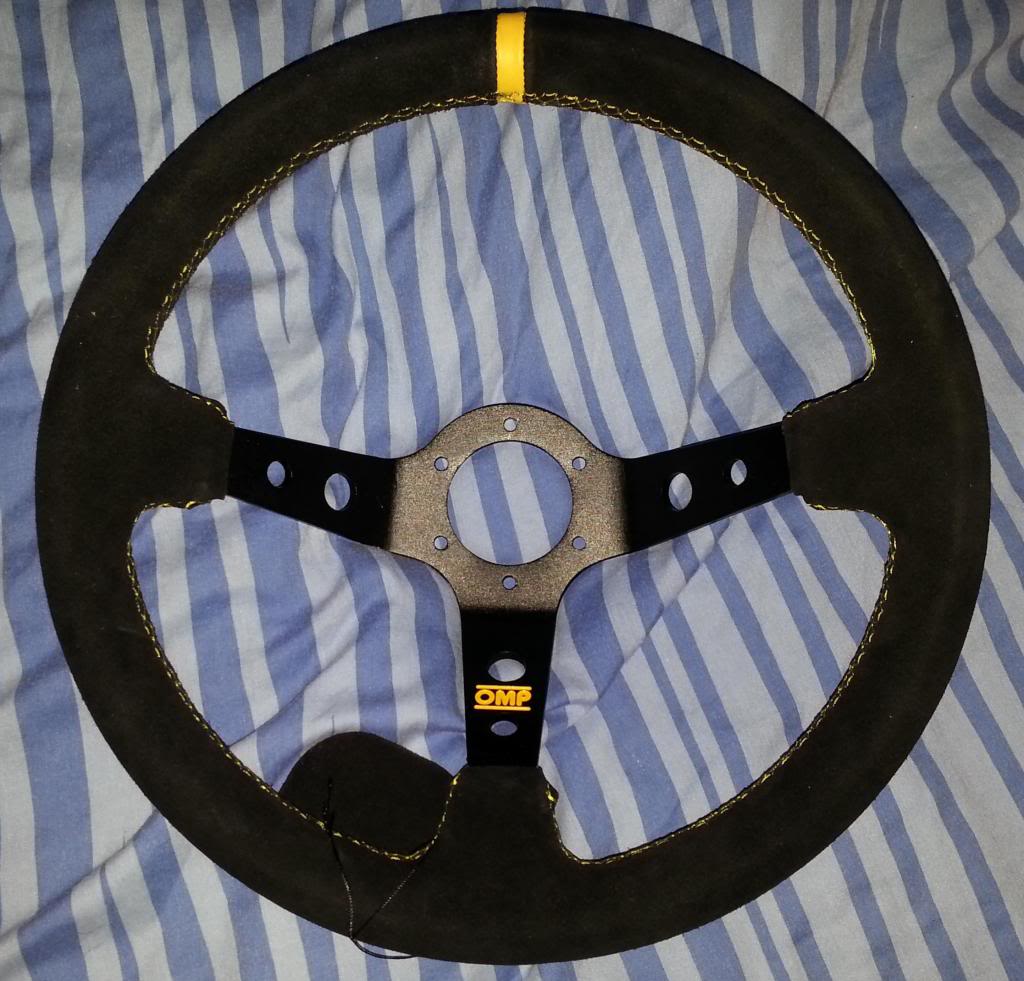
Also got a new wheel. The new seats should be lower and further back so gone for a deep dished OMP wheel:
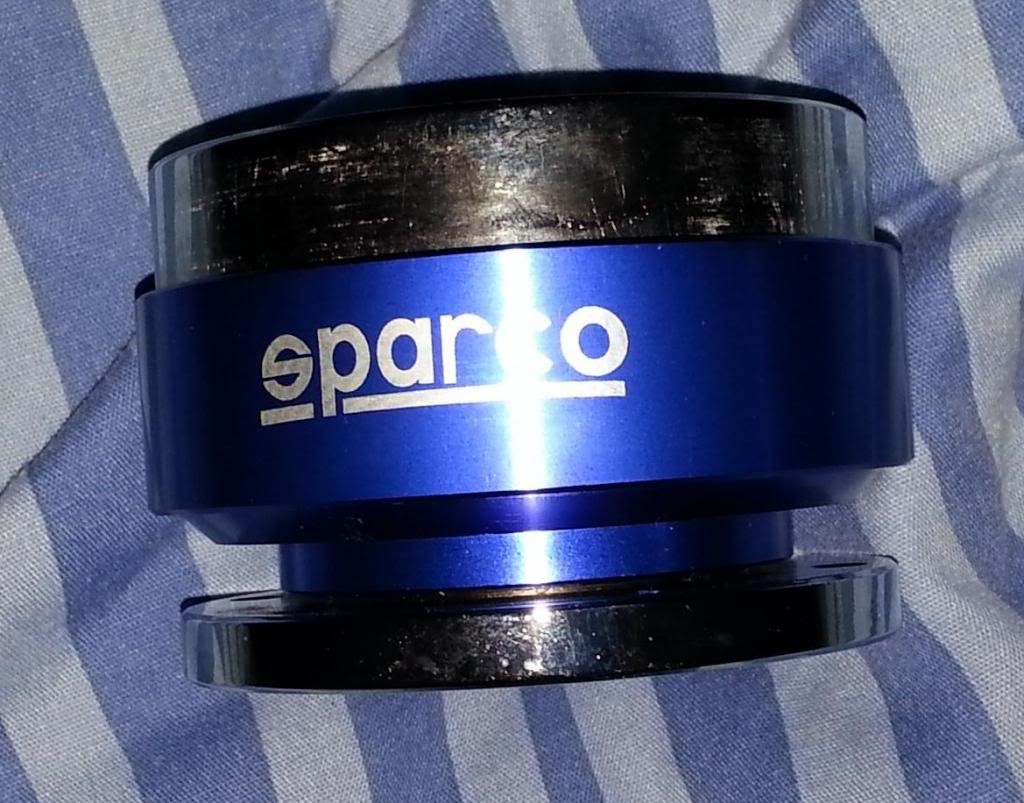
Also a quick release coupling:
Still a lot to do before ford fair. Luckily ive got next week off work to do some of it!!
Also decided to give it a clean up and get years of dirt off it. Literally used half a can of penetrating oil to loosen the dirt and dissolved it with literally 3 cans of brake cleaner!!
Also removed all the flaking paint off the fuel rail and it looks much better in bare metal:
Reassembled everything and hid the wiring away so it looks much neater:
Just the rest of the engine bay to clean now LOL.
Got a lot of bits to fit/make and not enough time!!
Fitted my carbon mud flaps up front:
Got rears to make sometime.
My carbon bonnet is finished just need to fit it! Also bought these vents for it:
Surprisingly heavy so i will be remoulding them much lighter before fitting the vents in a few weeks.
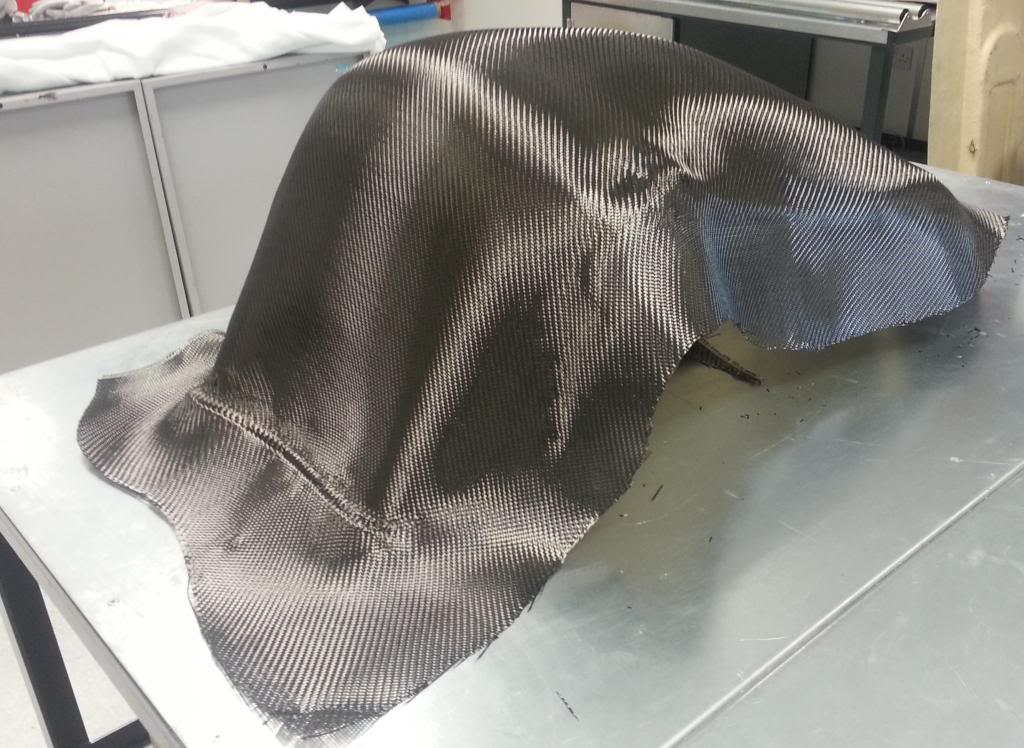
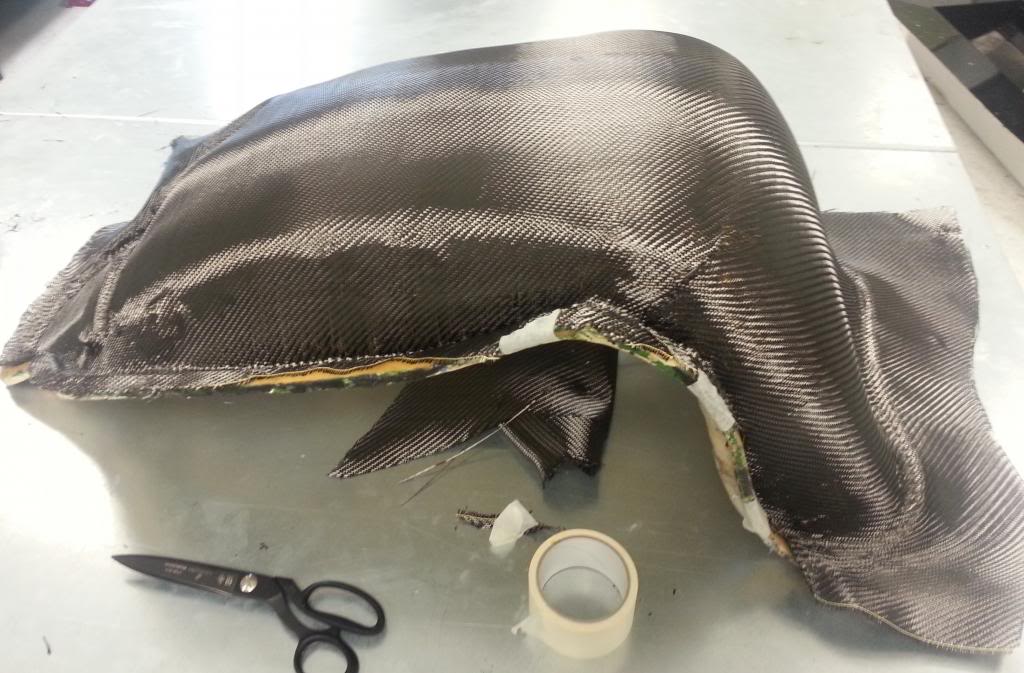
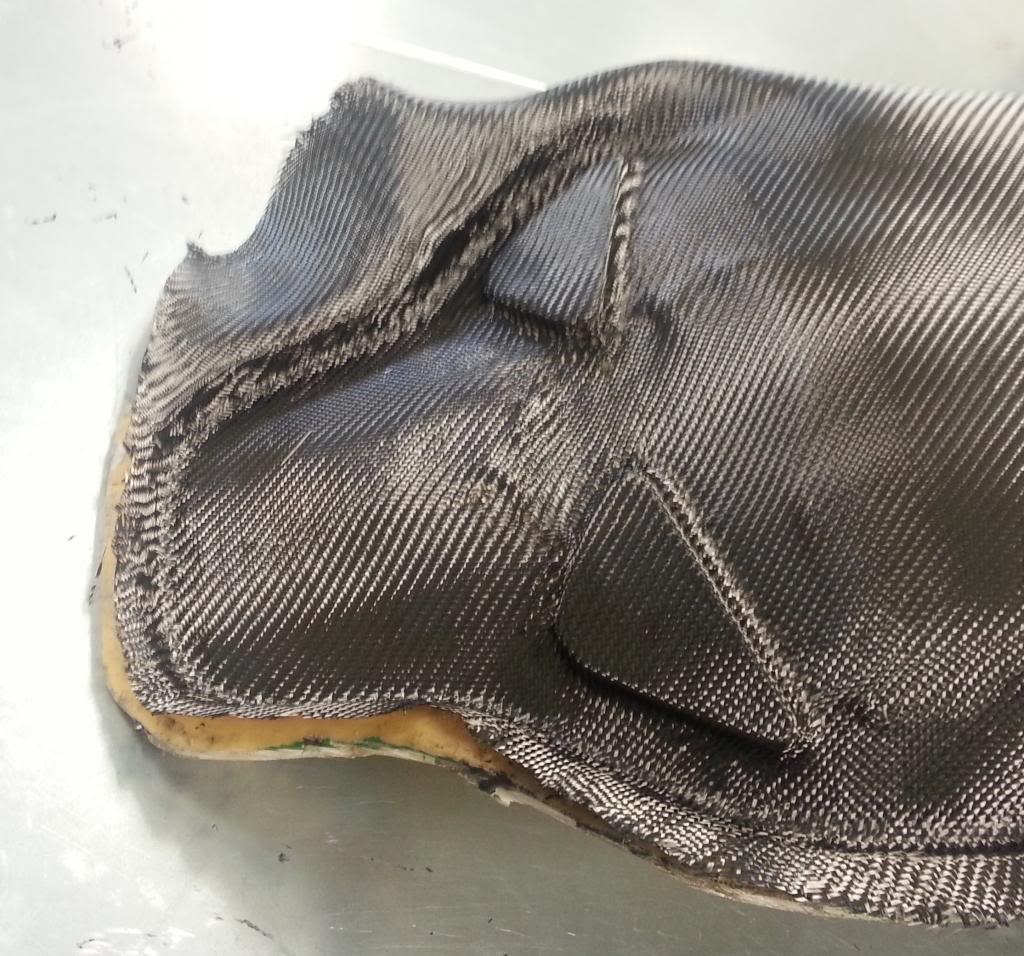
Started making my carbon seats. want at least 1 fitted before ford fair.
They take a shit load of time to lay up plus i need to modify fiesta mk3.5 seat mounts to fit them.
Got some new shiny bits too. fasterners for my new splitter (to be made lol) and the bonnet:
Also got a new wheel. The new seats should be lower and further back so gone for a deep dished OMP wheel:
Also a quick release coupling:
Still a lot to do before ford fair. Luckily ive got next week off work to do some of it!!

Thread
Thread Starter
Forum
Replies
Last Post
Ben26
Pictures, video & Photoshop Forum
10
27-08-2015 08:56 PM