
T26 WRC - "RE-IMAGINED" 550bhp+ Prodrive S8 WRC
 21-08-2008, 08:42 PM
#81
Boost Junkie
Thread Starter
Little update as of tonight.
Havent done much what with WRC in the way but hoping to use the bank holiday weekend to good effect.
Heres the latest..
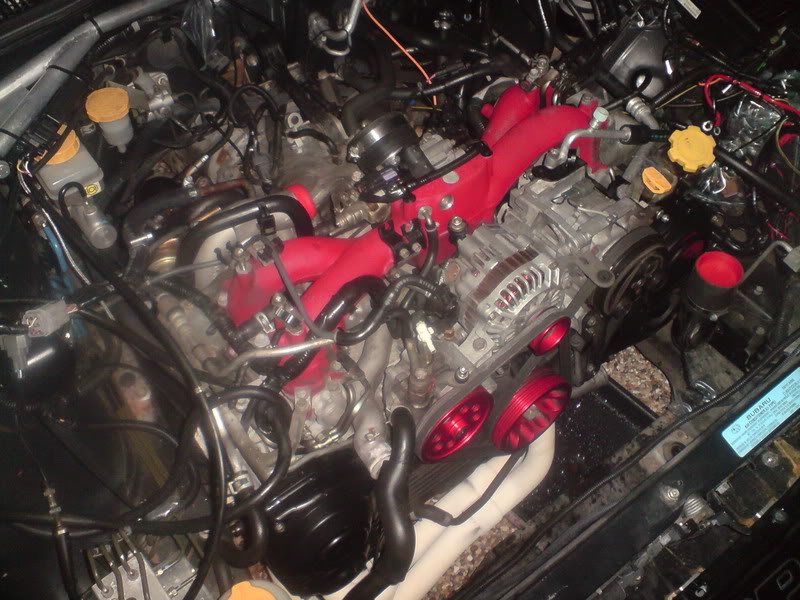
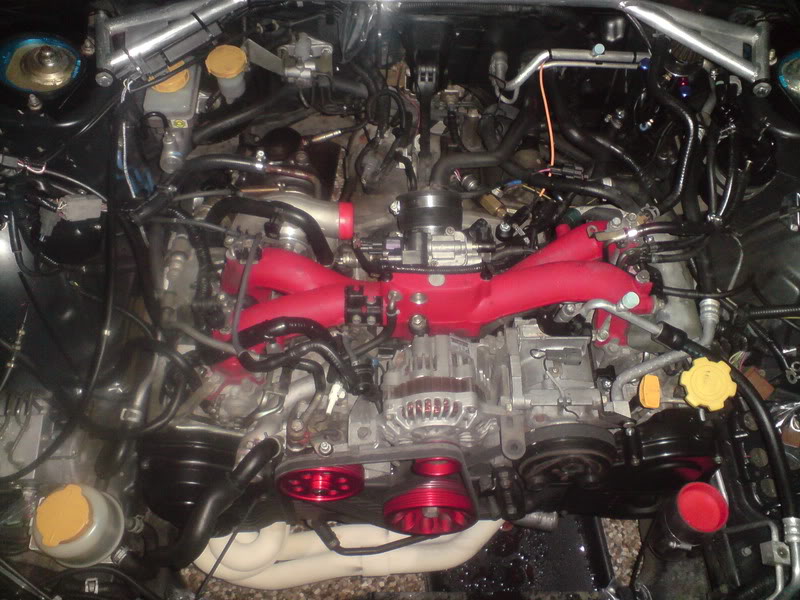
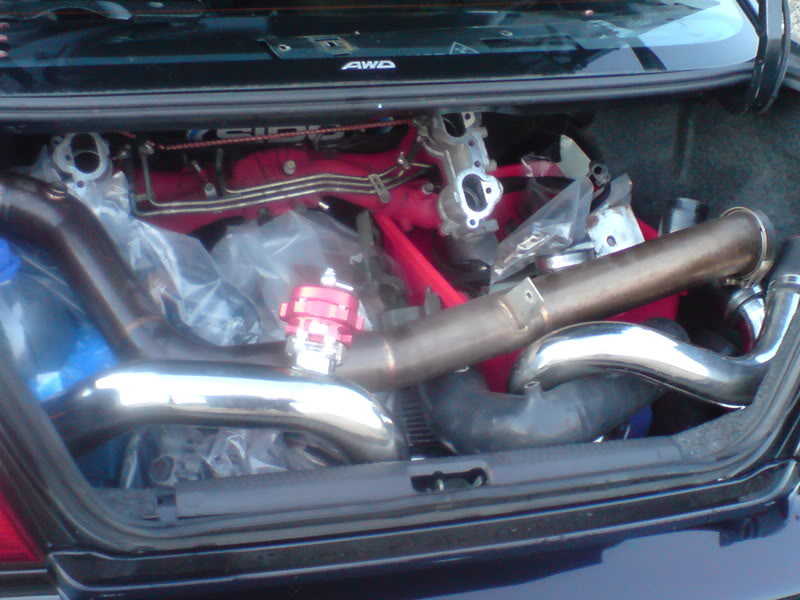
All intake gone, radpack out and downpipe ready to lift off.
Havent done much what with WRC in the way but hoping to use the bank holiday weekend to good effect.
Heres the latest..
All intake gone, radpack out and downpipe ready to lift off.
 23-08-2008, 05:23 PM
#82
Boost Junkie
Thread Starter
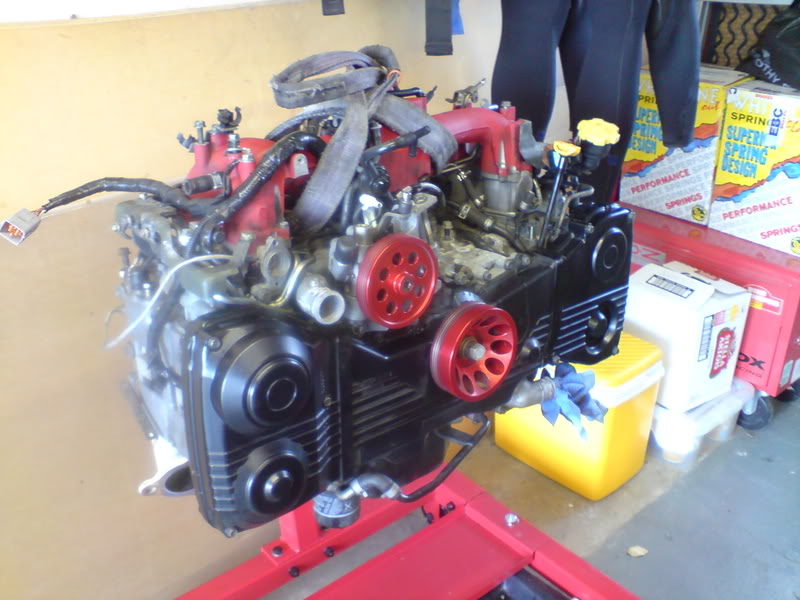
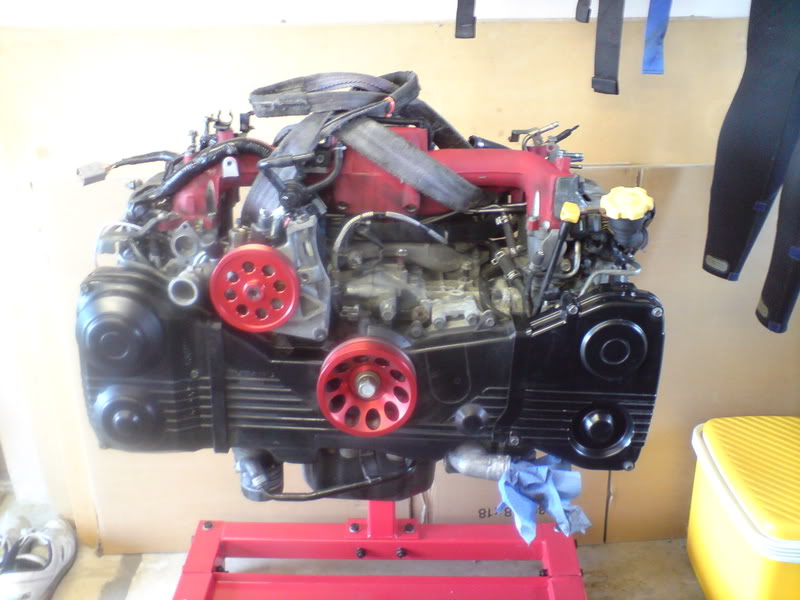
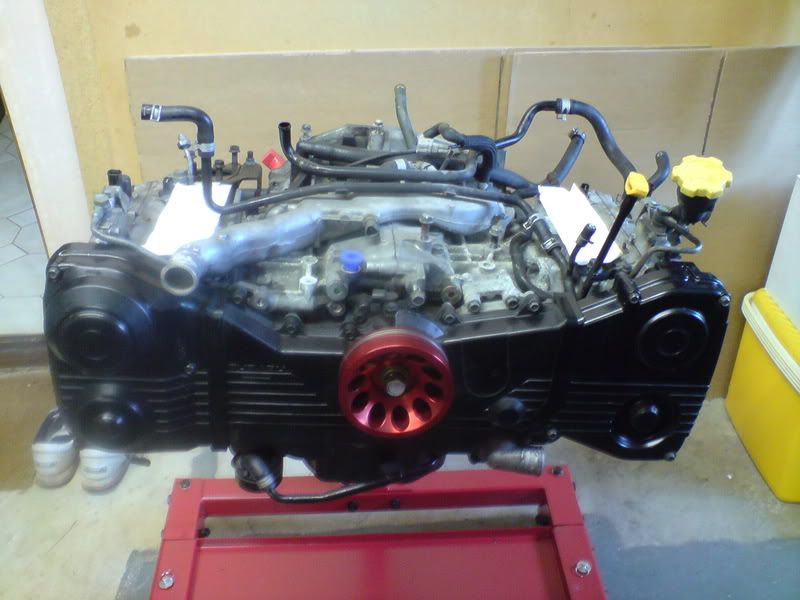
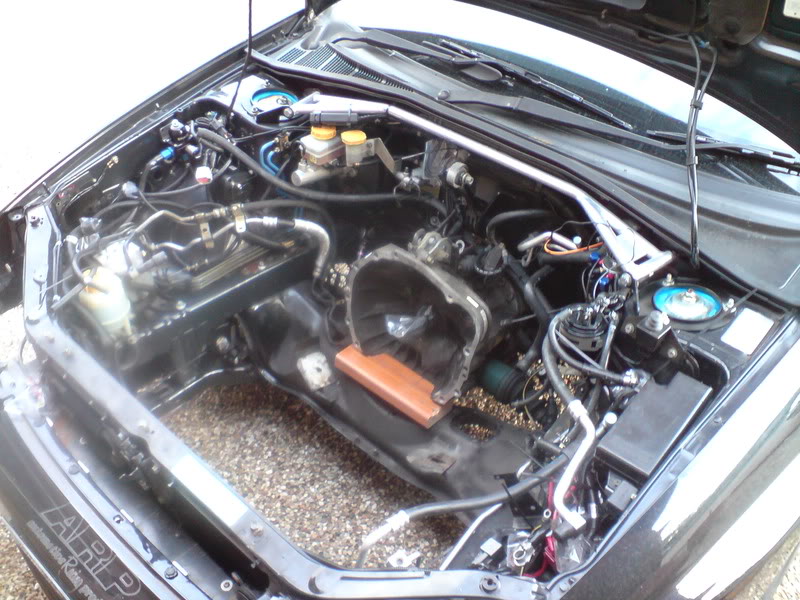
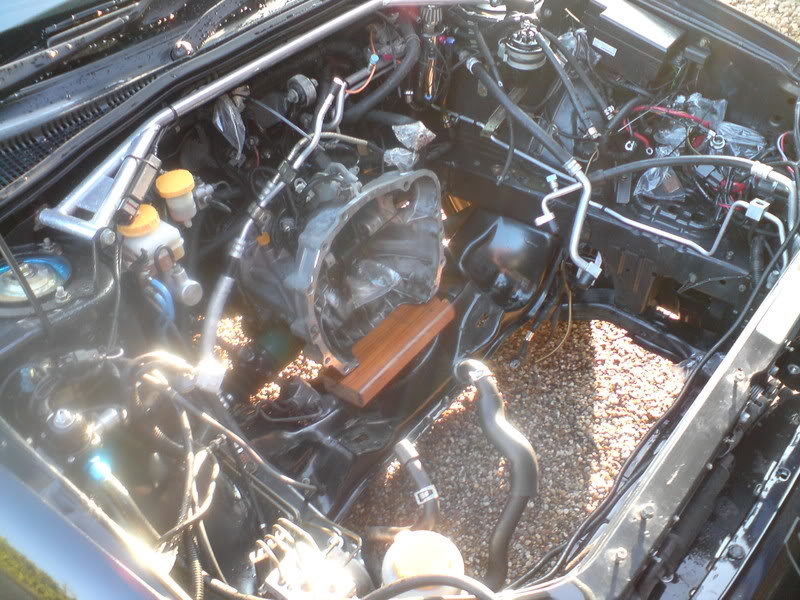
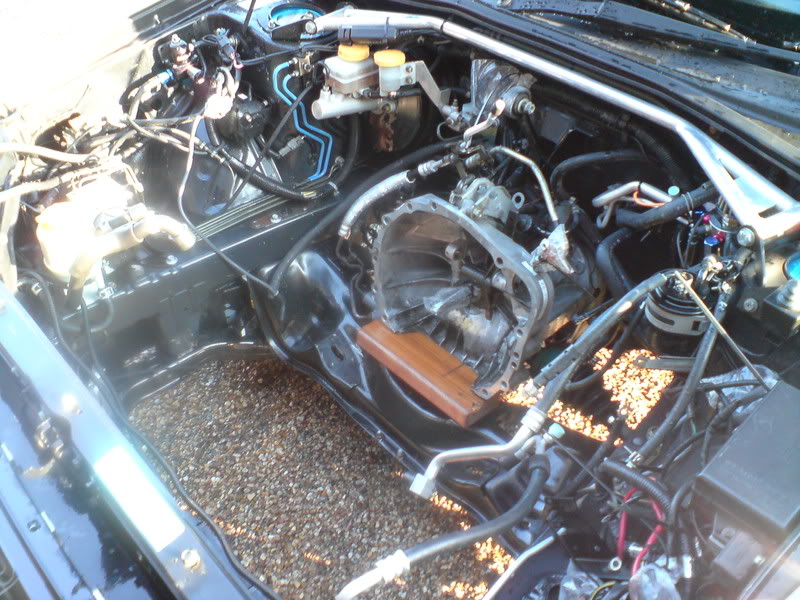
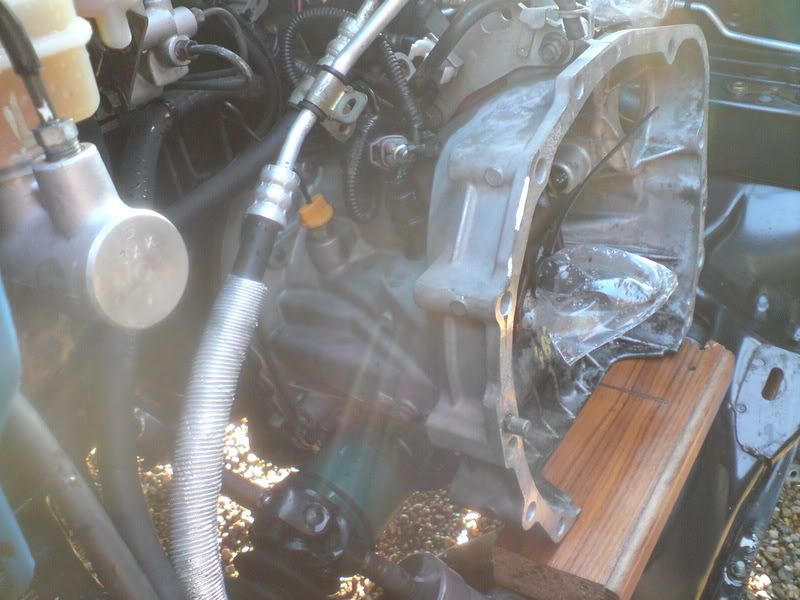
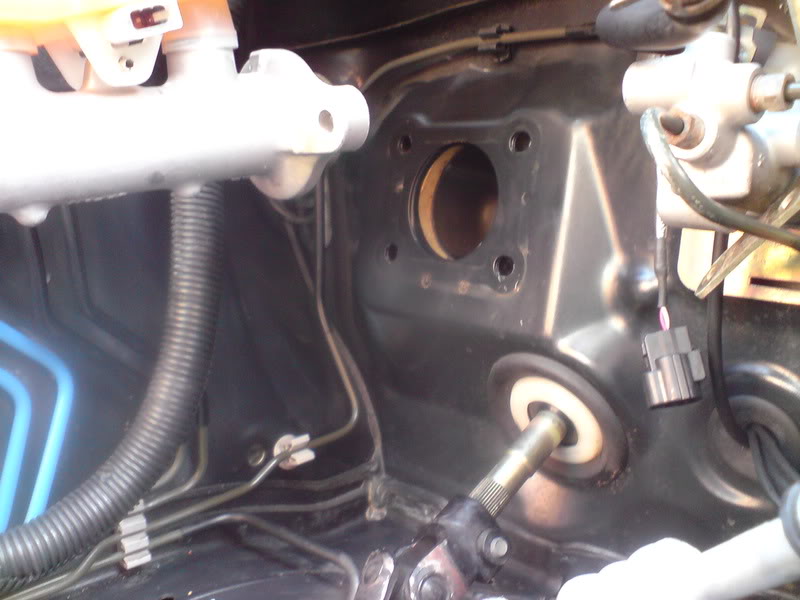
After alot of work today, these are the fruits of my labour. Was a little tricky at times working completely alone but after some swearing and some cut knuckles the motor finally came out.
Not a hard job by any means but not the easiest without another set of hands.
Now the task of cleaning and preping everything to go back in before stripping the motor for parts and then on to the new build.

Sorry for the cak fone pics but i wasnt about to get out the DSLR with dirty hands

Not a hard job by any means but not the easiest without another set of hands.
Now the task of cleaning and preping everything to go back in before stripping the motor for parts and then on to the new build.
Sorry for the cak fone pics but i wasnt about to get out the DSLR with dirty hands
25-08-2008, 02:00 PM
#84
Boost Junkie
Thread Starter
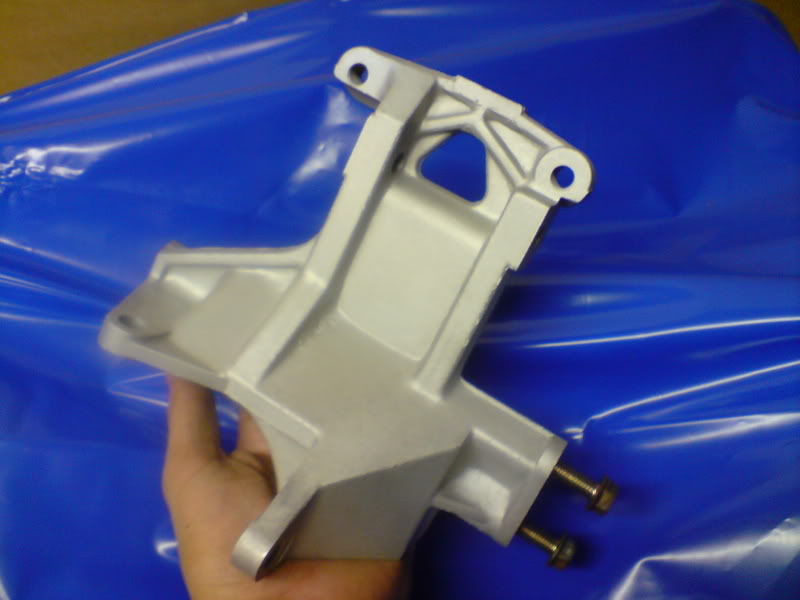
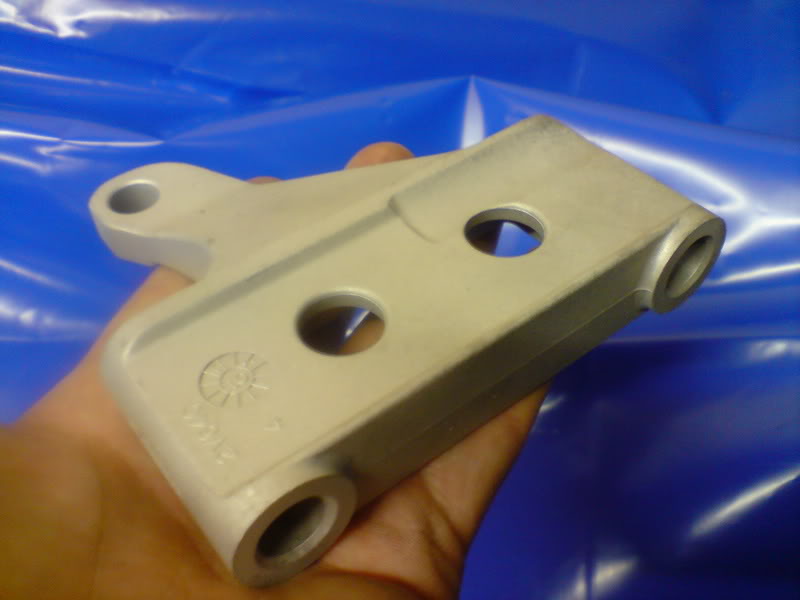
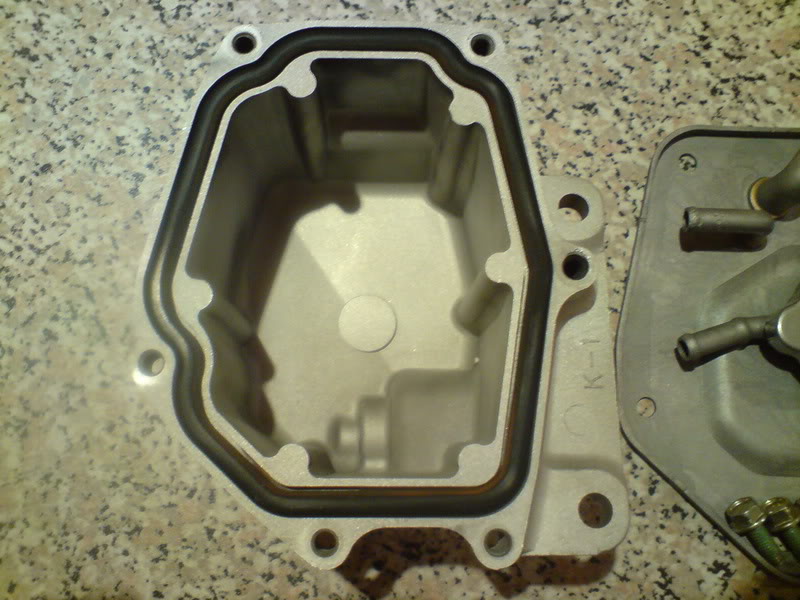
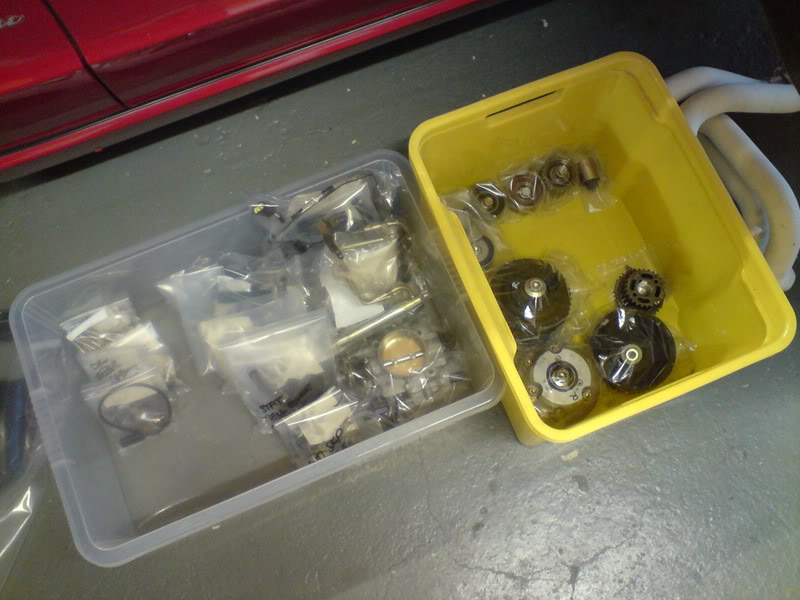
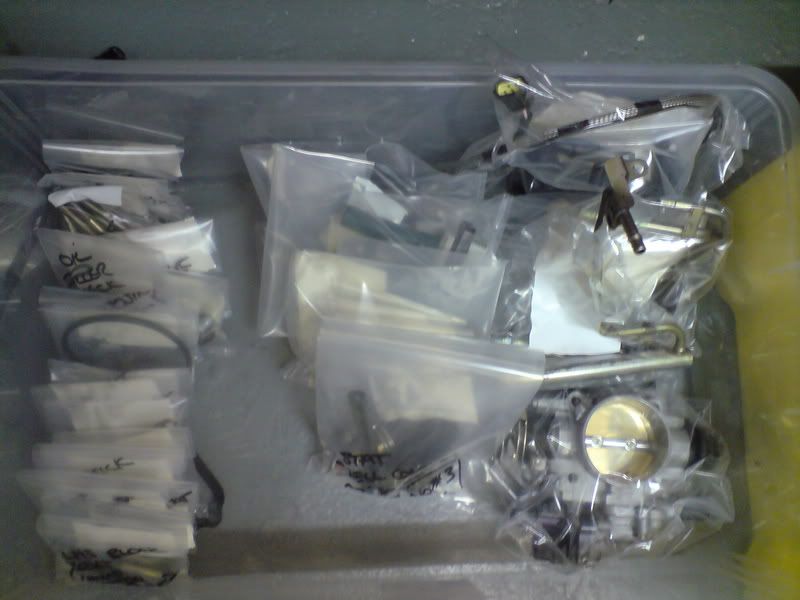
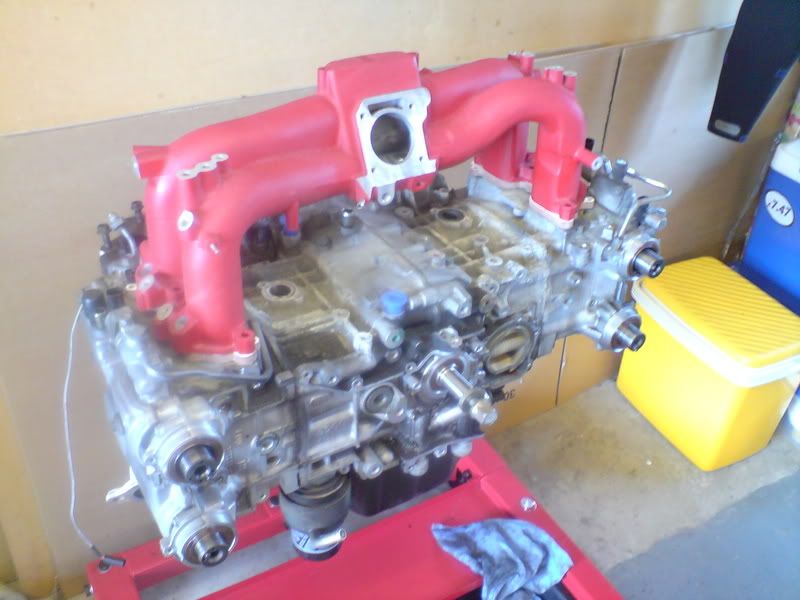
Got a bit of time this morning so started stripping the ancilleries off the 207 motor. These will all be going on the 257 motor in some way shape or form.
Spent the time cleaning everything as i came off, some larger stuff will be chemically cleaned and/or beadblasted and refurbished before going back on.
All the important stuff was tagged inc all hardware removed. Everything was then bagged and sealed.
Heres a few snaps, inc various stages of the stripping of the intake manifold.
(Also found out that my manifold had the JDM TGV'less bodies on them, but im still gonna fit the spec C intake.
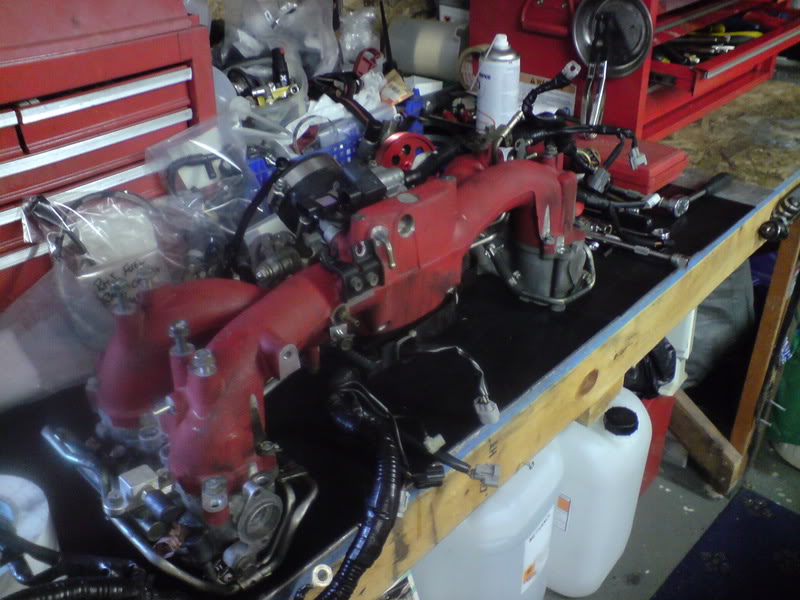
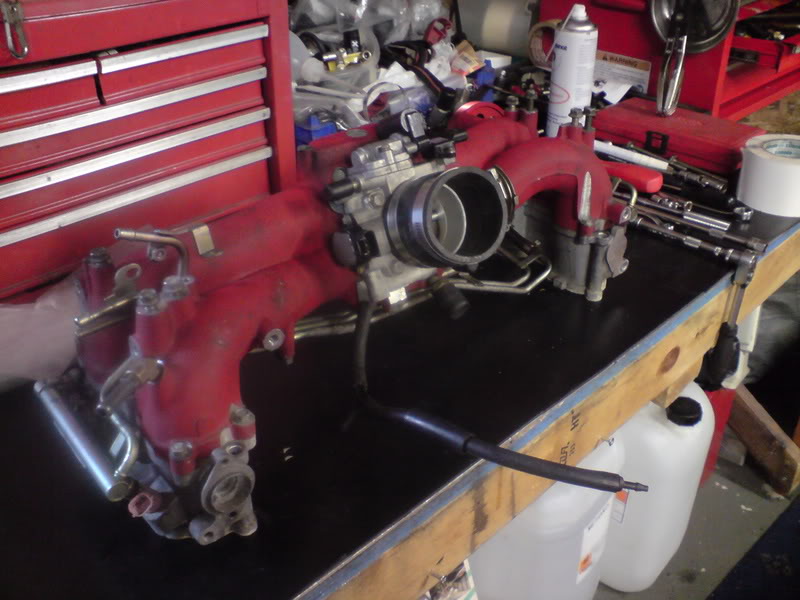


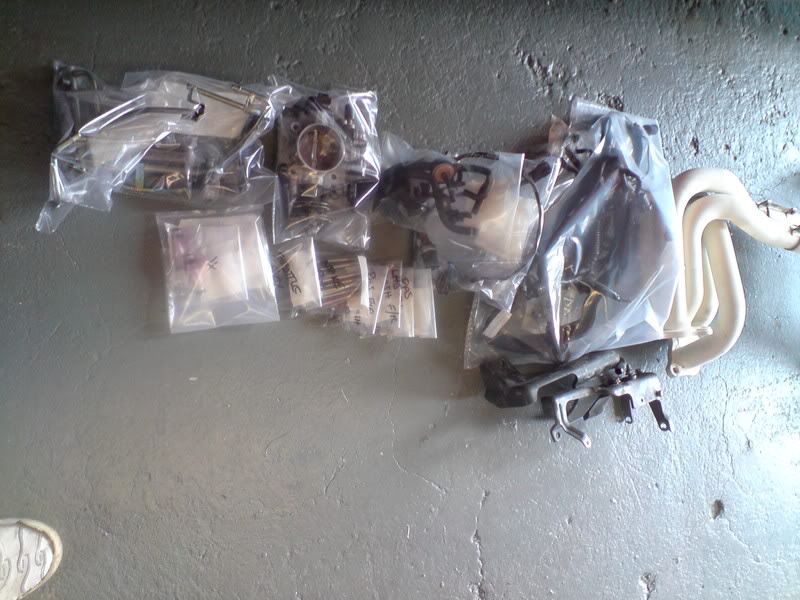
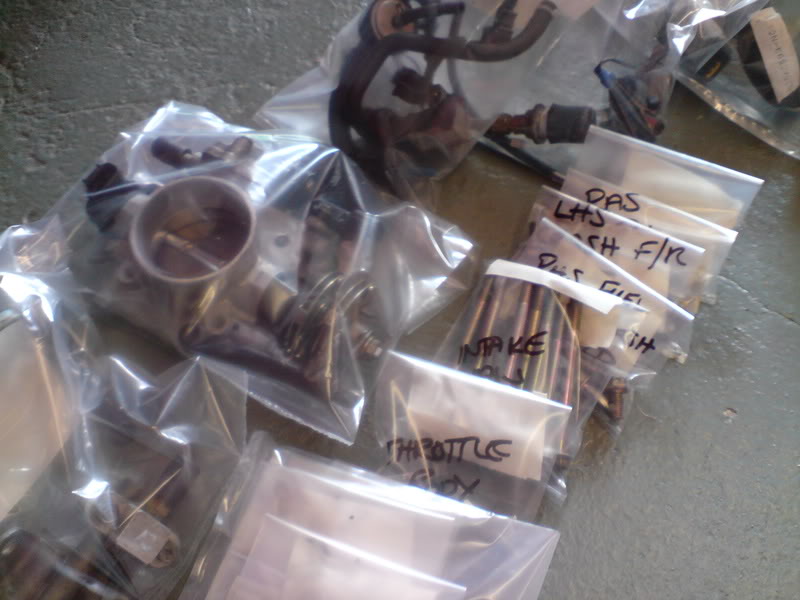
Heres some parts to be done tomorrow
Spent the time cleaning everything as i came off, some larger stuff will be chemically cleaned and/or beadblasted and refurbished before going back on.
All the important stuff was tagged inc all hardware removed. Everything was then bagged and sealed.
Heres a few snaps, inc various stages of the stripping of the intake manifold.
(Also found out that my manifold had the JDM TGV'less bodies on them, but im still gonna fit the spec C intake.
Heres some parts to be done tomorrow


 25-08-2008, 06:34 PM
#92
Boost Junkie
Thread Starter
Lol, nah i want useable power. I dont want a silly peaky powerband. Personally i thing a GT30 is best for useability and should suit the 2.5 ltr a treat
 26-08-2008, 11:59 PM
#94
Boost Junkie
Thread Starter
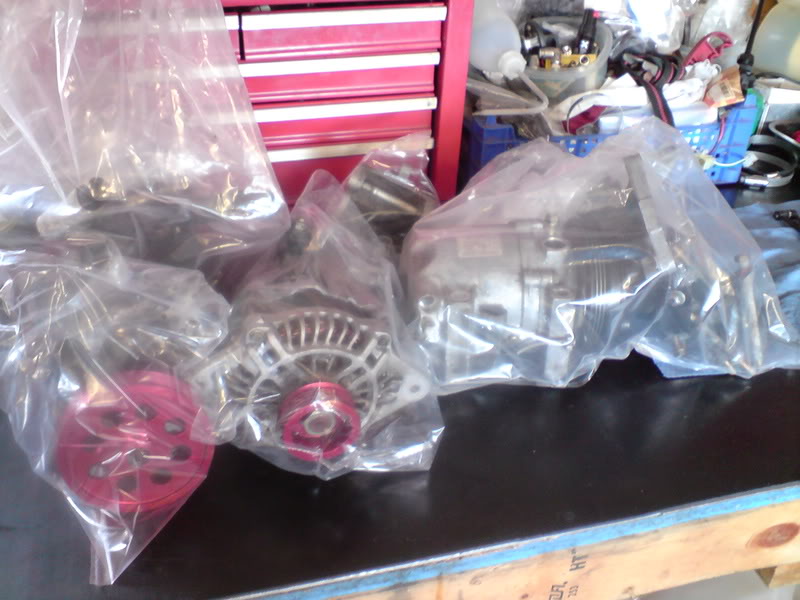
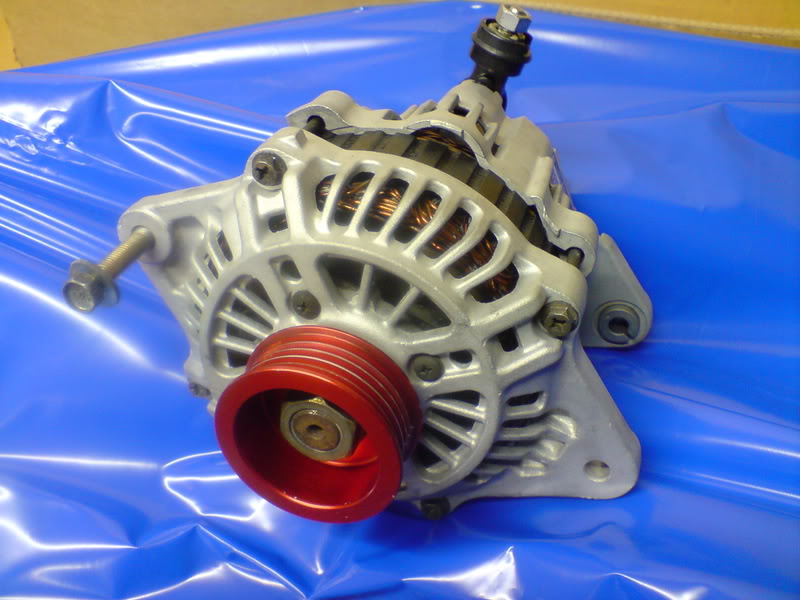
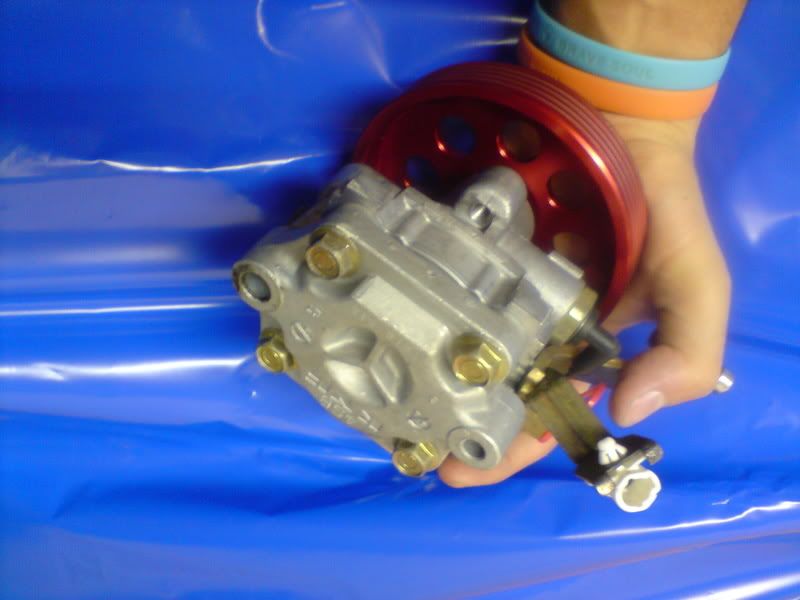
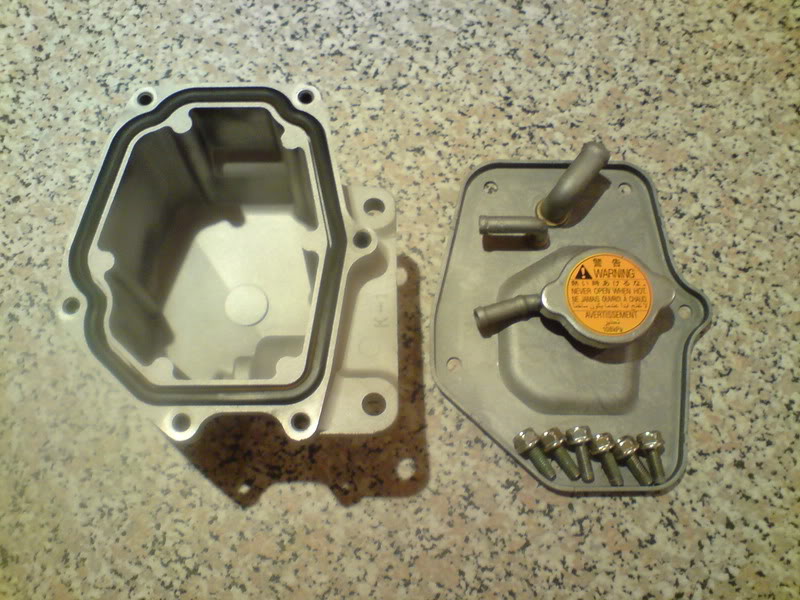
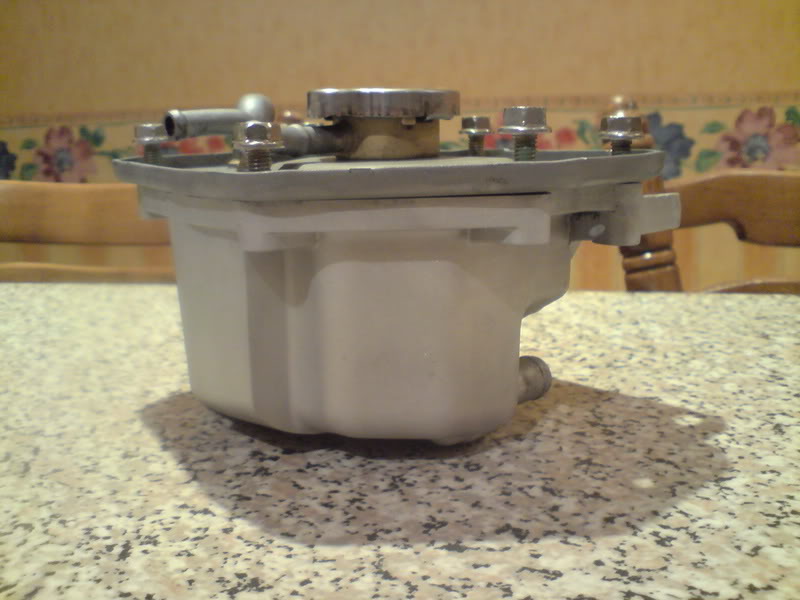
Not much to show today except ive rebuilt my alternator inc some glass bead blasting, also cleaned the PAS pump and glas blasted the aux brackets.
All came up quite clean... which was nice

All came up quite clean... which was nice
27-08-2008, 11:45 PM
#95
Boost Junkie
Thread Starter
Todays updates...
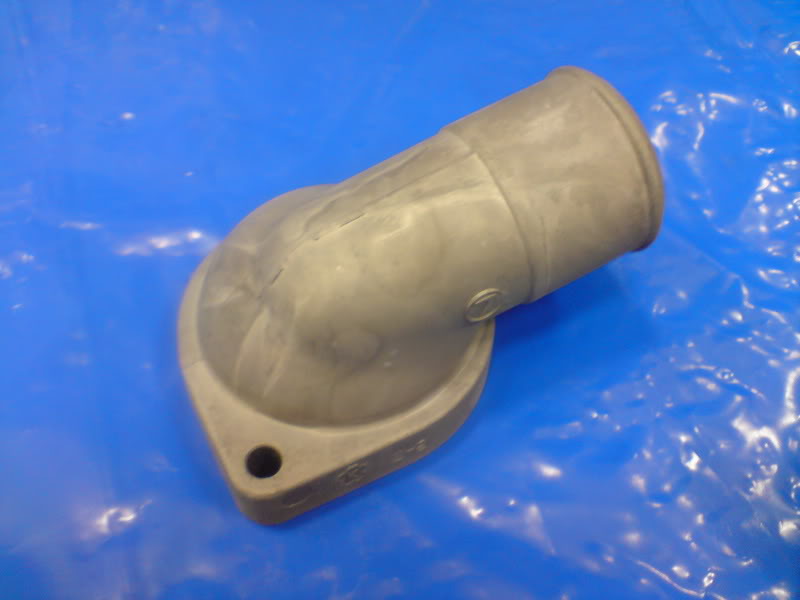
Stripped and cleaned the throttlebody and smoothed out a few imperfections. Didnt go mad, just jolly'd it up a bit
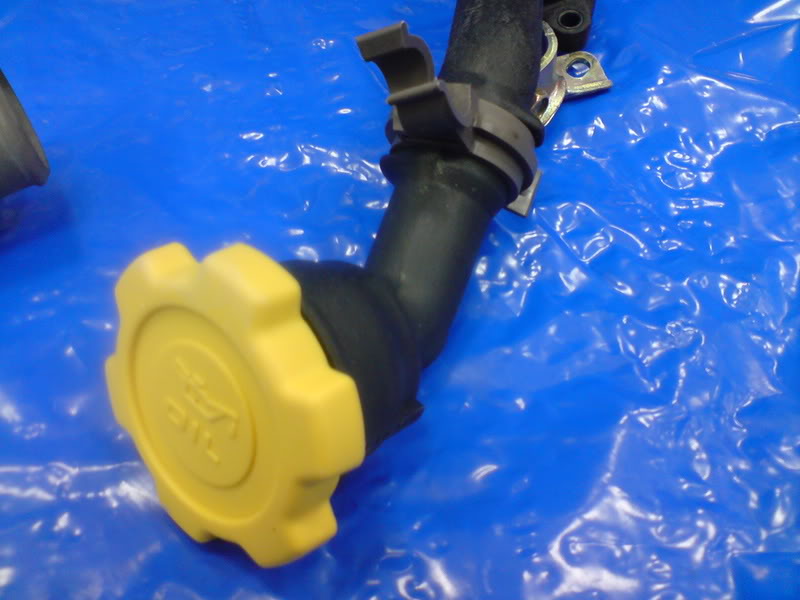
Also gave the header tank the glass bead treatment ready to be powdercoated. The turbo water feed will be converted to an -AN fitting before this is done.
Also wonder if anybody can spot the modification to the newage tank?
Okay, ive cut and smoothed the lower leg that usually bolts to the power steering line. The tank will not be in the stock location and the PAS lines will be different anyway so i thought id give the header tank a smoother cleaner look.
I think they came up quite nice
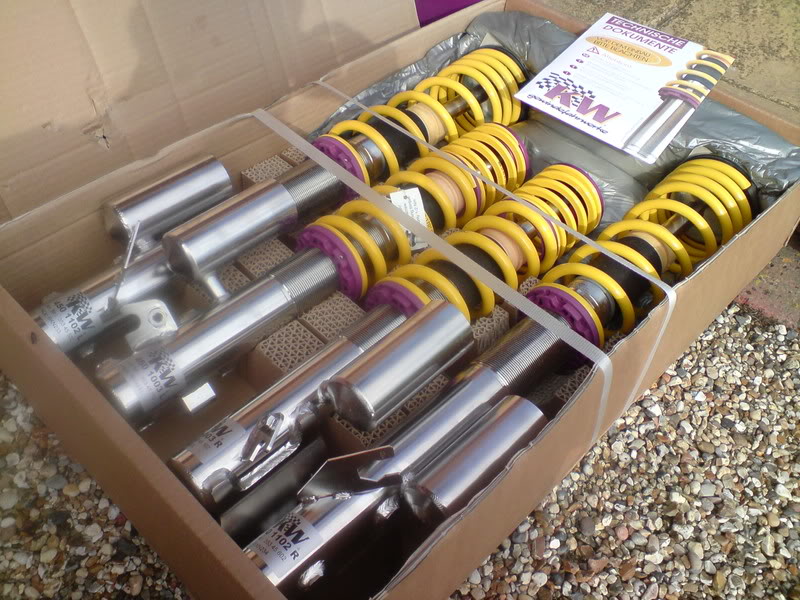
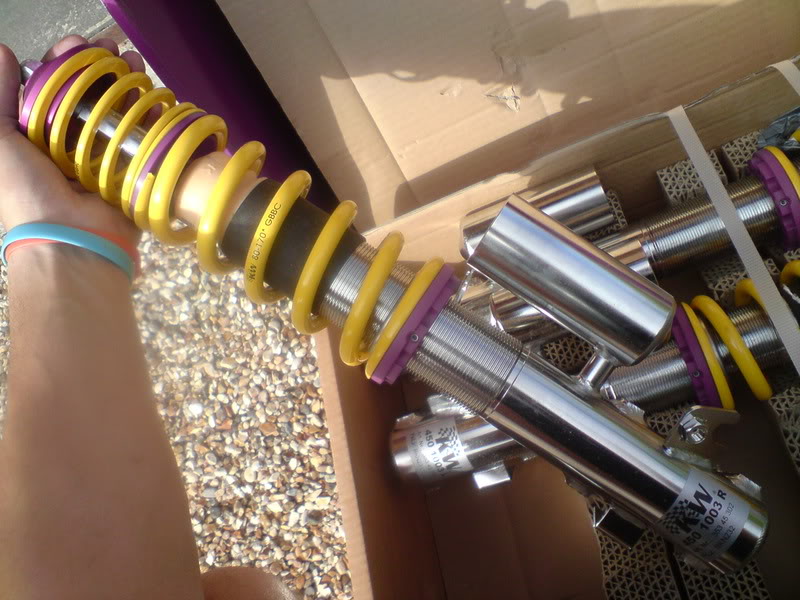
Oh, i also got a call to say my all new KW V3 coilovers had arrived, finally!!

Stripped and cleaned the throttlebody and smoothed out a few imperfections. Didnt go mad, just jolly'd it up a bit
Also gave the header tank the glass bead treatment ready to be powdercoated. The turbo water feed will be converted to an -AN fitting before this is done.
Also wonder if anybody can spot the modification to the newage tank?
Okay, ive cut and smoothed the lower leg that usually bolts to the power steering line. The tank will not be in the stock location and the PAS lines will be different anyway so i thought id give the header tank a smoother cleaner look.
I think they came up quite nice
Oh, i also got a call to say my all new KW V3 coilovers had arrived, finally!!
 28-08-2008, 08:28 AM
#97
Boost Junkie
Thread Starter
Id love a YB in there mate but it would foul the bonnet
Think i may do that in a few years, buy a cheap scoob and put a lairy YBT or BDT in it, how cool would that be. Ha ha.
At least it would sound right the off
Think i may do that in a few years, buy a cheap scoob and put a lairy YBT or BDT in it, how cool would that be. Ha ha.
At least it would sound right the off


 28-08-2008, 02:51 PM
#102
Part of the Furniture
Join Date: Apr 2008
Location: Looking for my next project car...
Posts: 151
Likes: 0
Received 0 Likes
on
0 Posts
28-08-2008, 03:50 PM
#103
Boost Junkie
Thread Starter
28-08-2008, 06:39 PM
#104
Part of the Furniture
Join Date: Apr 2008
Location: Looking for my next project car...
Posts: 151
Likes: 0
Received 0 Likes
on
0 Posts
LOL, I kind of know what you mean, though it's been a long long time since I sat my ar$e in one....about the time I made the choice to buy my first Subaru over an Escoss.. 
28-08-2008, 10:29 PM
#105
Boost Junkie
Thread Starter
I really hope it turns out as good as i want it to.
29-08-2008, 12:20 AM
#107
Boost Junkie
Thread Starter
Todays work...
Glass blasted the, thermostat outlet, water bridge and block pipes. These were then resprayed gloss black the same as they left the factory.
Also hot washed/degreased the oil filler and cambelt covers.
All came up rather spiffing too
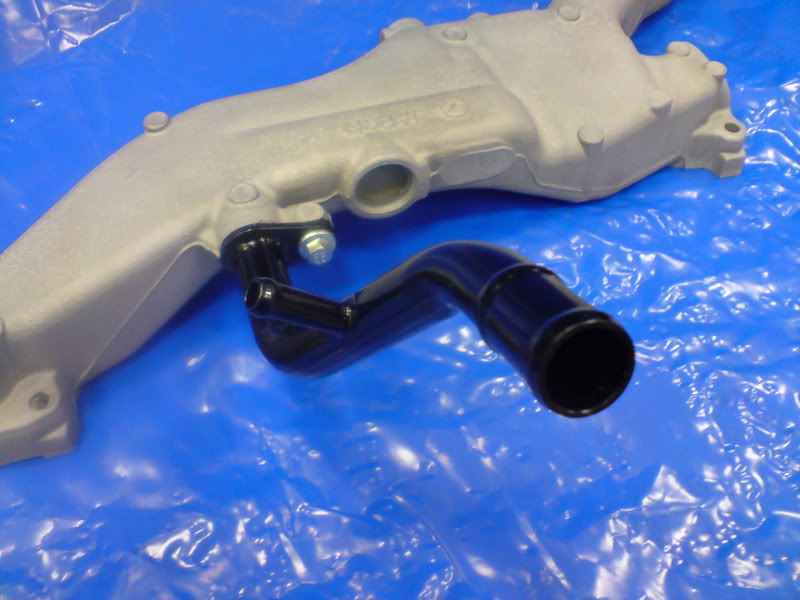

Glass blasted the, thermostat outlet, water bridge and block pipes. These were then resprayed gloss black the same as they left the factory.
Also hot washed/degreased the oil filler and cambelt covers.
All came up rather spiffing too
29-08-2008, 08:40 PM
#108
Boost Junkie
Thread Starter
Todays progress...
Firstly, big thanks to Trails for dropping some parts off for me.
Firstly my KW's are finally here. They look awesome and i cant wait to get them on.
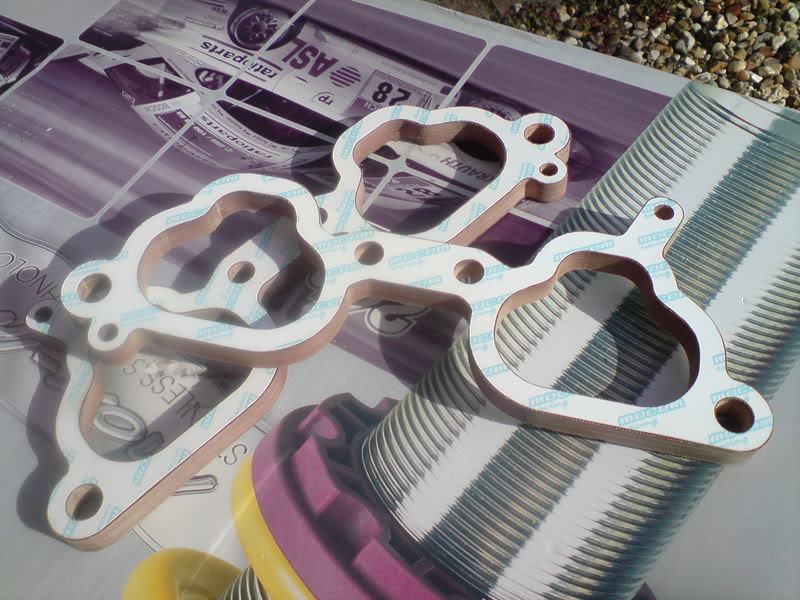
Mocom Phenolic manifold spacers
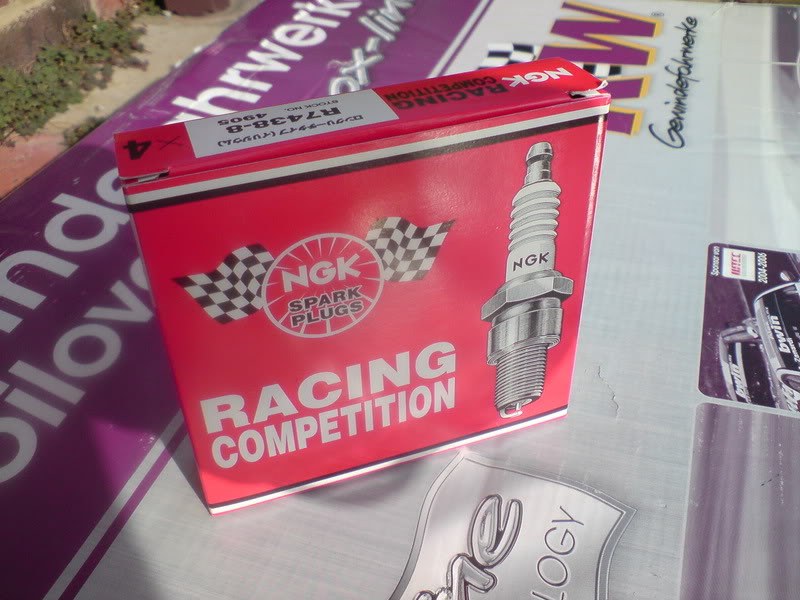
NGK Racing 8's (Sparkplugs) - Seemingly the most expensive plugs on gods earth lol!-
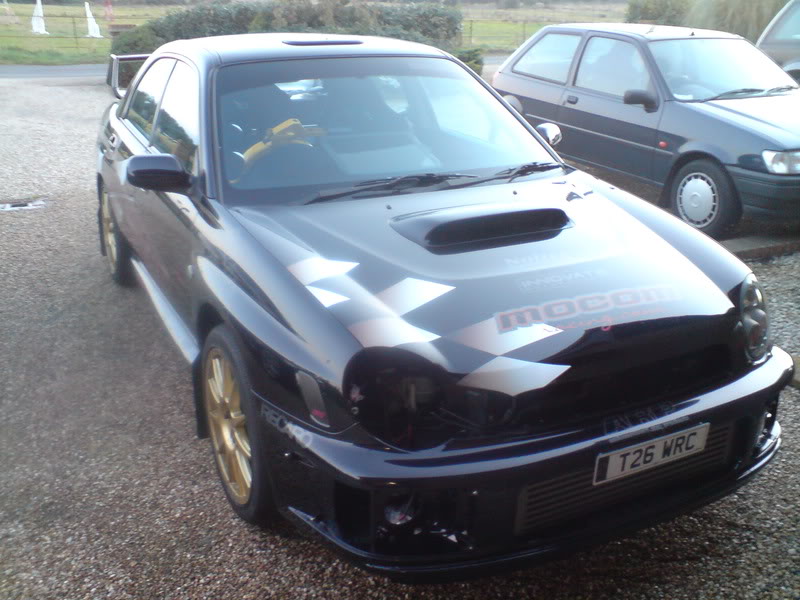
Shame that the pics are cak but i gave the car a wash today and also spent about 2 hours fully degreasing my engine bay as best i can. Lots more to be done here but at least its all dirt free now.
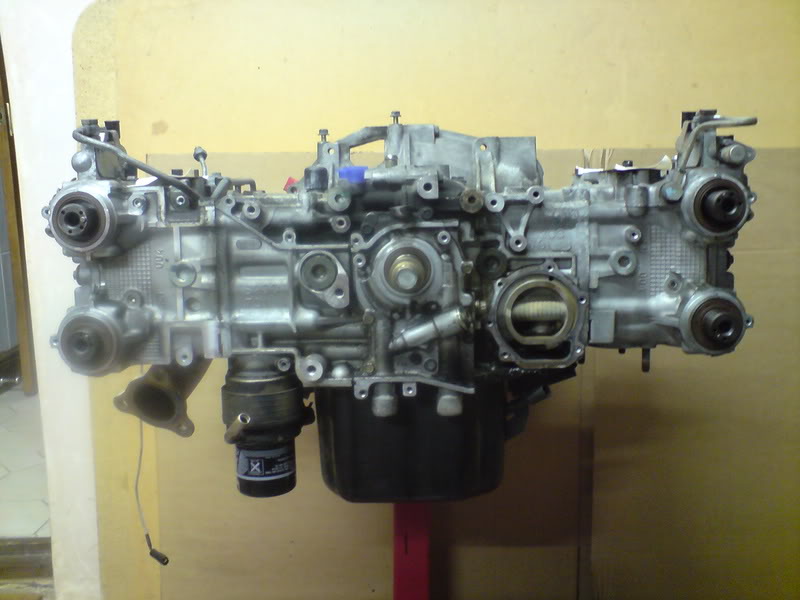
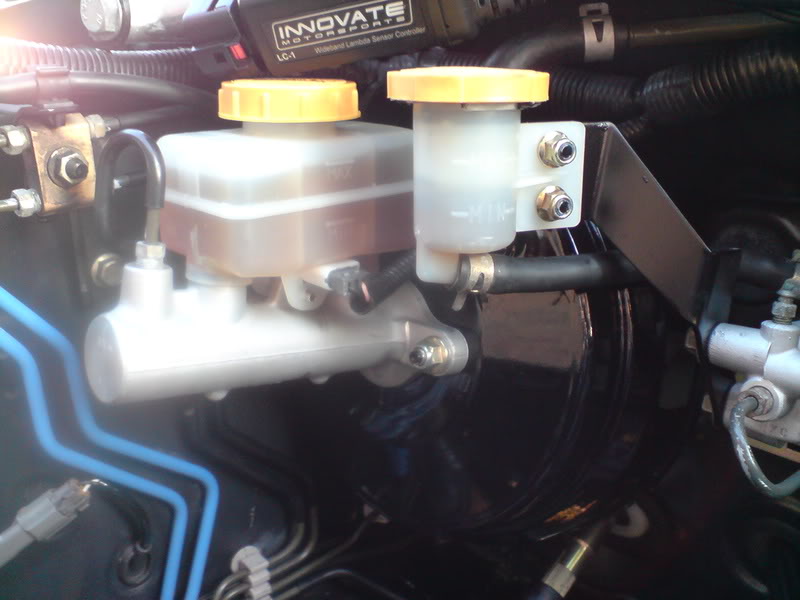
Heres the EJ207's current status. Waiting on my turbo kit till i can go much further now.
Had to laugh when i see this earlier.... what a car boot sale this would be
Firstly, big thanks to Trails for dropping some parts off for me.
Firstly my KW's are finally here. They look awesome and i cant wait to get them on.
Mocom Phenolic manifold spacers
NGK Racing 8's (Sparkplugs) - Seemingly the most expensive plugs on gods earth lol!-
Shame that the pics are cak but i gave the car a wash today and also spent about 2 hours fully degreasing my engine bay as best i can. Lots more to be done here but at least its all dirt free now.
Heres the EJ207's current status. Waiting on my turbo kit till i can go much further now.
Had to laugh when i see this earlier.... what a car boot sale this would be
30-08-2008, 06:16 PM
#109
Boost Junkie
Thread Starter
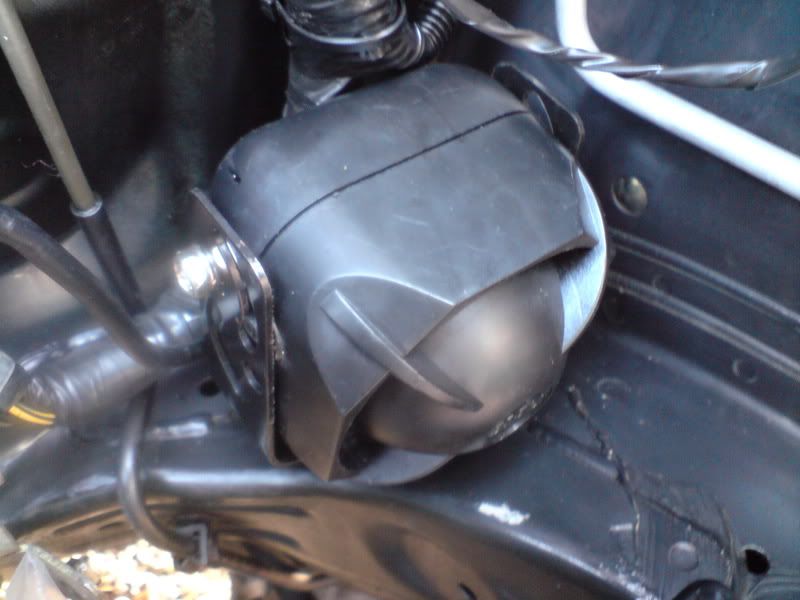
Spent some more time on the engine bay today guys.
Firstly, when cleaning yesterday i noticed there were some small rust bubbles on the brake servo. I made this worse pointing a jet wash at it lol.
Not happy with that i whipped it off the car in preparation to be bead blasted and repainted.
Heres the damage lol

With that out of the way i continued to clean in and about. Moving wires and generally tidying things in preparation for the new motor. I would like the new install to be as clean and clutter free as possible. Some new brackets will need to be made but unfortunately i cant make these until the motor is in and i know how much room i have to play with.
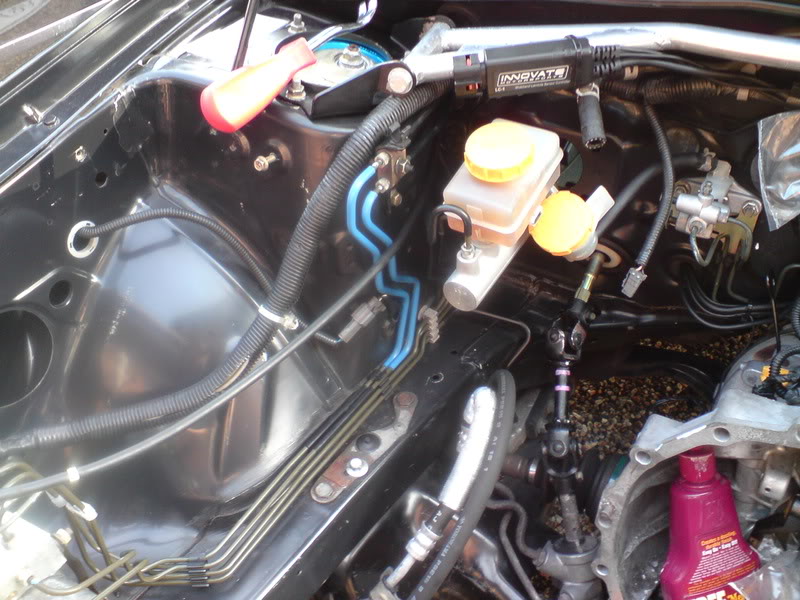
Took the oppotunity to relocate the alarm siren to the passenger side chassis rail as there was plenty of room down there that wasnt doing anything
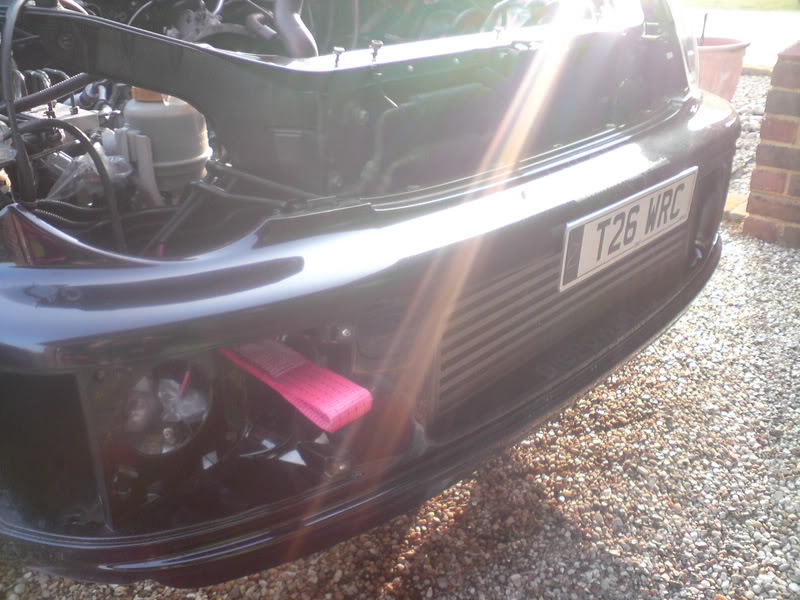
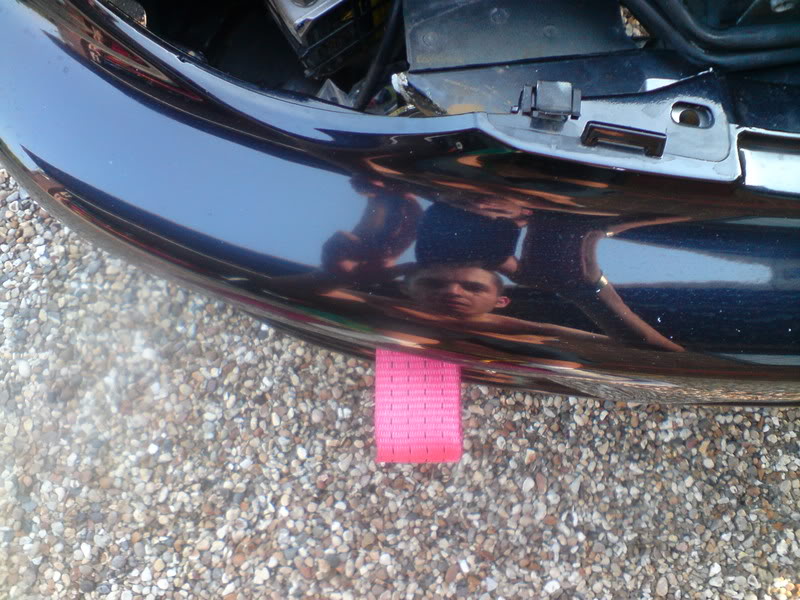
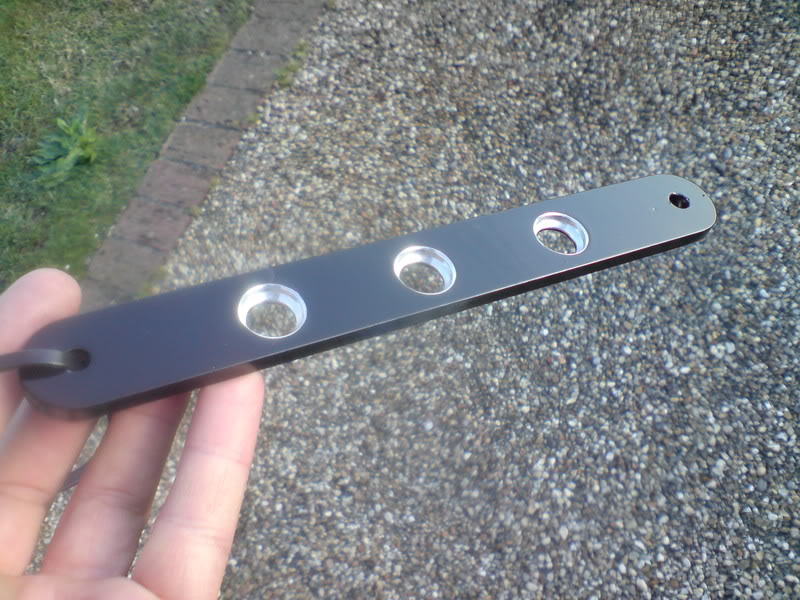
Also had the chance to finally fit my towing strap to the front of the car. The FMIC does away with the stock towing eye so i had this made and will poke through a slot that i need to cut in the foglight cover. (Cheers Alyn :thumb
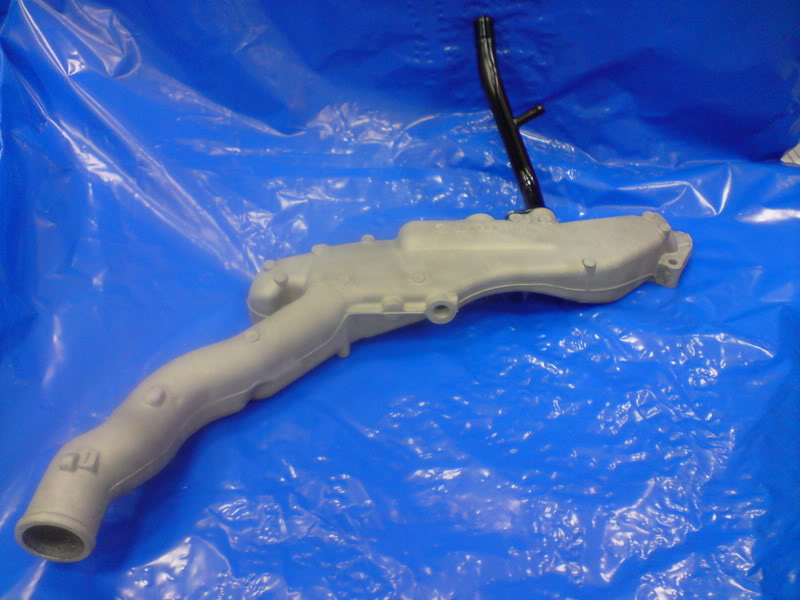
Test fitted the manifold and spacers to take some measurements etc
Firstly, when cleaning yesterday i noticed there were some small rust bubbles on the brake servo. I made this worse pointing a jet wash at it lol.
Not happy with that i whipped it off the car in preparation to be bead blasted and repainted.
Heres the damage lol
With that out of the way i continued to clean in and about. Moving wires and generally tidying things in preparation for the new motor. I would like the new install to be as clean and clutter free as possible. Some new brackets will need to be made but unfortunately i cant make these until the motor is in and i know how much room i have to play with.
Took the oppotunity to relocate the alarm siren to the passenger side chassis rail as there was plenty of room down there that wasnt doing anything
Also had the chance to finally fit my towing strap to the front of the car. The FMIC does away with the stock towing eye so i had this made and will poke through a slot that i need to cut in the foglight cover. (Cheers Alyn :thumb
Test fitted the manifold and spacers to take some measurements etc

 30-08-2008, 06:36 PM
#111
Boost Junkie
Thread Starter
01-09-2008, 09:09 PM
#113
Boost Junkie
Thread Starter
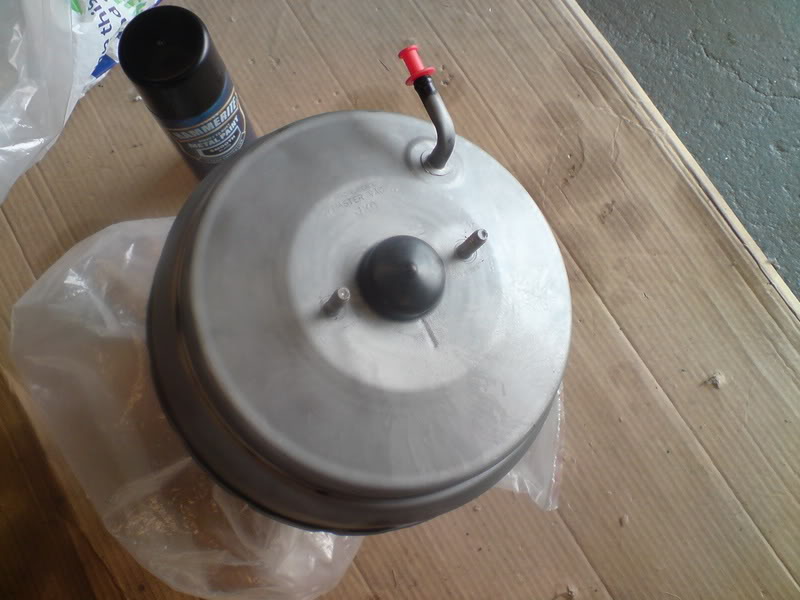
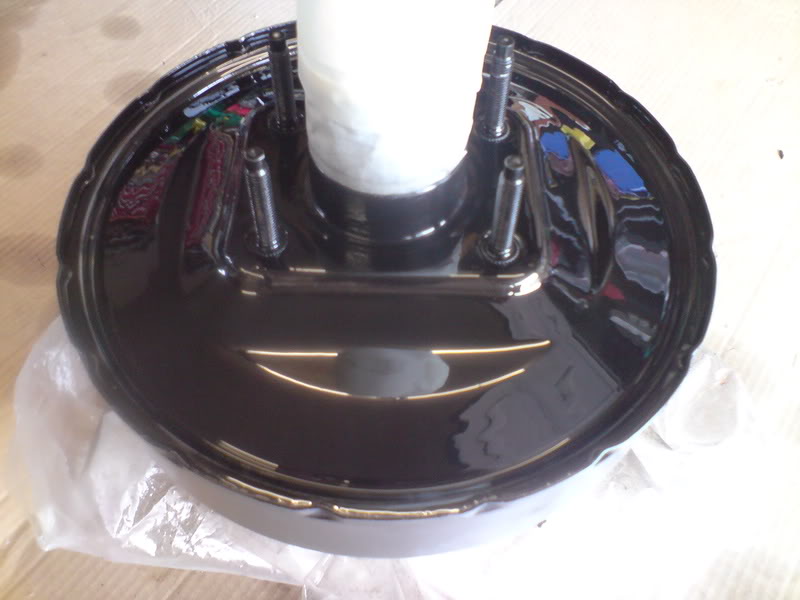
Remember that rusty brake servo?
Well, it too got the glass bead treatment and then some new paint.
Not too sad for an amateur eh
From this...
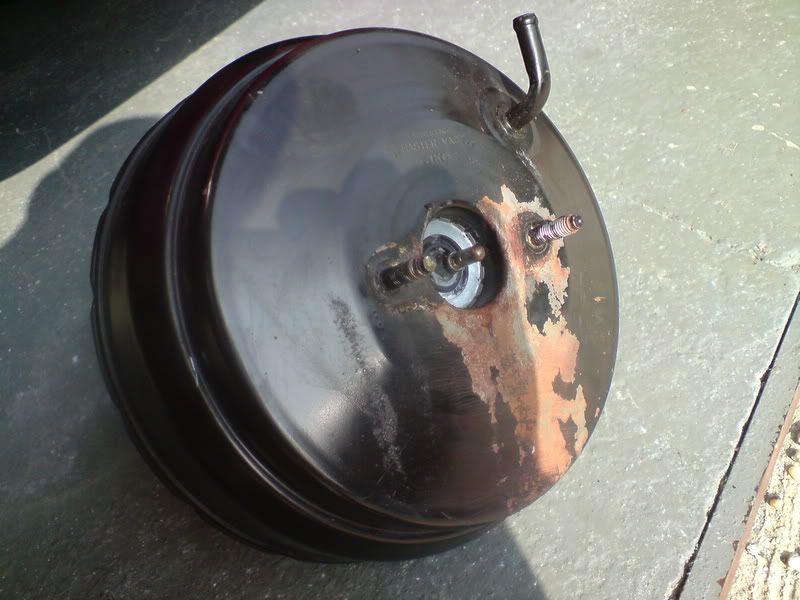
to this
Well, it too got the glass bead treatment and then some new paint.
Not too sad for an amateur eh
From this...
to this
 02-09-2008, 06:40 PM
#116
Boost Junkie
Thread Starter
Todays progress.
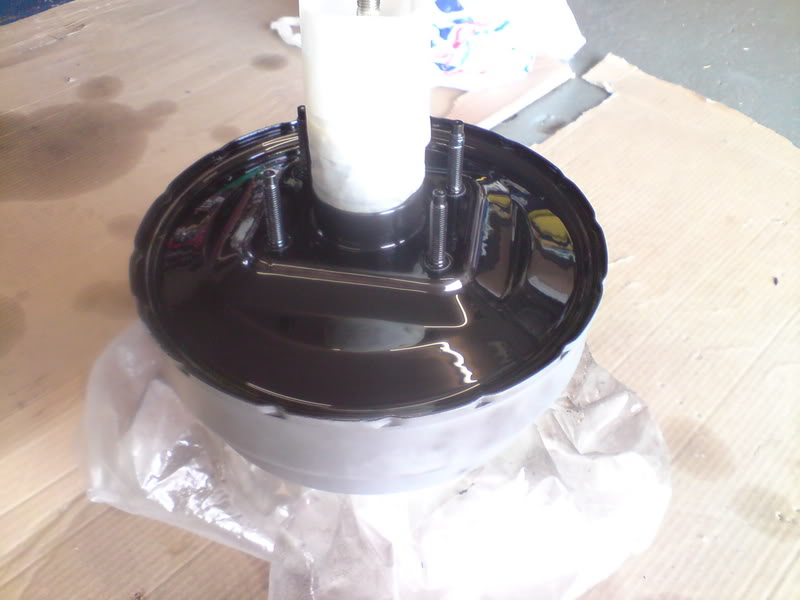
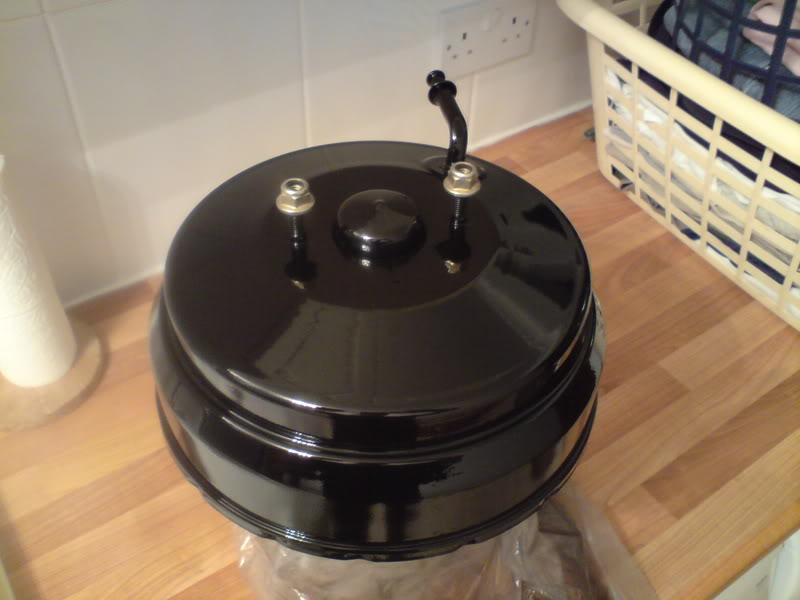
I fitted up the servo now the paint was nice and dry, looks really nice now its installed and cleans the bay up a treat.
(Please ignore the dirty nut and cable bracket. I have a little idea for this area)
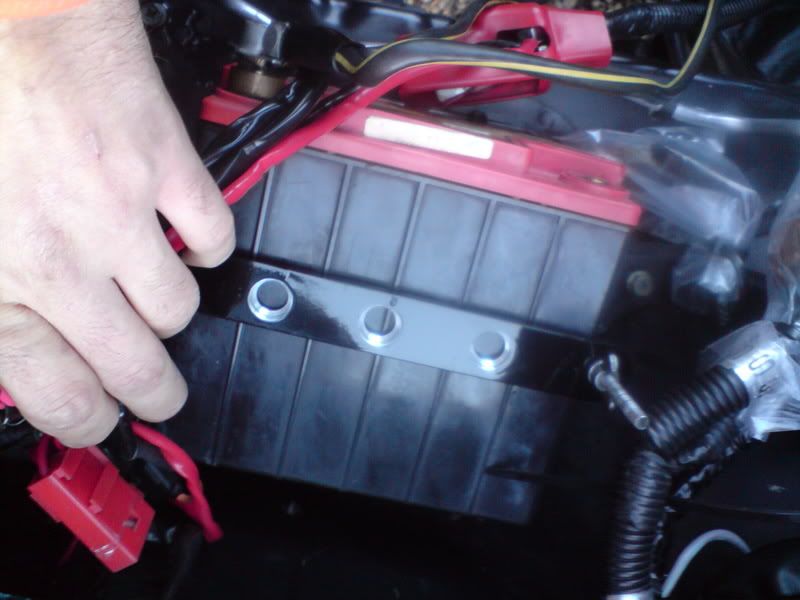
I also made up a battery tie down bracket, although this too will be an item not often seen as my battery and cables will be getting a little cover.
Looks pretty cool though
I fitted up the servo now the paint was nice and dry, looks really nice now its installed and cleans the bay up a treat.
(Please ignore the dirty nut and cable bracket. I have a little idea for this area)
I also made up a battery tie down bracket, although this too will be an item not often seen as my battery and cables will be getting a little cover.
Looks pretty cool though
03-09-2008, 05:40 PM
#117
Boost Junkie
Thread Starter
Todays job.
Started the makings of what will be a battery cover and also somewhere for me to cover the wires/relays for the HID kits etc.
Id love to disassemble the entire loom and nip/tuck it but thats just not really viable. So this is what i have come up with.
Folded up from 1mm ally sheet, it will be TIG welded up at the corners, glass blasted and painted. It will clean up the last messy area in the bay.
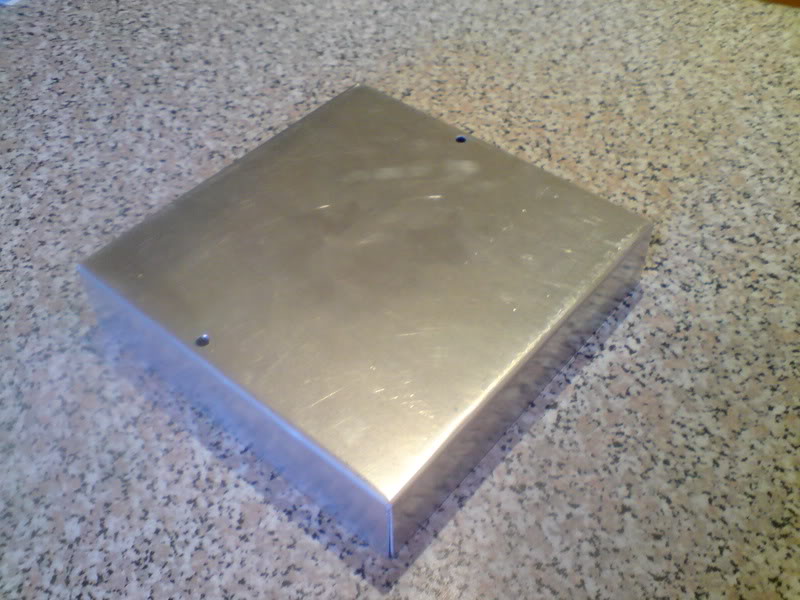
05-09-2008, 05:31 PM
#118
Boost Junkie
Thread Starter
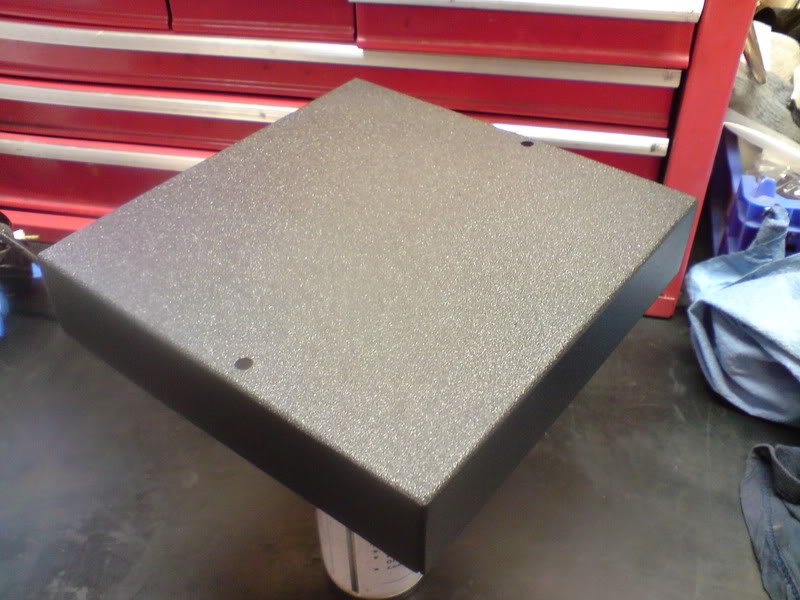
Okay guys, my battery/relay cover is done.
Corners welded, smoothed and now with paint. Ive gone for a matte wrinkle black finish to keep it all purposeful and discreet looking. Lots of parts in the bay will end up in this finish.
Its tough to photograph as it looks as though it has a flake to it but anyone that has seen it before will know clean and purposeful it looks.
Drying now and hopefully be, rubber lined and fitted up soon
07-09-2008, 12:27 PM
#119
Boost Junkie
Thread Starter
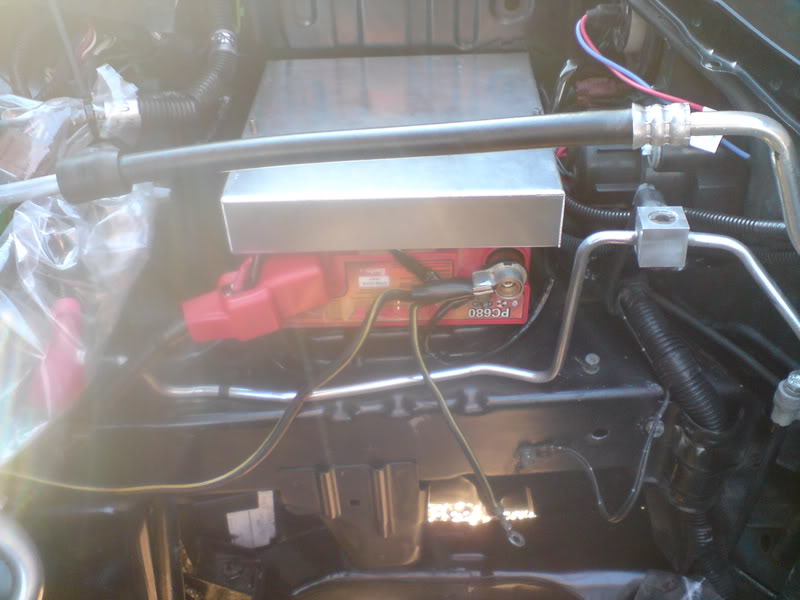
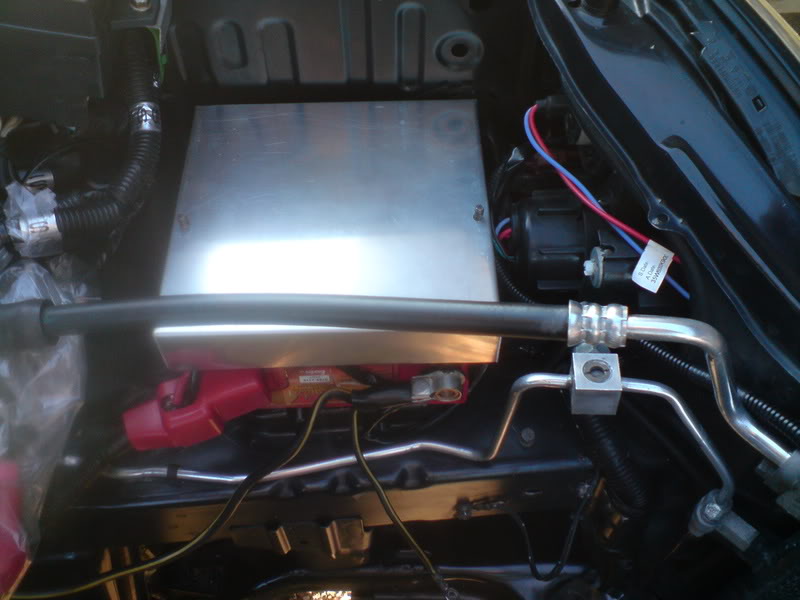
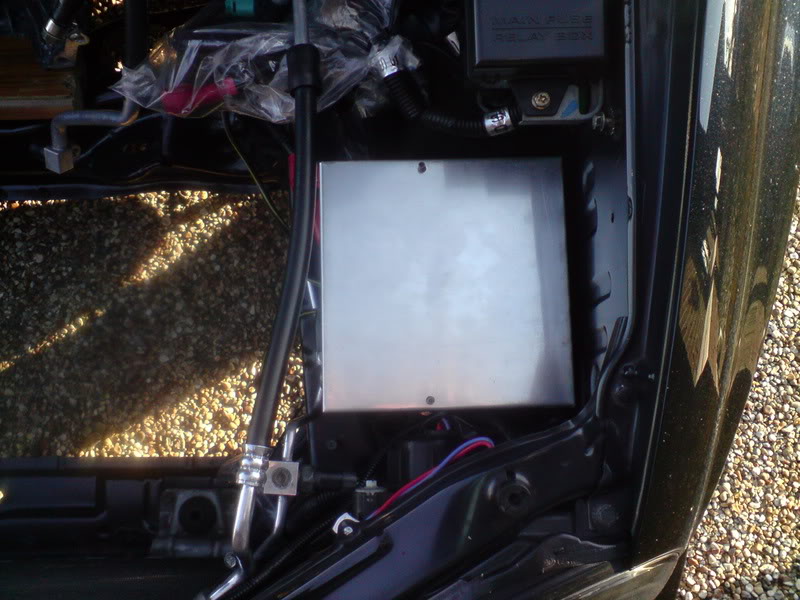
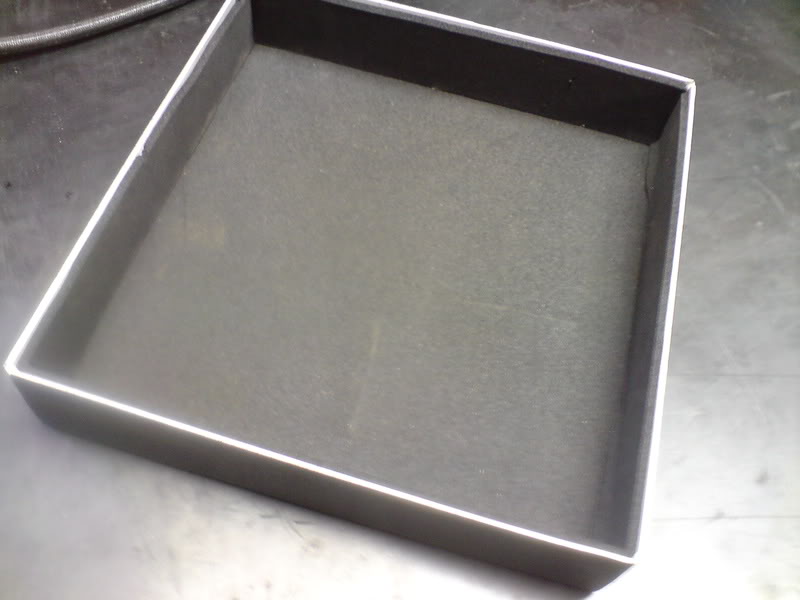
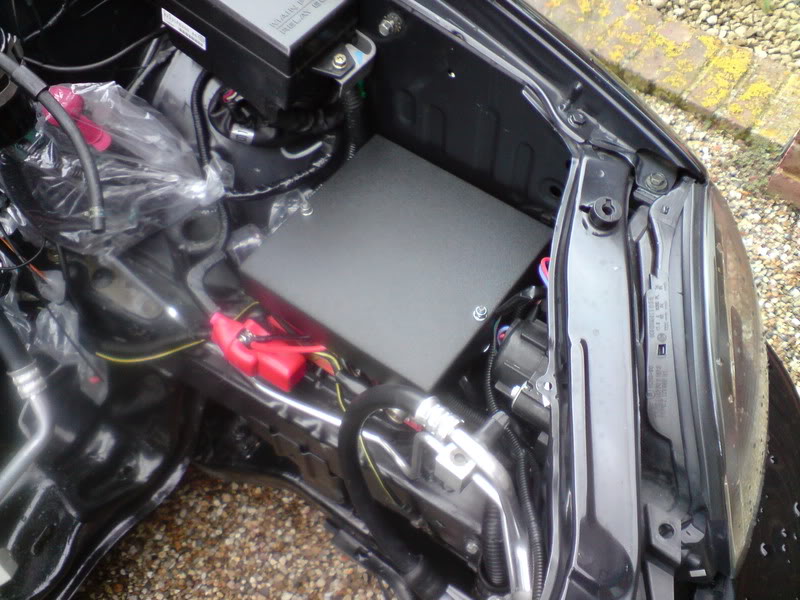
Hey guys, the battery/relaty cover is finished.
Paint has dried a nice matte wrinkle finish so i was able to flip it over and trim the inside with 3M backed HD foam sheet. This stuff is very thin high density foam. I put it there to stop the possibility of any short circuits and also to cushion and protect the relays/wires from damage.
Here it is all fitted up with some new stainless hardware
08-09-2008, 10:10 AM
#120
Boost Junkie
Thread Starter
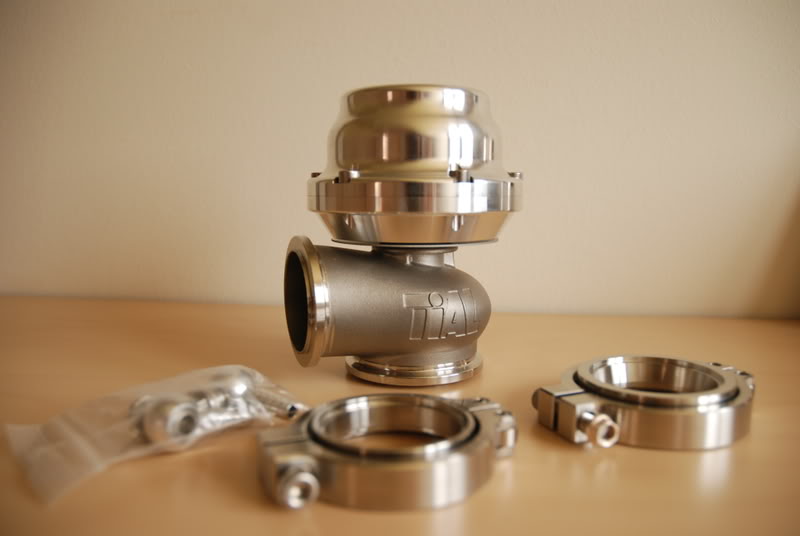
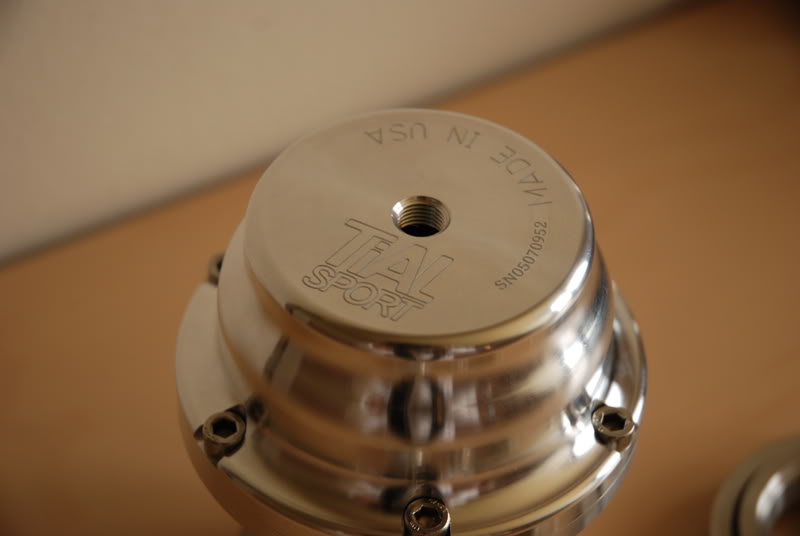
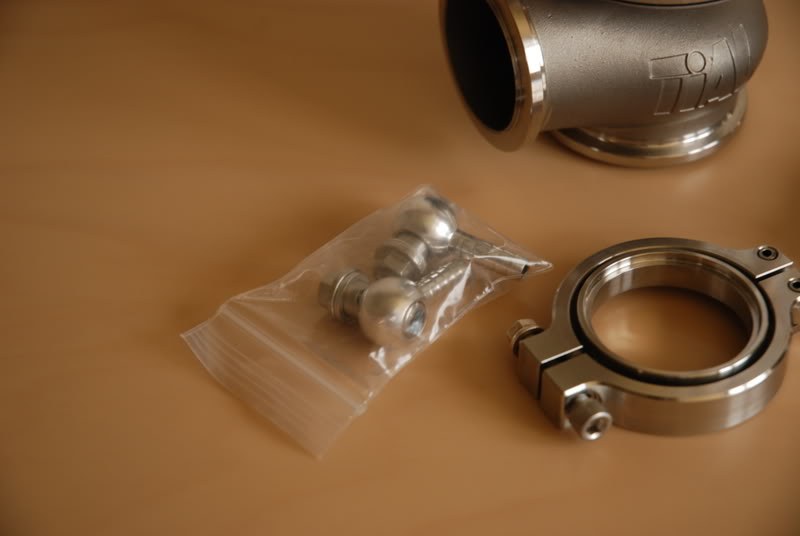
Look what Mr Postie dropped off this morning :norty:
Now officially the owner of a Tial 44mm external wastegate. V-bands on both ends for the best mounting possible.
Build quality is the usual Tial. Nothing short of mindblowing... but i'll let you see for yourselves.
Now just my turbo and i can get on with some fabrication.

Now officially the owner of a Tial 44mm external wastegate. V-bands on both ends for the best mounting possible.
Build quality is the usual Tial. Nothing short of mindblowing... but i'll let you see for yourselves.
Now just my turbo and i can get on with some fabrication.