
BMW E36 Coupe Track Car
 22-05-2008, 08:27 PM
#41
PassionFord Post Whore!!
iTrader: (6)
Join Date: May 2004
Location: warrington
Posts: 8,651
Likes: 0
Received 0 Likes
on
0 Posts
hats off to you
put me to shame in the weight loss department.ive still got all the loom in and the dashboard.
the more i enjoy it and use it,the more i think ill "track prep" it.work in progress and all that.............
great work and a good read.
put me to shame in the weight loss department.ive still got all the loom in and the dashboard.
the more i enjoy it and use it,the more i think ill "track prep" it.work in progress and all that.............
great work and a good read.


 23-05-2008, 02:00 PM
#44
Team HOTHOT!

Thread Starter
Just ordered a VDO 80mm 0-140mph Speedo and 80mm 0-7000 VDO tacho aswell (not cheep I might add, certainly miles over budet now, but wha the hell - you only live once  )
)
Anyhoo, Todays update
Morning started with a trip to the local scrappers for a new steering column bearing bush. A pair of these came to the grand total of nothing. Very kind of the local breakers indeed Once fitted, the steering column stopped flapping about like a cock in a whore

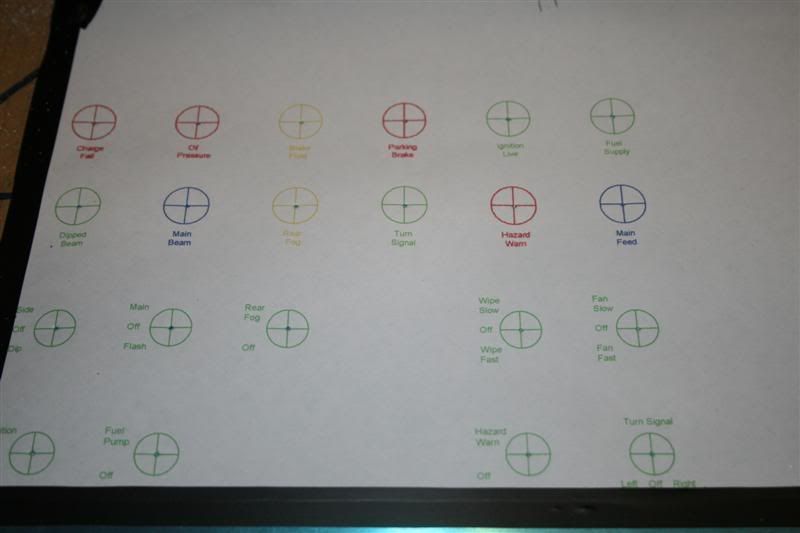
Next job of the day was to put the paper template of the dashbaord back in and double check it all before measuring and marking the alloy sheet.
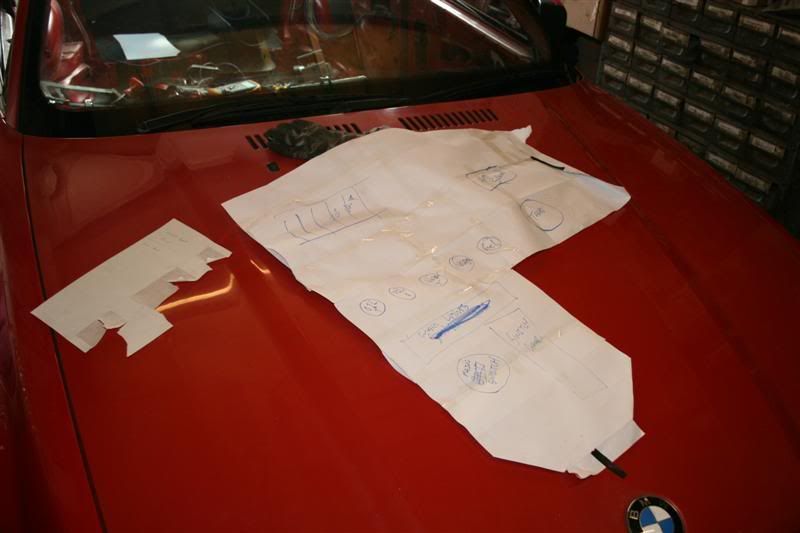
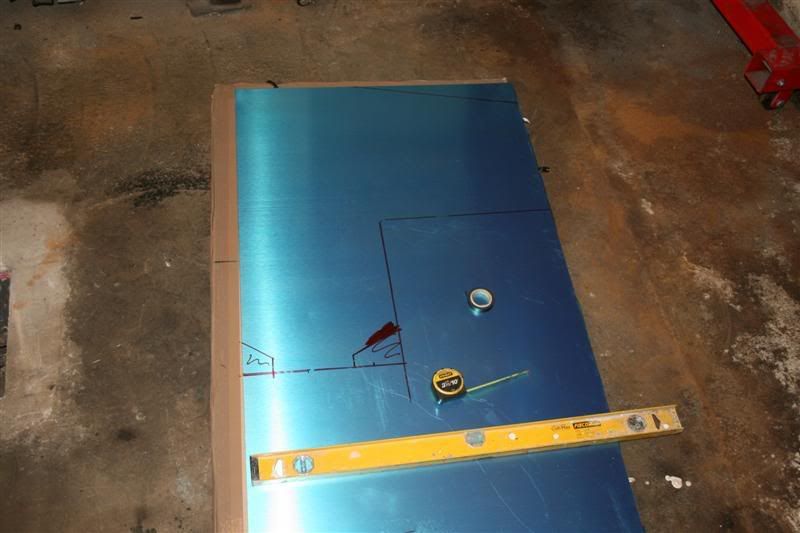
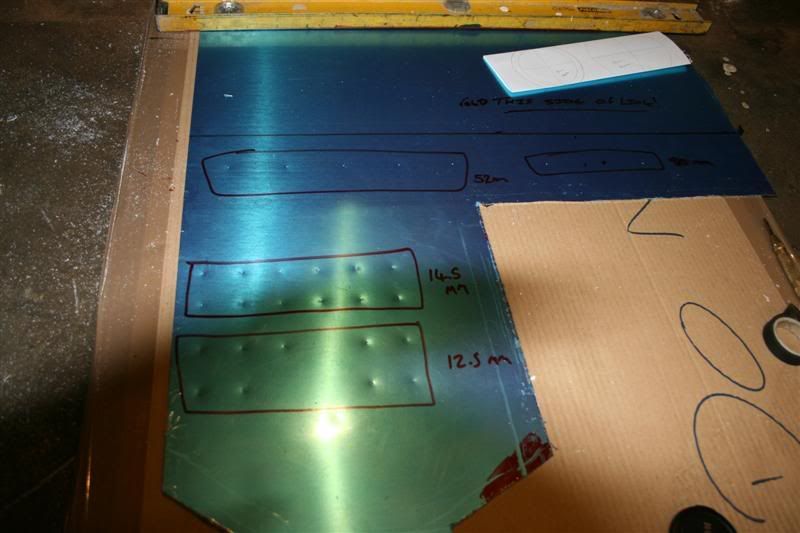
Once this was cut out, I stuck my 1:1 scale layout design (Autocad is wonderful for this sort of thing) onto the cut sheet and then centre-punched all the holes.
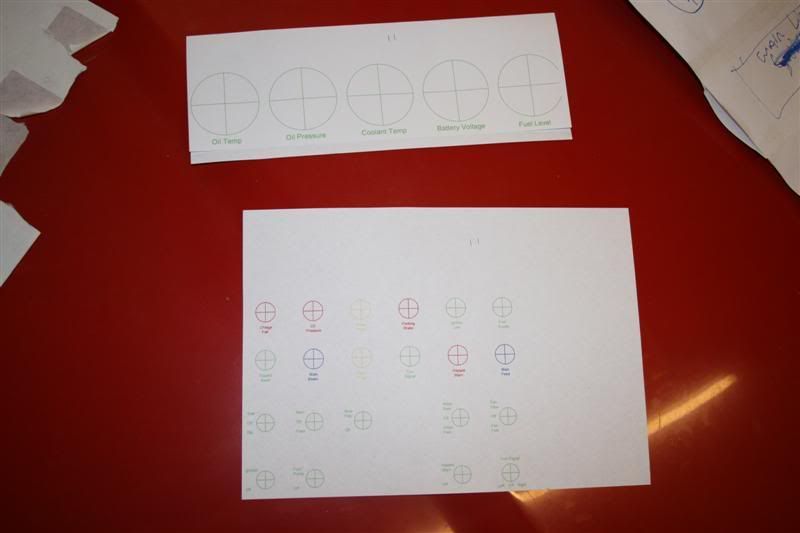
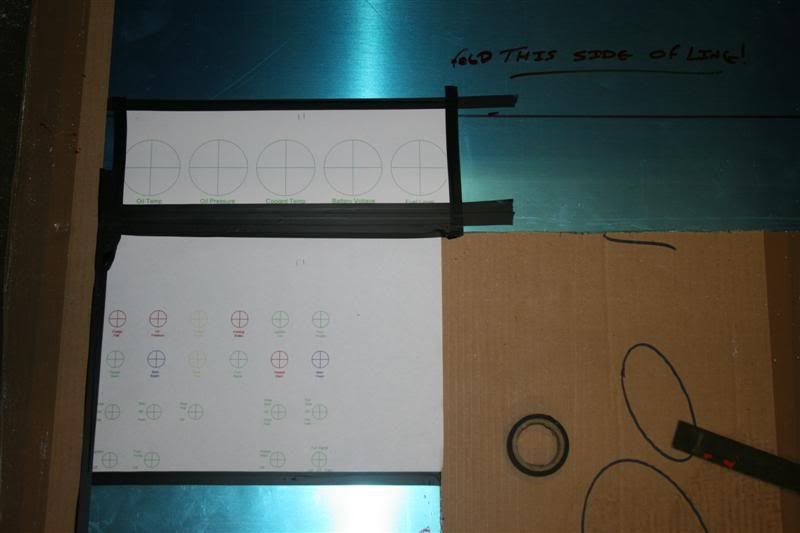

Then with the layout design removed, it left me with this
Which after an hour of drilling, filing and checking, turned into this:
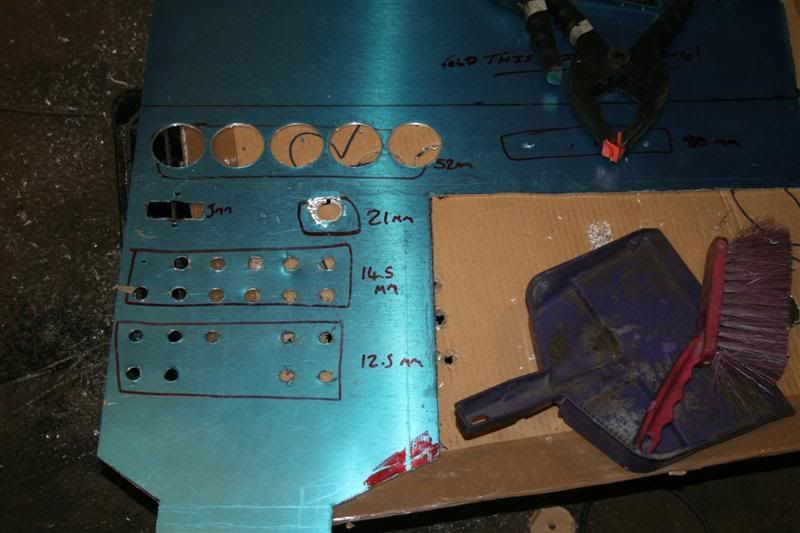
Only 2 more holes to drill - for the tacho and speedo, but I have to wait for my 81mm hole saw to arrive before I can do that
So after that was done, and a quick cleanup of the workspace again, the postman dropped a parcel with a load more electrical wiring goodies for me - including relay bases, multiplug socket/plug kits, crimp terminals (always running out of these so bought bulk) and wiring clips.
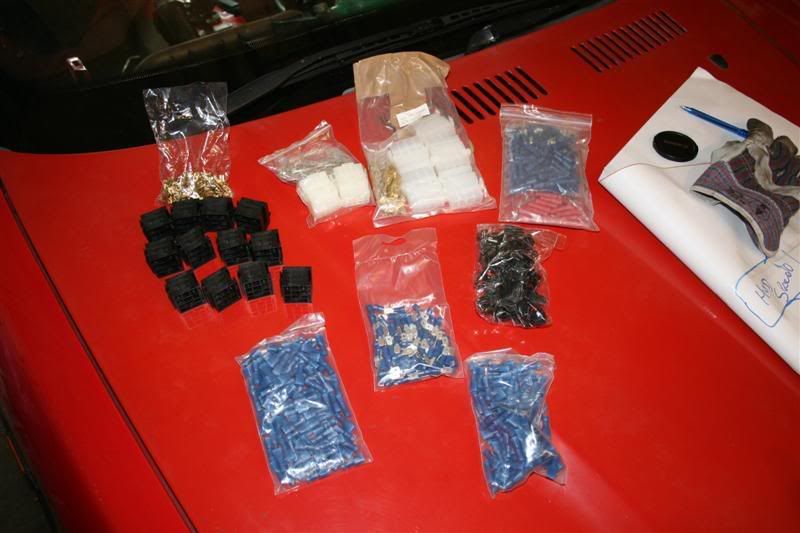
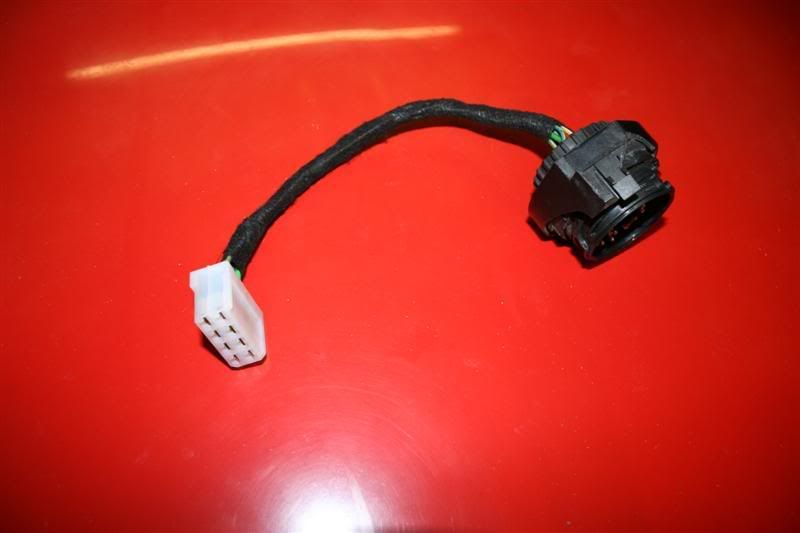
That little lot was sorted and logged while put into its correct place. After that job I decided to make haste and build the first piece of the wiring loom. This is to take the 8 wires from the Engine loom plug and give them a useable fitting for my wiring loom. All finished off with OEM loom tape
Might go and do some more in a bit, but depends if I can drag myself away from the telly
)Anyhoo, Todays update
Morning started with a trip to the local scrappers for a new steering column bearing bush. A pair of these came to the grand total of nothing. Very kind of the local breakers indeed
Once fitted, the steering column stopped flapping about like a cock in a whore Next job of the day was to put the paper template of the dashbaord back in and double check it all before measuring and marking the alloy sheet.
Once this was cut out, I stuck my 1:1 scale layout design (Autocad is wonderful for this sort of thing) onto the cut sheet and then centre-punched all the holes.
Then with the layout design removed, it left me with this
Which after an hour of drilling, filing and checking, turned into this:
Only 2 more holes to drill - for the tacho and speedo, but I have to wait for my 81mm hole saw to arrive before I can do that
So after that was done, and a quick cleanup of the workspace again, the postman dropped a parcel with a load more electrical wiring goodies for me - including relay bases, multiplug socket/plug kits, crimp terminals (always running out of these so bought bulk
) and wiring clips.That little lot was sorted and logged while put into its correct place. After that job I decided to make haste and build the first piece of the wiring loom. This is to take the 8 wires from the Engine loom plug and give them a useable fitting for my wiring loom. All finished off with OEM loom tape
Might go and do some more in a bit, but depends if I can drag myself away from the telly
Last edited by Graceland; 23-05-2008 at 04:45 PM.


 24-05-2008, 02:35 PM
#52
Team HOTHOT!
Thread Starter
LOL @ Homemade turbo.
Not going to anything blown, I want reliability. the only thing that will change over time will be the engine - a nice 3.5 or 4.0 V8 should sit in there pretty well
And with my 16 ton 0.5 to 3" thickwall pipe bender, making an exhaust (for anything) will be childsplay
Not going to anything blown, I want reliability. the only thing that will change over time will be the engine - a nice 3.5 or 4.0 V8 should sit in there pretty well
And with my 16 ton 0.5 to 3" thickwall pipe bender, making an exhaust (for anything) will be childsplay
24-05-2008, 03:04 PM
#53
Fucking superstar........
Join Date: May 2004
Location: Argyll.... It's lonely...
Posts: 13,240
Likes: 0
Received 0 Likes
on
0 Posts
You don't waste time do you Paul! 
Ought to be a laugh when it's done. Leaving the engine as is?
Don't tell me you're cossy'ing this one too........
Ought to be a laugh when it's done. Leaving the engine as is?
Don't tell me you're cossy'ing this one too........
 24-05-2008, 04:50 PM
#57
Team HOTHOT!
Thread Starter
If the engine dies then its getting the V8 treatment
Alex - get that golf finished boyo
PS - remember me talking about borring a hydraulic steel tube bender, well I've bought one instead - 16 tonnes of pressure
Alex - get that golf finished boyo
PS - remember me talking about borring a hydraulic steel tube bender, well I've bought one instead - 16 tonnes of pressure

 25-05-2008, 10:19 AM
#62
Team HOTHOT!
Thread Starter
 25-05-2008, 11:04 AM
#64
Team HOTHOT!
Thread Starter
No problem Len - My budget for the car has dramatically increased from �1000 to �2000 - that doesn;t include tools I have bought specially to do the job
I think the VDO speedo and VDO tacho (both calibarated for my car) blew the budget to start with - weighing in at �240 delivered for the pair
Still need to buy polybushes coilovers and toyo R888's aswell as a few other odds and sods
I think the VDO speedo and VDO tacho (both calibarated for my car) blew the budget to start with - weighing in at �240 delivered for the pair
Still need to buy polybushes coilovers and toyo R888's aswell as a few other odds and sods
Last edited by Graceland; 25-05-2008 at 11:18 AM.
 25-05-2008, 02:21 PM
#67
10K+ Poster!!
iTrader: (3)

Join Date: Jun 2003
Location: Hartlepool
Posts: 10,956
Likes: 0
Received 0 Likes
on
0 Posts
Fantastic project, we are doing the same with our nova for some weight saving, but not hacking the entire car to bits in the process
best way to get sound deadening off instead of chiselling- blow torch and wallpaper scraper
will keep an eye on this very interesting thread
Sarah
best way to get sound deadening off instead of chiselling- blow torch and wallpaper scraper
will keep an eye on this very interesting thread
Sarah
25-05-2008, 06:21 PM
#68
Team HOTHOT!
Thread Starter
Cheers for all the nice comments so far - very encouraging
Little update for this weekend
Now due to a couple of reasons, mainly I needed to do other shit this weekend, I havn't done much on the car, well, unless you call half the rewiring "not much".
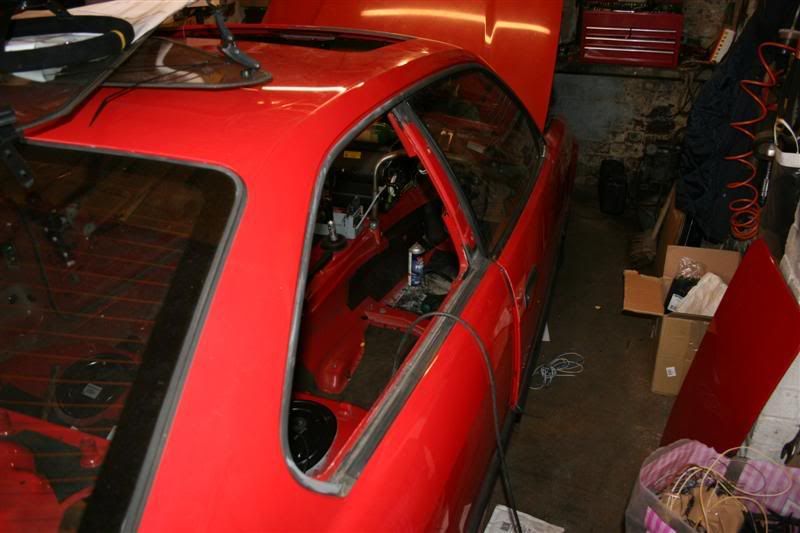
Weekend work started with removing the rear quarters and the remaining window seals - won't be needing these as plexiglass is bonded in
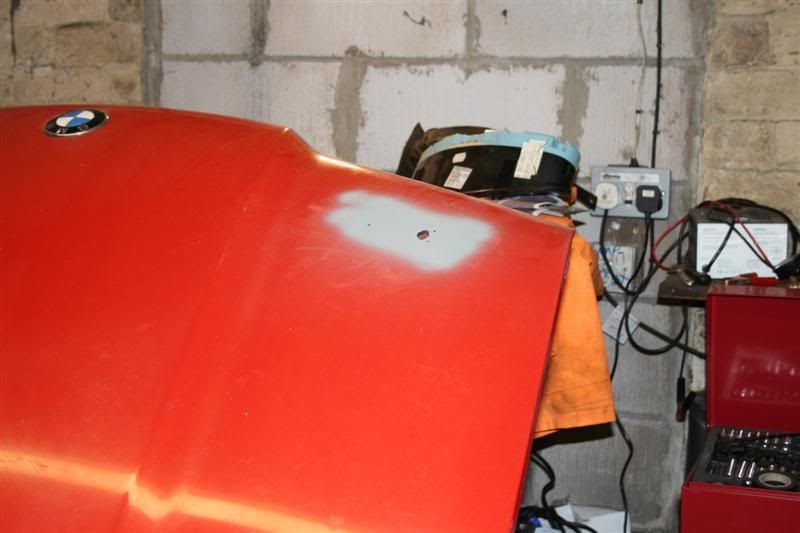
Also fitted the stainless steel bonnet pins aswell, and gave the holes a quick lick of zinc primer to protect the bare metal.


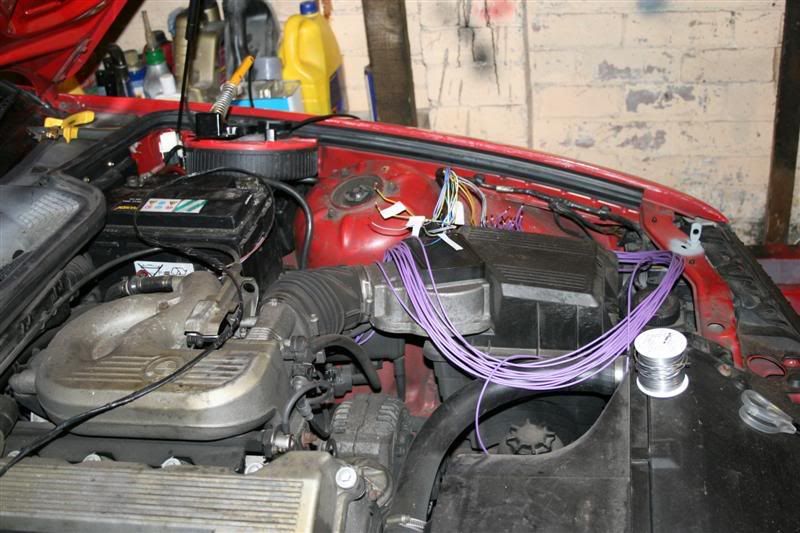
With that little task completed, I set about the wiring loom for the front and rear lights, and the fuel pumps.
This wasn't too difficult, just very time consuming getting all the soldering, heat shrinking and wrapping done. But it looks the part so thats all that matters
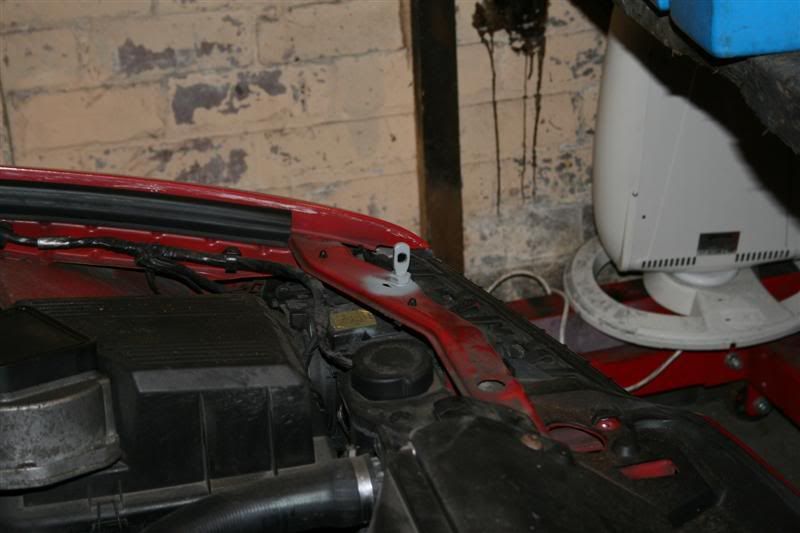
A quick snap of the front loom being put together
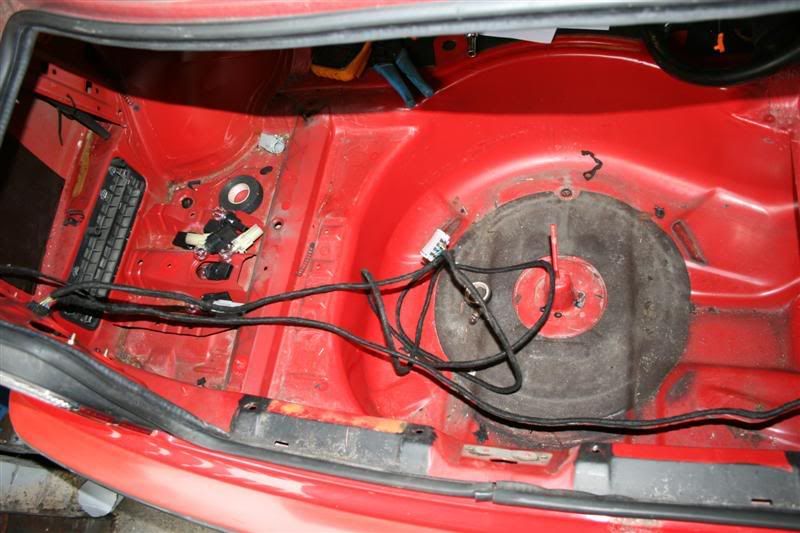
Here are a couple of pics of the wiring looms for the lighting systems, Rear then Front.

Little update for this weekend
Now due to a couple of reasons, mainly I needed to do other shit this weekend, I havn't done much on the car, well, unless you call half the rewiring "not much".
Weekend work started with removing the rear quarters and the remaining window seals - won't be needing these as plexiglass is bonded in
Also fitted the stainless steel bonnet pins aswell, and gave the holes a quick lick of zinc primer to protect the bare metal.
With that little task completed, I set about the wiring loom for the front and rear lights, and the fuel pumps.
This wasn't too difficult, just very time consuming getting all the soldering, heat shrinking and wrapping done. But it looks the part so thats all that matters
A quick snap of the front loom being put together
Here are a couple of pics of the wiring looms for the lighting systems, Rear then Front.


 26-05-2008, 04:01 PM
#78
Team HOTHOT!
Thread Starter
Another day and another update
Since today has been another day of wiring loom making, I thought that it would be fitting to show you how I make my looms.
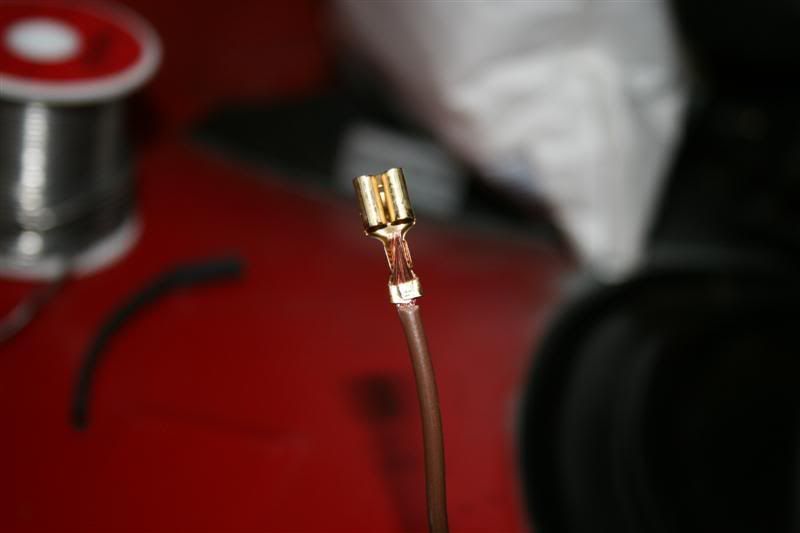
Lets start with the individual wire.
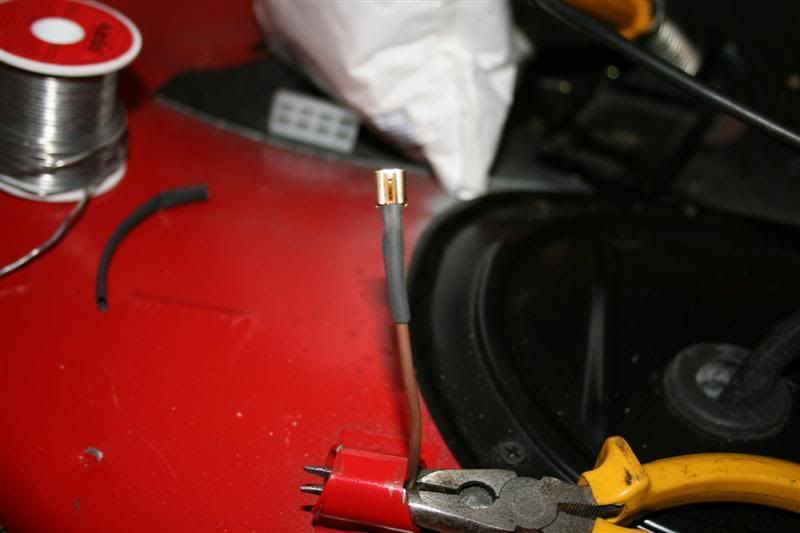
First I strip the wire to show 6mm of copper conductor, slide on a piece of heatshrink and then attatch a terminal and crimp the lower arms of the terminal round the wire.
I then solder the wire into the terminal for a perfect electrical connection and a strong mechanical connection.
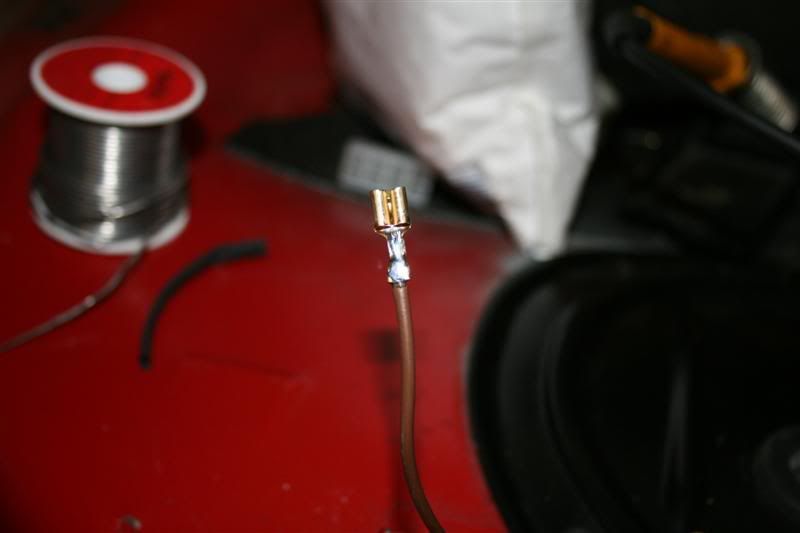
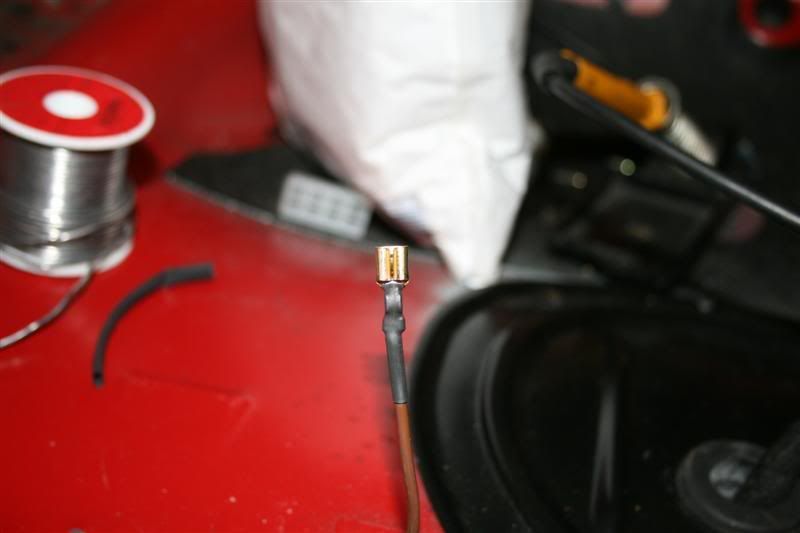
Then I slide up the heatshrink that I earlier slid onto the wire and cover the end of the terminal leaving only the connector part of the terminal exposed.
Once this has been done, I gentally heat the heatshrink with the blowlamp so it will shrink and perfectly seal the terminal joint.
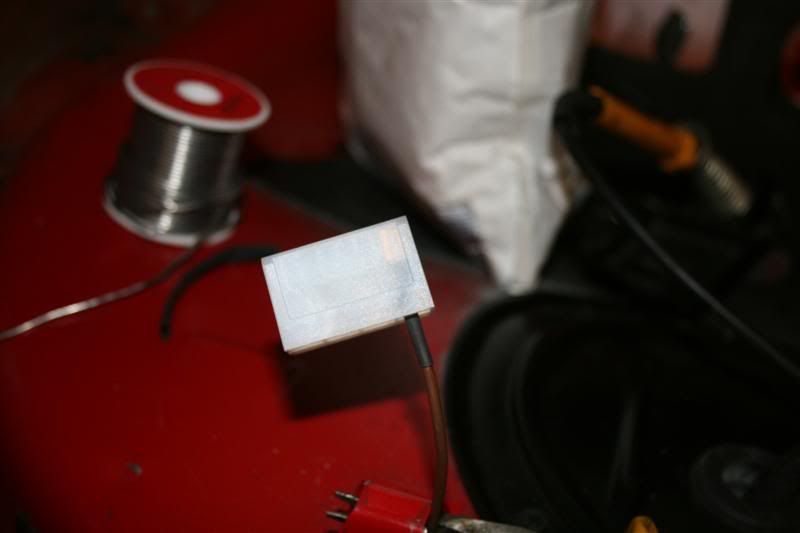
Once that has cooled for a few seconds, the terminal is then pushed home into the multiplug in the desired hole.
The same process is done for the other wires for the loom I am making, and then they are all pushed into the terminal block and secured by a spring clip on the back of the terminal.
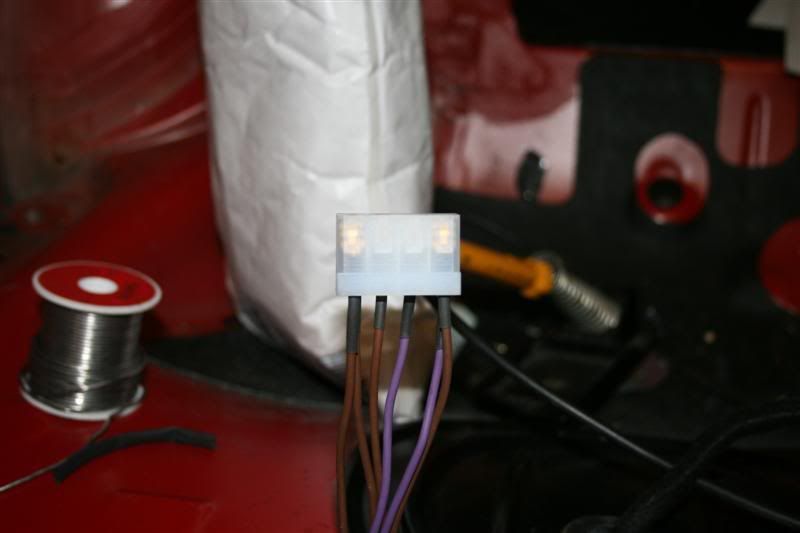
Once all that is done, the loom is then wrapped in water resistant and fire retardent wiring loom wrap for its entire length, leaving approx 6" exposed at the opposite end for the other connections.
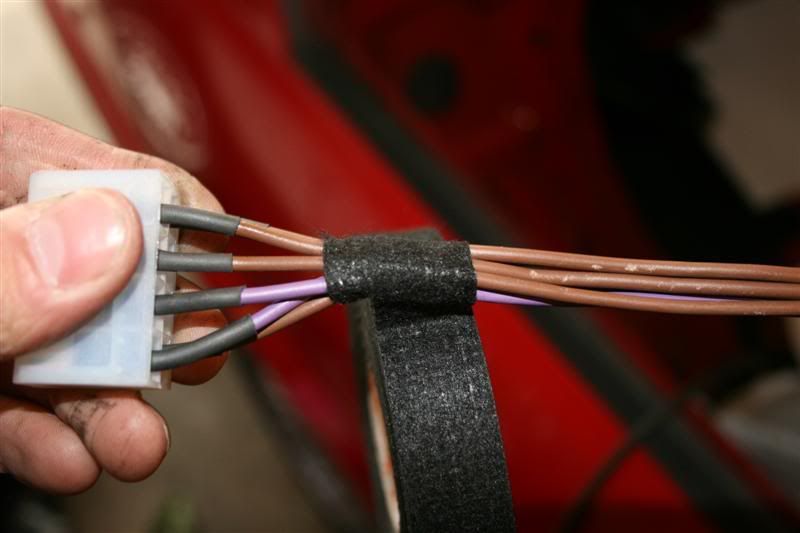
This then leaves a perfect loom that is protected against chaifage and moisture which is ready for a final install when the time comes.

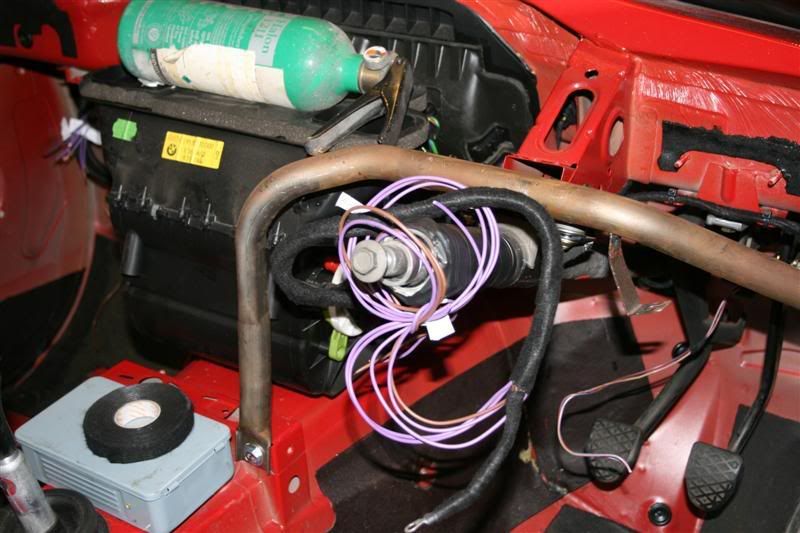
So a few of these looms have been made today. One for the rear lights, one for the fuel pumps, and one for the heat fan, wipers, screen wash and brake fluid warning level.
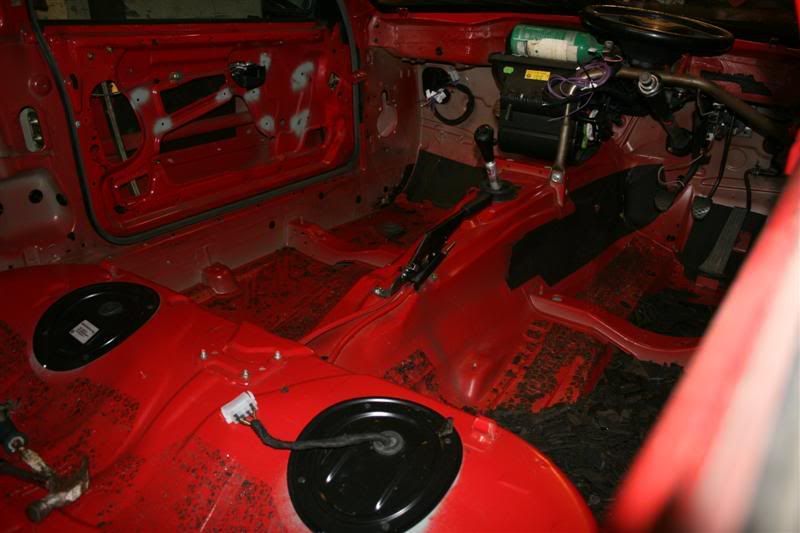
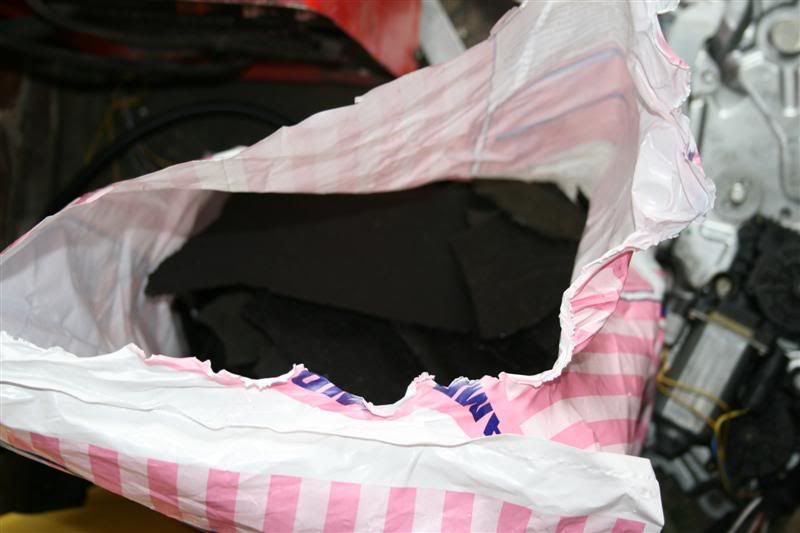
With the thought of further weight saving, another 15 kilo of shit was removed from the already sparse car, this was in the form of the adhesive sound deadening. Due to it being nearly 15 years old, the once soft and rubbery material has gone hard and brittle - a good crack with the hammer many many many times and it flakes off in big chunks. The chisel is then needed to remove the smaller pieces that are firmly bonded on.
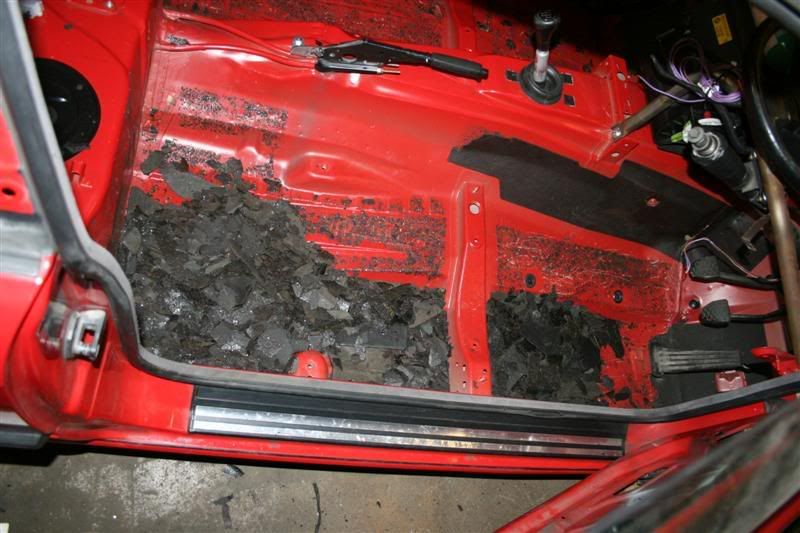
15 kilo sack of dog food full of sound deadening
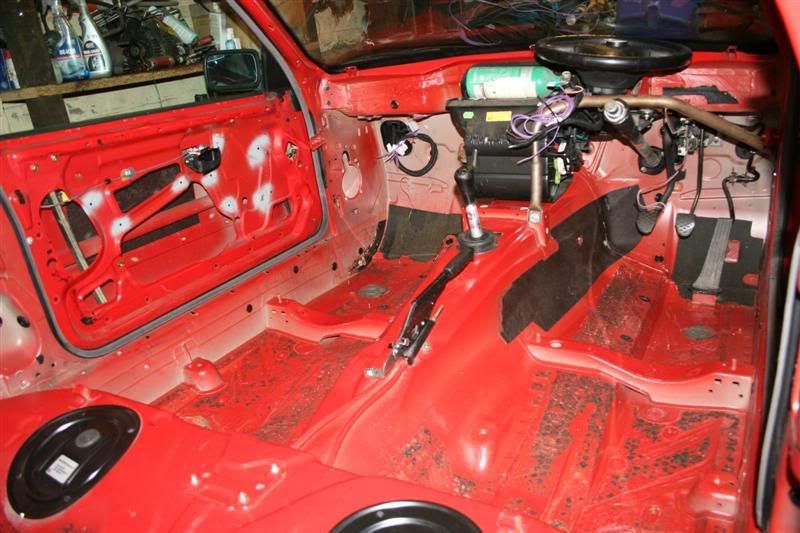
Thus leaving a nearly empty shell

Superb work for today
Since today has been another day of wiring loom making, I thought that it would be fitting to show you how I make my looms.
Lets start with the individual wire.
First I strip the wire to show 6mm of copper conductor, slide on a piece of heatshrink and then attatch a terminal and crimp the lower arms of the terminal round the wire.
I then solder the wire into the terminal for a perfect electrical connection and a strong mechanical connection.
Then I slide up the heatshrink that I earlier slid onto the wire and cover the end of the terminal leaving only the connector part of the terminal exposed.
Once this has been done, I gentally heat the heatshrink with the blowlamp so it will shrink and perfectly seal the terminal joint.
Once that has cooled for a few seconds, the terminal is then pushed home into the multiplug in the desired hole.
The same process is done for the other wires for the loom I am making, and then they are all pushed into the terminal block and secured by a spring clip on the back of the terminal.
Once all that is done, the loom is then wrapped in water resistant and fire retardent wiring loom wrap for its entire length, leaving approx 6" exposed at the opposite end for the other connections.
This then leaves a perfect loom that is protected against chaifage and moisture which is ready for a final install when the time comes.
So a few of these looms have been made today. One for the rear lights, one for the fuel pumps, and one for the heat fan, wipers, screen wash and brake fluid warning level.
With the thought of further weight saving, another 15 kilo of shit was removed from the already sparse car, this was in the form of the adhesive sound deadening. Due to it being nearly 15 years old, the once soft and rubbery material has gone hard and brittle - a good crack with the hammer many many many times and it flakes off in big chunks. The chisel is then needed to remove the smaller pieces that are firmly bonded on.
15 kilo sack of dog food full of sound deadening
Thus leaving a nearly empty shell
Superb work for today


 26-05-2008, 04:29 PM
#80
Team HOTHOT!
Thread Starter