450+ BHP Impreza re-build in a Ford Forum.....Shock Horror... ;)
 28-04-2008, 10:14 PM
#1
Part of the Furniture
Thread Starter
Join Date: Apr 2008
Location: Looking for my next project car...
Posts: 151
Likes: 0
Received 0 Likes
on
0 Posts
OK, first post, but please be gentle with me....
Small bit about me...
Had plenty of the usual 70's/80's/90's fast Fords in the past, but gave up on them circa 9 years ago when I made the choice of an Impreza over an Escort Cos ( 15K for a 92/3 escos, 9.5K for a similar impreza, which I also thought drove better TBH) which lasted a few years before I had to grow up,get a house etc etc...
Got back into Subaru ownership 3 years ago, and have been there pretty ever since...
Anyway, I have recently been getting a bit fed up of a lot of the Subaru mentality regarding the marque..(if its not blue with gold wheels and loads of stickers it's not a Scoob..etc etc..), and I have found myself lurking over here in the projects section especially, and found it extremely refreshing and good to see so many projects on the go...
So much so, that I am already thinking about returning to the marque, but more of that later...
I thought I would begin my introduction to your projects forum, with my ongoing rebuild of a 2003 WRX Impreza.
The car is 90% finished as of today, so will probably take a while to get all the updates, erm, up to date...
But suffice to say, that the plan for the car is fat arches, sat nice and low, torquey 2.5 engine with loverly 450bhp/450 lbs/ft for a hopefully great cross country car, with creature comforts..
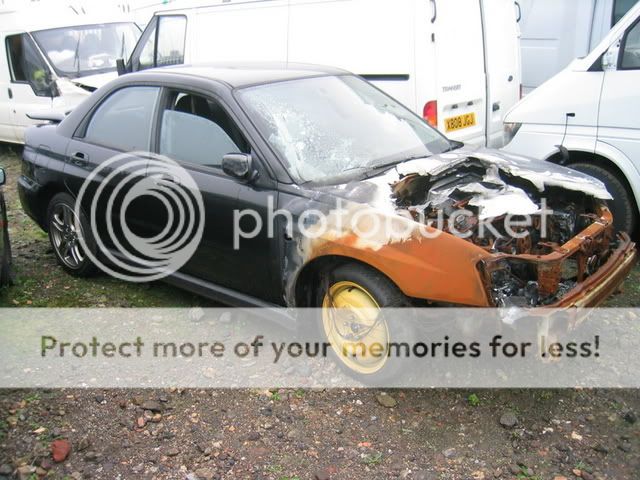
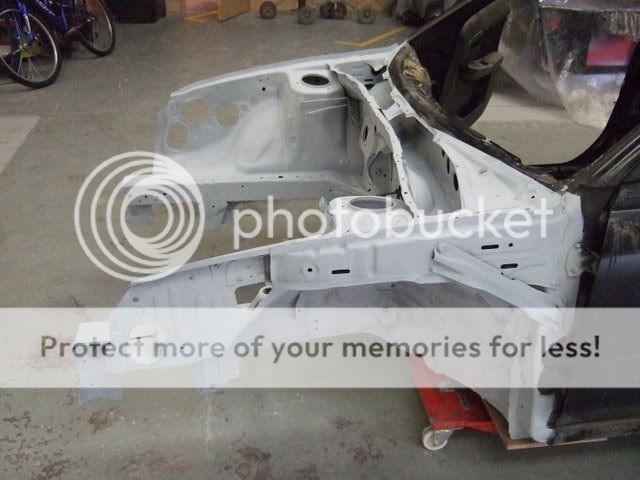
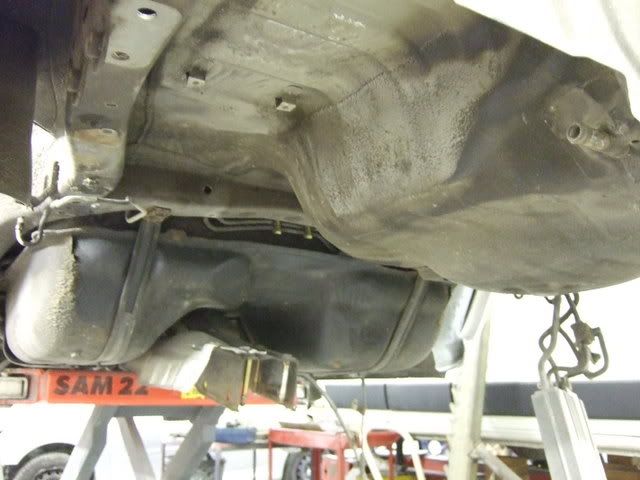
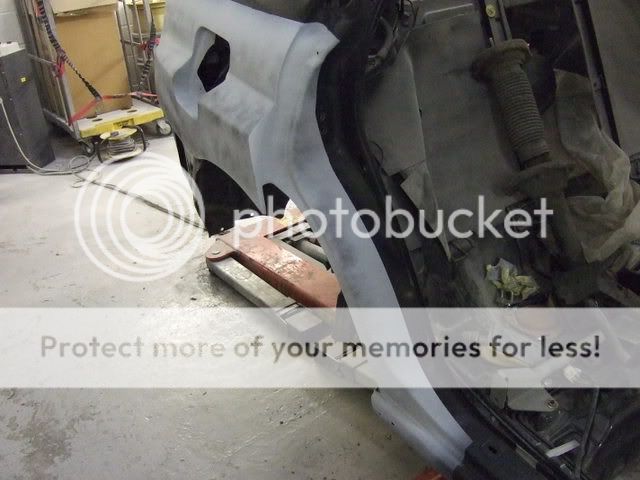
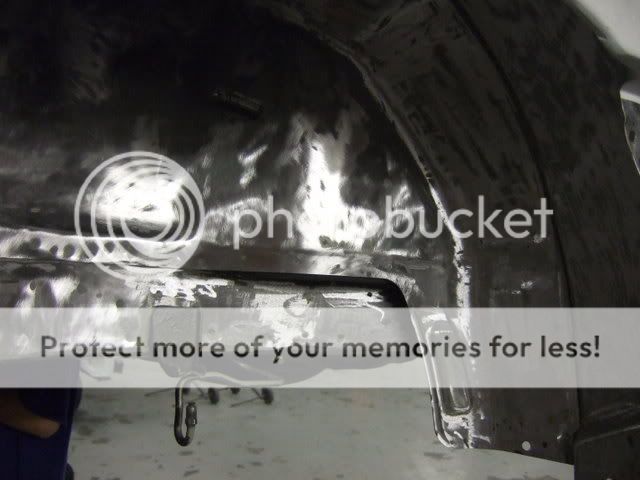
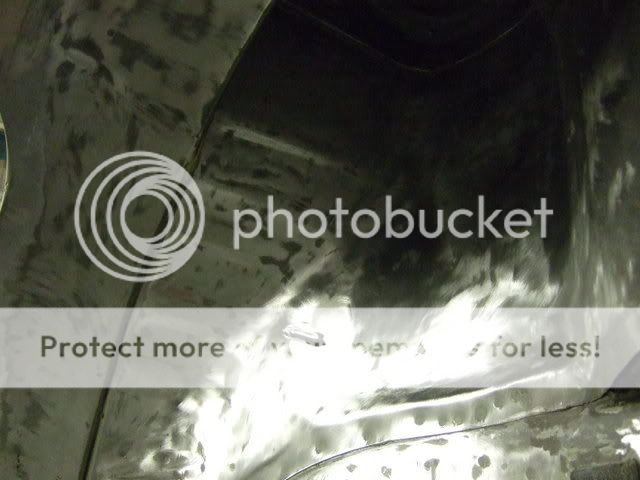
It started off when I bought a 2003 WRX back in August 2006, which had had a bit of a fire..
As can be seen from the pics, it had got a touch hot, especially in the engine bay area, which had sustained most of the damage.
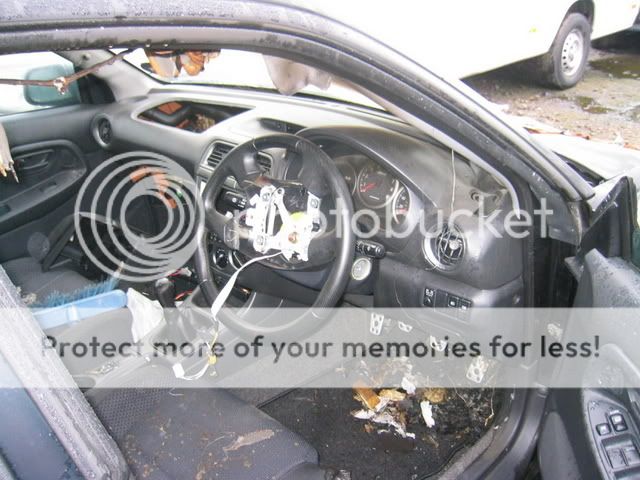
The interior also was a bit of a mess, mainly due to smoke damage.
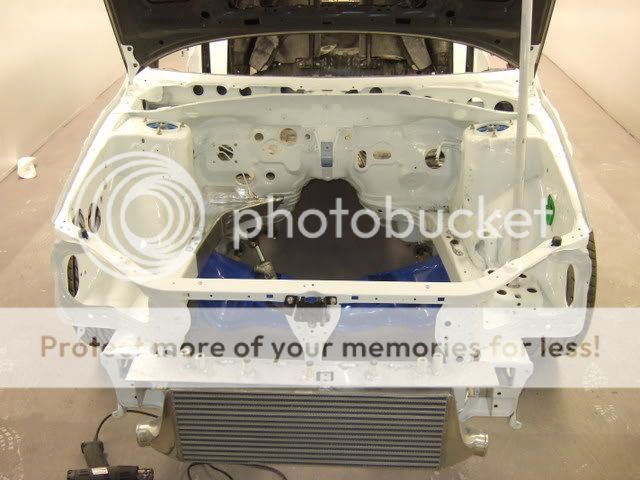
Here is what I bought...
I am obviously quite lucky, in that I work in the trade, and have all the facilities at my disposal to carry out all the work myself.
Even though, this job is being carried out on a 'As I can afford it basis', so is being done in various stages, due to finances and time constraints...
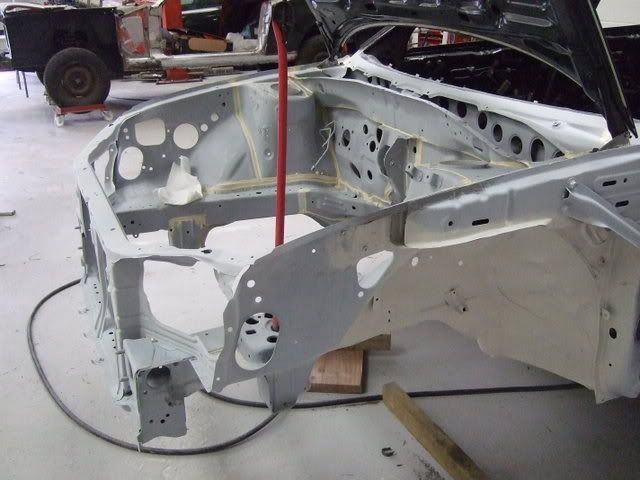
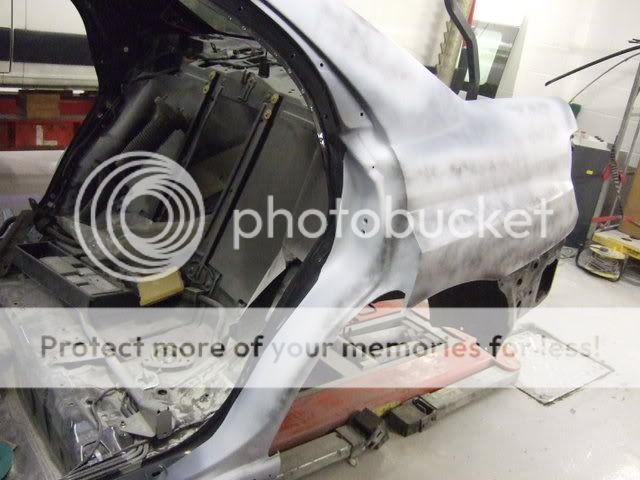
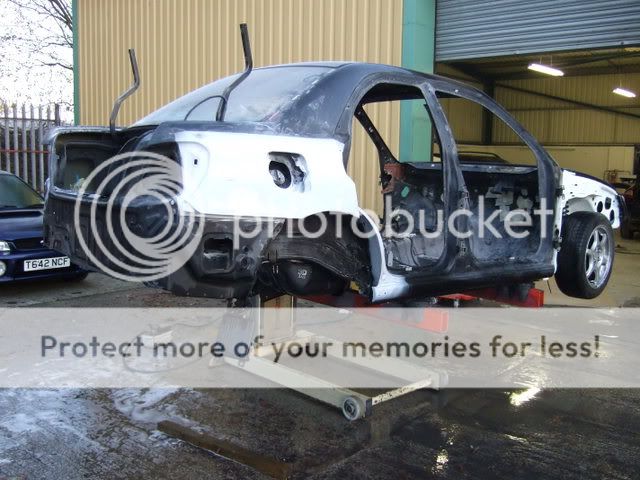
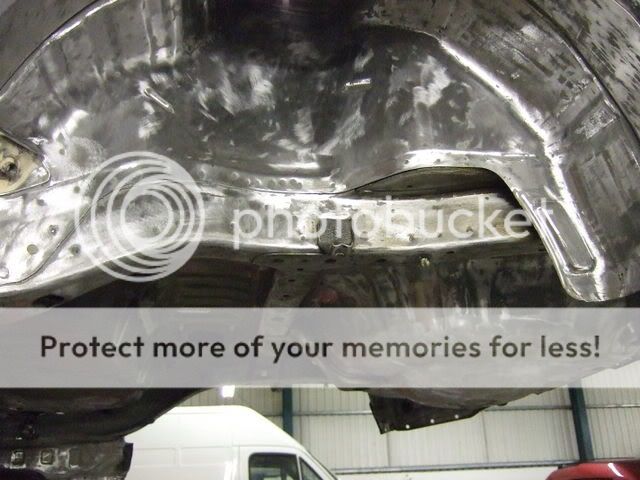
First job was to strip all the crusty burnt stuff out of the car, mainly due to the toxic nature of the remains, and of course to throw it all in the skip...
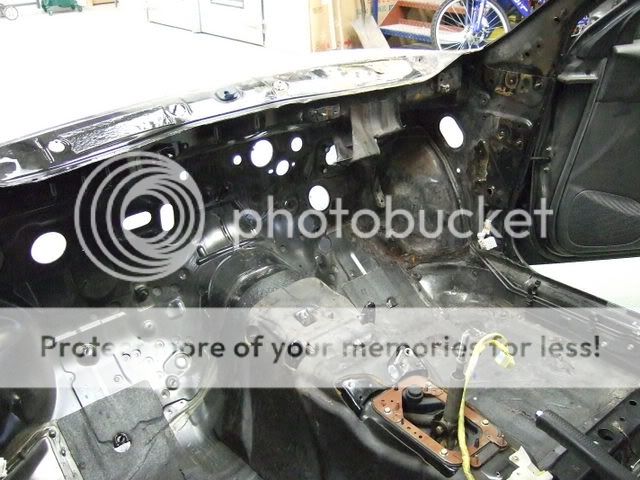
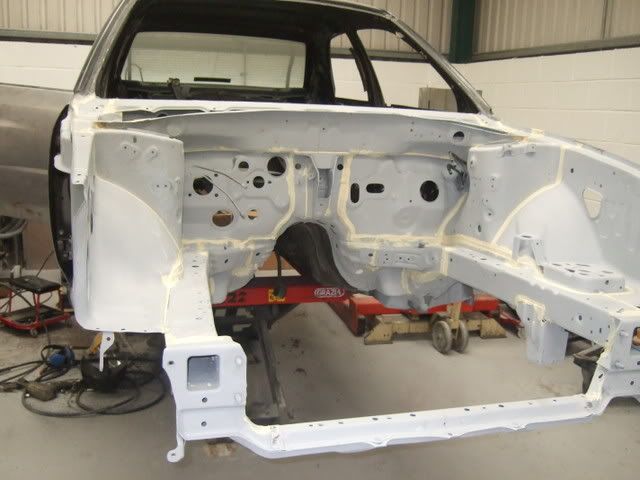
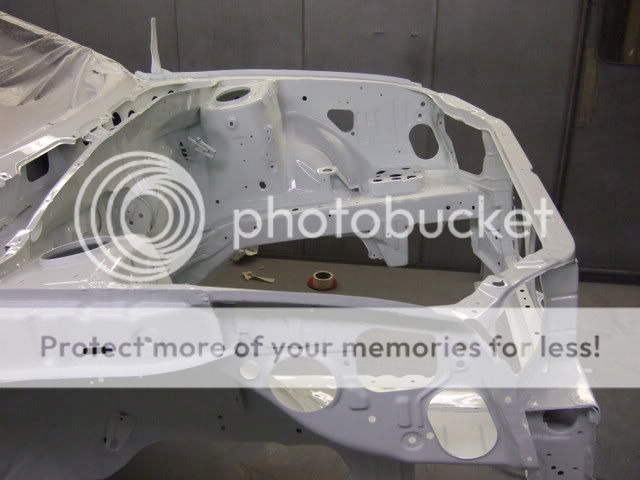
All the interior, and the engine bay area were stripped completely, and the engine bay was shot blasted, to clean up all the metal.
This was carried out by a mobile blaster, who normally blasts buildings, for the bargain price of �50.00.
Well worth it, took him about an hour to do something that would have took me days to complete, and still would not have been as good.
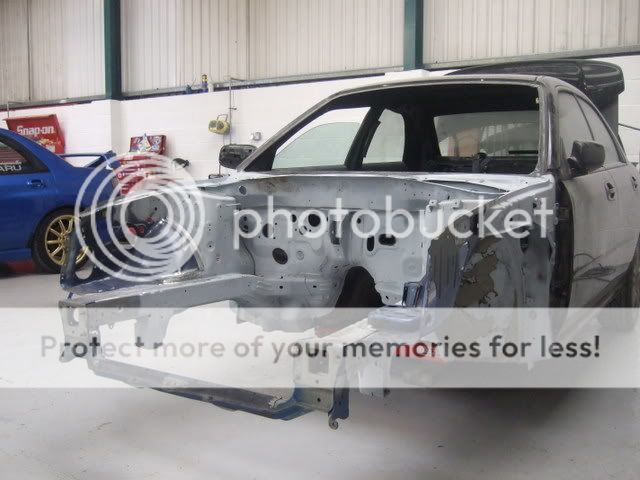
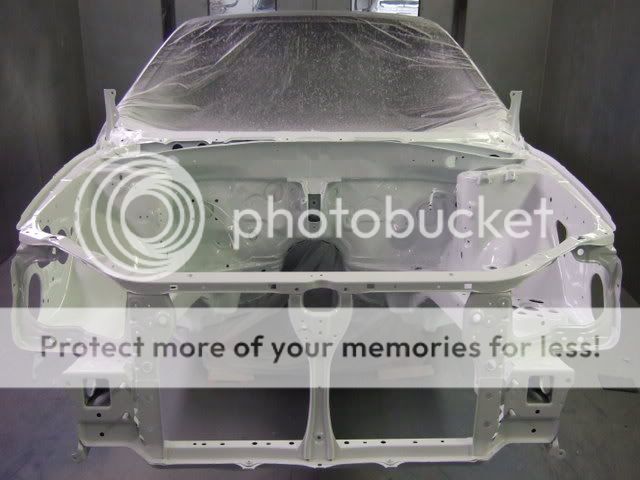
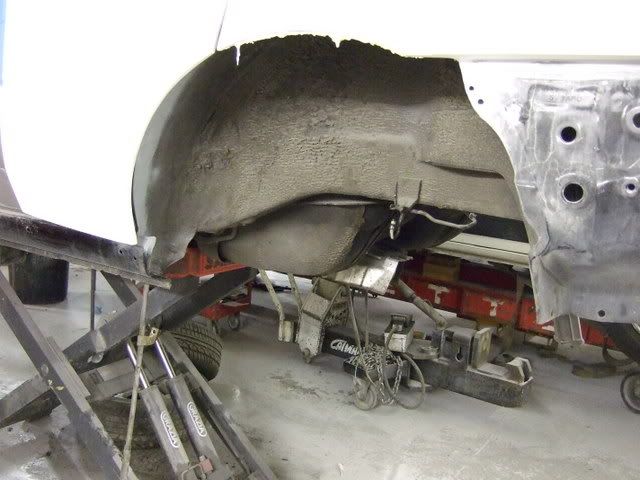
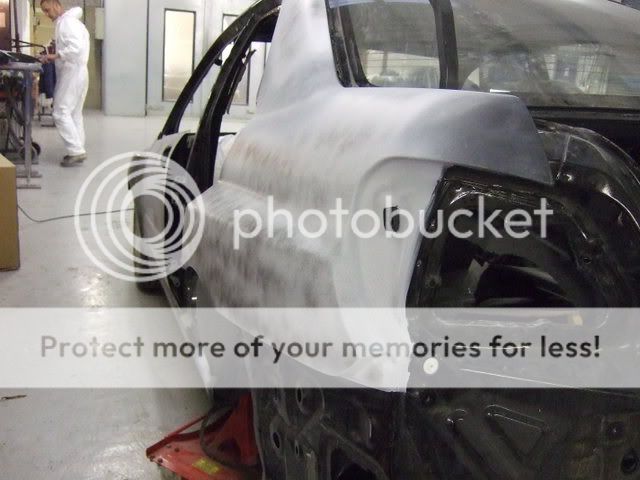
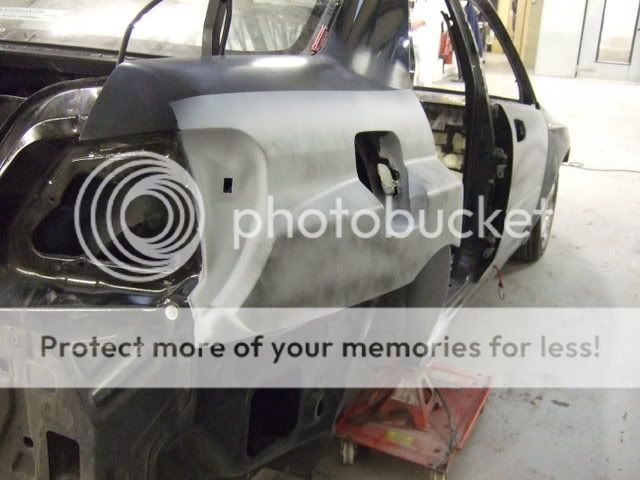
Due the fire, all of the outer front body panels were scrap, and the some of the structural panels in the engine bay were damaged and would need replacing.
The front panels and cross members were also badly damaged, probably because of what would appear to be the attempts made by the Fire Services to open the bonnet at the time of the fire, so these too would need replacing, and have been removed.
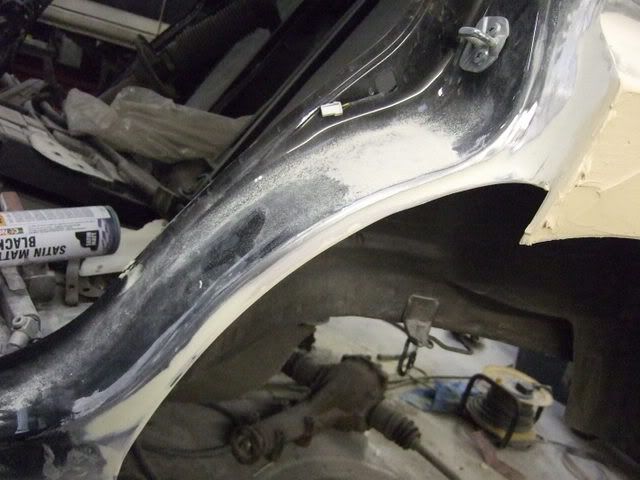
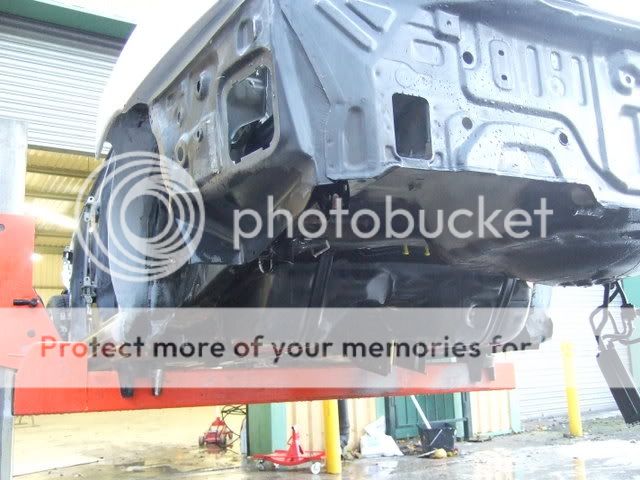
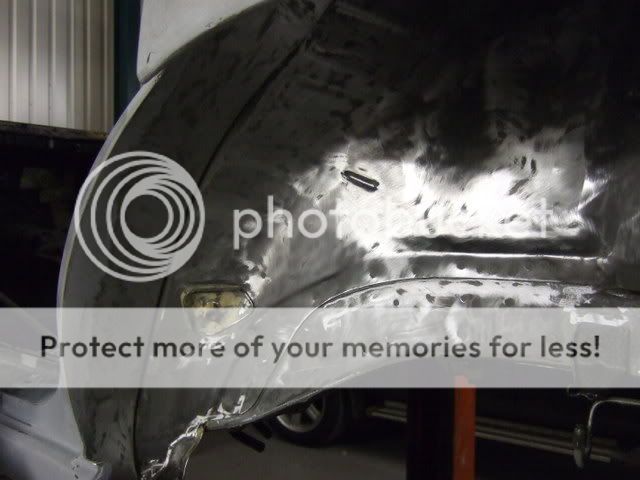
Here it is once shotblasted, and with a quick coat of etching primer to avoid any rusting...
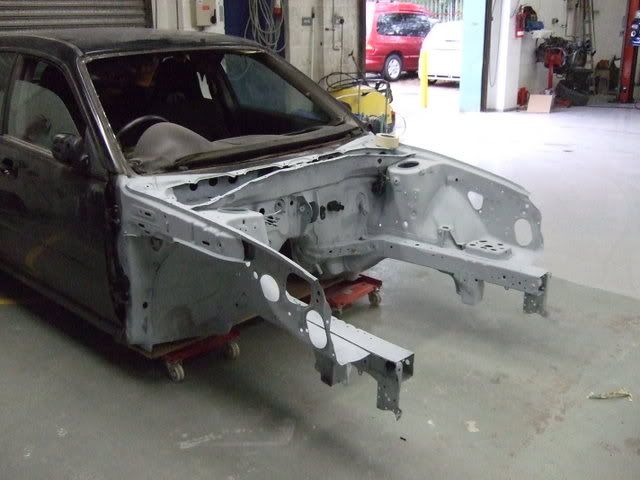
The inner wings were a bit distorted as well, so these were removed, ready for new panels to be fitted.
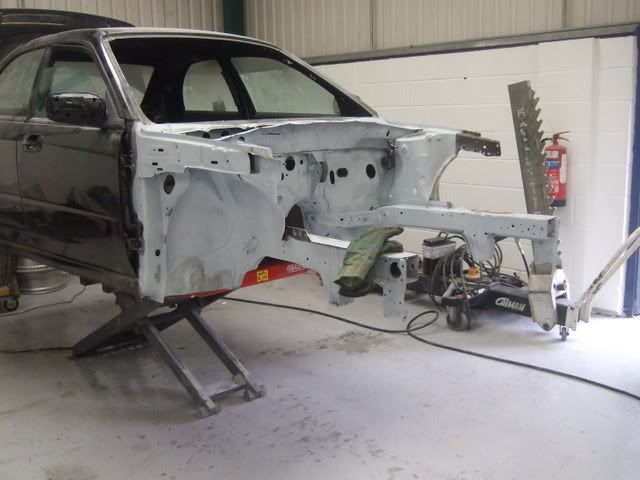
I managed to get hold of a front cross member set up, along with inner wings from a breakers, which not only makes the job a bit easier, but cheaper too
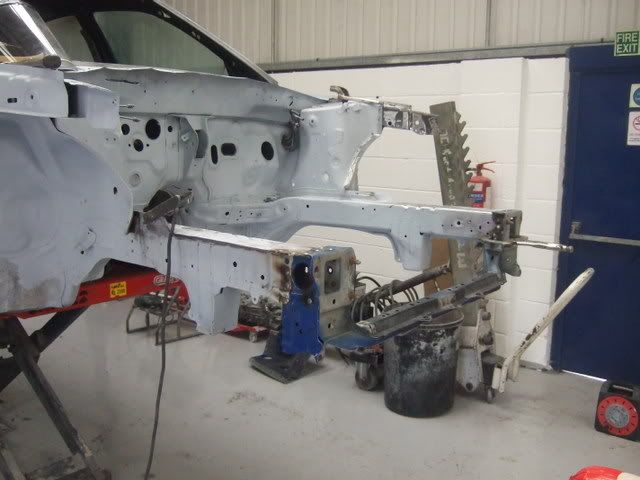
Here you can see where the new (used) panels have been welded into place, along with a few coats of primer, again to avoid any surface corrosion.
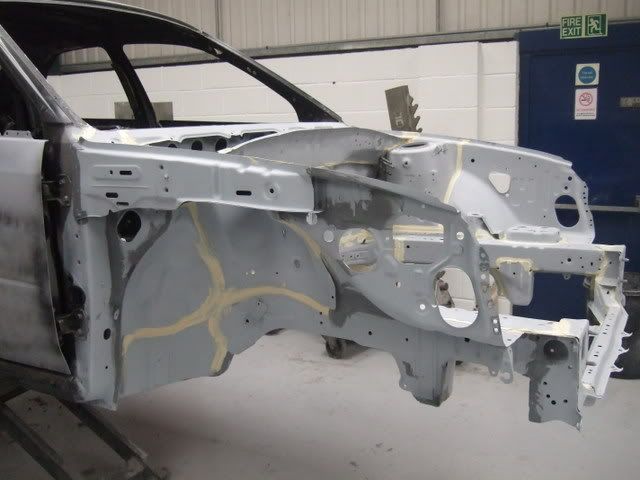
You can also see where all the seams have been sealed up, due to the original being burnt off.
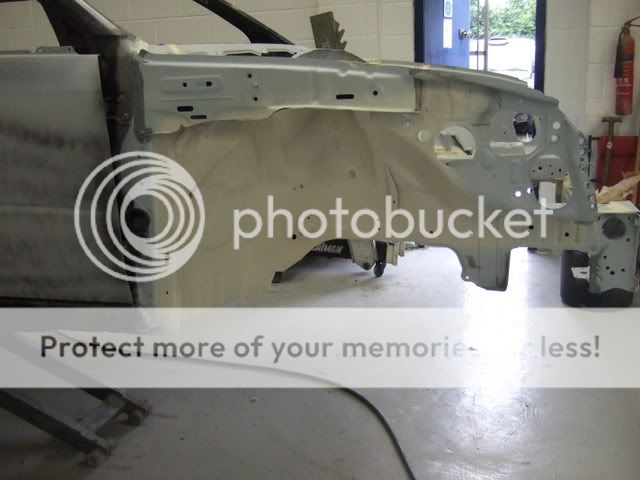
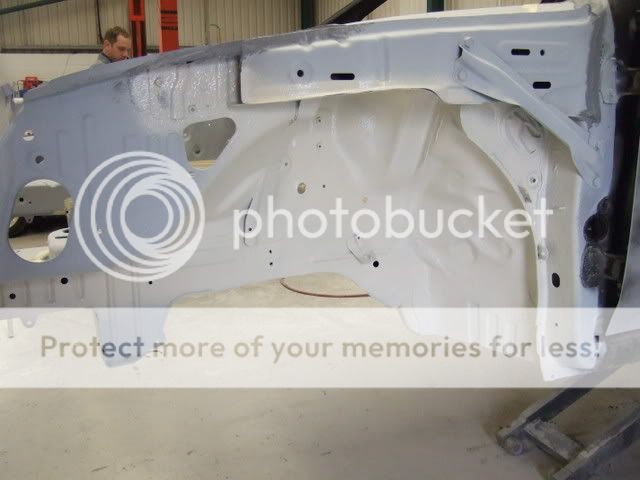
With all the underseal protection also being burnt off, I thought it wise to replace this, so a few coats of stonechip have been applied to the required areas.
Next stage is to purchase new front panels from the dealers , and get it looking at least like a Scoob again
Small bit about me...
Had plenty of the usual 70's/80's/90's fast Fords in the past, but gave up on them circa 9 years ago when I made the choice of an Impreza over an Escort Cos ( 15K for a 92/3 escos, 9.5K for a similar impreza, which I also thought drove better TBH) which lasted a few years before I had to grow up,get a house etc etc...
Got back into Subaru ownership 3 years ago, and have been there pretty ever since...
Anyway, I have recently been getting a bit fed up of a lot of the Subaru mentality regarding the marque..(if its not blue with gold wheels and loads of stickers it's not a Scoob..etc etc..
So much so, that I am already thinking about returning to the marque, but more of that later...
I thought I would begin my introduction to your projects forum, with my ongoing rebuild of a 2003 WRX Impreza.
The car is 90% finished as of today, so will probably take a while to get all the updates, erm, up to date...
But suffice to say, that the plan for the car is fat arches, sat nice and low, torquey 2.5 engine with loverly 450bhp/450 lbs/ft for a hopefully great cross country car, with creature comforts..
It started off when I bought a 2003 WRX back in August 2006, which had had a bit of a fire..
As can be seen from the pics, it had got a touch hot, especially in the engine bay area, which had sustained most of the damage.
The interior also was a bit of a mess, mainly due to smoke damage.
Here is what I bought...
I am obviously quite lucky, in that I work in the trade, and have all the facilities at my disposal to carry out all the work myself.
Even though, this job is being carried out on a 'As I can afford it basis', so is being done in various stages, due to finances and time constraints...
First job was to strip all the crusty burnt stuff out of the car, mainly due to the toxic nature of the remains, and of course to throw it all in the skip...
All the interior, and the engine bay area were stripped completely, and the engine bay was shot blasted, to clean up all the metal.
This was carried out by a mobile blaster, who normally blasts buildings, for the bargain price of �50.00.
Well worth it, took him about an hour to do something that would have took me days to complete, and still would not have been as good.
Due the fire, all of the outer front body panels were scrap, and the some of the structural panels in the engine bay were damaged and would need replacing.
The front panels and cross members were also badly damaged, probably because of what would appear to be the attempts made by the Fire Services to open the bonnet at the time of the fire, so these too would need replacing, and have been removed.
Here it is once shotblasted, and with a quick coat of etching primer to avoid any rusting...
The inner wings were a bit distorted as well, so these were removed, ready for new panels to be fitted.
I managed to get hold of a front cross member set up, along with inner wings from a breakers, which not only makes the job a bit easier, but cheaper too
Here you can see where the new (used) panels have been welded into place, along with a few coats of primer, again to avoid any surface corrosion.
You can also see where all the seams have been sealed up, due to the original being burnt off.
With all the underseal protection also being burnt off, I thought it wise to replace this, so a few coats of stonechip have been applied to the required areas.
Next stage is to purchase new front panels from the dealers
, and get it looking at least like a Scoob again Last edited by E_M_B; 22-10-2008 at 12:44 PM.
 28-04-2008, 10:17 PM
#2
Part of the Furniture
Thread Starter
Join Date: Apr 2008
Location: Looking for my next project car...
Posts: 151
Likes: 0
Received 0 Likes
on
0 Posts
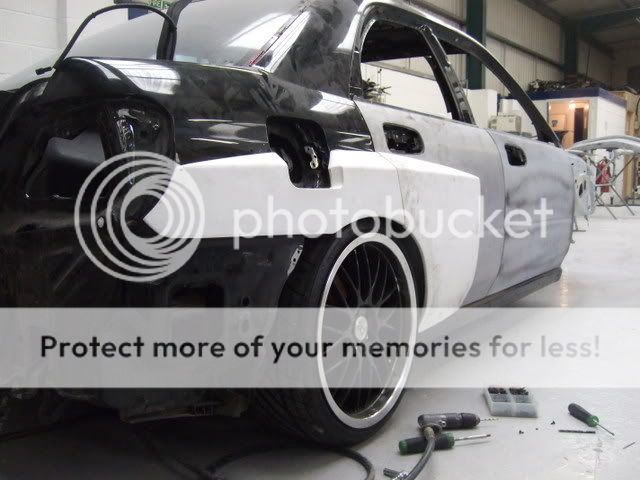
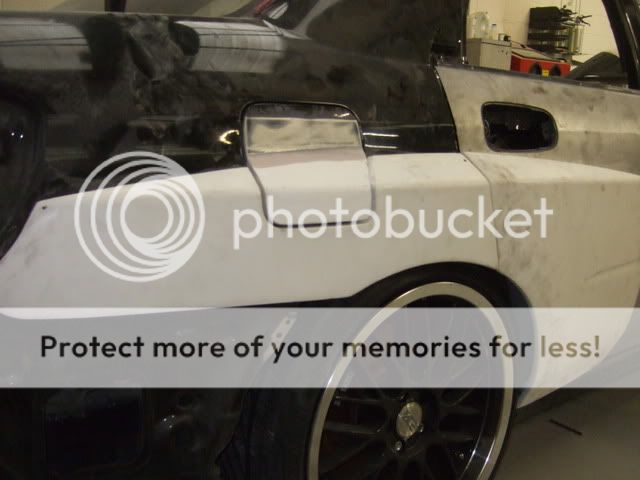
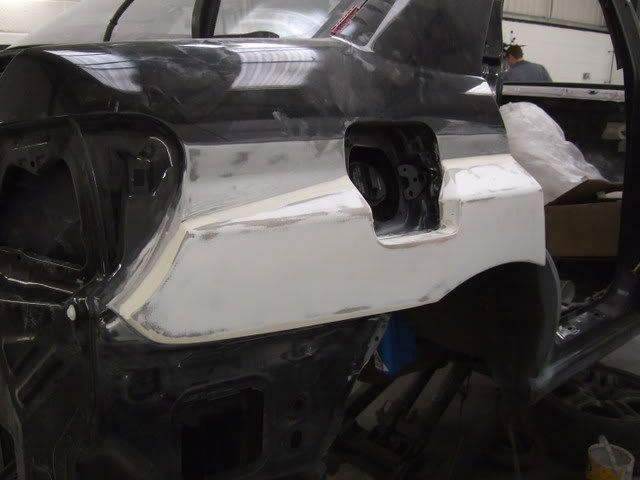
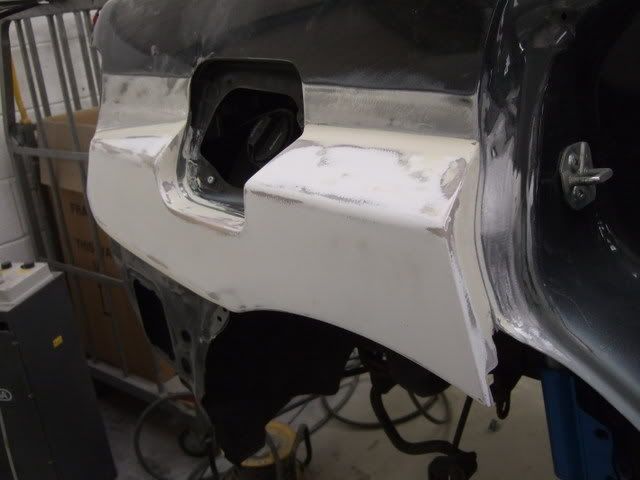
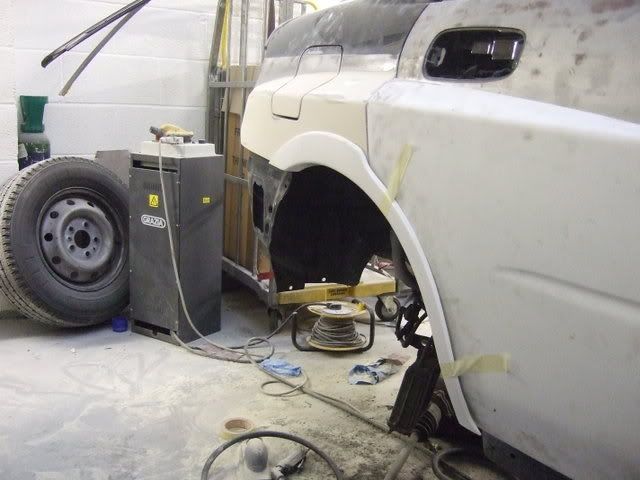
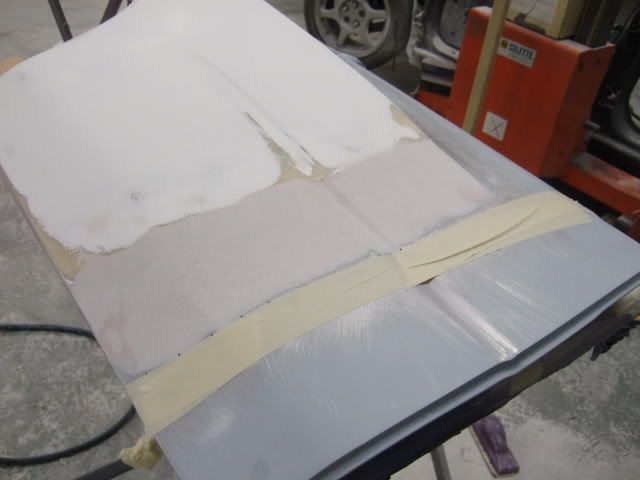
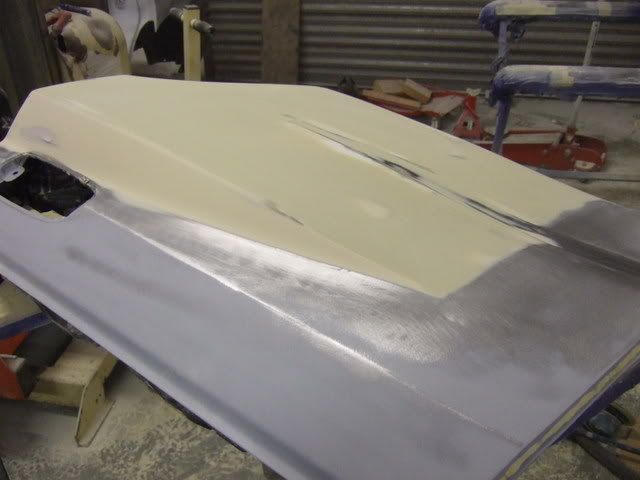
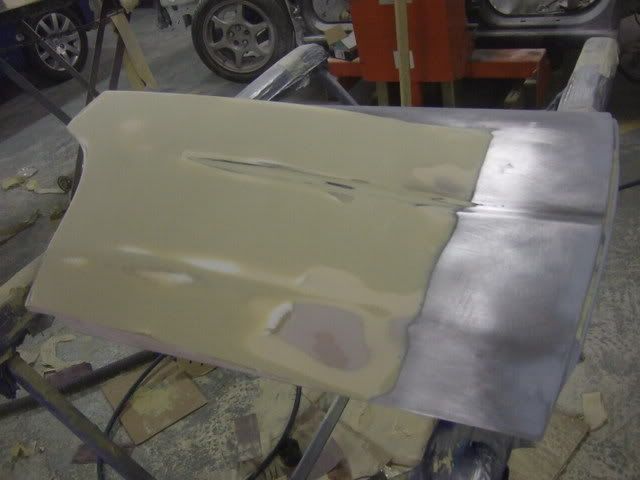
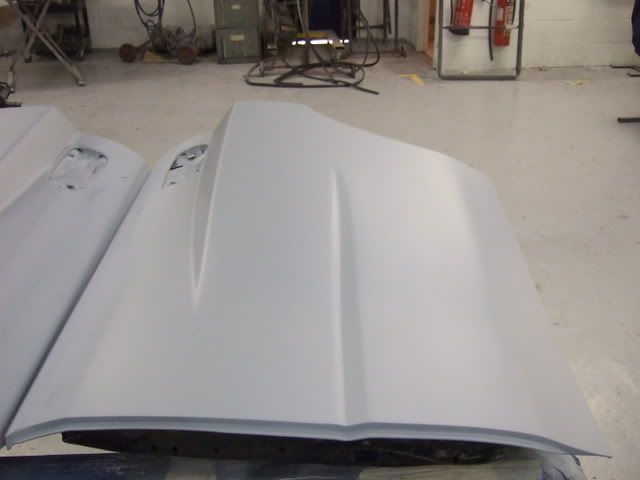
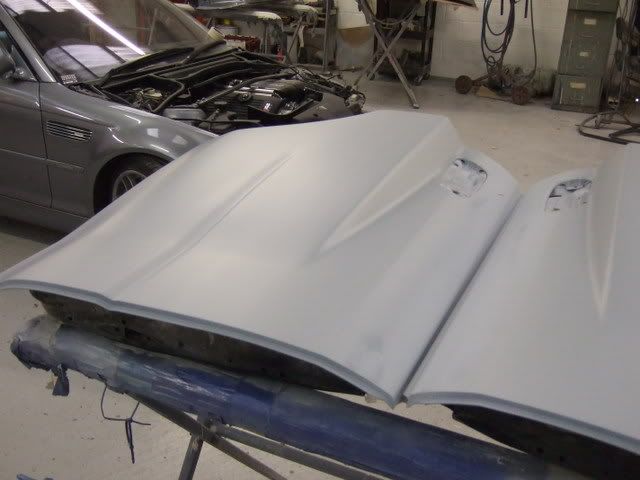
Next up, new panels and goodies.... 
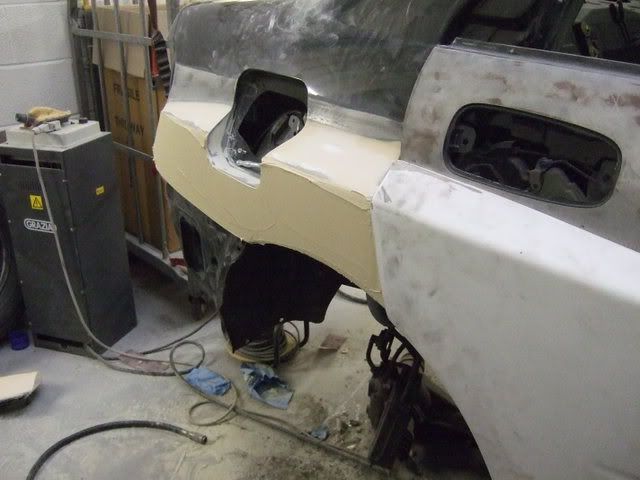
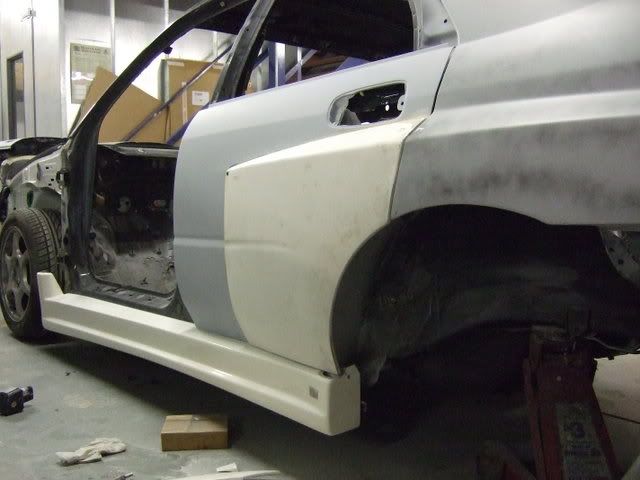
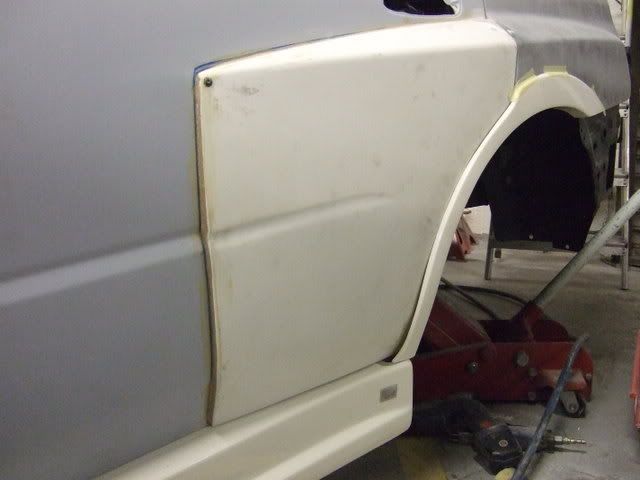
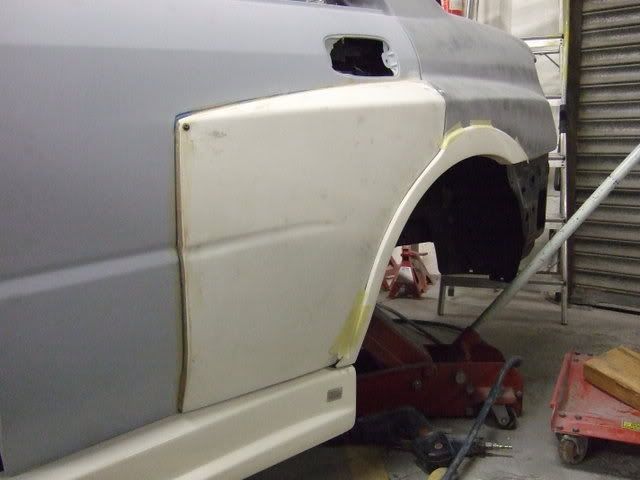
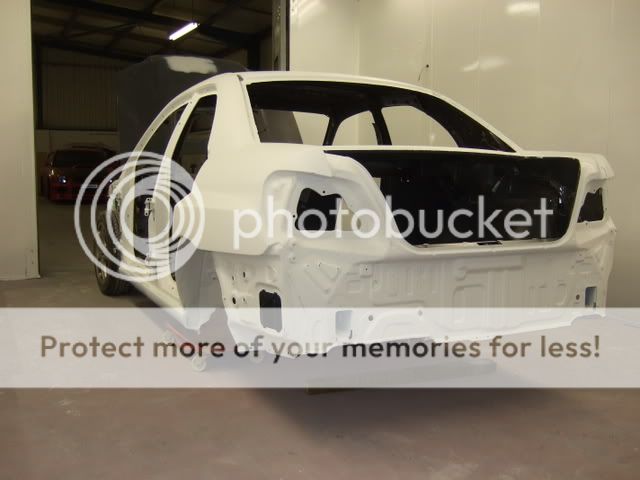
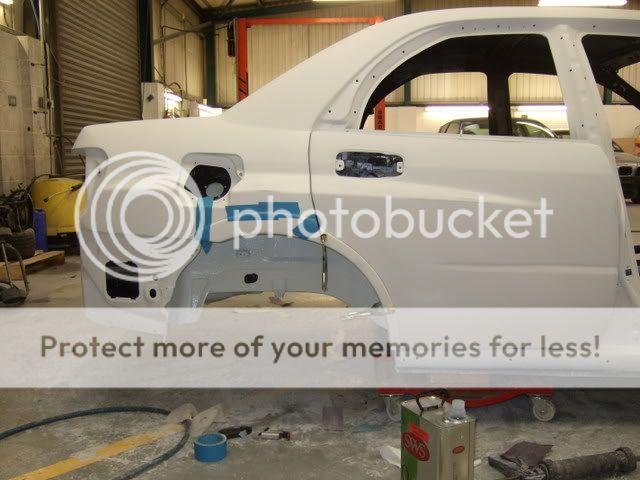
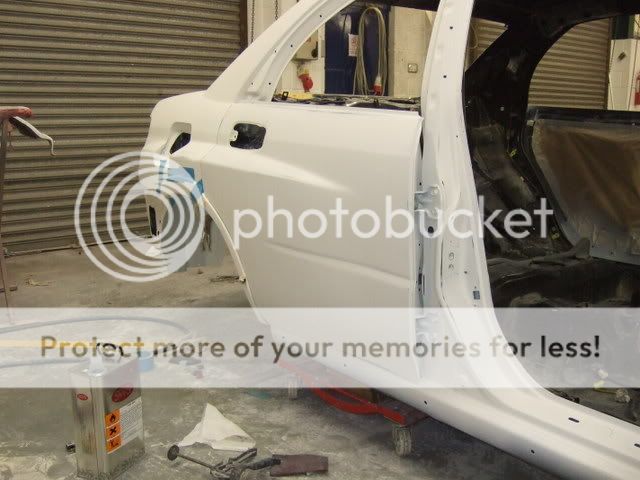
OK, got new front panels, so time to line everything up and see what it's gonna look like..
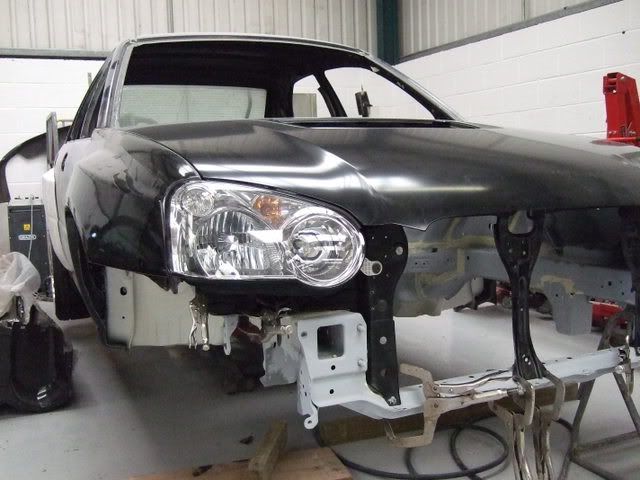
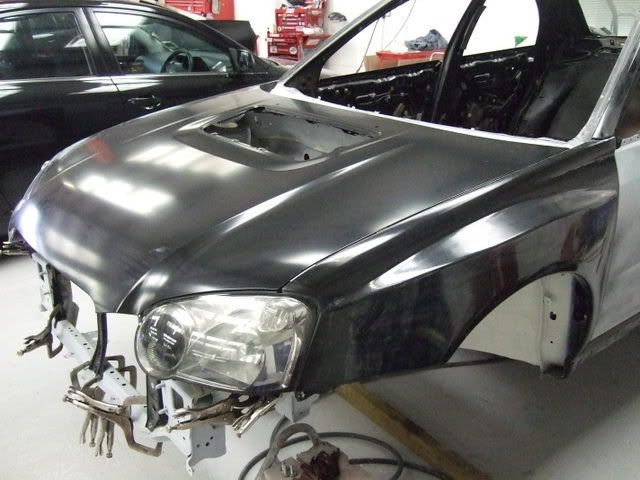
Front wings are wide arched, and are fibreglass, and as such I expected some fitting issues.
However, they are an extremely good fit, and line up with the doors/bonnet and lights as factory intended.
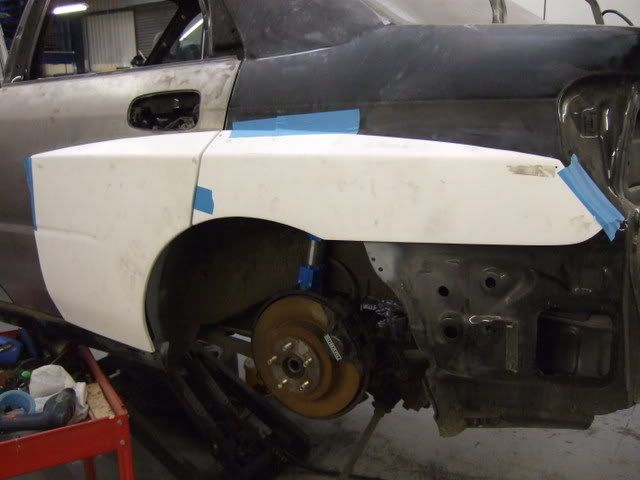
Here is the front all welded up and ready for paint..
OK, got new front panels, so time to line everything up and see what it's gonna look like..
Front wings are wide arched, and are fibreglass, and as such I expected some fitting issues.
However, they are an extremely good fit, and line up with the doors/bonnet and lights as factory intended.
Here is the front all welded up and ready for paint..
28-04-2008, 10:20 PM
#3
Part of the Furniture
Thread Starter
Join Date: Apr 2008
Location: Looking for my next project car...
Posts: 151
Likes: 0
Received 0 Likes
on
0 Posts
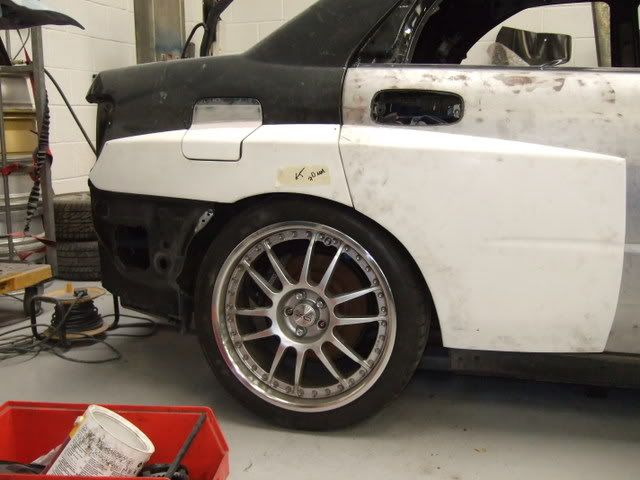
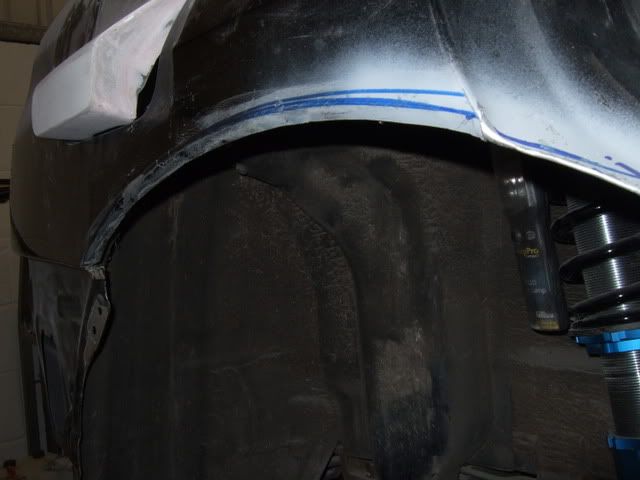
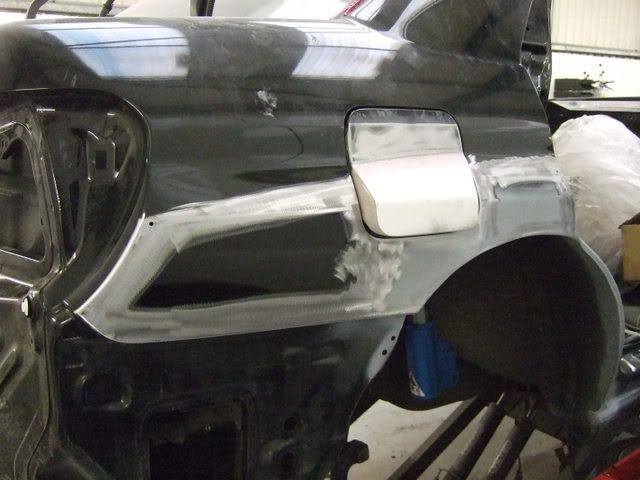
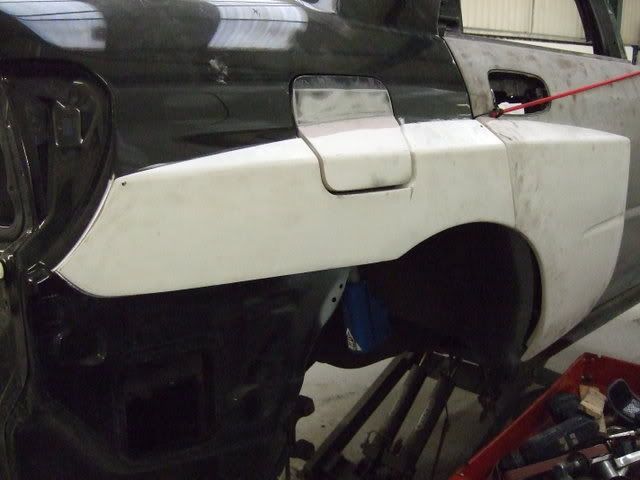
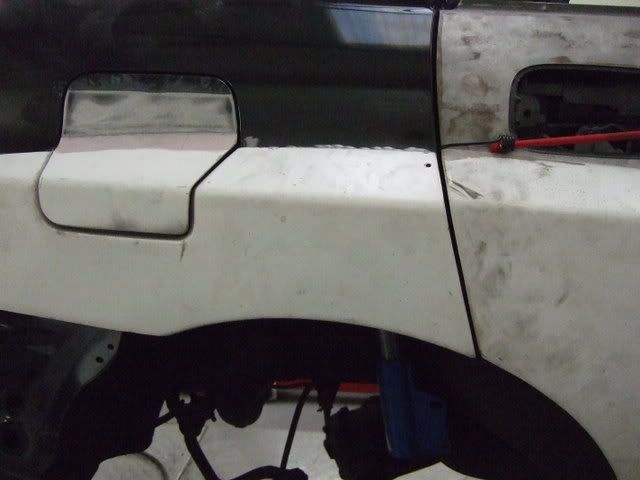
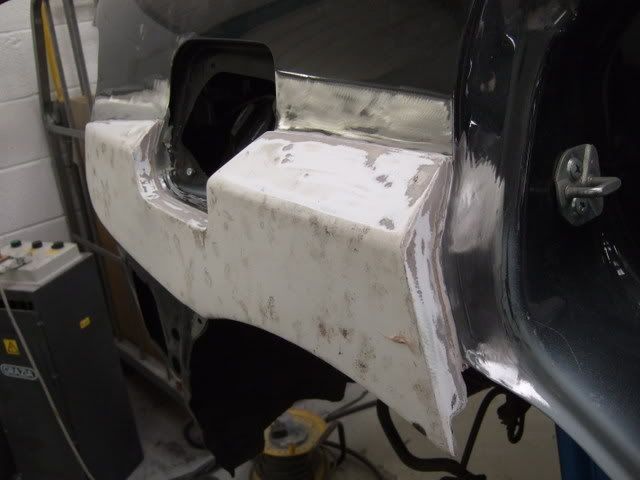
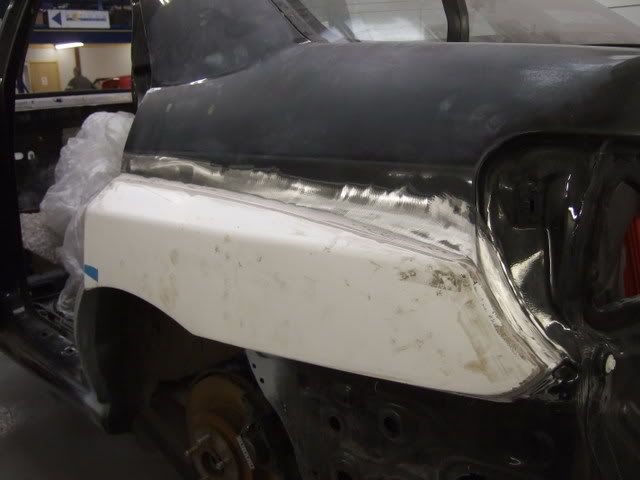
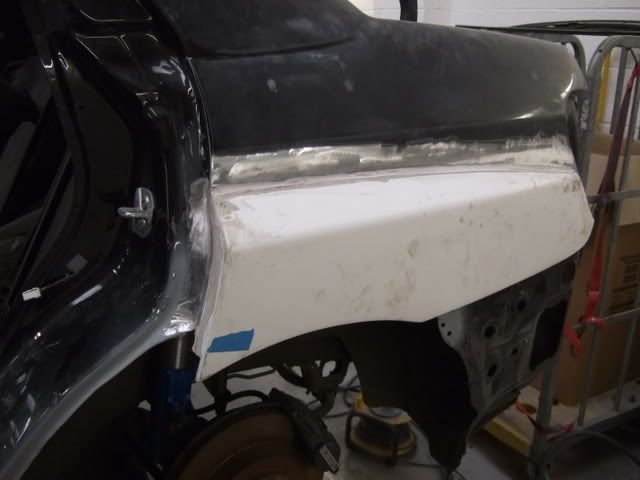
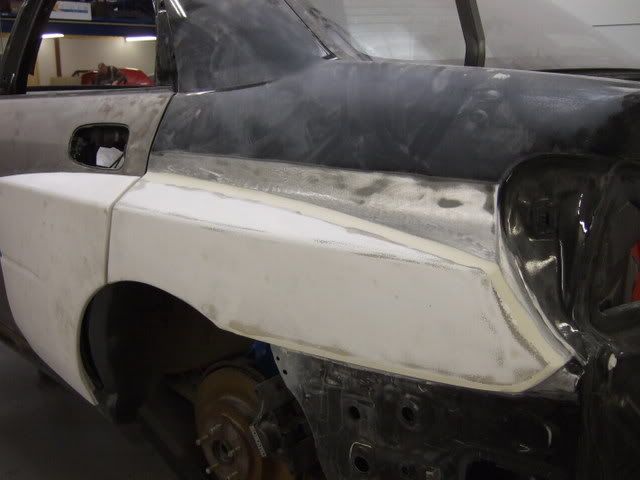
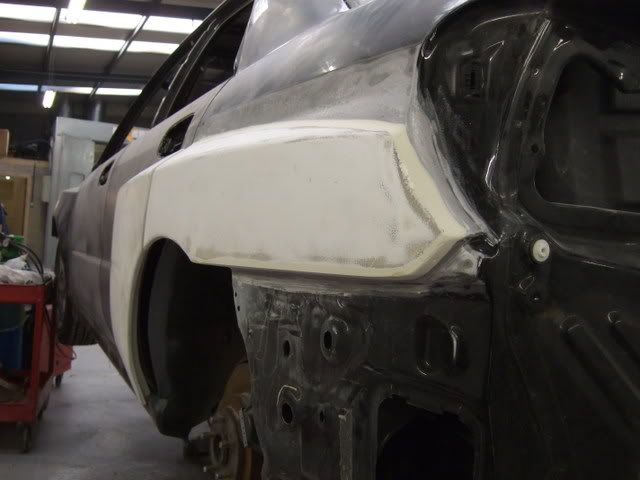
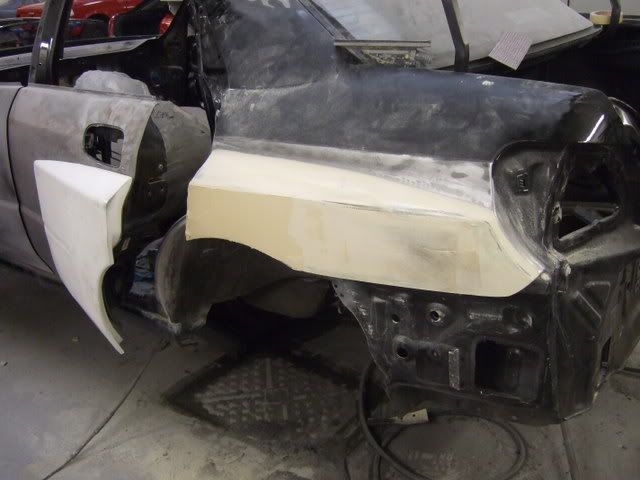
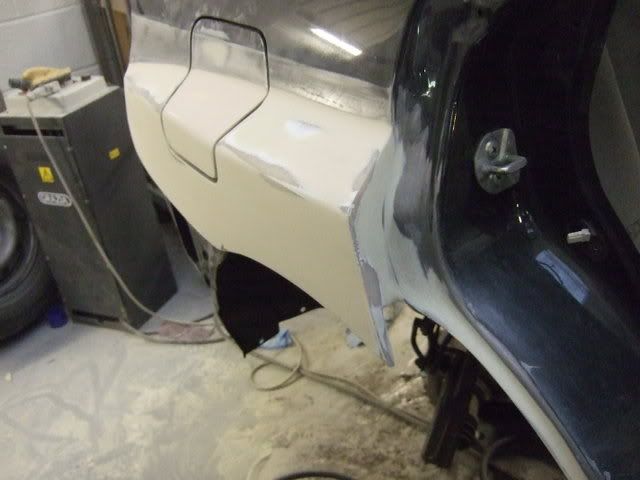
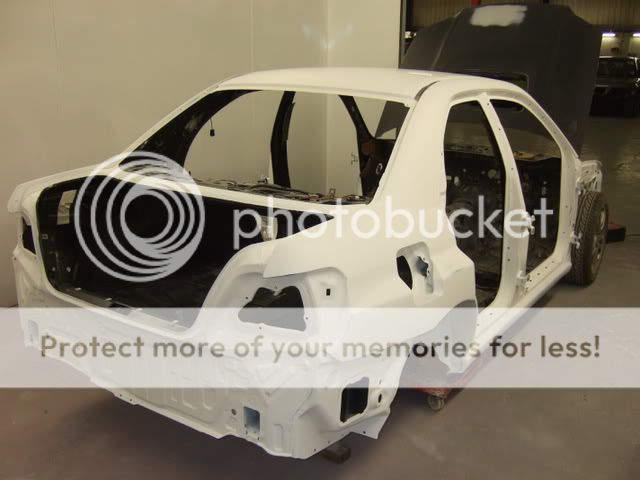
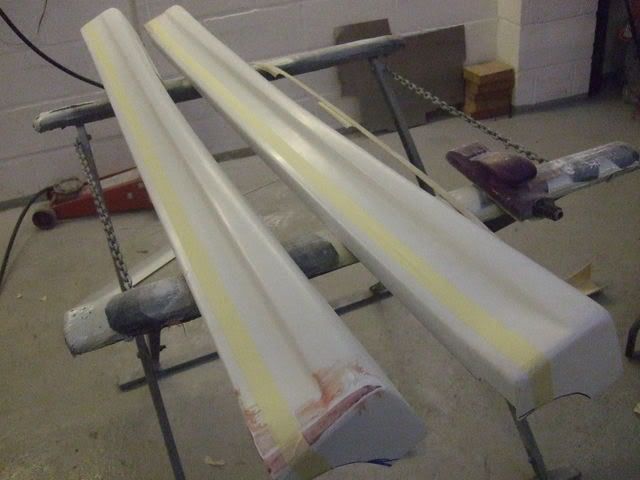
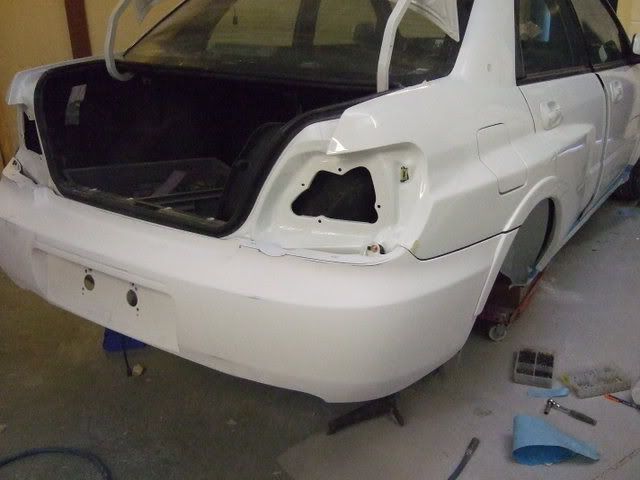
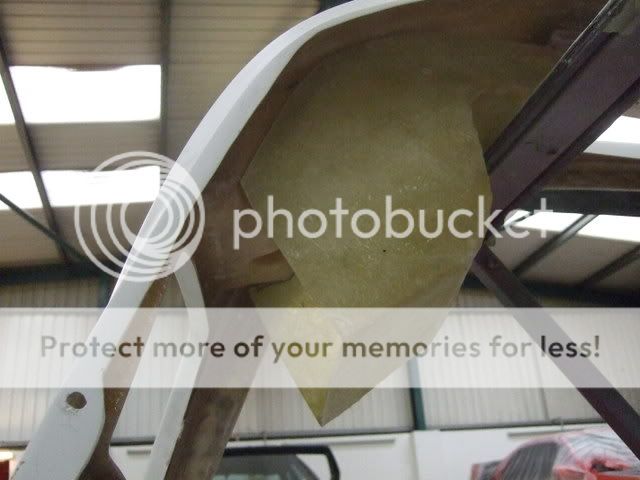
As can be seen from the front pics, the wide arches are simply replacement front wings, the rear however is a bit more complex..
Here's are some shots showing one side, roughly in place..

With the new arches in place, the next job will be to cut out the original rear arches, in order to gain clearance for the new rear axle width.
Before I carry this out though, I need to sort out the ride height, suspension travel and the size of wheel neccesary..
I have roughly calculated that I am going to need a 9" wide rim, with an ET of 15-25mm, in order to fill the arches..
But I don't know if that will be too much for the front, so I'm going to get the front suspension all built up, and get the car at normal ride height and try some wheels on.
Here's are some shots showing one side, roughly in place..
With the new arches in place, the next job will be to cut out the original rear arches, in order to gain clearance for the new rear axle width.
Before I carry this out though, I need to sort out the ride height, suspension travel and the size of wheel neccesary..
I have roughly calculated that I am going to need a 9" wide rim, with an ET of 15-25mm, in order to fill the arches..
But I don't know if that will be too much for the front, so I'm going to get the front suspension all built up, and get the car at normal ride height and try some wheels on.
28-04-2008, 10:22 PM
#4
Part of the Furniture
Thread Starter
Join Date: Apr 2008
Location: Looking for my next project car...
Posts: 151
Likes: 0
Received 0 Likes
on
0 Posts
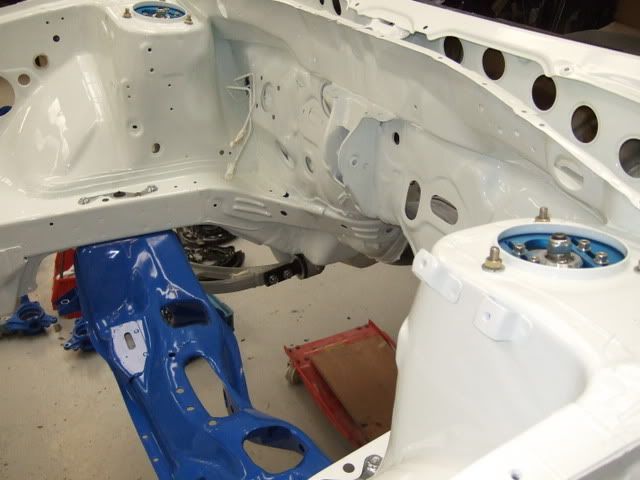
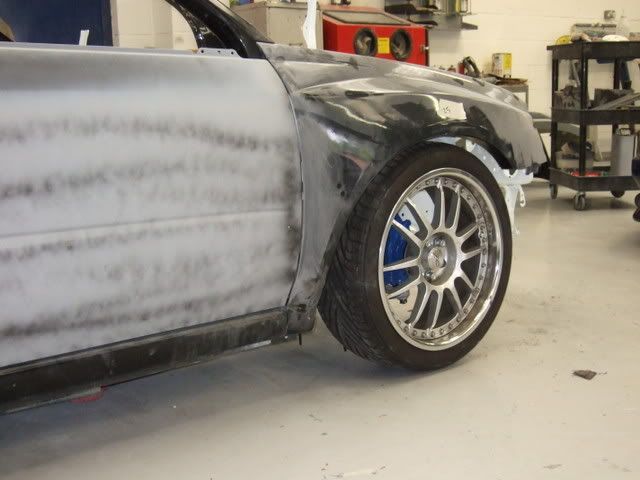
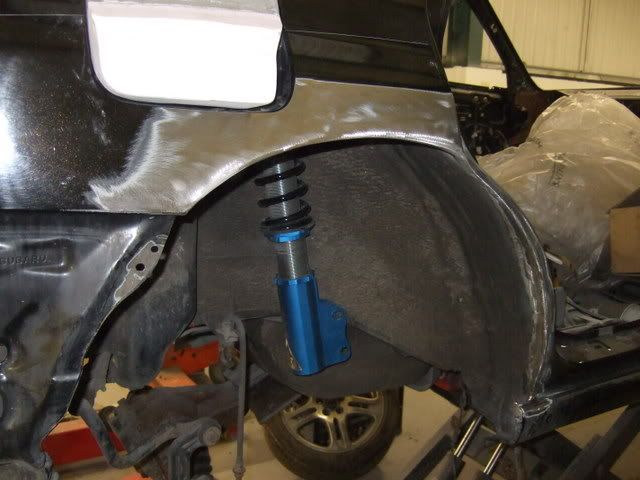
Managed to get hold of some rather nice powder coated suspension components,along with a box of shiney nuts/bolts and brackets, courtesy of someone else's unfinished project
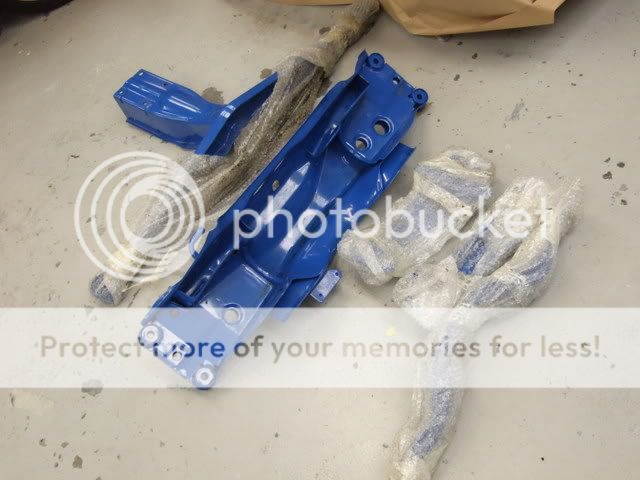
I've also managed to get some paint thrown at it..
Here's the engine bay during paint..

White is the new black...apparently.
I've also managed to get some paint thrown at it..
Here's the engine bay during paint..
White is the new black...apparently.
28-04-2008, 10:29 PM
#5
Part of the Furniture
Thread Starter
Join Date: Apr 2008
Location: Looking for my next project car...
Posts: 151
Likes: 0
Received 0 Likes
on
0 Posts
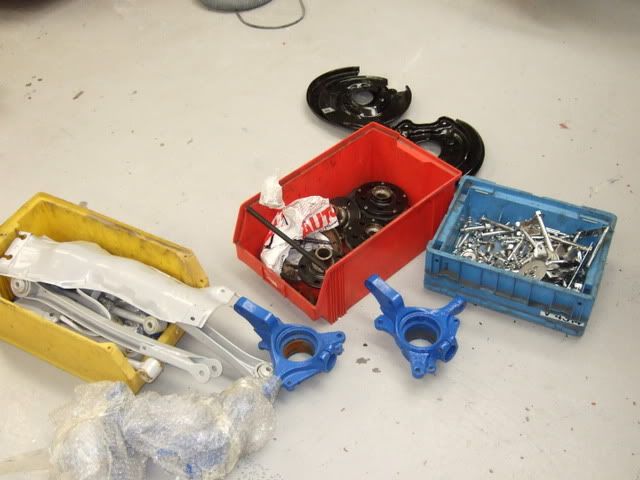
Also, I thought it would be rude not to get some of them luverly bits bolted upto the car..
The bottom arms even came with new ball joints
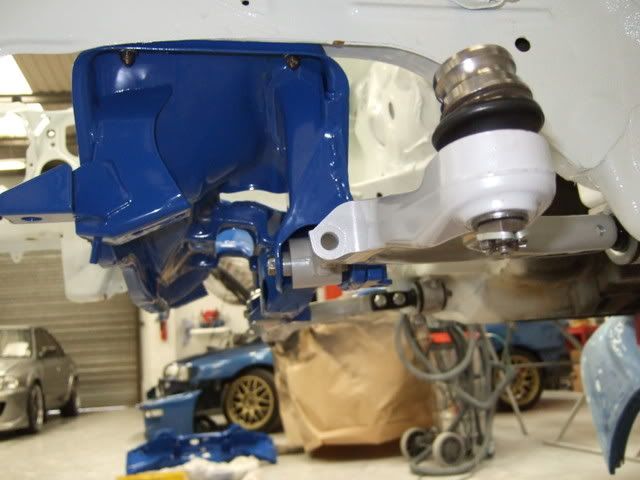
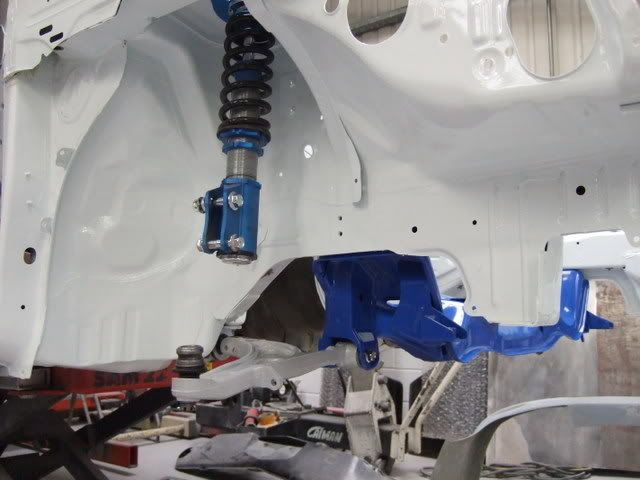
And a little shot of a nice chrome bracket, which won't be seen once built up..
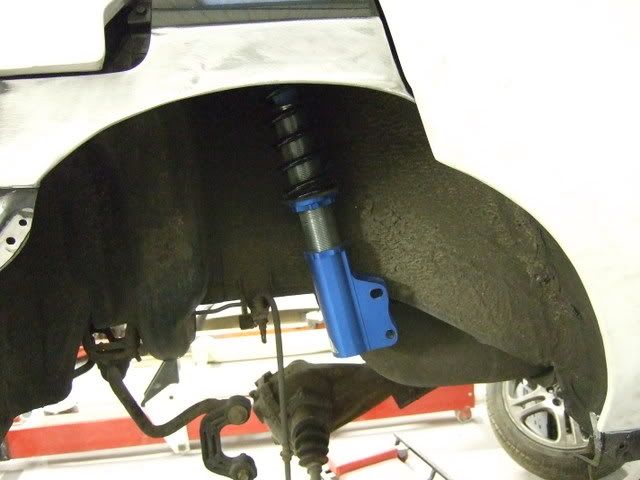
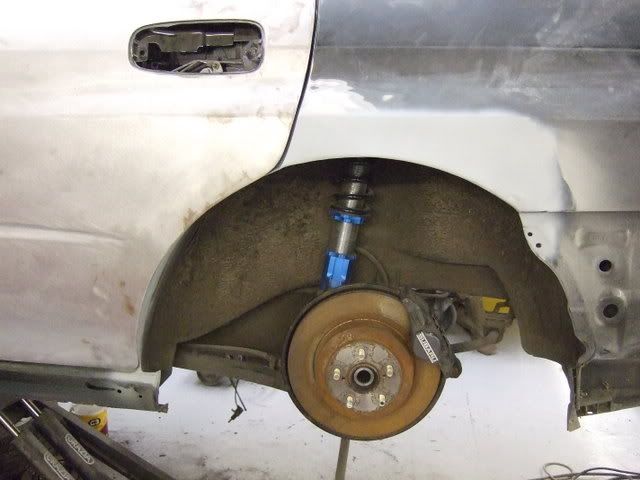
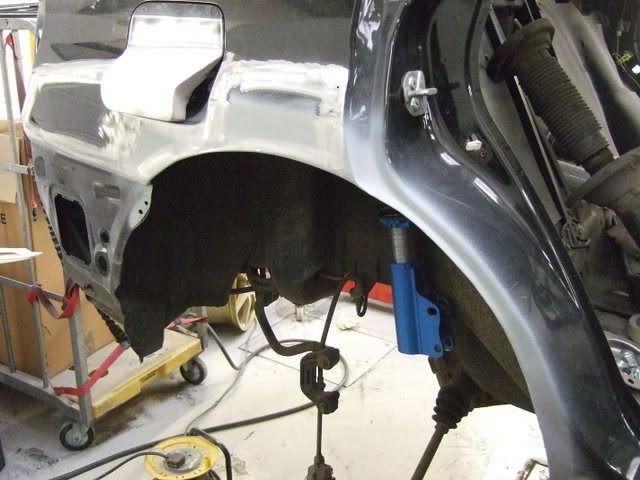
Got some new bearings fitted today, along with the front suspension temporarily built up, and got it down on its wheels.
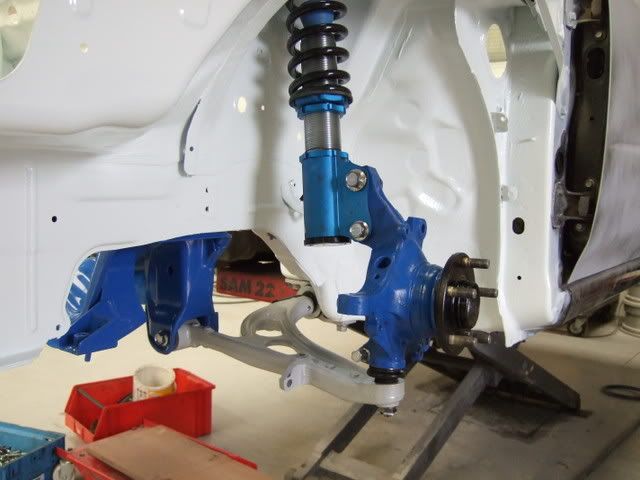
Looking a bit on the high side at first, although the camera angle doesn't quite show it...
Just dropped it 25mm all round, and it's getting there..
Just need to try and work out what size wheels I definately need now, as the ones on it are just too skinny...
Then I can attack the rear arches for clearance, and get all the underside and inner rear arches looking like the front (not a job I am looking forward to).
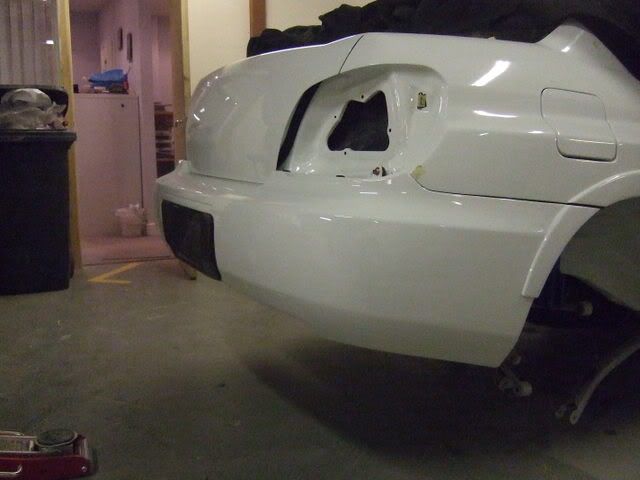
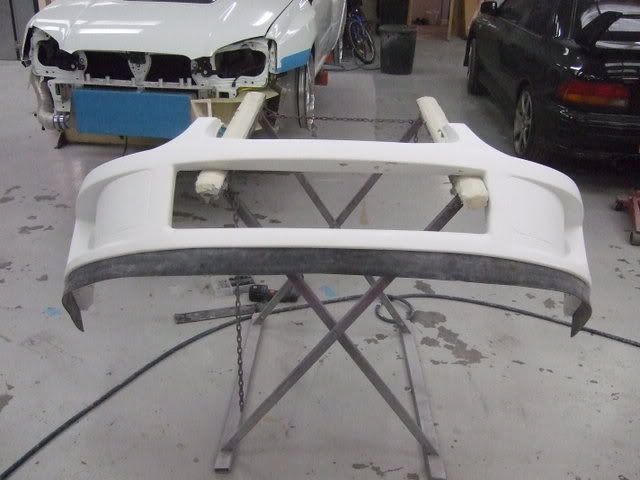
Got my new front bumper support, so I thought I would try the front bumper on, and see how it fits
Here's the front bumper support, nice lightweight alloy job
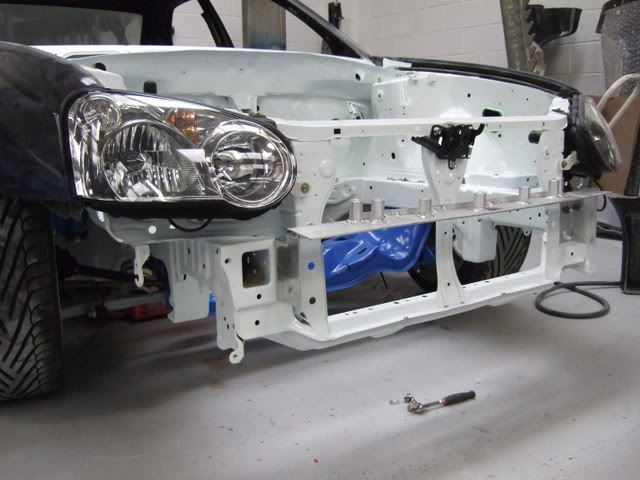
And here's a few pics with the bumper on.
Starting to look a bit like a car now
Oh, and here's what's behind the bumper
The bottom arms even came with new ball joints
And a little shot of a nice chrome bracket, which won't be seen once built up..
Got some new bearings fitted today, along with the front suspension temporarily built up, and got it down on its wheels.
Looking a bit on the high side at first, although the camera angle doesn't quite show it...
Just dropped it 25mm all round, and it's getting there..
Just need to try and work out what size wheels I definately need now, as the ones on it are just too skinny...
Then I can attack the rear arches for clearance, and get all the underside and inner rear arches looking like the front (not a job I am looking forward to).
Got my new front bumper support, so I thought I would try the front bumper on, and see how it fits
Here's the front bumper support, nice lightweight alloy job
And here's a few pics with the bumper on.
Starting to look a bit like a car now
Oh, and here's what's behind the bumper
 28-04-2008, 10:34 PM
#7
Part of the Furniture
Thread Starter
Join Date: Apr 2008
Location: Looking for my next project car...
Posts: 151
Likes: 0
Received 0 Likes
on
0 Posts
Now, for you Ford people, this is what an Impreza short motor looks like...
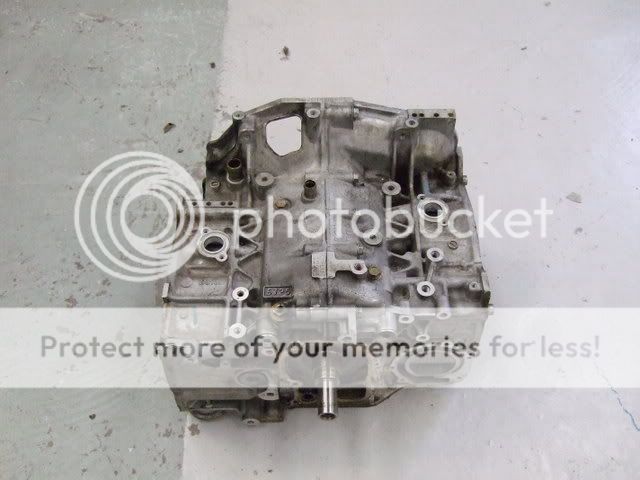
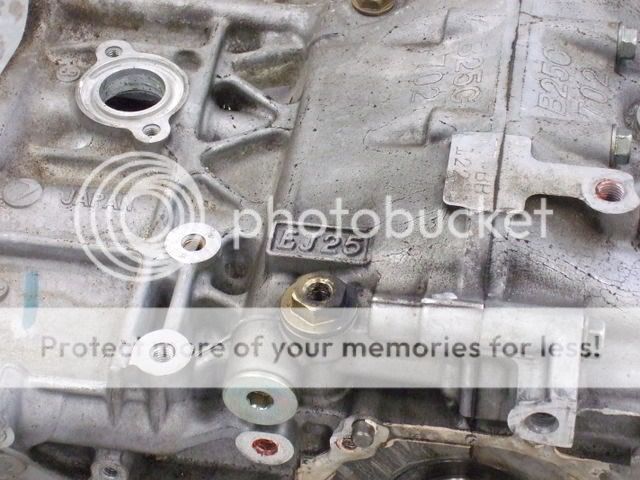
A 2.5 bottom end, out of a 2006 car, which needs a rebuild.
Essentially I plan on using the crank cases, and fitting new uprated internals...
A 2.5 bottom end, out of a 2006 car, which needs a rebuild.
Essentially I plan on using the crank cases, and fitting new uprated internals...
Trending Topics
28-04-2008, 10:42 PM
#9
Part of the Furniture
Thread Starter
Join Date: Apr 2008
Location: Looking for my next project car...
Posts: 151
Likes: 0
Received 0 Likes
on
0 Posts
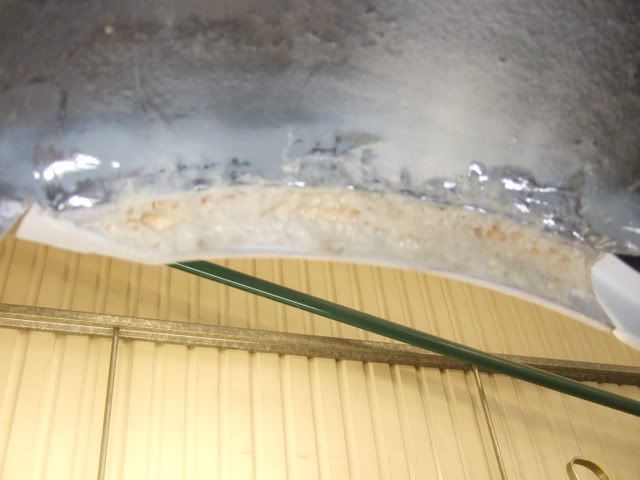
After some guestmations, and a bit of measuring, I thought I'd get started with cutting out the rear arches, to allow clearance for the new wheels..
First step/mistake, is to cut and weld one side first, only to find that there still won't be enough clearance for the wheel/suspension set up I am using..
Then re-mark where we need to cut...again
The outer arch is then cut, and the inner is also cut about 10-15mm up from that, and fold the outer wing inwards to form a return to weld to.
Heres a few shots from under the arches.
First with the metalwork cut.

And then with the outer folded around the inner, to make a nice join to weld together..
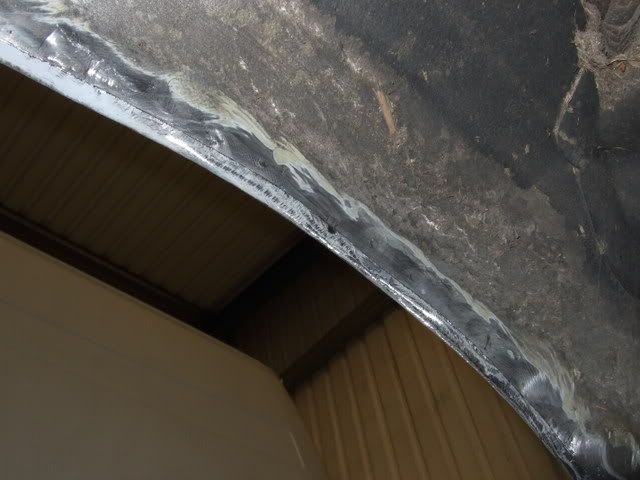
Next step, weld as necesary, being careful not to distort the metal as much as possible.
The trick is to spot/stitch in one spot, then move to another spot, and so on, until is is totally welded up all around..
The metal is very thin on both the inner and outer arches... damn Japanese recycled washing machines..

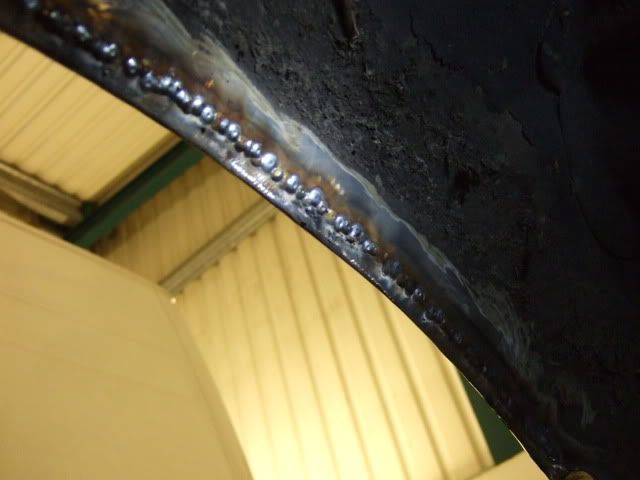
Next step, is to clean up the welds..
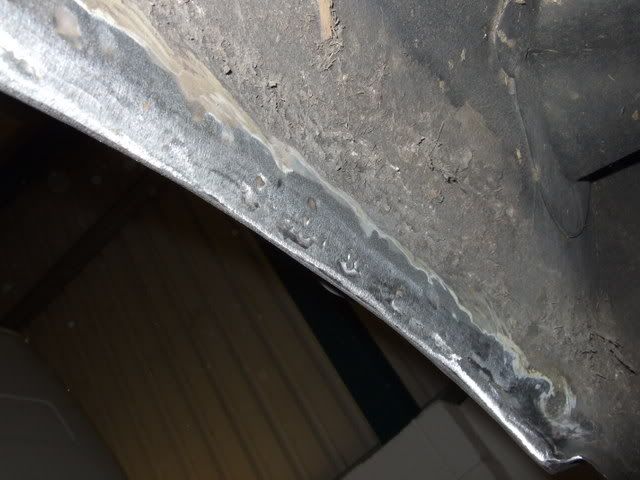
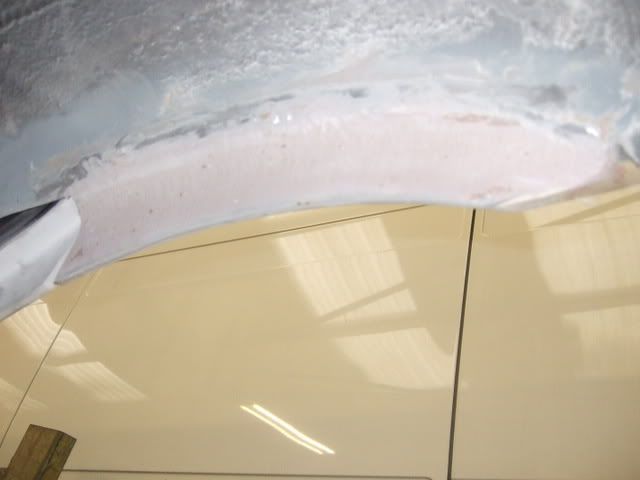
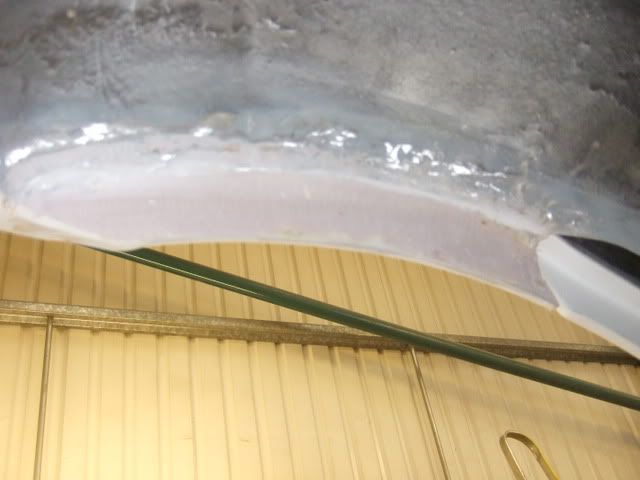
Here's a shot of the outside of the arch.
Here you can see the gap left where the old arch met the rear door..
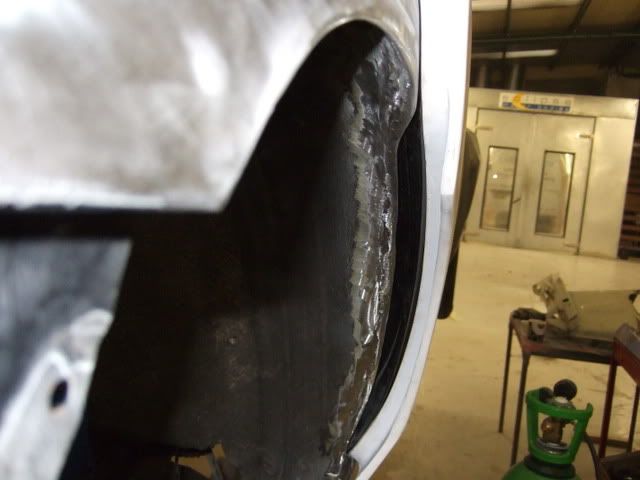
This will have some sort of rubber strip fixed to the door once painted/built up, to stop excess crap being thrown into the rear door shut.
Here you can see how much the arch line has been raised.
The arch is approximately 4" higher, so should allow plenty of room for wheel travel....I hope.
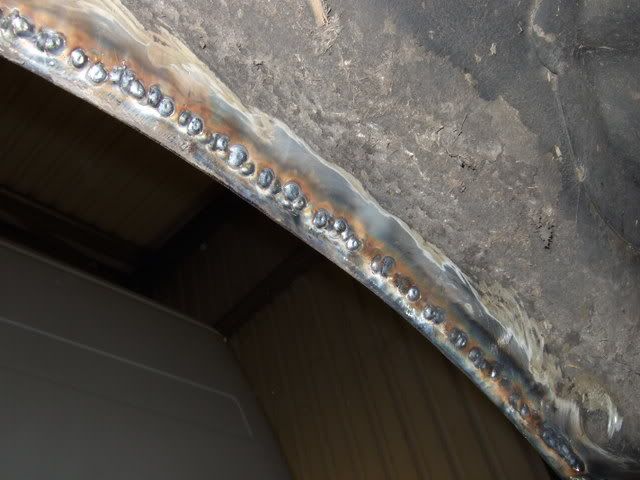
Now all I need to do, is the other side to match..
Et viola, got the other side all cut up and welded back..

Also started to get the rear quarter sections into place as well..
First step, grind back to bare metal where they will be bonded on..
Then it was a case of aligning the parts, and then use a couple of self tapper screws as locating points..
Next, remove the panels, and key the areas to be bonded, along with a nice chamfer along all the outer edges..
Then I used some top secret bonding gear to bond the parts onto the car..
Anyway, here is one side bonded on..
Here is the first application of filler to the joint area..
And then all that is required, is to get the other side done...

First step/mistake, is to cut and weld one side first, only to find that there still won't be enough clearance for the wheel/suspension set up I am using..
Then re-mark where we need to cut...again
The outer arch is then cut, and the inner is also cut about 10-15mm up from that, and fold the outer wing inwards to form a return to weld to.
Heres a few shots from under the arches.
First with the metalwork cut.
And then with the outer folded around the inner, to make a nice join to weld together..
Next step, weld as necesary, being careful not to distort the metal as much as possible.
The trick is to spot/stitch in one spot, then move to another spot, and so on, until is is totally welded up all around..
The metal is very thin on both the inner and outer arches... damn Japanese recycled washing machines..
Next step, is to clean up the welds..
Here's a shot of the outside of the arch.
Here you can see the gap left where the old arch met the rear door..
This will have some sort of rubber strip fixed to the door once painted/built up, to stop excess crap being thrown into the rear door shut.
Here you can see how much the arch line has been raised.
The arch is approximately 4" higher, so should allow plenty of room for wheel travel....I hope.
Now all I need to do, is the other side to match..
Et viola, got the other side all cut up and welded back..
Also started to get the rear quarter sections into place as well..
First step, grind back to bare metal where they will be bonded on..
Then it was a case of aligning the parts, and then use a couple of self tapper screws as locating points..
Next, remove the panels, and key the areas to be bonded, along with a nice chamfer along all the outer edges..
Then I used some top secret bonding gear to bond the parts onto the car..
Anyway, here is one side bonded on..
Here is the first application of filler to the joint area..
And then all that is required, is to get the other side done...
28-04-2008, 10:54 PM
#10
Part of the Furniture
Thread Starter
Join Date: Apr 2008
Location: Looking for my next project car...
Posts: 151
Likes: 0
Received 0 Likes
on
0 Posts
I must apologise here chaps, as I am trying to update this thread off another thread which has been running for a while now and make it more understandable to non Subaru type peeps, so I am not being ignorant and ignoring any posts..
Removed all the rear suspension...
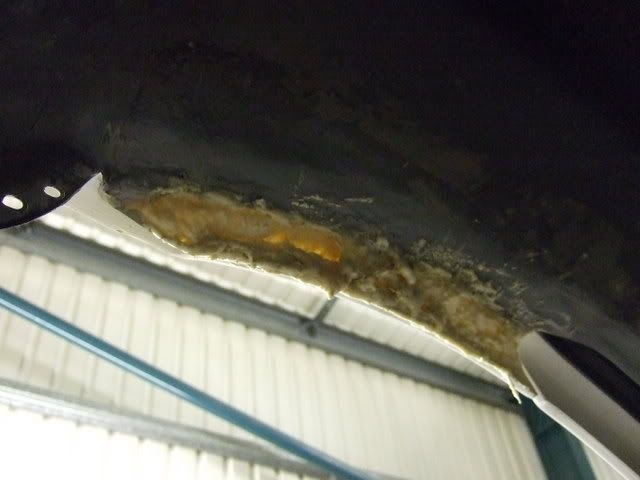
And set about sorting out the gap between the new outer wings, and the existing metal work..
Basically we have a large gap, and I needed to come up with a soultion to fill it in.
I thought about welding a metal plate there, but really there is no need for that, as it is not structural, and therefore not neccesary.
I came up with using a can of expanding foam...
This was used, like so..
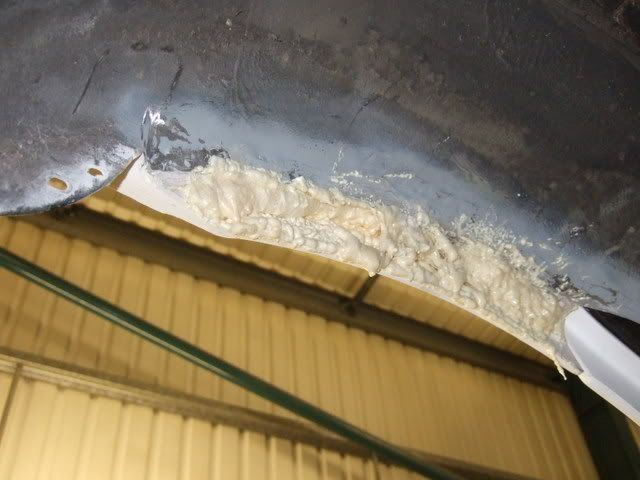
After a bit of trimming, looks like this..

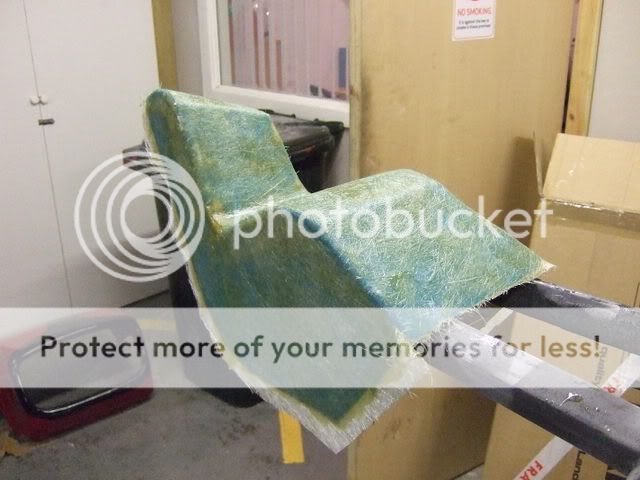
Next step, was to get some fibre glass on there, which was done, and again trimmed back into shape..
Apologies for the crappie pics, got a touch of the shakes whilst taking these pics, due to the night before...
Anyway, the arches are pretty much, well and truly bonded on now, and feel pretty strong around the wheel arch area, which is good.
In fact, I can actually lift the car using the new, fibreglass, rear arches, so good enough for me.
Having said which, it is just a shell...
Started to tidy up the inner rear wheel arch area on both sides..
Got both rear wings sorted also..
As the fibreglass panels can be a bit 'wobbly' (official technical term , the best way to sort it is get some stopper on it..
Then put a guide coat on it,and get rubbin'...
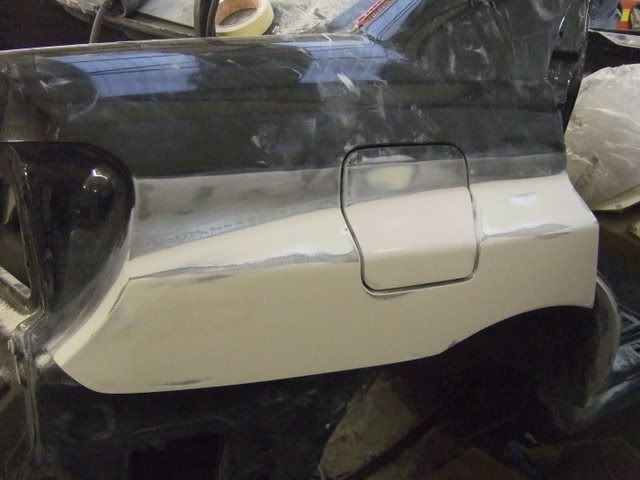
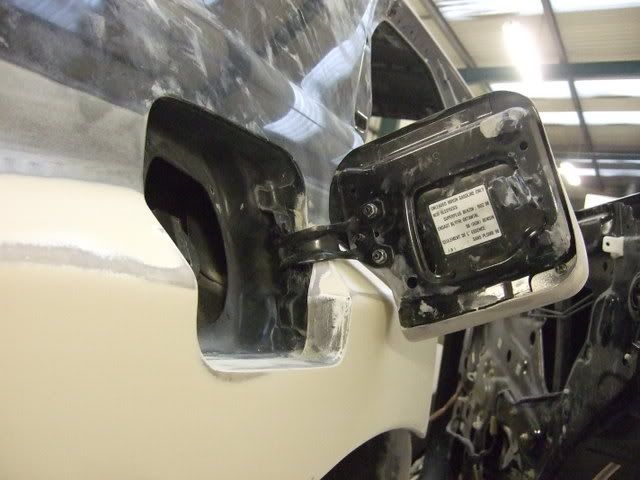
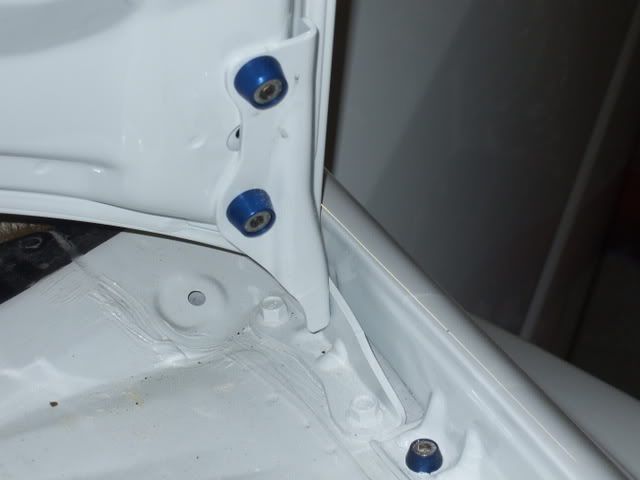
A few shots of the petrol flap area..
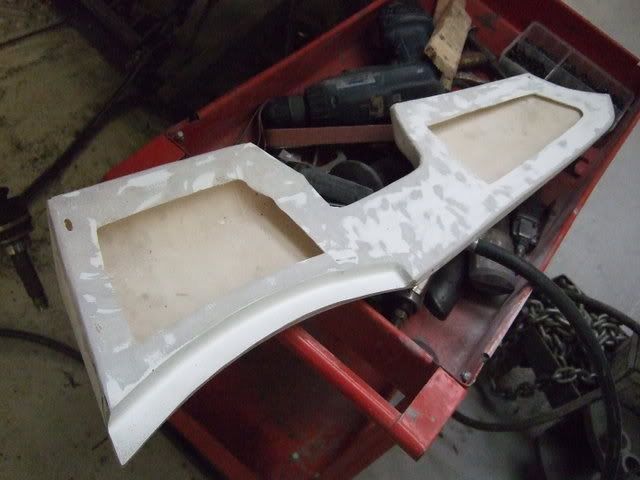
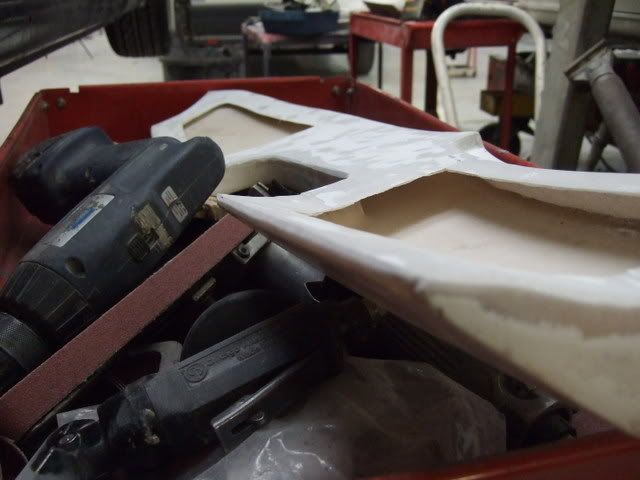
Also, one of the things I don't like about these type of rear arch conversions, is the loss of the door shut line.
But, one of the thngs I like about the 05 STi, are the little extra arch lips, so I got some fibreglass ones from Chargespeed, like this..
I plan on bonding them on, and simply cutting through where the door shut line is, to give the illusion of the rear arch line..
Removed all the rear suspension...
And set about sorting out the gap between the new outer wings, and the existing metal work..
Basically we have a large gap, and I needed to come up with a soultion to fill it in.
I thought about welding a metal plate there, but really there is no need for that, as it is not structural, and therefore not neccesary.
I came up with using a can of expanding foam...
This was used, like so..
After a bit of trimming, looks like this..
Next step, was to get some fibre glass on there, which was done, and again trimmed back into shape..
Apologies for the crappie pics, got a touch of the shakes whilst taking these pics, due to the night before...
Anyway, the arches are pretty much, well and truly bonded on now, and feel pretty strong around the wheel arch area, which is good.
In fact, I can actually lift the car using the new, fibreglass, rear arches, so good enough for me.
Having said which, it is just a shell...
Started to tidy up the inner rear wheel arch area on both sides..
Got both rear wings sorted also..
As the fibreglass panels can be a bit 'wobbly' (official technical term
Then put a guide coat on it,and get rubbin'...
A few shots of the petrol flap area..
Also, one of the things I don't like about these type of rear arch conversions, is the loss of the door shut line.
But, one of the thngs I like about the 05 STi, are the little extra arch lips, so I got some fibreglass ones from Chargespeed, like this..
I plan on bonding them on, and simply cutting through where the door shut line is, to give the illusion of the rear arch line..
28-04-2008, 10:58 PM
#13
Part of the Furniture
Thread Starter
Join Date: Apr 2008
Location: Looking for my next project car...
Posts: 151
Likes: 0
Received 0 Likes
on
0 Posts
Both rear wings into first coats of primer this week..
Also dragged the car outside to give the underside a good pressure wash off to get rid of any cr@p ready for the next stage of shell preparation...removing all the existing underseal..

Also dragged the car outside to give the underside a good pressure wash off to get rid of any cr@p ready for the next stage of shell preparation...removing all the existing underseal..
28-04-2008, 11:04 PM
#14
Part of the Furniture
Thread Starter
Join Date: Apr 2008
Location: Looking for my next project car...
Posts: 151
Likes: 0
Received 0 Likes
on
0 Posts
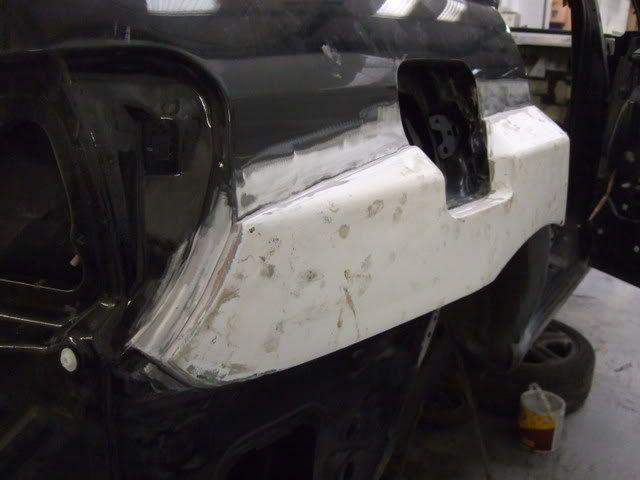
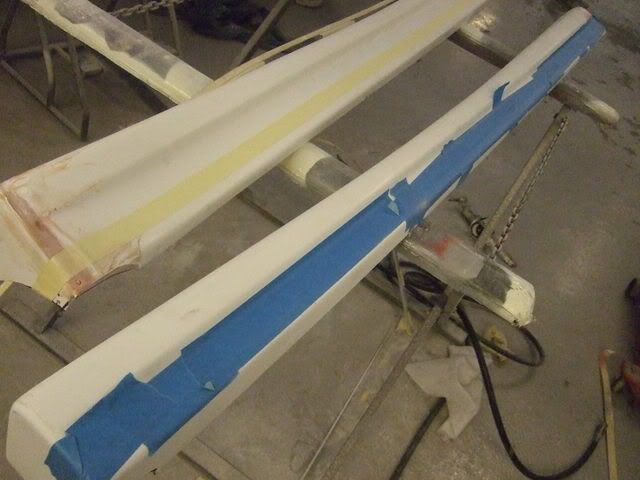
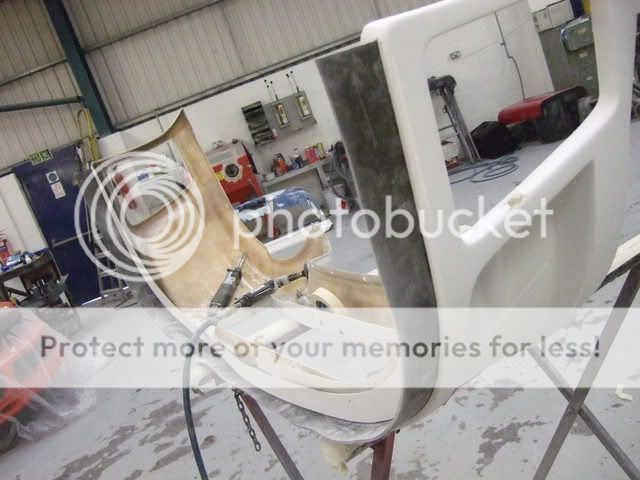
The rear doors now have the arch extensions well and truly bonded on, and I have started to mock up the side skirt arrangement..
The arch kit doesn't come with any side skirts, as it is designed to use the existing WRX/STi skirts.
As I don't have either, I am thinking about using these Chargespeed T1 skirts
They need a bit of modification, but once the rear arch lips are on, I think/hope they will look OK..
Now that the arch extensions are bonded onto the original rear doors, the next job is to blend them in...
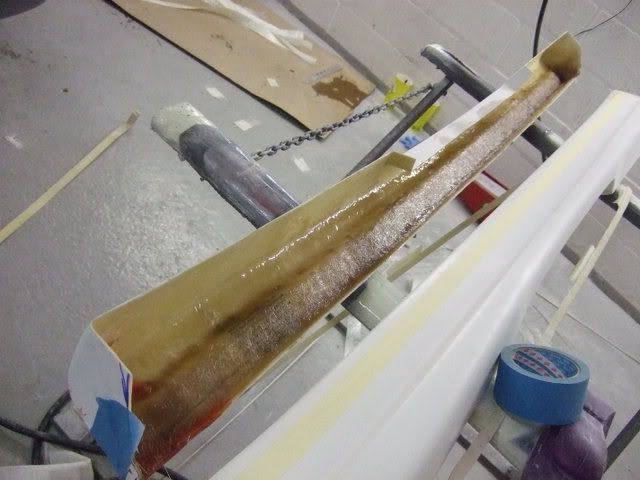
I've used a mix of fibreglass and filler (furry bog) to fill the gap initially.
The reasoning behind this, is that filler on its own has not got much actual strength, and is rather heavy. The fibreglass on the other hand has got its own strength, and is lighter than filler, so this mix will hopefully fill the gap, and not crack and fall out..
You can also see some masking tape on the doors in these pics...
The reason for this, is that I wanted the arch extensions blended into the doors, but with a definate line to show the change in body shape.
So I plotted an imaginary line, and masked it out.
I then applied filler over the whole arch extension upto this edge, and after a bit of sanding, ended up with this..
The next problem was the swage line that runs along the door.
Now if you look at a few of the previous pics, you can see that the swage line in the arch extensions does not quite match the one in the doors..
To cut a long, boring, time consuming, and stressful story short, I ended up actually cutting the existing swage line in the arch extension out, and fibreglassing a new one in, using a template that I made to ensure that the line contour was even..
After initial primer, I ended up with this result..
A lot better than before, and once this is blocked down several times, I'm pretty confident it will look like factory-ish..
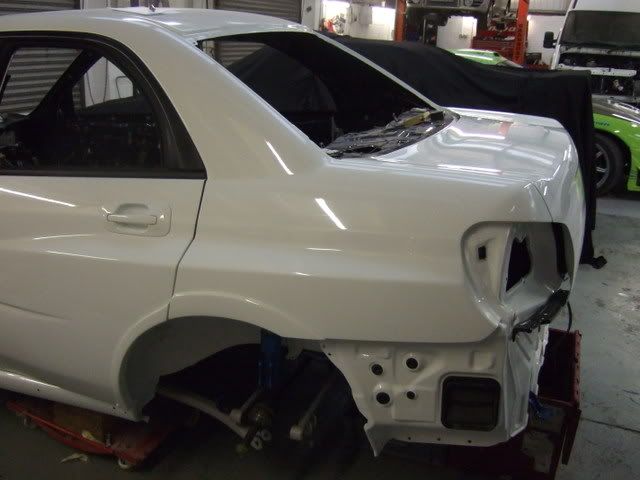
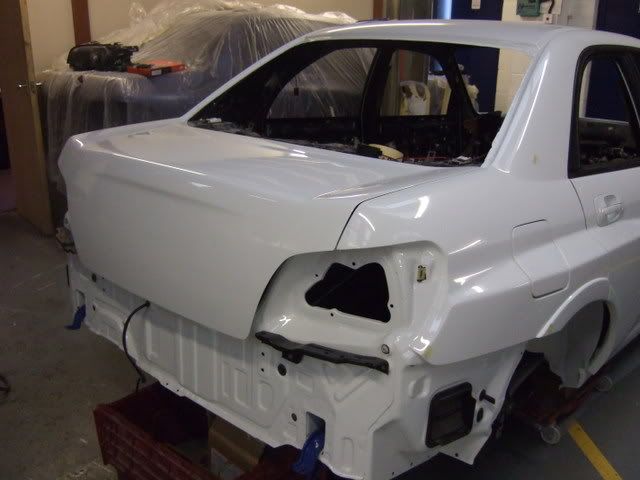
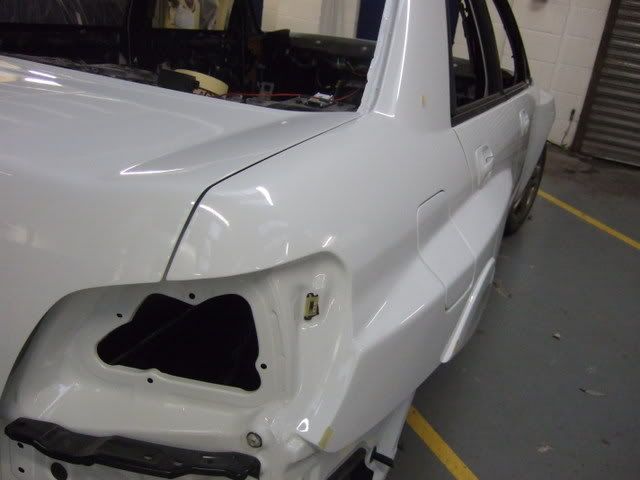
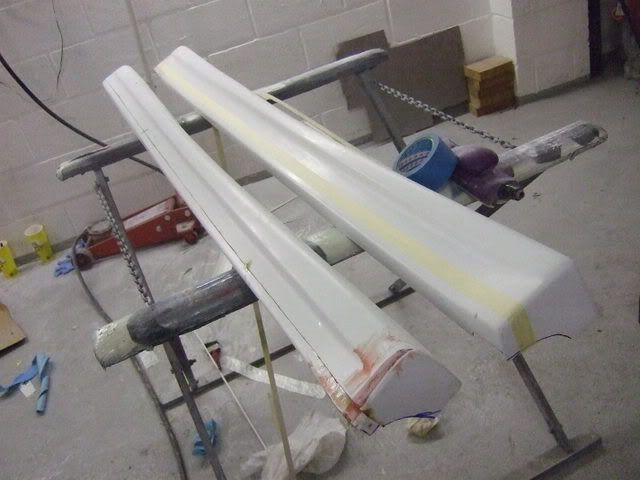
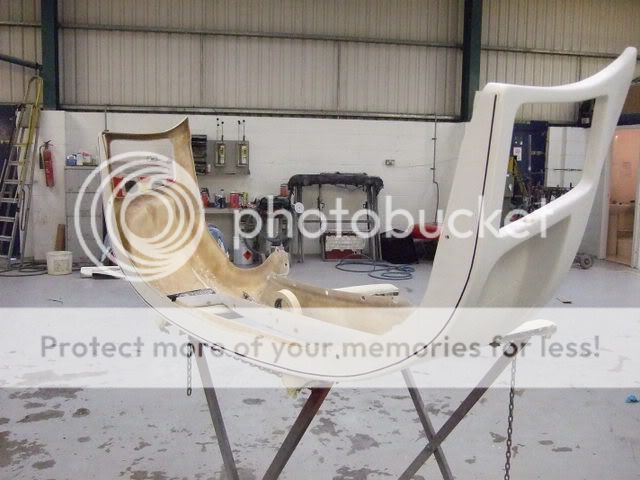
Anyway, after seeing the car in so many bits for a while, I needed a bit of motivation, and needed to assess and inspect the final fit and gaps of all the kit...
Getting there..
The arch kit doesn't come with any side skirts, as it is designed to use the existing WRX/STi skirts.
As I don't have either, I am thinking about using these Chargespeed T1 skirts
They need a bit of modification, but once the rear arch lips are on, I think/hope they will look OK..
Now that the arch extensions are bonded onto the original rear doors, the next job is to blend them in...
I've used a mix of fibreglass and filler (furry bog) to fill the gap initially.
The reasoning behind this, is that filler on its own has not got much actual strength, and is rather heavy. The fibreglass on the other hand has got its own strength, and is lighter than filler, so this mix will hopefully fill the gap, and not crack and fall out..
You can also see some masking tape on the doors in these pics...
The reason for this, is that I wanted the arch extensions blended into the doors, but with a definate line to show the change in body shape.
So I plotted an imaginary line, and masked it out.
I then applied filler over the whole arch extension upto this edge, and after a bit of sanding, ended up with this..
The next problem was the swage line that runs along the door.
Now if you look at a few of the previous pics, you can see that the swage line in the arch extensions does not quite match the one in the doors..
To cut a long, boring, time consuming, and stressful story short, I ended up actually cutting the existing swage line in the arch extension out, and fibreglassing a new one in, using a template that I made to ensure that the line contour was even..
After initial primer, I ended up with this result..
A lot better than before, and once this is blocked down several times, I'm pretty confident it will look like factory-ish..
Anyway, after seeing the car in so many bits for a while, I needed a bit of motivation, and needed to assess and inspect the final fit and gaps of all the kit...
Getting there..
28-04-2008, 11:29 PM
#15
Part of the Furniture
Thread Starter
Join Date: Apr 2008
Location: Looking for my next project car...
Posts: 151
Likes: 0
Received 0 Likes
on
0 Posts
Right, onto the most horrible grueling bit of the job....
Removing the existing underseal..
This has got to be the most soul destroying job there is, not helped at all by the fact that the underneath of the car has also got a coating of rust preventative wax-oil type stuff..
Started off with the heat gun to scrape most of the undercoating away, followed by a variety of tools to clean it off.
Got both rear wheel arches done..
Neede to buy this bought this little gadget..

Although it wasn't particularly cheap , it removes underseal/wax like no body's business (along with skin if you are not too careful )
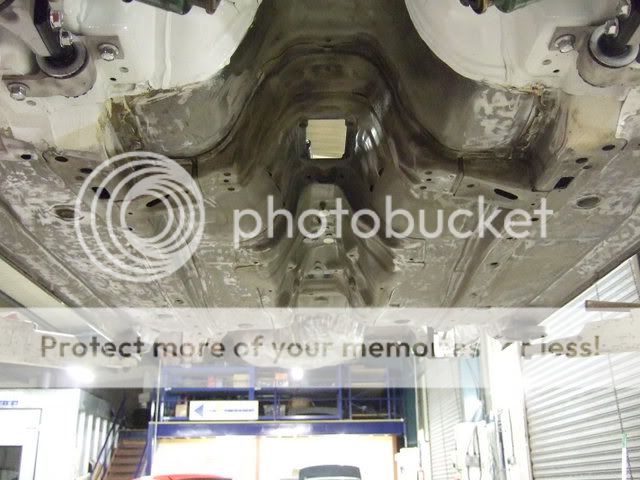
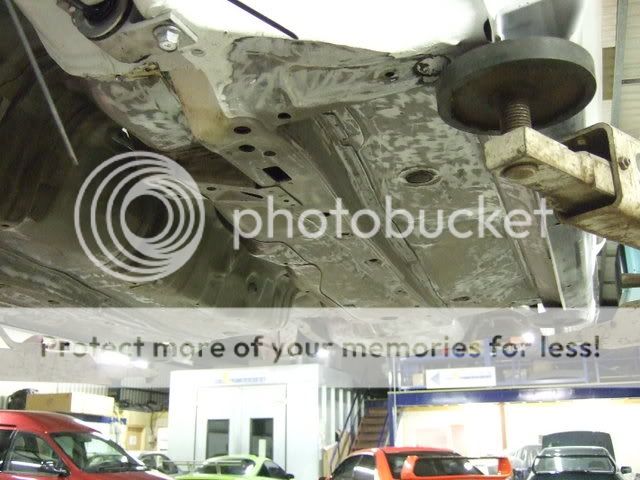
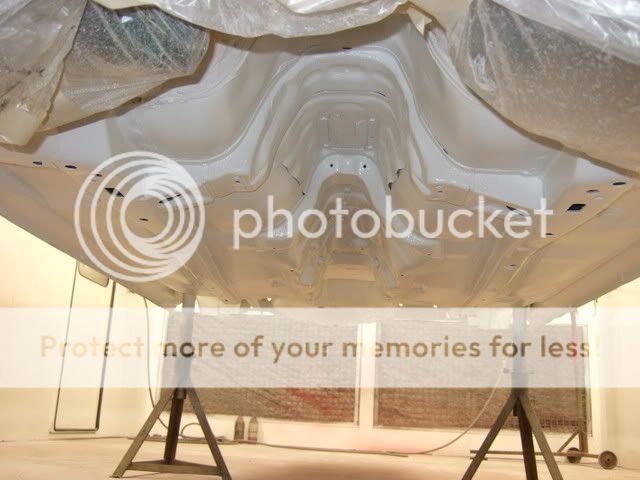
Managed to get all the underside cleaned off, at long last..
Next car I do like this, will definately be getting chemically stripped and e-primed..
Anyway, once cleaned off, the underside was treated to 2 coats of wash etch primer.
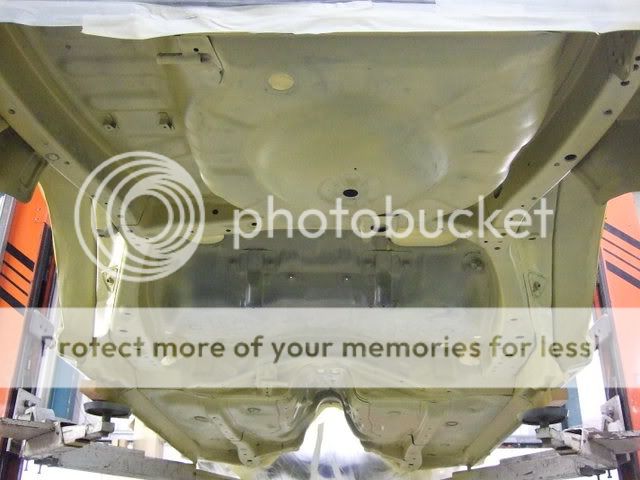
All the seams were sealed up to replace any sealer removed, and also to seal up the many joints that Mr Subaru decides to miss, using OEM sealant..
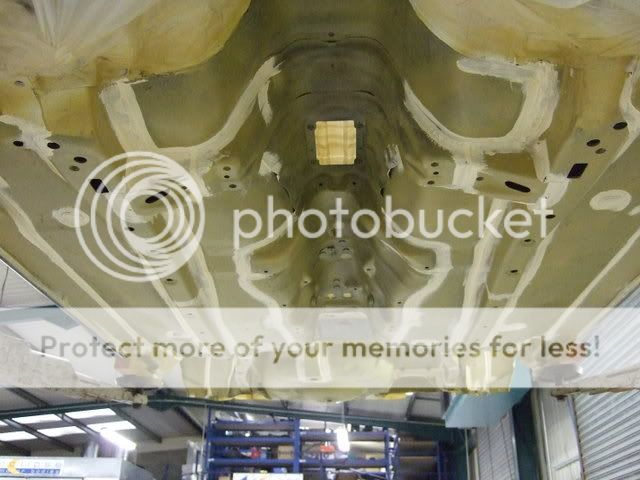
Once this had cured, it was time for 2 coats of white stonechip protector, allowing time in between coats for it to flash off..
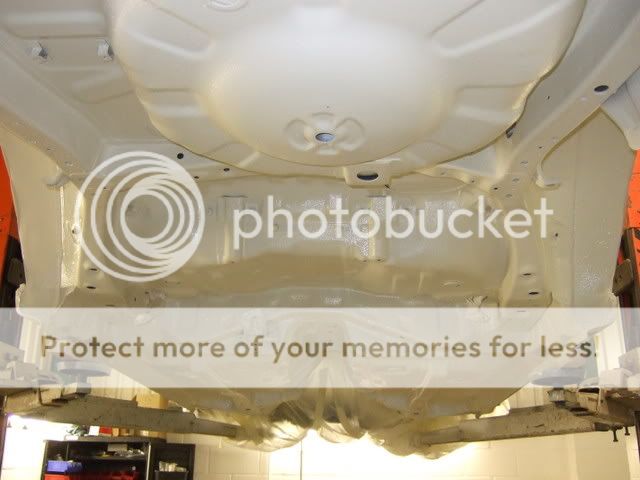
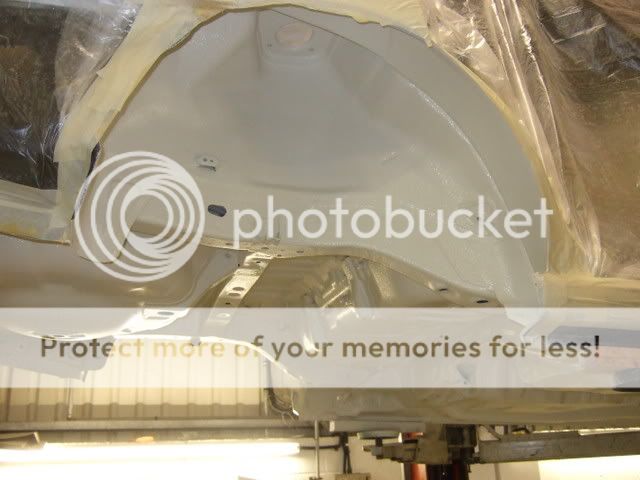
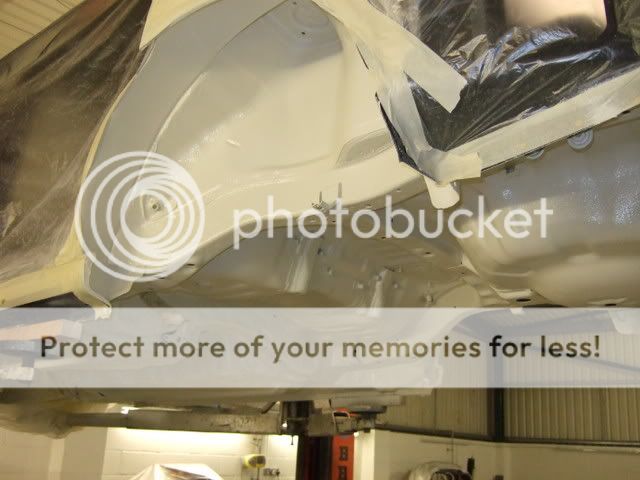
Looking better already.
Some might ask why remove all the existing underseal, only to replace it all ..
My reasoning is that the original, was at best, a bit random and on the rough side, and if that was painted it would look a bit, erm, crap..
With the finish I have now, and once the underside is painted with gloss 2K paint the same colour as the exterior, it should look pretty good, be good for rust prevention, and be easier to keep clean..
Removing the existing underseal..
This has got to be the most soul destroying job there is, not helped at all by the fact that the underneath of the car has also got a coating of rust preventative wax-oil type stuff..
Started off with the heat gun to scrape most of the undercoating away, followed by a variety of tools to clean it off.
Got both rear wheel arches done..
Neede to buy this bought this little gadget..
Although it wasn't particularly cheap
Managed to get all the underside cleaned off, at long last..
Next car I do like this, will definately be getting chemically stripped and e-primed..
Anyway, once cleaned off, the underside was treated to 2 coats of wash etch primer.
All the seams were sealed up to replace any sealer removed, and also to seal up the many joints that Mr Subaru decides to miss, using OEM sealant..
Once this had cured, it was time for 2 coats of white stonechip protector, allowing time in between coats for it to flash off..
Looking better already.
Some might ask why remove all the existing underseal, only to replace it all ..
My reasoning is that the original, was at best, a bit random and on the rough side, and if that was painted it would look a bit, erm, crap..
With the finish I have now, and once the underside is painted with gloss 2K paint the same colour as the exterior, it should look pretty good, be good for rust prevention, and be easier to keep clean..
28-04-2008, 11:31 PM
#16
Part of the Furniture
Thread Starter
Join Date: Apr 2008
Location: Looking for my next project car...
Posts: 151
Likes: 0
Received 0 Likes
on
0 Posts
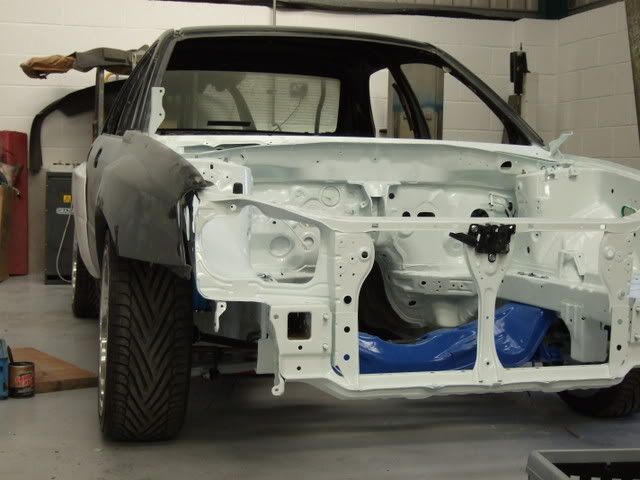
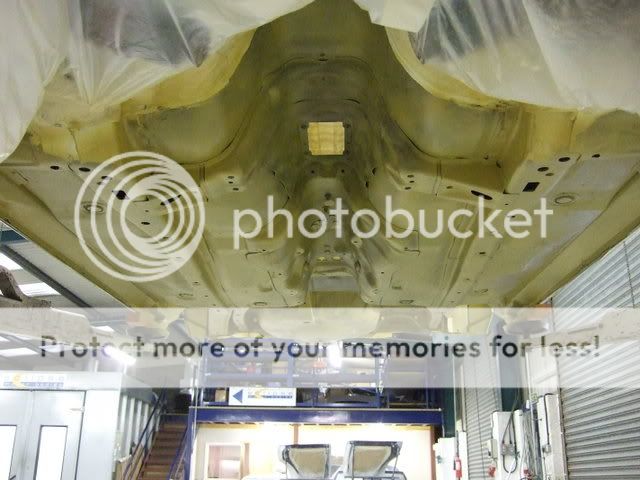
OK, managed to get some more done yesterday.
Got the shell in the oven, and up as high as we could get it...
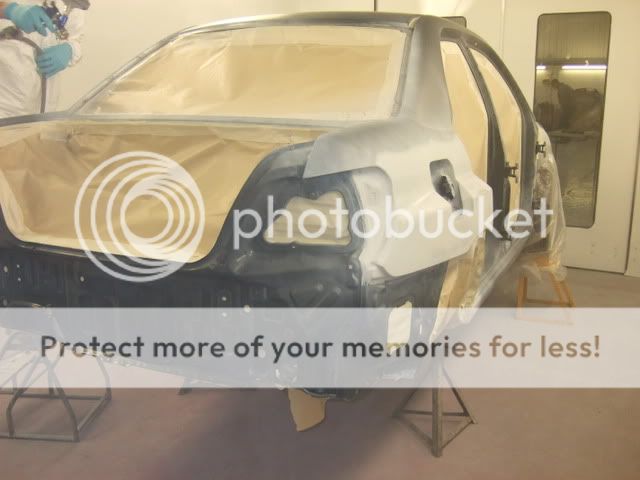

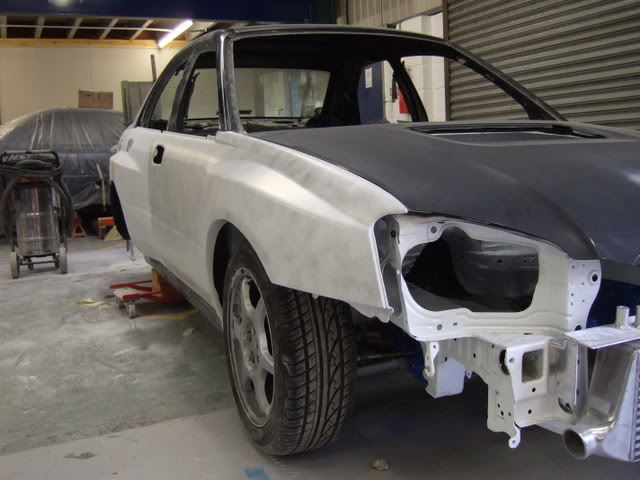
Next the exterior was given it's last coats of white primer..
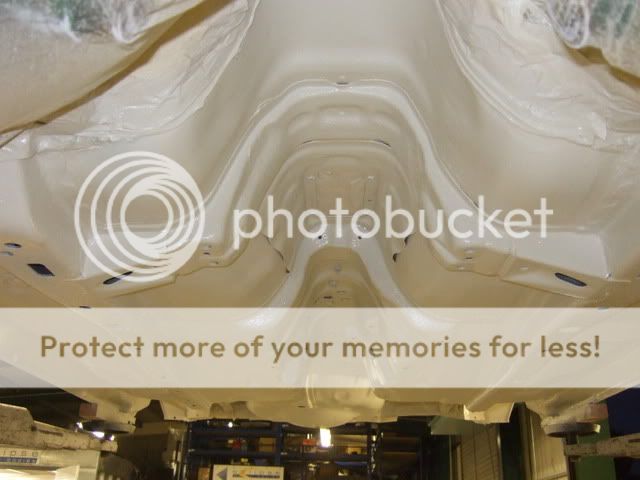
And got the underside painted with 2 coats of 2K Subaru shiney white..


Got the shell in the oven, and up as high as we could get it...
Next the exterior was given it's last coats of white primer..
And got the underside painted with 2 coats of 2K Subaru shiney white..
28-04-2008, 11:35 PM
#17
Part of the Furniture
Thread Starter
Join Date: Apr 2008
Location: Looking for my next project car...
Posts: 151
Likes: 0
Received 0 Likes
on
0 Posts
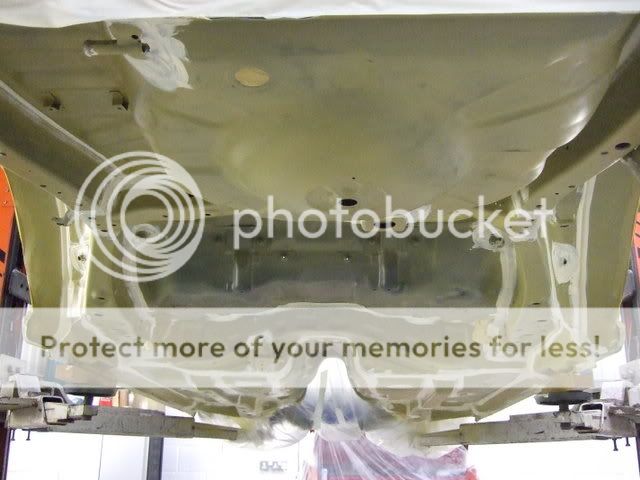
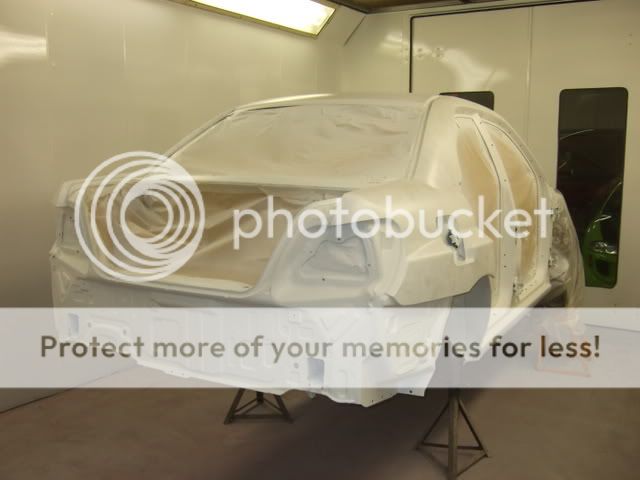
Nearly ready for paint...
Shell and all panels all sanded down, so now it's a case of masking the shell up, and getting some shiny paint thrown at it.
Also got hold of some heat reflective stuff, and put it in the areas near/around the turbo/exhaust.
OK, bit of a step backwards..
I was planning on painting the car/parts first, and then bond on the rear arch trims afterwards.
However, I have decided to fit the arch trims first, so it was back on with the rear doors, again, and line up the trims to cut the door opening shut line..
Et viola..
I'll have left these overnight for the bonding agent to cure, and then it should be just a case of wiping a bit of sealer in the join and we're ready for paint..
28-04-2008, 11:40 PM
#18
Part of the Furniture
Thread Starter
Join Date: Apr 2008
Location: Looking for my next project car...
Posts: 151
Likes: 0
Received 0 Likes
on
0 Posts
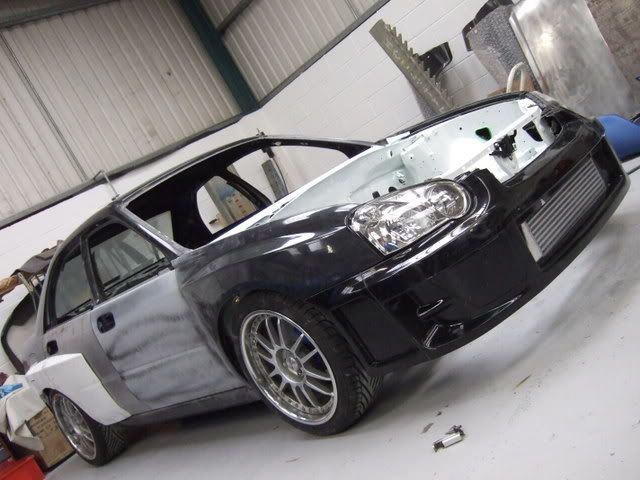
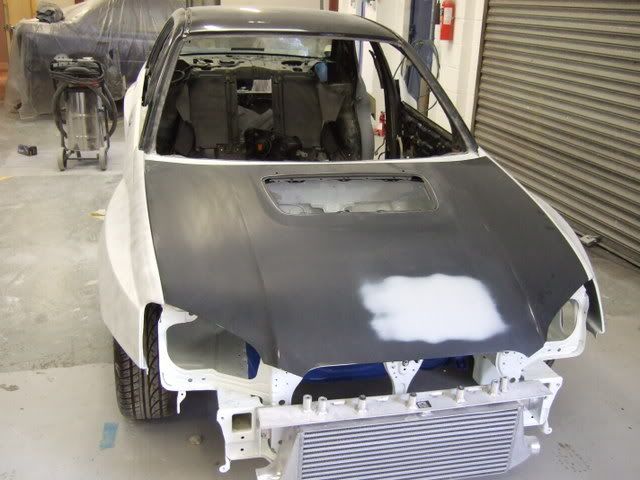
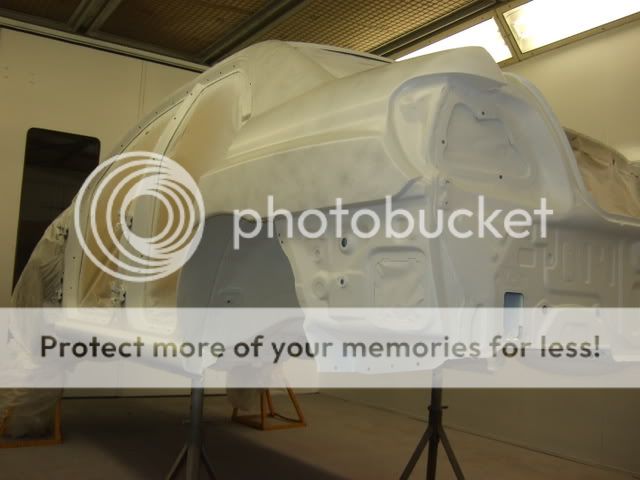
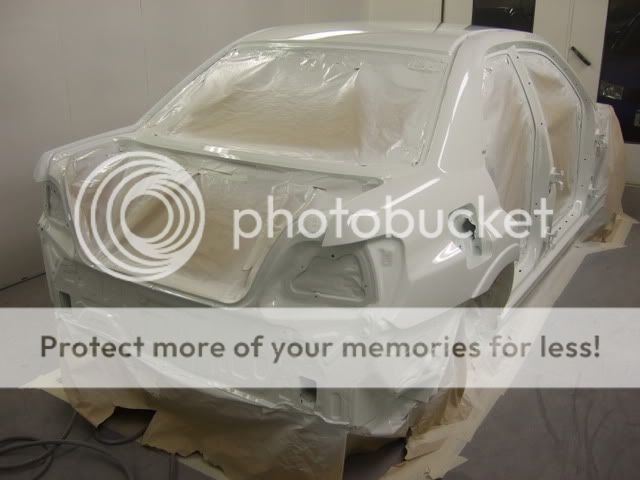
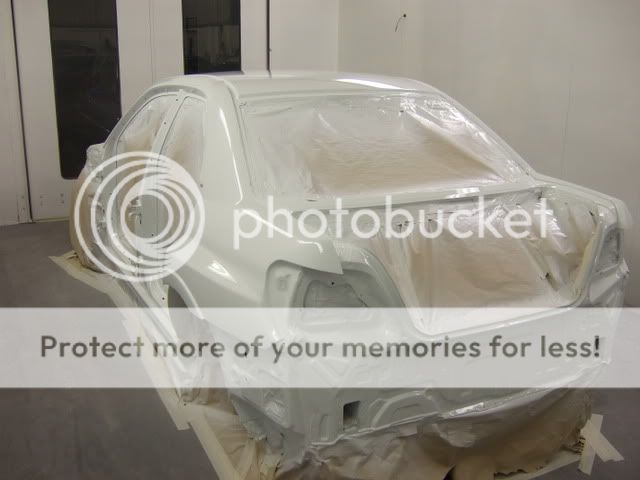
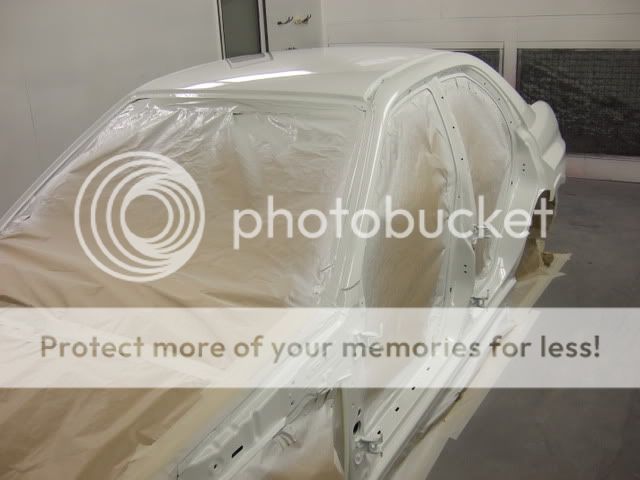
Finally managed to get some paint thrown at it..
All masked up and ready to shoot..
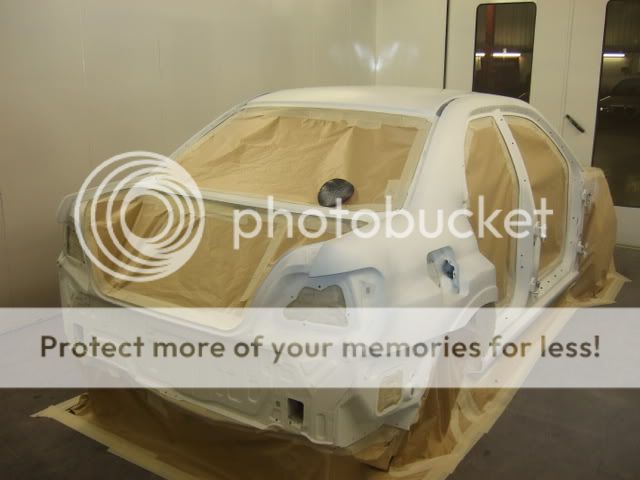
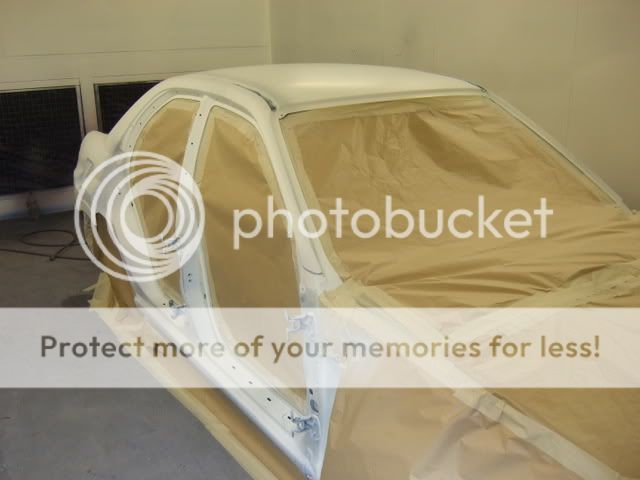
And with a coat of the shiney stuff..
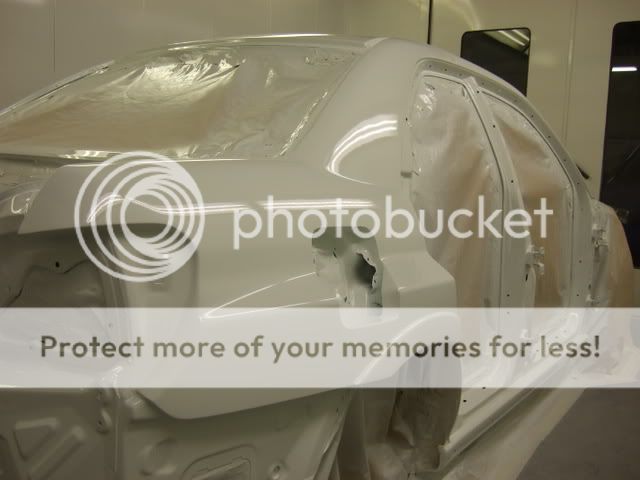
Managed to bolt some shiny bits on..
The first bit to go back on, fresh from the platers...
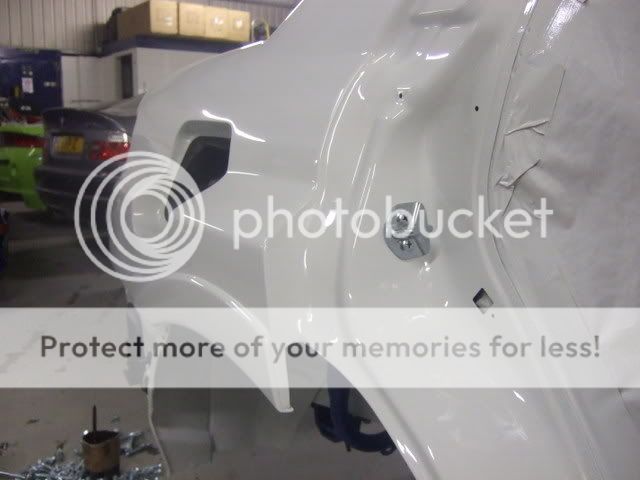
Along with parts fresh from the powder coaters..
Uprated brace thingies...

These pics are from just before Christmas 2007...
All masked up and ready to shoot..
And with a coat of the shiney stuff..
Managed to bolt some shiny bits on..
The first bit to go back on, fresh from the platers...
Along with parts fresh from the powder coaters..
Uprated brace thingies...
These pics are from just before Christmas 2007...
28-04-2008, 11:51 PM
#19
Part of the Furniture
Thread Starter
Join Date: Apr 2008
Location: Looking for my next project car...
Posts: 151
Likes: 0
Received 0 Likes
on
0 Posts
With a zillion freshly powder coated parts lying around, I have resisted the temptation to just simply bolting everything I can back on it..
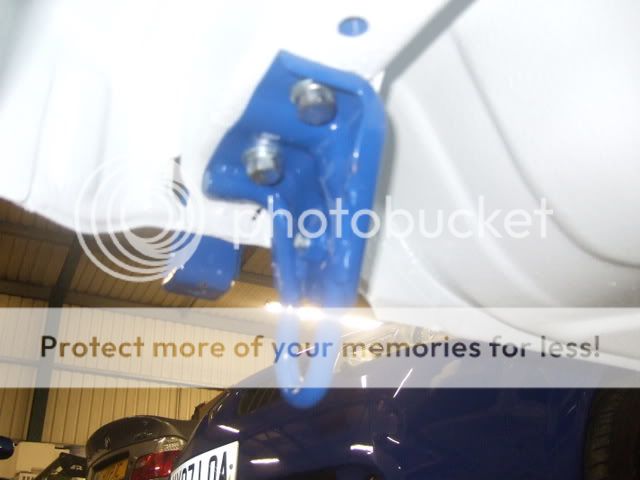
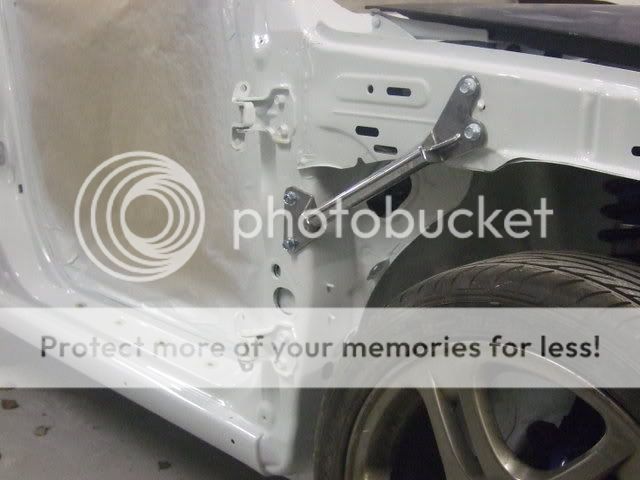
Instead I've concentrated on getting the car back on it's wheels, and simple things like getting the door catches on, along with the check straps to avoid any potential disasters..
Enough of that, and on to the pics..
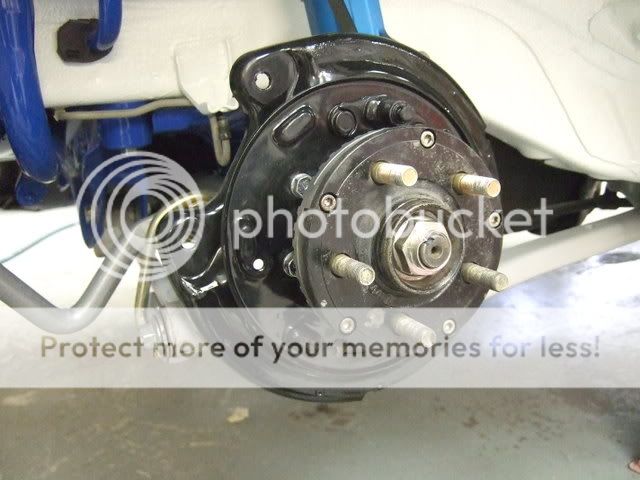
Rear hubs/backplates ready for wheel bearings to be pressed in, along with one of the many piles of plated nuts/bolts...
It's amazing how long it takes to identify the correct nuts/bolts once they have all been re-plated, and then to copper slip them all prior to fitting...

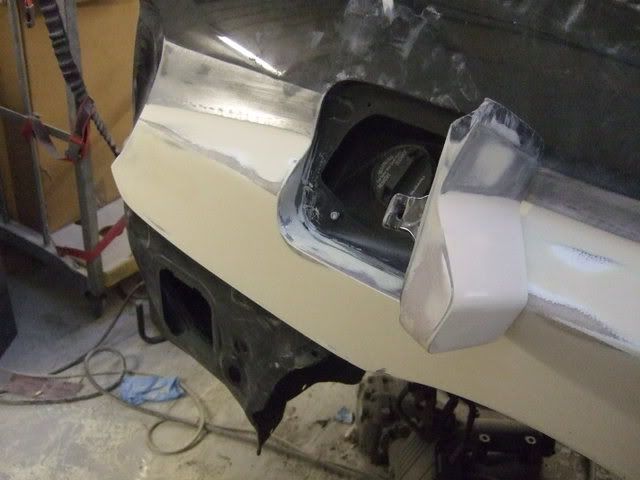
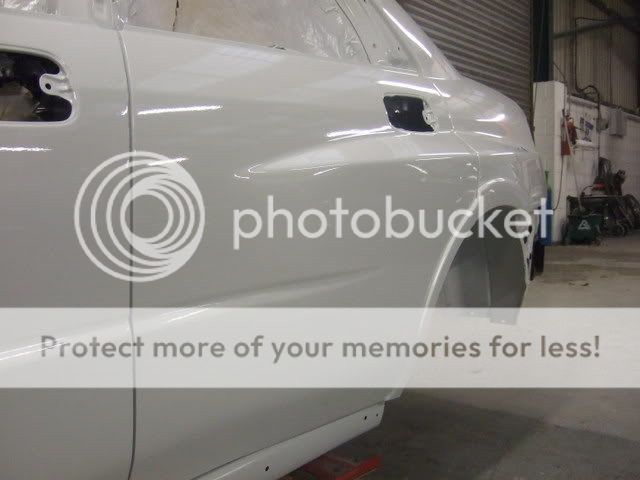
Doors, handles and fuel cap fitted.
Also got the box in place, a 6 speed Uk jobbie..
Instead I've concentrated on getting the car back on it's wheels, and simple things like getting the door catches on, along with the check straps to avoid any potential disasters..
Enough of that, and on to the pics..
Rear hubs/backplates ready for wheel bearings to be pressed in, along with one of the many piles of plated nuts/bolts...
It's amazing how long it takes to identify the correct nuts/bolts once they have all been re-plated, and then to copper slip them all prior to fitting...
Doors, handles and fuel cap fitted.
Also got the box in place, a 6 speed Uk jobbie..
28-04-2008, 11:58 PM
#20
Part of the Furniture
Thread Starter
Join Date: Apr 2008
Location: Looking for my next project car...
Posts: 151
Likes: 0
Received 0 Likes
on
0 Posts
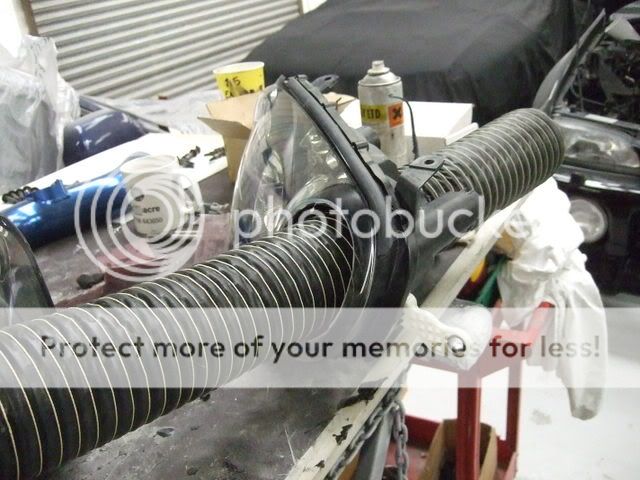
Got a bit bored a few weeks back, and took the O/S headlamp, and got hold of my small grinder thing, and did this...
I then bought one of those inlet trumpet things, and re-shaped it to the shape of the headlamp, and fits just nicely..
All that remains now is to split the headlamp and cut away the inner to allow fitment of a cold feed duct.
Should make for a nice inlet area for cool air, and away from the low down, bumper type, water intake system...
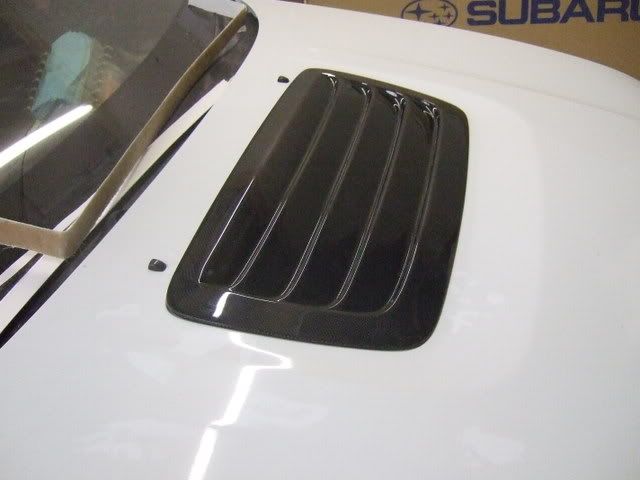
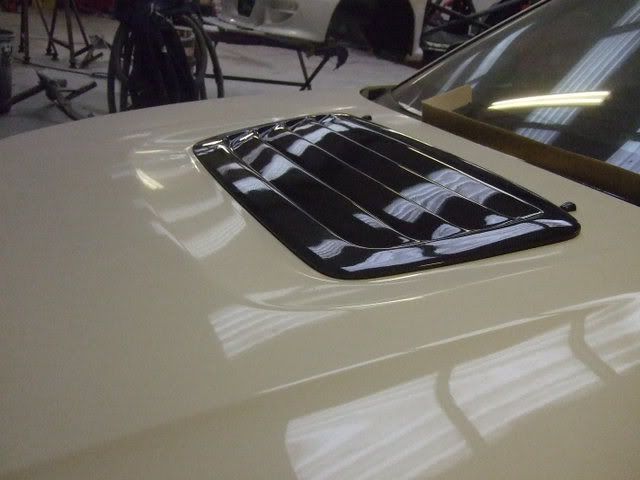
Also got a bit of trim on..
Really liking the back/white contrast, and I'm even thinking of having a very light, legal tint applied to the glass before installation..
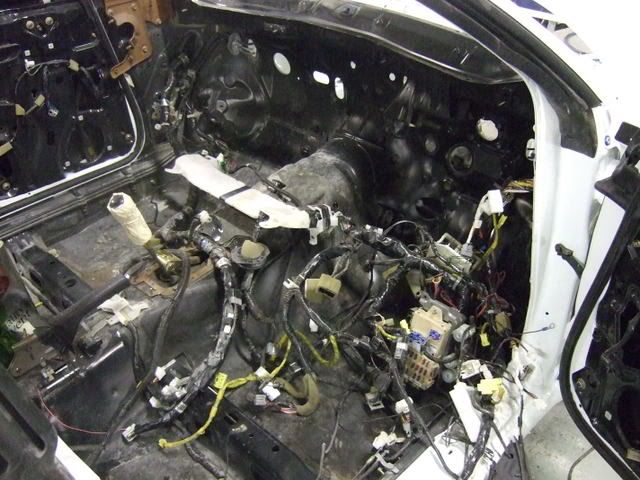
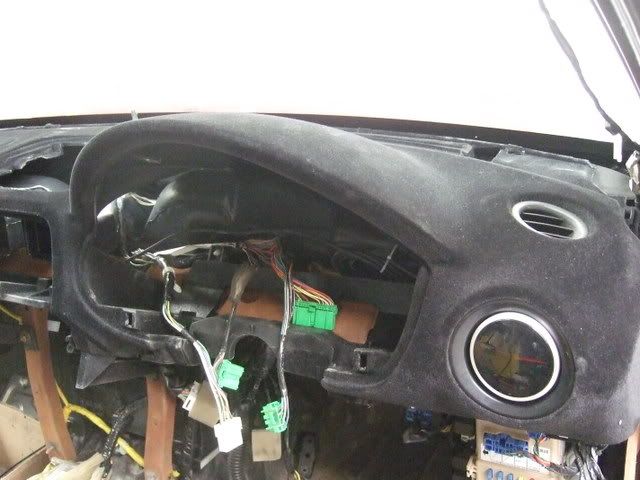
Thought I'd tackle the loom next...
Bit of a nightmare, as the original had perished in the fire, so a second hand one was obtained, and preceded to fit it, but I'm getting there..
And a quick shot of some nice luverly bolts used for the bonnet and front wings..
Hopefully I should have the loom fully transplanted, along with a few other little jobs...
Ah, well that was what I thought...
Turns out the loom I got was out of a 2002 WRX, so I thought it might have done the job, however upon installation, there were just too many differences to make the job right.
Allied to this, the loom did in fact turn out to be from a wagon, so definately a FAIL on this bit.
Anyway, a few pics of the boot lid...WoW eh...?

I then bought one of those inlet trumpet things, and re-shaped it to the shape of the headlamp, and fits just nicely..
All that remains now is to split the headlamp and cut away the inner to allow fitment of a cold feed duct.
Should make for a nice inlet area for cool air, and away from the low down, bumper type, water intake system...
Also got a bit of trim on..
Really liking the back/white contrast, and I'm even thinking of having a very light, legal tint applied to the glass before installation..
Thought I'd tackle the loom next...
Bit of a nightmare, as the original had perished in the fire, so a second hand one was obtained, and preceded to fit it, but I'm getting there..
And a quick shot of some nice luverly bolts used for the bonnet and front wings..
Hopefully I should have the loom fully transplanted, along with a few other little jobs...
Ah, well that was what I thought...
Turns out the loom I got was out of a 2002 WRX, so I thought it might have done the job, however upon installation, there were just too many differences to make the job right.
Allied to this, the loom did in fact turn out to be from a wagon, so definately a FAIL on this bit.
Anyway, a few pics of the boot lid...WoW eh...?
29-04-2008, 12:04 AM
#21
Part of the Furniture
Thread Starter
Join Date: Apr 2008
Location: Looking for my next project car...
Posts: 151
Likes: 0
Received 0 Likes
on
0 Posts
New second hand loom has been obtained, and to my surprise it is the right one... Must be something wrong there...??
So out with the wrong loom, and in with the new second hand loom.
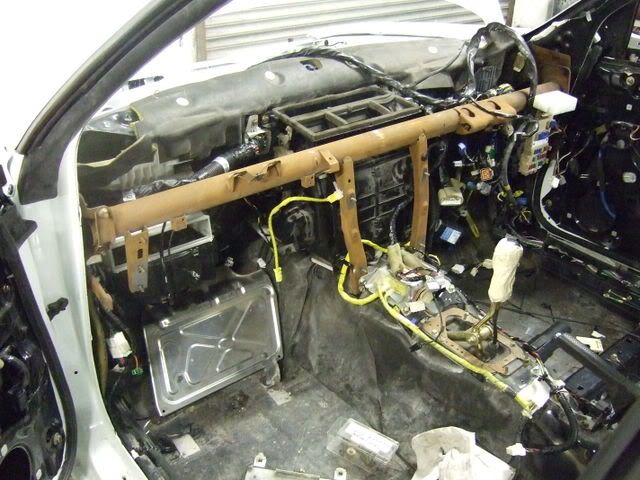
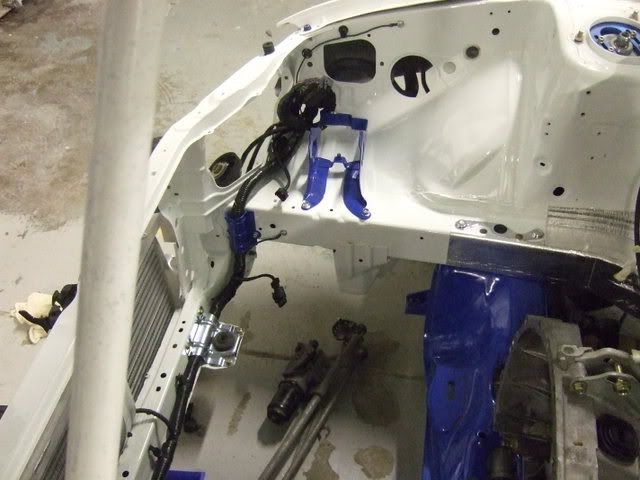
With the loom in, I could also get the heater assembly in, along with the dash strengthener thing...
It's been a while since I stripped it, but it seemed to go back together without too much drama..
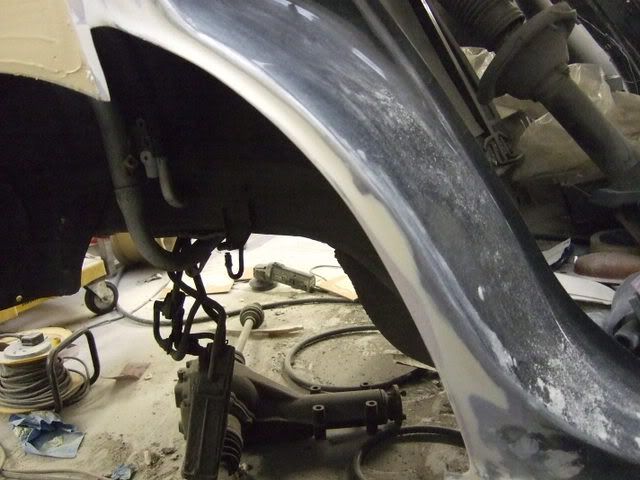
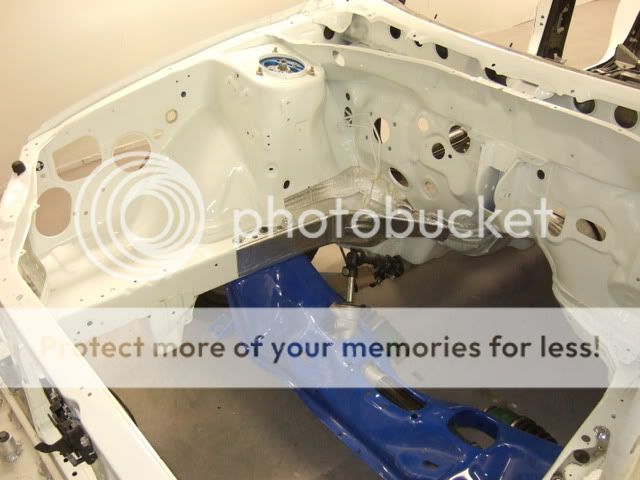
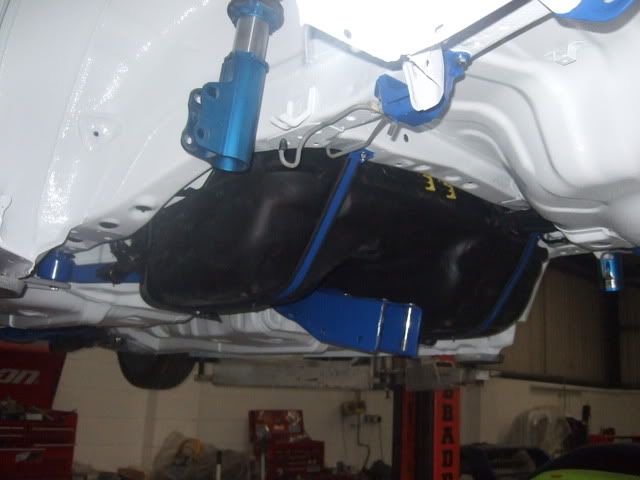
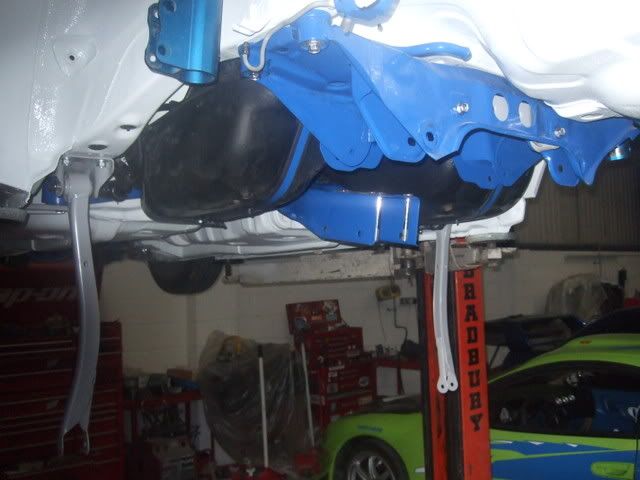
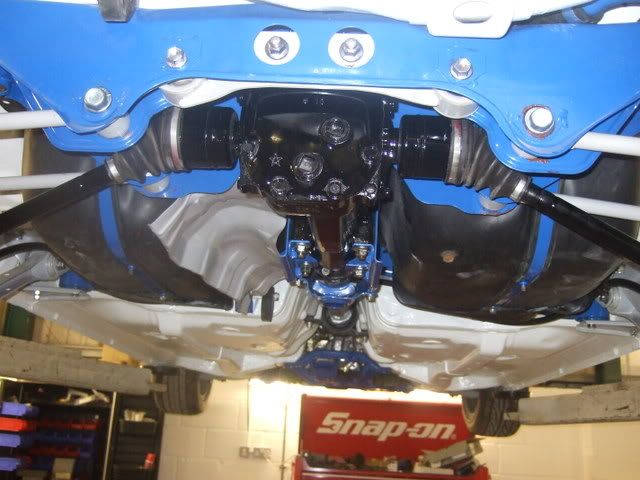
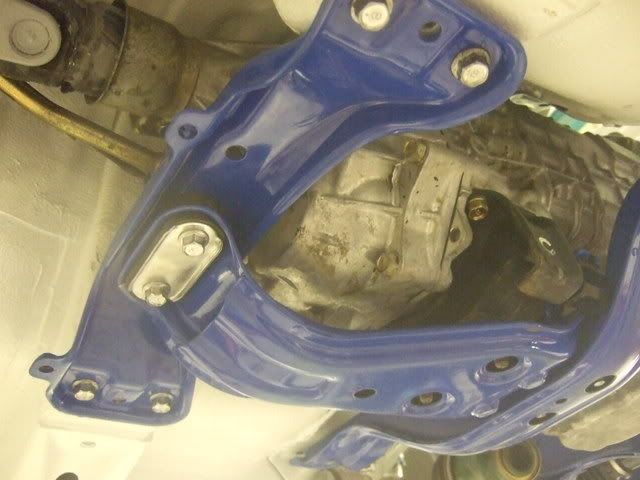
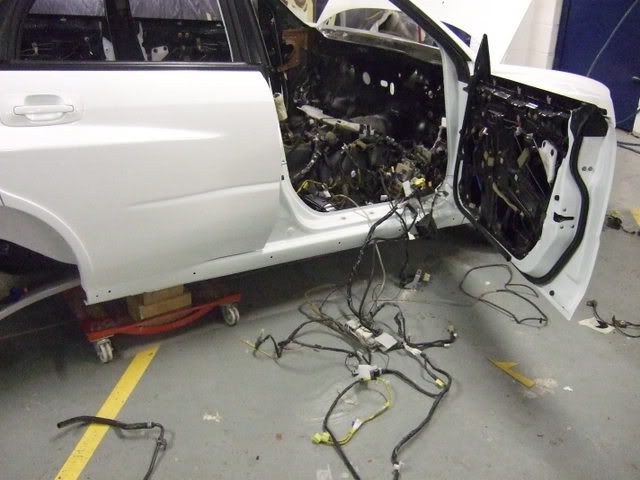
Also got some of the engine bay components into place, to see what I have and haven't got.
I am also trying to minimise some of the loom on show in the engine bay, especially around the bulkhead area.
I am planning on running some of the loom where the wiper mechanism is,(which I you can just see on the next pic) and also maybe reposition the fuse box...
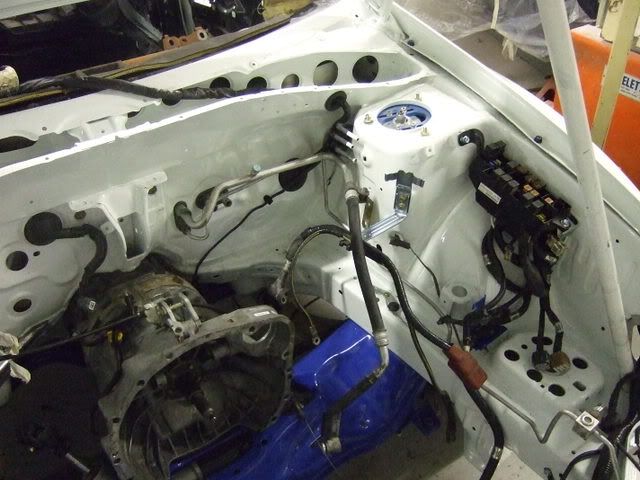
As I am planning on going blow through MAF, I need to decide where the MAF is going to be, and re-route/lengthen the wires accordingly..
So the wiring saga begins again, and I'll probably end up splitting most of the loom at some point..
Goodies..
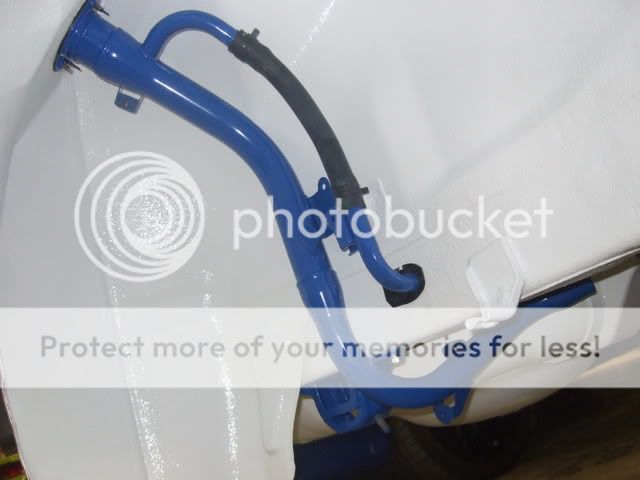
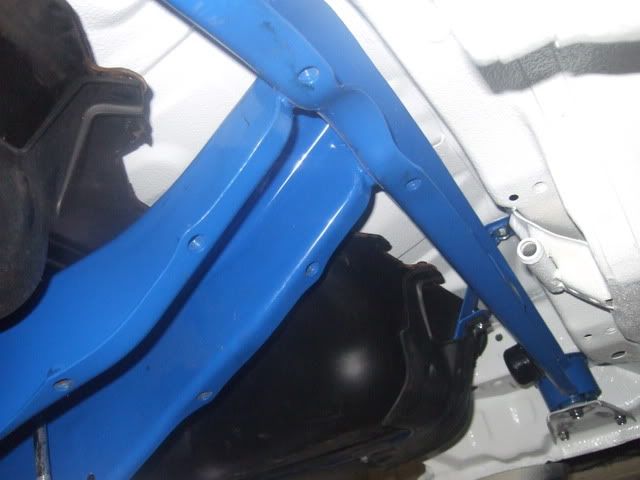
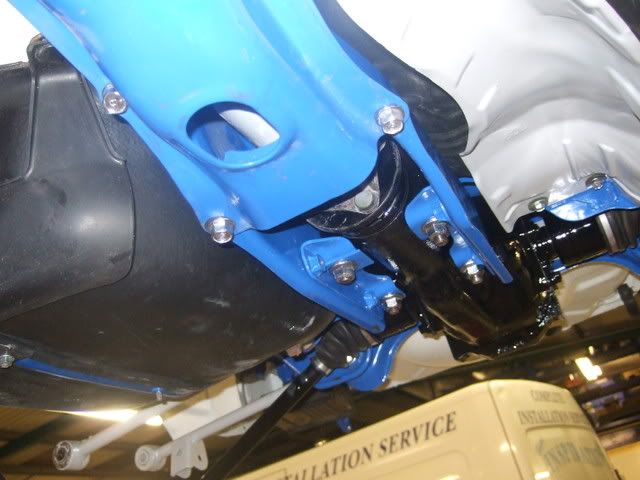
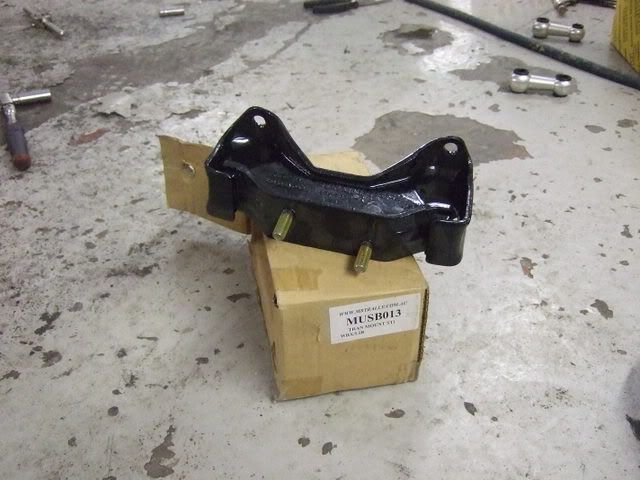
STI gearbox mount..
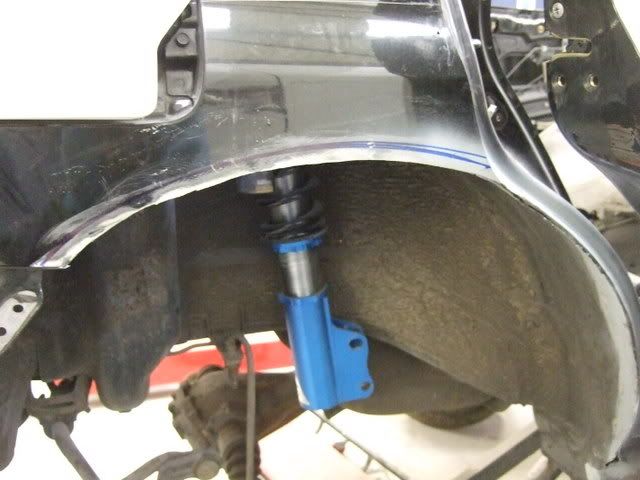
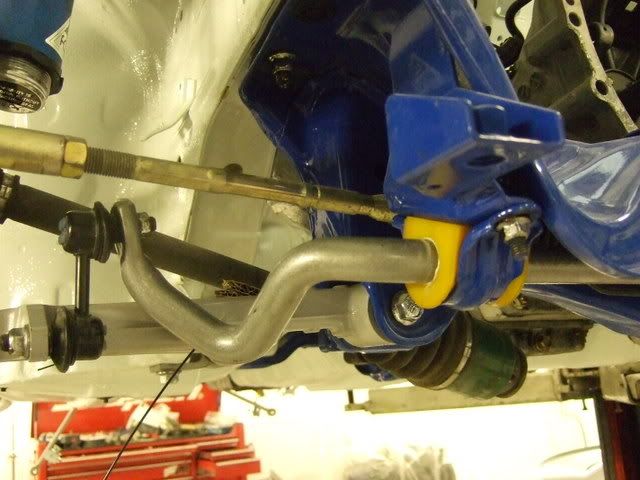
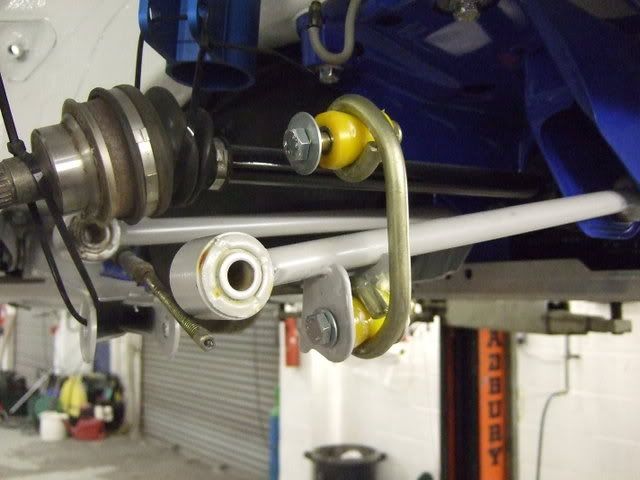
Whiteline front anti roll bar, and got it fitted
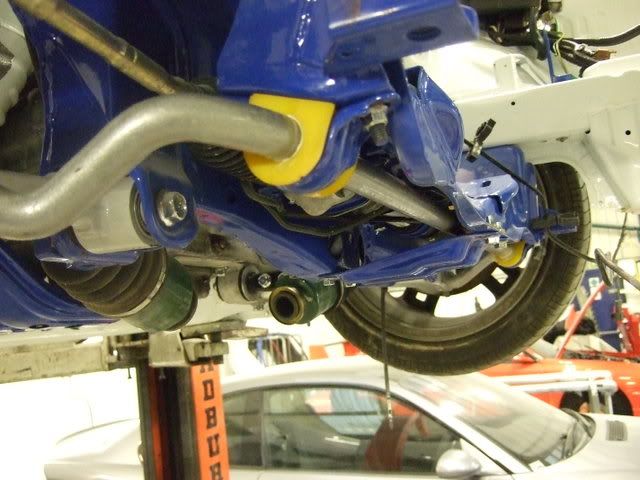
Rear Whiteline droplinks.
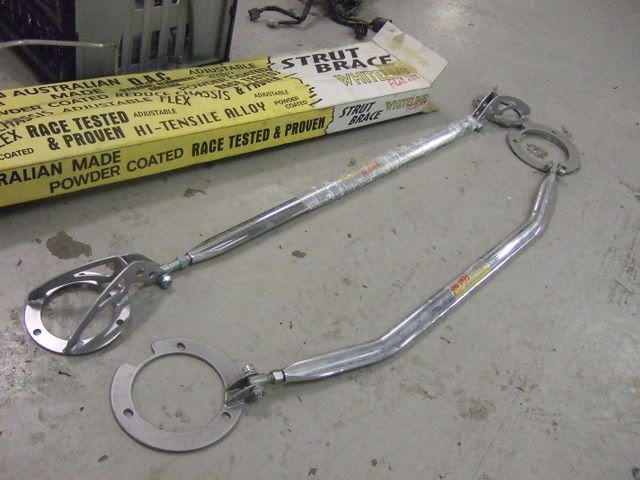
Front and rear Whiteline strut braces..
So out with the wrong loom, and in with the new second hand loom.
With the loom in, I could also get the heater assembly in, along with the dash strengthener thing...
It's been a while since I stripped it, but it seemed to go back together without too much drama..
Also got some of the engine bay components into place, to see what I have and haven't got.
I am also trying to minimise some of the loom on show in the engine bay, especially around the bulkhead area.
I am planning on running some of the loom where the wiper mechanism is,(which I you can just see on the next pic) and also maybe reposition the fuse box...
As I am planning on going blow through MAF, I need to decide where the MAF is going to be, and re-route/lengthen the wires accordingly..
So the wiring saga begins again, and I'll probably end up splitting most of the loom at some point..
Goodies..
STI gearbox mount..
Whiteline front anti roll bar, and got it fitted
Rear Whiteline droplinks.
Front and rear Whiteline strut braces..
 29-04-2008, 12:11 AM
#23
Part of the Furniture
Thread Starter
Join Date: Apr 2008
Location: Looking for my next project car...
Posts: 151
Likes: 0
Received 0 Likes
on
0 Posts
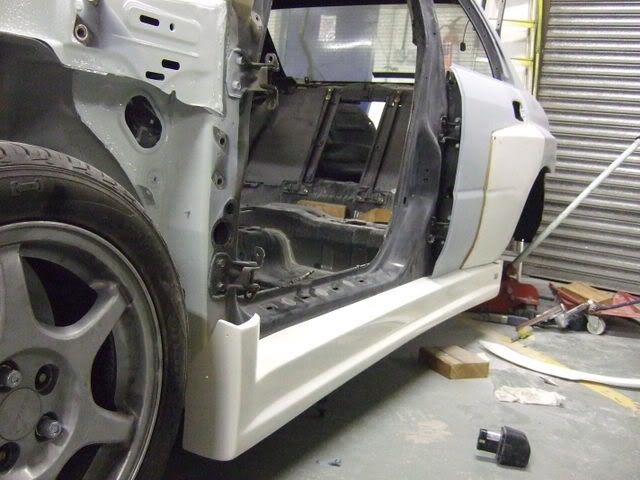
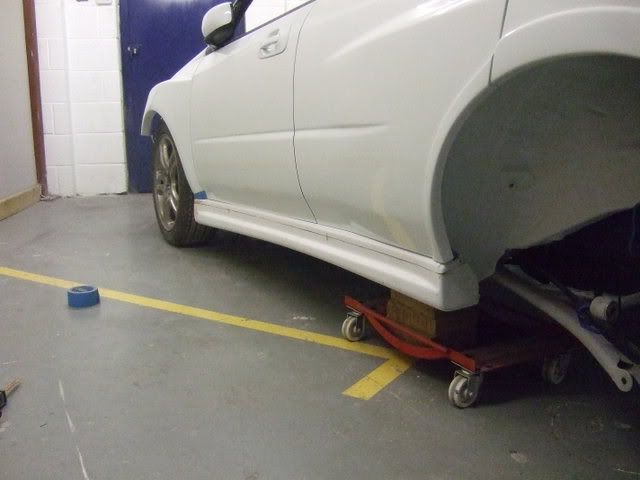
Whilst awaiting for parts to arrive, and for my finances to sort themselves out, I took another look at the side skirt situation..
I originally had this set up, which was OK, but not what I was looking for..
So I attacked them today, to see what I could do..
First off, I managed to trim them so they do not stick out as far, and meet up with both the rear door extension, and the front wing.
Next I decided that they were simply too deep, so I chopped them in two..
Here you can see the 25mm I intend to chop out..
Chopped, and stuck together..
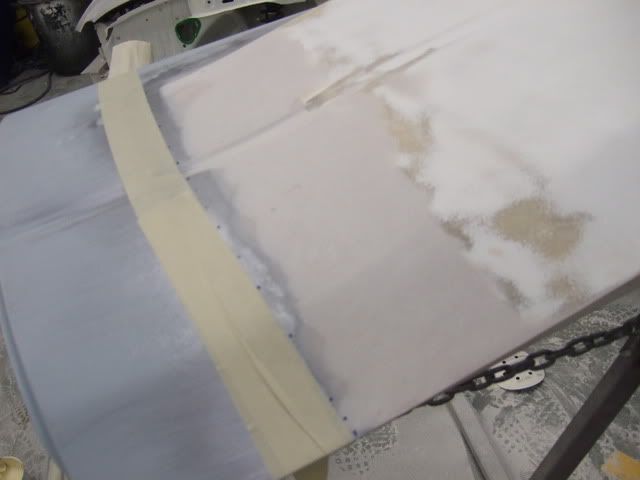
Next job, fibreglass matting and resin..
Old and new..
On..
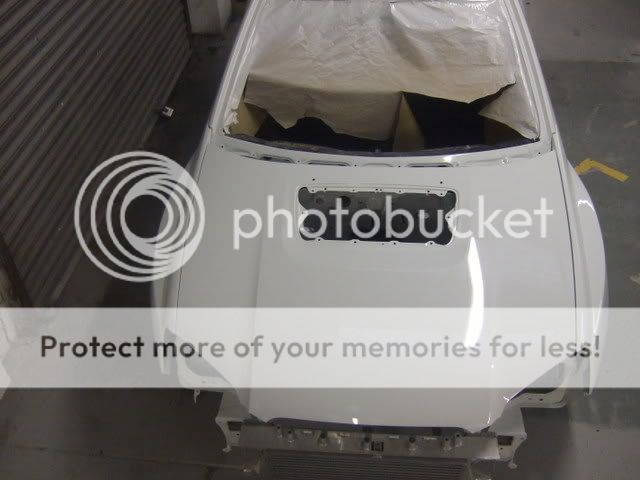
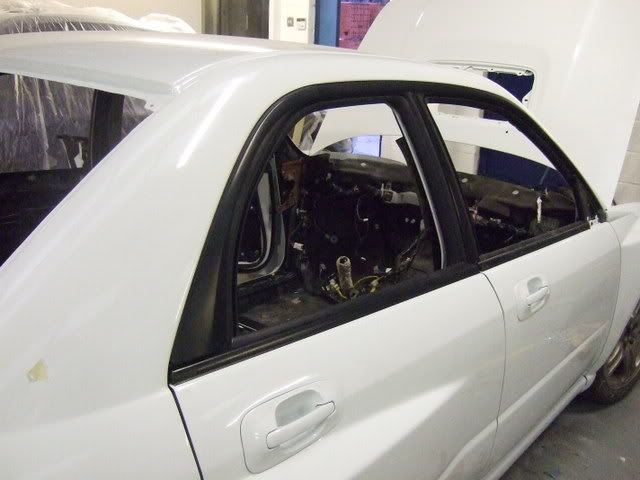
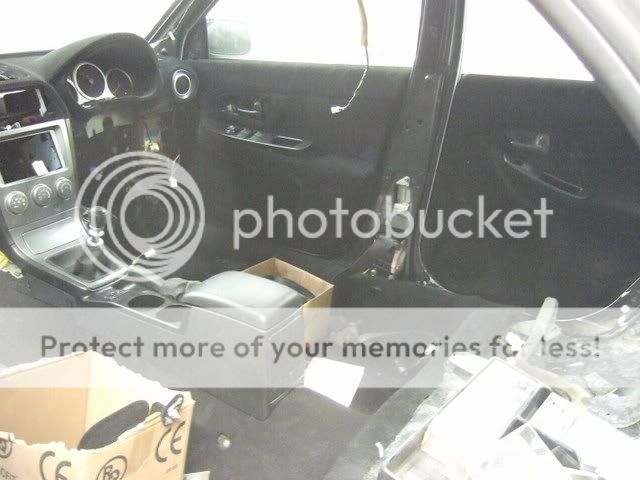
All the glass has been fitted, along with roof trims and door mirrors.
The interior is now in a state where it can be kept clean, ready for the interior work to begin..
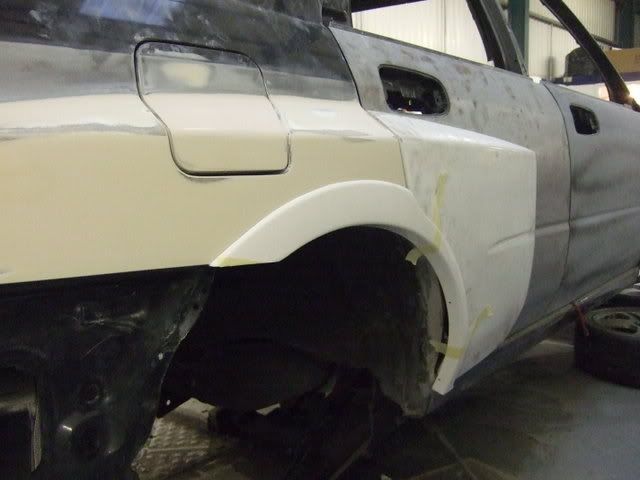
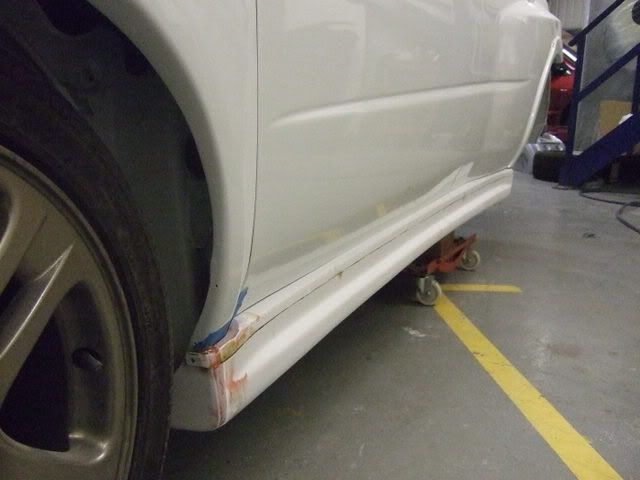
I also managed to get both side skirts modified and in primer, along with the rear bumper.
You can see I've also smoothed out the swage line in the lower half of the bumper, as it no longer has to 'match' the OEM side skirts..
Also a quick shot of the spacers I have had to make in order to push the
OEM rear bumper out to meet the arches..
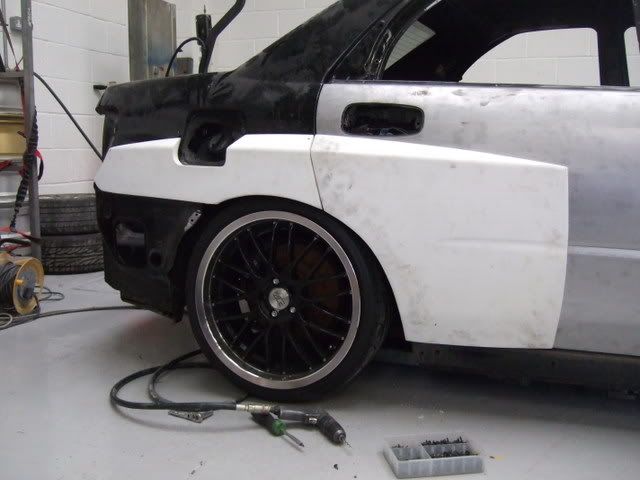
Side skirts and rear bumper are painted, and bumper is fitted.
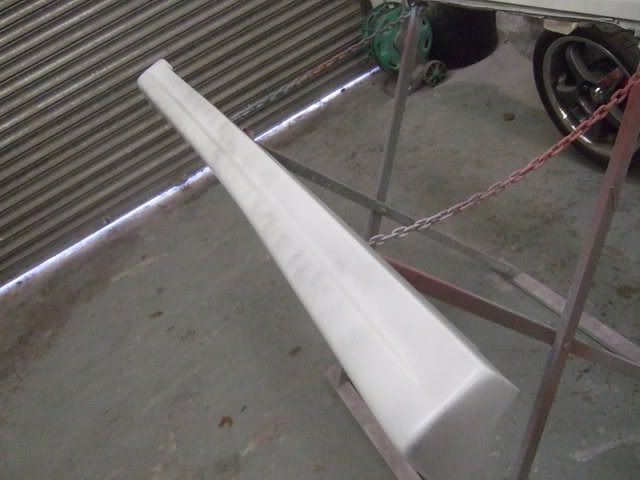
Managed to get hold of this also...
Nice carbon jobbie form Chargespeed...Awesome quality, and much cheaper than other offerings..
I originally had this set up, which was OK, but not what I was looking for..
So I attacked them today, to see what I could do..
First off, I managed to trim them so they do not stick out as far, and meet up with both the rear door extension, and the front wing.
Next I decided that they were simply too deep, so I chopped them in two..
Here you can see the 25mm I intend to chop out..
Chopped, and stuck together..
Next job, fibreglass matting and resin..
Old and new..
On..
All the glass has been fitted, along with roof trims and door mirrors.
The interior is now in a state where it can be kept clean, ready for the interior work to begin..
I also managed to get both side skirts modified and in primer, along with the rear bumper.
You can see I've also smoothed out the swage line in the lower half of the bumper, as it no longer has to 'match' the OEM side skirts..
Also a quick shot of the spacers I have had to make in order to push the
OEM rear bumper out to meet the arches..
Side skirts and rear bumper are painted, and bumper is fitted.
Managed to get hold of this also...
Nice carbon jobbie form Chargespeed...Awesome quality, and much cheaper than other offerings..
29-04-2008, 12:14 AM
#24
Part of the Furniture
Thread Starter
Join Date: Apr 2008
Location: Looking for my next project car...
Posts: 151
Likes: 0
Received 0 Likes
on
0 Posts
29-04-2008, 12:19 AM
#25
Part of the Furniture
Thread Starter
Join Date: Apr 2008
Location: Looking for my next project car...
Posts: 151
Likes: 0
Received 0 Likes
on
0 Posts
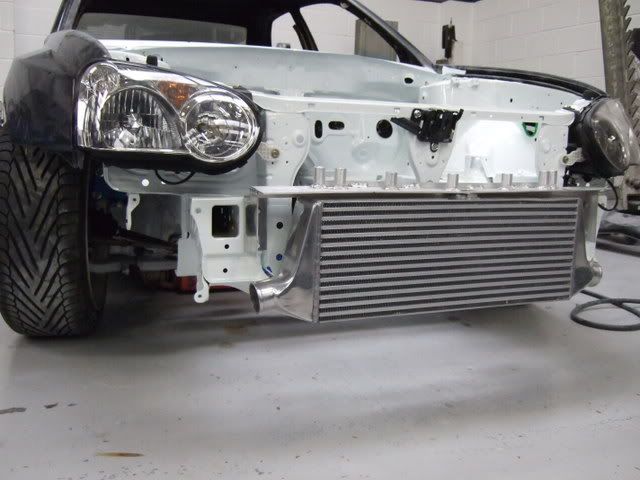
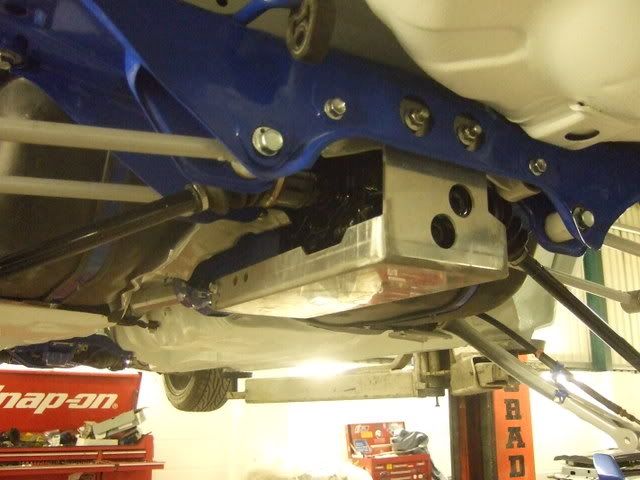
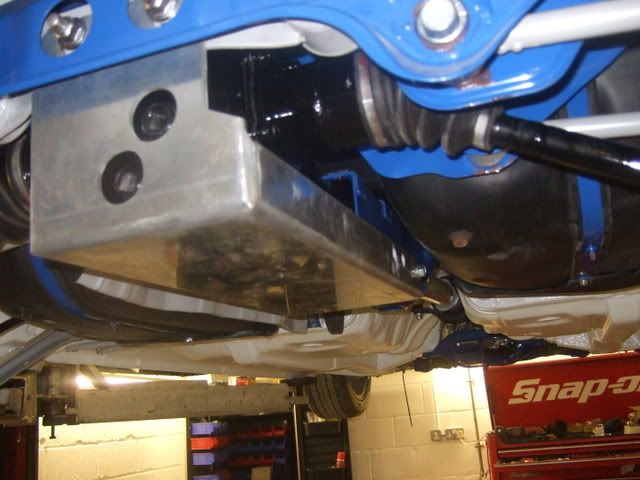
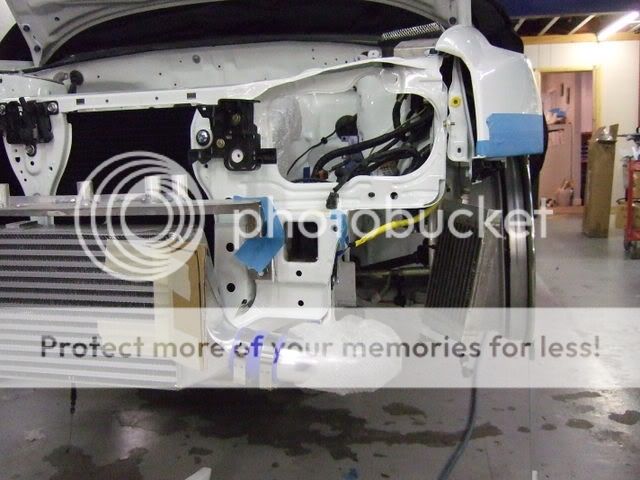
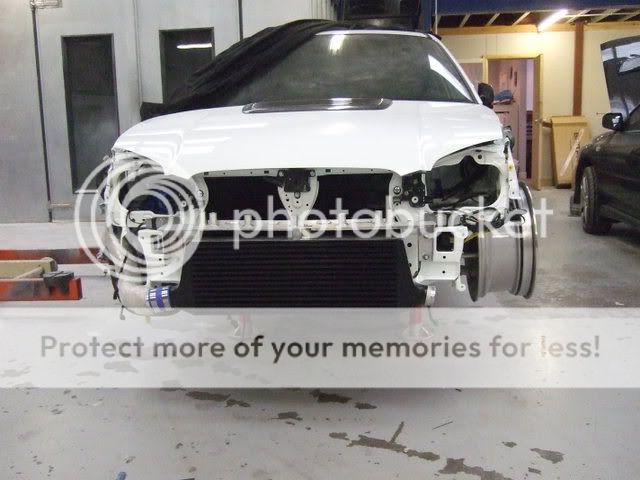
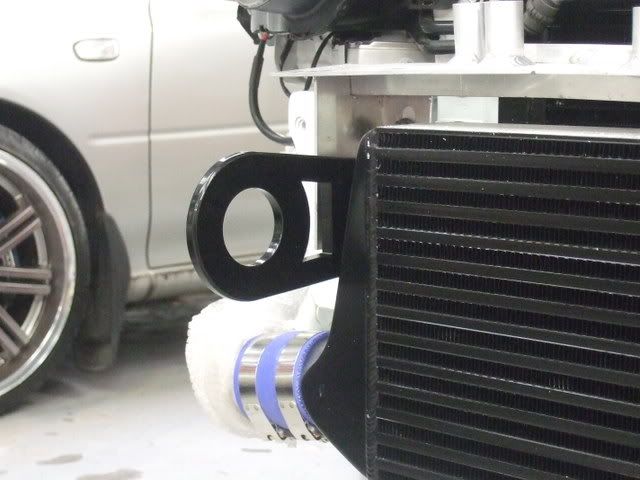
OK, so I have an oil cooler to fit, and I was initially going to have it on the offside of the car somewhere.
However, due to space constaints, and past experiences with oil pipes near the exhaust area, I decided to put it over on the nearside, and route the oil pipes along the steering cross member.
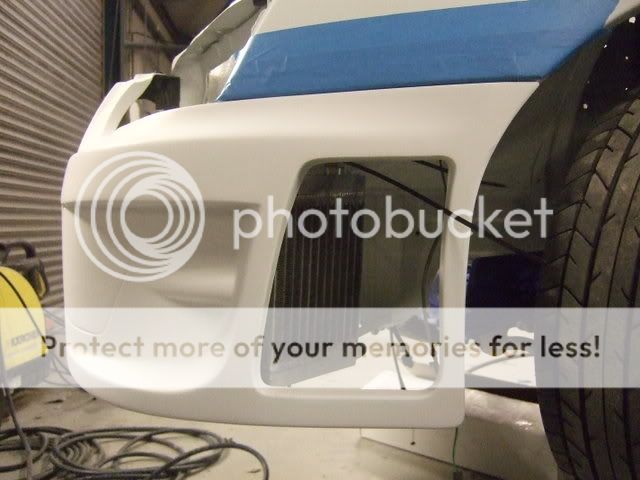
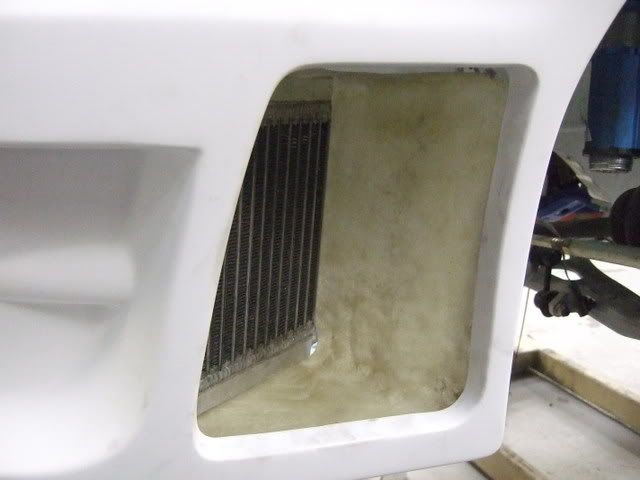
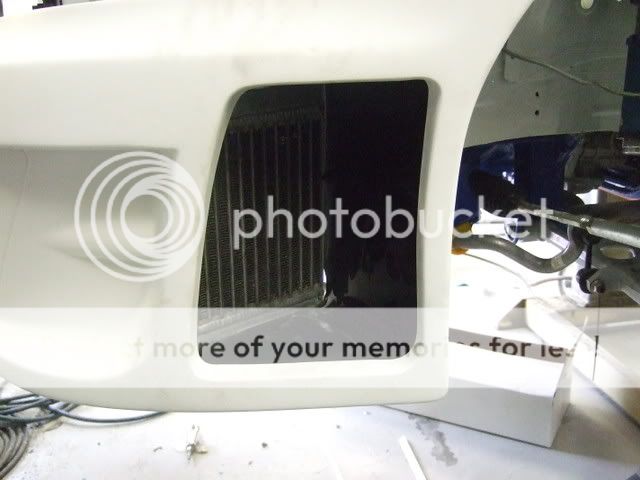
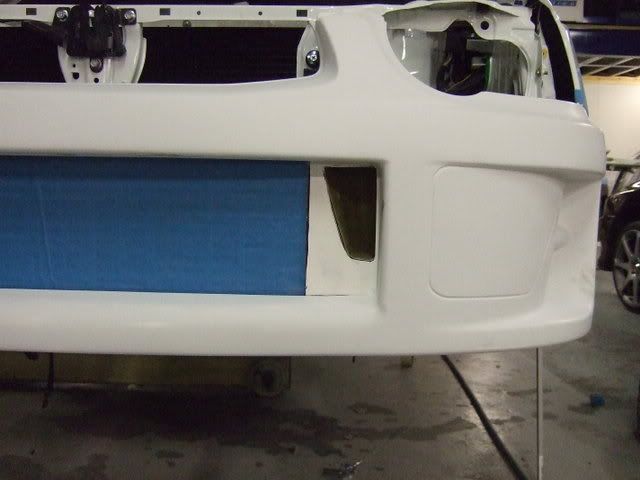
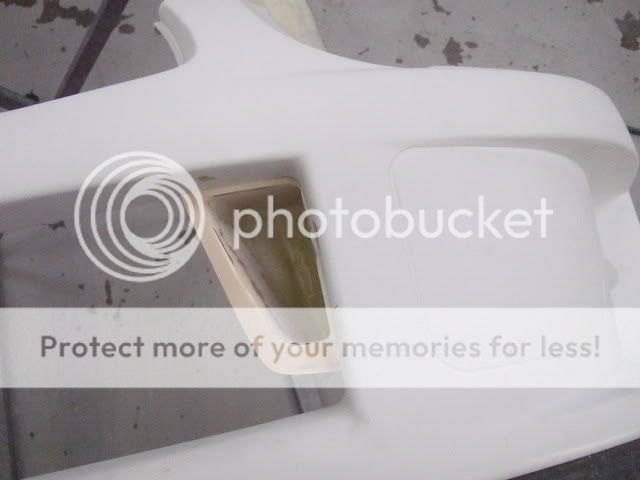
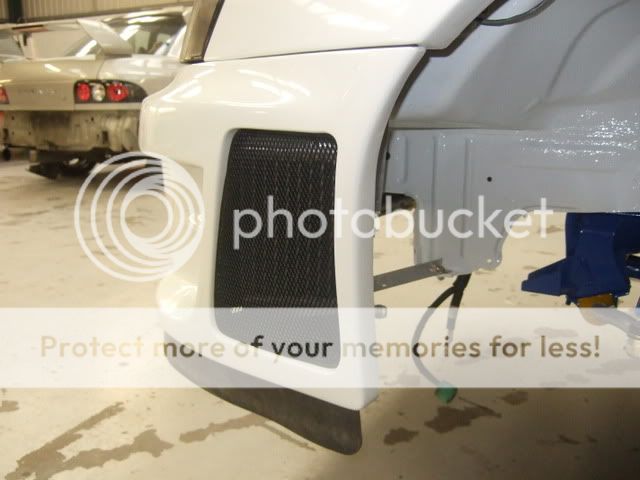
I also wanted it to look part of the car, so I started to make a duct for it to fit in the front bumper..
First, cut new bumper, and find a spot for oil cooler, using plenty of cable ties..
Then make up a duct, using fibreglass..
Waft a bit of satin black on it..
And I have also made a bit of mesh to fit into the area, to stop small creatures form nesting in there at night..
Here in alloy finish..

And painted (although not very clear, you can see it looks a zillion times better in black)..
Took me about 8 hours so far to fabricate, and get to this point..
Once the bumper is painted, and I get to final fitment, I shall be sealing the oil cooler to the duct using some foam tape for a neat finish.
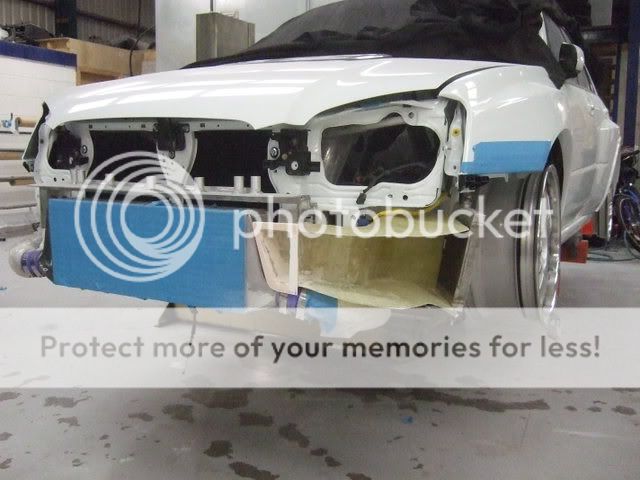
So that was the ducting to get the air out of the oil cooler, all I need to do now, is to duct some air into it....
I wasn't looking forward to this, as I knew it would be a lot of work, for something that would never get seen, but an essential none the less..
Here goes..
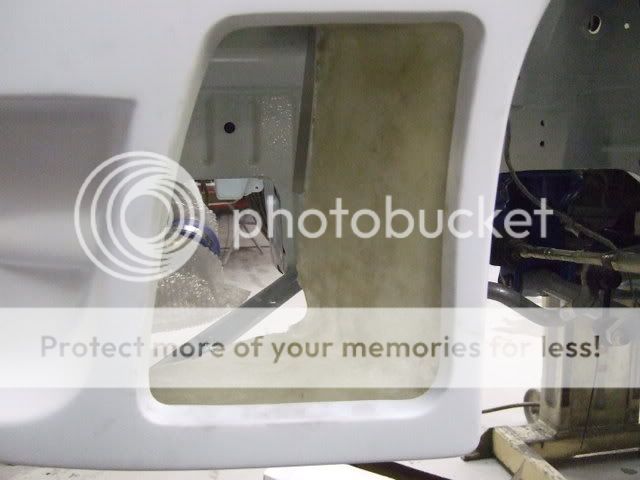
No front bumper, showing the cooler in place-ish..
Next step, make a dummy duct out of cardboard and tape in true blue peter fashion..

I then used this as my mould..
A bit of trimming, and it goes here..

Once the front bumper is on, the duct actually fits up to the inside of it, creating quite a good seal.
Here is the opening to the duct, which I have already altered since the pics were taken.
I have lowered the intercooler by 30mm using some alloy spacer blocks, making the opening that little bit larger..
However, due to space constaints, and past experiences with oil pipes near the exhaust area, I decided to put it over on the nearside, and route the oil pipes along the steering cross member.
I also wanted it to look part of the car, so I started to make a duct for it to fit in the front bumper..
First, cut new bumper, and find a spot for oil cooler, using plenty of cable ties..
Then make up a duct, using fibreglass..
Waft a bit of satin black on it..
And I have also made a bit of mesh to fit into the area, to stop small creatures form nesting in there at night..
Here in alloy finish..
And painted (although not very clear, you can see it looks a zillion times better in black)..
Took me about 8 hours so far to fabricate, and get to this point..
Once the bumper is painted, and I get to final fitment, I shall be sealing the oil cooler to the duct using some foam tape for a neat finish.
So that was the ducting to get the air out of the oil cooler, all I need to do now, is to duct some air into it....
I wasn't looking forward to this, as I knew it would be a lot of work, for something that would never get seen, but an essential none the less..
Here goes..
No front bumper, showing the cooler in place-ish..
Next step, make a dummy duct out of cardboard and tape in true blue peter fashion..
I then used this as my mould..
A bit of trimming, and it goes here..
Once the front bumper is on, the duct actually fits up to the inside of it, creating quite a good seal.
Here is the opening to the duct, which I have already altered since the pics were taken.
I have lowered the intercooler by 30mm using some alloy spacer blocks, making the opening that little bit larger..
29-04-2008, 12:24 AM
#26
Part of the Furniture
Thread Starter
Join Date: Apr 2008
Location: Looking for my next project car...
Posts: 151
Likes: 0
Received 0 Likes
on
0 Posts
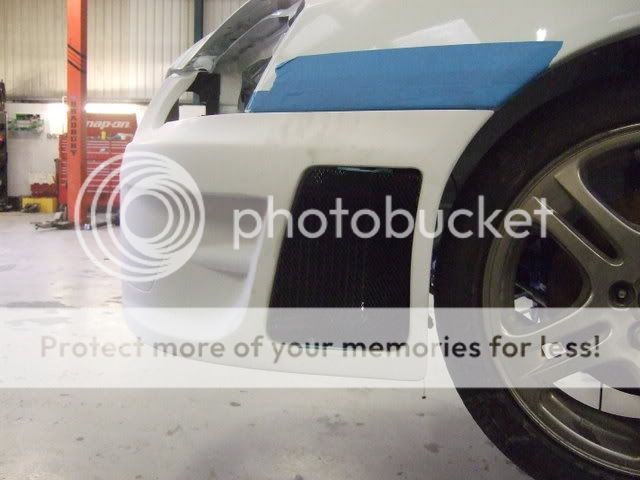
First, a few more shots of the oil cooler duct..
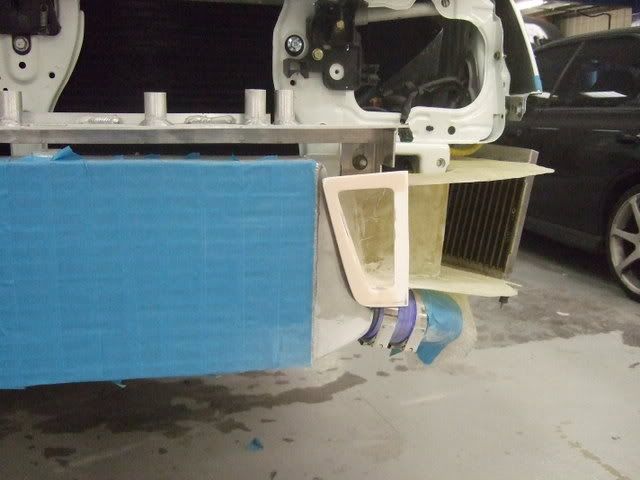
And a quick shot showing how it meets up to the inside of the bumper..
Now onto the lower skirt on the front bumper.
Normally, I have seen these fitted to the bumper with either a series of rivets, or self tapper screws along the top edge of the skirt.
I didn't want that, so devised a method of hiding the fixings....
Basically I needed to create a slot in the underside of the front bumper, as seen here marked out with a pen line...
I then cut this out, and fabricated a return edge on the inside of the
bumper, to which the skirt fixes to..
Sounds simple eh..?
Errr, not quite, but I managed it in the end after about 5 hours graft, although no 'in progress pics', as I was too damn busy doing it..
Anyway, ended up with this result..
It looks a bit wobbly, but this is due to the skirt being a touch too long enough, so I think once the ends are trimmed off neatly and to the correct size, it should look OK...
29-04-2008, 12:28 AM
#27
Part of the Furniture
Thread Starter
Join Date: Apr 2008
Location: Looking for my next project car...
Posts: 151
Likes: 0
Received 0 Likes
on
0 Posts
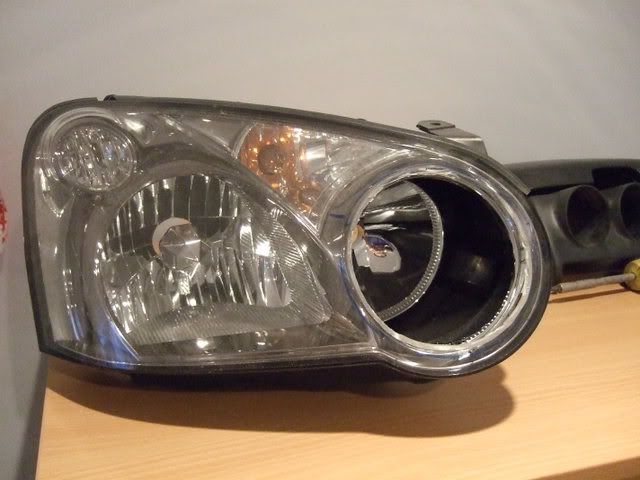
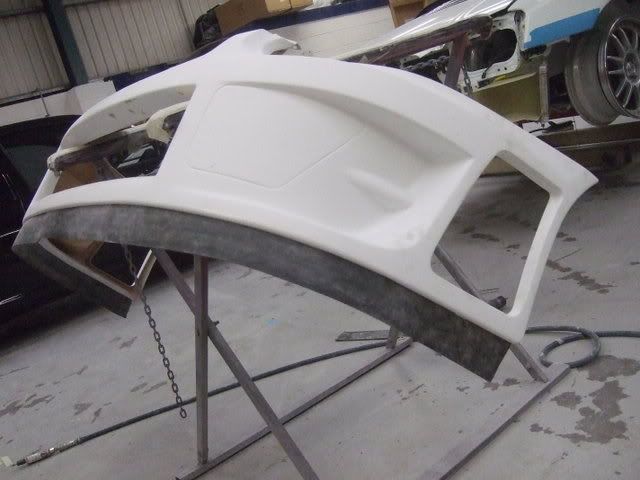
Further up in the thread I shown a pic of the headlamp intake duct that I started, well now I thought it time to finish.
First job, into the oven, get nice and warm and split the headlamp into 2..
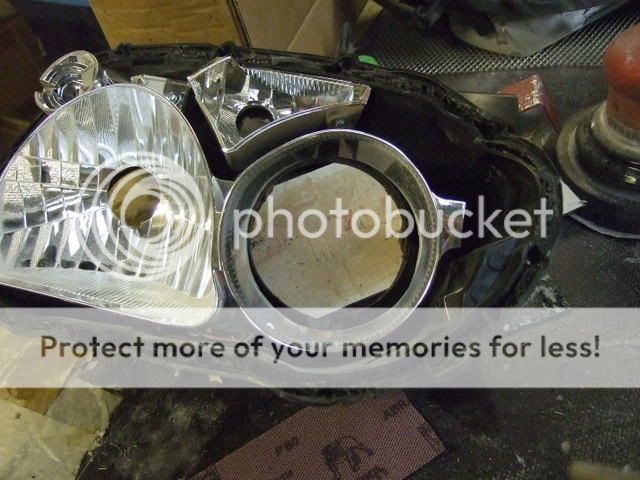
Next, cut out the inner and the backframe to 90mm to accomodate the
ducting..
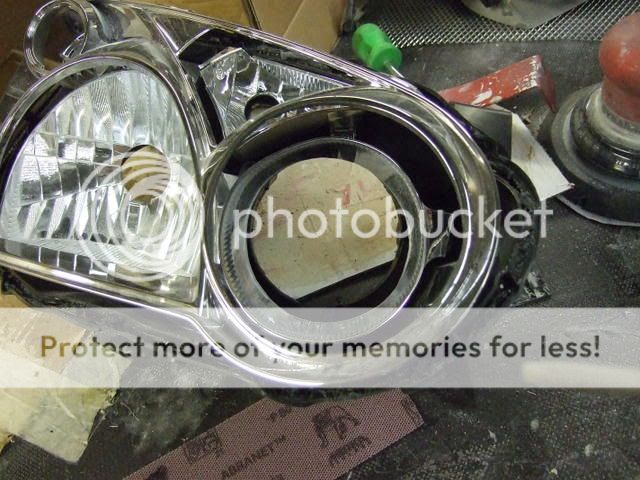
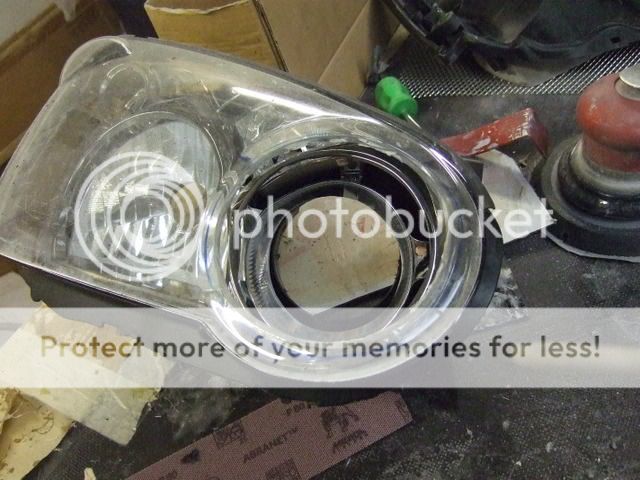
Fit ducting, like so..
Fit intake trumpet, with heat shrink adhesive sleeve..
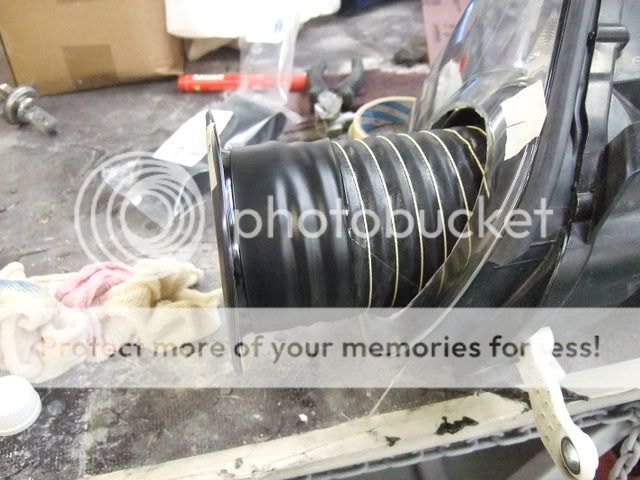
Reverse looks like this..
Front looks like this..

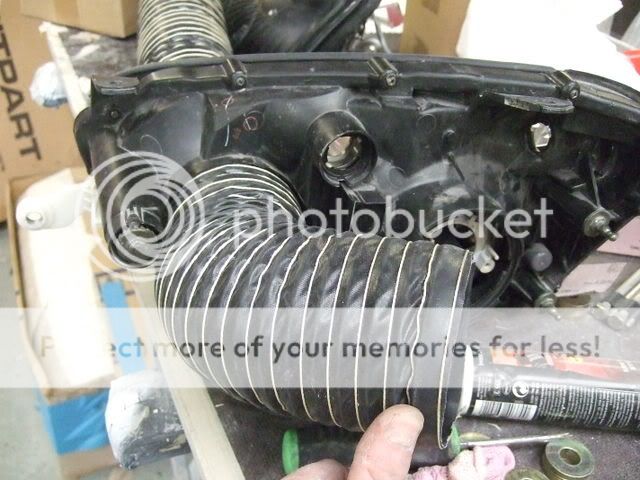
Whilst the headlamps were apart, I treated the inner to some satin matt black, and as they are JDM, they were already de-tangoed.
HID kit has been ordered, the headlamps have been modified to accept H4 dim/dip bulbs, so another job nearly done..
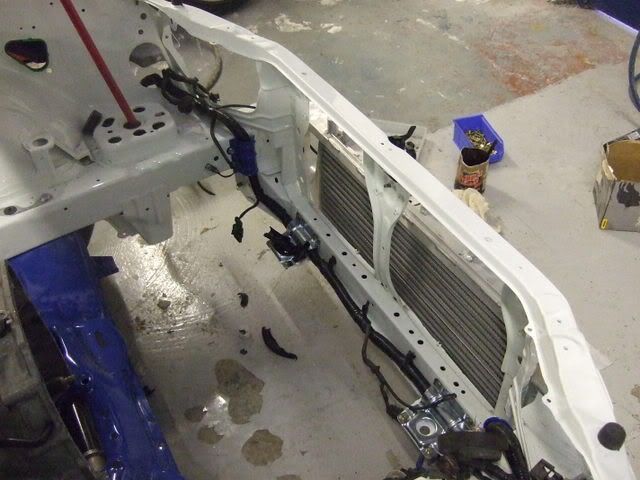
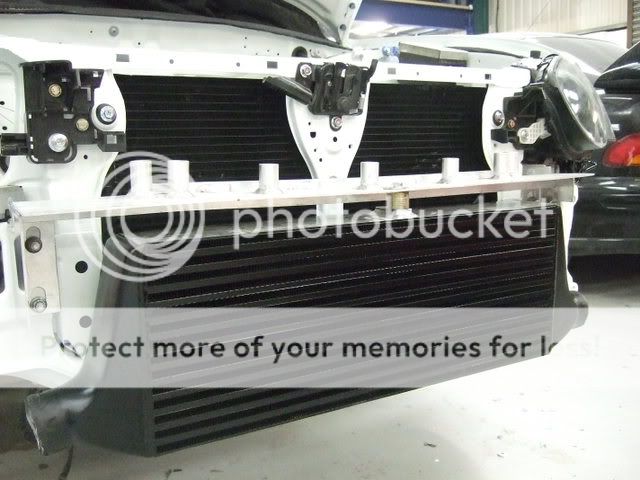
Having had mixed results with anodising fading and generally not weathering too good in the past on FMIC's, I contemplated having it powder coated, but was concerned about it's effeciency being affected..
After a bit pondering, I decided to lightly sand blast the front of the intercooler, etch prime it, and paint it black with a thin coat of matt lacquer on top.
Which looks like this..
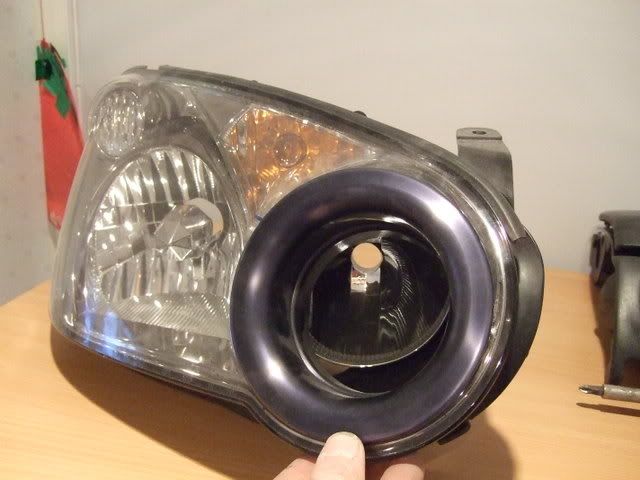
Also recieved my HID headlamp kit, so mounted the module's (or whatever they are called..) like so..
Holes drilled, touched in and fitted with some anti-vibration washers..
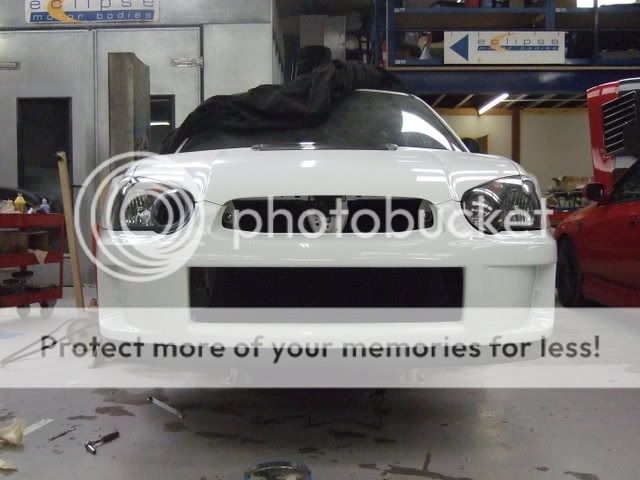
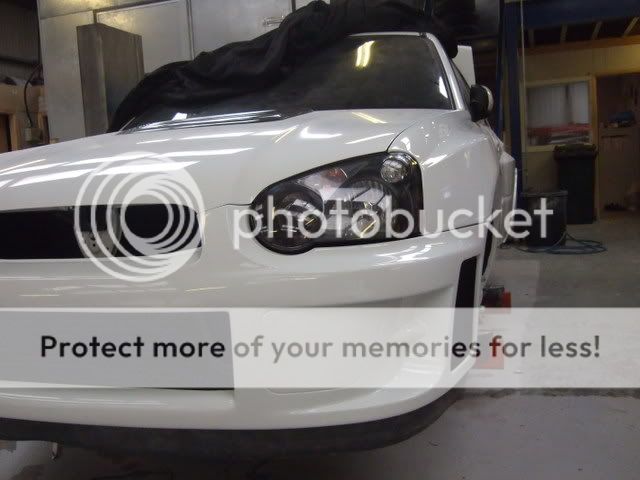
Fitted..
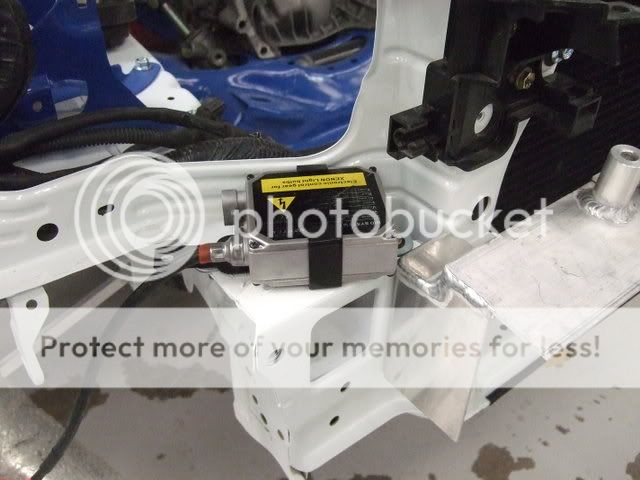
It has eyes at last...

First job, into the oven, get nice and warm and split the headlamp into 2..
Next, cut out the inner and the backframe to 90mm to accomodate the
ducting..
Fit ducting, like so..
Fit intake trumpet, with heat shrink adhesive sleeve..
Reverse looks like this..
Front looks like this..
Whilst the headlamps were apart, I treated the inner to some satin matt black, and as they are JDM, they were already de-tangoed.
HID kit has been ordered, the headlamps have been modified to accept H4 dim/dip bulbs, so another job nearly done..
Having had mixed results with anodising fading and generally not weathering too good in the past on FMIC's, I contemplated having it powder coated, but was concerned about it's effeciency being affected..
After a bit pondering, I decided to lightly sand blast the front of the intercooler, etch prime it, and paint it black with a thin coat of matt lacquer on top.
Which looks like this..
Also recieved my HID headlamp kit, so mounted the module's (or whatever they are called..) like so..
Holes drilled, touched in and fitted with some anti-vibration washers..
Fitted..
It has eyes at last...
29-04-2008, 12:31 AM
#28
Part of the Furniture
Thread Starter
Join Date: Apr 2008
Location: Looking for my next project car...
Posts: 151
Likes: 0
Received 0 Likes
on
0 Posts
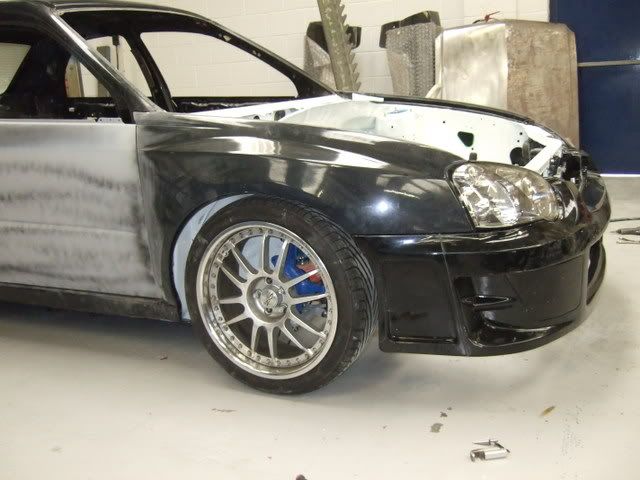
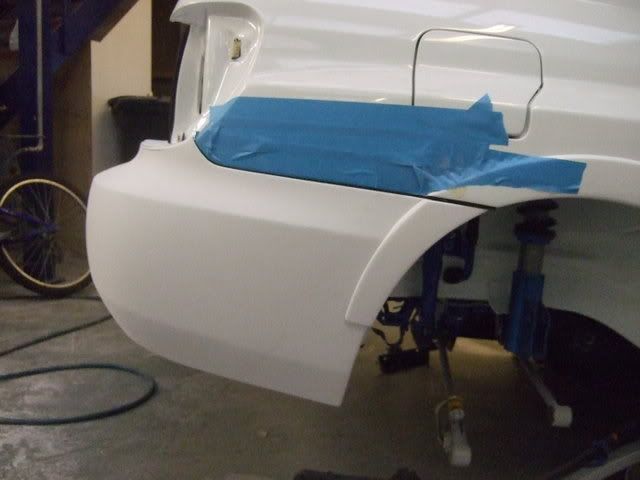
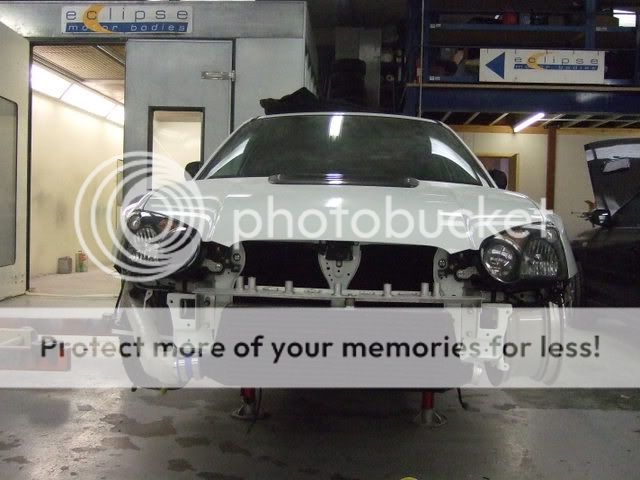
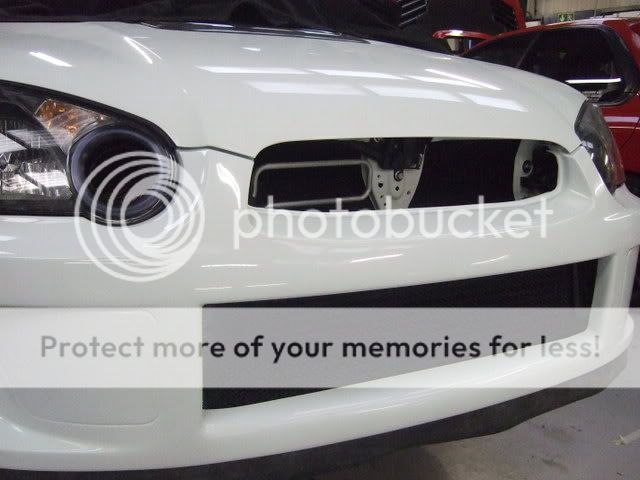
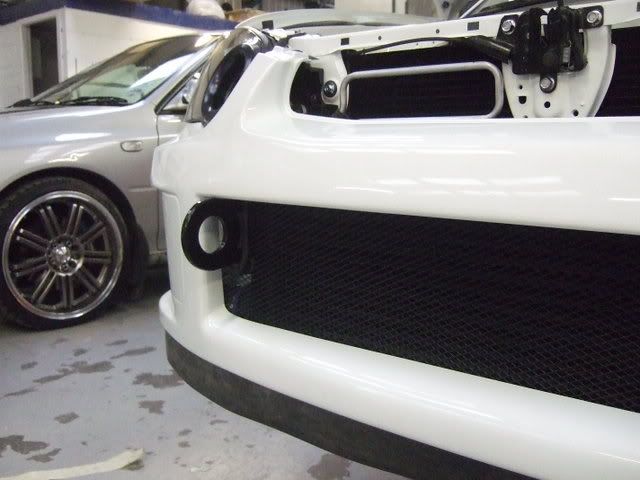
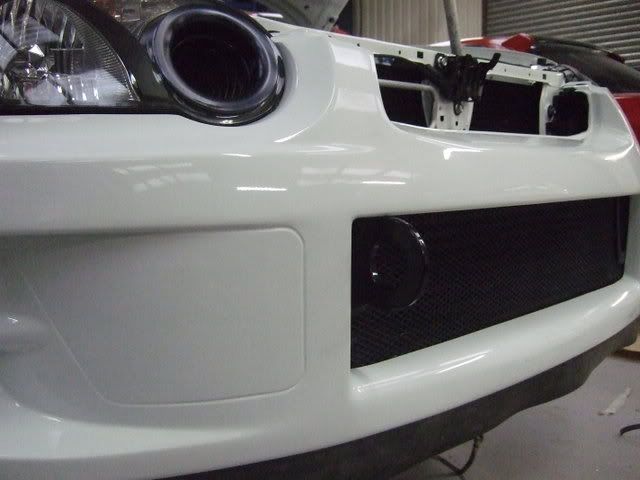
Front bumper painted, assembled, and fitted..
Then forgot about the power steering cooler pipe, and had to remove it to fit..
Also got the ABS pump fitted, along with some of the brake lines, and the power stering reservoir.
Next job is all the ABS sensors to be stripped/cleaned plated brackets as neccesary.
Then forgot about the power steering cooler pipe, and had to remove it to fit..
Also got the ABS pump fitted, along with some of the brake lines, and the power stering reservoir.
Next job is all the ABS sensors to be stripped/cleaned plated brackets as neccesary.
29-04-2008, 12:39 AM
#29
Part of the Furniture
Thread Starter
Join Date: Apr 2008
Location: Looking for my next project car...
Posts: 151
Likes: 0
Received 0 Likes
on
0 Posts
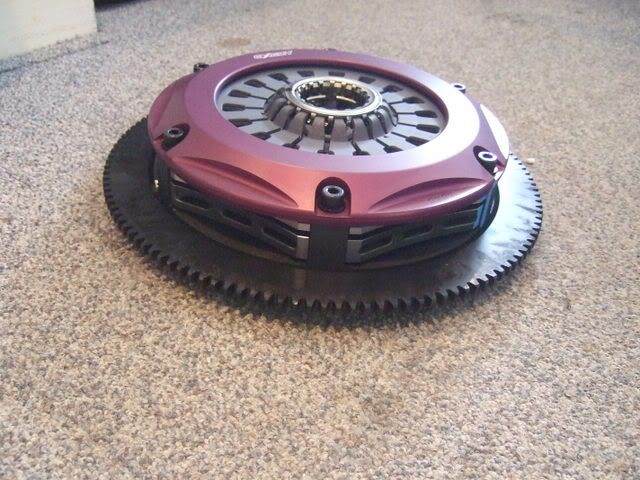
More goodies..
Twin plate Excedy clutch set up..
Nukabe tow hook..
And due to one of my friends changing his mind on his car, I also ended up with this flocked dashboard also..

With the first of several Defi's installed in the air vent..
Twin plate Excedy clutch set up..
Nukabe tow hook..
And due to one of my friends changing his mind on his car, I also ended up with this flocked dashboard also..
With the first of several Defi's installed in the air vent..
 29-04-2008, 12:51 AM
#31
Part of the Furniture
Thread Starter
Join Date: Apr 2008
Location: Looking for my next project car...
Posts: 151
Likes: 0
Received 0 Likes
on
0 Posts
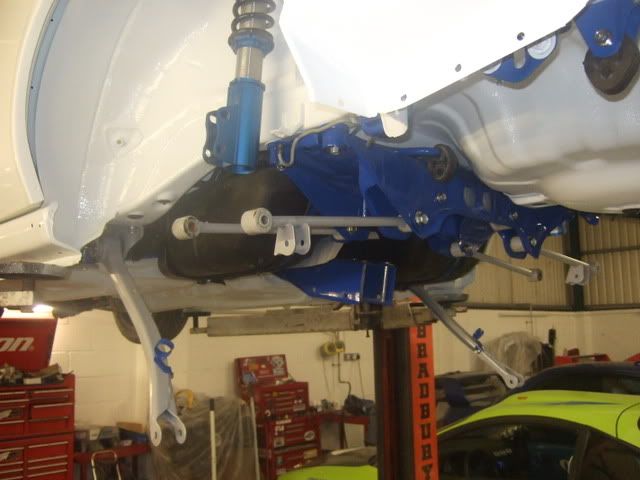
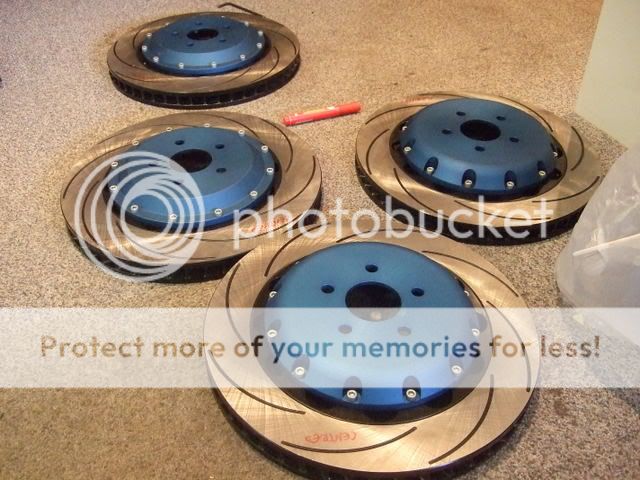
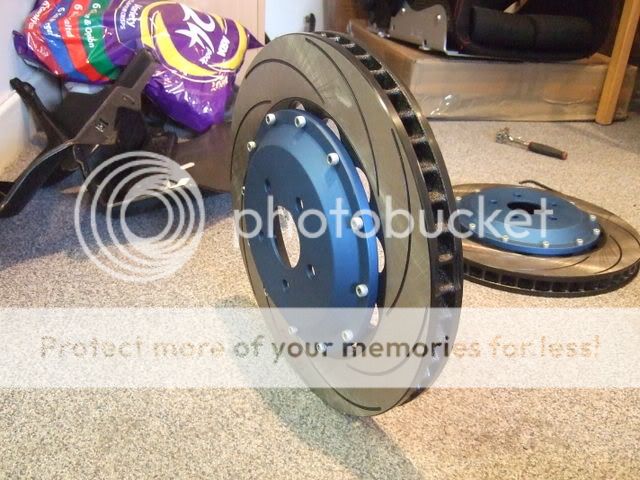
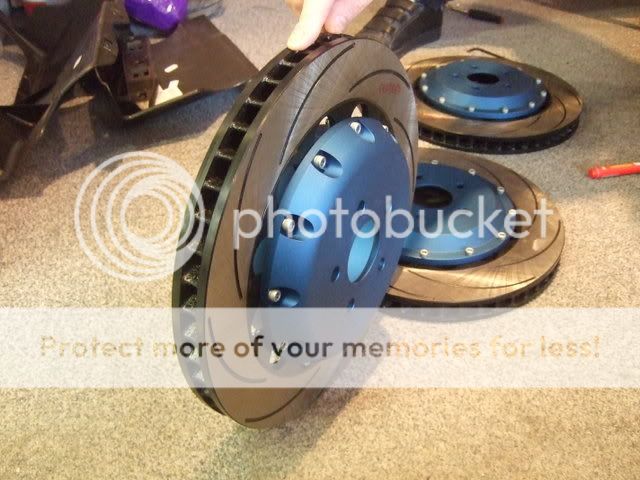
Due to the size of the rear discs, I had to remove the shroud off the rear backplate, like so by drilling out the spot welds, and a bit of touching up was neccesary of the powder coating..
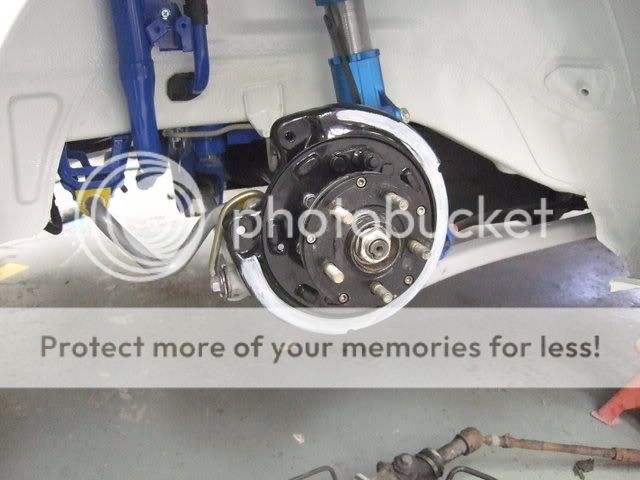
Handbrake assembly is also now complete, and discs are fitted..
Onto the interior, I have got some bits fitted..
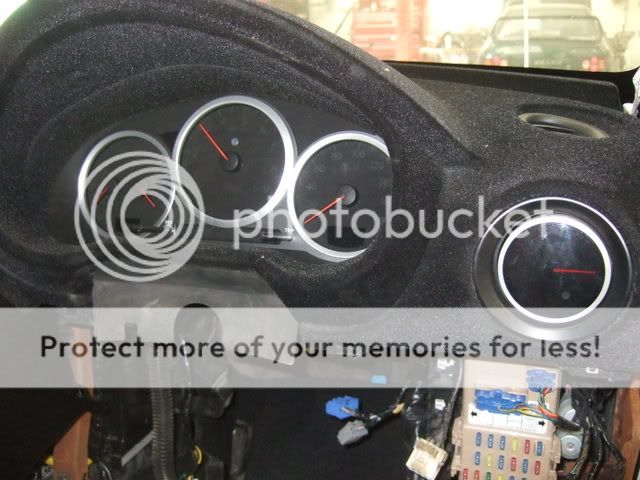
JDM Defi style clocks.

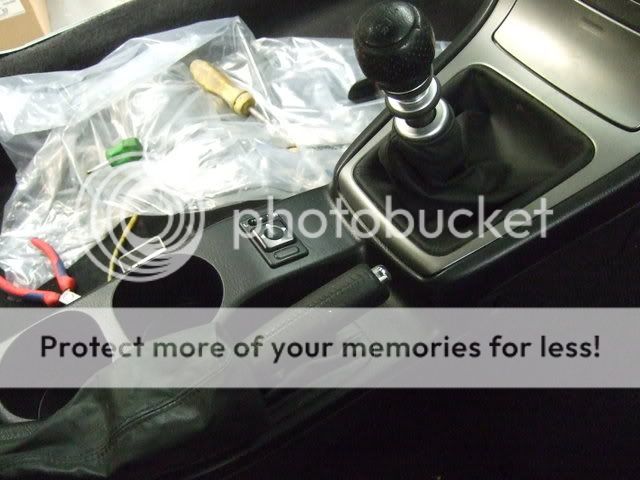
And I also got some of the 2005 centre console fitted, along with the modified location for the electric mirror switch.
2005 models have the electric mirror switch in the door, whereas my 2003 has it in the centre console.
The 2005 centre console has a space for 2 heated seat switches, which I simply altered to take the mirror switch, and re-wire the direction outputs to coincide with the mirror movements.
Sort of resembling some kind of interior now..
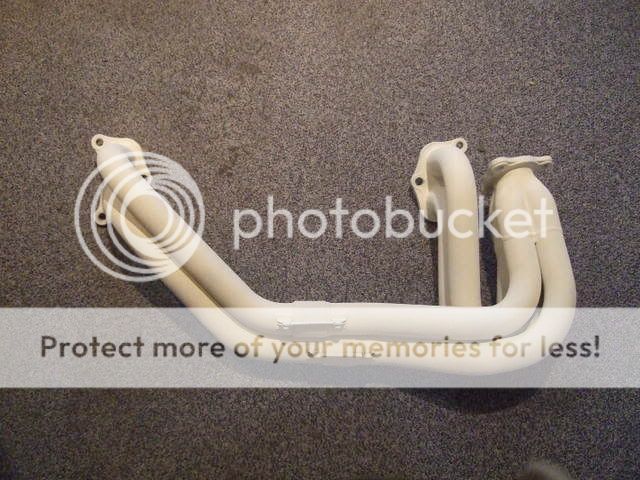
Also recieved this, along with my up-pipe and downpipe, all ceramic coated...No more heat wrap for me.
Handbrake assembly is also now complete, and discs are fitted..
Onto the interior, I have got some bits fitted..
JDM Defi style clocks.
And I also got some of the 2005 centre console fitted, along with the modified location for the electric mirror switch.
2005 models have the electric mirror switch in the door, whereas my 2003 has it in the centre console.
The 2005 centre console has a space for 2 heated seat switches, which I simply altered to take the mirror switch, and re-wire the direction outputs to coincide with the mirror movements.
Sort of resembling some kind of interior now..
Also recieved this, along with my up-pipe and downpipe, all ceramic coated...No more heat wrap for me.
29-04-2008, 12:58 AM
#32
Part of the Furniture
Thread Starter
Join Date: Apr 2008
Location: Looking for my next project car...
Posts: 151
Likes: 0
Received 0 Likes
on
0 Posts
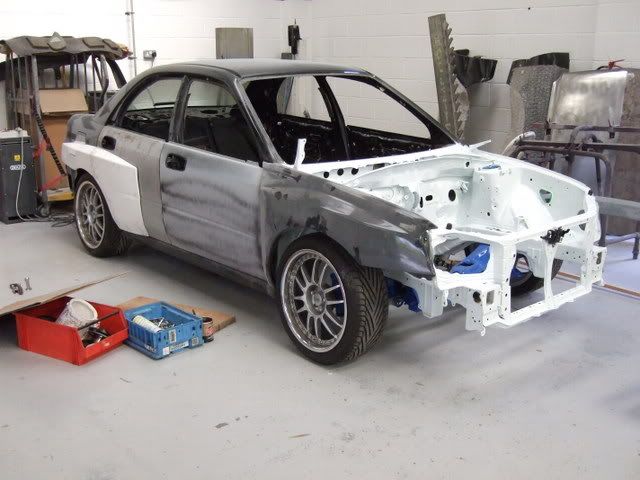
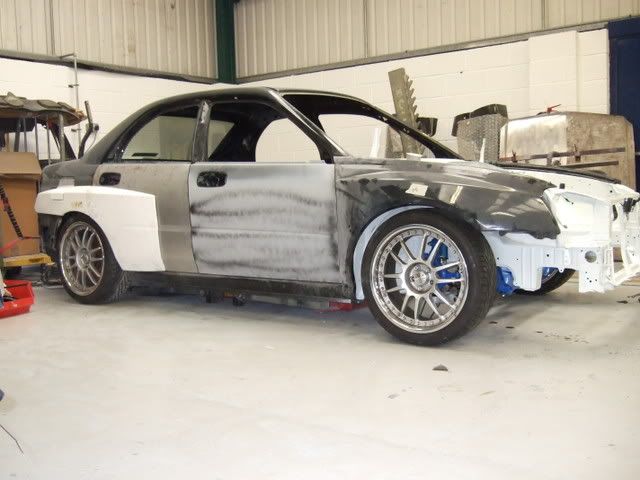
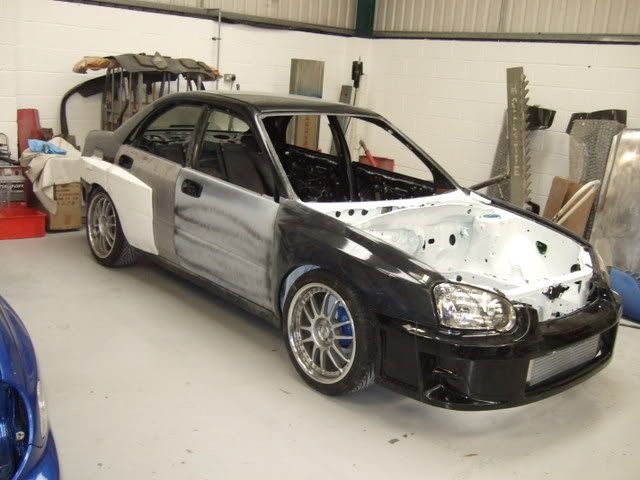
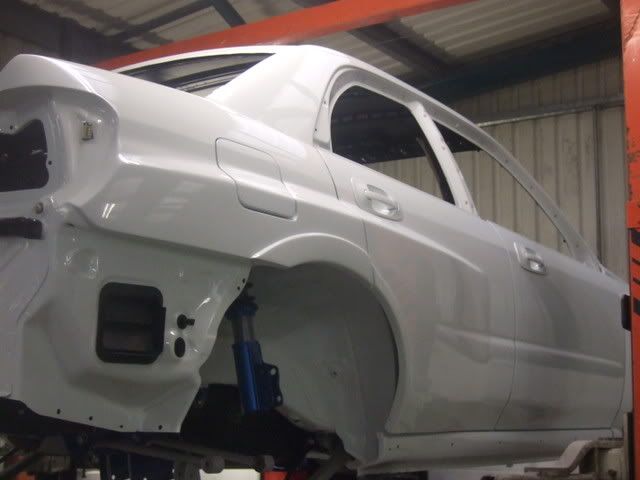
Needed a bit of motivation, so got it on its wheels to see how we are looking..
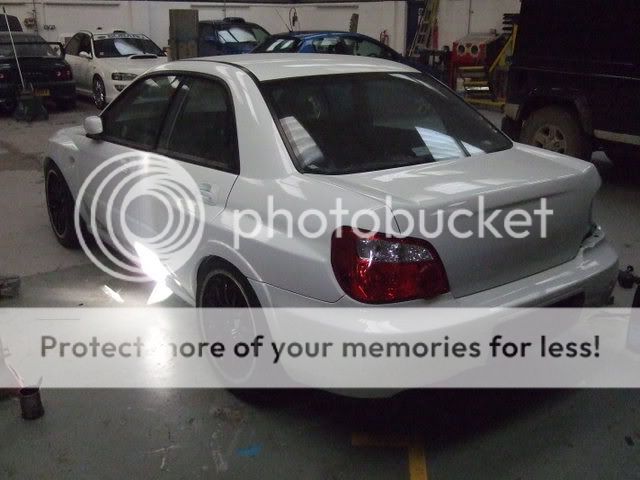
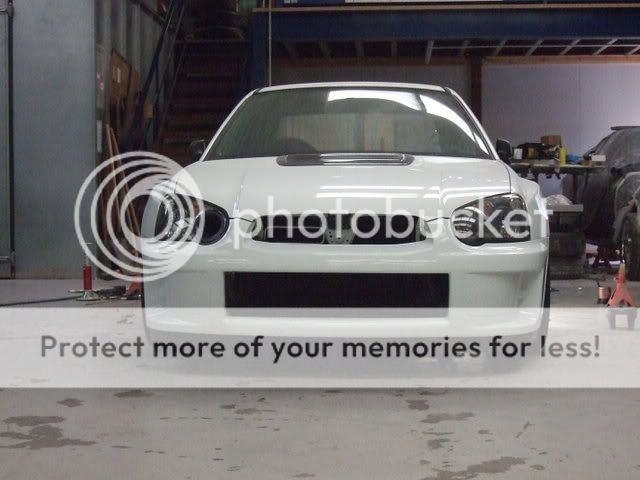
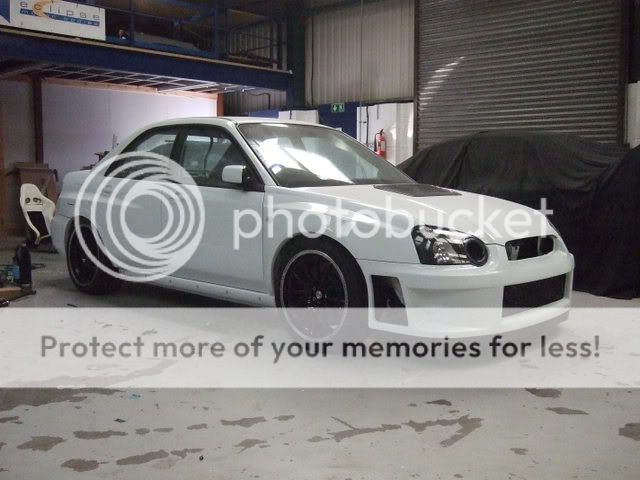
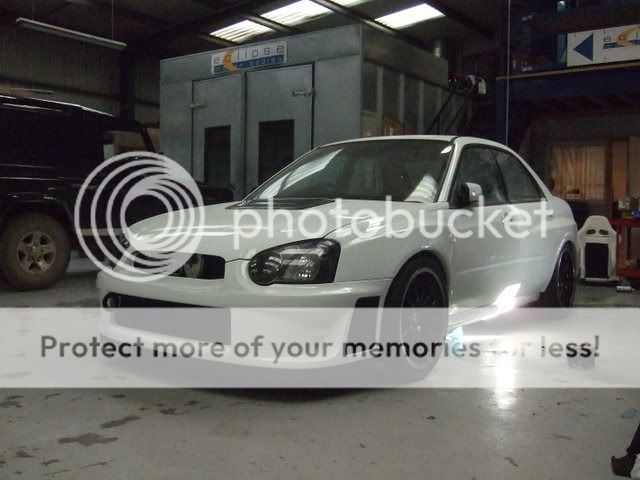
Not sitting too bad, and once the engine is in, it should have that slight nose down stance I am looking for..
And that my Ford chaps, is where we are at today....
I hope to have the car finished this side of summer, and I hope the above posts were not too much to take in in one gulp...( I have tried to condense as much as possible.)
Just thought it wold be nice to see a different face on here....
And hopefully I may be back into Ford ownership status, provided I can find a rot free RS1600i, or Mk 2 Fiesta...
29-04-2008, 01:18 AM
#33
Advanced PassionFord User

fucking superb project that, real wrecks to riches stuff!
Bodywork isnt my thing, but the amount of work thats gone into that is awesome, and the attention to detail is superb
Wheels arent my thing, but they work with the overall look of the car.
Whats left to do now apart from the engine build and fit?
Bodywork isnt my thing, but the amount of work thats gone into that is awesome, and the attention to detail is superb
Wheels arent my thing, but they work with the overall look of the car.
Whats left to do now apart from the engine build and fit?


