EDAN Escort S2 Turbo.Update,03/04/11 reverse charge carrier fitted
#1531
Thread Starter
15K+ Super Poster!!
iTrader: (18)
Joined: Sep 2004
Posts: 18,043
Likes: 118
From: ESSEX
Right some of you may think i am mad ,but i have just got in from repainting the bonnet  couple of bits on it i was not 100% happy with so gave it a block down with 1000 grit wet and dry and gave it 3 more coats
  soooooooooo much happier with it now ,forgot to take the camera round there though
 so will take it along when i colour sand it on thurs


 so will take it along when i colour sand it on thurs


#1532
Originally Posted by Twins
Originally Posted by Michelle
Looks lovely dave done a top job there, lovely outfits you have mate 
see ya soon
see ya soon

Hi Dave yeah ive been great thanks

#1535
Thread Starter
15K+ Super Poster!!
iTrader: (18)
Joined: Sep 2004
Posts: 18,043
Likes: 118
From: ESSEX
Originally Posted by Michelle
Originally Posted by Twins
Originally Posted by Michelle
Looks lovely dave done a top job there, lovely outfits you have mate 
see ya soon
see ya soon

Hi Dave yeah ive been great thanks

#1536
Thread Starter
15K+ Super Poster!!
iTrader: (18)
Joined: Sep 2004
Posts: 18,043
Likes: 118
From: ESSEX
Originally Posted by Dan
Looks great mate, doesn't the black or should I say carbon look the nuts against gleaming red paintwork! 

Lovely work mate!


Lovely work mate!


#1539
Originally Posted by Twins
Should be a law against painting carbon lol . 

Yes there should


 , Because when you prep it you cant prep it again as you'll destroy the weave/resin
 So glad you didnt
Get these pics up

#1542
Thread Starter
15K+ Super Poster!!
iTrader: (18)
Joined: Sep 2004
Posts: 18,043
Likes: 118
From: ESSEX
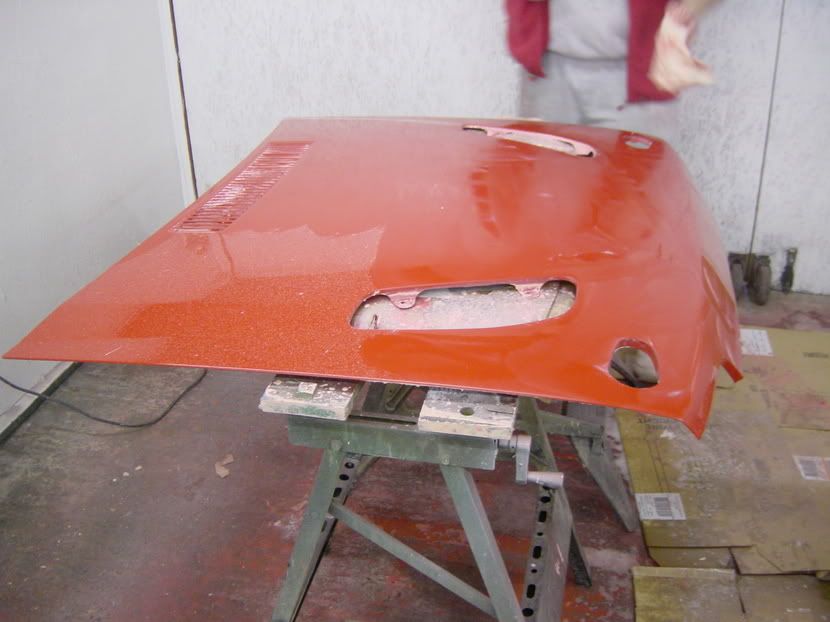
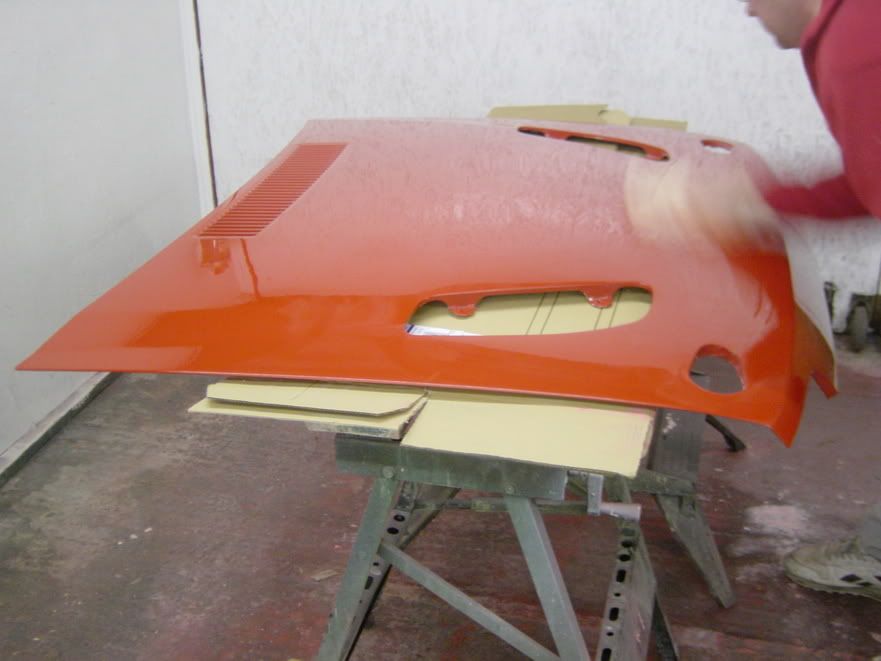
Ok time for an update ,rubbed down the bonnet and repainted it the other day ,as there was a few bits on it i was not happy with,went over there today to colour sand and mop the bonnet ,here are some pics.
Rubbing down with 2000 grit

Ready for mopping.

Nearly mopped.

Finnesse it going on.

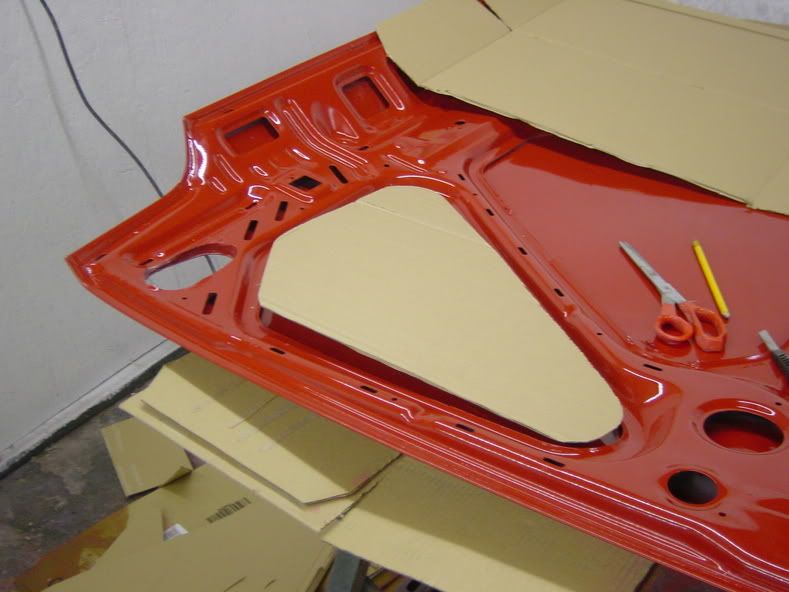
Flipped the bonnet over at this stage to make up some templates for the bonnet heat insulation,going to use the silver self adehsive stuff(anyone got any good places to pick this stuff up).

Taped down so vent hole can be drawn around from top.


Flipped over and checked on other side.

Middle template complete.

Bonnet turned back over and hand polished to finish.

Random piccys of the bonnet ,very pleased how it turned out this time ,glad we rubbed it down and re-did it


Rubbing down with 2000 grit

Ready for mopping.

Nearly mopped.

Finnesse it going on.

Flipped the bonnet over at this stage to make up some templates for the bonnet heat insulation,going to use the silver self adehsive stuff(anyone got any good places to pick this stuff up).

Taped down so vent hole can be drawn around from top.


Flipped over and checked on other side.

Middle template complete.

Bonnet turned back over and hand polished to finish.

Random piccys of the bonnet ,very pleased how it turned out this time ,glad we rubbed it down and re-did it


#1548
Originally Posted by 12jedi12
where have u had all the paint work done? i am asking this because i am looking for a good paint shop in essex thanks


Superb work Dave, that bonnet looks factory with the 4by4 vents.....looks excellent from the pics


#1549
Thread Starter
15K+ Super Poster!!
iTrader: (18)
Joined: Sep 2004
Posts: 18,043
Likes: 118
From: ESSEX
Originally Posted by 12jedi12
where have u had all the paint work done? i am asking this because i am looking for a good paint shop in essex thanks

#1552
Thread Starter
15K+ Super Poster!!
iTrader: (18)
Joined: Sep 2004
Posts: 18,043
Likes: 118
From: ESSEX
Thought i would fix the bonnet pins into the holders today ,some pictures of the work.
Masking tape applied to mark out the holes.

Holes marked out.

Drilled.

Pin riveted into place.


Did this one from below as the gap was too small to get the gun into from above.

Also used washers to stop the rivets pulling through.

All ready for bonding to the bonnet when its lined up on the car.


Thats its for now untill i get the bonnet on ,Happy new year
Masking tape applied to mark out the holes.

Holes marked out.

Drilled.

Pin riveted into place.


Did this one from below as the gap was too small to get the gun into from above.

Also used washers to stop the rivets pulling through.

All ready for bonding to the bonnet when its lined up on the car.


Thats its for now untill i get the bonnet on ,Happy new year

#1557


