
astra gte turbo, track car

")

 24-01-2009, 09:07 PM
#163
PassionFord Post Troll
Thread Starter

time for a update 
after doing a few miles in the car now i have decided that the weight of a let, big sticky tyres and quick rack and not power steering (plus a little bit of gettting old LOL) is far to heavy to drive with
i was very happy with the way the car handled and was happy with the rack rate so i did not want to change to a hydraulic set-up, so i started looking into using a corsa epas system.
i decided on using a corsa c system now on the standard car it uses a speed input and engine speed to decide how much assistance to give, thats far to difficult to implement in bespoke item so i decided that i would use a control box these are now avalible for as little as �30 from ebay and replicate the 2 signals required, then via a dial on the dash you can change how much assist you get.
anyway enough chat lets have some pics
the first problem was that the rack was the fitting at the bottom of the column was different
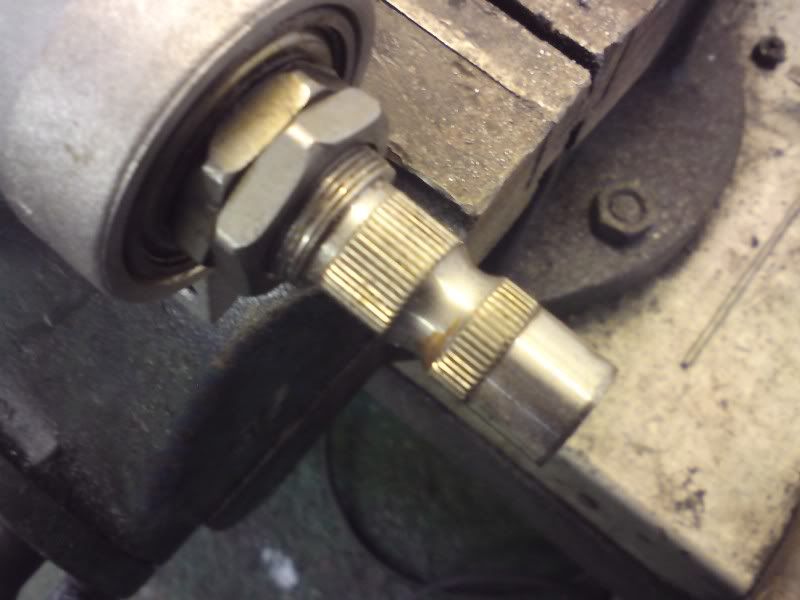
after some measurments i decided that i could file down the shaft to the correct shape and there would be more than meat left on the shaft so out came the file
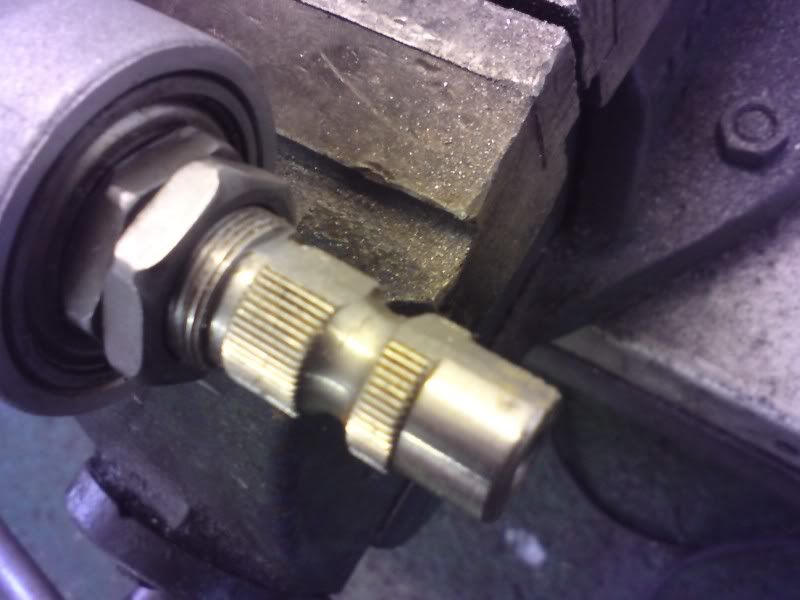
as you can see i even had to flat the smallest part of the shaft so there is alot of flat to grip on
the standard astra uj was then able to slot straight on
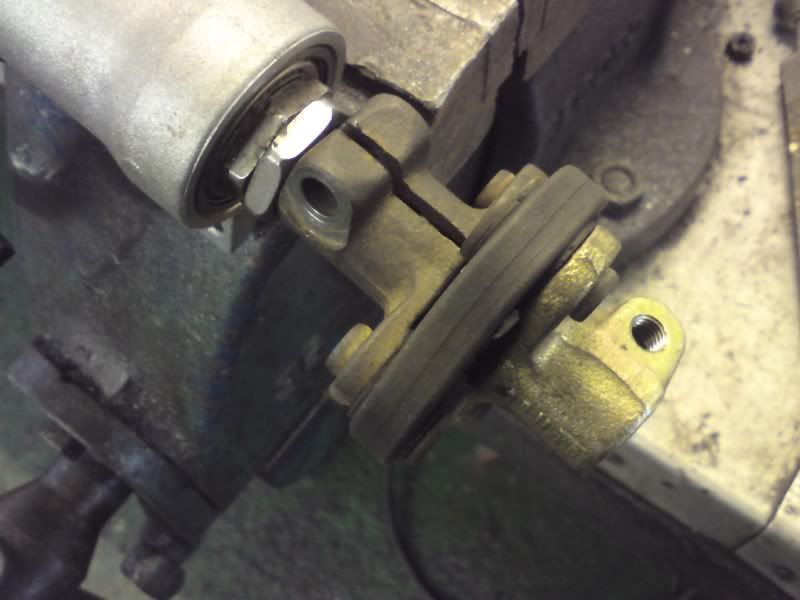

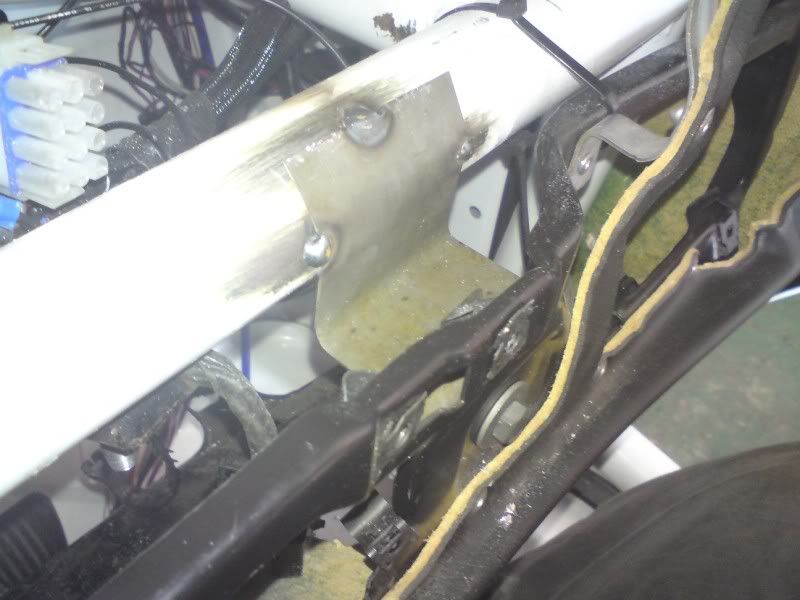
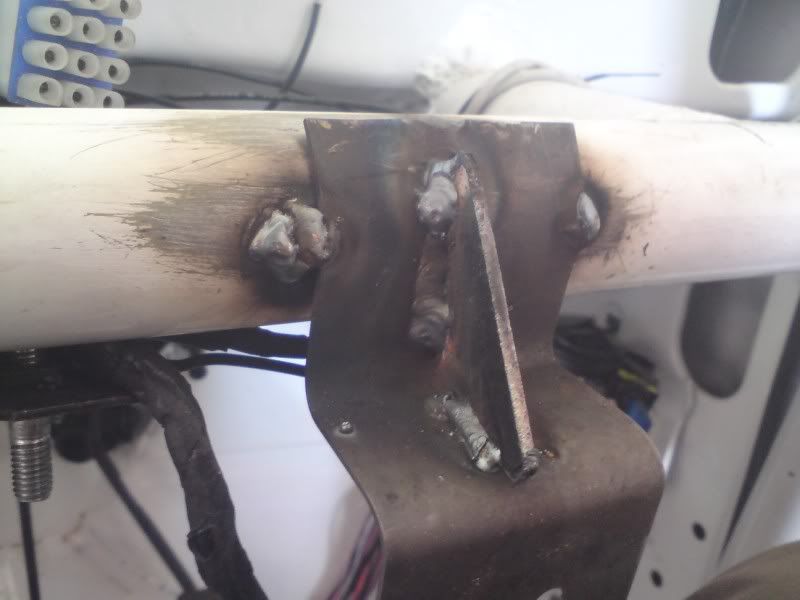
next up was to hold the rack in place
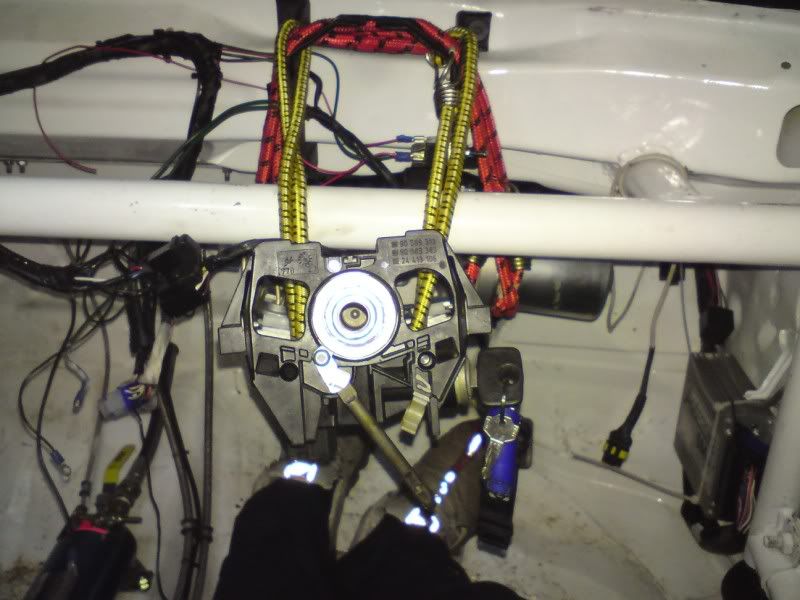
my strechable mounting system worked perfect to show that the column would be much better fitted upside down so was turned upside down, this ment that the key was on the wrong side
so i removed the rivets that held the second half of the shaft on turned it around and used bolts to hold it
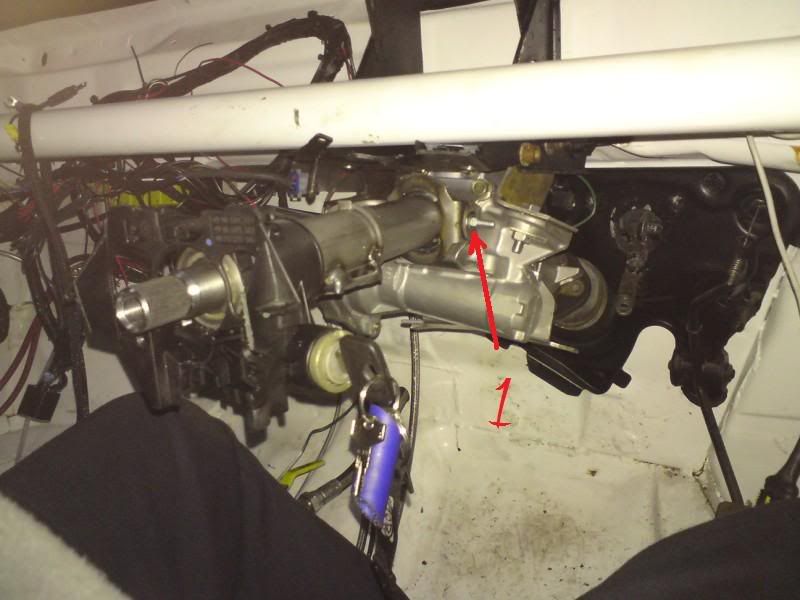
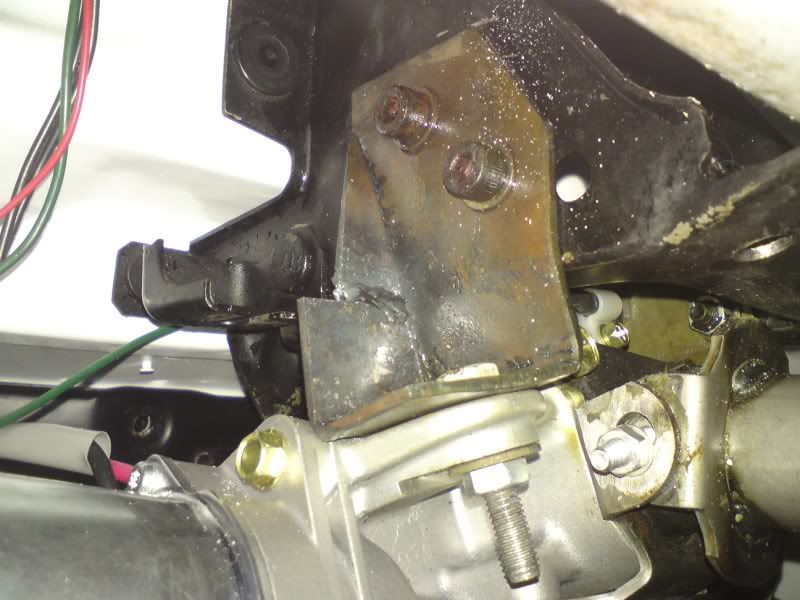
it was then time to make some brackets first i made some out of very thin alloy so i could bend into shape i then made some thicker steel ones.

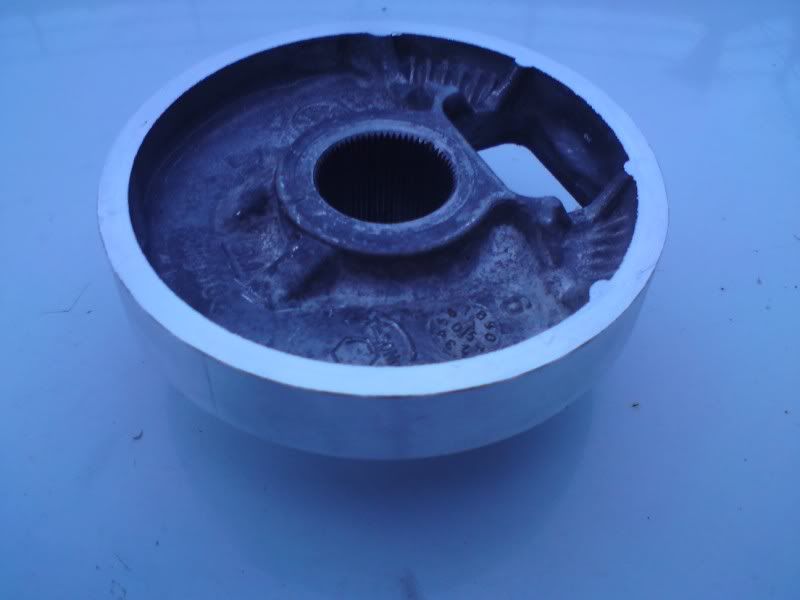
another difference between the new corsa rack and the old astra ones was the steering bose they are no longer tapper fit but are much larger sline and parrell fit, this ment my old bose would not fit
i could have got a new one but the problem is they are very long and with the extra length of the corsa rack vs the astra one i was already having space problems, so decided that i would make my own.
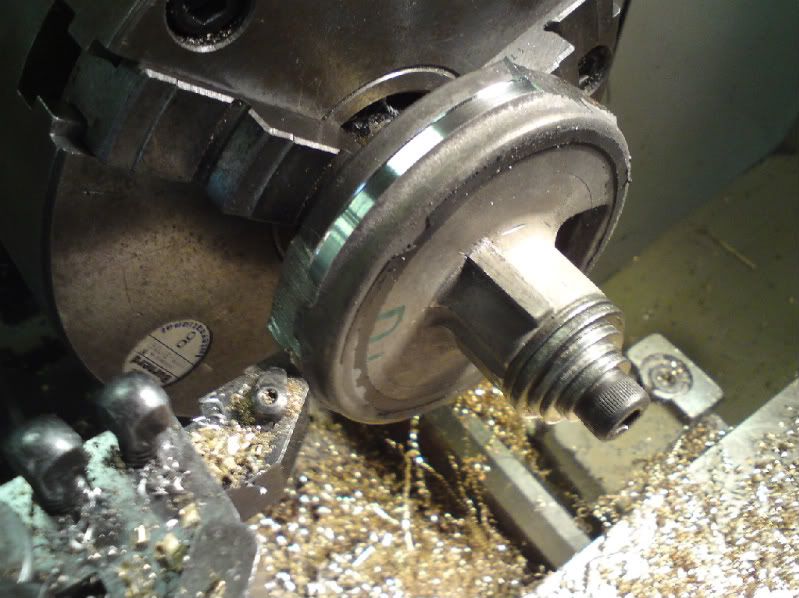
first i cut apart a corsa wheel for the spline part then chucked it into the lathe to clean it up

i then made a 8mm spacer than slots over that shaft this was to screw the steering wheel snap off onto as the pcd fell just in the wrong place on the standard corsa part, im afraid i dont have any pics of this thou was just a bit of alloy i machined down thou so im sure you can get the idea
anyway
the final piece you say
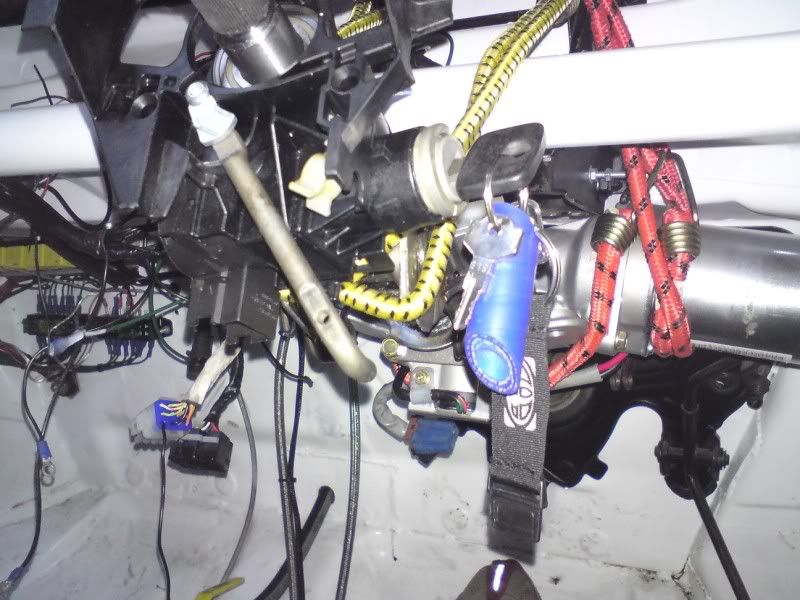
there was one final problem i had and it was keys i have a single key on my astra and was a little annoyed that i was going to have to have a big corsa key with lots of buttons that are no good to me.
so toyed the the idea of just not having a key but i happen to like the steering lock, it was then for some reason i decided to see if the mk2 and the corsa c barrel was the same, my head was telling me i was being silly but there was a little voice saying go on try it you know you want to
so out came the corsa one on first inspection i thought fuck me that does look like the mk2 one, so sloted the mk2 barrel in and to my shock it worked,
so in 20 year vauxhall have not changed the fitment of the key barrel.
ive had it working and im more than happy with the assistance it gives, i can now turn the wheel on the spot without causing myself a mischief lol
after doing a few miles in the car now i have decided that the weight of a let, big sticky tyres and quick rack and not power steering (plus a little bit of gettting old LOL) is far to heavy to drive with
i was very happy with the way the car handled and was happy with the rack rate so i did not want to change to a hydraulic set-up, so i started looking into using a corsa epas system.
i decided on using a corsa c system now on the standard car it uses a speed input and engine speed to decide how much assistance to give, thats far to difficult to implement in bespoke item so i decided that i would use a control box these are now avalible for as little as �30 from ebay and replicate the 2 signals required, then via a dial on the dash you can change how much assist you get.
anyway enough chat lets have some pics
the first problem was that the rack was the fitting at the bottom of the column was different
after some measurments i decided that i could file down the shaft to the correct shape and there would be more than meat left on the shaft so out came the file
as you can see i even had to flat the smallest part of the shaft so there is alot of flat to grip on
the standard astra uj was then able to slot straight on
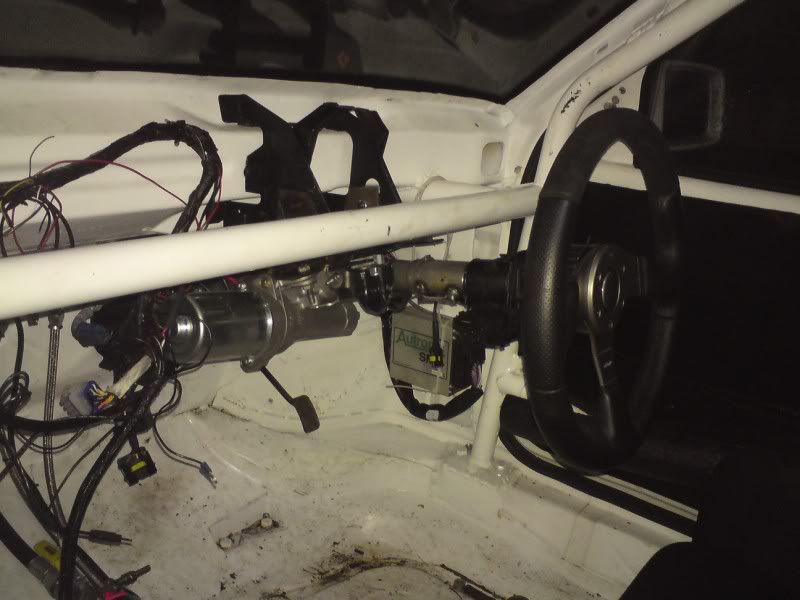
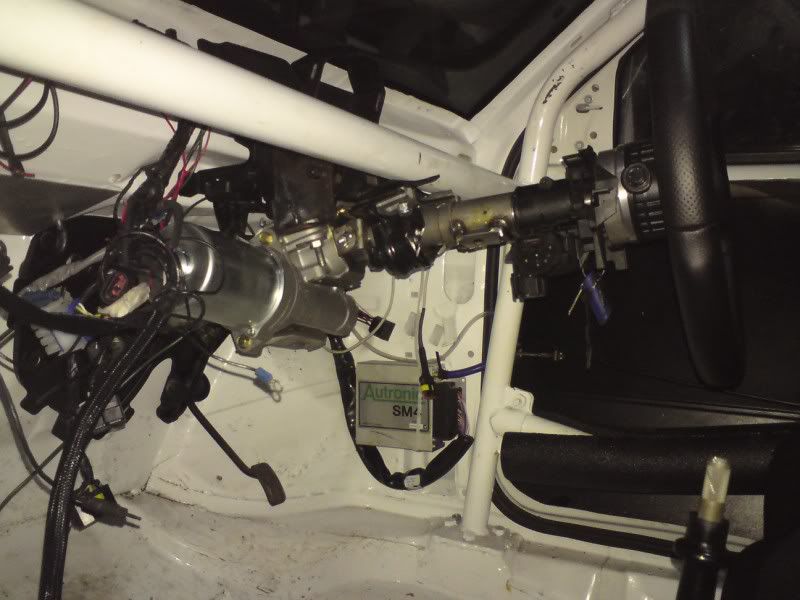
next up was to hold the rack in place
my strechable mounting system worked perfect to show that the column would be much better fitted upside down so was turned upside down, this ment that the key was on the wrong side
so i removed the rivets that held the second half of the shaft on turned it around and used bolts to hold it
it was then time to make some brackets first i made some out of very thin alloy so i could bend into shape i then made some thicker steel ones.
another difference between the new corsa rack and the old astra ones was the steering bose they are no longer tapper fit but are much larger sline and parrell fit, this ment my old bose would not fit
i could have got a new one but the problem is they are very long and with the extra length of the corsa rack vs the astra one i was already having space problems, so decided that i would make my own.
first i cut apart a corsa wheel for the spline part then chucked it into the lathe to clean it up
i then made a 8mm spacer than slots over that shaft this was to screw the steering wheel snap off onto as the pcd fell just in the wrong place on the standard corsa part, im afraid i dont have any pics of this thou
anyway
the final piece you say
there was one final problem i had and it was keys i have a single key on my astra and was a little annoyed that i was going to have to have a big corsa key with lots of buttons that are no good to me.
so toyed the the idea of just not having a key but i happen to like the steering lock, it was then for some reason i decided to see if the mk2 and the corsa c barrel was the same, my head was telling me i was being silly but there was a little voice saying go on try it you know you want to
so out came the corsa one on first inspection i thought fuck me that does look like the mk2 one, so sloted the mk2 barrel in and to my shock it worked,
so in 20 year vauxhall have not changed the fitment of the key barrel.
ive had it working and im more than happy with the assistance it gives, i can now turn the wheel on the spot without causing myself a mischief lol
18-02-2009, 09:45 PM
#165
PassionFord Post Troll
Thread Starter
time for a update
been doing quite a few things over the last week to get the car ready for bedford at the weekend
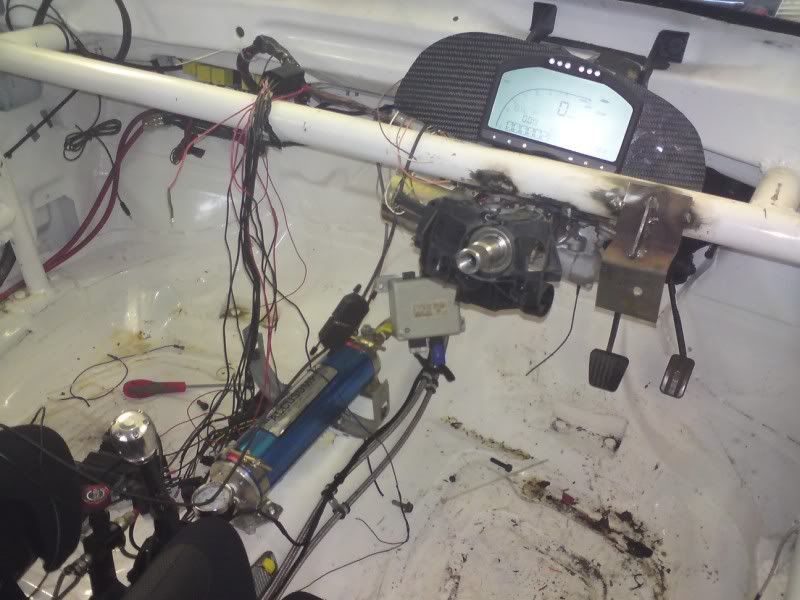
dash has gone back in after being out for the steering to be fitted.
ok some new bits
new manifold is now here

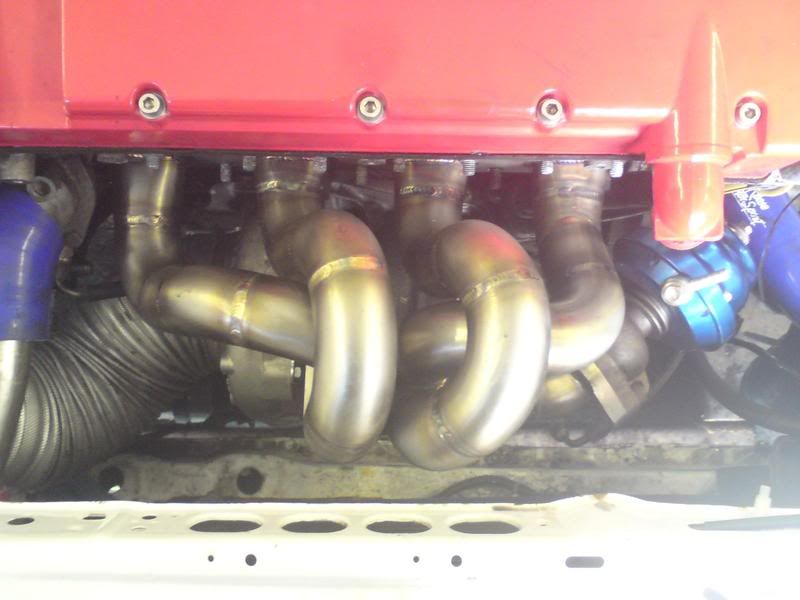
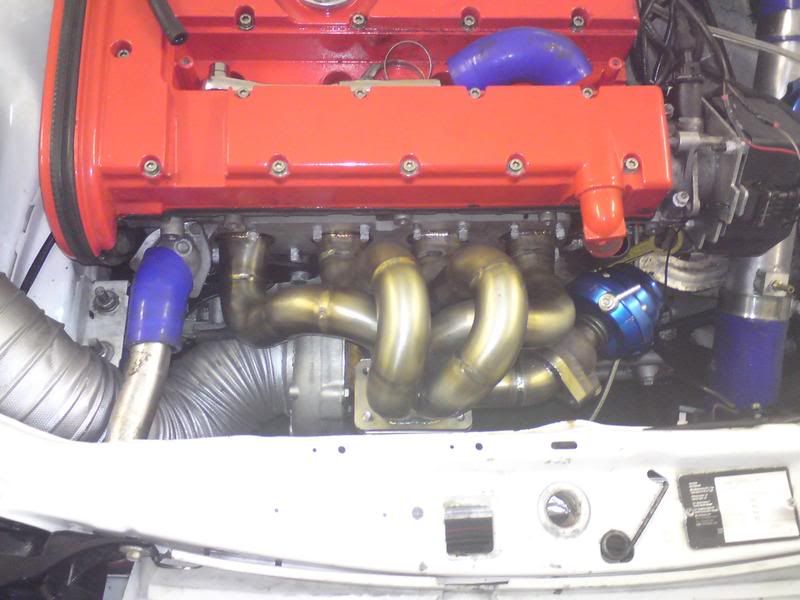
needed a new one as the old one cracked inside the collecter and welding it was not possible DOH
while the exhuast was all off i decided that i wanted to fit another silencer to the exhuast with bedford being quite strict on noise i dont want any problems

if you can belive it there is 2 boxes in that part of the exhuast LOL, it should make quite a big difference as the exhuast was more like a single box system but now its good a rather large center box lol
with not having a huge amount to do i decided to takle a few random jobs
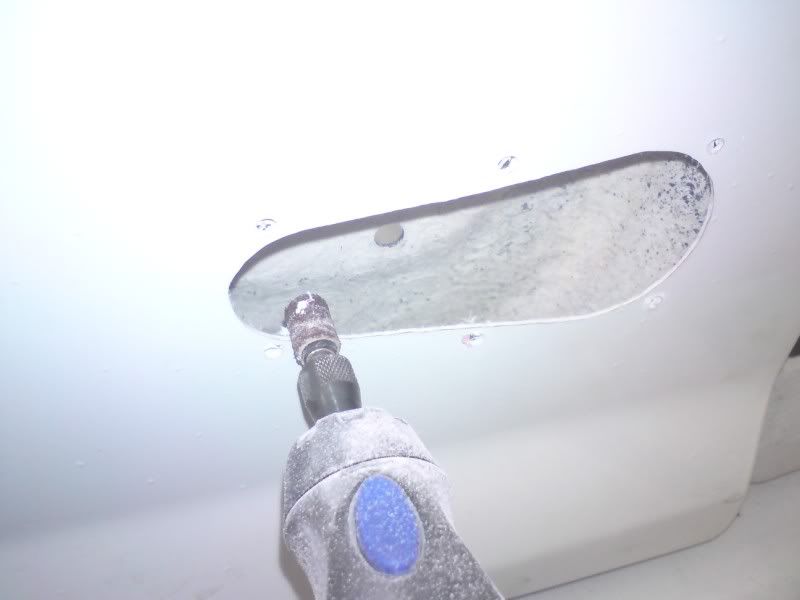
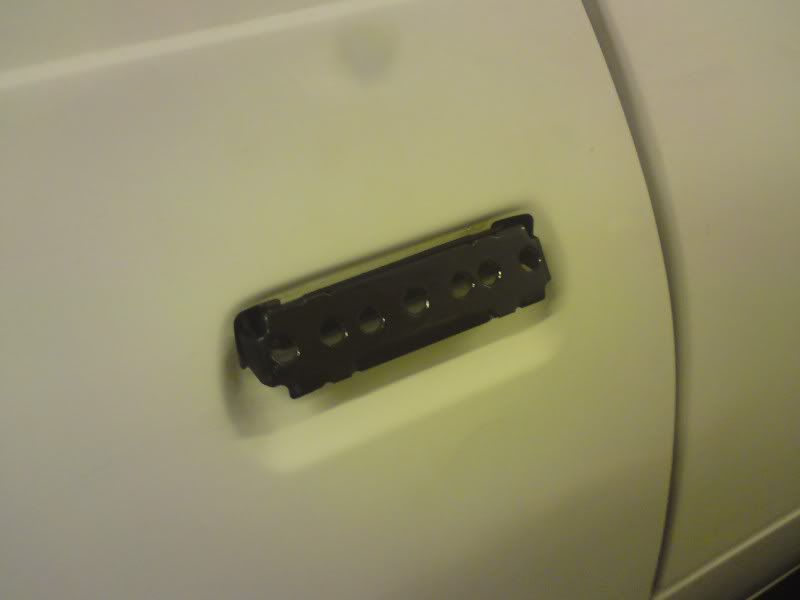
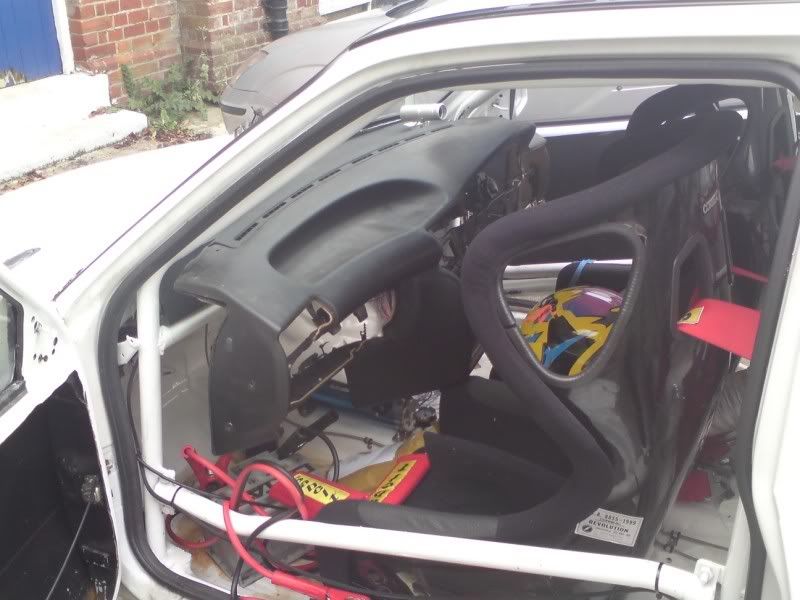
fitting the F/G tailgate was sometime i wanted to do, after deciding to use the same aero catches on the front i needed to cut the correct holes for them
first drilled some holes then used the dremel to take the holes out to the correct shape
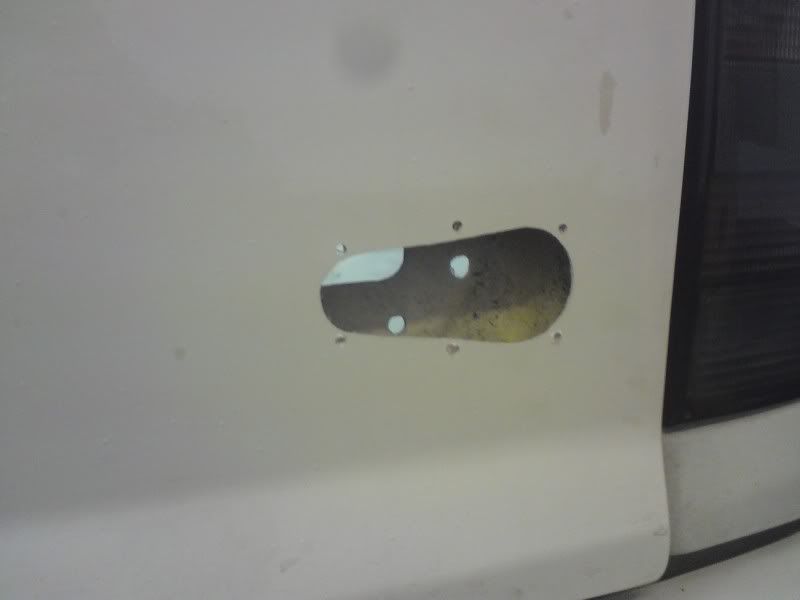
to hold the pins i done the same as the front using some strips of alloy
tailgate is a good fit pins are a little tricky to get in place but only take a few more seconds to fit
i think it looks quite cool from behind with them

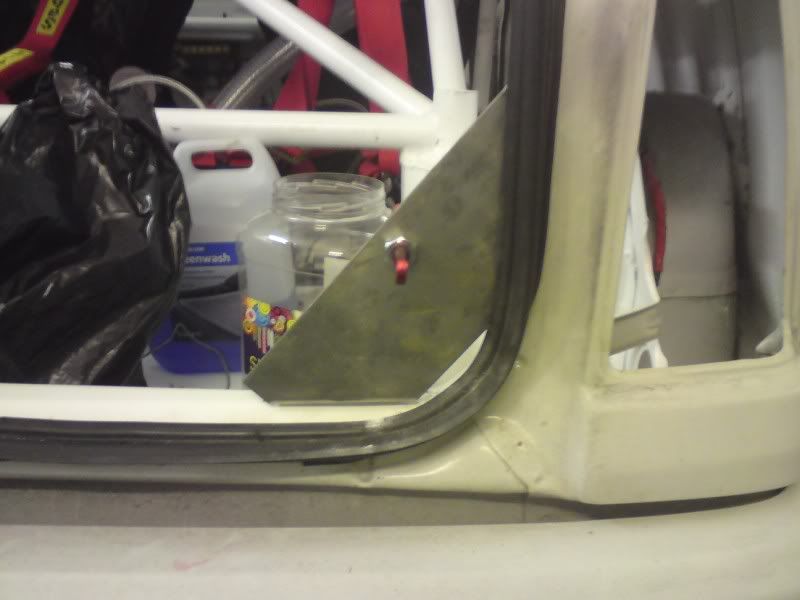
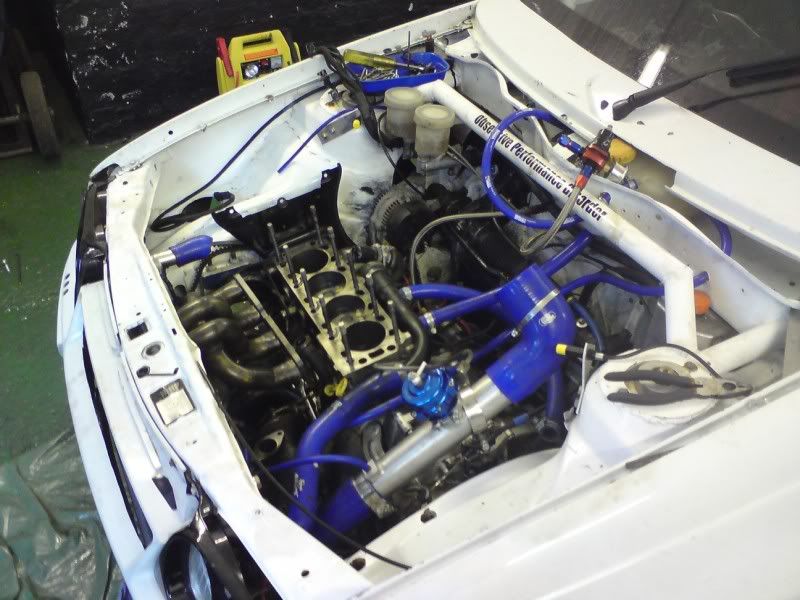
because my engine bay was getting a little cramped i went on the look at the scrappy to find a new header tank
in the end i found a zafira one that fits perfect into the scutle panel.

perfect fit
i also have some roose hoses for the water pipes and i ordered a load of silicon for doing the other water pipes (turbo feed/return)
had a bit of a problem yesterday
raised the car on the ramp and the passegers door opened as it was on its way up and the door caught on the wall oopps
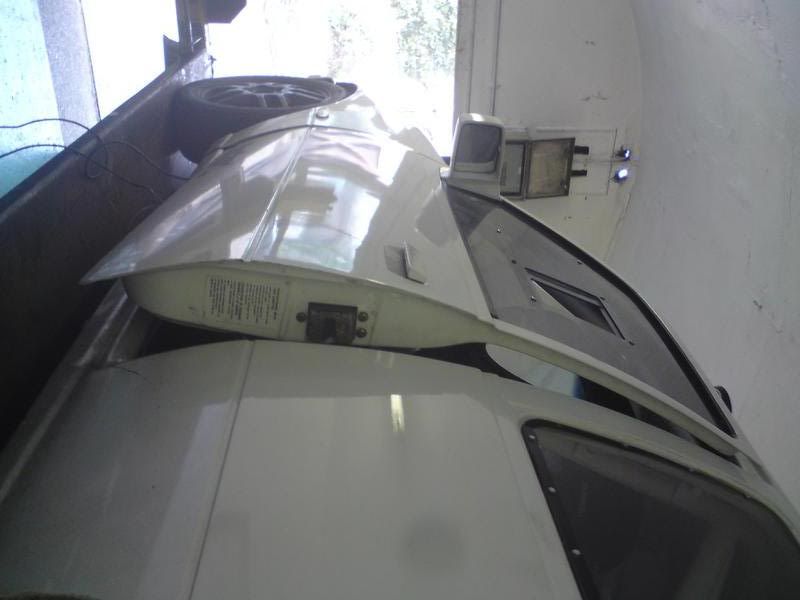
its not all that bad now was able to bend it back its not 100% but its close enough for now, lol
after seeing this on olly h's nova i really wanted to give it a try
i cut all the ruber off the handles and then drilled them out, just for looks more than anything but they do look good imo
anyway the car is nearly ready for bedford so fingers crossed
been doing quite a few things over the last week to get the car ready for bedford at the weekend
dash has gone back in after being out for the steering to be fitted.
ok some new bits
new manifold is now here
needed a new one as the old one cracked inside the collecter and welding it was not possible DOH
while the exhuast was all off i decided that i wanted to fit another silencer to the exhuast with bedford being quite strict on noise i dont want any problems
if you can belive it there is 2 boxes in that part of the exhuast LOL, it should make quite a big difference as the exhuast was more like a single box system but now its good a rather large center box lol
with not having a huge amount to do i decided to takle a few random jobs
fitting the F/G tailgate was sometime i wanted to do, after deciding to use the same aero catches on the front i needed to cut the correct holes for them
first drilled some holes then used the dremel to take the holes out to the correct shape
to hold the pins i done the same as the front using some strips of alloy
tailgate is a good fit pins are a little tricky to get in place but only take a few more seconds to fit
i think it looks quite cool from behind with them
because my engine bay was getting a little cramped i went on the look at the scrappy to find a new header tank
in the end i found a zafira one that fits perfect into the scutle panel.
perfect fit
i also have some roose hoses for the water pipes and i ordered a load of silicon for doing the other water pipes (turbo feed/return)
had a bit of a problem yesterday
raised the car on the ramp and the passegers door opened as it was on its way up and the door caught on the wall oopps
its not all that bad now was able to bend it back its not 100% but its close enough for now, lol
after seeing this on olly h's nova i really wanted to give it a try
i cut all the ruber off the handles and then drilled them out, just for looks more than anything but they do look good imo
anyway the car is nearly ready for bedford so fingers crossed


 17-04-2009, 08:08 PM
#171
PassionFord Post Troll
Thread Starter
well i guess its time for a little update
ive been a busy boy again, althou im afraid i dont have many pictures
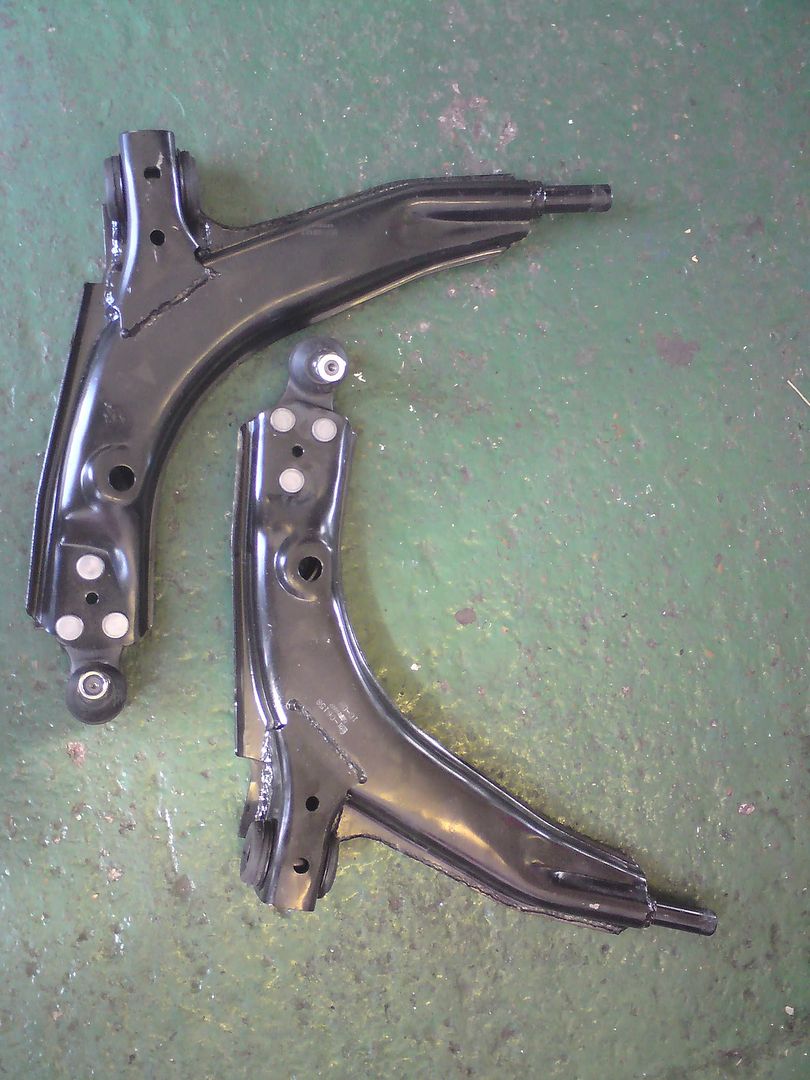
the astra developed alot of problems with torque steer and generally not even being able to drive in a straight line, alot of this was down to tracking after the off at bedford you could see the wheels where towing out, knowing that the tracking needed doing i deiced to just replace a load of compants before to save 2 lots of tracking
so got new lower wish bones (thanks mr G )
removed the wheels as the begining of the strip down and i could not turn the steering from the disc (shock)(shock) so i started to remove bits to find the problem, removed the epas and this did help but was not the problem,
on digging a little deeper i found that my quick rack was very tight and noisy, so i removed the rack and decided to strip it upon stripping i found alot of damage to the teeth inside the rack on the poinion damage that i feel was cause by the rack not beeing properly hardended :hissyfit::hissyfit::hissyfit:
i fille down some of the damage on the top od the tooth the fack i could file it down was telling me the metal was not even close to hard enough, and rebuilt the rack althou it was now free to turn it was also very noisy and rough, so i have basically thrown that in the bin.
now ive gone down a slightly different route this time i have fitted a PAS cav rack that is 2.8 turns the same as the quick rack but i have removed all the pipeing and im using it in manual mode, so ill let everyone know how i get on with that.
the car is now built back up with the rack, new track rod ends and new lower arms i have also refited the standard manual column for the moment as i think there was a little damage to my epas one as it was a little tight i set the tracking with some very basic gauges at work and took it for a quick drive
and to say its a different car is a understatement
the car is ALOT lighter to drive turning on the spot is now quite easy and when moving its perfect im now back of the opinion that the epas is not really needed atm but time will tell.
while the car was in bits i checked the brake pads and its a good job i did !!!

looks like i have got the pads far to hot and they have burnt out the resin so started tot fall apart ordered some ds3000 pads today so that should cure that problem
car is all ready now bar tracking for the ace caf meet next week and combe on the 25th
ive been a busy boy again, althou im afraid i dont have many pictures
the astra developed alot of problems with torque steer and generally not even being able to drive in a straight line, alot of this was down to tracking after the off at bedford you could see the wheels where towing out, knowing that the tracking needed doing i deiced to just replace a load of compants before to save 2 lots of tracking
so got new lower wish bones (thanks mr G )
removed the wheels as the begining of the strip down and i could not turn the steering from the disc (shock)(shock) so i started to remove bits to find the problem, removed the epas and this did help but was not the problem,
on digging a little deeper i found that my quick rack was very tight and noisy, so i removed the rack and decided to strip it upon stripping i found alot of damage to the teeth inside the rack on the poinion damage that i feel was cause by the rack not beeing properly hardended :hissyfit::hissyfit::hissyfit:
i fille down some of the damage on the top od the tooth the fack i could file it down was telling me the metal was not even close to hard enough, and rebuilt the rack althou it was now free to turn it was also very noisy and rough, so i have basically thrown that in the bin.
now ive gone down a slightly different route this time i have fitted a PAS cav rack that is 2.8 turns the same as the quick rack but i have removed all the pipeing and im using it in manual mode, so ill let everyone know how i get on with that.
the car is now built back up with the rack, new track rod ends and new lower arms i have also refited the standard manual column for the moment as i think there was a little damage to my epas one as it was a little tight i set the tracking with some very basic gauges at work and took it for a quick drive
and to say its a different car is a understatement
the car is ALOT lighter to drive turning on the spot is now quite easy and when moving its perfect im now back of the opinion that the epas is not really needed atm but time will tell.
while the car was in bits i checked the brake pads and its a good job i did !!!
looks like i have got the pads far to hot and they have burnt out the resin so started tot fall apart ordered some ds3000 pads today so that should cure that problem
car is all ready now bar tracking for the ace caf meet next week and combe on the 25th
08-10-2009, 08:14 PM
#172
PassionFord Post Troll
Thread Starter
well not updated this in a while so some of this is months old but never mine
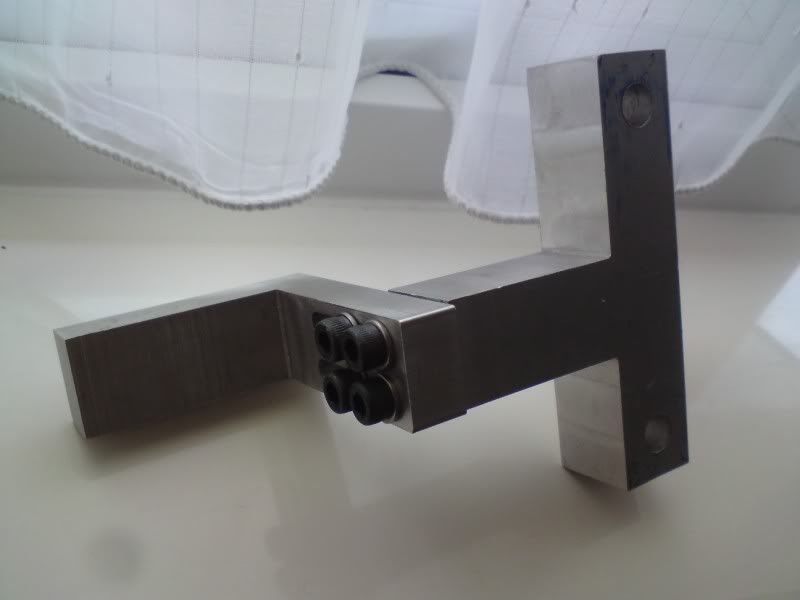
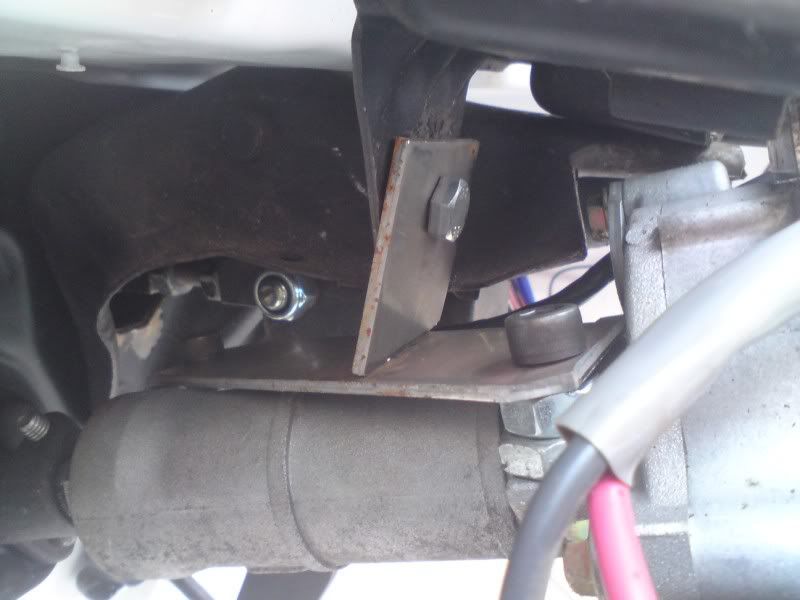
decided to make myself a new crank sensor holder
started off with some lumps of alloy and some rough meassurments
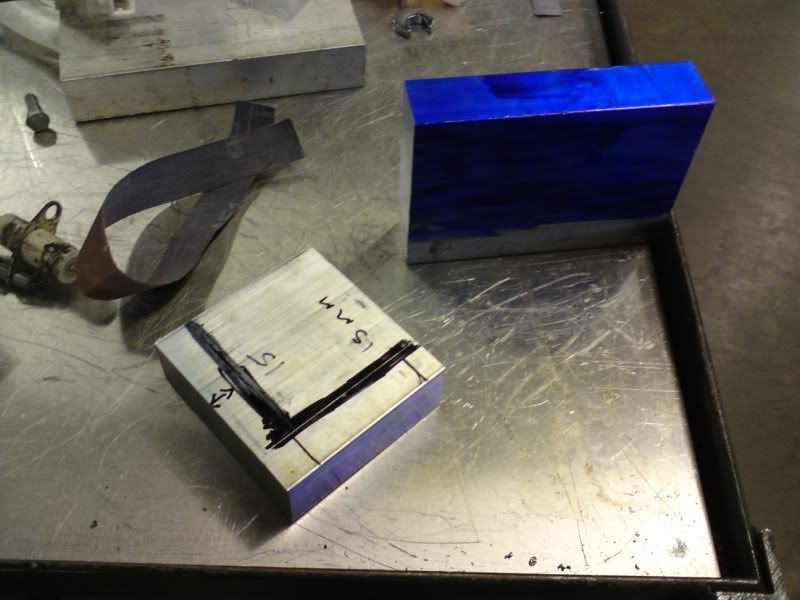
the bracket is made from 2 parts one that bolts to the block and the other holds the sensor to allow it to move and set the correct sensor gap.
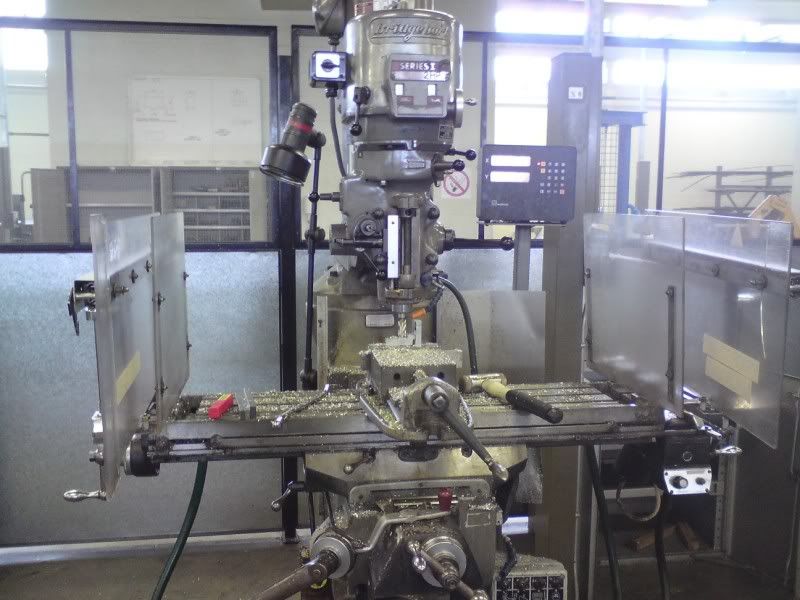
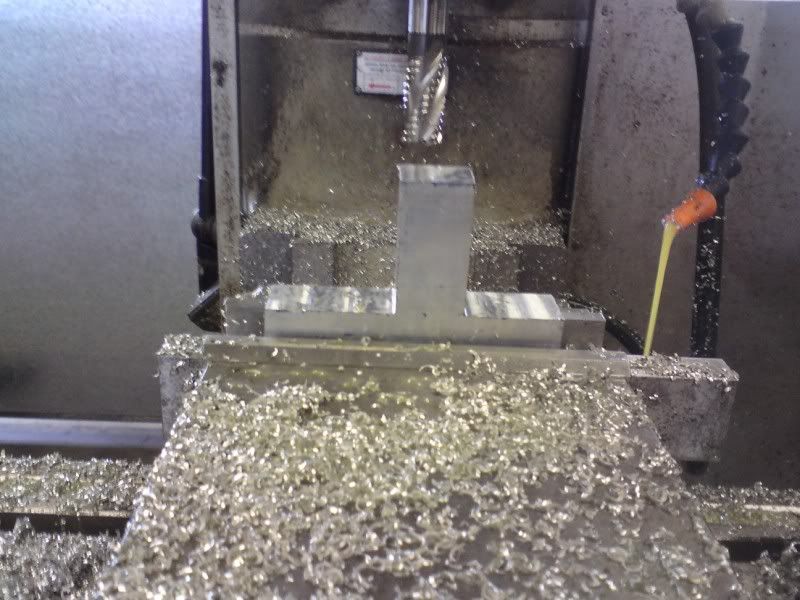
this is the mill i was using
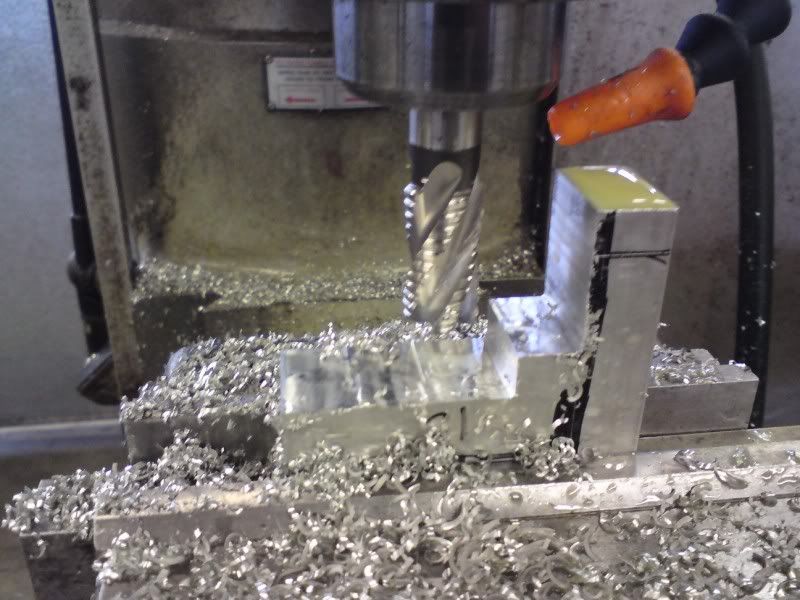
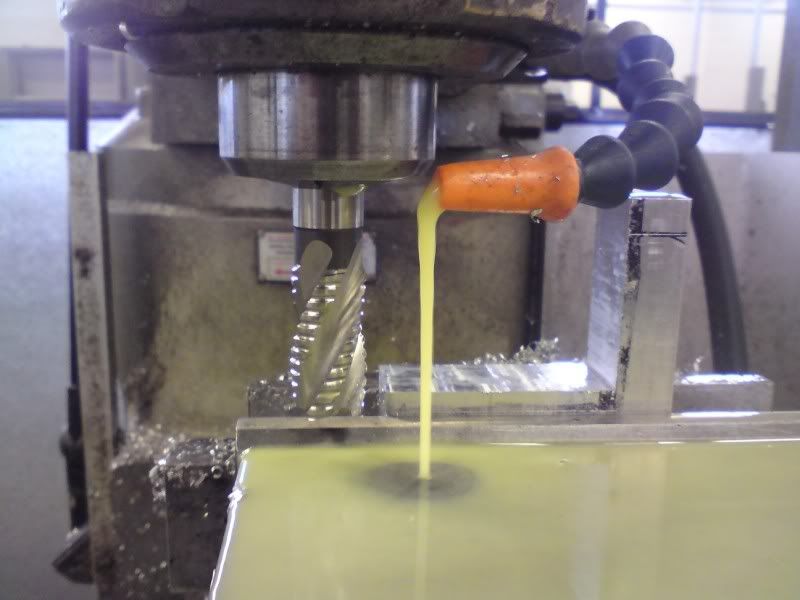
and this is cutting the L shape part of the bracket
and then
once it was the correct shape i then cut the slots in for adjustment
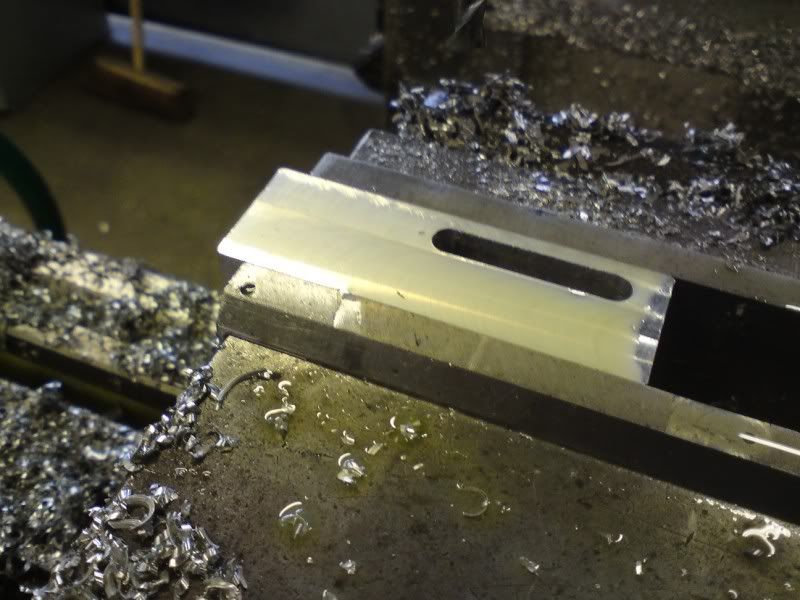
and was finally left with
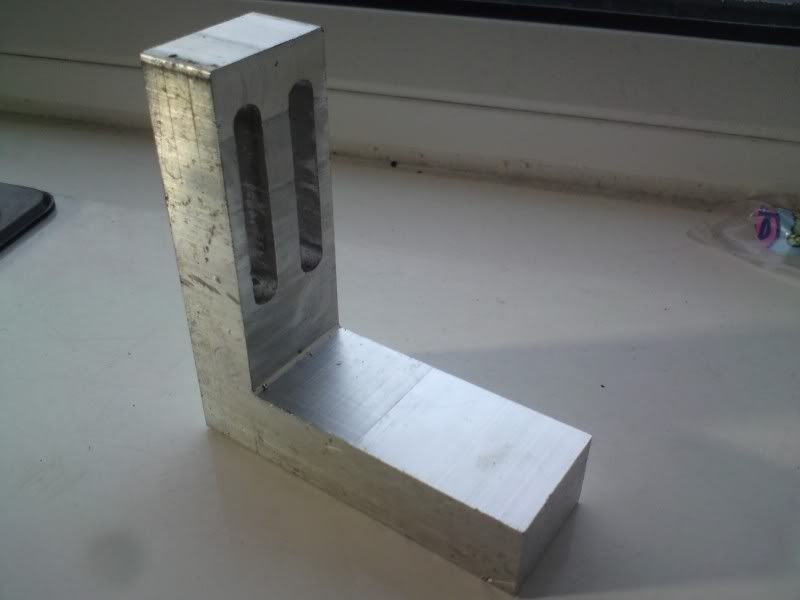
then onto the second part this is a T shape
once the T part was finished it was time for some drilling and tapping
the slots are exactally 6mm and the bolts are m6 so the tollerance was very tight and holes needed to be perfectly square and tapped straight.
first a hole was drilled

then the drill bit was replaced with a center in the chuck and a tap holder was used that enables me to tap perfectly straight
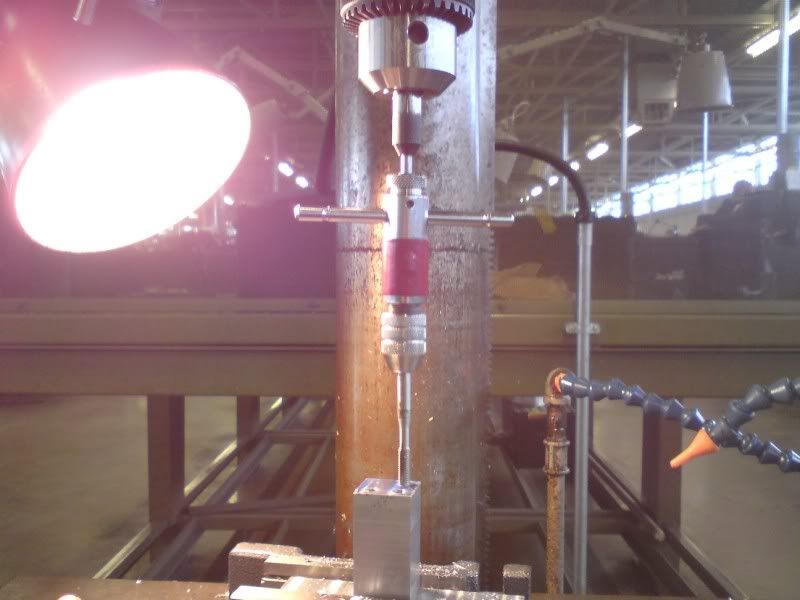
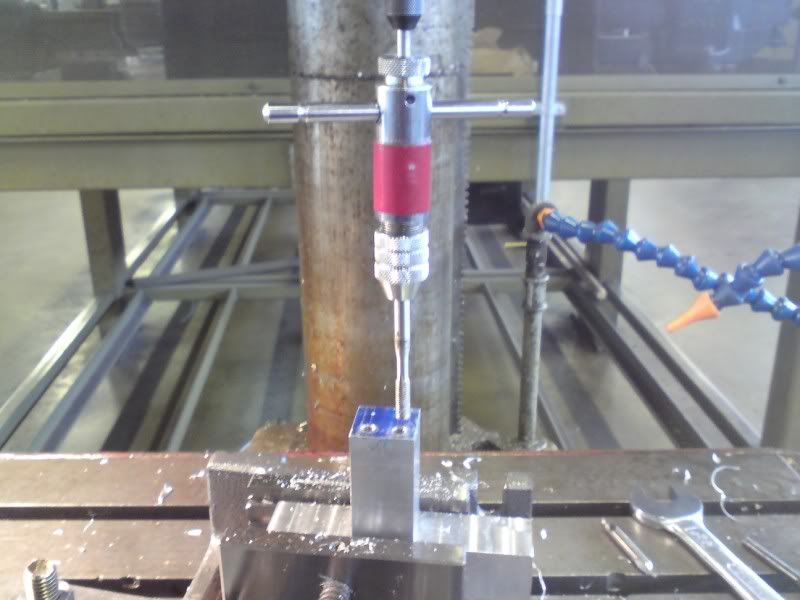
once all 4 holes were it could be assembled

it was then fitted to the car so the final alighment of the sensor could take place and the 15mm hole drilled for the sensor
and here she is near enough fitted and finished
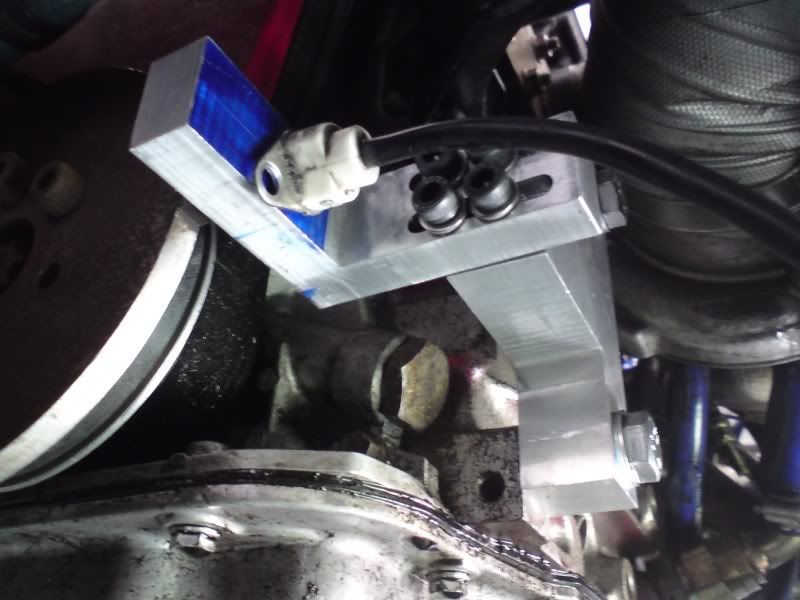
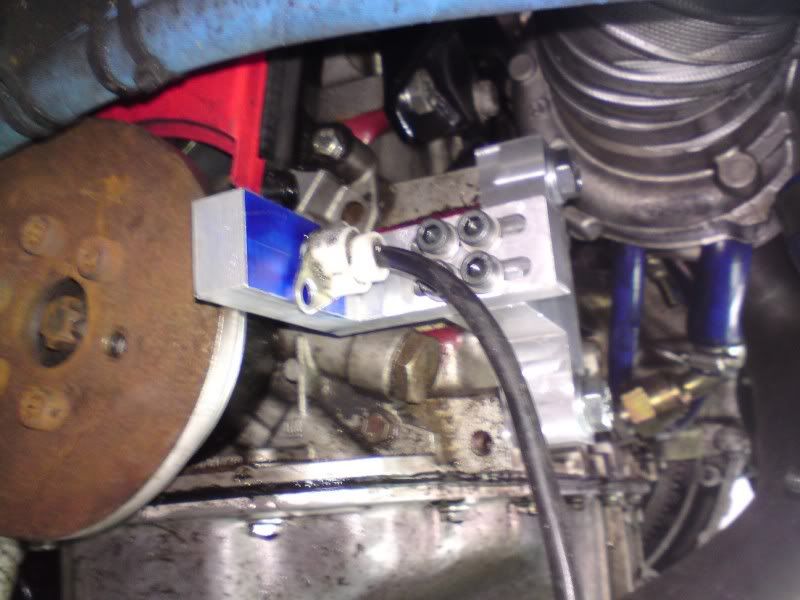
there is now no up and down movment and the sensor gap can be set up to the correct distance.
decided to make myself a new crank sensor holder
started off with some lumps of alloy and some rough meassurments
the bracket is made from 2 parts one that bolts to the block and the other holds the sensor to allow it to move and set the correct sensor gap.
this is the mill i was using
and this is cutting the L shape part of the bracket
and then
once it was the correct shape i then cut the slots in for adjustment
and was finally left with
then onto the second part this is a T shape
once the T part was finished it was time for some drilling and tapping
the slots are exactally 6mm and the bolts are m6 so the tollerance was very tight and holes needed to be perfectly square and tapped straight.
first a hole was drilled
then the drill bit was replaced with a center in the chuck and a tap holder was used that enables me to tap perfectly straight
once all 4 holes were it could be assembled
it was then fitted to the car so the final alighment of the sensor could take place and the 15mm hole drilled for the sensor
and here she is near enough fitted and finished
there is now no up and down movment and the sensor gap can be set up to the correct distance.
08-10-2009, 08:15 PM
#173
PassionFord Post Troll
Thread Starter
i finally found the problem with not going in a straight line !!
one of the engine mounts was loose, im ammazed a loose engine mount made the car feel so bad but im just glad its handling good again, so with the car going in a straight line should be all ready for pv right
pfff that would be boring
as some of you will remeber i had a problem with my engine smoking, first we thought it was valve stem seals but the actuall diagnosis was that oil is leaking between the valve guide and the head i get a streek of oil on the roof of the exhuast chambers and wet inlet valves lol.
i have ignored it for quite a while as it only used to smoke on the first start of the day but its got worse first it started smoking every time i started it then if i left it ticking over it would smoke ALOT althou it was not damaging anything it did make the car kind of emabarrising.
to the point that at combe i had a blowing exhuast gaket under the bonnet and a guy walking past was telling me to turn it off becasue it was on fire which i knew it was not but it really did look like it was.
after a chat with chip it turned out he had a spare coscast head atm in good nick, so i decided i would fit that before pv, the idea was to fit with standard valves as we were not to bothered if i trashed the head as we were pretty sure my pistons would be needing a replace soon anyway.
this is the oil that has leaked from the guides back into the inlet
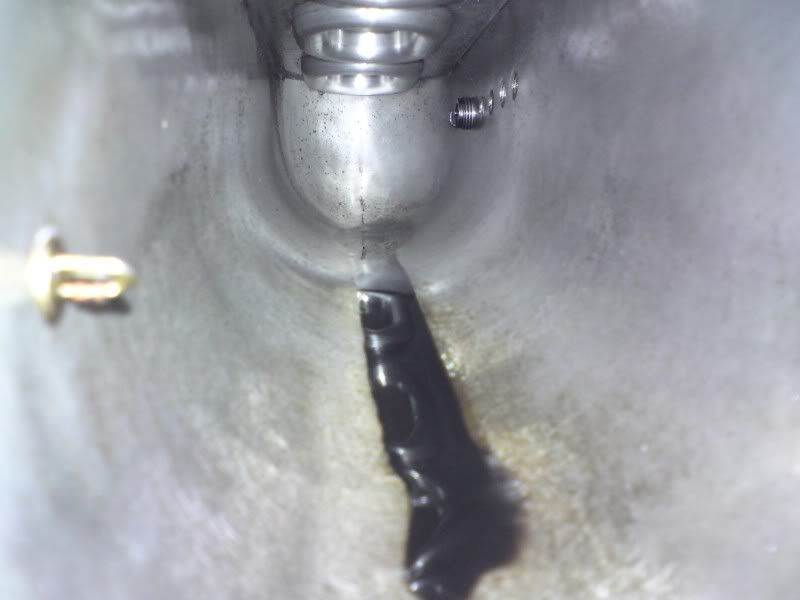
much to my surprise when i opened it up there were no damage to my pistons or bores so this got me thinking

do i just want to fit the head as standard or fit my over size valves, after talking to steve boy slim it was soon aparent that just fitting the valves was not possible as you end up with a step in the throat
so the throats would need a little work, and after some more words with steve it was decided that the new head would not only be fitted out with the valves but would also be going to neil roper for a full port job (that hurt lol)
i decided while the engine was near all out anyway that id change the gearbox and drop the enigne out so i could properly clean the bay where it spat cv grease everywhere like i said dont like to do things by halfs LOL
so a few hours later


new head should be with me an in a week or so then its rebuild intime for pv
one of the engine mounts was loose, im ammazed a loose engine mount made the car feel so bad but im just glad its handling good again, so with the car going in a straight line should be all ready for pv right
pfff that would be boring
as some of you will remeber i had a problem with my engine smoking, first we thought it was valve stem seals but the actuall diagnosis was that oil is leaking between the valve guide and the head i get a streek of oil on the roof of the exhuast chambers and wet inlet valves lol.
i have ignored it for quite a while as it only used to smoke on the first start of the day but its got worse
to the point that at combe i had a blowing exhuast gaket under the bonnet and a guy walking past was telling me to turn it off becasue it was on fire
after a chat with chip it turned out he had a spare coscast head atm in good nick, so i decided i would fit that before pv, the idea was to fit with standard valves as we were not to bothered if i trashed the head as we were pretty sure my pistons would be needing a replace soon anyway.
this is the oil that has leaked from the guides back into the inlet
much to my surprise when i opened it up there were no damage to my pistons or bores so this got me thinking
do i just want to fit the head as standard or fit my over size valves, after talking to steve boy slim it was soon aparent that just fitting the valves was not possible as you end up with a step in the throat
so the throats would need a little work, and after some more words with steve it was decided that the new head would not only be fitted out with the valves but would also be going to neil roper for a full port job (that hurt lol)
i decided while the engine was near all out anyway that id change the gearbox and drop the enigne out so i could properly clean the bay where it spat cv grease everywhere like i said dont like to do things by halfs LOL
so a few hours later
new head should be with me an in a week or so then its rebuild intime for pv
08-10-2009, 08:15 PM
#174
PassionFord Post Troll
Thread Starter
i have now got my new head spec as follows
neil roper ported
1mm oversize RCE valves
double valve springs
steel retainers
early spring platforms
13mm cosworth bronze guides
both XE cams
arrow solid lifter conversion
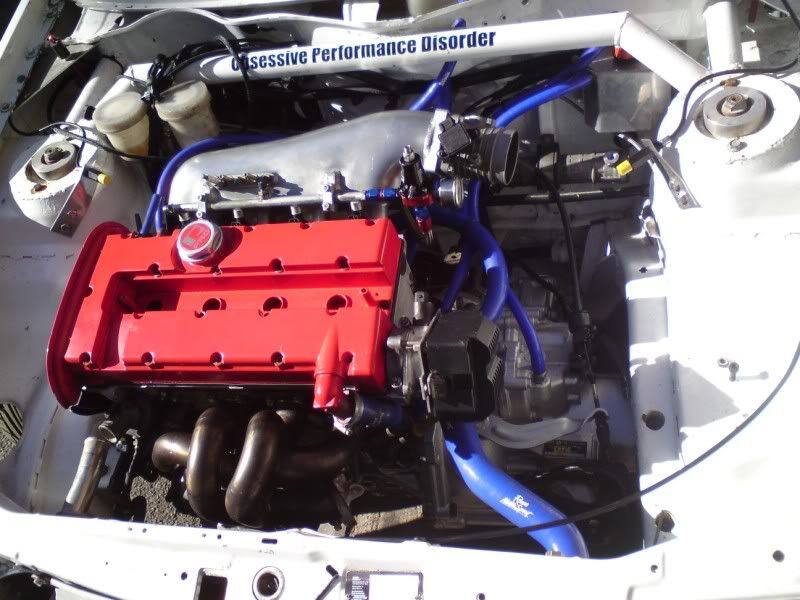
while the engine was put decided to change the gearbox as mine got very noisy
gave the new box a lick of paint before going in
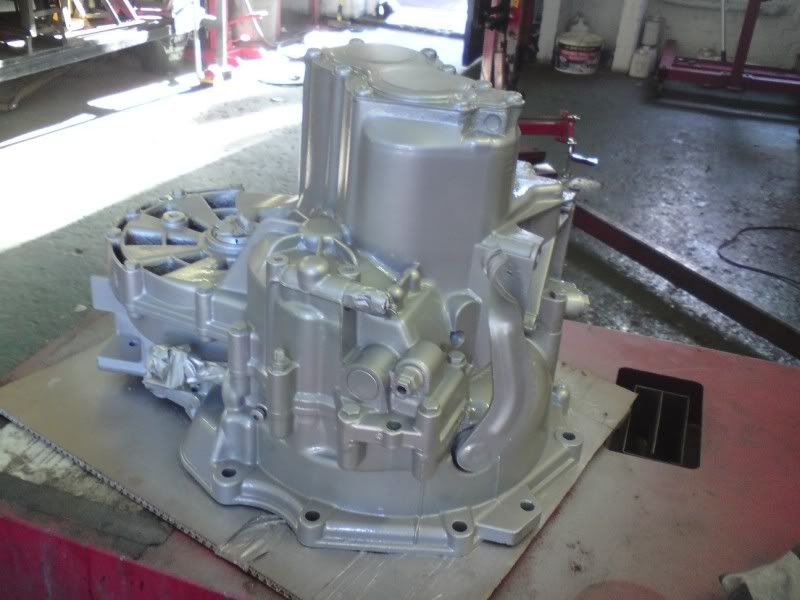
and then sloted it all into place
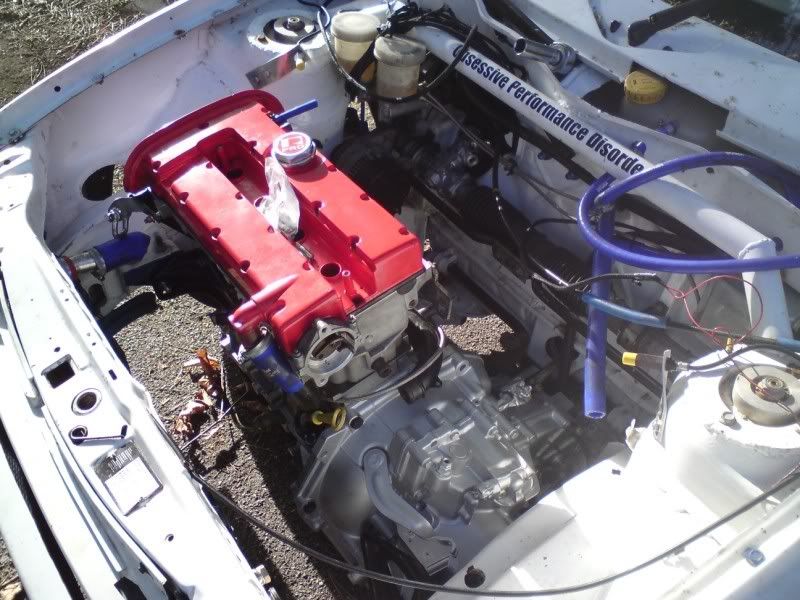
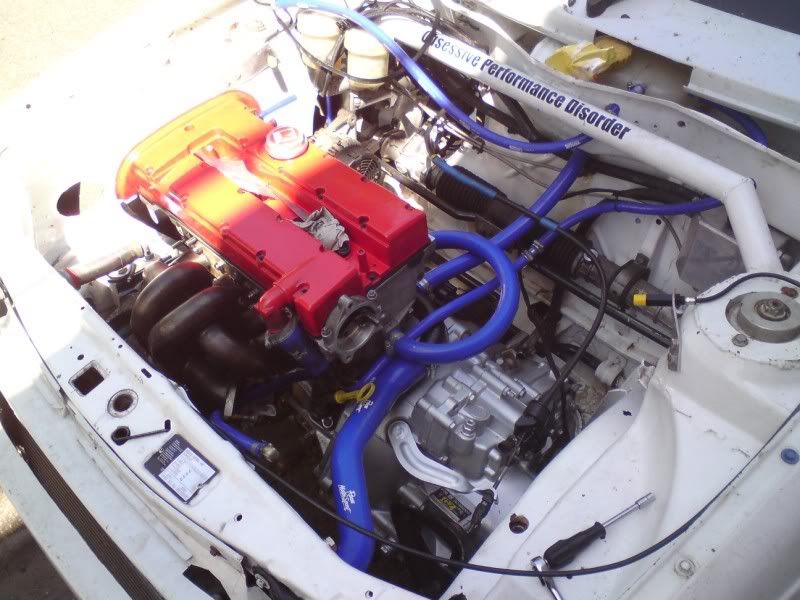
turbo and hoses back in
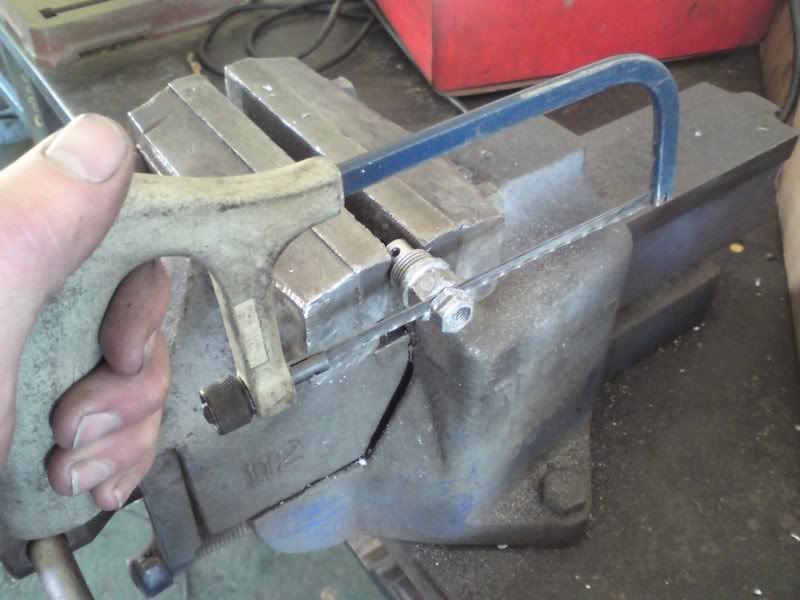
while fitting bits today i rememebered that my gearbox has been breathing really heavy so decided to plumb the gearbox vent into the catch tank
first i adapted the standard vent
drilled the center out to 8.5mm and then tapped it with a 1/8npt tap
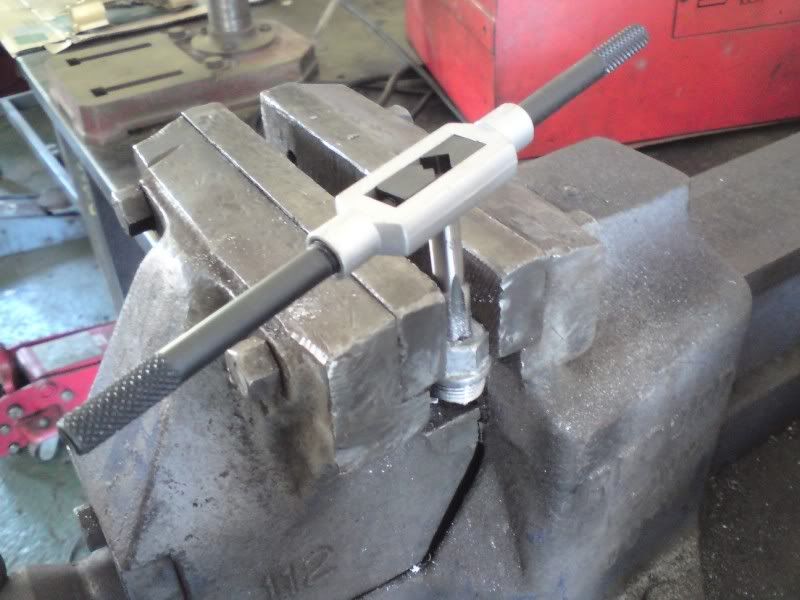
this allowed me to screw in a 8mm push fitting
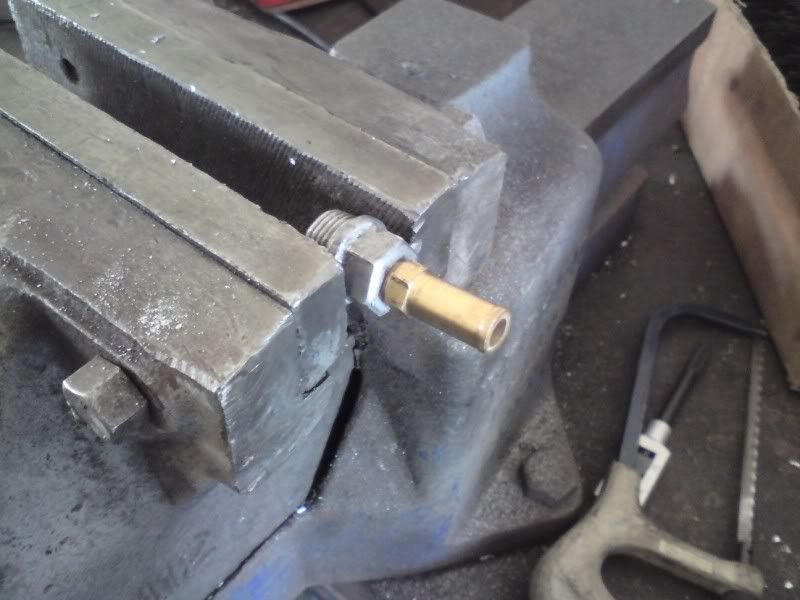
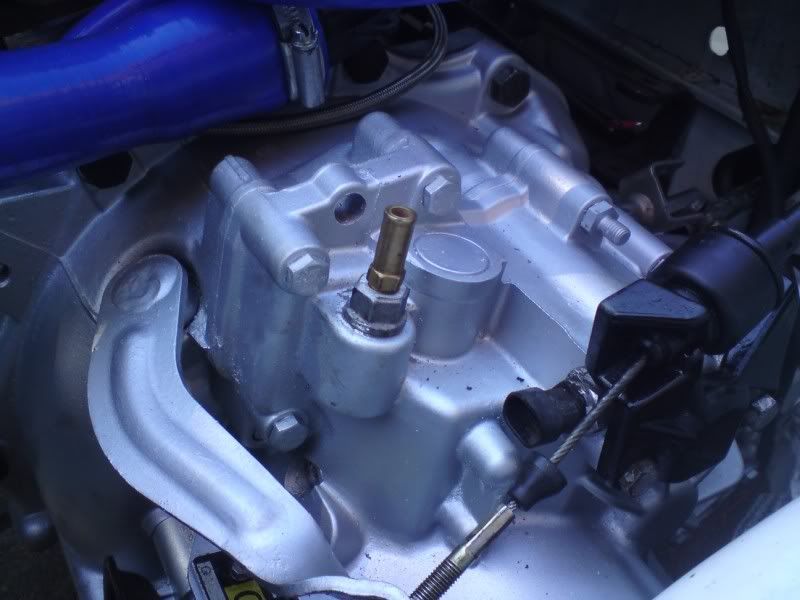
and fitted
drilled the catch tank and fitted the same fitting in there
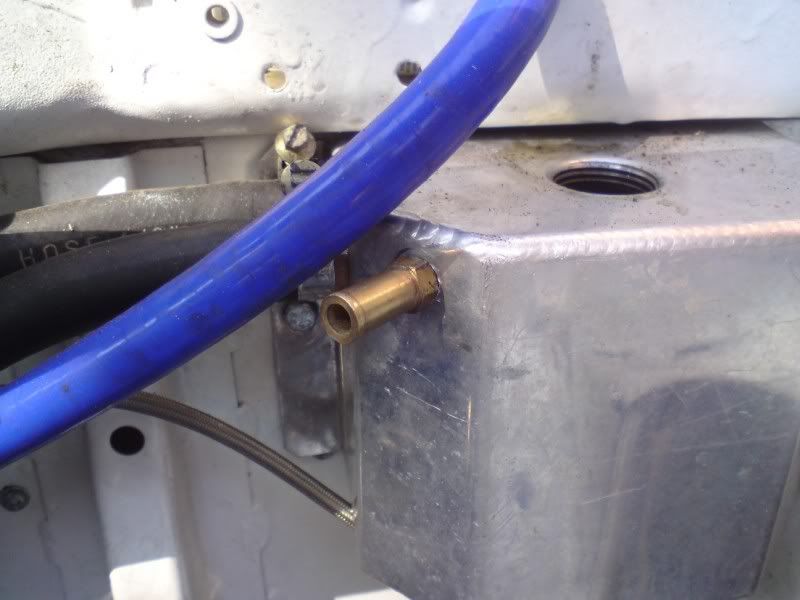
then got some of my 8mm silicon hoses i had left and there we have it a gearbox vent
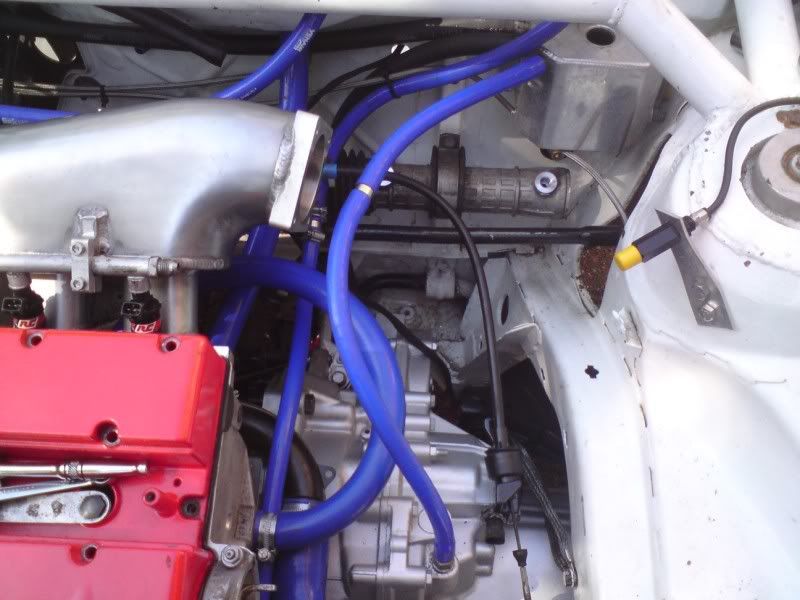
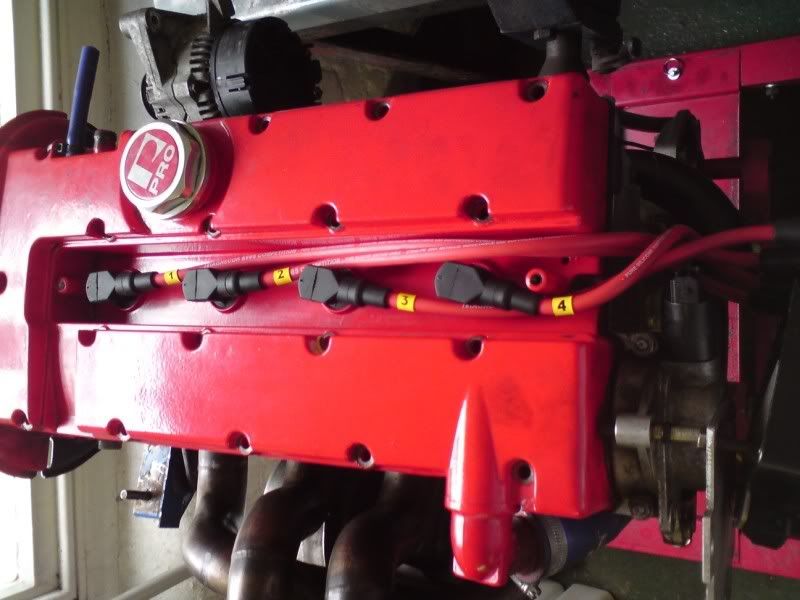
and with all the hoses neatly run
also recived some new leads from magnecor under warrenty
neil roper ported
1mm oversize RCE valves
double valve springs
steel retainers
early spring platforms
13mm cosworth bronze guides
both XE cams
arrow solid lifter conversion
while the engine was put decided to change the gearbox as mine got very noisy
gave the new box a lick of paint before going in
and then sloted it all into place
turbo and hoses back in
while fitting bits today i rememebered that my gearbox has been breathing really heavy so decided to plumb the gearbox vent into the catch tank
first i adapted the standard vent
drilled the center out to 8.5mm and then tapped it with a 1/8npt tap
this allowed me to screw in a 8mm push fitting
and fitted
drilled the catch tank and fitted the same fitting in there
then got some of my 8mm silicon hoses i had left and there we have it a gearbox vent
and with all the hoses neatly run
also recived some new leads from magnecor under warrenty
08-10-2009, 08:16 PM
#175
PassionFord Post Troll
Thread Starter
and upto date
well i made pv and as some of you will know i managed a 12.1@126 mph with only 3 runs
little gutted the weather was so poor i could not do another few runs but there goes, anyway the car was not touched for a few months so these next updates are all inside the past month
begining of september
i have not touched the car really in the last 3 months partly due to work comitments, partly due to dad comitments and partly due to waiting on an exhaust manifold AGAIN.
but this week i did start doing a few jobs ive been putting off, first was the roof a few years ago i had the roof rails welded and filled, or so i thought

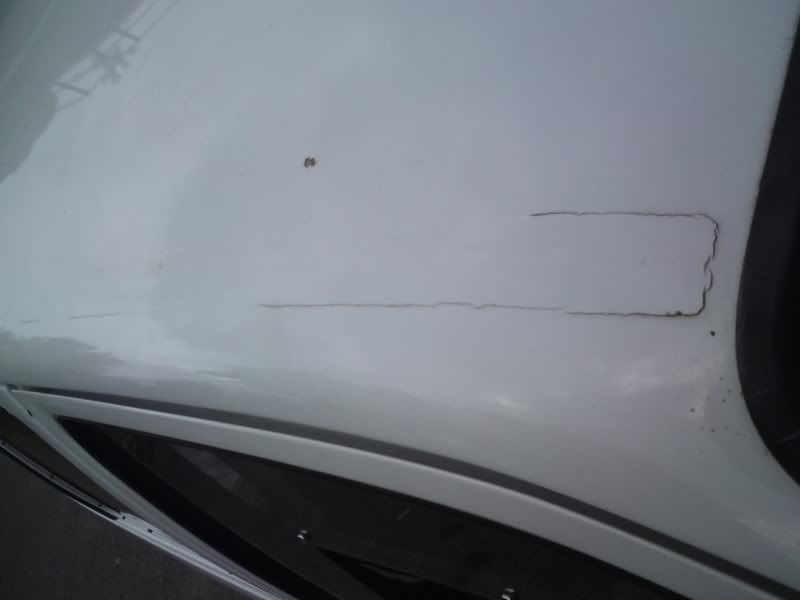
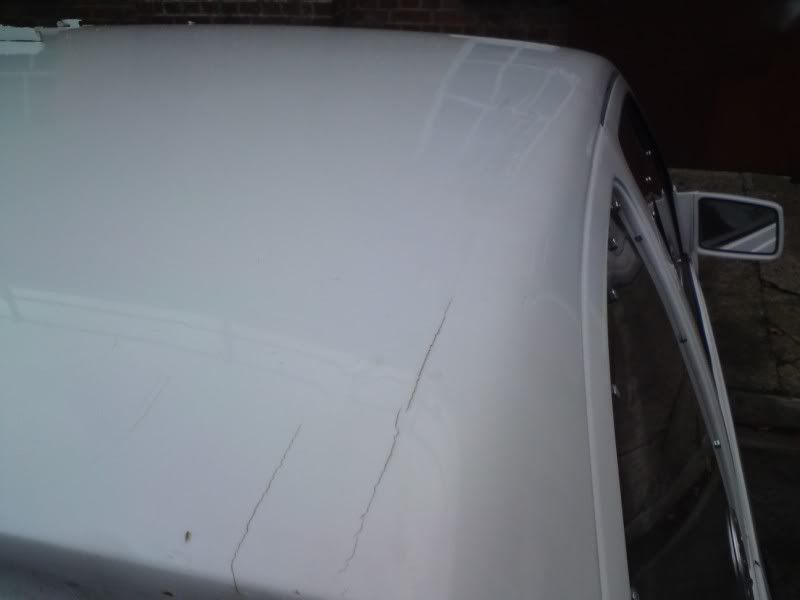
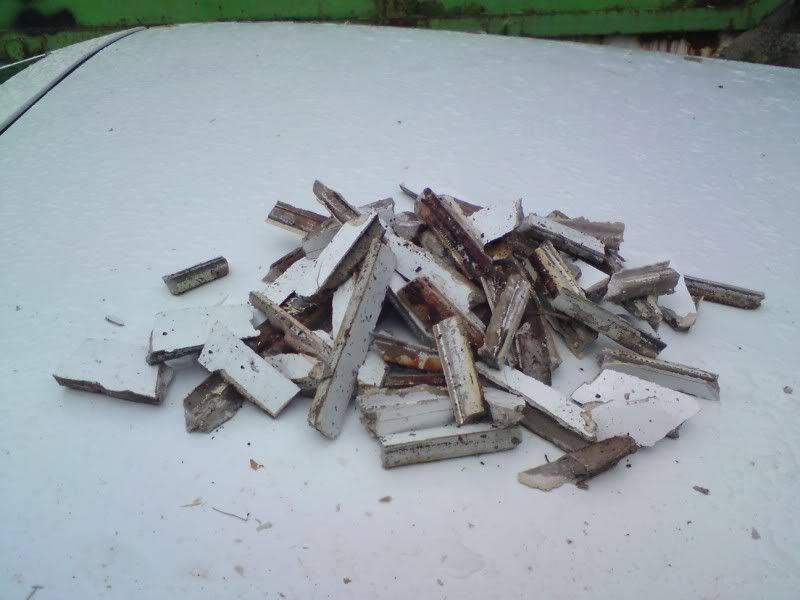
as you can see the job they done was not to hot so i decided to have a dig foolishly thinking i could do it without damaging the paint to much lol what i found was the rail was TOTALLY full of filler with no plate at all no wonder it was cracked to ****

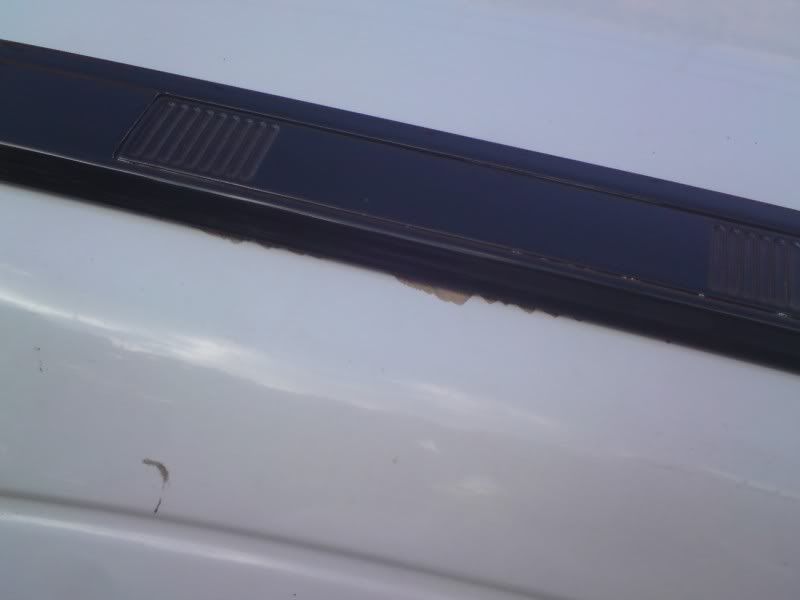
anyway i was going to get the car painted soon however ive been making some purchases lol as you will see in a min, so i decided as a temp fixing to get a pair of roof rails after making a few calls i found a set from brett and he posted them to me, i was hoping they had a decent overlay as that should cover most of the problem areas
i was plesently surprised
this is the worst part where it still shows from under but there is only one place like that so quite happy

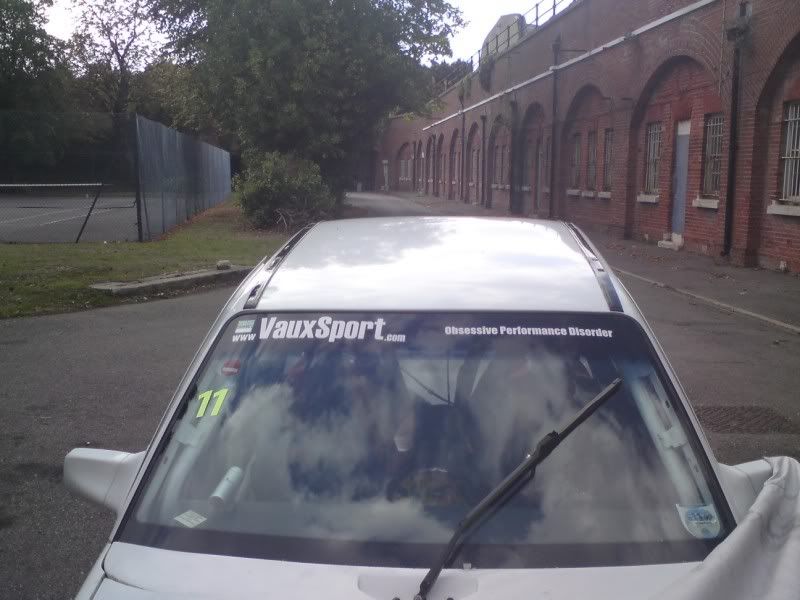
i dont normally like them but there kind of growing on me now.
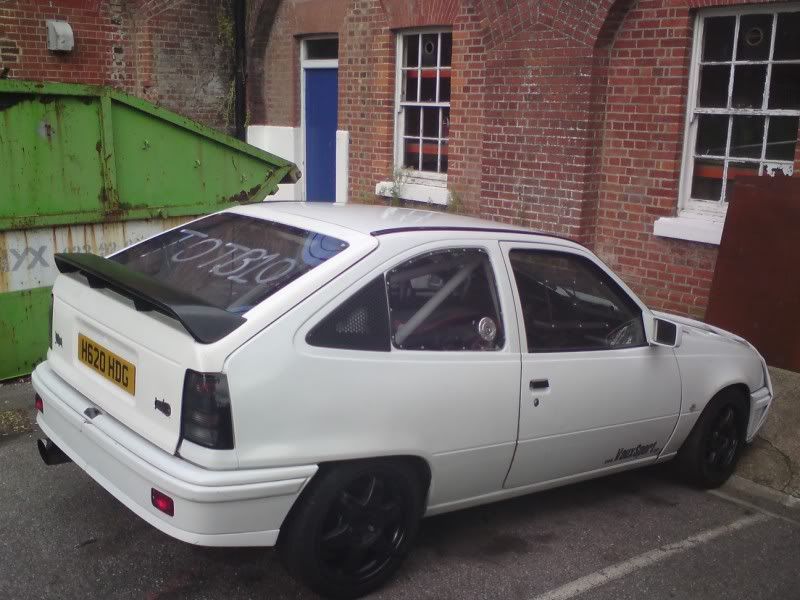
i also made a new purchase for it last week aswell, im fed up with problems with my dash and a few gauges have recently died so i decided to get a new dash


race technologys dash 2 and a DL1 data logger ive been playing the with data logger and its quite cool can do track mapping and upload all your data onto videos, with dials and maps of tracks etc but annoyingly for some reason when i got the dash 2 wired in it did not work so i have sent it back to be looked at but here is a pic of it working

well i made pv and as some of you will know i managed a 12.1@126 mph with only 3 runs
little gutted the weather was so poor i could not do another few runs but there goes, anyway the car was not touched for a few months so these next updates are all inside the past month
begining of september
i have not touched the car really in the last 3 months partly due to work comitments, partly due to dad comitments and partly due to waiting on an exhaust manifold AGAIN.
but this week i did start doing a few jobs ive been putting off, first was the roof a few years ago i had the roof rails welded and filled, or so i thought
as you can see the job they done was not to hot so i decided to have a dig foolishly thinking i could do it without damaging the paint to much lol what i found was the rail was TOTALLY full of filler with no plate at all no wonder it was cracked to ****
anyway i was going to get the car painted soon however ive been making some purchases lol as you will see in a min, so i decided as a temp fixing to get a pair of roof rails after making a few calls i found a set from brett and he posted them to me, i was hoping they had a decent overlay as that should cover most of the problem areas
i was plesently surprised
this is the worst part where it still shows from under but there is only one place like that so quite happy
i dont normally like them but there kind of growing on me now.
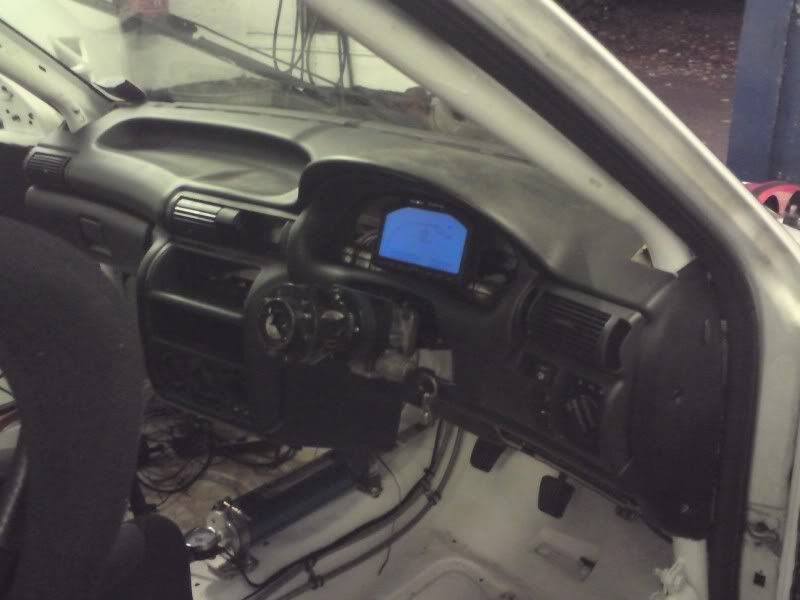
i also made a new purchase for it last week aswell, im fed up with problems with my dash and a few gauges have recently died so i decided to get a new dash
race technologys dash 2 and a DL1 data logger ive been playing the with data logger and its quite cool can do track mapping and upload all your data onto videos, with dials and maps of tracks etc but annoyingly for some reason when i got the dash 2 wired in it did not work
08-10-2009, 08:18 PM
#176
PassionFord Post Troll
Thread Starter
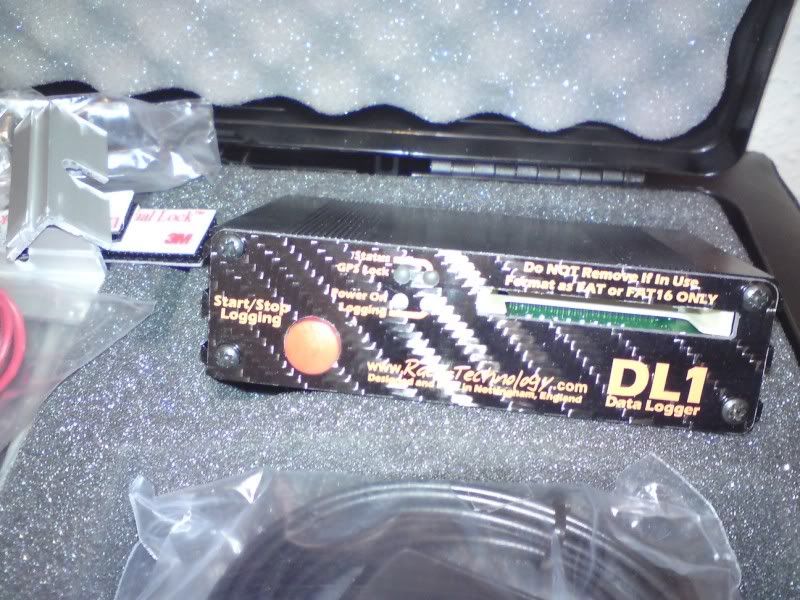
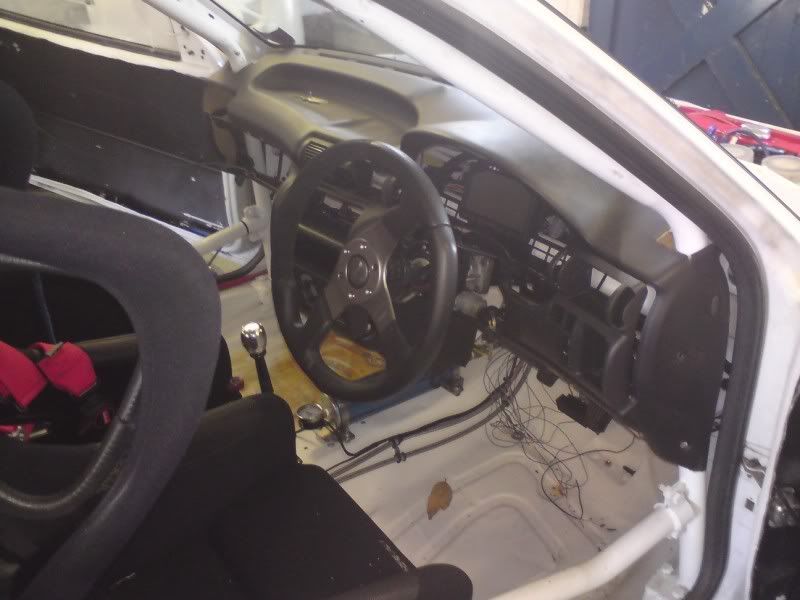
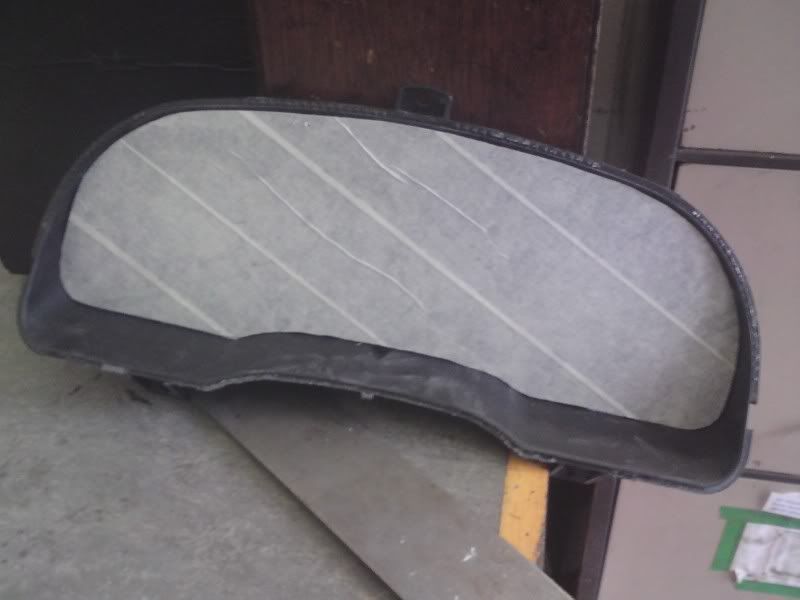
ive not been happy for a while with the inside of the car, i have decided to turn it back into a little bit more of a car
with the purchase of a new dash i was going to need to make a new dashboard i decided that this time i wanted a proper dash and the dash is
once i have it properly fitted it will be getting sent off to get flocked
had a quick trial of the dash 2 inside the instrment panel and it fits really well
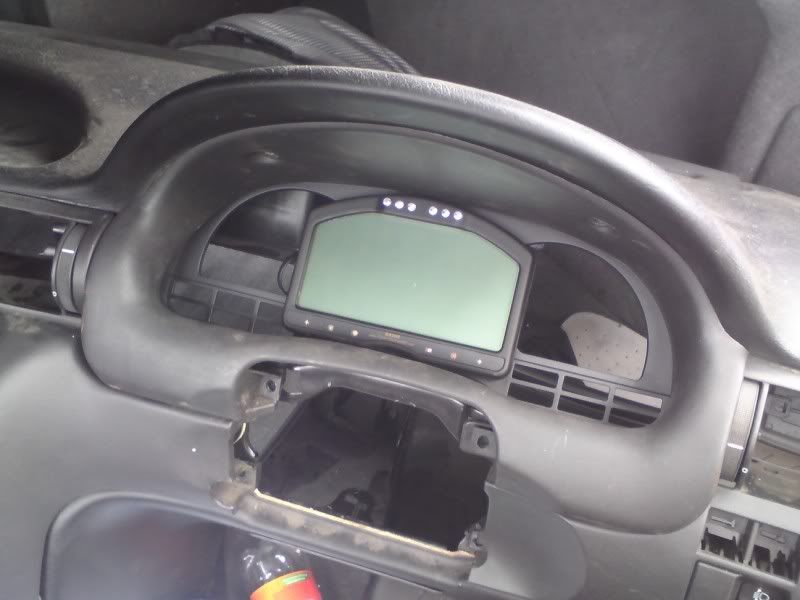
little bit of progress on the dash got the old one stripped out and the new one cut into place, i must admit its harder than it looks cutting around a cage and i cut alot more than i needed to lol
so im going to get this one all mounted then once im fully happy ill get another to get flocked and cut it a minimal amount
but the good news is its now in i have properly mounted one side, using the original mounting points on the dash i cut a piece of metal the correct shape then welded it onto the cage going to do the drivers side tommorow in the same way, what it means is that i can mount the new flocked dash simply on original points
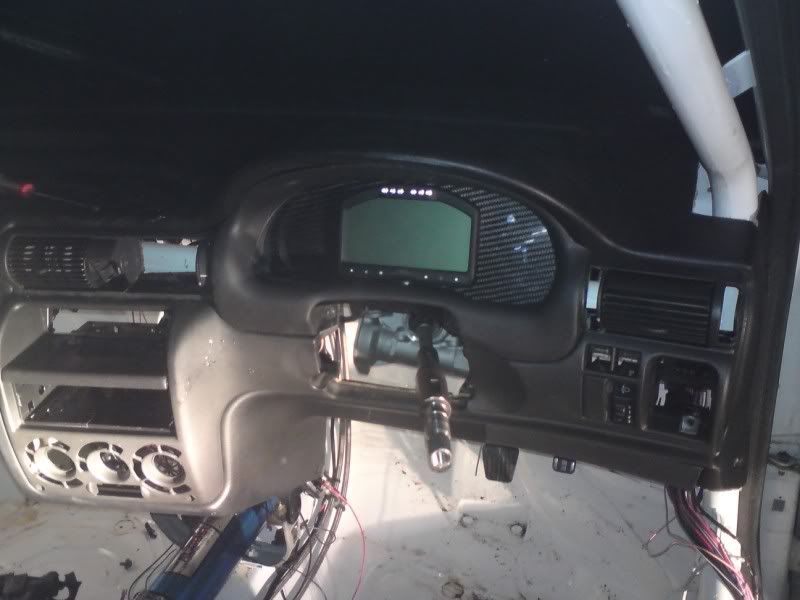
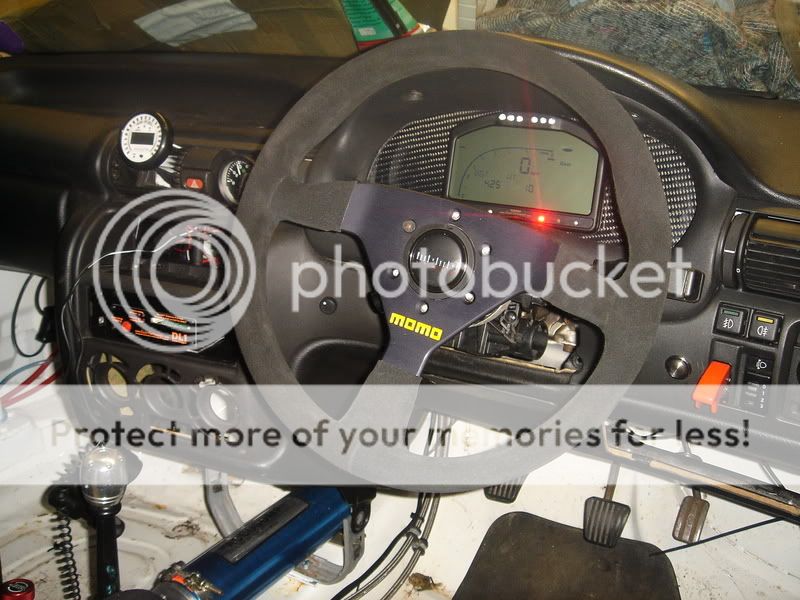
took a cheeky picture of what you can see though the steering wheel
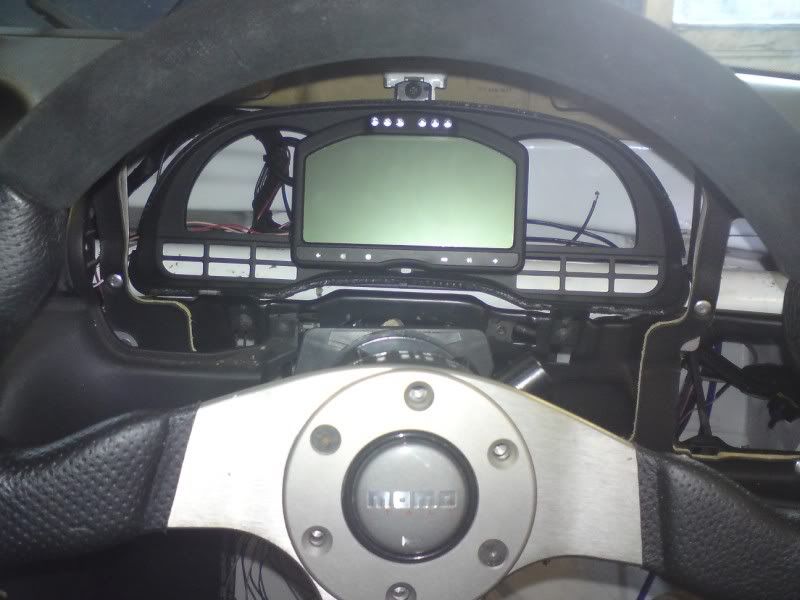
should look really nice once properly mounted and you can see the shift lights perfect
i powered it up tonight so it deserved a picture lol

with the purchase of a new dash i was going to need to make a new dashboard i decided that this time i wanted a proper dash and the dash is
once i have it properly fitted it will be getting sent off to get flocked
had a quick trial of the dash 2 inside the instrment panel and it fits really well
little bit of progress on the dash got the old one stripped out and the new one cut into place, i must admit its harder than it looks cutting around a cage and i cut alot more than i needed to lol
so im going to get this one all mounted then once im fully happy ill get another to get flocked and cut it a minimal amount
but the good news is its now in i have properly mounted one side, using the original mounting points on the dash i cut a piece of metal the correct shape then welded it onto the cage going to do the drivers side tommorow in the same way, what it means is that i can mount the new flocked dash simply on original points
took a cheeky picture of what you can see though the steering wheel
should look really nice once properly mounted and you can see the shift lights perfect
i powered it up tonight so it deserved a picture lol
 08-10-2009, 08:42 PM
#179
PassionFord Post Troll
Thread Starter
sensor bracket rocks, aint had any crank sensor errors since fitting it

yeh dash makes the car ALOT nicer to sit in, its getting treated to some more bits over the next few weeks, i removed the power steering a while ago as i had some problems with it but ive started to refit it again, making a lightweight heater box for it and im pretty sure once i find some new doors its getting proper front doors and electric windows lol

 25-10-2009, 10:35 PM
#184
PassionFord Post Troll
Thread Starter
a few pics
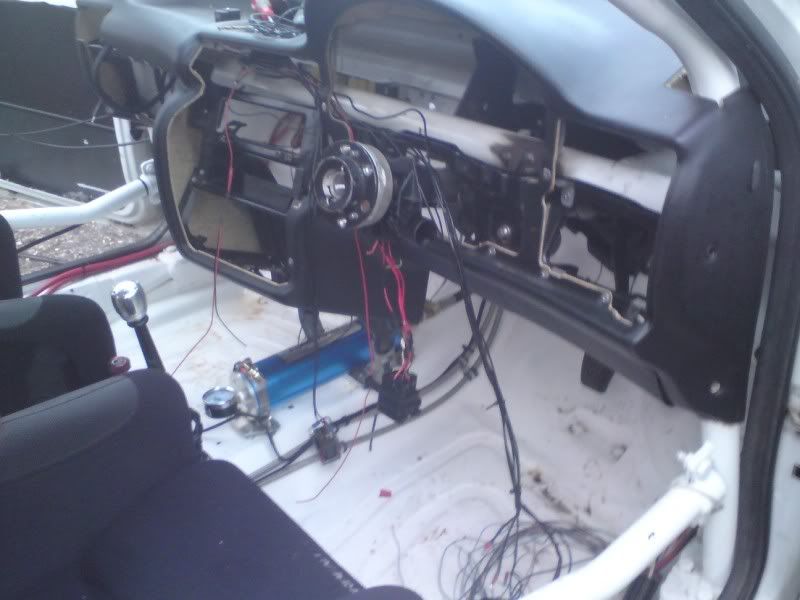
i want the dash to be held very firm as im fitting my data logger inside where the standard stereo went and it has sensors to measure movement so need to dash to be ridged
so i decided to leave the metal backing behind the dash and mount that to the cage

little bracket welded onto the cage once it was bent in place and i was happy with the possition i whiped the dash back out and strengthened it
there was still a little movement so i went back to the scrap yard to see if the mk3 astra lower mount would fit, it turned out the mk3 astra tunnel is higher than the mk2 so it would not fit dirrect but all it needed was spacing
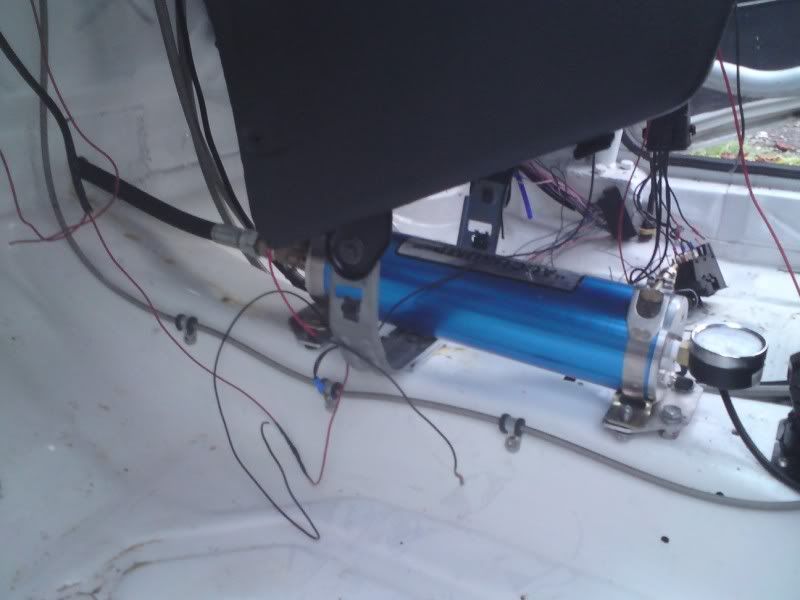
mount fits well i need to space up the accusump but thats easy done, i then gave the inside a good clean out and started on some wiring

thats as far as i got, i have all the switches for the lights etc working now on the original ones.
i want the dash to be held very firm as im fitting my data logger inside where the standard stereo went and it has sensors to measure movement so need to dash to be ridged
so i decided to leave the metal backing behind the dash and mount that to the cage
little bracket welded onto the cage once it was bent in place and i was happy with the possition i whiped the dash back out and strengthened it
there was still a little movement so i went back to the scrap yard to see if the mk3 astra lower mount would fit, it turned out the mk3 astra tunnel is higher than the mk2 so it would not fit dirrect but all it needed was spacing
mount fits well i need to space up the accusump but thats easy done, i then gave the inside a good clean out and started on some wiring
thats as far as i got, i have all the switches for the lights etc working now on the original ones.
31-10-2009, 05:42 PM
#185
PassionFord Post Troll
Thread Starter
little update
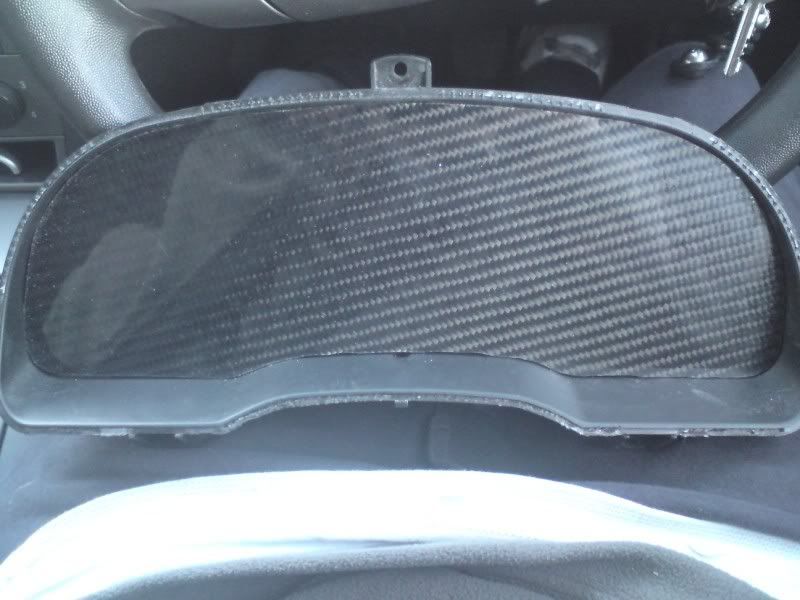
had to go pick up a cake for my boys 1st birthday and it was in the same direction as performance trim (the carbon ppl) so i gave them a ring in the week to see if they had any offcuts and they said to pop in
so i went over and picked up this bit of carbon for �10

perfect for what i need
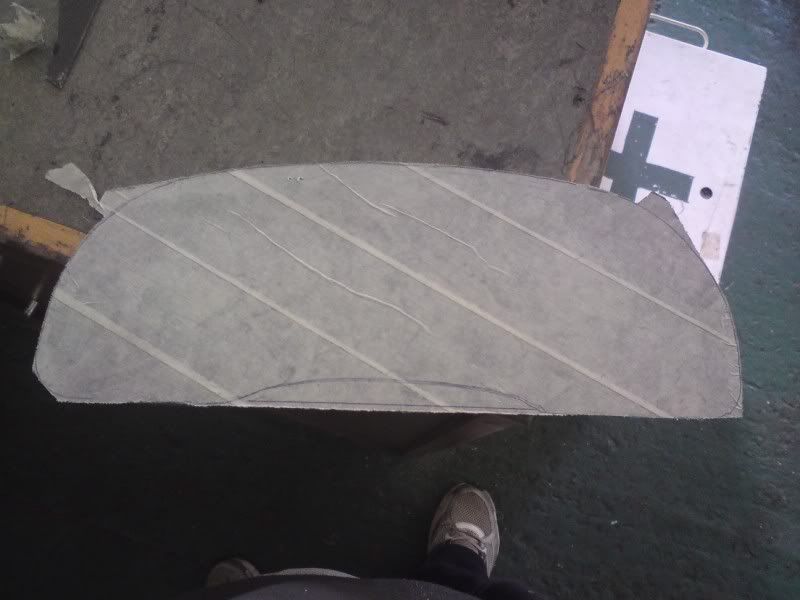
first i cut it down to a more manageable piece
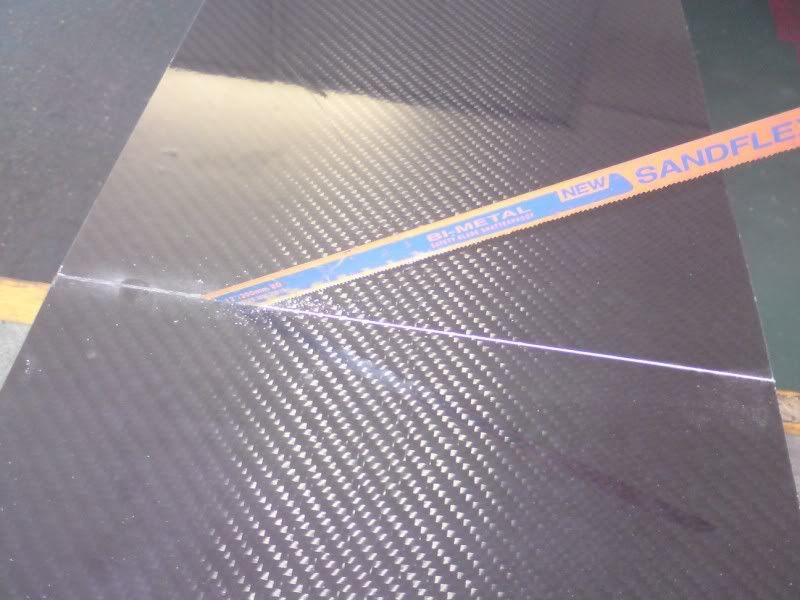
i then covered the whole piece in masking tape so i would be able to mark it out and then i made my markings for cutting
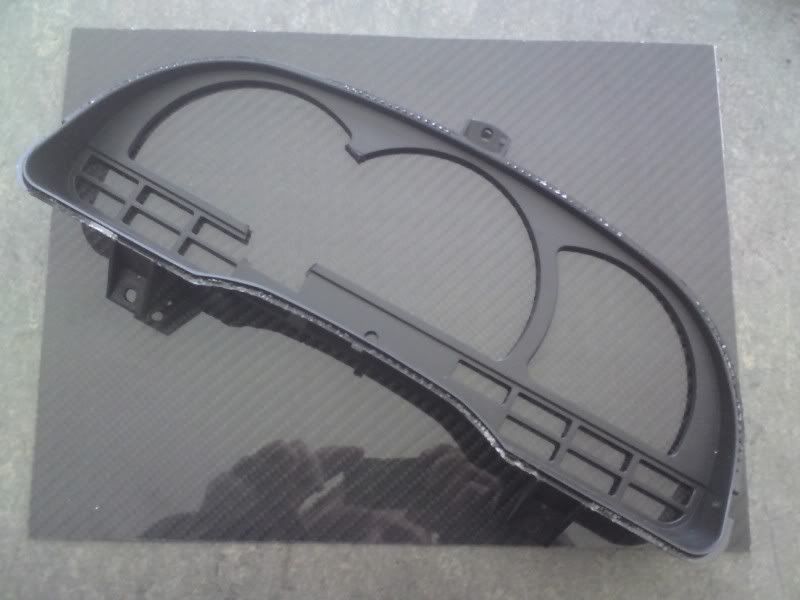
i made a cardboard cutout for getting the correct shape on the bottom
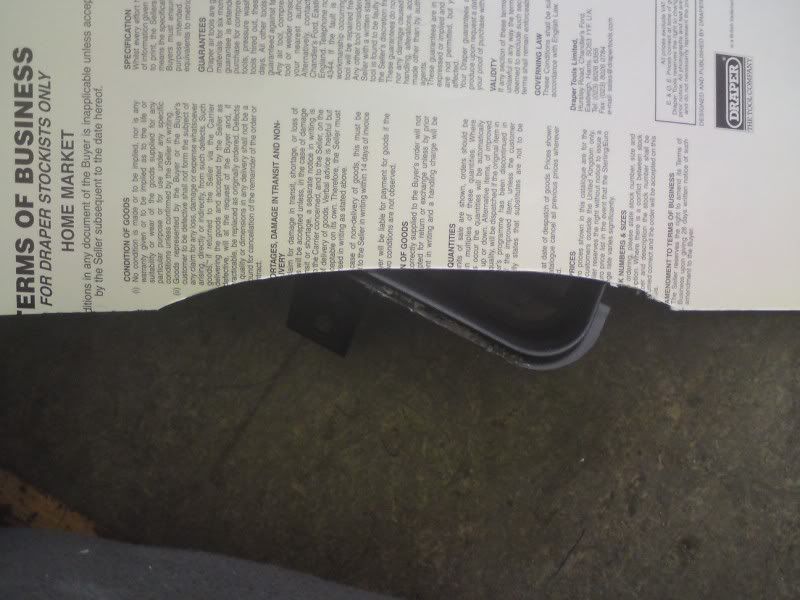
here it is mostly cut out
i used a hacksaw and then a bench grider for cutting and shaping
and here it is fitted
need to bond it in and drill wholes for the electrical conections and mounting screws, overall well happy with the job and it only took me an hour which was a bonus
had to go pick up a cake for my boys 1st birthday and it was in the same direction as performance trim (the carbon ppl) so i gave them a ring in the week to see if they had any offcuts and they said to pop in
so i went over and picked up this bit of carbon for �10
perfect for what i need
first i cut it down to a more manageable piece
i then covered the whole piece in masking tape so i would be able to mark it out and then i made my markings for cutting
i made a cardboard cutout for getting the correct shape on the bottom
here it is mostly cut out
i used a hacksaw and then a bench grider for cutting and shaping
and here it is fitted
need to bond it in and drill wholes for the electrical conections and mounting screws, overall well happy with the job and it only took me an hour which was a bonus
31-10-2009, 06:00 PM
#187
PassionFord Post Troll
Thread Starter
02-11-2009, 05:57 PM
#189
PassionFord Post Troll
Thread Starter
had 30 mins spare after work so i decided to mount the clocks onto the carbon then bolt it in for a quick picture
more than happy with the way its turned out
more than happy with the way its turned out
 07-11-2009, 08:54 PM
#192
PassionFord Post Troll
Thread Starter
been working on the car today, alot of the jobs were rebuilding the car with parts ive taken pics of before so could not be arsed with any of that.
i have been doing something new thou, i never got the EPAS working properly before as it keep breaking the controller i was using, i decided that while its all in bits i was going to give it another shot with a new column and a new controller so hopfully it should all work this time.
i was never 100% happy with how i mounted the column before as there was some movement so i took this as a good time to make some new brackets
first i found a suitable piece of steel

i then used the sheet metal cutter to get the right shape of metal using my spare column


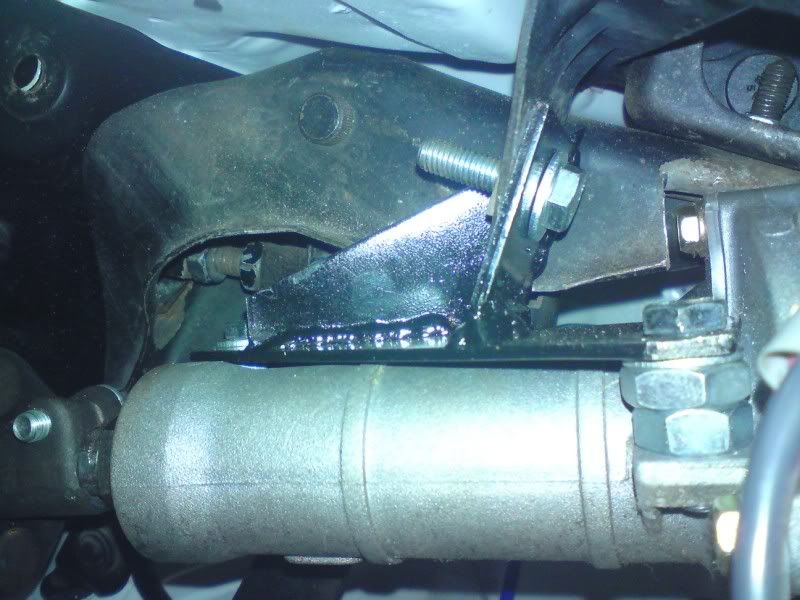
i then bolted it into the car and cut a second piece of metal for the upright of the bracket
tacked that in place in the car then took it out to be properly welded

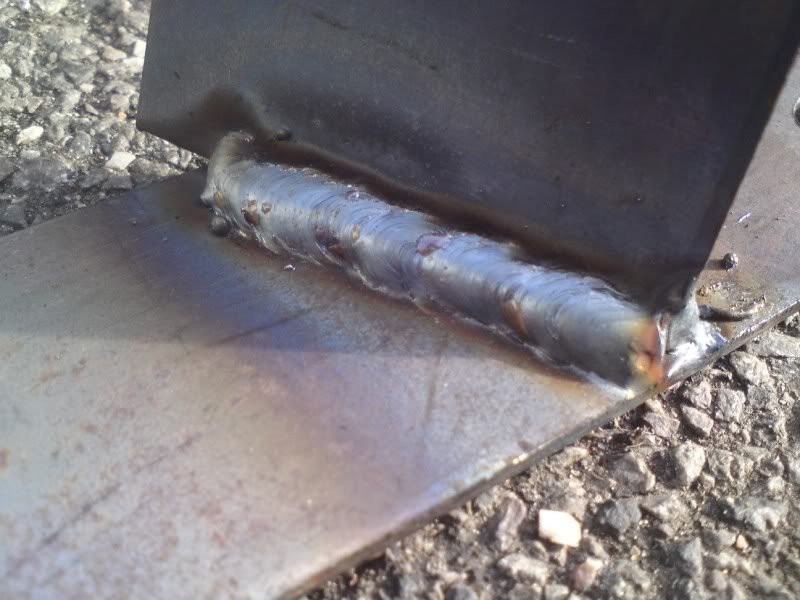
i wanted to make a small gusset to make sure the bracket did not flex, it is a odd shape due to space constrictions around the pedals

quick quirt of paint
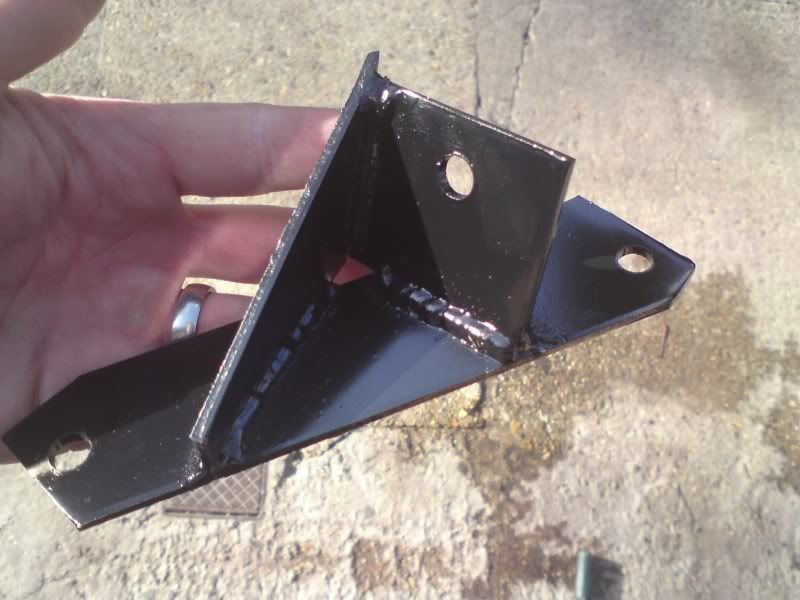
and here it is fitted to a column
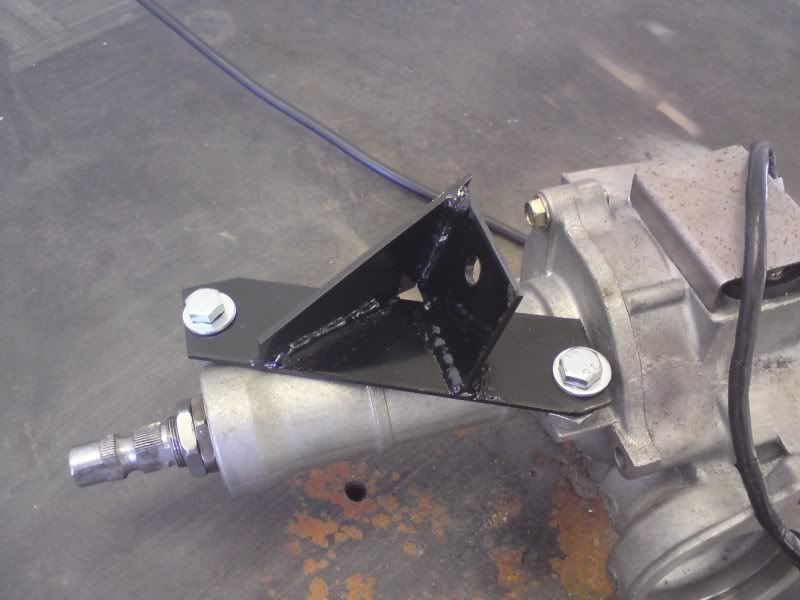
going to finish putting the turbo on tomorrow morning, then its on with the wiring
i have been doing something new thou, i never got the EPAS working properly before as it keep breaking the controller i was using, i decided that while its all in bits i was going to give it another shot with a new column and a new controller so hopfully it should all work this time.
i was never 100% happy with how i mounted the column before as there was some movement so i took this as a good time to make some new brackets
first i found a suitable piece of steel
i then used the sheet metal cutter to get the right shape of metal using my spare column
i then bolted it into the car and cut a second piece of metal for the upright of the bracket
tacked that in place in the car then took it out to be properly welded
i wanted to make a small gusset to make sure the bracket did not flex, it is a odd shape due to space constrictions around the pedals
quick quirt of paint
and here it is fitted to a column
going to finish putting the turbo on tomorrow morning, then its on with the wiring
08-11-2009, 09:16 PM
#195
PassionFord Post Troll
Thread Starter
not really alot to take pictures of today but im a pic whore so found a few
lol, been working on the car all day again mostly wiring
how the day started

a mess of wires the good news is the dash is now all wired in, for controlling the dash menu,select, up and down i have used a cruise control indicator stork and a trip computer reset one for the wiper, this has meant i dont have to have 4 random buttons on the dash and they are easy to get to with your hands on the wheel.
i also got the ECU interface working, this allows me to transmit any of the ECU parameters to the dash.
i chucked a few up and took a picture this is screen
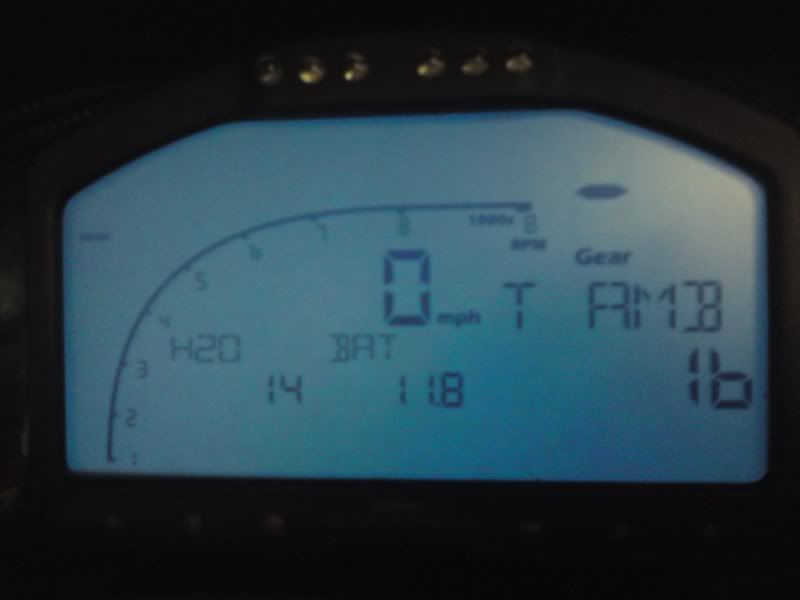
that is screen one atm and it has water temp, battery voltage and ambient air temp
you have 5 different screens with 3 different parameters on each screen, this is screen 2

boost pressure and throttle percentage
the dash allows you to set high and low warnings for all parameters that as displayed on each screen, when you get a warning up it flashes the red shit lights brings up the channel that is alarming and reads low/high pressure etc.
i did not get any pics of it all fitted but the dash is all in and the lights are wired in to the orignal switches
lol, been working on the car all day again mostly wiring
how the day started
a mess of wires the good news is the dash is now all wired in, for controlling the dash menu,select, up and down i have used a cruise control indicator stork and a trip computer reset one for the wiper, this has meant i dont have to have 4 random buttons on the dash and they are easy to get to with your hands on the wheel.
i also got the ECU interface working, this allows me to transmit any of the ECU parameters to the dash.
i chucked a few up and took a picture this is screen
that is screen one atm and it has water temp, battery voltage and ambient air temp
you have 5 different screens with 3 different parameters on each screen, this is screen 2
boost pressure and throttle percentage
the dash allows you to set high and low warnings for all parameters that as displayed on each screen, when you get a warning up it flashes the red shit lights brings up the channel that is alarming and reads low/high pressure etc.
i did not get any pics of it all fitted but the dash is all in and the lights are wired in to the orignal switches
03-05-2010, 08:03 PM
#197
PassionFord Post Troll
Thread Starter
new manifold turned up a month or so ago lots of changes on this one fingers crossed it will not break
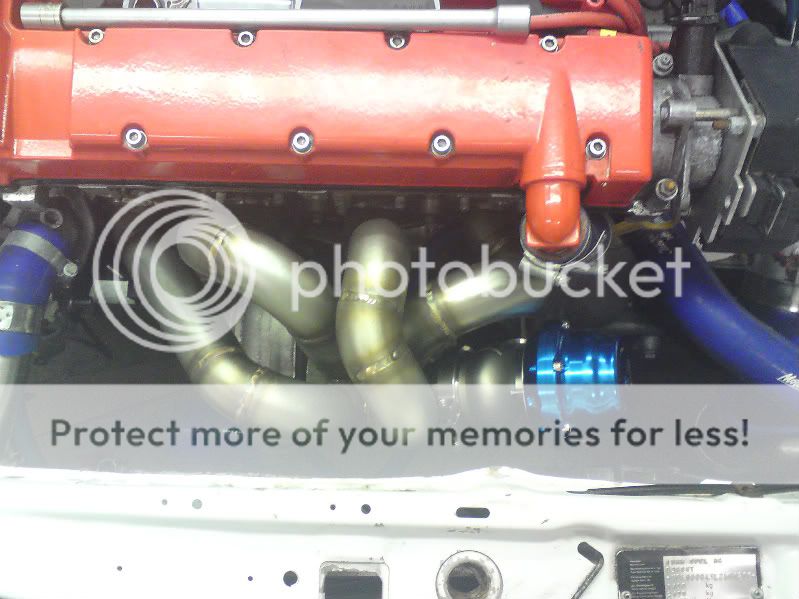
i have also changed over to a 44mm v band wastegate will i was at it as the 4 bolt tials do my head in lol, because the turbo was lowered on the new manifold i needed to remake the oil drain, i had some problems last month with using -8 fittings so i have now gone upto -10 and instead of going into the block i am going to go down into the sump.
ill put some pics up of how i have done it once i get the correct size hose tommorow as DT sent me -12
this little bad boy also turned up today

its a rollover valve for my fuel tank, it lets the tank vent if it goes under pressure but also lets air into the tank to stop the pumps pulling a vacum, but if you end up on your roof it stops any fuel coming out the tank.
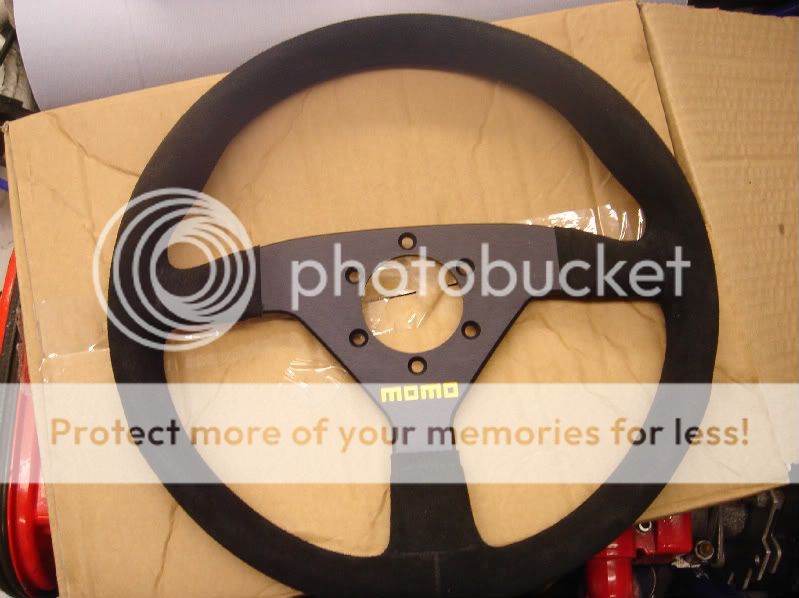
ive been looking for a new steering wheel one ebay etc for a while but yesterday decided to just get a new one so ordered a 330mm momo suede wheel
just a few more bits to do inside the car with bits of trim but overall im getting very happy with the inside
also got a ctek battery charger
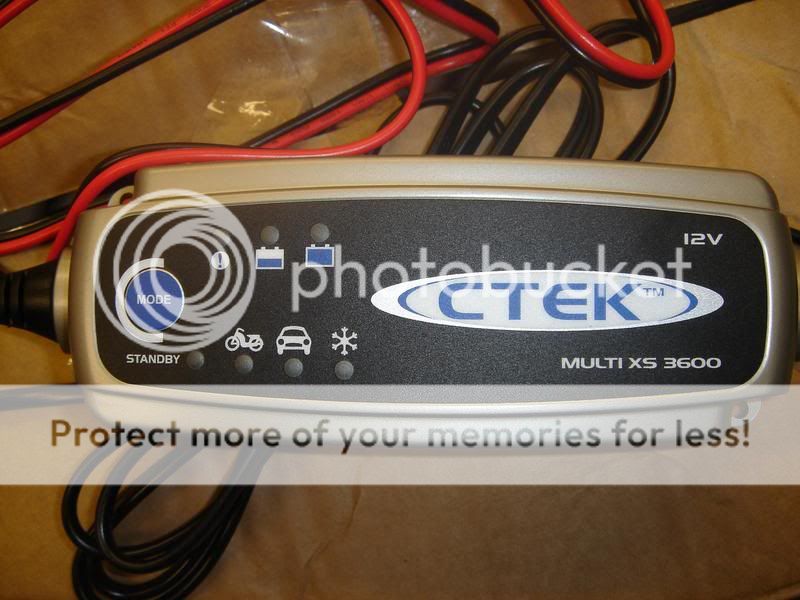
this is a charger/conditioner you basically conect it and leave it conected to the car it then keeps the battery charged running it thou use cycles slightly discharging then charging the battery to keep it in good condition.
went to combe for the spring actionday and one of the lads from migweb took some pics


was a good day had a few problems with boost control and water temp so looking into a larger rad atm hopefully a alloy cossie one
but minnor things really
i have also changed over to a 44mm v band wastegate will i was at it as the 4 bolt tials do my head in lol, because the turbo was lowered on the new manifold i needed to remake the oil drain, i had some problems last month with using -8 fittings so i have now gone upto -10 and instead of going into the block i am going to go down into the sump.
ill put some pics up of how i have done it once i get the correct size hose tommorow as DT sent me -12
this little bad boy also turned up today
its a rollover valve for my fuel tank, it lets the tank vent if it goes under pressure but also lets air into the tank to stop the pumps pulling a vacum, but if you end up on your roof it stops any fuel coming out the tank.
ive been looking for a new steering wheel one ebay etc for a while but yesterday decided to just get a new one so ordered a 330mm momo suede wheel
just a few more bits to do inside the car with bits of trim but overall im getting very happy with the inside
also got a ctek battery charger
this is a charger/conditioner you basically conect it and leave it conected to the car it then keeps the battery charged running it thou use cycles slightly discharging then charging the battery to keep it in good condition.
went to combe for the spring actionday and one of the lads from migweb took some pics
was a good day had a few problems with boost control and water temp so looking into a larger rad atm hopefully a alloy cossie one
but minnor things really
03-05-2010, 09:19 PM
#198
Professional Waffler
iTrader: (1)
Join Date: May 2003
Location: Cardiff
Posts: 26,931
Likes: 0
Received 0 Likes
on
0 Posts
what lap times you get?
seem to dip under cornering a lot? are you going to stiffen that up?
great to see it back out and destroying other cars on track
seem to dip under cornering a lot? are you going to stiffen that up?
great to see it back out and destroying other cars on track
03-05-2010, 09:31 PM
#199
PassionFord Post Troll
Thread Starter
i was really really surprised at how much it leans in cornering its on iirc 375lb front springs so not light !!
looks like all that weight over the front is deff causing issues, intensions are to lower the rear by quite a bit its about 1-2 inchs higher than it should be.
stiffen the front either with a harder anti roll bar or some harder springs i like how it rides atm so will try a anti roll bar first.
there are alot of other problems with set up of the car atm the front camber and caster is all over the place and does not have close to enough caster.
and the rear beam is toeing out a little, its all little things but i think there all enough combined to make it feel very unstable.
i had alot of boost problems on the day as the new manifold caused my boost map to be all over the place. i did manage a 1.22 thou from the data logger still quite a bit more to come out i would like to think that i can make it 1.20 flat or better at rs combe.
03-05-2010, 09:48 PM
#200
Professional Waffler
iTrader: (1)
Join Date: May 2003
Location: Cardiff
Posts: 26,931
Likes: 0
Received 0 Likes
on
0 Posts
mine used to dip like that, i then put a thicker front + rear ARB and 300lbs springs,
now it's fine
under 1m20 is my aim, i have no idea if the car + driver is capable..lol
1m22 is a good time, was the track clear for you?
mind if you got all those issues i cant see wht you cant knock off a few seconds
now it's fine
under 1m20 is my aim, i have no idea if the car + driver is capable..lol
1m22 is a good time, was the track clear for you?
mind if you got all those issues i cant see wht you cant knock off a few seconds