Concrete pit for the garage
 18-08-2009, 08:24 AM
#1
Jeebus
Thread Starter
iTrader: (1)
Join Date: May 2003
Location: Staffordshire, UK
Posts: 8,663
Likes: 0
Received 0 Likes
on
0 Posts
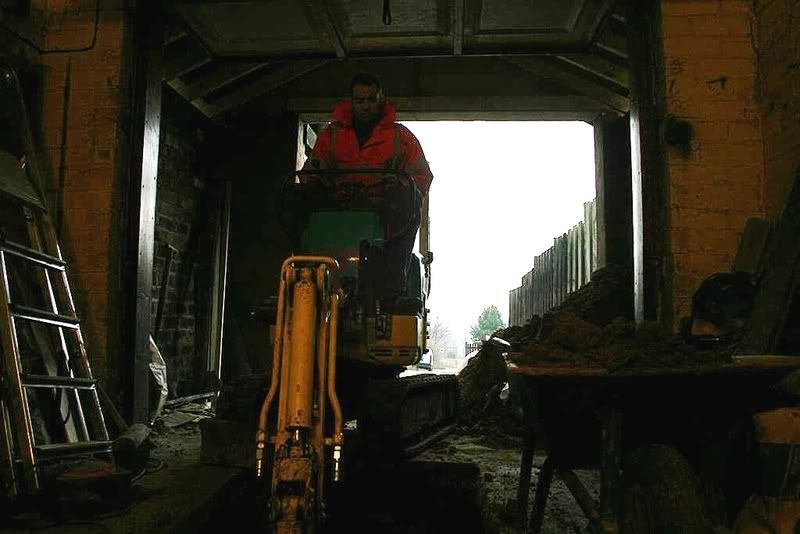
I'm extending my garage at the moment and have taken out the old concrete base (about a foot of reinforced concrete  ) to dig a pit. I would like the new pit to be solid concrete, to prevent any water ingress etc. Has anyone done this?
I was thinking the rough process would be something like:
Line with DPM
Put the steel reinforcement in the floor and sides
Pour some concrete for the floor
Insert prebuilt shuttering to maintain shape (including sump and recessed sides to rest pit cover)
Pour surrounding concrete to fill in the sides
Remove shuttering when dry
Any builders or people who have done similar with more of a clue than me?
) to dig a pit. I would like the new pit to be solid concrete, to prevent any water ingress etc. Has anyone done this?I was thinking the rough process would be something like:
Line with DPM
Put the steel reinforcement in the floor and sides
Pour some concrete for the floor
Insert prebuilt shuttering to maintain shape (including sump and recessed sides to rest pit cover)
Pour surrounding concrete to fill in the sides
Remove shuttering when dry
Any builders or people who have done similar with more of a clue than me?


 18-08-2009, 09:14 AM
#4
I'm Finding My Feet Here Now

Join Date: May 2006
Location: Help i'm lost
Posts: 143
Likes: 0
Received 0 Likes
on
0 Posts
I know its a long time ago...but when my dad built his garage some forty odd years ago, he sank a pit into it.
It was fully lined and sealed to the best level materials would allow back in the 60's. Its fully concrete lined and during the winter it always fills up with water, not seriously but enough to be an annoyance....
If I was building one today i'd use one of those pre cast pits in a second.. Nice and dry with all the neat little extras too!
Hope this helps!
18-08-2009, 09:22 AM
#5
I have a concrete pit in my garage and it always has 1-3cm of water in the bottom. When I get it sucked out it takes about 3-4weeks before it gets annoying again.
These pits look really good but at a cost I should think. If you can afford it I think these would be the tool.
Happy digging!
These pits look really good but at a cost I should think. If you can afford it I think these would be the tool.
Happy digging!
18-08-2009, 11:04 AM
#6
Jeebus
Thread Starter
iTrader: (1)
Join Date: May 2003
Location: Staffordshire, UK
Posts: 8,663
Likes: 0
Received 0 Likes
on
0 Posts
They look good, possibly slightly on the thin side at the bottom of the pit. They are sending me over a full price list but it seems prices start at just shy of �1k for the smallest size. You still have to pour concrete and rebar the sides for these pits also, so it seems like it would be quite a bit more expensive than a DIY attempt.
Trending Topics
18-08-2009, 01:18 PM
#8
Jeebus
Thread Starter
iTrader: (1)
Join Date: May 2003
Location: Staffordshire, UK
Posts: 8,663
Likes: 0
Received 0 Likes
on
0 Posts
They offer a 5% discount to anyone in a car club which is a start. Still probably going with the original plan though, so any builders? Was hoping to avoid leaks by pouring the whole lot in one go so there were no joins for water to come in through.
 18-08-2009, 04:45 PM
#11
PassionFord Post Whore!!

as Scott says but try to liner the bottom and behind the concrete blocks in one pice of membrane , creating a tank, membrane is 4m wide and as long enogh so it should do the trick.
I wold go for a 150mm block too for stability.Beats suttering all day long
I wold go for a 150mm block too for stability.Beats suttering all day long
 18-08-2009, 06:45 PM
#14
Team HOTHOT!

We did our pit by breaking through the concrete floor base and then digging down 5 foot and then a lot wider and longer than needed.
After that mamoth job and some 10 ton of mud, clay and rubble later, we put a large tarpauline in the hole and used that as the damp proofing. Filled the base with concrete and then allowed it to set. Then we built up the walls using breezeblocks and then once set backfilled using some of the clay and rubble we removed. We also used the hosepipe to settle the backfill while putting more in and then skimmed concrete on the top 6" to level the floor while using some angle iron for the top lips.
All has been perfect and no water ingress at all

Thread
Thread Starter
Forum
Replies
Last Post
rsguy
General Car Related Discussion.
44
29-09-2015 03:29 PM
PRO-LINE MOTORSPORT
General Car Related Discussion.
5
28-09-2015 09:54 PM