When you click on links to various merchants on this site and make a purchase, this can result in this site earning a commission. Affiliate programs and affiliations include, but are not limited to, the eBay Partner Network.
So for years ive been on and off here looking at the amazing build threads and some top quality engineering skill.
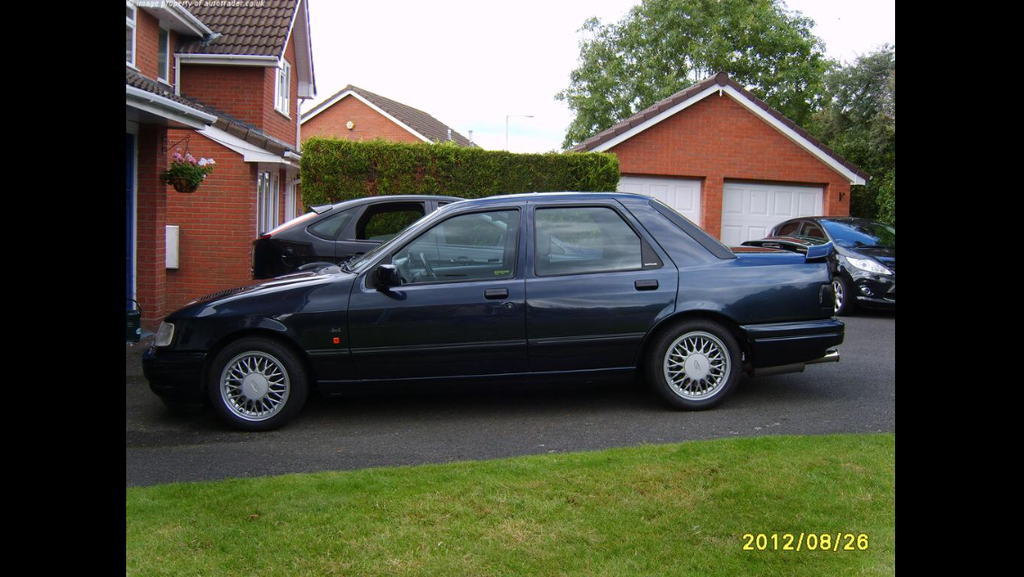
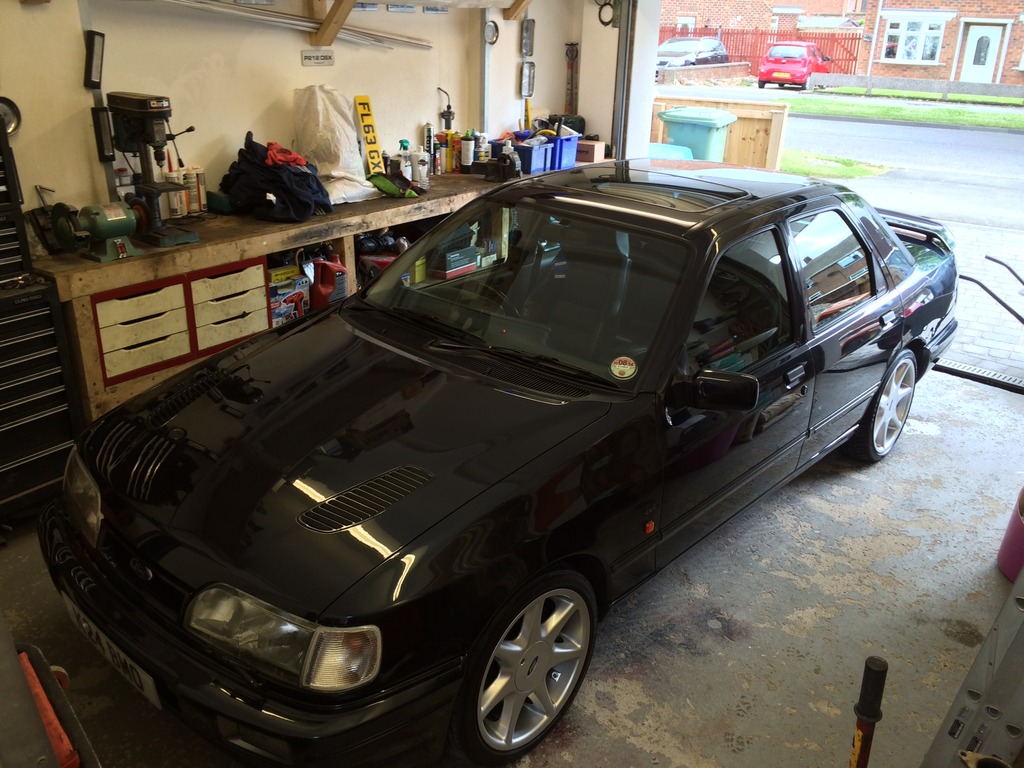
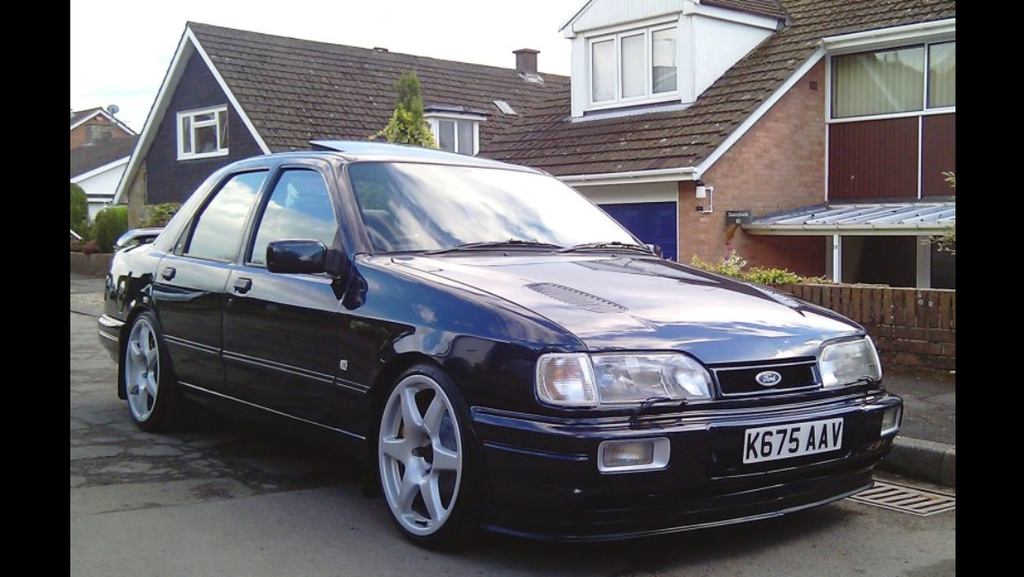
Ever since I was a kid ive wanted a cossie, ive had loads of sapphires a few replicas but moved away from Fords a bit in later years but the time came and thought now or never so 2 years ago I found the exact car I was looking for.
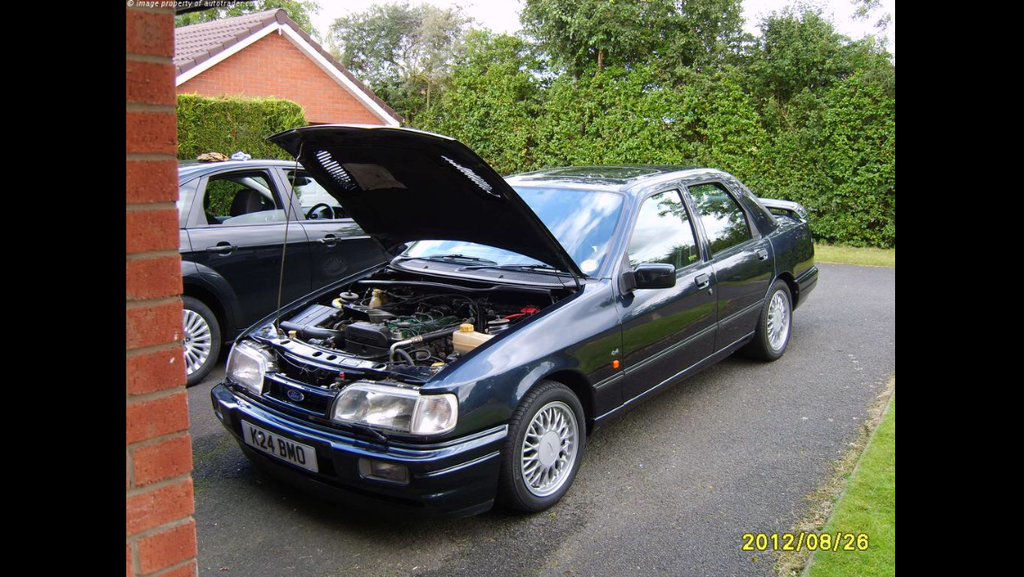
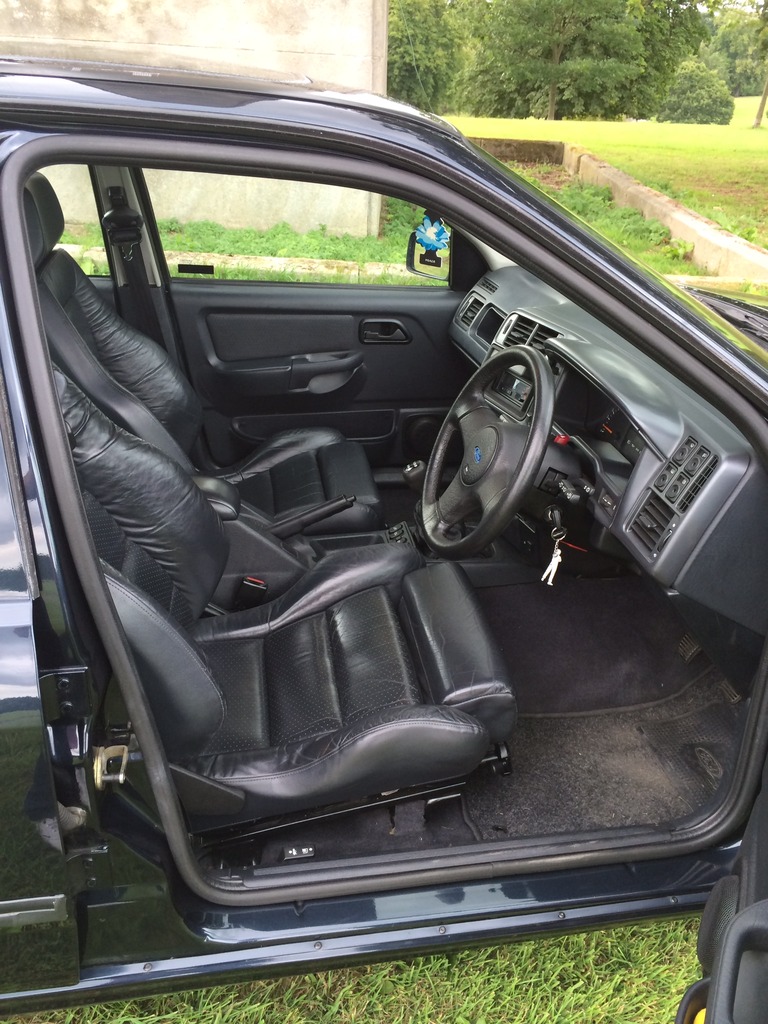
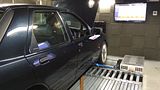
92 K Sapphire Cosworth in Smokestone Blue - 2 owners from new totally standard with only a Stainless Exhaust. The guy I bought it from had it years and it only came out 2-3 times a year when he used to take the wife out for Sunday dinner. He had it parked in a garage with a duvet over it and socks over the mirrors 'So he did scratch the mirrors with his belt when he went to the fridge for a beer' lol
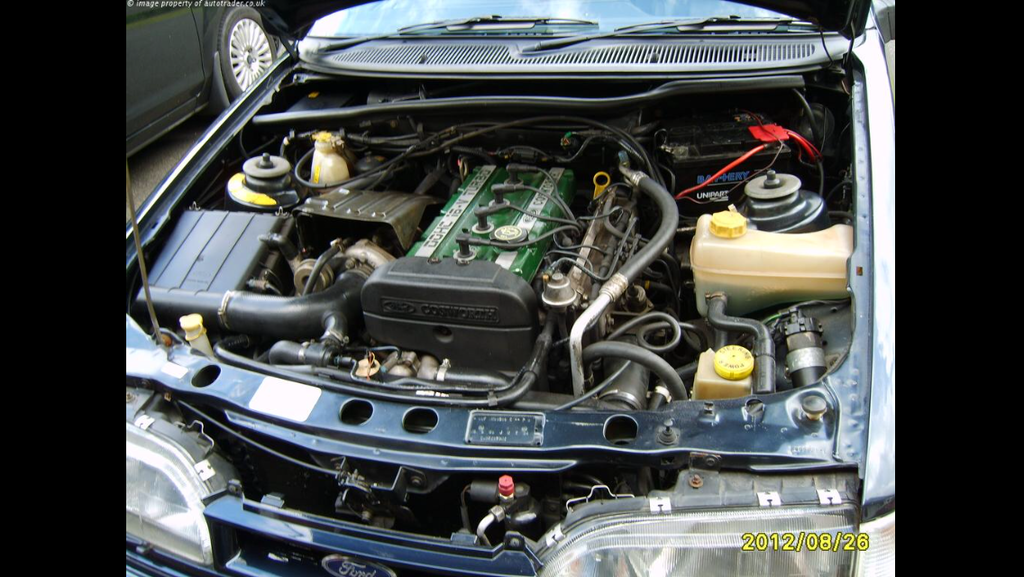
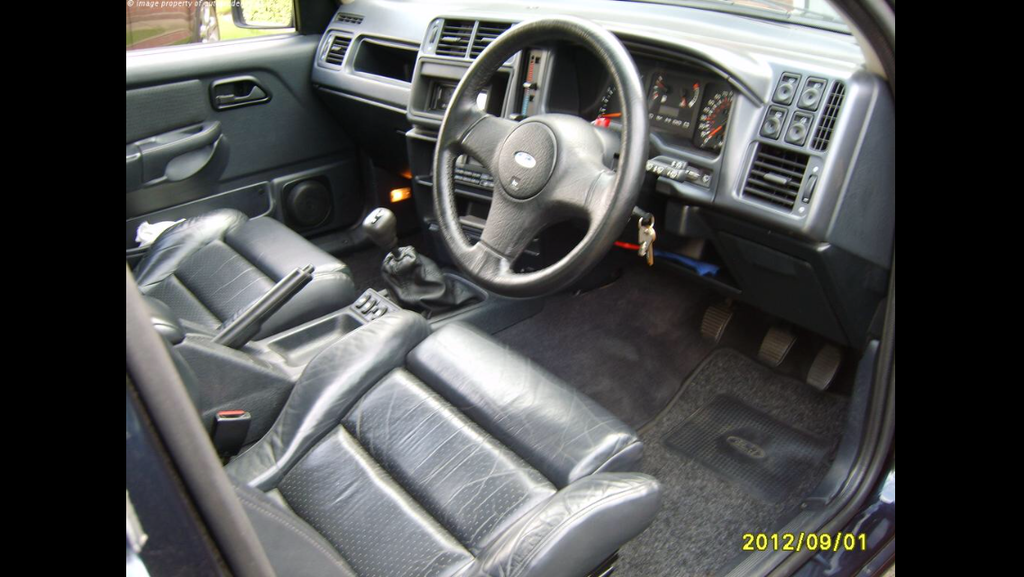
So heres a few pictures from the day I went to view it,
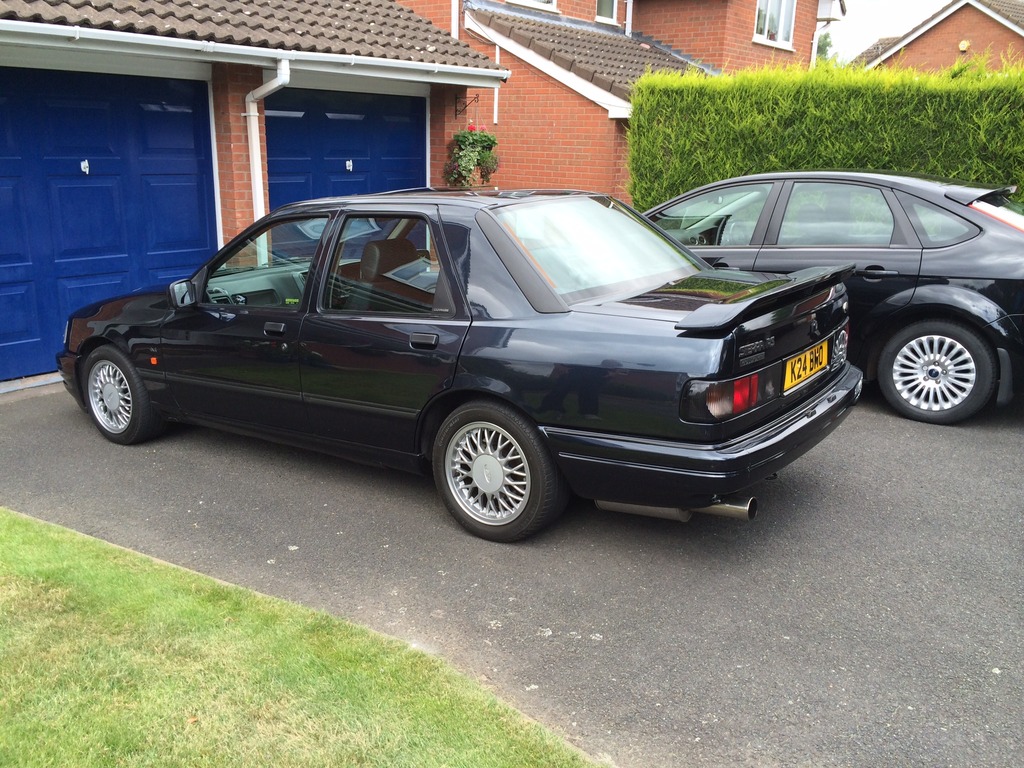
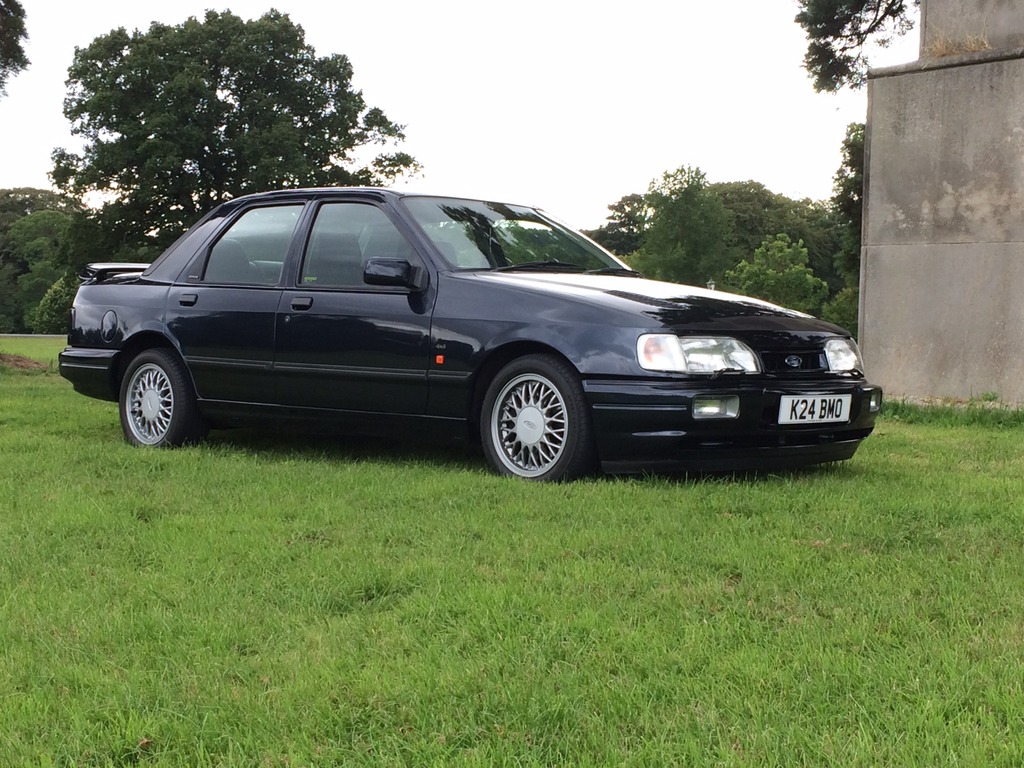
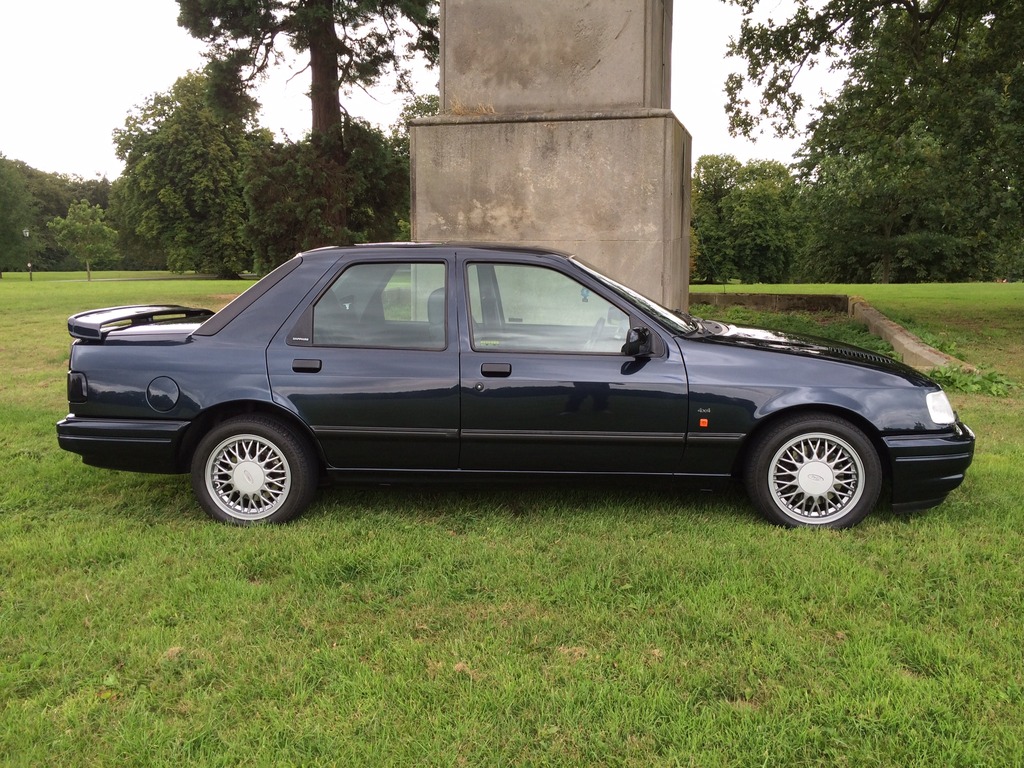
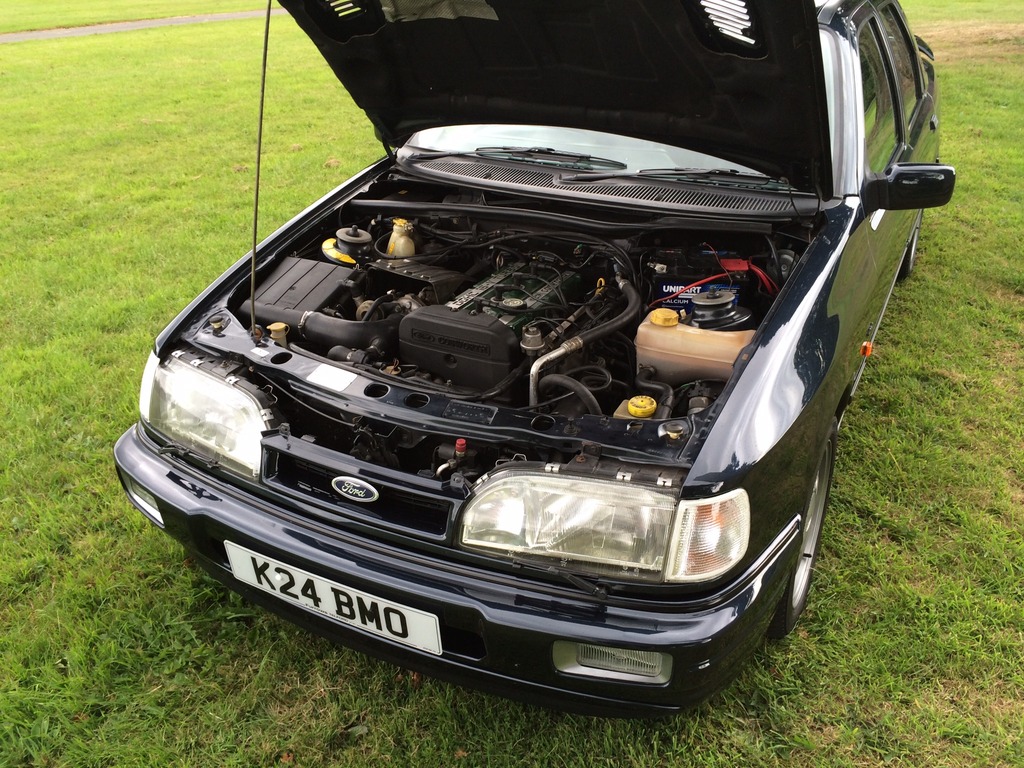
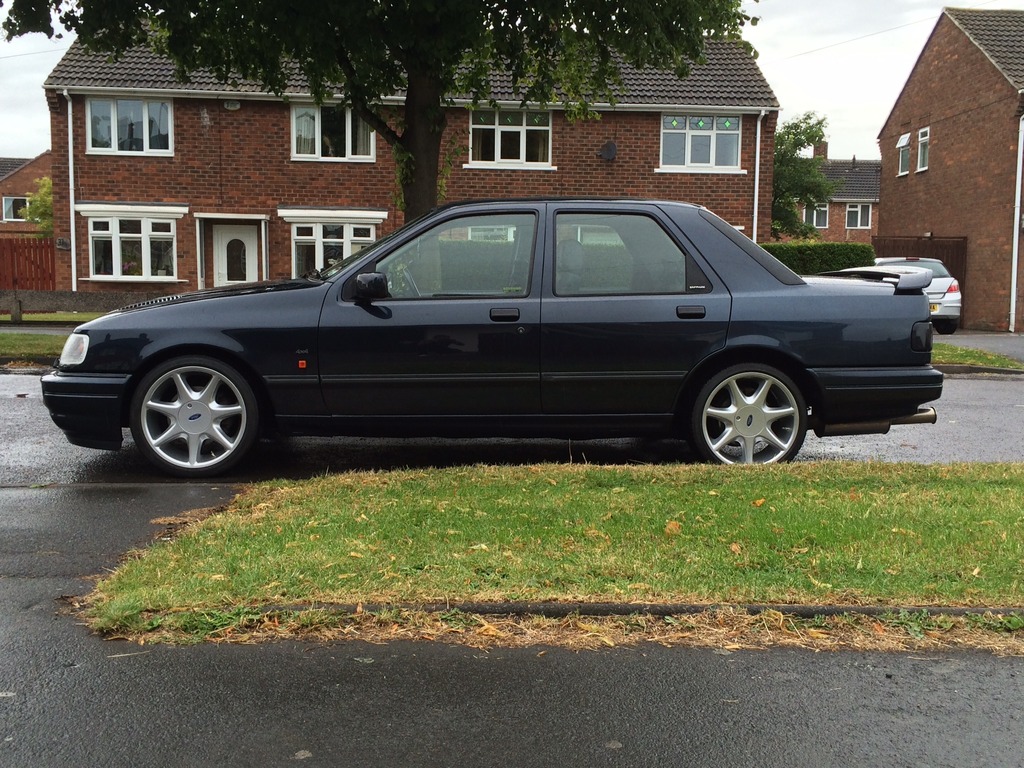
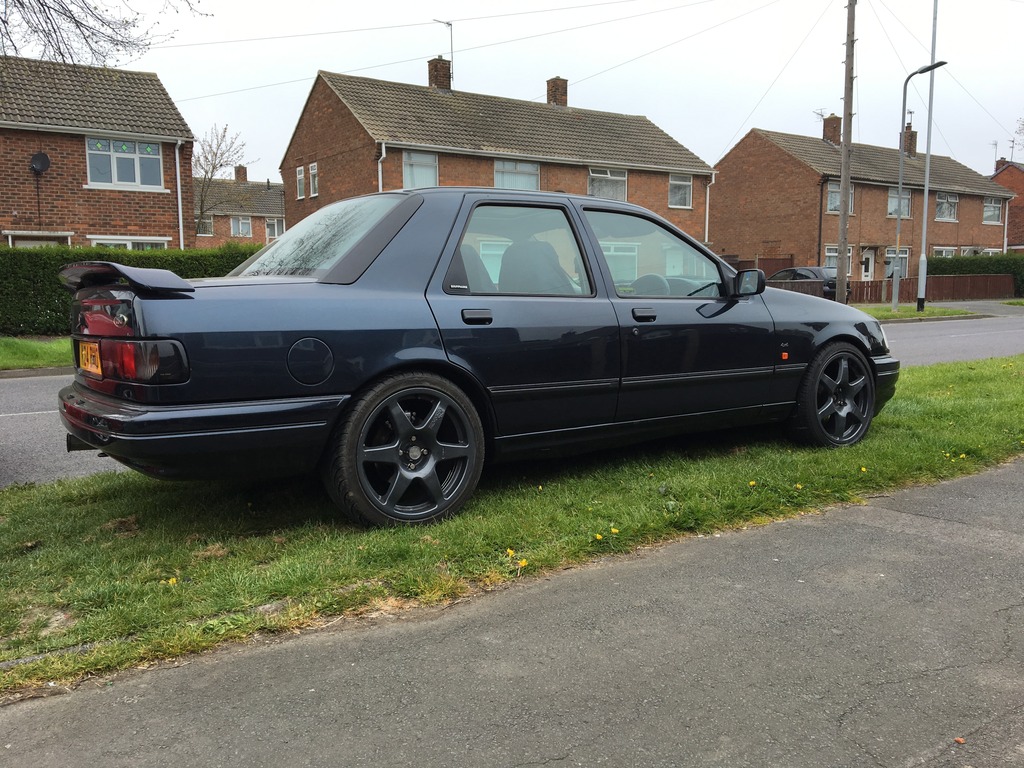
And a few from when I got it home and gave it a good polish. These were for the agreed valuation,
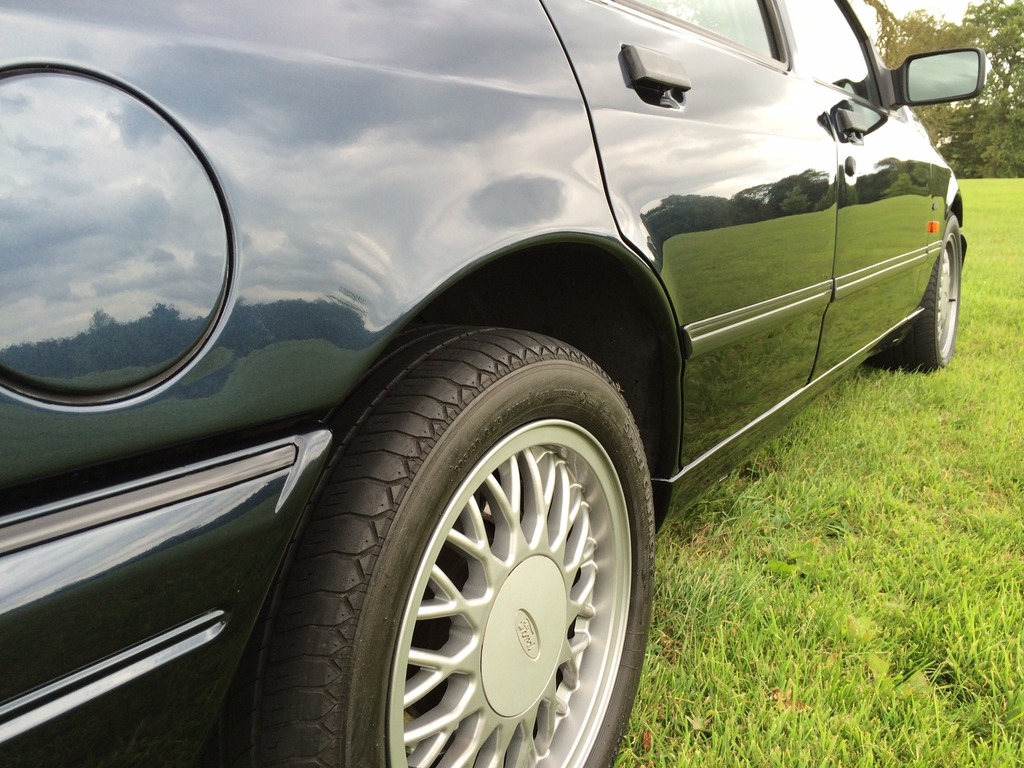
Id always wanted a Smokestone Saph with RS7 Soft spokes, so I found a set and fitted them along with a set of Koni's and Ahmed Bayjoo springs. Whist I was at it I changed the front disc and pads as they were warped,
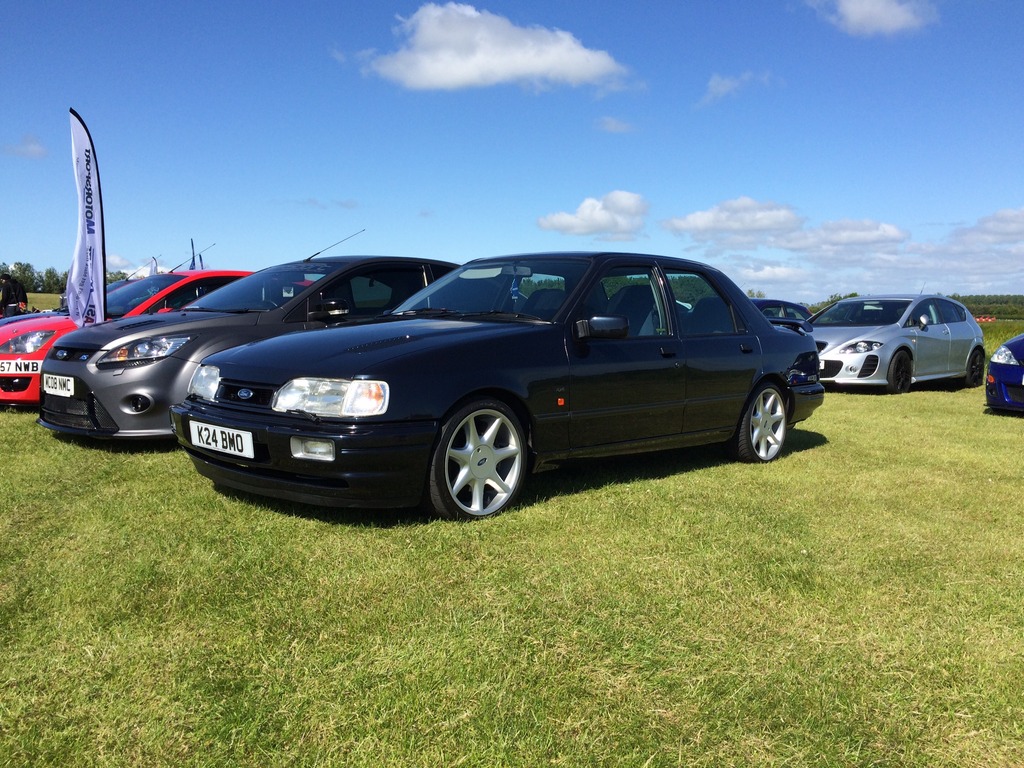
Then managed to make it too RSOC Day at Croft,
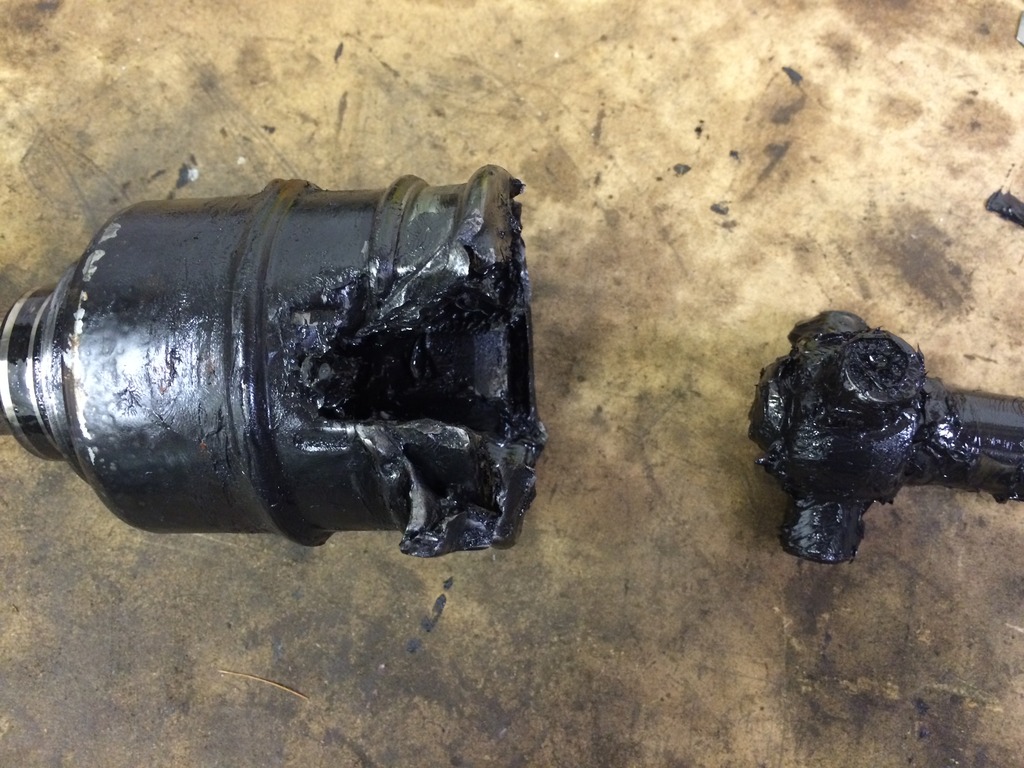
It didn't take long until I was on the hunt for more power. I asked around and many people advised MSD Blackpool to me, a quick call and the car was booked in. A couple of months wait and the week finally came, the Sunday before it was due to go in on the Thursday I called in where some of the local lads practice a bit of drifting and had to have ago as I was leaving. Heres the results drivers side CV joint exploded,
Managed to get the car home stripped down a new shaft on 24hr delivery and back together the night before going to MSD.
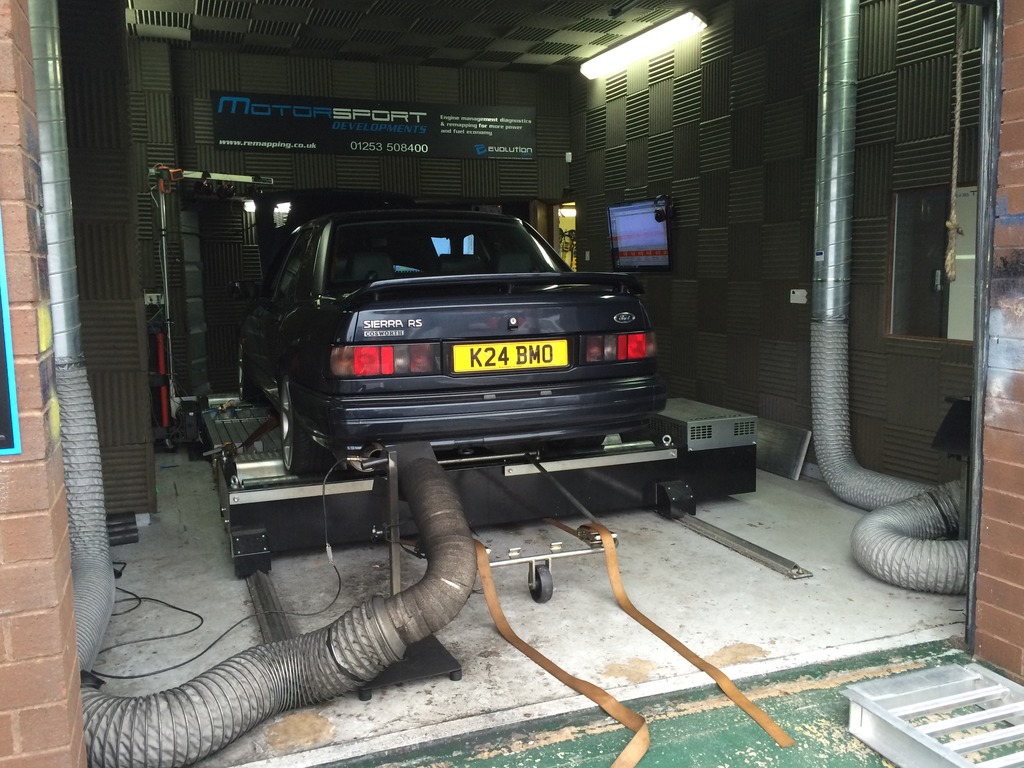
Thursday came and road trip to MSD, car had a stage 2 and was mapped to 310,
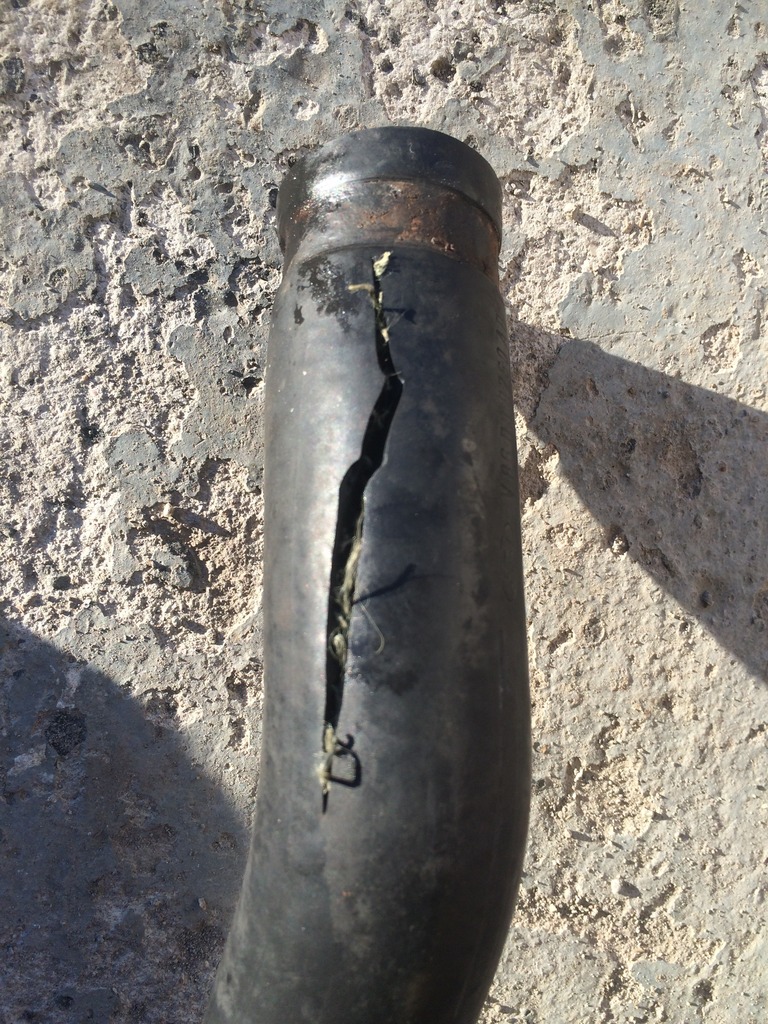
Got to say MSD were great I couldn't recommend them enough, car drove amazing and pulled in every gear until we got to the M6. Coming down the slip road just about to joint the M6 and bang steam everywhere. Coasted to the hard shoulder popped the bonnet to find the water hose off the stat housing had burst right on the jubilee clip. A bit of ingenuity and taking turns pissing in a bottle (really lol) and we were back on the road.
Got the car home and it wasn't long until the same hose wen again, this time properly,
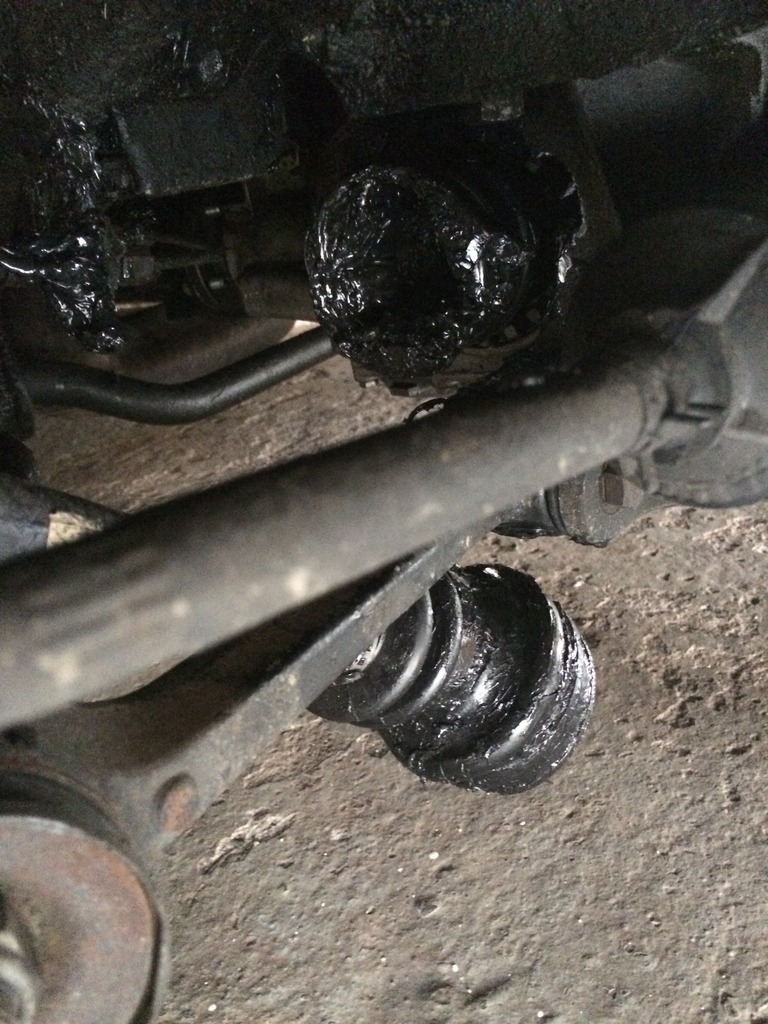
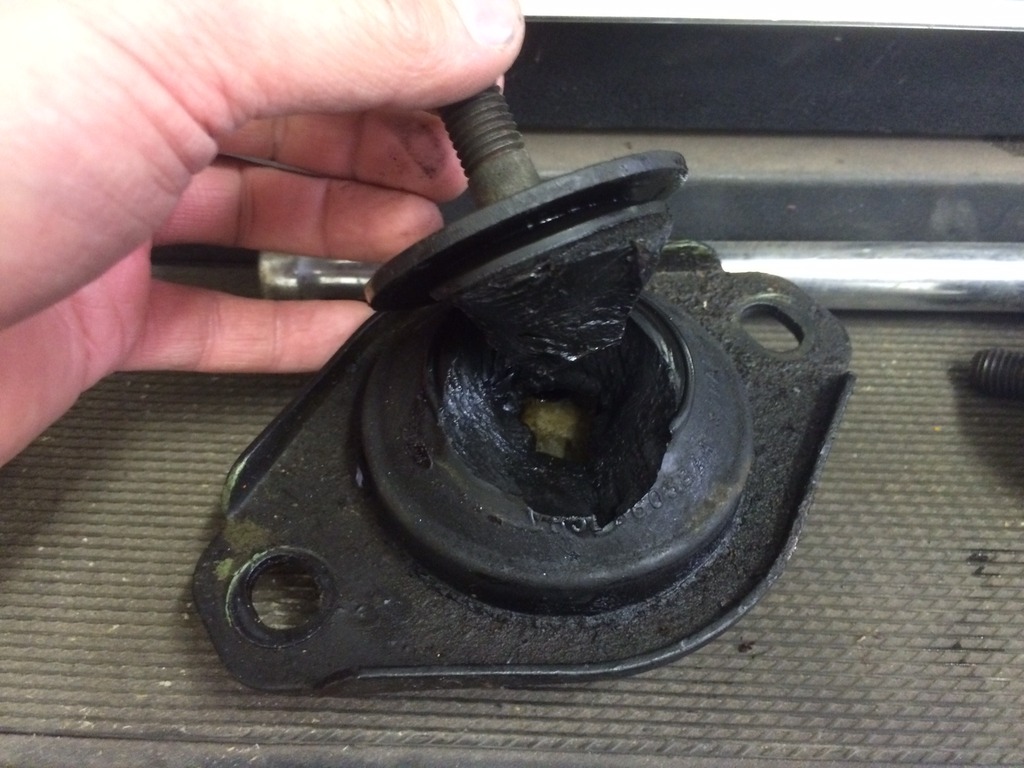
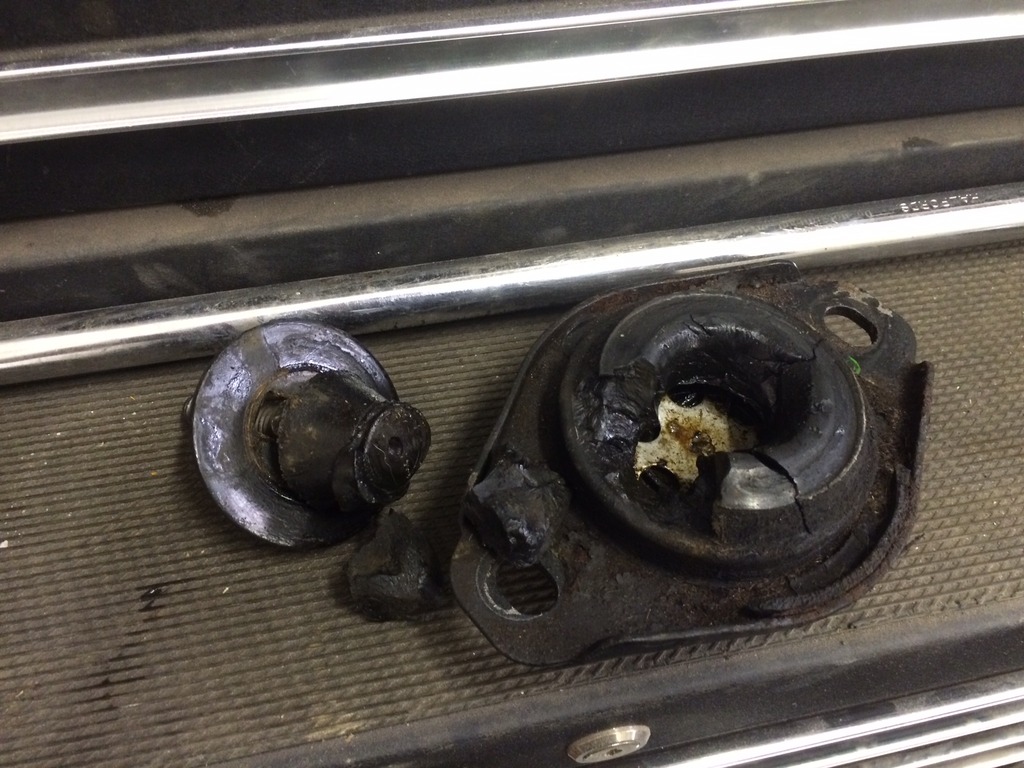
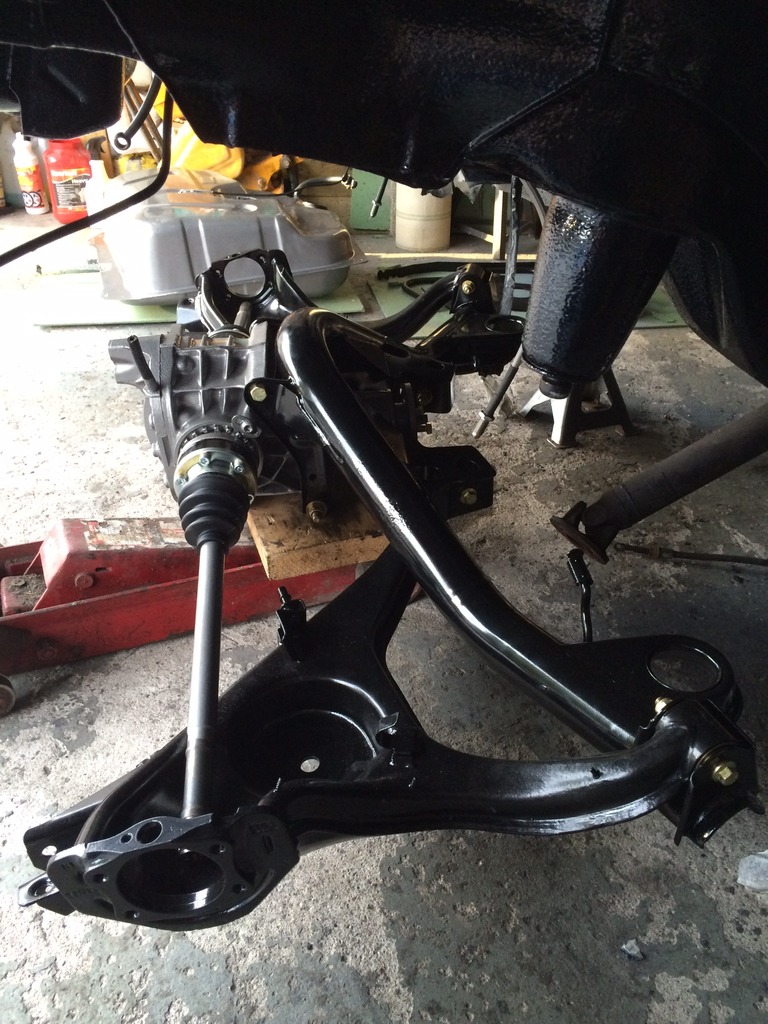
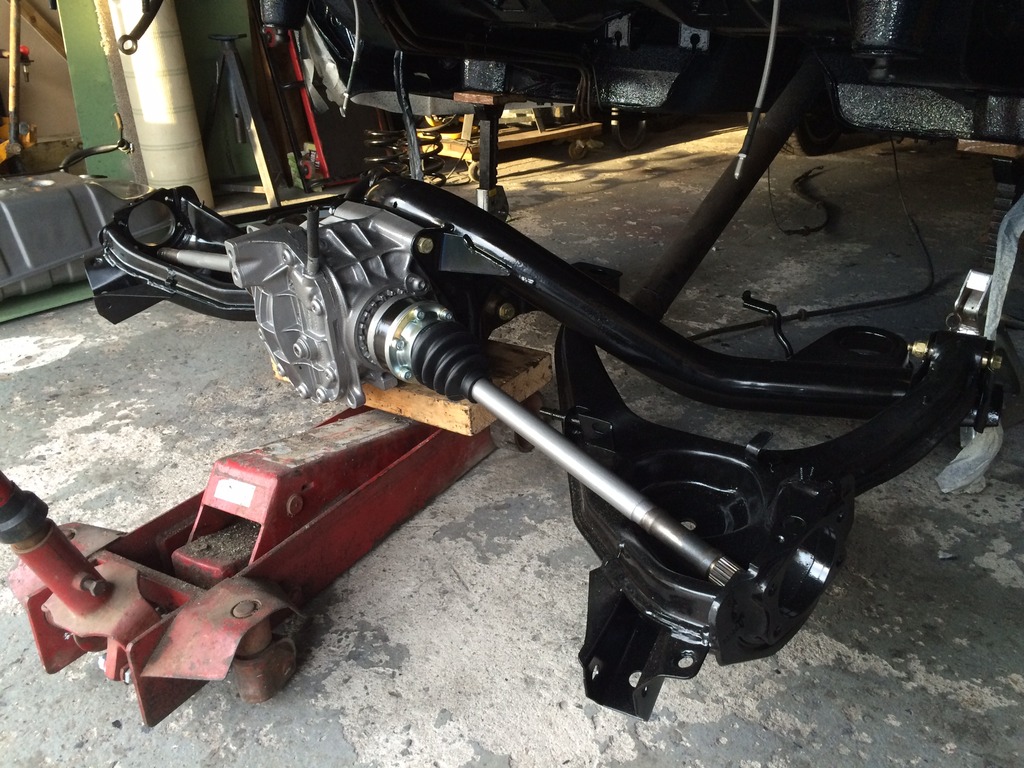
After fixing this I had a good look over and found the engine mount where fooked, think this was a big contributor to the CV joint exploding on full lock,
These were changed out for some Colin Performance mounts and the car drove great for about 2-3 months until I heard this really annoying knocking coming form the back end.
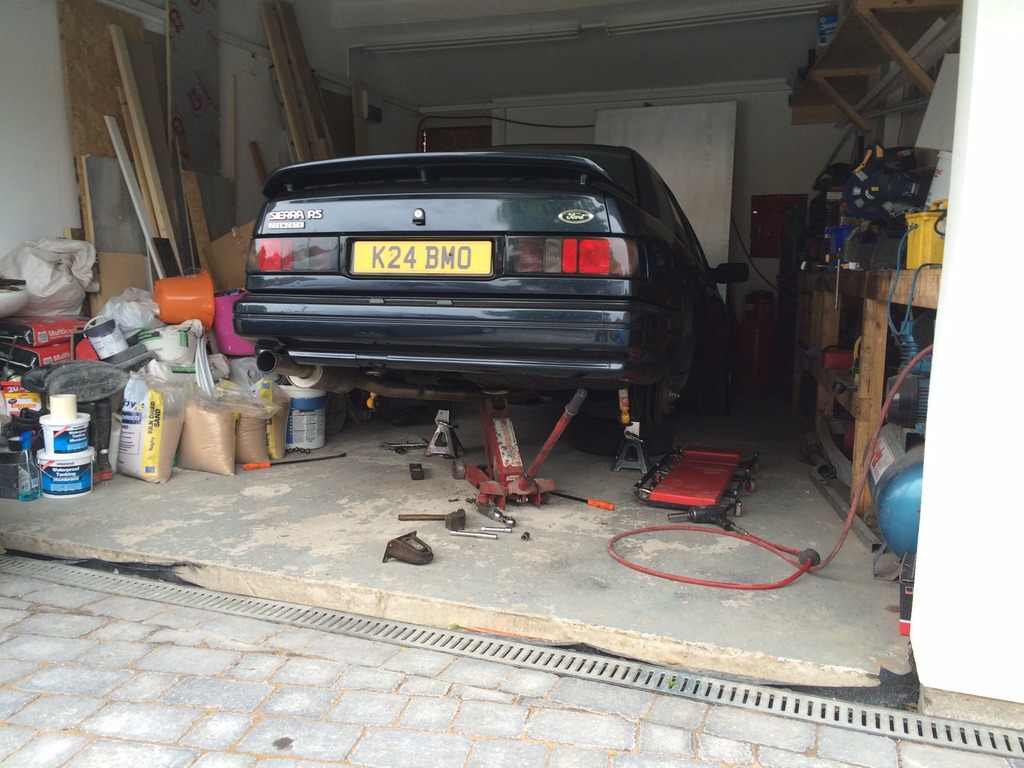
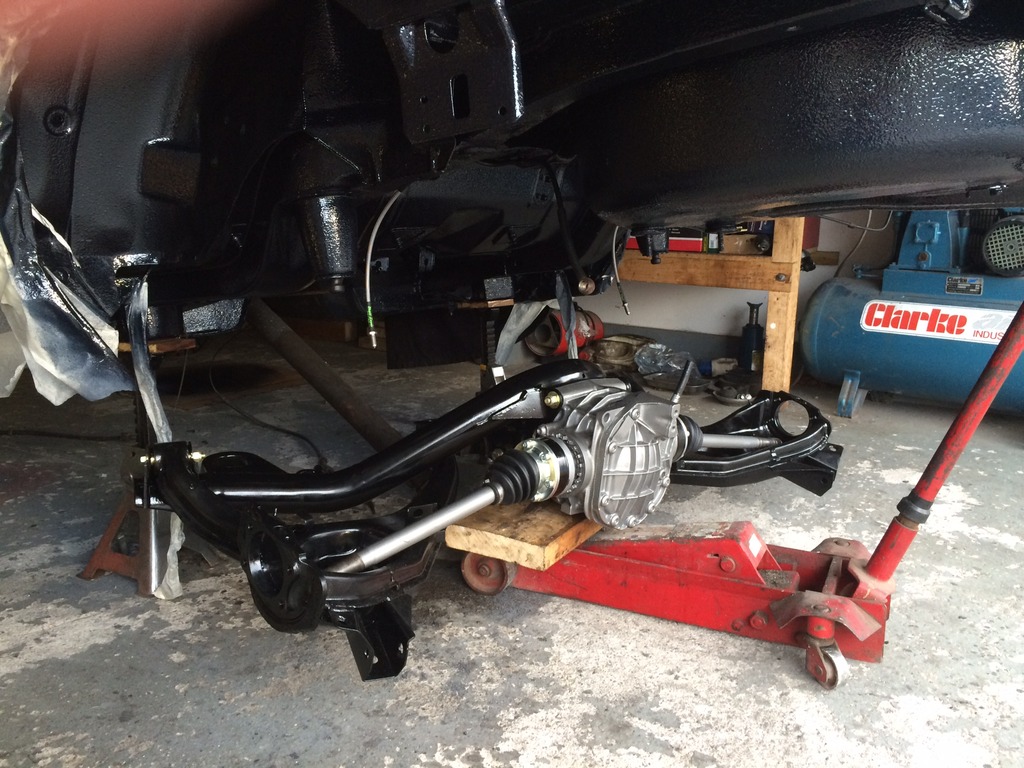
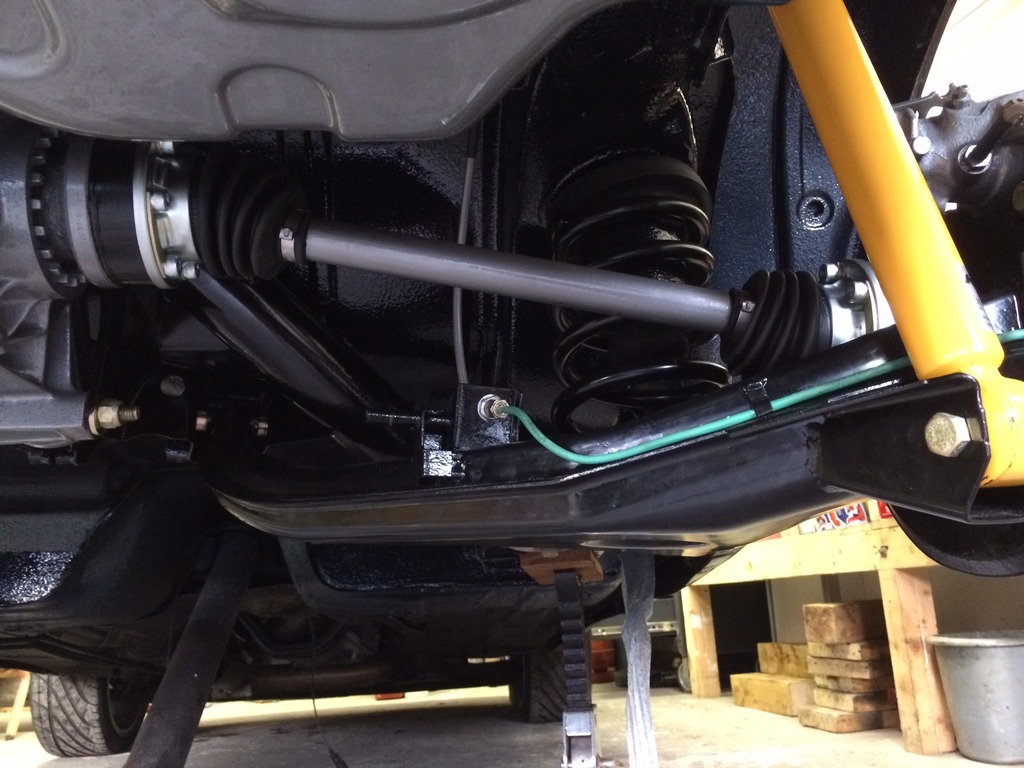
After weeks of trying to find the knock I found play in the read drop arm bushes, bit of reading up I found lots of people saying not to poly bush these and go with Graham Goode replacements so a shopping list of parts when in and the work started.
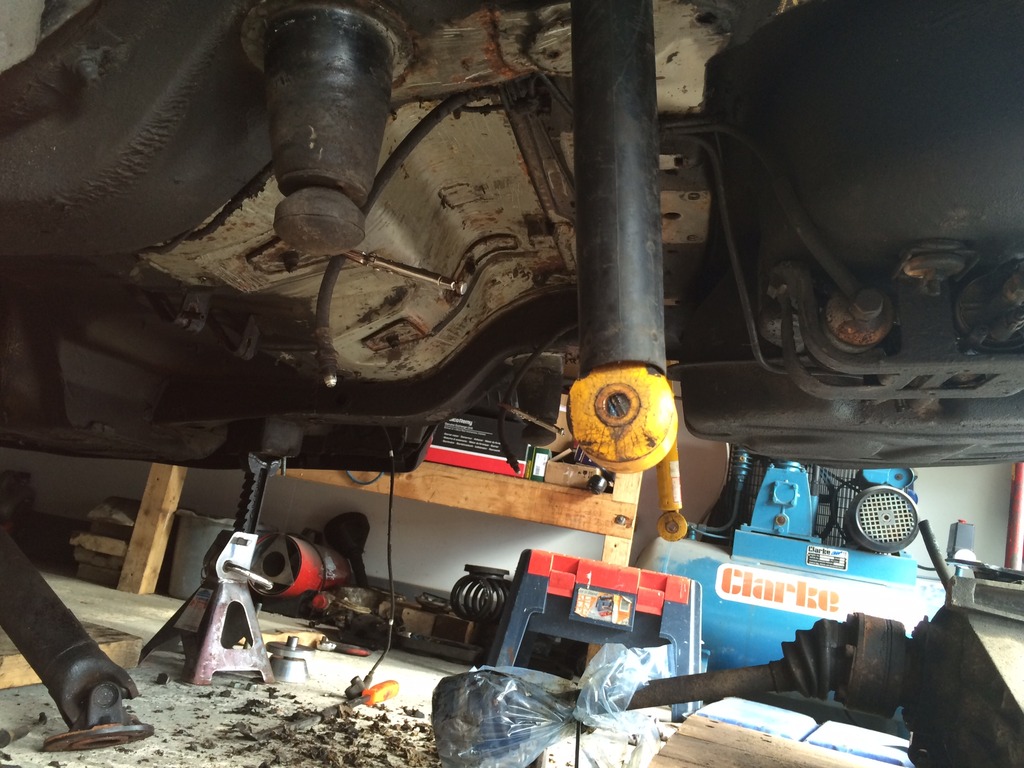
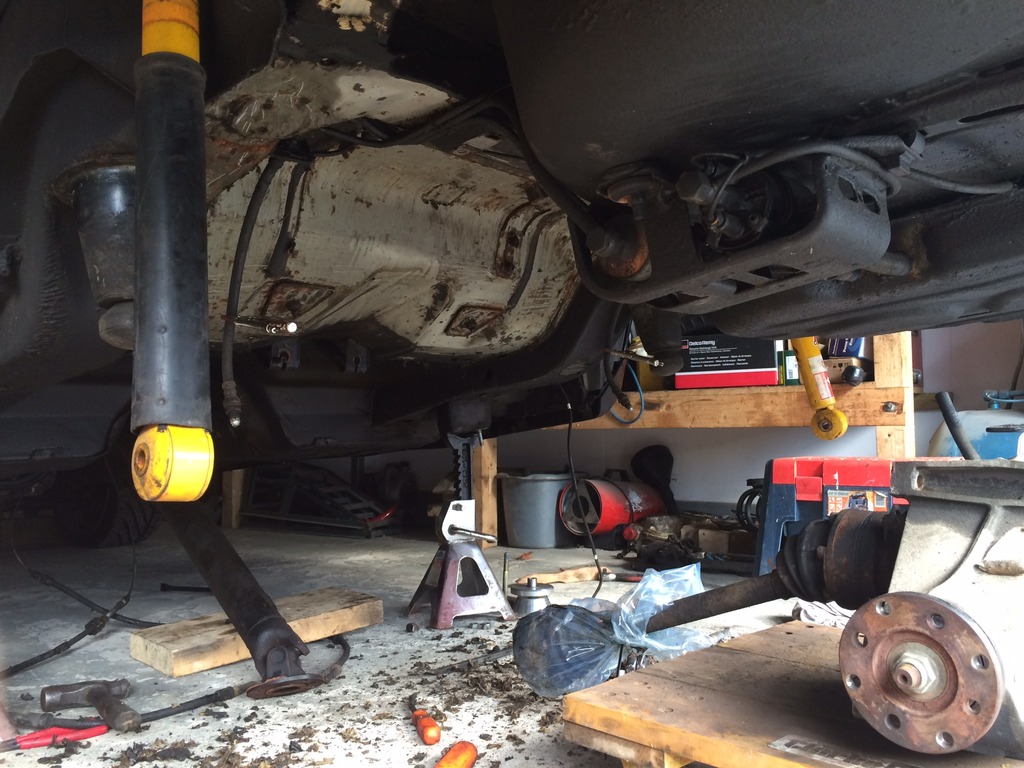
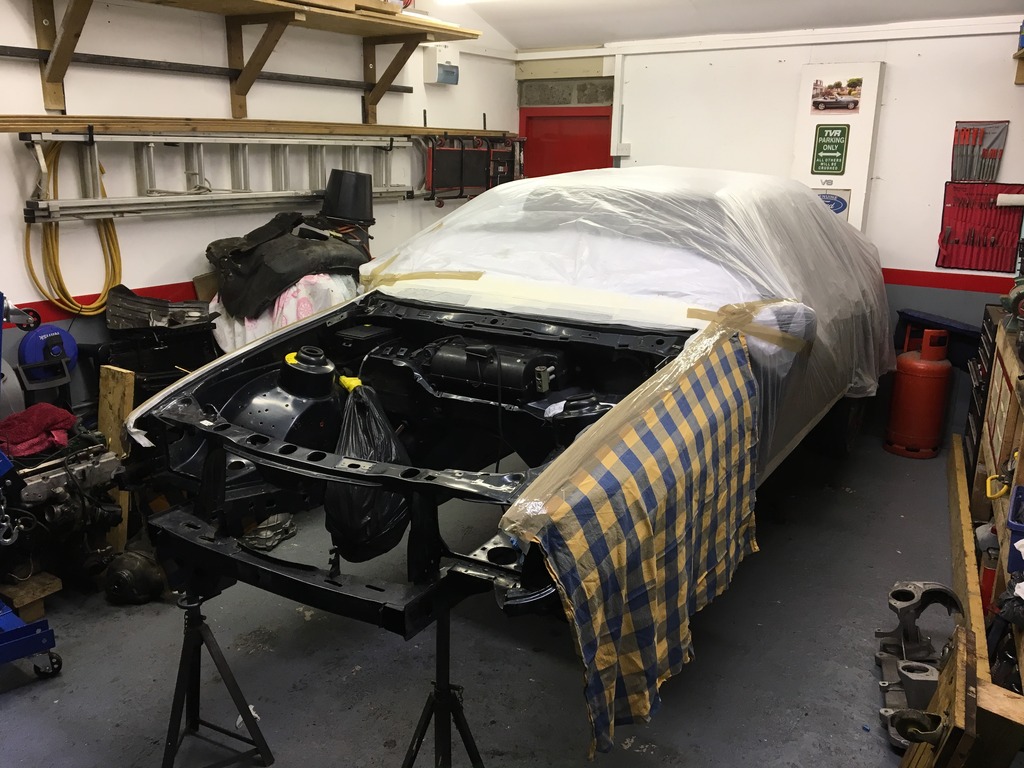
Ignore the mess in the garage I was in the middle of working on the house too.
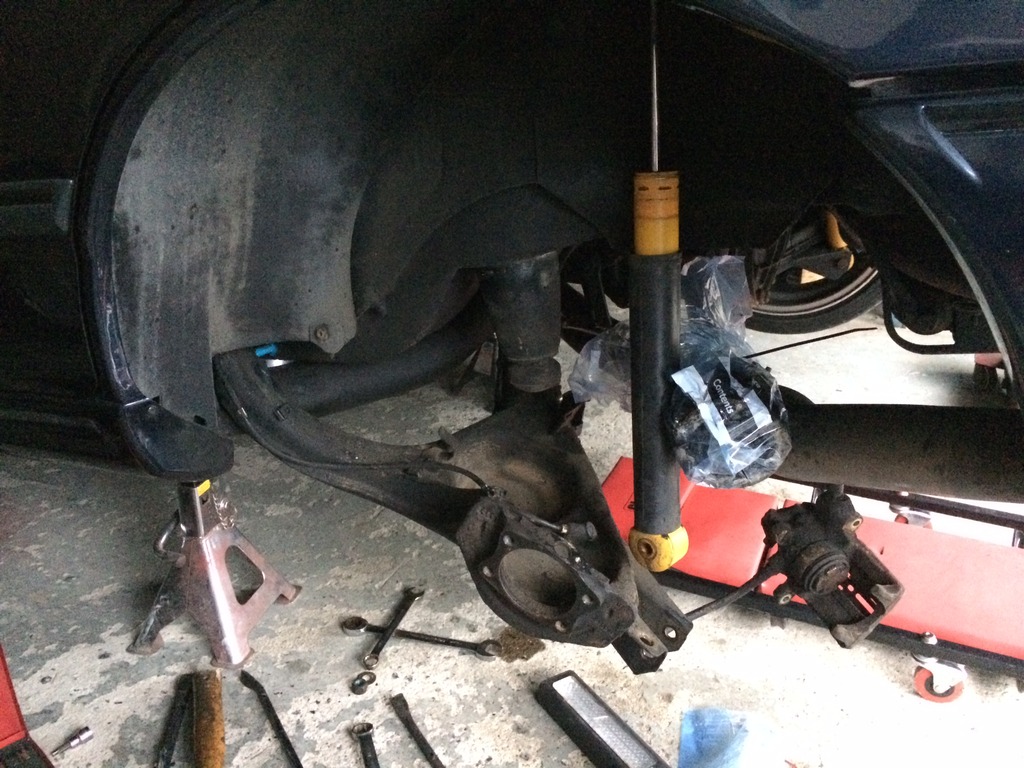
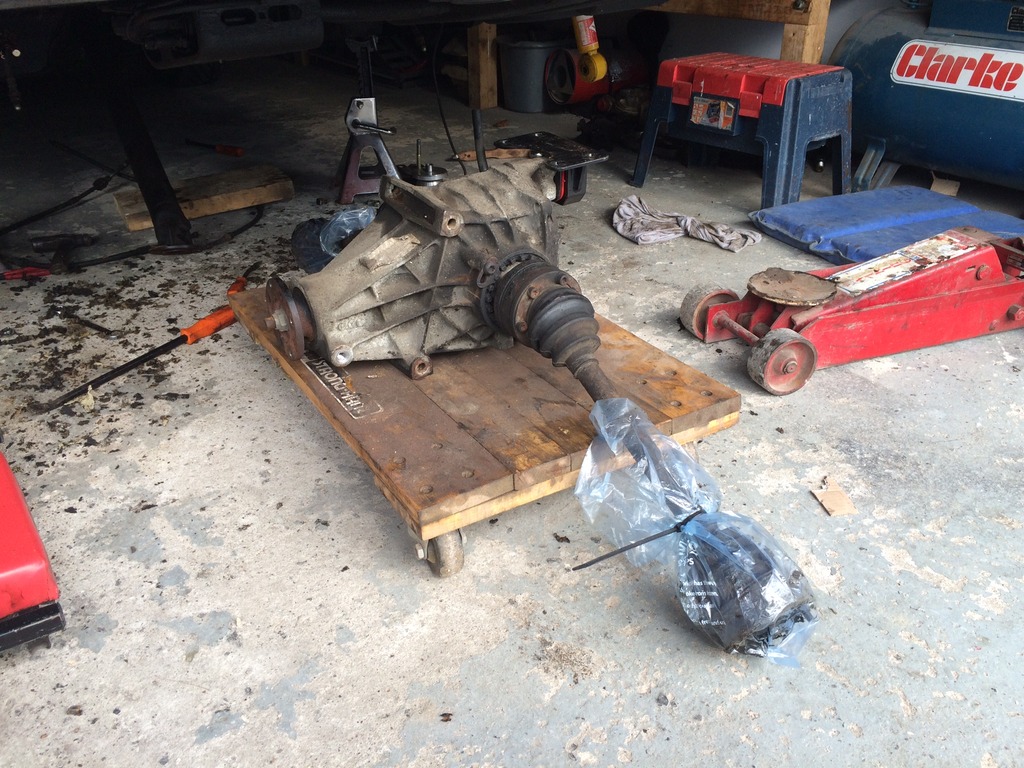
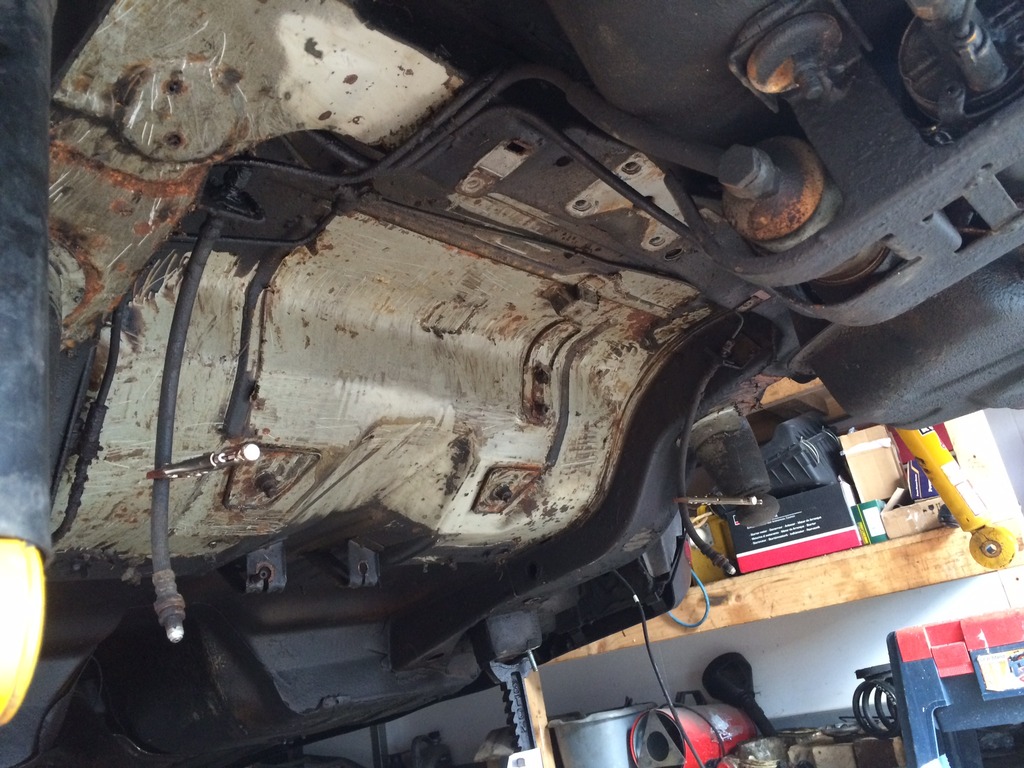
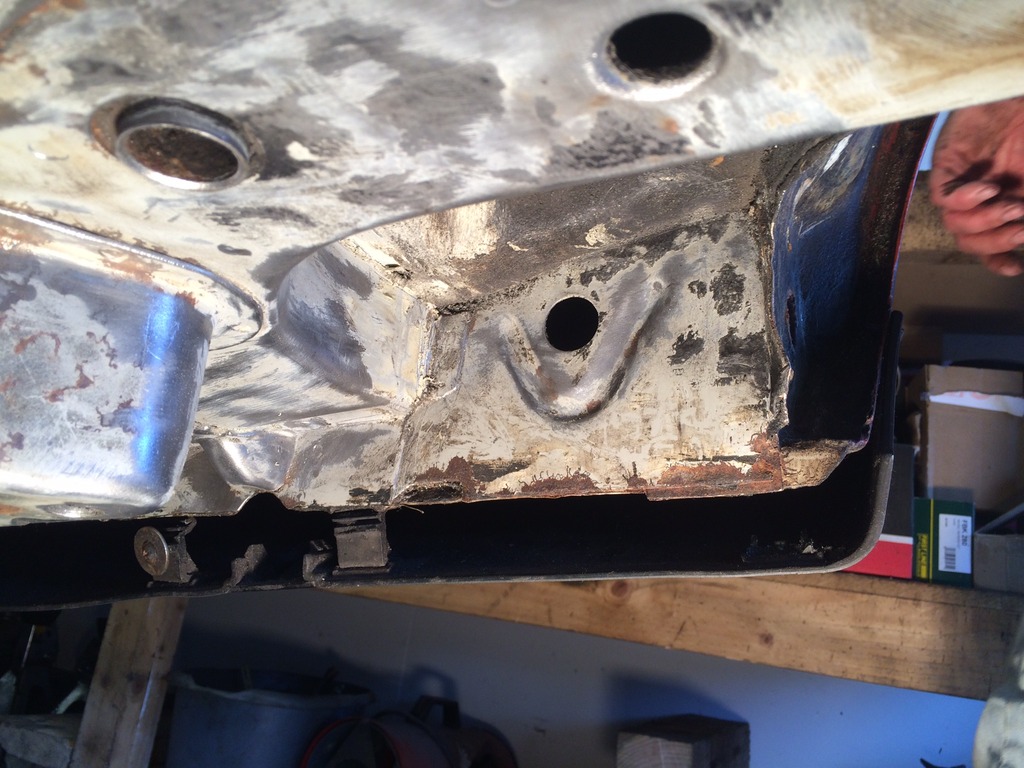
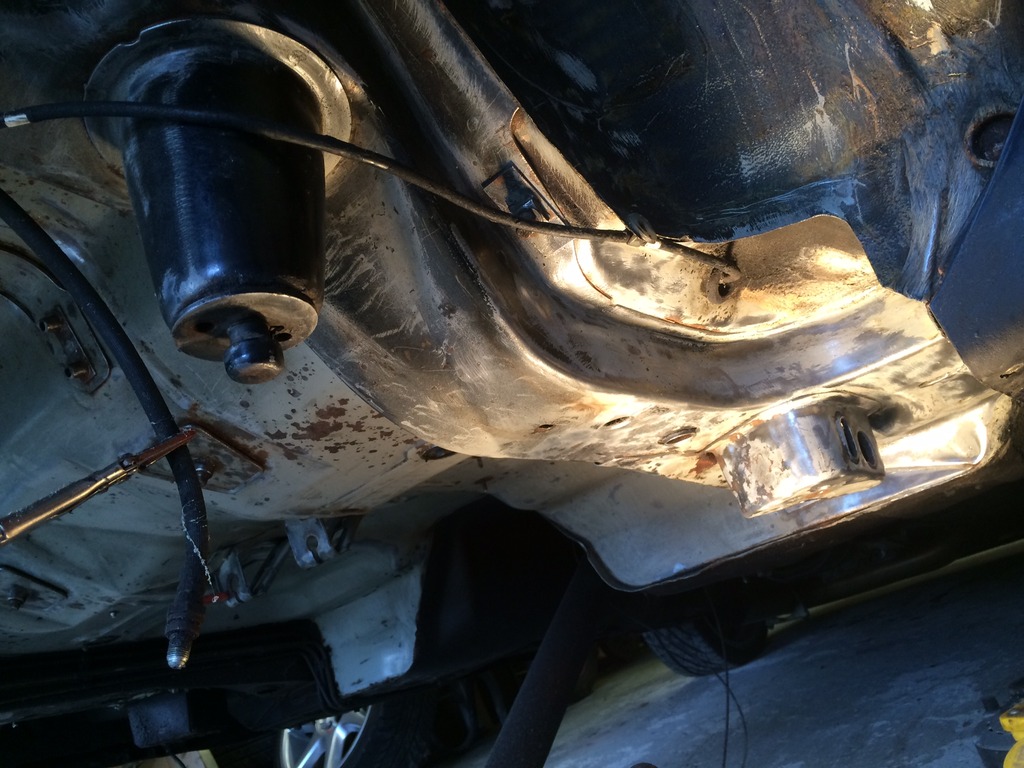
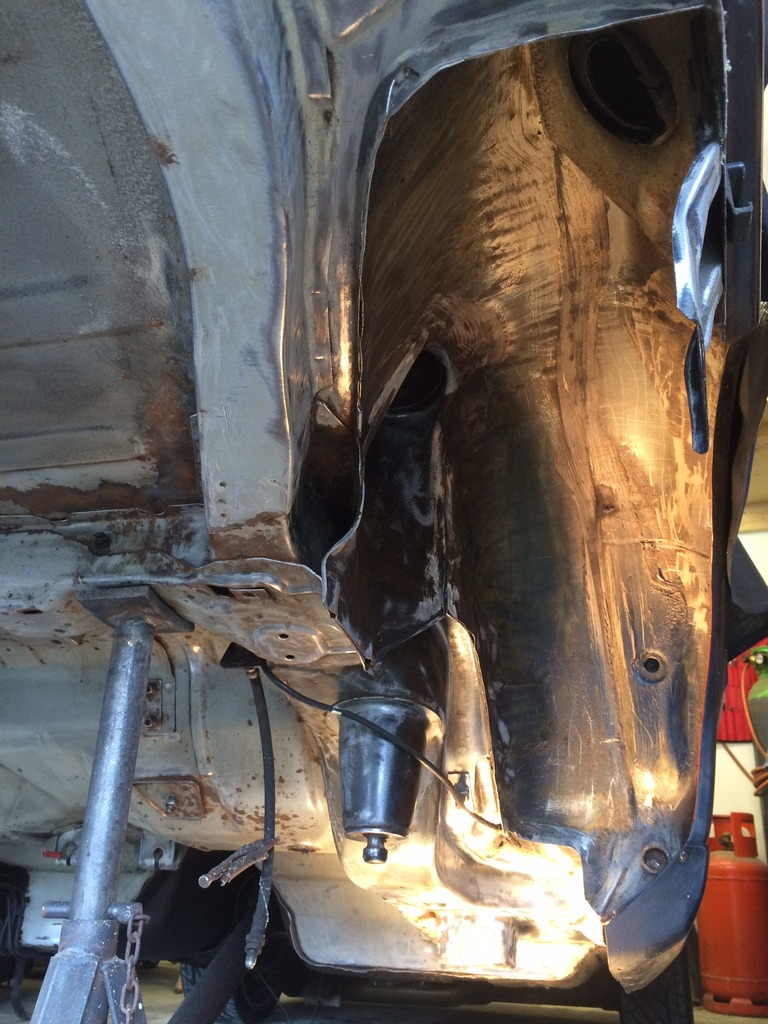
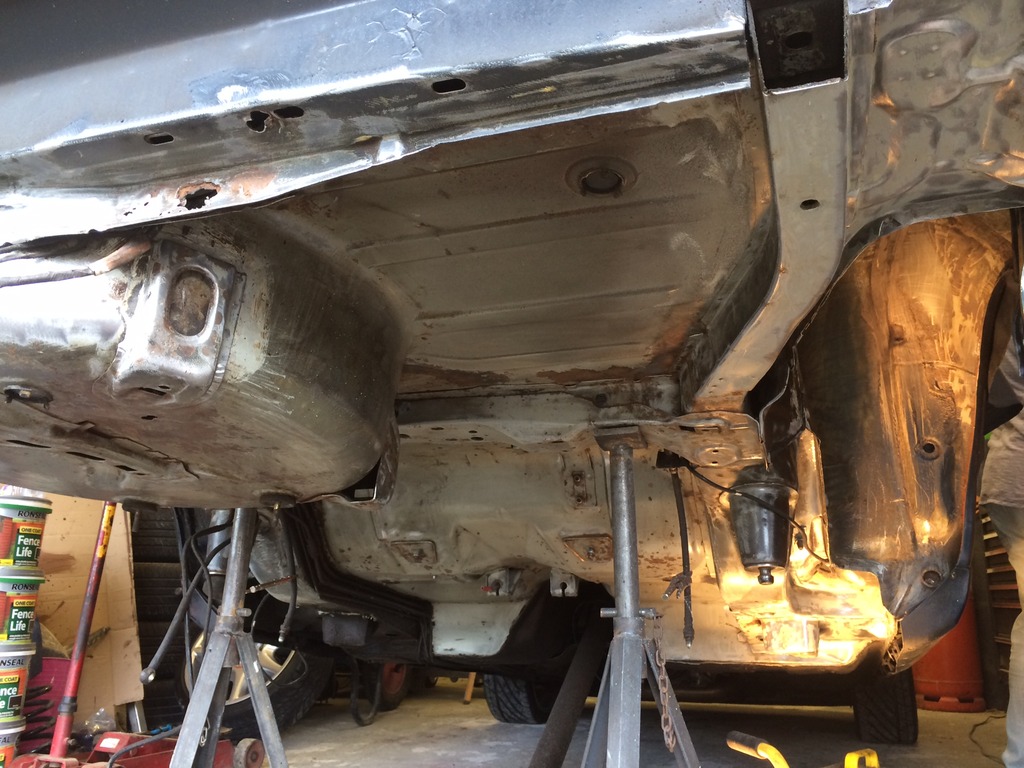
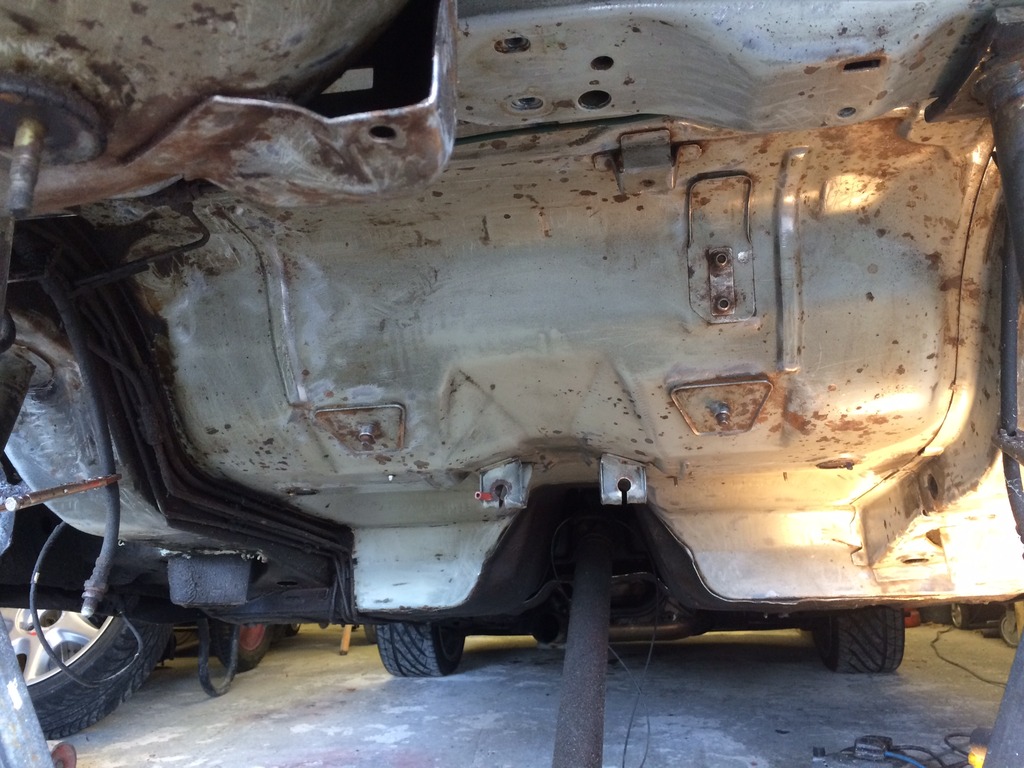
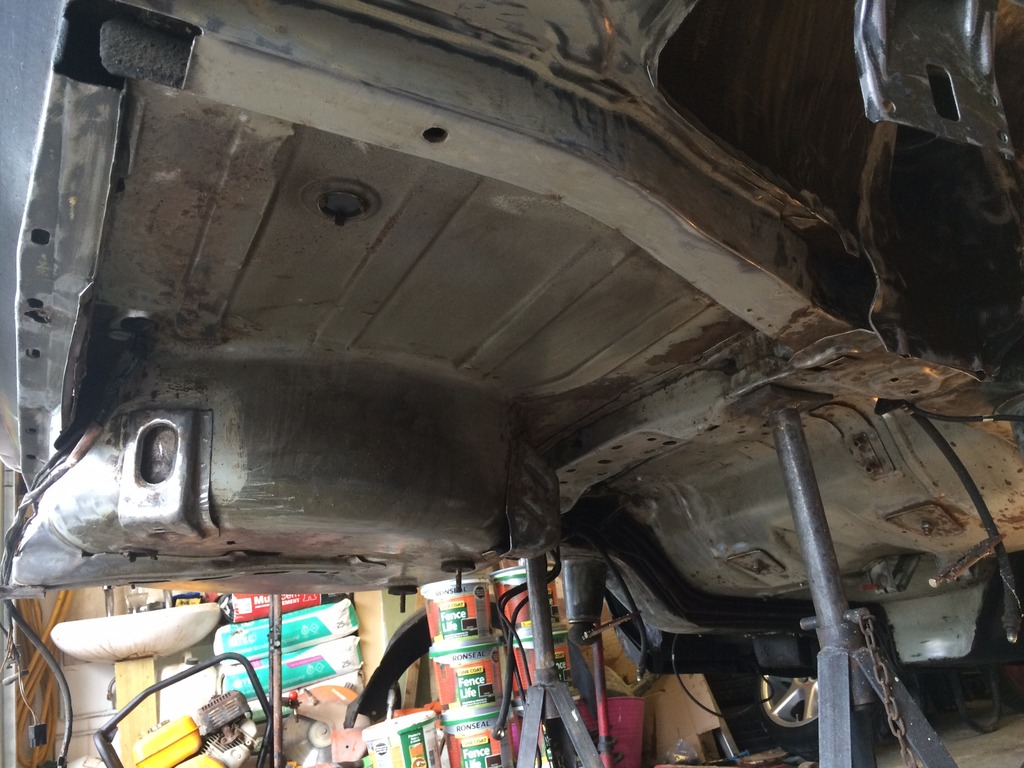
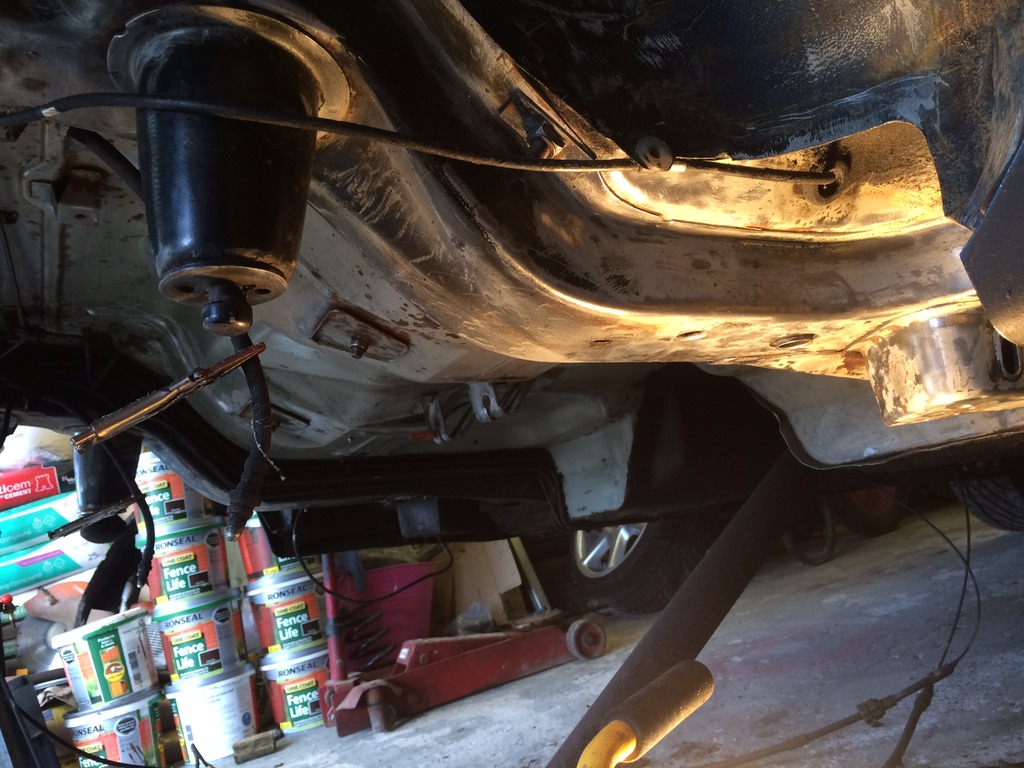
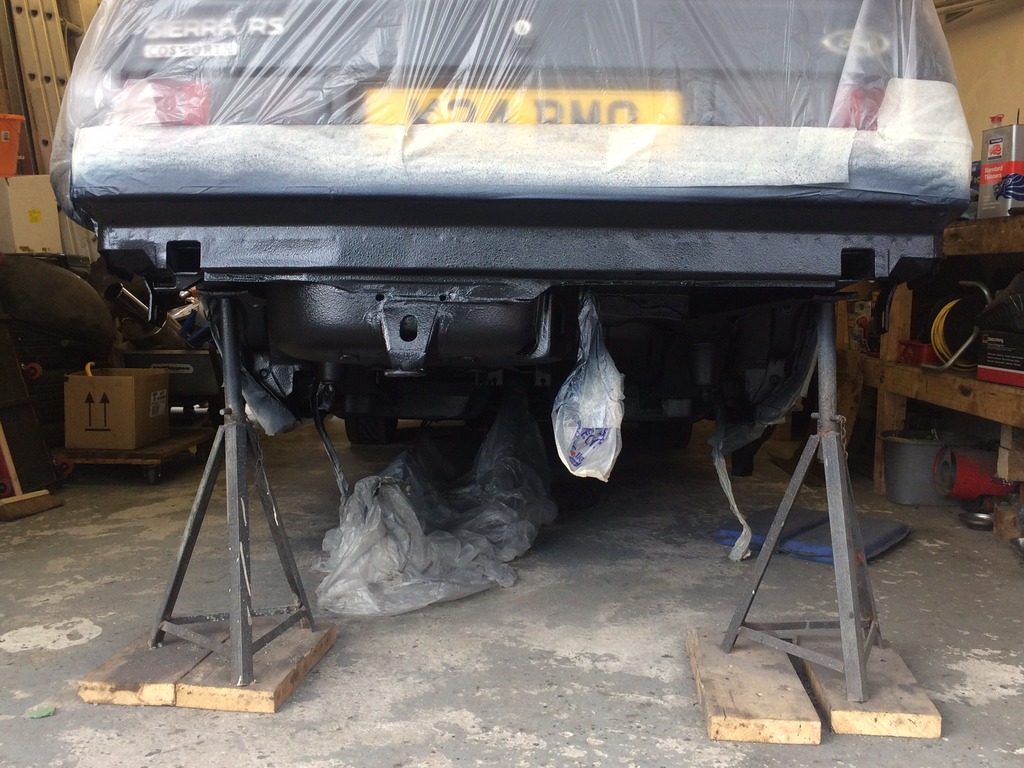
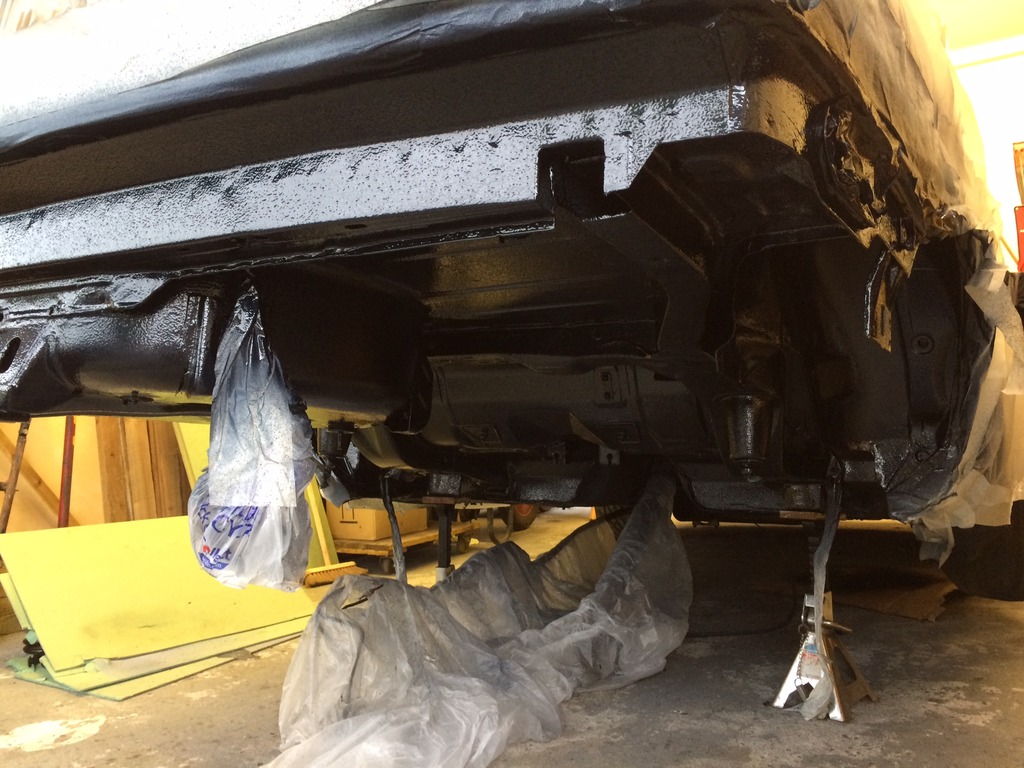
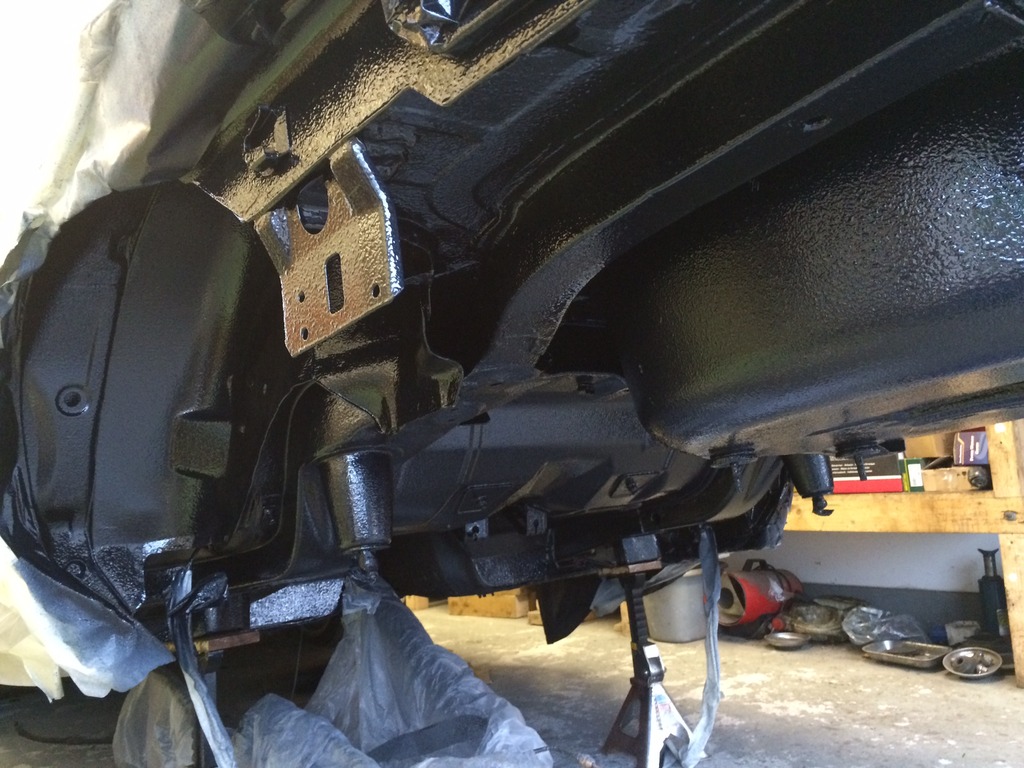
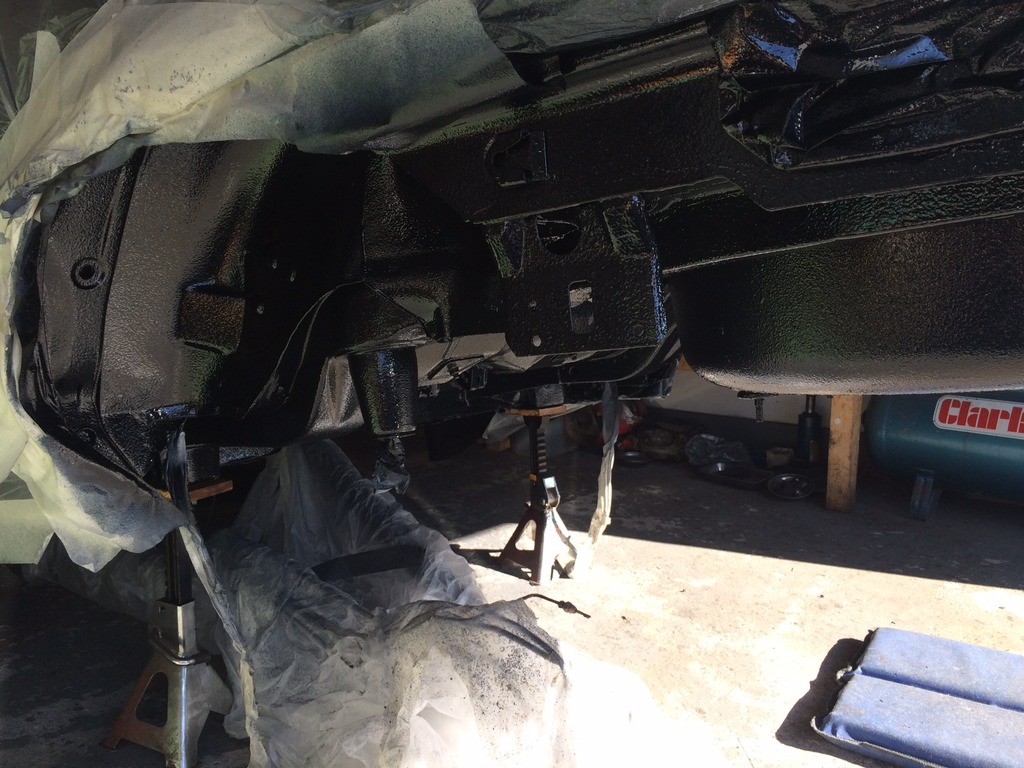
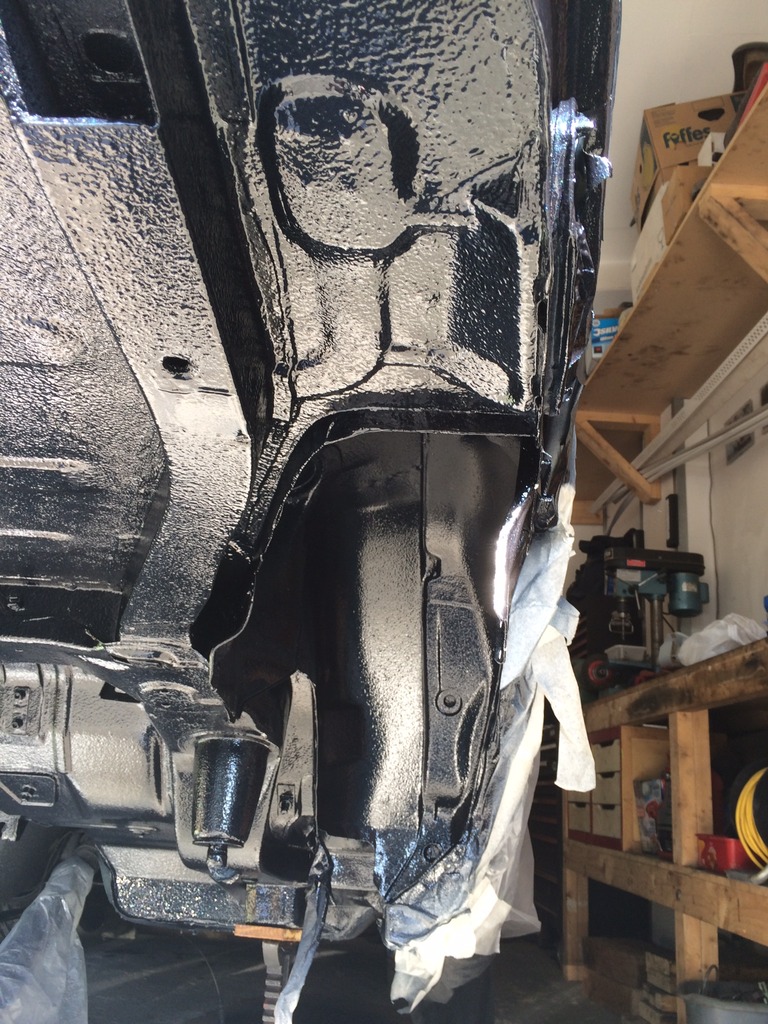
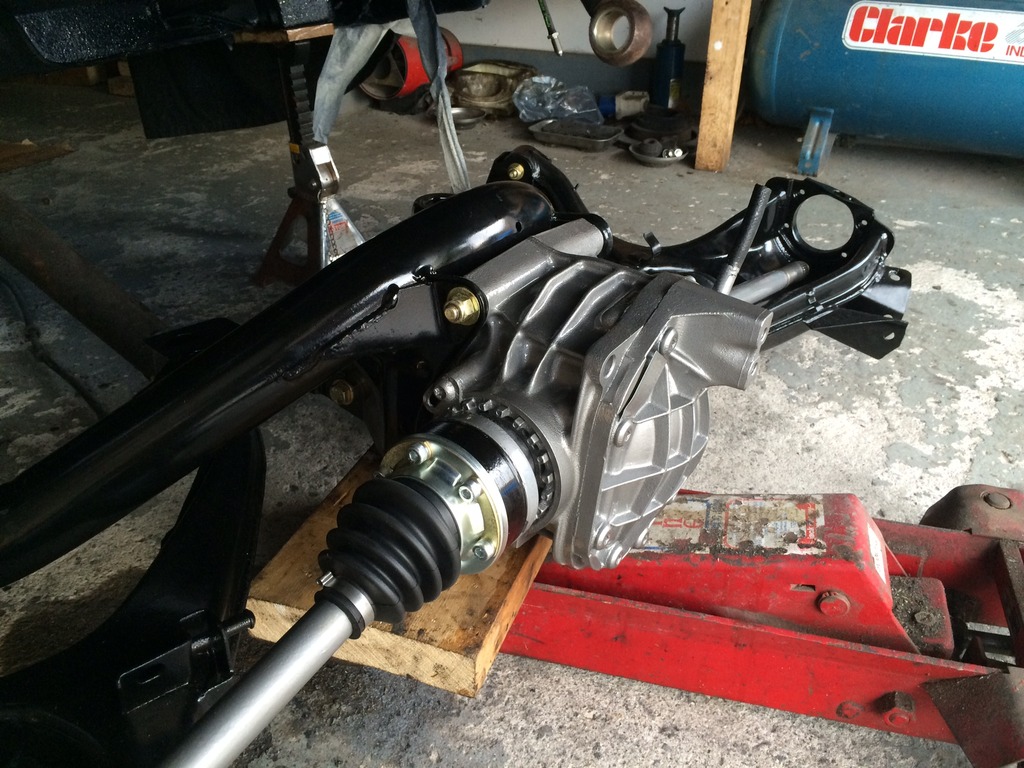
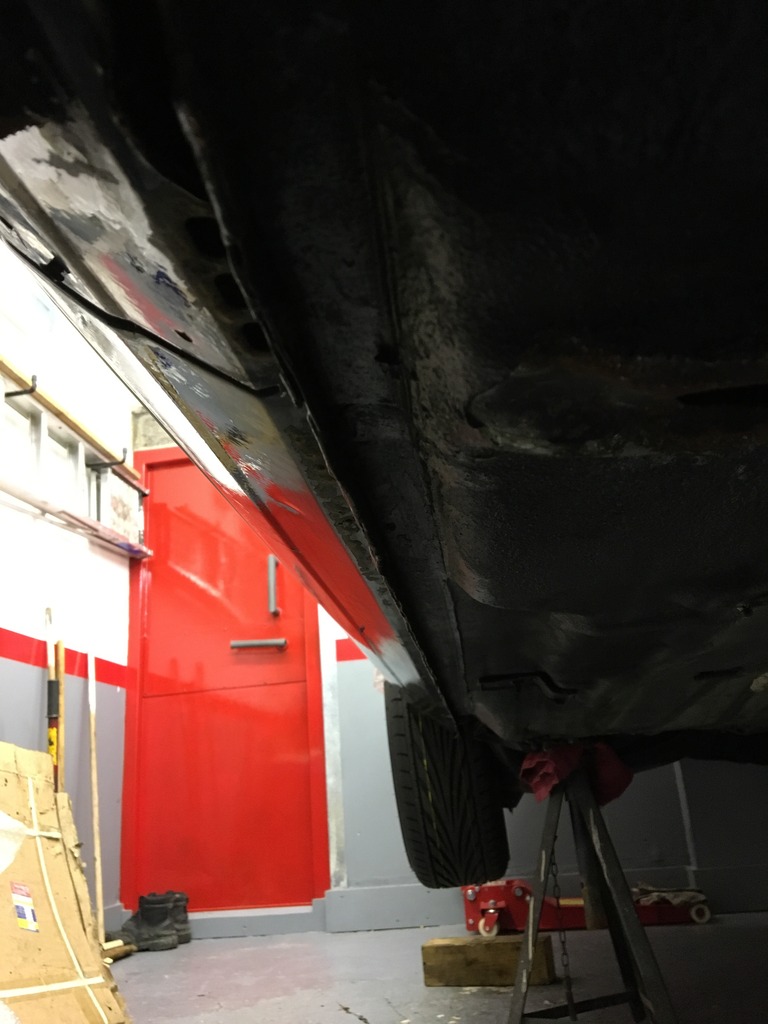
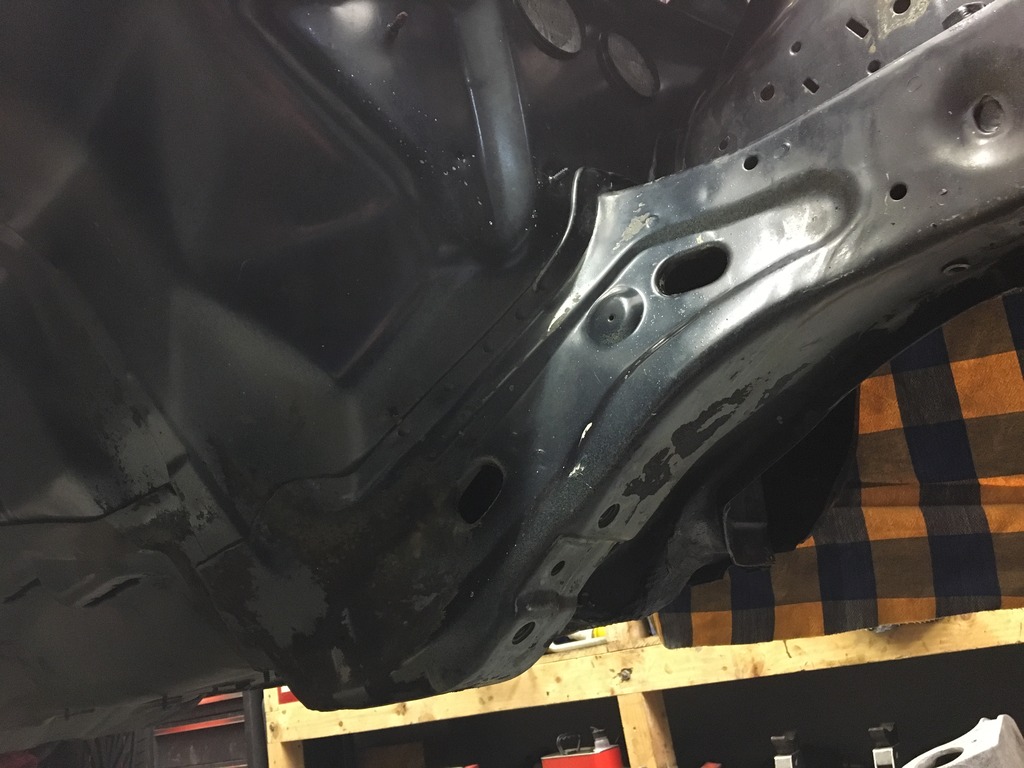
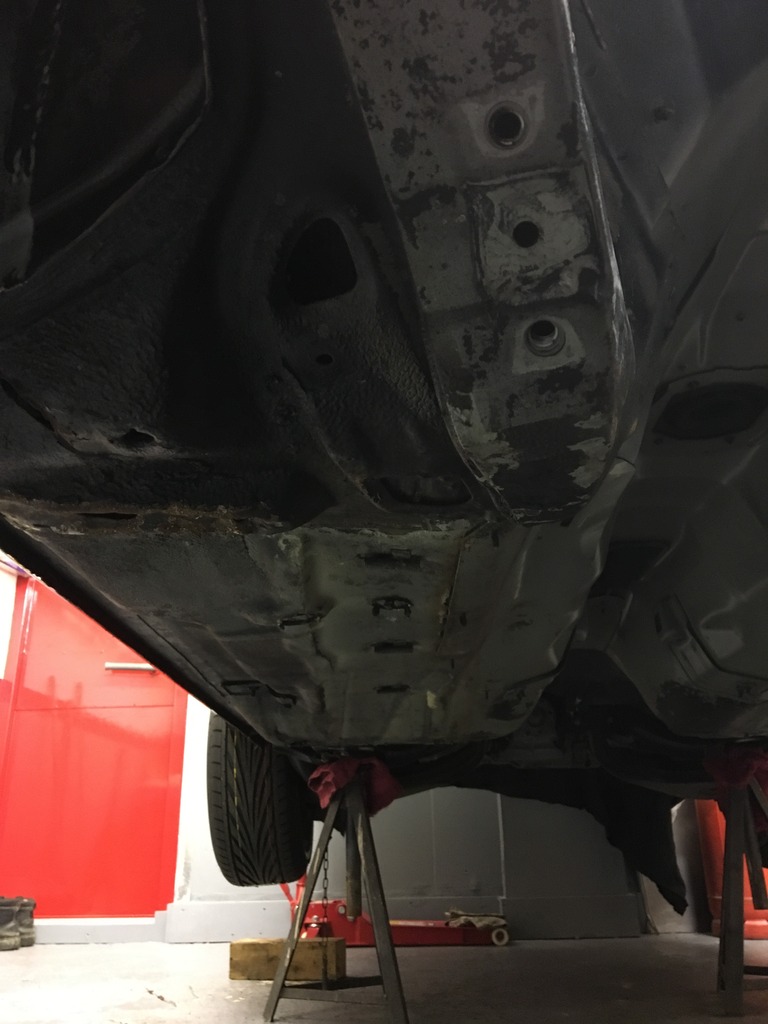
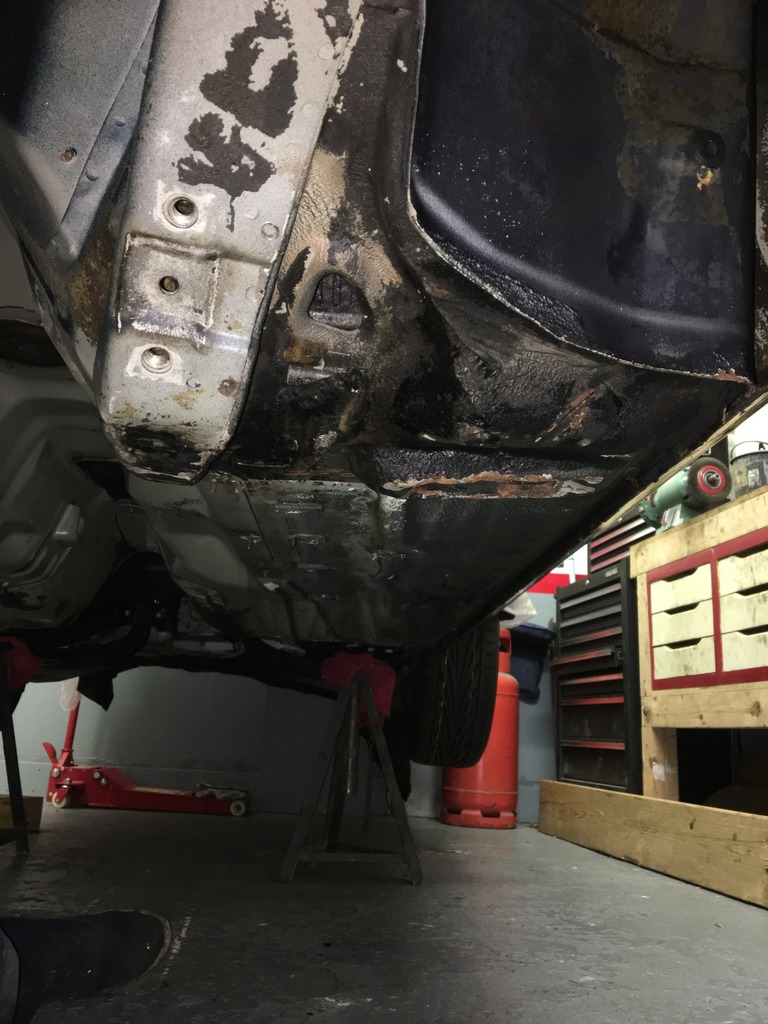
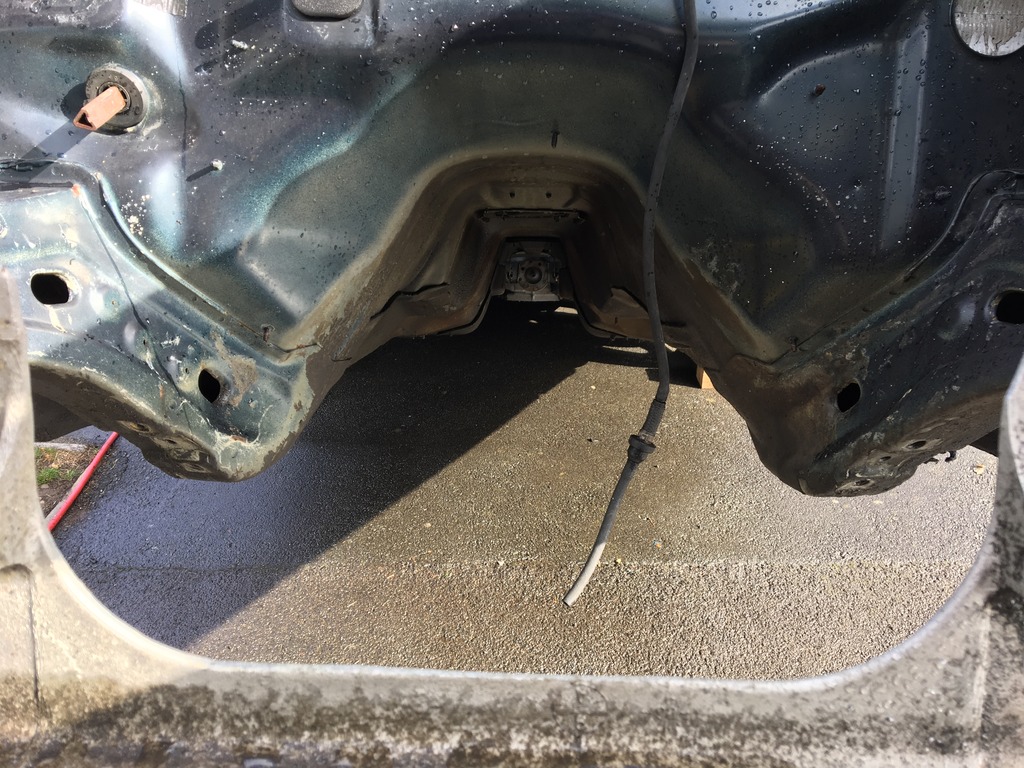
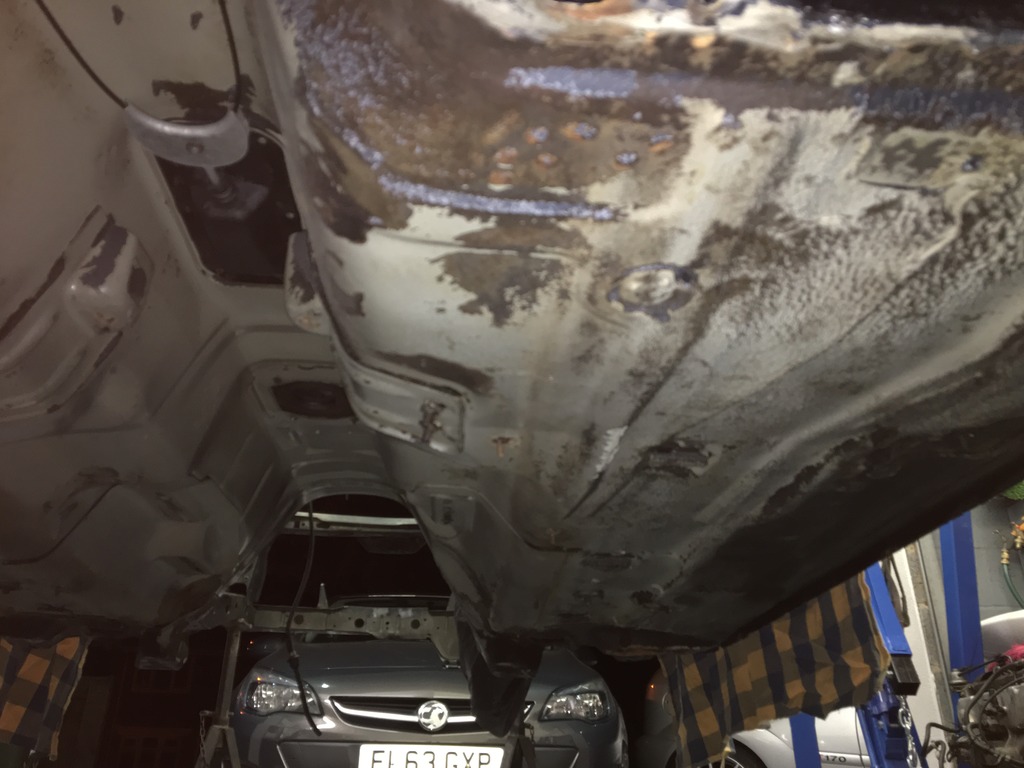
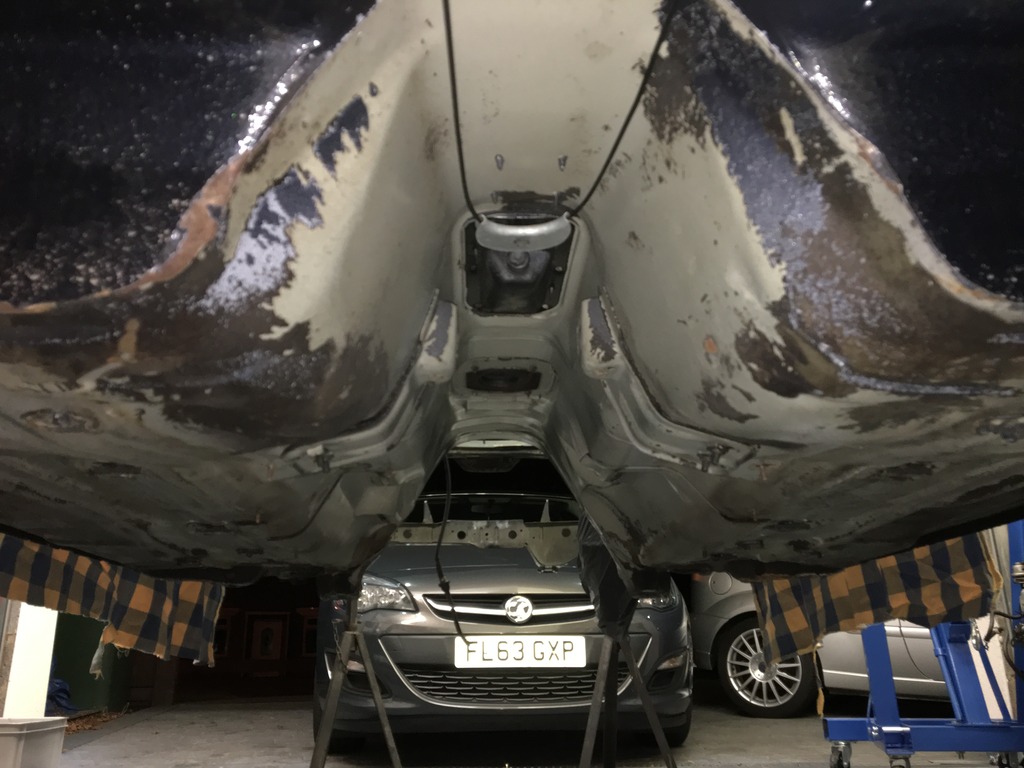
Once the car was in the air and I had the rear beam out, tank off, diff out etc I started to poke around and have a scrap of the wax oil to see what it was like under there. Before long it started to get into a full rear end resto. Ill let the pictures tell the story,
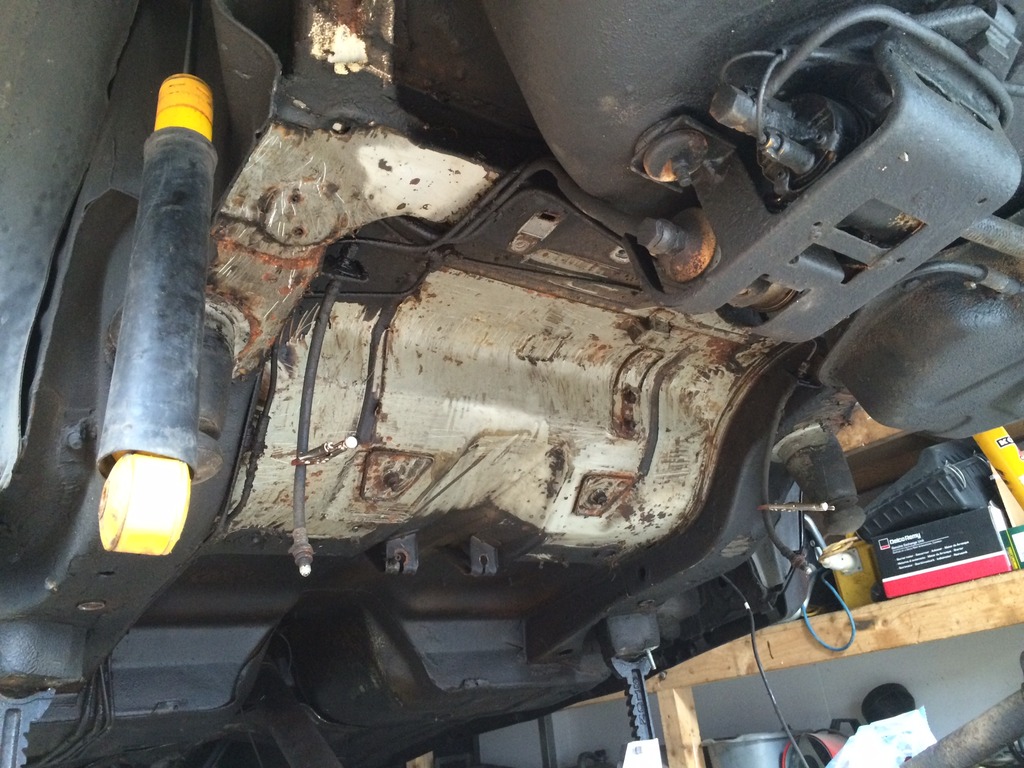
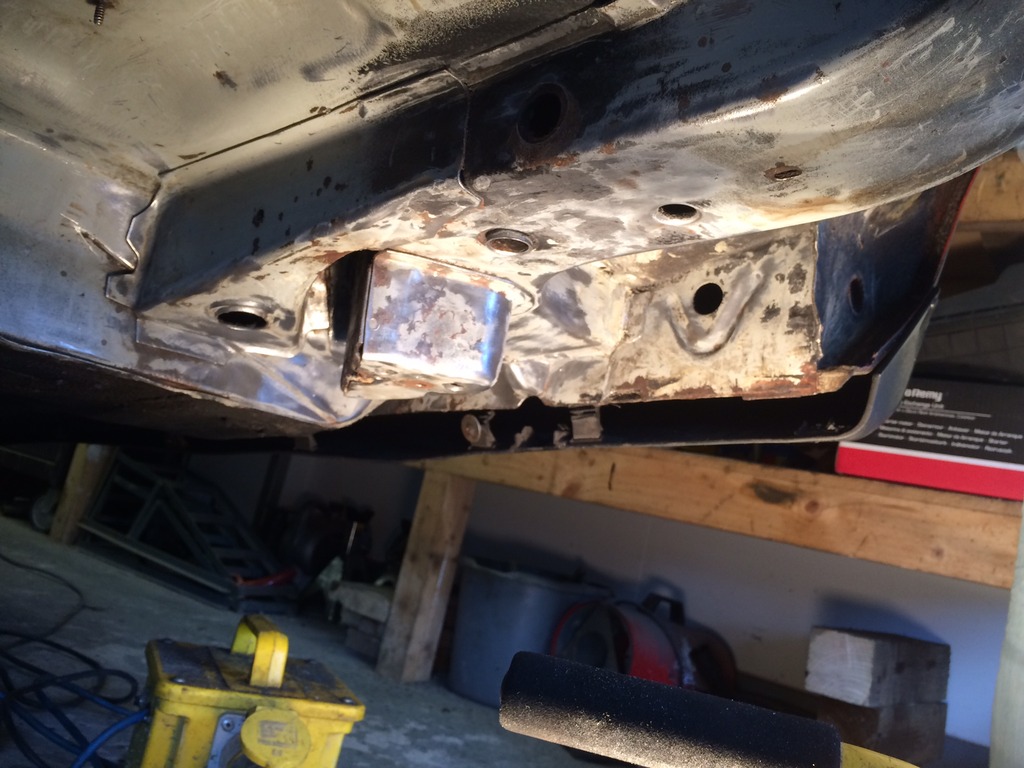
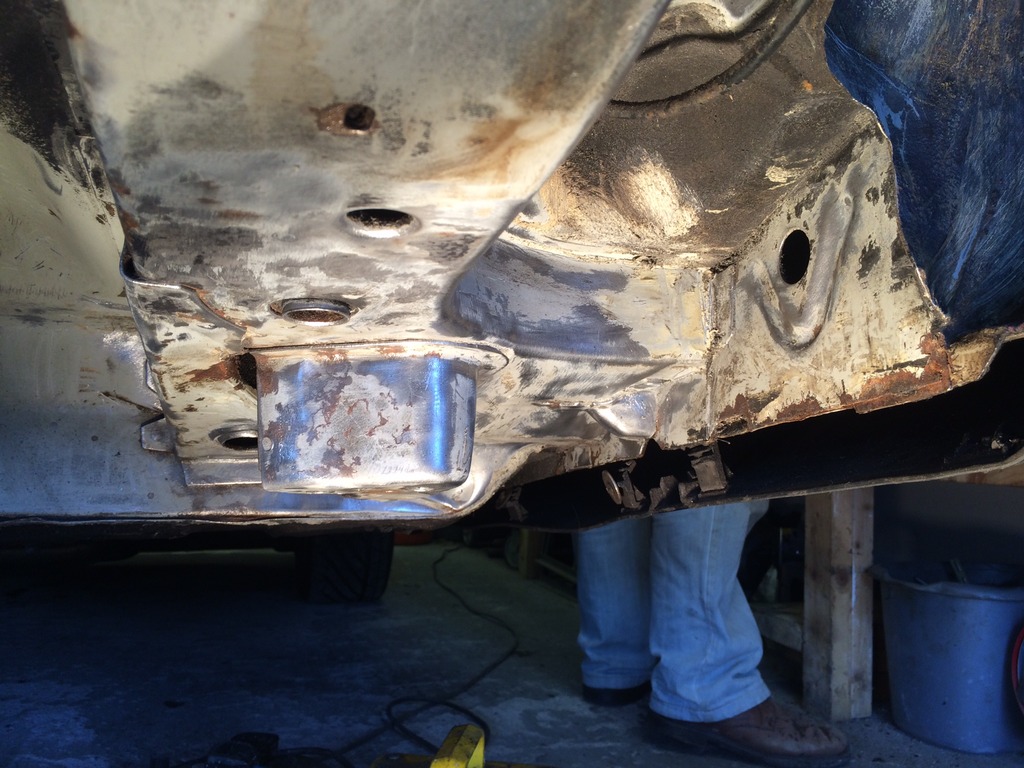
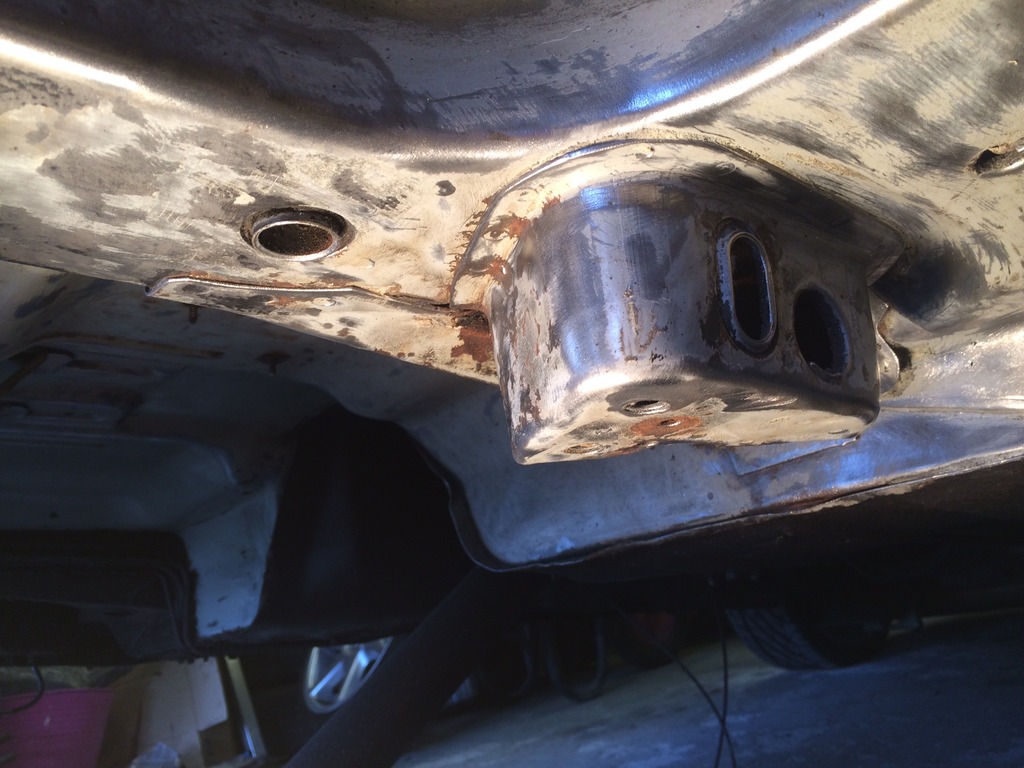
The whole underneath from behind the rear bumper to the start of the transmission tunnel was stripped including right up into the rear arches. There was only a little bit of surface rust. The car had never been welded and didn't need any. I treated the areas of rust with rust convertor before going at the bear metal with POR15 first.
Last edited by growlingchim; Oct 7, 2016 at 01:46 PM.
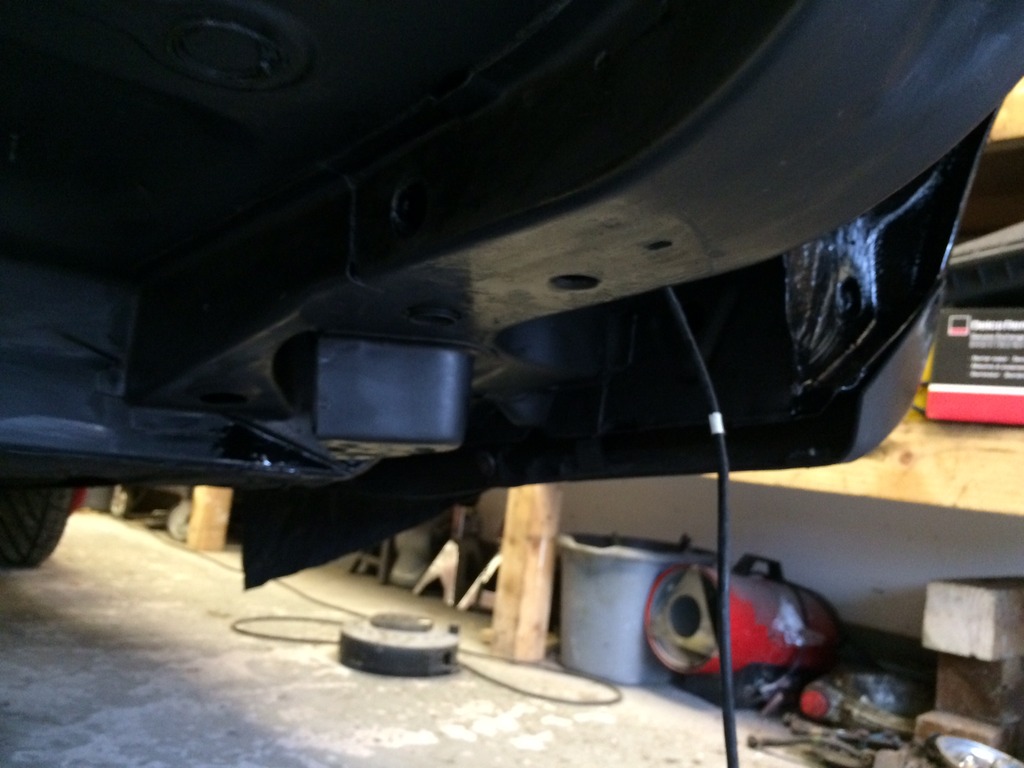
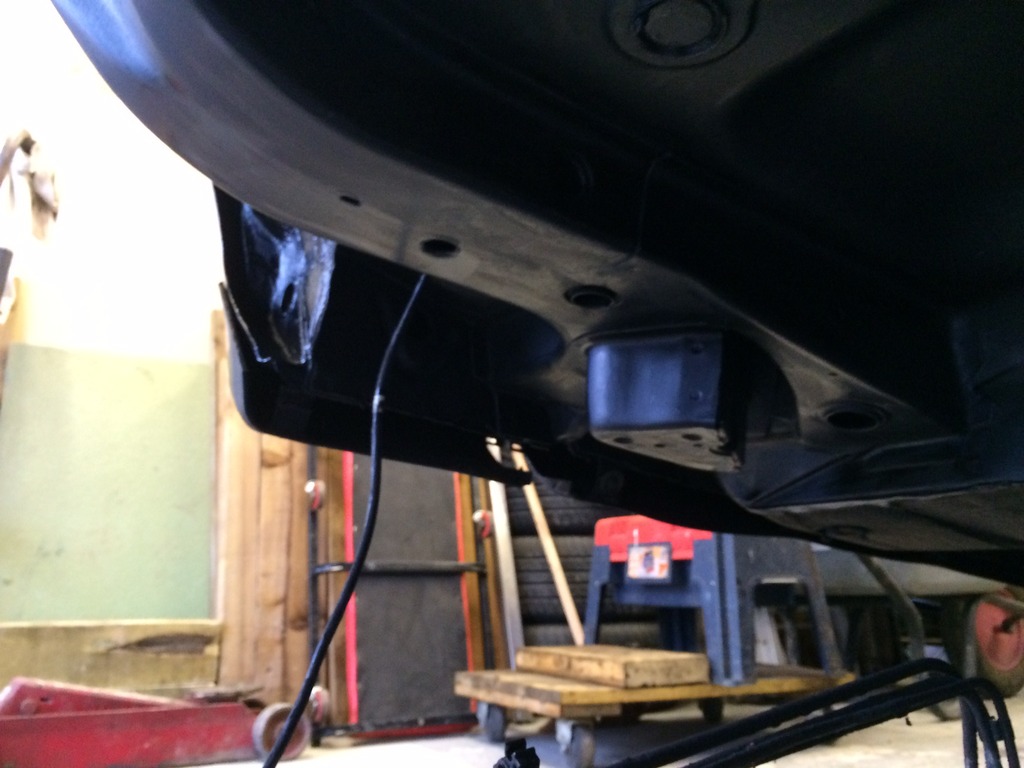
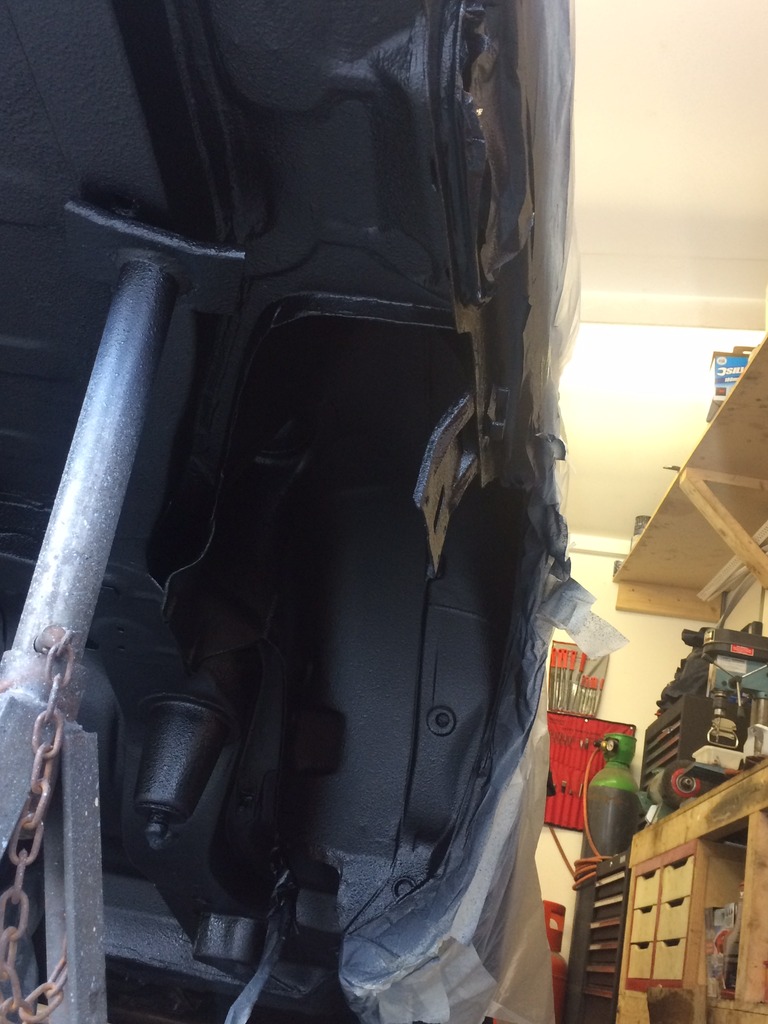
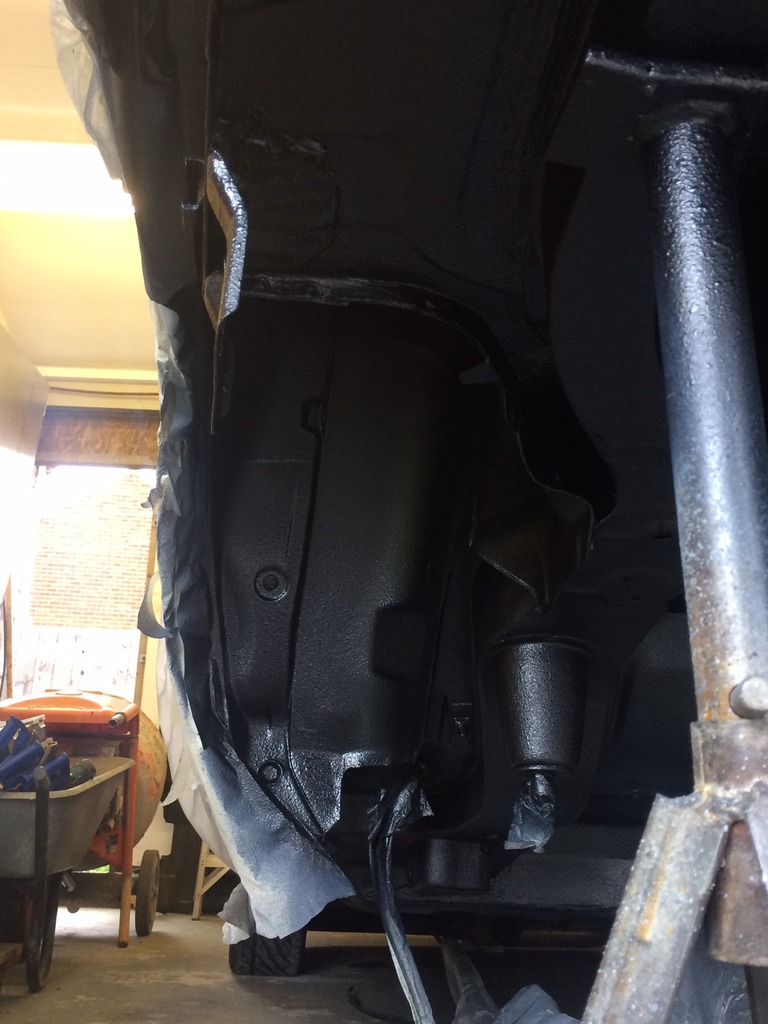
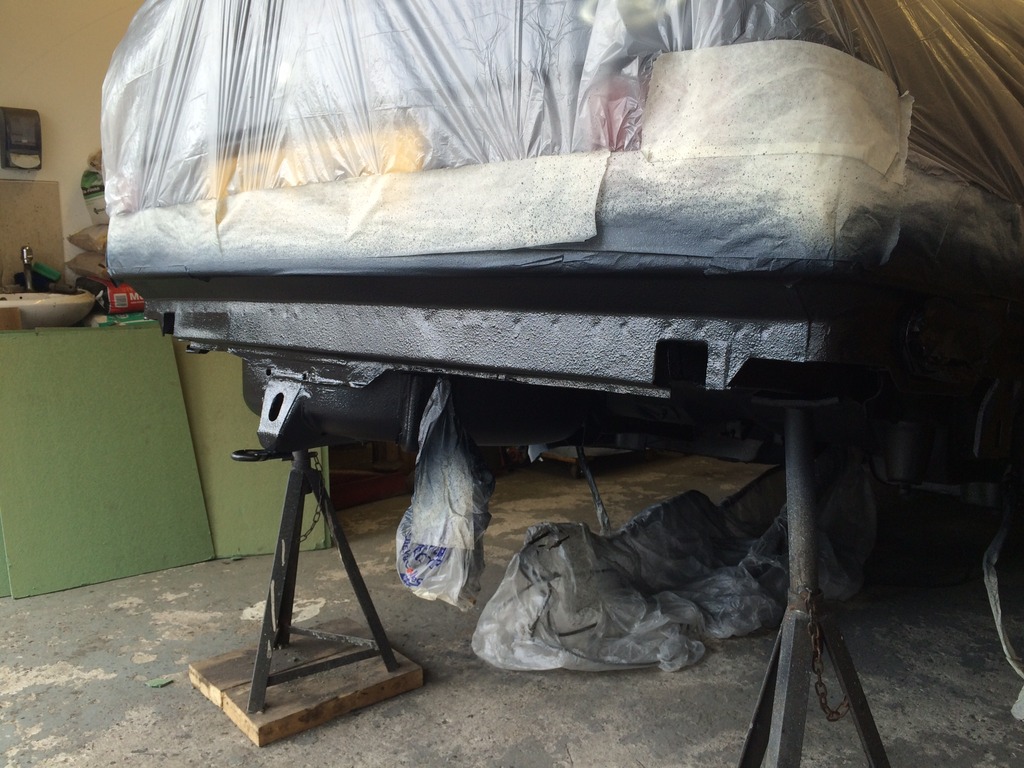
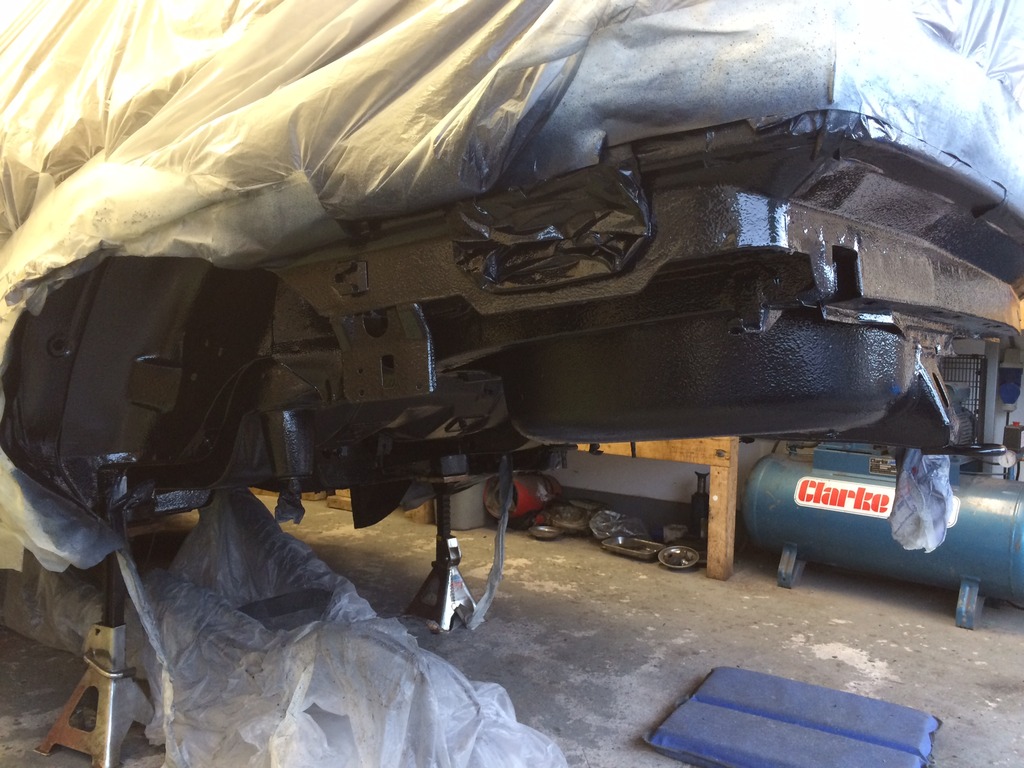
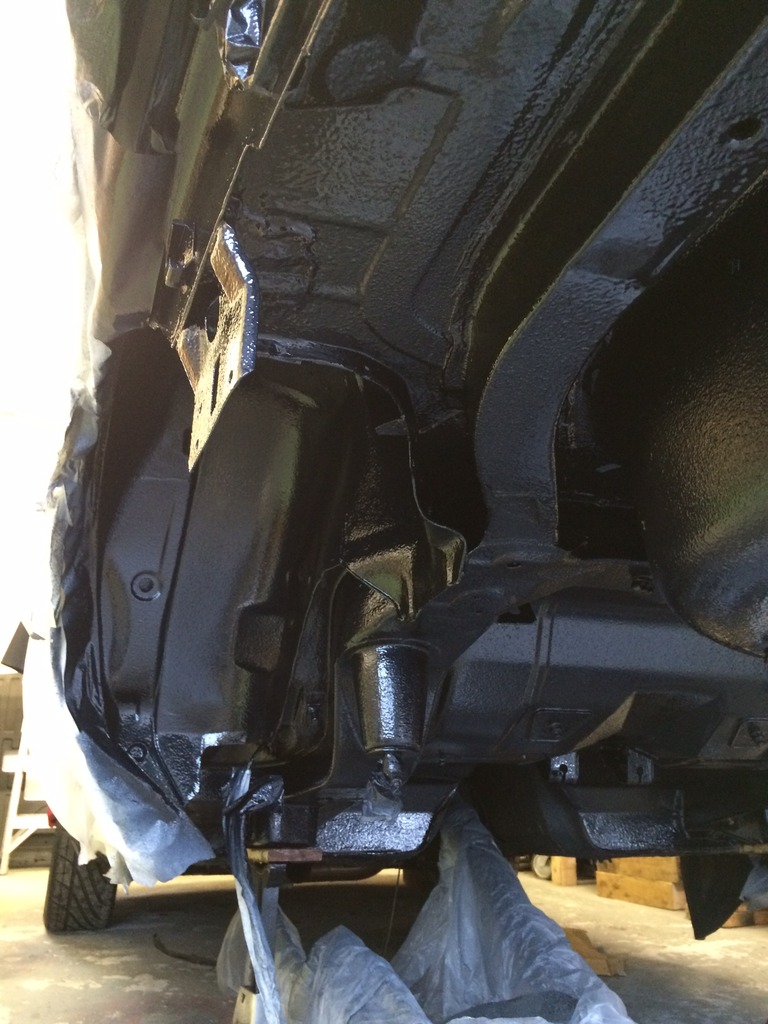
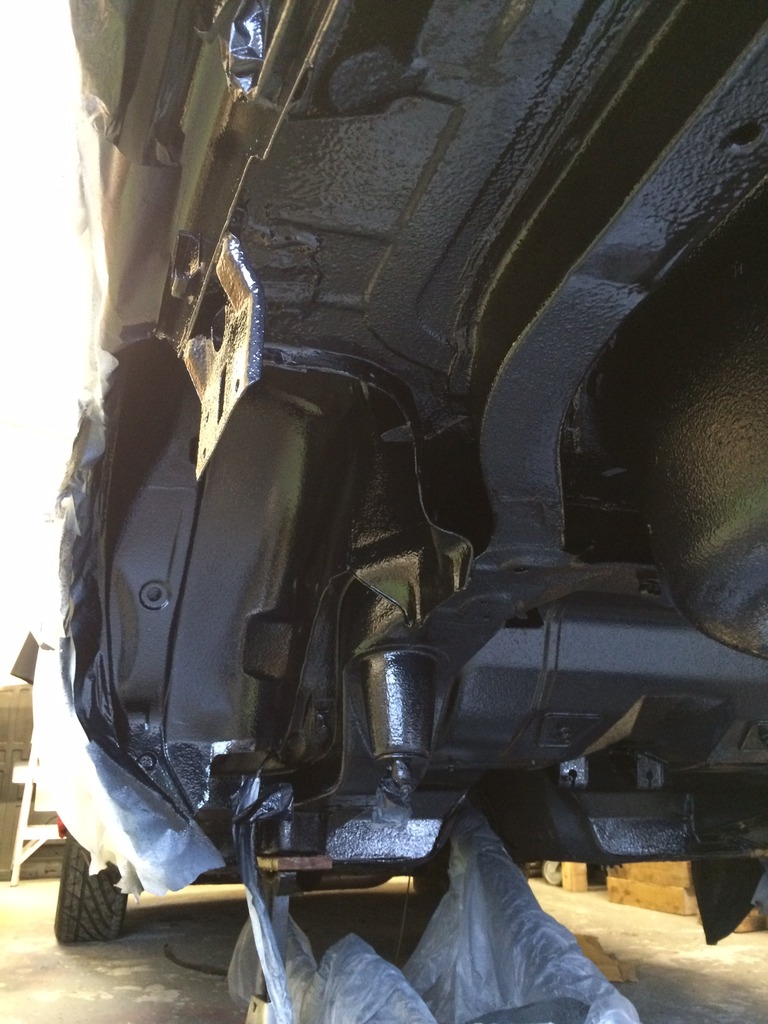
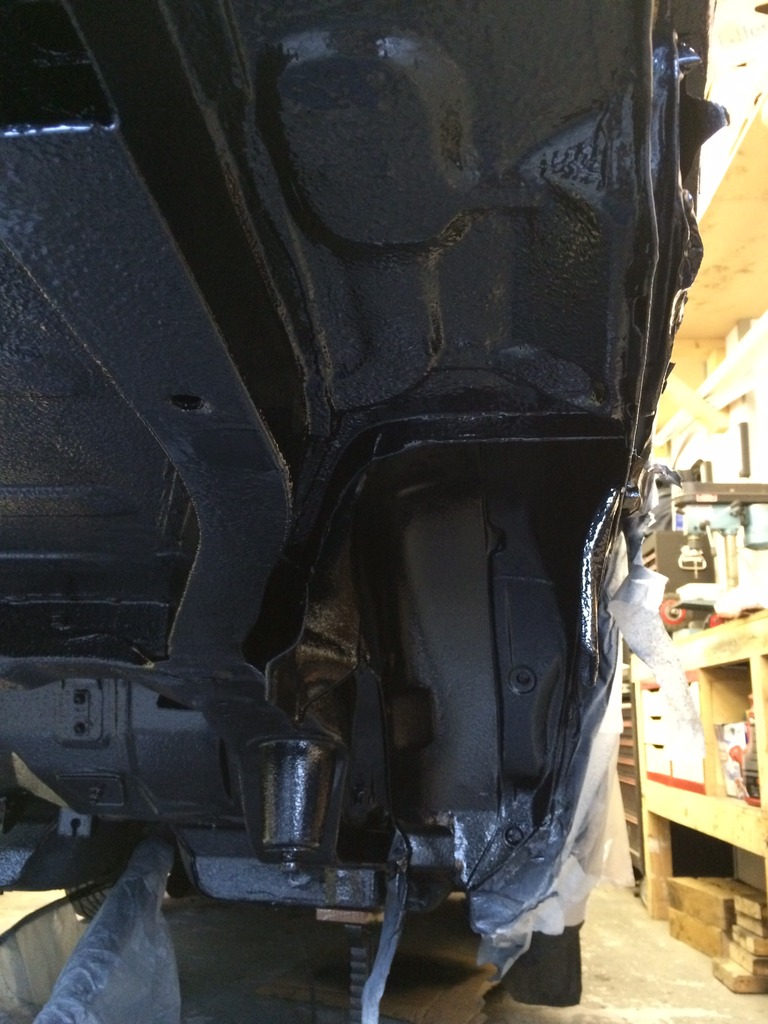
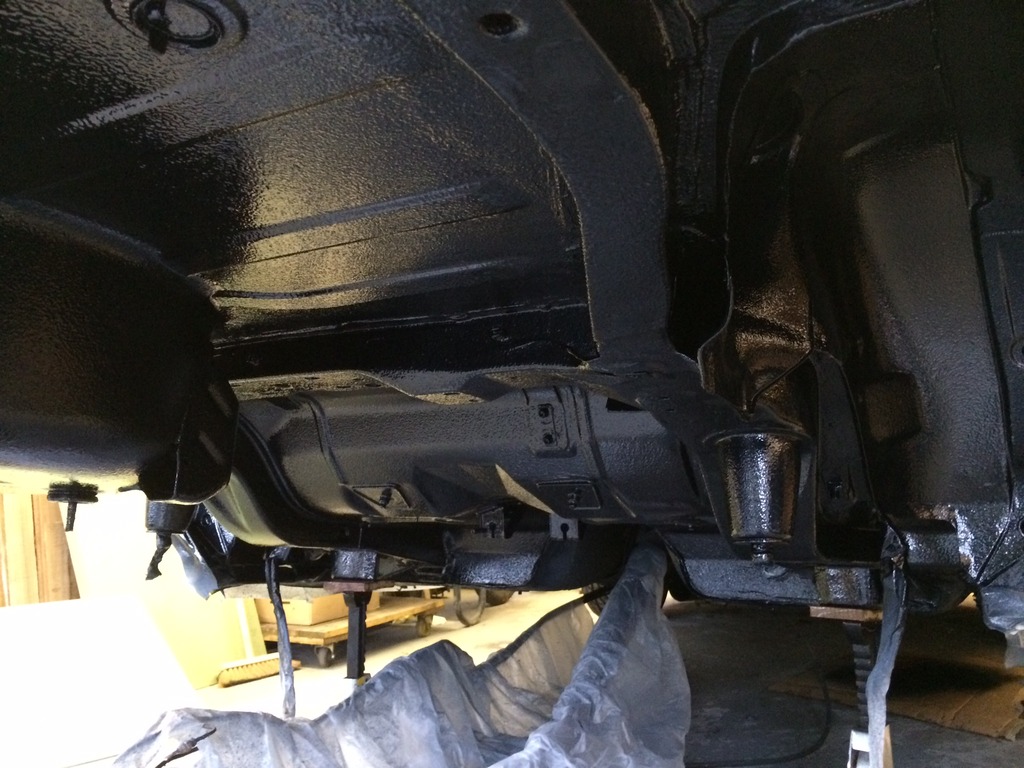
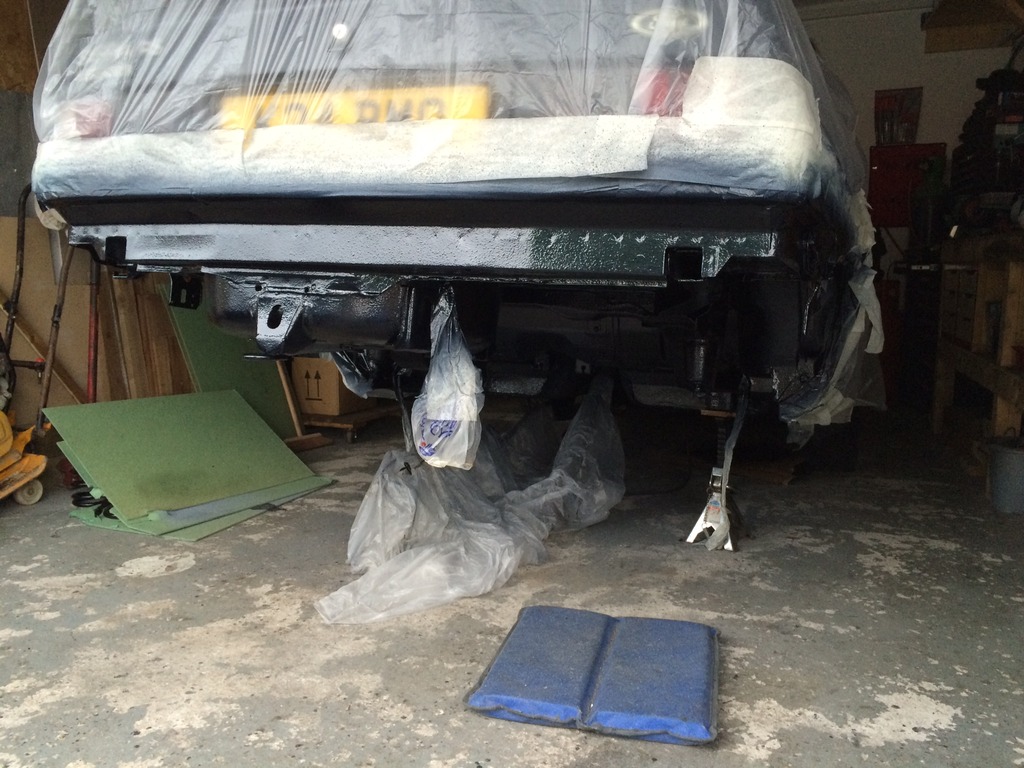
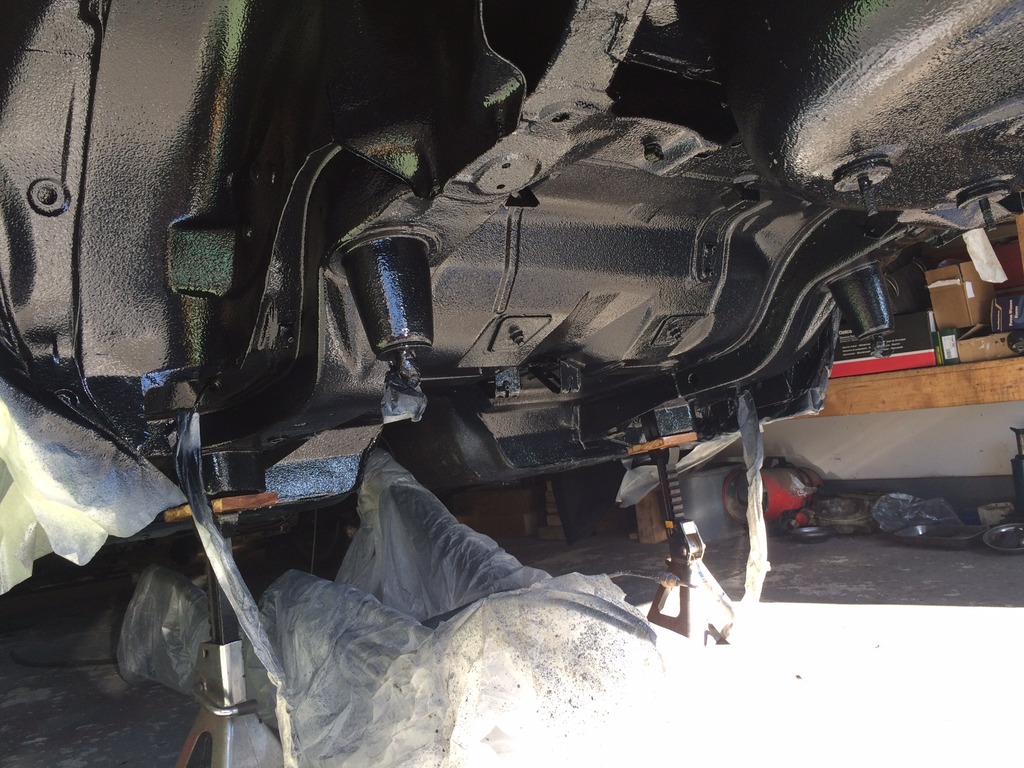
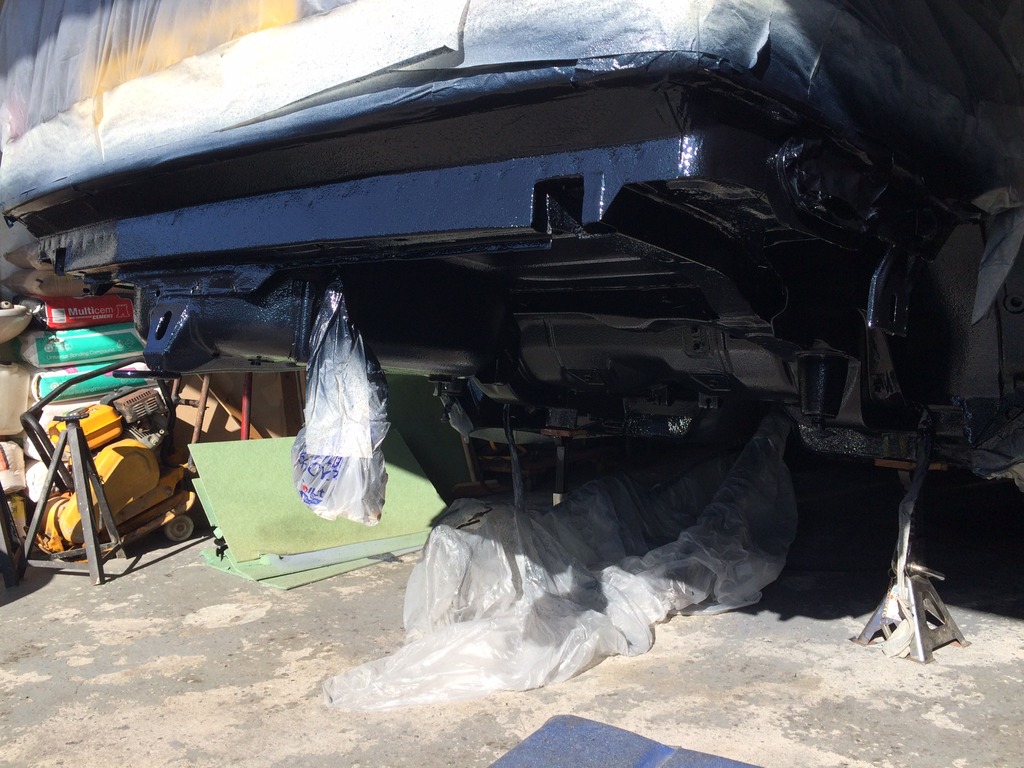
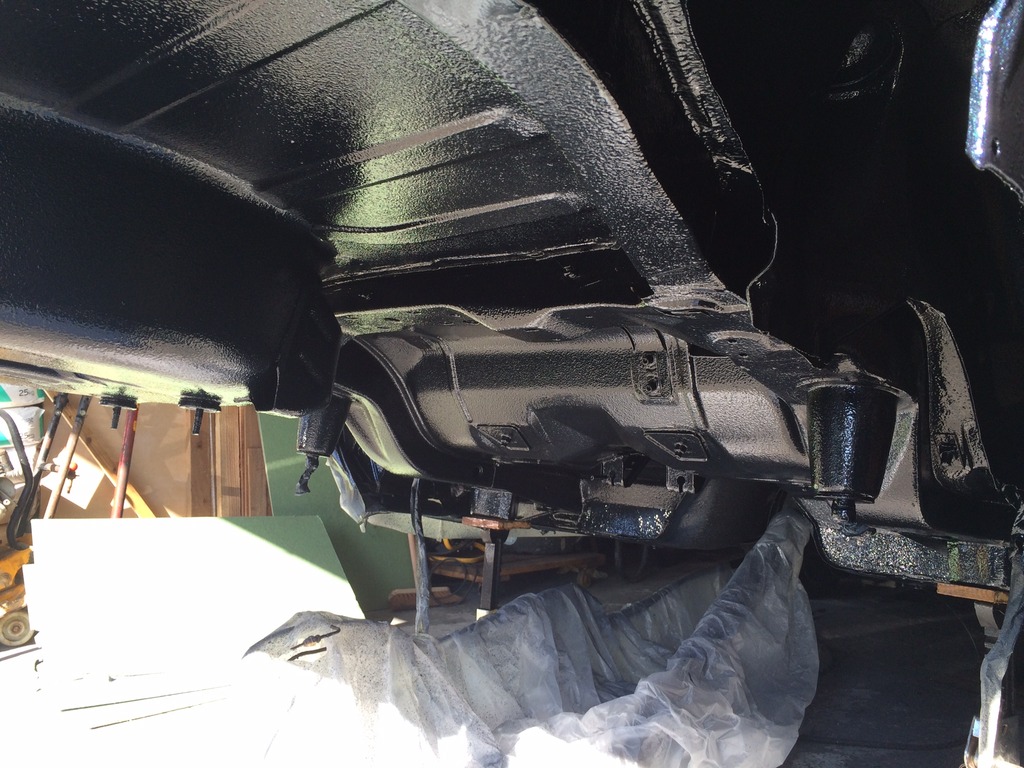
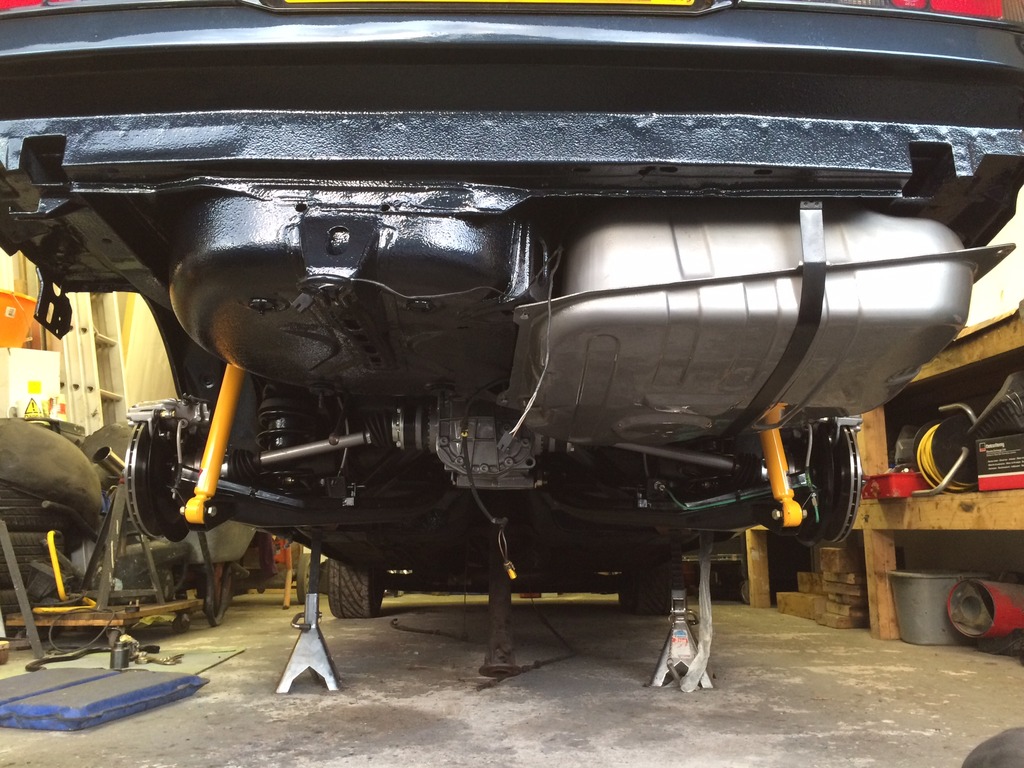
Then a coat of under seal and two coats of body colour,
Then 2 coats a 2 pack lacquer to finish it off,
I didn't think it turned out too bad seen as though this was the first time I had tried to spray. I can say I hate wax oil it was a nightmare to get off loads of petrol then wire brush on grinder to get it back to bear metal.
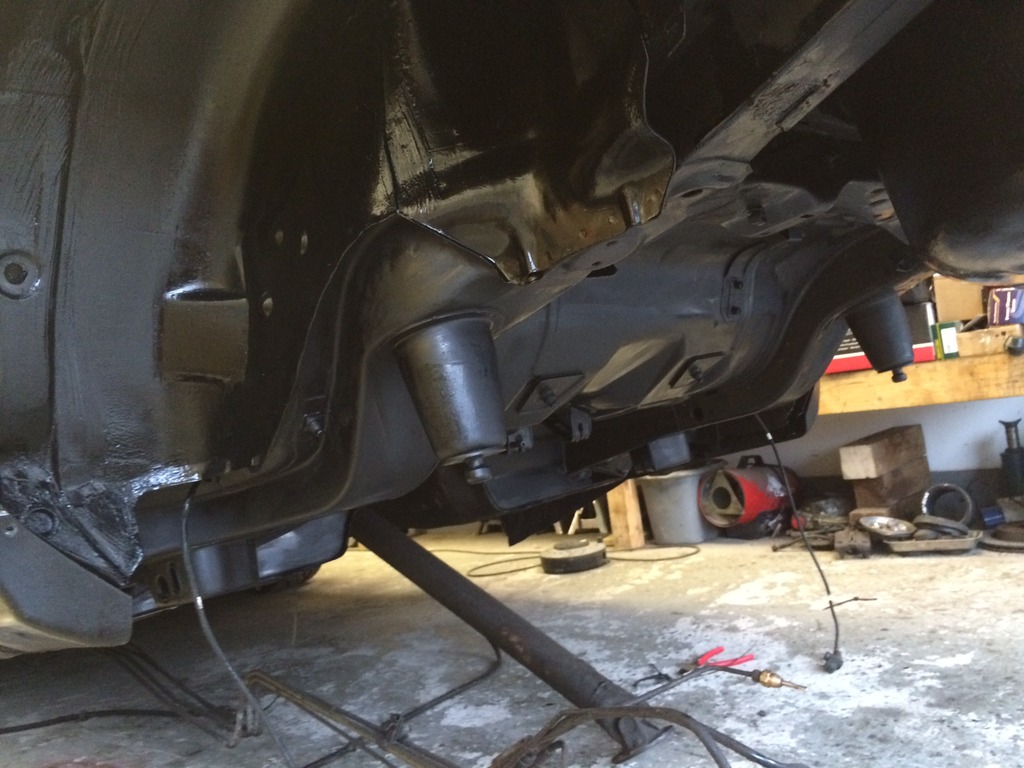
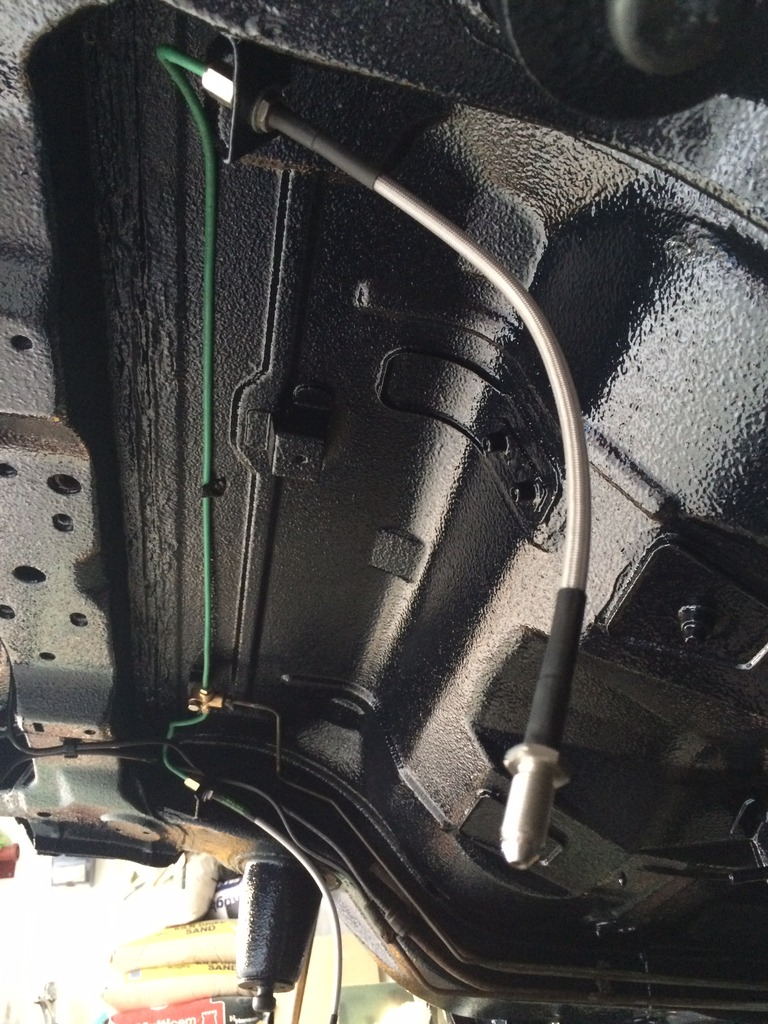
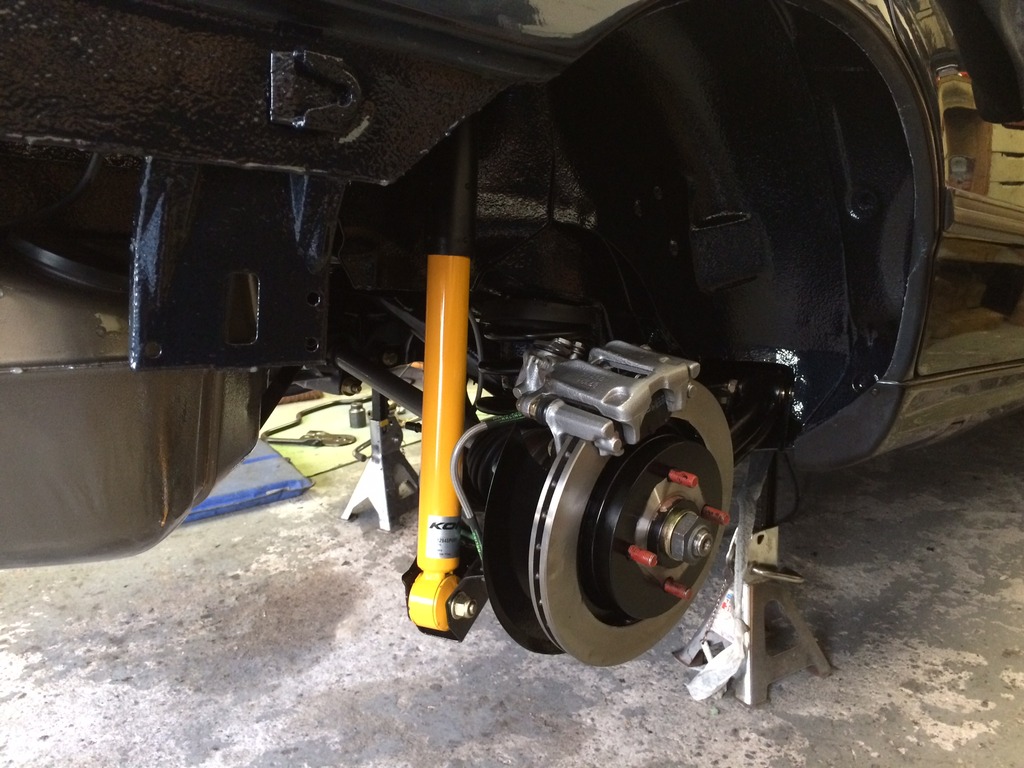
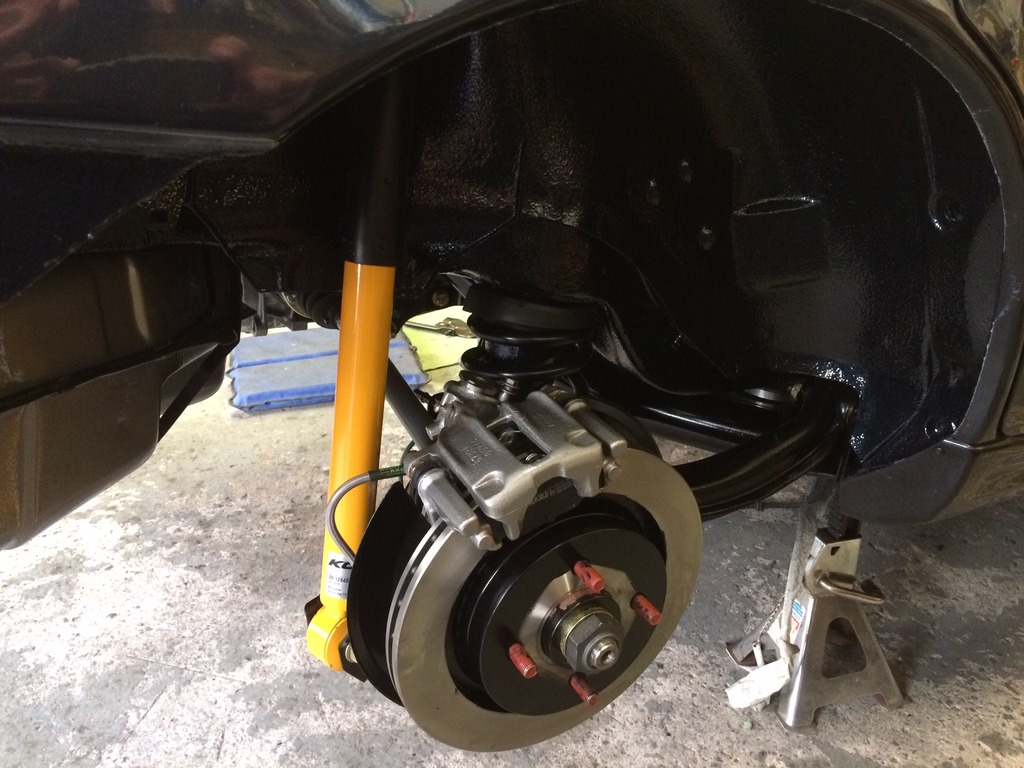
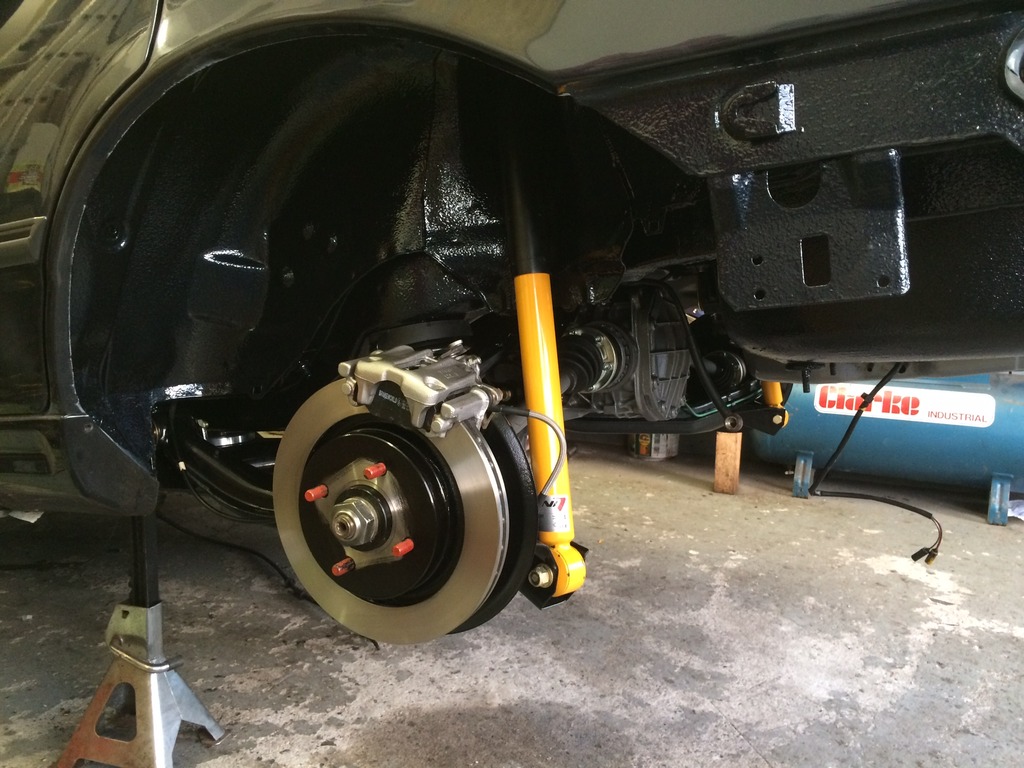
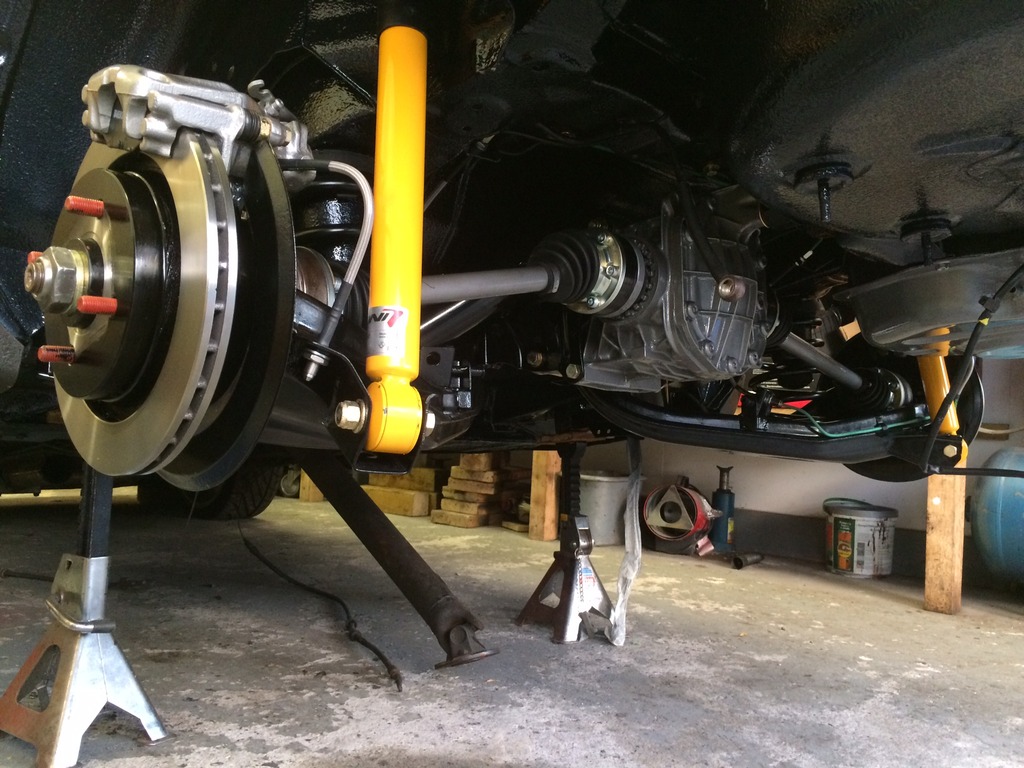
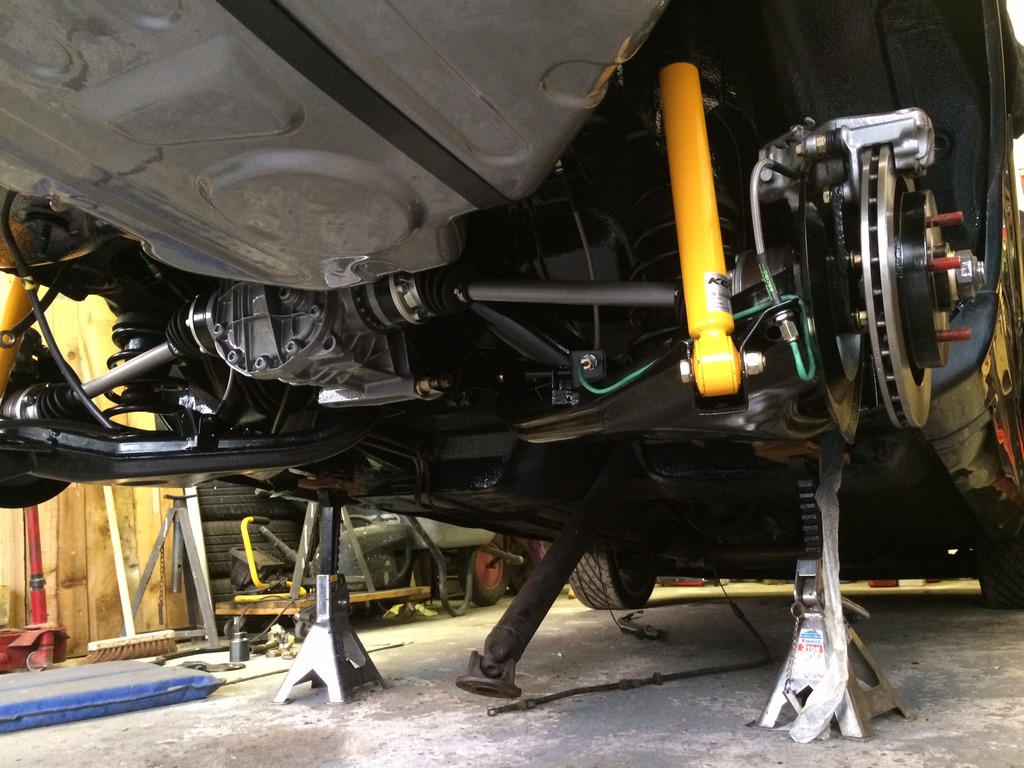
Next up I thought I cant put the old bits back on so all the parts were powder coated and the bolts zinc plated. Braided brake hoses, new brake lines, bushes, bearings and brakes. More pictures,
Also painted the tank and calipers then 2x Lacquered them turned out well. I went to painted the rear Koni's up and found the drivers side had been leaking and this had caused the shocker to be notchy when pushed in and then out. They were second hand so a new set were installed.
Managed to make it to a couple of shows before the end of the session last year and then parked the car up for the winder. Whilst parked I gave it a good service and once over only to find the head gasket to have gone and a fine spray of water coming out under the inlet manifold when coming off boost.
So this year the car has been off the road, and I though time to make it the car I really want it to be. I hope the owner of this one doesn't mind but I love this one and that's where ive got my inspiration from,
So sold the RS7 and the original Shark Tooth wheels and found these,
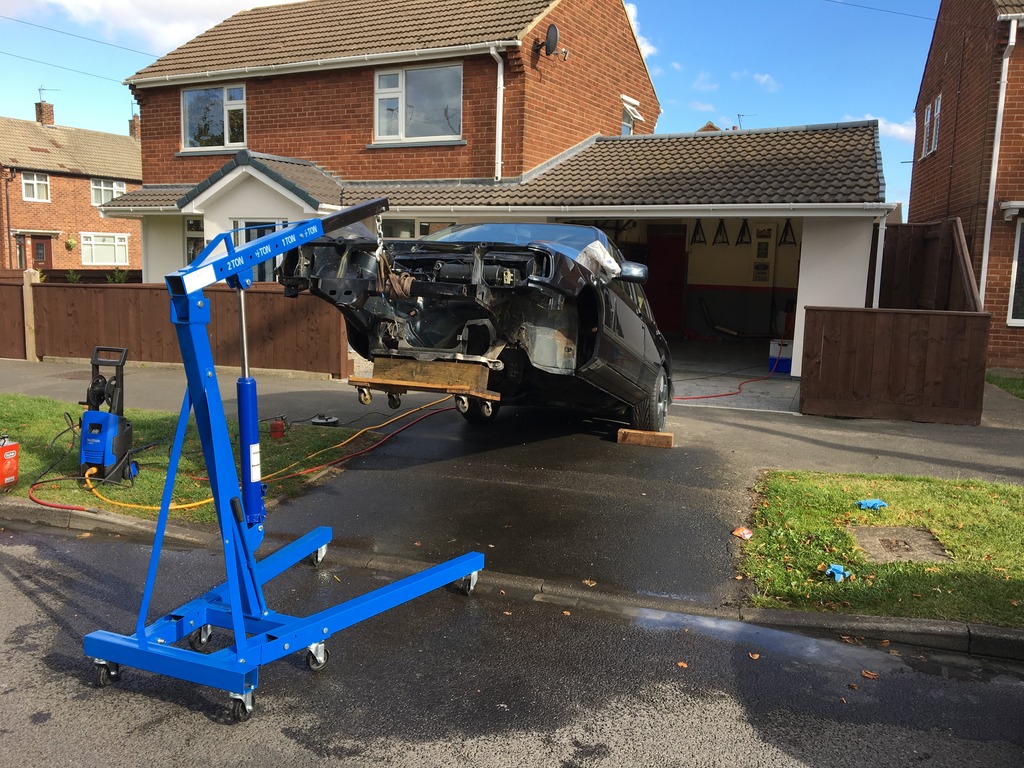
Nice set of 18" MO6. I started to look into prices for a engine rebuild and obviously more power. I wanted a reliable 450-500Bhp so I would be looking at around 10k. Then a mate of mine dropped me a message to say he was giving up on his rebuild and was looking to strip and sell car as parts so I went to have a look and came home with everything in the pic lol,
Will go into more detail about the engine later but quickly its a 10x long stud fully forged, new T38, MSD Coil pack conversion. All tanks in pic hoses ets, Air Tec RS500 intercooler and ali rad, fans MSD engine loom and fuel pump loom. All at a very good price.
More to come........
Last edited by growlingchim; Oct 7, 2016 at 02:06 PM.
Awesome work and lovely car. I remember when I first got mine I kept blowing offside front driveshafts until one day I jacked the engine up a fraction to do another job and it lifted right off the mounts lol. Tried another second hand set but they ripped apart within 100 miles so bought the Collins ones. Been mint since
Very good work on the resto I have repainted the under side of my 4x4 Cosworth and am just starting to piece it back together again.
There must be something about the M6 I took my 2wd to MSD a few weeks back and must say they are one of the most profesional companys I have ever used .
I left home at 3-15am from Tunbridge Wells in Kent and drove quite gently to MSD( as was concerned about lean mixtures) for a 9-30 booking .
Had an interesting day and got 308 bhp and 305 lb ft of torque so all good untill I got onto the M6, had only done 15miles when we stoped with Altenator failure.
Got back home at 2-45am the next day.
We used the AA to get us off the motorway and the RS owners brake down service to transport us home who were great!
Hi and welcome mate I love smoke stone and really like the fact you have restored it for road use rather than all painted body colour underneath like all the fashion of trailor queens of recent times ! Great stuff
Hi and welcome mate I love smoke stone and really like the fact you have restored it for road use rather than all painted body colour underneath like all the fashion of trailor queens of recent times ! Great stuff
I have painted it body colour mate, but it's not trailer queen. She gets used as often as I can that how it should be 👍
Your doing a cracking job on this mate �� I take it when the engine comes out you will be doing the rest of the underside? I will be keeping an eye out for more updates ����
Your doing a cracking job on this mate �� I take it when the engine comes out you will be doing the rest of the underside? I will be keeping an eye out for more updates ����
Yes mate. I never intended to really do the back but to get to the bushes on the rear arms the beam had to come out and then there was only the tank left so i thought what the hell.
Ive done upto the transmission tunnel so far, the next step witch ill be starting soon is engine an box out and strip the whole front end. Then bare metal the rest of the floor, sills in and outer, bulk head and front arches before paining them all to match. Then back in with all the new parts.
Well thanks to everyone for your kid words. Its taken so me hard work and alot of time to get it to this point and even more to come to finish it but its all worth it when you hear peoples comments on you work so thanks again to you all and hope you enjoy as ill be starting the work this week
So for another update, my last drive of the car before i took it off the road i was on some great Yorkshire country roads but at times when pushing off a bit i was experiencing so brake fade. Now knowing i have the new engine to go in and more power i knew it would only get worse and so time to look into brake conversions.
So i wanted to try something different to the norm, i have seen this idea on a Escort Cosworth once before and offered by Martin Rayland for 2WD Saphs.
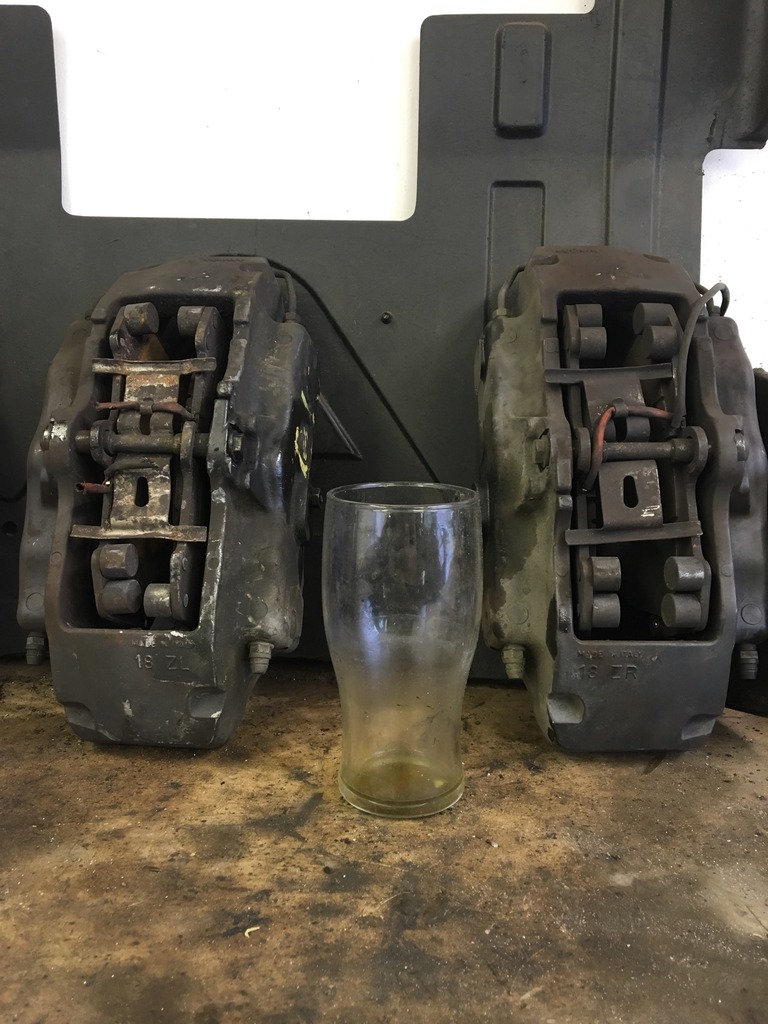
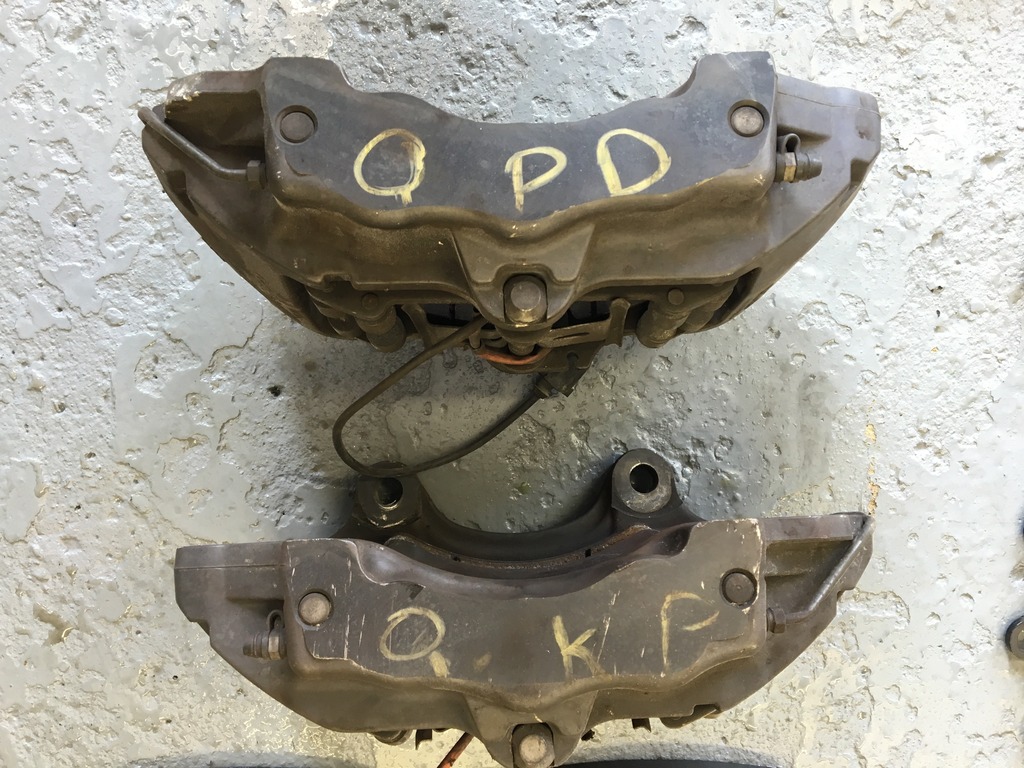
So the idea is to use Porsche Cayenne Brembo front calipers, these will be mounted on some custom made brackets from Martin Rayland along with custom bells and AP Rotors. The front brakes will be 362mm when finished along with the 6 pot calipers.
So i bought these...... They are huge!
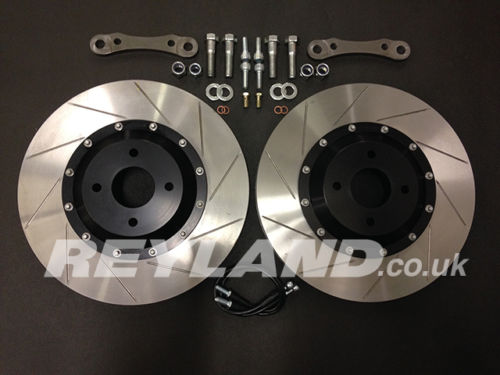
and this will be the kit from Martin to fit the fronts,
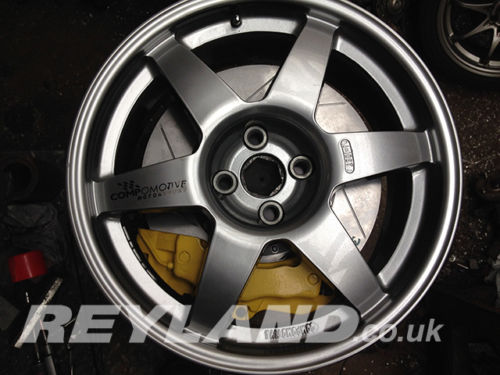
and under the Comp MO6's
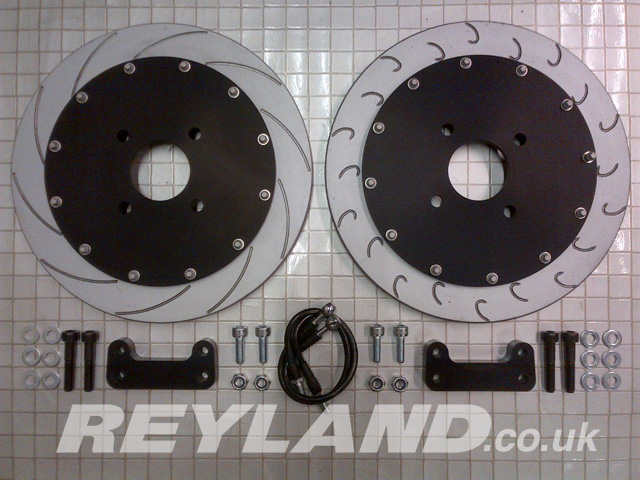
Ive also decided to go for rear Brakes from Rayland too so the Reyland Sport Rear 325mm Disc Kit will be bought at the same time,
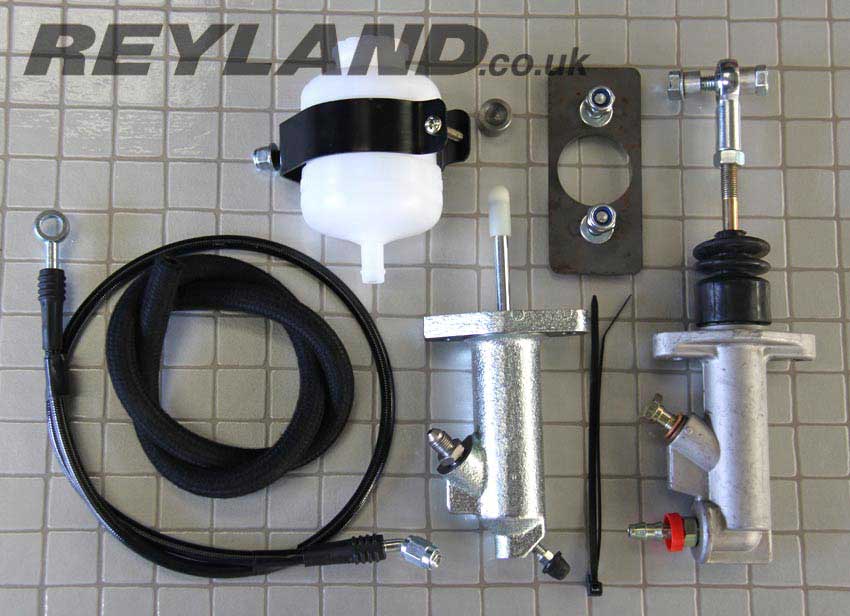
and thought i may as well go for the Hydro Clutch conversion at the same time, so this will be part of the order too,
I have also just ordered the following from Demon Tweeks,
2x Front Koni Shockers
Full front end Poly Bush Kit
2x Poly Bush front spring bushes
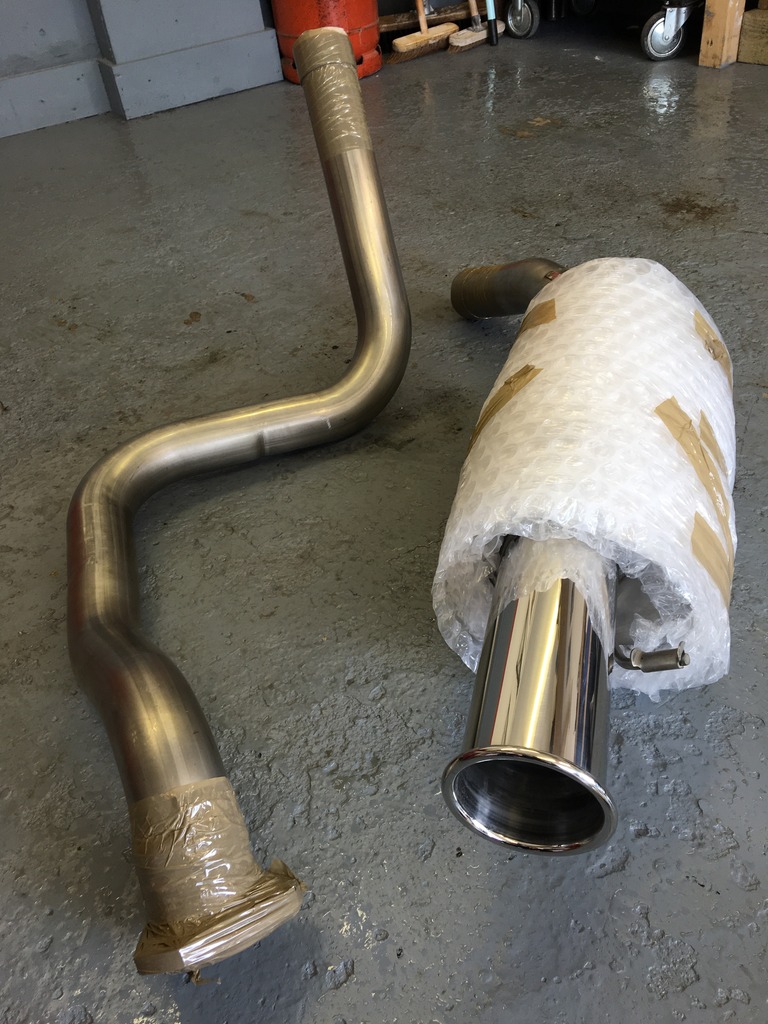
Full Mongoose Exhaust System with 4" Outward Rolled tail pipe
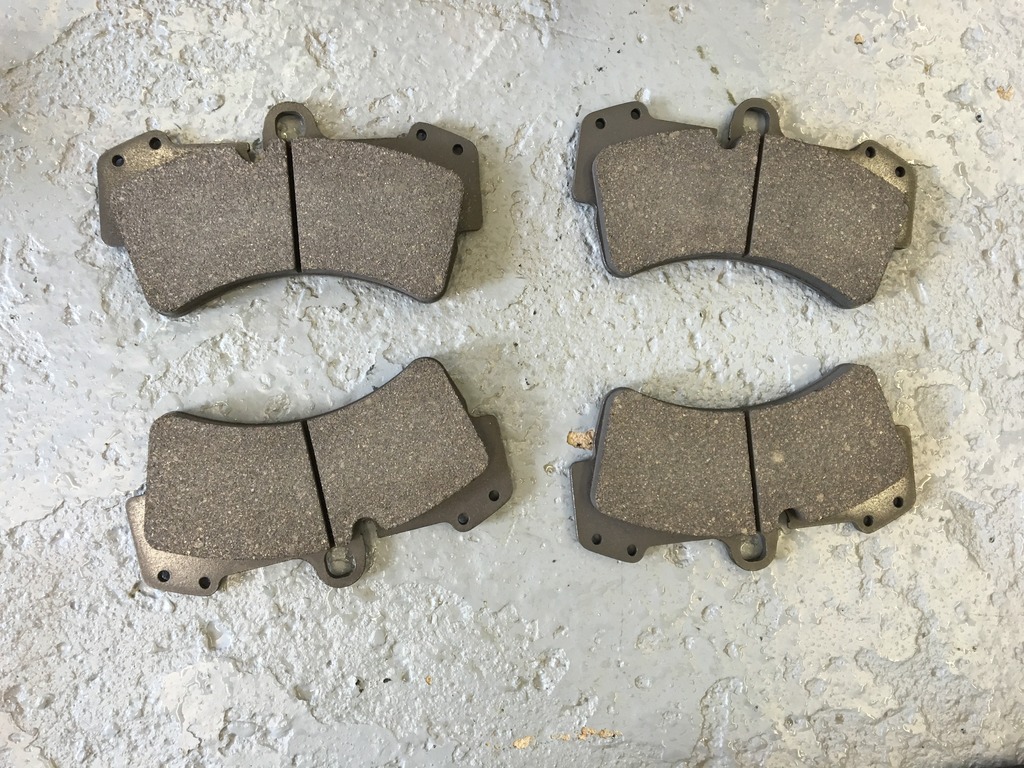
Ferodo DS2500 Front Porsche Pads
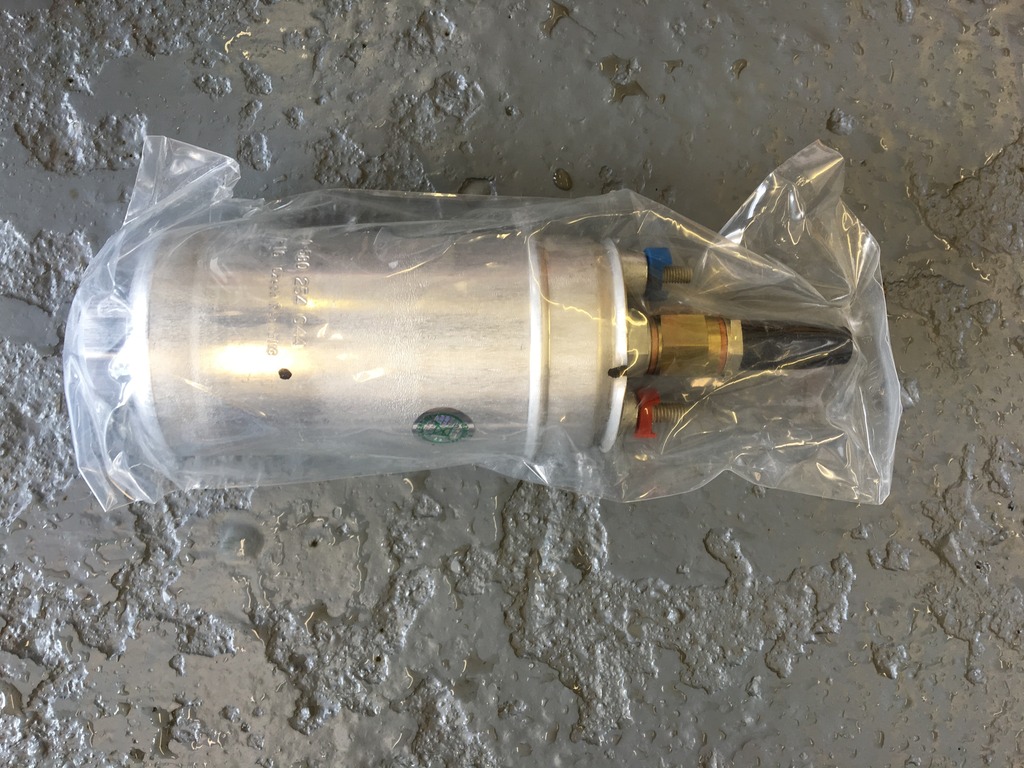
Bosch 044 Fuel Pump
Stack Pro Oil Temp Gauge
Stack Pro Oil Pressure Gauge
Stack Pro Boost Gauge
That's all for now fooks i will update with more pictures when the parts arrive, and stay tune for the strip down starting soon!
Last edited by growlingchim; Oct 7, 2016 at 02:21 PM.
Some excellent mods mate glad it's not being kept standard, just improved in places where they all need it.
Good choice on front brakes that's the ones I'm eyeing up for mines, how much did you pay for calipers? Think I added it up to be about �1300 all in which is good for 360mm 6 pots.
Some excellent mods mate glad it's not being kept standard, just improved in places where they all need it.
Good choice on front brakes that's the ones I'm eyeing up for mines, how much did you pay for calipers? Think I added it up to be about �1300 all in which is good for 360mm 6 pots.
I bought the calipers from a bloke on ebay mate, his username was nedidelisrado they came from Lithuania and were �320 for the pair
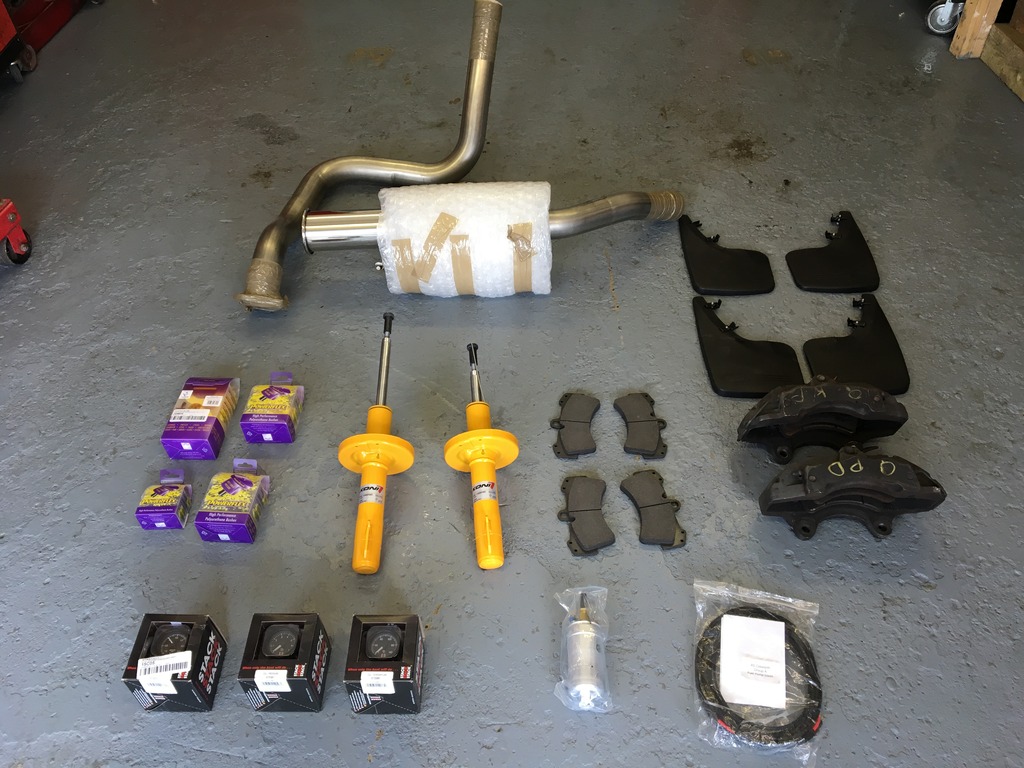
So today the parts arrived from Demon Tweeks, felt like Christmas, ill let the pictures do the talking,
Stack Gauges
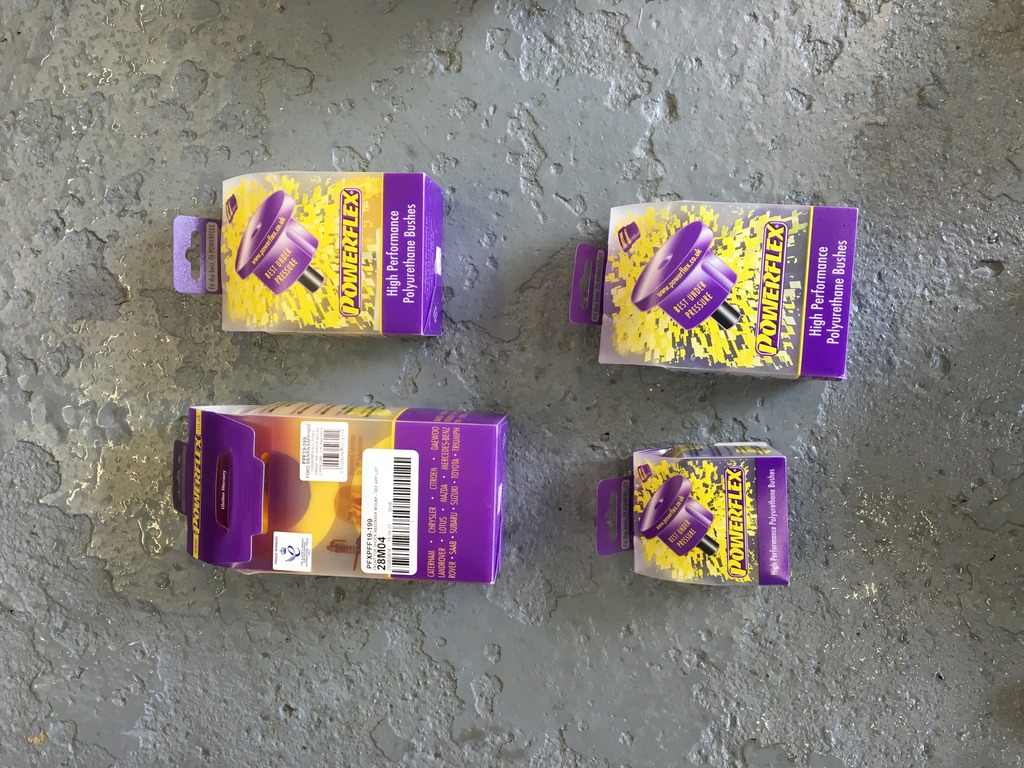
Poly Bushes
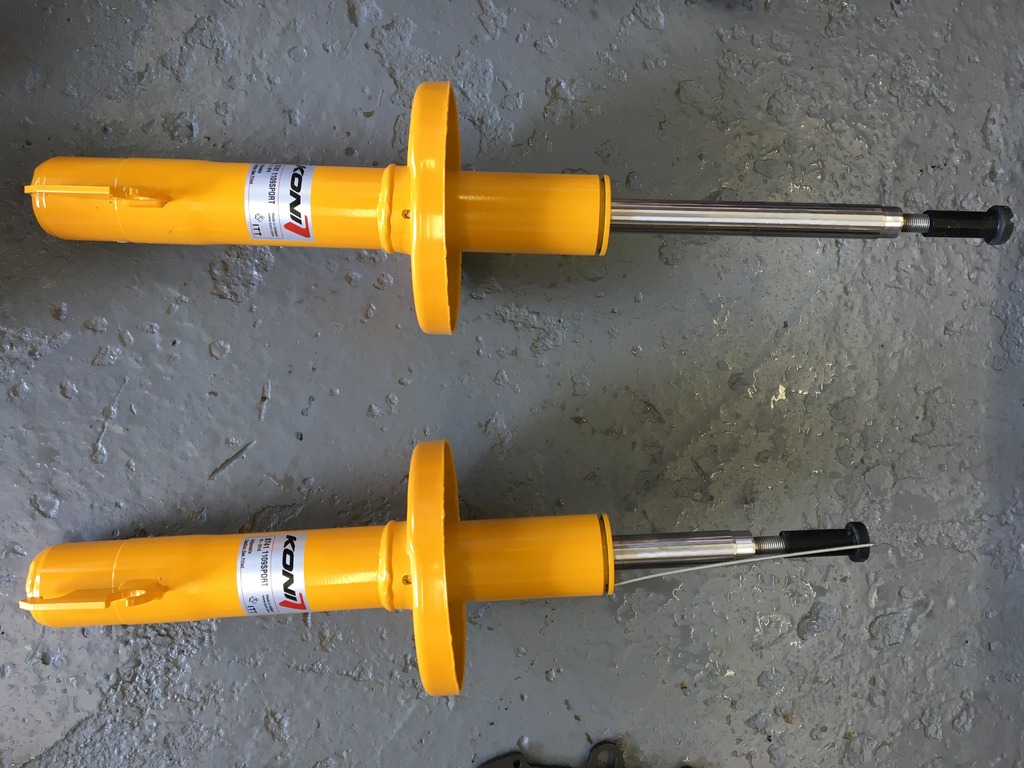
Front Koni's
Front Pads for the Porsche Calipers
Bosch 044 Fuel Pump
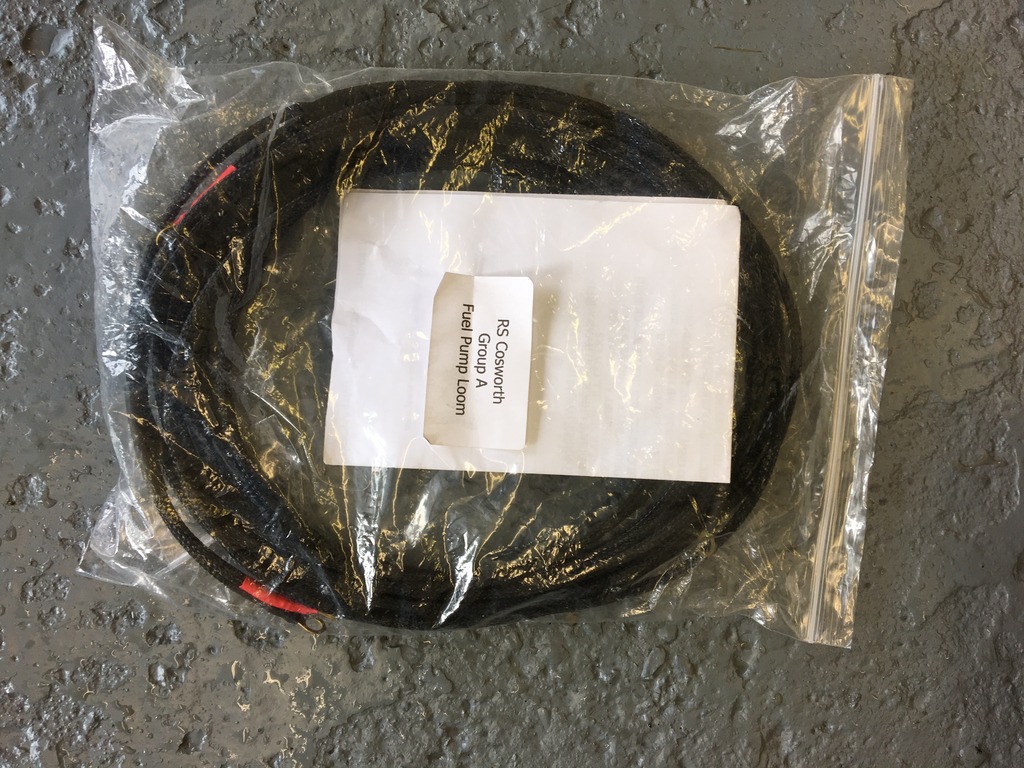
MSD Fuel Pump Loom
The Porsche Ceyenne Calipers again
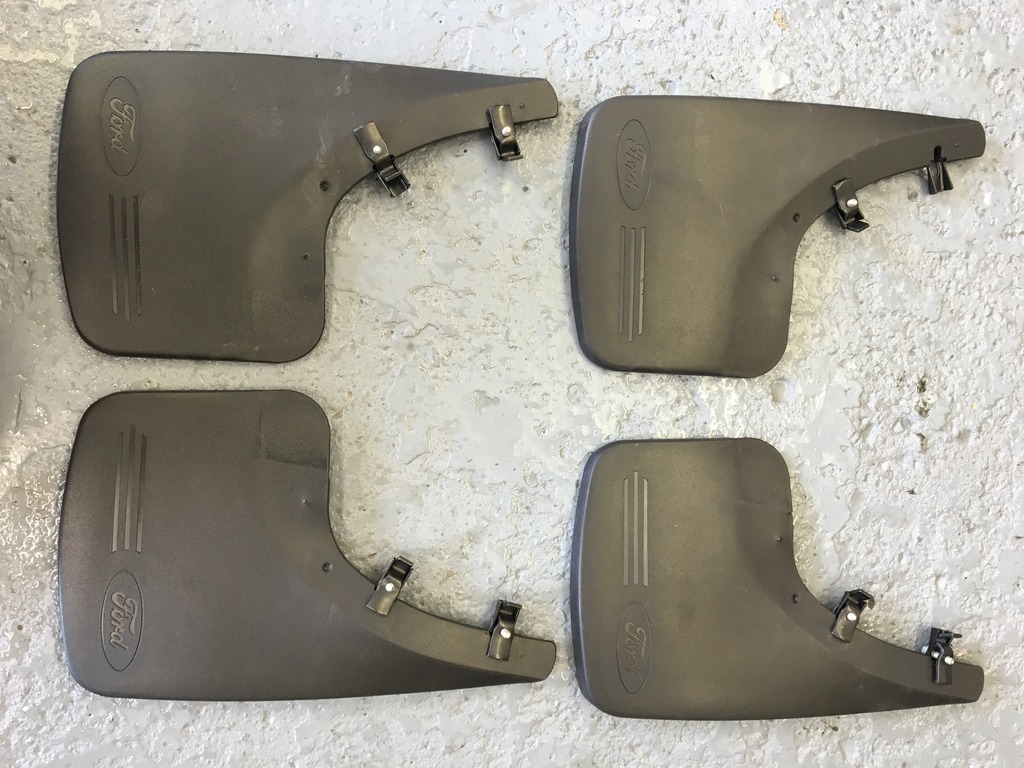
A set of mint original sierra mud flaps never been fitted
And the Mongoose Exhaust system
So next up for parts is the bits from Rayland and some Alloy Side Skirt clips, anyone recommend the best place to get them from?
And i should be starting the tear down on Saturday so ill have the next update then
Last edited by growlingchim; Oct 7, 2016 at 02:56 PM.
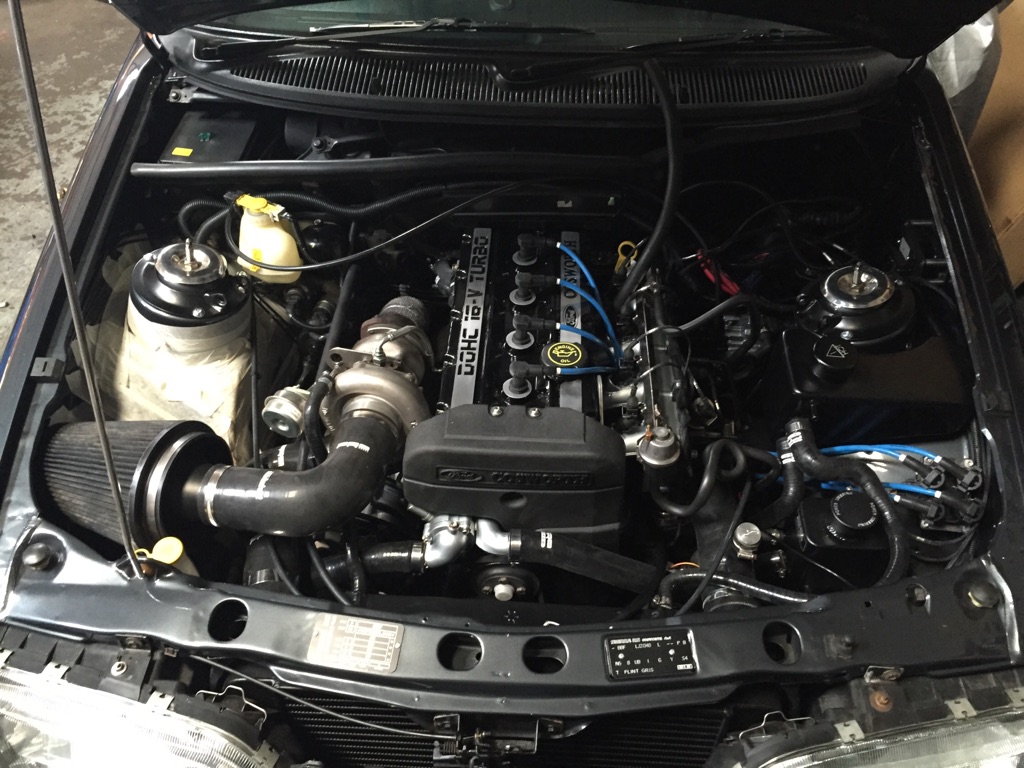
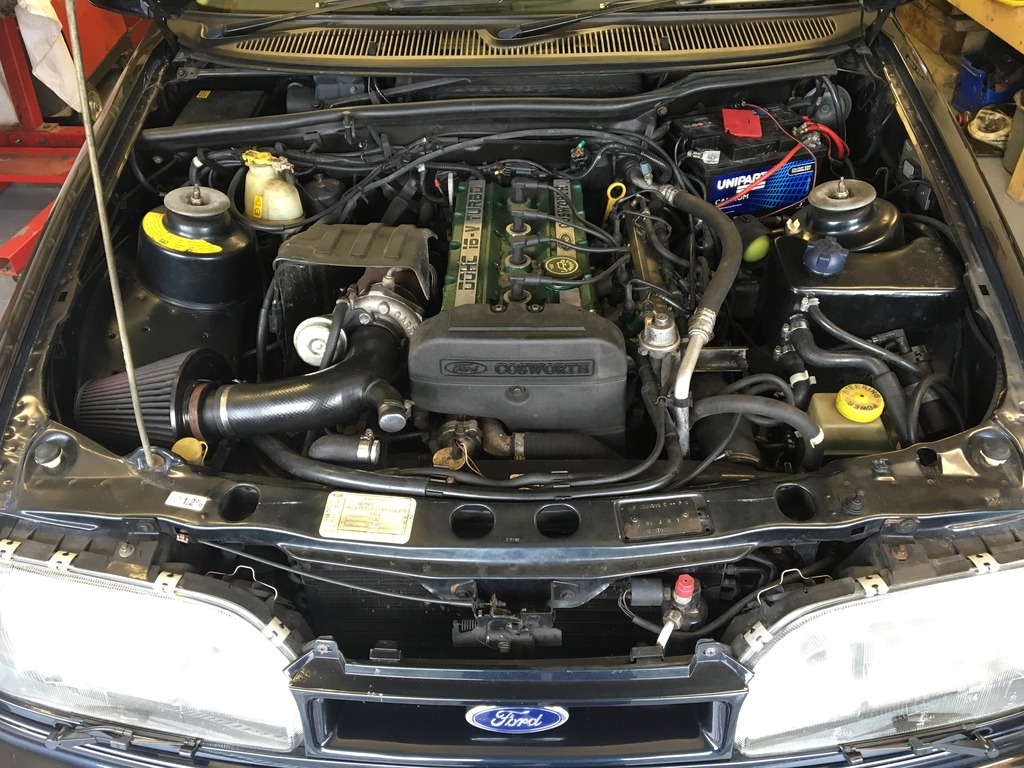
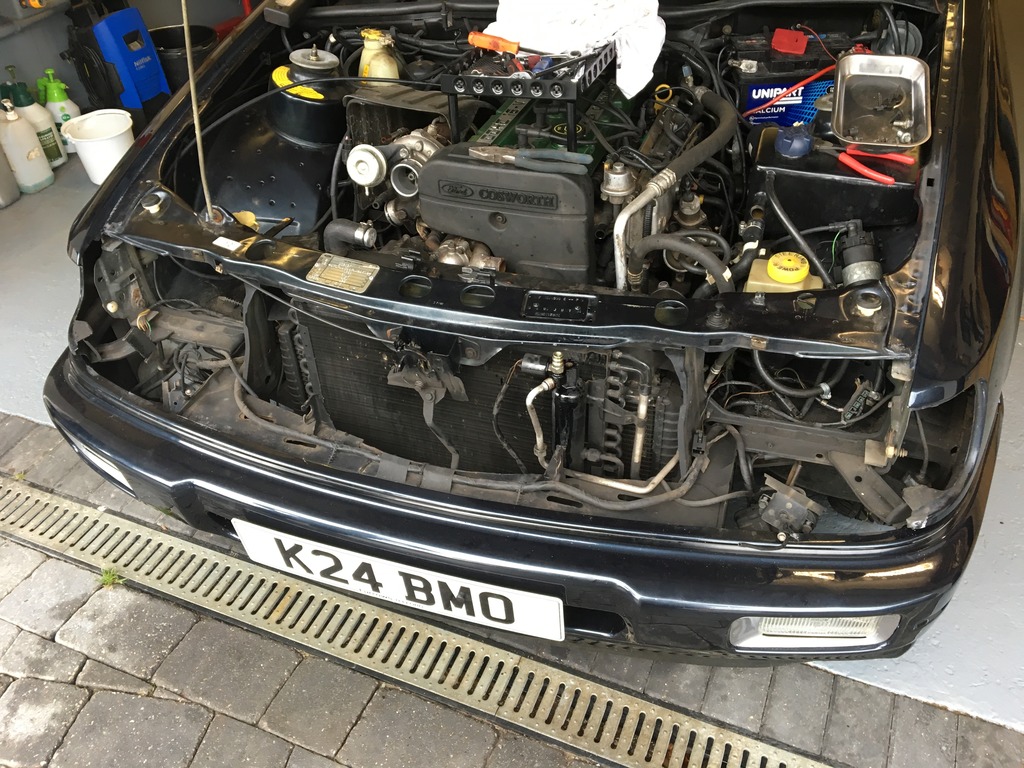
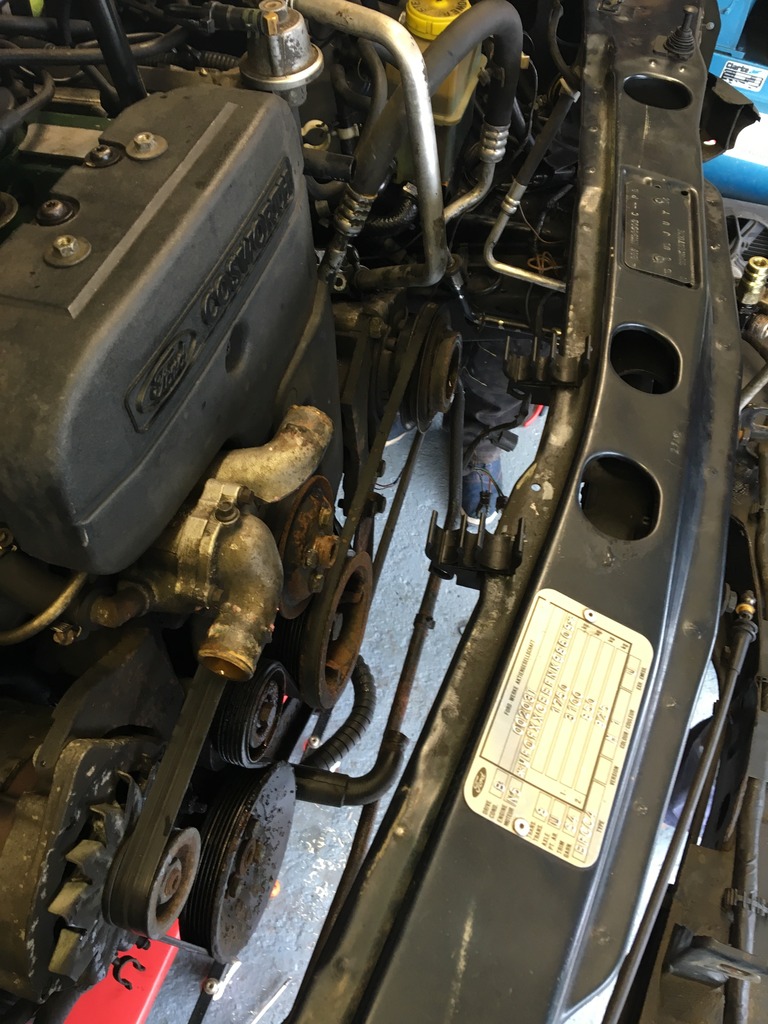
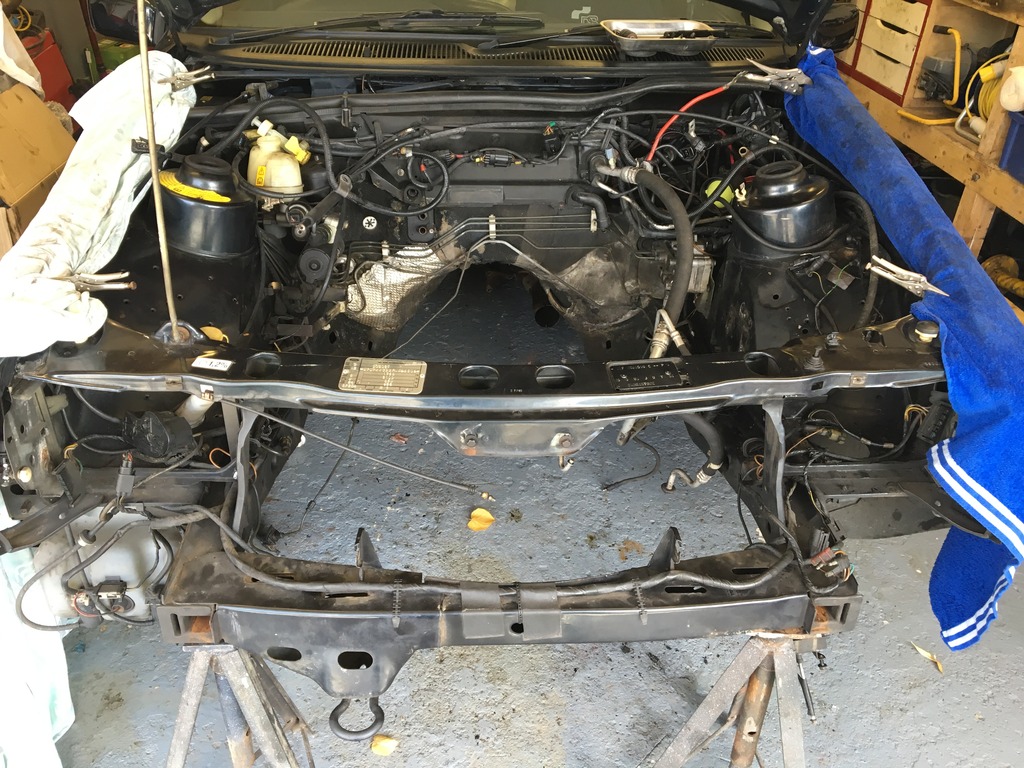
So ive started on dismantling the engine bay, this is how it started
So my car has air con and i plan to keep it as although the car is going to be modified i still want to keep it with as many of the original features.
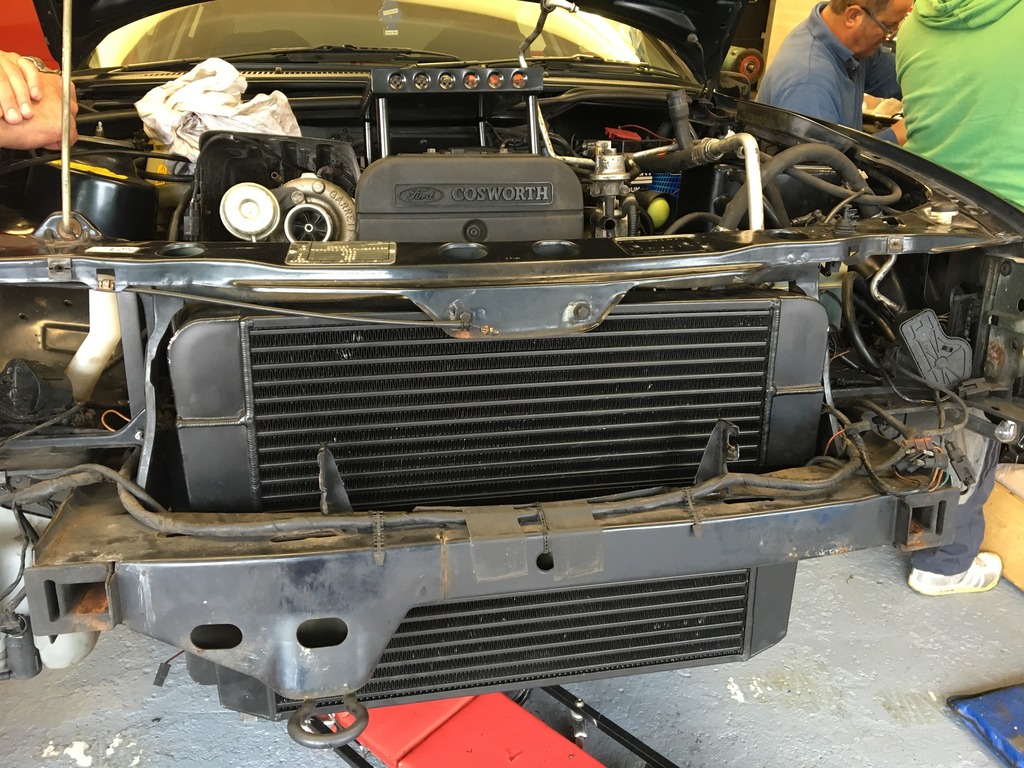
I know using the RS500 Intercooler means this takes up the space where the air con radiator would normally sit, but ive seen on Martin Rayland RS500 build that he used a air con radiator from a MG ZS180 and mounted it in between the intercooler and radiator. So whilst i still have the engine in i wanted to mock this up because if i need to move the mounting points it would be better to do this now rather than once it's painted.
The RS500 intercooler in place,
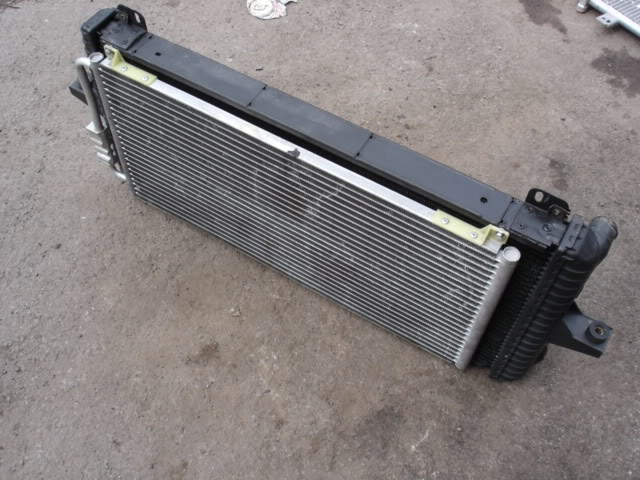
Few pictures from Martins thread as to how the MG radiator should sit (ive ordered one and waiting on it being delivered)
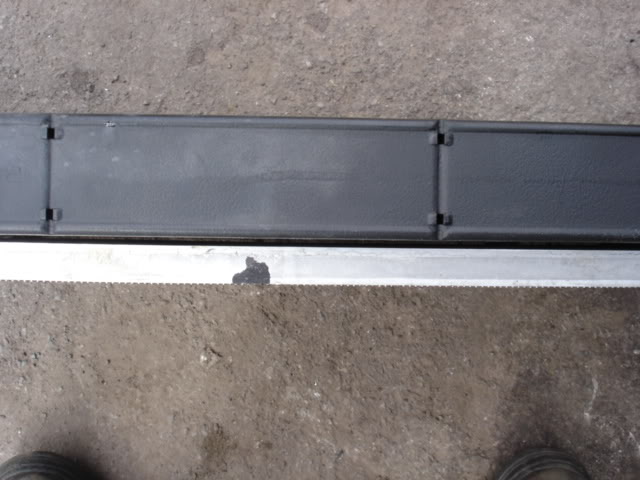
How close it should fit to the radiator
And then i would just have to have pipes made to feed it,
Think i might purchase a pair of slim line fans and fan mount from Auto Specialists to help with maximising space between the fans and front pulleys?
Im now just about ready to take the engine out, just waiting on MG radiator coming to mock up then ill have another update with lots more progress and pictures.
Last edited by growlingchim; Oct 10, 2016 at 10:30 AM.
Wish I had bought one with air con, in the summer show season there must be nothing like getting into the car on a boiling day and sitting
In that traffic
Nice and cool
Ive been meaning to update this for the last couple of weeks so here goes.
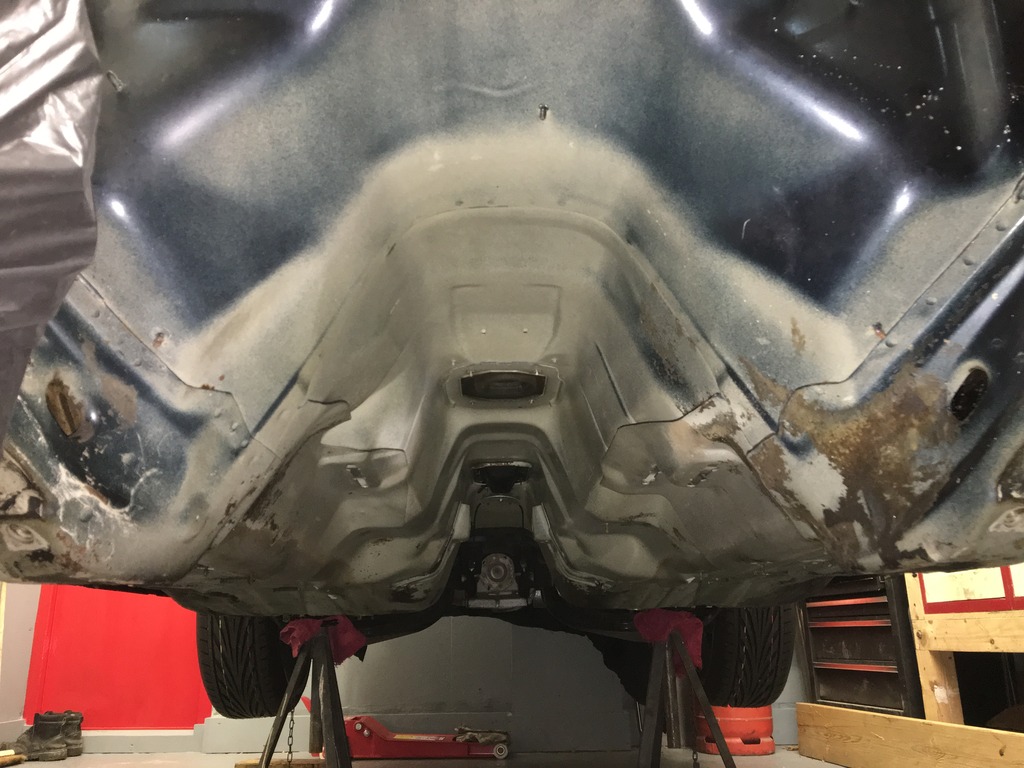
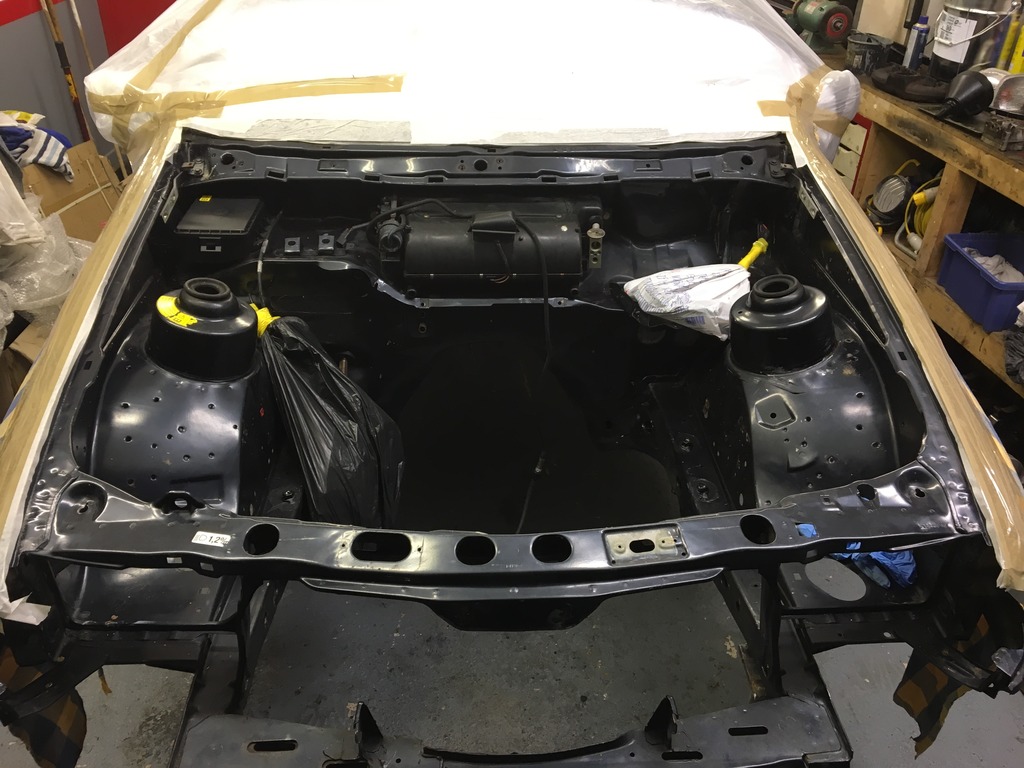
So ive now got the engine out, bay stripped and full front end, bay and underneath de-greased and jet washed. The amount of shit that came off it was unbelievable. Still some stubborn wax oil and underseal to remove from places, I hate trying to remove wax oil and underseal but ive got to say it has really done its job.
Ill leave the pictures to do the talking.
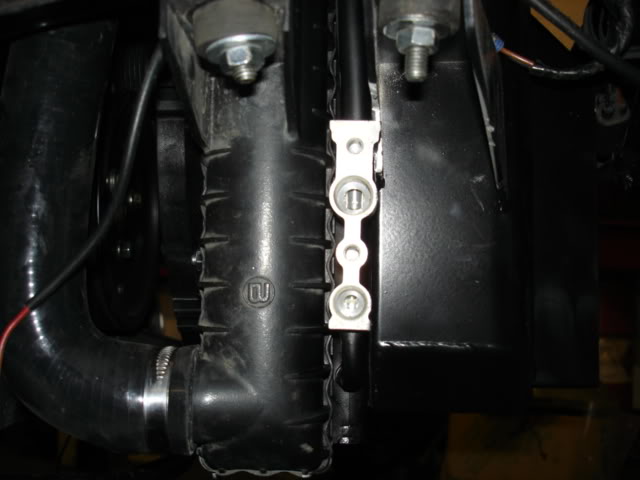
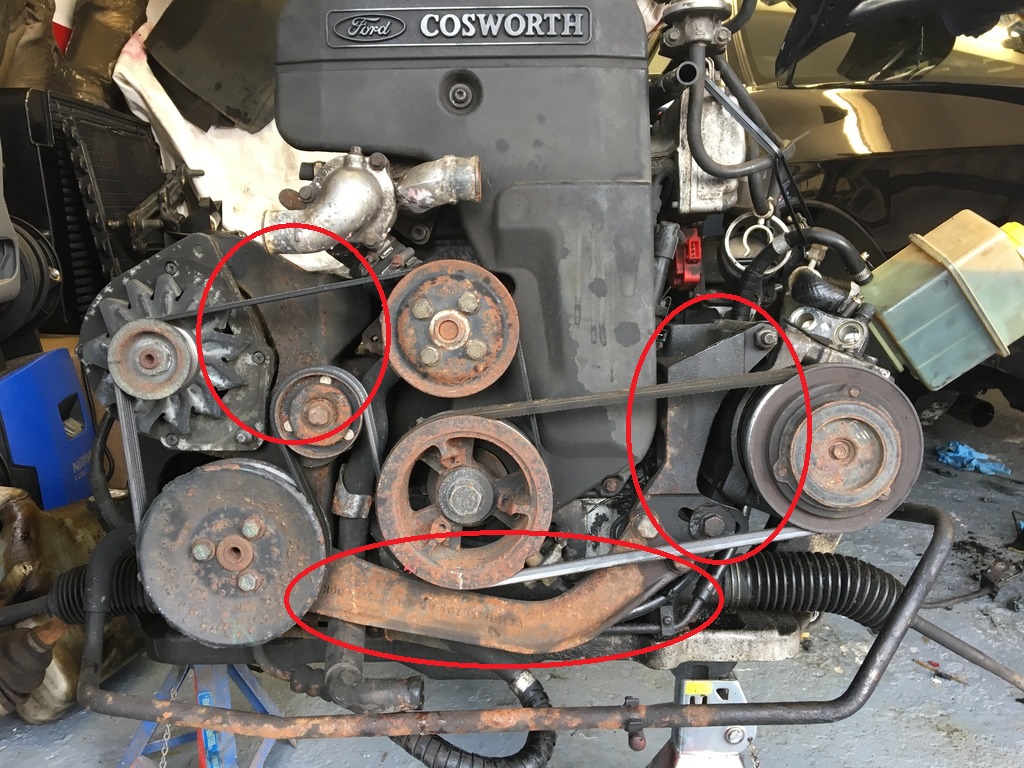
Aux loom is left bagged up on the right. Once the engine was out I managed to get a good look at it I could see the difference between old and new. My engine having Air Con has a very different setup, with the PAS Pump being on the left had side instead of the conversional location on the right. This is where the Air Con pump is located.
As you can see in the pic there's a cat bracket on the right and left which locates the PAS and Air Con pumps in their locations and a steel brace along the bottom. These have all been removed for powder coat before been fitted to the new engine.
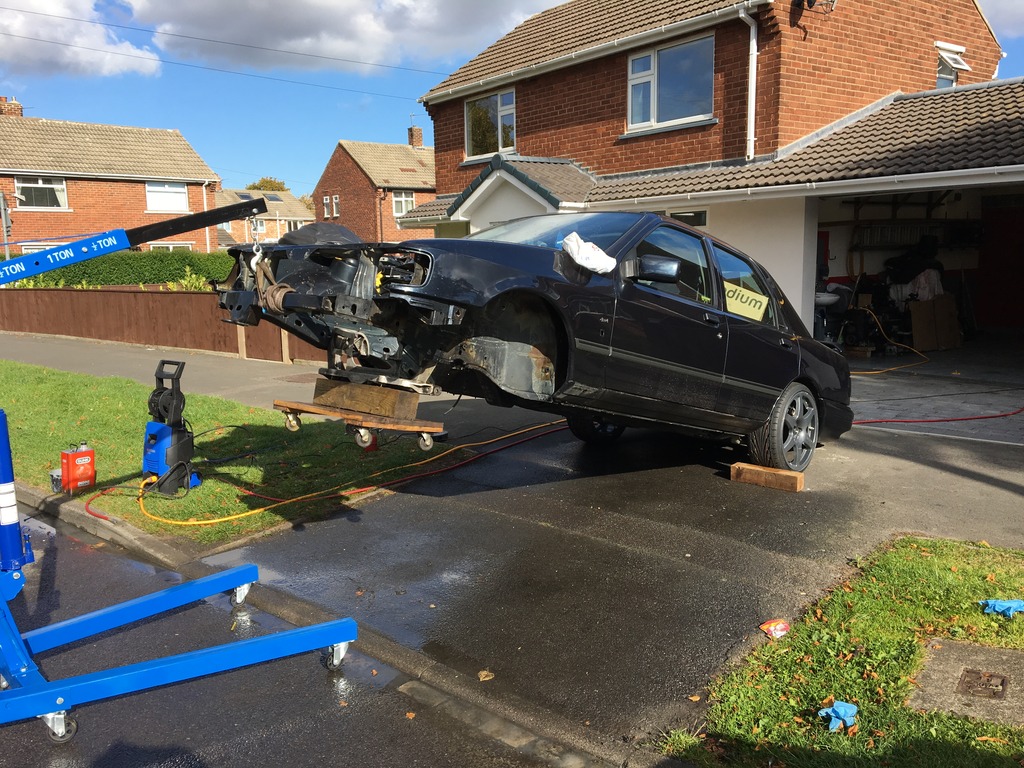
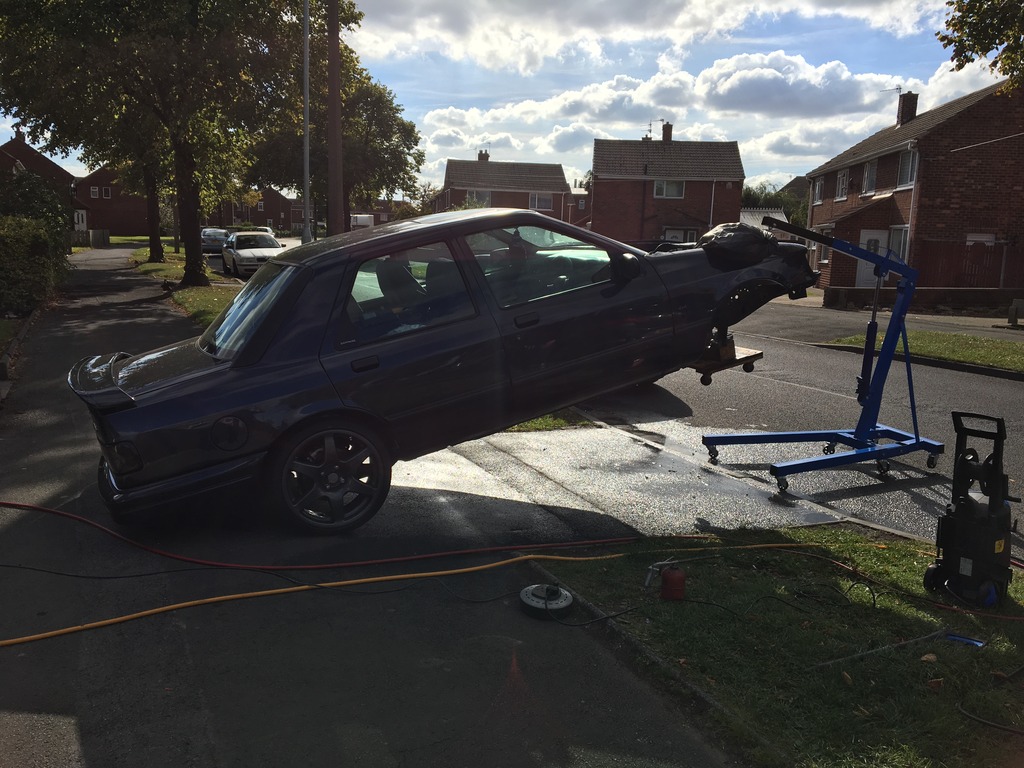
Next up was to pull the car out and give it a good clean.
Needless to say we got a few funny looks form people passing haha
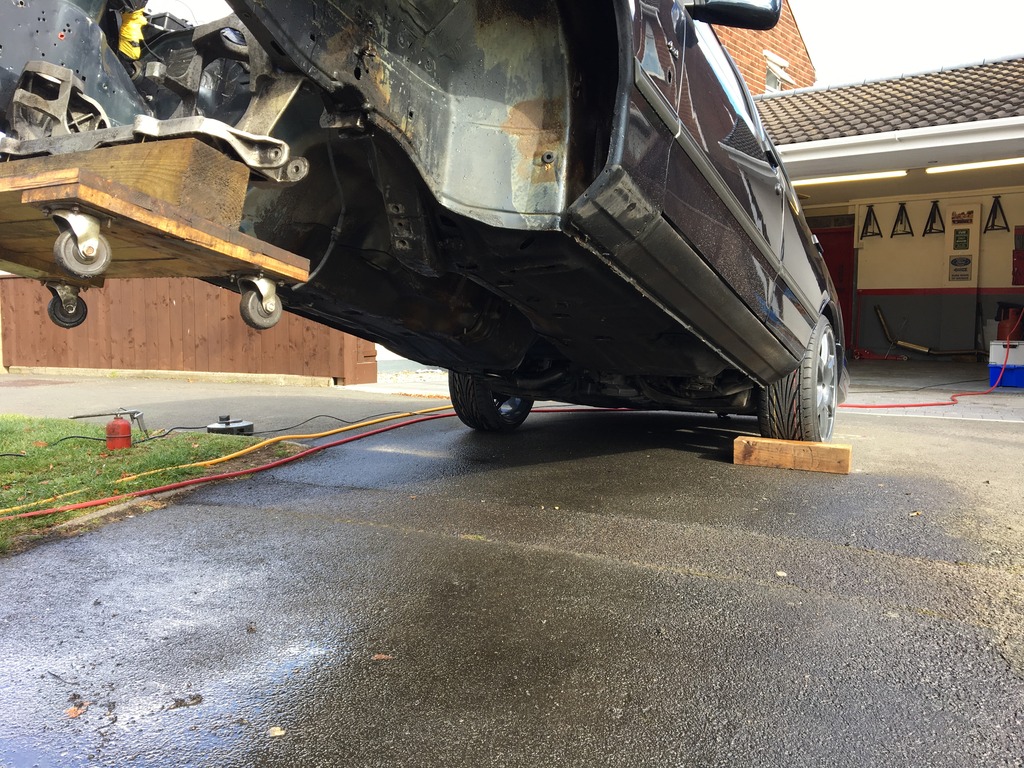
The condition of the shell is unbelievable really, there was no rust or signs of welding on the rear end when I did that last year. And now to have the rest striped and find only minor signs of surface rust which will easily clean up with a flap disk is really good news. Even the sills are spotless, inner and outers are perfect.
So next step now its clean is to get it setup on stands back in the garage and go to town on the strip back. The inner and out sills will be taken back to bare metal to be 100% everything is treated, floors will also be stripped back and then new seam sealer and stone chip applied before paint. The bay im in a little bit or a dilemma with, its needs minimal prep work but im undecided whether to weld up unwanted holes. What peoples thoughts?
Also after some advice, what have people use to replace the heat/sound deadening on the bulkhead? Mine just turns to dust in your hands in places, ive managed to keep it together as much as I can to get a template from but any advice on what to use would be great.
Well ill be cracking on with more this week and will update again soon.
Thanks for reading
Last edited by growlingchim; Sep 17, 2024 at 01:48 PM.
I definately would like to see the updates! Would be nice if more people would post here again instead of on those annoying facebook groups. Over time all the knowledge will be lost if people only post on facebook, as you cannot find anything back.
Glad to see that there are still people using the site. Ive spent hours over the years reading other people restorations and builds and it would be a shame for others not to be able to do the same in the future. I too do not use Facebook etc i much prefer to use a site like this, the information is only a search away or someone to hand to answer a question.
So its been too long since the last update on the Cosworth but alot has happened - The project had to be paused back in 2020 as i sold my house and moved , the only option i had was to put the car into storage so i got it rolling again to move it. Recently i have been able to move it back into a garage to start work again, to say im excited is an understatement.
But since the last update and when the car went into storage i actually got a lot further with the restoration and managed to get all the car into paint, so here is an update as to where i got too before storage.
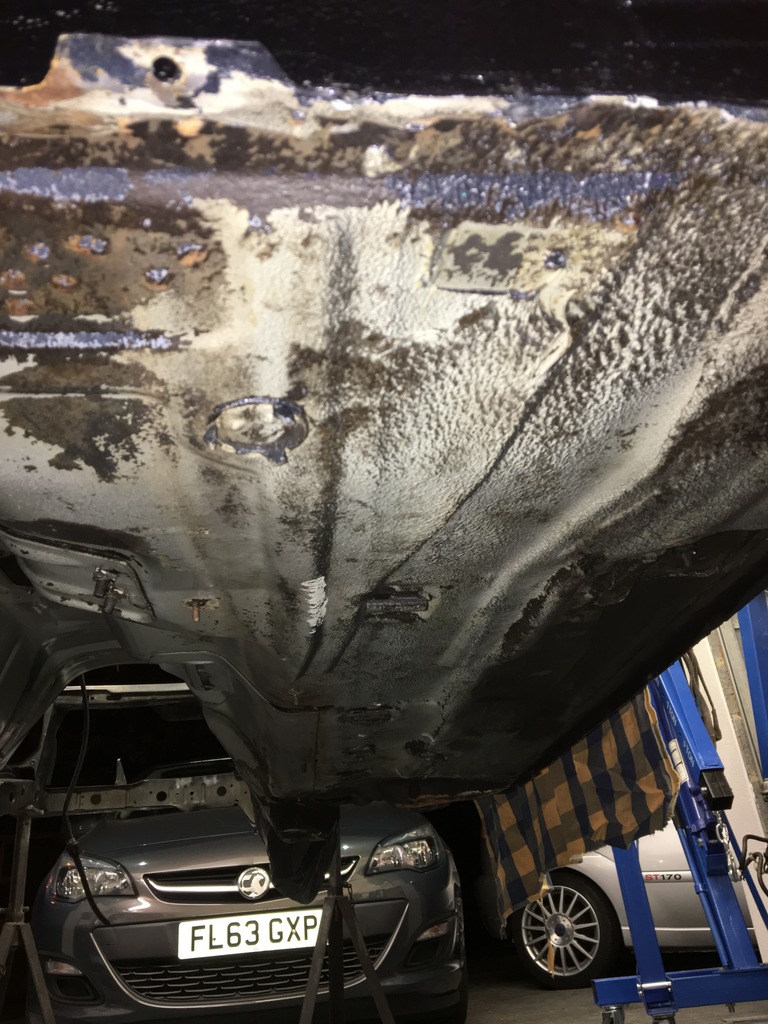
The condition of the underside was unbelievable really, the car has never had any welding and didn't need any either. But i still wanted the whole underside and engine bay to all be bare metal restored and painted in body colour. So i began the task of stripping off all the wax oil and original underseal to get it back to bear metal.
Original Ford Stamped Sills
So once back to bare metal it was on with the first coat of paint to seal the bare metal and give a good base for everything else. I choose red oxide and sprayed everything, this really started to show how nice and straight the under body is. The only thing i found was the common dents where it had been jacked up on the non-jacking points.
Next up to move onto to the engine bay.
Last edited by growlingchim; Sep 17, 2024 at 02:45 PM.
I decided i wanted to weld up any of the unwanted/needed holes in the engine bay so went ahead with this and then filled and primed the bay.
Continued into the front arches and got them all into red oxide too.
Getting the wax oil out from everywhere was painstaking, in the end i resorted to a wall paper stripper and steam clean the arches out. Difficult to get a good picture but this is how they looked before a quick coat of red oxide.
Last edited by growlingchim; Sep 17, 2024 at 03:02 PM.
Next up i had to create a spray booth within the garage to paint the car in. So a good old gazebo and some plastic sheeting and it did the job.
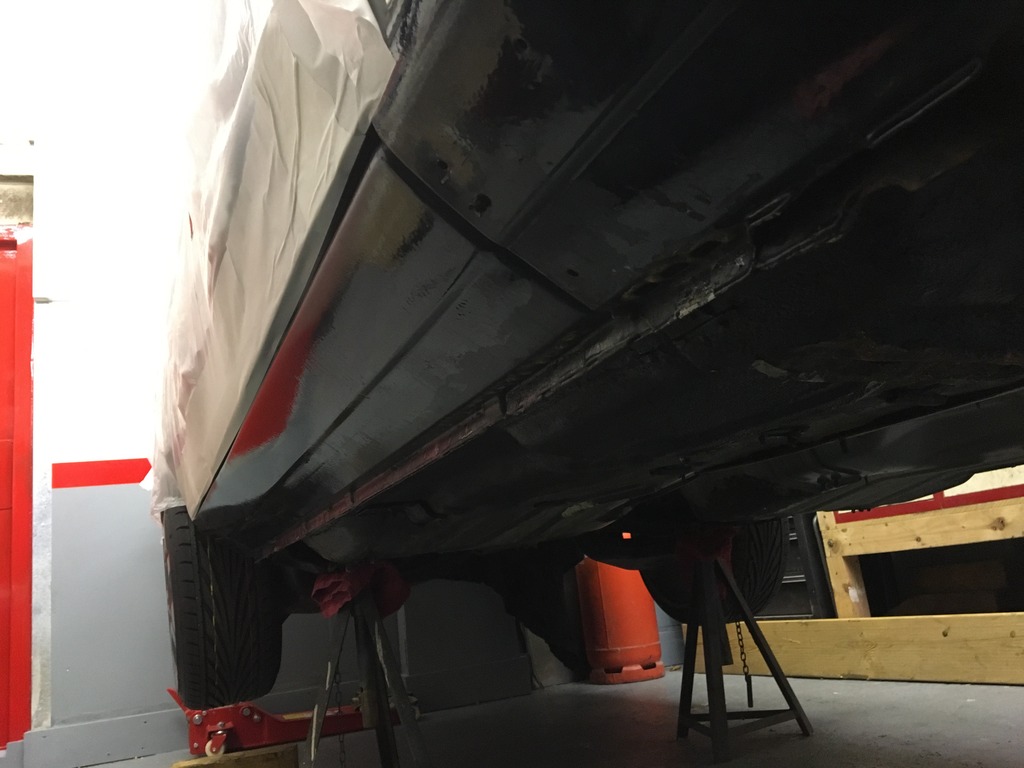
On top of the red oxide underneath the car i hand painted black POR-15, i have used this previously on other projects and found it really good. So before any Raptor Stone guard it had a coat of POR-15. Then added seam sealer everywhere that it was needed.
Finally everything underneath, arches, sills (inner and outer) and bottom side of front chassis legs where all coated in Raptor Stone guard.
U-Pol Raptor is great stuff, it can be tinted to if needed. I put plenty of this on especially in areas susceptible to rust. Finished up with a matching undercoat in the engine bay.
Next up body colour Smokestone Blue!
Not many pictures of base coat but straight onto lacquer - in the end i did 3 coats everywhere. This is the first time i had sprayed with 2 pack, new gun in a gazebo in the garage! This was the result straight out the gun.
Last edited by growlingchim; Sep 17, 2024 at 03:45 PM.
Unfortunately from here it sat for quite a while until i decided i was selling the house and moving. At this stage getting the front crossmember on and getting the car rolling was a bit of a rush as the house had sold and i just needed it moving so no pictures of the work. But i couldn't bare putting anything back on the car until it was painted or new.
So i quickly i had the front cross member powder coated silver, reconditioned the power steering rack and painted that black. Fitted the Rayland Motorsport front brake conversion and had the calipers restored and painted, bought and installed the adjustable TCA and painted the anti roll bar black. Fitted everything back together with the poly bush kits and got the car rolling to be moved.
But i have found some pictures i took off the car once it was in storage.
And so that brings us up to my last visit to the car this week where i finally started to work on the car again. Its has a wash and the engine bay a good polish and we have began work.
This weekend was really just to try and work out an order of what needs to be cleaned and painted ready to go back on and what i need to order for the next time.
I managed to get the wiper motor and arms cleaned/painted and installed along with the fan/air con unit.
Cut the hole trough the bulk head and install the master cylinder for the hydraulic clutch conversion and dry fitted the brake lines to see if they can be cleaned up or need replacing. Im trying to work out what to use on the bulk head as the original sound proofing fell apart as they do. So if anyone has any recommendations let me know.
So this is the story up to date so far, im hoping to get back on with a bit more of the car before the end of the month. But i do need so advice help.
1) Any recommendations for bulkhead material?
2) The car is going to be running eventually around 450bhp are 8mm id fuel lines big enough?
3) Does anyone have a copy of the instructions to install a MSD New engine loom?
4) Does anyone have a picture of where to drill/mount the master cylinders to on the clutch peddle?


