
Mk3 Fiesta Zetec Turbo Build


Thread Starter
Too many posts.. I need a life!!
Joined: Apr 2005
Posts: 730
Likes: 2
From: Hertfordshire
Im gonna start off with a bit of previous built history of the car, and then what im doing now.
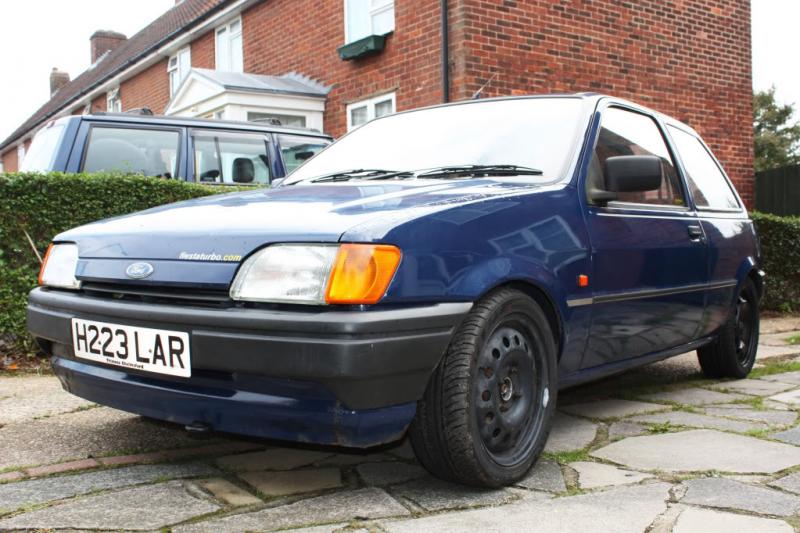
The 'Dirtbox' started off as a humble 1.0 fiesta that ~nomad~ bought whilst under the influence on ebay one evening.

It got the usual treatment of a 2.0 silver top etc....


A bit of recaro interior


Lowered on 15" steels and -60mm spax

The car looked pretty clean and tidy, and in many ways considered finished


Then it started smoking, loads, and it wasnt long before the oil pressure light came on and the engine had given up. A 130ps spec 1.8 was picked up off a friend and dropped in over a couple of days, the car was running again.
I began the quest for more power. My first choice was this


Quite a simple install, which i then added a controller to.
I also at this point decided to fit megasquirt, that way whatever i did next to the car i had the flexibility that it gave.
By this point it was making 165bhp and loads of fun. It was starting to get a little smokey which was valve stem oil seals.
By this point i had started doing a few track days so opted for a more suitable interior. I picked up some cobra monaco seats, and sabelt 6 point harnesses.

A proper harness bar in the back

I then picked up some throttle bodies off a 4age engine to put away for further development, they were cheap and had potential


Then along came a very cheap st170 engine due to needing a head gasket change so the next direction of development was found
I removed the rear engine mount completely, as i was going to fit the focus mount.

Then i started mocking up

And a friend came and fabricated and welded the new mount


Whilst the engine was out i also converted it to power steering. Once mount was done i built it all back up with a escort plastic inlet, tweaked the map and enjoyed it as it was for a few months


Then along came the bodies on a custom made manifold, plus i changed to direct port nitrous, and the car was making 220bhp

The 'Dirtbox' started off as a humble 1.0 fiesta that ~nomad~ bought whilst under the influence on ebay one evening.
It got the usual treatment of a 2.0 silver top etc....
A bit of recaro interior
Lowered on 15" steels and -60mm spax
The car looked pretty clean and tidy, and in many ways considered finished
Then it started smoking, loads, and it wasnt long before the oil pressure light came on and the engine had given up. A 130ps spec 1.8 was picked up off a friend and dropped in over a couple of days, the car was running again.
I began the quest for more power. My first choice was this
Quite a simple install, which i then added a controller to.
I also at this point decided to fit megasquirt, that way whatever i did next to the car i had the flexibility that it gave.
By this point it was making 165bhp and loads of fun. It was starting to get a little smokey which was valve stem oil seals.
By this point i had started doing a few track days so opted for a more suitable interior. I picked up some cobra monaco seats, and sabelt 6 point harnesses.
A proper harness bar in the back
I then picked up some throttle bodies off a 4age engine to put away for further development, they were cheap and had potential
Then along came a very cheap st170 engine due to needing a head gasket change so the next direction of development was found
I removed the rear engine mount completely, as i was going to fit the focus mount.
Then i started mocking up
And a friend came and fabricated and welded the new mount
Whilst the engine was out i also converted it to power steering. Once mount was done i built it all back up with a escort plastic inlet, tweaked the map and enjoyed it as it was for a few months
Then along came the bodies on a custom made manifold, plus i changed to direct port nitrous, and the car was making 220bhp
Thread Starter
Too many posts.. I need a life!!
Joined: Apr 2005
Posts: 730
Likes: 2
From: Hertfordshire
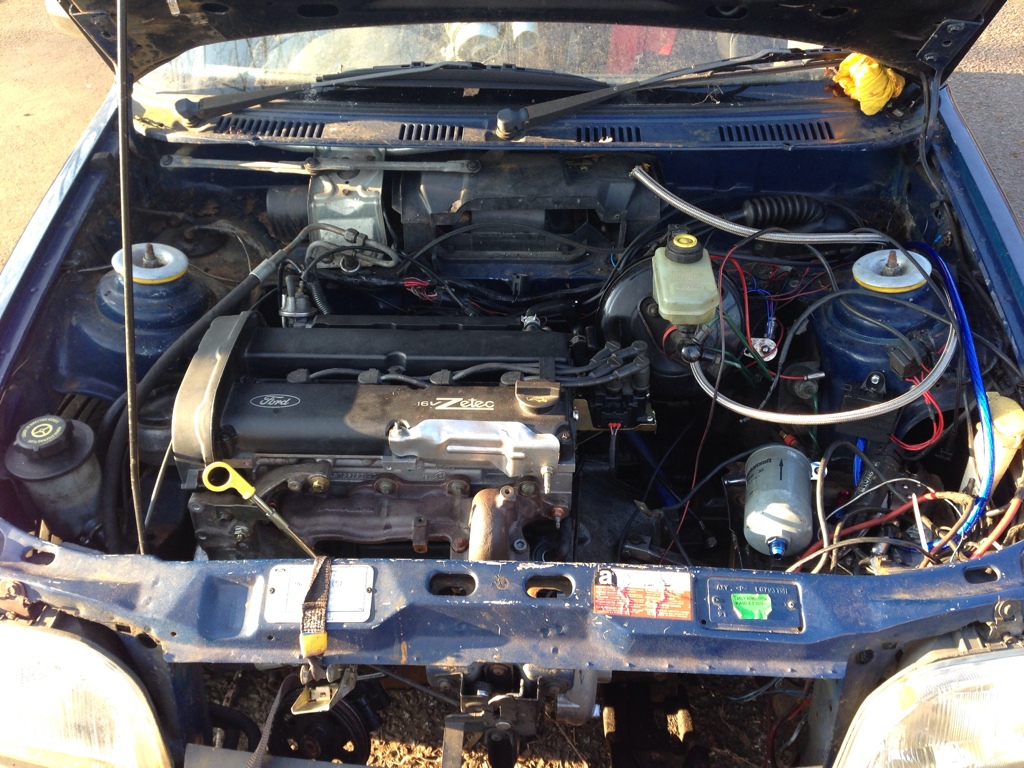
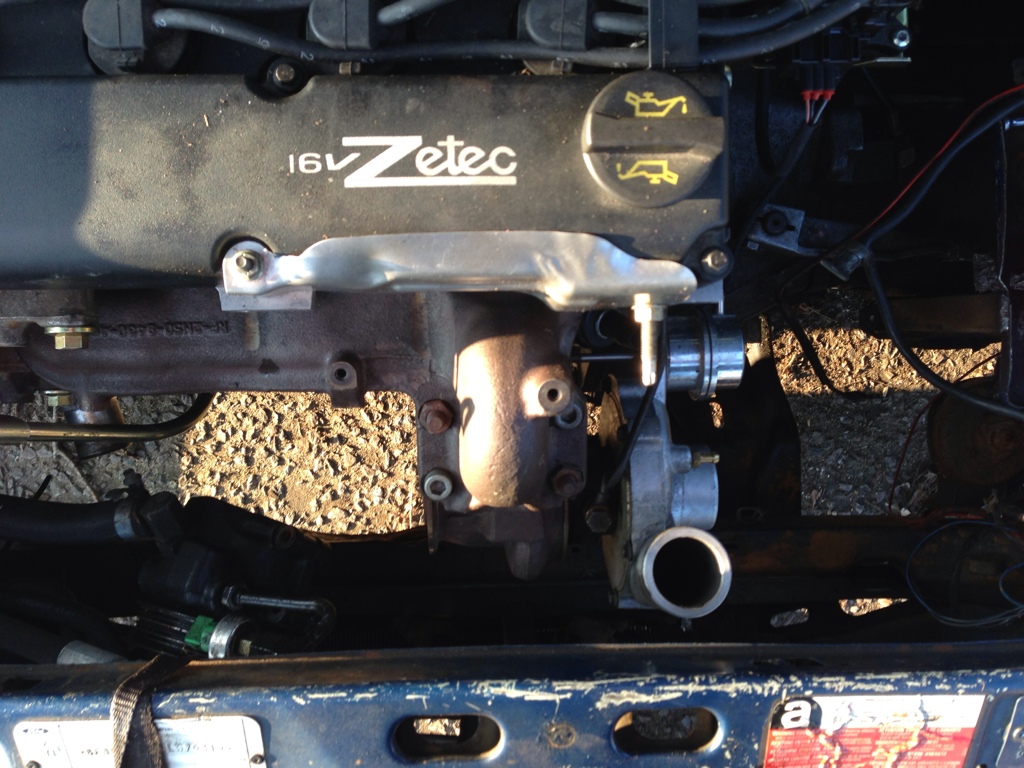
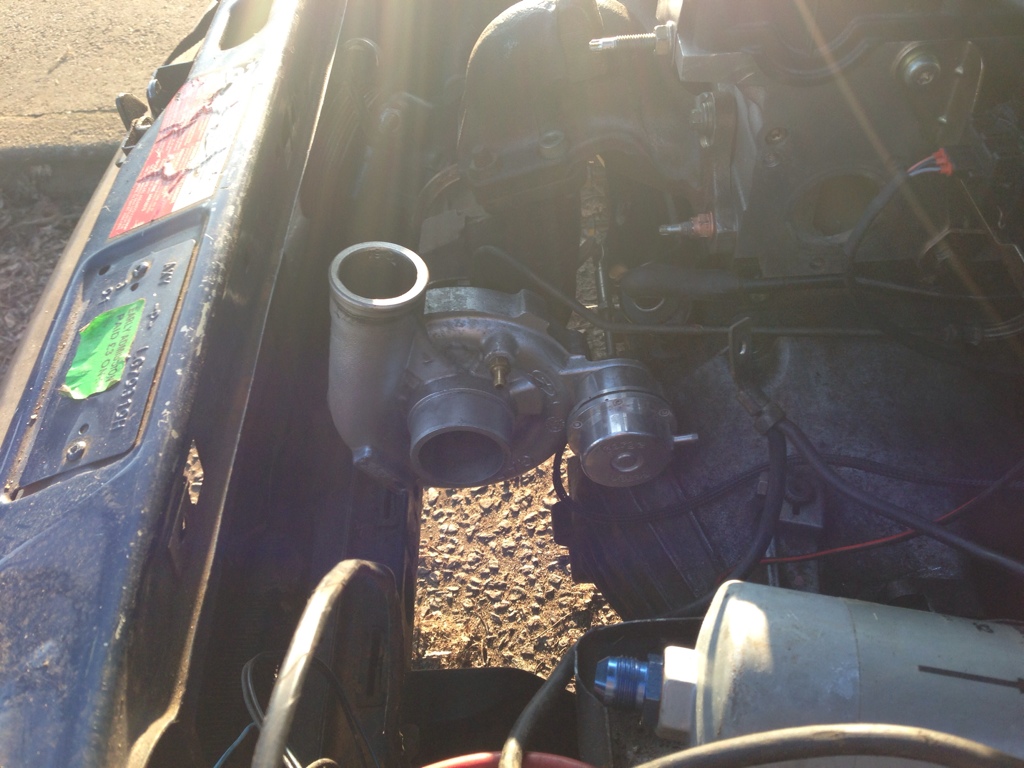
Then i decided i've had enough of N/a power, its expensive and decided i wanted a turbo instead....
I picked up for cheap a frs turbo and manifold, injectors, focus inlet, frs top elbow and a loads of other bits.
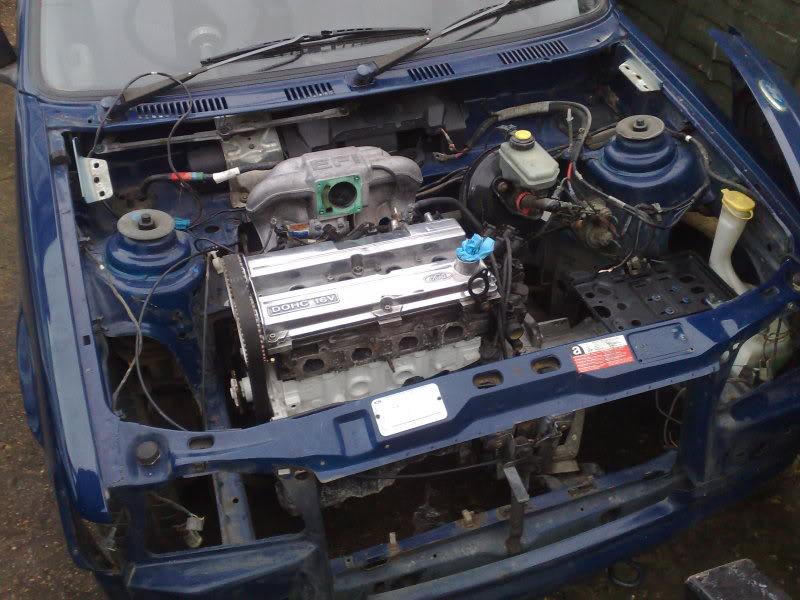
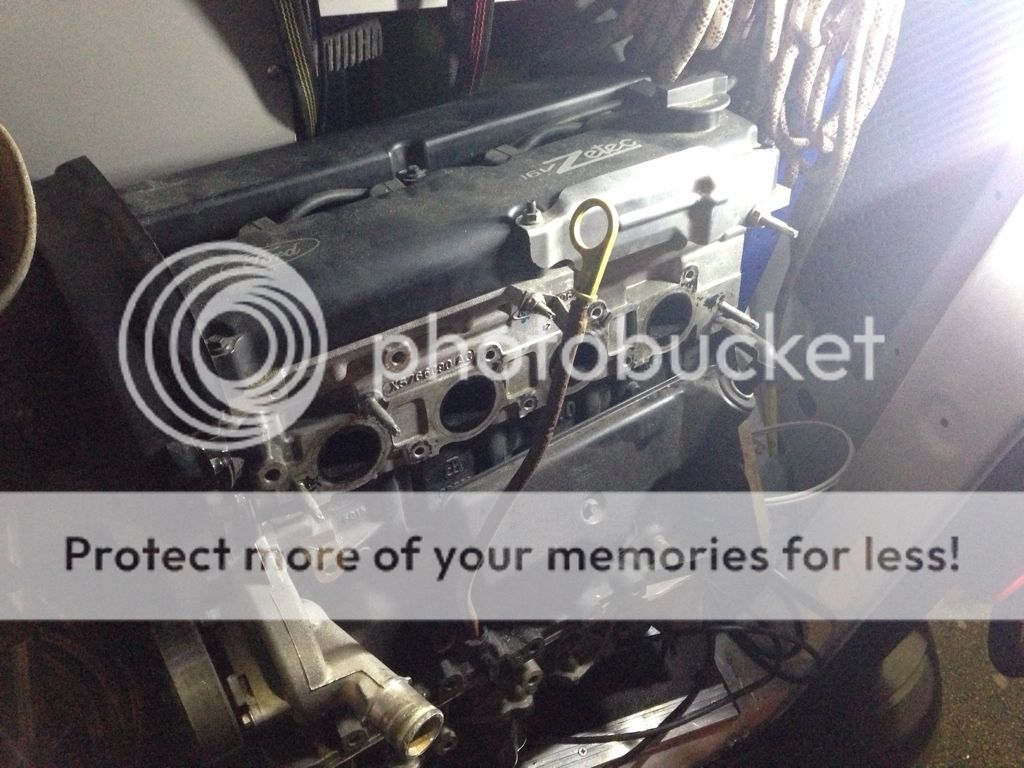
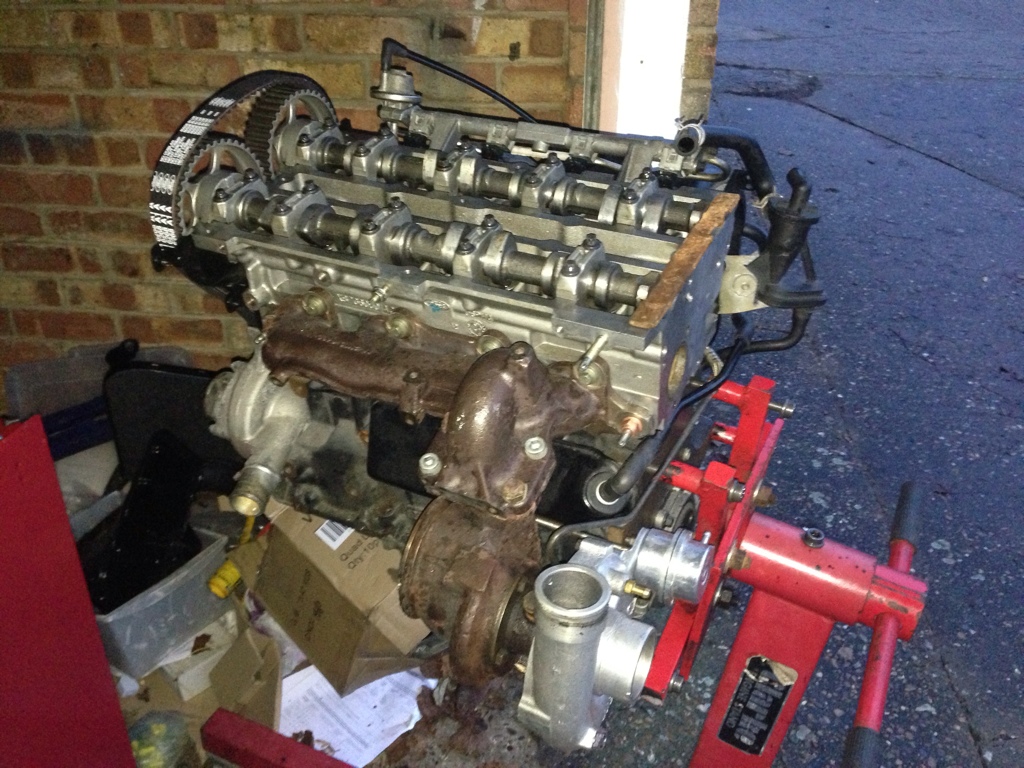
a 4k mile old zetec
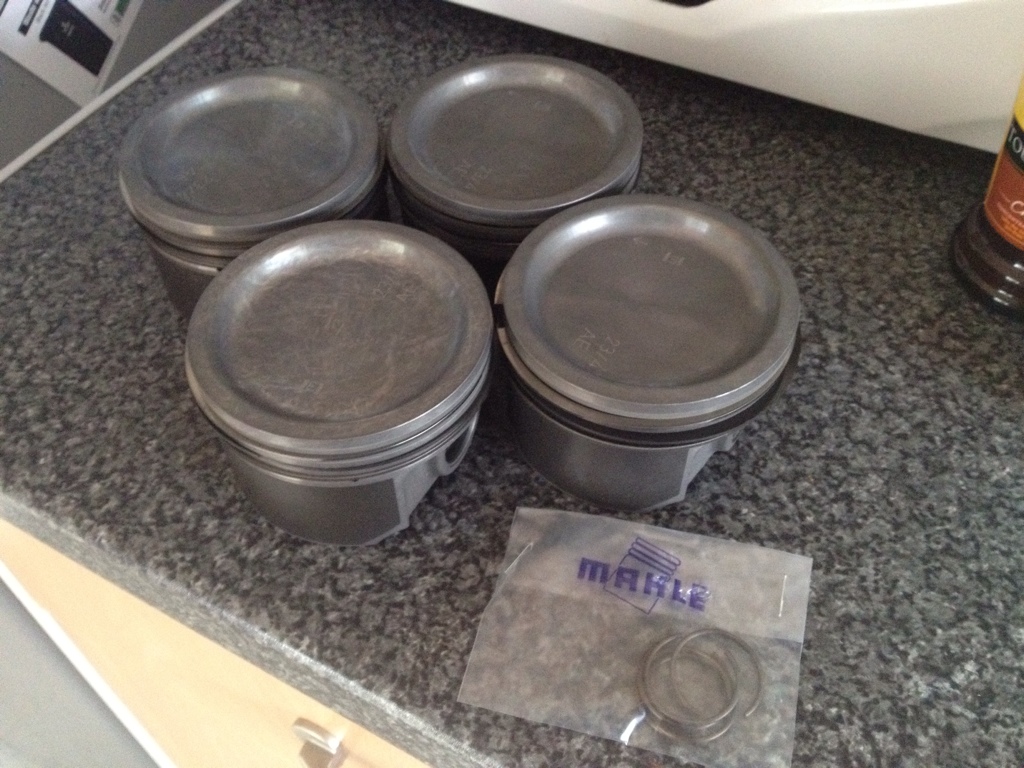
Brand new frs pistons which i fitted to a set of free frs rods
The head as it was removed
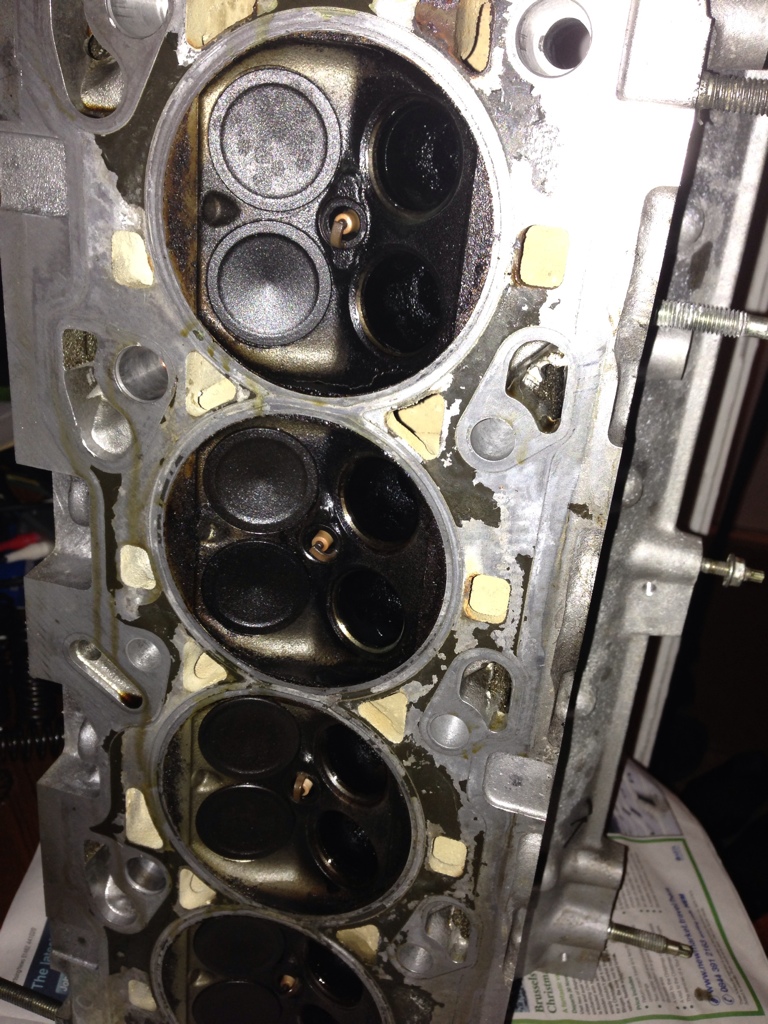
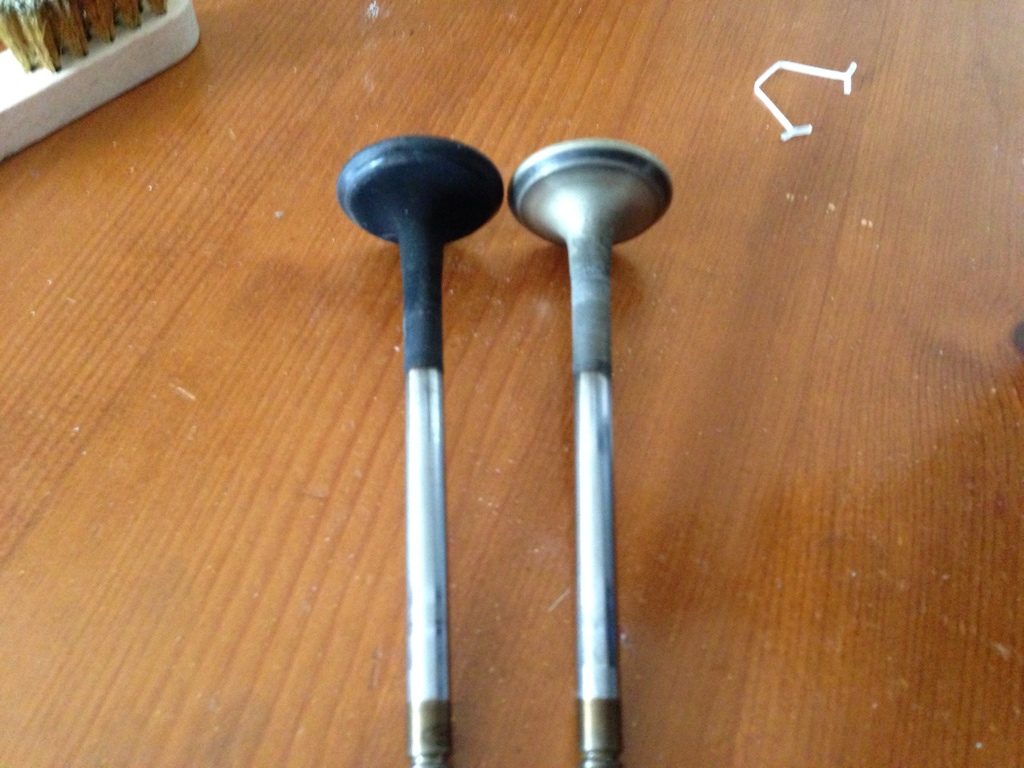
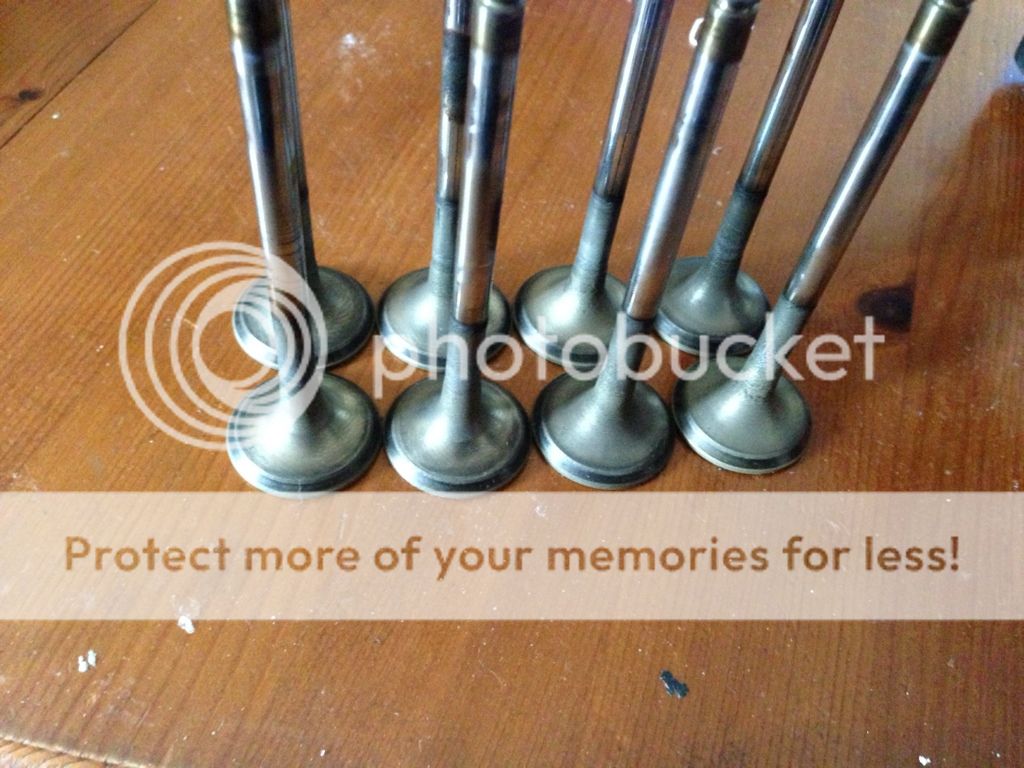
I then set about cleaning the exhaust valves. Im fitting focus rs valves but they needed a clean up first, so one by one i put them in a drill and cleaned them with a brass brush. They came out rather nice! I lapped these in afterwards and replaced all the valve springs with the focus rs version. You can see in the pictures that it is a much thicker coil.

This was then reshimmed on the exhaust side to get the clearances of the solid lifters correct because of changing the exhaust valves.
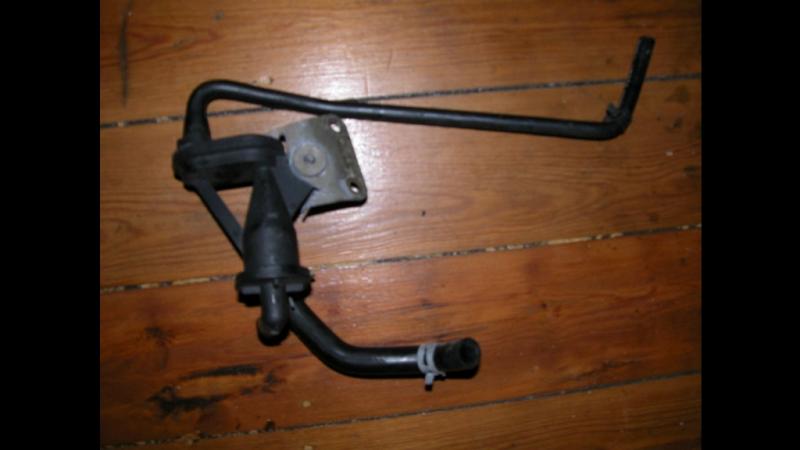
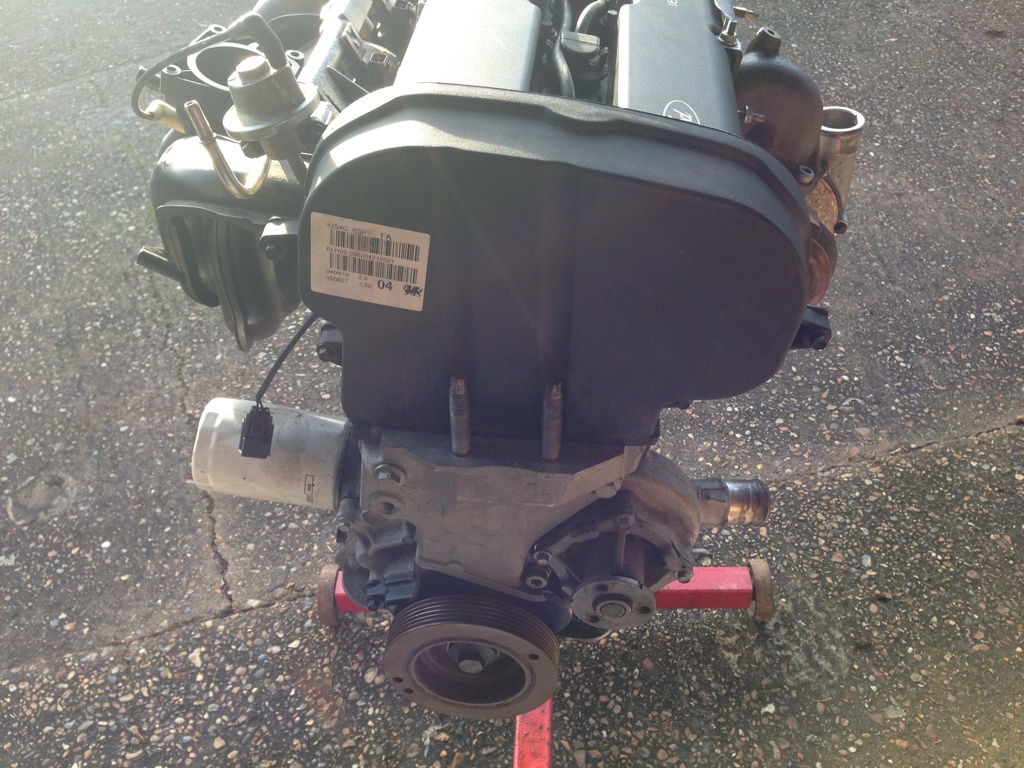
I also picked up this focus rs breather pot along the way for �5
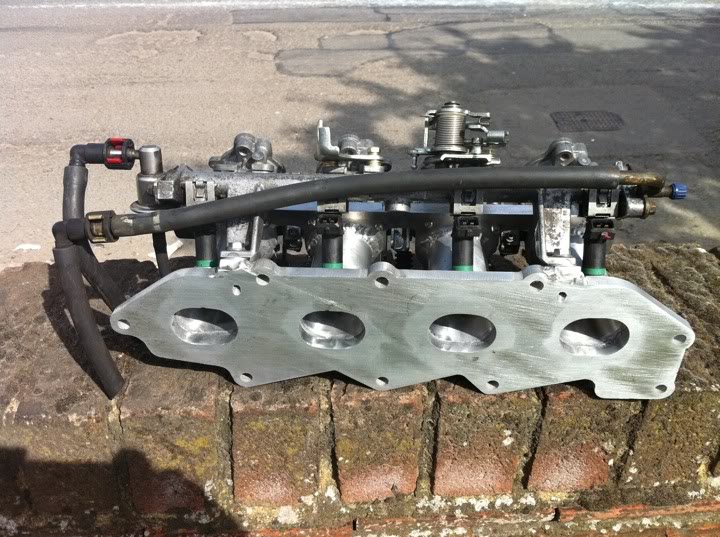
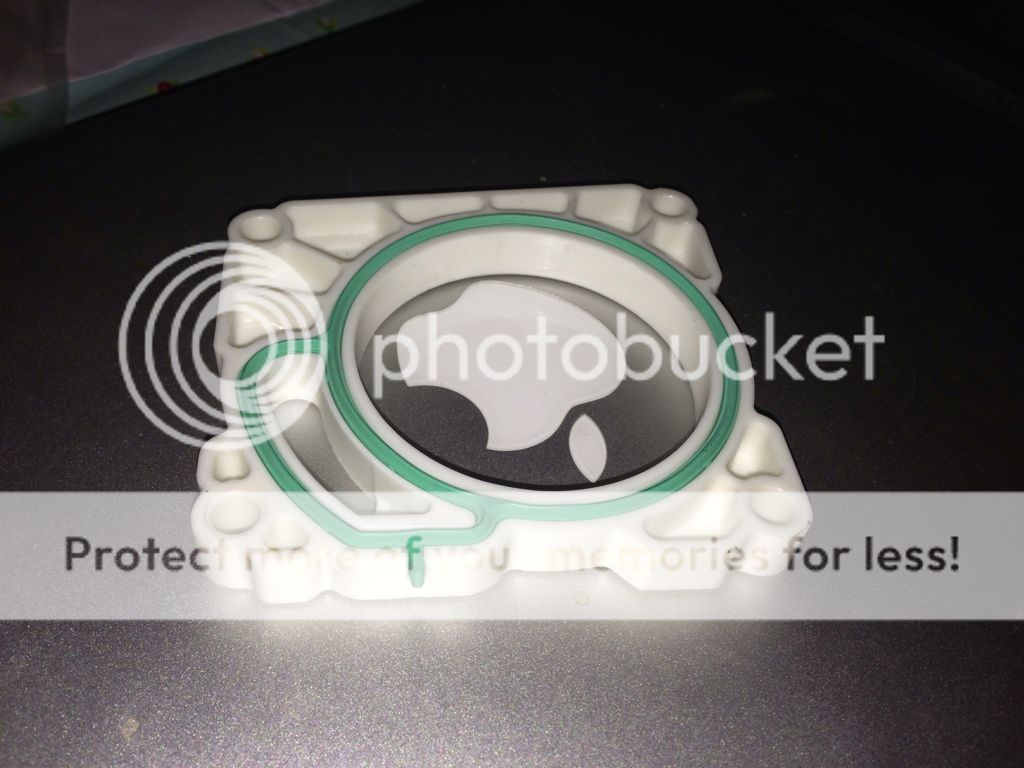
Also this difficult to get hold of adaptor/gasket for fitting a metal throttle body to a plastic inlet manifold
On christmas eve i got pretty close to having the package ready to drop in, but disaster struck and i accidentally over-torqued the idler pulley and snapped the bolt. The left over bit of bolt came out the head fine but due to some confusion at ford, getting the right bolt to replace it wasnt an option, turns out it only comes with the pulley itself so i got a complete new INA pulley from eurocarparts for �15 This is how i finished up before xmas
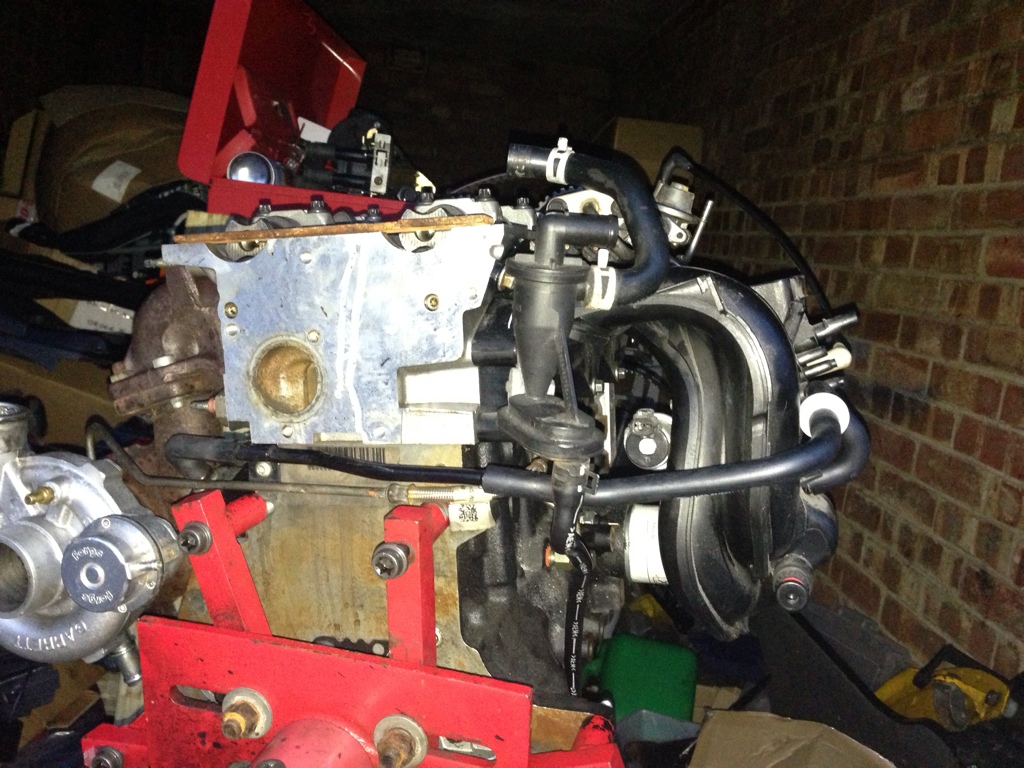
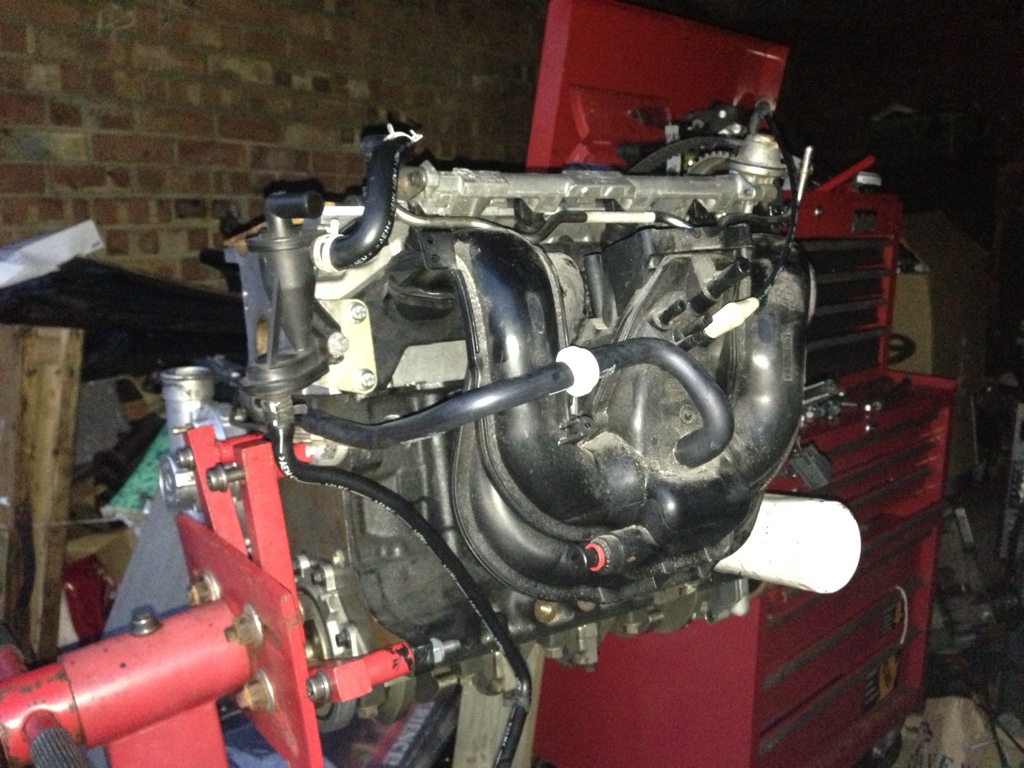
After advise from Mark Stewart i've ordered a single piece inlet manifold instead of the 2 piece i have fitted. I should imagine it is far more susceptible to splitting under boost being a 2 piece.
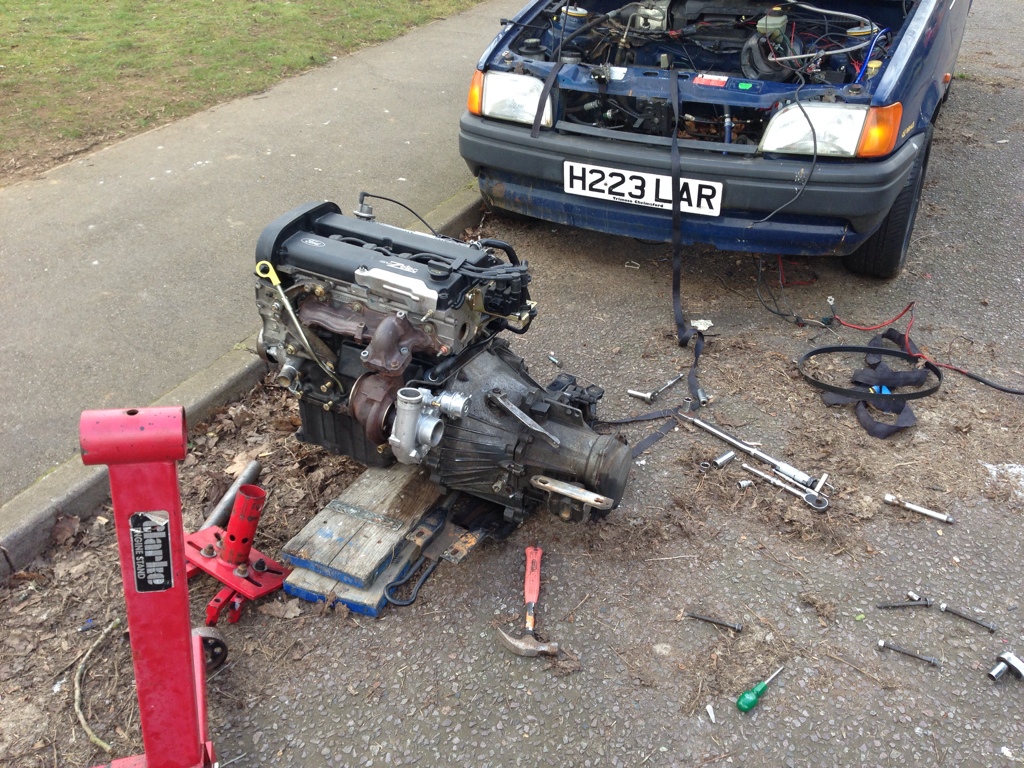
Then today this happened
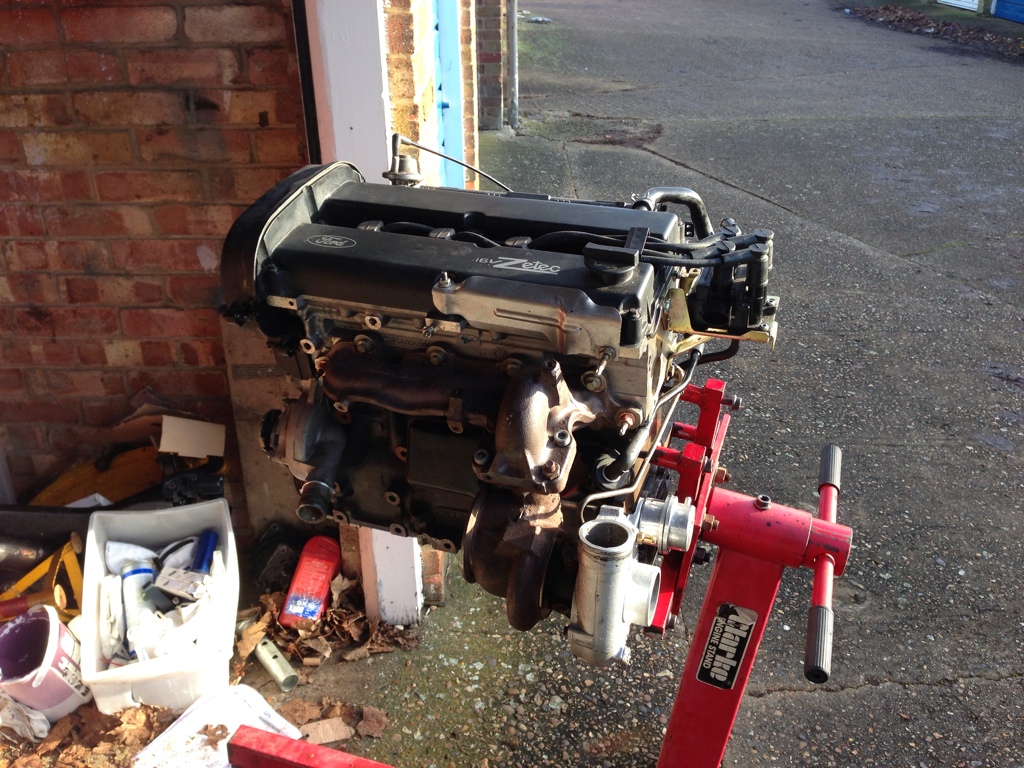
All i need now is some moly lube to put the arp rod bolts back in, modify the sump for oil return and bolt it on
I picked up for cheap a frs turbo and manifold, injectors, focus inlet, frs top elbow and a loads of other bits.
a 4k mile old zetec
Brand new frs pistons which i fitted to a set of free frs rods
The head as it was removed
I then set about cleaning the exhaust valves. Im fitting focus rs valves but they needed a clean up first, so one by one i put them in a drill and cleaned them with a brass brush. They came out rather nice! I lapped these in afterwards and replaced all the valve springs with the focus rs version. You can see in the pictures that it is a much thicker coil.
This was then reshimmed on the exhaust side to get the clearances of the solid lifters correct because of changing the exhaust valves.
I also picked up this focus rs breather pot along the way for �5
Also this difficult to get hold of adaptor/gasket for fitting a metal throttle body to a plastic inlet manifold
On christmas eve i got pretty close to having the package ready to drop in, but disaster struck and i accidentally over-torqued the idler pulley and snapped the bolt. The left over bit of bolt came out the head fine but due to some confusion at ford, getting the right bolt to replace it wasnt an option, turns out it only comes with the pulley itself so i got a complete new INA pulley from eurocarparts for �15 This is how i finished up before xmas
After advise from Mark Stewart i've ordered a single piece inlet manifold instead of the 2 piece i have fitted. I should imagine it is far more susceptible to splitting under boost being a 2 piece.
Then today this happened
All i need now is some moly lube to put the arp rod bolts back in, modify the sump for oil return and bolt it on


Thread Starter
Too many posts.. I need a life!!
Joined: Apr 2005
Posts: 730
Likes: 2
From: Hertfordshire
Im keeping it on megasquirt, the ecu got sent off to boostmonkeys today for a bigger map sensor, barometric correction, and boost control
Thread Starter
Too many posts.. I need a life!!
Joined: Apr 2005
Posts: 730
Likes: 2
From: Hertfordshire
Yes mate. It was a focus inner wing mount I butchered, since there is no engine in the bay il take pictures with some measurements if you want, or make templates if you want. All of it was made from pieces of the original focus mount
Trending Topics
Thread Starter
Too many posts.. I need a life!!
Joined: Apr 2005
Posts: 730
Likes: 2
From: Hertfordshire
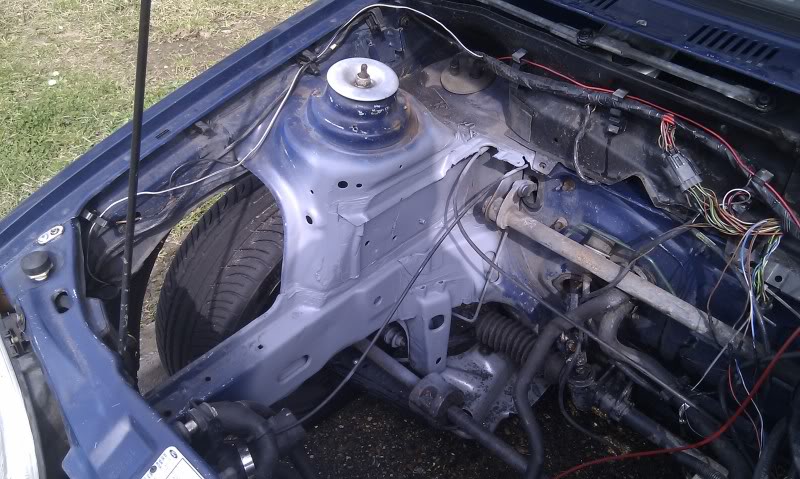
Got some more enthusiasm today at about 3:30pm.
Bolted in the battery tray, ran the new fuel lines, battery cable, bolted in the swirl pot and fuel pump, and fitted the front live terminal to the inner arch. Pictures should explain all

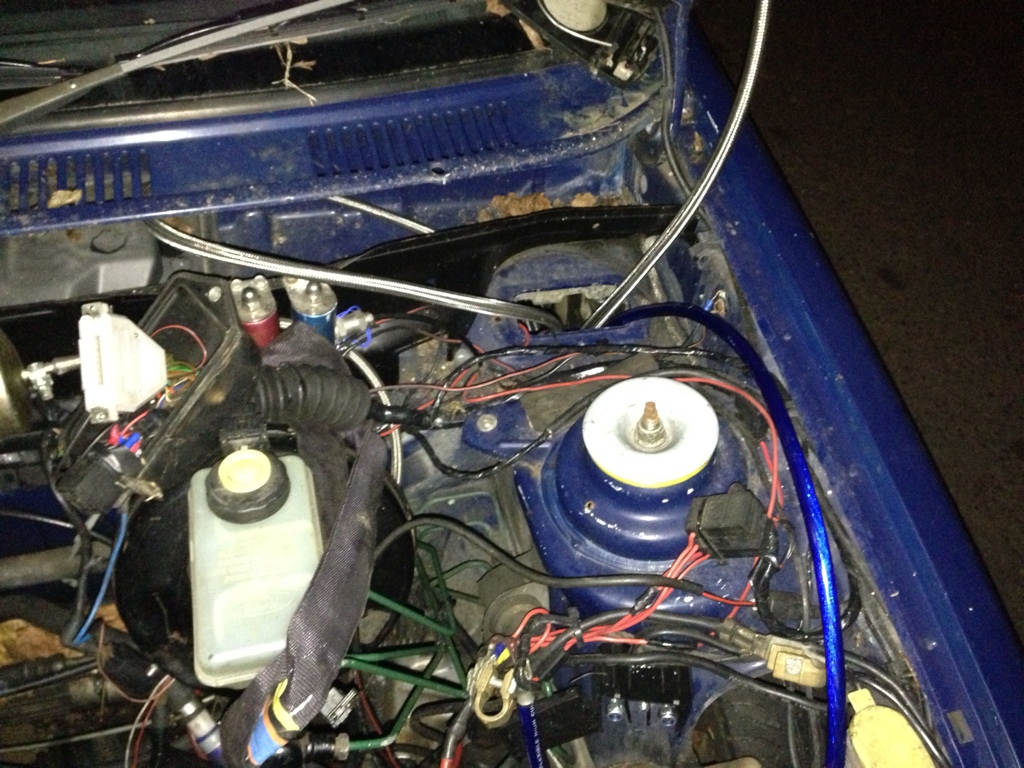
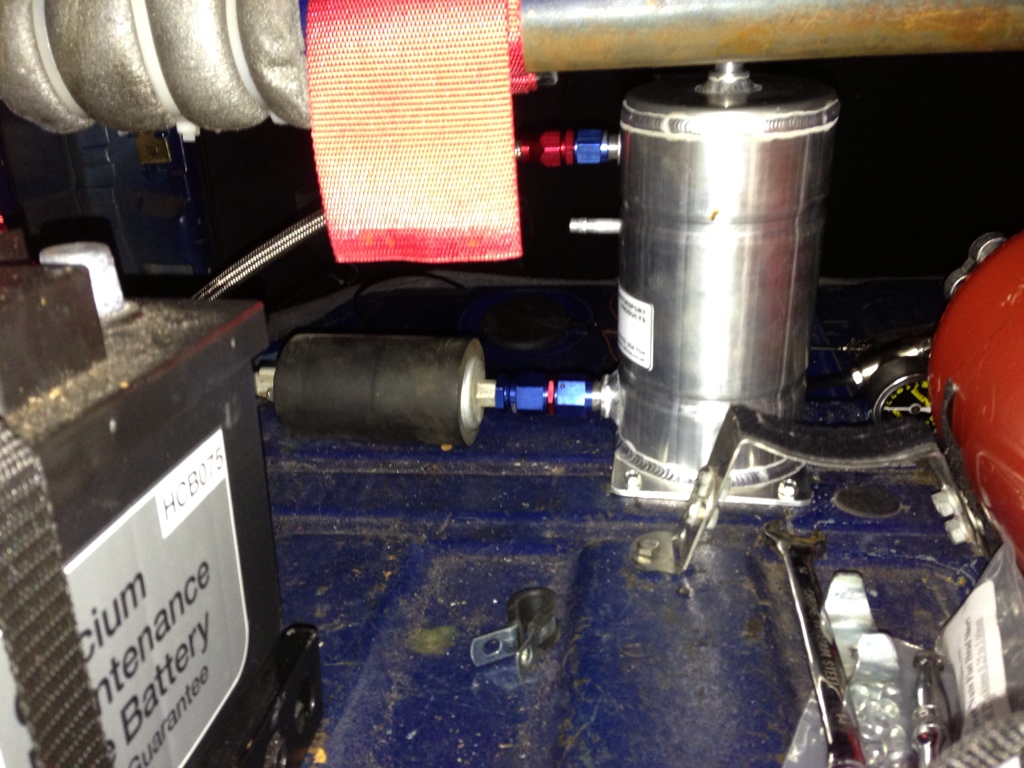
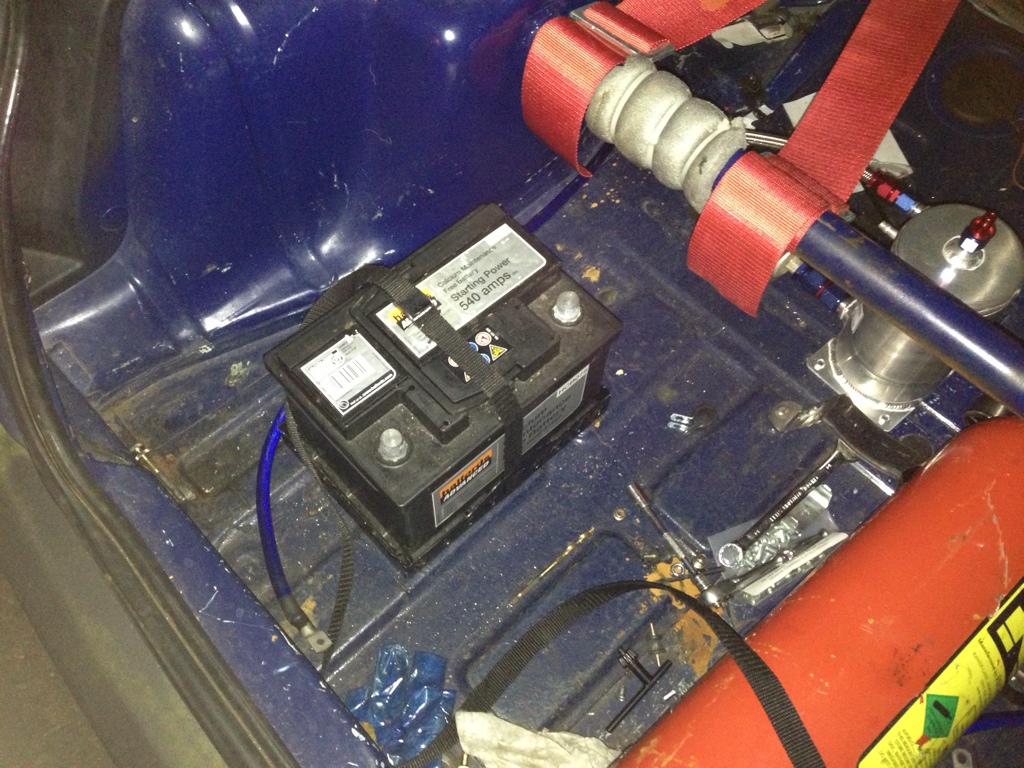
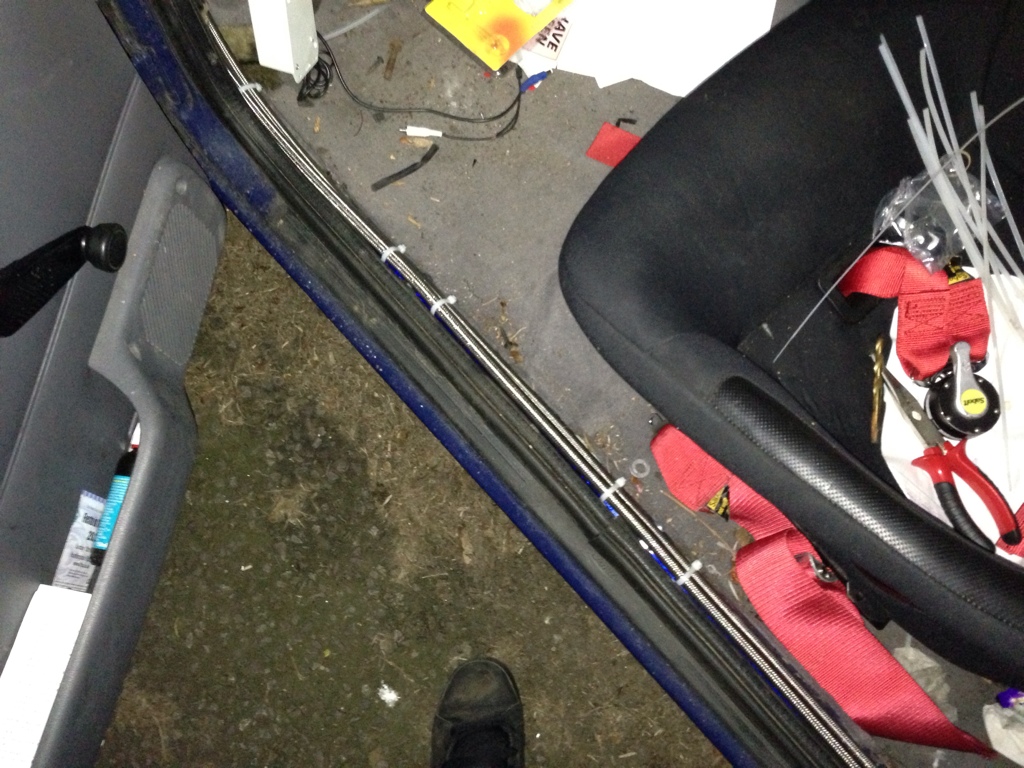
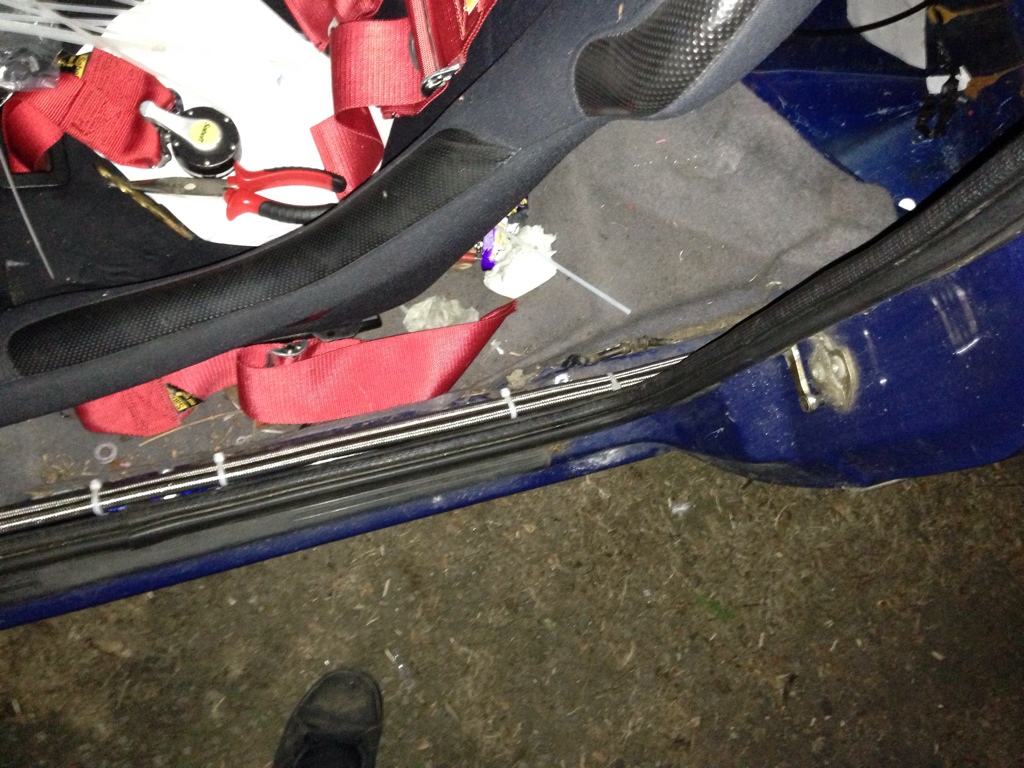
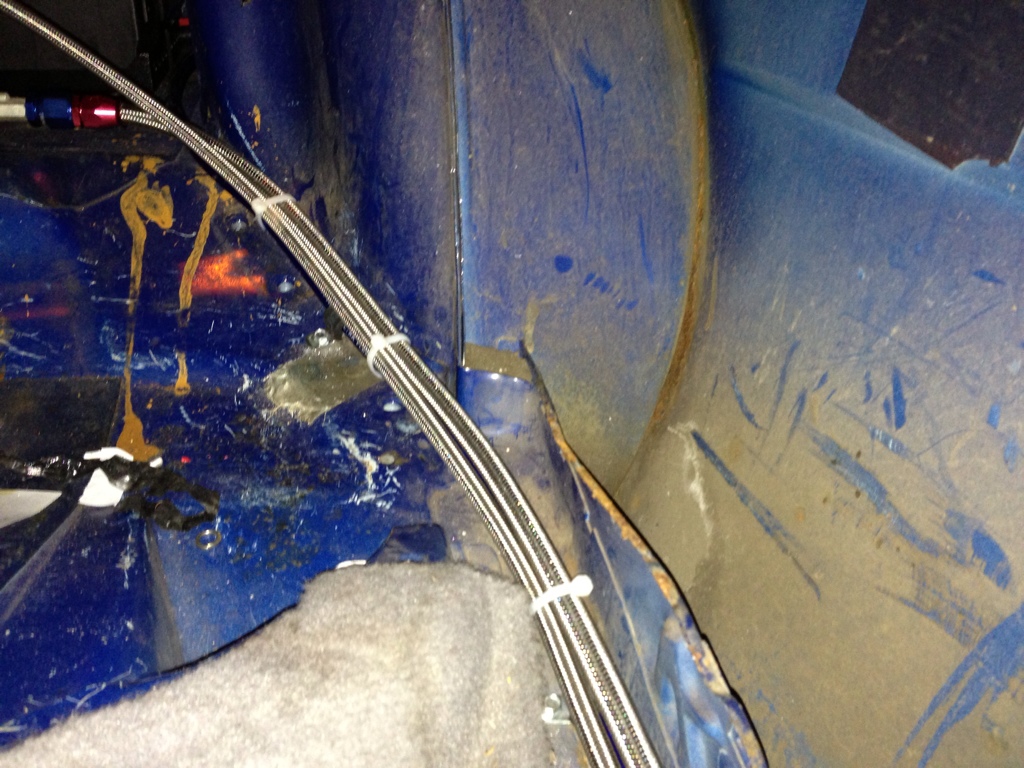
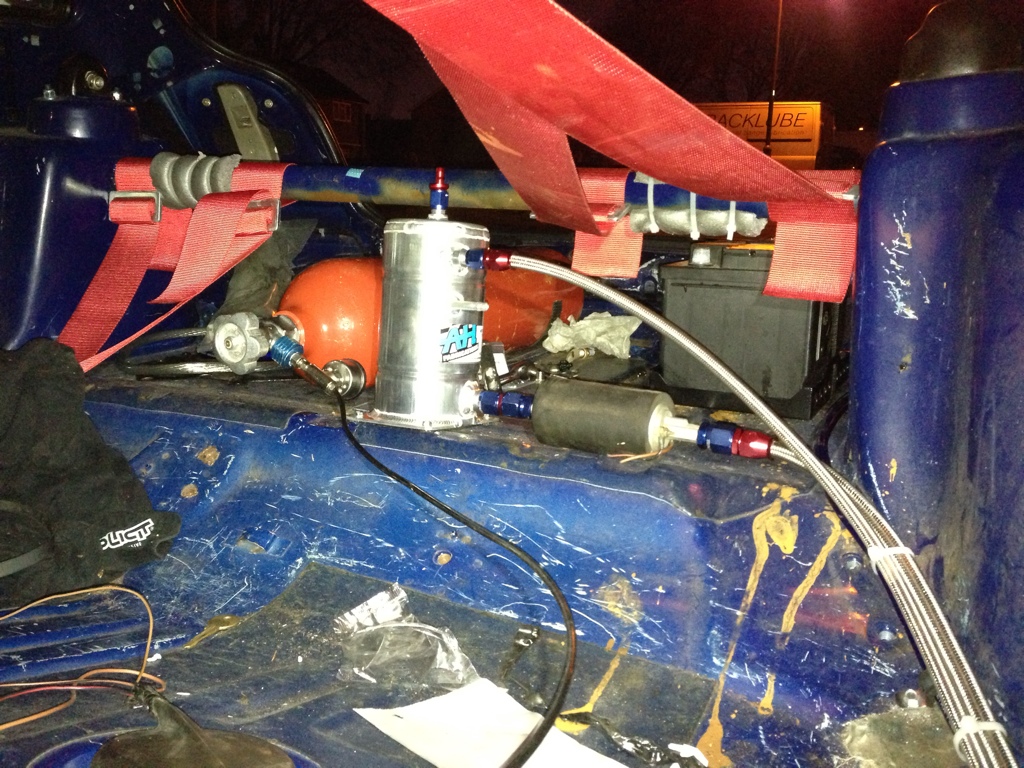
Bolted in the battery tray, ran the new fuel lines, battery cable, bolted in the swirl pot and fuel pump, and fitted the front live terminal to the inner arch. Pictures should explain all
Thread Starter
Too many posts.. I need a life!!
Joined: Apr 2005
Posts: 730
Likes: 2
From: Hertfordshire
Wiring loom is almost done! All i need now is the connector from a focus so my injector loom can be connected to the main loom, i wanted to keep it detachable like standard
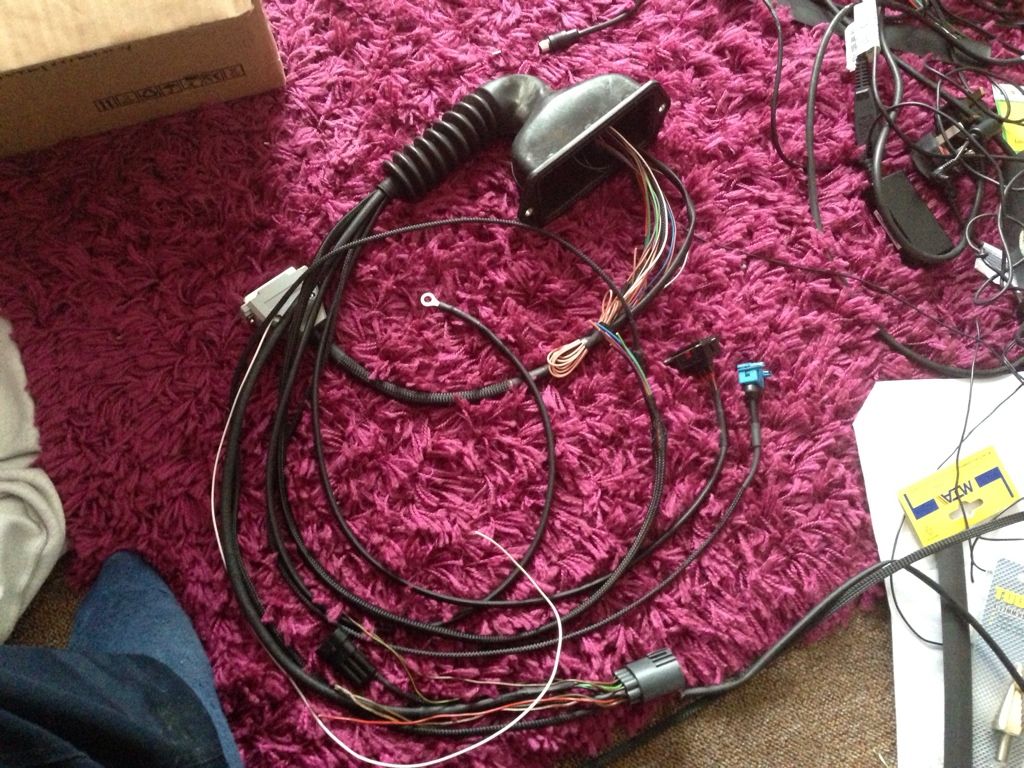
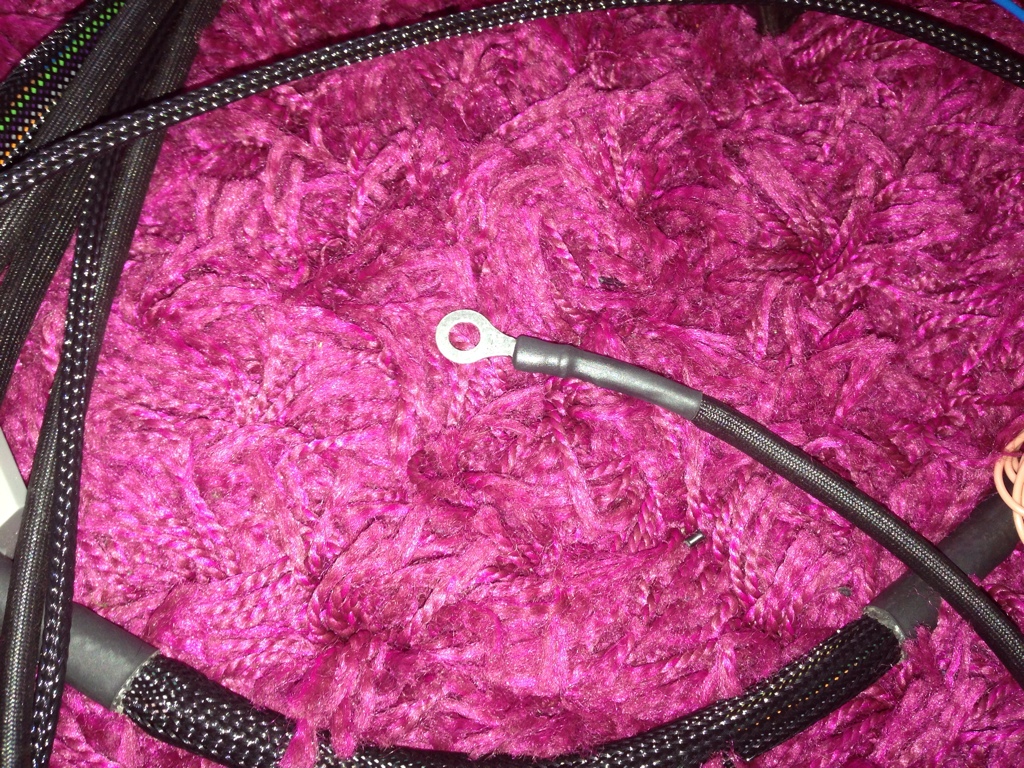
The main earth connection
Crank sensor and coil pack connections (all brand new terminals)
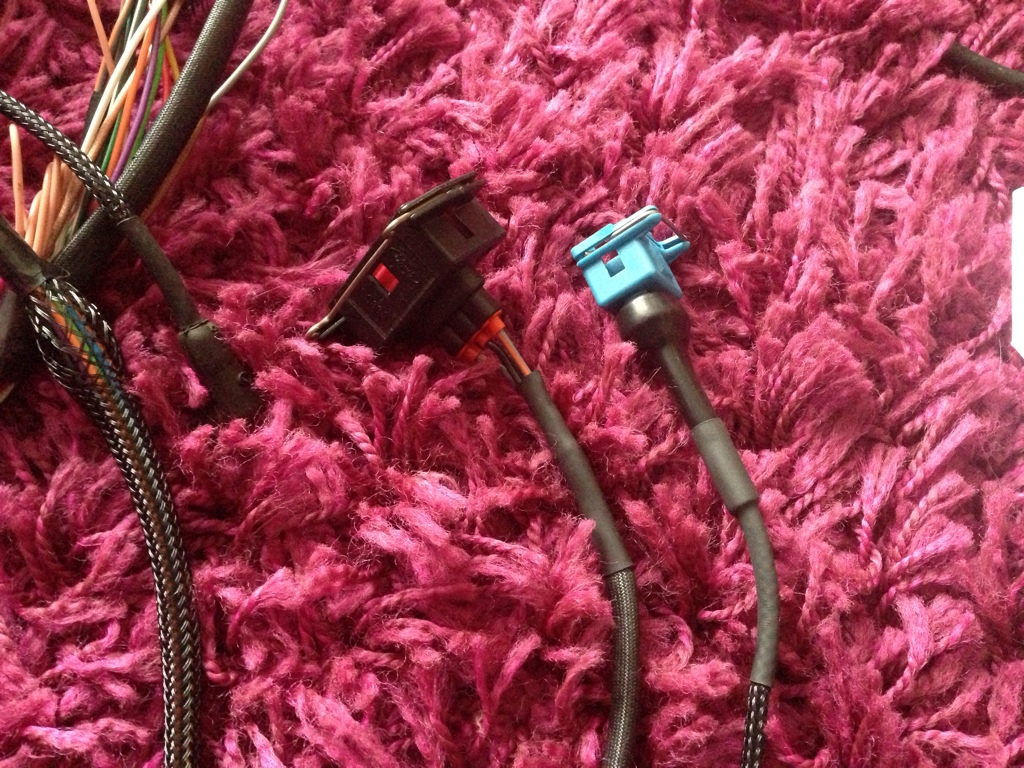
Connector to make it plug and play with the car loom, and a sub connector to make the wideband lambda controller detachable

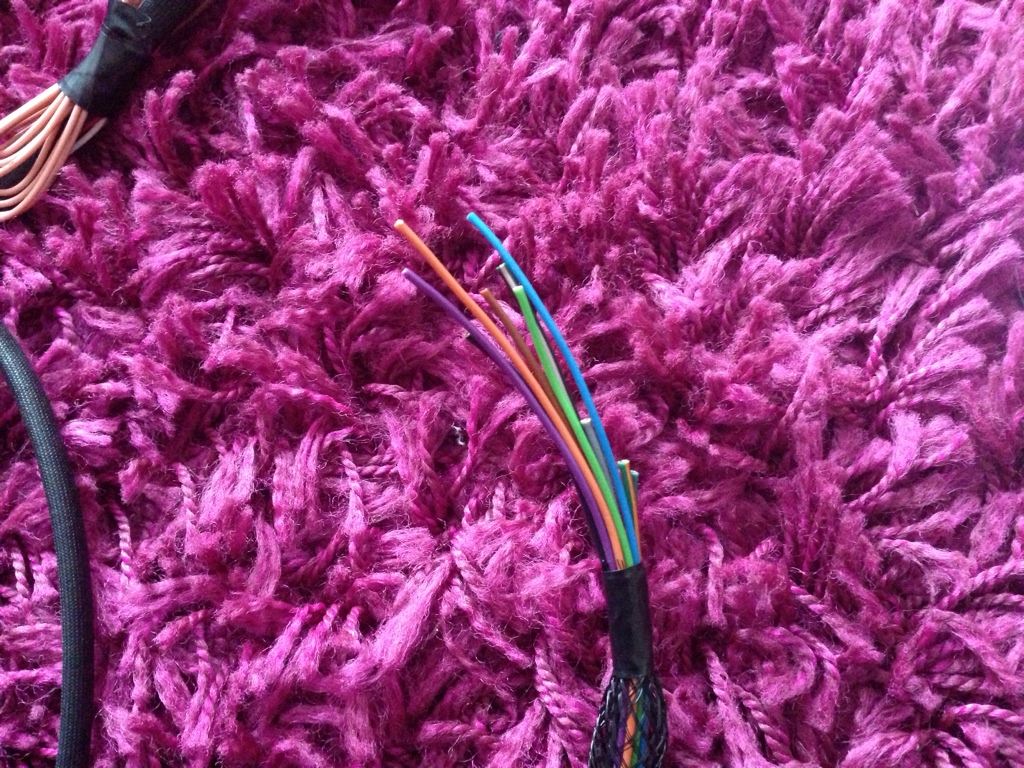
The last wires going to the new connector
All comments and criticism welcome
The main earth connection
Crank sensor and coil pack connections (all brand new terminals)
Connector to make it plug and play with the car loom, and a sub connector to make the wideband lambda controller detachable
The last wires going to the new connector
All comments and criticism welcome
Thread Starter
Too many posts.. I need a life!!
Joined: Apr 2005
Posts: 730
Likes: 2
From: Hertfordshire
A few updates in one here.....
Today this happened
With only 2 trolley jacks....
Need to work out spacing the rad and intercooler setup, but I expect first step is ditch the bonnet release cable, fit removable slam panel, and lockable aero catches
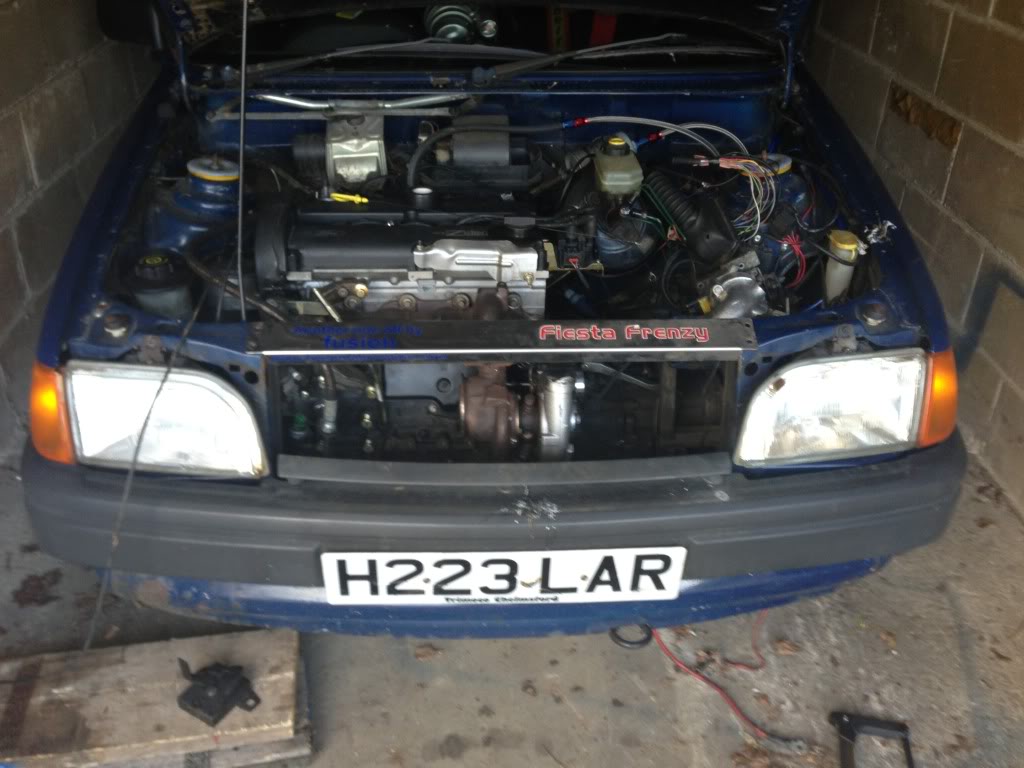
New slam panel, originally fitted to one of the uk's fastest zetec turbos, hopefully it gives me some good luck!
Small update
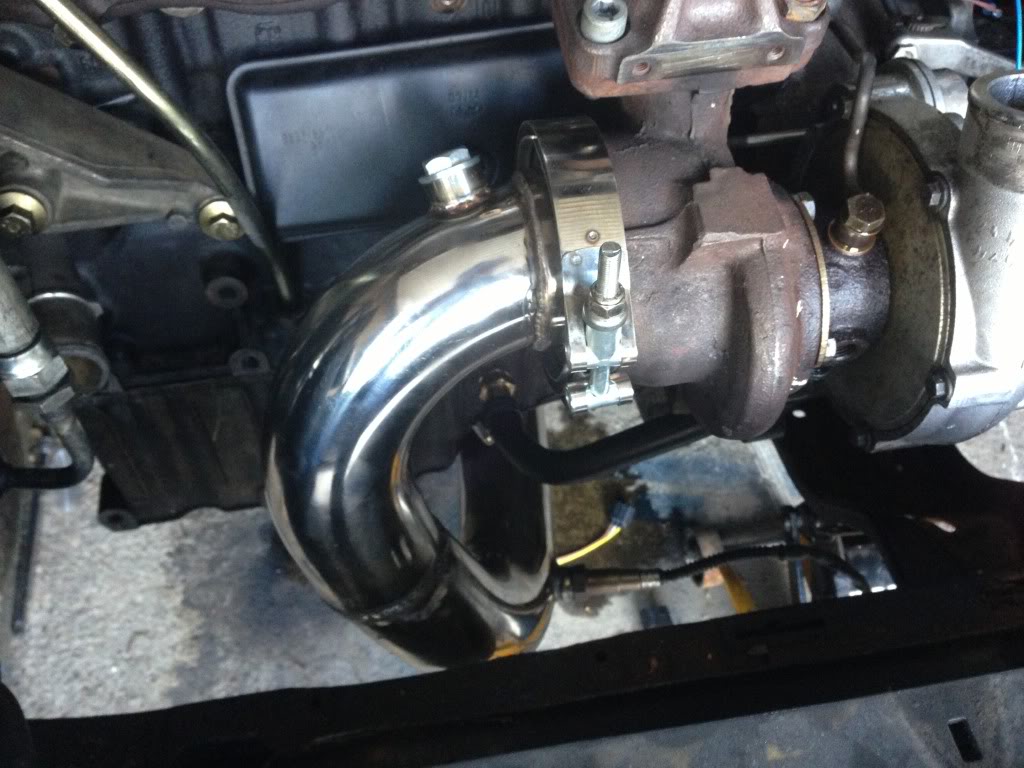
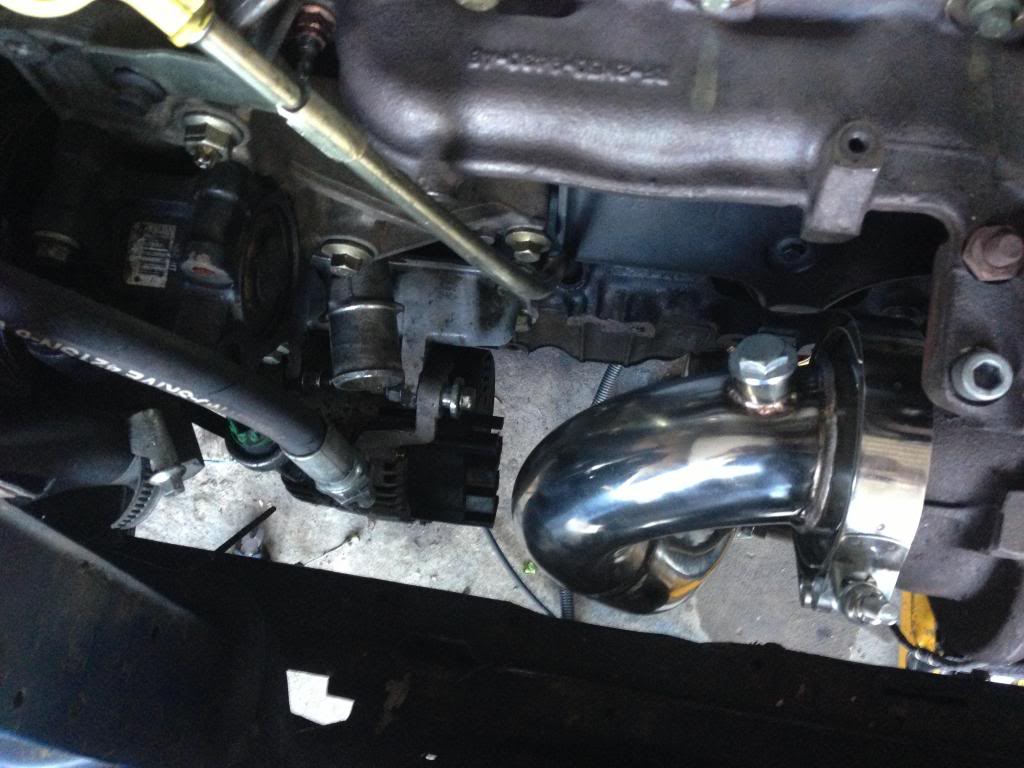
Got the downpipe back today and fitted it on
Followed by the alternator, mainly because i suddenly panicked that the downpipe was going to foul it. All clear tho.
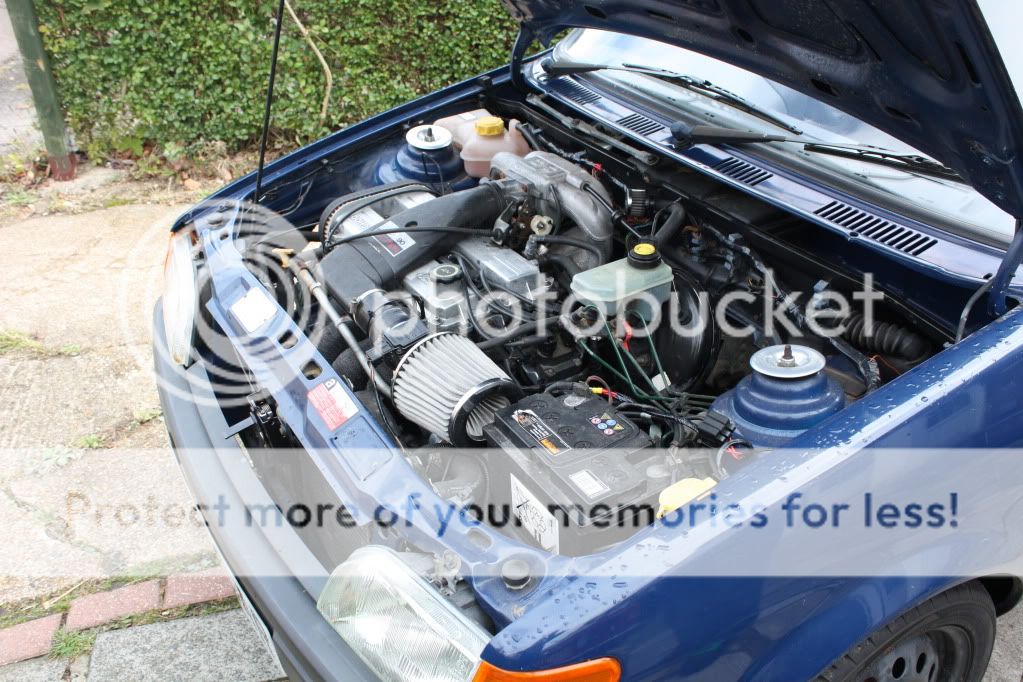
Done a few more bits recently and starting to feel a bit more complete!
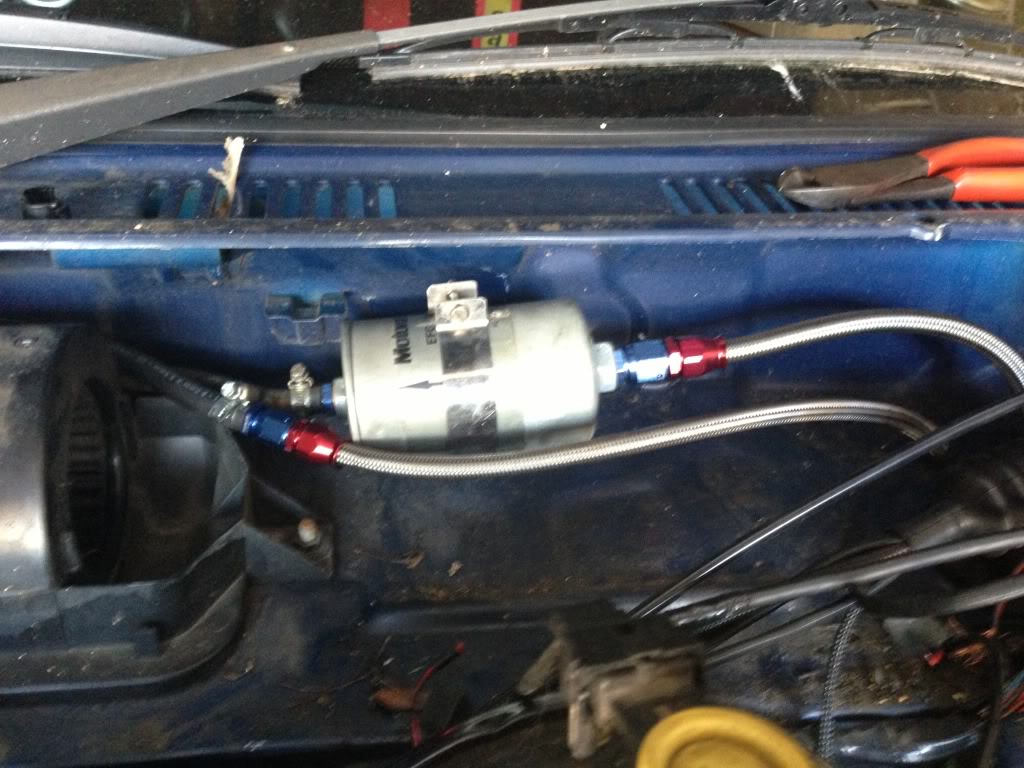
Bolted the fuel filter bracket in, the ERST item is massive!
Fitted the big aluminium radiator, and removable slam panel

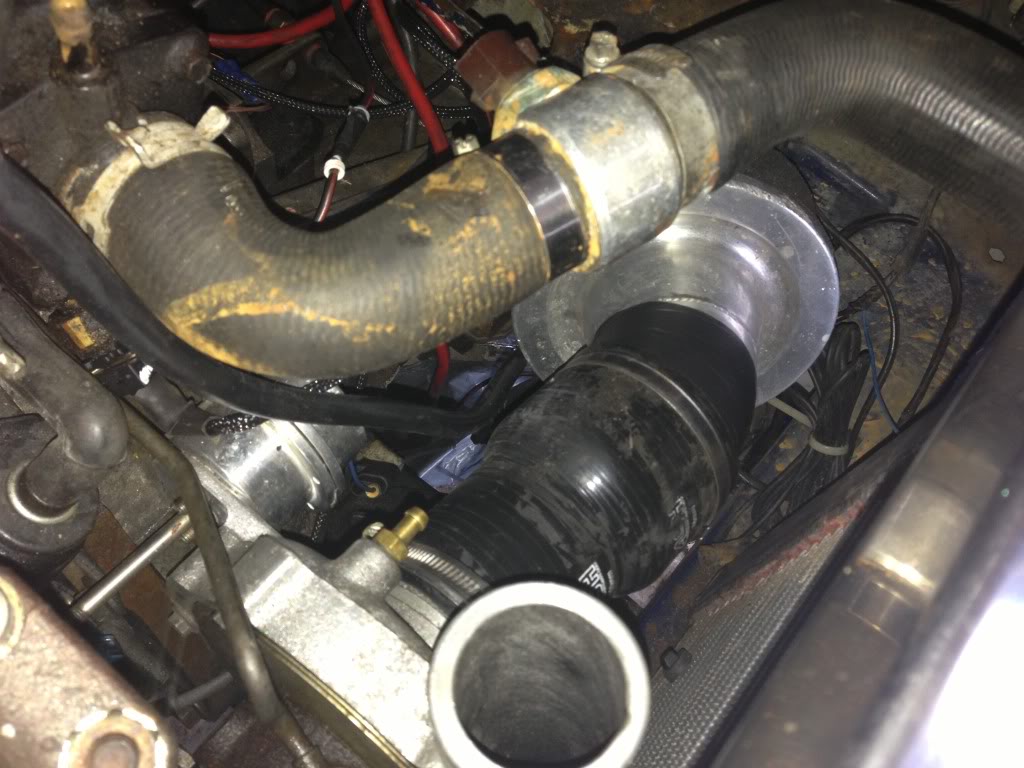
And finally the pace escort charge cooler i picked up the other day. First boost hose went straight on, and only a little fucking around to fit the other. Back to being a proper sleeper with no stupid intercooler hanging out the front.
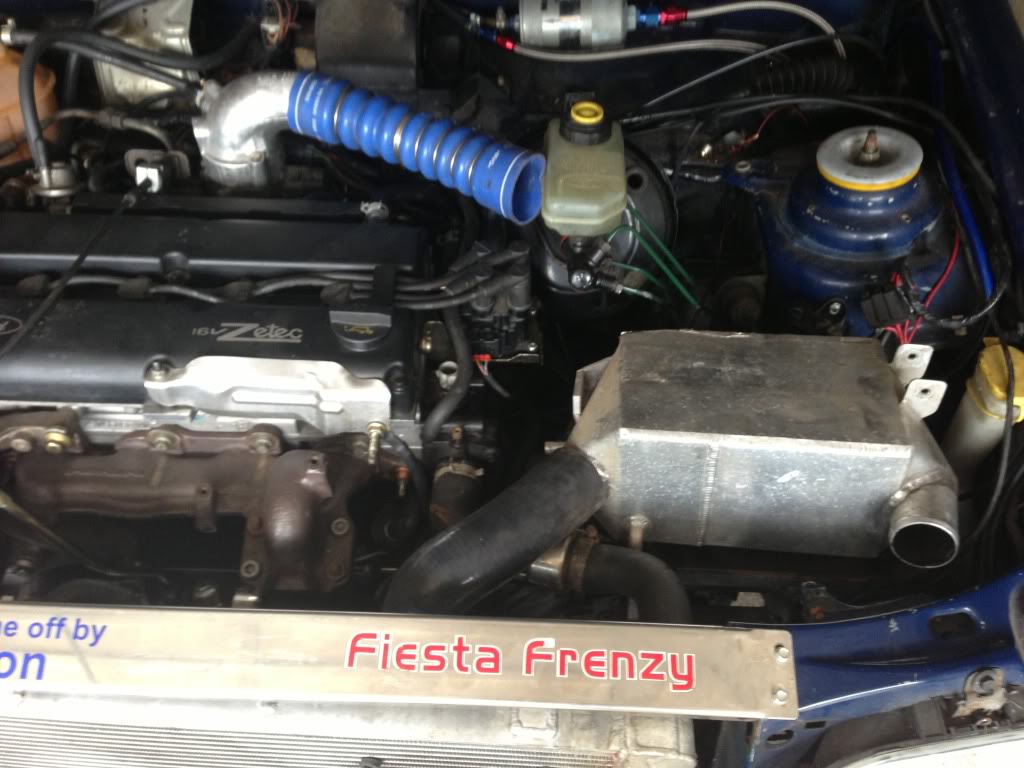
Also got the air filter in
Did a few more other jobs that i didn't take photos of. Gear linkage, alternator wiring, mounted ecu.
Today this happened
With only 2 trolley jacks....
Need to work out spacing the rad and intercooler setup, but I expect first step is ditch the bonnet release cable, fit removable slam panel, and lockable aero catches
New slam panel, originally fitted to one of the uk's fastest zetec turbos, hopefully it gives me some good luck!
Small update
Got the downpipe back today and fitted it on

Followed by the alternator, mainly because i suddenly panicked that the downpipe was going to foul it. All clear tho.

Done a few more bits recently and starting to feel a bit more complete!
Bolted the fuel filter bracket in, the ERST item is massive!

Fitted the big aluminium radiator, and removable slam panel

And finally the pace escort charge cooler i picked up the other day. First boost hose went straight on, and only a little fucking around to fit the other. Back to being a proper sleeper with no stupid intercooler hanging out the front.

Also got the air filter in

Did a few more other jobs that i didn't take photos of. Gear linkage, alternator wiring, mounted ecu.

as said before...... this is a wicked project..........
i got a problem with mine that the fans are so big on my new rad that the bar in front of the rad touches them and i think i need to remove it with the catch and go bonnet pins
which i couldnt be bothered to do but guess i have no choice now
what power you going for?, 300bhp? people say the standard manifold wont do it, but my old frs was 290bhp and 314lbs at 21psi and couldnt flow more because its all the standard management and map sensor could do at the time... so 1.7/1.8bar and should be ok
but your spec with tubular manifold and forge actuator will do nearly 300bhp at 1.5bar which will be bloody good fun
Thread Starter
Too many posts.. I need a life!!
Joined: Apr 2005
Posts: 730
Likes: 2
From: Hertfordshire
Tubular manifold is on the list of upgrades once the car is running and on the road!
I'd like 320bhp by that stage, with a 50shot of nos for the fun of it
I didnt really want to ditch the standard catch, but wanted to have plenty of space for radiator, fans, and the option of intercooler etc. With my current setup theres nothing to stop me adding a twin pass intercooler as well as using my chargecooler!


Thread
Thread Starter
Forum
Replies
Last Post
Billy_RS
Pictures, video & Photoshop Forum
16
Oct 11, 2025 09:41 PM