ZX10R turbo kit car build - update 10-08-13


Thread Starter
10K+ Poster!!
Joined: Jun 2003
Posts: 10,788
Likes: 2
From: South Shields
 ZX10R turbo kit car build - update 10-08-13
I've just collected the first stage of a my Mac#1 Motorsports Worx kit  in a nutshell it's a lotus 7 styled kit car, similar to the likes of Caterham and Westfield etc.
http://www.mac1motorsports.co.uk/
Car type Two seater sportscar
Chassis 16 gauge tubular steel-fully triangulated
Body Light weight glass reinforced polymer and aluminium
Engine spec. 300-350 BHP ie Kawasaki ZX10R turbo
Gearbox 6 speed sequential
Differential 3.22:1
Suspension Unequal length oval wishbones
Race quality Polyurethane bushes
Coil over adjustable height and damping
1.975” springs
Brakes Front discs 260 mm
4 pot callipers
Rear discs 4 pot callipers
Weight 425-450 kgs
Length 3280 mm
Width 1670 mm
Height 1140 mm
Wheels/tyres 13” x 7” Team Dynamics Pro-race 1.2’s / Toyo R888 tyres
Anyway enough of the talking heres a few photos...
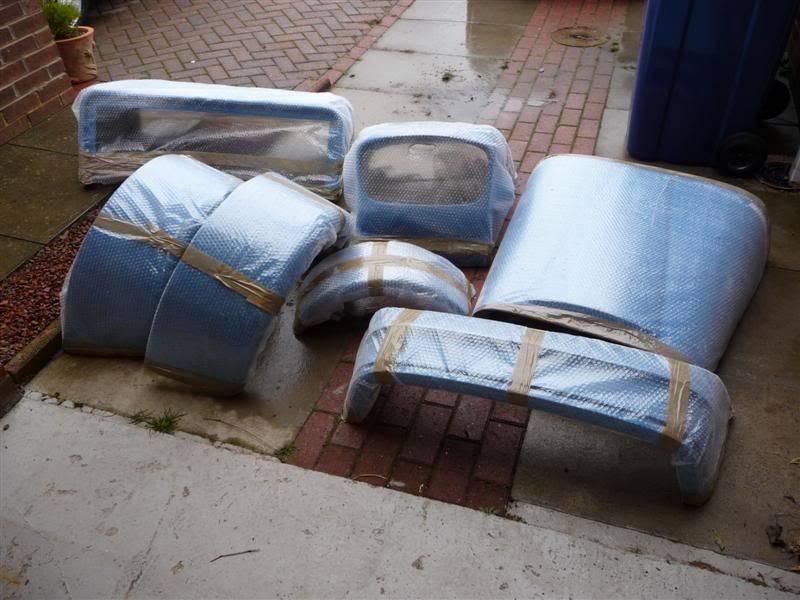
Body panels in light french blue gel coat
Chassis squashed into its new home... my huge garage
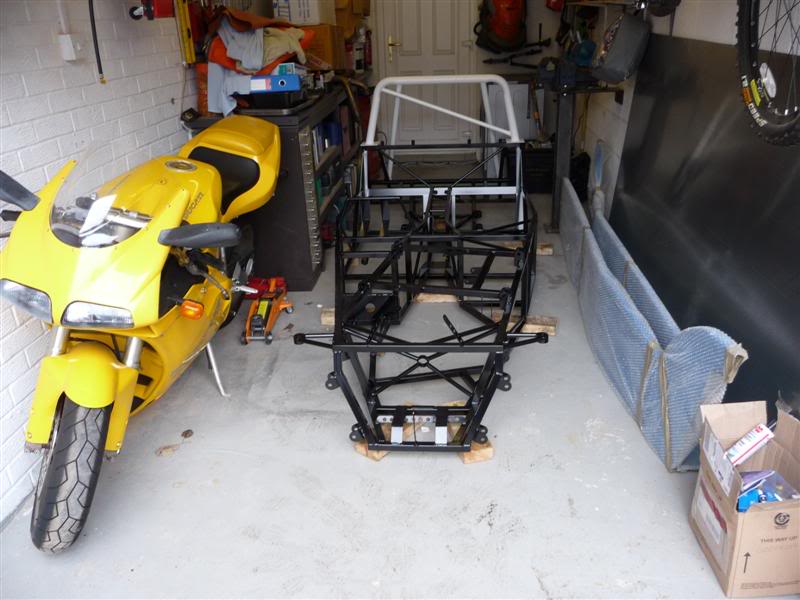
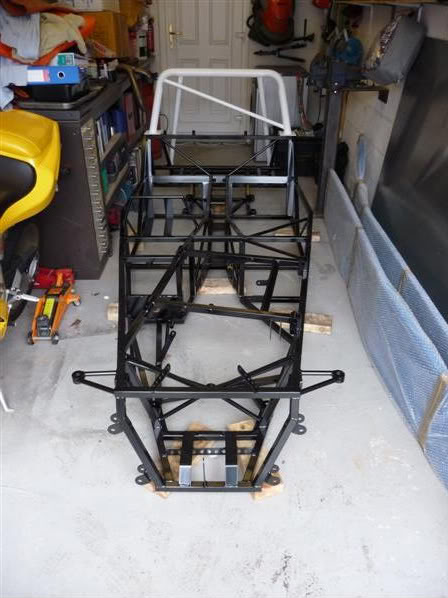
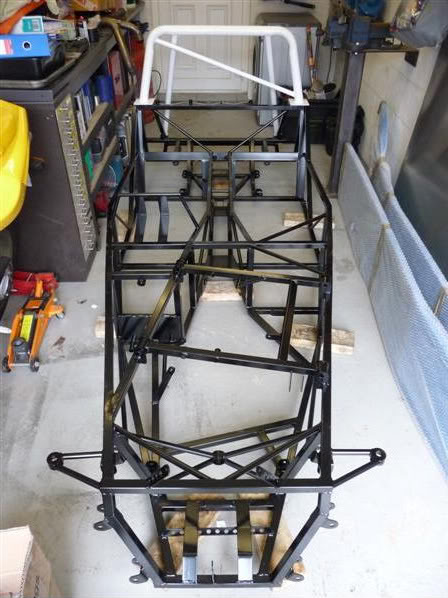
Chassis from the rear
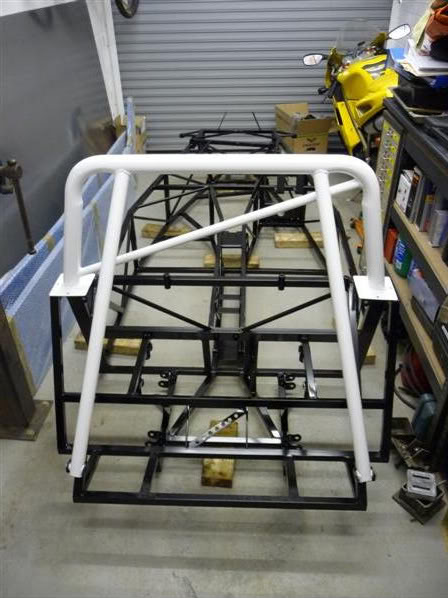
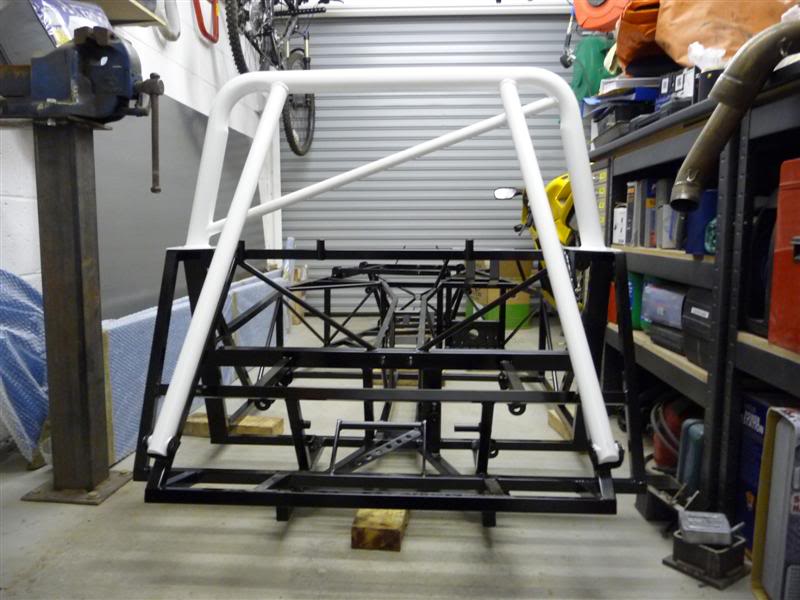
Cockpit
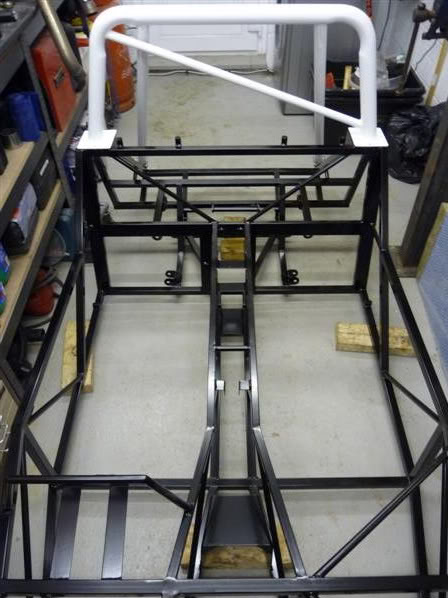
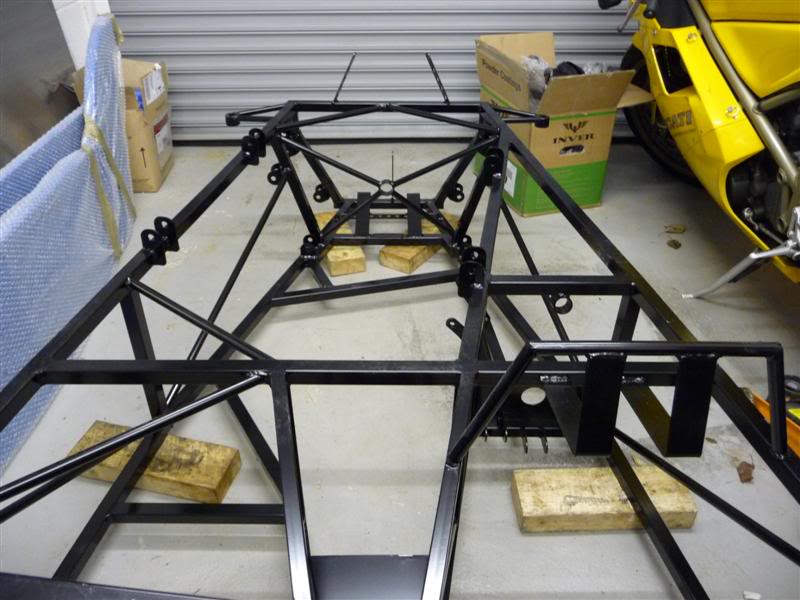
Engine bay
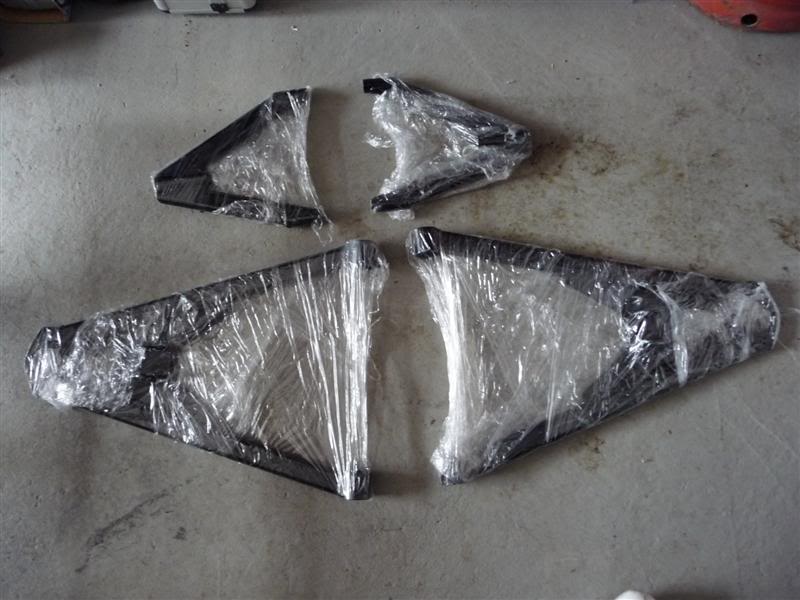
Front wishbones
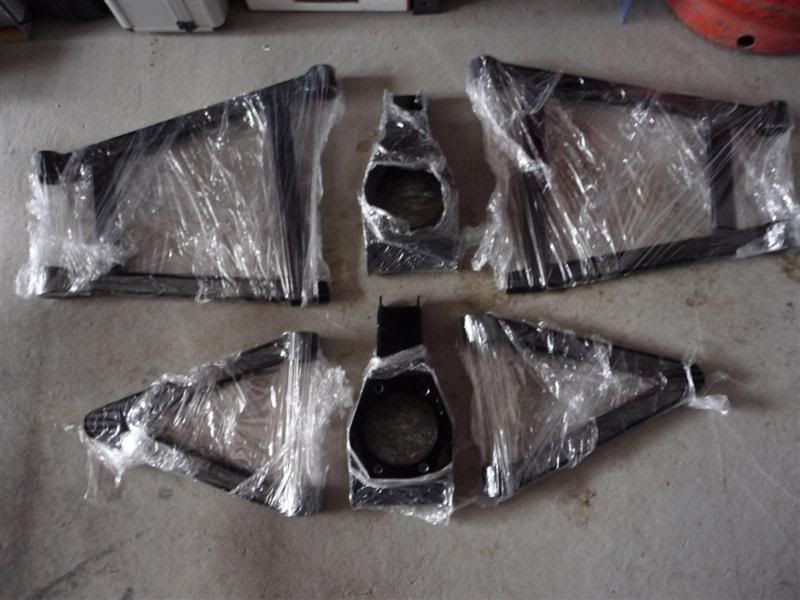
Rear wishbones and uprights
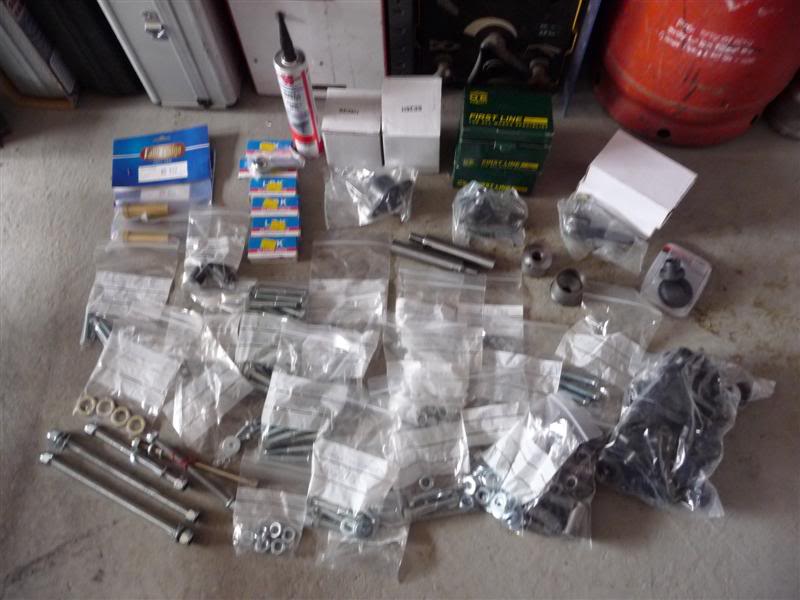
Nuts, bolts, bushes, tie rods, balljoints, rosejoints etc
in a nutshell it's a lotus 7 styled kit car, similar to the likes of Caterham and Westfield etc.http://www.mac1motorsports.co.uk/
Car type Two seater sportscar
Chassis 16 gauge tubular steel-fully triangulated
Body Light weight glass reinforced polymer and aluminium
Engine spec. 300-350 BHP ie Kawasaki ZX10R turbo
Gearbox 6 speed sequential
Differential 3.22:1
Suspension Unequal length oval wishbones
Race quality Polyurethane bushes
Coil over adjustable height and damping
1.975” springs
Brakes Front discs 260 mm
4 pot callipers
Rear discs 4 pot callipers
Weight 425-450 kgs
Length 3280 mm
Width 1670 mm
Height 1140 mm
Wheels/tyres 13” x 7” Team Dynamics Pro-race 1.2’s / Toyo R888 tyres
Anyway enough of the talking heres a few photos...
Body panels in light french blue gel coat
Chassis squashed into its new home... my huge garage
Chassis from the rear
Cockpit
Engine bay
Front wishbones
Rear wishbones and uprights
Nuts, bolts, bushes, tie rods, balljoints, rosejoints etc
Last edited by Red16; Aug 10, 2013 at 10:05 PM.



Trending Topics


Thread Starter
10K+ Poster!!
Joined: Jun 2003
Posts: 10,788
Likes: 2
From: South Shields
Theyre not very wide really, im 5' 10" and weigh 12st and its easy for me to get in and out. I'll measure it next time i'm in the garage if you like?
Thread Starter
10K+ Poster!!
Joined: Jun 2003
Posts: 10,788
Likes: 2
From: South Shields
This afternoon i finally got a spare few hours to myself... so i began working on the car 
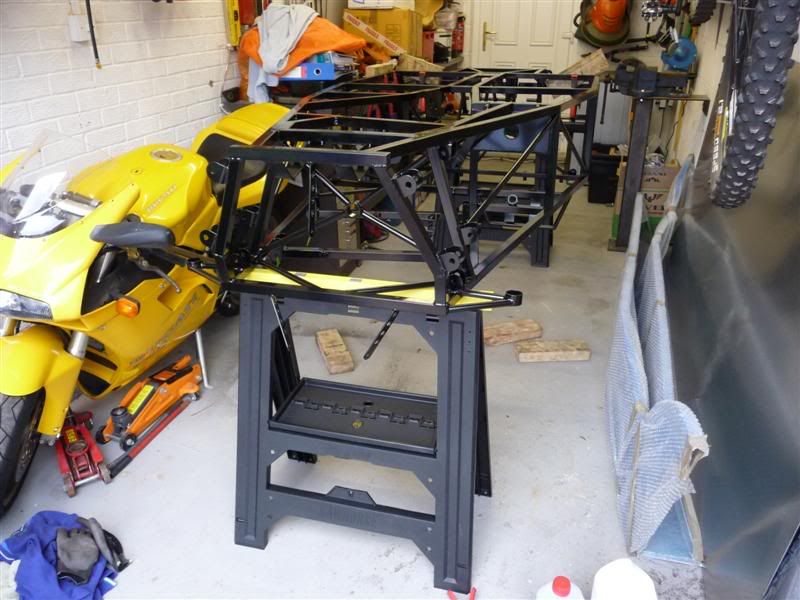
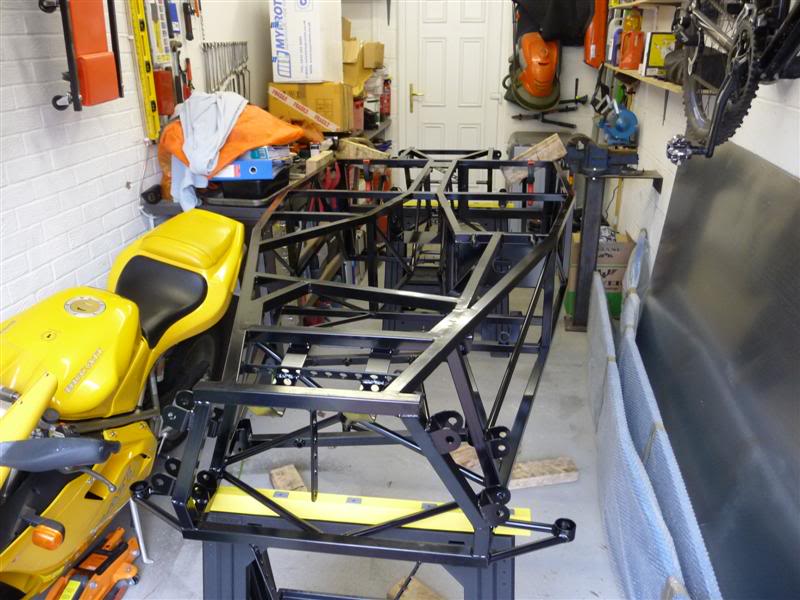
With the help of a neighbour, the upturned chassis was rested onto a pair of saw horses
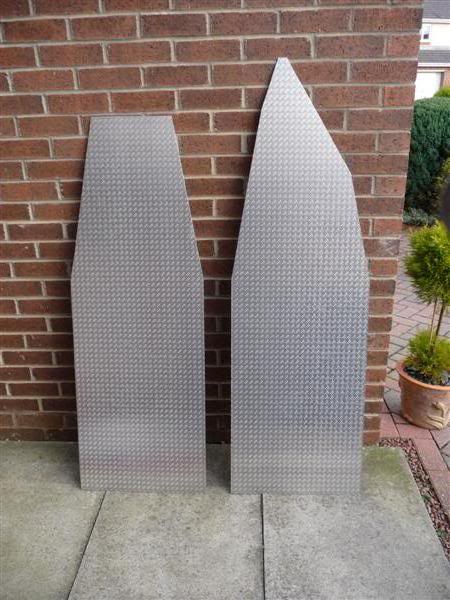
The cricket weave aluminium sheet was then rested on the chassis so i could mark the outline of the floorpan,
a few minutes of playing with the jigsaw and this was the result.
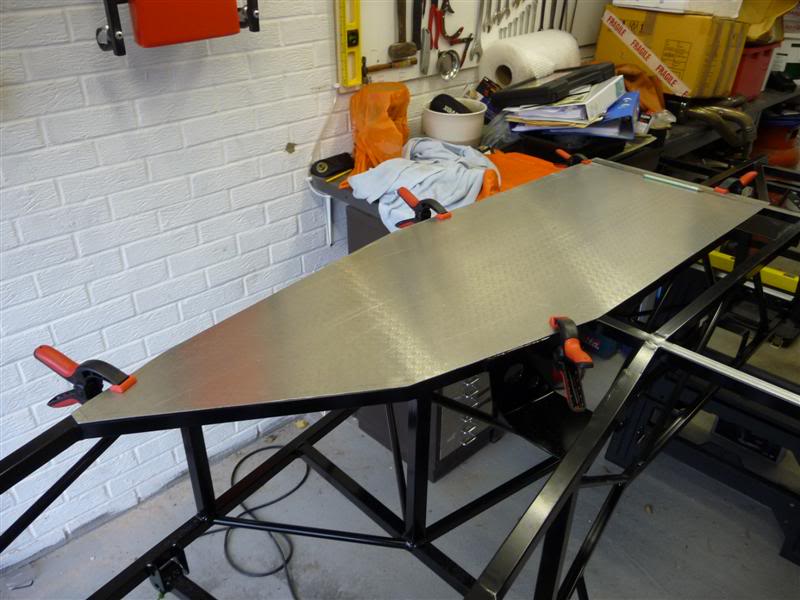
Passenger side floor clamped in position
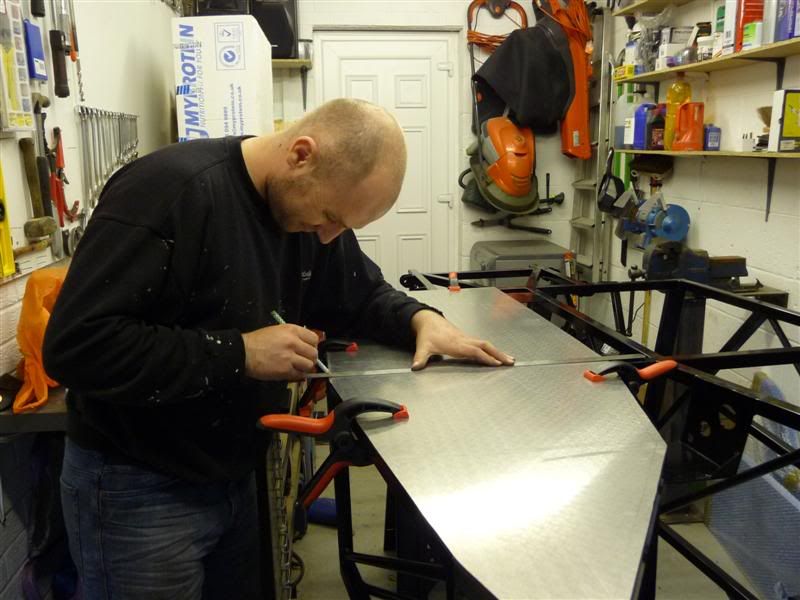
R6Franky popped round to make coffee and poke his nose in, while he was here he took a few photos of me in action
marking out rivet locations
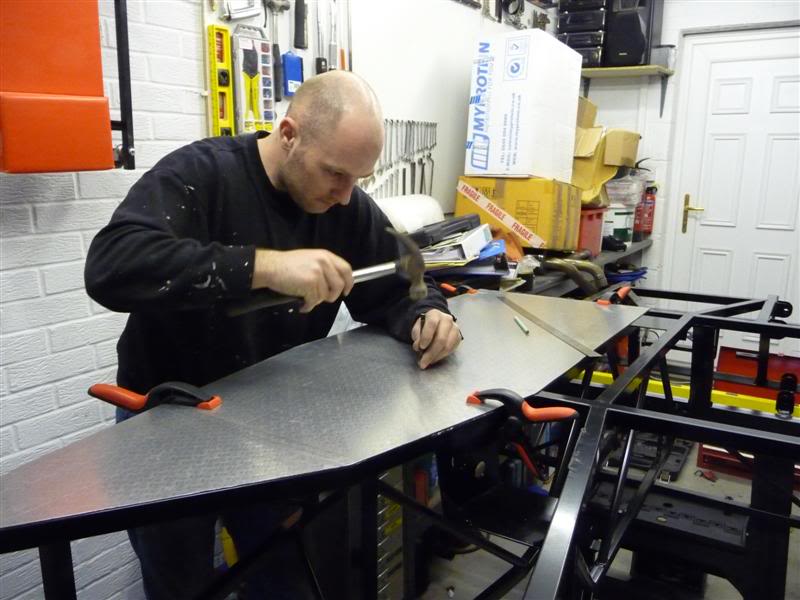
centre punching the rivet locations ready to be drilled
My battery drill died midway through drilling the holes for the rivets, so this is how play ended today
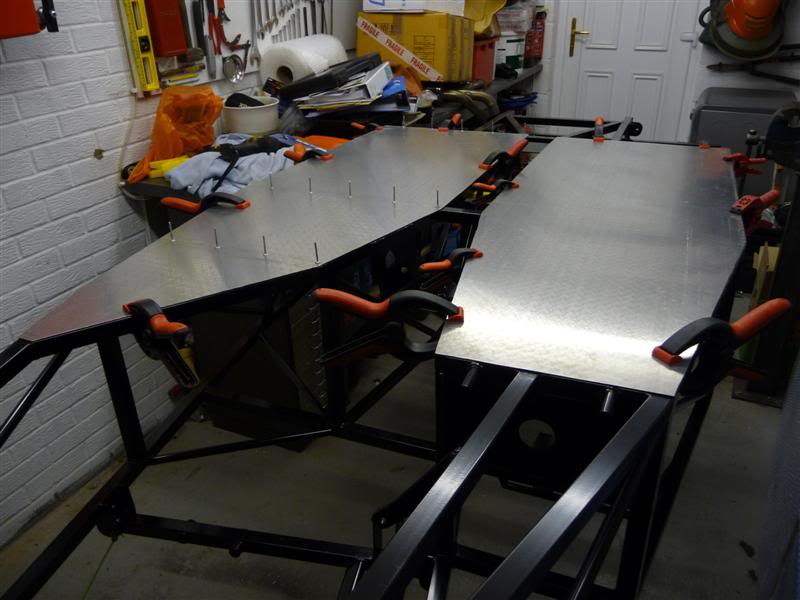
I've been to B&Q tonight and bought a new drill, so i'll be back in the garage tomorrow to continue this.
With the help of a neighbour, the upturned chassis was rested onto a pair of saw horses


The cricket weave aluminium sheet was then rested on the chassis so i could mark the outline of the floorpan,
a few minutes of playing with the jigsaw and this was the result.

Passenger side floor clamped in position

R6Franky popped round to make coffee and poke his nose in, while he was here he took a few photos of me in action
marking out rivet locations

centre punching the rivet locations ready to be drilled

My battery drill died midway through drilling the holes for the rivets, so this is how play ended today

I've been to B&Q tonight and bought a new drill, so i'll be back in the garage tomorrow to continue this.

Thread Starter
10K+ Poster!!
Joined: Jun 2003
Posts: 10,788
Likes: 2
From: South Shields
Me being the nerd that I am, I weighed the chassis yesterday and it came in at 70.5kg
forgot to measure the width for you while i was in the garage yesterday,
hope this helps
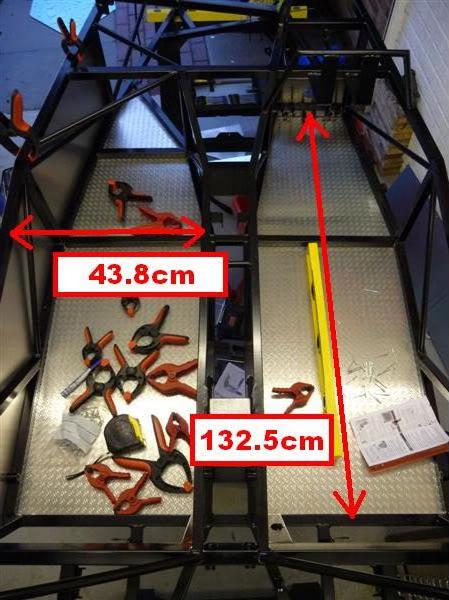
hope this helps
Last edited by Red16; Apr 4, 2010 at 04:34 PM.
Thread Starter
10K+ Poster!!
Joined: Jun 2003
Posts: 10,788
Likes: 2
From: South Shields
The rivets that had been holding the build up came in the post this afternoon, the ones i had used in the eralier photos were just for location while i drilled the holes, the new ones have a much larger head on them.
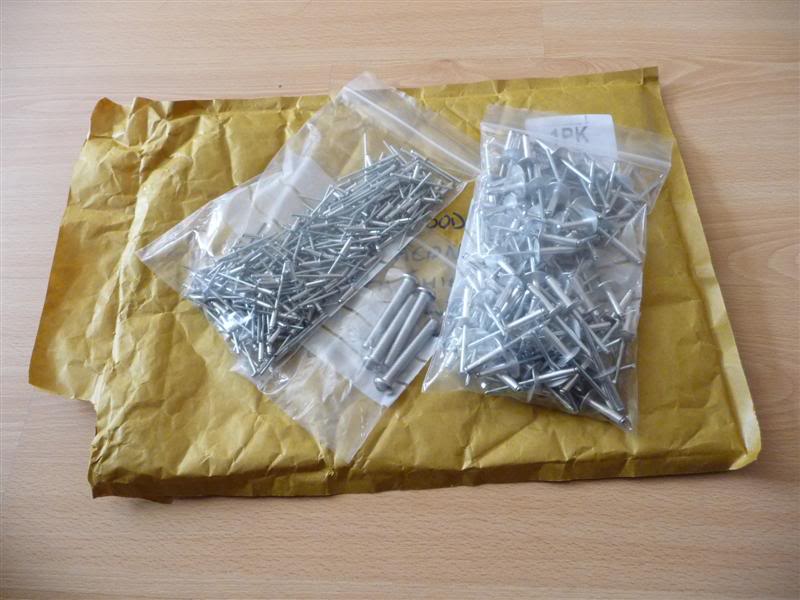
Not done a great deal of work on the car today, been round my dads fitting new wheels to his Mini, but managed to get the floor panels finished off.
An application of Wurth Bond + Seal stops water/dirt getting into the chassis and also into the cockpit
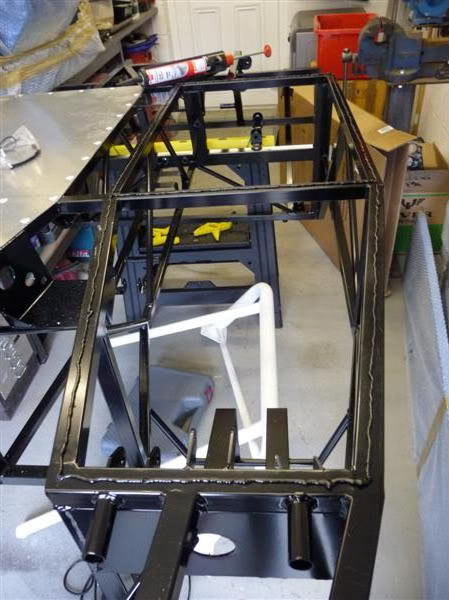
Finally all the rivets were fastened up and the edges of the panels clamped into position while the sealant cures, the extreme left/right sides of the panels have been intentionally left without rivets as this is where the outer body panels are riveted to the chassis later in the build.
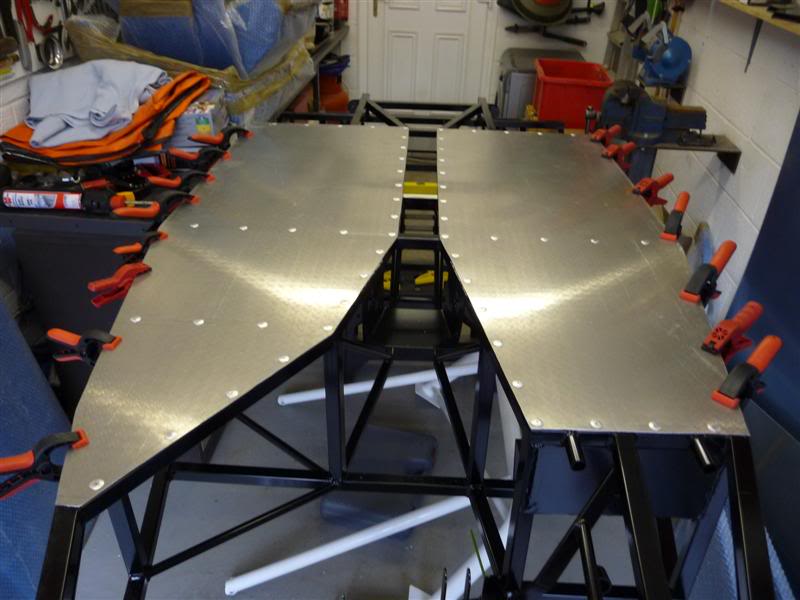
Not done a great deal of work on the car today, been round my dads fitting new wheels to his Mini, but managed to get the floor panels finished off.
An application of Wurth Bond + Seal stops water/dirt getting into the chassis and also into the cockpit
Finally all the rivets were fastened up and the edges of the panels clamped into position while the sealant cures, the extreme left/right sides of the panels have been intentionally left without rivets as this is where the outer body panels are riveted to the chassis later in the build.
Last edited by Red16; Mar 27, 2010 at 05:22 PM.

Thread Starter
10K+ Poster!!
Joined: Jun 2003
Posts: 10,788
Likes: 2
From: South Shields
ZX10r... should've gone to Specsavers 


Thank you cars looking good too
Aye, i think im gonna pop down and show my face
cars looking good too Aye, i think im gonna pop down and show my face
Thread Starter
10K+ Poster!!
Joined: Jun 2003
Posts: 10,788
Likes: 2
From: South Shields
Marked out the interior side panel and cut it out using 3 wheelie bins in an unorthodox fashion 
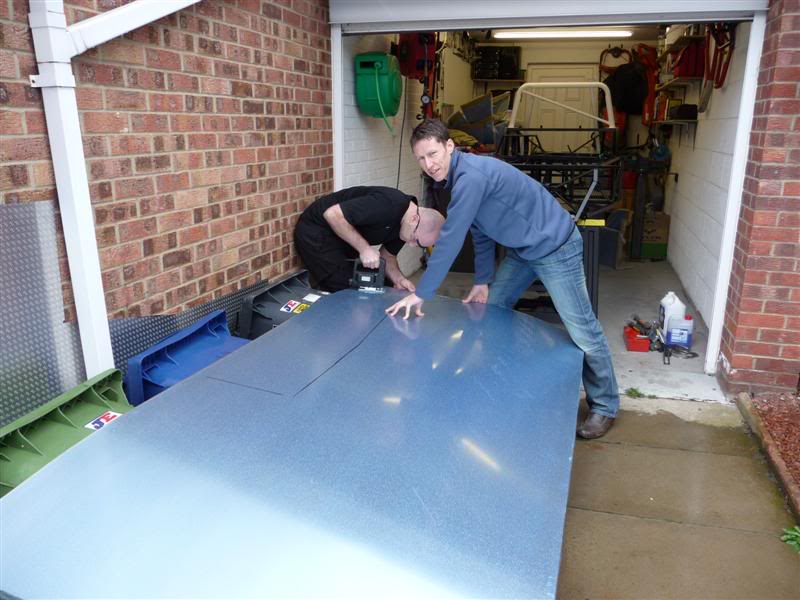
Marked out, drilled and then bonded and riveted the panel to the chassis
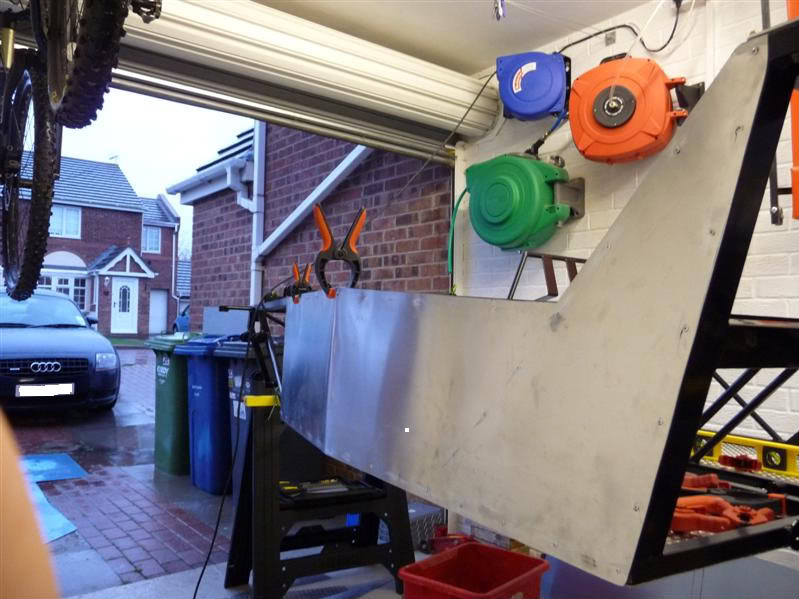
From the inside of the car it now looks like this
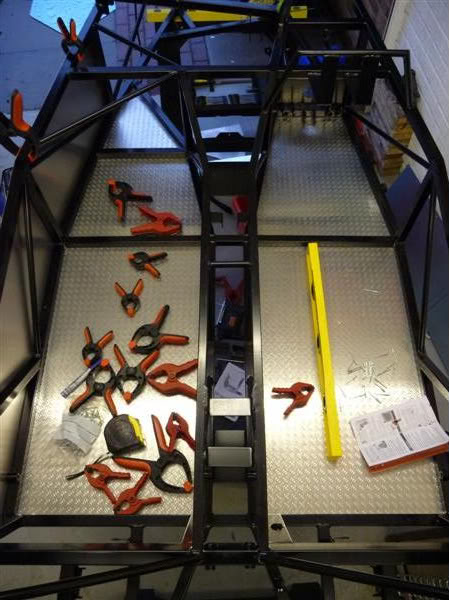
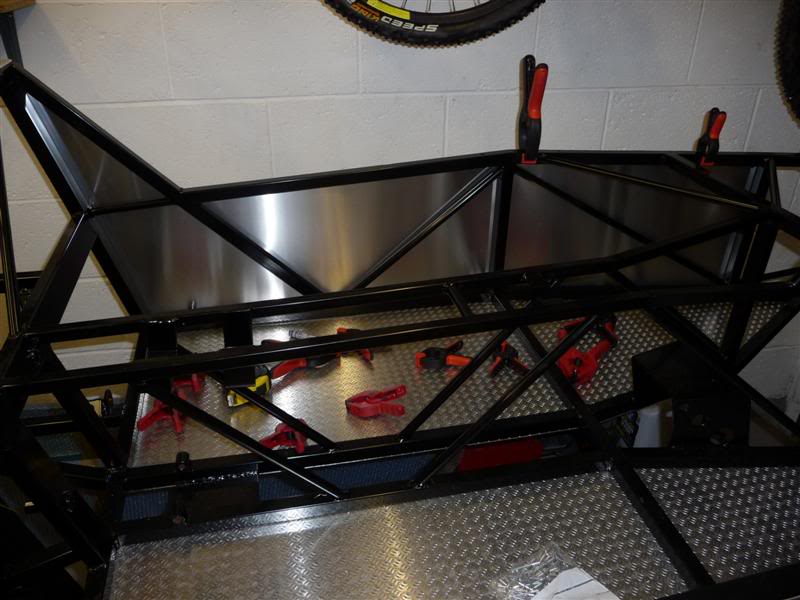
Then cut out and mounted the other side panel in the same way but didn't bother to get any more photos as it looks exactly the same as the other side.
Marked out, drilled and then bonded and riveted the panel to the chassis
From the inside of the car it now looks like this
Then cut out and mounted the other side panel in the same way but didn't bother to get any more photos as it looks exactly the same as the other side.
Thread Starter
10K+ Poster!!
Joined: Jun 2003
Posts: 10,788
Likes: 2
From: South Shields
I've been in the garage tonight pottering about, knocked up a some panels for the drivers side of the cockpit.
Bulkhead panel
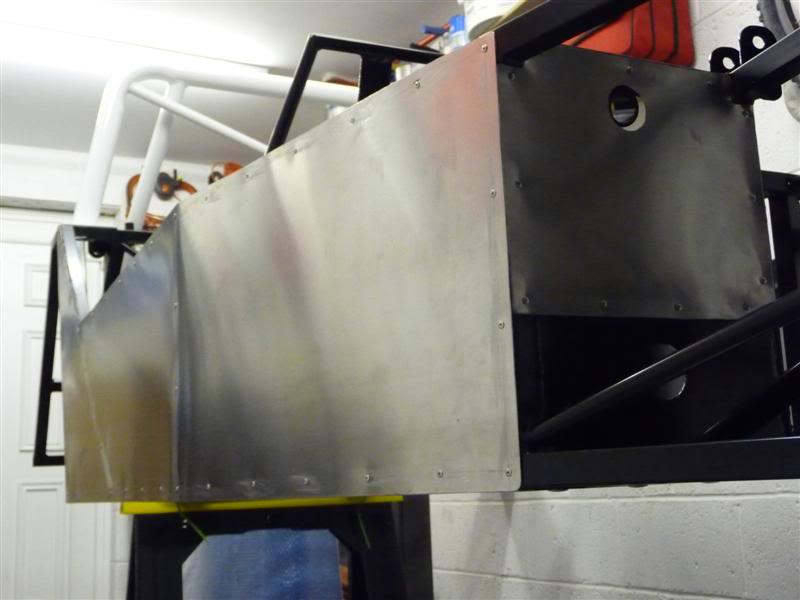
Bulkhead panel and start of the centre console/drive tunnel.
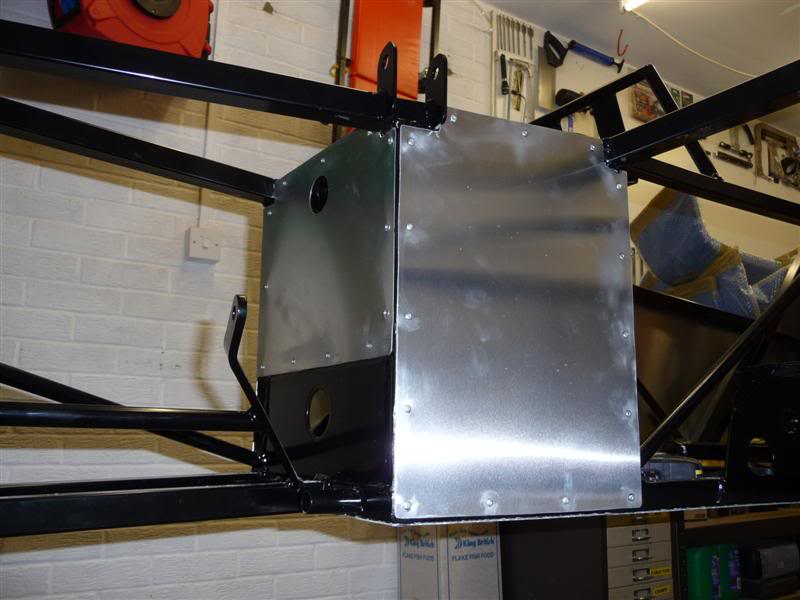
How it looks from the inside at the end of play today.
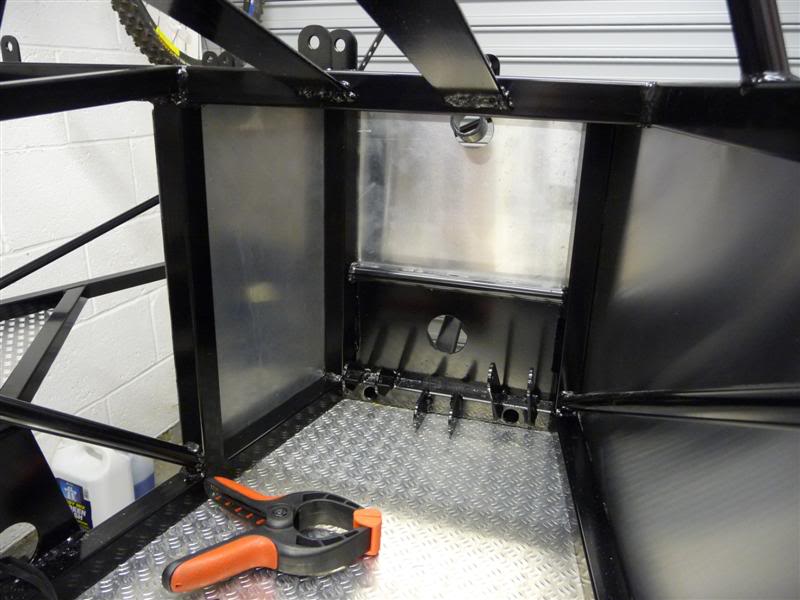
Thanks kidda
Bulkhead panel
Bulkhead panel and start of the centre console/drive tunnel.
How it looks from the inside at the end of play today.
Thanks kidda


I've found that life I needed.. It's HERE!!
iTrader: (4)
Joined: May 2004
Posts: 1,352
Likes: 5
From: leics
looking good, takes me back a few years to when i built my indy. nothing as satisfying as the 1st time you fire that up or the 1st time you'll take it on the road. looks like the mac1 chassis have come a long way over the years, they used to use MK chassis with a couple of body mods but looks like they are using a different design now?
good luck with it all
good luck with it all
Thread Starter
10K+ Poster!!
Joined: Jun 2003
Posts: 10,788
Likes: 2
From: South Shields
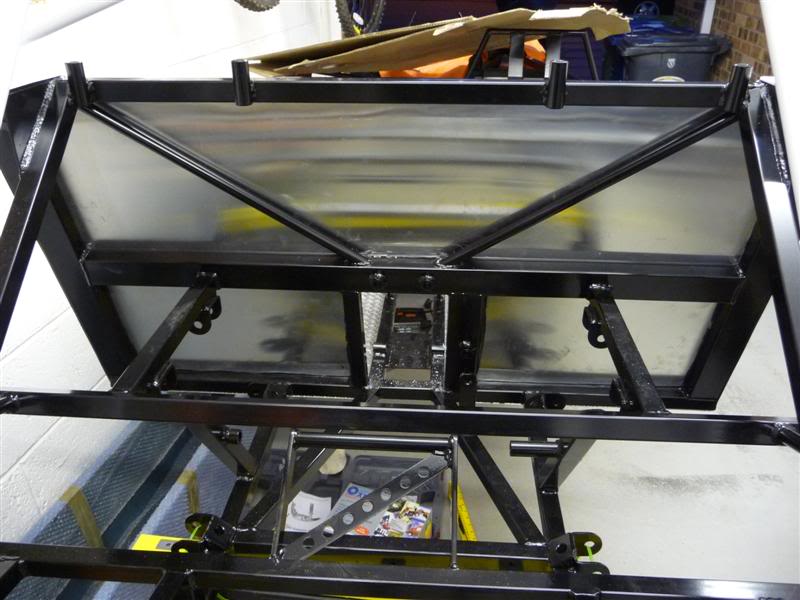
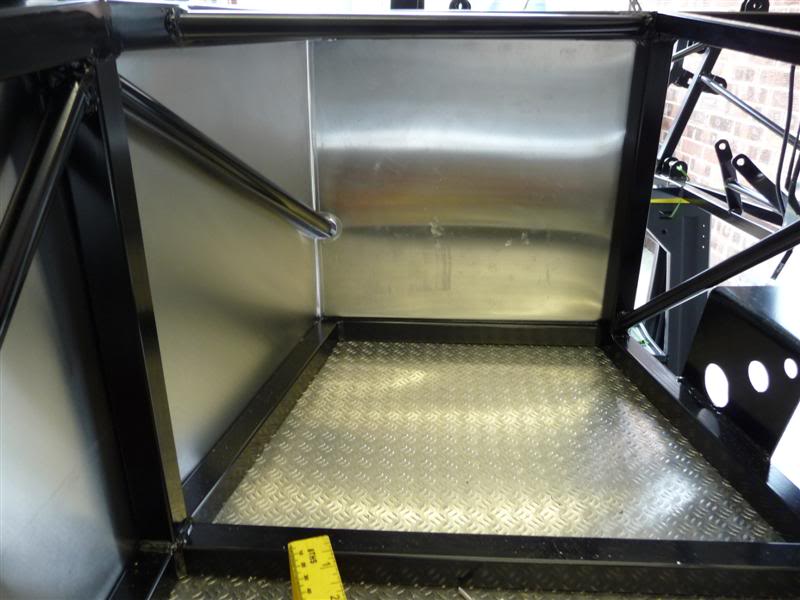
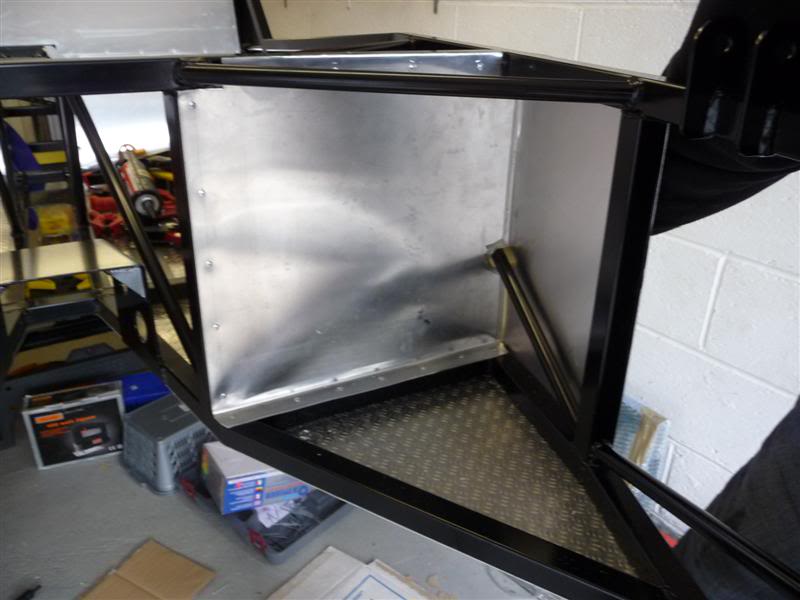
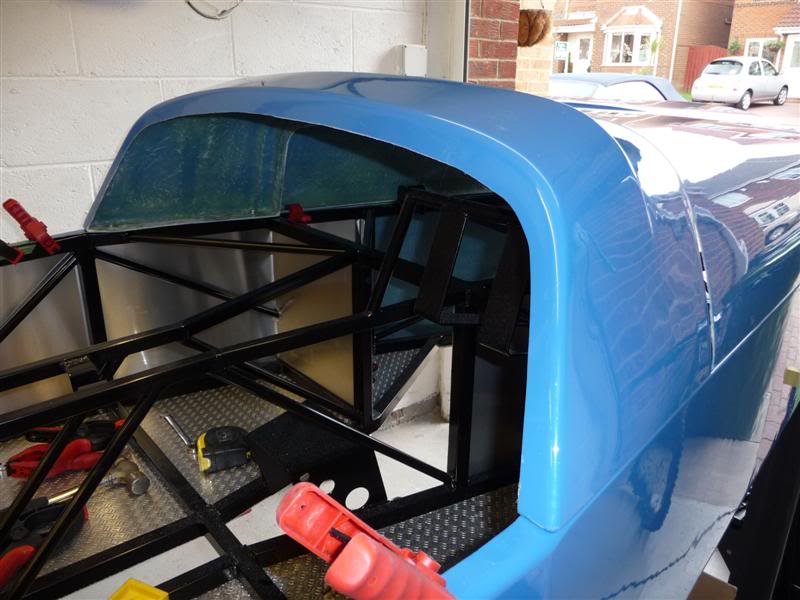
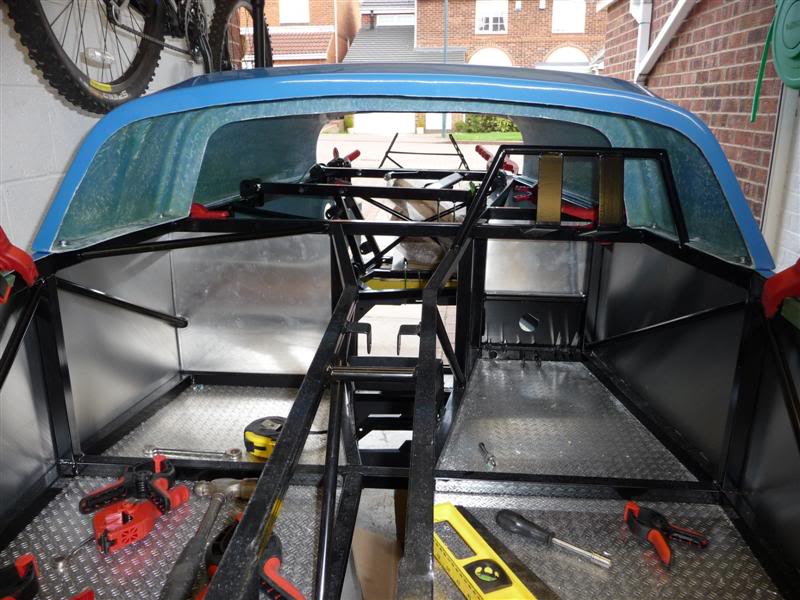
Finally got round to cutting out and mounting the large panel to the rear end of the cockpit area.
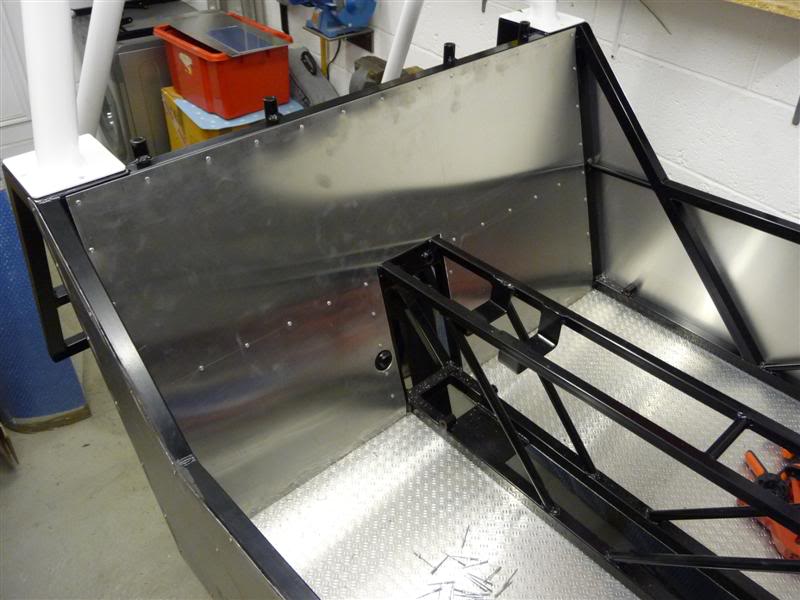
Here it is viewed from the back of the car
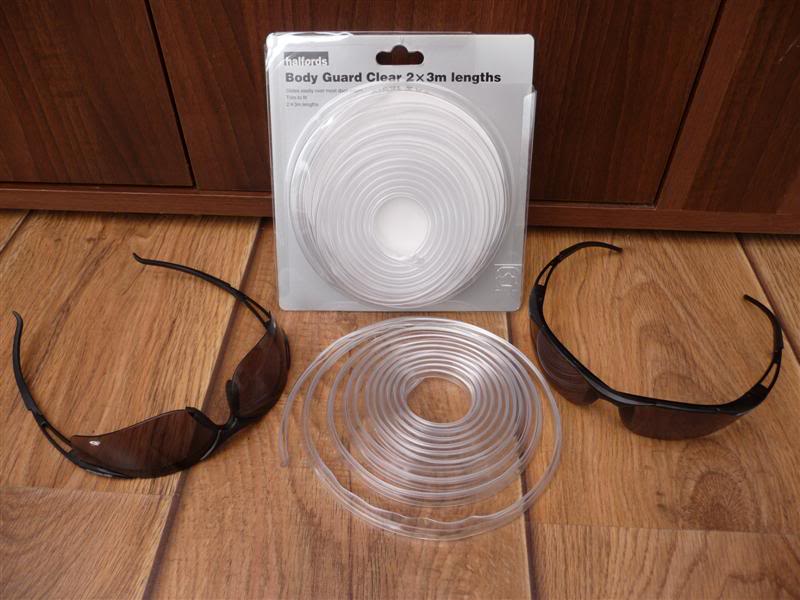
Kinda jumping the gun a bit here but I seen the Bolle tinted safety glasses  and couldn't resist buying them, lol. Also bought a roll of clear edging from Halfords, i'm sure it'll come in handy at some point during the build.
Here it is viewed from the back of the car
Kinda jumping the gun a bit here
but I seen the Bolle tinted safety glasses and couldn't resist buying them, lol. Also bought a roll of clear edging from Halfords, i'm sure it'll come in handy at some point during the build.
Thread Starter
10K+ Poster!!
Joined: Jun 2003
Posts: 10,788
Likes: 2
From: South Shields
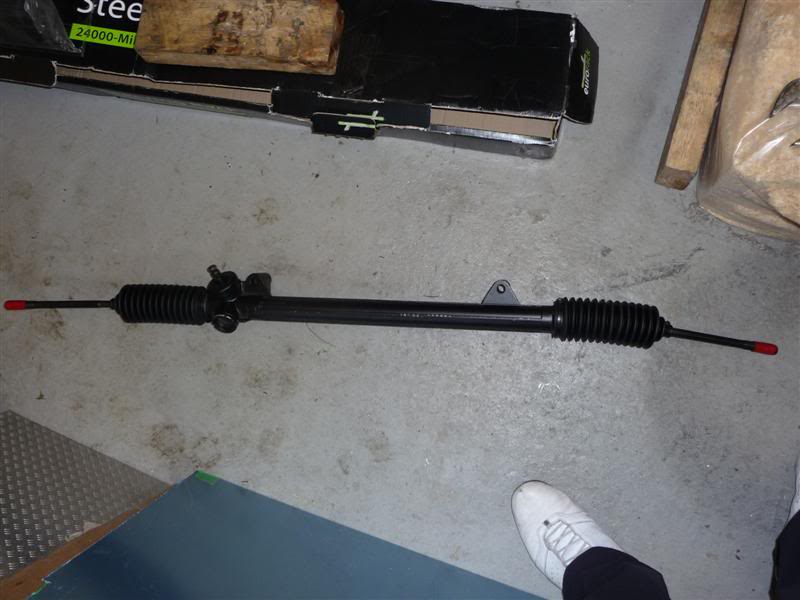
One brand new Sierra steering rack, which has since been packaged up and sent to Mac Motorsport to be shortened.
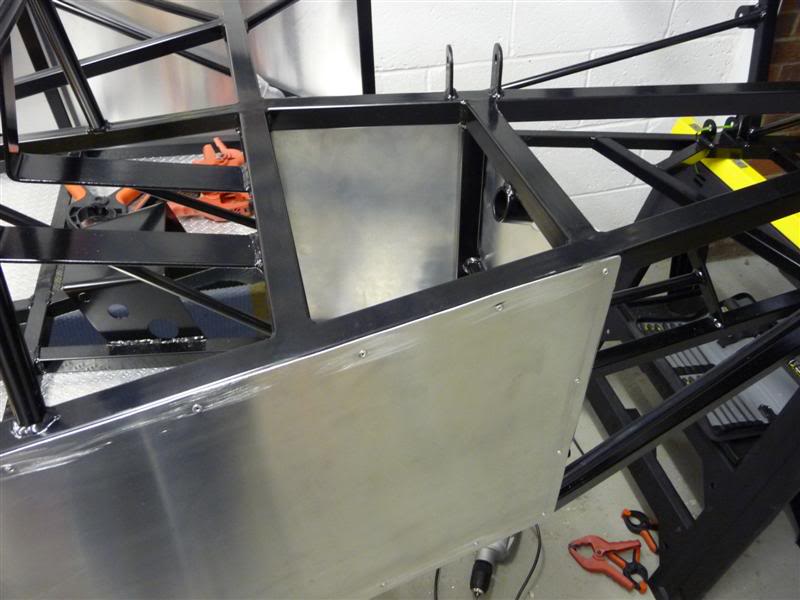
I've been in the garage today and made a bit of progress, the drivers side panel was notched to fit around the steering column support bracket and then the front end had its first cut to accomodate the brackets for headlight, strut top and upper wishbone arm.
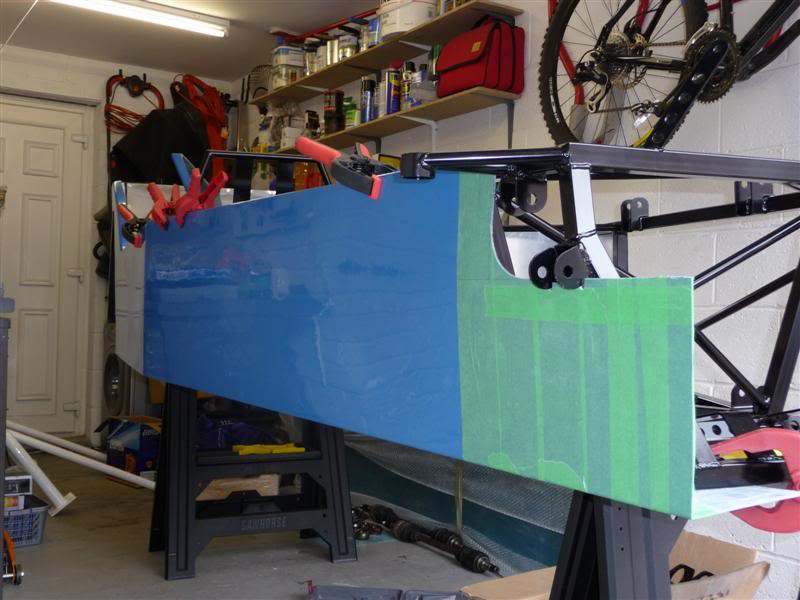
Holes were then cut into the side panel to allow access to the wishbone mounting brackets. The drivers side of the scuttle panel was notched to fit around the steering column support bracket and then secured to the chassis using rivnuts.
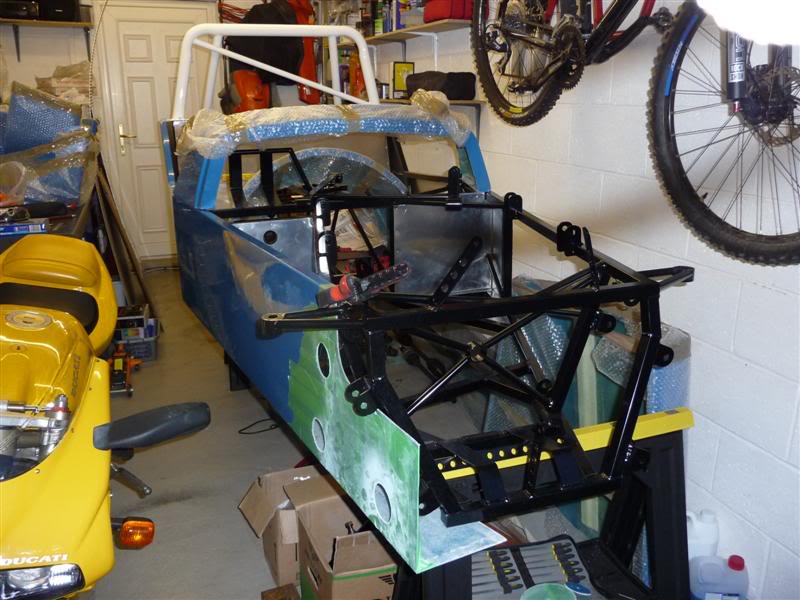
Doesn't look much in the photo's but it took me ages in the garage to get to this stage!
I've been in the garage today and made a bit of progress, the drivers side panel was notched to fit around the steering column support bracket and then the front end had its first cut to accomodate the brackets for headlight, strut top and upper wishbone arm.
Holes were then cut into the side panel to allow access to the wishbone mounting brackets. The drivers side of the scuttle panel was notched to fit around the steering column support bracket and then secured to the chassis using rivnuts.
Doesn't look much in the photo's but it took me ages in the garage to get to this stage!
Thread Starter
10K+ Poster!!
Joined: Jun 2003
Posts: 10,788
Likes: 2
From: South Shields
Thread Starter
10K+ Poster!!
Joined: Jun 2003
Posts: 10,788
Likes: 2
From: South Shields
Well it's been another busy day in the garage for me...
Drivers side panel with notch and rivnuts as mentioned earlier
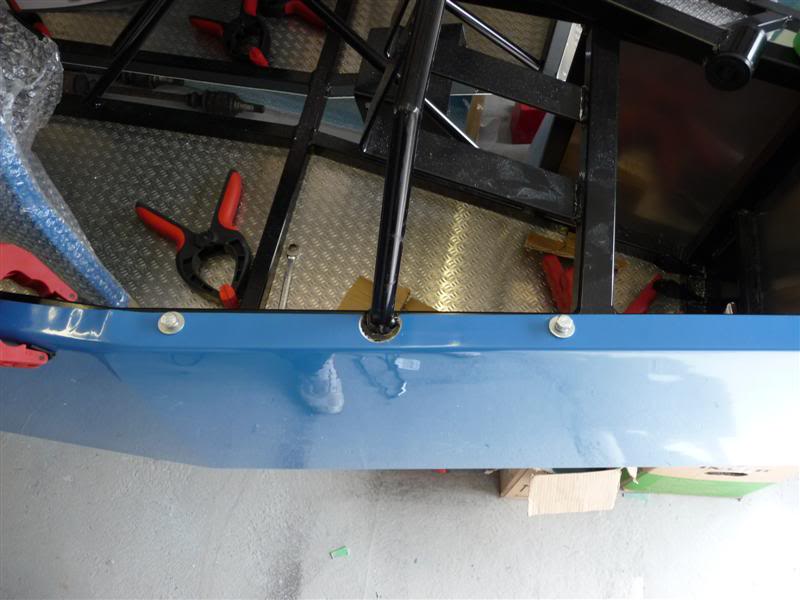
Rear of the drivers side panel modified to fit around the base of the roll bar
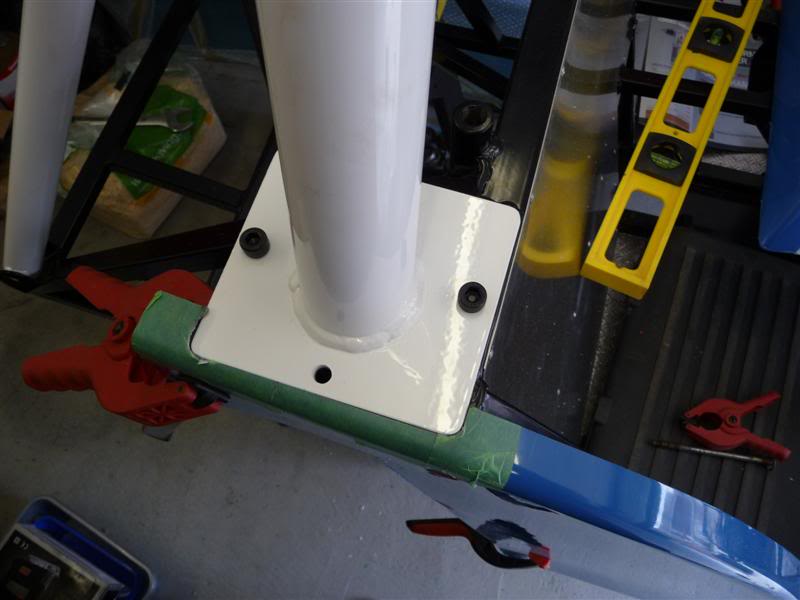
Began cutting and fitting the passenger side panel
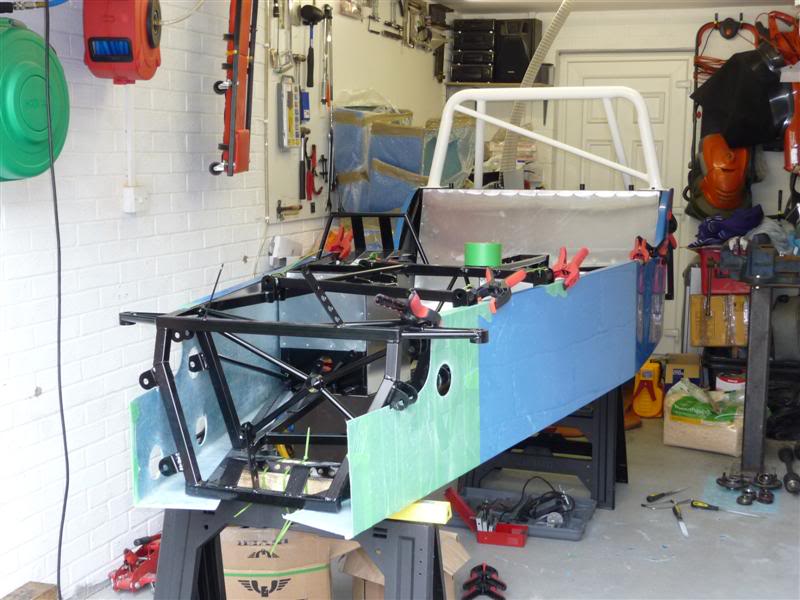
Scuttle panel fastened into position at both sides
With the bonnet on it finally begins to resemble a car
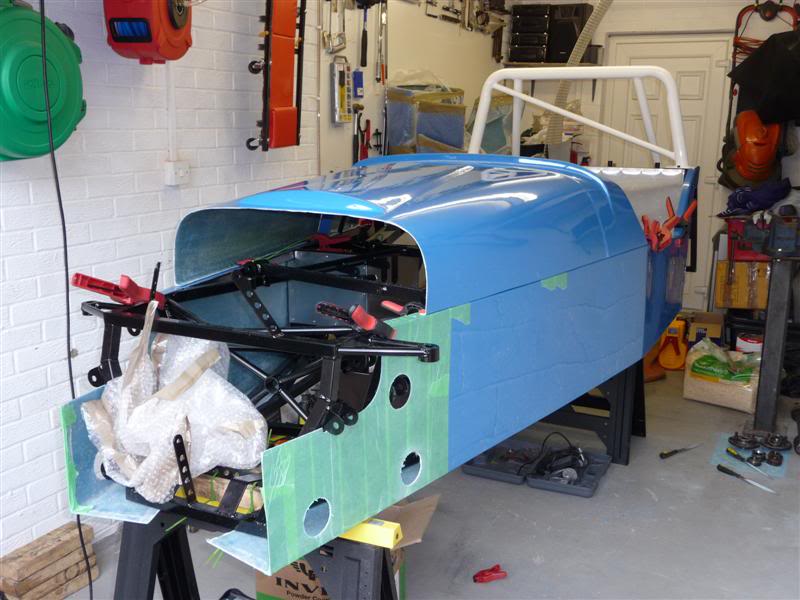
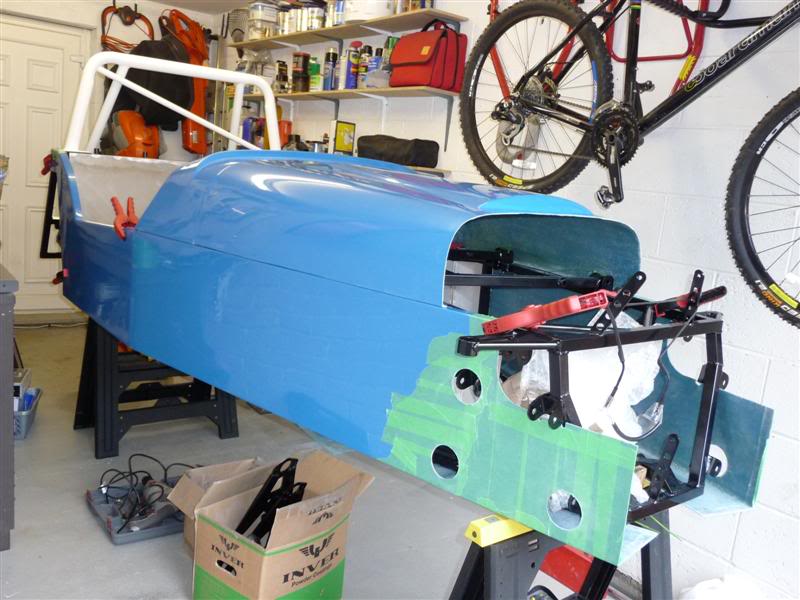
Drivers side panel with notch and rivnuts as mentioned earlier
Rear of the drivers side panel modified to fit around the base of the roll bar
Began cutting and fitting the passenger side panel
Scuttle panel fastened into position at both sides
With the bonnet on it finally begins to resemble a car
Thread Starter
10K+ Poster!!
Joined: Jun 2003
Posts: 10,788
Likes: 2
From: South Shields
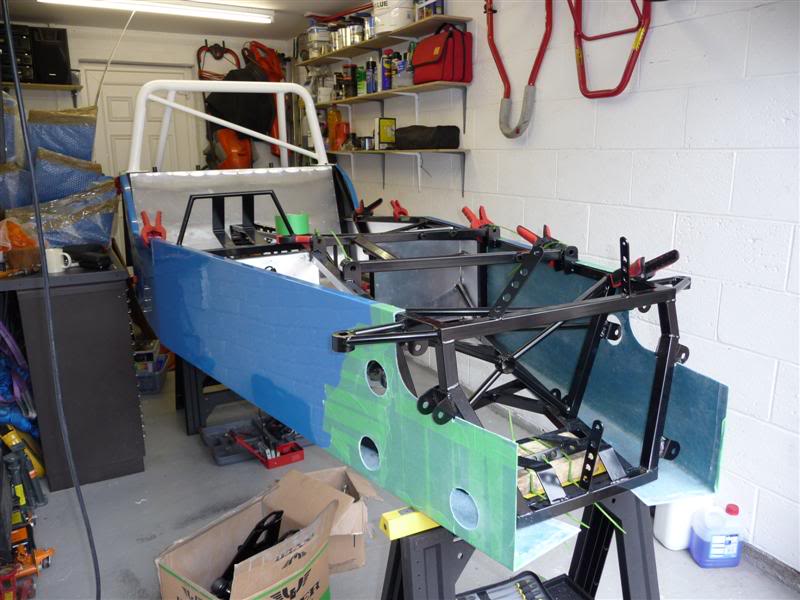
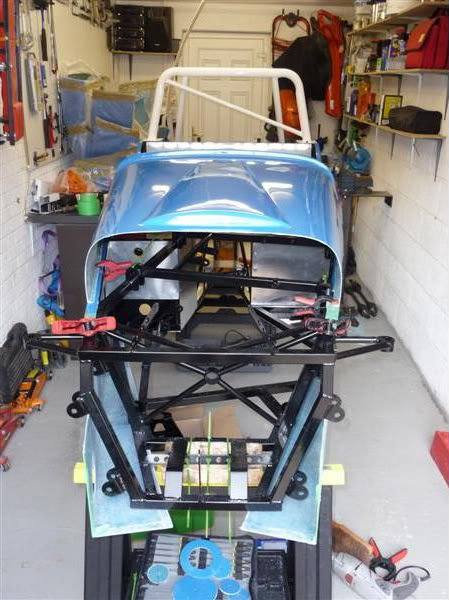
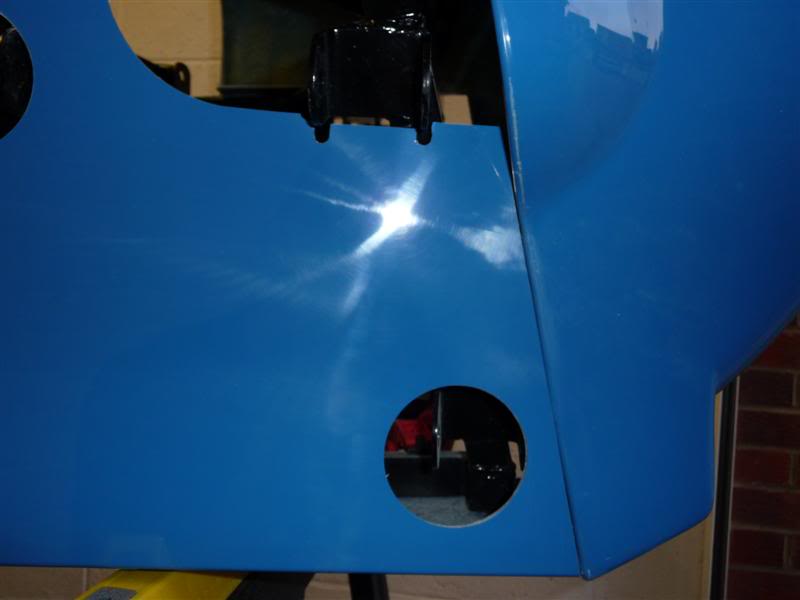
Todays plan of attack... get the side panels chopped down and have the nose cone mounted by the end of play.
Nose cone provisionally mounted to mark out where the side panels need to be cut
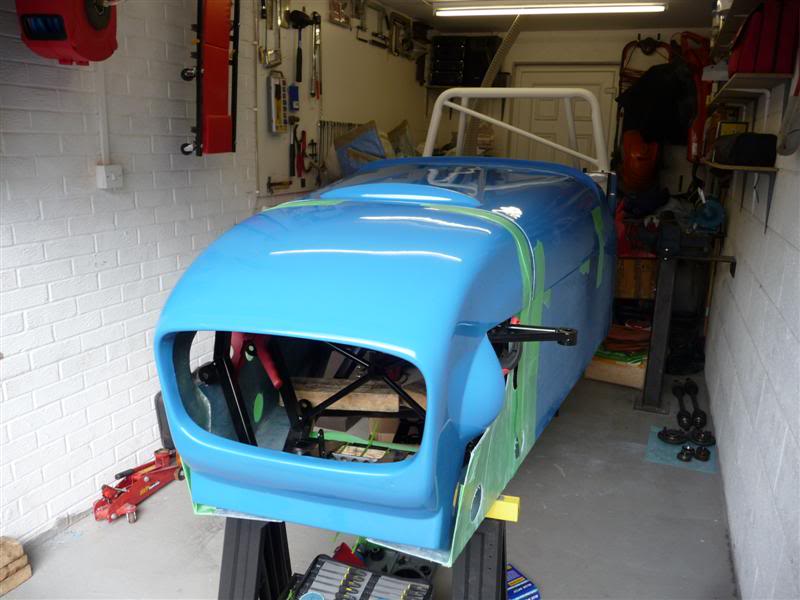
Passenger side cut, still masked off
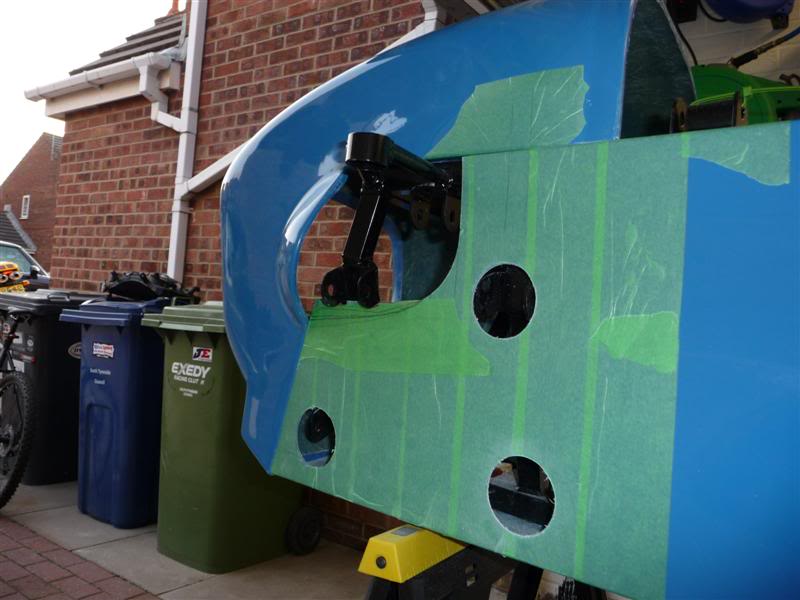
Drivers side, cut and unmasked
How it looks without the bonnet
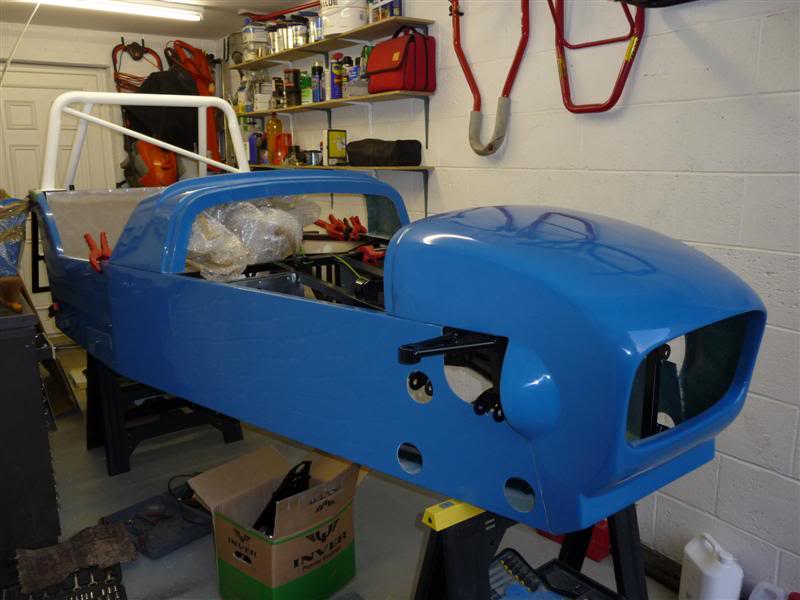
Bonnet rested in place, to pose for the camera
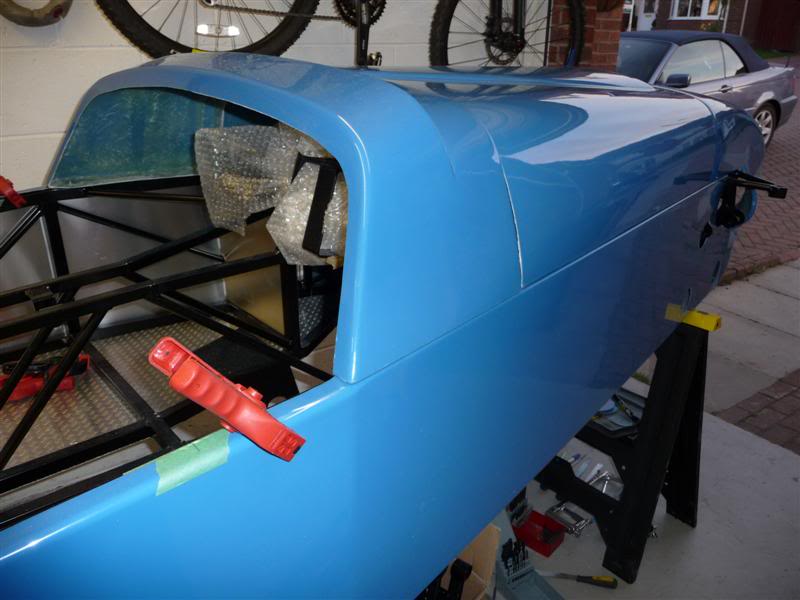
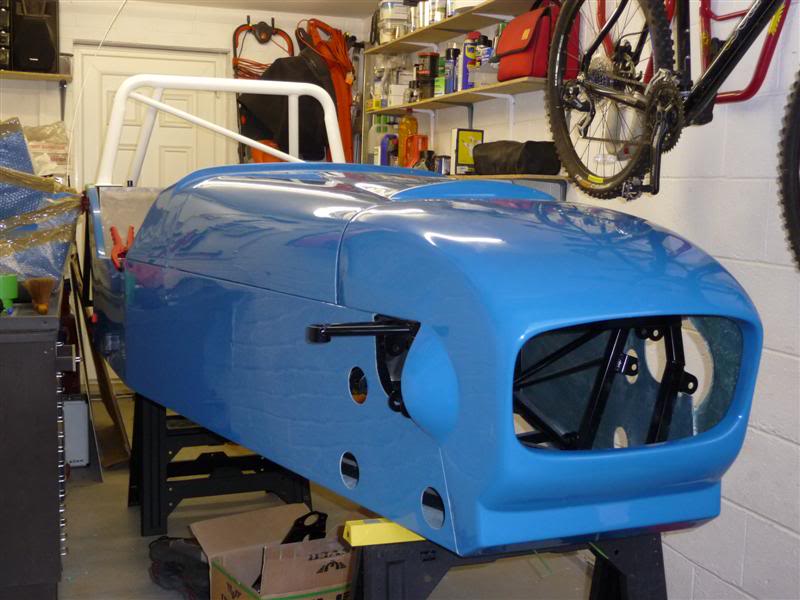
A full frontal shot
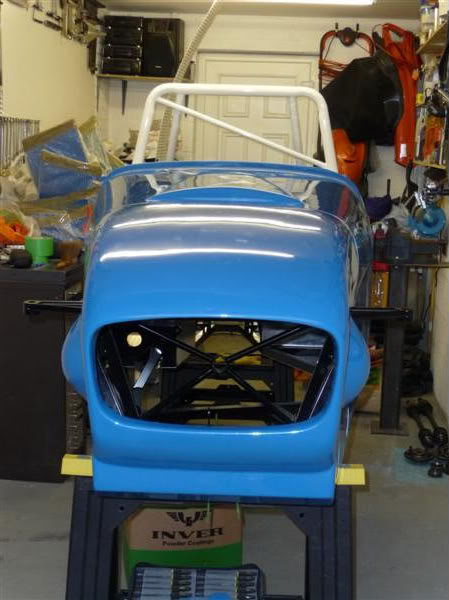
I couldn't help one last glance back to the garage before closing the door
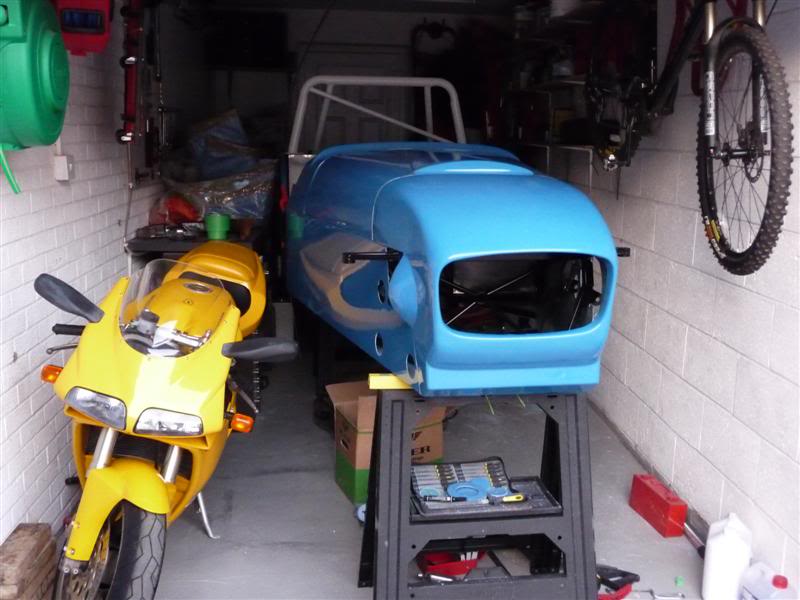
Nose cone provisionally mounted to mark out where the side panels need to be cut
Passenger side cut, still masked off
Drivers side, cut and unmasked
How it looks without the bonnet
Bonnet rested in place, to pose for the camera
A full frontal shot
I couldn't help one last glance back to the garage before closing the door
Last edited by Red16; Apr 28, 2010 at 08:09 PM.
Thread Starter
10K+ Poster!!
Joined: Jun 2003
Posts: 10,788
Likes: 2
From: South Shields
I've been in the garage again today and managed to get the rear end cut and clamped into position.
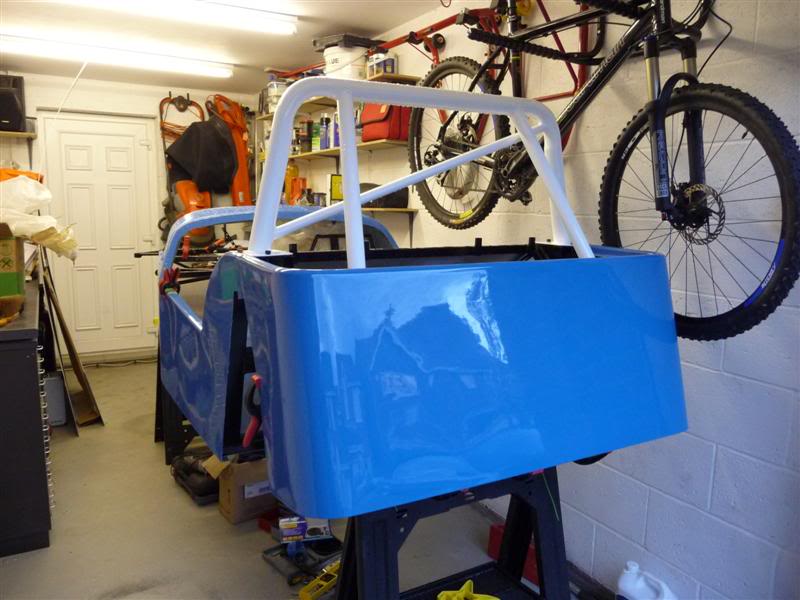
And while I was at it I couldn't resist clamping one of the rear arches on to see how it'd look
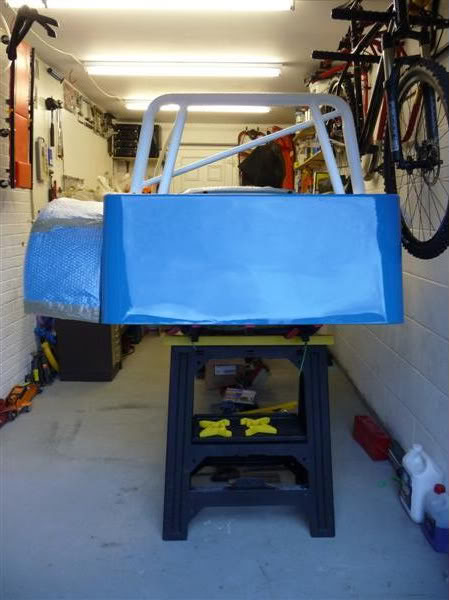
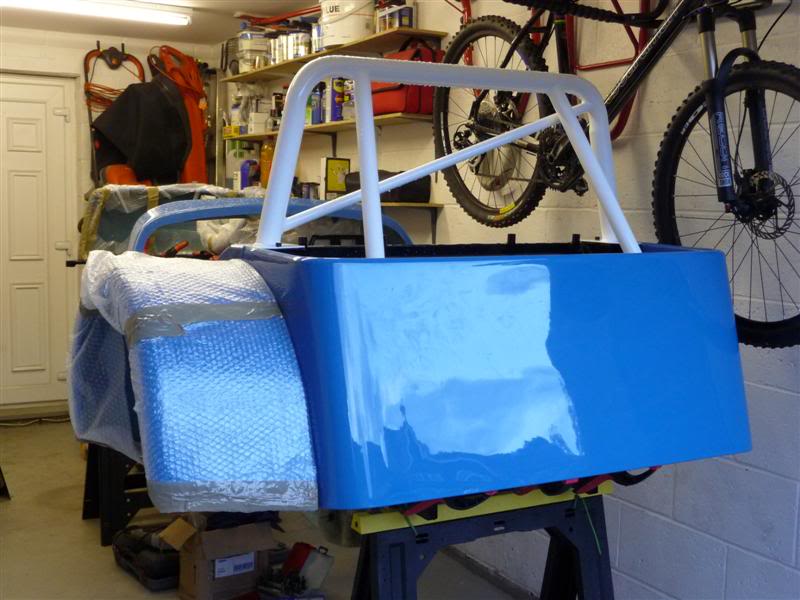
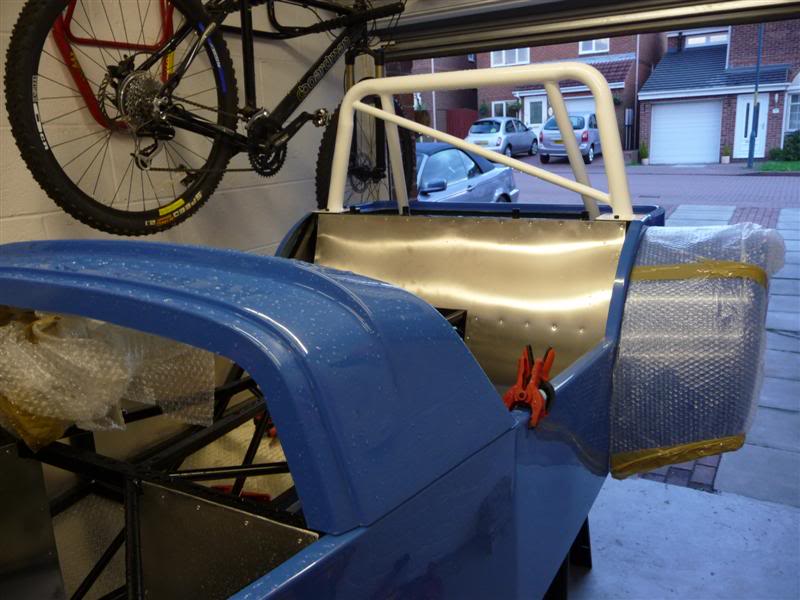
Looking a lot more car like now
And while I was at it I couldn't resist clamping one of the rear arches on to see how it'd look
Looking a lot more car like now
Thread Starter
10K+ Poster!!
Joined: Jun 2003
Posts: 10,788
Likes: 2
From: South Shields
I've been having a little look at the nose cone area today, and it looks like there is plenty of space inside infront of the radiator to squeeze an intercooler in
Cheers
Whats the matter Beef, whats stopping you?
Thanks Matt
Whats the matter Beef, whats stopping you?
Thanks Matt