
BMW E36 Coupe Track Car
 19-05-2008 | 03:48 PM
#1
Thread Starter
Team HOTHOT!
Joined: Aug 2003
Posts: 19,065
Likes: 1
From: Huddersfield Drives: Trains ;)
Welcome.
After the latest trip to the 'Ring, and batting round in the E39, the decision was come to that the E39 whilst suitably perfect is far too business like for track abuse
So here is the diary of my E36 project.
19 May 2008.
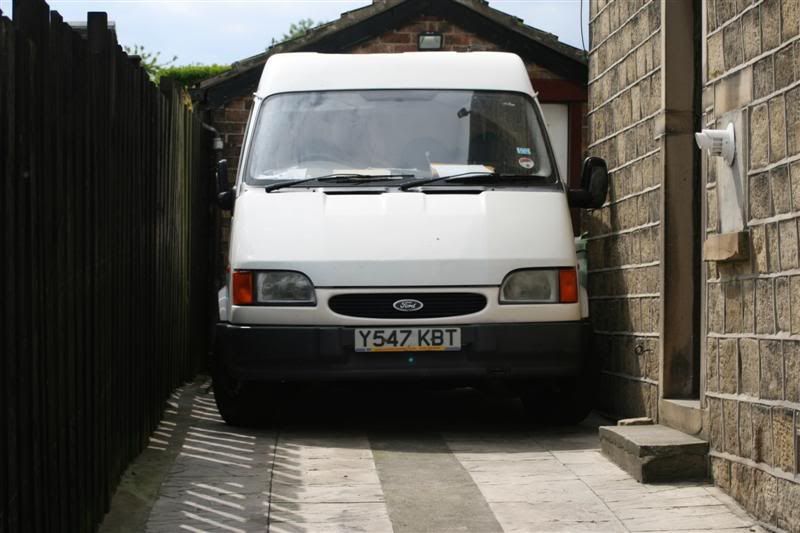
Cleared the shit out of the garage, took a full transit van load down to the tip. A bit of a squeeze to get the van up the very narrow drive with 1 inch either side of it
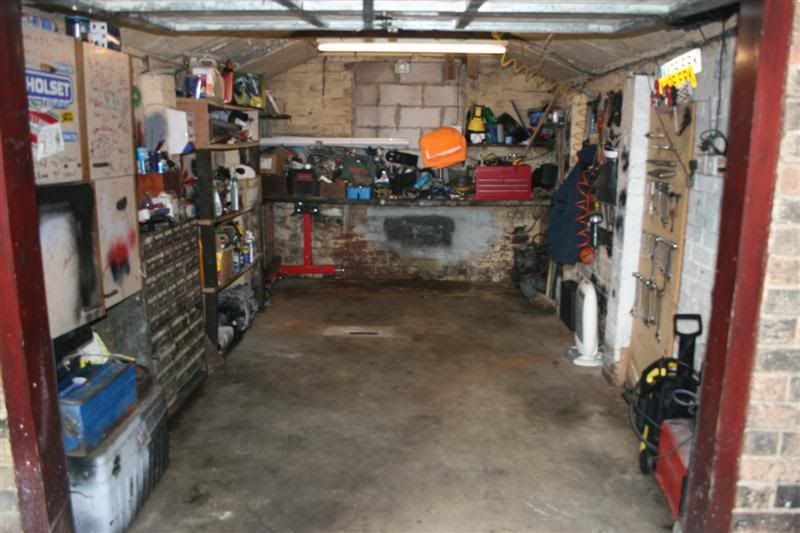
Now the garage come workshop where my magic happens is now spotless bar the crap on the workbench that needs sorting
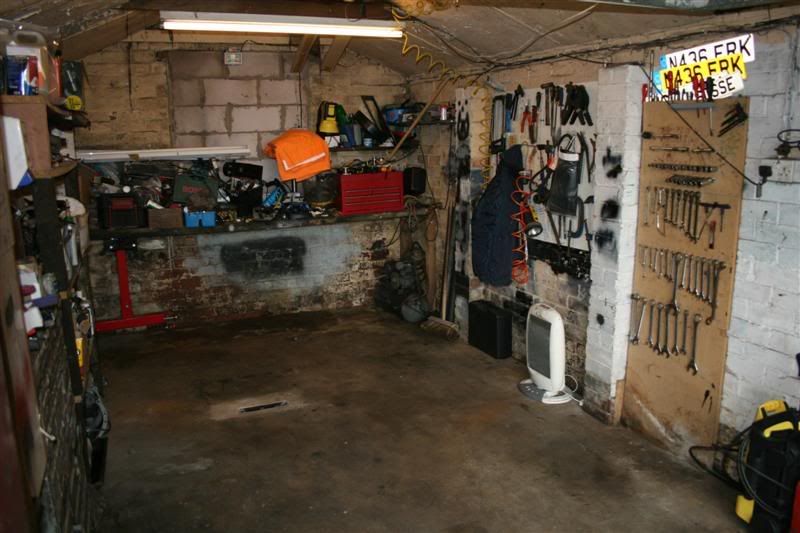
The E36 will be arriving home sometime tonight, so once that is home, Pics will follow
After the latest trip to the 'Ring, and batting round in the E39, the decision was come to that the E39 whilst suitably perfect is far too business like for track abuse
So here is the diary of my E36 project.
19 May 2008.
Cleared the shit out of the garage, took a full transit van load down to the tip. A bit of a squeeze to get the van up the very narrow drive with 1 inch either side of it
Now the garage come workshop where my magic happens is now spotless bar the crap on the workbench that needs sorting
The E36 will be arriving home sometime tonight, so once that is home, Pics will follow
 20-05-2008 | 06:44 AM
#5
Thread Starter
Team HOTHOT!
Joined: Aug 2003
Posts: 19,065
Likes: 1
From: Huddersfield Drives: Trains ;)
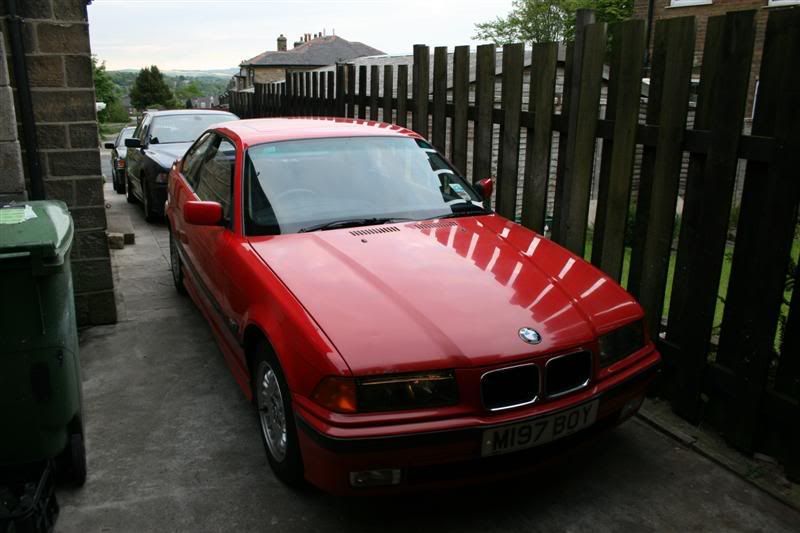
Well the E36 arrived home last night, but unfortunately, due to Orange BBand having a fit, I was unable to get online 
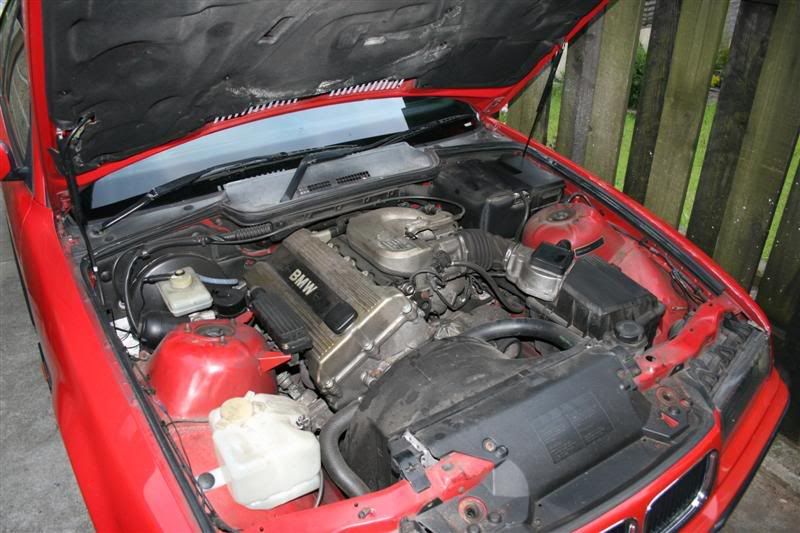
Here are the snaps of the car in its original BMW form
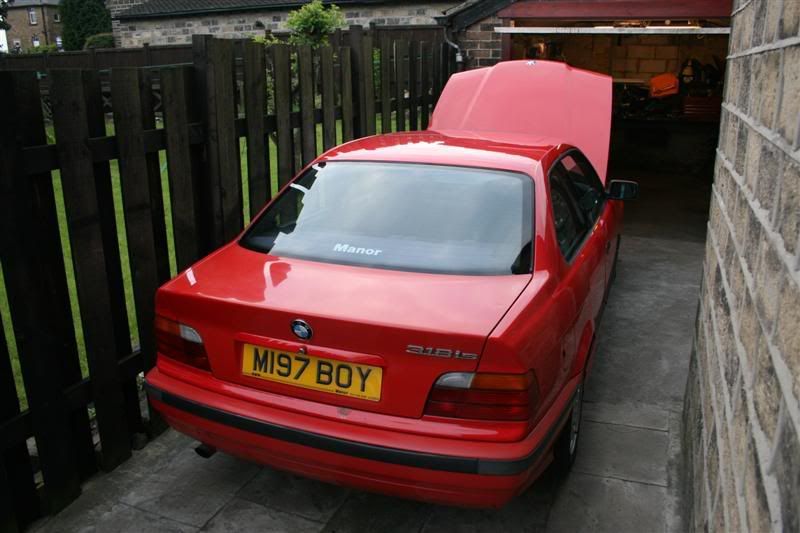
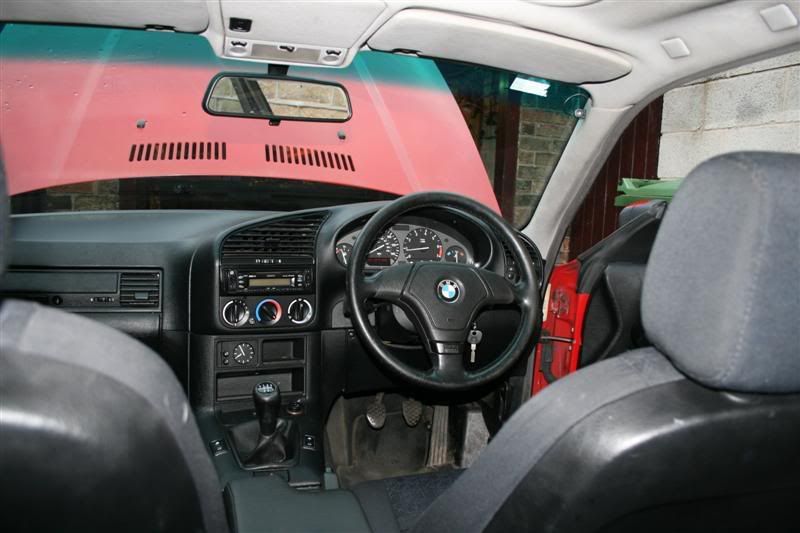
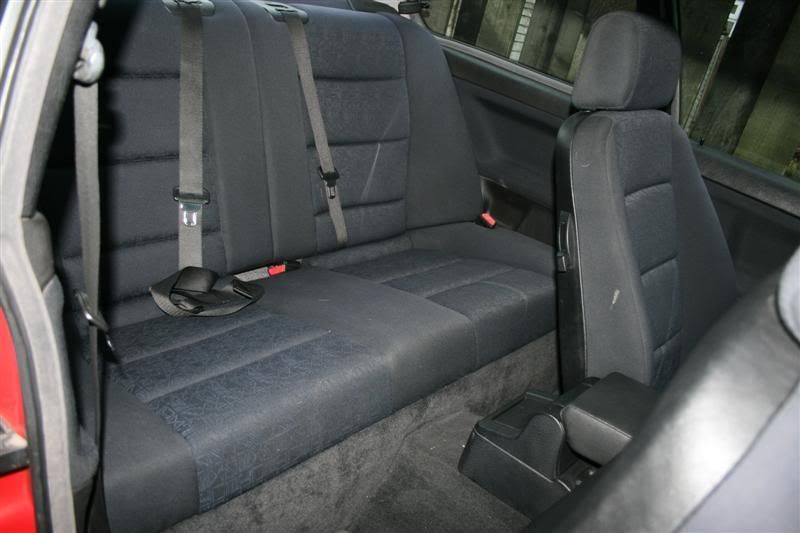
Looks like there is a LOT of weight to be saved here The tntire interior is going to be removed, and sold on ebay
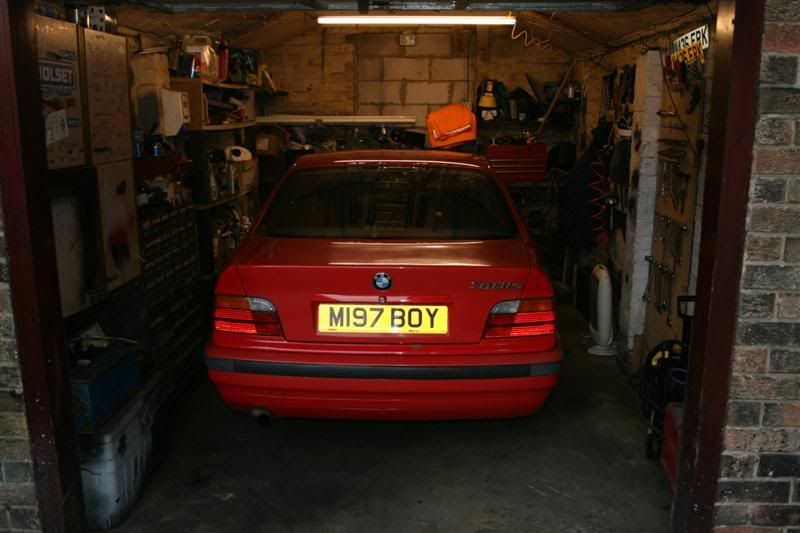
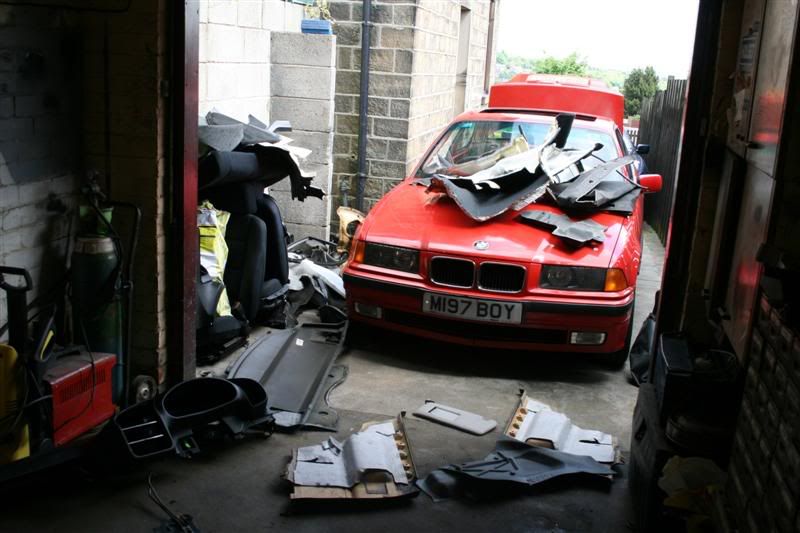
And here she is in her new home - La Workshop
Here are the snaps of the car in its original BMW form
Looks like there is a LOT of weight to be saved here
And here she is in her new home - La Workshop
 20-05-2008 | 04:26 PM
#7

Trending Topics
 20-05-2008 | 07:52 PM
#9
Thread Starter
Team HOTHOT!
Joined: Aug 2003
Posts: 19,065
Likes: 1
From: Huddersfield Drives: Trains ;)
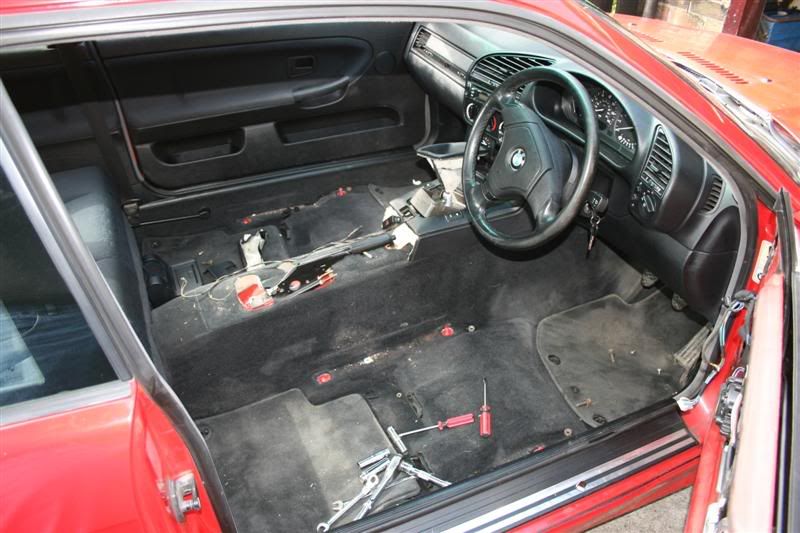
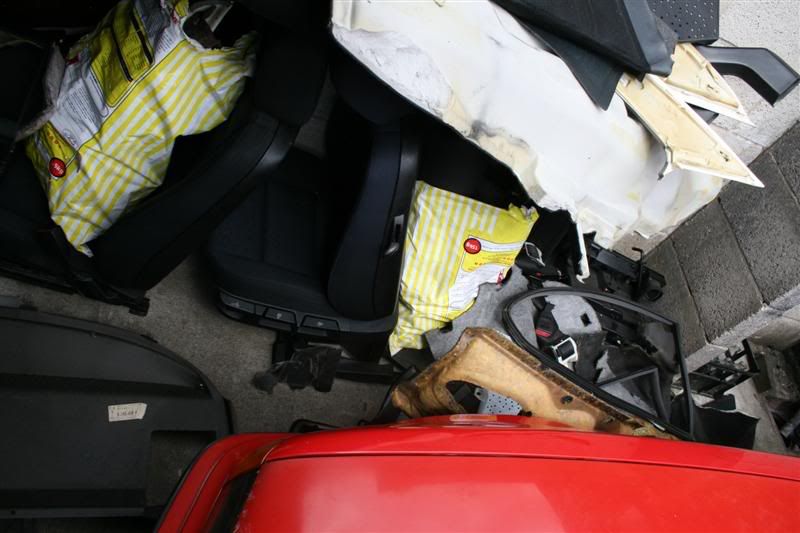
Well today has been an interesting day. Spent 5 hours totally stripping out the interior and took 2 car loads to the tip (thats 2 cars at the same time - mine and brothers, both rammed full of interior shite )
First things first - take the front seats out
Found 2 quid aswell - hapopy days
This pile of parts will get much bigger I fear
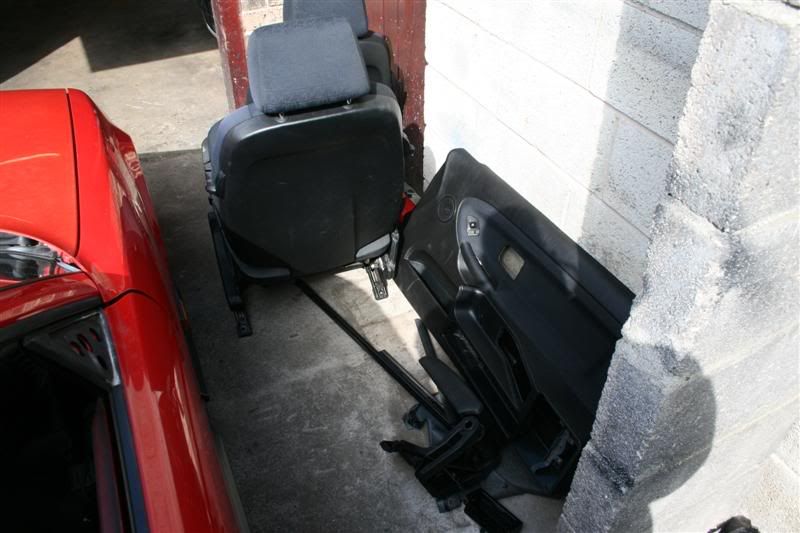
More parts out and its starting to look like a wiry mess
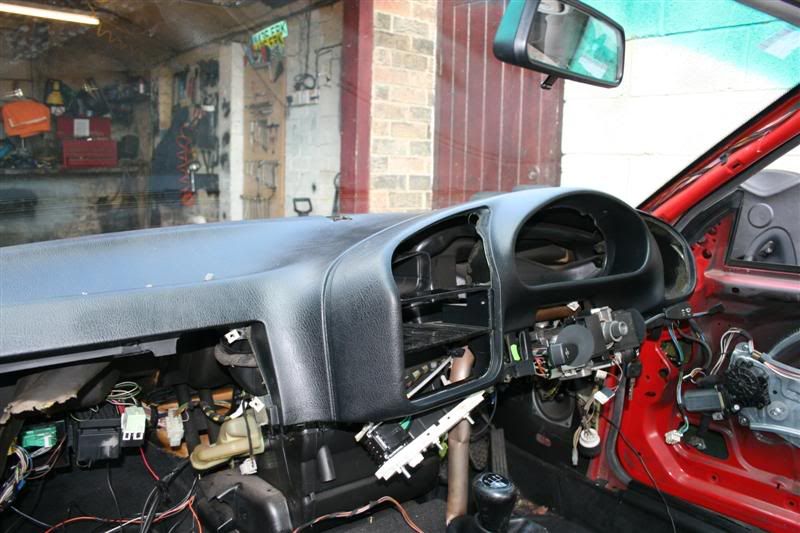
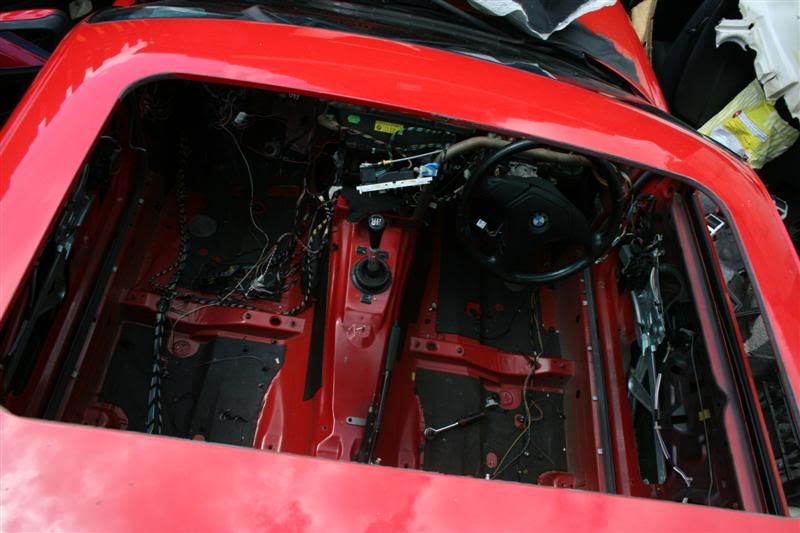
Now, to get the upper dash out is a bit of a mission. BMW, being the engineers they are, put the dashboard in before the windscreen - no chance of getting a 7mm spanner or socket in to the top 3 bolts - how to overcome this? hammer + chisel = spanner access
Thats the dash out then
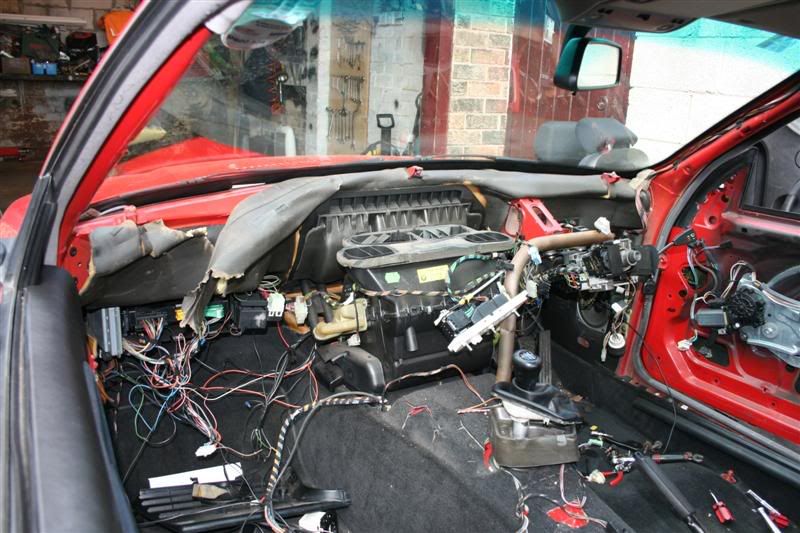
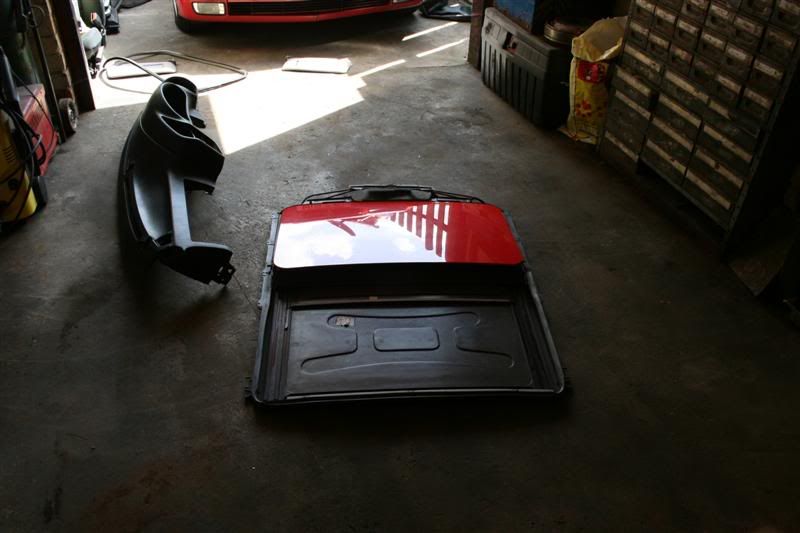
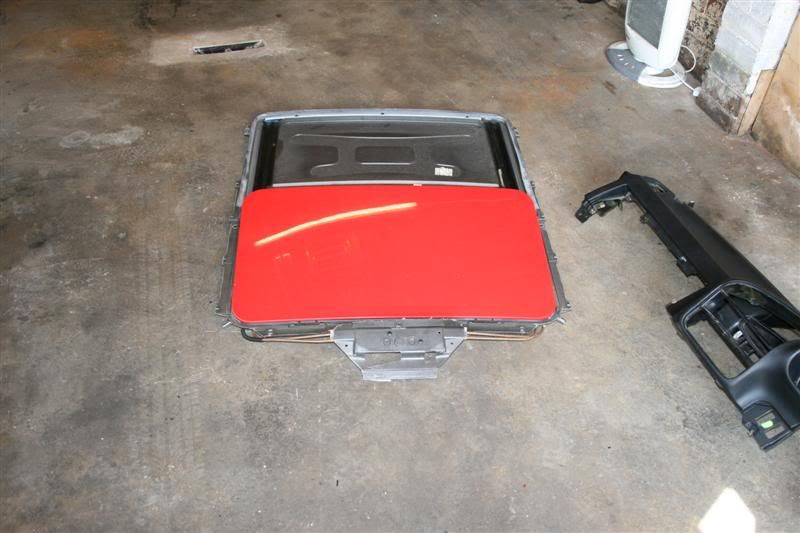
Next the sunroof - another 20 kilo to be saved here in the mechanism alone, it runs the entire length of the roof of the car
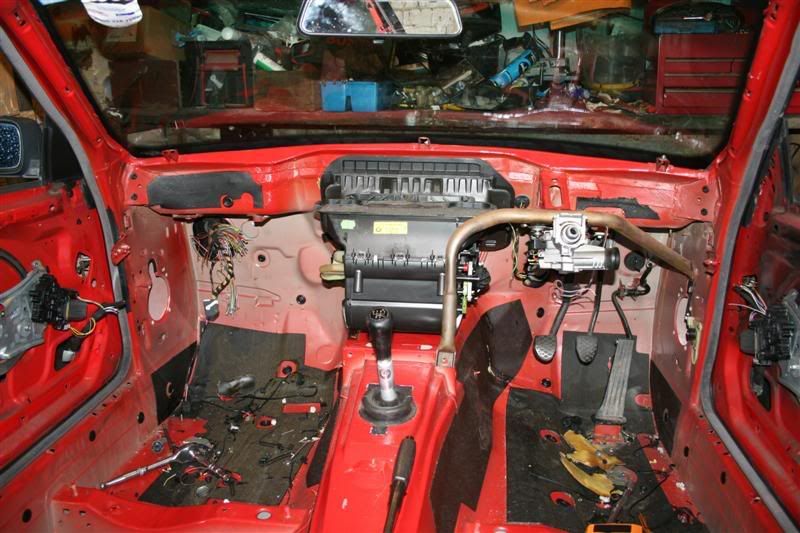
So thats the complete interior out and the parts pile is huge, and the car is bare
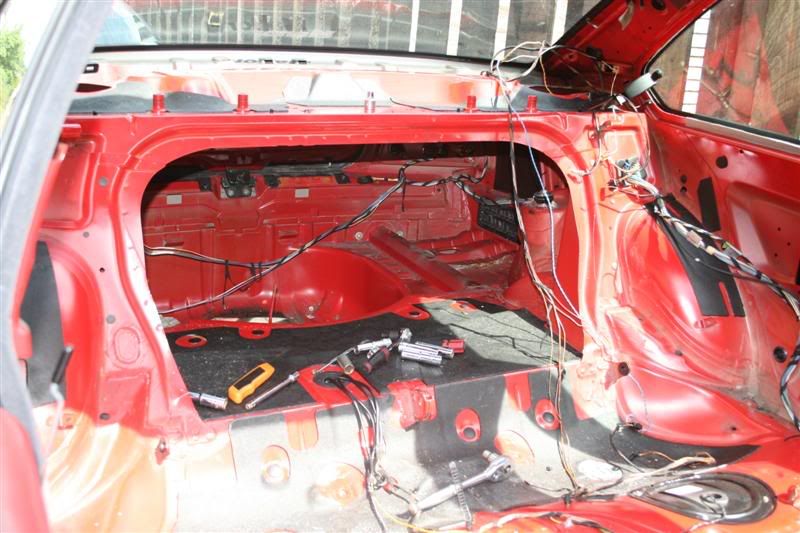
All these parts to get rid of
Whilst down at the tip with that lot, a box of goodies arrived for me. - Contents:
8 way fuse boxes x 4
Battery isolators x 2
500 cable ties
Stainless Steel bonnet pins
10 toggle switches
2 aero style toggle switch covers
Heatshrink
Rubber things that hold the boot shut instead of the boot lock
100 metres of 1.5mm pvc cable
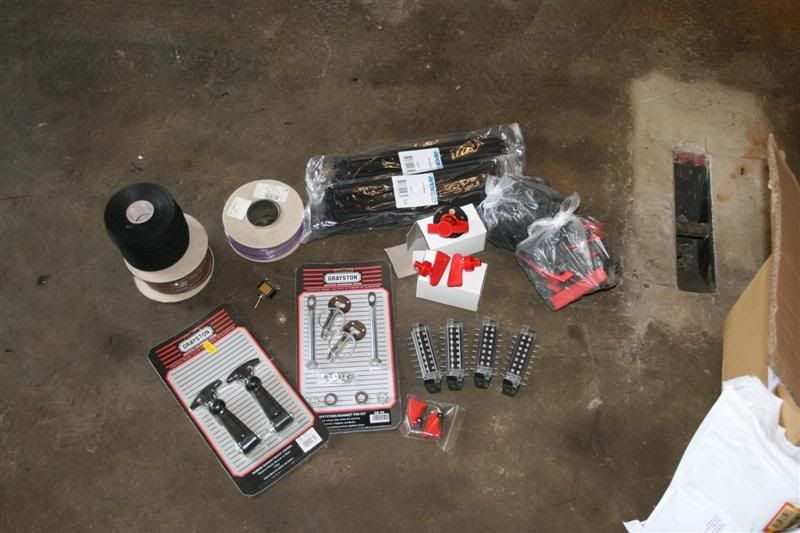
And a sheet (1.2m x 0.68m)of 1.2mm alloy for making the dash and a blanking off the heaterbox hole once that has been removed.
Also, picked up a set of 4 M3 alloys for the princly sum of �170 - I love ebay
)First things first - take the front seats out
Found 2 quid aswell - hapopy days
This pile of parts will get much bigger I fear
More parts out and its starting to look like a wiry mess
Now, to get the upper dash out is a bit of a mission. BMW, being the engineers they are, put the dashboard in before the windscreen - no chance of getting a 7mm spanner or socket in to the top 3 bolts - how to overcome this? hammer + chisel = spanner access
Thats the dash out then
Next the sunroof - another 20 kilo to be saved here in the mechanism alone, it runs the entire length of the roof of the car
So thats the complete interior out and the parts pile is huge, and the car is bare
All these parts to get rid of
Whilst down at the tip with that lot, a box of goodies arrived for me. - Contents:
8 way fuse boxes x 4
Battery isolators x 2
500 cable ties
Stainless Steel bonnet pins
10 toggle switches
2 aero style toggle switch covers
Heatshrink
Rubber things that hold the boot shut instead of the boot lock
100 metres of 1.5mm pvc cable
And a sheet (1.2m x 0.68m)of 1.2mm alloy for making the dash and a blanking off the heaterbox hole once that has been removed.
Also, picked up a set of 4 M3 alloys for the princly sum of �170 - I love ebay
Last edited by Graceland; 20-05-2008 at 07:54 PM.
20-05-2008 | 08:05 PM
#12
didnt realise the sunroof weighed so much-may have to lose mine.
i was amazed at just how heavy the interior really is!
are you changing the glass for perspex?
what suspension?
i was amazed at just how heavy the interior really is!
are you changing the glass for perspex?
what suspension?
20-05-2008 | 08:06 PM
#13
Thread Starter
Team HOTHOT!
Joined: Aug 2003
Posts: 19,065
Likes: 1
From: Huddersfield Drives: Trains ;)
Glass is all going to be perspex apart from the windscreen (obvious reasons)
Not decided on the suspension yet, but coilovers of sme description would be in order
Not decided on the suspension yet, but coilovers of sme description would be in order
21-05-2008 | 09:13 AM
#14

20K+ Super Poster.
Joined: Jun 2003
Posts: 22,888
Likes: 0
From: Local, when i'm home...
Good work, car should be a good laugh on track!
What are you doing about the sunroof, just going to blank it off with a sheet?
How much did you give for the car in the first place Paul?
What are you doing about the sunroof, just going to blank it off with a sheet?
How much did you give for the car in the first place Paul?
21-05-2008 | 10:27 AM
#15
Thread Starter
Team HOTHOT!
Joined: Aug 2003
Posts: 19,065
Likes: 1
From: Huddersfield Drives: Trains ;)
Gave 750 for the car, it was advertised at 895
Sunroof - going to use the original metal panel and spot weld it in place, then a bit of sealant and a sheet of black vynal for the roof
A breif update from this mornings work as I have other stuff to do today (keep the wife happy etc etc
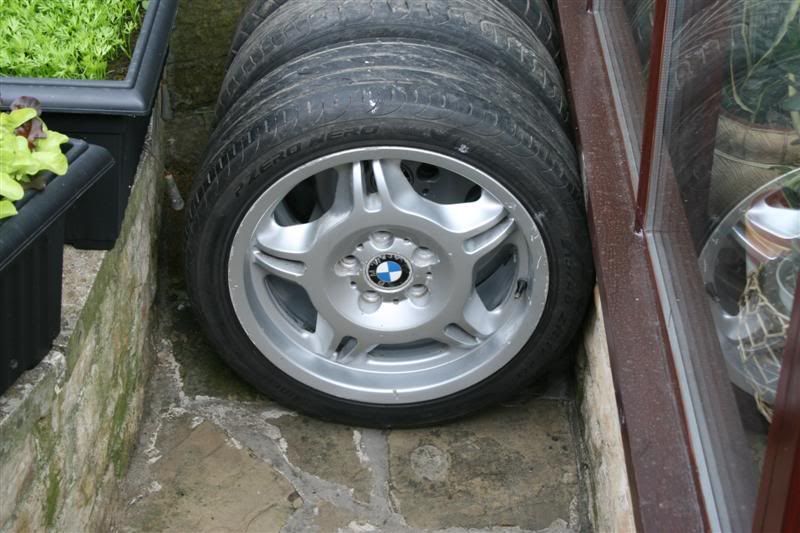
last night saw the addition of a set of 17" M3 reps - �170 sheets, bargaintastic
They should look smart with a set of toyo R888's on them
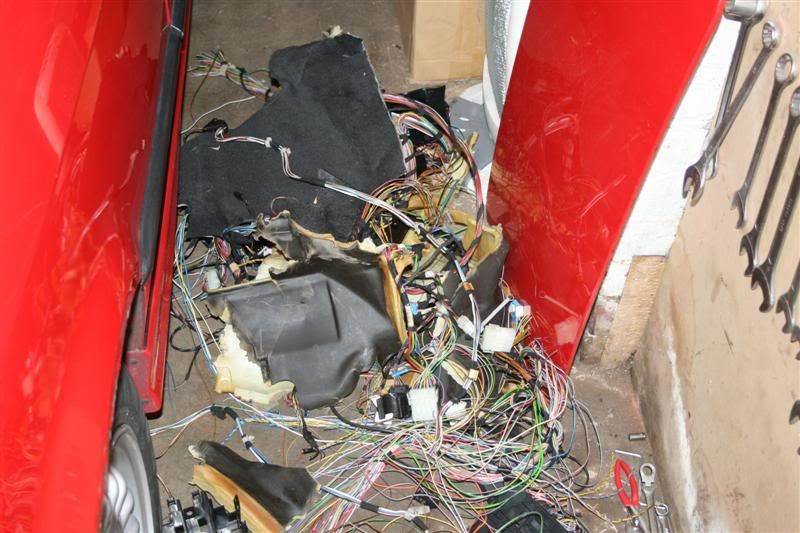
job for today was to remove the wiring harness for the car but leaving the engine loom in place. I good game of "how many wires can I cut before the engine stops" ensured
Just a few then
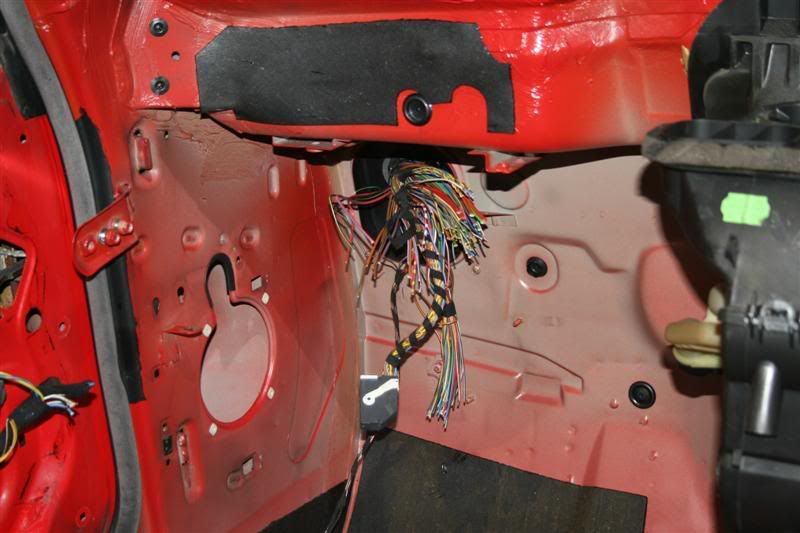
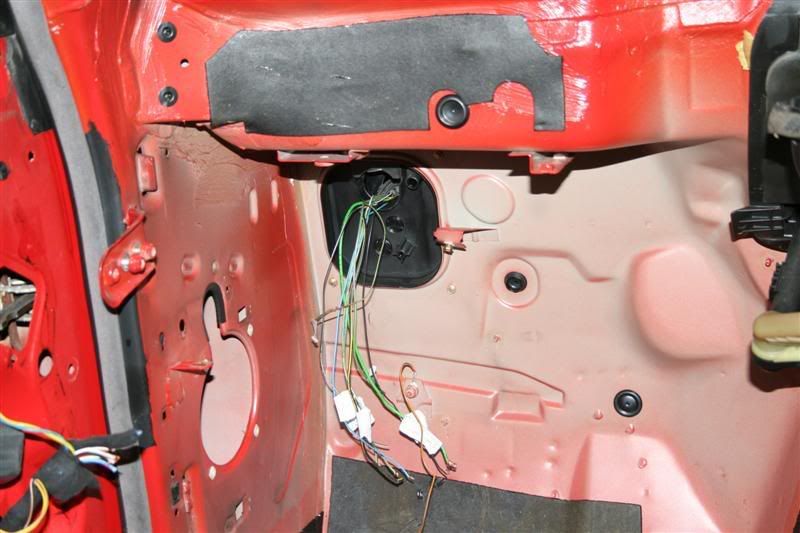
So with the wiring loom out of the interior totally bar the few bits I need (heater motor, wipers, rear lights and fuel pumps) I set about cutting rest of the loom from the fustbox :thumb:
So from this:
To this
leaving this:
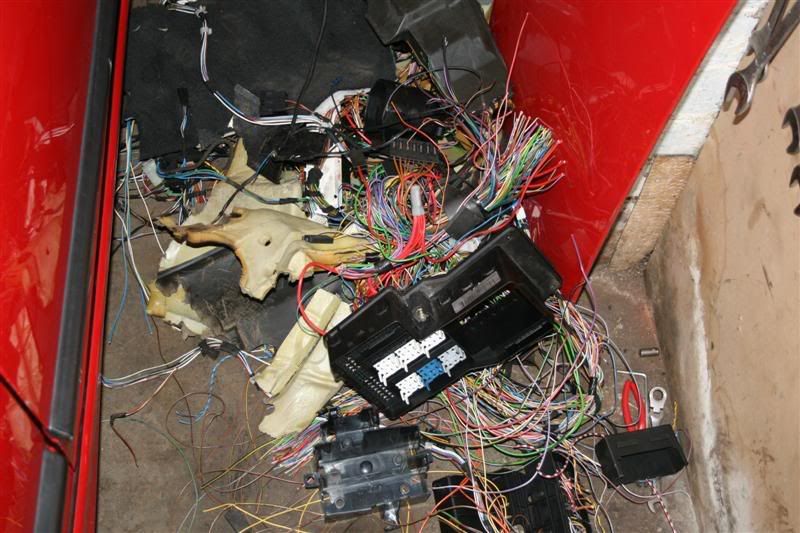
A massive 10 kilo pile of wires
just aswell the engine loom is totally seperate from the car loom - now all that I need to do is find out where the bugger plugs in, I have found the ECU and its cable run, but I have a sneeky feeling that the harness finds a feed for power somewhere under the scuttle panel below the windscreen. Investigation tomorrow will find that out
Sunroof - going to use the original metal panel and spot weld it in place, then a bit of sealant and a sheet of black vynal for the roof
A breif update from this mornings work as I have other stuff to do today (keep the wife happy etc etc
last night saw the addition of a set of 17" M3 reps - �170 sheets, bargaintastic
They should look smart with a set of toyo R888's on them
job for today was to remove the wiring harness for the car but leaving the engine loom in place. I good game of "how many wires can I cut before the engine stops" ensured
Just a few then
So with the wiring loom out of the interior totally bar the few bits I need (heater motor, wipers, rear lights and fuel pumps) I set about cutting rest of the loom from the fustbox :thumb:
So from this:
To this
leaving this:
A massive 10 kilo pile of wires
just aswell the engine loom is totally seperate from the car loom - now all that I need to do is find out where the bugger plugs in, I have found the ECU and its cable run, but I have a sneeky feeling that the harness finds a feed for power somewhere under the scuttle panel below the windscreen. Investigation tomorrow will find that out
 21-05-2008 | 10:39 AM
#18
Thread Starter
Team HOTHOT!
Joined: Aug 2003
Posts: 19,065
Likes: 1
From: Huddersfield Drives: Trains ;)
The loom should be much easier now, especially as I will be making my own loom for the rest of it - the engine loom should only be 5 or 6 wires at the most to connect up, thankfully
No point in messing about when you have off work untill the 29th - otherwise nothing would get done
No point in messing about when you have off work untill the 29th - otherwise nothing would get done

 .
.
 21-05-2008 | 02:02 PM
#25
Least you'll be able to still qualify for the 'lack of indicators' category all Beemer drivers fall into albeit involuntary due to the lack of control stalks & wiring!!
 21-05-2008 | 06:16 PM
#31

Advanced PassionFord User
Joined: Oct 2003
Posts: 1,845
Likes: 0
From: west yorks
as dogsmoke as he works at john cottons and they have a weigh bridge as far as i know
p.s looks a cool little project mate
Last edited by pollocks; 21-05-2008 at 06:17 PM. Reason: mooo baaa all the sounds of the farm
 22-05-2008 | 05:52 PM
#34
Thread Starter
Team HOTHOT!
Joined: Aug 2003
Posts: 19,065
Likes: 1
From: Huddersfield Drives: Trains ;)
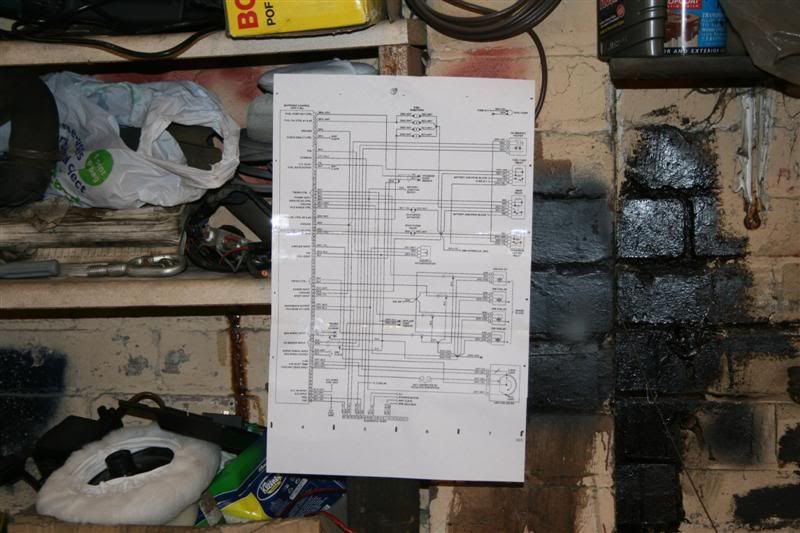
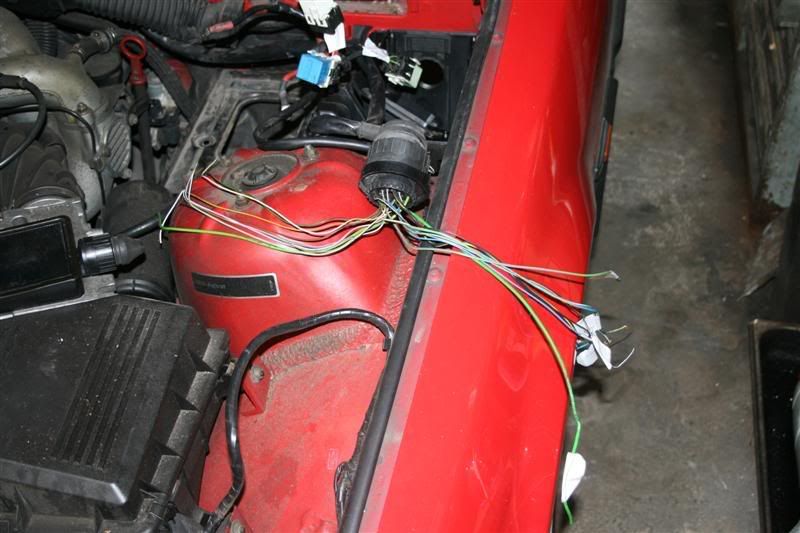
Today was a bit of a steady day. The plan was to clean up the remainder of the wiring loom and get the engine running with what was left. This was started by removing the ECU plug and belling out the wires with the aid of handy wiring diagram - how handy

Then the wires i needed were labled up to quickly identify them when the wiring begins
Was a bit cold at 9 this morning so the heater was on for a bit
Anyway. once the wired had been belled out and checked, labled and double checked, it was time to see if the engine would run. ECu live to the battery, relays clicked, starter feed to the batttery and the engine fired into life perfectly. Absolutely spot on
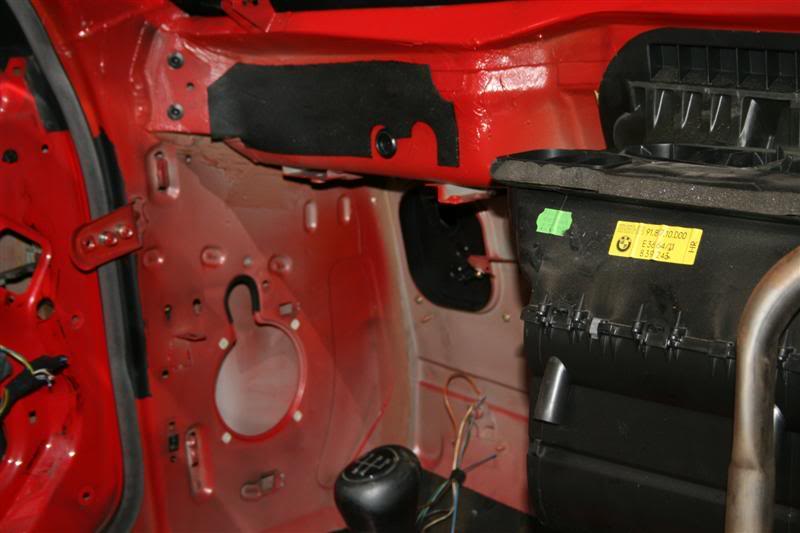
So with that done, the wires were temporarily shoved thru the bulkhead and the ecu cover was refitted etc etc.
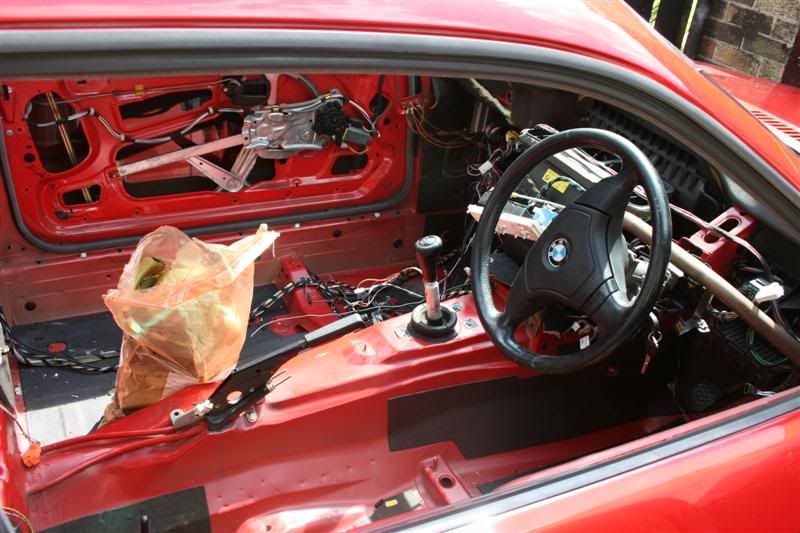
Then my nice new OMP steering wheel and boss arrived- 350mm alcantara 3 spoke - superb. Checked the fit and excellent.
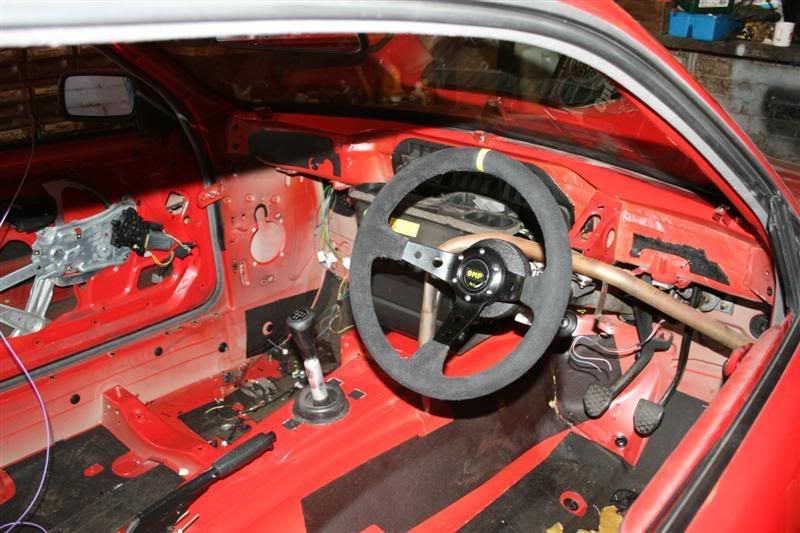
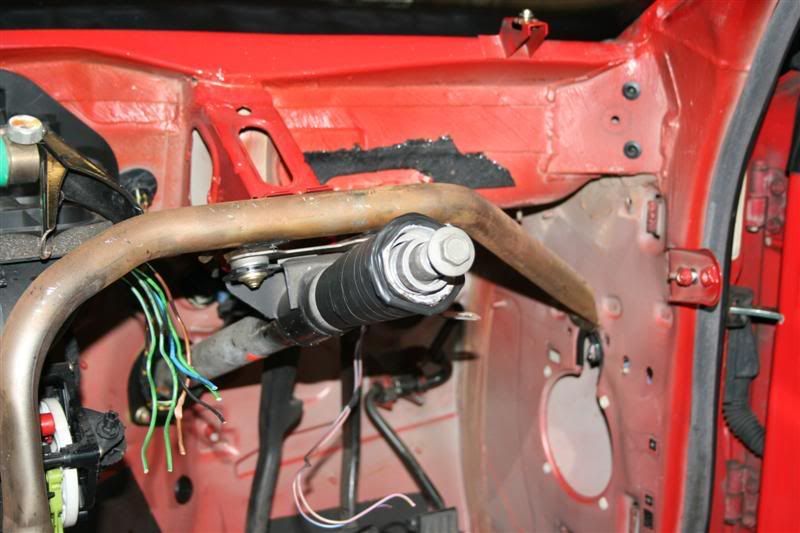
So with that done, it was time to modify the steering column to remove the ignition switch, barrel and steering lock. Now, this would of been easy, but BMW, unlike Ford, use the face of the alloy barrel as the bush/bearing for the collapsable collumn. Not a problem, weld a piece of pipe around the column and then file the alloy down to fit and bray into place. Only job left to do there is fit the new bearing in the column. Happy times Taped up for asthetics, not that it will be seen, but heyho.
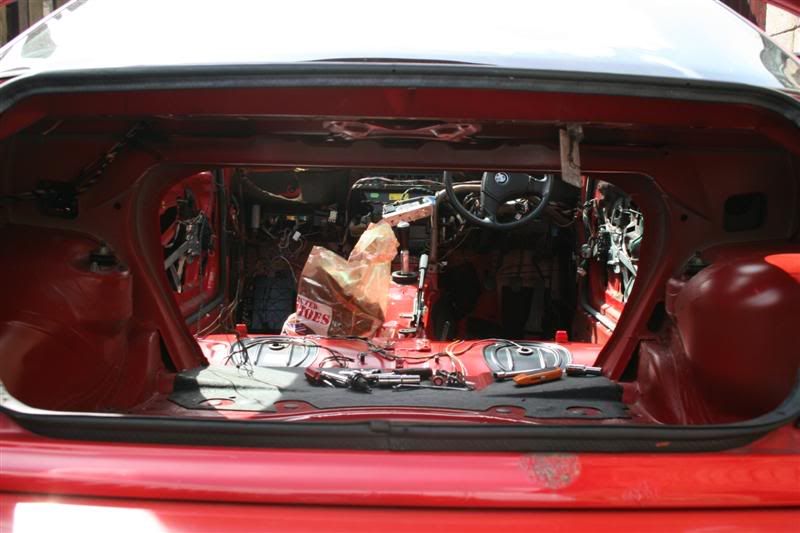
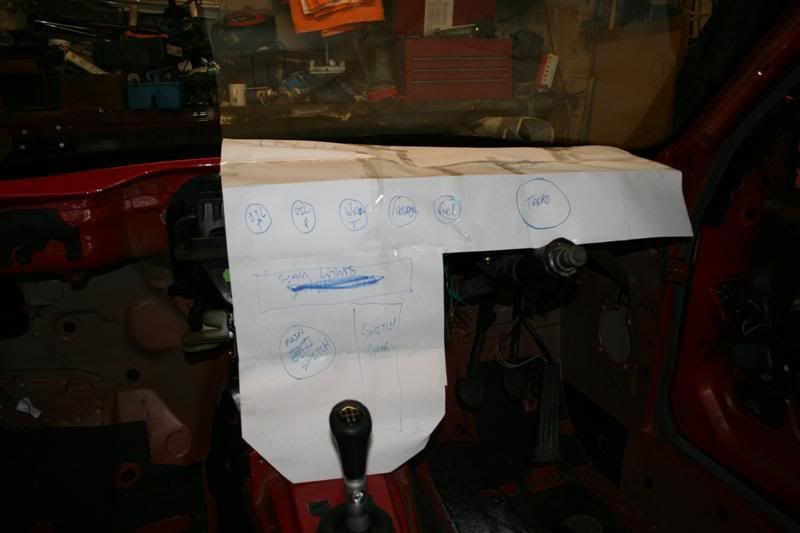
Next on the agenda was to make a mockup of how I want the Alloy Dashboard to be - this was done using paper and selotape - very easy to do and saves so much hassle at the alloy stage Once that was done, quickly scribbled on where I want what parts.
And then with the steerywheel fitted

All in all, not a bad days work. Now i'm off to play in Autocad to make a template for cutting and drilling for the switchgear and gauges etc etc
Then the wires i needed were labled up to quickly identify them when the wiring begins
Was a bit cold at 9 this morning so the heater was on for a bit
Anyway. once the wired had been belled out and checked, labled and double checked, it was time to see if the engine would run. ECu live to the battery, relays clicked, starter feed to the batttery and the engine fired into life perfectly. Absolutely spot on
So with that done, the wires were temporarily shoved thru the bulkhead and the ecu cover was refitted etc etc.
Then my nice new OMP steering wheel and boss arrived- 350mm alcantara 3 spoke - superb. Checked the fit and excellent.
So with that done, it was time to modify the steering column to remove the ignition switch, barrel and steering lock. Now, this would of been easy, but BMW, unlike Ford, use the face of the alloy barrel as the bush/bearing for the collapsable collumn. Not a problem, weld a piece of pipe around the column and then file the alloy down to fit and bray into place. Only job left to do there is fit the new bearing in the column. Happy times
Taped up for asthetics, not that it will be seen, but heyho.Next on the agenda was to make a mockup of how I want the Alloy Dashboard to be - this was done using paper and selotape - very easy to do and saves so much hassle at the alloy stage
Once that was done, quickly scribbled on where I want what parts.And then with the steerywheel fitted
All in all, not a bad days work. Now i'm off to play in Autocad to make a template for cutting and drilling for the switchgear and gauges etc etc
 22-05-2008 | 06:29 PM
#37
22-05-2008 | 06:43 PM
#38

DEYTUKURJERBS
Joined: Apr 2004
Posts: 29,378
Likes: 1
From: North Korea
i hope your gonna chisel off all that sound deadening, as its a bit (totally) lame to candy strip it with all the big bits that make it showy light without removing the 20kg of rubbery gunky sound deading crap thats stuck to the entire interior floorpan.
id put the top layer of carpet back in after if it was me, weighs less than a kg and makes the car feel a lot less pikey to drive.
id put the top layer of carpet back in after if it was me, weighs less than a kg and makes the car feel a lot less pikey to drive.
22-05-2008 | 06:44 PM
#39
Too many posts.. I need a life!!
Joined: Jul 2004
Posts: 768
Likes: 0
From: North Wales
Your progress is very quick, fair play to you 
What's the 'ring like now with stripped out cars etc after the rumor that the were clamping down on race cars and anything similar? Will there be any problems with it being let on the 'ring?
Anyway, carry on the good work
What's the 'ring like now with stripped out cars etc after the rumor that the were clamping down on race cars and anything similar? Will there be any problems with it being let on the 'ring?
Anyway, carry on the good work