Restorations, Rebuilds & Projects. Restoring her to Concourse? Just getting her running again? Or got a mad project? This is your room.

1990 Escort RS Turbo Restoration. Focus RS Conversion

Thread Tools
 
Search this Thread
 
Old Feb 10, 2014 | 06:03 PM
  #81  
xxTWINNYxx's Avatar
xxTWINNYxx
Thread Starter
Regular Contributor
iTrader: (1)
 
Joined: Jul 2010
Posts: 217
Likes: 3
From: NORFOLK
Default

Had a couple of spare hours so did a little on the front of the car, Changed N/S bottom wishbone so now all the joints have been fitted finally.

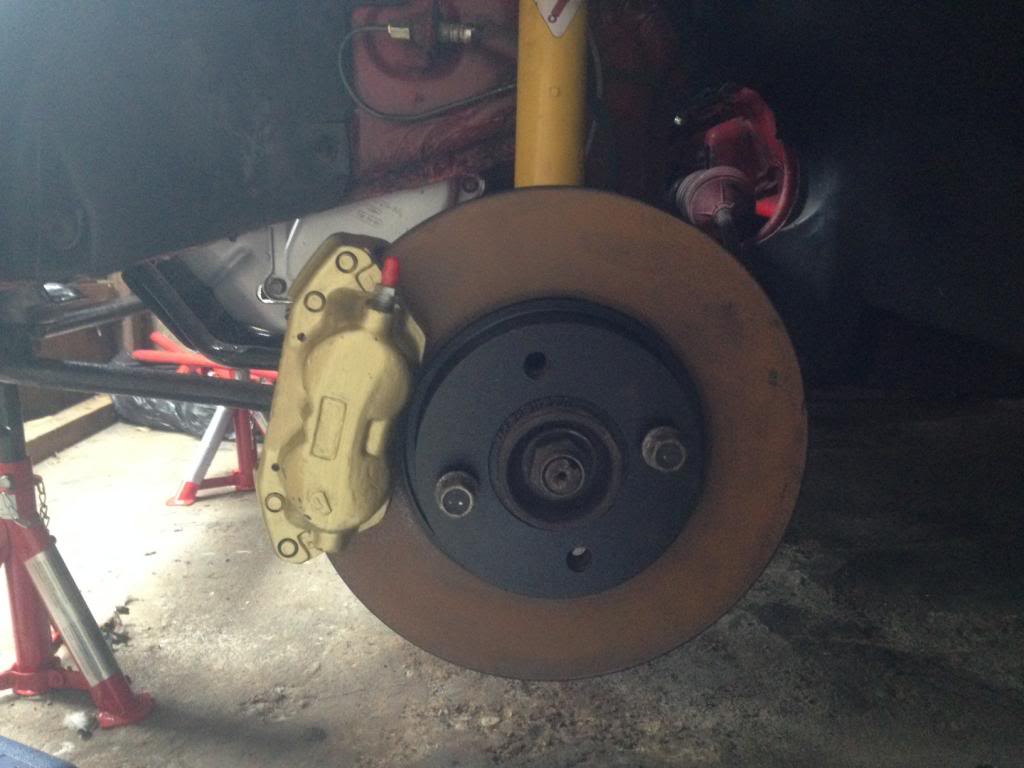
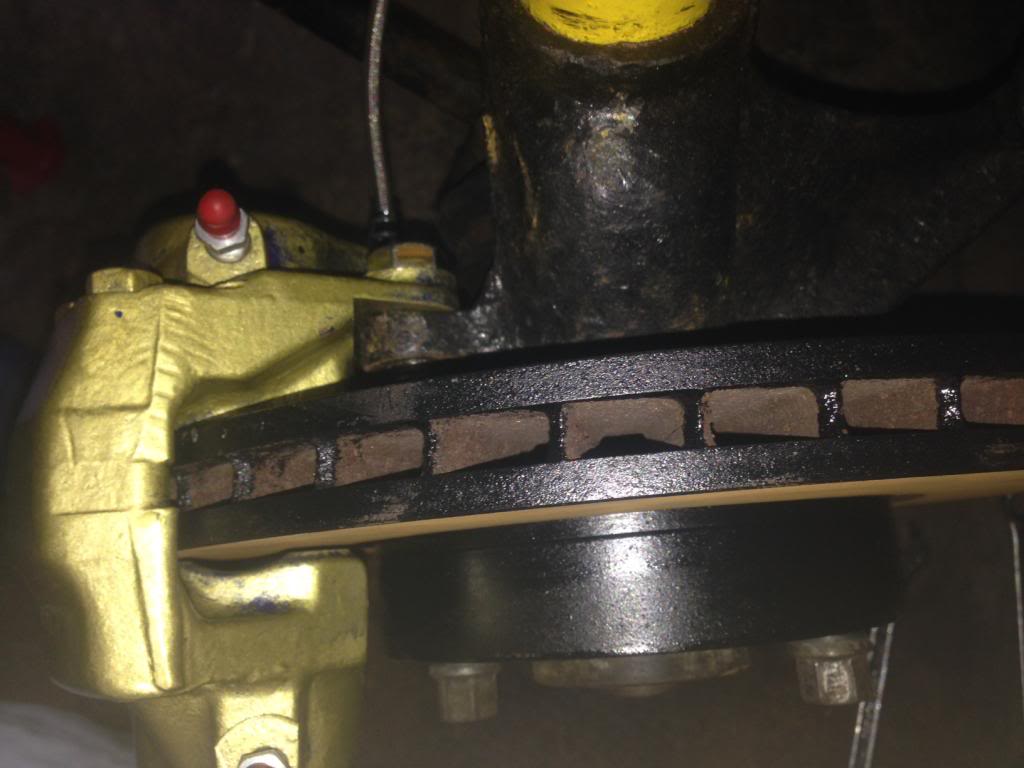
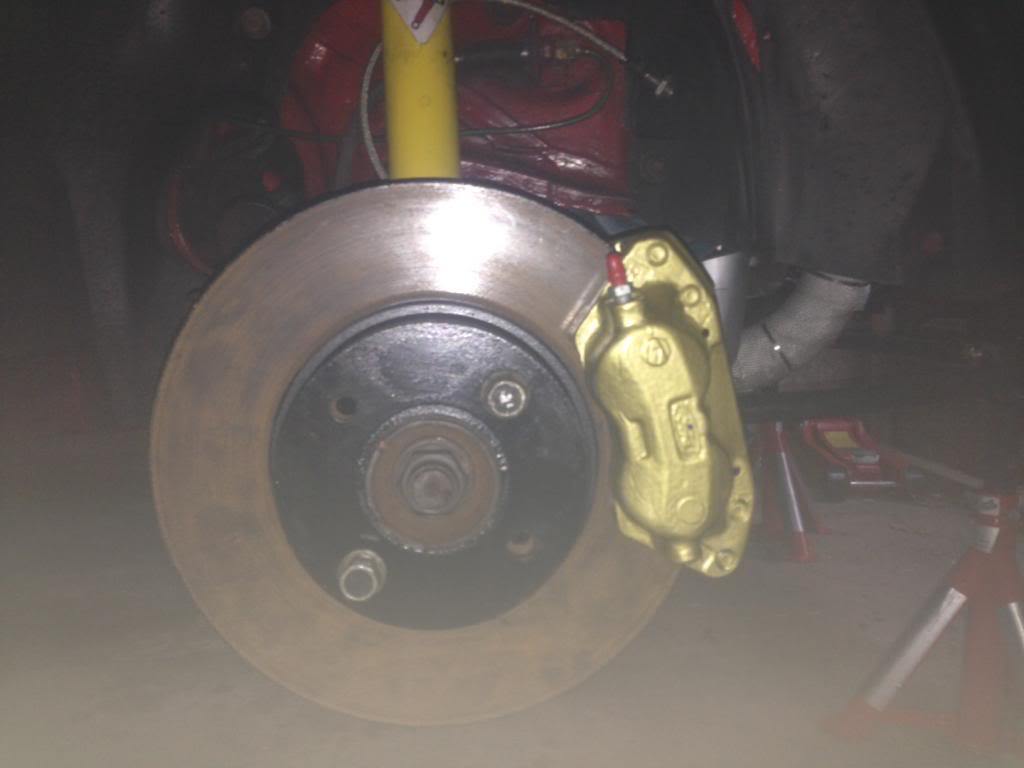
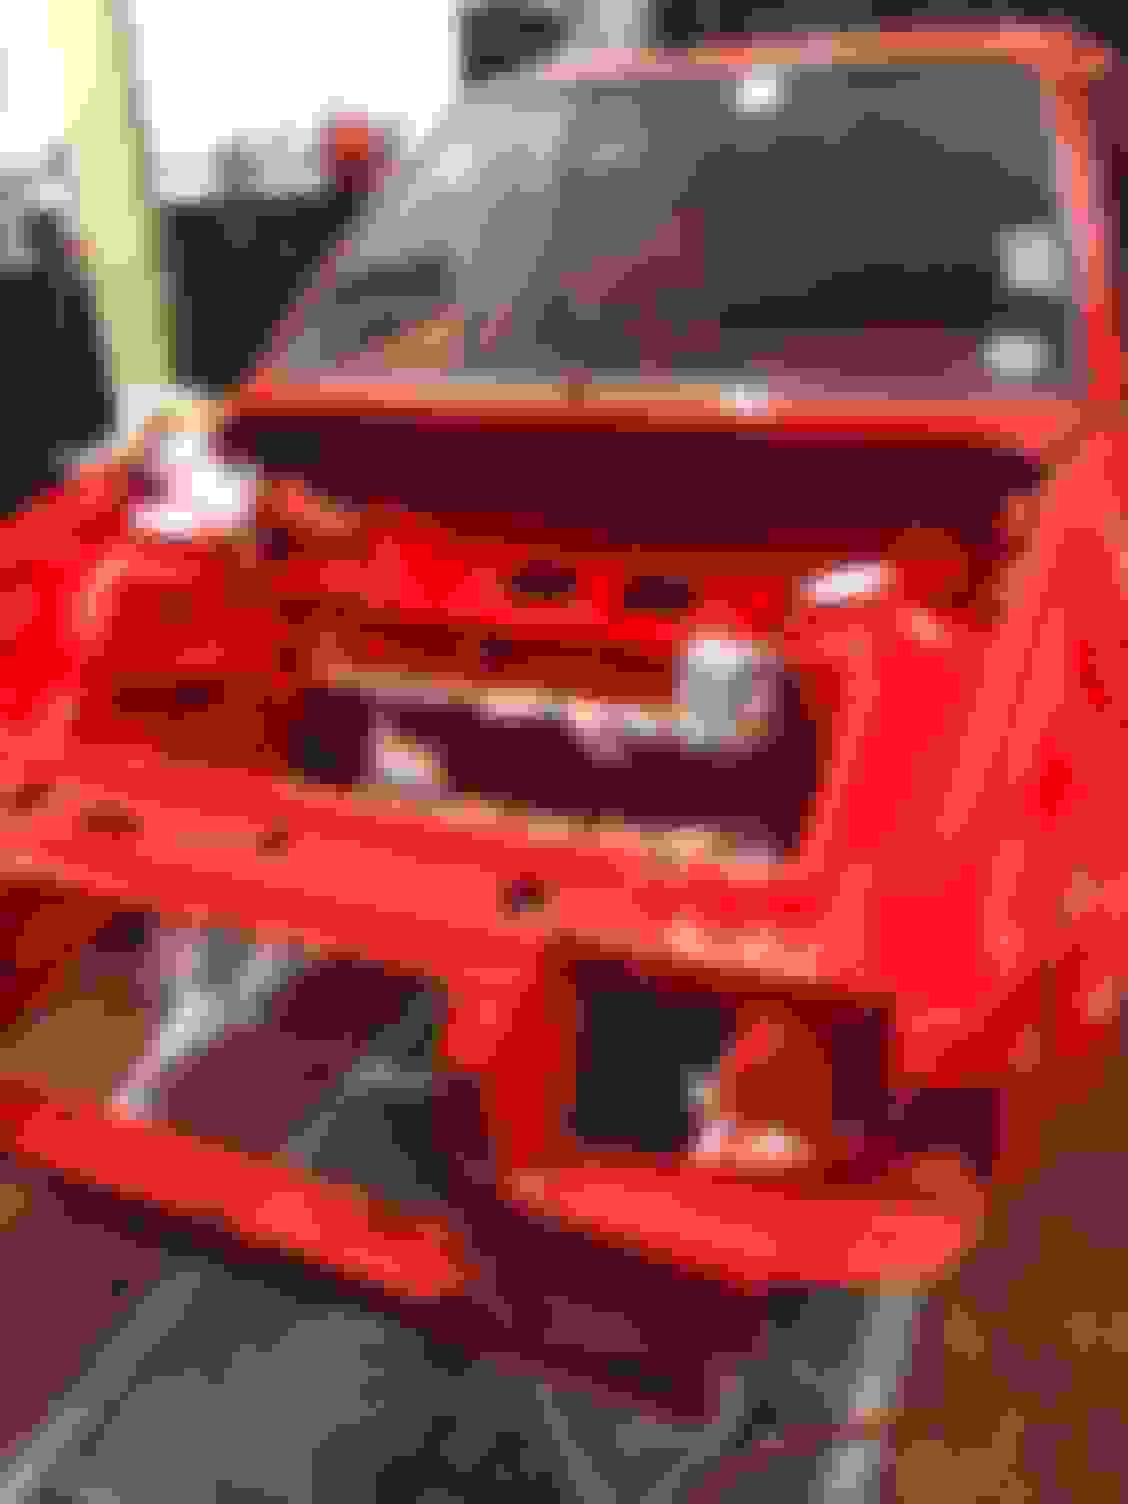
Then trial fitted the 3dr Cossie front brakes, (excuse the dirty discs) will need to decide how to mount the calipers as neither the hub or caliper has a thread, maybe easiest way will be to tap a thread into the hub. Anybody who has done this brake upgrade, feel free to comment.

Name:  RS-60_zps32112a66.jpg
Views: 1161
Size:  54.4 KB
Reply
Old Mar 19, 2014 | 12:12 AM
  #82  
xxTWINNYxx's Avatar
xxTWINNYxx
Thread Starter
Regular Contributor
iTrader: (1)
 
Joined: Jul 2010
Posts: 217
Likes: 3
From: NORFOLK
Default

Got the brakes all fitted properly, had to drill out the hole in the hub and tap it to take m12 high tensile bolts.pics of them all bolted up, few bits to touch up with paint.
Next job is to get the wheels sorted


Name:  photo71_zpsc5d6ee8e.jpg
Views: 1135
Size:  68.9 KB

Name:  photo72_zps67c31bcc.jpg
Views: 1159
Size:  66.3 KB

Name:  photo73_zps009c5683.jpg
Views: 1139
Size:  37.9 KB
Reply
Old Mar 19, 2014 | 12:31 PM
  #83  
Glenn_'s Avatar
Glenn_
Glennvestite
15 Year Member
Liked
Loved
Community Favorite
iTrader: (1)
 
Joined: Jul 2006
Posts: 62,771
Likes: 1,049
From: Darlington county durham
Default

Tip top matey. Just need to paint them red n put some brembo stickers on them lol.
Reply
Old Mar 19, 2014 | 07:38 PM
  #84  
xxTWINNYxx's Avatar
xxTWINNYxx
Thread Starter
Regular Contributor
iTrader: (1)
 
Joined: Jul 2010
Posts: 217
Likes: 3
From: NORFOLK
Default

Wanted them to look like original cossie ones, may even try get some cosworth decals for them if available
Reply
Old Mar 30, 2014 | 10:46 AM
  #85  
xxTWINNYxx's Avatar
xxTWINNYxx
Thread Starter
Regular Contributor
iTrader: (1)
 
Joined: Jul 2010
Posts: 217
Likes: 3
From: NORFOLK
Default

Started stripping the rear end due to alot of bad repairs, going to remove all the rot and attempted repair and do it properly.

started stripping the underside

Name:  RS-65_zps45e9418b.jpg
Views: 1148
Size:  55.0 KB

Got the fuel tank off, didnt realise how much fuel was still in it til it poured over me

Name:  RS-66_zps03345cf7.jpg
Views: 1098
Size:  121.6 KB

Some pics of the attempted repairs and rot, its all getting chopped out and done properly

Name:  RS-69_zpsba0d5d6a.jpg
Views: 1160
Size:  58.6 KB
Name:  RS-70_zps4961bf49.jpg
Views: 1132
Size:  39.0 KB
Name:  RS-67_zpsda7d5ba9.jpg
Views: 1091
Size:  44.2 KB
Name:  RS-68_zps3a22db82.jpg
Views: 1132
Size:  32.8 KB

Also stripped the rear brakes as its having rear disc conversion

Name:  RS-71_zps0231c695.jpg
Views: 1131
Size:  114.7 KB


Now better get back to cutting out rot
Reply
Old Mar 30, 2014 | 08:26 PM
  #86  
xxTWINNYxx's Avatar
xxTWINNYxx
Thread Starter
Regular Contributor
iTrader: (1)
 
Joined: Jul 2010
Posts: 217
Likes: 3
From: NORFOLK
Default

Pics of the repairs that were started by previous owners

Name:  RS-72_zpsbf8d2625.jpg
Views: 1085
Size:  57.6 KB
Name:  RS-73_zpsd063f055.jpg
Views: 1156
Size:  49.1 KB
Name:  RS-74_zpsb362c443.jpg
Views: 1071
Size:  72.1 KB
Name:  RS-75_zps9aed4326.jpg
Views: 1043
Size:  84.7 KB
Reply
Old Mar 30, 2014 | 08:27 PM
  #87  
xxTWINNYxx's Avatar
xxTWINNYxx
Thread Starter
Regular Contributor
iTrader: (1)
 
Joined: Jul 2010
Posts: 217
Likes: 3
From: NORFOLK
Default

I decided to cut it all out and do it properly with new chassis rails and panels

Out it all comes

Name:  RS-76_zps6b749752.jpg
Views: 1101
Size:  90.5 KB
Name:  RS-77_zpsc098f650.jpg
Views: 1136
Size:  95.0 KB
Name:  RS-78_zps6415d86b.jpg
Views: 1116
Size:  79.6 KB
Name:  RS-79_zps8bab5518.jpg
Views: 1145
Size:  116.9 KB
Reply
Old Mar 30, 2014 | 08:29 PM
  #88  
xxTWINNYxx's Avatar
xxTWINNYxx
Thread Starter
Regular Contributor
iTrader: (1)
 
Joined: Jul 2010
Posts: 217
Likes: 3
From: NORFOLK
Default

Going to order new rear chassis rails and do the job properly. Its the first time i can say theres no rot left on the escort
Reply
Old Mar 30, 2014 | 09:59 PM
  #89  
nicodinho's Avatar
nicodinho
Winters over time to work
 
Joined: Aug 2013
Posts: 114
Likes: 0
From: Carlisle
Default

Love this thread. Good pics. Keep it up.
Reply
Old Mar 30, 2014 | 10:19 PM
  #90  
cossiestu's Avatar
cossiestu
PassionFord Post Whore!!
 
Joined: May 2004
Posts: 5,730
Likes: 150
From: Surrey/Norfolk/Cambs
Default

Not seen this thread before!? And hello from a fellow Norfolkian!

For what it's worth, love the brake resovoir detailing!
Reply
Old Apr 3, 2014 | 08:05 PM
  #91  
garfj's Avatar
garfj
15000
 
Joined: Jan 2012
Posts: 38
Likes: 0
From: Ipswich, Suffolk
Default

Hi, are you going to use pattern panels? If so can you still get a boot floor or are you going to source a good second hand one?.. Good work on keeping it alive though.
Reply
Old Apr 5, 2014 | 01:58 PM
  #92  
xxTWINNYxx's Avatar
xxTWINNYxx
Thread Starter
Regular Contributor
iTrader: (1)
 
Joined: Jul 2010
Posts: 217
Likes: 3
From: NORFOLK
Default

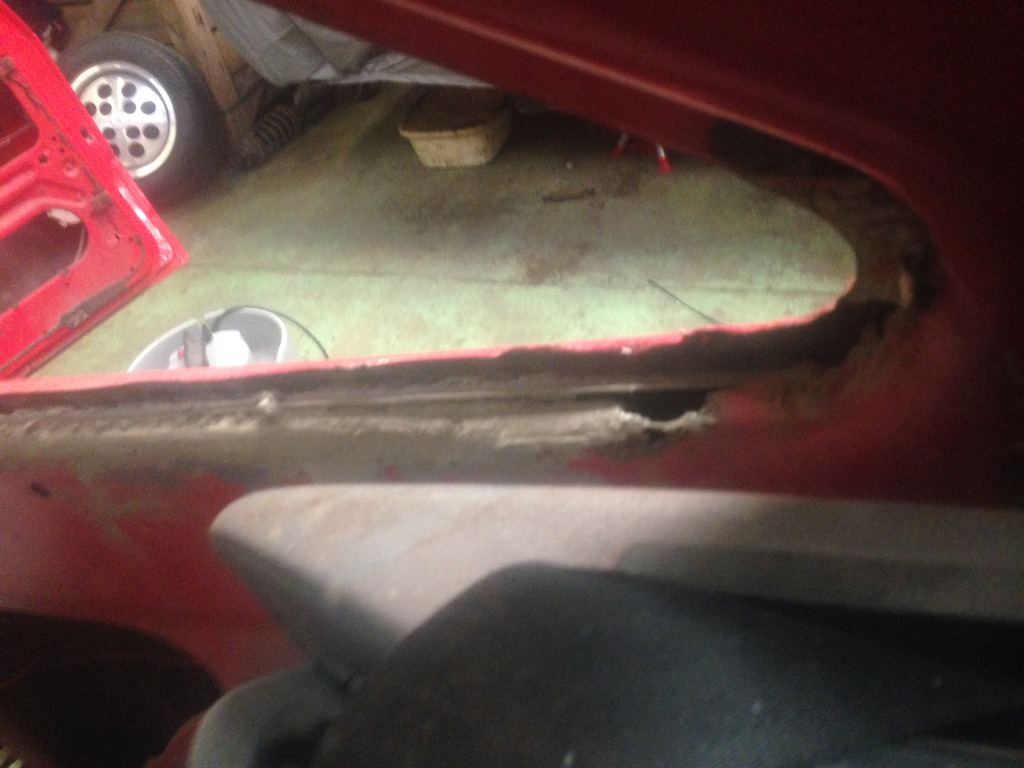
I have purchased a whole back end from a bonus shell, its completely mint so i will be drilling out the spot welds on the boot floor and using that to weld into my shell.
Reply
Old Apr 5, 2014 | 02:06 PM
  #93  
xxTWINNYxx's Avatar
xxTWINNYxx
Thread Starter
Regular Contributor
iTrader: (1)
 
Joined: Jul 2010
Posts: 217
Likes: 3
From: NORFOLK
Default

Quick update -

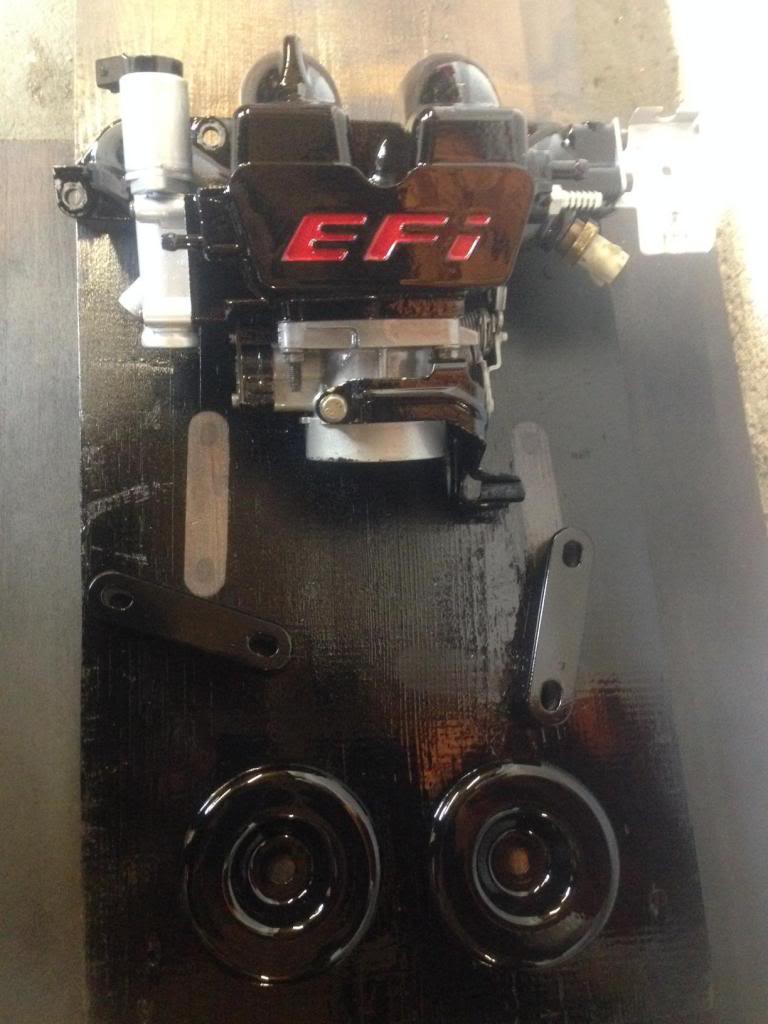
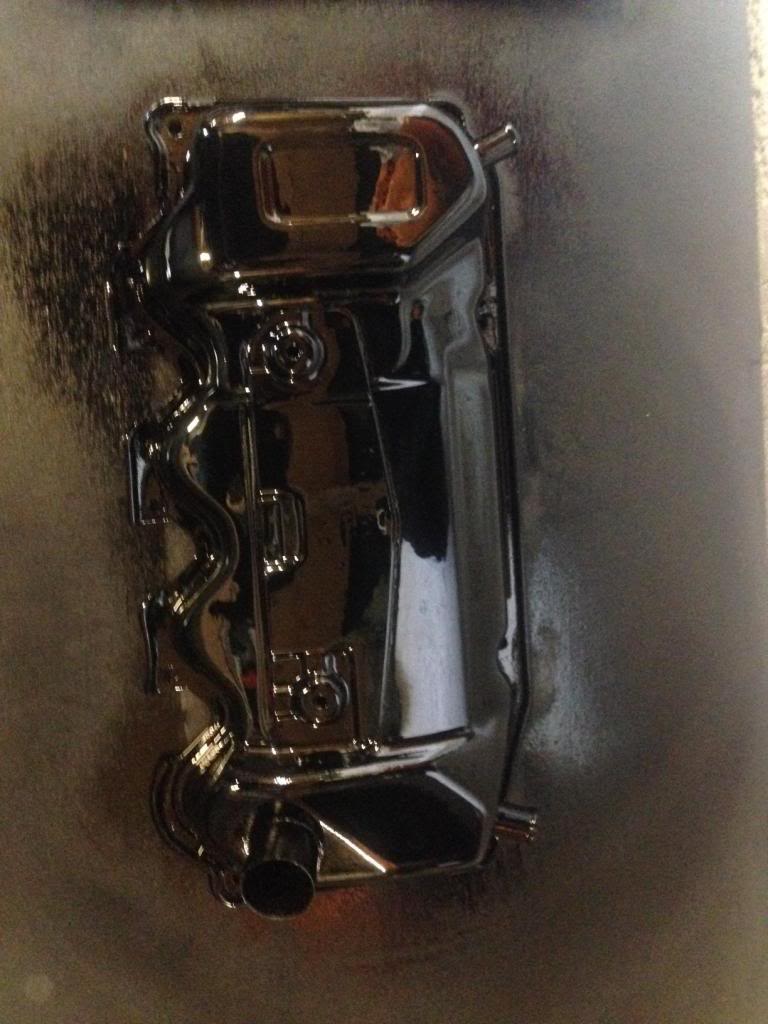
Wanted a rest from rust and rot so decided to do a bit of painting, gave the inlet a few coats of laquer and painted the strut tops, bonnet lifters and rocker cover a fresh coat of satin black and clear coat.

Name:  RS-80_zpsb9da9ff4.jpg
Views: 1093
Size:  79.0 KB

Name:  RS-81_zps30c8df8b.jpg
Views: 1166
Size:  85.5 KB
Reply
Old Apr 6, 2014 | 08:26 PM
  #94  
xxTWINNYxx's Avatar
xxTWINNYxx
Thread Starter
Regular Contributor
iTrader: (1)
 
Joined: Jul 2010
Posts: 217
Likes: 3
From: NORFOLK
Default

Got around to fitting the painted bits and also detailed the header tank

Name:  RS-82_zps1b827458.jpg
Views: 1158
Size:  105.2 KB

Name:  RS-83_zps17ec63d9.jpg
Views: 1088
Size:  40.8 KB
Reply
Old Apr 21, 2014 | 05:33 PM
  #95  
turbowag's Avatar
turbowag
I'm Finding My Feet Here Now
 
Joined: Nov 2013
Posts: 102
Likes: 5
From: north walsham, norfolk
Default

Nice work James, u just need a nice charge pipe 2 finish it off
Reply
Old Apr 25, 2014 | 07:06 PM
  #96  
Rs sid's Avatar
Rs sid
I just love fords!
 
Joined: Jul 2006
Posts: 165
Likes: 1
From: norfolk
Default

Originally Posted by turbowag
Nice work James, u just need a nice charge pipe 2 finish it off
Nice little project u have hear james, like turbowag says would finish it off a nice black one with silver letters,... How u getting on with it new floor in yet
Reply
Old Dec 18, 2015 | 08:10 PM
  #97  
xxTWINNYxx's Avatar
xxTWINNYxx
Thread Starter
Regular Contributor
iTrader: (1)
 
Joined: Jul 2010
Posts: 217
Likes: 3
From: NORFOLK
Default

After a very long break, playing around with other toys/projects, the time has came to crack on with the ol girl.

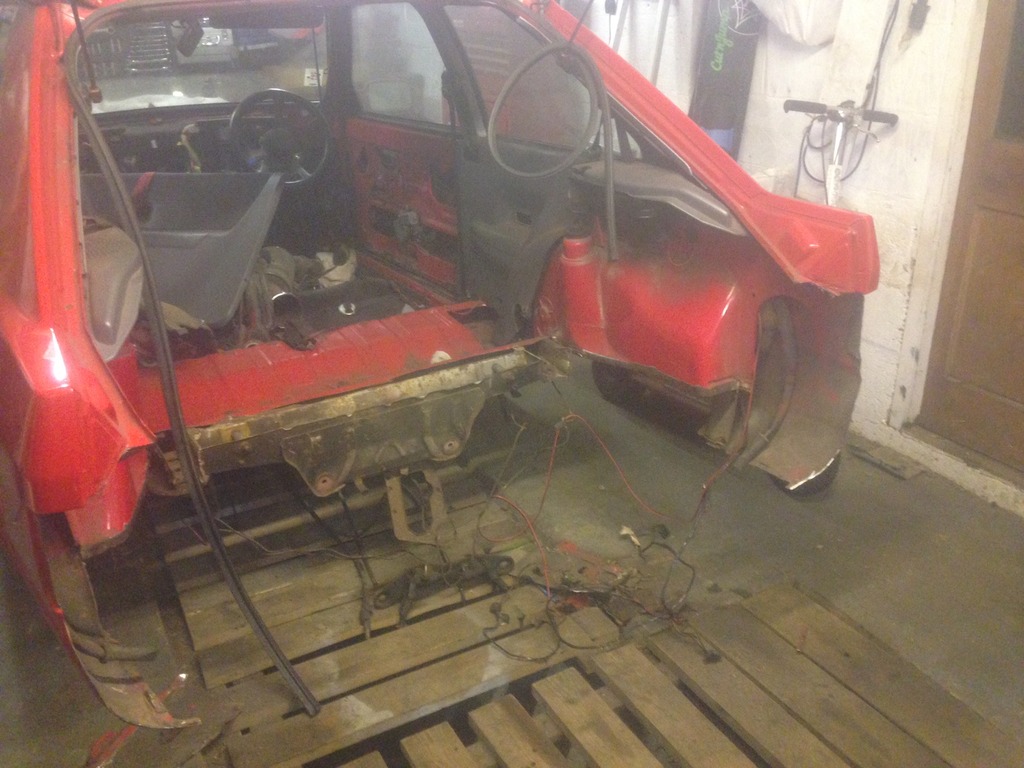
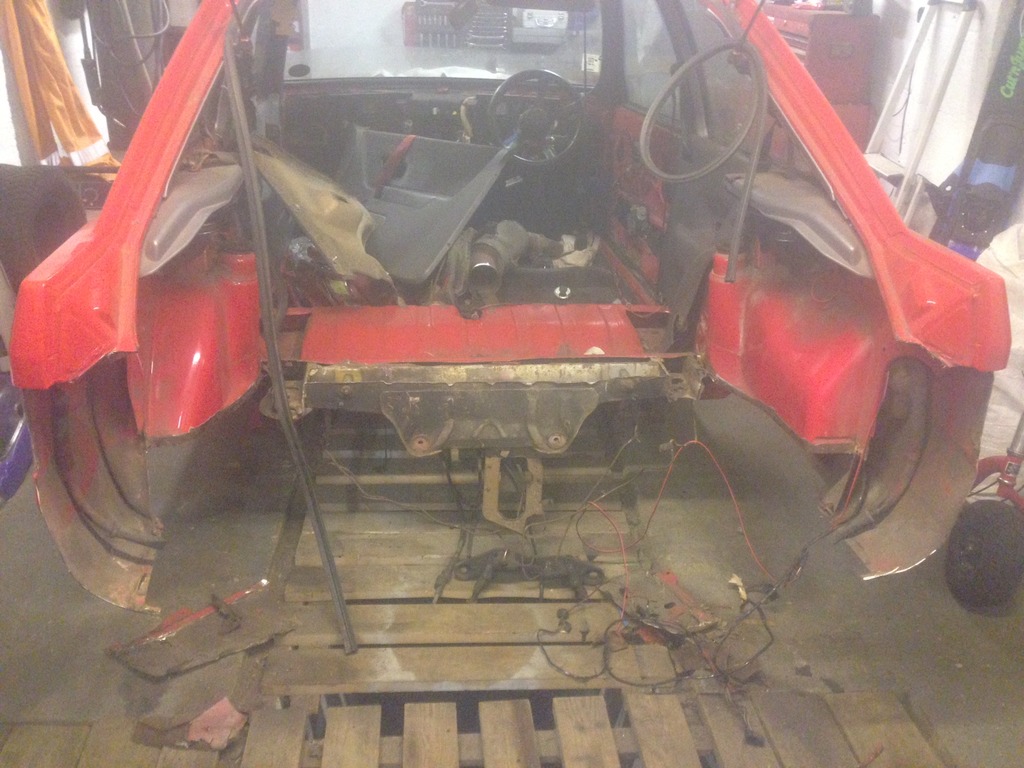
had a good look and after much thought we decided to cut all the shit bodge ups from somebody and start fresh, all the rear panel was removed with the floor, inner rear boot bits and so on,spent plenty of time trimming the back end of the bonus section i bought so it would weld onto the original sections and maintain the factory look. And being a genuine ford panel from another escort it went in pretty much first time, only tacked in at the moment but you get the idea.
More to come soon.

Name:  RS%20-%2084_zpsruouslqt.jpg
Views: 1130
Size:  186.5 KB

Name:  RS%20-%2085_zpsisdyjdvm.jpg
Views: 1150
Size:  195.7 KB
Attached Images
File Type: jpg
RS%20-%2086_zpsimbxr2mo.jpg (168.2 KB, 298 views)
File Type: jpg
RS%20-%2087_zps5ls5y3de.jpg (190.6 KB, 292 views)

Last edited by xxTWINNYxx; Jan 30, 2018 at 09:23 PM.
Reply
Old Dec 18, 2015 | 08:29 PM
  #98  
Glenn_'s Avatar
Glenn_
Glennvestite
15 Year Member
Liked
Loved
Community Favorite
iTrader: (1)
 
Joined: Jul 2006
Posts: 62,771
Likes: 1,049
From: Darlington county durham
Default

Wow. Too work, that's one way to do it.
Reply
Old Mar 19, 2016 | 06:16 PM
  #99  
xxTWINNYxx's Avatar
xxTWINNYxx
Thread Starter
Regular Contributor
iTrader: (1)
 
Joined: Jul 2010
Posts: 217
Likes: 3
From: NORFOLK
Default

Been a while but here we go, back panel and boot floor are now welded properly and has a little seam sealer.

Name:  image_zpsutkfjalq.jpeg
Views: 1170
Size:  183.3 KB

Name:  image_zps4eovocvu.jpeg
Views: 1138
Size:  182.1 KB

Name:  image_zpsulo6bdcw.jpeg
Views: 1135
Size:  210.6 KB
Reply
Old Mar 19, 2016 | 06:22 PM
  #100  
xxTWINNYxx's Avatar
xxTWINNYxx
Thread Starter
Regular Contributor
iTrader: (1)
 
Joined: Jul 2010
Posts: 217
Likes: 3
From: NORFOLK
Default

Also decided to strip roof lining as i plan on having a new one made in alcantara and strip sunroof to check for corrosion.

Name:  image_zpspqp19cfg.jpeg
Views: 1120
Size:  143.9 KB

Name:  image_zpsuqur60y3.jpeg
Views: 1175
Size:  156.1 KB
Reply
Old Mar 19, 2016 | 06:24 PM
  #101  
xxTWINNYxx's Avatar
xxTWINNYxx
Thread Starter
Regular Contributor
iTrader: (1)
 
Joined: Jul 2010
Posts: 217
Likes: 3
From: NORFOLK
Default

Only found a tiny hole under sunroof the size of a thumb nail so wont be an issue to sort

Name:  image_zpsnxuag06t.jpeg
Views: 1168
Size:  304.2 KB
Reply
Old Mar 19, 2016 | 06:40 PM
  #102  
xxTWINNYxx's Avatar
xxTWINNYxx
Thread Starter
Regular Contributor
iTrader: (1)
 
Joined: Jul 2010
Posts: 217
Likes: 3
From: NORFOLK
Default

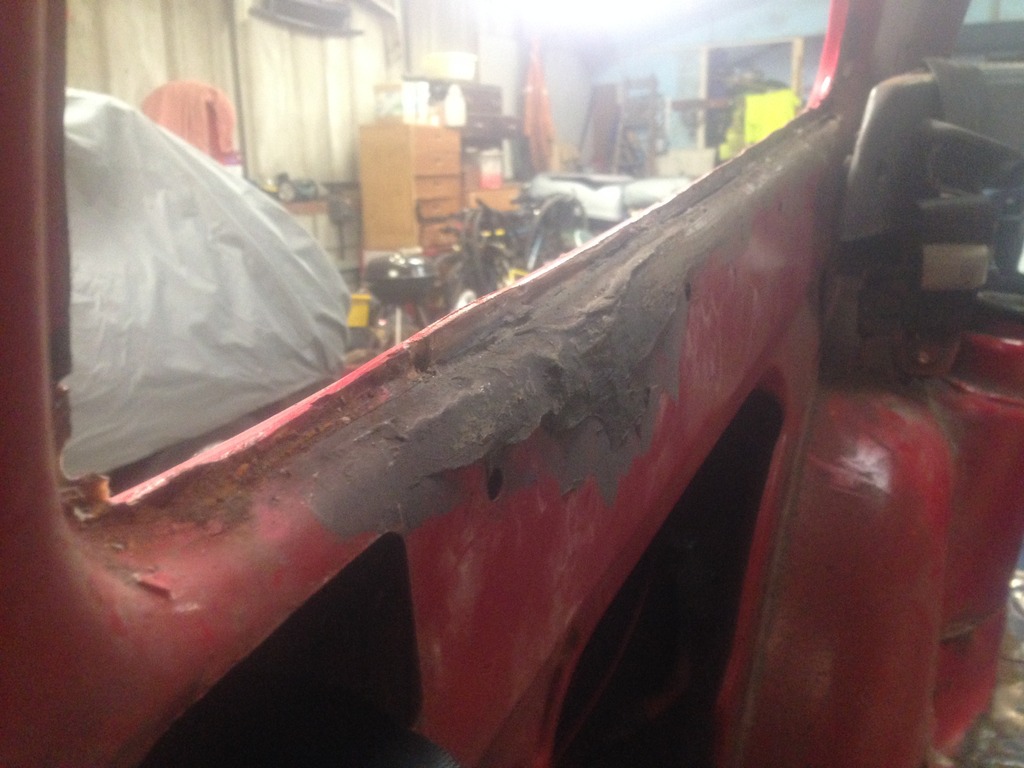
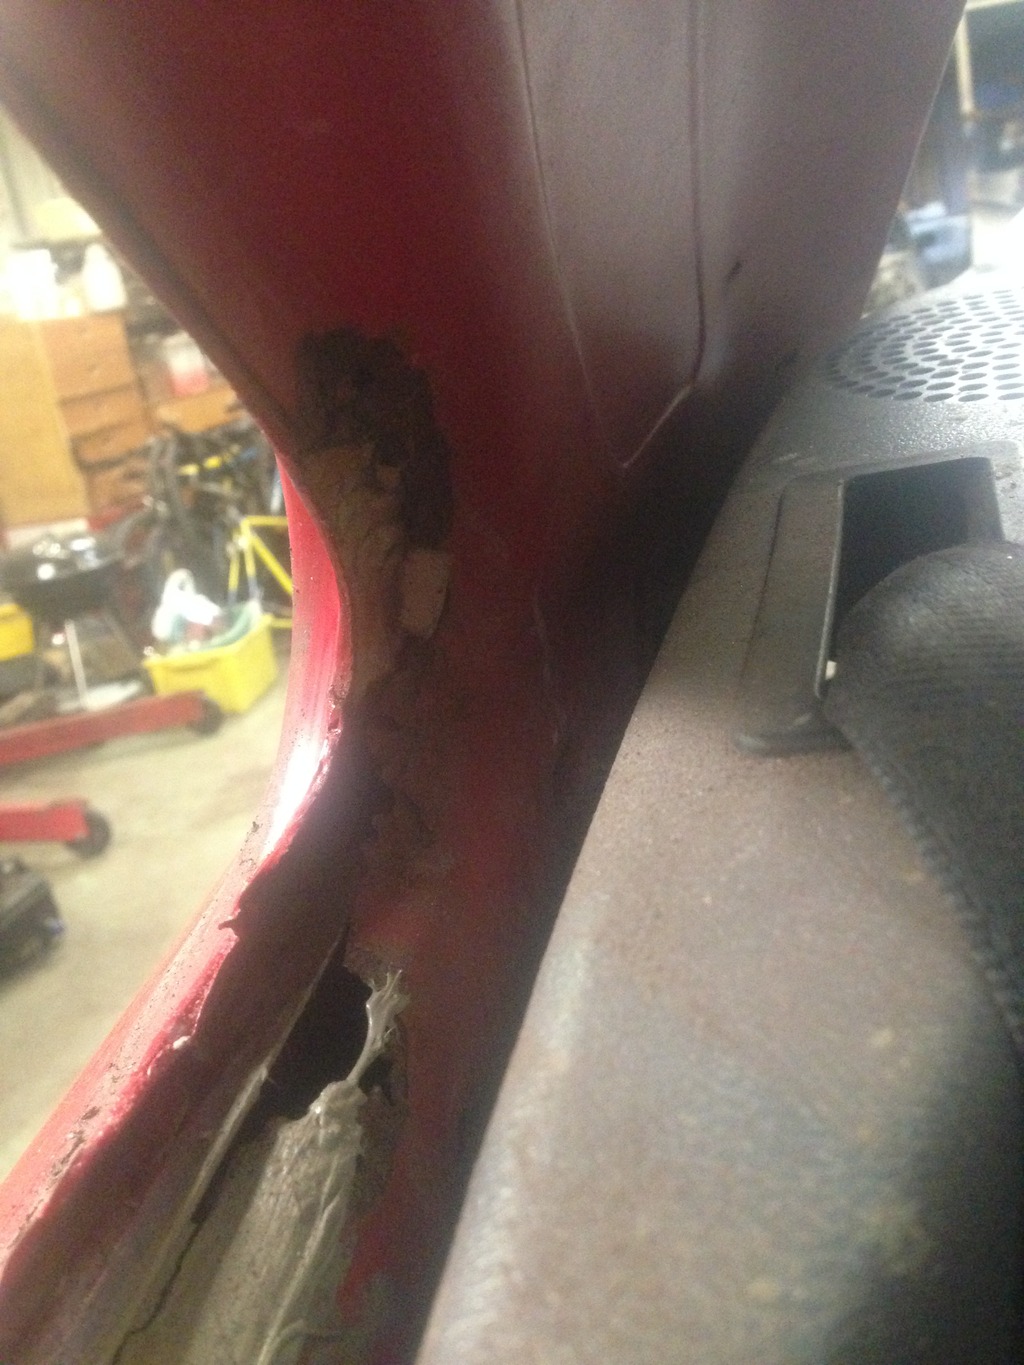
Now when i got the car i knew it ha a new rear 1/4 on which was done very well, so i removed the rear 1/4 card and window and was shocked to see the bodge up on the inner rear 1/4 which consisted of paper and fibreglass.

Name:  image_zpsaduyuuxo.jpeg
Views: 1085
Size:  179.0 KB

Name:  image_zps9jddebbd.jpeg
Views: 1094
Size:  162.1 KB

After anding it all off it revealed another coulpe of bit i now have to weld in, the end is in sight thankfully

Name:  image_zpssic5cfgj.jpeg
Views: 1073
Size:  306.1 KB

Name:  image_zps4b4ns14w.jpeg
Views: 1035
Size:  162.5 KB
Reply
Old Mar 20, 2016 | 03:04 PM
  #103  
AD-RS1600i's Avatar
AD-RS1600i
Too many posts.. I need a life!!
 
Joined: Aug 2003
Posts: 985
Likes: 2
From: Northamptonshire
Default

Some cracking work on this resto, well done
Reply
Old Mar 28, 2016 | 08:30 PM
  #104  
dazrsturbo's Avatar
dazrsturbo
Too many posts.. I need a life!!
iTrader: (3)
 
Joined: Sep 2007
Posts: 624
Likes: 21
From: Norwich
Default

Wow that window bodge is crazy bad! Glad to see your still at it dude! Iv now started another one myself! Few rs turbos in norfolk now!
Reply
Old Mar 29, 2016 | 07:22 AM
  #105  
xxTWINNYxx's Avatar
xxTWINNYxx
Thread Starter
Regular Contributor
iTrader: (1)
 
Joined: Jul 2010
Posts: 217
Likes: 3
From: NORFOLK
Default

Yeah there seems to be a nice collection of them now, I was a bit annoyed to see a bodge like that but I suppose the good thing is that I can now sort it properly and not have to worry about it again
Reply
Old Jul 21, 2016 | 09:02 PM
  #106  
xxTWINNYxx's Avatar
xxTWINNYxx
Thread Starter
Regular Contributor
iTrader: (1)
 
Joined: Jul 2010
Posts: 217
Likes: 3
From: NORFOLK
Default

Quick update
Sealed and stone guarded the boot floor
Name:  RS%20-%2098_zpsfbvcbvw8.jpg
Views: 1090
Size:  184.2 KB
Reply
Old Jul 21, 2016 | 09:07 PM
  #107  
xxTWINNYxx's Avatar
xxTWINNYxx
Thread Starter
Regular Contributor
iTrader: (1)
 
Joined: Jul 2010
Posts: 217
Likes: 3
From: NORFOLK
Default

Fitted front suspension with the new wheel bearings and track rod ends
Name:  RS%20-%2099_zpstaadho1x.jpg
Views: 1070
Size:  171.0 KB
Name:  RS%20-%20100_zpskaybu9ov.jpg
Views: 1056
Size:  216.2 KB
Reply
Old Jul 21, 2016 | 09:11 PM
  #108  
xxTWINNYxx's Avatar
xxTWINNYxx
Thread Starter
Regular Contributor
iTrader: (1)
 
Joined: Jul 2010
Posts: 217
Likes: 3
From: NORFOLK
Default

Finally got around to fitting the new front indicators and headlights, with fittings.
Also got the front cosworth brakes fitted properly.
Name:  RS%20-%20101_zpsudku1gyt.jpg
Views: 1150
Size:  192.3 KB
Reply
Old Jul 21, 2016 | 09:17 PM
  #109  
xxTWINNYxx's Avatar
xxTWINNYxx
Thread Starter
Regular Contributor
iTrader: (1)
 
Joined: Jul 2010
Posts: 217
Likes: 3
From: NORFOLK
Default

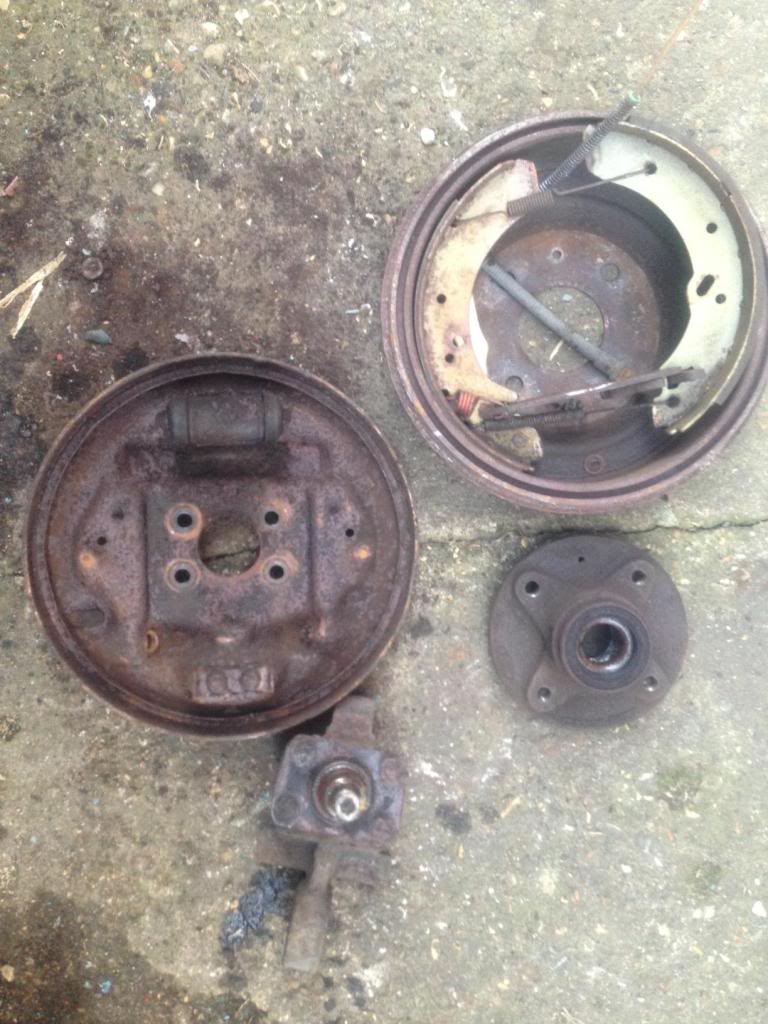
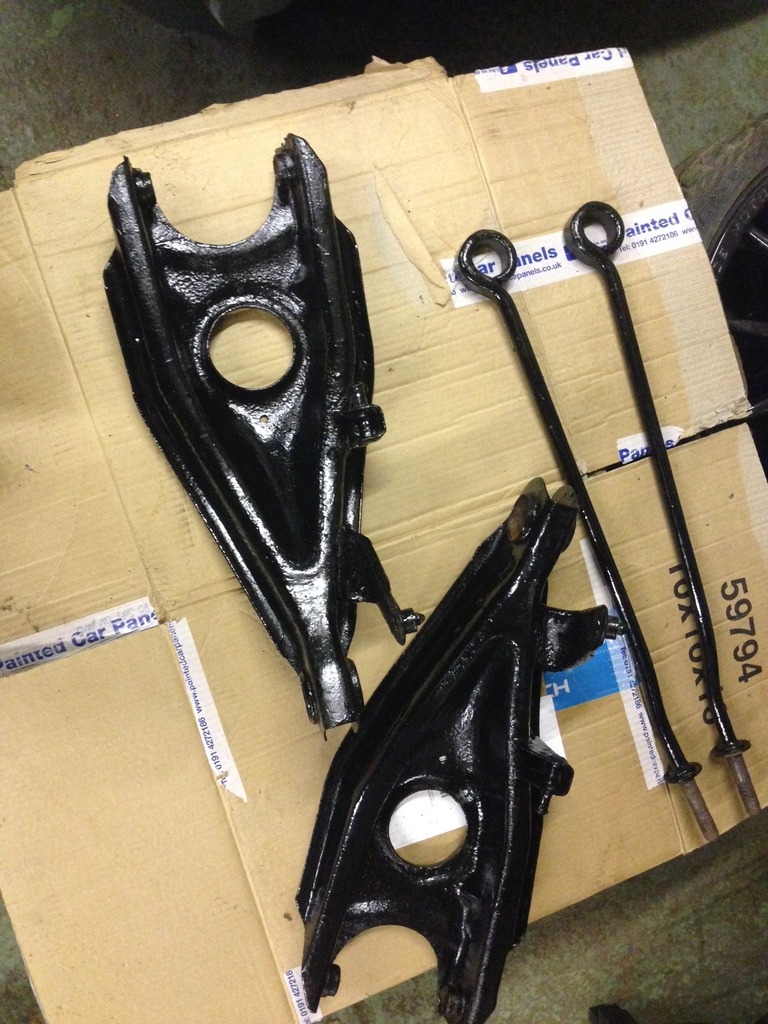
Stripped and blasted the rear wishbones and trailing arms and gave them a few good coats of paint.

Name:  RS%20-%20104_zpsrthbrba6.jpg
Views: 1127
Size:  236.4 KB

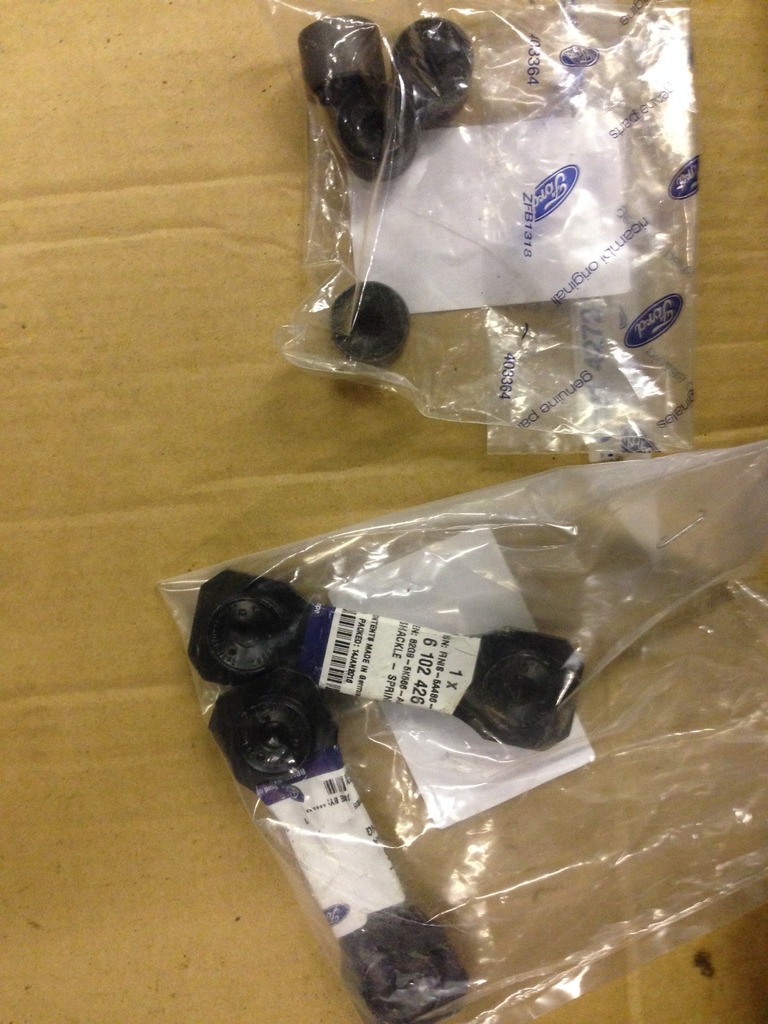
Finally got my delivery from ford so the suspension set up can go on. new bearings for hubs, new nuts, castle washer and split pin and rear anti roll bar links
Name:  RS%20-%20105_zpsjedytfht.jpg
Views: 1147
Size:  204.3 KB

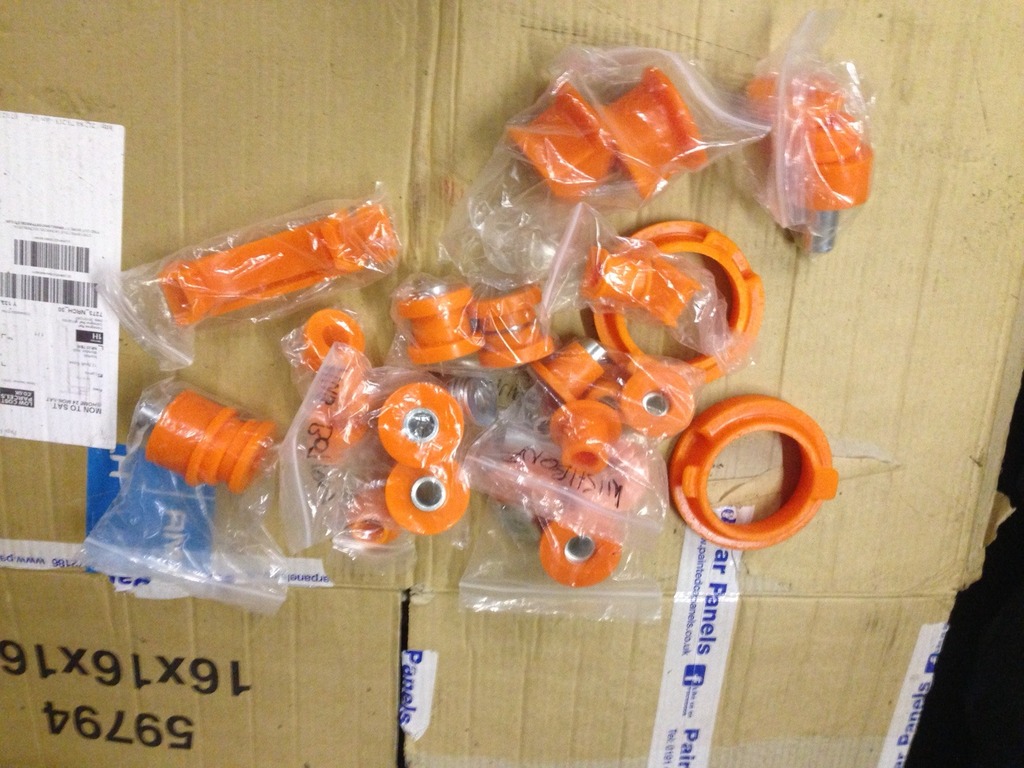
Got the full flowflex kit turned up (Top mounts already fitted) i know some people dont like them but i'll see how i get on with them
Name:  RS%20-%20106_zps5l12rskg.jpg
Views: 1096
Size:  215.9 KB

Last edited by xxTWINNYxx; Jul 21, 2016 at 09:22 PM.
Reply
Old Jul 21, 2016 | 09:26 PM
  #110  
xxTWINNYxx's Avatar
xxTWINNYxx
Thread Starter
Regular Contributor
iTrader: (1)
 
Joined: Jul 2010
Posts: 217
Likes: 3
From: NORFOLK
Default

Got the paint mixed up so gave the boot floor a couple of coats
Name:  RS%20-%20103_zpsvwgktdhz.jpg
Views: 1195
Size:  227.3 KB
Name:  RS%20-%20102_zpskbrfyfw0.jpg
Views: 1149
Size:  203.3 KB
Reply
Old Jul 21, 2016 | 09:38 PM
  #111  
xxTWINNYxx's Avatar
xxTWINNYxx
Thread Starter
Regular Contributor
iTrader: (1)
 
Joined: Jul 2010
Posts: 217
Likes: 3
From: NORFOLK
Default

Built the rear hubs up with the new parts and the rear disk conversion, fitted the polybushes

Name:  RS%20-%20107_zpsvmywwpgg.jpg
Views: 1070
Size:  221.8 KB
Name:  RS%20-%20108_zpsdiyuveej.jpg
Views: 1158
Size:  231.2 KB
Name:  RS%20-%20109_zpsh3gcdvxq.jpg
Views: 1073
Size:  217.7 KB
Reply
Old Jan 15, 2017 | 04:47 PM
  #112  
dazrsturbo's Avatar
dazrsturbo
Too many posts.. I need a life!!
iTrader: (3)
 
Joined: Sep 2007
Posts: 624
Likes: 21
From: Norwich
Default

How's the car coming along dude?
Reply
Old Nov 7, 2017 | 09:47 PM
  #113  
xxTWINNYxx's Avatar
xxTWINNYxx
Thread Starter
Regular Contributor
iTrader: (1)
 
Joined: Jul 2010
Posts: 217
Likes: 3
From: NORFOLK
Default

Little bit of an update....

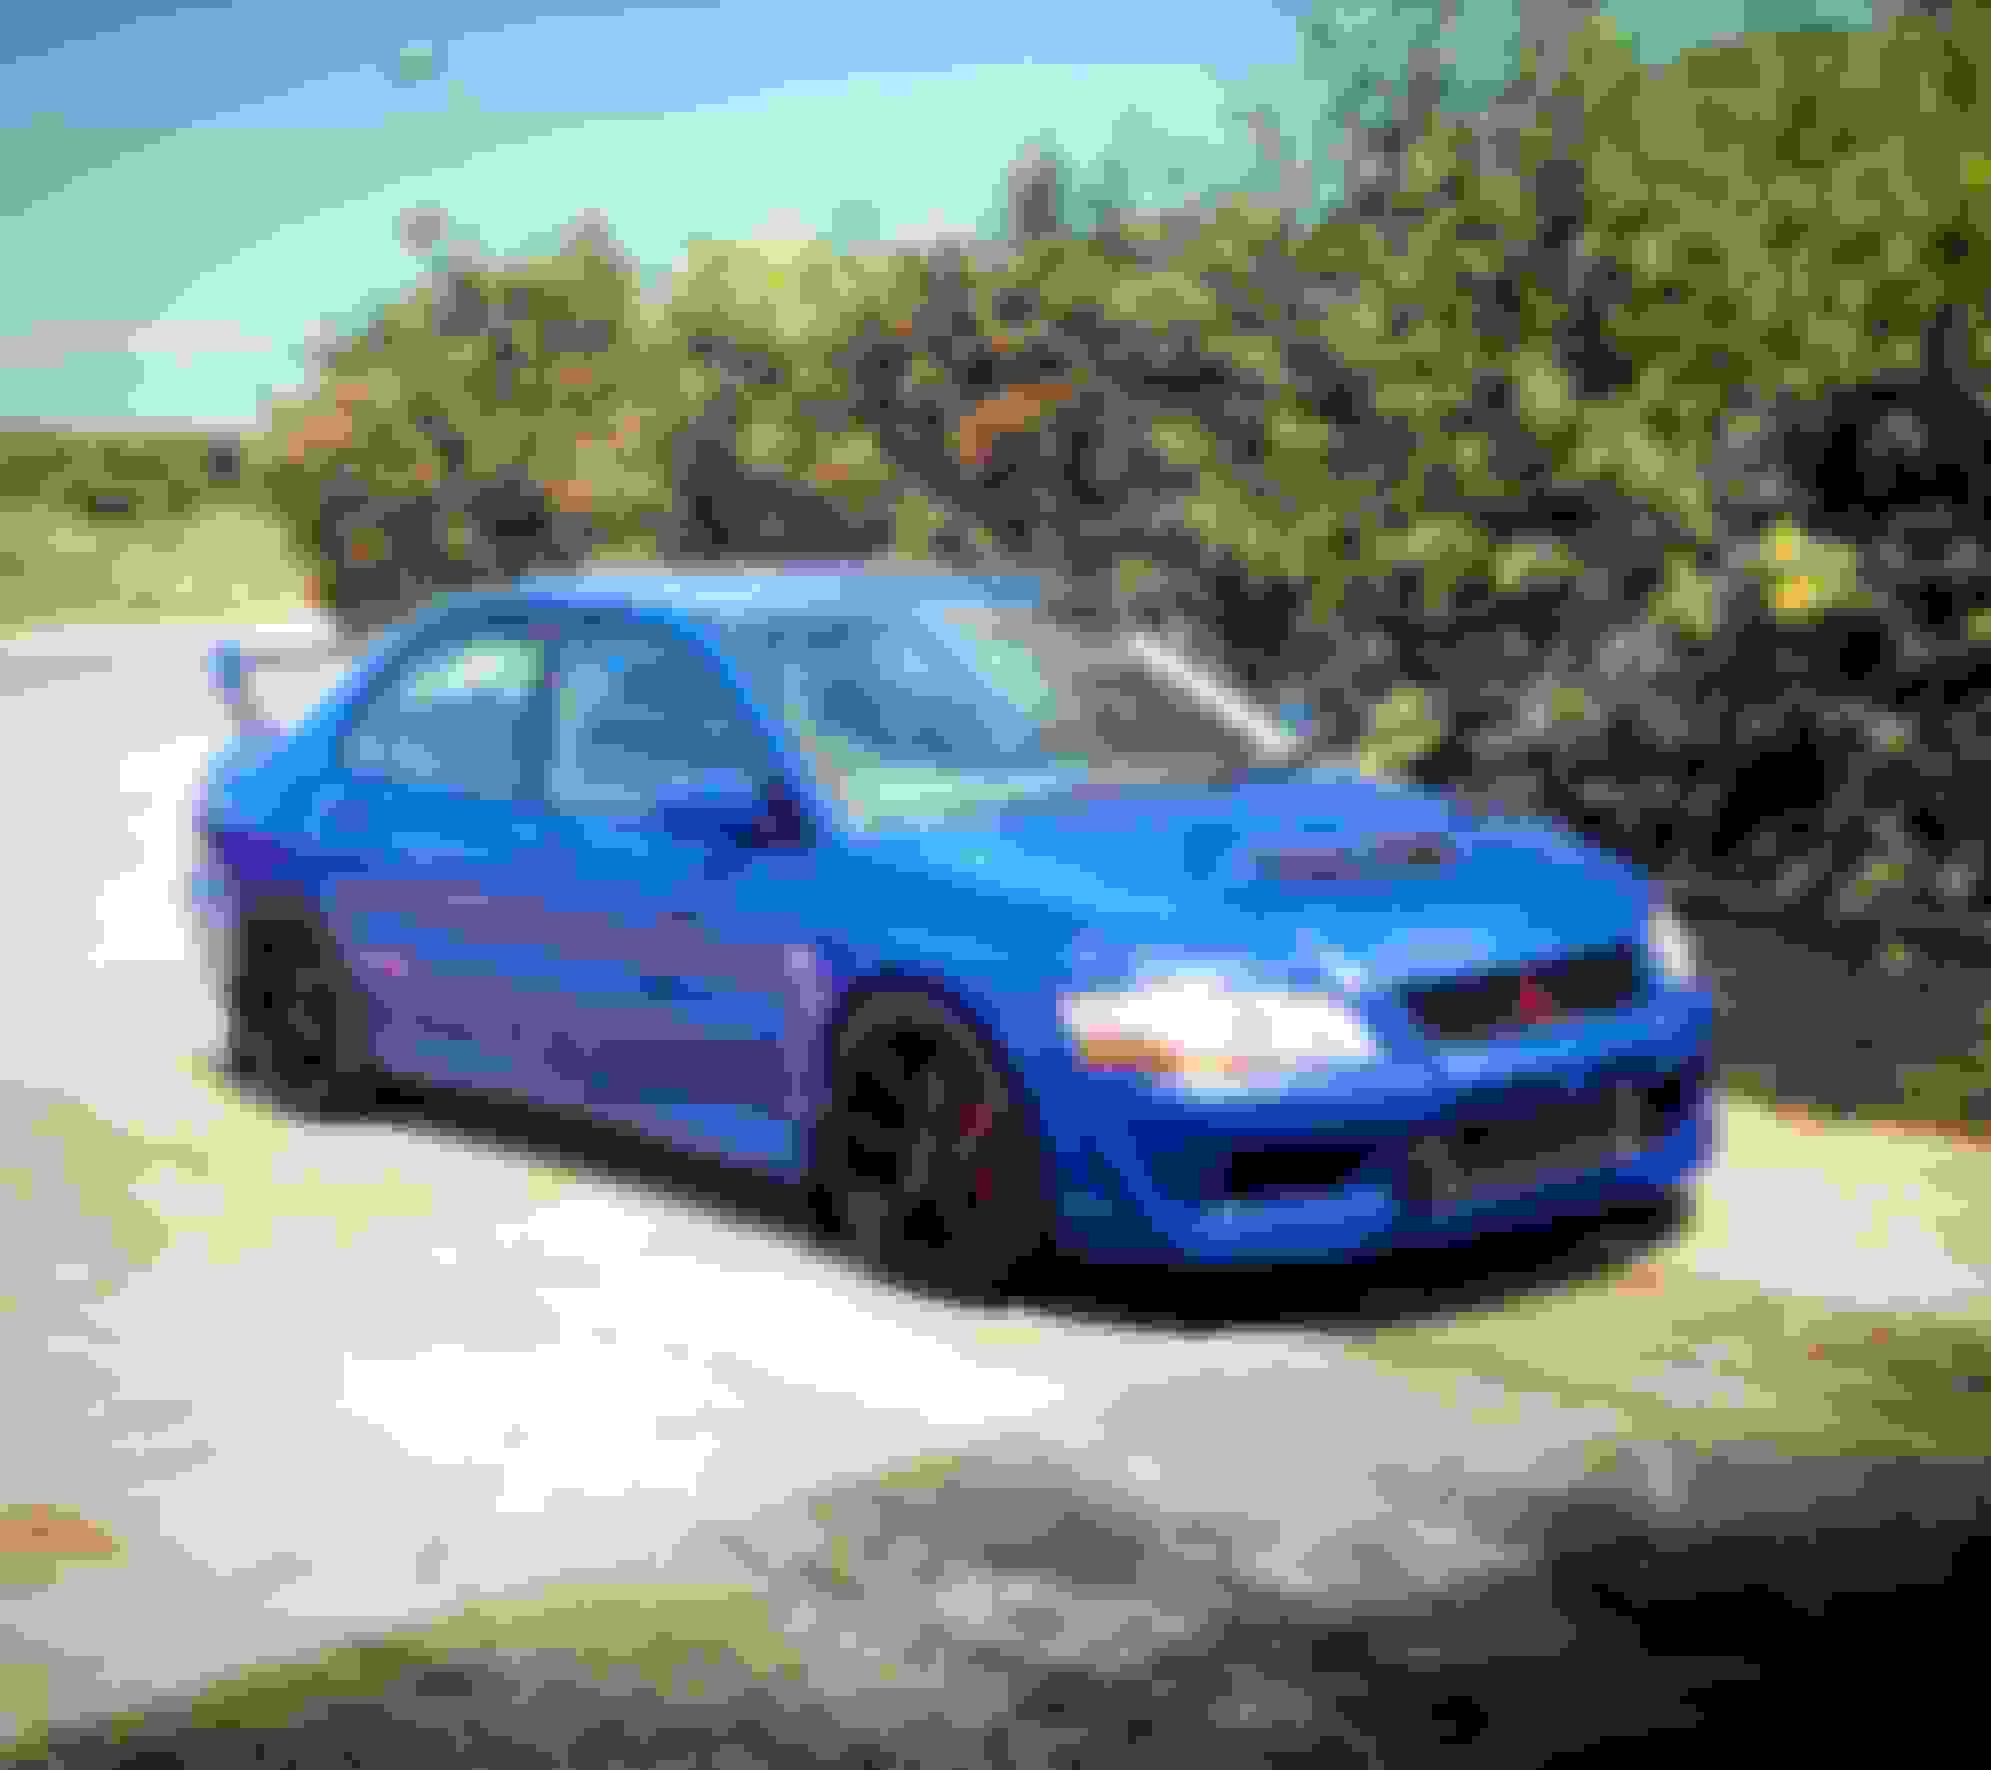
Had my evo painted and did a few bits to that and then sold it in the summer after 4 years of fun. Bought a mk1 escort which I will start a thread for and post link at some point.
Done a few bits to the rs turbo, all welded and under sealed at the back end now.


Last edited by xxTWINNYxx; Nov 8, 2017 at 02:35 PM.
Reply
Old Nov 8, 2017 | 05:54 PM
  #114  
Rsmat's Avatar
Rsmat
Professional Waffler
20 Year Member
Liked
Loved
Community Favorite
iTrader: (2)
 
Joined: May 2004
Posts: 27,262
Likes: 585
From: either at work or on way :)
Default

Looking good mate ..like it .
Reply
Old Jan 30, 2018 | 09:28 PM
  #115  
xxTWINNYxx's Avatar
xxTWINNYxx
Thread Starter
Regular Contributor
iTrader: (1)
 
Joined: Jul 2010
Posts: 217
Likes: 3
From: NORFOLK
Default

Small little update, in the process of building all the brakes and suspension out so it’s ready to fit so started laying down the sound deadening in the boot
Reply
Old Jan 31, 2018 | 10:33 PM
  #116  
xxTWINNYxx's Avatar
xxTWINNYxx
Thread Starter
Regular Contributor
iTrader: (1)
 
Joined: Jul 2010
Posts: 217
Likes: 3
From: NORFOLK
Default

https://passionford.com/forum/attach...1&d=1517441371

https://passionford.com/forum/attach...1&d=1517441371

https://passionford.com/forum/attach...1&d=1517441371

https://passionford.com/forum/attach...1&d=1517441371

https://passionford.com/forum/attach...1&d=1517441371


https://passionford.com/forum/attach...1&d=1517441371

https://passionford.com/forum/attach...1&d=1517441215
Attached Thumbnails 1990 Escort RS Turbo Restoration. Focus RS Conversion-f630c103-ea19-4912-8165-85f025a1d9d4.jpeg   1990 Escort RS Turbo Restoration. Focus RS Conversion-69288e44-87ec-4dbe-a43a-5d4f8c2fa3e4.jpeg   1990 Escort RS Turbo Restoration. Focus RS Conversion-dc3b0c0d-a440-4c0e-87f8-9173a187104a.jpeg   1990 Escort RS Turbo Restoration. Focus RS Conversion-63e2c4ae-bd86-4ccd-9c10-f094705879d7.jpeg   1990 Escort RS Turbo Restoration. Focus RS Conversion-2162f6e1-6215-4813-85f6-8f2739f1f8dd.jpeg  

1990 Escort RS Turbo Restoration. Focus RS Conversion-85ceafe3-36ad-4b2a-a088-81af608afdda.jpeg   1990 Escort RS Turbo Restoration. Focus RS Conversion-aa85457f-b8c4-447a-a7a9-f9f4dd14e803.jpeg  
Reply
Old Jan 31, 2018 | 10:34 PM
  #117  
xxTWINNYxx's Avatar
xxTWINNYxx
Thread Starter
Regular Contributor
iTrader: (1)
 
Joined: Jul 2010
Posts: 217
Likes: 3
From: NORFOLK
Default

Built up all the rear suspension and got it mounted up, first time the rear suspension has been on in years
Reply
Old Dec 17, 2018 | 06:53 PM
  #118  
xxTWINNYxx's Avatar
xxTWINNYxx
Thread Starter
Regular Contributor
iTrader: (1)
 
Joined: Jul 2010
Posts: 217
Likes: 3
From: NORFOLK
Default

Had a hectic year but decided to get the car fully painted
Reply
Old Dec 17, 2018 | 06:57 PM
  #119  
xxTWINNYxx's Avatar
xxTWINNYxx
Thread Starter
Regular Contributor
iTrader: (1)
 
Joined: Jul 2010
Posts: 217
Likes: 3
From: NORFOLK
Default

Just before being sent off to paint
Reply
Old Dec 17, 2018 | 07:09 PM
  #120  
xxTWINNYxx's Avatar
xxTWINNYxx
Thread Starter
Regular Contributor
iTrader: (1)
 
Joined: Jul 2010
Posts: 217
Likes: 3
From: NORFOLK
Default

Car was away a while being painted, didn’t really get any pics of it in paint but you all know what a car in a paint booth looks like.

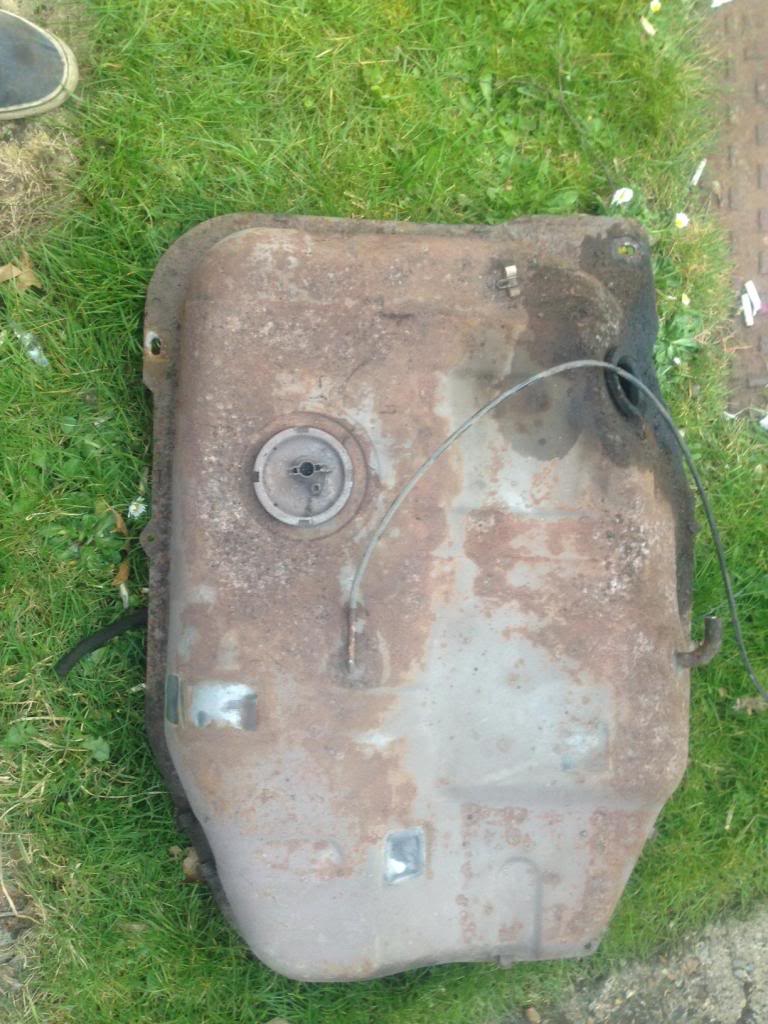
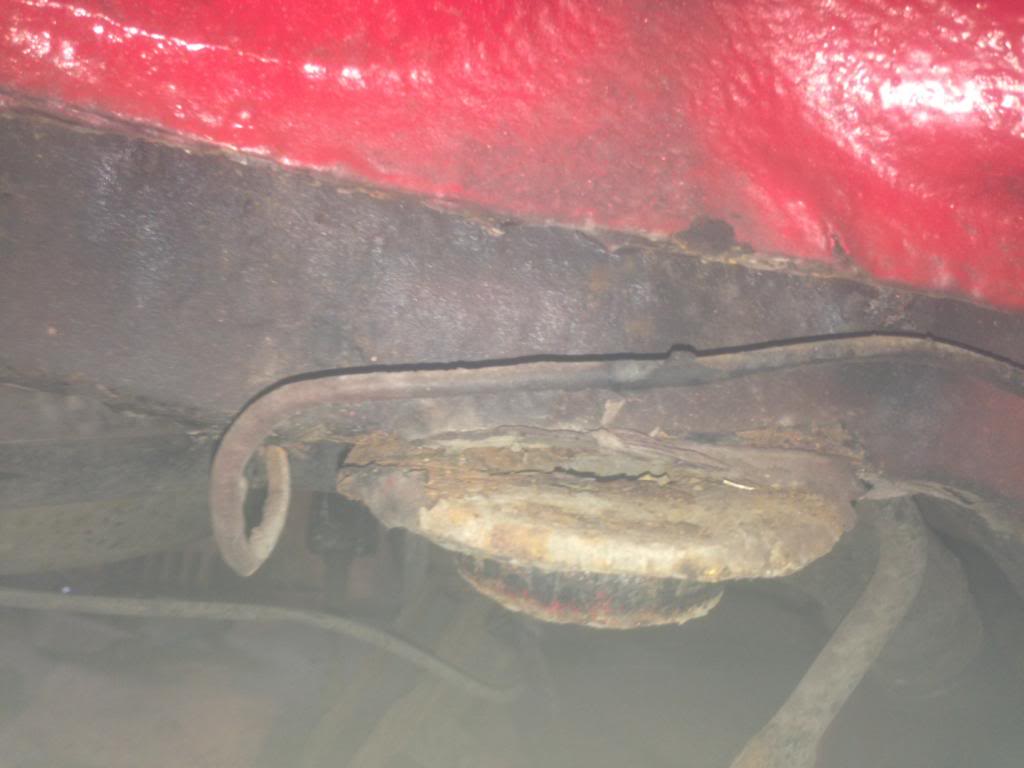
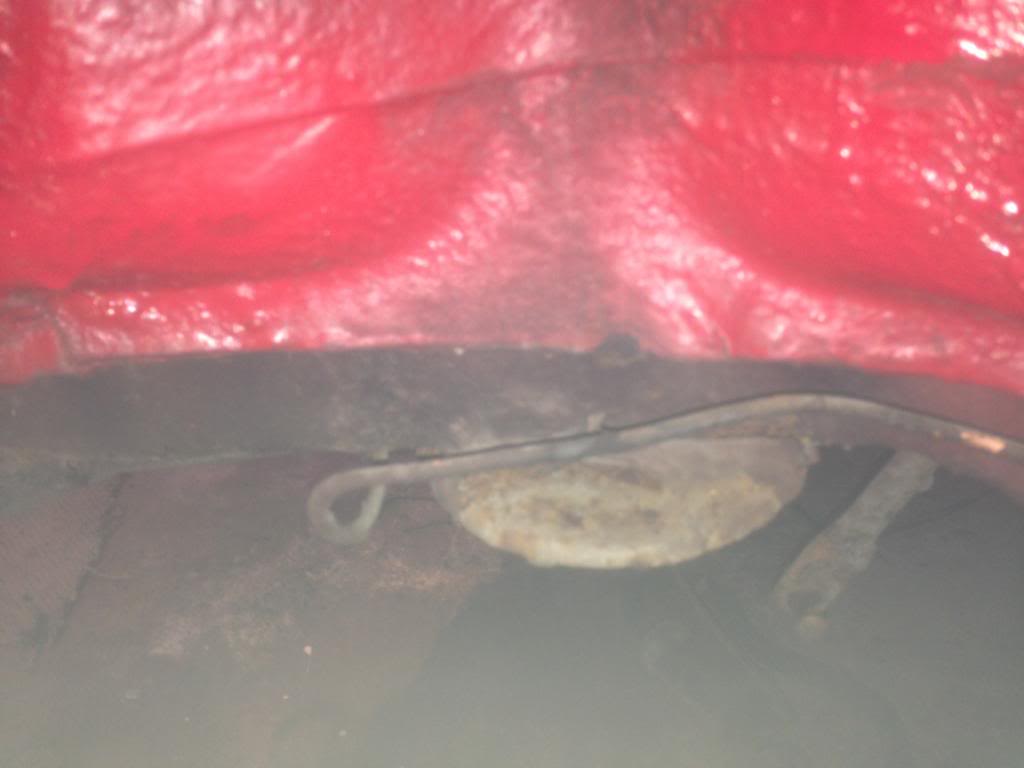
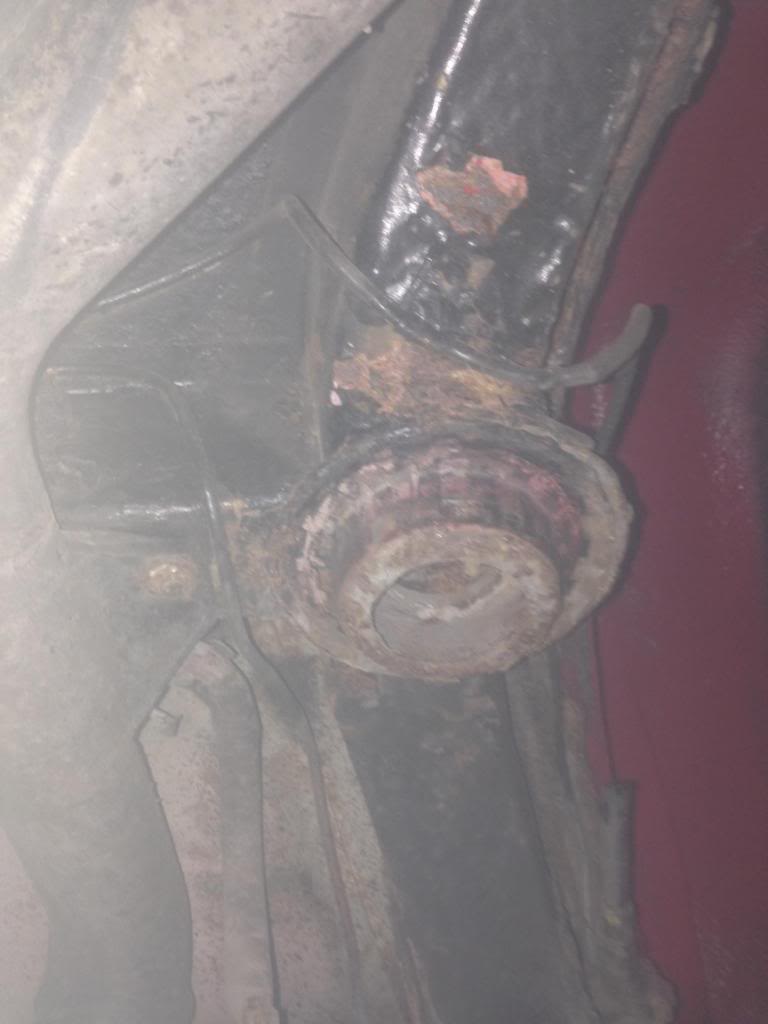
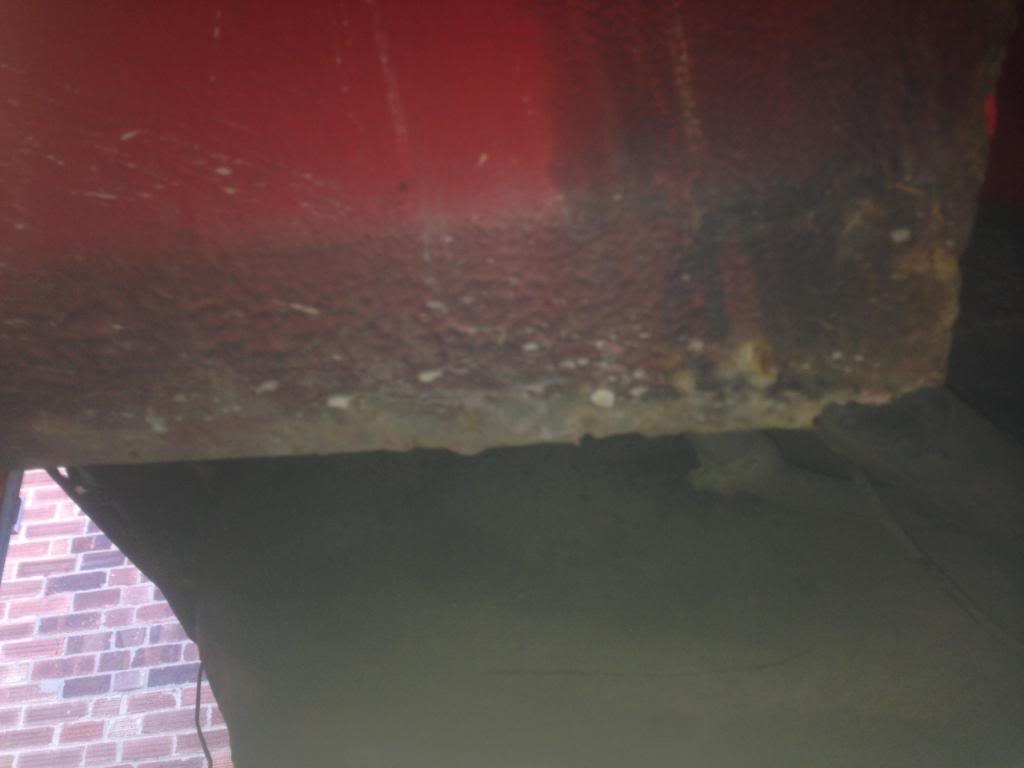
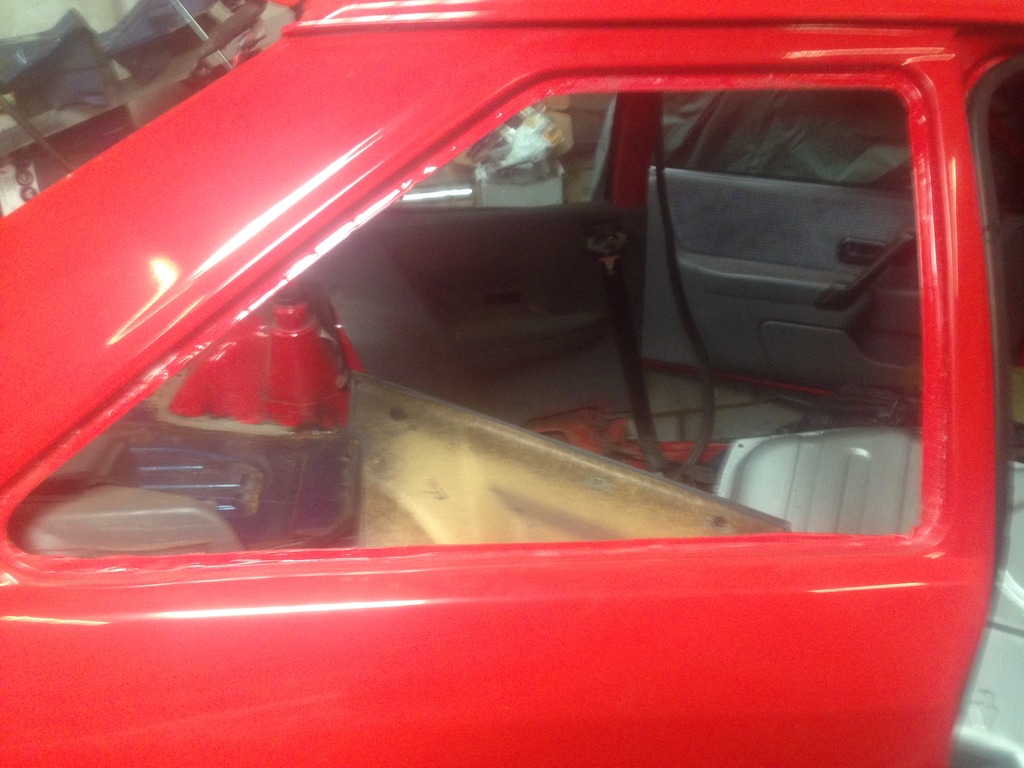
got the car back a few days ago, stripped the engine bay out and removed all the fuel lines and brake lines to make them all fresh again, few little bits done and then I decided to strip the underside and paint it red too, what a chore!!!
Excuse the overspray..


Reply


All times are GMT. The time now is 09:34 PM.