Puma 4x4 Cosworth
 20-11-2015, 04:55 PM
#121
Glennvestite
iTrader: (1)
Join Date: Jul 2006
Location: Darlington county durham
Posts: 62,755
Received 1,042 Likes
on
996 Posts
Yeh i got a refurbished rack. I have also fitted the solid bushes. At first i hated them but im used to them now.
You can just feel every judder through the steering wheel.
You can just feel every judder through the steering wheel.
 21-11-2015, 07:46 PM
#122
I've found that life I needed.. It's HERE!!
The puma is fighting you all the way but you have the patience, skill (and money) to sort it out. Great reading thanks for posting and hope you get some problem free time soon.
23-11-2015, 08:55 PM
#125
PassionFord Regular
Thread Starter

Hopefully going to get some track time in next year!
Thanks for looking
24-11-2015, 01:12 PM
#126

Just read the whole thread and enjoyed reading it 
Can't believe the state of the wiring! I could never have built a car with wiring like that! I think Pumaspeed should change their name to Pumabodge!! Lucky the car didn't go up in smoke!
Coming along very well now though mate, well done
Can't believe the state of the wiring! I could never have built a car with wiring like that! I think Pumaspeed should change their name to Pumabodge!! Lucky the car didn't go up in smoke!
Coming along very well now though mate, well done
 29-11-2015, 08:31 PM
#128
PassionFord Regular
Thread Starter
Just read the whole thread and enjoyed reading it
Can't believe the state of the wiring! I could never have built a car with wiring like that! I think Pumaspeed should change their name to Pumabodge!! Lucky the car didn't go up in smoke!
Coming along very well now though mate, well done
Can't believe the state of the wiring! I could never have built a car with wiring like that! I think Pumaspeed should change their name to Pumabodge!! Lucky the car didn't go up in smoke!
Coming along very well now though mate, well done
Thanks very much, hopefully I can get to use it a bit more soon!
The following users liked this post:
Mad_Mat (18-03-2016)
29-11-2015, 08:34 PM
#129
PassionFord Regular
Thread Starter
29-11-2015, 09:25 PM
#130
PassionFord Regular
Thread Starter
Time for an update on progress over the last few weeks / month or so.
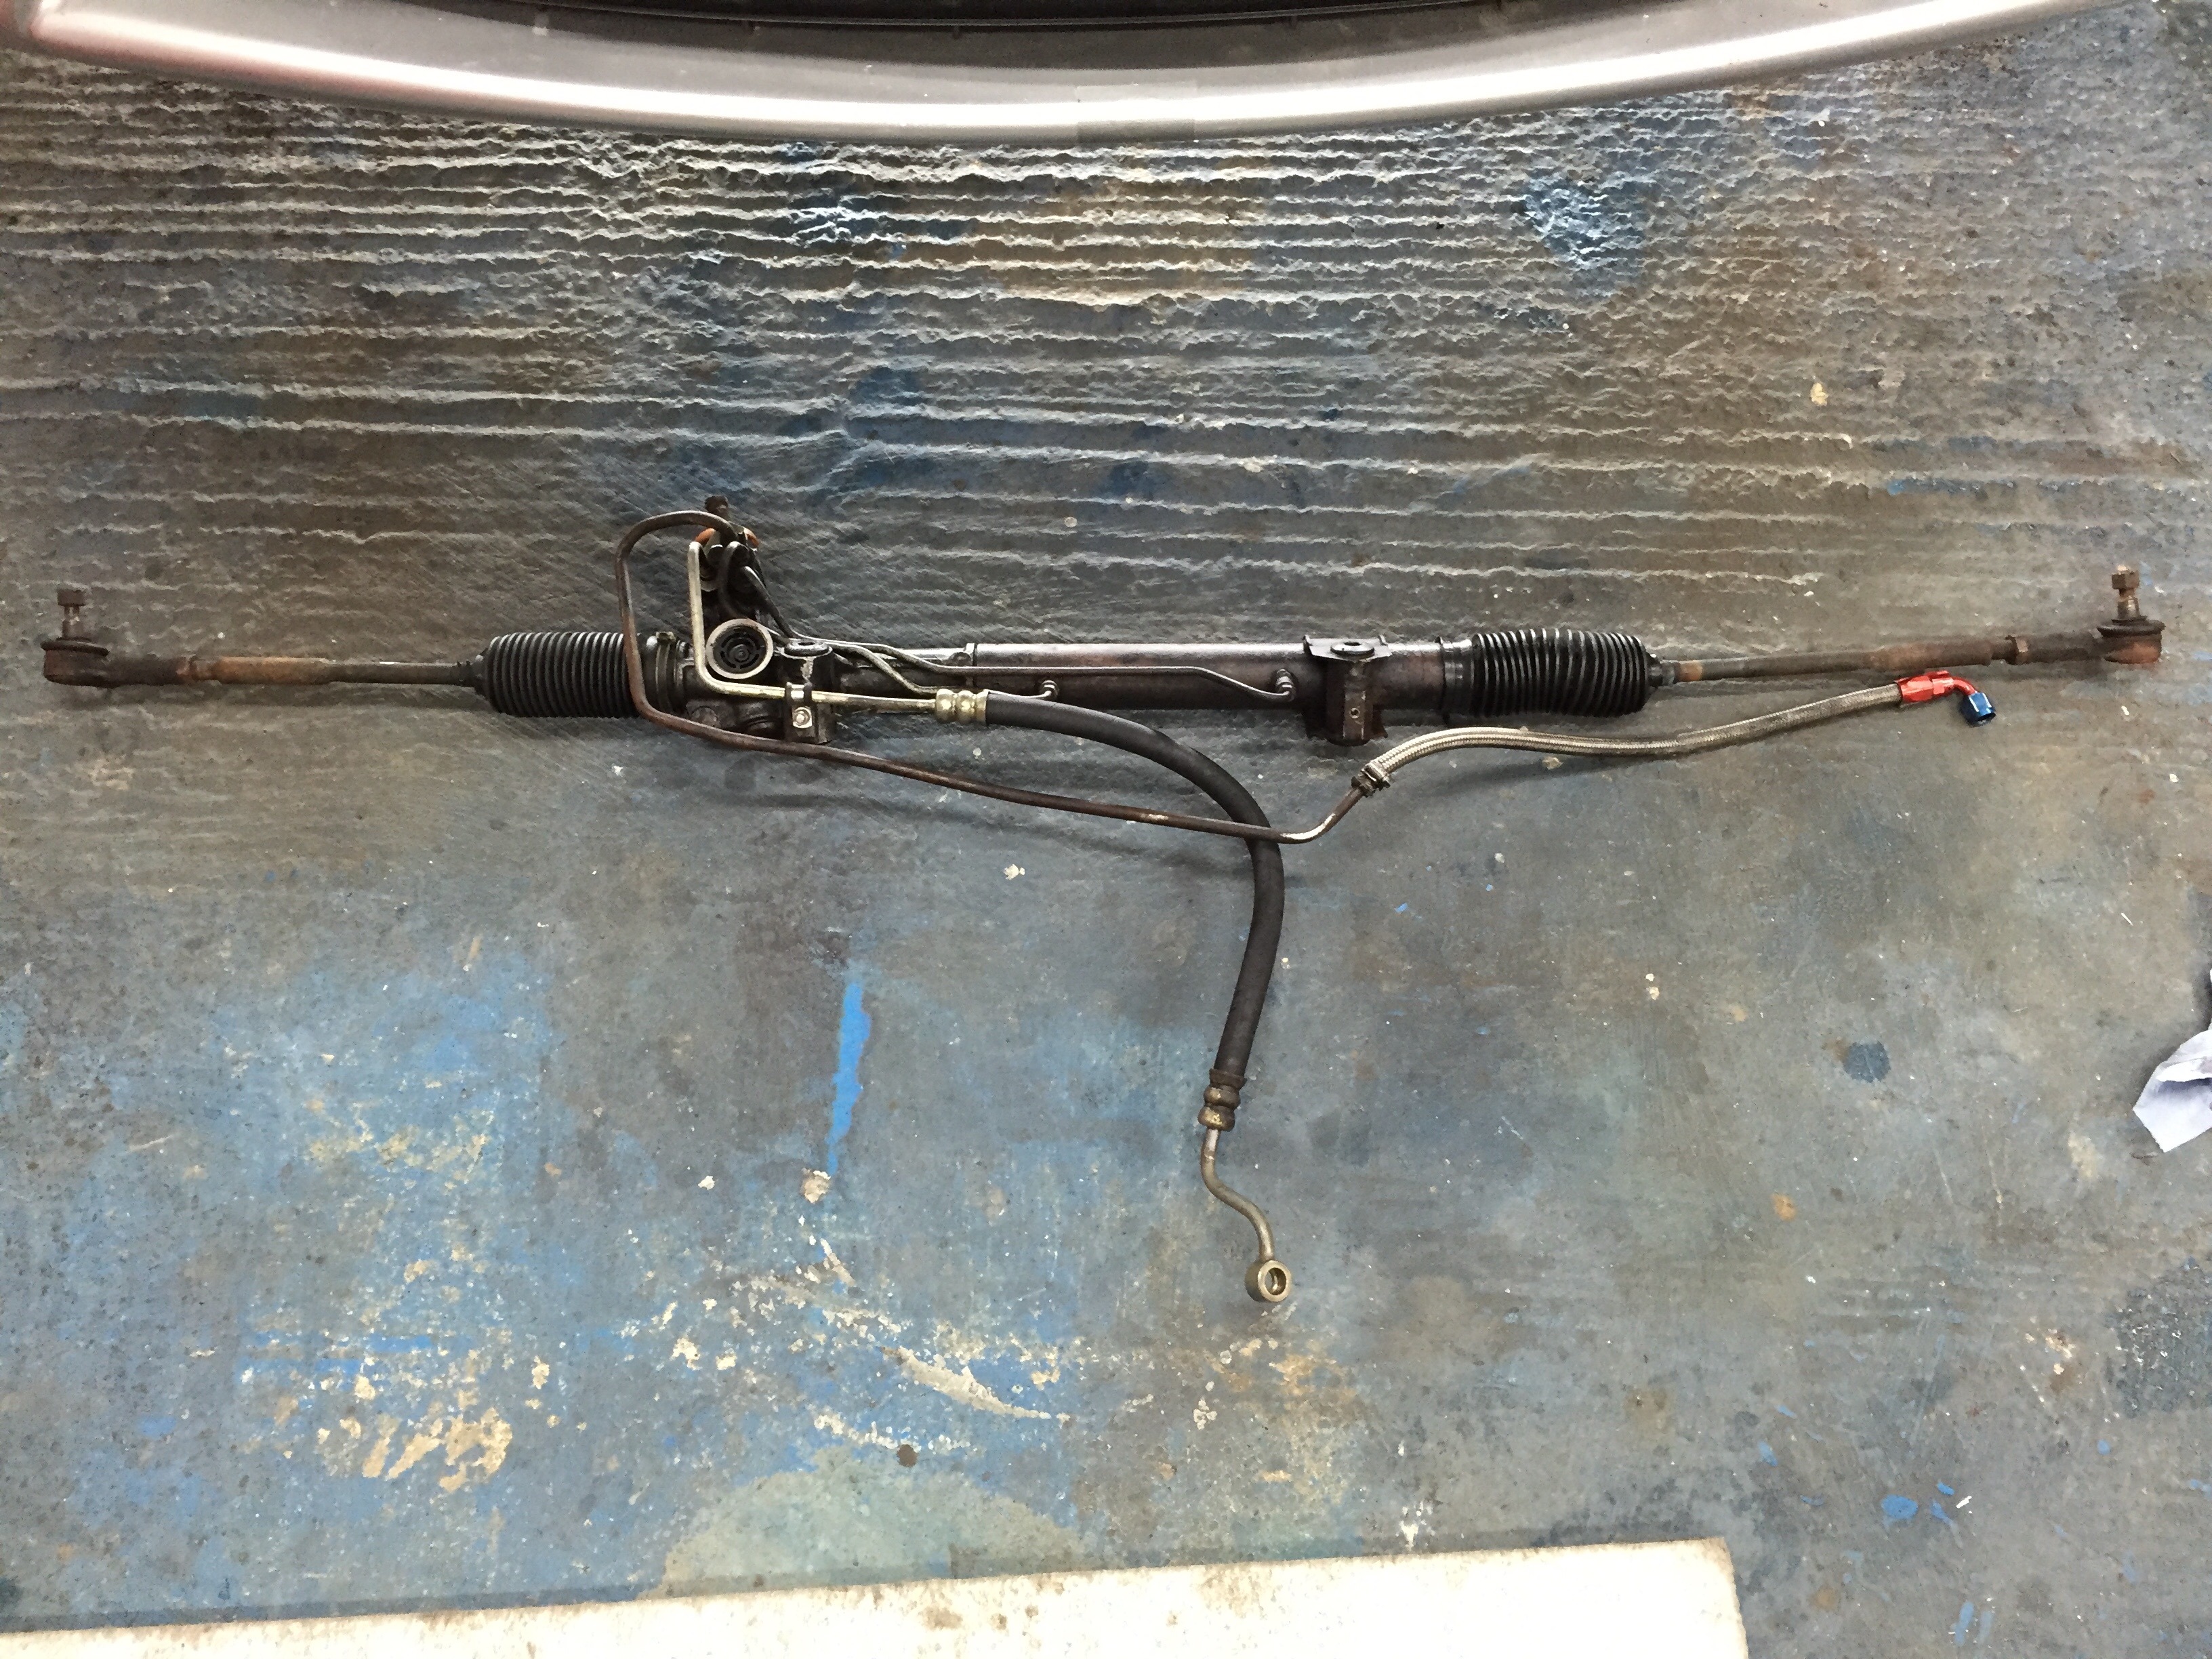
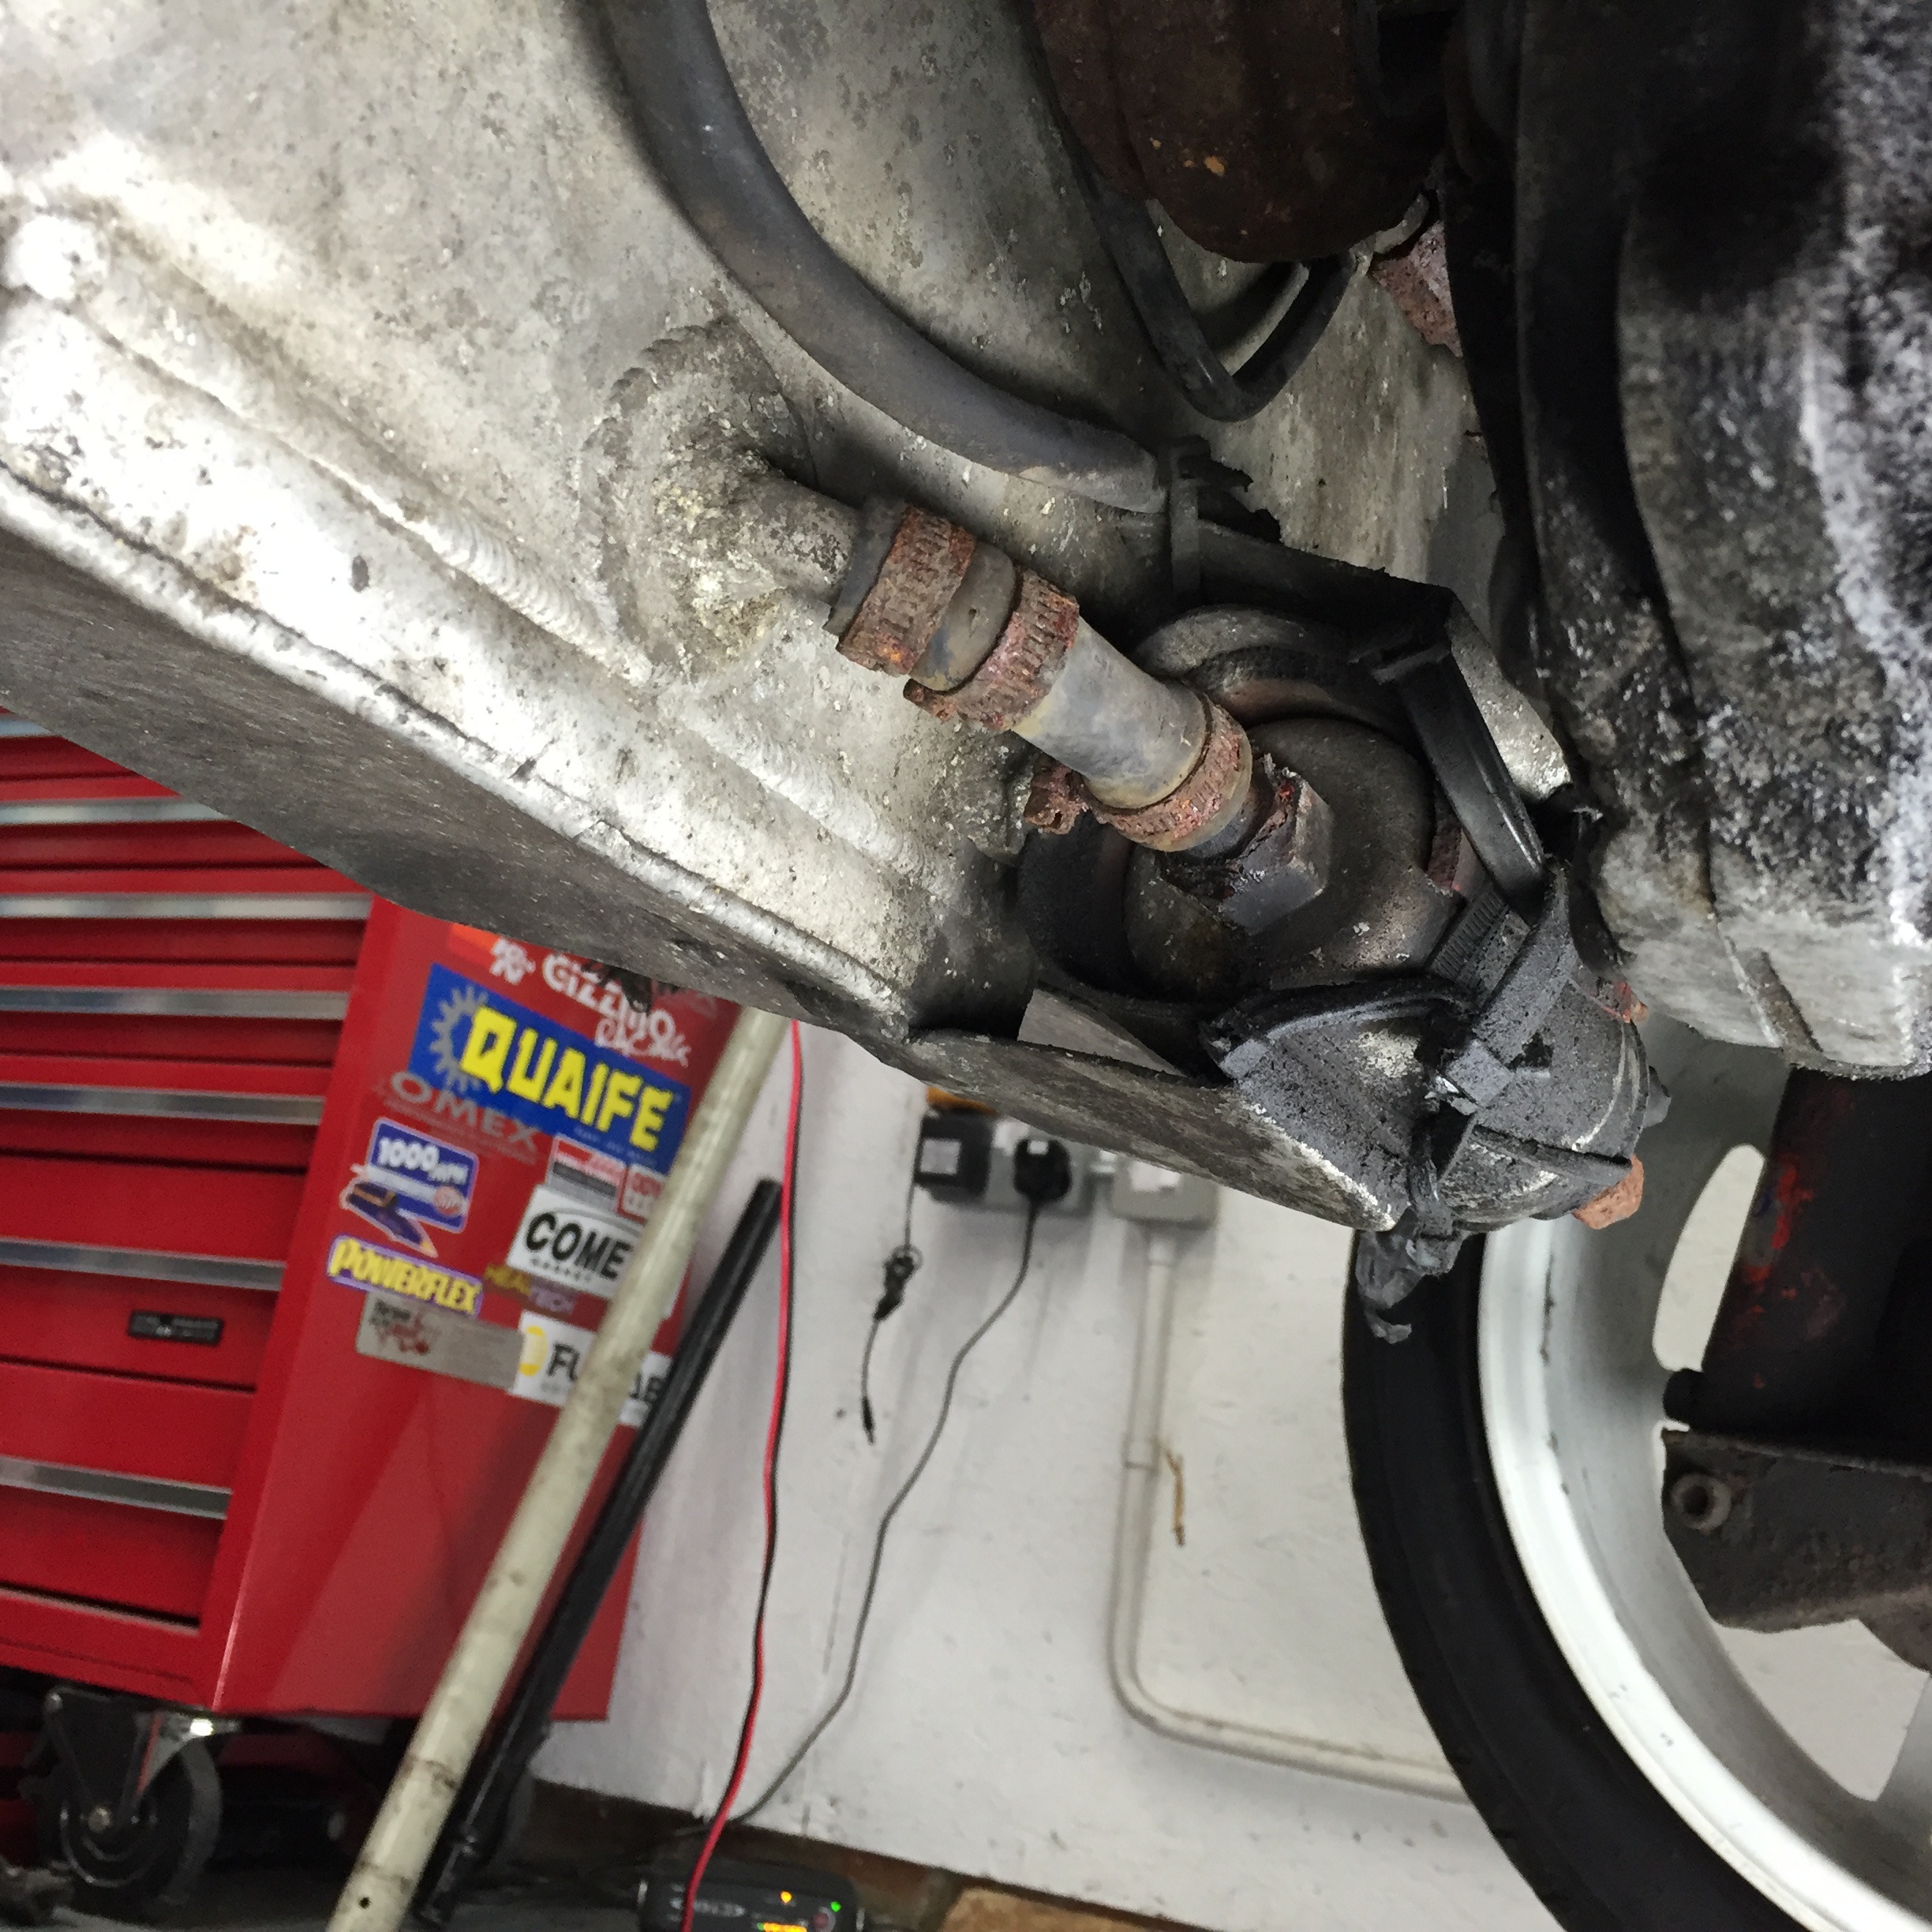
Last time out the steering rack decided it was its turn to get on the to do list and started leaking.. So out it came for new seals and while I was at it, decided it was also time to address the poor but still working steering hoses.
Rack out
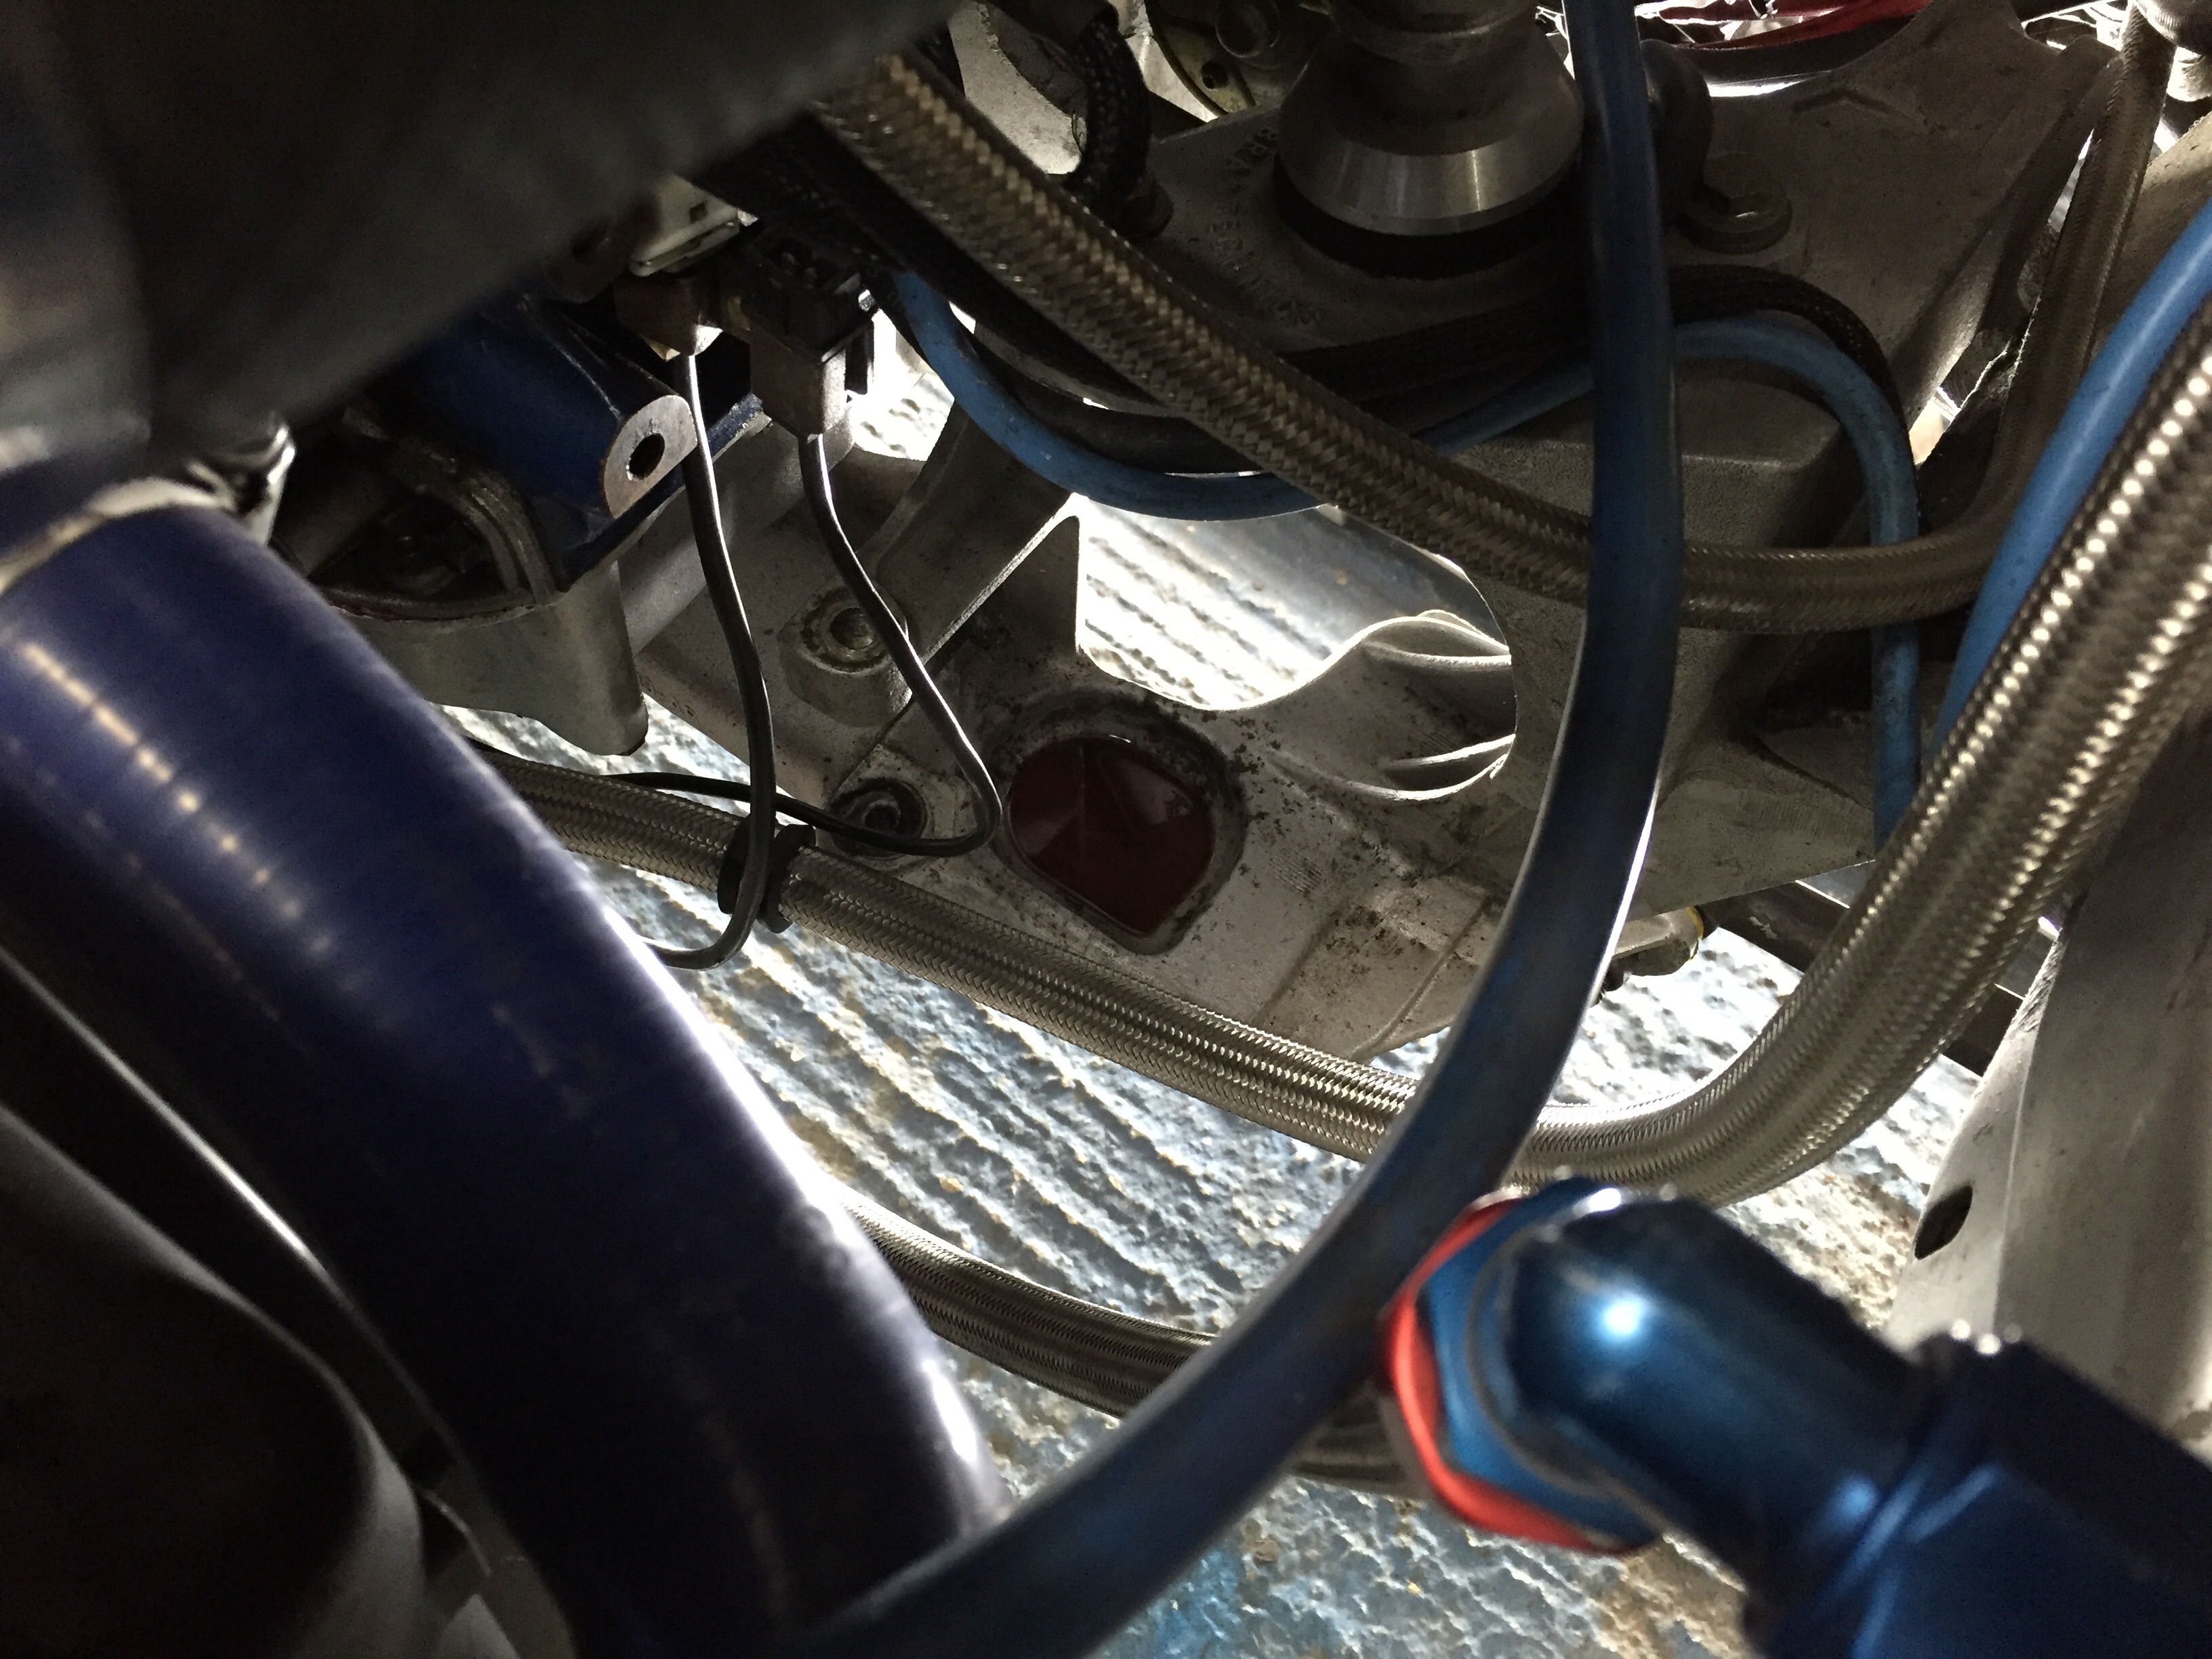
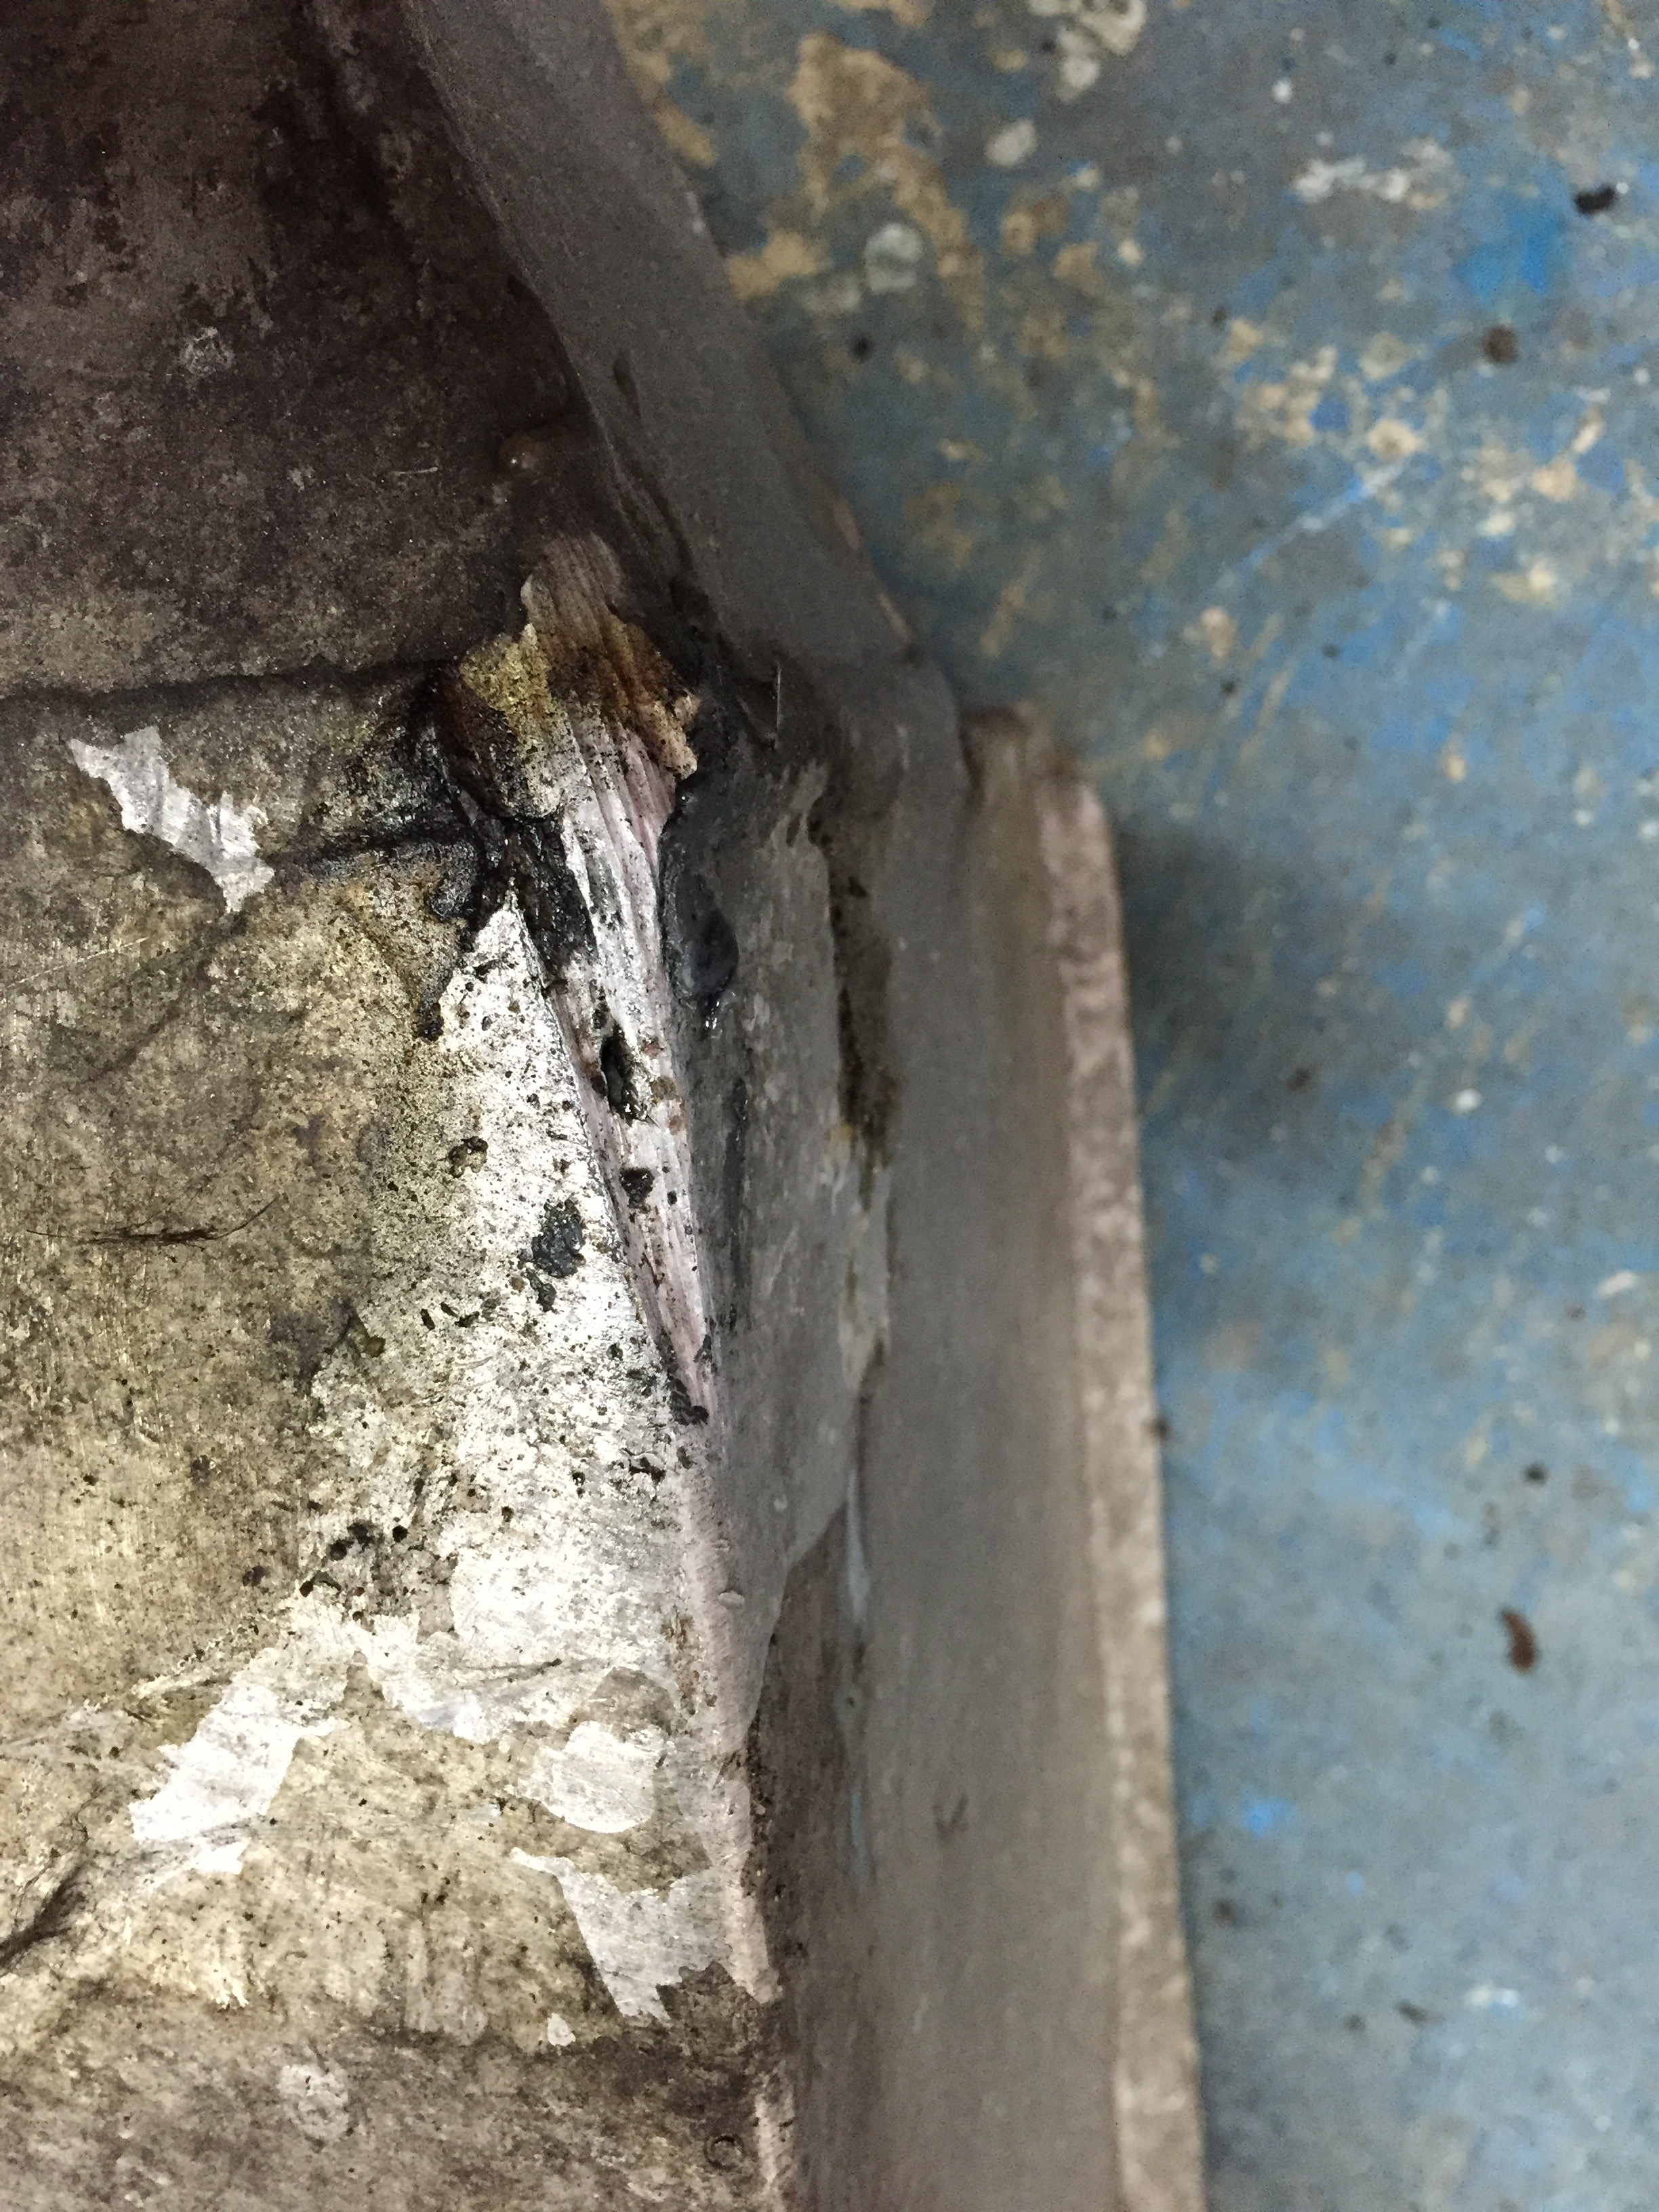
The puddle it left behind on the passenger side of the crossmember
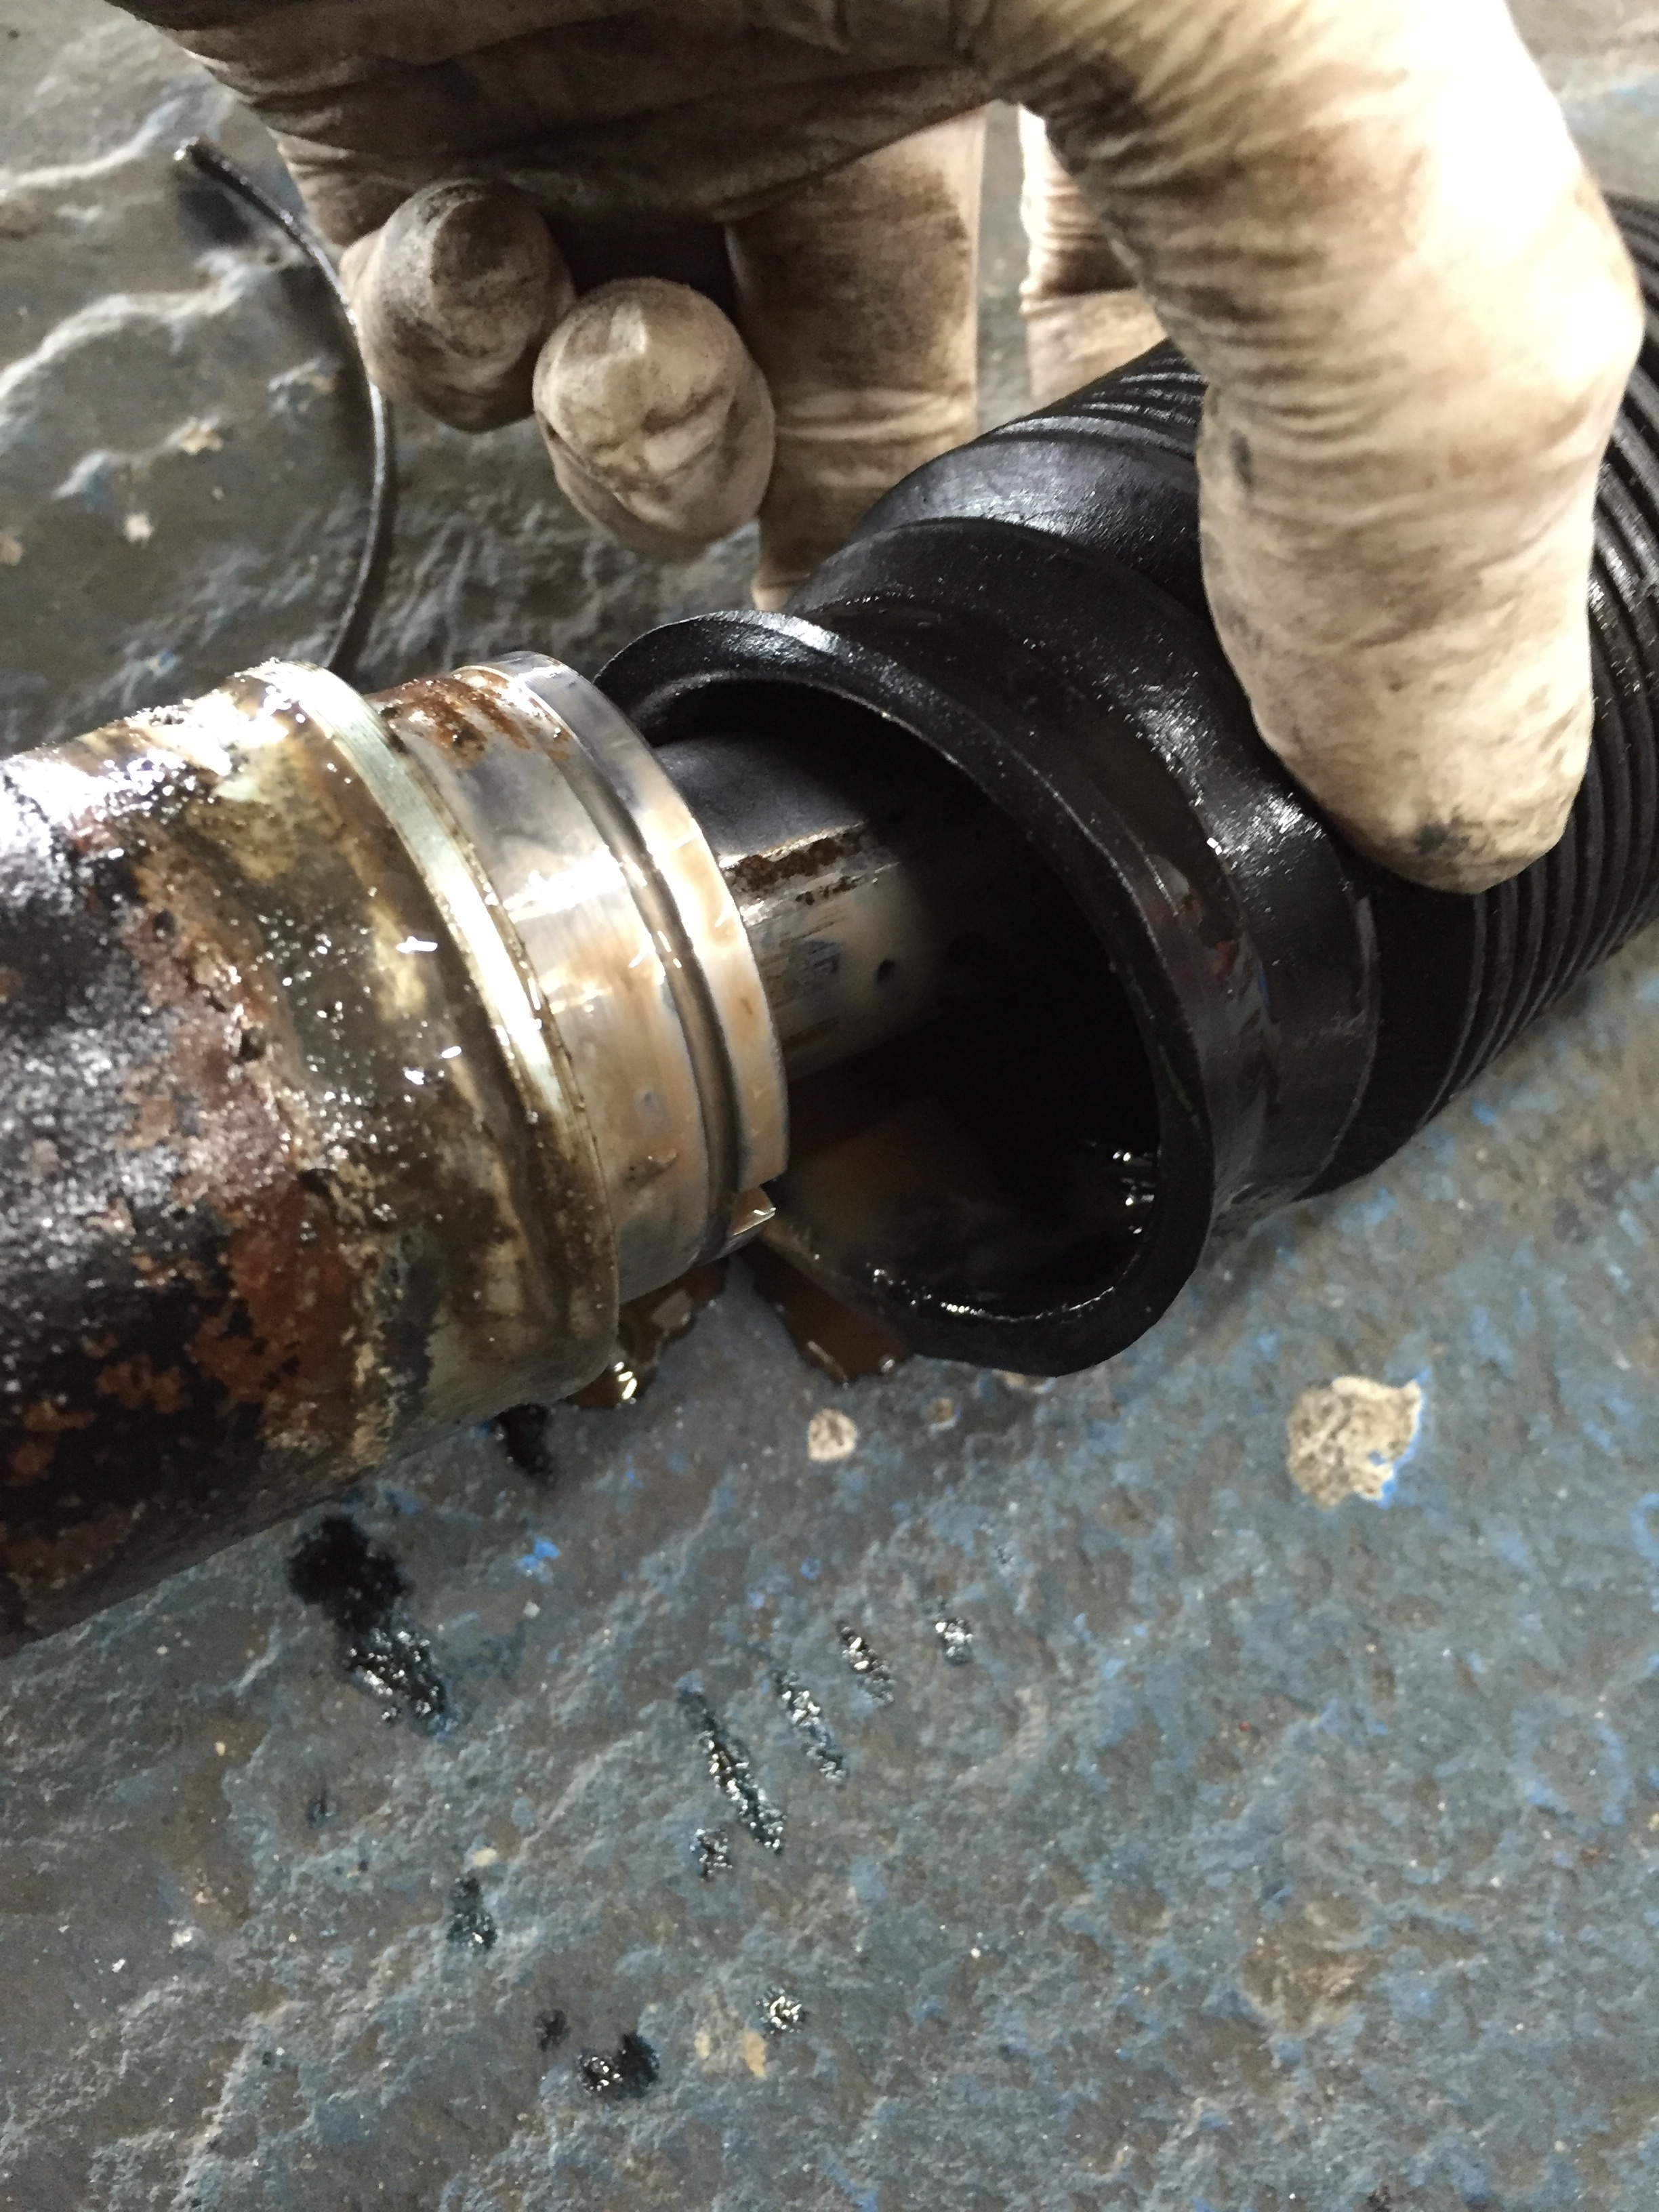
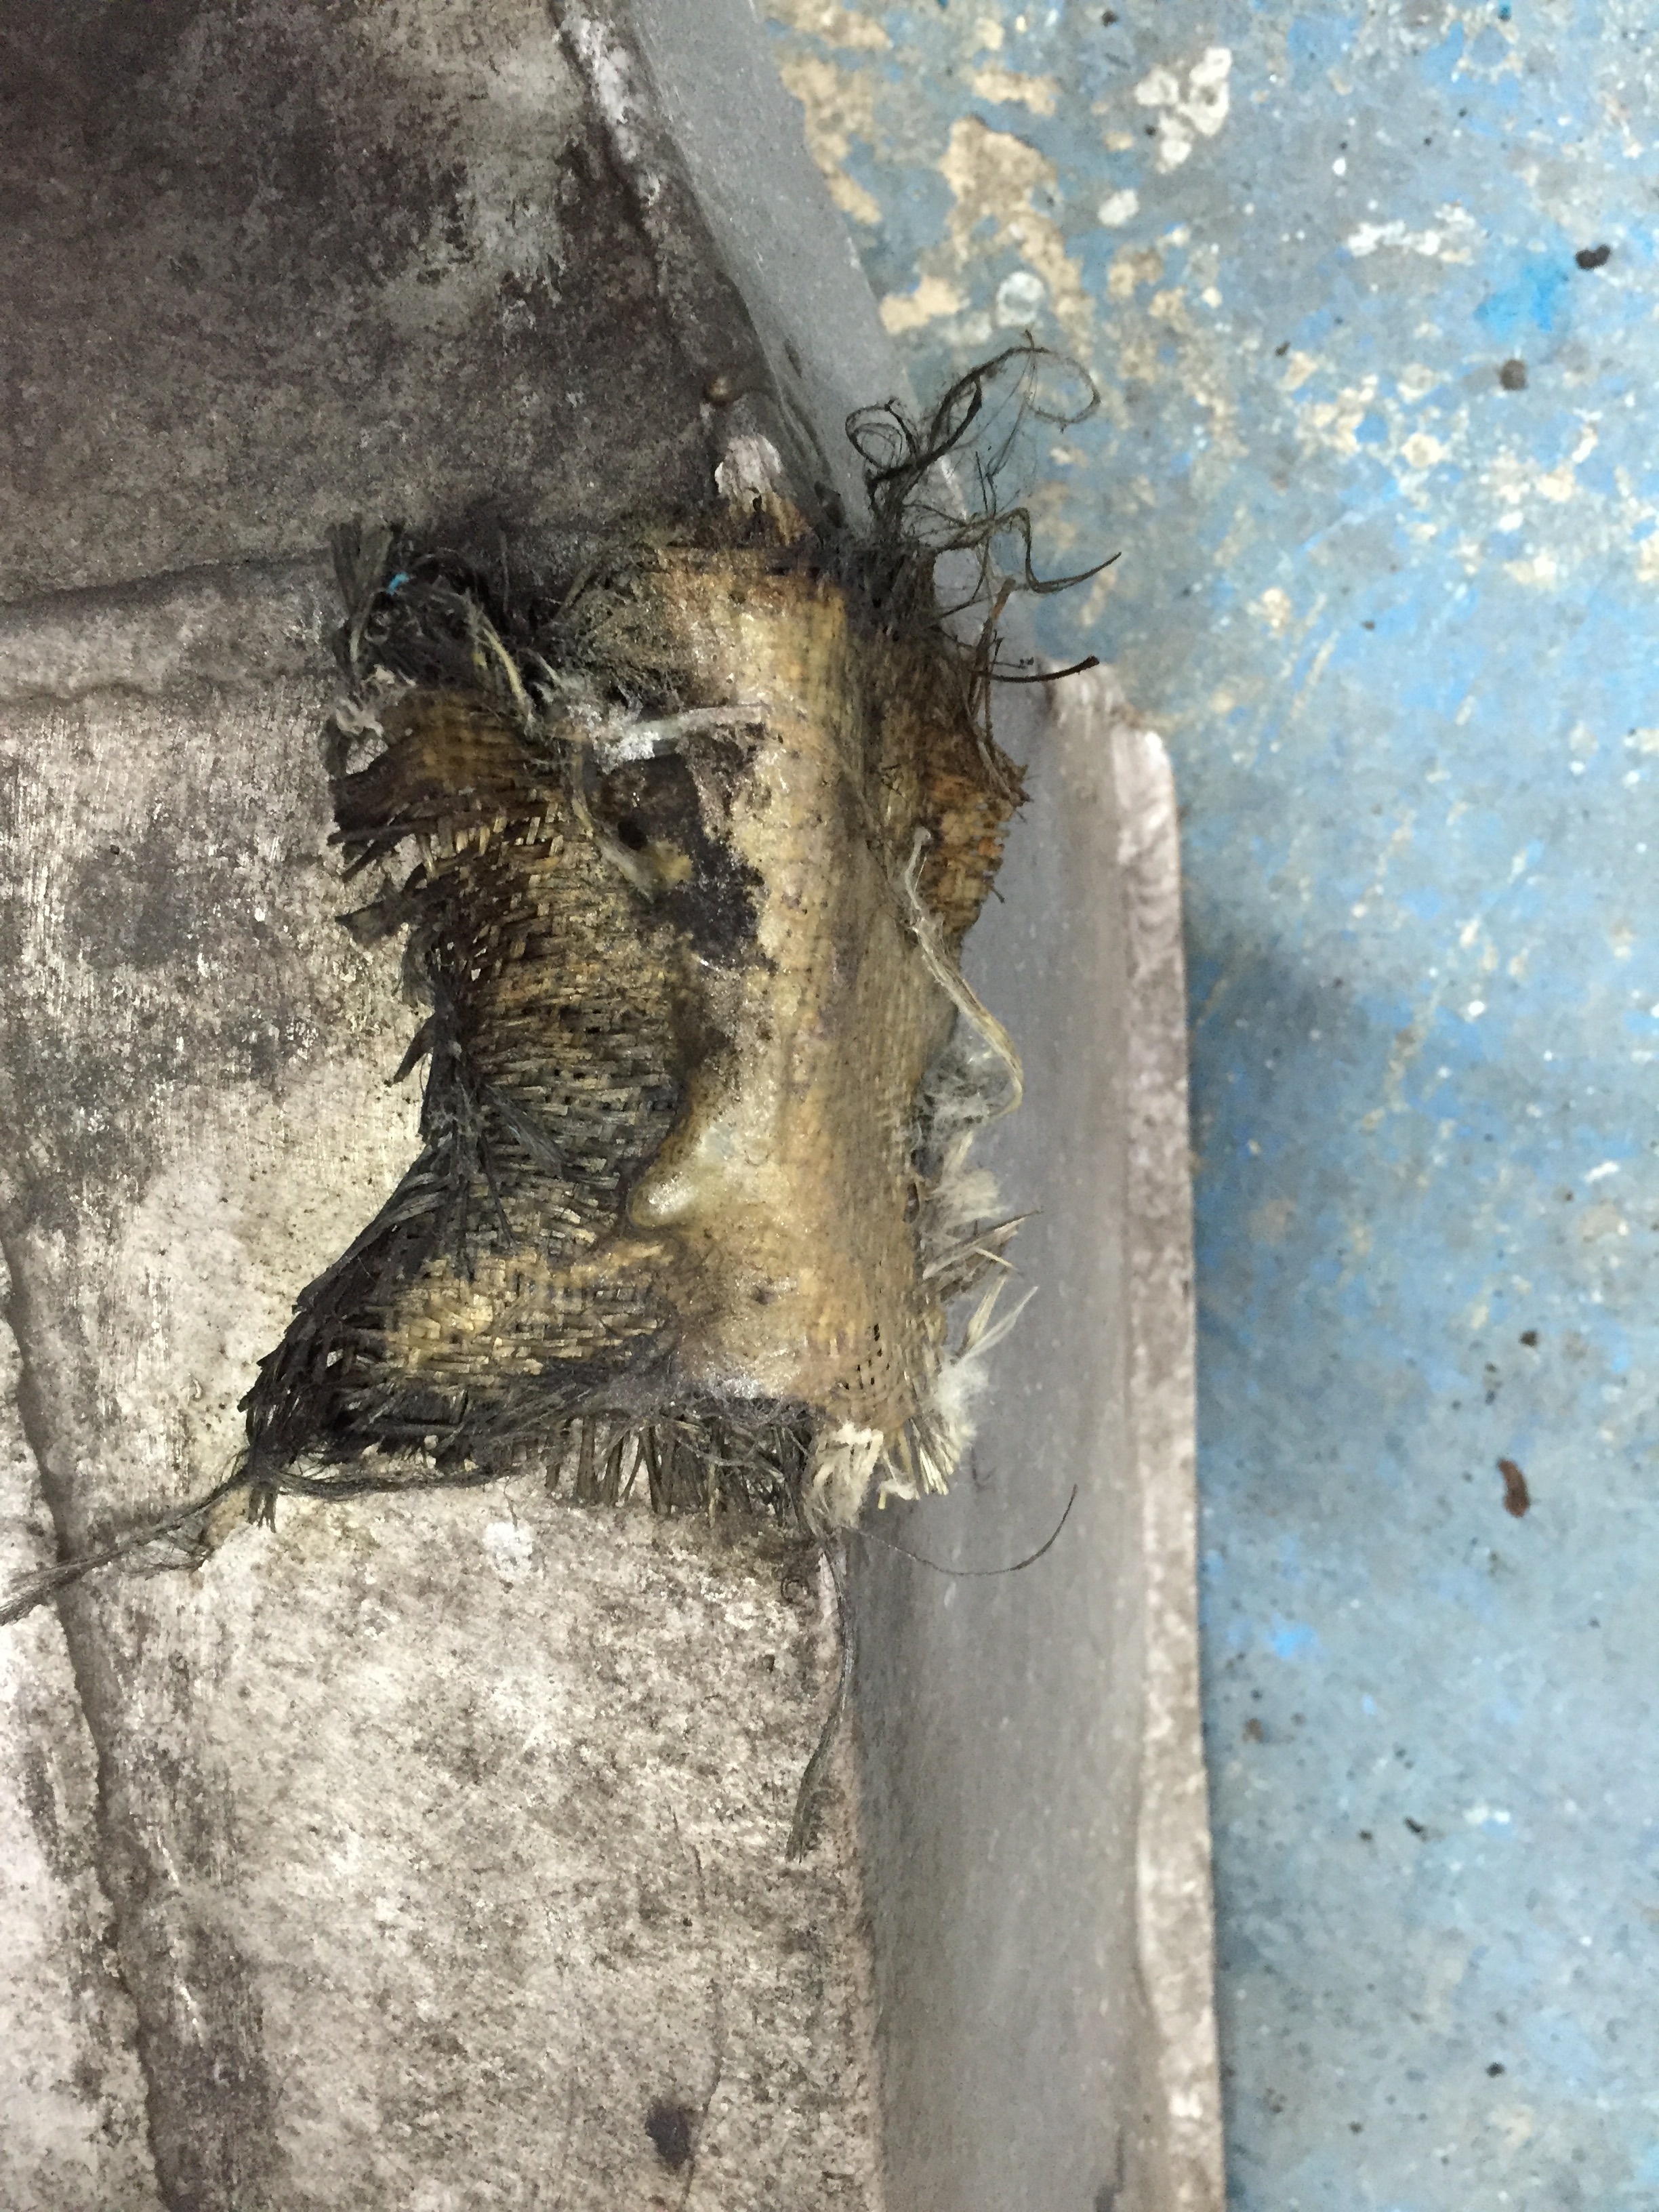
Bit of a mess under the gaitor
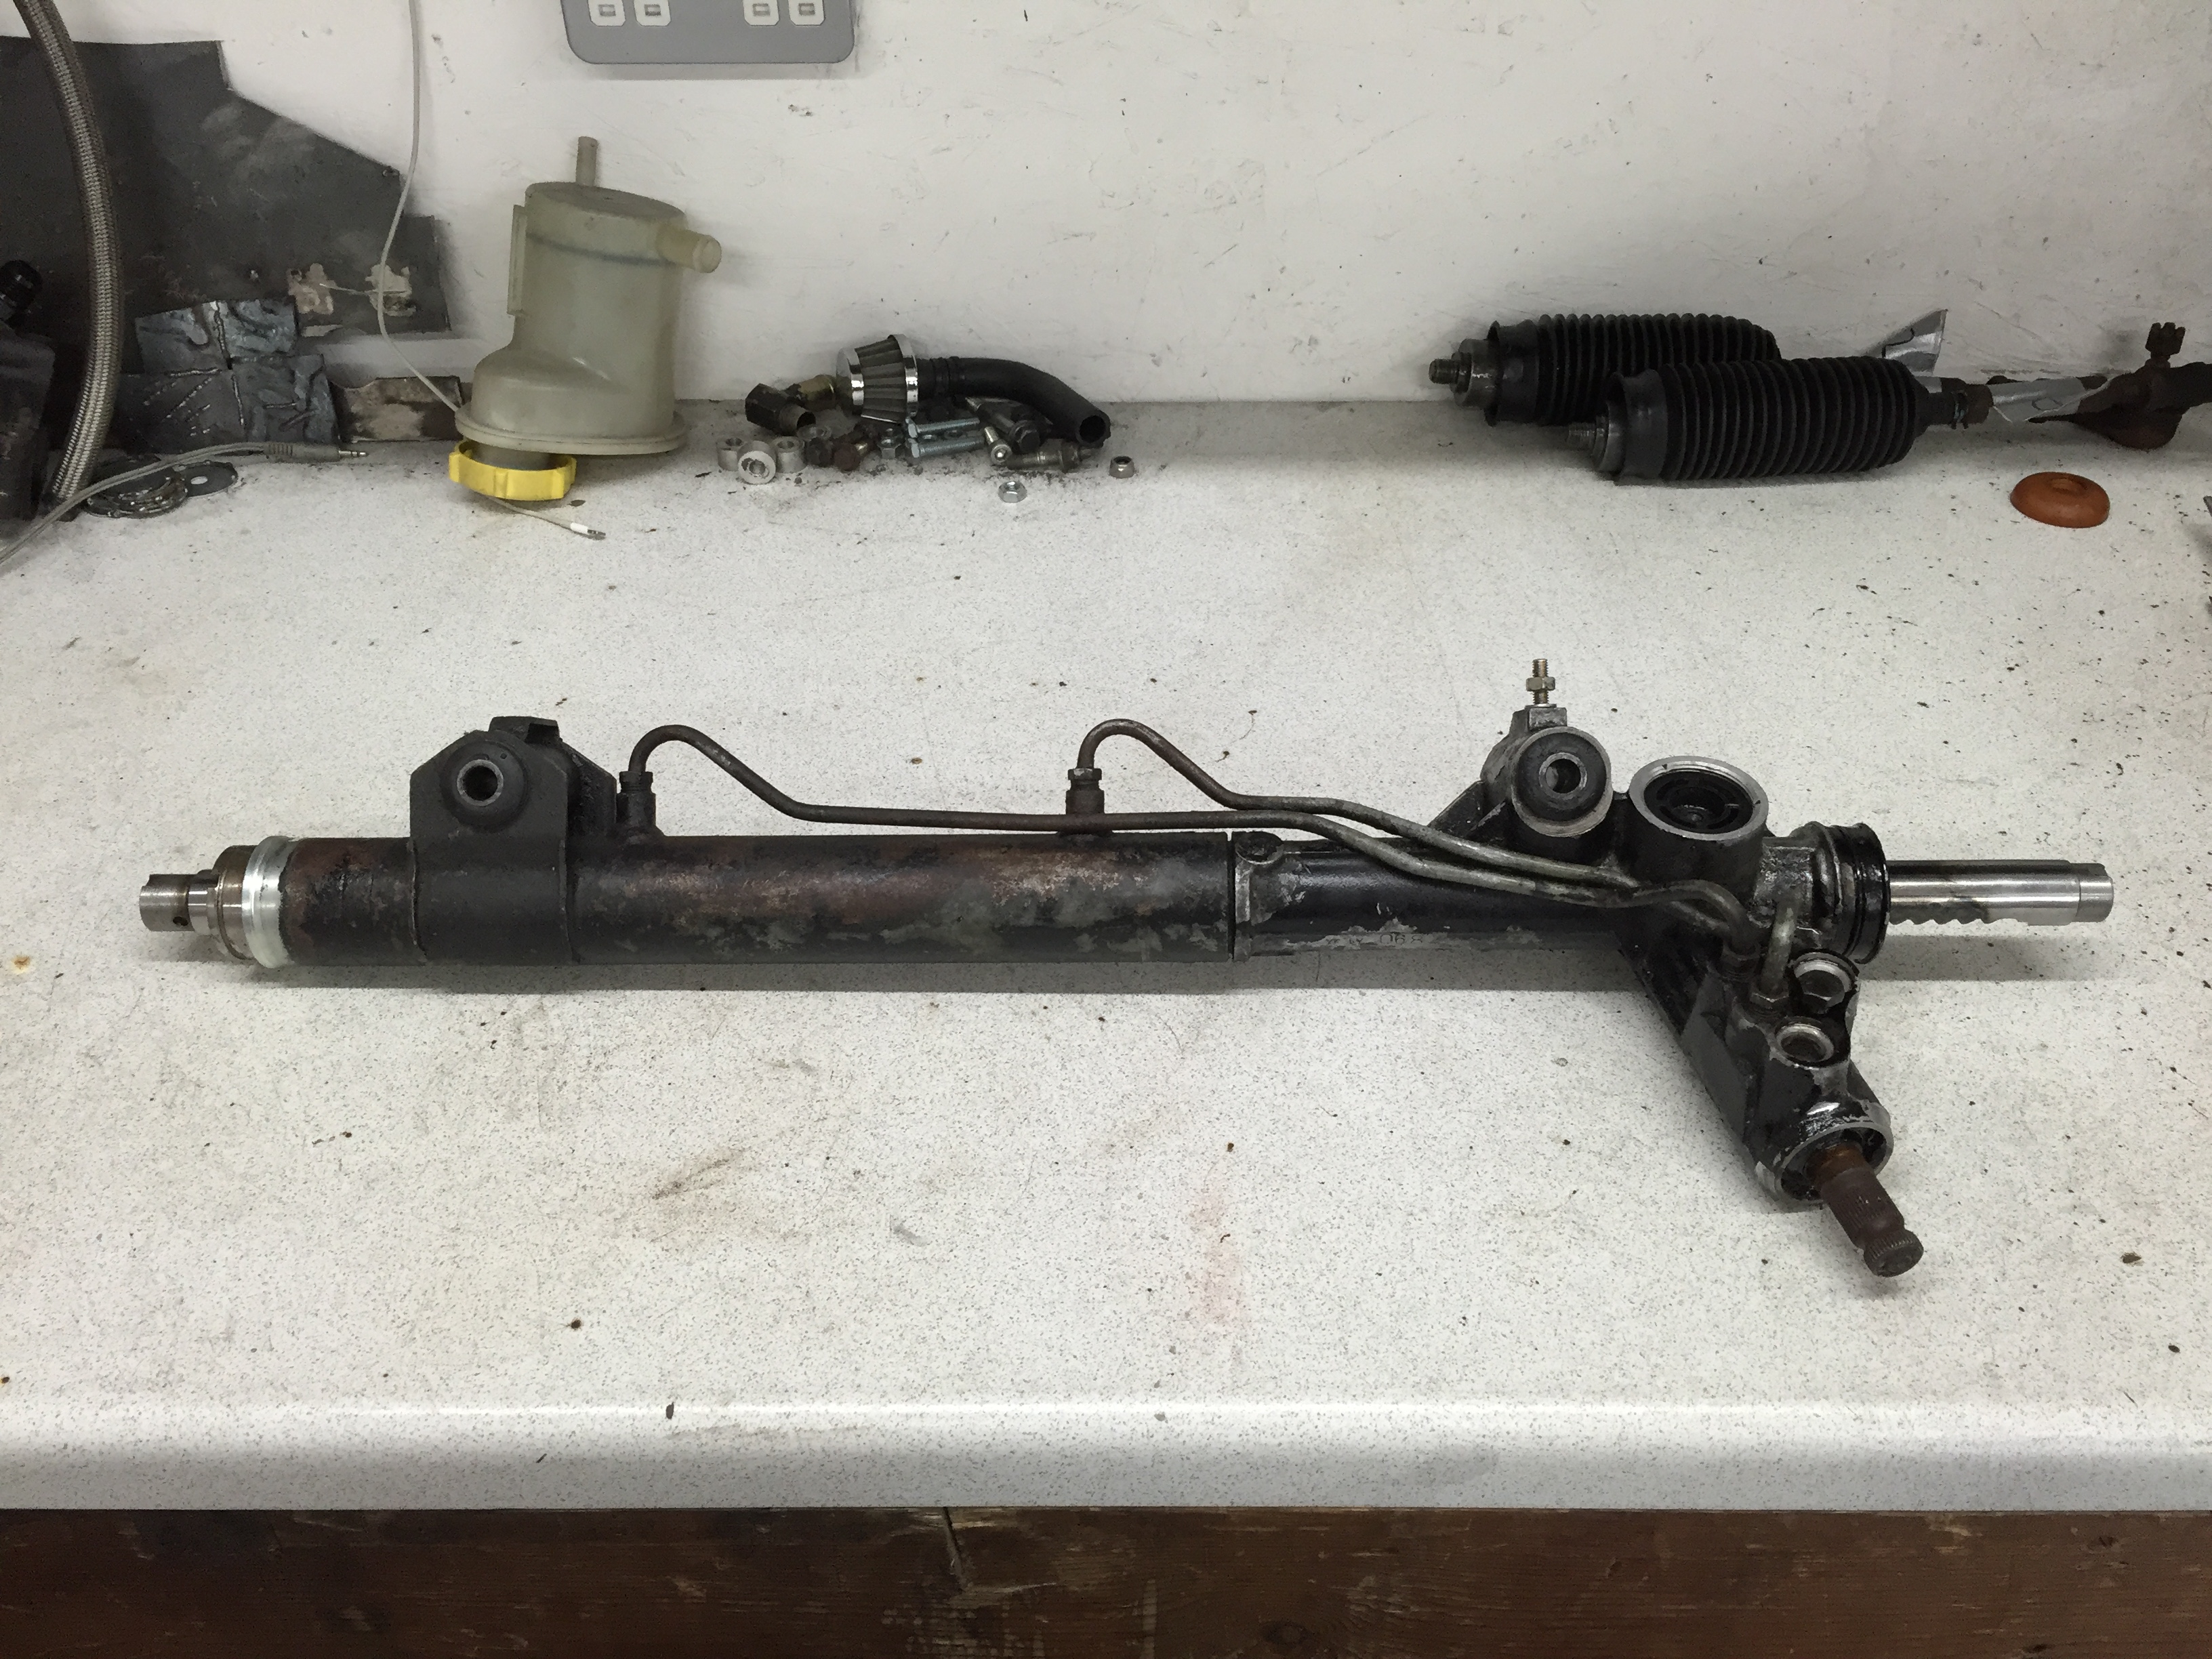
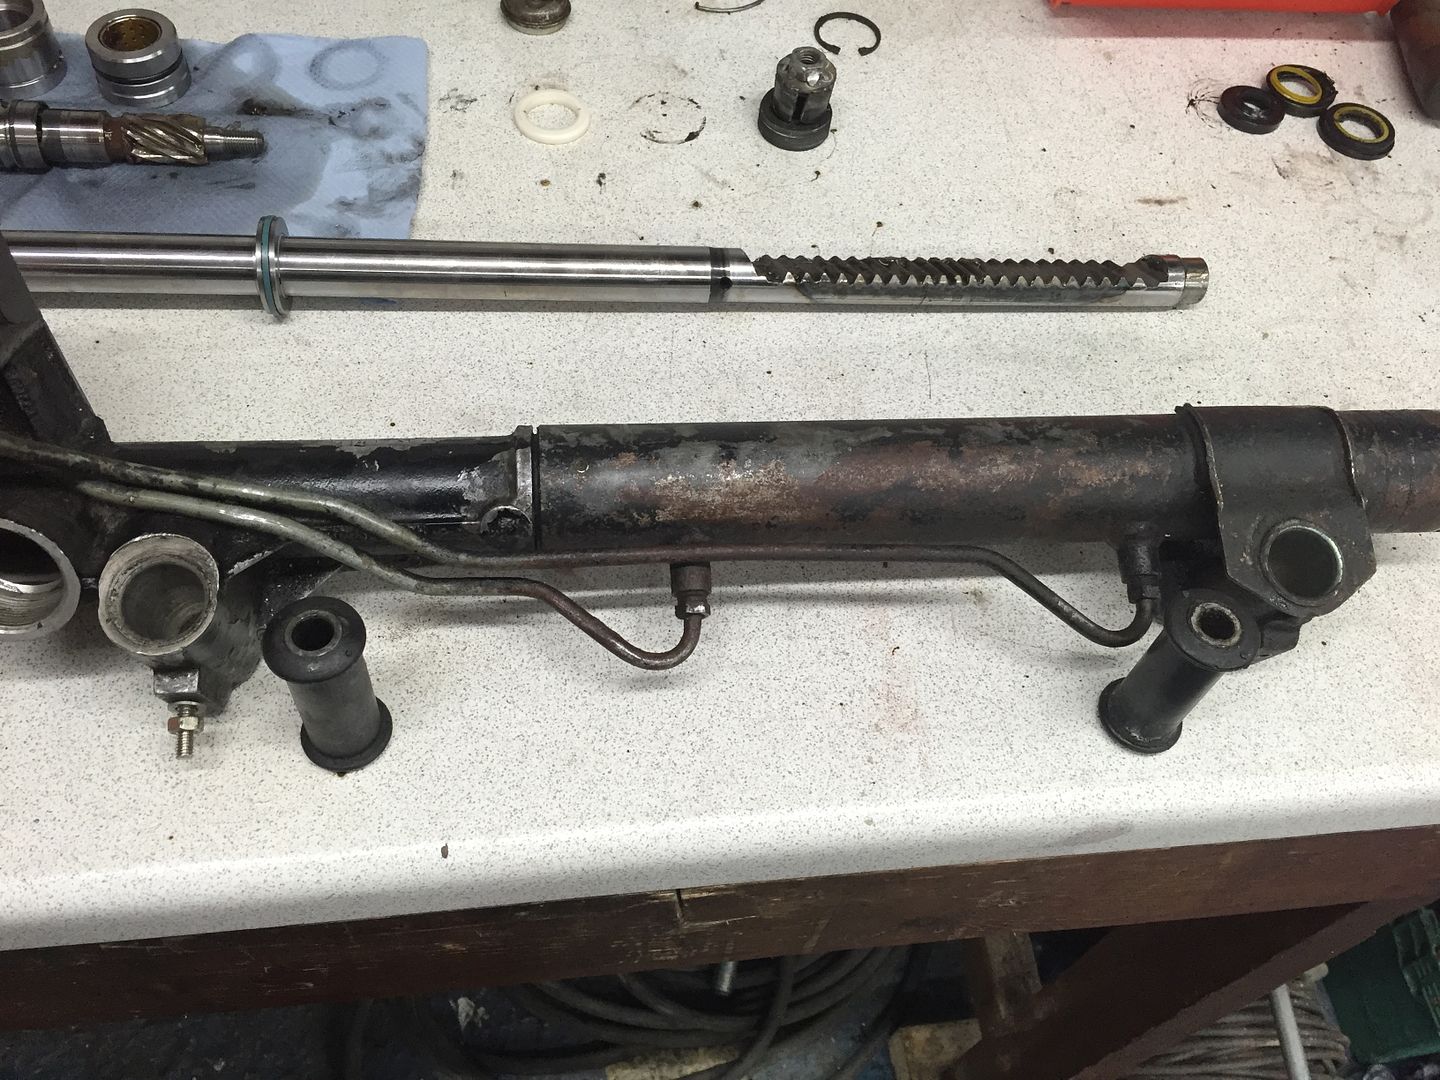
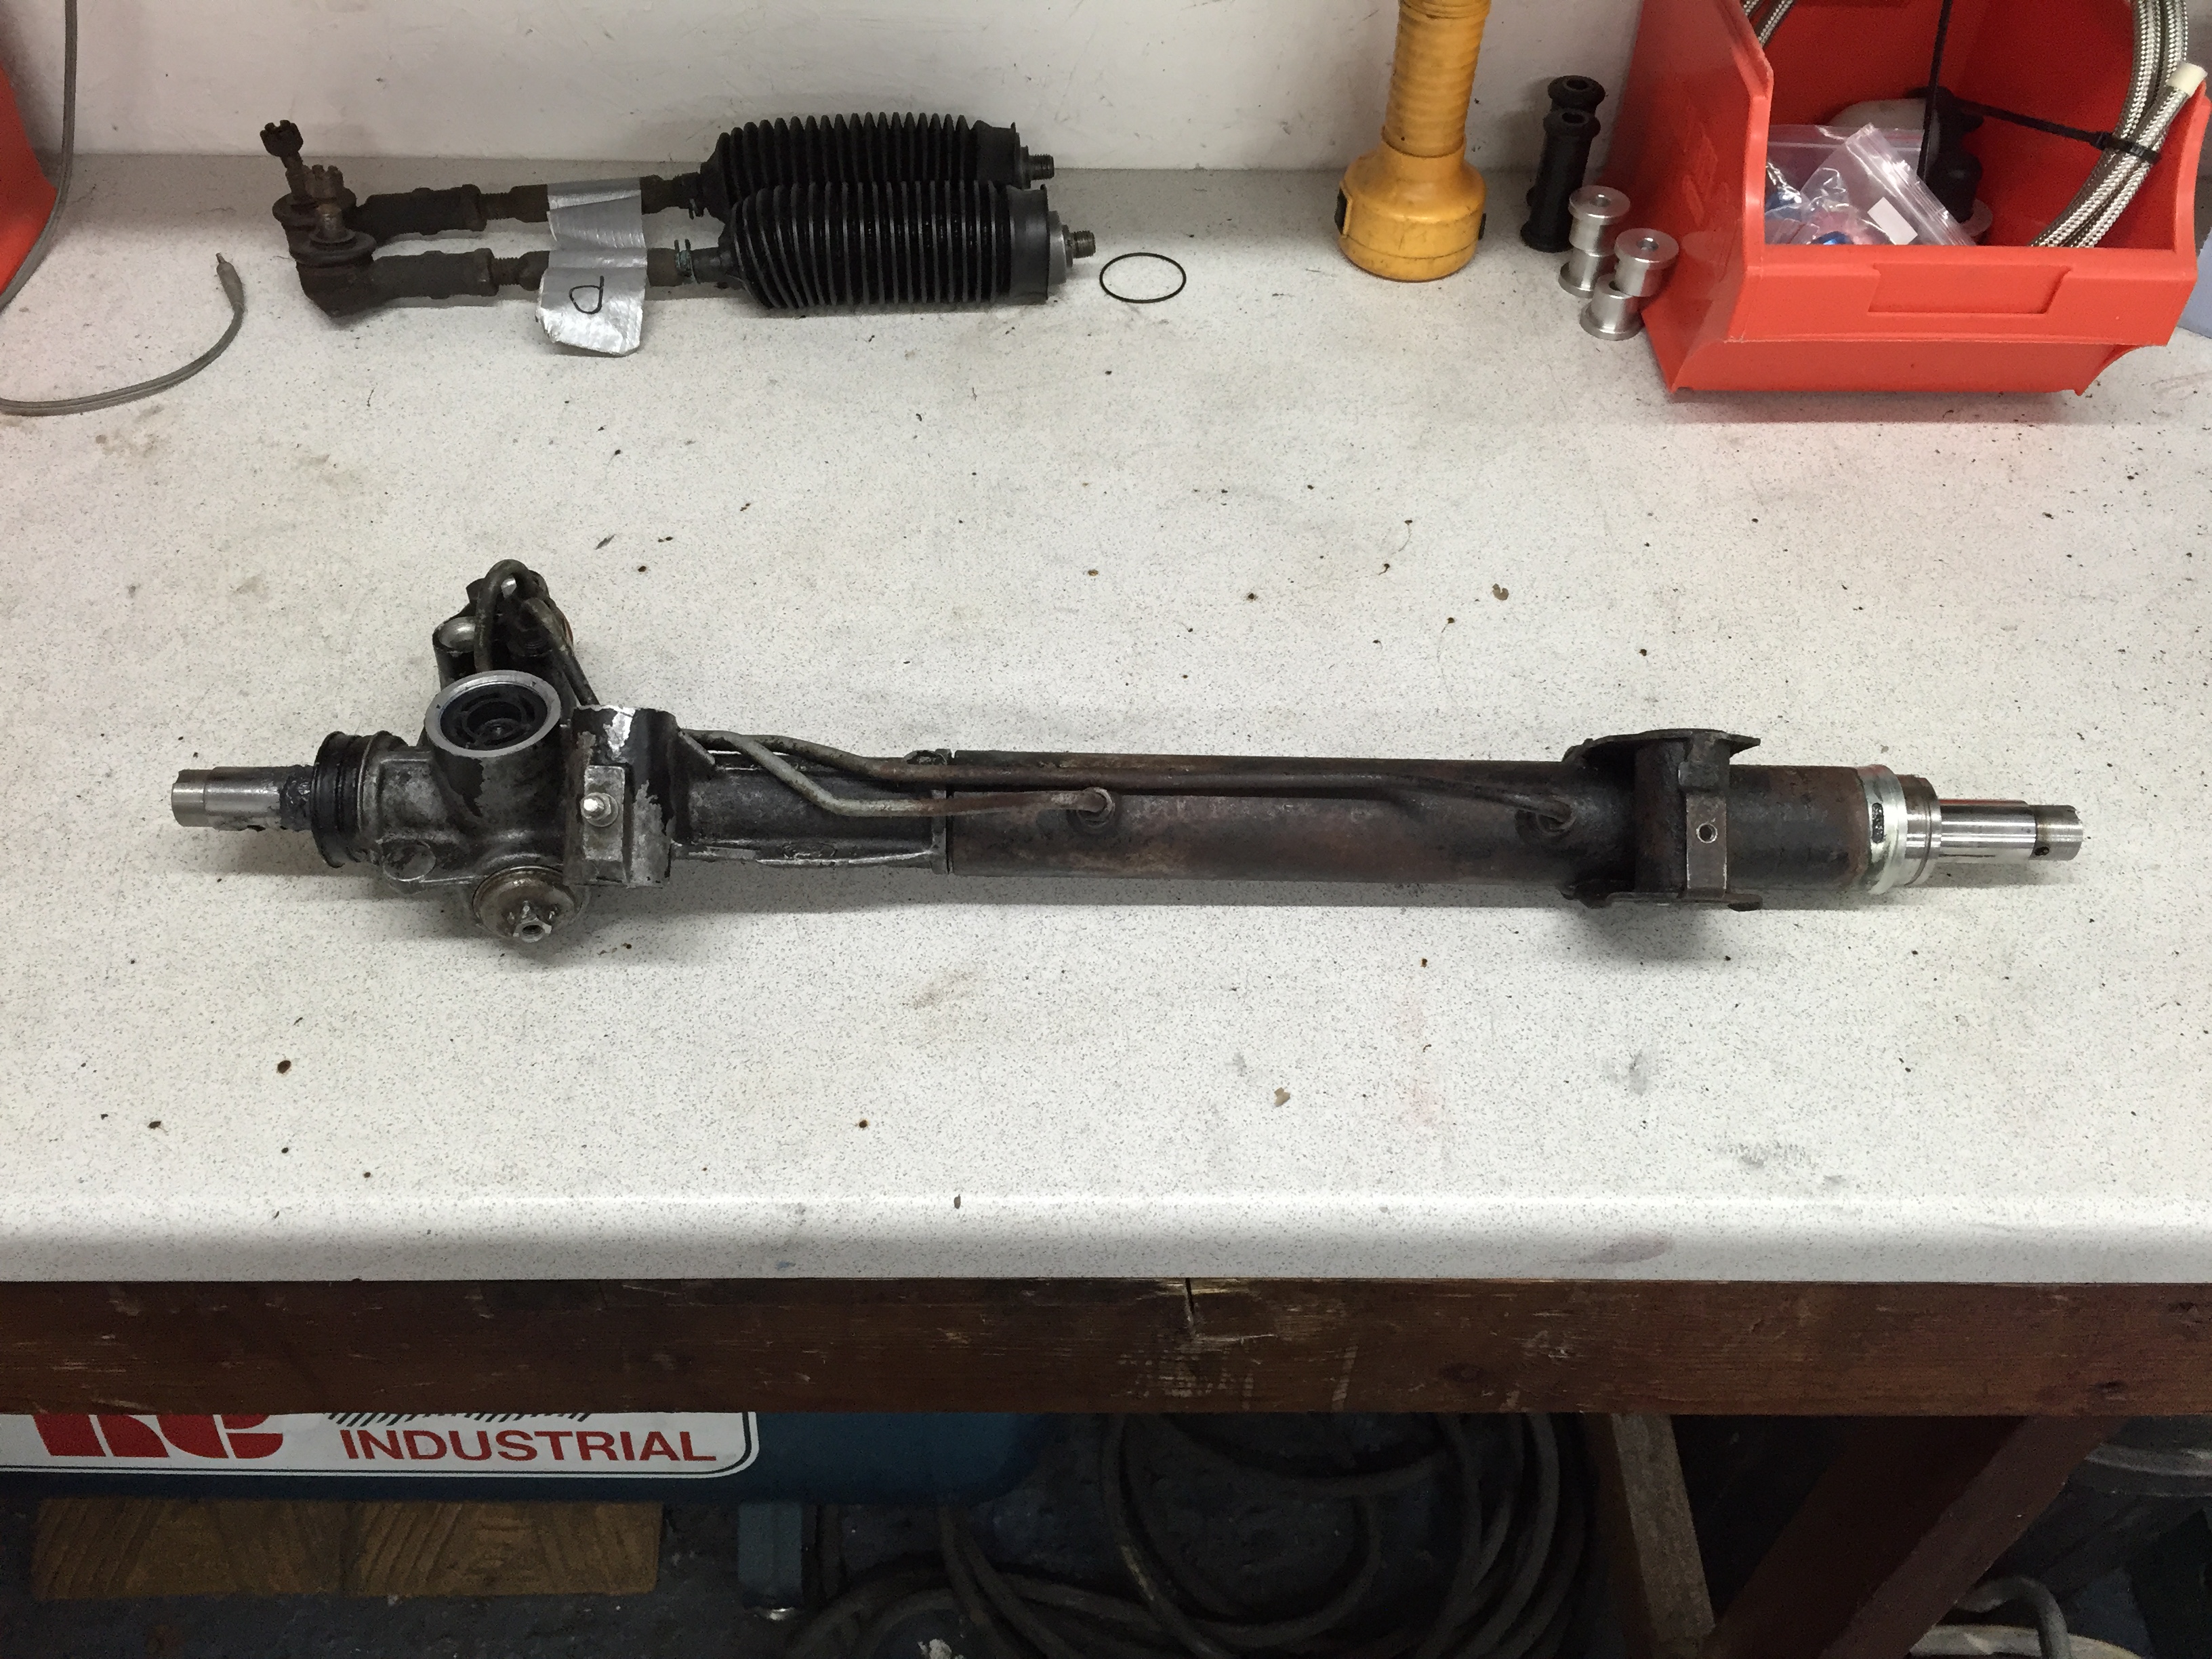
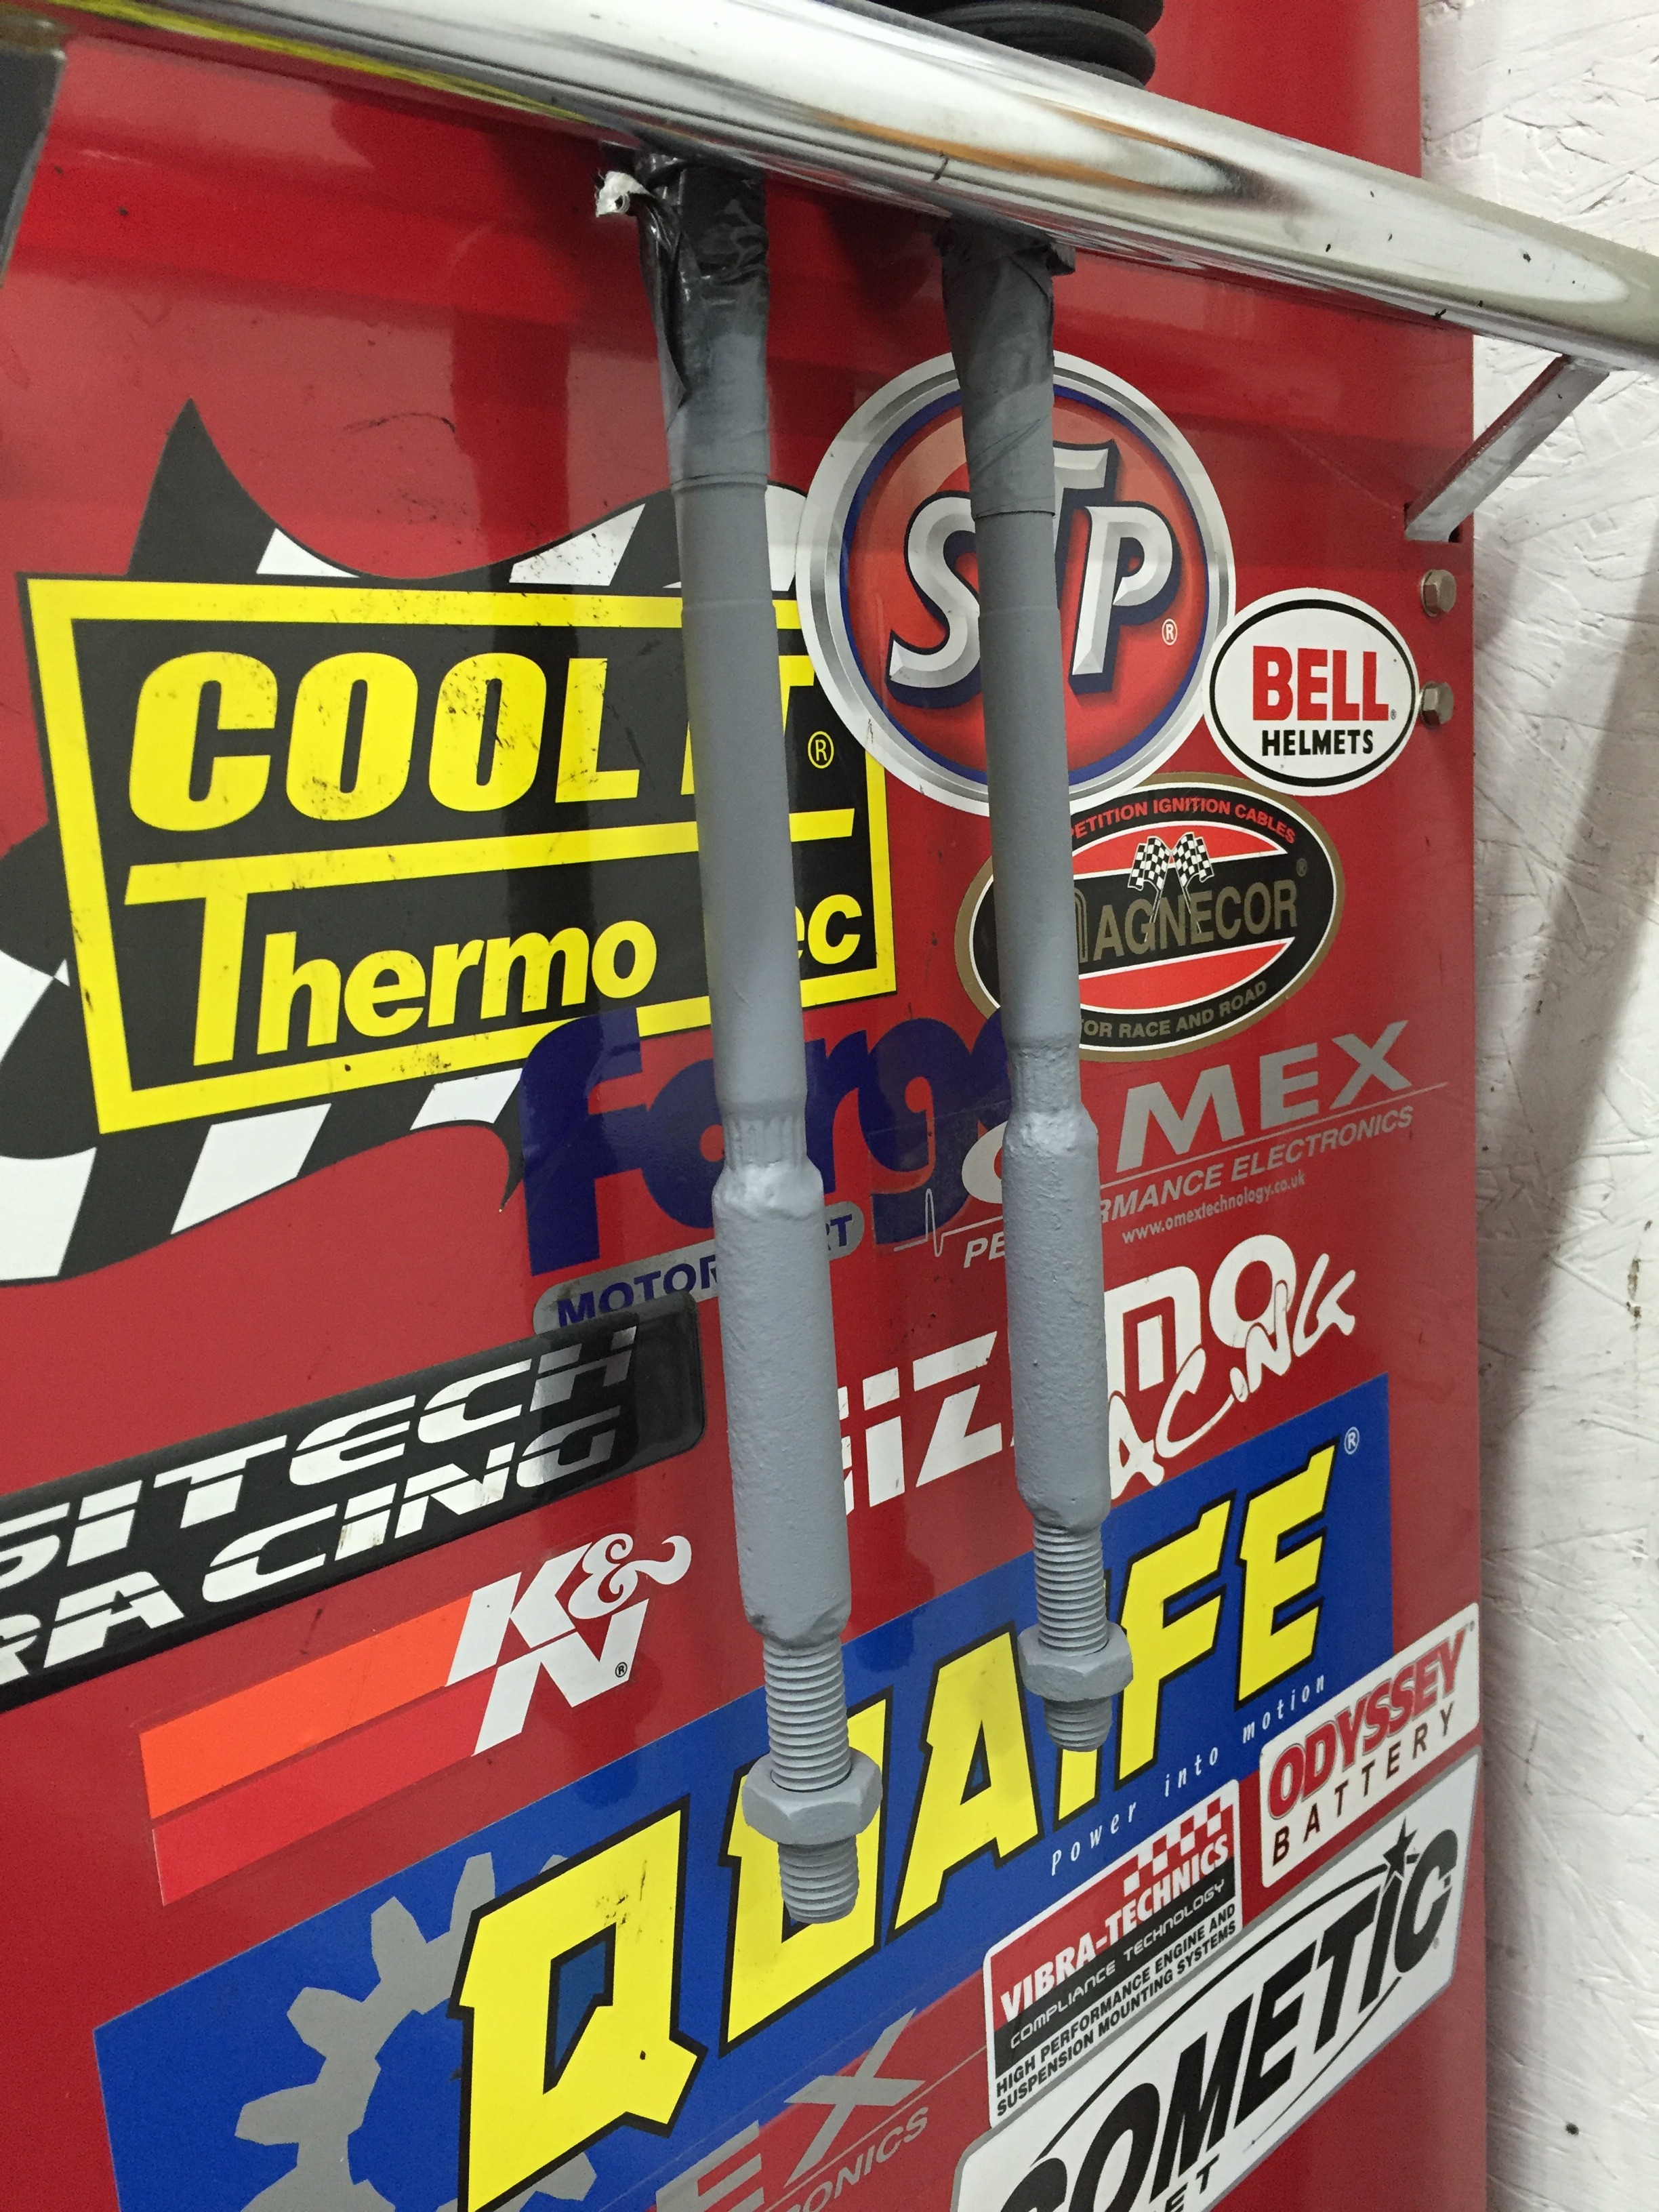
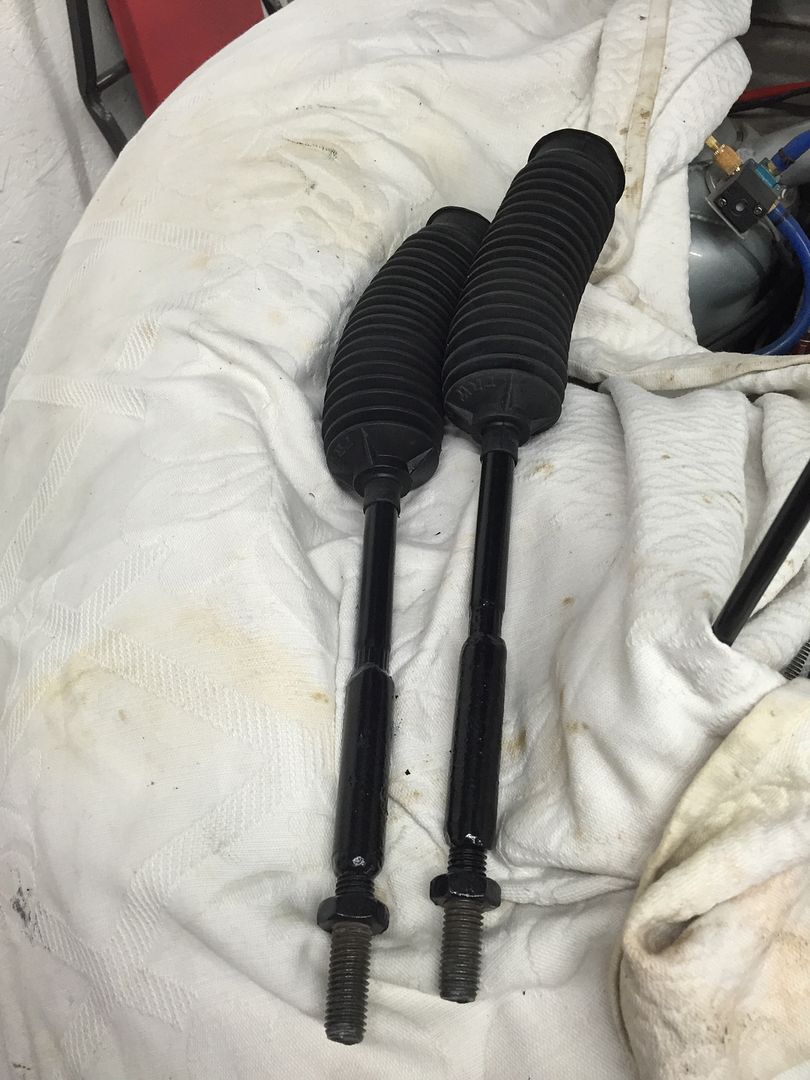
So onto the bench tie rods and gaitors taken off and time to get the rack stripped down
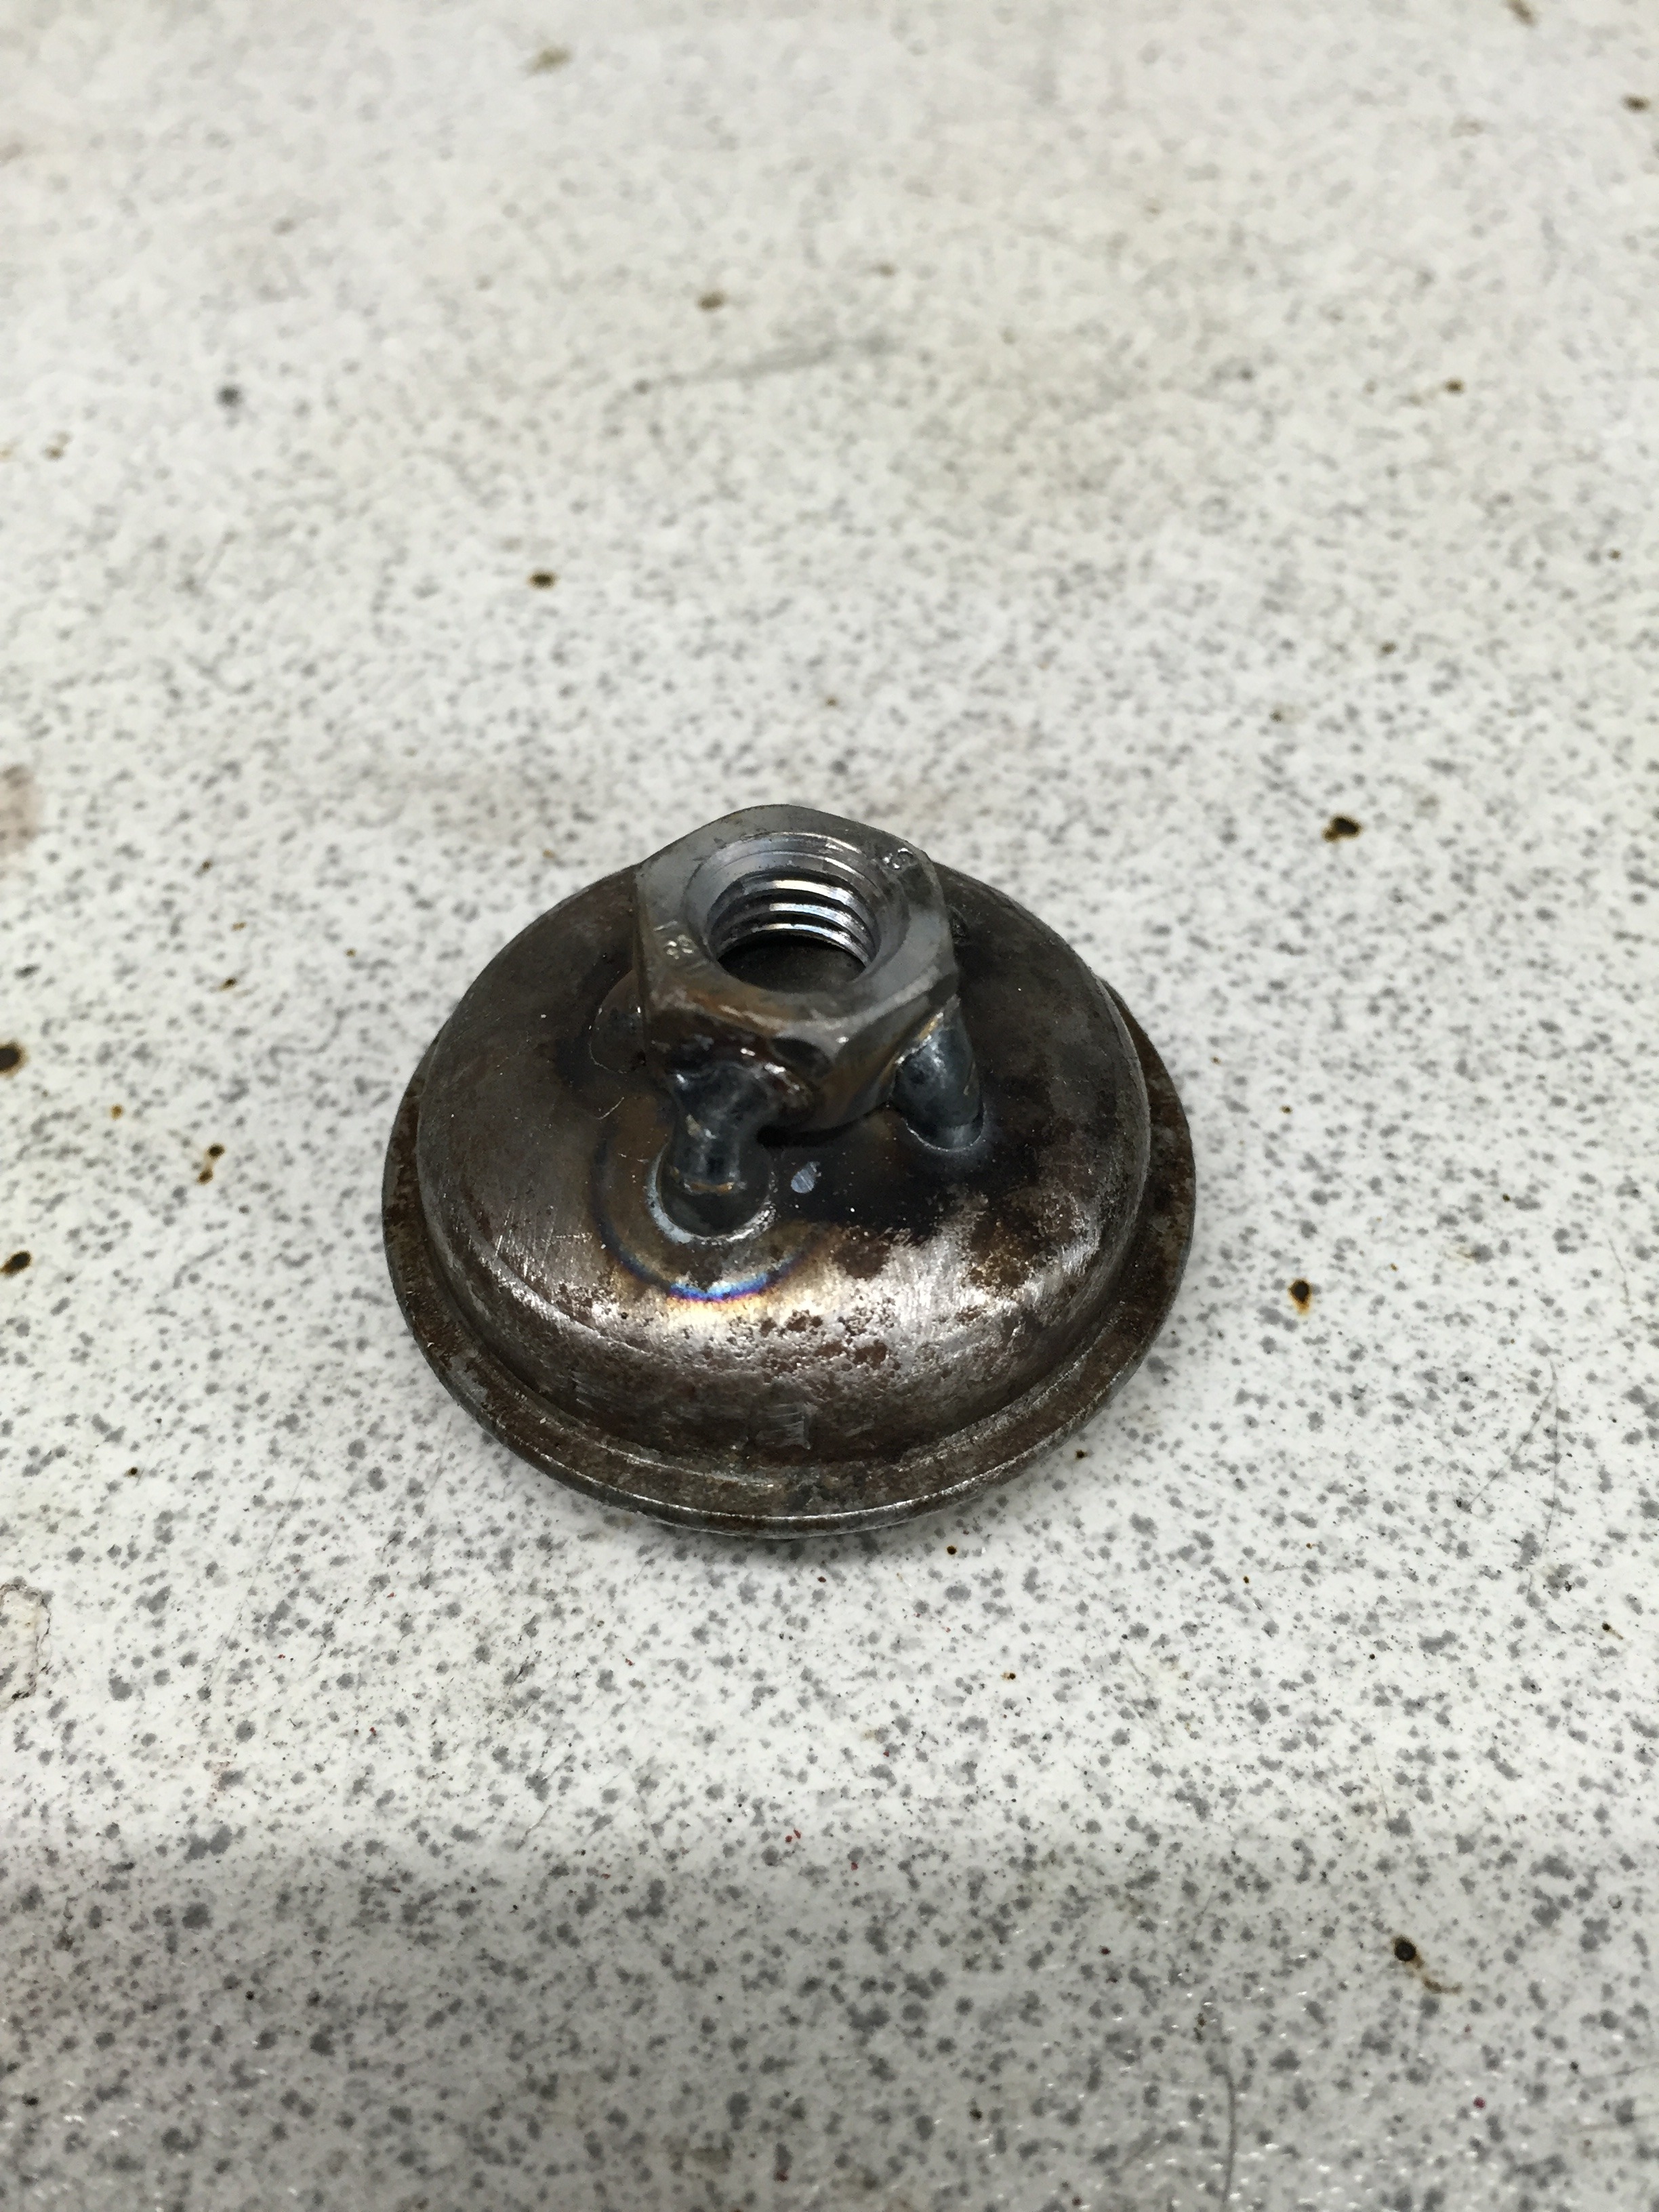
First issue was to make a tool of some kind to get the yoke cover off, so a bit of sheet metal quickly cut up, shaped and a nut did the trick just fine
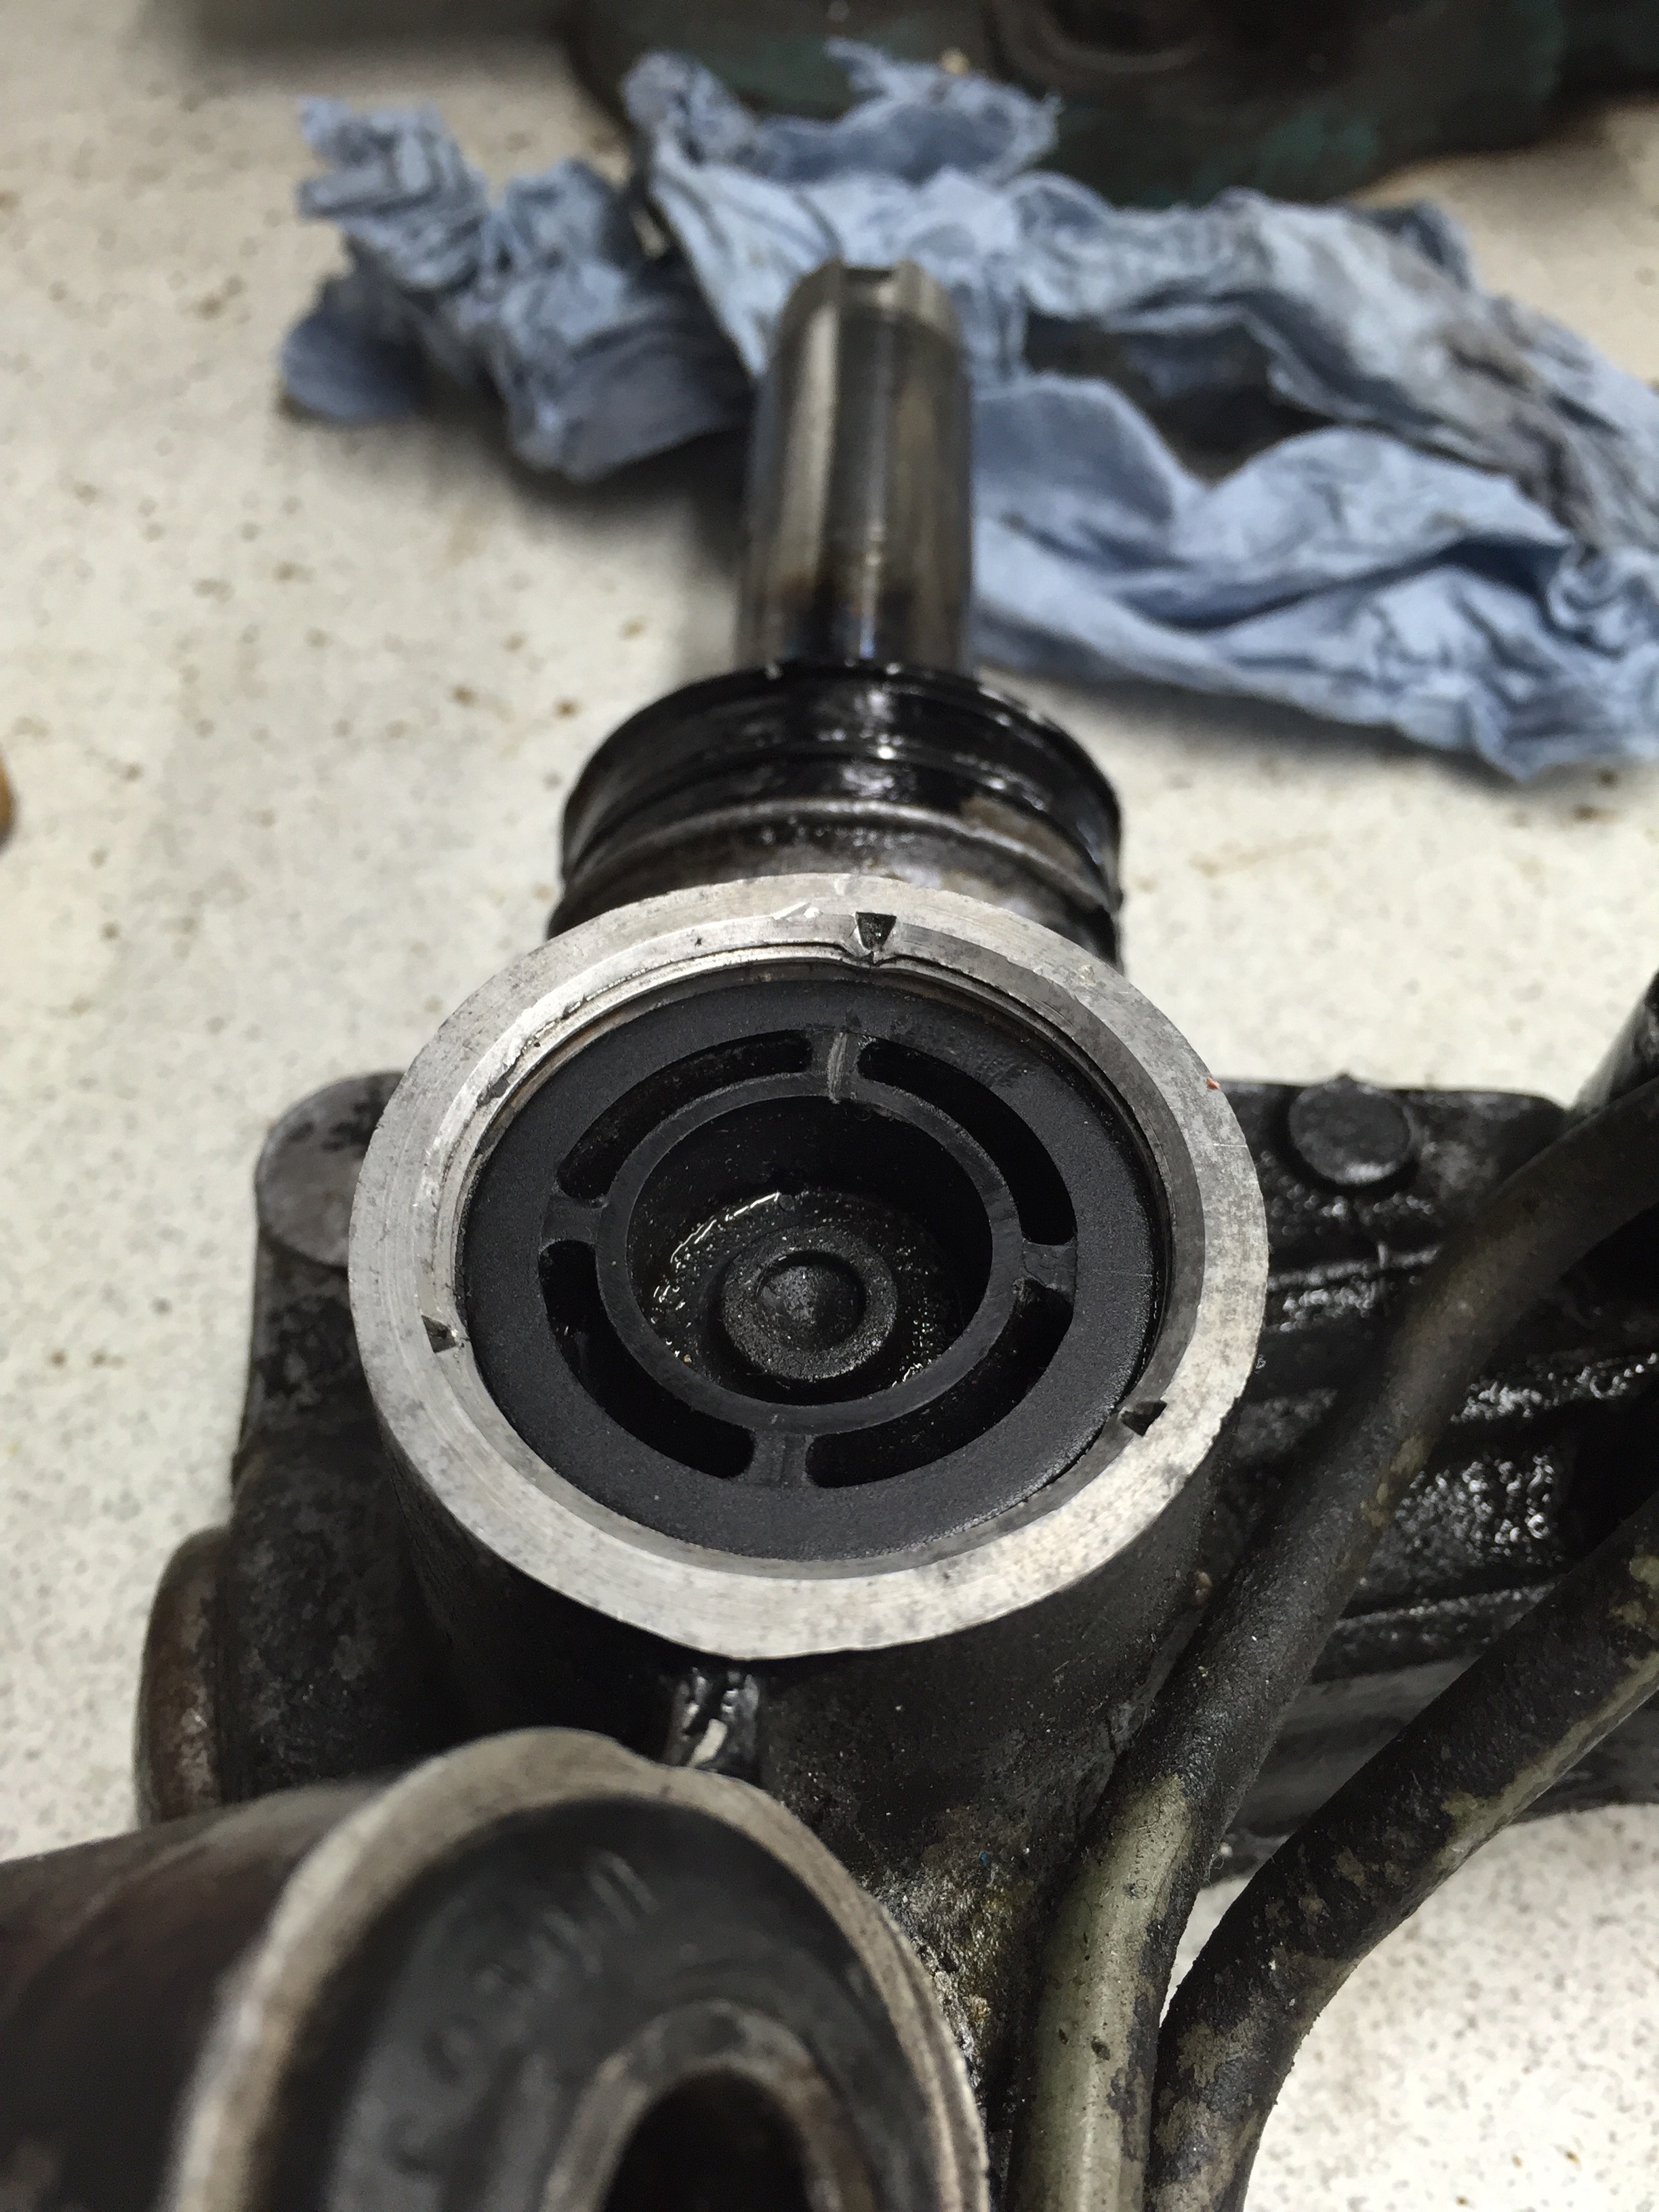
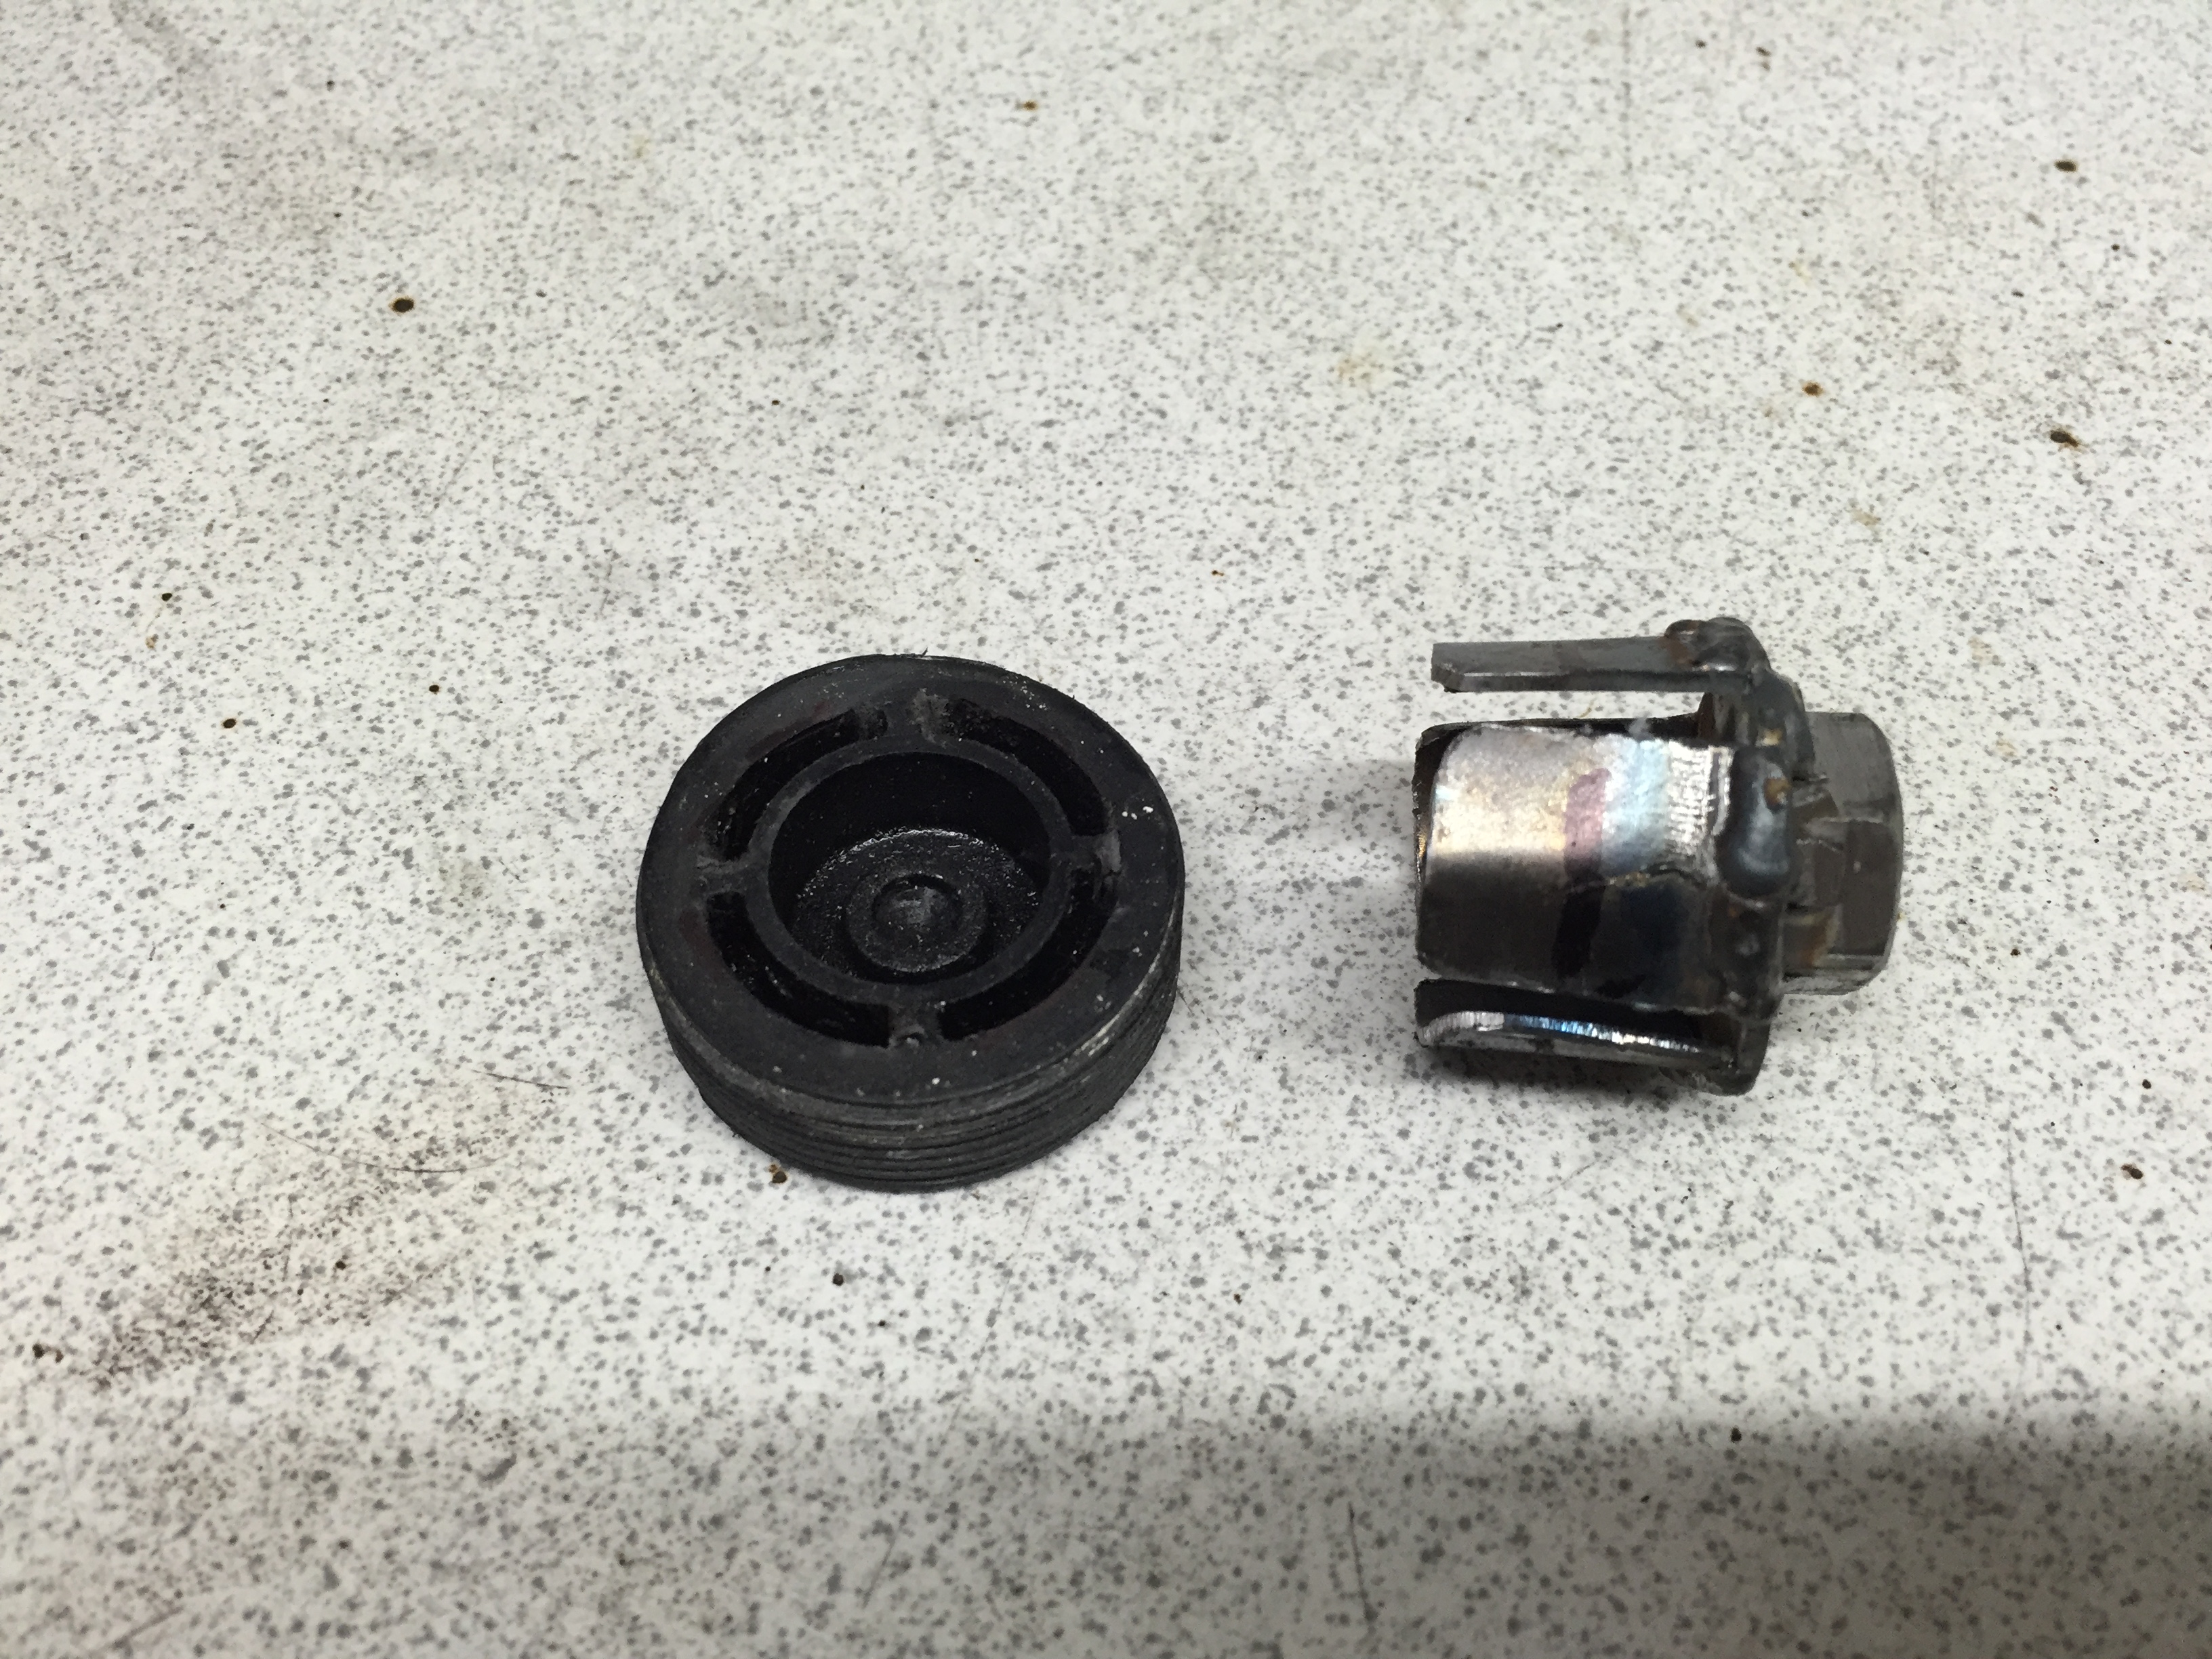
Next up was to remove the pinion nut cover.. Needed to do so without damaging the rack or cover so a quick tack weld of a nut on it I turned the cover off with ease
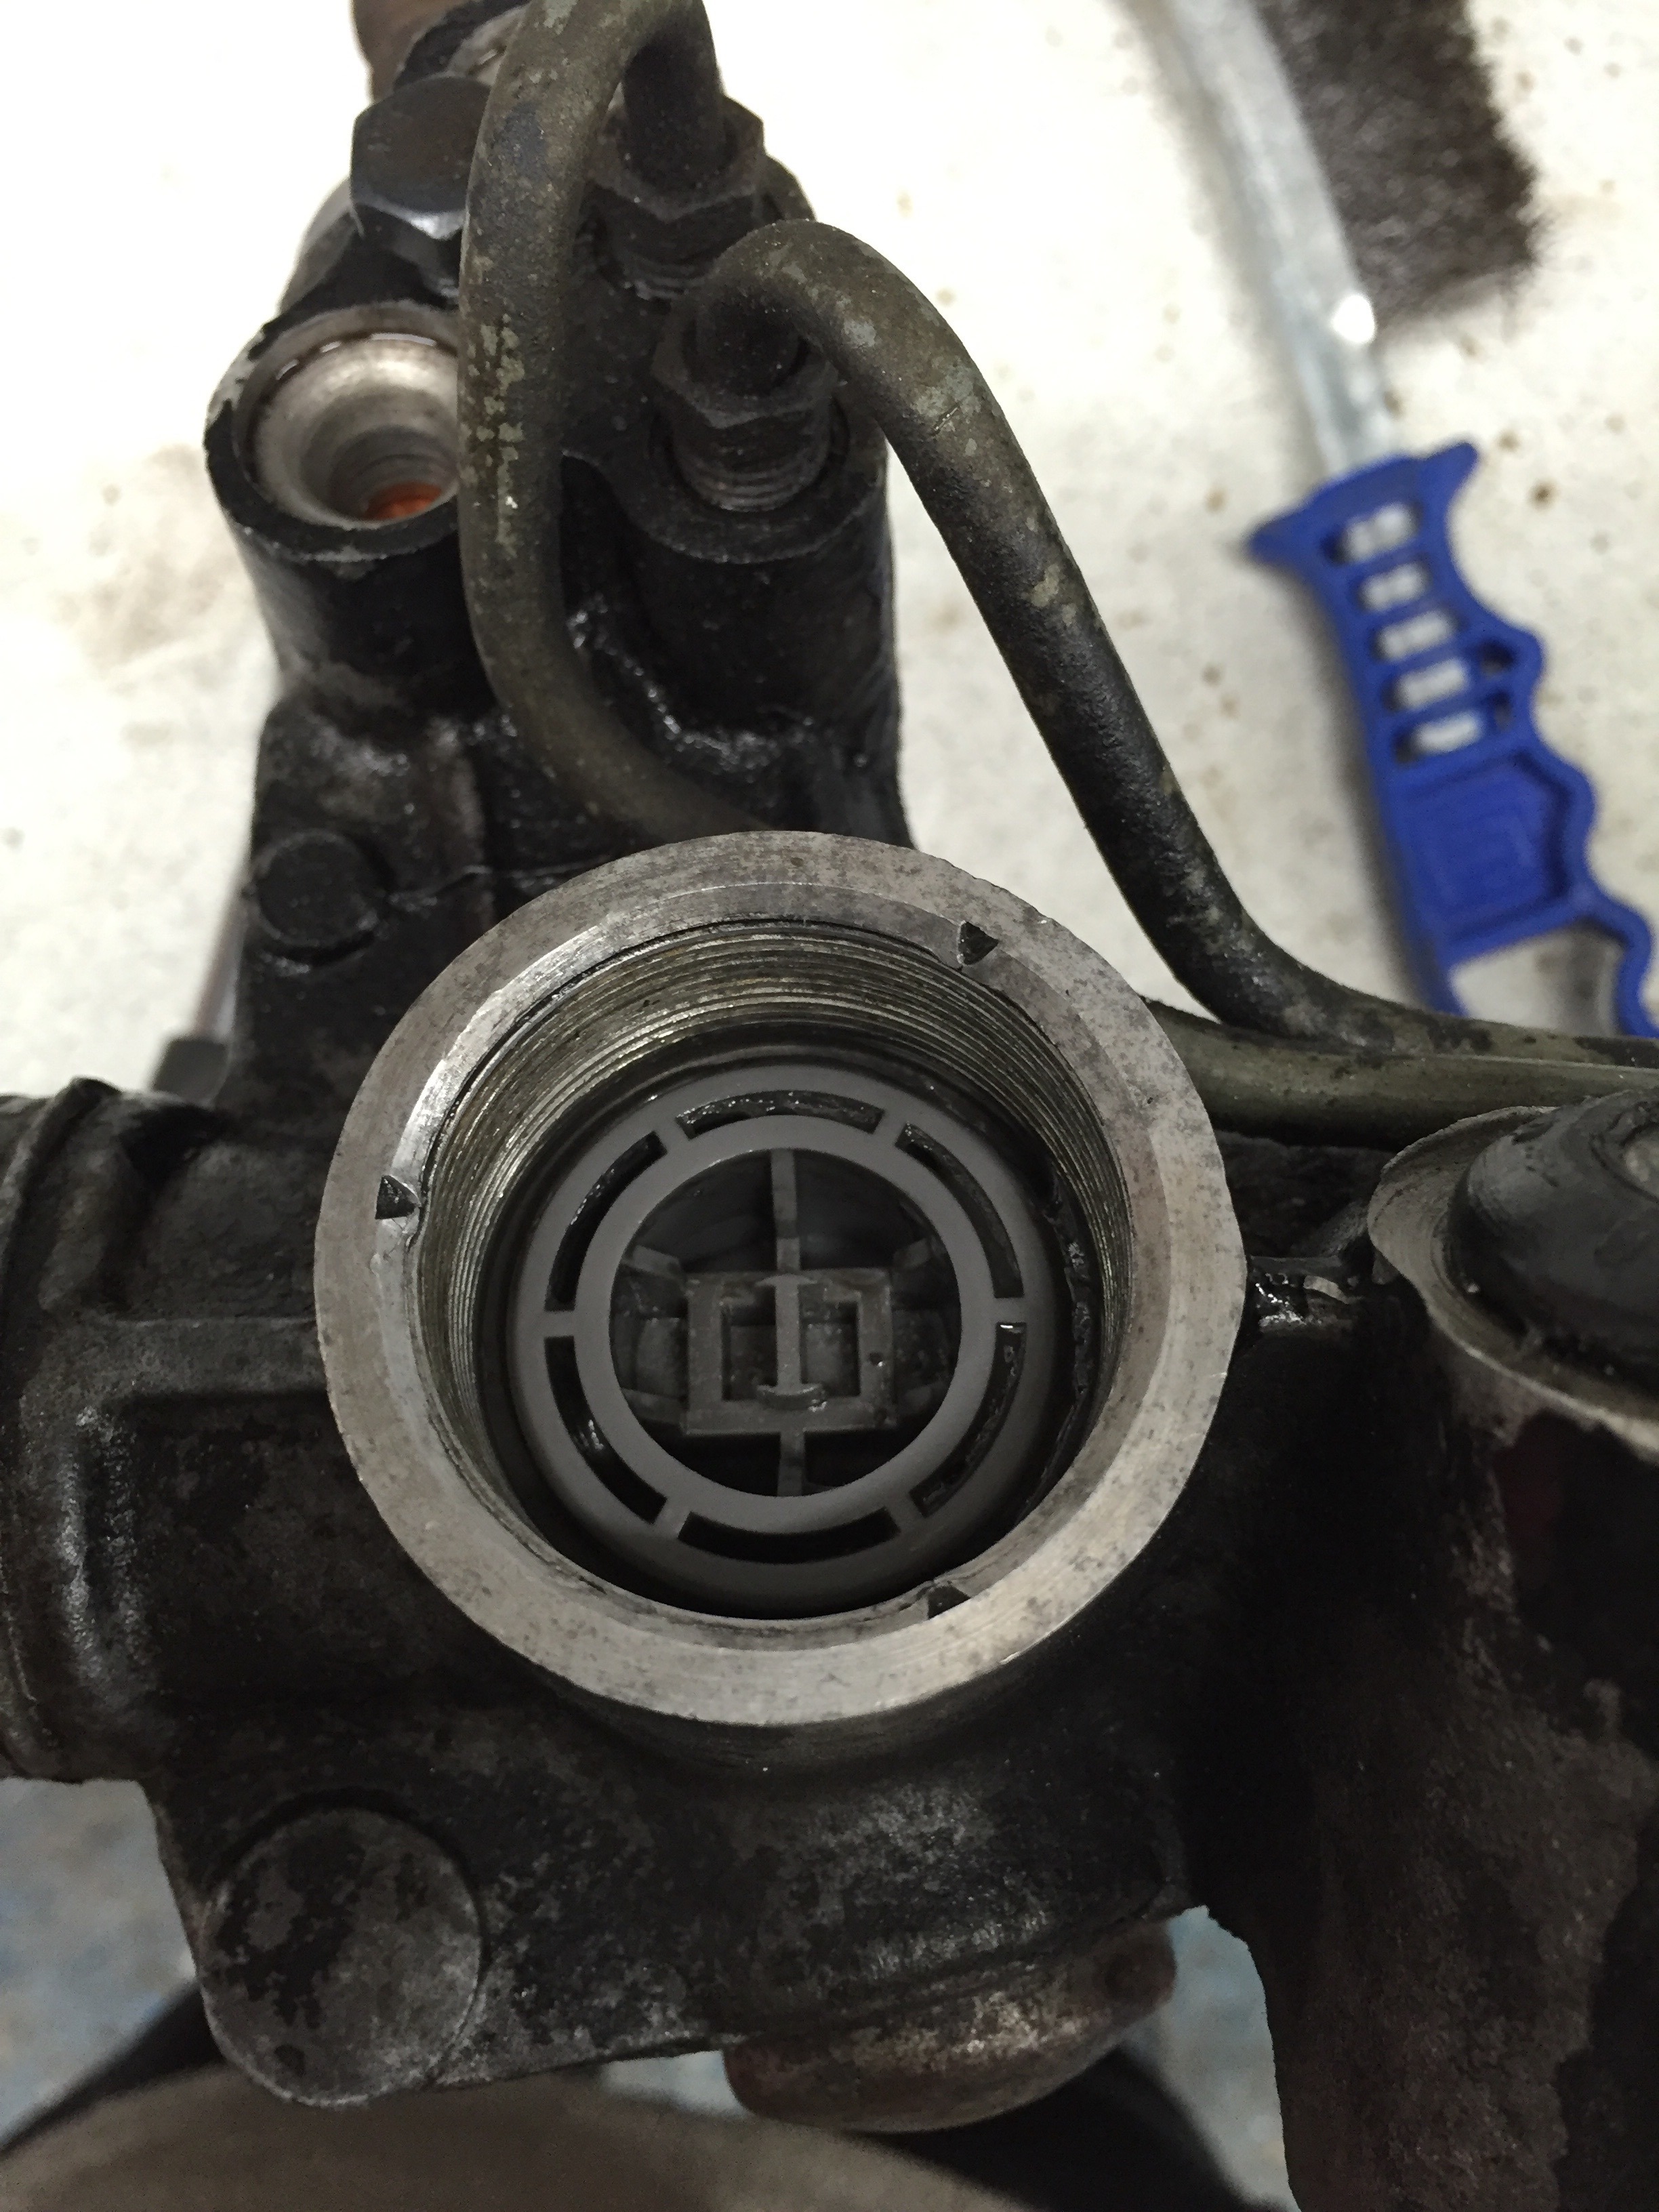
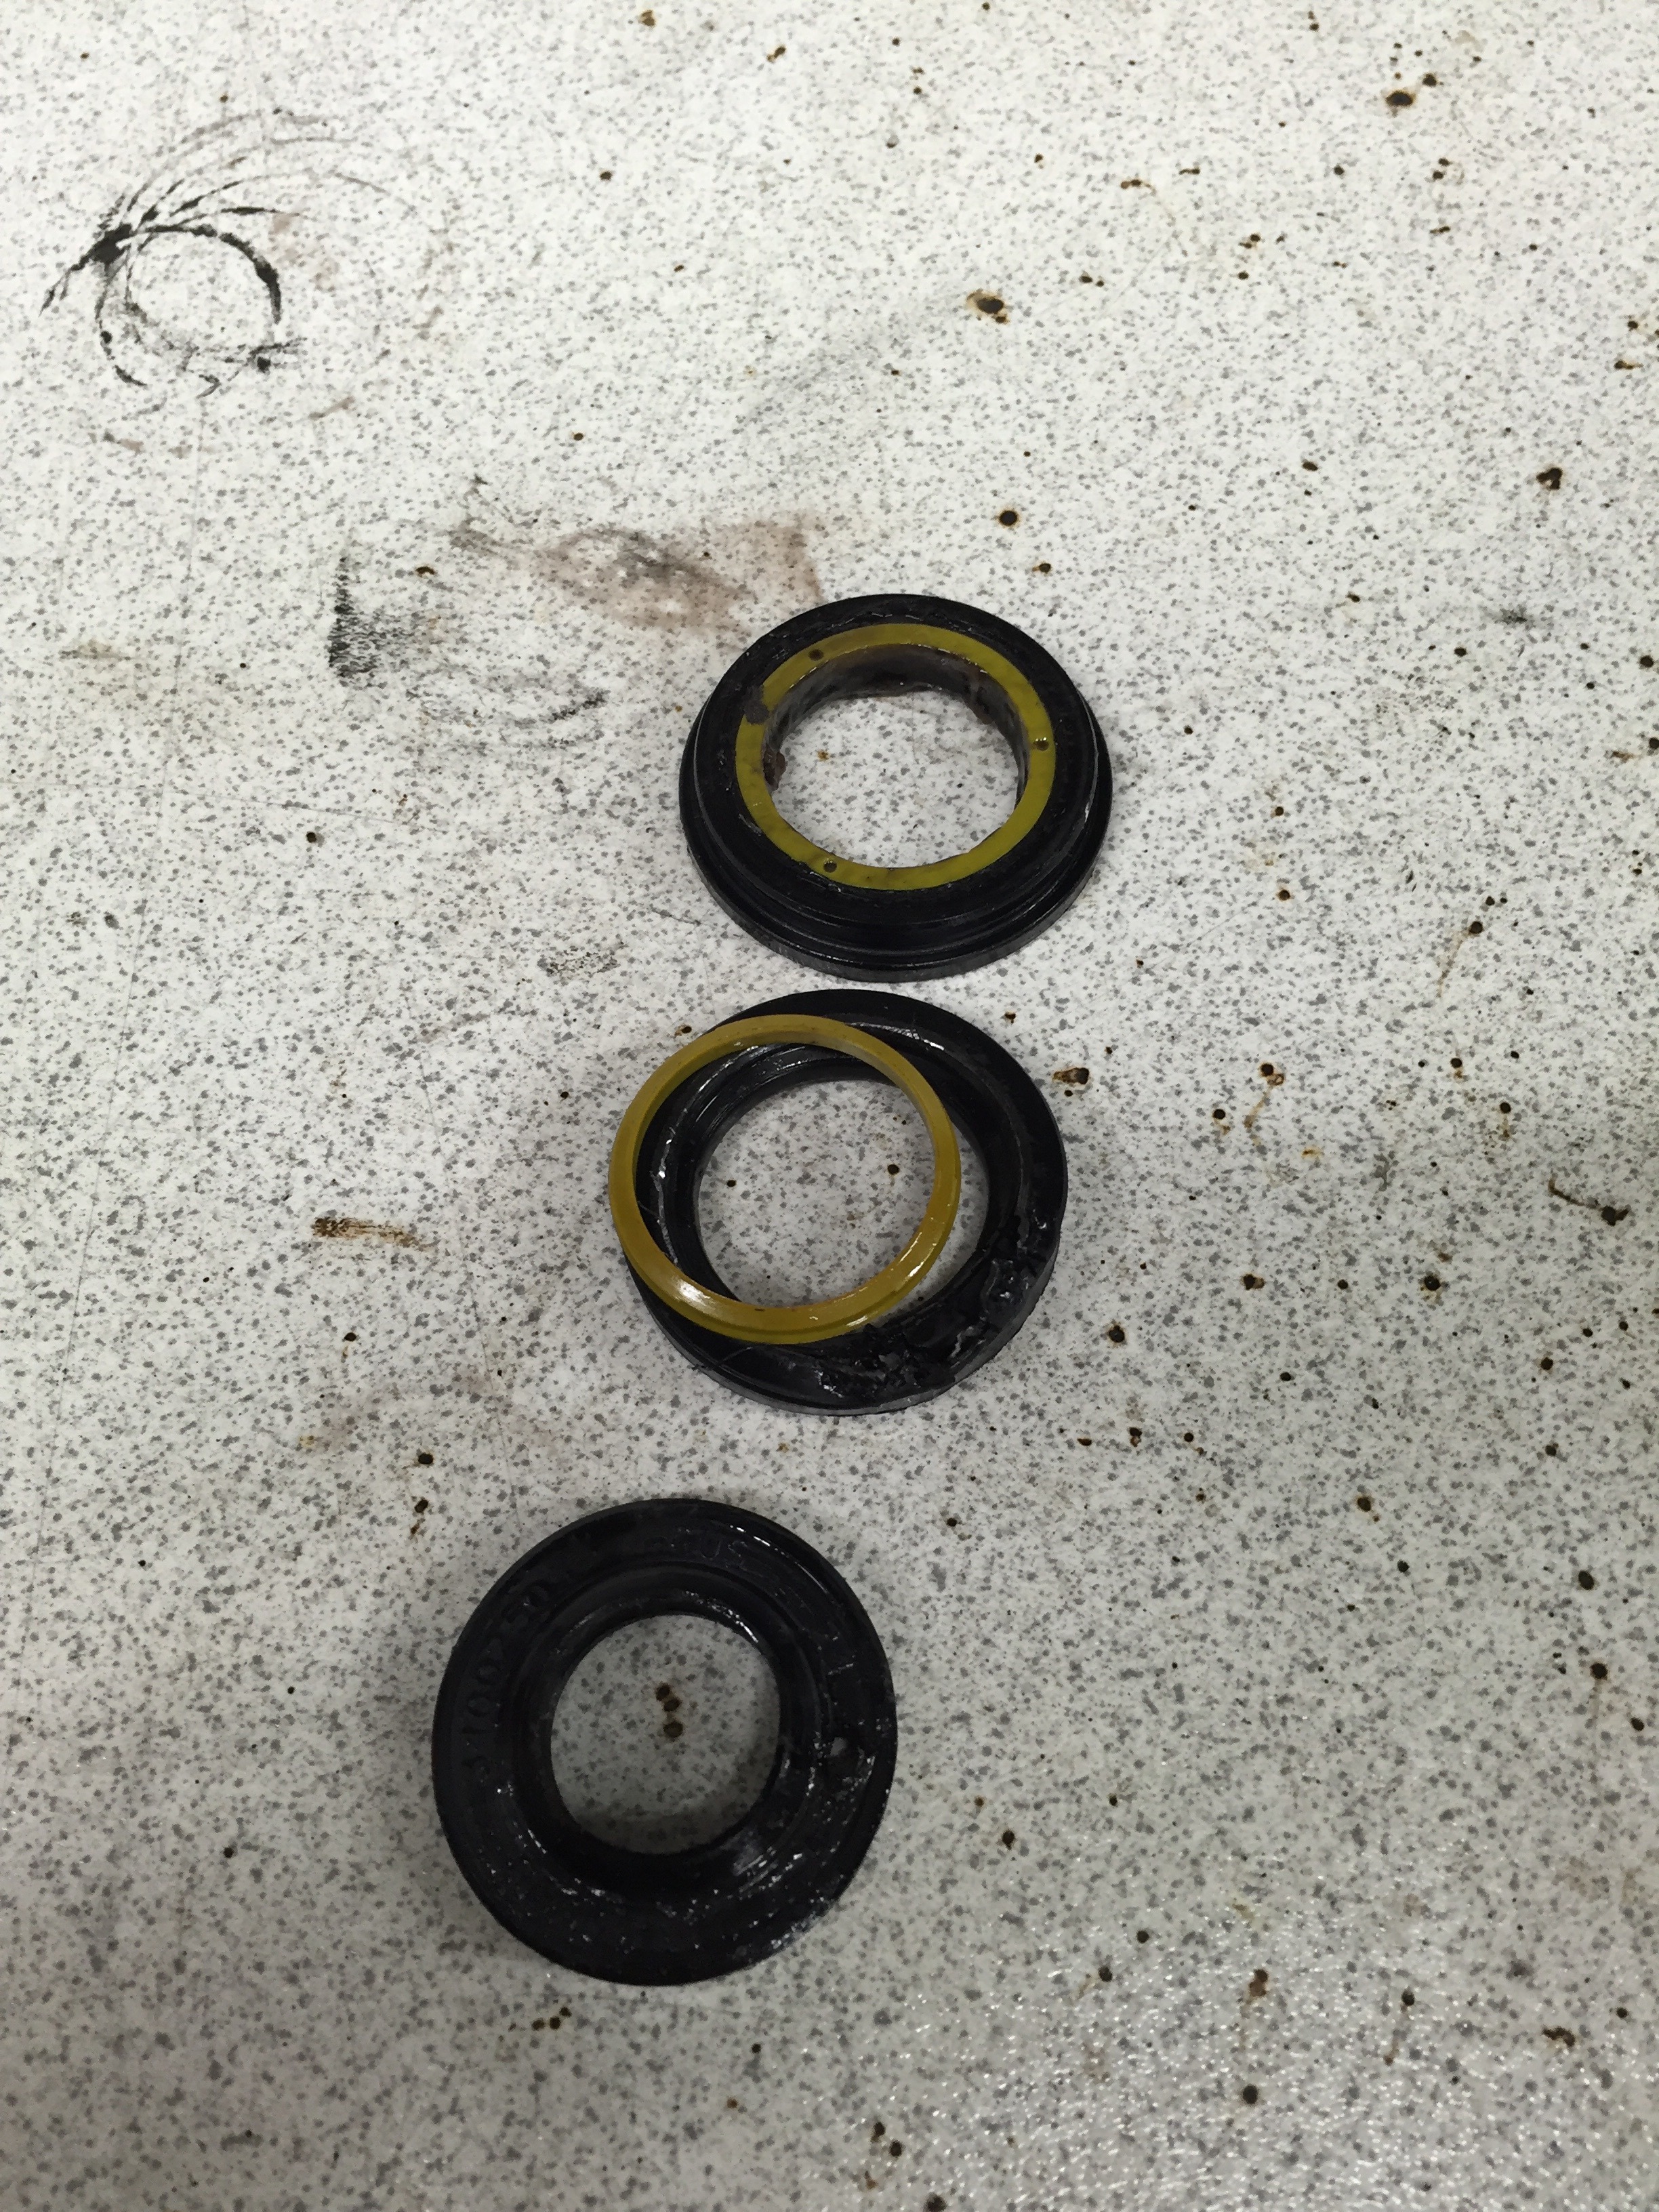
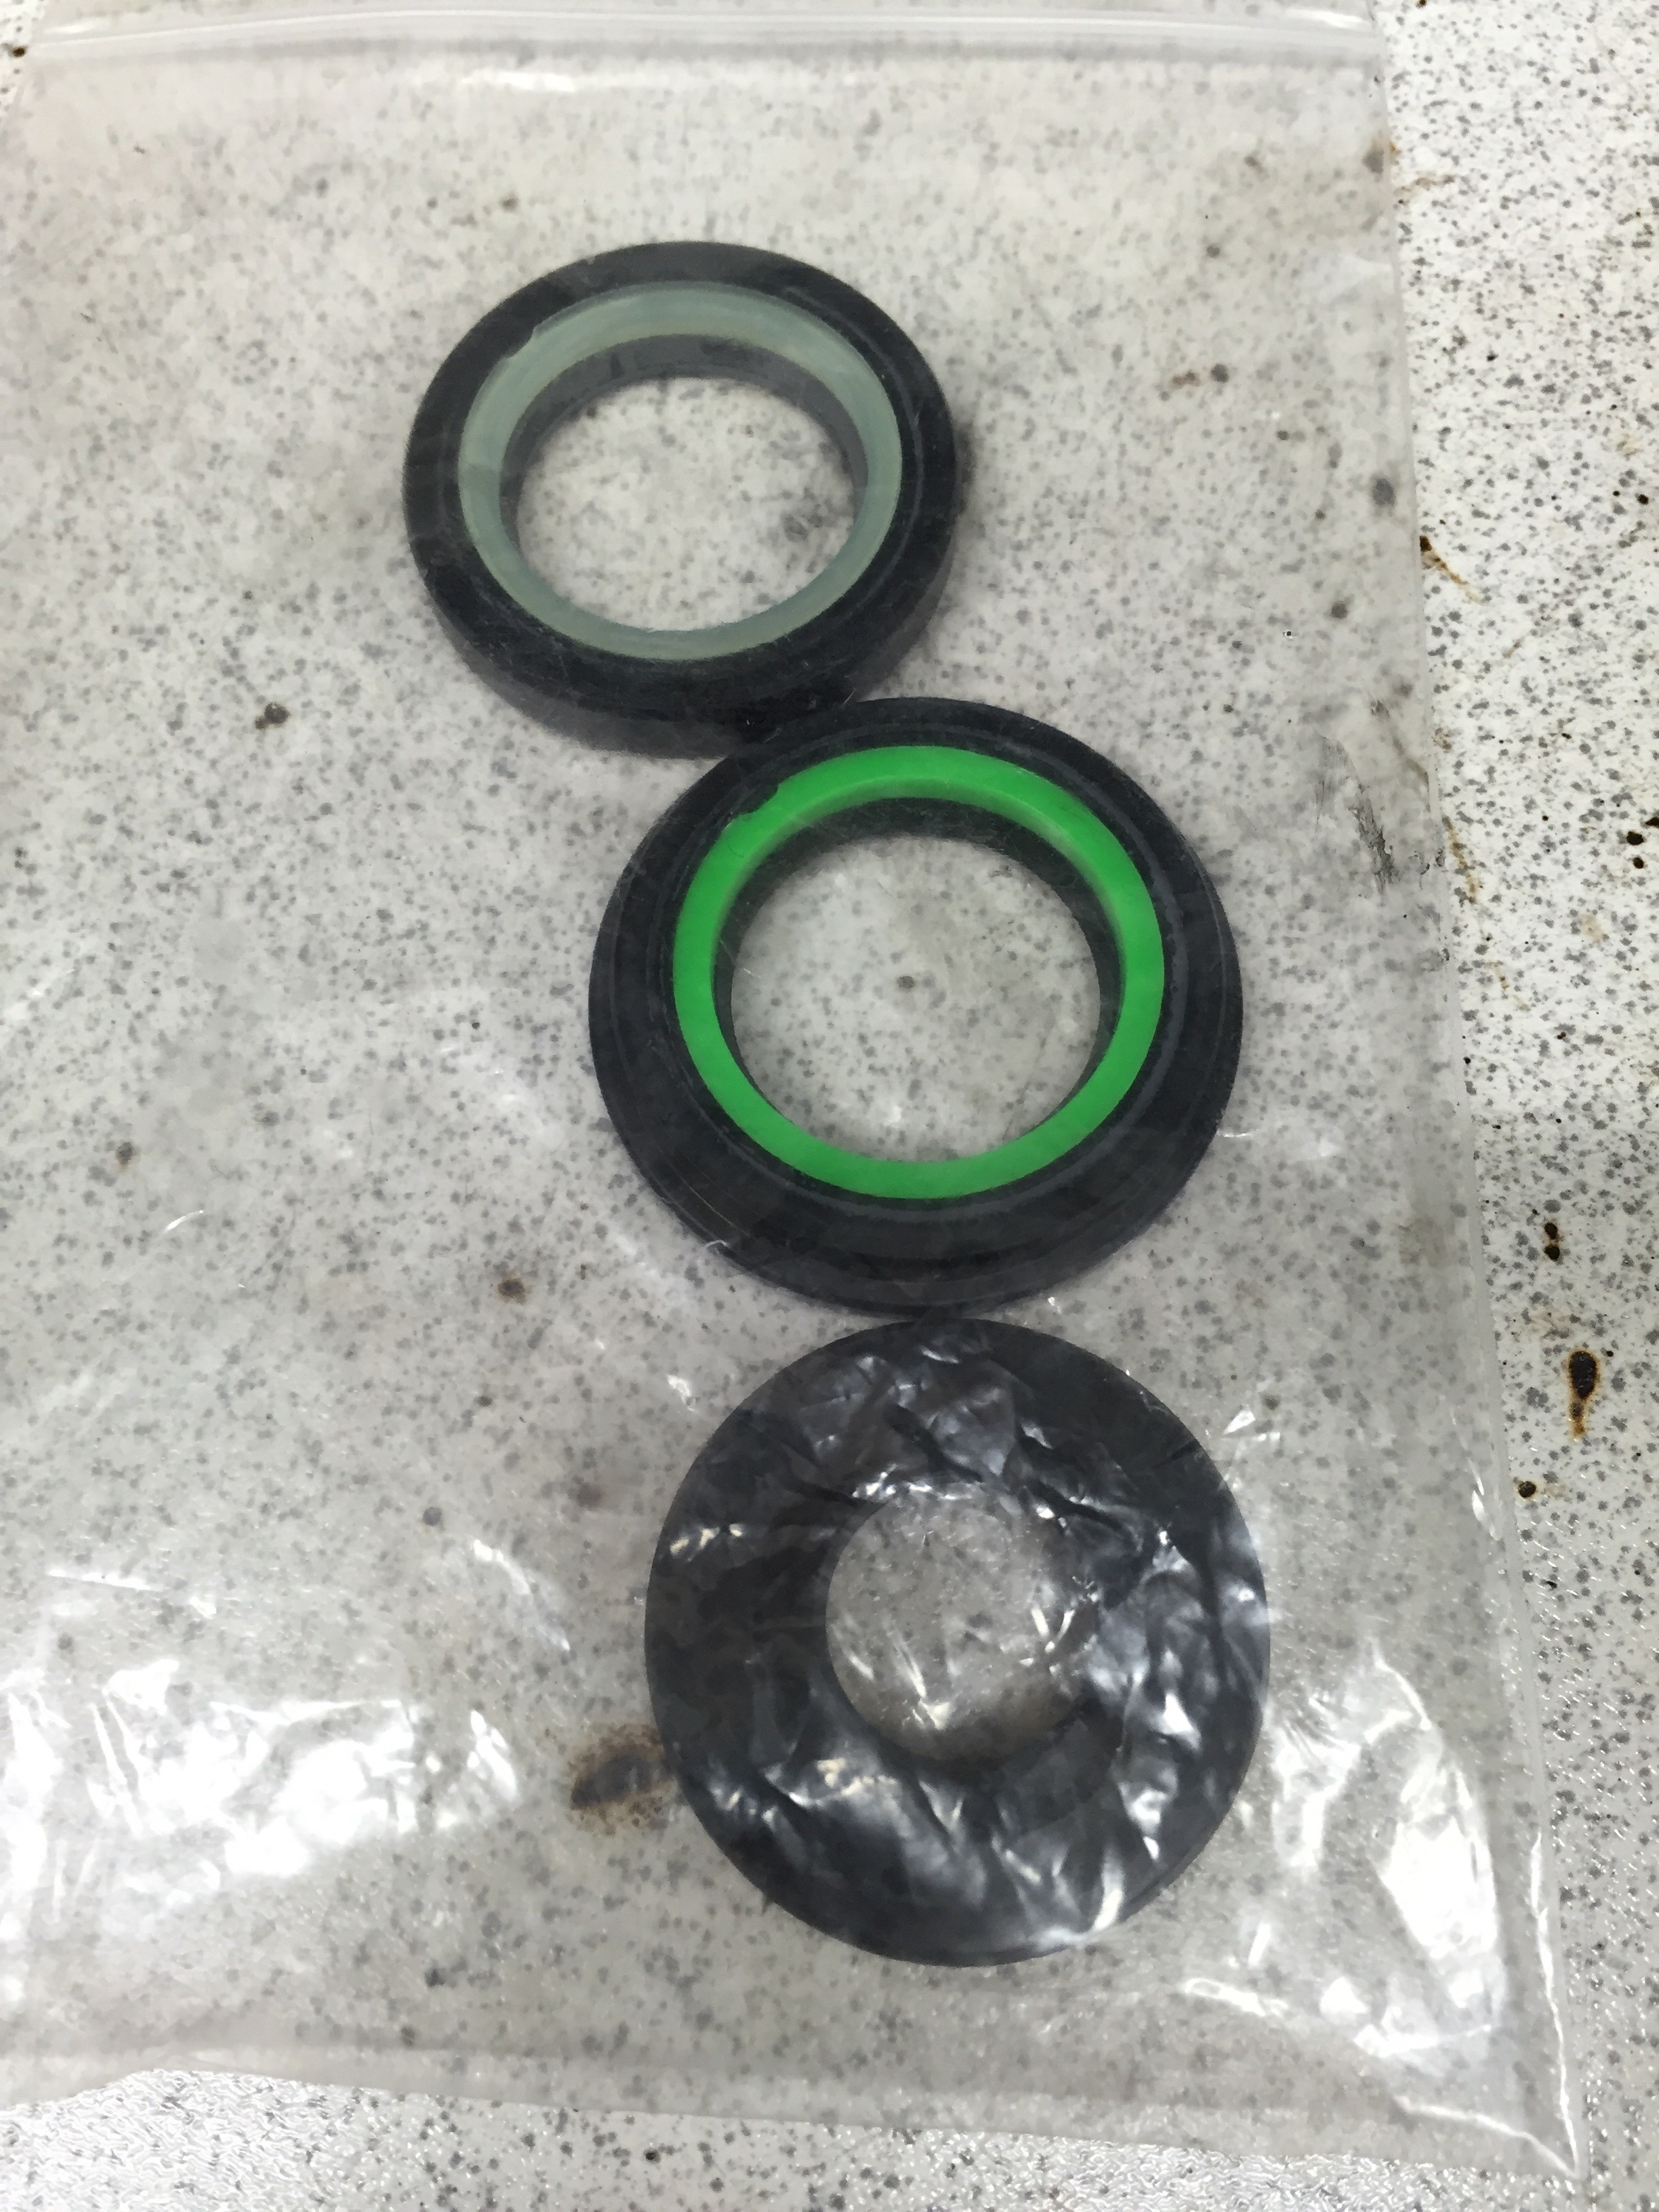
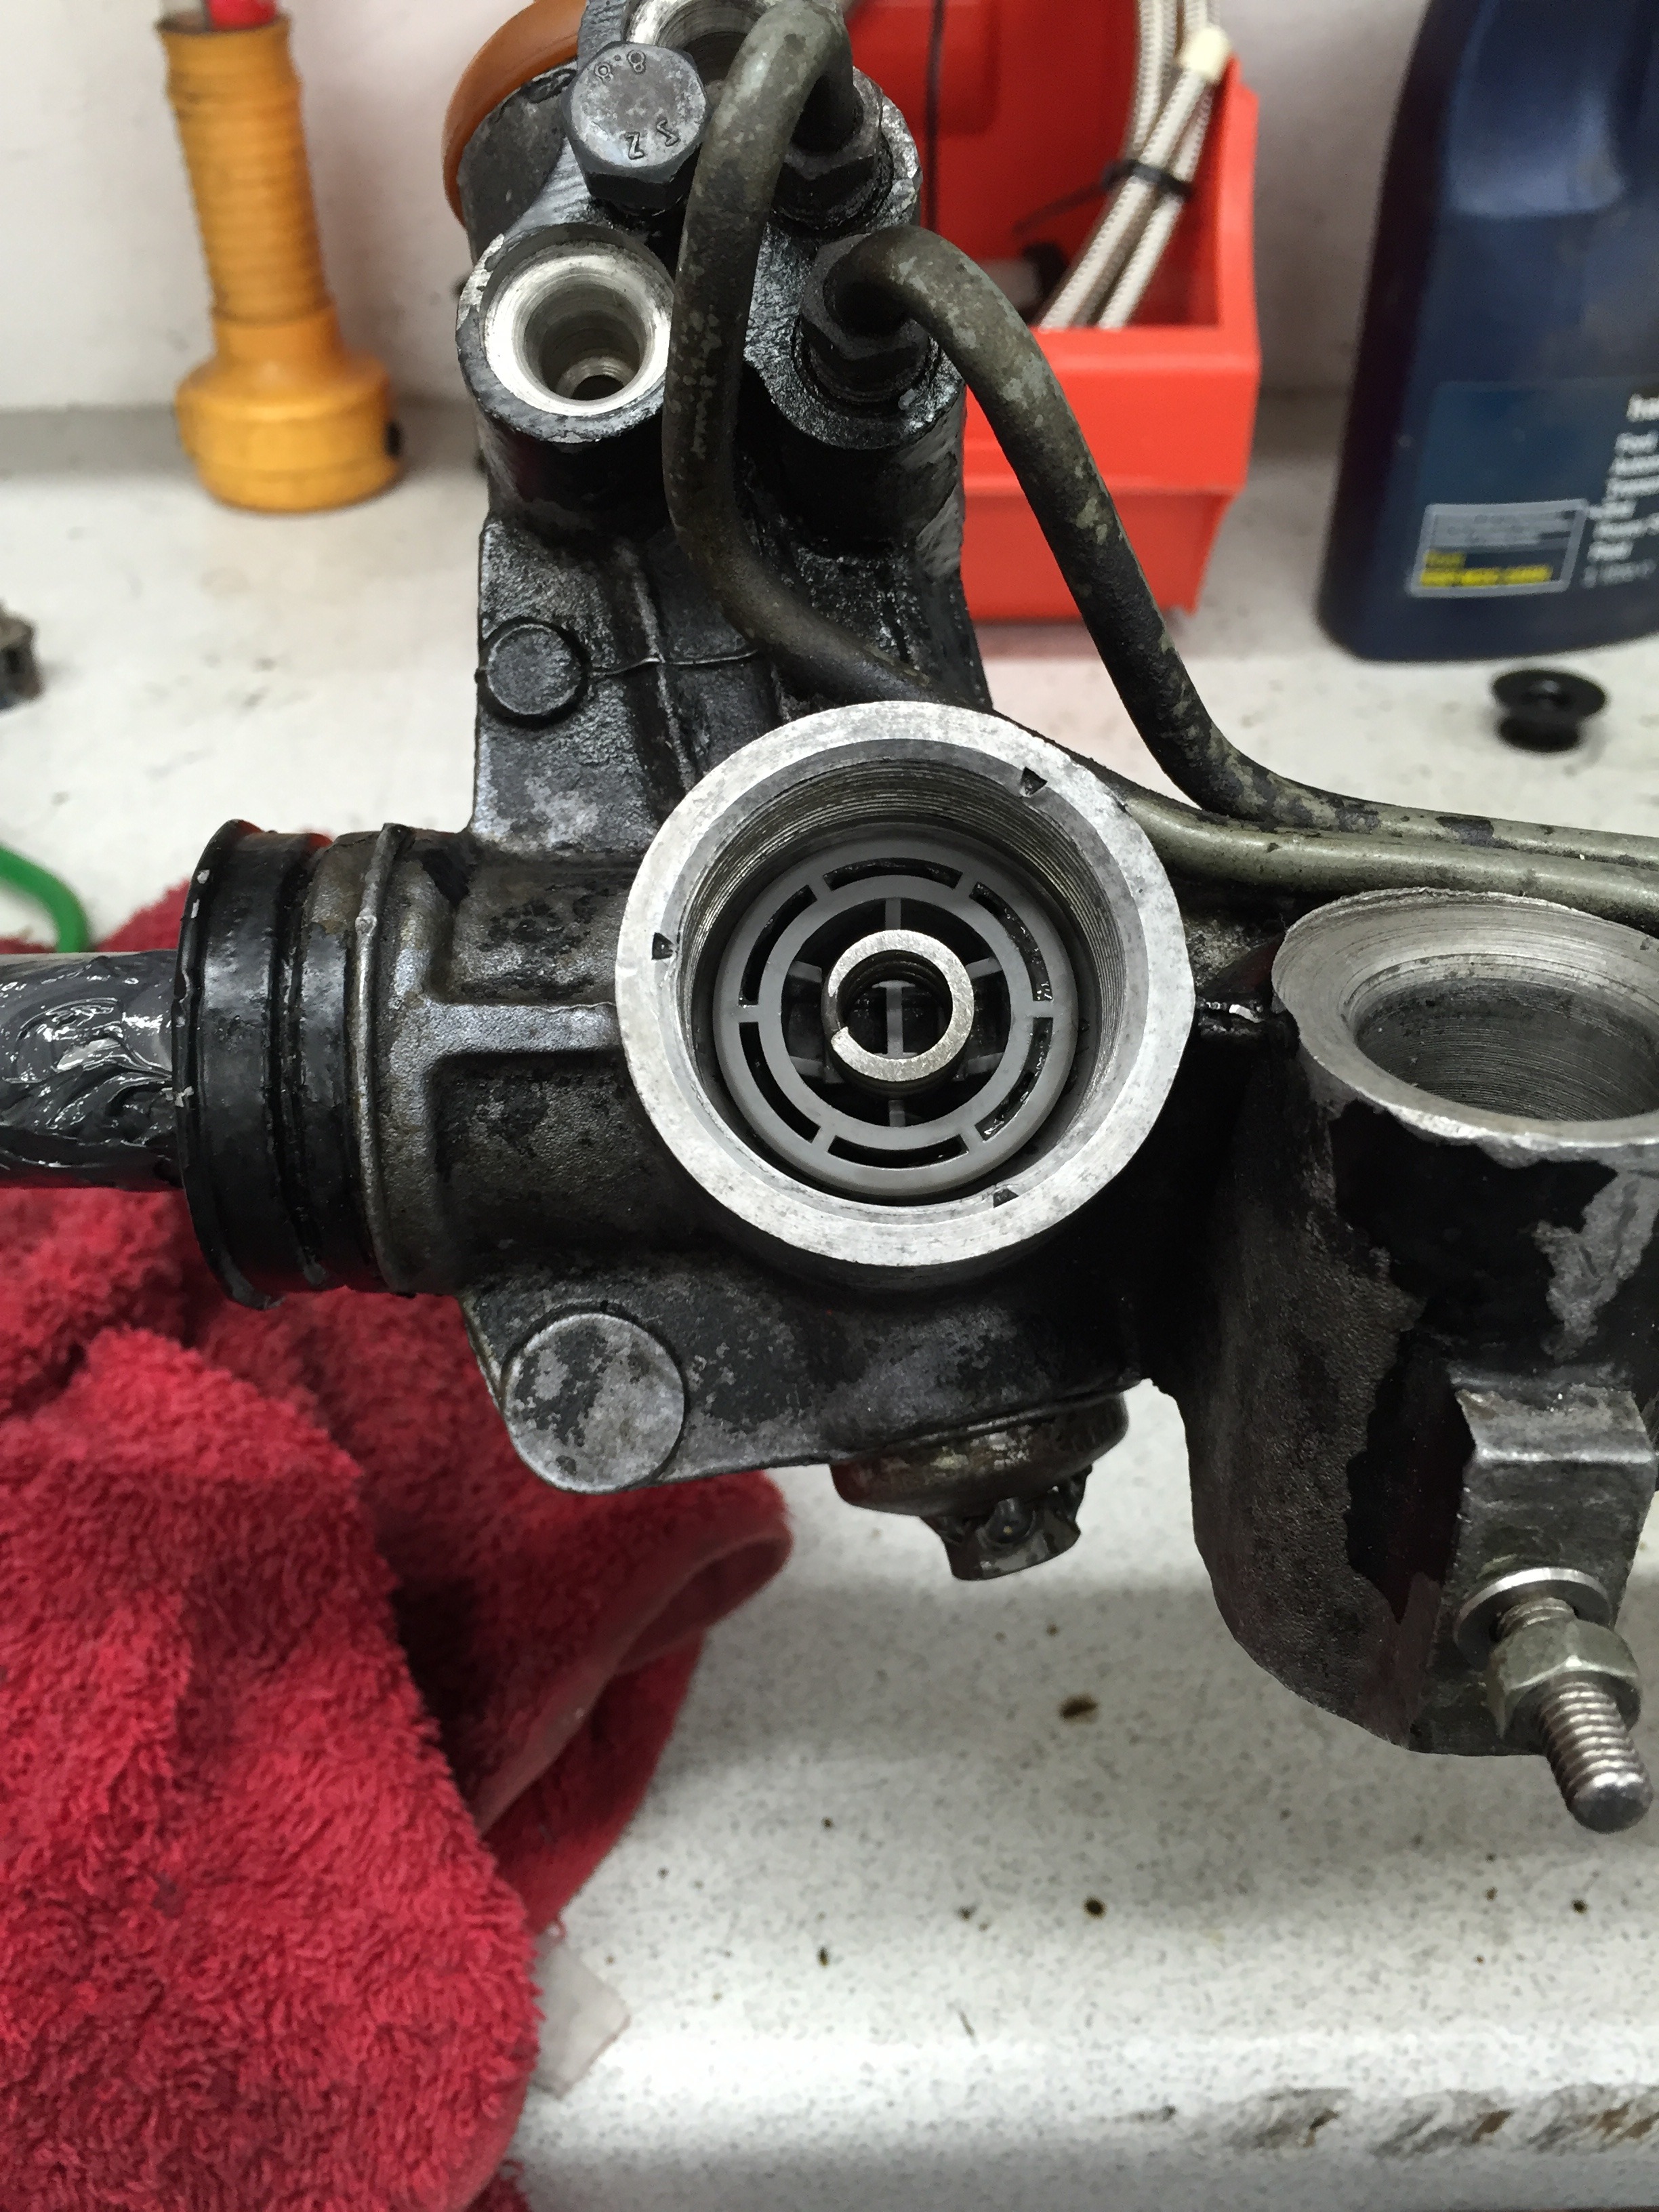
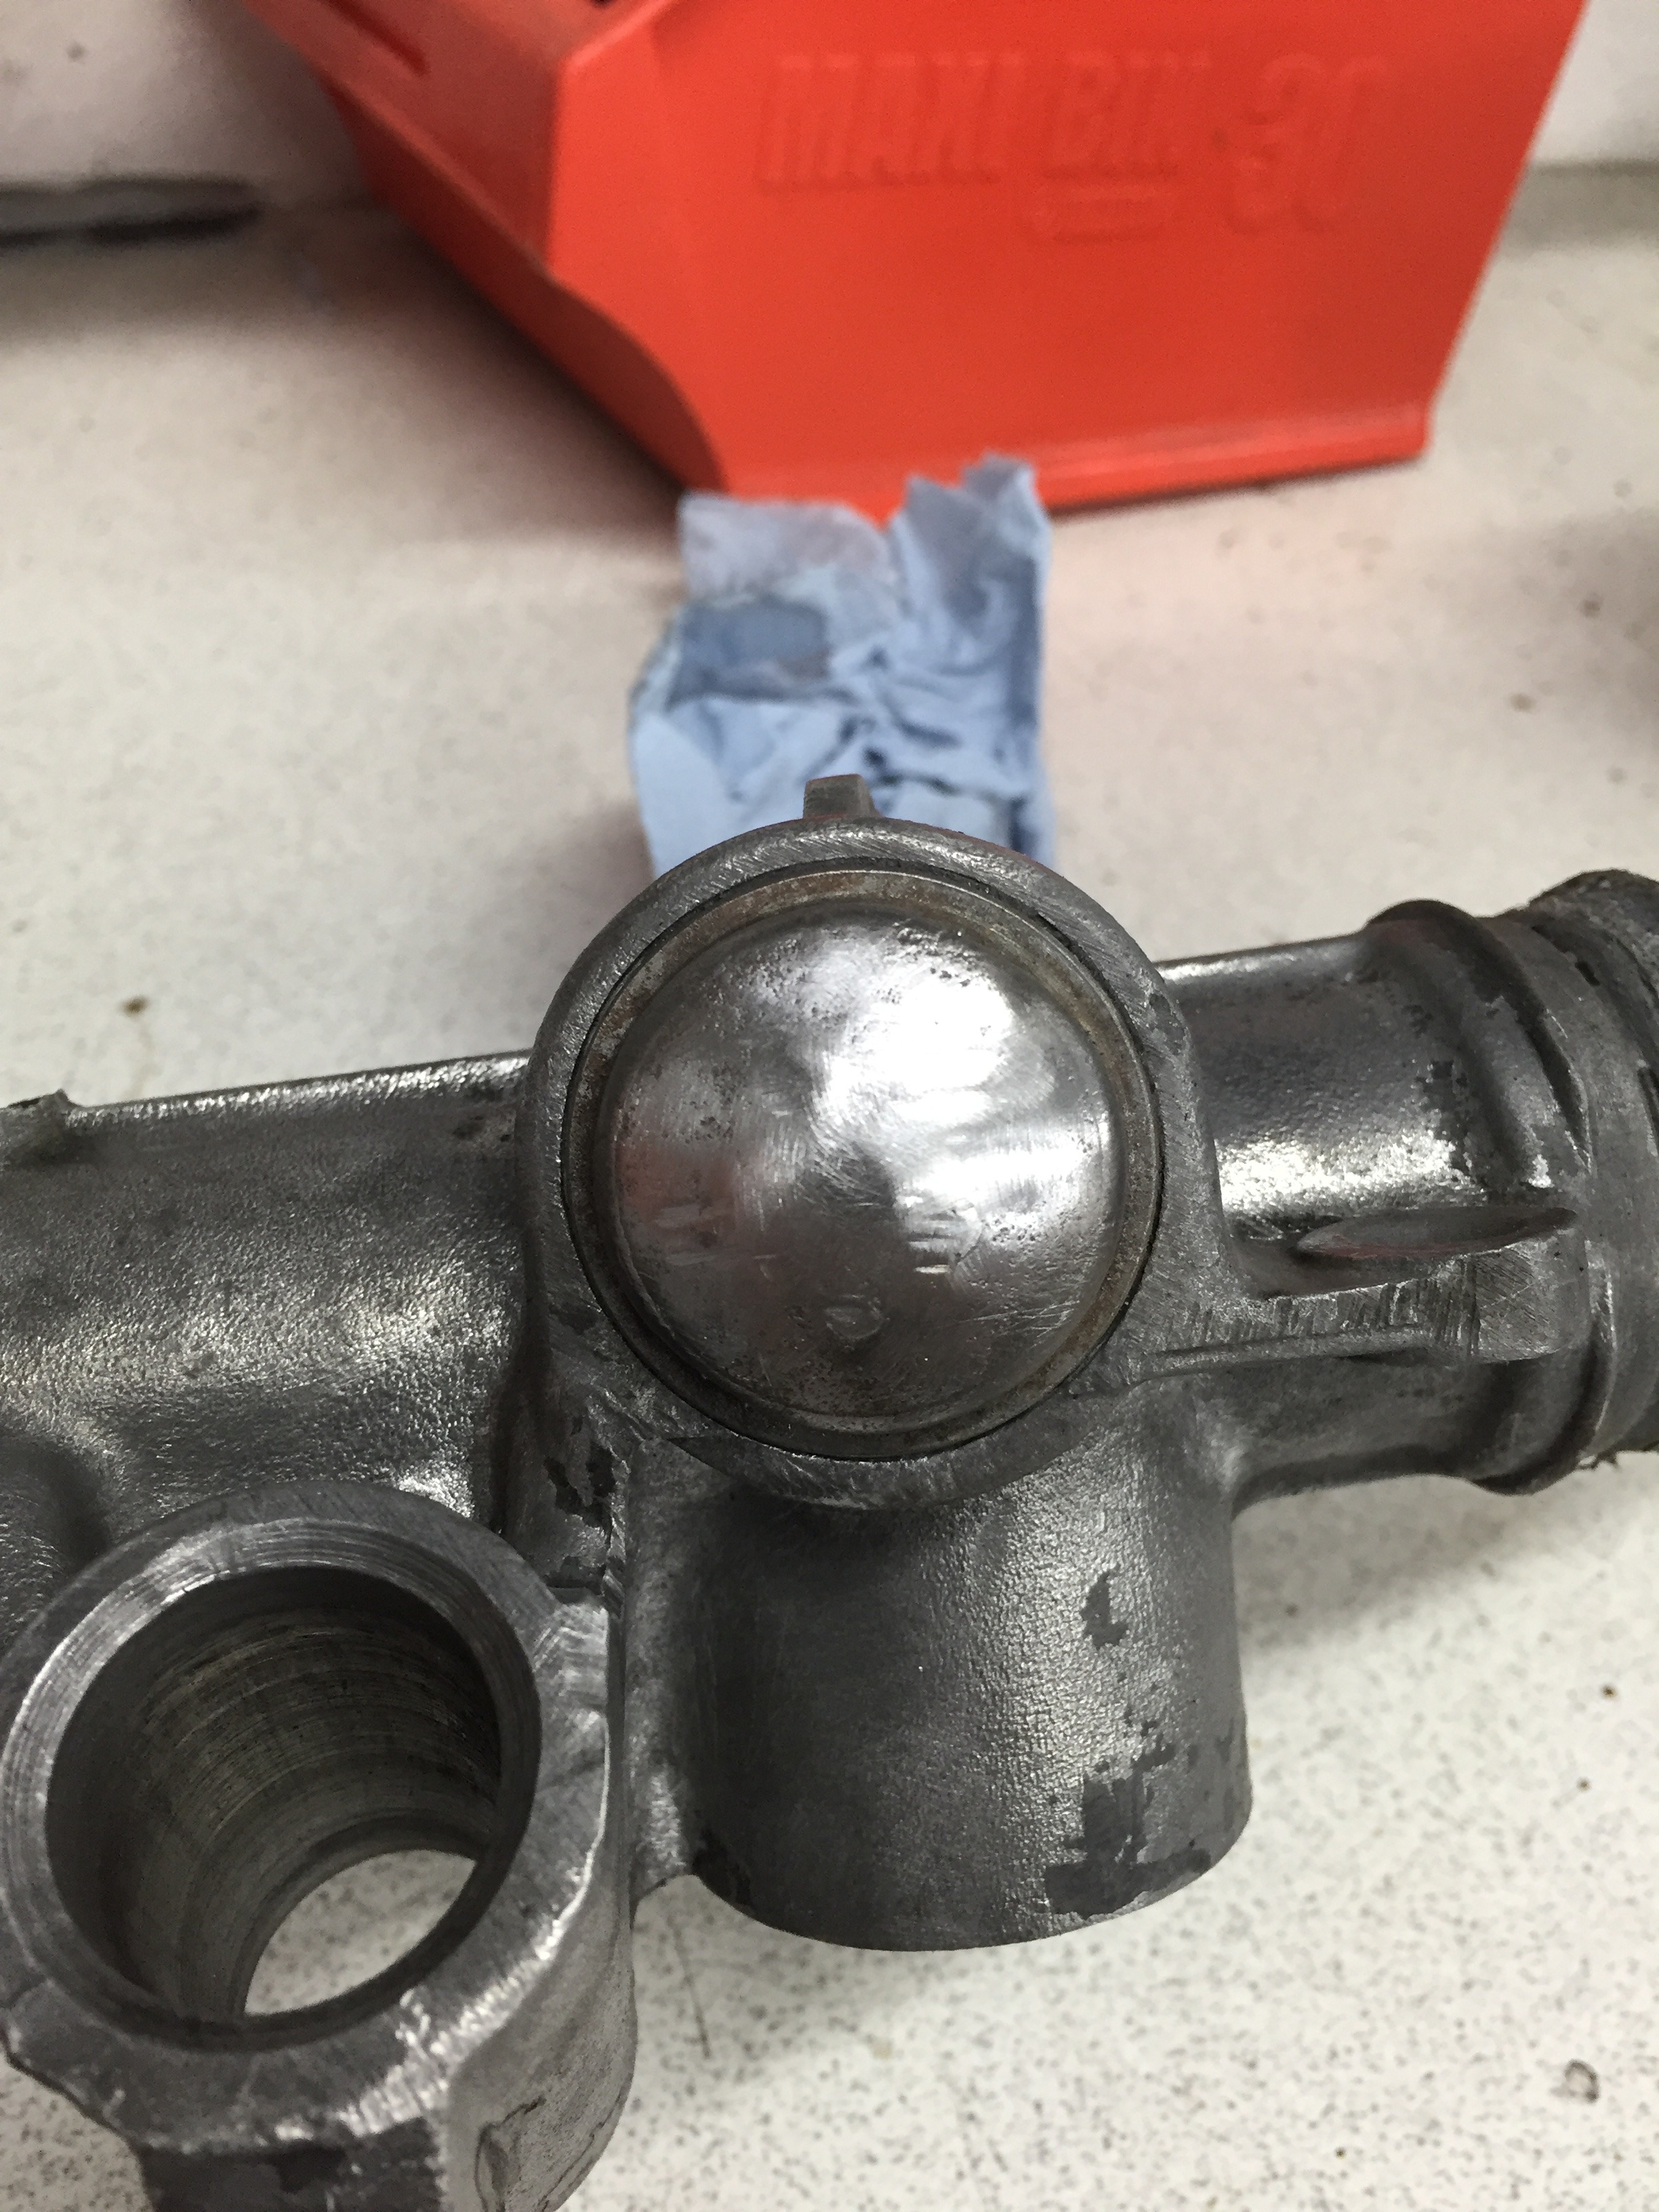
With that and a little help from the workshop manual the rack was stripped down enough for me to get the old seals out and ready for the new to be fitted

Also decided to opt for solid rack bushes and so this seemed a good time to press the old rubber mounts out
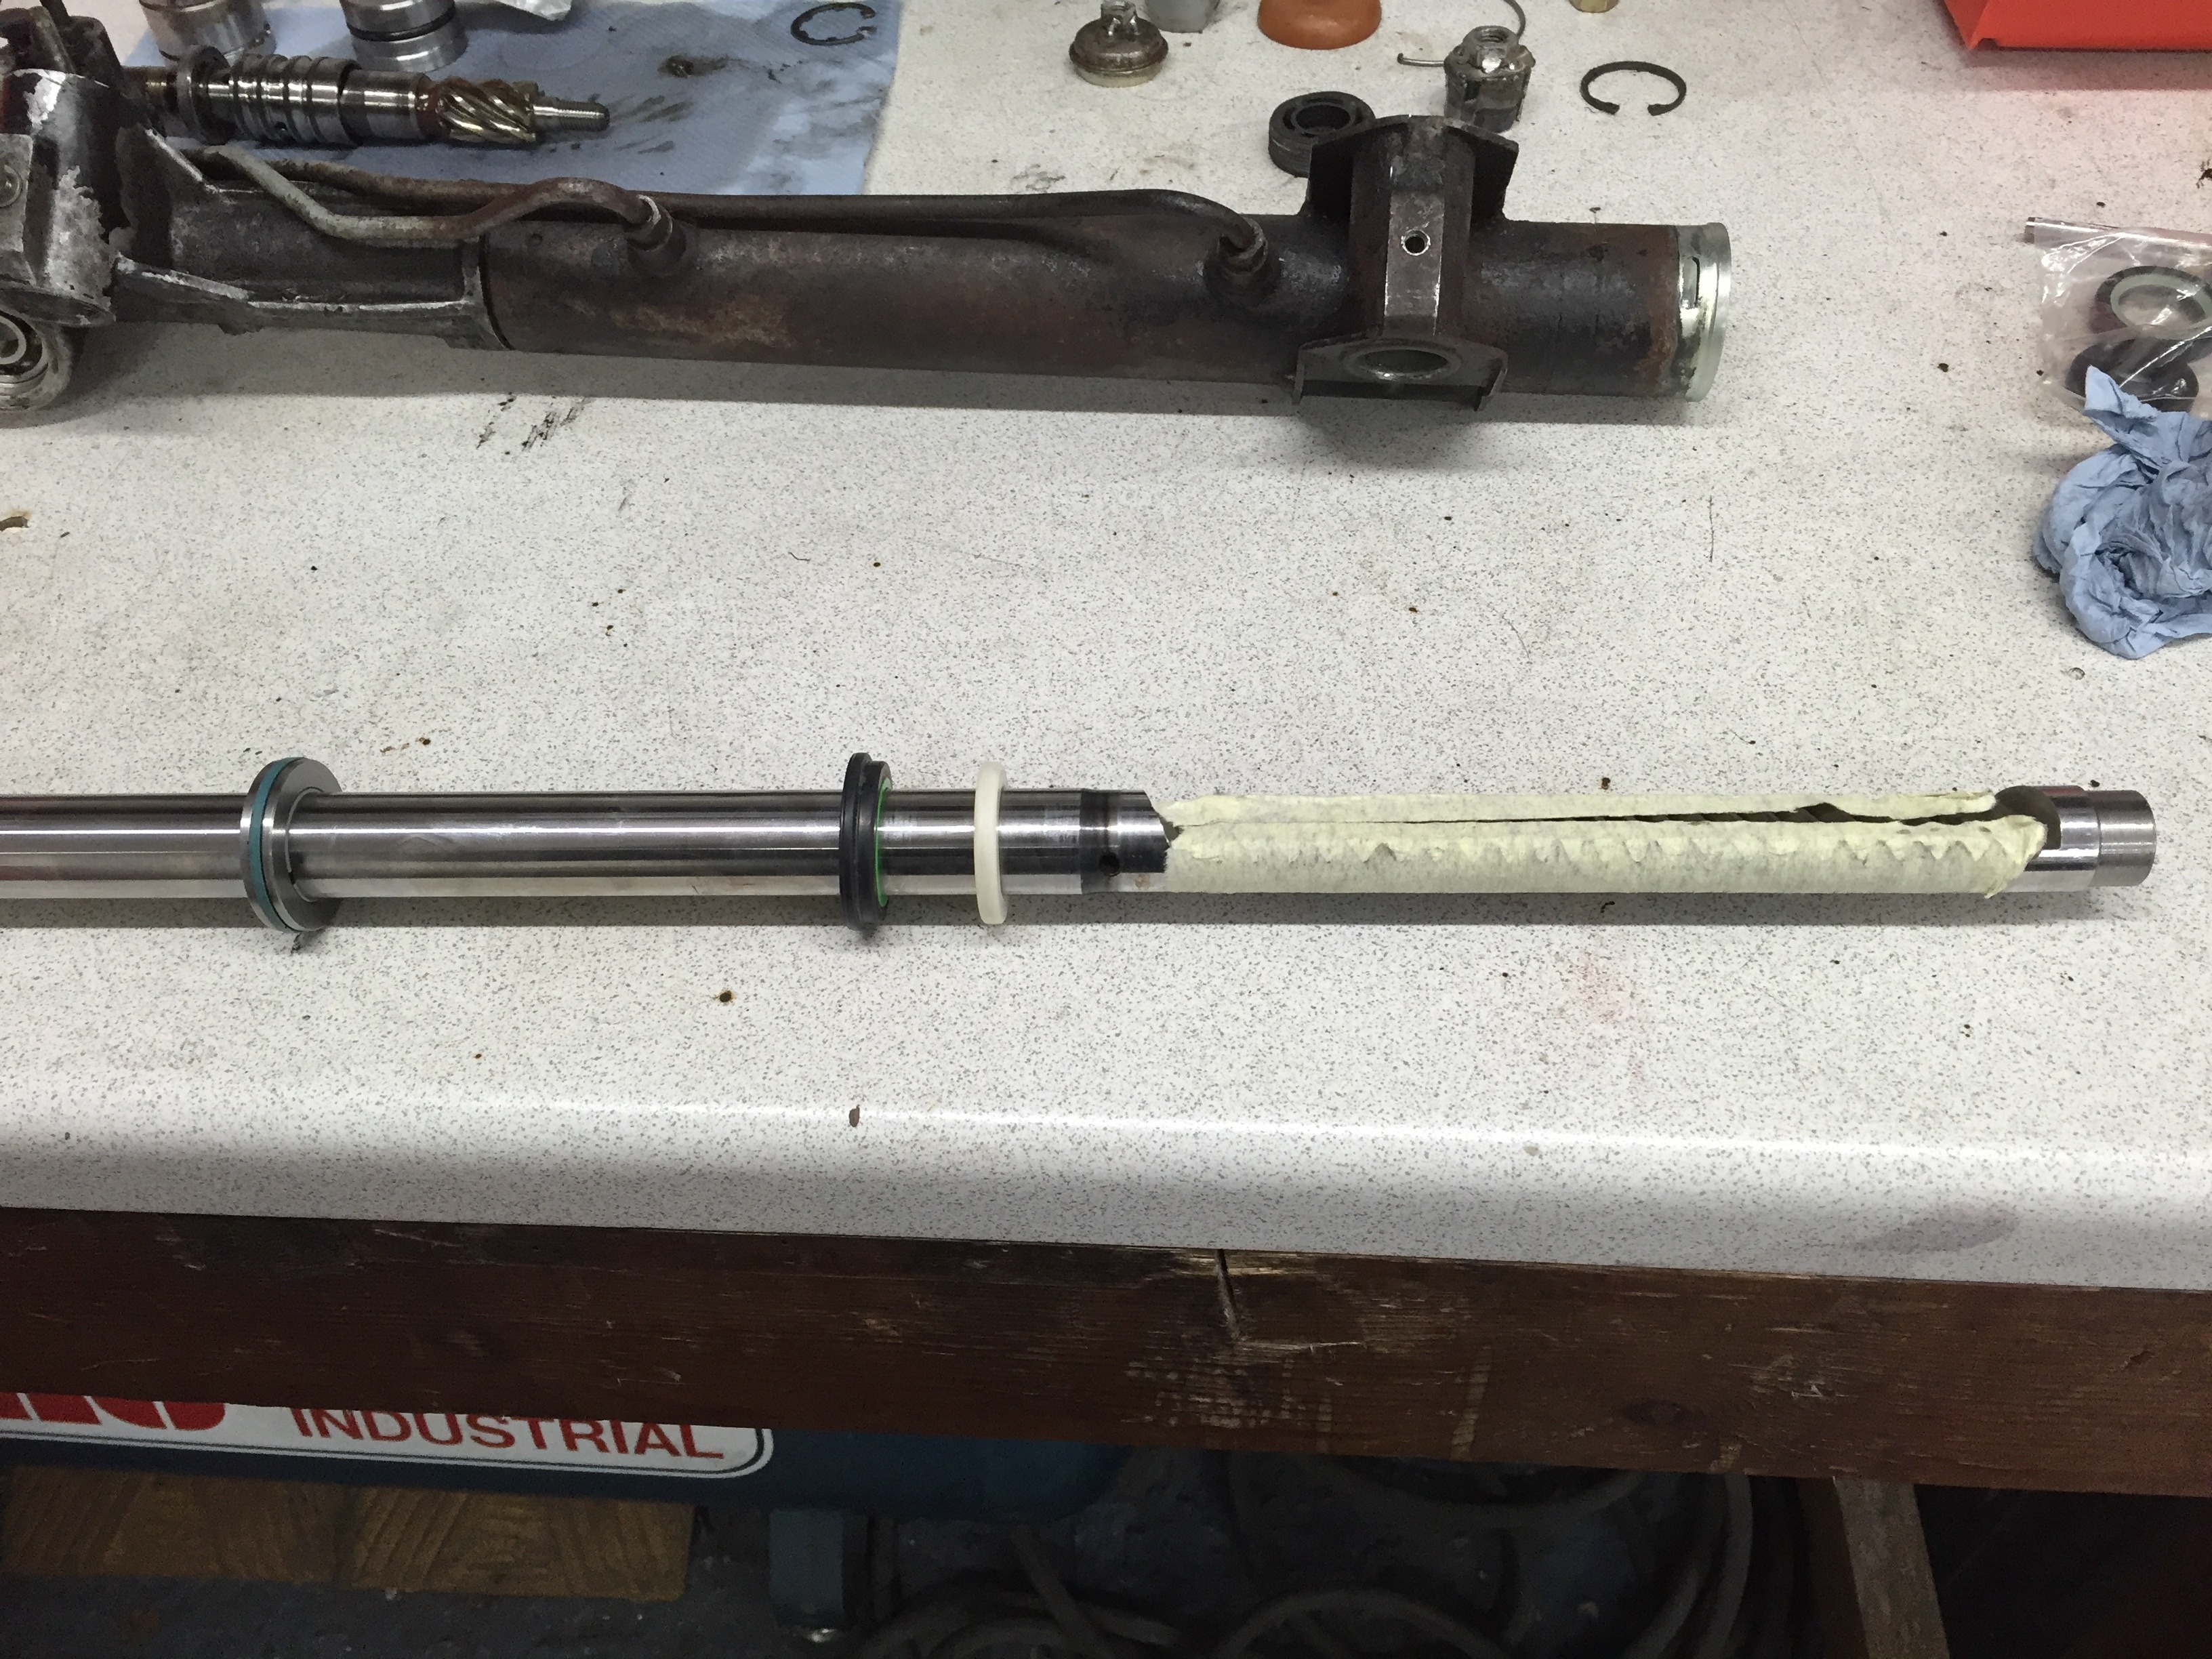
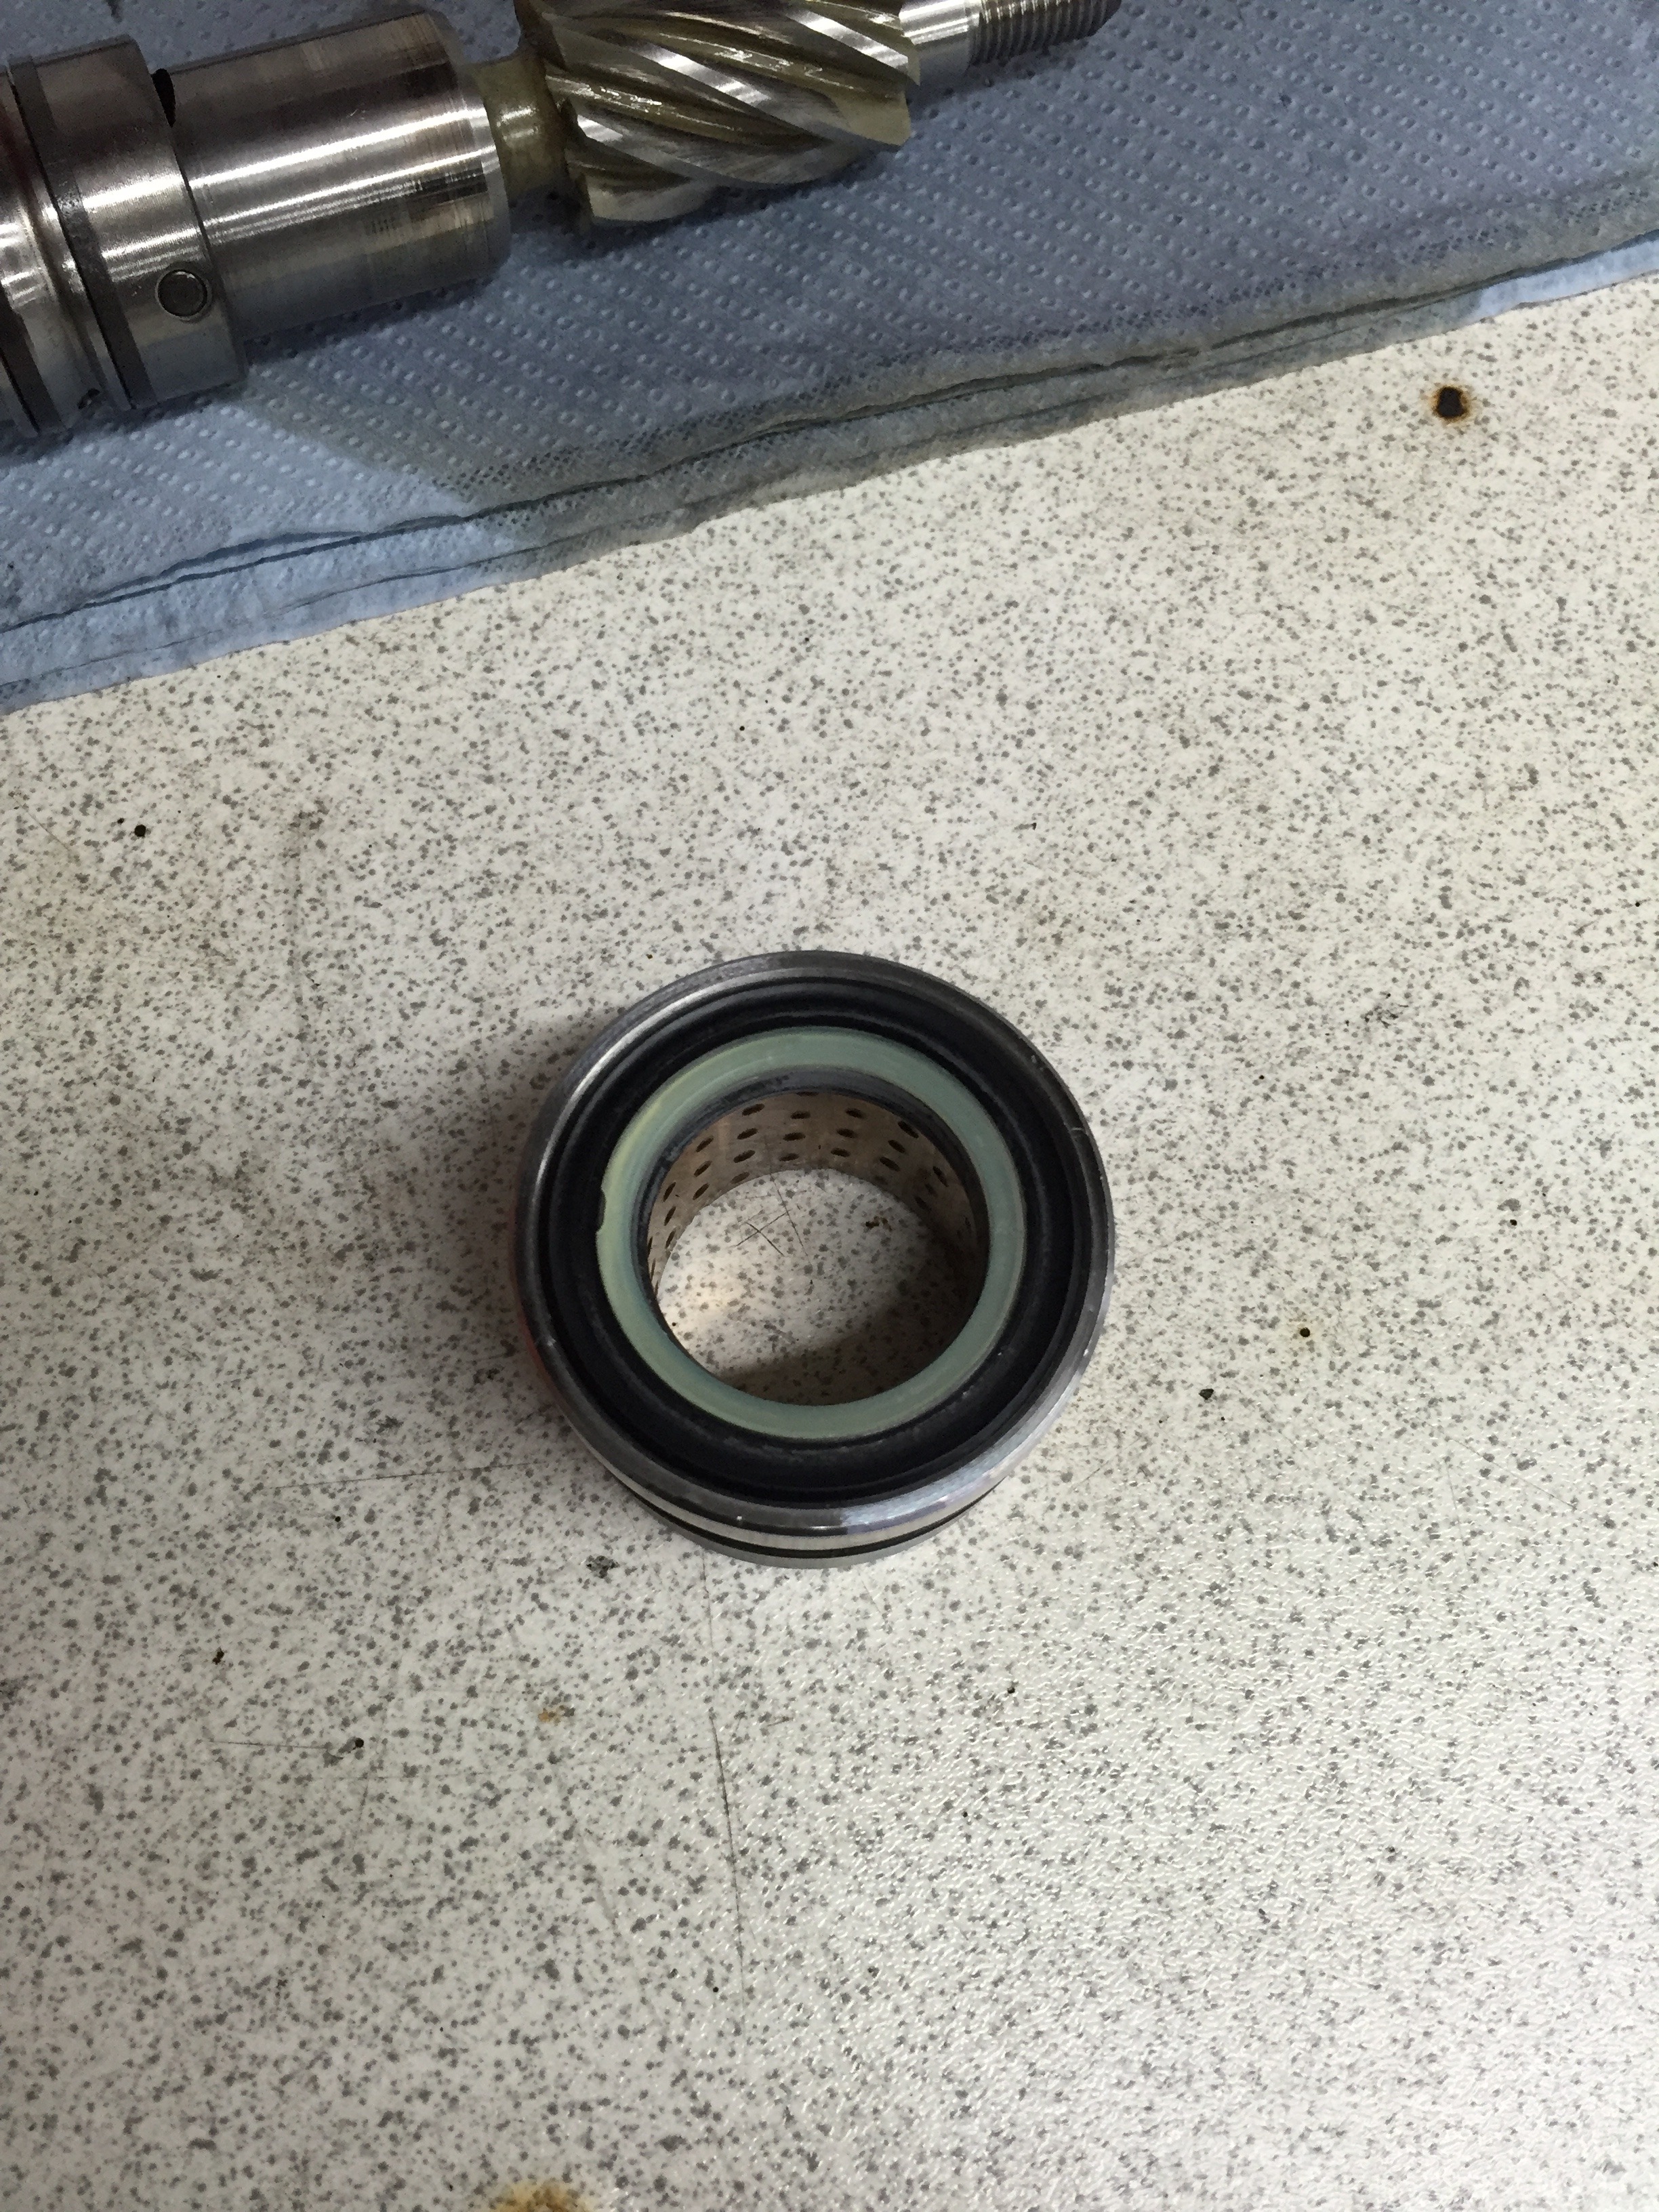
New seals being fitted - masking tape put over the rack teeth to protect the seal as I slide it on
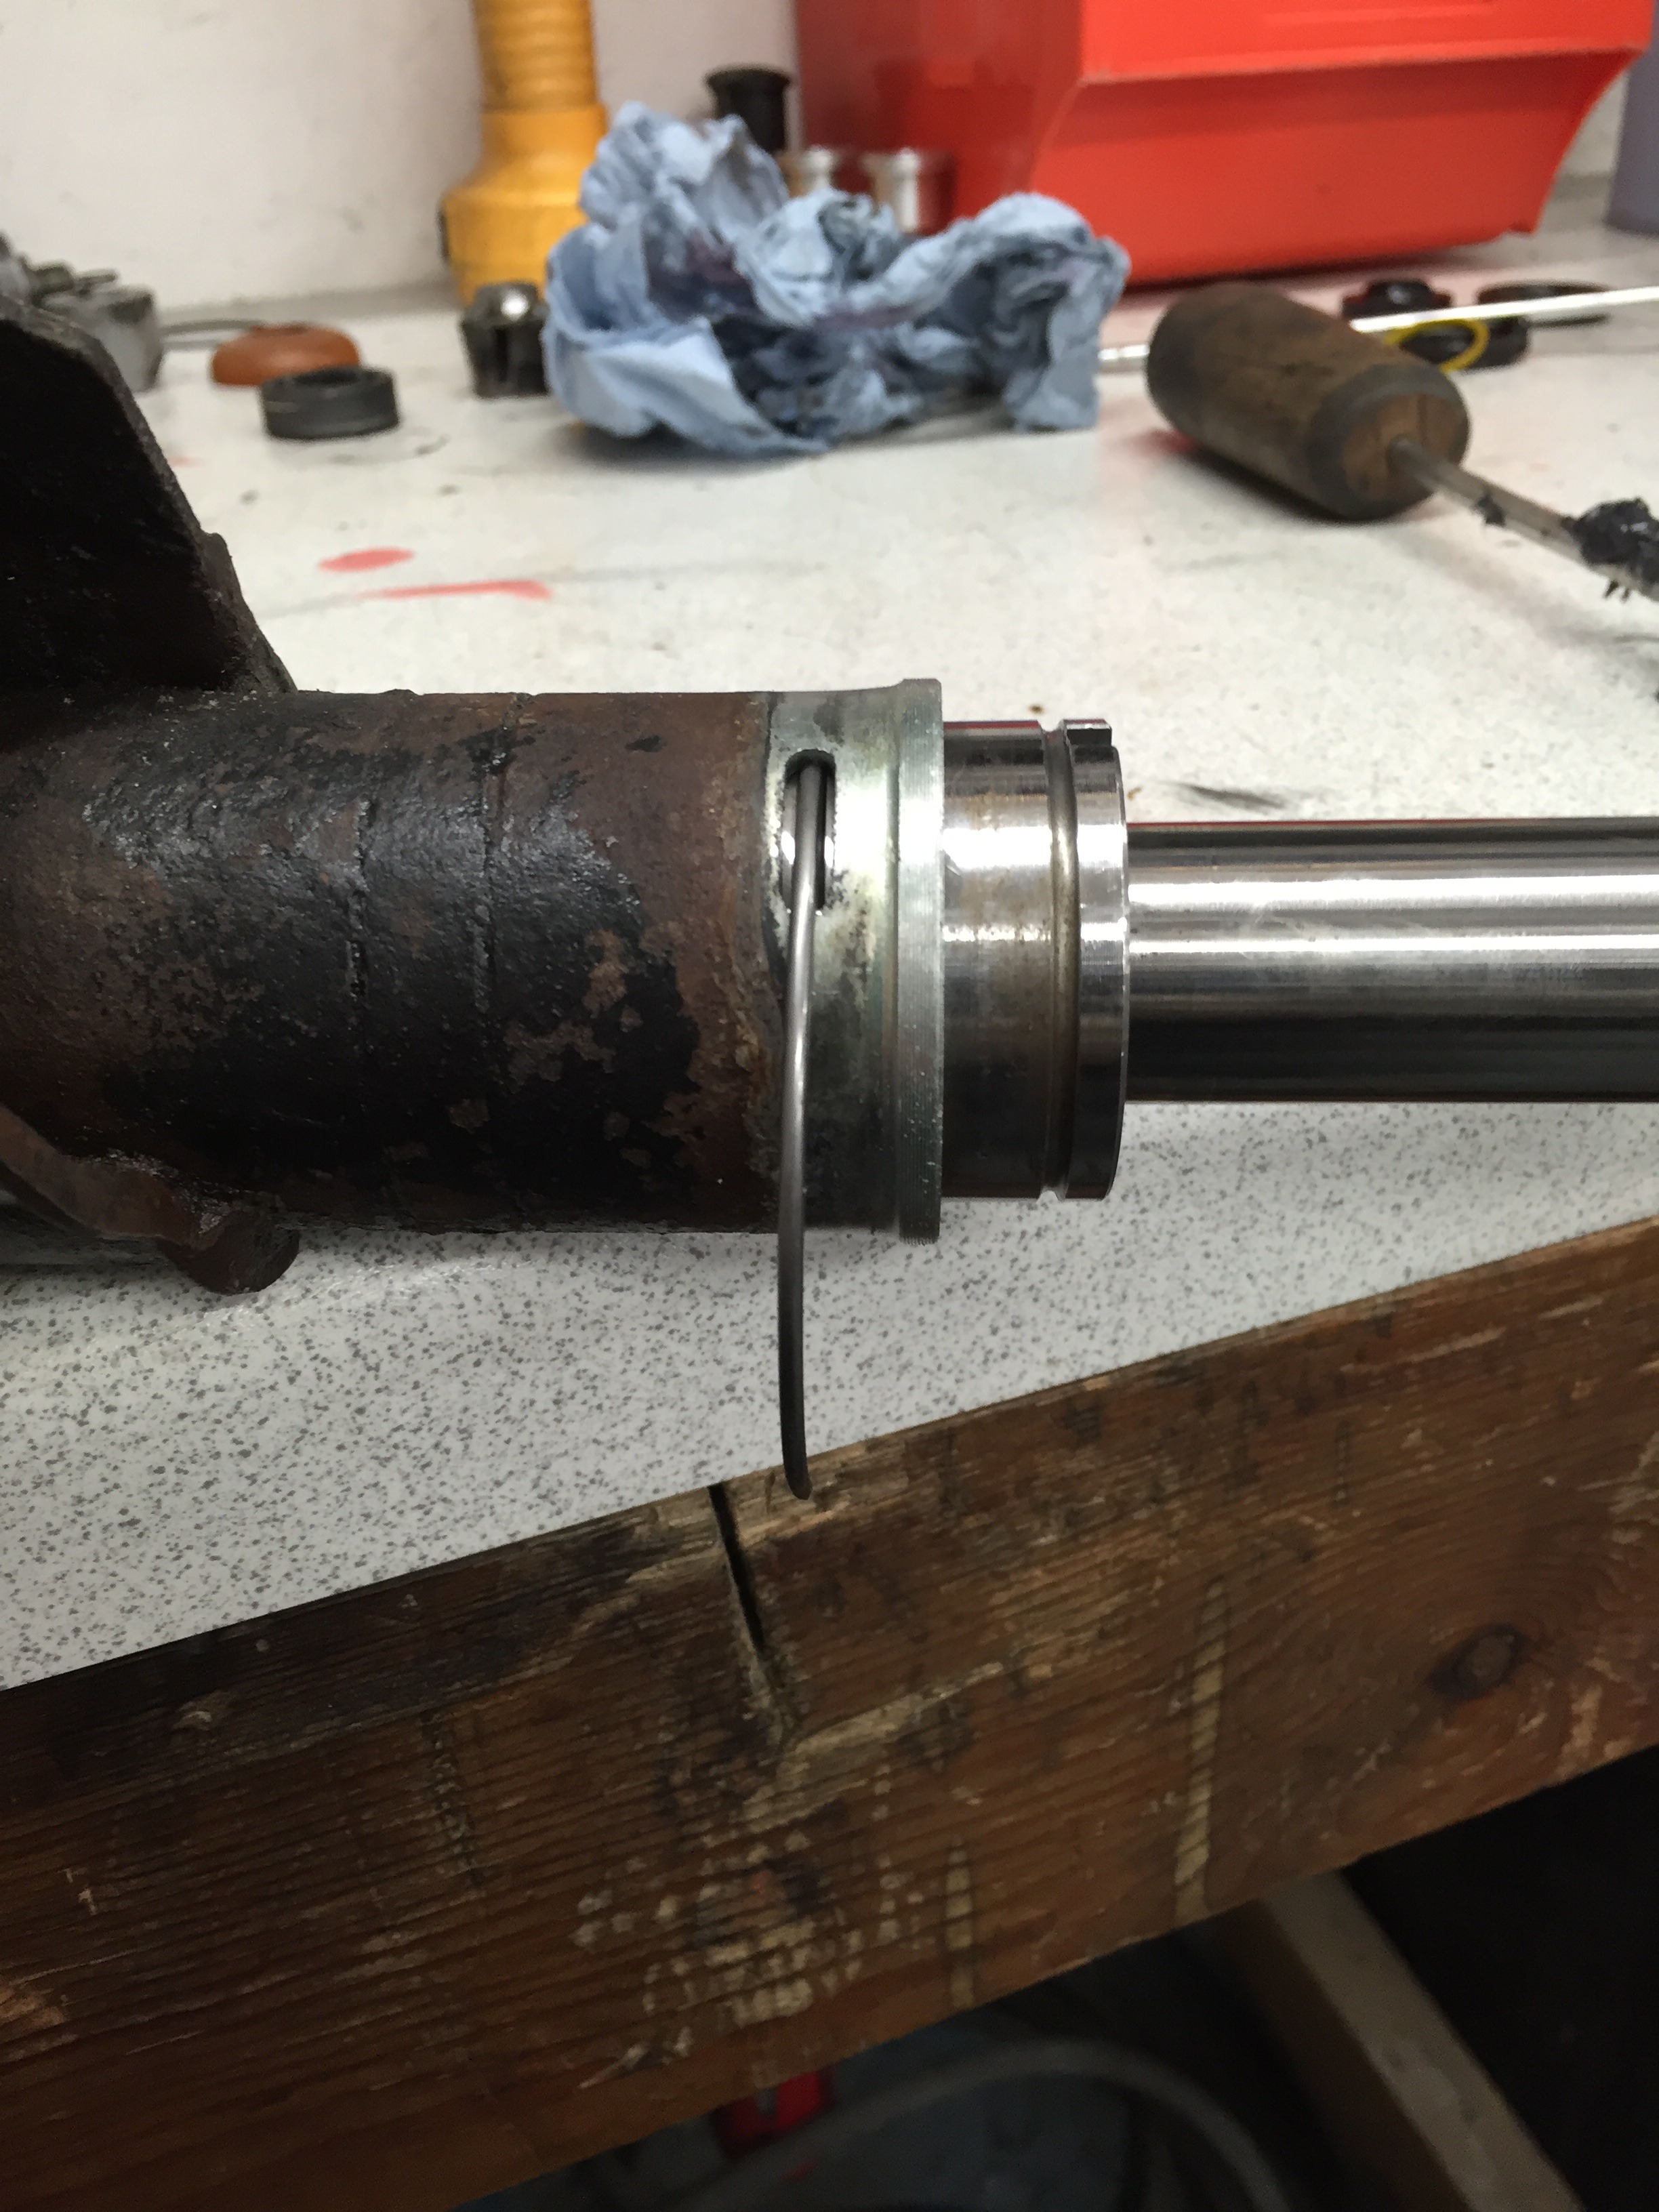
Wire re-fitted to hold seal housing in place
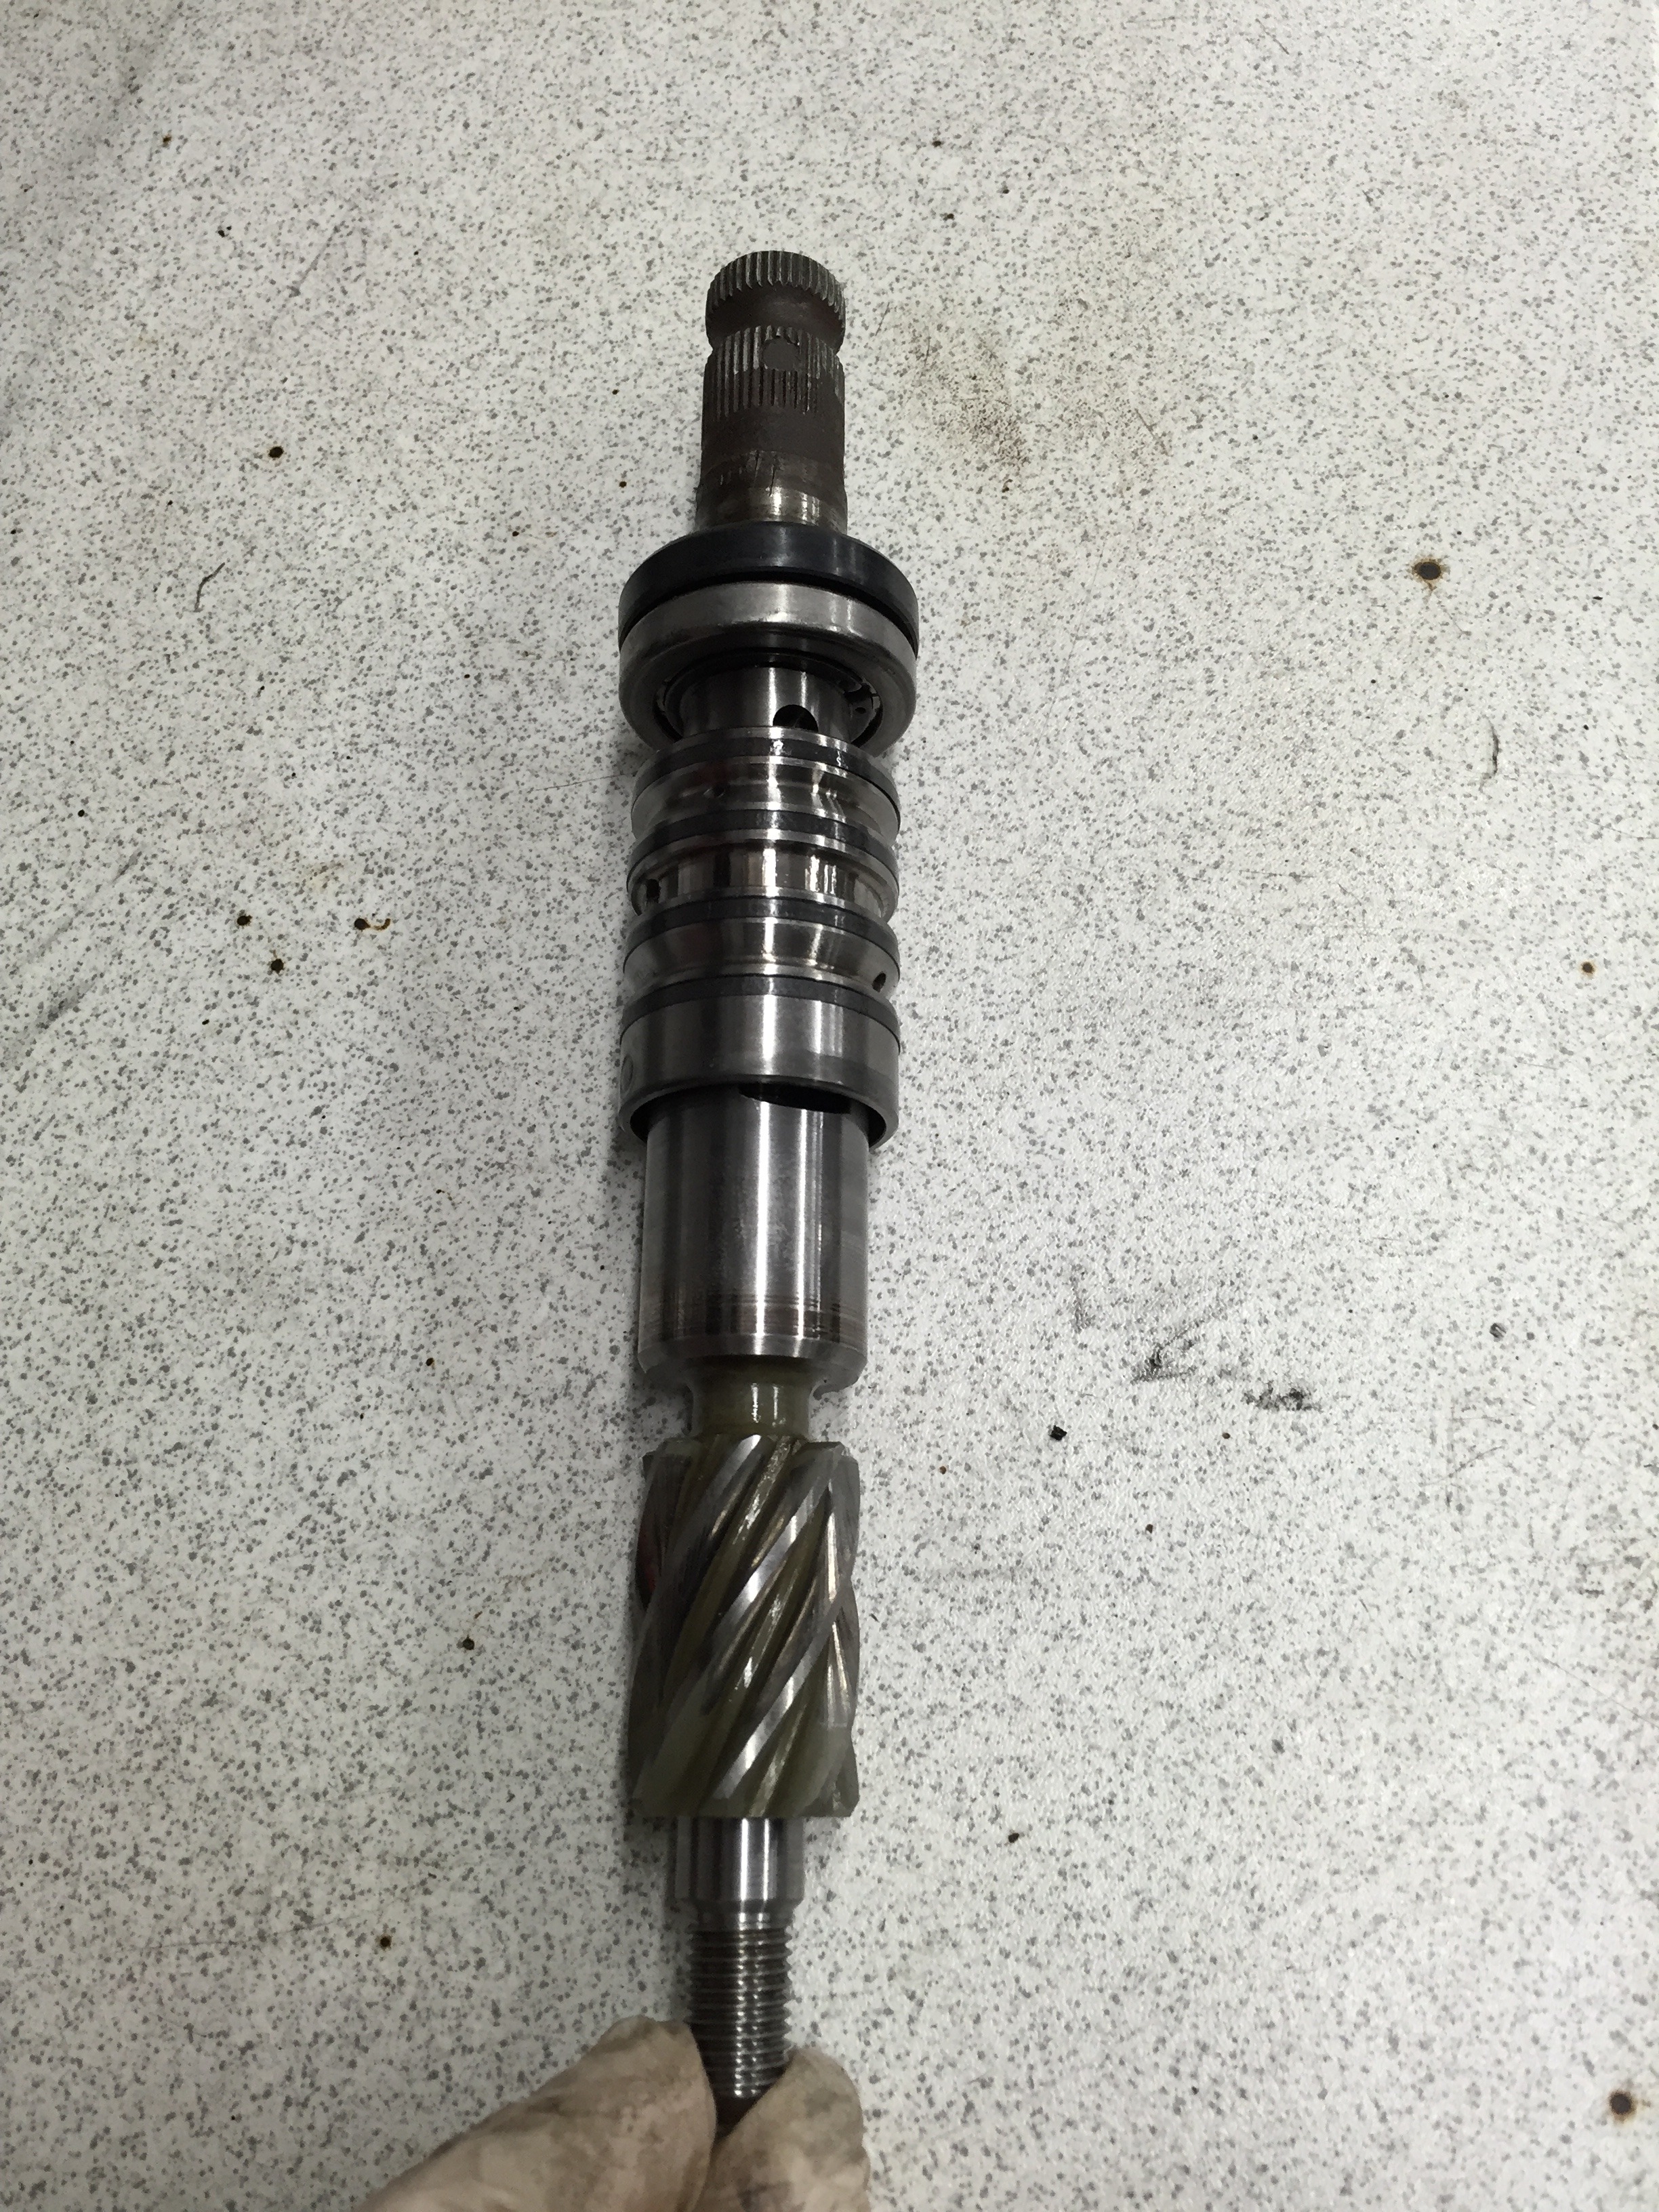
Pinion ready to go back in with new seal
Yoke cover ready to be refitted
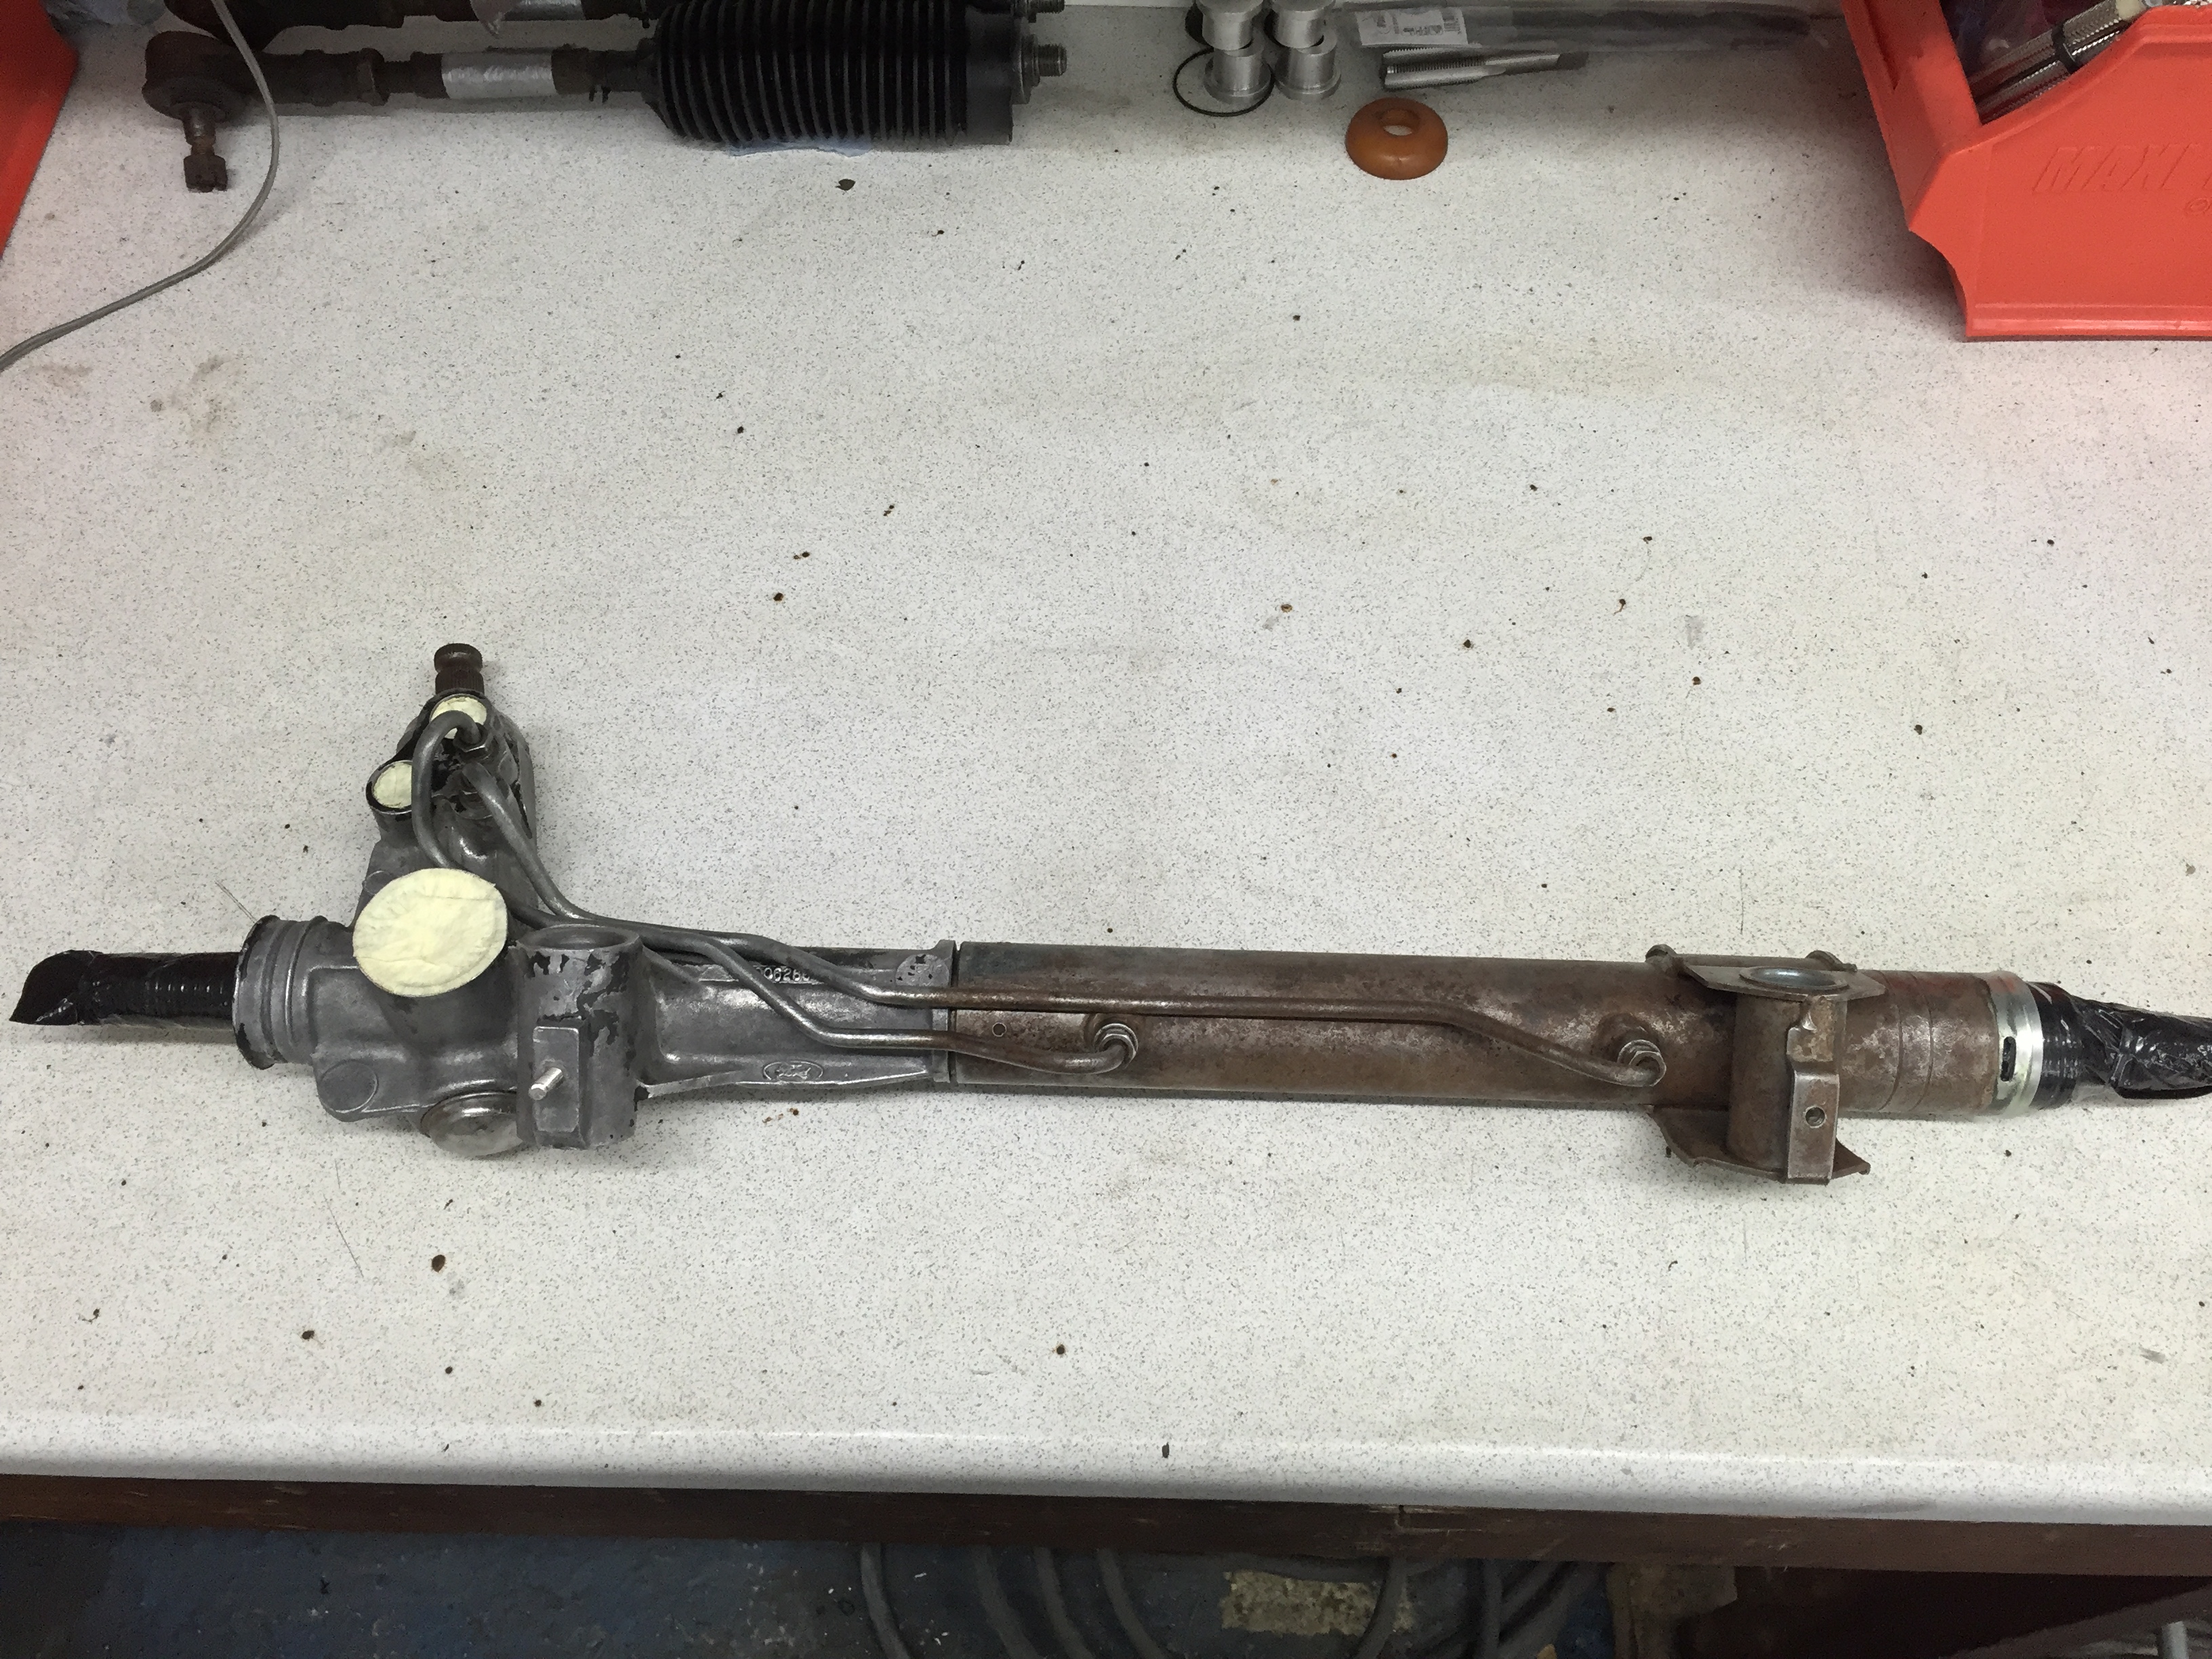
Rack built back up
Nut removed from pinion cover
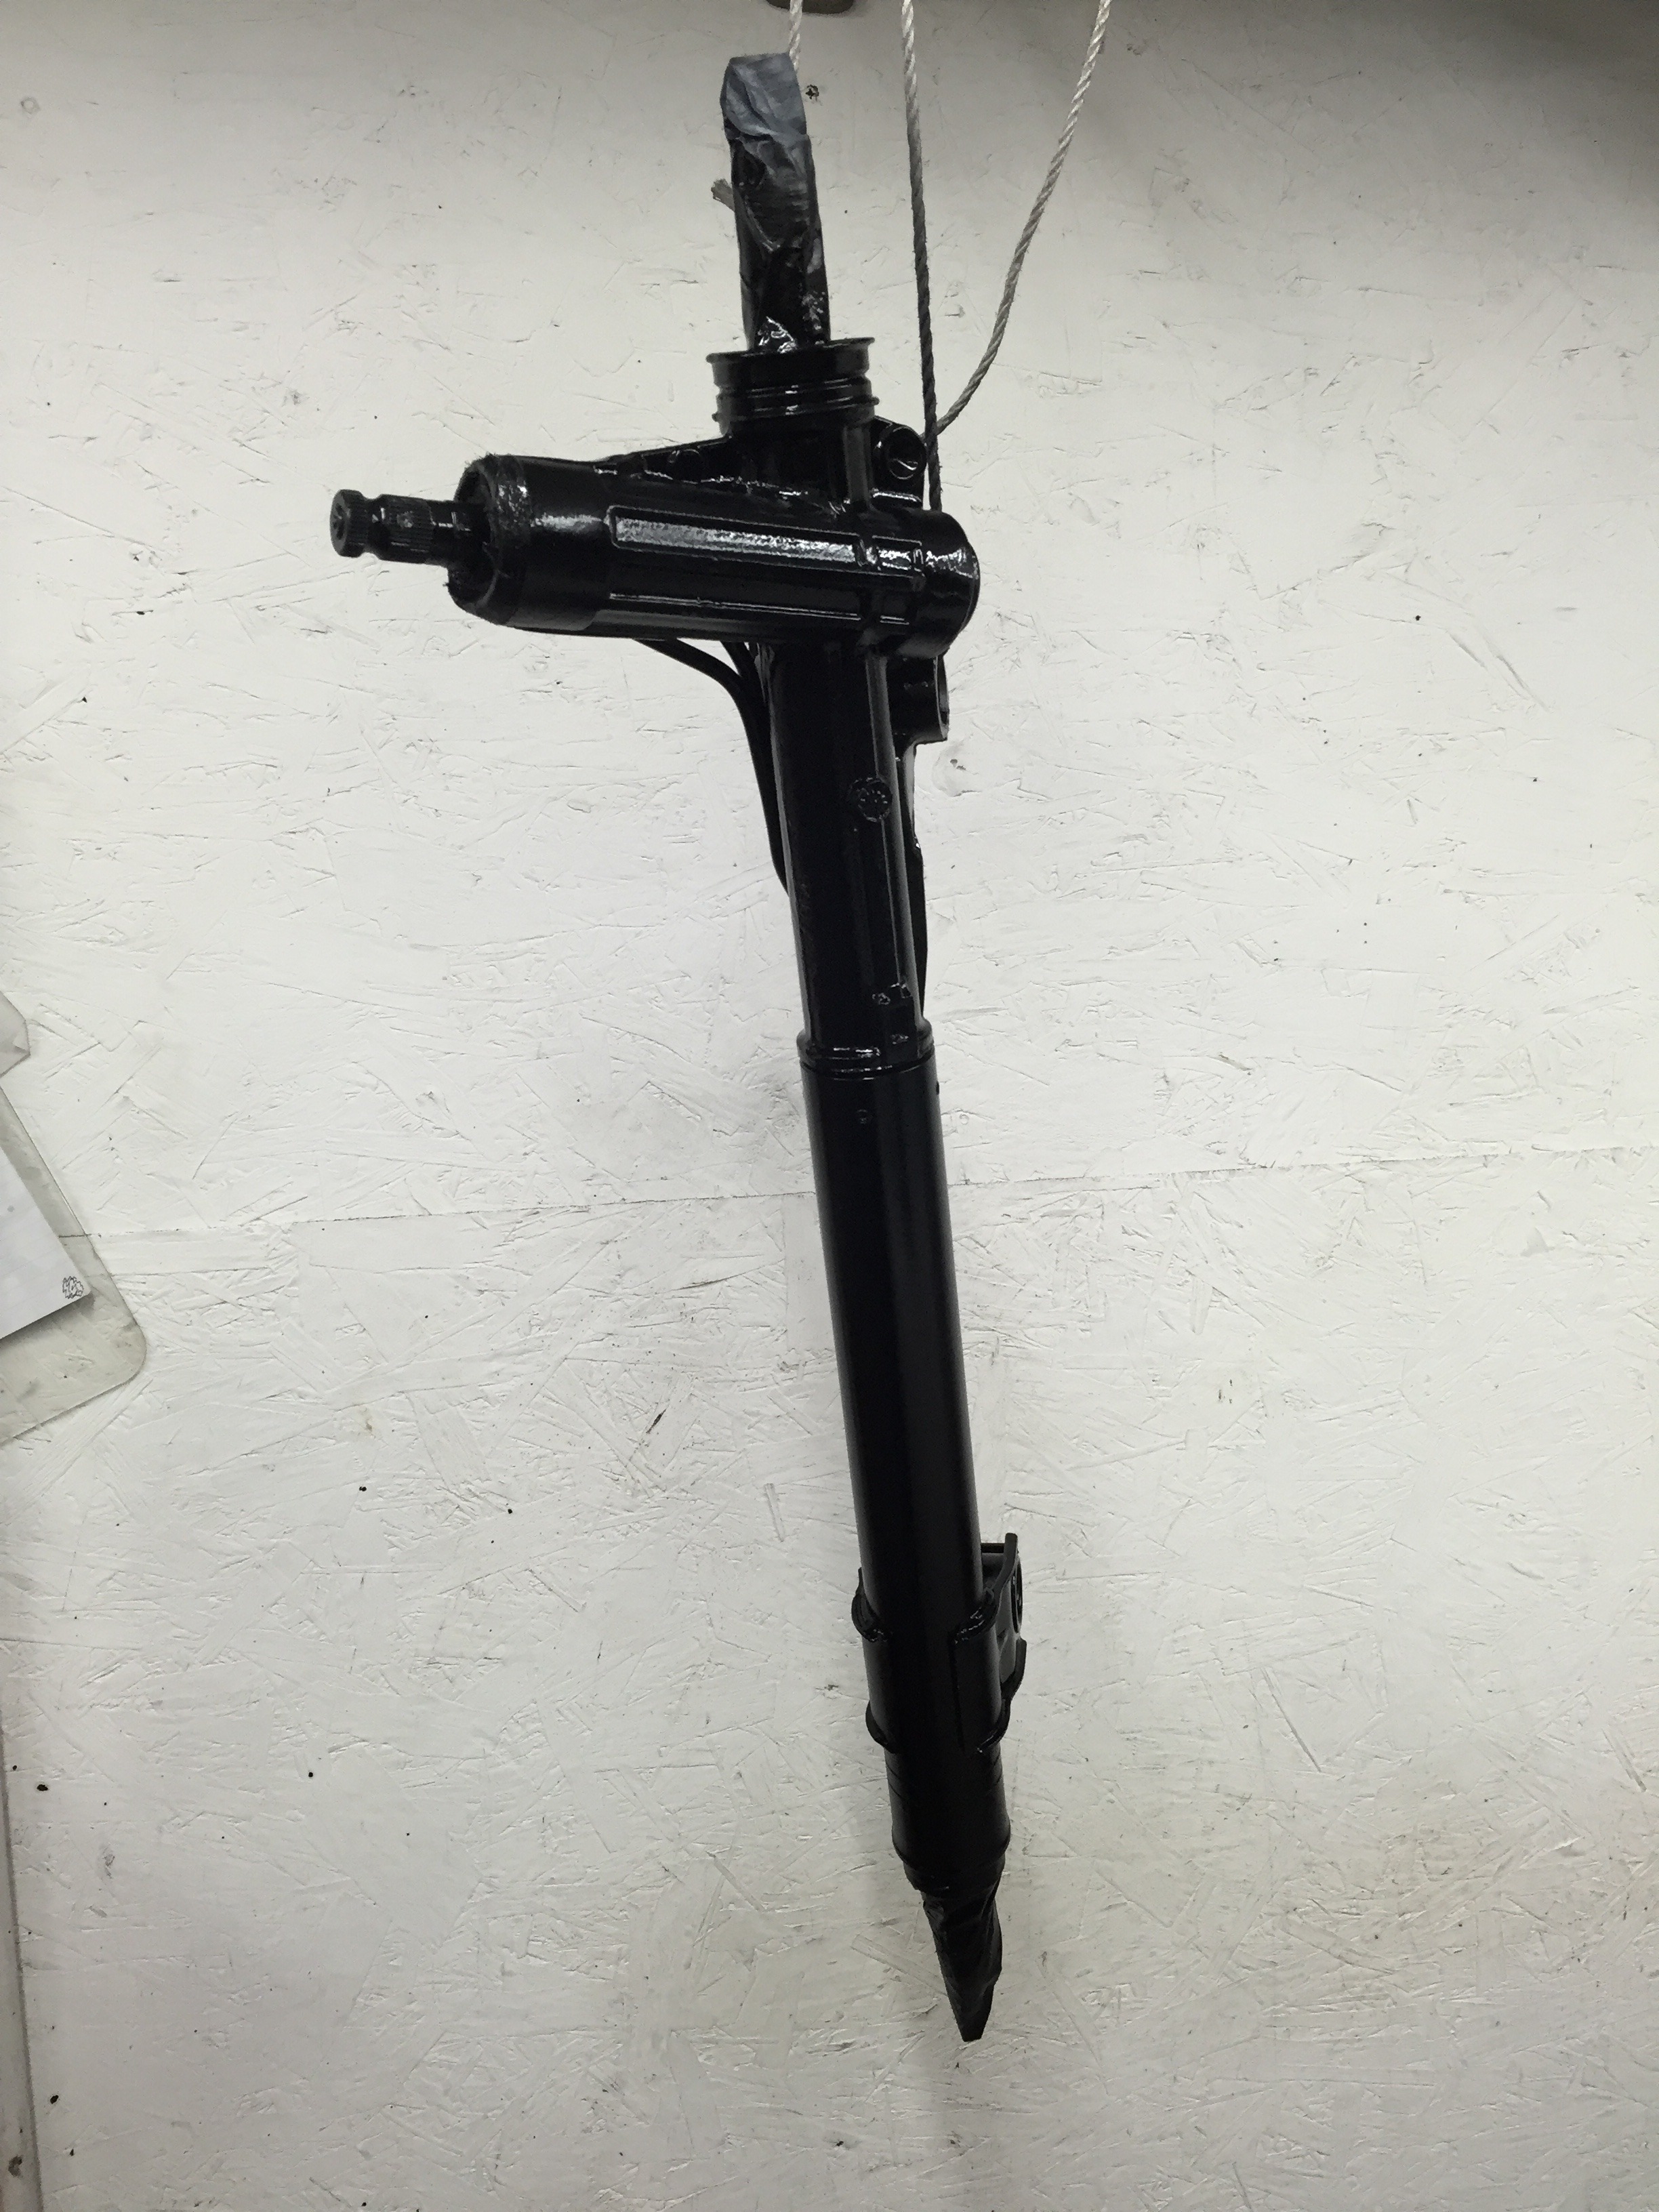
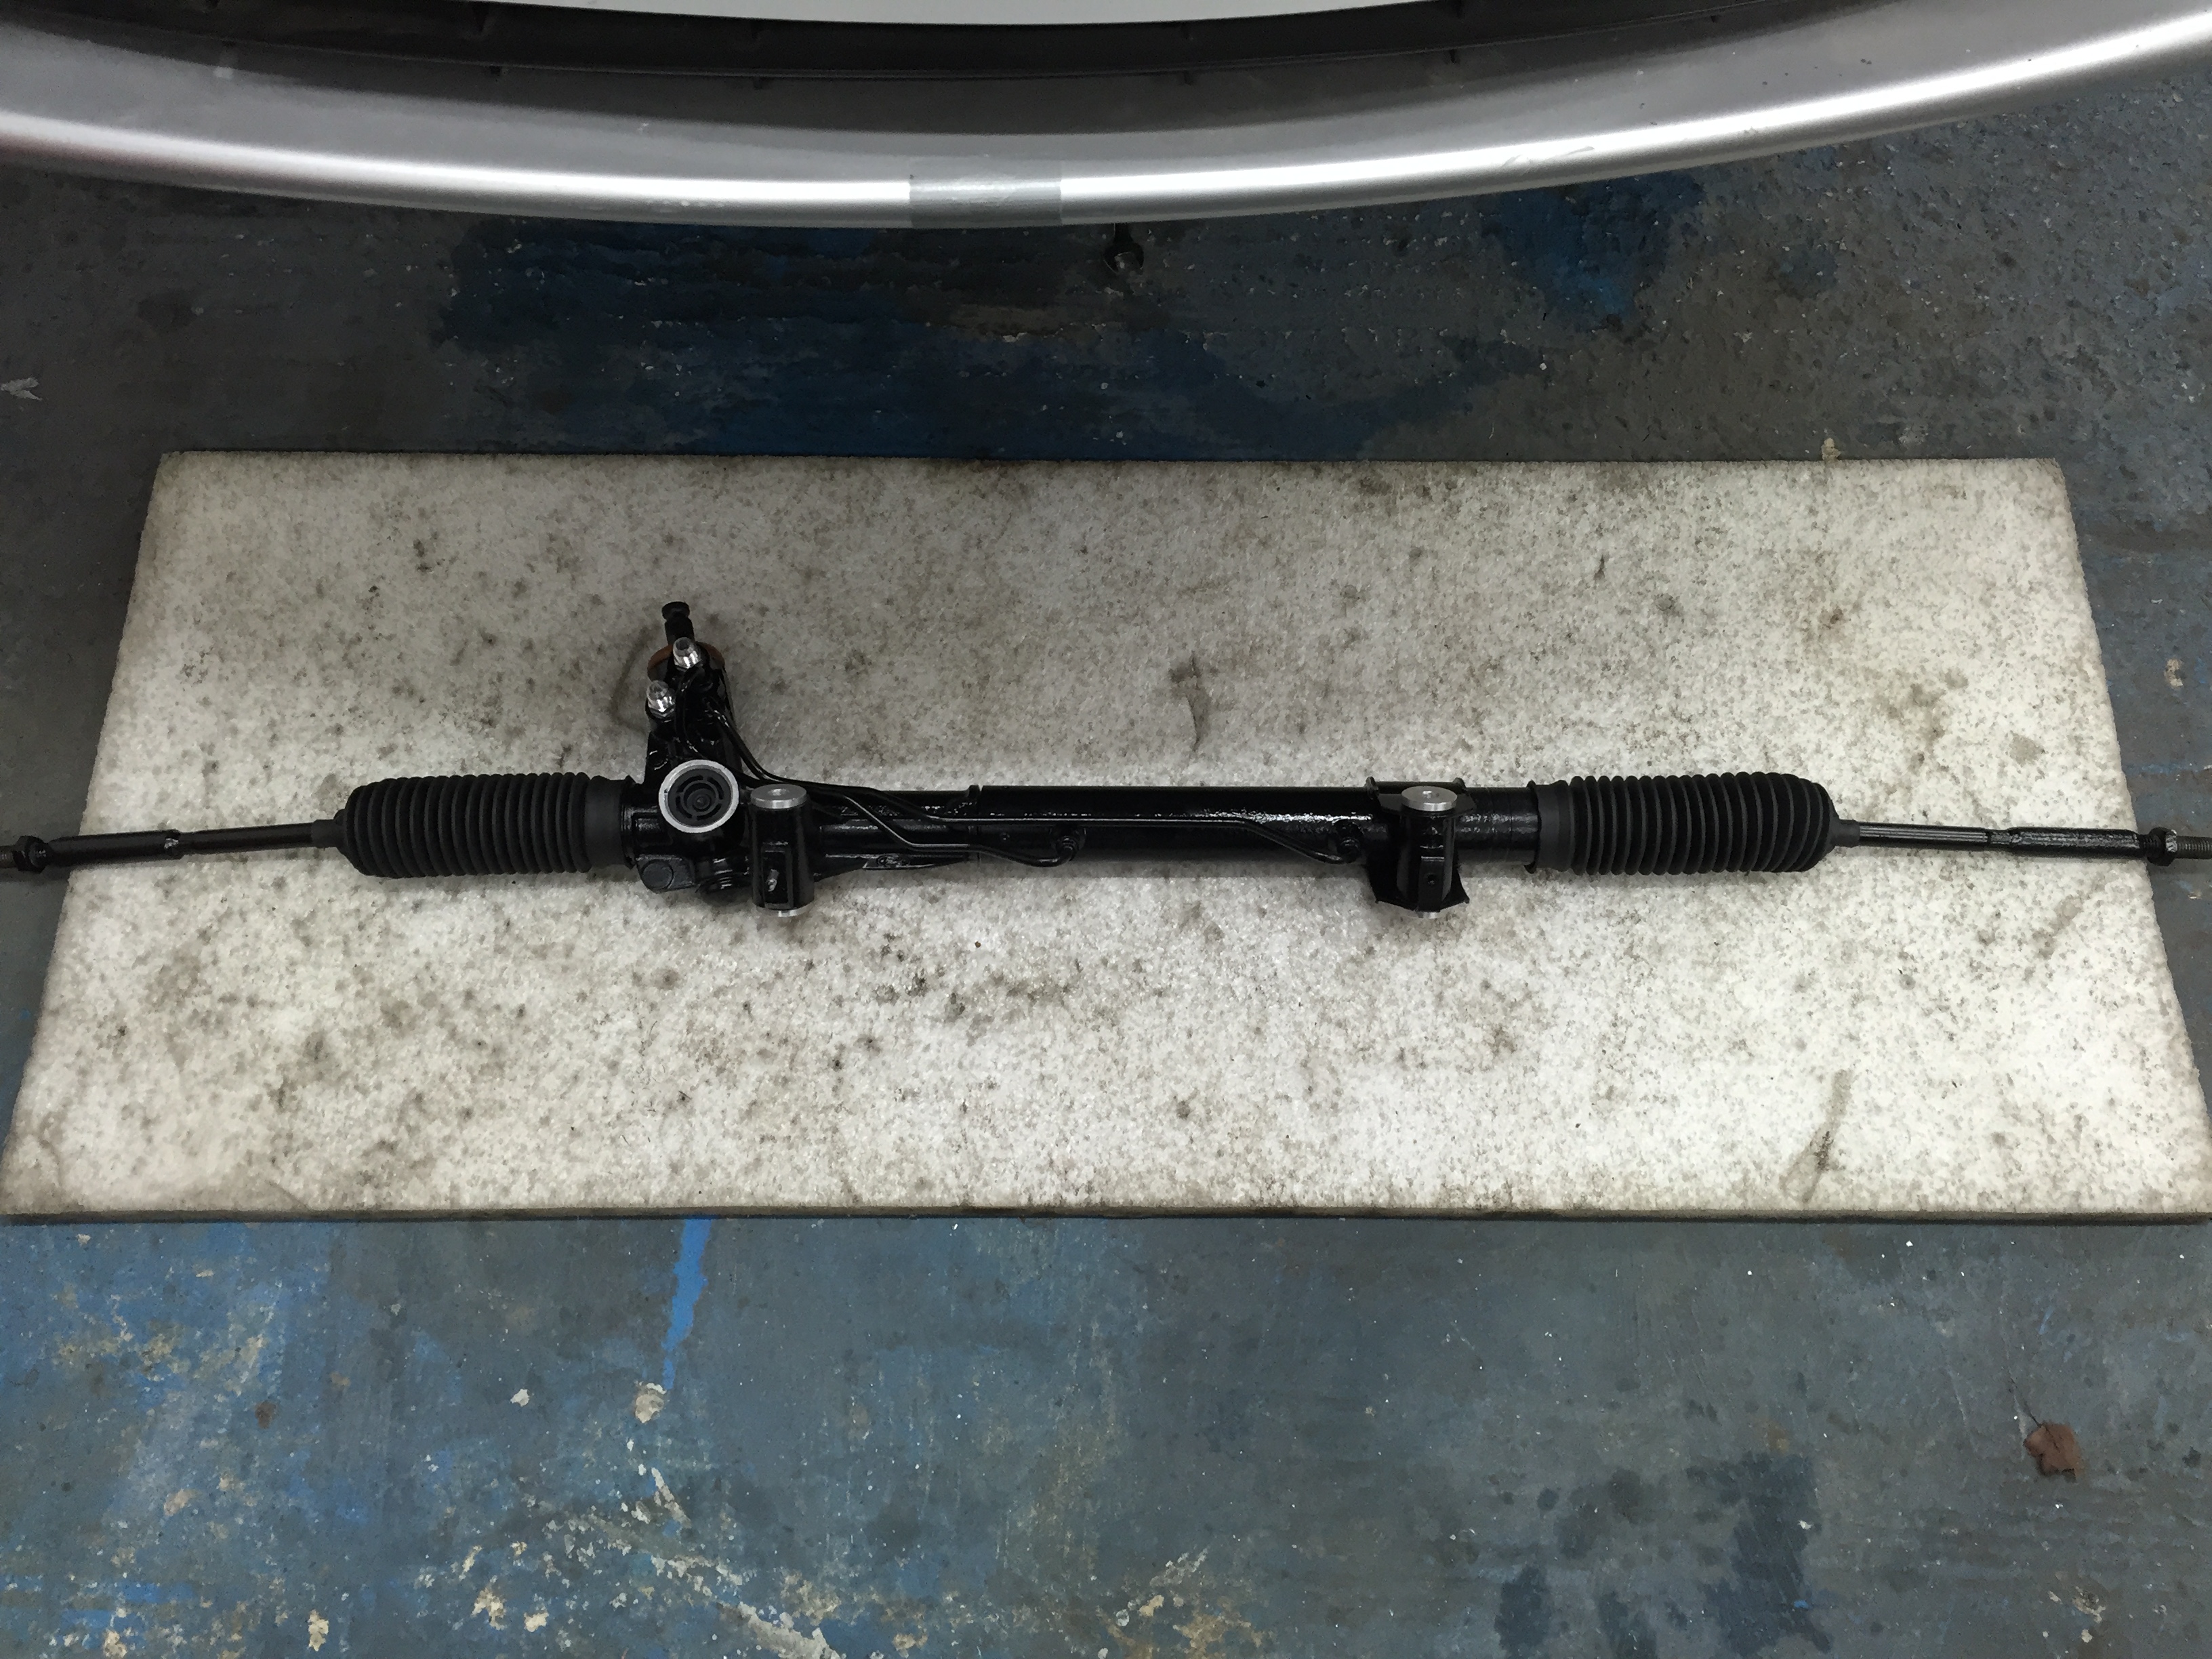
Rack cleaned and prepped ready for a bit of paint
Primer, paint and lacquer
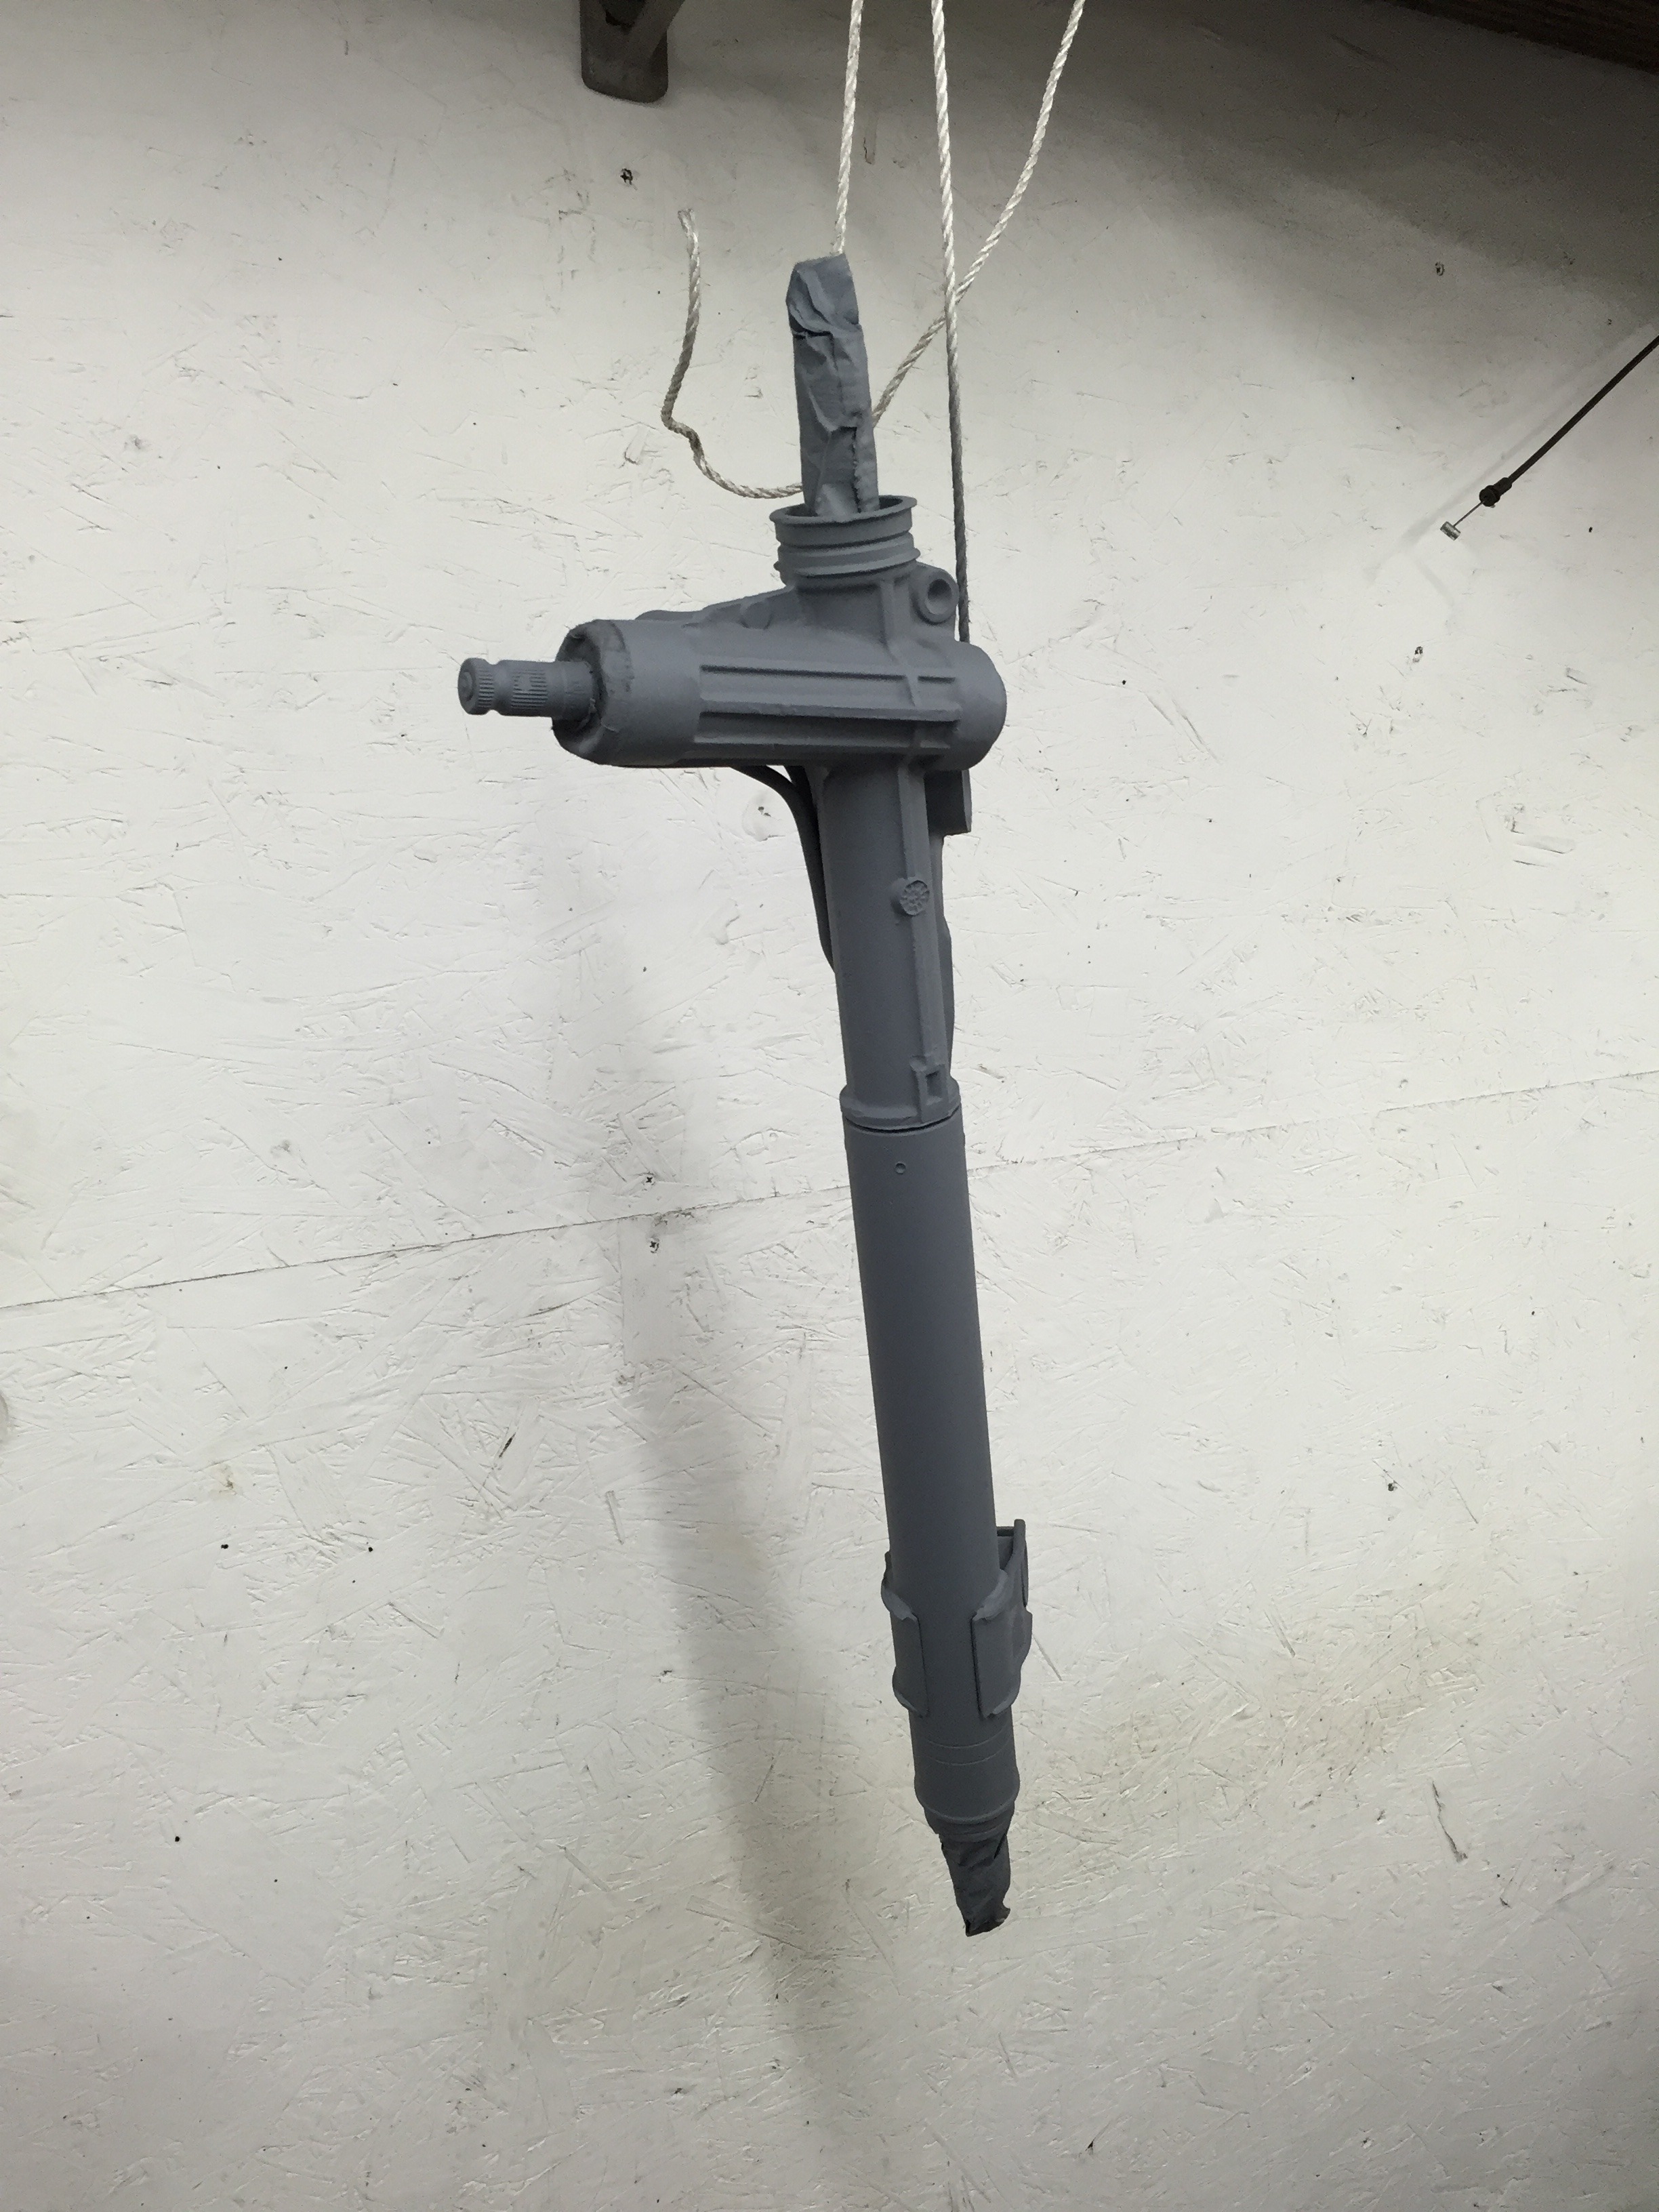
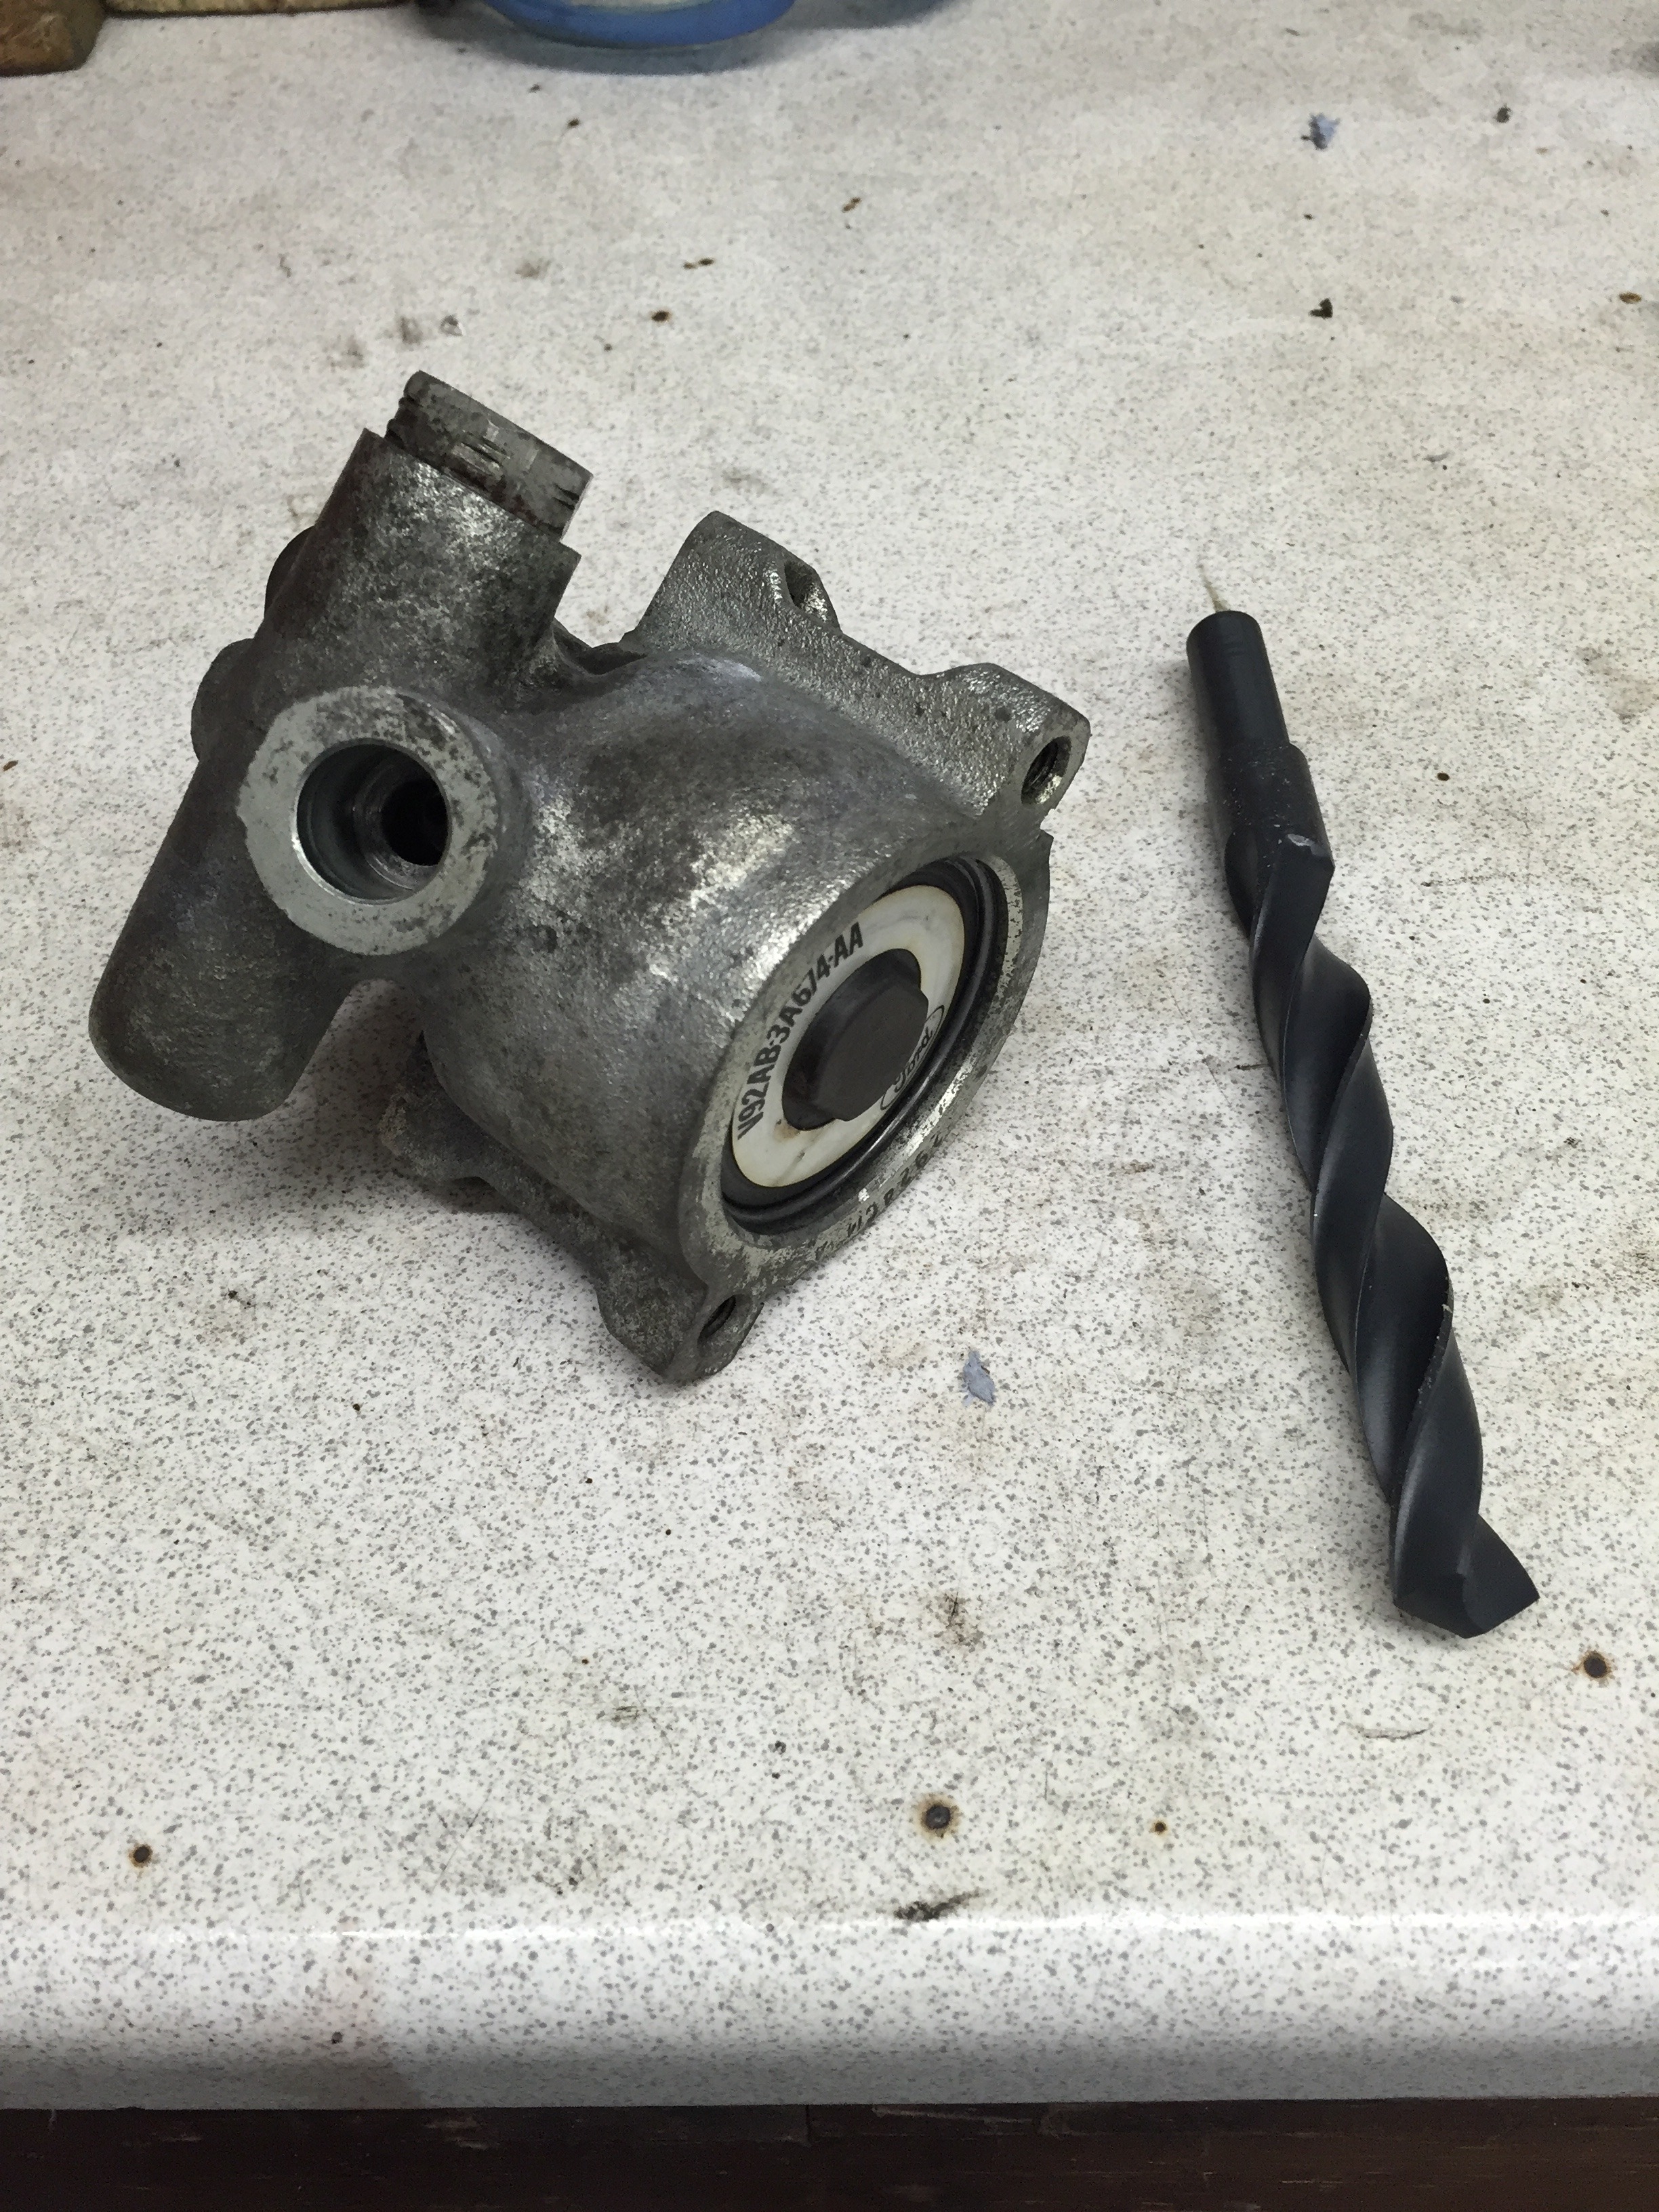
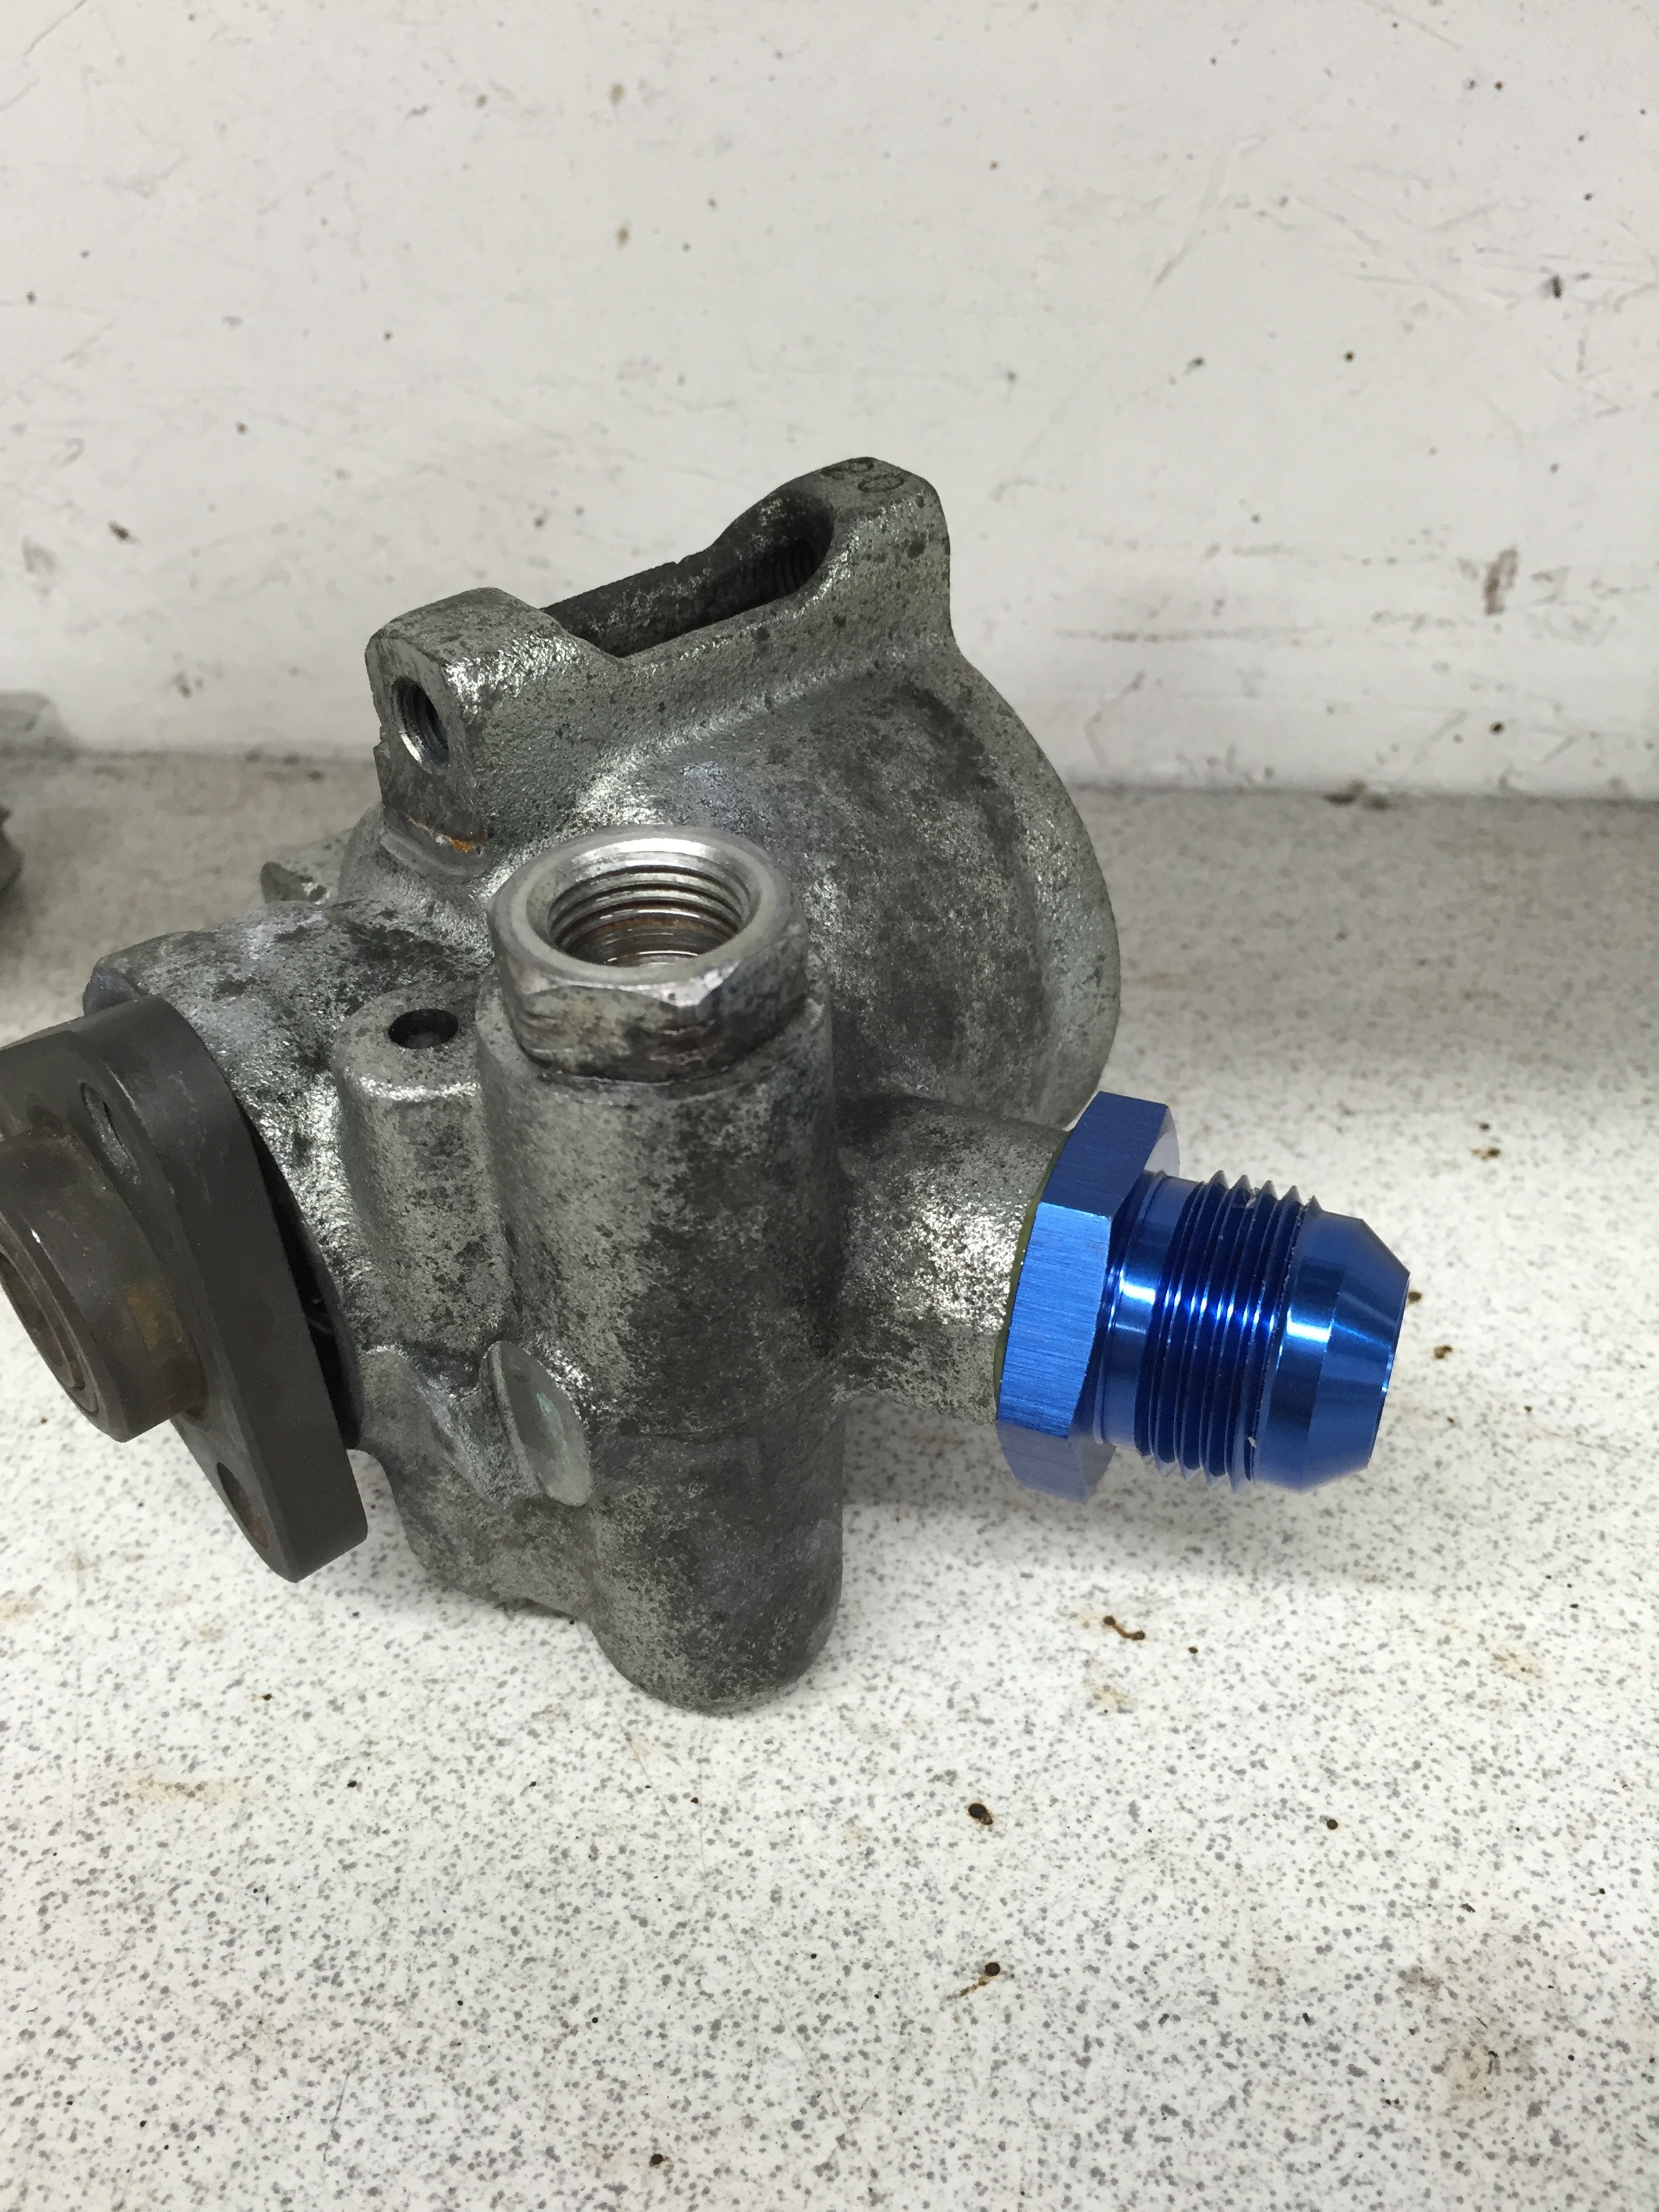
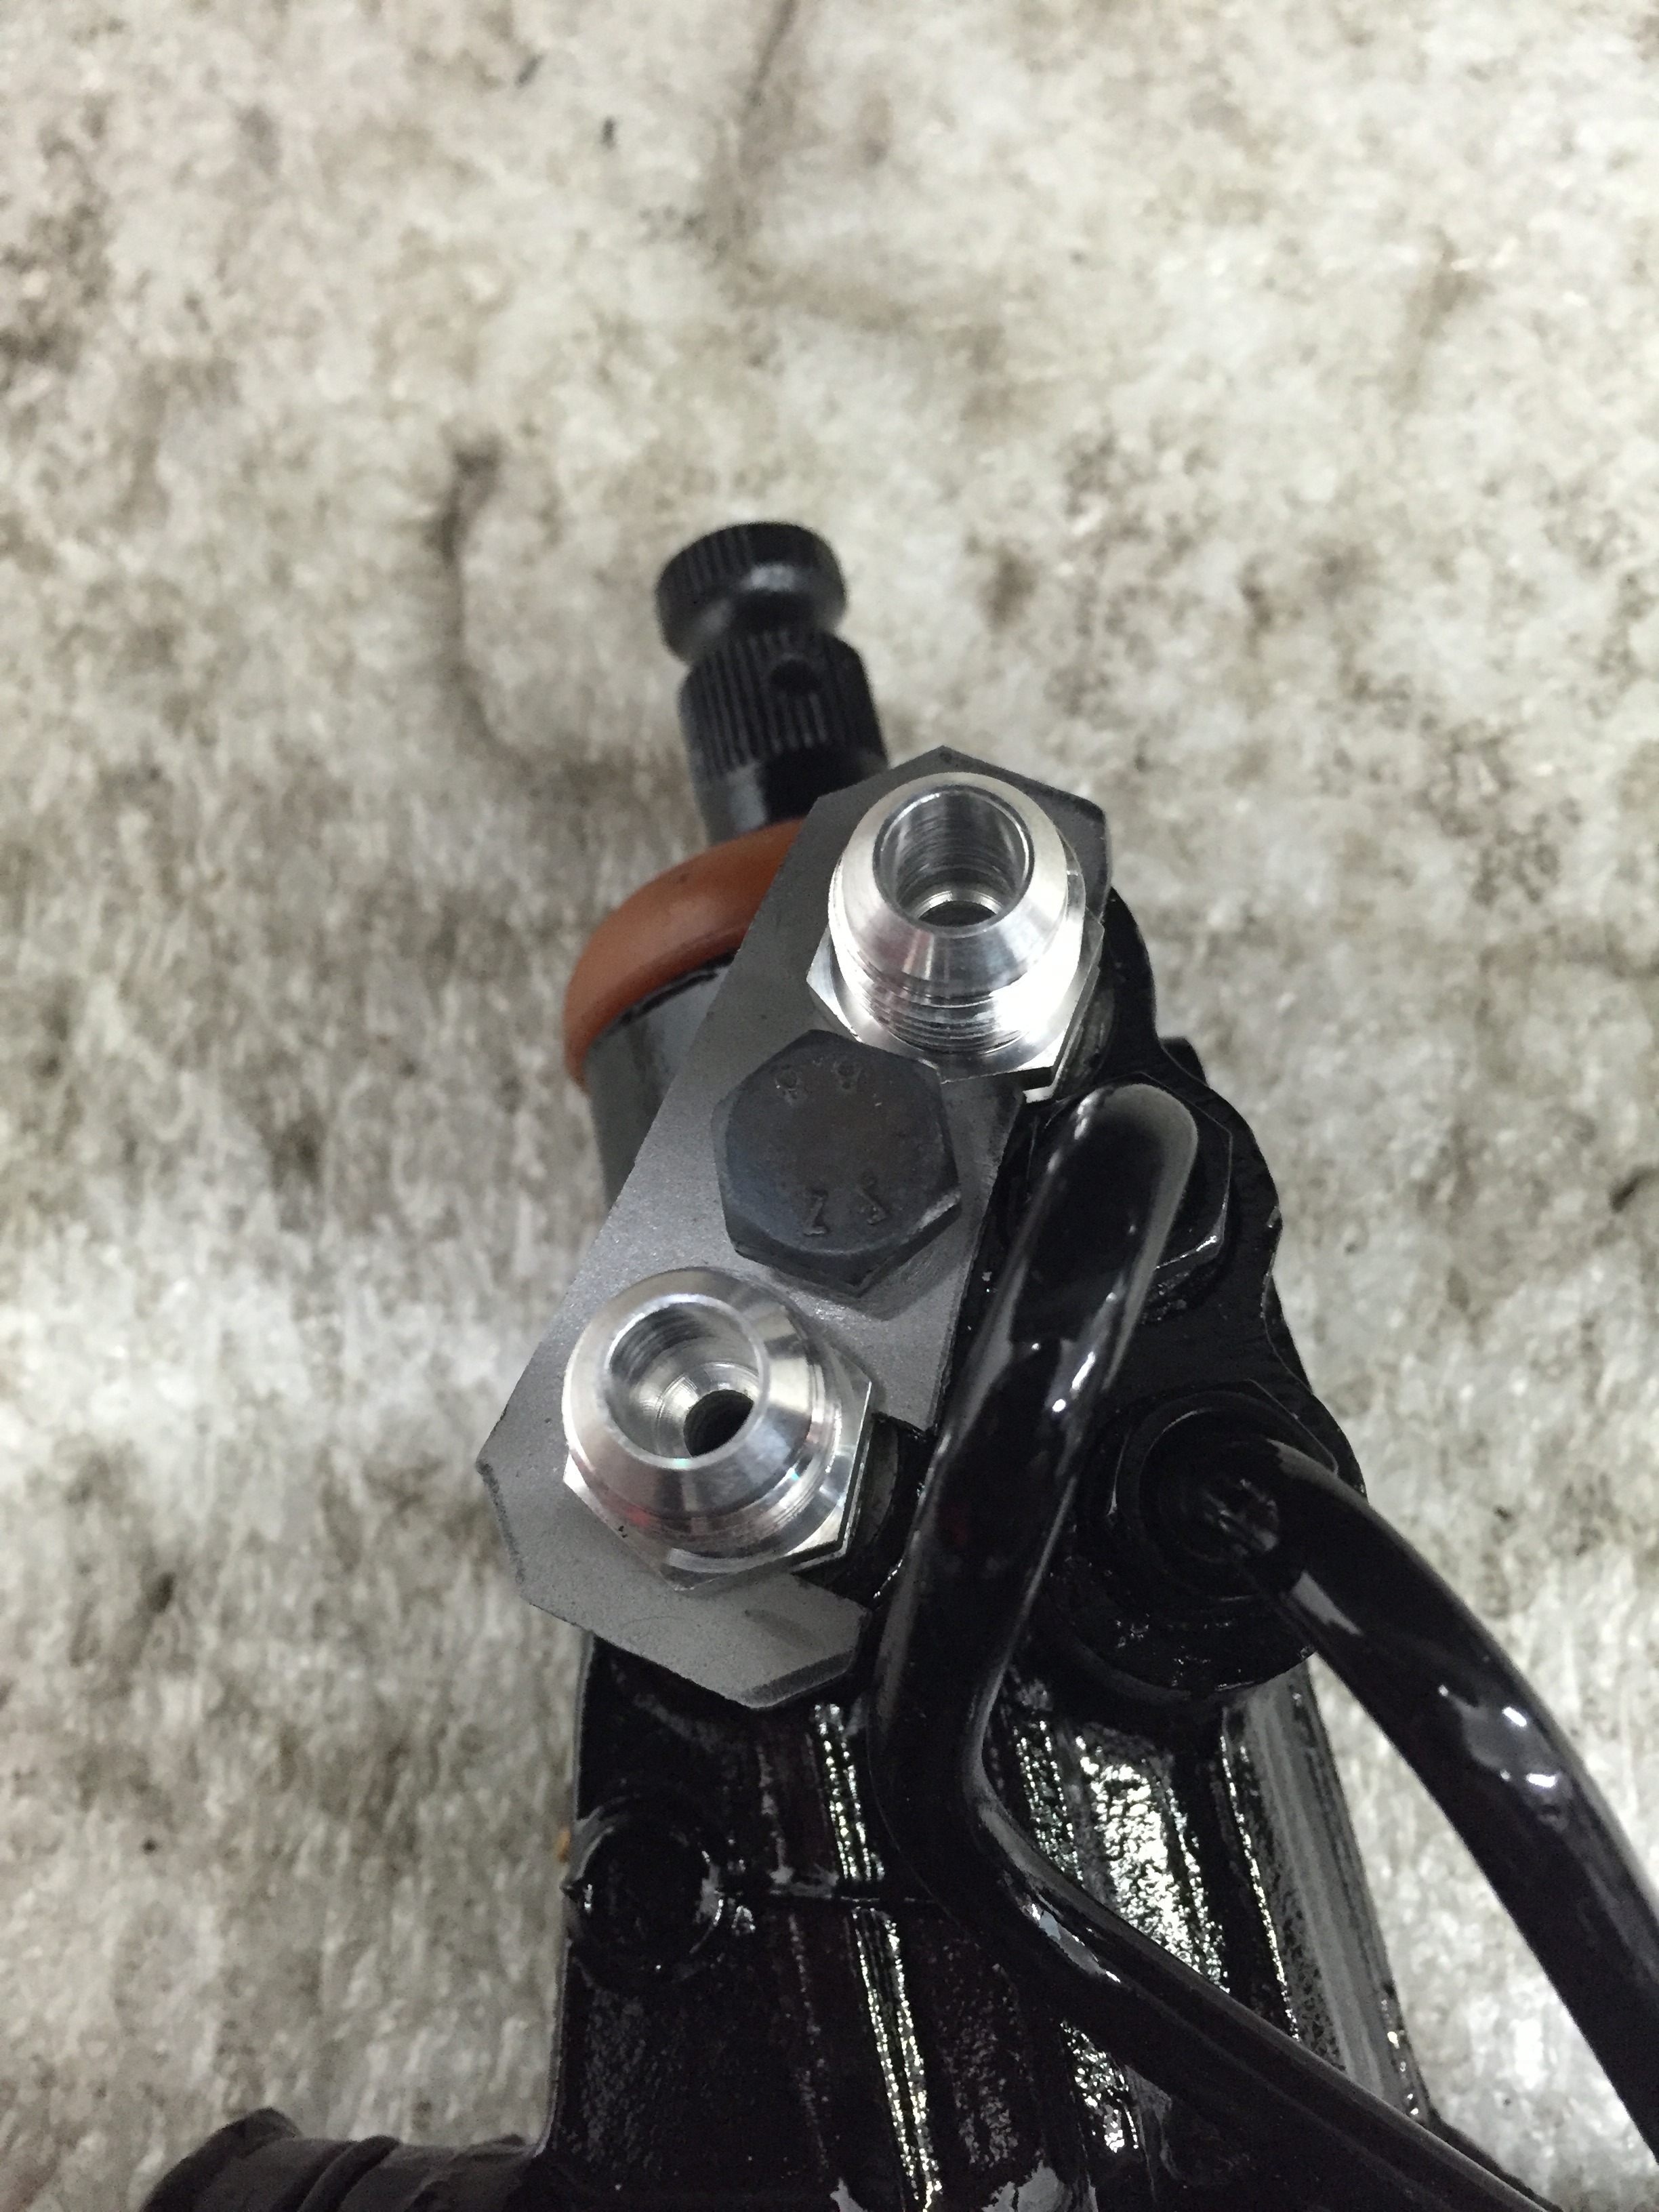
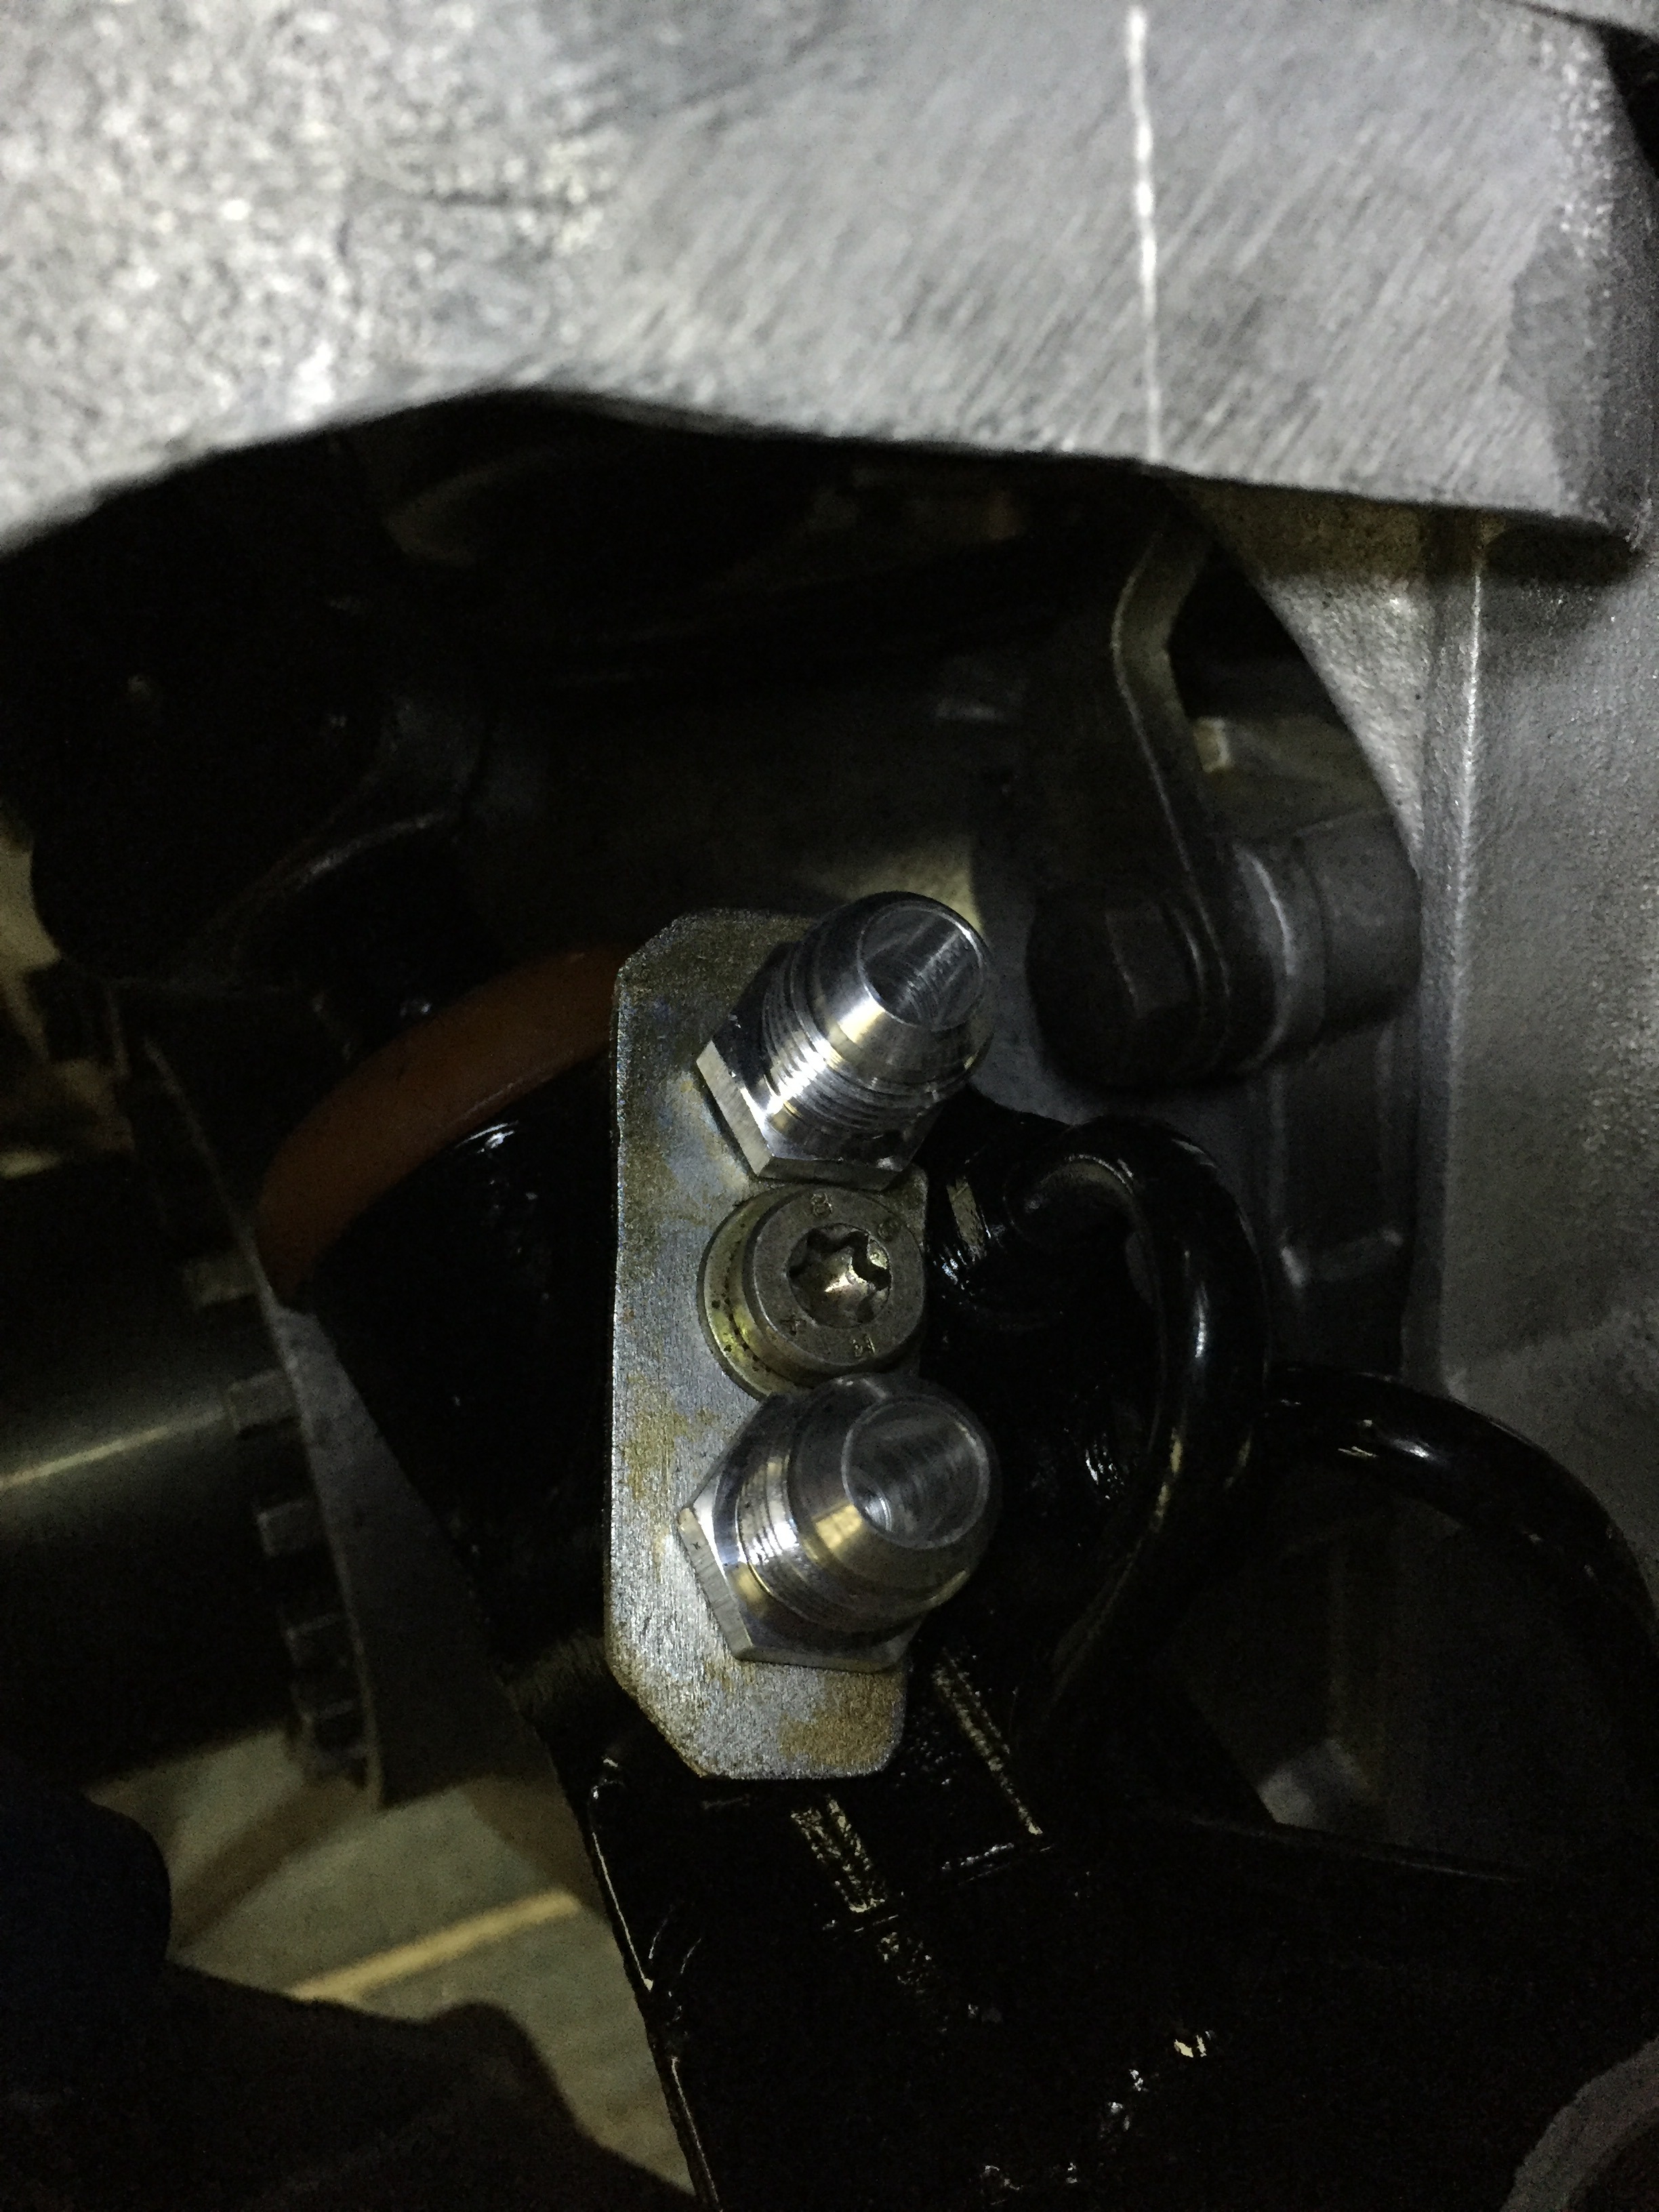
Drilled and taped the feed I let on the pump to allow an adaptor to be fitted
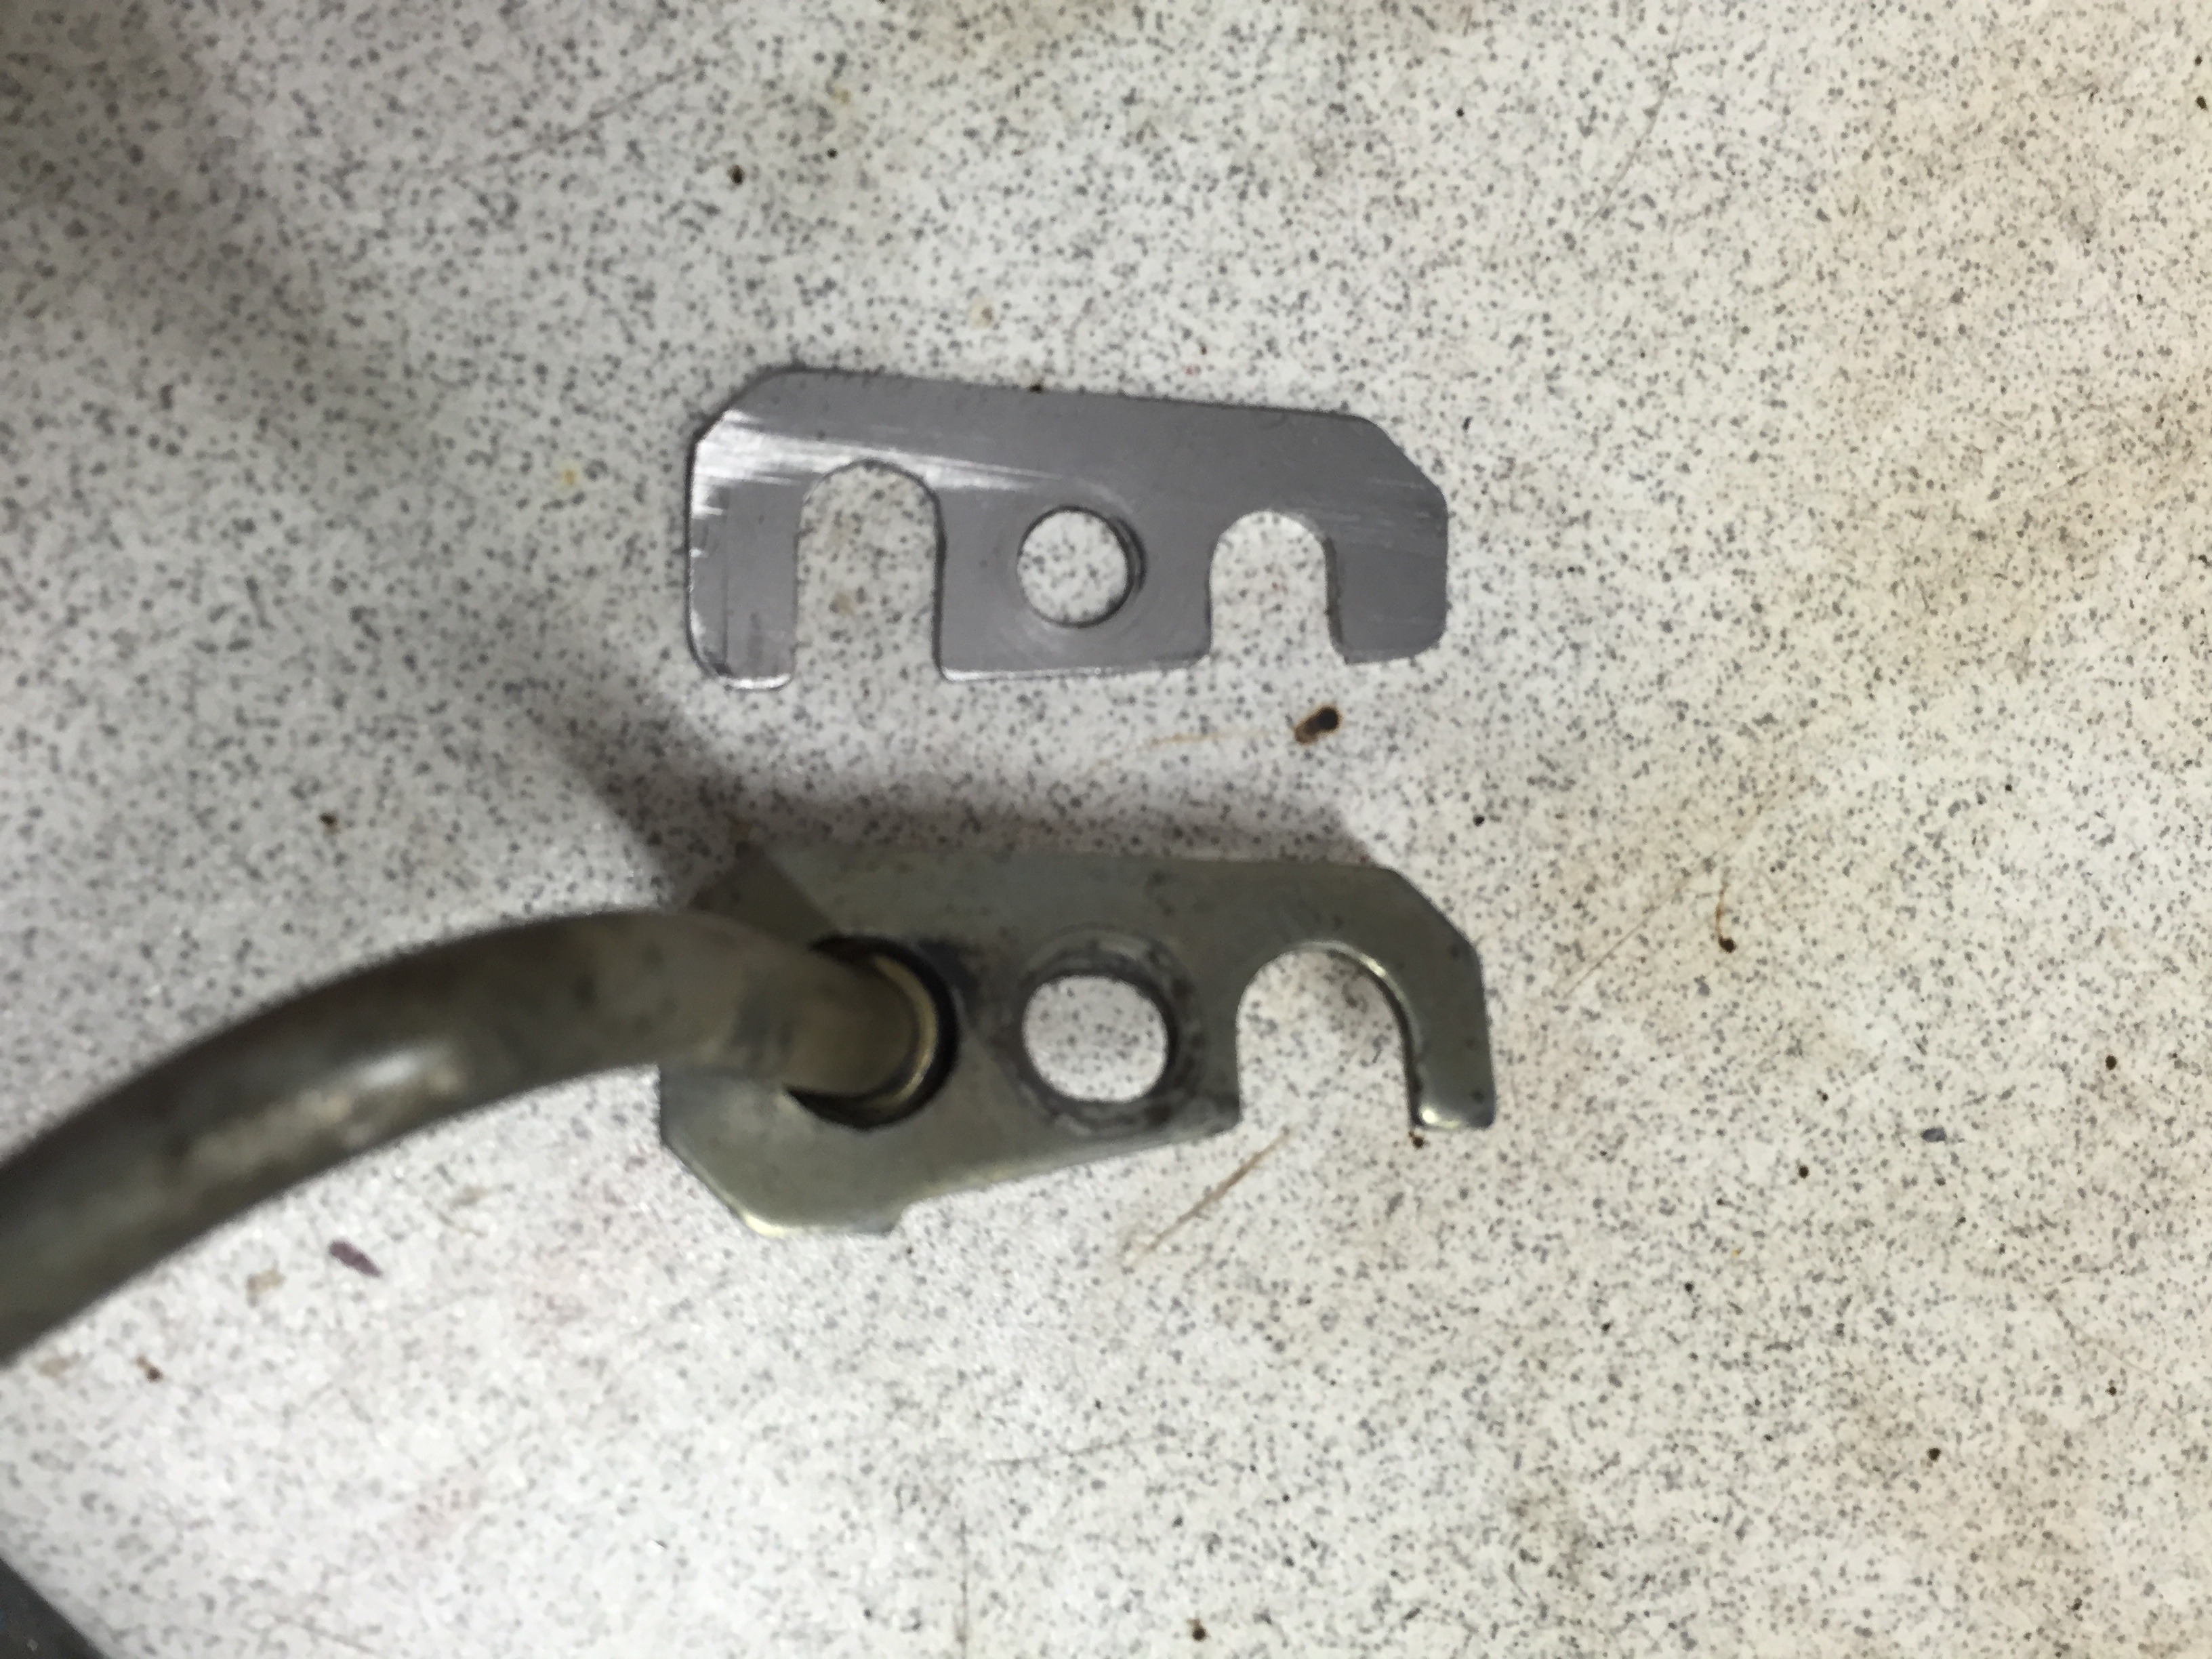
New bracket made to hold in the AN rack adaptors (courtesy of Marc - MK)
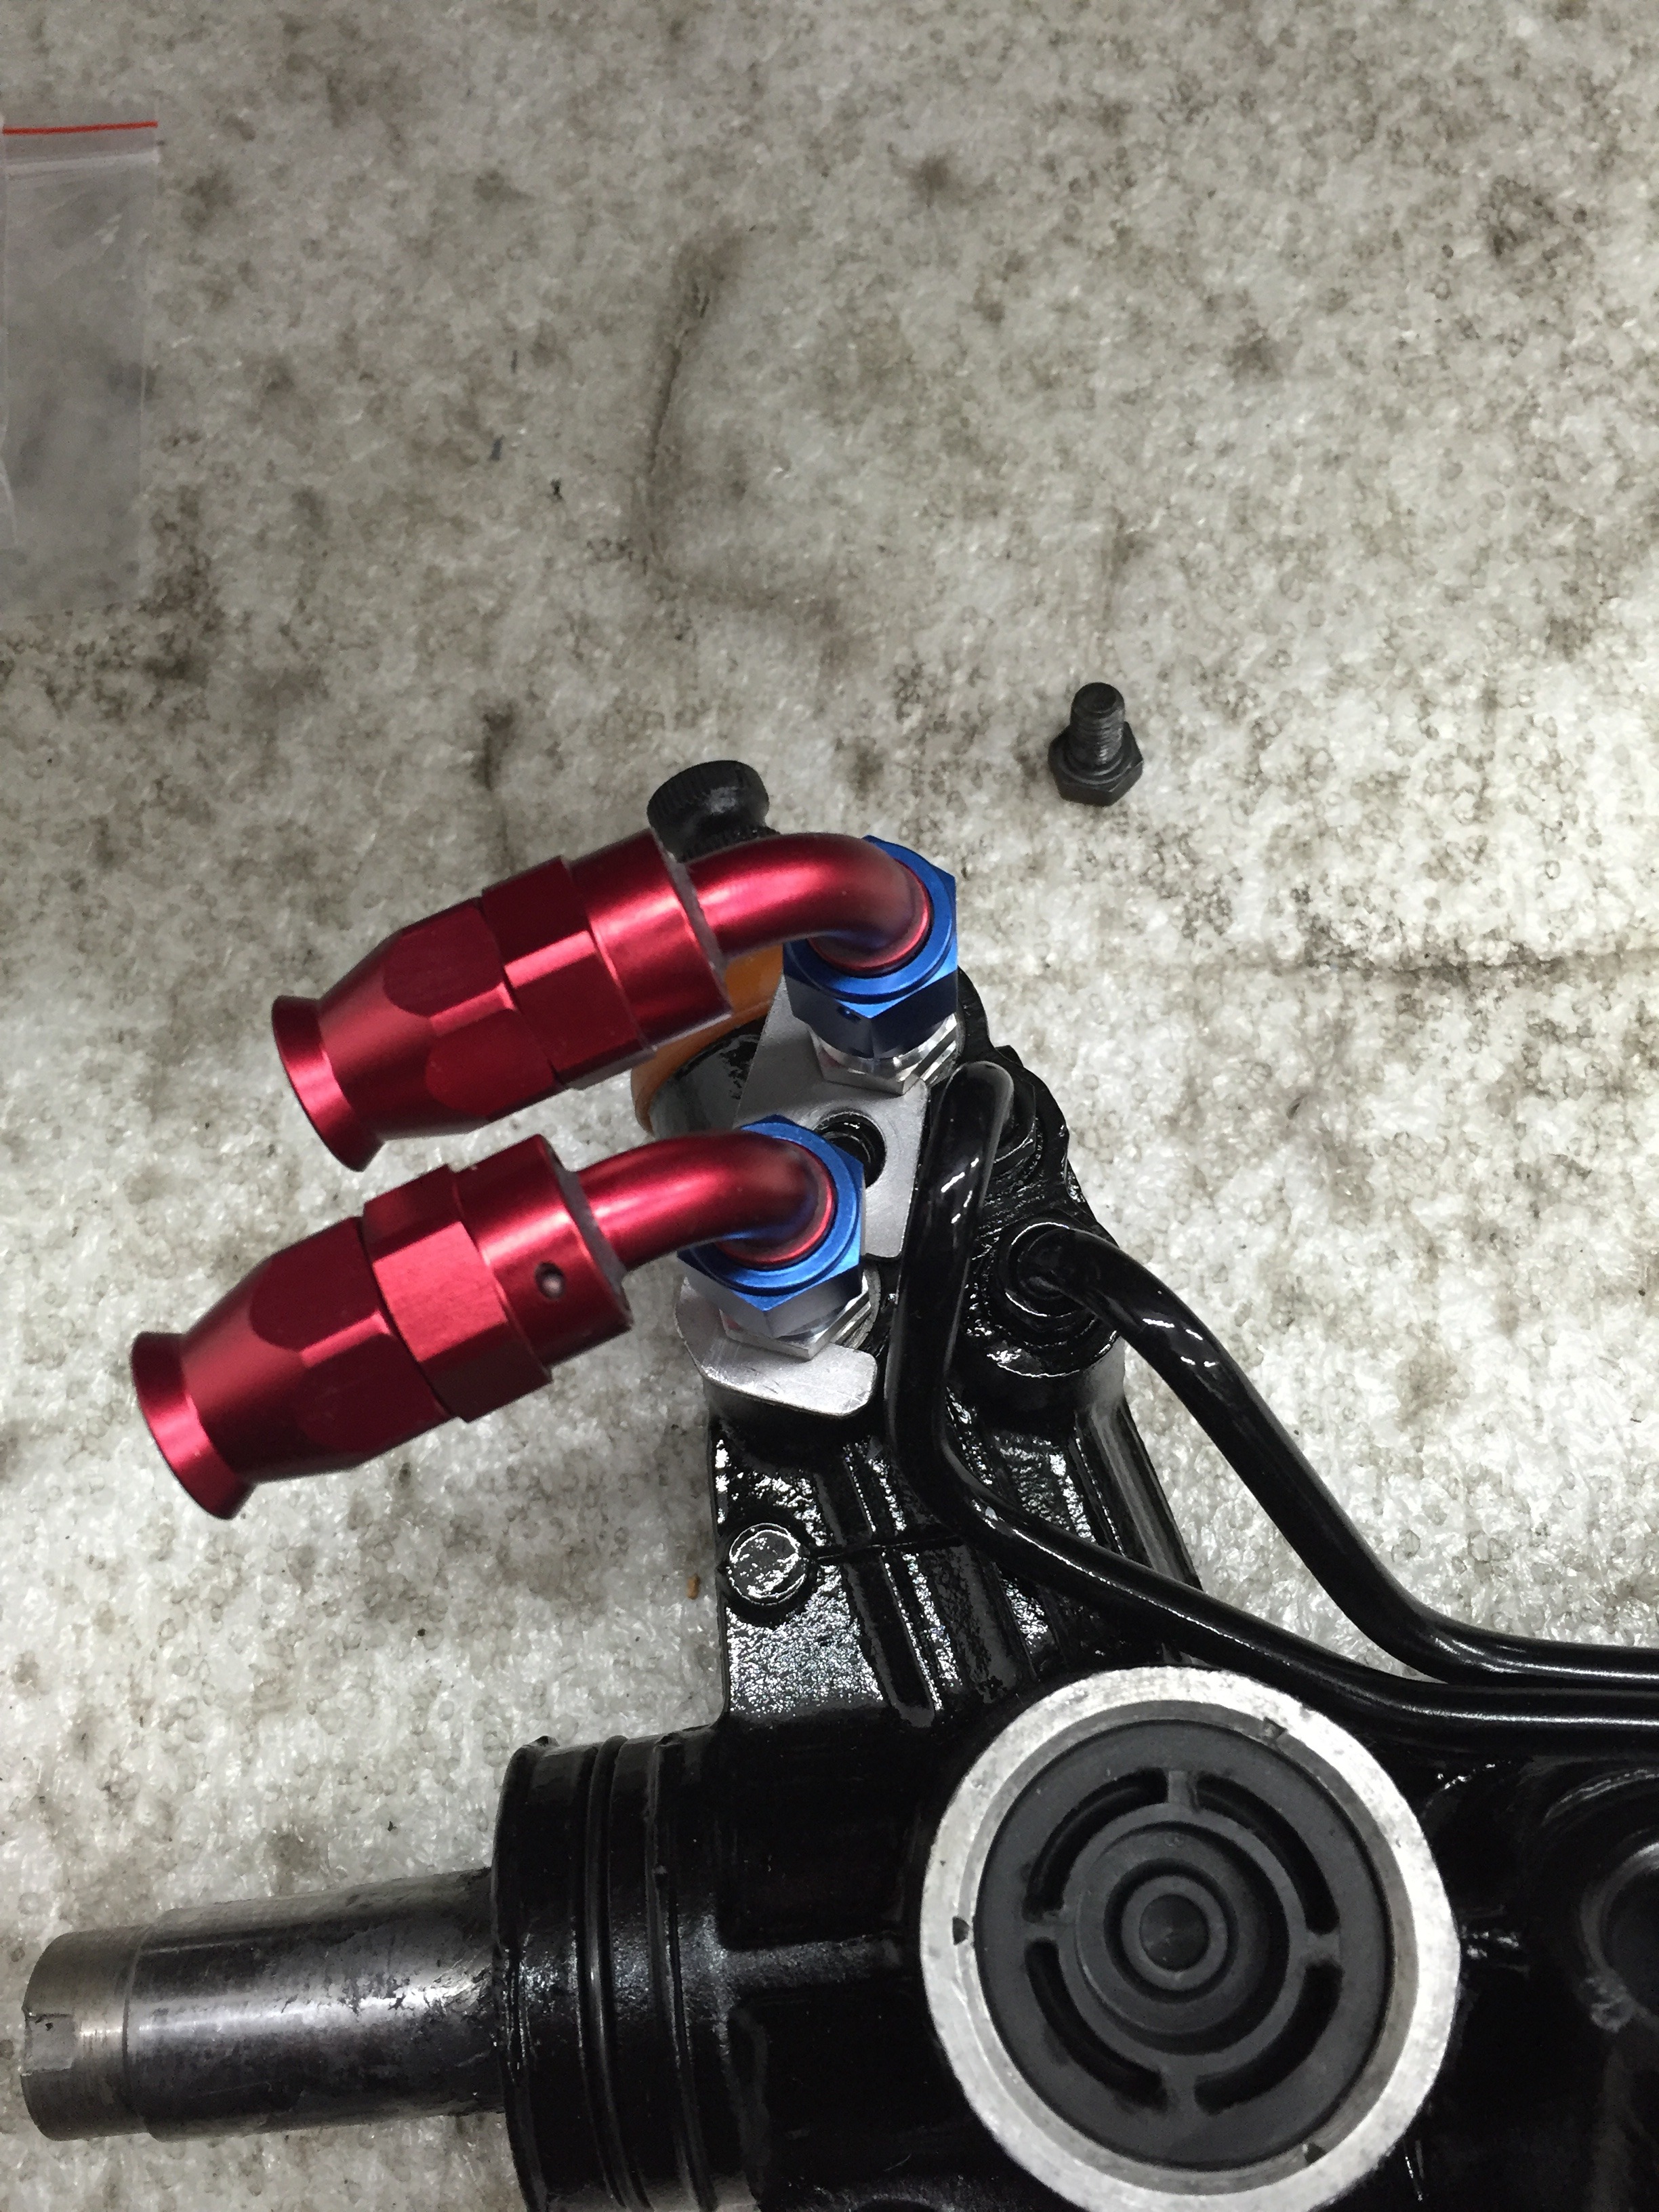
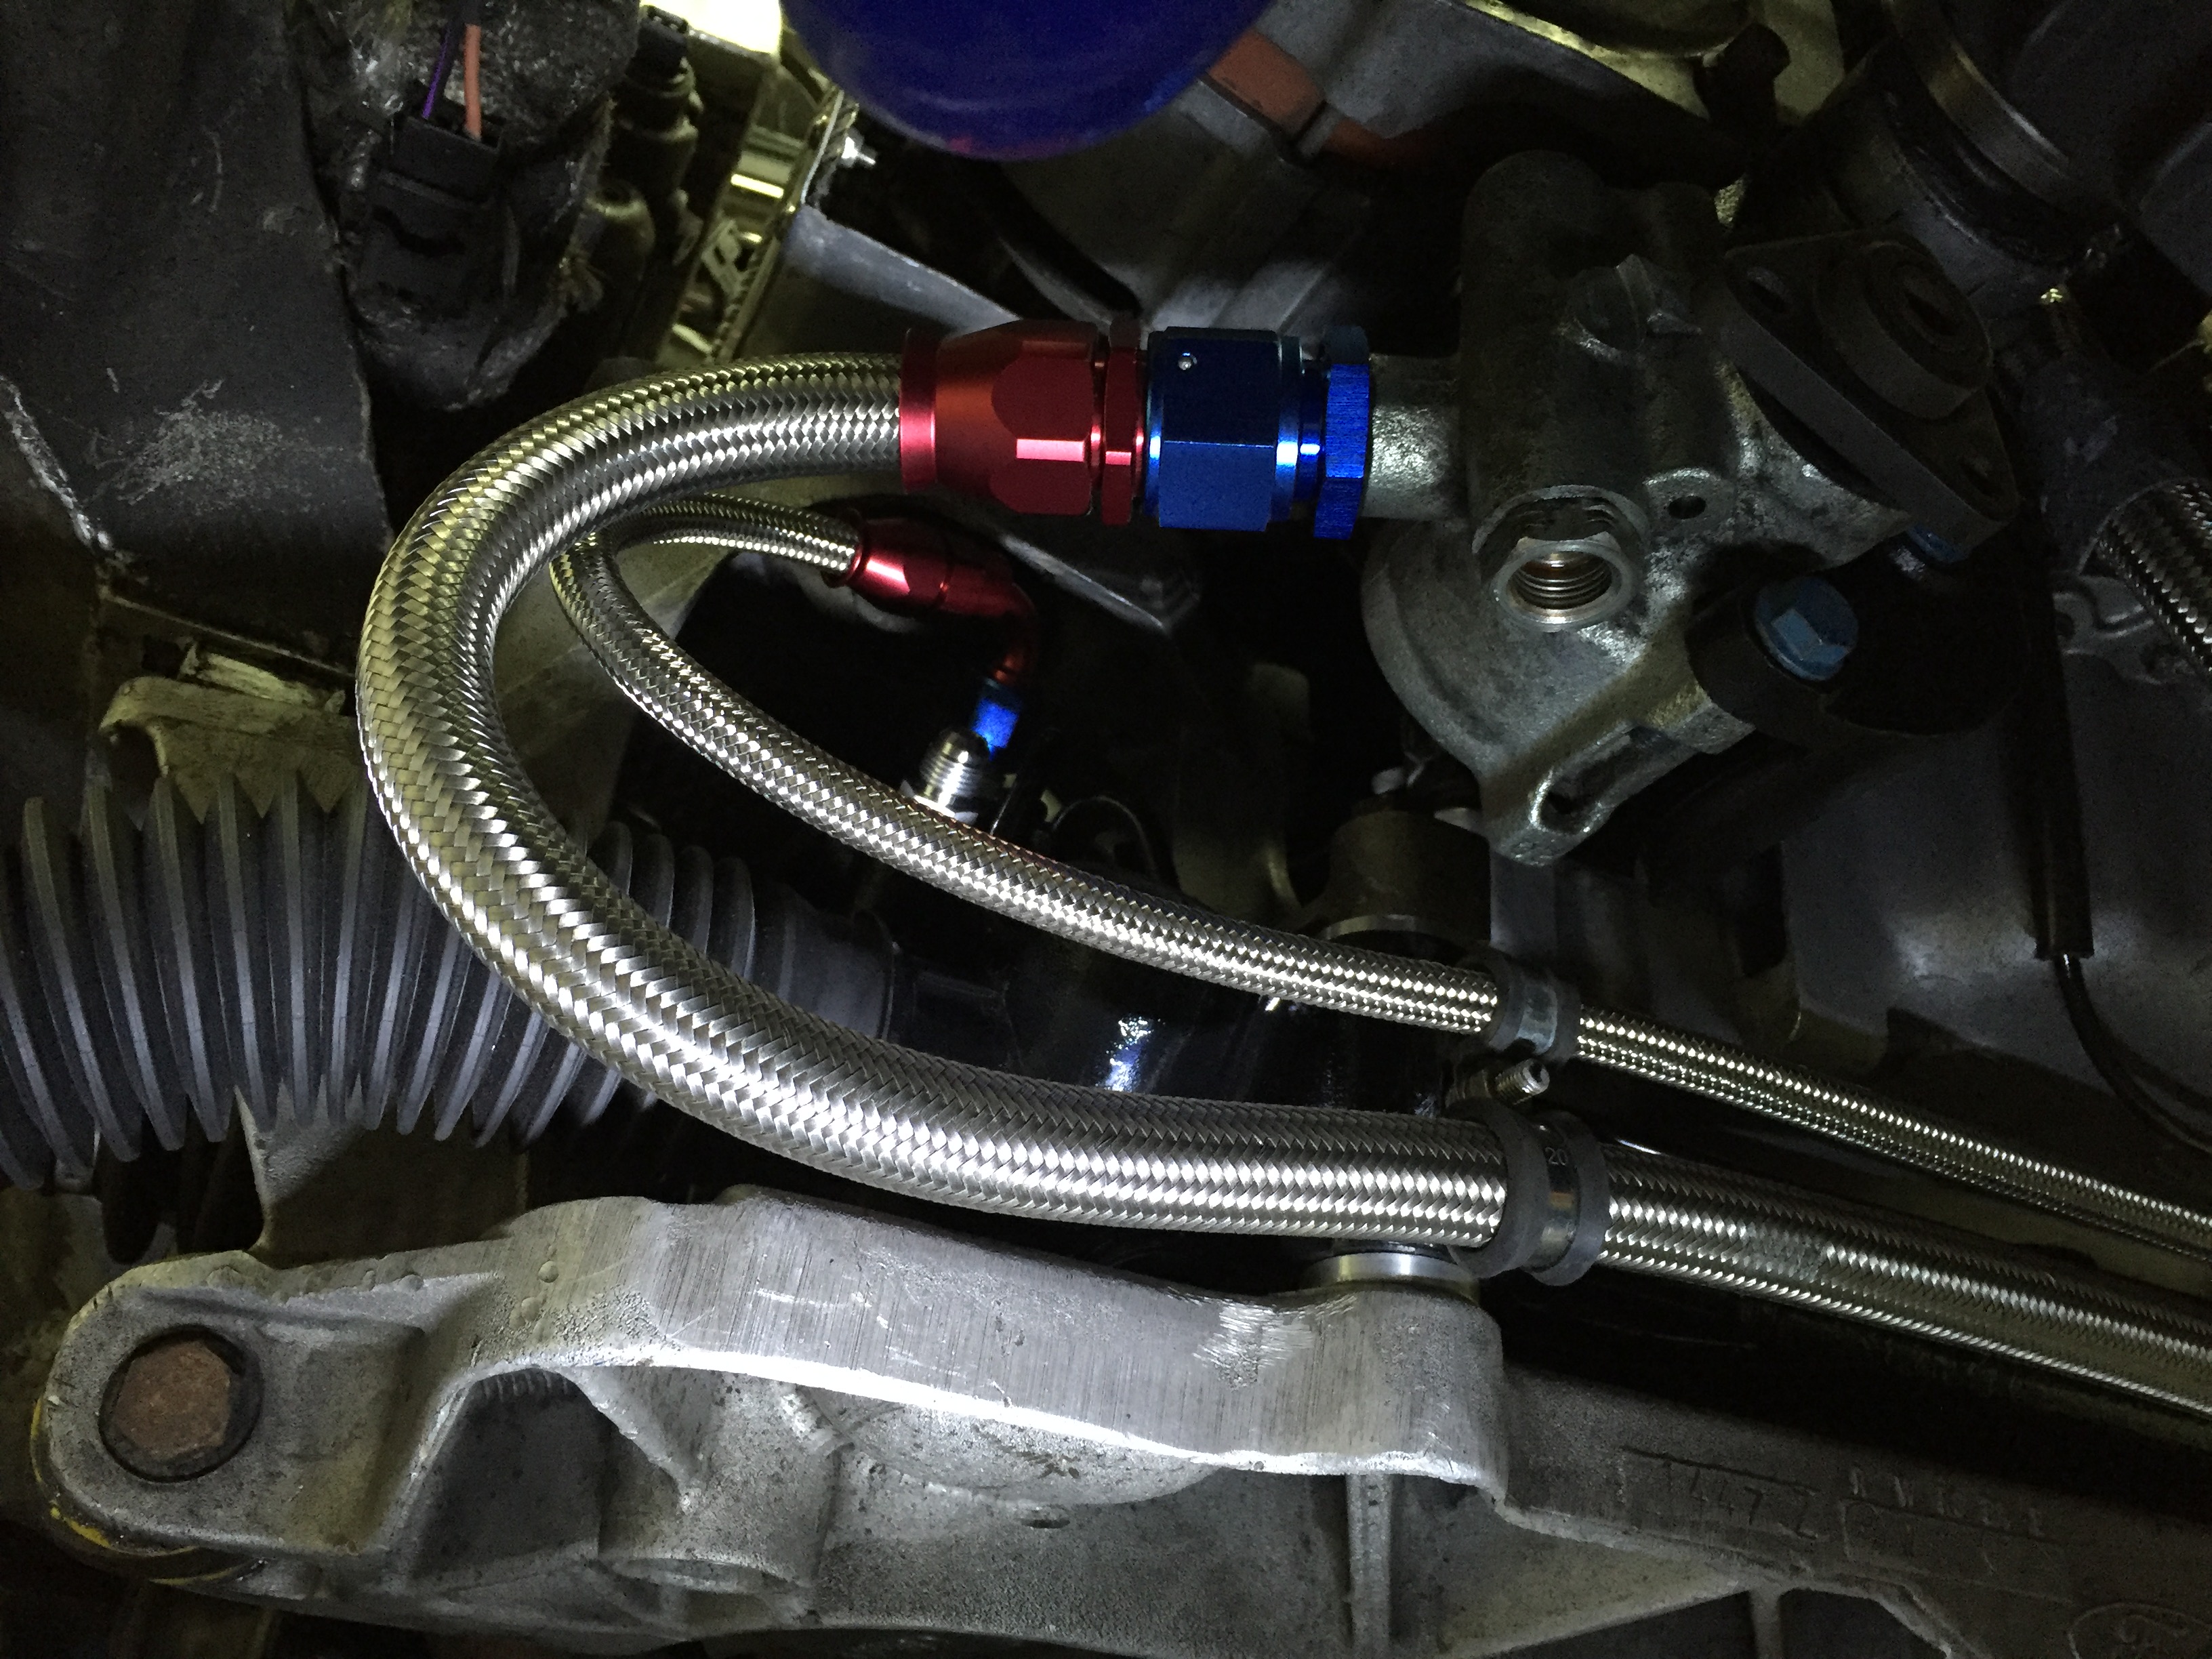
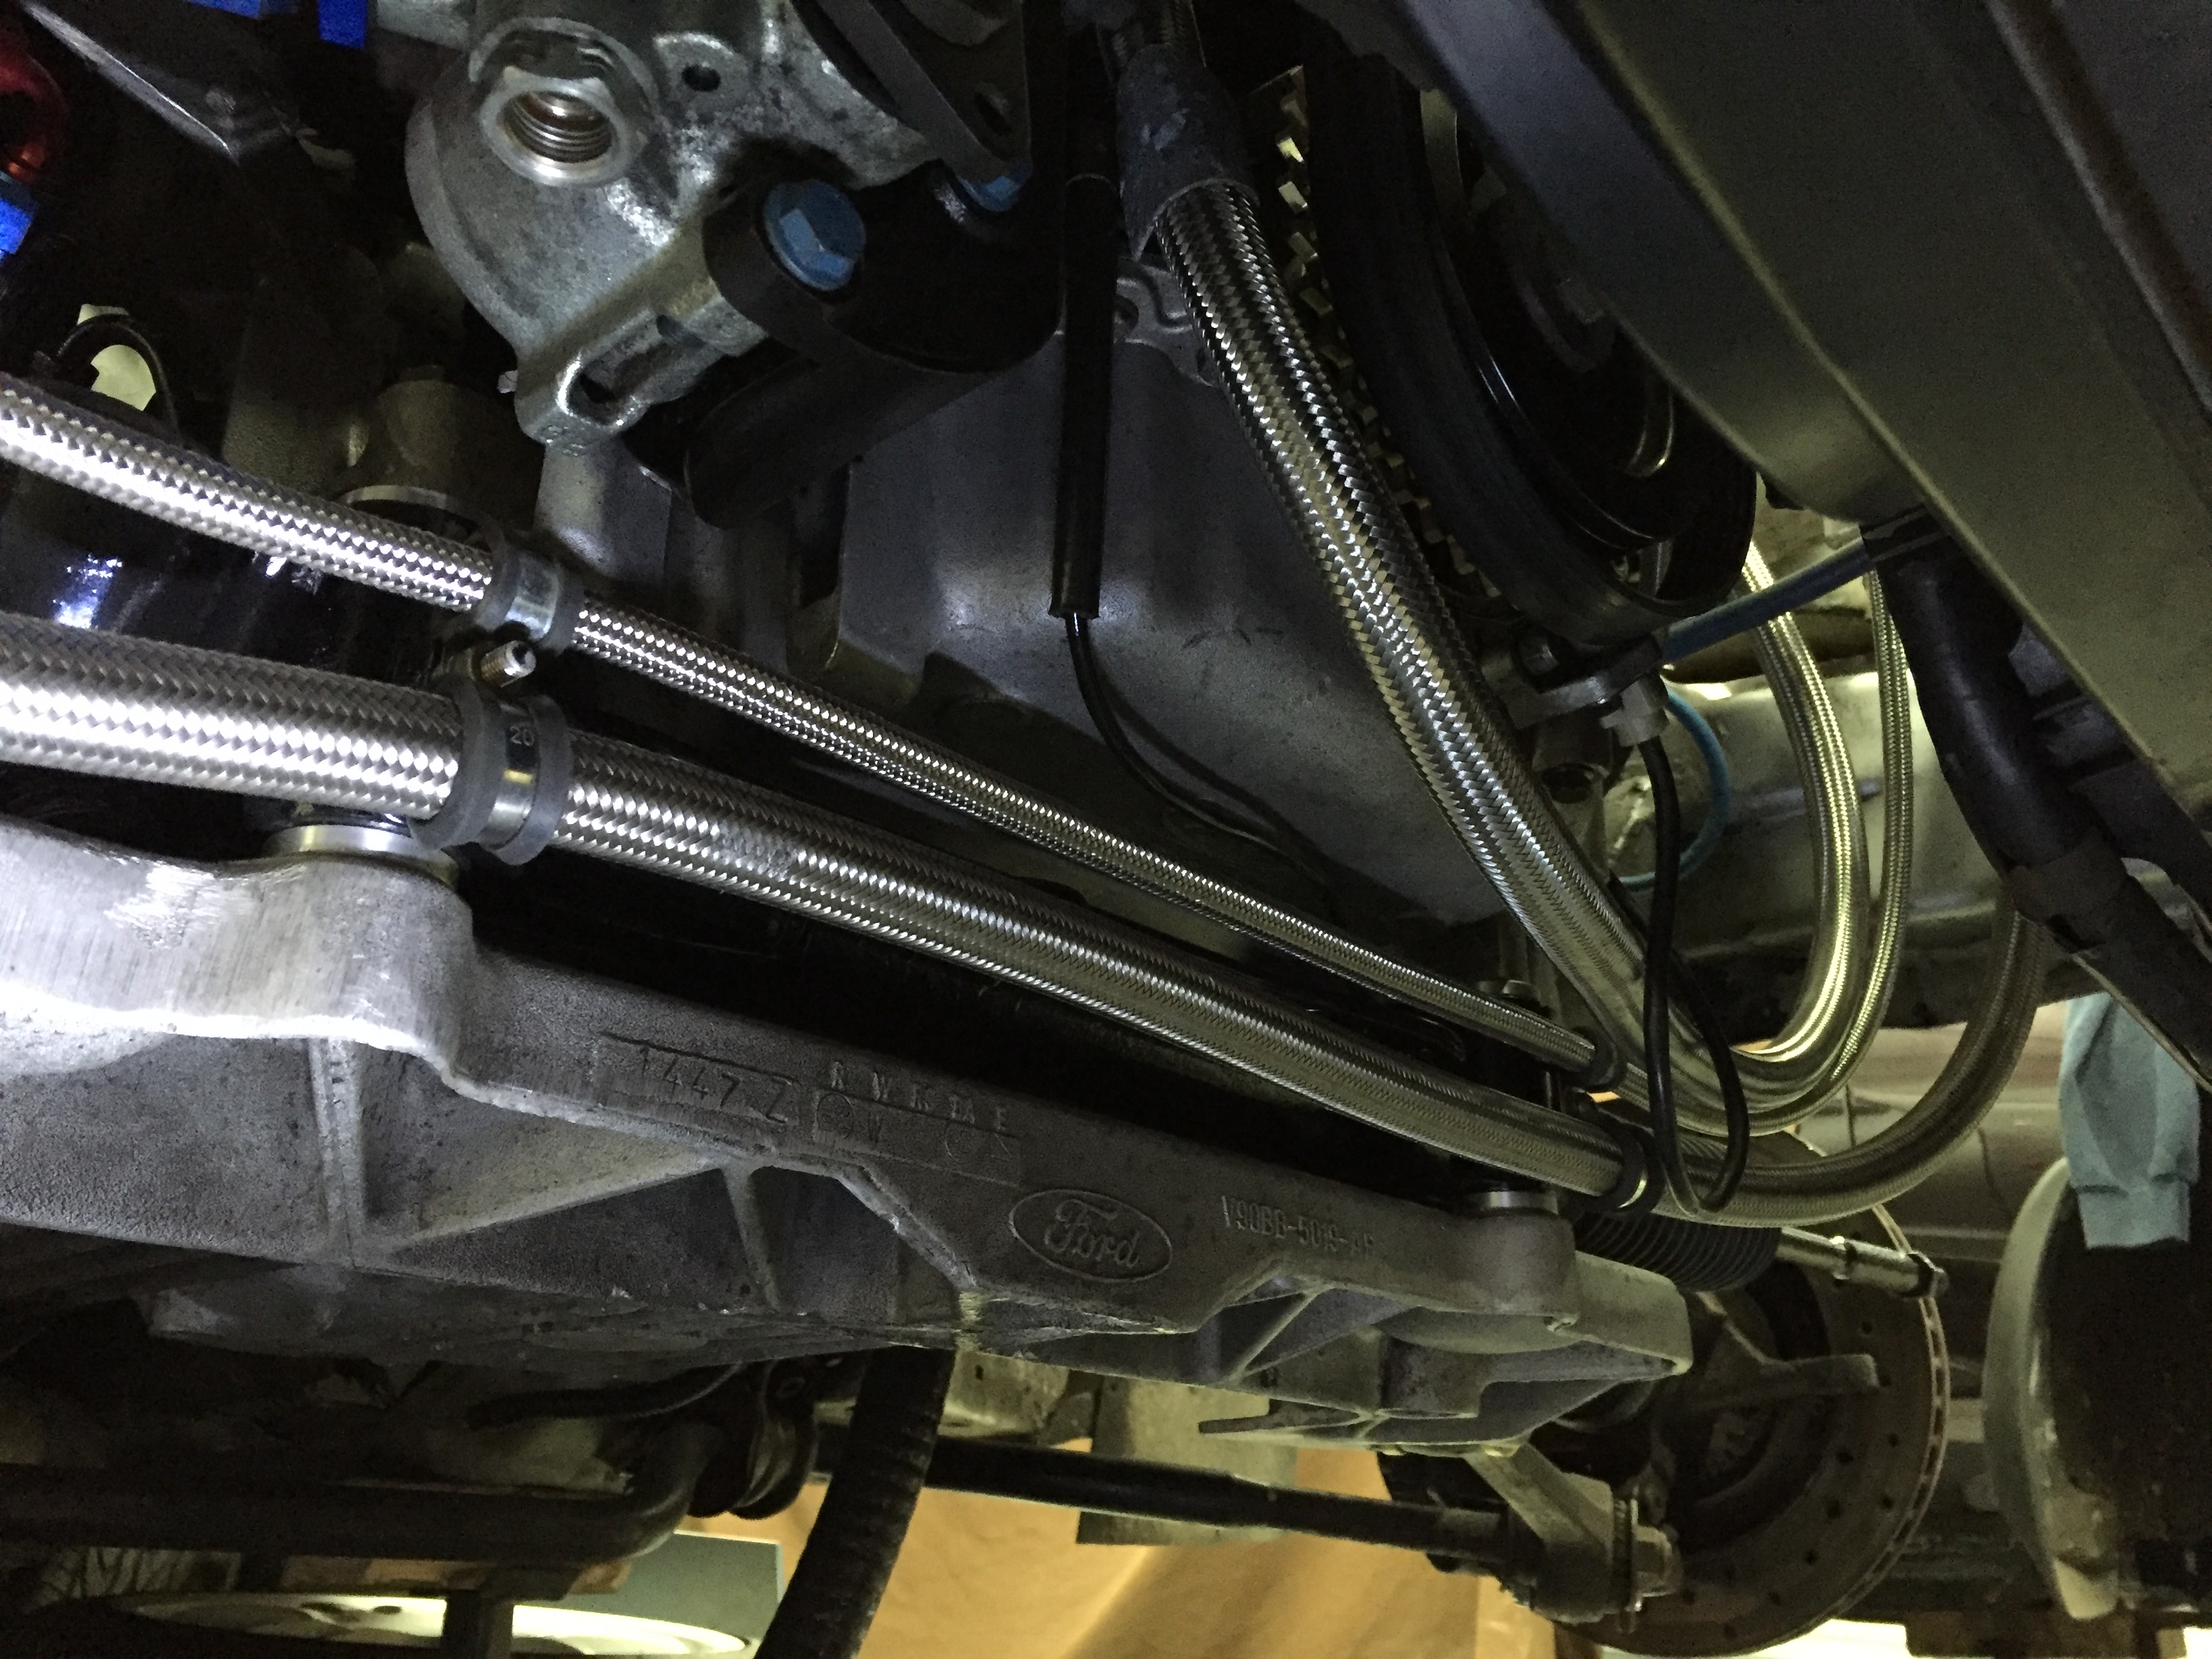
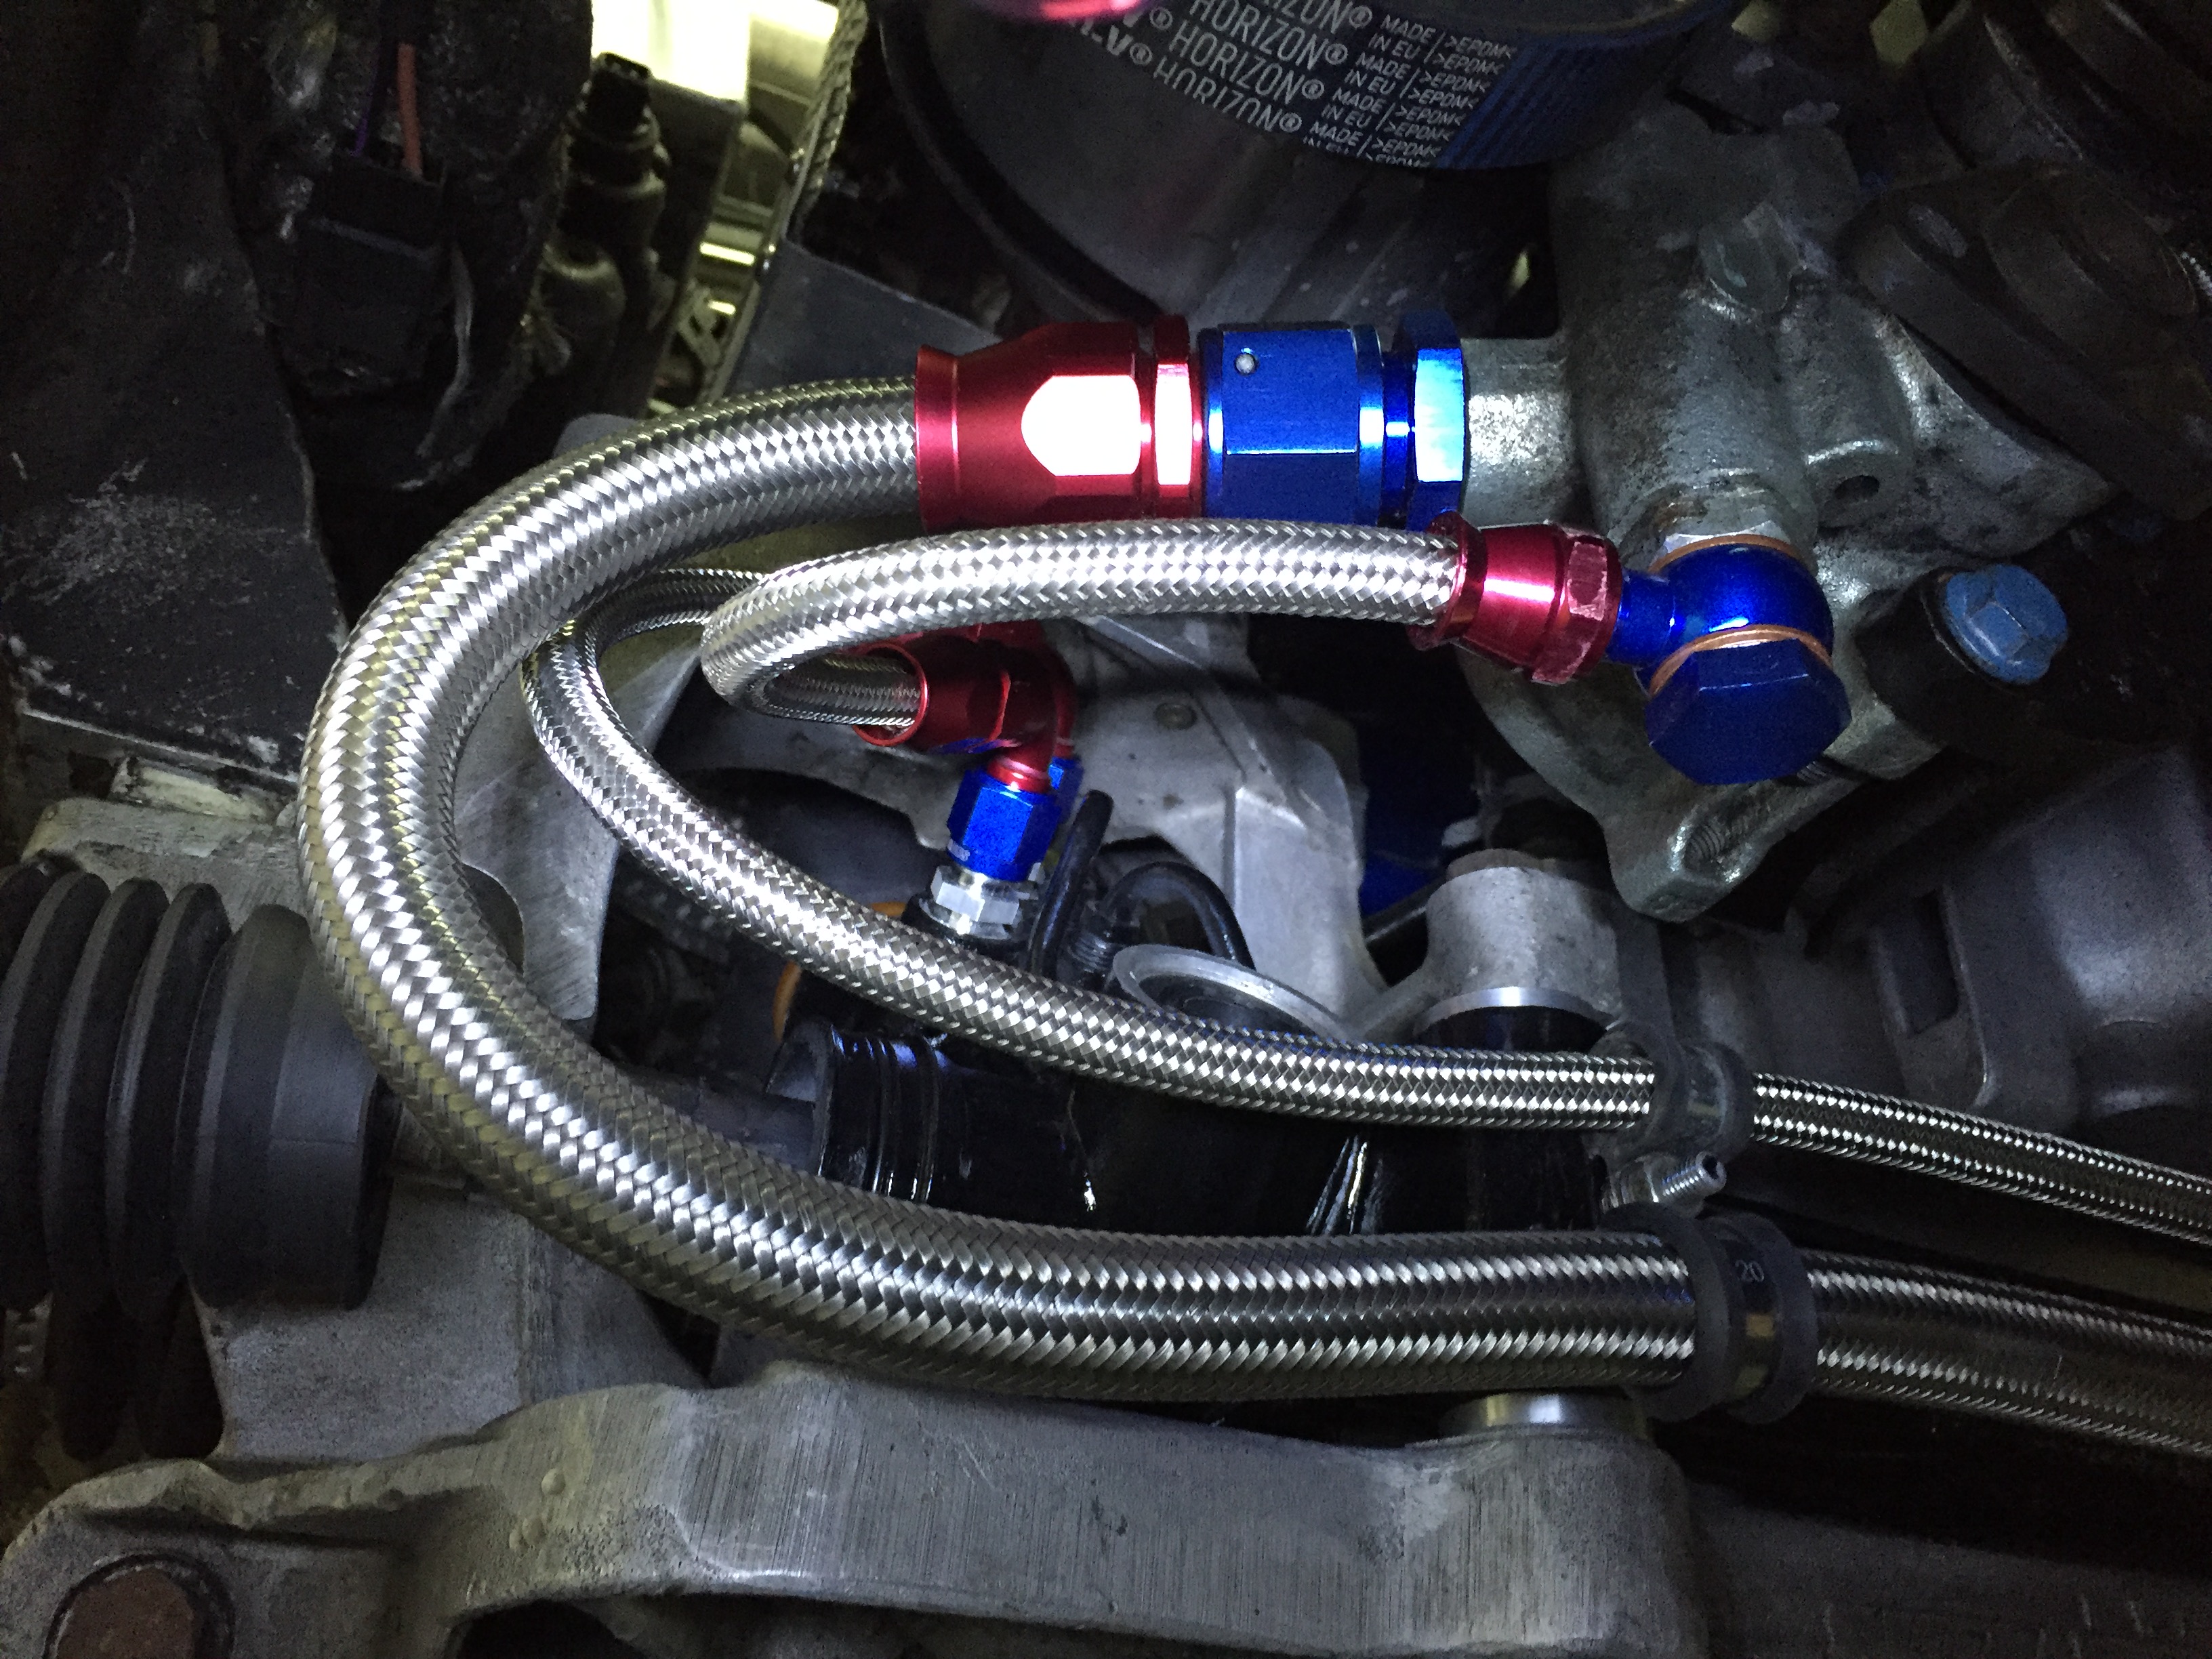
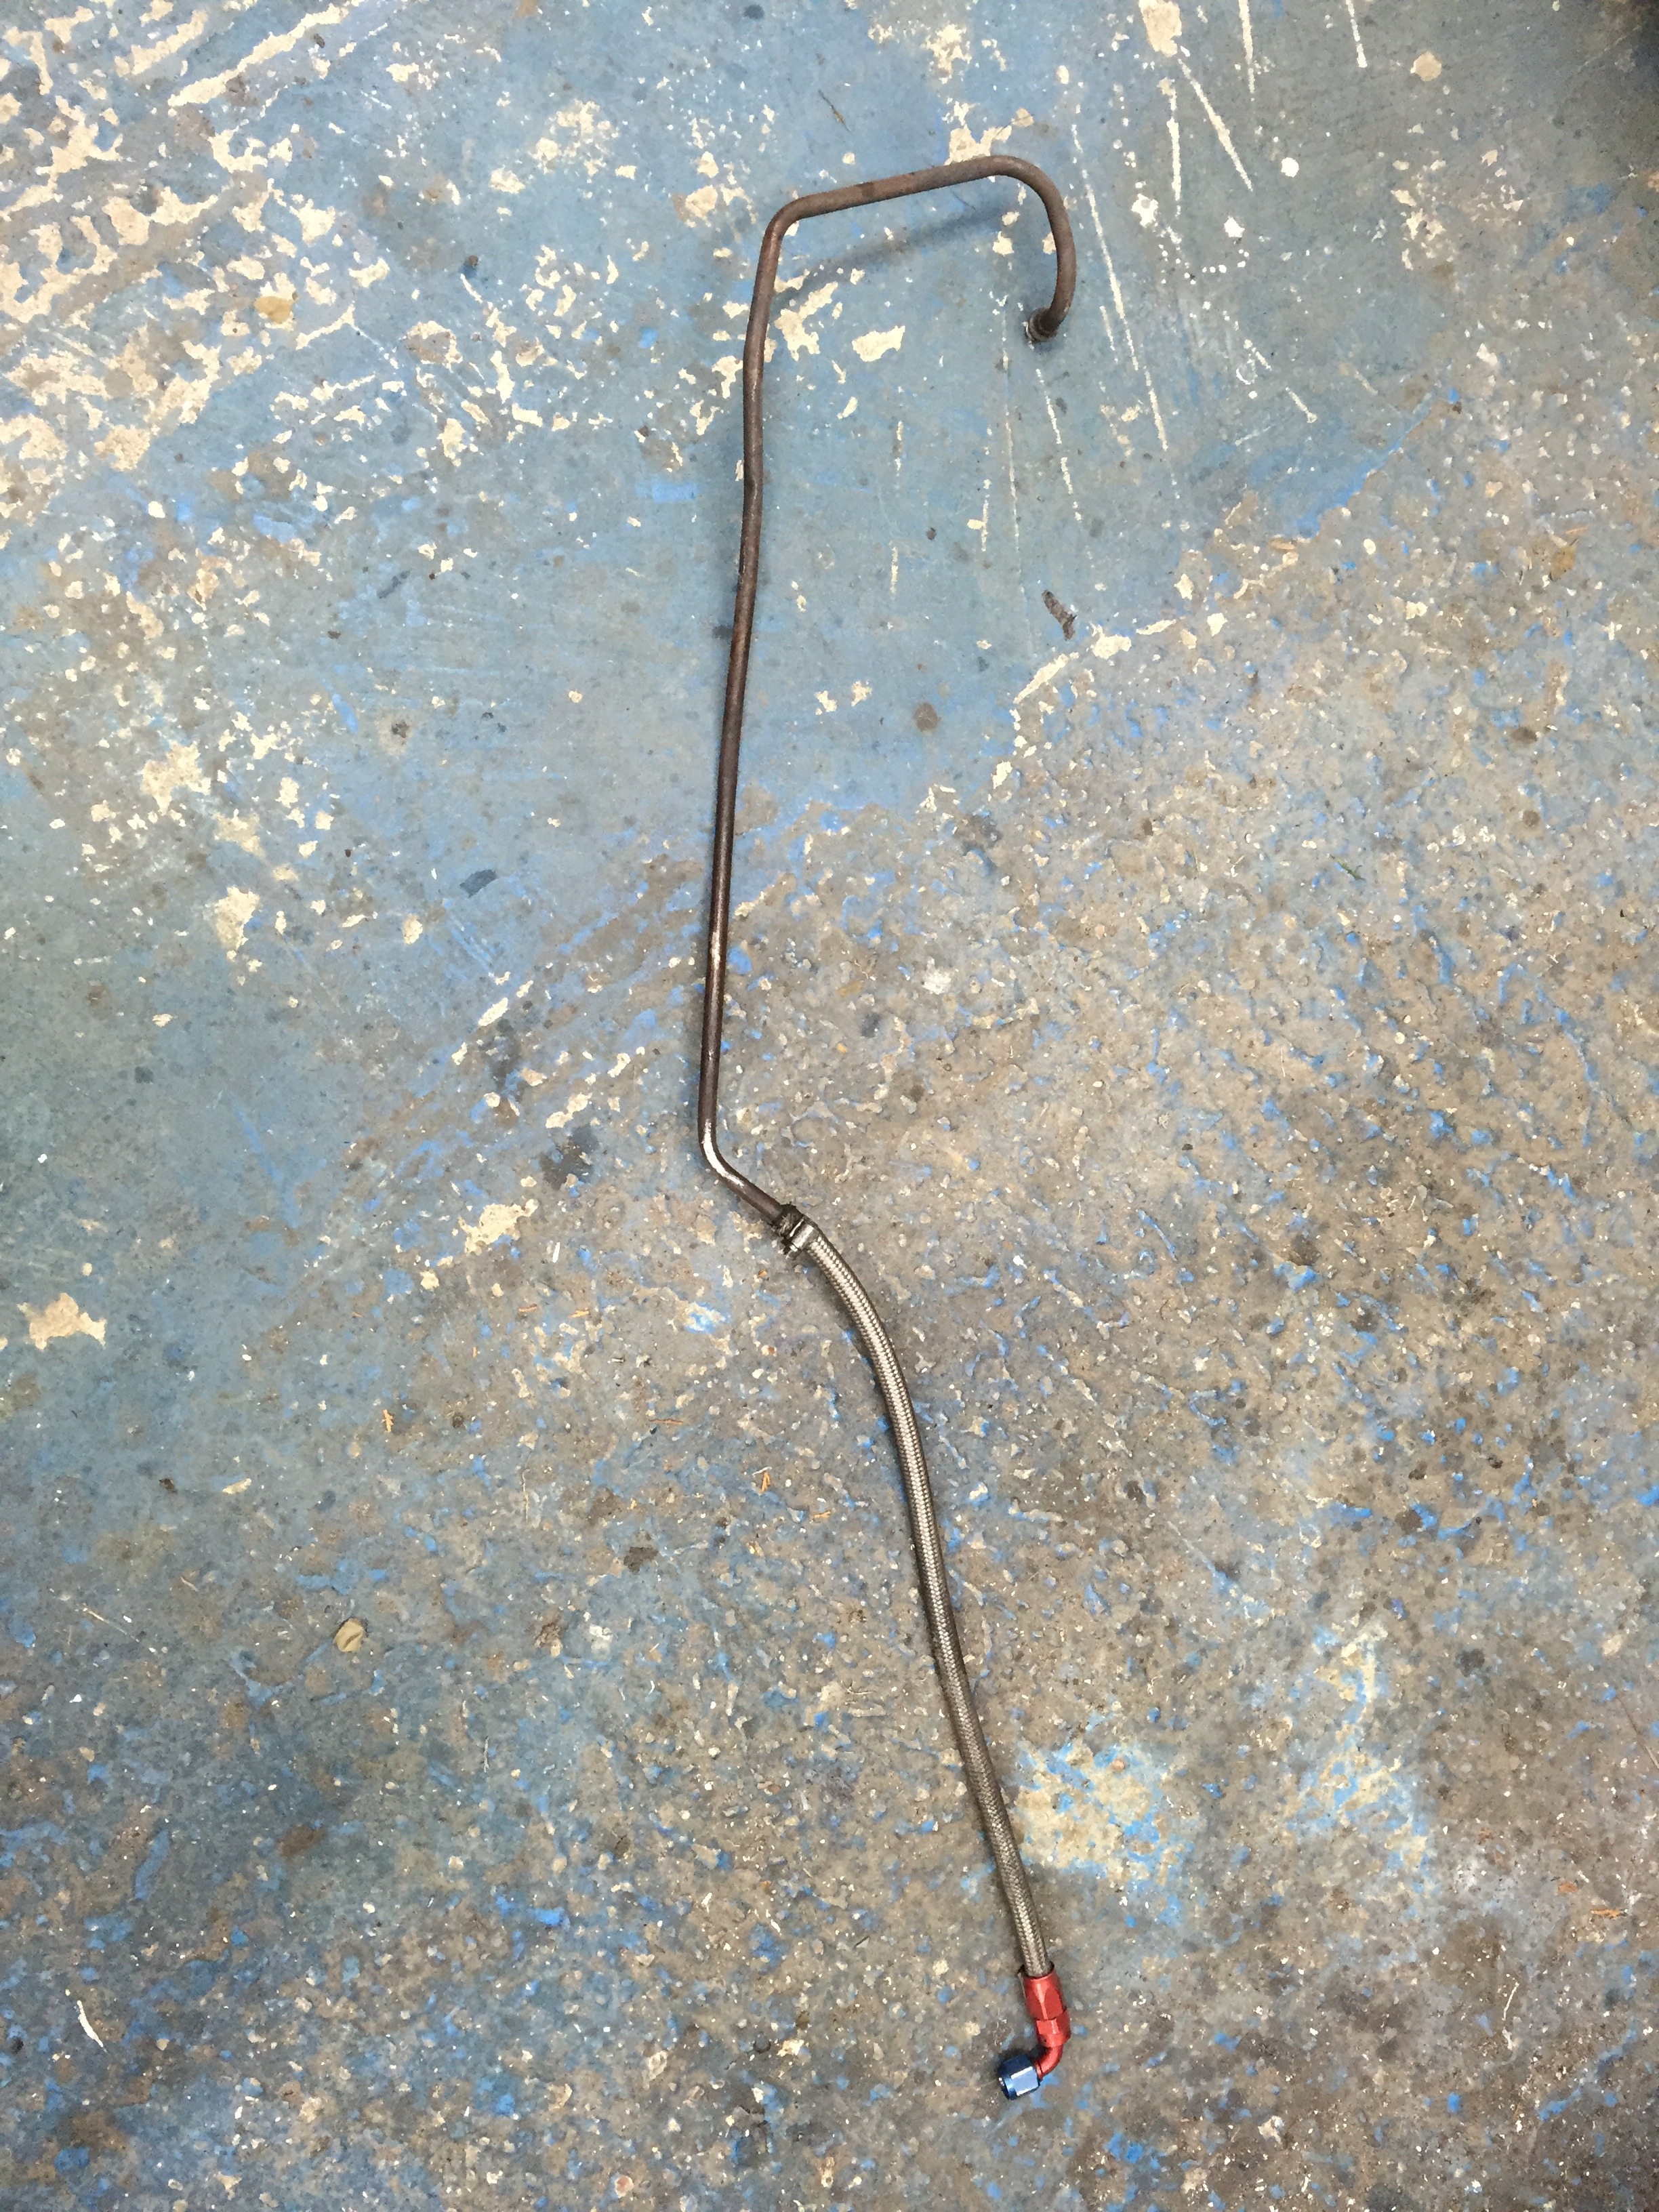
So with that done it was time to make up the new hoses and get everything fitted back together.
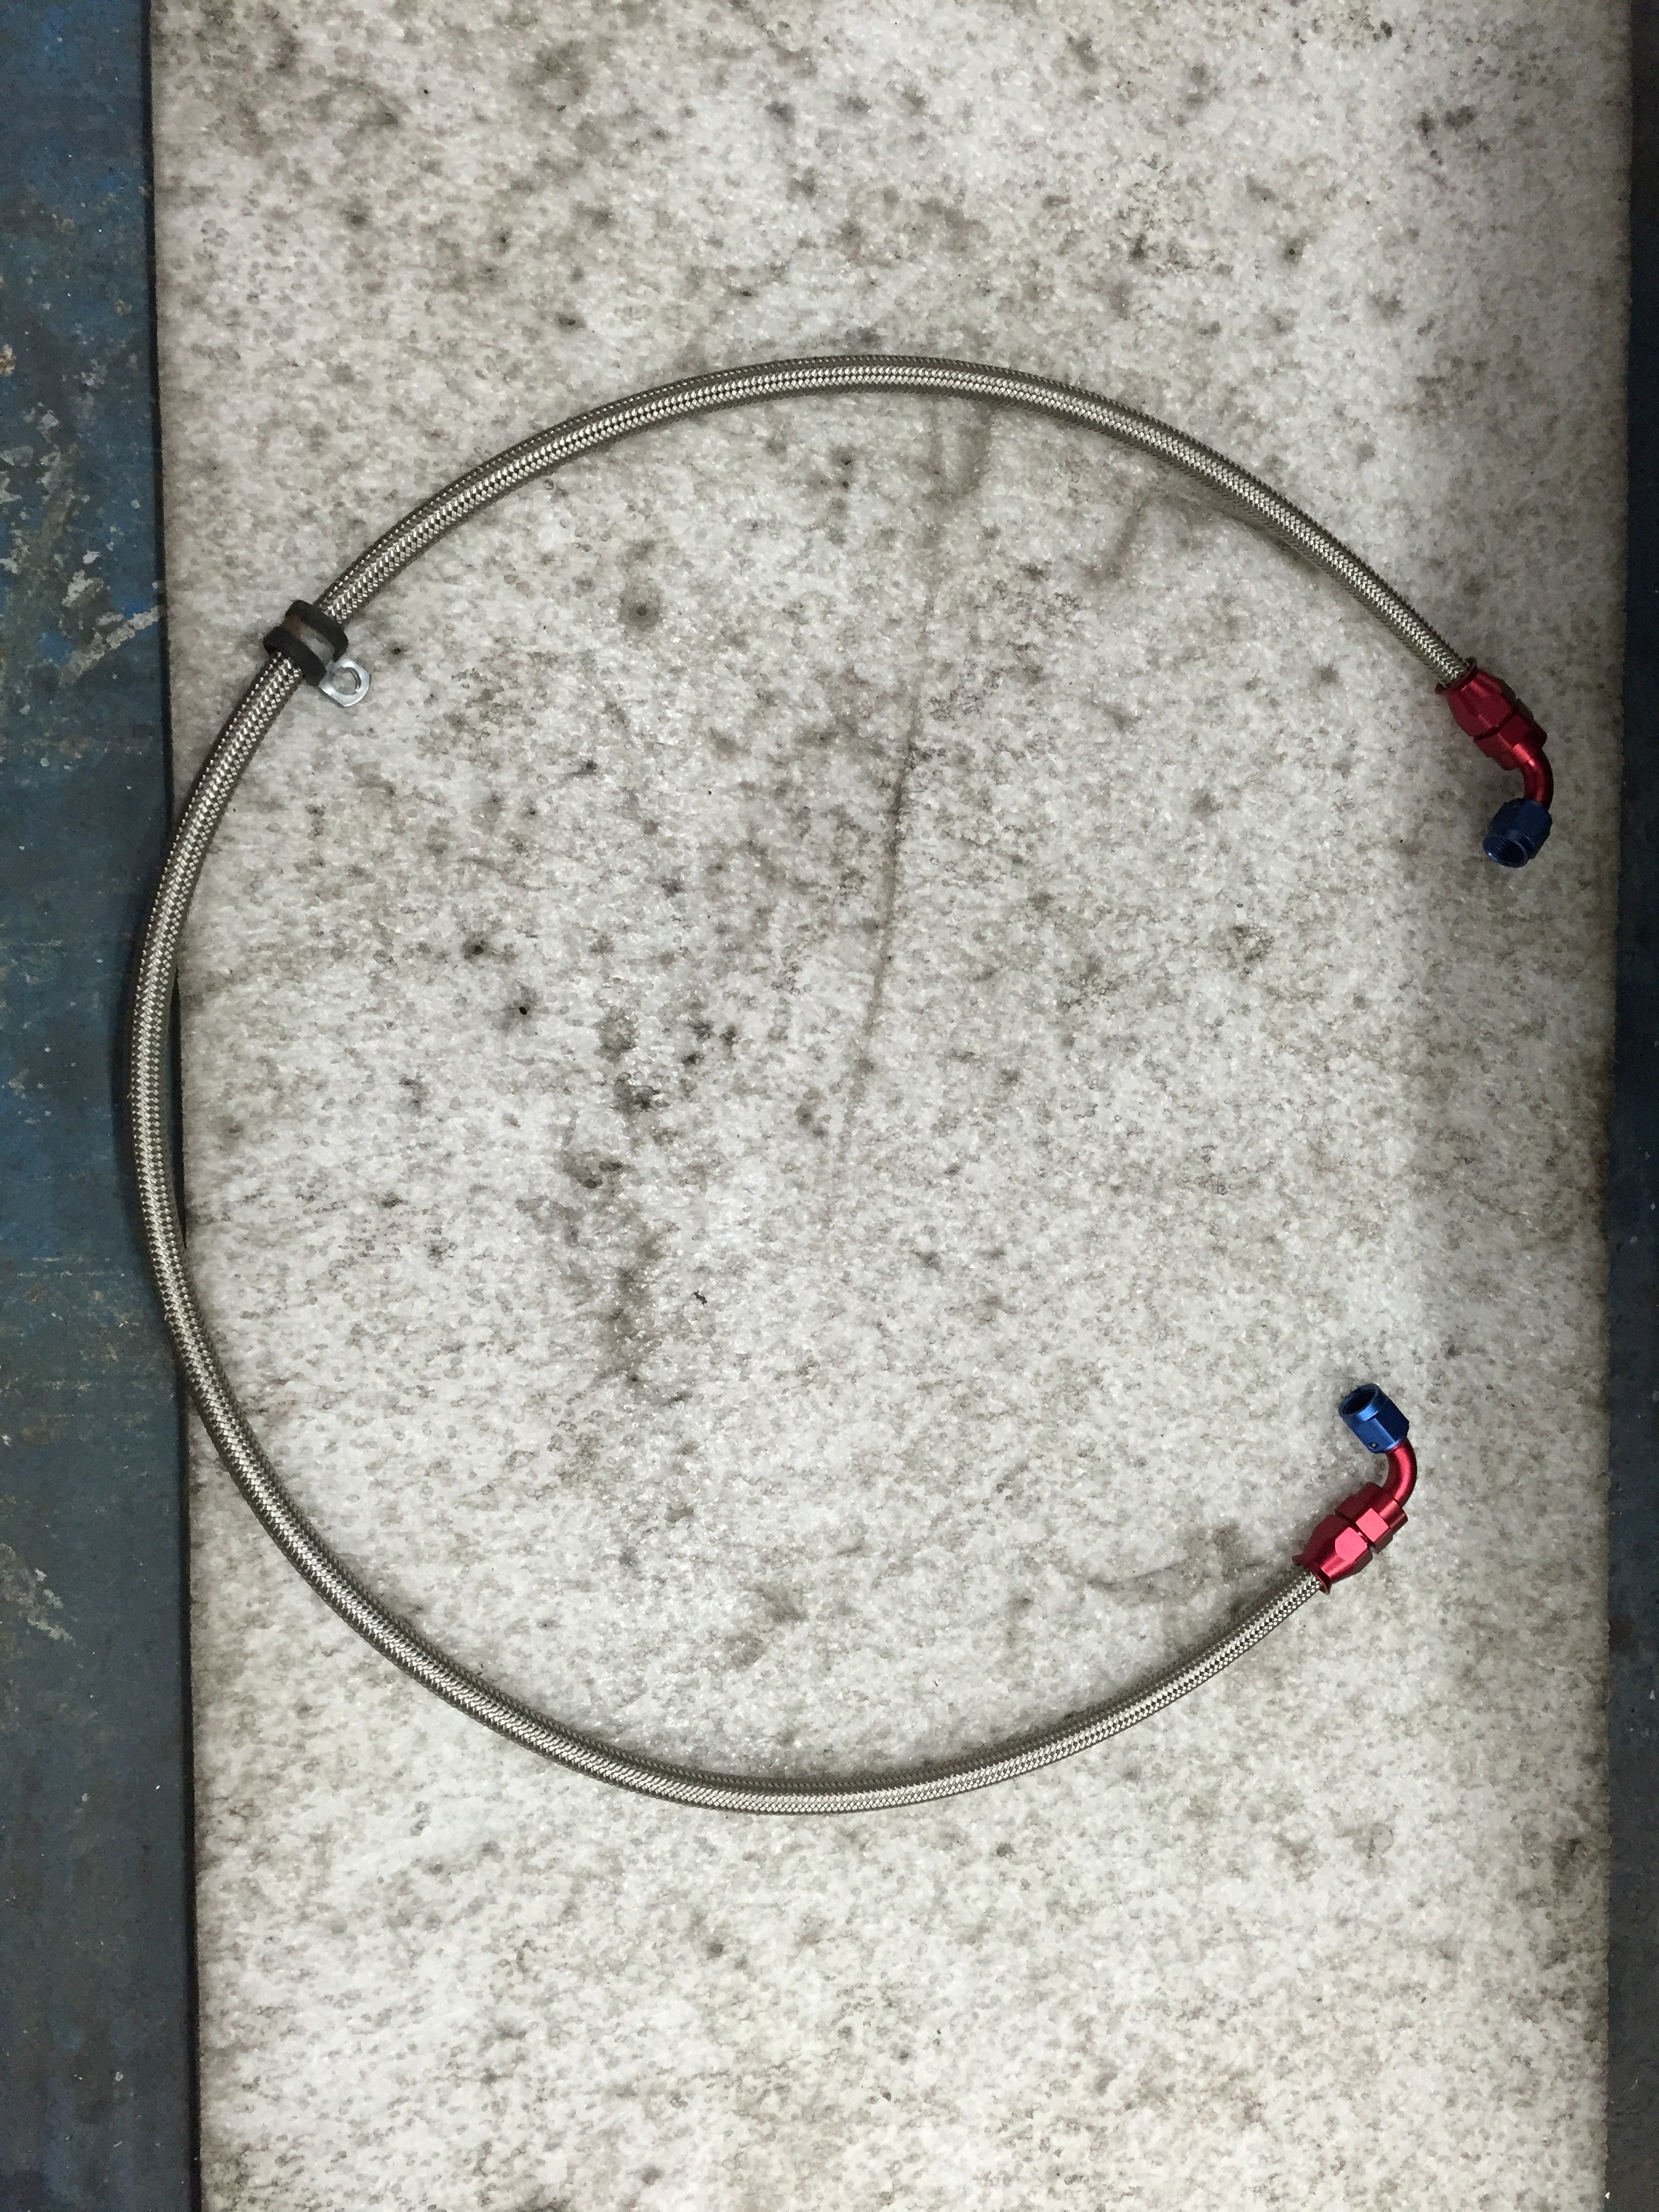
Old return hose now fit for the bin, old original high pressure hose sold on.
So with that all done and finally back together again it was off to get the car tracked again, having had the tie rods off and fitting new track rod ends thought it best to get it dialled back in again. All went well, great drive home again and back in the workshop

So happy that the car is back together again, though I'm now wondering whether to get out and use it a bit or start looking into that fuel tank issue.. Which will mean I'll do the rear beam at the same time..
Thanks for looking
Last time out the steering rack decided it was its turn to get on the to do list and started leaking.. So out it came for new seals and while I was at it, decided it was also time to address the poor but still working steering hoses.
Rack out

The puddle it left behind on the passenger side of the crossmember

Bit of a mess under the gaitor

So onto the bench tie rods and gaitors taken off and time to get the rack stripped down

First issue was to make a tool of some kind to get the yoke cover off, so a bit of sheet metal quickly cut up, shaped and a nut did the trick just fine


Next up was to remove the pinion nut cover.. Needed to do so without damaging the rack or cover so a quick tack weld of a nut on it I turned the cover off with ease

With that and a little help from the workshop manual the rack was stripped down enough for me to get the old seals out and ready for the new to be fitted


Also decided to opt for solid rack bushes and so this seemed a good time to press the old rubber mounts out

New seals being fitted - masking tape put over the rack teeth to protect the seal as I slide it on


Wire re-fitted to hold seal housing in place

Pinion ready to go back in with new seal

Yoke cover ready to be refitted

Rack built back up

Nut removed from pinion cover

Rack cleaned and prepped ready for a bit of paint

Primer, paint and lacquer


Drilled and taped the feed I let on the pump to allow an adaptor to be fitted


New bracket made to hold in the AN rack adaptors (courtesy of Marc - MK)


So with that done it was time to make up the new hoses and get everything fitted back together.


Old return hose now fit for the bin, old original high pressure hose sold on.

So with that all done and finally back together again it was off to get the car tracked again, having had the tie rods off and fitting new track rod ends thought it best to get it dialled back in again. All went well, great drive home again and back in the workshop


So happy that the car is back together again, though I'm now wondering whether to get out and use it a bit or start looking into that fuel tank issue.. Which will mean I'll do the rear beam at the same time..
Thanks for looking
Last edited by McCloud 85; 29-11-2015 at 10:08 PM.
30-11-2015, 09:46 PM
#134
PassionFord Regular
Thread Starter
Thanks for the comments.
13-03-2016, 11:09 PM
#135
PassionFord Regular
Thread Starter
So it's been a little while since the last update so thought I'd show what I've managed to get done to date on the car
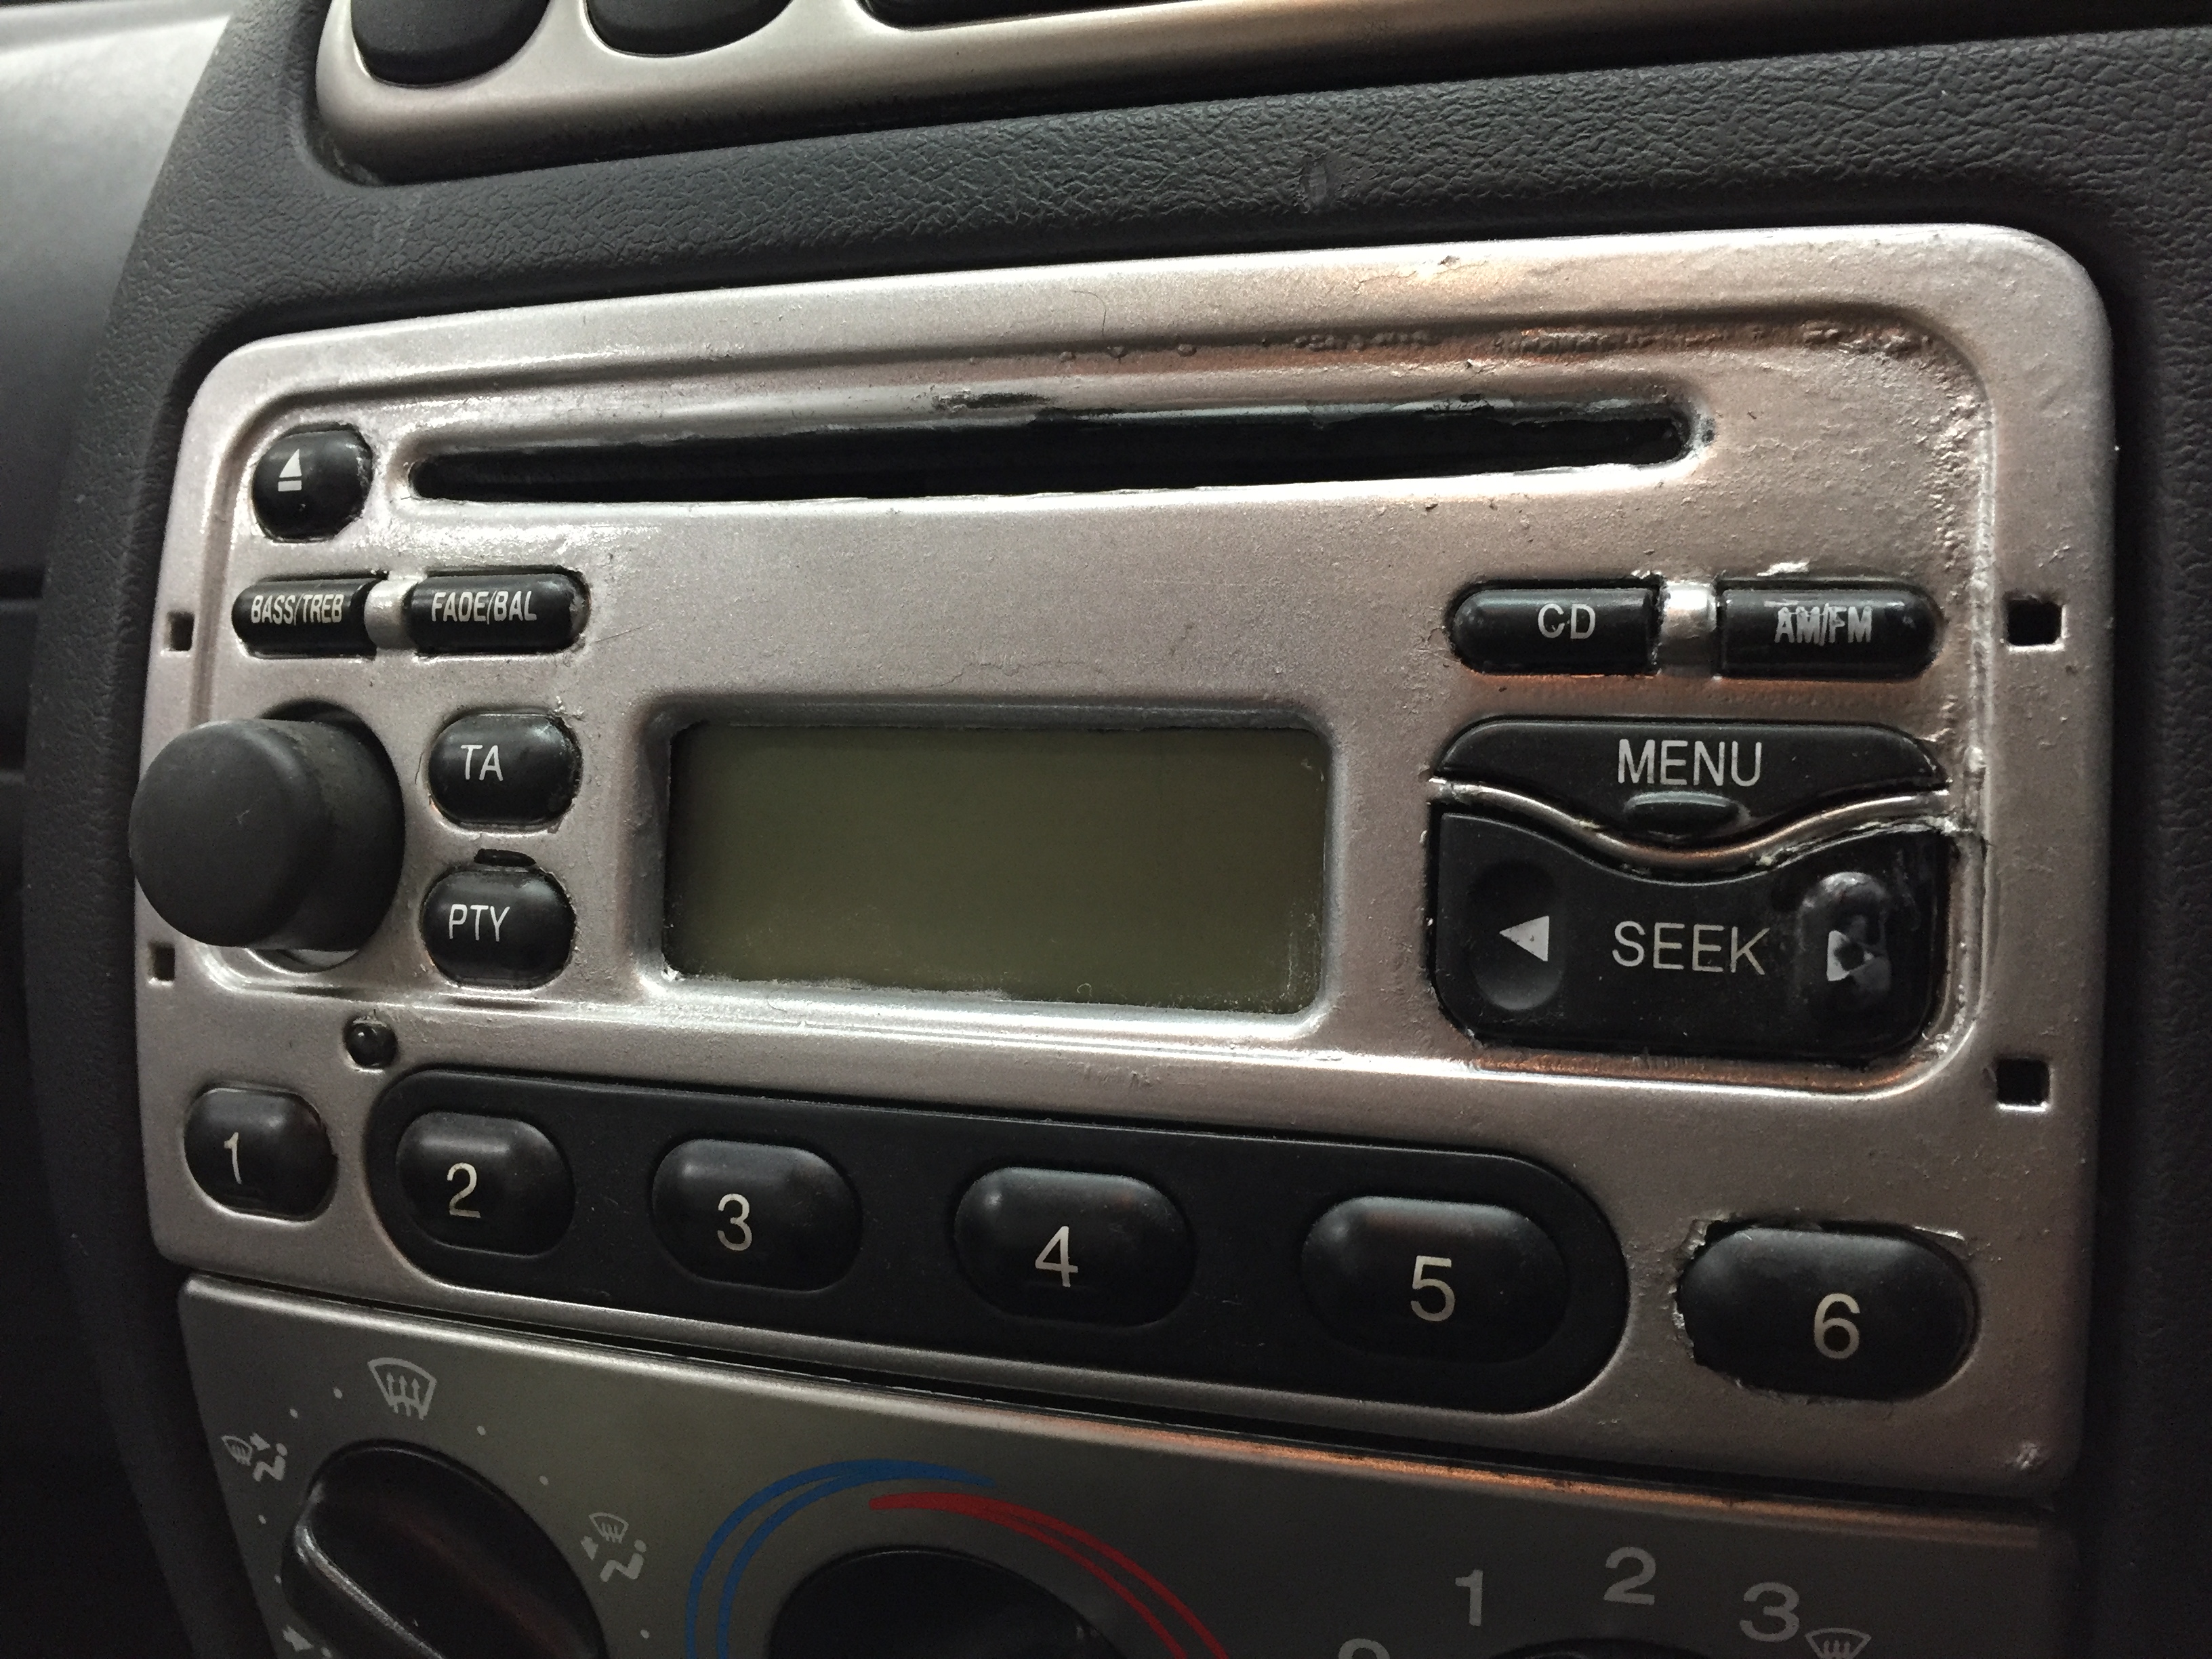
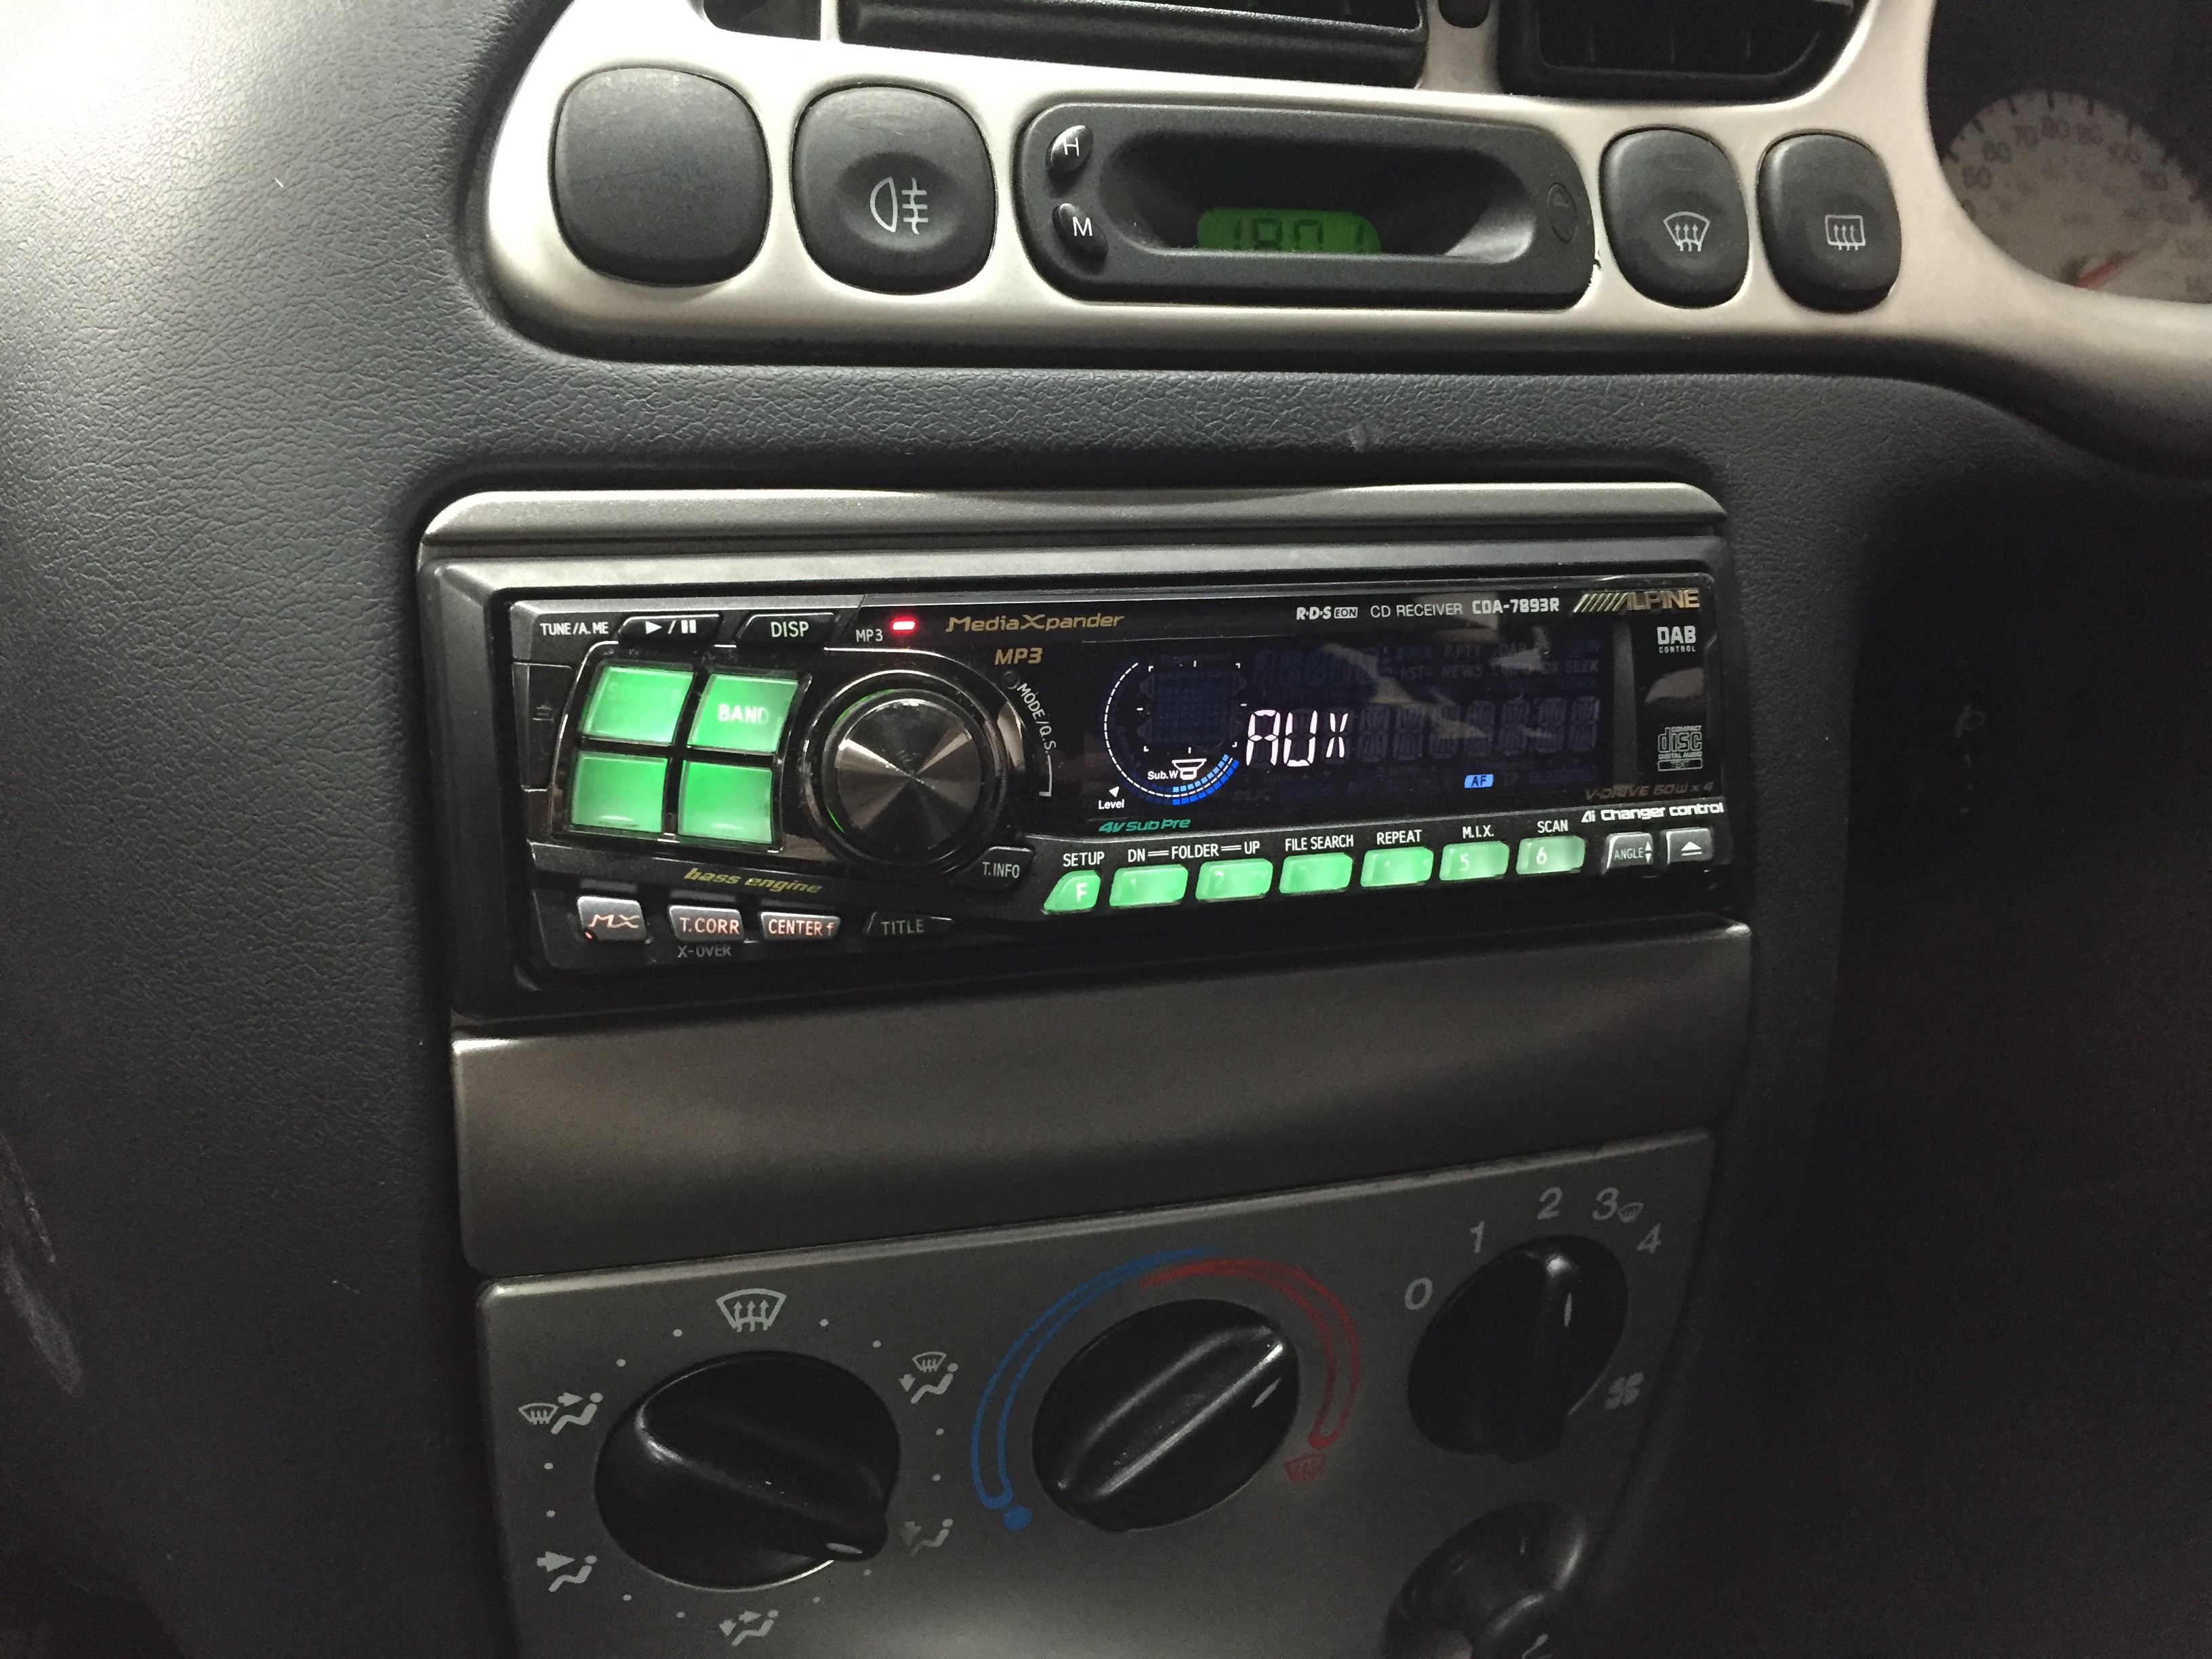
Small improvement inside.. Old 'nail varnish effect' radio out and in with a more useable headunit albeit a little old skool!
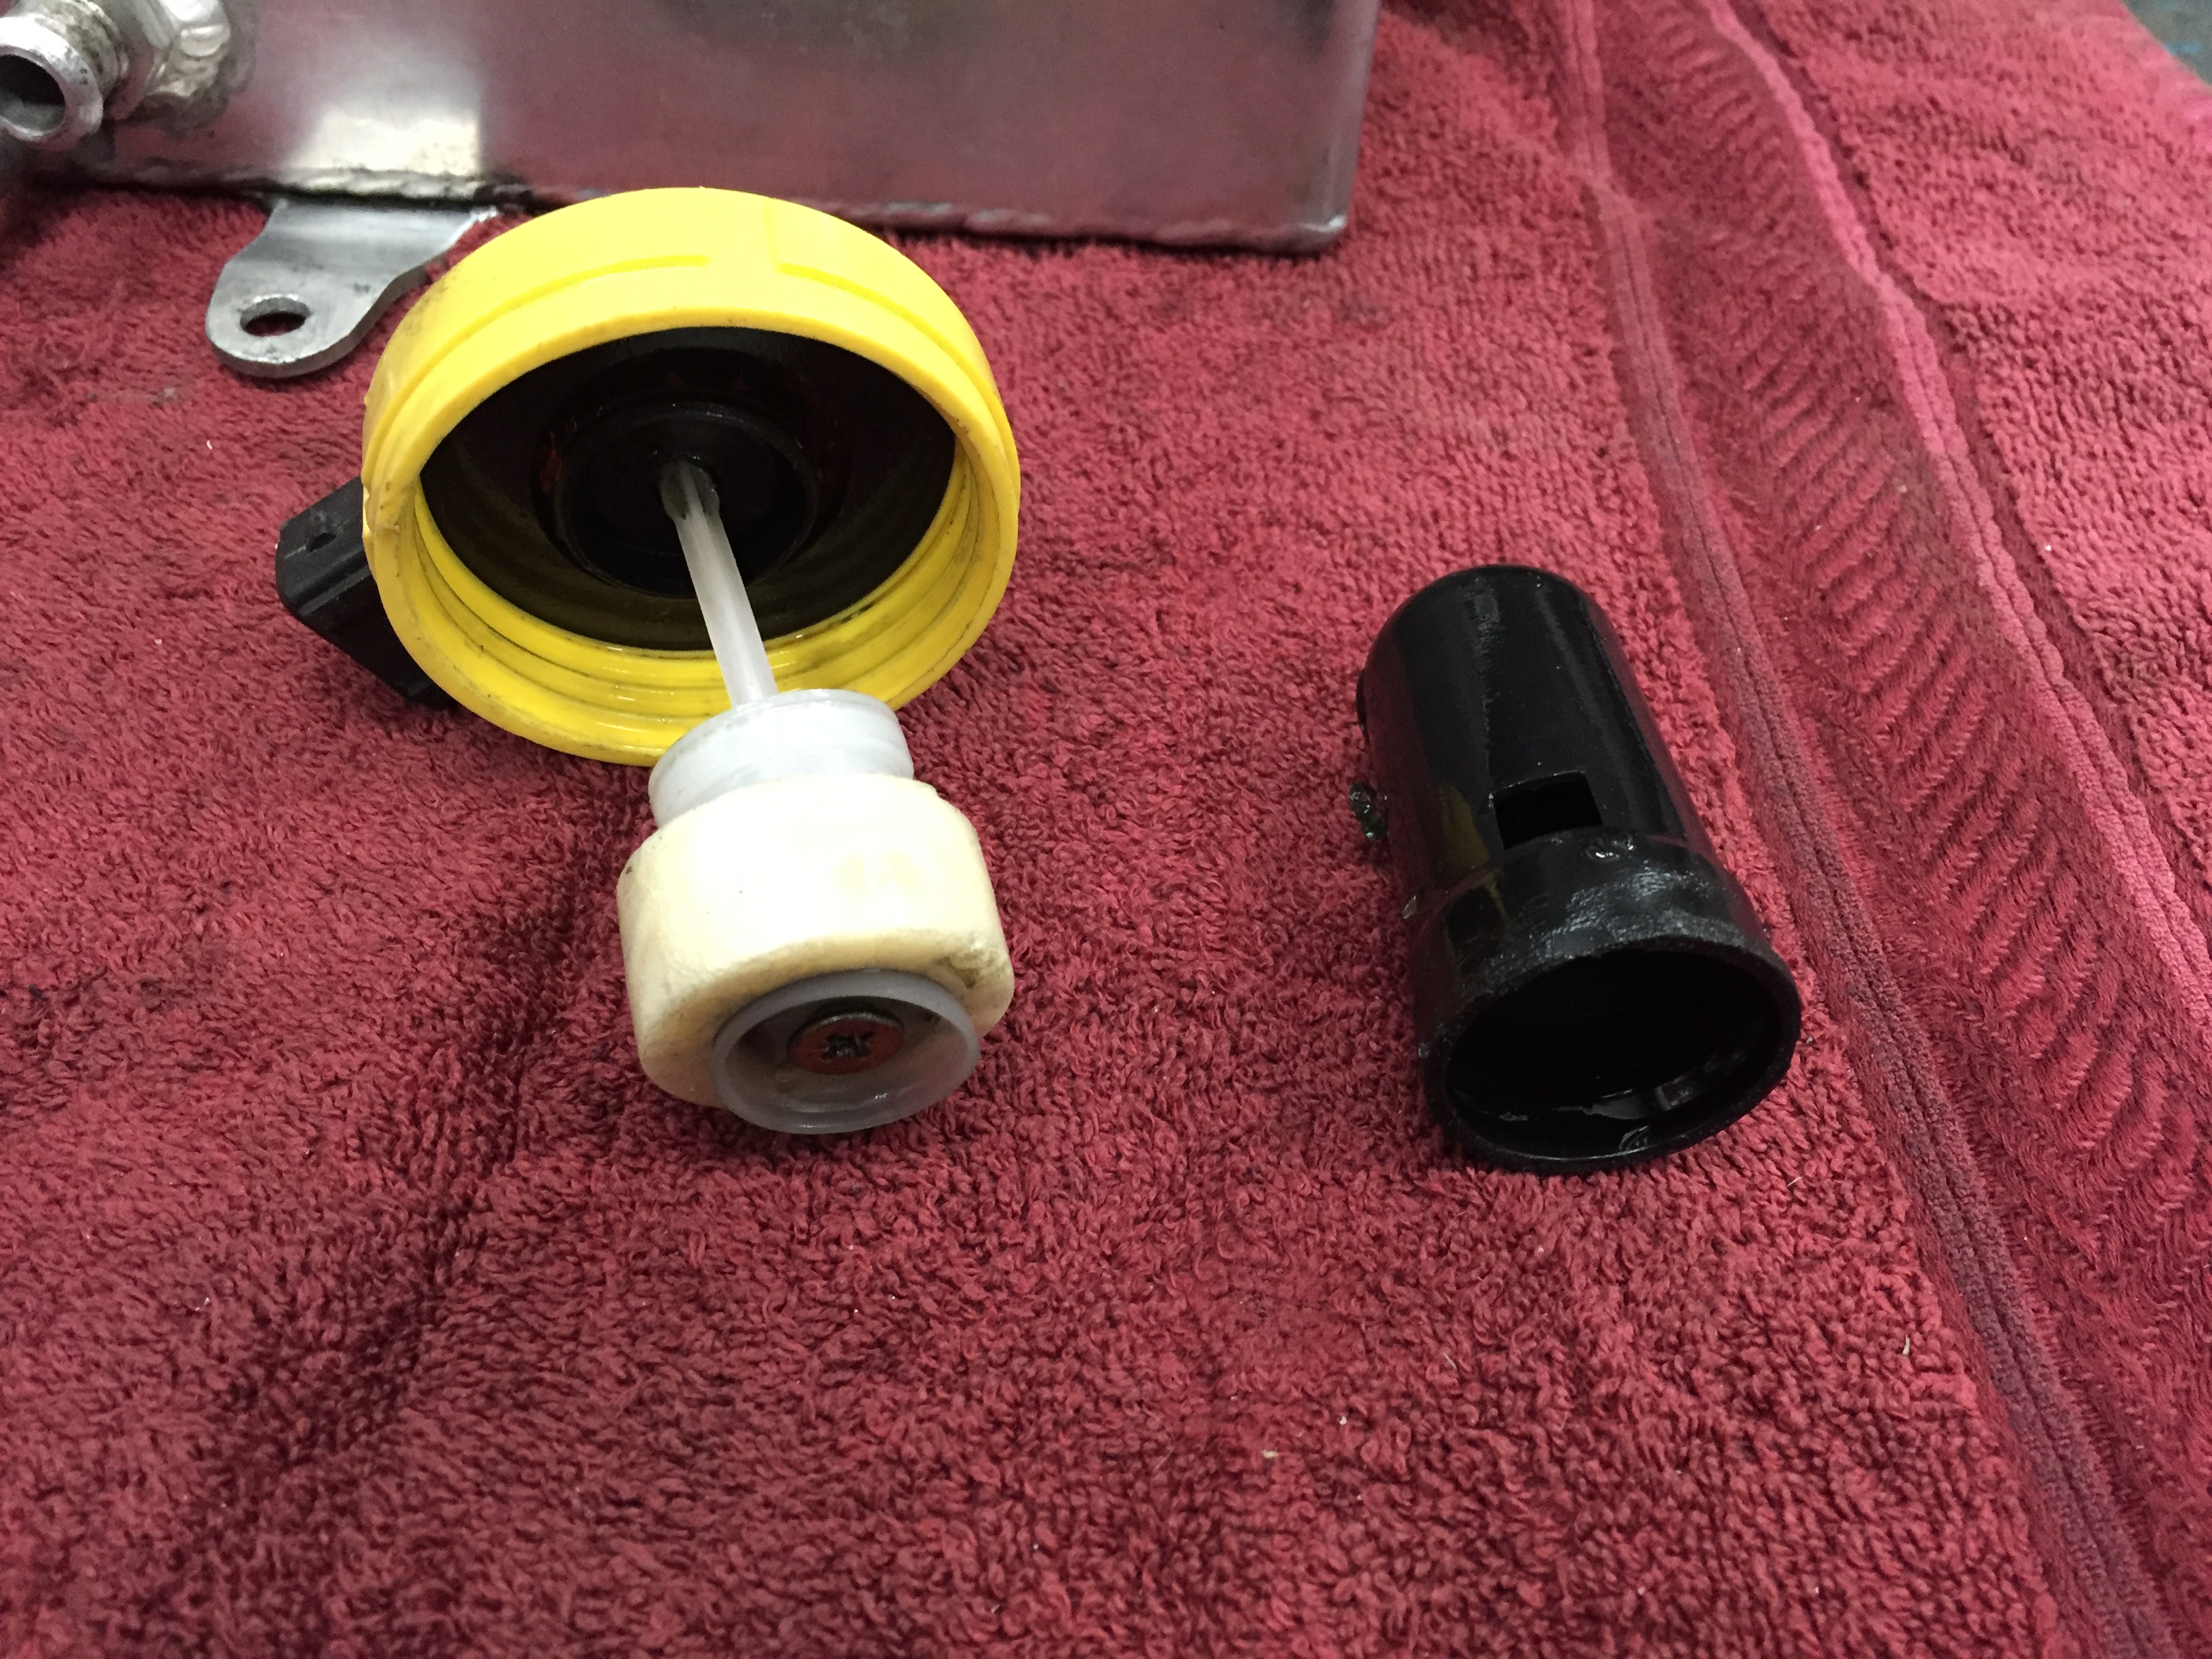
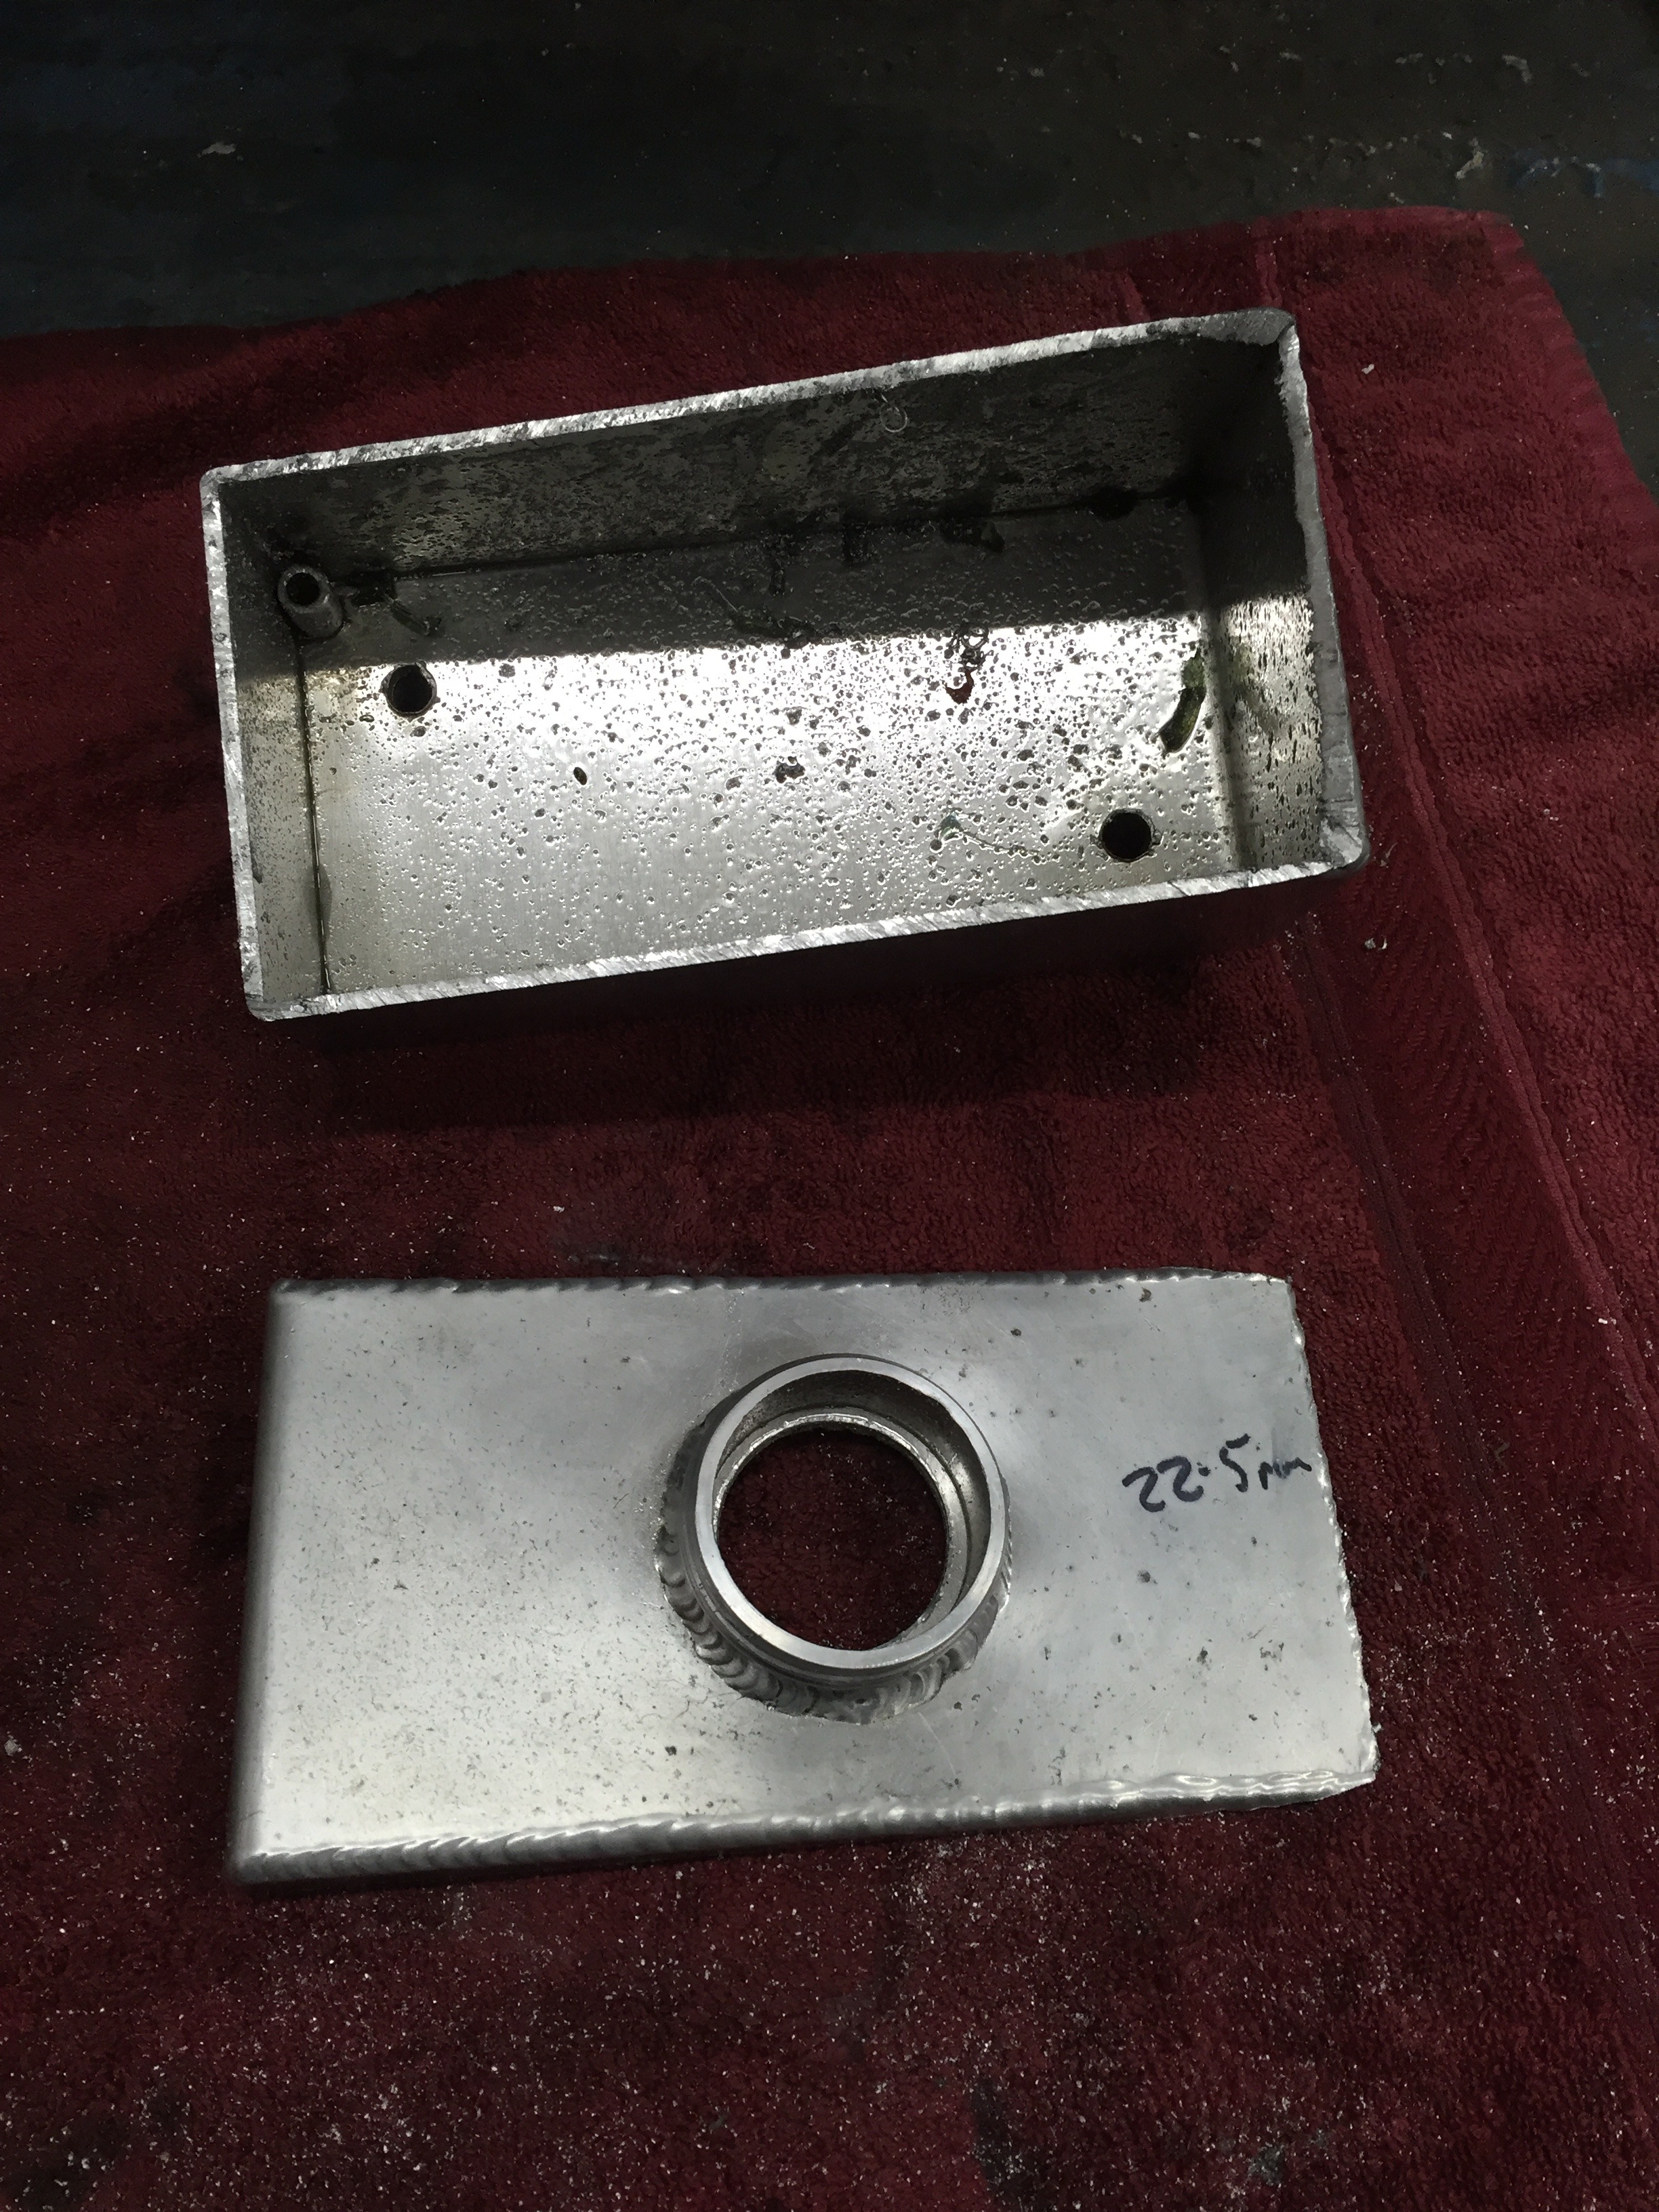
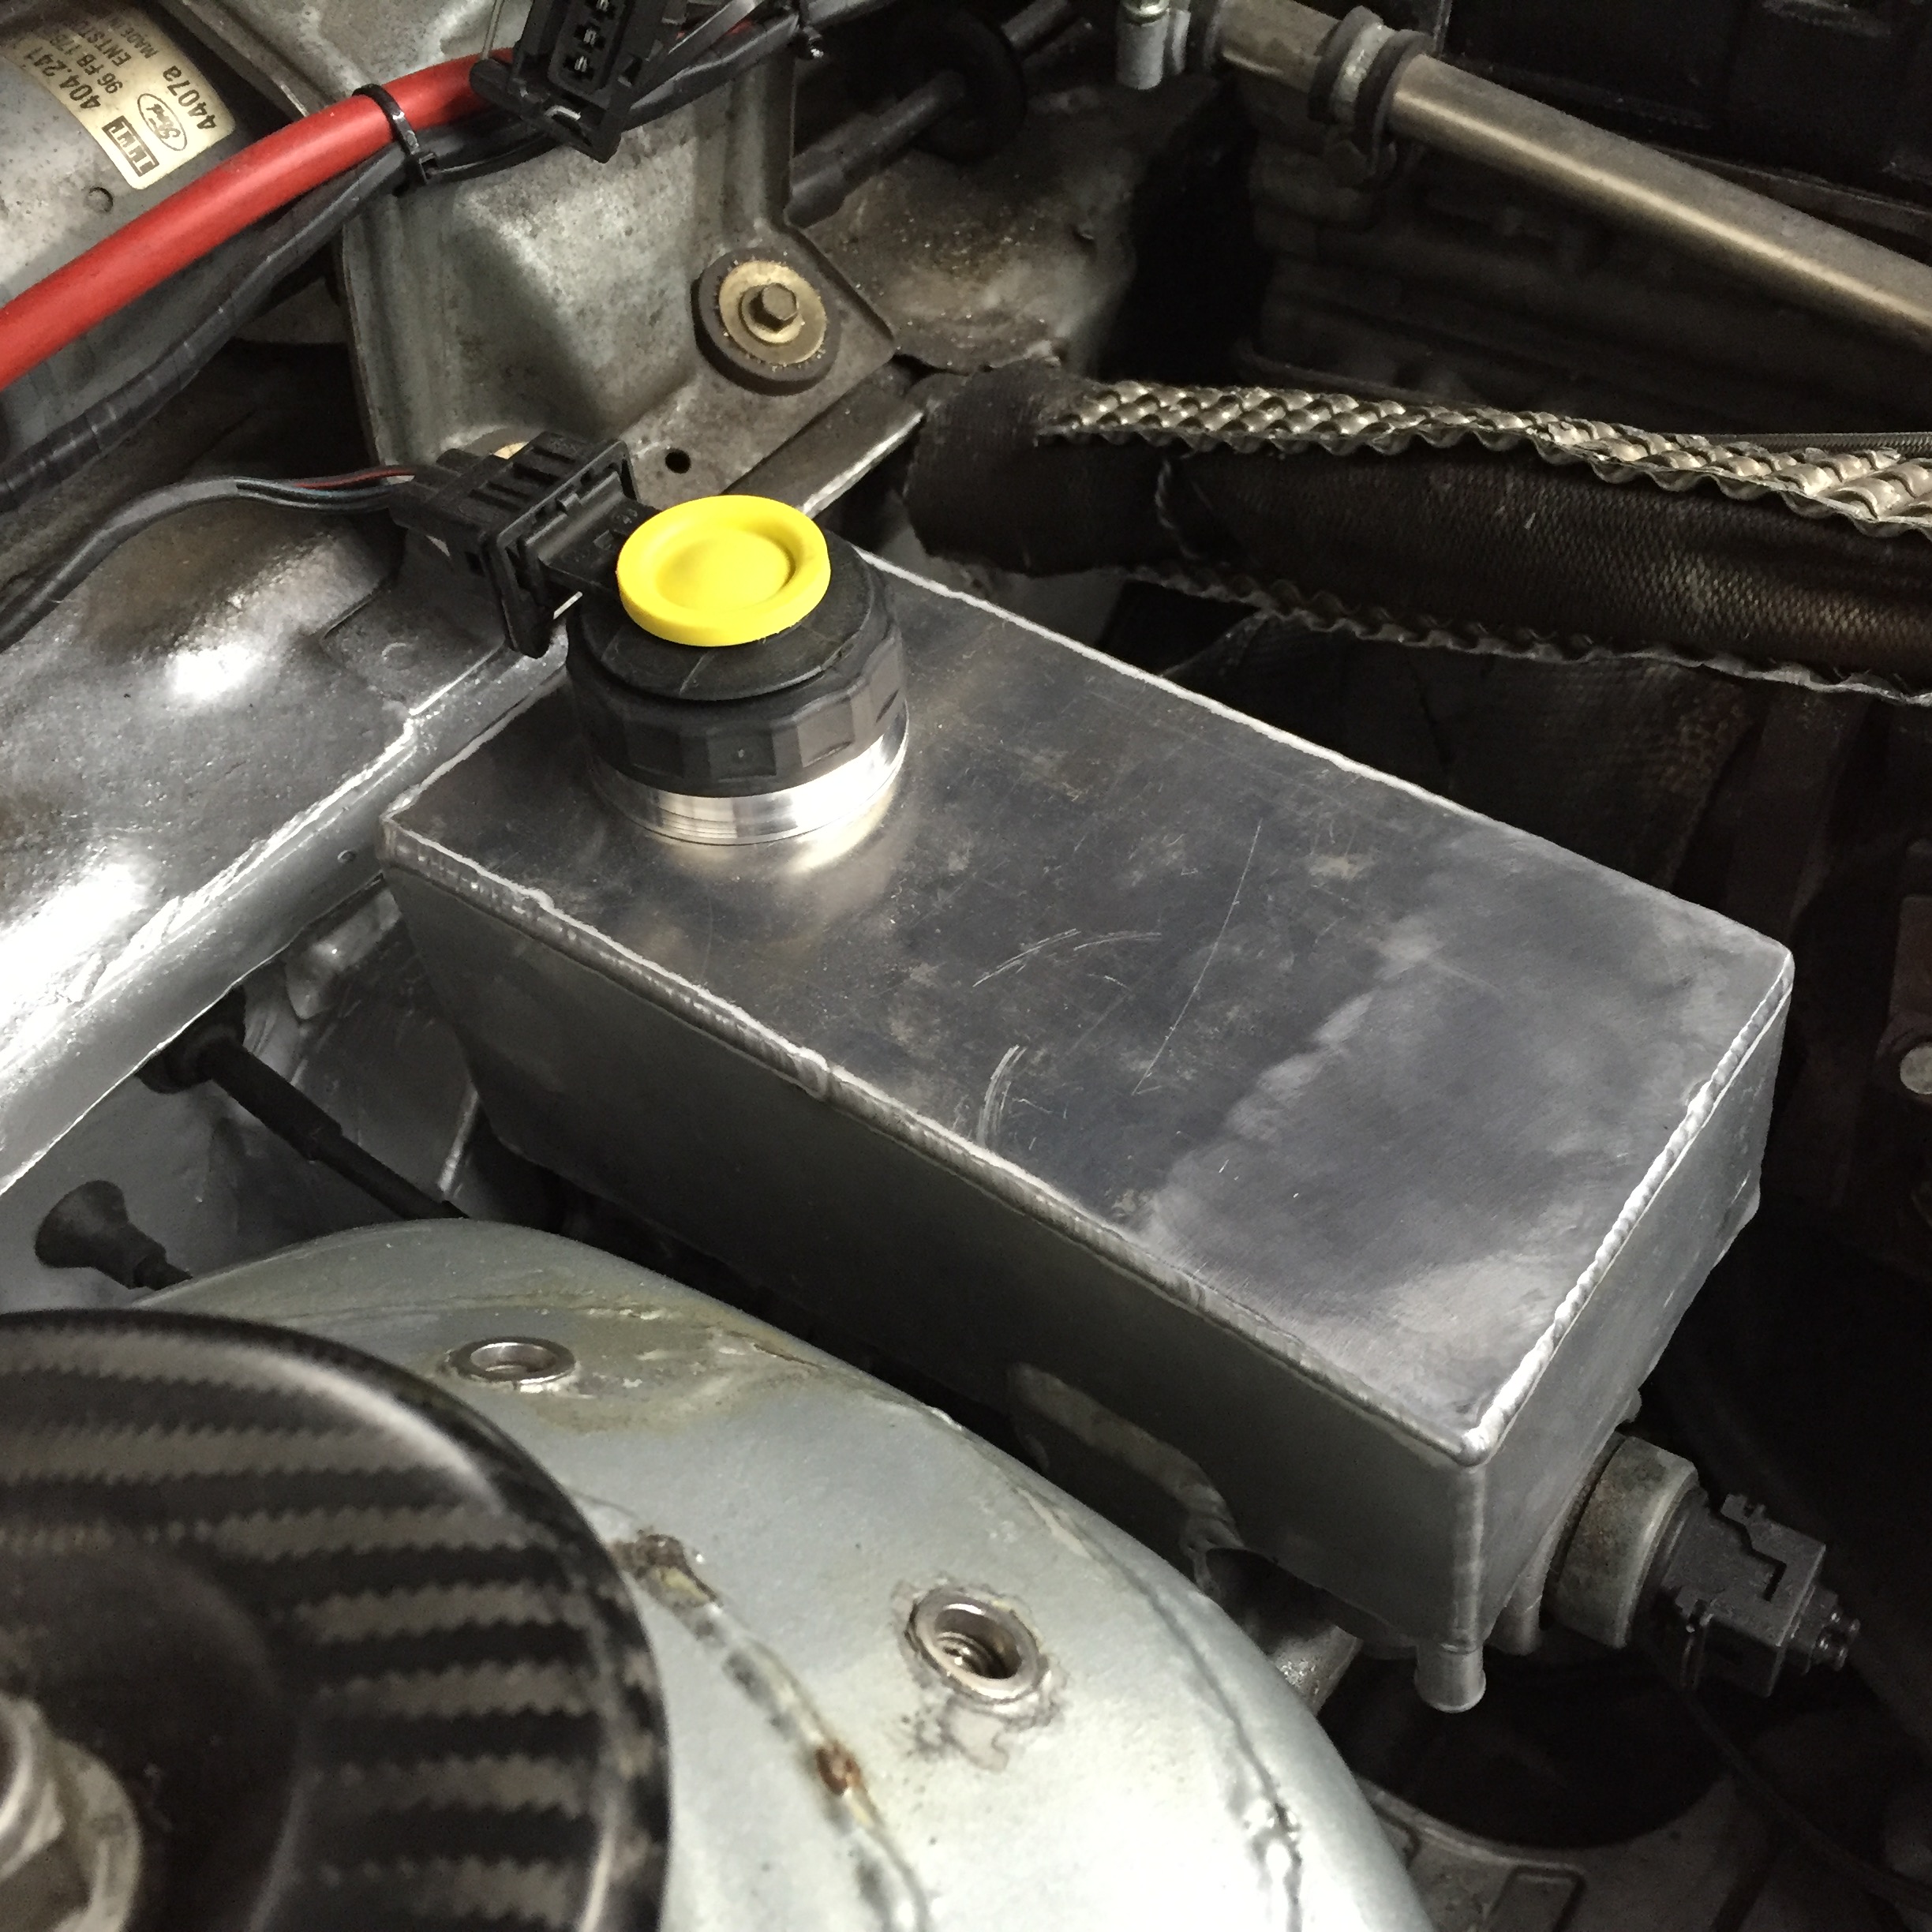
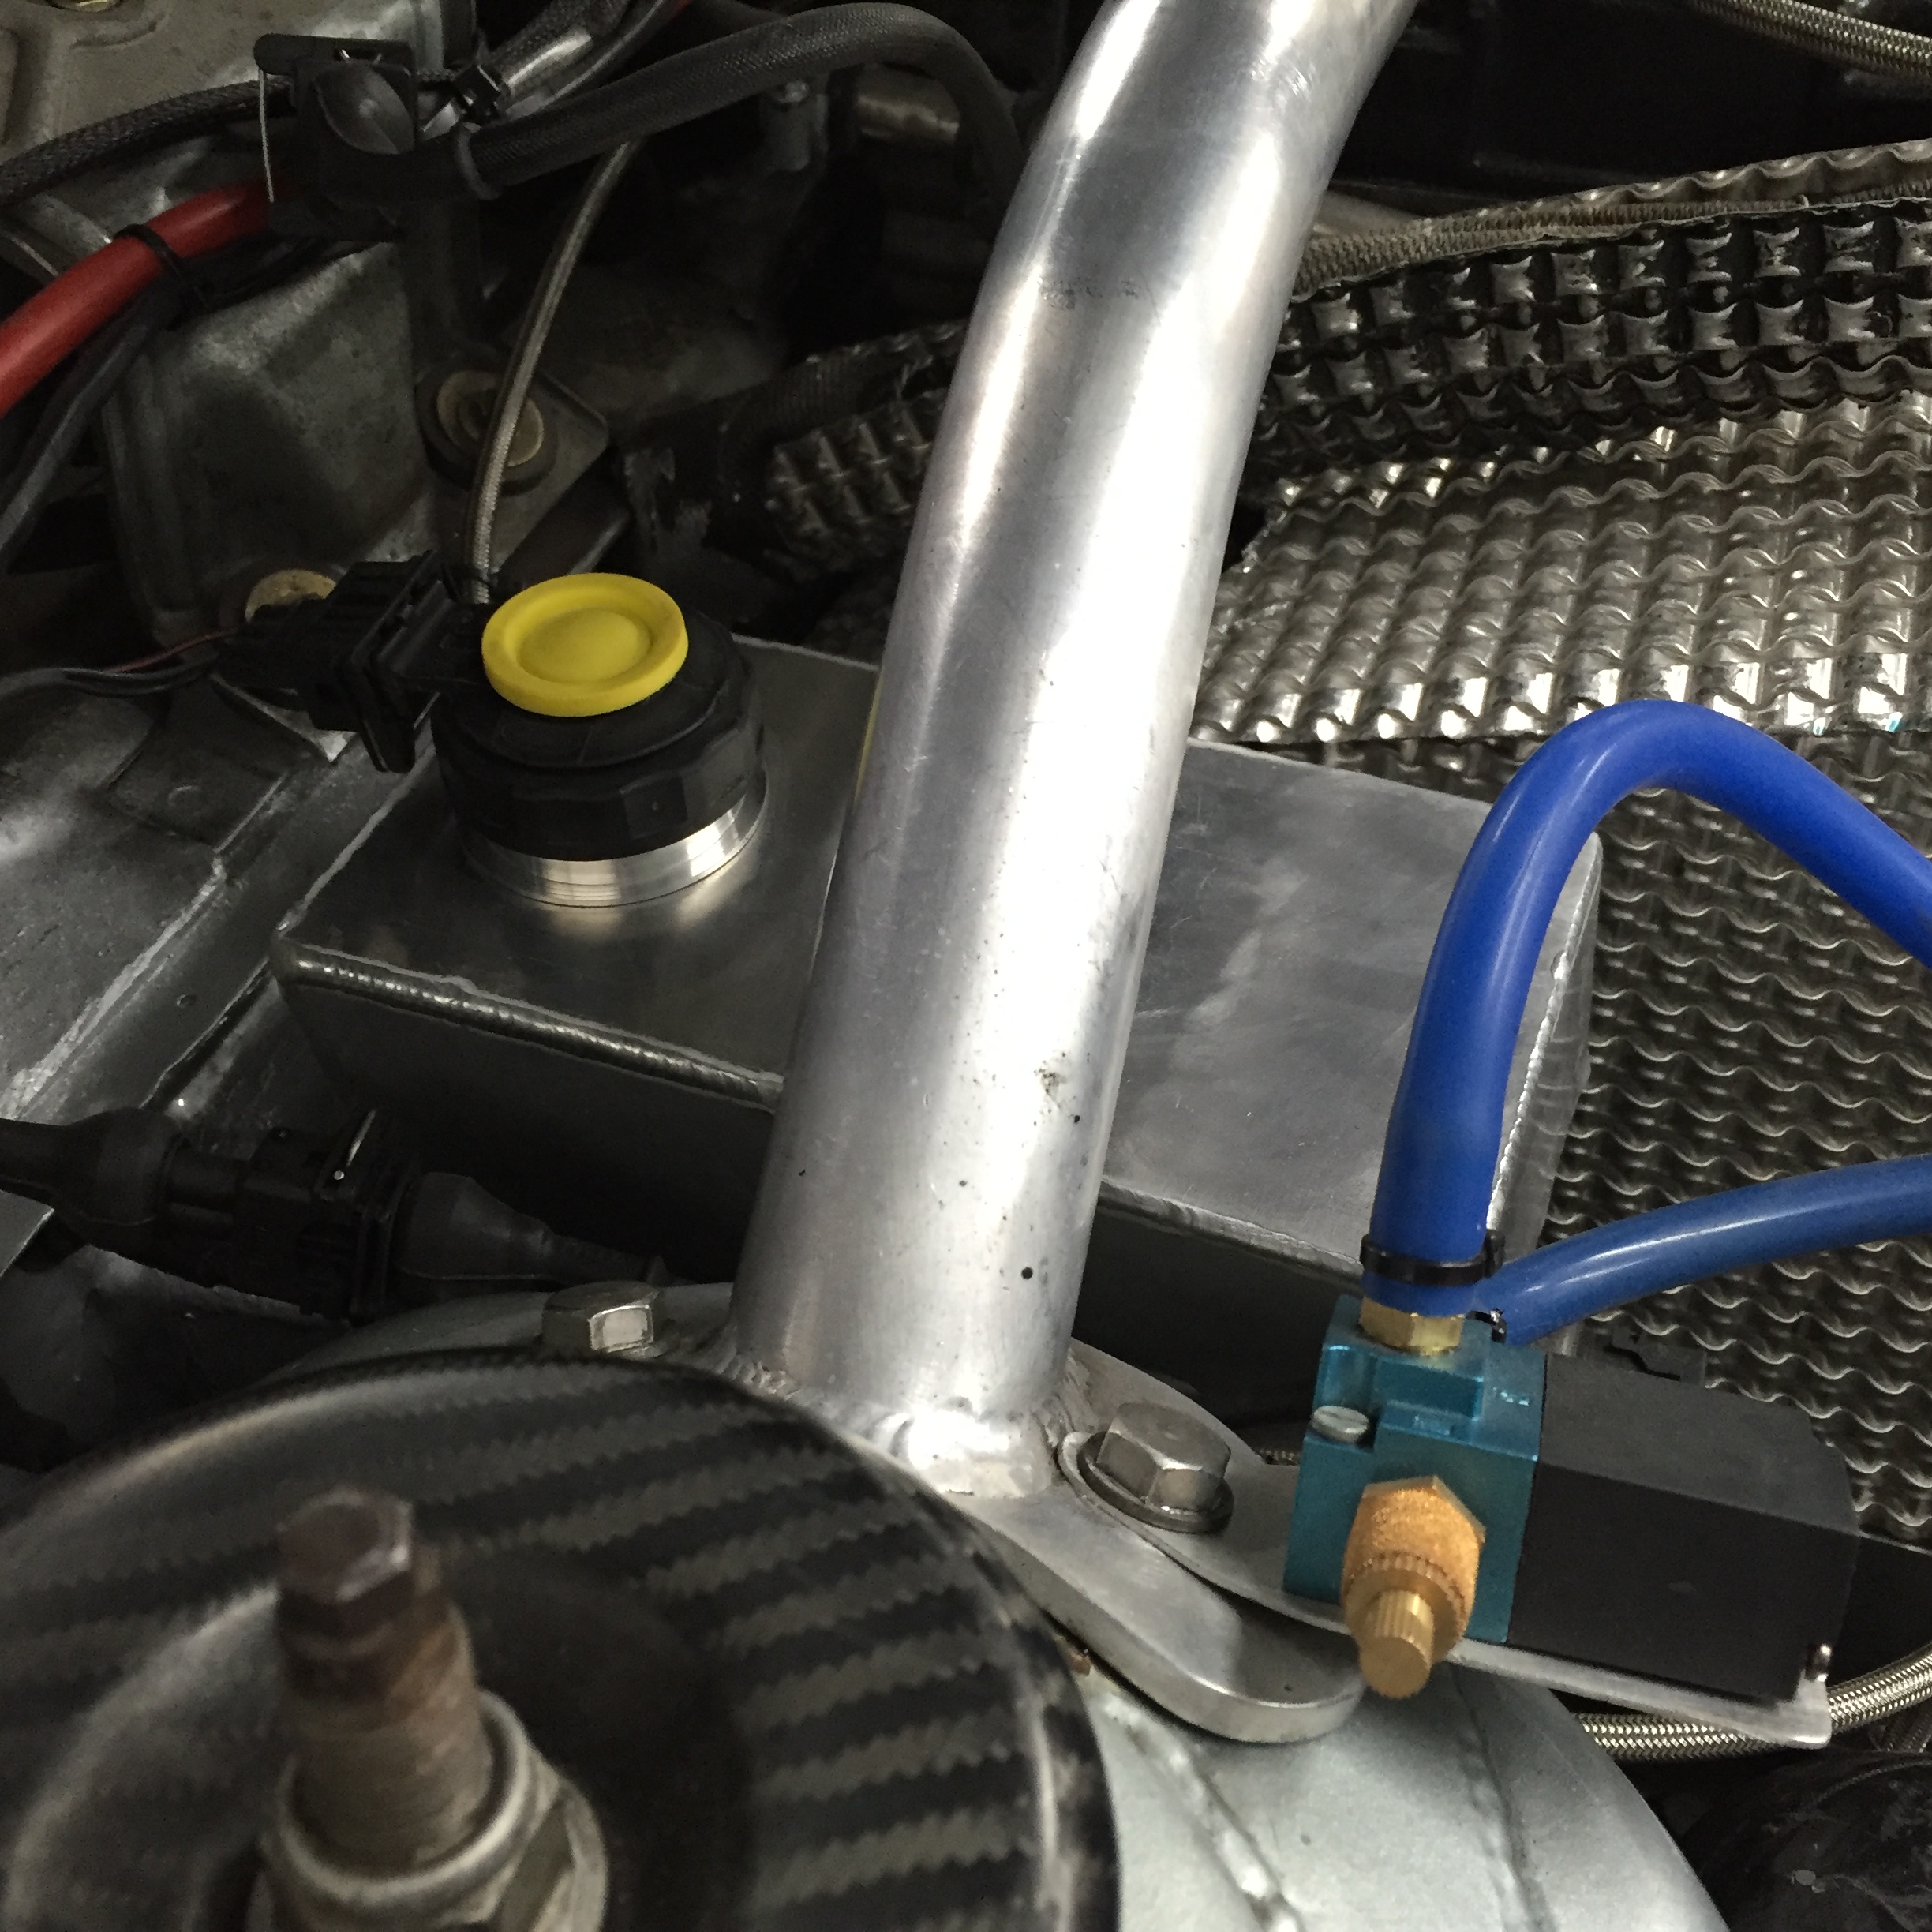
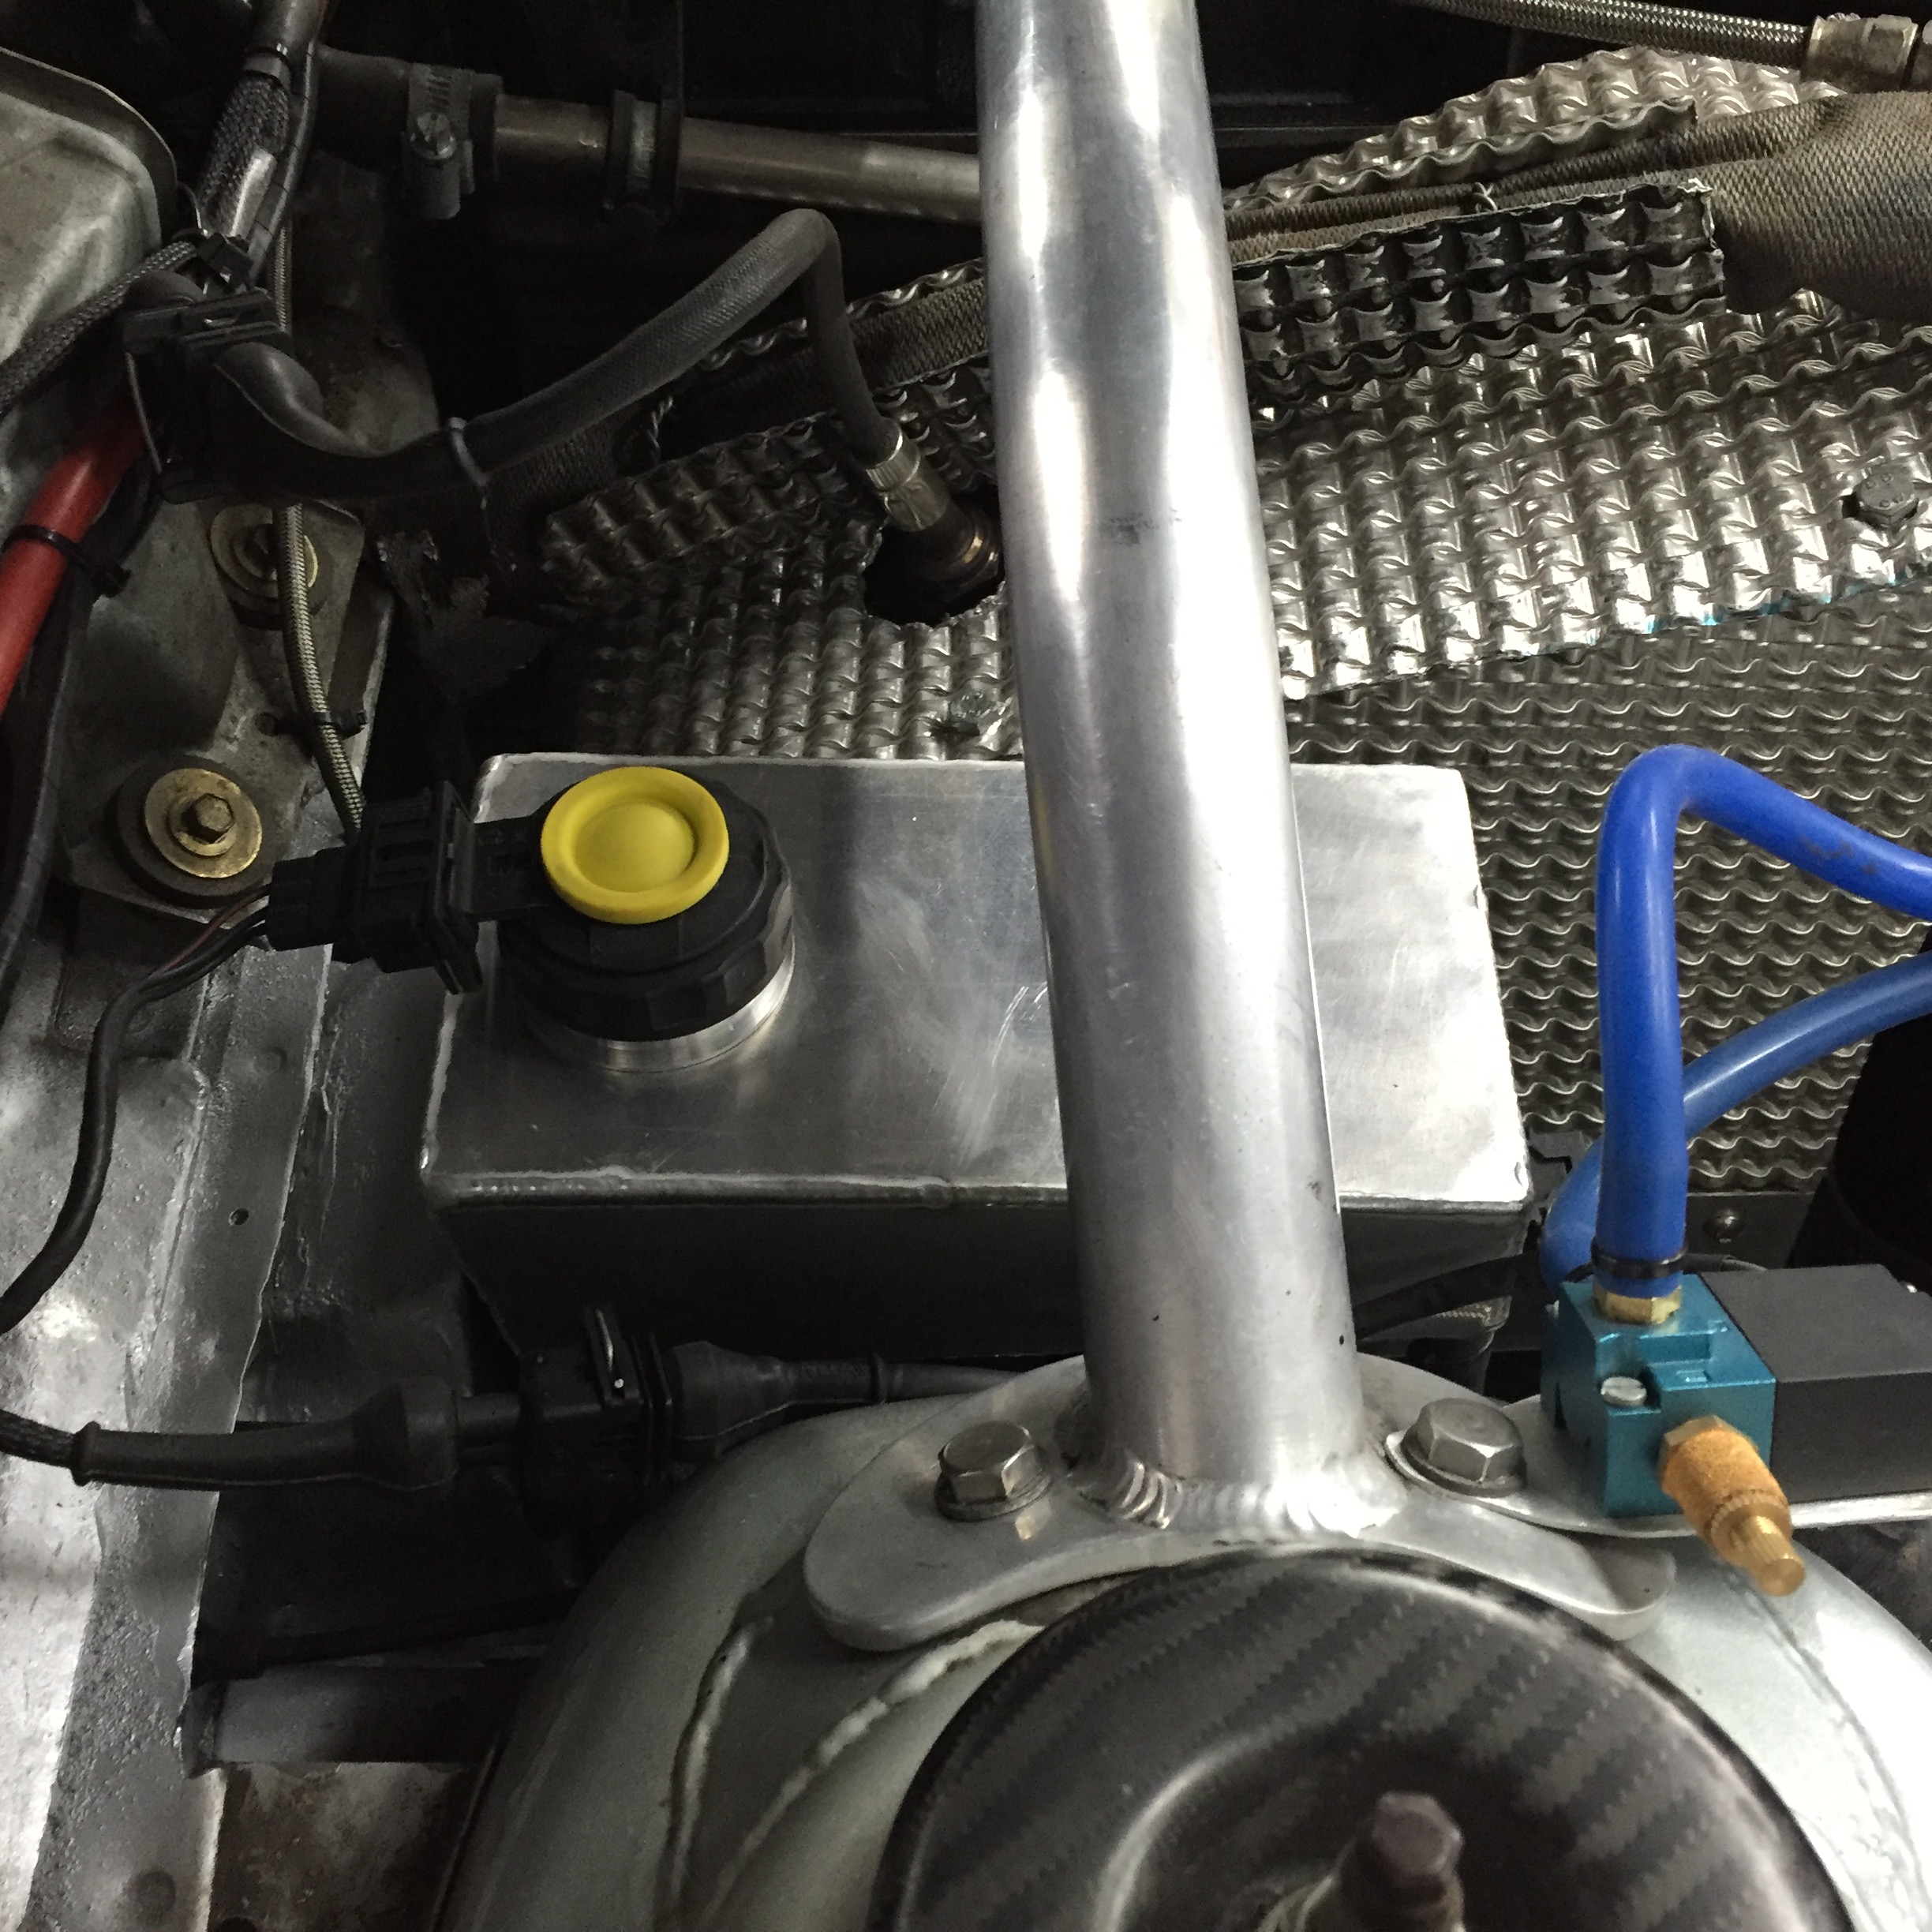
Then onto another small problem that's being annoying me for a while. The brake reservoir pot had in my opinion been made wrong in the beginning. It didn't have a flat top to it and actually angled back down to the bulkhead, it was fitted with a screw cap normally associated with a power steering bottle. This meant that the brake fluid level sensor had then been bodged into the top.
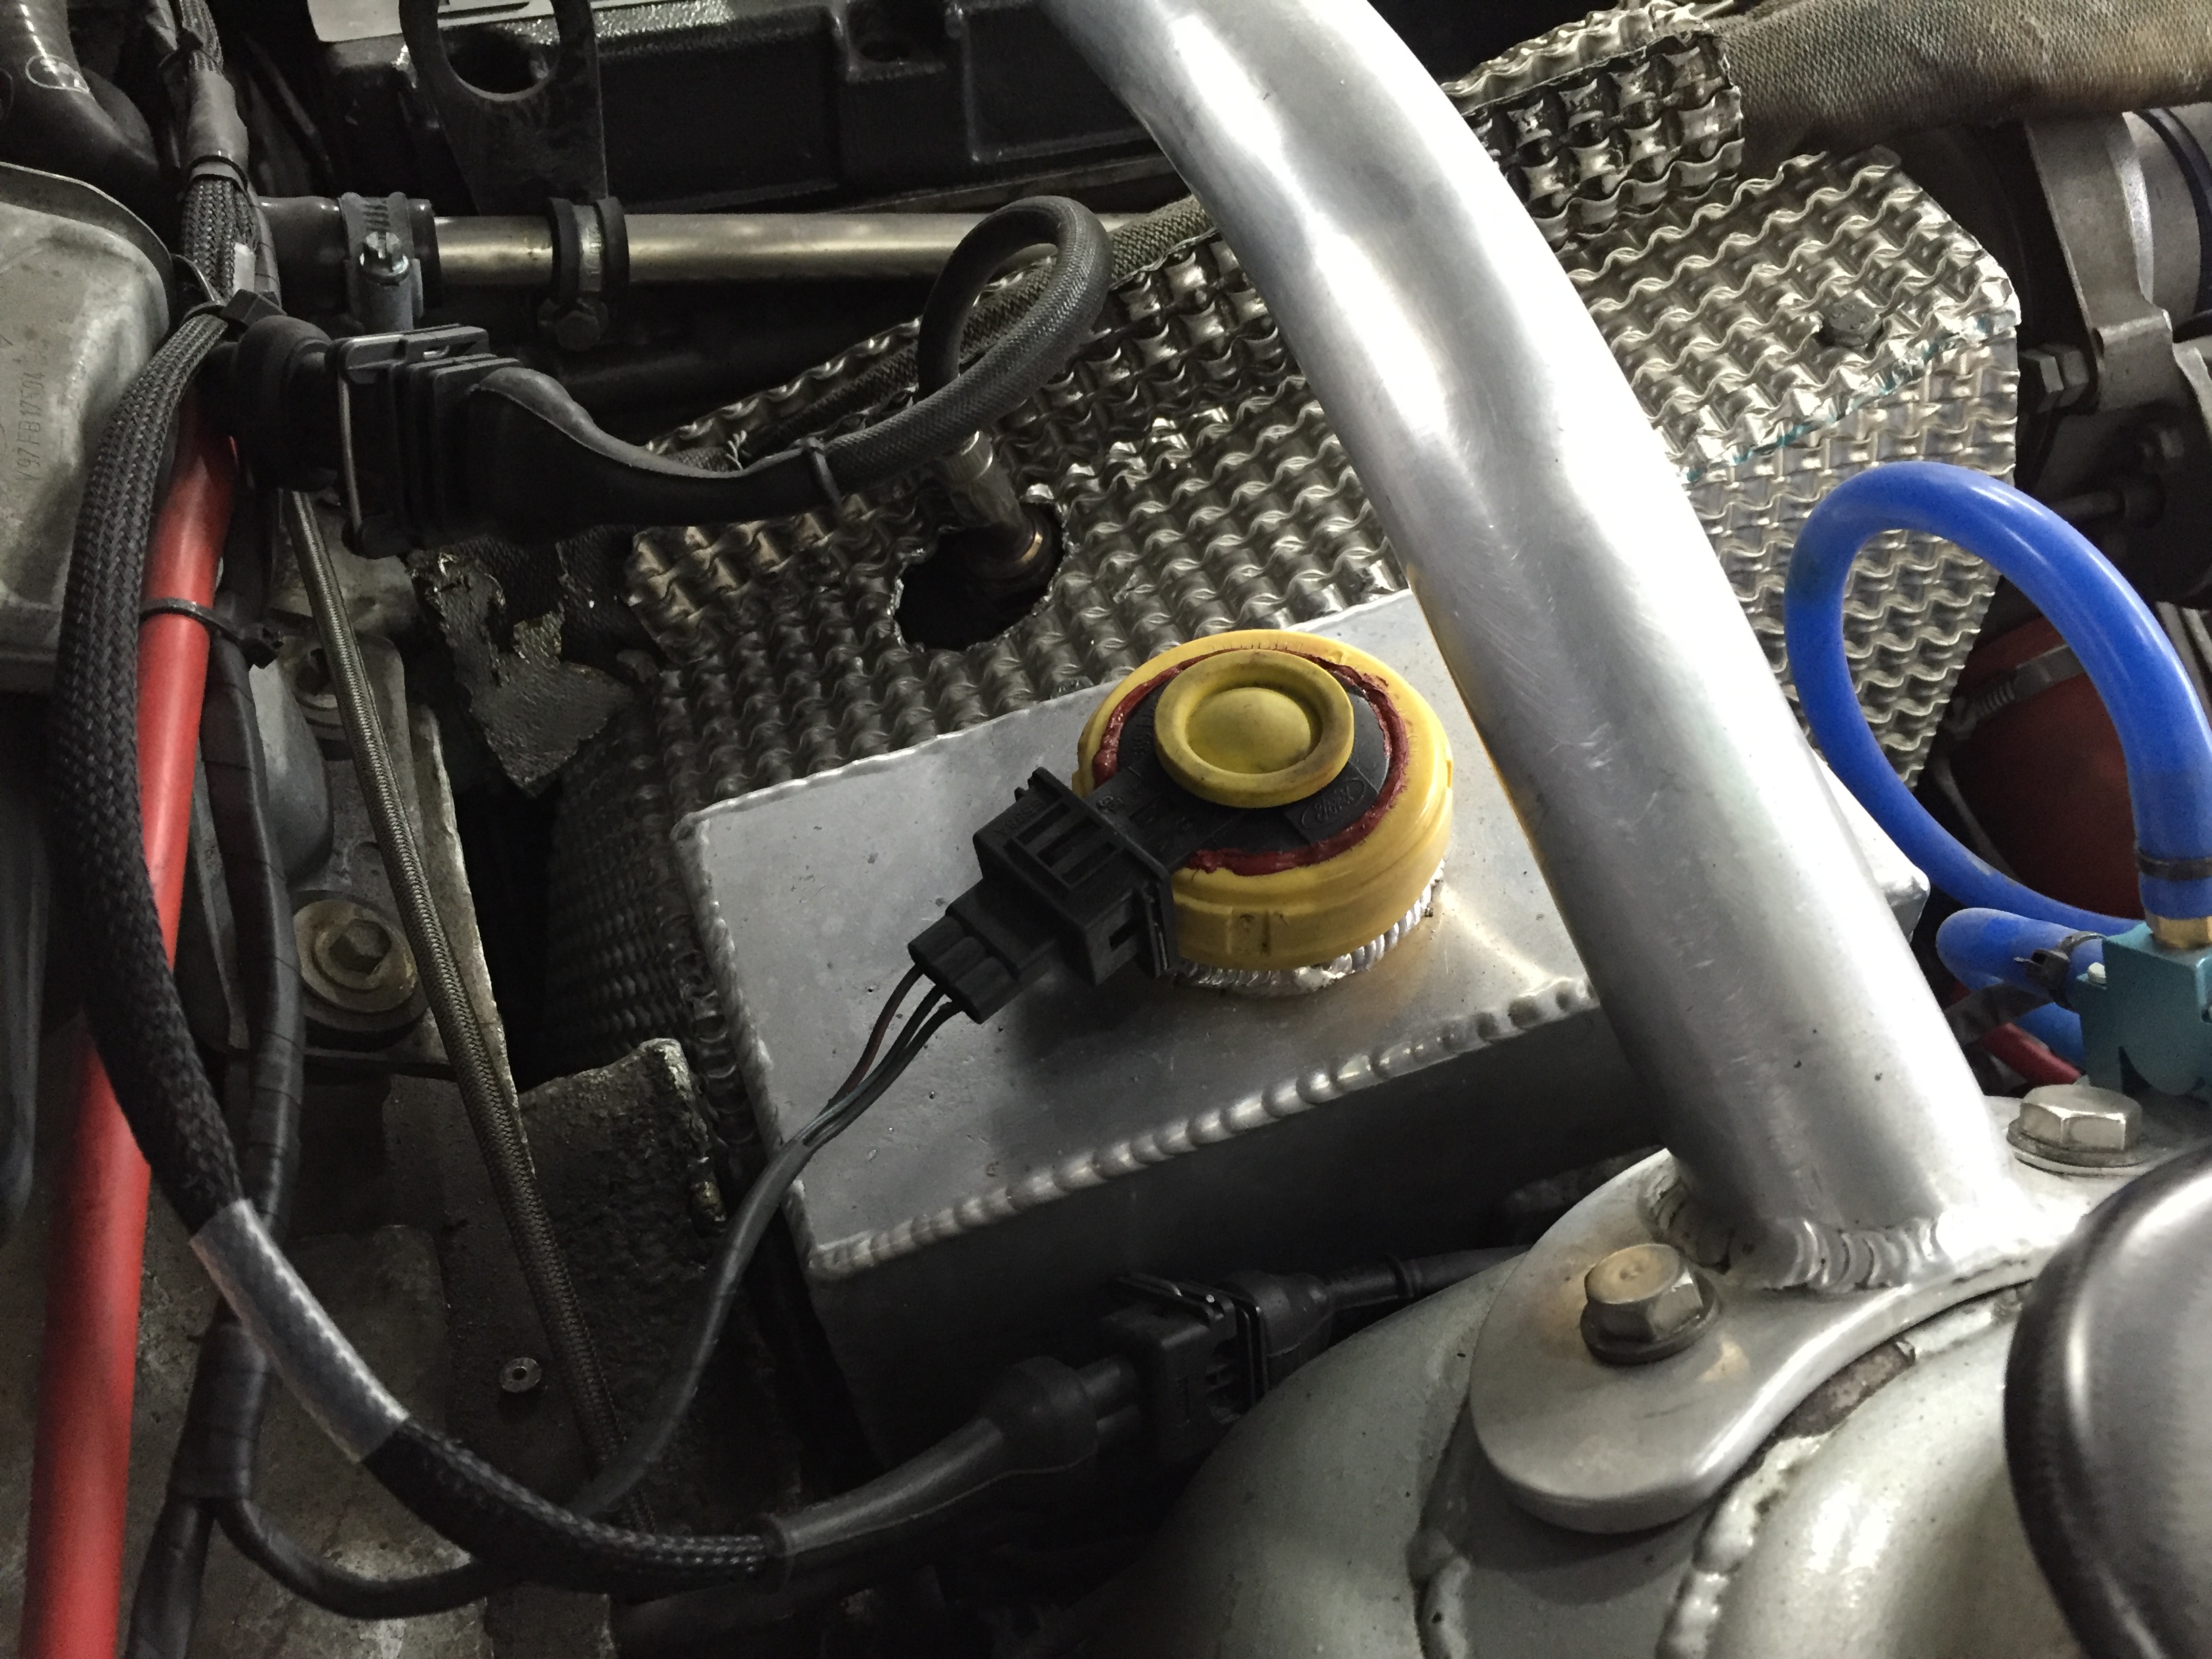
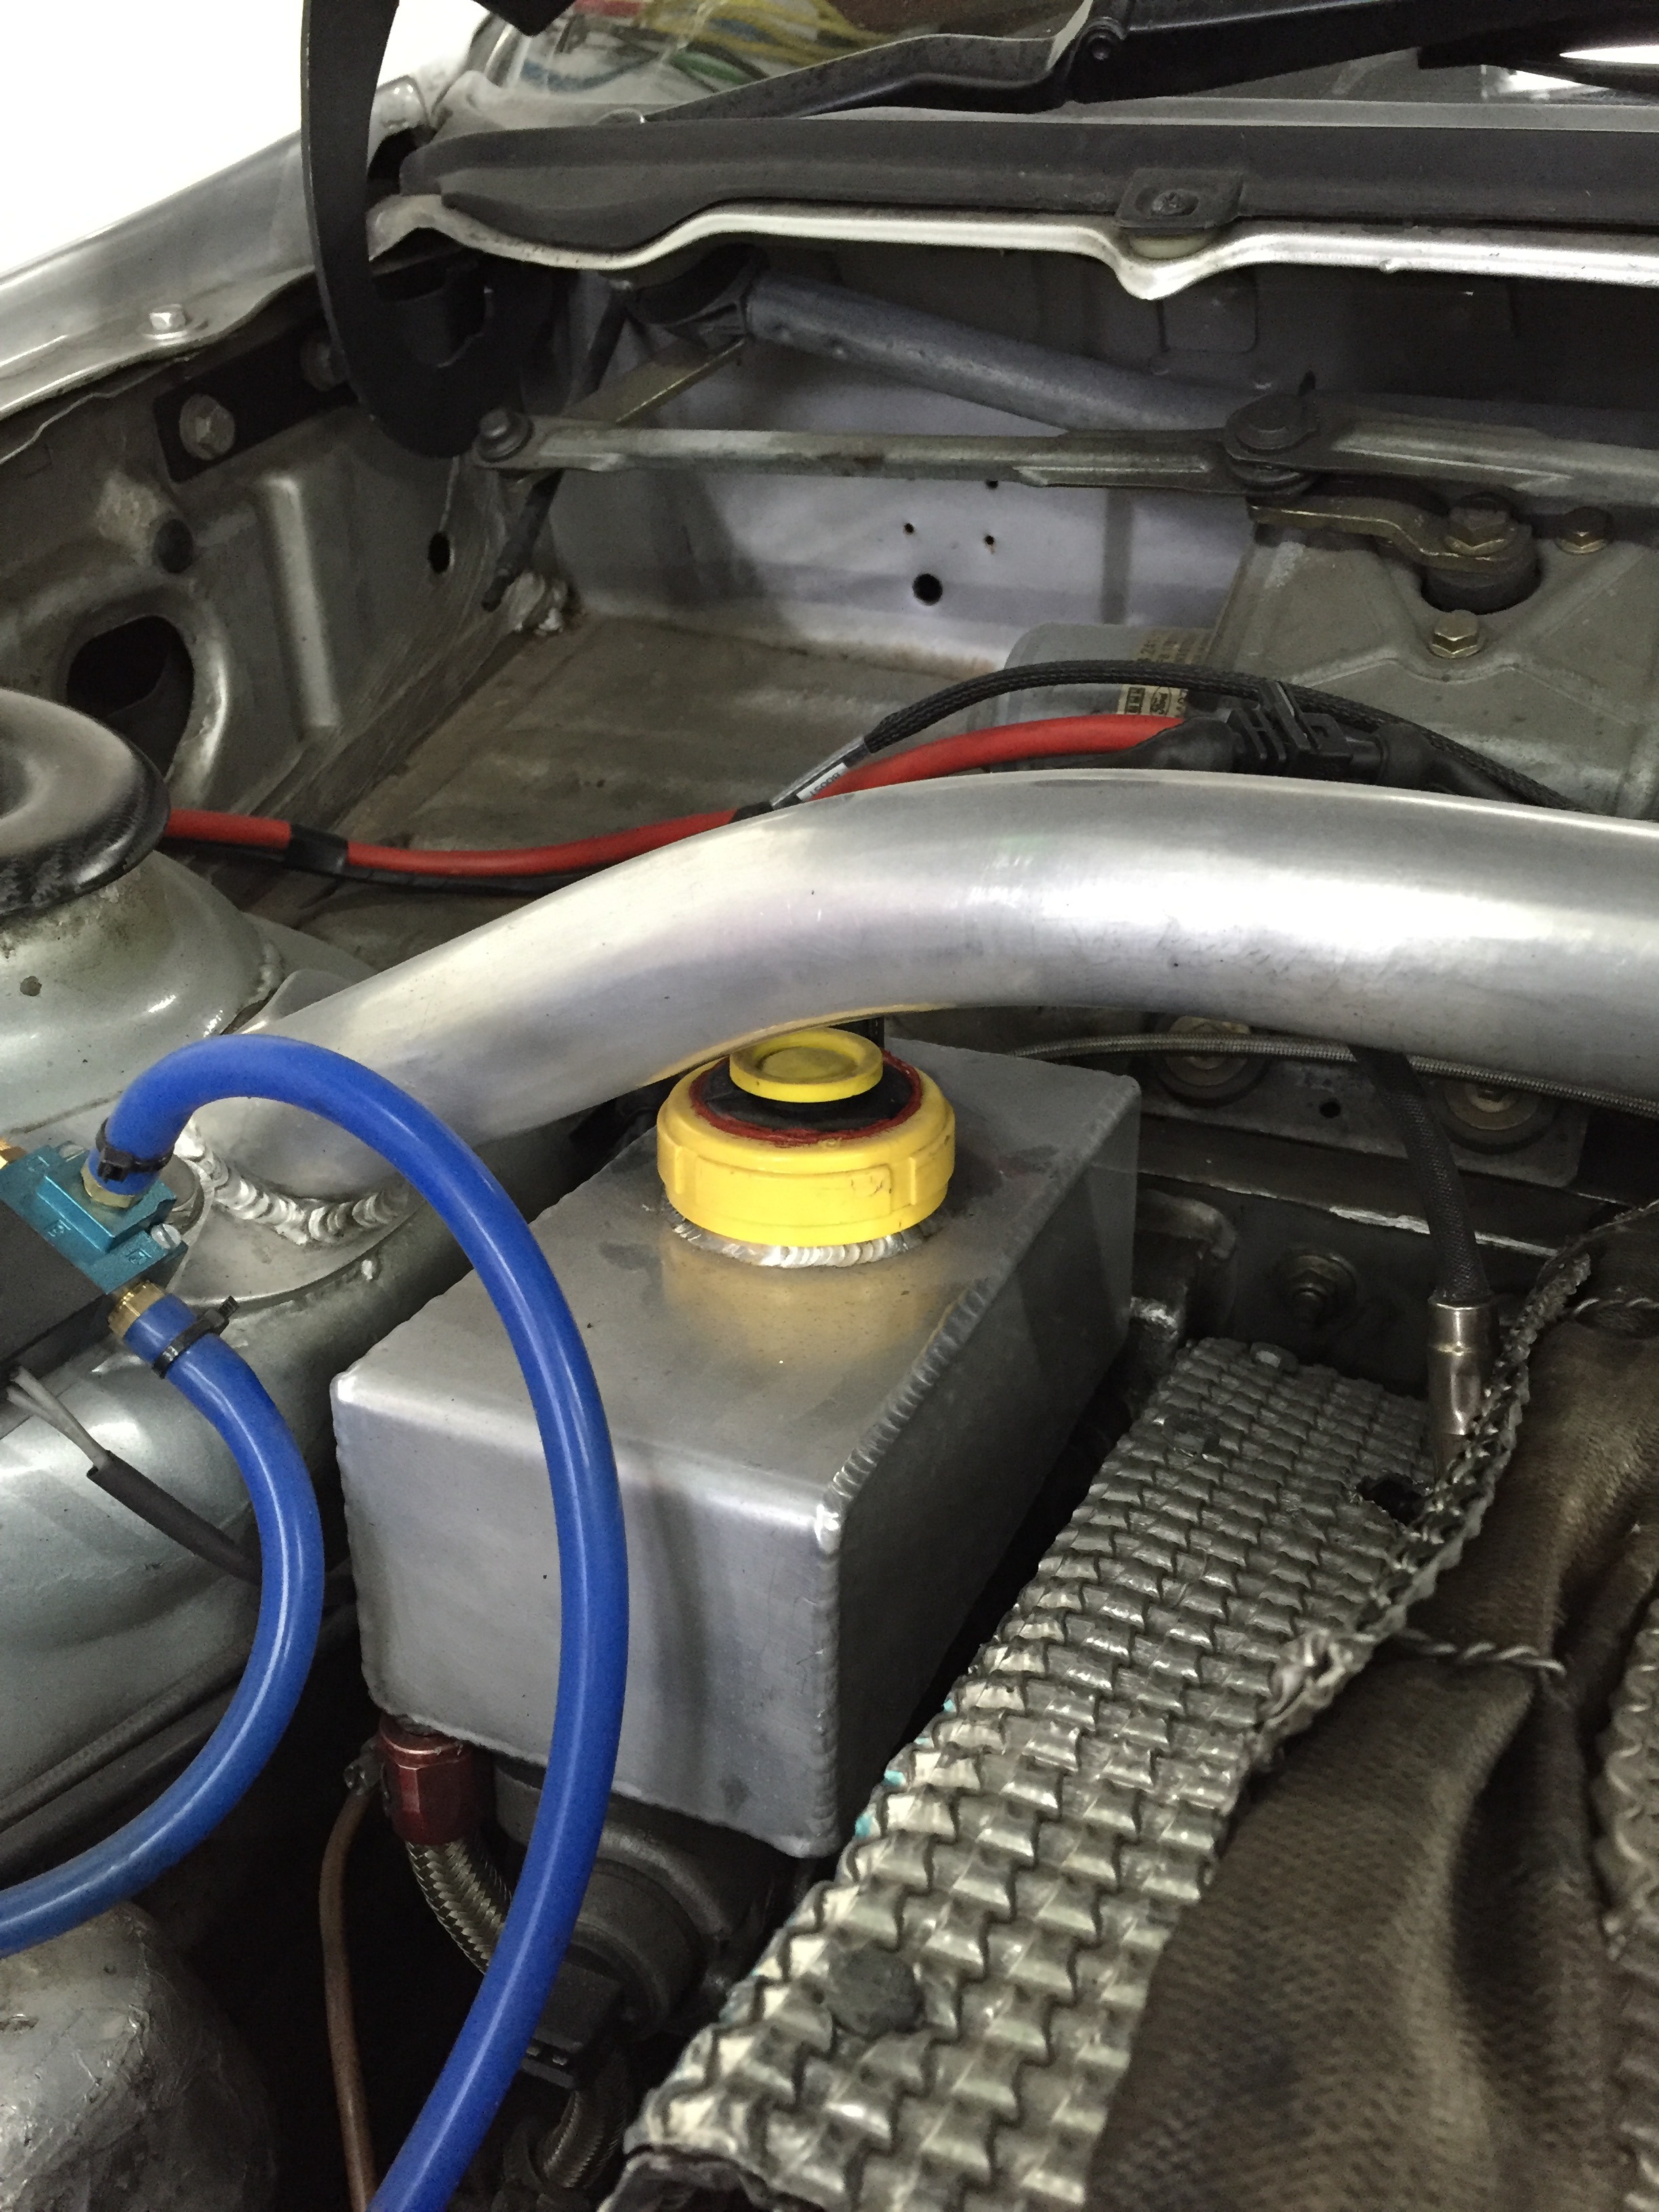
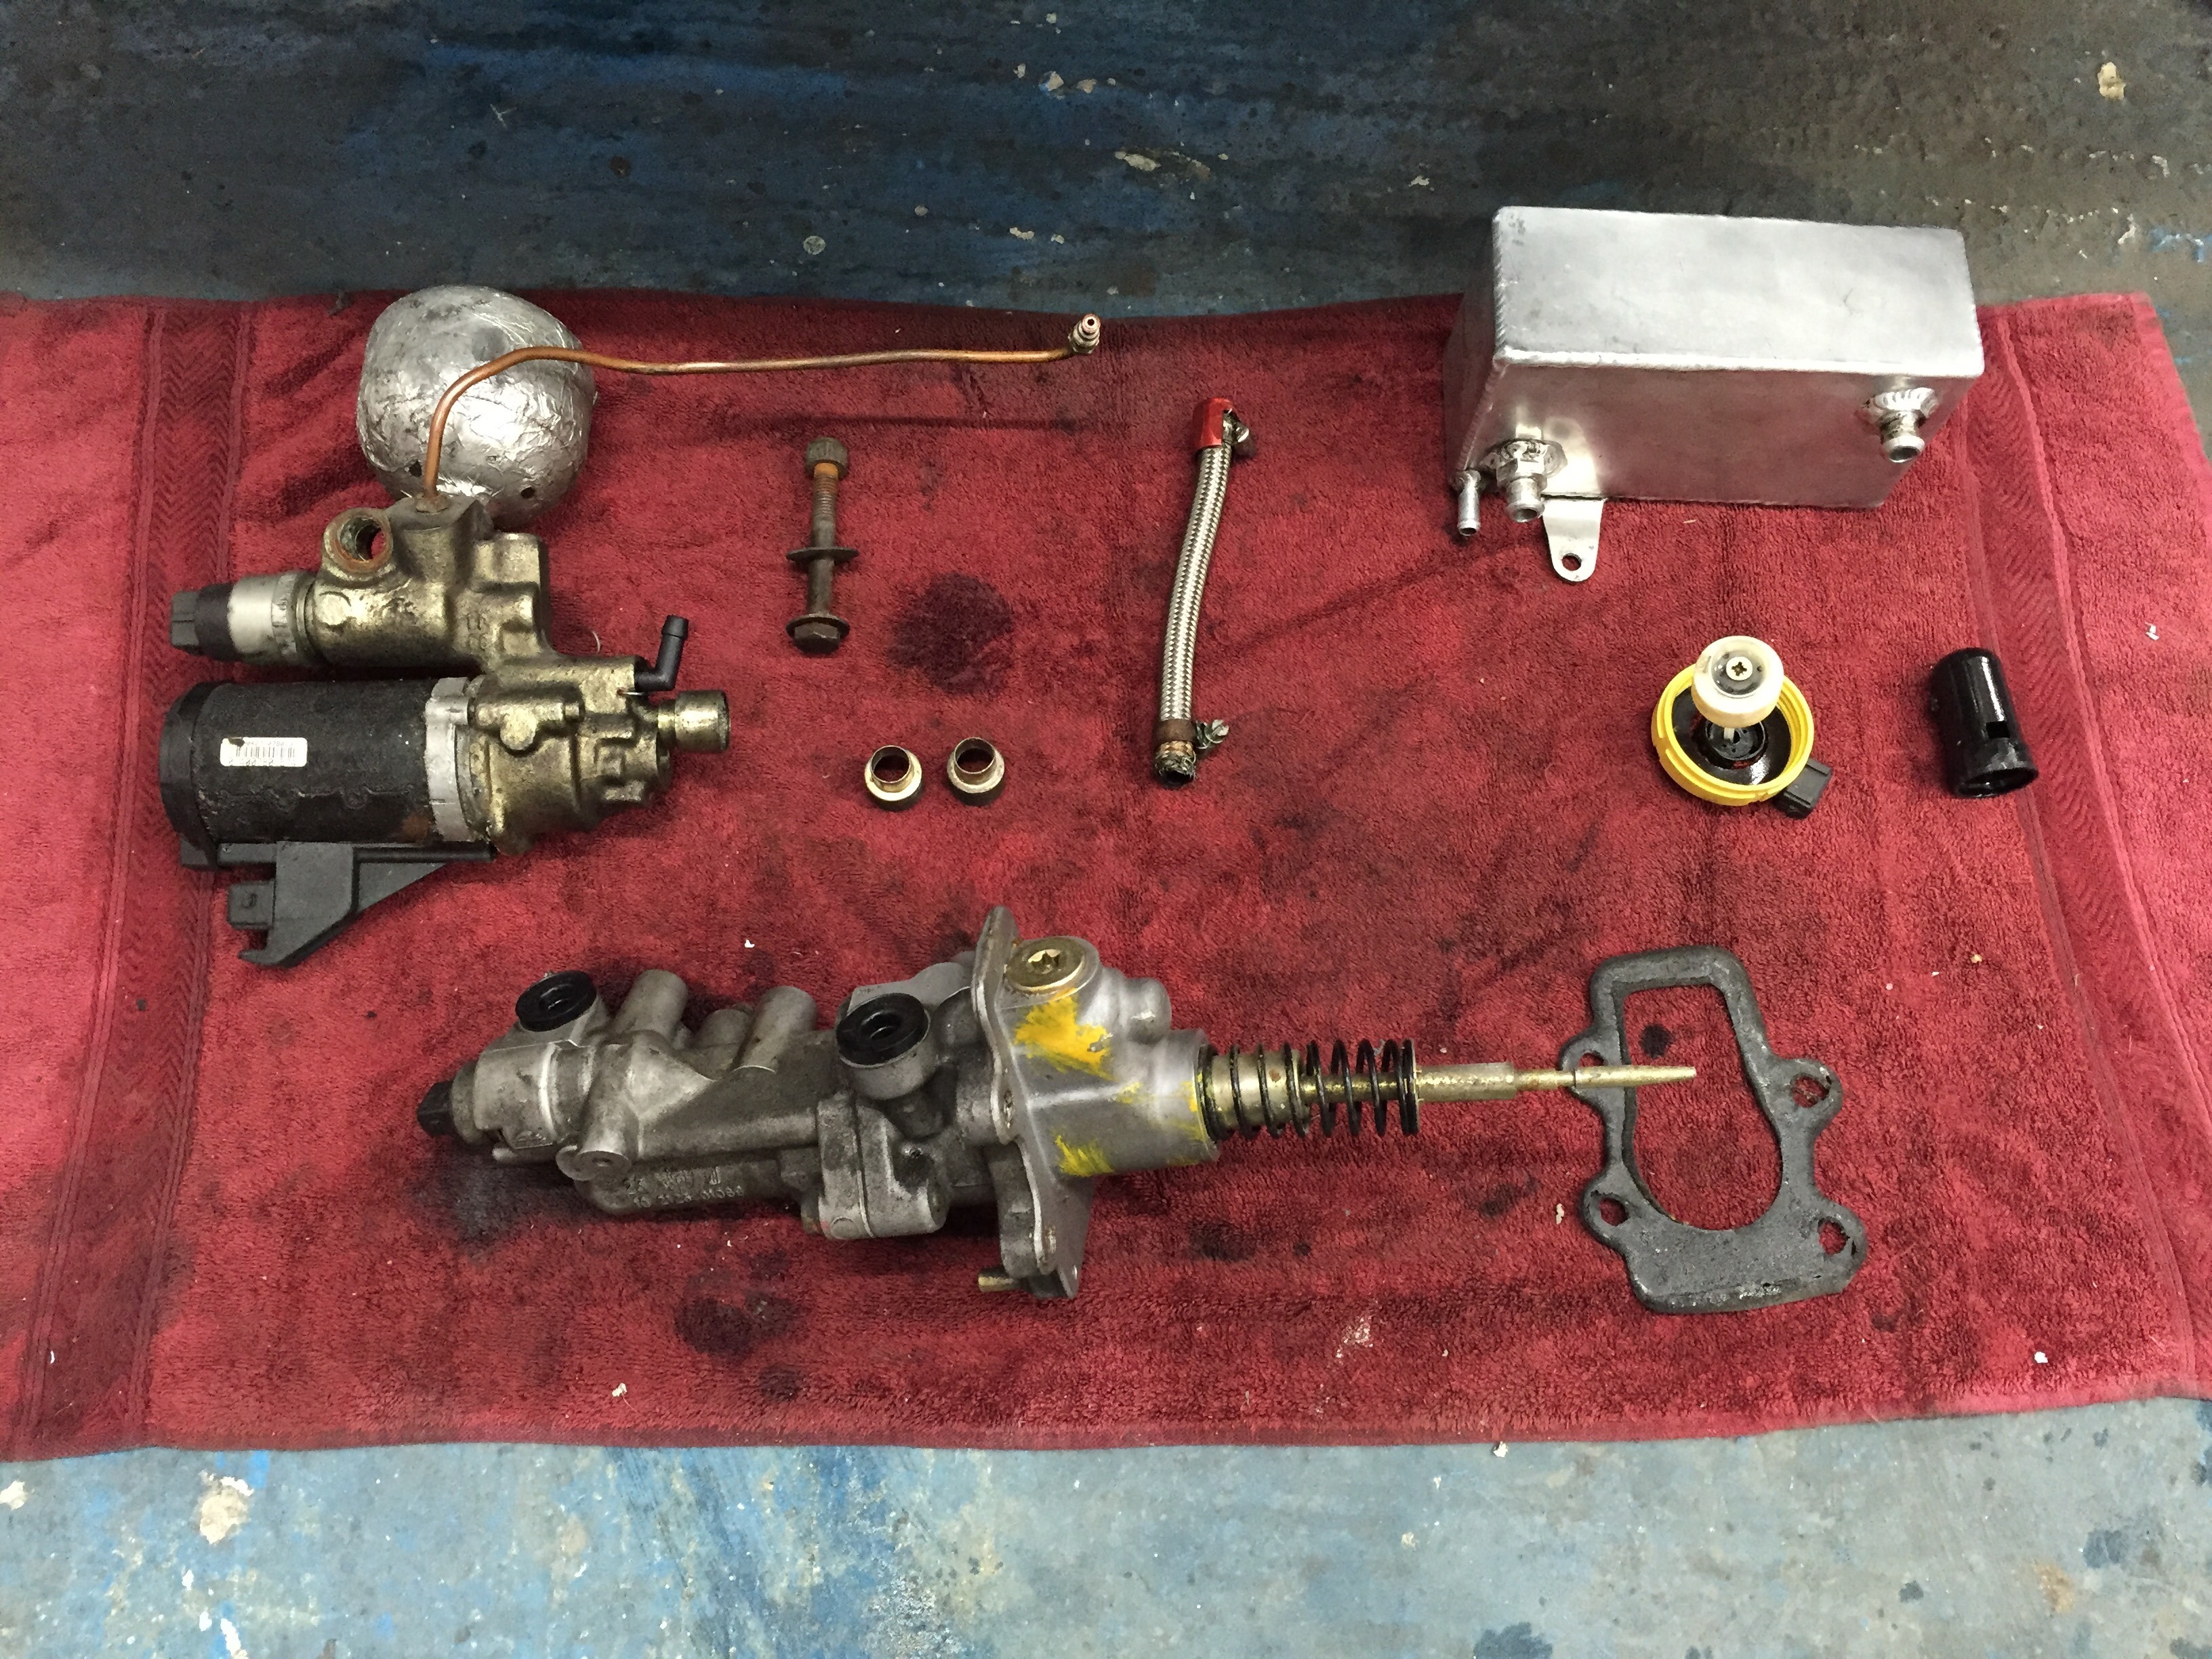
So with a little thought I came up with a better solution.
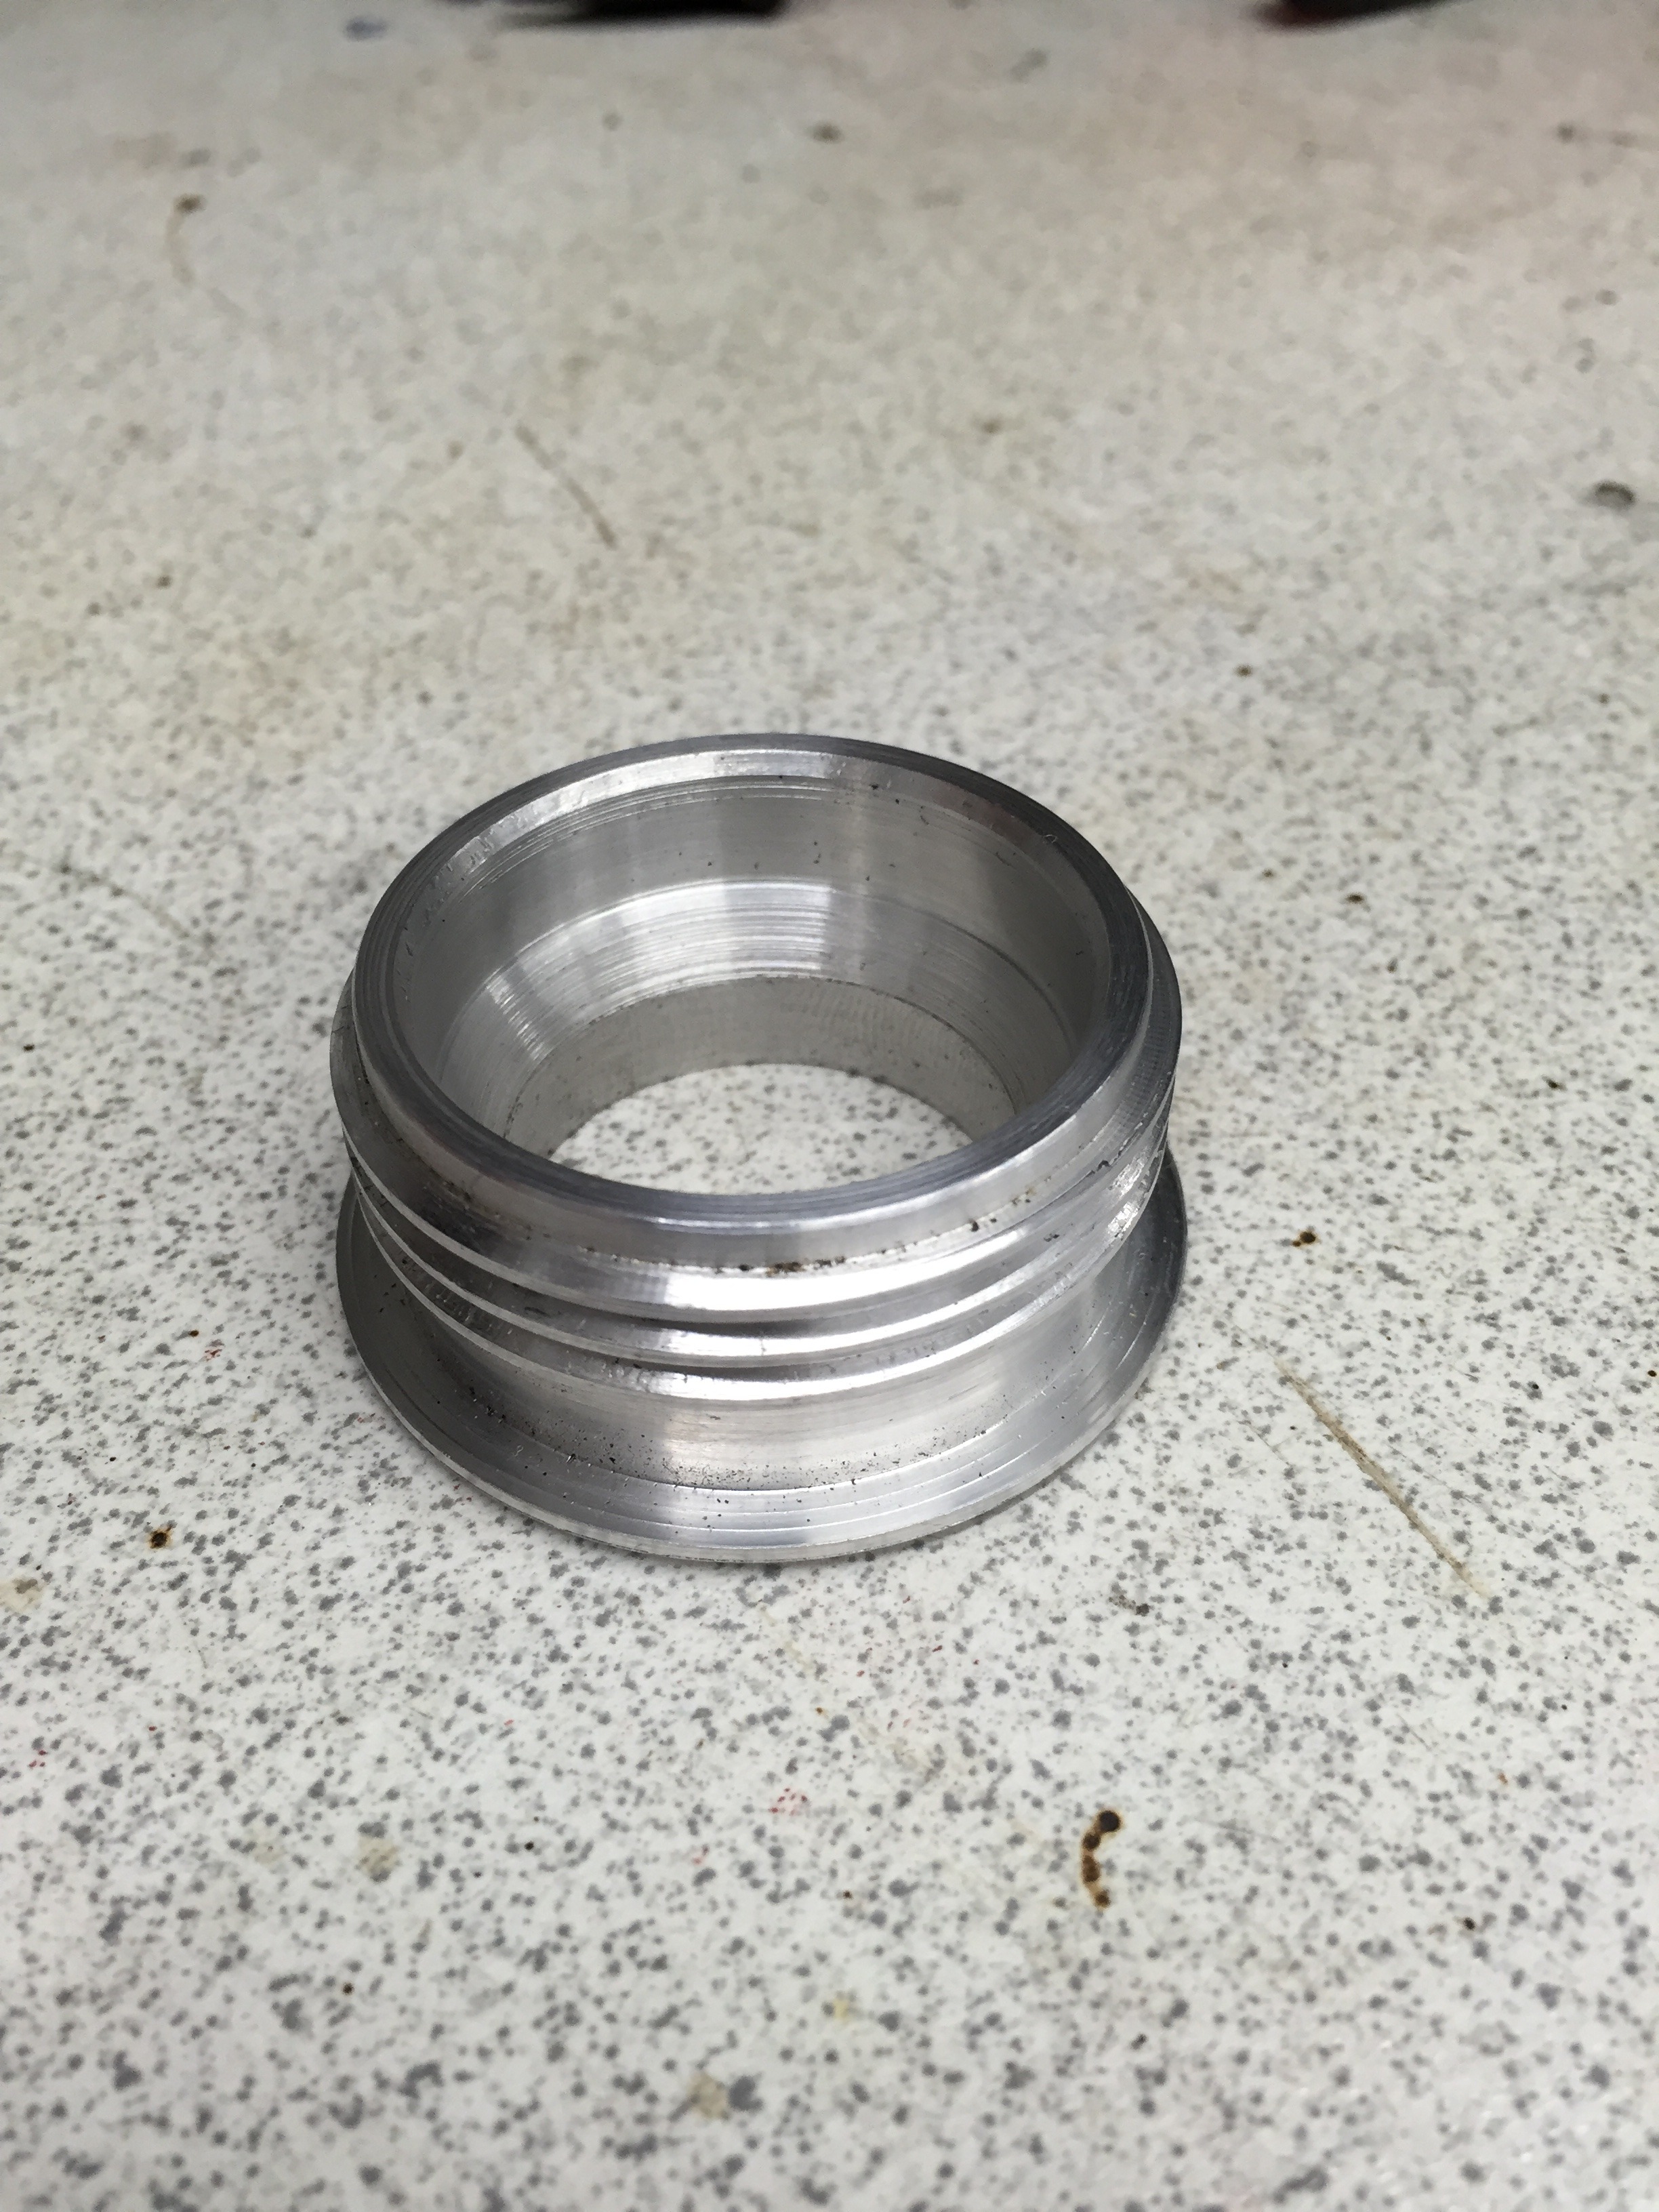
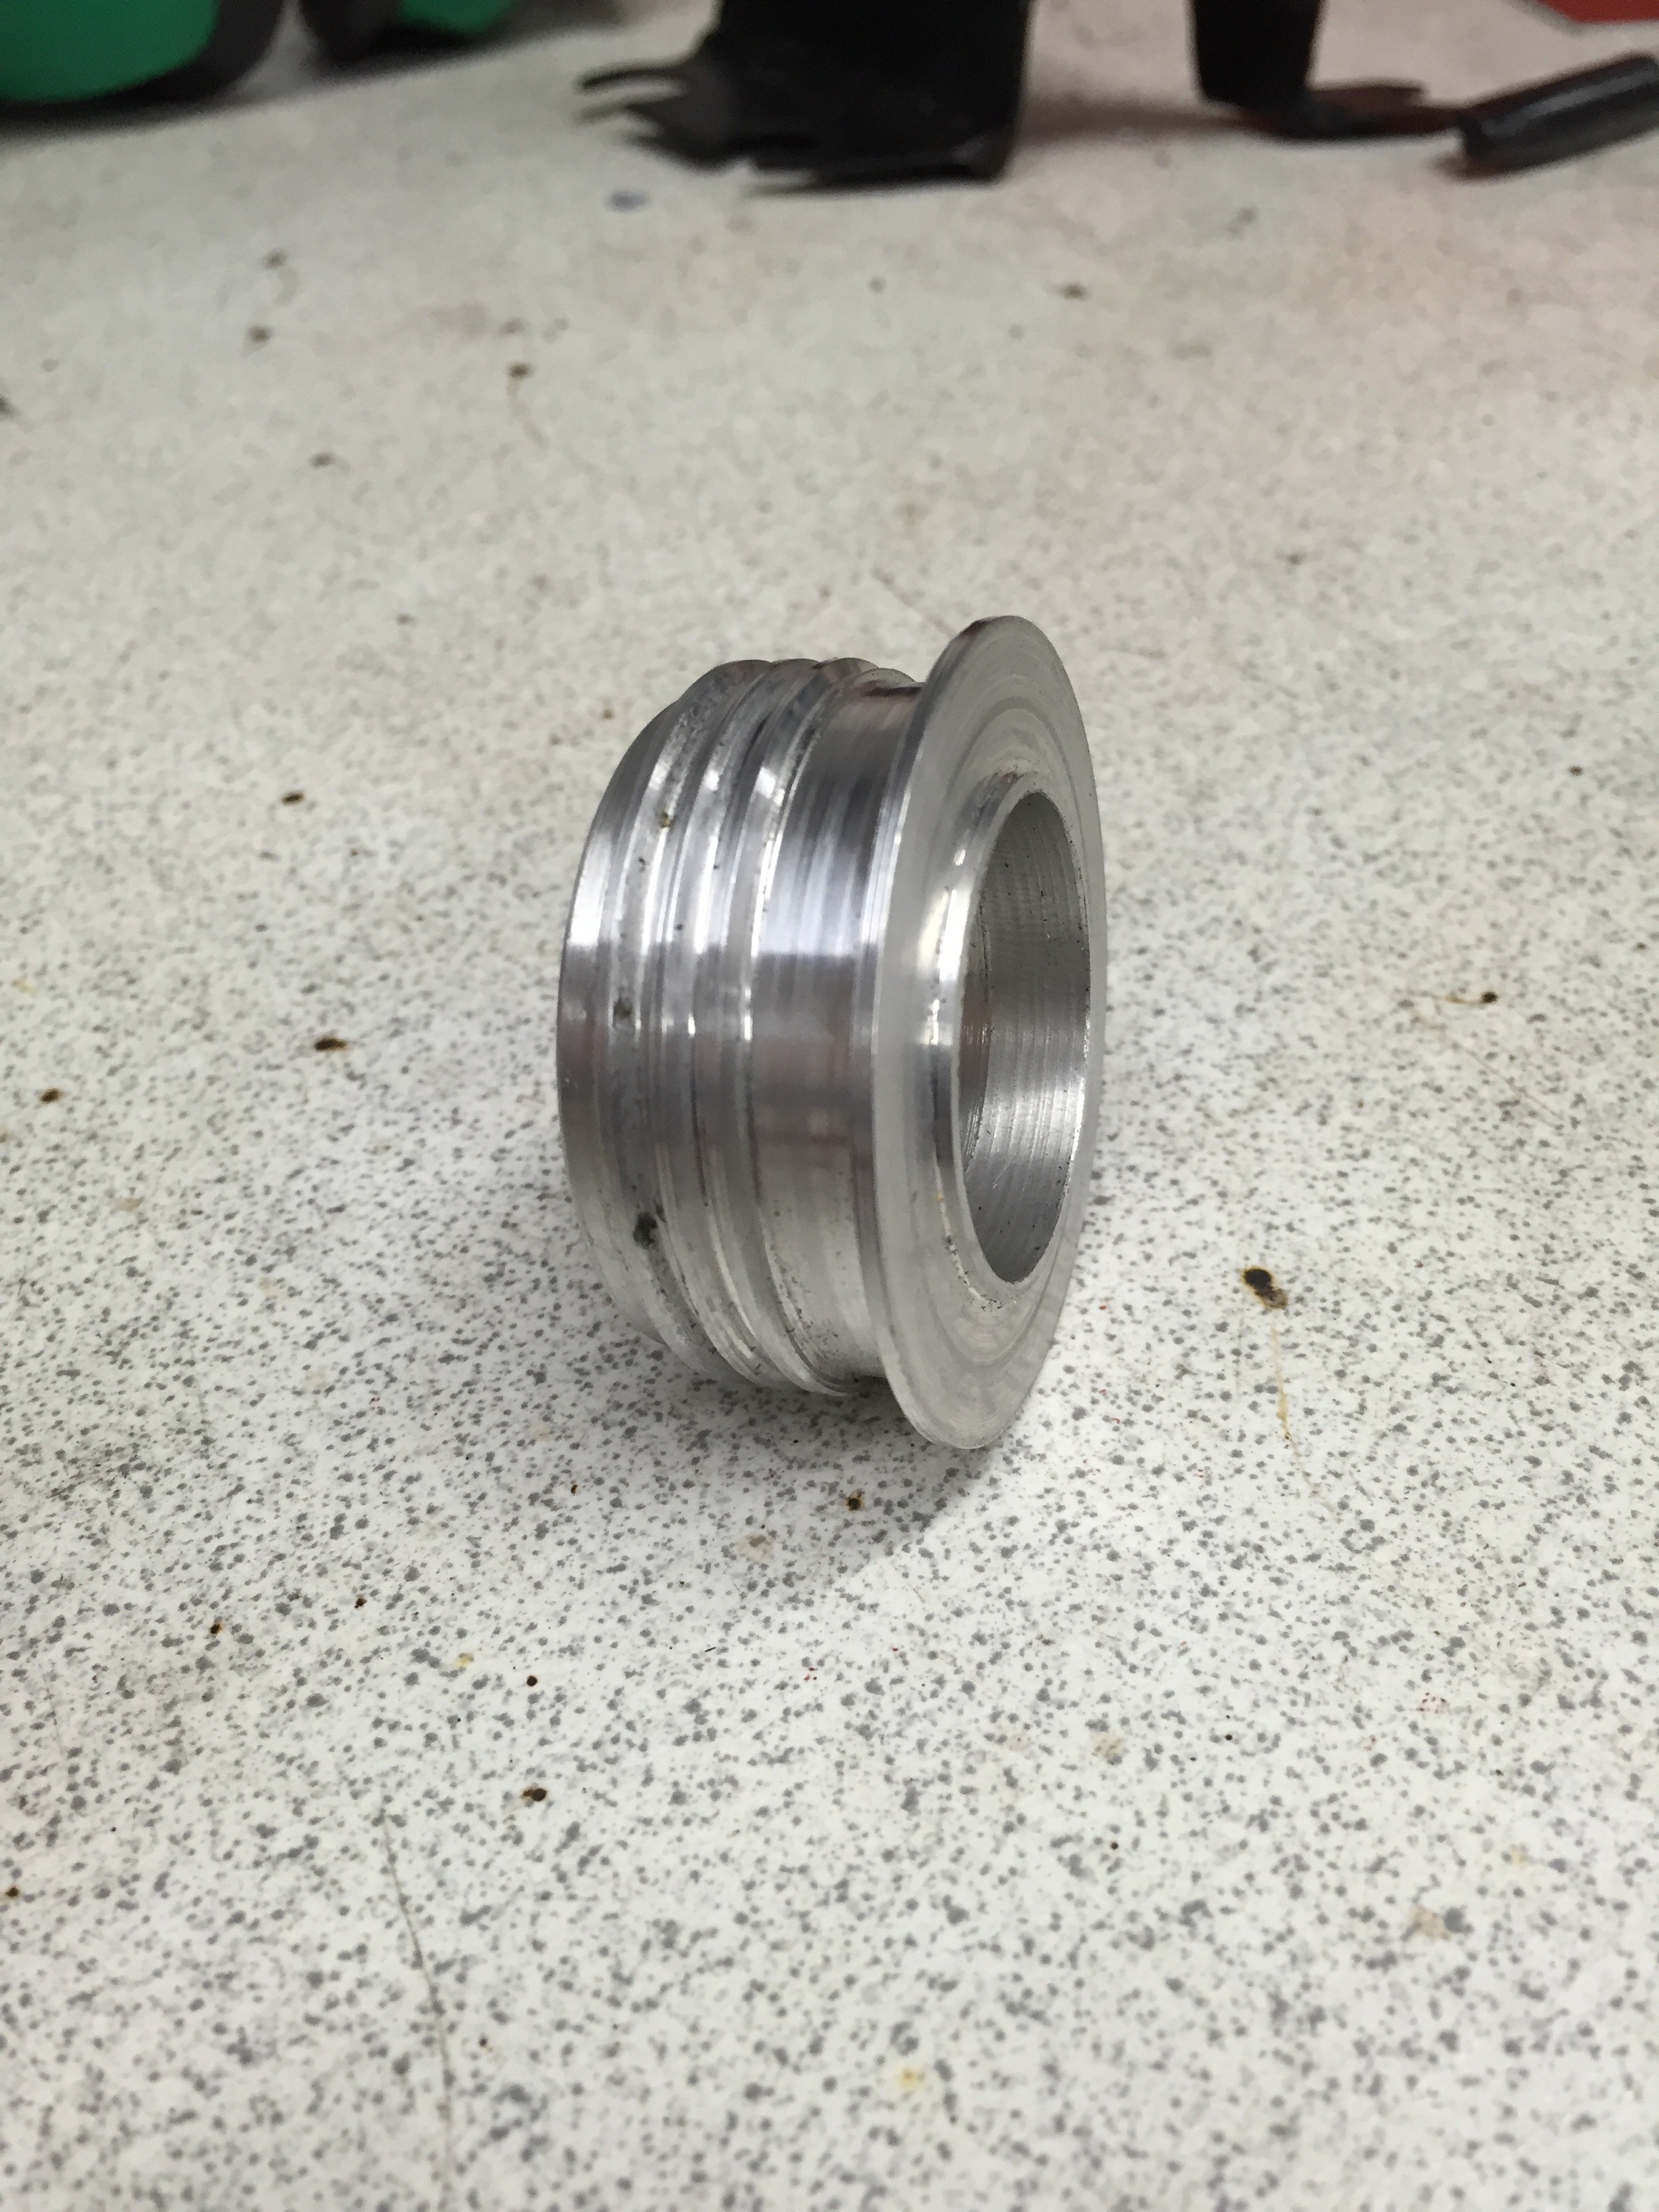
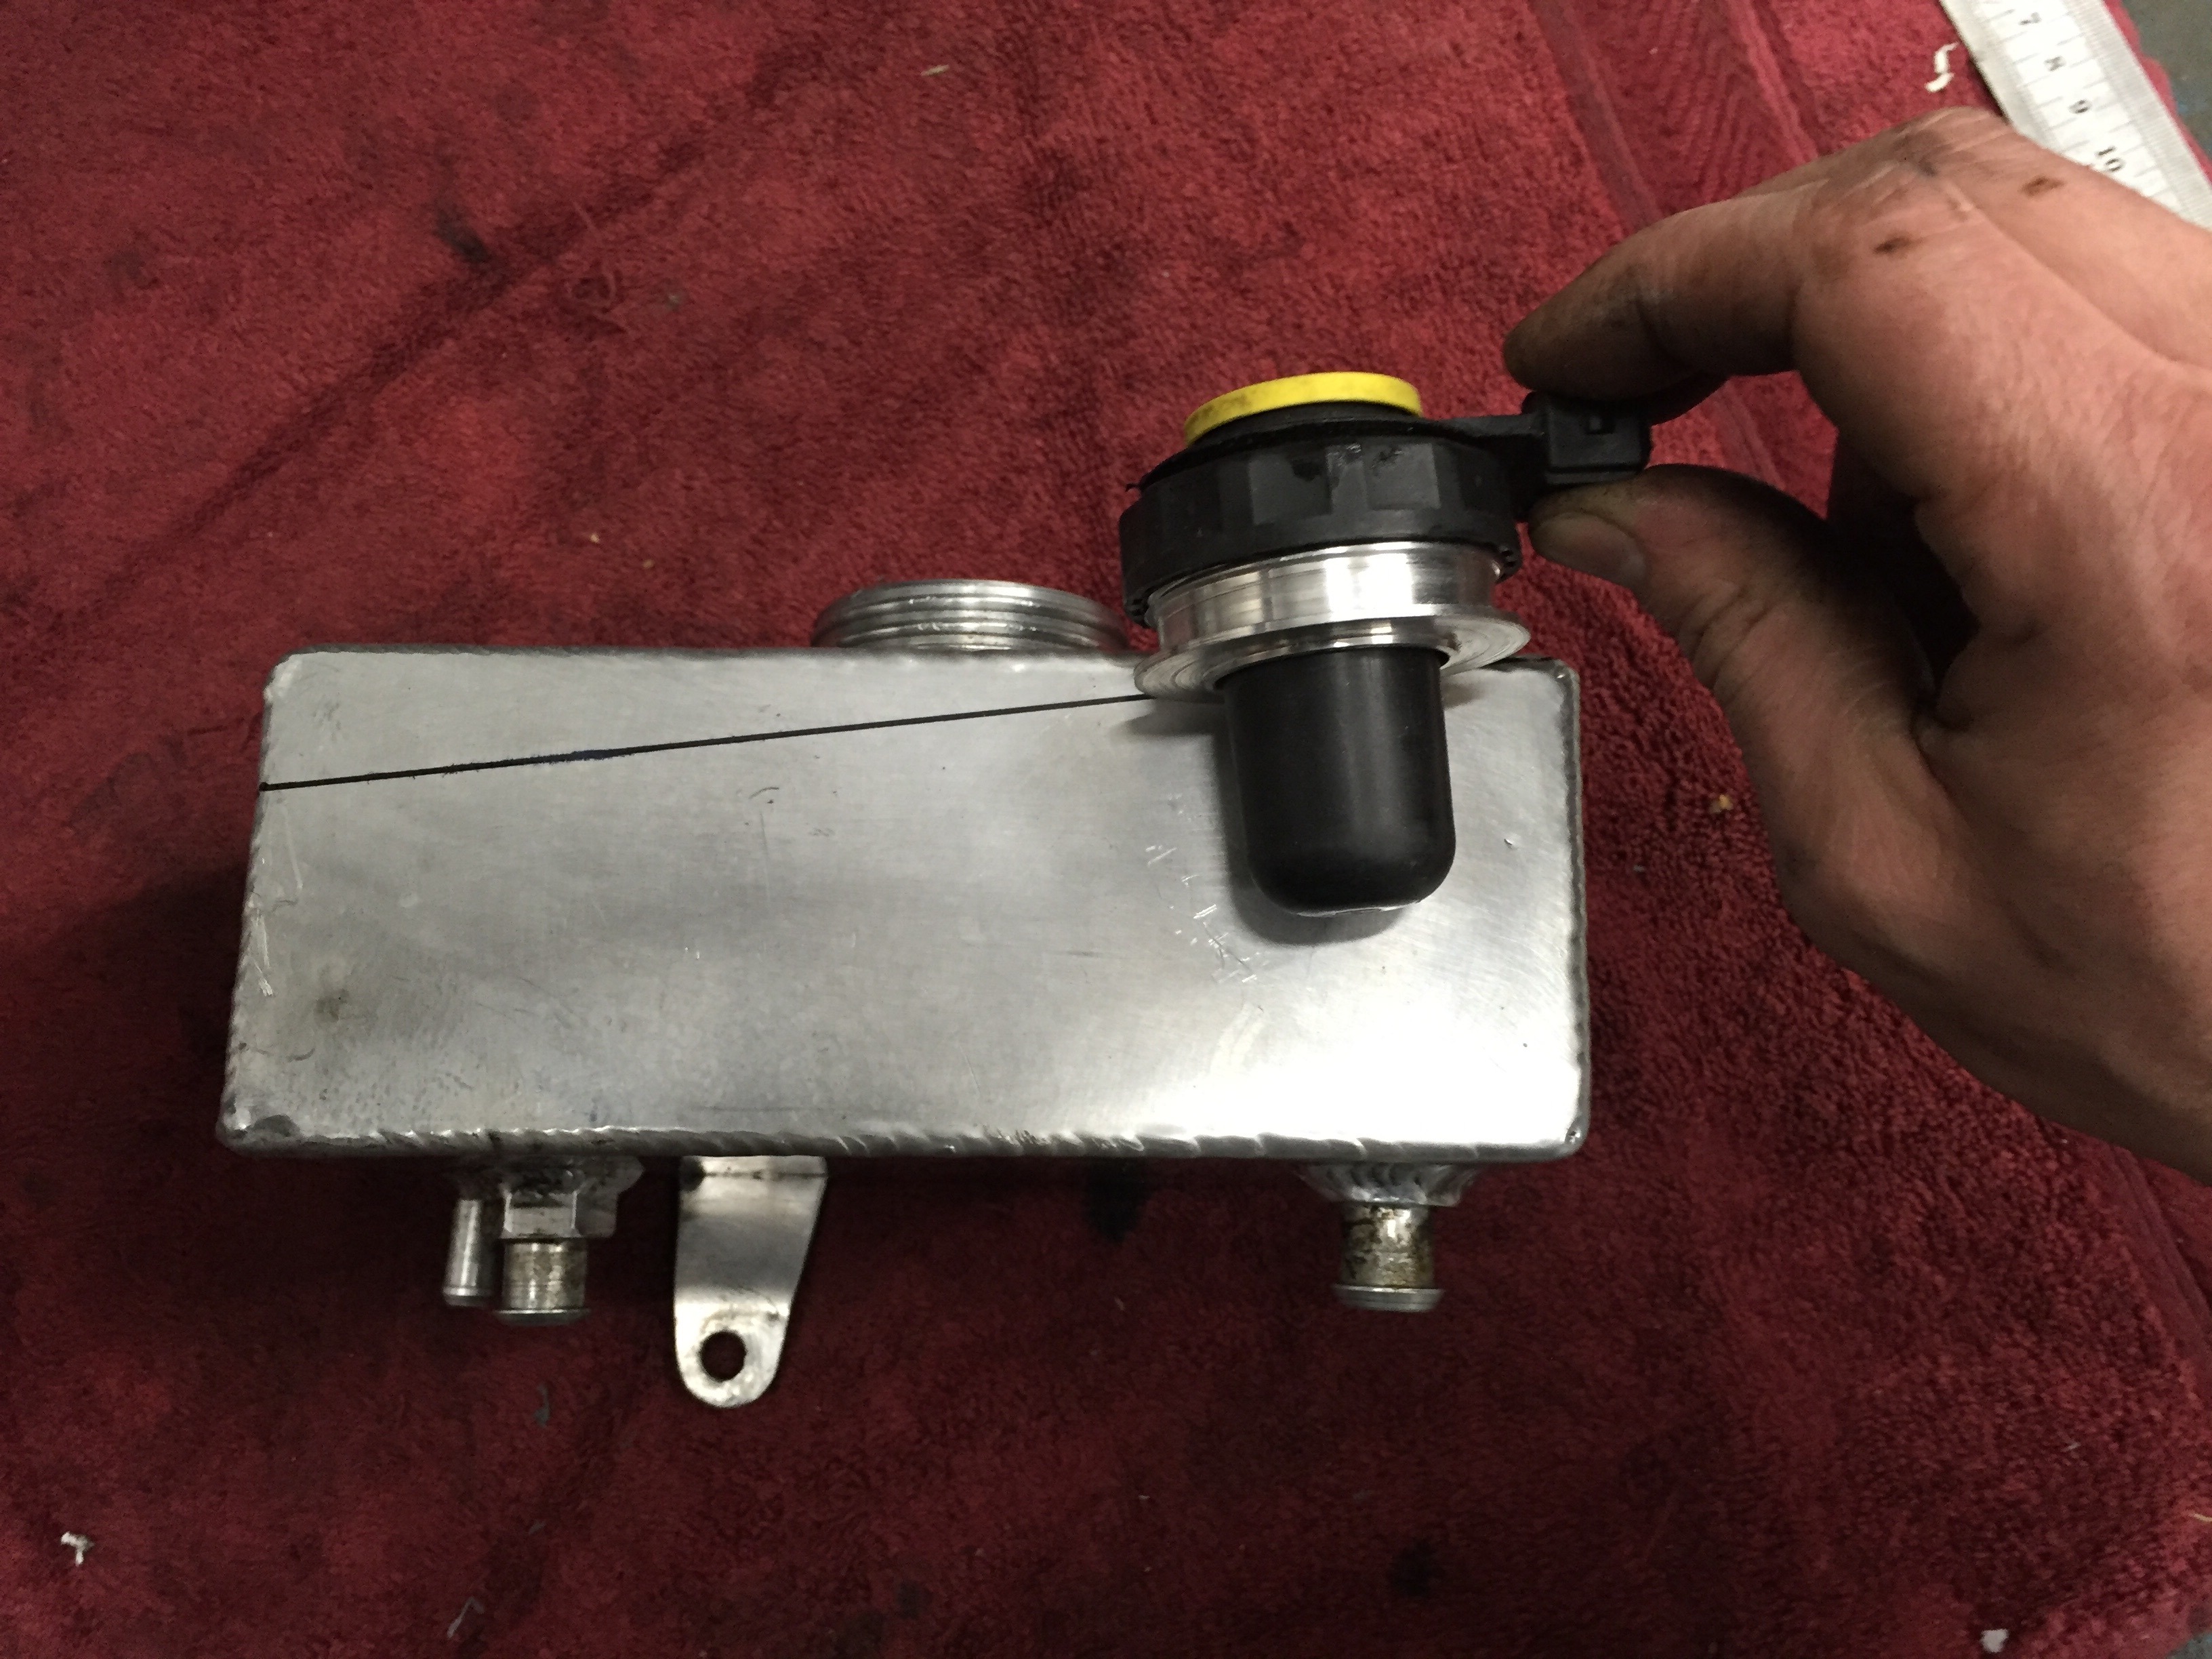
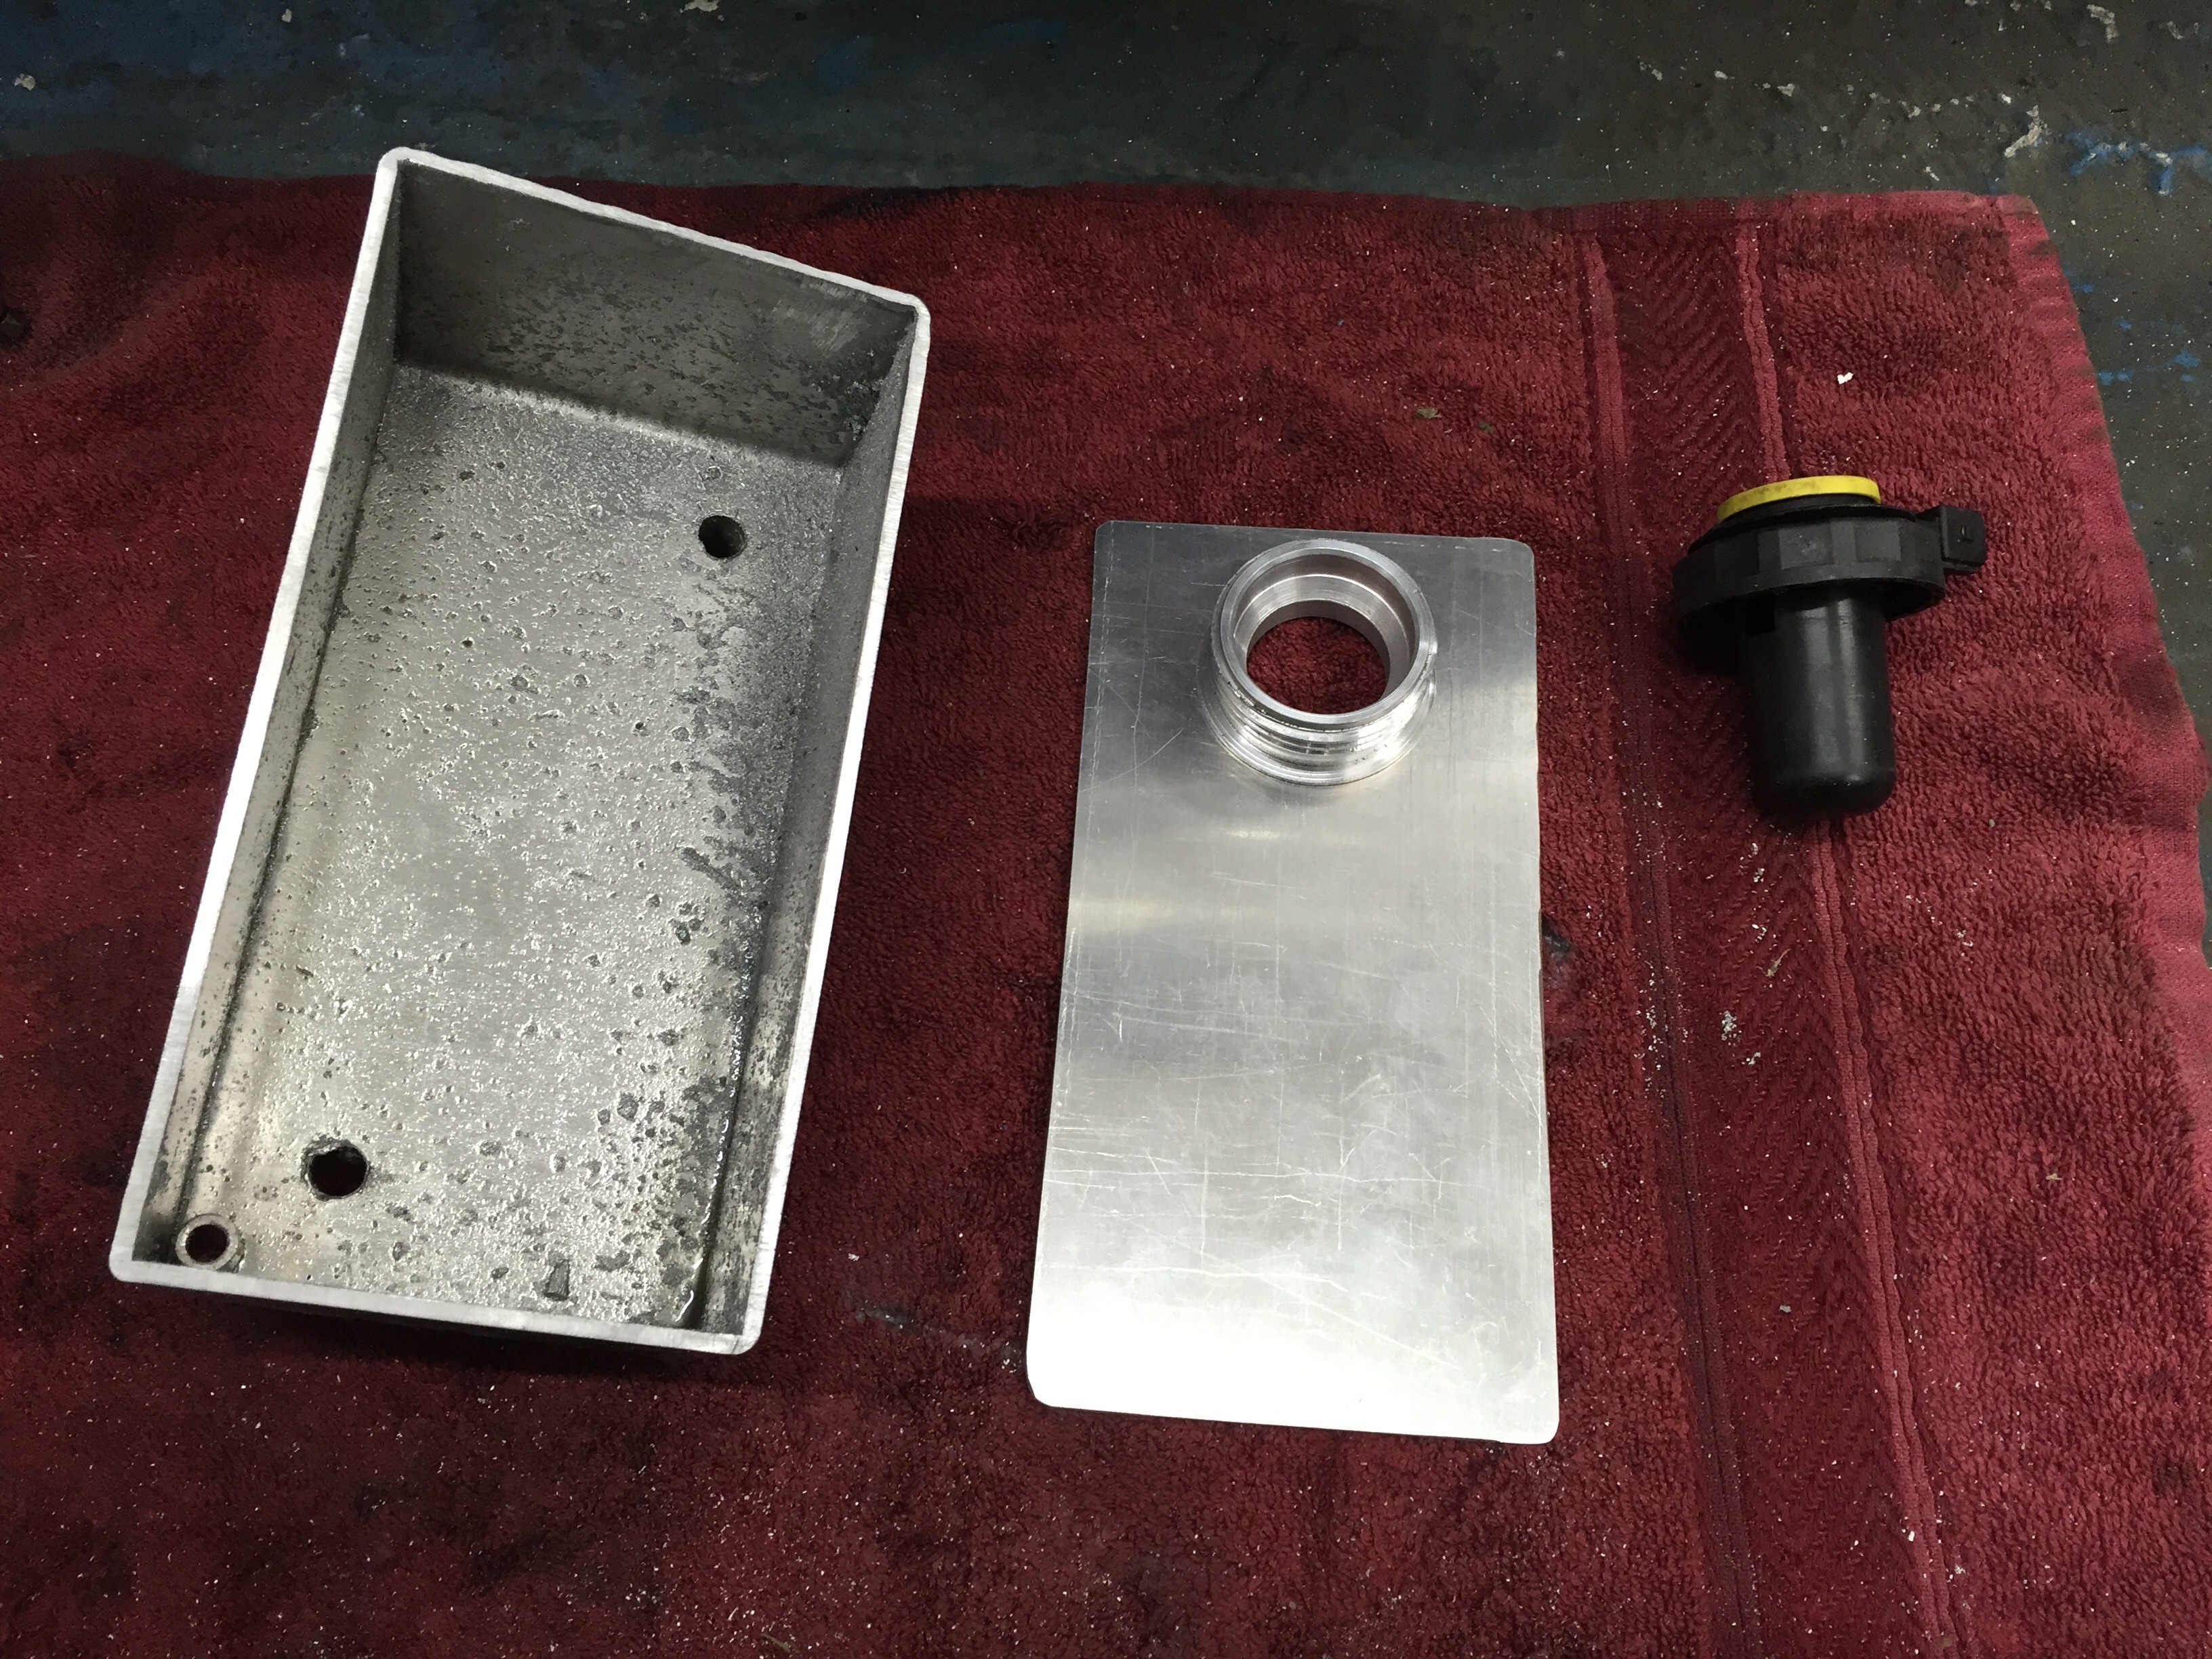
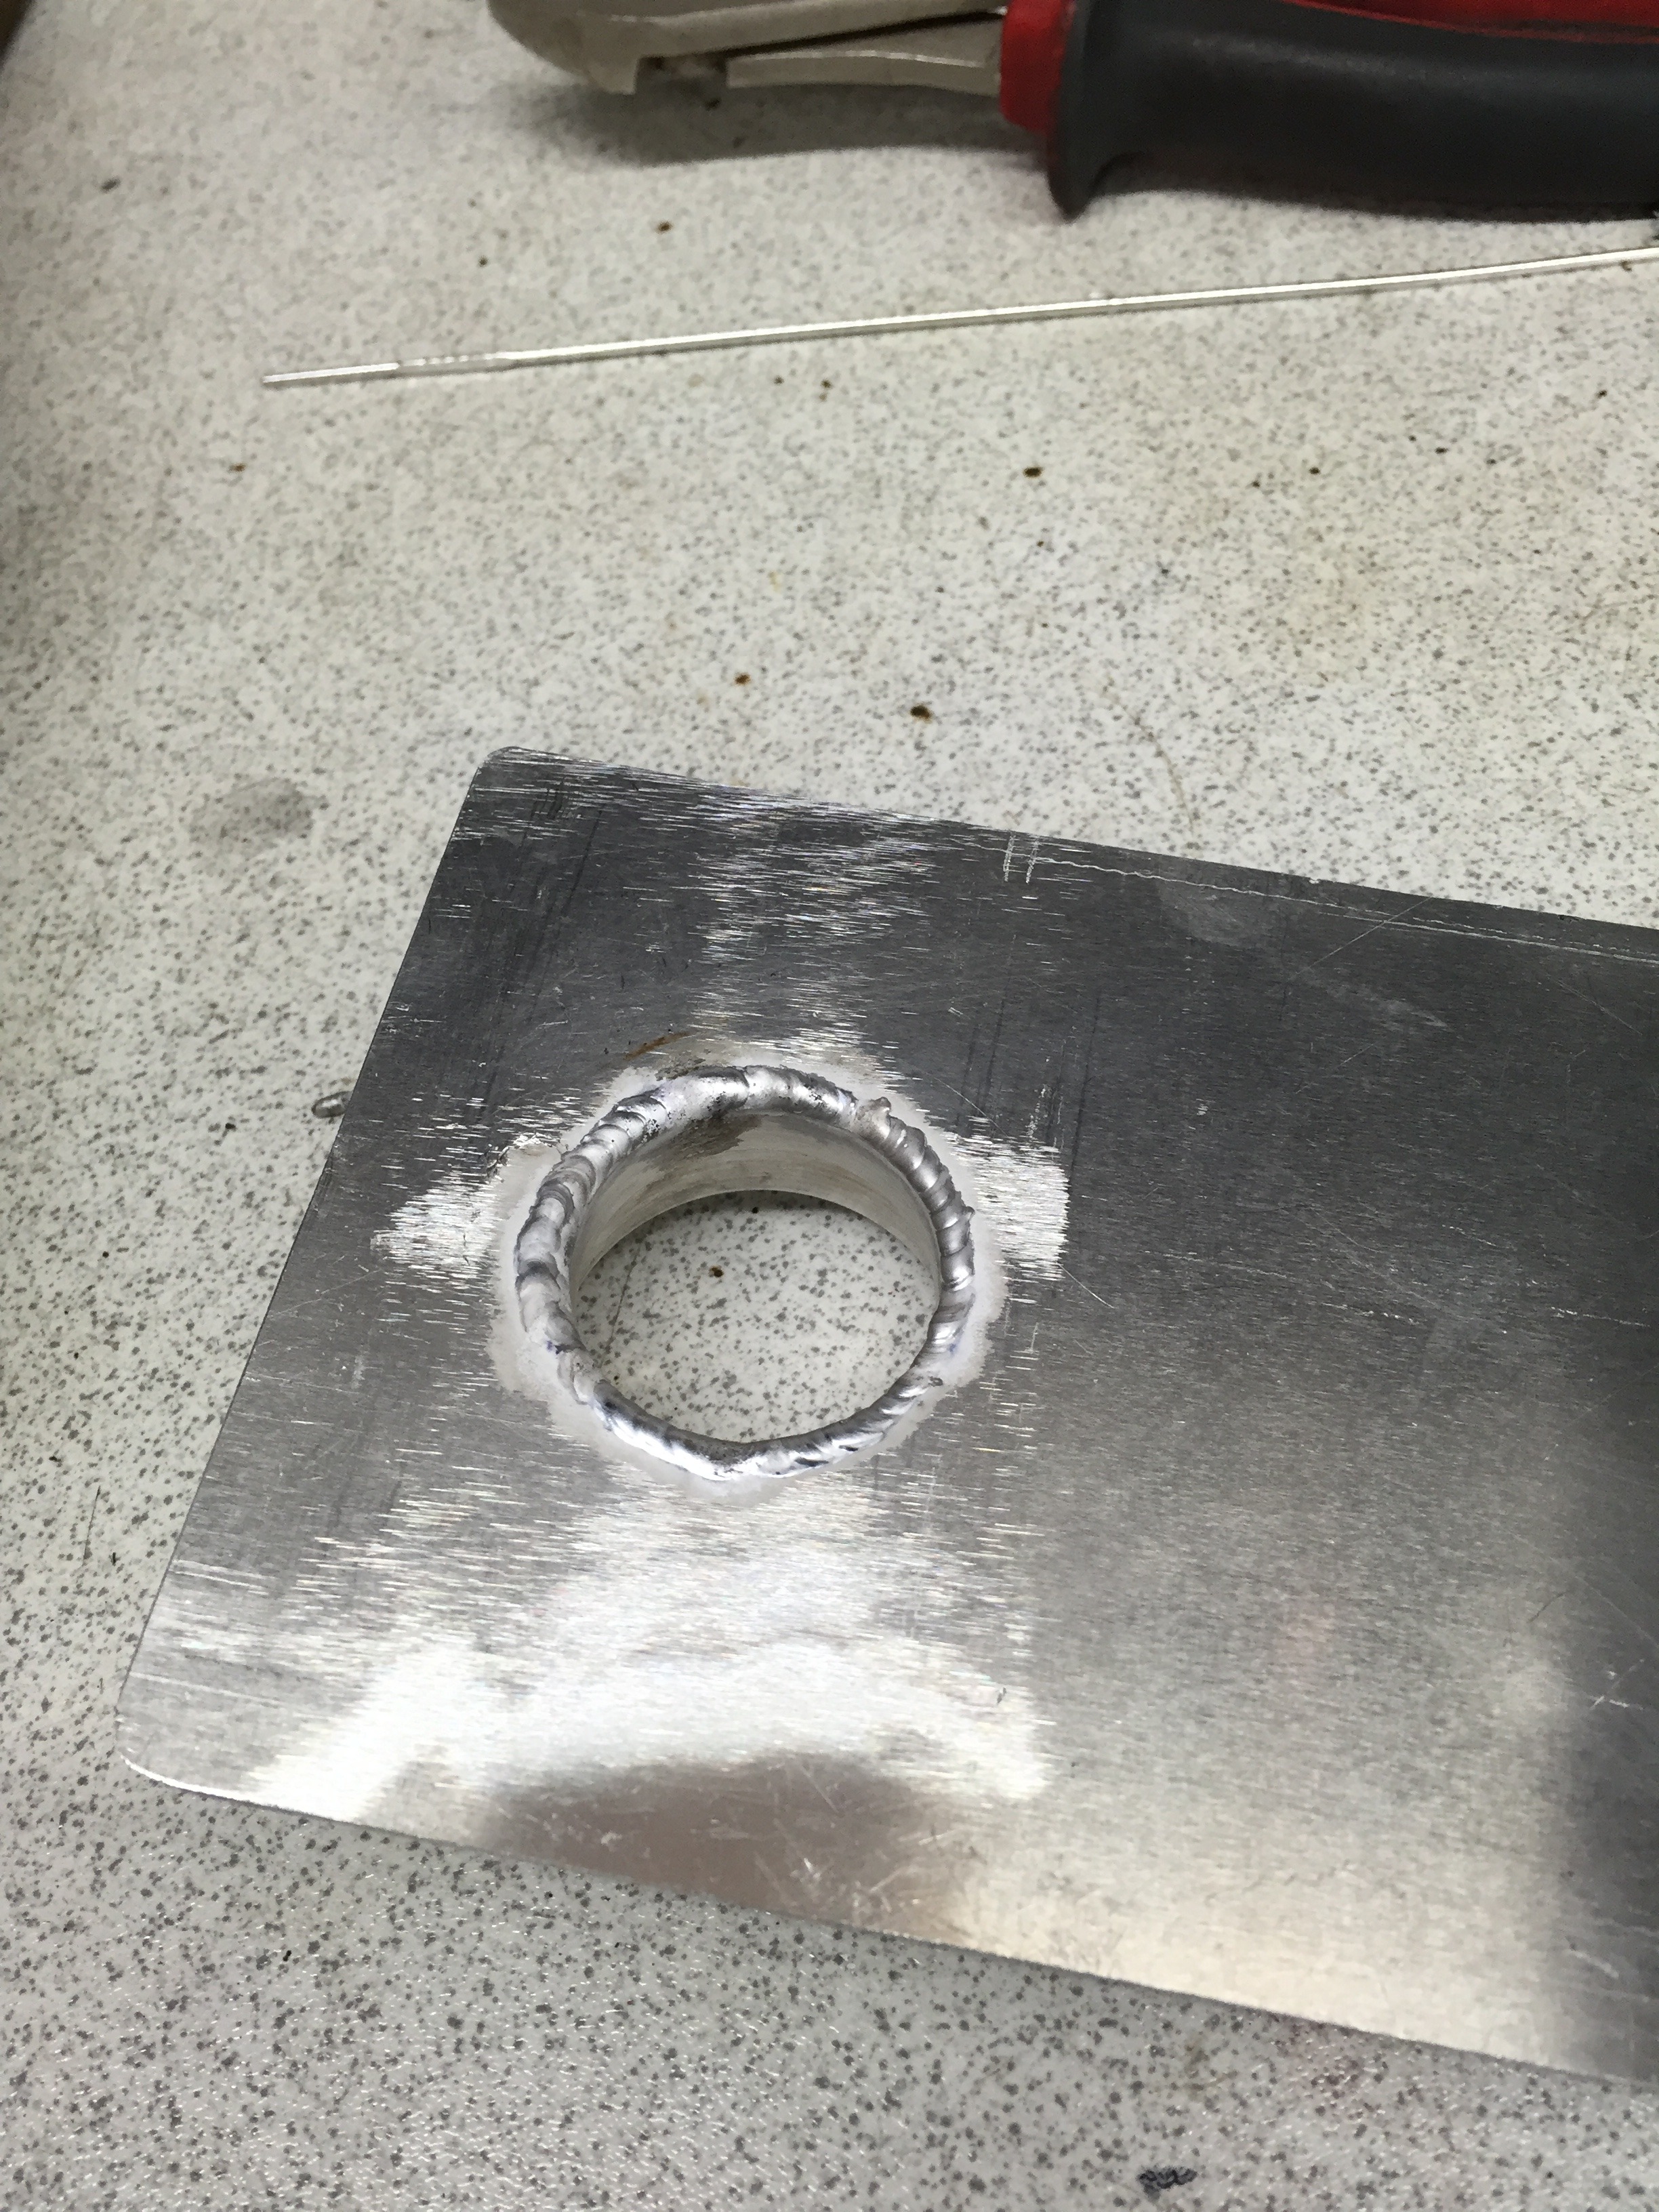
I have a friend who is quite handy with a lathe and asked if it was possible to make the correct screw thread for the factory brake reservoir cap... This is what he came out with
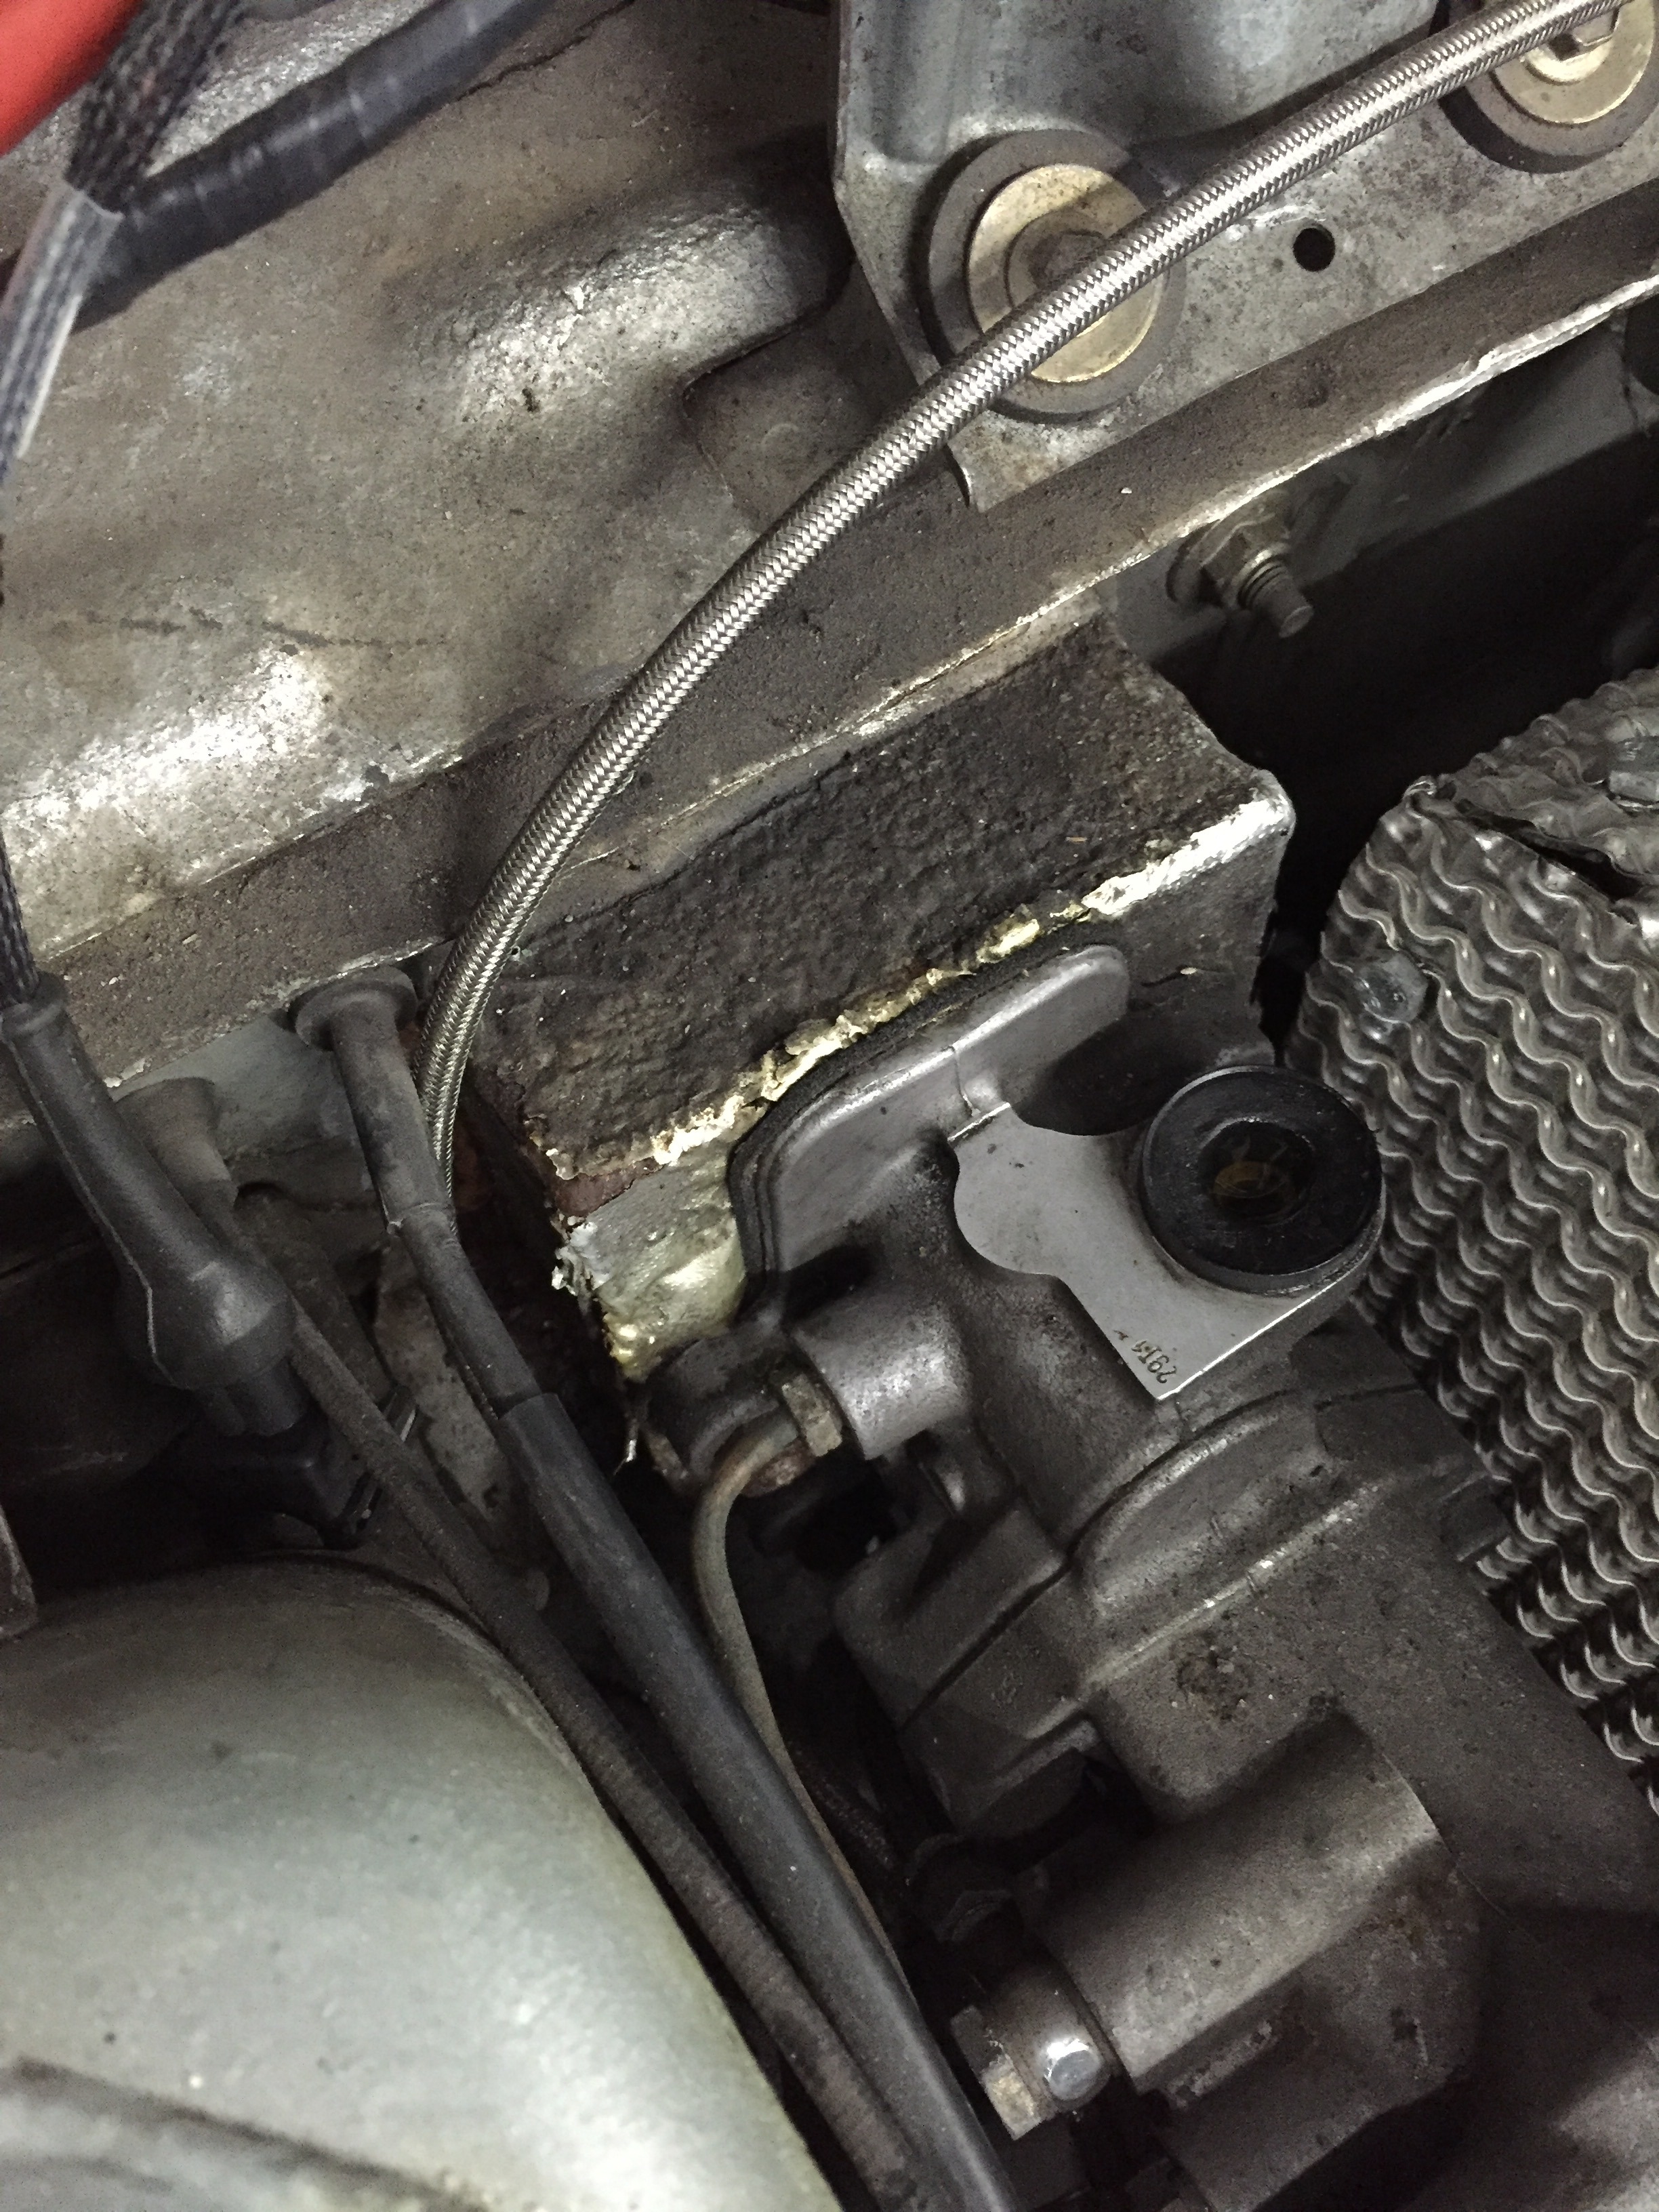
So with that made I started to remove the tank off the car, having done so I could see that over the years of leaking fluid it had attacked the paint and although not a massive issue wanted to get a better protection on before the tank went back on. I also noticed that the box made for the master cylinder had meant it came very close to the throttle cable hole. So close the cable didn't actually sit home. So made the decision to take the lot out and get it all sorted in one hit.
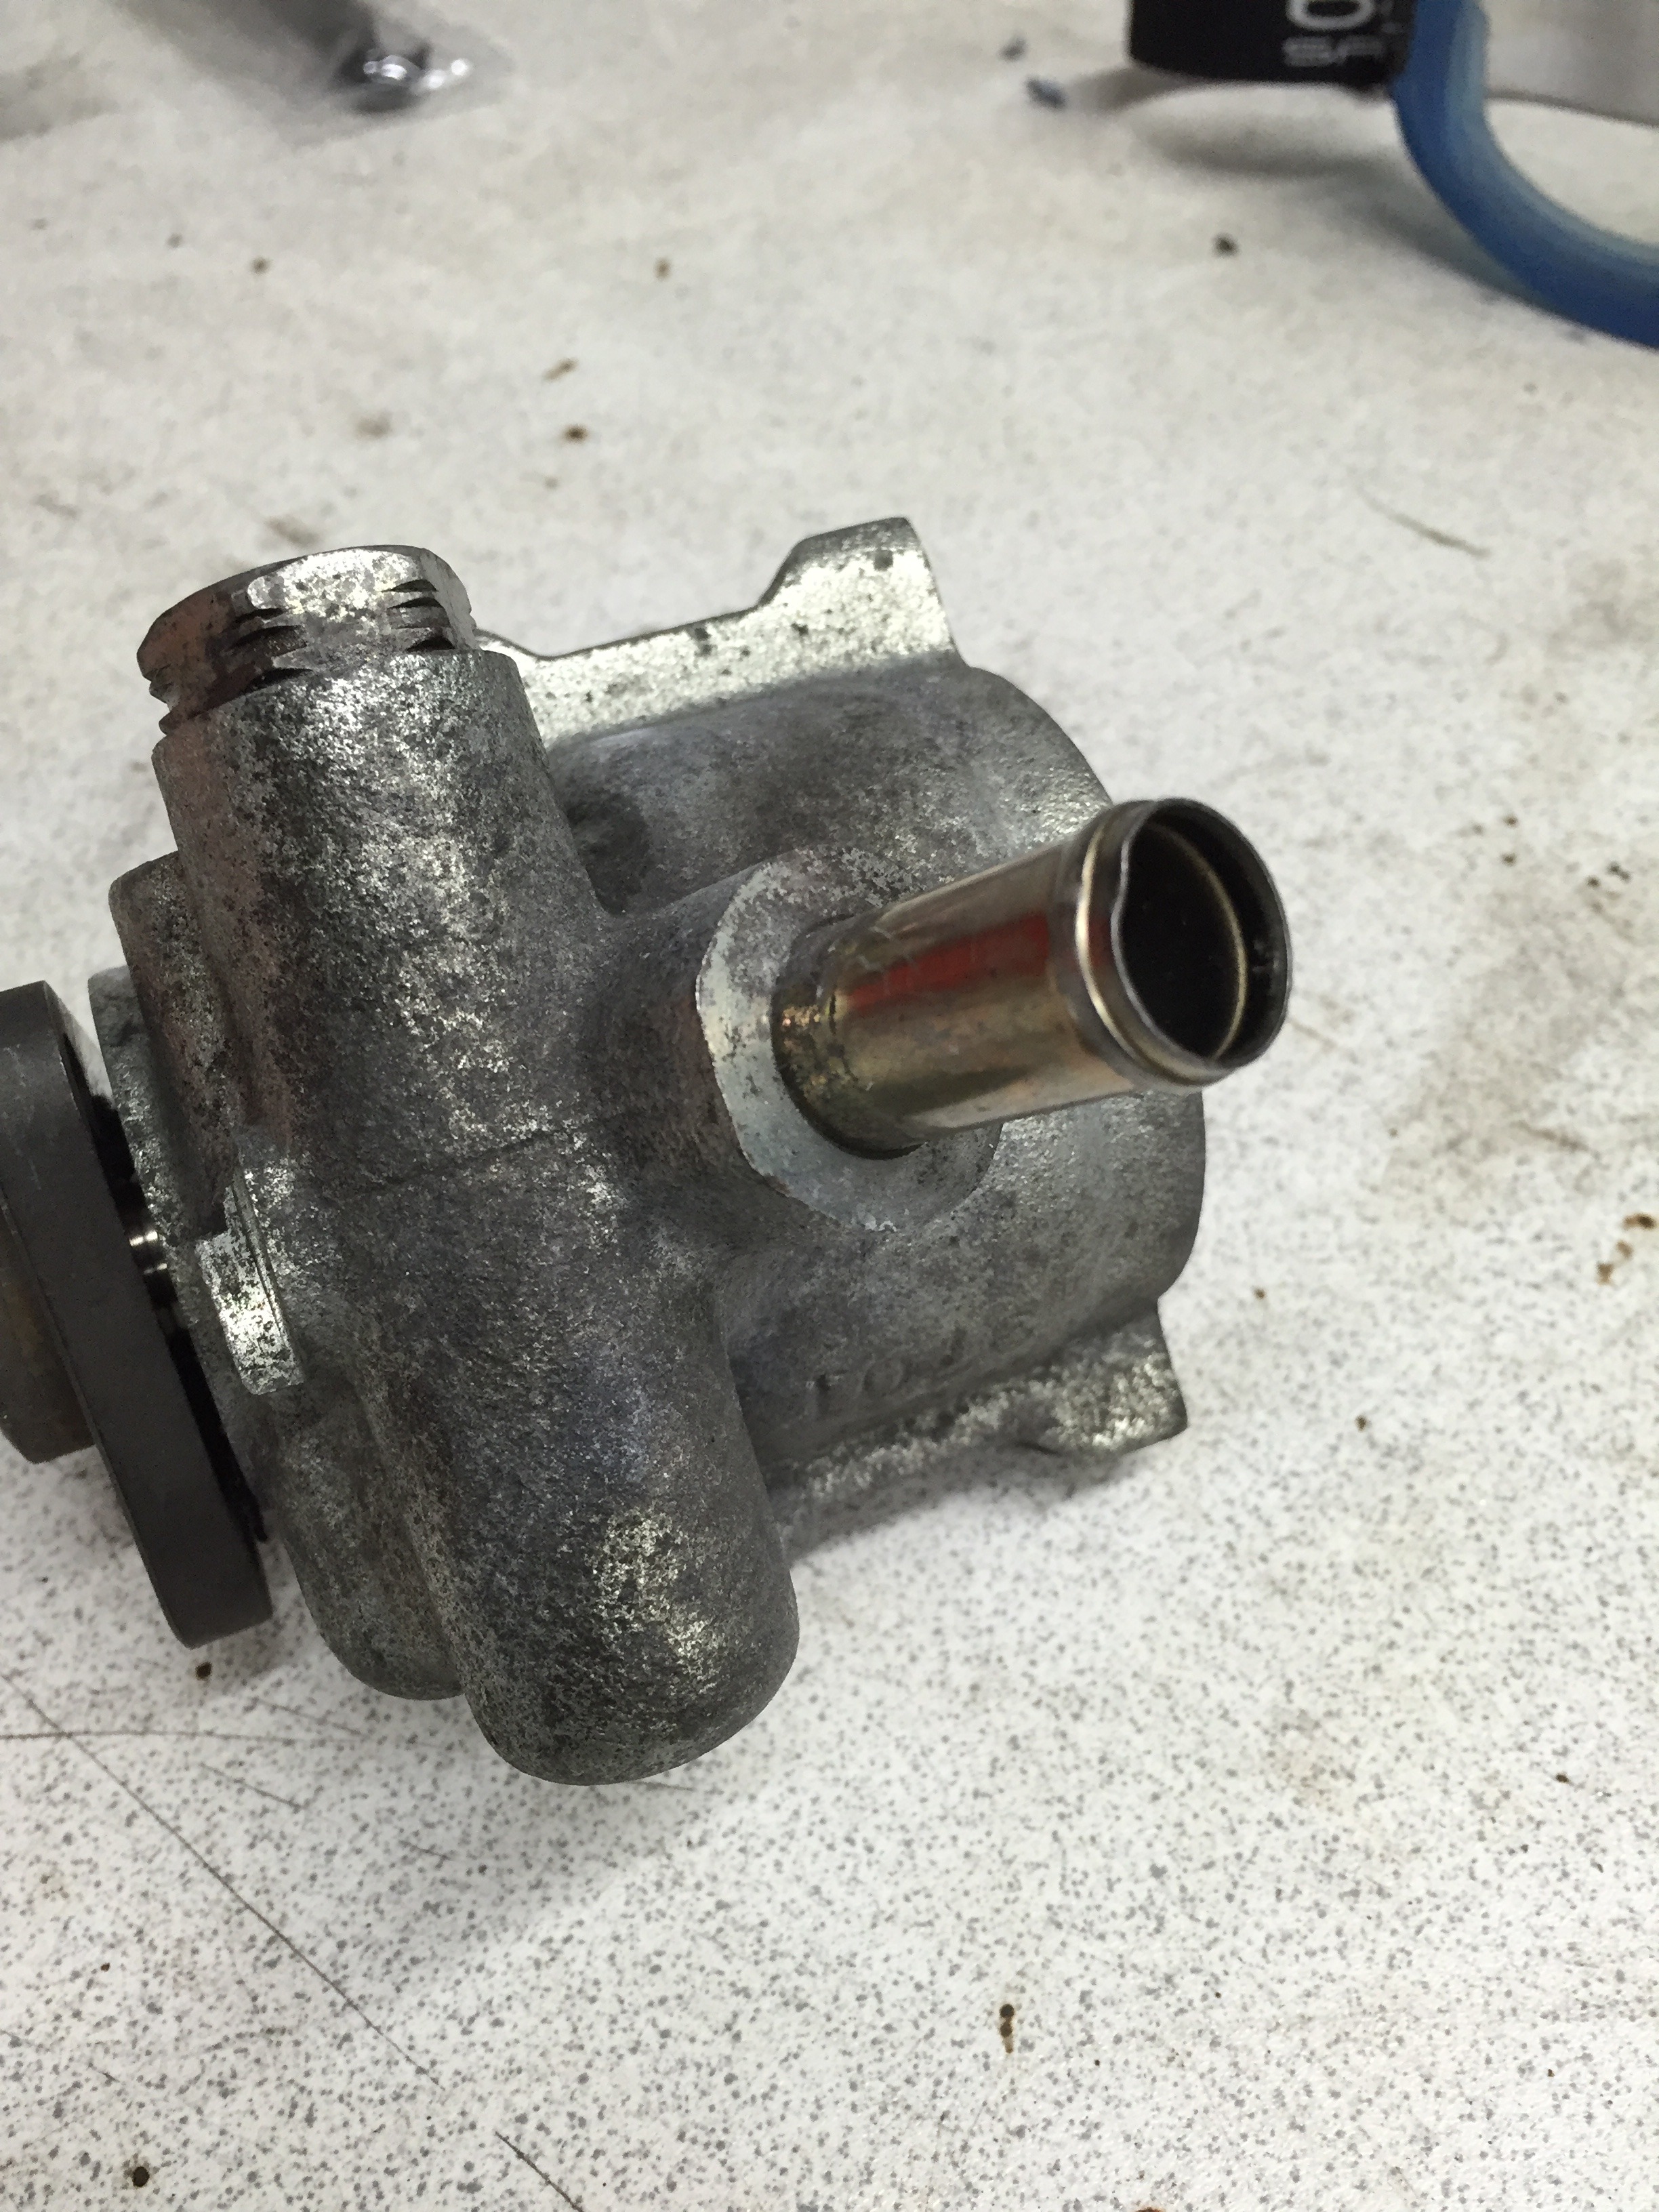
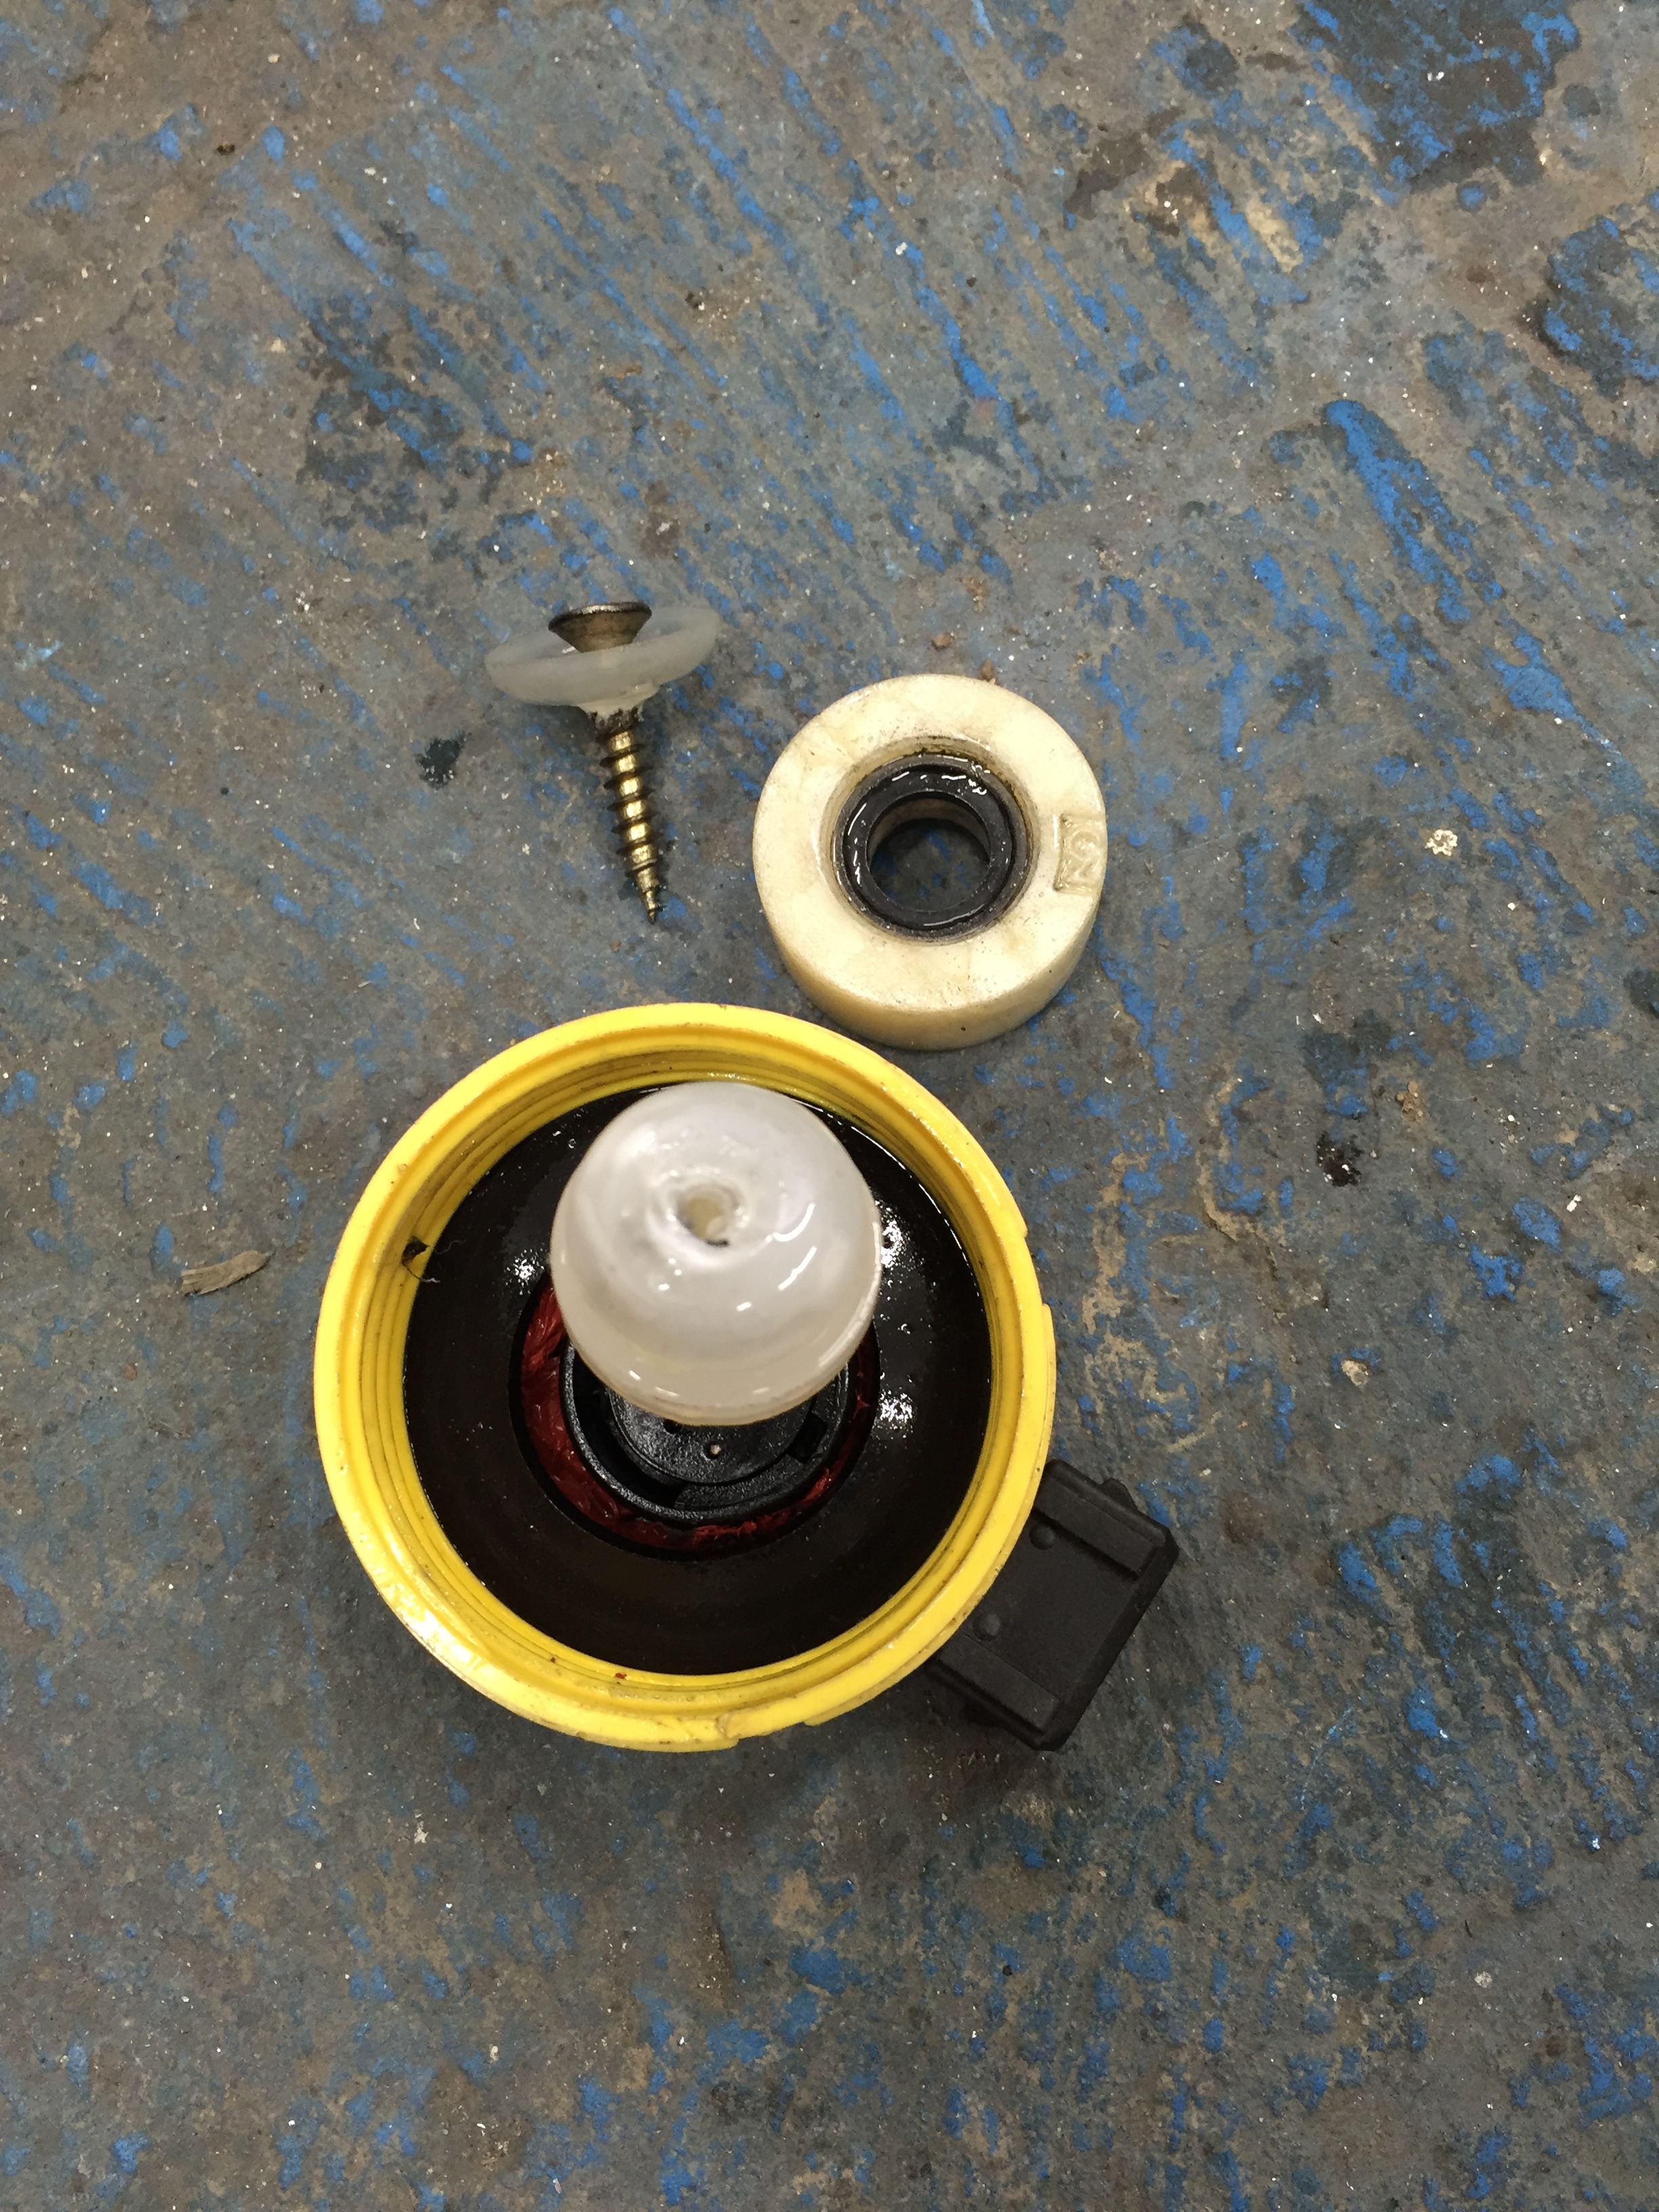
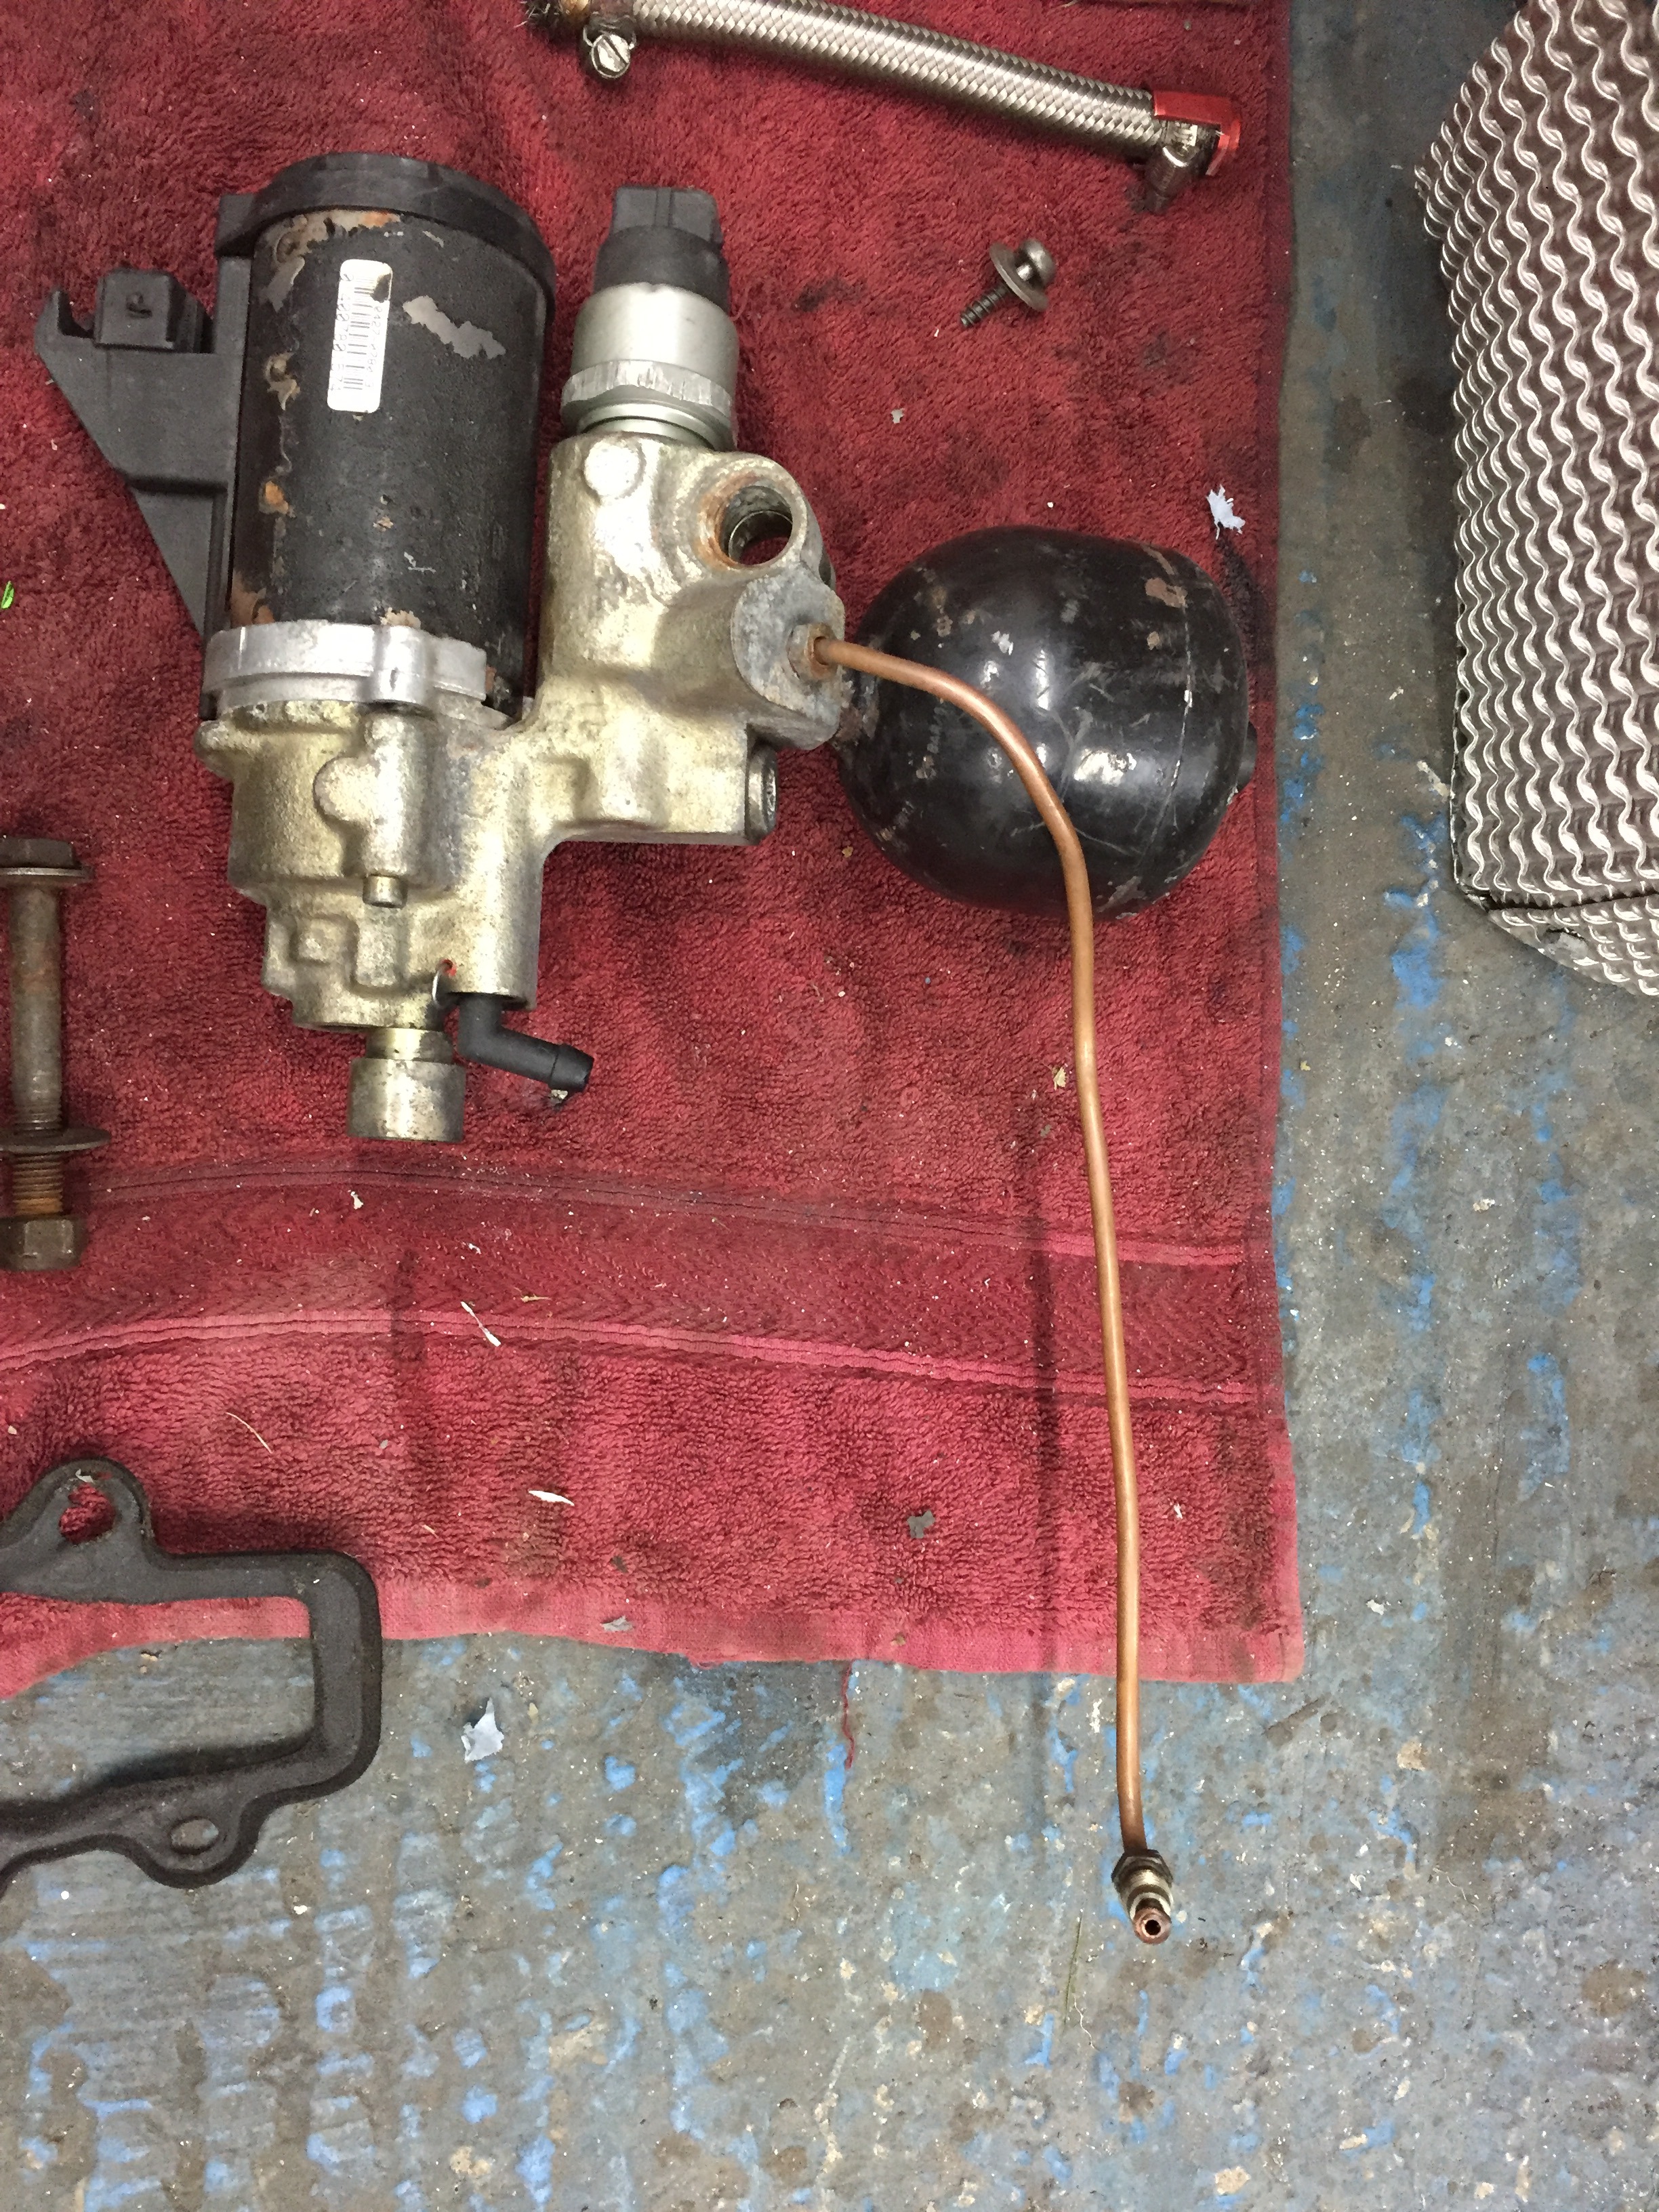
Also decided to take the pump out to give that a clean and check over
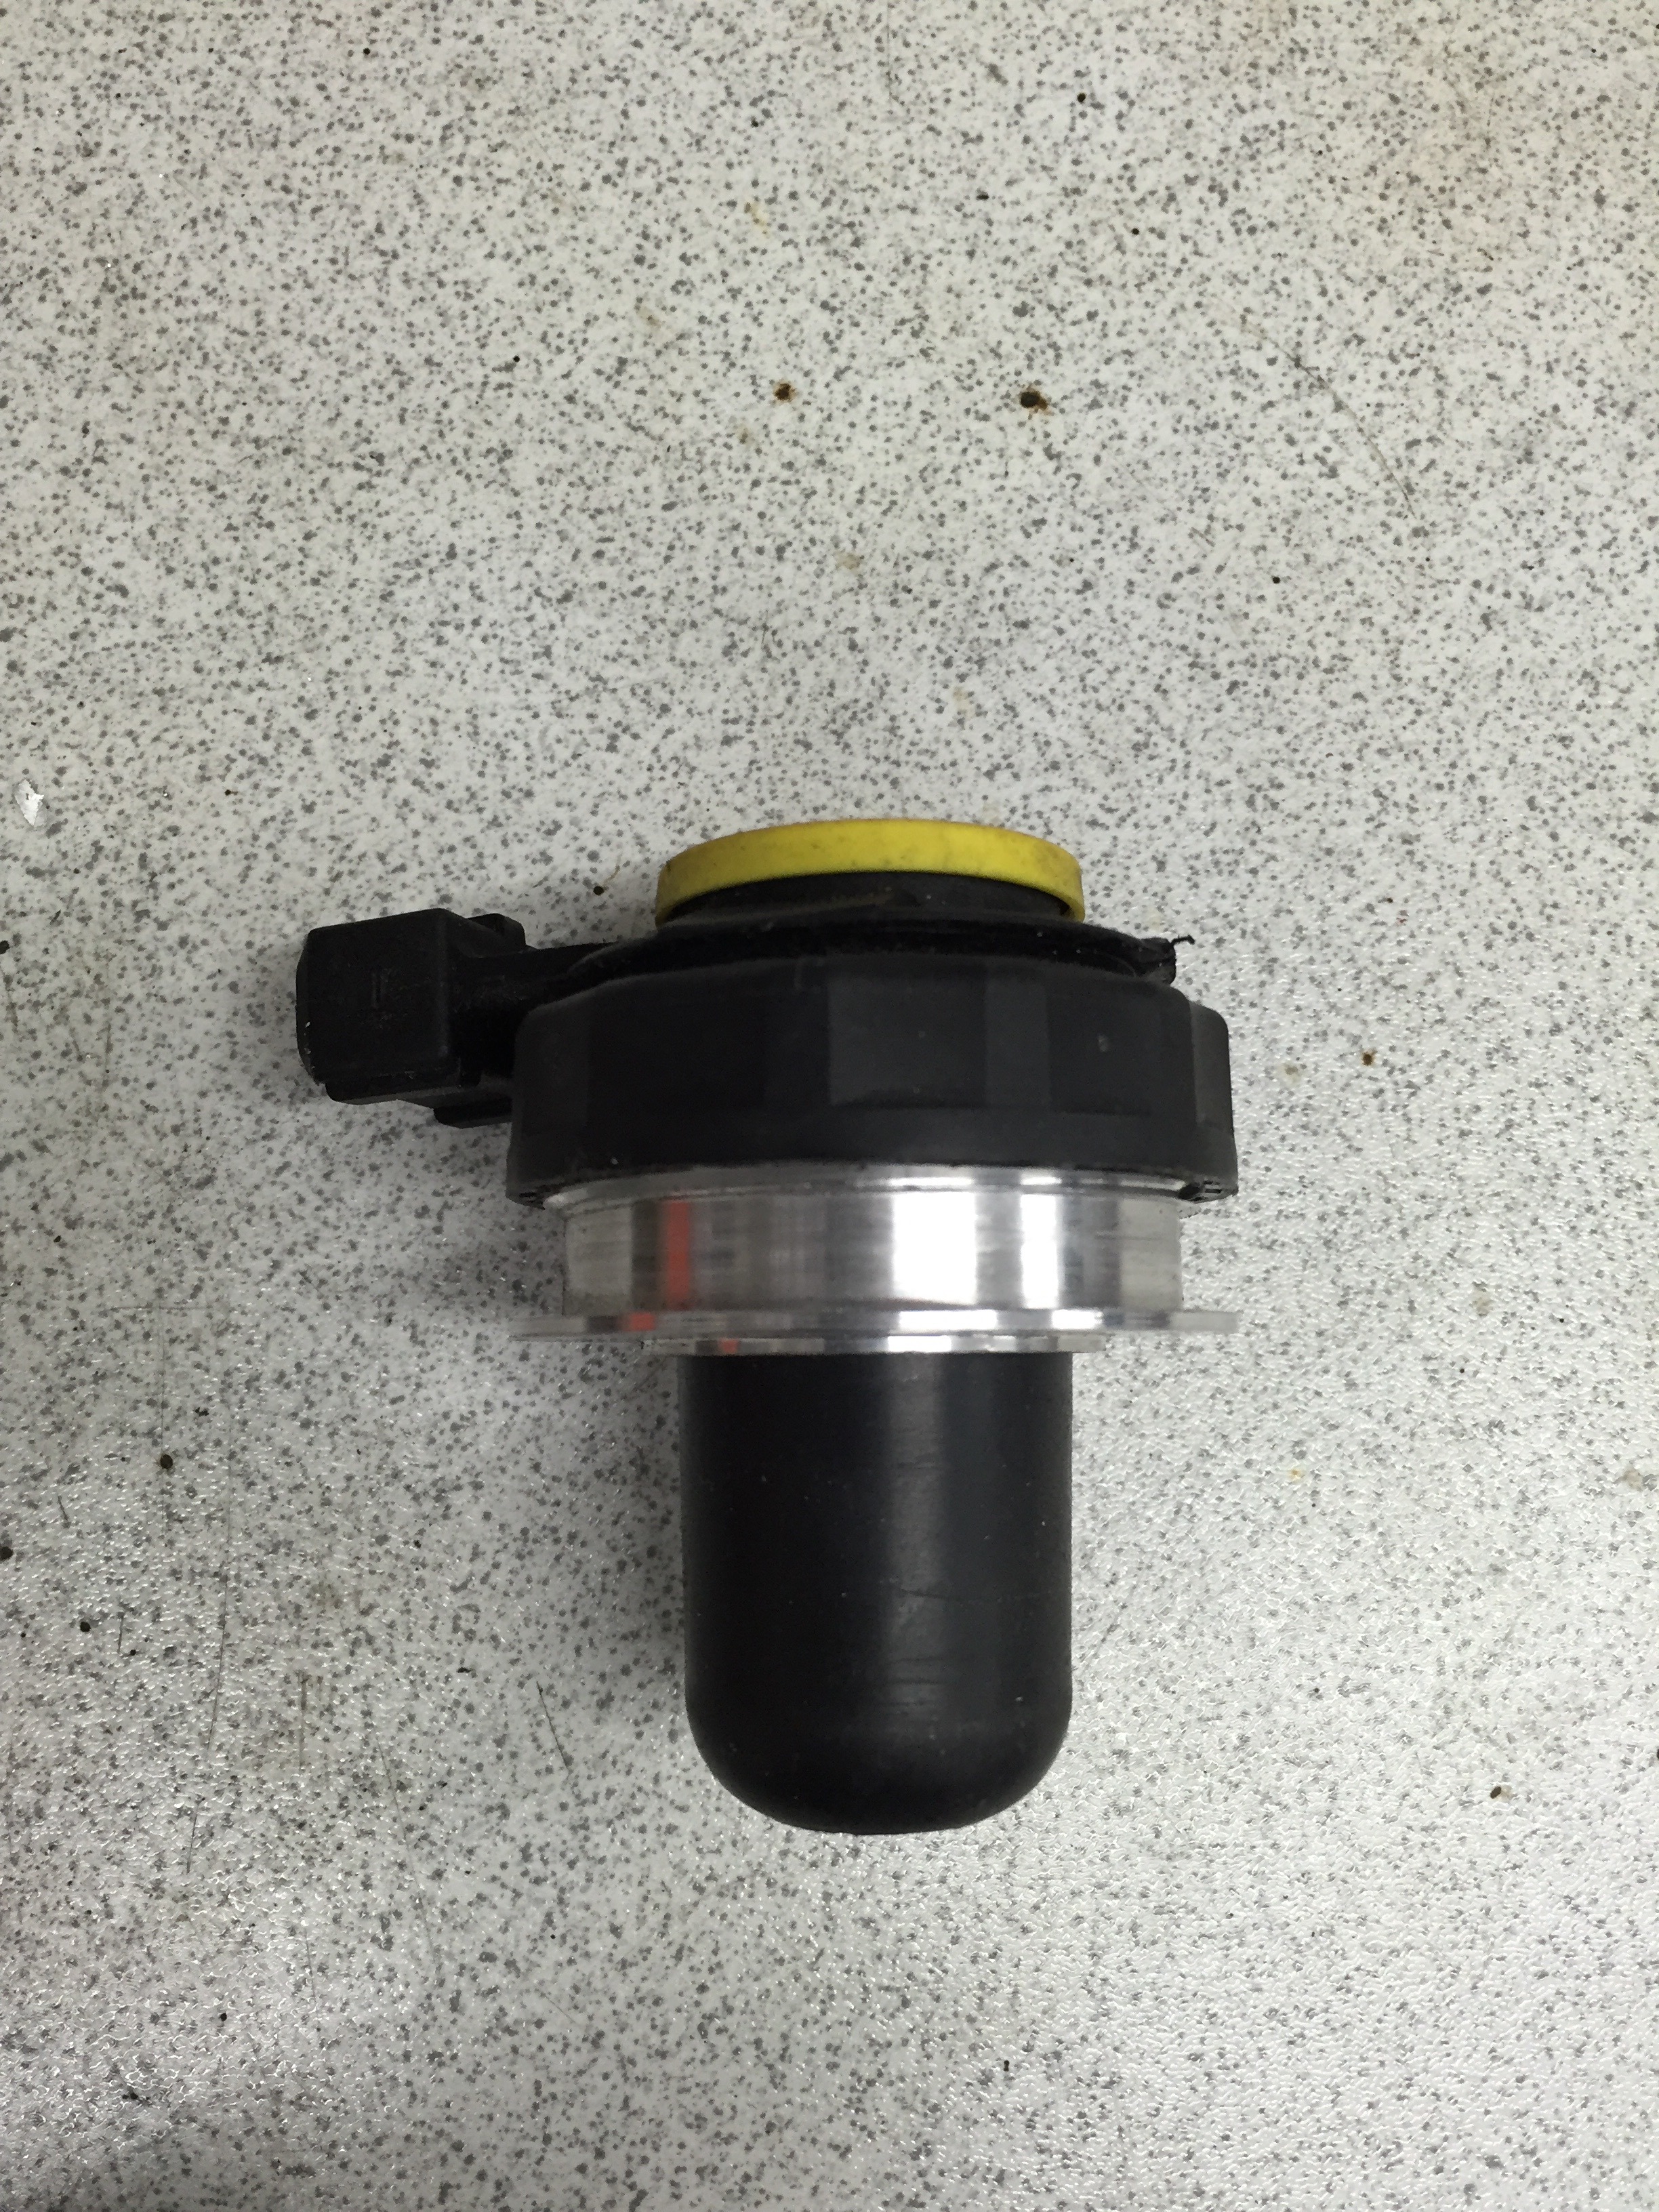
This is the interesting brake fluid level sensor float that's been adapted I assume to make it work of sorts with the sloping top to the tank
So on to adapting the tank

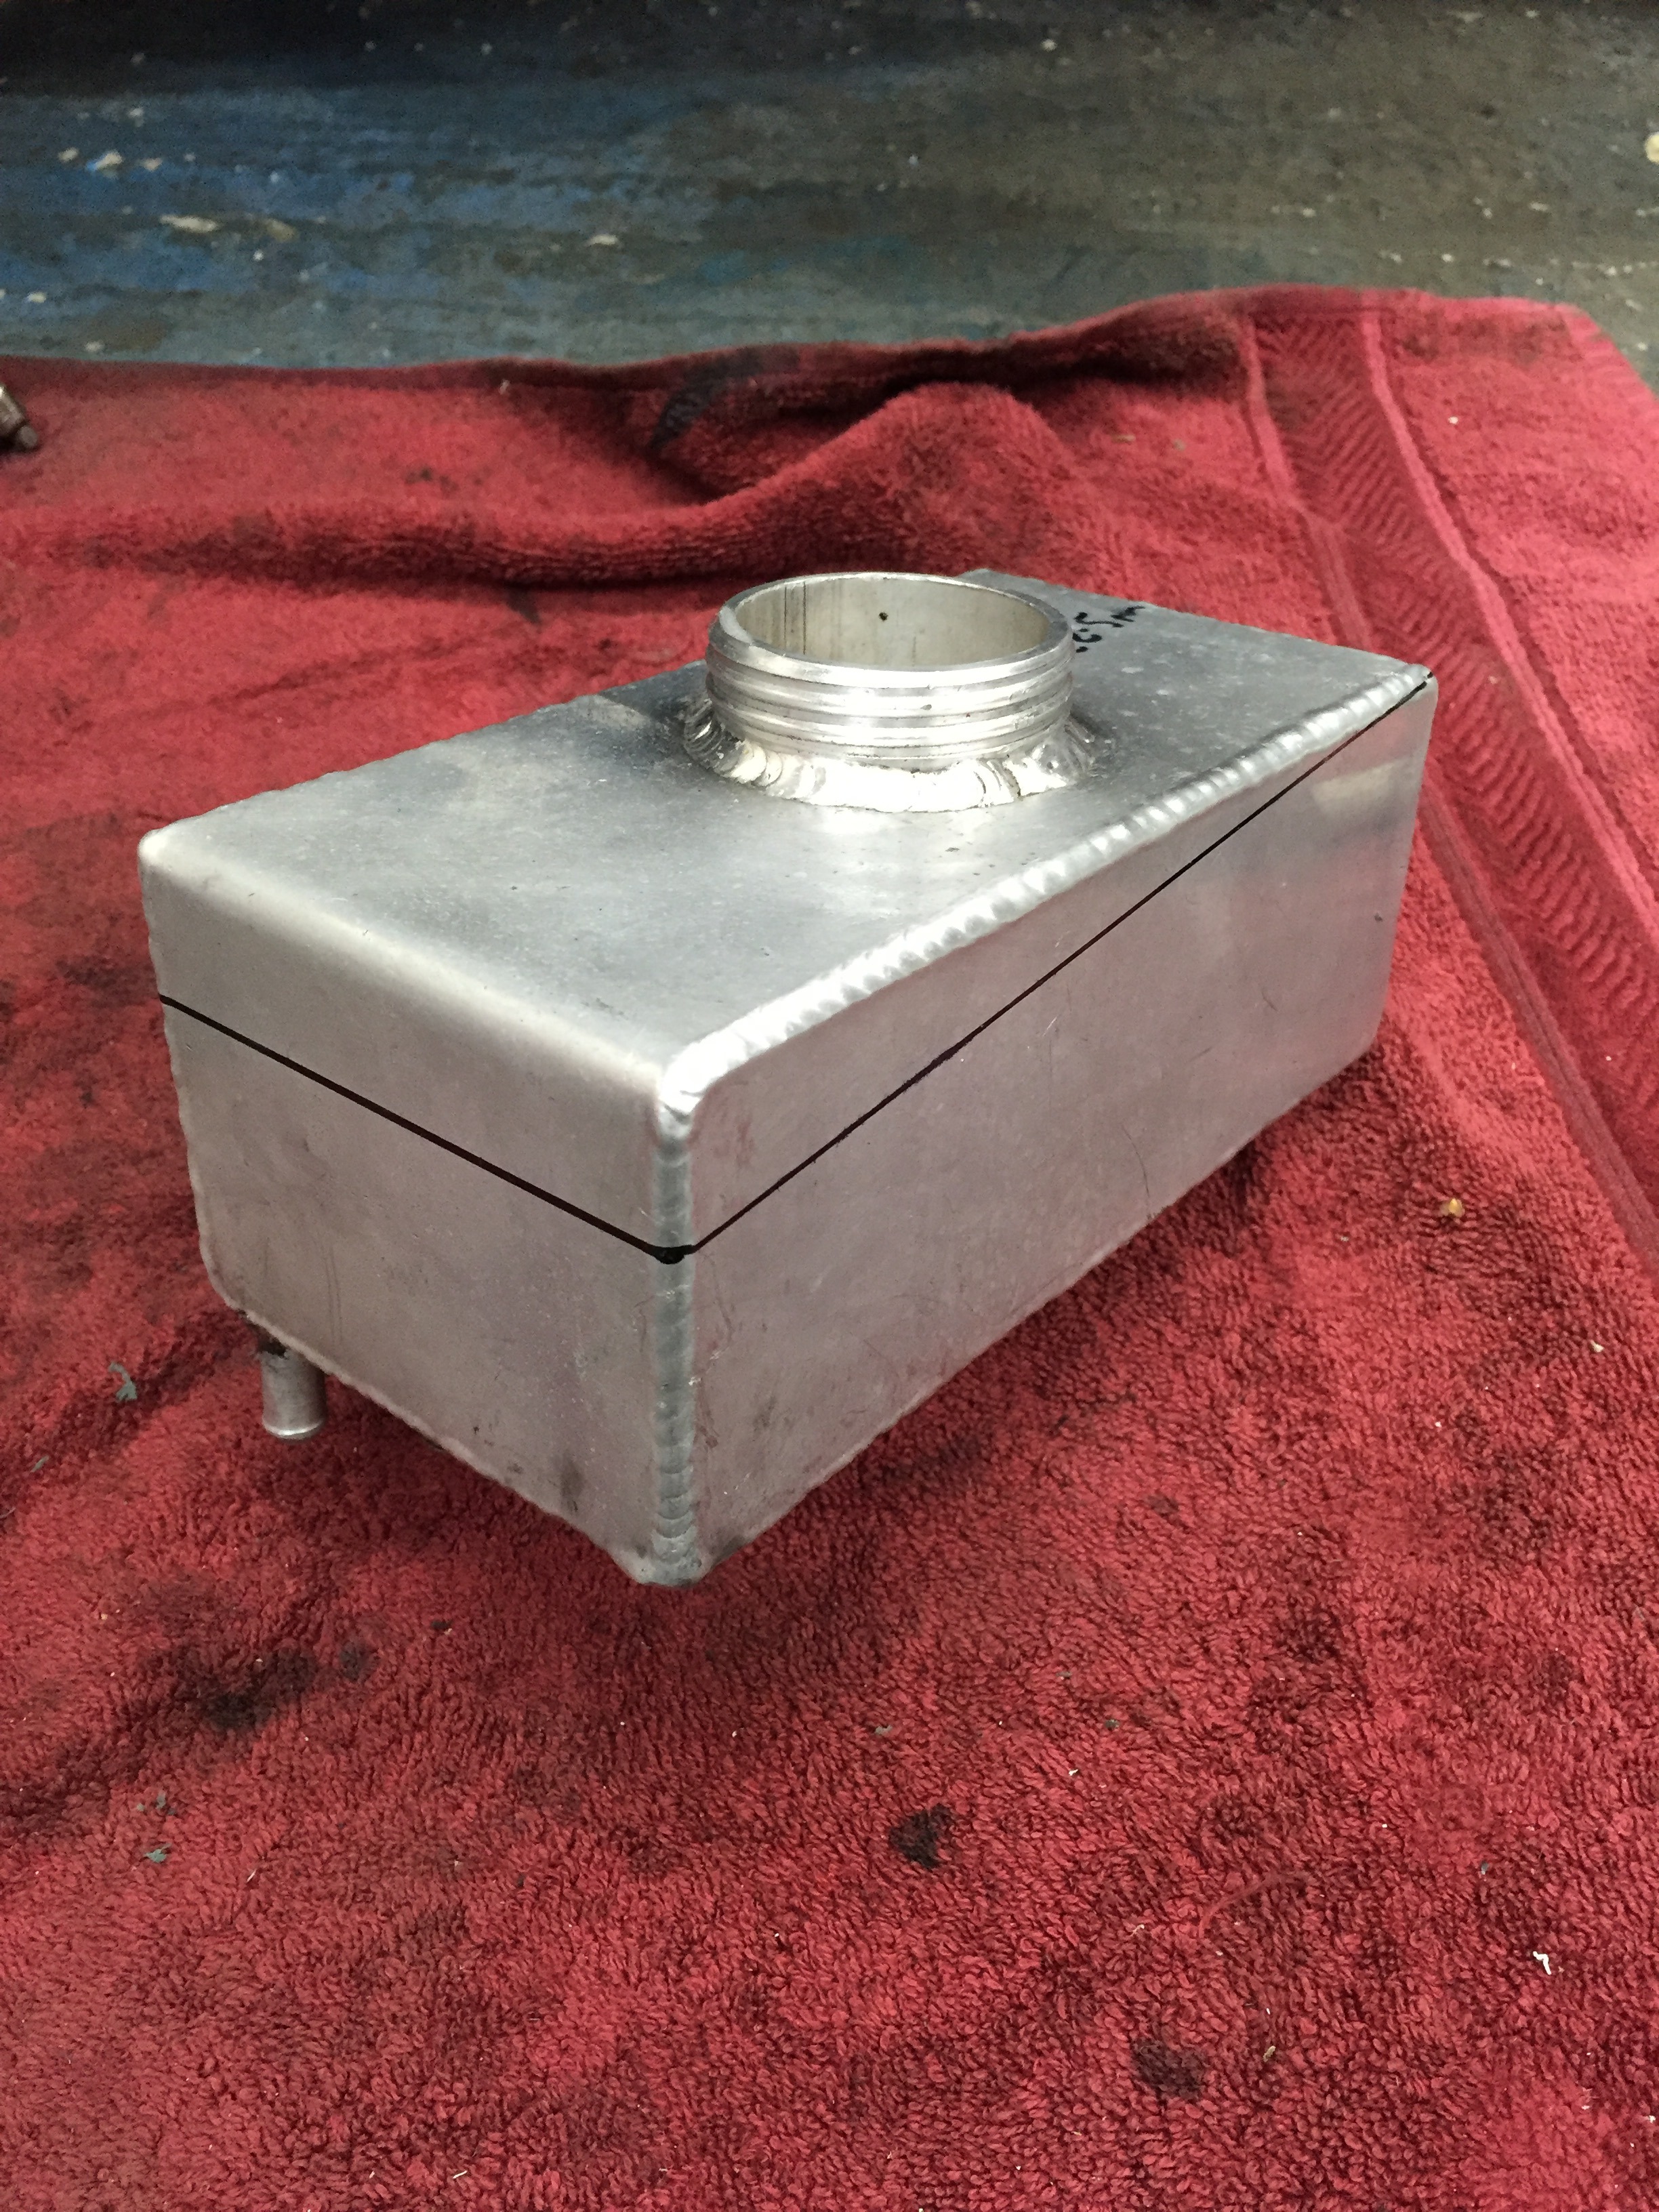
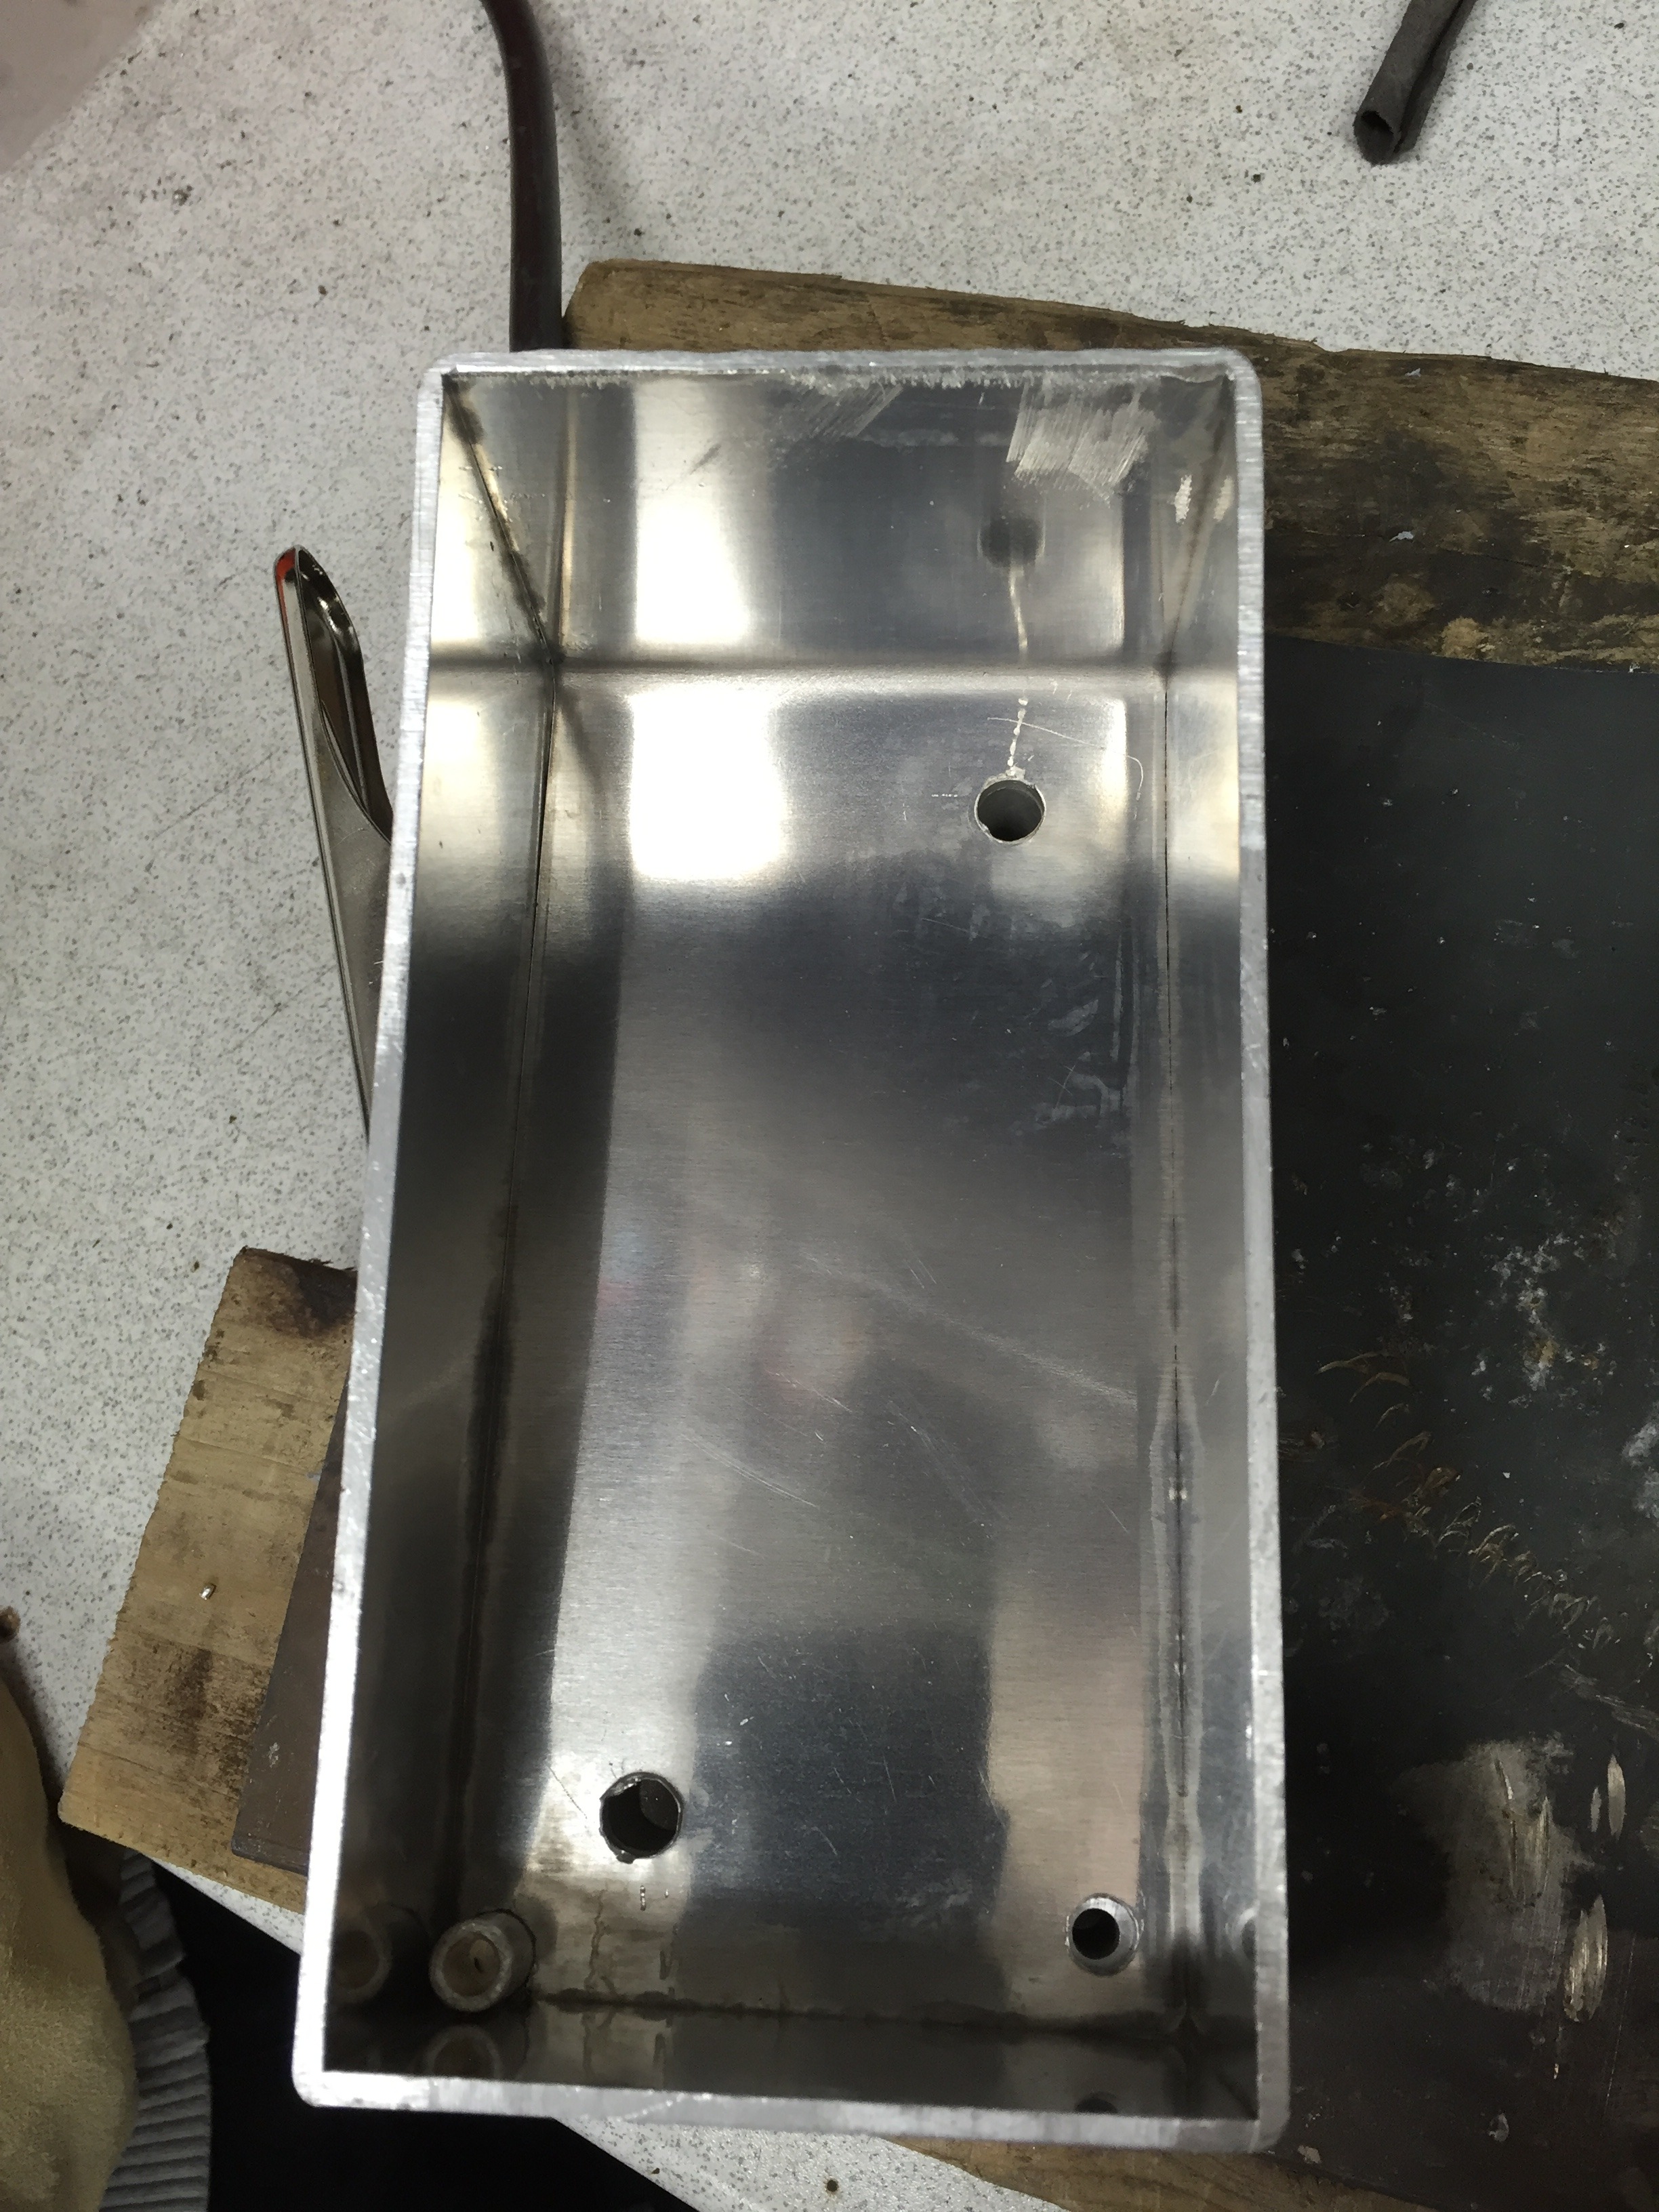
Old top cut of and levelling tank at the same time
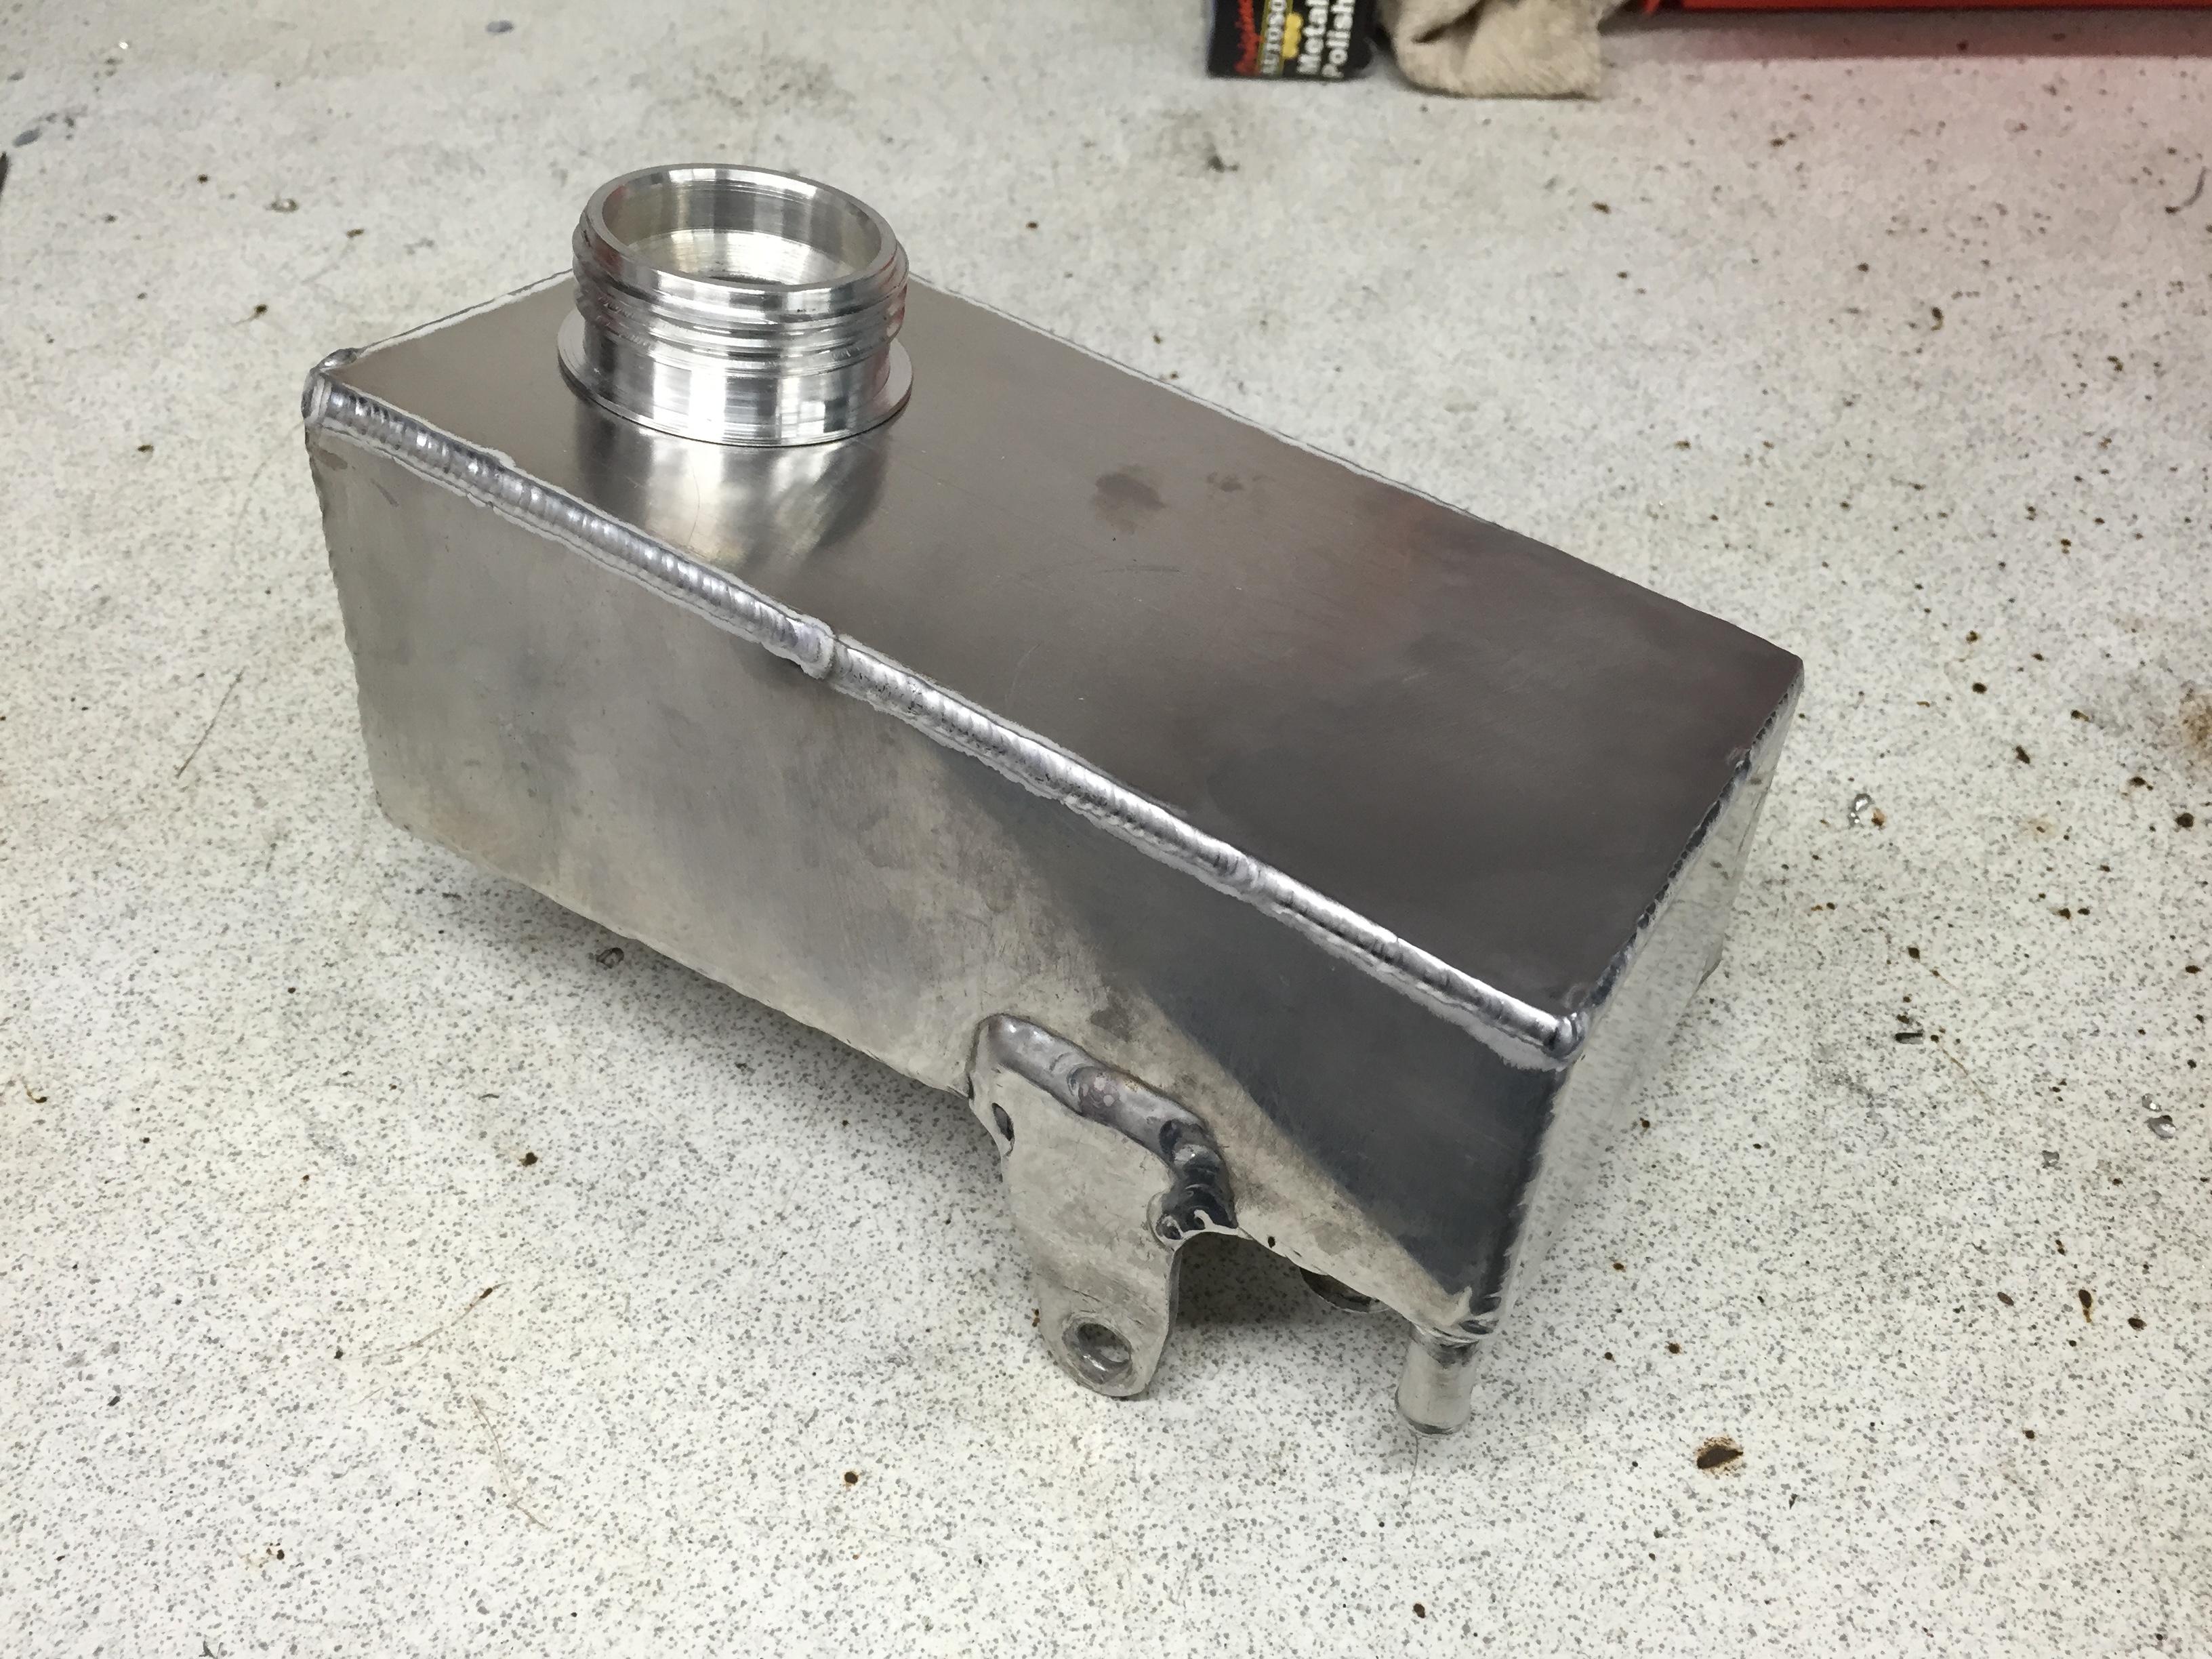
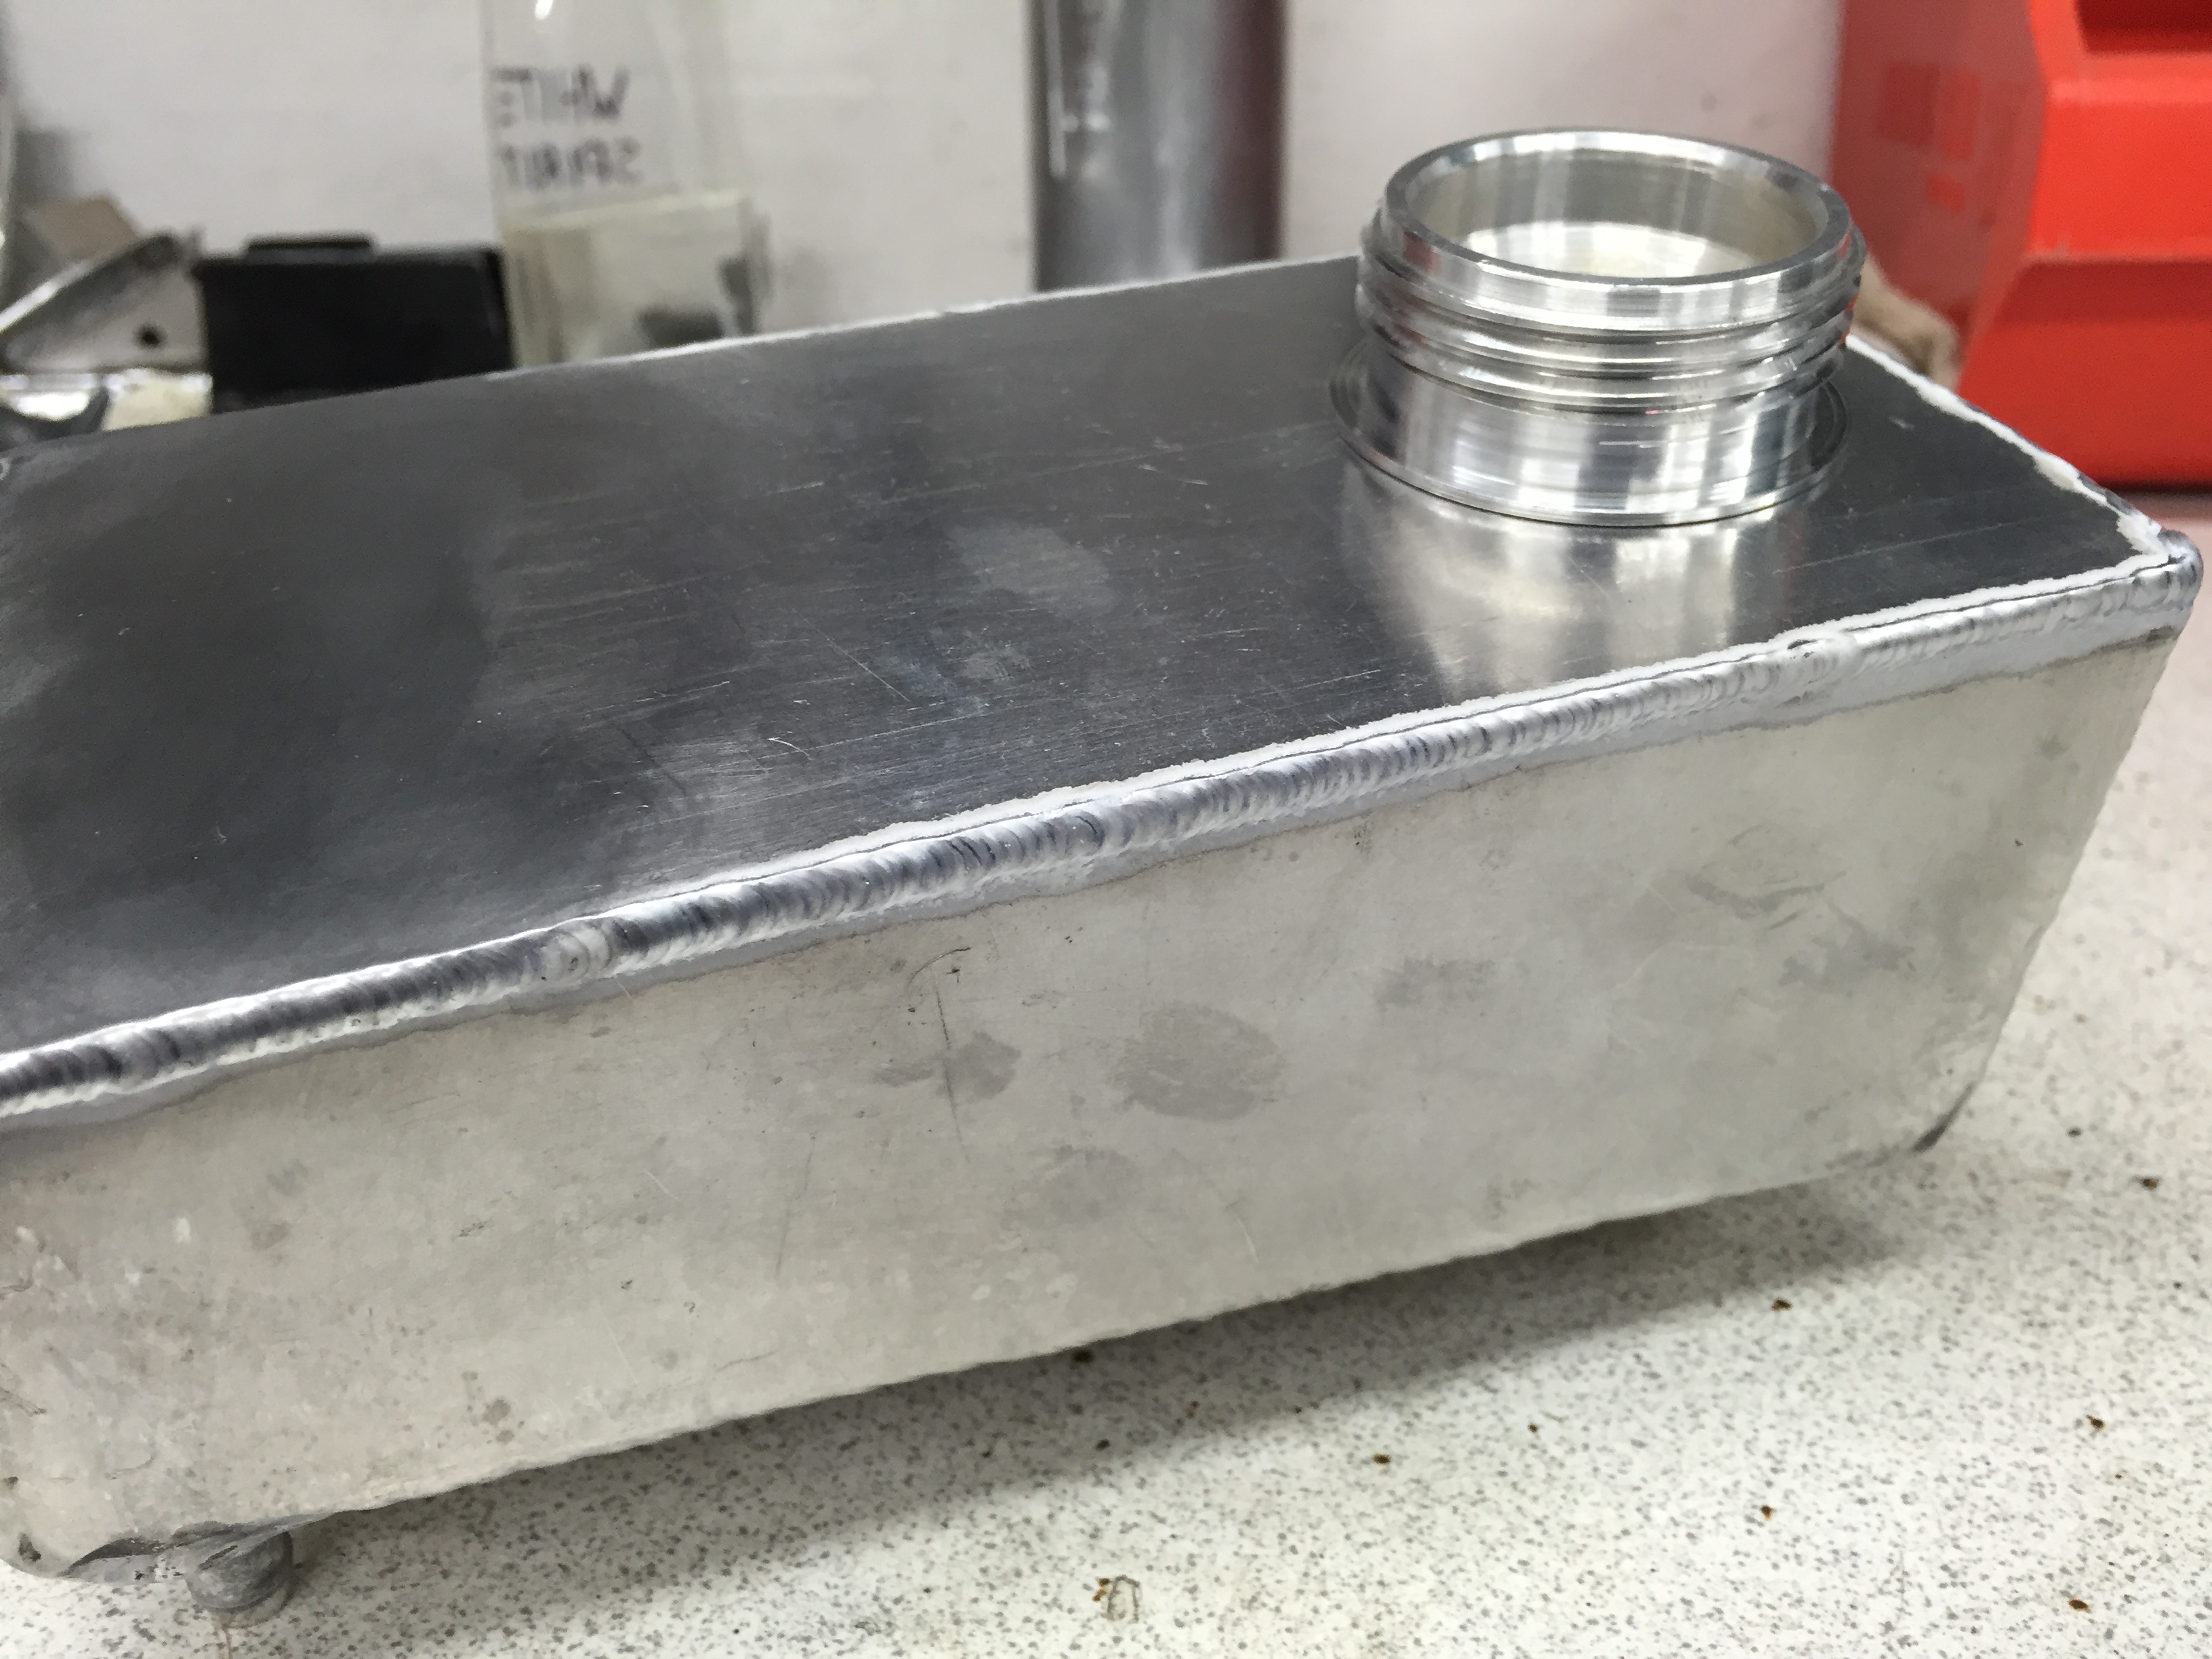
New lid made
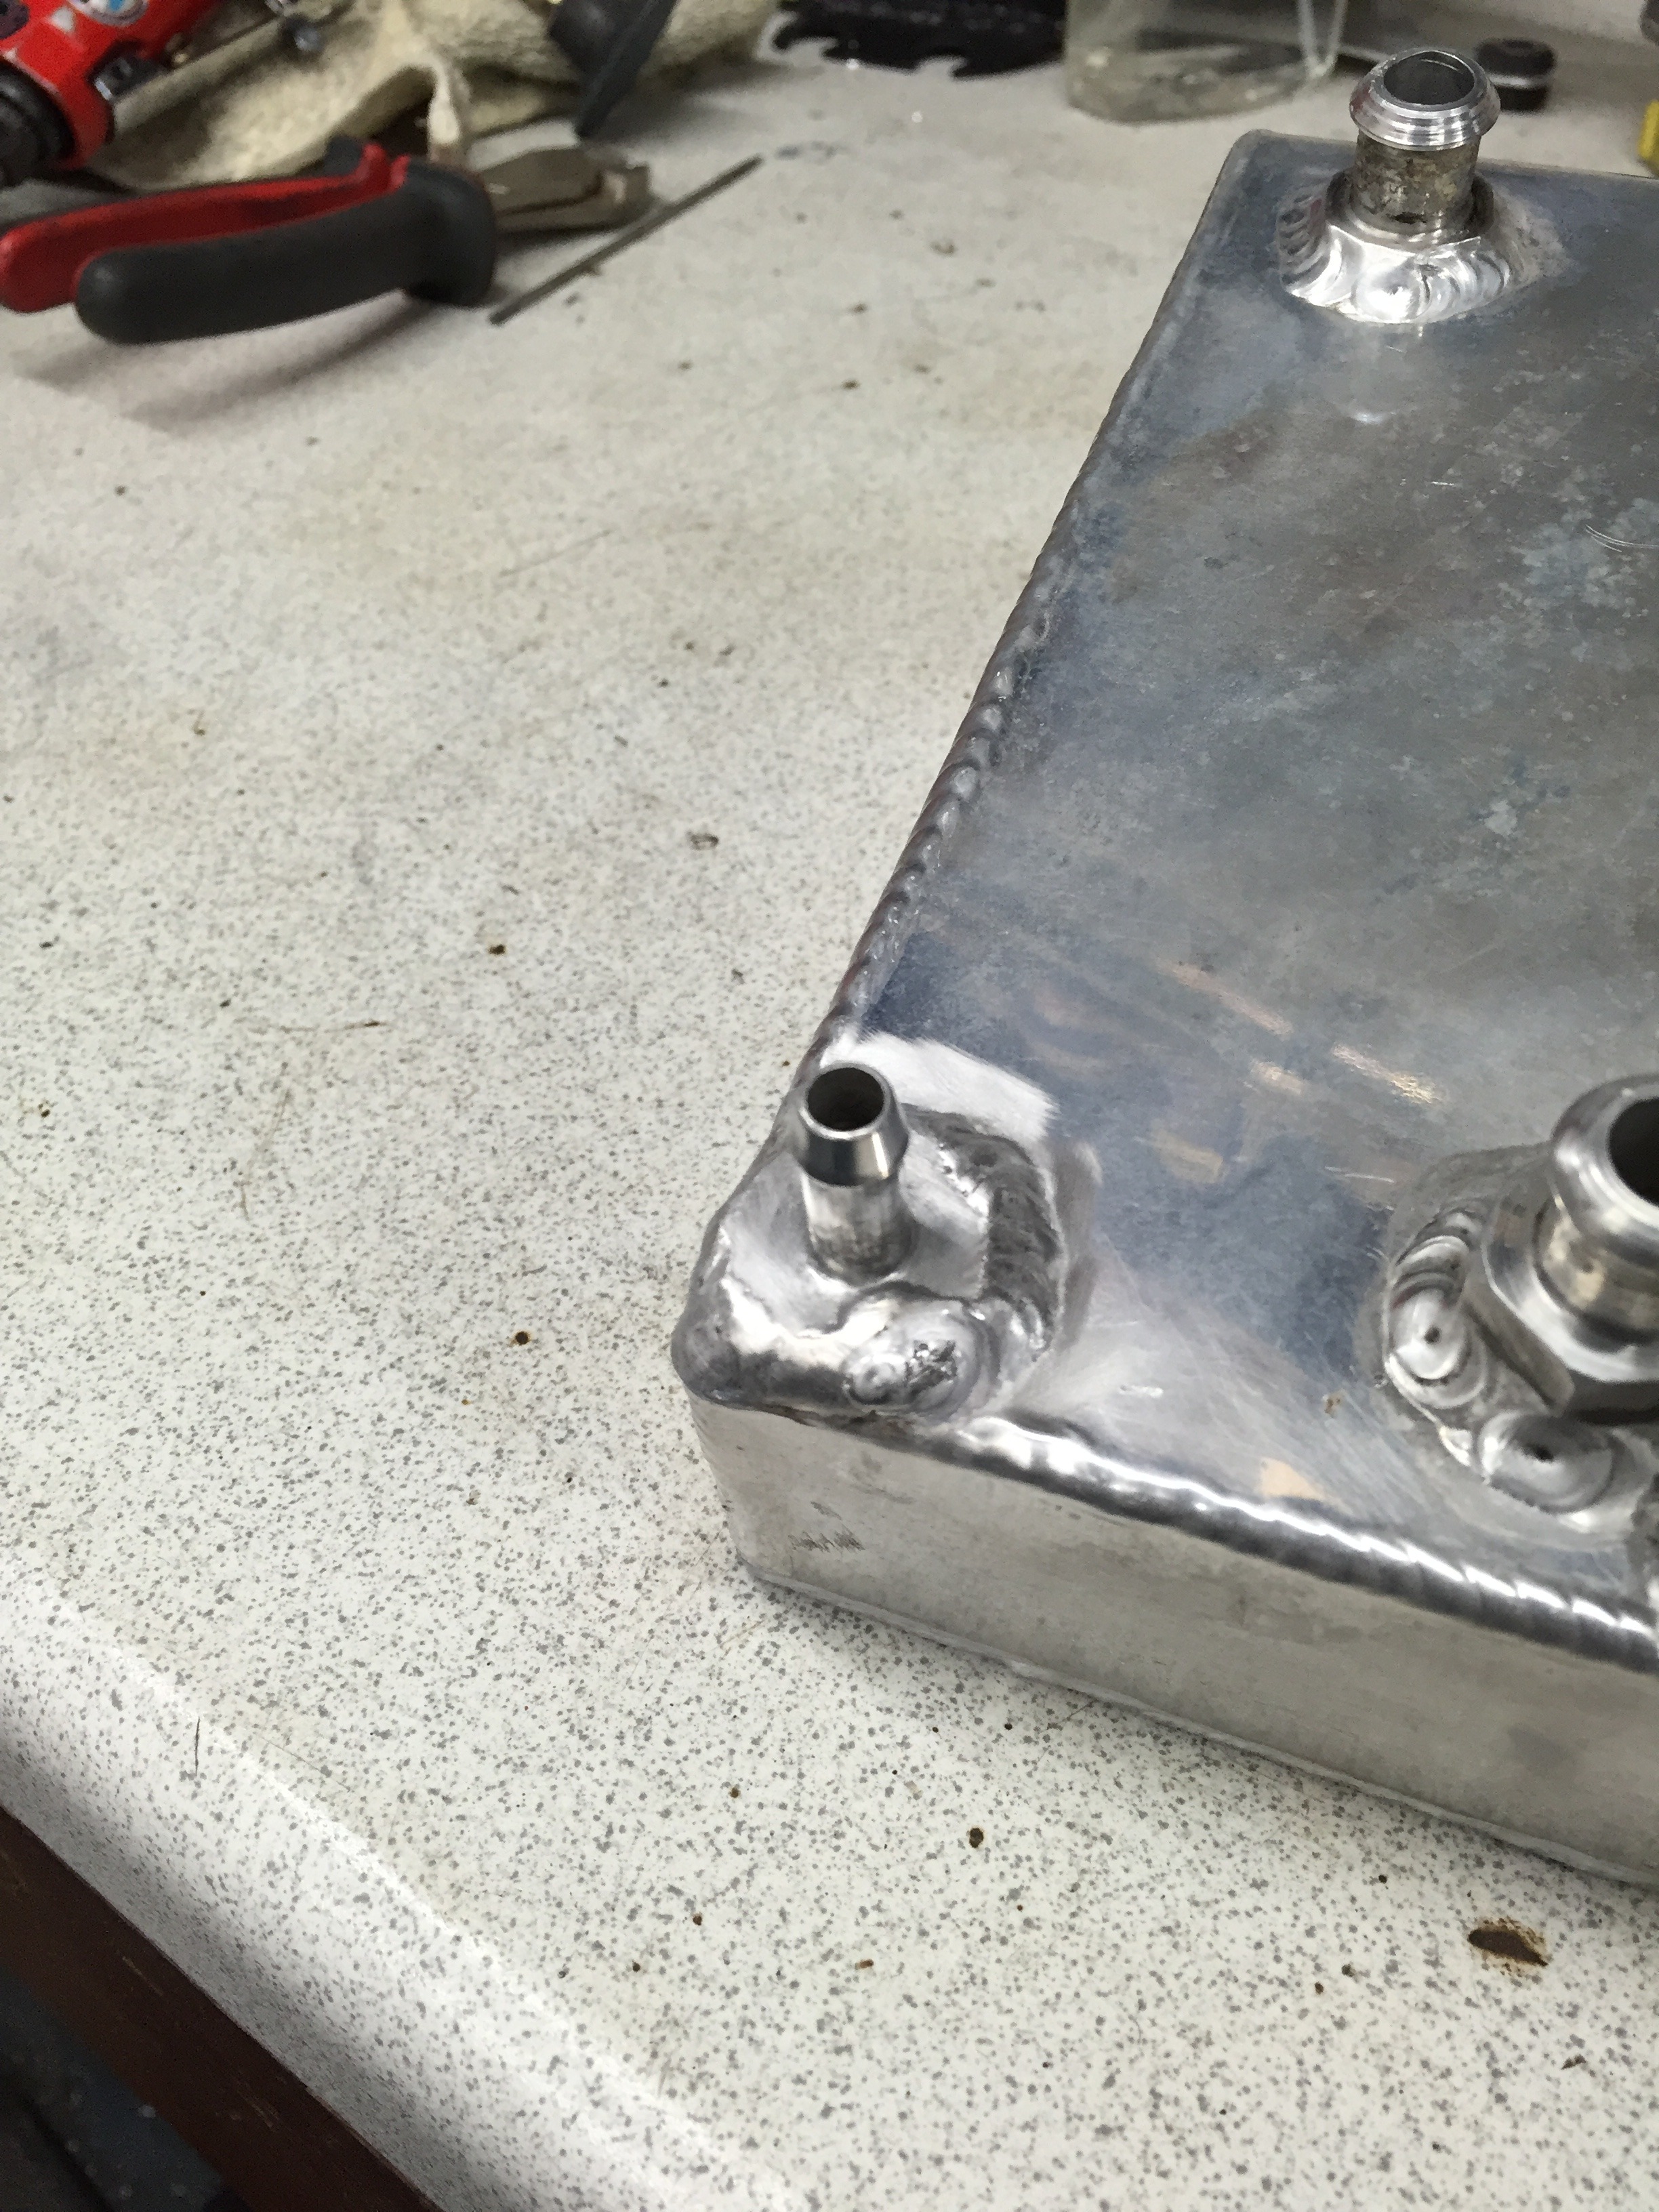
Whilst the tank was off I decided to add a take of for a hydraulic clutch conversion at a later date
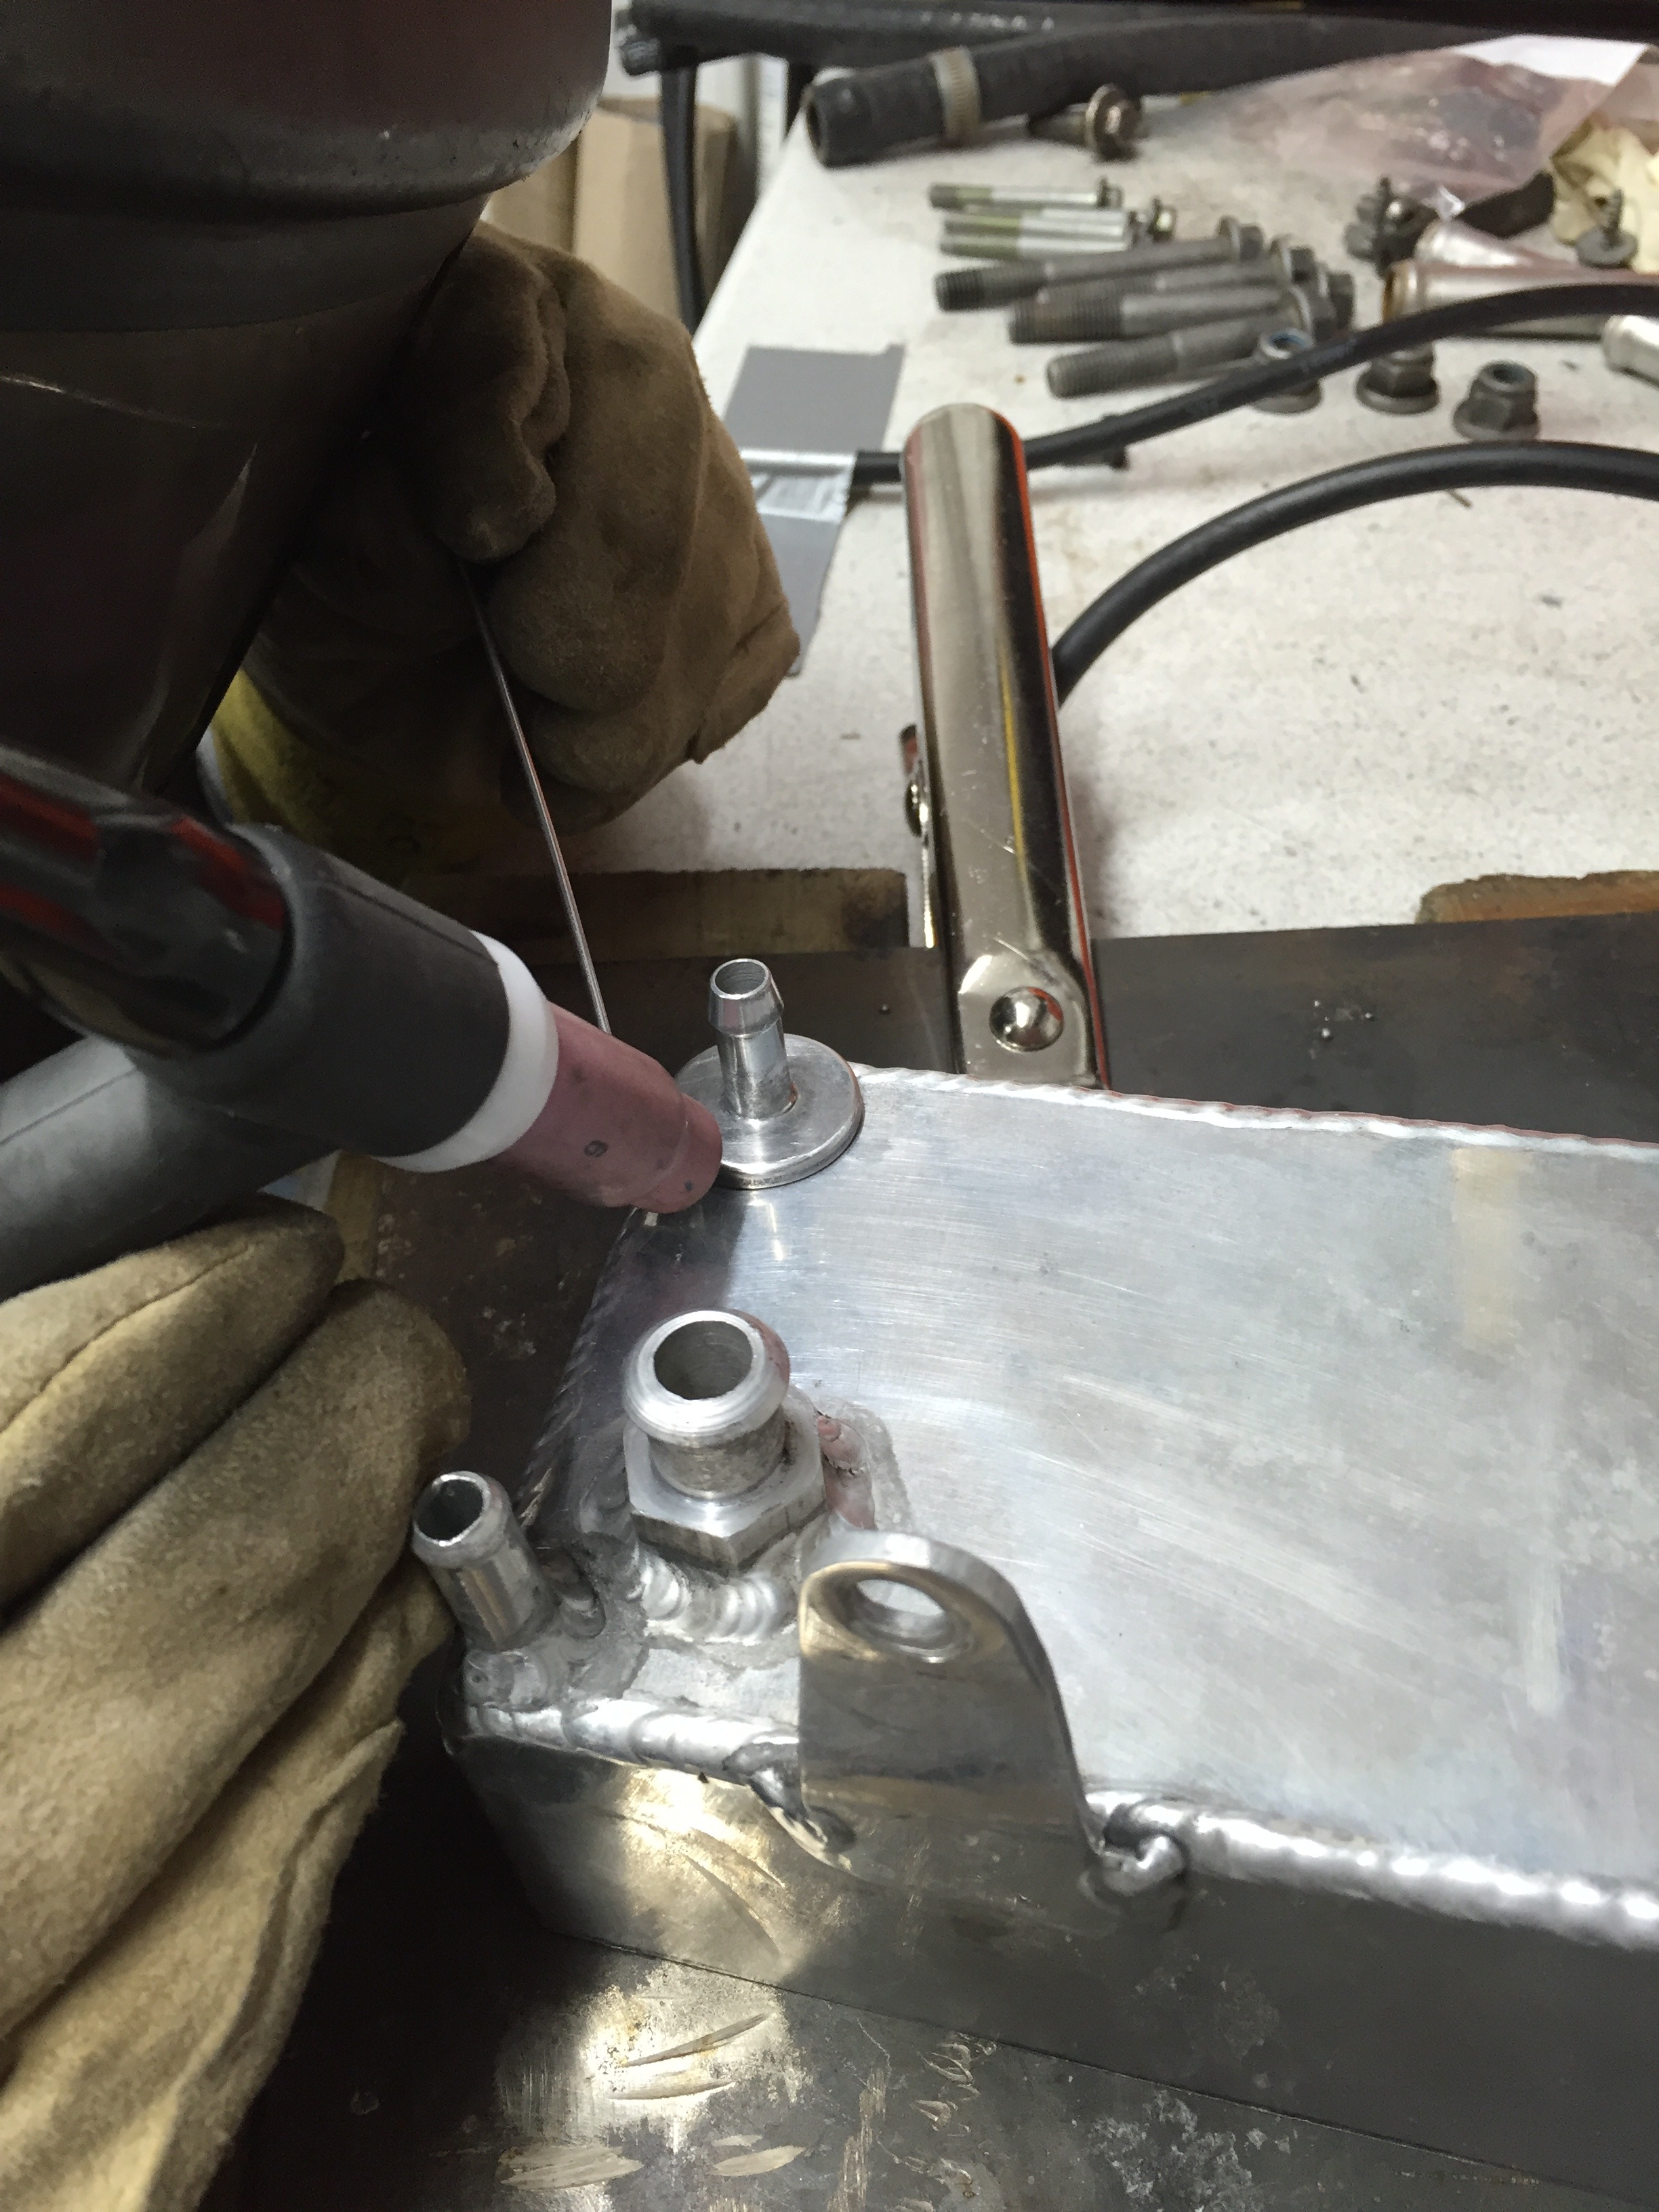
Then it was time to get it all welded back together. A while ago we bought a TIG welder as both my brother and I always wanted to learn how to weld aluminium to allow us to do more work on the cars by ourselves. So we are completely self taught and when I say we I mean my brother Ben as I have yet to spend enough time practising the art! So please be kind with our welds as we are still learning, any tips would be greatly appreciated!
That's it for now, will get the next bit of progress up shortly.
Thanks for looking
Small improvement inside.. Old 'nail varnish effect' radio out and in with a more useable headunit albeit a little old skool!


Then onto another small problem that's being annoying me for a while. The brake reservoir pot had in my opinion been made wrong in the beginning. It didn't have a flat top to it and actually angled back down to the bulkhead, it was fitted with a screw cap normally associated with a power steering bottle. This meant that the brake fluid level sensor had then been bodged into the top.


So with a little thought I came up with a better solution.
I have a friend who is quite handy with a lathe and asked if it was possible to make the correct screw thread for the factory brake reservoir cap... This is what he came out with


So with that made I started to remove the tank off the car, having done so I could see that over the years of leaking fluid it had attacked the paint and although not a massive issue wanted to get a better protection on before the tank went back on. I also noticed that the box made for the master cylinder had meant it came very close to the throttle cable hole. So close the cable didn't actually sit home. So made the decision to take the lot out and get it all sorted in one hit.


Also decided to take the pump out to give that a clean and check over

This is the interesting brake fluid level sensor float that's been adapted I assume to make it work of sorts with the sloping top to the tank


So on to adapting the tank


Old top cut of and levelling tank at the same time

New lid made

Whilst the tank was off I decided to add a take of for a hydraulic clutch conversion at a later date


Then it was time to get it all welded back together. A while ago we bought a TIG welder as both my brother and I always wanted to learn how to weld aluminium to allow us to do more work on the cars by ourselves. So we are completely self taught and when I say we I mean my brother Ben as I have yet to spend enough time practising the art! So please be kind with our welds as we are still learning, any tips would be greatly appreciated!


That's it for now, will get the next bit of progress up shortly.
Thanks for looking
Last edited by McCloud 85; 13-03-2016 at 11:15 PM.
 14-03-2016, 09:58 AM
#137
PassionFord Regular
Thread Starter
We still feel there's a lot more learning yet. Prep on aluminium is key to a good weld too we found.
14-03-2016, 01:03 PM
#139
PassionFord Regular
Thread Starter
It's been a fascinating journey into the thoughts and processes of the people that have worked on this car over the years. Wait until you see what I found with the fuel tank!!
20-03-2016, 09:52 AM
#146
I'm Finding My Feet Here Now

So think we should start to forget how bodged this was previously and start looking at how bloody awesome it is becoming! I'm lucky to get regular updates on this and I can assure you there is much more awesomeness to come....!
 21-03-2016, 11:36 PM
#149
PassionFord Regular
Thread Starter
Thanks very much!
The fuel tank 'episode' is on its way! It's had a hard life for sure this car, don't think it's had much attention over the years and so it's simply just a case of knowing that everything needs looking at.
Thanks Paul, you have first hand heard all the problems with this thing and know the time more than anything I've spent on it so far.. Hopefully soon it will be a long way from where it was and therefore appear a different car!
Those beads look nice and even, that's not bad at all for 1.5 hrs practice! Ben said the foot pedal made a massive difference in terms of being able to control the arc and therefore puddle size and heat into the aluminium. I really need to get up to speed with the TIG welder and do it myself! Will take a look at that on you tube. Thanks
Whilst I'm sure Dan could bore us all to tears with his findings and probably name and shame a few forum members, I know he is keen to put his (ocd) mark on it.
So think we should start to forget how bodged this was previously and start looking at how bloody awesome it is becoming! I'm lucky to get regular updates on this and I can assure you there is much more awesomeness to come....!
So think we should start to forget how bodged this was previously and start looking at how bloody awesome it is becoming! I'm lucky to get regular updates on this and I can assure you there is much more awesomeness to come....!
Those beads look nice and even, that's not bad at all for 1.5 hrs practice! Ben said the foot pedal made a massive difference in terms of being able to control the arc and therefore puddle size and heat into the aluminium. I really need to get up to speed with the TIG welder and do it myself! Will take a look at that on you tube. Thanks
Last edited by McCloud 85; 21-03-2016 at 11:38 PM.
22-03-2016, 12:29 PM
#150
PassionFord Regular
Thread Starter
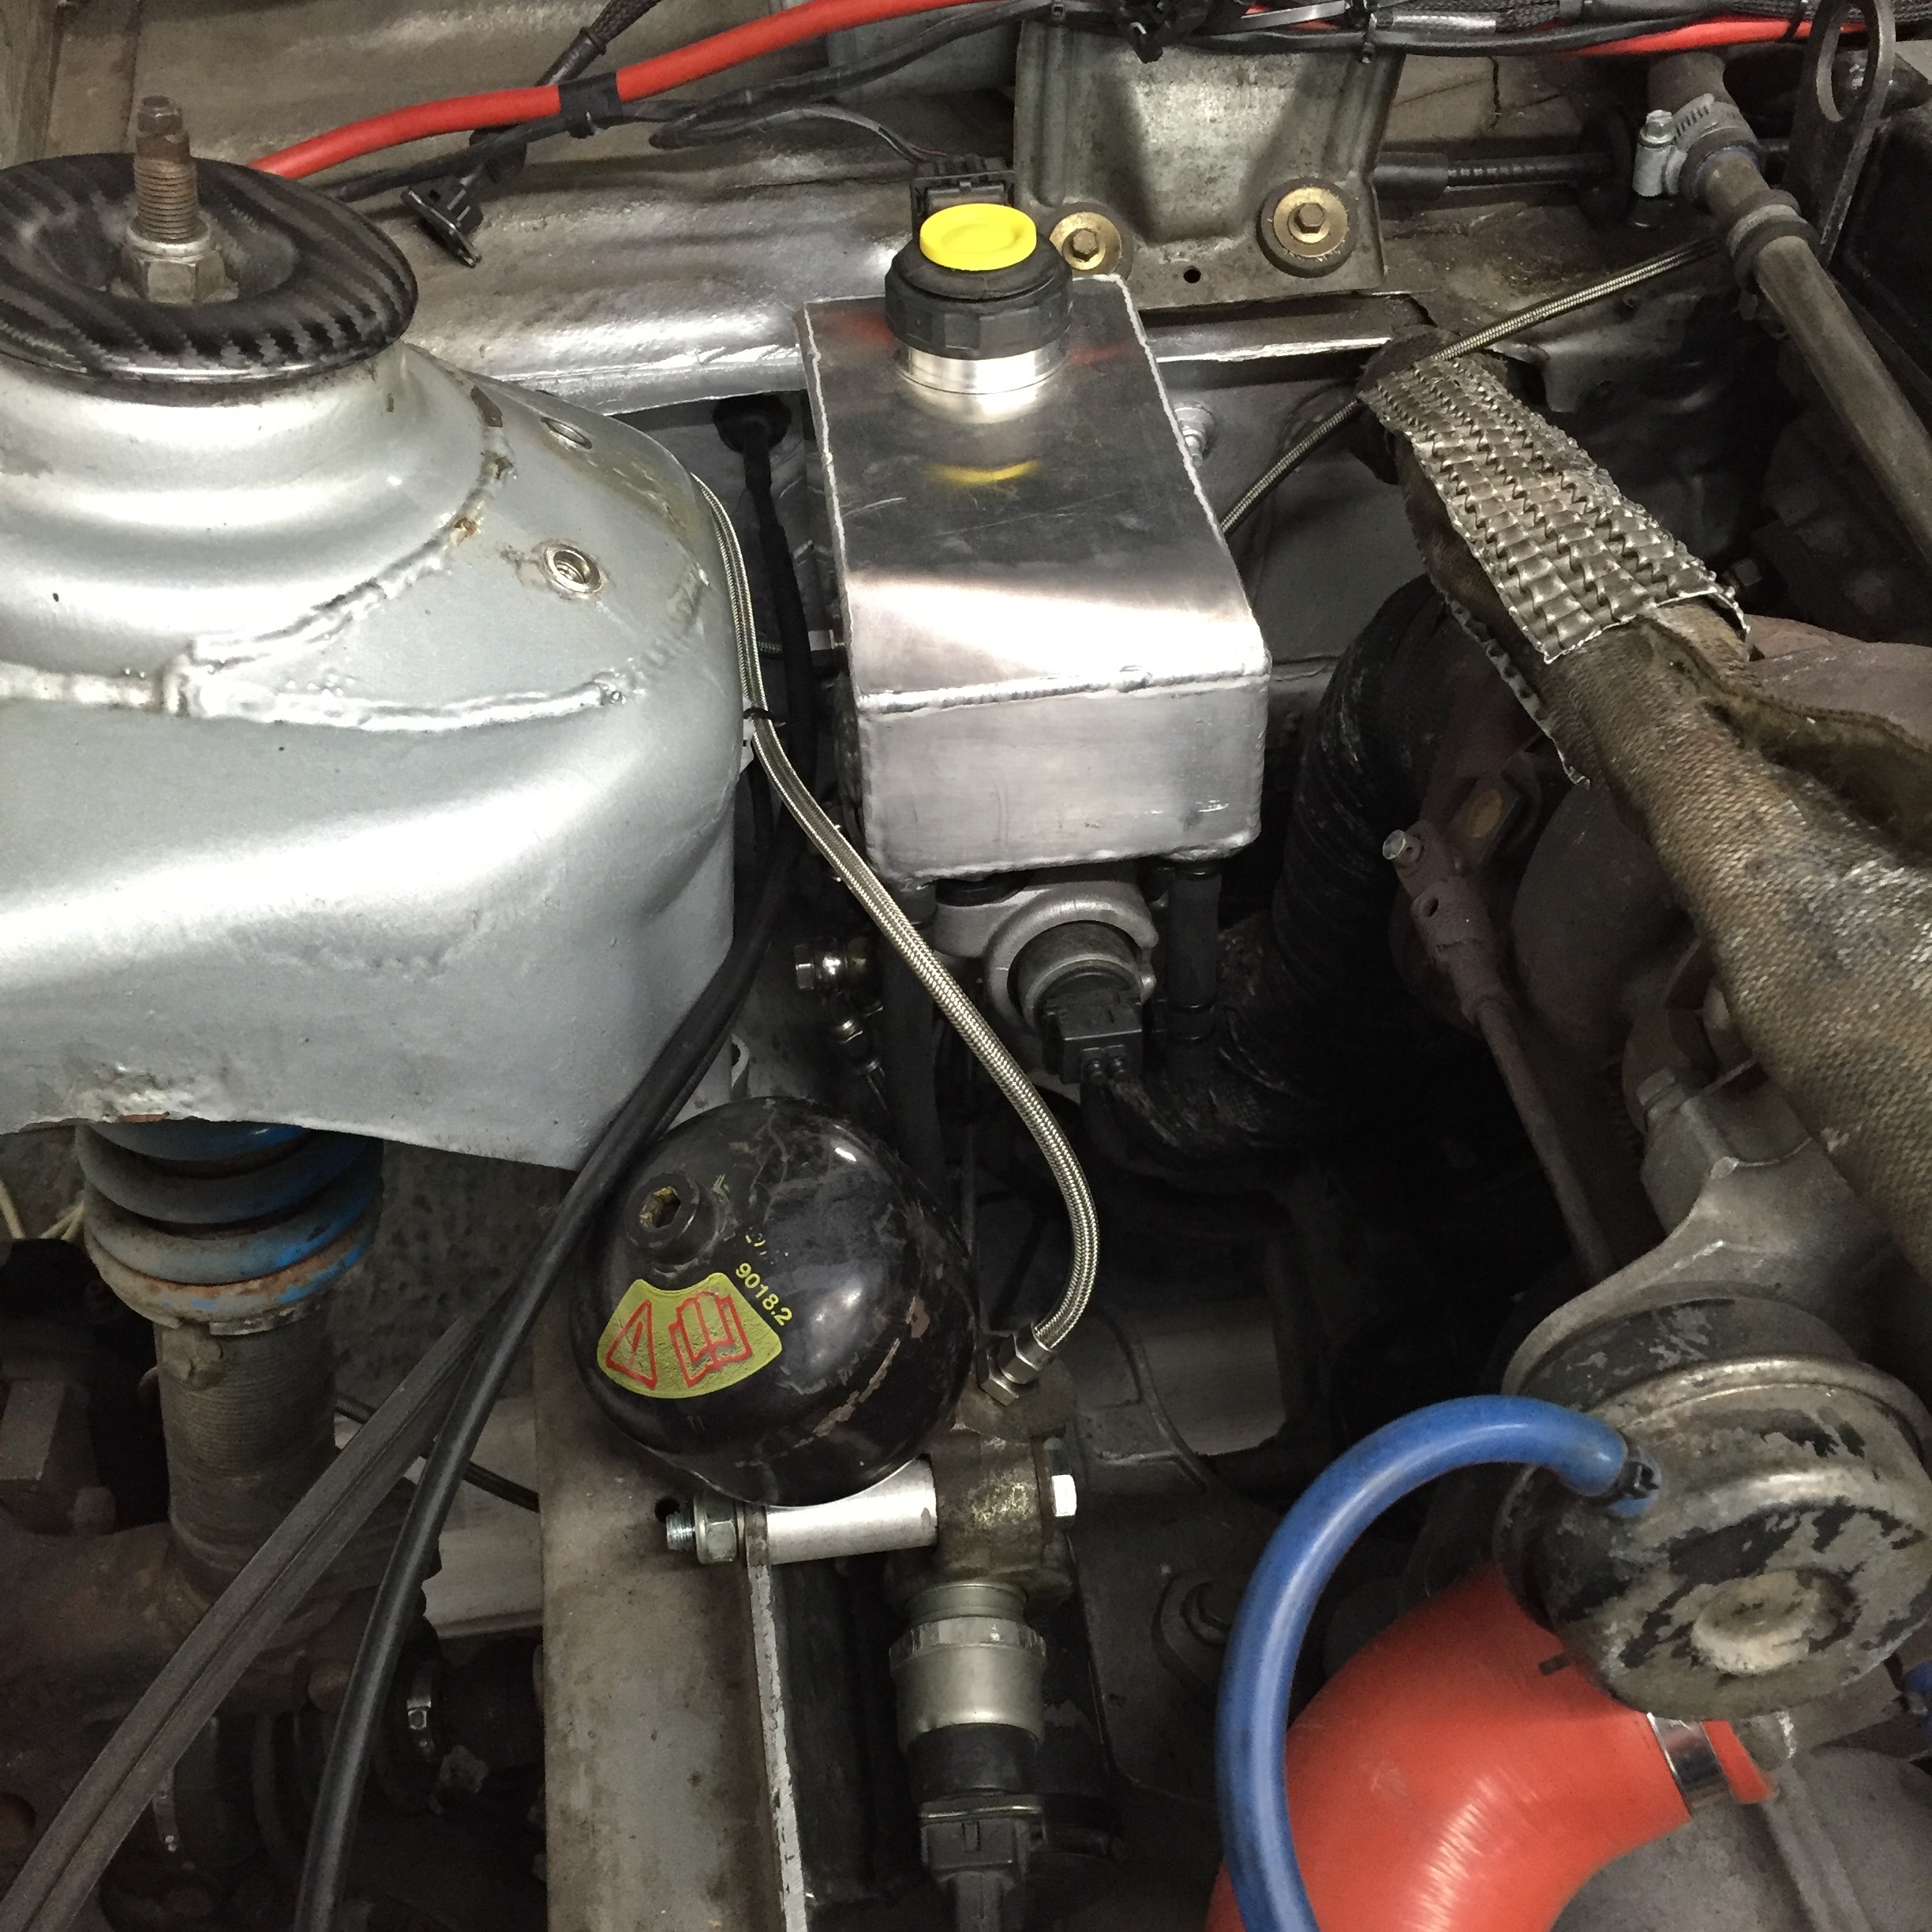
Update time..
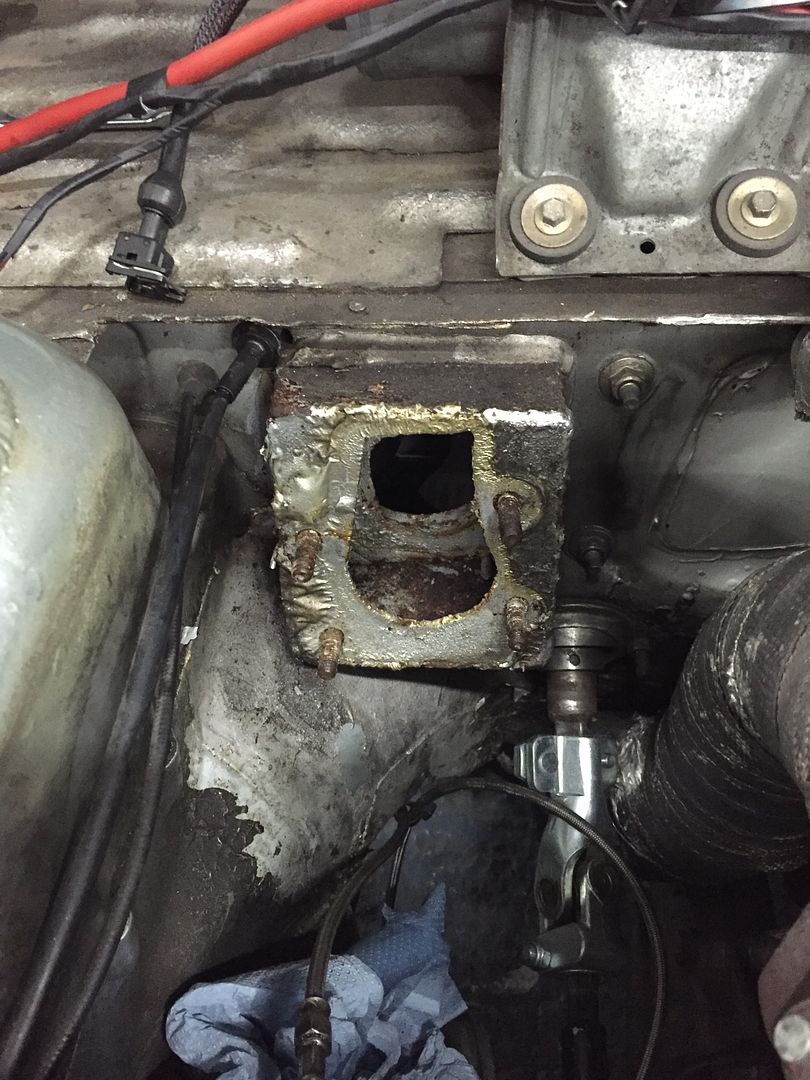
With the reservoir modified to suit the install I moved my attentions onto the master cylinder mount. This has seen better days and after all the years of brake fluid spilling out, it needed some paint. I noticed however the throttle cable wouldn't sit home because the mount had been made too large so set about taking the corner away to make room and clean the area up quickly.
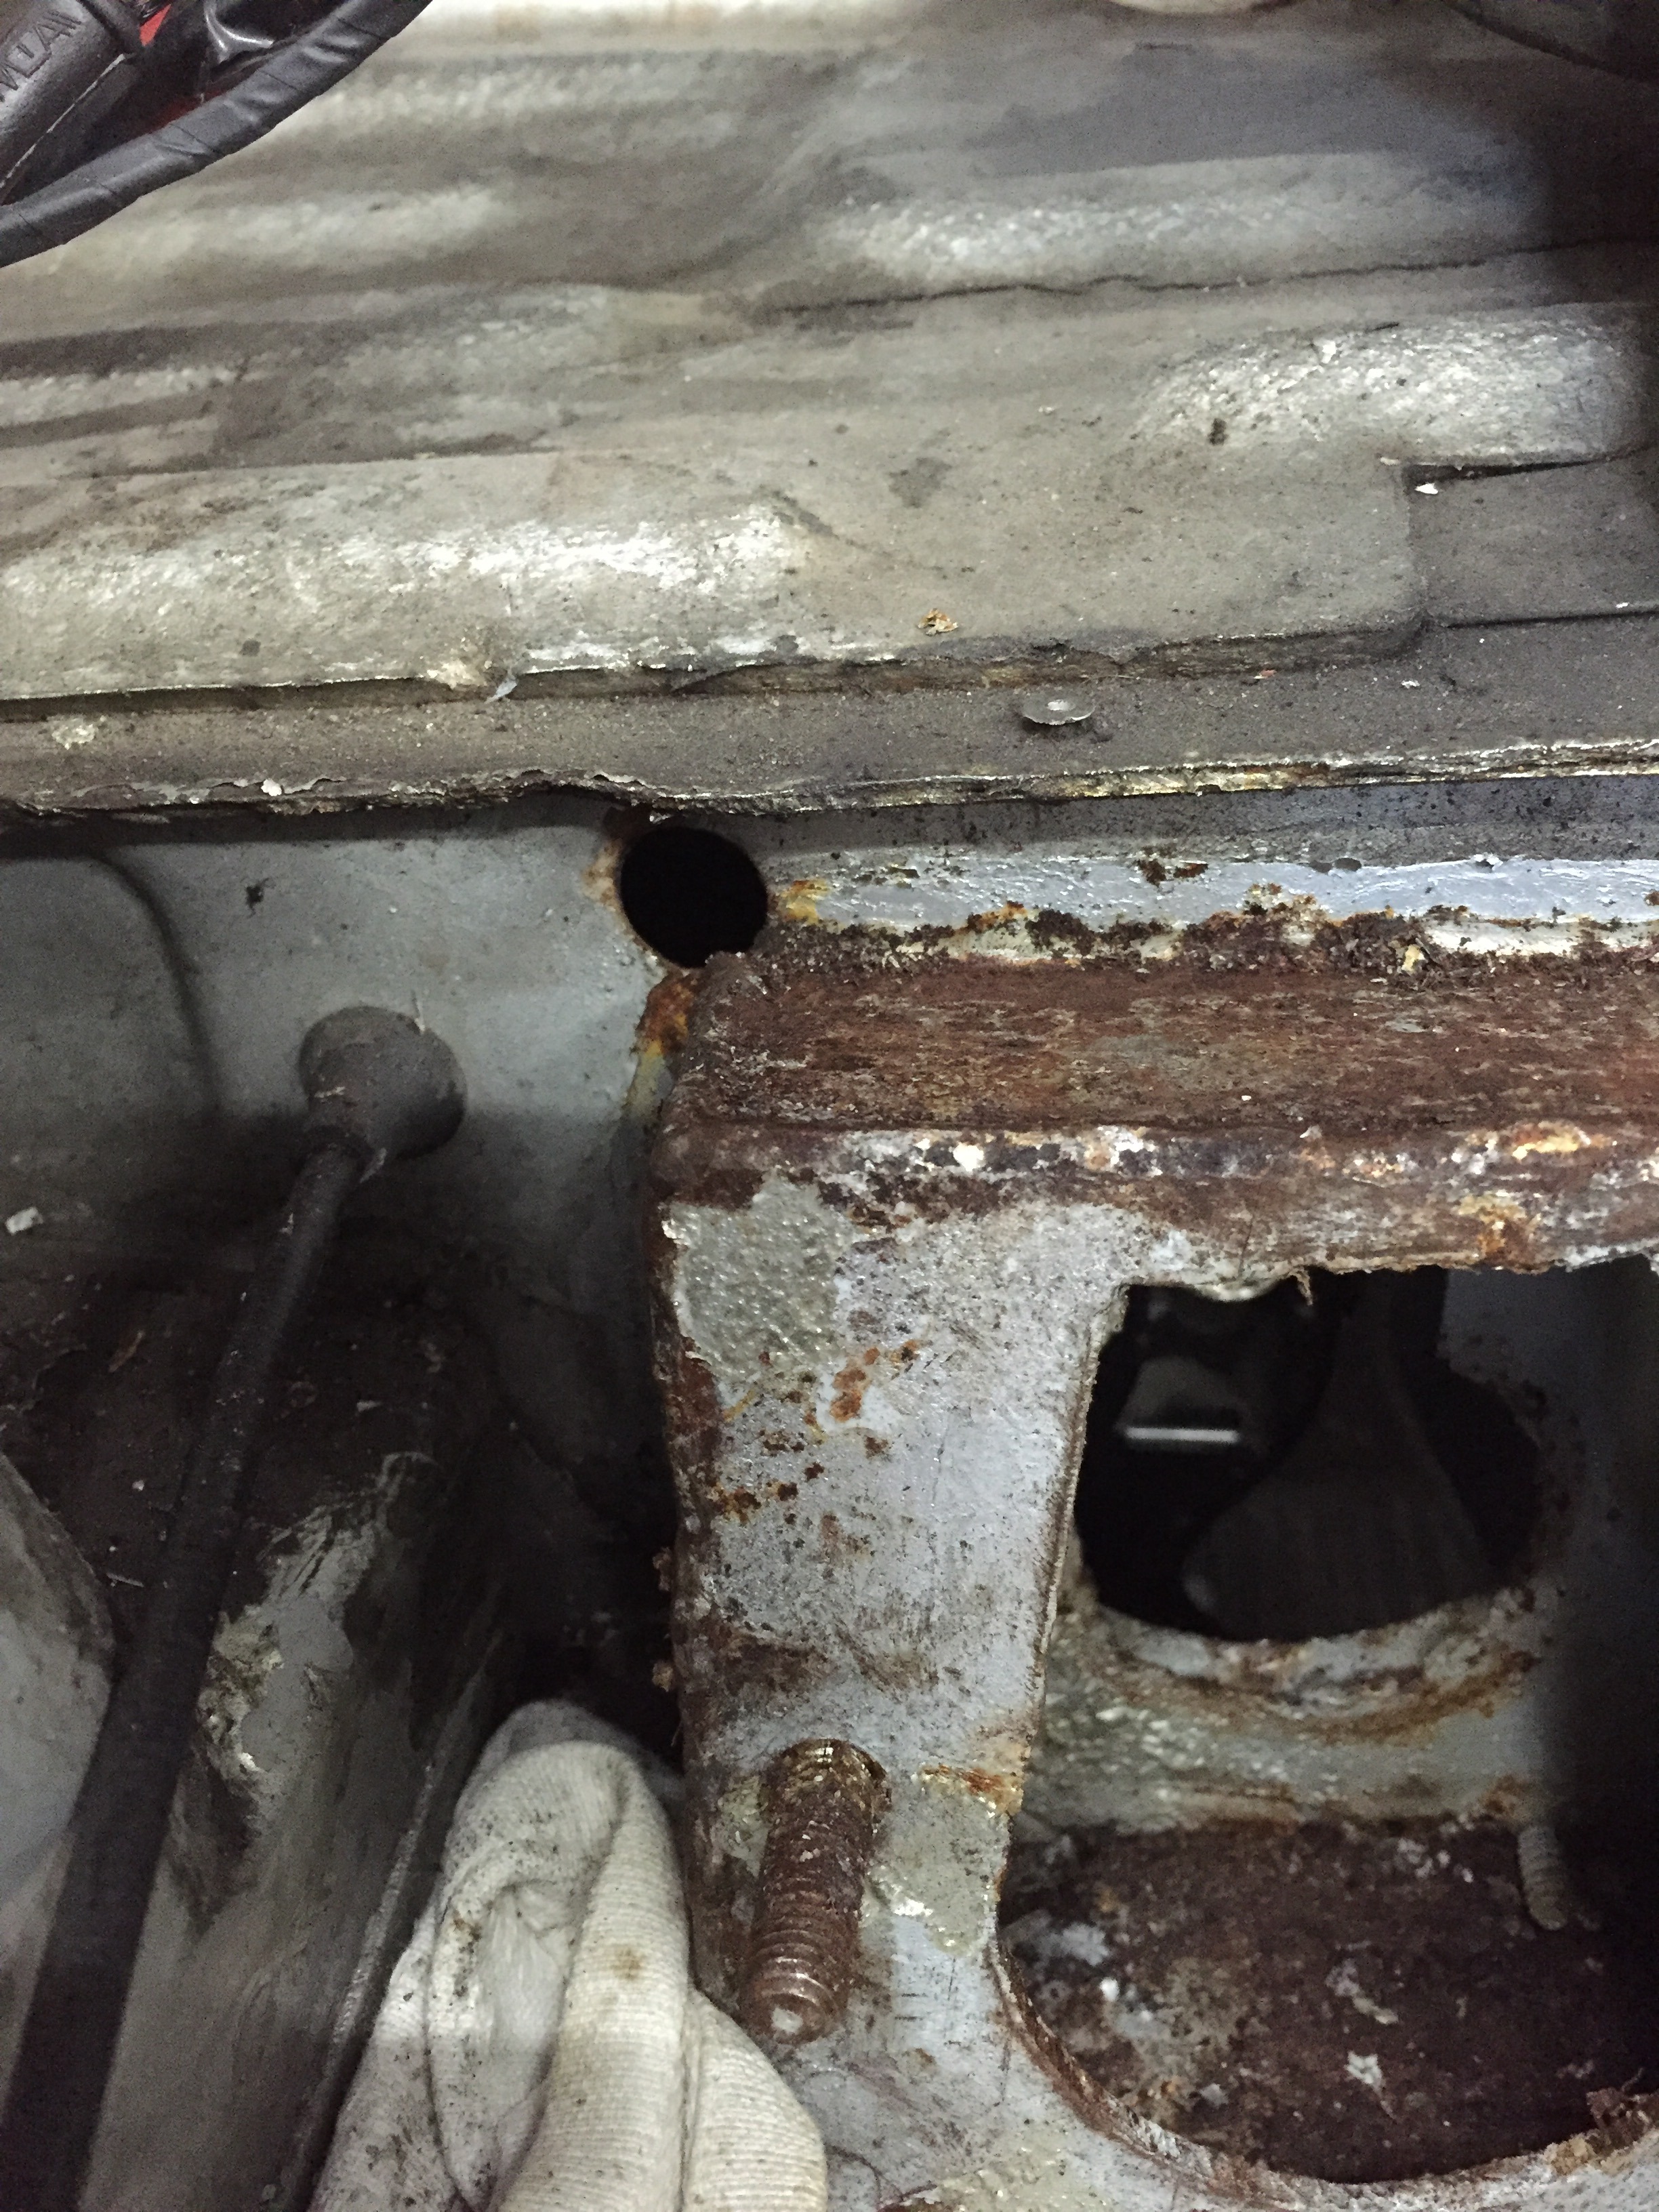
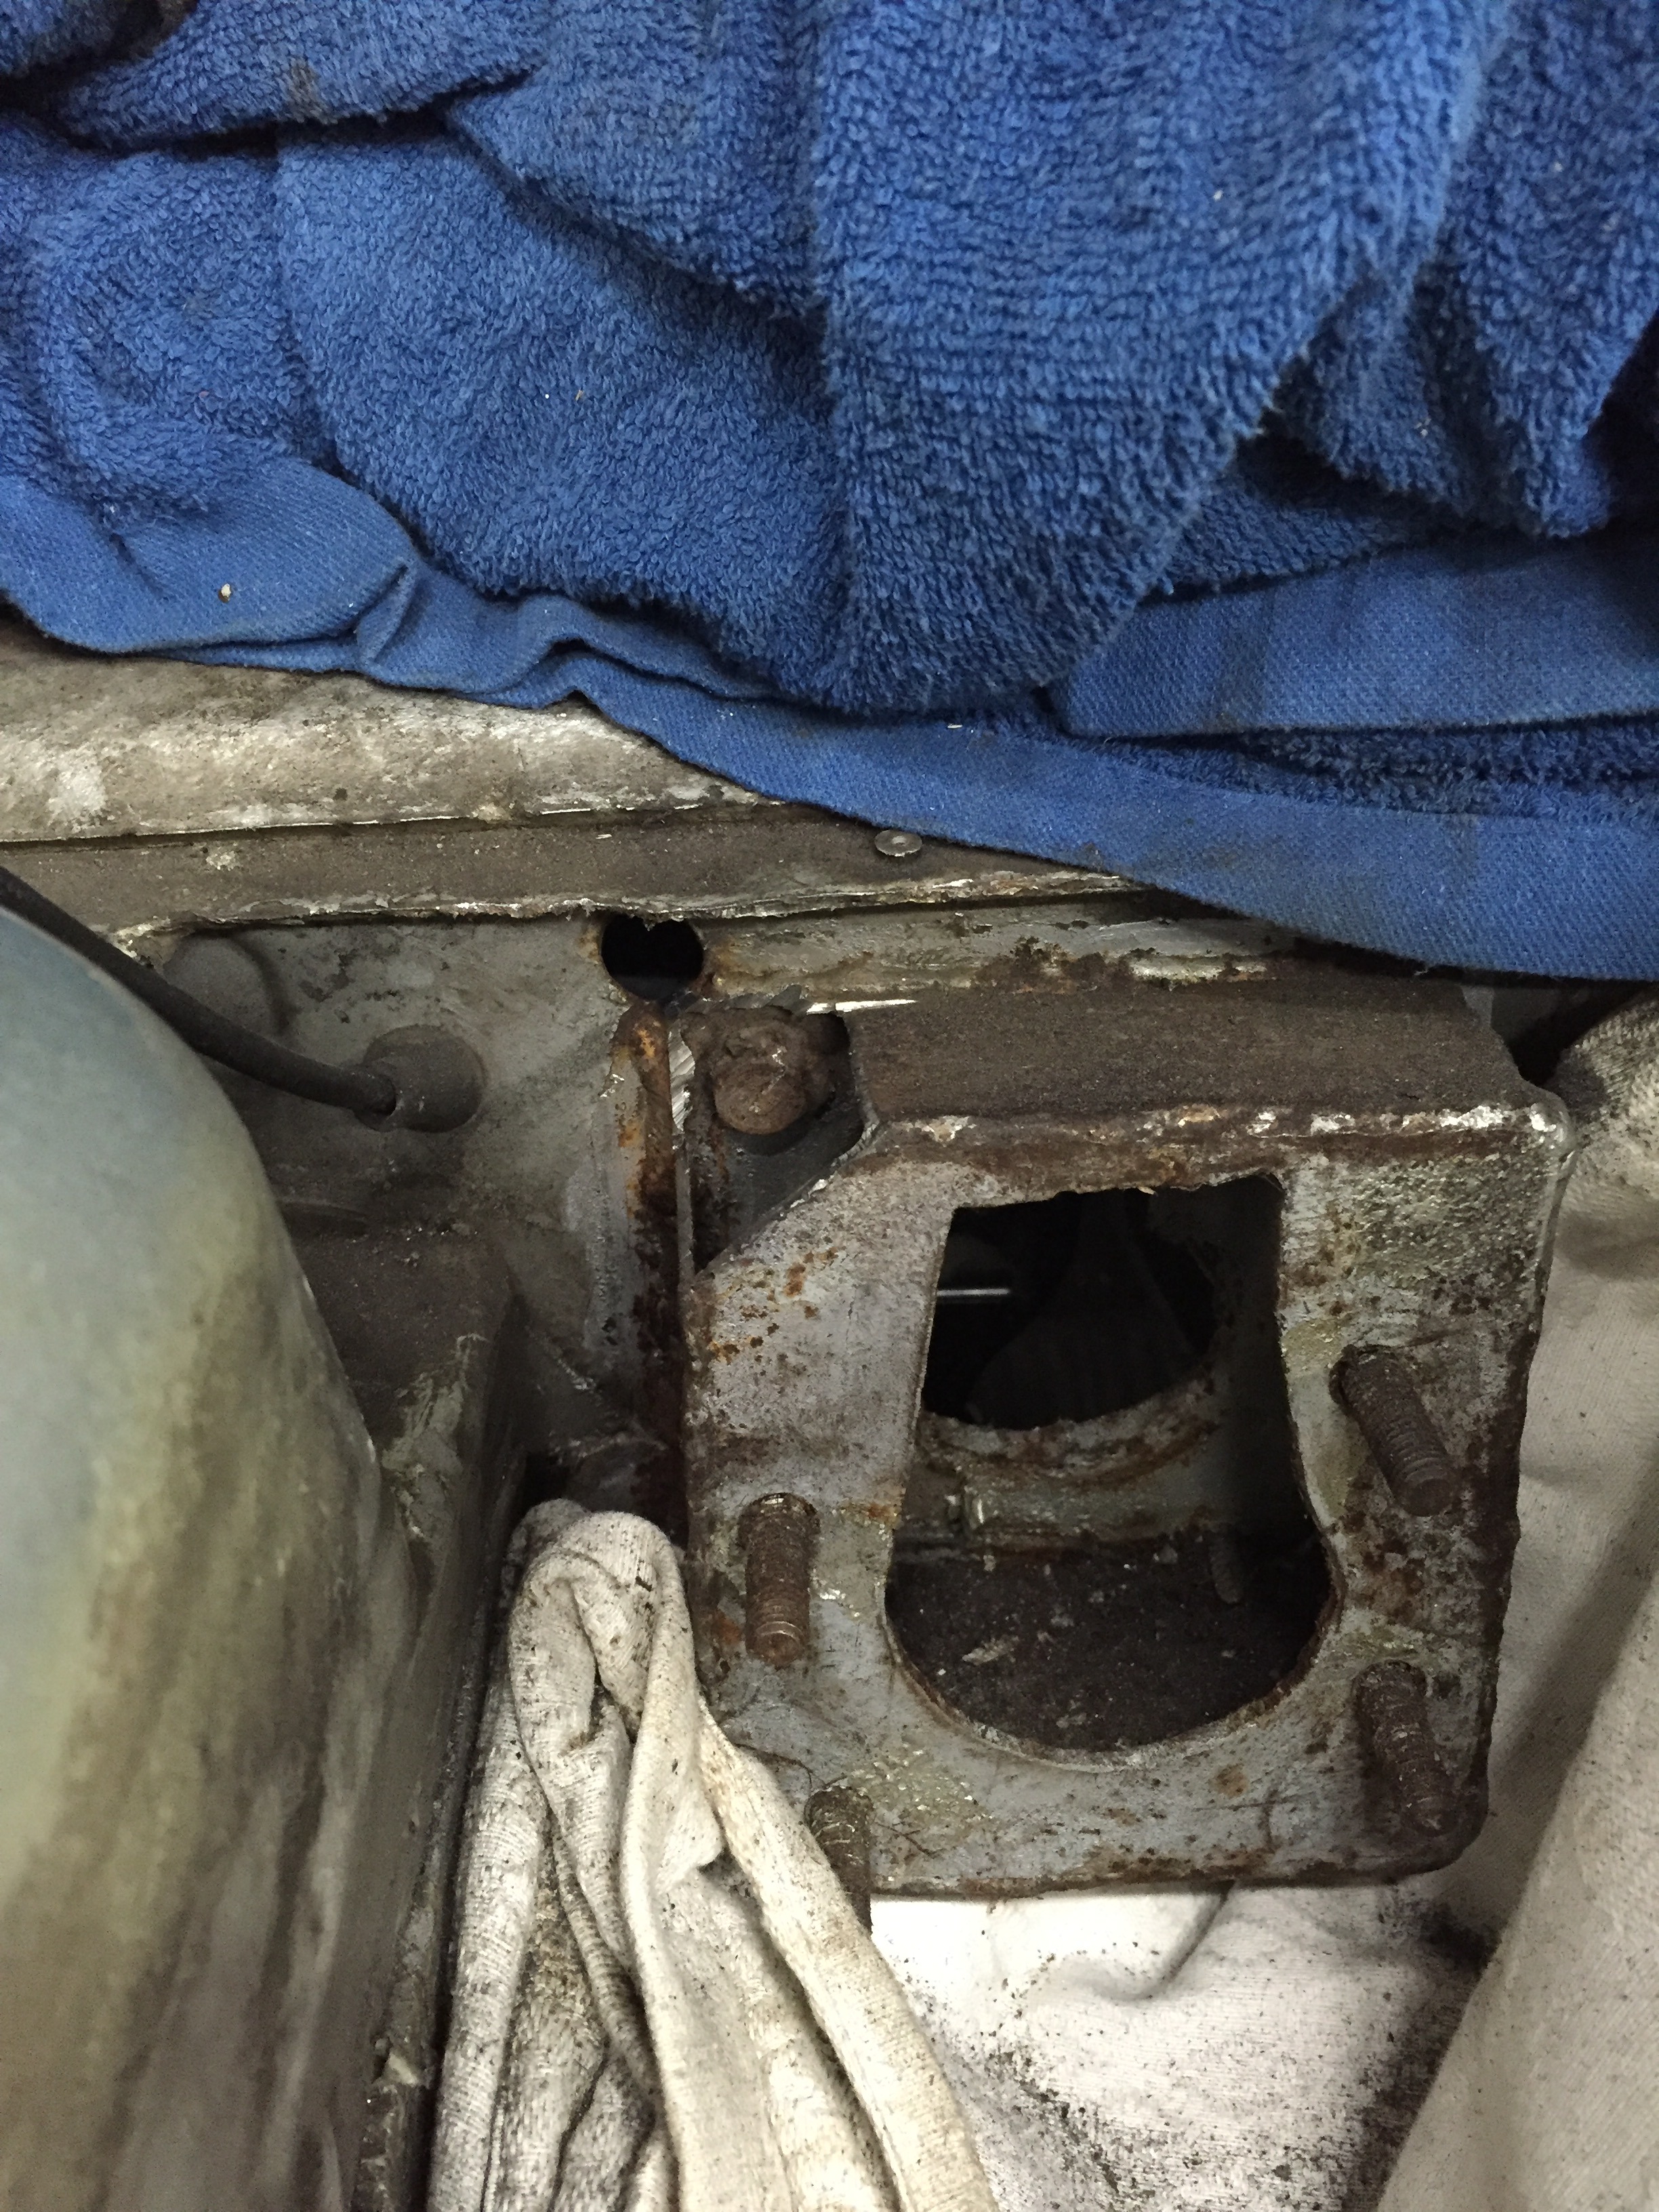
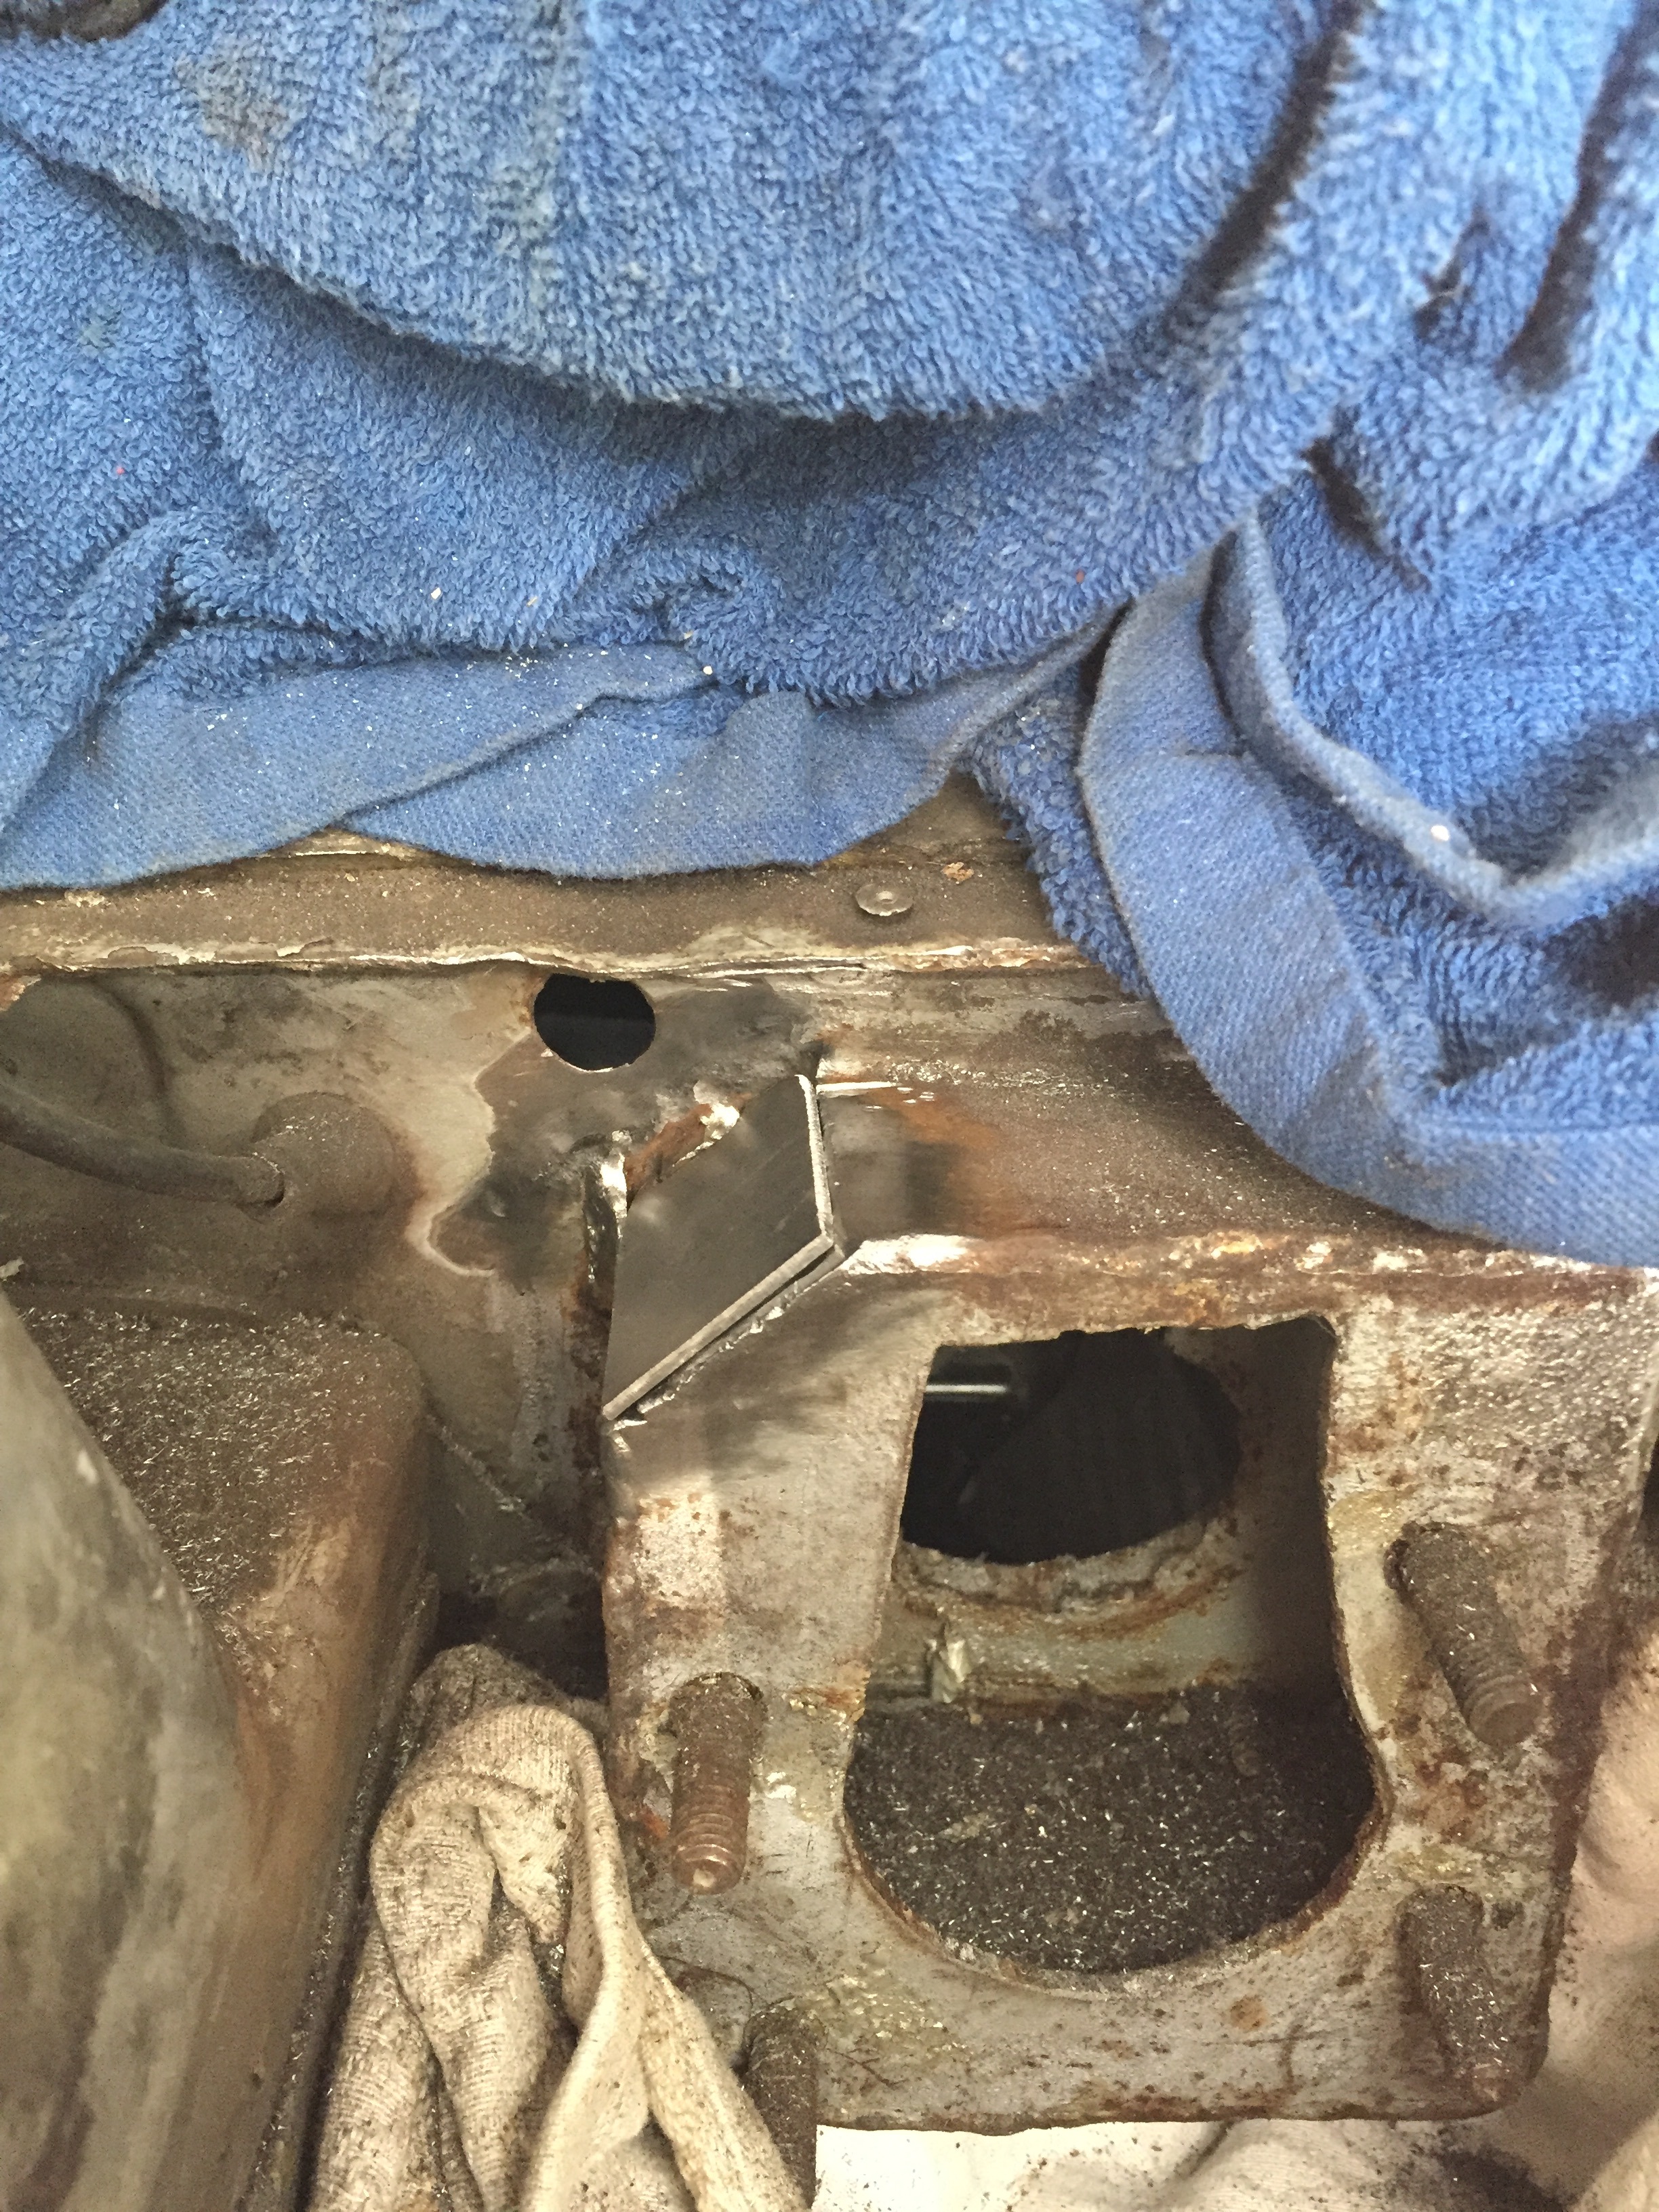
With the bay full it was difficult getting the welder in there, I also forget just how thin fords metal is sometimes. However after some trouble and some repairs I got the desired result. I'm not 100% happy but will be fine for now. Will spend some more time on it when a full shell restoration is done.
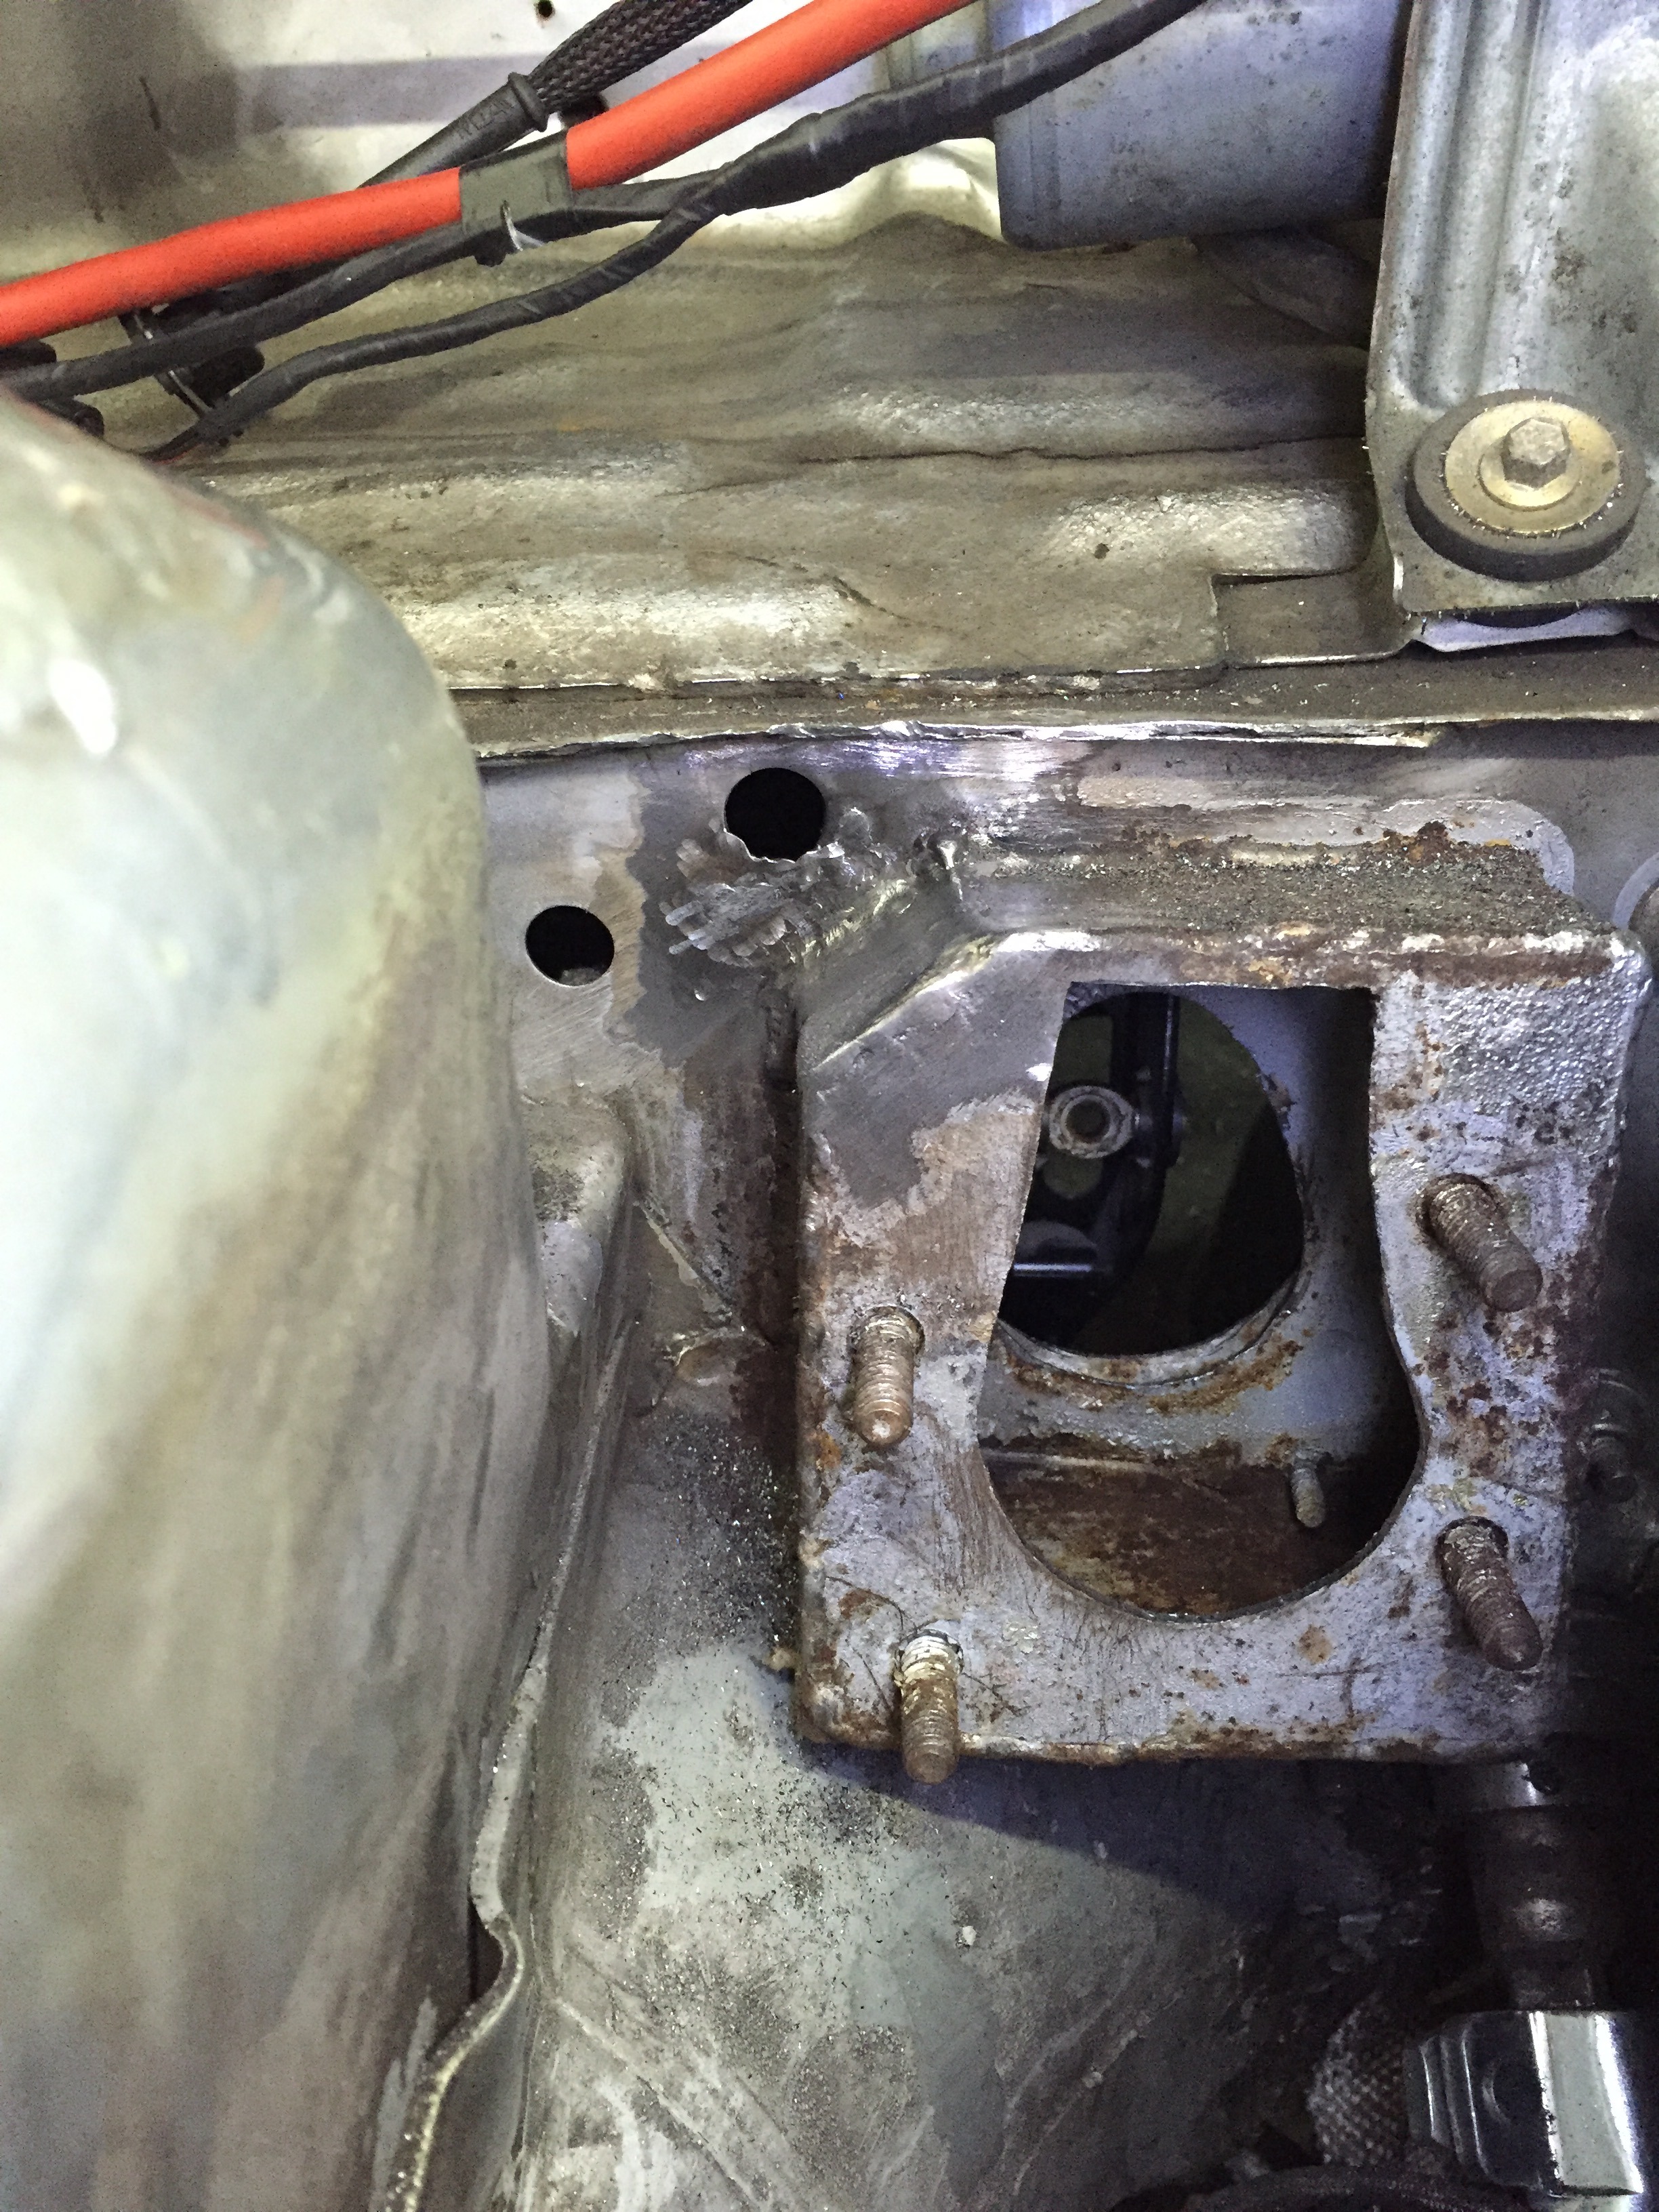
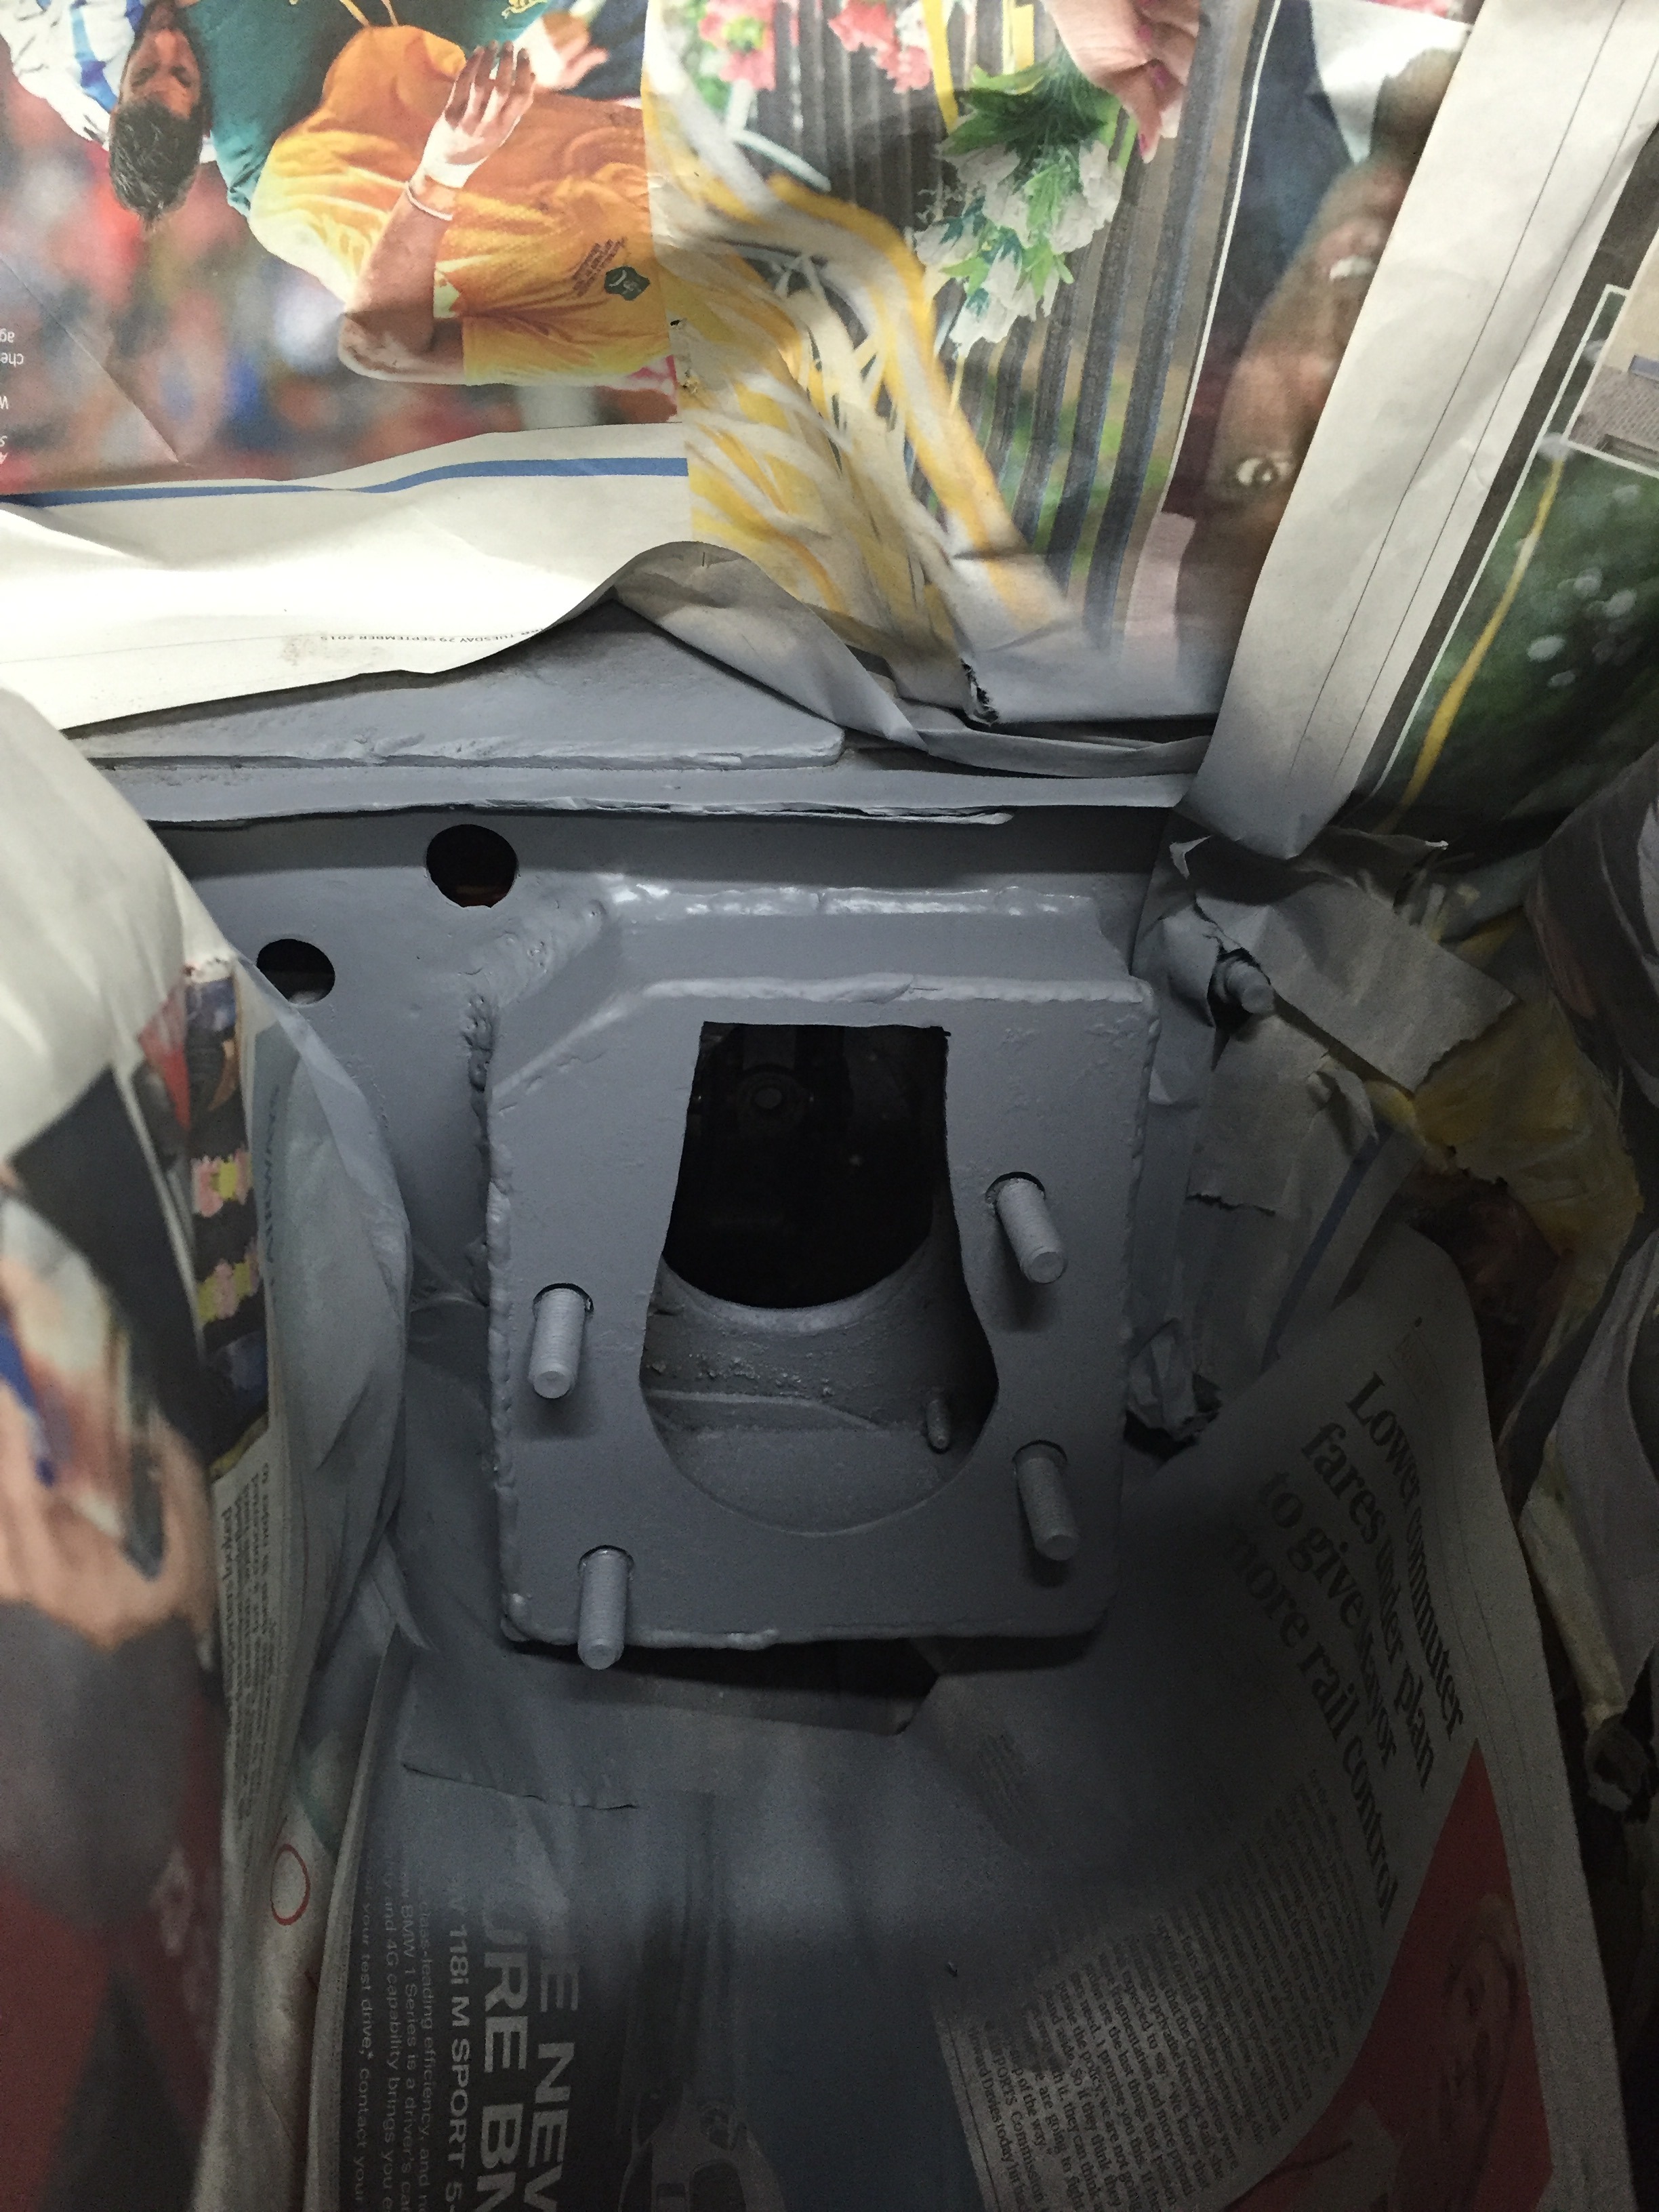
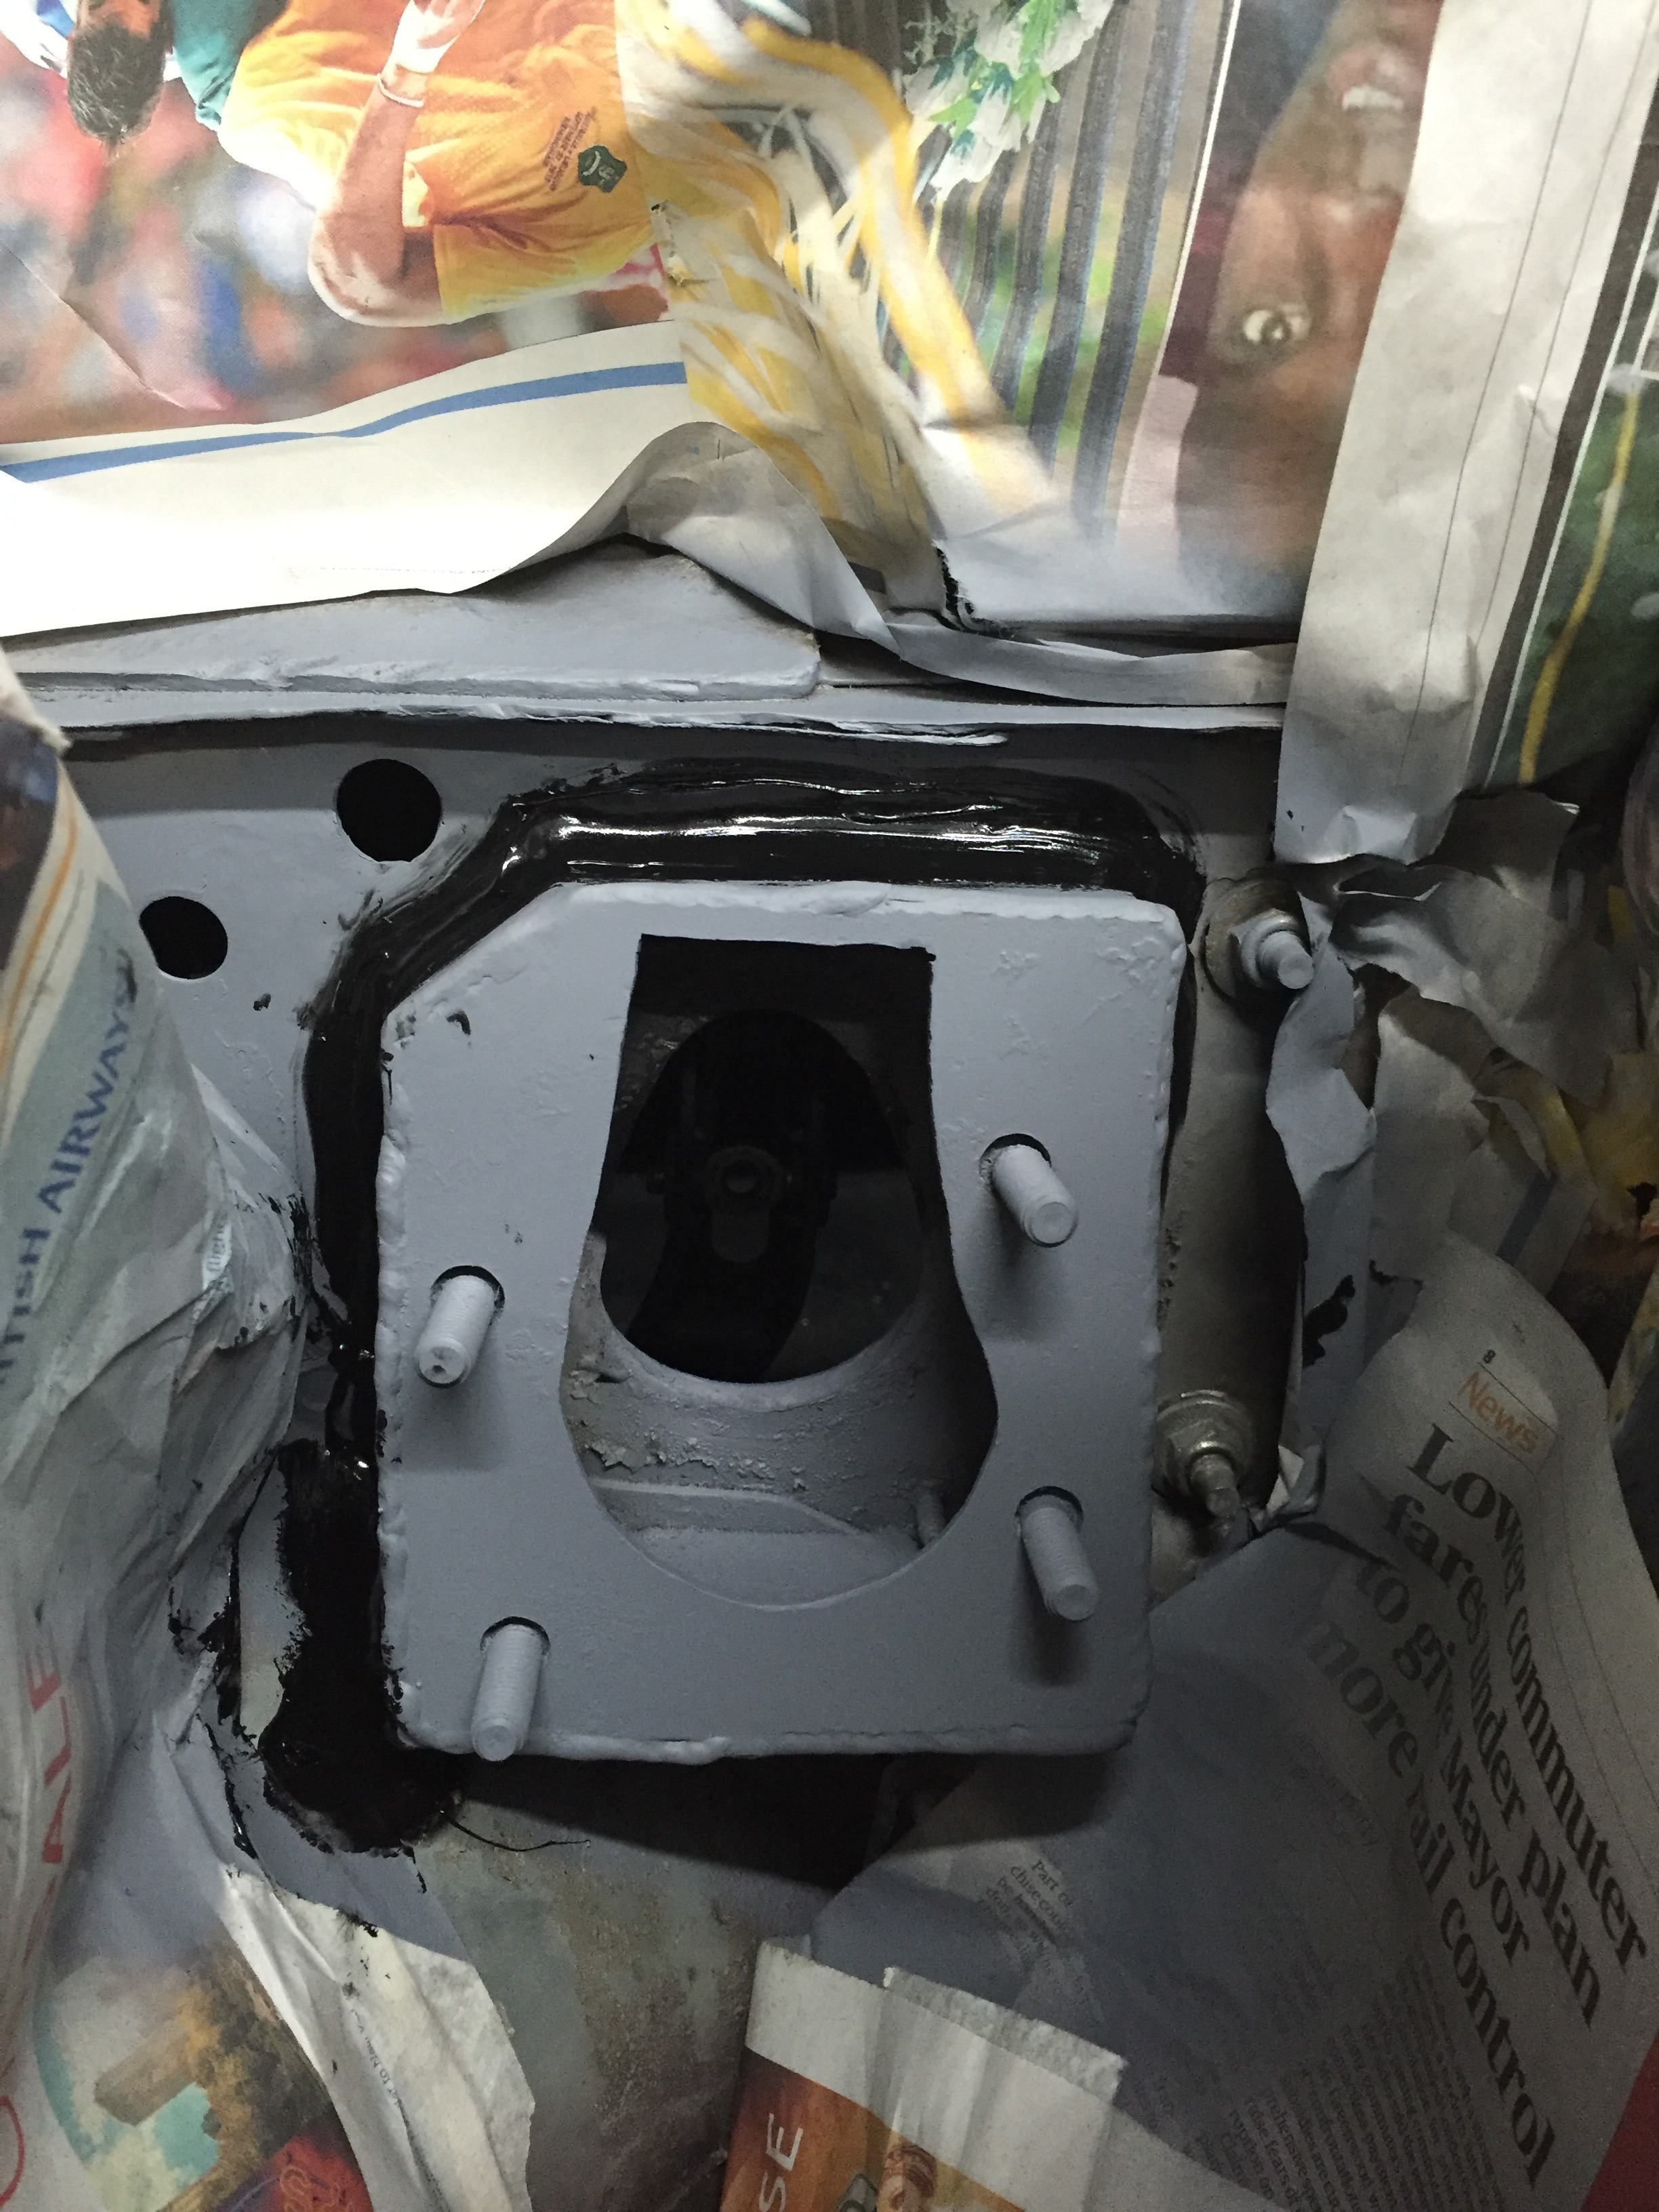
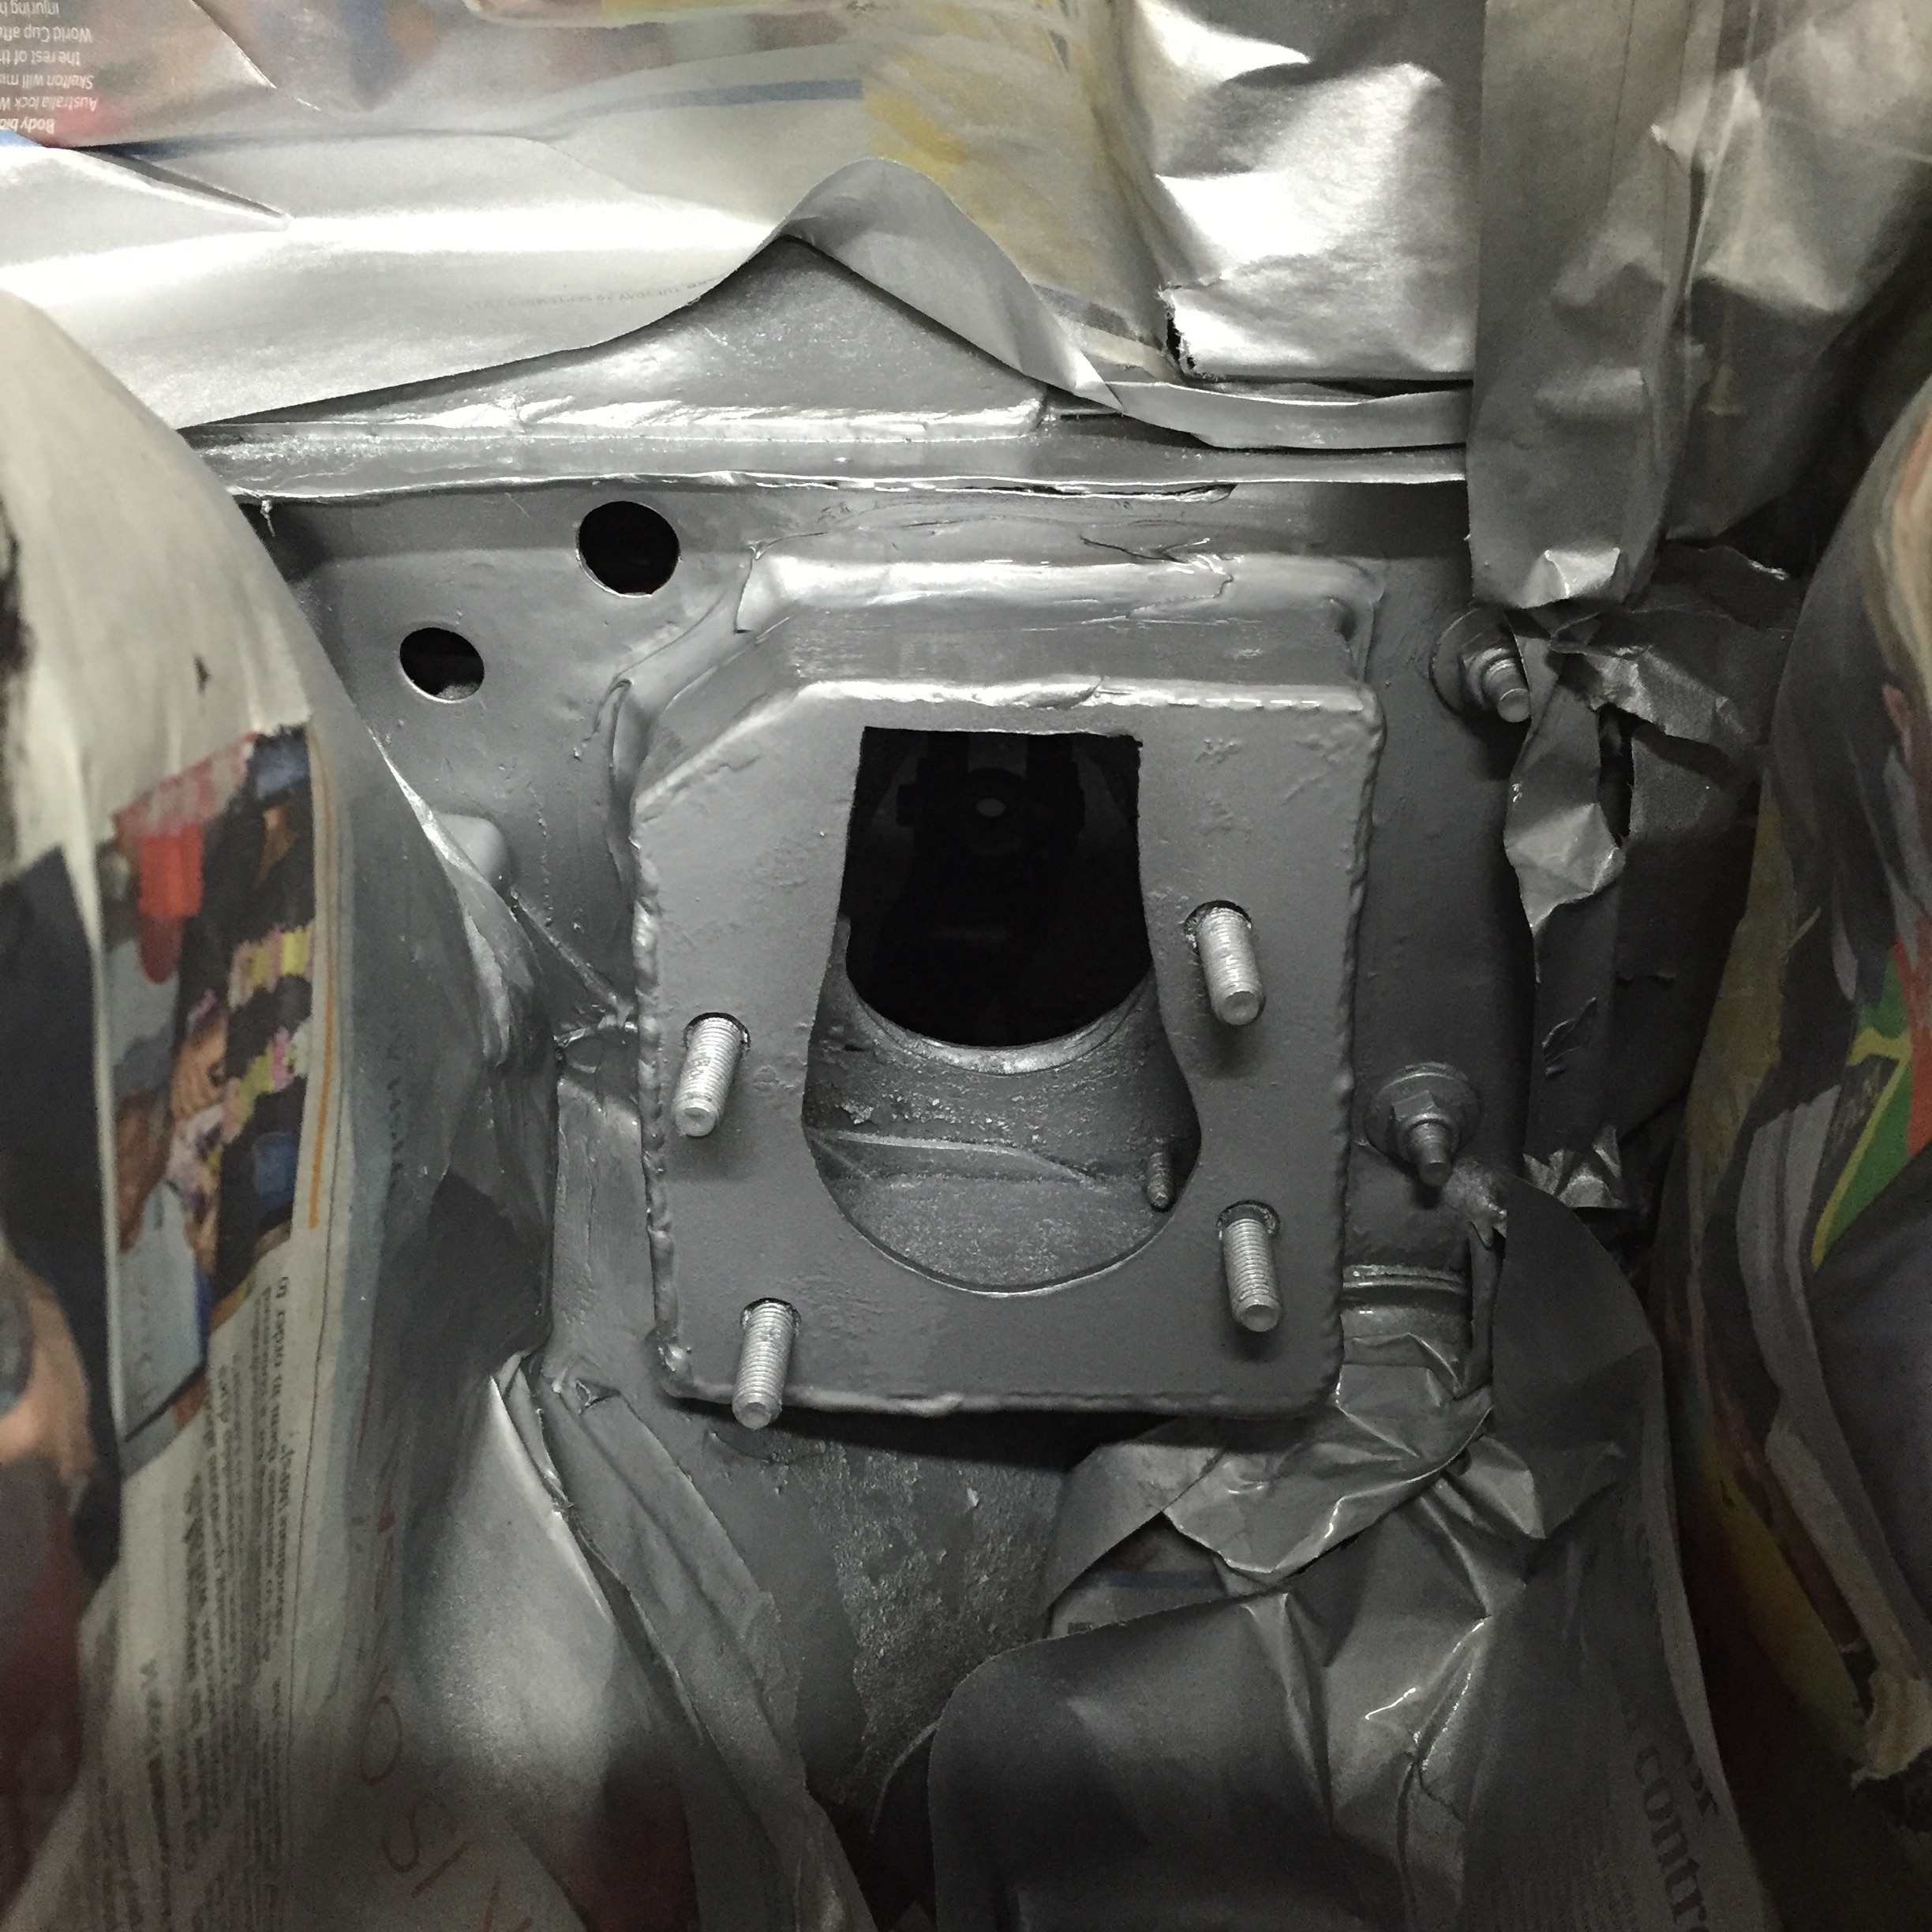
With a bit of sealer and paint on it the area has come up ok. Again at some point will neaten it all up at a later date.
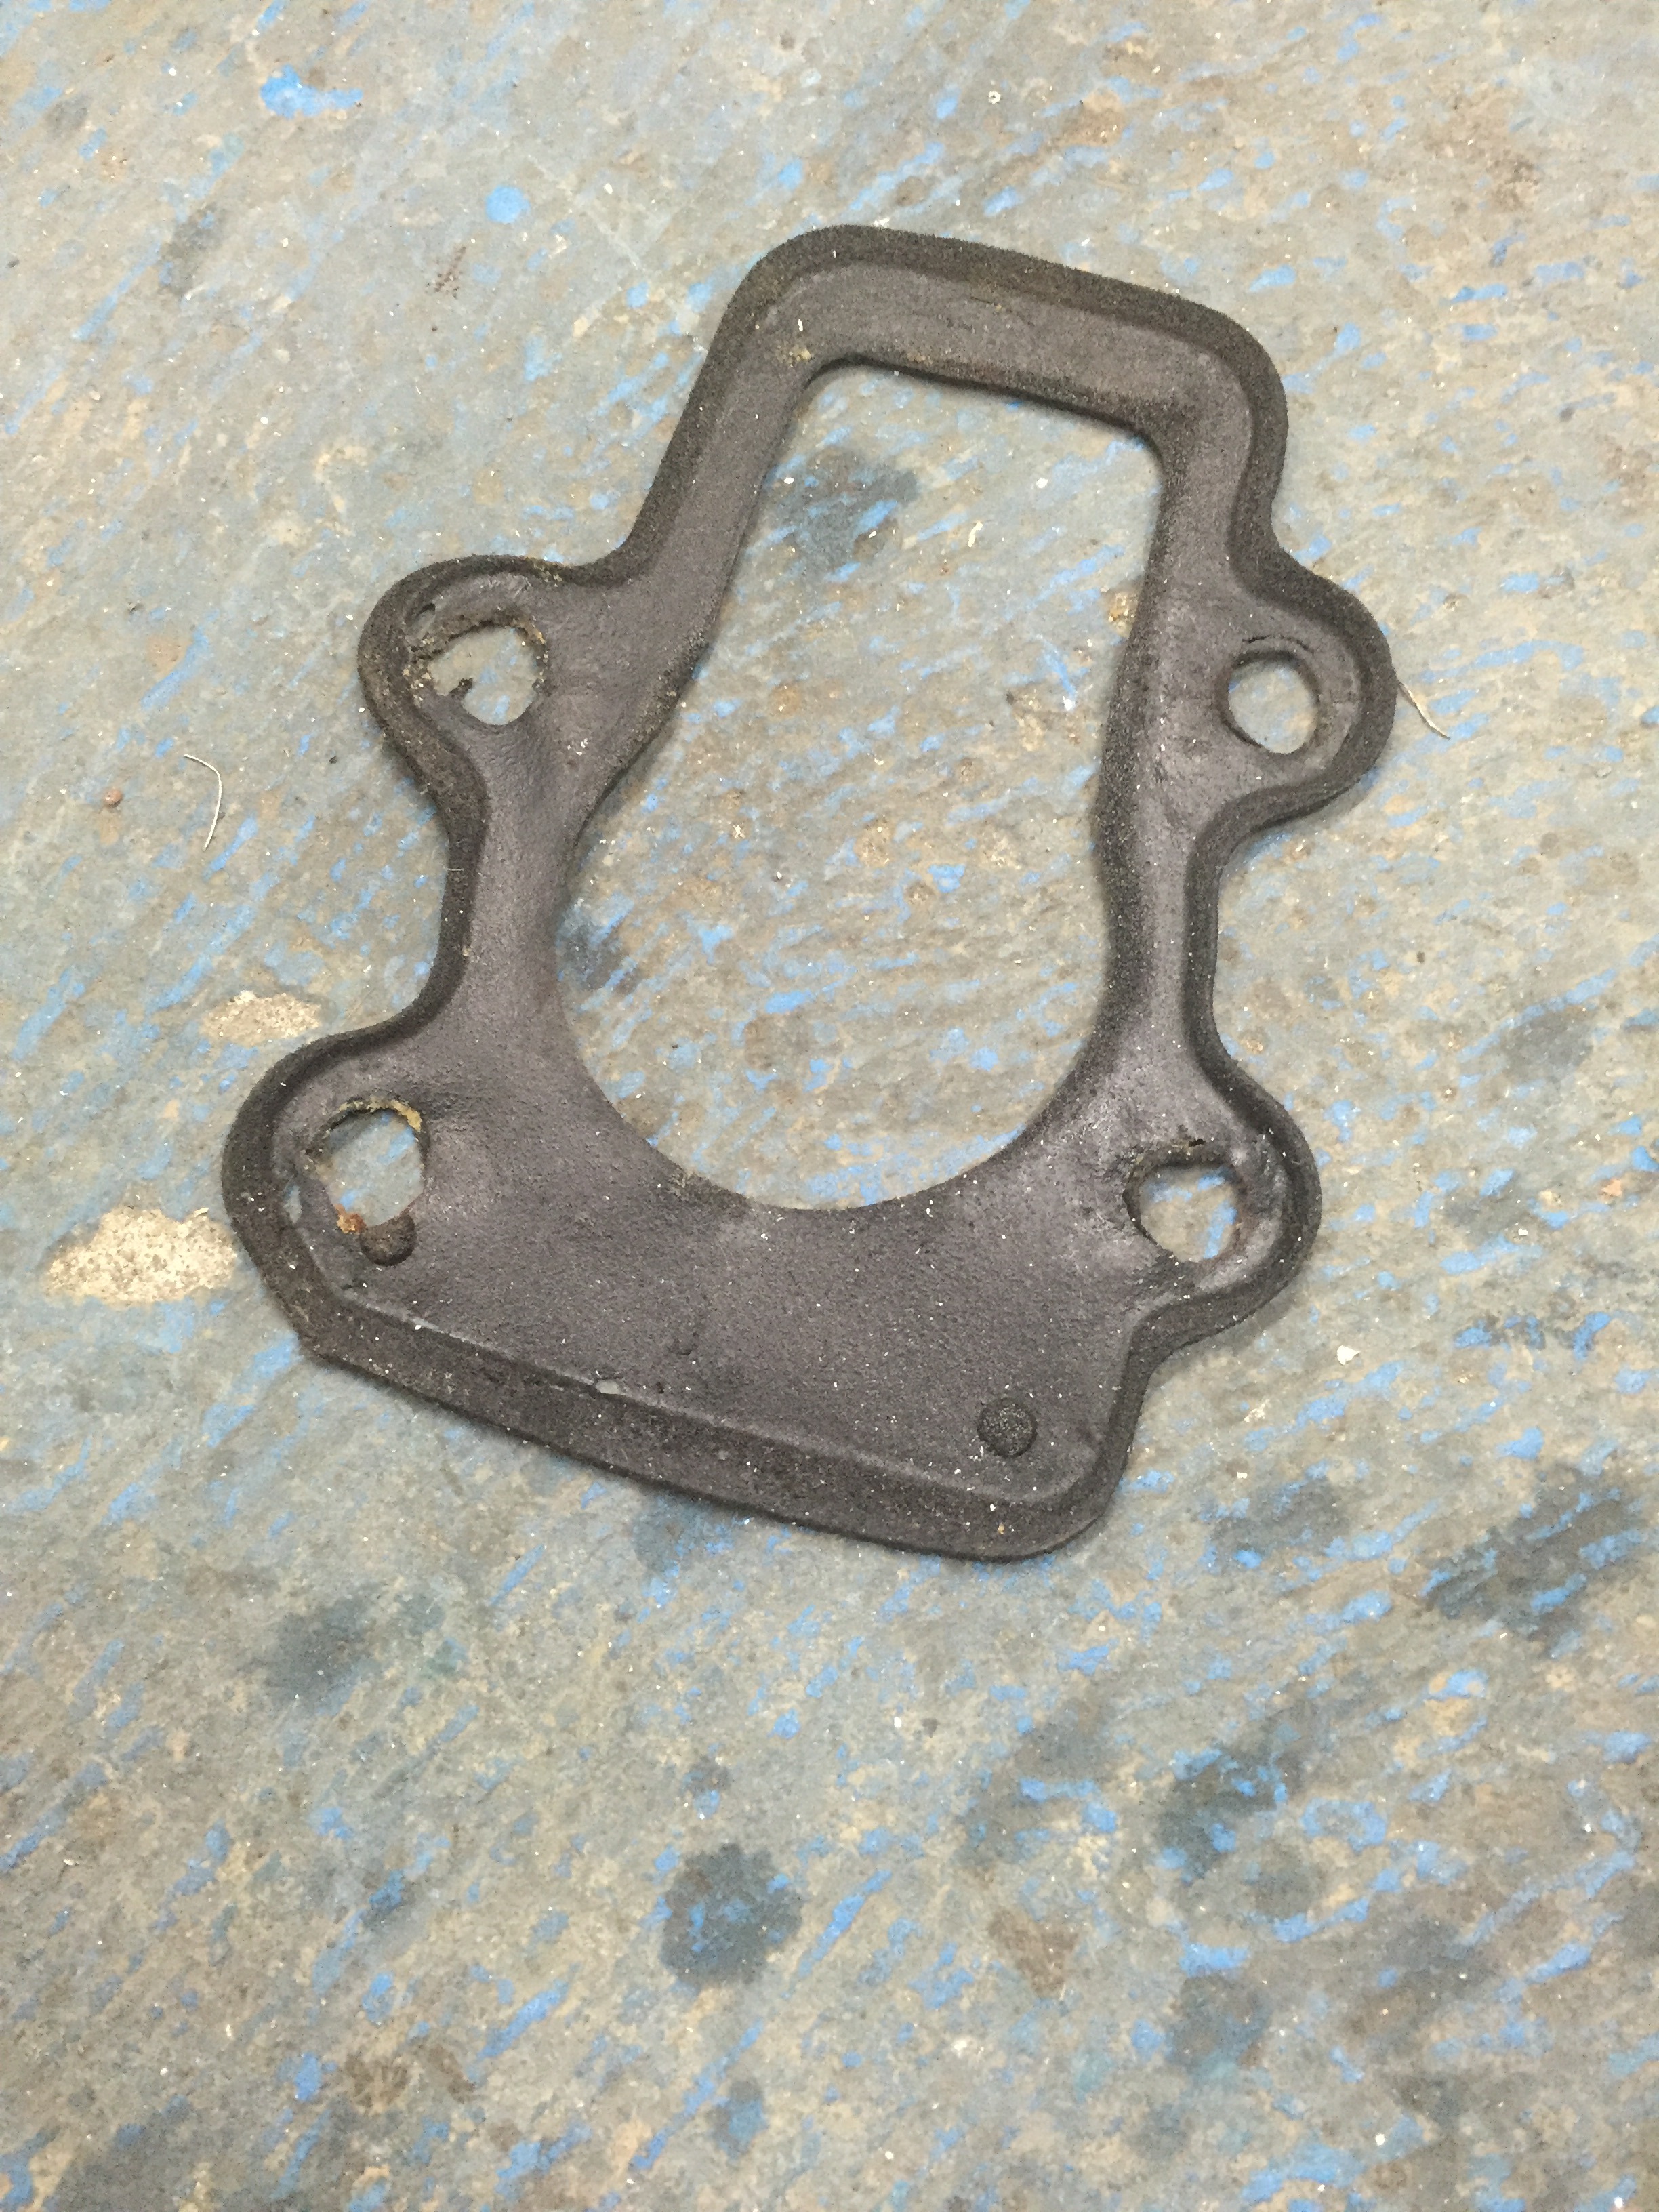
Need to get a new gasket for future use for the master cylinder. Would like to know where you can get the material from or something similar so if anyone knows and could let me know that would be greatly appreciated!
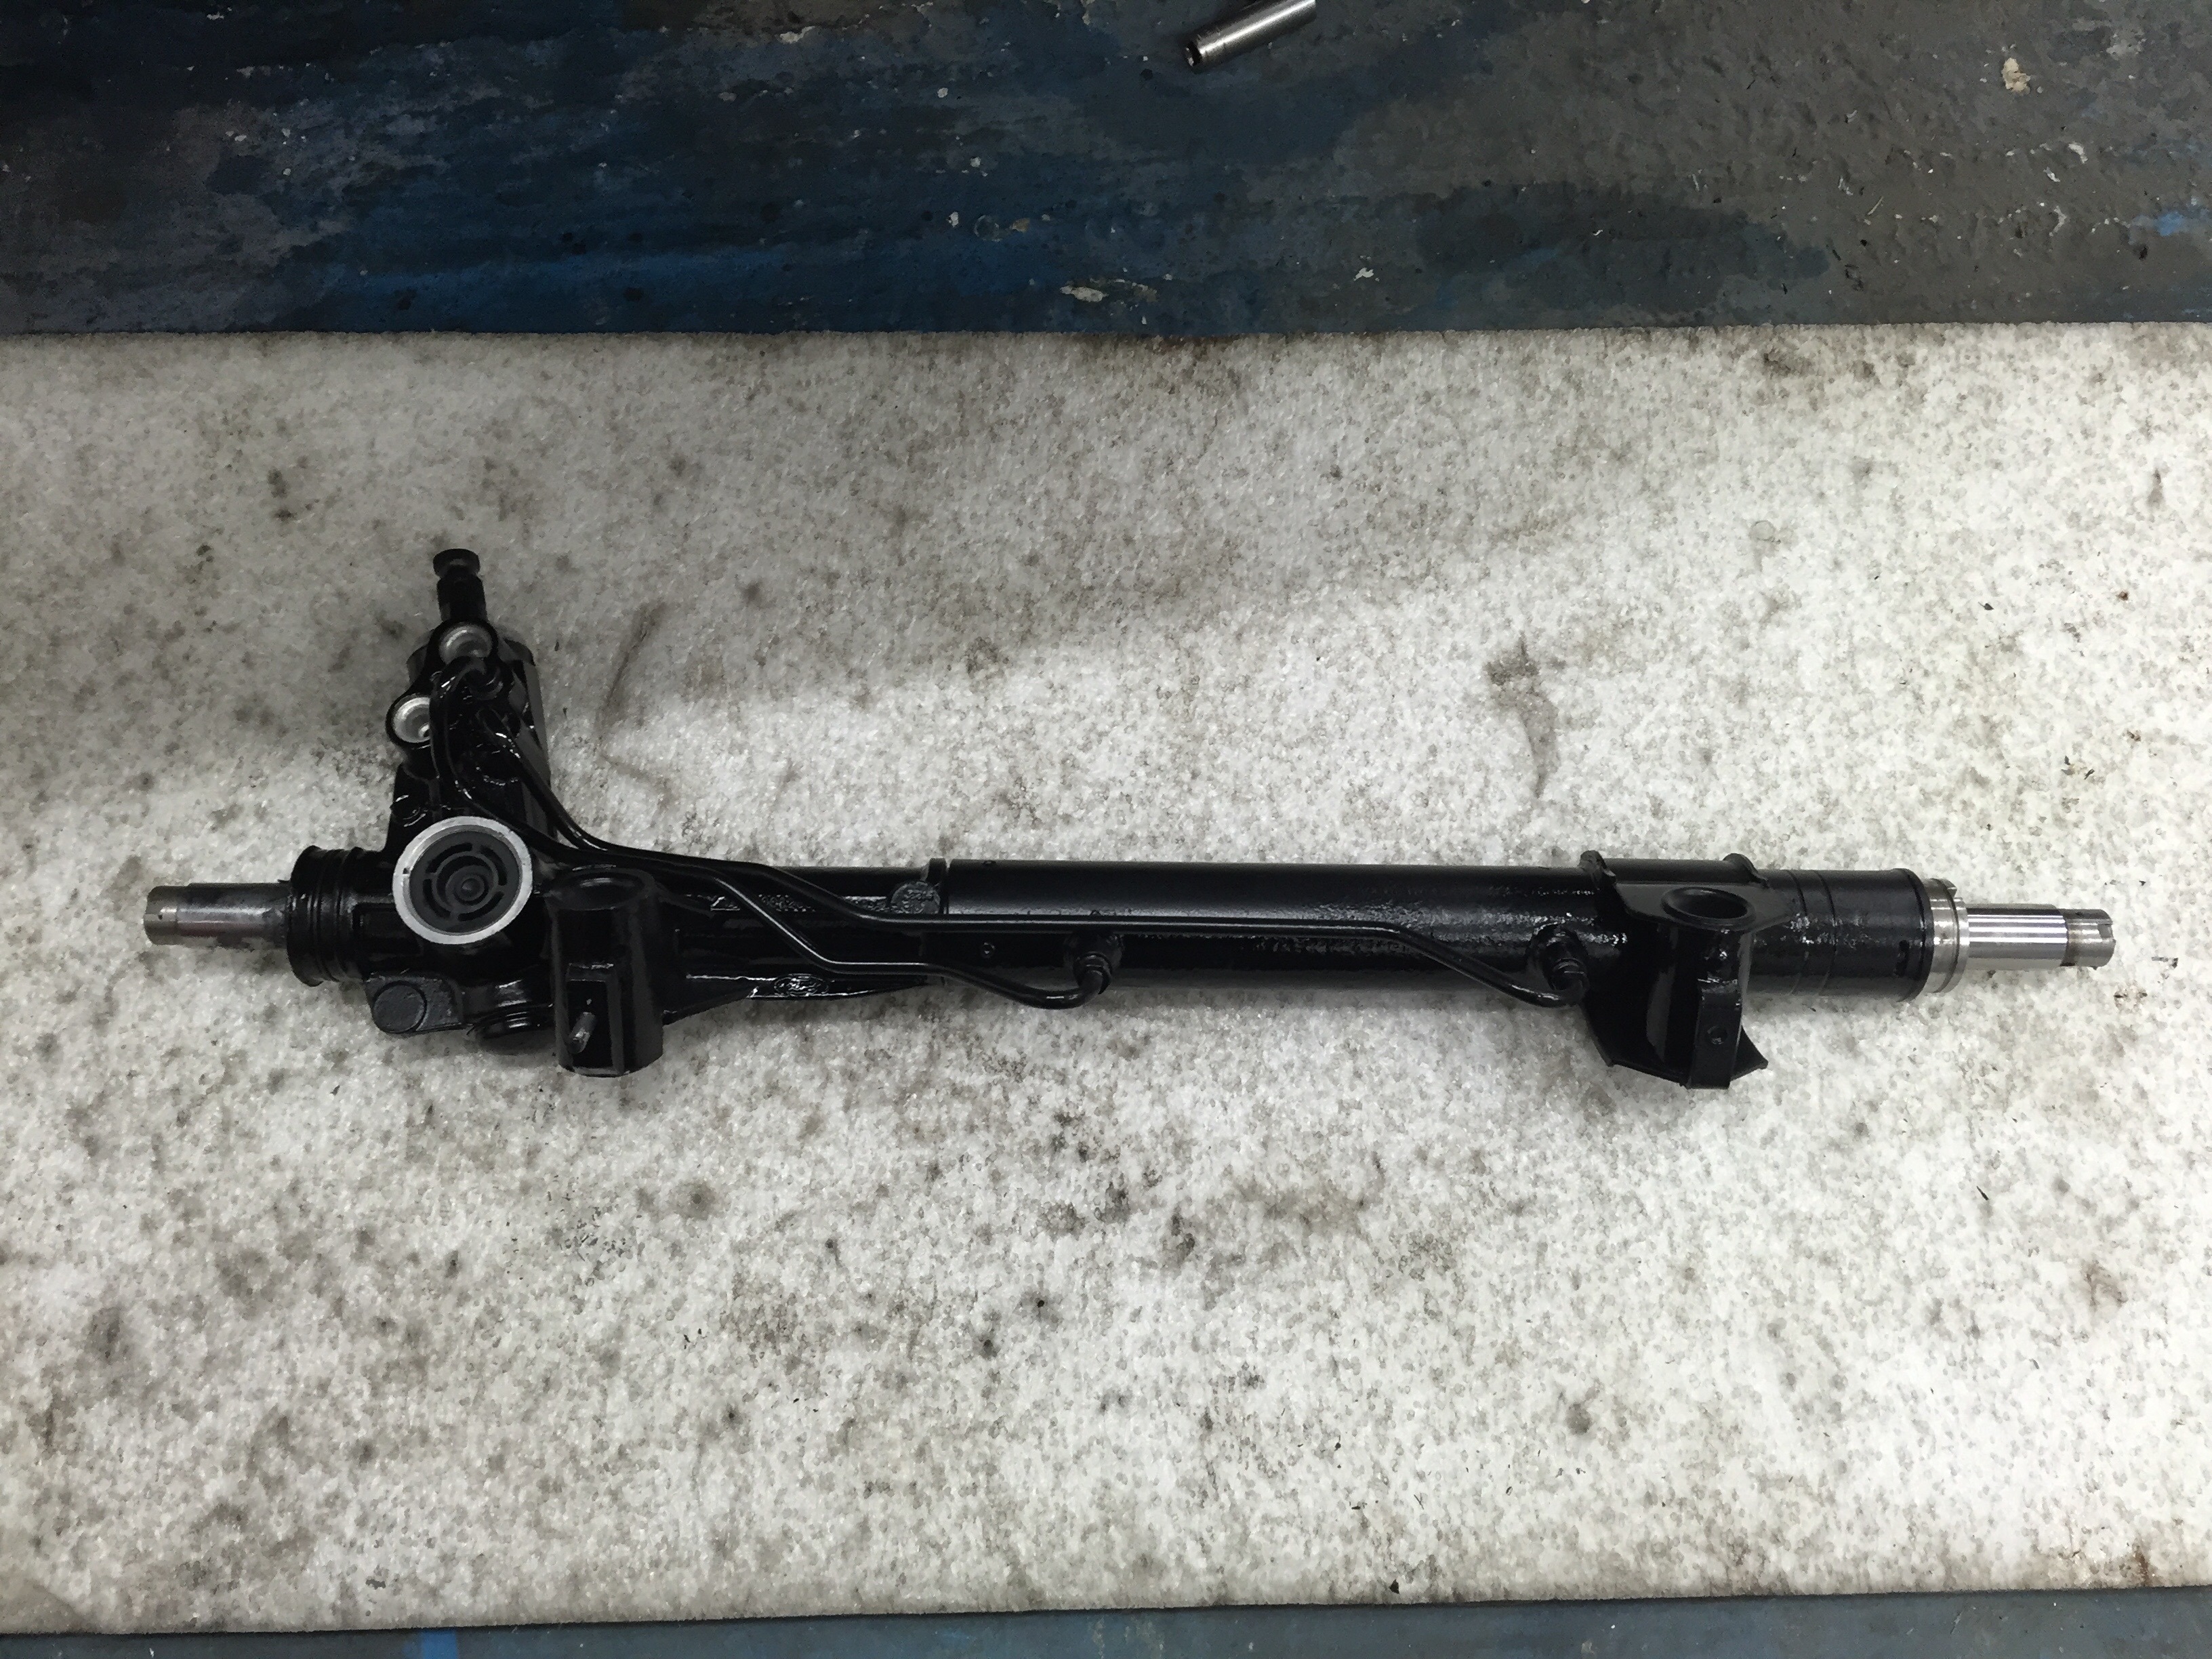
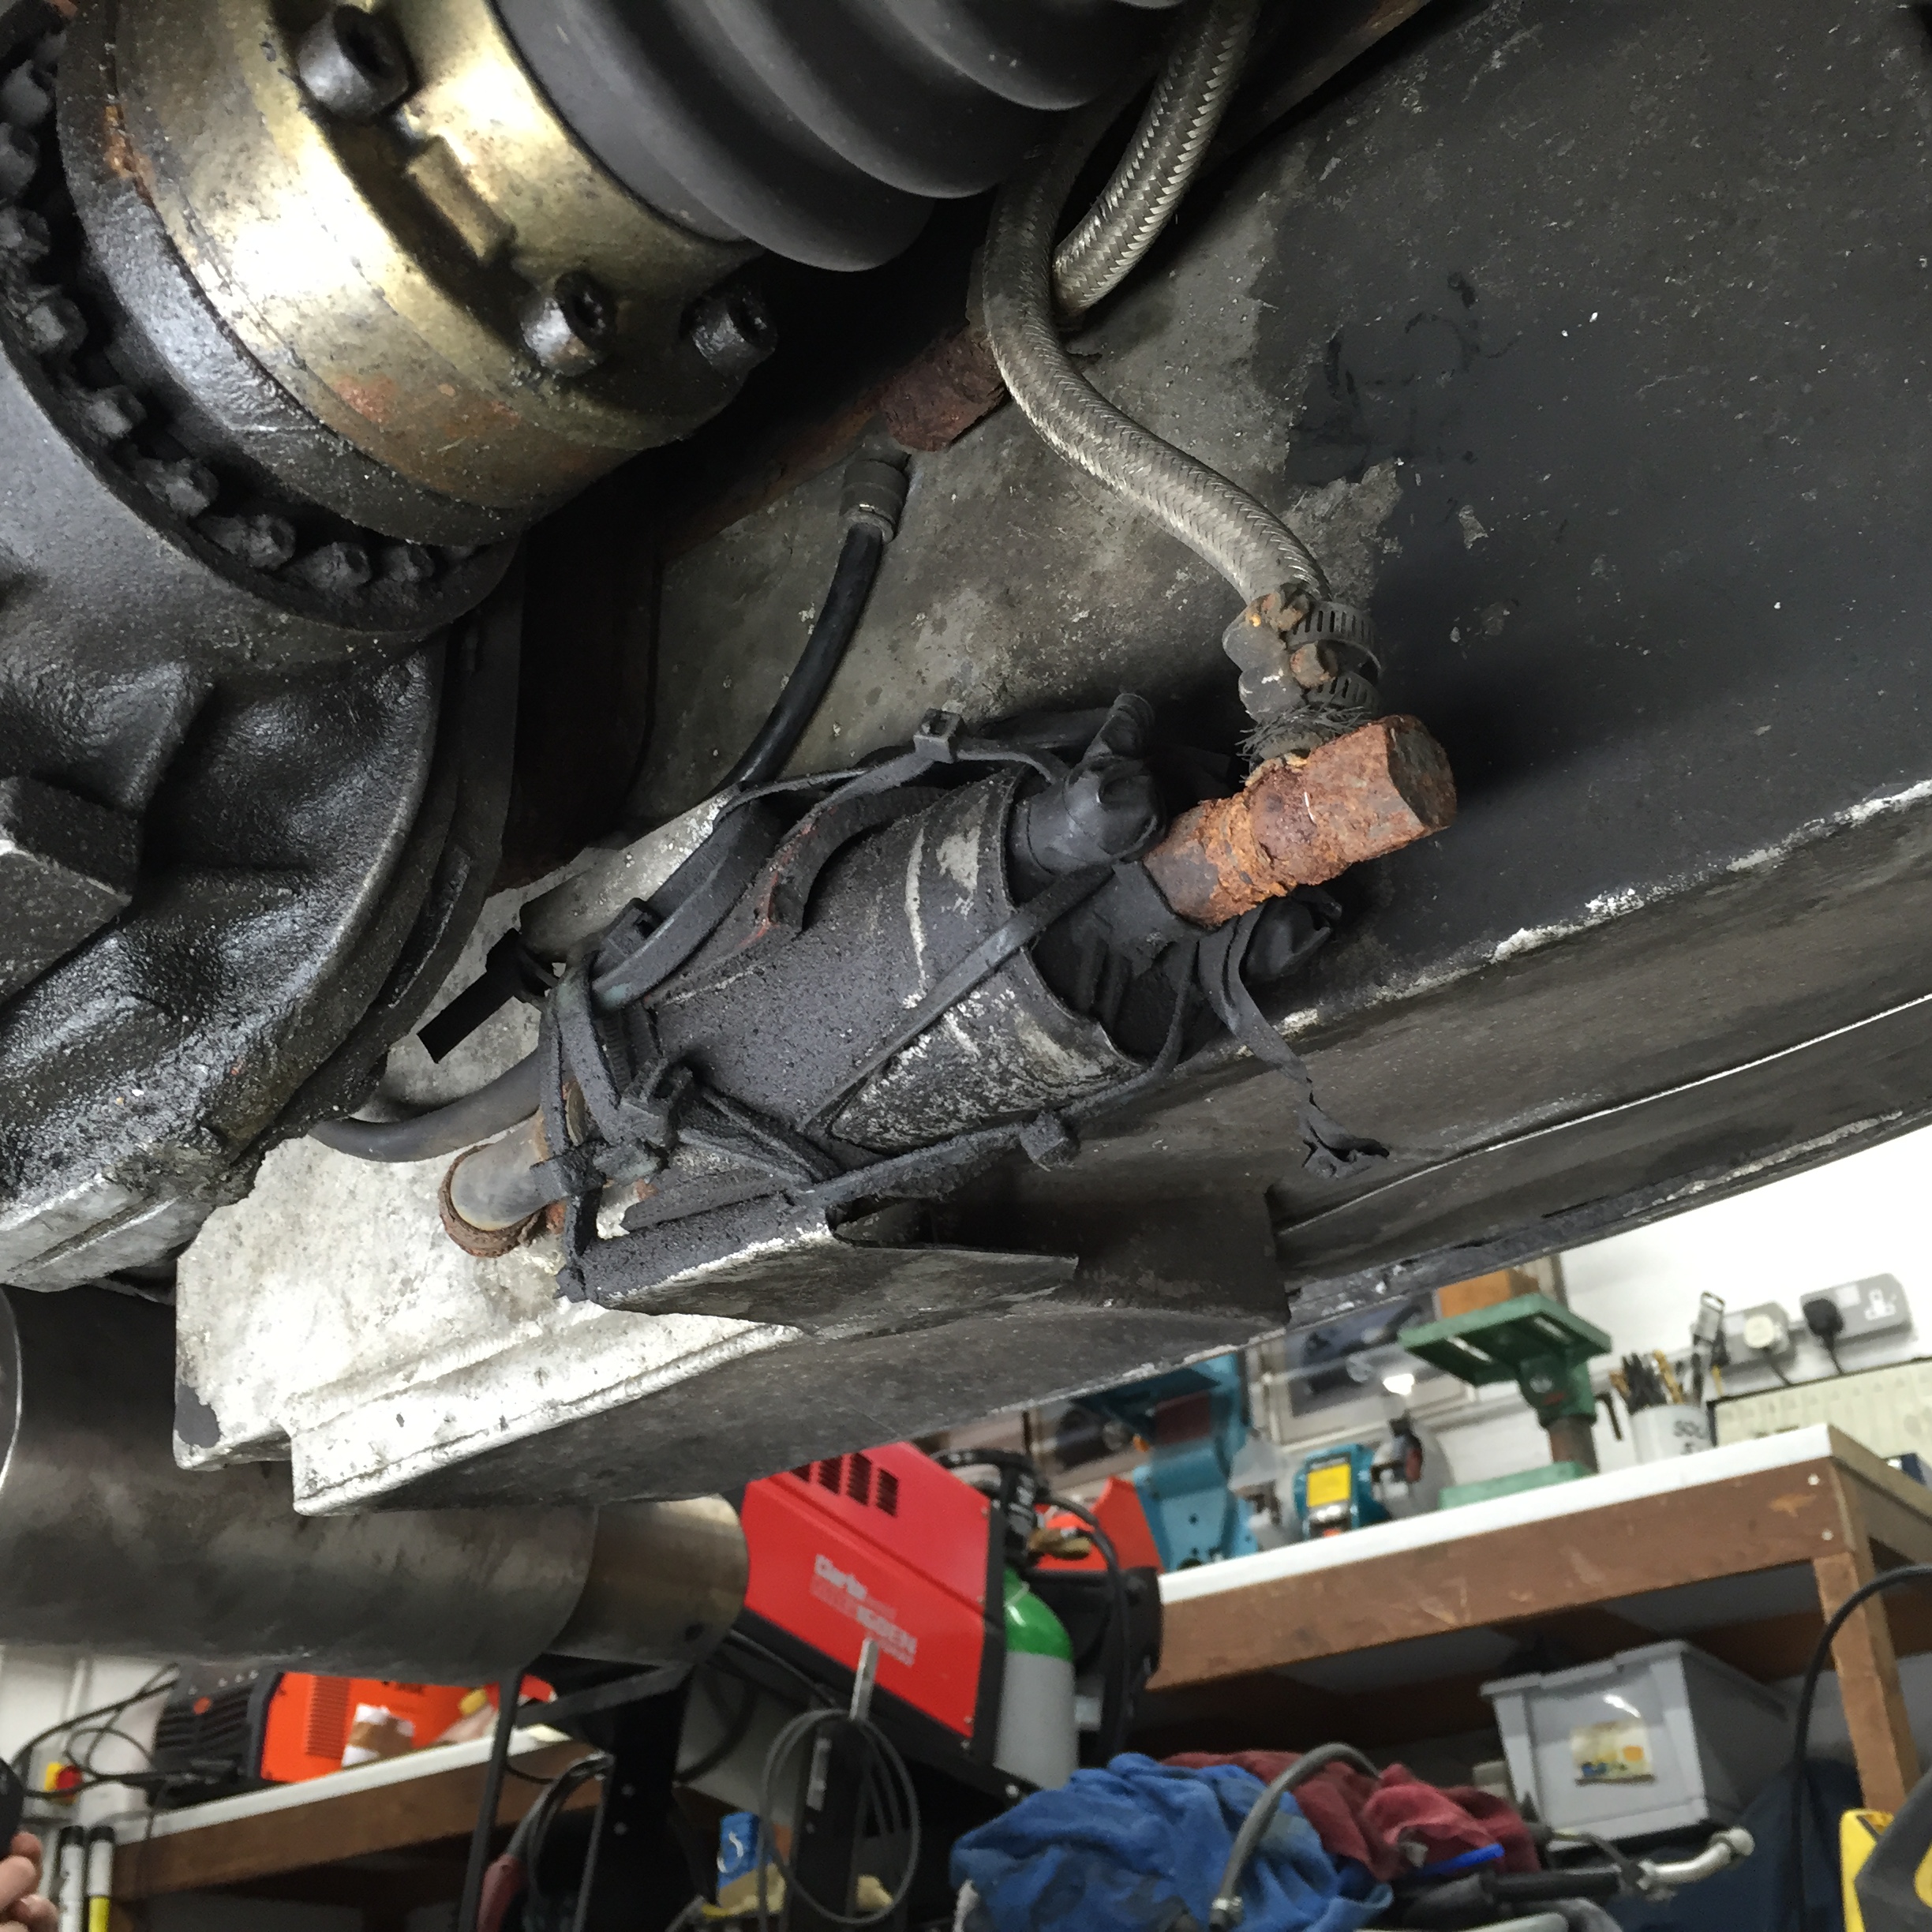
On a separate note this had to come back out again and be replaced...

My attempt at re-sealing my old rack was a waste of effort.. After around 15-20 odds miles it tarted leaking on the drivers side this time.. I think I know what happened but at this stage I couldn't be bothered and did what I should have done the first time around and bought a reconditioned rack. So set about getting that fitted and hopefully now this problem will go away for good!
I did find the patience to give it a quick paint before it went in though

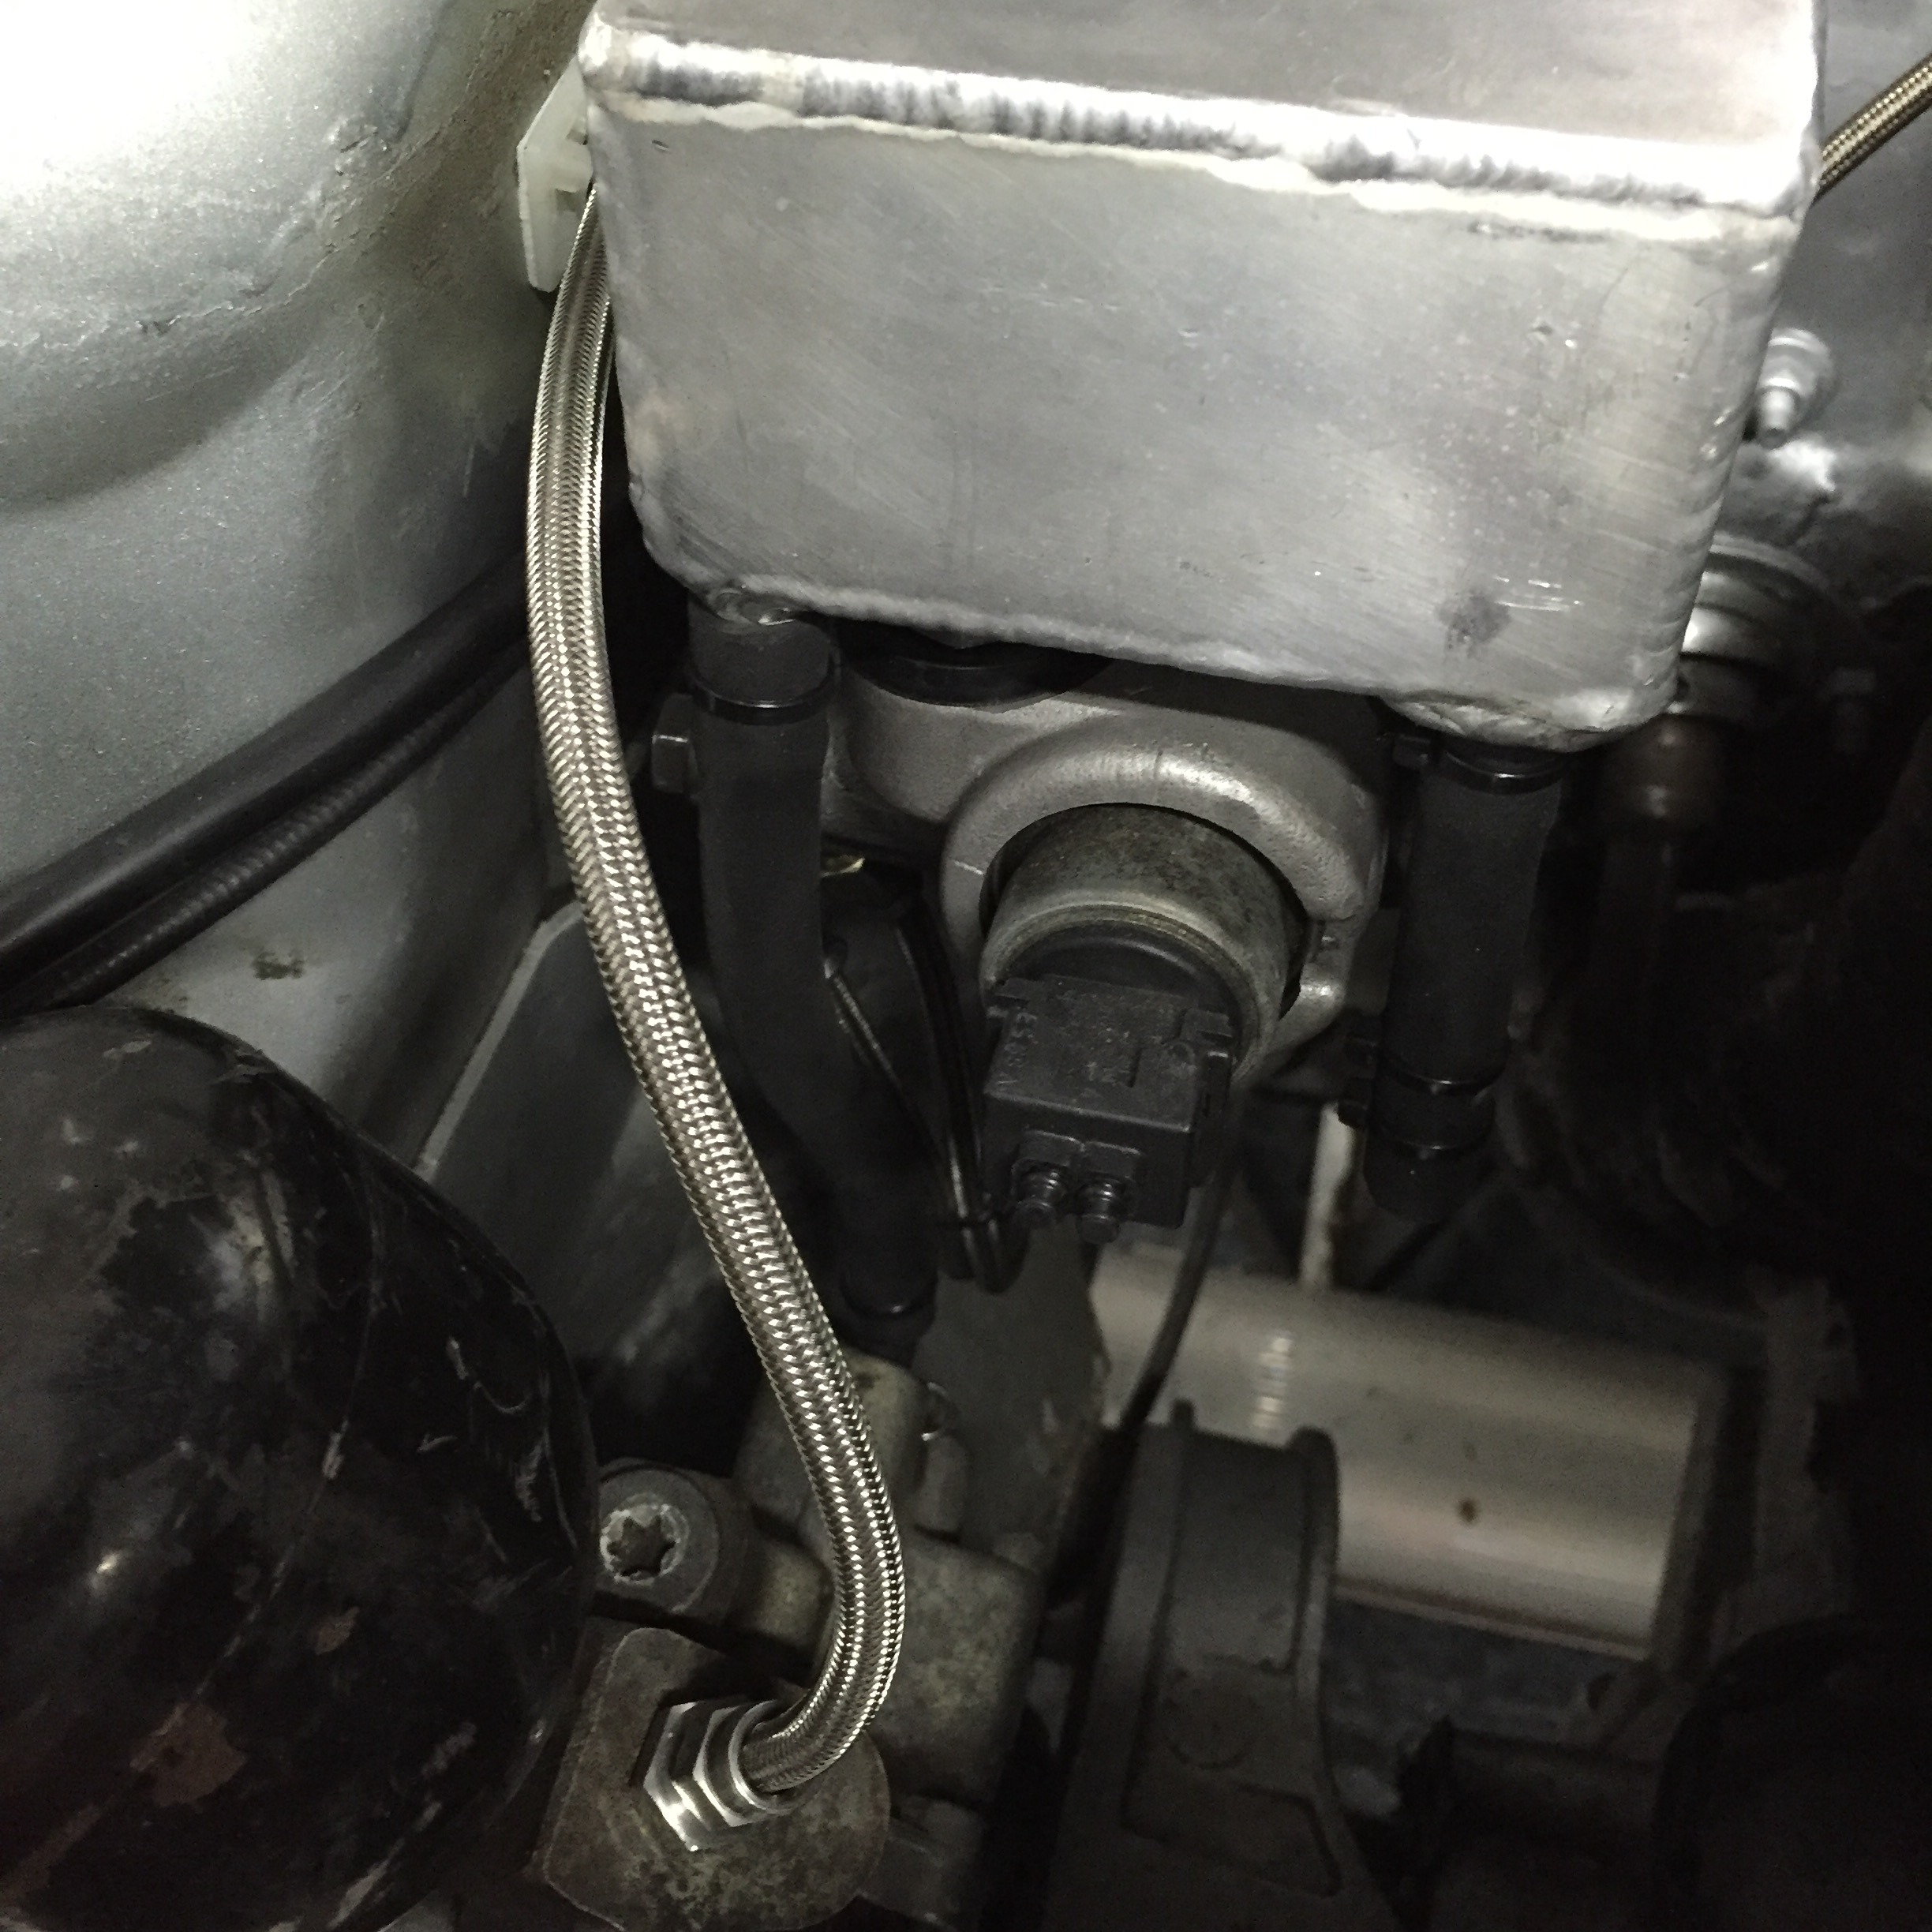
So with that task dealt with.. I moved back onto getting the brake system back together

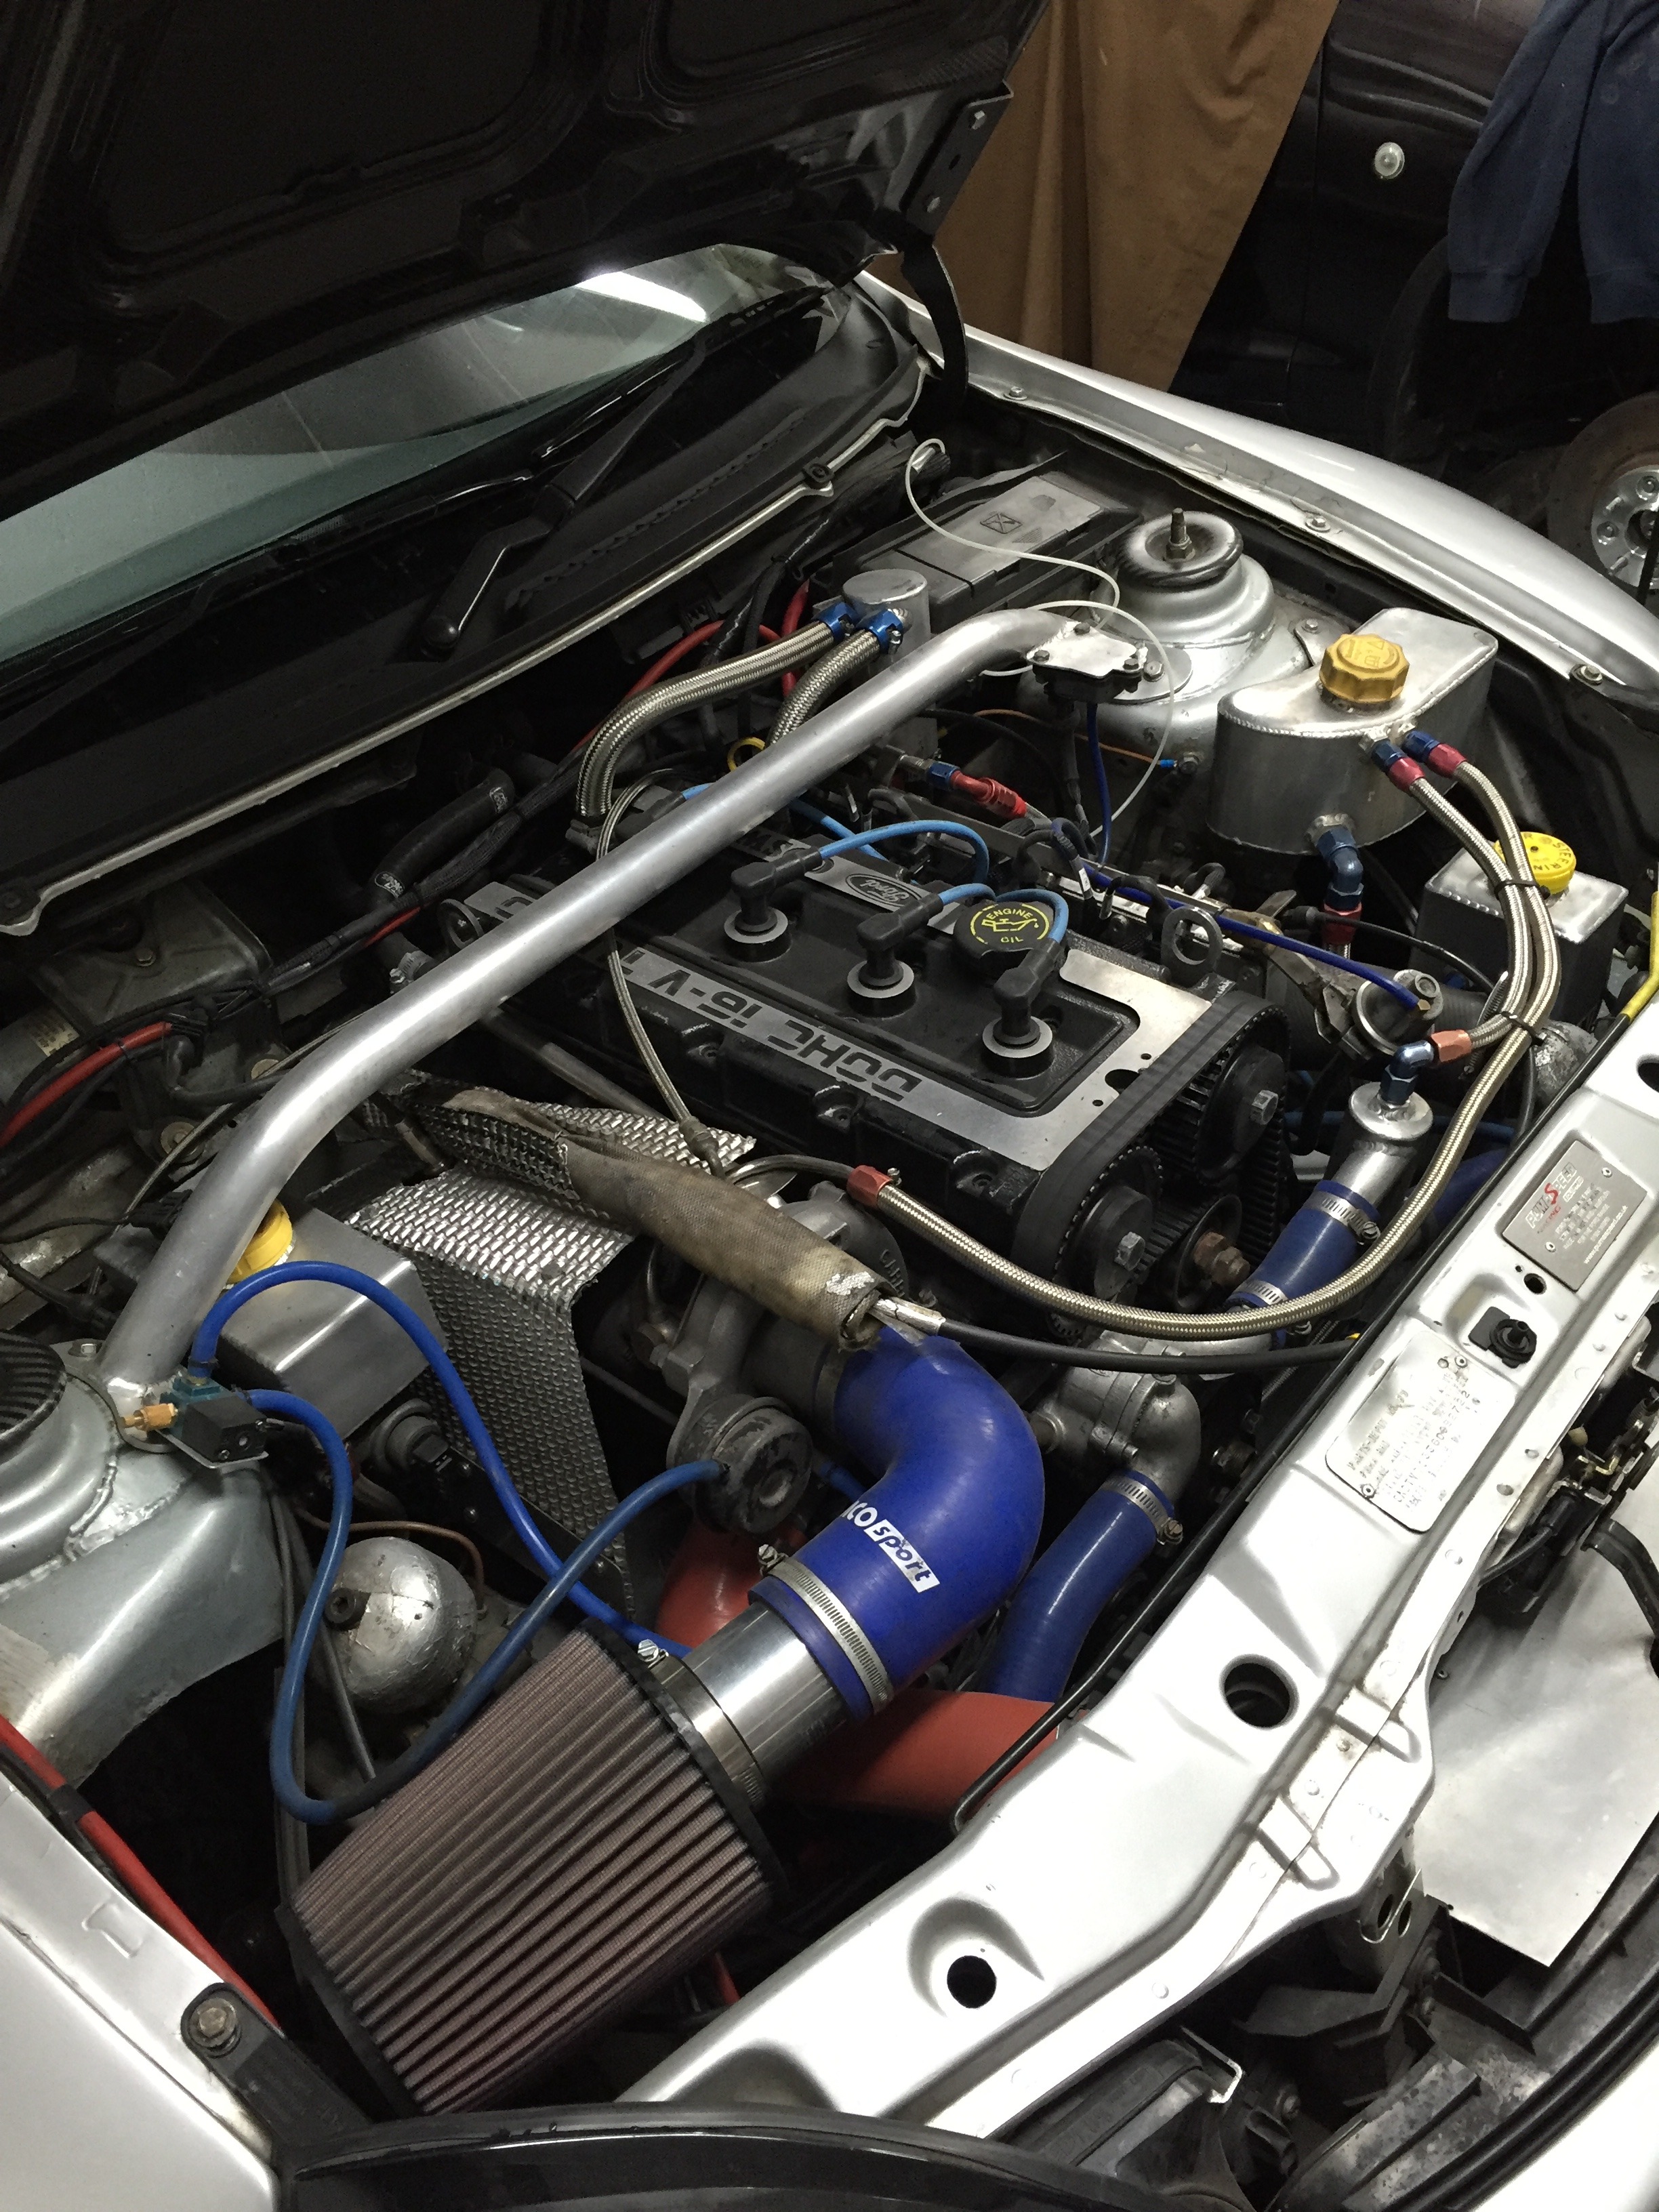
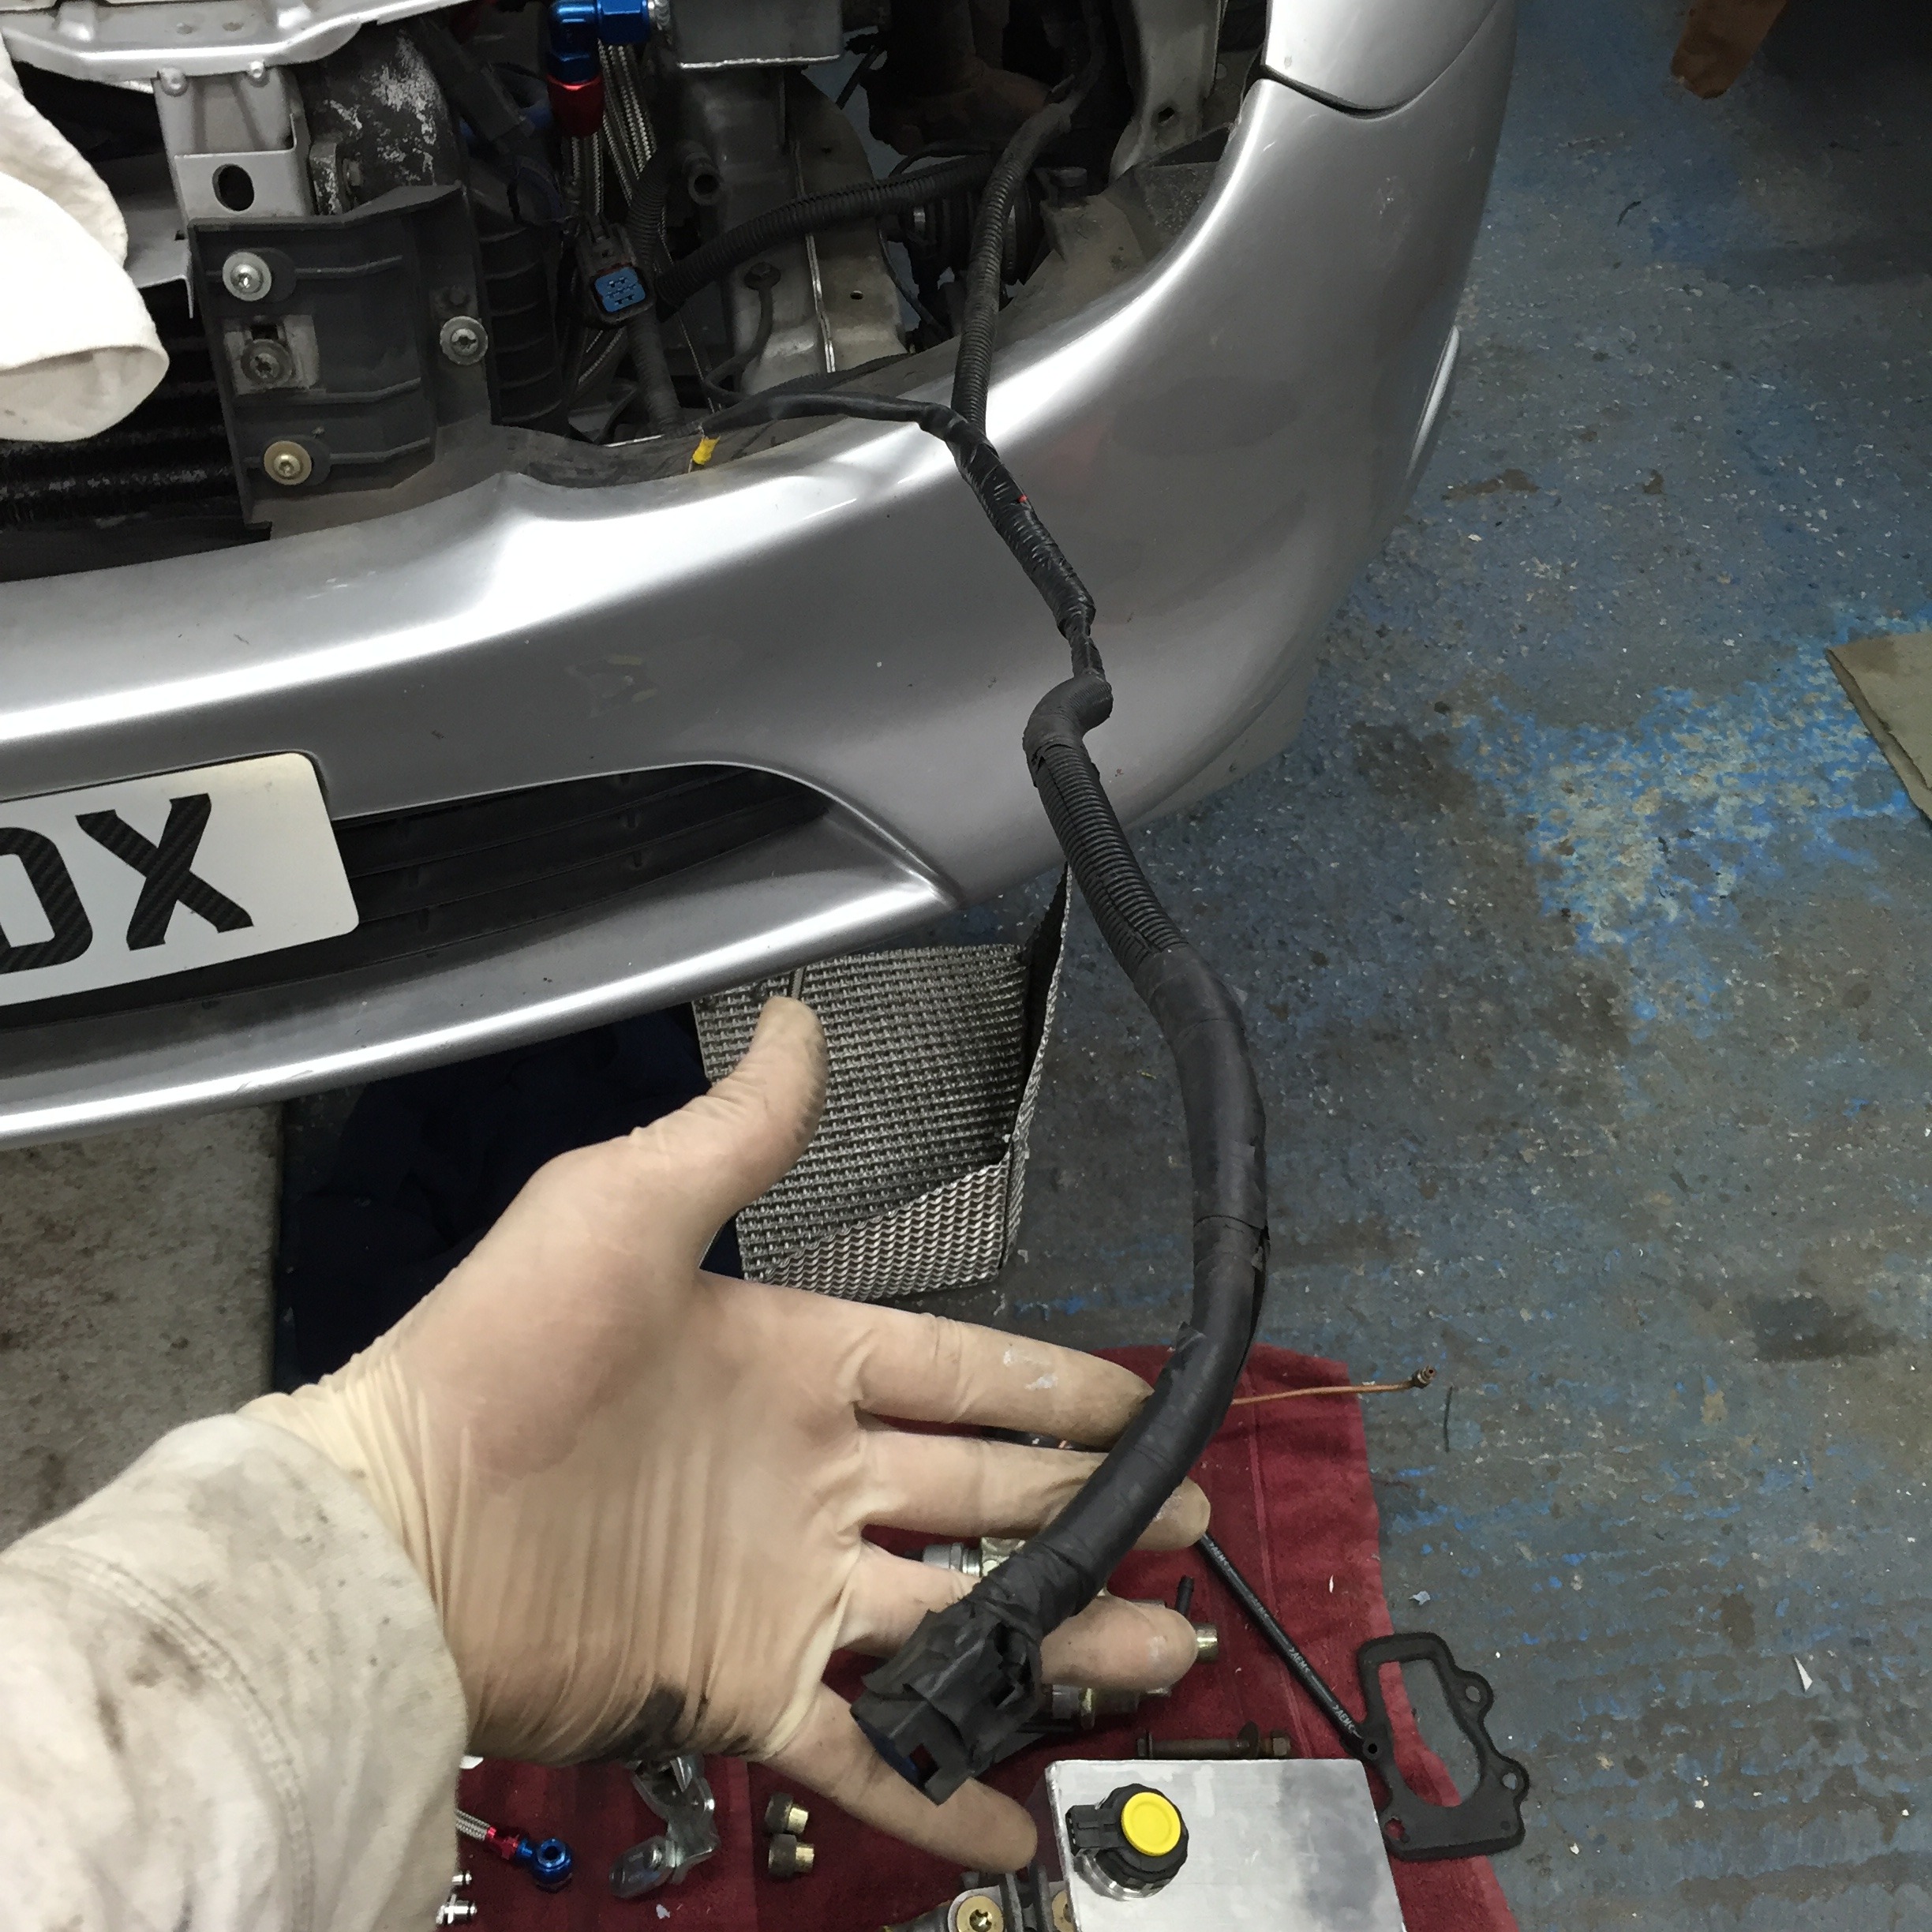
Decided to change the high pressure line on the brake pump
Also fitted a blanking plug to the pressure switch in the front that's no longer needed
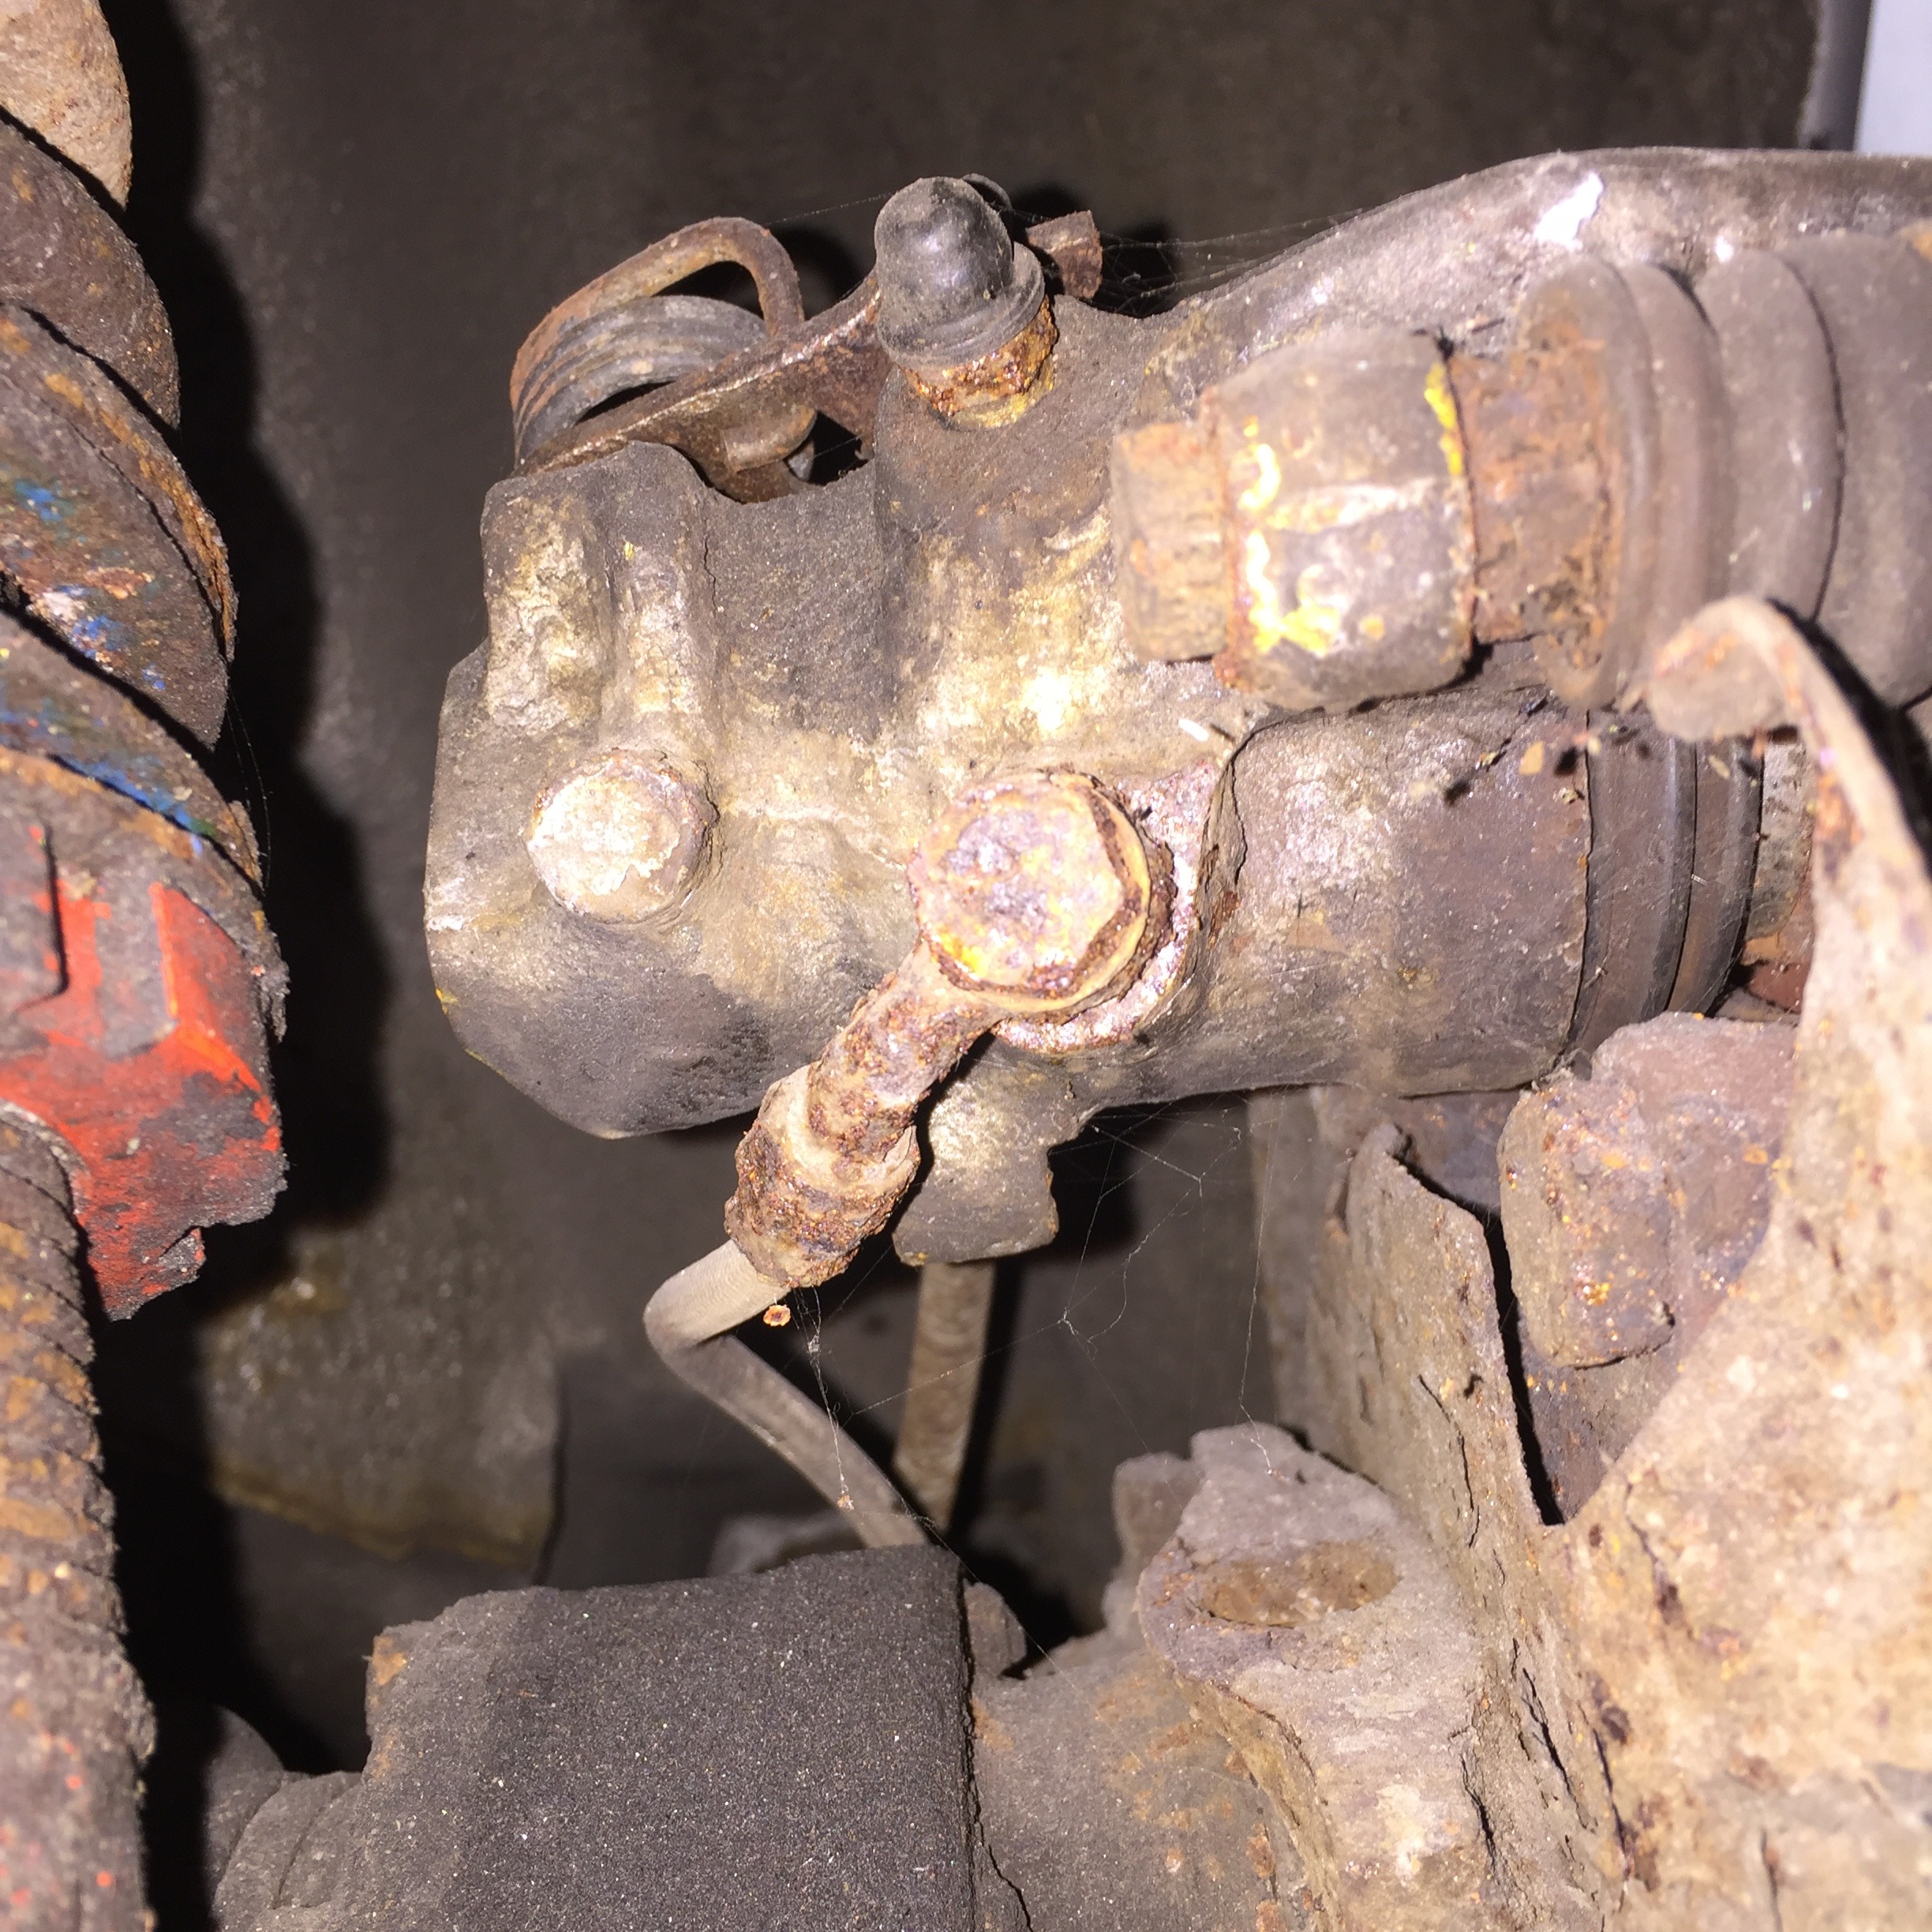
Before I filled up with brake fluid I changed all the ends on the callipers - the rears were knackered!
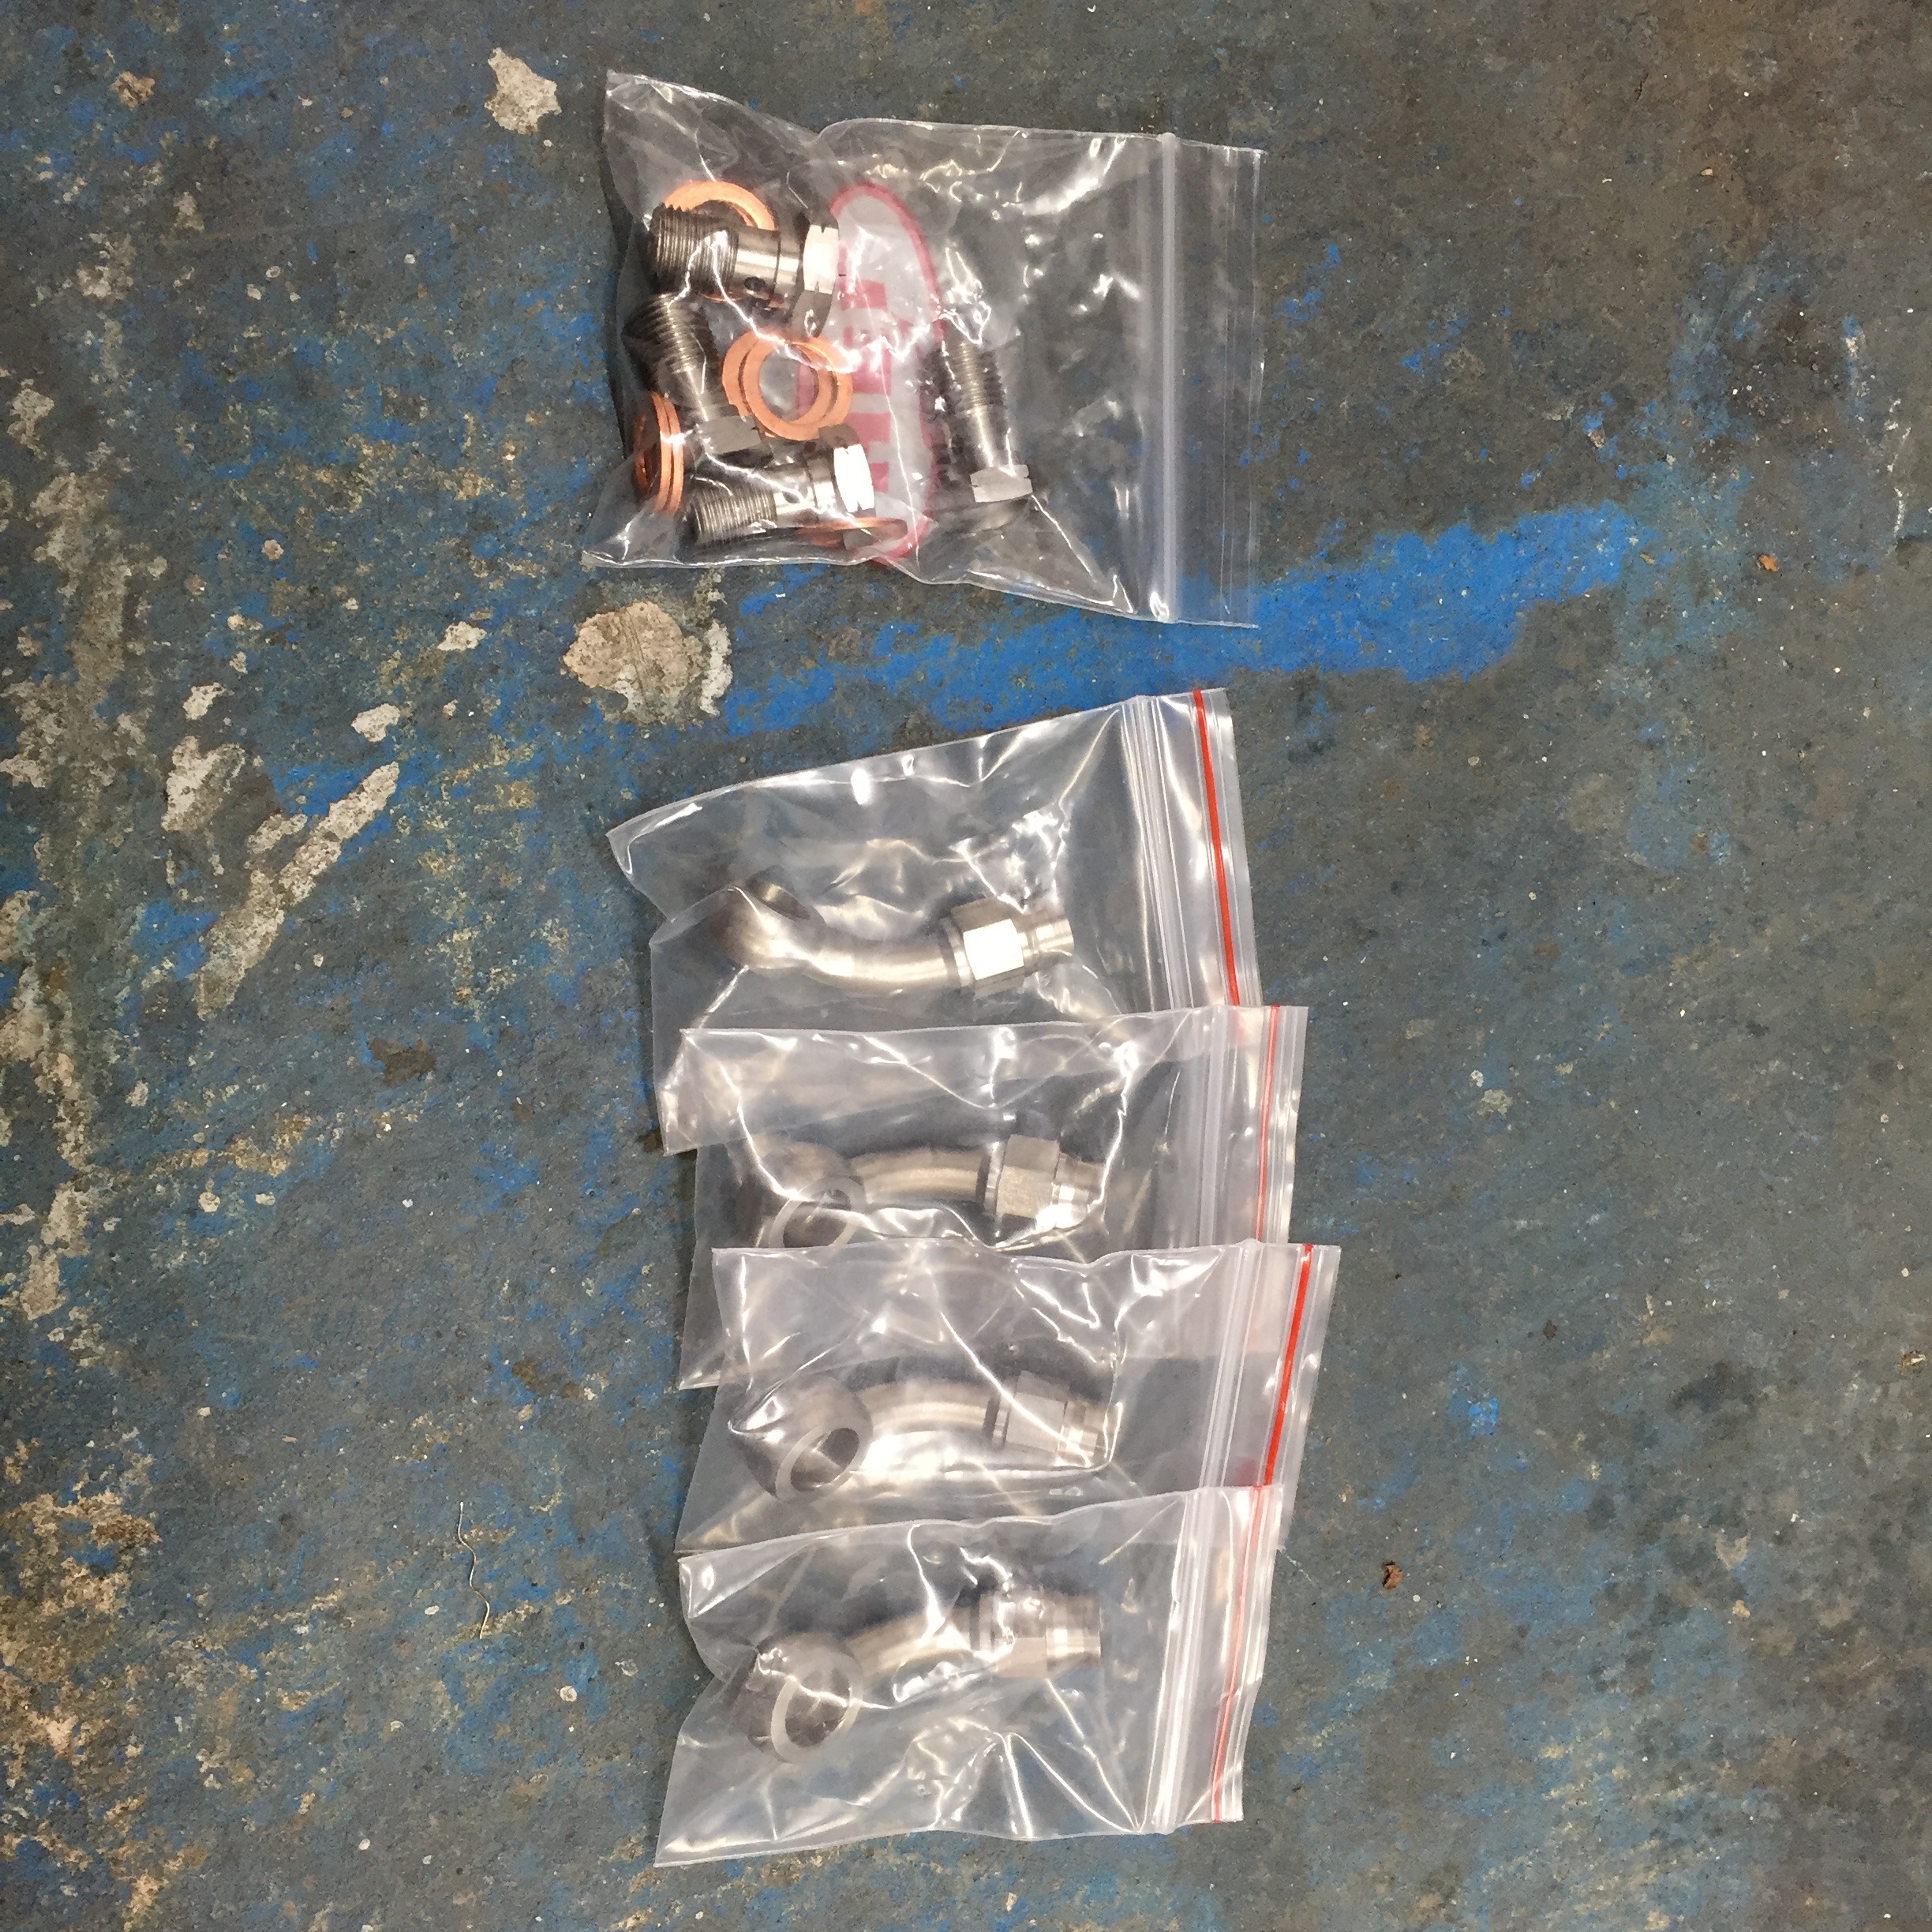
All new stainless steel fittings this time!
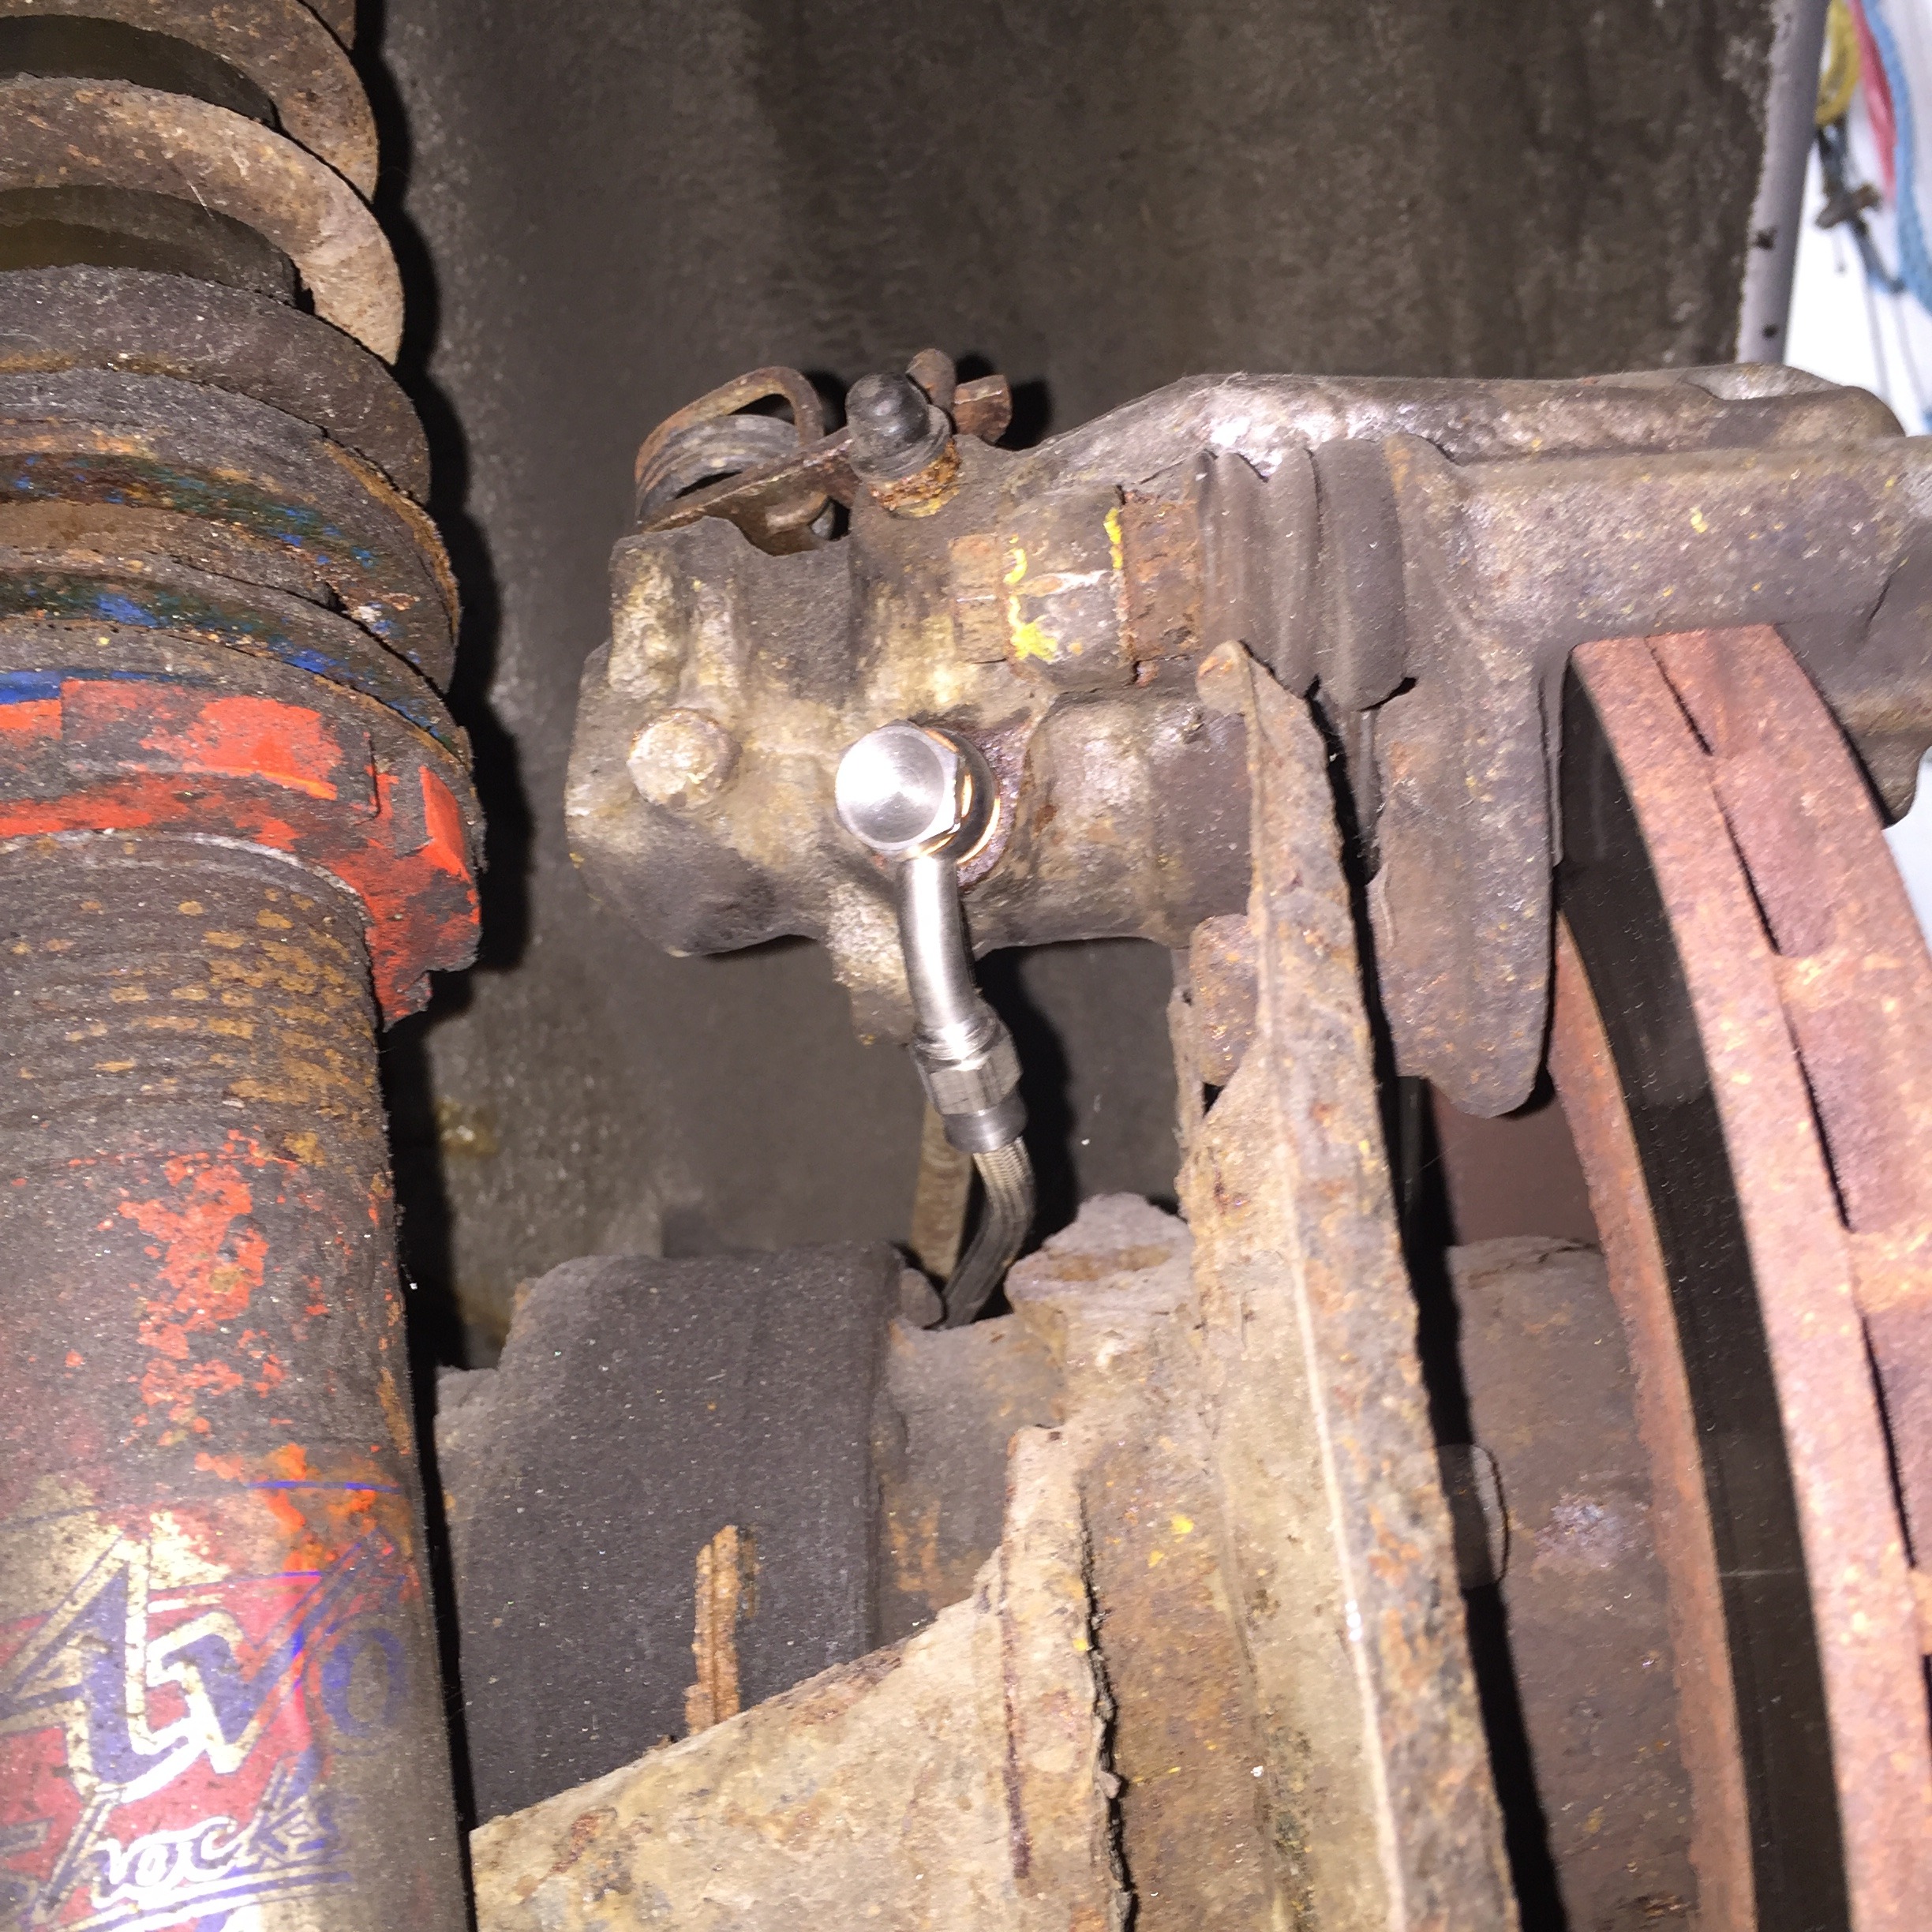
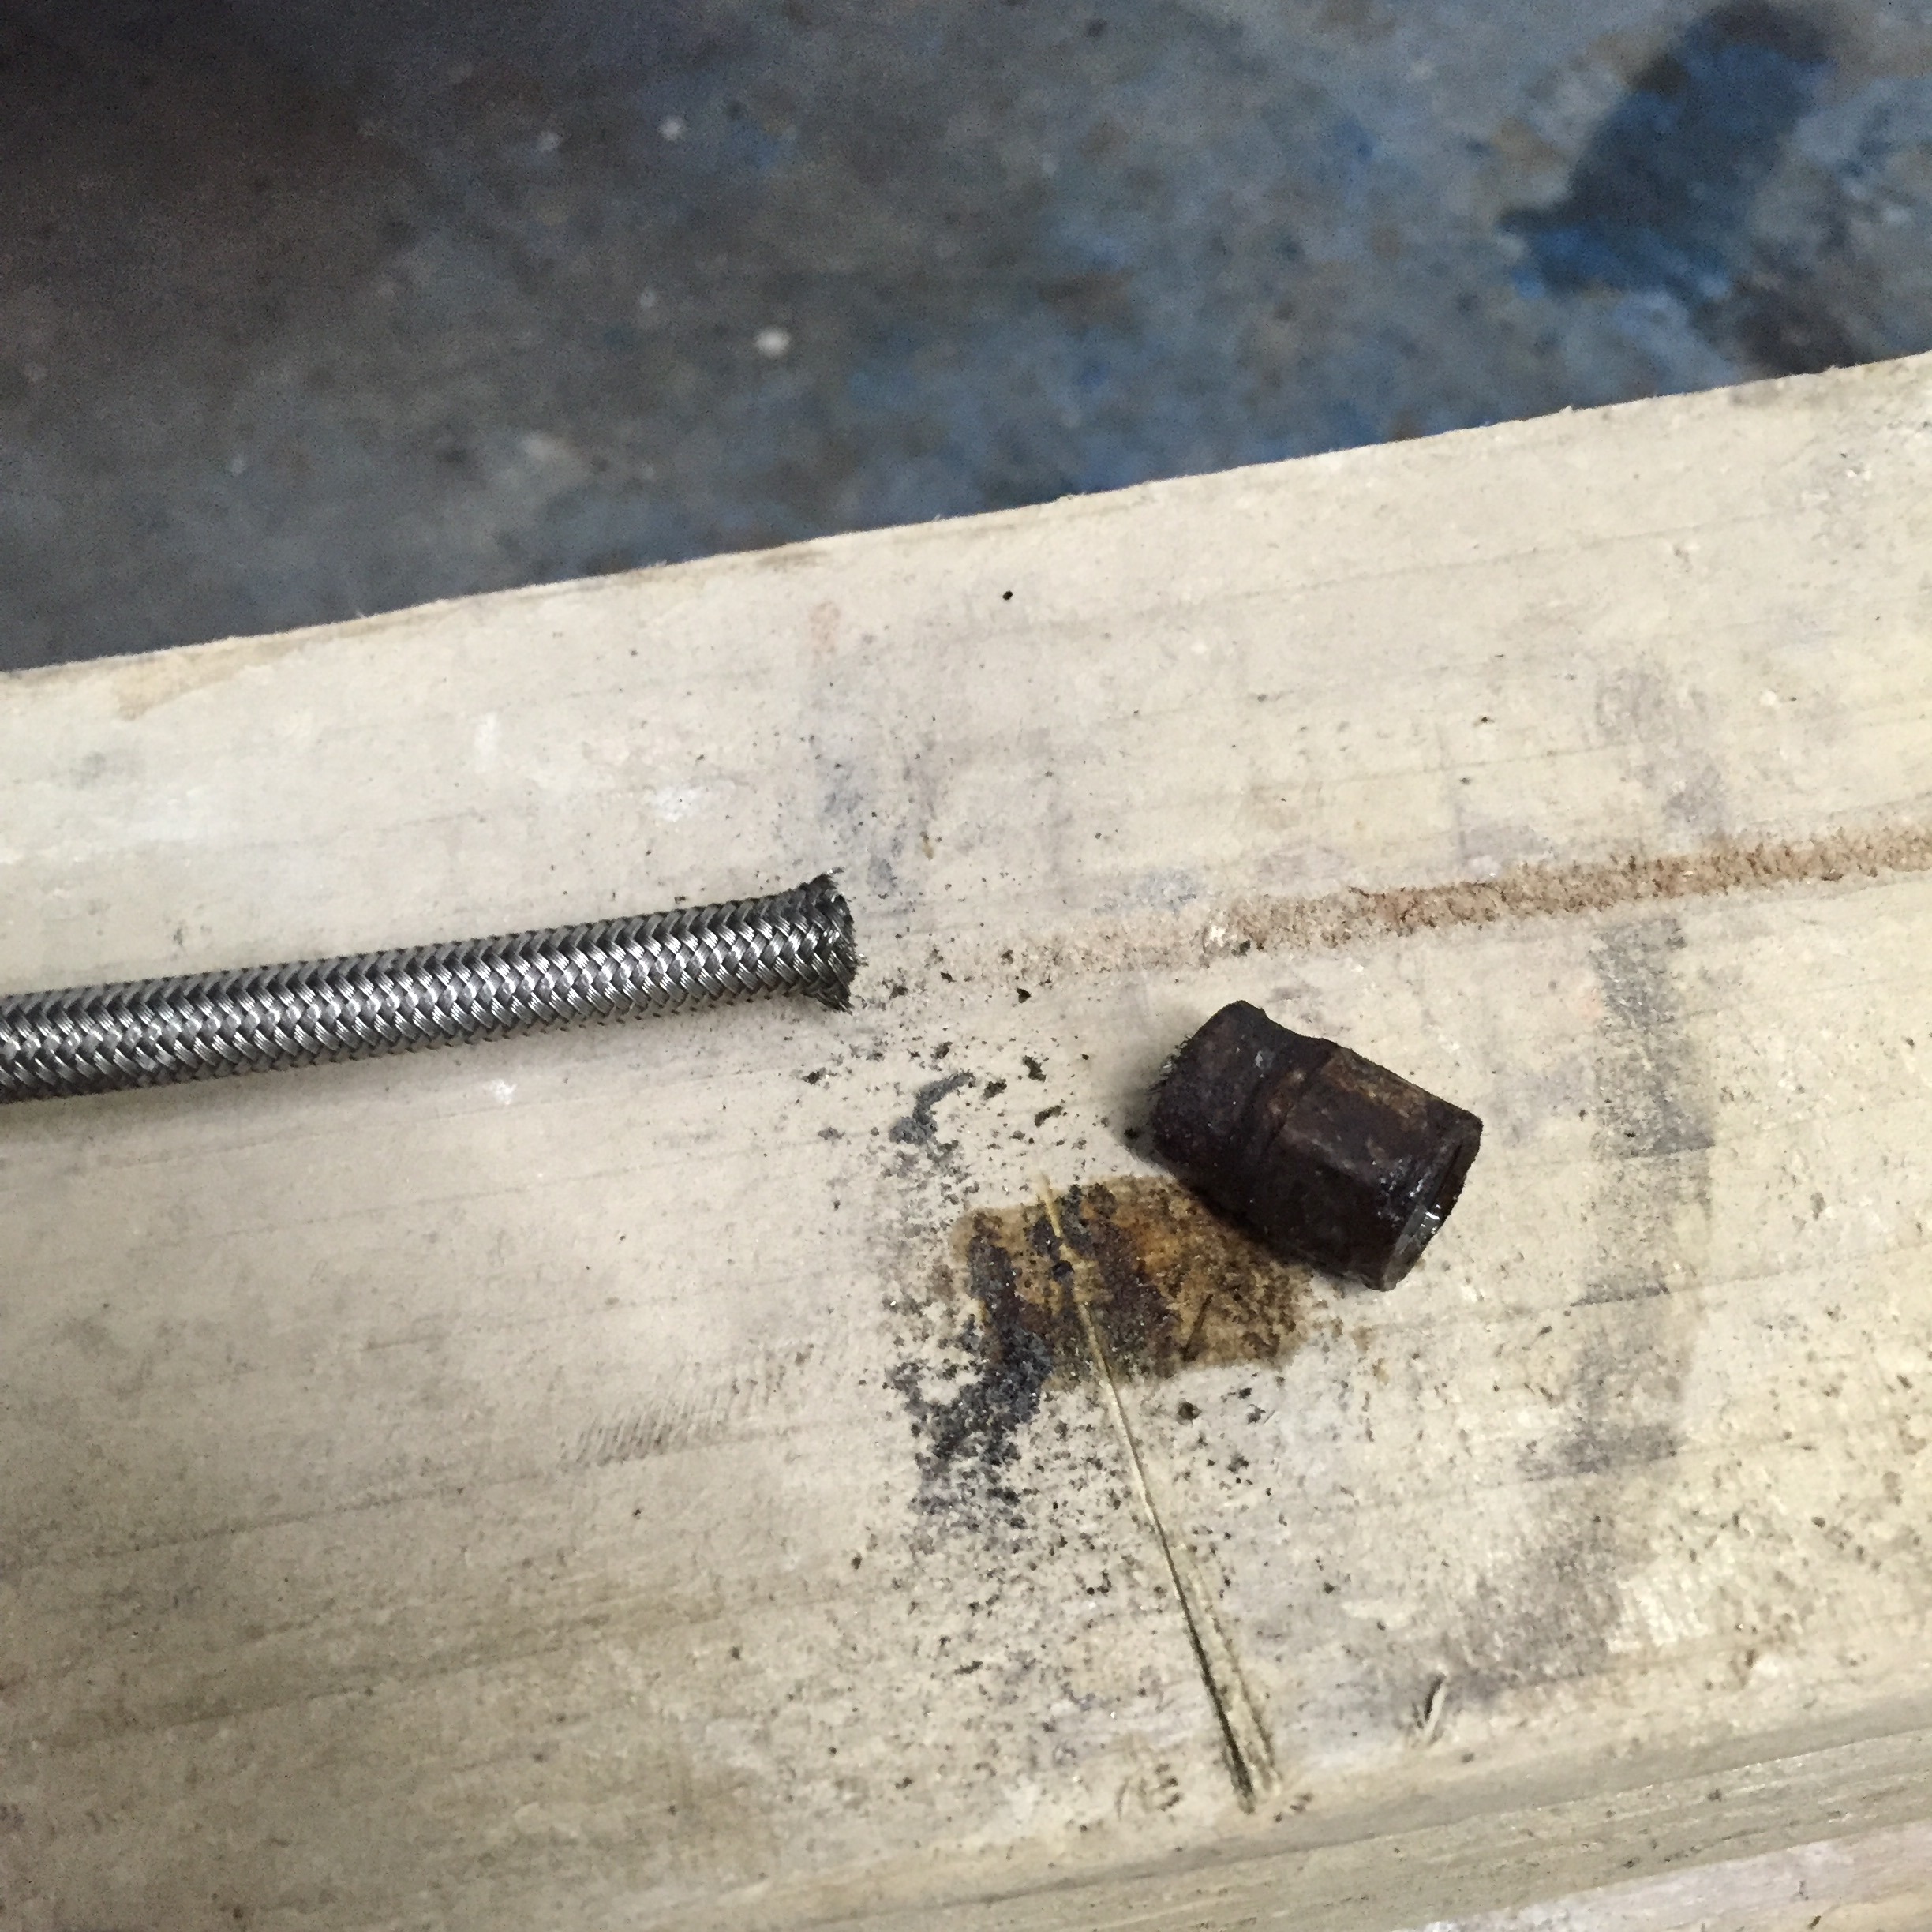
With that done at all four corners it was time to fill up and bleed the brakes, which to my annoyance made me realise that this fitting on the high pressure line was not going to seal..
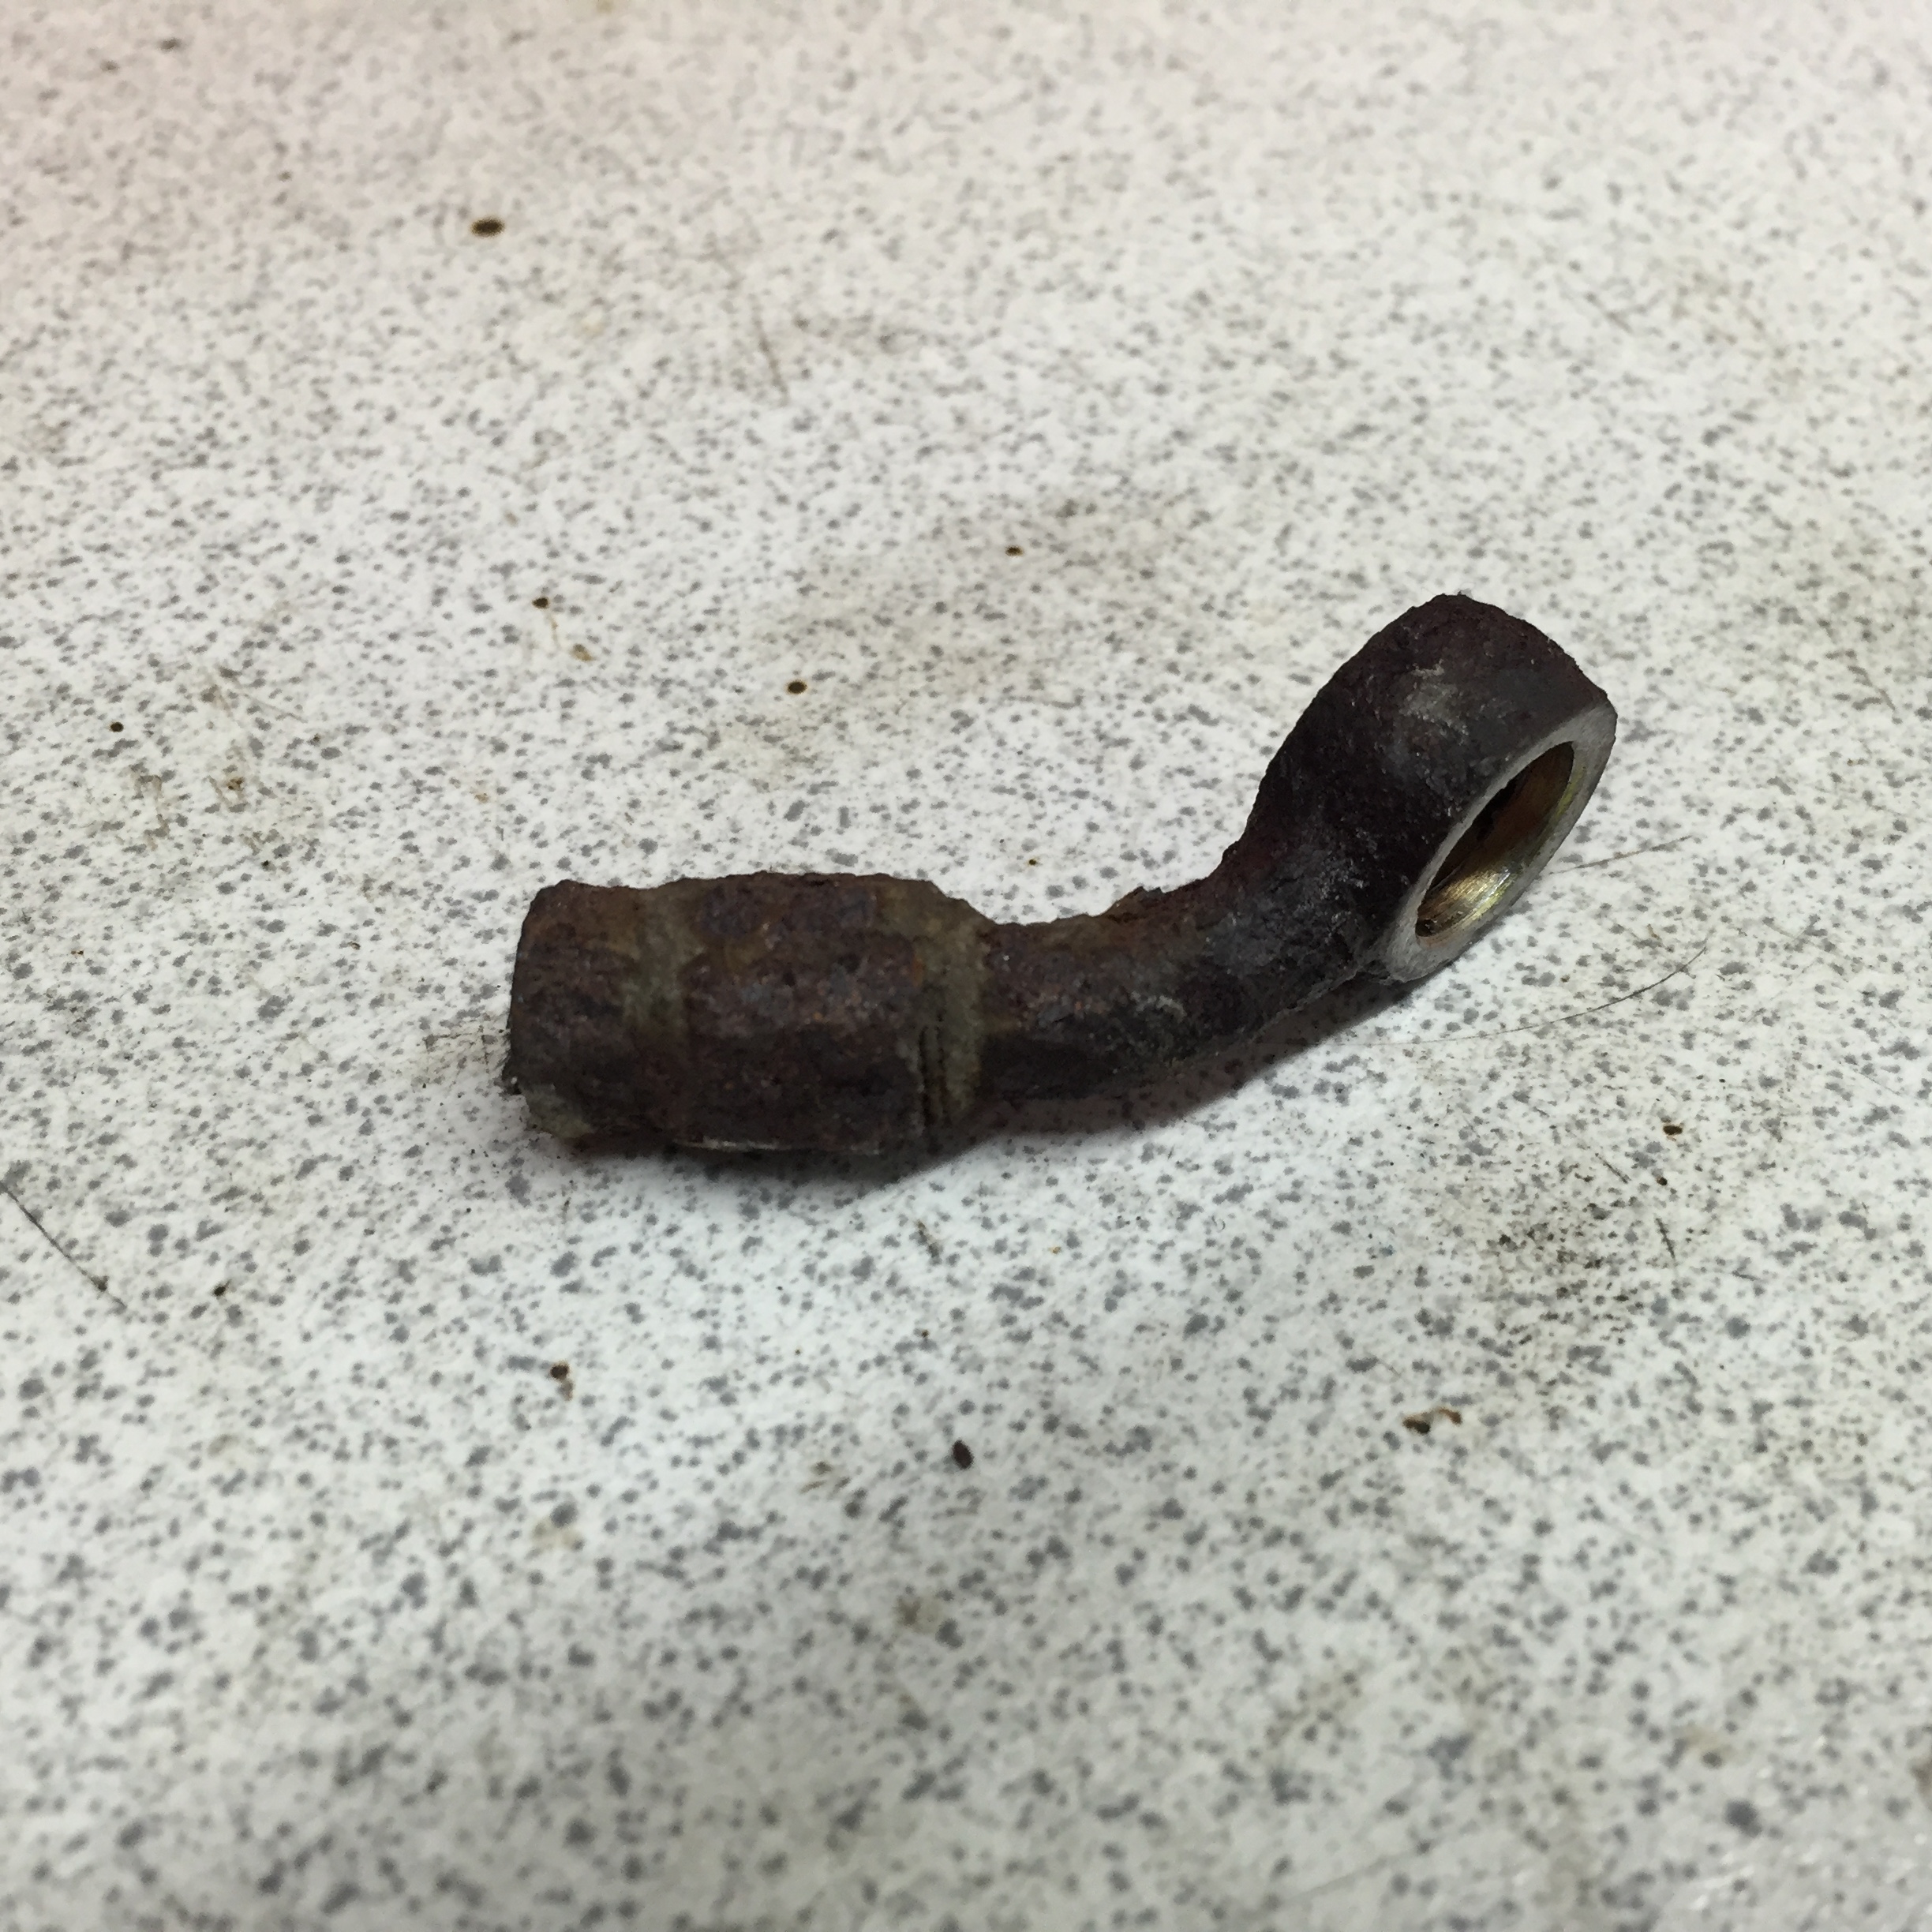
So the simplest option was to replace with a trusty banjo fitting and job done. It's actually probably what I should have used in the first place as it fits much better!
With that all done and tested I bolted everything back up and finished the job
Decided to do some little jobs on the car while I had a little time
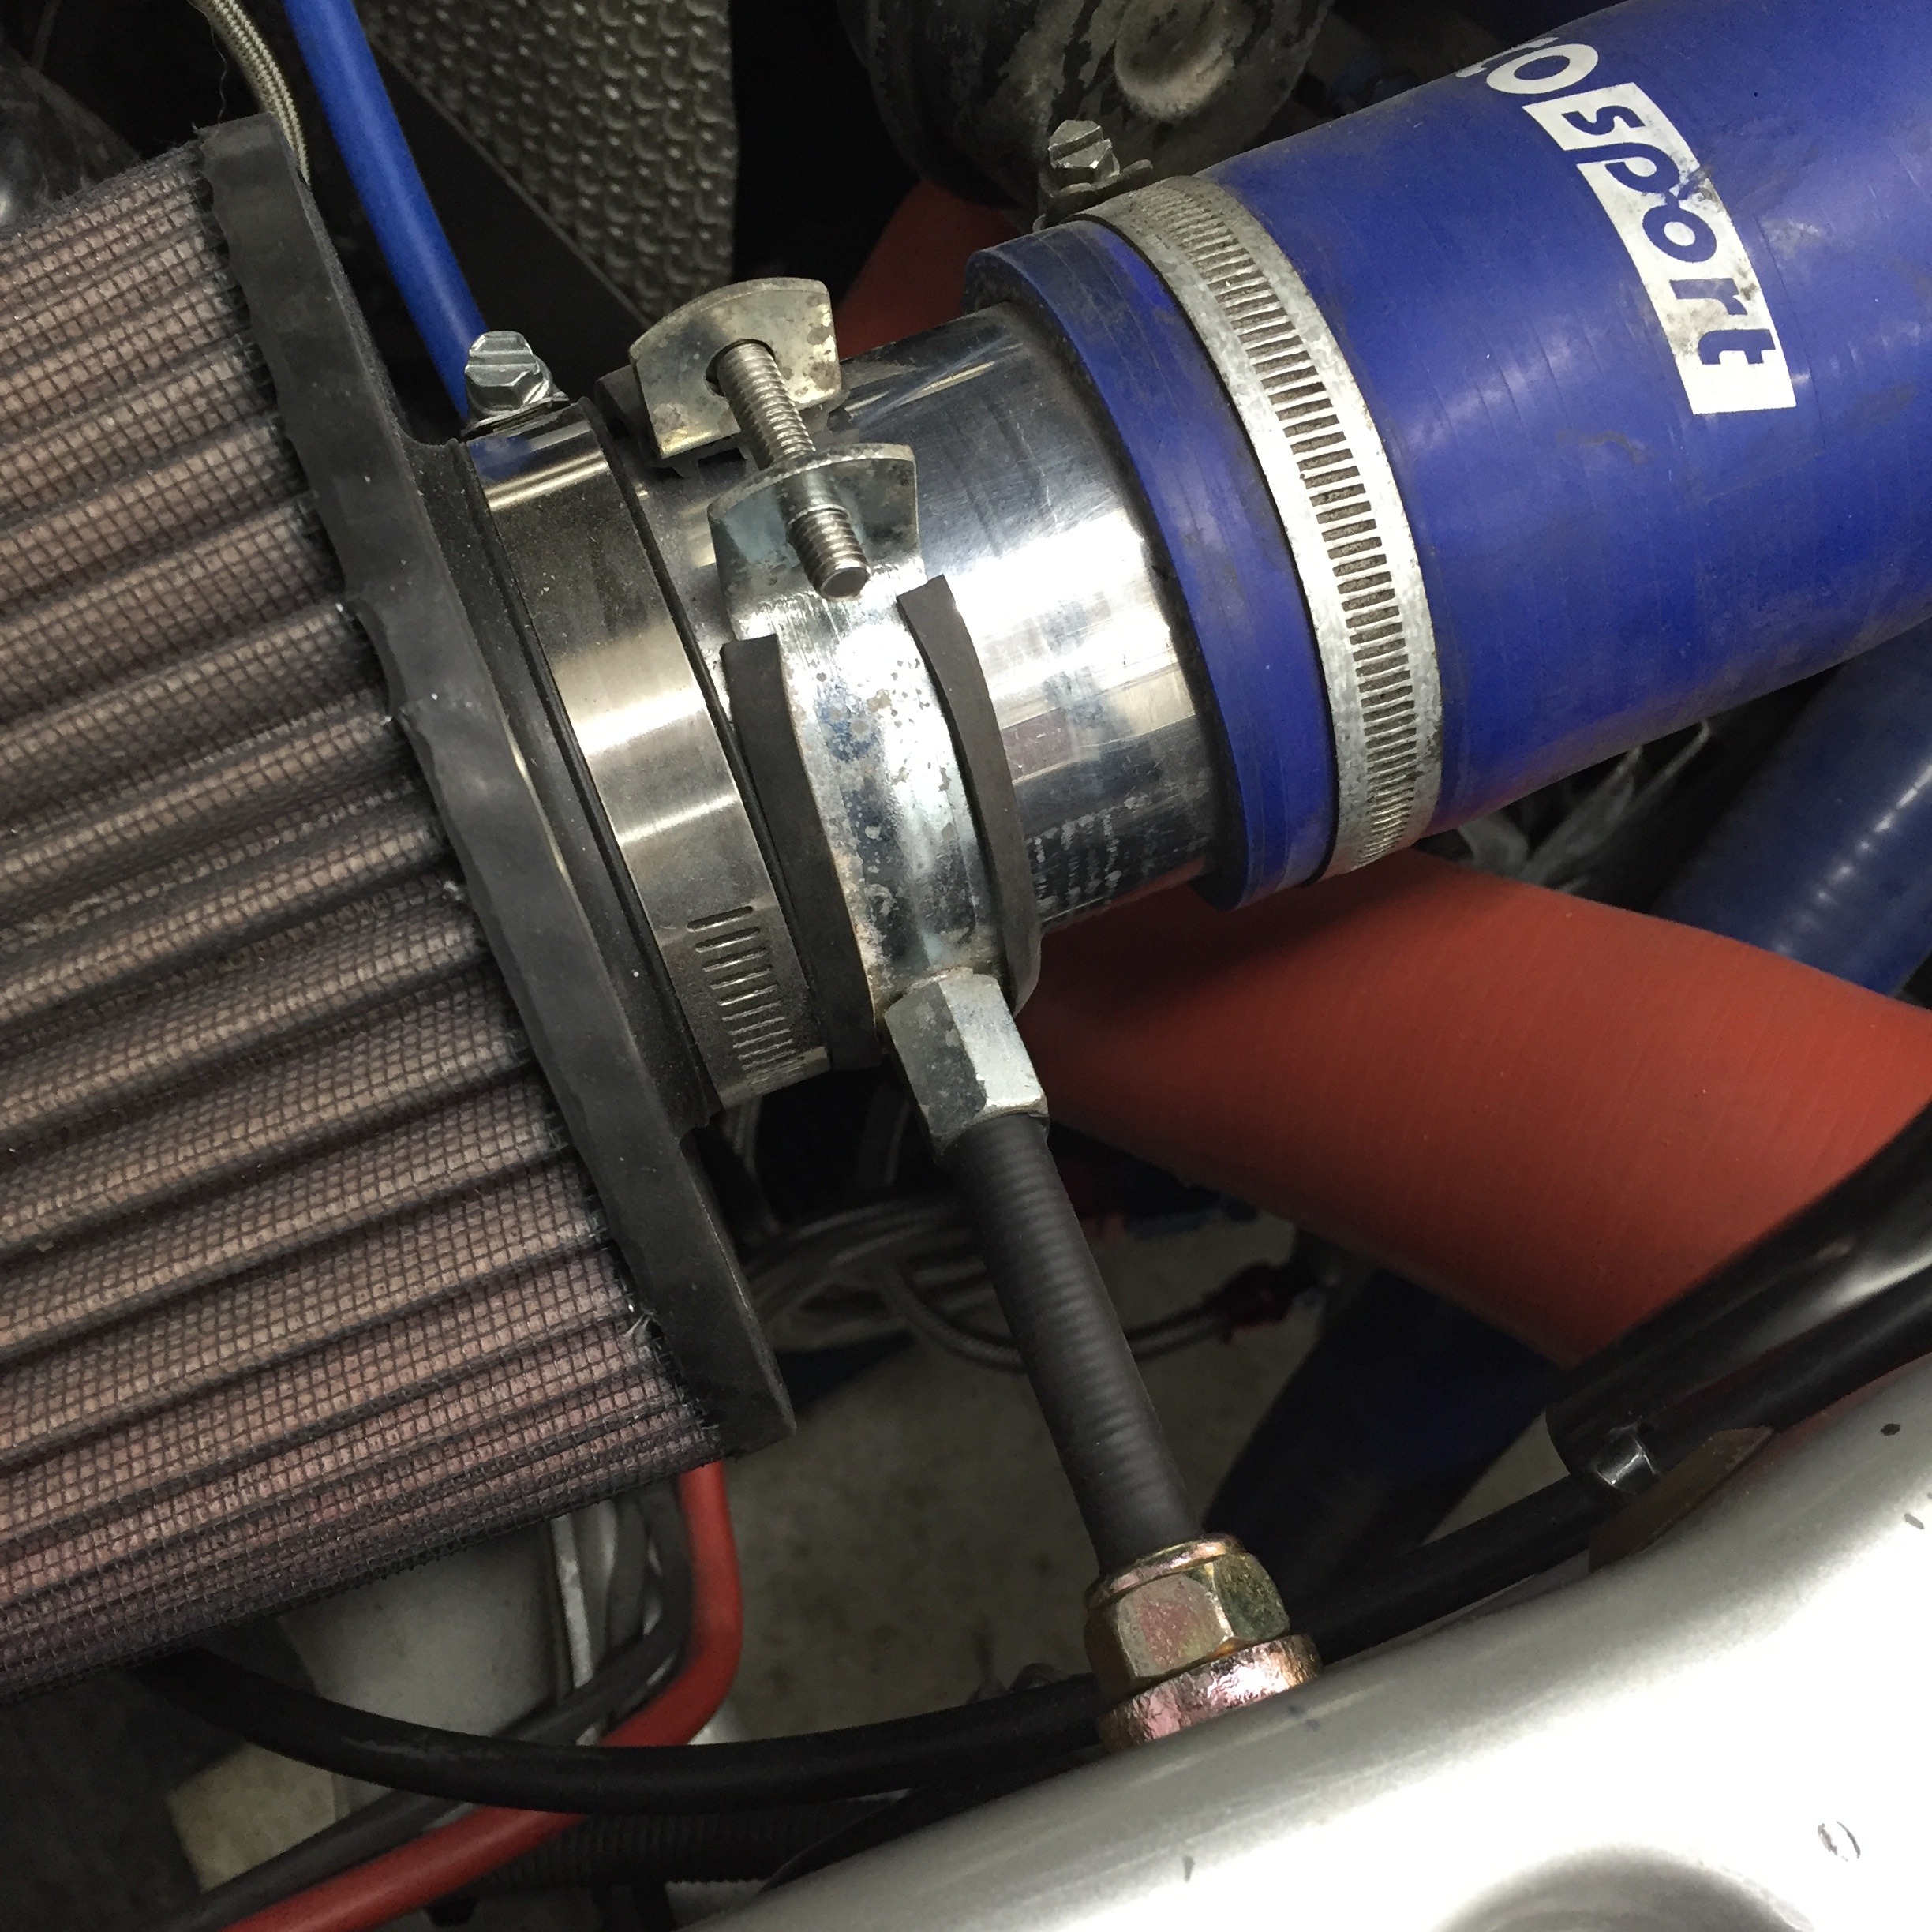
The air filter seemed to be moving around too much, generally bouncing up and down. So made a bracket to hold it in place..
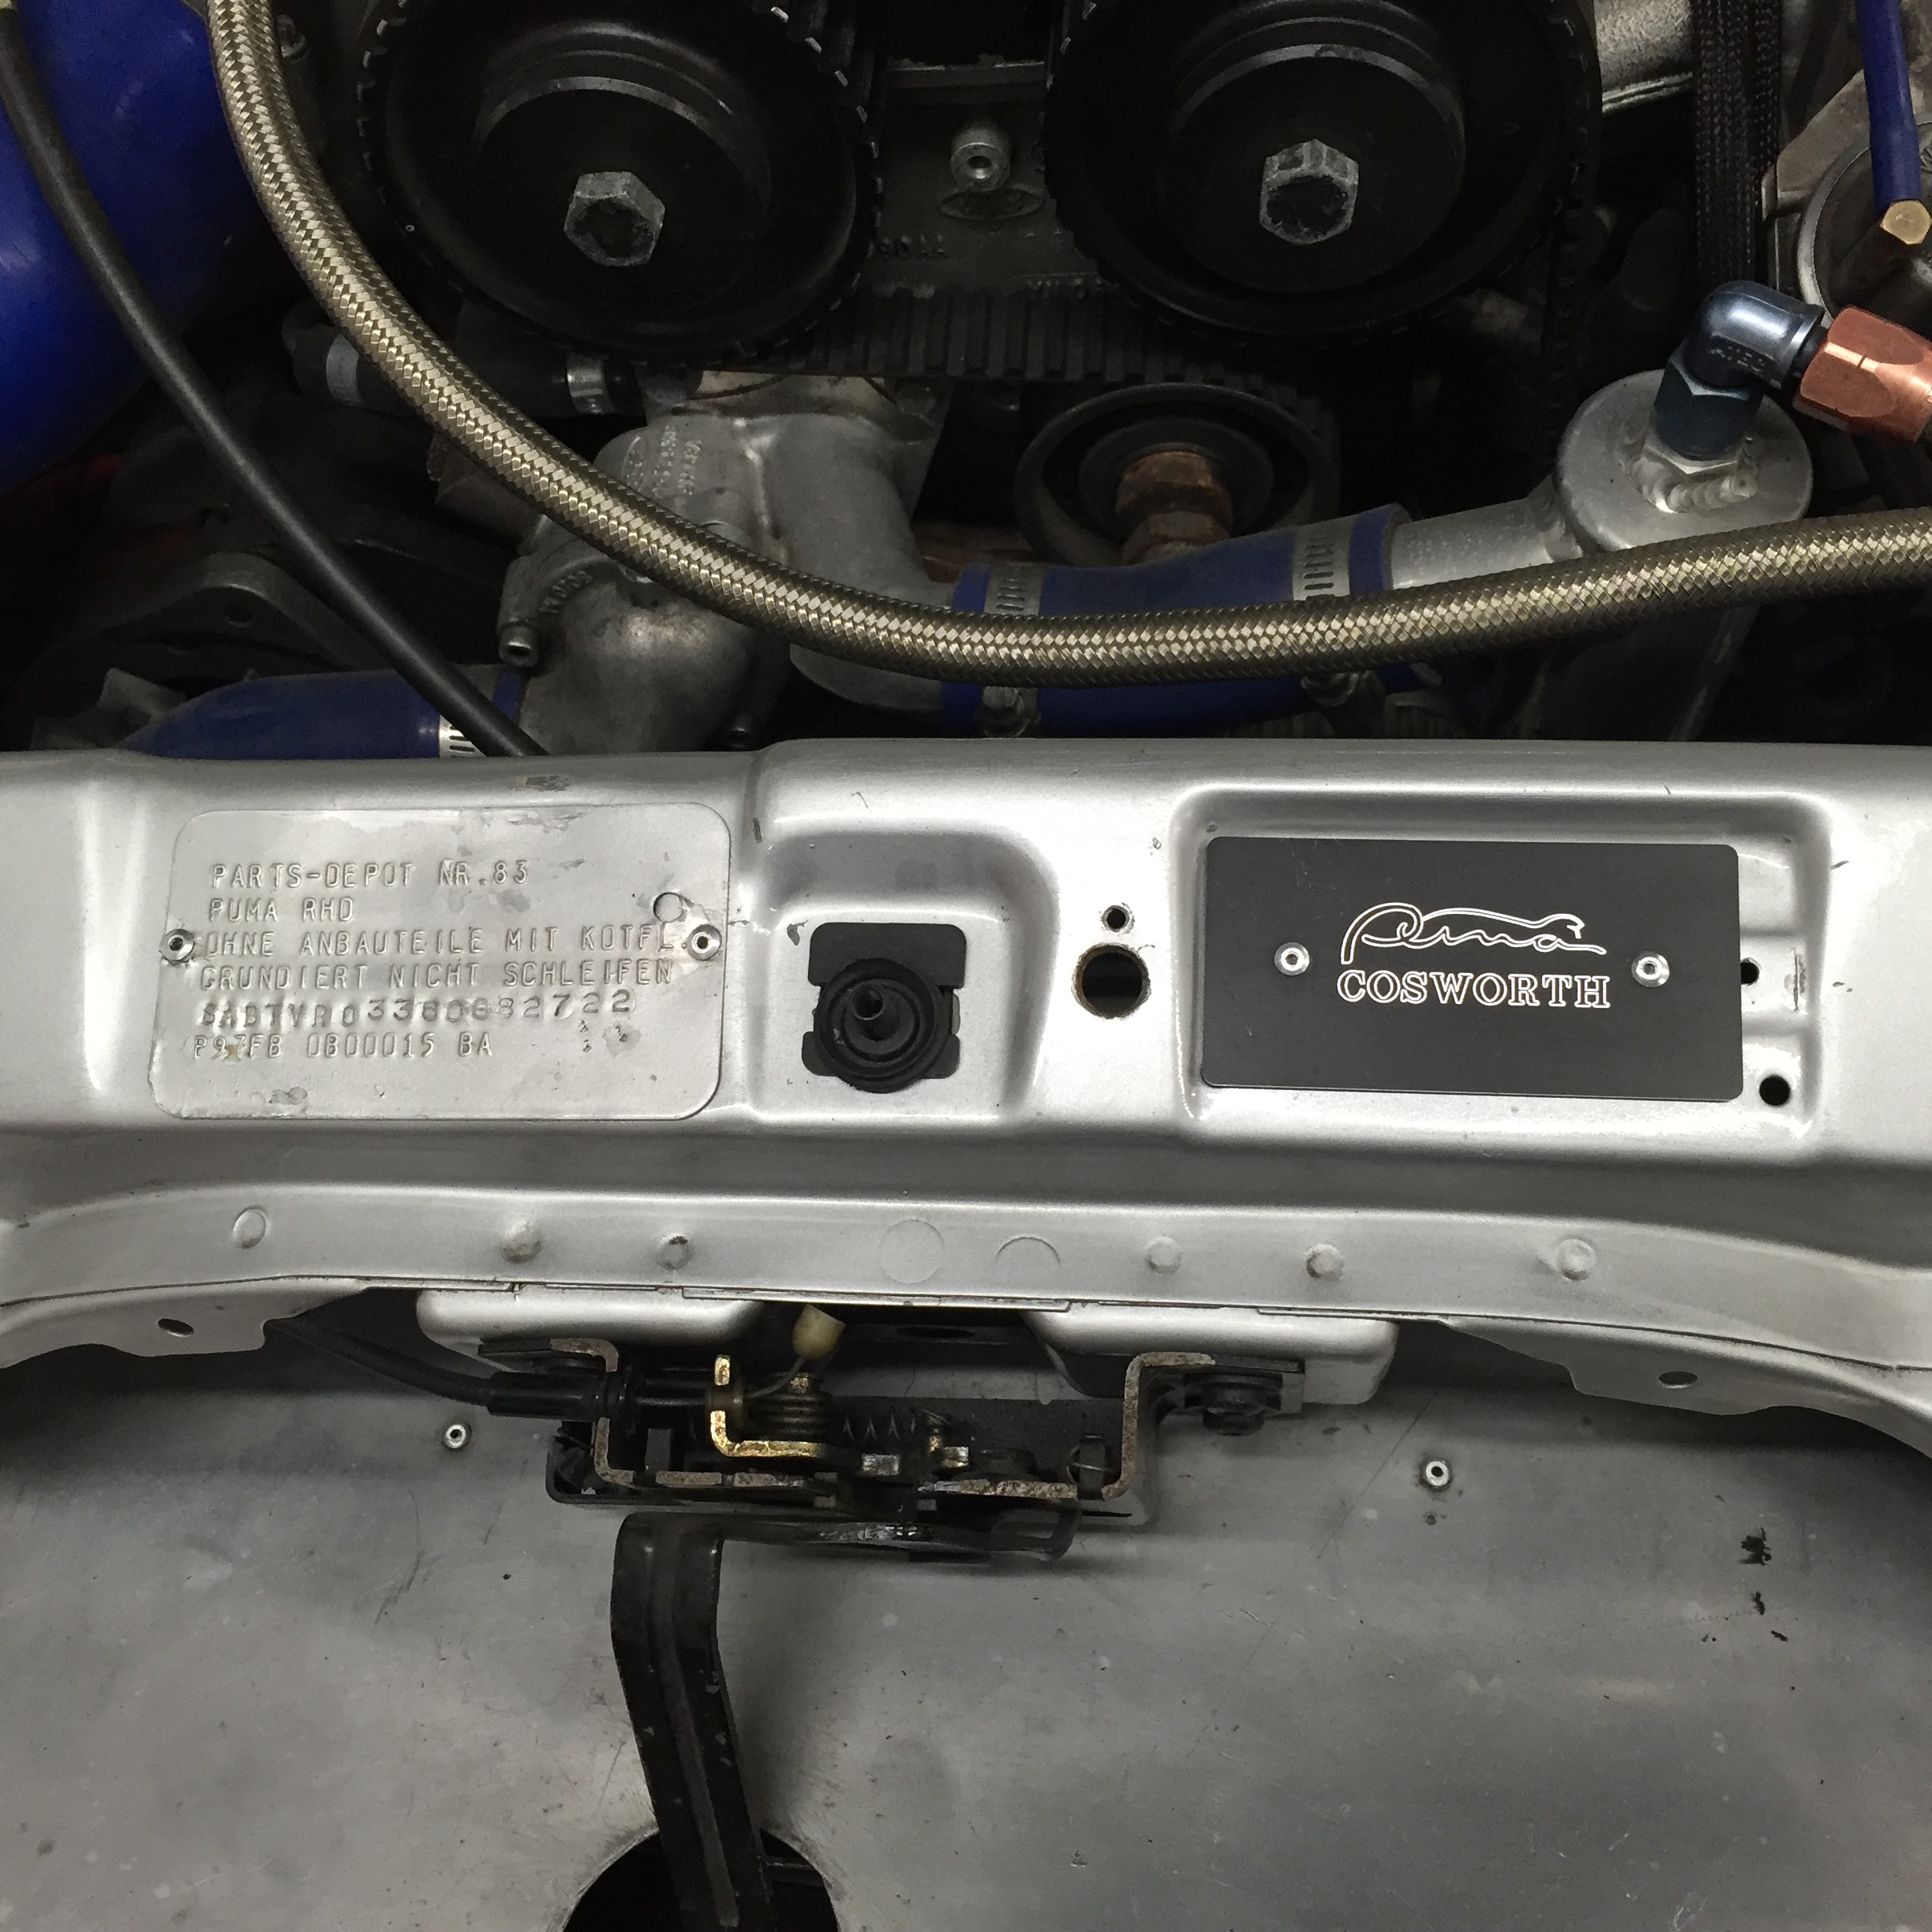
The plates on the front of the bay had seen better days and needed changing for various reasons. Some plates had been made which I got with the car so set about changing them.


But in the end I settled for this option and flattened out the original one
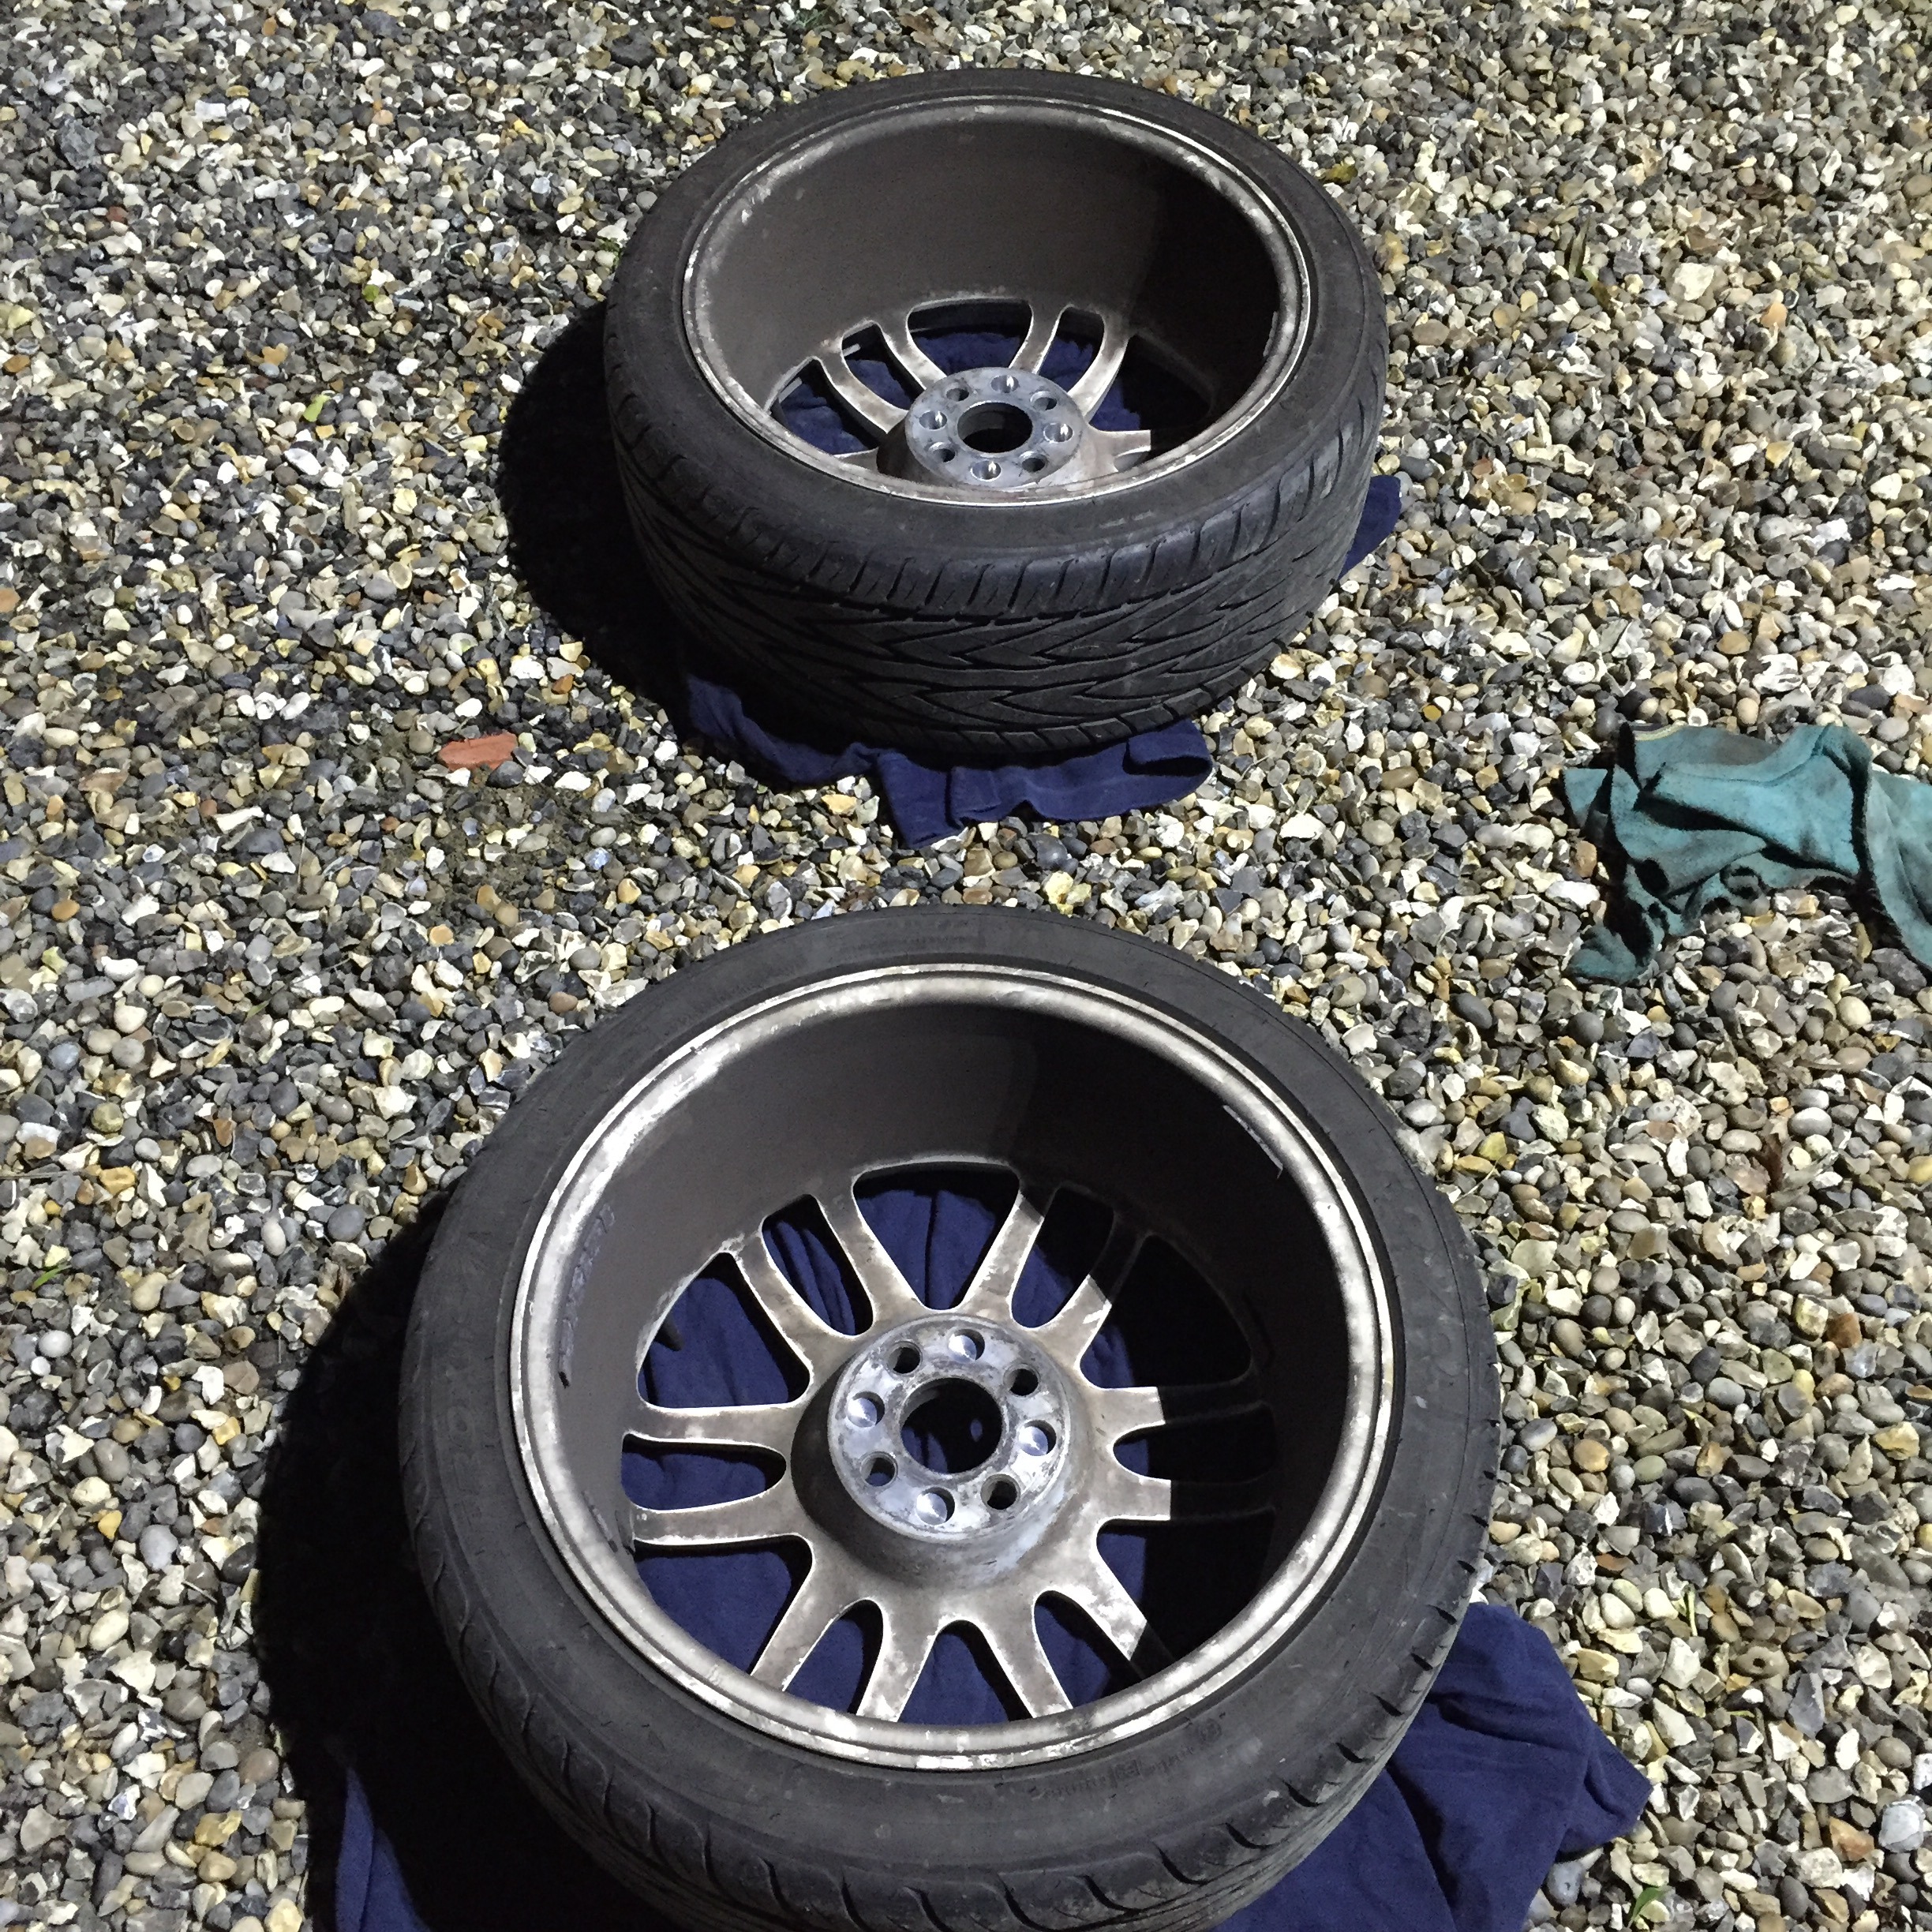
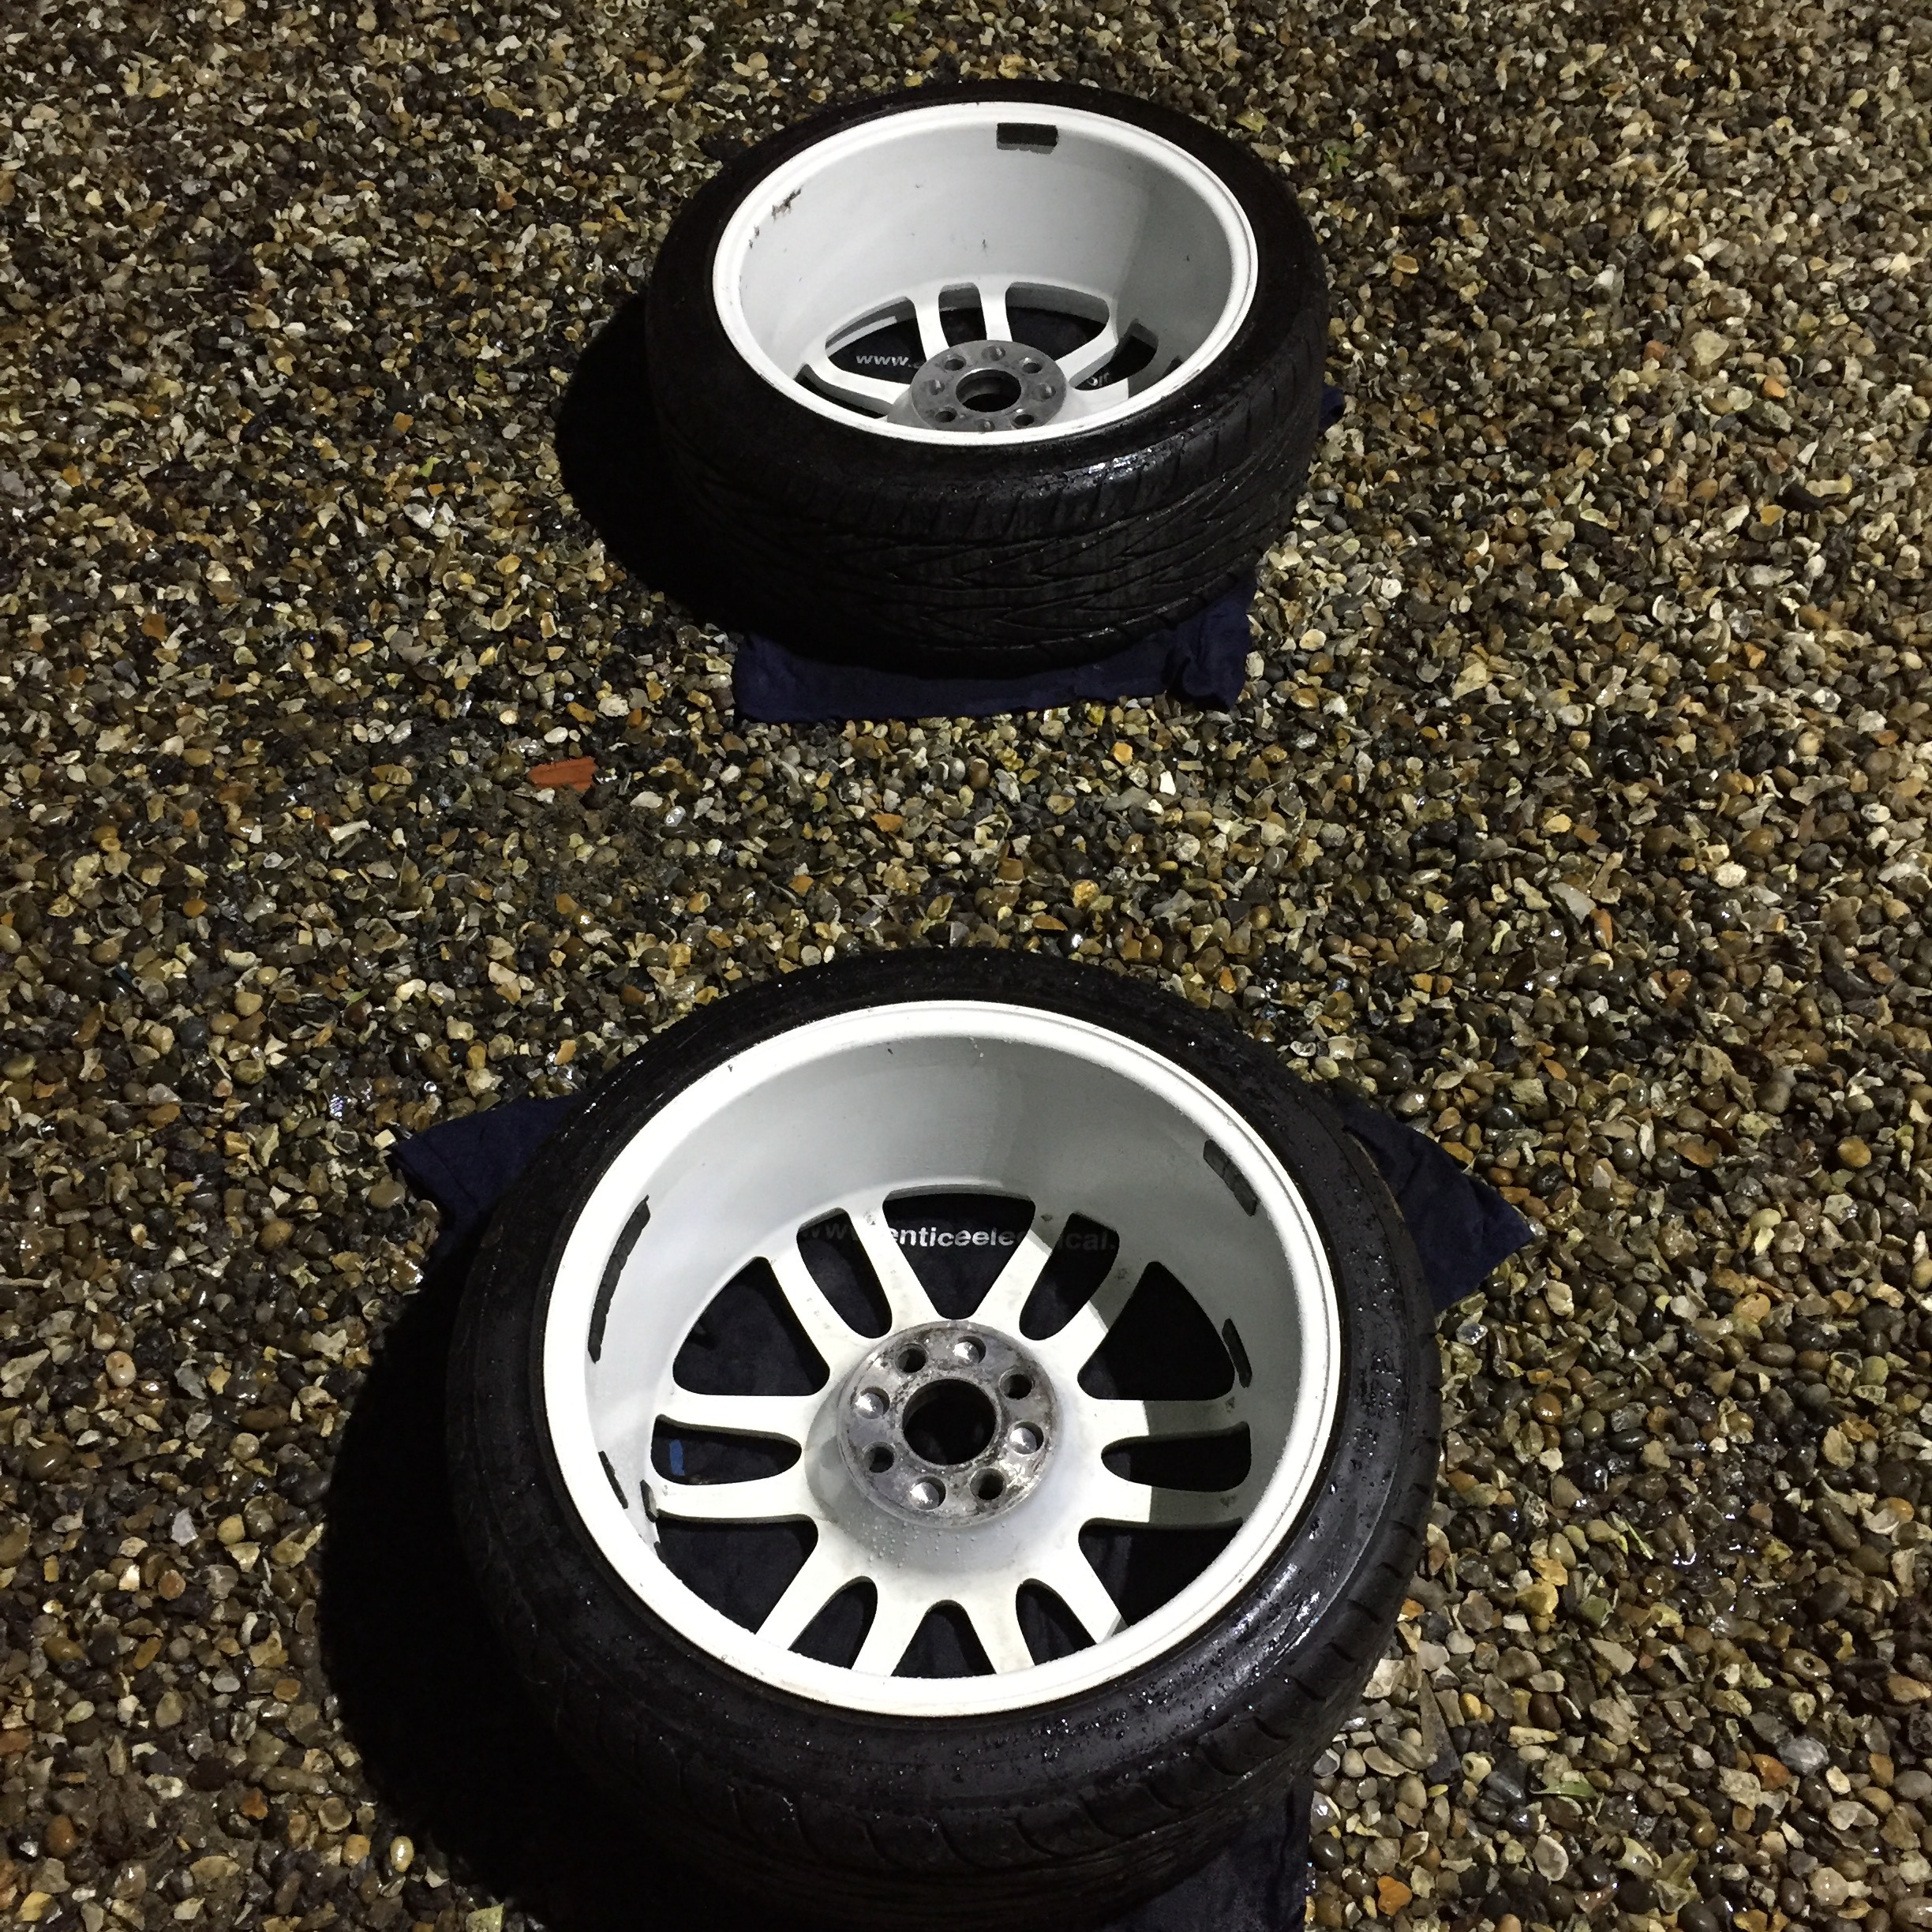
Also gave the back wheels a good clean
That's it for now, will get some more up soon.
Thanks for looking.
With the reservoir modified to suit the install I moved my attentions onto the master cylinder mount. This has seen better days and after all the years of brake fluid spilling out, it needed some paint. I noticed however the throttle cable wouldn't sit home because the mount had been made too large so set about taking the corner away to make room and clean the area up quickly.


With the bay full it was difficult getting the welder in there, I also forget just how thin fords metal is sometimes. However after some trouble and some repairs I got the desired result. I'm not 100% happy but will be fine for now. Will spend some more time on it when a full shell restoration is done.


With a bit of sealer and paint on it the area has come up ok. Again at some point will neaten it all up at a later date.
Need to get a new gasket for future use for the master cylinder. Would like to know where you can get the material from or something similar so if anyone knows and could let me know that would be greatly appreciated!

On a separate note this had to come back out again and be replaced...

My attempt at re-sealing my old rack was a waste of effort.. After around 15-20 odds miles it tarted leaking on the drivers side this time.. I think I know what happened but at this stage I couldn't be bothered and did what I should have done the first time around and bought a reconditioned rack. So set about getting that fitted and hopefully now this problem will go away for good!
I did find the patience to give it a quick paint before it went in though

So with that task dealt with.. I moved back onto getting the brake system back together


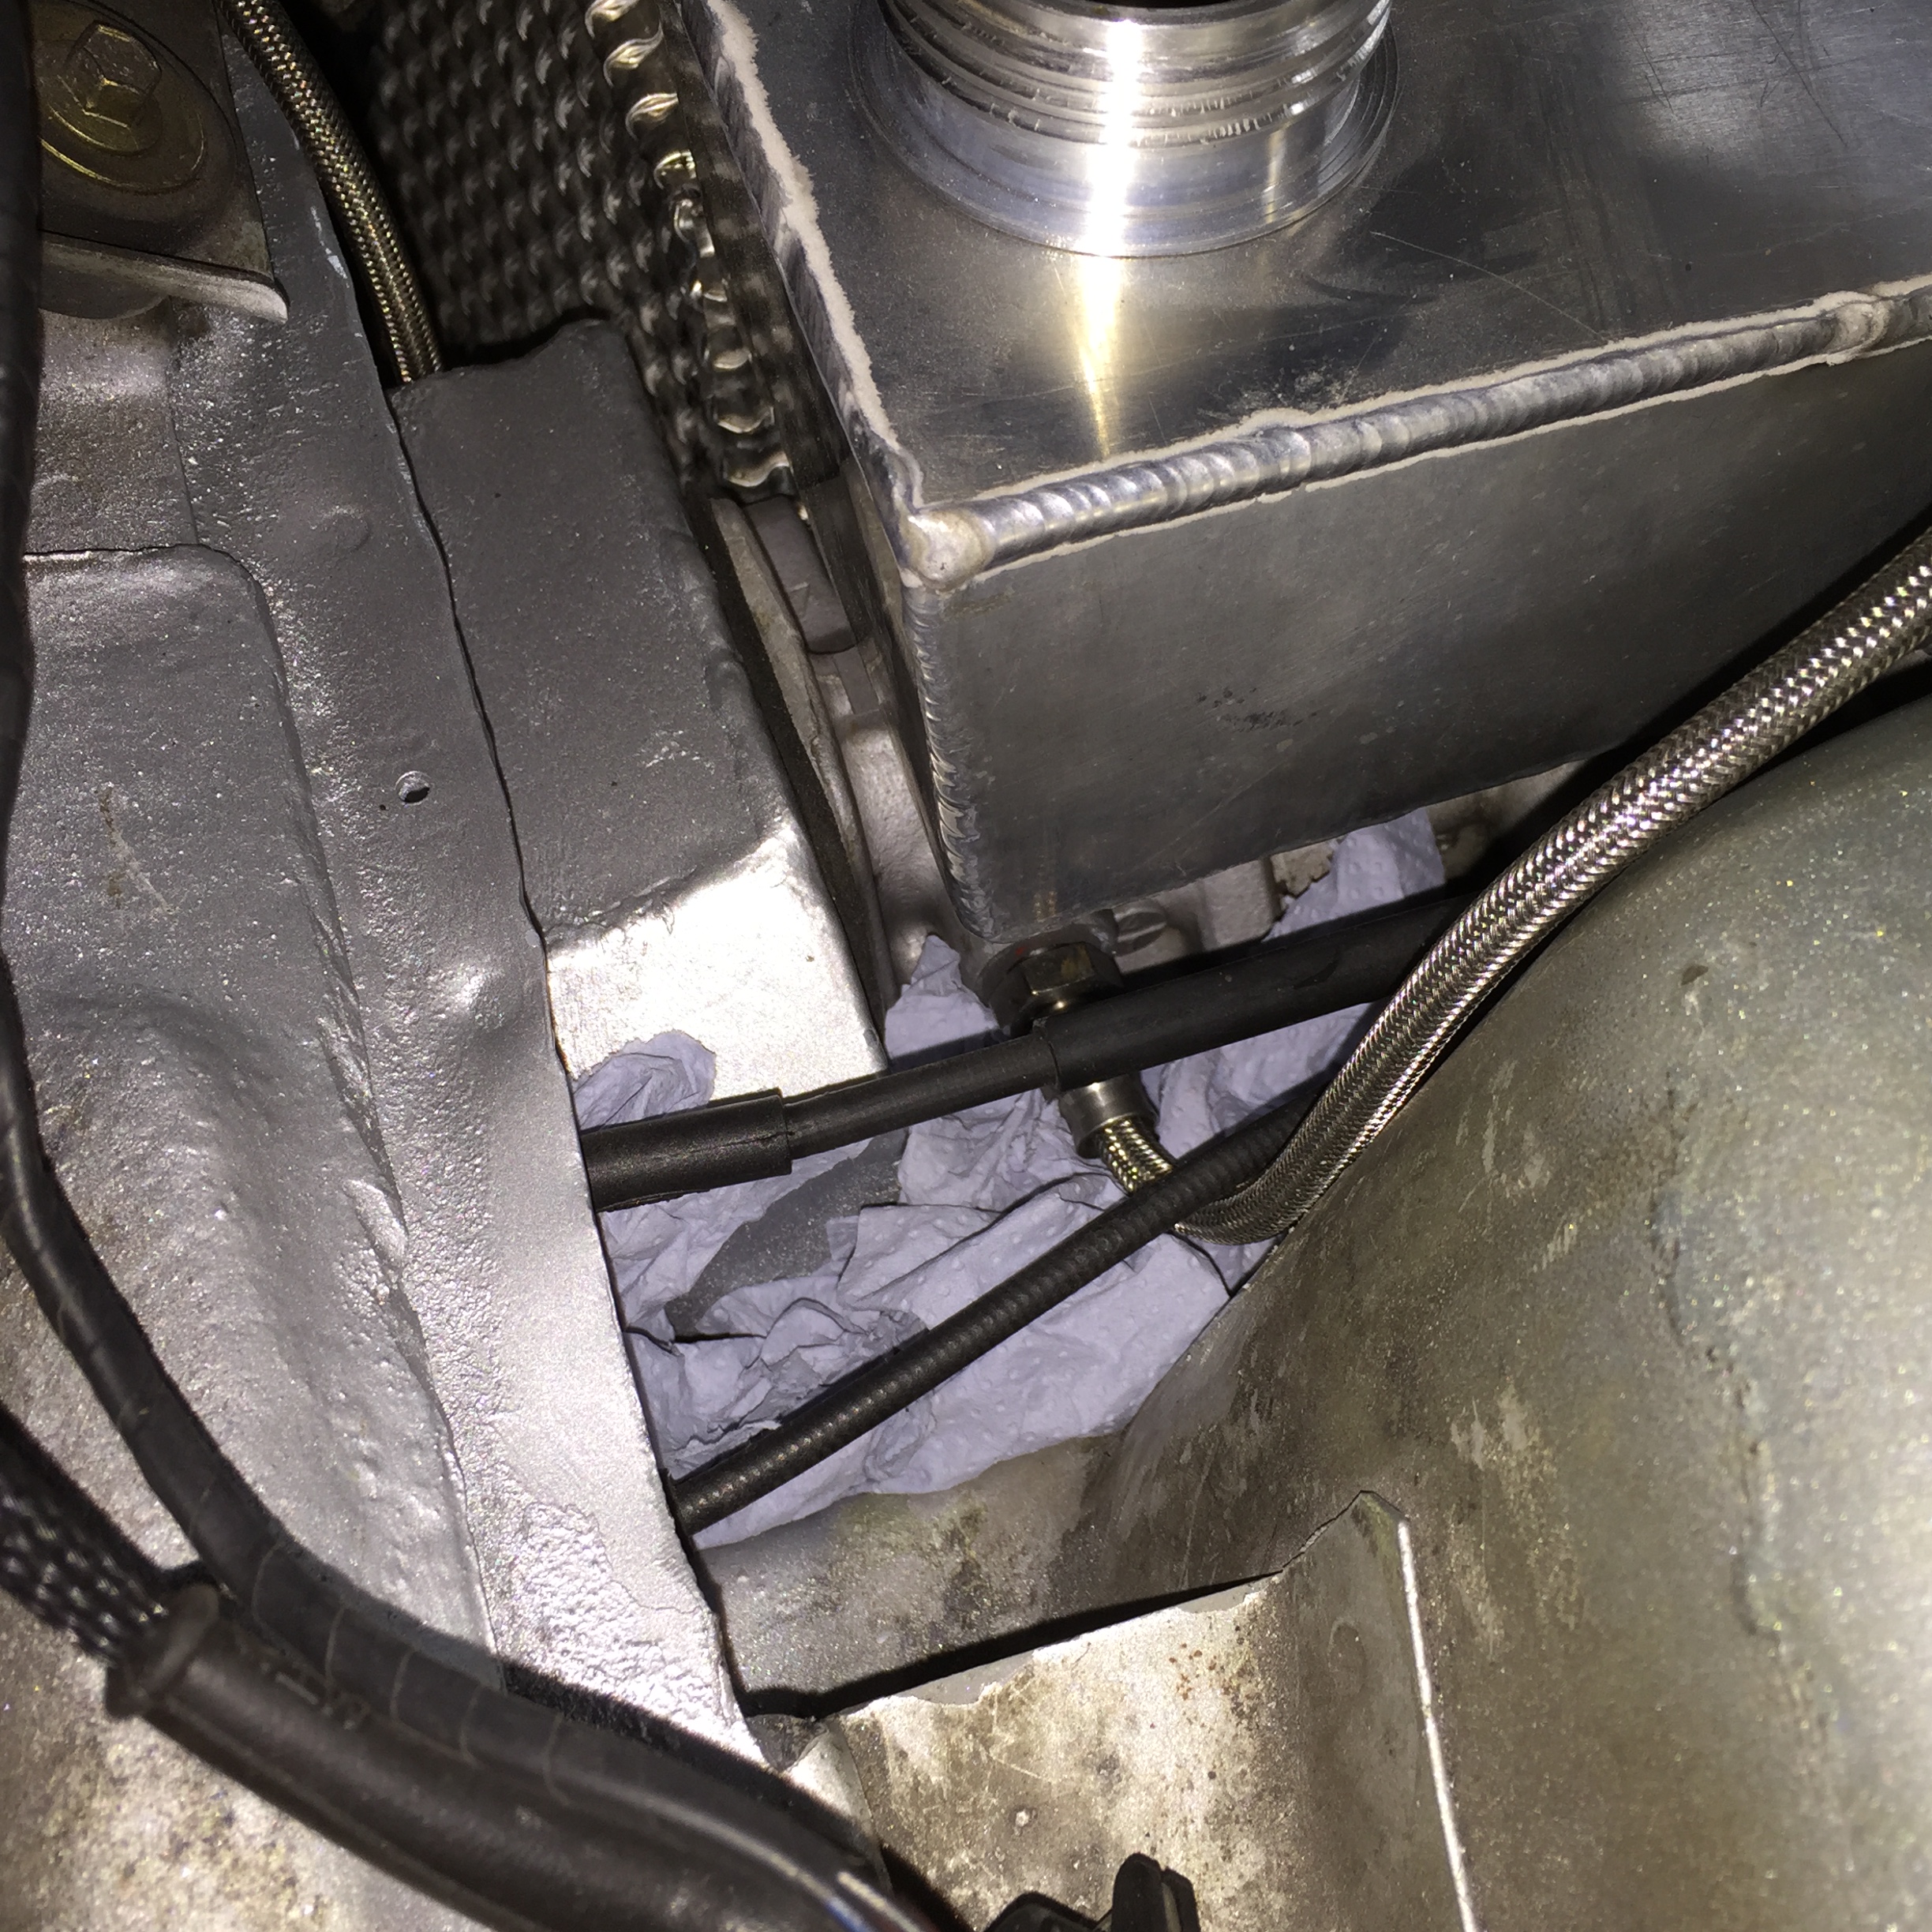
Decided to change the high pressure line on the brake pump


Also fitted a blanking plug to the pressure switch in the front that's no longer needed

Before I filled up with brake fluid I changed all the ends on the callipers - the rears were knackered!


All new stainless steel fittings this time!

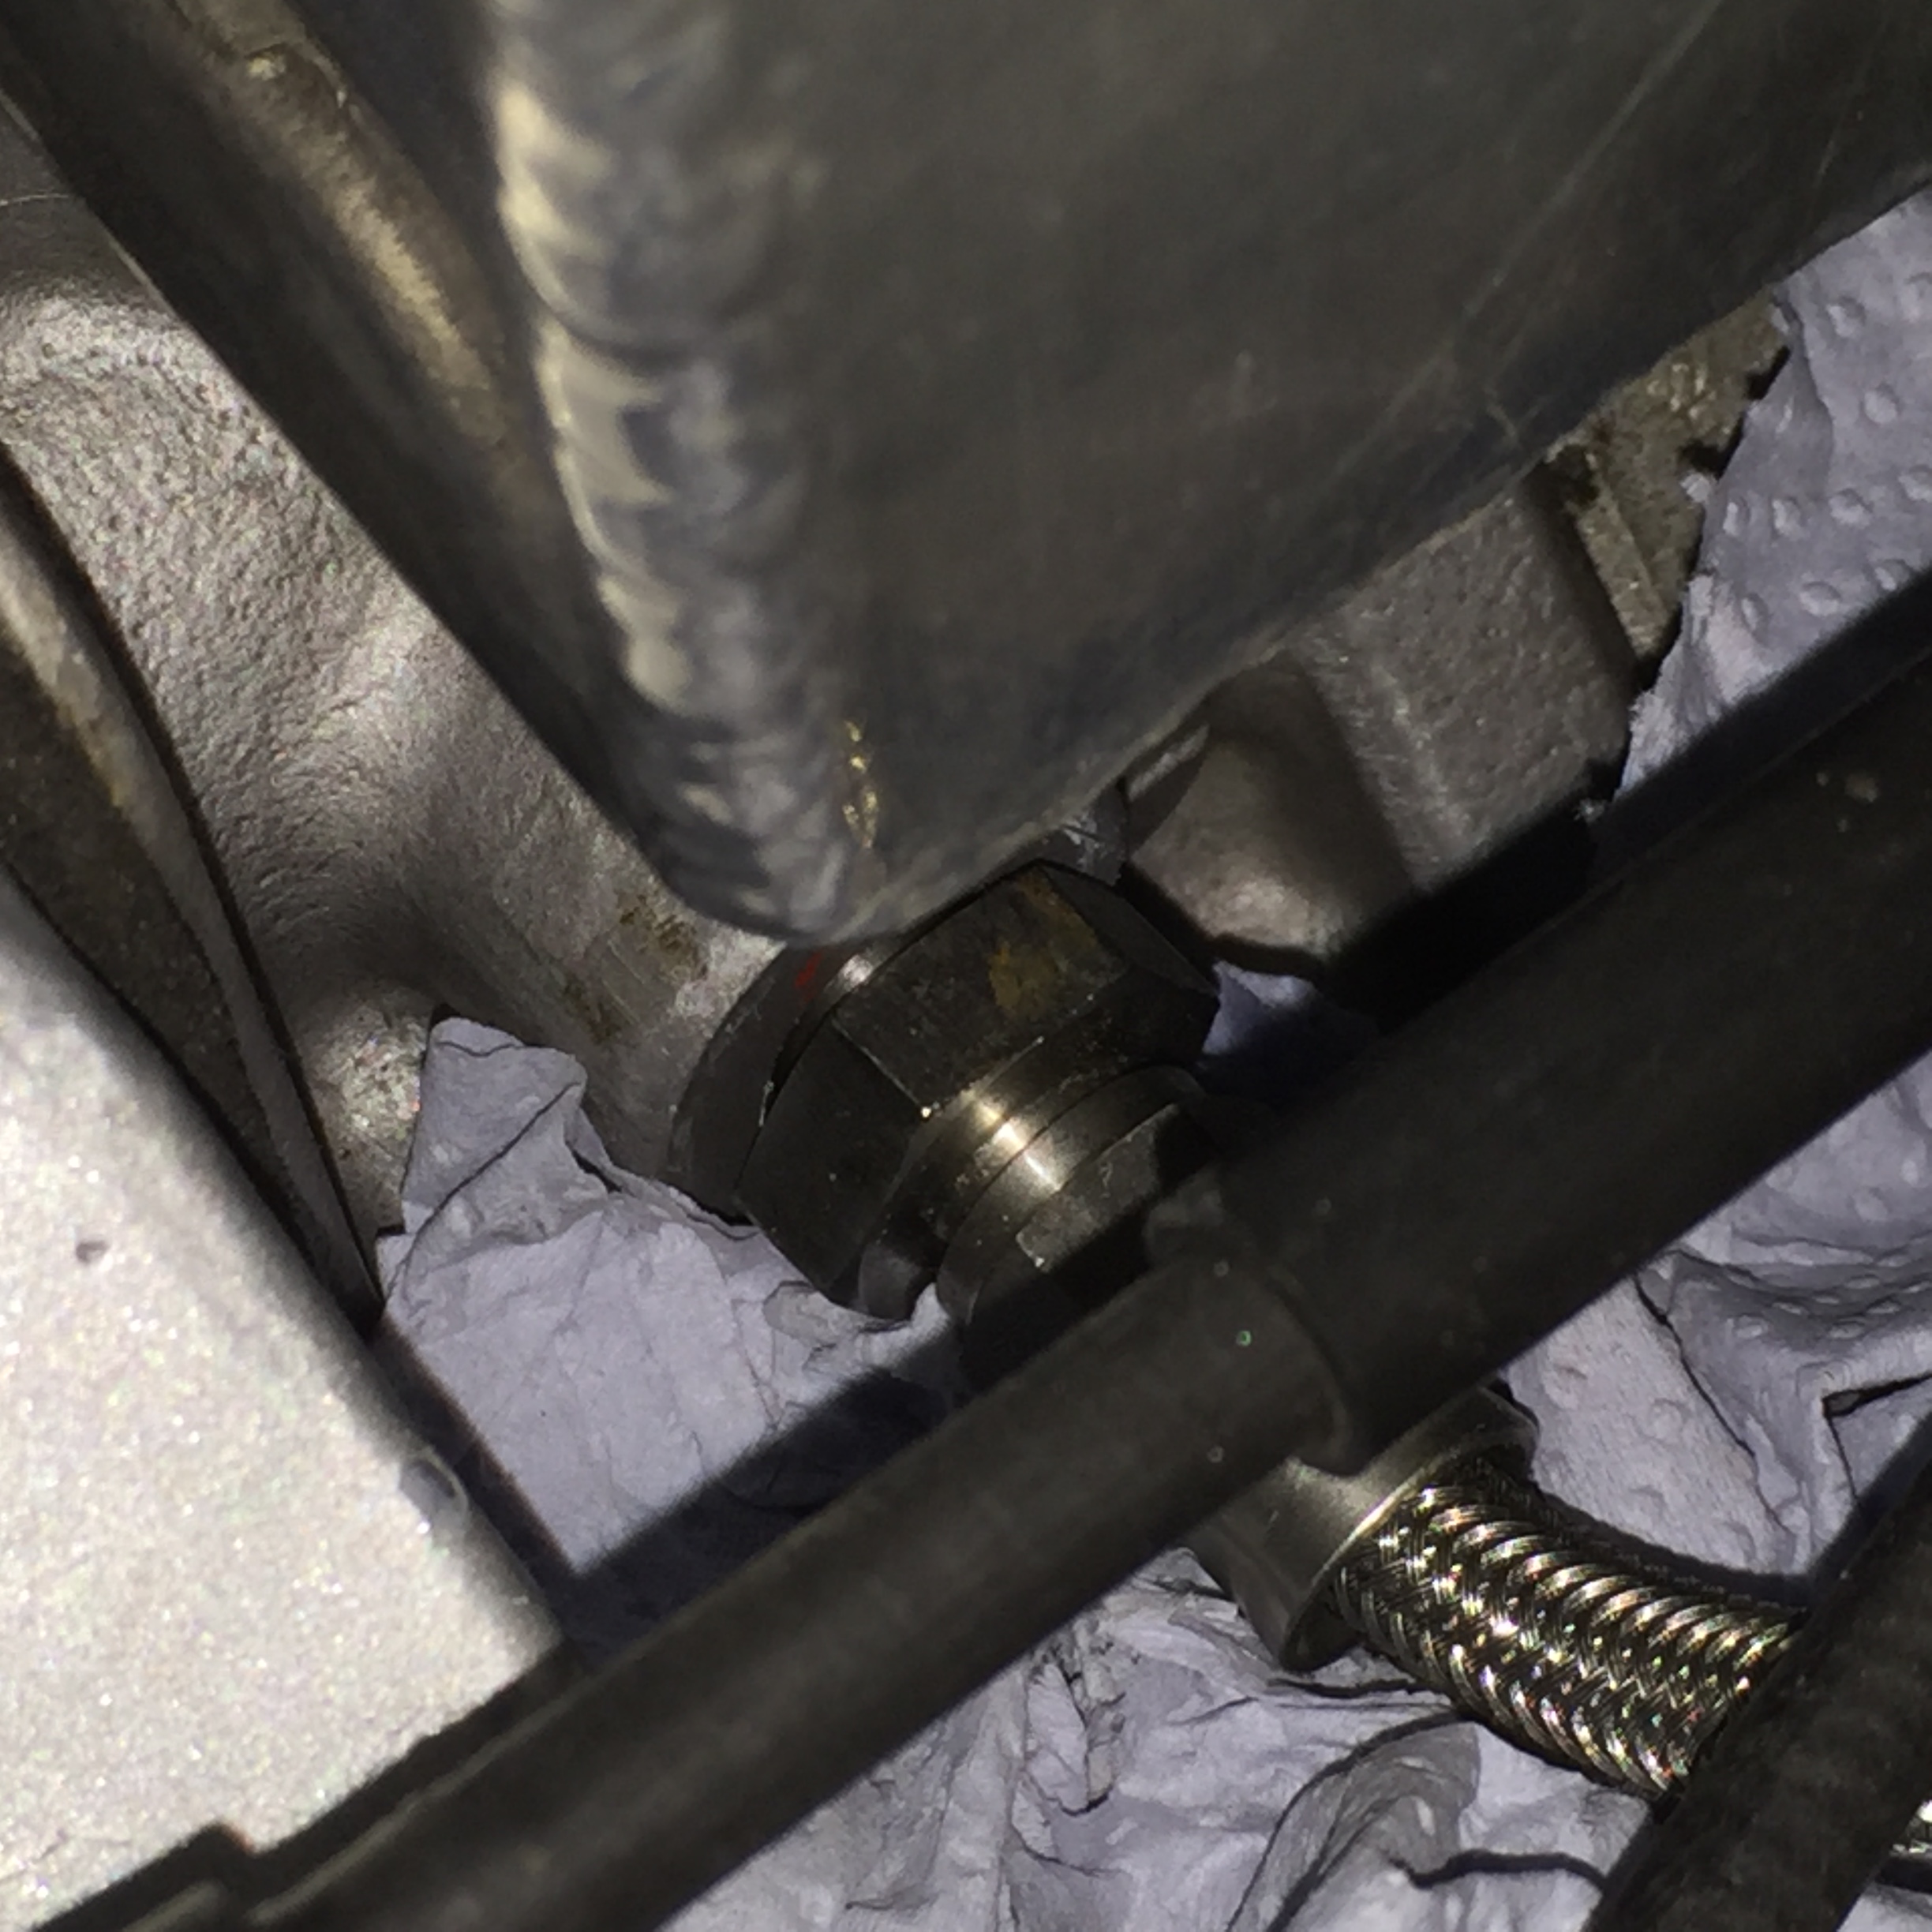
With that done at all four corners it was time to fill up and bleed the brakes, which to my annoyance made me realise that this fitting on the high pressure line was not going to seal..


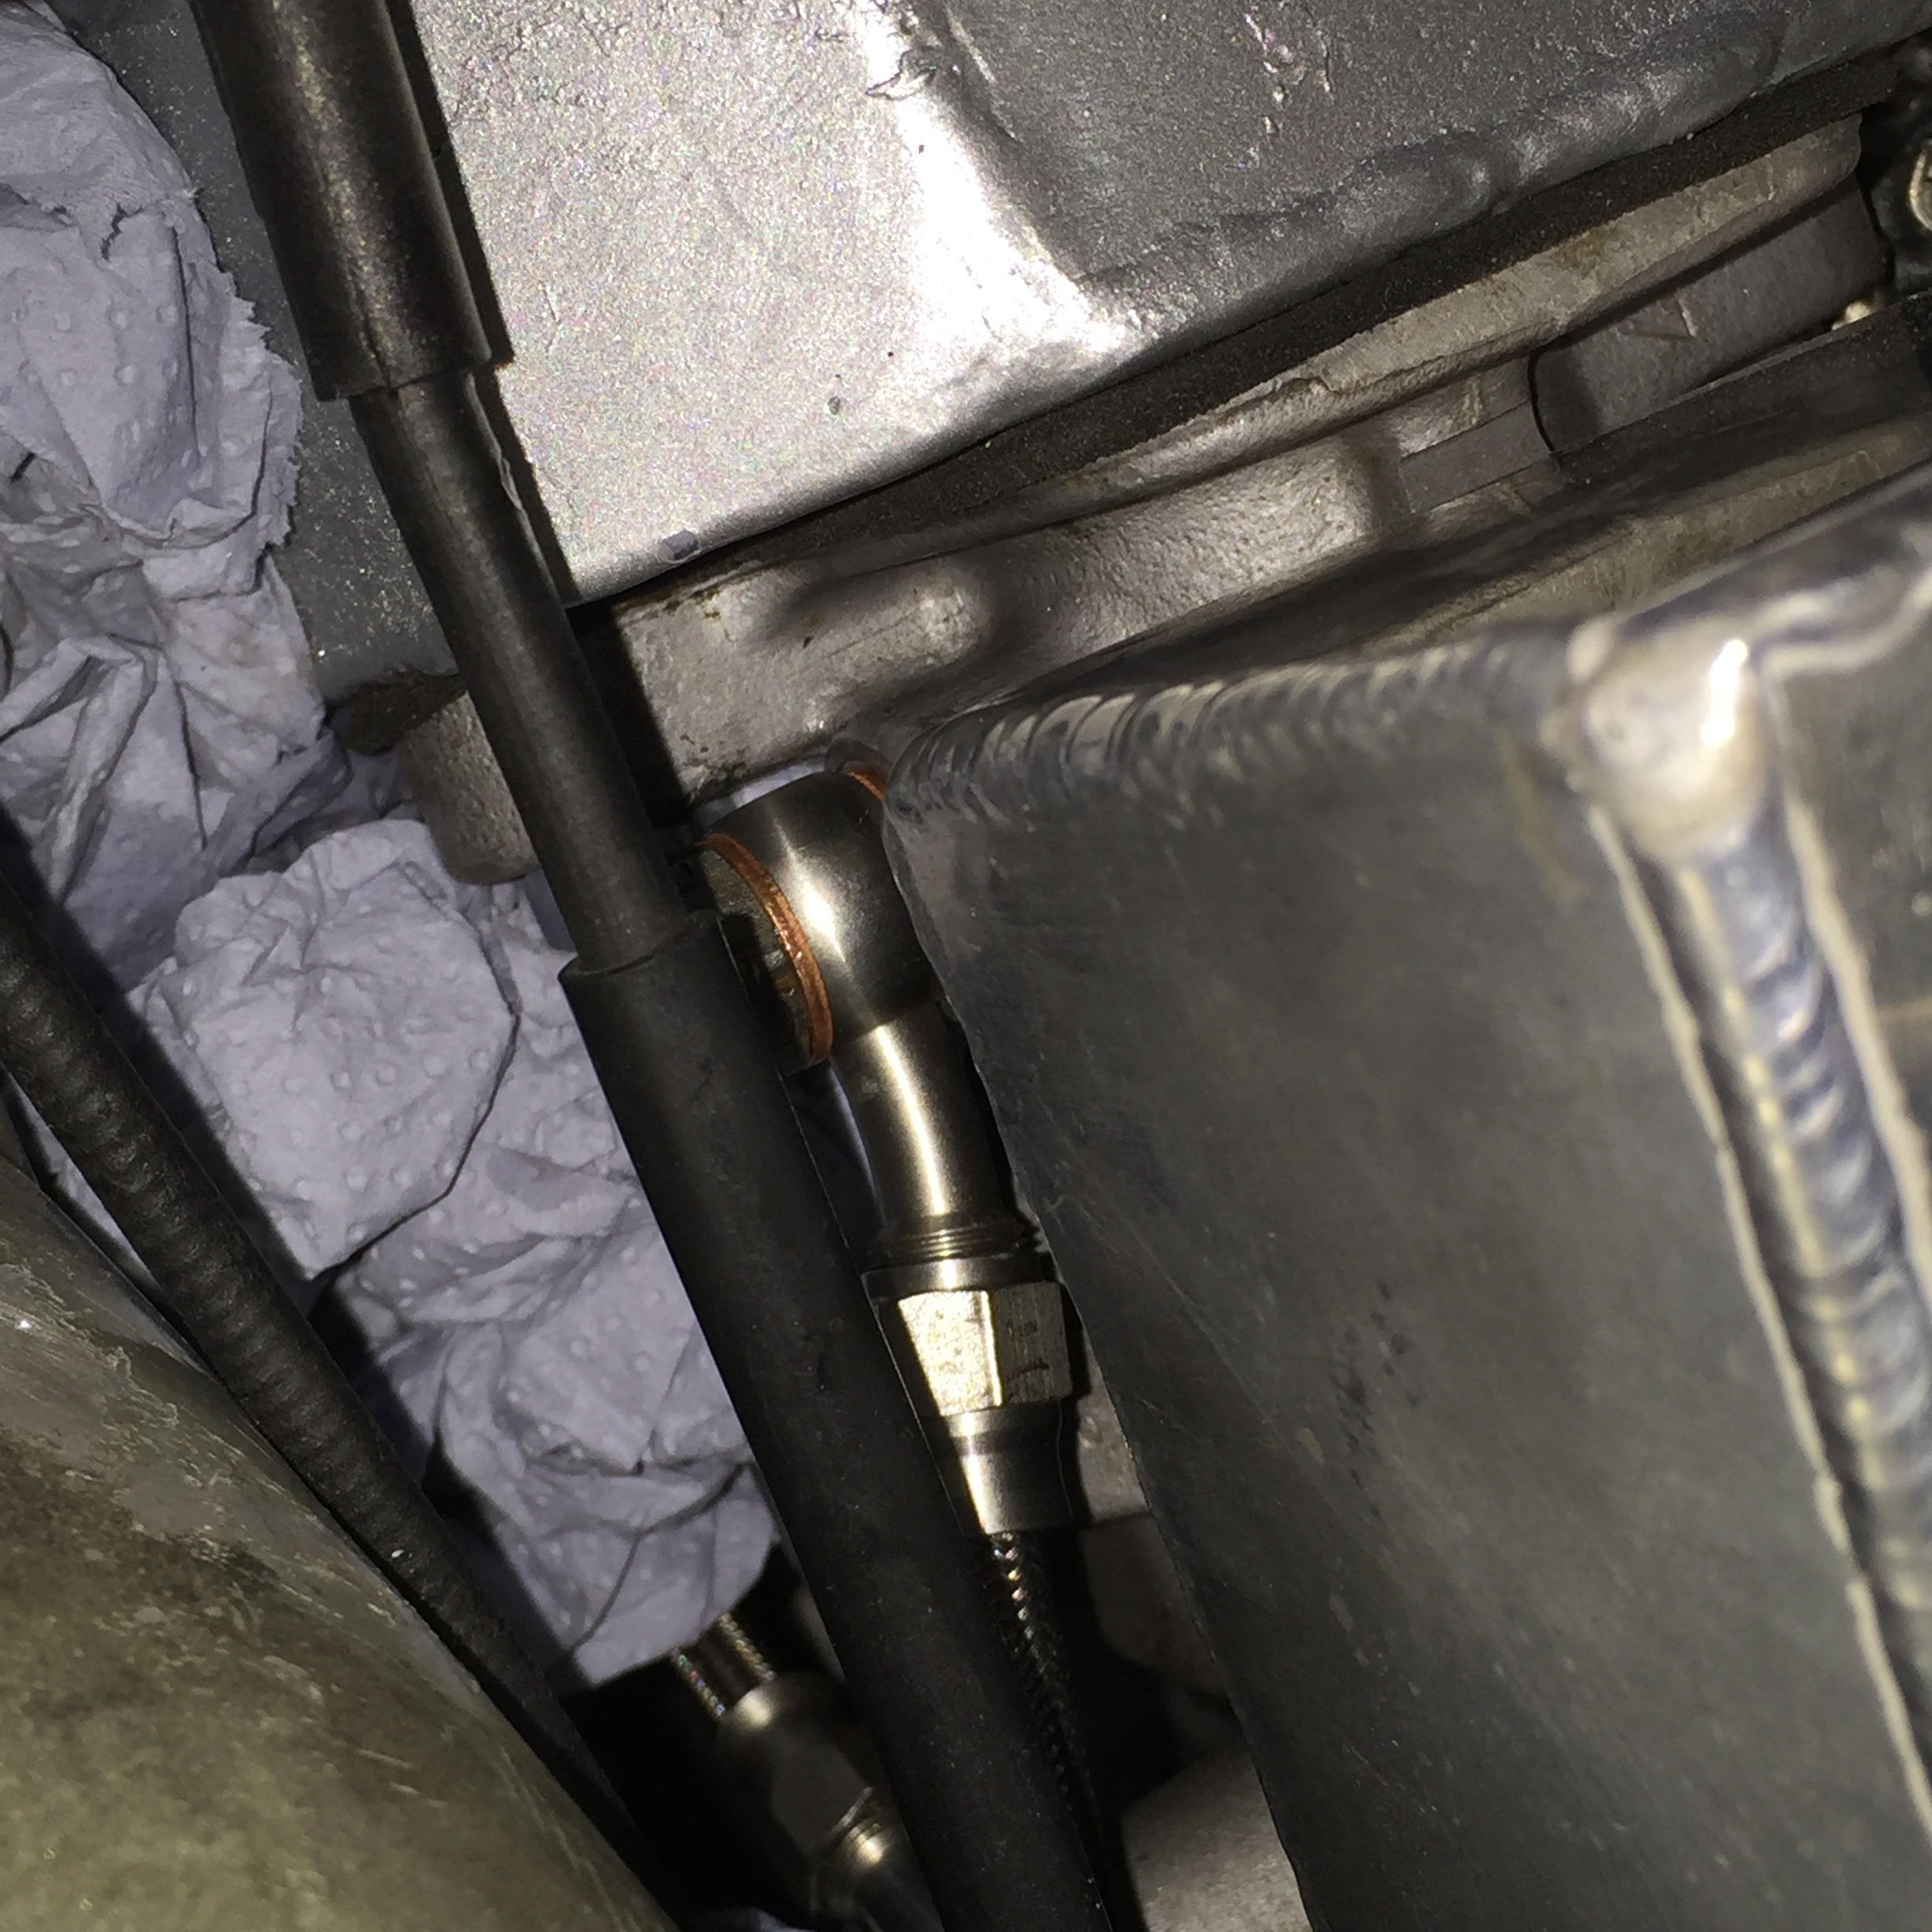
So the simplest option was to replace with a trusty banjo fitting and job done. It's actually probably what I should have used in the first place as it fits much better!

With that all done and tested I bolted everything back up and finished the job


Decided to do some little jobs on the car while I had a little time
The air filter seemed to be moving around too much, generally bouncing up and down. So made a bracket to hold it in place..

The plates on the front of the bay had seen better days and needed changing for various reasons. Some plates had been made which I got with the car so set about changing them.


But in the end I settled for this option and flattened out the original one

Also gave the back wheels a good clean


That's it for now, will get some more up soon.
Thanks for looking.
23-03-2016, 04:33 PM
#151
Glennvestite
iTrader: (1)
Join Date: Jul 2006
Location: Darlington county durham
Posts: 62,755
Received 1,042 Likes
on
996 Posts
Shame about the leaky rack. As said before mine did the same even though i left the boot loose to make sure it wasnt leaking.
Your doing a cracking job matey.
When welding my fords up in the past i try to do continuous welds but like you said with the metal been so thin i just do a bit at at a time. The way i look at it with weld is as long as its strong you can always grind it down to make it look respectable
Your doing a cracking job matey.
When welding my fords up in the past i try to do continuous welds but like you said with the metal been so thin i just do a bit at at a time. The way i look at it with weld is as long as its strong you can always grind it down to make it look respectable
23-03-2016, 11:18 PM
#152
PassionFord Regular
Thread Starter
It's funny because when I was pulling it out I was thinking you told me this would leak and could almost hear a 'I told you so' speech lol! I remember thinking I might have slightly scuffed that seal when installing the rack into the casing so I'm guessing that's what did it.
That's what I did in the end, added more metal then carefully die ground back to a state I was happier with. Still think I may revisit at some point.
Thanks for the comments Glenn
That's what I did in the end, added more metal then carefully die ground back to a state I was happier with. Still think I may revisit at some point.
Thanks for the comments Glenn
24-03-2016, 01:57 PM
#153
25-03-2016, 05:00 PM
#154
Regular Contributor

I cannot believe the electrical system was put together this way!
Glad to see you are steadily improving this car, most would have given up by now!
Glad to see you are steadily improving this car, most would have given up by now!
Last edited by thielt1; 25-03-2016 at 05:42 PM.
30-03-2016, 08:32 PM
#155

Seriously need to get an update in. Everyone has got to see the fuel tank, it's brilliant - we found exactly why you couldn't use it below 1/4 tank and why it leaked.
You'll also see some very average TIG welding!
And yes, there were and are bodges everywhere on this car. Actually amazes me sometimes what must have gone through someone's head - maybe nothing at all??
Getting sorted now and Dan has got more patience than me! I don't think many people could have taken this on.
13-04-2016, 10:15 PM
#156
PassionFord Regular
Thread Starter
Little update
Decided to re-do the fan wiring whilst I was doing the brake reservoir, as it wasn't looking in great shapes and the relays in the fuse box didn't give me much confidence. It was one of the areas I left untouched when I did all the repairs and alterations last year.
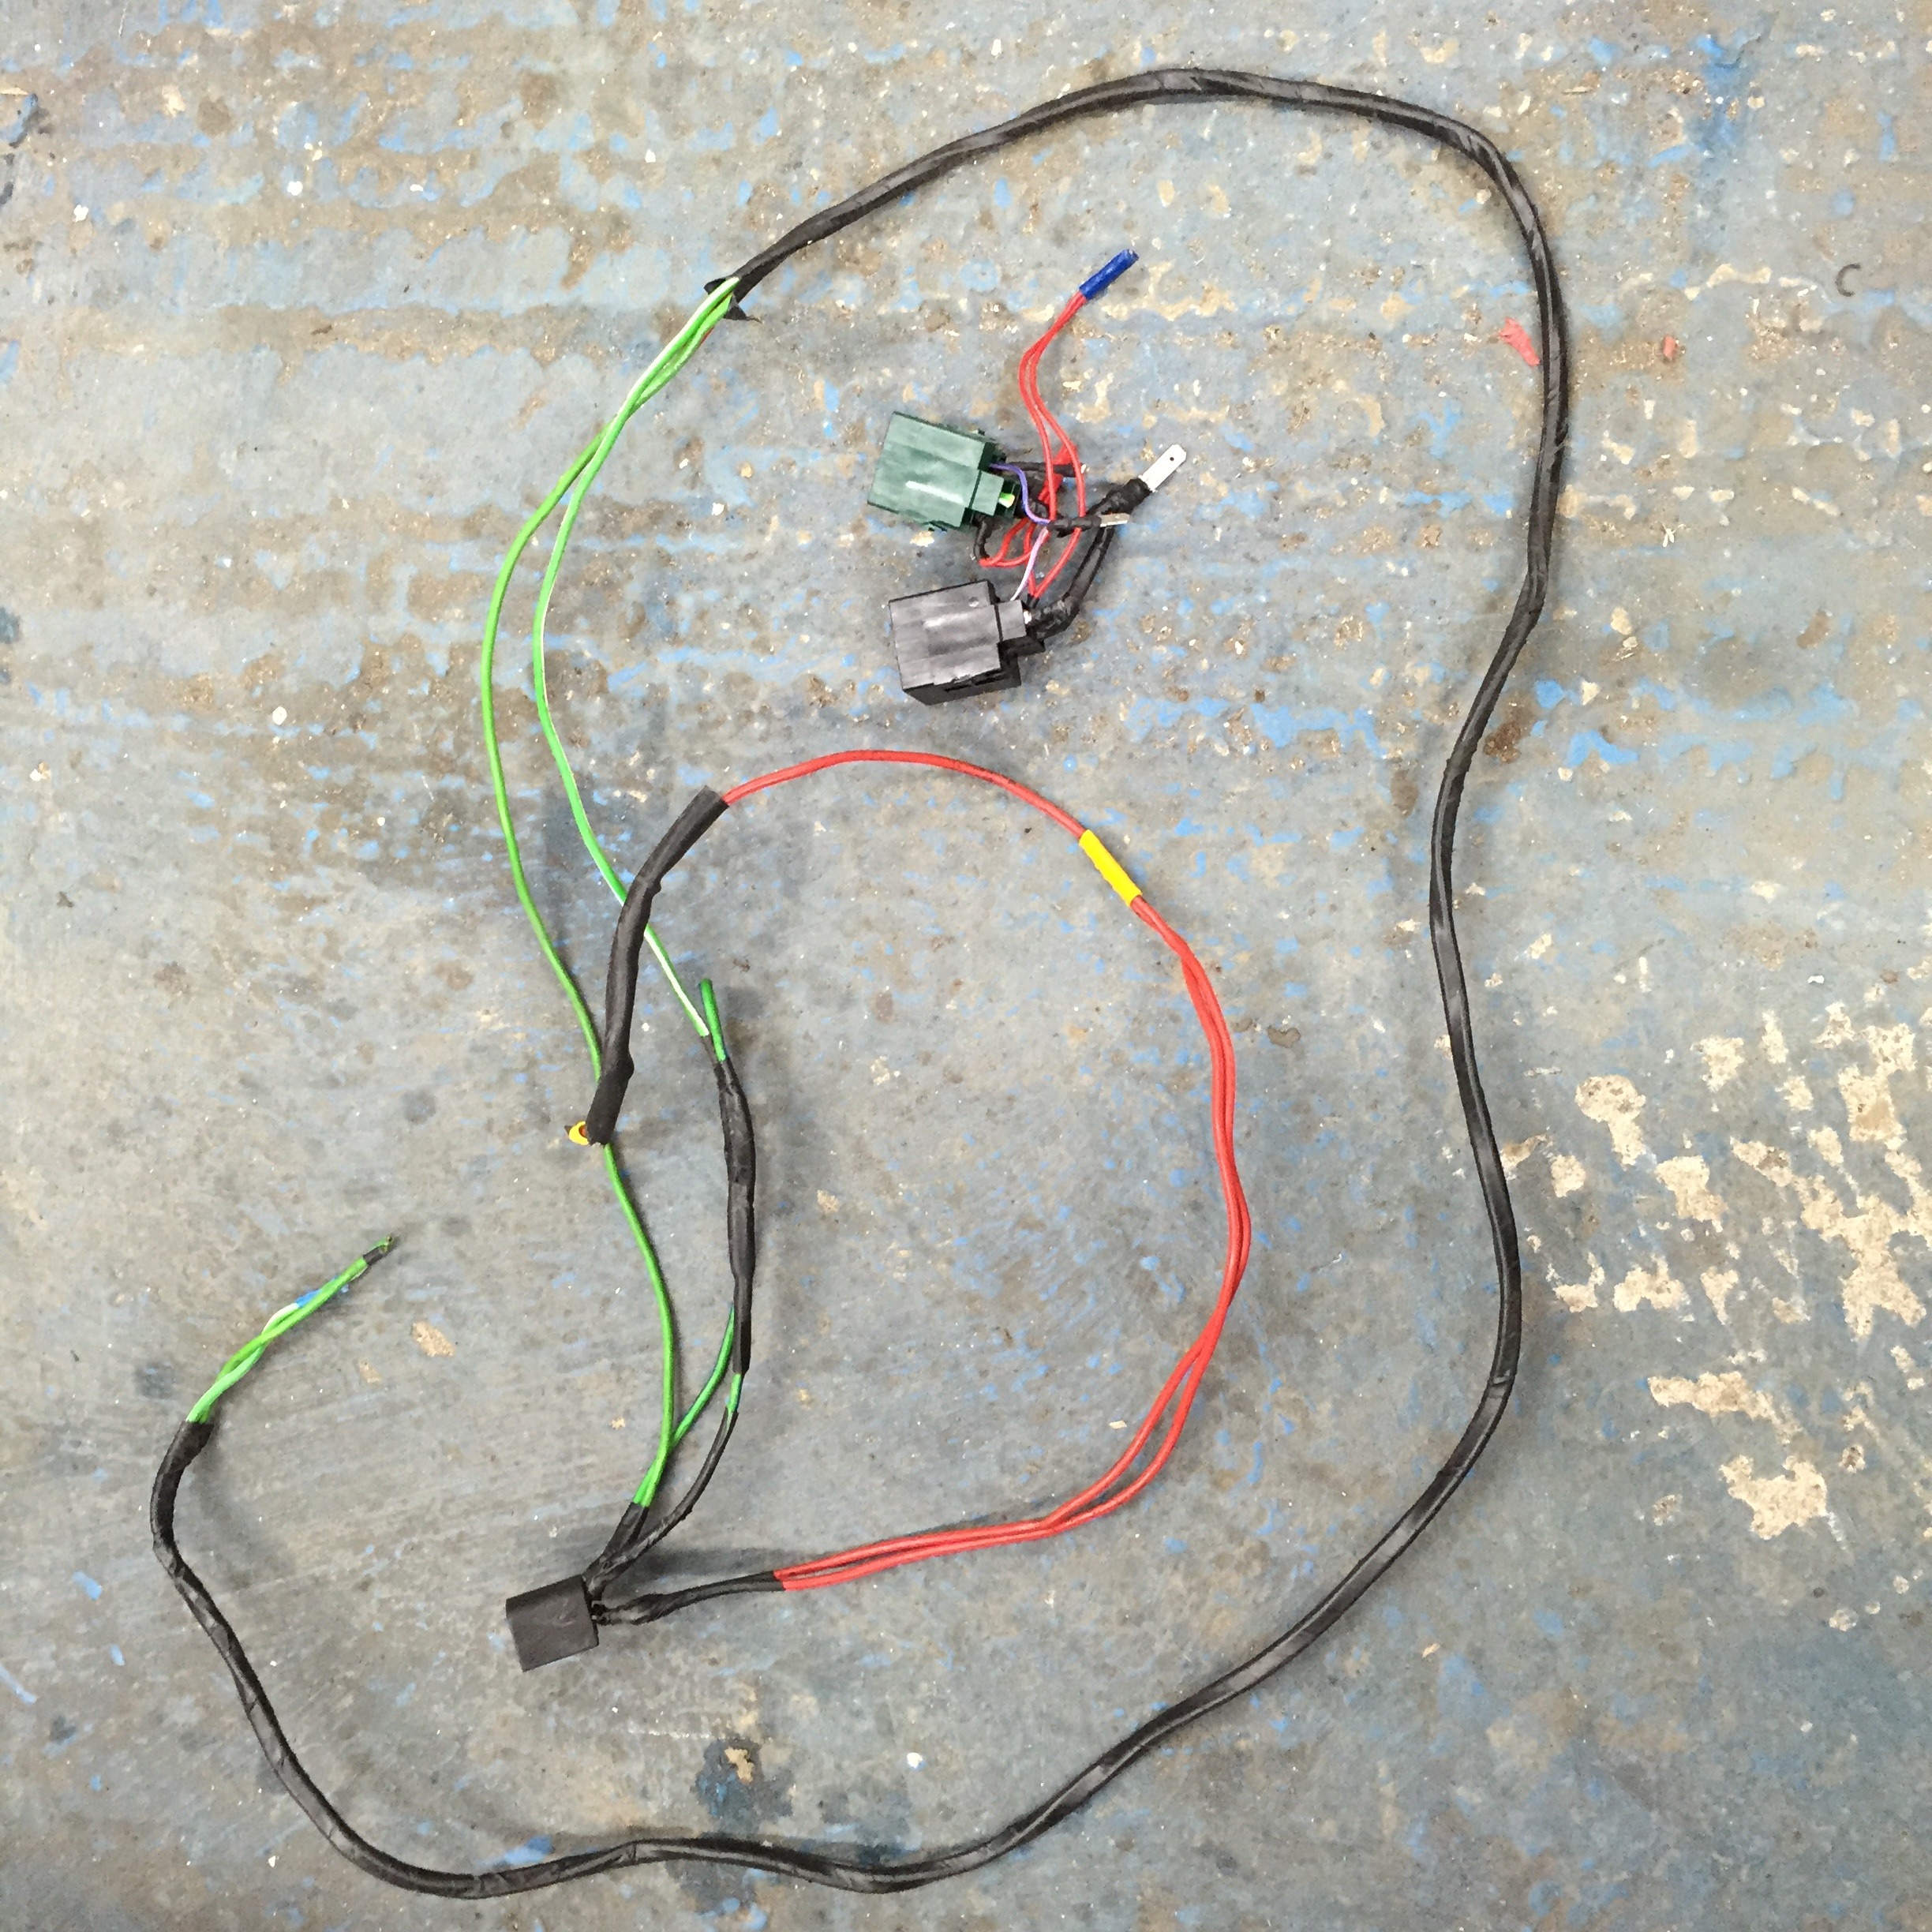
Old wiring

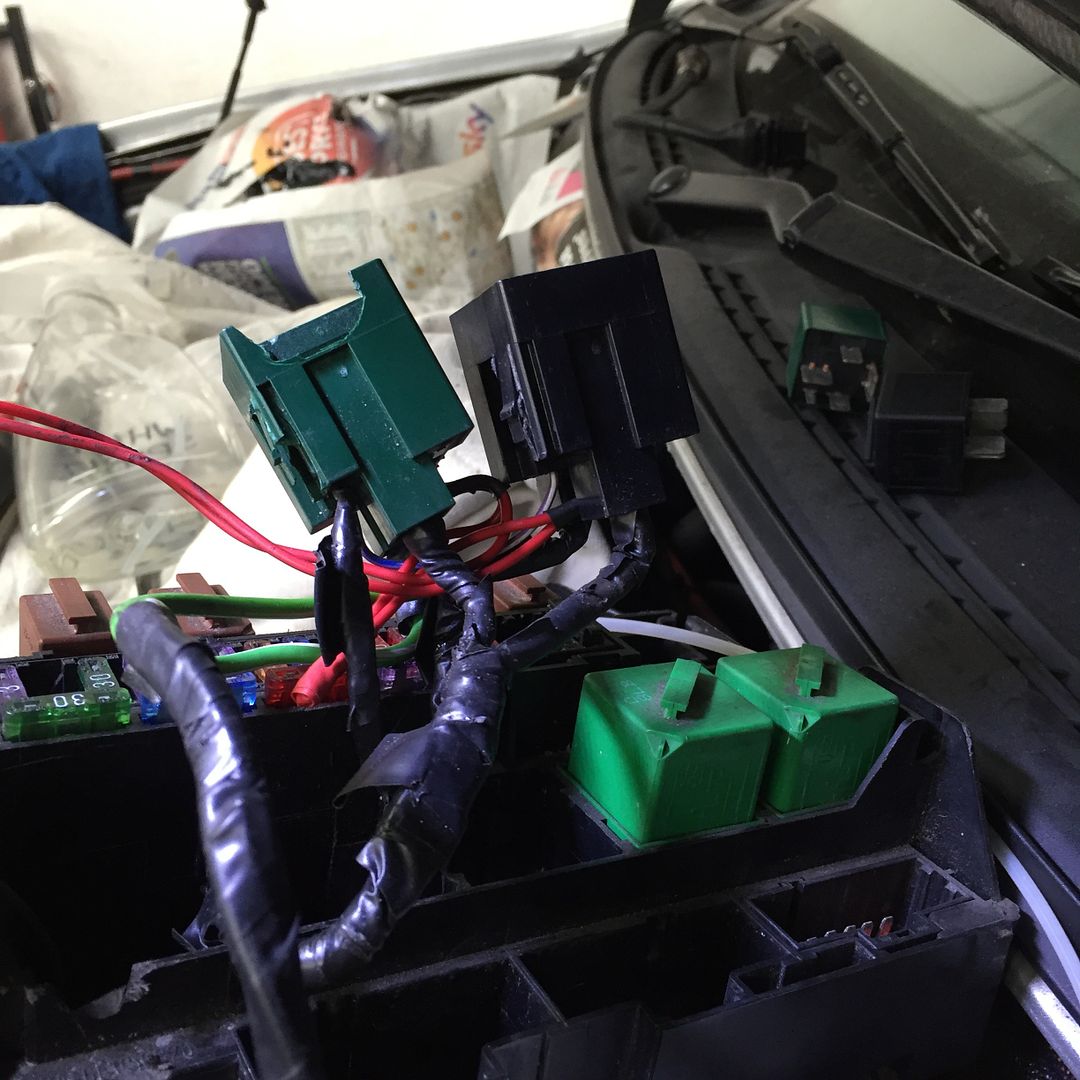
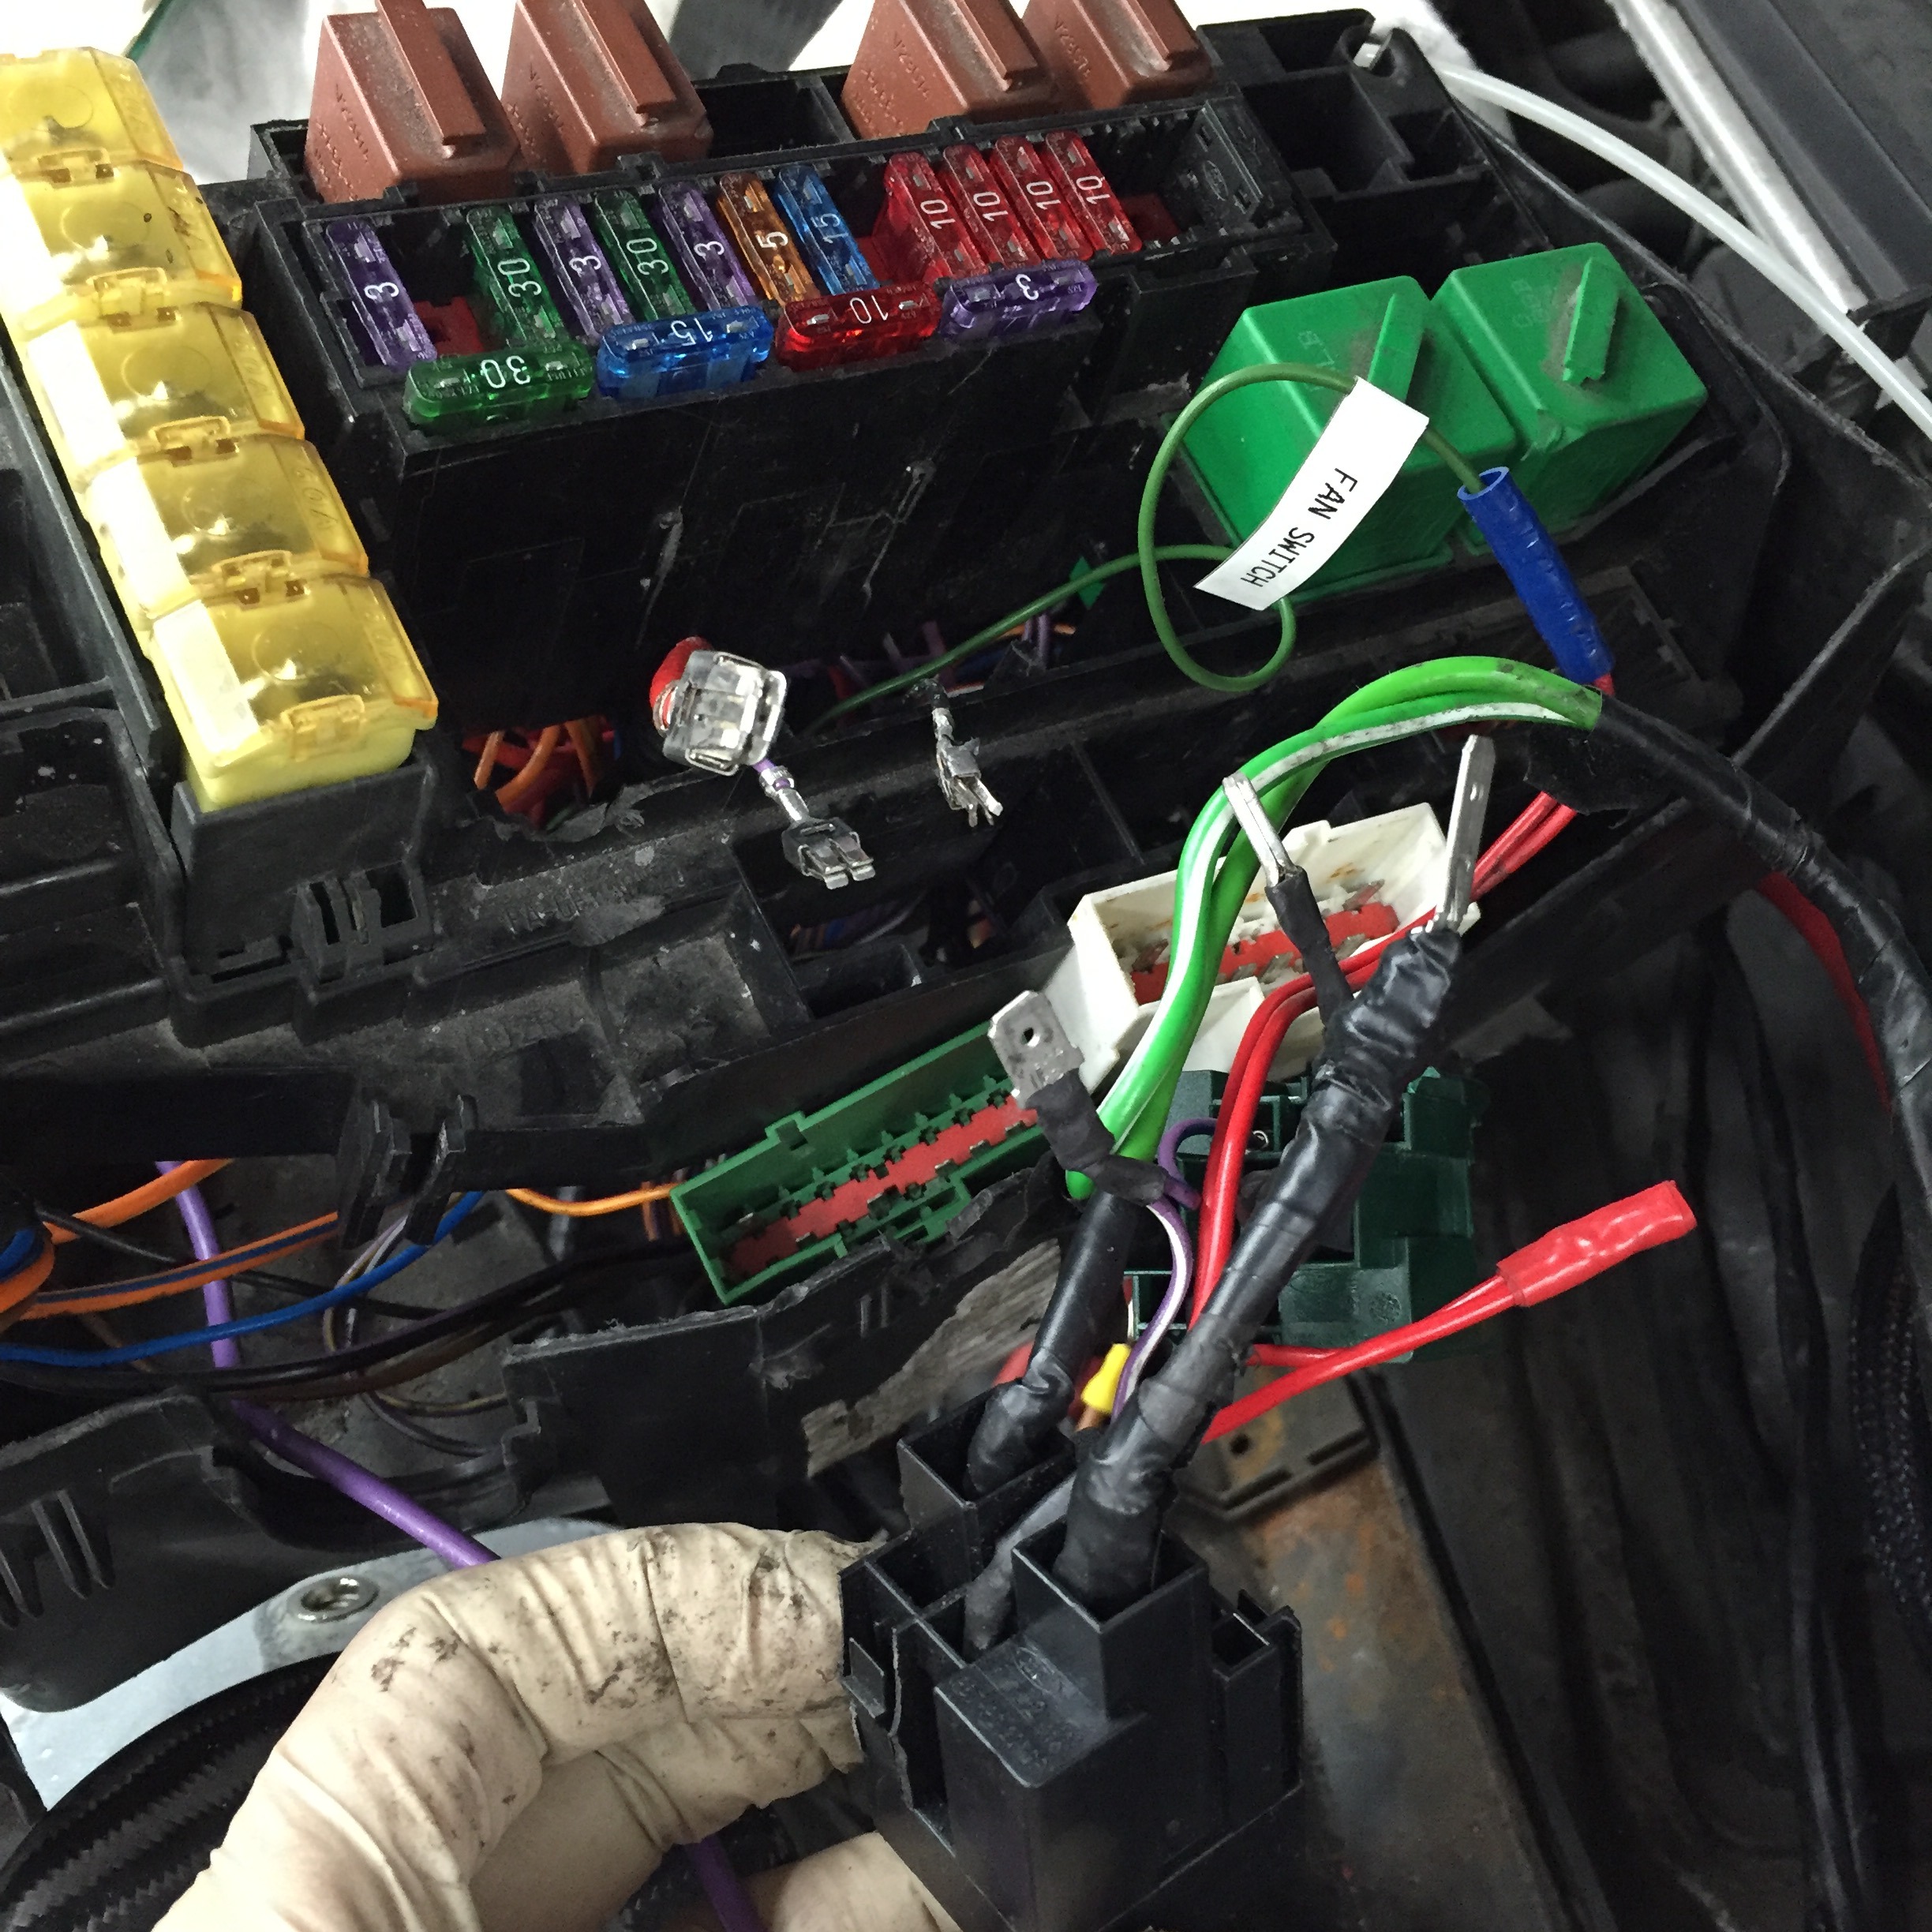
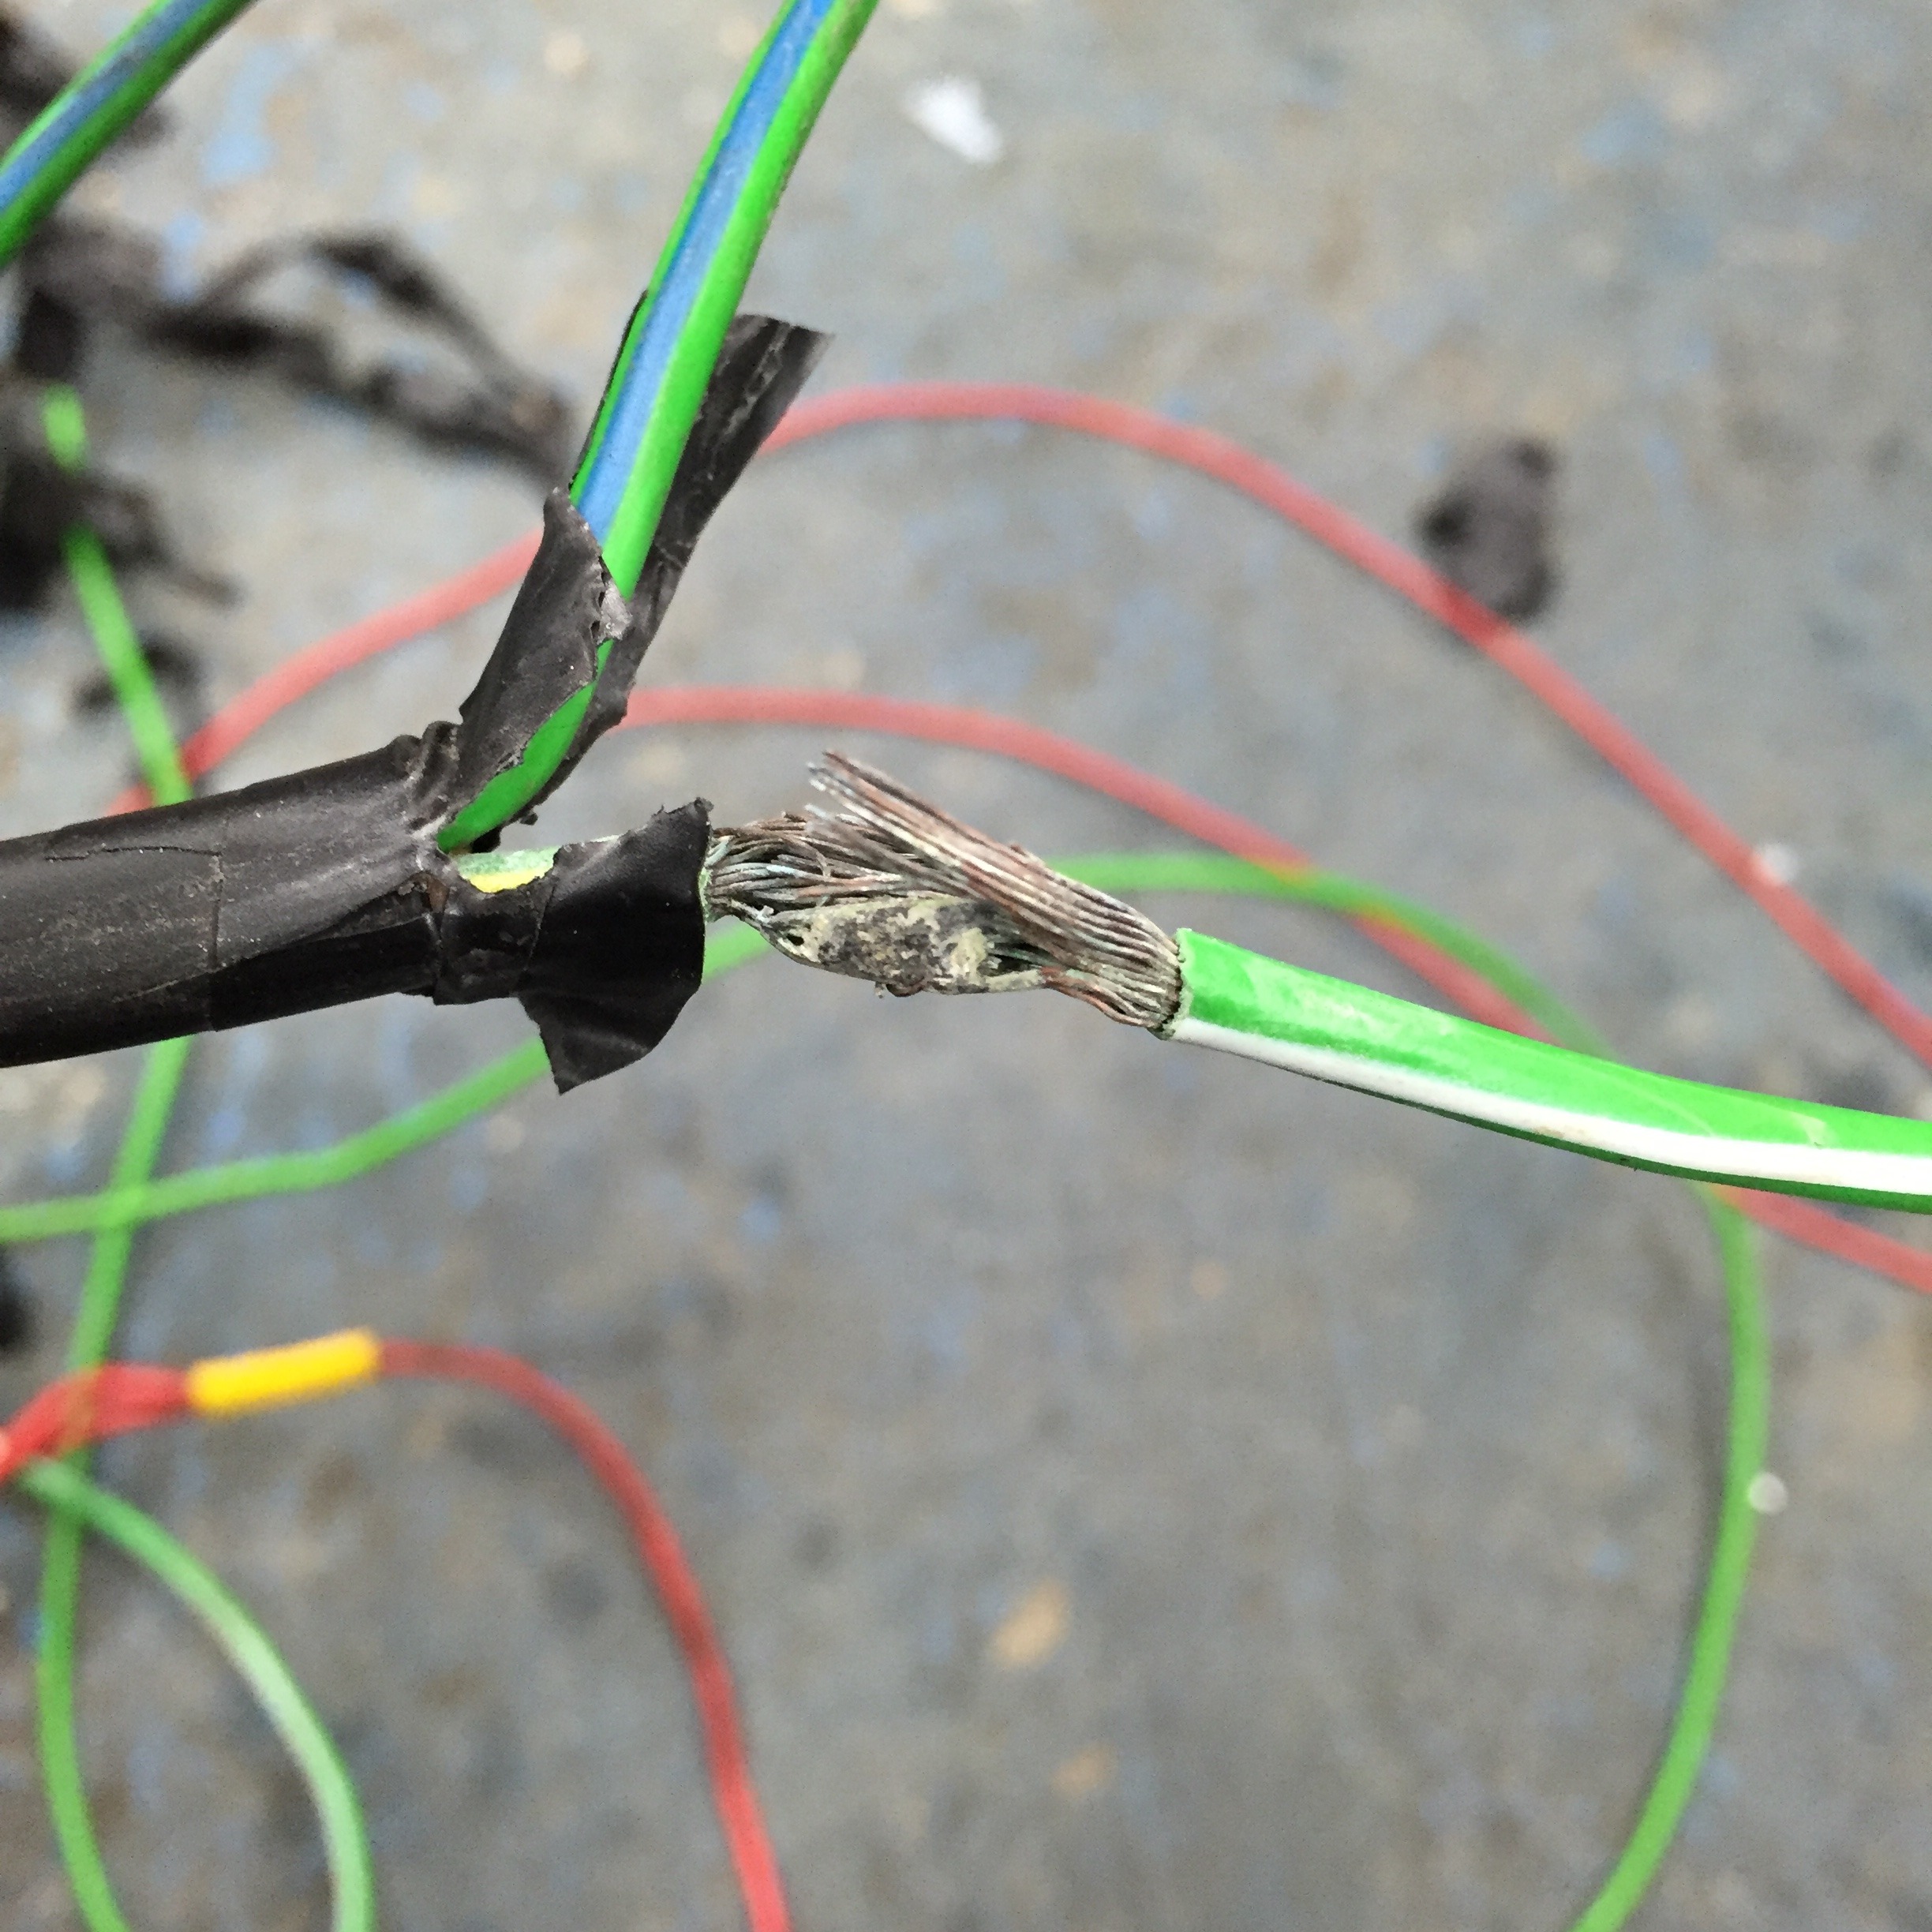
Poor dry joint
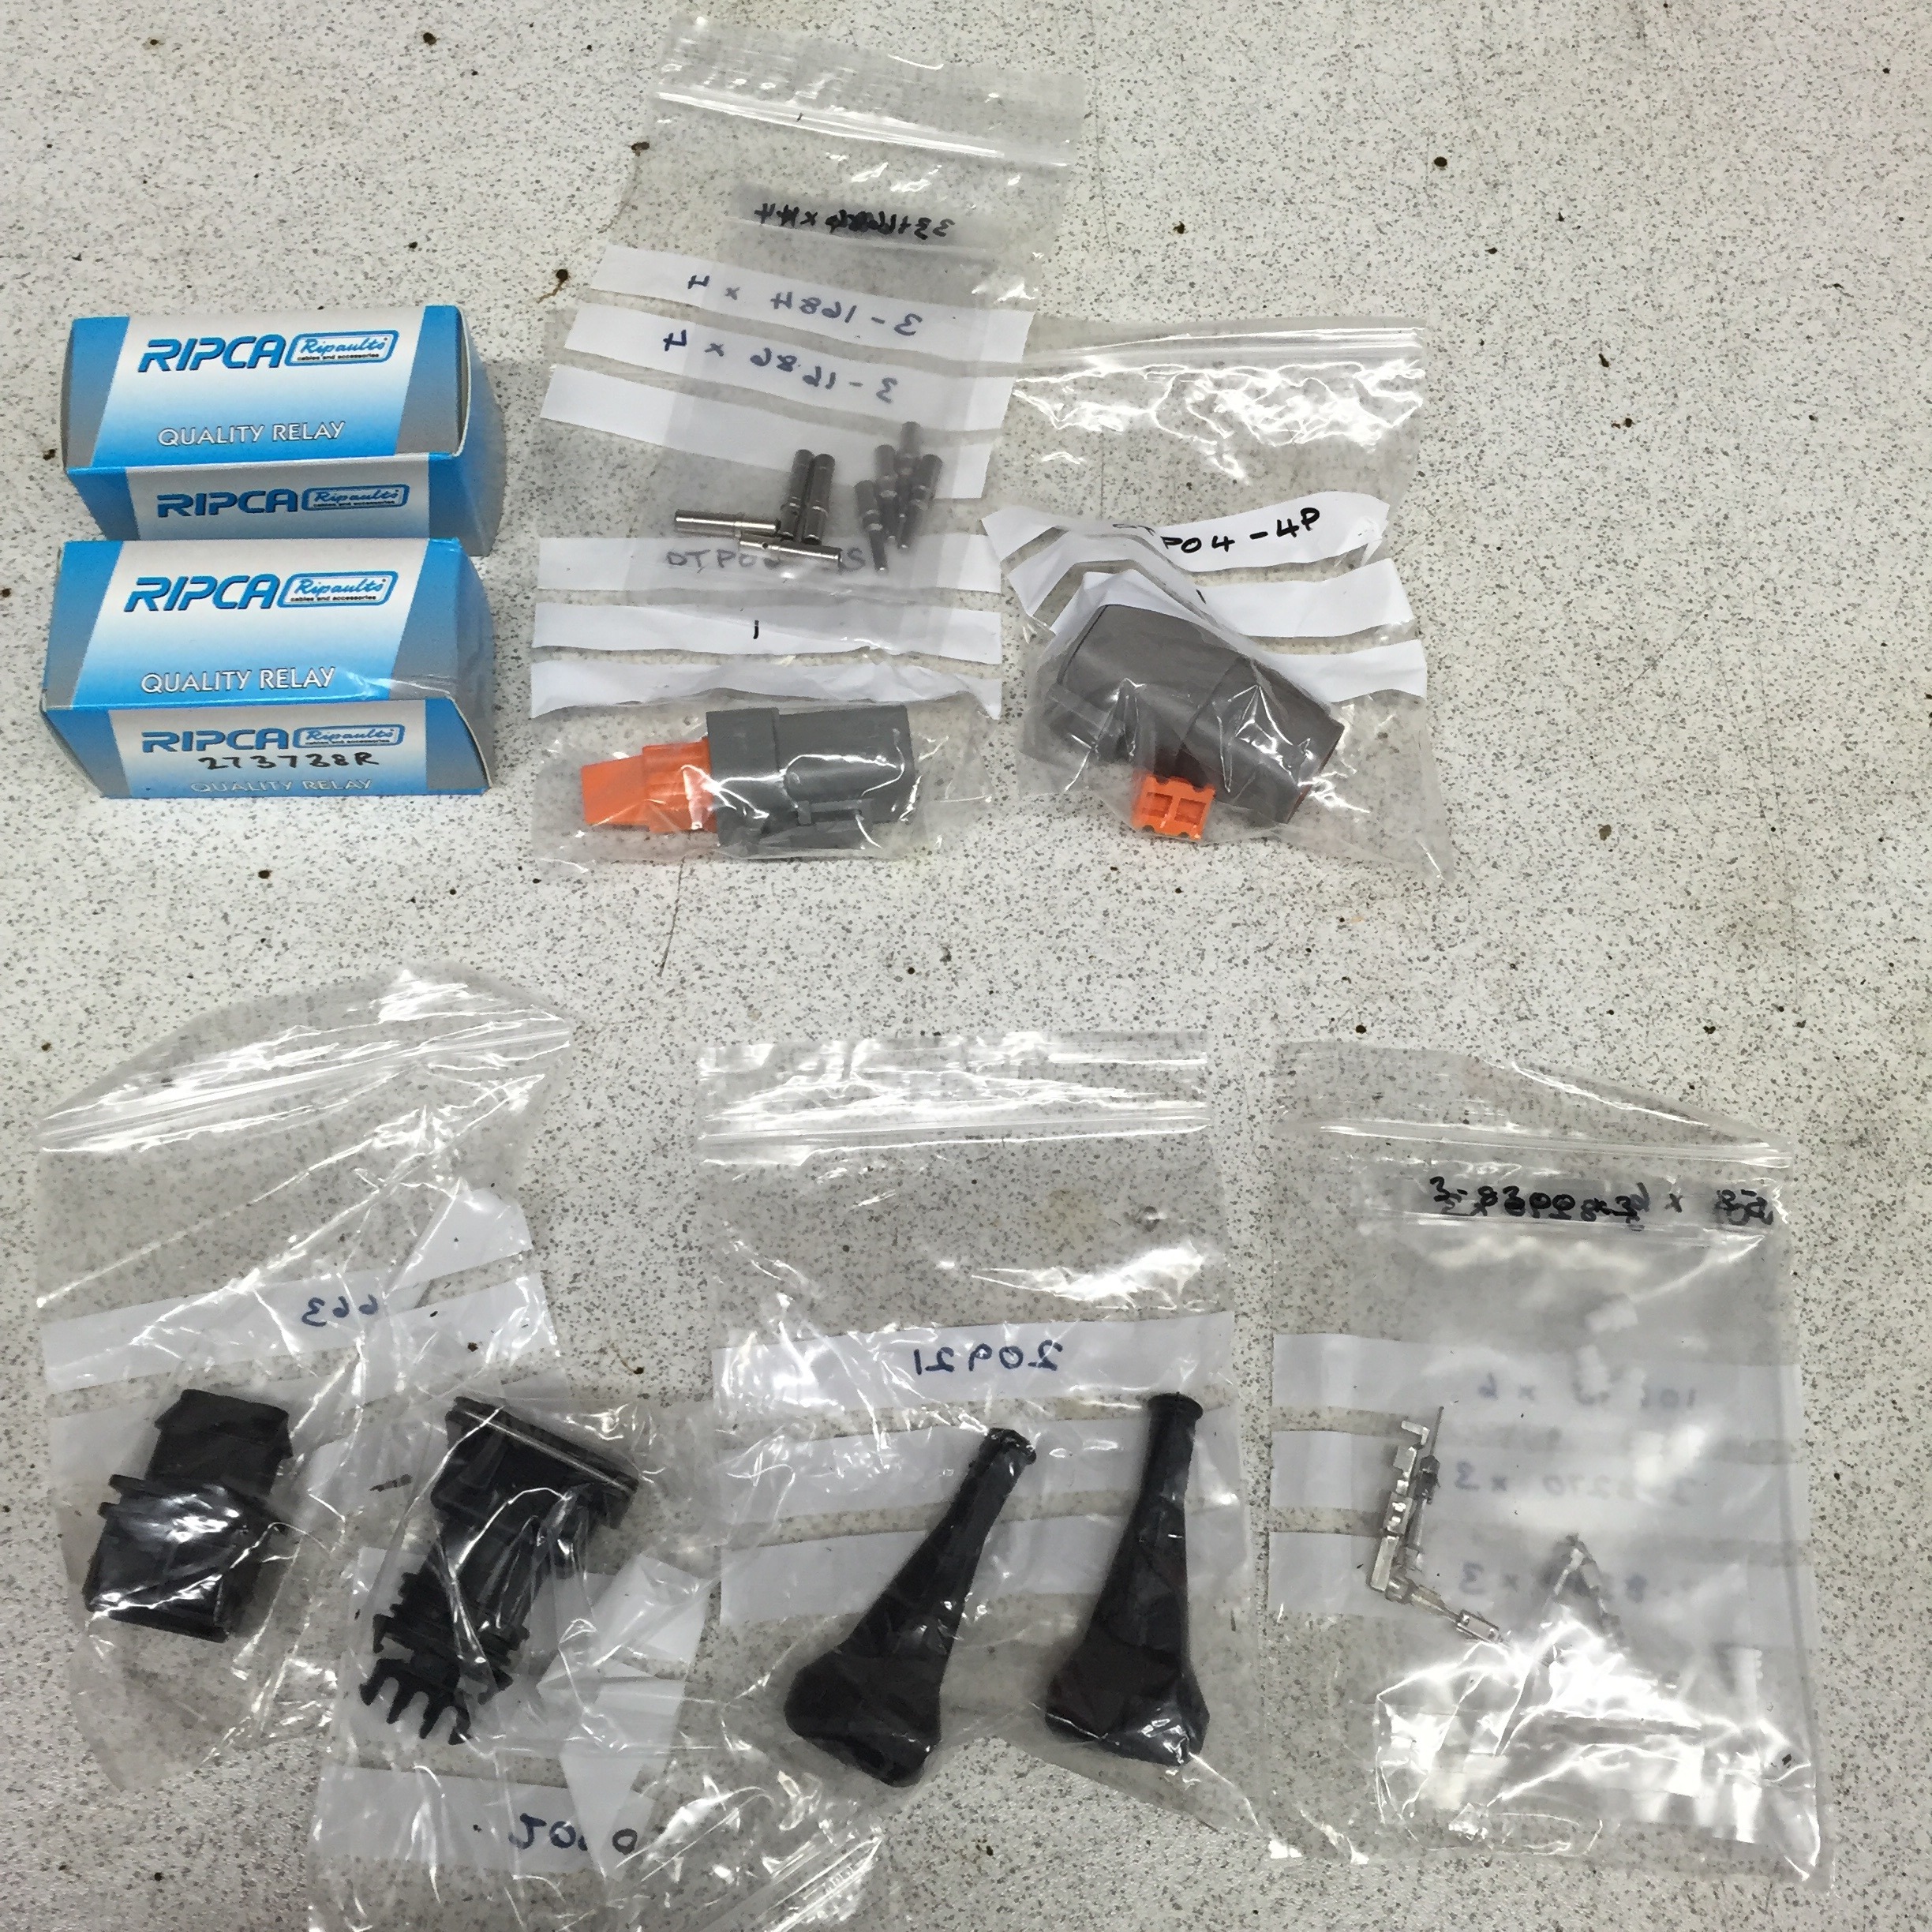
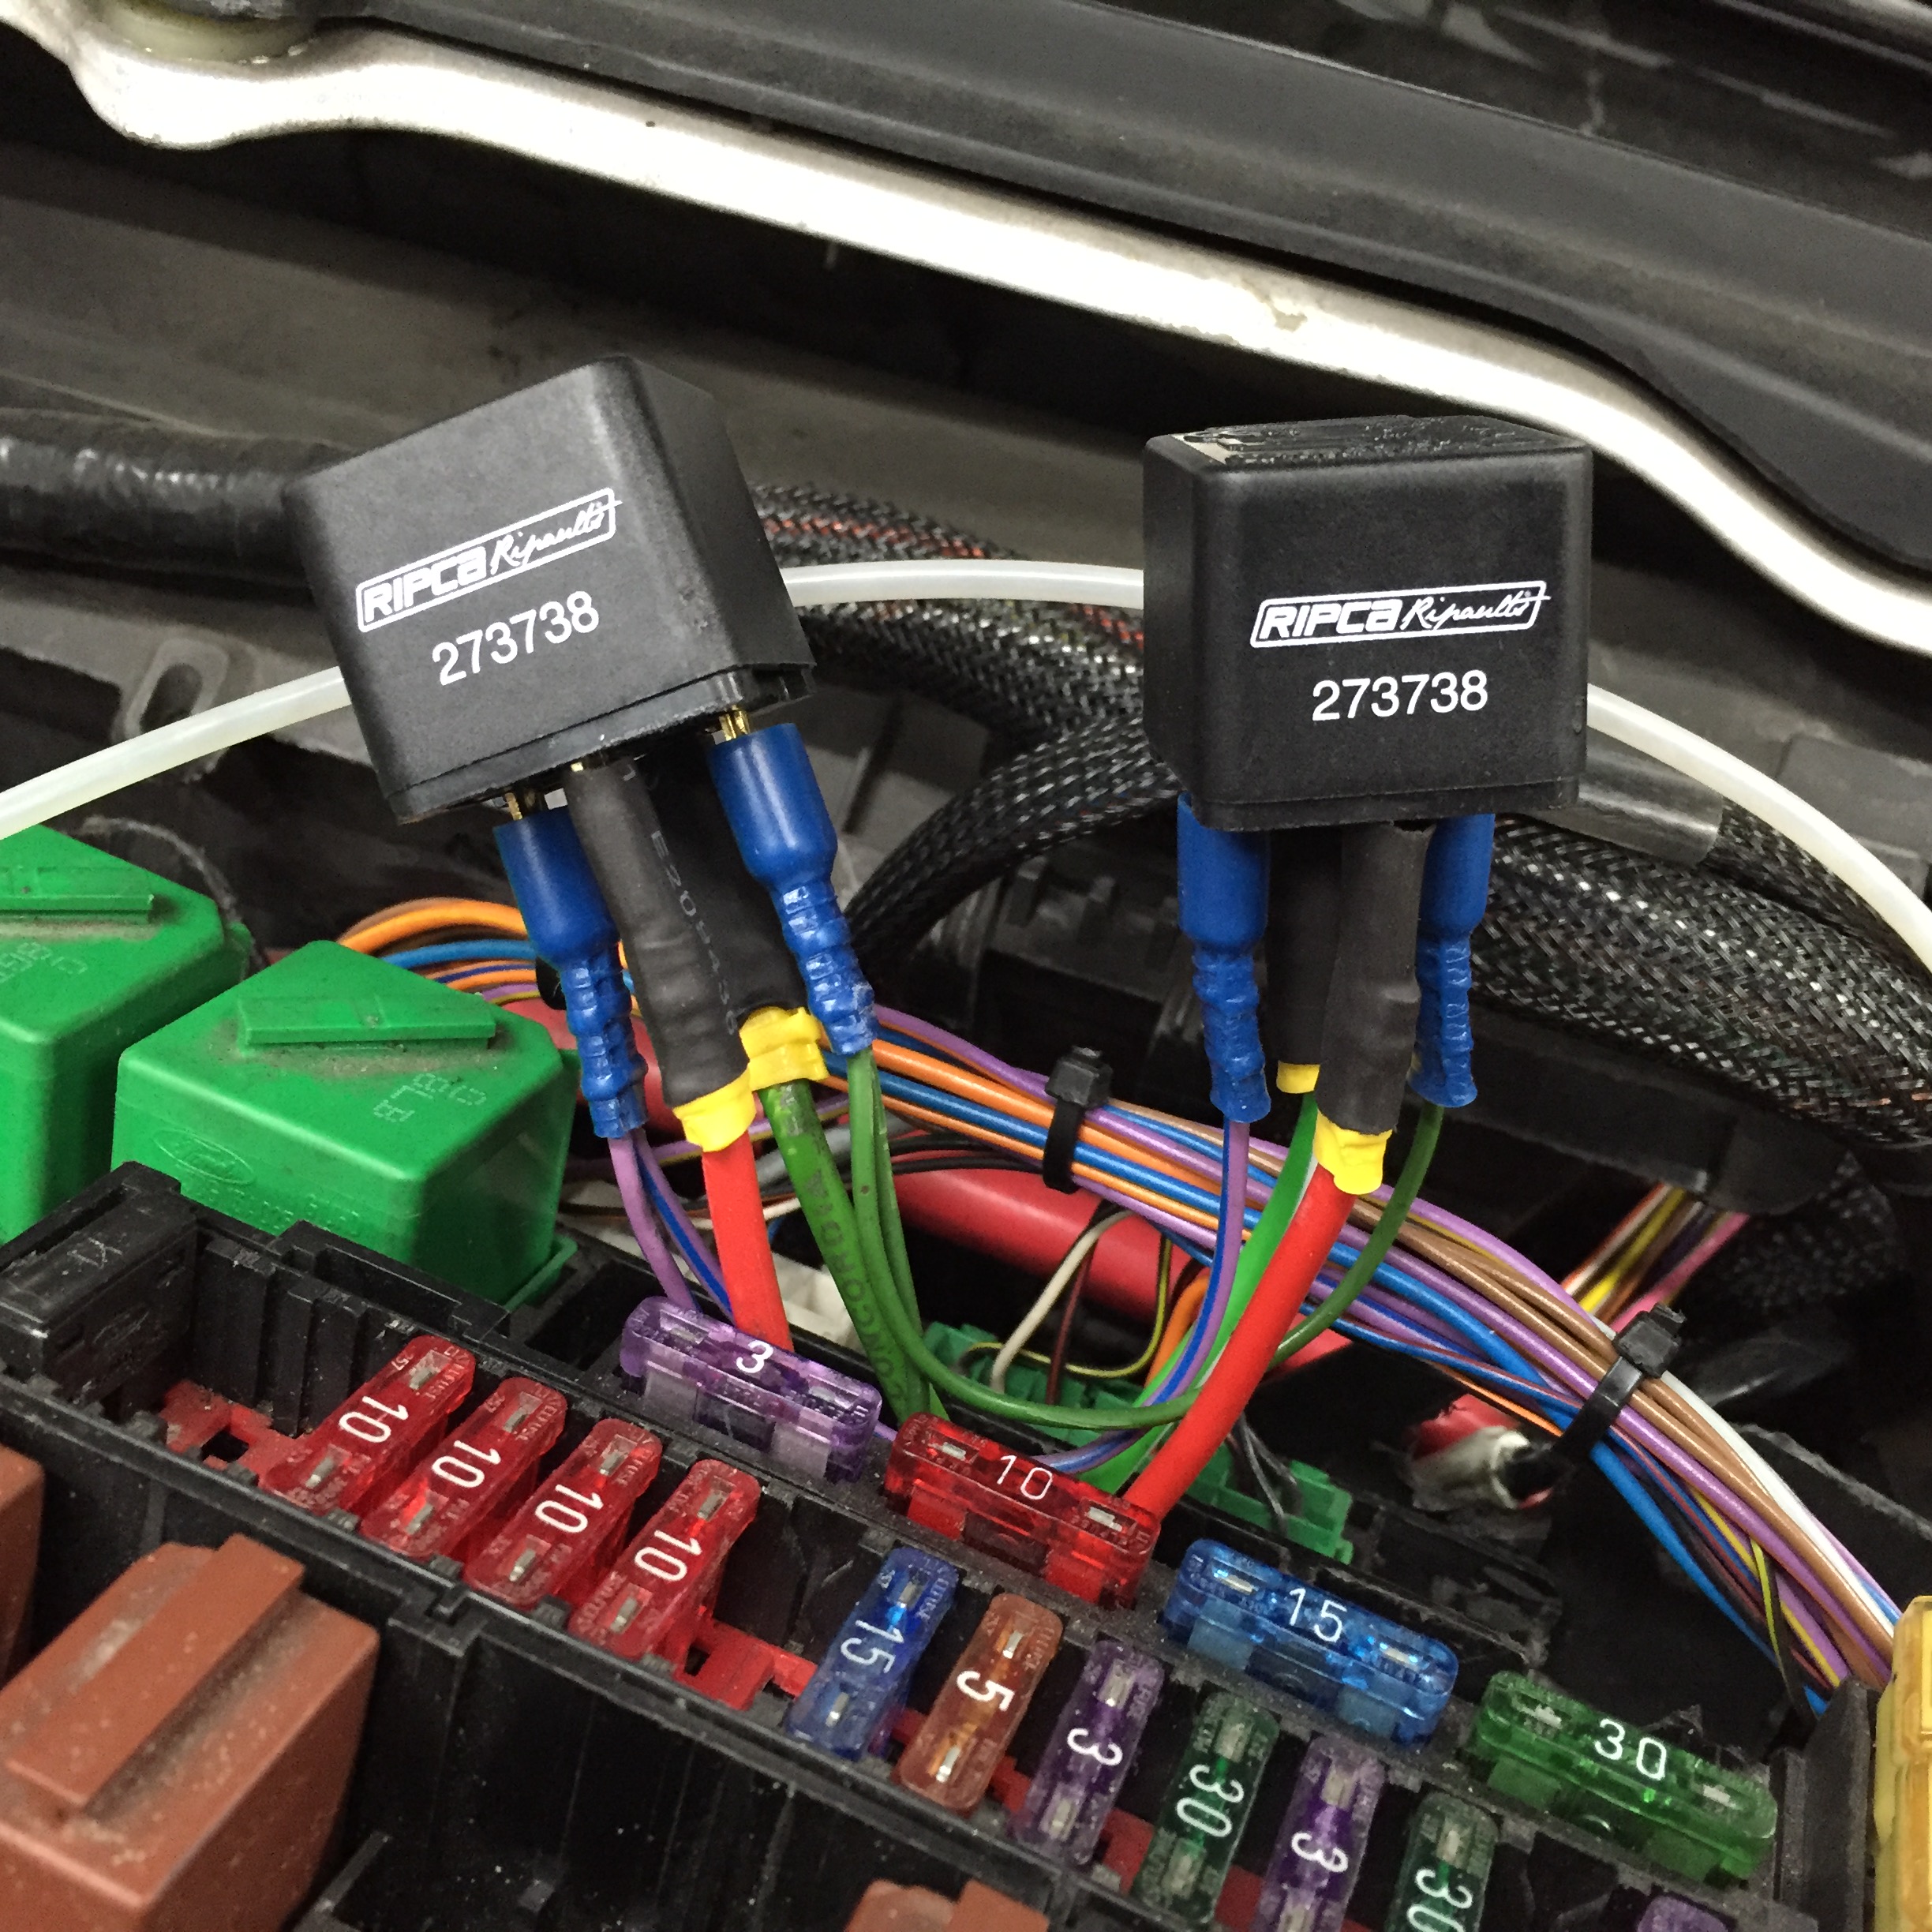
New plugs and relays ordered (bottom ones in the pic are for the speed sensor)
New relay and fuse box wiring installed
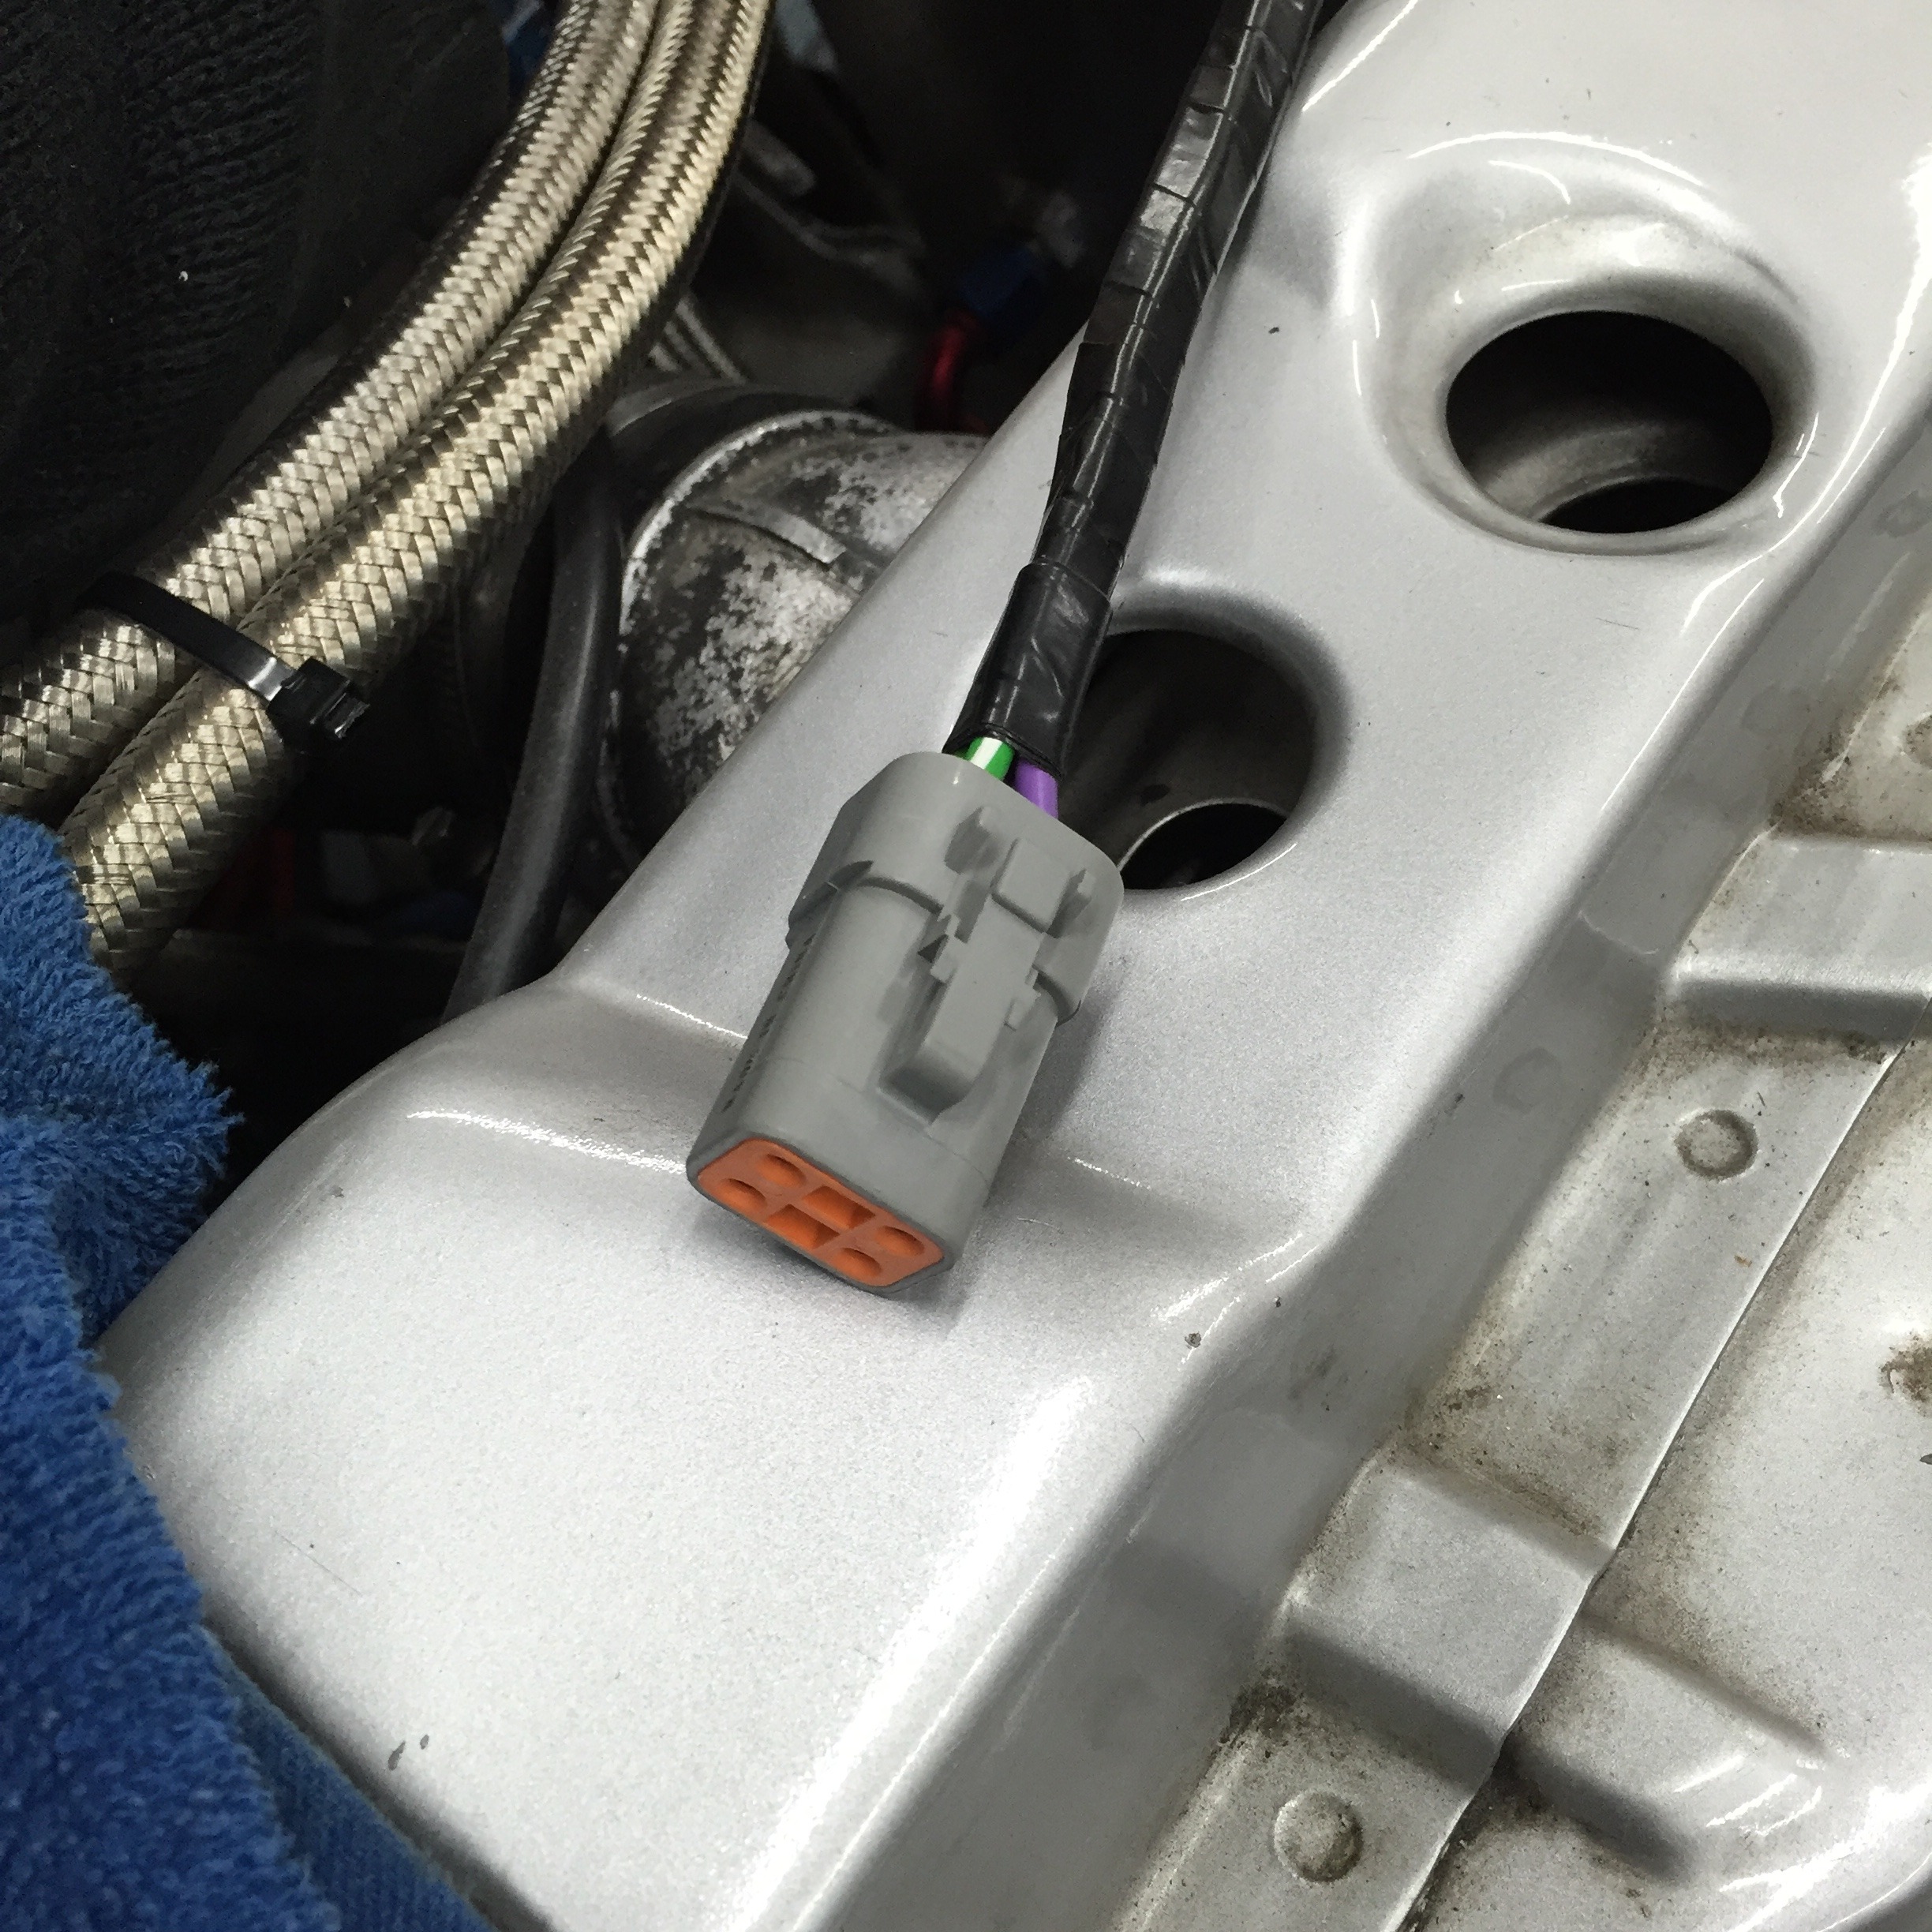
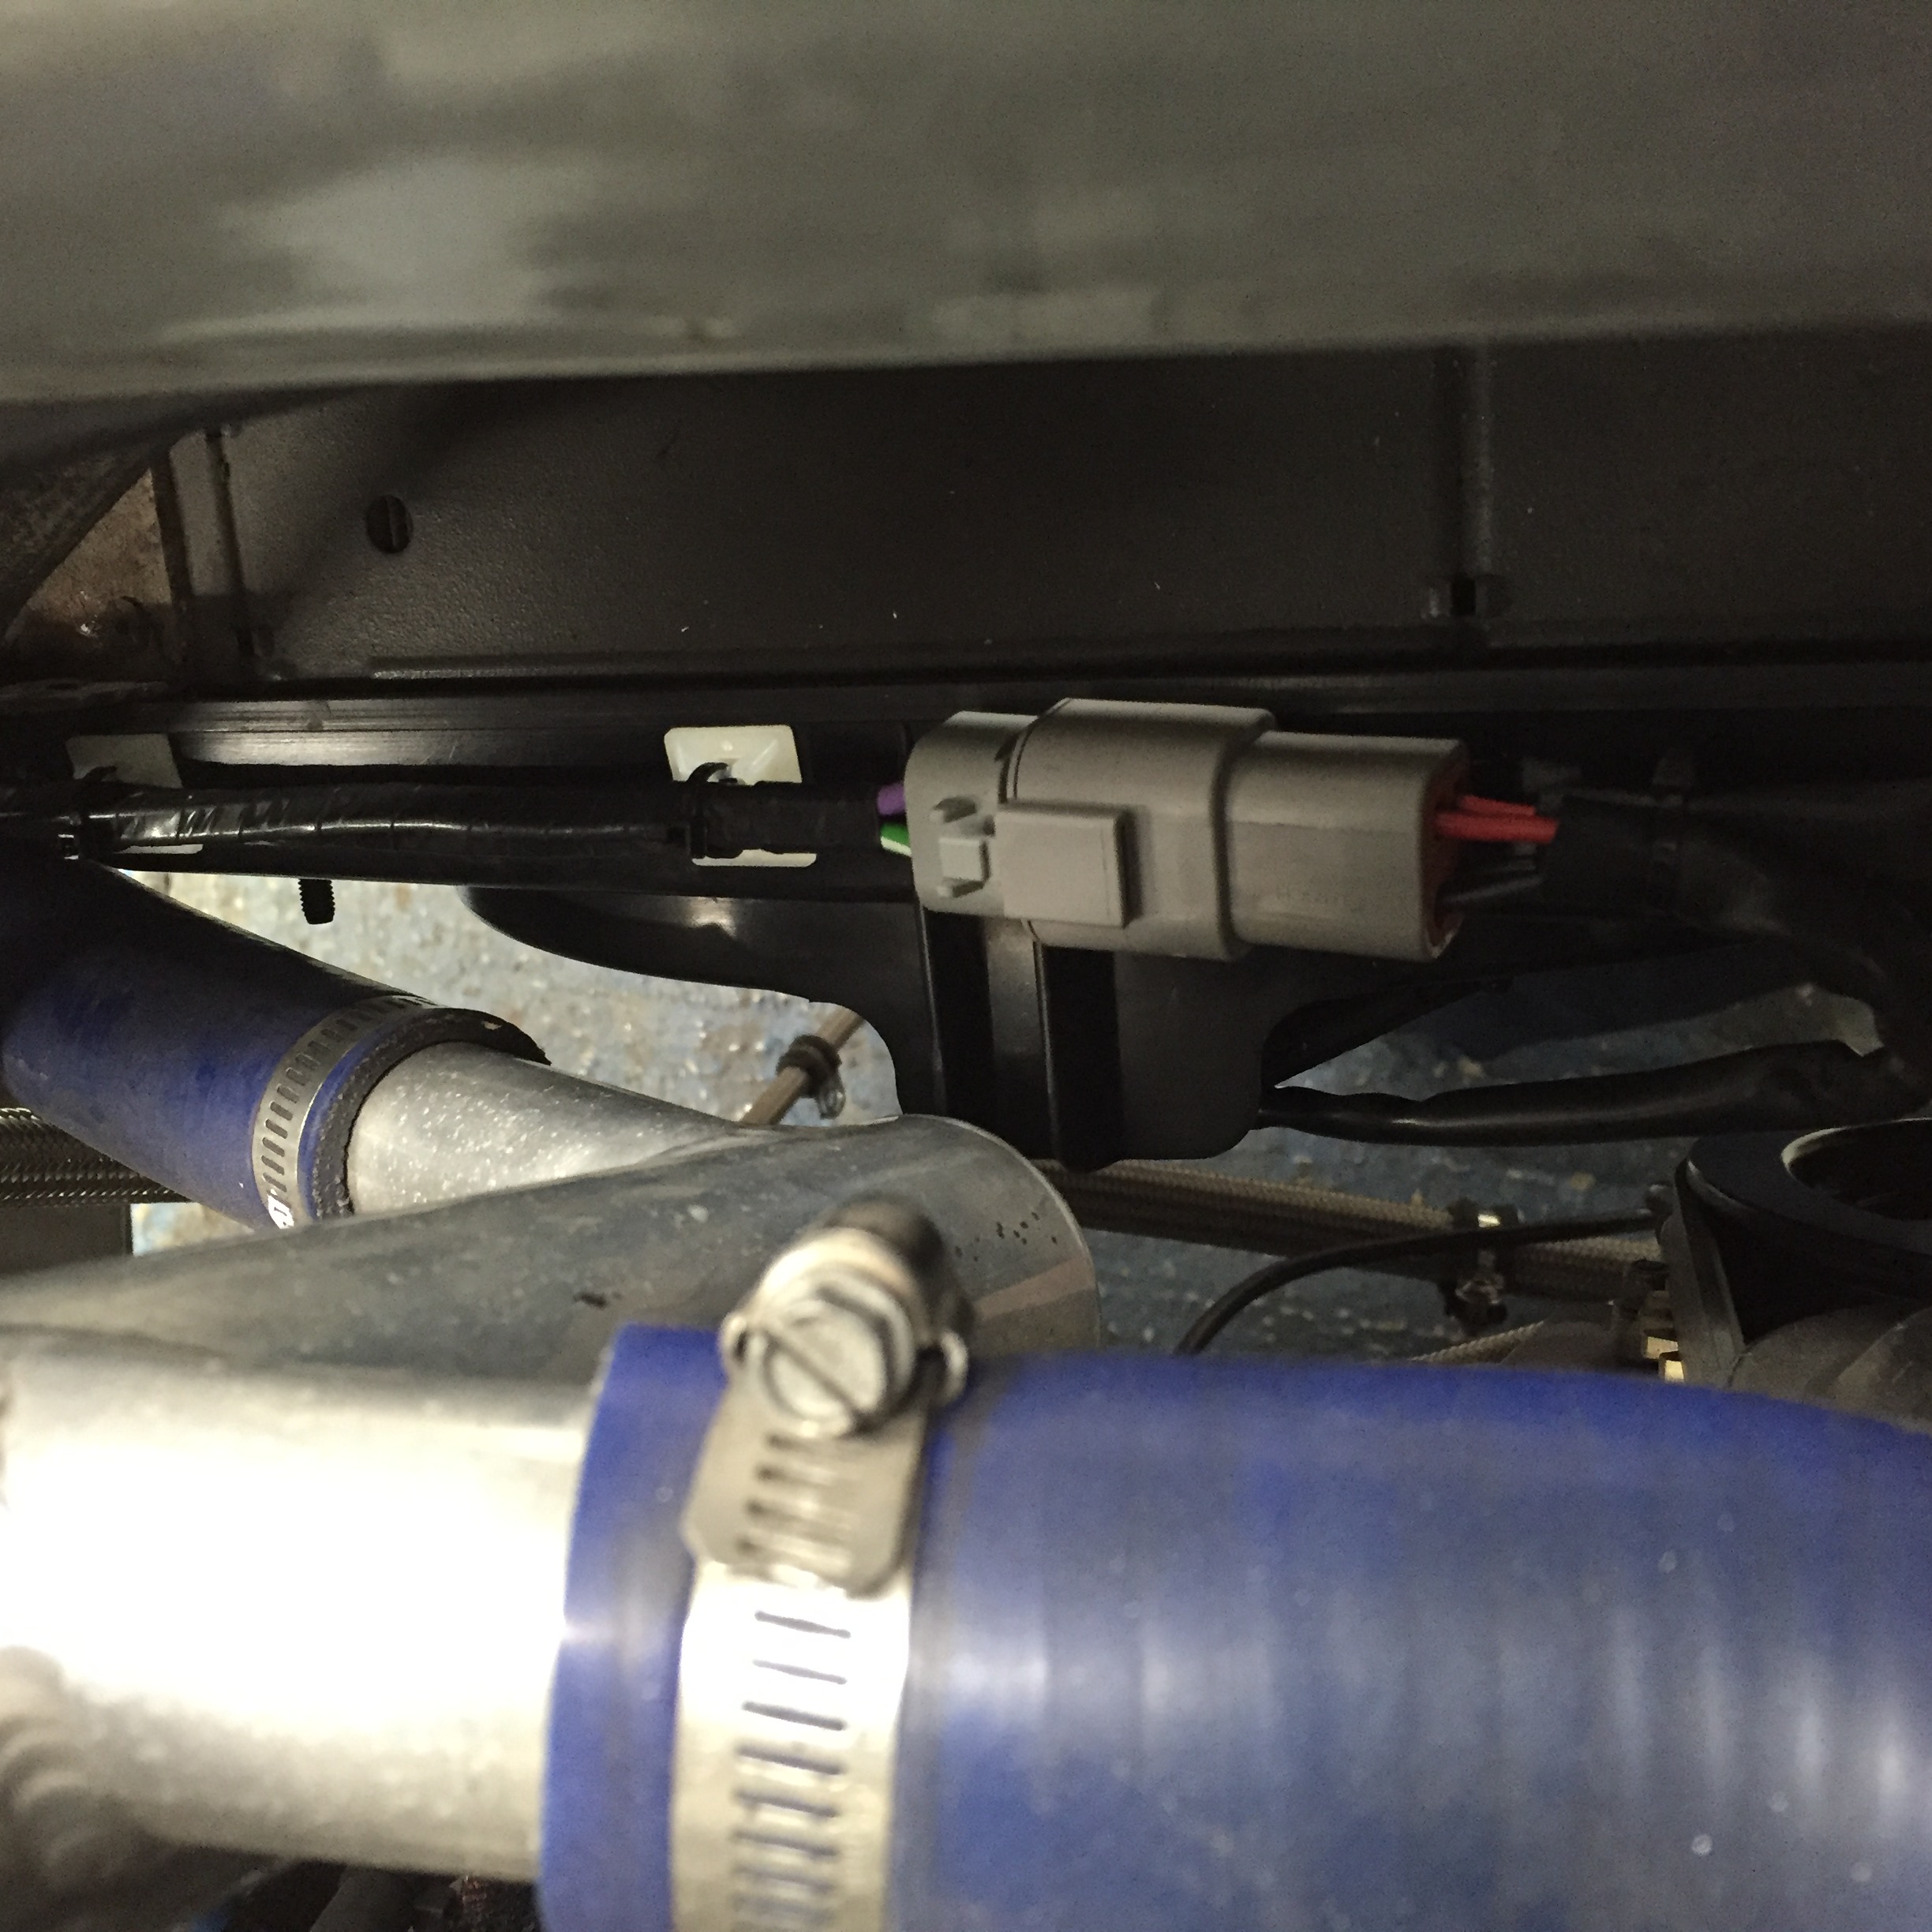
New plug from car wiring to fan wiring installed all onto new cable runs
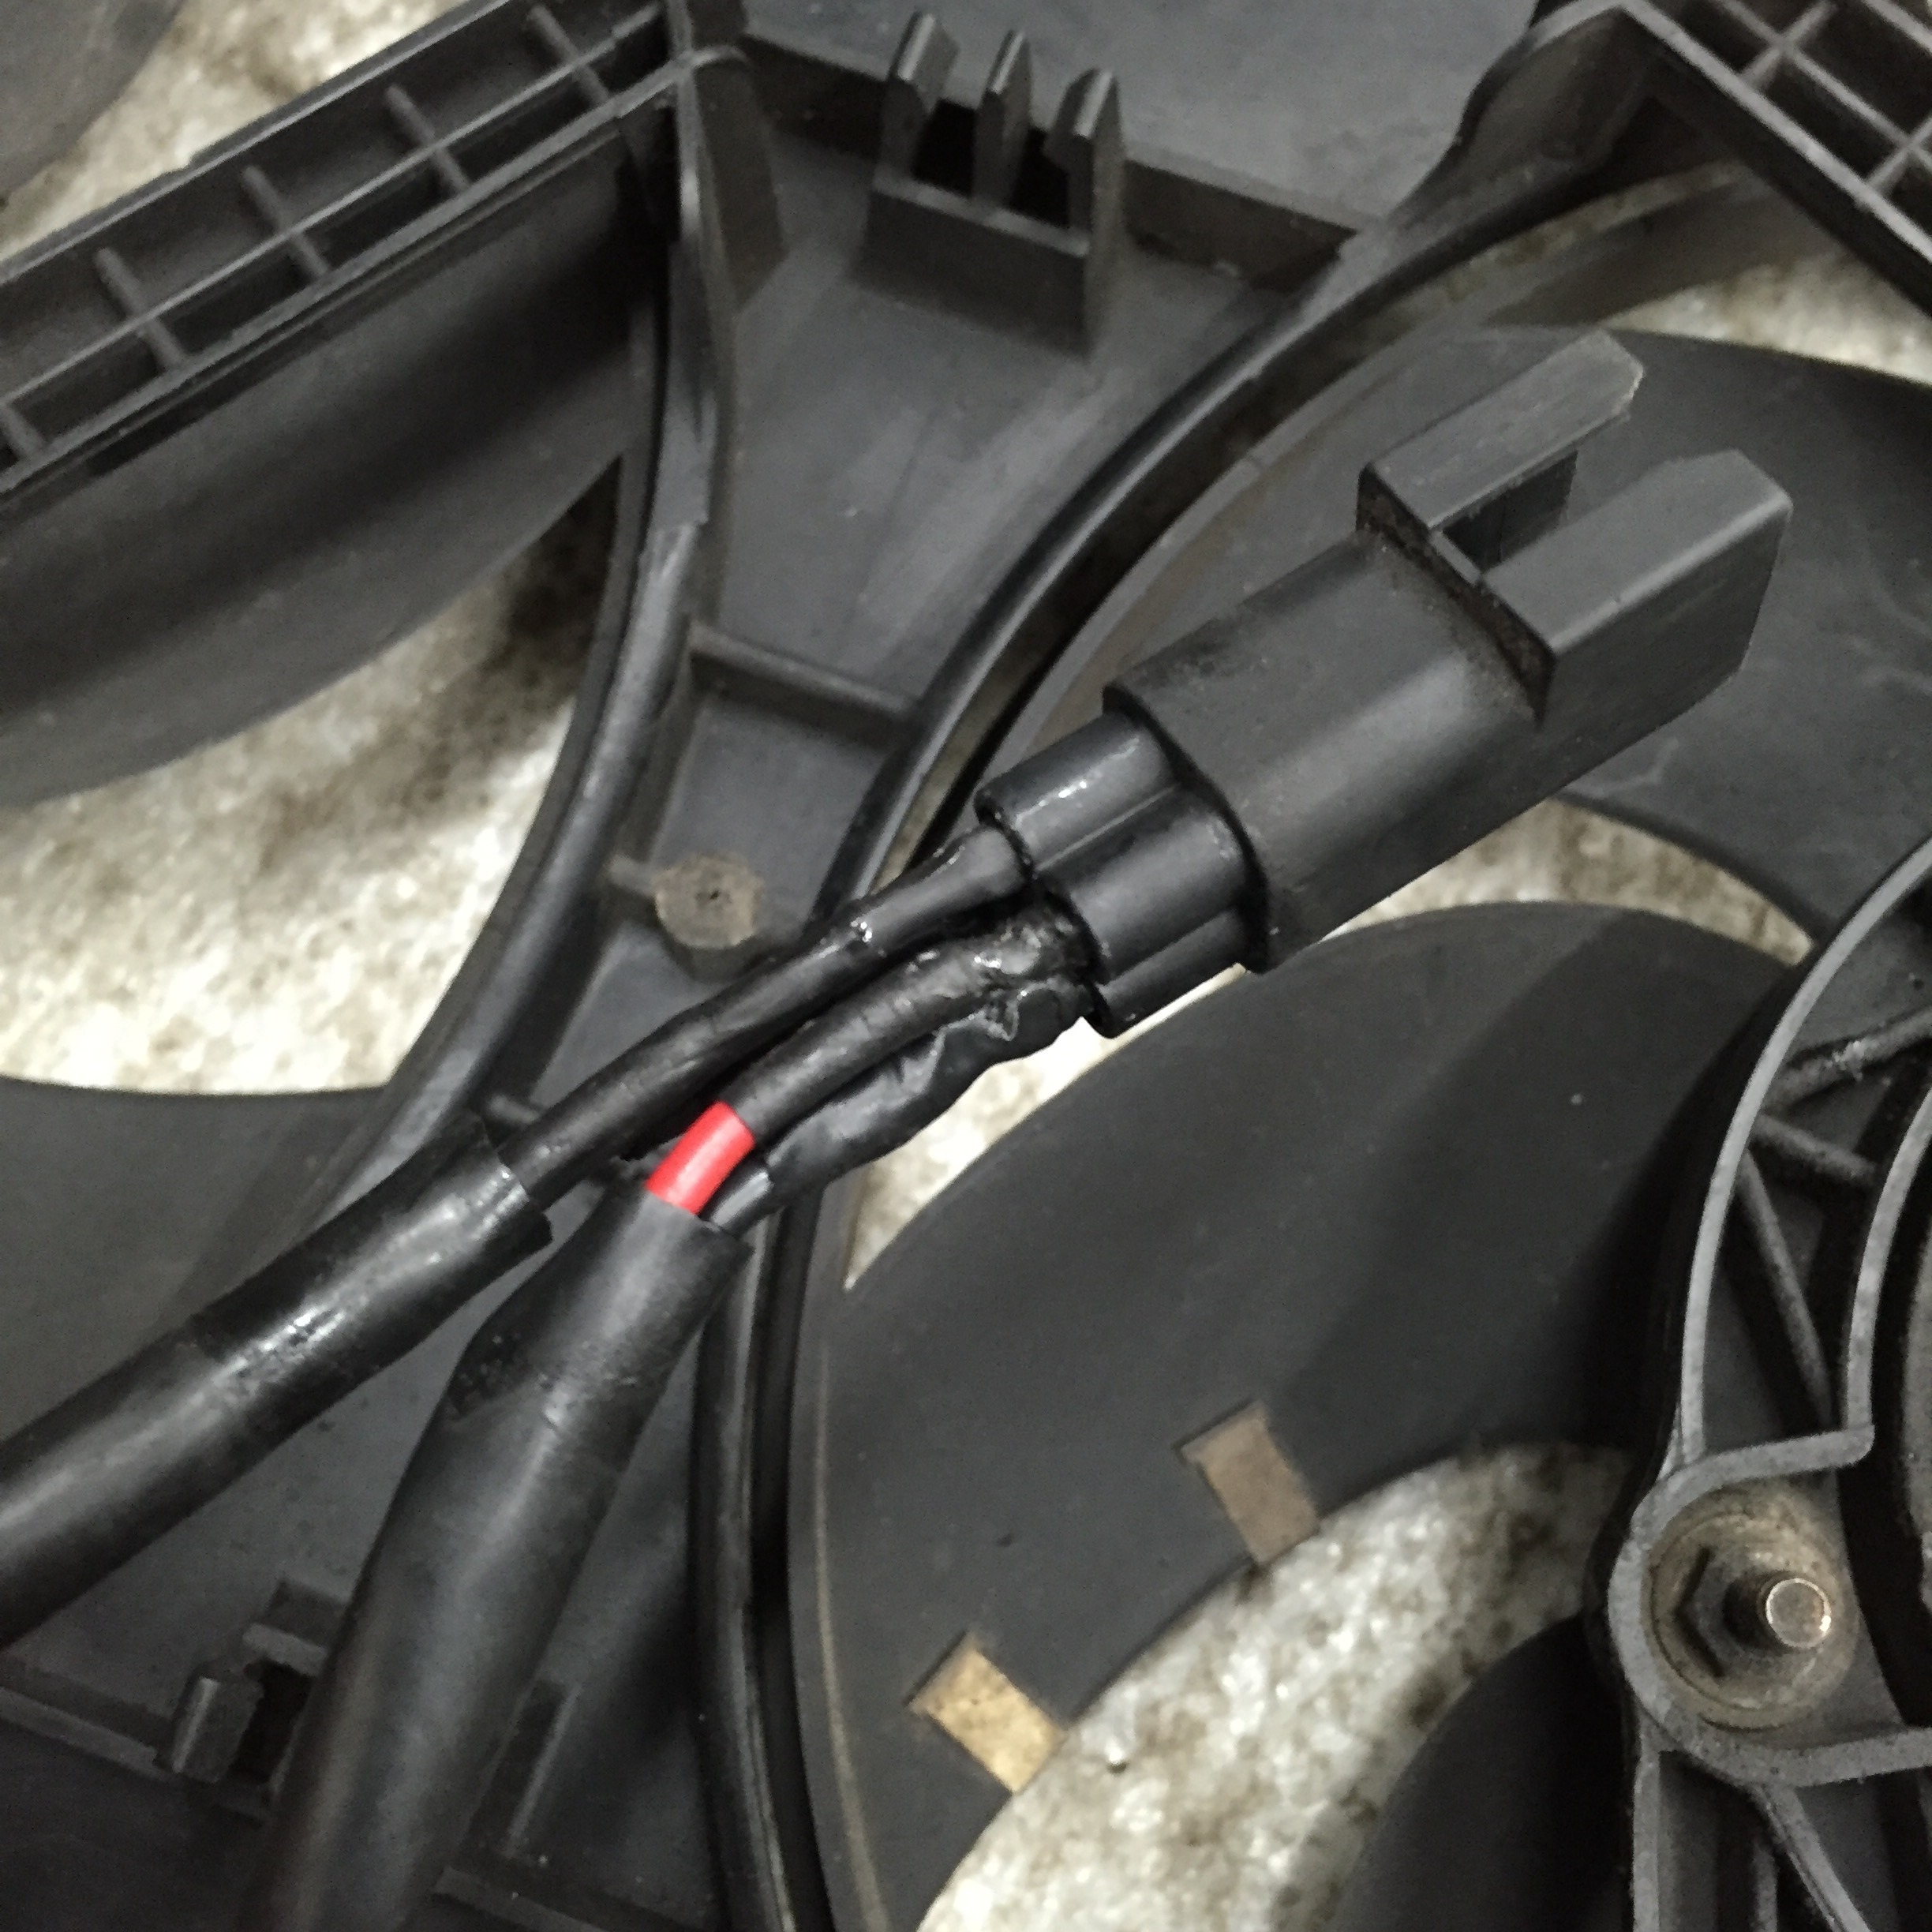
Now this was a fascinating find - my fans have always been loud and I just figured they were old ford fans and so that's how they were. I also never really measured how good they were or even how much air they were pulling through. When I found this it looks like the pins have been played about with.. And they had been. They were wired backwards. Red was not positive and black was not negative. When I reversed them and used the black as the positive the fans became much quieter, smoother and pulled 3 times as much air through. So no idea what happened here over the years but this is the way I fitted the new plug and he fans work perfectly now.
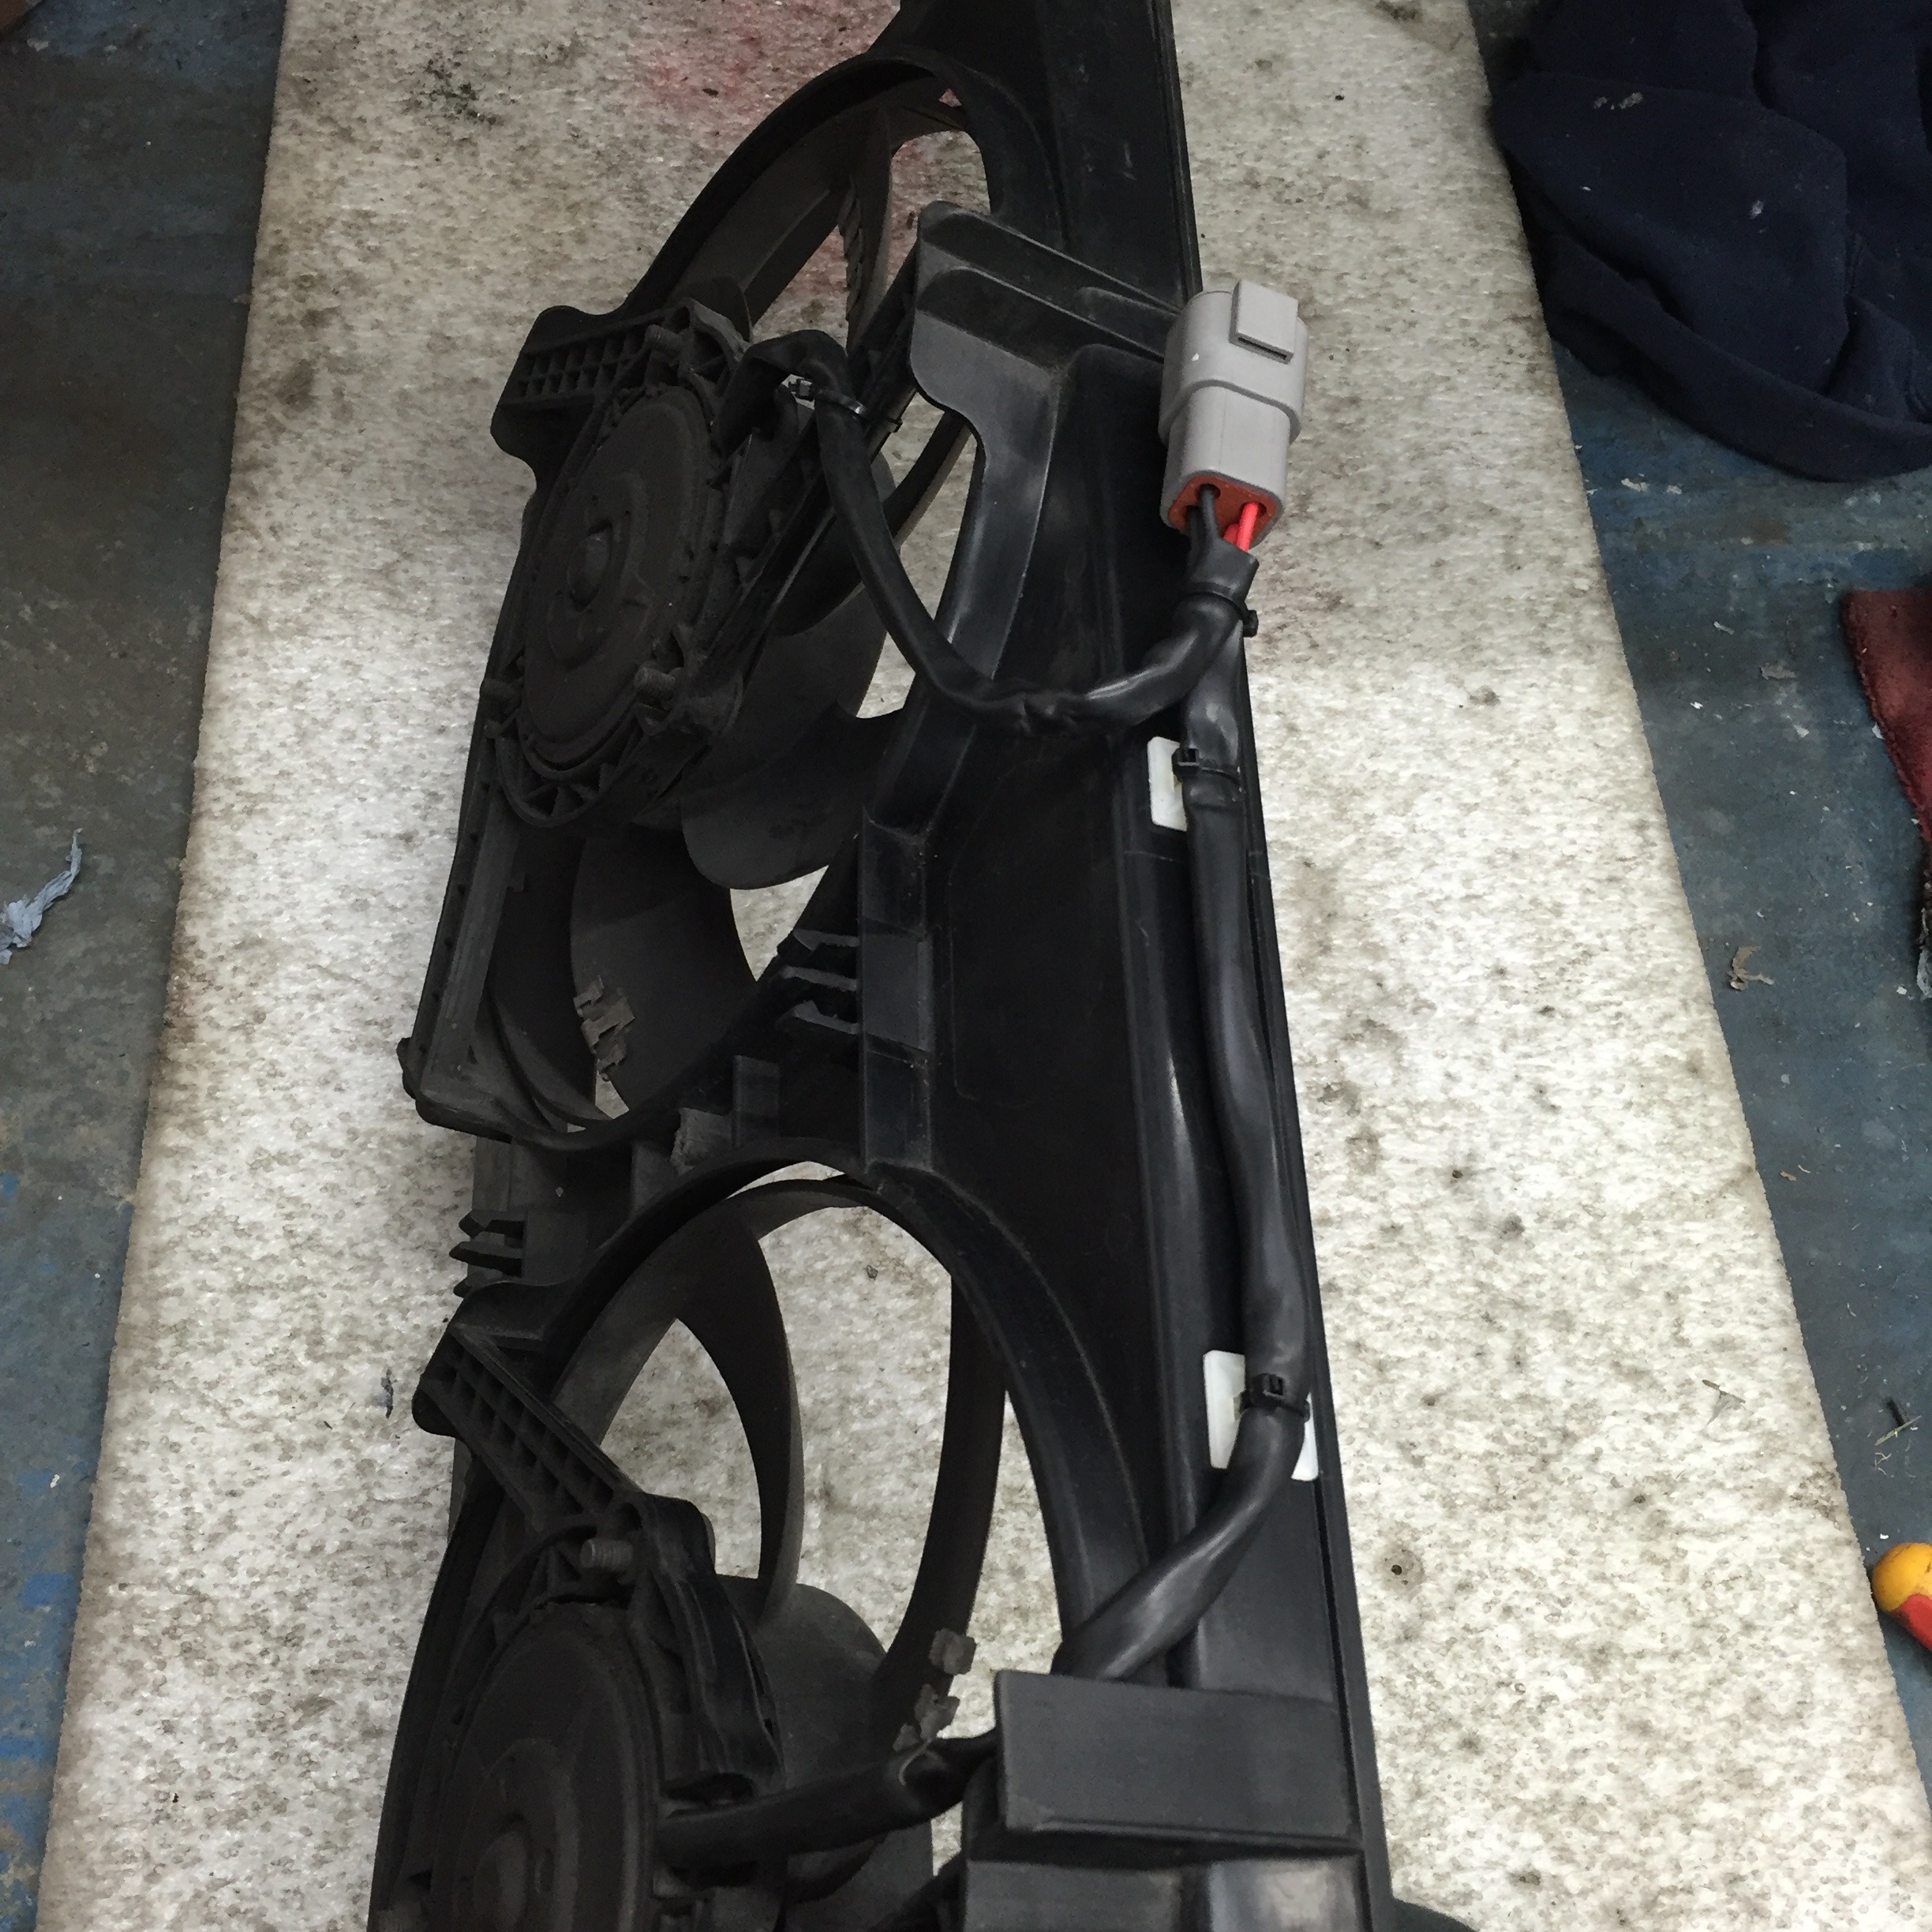
All fitted back up and plugged together
Thanks for looking
Decided to re-do the fan wiring whilst I was doing the brake reservoir, as it wasn't looking in great shapes and the relays in the fuse box didn't give me much confidence. It was one of the areas I left untouched when I did all the repairs and alterations last year.
Old wiring


Poor dry joint

New plugs and relays ordered (bottom ones in the pic are for the speed sensor)

New relay and fuse box wiring installed

New plug from car wiring to fan wiring installed all onto new cable runs

Now this was a fascinating find - my fans have always been loud and I just figured they were old ford fans and so that's how they were. I also never really measured how good they were or even how much air they were pulling through. When I found this it looks like the pins have been played about with.. And they had been. They were wired backwards. Red was not positive and black was not negative. When I reversed them and used the black as the positive the fans became much quieter, smoother and pulled 3 times as much air through. So no idea what happened here over the years but this is the way I fitted the new plug and he fans work perfectly now.


All fitted back up and plugged together

Thanks for looking
Last edited by McCloud 85; 13-04-2016 at 10:21 PM.
 15-05-2016, 07:37 PM
#159
PassionFord Regular
Thread Starter
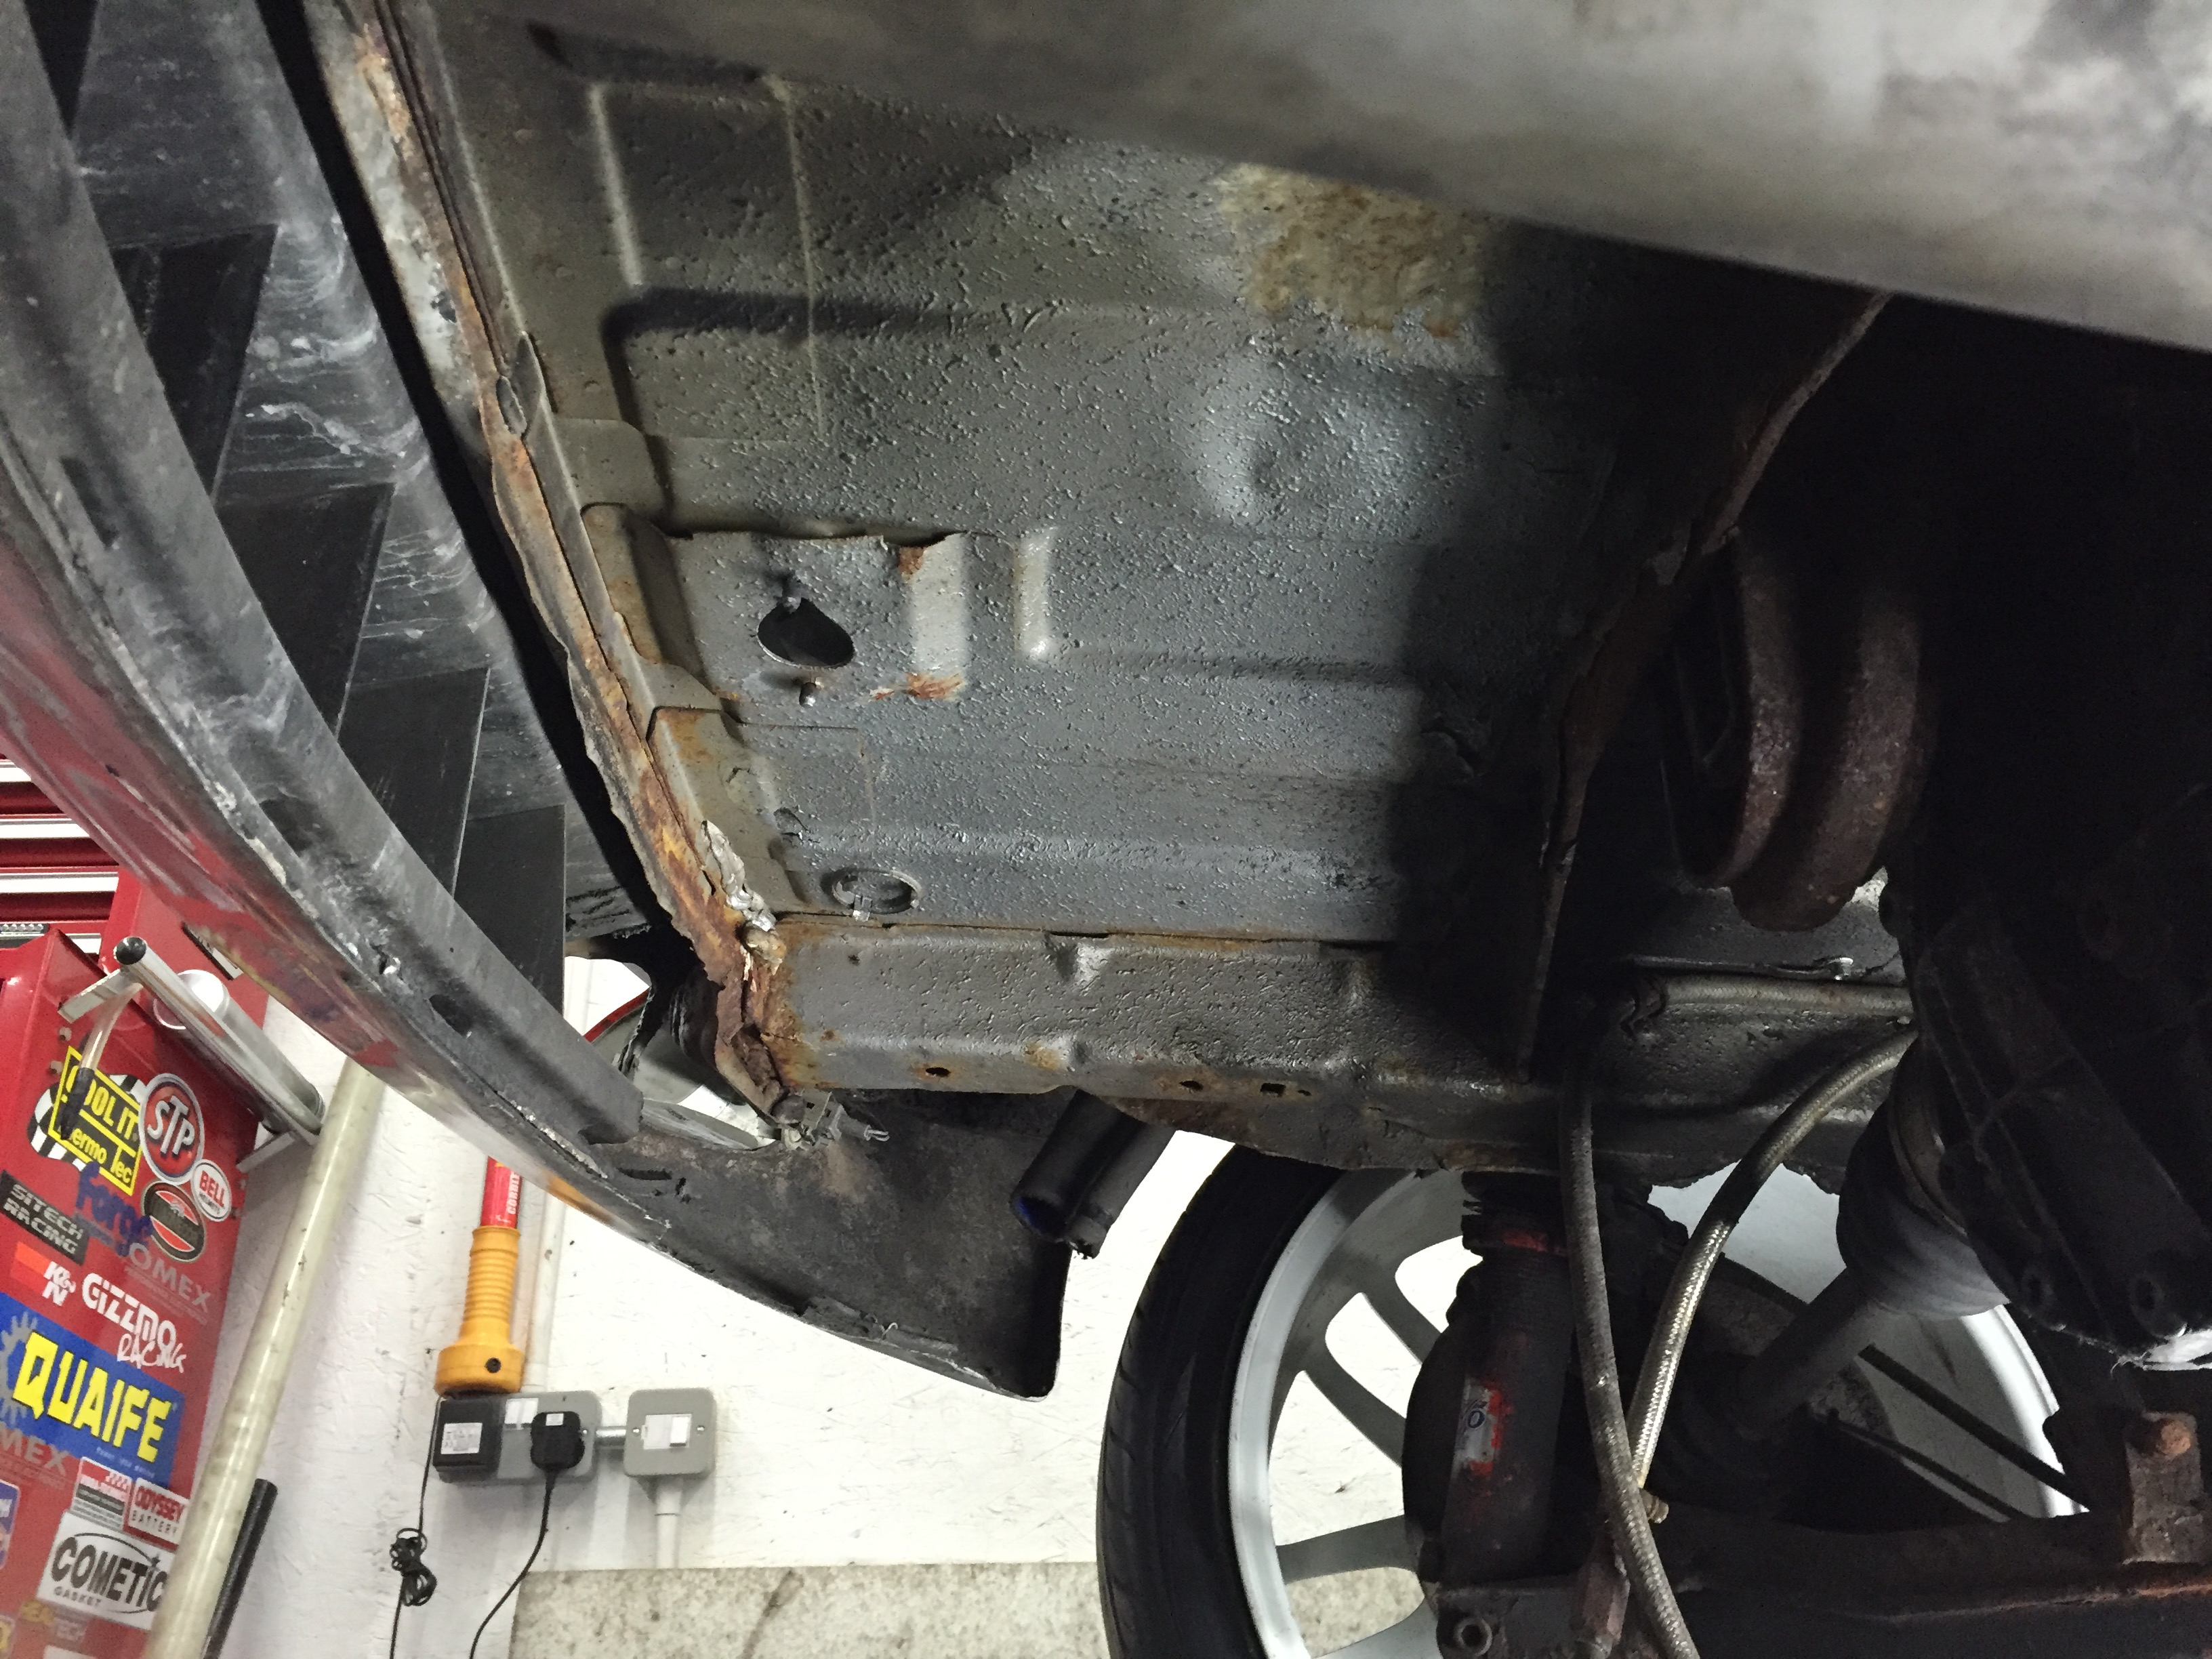
Long overdue an update on this, so I thought I'd share the fuel tank..
The aim was to tank it off and repair and work out why I could only use 2/3 of the tank before I had fuel starvation. That's also after not being able to fill it to the brim as it would leak all over the petrol station forecourt.
Few shots of it on the car - this is the side facing the front of the car
State of the tank wiring - I had connected on to the existing cables last year and left a coil of new cable ready to take straight to the pump
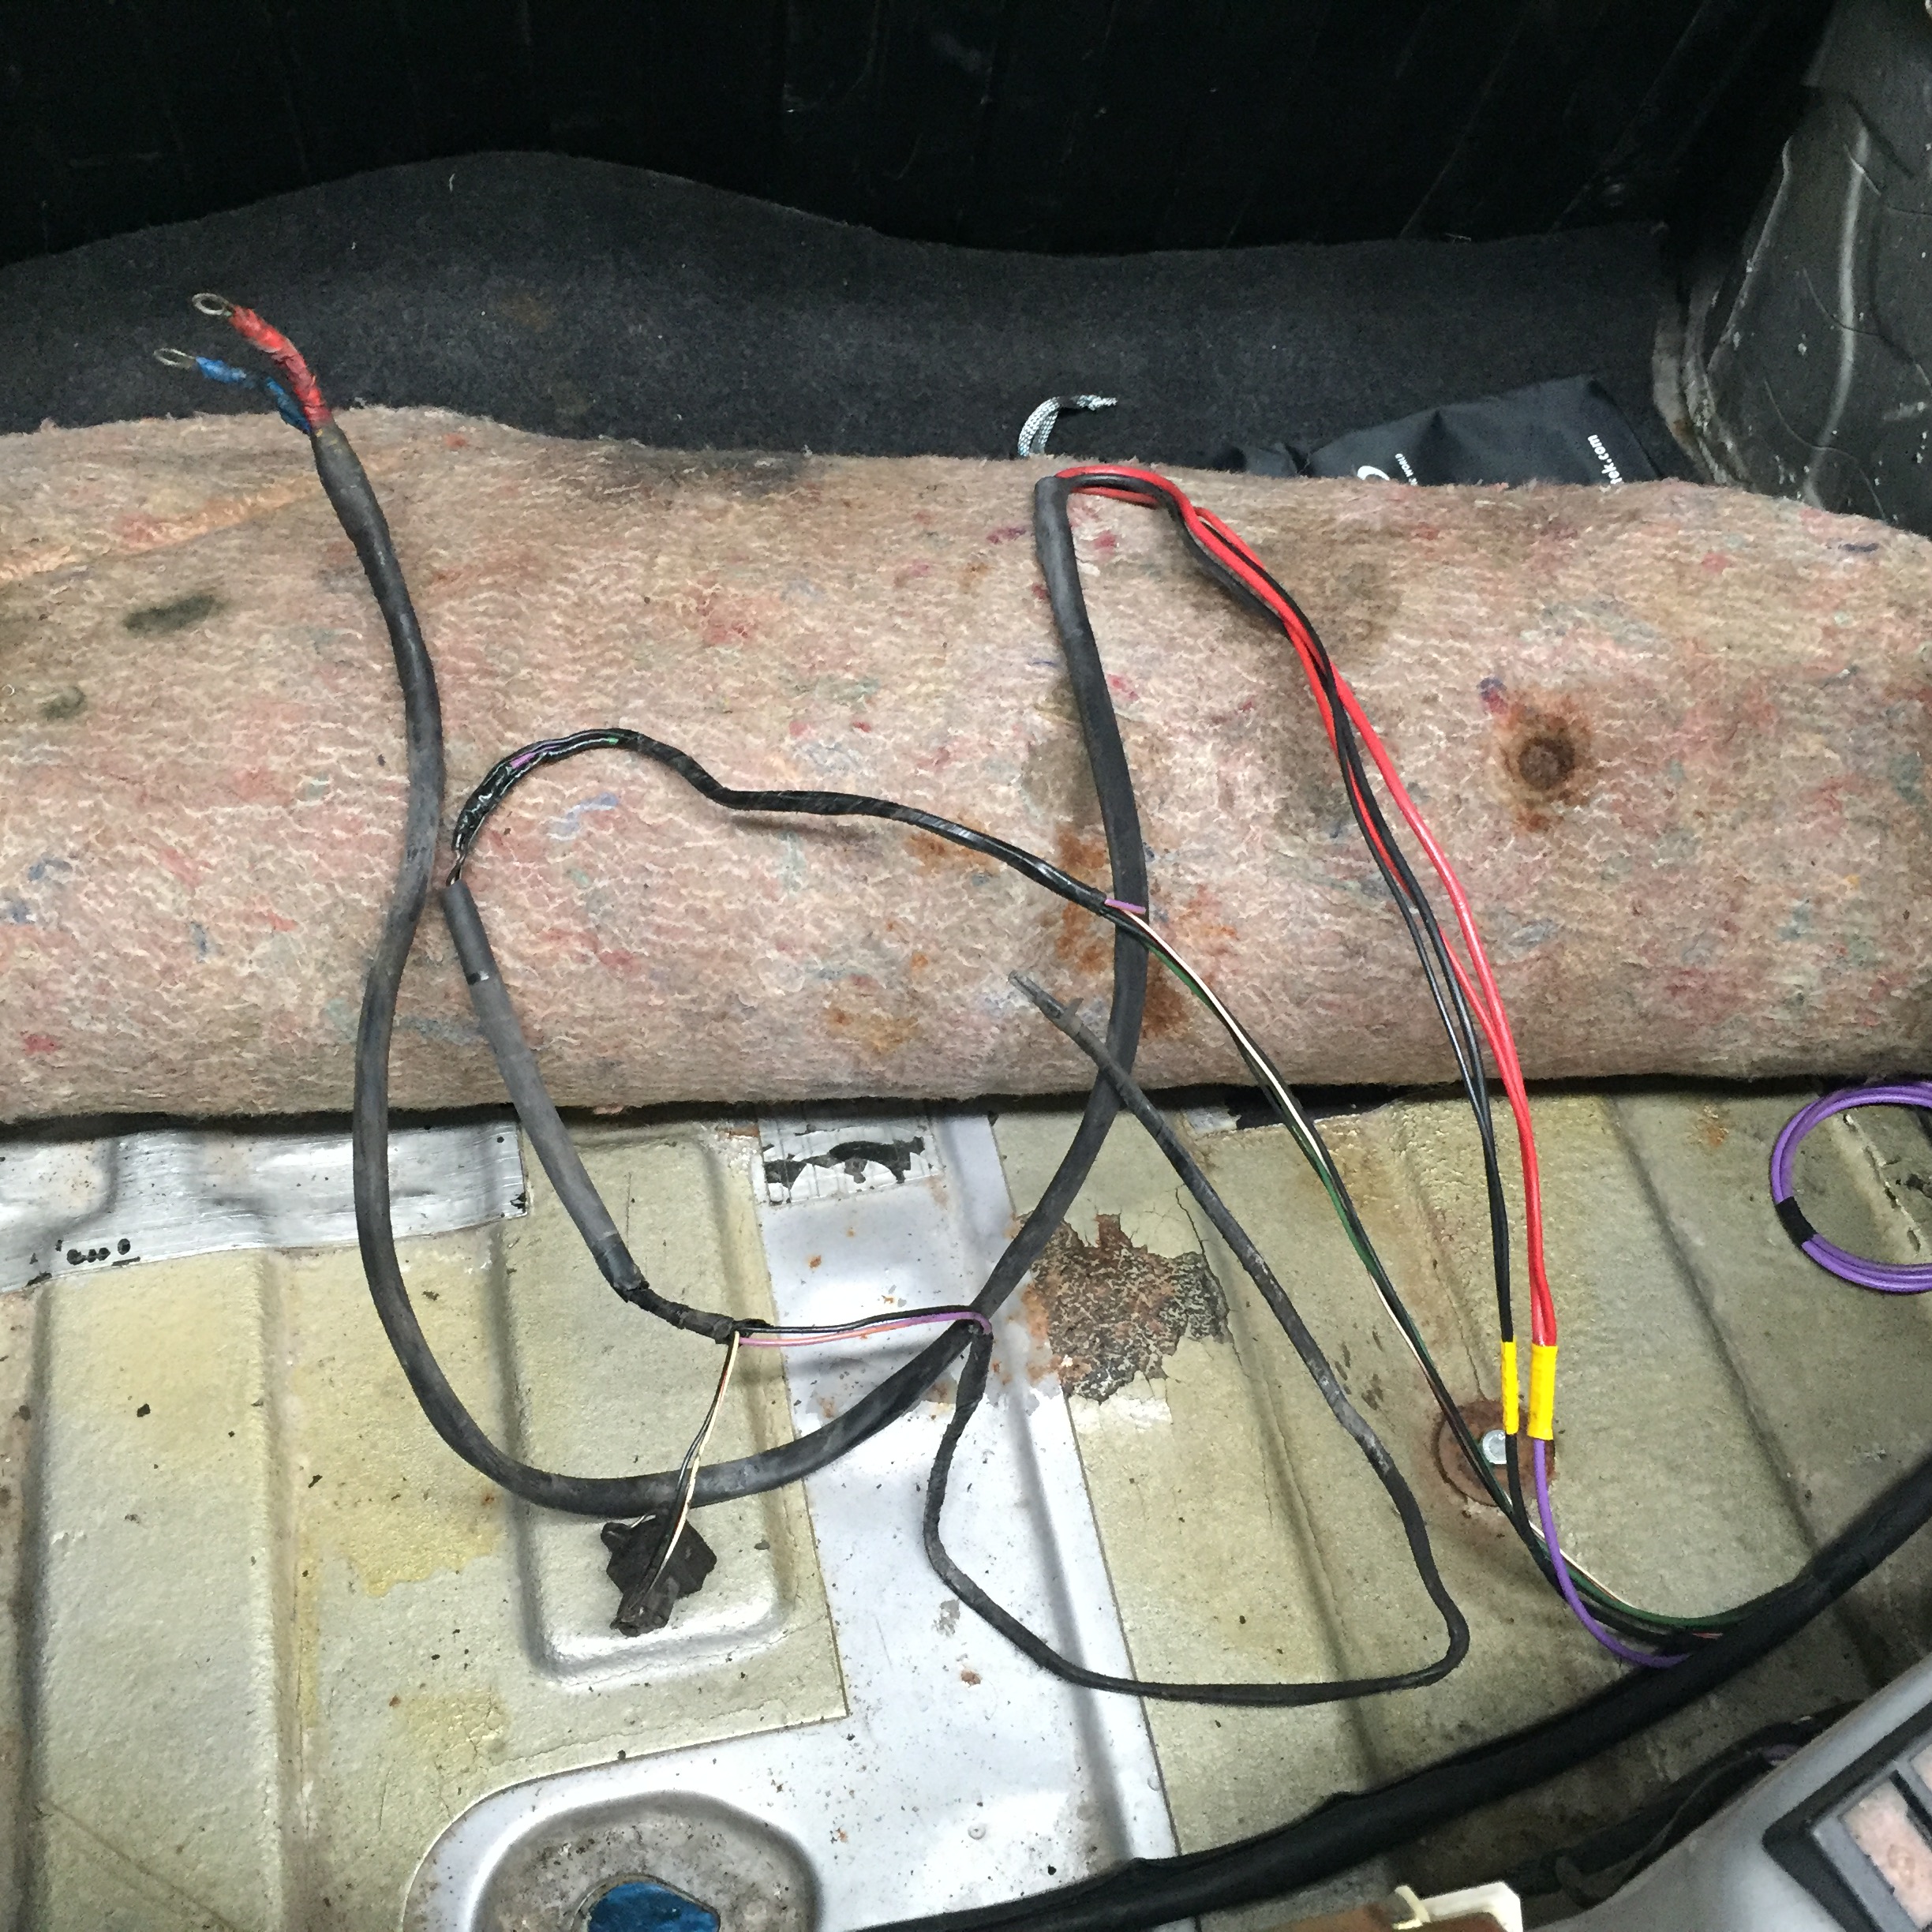
Off the car and the realisation that this was a mess and needed to be binned! Exhaust rubbers used to space the tank of the boot floor.

Sender unit fitted to the top and I'm guessing this seal had failed
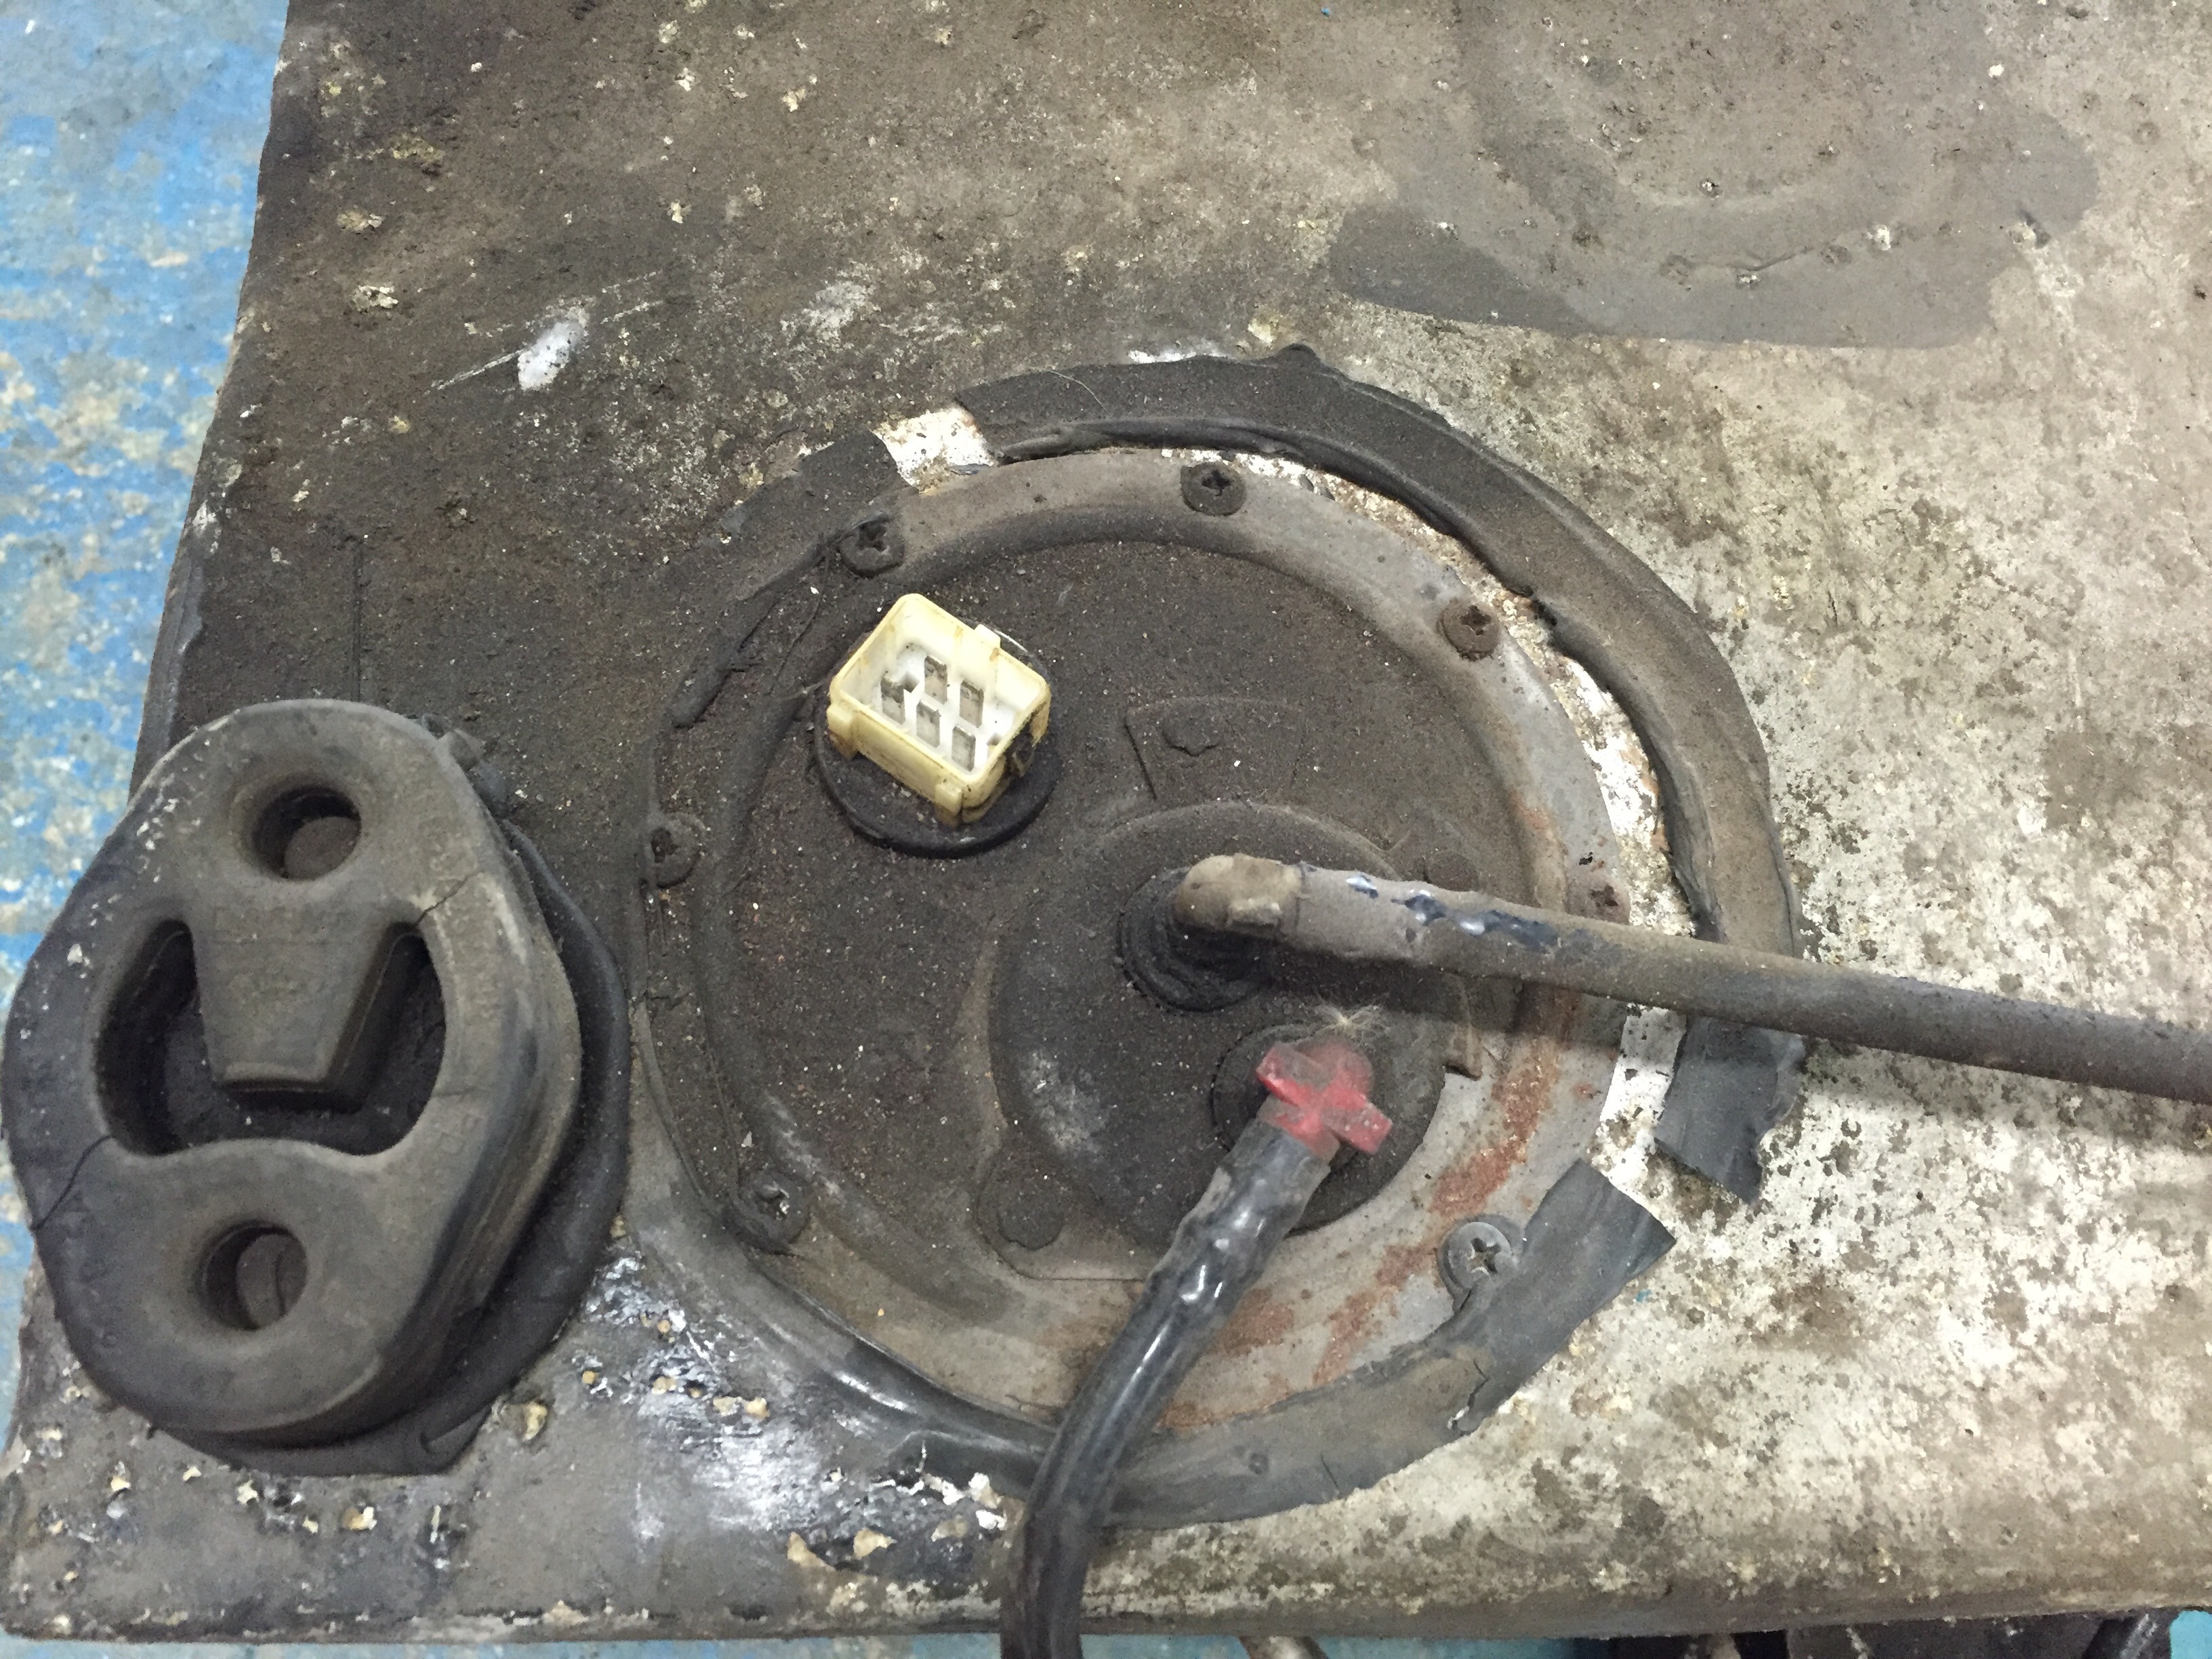
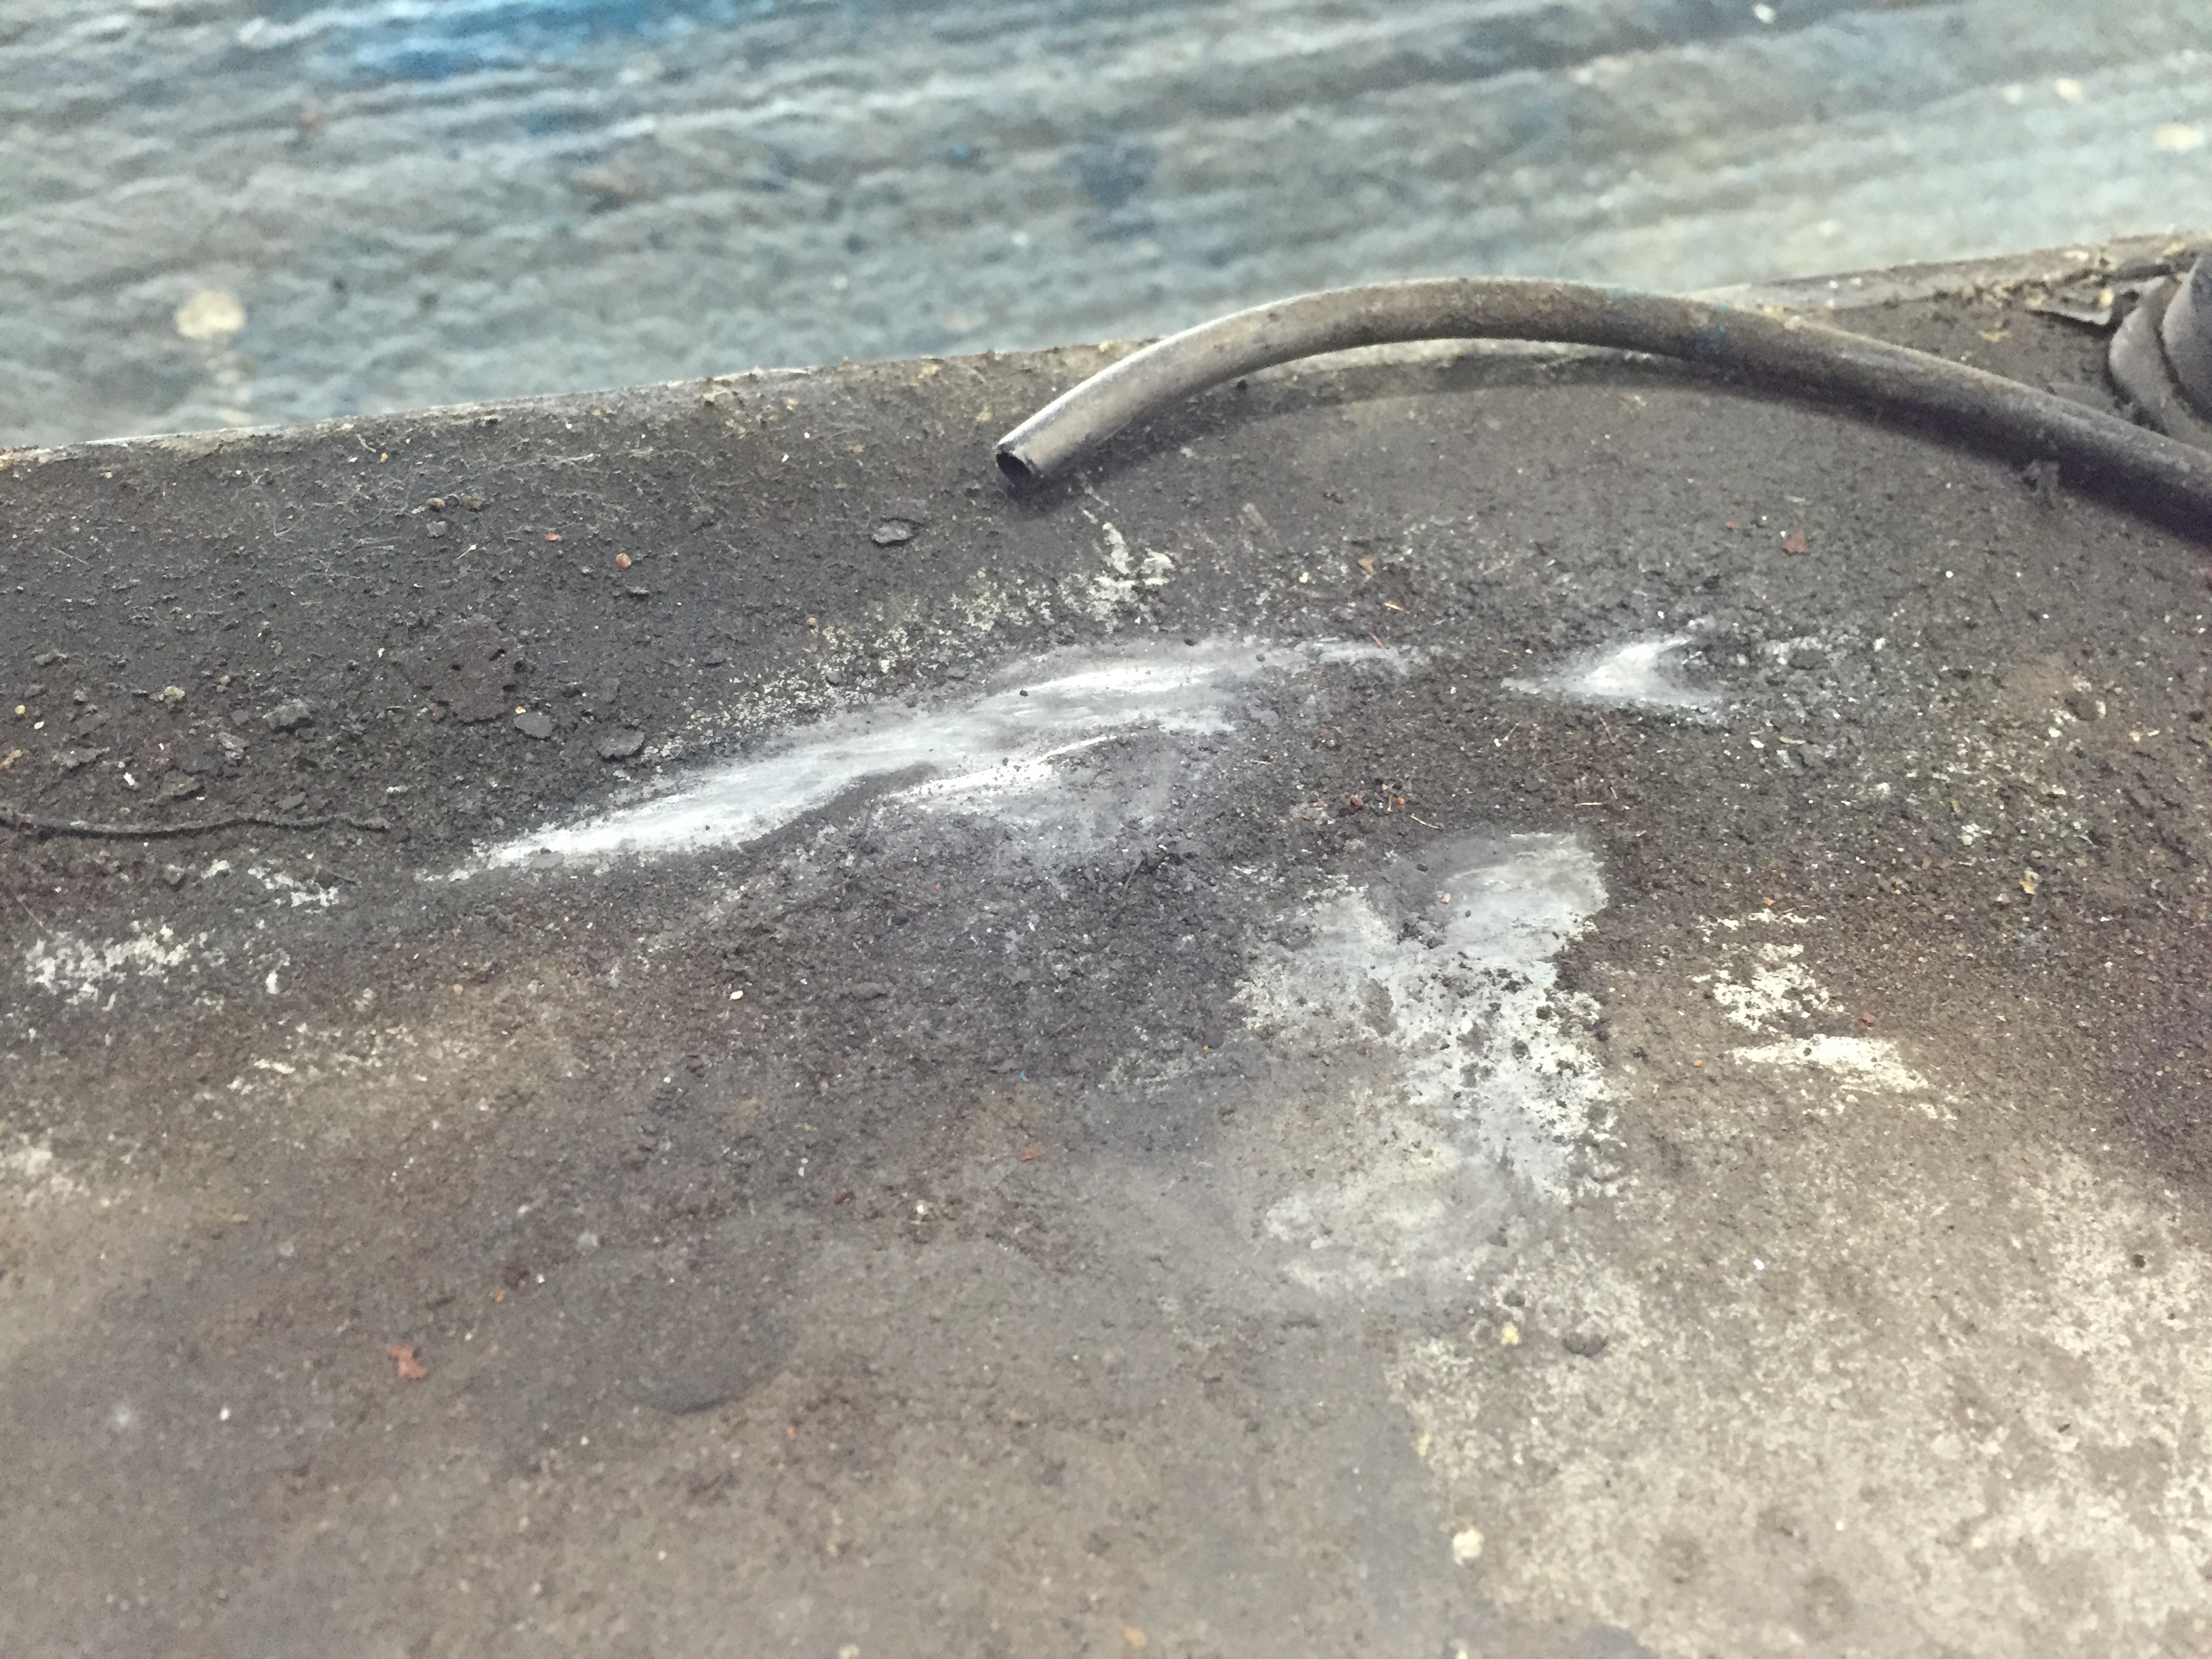
This I'm assuming was used as the breather pipe - without any one way valve so this must be also where fuel poured out of
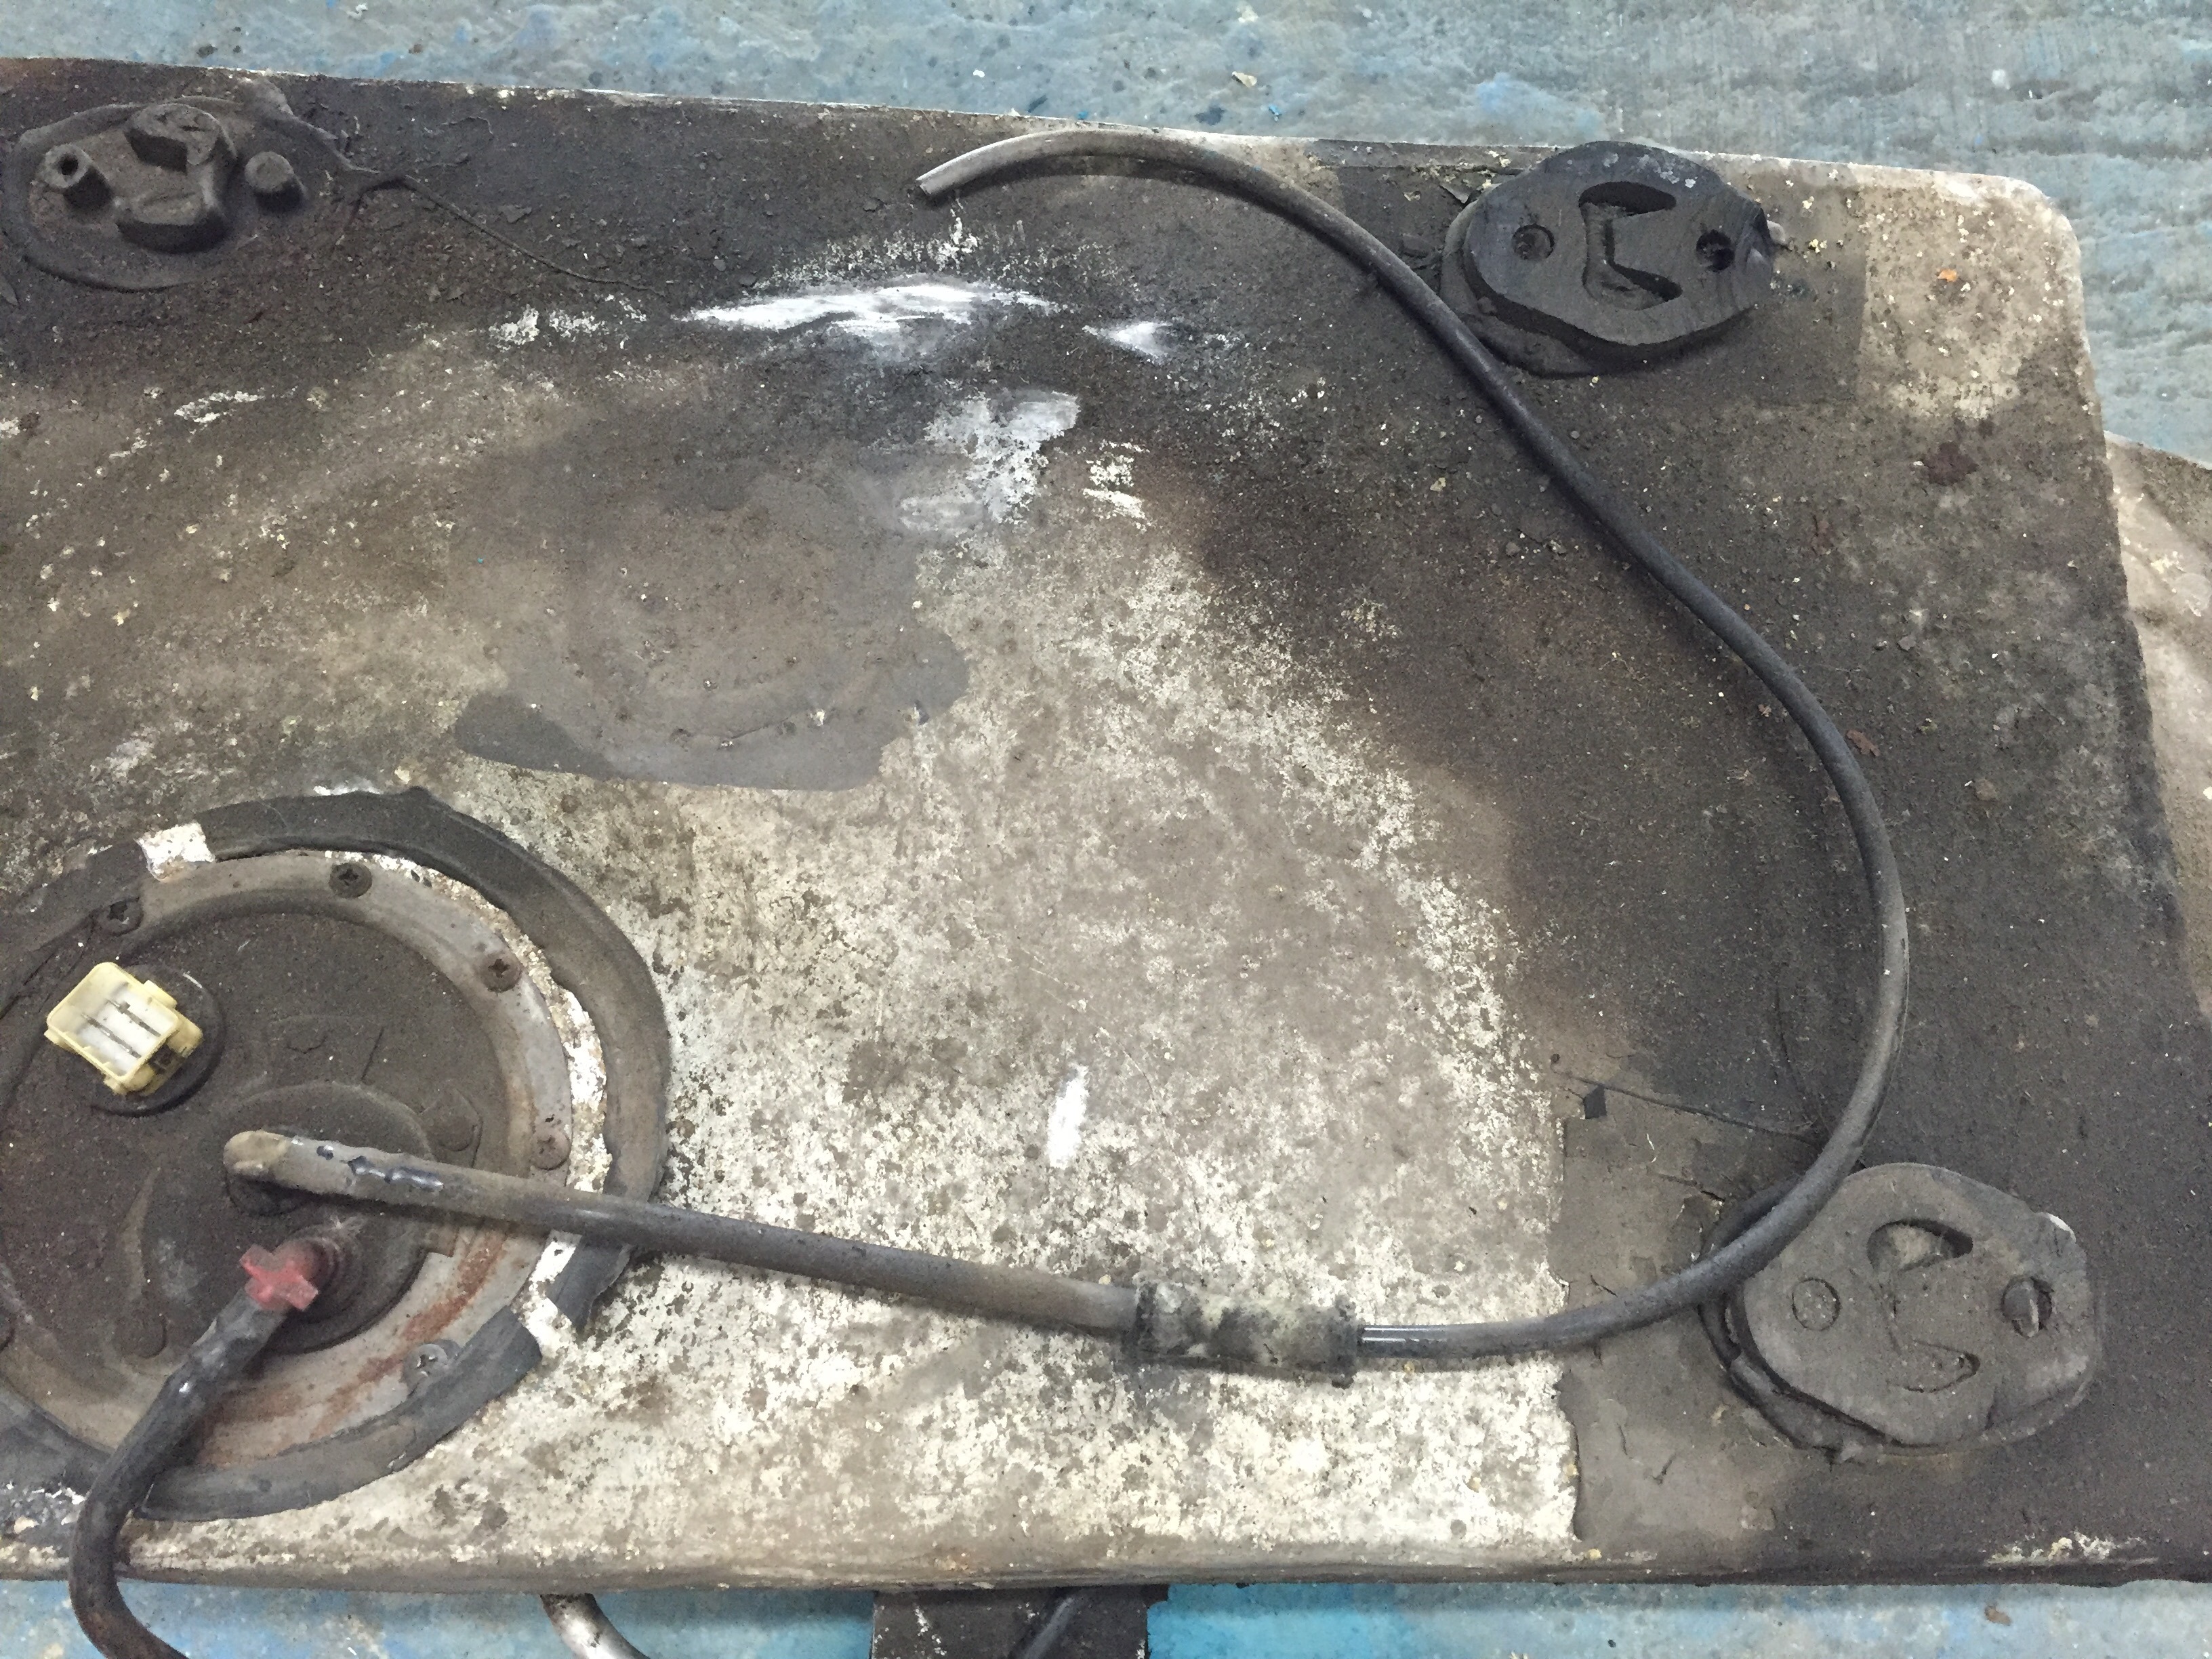
Pump feed pipe and some sort of pump bracket, return pipe also was slightly kinked by the rear diff support bar across the boot floor
A rivet was left in where the old spare wheel holder bracket was. Because the fuel tank was not held in very well at all it had been rubbing against this and was only a matter of time before the tank had another leak
Poor repair done on another hole I found on the tank
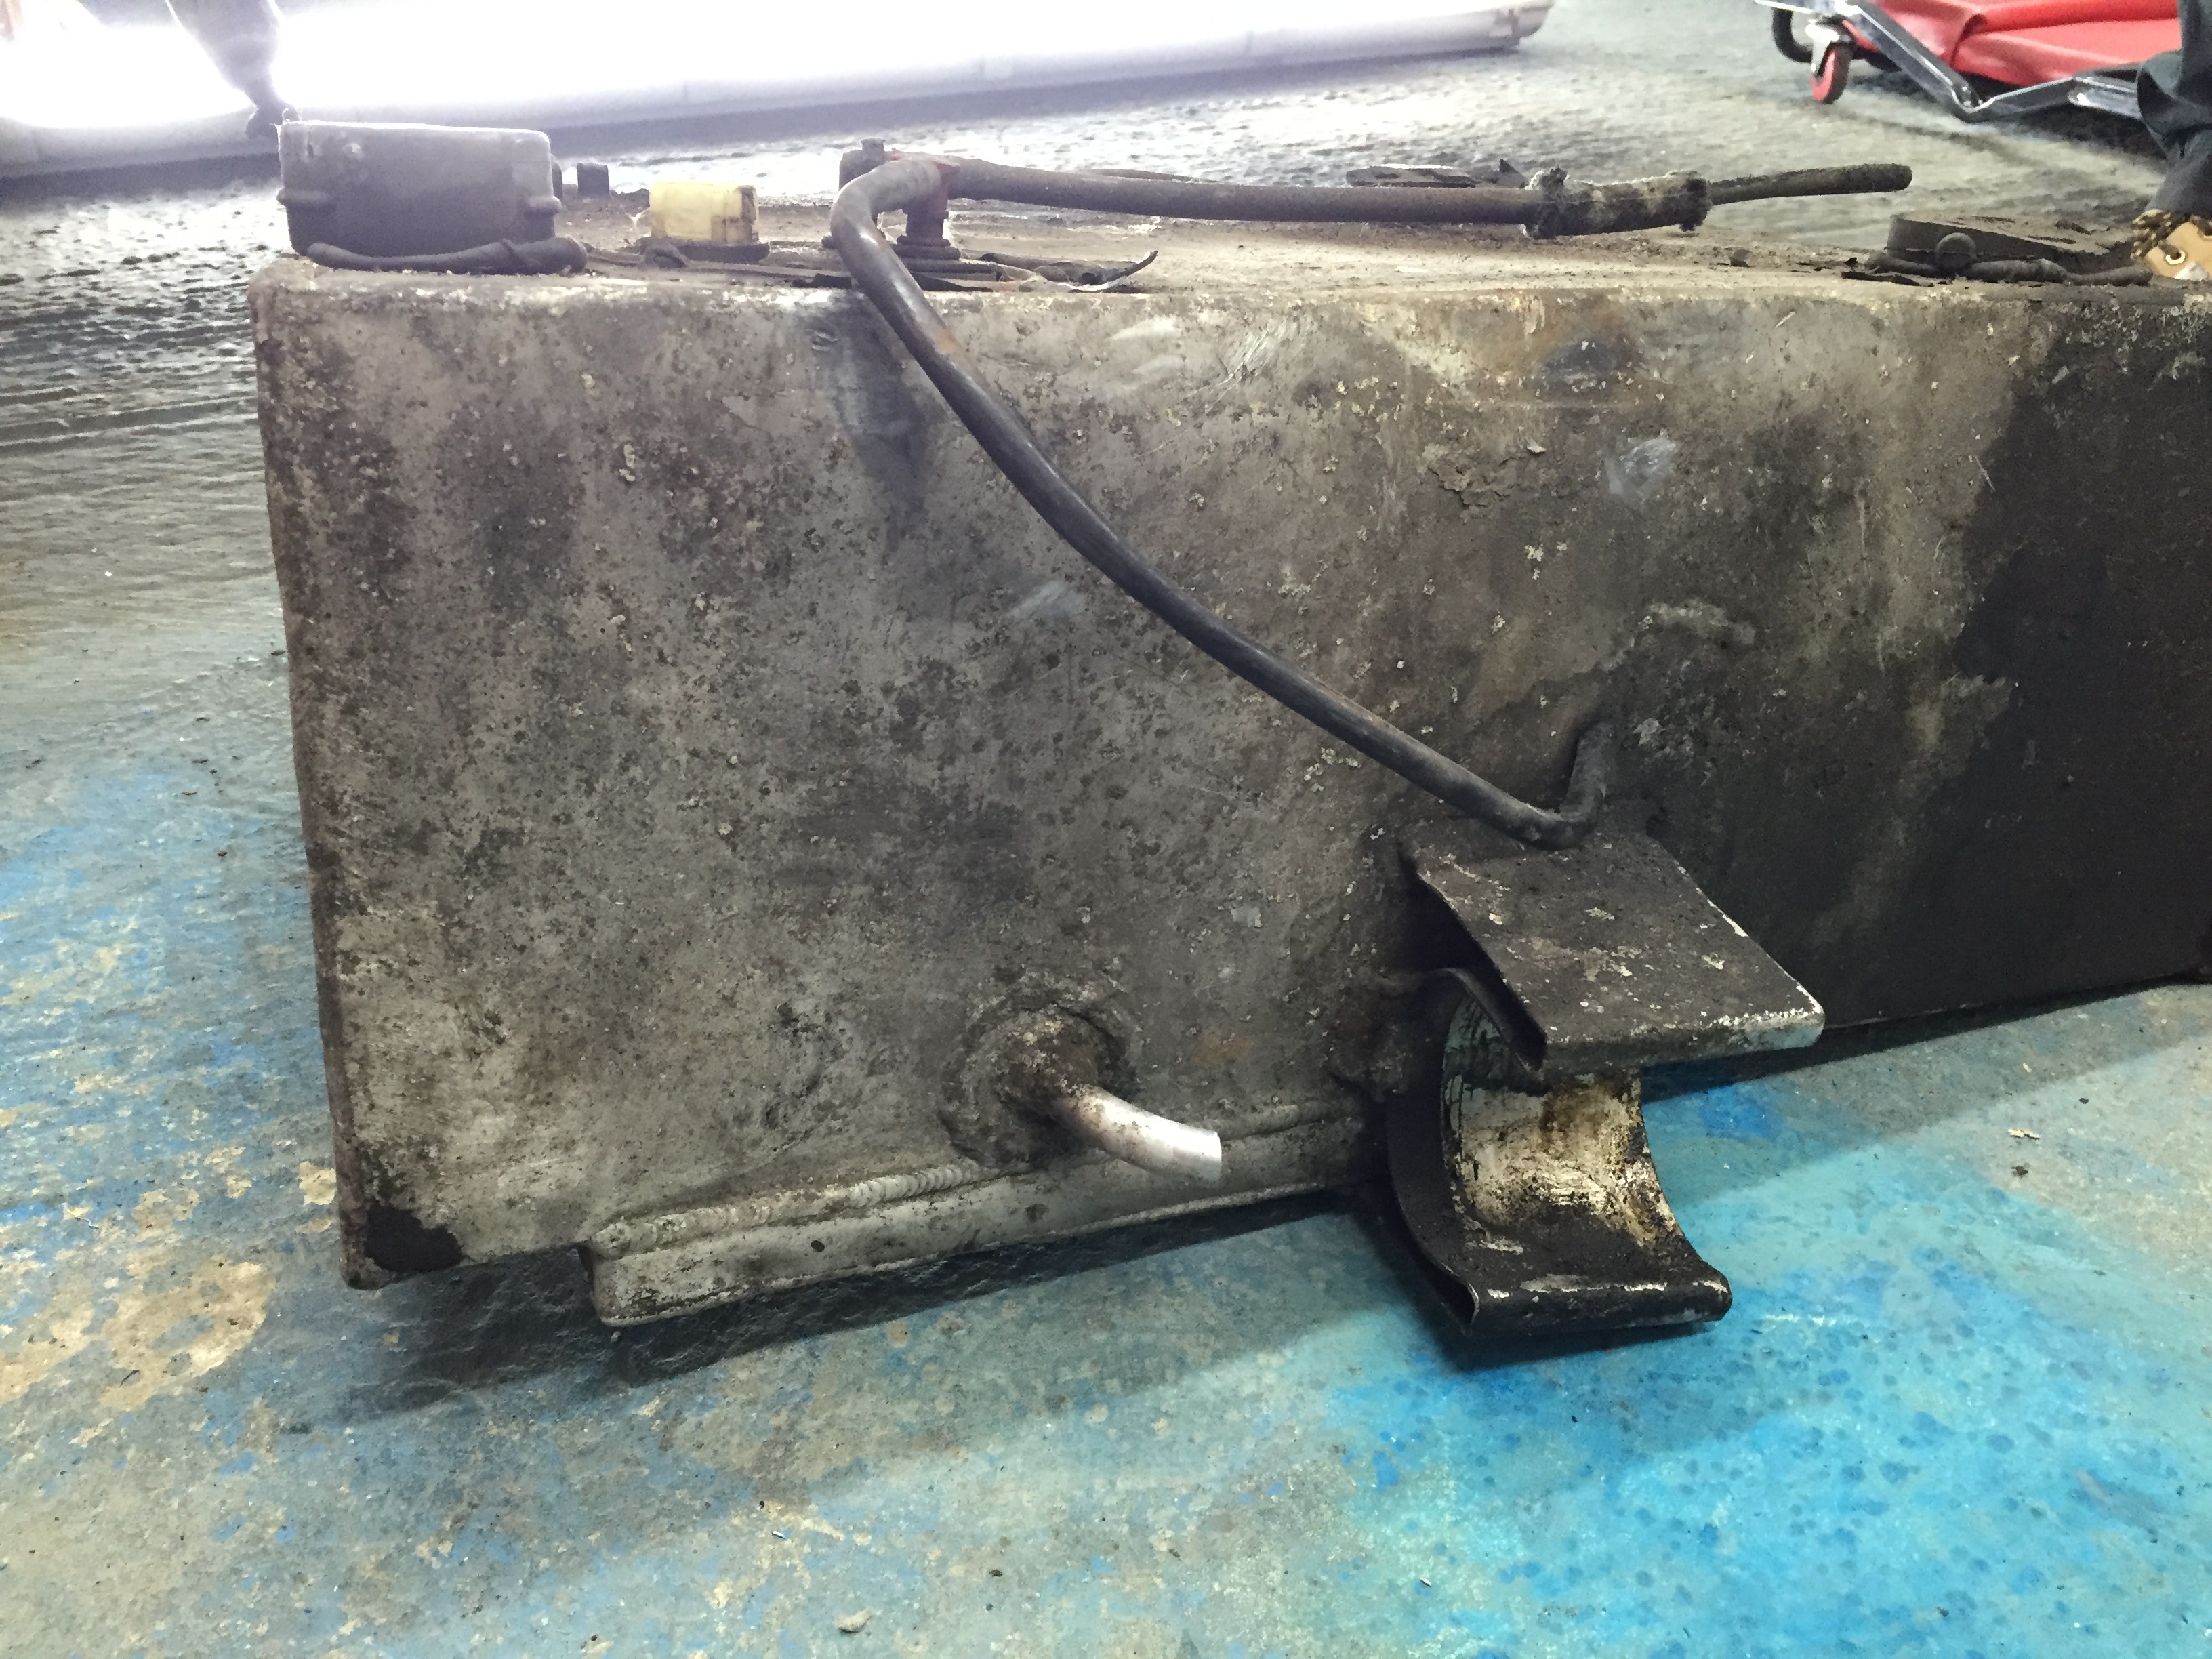
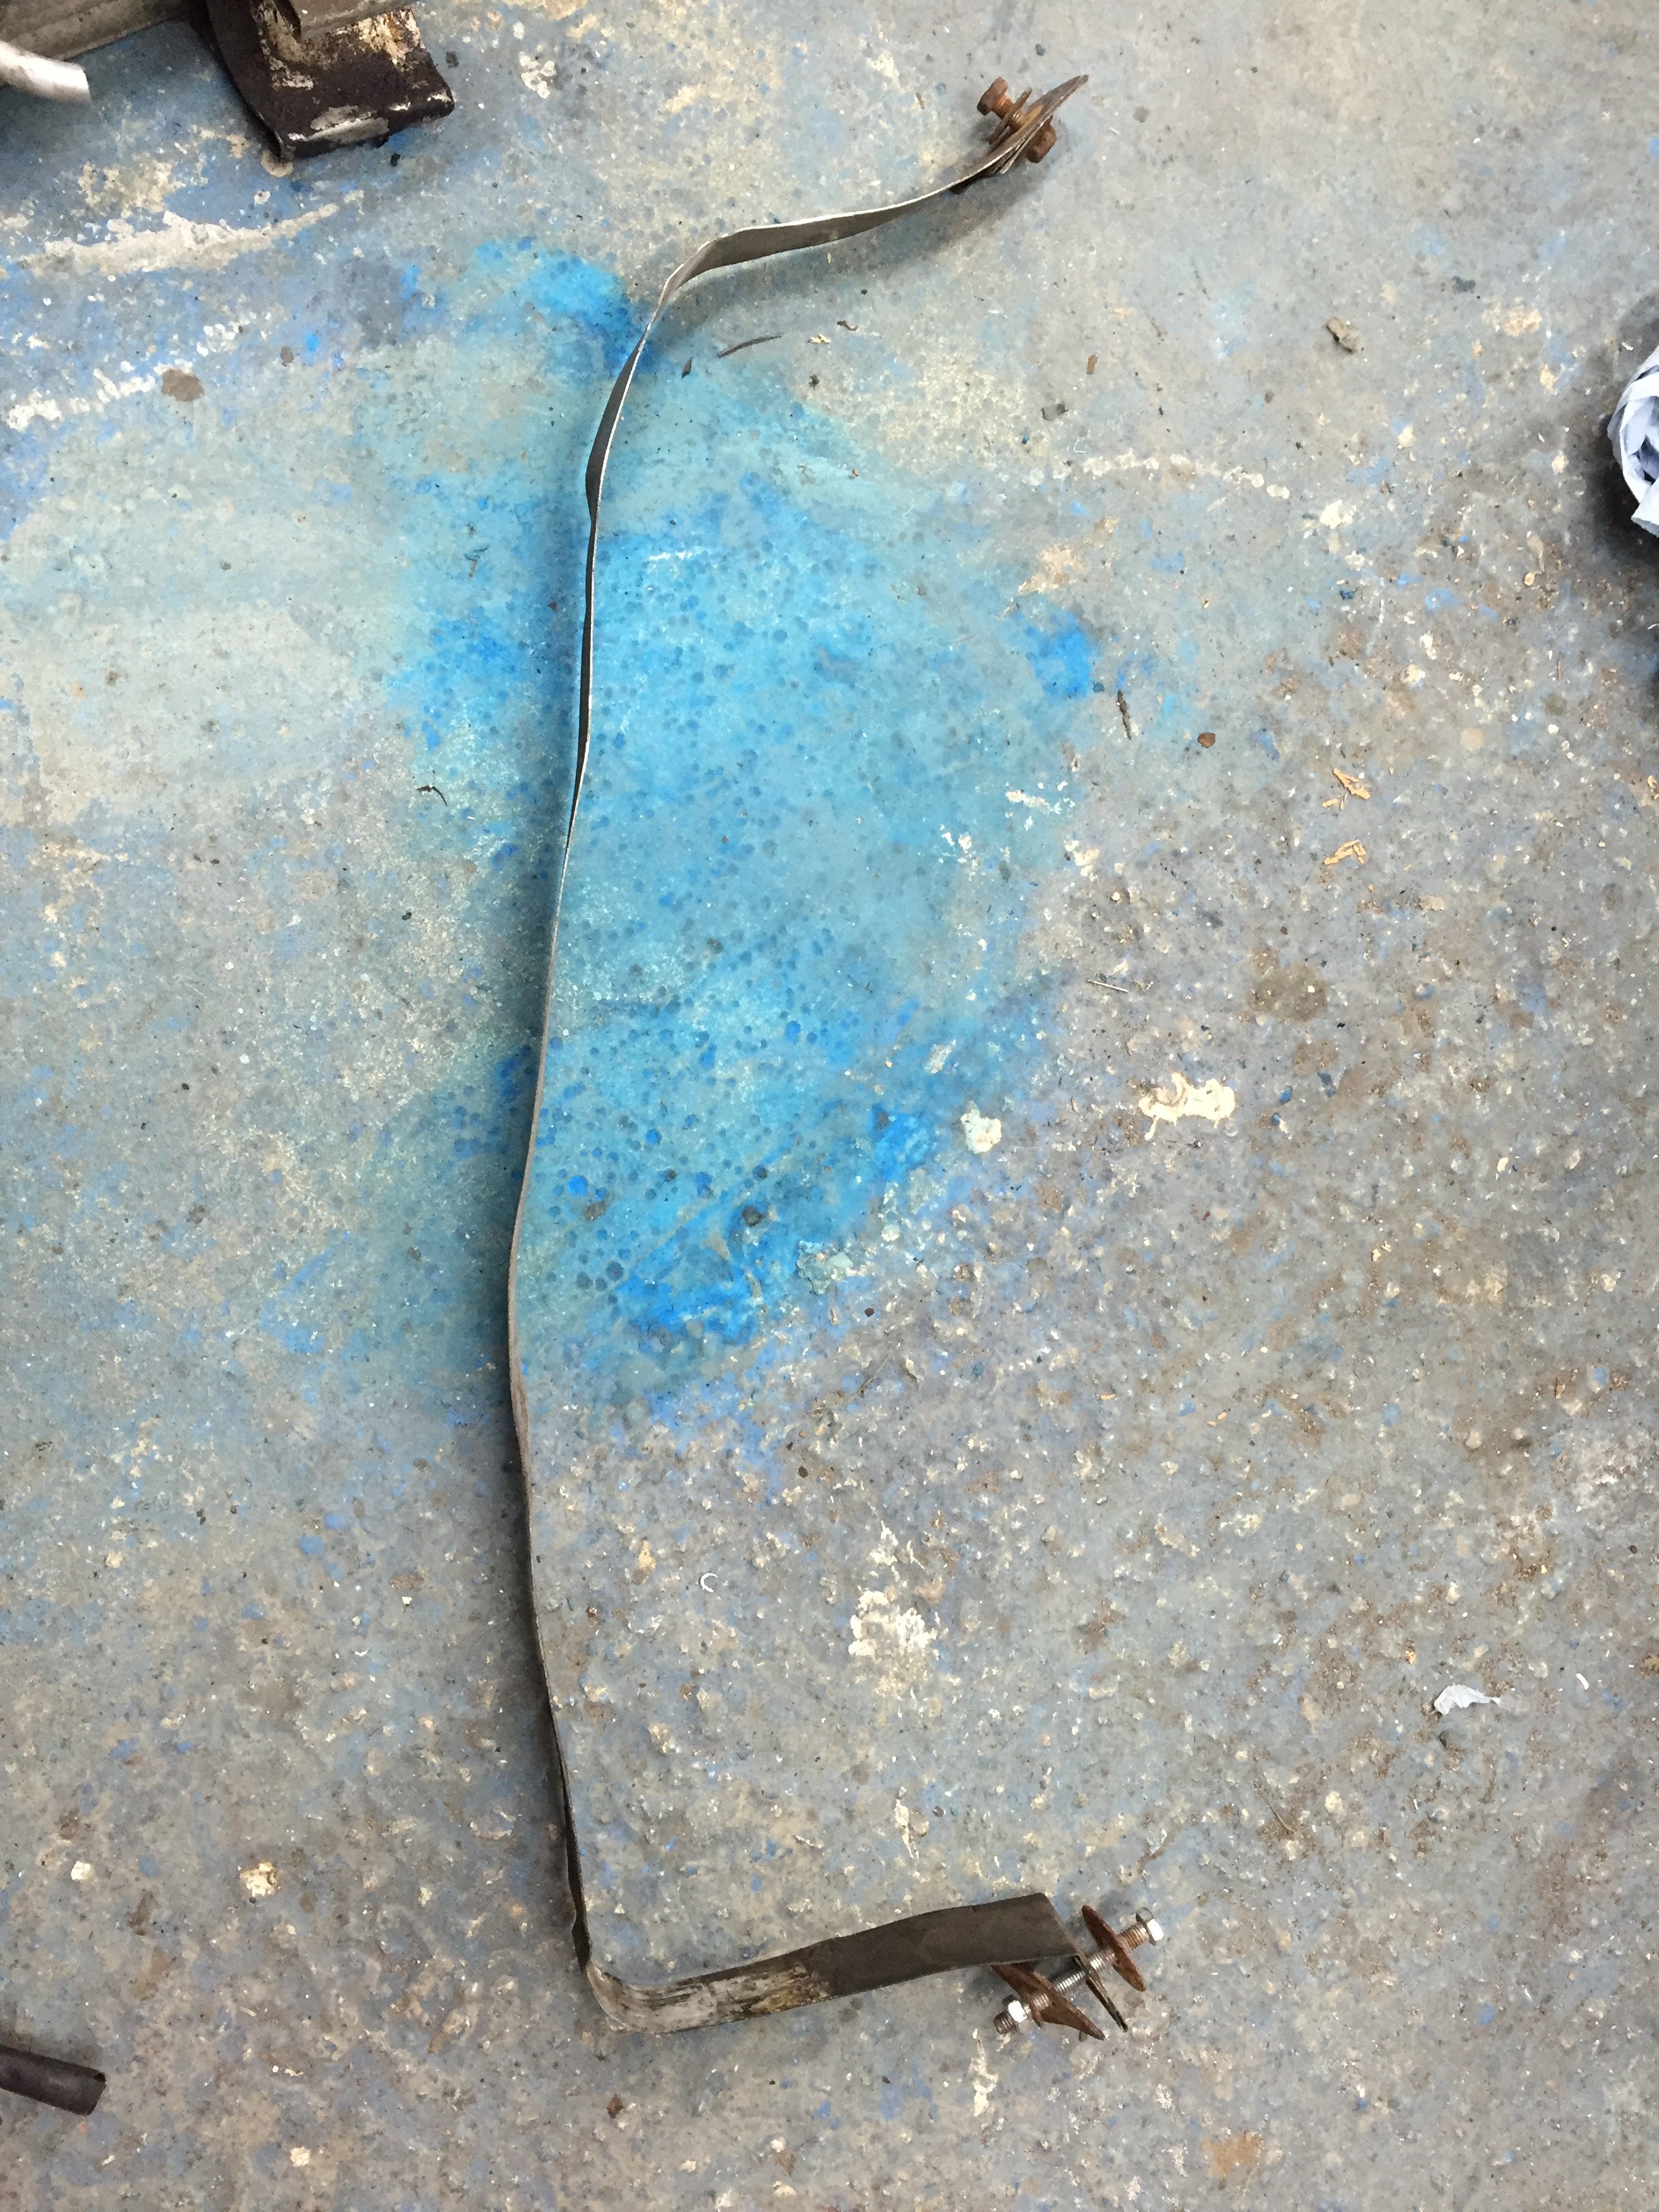
This was the tank strap - that really only stopped the tank dropping - it's other means of attachment to the car was the fact that it was wedged between the rear diff support bar and the back bumper....
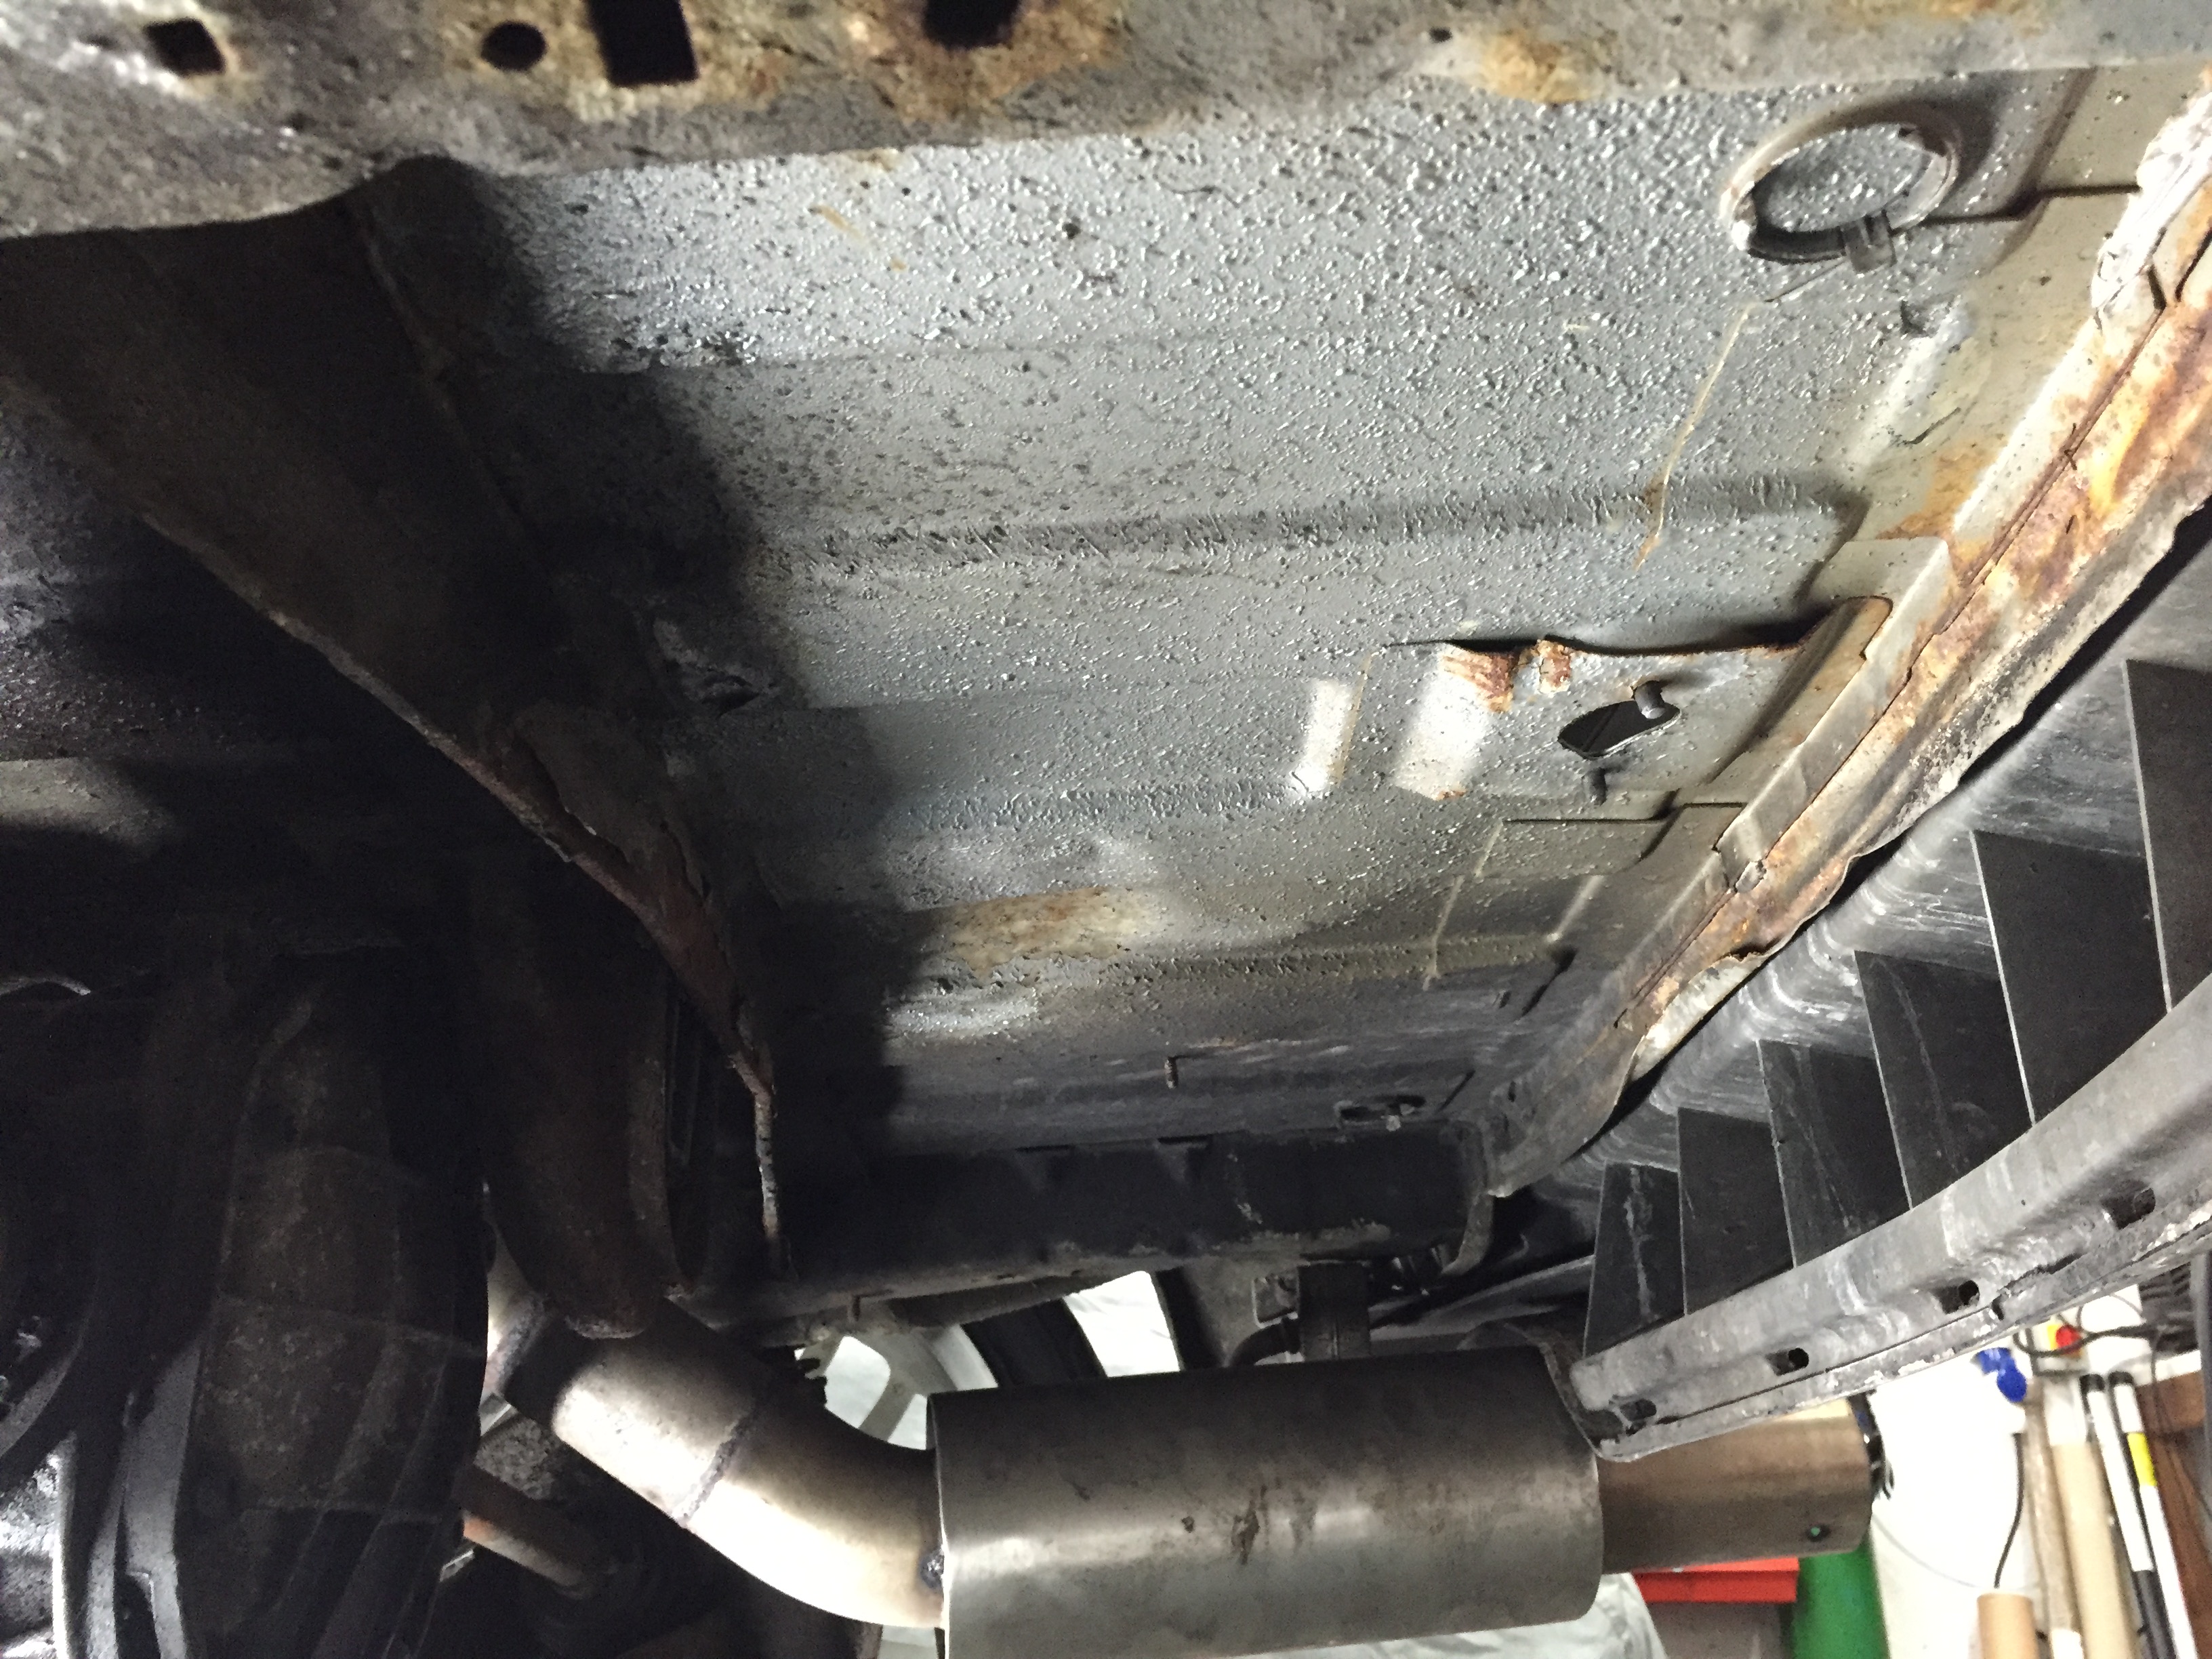
Few pics of the boot floor, you can see someone has been out with their hammer again and dished the boot floor up to clear the sender unit plugs and pipes...
So curiosity got the better of me now and I wanted to see just how bad inside this tank was and why I couldn't use the last third of fuel due to getting starvation issues, and here it is..
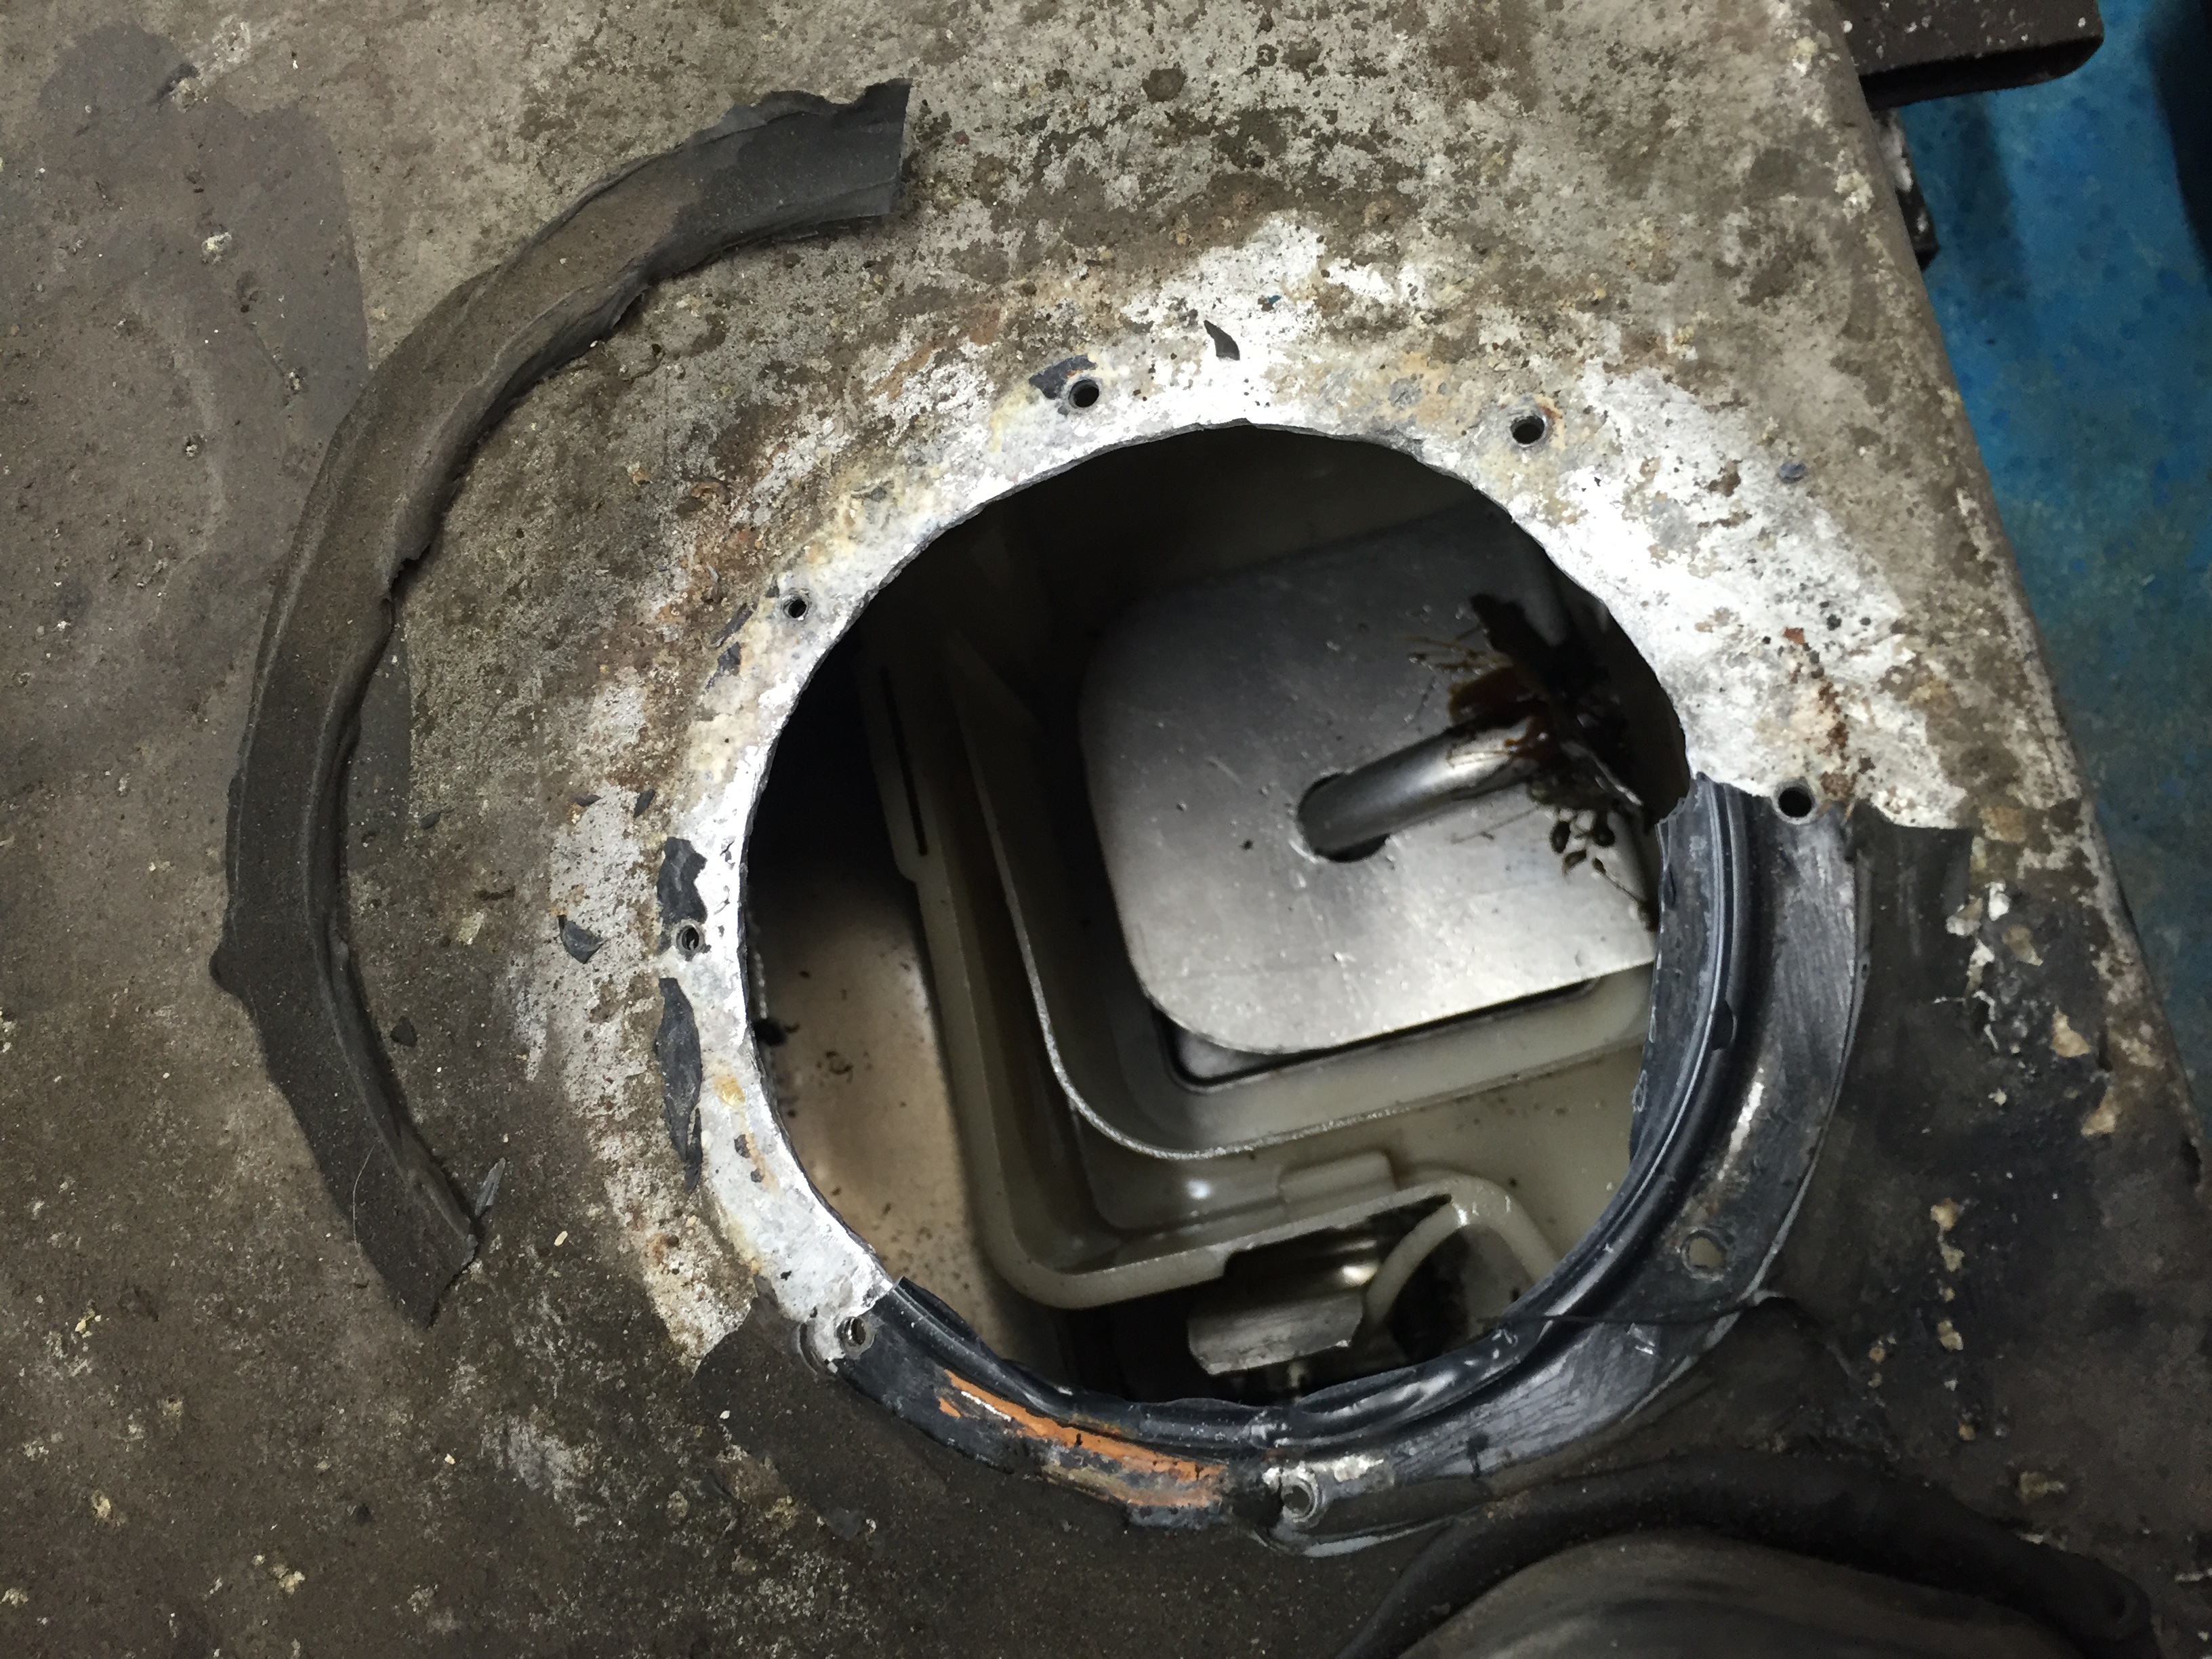
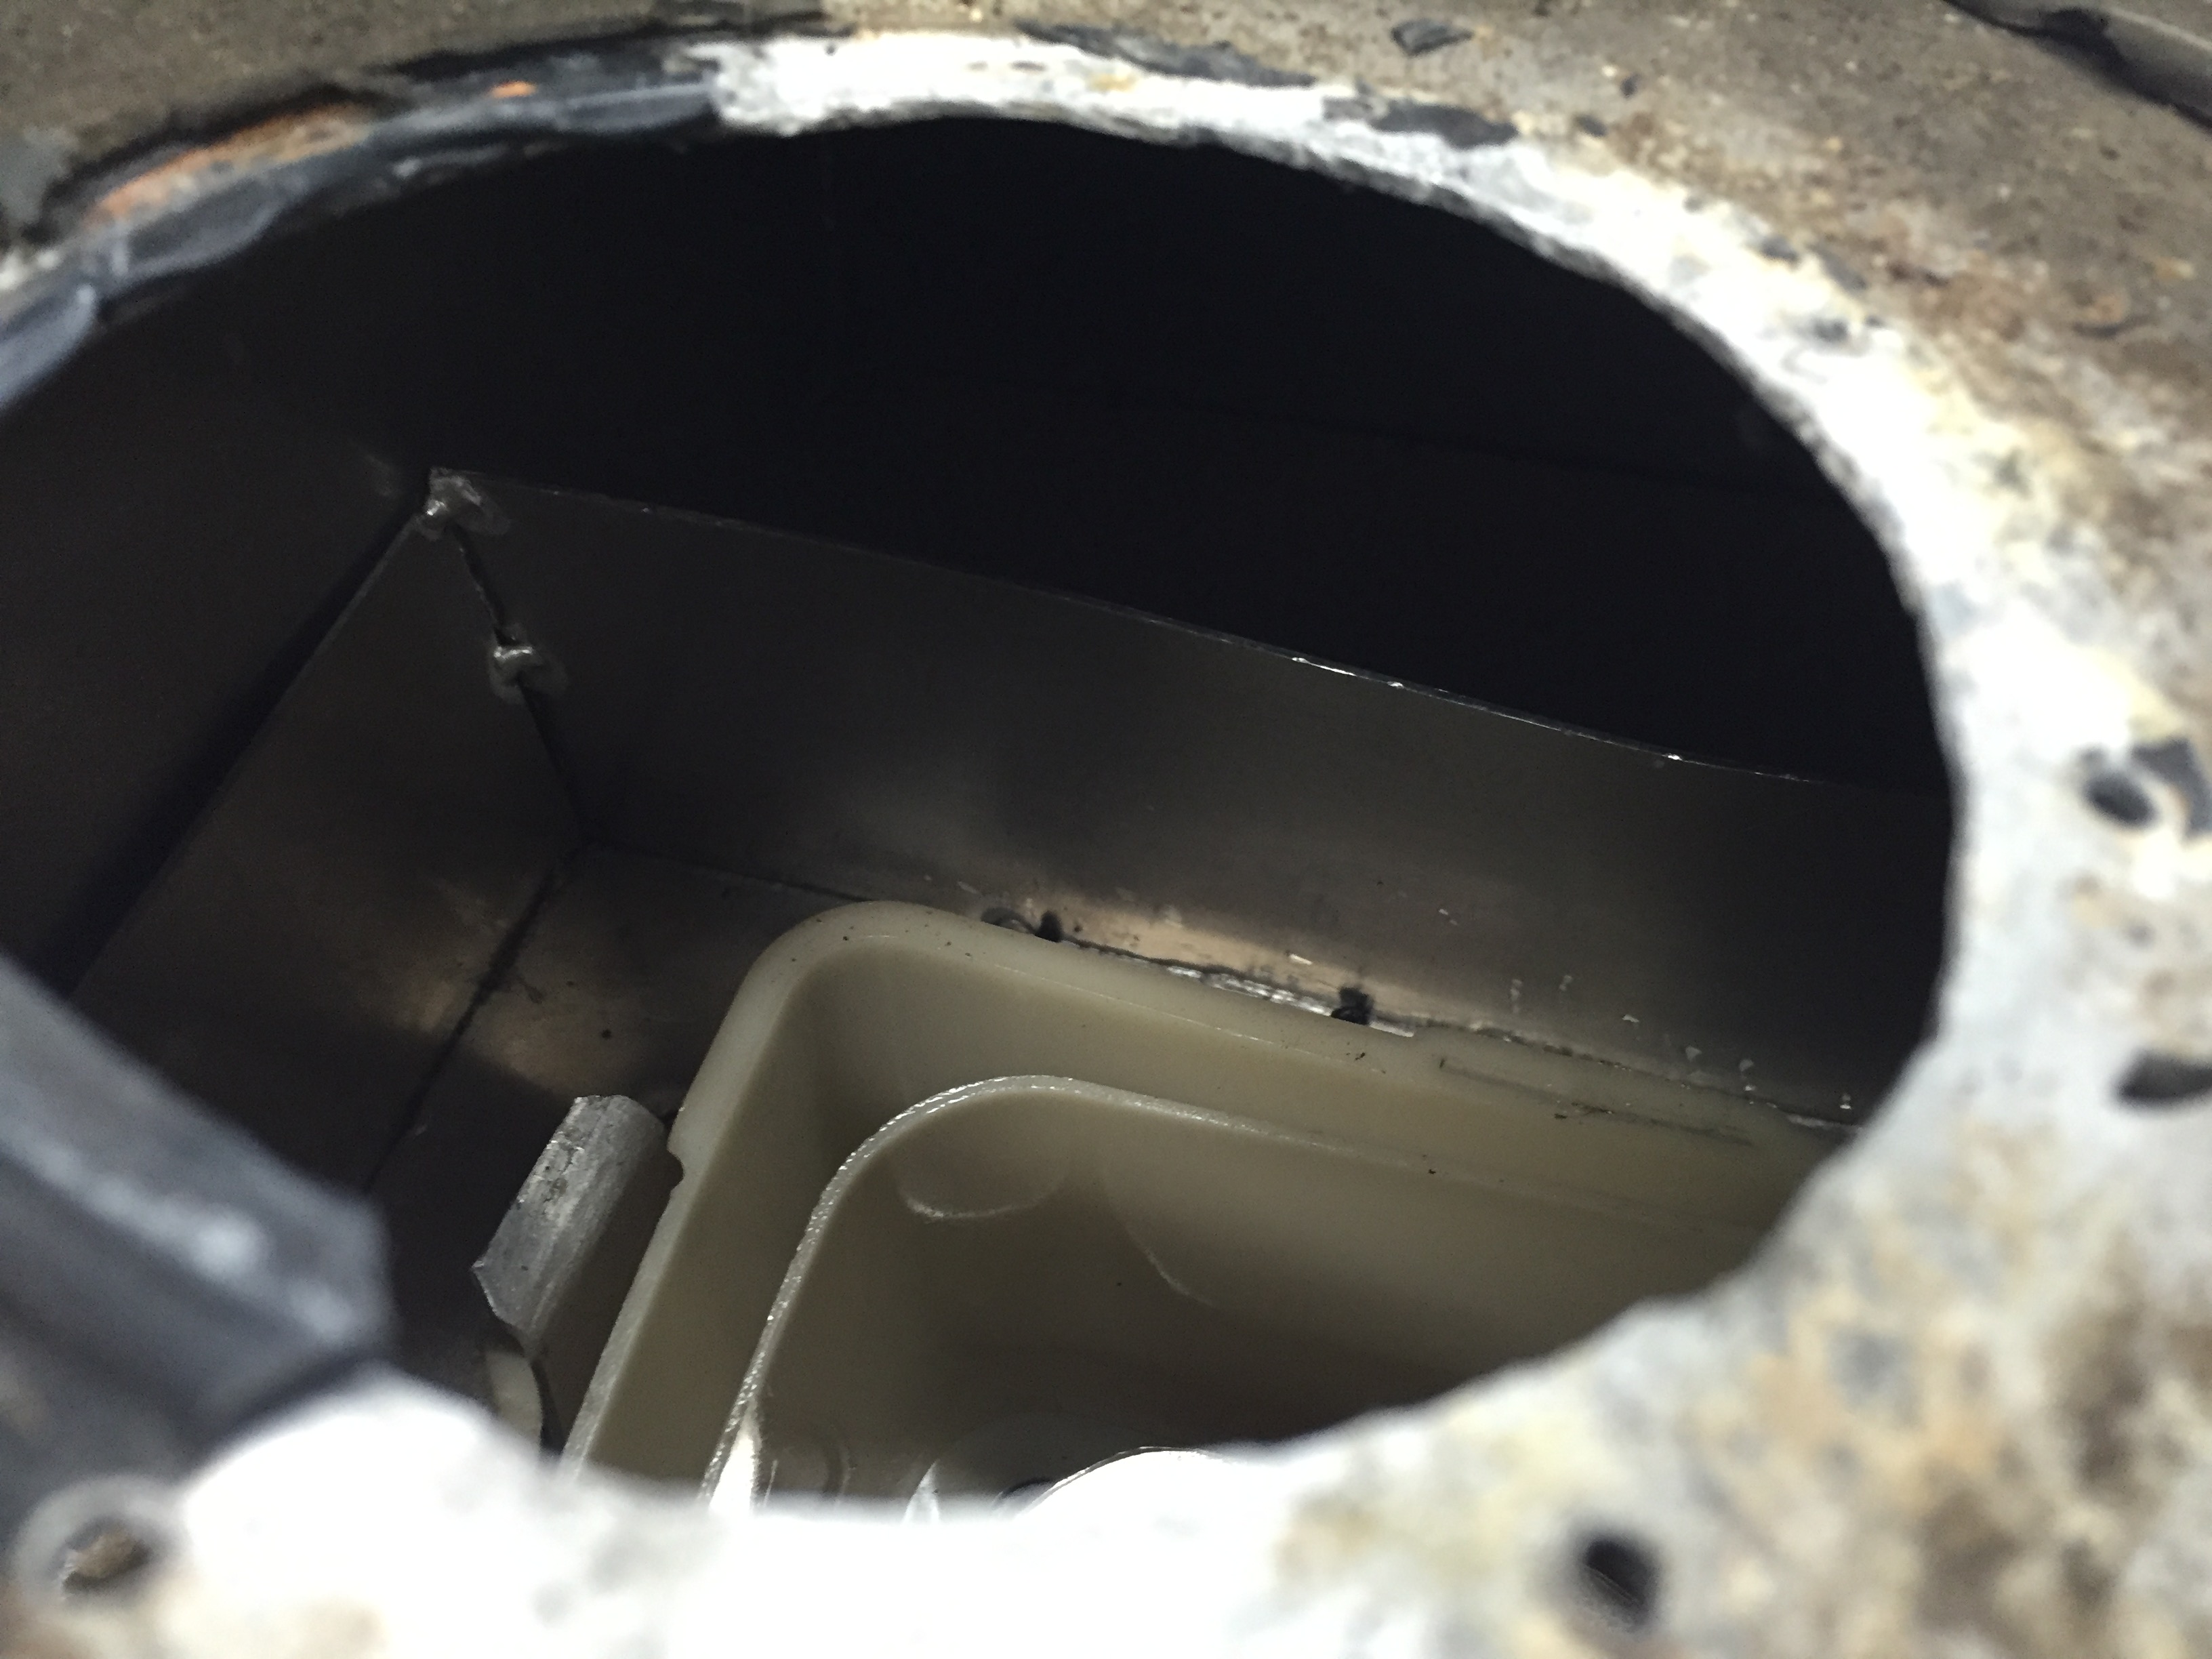
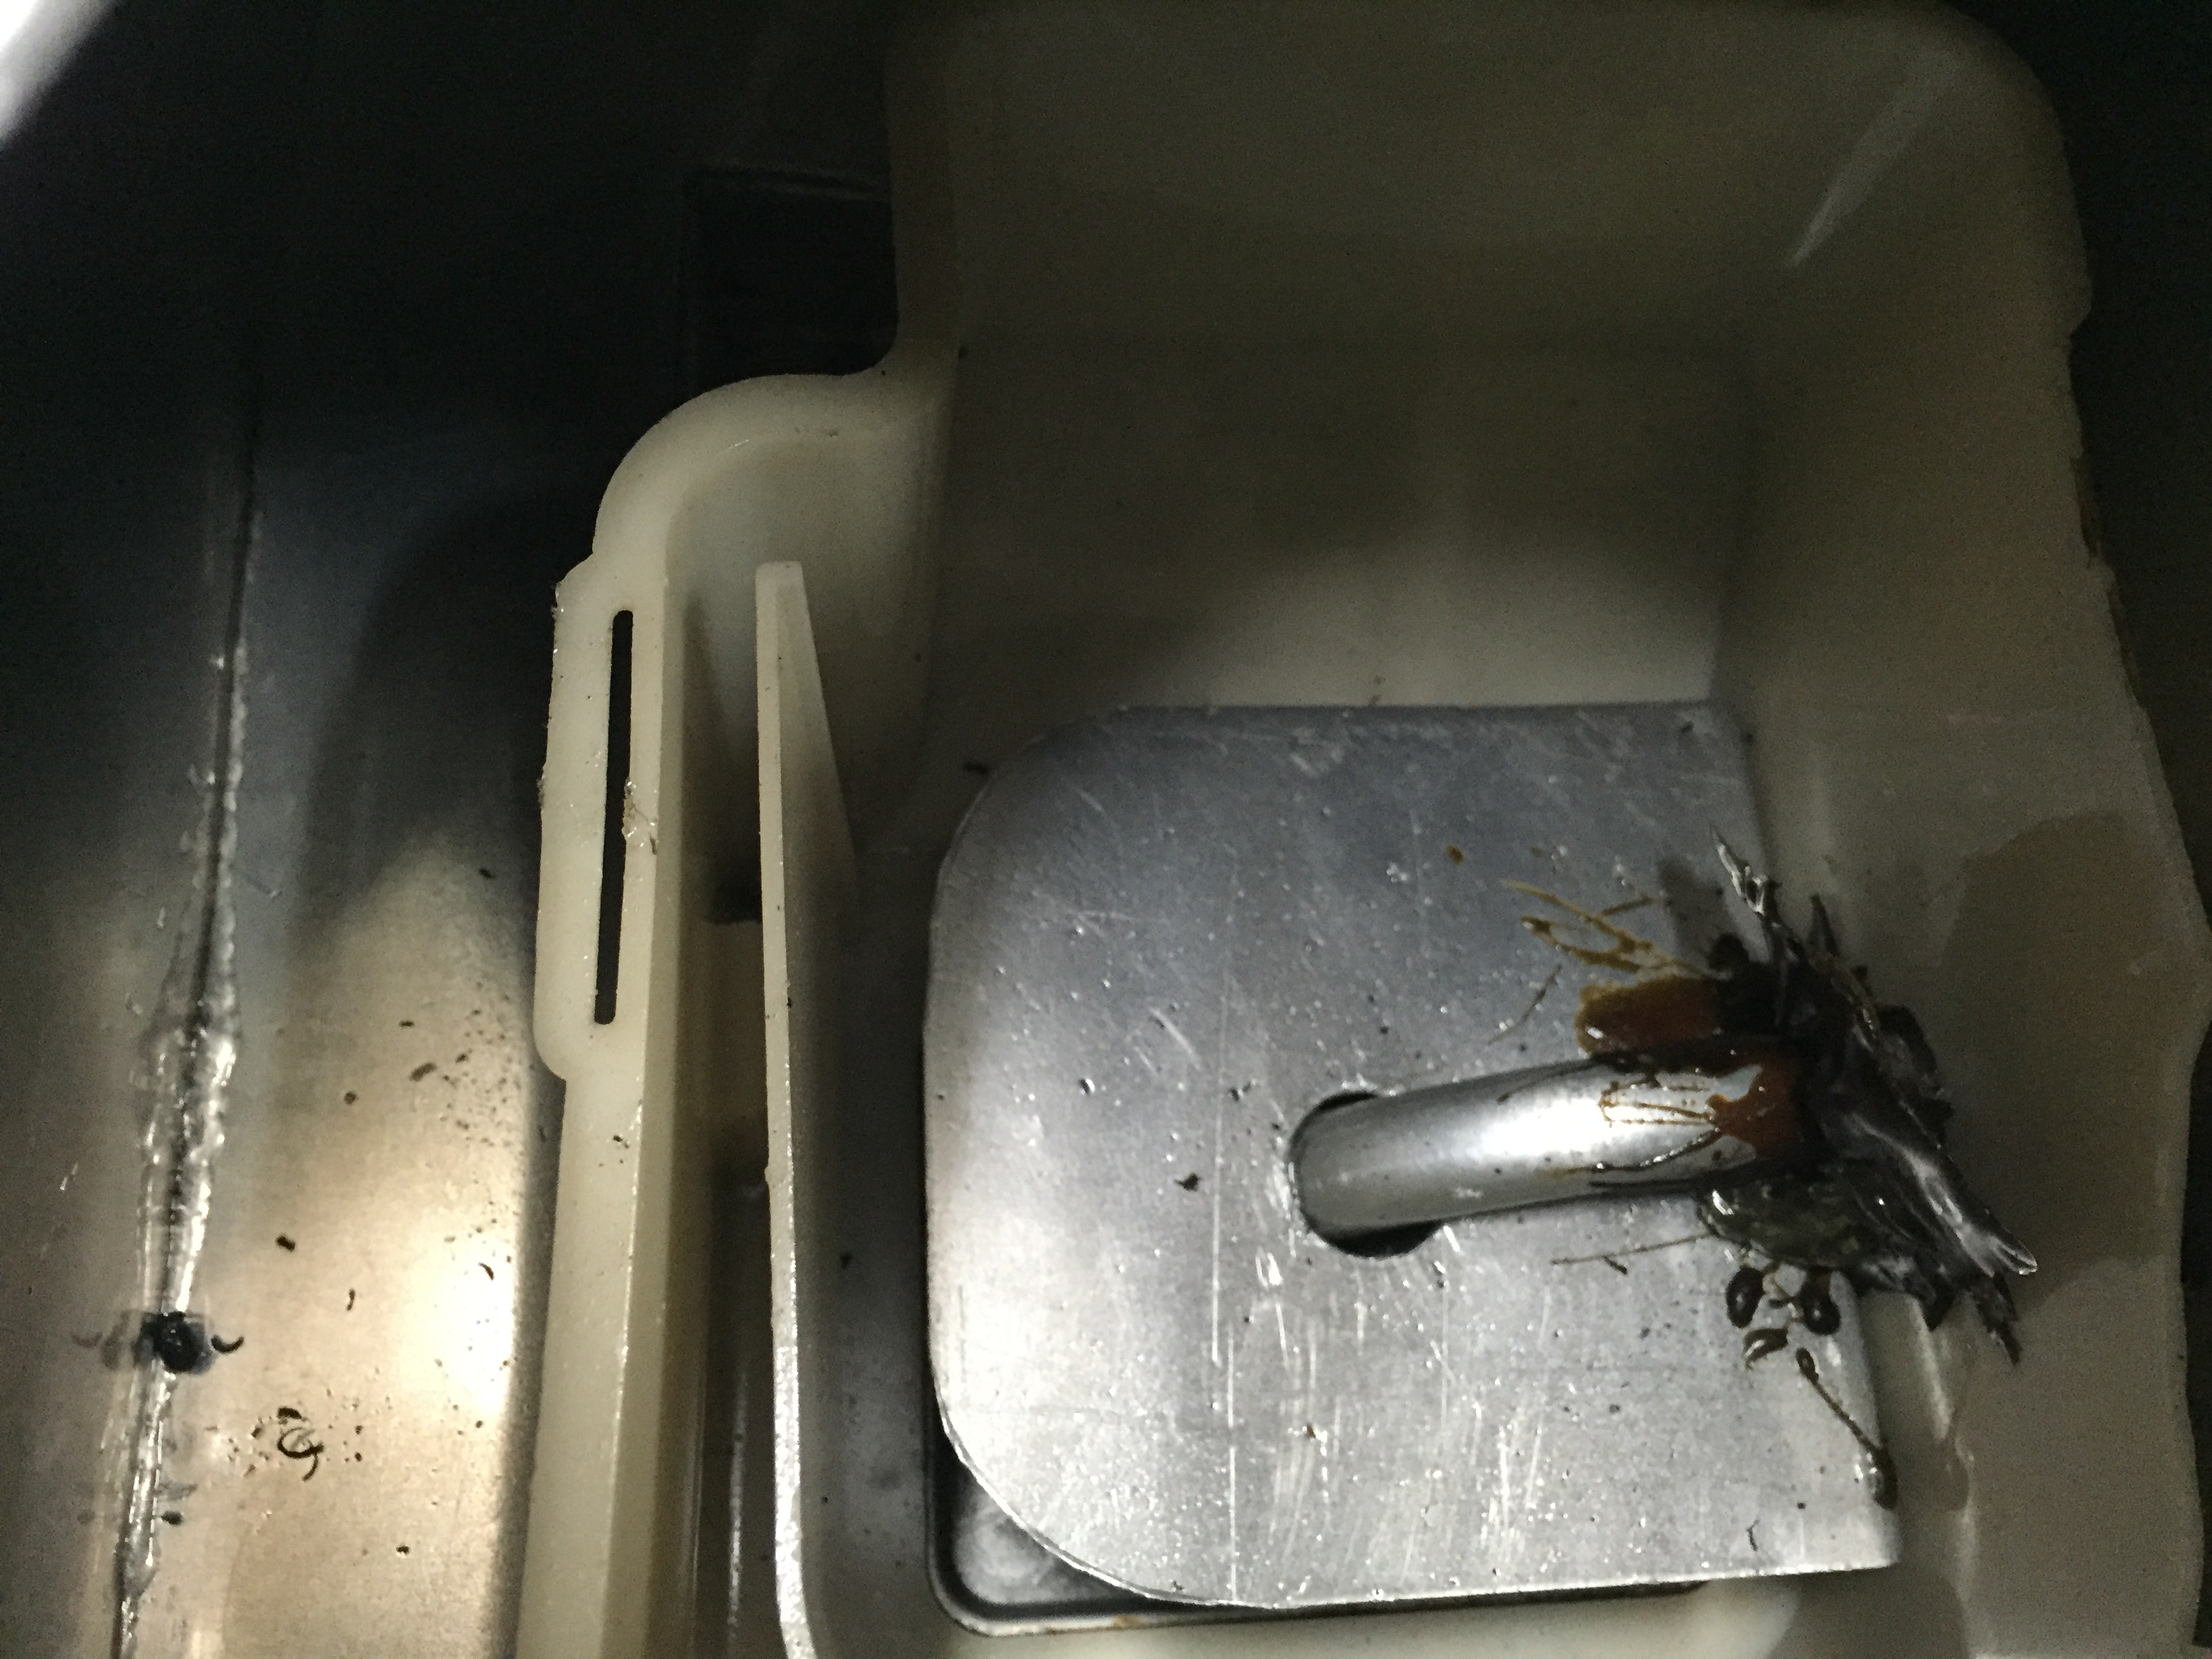
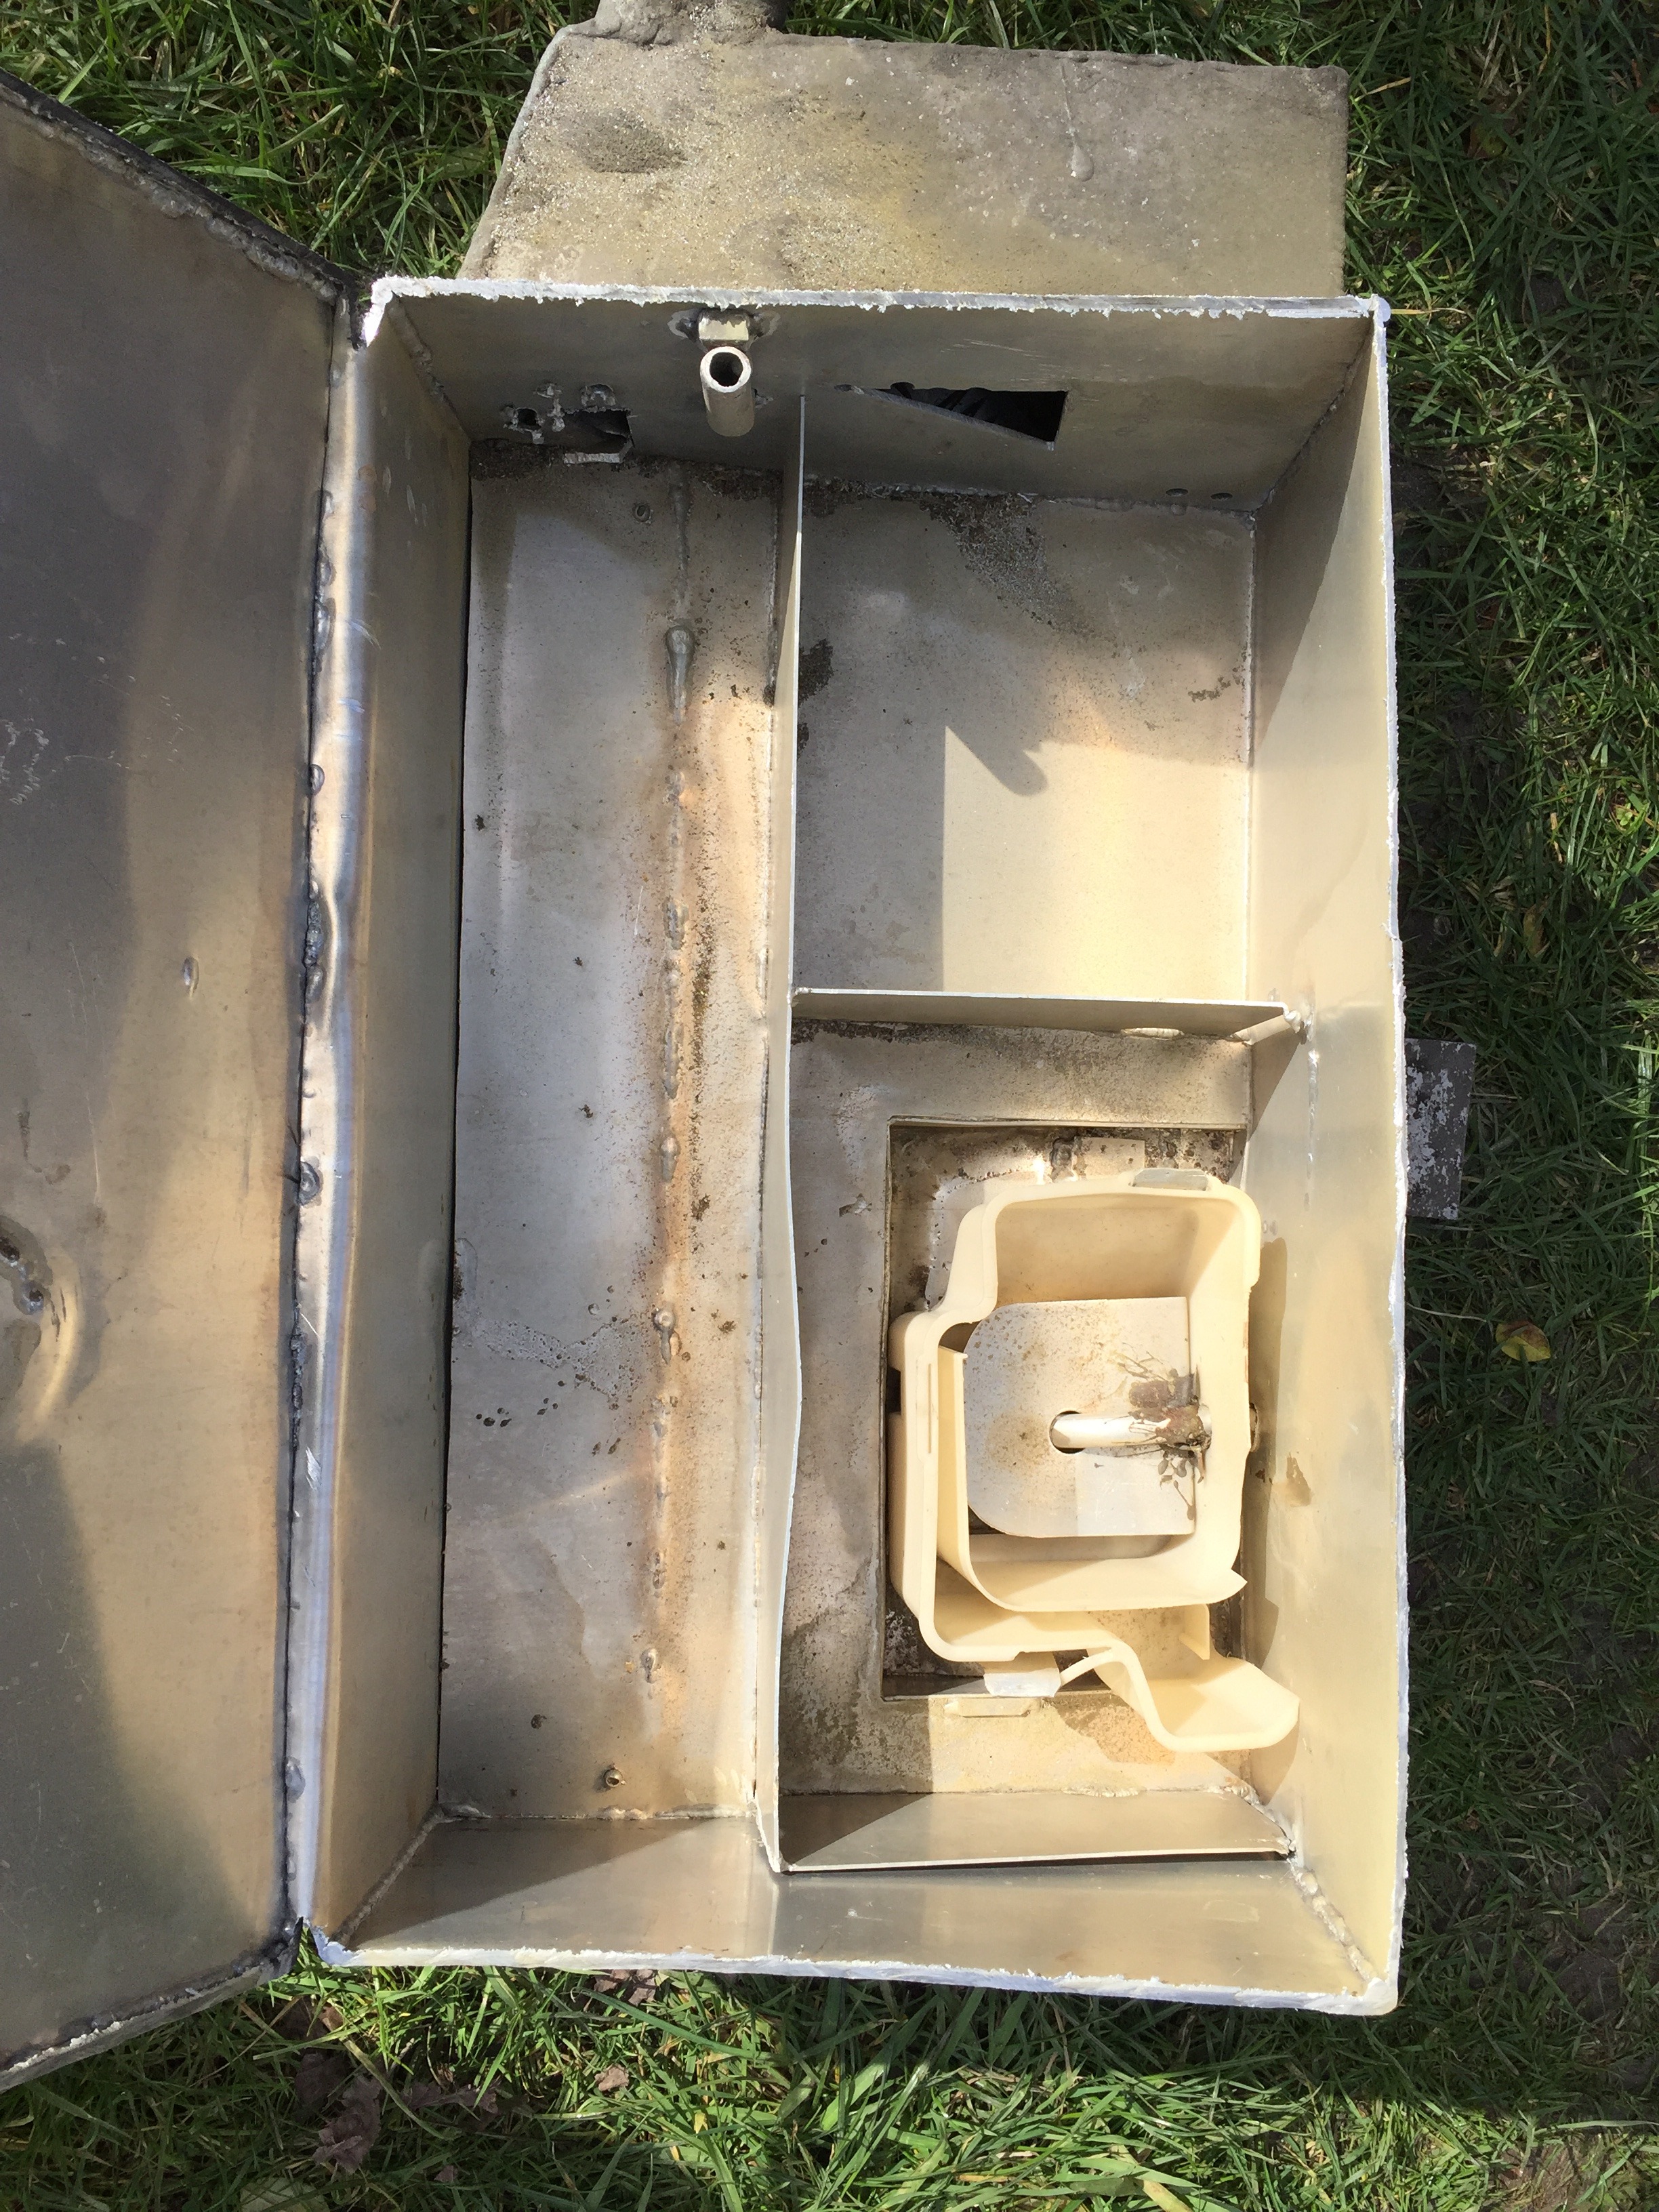
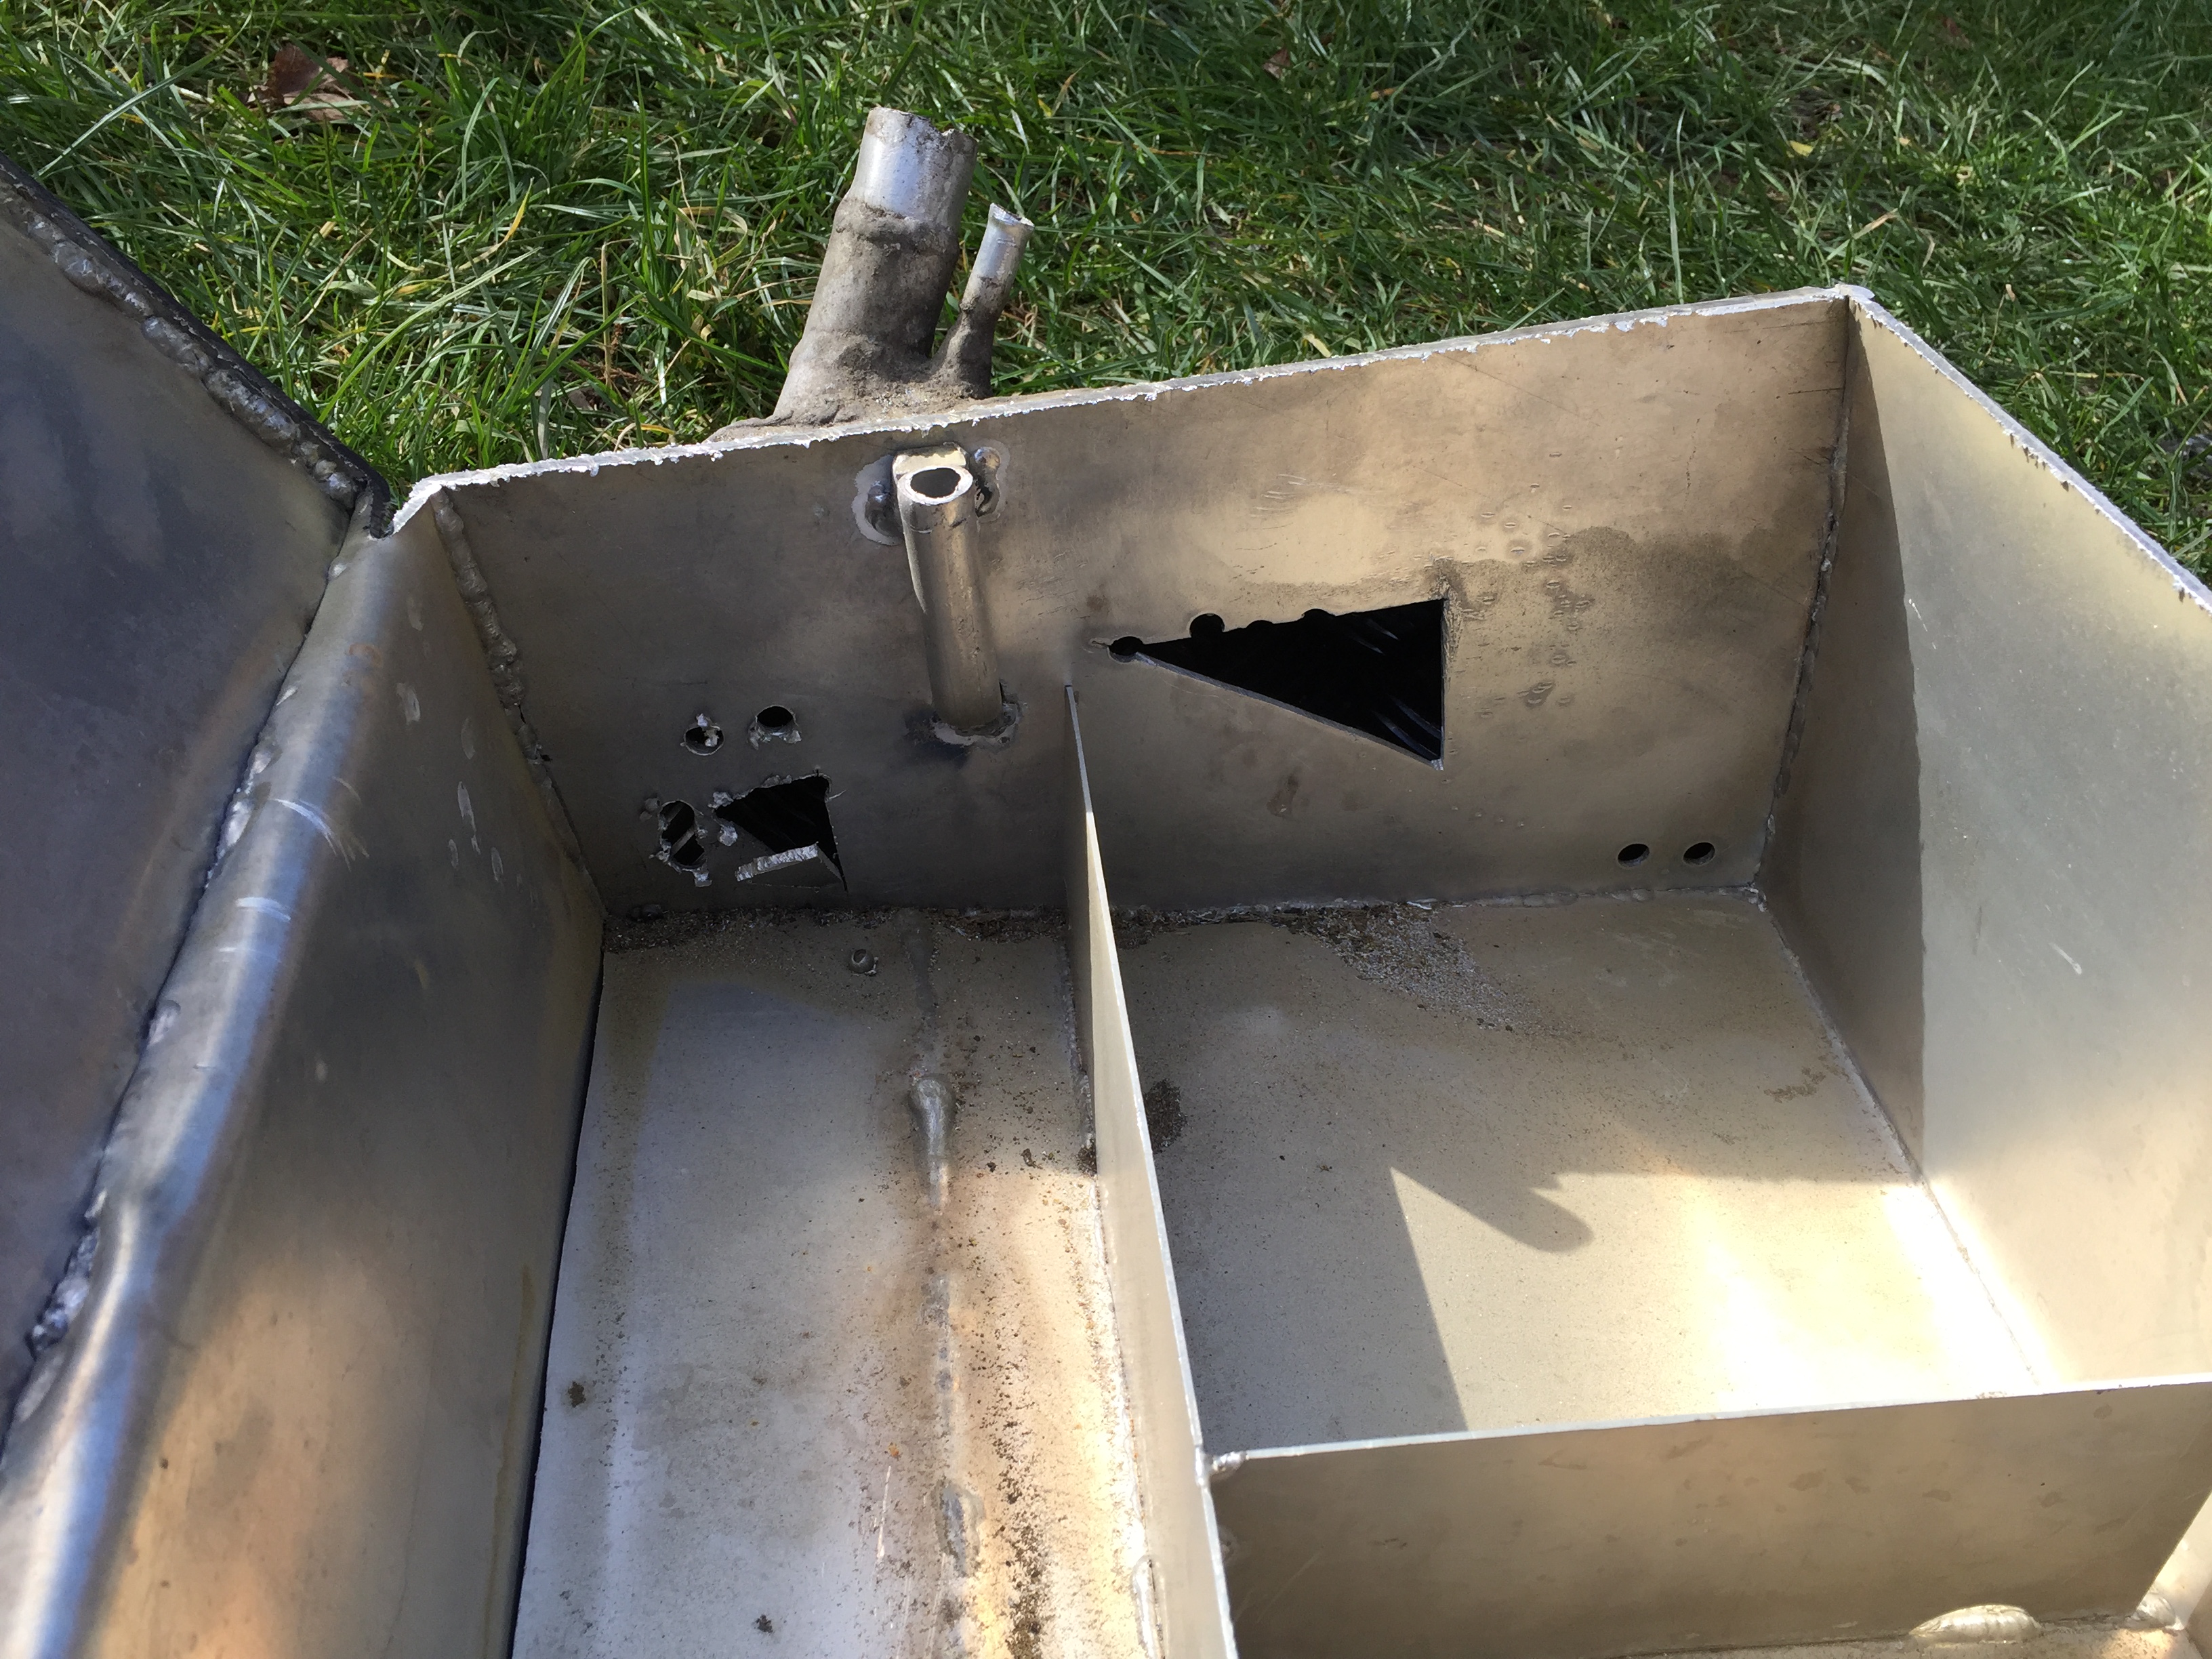
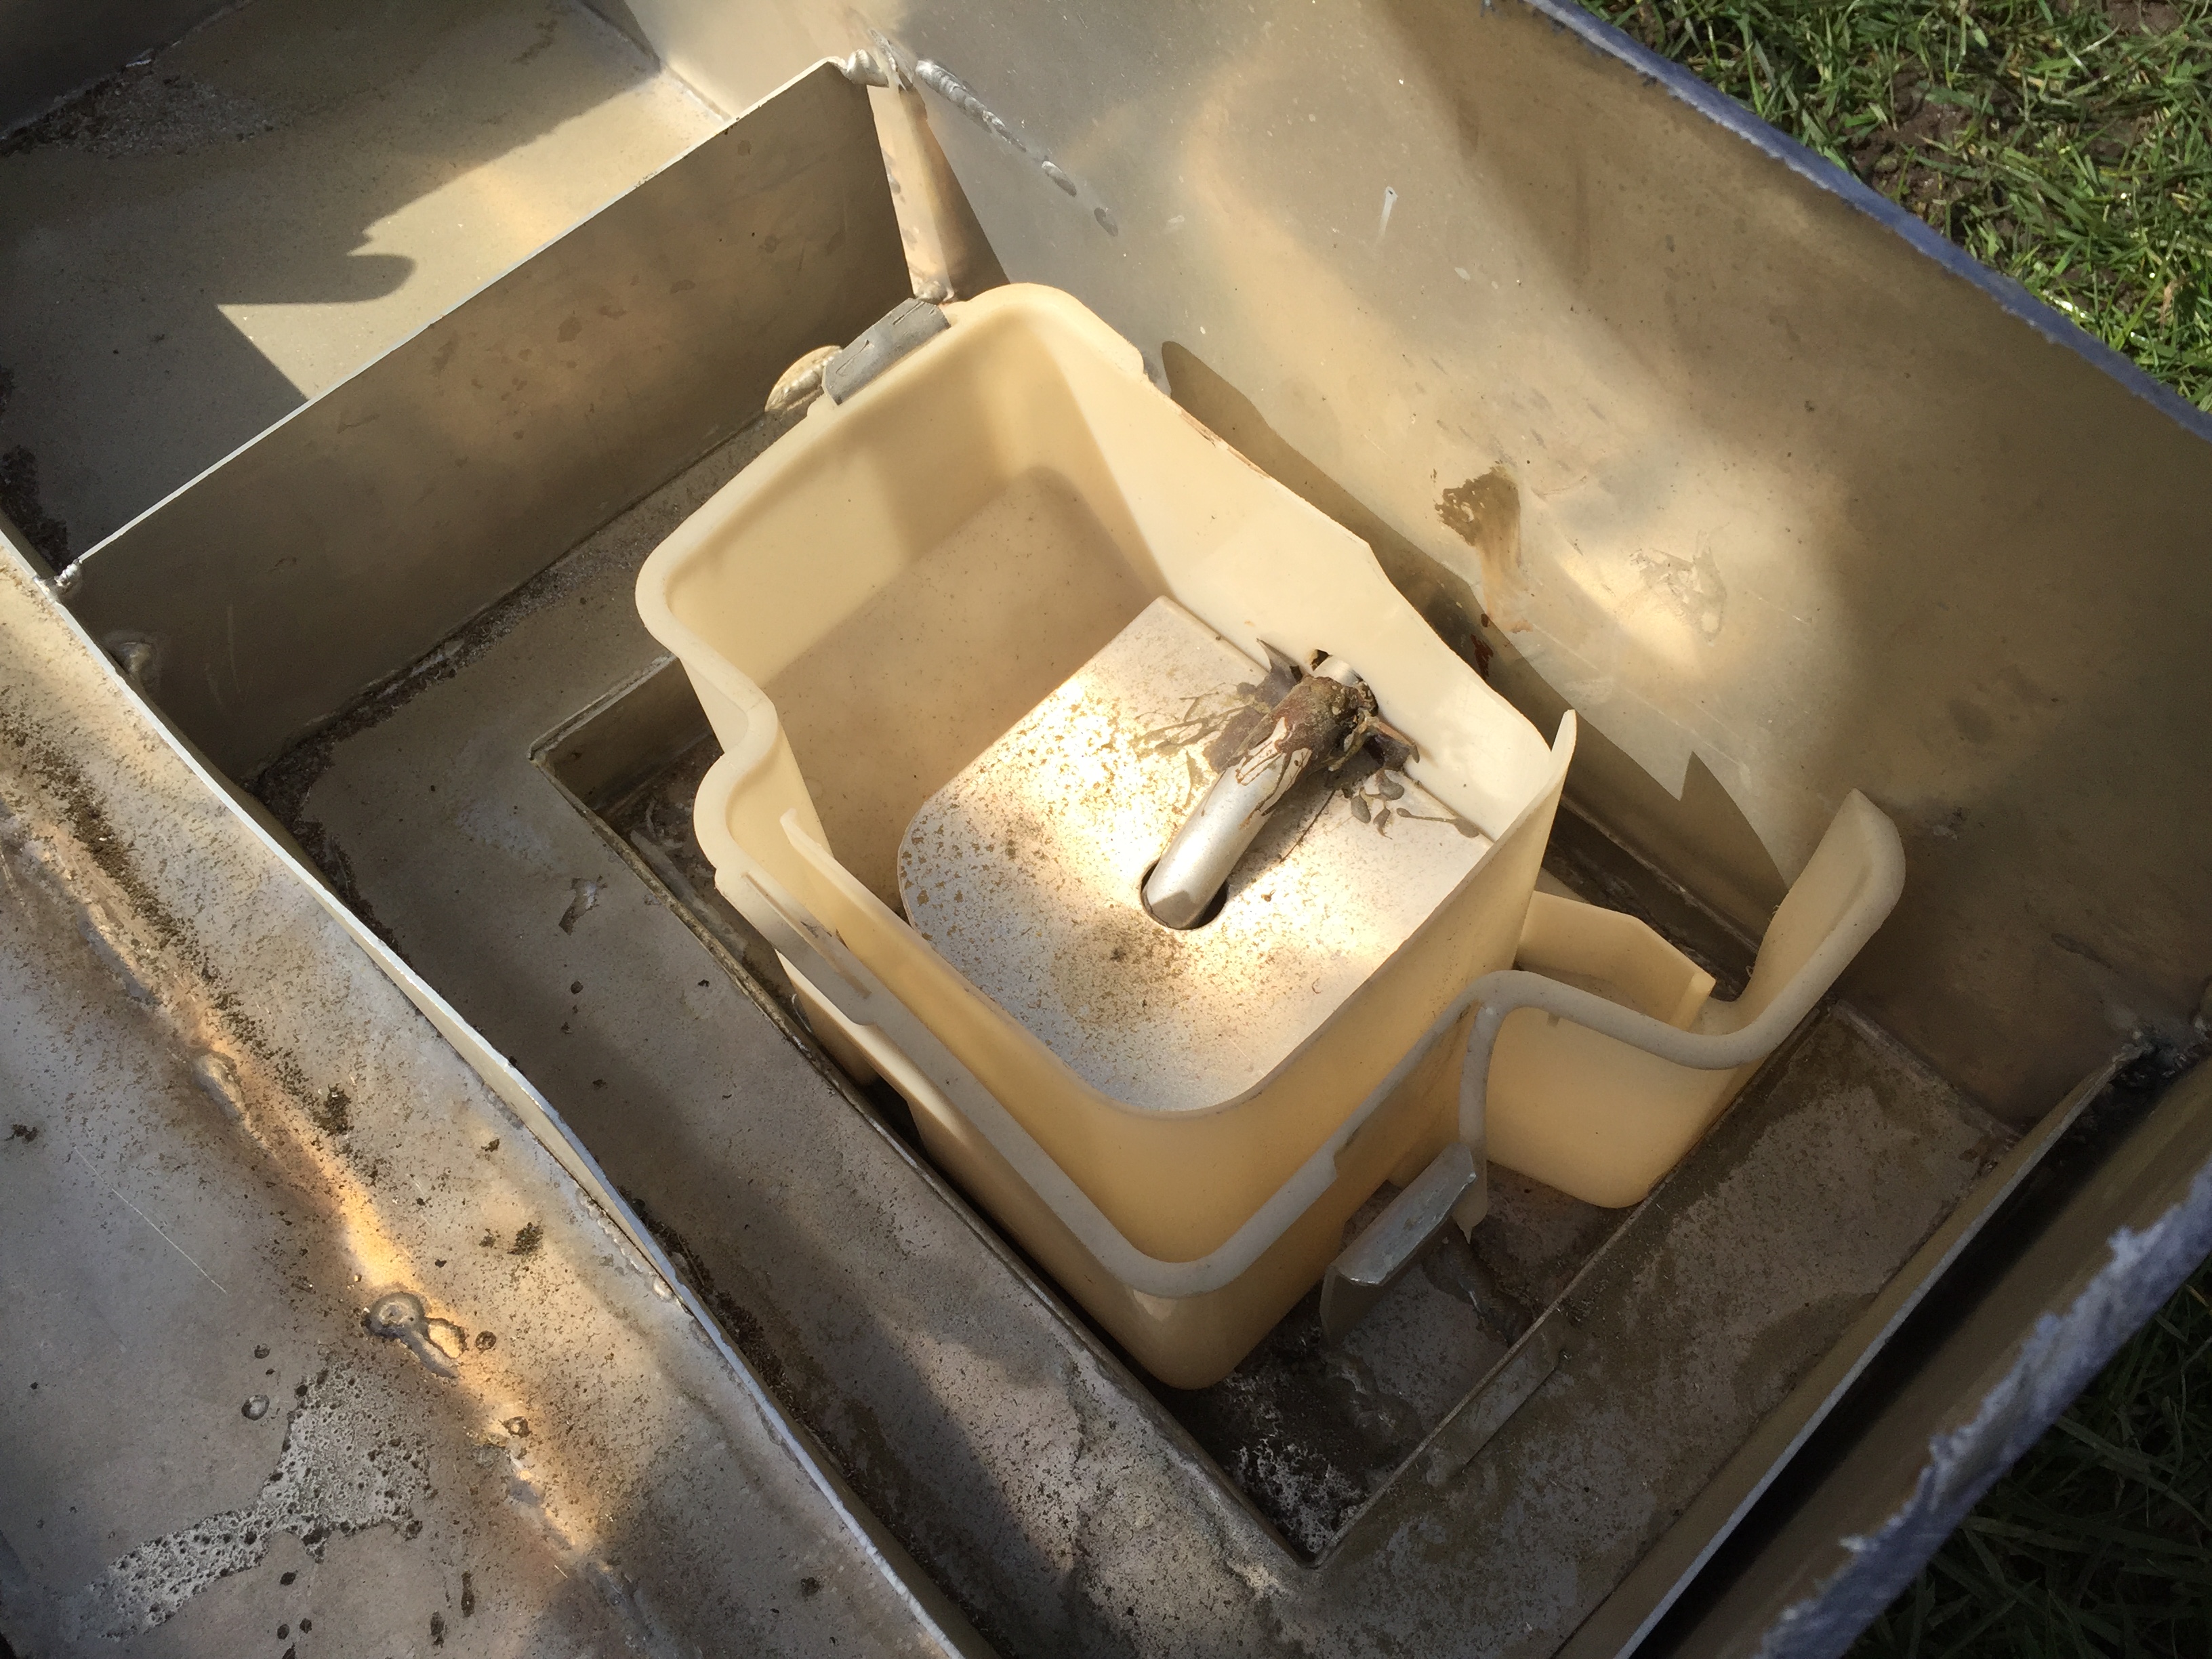
I couldn't believe how bad this was.. Looks like a child made it, the bit on the side of the main tank was made using chequer plate aluminium! I know metal is metal but it's just another example of using anything that was lying around rather than using the right materials. Although the tank had baffles they didn't have enough holes in them to let fuel in which is why once the fuel was down to the top of the baffles the fuel wasn't getting in quick enough giving me the starvation issues. The swirl pot was something and nothing and was bodged in from I'm guessing a manufacturers tank.
So with that in the way that is.. It's gone in the bin, only the sender unit will be taken out and cleaned up ready to be fitted to a new tank better made for the job.
Watch this space!
The aim was to tank it off and repair and work out why I could only use 2/3 of the tank before I had fuel starvation. That's also after not being able to fill it to the brim as it would leak all over the petrol station forecourt.
Few shots of it on the car - this is the side facing the front of the car


State of the tank wiring - I had connected on to the existing cables last year and left a coil of new cable ready to take straight to the pump

Off the car and the realisation that this was a mess and needed to be binned! Exhaust rubbers used to space the tank of the boot floor.

Sender unit fitted to the top and I'm guessing this seal had failed

This I'm assuming was used as the breather pipe - without any one way valve so this must be also where fuel poured out of

Pump feed pipe and some sort of pump bracket, return pipe also was slightly kinked by the rear diff support bar across the boot floor

A rivet was left in where the old spare wheel holder bracket was. Because the fuel tank was not held in very well at all it had been rubbing against this and was only a matter of time before the tank had another leak

Poor repair done on another hole I found on the tank


This was the tank strap - that really only stopped the tank dropping - it's other means of attachment to the car was the fact that it was wedged between the rear diff support bar and the back bumper....

Few pics of the boot floor, you can see someone has been out with their hammer again and dished the boot floor up to clear the sender unit plugs and pipes...


So curiosity got the better of me now and I wanted to see just how bad inside this tank was and why I couldn't use the last third of fuel due to getting starvation issues, and here it is..


I couldn't believe how bad this was.. Looks like a child made it, the bit on the side of the main tank was made using chequer plate aluminium! I know metal is metal but it's just another example of using anything that was lying around rather than using the right materials. Although the tank had baffles they didn't have enough holes in them to let fuel in which is why once the fuel was down to the top of the baffles the fuel wasn't getting in quick enough giving me the starvation issues. The swirl pot was something and nothing and was bodged in from I'm guessing a manufacturers tank.
So with that in the way that is.. It's gone in the bin, only the sender unit will be taken out and cleaned up ready to be fitted to a new tank better made for the job.
Watch this space!
Last edited by McCloud 85; 15-05-2016 at 07:48 PM.

