teamSPB : MkV R32 Build : H&R Ultra Lows, 19s, SQ Sound system
 08-10-2014, 12:44 PM
#1
PassionFord Post Troll
Thread Starter

We saw a couple of R32's and they were all dogs frankly...constantly getting the 'oh the car is mint, its absolutely perfect, once you see it you will buy it blah blah blah'...in the end we saw a few and I do not know how people can call a car 'mint' or 'immaculate' when you have paint stains all over it from when the next door neighbours were painting the front of their house, or when the engine management light was on yet the car is perfect, or when there are interior trim panels missing etc!
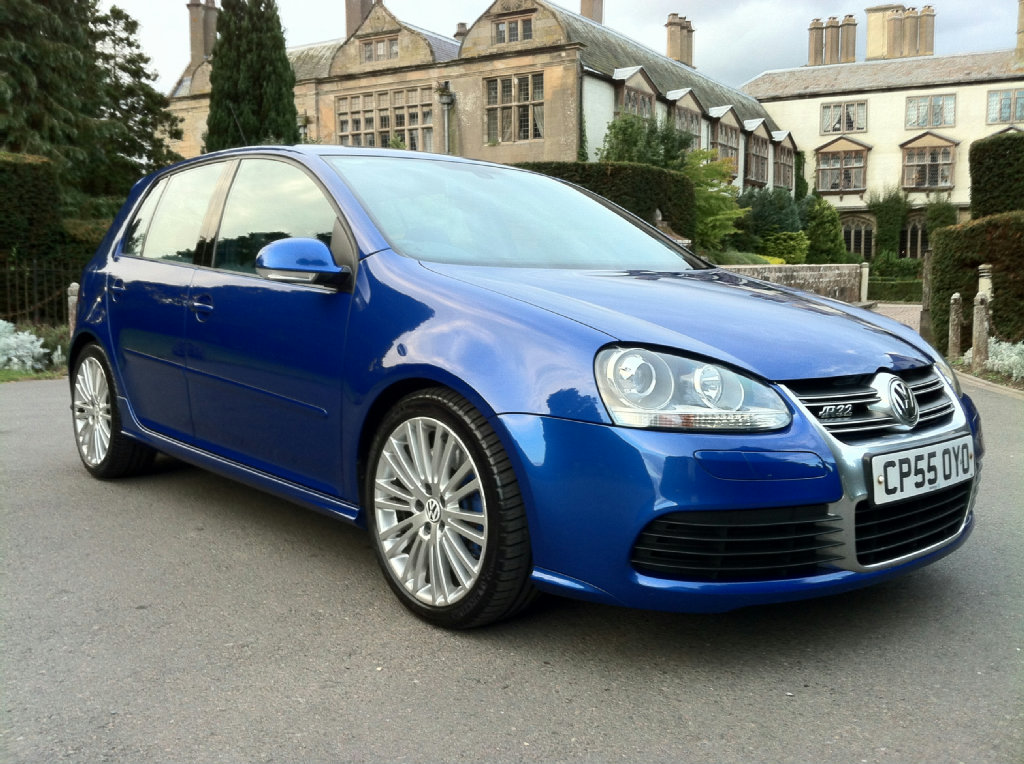
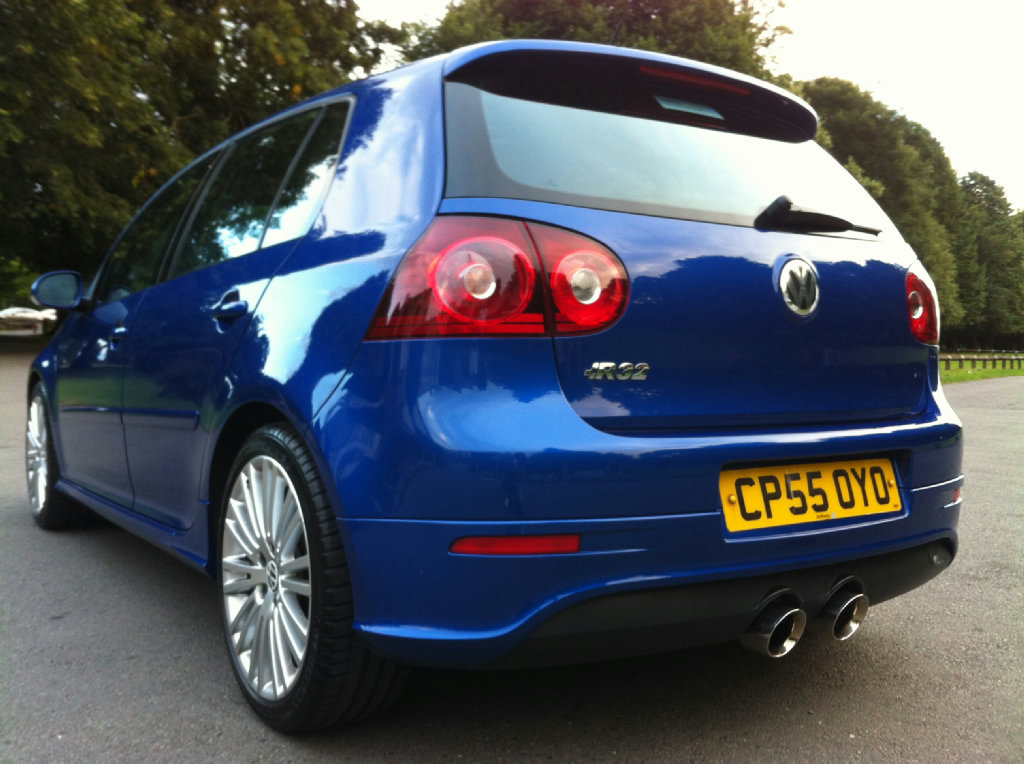
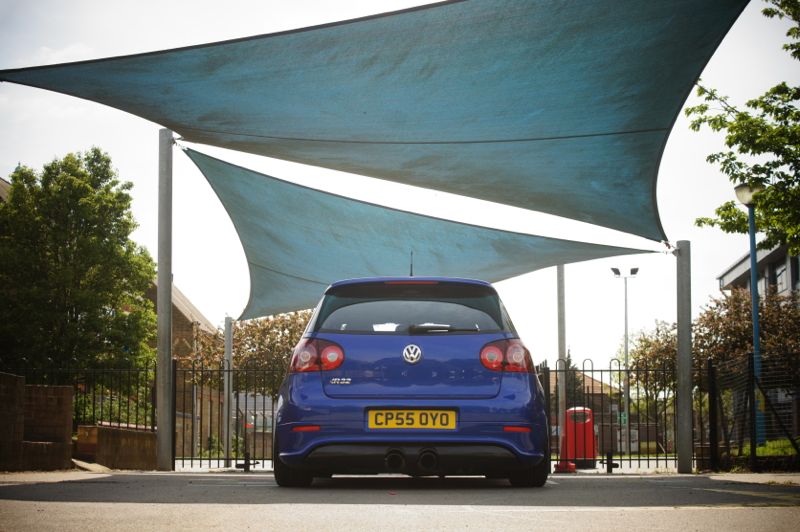
After seeing the last car in Slough and being put off thinking that we werent going to find one, one last trip to Coventry and we found this beauty!
79k on the clock
1 owner from new (from memory)
Every single receipt from brand new
New tyres all round
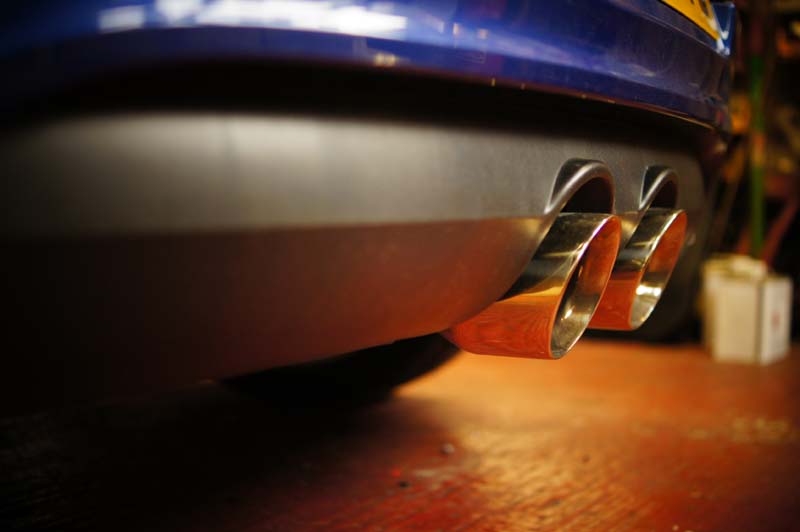
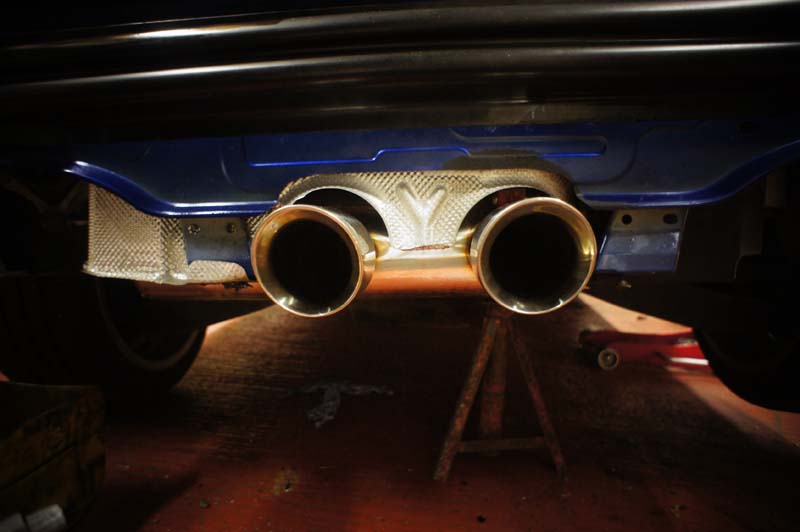
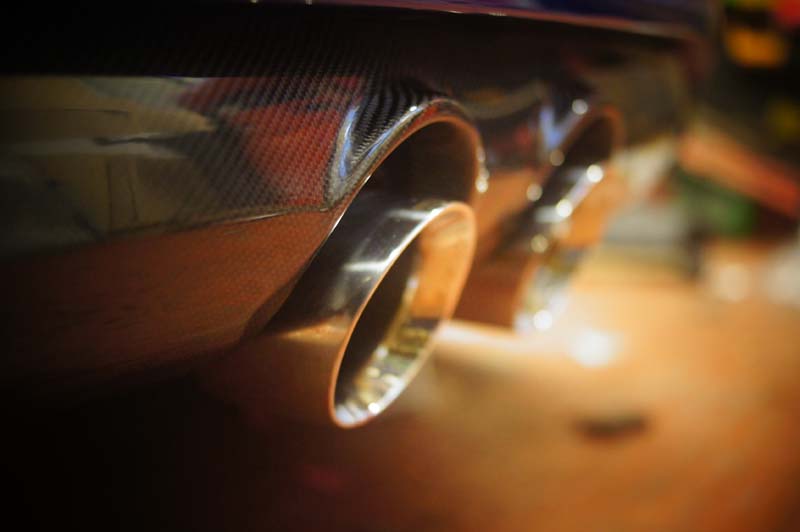
Miltek exhaust (the only mod done to the car)
Every service stamp from main dealer apart from 2-3 which were done from a VAG specialist
VERY VERY clean inside and out
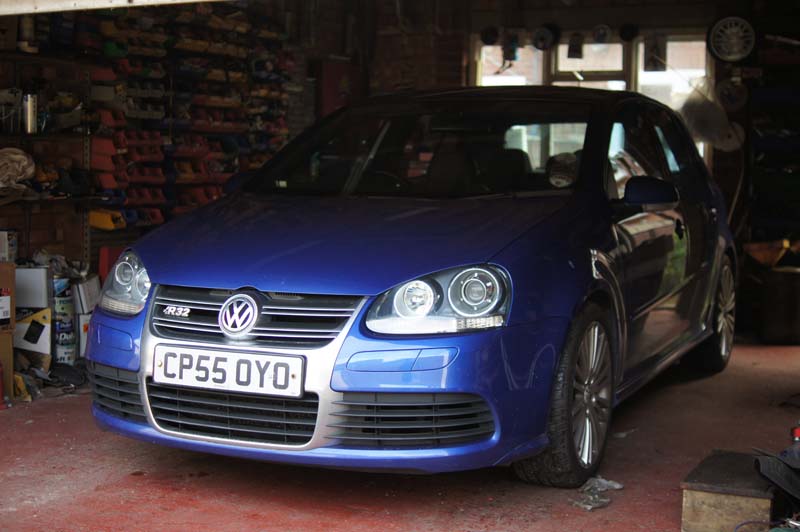
And being DBP it stood out from the previous coloured R32's we saw (and resembled my old Focus RS lol)
A deal was struck and we took the car home there and then!
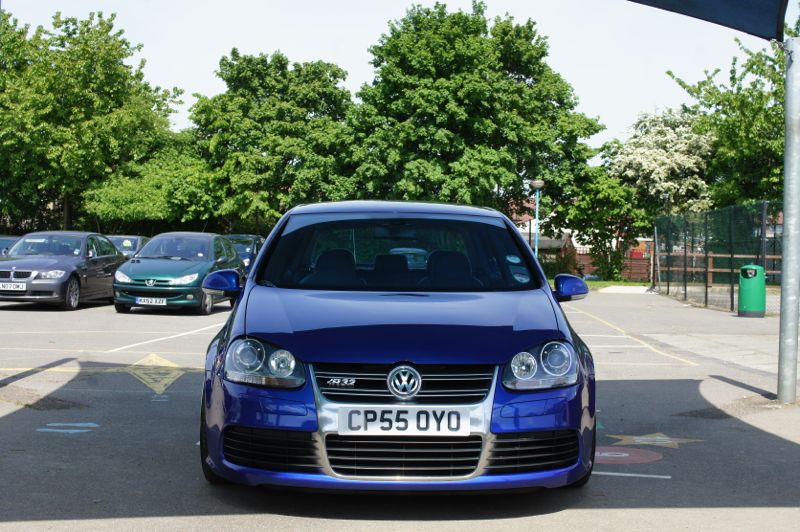
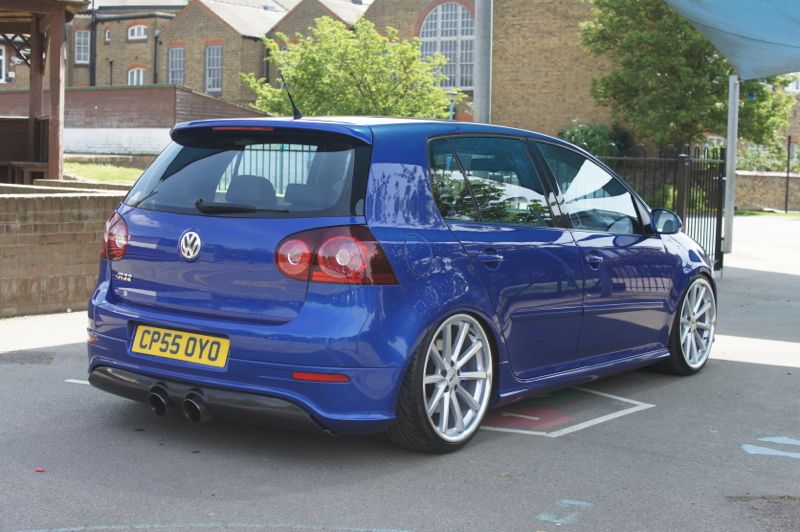
Heres some pics as it was advertised;
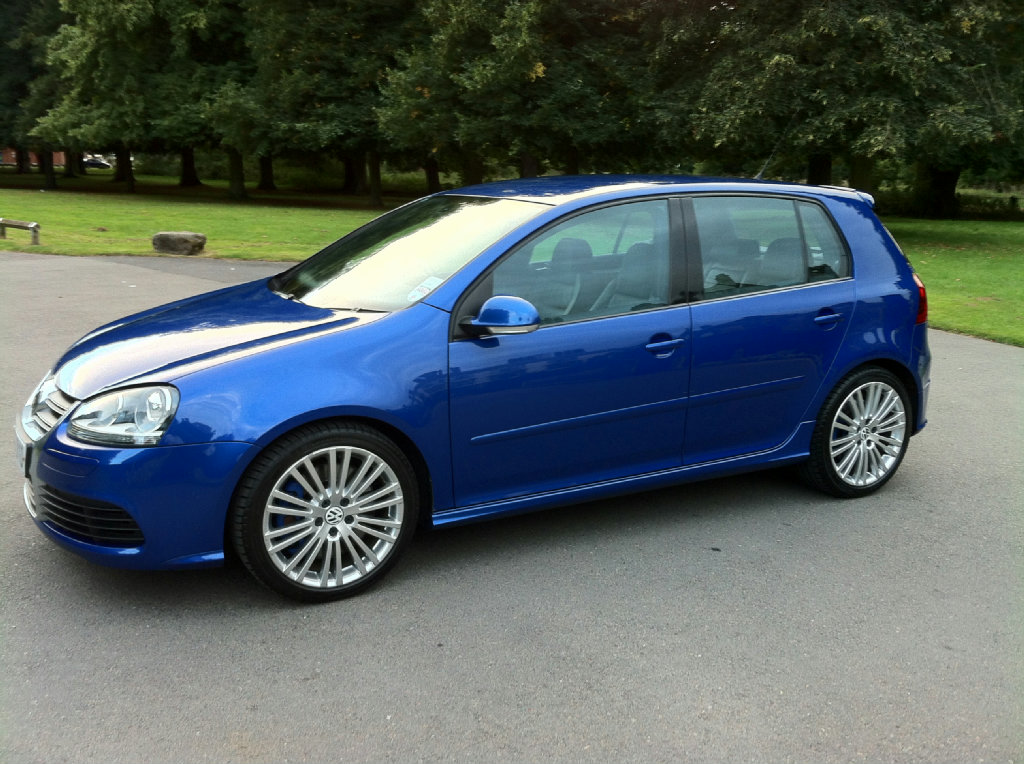
The drive home was lovely, smooth, elegant, and event free! Car had plenty of power (which I dont think is enough poke coming from a 430hp Focus lol) especially for the wife (shes coming from a 1.4 Corsa SRI!!)
There were a few marks on the outside, but as I detail cars as part of my work I knew it was no issue for me to sort out.
It didnt stay standard for too long though and me being me...was ordering parts as soon as it got home lol!!!
After seeing the last car in Slough and being put off thinking that we werent going to find one, one last trip to Coventry and we found this beauty!
79k on the clock
1 owner from new (from memory)
Every single receipt from brand new
New tyres all round
Miltek exhaust (the only mod done to the car)
Every service stamp from main dealer apart from 2-3 which were done from a VAG specialist
VERY VERY clean inside and out
And being DBP it stood out from the previous coloured R32's we saw (and resembled my old Focus RS lol)
A deal was struck and we took the car home there and then!
Heres some pics as it was advertised;
The drive home was lovely, smooth, elegant, and event free! Car had plenty of power (which I dont think is enough poke coming from a 430hp Focus lol) especially for the wife (shes coming from a 1.4 Corsa SRI!!)
There were a few marks on the outside, but as I detail cars as part of my work I knew it was no issue for me to sort out.
It didnt stay standard for too long though and me being me...was ordering parts as soon as it got home lol!!!
 08-10-2014, 01:04 PM
#2
PassionFord Post Troll
Thread Starter
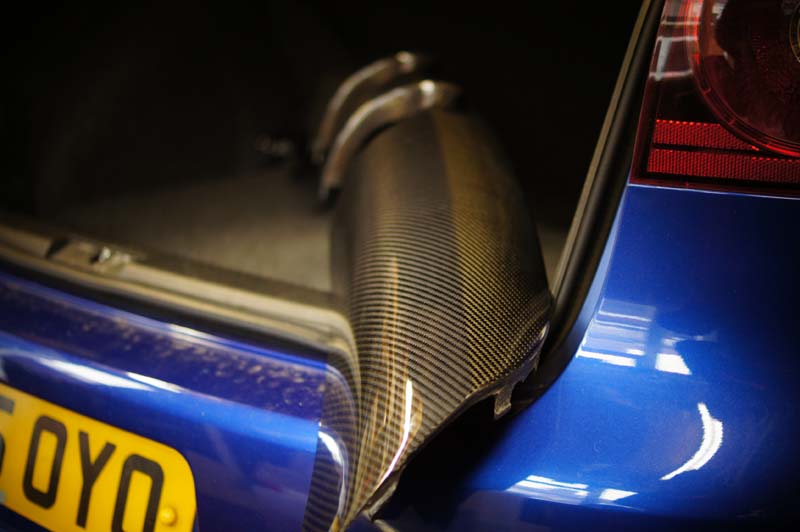
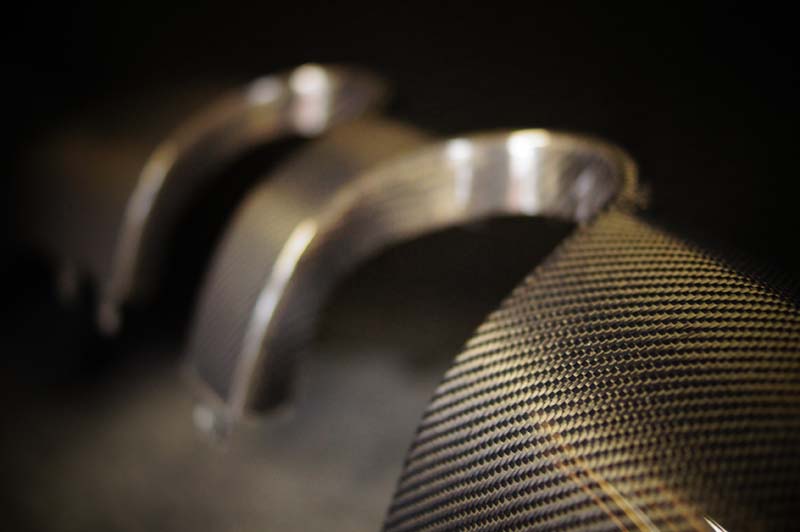
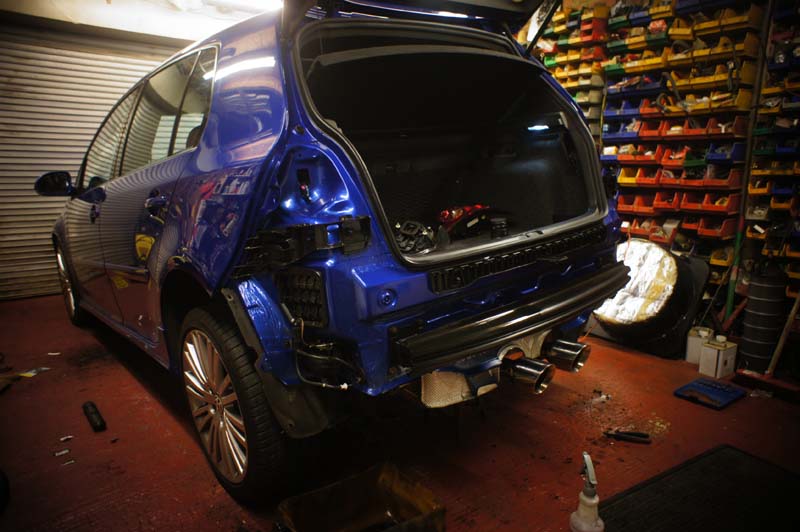
One of the first mods we did with the car was to add a different diffuser...my Focus RS had a carbon diffuser as well as carbon mirrors and carbon front splitter...Liking the carbon/blue theme...my wife wanted a Carbon diffuser on it! So I managed to track one down and fitted it...its not the best fit...but it works and looks good!
I also sourced some carbon mirrors caps for it, but im not sure about using them...I might leave them...the caps were like stick on carbon...when I thought they were proper carbon versions of the mirror. Never mind! I know I can get them to work..but needs a bit more effort to make them work as well as I would want them to!
I also sourced some carbon mirrors caps for it, but im not sure about using them...I might leave them...the caps were like stick on carbon...when I thought they were proper carbon versions of the mirror. Never mind! I know I can get them to work..but needs a bit more effort to make them work as well as I would want them to!
08-10-2014, 01:14 PM
#3
PassionFord Post Troll
Thread Starter
The car sat stock for a few days
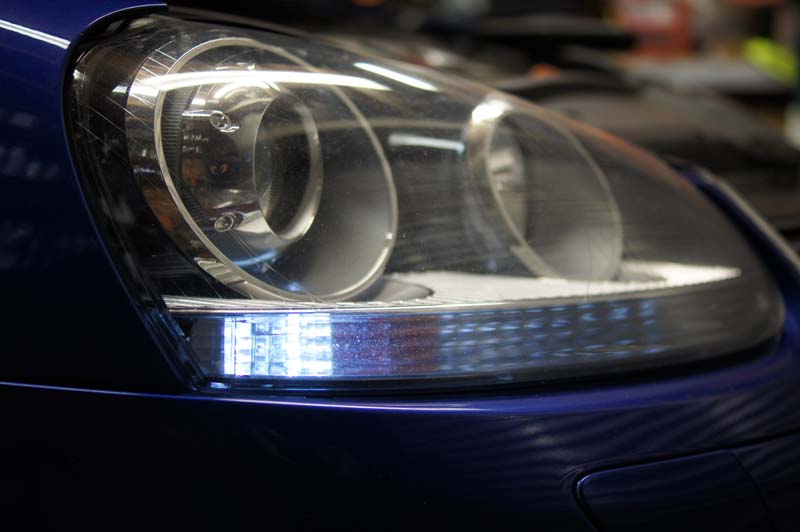
Upgraded the side and interior lights

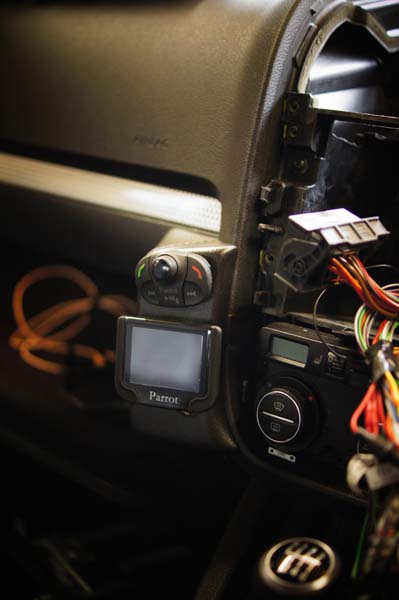
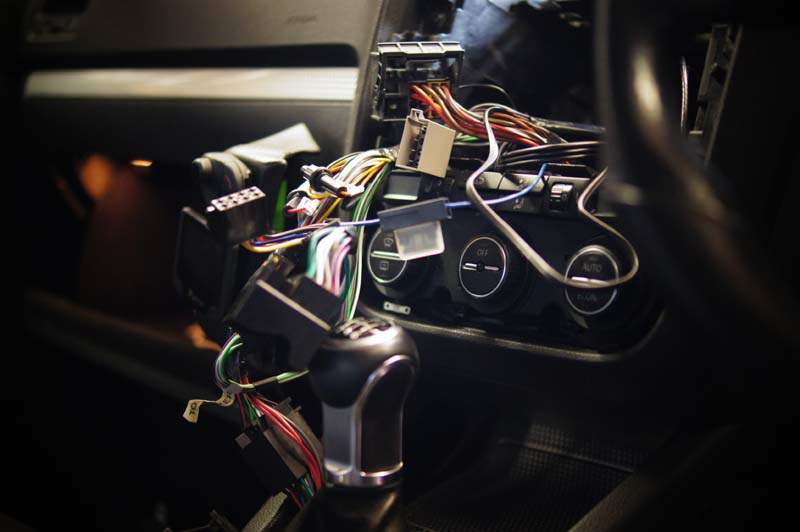
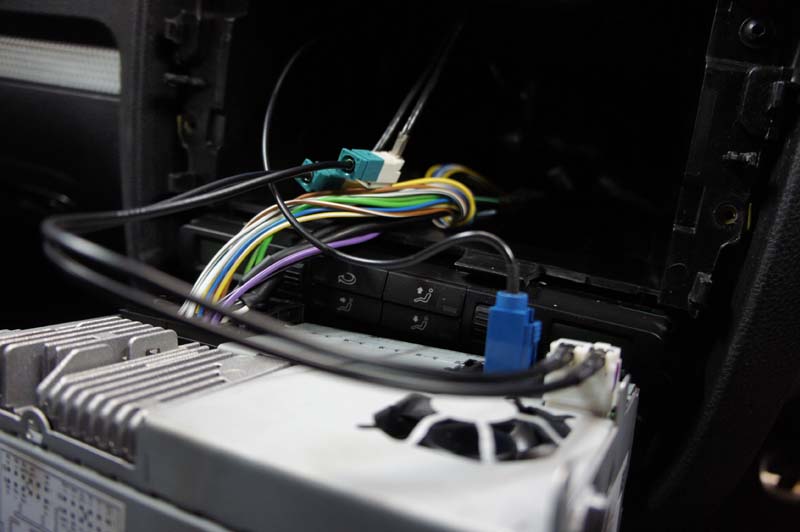
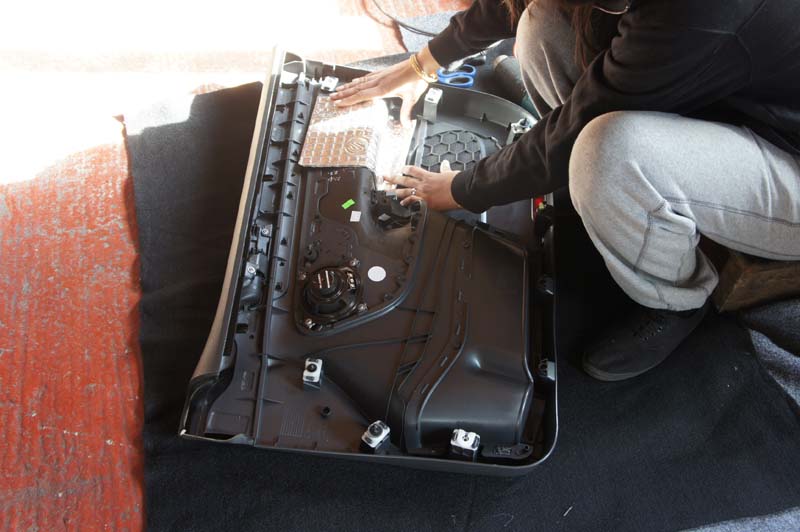
The car came with a Parrot kit that I wanted to remove as I didnt like the cluttered look. As good as the kit was, I would rather have a simpler sleaker looking dash...to my horror, when the kit was removed, the wiring behind it was a nightmare! So I had to sort it all out of course!
Then this happened LOL
Upgraded the side and interior lights
The car came with a Parrot kit that I wanted to remove as I didnt like the cluttered look. As good as the kit was, I would rather have a simpler sleaker looking dash...to my horror, when the kit was removed, the wiring behind it was a nightmare! So I had to sort it all out of course!
Then this happened LOL
08-10-2014, 01:24 PM
#4
PassionFord Post Troll
Thread Starter
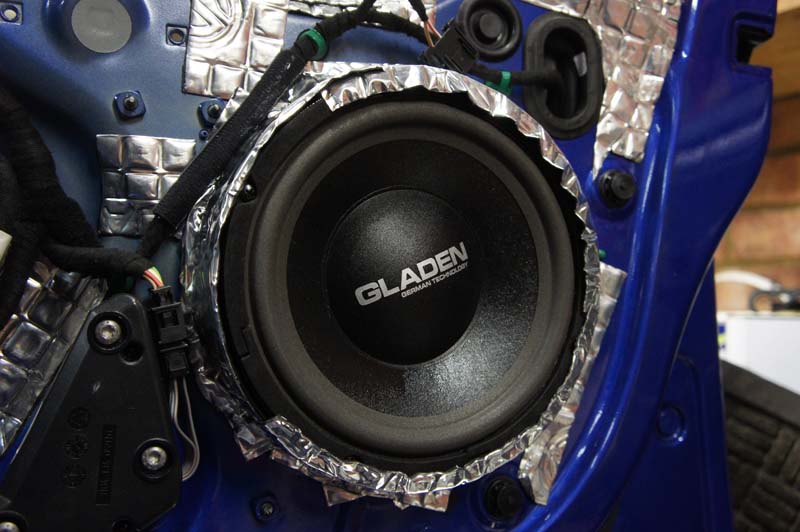
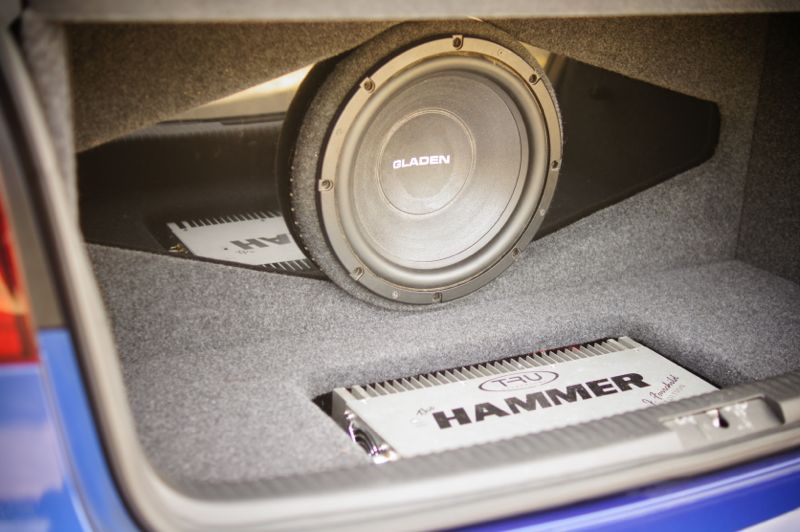
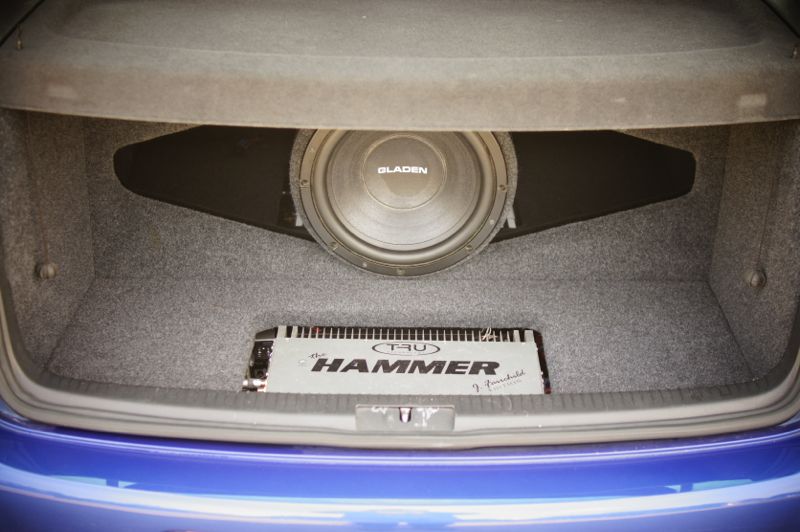
As stated, it was time to upgrade the shocking R32 audio system!
The plans for the R32 was to have a kit of Gladen VW upgrade speakers available for customers to listen to, but also be able to have the ability to be very flexible with any equipment I wanted to run in the vehicle and fulfil my very high needs and expectations (when it comes to audio systems!)
The final spec of the system ended up being;
RNS510 headunit with MDI option
Mosconi 6to8 processor
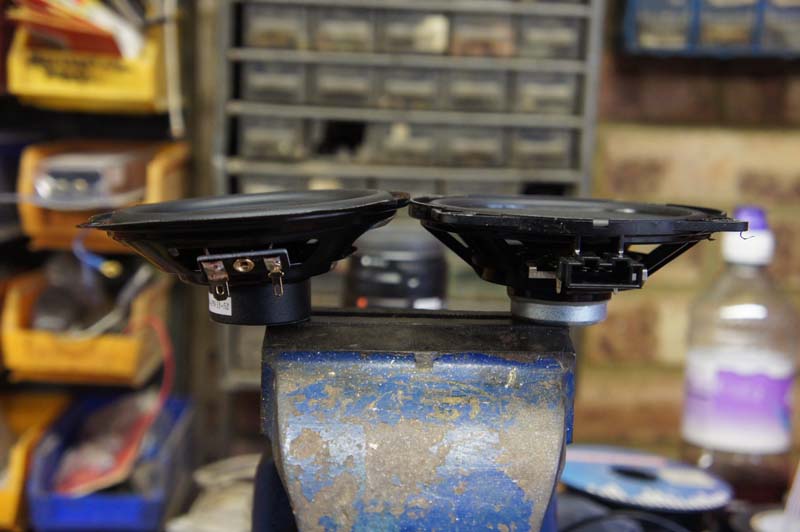
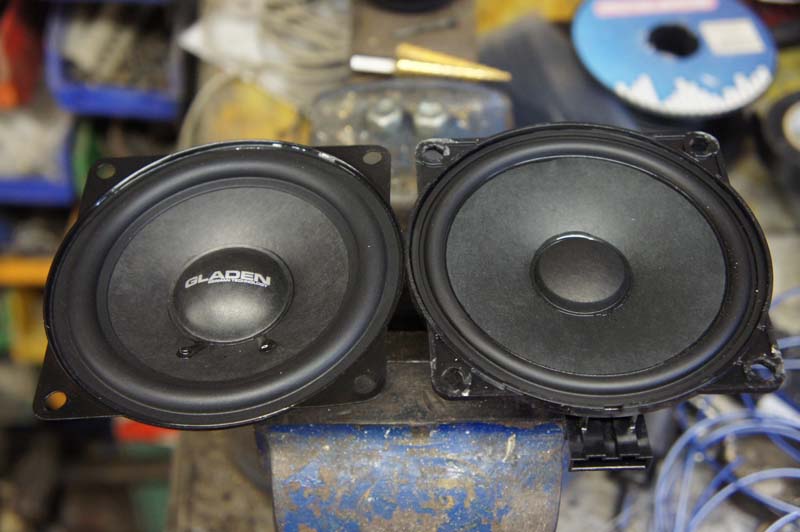
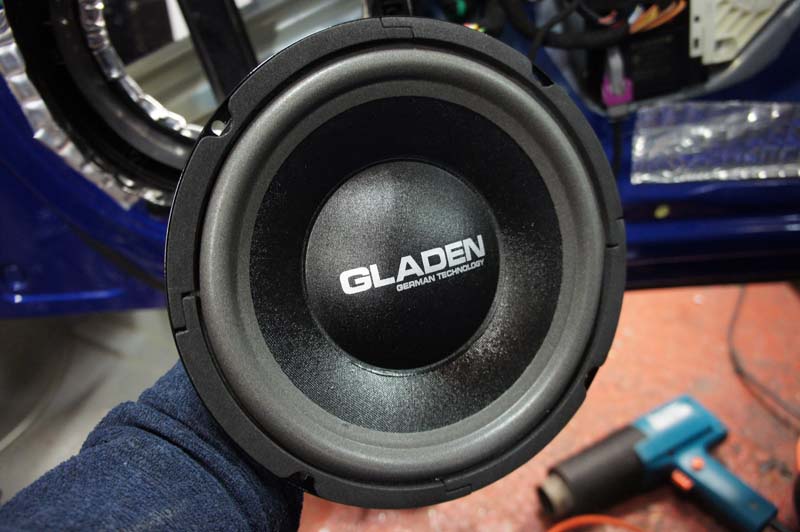
Gladen Audio VW Mk5 speaker upgrade - 3 way kit consisting of Gladen 8inch subwoofers, 4inch midrange and a pair of tweeters
Mosconi ONE 120.4 amplifier
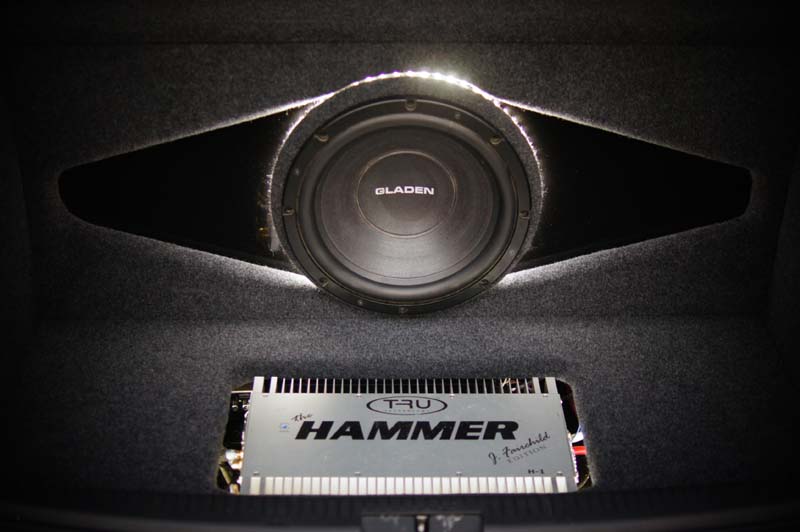
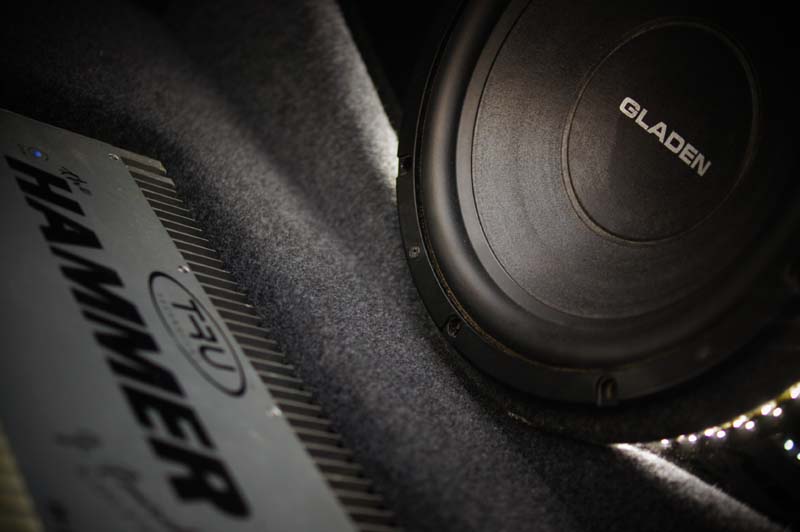
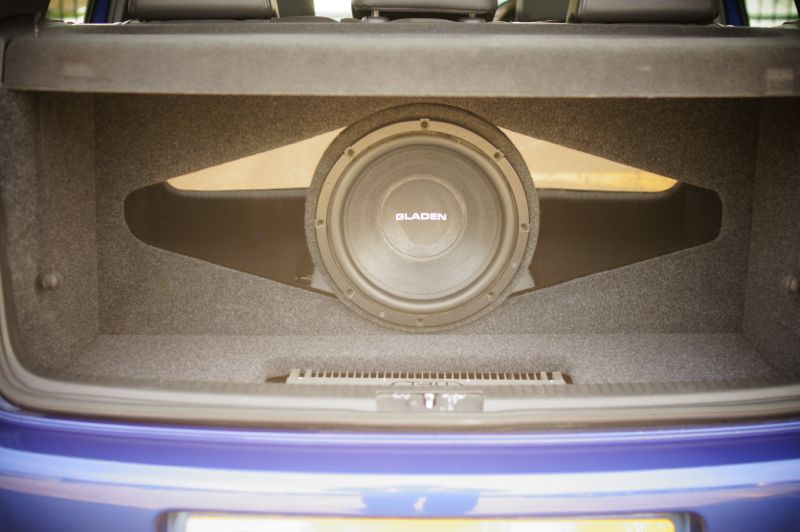
Gladen Audio Zero Pro 12inch subwoofer
Tru Tech Hammer H-1 amplifier
Gladen audio VW Mk5 8inch subwoofers in rear doors (just the woofers)

The plans for the R32 was to have a kit of Gladen VW upgrade speakers available for customers to listen to, but also be able to have the ability to be very flexible with any equipment I wanted to run in the vehicle and fulfil my very high needs and expectations (when it comes to audio systems!)
The final spec of the system ended up being;
RNS510 headunit with MDI option
Mosconi 6to8 processor
Gladen Audio VW Mk5 speaker upgrade - 3 way kit consisting of Gladen 8inch subwoofers, 4inch midrange and a pair of tweeters
Mosconi ONE 120.4 amplifier
Gladen Audio Zero Pro 12inch subwoofer
Tru Tech Hammer H-1 amplifier
Gladen audio VW Mk5 8inch subwoofers in rear doors (just the woofers)
08-10-2014, 03:03 PM
#6
Too many posts.. I need a life!!

I love the rns-510 on my passat  You can recode it too for amplifier level input to your amps etc too. Also worth upgrading to the latest firmware and maps, i've got both if you need them?
08-10-2014, 07:40 PM
#7
PassionFord Post Troll
Thread Starter
Trending Topics
08-10-2014, 07:44 PM
#8
PassionFord Post Troll
Thread Starter
We were considering recoding it to low level outputs, however, believe it or not, you tend to get a cleaner signal and less noise with high level so we left it as it is (the processor can handle both and when using high level inputs, it is able to auto sense to turn the processor and amps on and off)
We already have the latest software and maps when we bought it
08-10-2014, 07:52 PM
#10
Too many posts.. I need a life!!
Let me know your firmware number and il check for you. GPs antenna should be fine anywhere, mine is mounted on its side at the base of my drivers side a pillar with its magnetic base. Try another one first?
I would be interested in those 3 ways in my Passat. The shape of the door card makes it look like it was designed to have the option of 3 ways
I would be interested in those 3 ways in my Passat. The shape of the door card makes it look like it was designed to have the option of 3 ways
 08-10-2014, 09:57 PM
#14
PassionFord Post Troll
Thread Starter
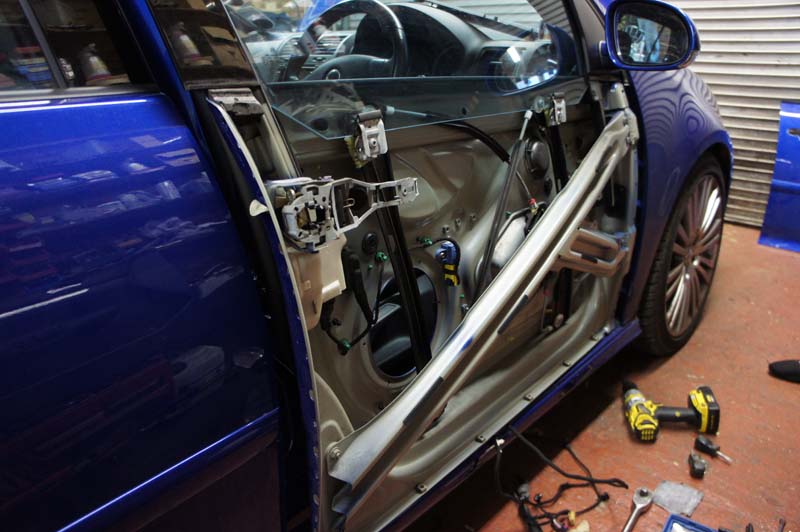
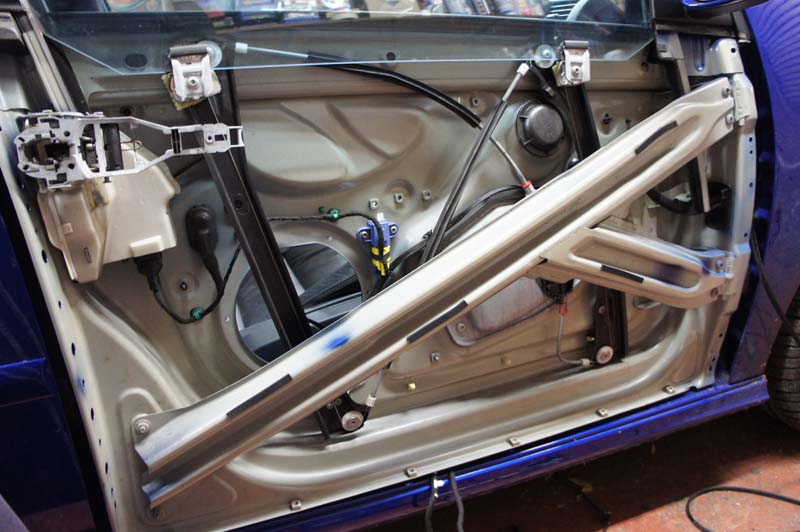
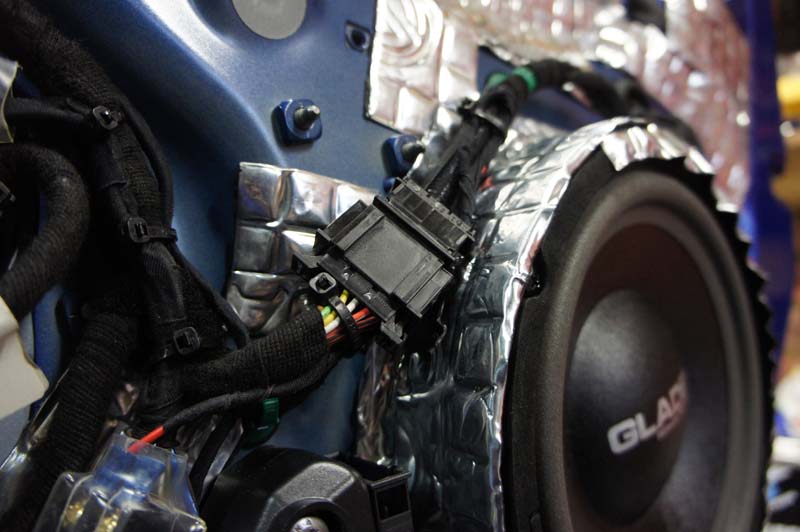
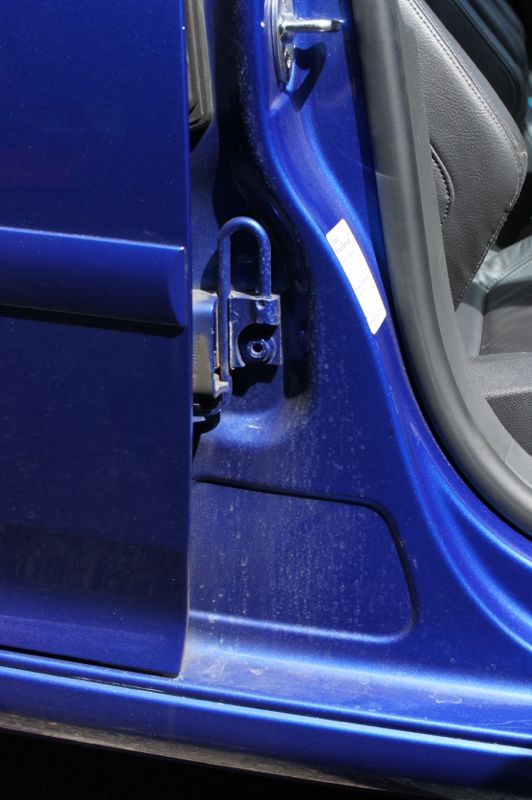
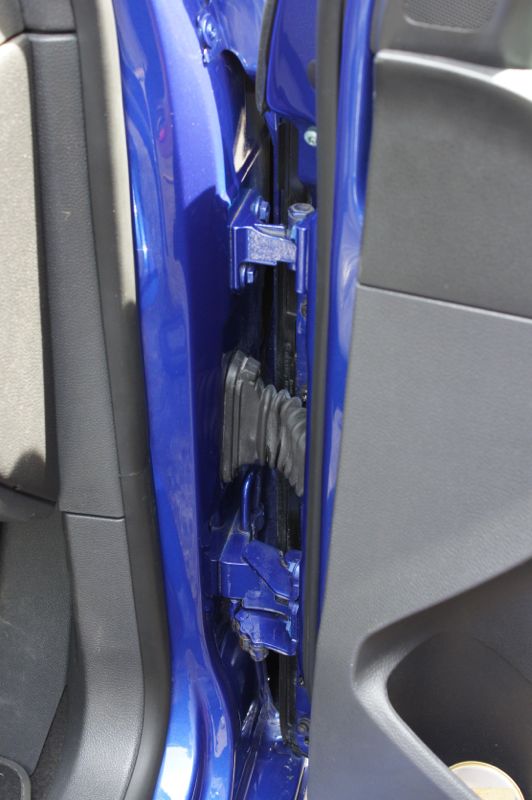
They were removed to complete all the wiring in the door, and for those of you don't know this era of VW's will find it rather strange, however, its what you have to do to access anything in the door. Probably easier than taking the door apart and skinning your fingers and knuckles trying to access things through stupid little holes in the door
08-10-2014, 09:59 PM
#15
PassionFord Post Troll
Thread Starter
Let me know your firmware number and il check for you. GPs antenna should be fine anywhere, mine is mounted on its side at the base of my drivers side a pillar with its magnetic base. Try another one first?
I would be interested in those 3 ways in my Passat. The shape of the door card makes it look like it was designed to have the option of 3 ways
I would be interested in those 3 ways in my Passat. The shape of the door card makes it look like it was designed to have the option of 3 ways
They may work in your Passat, but you gotta check the fitment in the doors first. Is there a mid bass that fires into your hip so to speak
08-10-2014, 10:00 PM
#16
PassionFord Post Troll
Thread Starter

 09-10-2014, 07:06 PM
#20
I've found that life I needed.. It's HERE!!
Your work is fantastic, looking forward to the next installment.
09-10-2014, 08:18 PM
#21
PassionFord Post Whore!!
Great work as normal... 
If the front arches arnt showing signs of rusting get the liners out quick and remove the foam behind the arches that hold water and rot them inside out...
Get them treated too...
If the front arches arnt showing signs of rusting get the liners out quick and remove the foam behind the arches that hold water and rot them inside out...
Get them treated too...
07-11-2014, 09:13 AM
#23
PassionFord Post Troll
Thread Starter
I think its time to get this back on track!
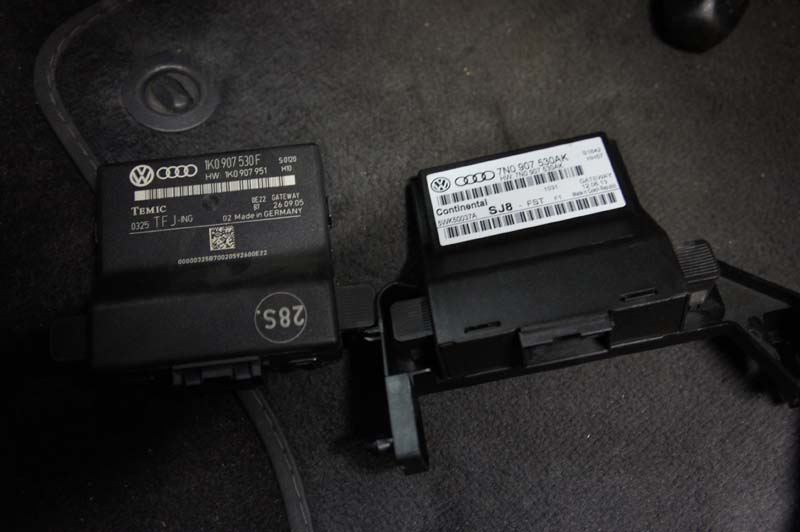
One thing with the RNS510, is it needed two ariel inputs which we had in the car, but they were single connectors rather than the single block that we needed. So we sourced one and installed it…perfect working radio!
It also meant we had to change the CANBUS module as the earlier Mk5 Golf's keep the stereo on (even if it is powered down) and eventually drain the battery. With the CANBUS module fitted, some coding work, the installation was complete!
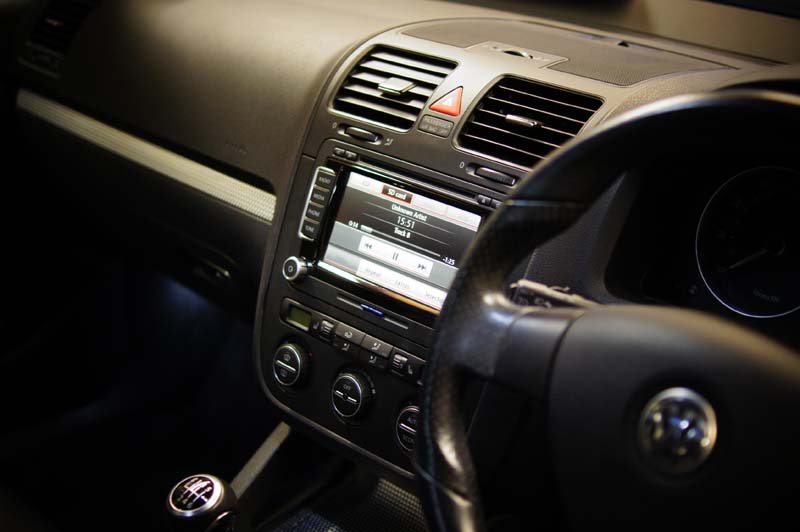
All in and working!
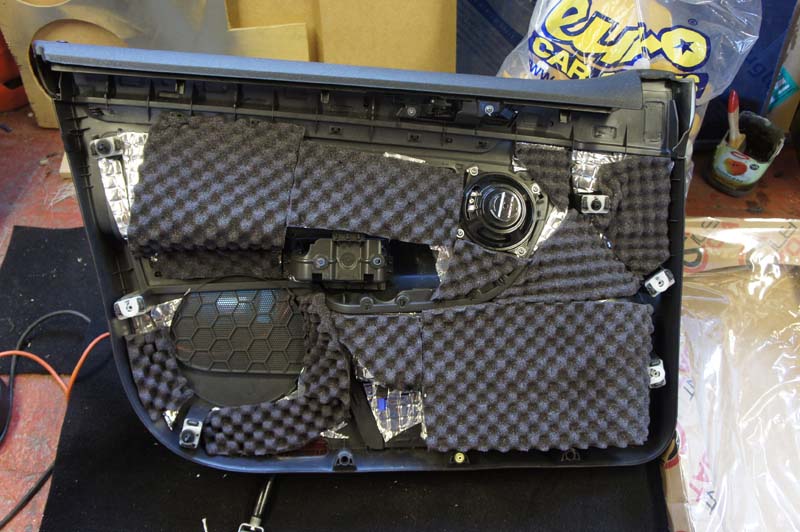
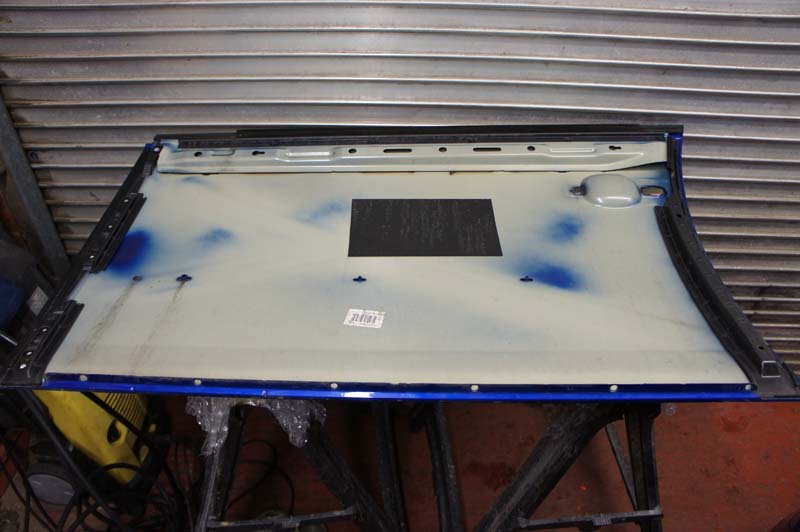
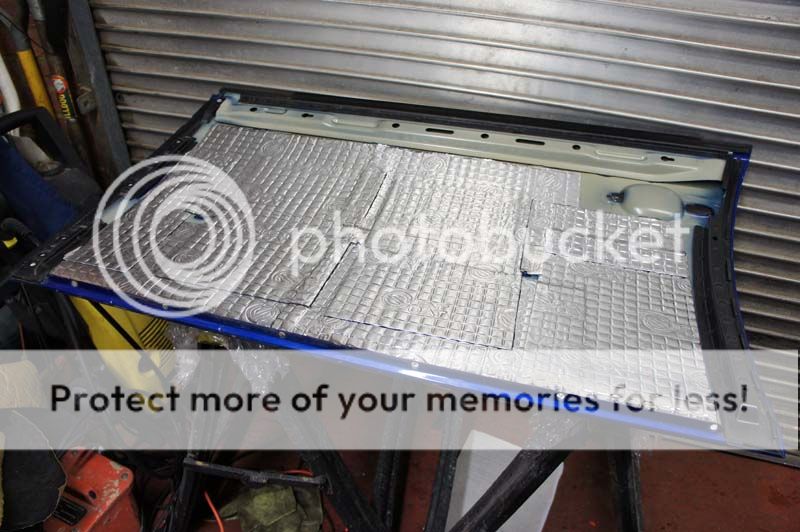
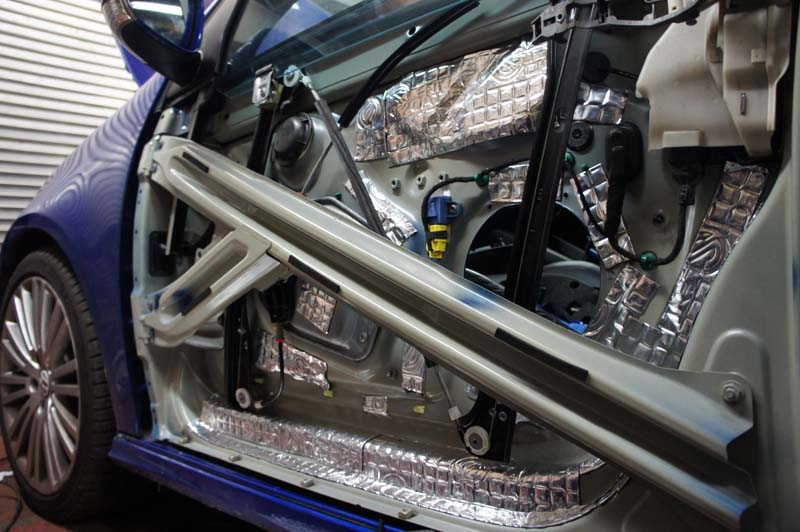
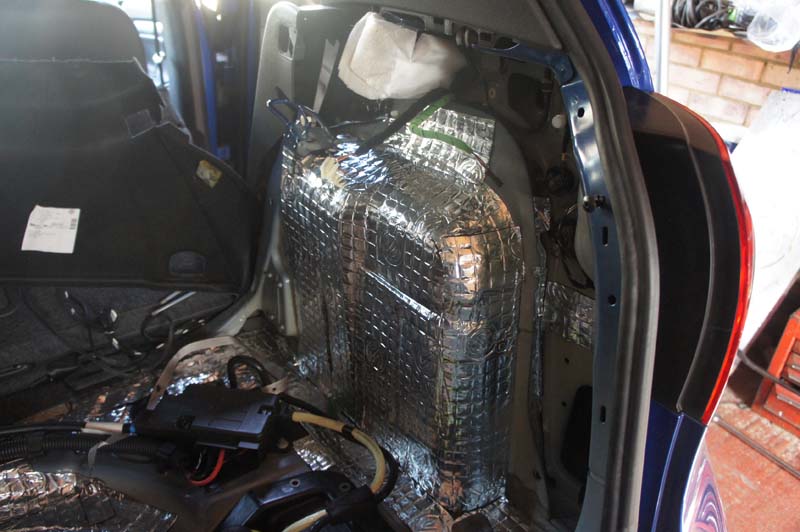
The door cards also received the deadening treatment…getting the wife to help out here lol. They were treated with 2mm Silent Coat and them Silent Coat Absorber 15 and 35
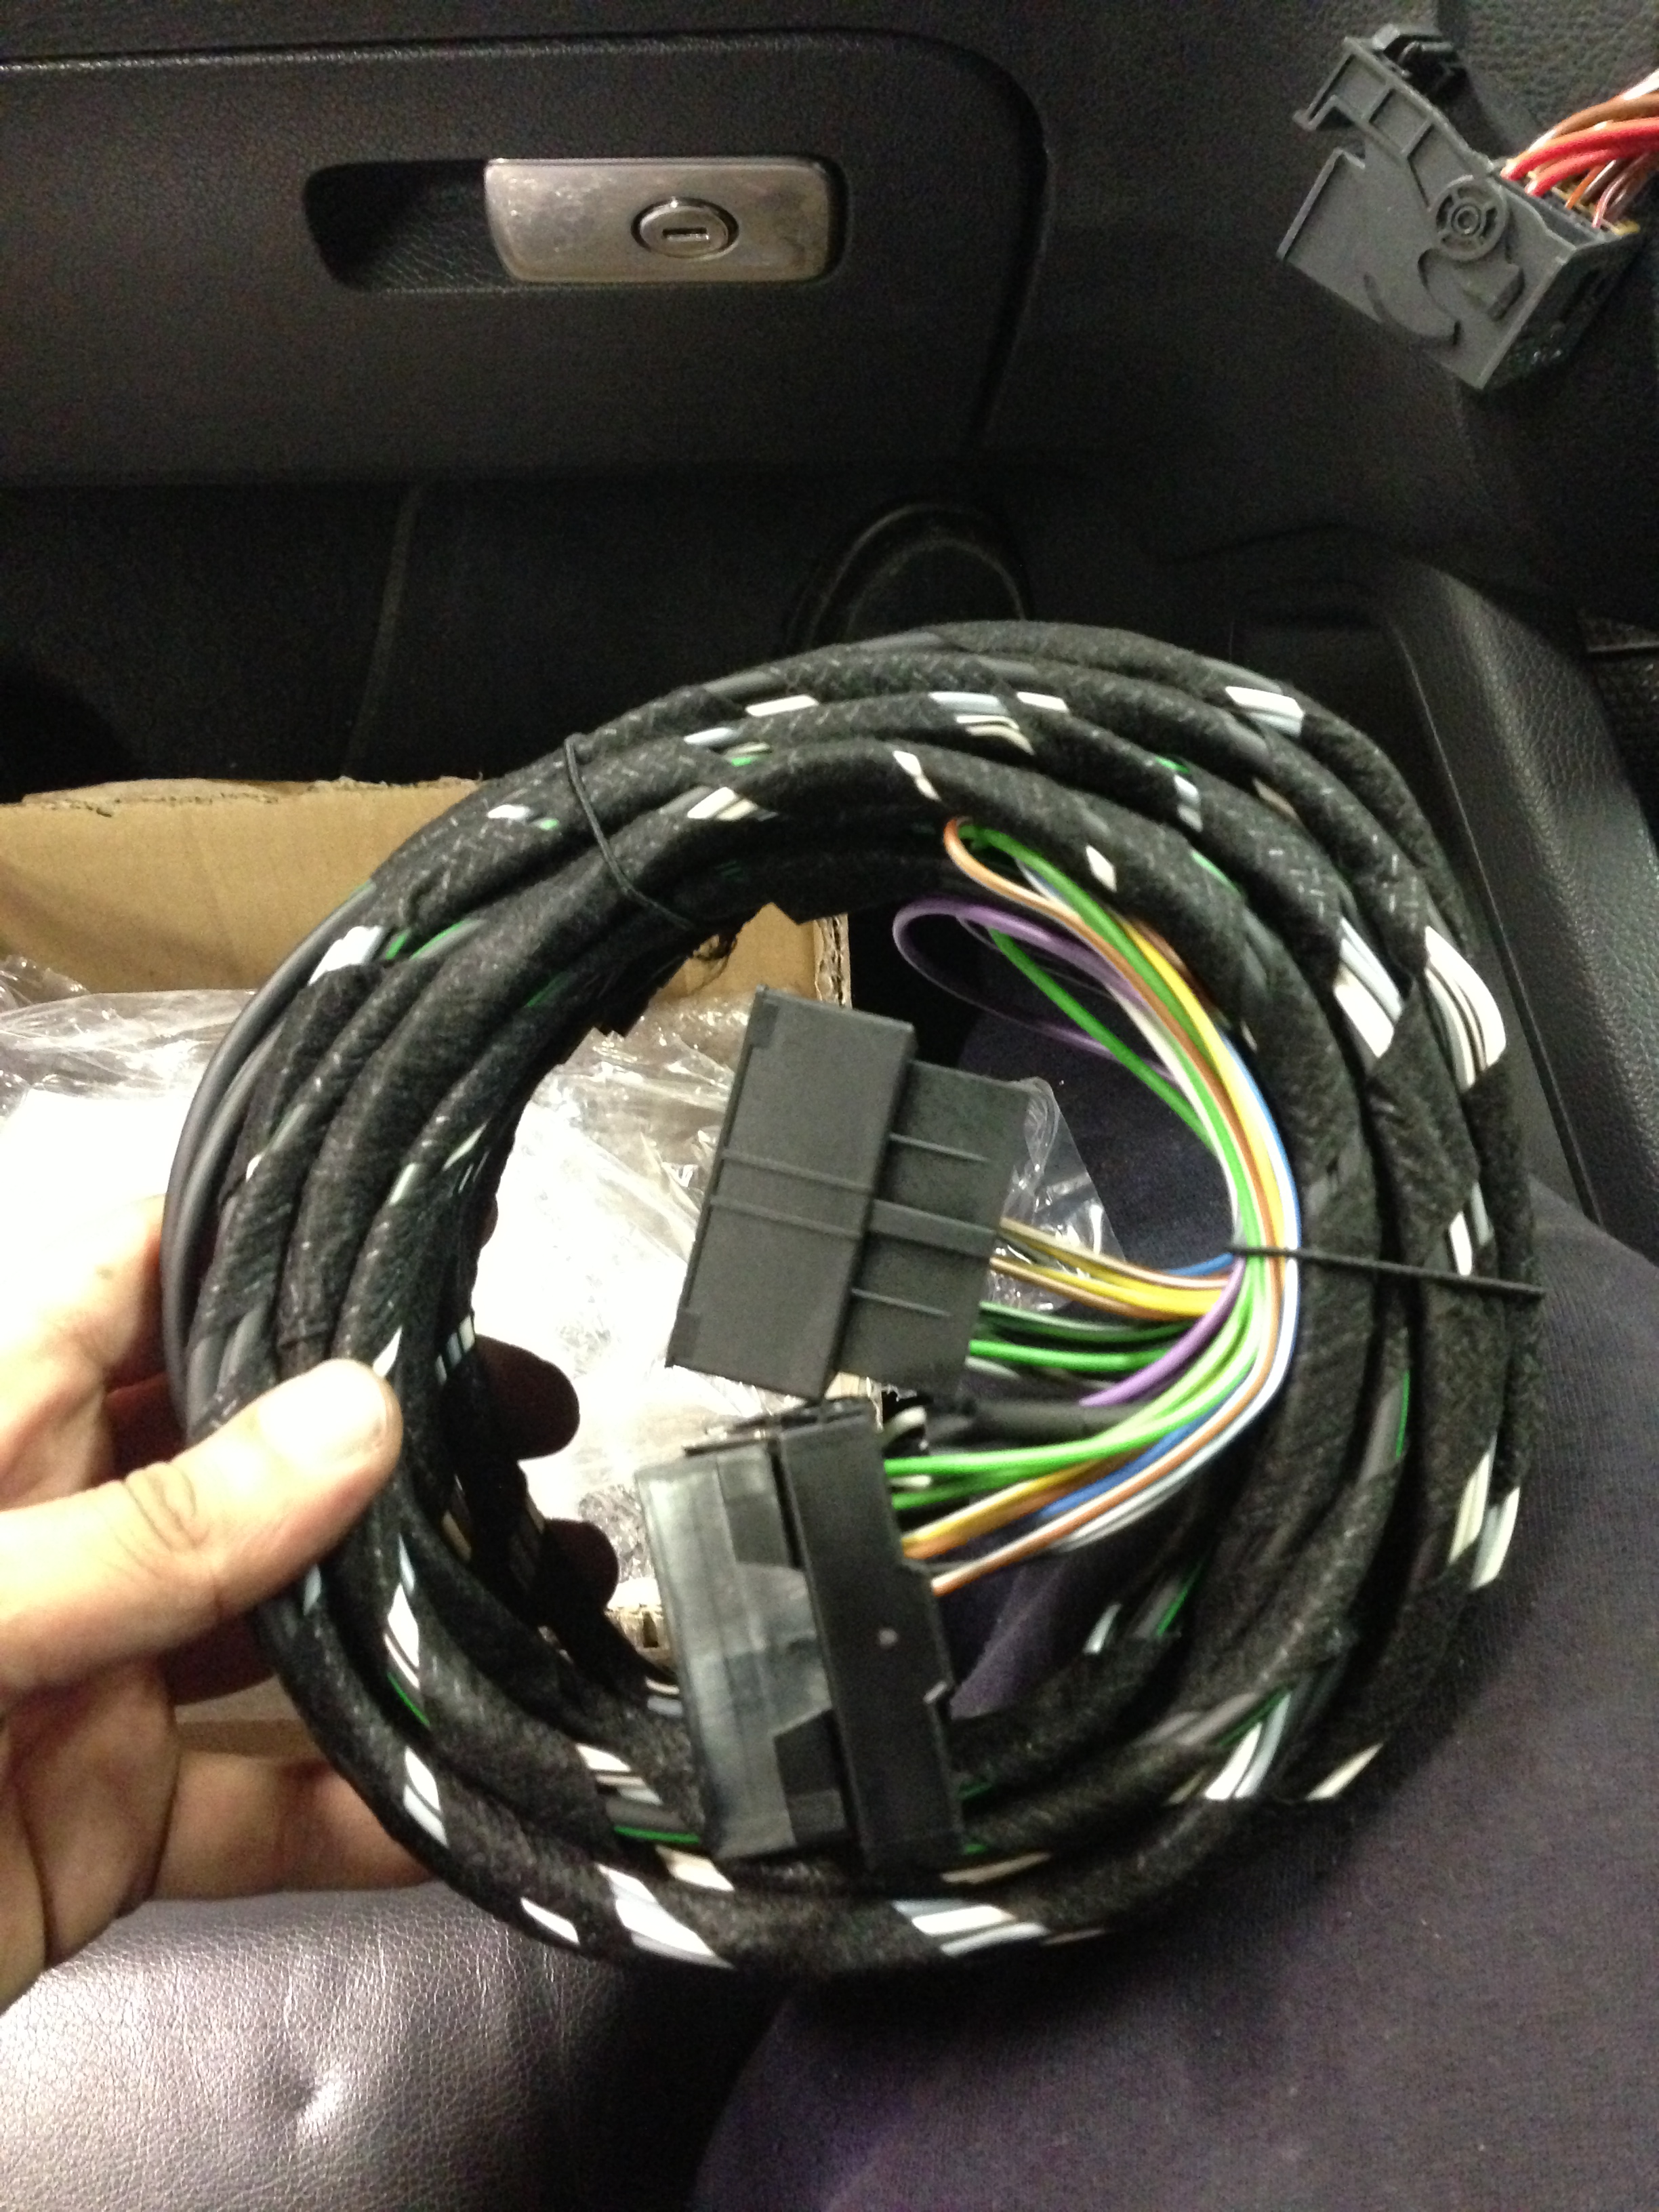
Now all the speakers were in and ready for an amp, we used this wiring harness available in our store which allows you to seamlessly integrate between an OEM stereo and an amplifier with a High Level input, in our case, a Mosconi ONE 120.4. It is basically a T-piece harness that plugs into your existing Quadlock harness, gives you RCA connectors and speaker cables to plug into the amplifier. So you have your high level signals going into the amplifier, and you have your speaker cable leads already connector to get the signal back up the car and into the doors. When you want to move on and remove the audio system, you can simply remove this cable and begin returning the vehicle back to OEM!
One thing with the RNS510, is it needed two ariel inputs which we had in the car, but they were single connectors rather than the single block that we needed. So we sourced one and installed it…perfect working radio!
It also meant we had to change the CANBUS module as the earlier Mk5 Golf's keep the stereo on (even if it is powered down) and eventually drain the battery. With the CANBUS module fitted, some coding work, the installation was complete!
All in and working!
The door cards also received the deadening treatment…getting the wife to help out here lol. They were treated with 2mm Silent Coat and them Silent Coat Absorber 15 and 35
Now all the speakers were in and ready for an amp, we used this wiring harness available in our store which allows you to seamlessly integrate between an OEM stereo and an amplifier with a High Level input, in our case, a Mosconi ONE 120.4. It is basically a T-piece harness that plugs into your existing Quadlock harness, gives you RCA connectors and speaker cables to plug into the amplifier. So you have your high level signals going into the amplifier, and you have your speaker cable leads already connector to get the signal back up the car and into the doors. When you want to move on and remove the audio system, you can simply remove this cable and begin returning the vehicle back to OEM!
26-11-2014, 07:32 PM
#26
PassionFord Post Troll
Thread Starter
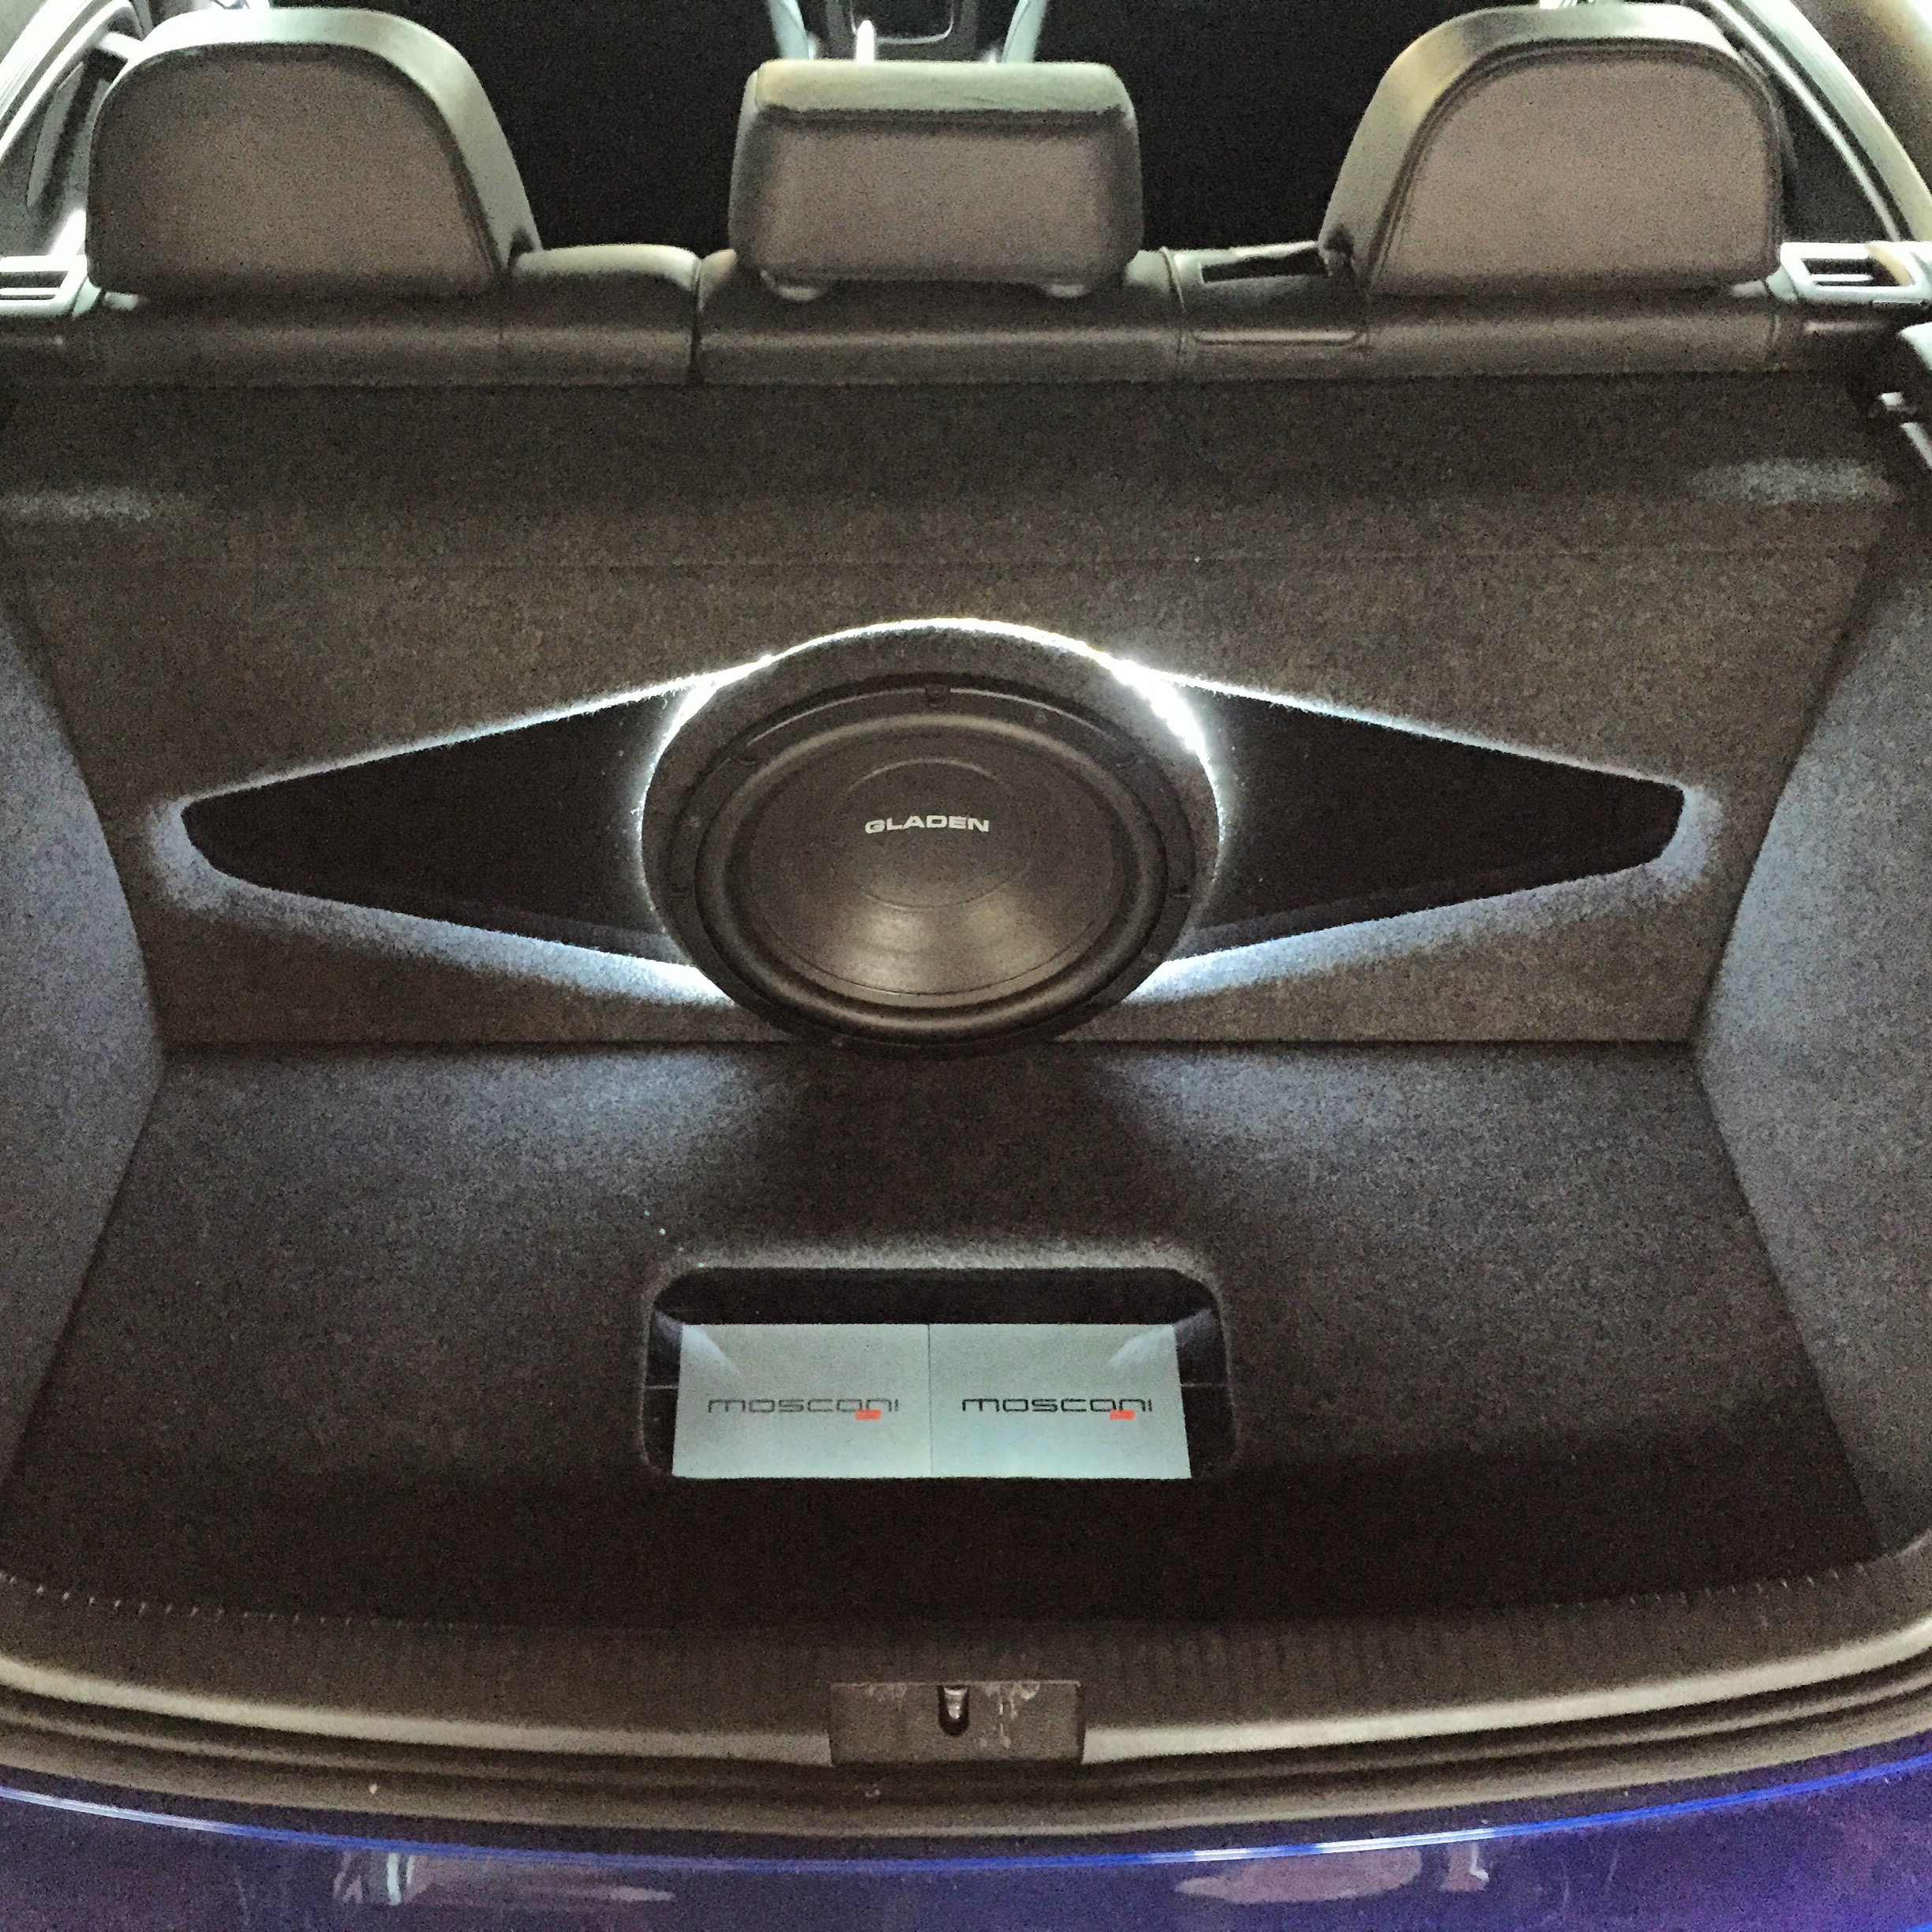
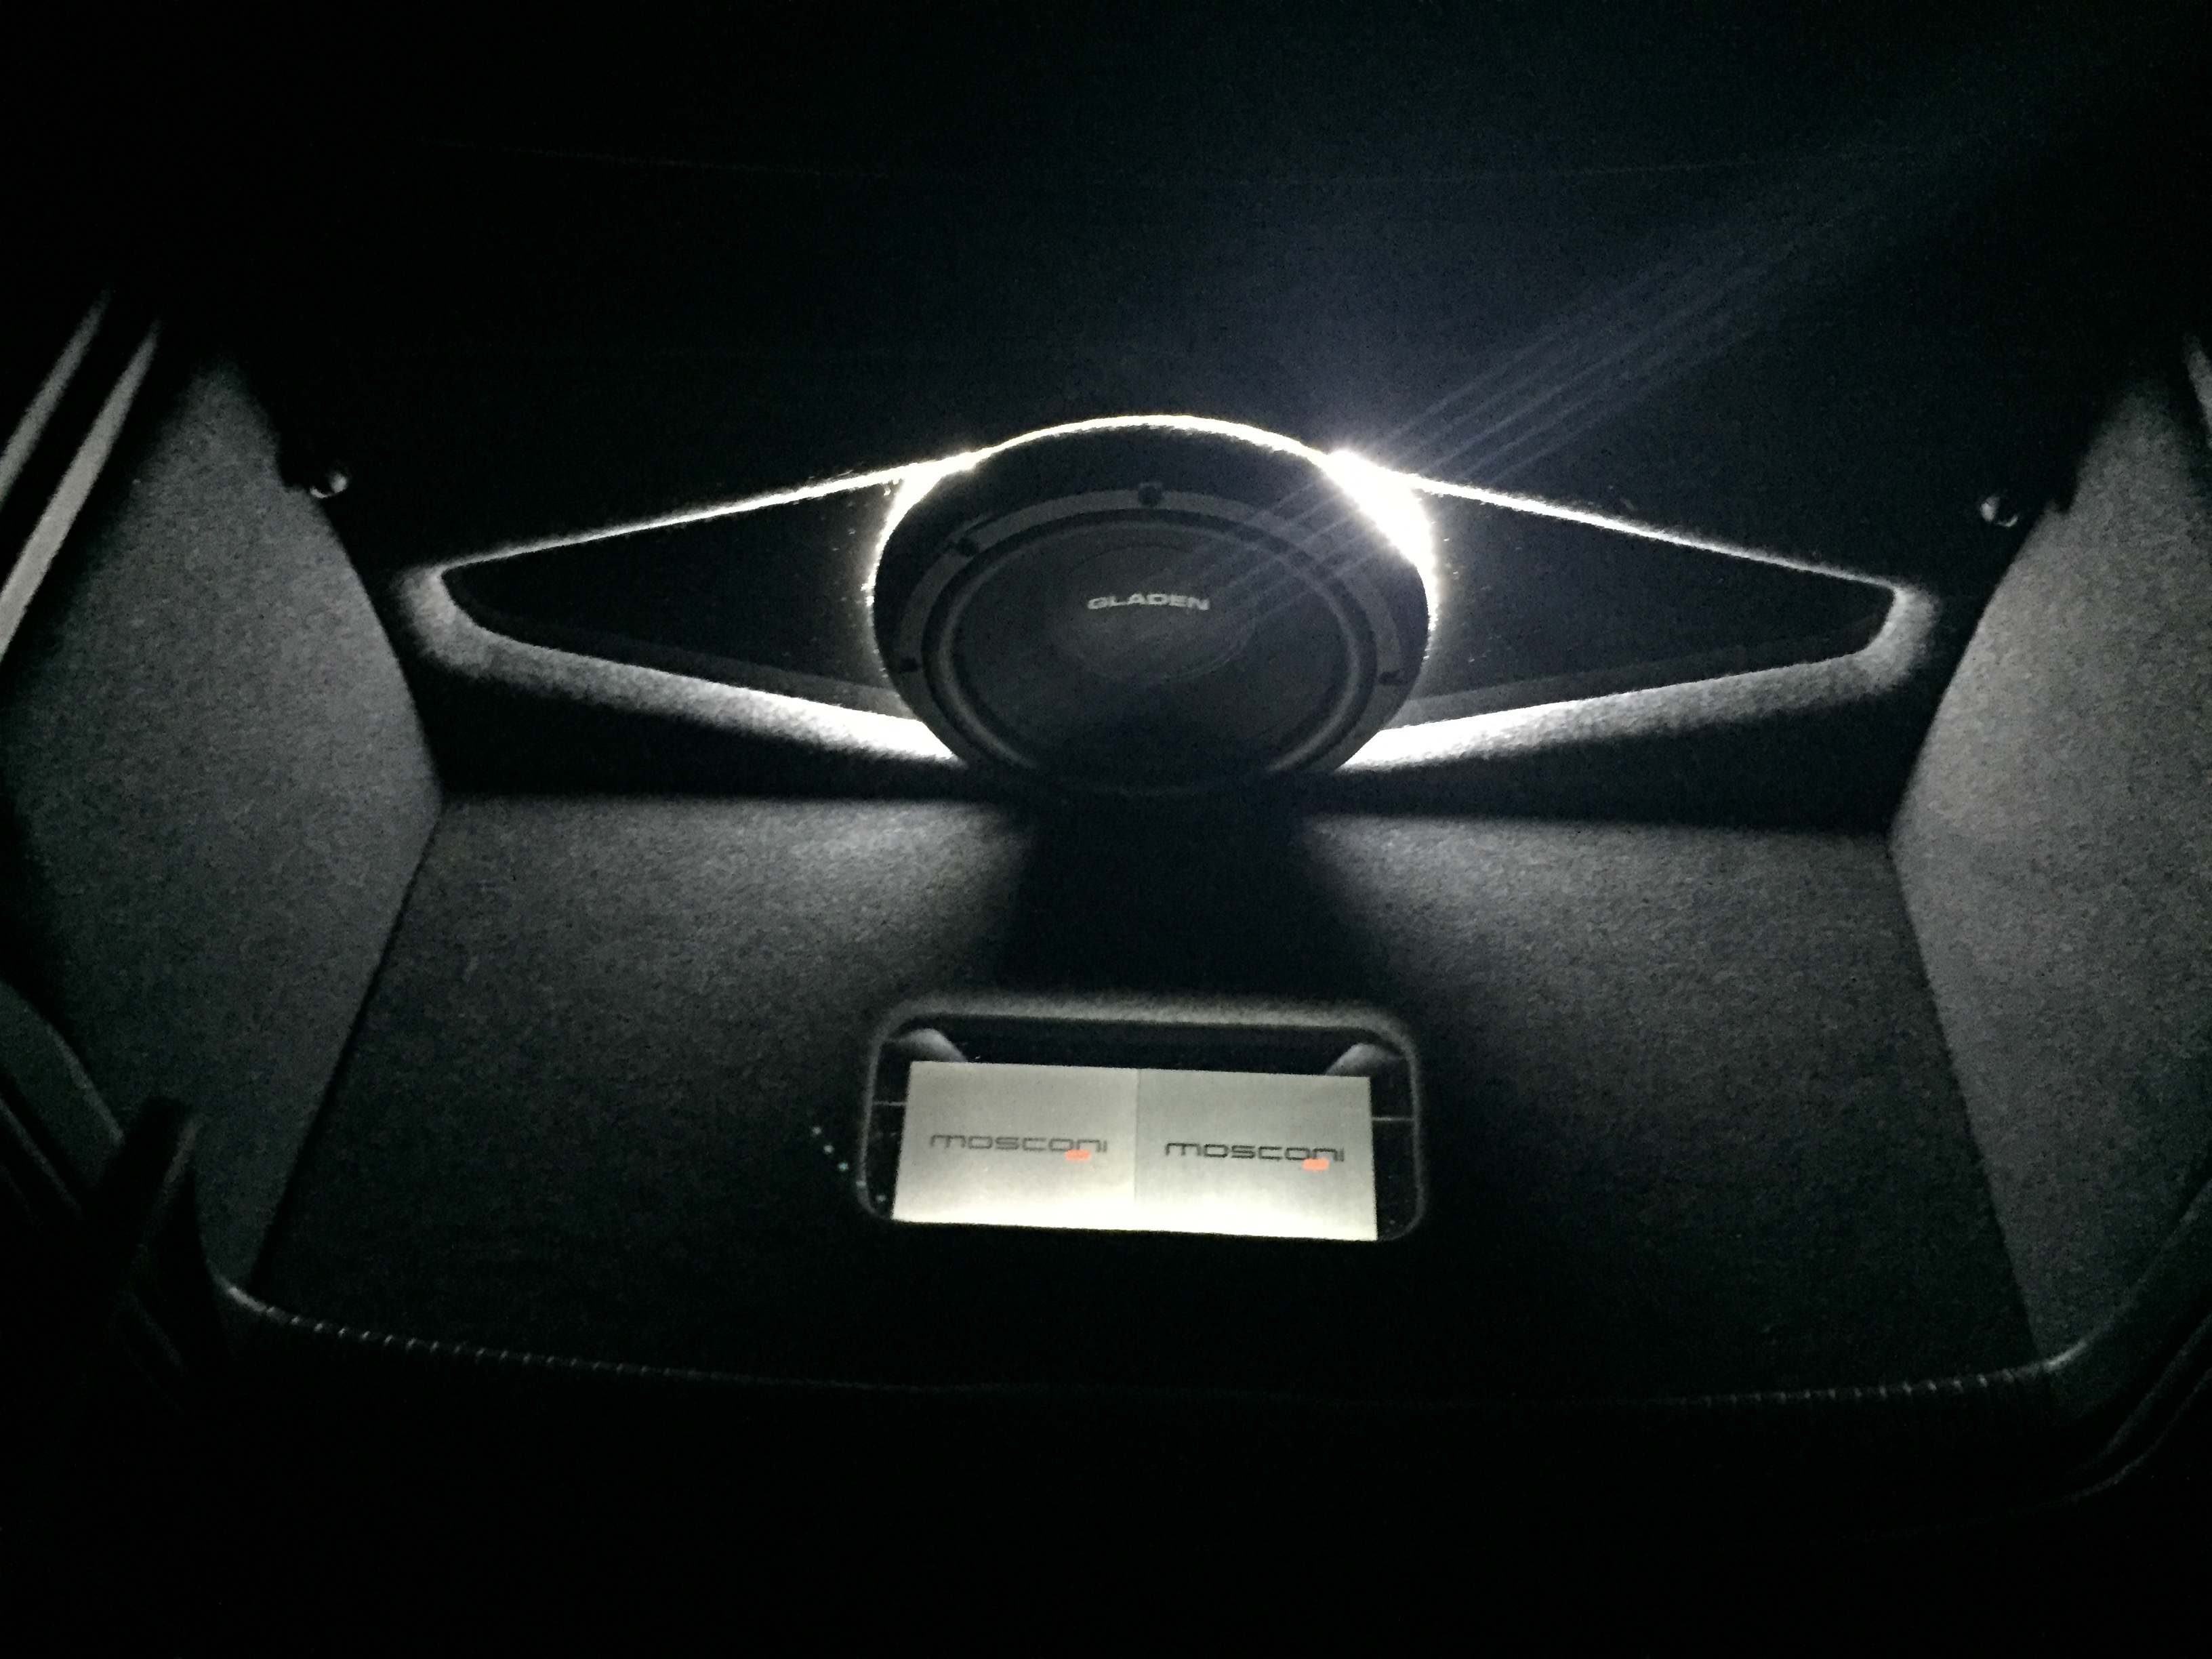
Time for some deadening!
In this stage, only the boot floor and rear arches were covered, the tailgate, rear doors, floor and roof still need to be done.
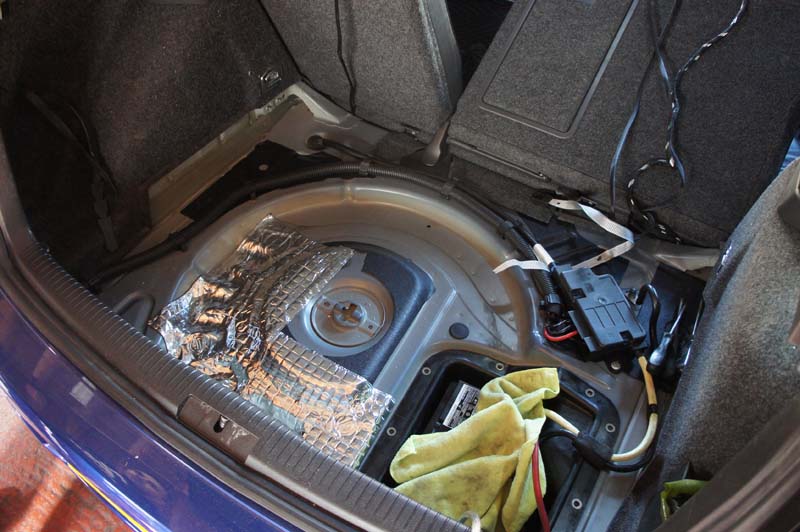
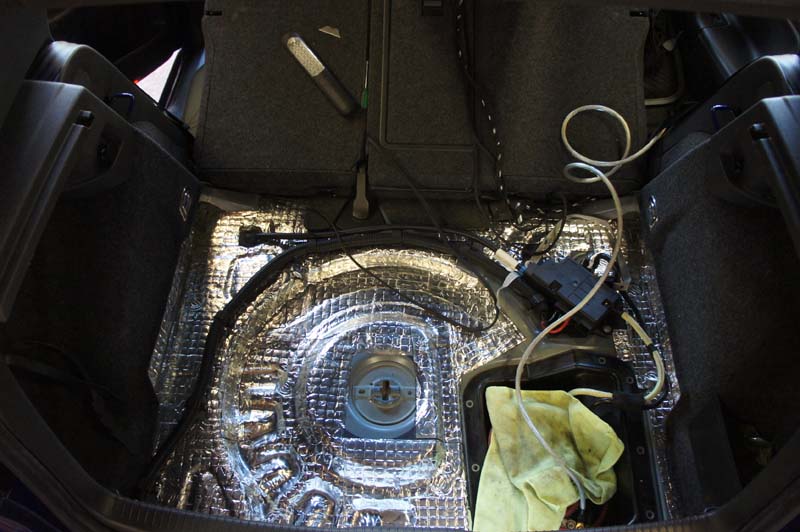

Ill be revisiting the rear arches at some point to cover with some CCF and MLV to help reduce road noise.
Needed to test the amp and front stage to make sure it all worked as expected…and was keep the hear the Gladen front end in action so excuse the temporary wiring etc
Floor panels being built
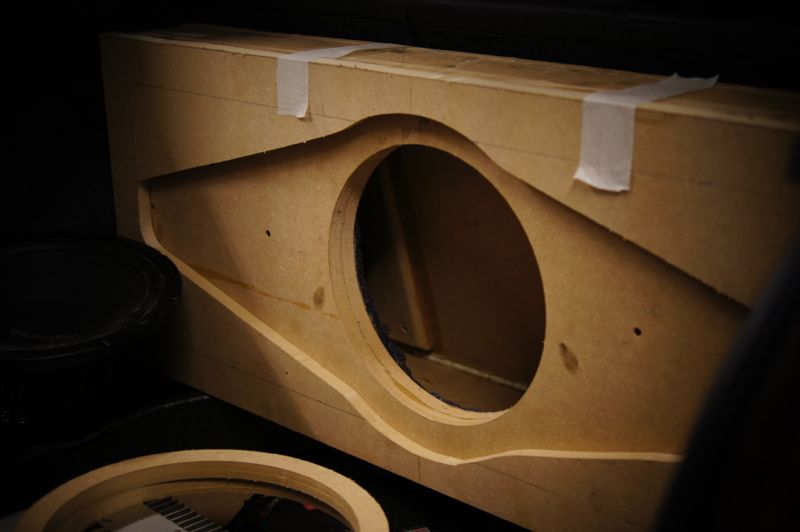
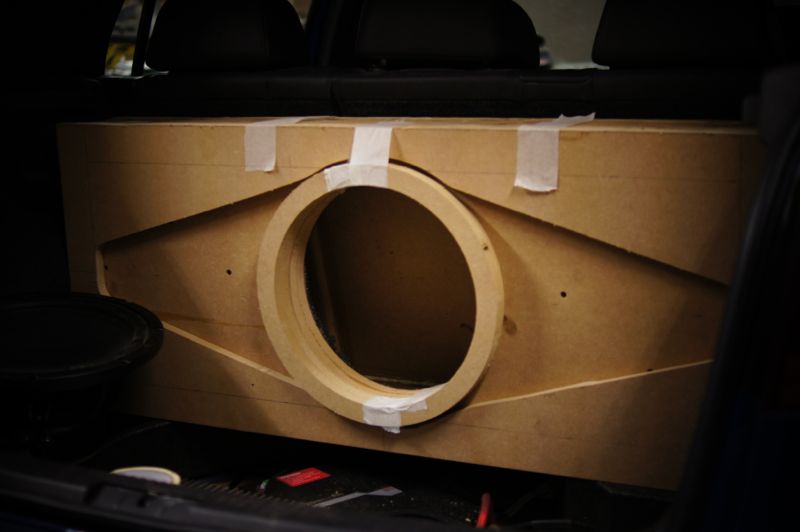
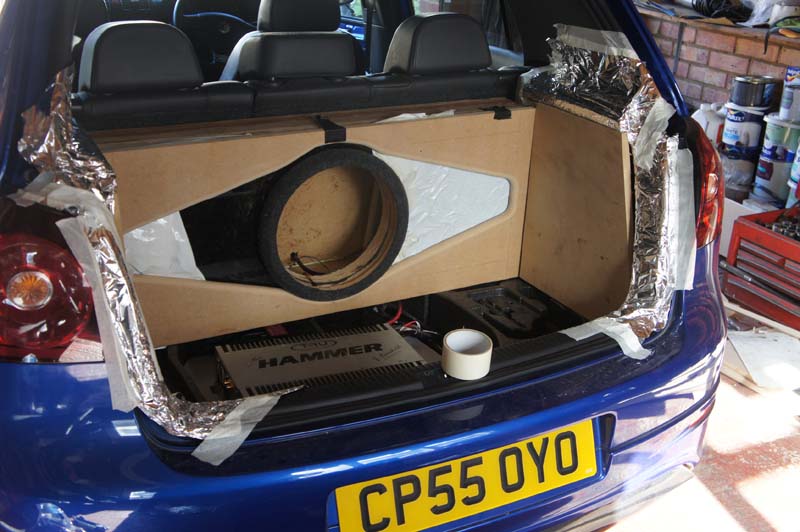
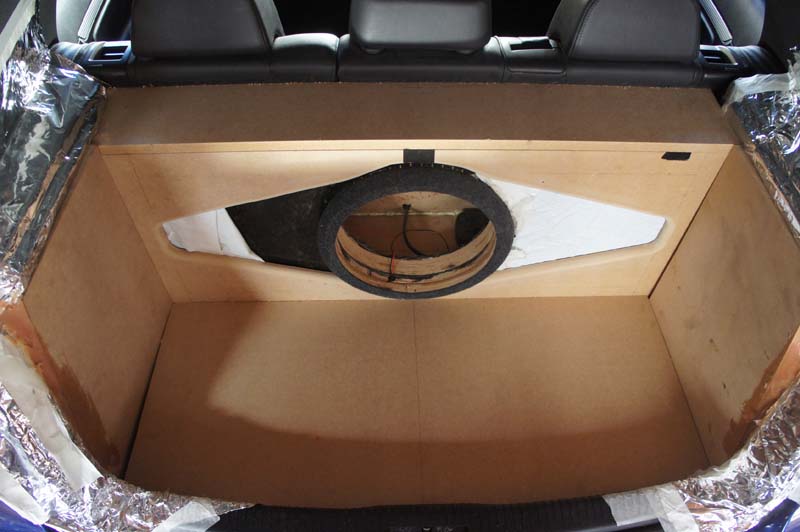
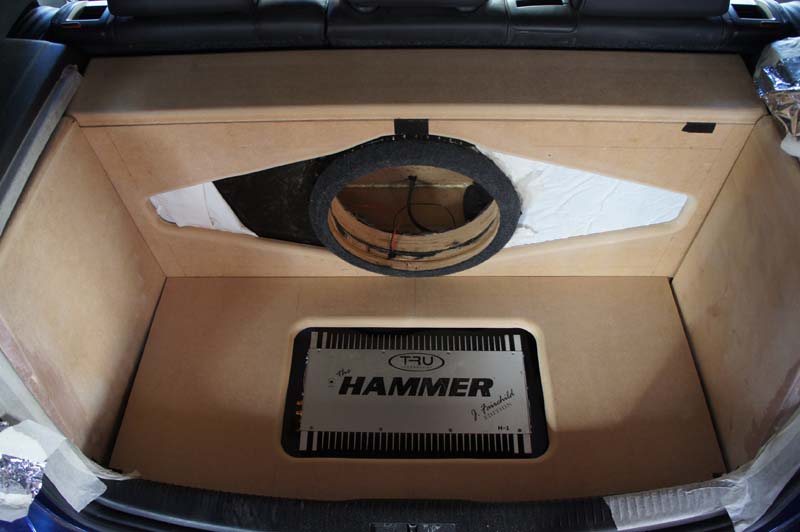
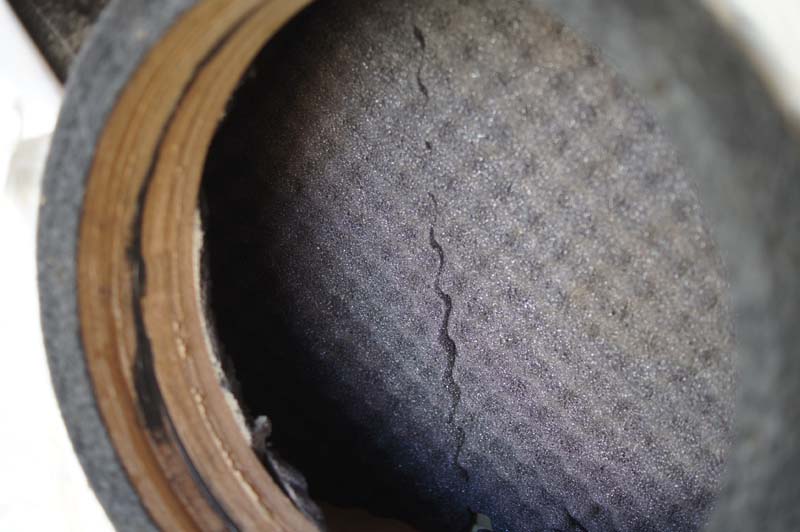
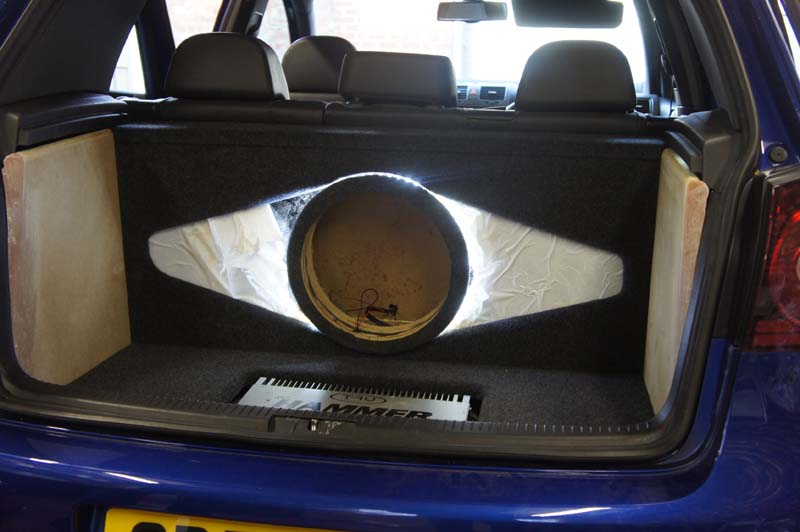
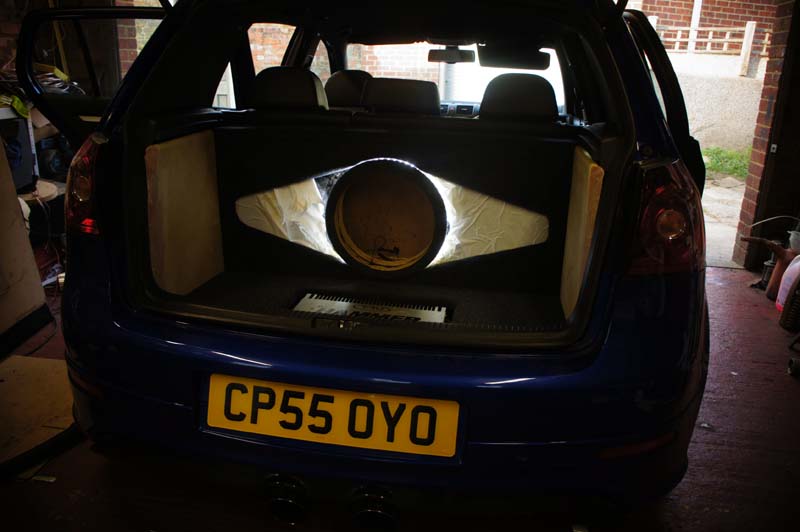
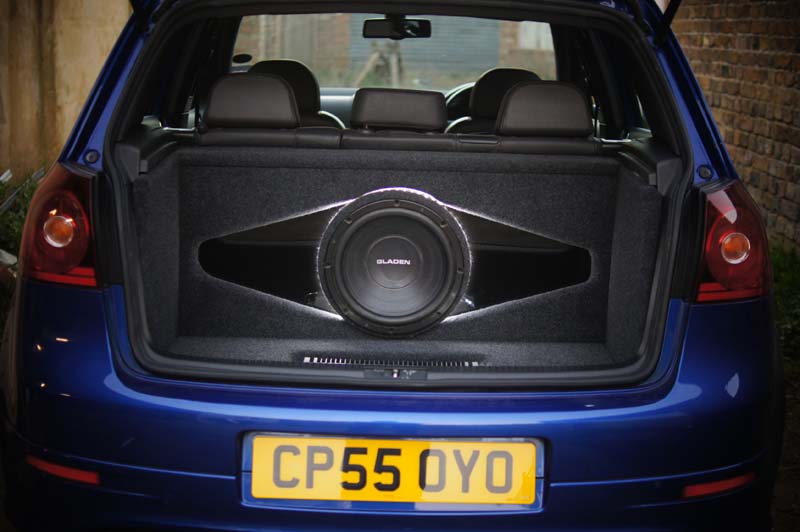
Box and pretty panels getting sorted, you can just about see the bracing inside the box there, front panel is 36mm thick and later becomes 54mm with the trim ring!
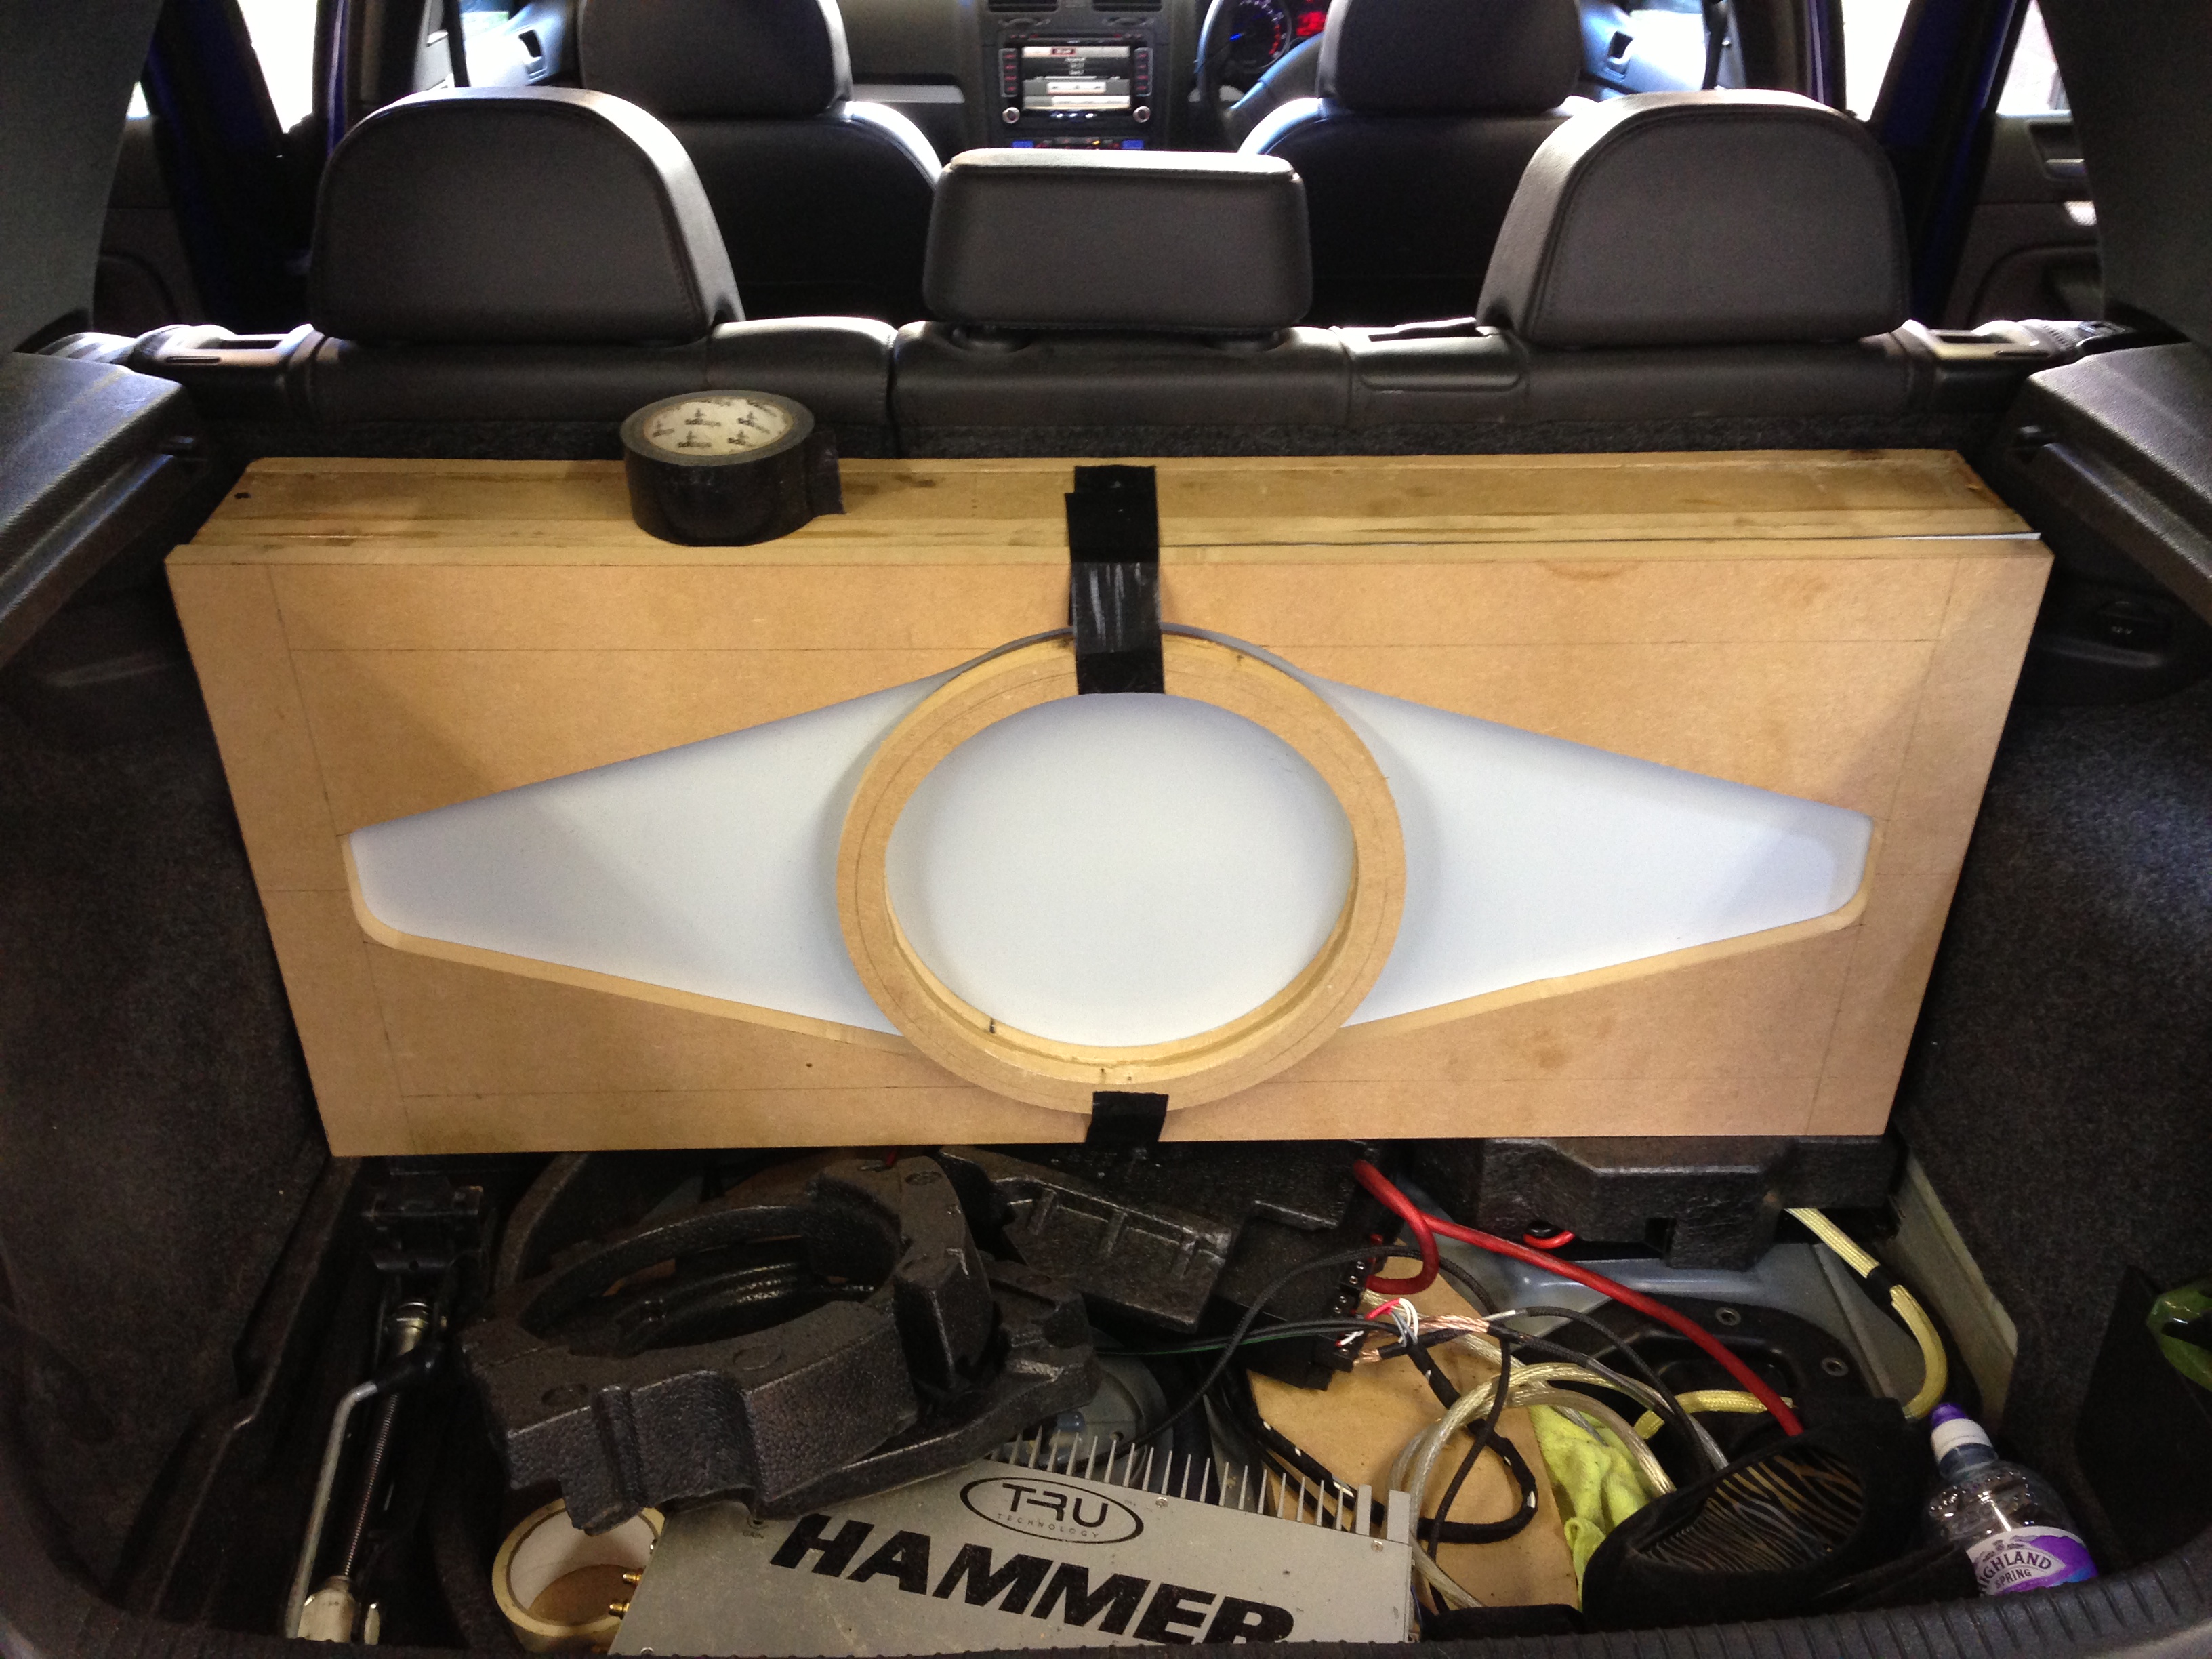
Perspex panel testing
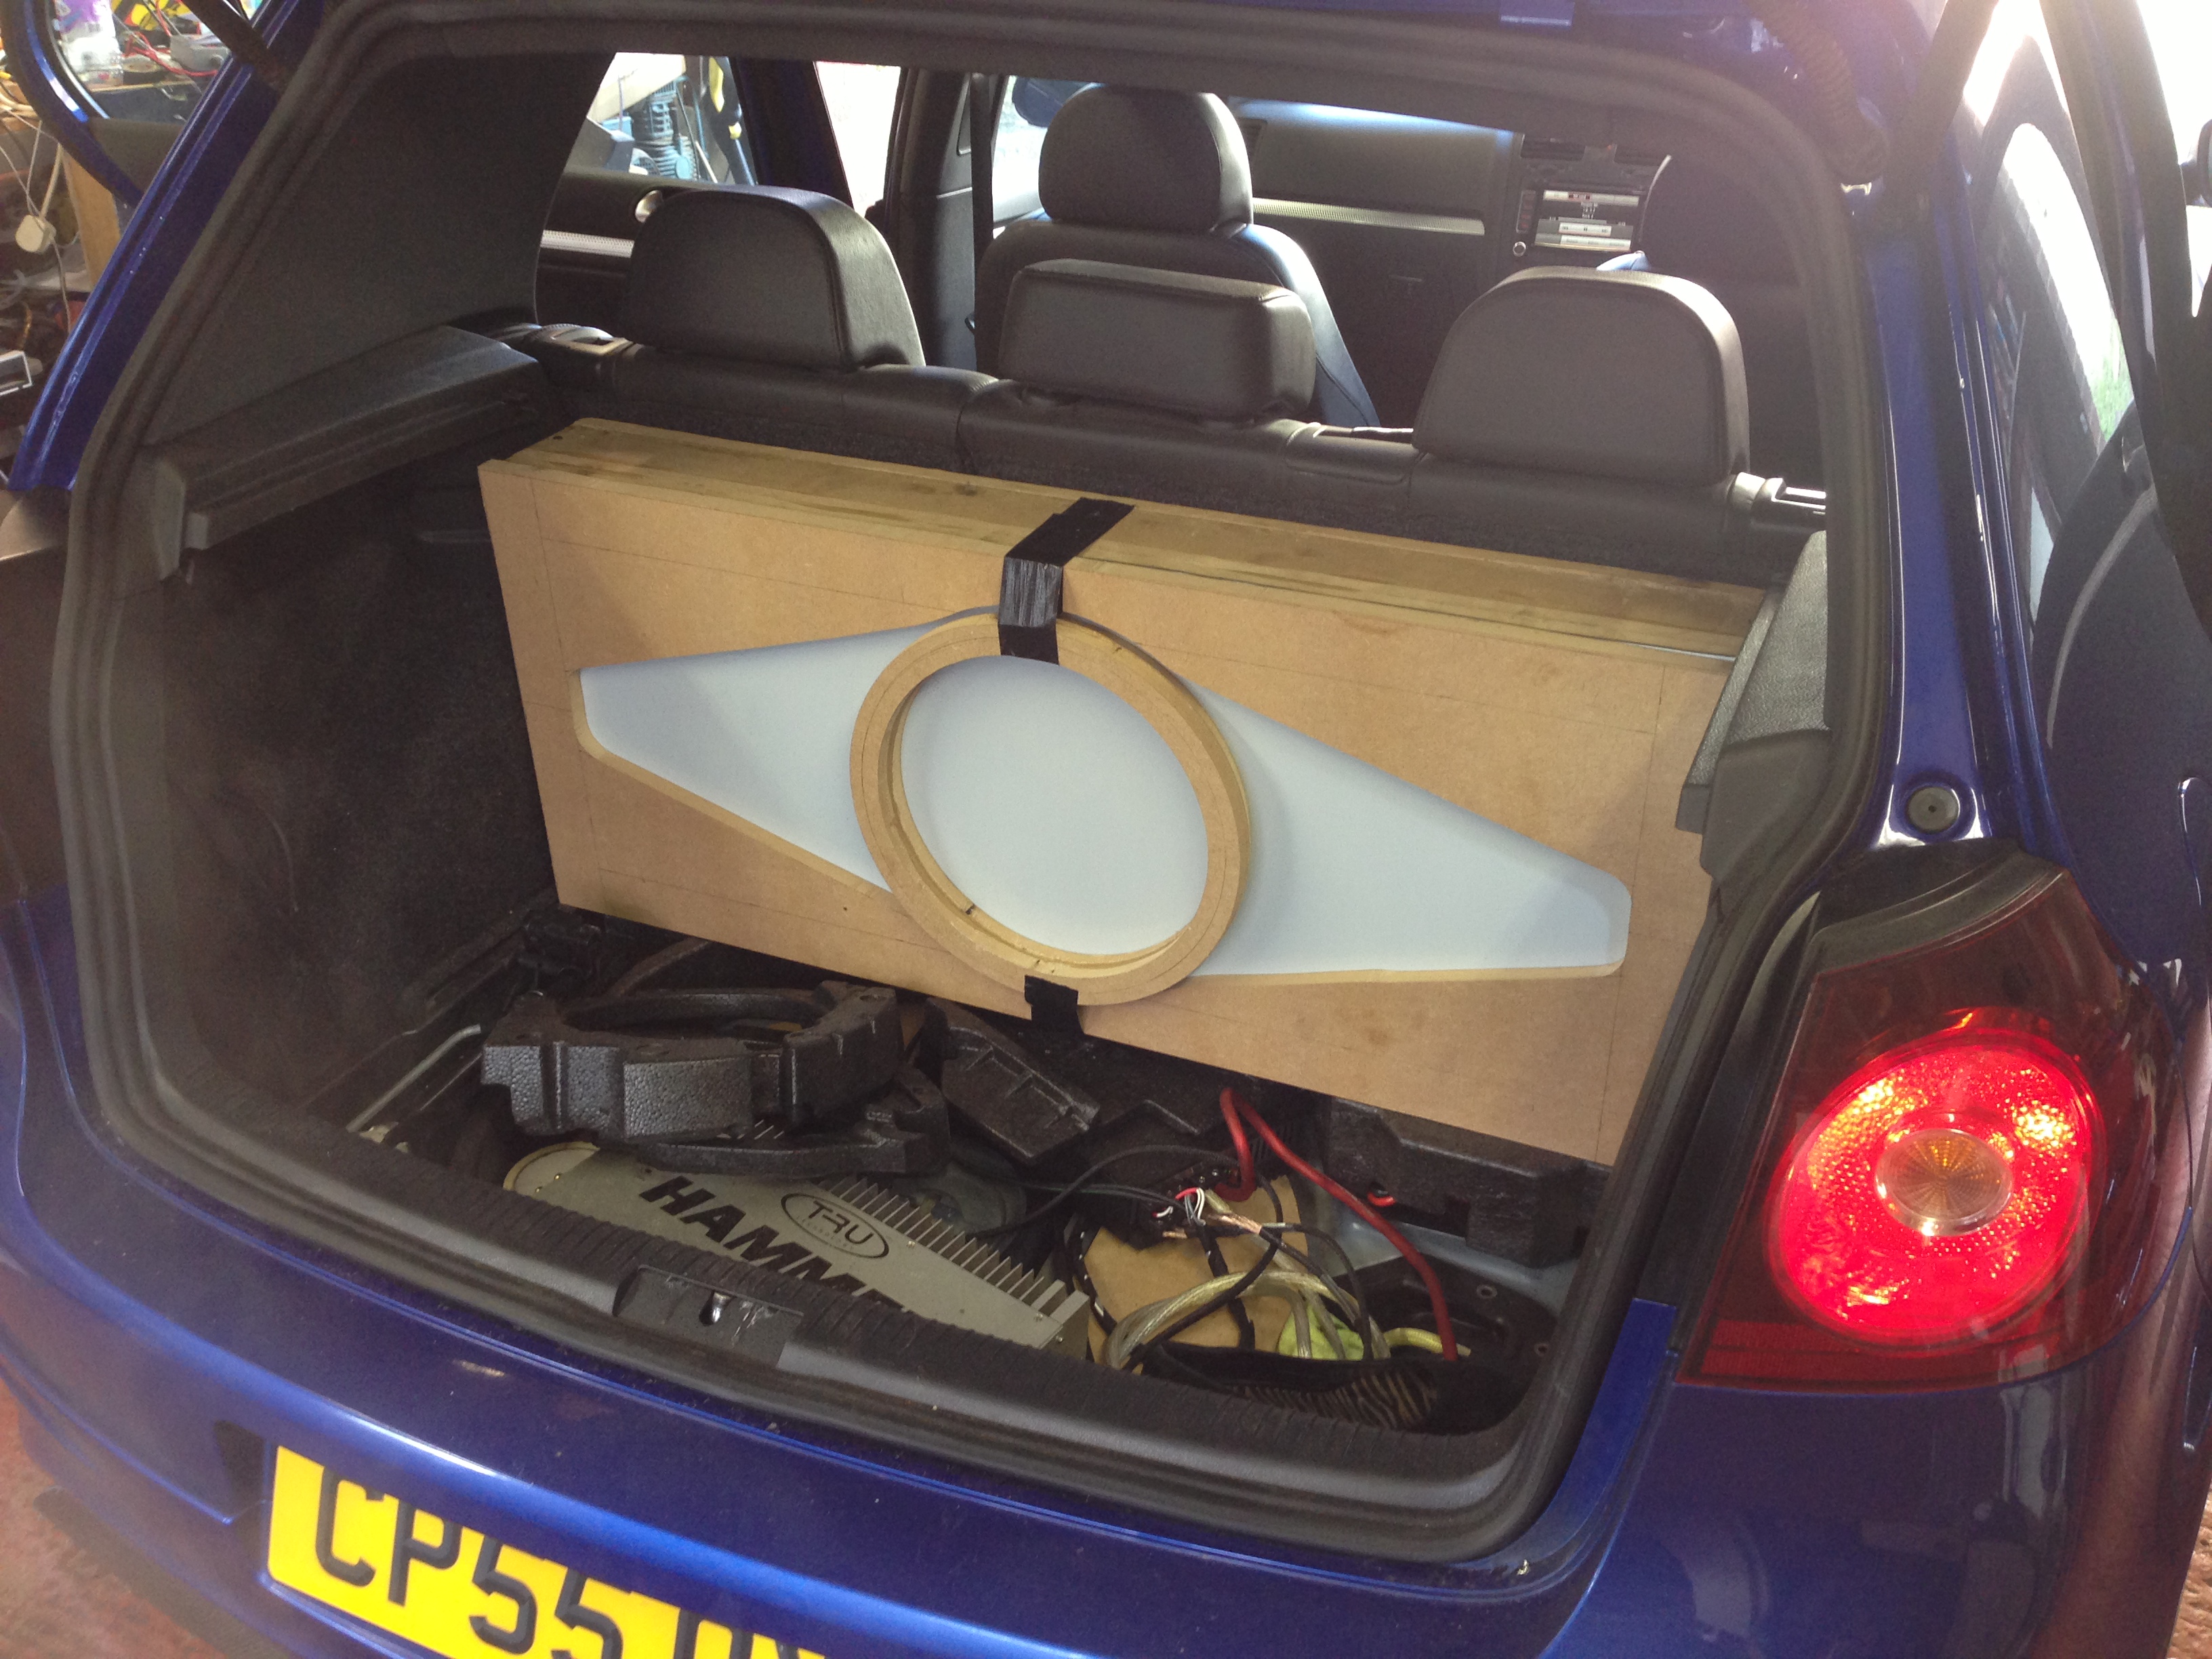
Letting the perspex panel adhere to the box overnight
In this stage, only the boot floor and rear arches were covered, the tailgate, rear doors, floor and roof still need to be done.
Ill be revisiting the rear arches at some point to cover with some CCF and MLV to help reduce road noise.
Needed to test the amp and front stage to make sure it all worked as expected…and was keep the hear the Gladen front end in action so excuse the temporary wiring etc
Floor panels being built
Box and pretty panels getting sorted, you can just about see the bracing inside the box there, front panel is 36mm thick and later becomes 54mm with the trim ring!
Perspex panel testing
Letting the perspex panel adhere to the box overnight

 02-12-2014, 04:48 AM
#30
Regular Contributor
Join Date: Jan 2013
Location: Middlesbrough, North East England
Posts: 207
Likes: 0
Received 3 Likes
on
3 Posts
Hes all about the bass about the bass no treble he's all about the bass about the bass no treble haha.... nice effort i do like the R32... nice colour
10-12-2014, 10:25 AM
#32
PassionFord Post Troll
Thread Starter
Testing the lighting out
The carpet we used was a 99.9% match to the original carpet in the boot�I wanted to maintain that OEM look and feel which we did with ease...
Time for trimming!
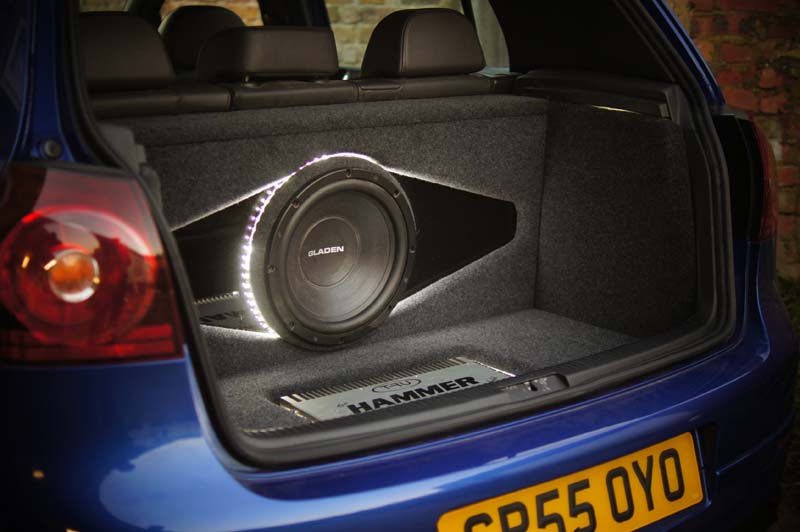


The last section of the install was a bit 'rushed together' so I didn't have much time taking photos etc. But the Tru Tech and the floor build is a temp fill until the new amps arrive (which they now have)
The carpet we used was a 99.9% match to the original carpet in the boot�I wanted to maintain that OEM look and feel which we did with ease...
Time for trimming!
The last section of the install was a bit 'rushed together' so I didn't have much time taking photos etc. But the Tru Tech and the floor build is a temp fill until the new amps arrive (which they now have)
10-12-2014, 09:42 PM
#34
PassionFord Post Troll
Thread Starter
 10-12-2015, 09:51 AM
#38
PassionFord Post Troll
Thread Starter
I keep meaning to update this but never seem to have the time!
So here we go lol!
Firstly, a few bits I haven't mentioned on the thread so far...
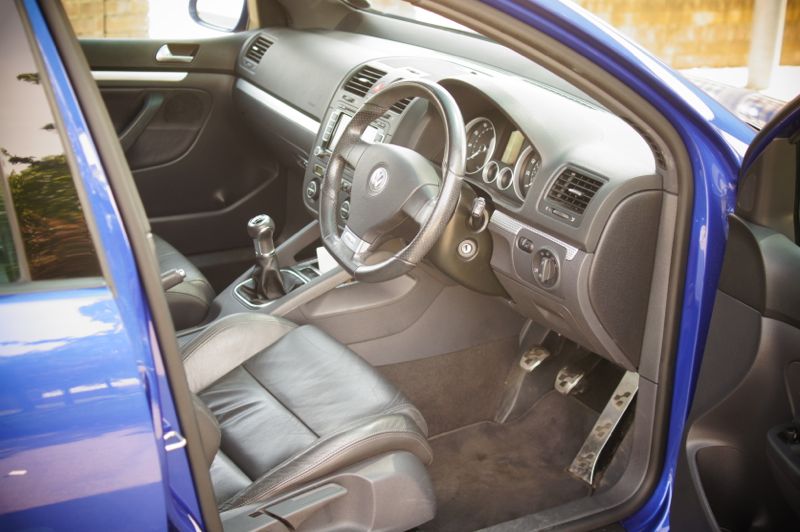
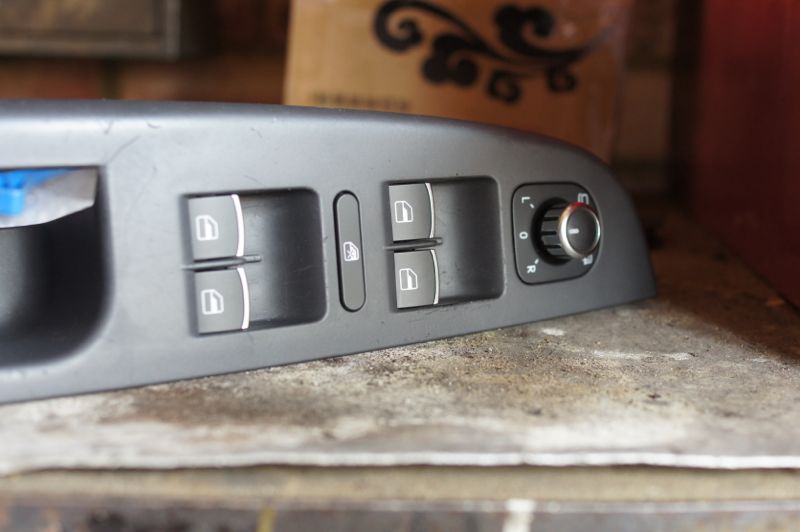
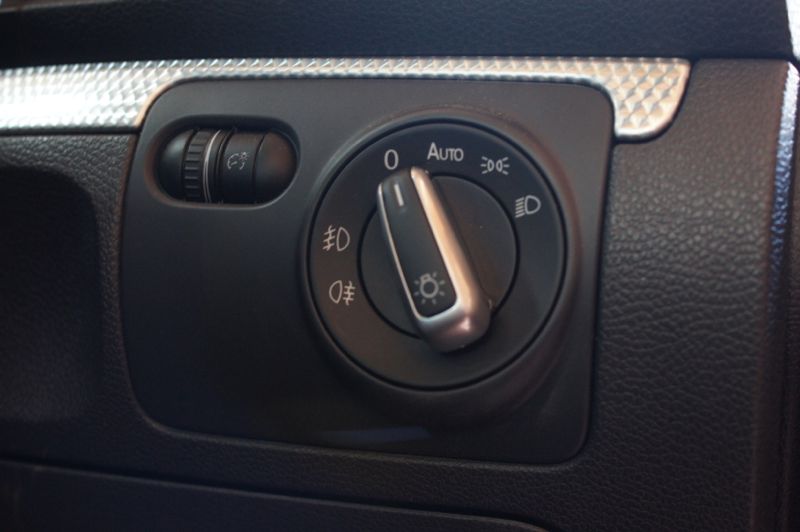
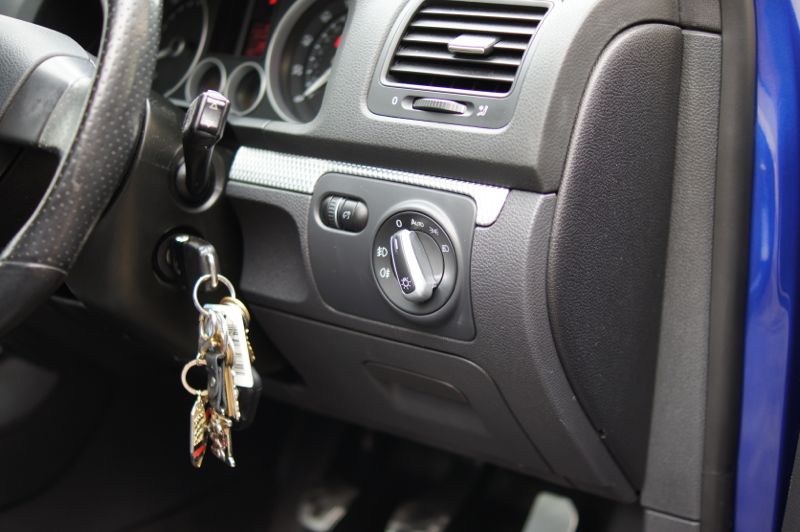
All the switches in the car have been swapped out for switches from a Passat CC I think it is with the silver tips. This was done purely for aesthetics and give a much nicer feel inside the car.


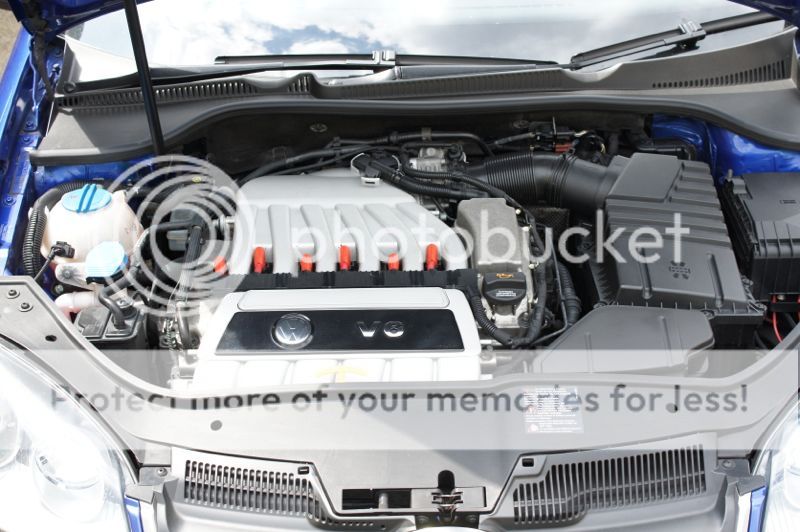
Car has been given a major service and looks rather stock under the bonnet!
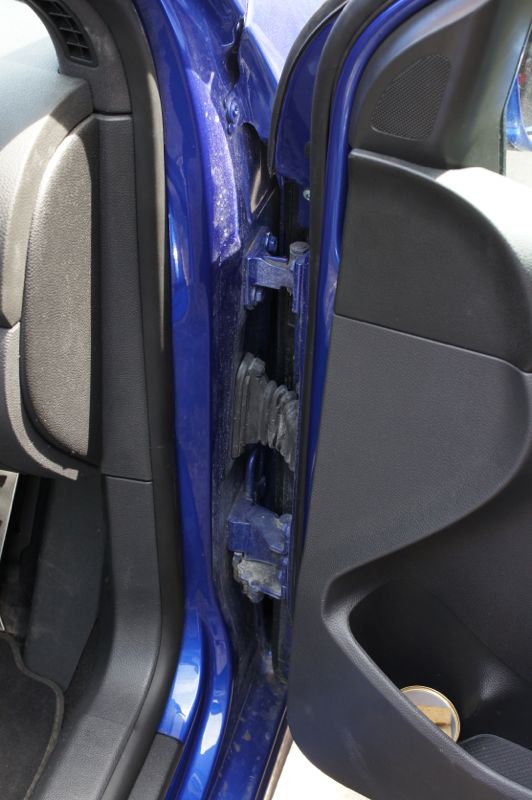
One thing we like to recommend doing when we detail a car, is clean the door shuts etc, just adds that extra bit of attention to detail...so obviously ours had to be minty mint!
Unfortunately I didn't get a picture with it fully finished as its missing Aerospace R303 protectant in the last picture
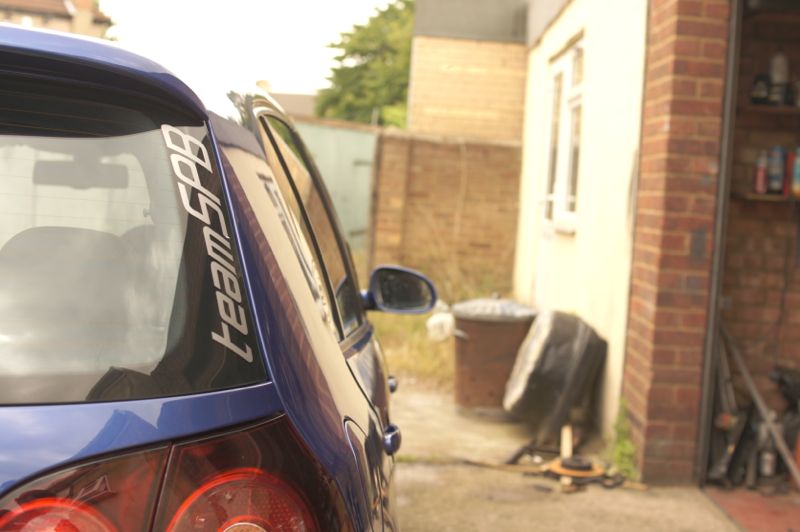
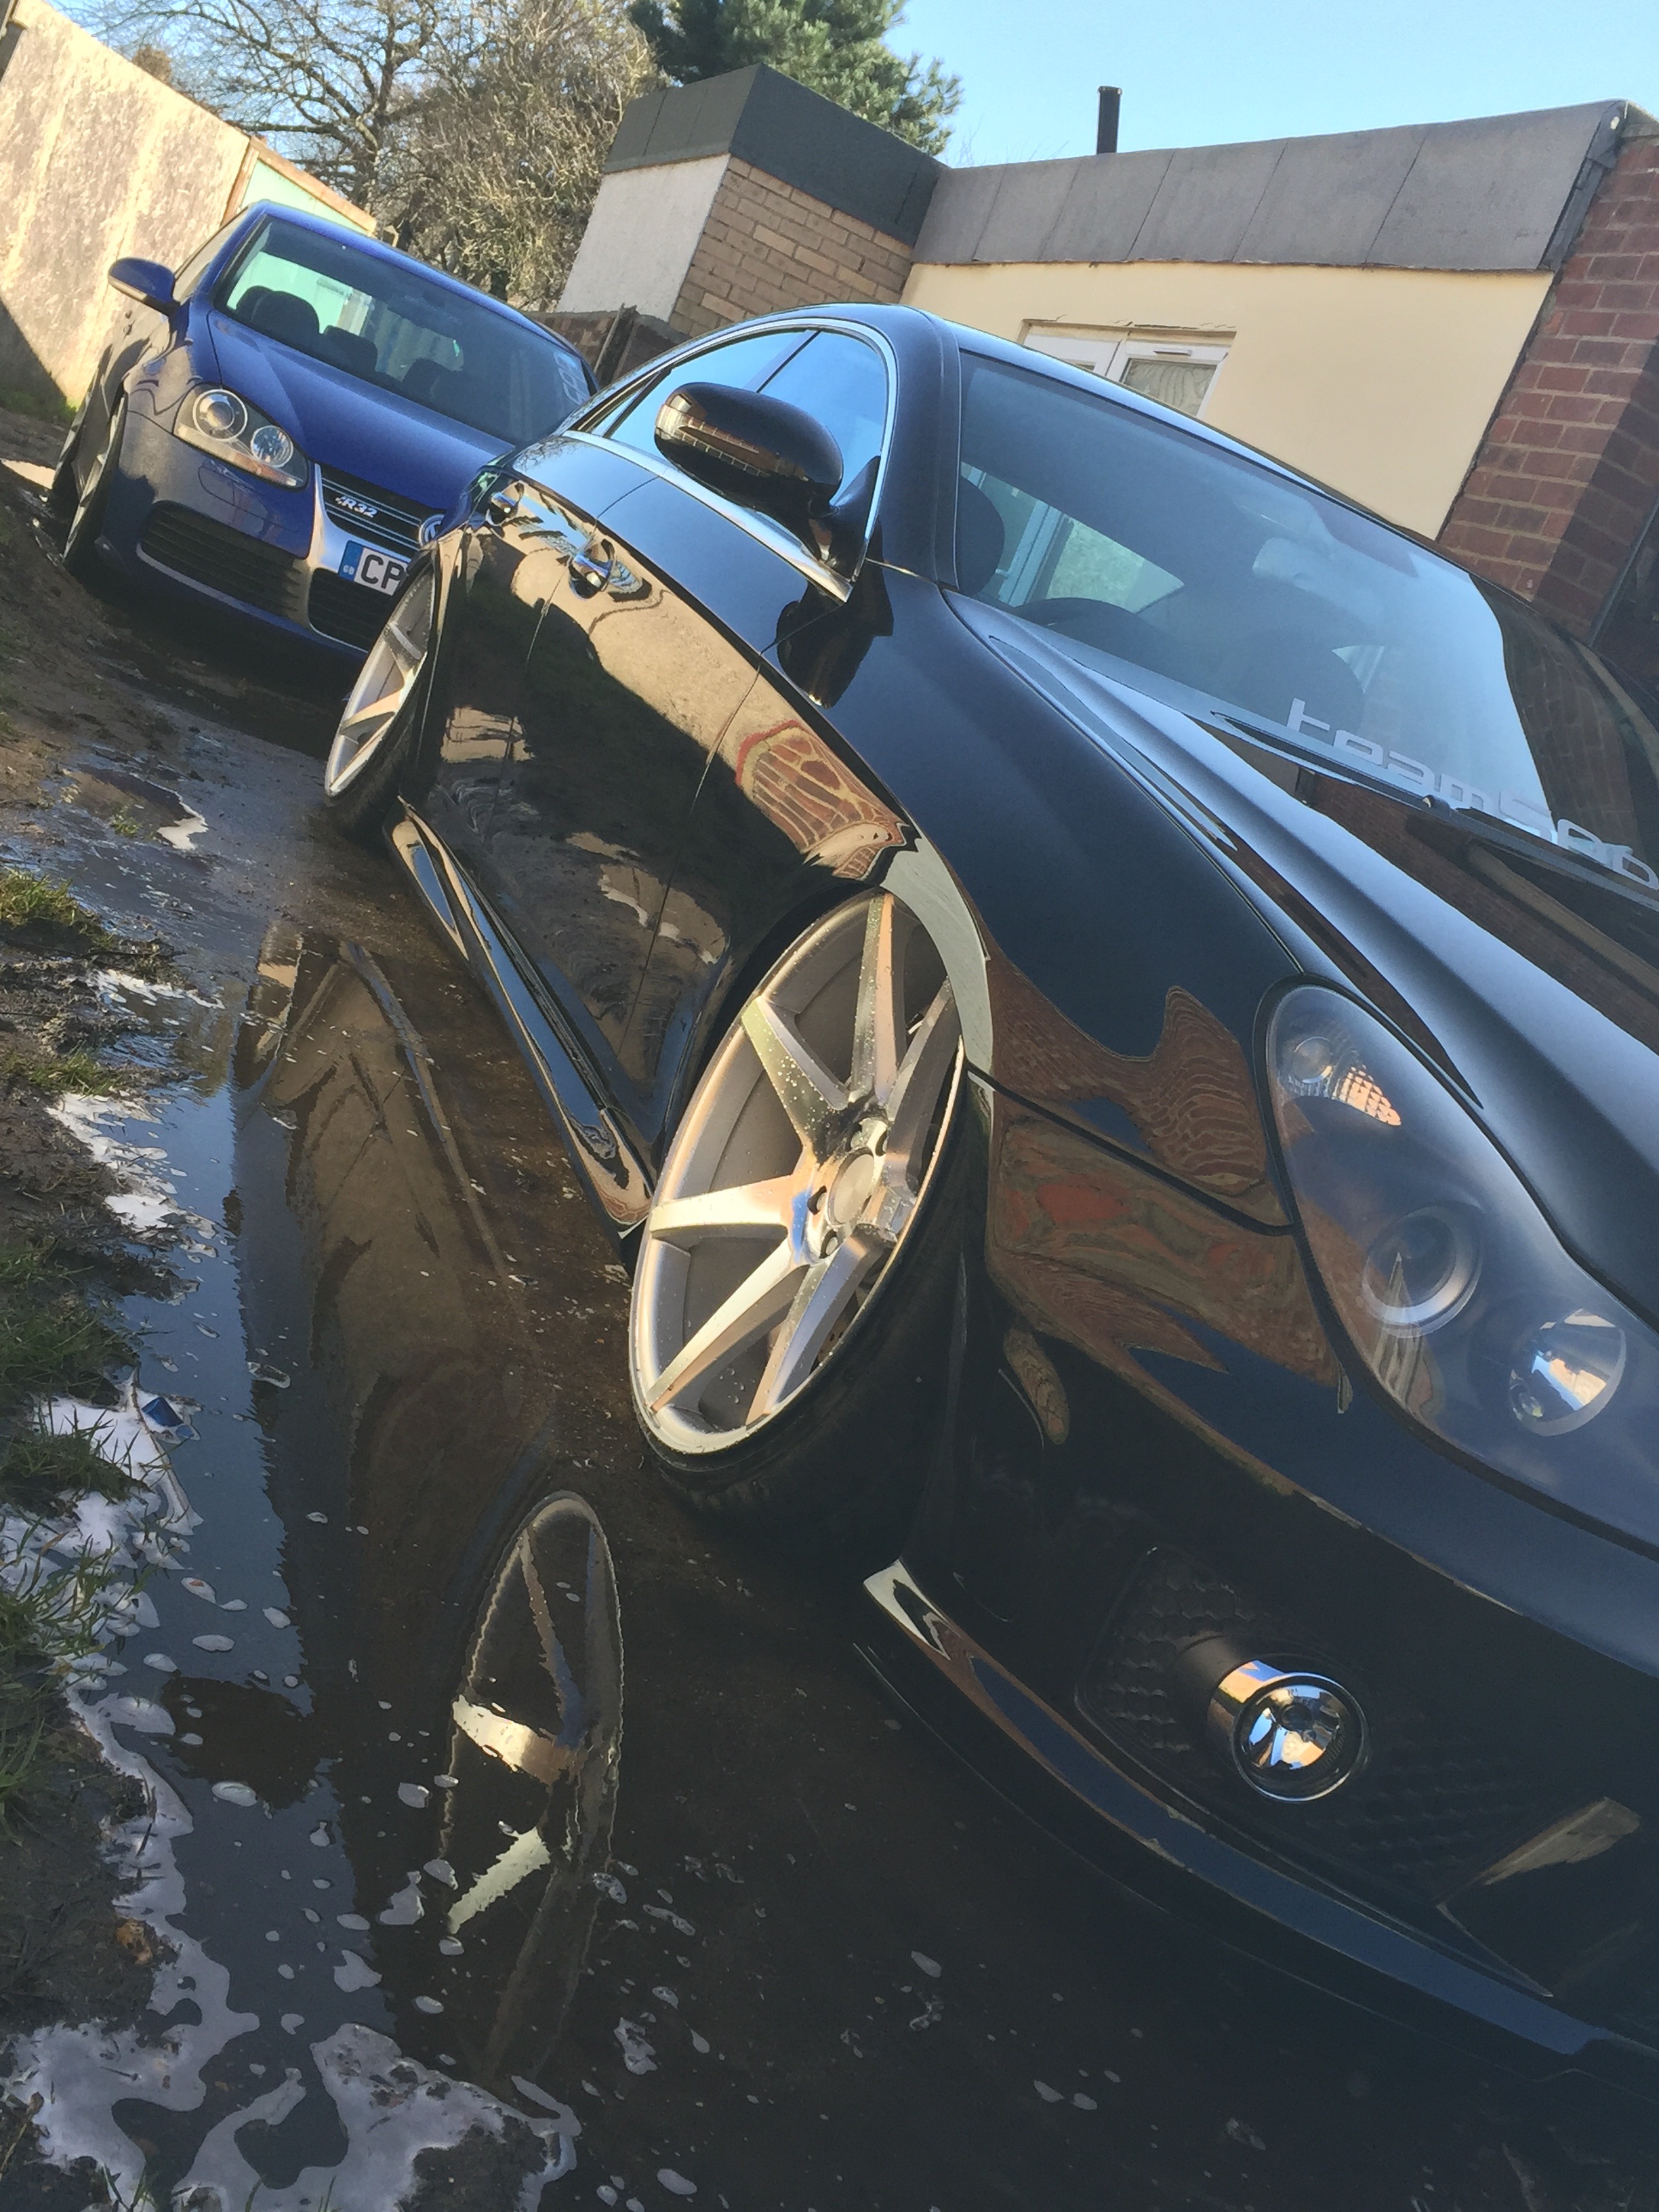
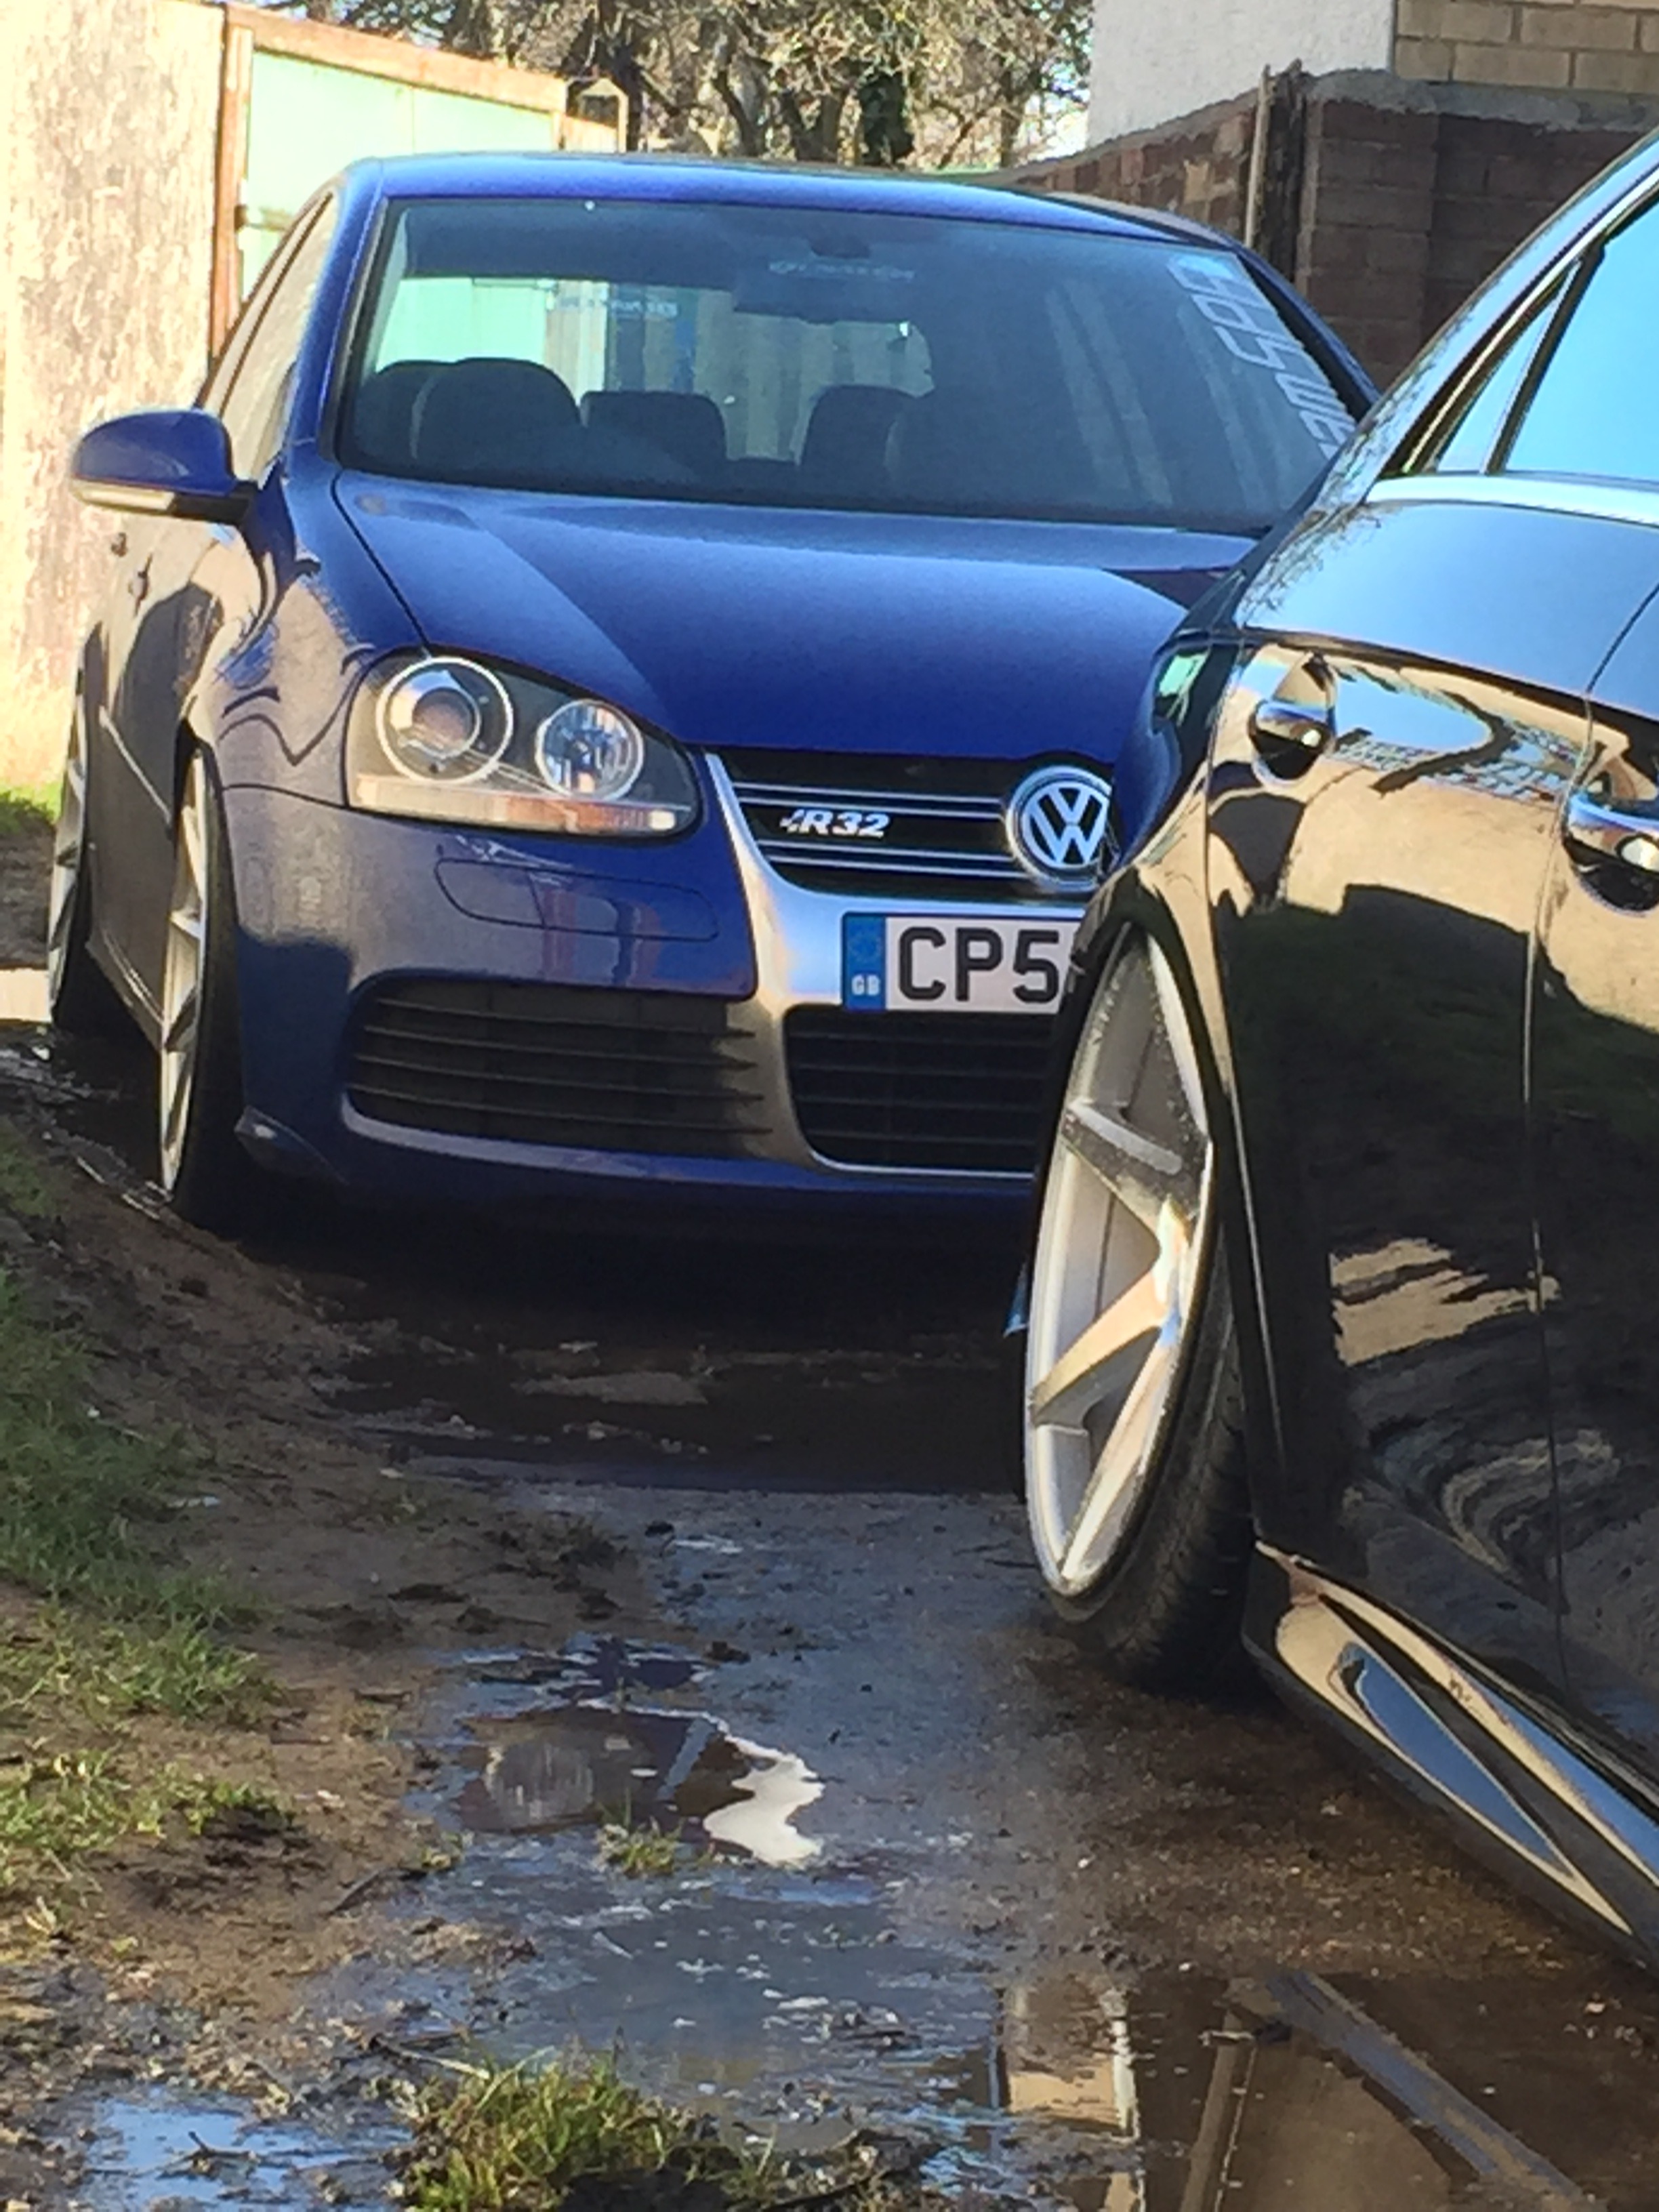
Car also received its latest sticker
Group shot from Westside Treffen 2014

More to come a bit later
teamSPB
So here we go lol!
Firstly, a few bits I haven't mentioned on the thread so far...
All the switches in the car have been swapped out for switches from a Passat CC I think it is with the silver tips. This was done purely for aesthetics and give a much nicer feel inside the car.
Car has been given a major service and looks rather stock under the bonnet!
One thing we like to recommend doing when we detail a car, is clean the door shuts etc, just adds that extra bit of attention to detail...so obviously ours had to be minty mint!
Unfortunately I didn't get a picture with it fully finished as its missing Aerospace R303 protectant in the last picture
Car also received its latest sticker
Group shot from Westside Treffen 2014
More to come a bit later
teamSPB
20-01-2016, 09:02 AM
#40
PassionFord Post Troll
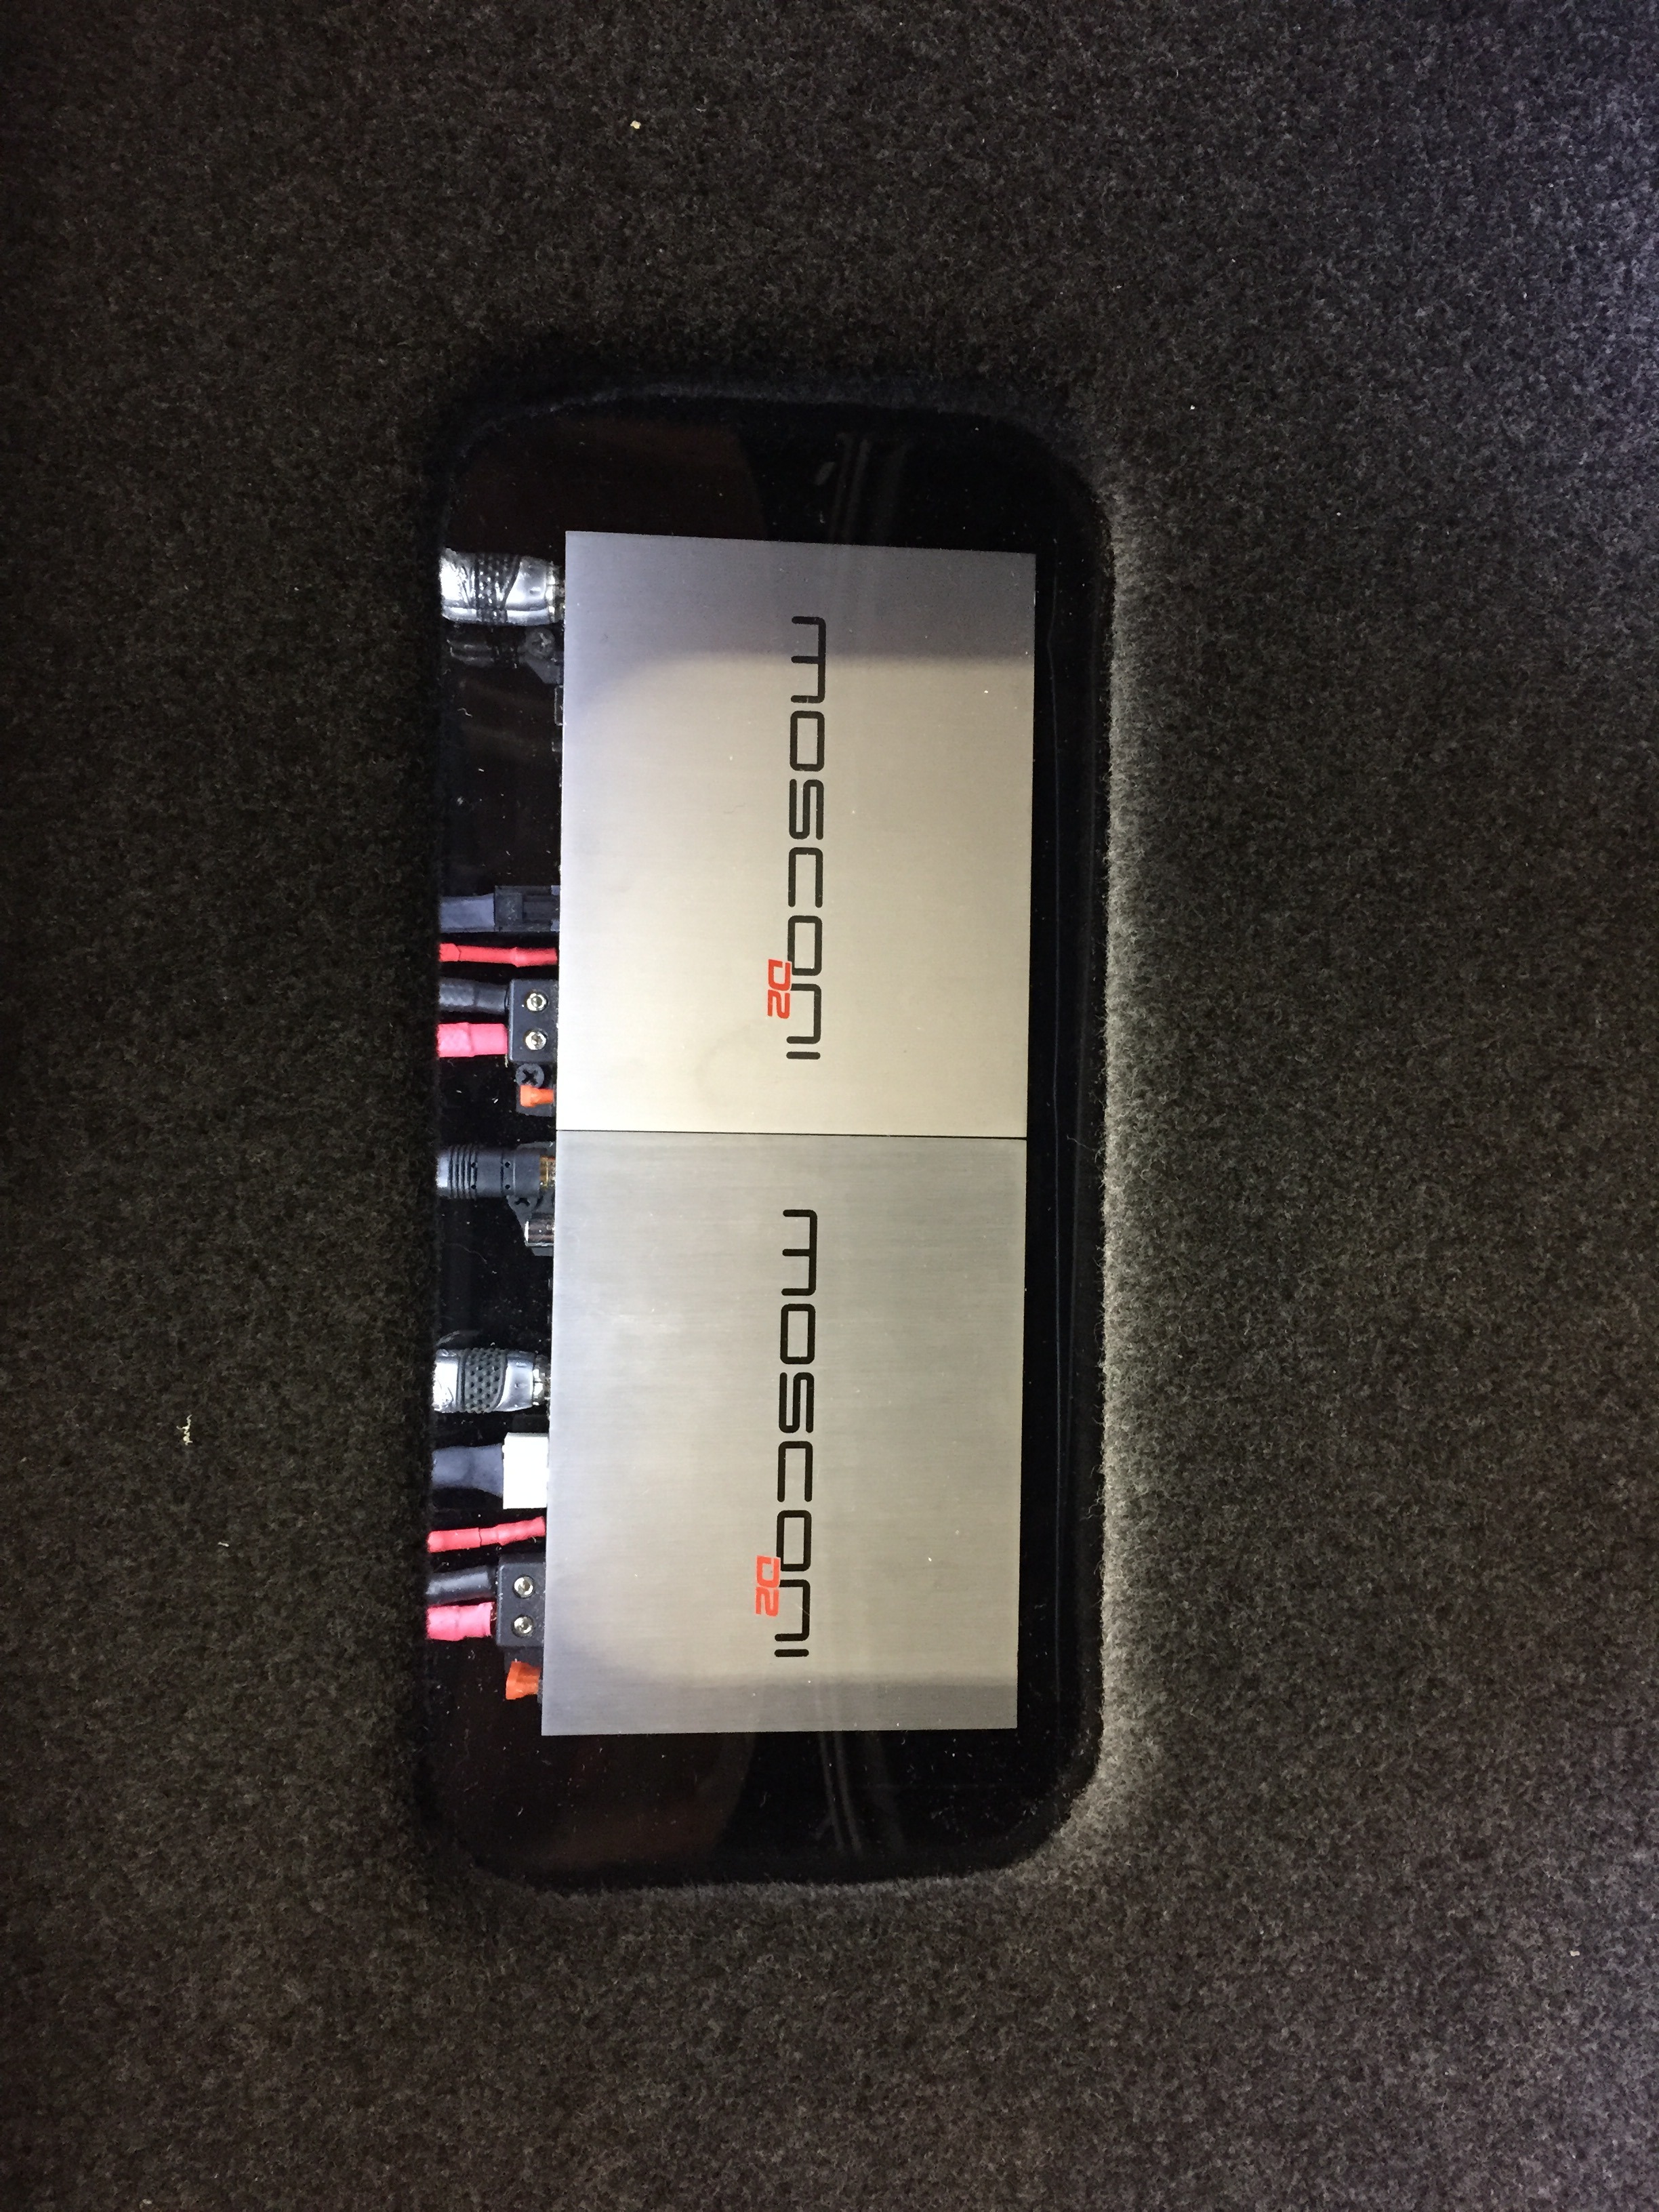
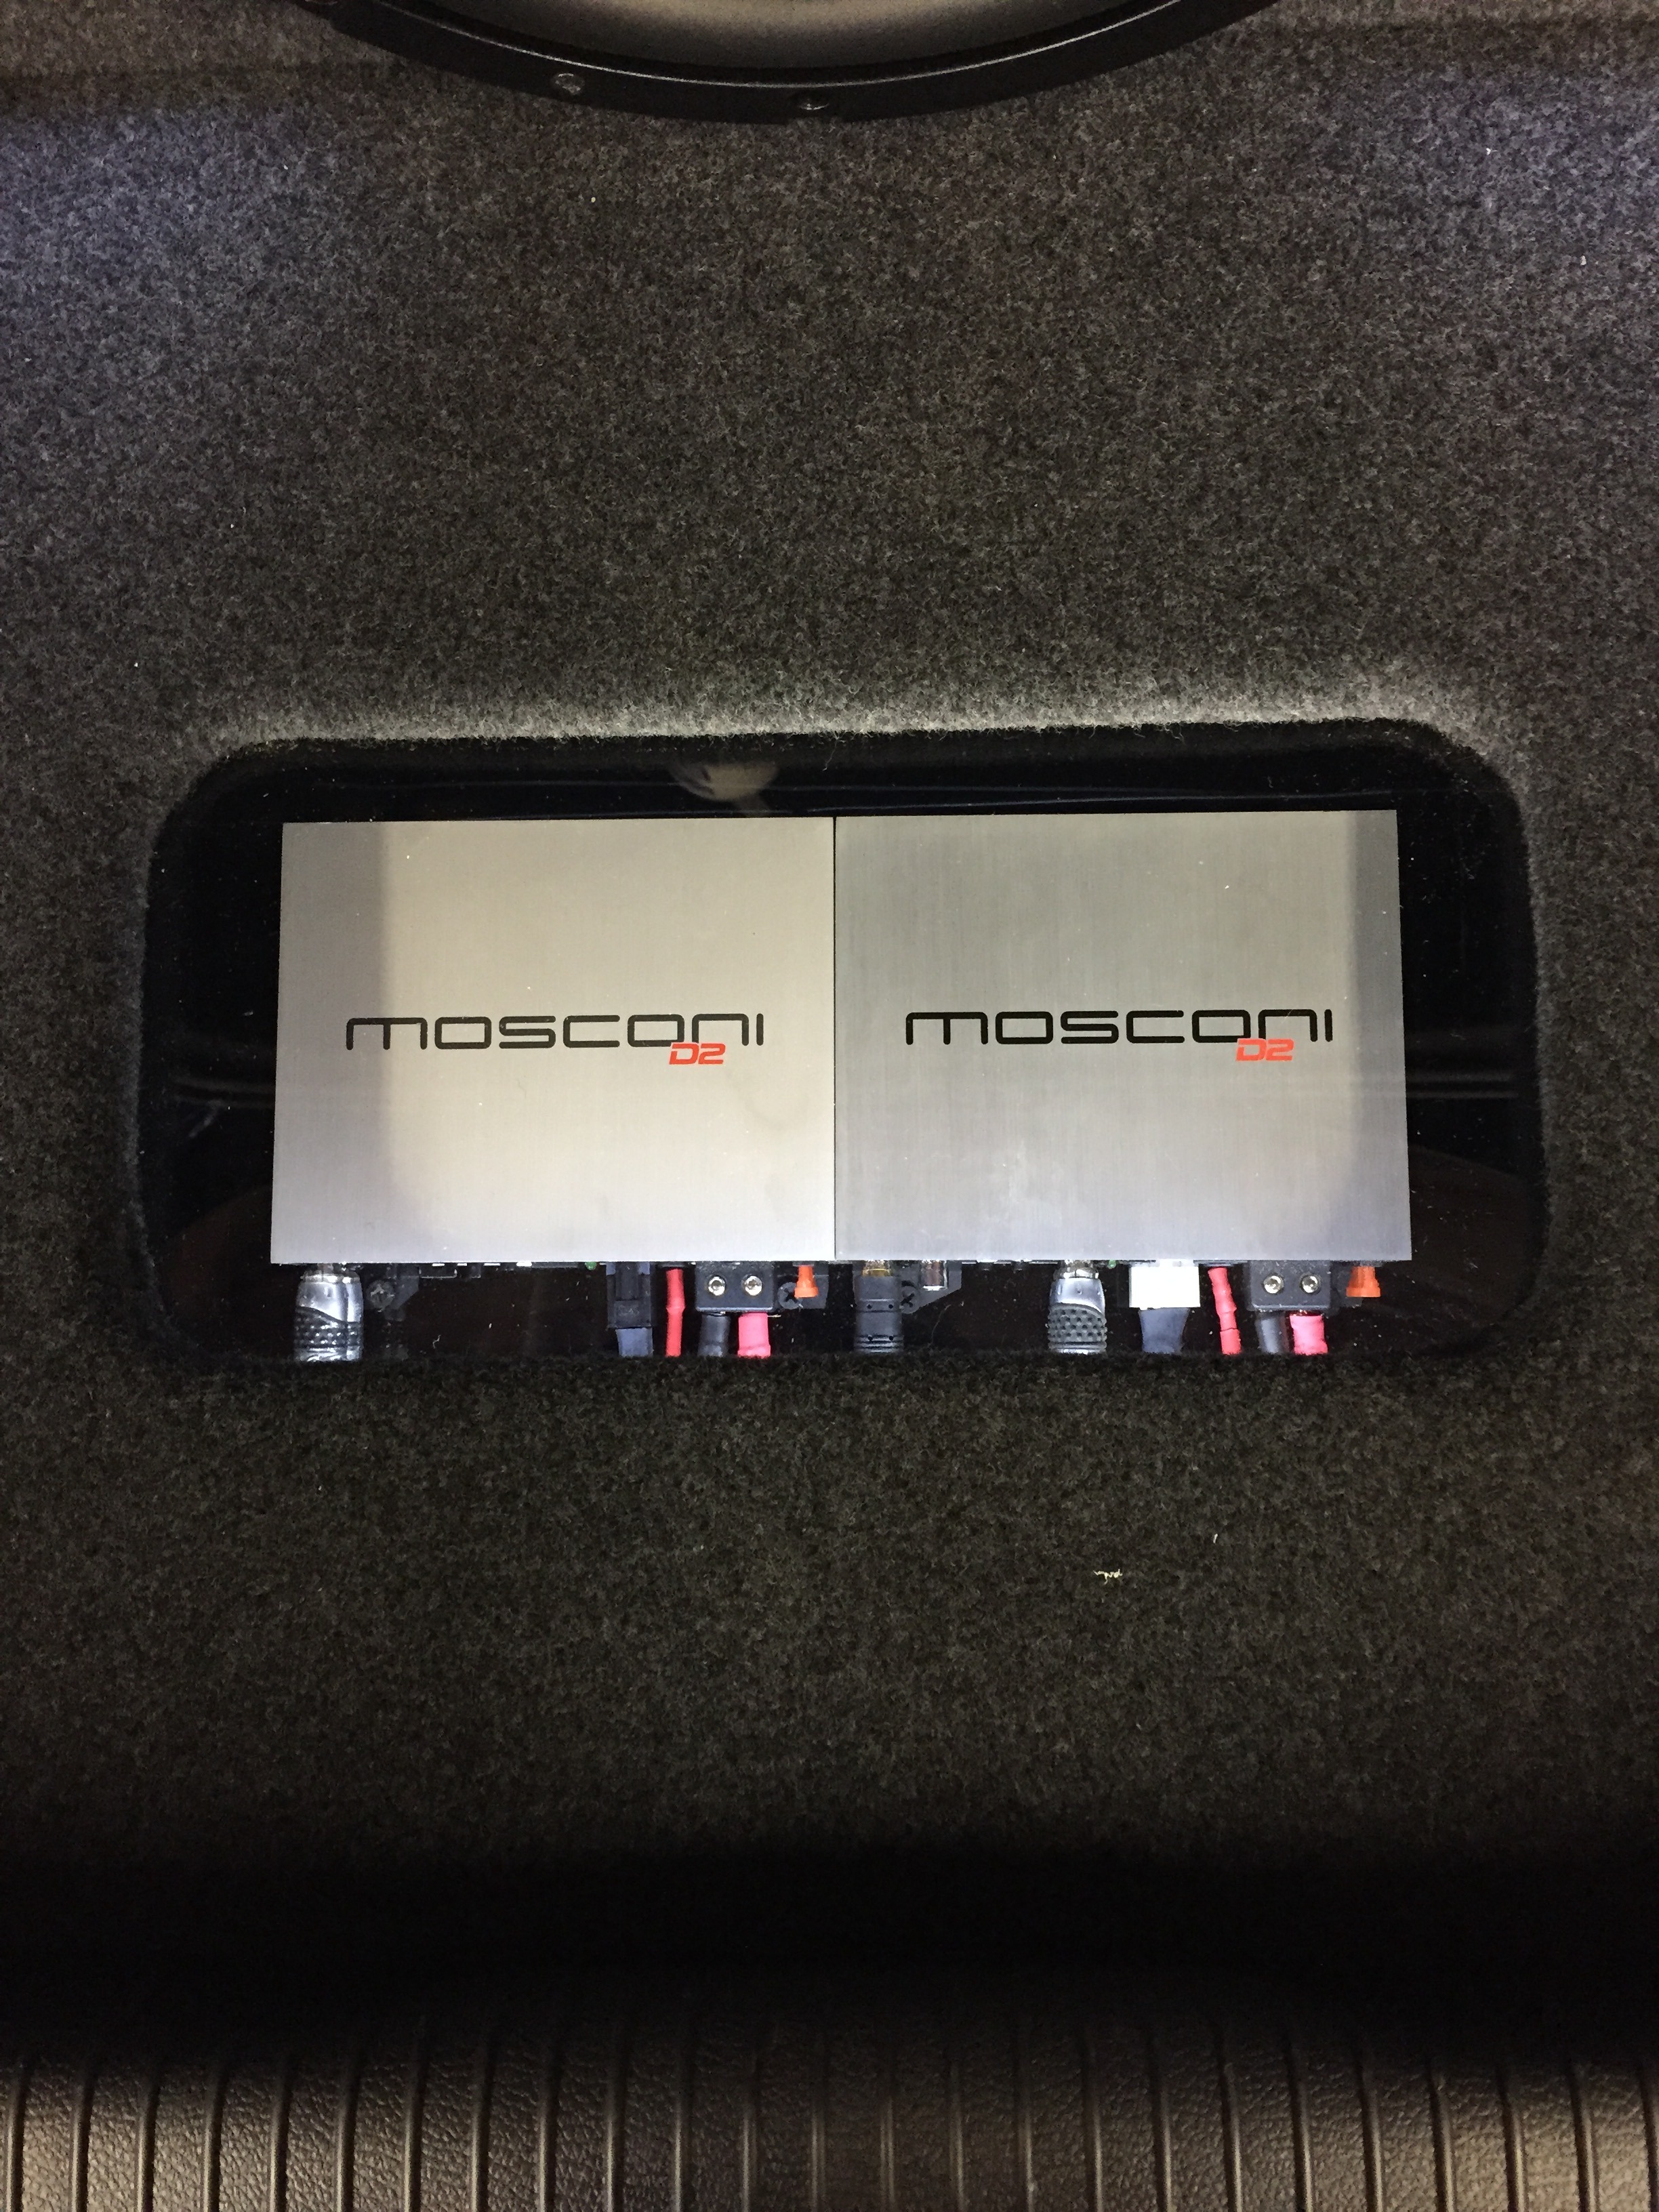
Thread Starter
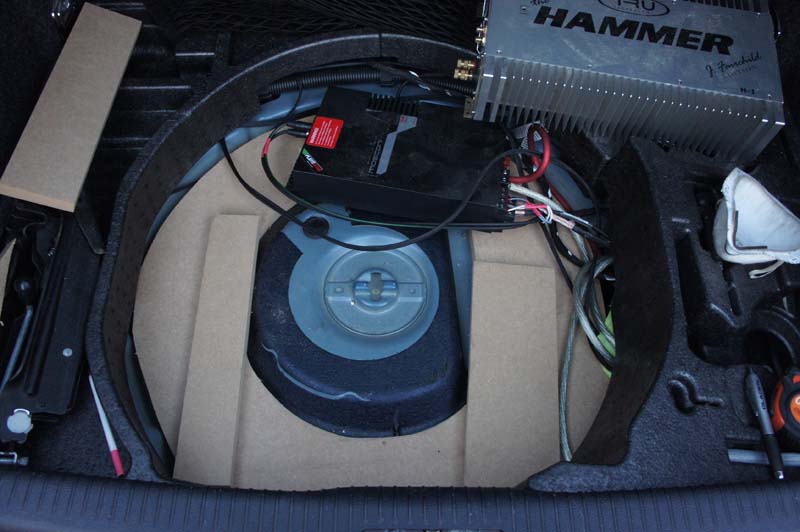
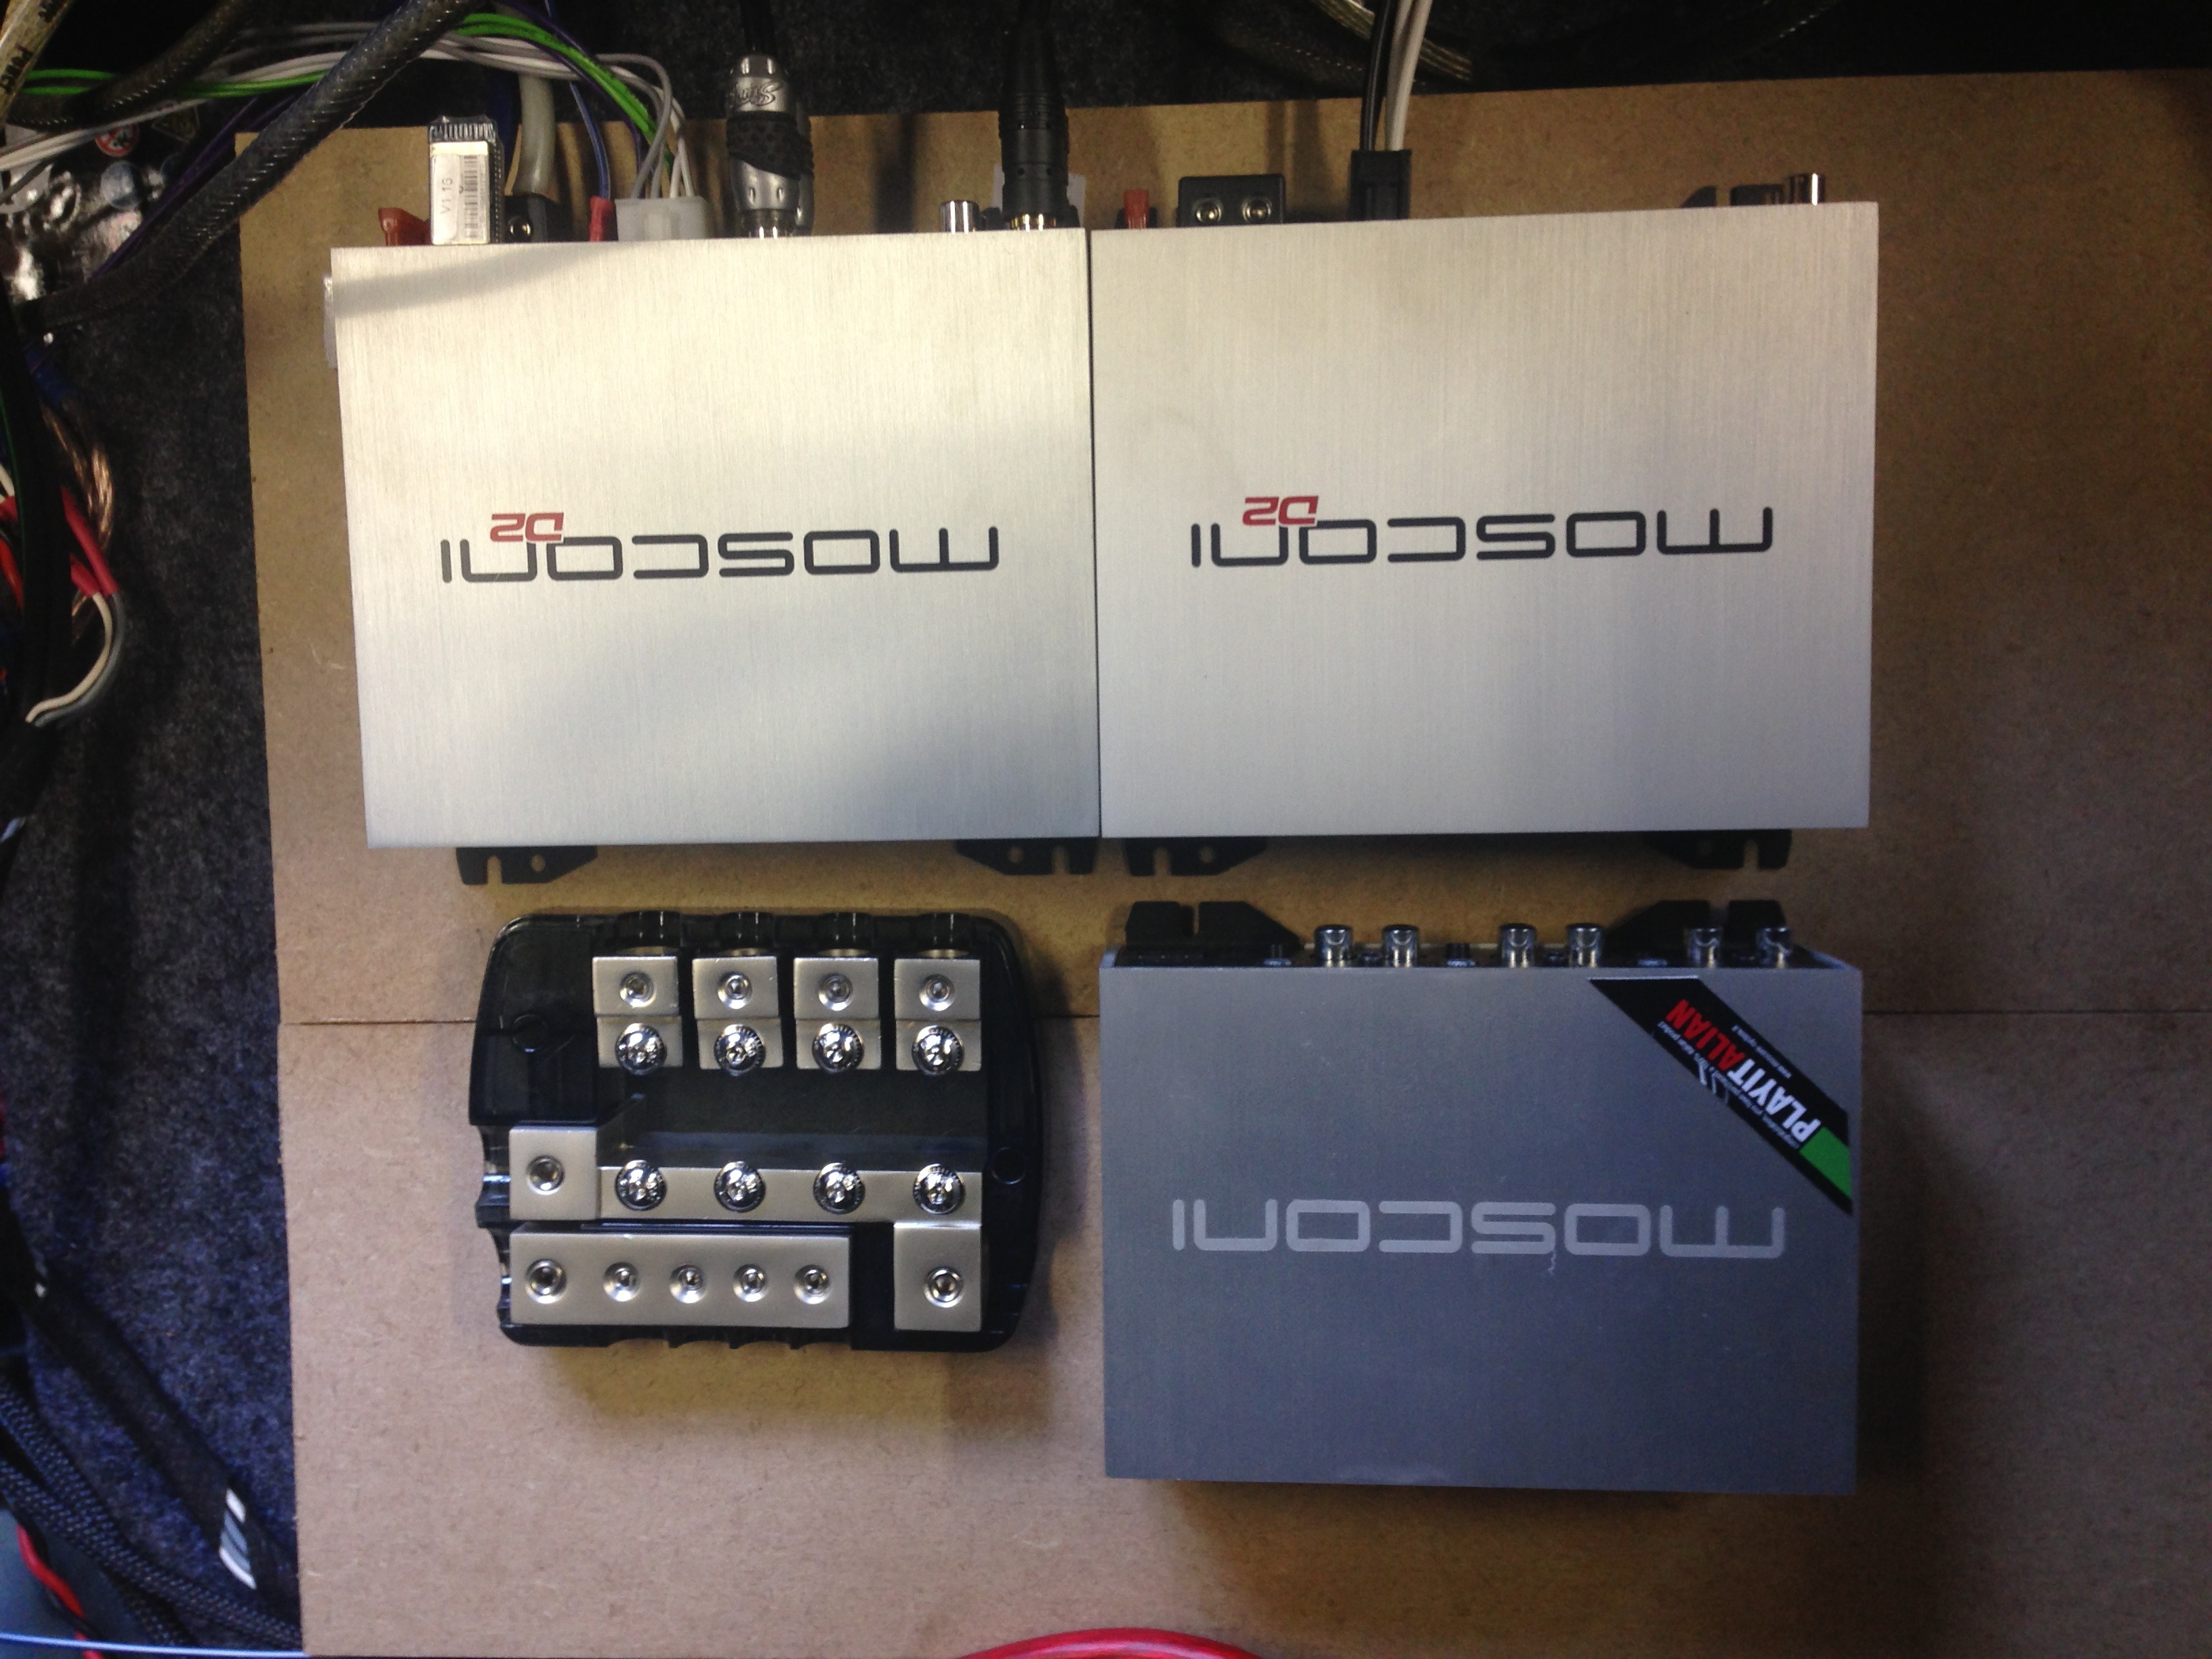
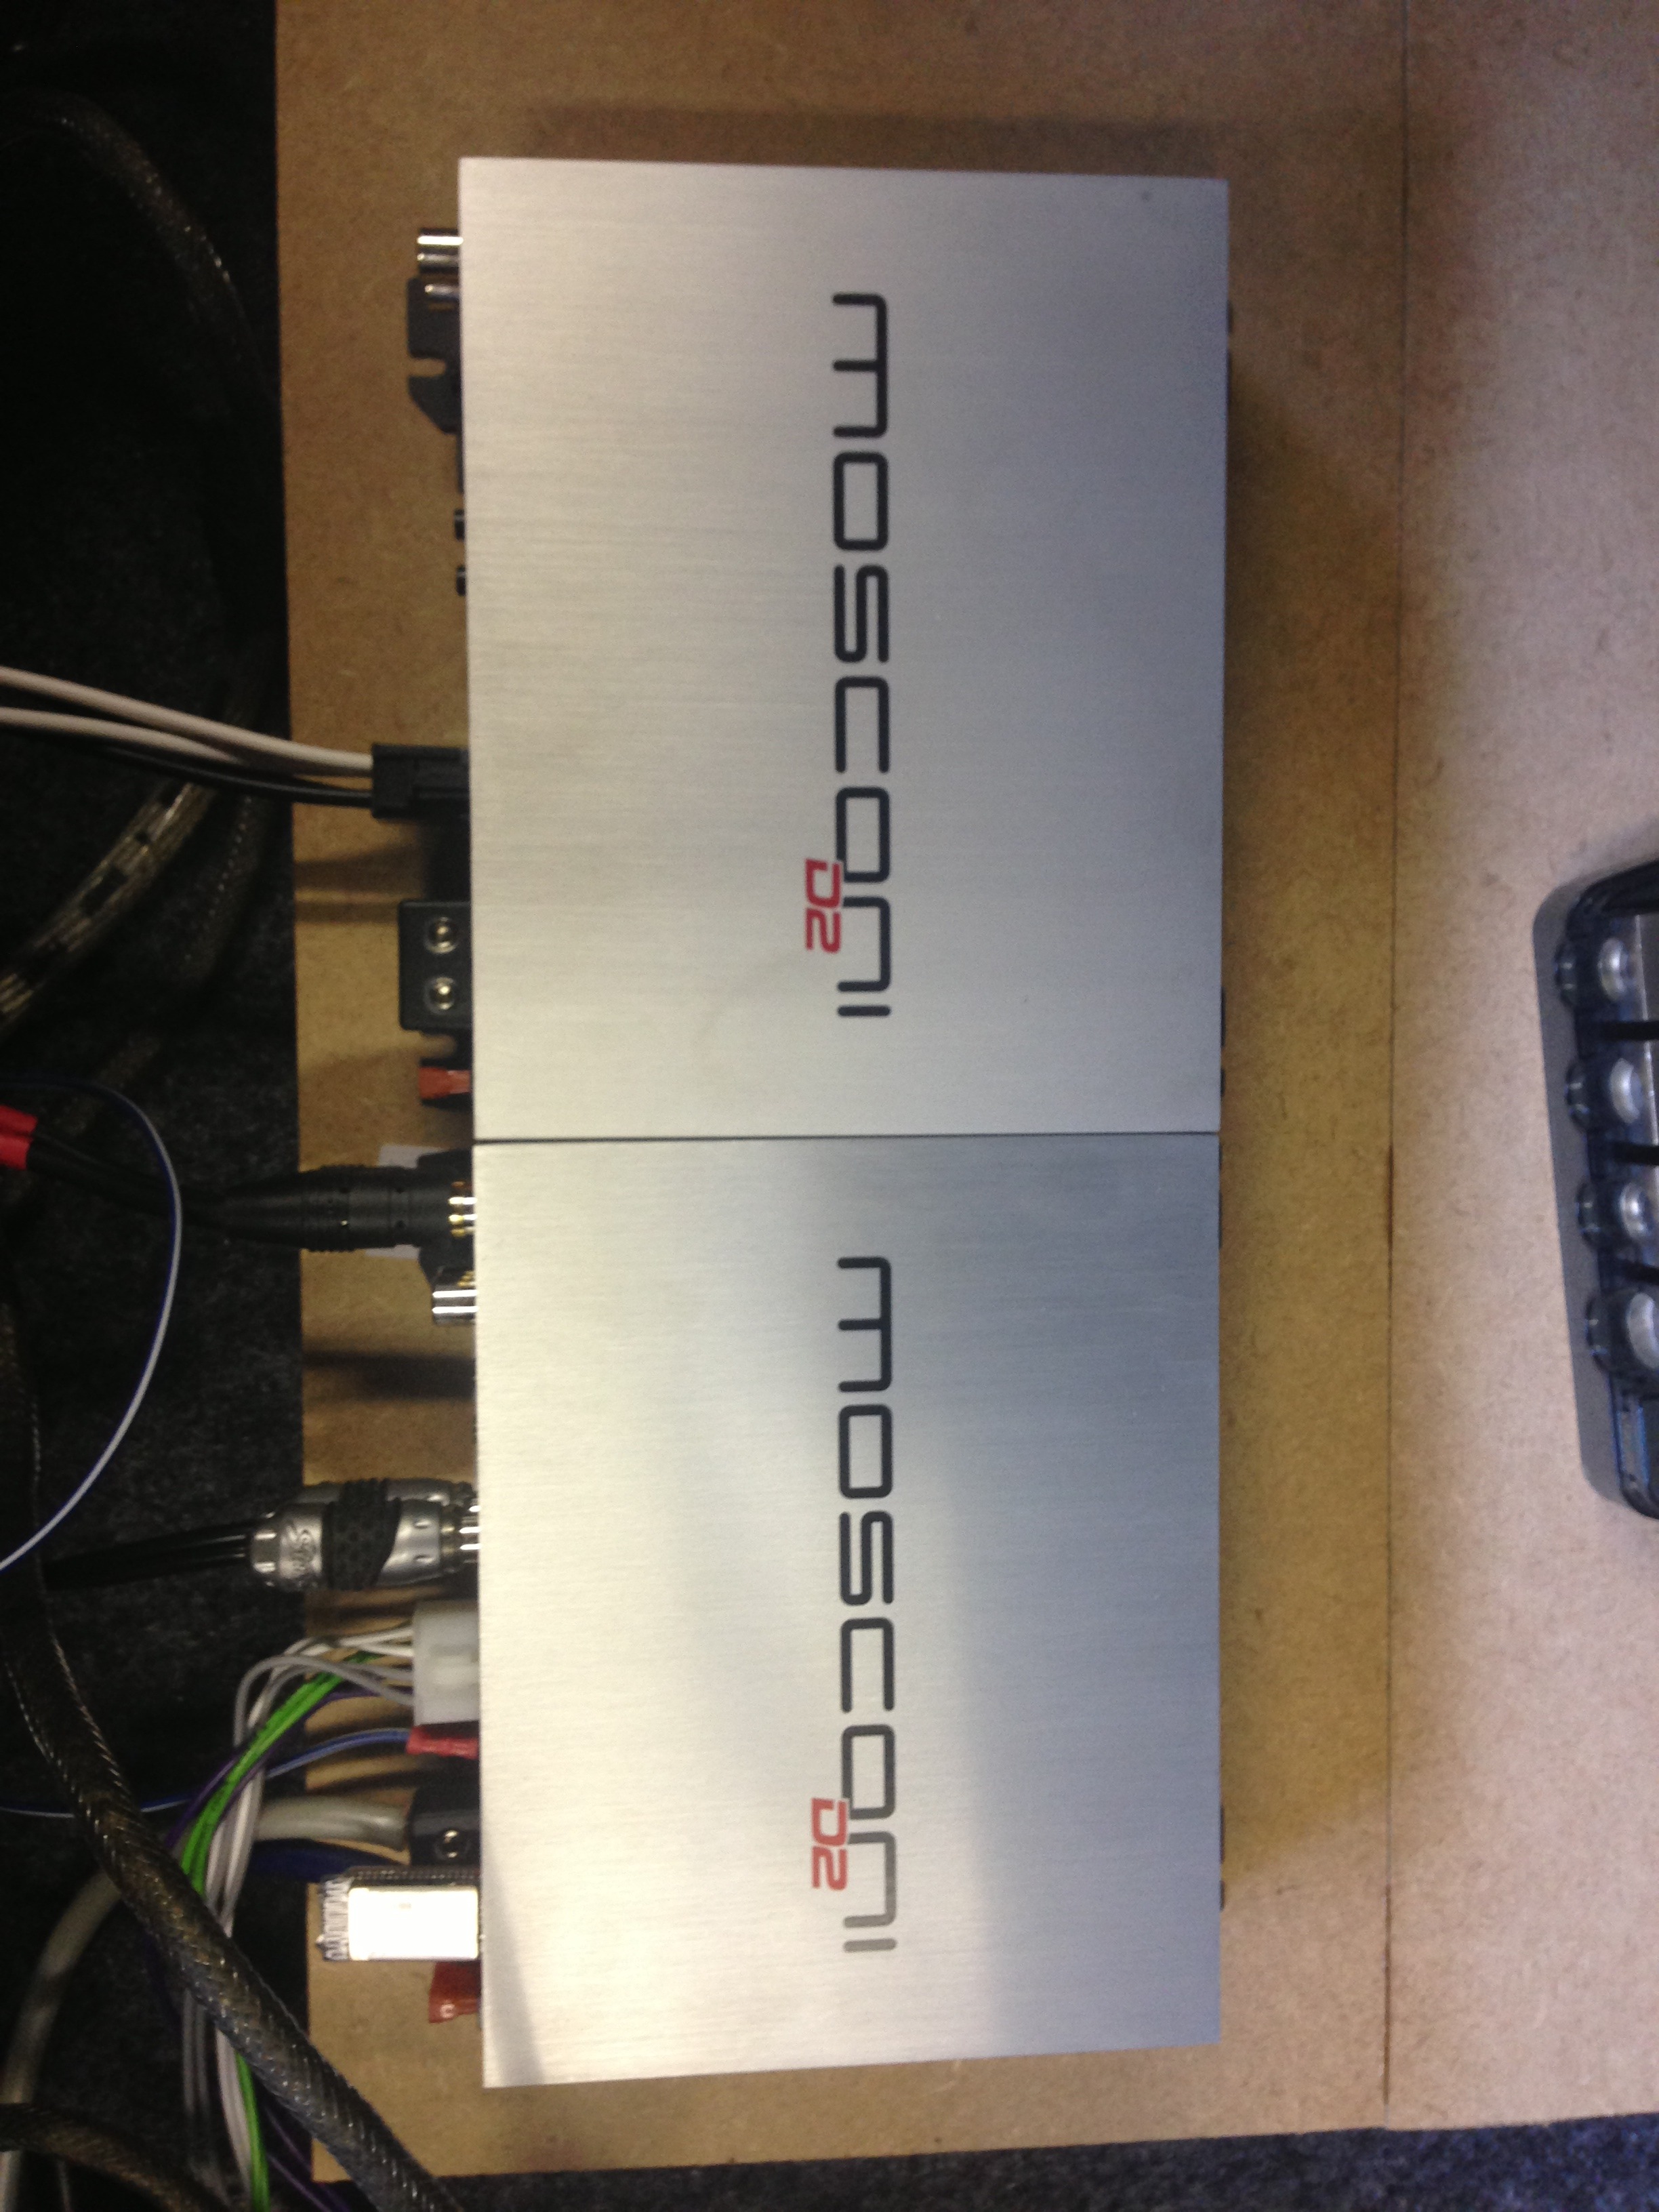
With the imminent release of the Mosconi D2 range of amplifiers, it was time to change things slightly in the boot! The Tru Tech Hammer, which is a LEGEND of an amp, has now made its way into my workshop and is happily powering a B2 Audio CC8 for demo use, and the R32 made way for a pair of Mosconi D2 amplifiers.
First up is a Mosconi D2 100.4DSP. This fits in the palm of your hand yet can delivery 4 x 100wrms of class d power AND has a full blown Mosconi 4to6 on board! It still accepts the high level inputs from the stereo meaning we now don't need an external processor like before, and still keep all of the tuning abilities I have always liked! The icing on the cake however is the processed line output meaning you can control a second amp using all the processor functions from the 100.4, and just simply feed them into the next amp! PERFECT!!!
We have also added the Bluetooth streaming module into the D2 100.4DSP which allows us to wirelessly stream into the amplifier without the need of any cables. This gives us the ability to stream music off of our phone/ipad etc without having the need to plug anything in. This device is always active when the amplifier is on and simply switches over from the stereo in a great way...once the amplifier has turned on from auto-sensing a signal from the head unit (only in high level input mode), it starts playing music from the stereo, once the phone has paired, you can either continue playing music from the stereo, or you can start playing music from the phone, in which case it will slowly fade out the stereo and start playing the music via bluetooth. When you want to revert back to stereo, simply stop playing music on the phone, and after a set delay (which you can change...ours is on 3 seconds), the stereo music will fade back in and continue playing!
The next amp was for bass duties and we have gone for the Mosconi D2 500.1. This is the same size as the 100.4DSP however is a mono block delivering 500wrms @ 4ohms into the Gladen Audio Zero Pro 12 for sub bass duties.
Its amazing to think you can get both these amps and still have room in the space of the Hammer lol!
Here are the D2 amps next to a distribution block and a 4to6 processor
This is during our test phases of the amps
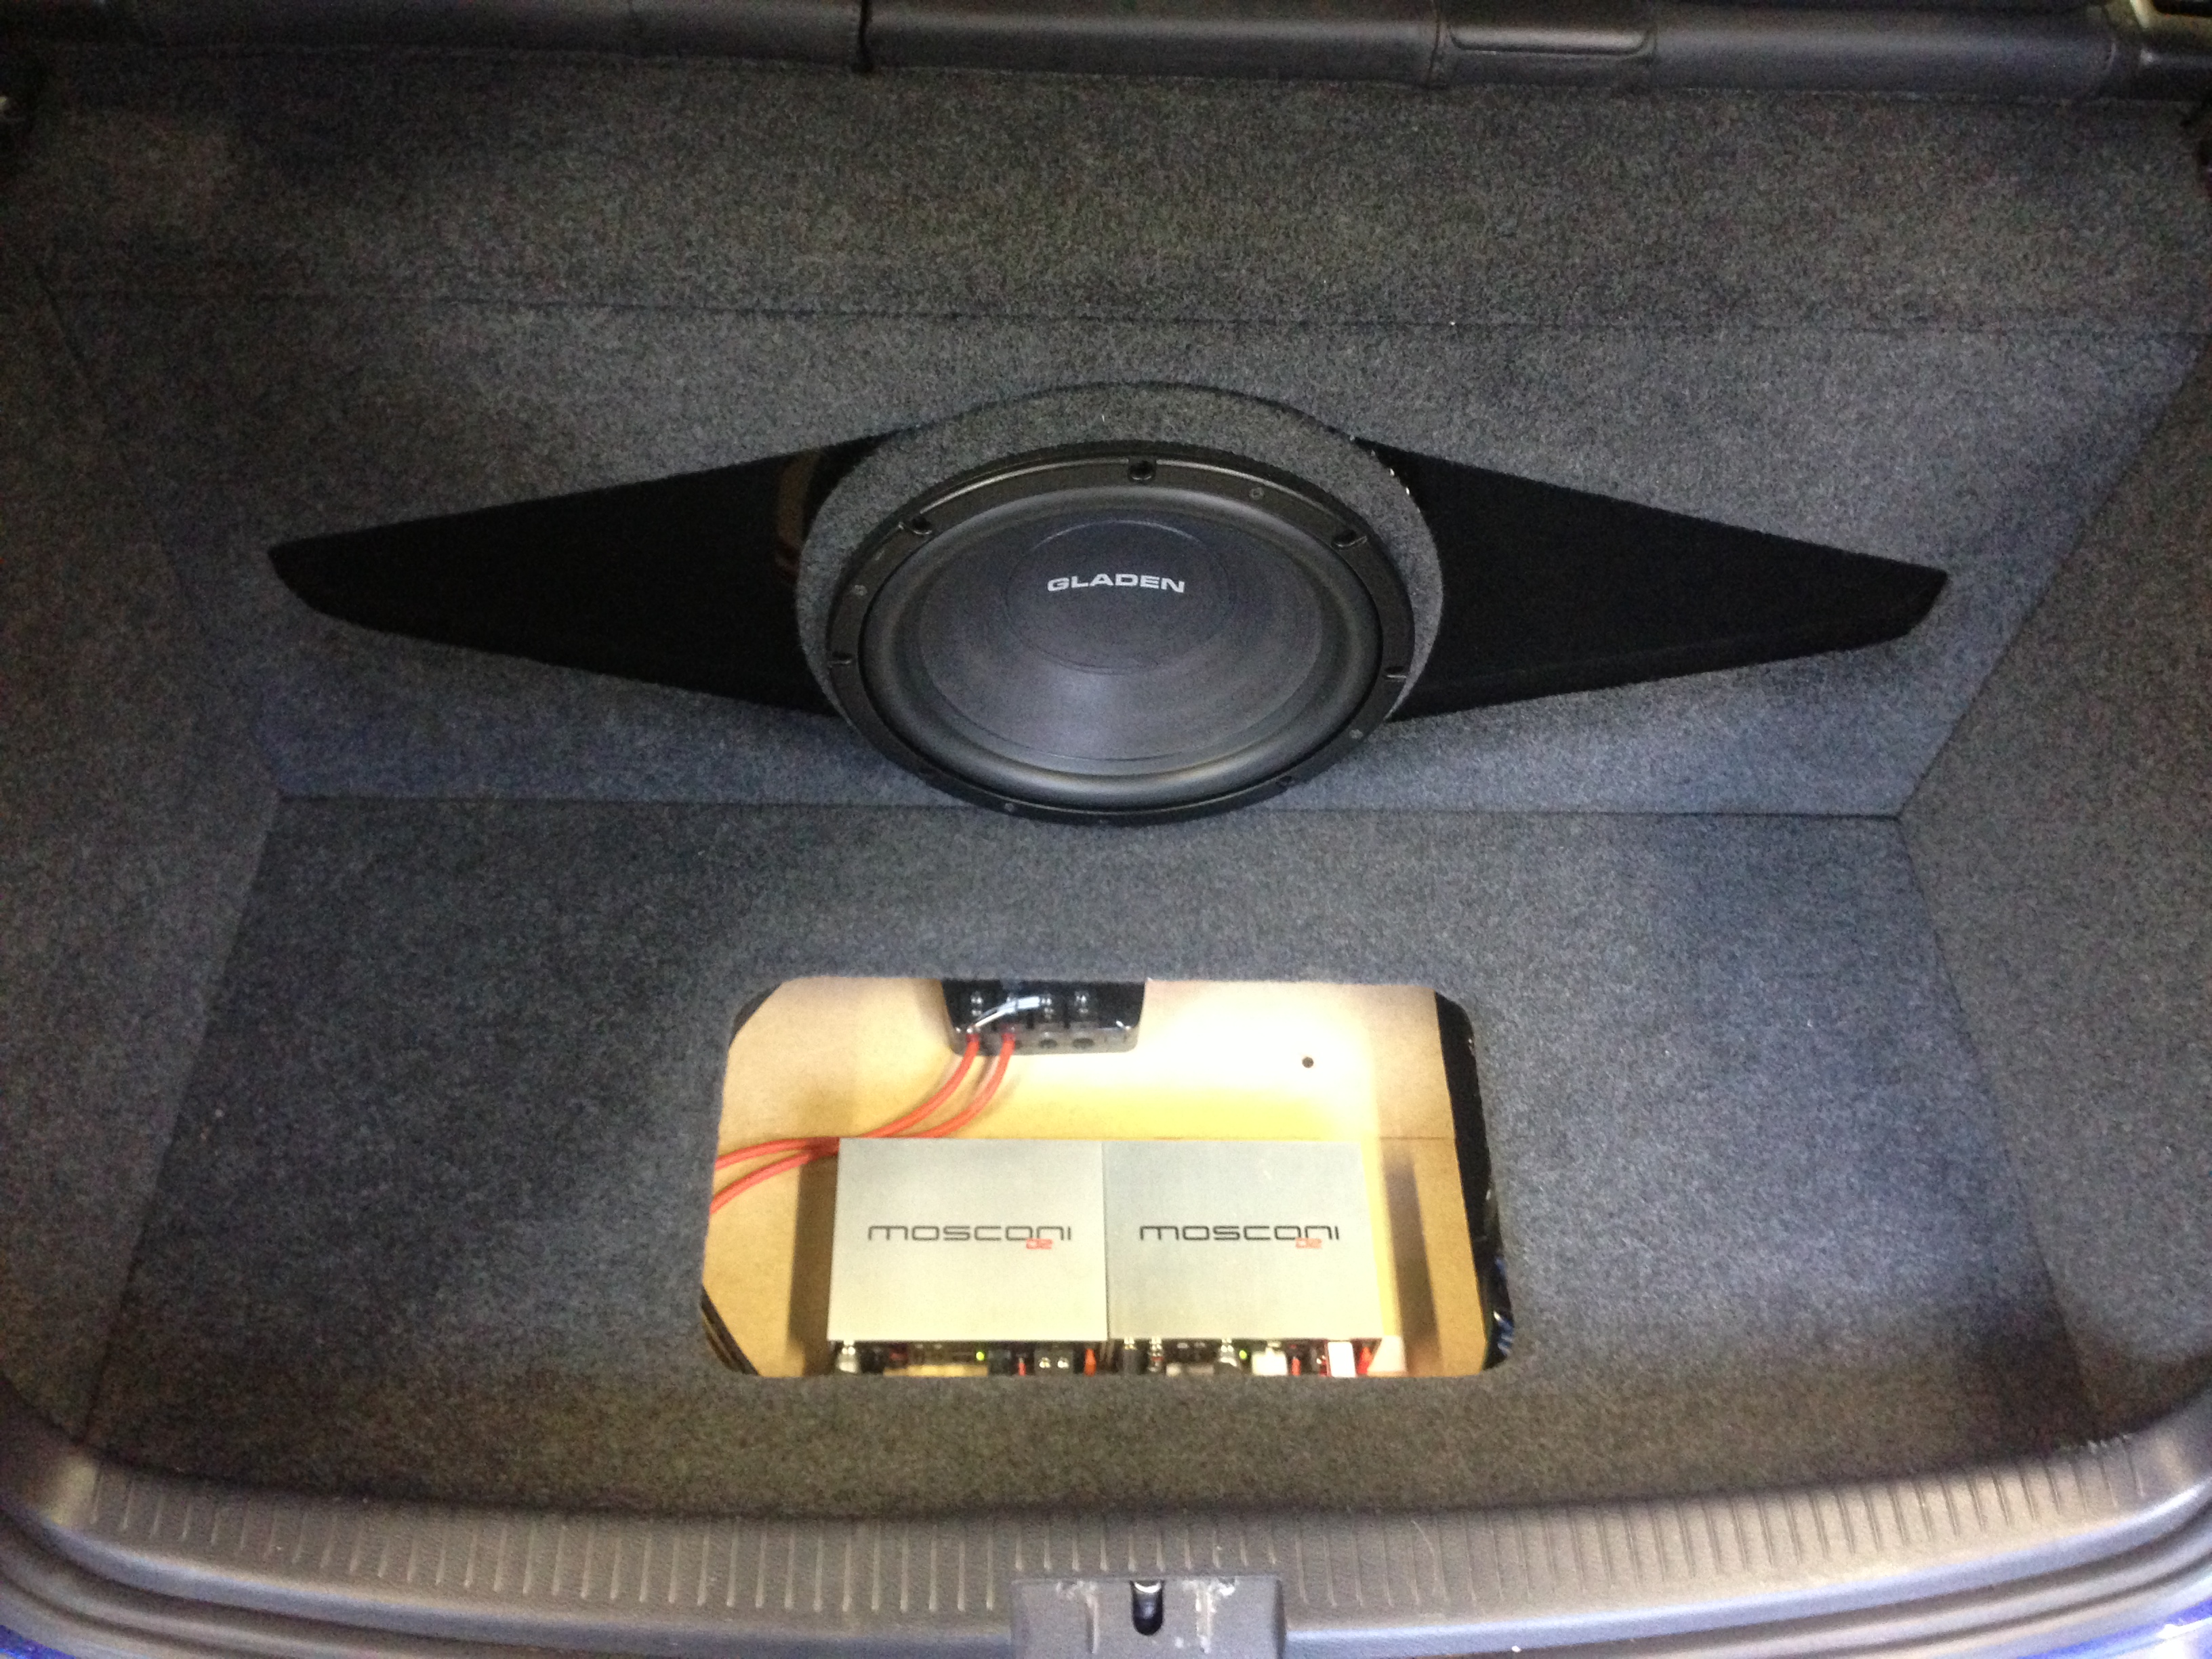
As soon as the system was set up, we fell in love instantly! They sound AWESOME for Class D amps! I have always been skeptical but these are a real eye opener! We have used them in many installs now and they never fail to impress! So I guess there was no choice but to pretty up the install a little with a mixture of black and clear perspex and some LEDs!

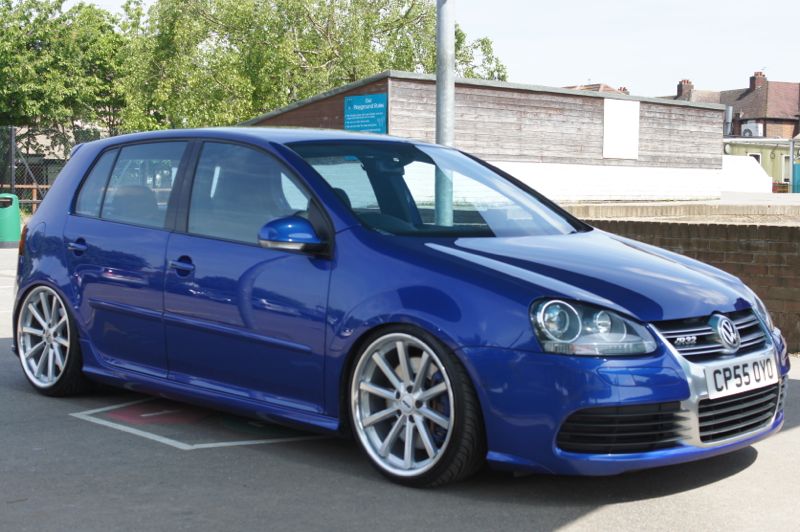
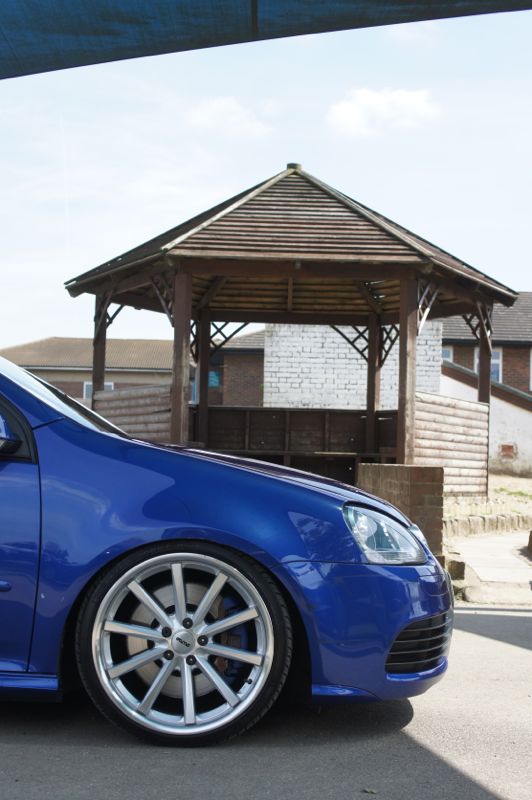
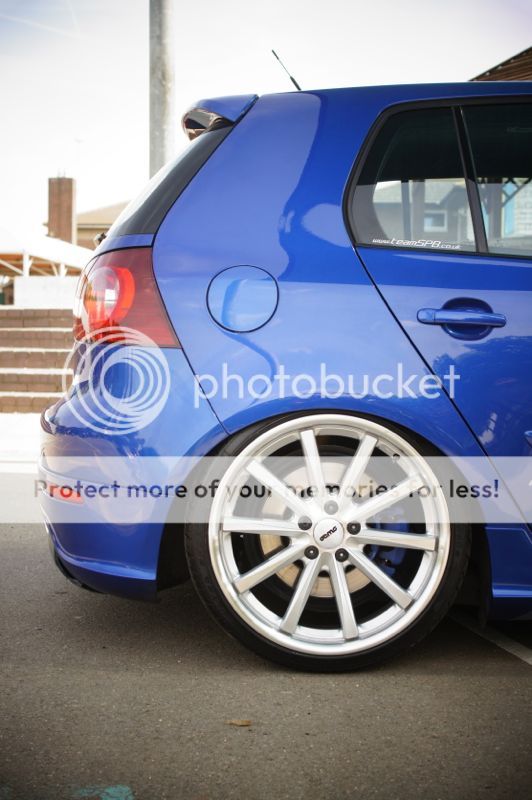
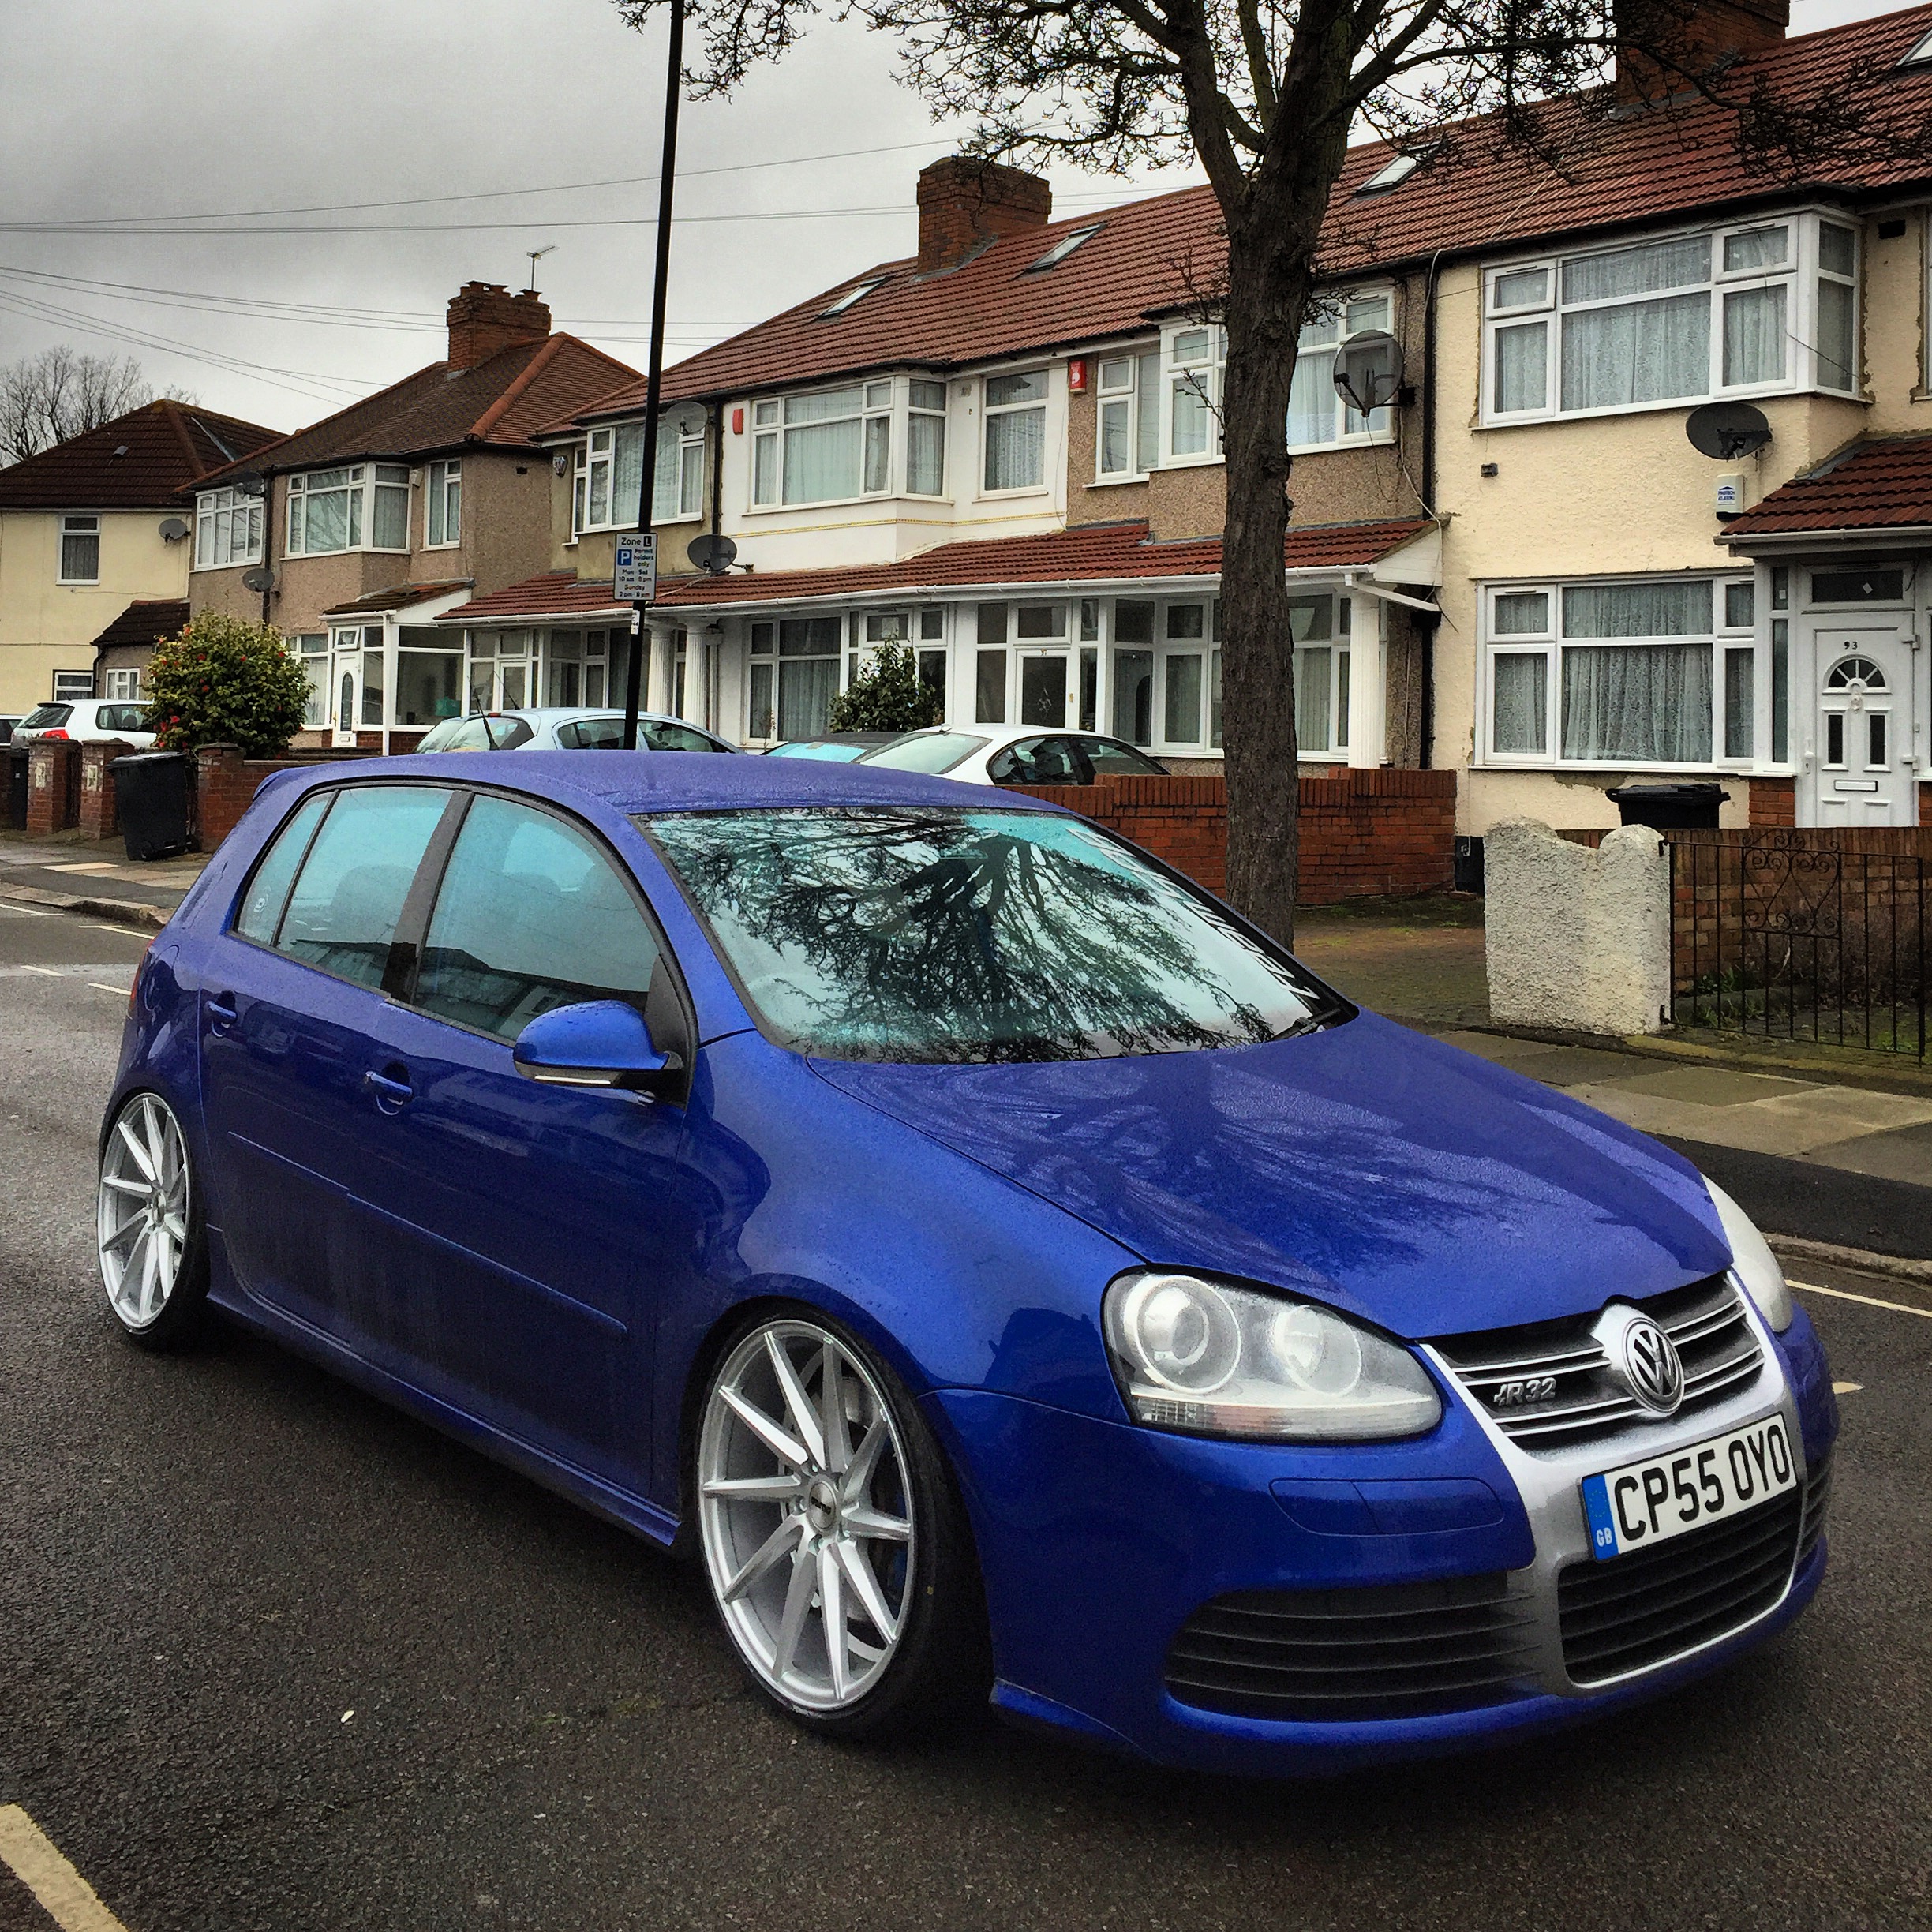
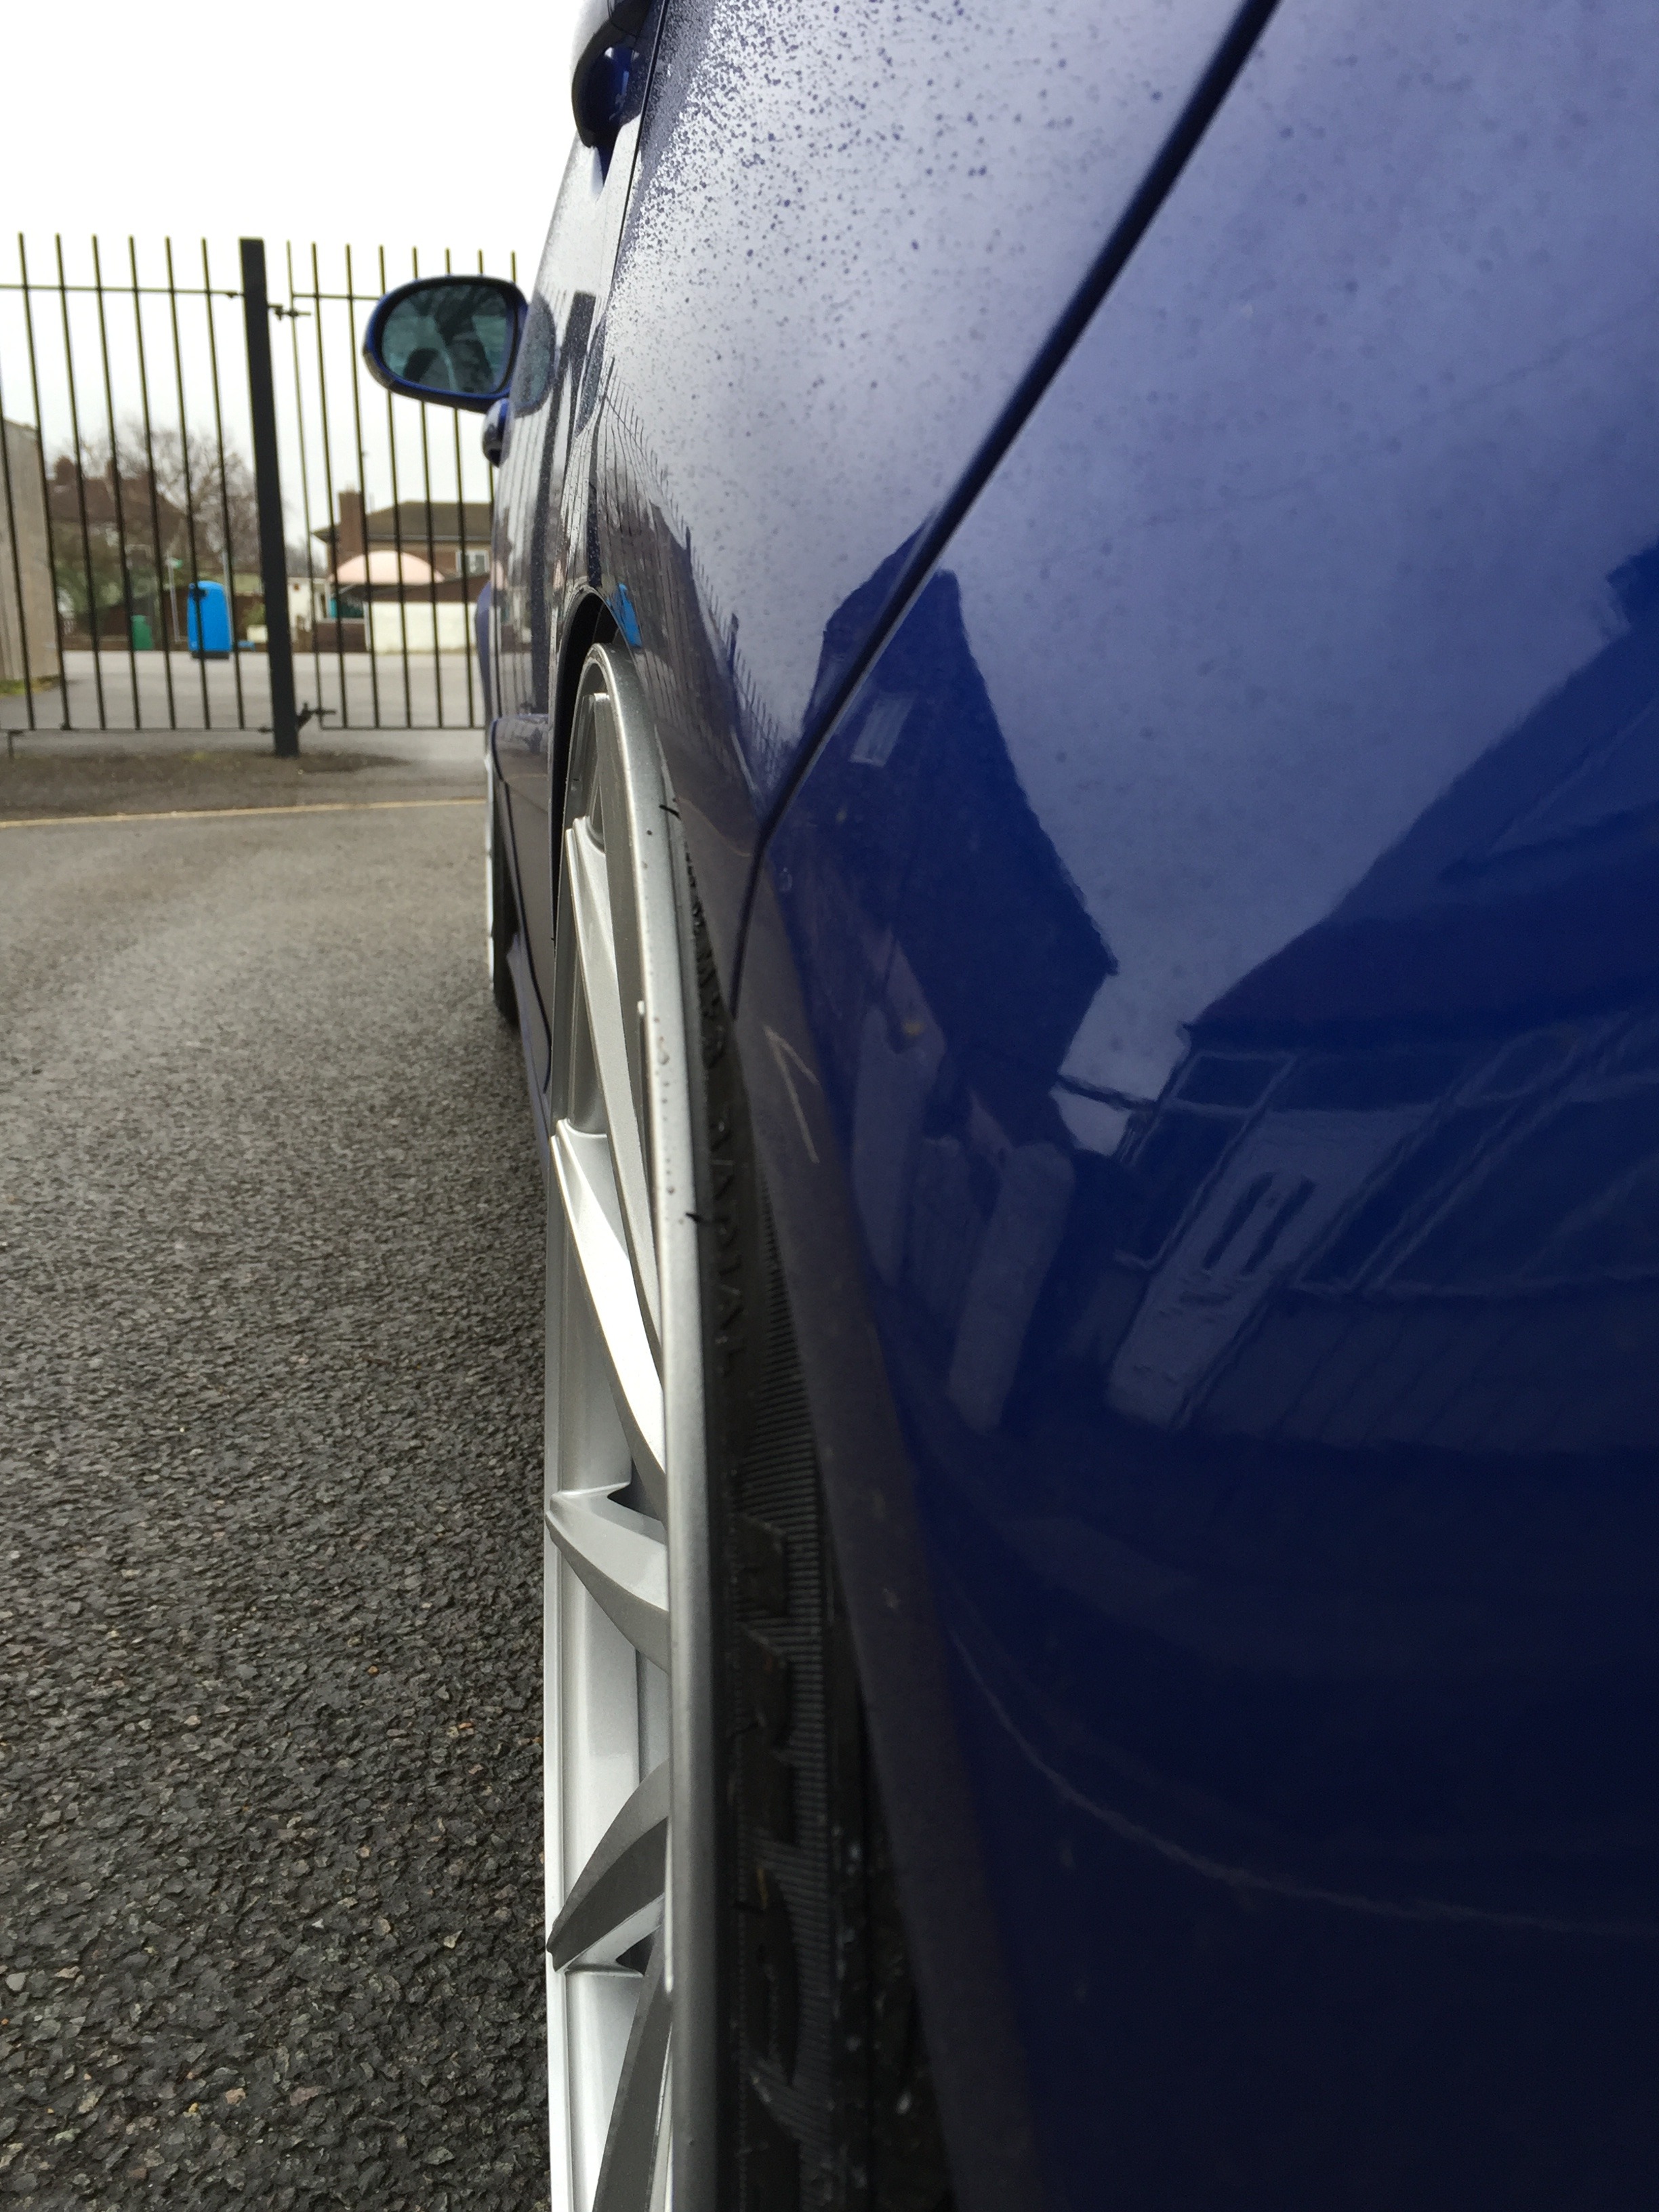
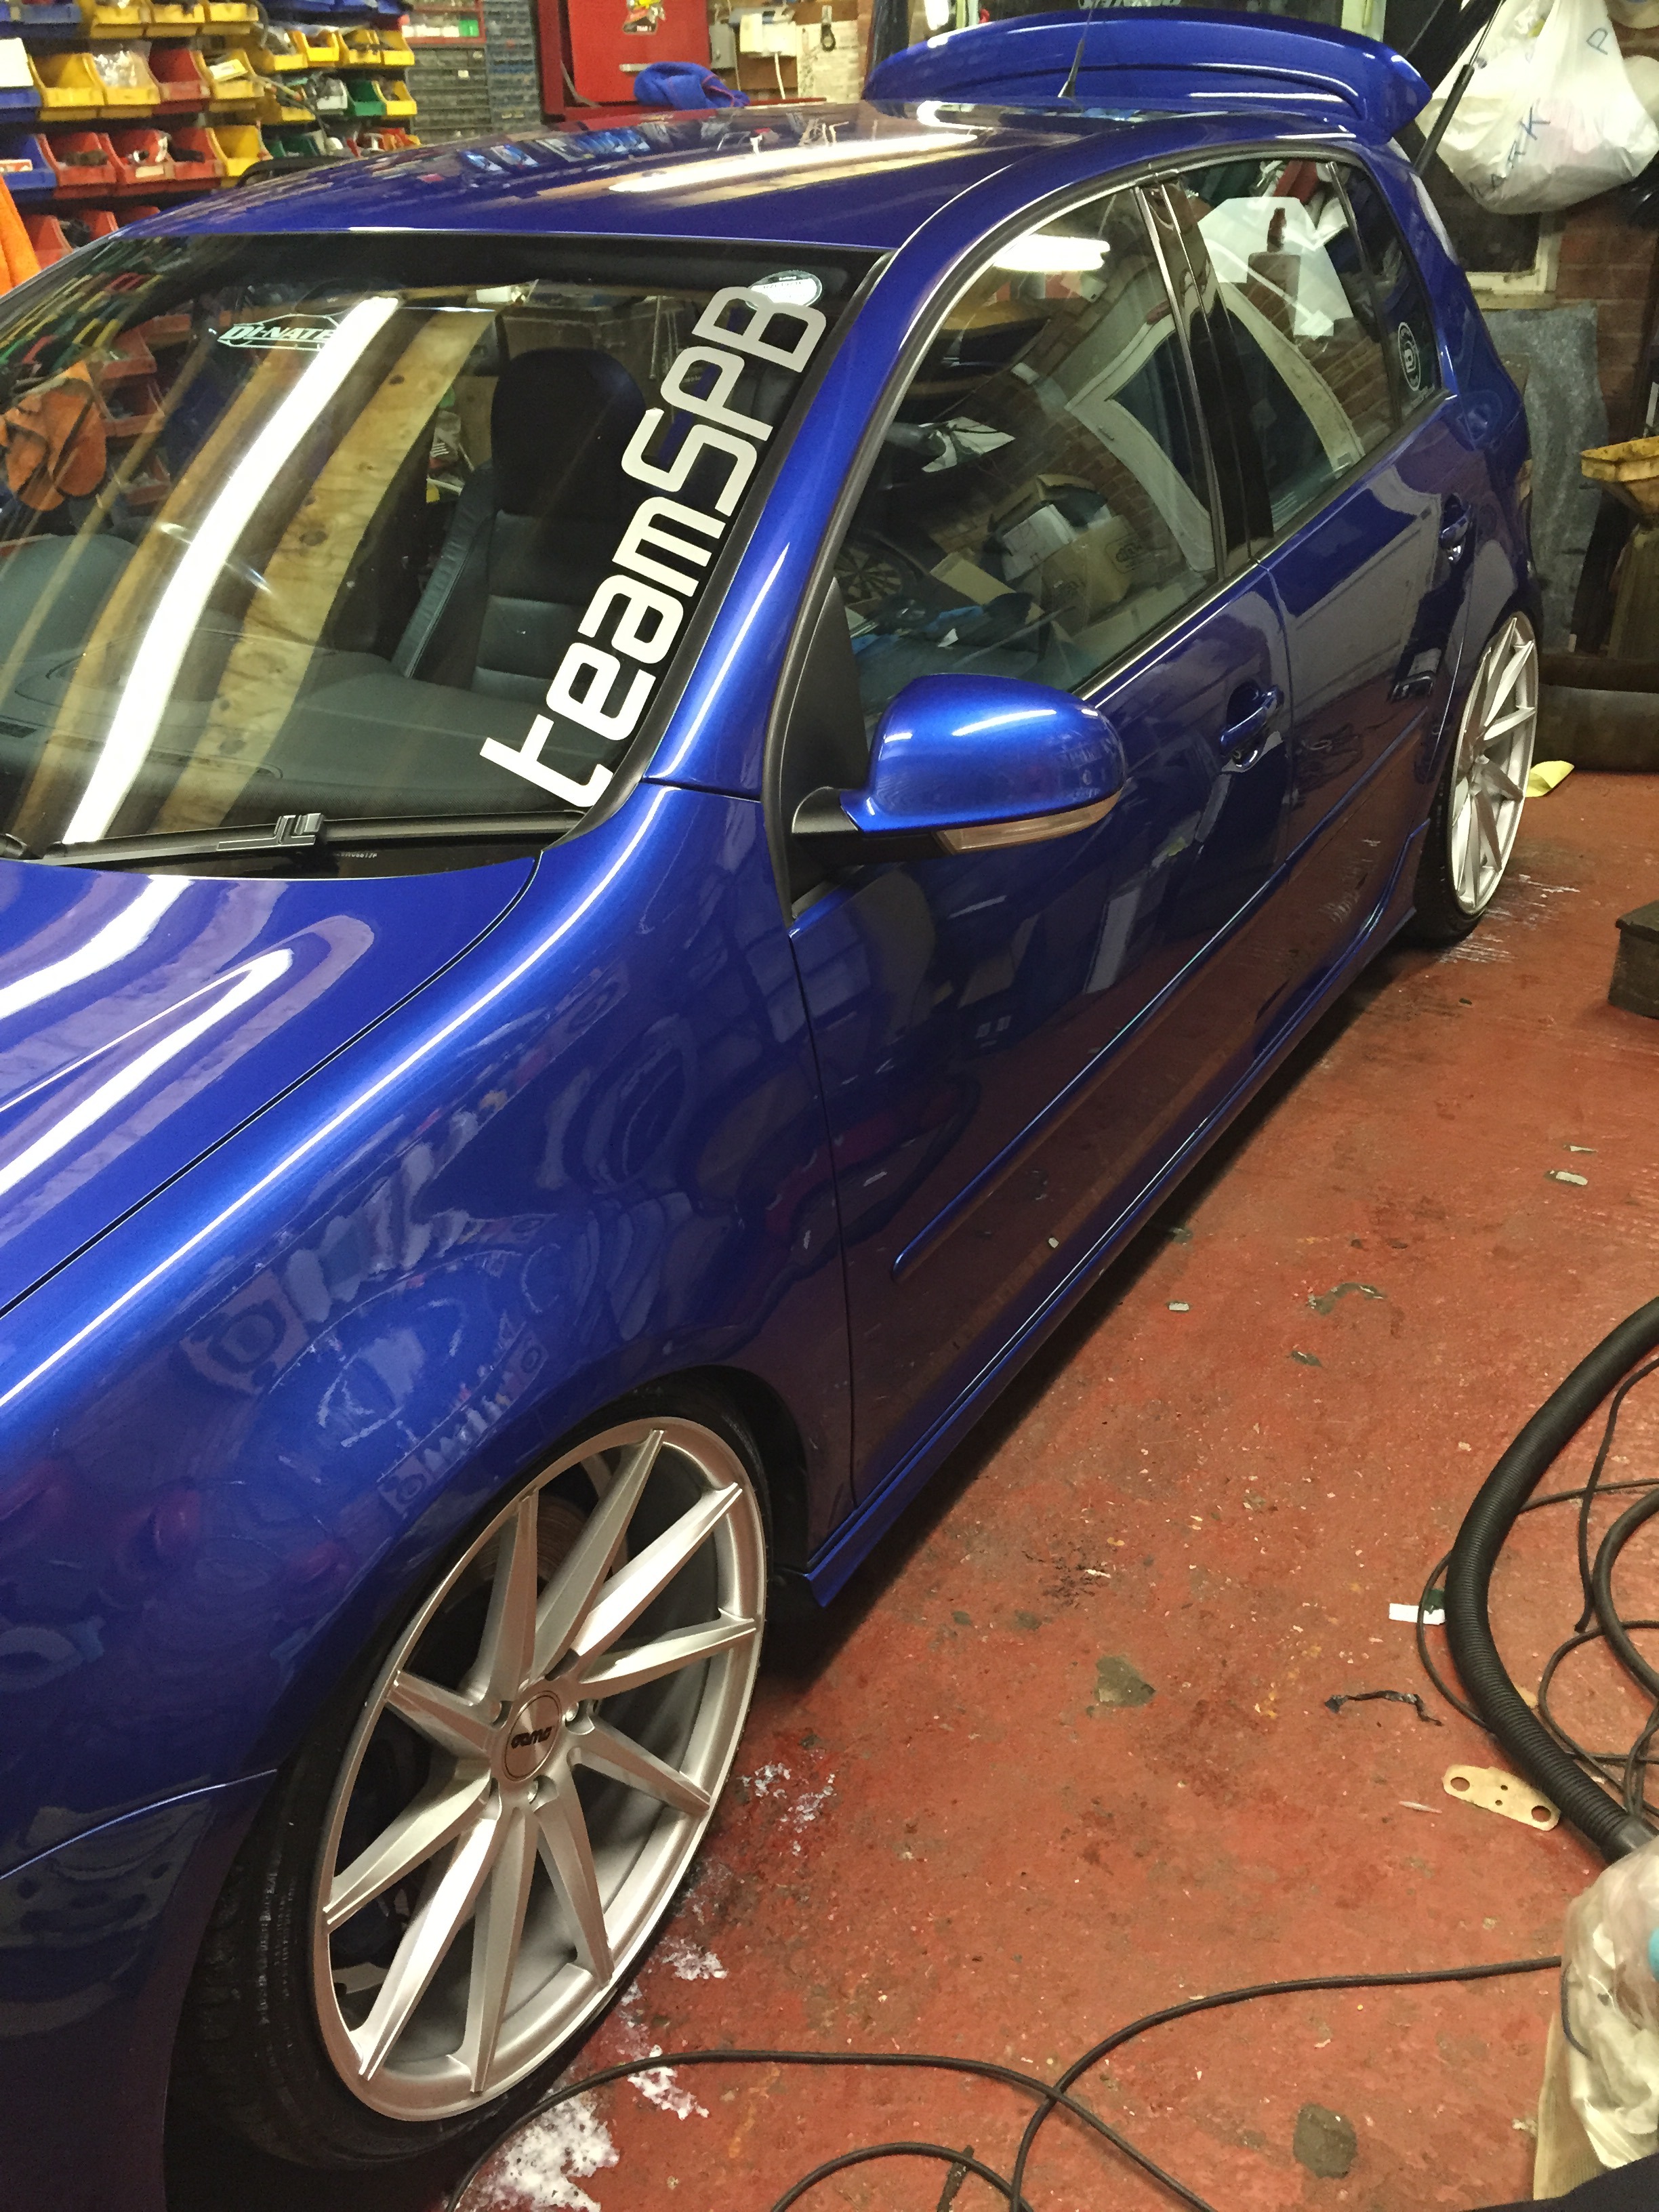
Around the same time, we decided it was time for a cosmetic change and the wheels needed a bit of an update...so here it is wearing its new shoes (well about a year and a bit ago lol)
First up is a Mosconi D2 100.4DSP. This fits in the palm of your hand yet can delivery 4 x 100wrms of class d power AND has a full blown Mosconi 4to6 on board! It still accepts the high level inputs from the stereo meaning we now don't need an external processor like before, and still keep all of the tuning abilities I have always liked! The icing on the cake however is the processed line output meaning you can control a second amp using all the processor functions from the 100.4, and just simply feed them into the next amp! PERFECT!!!
We have also added the Bluetooth streaming module into the D2 100.4DSP which allows us to wirelessly stream into the amplifier without the need of any cables. This gives us the ability to stream music off of our phone/ipad etc without having the need to plug anything in. This device is always active when the amplifier is on and simply switches over from the stereo in a great way...once the amplifier has turned on from auto-sensing a signal from the head unit (only in high level input mode), it starts playing music from the stereo, once the phone has paired, you can either continue playing music from the stereo, or you can start playing music from the phone, in which case it will slowly fade out the stereo and start playing the music via bluetooth. When you want to revert back to stereo, simply stop playing music on the phone, and after a set delay (which you can change...ours is on 3 seconds), the stereo music will fade back in and continue playing!
The next amp was for bass duties and we have gone for the Mosconi D2 500.1. This is the same size as the 100.4DSP however is a mono block delivering 500wrms @ 4ohms into the Gladen Audio Zero Pro 12 for sub bass duties.
Its amazing to think you can get both these amps and still have room in the space of the Hammer lol!
Here are the D2 amps next to a distribution block and a 4to6 processor
This is during our test phases of the amps
As soon as the system was set up, we fell in love instantly! They sound AWESOME for Class D amps! I have always been skeptical but these are a real eye opener! We have used them in many installs now and they never fail to impress! So I guess there was no choice but to pretty up the install a little with a mixture of black and clear perspex and some LEDs!
Around the same time, we decided it was time for a cosmetic change and the wheels needed a bit of an update...so here it is wearing its new shoes (well about a year and a bit ago lol)