
teamSPB's Focus RS - Merc C63 AMG brakes, Custom inlet, Custom Gaz coilovers etc etc

 24-04-2012, 12:39 AM
#42
PassionFord Post Troll
Thread Starter

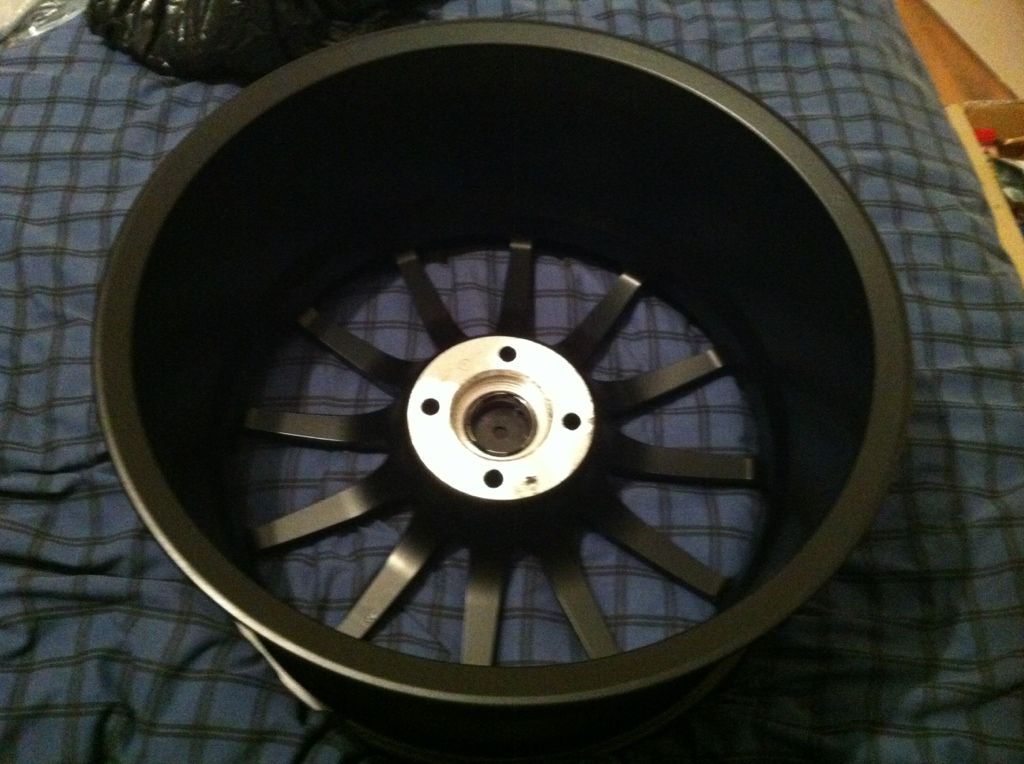
One Team Dynamics Pro Race 1.2
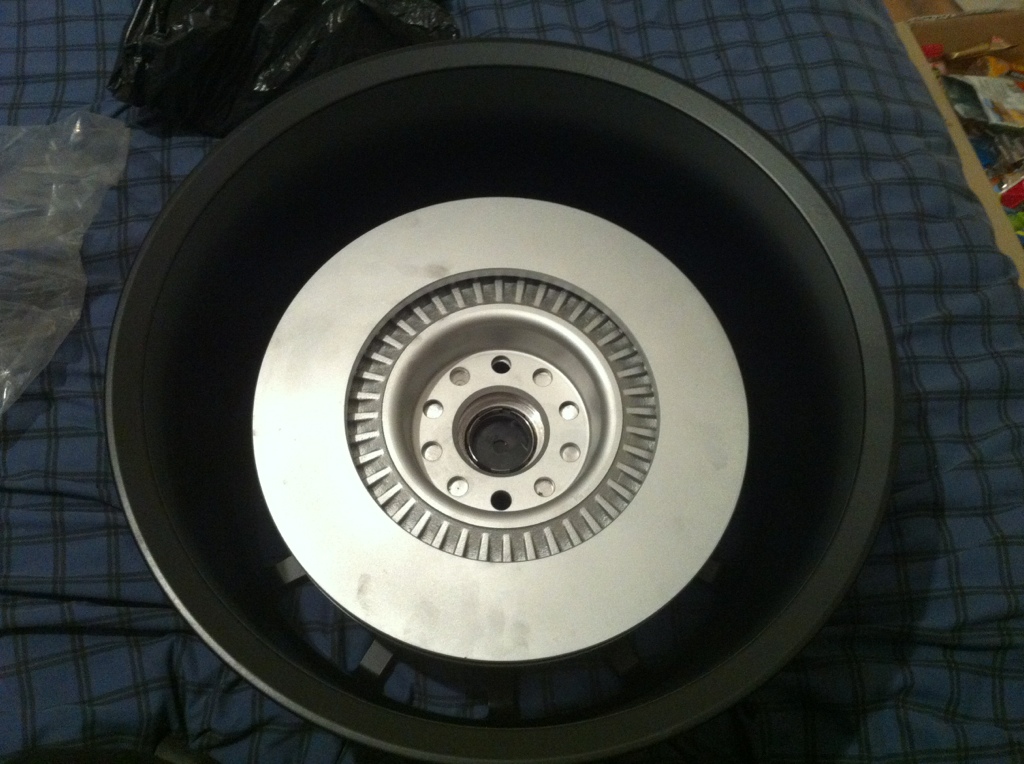
One Team Dynamics Pro Race 1.2 and one 360mm VW Phaeton disc
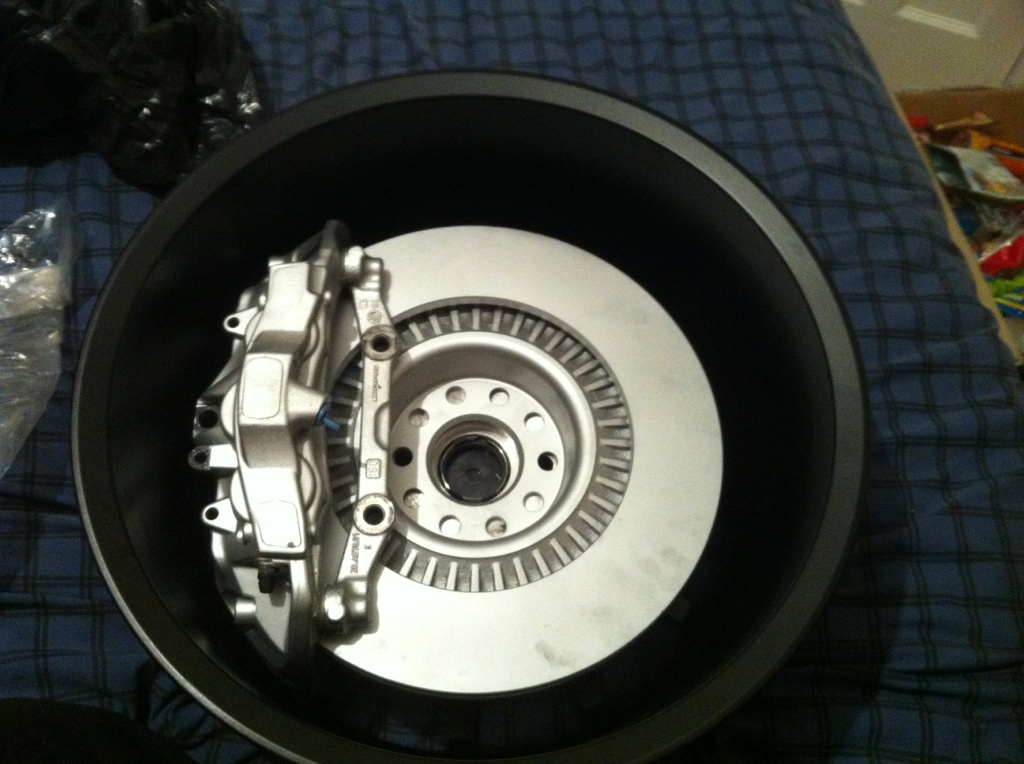
One Team Dynamics Pro Race 1.2 and one 360mm VW Phaeton disc AND one C63 AMG caliper
You should see what they look like on the other side
Small update to...so far I have the following things to fit/on order...
OMP subframe adapters
New seats with a custom retrim
Remap
Custom 3" downpipe with extra boss's
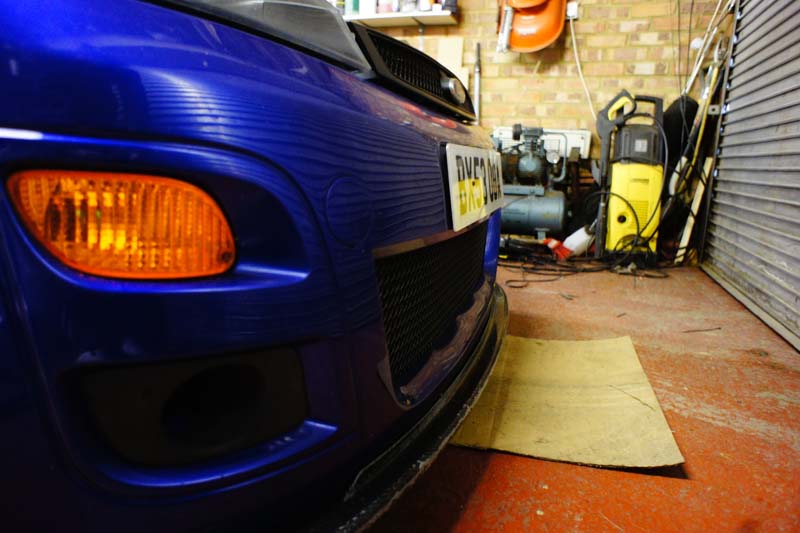
Orange front indicators
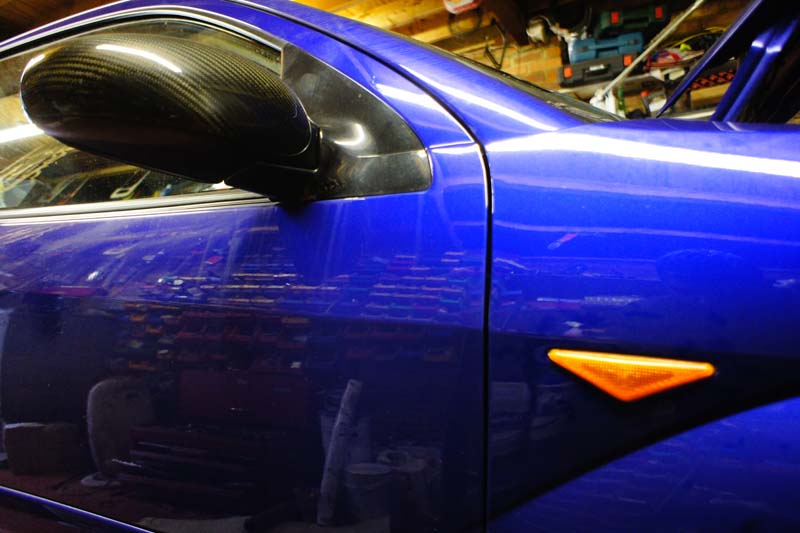
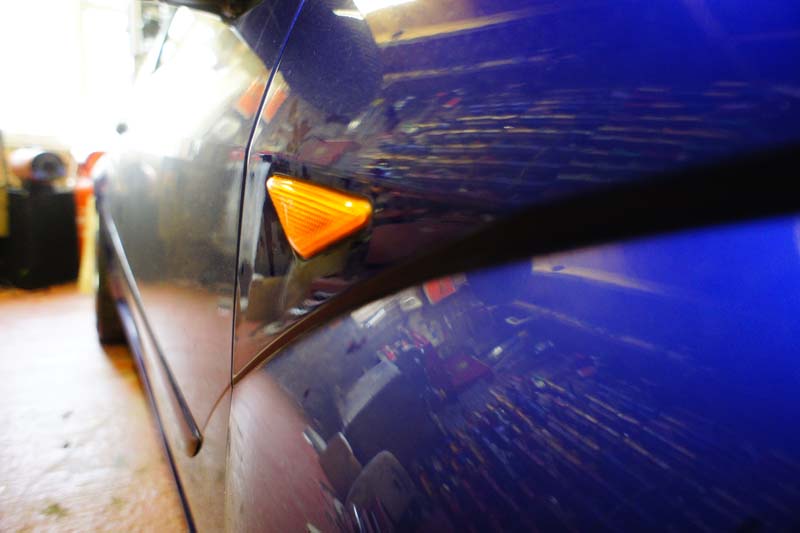
Orange side repeaters
Ghia/ST170 spec interior light
New rear view mirror
New small RS badges
New gear knob
AMG/Phaeton braking setup
Team Dynamics Pro Race 1.2s
Heated washer jets which I will be wiring up to make sure they are active and working
Redline tuning bonnet lifters
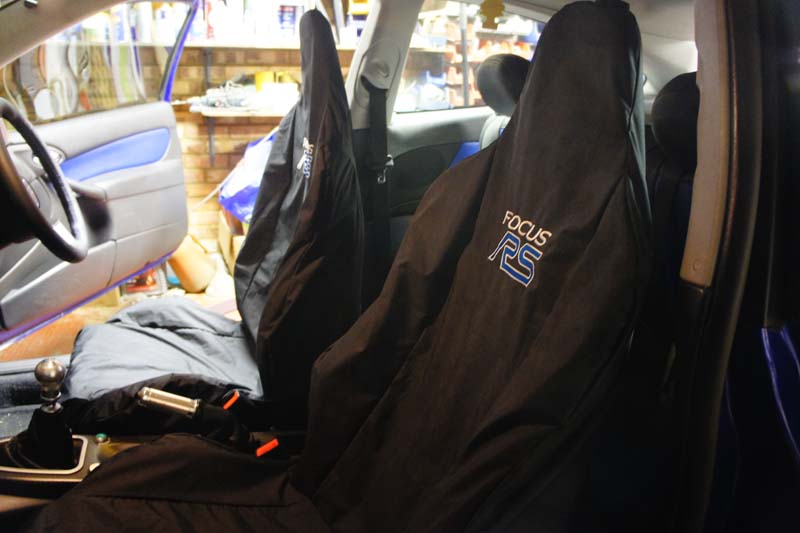
New seat covers
Also need to redesign the boot install and maybe not go for a loud install, this time go for more SQ
Decide what the fate of the rear seats are
I think thats about it to be honest!
Cant wait to get the car back!
teamSPB
One Team Dynamics Pro Race 1.2 and one 360mm VW Phaeton disc
One Team Dynamics Pro Race 1.2 and one 360mm VW Phaeton disc AND one C63 AMG caliper
You should see what they look like on the other side
Small update to...so far I have the following things to fit/on order...
OMP subframe adapters
New seats with a custom retrim
Remap
Custom 3" downpipe with extra boss's
Orange front indicators
Orange side repeaters
Ghia/ST170 spec interior light
New rear view mirror
New small RS badges
New gear knob
AMG/Phaeton braking setup
Team Dynamics Pro Race 1.2s
Heated washer jets which I will be wiring up to make sure they are active and working
Redline tuning bonnet lifters
New seat covers
Also need to redesign the boot install and maybe not go for a loud install, this time go for more SQ
Decide what the fate of the rear seats are
I think thats about it to be honest!
Cant wait to get the car back!
teamSPB
24-04-2012, 05:40 AM
#44
PassionFord Post Troll
Thread Starter
28-04-2012, 01:45 PM
#47
PassionFord Post Troll
Thread Starter
28-04-2012, 02:00 PM
#48
PassionFord Post Troll
Thread Starter
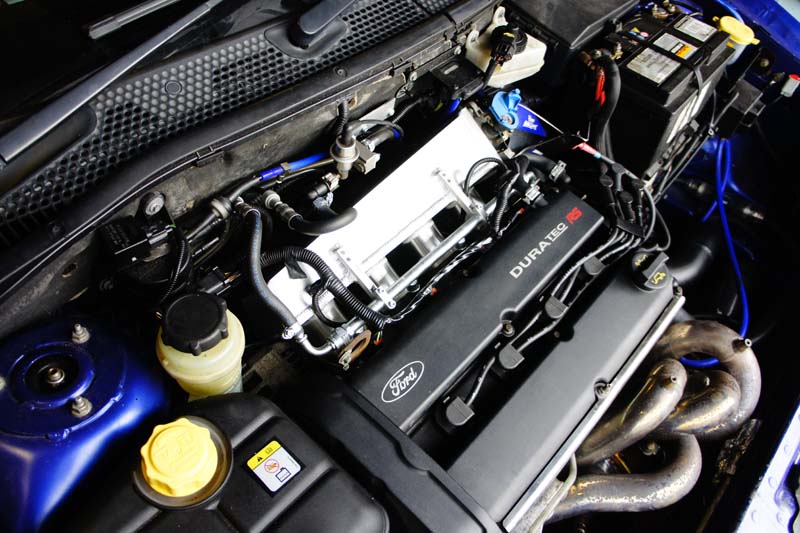
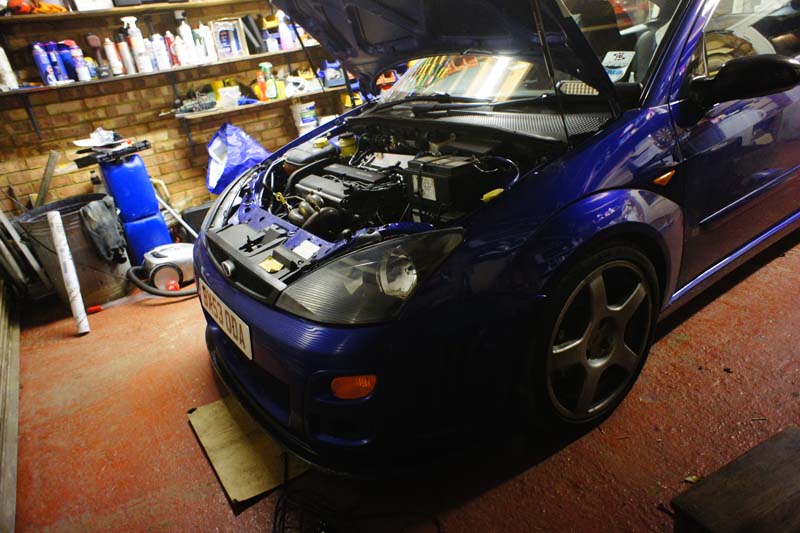
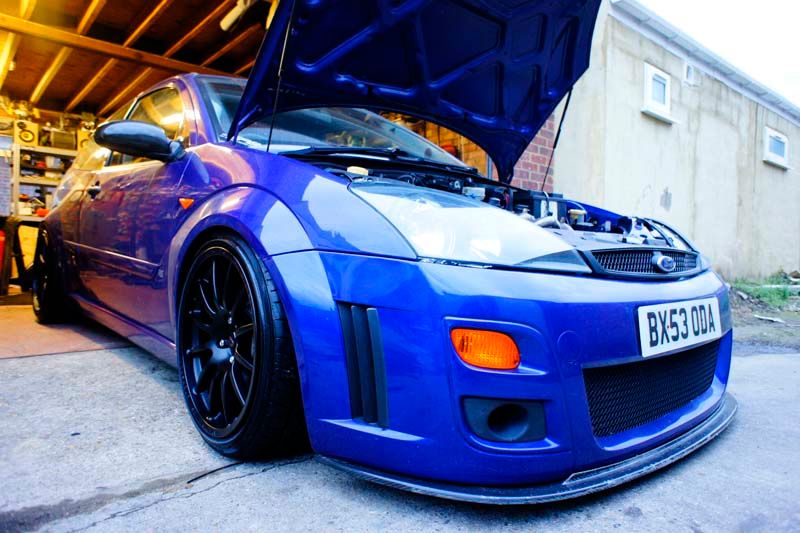
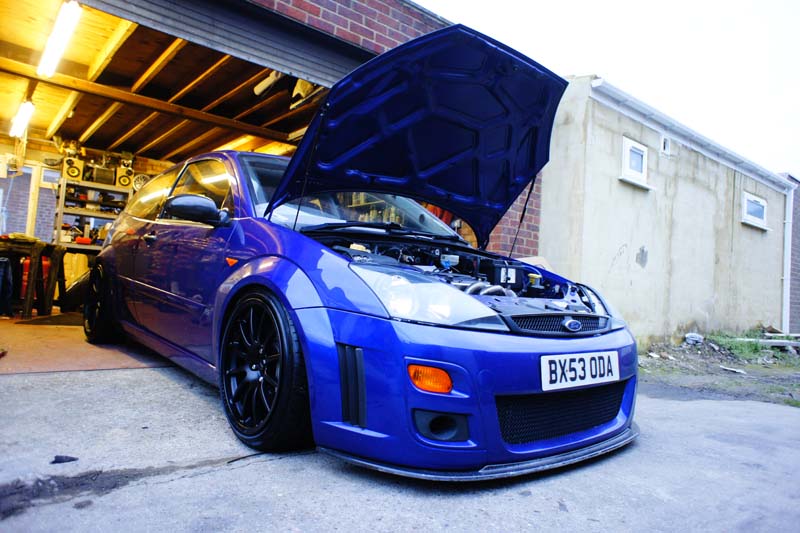
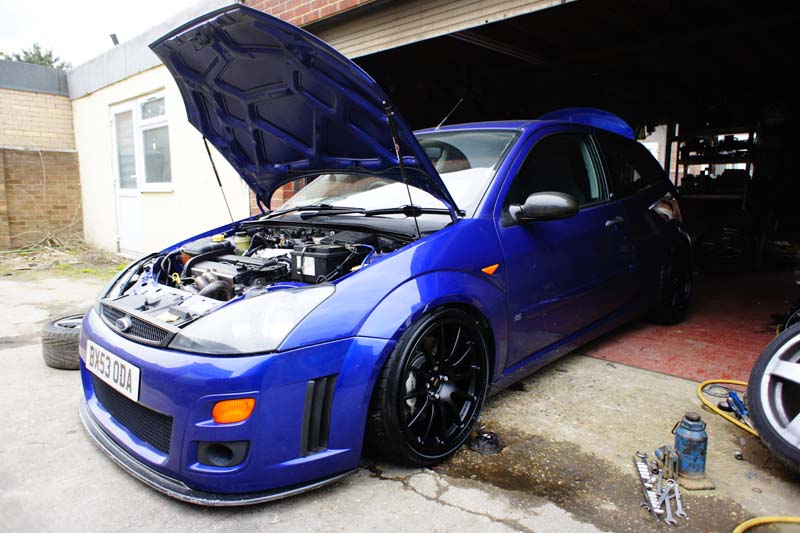
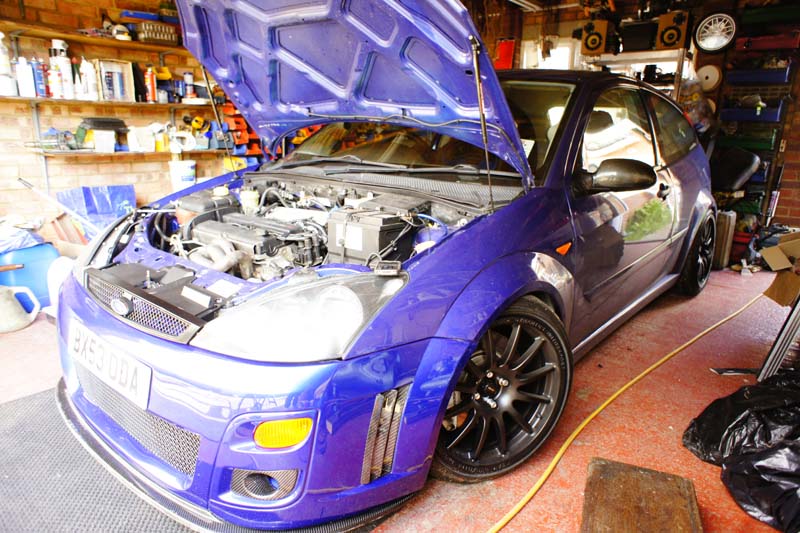
Now I finally have the car back!
Fingers crossed I can crack on with progress now!
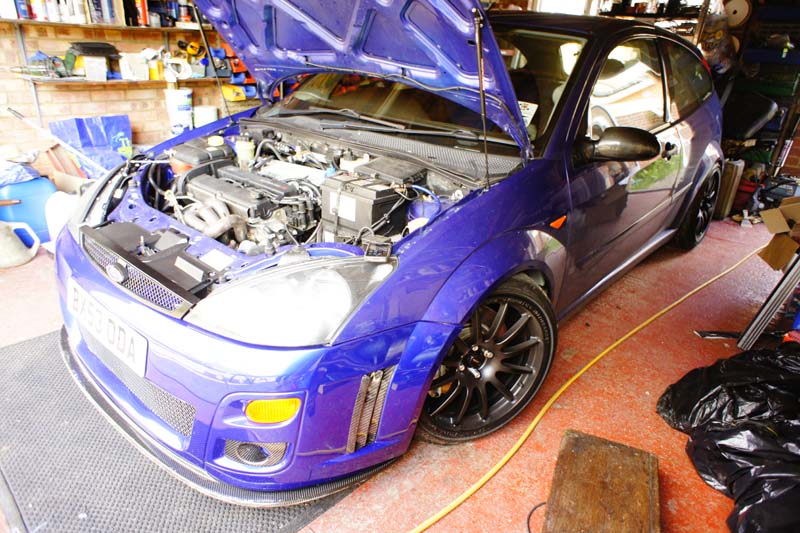
Some pics of the engine bay as it stands (its filthy!)
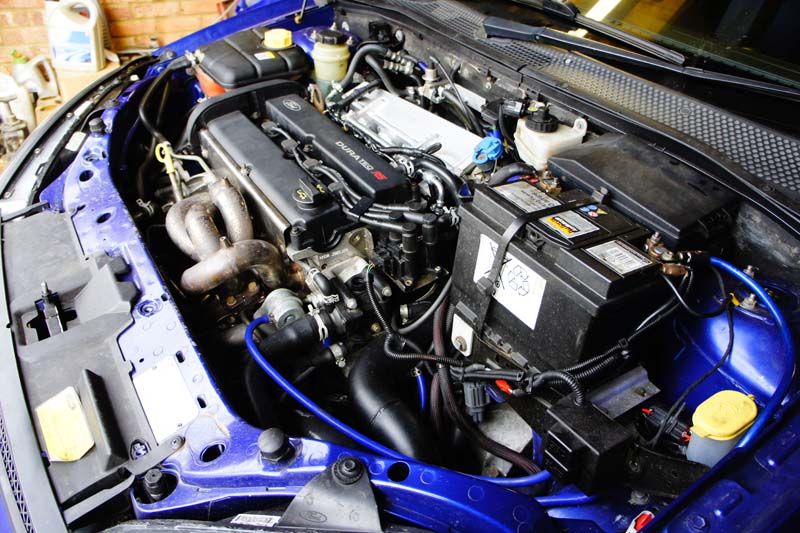
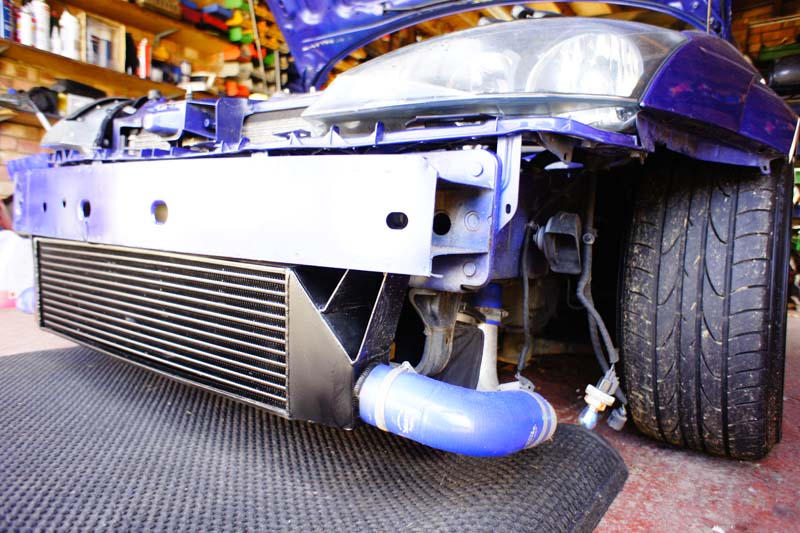
Custom 3" downpipe with GT28 flange and boss for EGT sensor made by Sabre (Paul and Leighton)
Re-routed lower boost pipe off the turbo to the intercooler
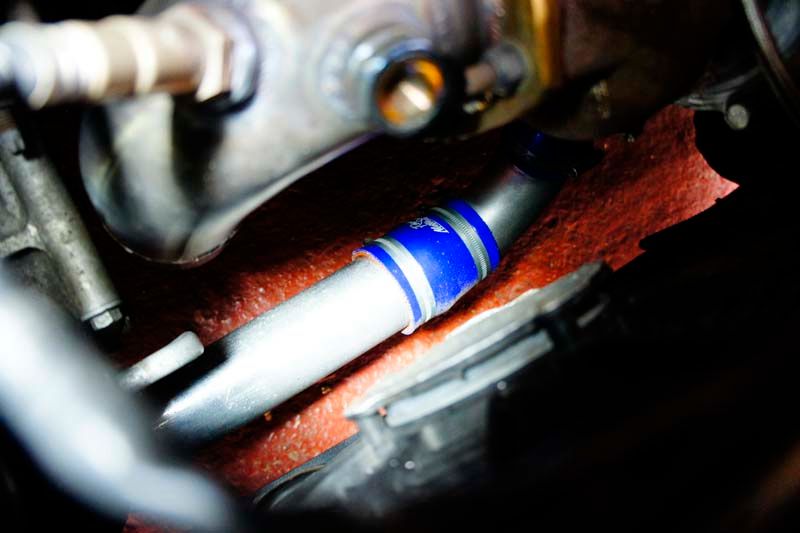
Re-routed inlet pipe
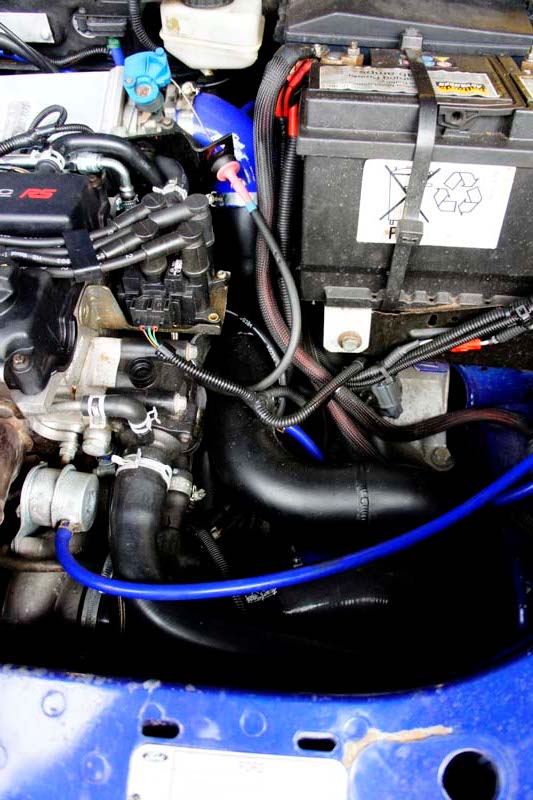
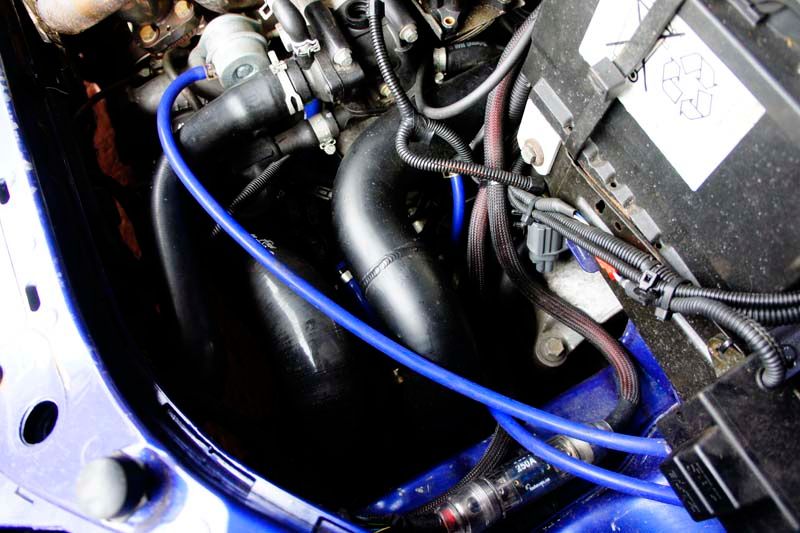
Area Six inlet manifold
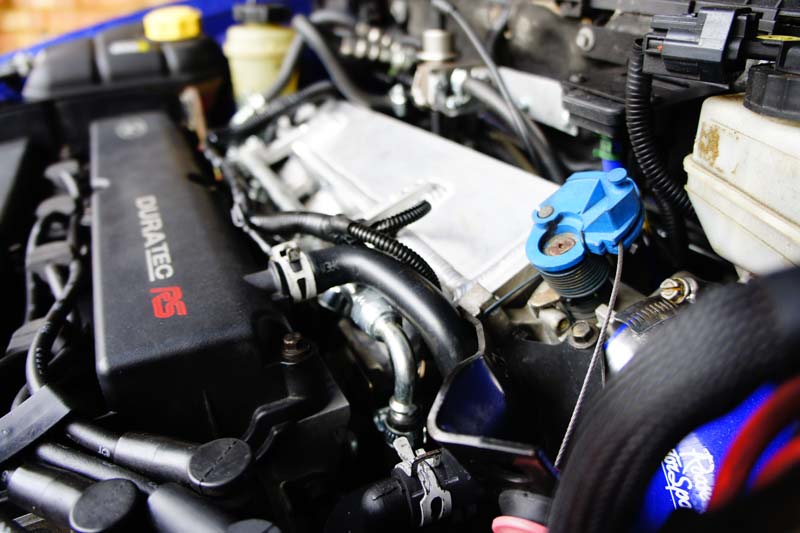
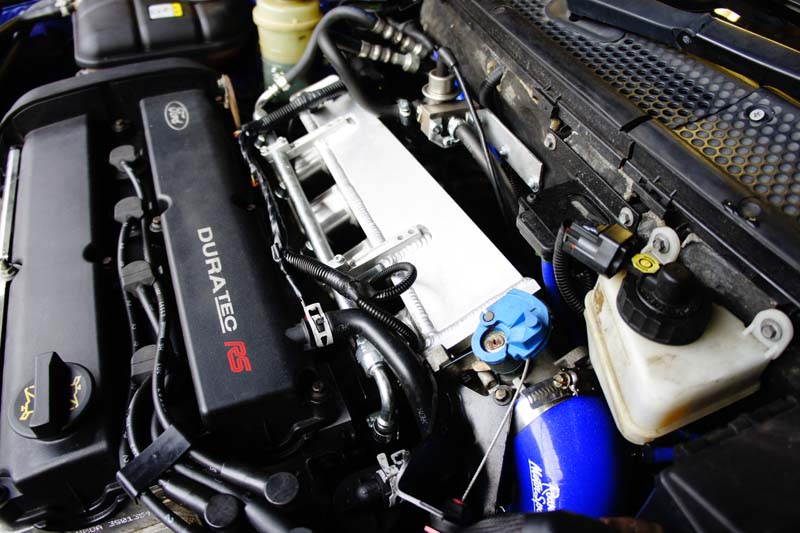
And an overall shot as I like photos lol
I think its about time I revealed the seats aint it?!
teamSPB
Fingers crossed I can crack on with progress now!
Some pics of the engine bay as it stands (its filthy!)
Custom 3" downpipe with GT28 flange and boss for EGT sensor made by Sabre (Paul and Leighton)
Re-routed lower boost pipe off the turbo to the intercooler
Re-routed inlet pipe
Area Six inlet manifold
And an overall shot as I like photos lol
I think its about time I revealed the seats aint it?!
teamSPB
01-05-2012, 08:43 PM
#49
PassionFord Post Troll
Thread Starter
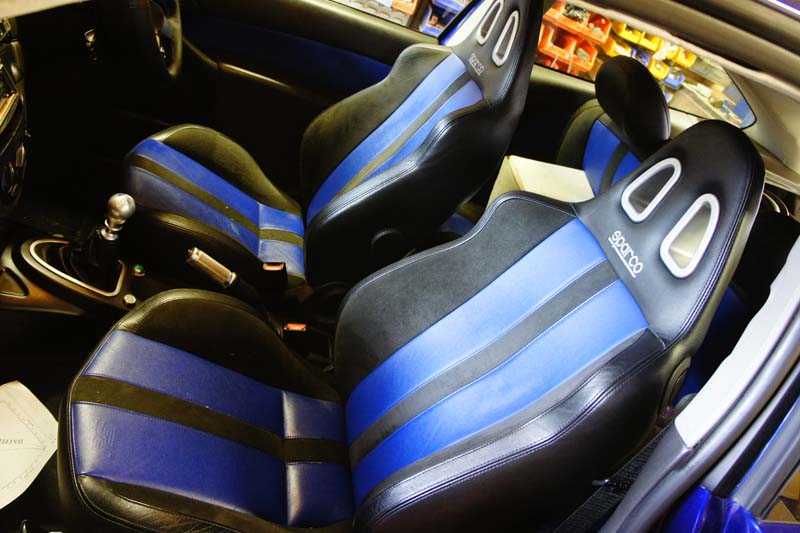
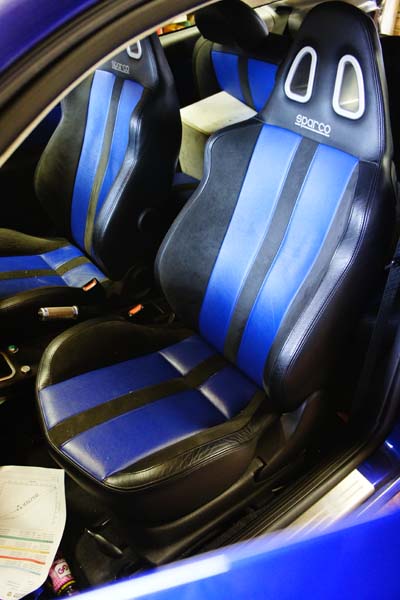
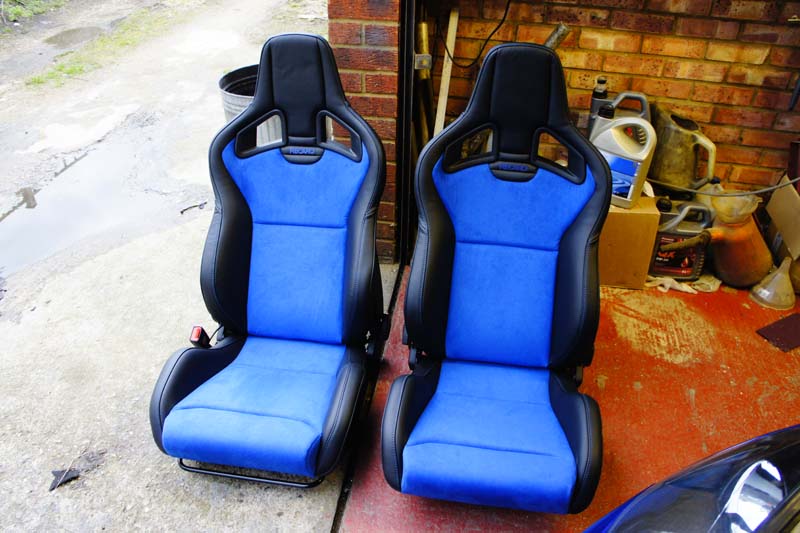
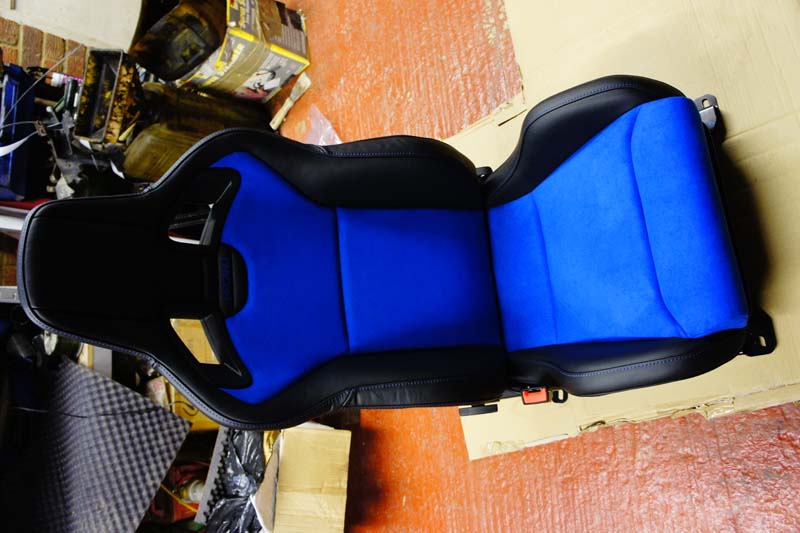
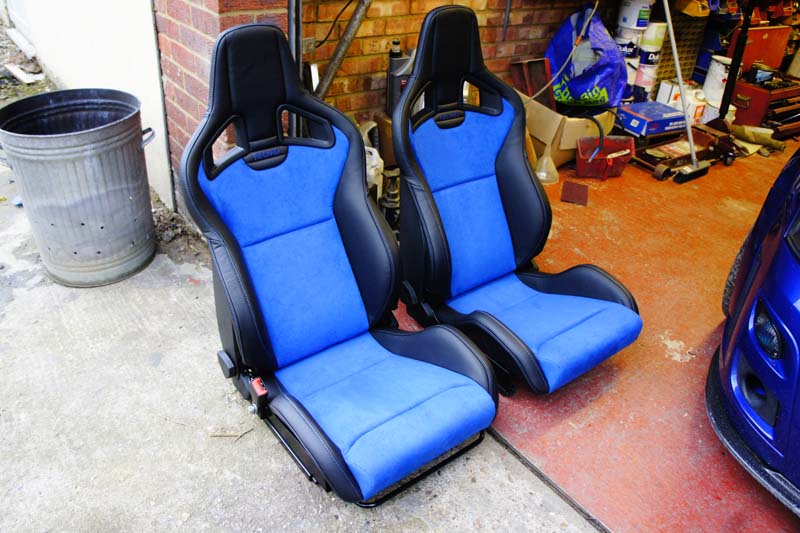
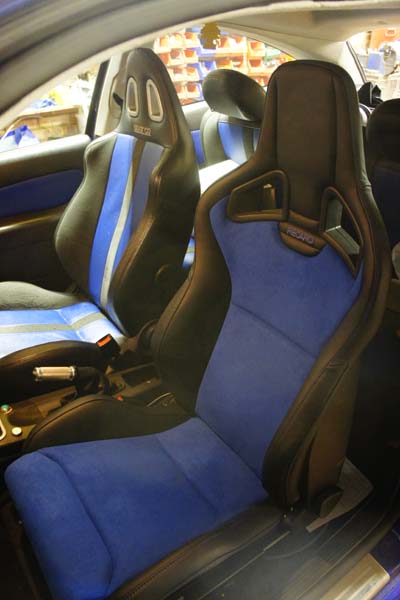
Some pics of the seats...
Sparco's
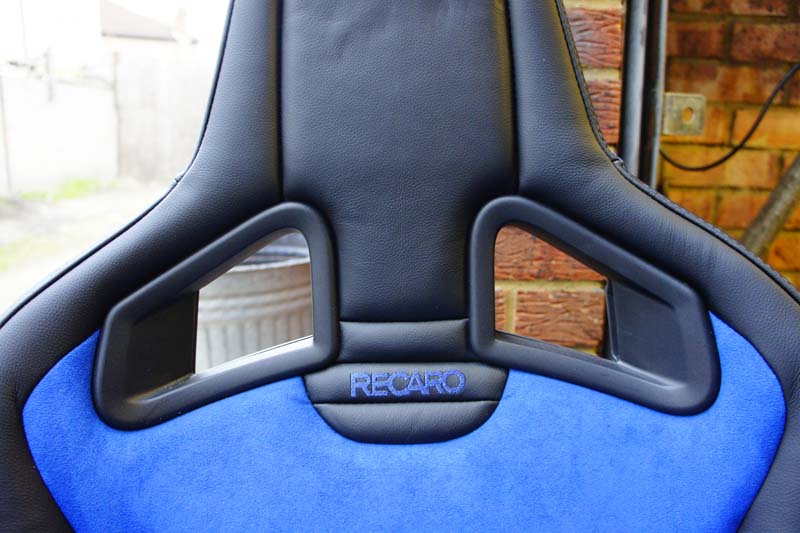
Recaro Sportster CS' as I picked them up in black leather
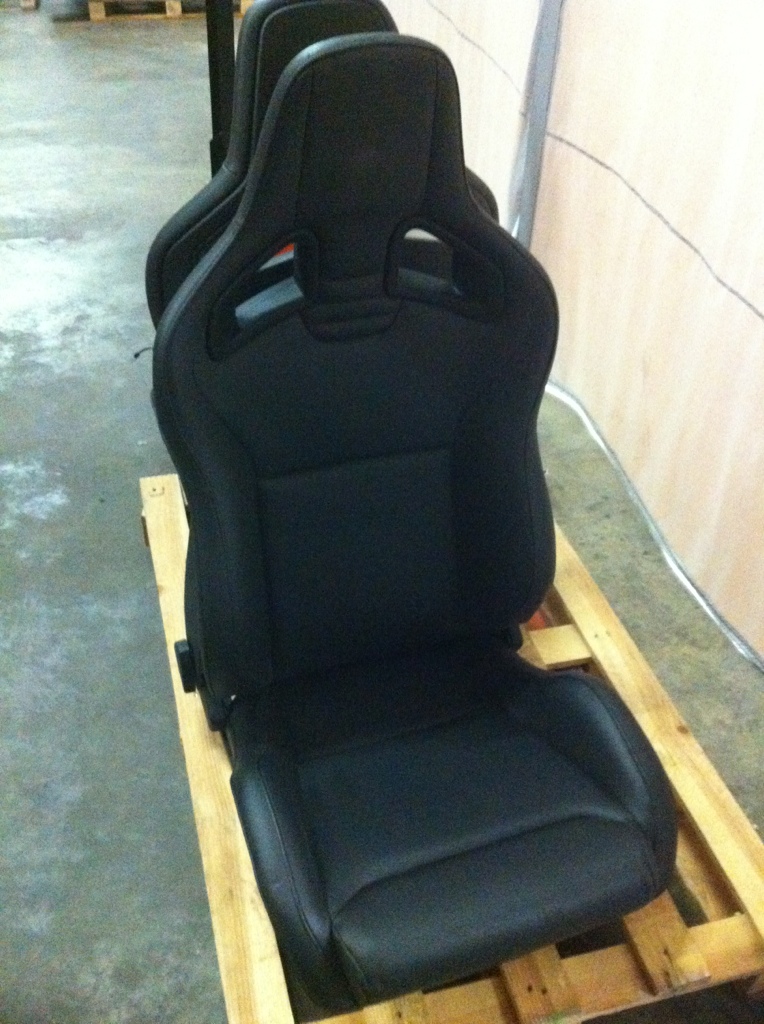
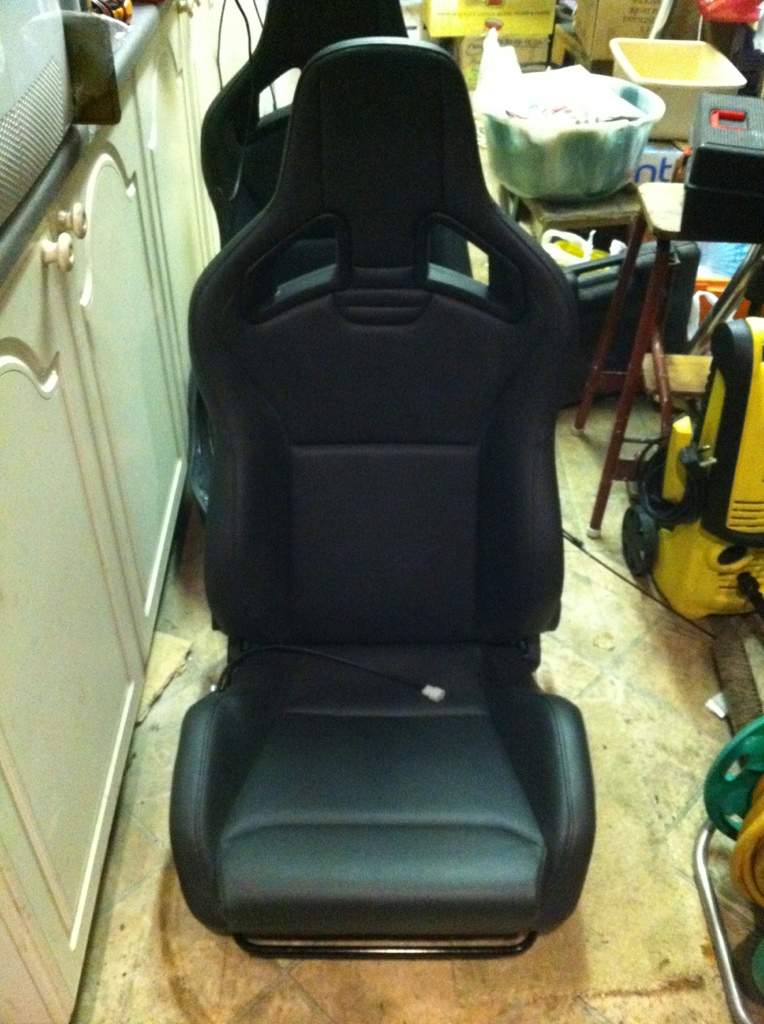
Then they were sent off to Capital Seating in Leicester to get trimmed for me...
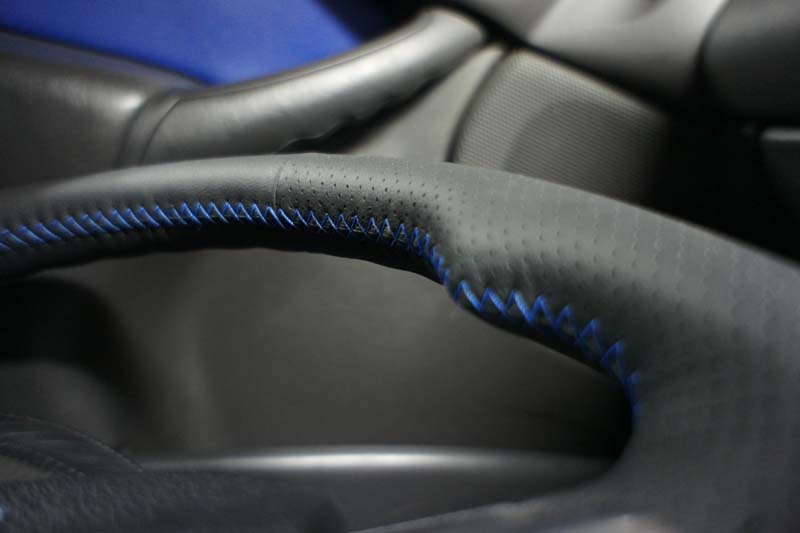
As I had gone for the Focus RS Mk2 steering wheel...it means it came incorporated with blue stitching...so I decided I wanted to match it...coupled with blue alcantera centres...and a blue RECARO logo...the end results...
Steering wheel stitching
Recaro's


teamSPB
Sparco's
Recaro Sportster CS' as I picked them up in black leather
Then they were sent off to Capital Seating in Leicester to get trimmed for me...
As I had gone for the Focus RS Mk2 steering wheel...it means it came incorporated with blue stitching...so I decided I wanted to match it...coupled with blue alcantera centres...and a blue RECARO logo...the end results...
Steering wheel stitching
Recaro's
teamSPB
 01-05-2012, 09:23 PM
#52
Lucifer II - 666

 03-05-2012, 12:01 AM
#54
PassionFord Post Troll
Thread Starter
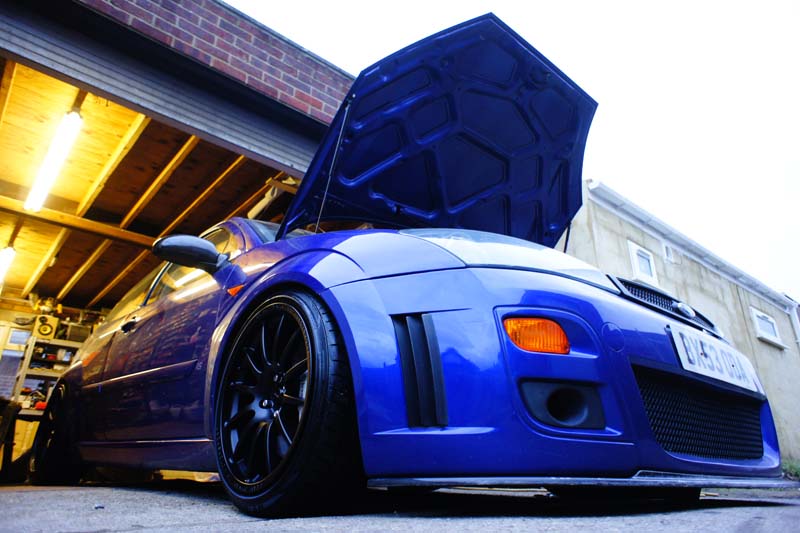
Got the bonnet struts sorted today...
I got the kit from Redline Tuning from the states...got stung on import tax etc, but still worth the money I paid IMO
Here are the contents of the kit
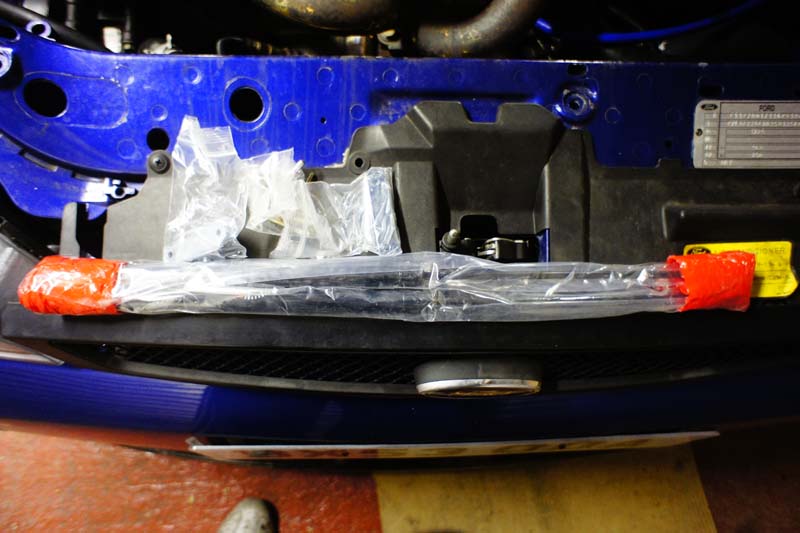
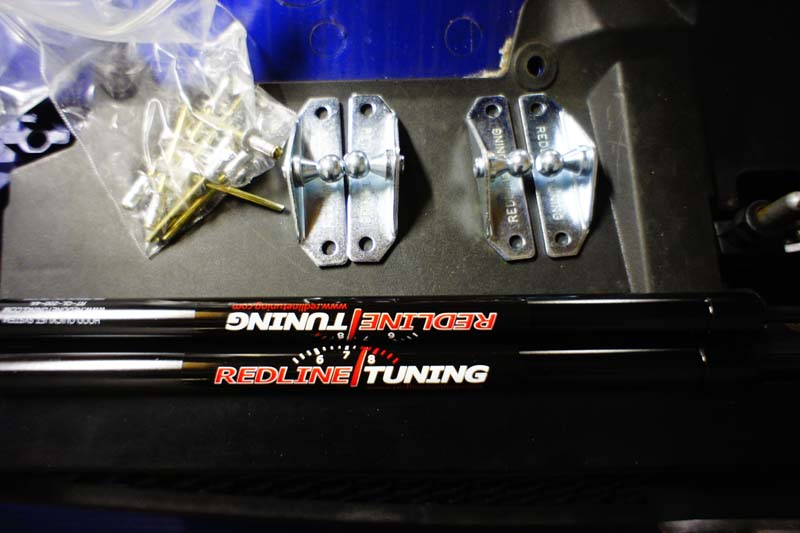
What you get are 2 struts, 4 brackets, and 9 pop rivets (you get one spare).
Other bits you will need are;
5mm drill bit (I used 3mm as the pilot hole)
Some paint (to paint over the bare metal when you have made the 4 holes)
Drill
Pop rivet gun
Tape measure
Masking tape (optional)
I didnt like the metal brackets being stainless/silver in finish, so I painted them black...
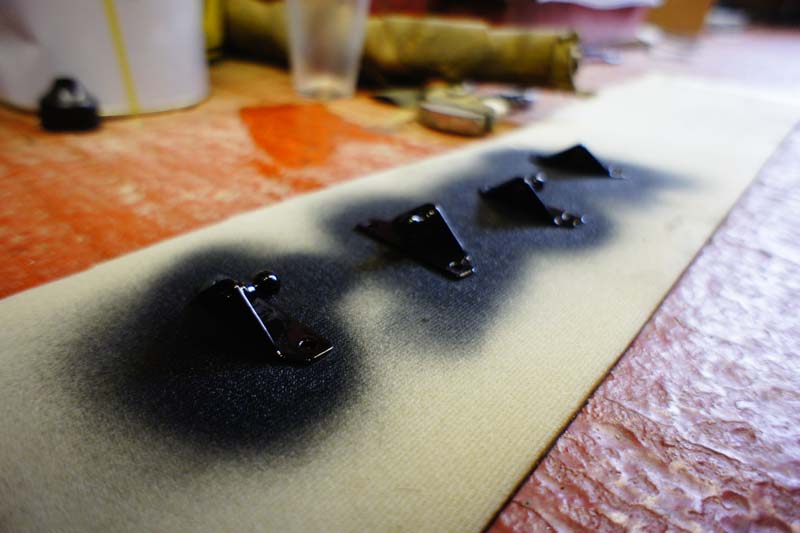
You have to measure 1 1/4 inches from the middle of the bolt and drill...I then painted the hole as I didnt want any rust!
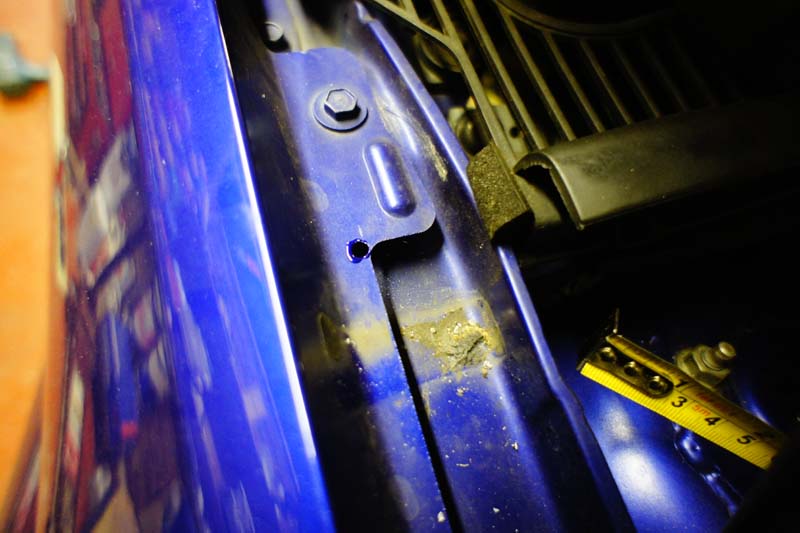
Then me being me...used some Megs APC to clean the wings etc and then pop riveted the bracket in place
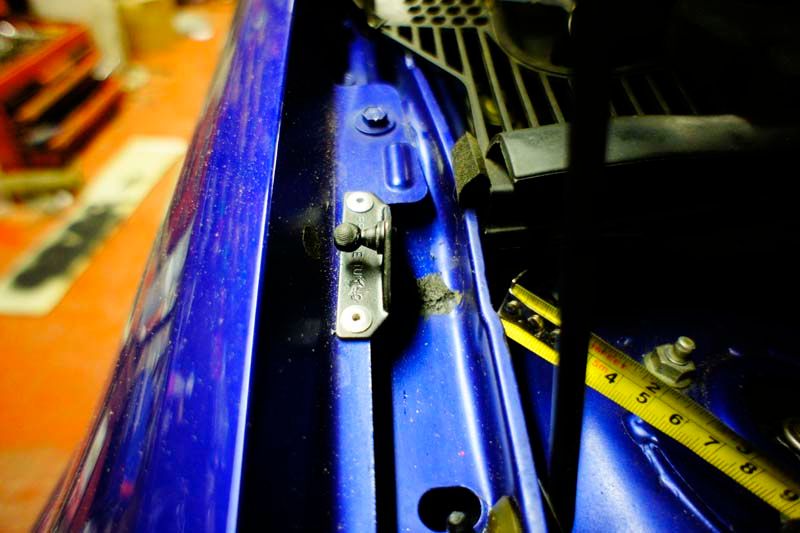
Repeated on the passenger side

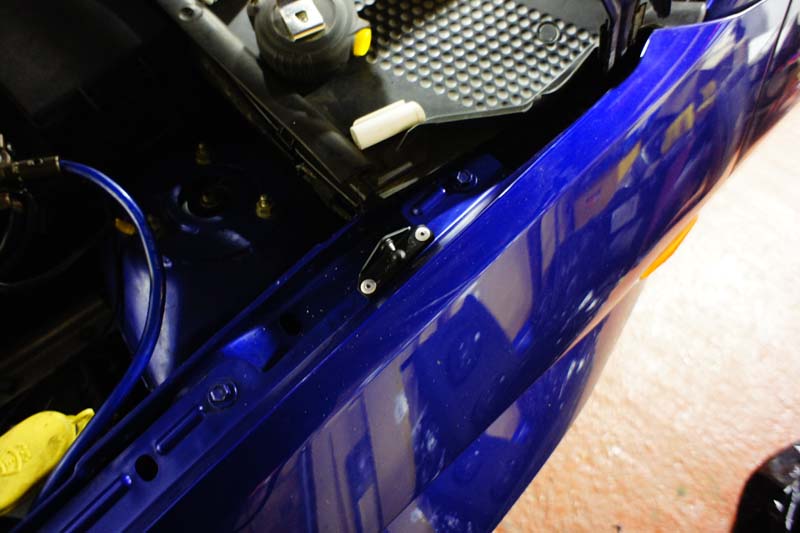
Then you have to use the edge of the bonnet for reference...I believe its 108mm from the edge of the bonnet...make a mark (on the masking tape) and use this as the centre point of where the bracket will align up to. So just to clarify, the center point mark aligns up with the center of the bracket. Then drill and pop rivet into place

Put the struts through three full cycles...push them all the way in and let them extend a minimum of 3 times...then clip them on!
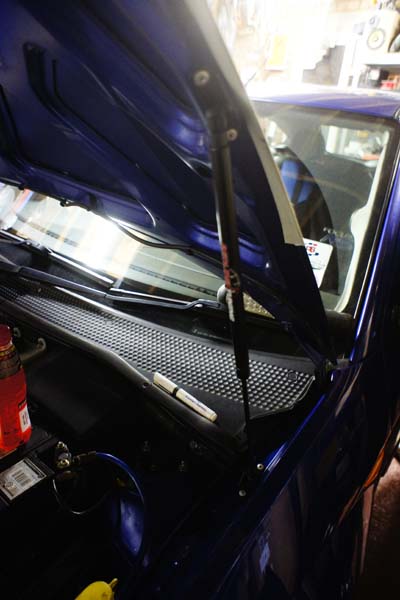
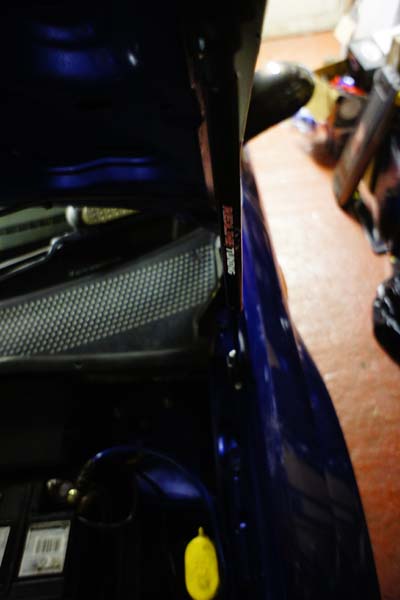
Remove the bonnet stand and admire your work!
They work a treat!!
Noticed the small change on the front end as well???
teamSPB
I got the kit from Redline Tuning from the states...got stung on import tax etc, but still worth the money I paid IMO
Here are the contents of the kit
What you get are 2 struts, 4 brackets, and 9 pop rivets (you get one spare).
Other bits you will need are;
5mm drill bit (I used 3mm as the pilot hole)
Some paint (to paint over the bare metal when you have made the 4 holes)
Drill
Pop rivet gun
Tape measure
Masking tape (optional)
I didnt like the metal brackets being stainless/silver in finish, so I painted them black...
You have to measure 1 1/4 inches from the middle of the bolt and drill...I then painted the hole as I didnt want any rust!
Then me being me...used some Megs APC to clean the wings etc and then pop riveted the bracket in place
Repeated on the passenger side
Then you have to use the edge of the bonnet for reference...I believe its 108mm from the edge of the bonnet...make a mark (on the masking tape) and use this as the centre point of where the bracket will align up to. So just to clarify, the center point mark aligns up with the center of the bracket. Then drill and pop rivet into place
Put the struts through three full cycles...push them all the way in and let them extend a minimum of 3 times...then clip them on!
Remove the bonnet stand and admire your work!
They work a treat!!
Noticed the small change on the front end as well???
teamSPB
06-05-2012, 11:24 PM
#57
PassionFord Post Troll
Thread Starter
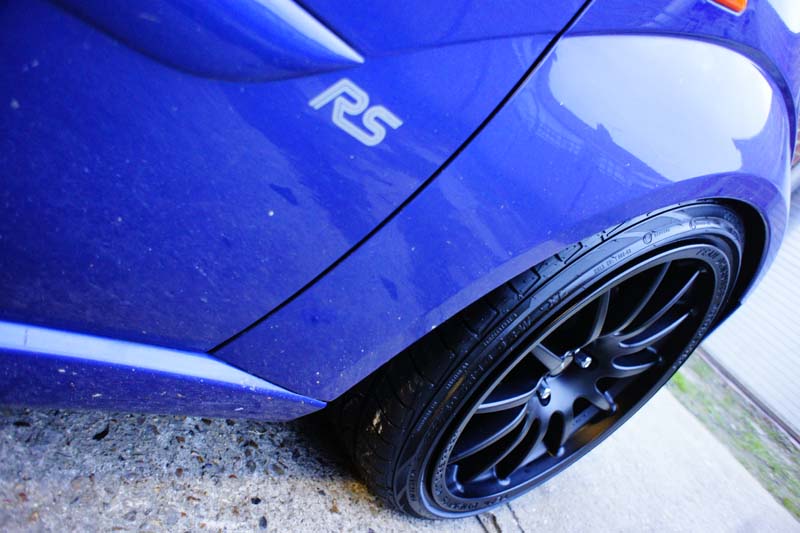
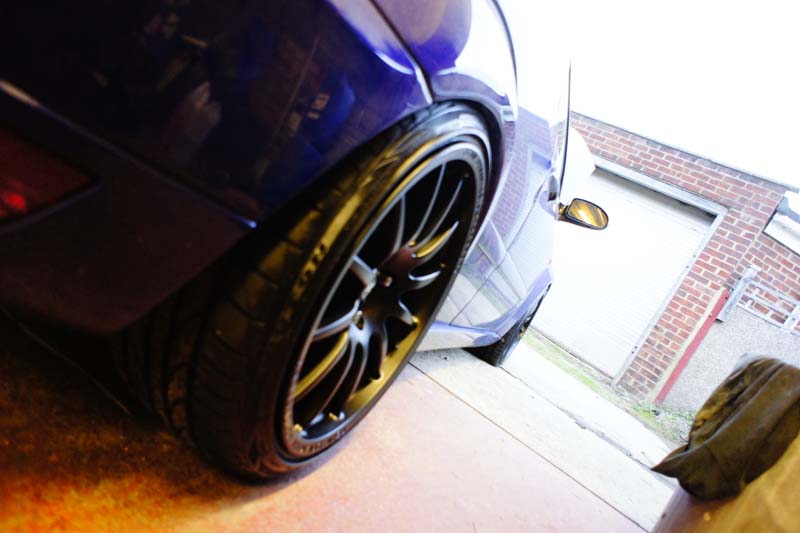
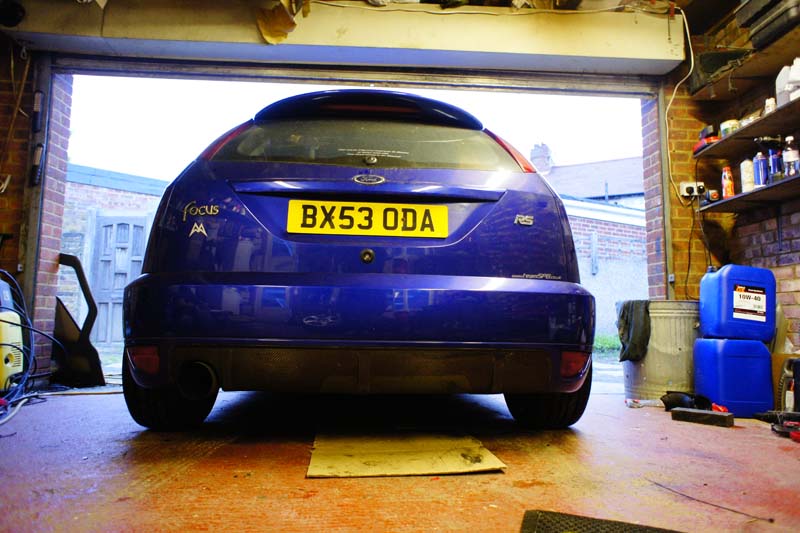
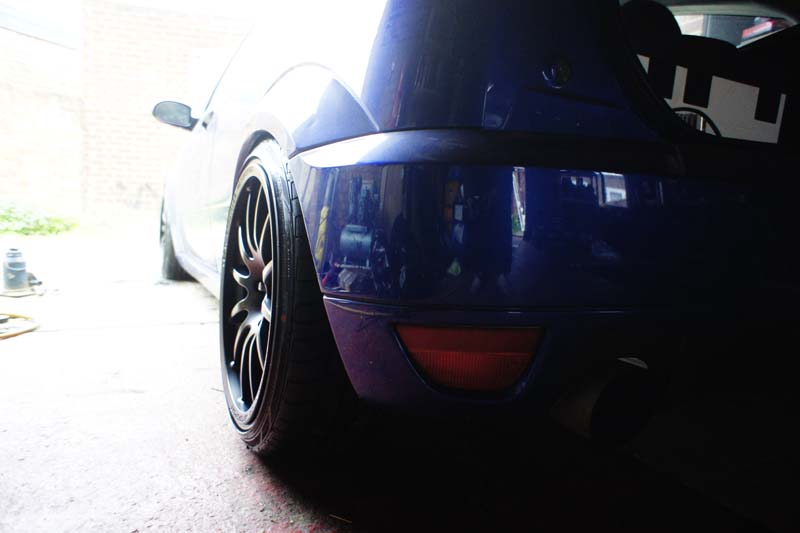
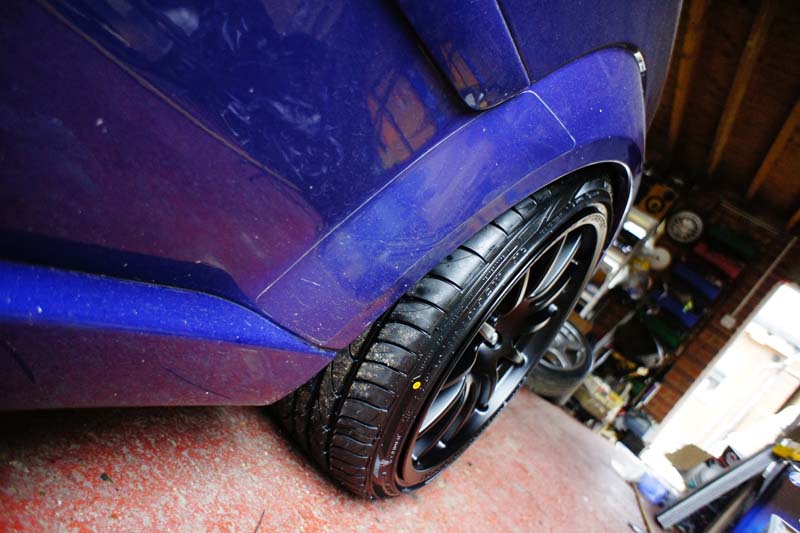
Some of you may have seen the sneak peaks of the rims...I have finally put them on the car....
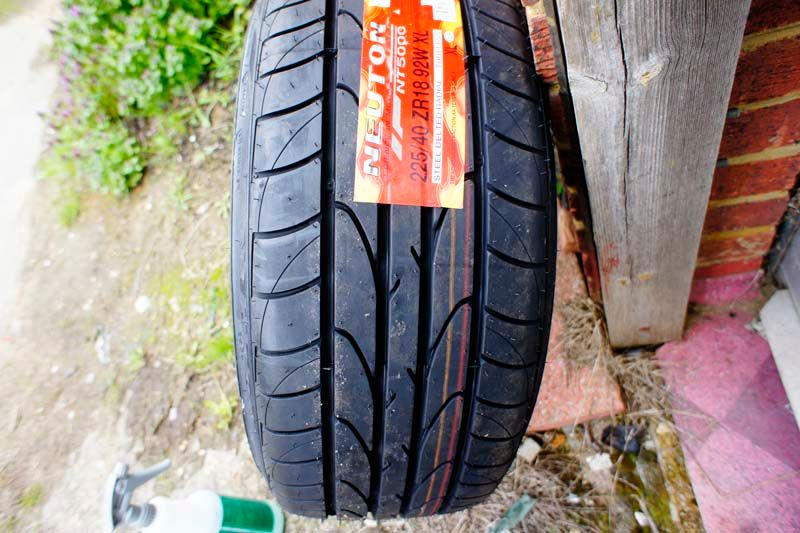
I decided to use Neuton NT5000 tires on Nathans recommendation...seem to be pretty reasonable to be fair! The guys fitting the tires were initially saying they are cheap budget rubbish...when they saw them their jaws promptly hit the floor and said the were actually pretty decent and had are the marks of a decent more expensive tire! Happy days!!
There is a slight stretch on the tires but nothing like the pictures may indicate...it really is pretty subtle!
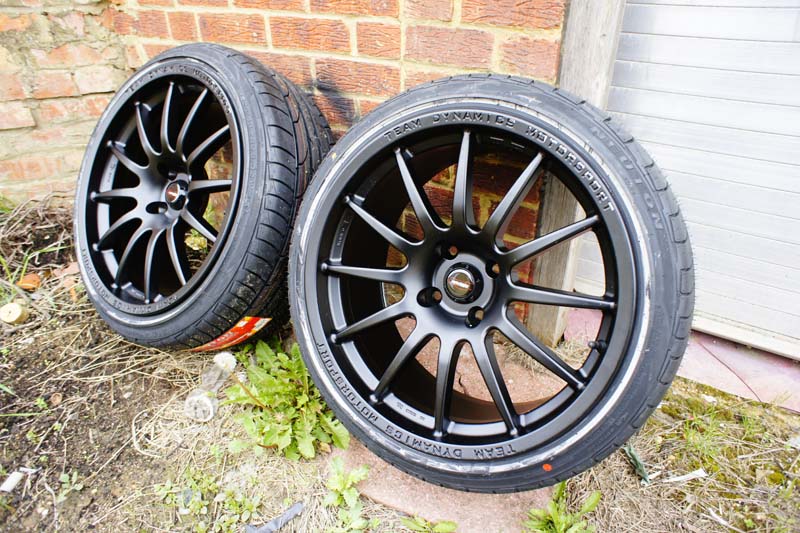

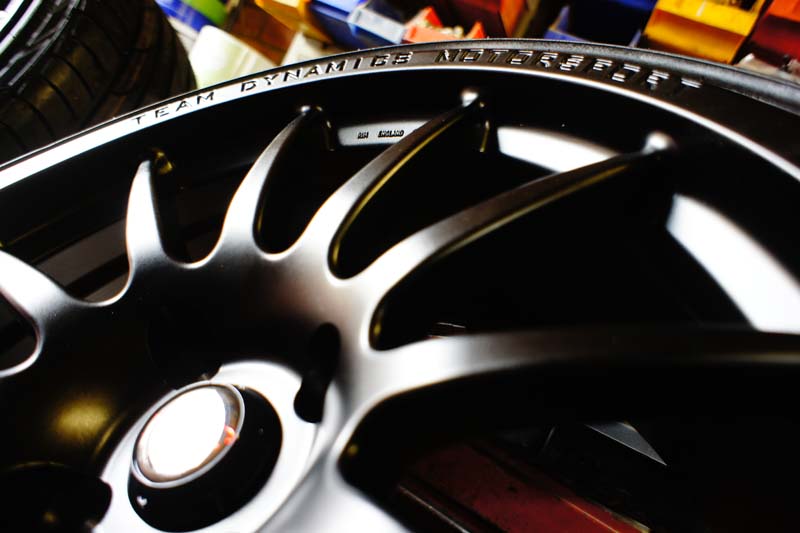
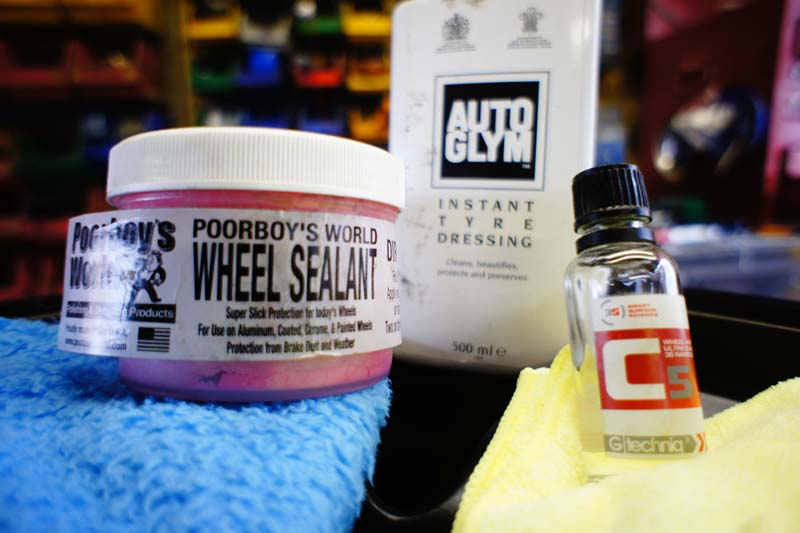
The rims were then cleaned with Megs APC, sealed with G-techniq C5 rim sealant, then 3 layers of PB rim sealant
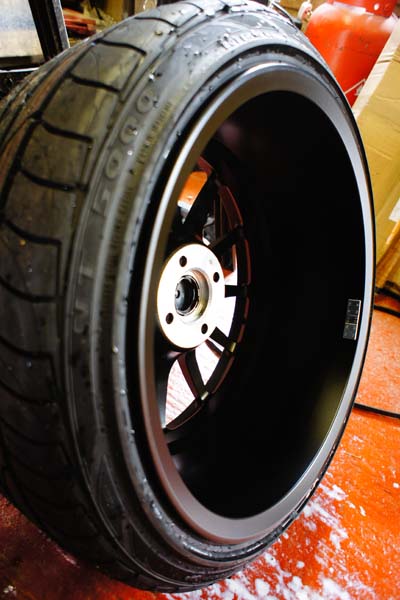
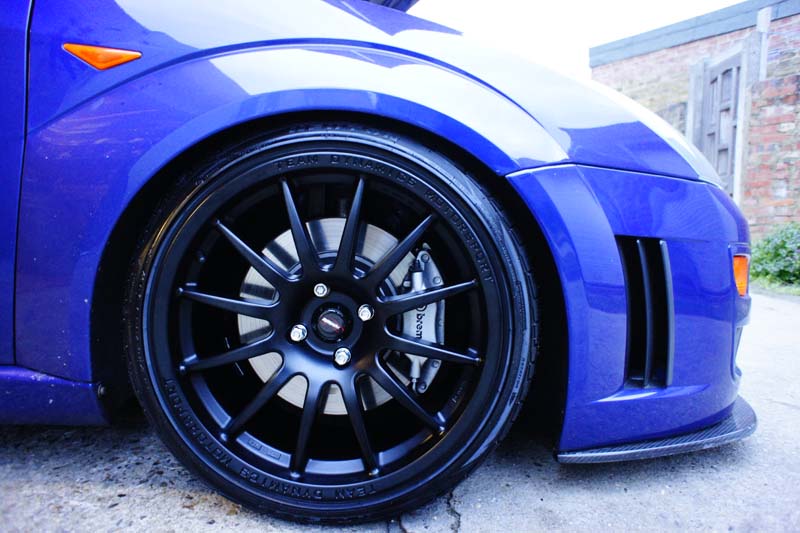
I decided to use Neuton NT5000 tires on Nathans recommendation...seem to be pretty reasonable to be fair! The guys fitting the tires were initially saying they are cheap budget rubbish...when they saw them their jaws promptly hit the floor and said the were actually pretty decent and had are the marks of a decent more expensive tire! Happy days!!
There is a slight stretch on the tires but nothing like the pictures may indicate...it really is pretty subtle!
The rims were then cleaned with Megs APC, sealed with G-techniq C5 rim sealant, then 3 layers of PB rim sealant

 07-05-2012, 10:49 AM
#61

brakes look awesome, as does most things on this.
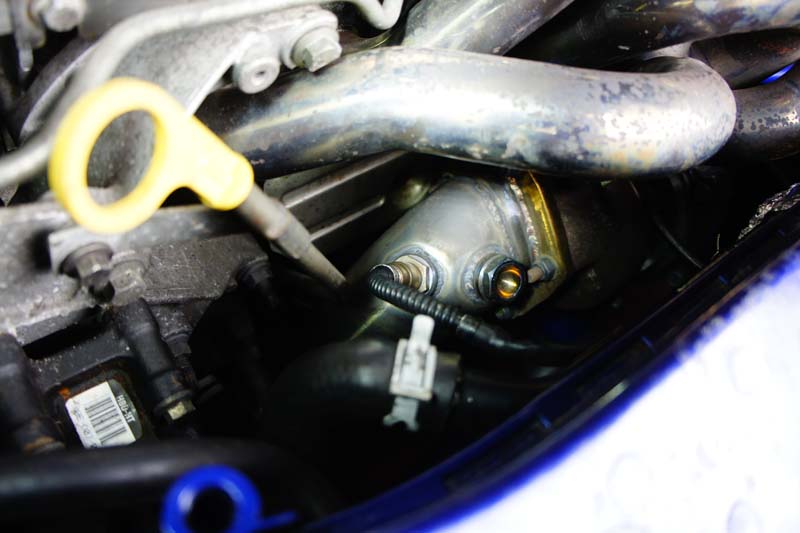
one thought though, are you sure the fuel pump is a 044 one?
looks like a regular erst or 2wd cosworth one, the 044 ones have a fitting to the feed into the pump and not moulded like the aforementioned ones. just something to check as the flow rates differ significantly.
one thought though, are you sure the fuel pump is a 044 one?
looks like a regular erst or 2wd cosworth one, the 044 ones have a fitting to the feed into the pump and not moulded like the aforementioned ones. just something to check as the flow rates differ significantly.
07-05-2012, 11:04 AM
#62
BANNED
BANNED

Join Date: Jan 2005
Location: North Wales....Congleton now though!
Posts: 9,757
Likes: 0
Received 1 Like
on
1 Post
Wheels looks really well, it's the only one in the U.K. with the 1.2's that look as good as they did on the German Focus RS everyone was copying...but never pulled off 
 08-05-2012, 05:22 AM
#66
PassionFord Post Troll
Thread Starter
Cheers mate...that means alot! Although not trying to copy the German one...I have to admit im so glad I went down the 1.2 route! Really must get the car along to some shows now!
08-05-2012, 05:04 PM
#67
BANNED
BANNED
Join Date: Jan 2005
Location: North Wales....Congleton now though!
Posts: 9,757
Likes: 0
Received 1 Like
on
1 Post
I wouldn't knock you for doing that mate, there's no other Focus RS with as good a stance and wheel combo as that German car. It's a winner in every angle
 09-05-2012, 11:05 PM
#69
PassionFord Post Troll
Thread Starter
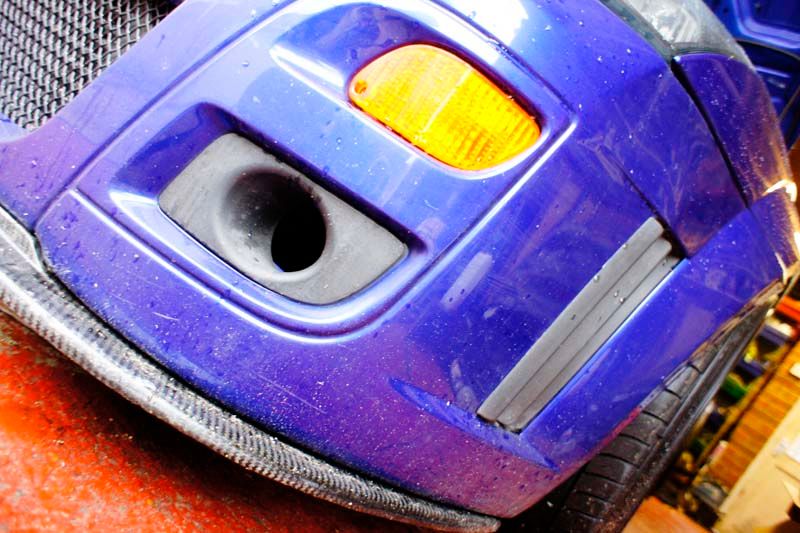
Some close ups of the indicators
I also managed to get hold of a new RS badge after it 'fell off' at Pete's...never heard of one doing that before! The only problem with the one I sourced was it was silver instead of blue...so I filled it in with some paint
Started fitting the carbon fogs and vents today...so ill update that tomorrow!
teamSPB
 12-05-2012, 10:19 PM
#71
PassionFord Post Troll
Thread Starter
I know what you mean..the current 325's look tiny in the wheel!! Fingers crossed ill be getting my hands dirty this coming week with the brakes! Thats if its raining and I aint out enjoying the car LOL!
16-05-2012, 06:51 PM
#72
PassionFord Post Troll
Thread Starter
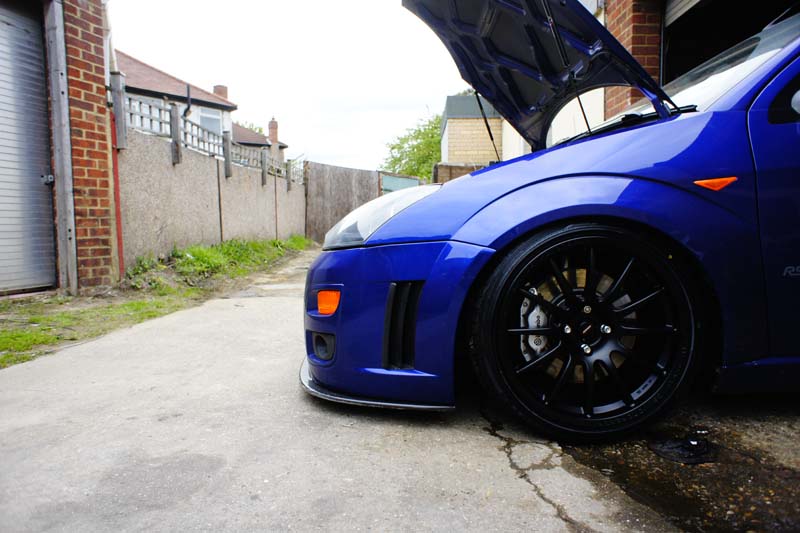
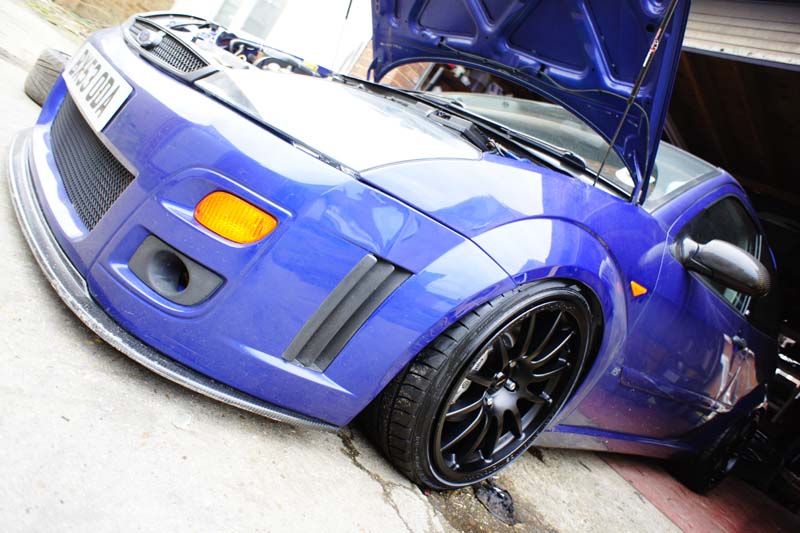
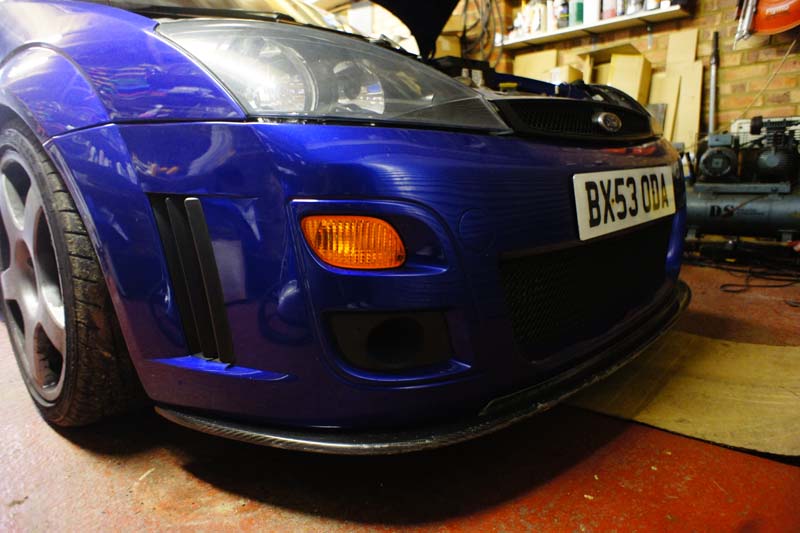
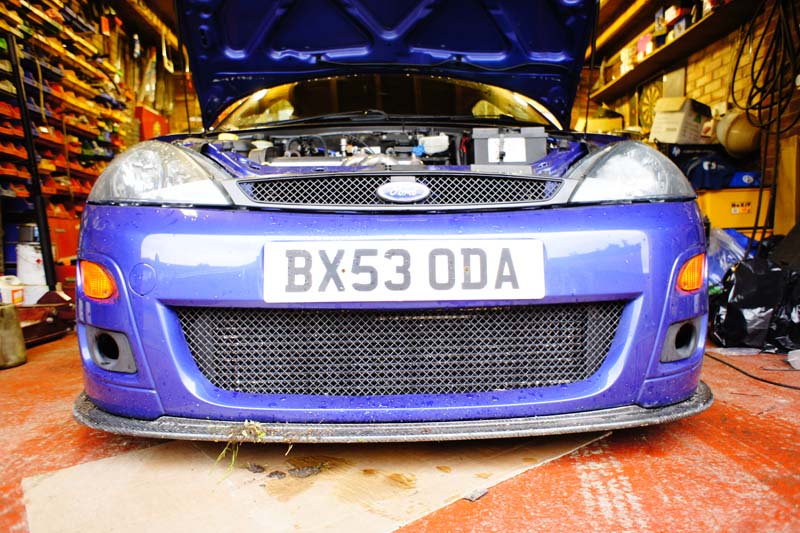
Some updates for you all....
Front bumper standard

Bumper off
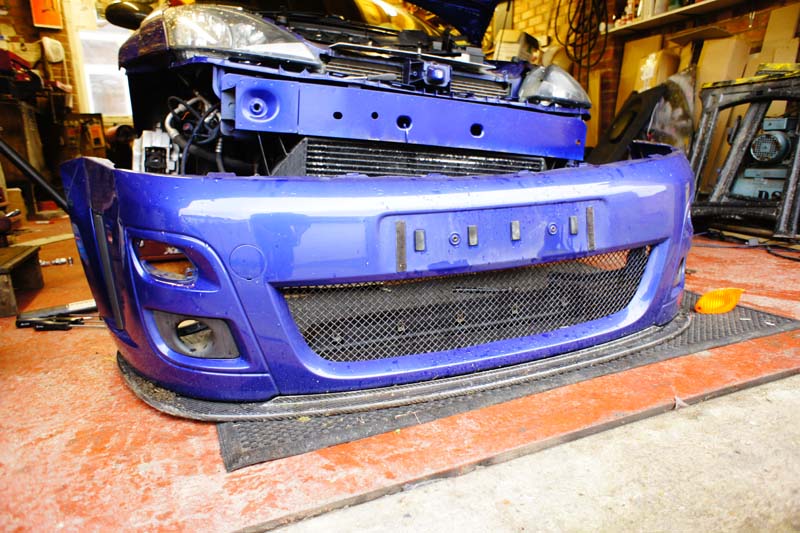
Bumper was cleaned and detailed
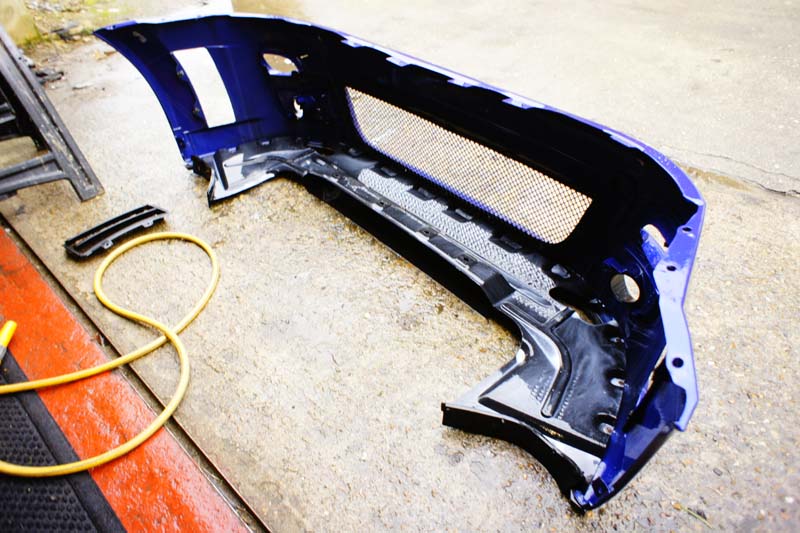
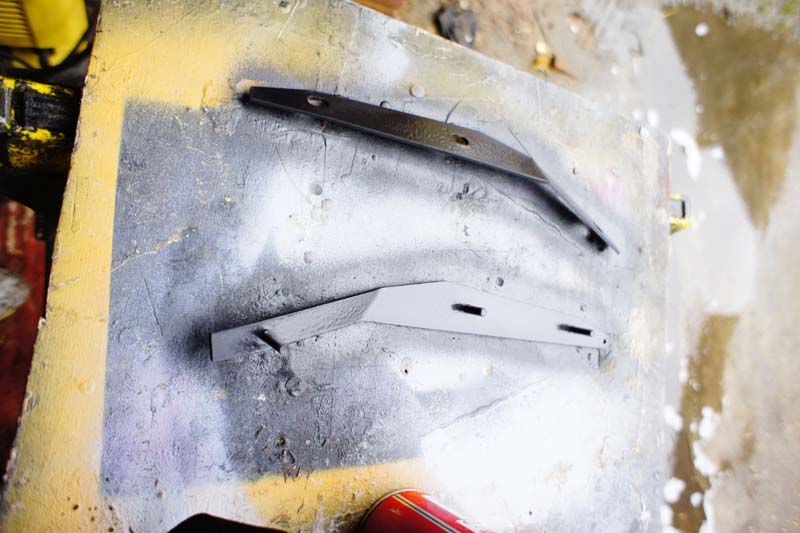
Bumper brackets were given some stone chip paint for protection
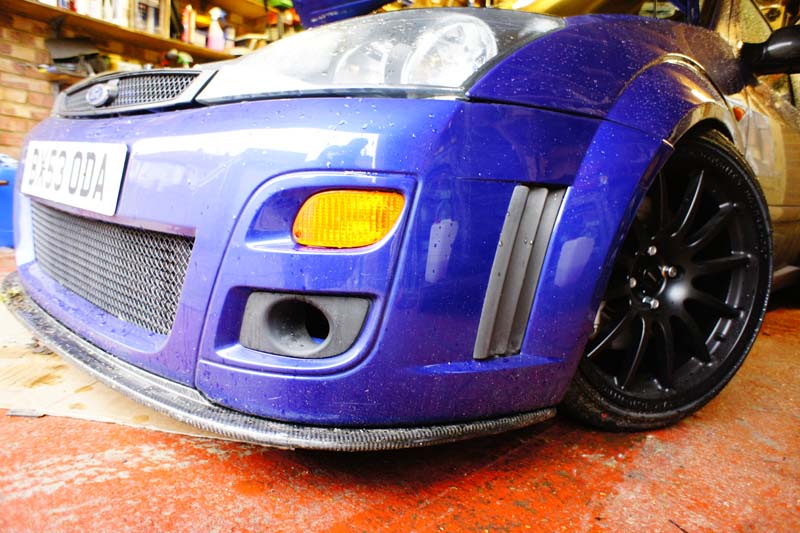
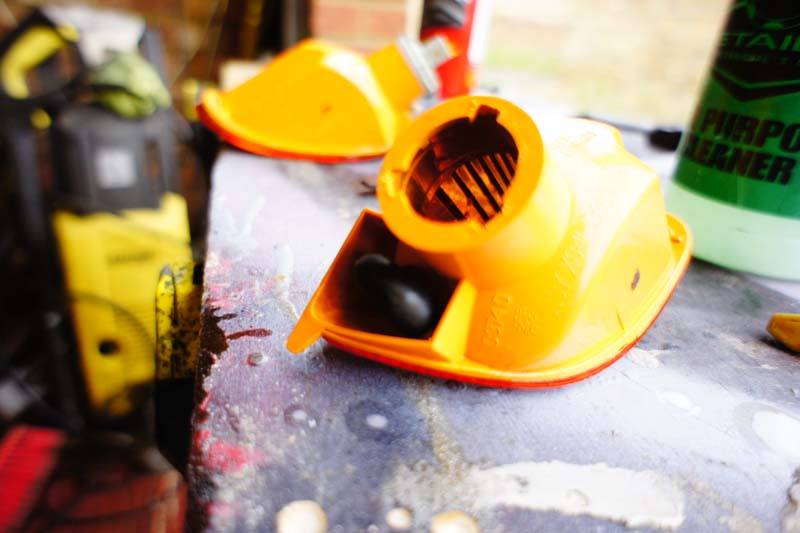
Indicators received some detailing to...after a clean, I decided I HATED the off looking rubber vent pipe thing
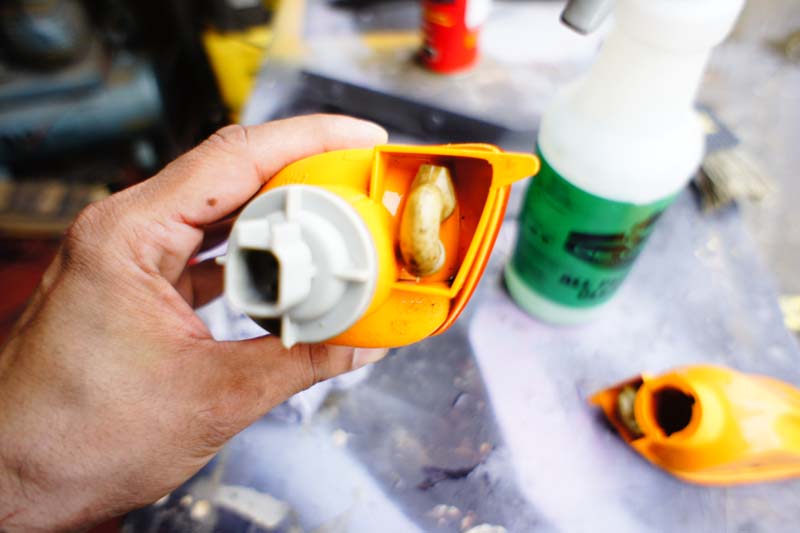
So on went some replacements
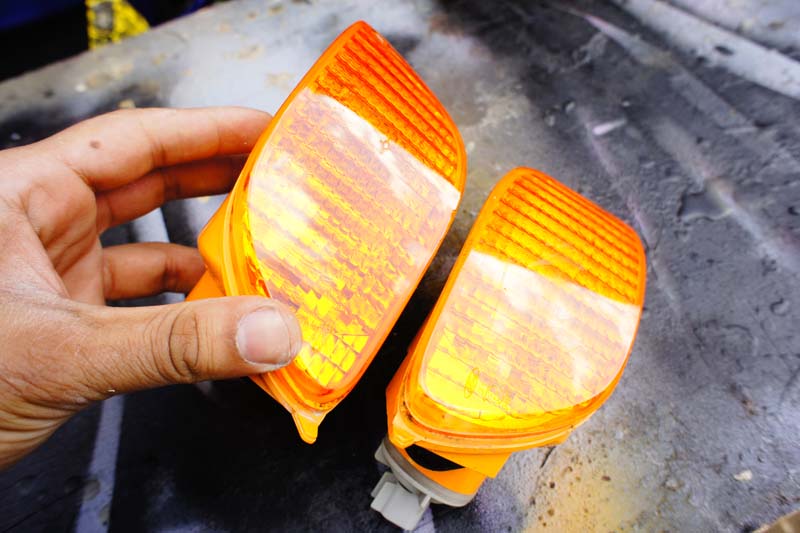
You cant really tell here but the indicators had loads of scratches on them so I machined them
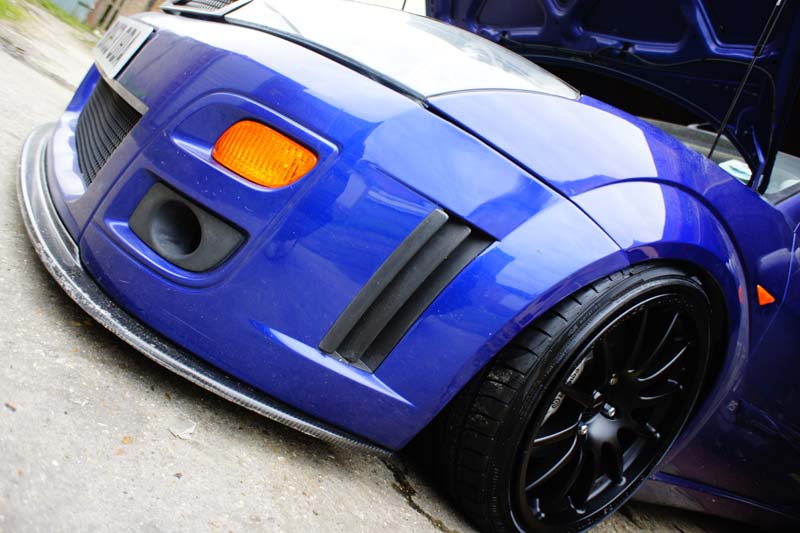
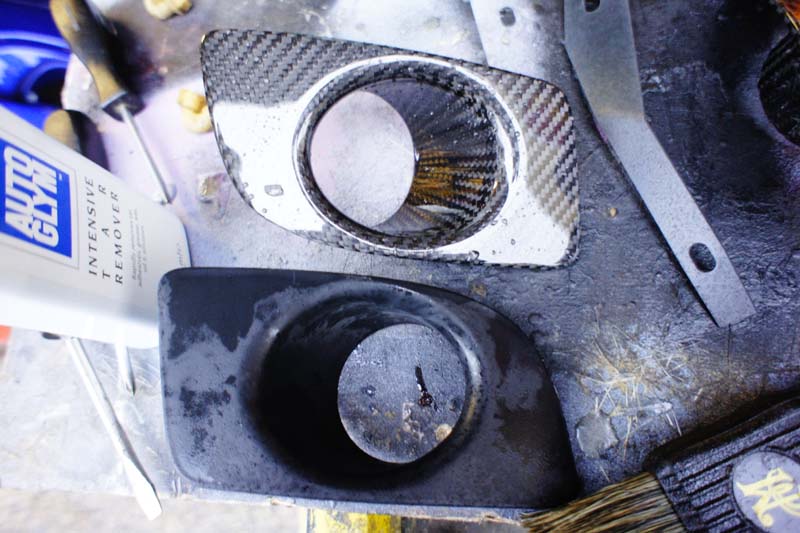
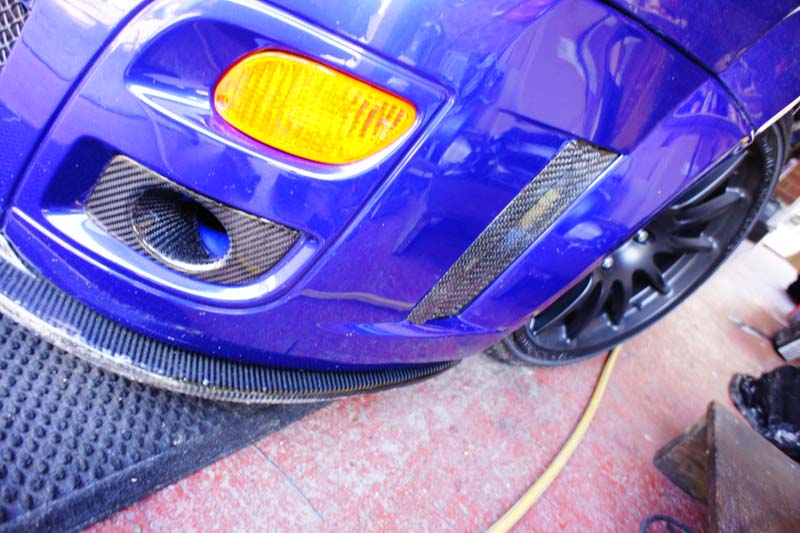
Fog light surrounds removed and area cleaned up

Carbon vs plastic
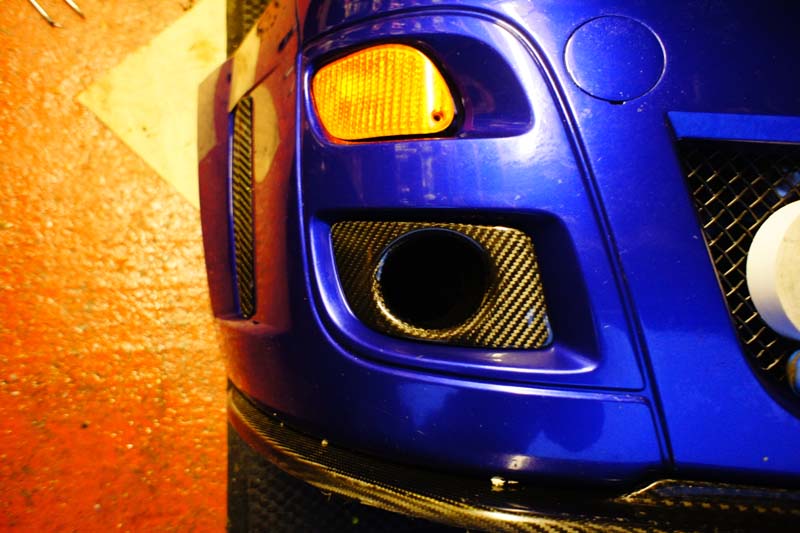
Fins and surrounds fitted
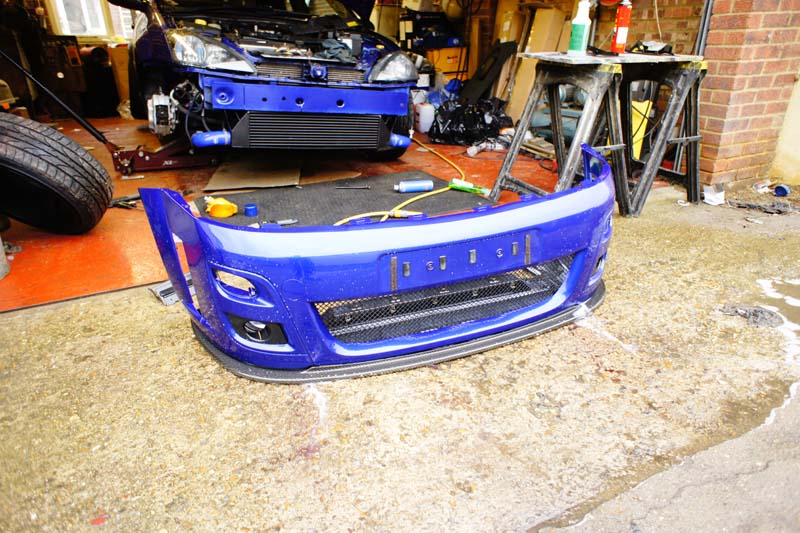
Intercooler given another lick of paint
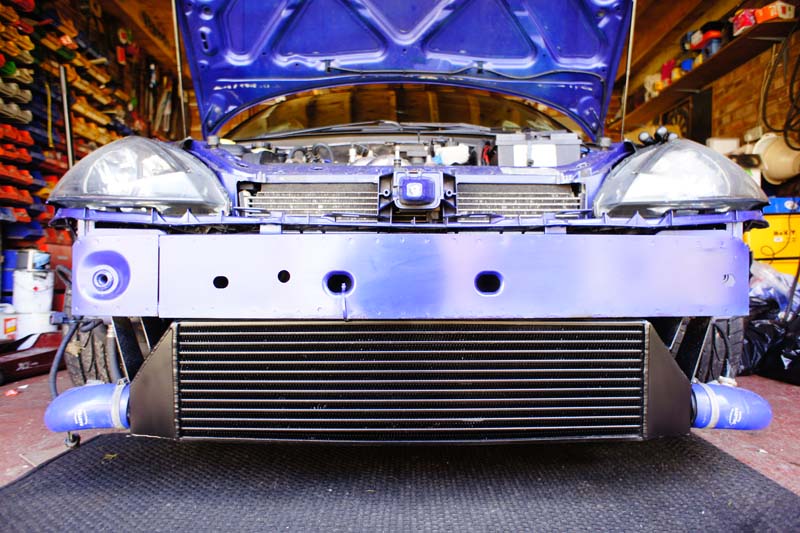
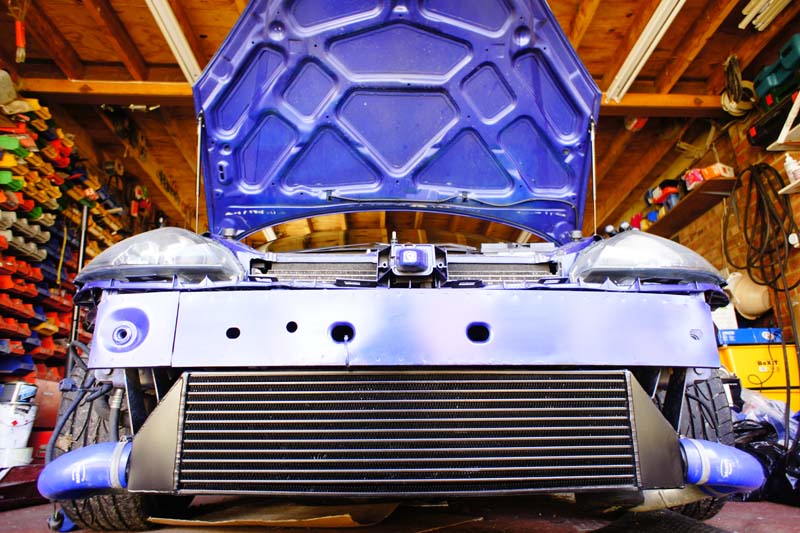
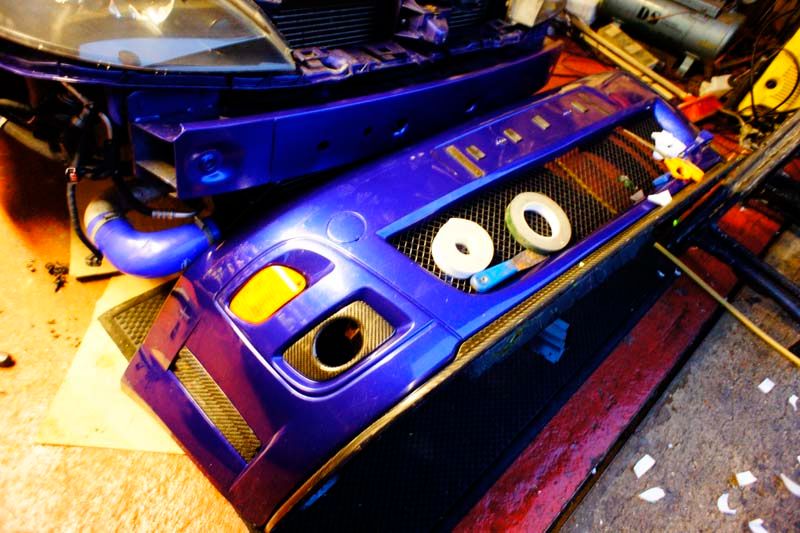
Bumper ready to go on
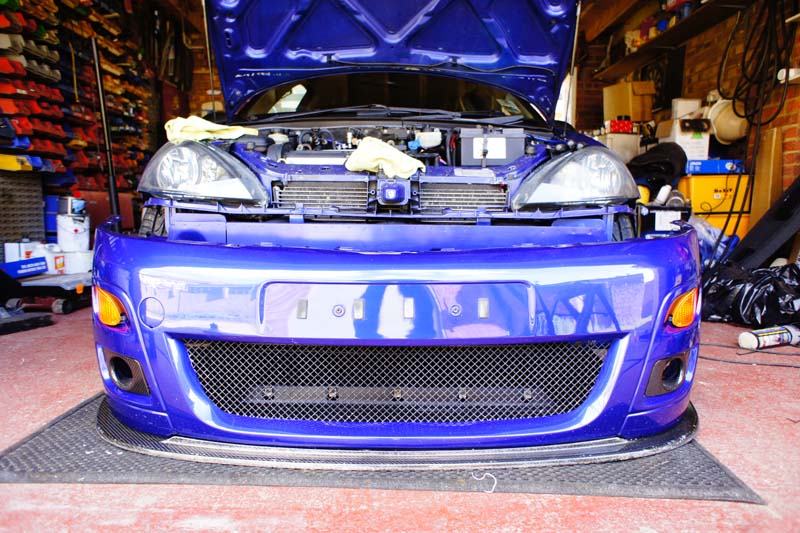
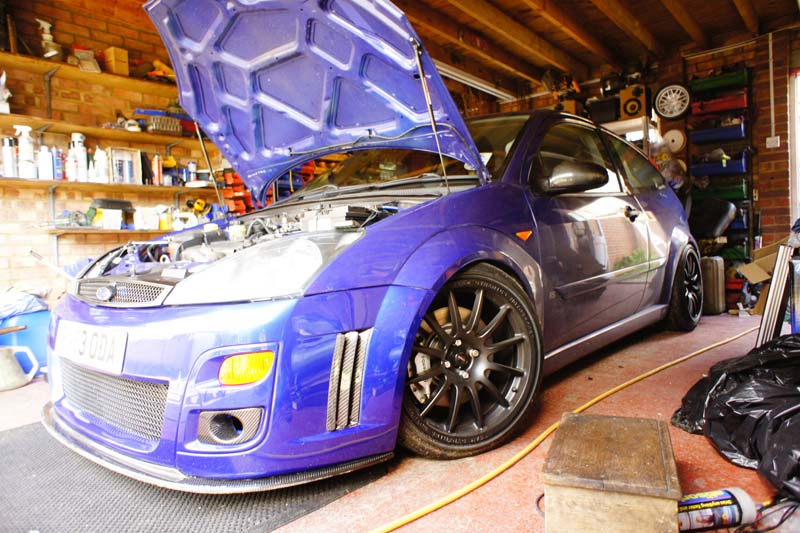
And its done!


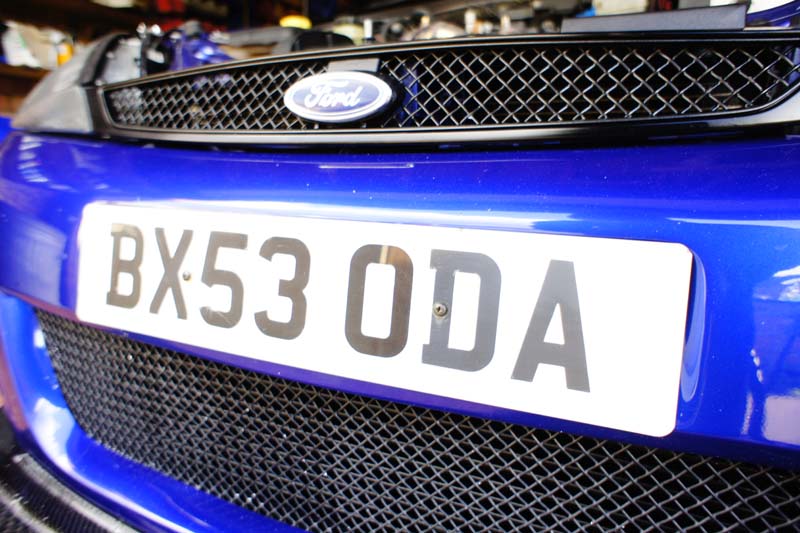
Also changed the number plate screws for some new black ones
Then it was time for a clean!!!
teamSPB
Front bumper standard
Bumper off
Bumper was cleaned and detailed
Bumper brackets were given some stone chip paint for protection
Indicators received some detailing to...after a clean, I decided I HATED the off looking rubber vent pipe thing
So on went some replacements
You cant really tell here but the indicators had loads of scratches on them so I machined them
Fog light surrounds removed and area cleaned up
Carbon vs plastic
Fins and surrounds fitted
Intercooler given another lick of paint
Bumper ready to go on
And its done!
Also changed the number plate screws for some new black ones
Then it was time for a clean!!!
teamSPB


