my mk2 escort estate *project rot box* update 12/9/12 metal work begins :)
 31-05-2012, 07:07 PM
#81
I've found that life I needed.. It's HERE!!
Thread Starter
iTrader: (8)

Join Date: Dec 2006
Location: eastbourne
Posts: 1,350
Likes: 0
Received 0 Likes
on
0 Posts
Tez,
Keeping you busy then, liking this car a lot.
You done some great work so far, keep it up.
What bodywork do you need a workshop to do as I know plenty near me who could, just depends on budget.
Makes me want to hurry up and get my MK1 Escort back to play aroung with.
You must get it on the road and bring it to a meet soon
 lol you should deffinatly get the mk1 out to play, I thought you had the engine swopped not so long ago? Did you swop like for like or upgrade?
As for body work, my budget is up an down like a yoyo atm because of work so I'm only able to do it bit by bit for now, my main thing is to get the rear sorted first so I'm after seperate quotes for each bit if you know what I mean? I want it done properly so any bodyshops you can recommend would be great!
 31-05-2012, 07:10 PM
#82
I've found that life I needed.. It's HERE!!
Thread Starter
iTrader: (8)
Join Date: Dec 2006
Location: eastbourne
Posts: 1,350
Likes: 0
Received 0 Likes
on
0 Posts
Cheers bud!!!
31-05-2012, 11:15 PM
#83
PassionFord Post Whore!!
Hello mate, how you been? Yeh will deffinatly bring it along one night, give everyone something to laugh at lol you should deffinatly get the mk1 out to play, I thought you had the engine swopped not so long ago? Did you swop like for like or upgrade?
As for body work, my budget is up an down like a yoyo atm because of work so I'm only able to do it bit by bit for now, my main thing is to get the rear sorted first so I'm after seperate quotes for each bit if you know what I mean? I want it done properly so any bodyshops you can recommend would be great!
lol you should deffinatly get the mk1 out to play, I thought you had the engine swopped not so long ago? Did you swop like for like or upgrade?As for body work, my budget is up an down like a yoyo atm because of work so I'm only able to do it bit by bit for now, my main thing is to get the rear sorted first so I'm after seperate quotes for each bit if you know what I mean? I want it done properly so any bodyshops you can recommend would be great!
Yep, new engine in, got a 1760 crossflow, just need a 2 litre carb to get running fine.
Hopefully on the road soon.
Your car certainly wont be laughed at, more like admired as so cool.
Be good to see it out and about
Came past your house tonight in the 3 door, did you hear it lol
02-06-2012, 12:46 PM
#86
I've found that life I needed.. It's HERE!!
Thread Starter
iTrader: (8)
Join Date: Dec 2006
Location: eastbourne
Posts: 1,350
Likes: 0
Received 0 Likes
on
0 Posts
All good thanks mate.
Yep, new engine in, got a 1760 crossflow, just need a 2 litre carb to get running fine.
Hopefully on the road soon.
Your car certainly wont be laughed at, more like admired as so cool.
Be good to see it out and about
Came past your house tonight in the 3 door, did you hear it lol
Yep, new engine in, got a 1760 crossflow, just need a 2 litre carb to get running fine.
Hopefully on the road soon.
Your car certainly wont be laughed at, more like admired as so cool.
Be good to see it out and about
Came past your house tonight in the 3 door, did you hear it lol
i'l should have my 2ltr carb up for sale soon along with the engine etc aswel, just waiting on pete an mark to sort me out with a cossie engine and bits
when is the next meet anyway? i finally got the looms swopped over yesturday and the cars back up and running again now
 is it still down chailey? and was it at the pub down there where theres and escos with orange alloys and a focus rs?
little update time while im here aswel
il start off with this...
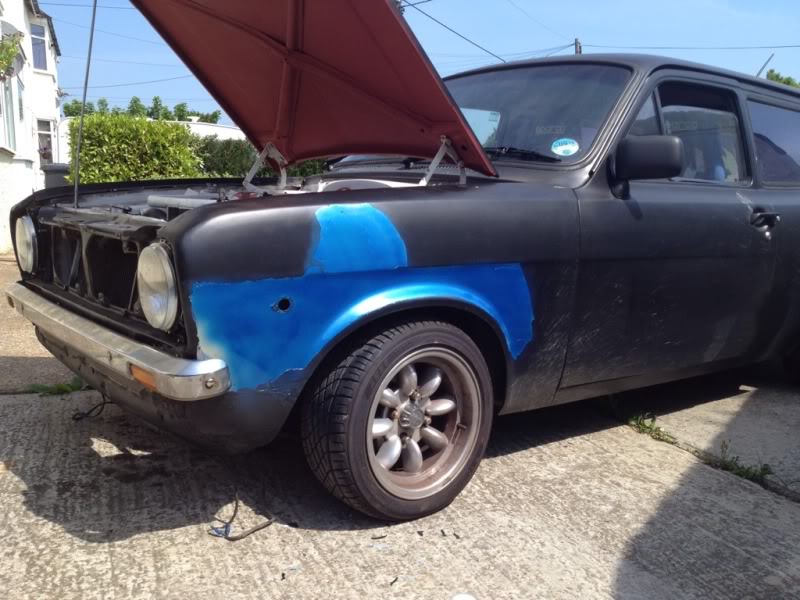
thats the colour the car will be going eventually, i just had half a rattle car left from something else so thought id see how it would look, what you reckon? it's vauxhall arden blue...
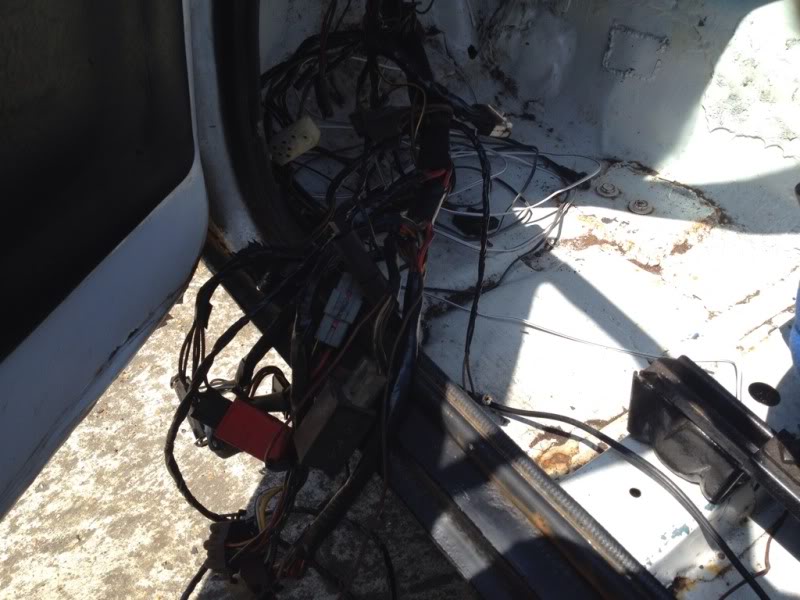
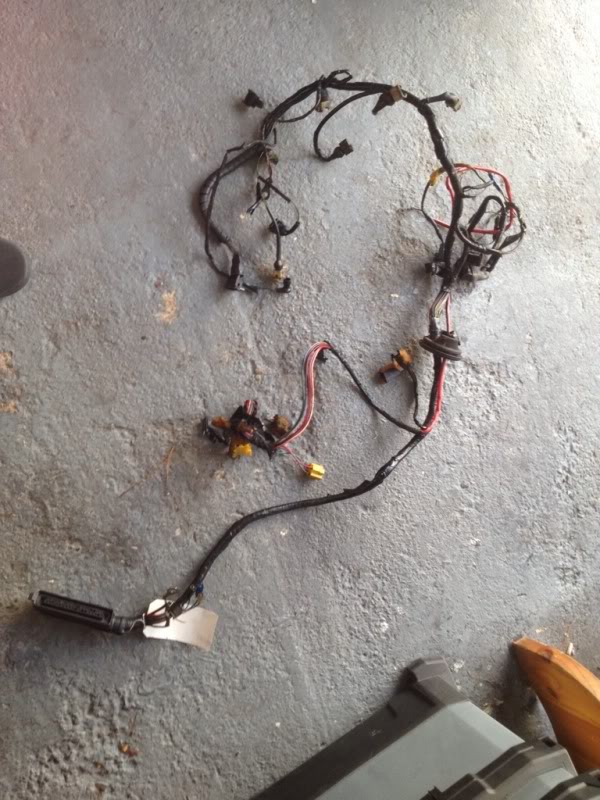
anyway, with that out of my system i got back onto fitting the new loom but befour i did i though id take a pic of the old and new looms together just so you can see what i was up against with the old loom
new loom on the right...
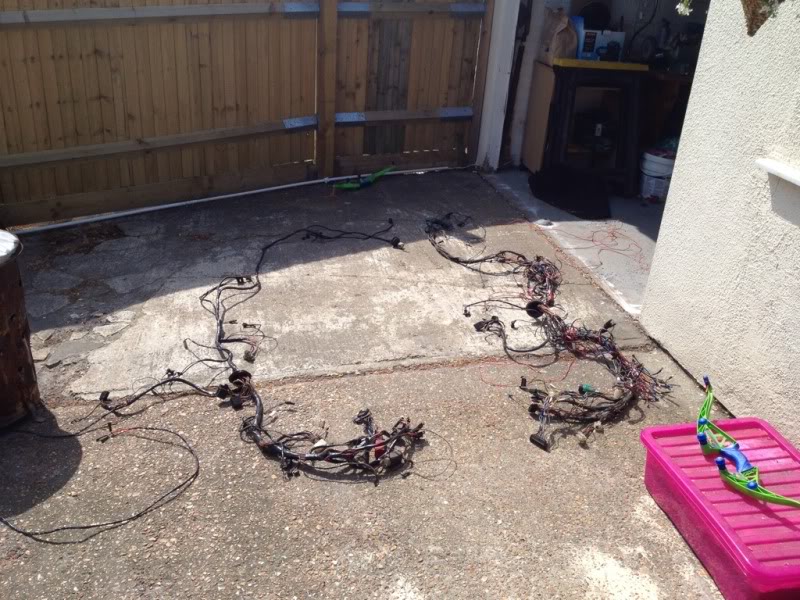
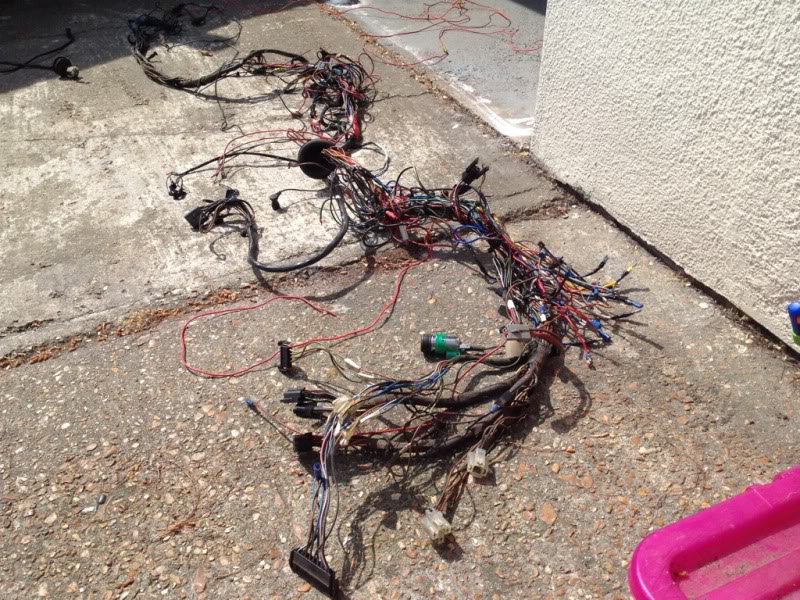
and individually
old loom
and the new loom
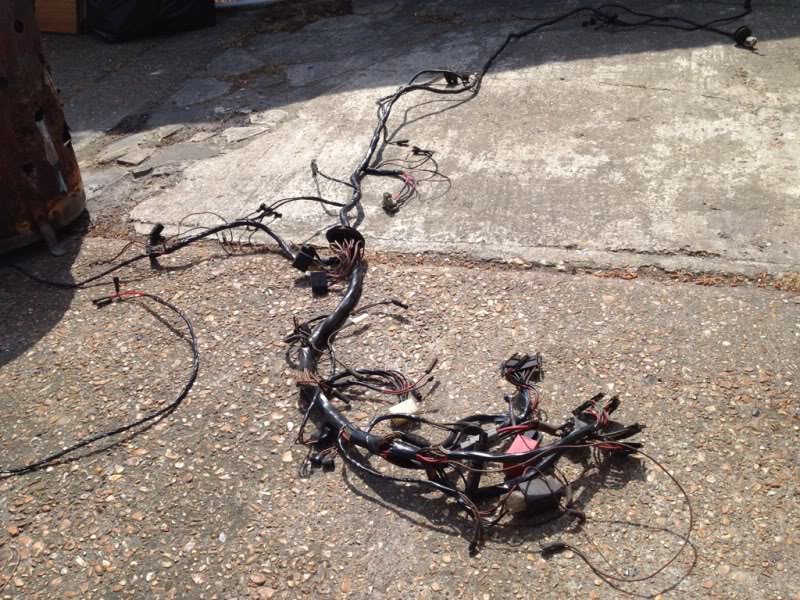
when i received the new loom i did go through it all taking off the old manky tape and wrapping it back up with new tape so it all now looks 100% better
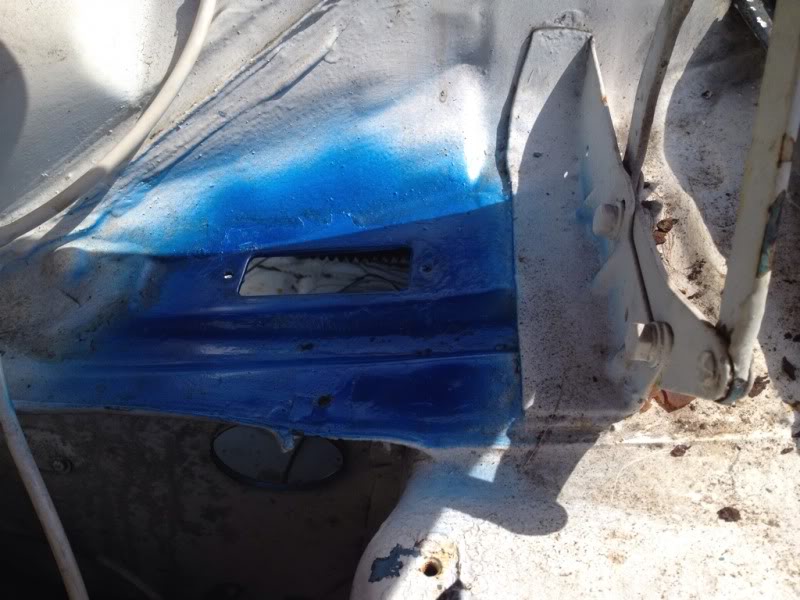
and then going into the rot box
where the original fuse box sits had been plated over so i had to remove that...
and then the new fuse box going back in where it should be...
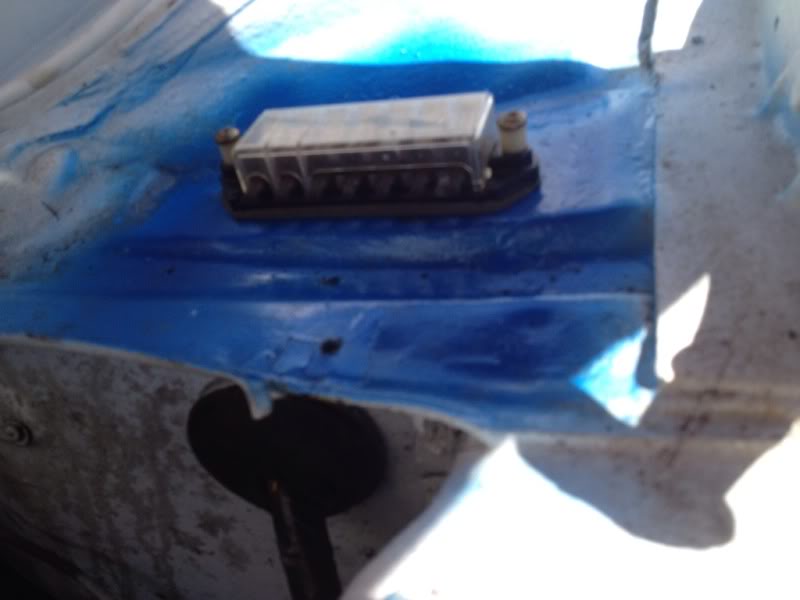
much better imo! so with that done i set about the interior wireing but i didnt really get any pics of it going in, just at the end with everything in place...
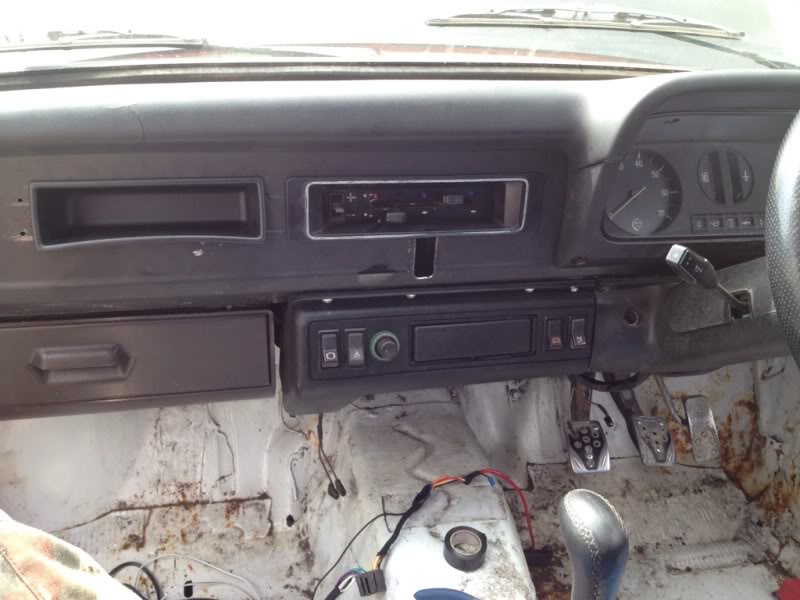
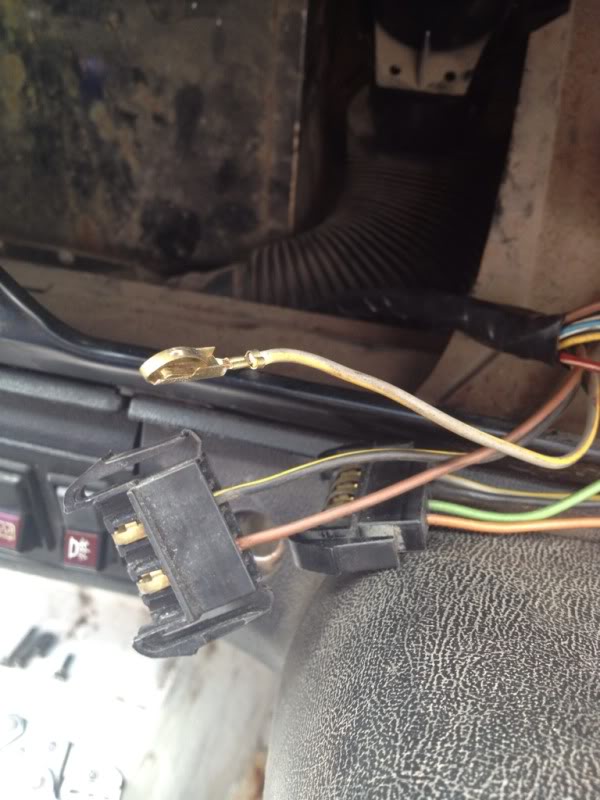
soo much tidier! but im left with a couple of wire's and no idea where they go...
first up this... if you cant make the picture out its a black wire with a red and yellow stripe going through it... anyone know where that goes?
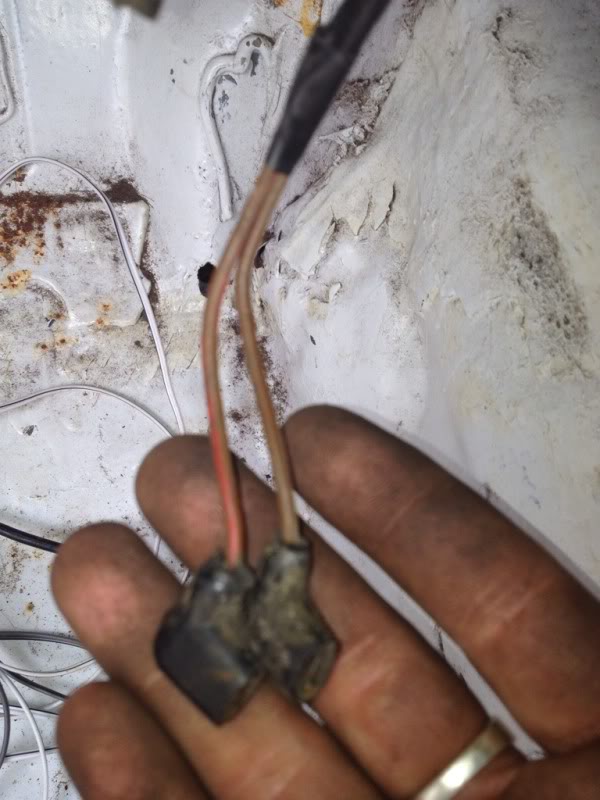
second... there's 2 wires, ones brown and ones brown with a red stripe going through it, im not 100% but i think this might be for the clock that goes in the centre console but can anyone confirm for me atall?
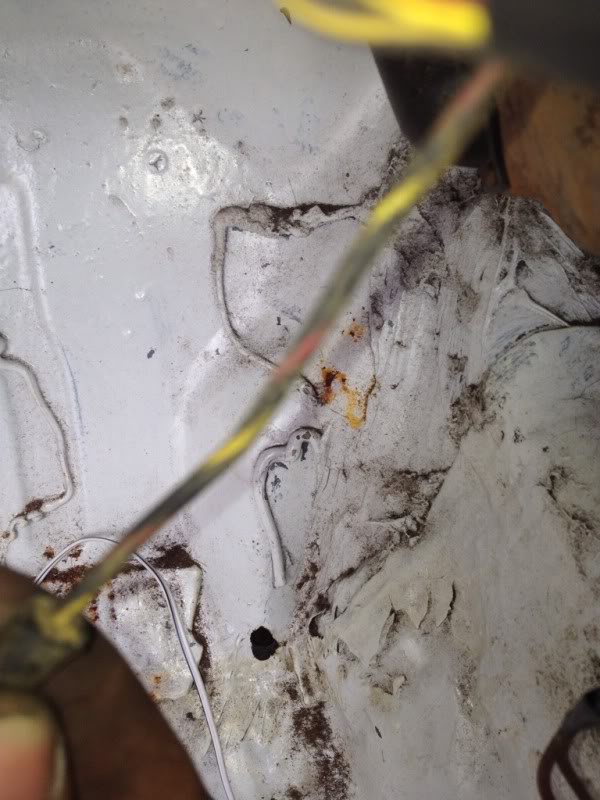
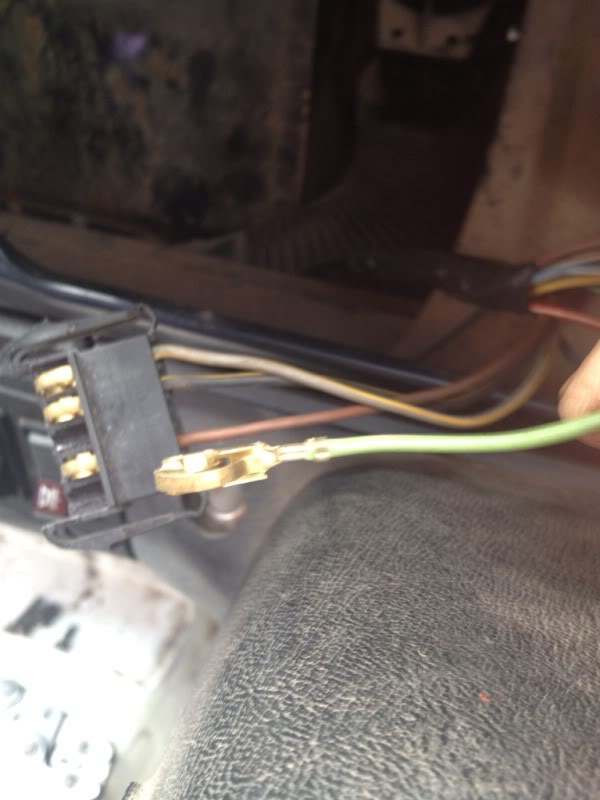
and finally these 2 wires, ones white with a yellow stripe and one brown, are these for my heater blower? the reason for me being unsure is that the wires coming from the blower unit are brown and a violet colour iirc...
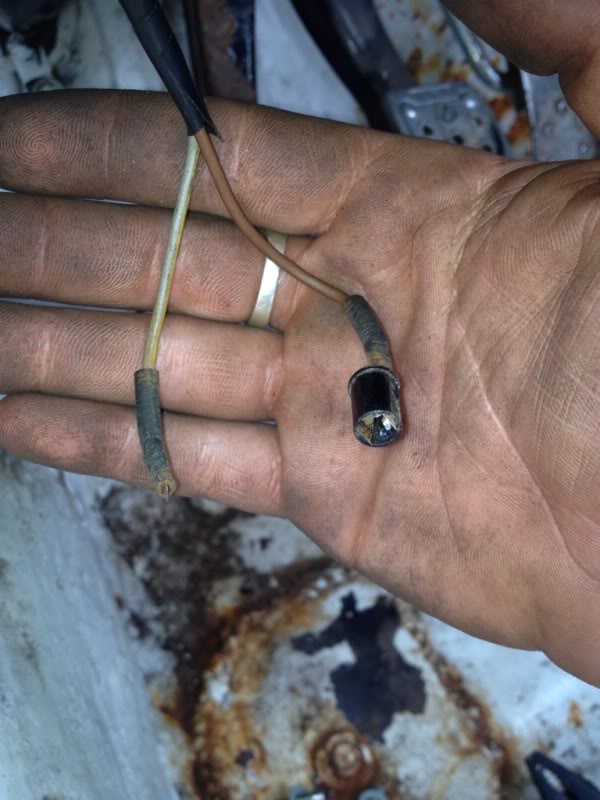
oh yeh, and i also have this in the engine bay left over...
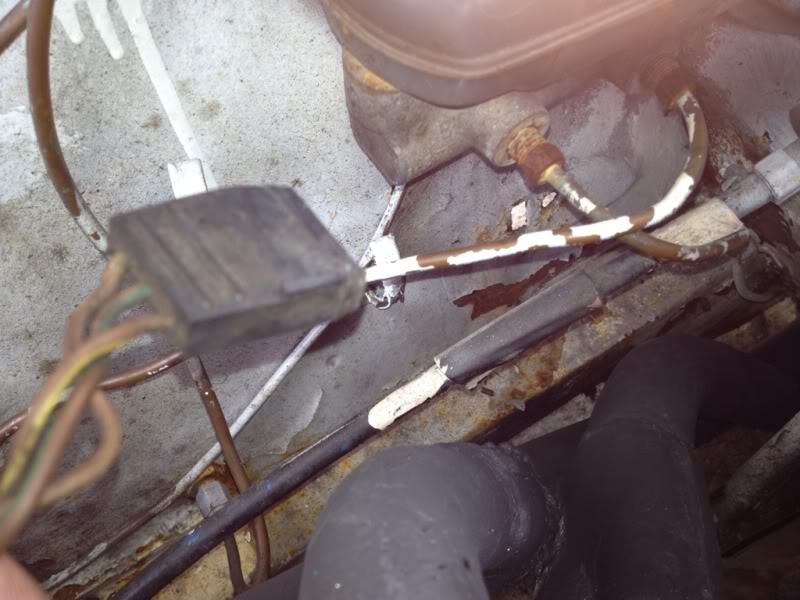
does this go to the brake fluid tank? thats all i can think it could be for but i dont have anywhere for it to connect onto ...
bar them wires above, all thats left to do on the loom is connect upto the headlights and front indicators
thats pretty much it for this installment, hopfully the next one will be better if my mates pull there fingers out and get my cossie bits together
but here a couple of random pics to finish...
drivers under dash parcel tray fitted
and a couple of pics that i took when i removed the bits of metal someone had fitted over the old wireing loom, was expecting to find massive holes but it's not actually too bad
thats all for now folks, thanks for looking
 04-06-2012, 09:03 PM
#89
I've found that life I needed.. It's HERE!!
Thread Starter
iTrader: (8)
Join Date: Dec 2006
Location: eastbourne
Posts: 1,350
Likes: 0
Received 0 Likes
on
0 Posts
had another little play today, because my petrol gauge, temp gauge and rev counter wasnt working when i test drove the car last night i started there first, both the gauges had been working befour i swopped the looms over so it had to be the new loom at fault, so i thought id start at the connectors that plug into the instrument clusted, then i compared to the old loom and sure enough a couple of wires just needed swopping over in the plugs 
with them swopped over i now have a fuel gauge and temp gauge again so now it was just the rev counter to sort out, which was just a case of running a wire down to the ignition coil so with the instrument cluster now working properly bar the speedo (next job lol)
i started on wireing in my rad fan, and because my choke cable was buggered i just removed it and used the hole to house my rad ran switch :thumbsup:
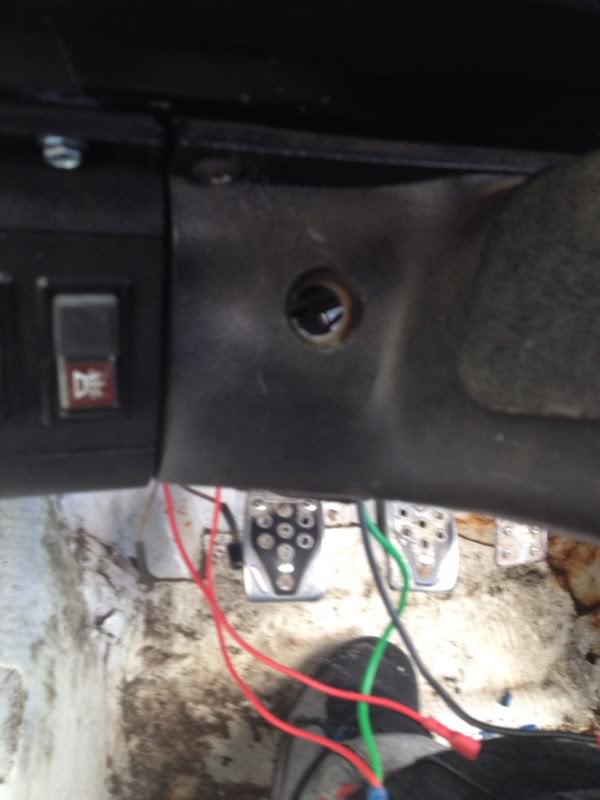
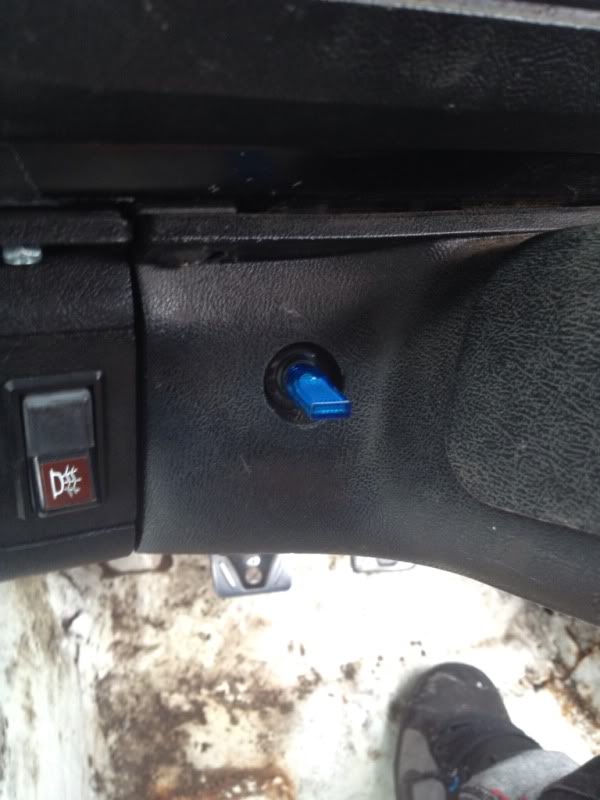
much better than just drilling another hole imo...
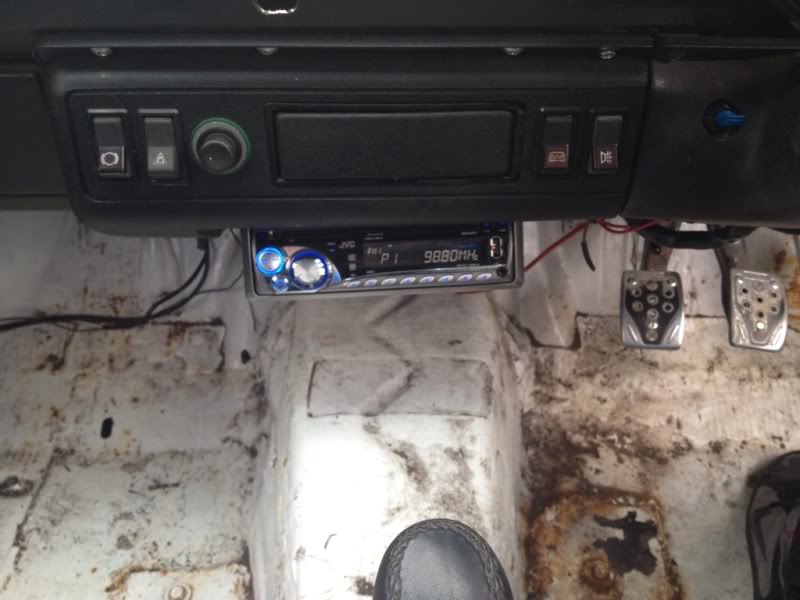
then it was time to fit my stereo so i can actually listen to the radio again lol, i just screwed this up under the switch panel for now until i get around to fitting the centre console...
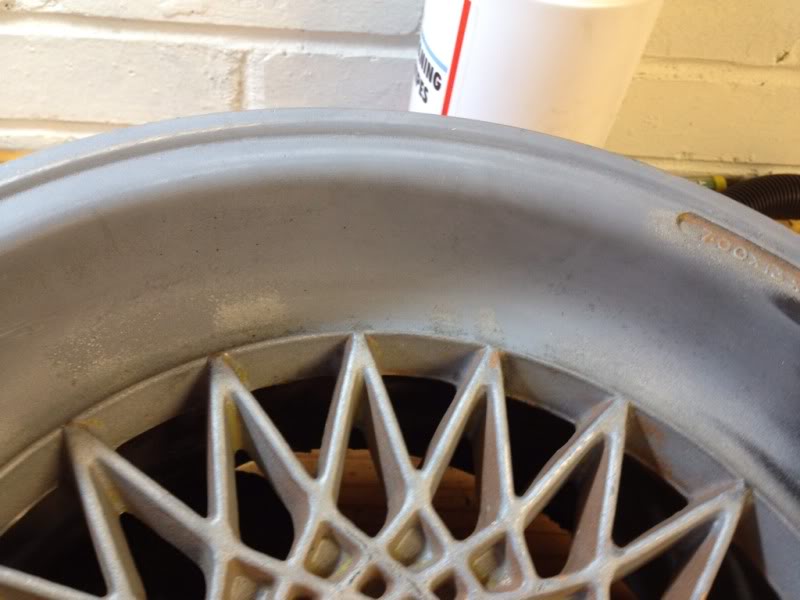
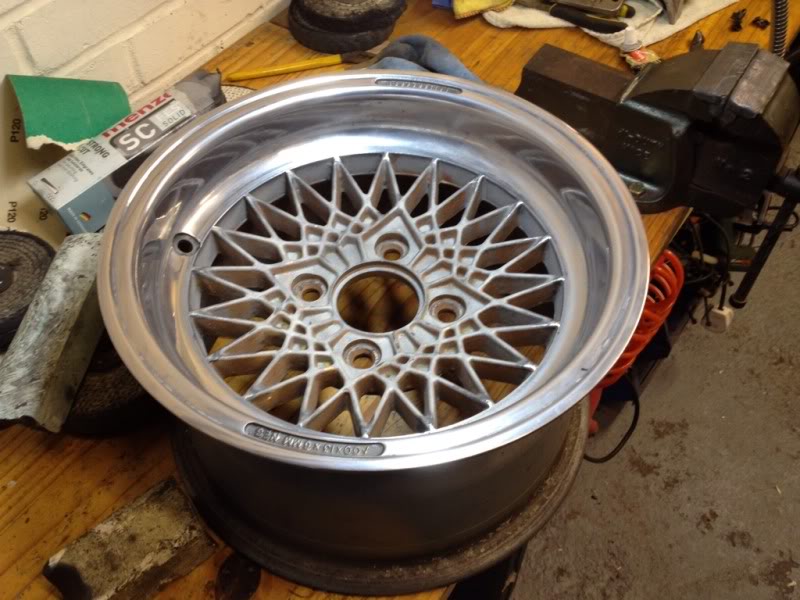
so with all the electrics now working as they should i thought id have a quick play with my new wheels
this is how it started...
and then after playing with the polishing mops for 10mins...
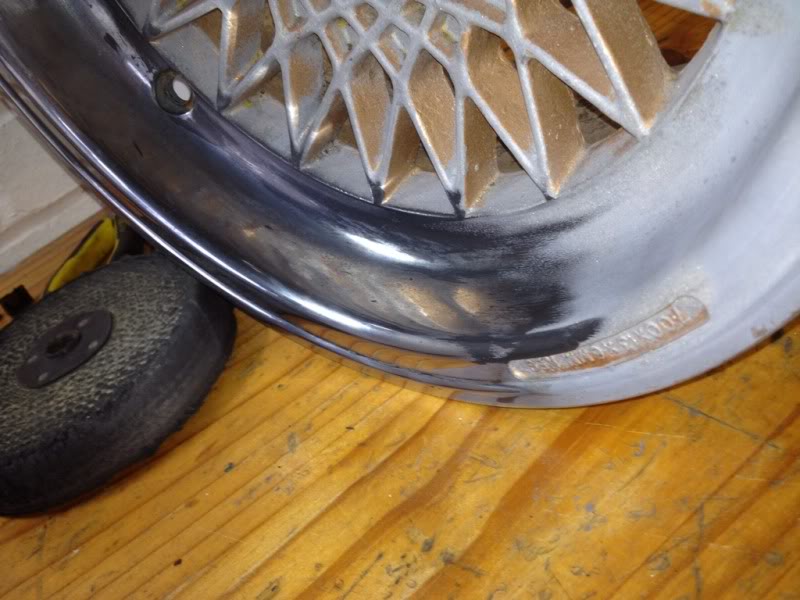
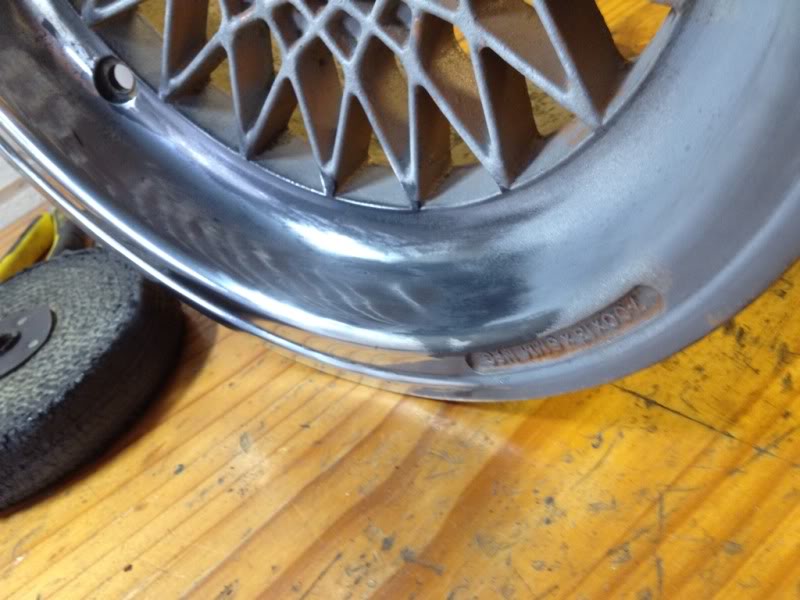
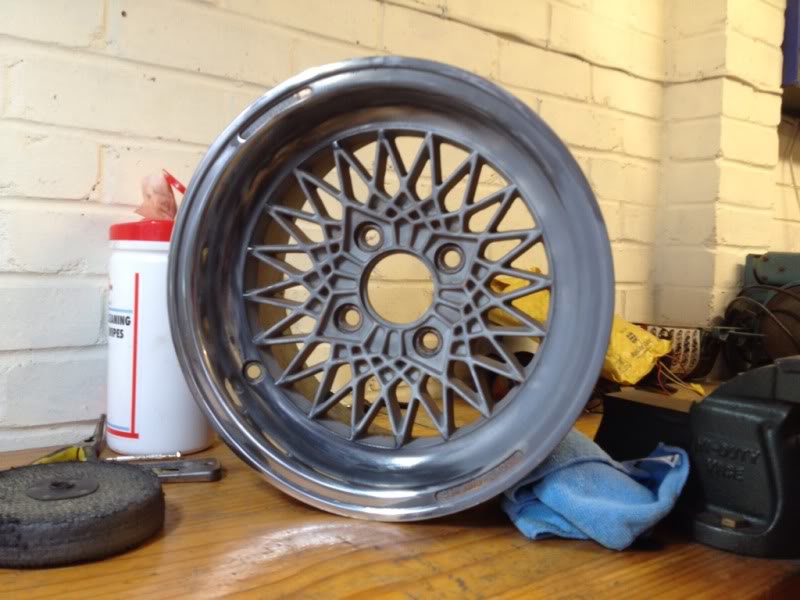
load of potential in them, but my father in-laws mops are past there best days now so i'v ordered some new mops and polish and hopfully when they arive i can get the wheels all buffed up, paint the centres and get them on the car
just not sure what colour to do the centres? the cars going vauxhall arder blue eventually with white mexico style decals so iv been thinking either white or gold centres? whats peoples opinions on that?
with them swopped over i now have a fuel gauge and temp gauge again
i started on wireing in my rad fan, and because my choke cable was buggered i just removed it and used the hole to house my rad ran switch :thumbsup:
much better than just drilling another hole imo...
then it was time to fit my stereo so i can actually listen to the radio again lol, i just screwed this up under the switch panel for now until i get around to fitting the centre console...
so with all the electrics now working as they should i thought id have a quick play with my new wheels
this is how it started...
and then after playing with the polishing mops for 10mins...
load of potential in them, but my father in-laws mops are past there best days now so i'v ordered some new mops and polish and hopfully when they arive i can get the wheels all buffed up, paint the centres and get them on the car
just not sure what colour to do the centres? the cars going vauxhall arder blue eventually with white mexico style decals so iv been thinking either white or gold centres? whats peoples opinions on that?
05-06-2012, 06:24 PM
#90
10K+ Poster!!

Looks like your goingto be running a set of bang tidy wheels! Whenever I look at wiring loom my head explodes, rather you than me with those jobs.
 17-06-2012, 09:55 PM
#93
I've found that life I needed.. It's HERE!!
Thread Starter
iTrader: (8)
Join Date: Dec 2006
Location: eastbourne
Posts: 1,350
Likes: 0
Received 0 Likes
on
0 Posts
little update once again... nothing major atal though 
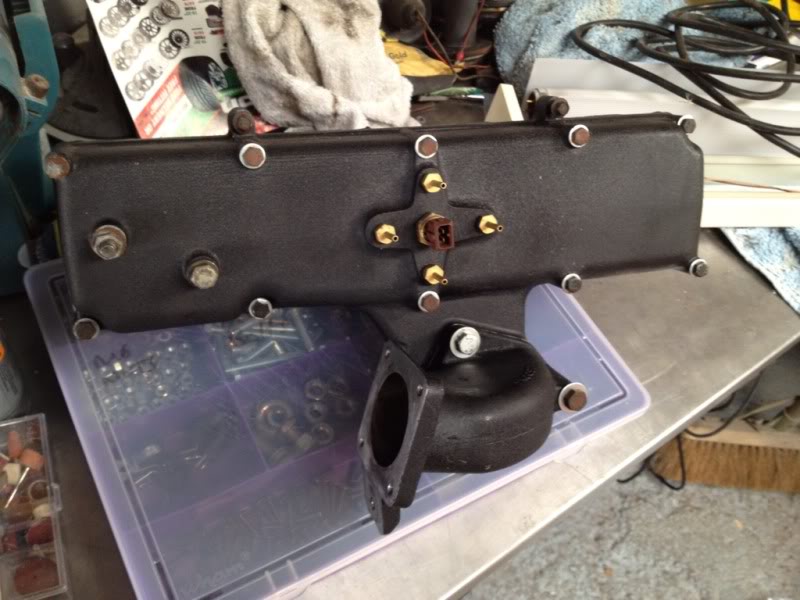
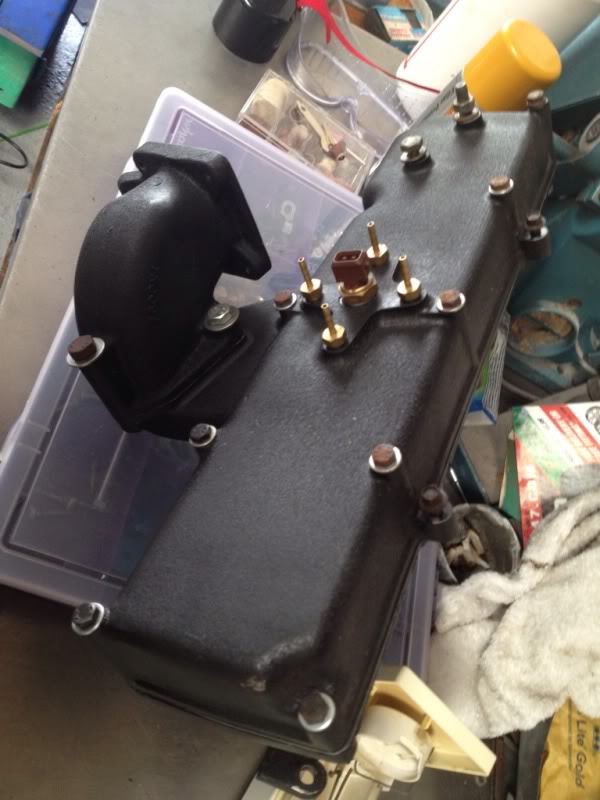
couple more bits iv collected...
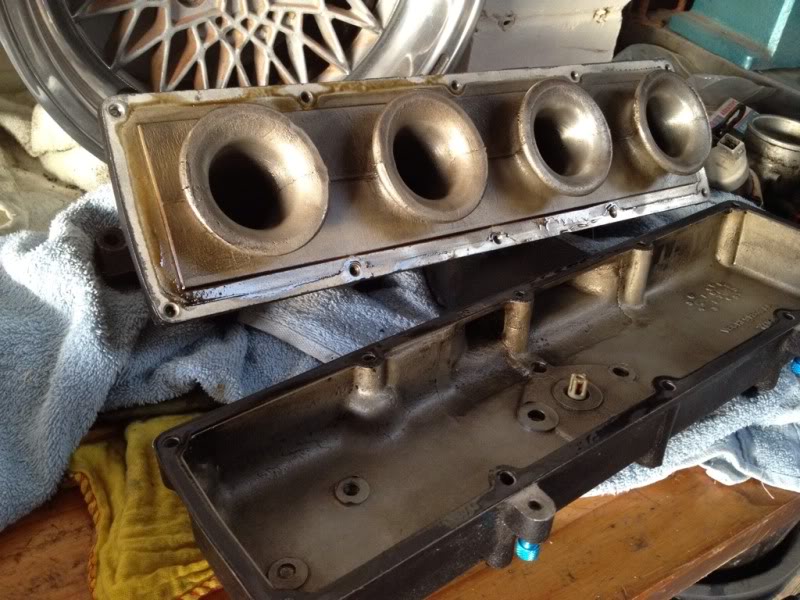
2wd cosworth inlet manifold it the crackle black finish
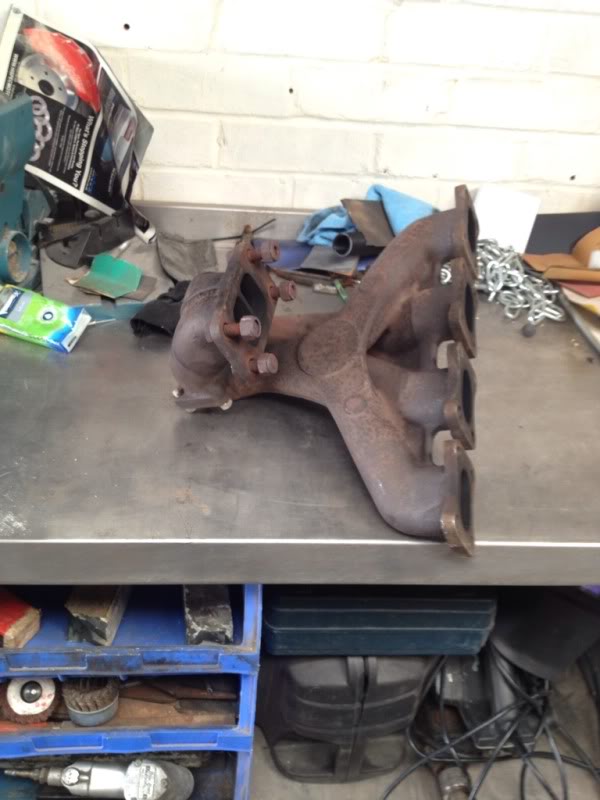
2wd cosworth exhaust manifold
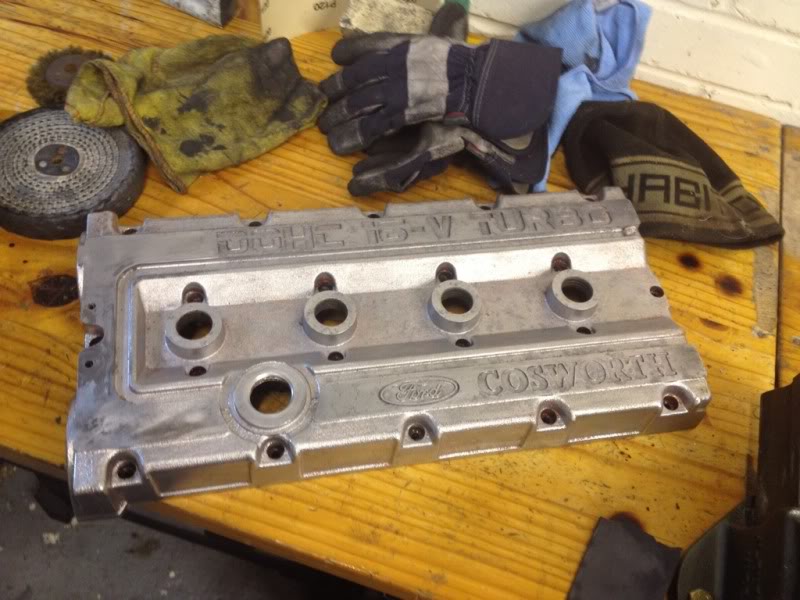
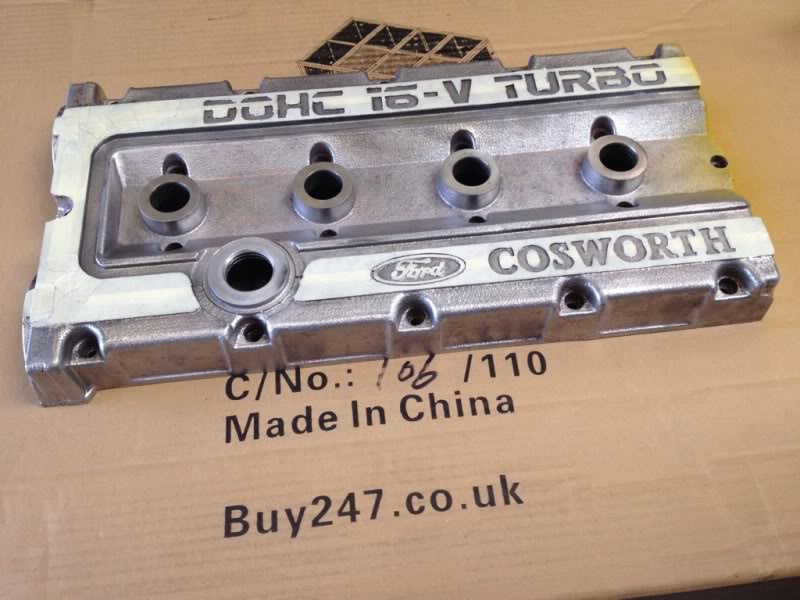
and a cosworth rocker cover
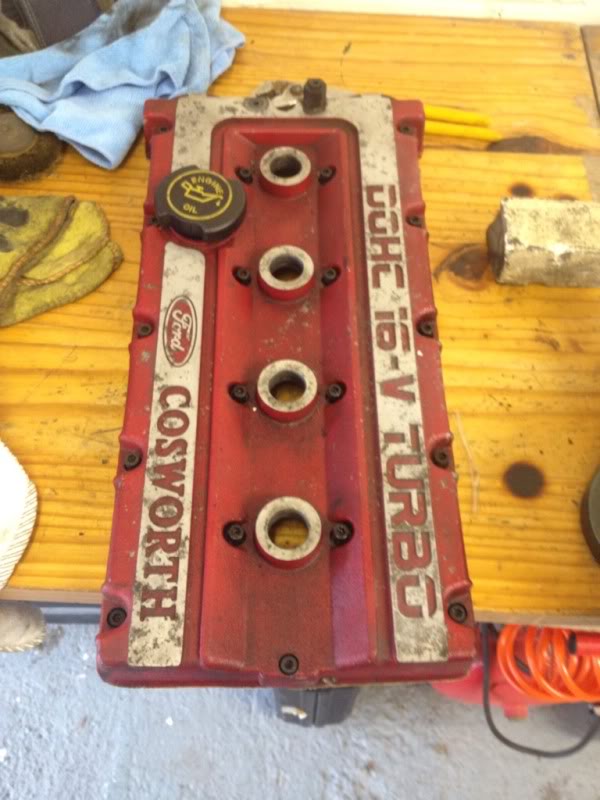

i was getting abit bored with wheel polishing so i decided to have a play with the rocker cover, first off it was paint removal...
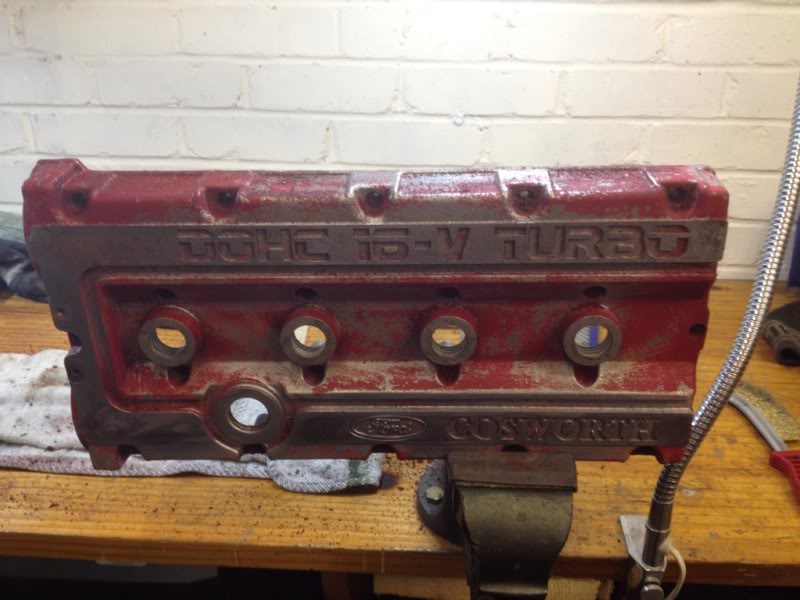
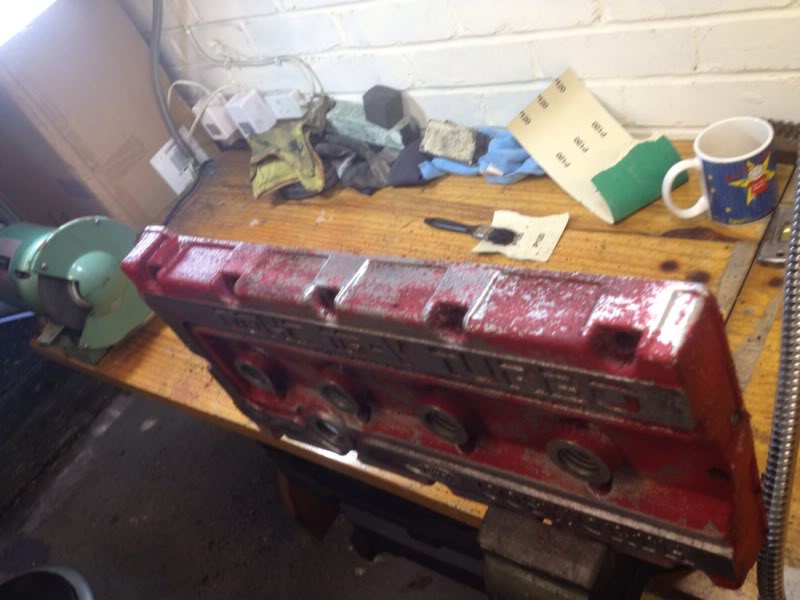
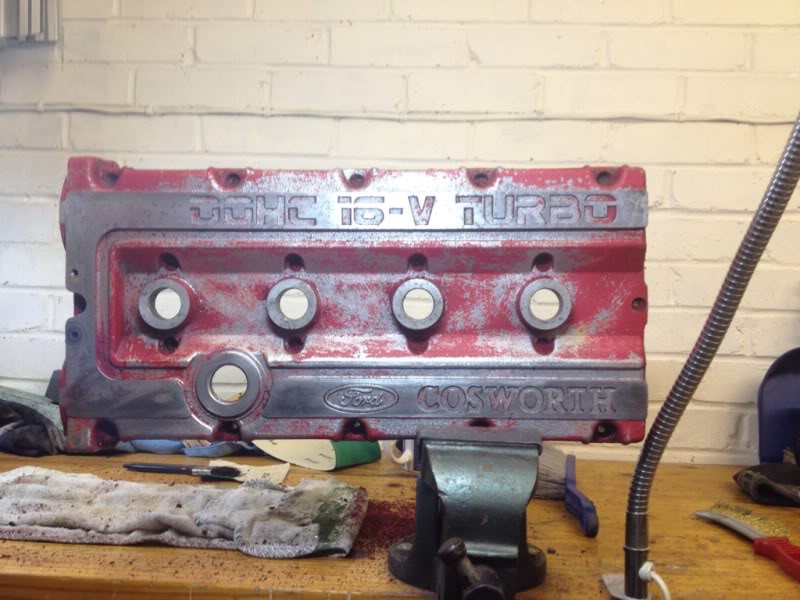
and then all stripped...
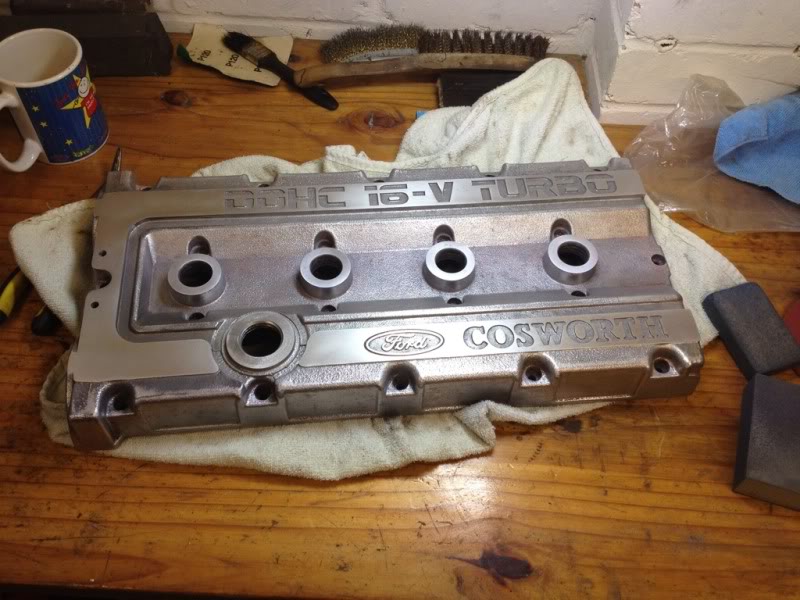
started polishing the top
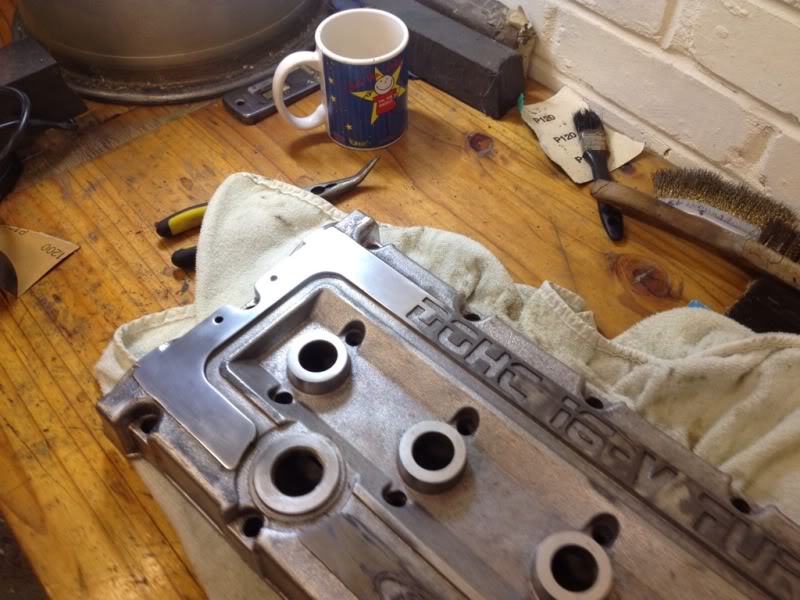
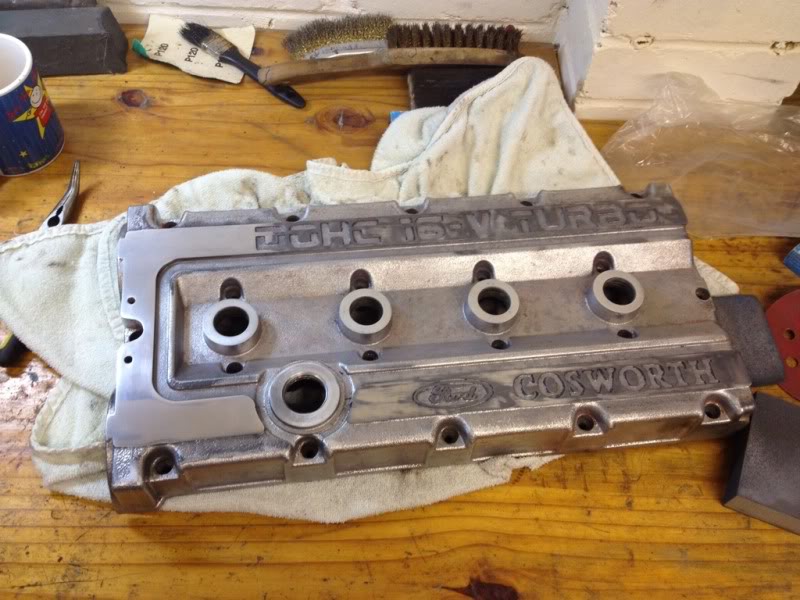
done,
once it was all polished up i masked it all off ready for paint
then laid some primer down
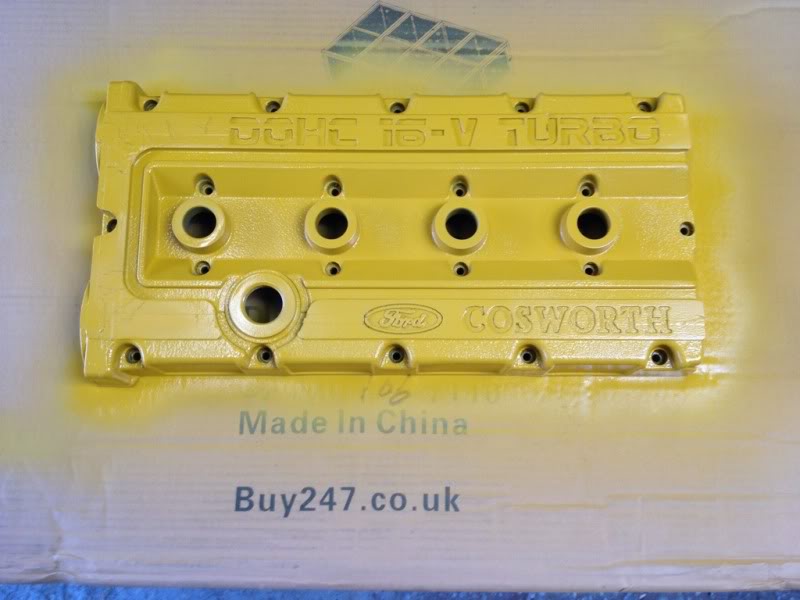
then it was time for paint, decided to go with ford frozen white...
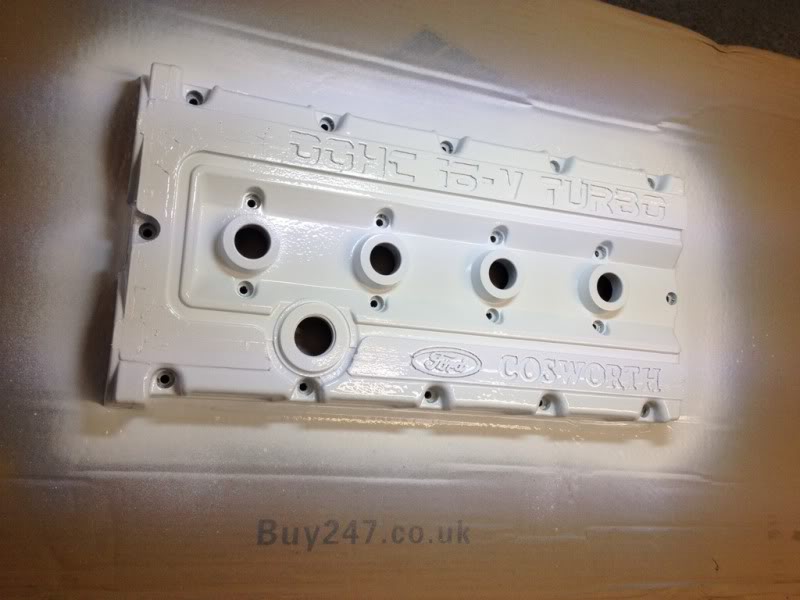
then at the last minute i decided to do the lettering blue so i masked off the rest of the rocker cover..
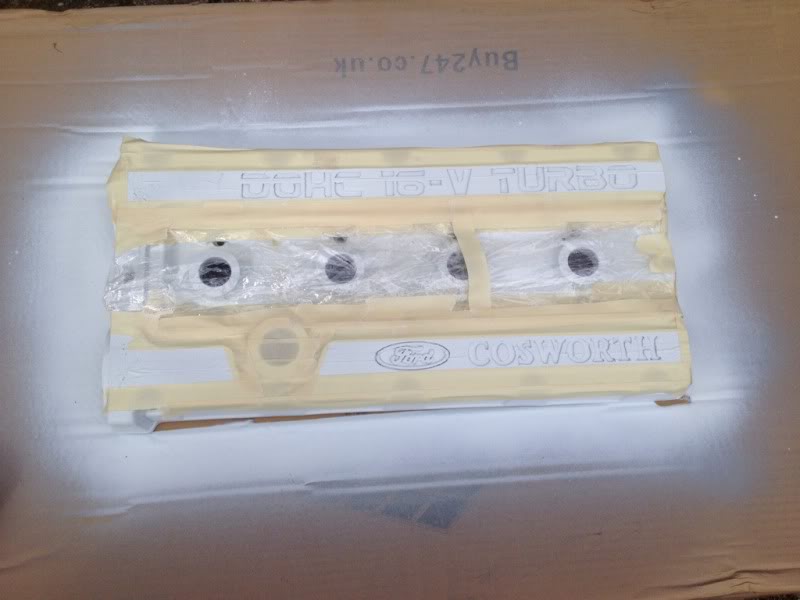
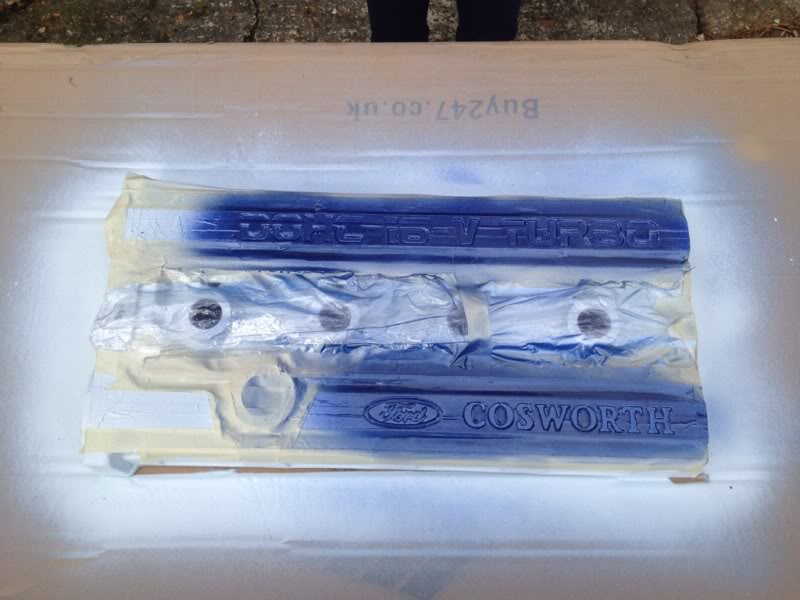
and then the masking coming off...
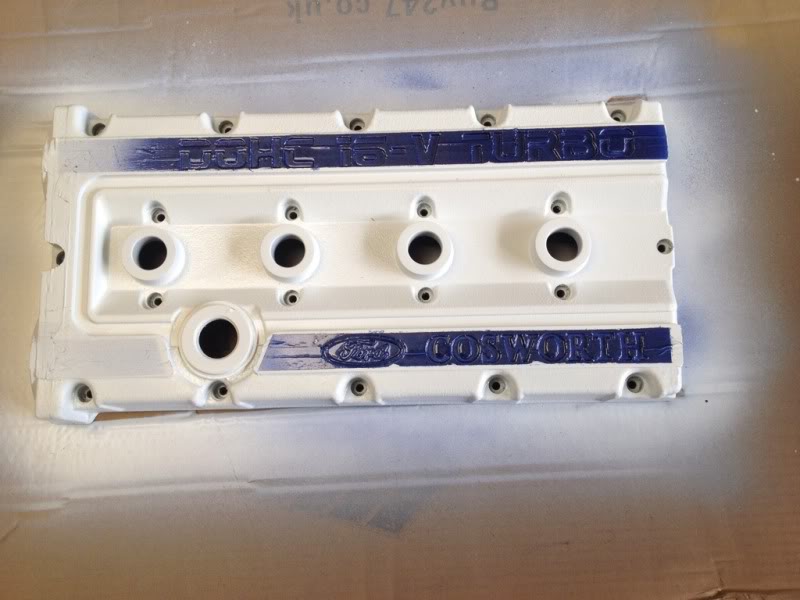
then with the final laquer coat applied i lift the last of the masking tape off
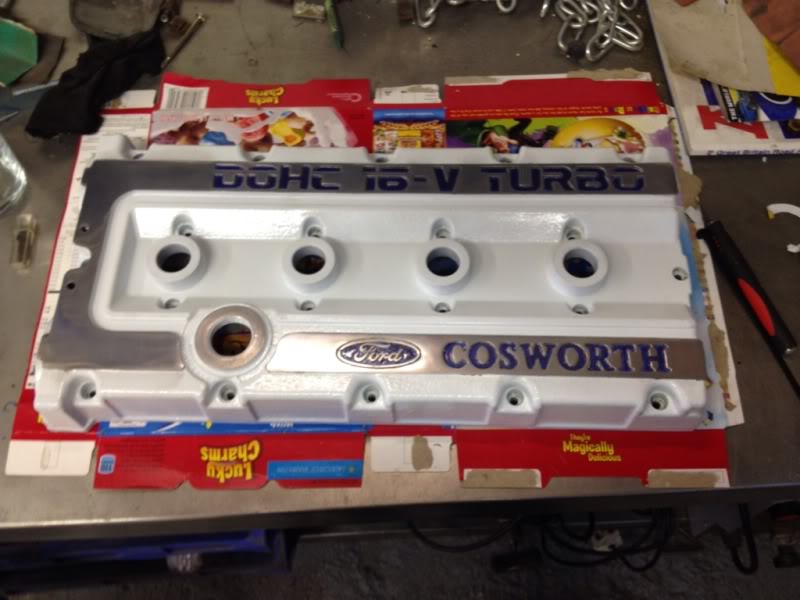
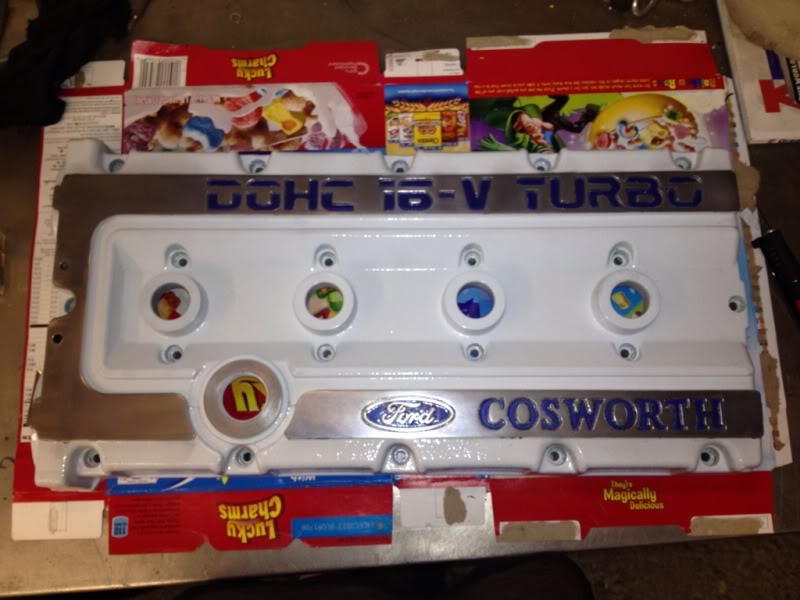
extremly happy with how its turnt out!! its now wrapped up and in my wardrobe until its ready to be used lol
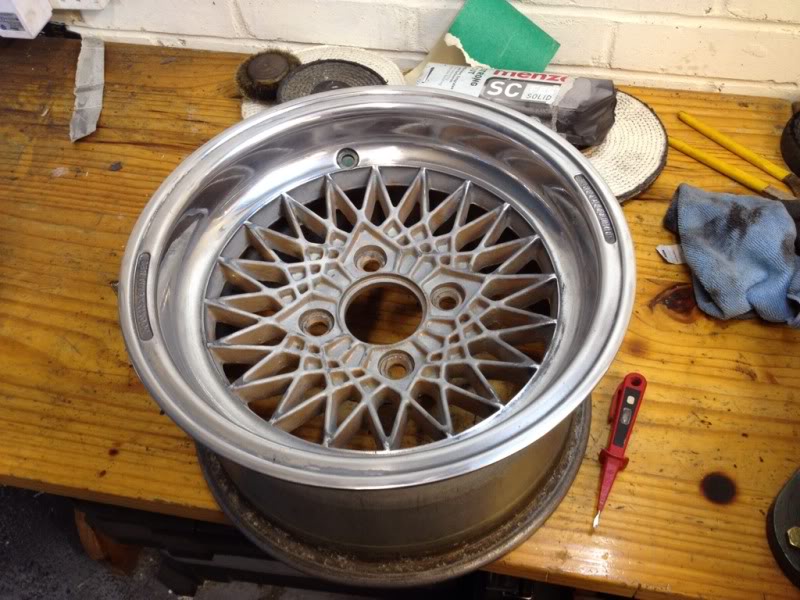
so with that done i went back to the wheel and finally got 1 finished well, the polishing bit anyway, still need to paint the centre yet but il wait until theyve all been polished befour i do the painting.
hopfully have some body work done soon so il update as and when
couple more bits iv collected...
2wd cosworth inlet manifold it the crackle black finish
2wd cosworth exhaust manifold
and a cosworth rocker cover
i was getting abit bored with wheel polishing so i decided to have a play with the rocker cover, first off it was paint removal...
and then all stripped...
started polishing the top
done,
once it was all polished up i masked it all off ready for paint
then laid some primer down
then it was time for paint, decided to go with ford frozen white...
then at the last minute i decided to do the lettering blue so i masked off the rest of the rocker cover..
and then the masking coming off...
then with the final laquer coat applied i lift the last of the masking tape off
extremly happy with how its turnt out!! its now wrapped up and in my wardrobe until its ready to be used lol
so with that done i went back to the wheel and finally got 1 finished
well, the polishing bit anyway, still need to paint the centre yet but il wait until theyve all been polished befour i do the painting.hopfully have some body work done soon so il update as and when
08-07-2012, 06:44 PM
#95
10K+ Poster!!
Looks very nice!
15-07-2012, 09:17 PM
#96
I've found that life I needed.. It's HERE!!
Thread Starter
iTrader: (8)
Join Date: Dec 2006
Location: eastbourne
Posts: 1,350
Likes: 0
Received 0 Likes
on
0 Posts
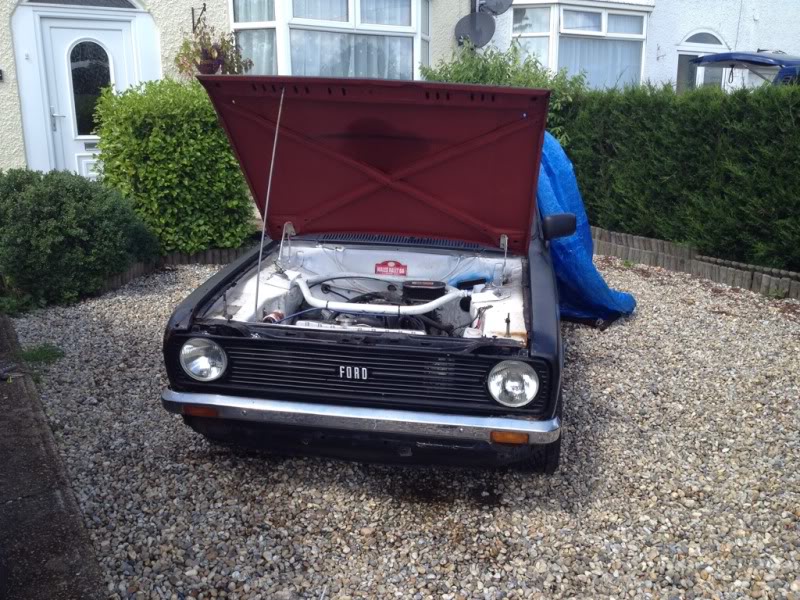
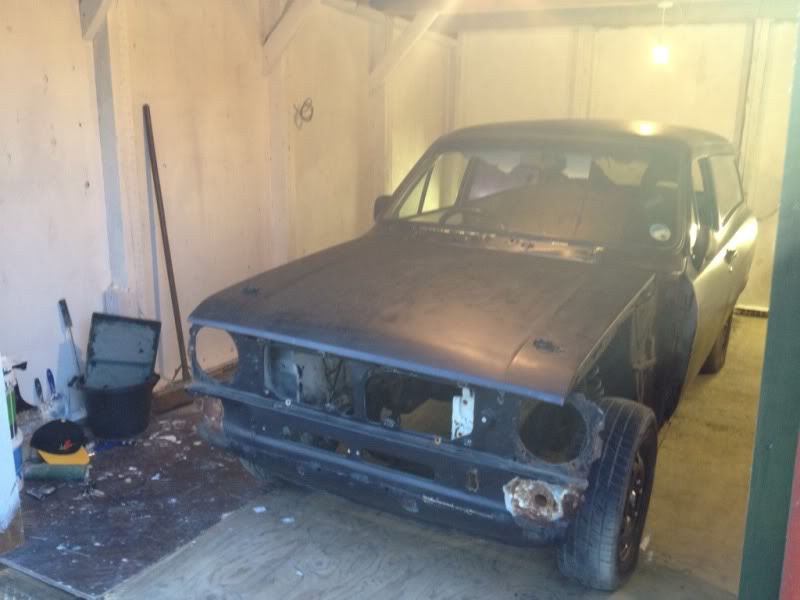
wee update again finally, today i decided it was time to take the car off the road and actully start doing something with it but i'l start with a few more bits iv collected...
complete 2wd cosworth throttle body and new cometic inlet manifold gaskets
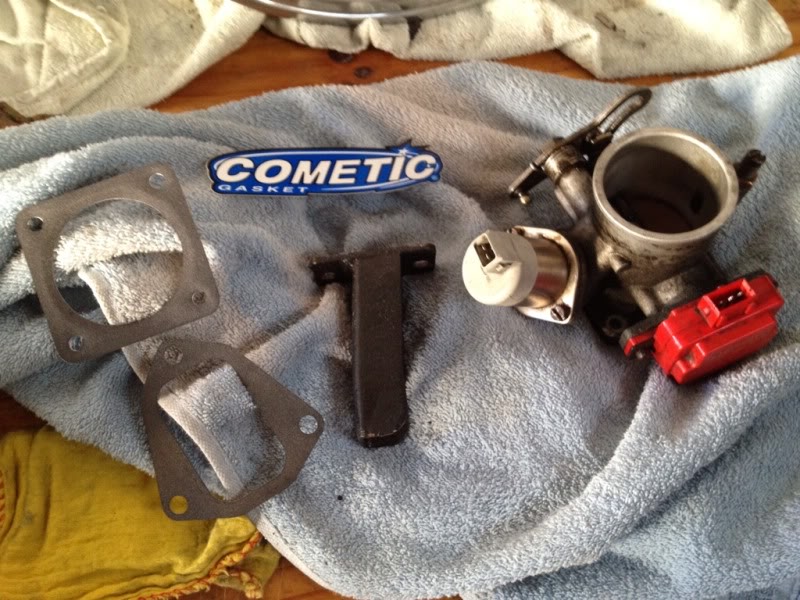
decided i might aswel take apart, clean and rebuild the inlet befour packing it away...
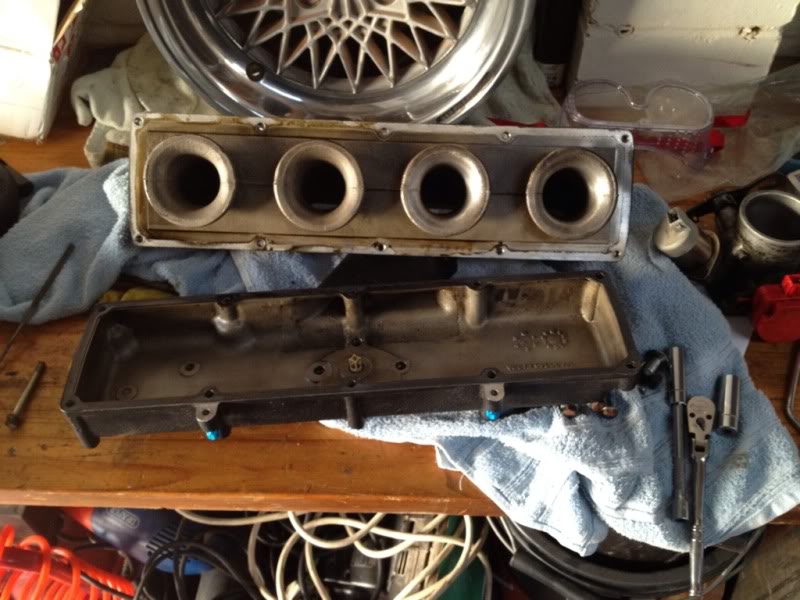
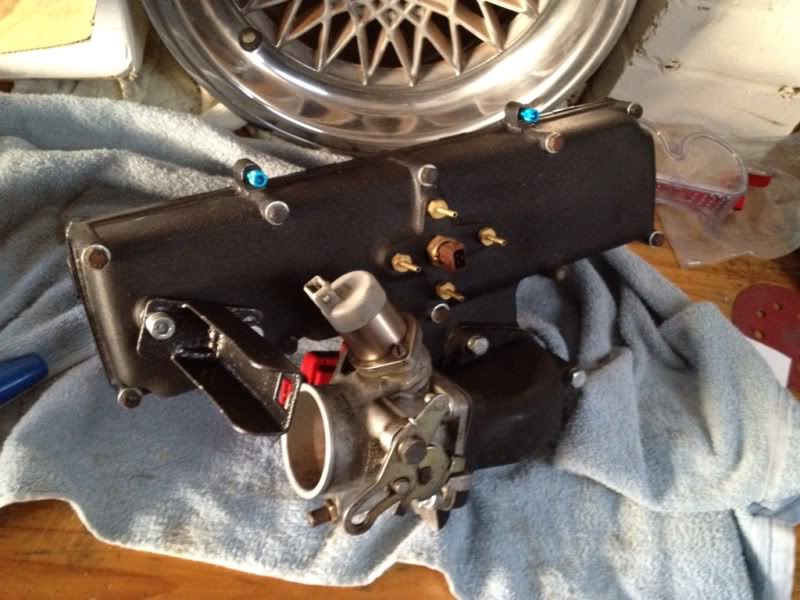
just need to swop all the bolts at some point for new clean ones
2wd cosworth standard t3
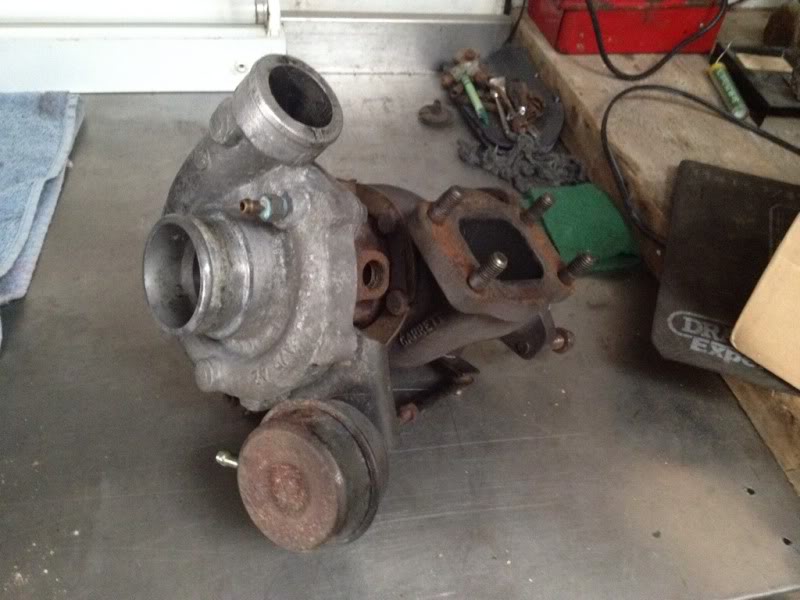
and bolted to manifold ready to be packed away...

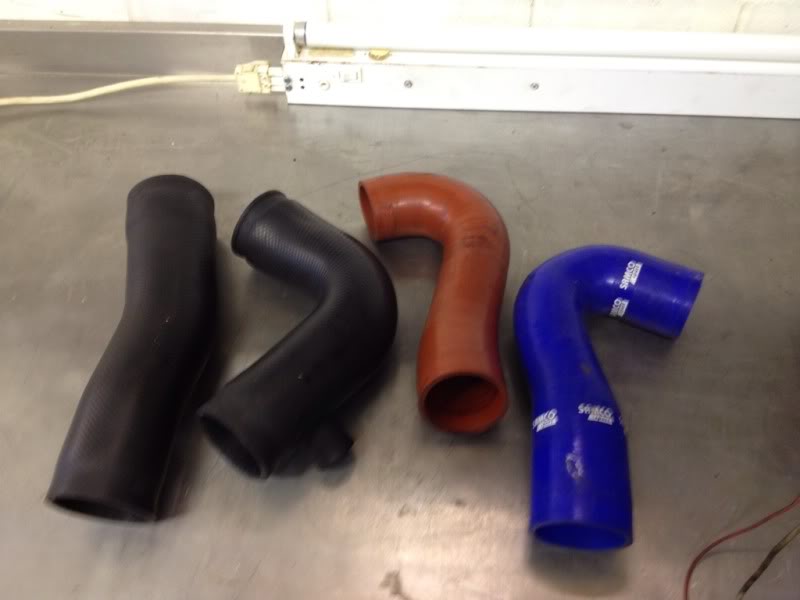
a few cosworth boost hoses i won for, wait for it......... �0.99p lol best buy so far!!
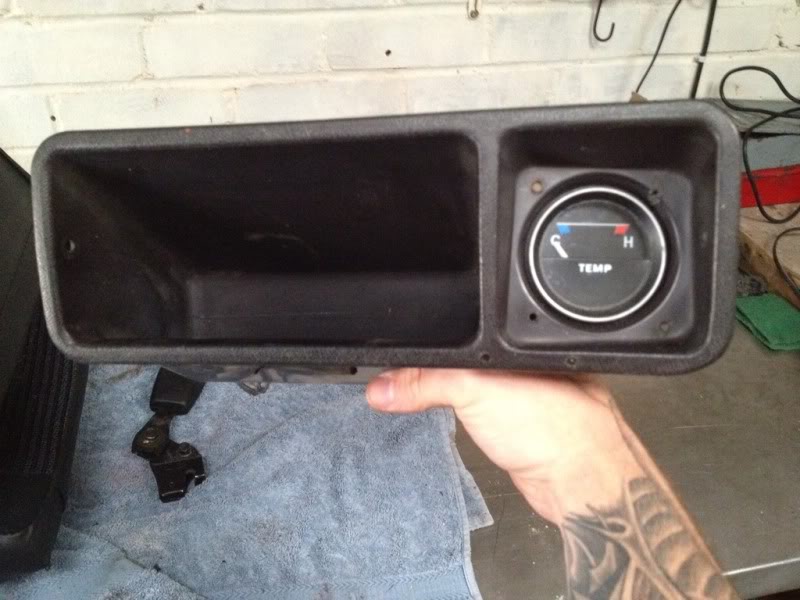
proper mk2 escort utility tray
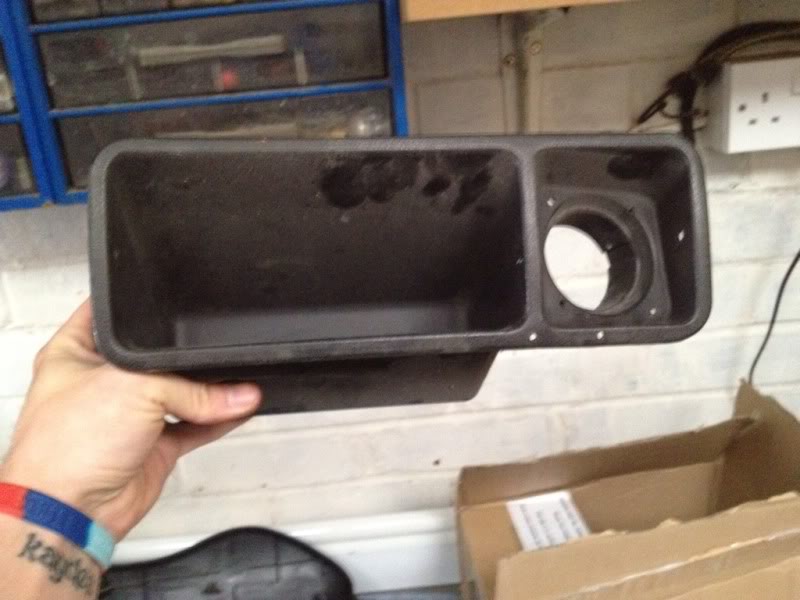
and the old clock hole is perfect for a 52mm gauge :thumbsup:
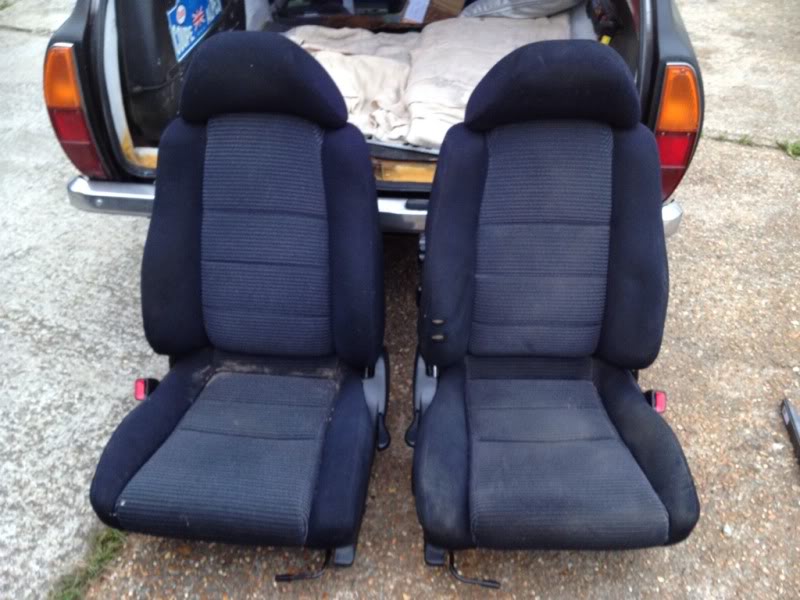
toyota mr2 front seats pinched out of my mates car befour he scrapped it
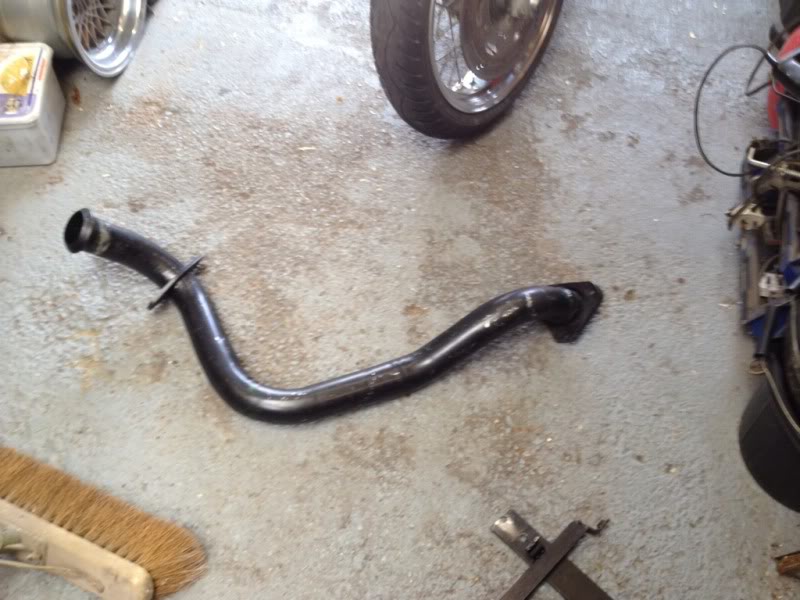
cosworth exhaust down pipe
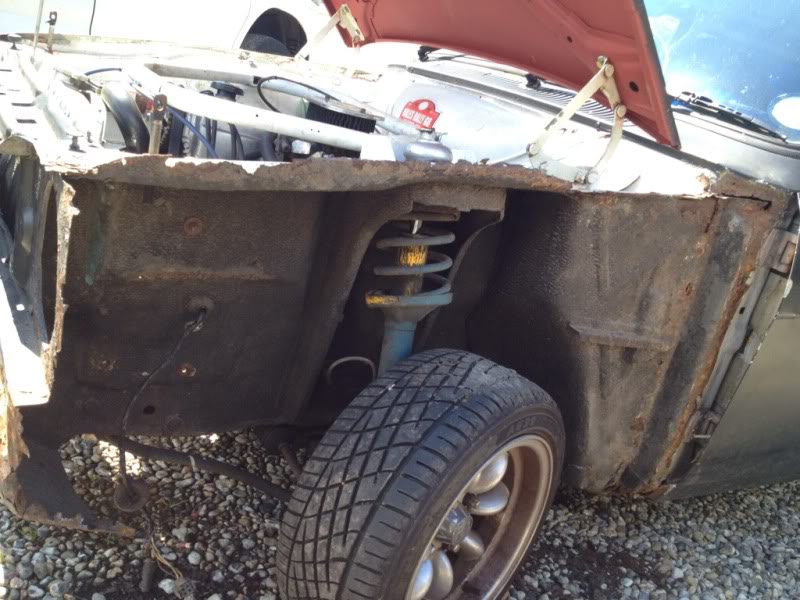
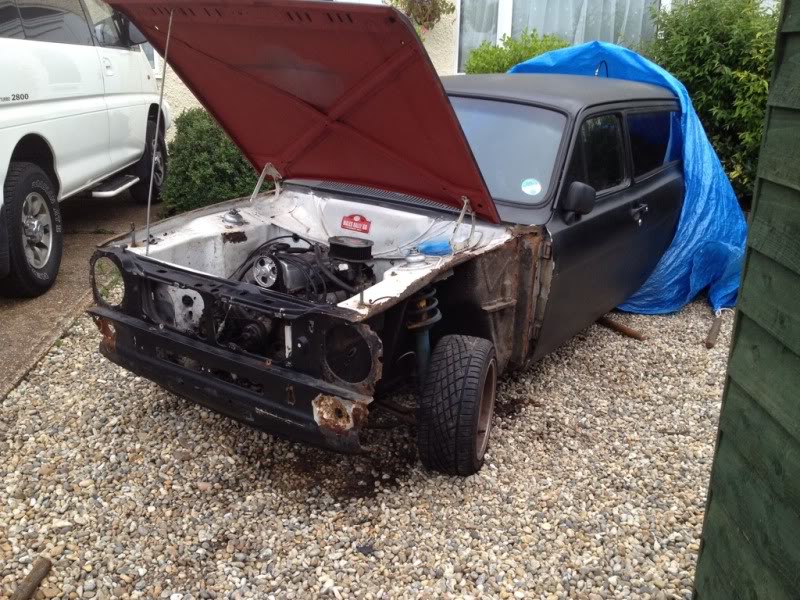
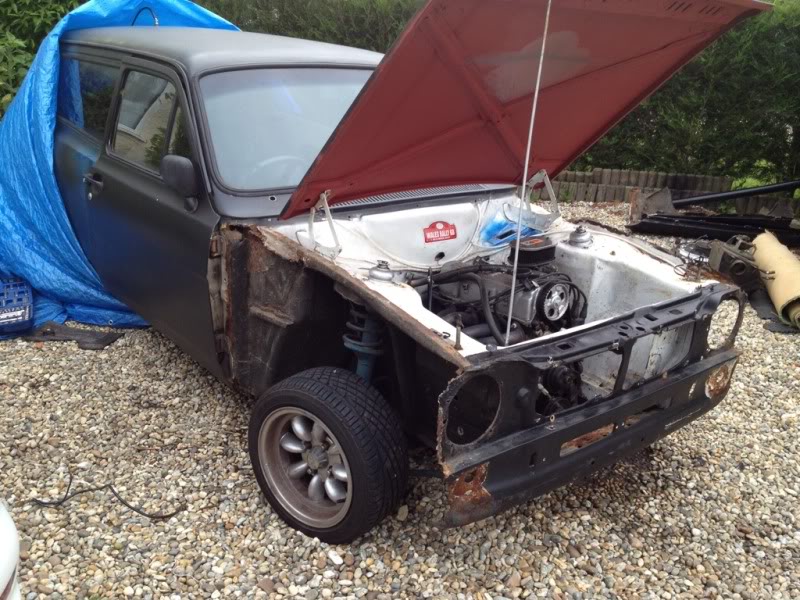
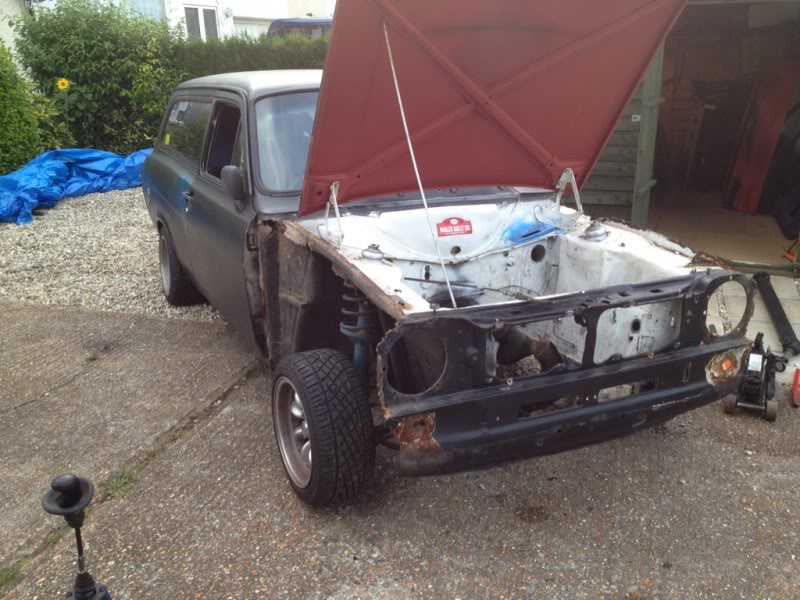
and that brings us back to the strip down, i decided the other night that today would be the day the car comes off the road to start its no dout slow restoration, soo today befour i gave myself chance to think about it i got the tools out and started stripping the front end...
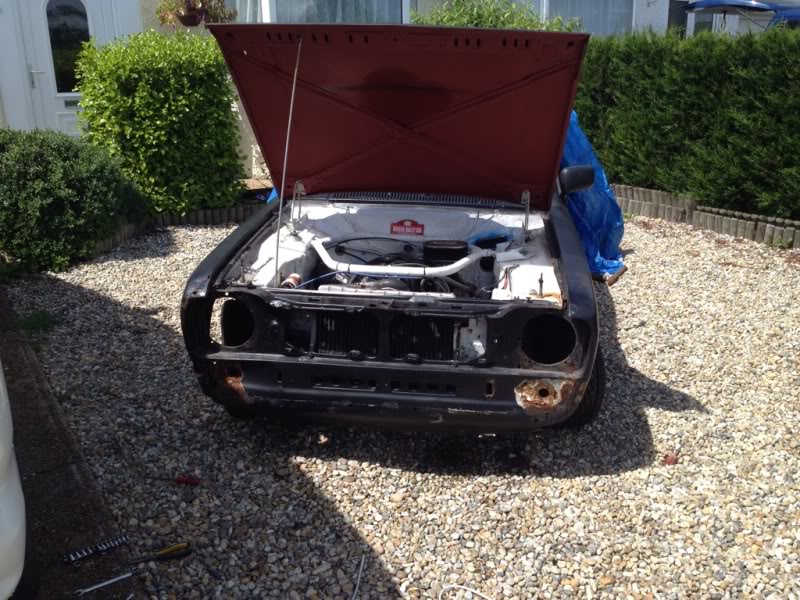
and then for the part i was dreading... removing the front wings to see what hidden delights there was for me
o/s/f wing off, this side was the worse of the 2 and was practically hanging off befour i started lol
and the n/s/f wing removed
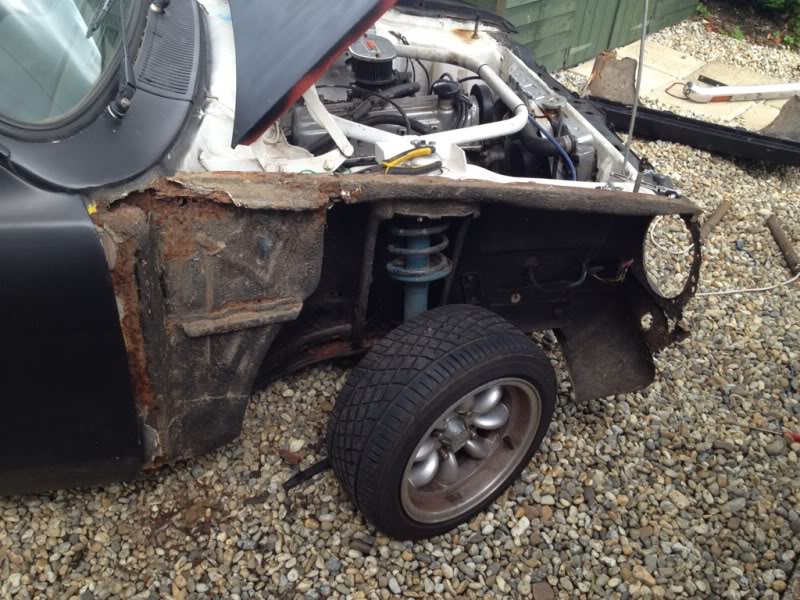
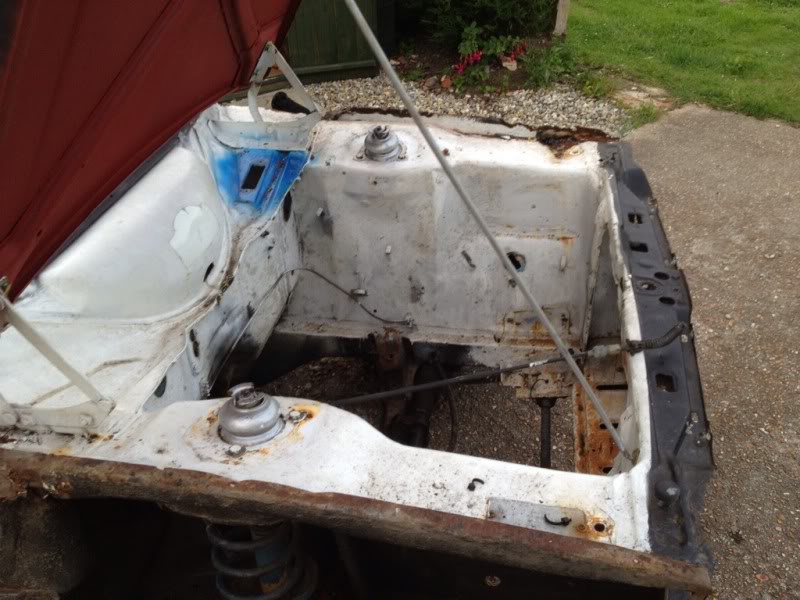
and there was plenty of delights behind them both
behind the o/s wing we have this...
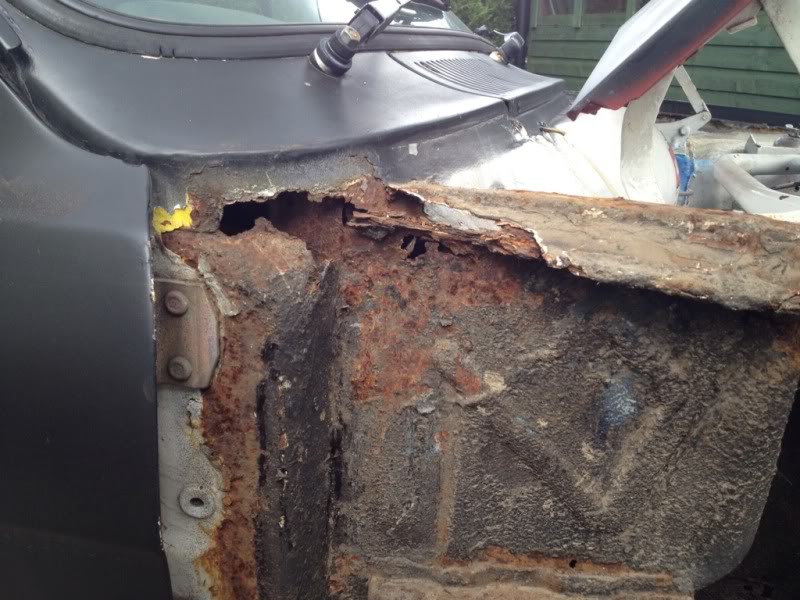
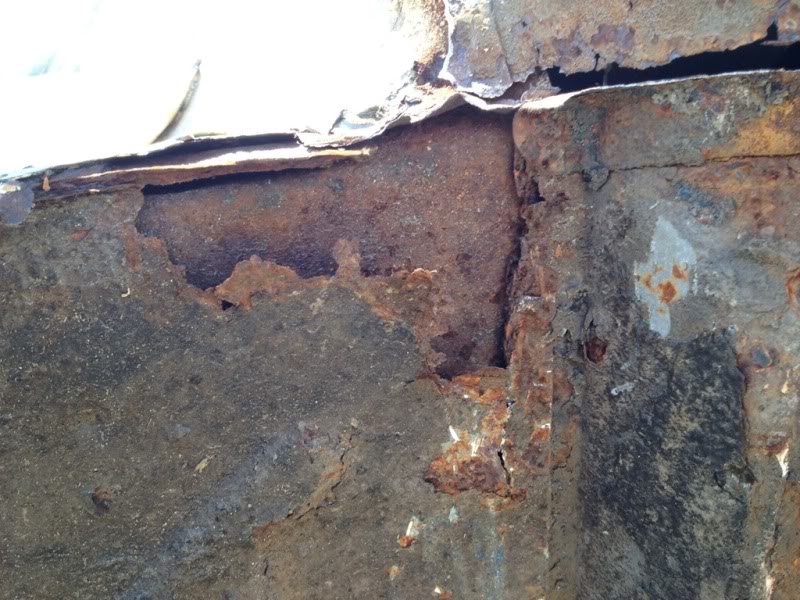
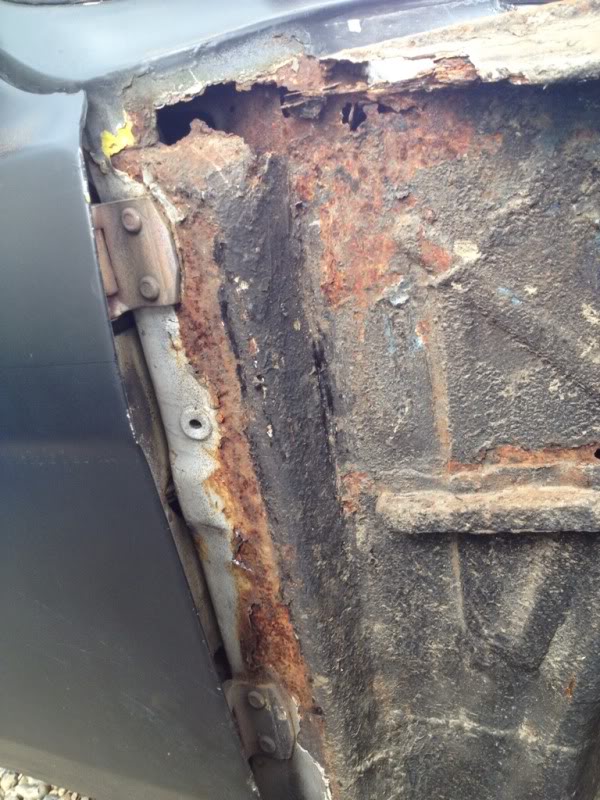
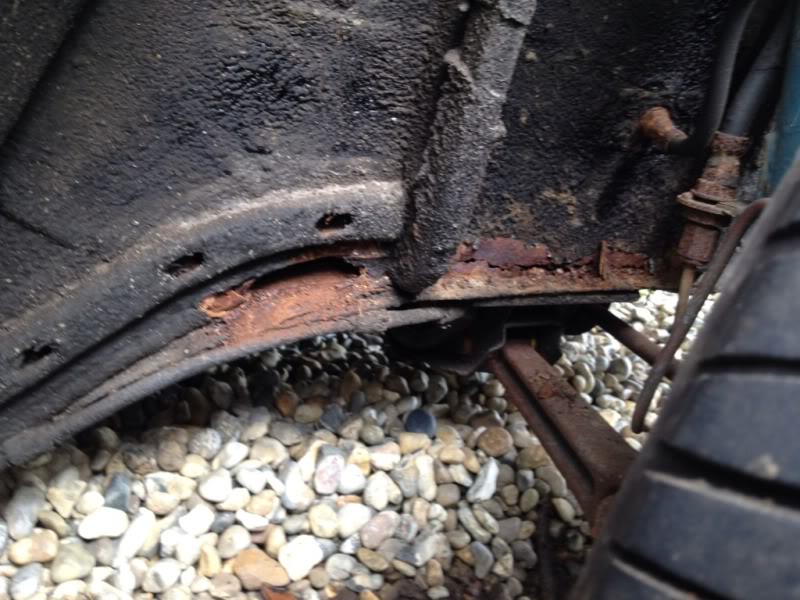
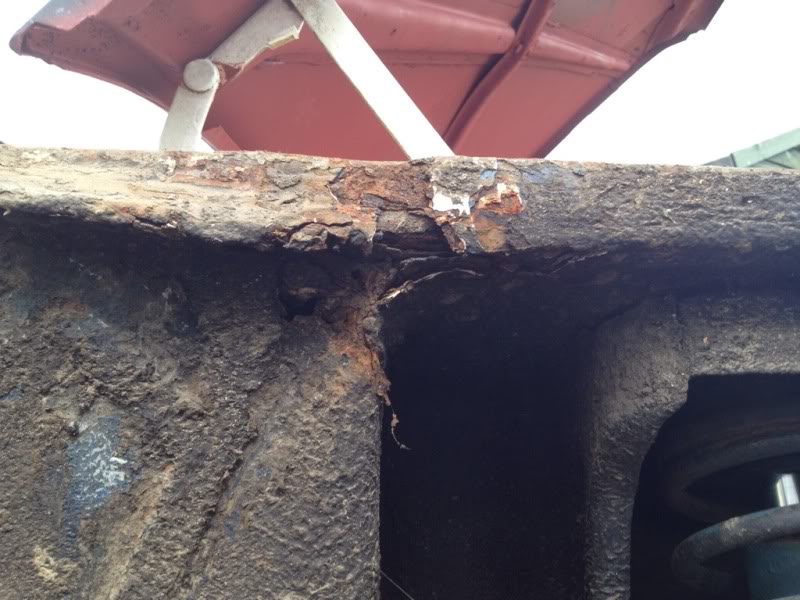
and behind the n/s wing
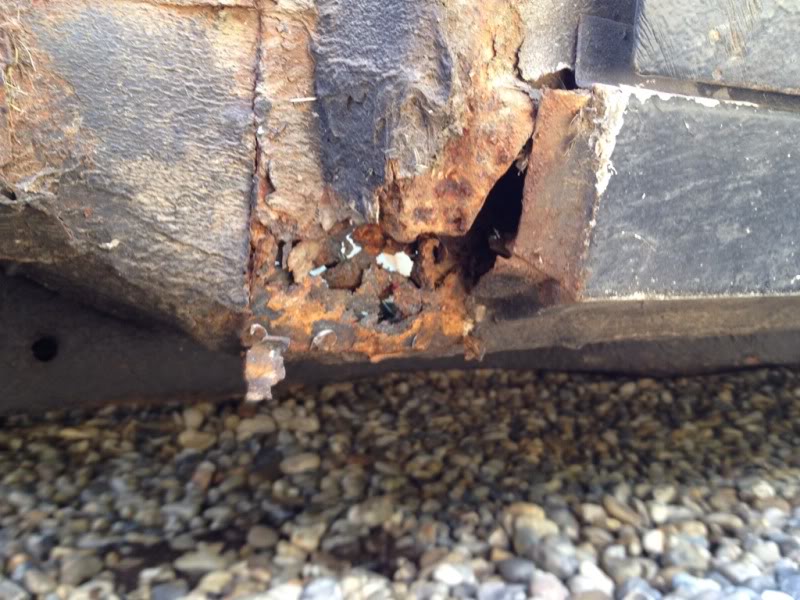
as you can see ive got my work cut out for me, admittedly i think i might be a little out of my depth with some of the body work so i will be having a pro doing the bits i cant do. so for the front i need to replace the front panel, both wing rail's and wings, slam panel bit and various patches here and there and repair the chassis rail, not too much really
oh a plus side, it turns out the front suspension is spax items...
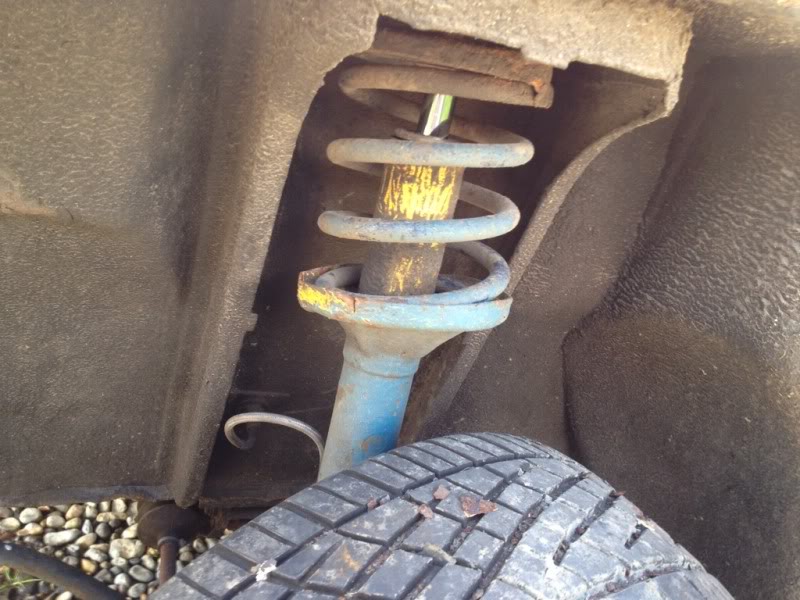
god knows why someone painted them blue
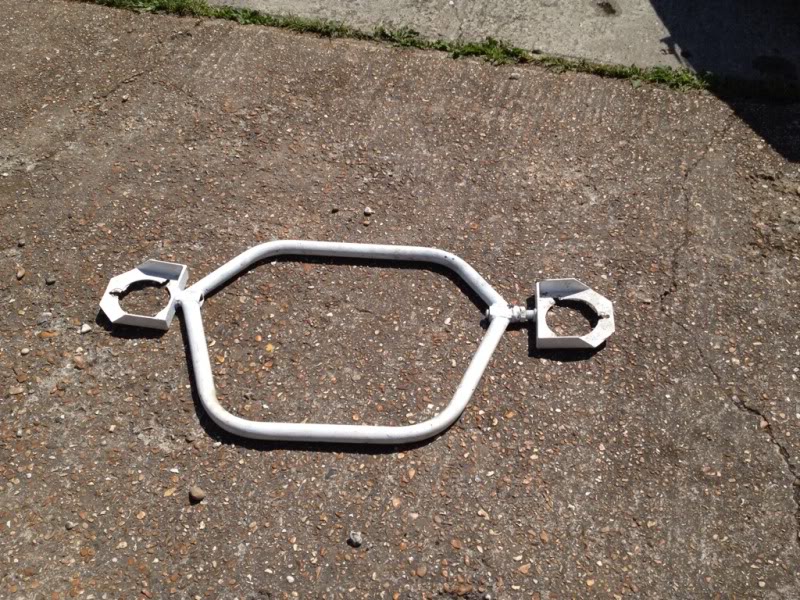
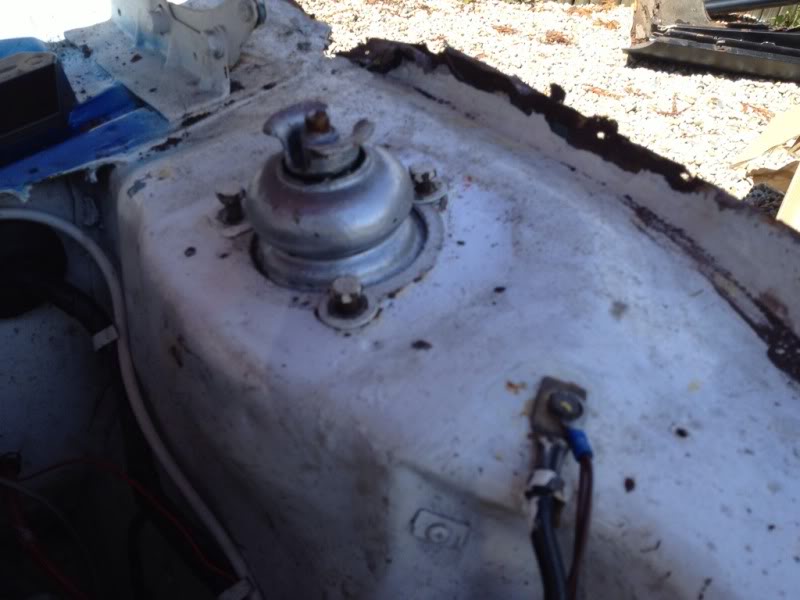
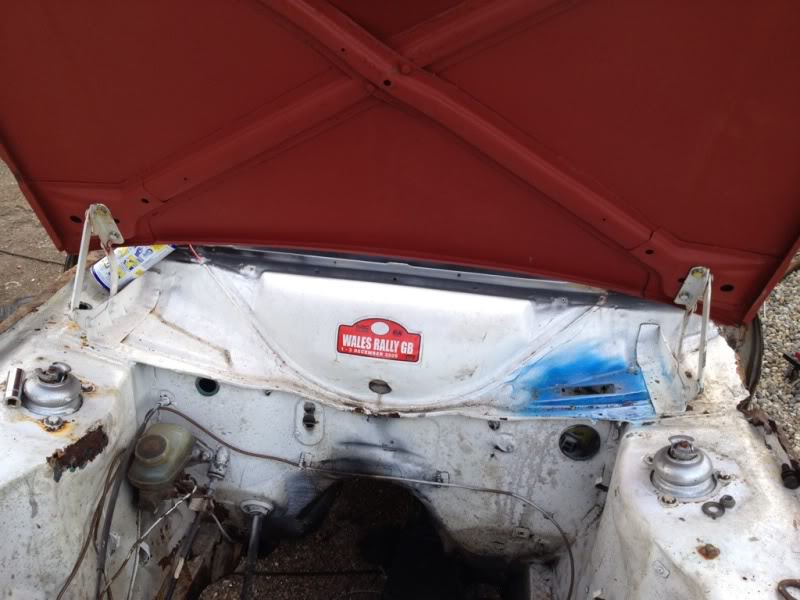
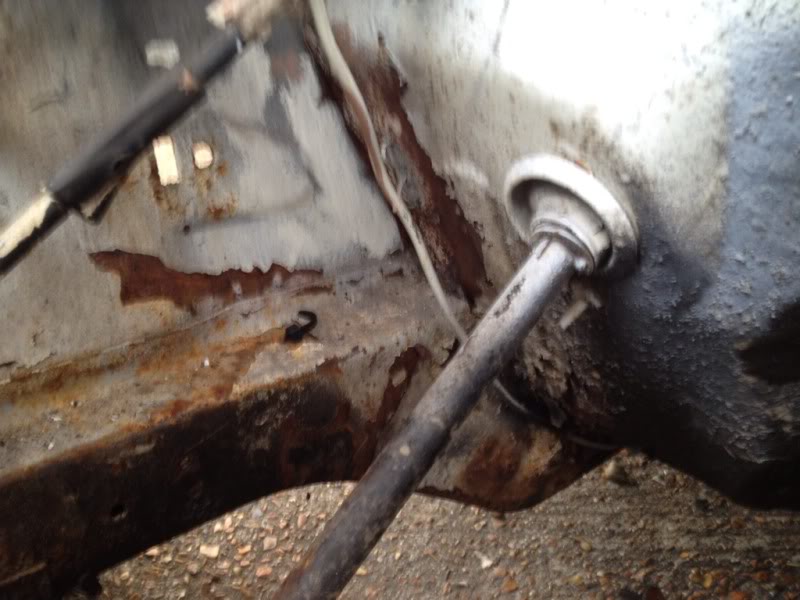
and befour i packed up i thought id have a look at the strut tops and check them out so i had to remove this old thing first
so with that off i could have a poke around and found this on the o/s...
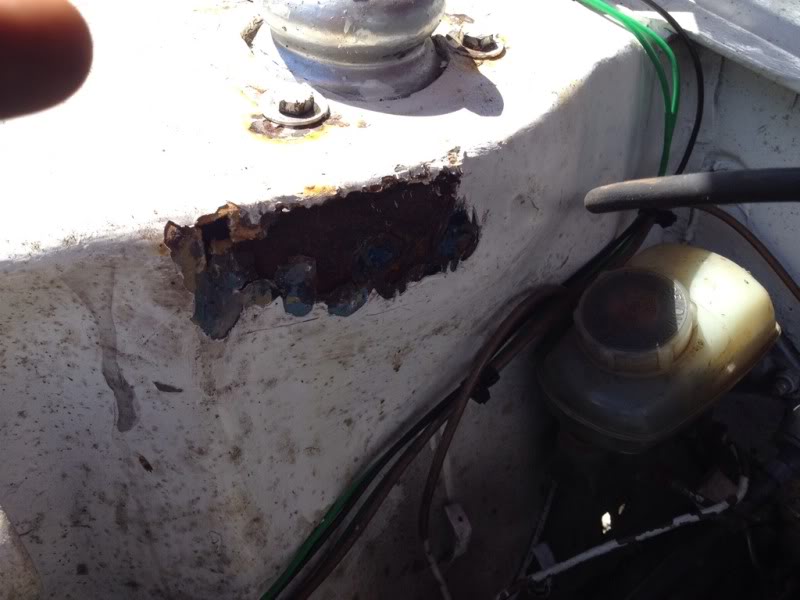
nothing major really, was expecting alot worse!!
and the n/s
thankfully this side was solid which was a good end to the day as thats as far as i got befour i being pulled away but im hoping to build a wooden shed type garage soon so it can be in there and i can work on it at my leisure because the weathers to unpridictable atm
anyway thats all for now, thanks for looking.
complete 2wd cosworth throttle body and new cometic inlet manifold gaskets
decided i might aswel take apart, clean and rebuild the inlet befour packing it away...
just need to swop all the bolts at some point for new clean ones
2wd cosworth standard t3
and bolted to manifold ready to be packed away...
a few cosworth boost hoses i won for, wait for it......... �0.99p lol best buy so far!!
proper mk2 escort utility tray
and the old clock hole is perfect for a 52mm gauge :thumbsup:
toyota mr2 front seats pinched out of my mates car befour he scrapped it
cosworth exhaust down pipe
and that brings us back to the strip down, i decided the other night that today would be the day the car comes off the road to start its no dout slow restoration, soo today befour i gave myself chance to think about it i got the tools out and started stripping the front end...
and then for the part i was dreading... removing the front wings to see what hidden delights there was for me
o/s/f wing off, this side was the worse of the 2 and was practically hanging off befour i started lol
and the n/s/f wing removed
and there was plenty of delights behind them both
behind the o/s wing we have this...
and behind the n/s wing
as you can see ive got my work cut out for me, admittedly i think i might be a little out of my depth with some of the body work so i will be having a pro doing the bits i cant do. so for the front i need to replace the front panel, both wing rail's and wings, slam panel bit and various patches here and there and repair the chassis rail, not too much really
oh a plus side, it turns out the front suspension is spax items...
god knows why someone painted them blue
and befour i packed up i thought id have a look at the strut tops and check them out so i had to remove this old thing first
so with that off i could have a poke around and found this on the o/s...
nothing major really, was expecting alot worse!!
and the n/s
thankfully this side was solid which was a good end to the day as thats as far as i got befour i being pulled away but im hoping to build a wooden shed type garage soon so it can be in there and i can work on it at my leisure because the weathers to unpridictable atm
anyway thats all for now, thanks for looking.
17-07-2012, 03:13 PM
#98
I've found that life I needed.. It's HERE!!
Thread Starter
iTrader: (8)
Join Date: Dec 2006
Location: eastbourne
Posts: 1,350
Likes: 0
Received 0 Likes
on
0 Posts
Yeh had to bite the bullet and just go for it mate, otherwise it would never get done.
Just got to strip the rest of her and build my new garage/shack thing so I can crack on..
Just got to strip the rest of her and build my new garage/shack thing so I can crack on..
18-07-2012, 10:09 AM
#100
I've found that life I needed.. It's HERE!!
Thread Starter
iTrader: (8)
Join Date: Dec 2006
Location: eastbourne
Posts: 1,350
Likes: 0
Received 0 Likes
on
0 Posts
Yeh certainly not going to be a quick turn around, decided to go balls out while it's off the road and get mk1 bubble archs fitted and run bigger wheels 14 or 15x9's maybe?
 18-07-2012, 08:42 PM
#103
I've found that life I needed.. It's HERE!!
Thread Starter
iTrader: (8)
Join Date: Dec 2006
Location: eastbourne
Posts: 1,350
Likes: 0
Received 0 Likes
on
0 Posts
a little more progress with the strip down, not bad for an hours work i dont think...
all front loom gone.
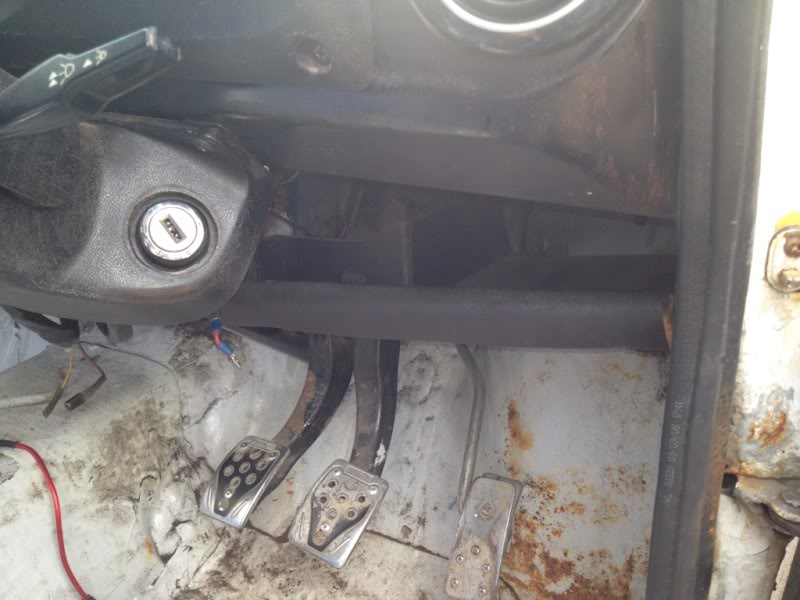
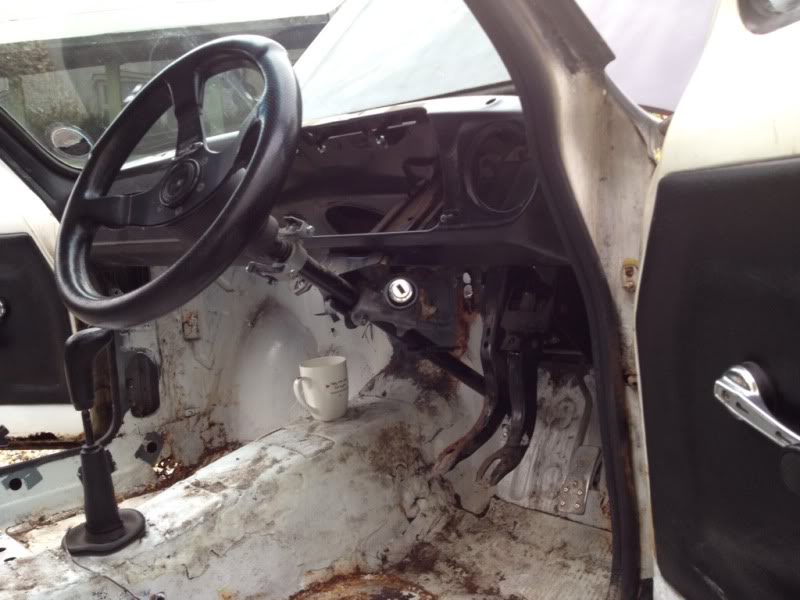
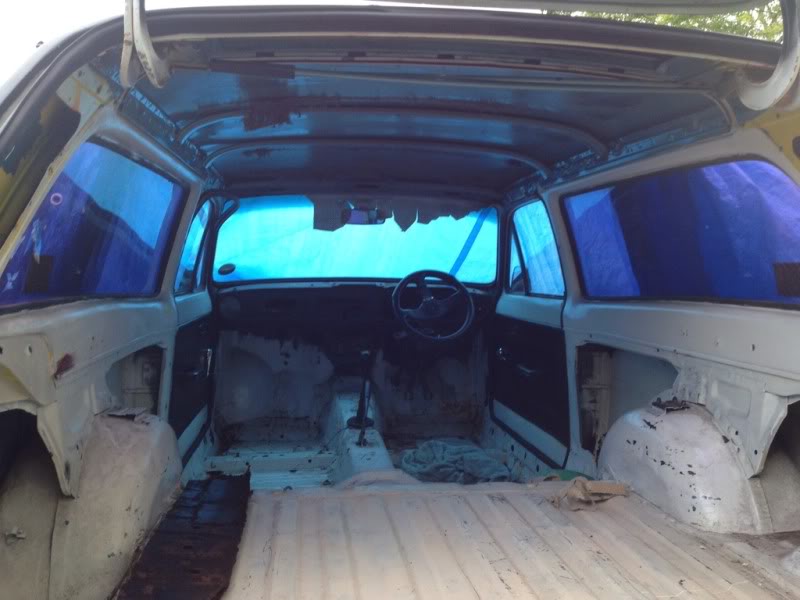
all the front half of the interior stripped bar the steering colum and pedal box assembely
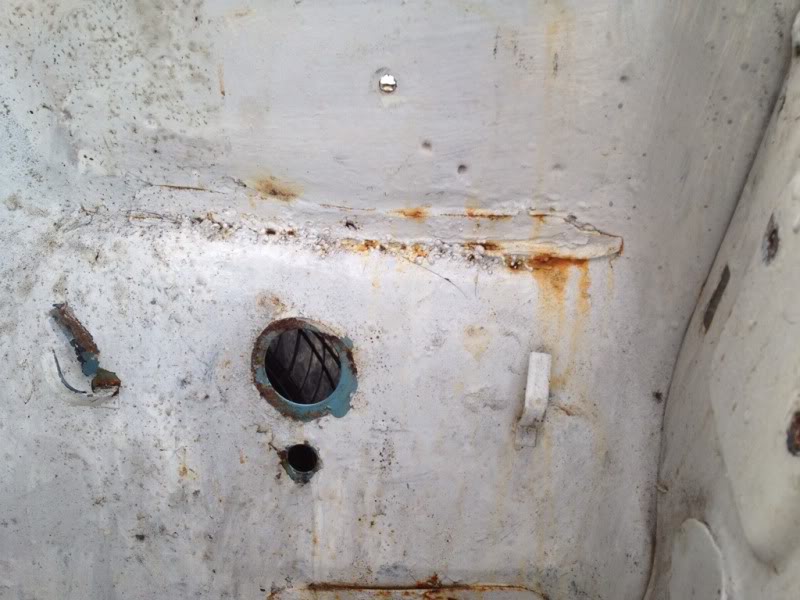
heater box blower thing gone revealing yet more rusty bits

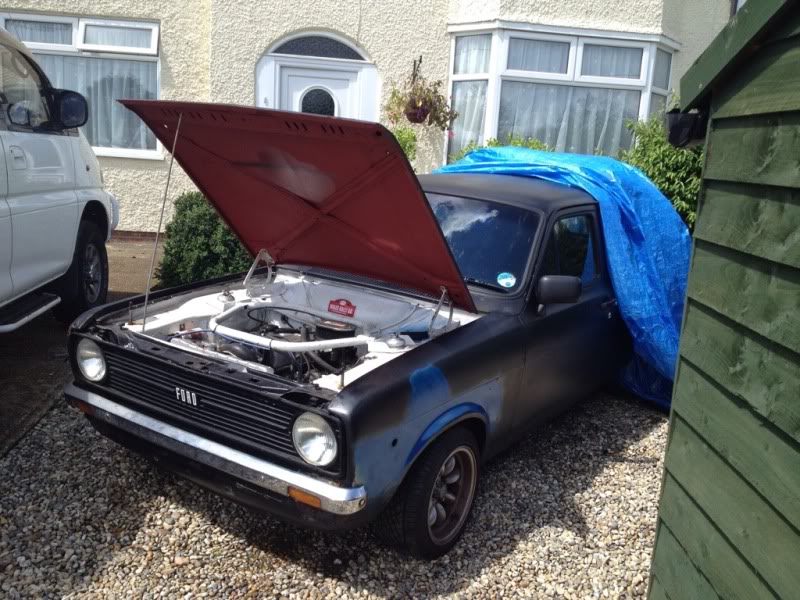
now everythings out of the way i can see properly what exactly needs to be done, but i cant really do too much until iv built my garage so its nice and dry because its just covered with abit of tarp for now...
so, we have...
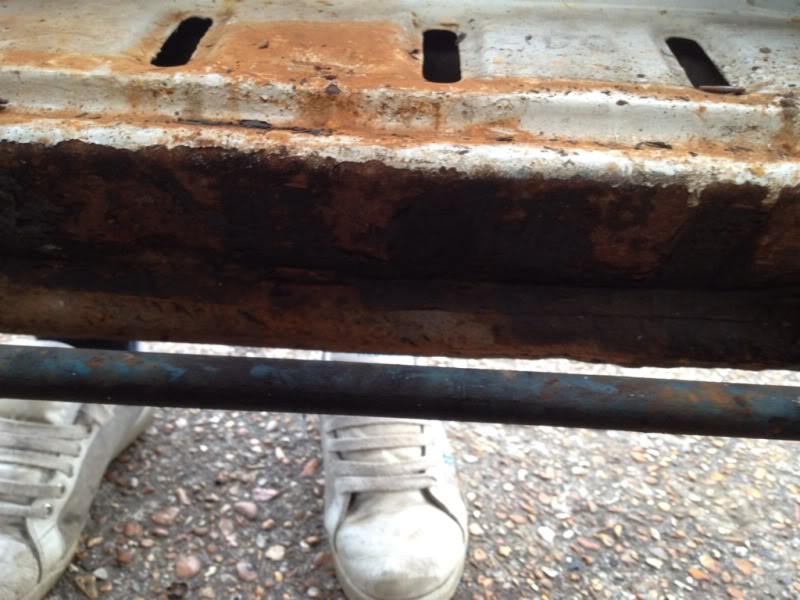
n/s inner sill
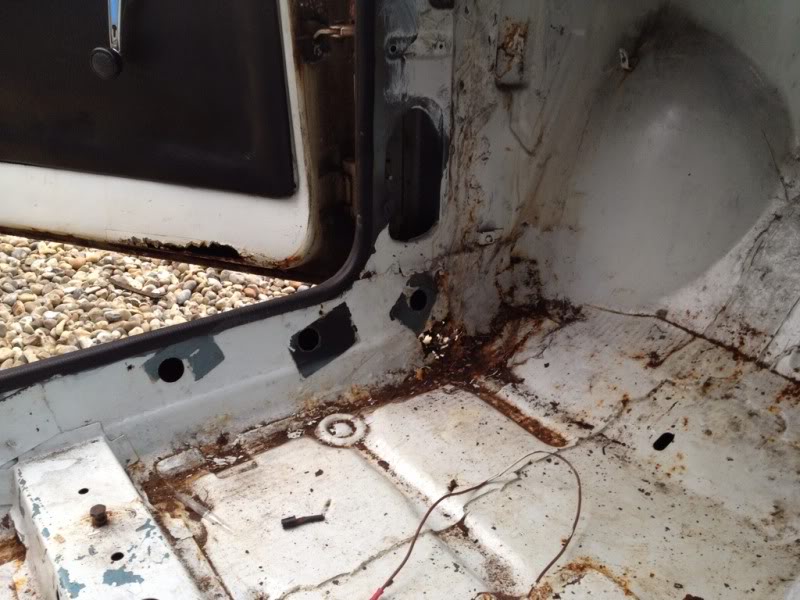
not all that bad really i dont think? but i'l be replacing it all anyway.
o/s inner sill

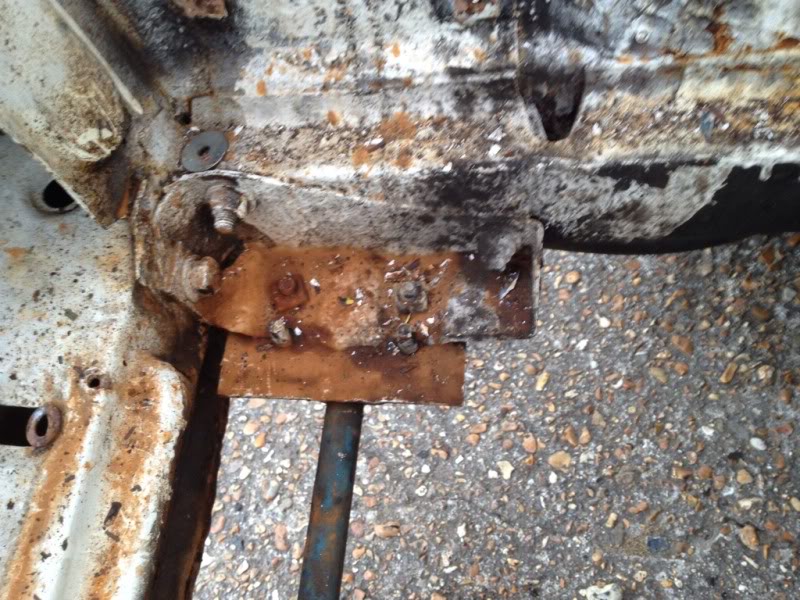
this sides already had quite abit of patch work, but god knows what they tried welding it with :no: but again, its all being replaced

note the dodgy plate welded to the floor on the left in this pic, this is where my gear box cradle bolts on to, so looks like new floors are needed aswel..?
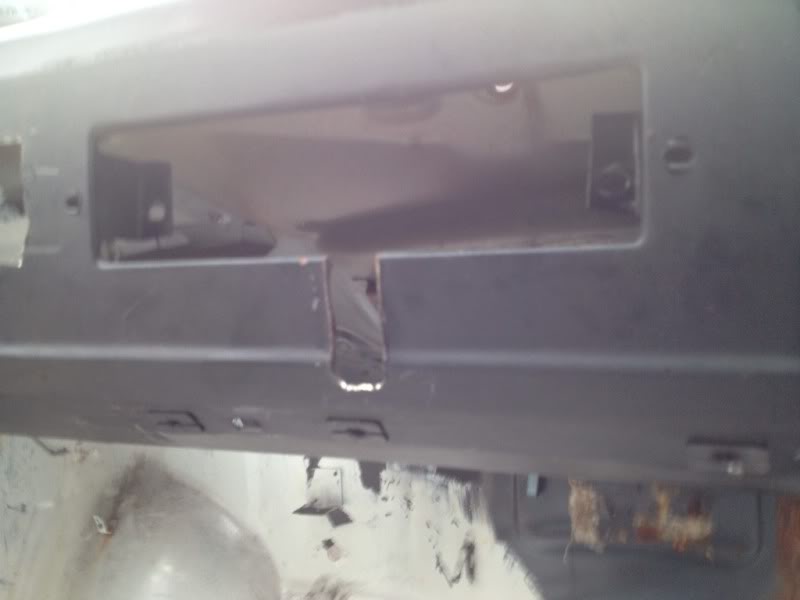
some muppet at some point had cut a slot into the dash for a switch (which was even wired in when i got the car lol) so need to make new bit to go in there and chop a bigger hole for my mk2 utility tray.
and a couple of random pics of the rot box in all its glory lol
so that brings us up to date, im hoping to get the engine and box out on my next stint and maybe get the rear completly stripped but we'll see...
all front loom gone.
all the front half of the interior stripped bar the steering colum and pedal box assembely
heater box blower thing gone revealing yet more rusty bits
now everythings out of the way i can see properly what exactly needs to be done, but i cant really do too much until iv built my garage so its nice and dry because its just covered with abit of tarp for now...
so, we have...
n/s inner sill
not all that bad really i dont think? but i'l be replacing it all anyway.
o/s inner sill
this sides already had quite abit of patch work, but god knows what they tried welding it with :no: but again, its all being replaced
note the dodgy plate welded to the floor on the left in this pic, this is where my gear box cradle bolts on to, so looks like new floors are needed aswel..?
some muppet at some point had cut a slot into the dash for a switch (which was even wired in when i got the car lol) so need to make new bit to go in there and chop a bigger hole for my mk2 utility tray.
and a couple of random pics of the rot box in all its glory lol
so that brings us up to date, im hoping to get the engine and box out on my next stint and maybe get the rear completly stripped but we'll see...
22-07-2012, 10:28 AM
#104
I've found that life I needed.. It's HERE!!
Thread Starter
iTrader: (8)
Join Date: Dec 2006
Location: eastbourne
Posts: 1,350
Likes: 0
Received 0 Likes
on
0 Posts
it's that time again for an update
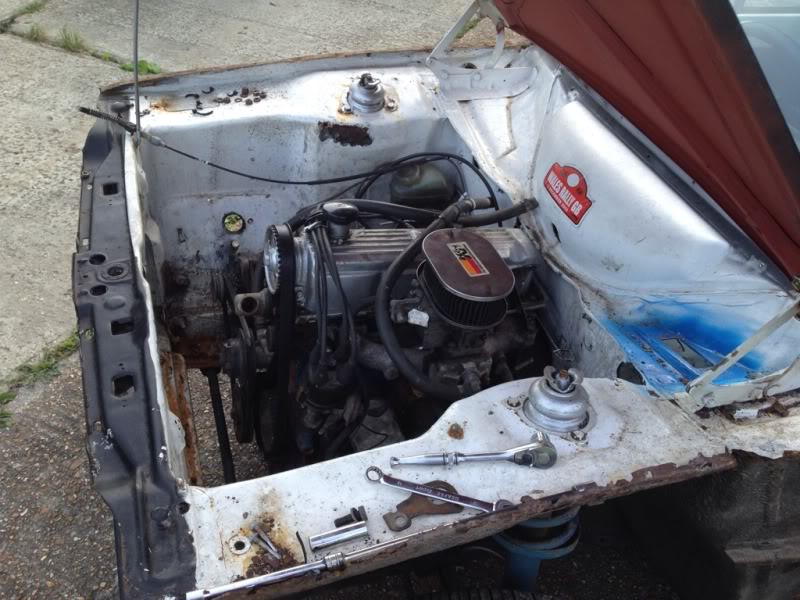
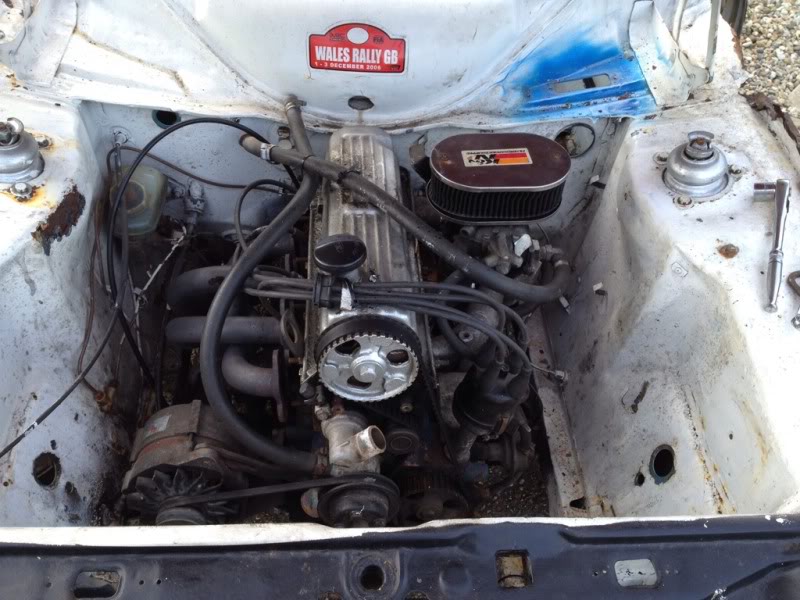
yesturday i managed to borrow a mates engine crane so i could remove the engine, gearbox and prop etc, so at 5pm i finally had the time to do it. iv never removed an engine on my own and couldnt beleive how easy it was!!
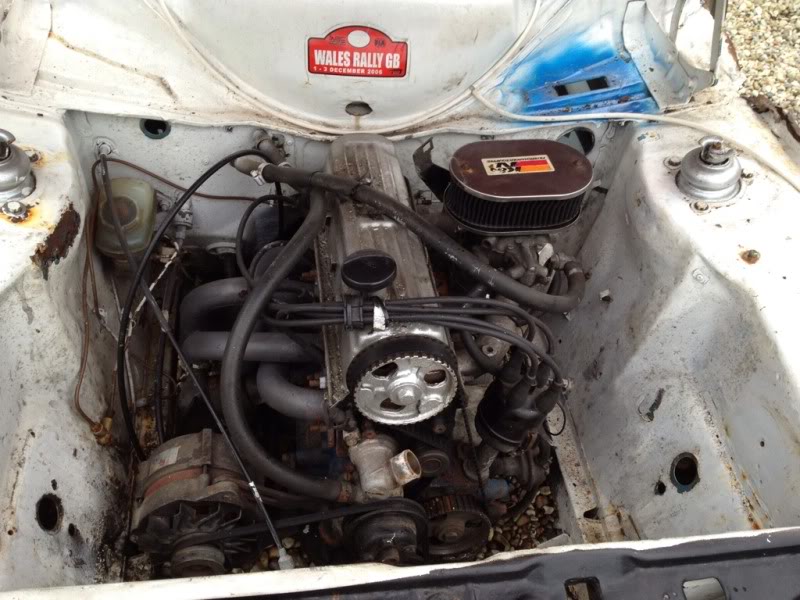
heres a couple of pictures of the engine befour it was removed...
soo, first up was removing the prop
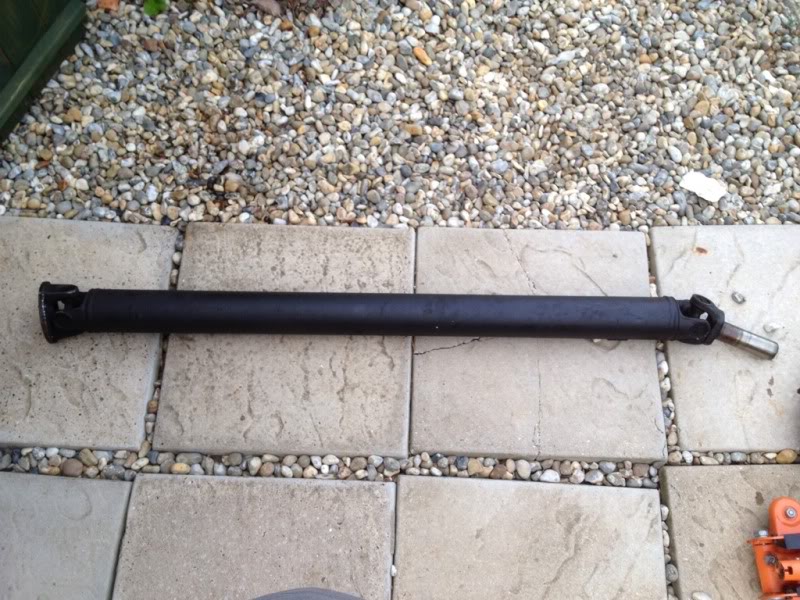
done
next was the gearbox, i had to sit this down on the floor until the engine was removed so i could pull it out so no pictures...
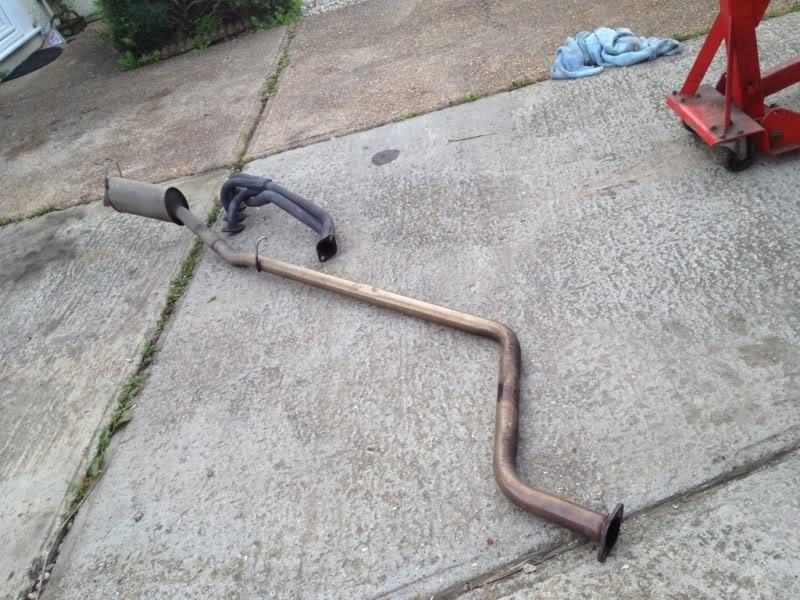
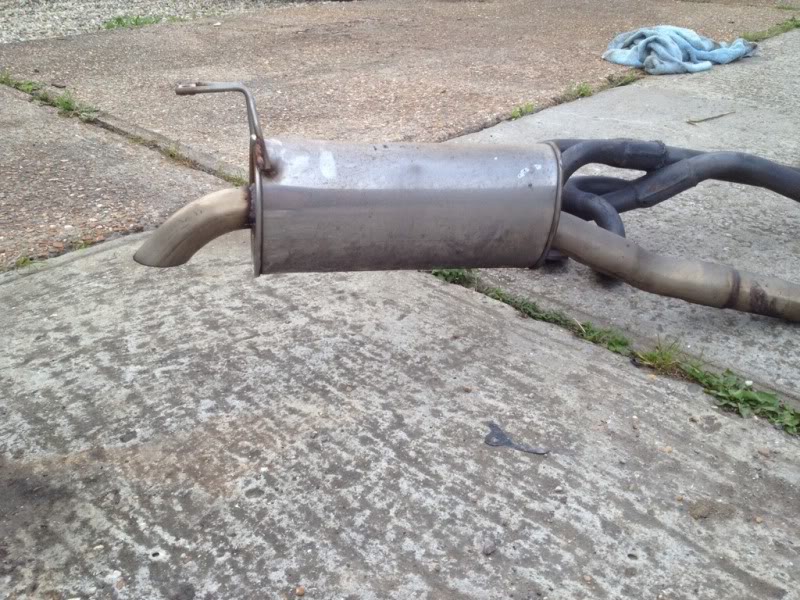
then it was time for the exhaust manifold and s/s exhaust system to come off... (the s/s systems proberly the best part of the car lol)
then it was time for the engine extraction so i set the engine crane up and went for it...
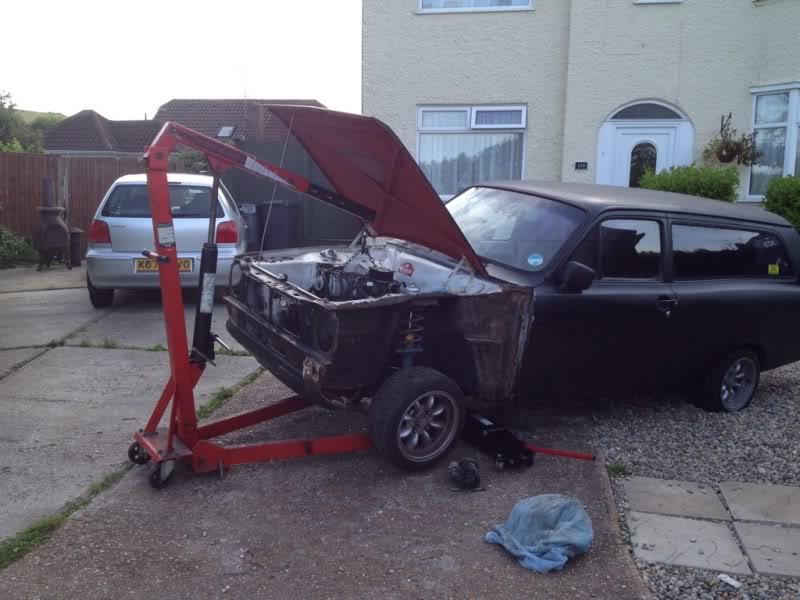
and its out
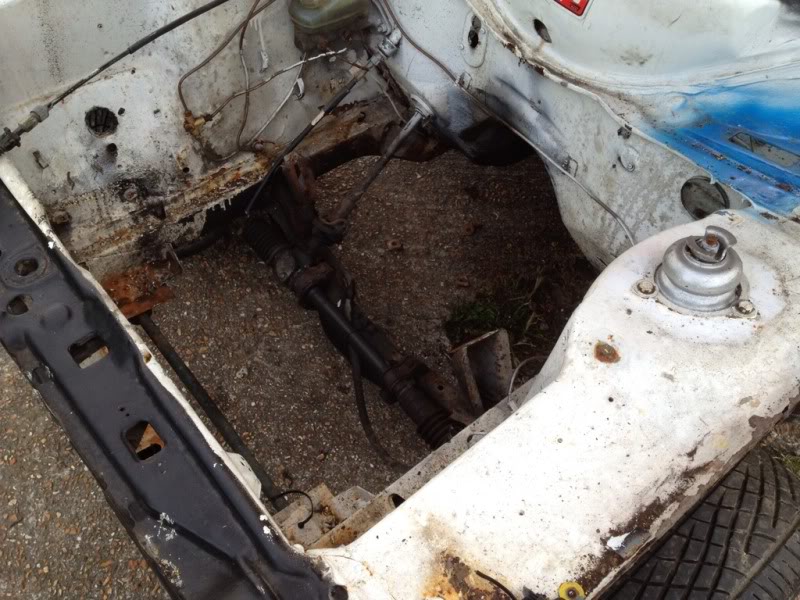
so now i have a big hole where the engine used to be and i can now see exactly what needs to be done in the engine bay which suprisingly isnt a great deal
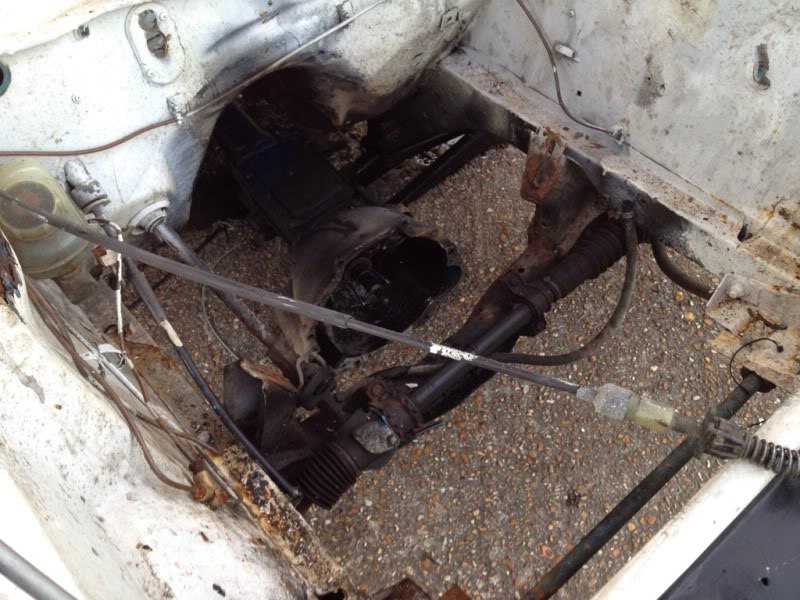
with the engine out i now had enough space to pull the gearbox out..

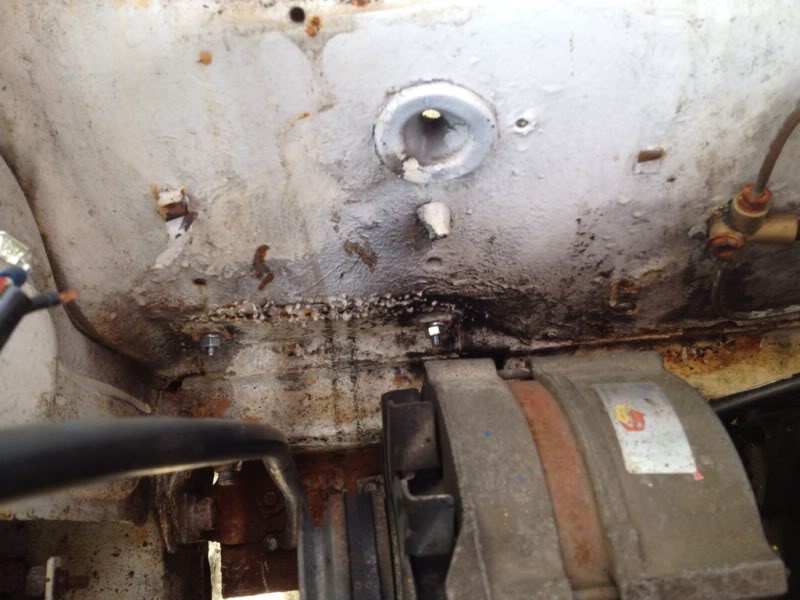
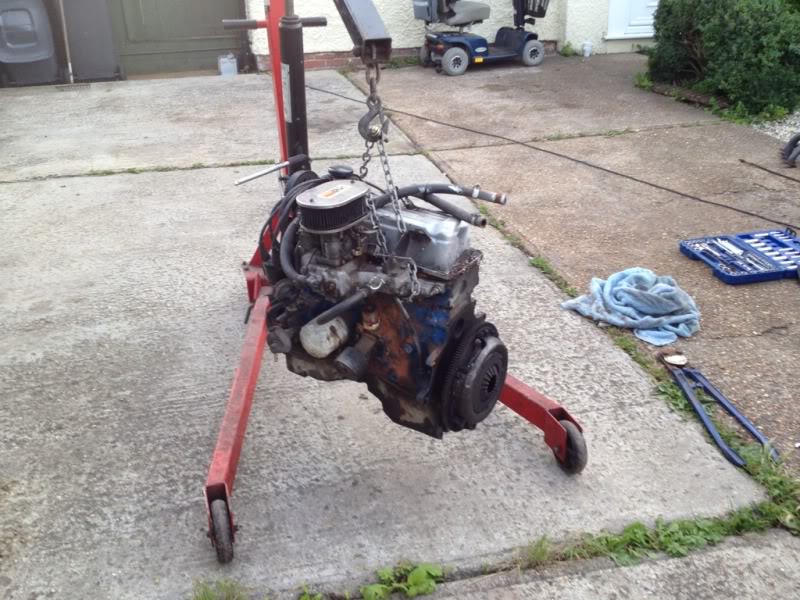
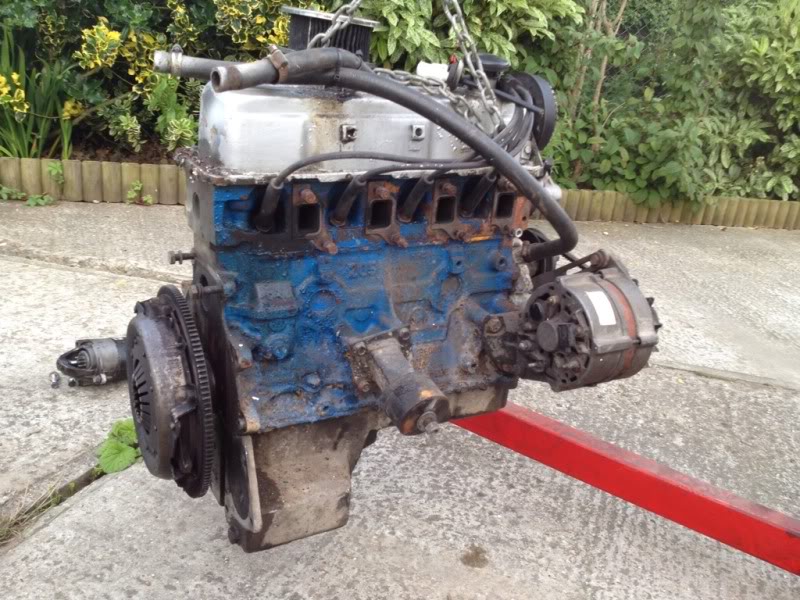
and some pics of the engine removed and where needs attention..
think this was where the battery tray used to be
not quite sure what this is all about?

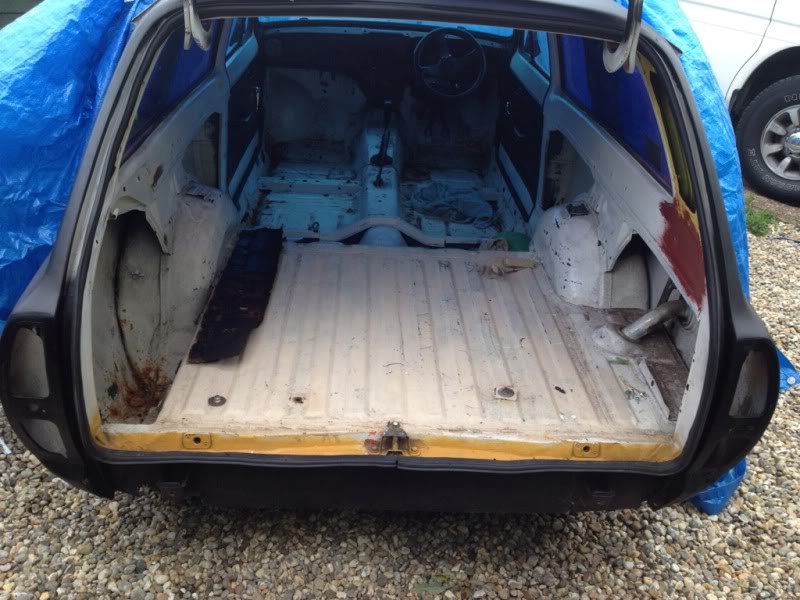
i was quite proud of myself after that so while i still had abit of go left in me i rolled the car back and stripped what was left on the rear of the car
jobs a gooden, but im literally holding myself up now with my garage, so once i have abit of spare time and money i'l get my garage sorted out and get whats left off the car and get it on its side to have a decent look at the underside
thats all for now folks, thanks for looking.
all the engine, box, prop and exhaust are for sale if anyone wants them?
yesturday i managed to borrow a mates engine crane so i could remove the engine, gearbox and prop etc, so at 5pm i finally had the time to do it. iv never removed an engine on my own and couldnt beleive how easy it was!!
heres a couple of pictures of the engine befour it was removed...
soo, first up was removing the prop
done
next was the gearbox, i had to sit this down on the floor until the engine was removed so i could pull it out so no pictures...
then it was time for the exhaust manifold and s/s exhaust system to come off... (the s/s systems proberly the best part of the car lol)
then it was time for the engine extraction
and its out
so now i have a big hole where the engine used to be and i can now see exactly what needs to be done in the engine bay which suprisingly isnt a great deal
with the engine out i now had enough space to pull the gearbox out..
and some pics of the engine removed and where needs attention..
think this was where the battery tray used to be
not quite sure what this is all about?
i was quite proud of myself after that so while i still had abit of go left in me i rolled the car back and stripped what was left on the rear of the car
jobs a gooden, but im literally holding myself up now with my garage, so once i have abit of spare time and money i'l get my garage sorted out and get whats left off the car and get it on its side to have a decent look at the underside
thats all for now folks, thanks for looking.
all the engine, box, prop and exhaust are for sale if anyone wants them?
22-07-2012, 05:12 PM
#105
10K+ Poster!!
Making good progress. Its a little rusty but doable


 06-08-2012, 10:24 PM
#108
I've found that life I needed.. It's HERE!!
Thread Starter
iTrader: (8)
Join Date: Dec 2006
Location: eastbourne
Posts: 1,350
Likes: 0
Received 0 Likes
on
0 Posts
Cheers guys, I'm affraid the mini lights and running gear have all sold now.
Hopfully be able to get back onto this soon, should be picking up some materials to build my garage/shed type thing then I can get it up and make a start on some metal work
Hopfully be able to get back onto this soon, should be picking up some materials to build my garage/shed type thing then I can get it up and make a start on some metal work
12-09-2012, 09:32 PM
#110
I've found that life I needed.. It's HERE!!
Thread Starter
iTrader: (8)
Join Date: Dec 2006
Location: eastbourne
Posts: 1,350
Likes: 0
Received 0 Likes
on
0 Posts
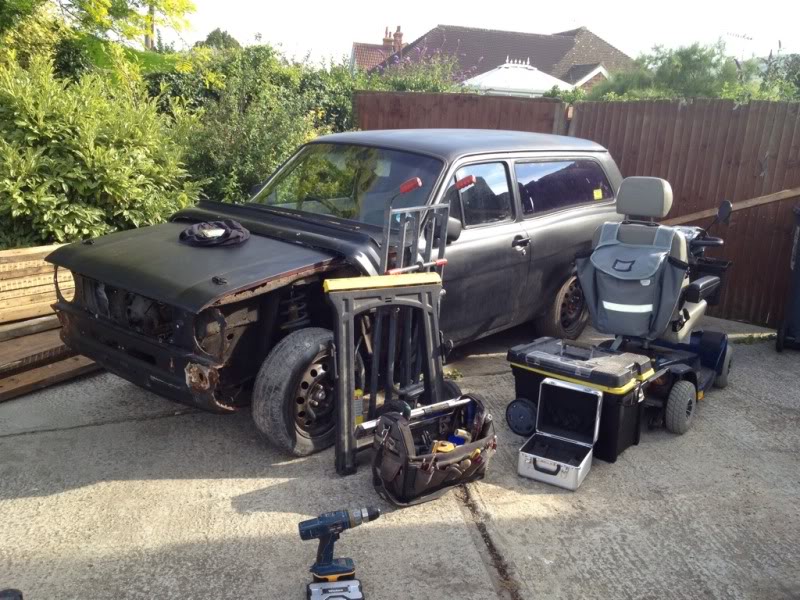
thought it was about time updated this thread, still havnt been able to get much done on the car as yet because iv been building my temporary garage
i managed to build it quite cheap by using all reclaimed wood and getting bits and peices that have been removed on other jobs, and we've built it in a prefab kinda style so i can hopefully sell it on once iv finished with it, but its been built to serve a purpose and not to look pretty so il proberly end up having a nice big bonfire come the end of it lol
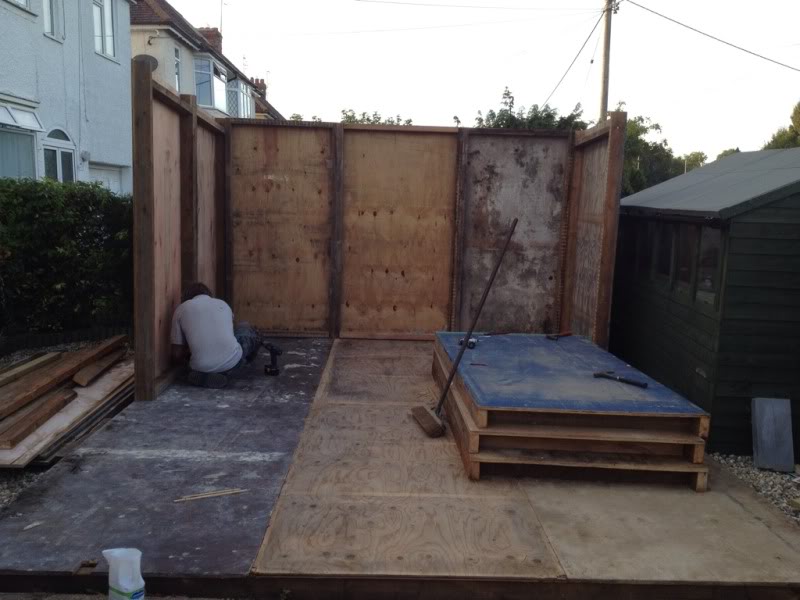
anyway, heres some pictures of my garage build
first up, move the car out the way...
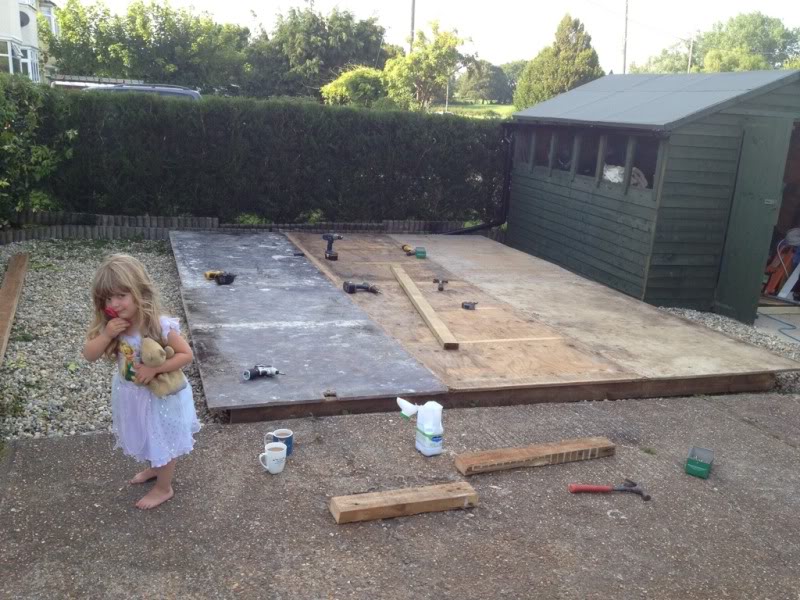
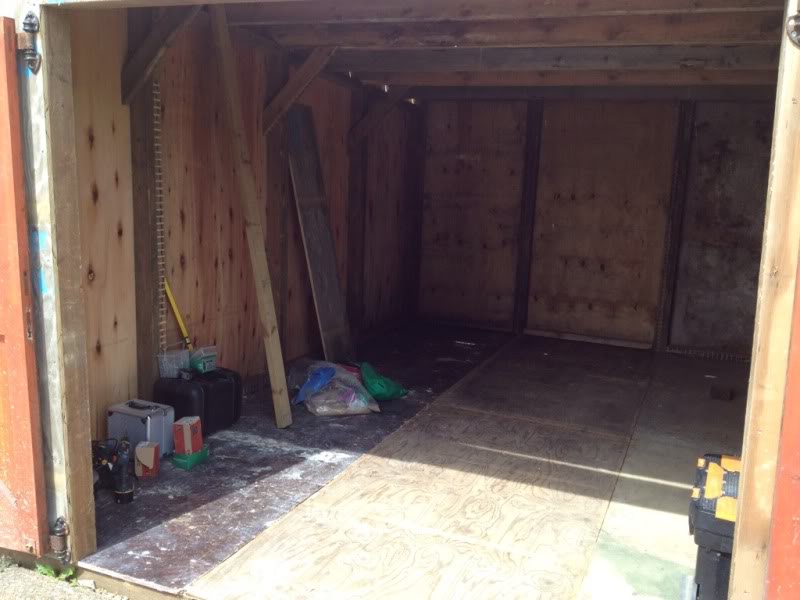
new garage floor going down (good old dad chipping in)
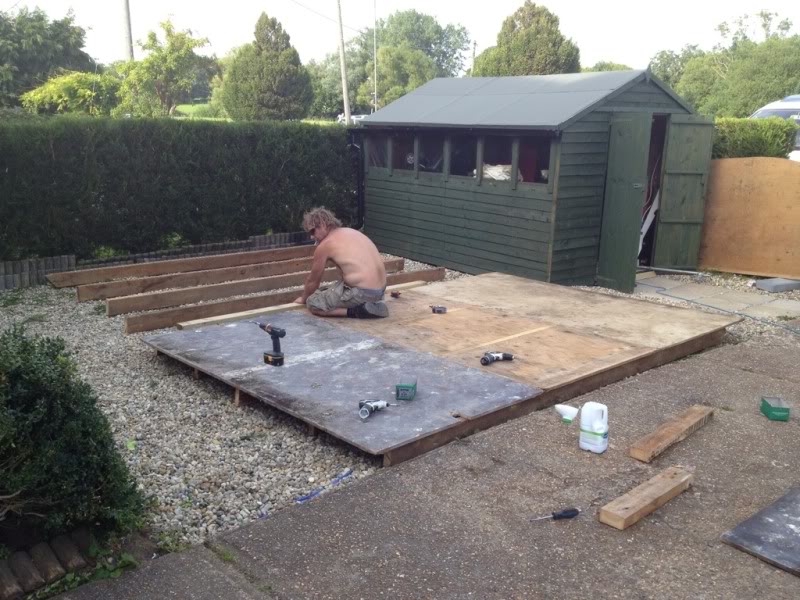
done...
and then the walls going up
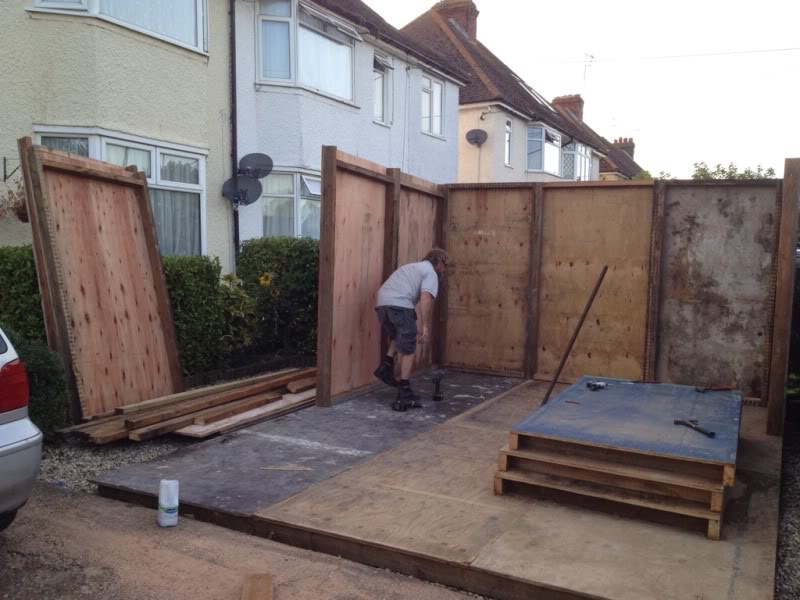
doors on
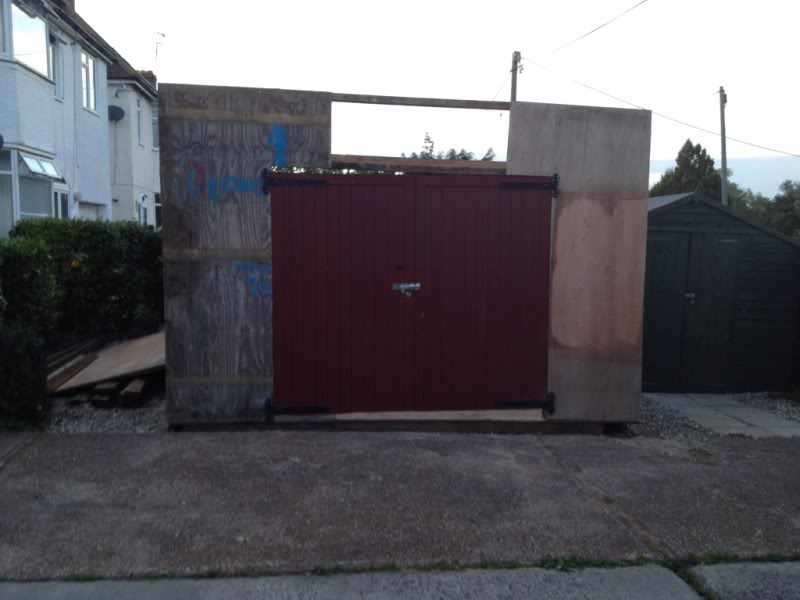
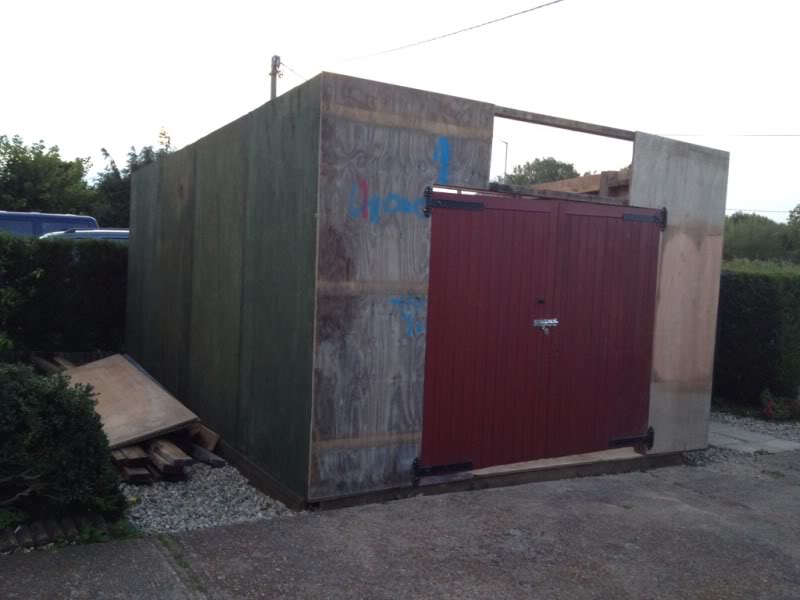
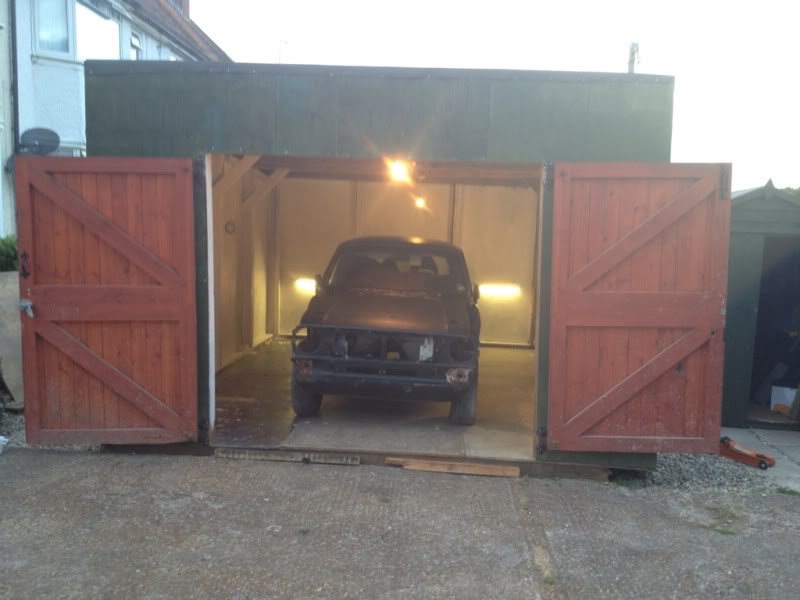
roof on
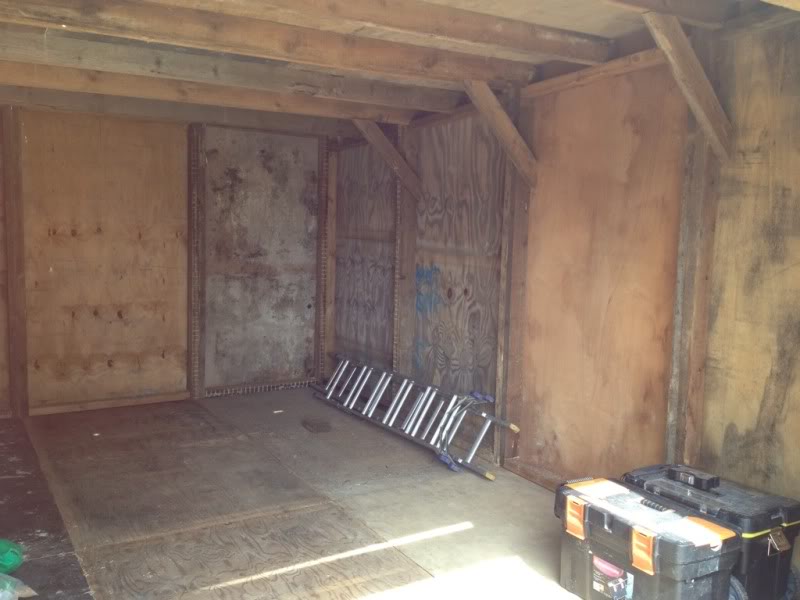
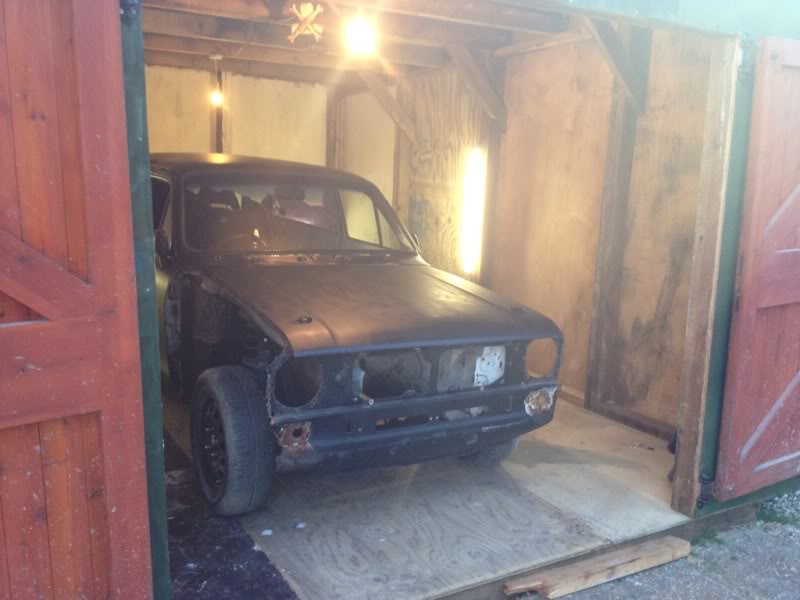
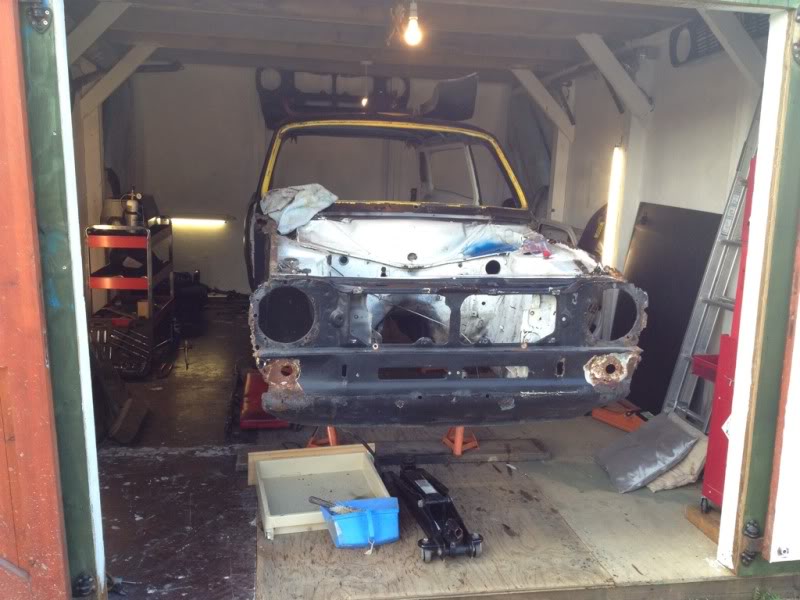
all painted, electrics done and car now in its new home
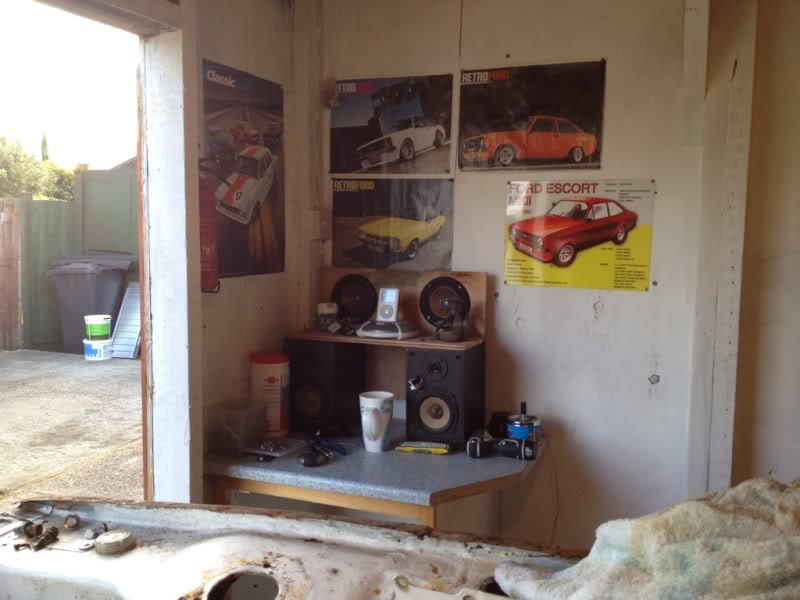
and my coffee break corner lol
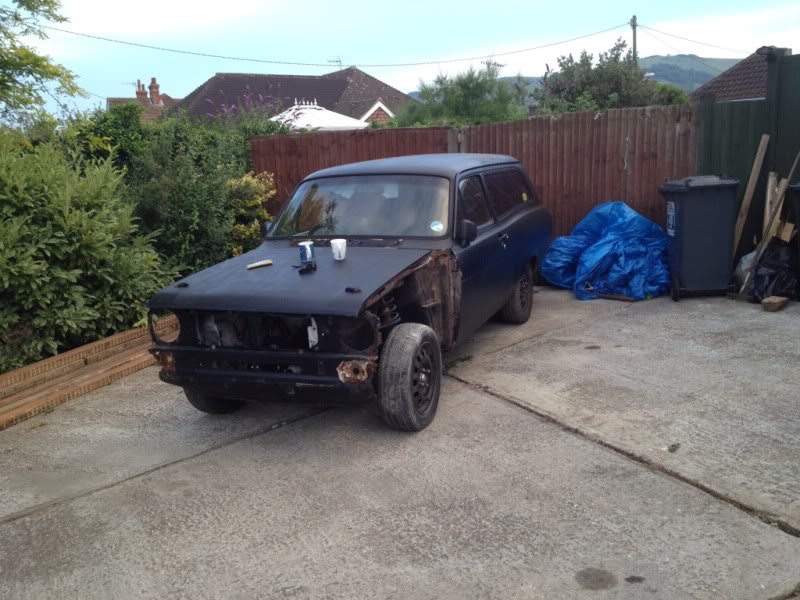
so with that all sorted out i started stripping off everything that was left on the car...
front cross member,suspension, bonnet, wind screen etc all gone
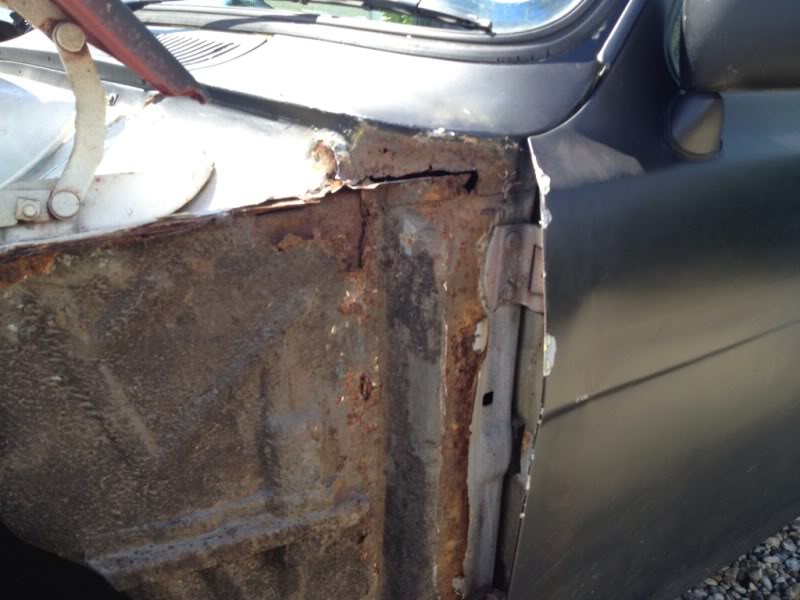
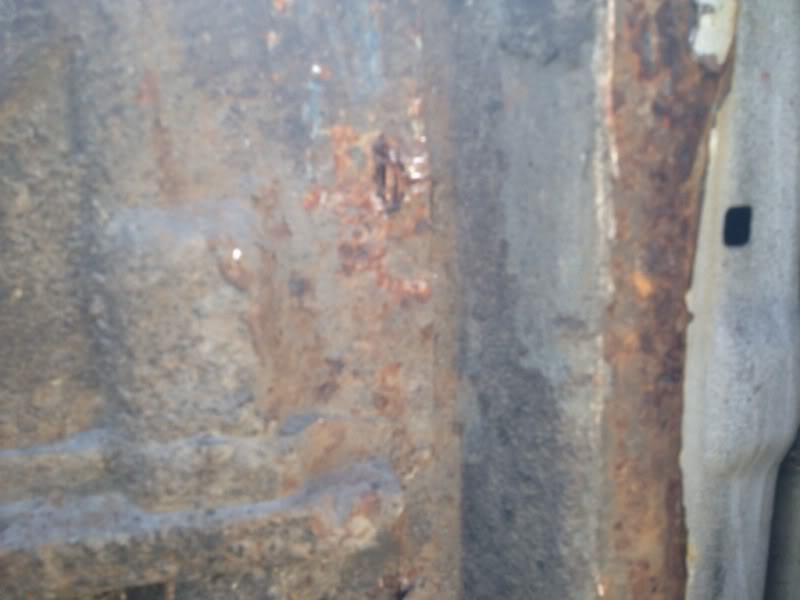
then it was time to take the doors off..

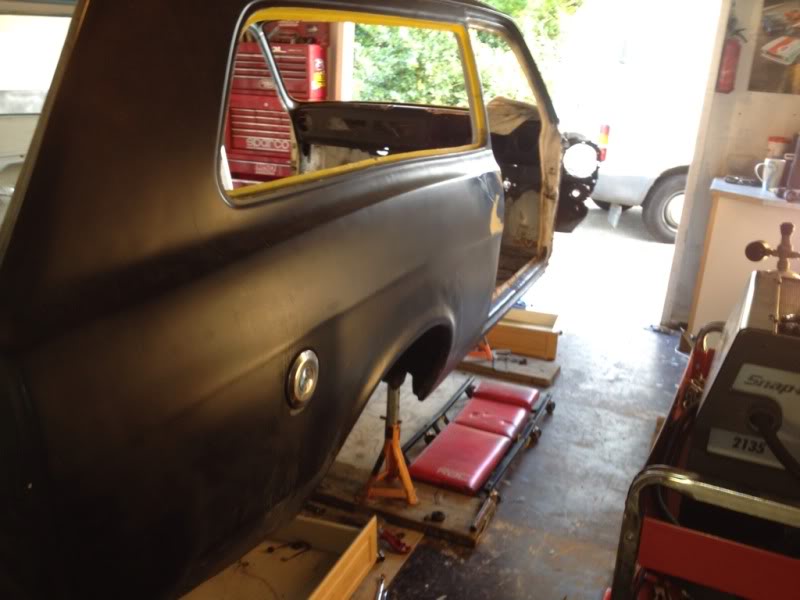
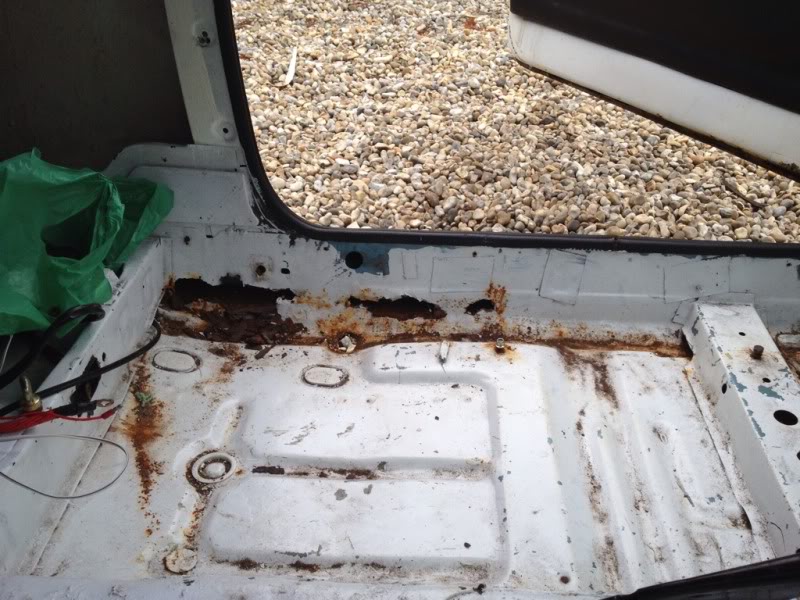
and heres whats left behind the drivers side..
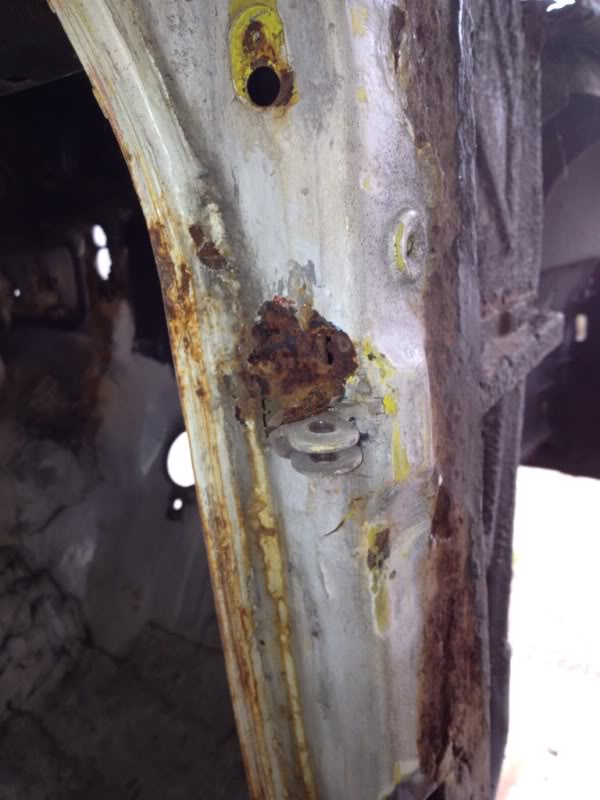
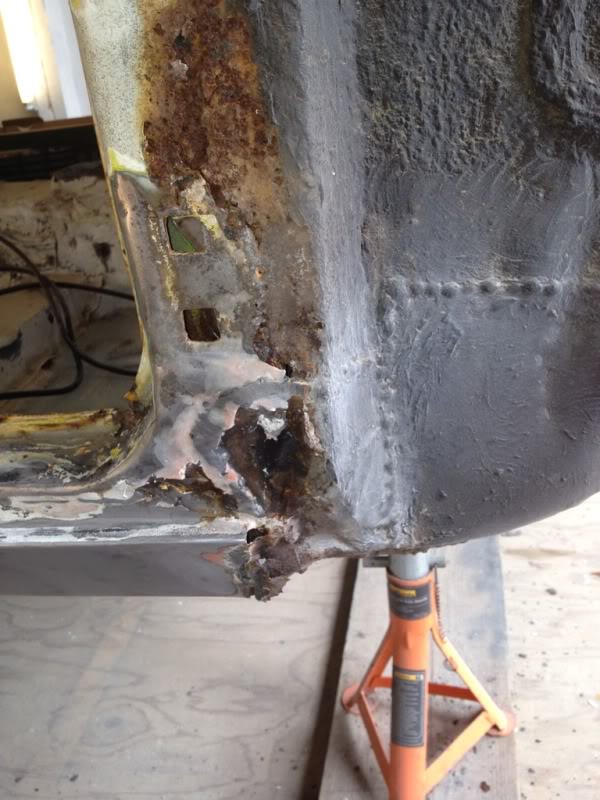

while i was sanding back the a post i came across abit of sheet metal just tacked over what should be the sill so i followed it right back to find it had had new sills at some point but rather than chopping them in properly they just chucked it straight on top of what was there and bunged loads of filler over top of it
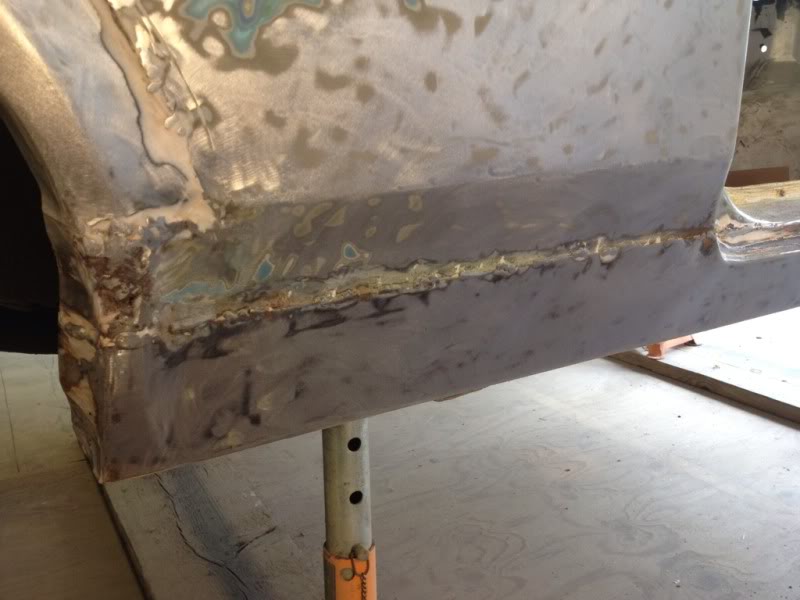
il get back to the sills at a later date and replace them properly.
so back to the strip down...
rear axle assembly off
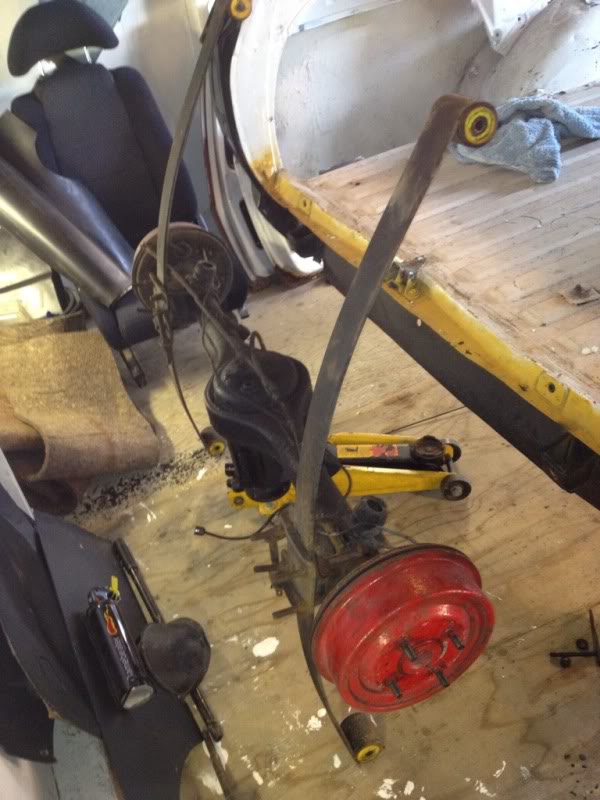
i did also remove all the fuel tank and boot lid aswel but forgot to take pics.
so with the strip down now complete i started chipping all the sound deadening off ready to replace the floor pans
while iv been doing all that iv slowly been gathering a few bits and bobs that have come up aswel...
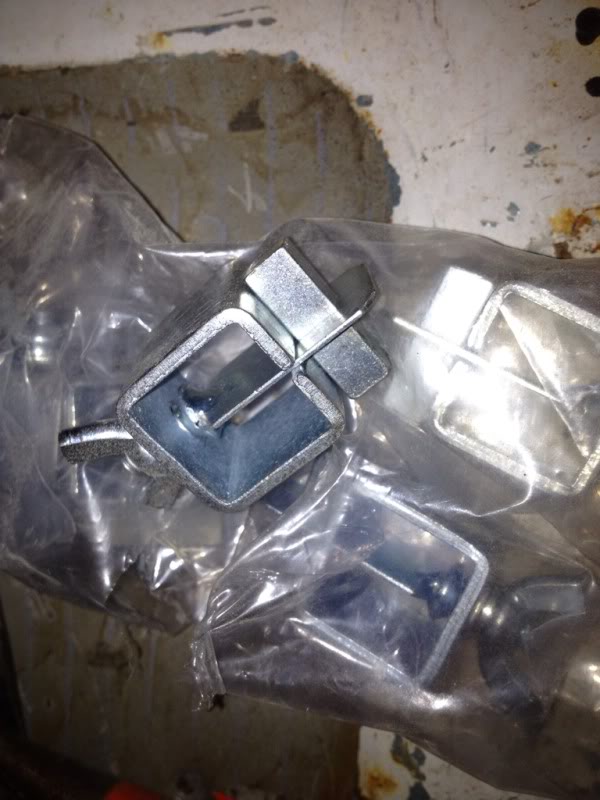
frost's body panel clamps
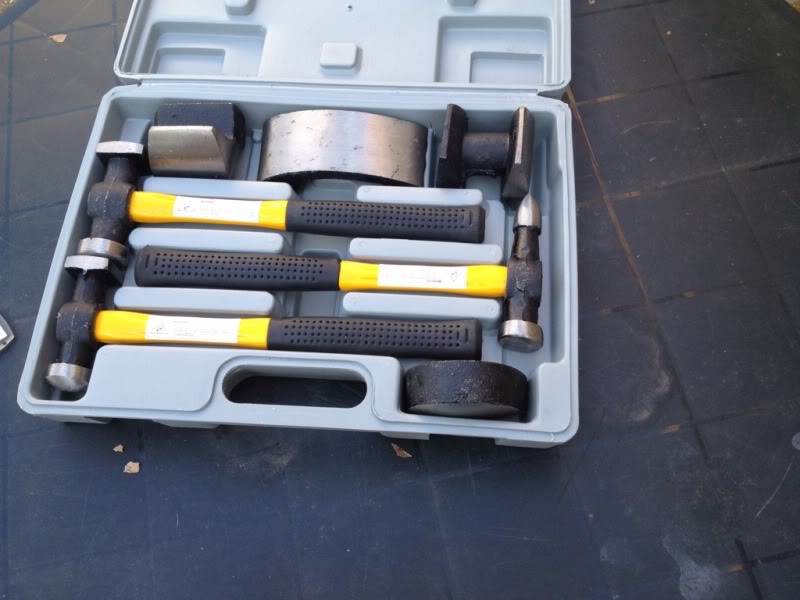
cheap crappy panel beating kit, had to spend and whole night polishing the hammers and dollys because they wer a bloody mess :banghead:
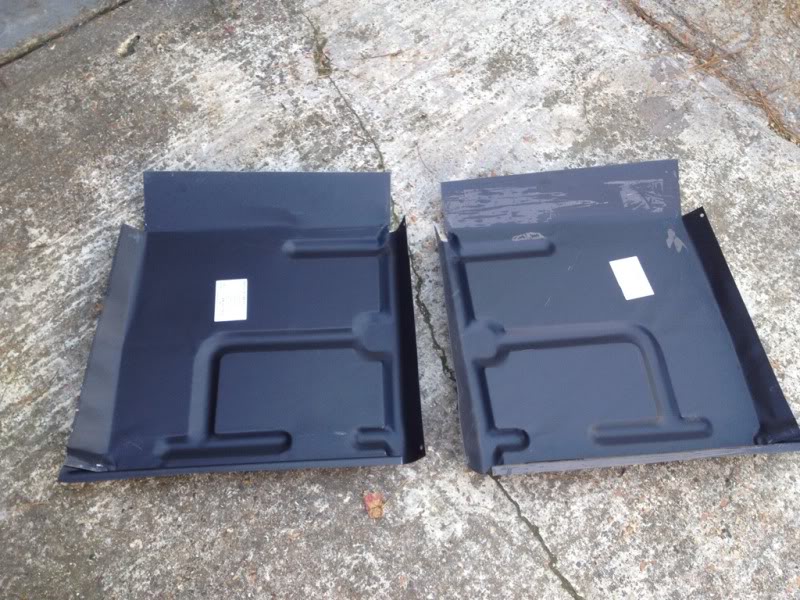
2 new front floor pan's
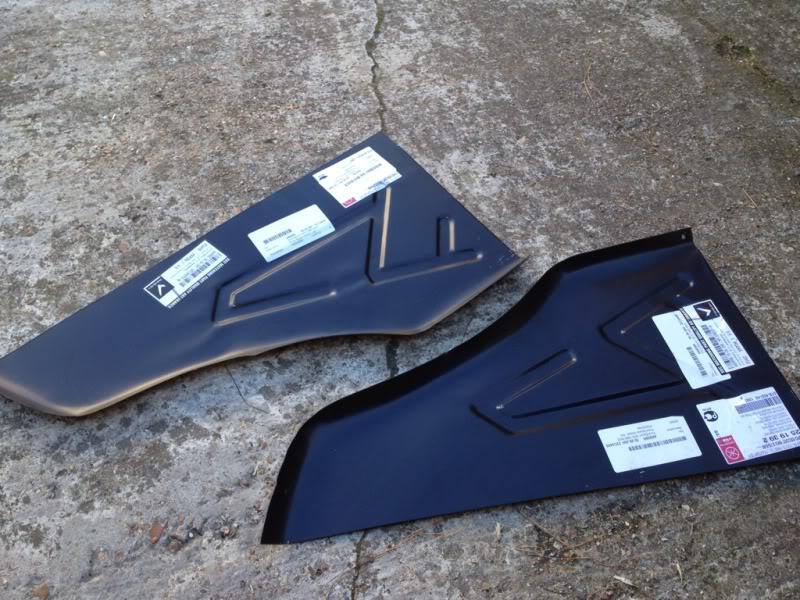
2 new splash panels
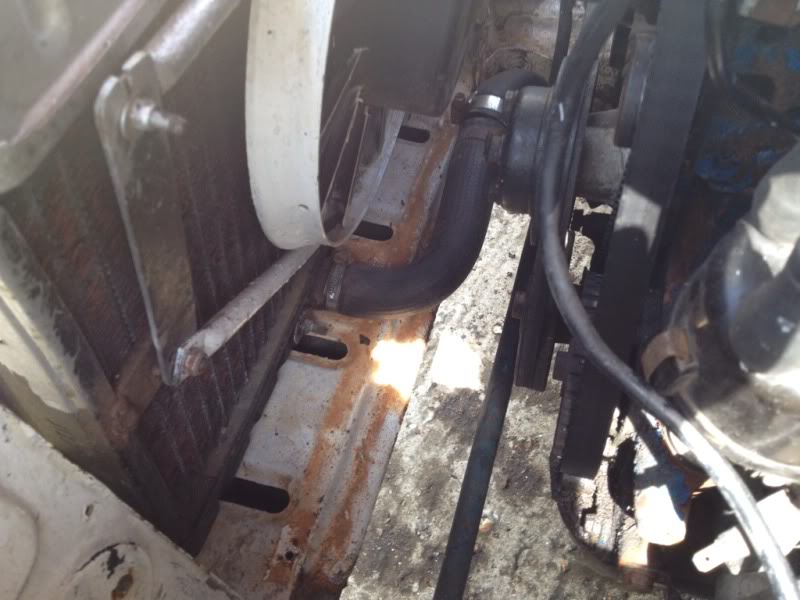
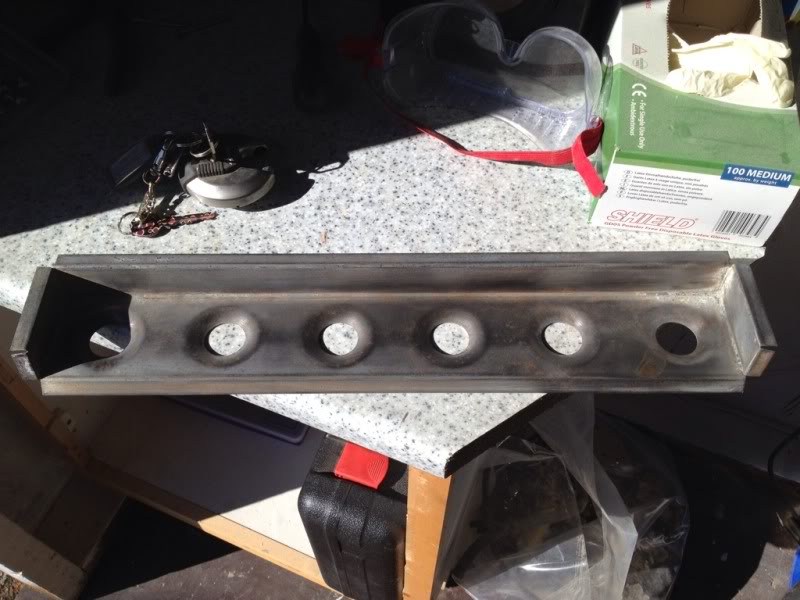
radiator cut out
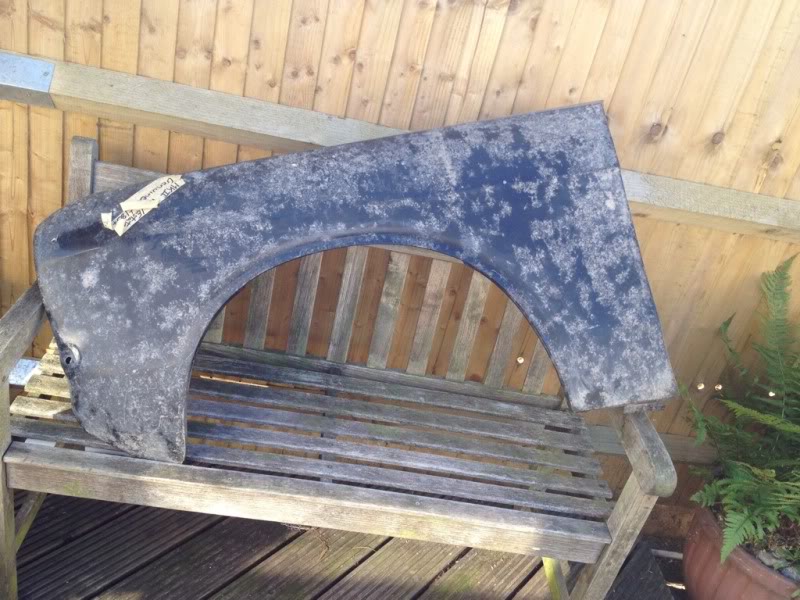
new gen ford n/s front wing
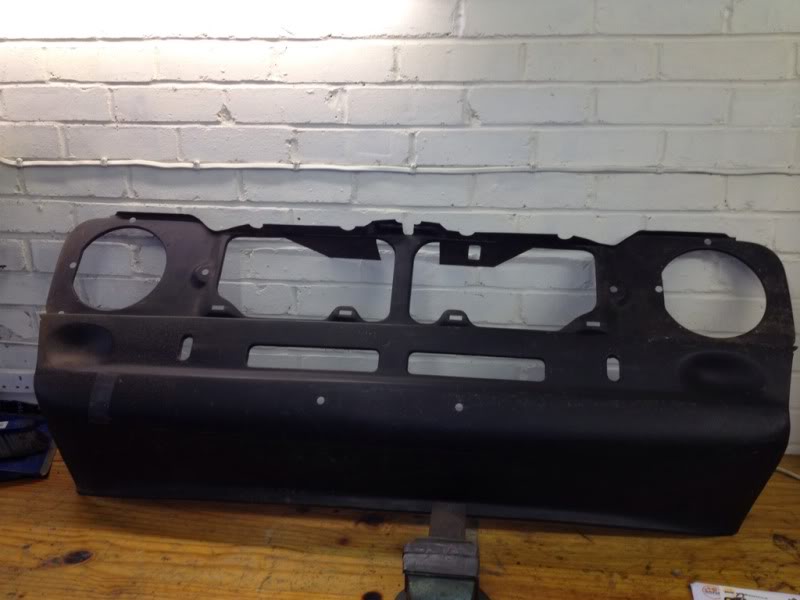
new front panel
2wd cosworth loom
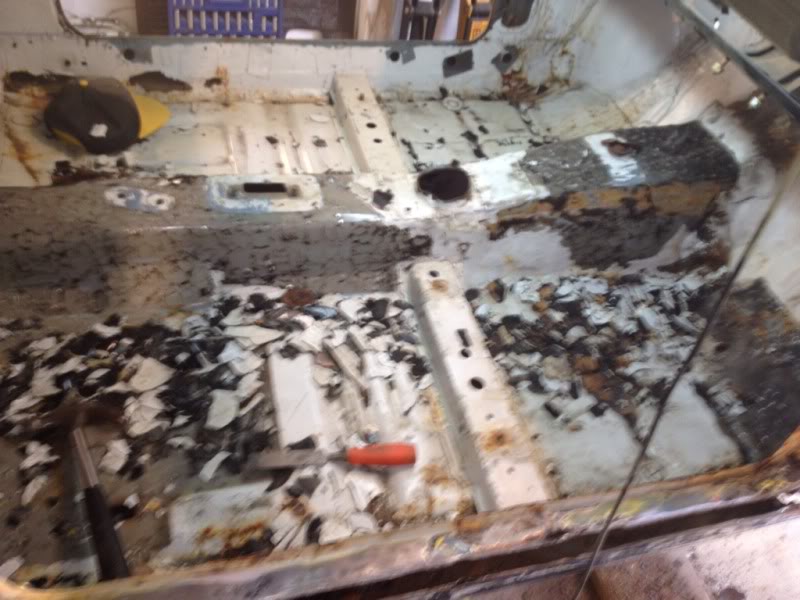
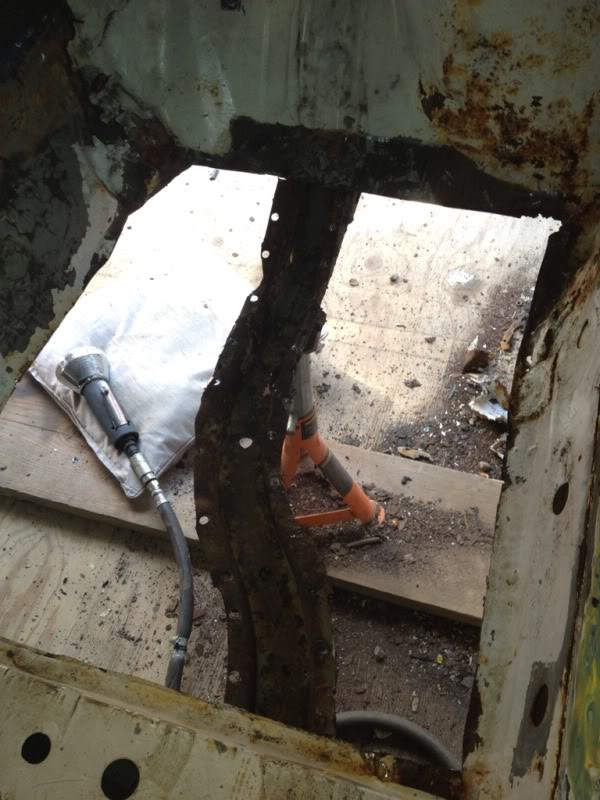
and that brings us more aless to where i am now with the rot box, i have started doing the drivers side floor pan and splash panel, but still have a little way to go befour there finished, but heres a couple of pics i have so far...
floor pan out, chassis rail isnt overly bad, mainly surface rust but does have one small hole so i'l tackle that when i get a rollover jig sorted. i did rub it all down and give it a quick coat of zinc weld through primer befour laying the new floor in place but forgot to take pics
after that it was the spash panels turn..
and gone
thats as for as i could go with that, so hopfully next time i get out there i can fit the new panel and finish off the floor
i do have a question though, so if anyone can help id really appriciate it!
first off, im going for a cosworth 2wd gearbox so do i need a larger tunnel or will it fit in the standard tunnel?
once i know that i can finish that side of my floor pans off...
but for now, that is all, fingers crossed i can get back out there tomorrow and get abit more done :thumbsup:
thanks for looking.
i managed to build it quite cheap by using all reclaimed wood and getting bits and peices that have been removed on other jobs, and we've built it in a prefab kinda style so i can hopefully sell it on once iv finished with it, but its been built to serve a purpose and not to look pretty so il proberly end up having a nice big bonfire come the end of it lol
anyway, heres some pictures of my garage build
first up, move the car out the way...
new garage floor going down (good old dad chipping in)
done...
and then the walls going up
doors on
roof on
all painted, electrics done and car now in its new home
and my coffee break corner lol
so with that all sorted out i started stripping off everything that was left on the car...
front cross member,suspension, bonnet, wind screen etc all gone
then it was time to take the doors off..
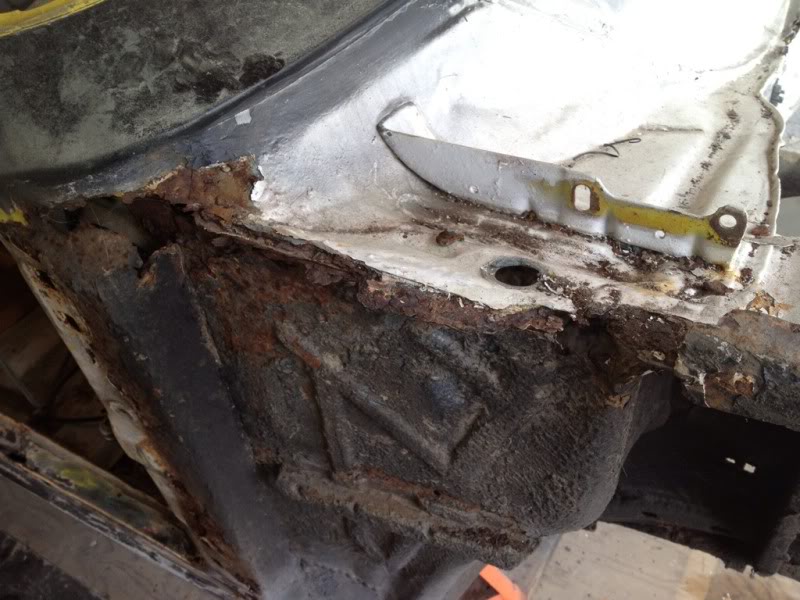
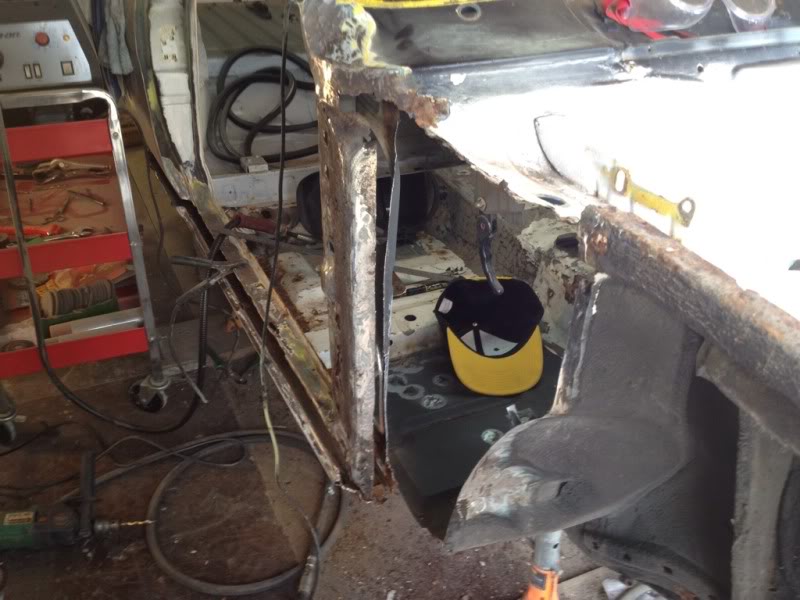
and heres whats left behind the drivers side..
while i was sanding back the a post i came across abit of sheet metal just tacked over what should be the sill so i followed it right back to find it had had new sills at some point but rather than chopping them in properly they just chucked it straight on top of what was there and bunged loads of filler over top of it
il get back to the sills at a later date and replace them properly.
so back to the strip down...
rear axle assembly off
i did also remove all the fuel tank and boot lid aswel but forgot to take pics.
so with the strip down now complete i started chipping all the sound deadening off ready to replace the floor pans
while iv been doing all that iv slowly been gathering a few bits and bobs that have come up aswel...
frost's body panel clamps
cheap crappy panel beating kit, had to spend and whole night polishing the hammers and dollys because they wer a bloody mess :banghead:
2 new front floor pan's
2 new splash panels
radiator cut out
new gen ford n/s front wing
new front panel
2wd cosworth loom
and that brings us more aless to where i am now with the rot box, i have started doing the drivers side floor pan and splash panel, but still have a little way to go befour there finished, but heres a couple of pics i have so far...
floor pan out, chassis rail isnt overly bad, mainly surface rust but does have one small hole so i'l tackle that when i get a rollover jig sorted. i did rub it all down and give it a quick coat of zinc weld through primer befour laying the new floor in place but forgot to take pics
after that it was the spash panels turn..
and gone
thats as for as i could go with that, so hopfully next time i get out there i can fit the new panel and finish off the floor
i do have a question though, so if anyone can help id really appriciate it!
first off, im going for a cosworth 2wd gearbox so do i need a larger tunnel or will it fit in the standard tunnel?
once i know that i can finish that side of my floor pans off...
but for now, that is all, fingers crossed i can get back out there tomorrow and get abit more done :thumbsup:
thanks for looking.
13-09-2012, 06:01 PM
#112
10K+ Poster!!
Nice one! Would love a little garage like that! It'll be back on the road in no time
13-09-2012, 06:14 PM
#113
Lucifer II - 666
Wicked update mate, loving that!
Spits are cheap enough on ebay, you can buy then and you just need to weld them together for about �100 iirc, I'll try and find a link to one.
Spits are cheap enough on ebay, you can buy then and you just need to weld them together for about �100 iirc, I'll try and find a link to one.
13-09-2012, 06:21 PM
#114
I've found that life I needed.. It's HERE!!
Thread Starter
iTrader: (8)
Join Date: Dec 2006
Location: eastbourne
Posts: 1,350
Likes: 0
Received 0 Likes
on
0 Posts
You should build yaself one, mine only cost around �250 but I was able to get screws, electric bits etc through work which helped to keep costs down, so nice to be able to just go out when I please and work on it
13-09-2012, 06:24 PM
#115
I've found that life I needed.. It's HERE!!
Thread Starter
iTrader: (8)
Join Date: Dec 2006
Location: eastbourne
Posts: 1,350
Likes: 0
Received 0 Likes
on
0 Posts
You got anywhere with lucifer 2 yet? Dont really come online much now..
13-09-2012, 06:29 PM
#116
Lucifer II - 666
Not to much progress this year pal as I got carried away with my other project as well
https://passionford.com/forum/restor...nd-rex-11.html
https://passionford.com/forum/restor...nd-rex-11.html
15-09-2012, 09:45 AM
#118
I've found that life I needed.. It's HERE!!
Thread Starter
iTrader: (8)
Join Date: Dec 2006
Location: eastbourne
Posts: 1,350
Likes: 0
Received 0 Likes
on
0 Posts
Not to much progress this year pal as I got carried away with my other project as well
https://passionford.com/forum/restor...nd-rex-11.html
https://passionford.com/forum/restor...nd-rex-11.html
i had adjustable gaz shocks on the back of mine and they wer great! Pretty sure there the same a Renault 5gt rear shocks but don't quote me on that... LolIs the van actually turbo'd already or just standard rs2k powered?
