My custom sound system install for those interested! - Finished!
#1
Thread Starter
15K+ Super Poster!!
iTrader: (2)
Joined: Aug 2004
Posts: 18,732
Likes: 449
From: Wiltshire
Thought I'd stick a thread up on here as there's a few into ICE installs so thought I'd show my progress.

This was something I built up a few months back, was made from 19mm MDF and weighed 27kgs, so was rather heavy. No point having a fast-ish car just to weight it down IMO so it all had to come out and was sold. Using one better quality sub this time instead of 2 cheaper ones to help with the weight.
As I go away quite a bit I also got fed up with not having a boot any more and keeping things on the back seat instead which got quite annoying, so the new system had to free up as much boot space as possible.
I've decided to make the new box from fibreglass to keep the weight down and to mould it to the side of the boot to make as much use of the space I have.
Firstly all this had to come out!

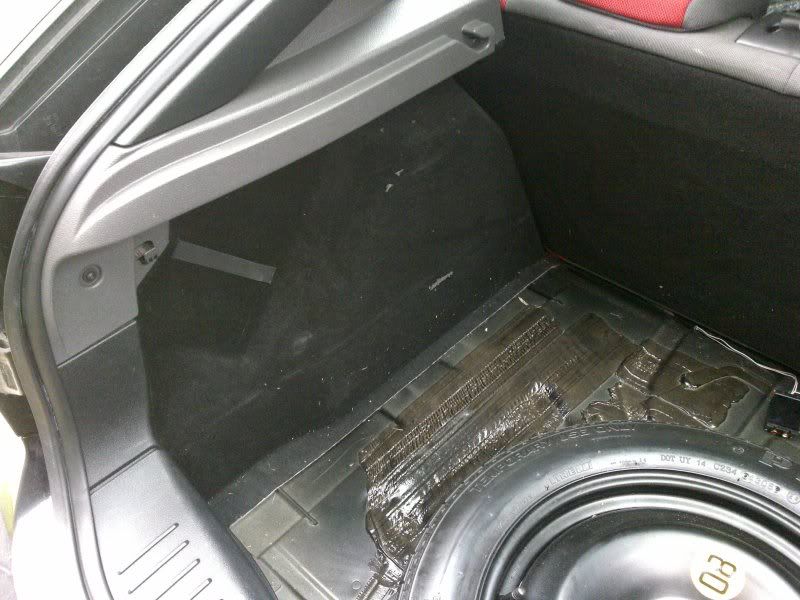
Gave everything a good hoover and started masking up ready for the fibreglass. I have used a layer of speed tape (otherwise known as 600mph tape). It's used for temporary repairs on aircraft, so should do a good job at stopping resin from leaking through!


Next I've put another layer of masking tape down and am smoothing it all over to make a nice base to start with the fibreglass.

That's where I am at the moment, going to start with the fibreglass tomorrow so shall update when I've got more to show!

This was something I built up a few months back, was made from 19mm MDF and weighed 27kgs, so was rather heavy. No point having a fast-ish car just to weight it down IMO so it all had to come out and was sold. Using one better quality sub this time instead of 2 cheaper ones to help with the weight.
As I go away quite a bit I also got fed up with not having a boot any more and keeping things on the back seat instead which got quite annoying, so the new system had to free up as much boot space as possible.
I've decided to make the new box from fibreglass to keep the weight down and to mould it to the side of the boot to make as much use of the space I have.
Firstly all this had to come out!


Gave everything a good hoover and started masking up ready for the fibreglass. I have used a layer of speed tape (otherwise known as 600mph tape). It's used for temporary repairs on aircraft, so should do a good job at stopping resin from leaking through!


Next I've put another layer of masking tape down and am smoothing it all over to make a nice base to start with the fibreglass.

That's where I am at the moment, going to start with the fibreglass tomorrow so shall update when I've got more to show!
Last edited by RichieST; 01-02-2011 at 04:45 PM.
#6
Thread Starter
15K+ Super Poster!!
iTrader: (2)
Joined: Aug 2004
Posts: 18,732
Likes: 449
From: Wiltshire
Me too mate, that's why I got fooked off with the 2 12s, it was too much. Less is more IMO 
Should get the rest of the fibreglass down tomorrow before pulling it out, then got to build up about 7 layers for a bit of extra strength!
Should get the rest of the fibreglass down tomorrow before pulling it out, then got to build up about 7 layers for a bit of extra strength!
#7
Glennvestite
iTrader: (1)
Joined: Jul 2006
Posts: 62,764
Likes: 1,044
From: Darlington county durham
I had a big sub box with 2 subs in which was in the back of mine.It sounded mint but the box was really heavy.A lad i worked with had a fli sub/amp bass box which was really light.I bought it off him for 30 quid and it sounds just as good as the other box.
Trending Topics
#8
Thread Starter
15K+ Super Poster!!
iTrader: (2)
Joined: Aug 2004
Posts: 18,732
Likes: 449
From: Wiltshire
Got a bit more done today, laid down another layer of fibreglass, waited for it to go off then pulled it out the car. Almost pulled my arms off, was bloody in there 

Also started building the top out to get the required volume, need to do the side tomorrow.


Getting there slowly!


Also started building the top out to get the required volume, need to do the side tomorrow.


Getting there slowly!
#9
Awesome build this, love it when someone actually tries to do something practical and not just fill a boot with neons and amps...
Was thinking of doing the same thing only just bin the spacesaver and make a box in the boot floor and use a shallower sub.
Waiting to see how yours comes out, may be the better way... keep up them updates!
Was thinking of doing the same thing only just bin the spacesaver and make a box in the boot floor and use a shallower sub.
Waiting to see how yours comes out, may be the better way... keep up them updates!
#10
Thread Starter
15K+ Super Poster!!
iTrader: (2)
Joined: Aug 2004
Posts: 18,732
Likes: 449
From: Wiltshire
Awesome build this, love it when someone actually tries to do something practical and not just fill a boot with neons and amps...
Was thinking of doing the same thing only just bin the spacesaver and make a box in the boot floor and use a shallower sub.
Waiting to see how yours comes out, may be the better way... keep up them updates!
Was thinking of doing the same thing only just bin the spacesaver and make a box in the boot floor and use a shallower sub.
Waiting to see how yours comes out, may be the better way... keep up them updates!
#12
Thread Starter
15K+ Super Poster!!
iTrader: (2)
Joined: Aug 2004
Posts: 18,732
Likes: 449
From: Wiltshire
Got some more done today, closed off the last remaining gap.

Quick test fit!

I then filled it with water to check for leaks and see what the rough volume of it was A few small leaks but managed to hold 8 stone of water with no bother. No pics of this I was a bit wet!
Then I trimmed it down to make it a bit more manageble. Am out of fibreglass now so have ordered some more! Next step is to add a few more layers to give it some more strength.

Rich

Quick test fit!

I then filled it with water to check for leaks and see what the rough volume of it was A few small leaks but managed to hold 8 stone of water with no bother. No pics of this I was a bit wet!
Then I trimmed it down to make it a bit more manageble. Am out of fibreglass now so have ordered some more! Next step is to add a few more layers to give it some more strength.

Rich
#18
looking good, look forward to seeing the finished install, i gather you are making a matching amp rack on the other side? what thickness baffle board are you going to use to mount the sub? 18mm mdf?
#21
Thread Starter
15K+ Super Poster!!
iTrader: (2)
Joined: Aug 2004
Posts: 18,732
Likes: 449
From: Wiltshire
Cheers guys, yes that's right, 18mm mdf, tigersealed to the fibreglass box then add more fibreglass to the back to give it a bit more strength. Really not decided what to do with the amp yet, don't know weather to flush it into the side of the box, make something on the other side or try and hide it somewhere!
#22
Thread Starter
15K+ Super Poster!!
iTrader: (2)
Joined: Aug 2004
Posts: 18,732
Likes: 449
From: Wiltshire
Got the fibreglassing finished today, then filled with water to determine correct volume before marking up and cutting it down to it's final size.


Need to make the MDF baffle tomorrow then it's nearly there!


Need to make the MDF baffle tomorrow then it's nearly there!
#27
Thread Starter
15K+ Super Poster!!
iTrader: (2)
Joined: Aug 2004
Posts: 18,732
Likes: 449
From: Wiltshire
Done a bit more today, cut the baffle out, was a bugger to get it to the right shape as I couldn't mark out the inside of the box, however I cut it close enough. Took a good hammering to get it to fit into the box, so I gave it a quick trial fit into the car. (excuse my mate's graffiti  )
)
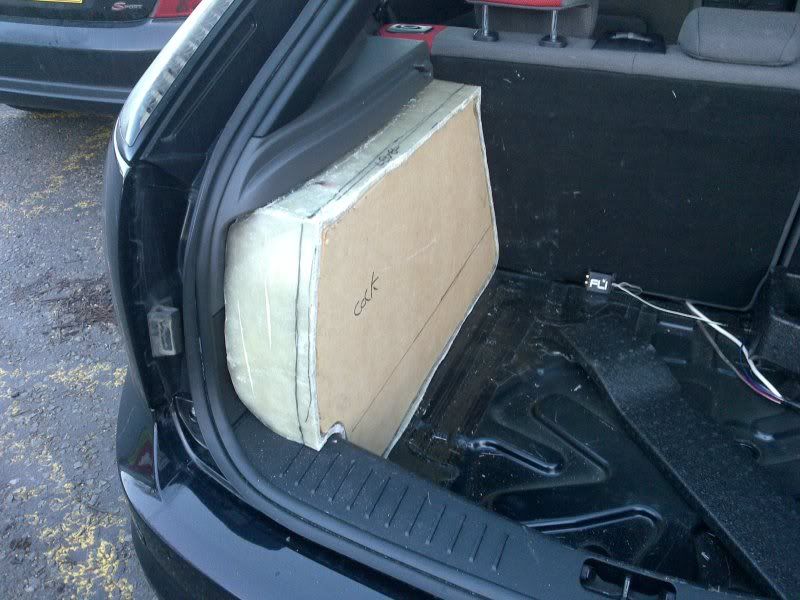
I cut the hole for the sub and made a backing ring so the sub would fit flush against the surface of the MDF. which wwas then siliconed and screwed to the baffle. I filled round the gaps with fibreglass filler, rubbed down the uneven edges of the box so it sat flush with the baffle, then added more fibreglass matting to the back of the baffle to stick it hard to the box.


Just a bit more tidying up then carpet tomorrow, then I need to work out what I'm going to do with the amp!
 )
)
I cut the hole for the sub and made a backing ring so the sub would fit flush against the surface of the MDF. which wwas then siliconed and screwed to the baffle. I filled round the gaps with fibreglass filler, rubbed down the uneven edges of the box so it sat flush with the baffle, then added more fibreglass matting to the back of the baffle to stick it hard to the box.


Just a bit more tidying up then carpet tomorrow, then I need to work out what I'm going to do with the amp!
Last edited by RichieST; 25-01-2011 at 06:28 PM.
#33
Thread Starter
15K+ Super Poster!!
iTrader: (2)
Joined: Aug 2004
Posts: 18,732
Likes: 449
From: Wiltshire
Got a bit more done today, carpeted the box, what a booger of a job that was! Modified the polystyrene surround to fit, masking tape is only temporary while the tiger seal dries!
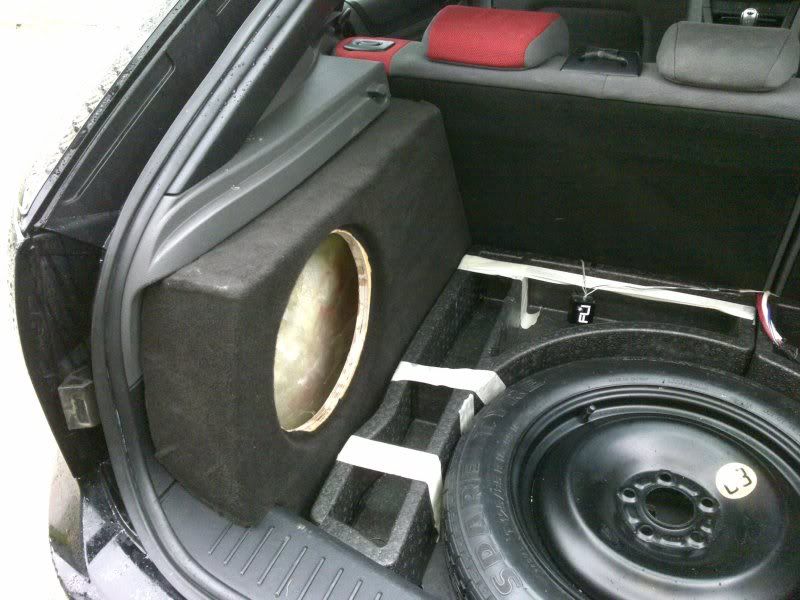
Made another piece on the other side to house the amp, not hugely sure about it so will stick some carpet on it and see what it look like once it's all finished.

Just waiting on some more carpet and the cabling so when that's arrived it should be finished!

Made another piece on the other side to house the amp, not hugely sure about it so will stick some carpet on it and see what it look like once it's all finished.

Just waiting on some more carpet and the cabling so when that's arrived it should be finished!
#37
Nice progress Rich!
Reminds me of an install I did ages ago


There does seem to be enough volume there, however, Rich, I would HIGHLY recommend putting around 50-75% wadding inside the box...it will improve the sound greatly!
If you need any help etc, please just drop me a PM and ill get back to you as soon as I can
Reminds me of an install I did ages ago


There does seem to be enough volume there, however, Rich, I would HIGHLY recommend putting around 50-75% wadding inside the box...it will improve the sound greatly!
If you need any help etc, please just drop me a PM and ill get back to you as soon as I can
#38
Awesome build this, love it when someone actually tries to do something practical and not just fill a boot with neons and amps...
Was thinking of doing the same thing only just bin the spacesaver and make a box in the boot floor and use a shallower sub.
Waiting to see how yours comes out, may be the better way... keep up them updates!
Was thinking of doing the same thing only just bin the spacesaver and make a box in the boot floor and use a shallower sub.
Waiting to see how yours comes out, may be the better way... keep up them updates!


However, instead of using the spare wheel, as you said ditch the space save and use all remaining space. Slim subs these days are pretty good! I know Rockfords latest creation has wowed LOTS of people! Diamond shallow mounts are some of the most advanced to!
#39
You could follow the lines of this
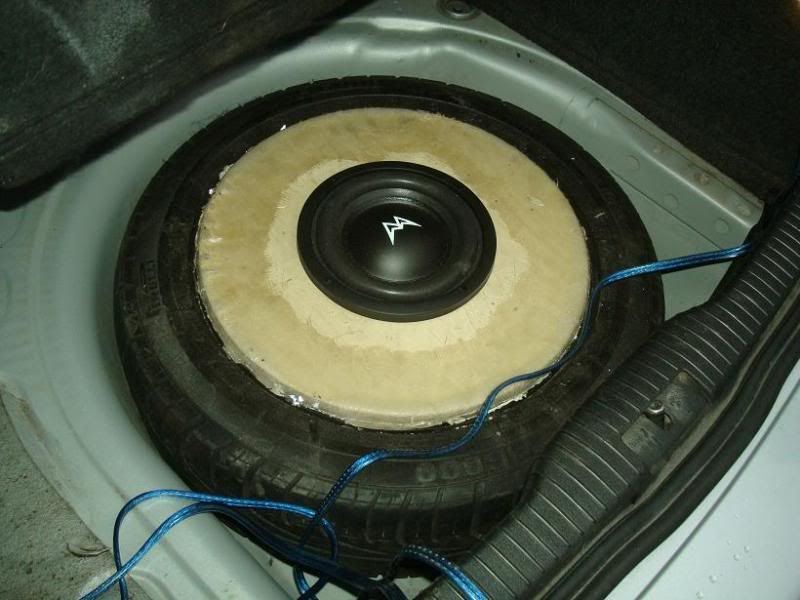
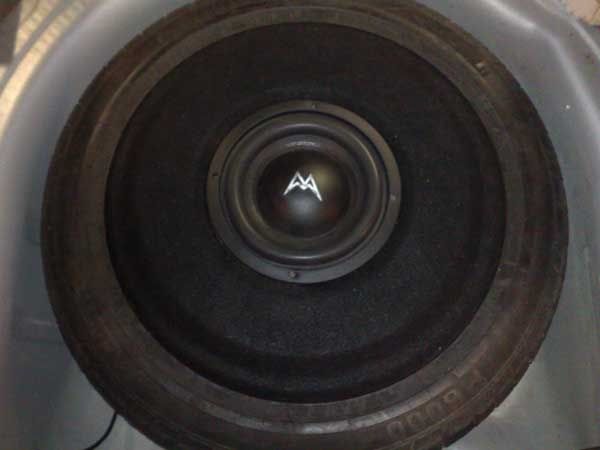
However, instead of using the spare wheel, as you said ditch the space save and use all remaining space. Slim subs these days are pretty good! I know Rockfords latest creation has wowed LOTS of people! Diamond shallow mounts are some of the most advanced to!


However, instead of using the spare wheel, as you said ditch the space save and use all remaining space. Slim subs these days are pretty good! I know Rockfords latest creation has wowed LOTS of people! Diamond shallow mounts are some of the most advanced to!
Sorry Rich for jacking the thread...Hope to see your build finished soon. Top work!

#40
Thread Starter
15K+ Super Poster!!
iTrader: (2)
Joined: Aug 2004
Posts: 18,732
Likes: 449
From: Wiltshire
Nice progress Rich!
There does seem to be enough volume there, however, Rich, I would HIGHLY recommend putting around 50-75% wadding inside the box...it will improve the sound greatly!
If you need any help etc, please just drop me a PM and ill get back to you as soon as I can
There does seem to be enough volume there, however, Rich, I would HIGHLY recommend putting around 50-75% wadding inside the box...it will improve the sound greatly!
If you need any help etc, please just drop me a PM and ill get back to you as soon as I can


