
teamSPB Project D*FN U - 4 SMD 18's,SPL D 25kwrms,16v,Air ride, PC, Carsson rims!
 29-03-2011 | 09:04 PM
#202

Thread Starter
PassionFord Post Troll
Joined: May 2004
Posts: 3,386
Likes: 64
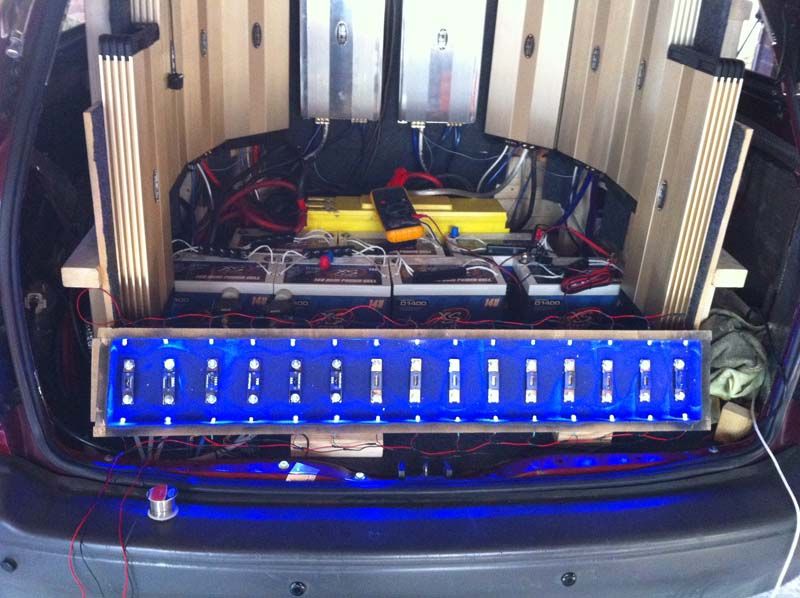
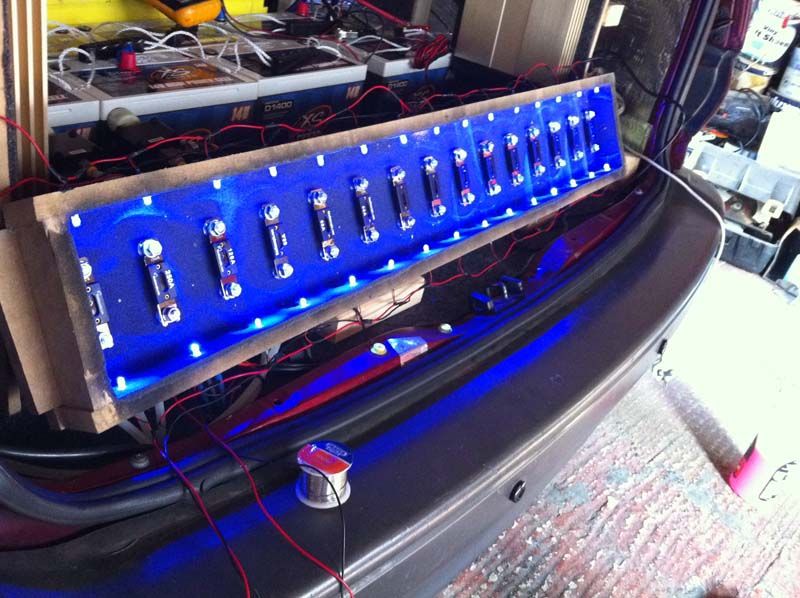
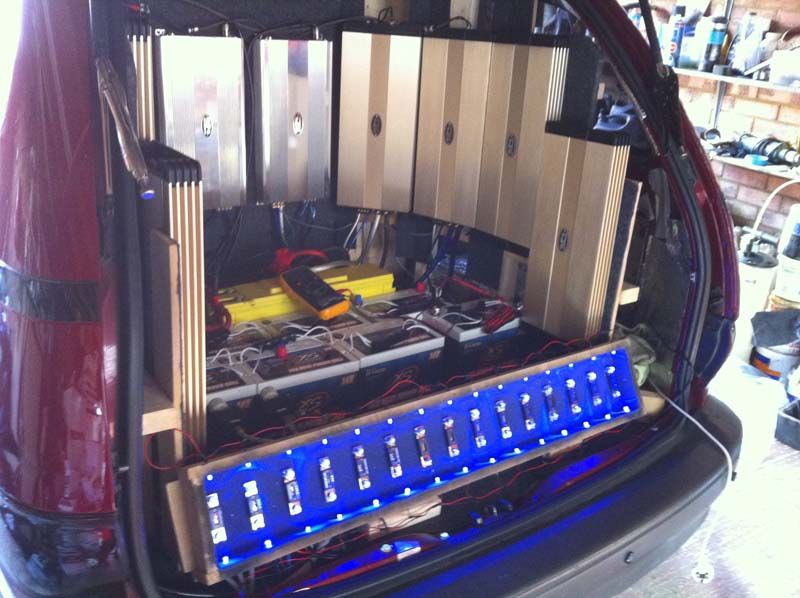
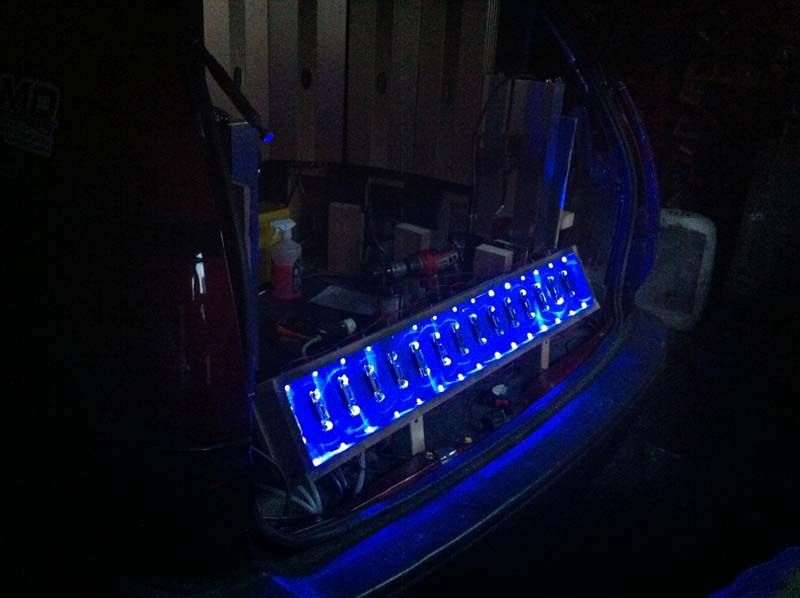
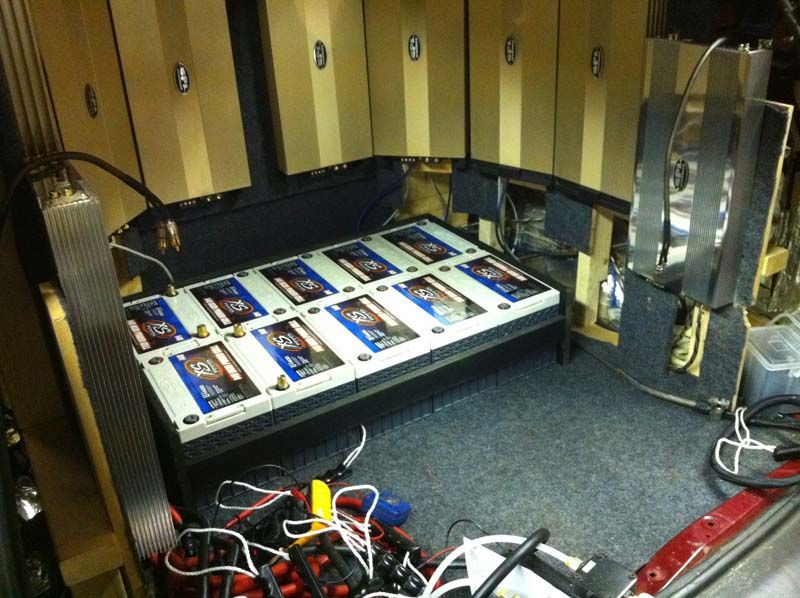
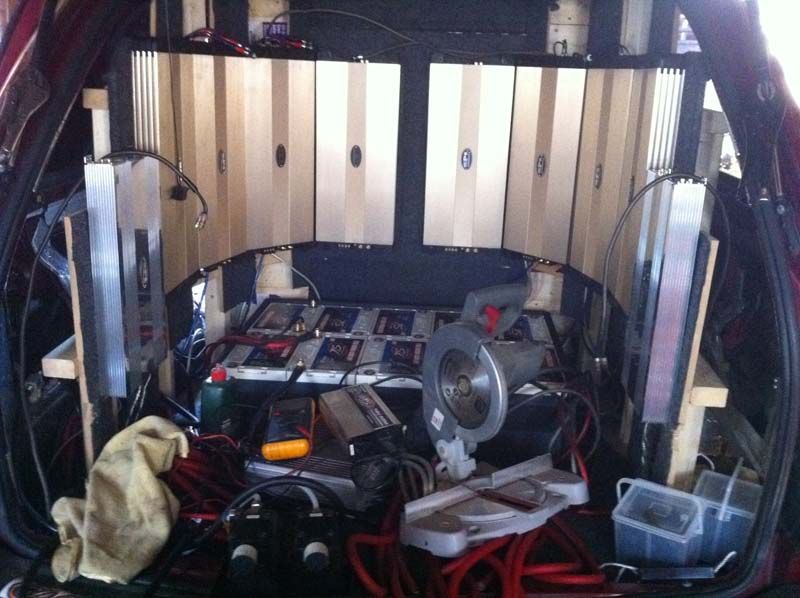
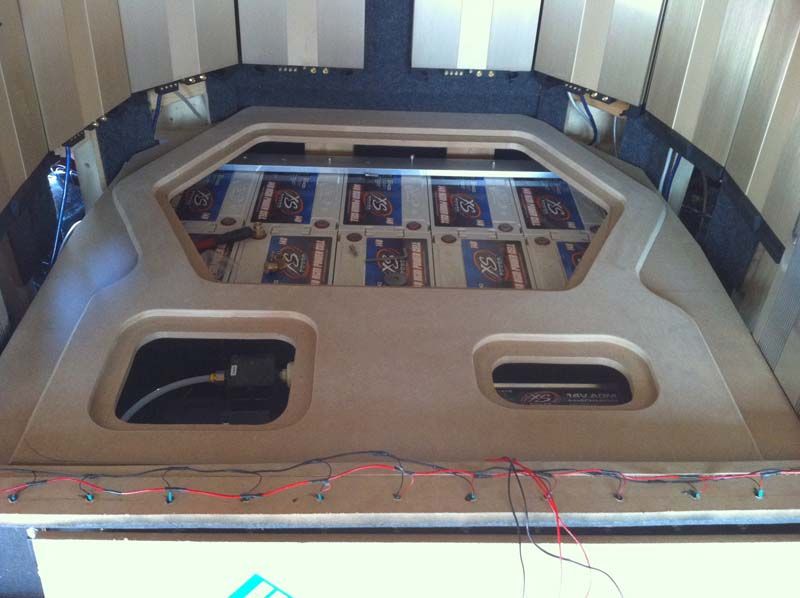
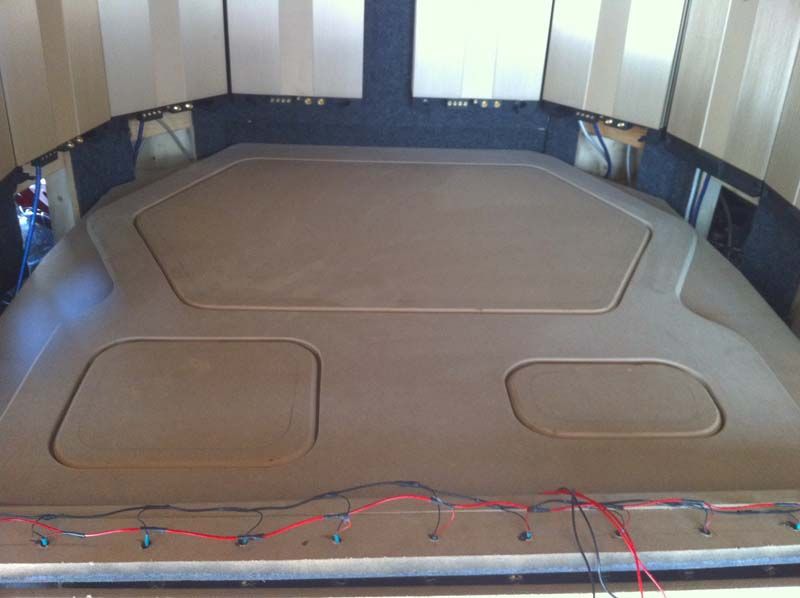
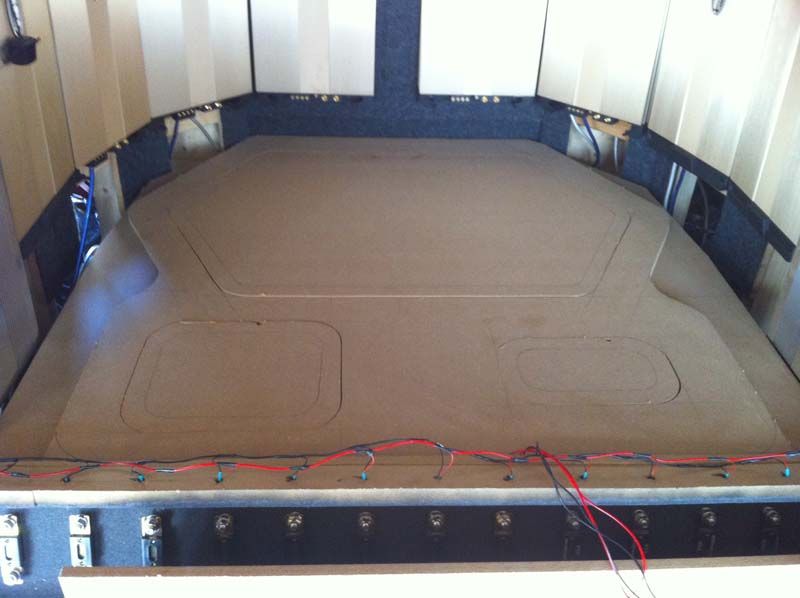
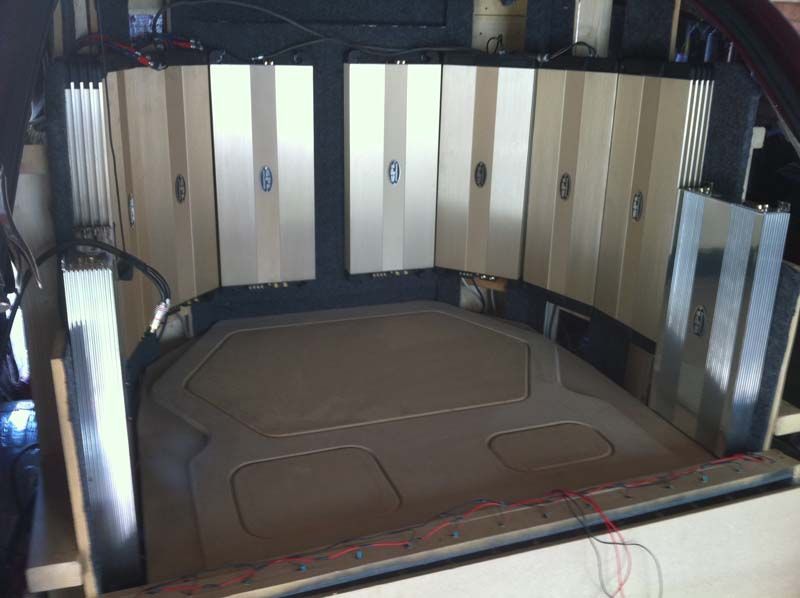
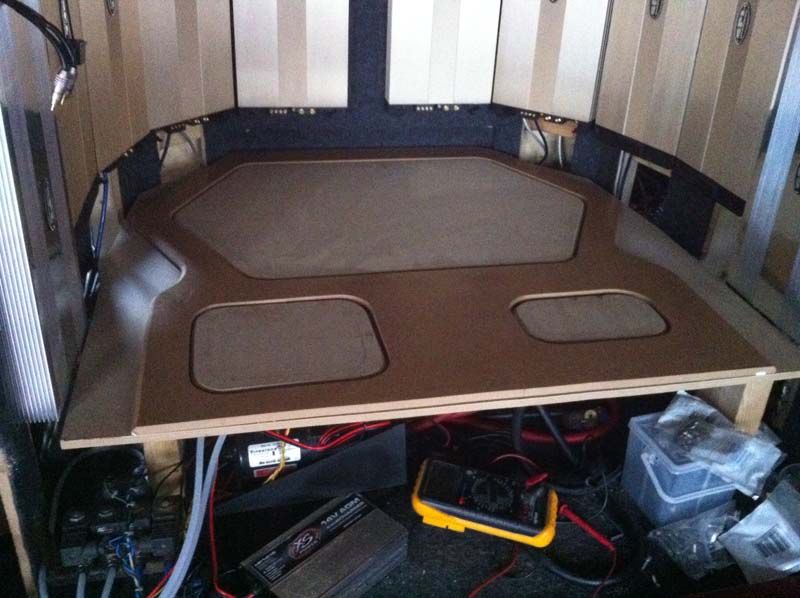
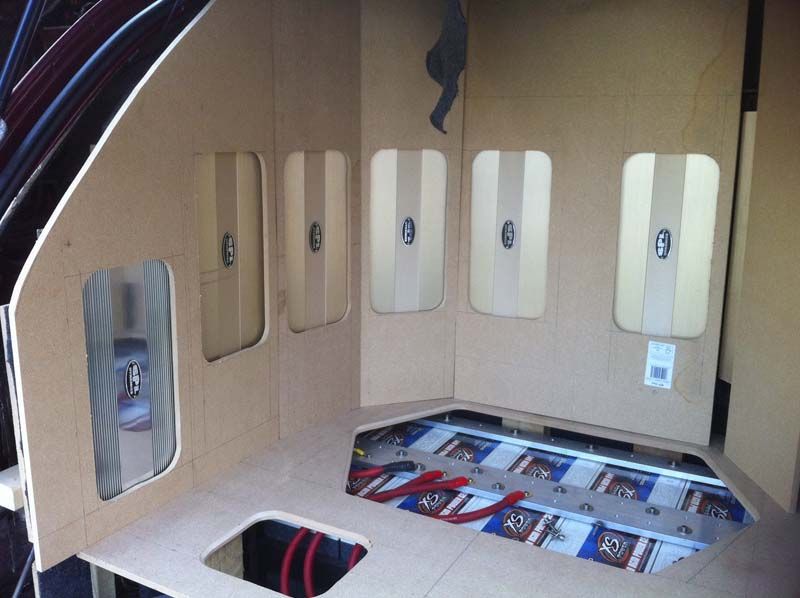
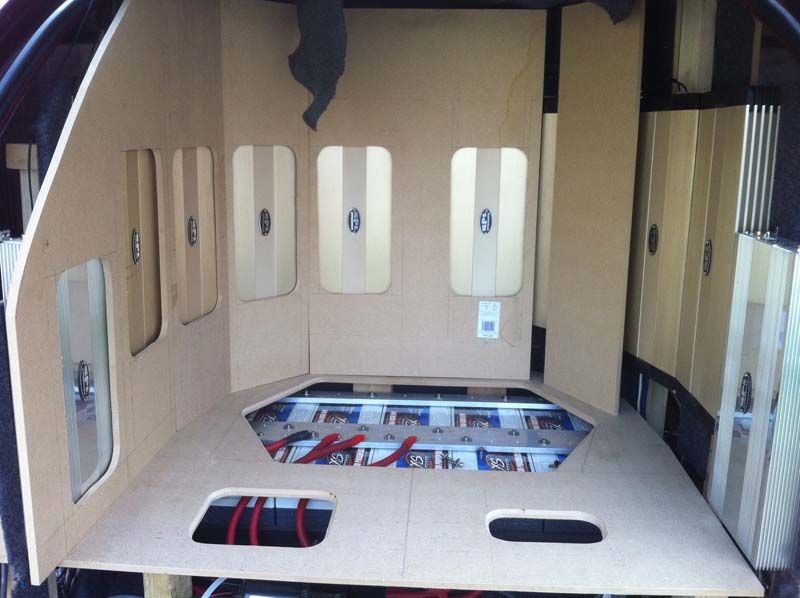
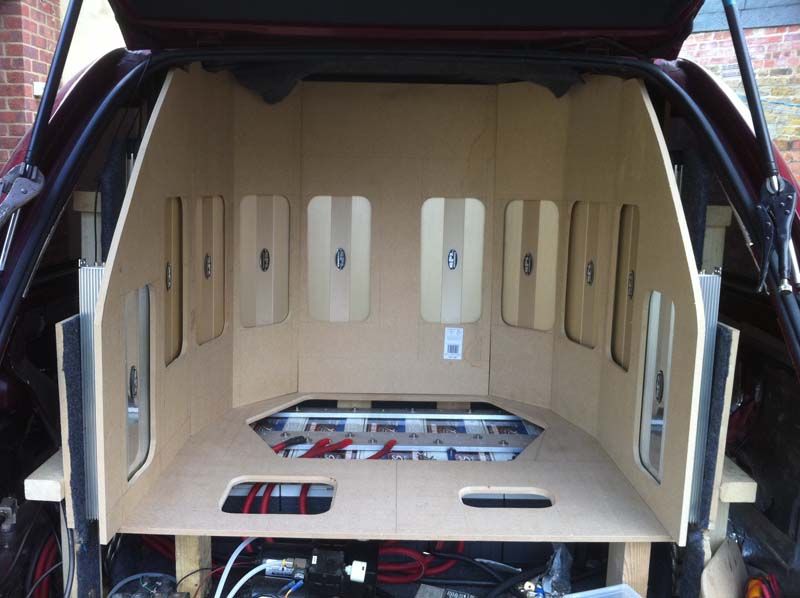
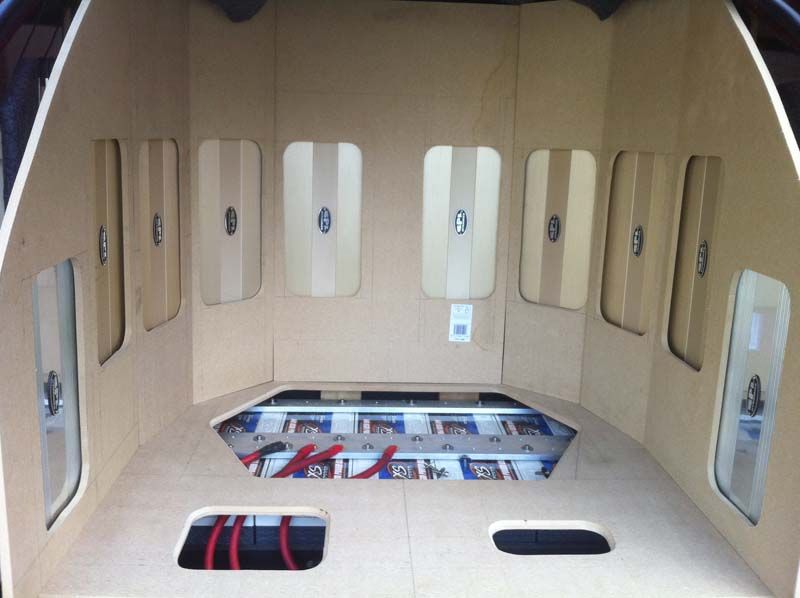
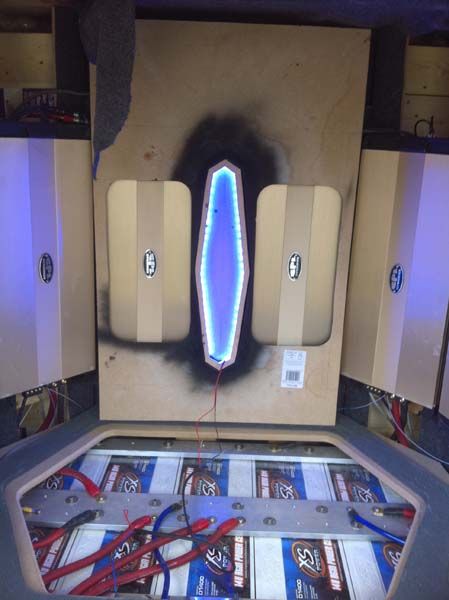
Right, have decided on layout 2...2 rows, 5 across...it gives me some extra room as well which always helps!
Some pics of the fuse holder lit up
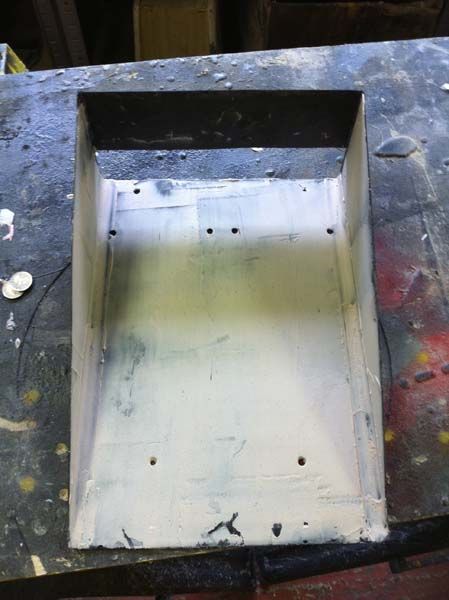
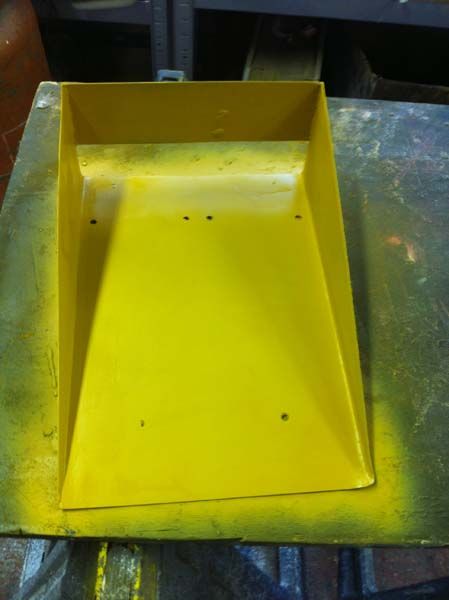
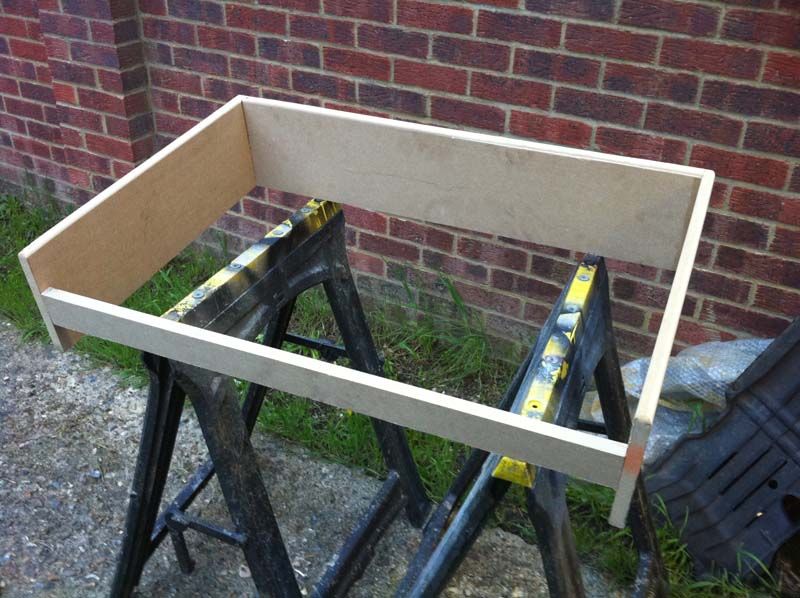
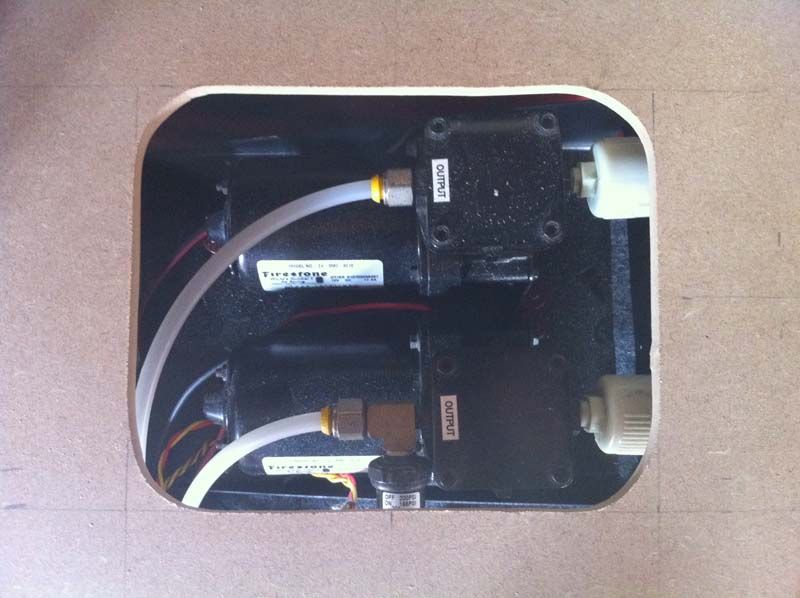
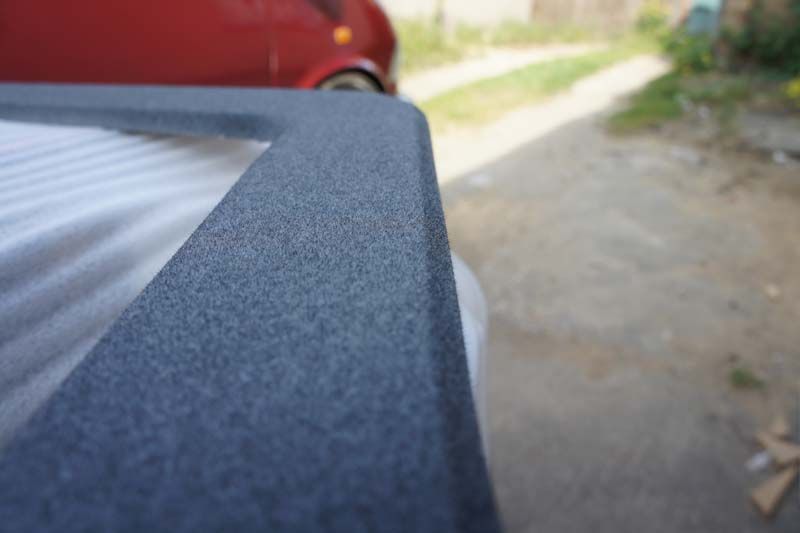
Also started cleaning up the air ride setup - as I want the compressors on show, I decided to clean them up and get the carry tray sprayed up.
Unfortunately I didnt get any pics of the tray before I grinded all the rust off...but here it is with filler to smooth it out a bit
Filler primer
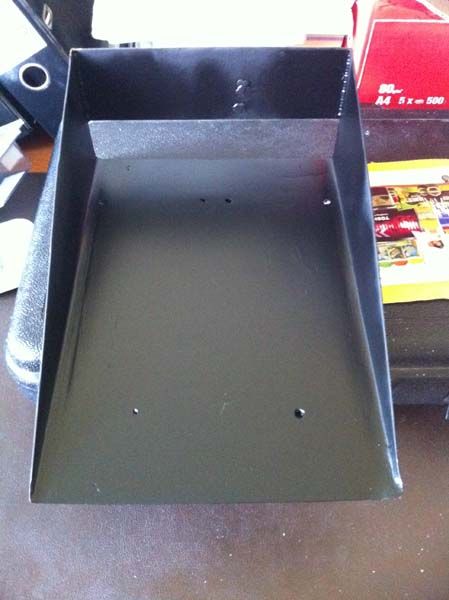
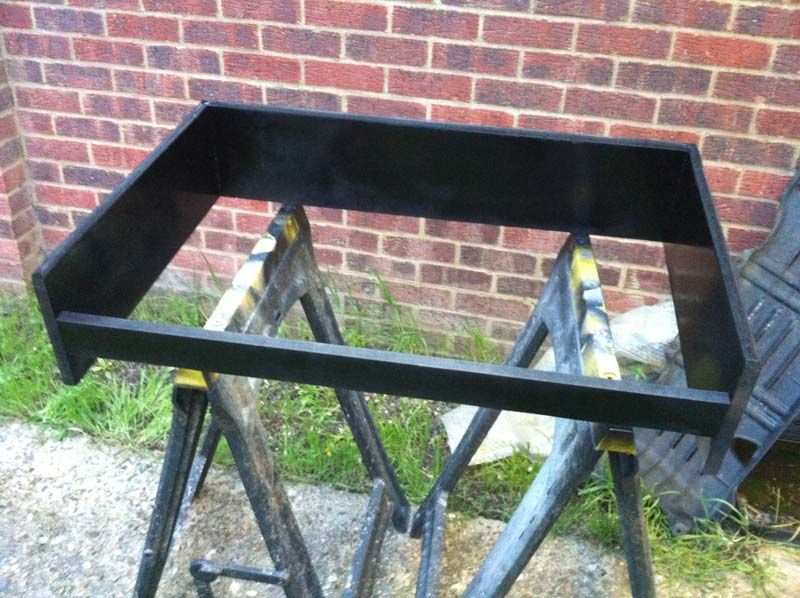
Painted black
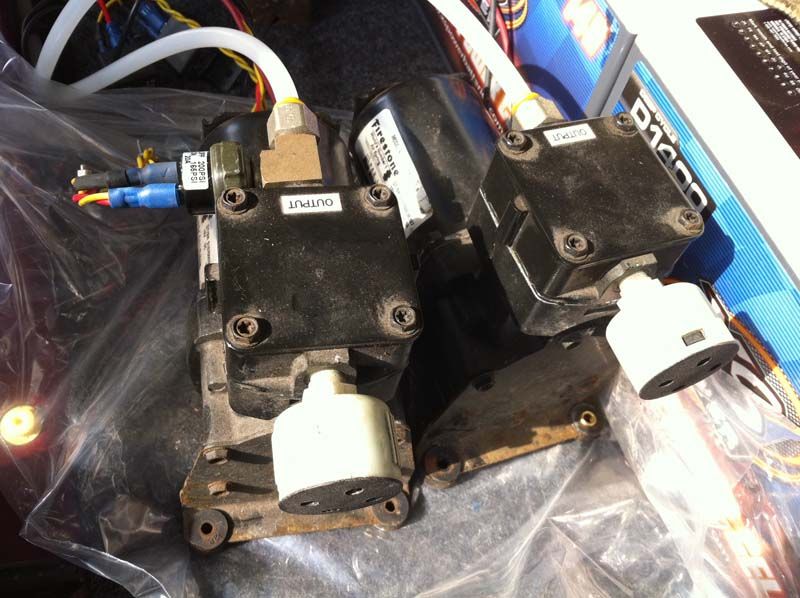
Compressors dirty
All cleaned up

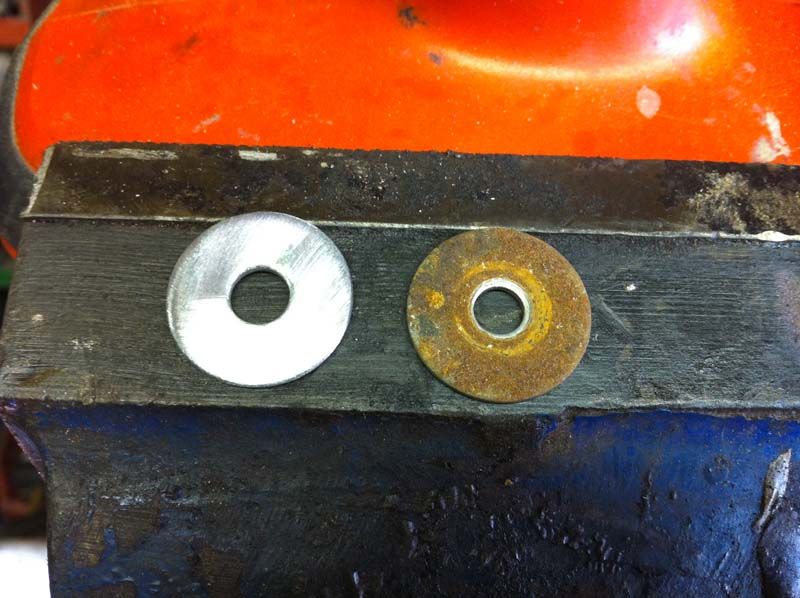
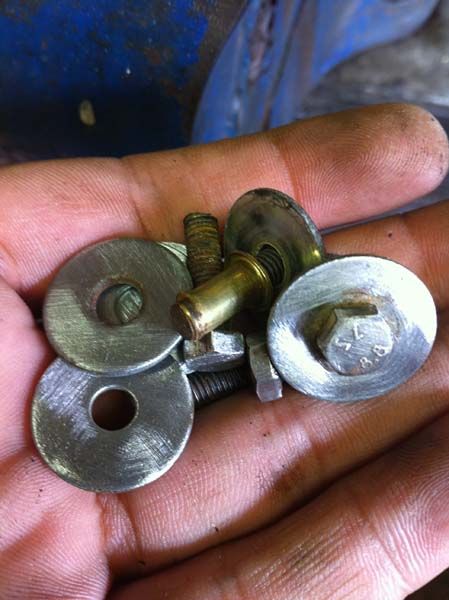
Cleaning up the rusty bolts and washers

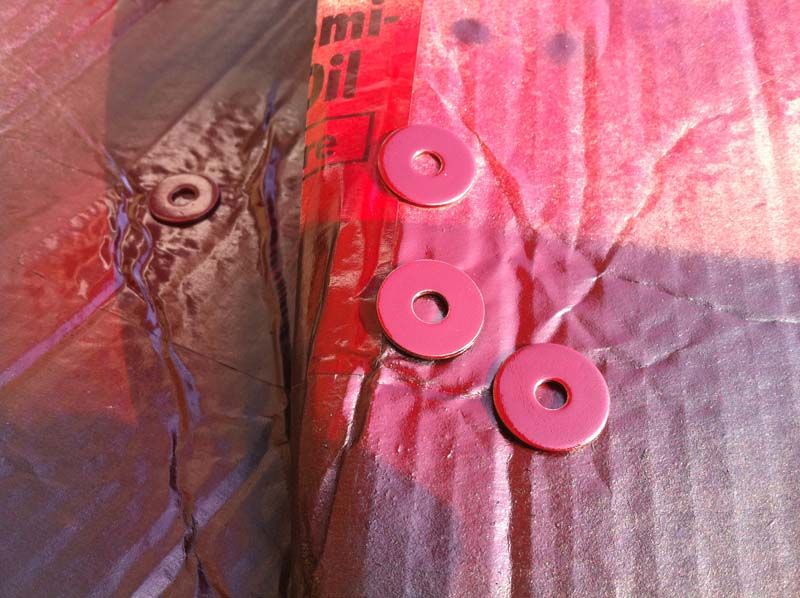
Sprayed VW Mica Red for a bit of 'detail'
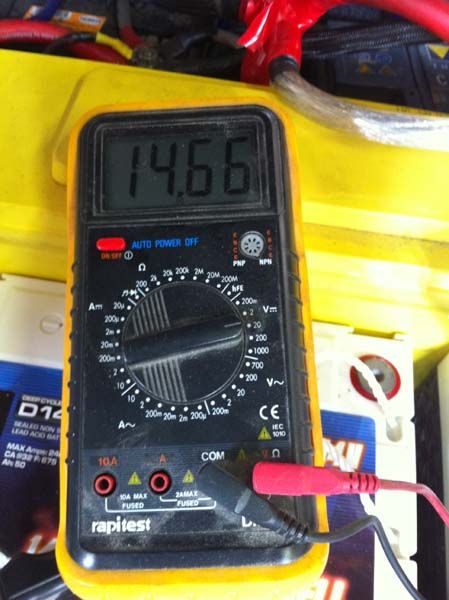
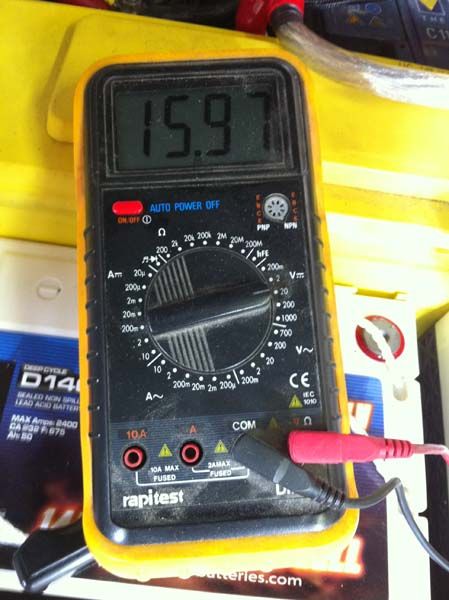
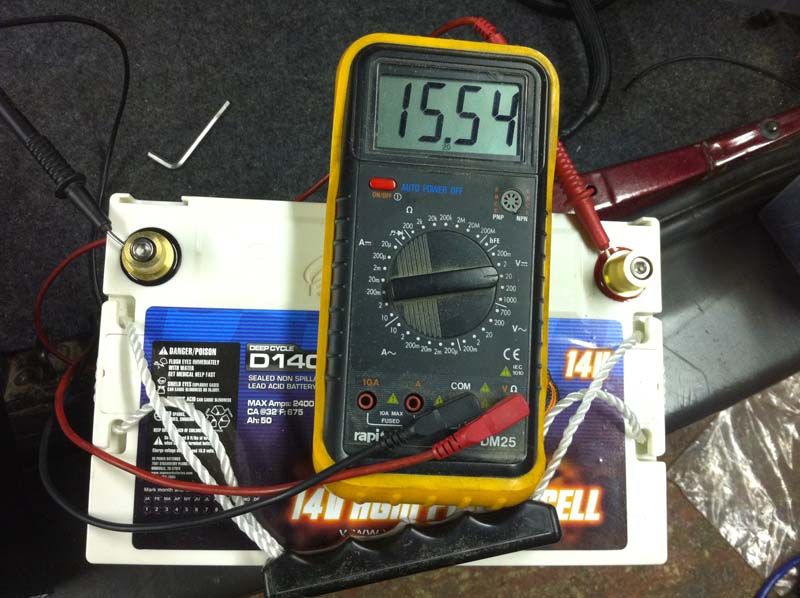
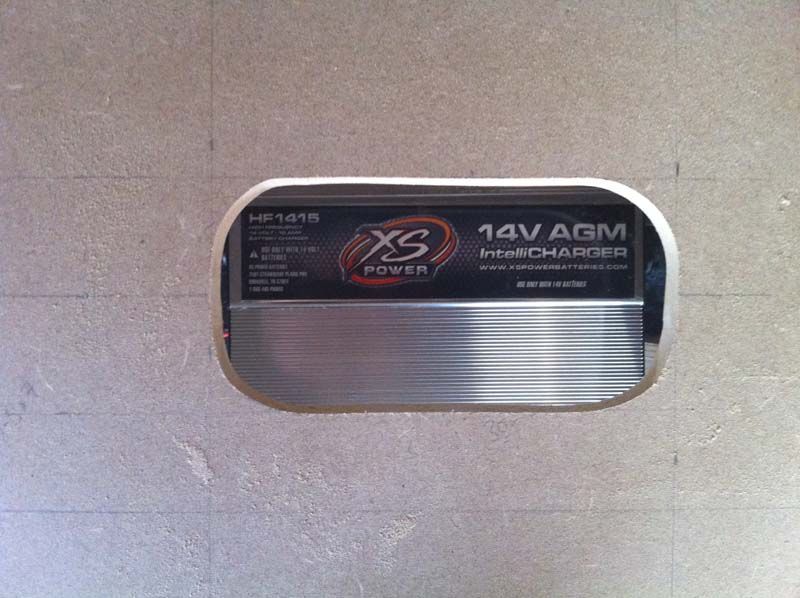
Also checked out the battery charger to...
Initial floating voltage was 14.6v on 1 battery...which is basically completely flat!
5mins of charging
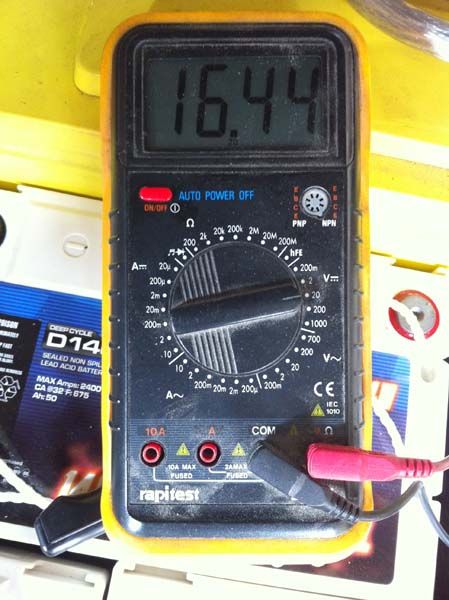
10mins
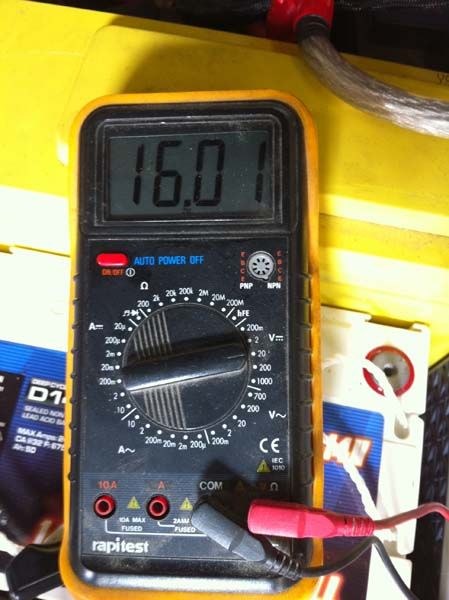
20-30mins later
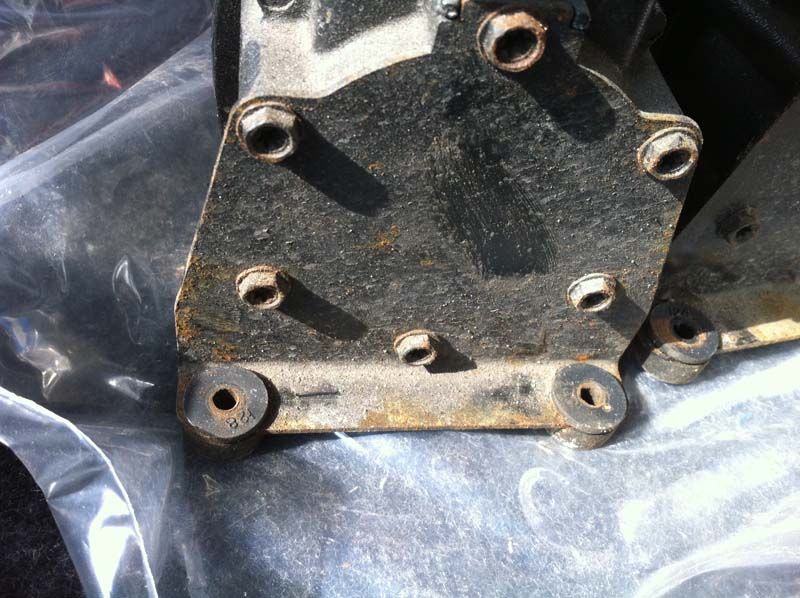
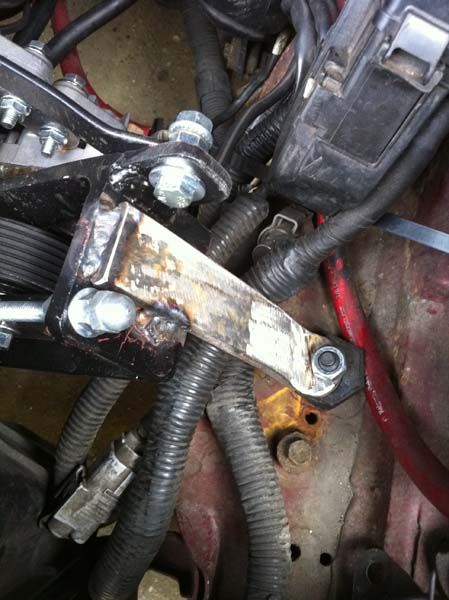
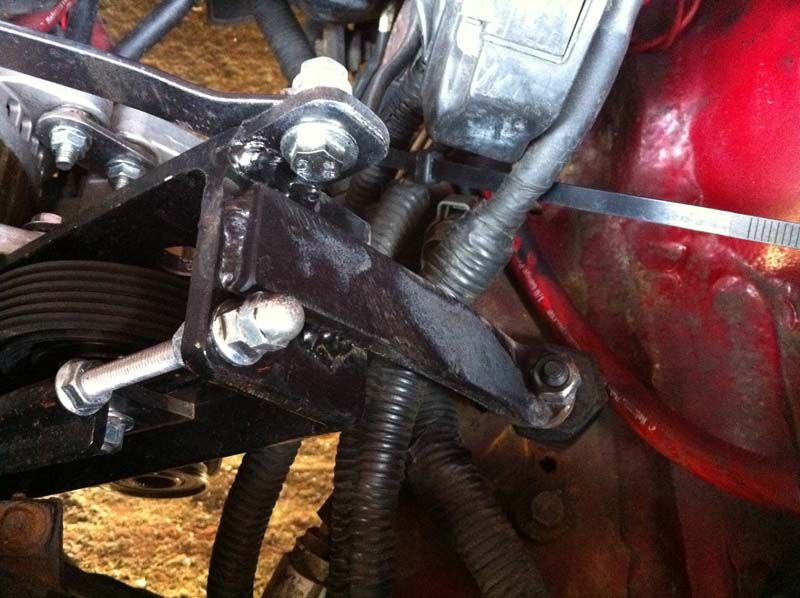
Also got the alt brace sorted!
teamSPB
Some pics of the fuse holder lit up
Also started cleaning up the air ride setup - as I want the compressors on show, I decided to clean them up and get the carry tray sprayed up.
Unfortunately I didnt get any pics of the tray before I grinded all the rust off...but here it is with filler to smooth it out a bit
Filler primer
Painted black
Compressors dirty
All cleaned up
Cleaning up the rusty bolts and washers
Sprayed VW Mica Red for a bit of 'detail'
Also checked out the battery charger to...
Initial floating voltage was 14.6v on 1 battery...which is basically completely flat!
5mins of charging
10mins
20-30mins later
Also got the alt brace sorted!
teamSPB
07-04-2011 | 11:12 AM
#203
Thread Starter
PassionFord Post Troll
Joined: May 2004
Posts: 3,386
Likes: 64
wish I had more time to crack on with this!
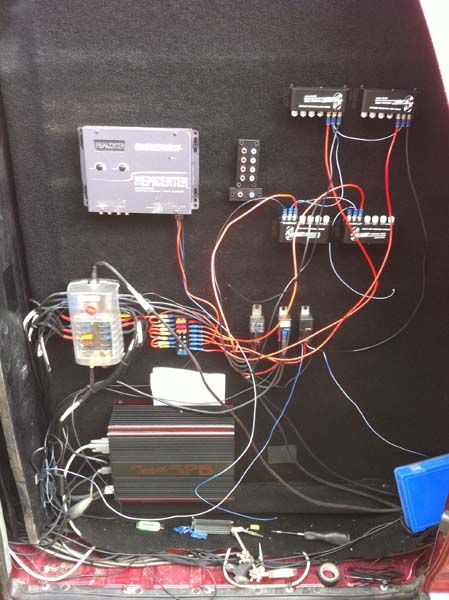
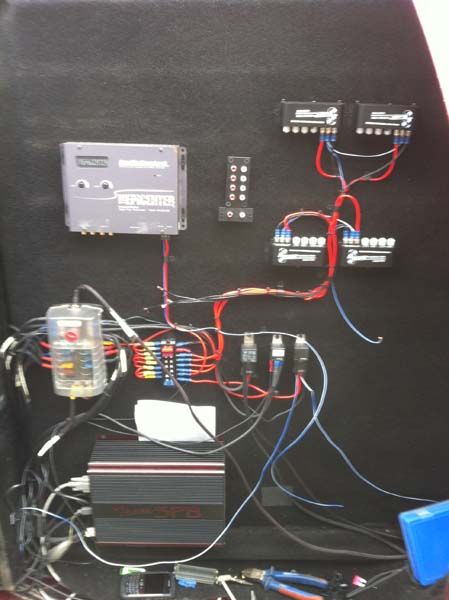
I put the fuse rack in and thought I would see how it looks
Also decided it would be wise to put a relay in for the remote turn ons....afterall, the headunit will be trying to power;
10 amps
Epicenter
Voltmeter
Bridging module
and God knows what else....
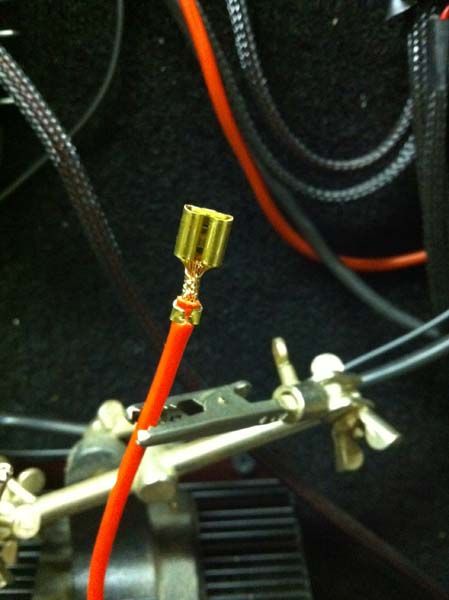
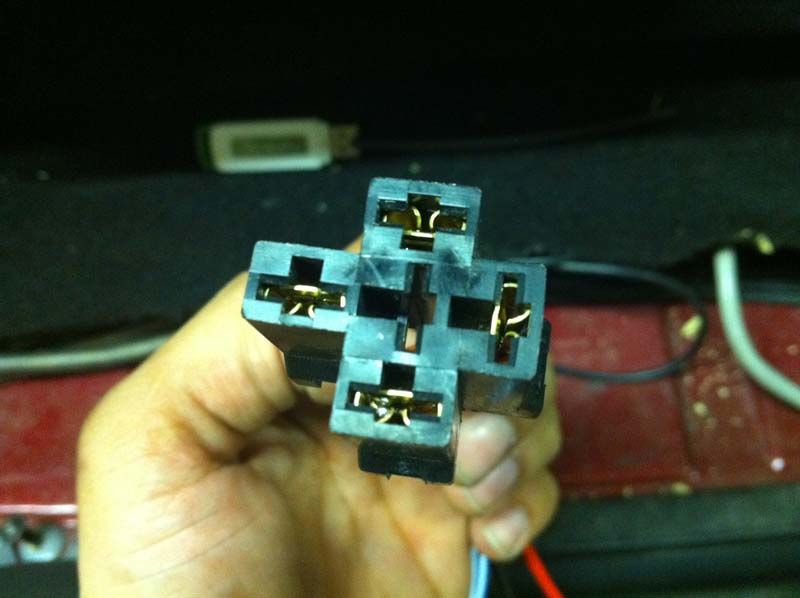
All connections properly secured, crimped in place first, then soldered, then heat shrinked
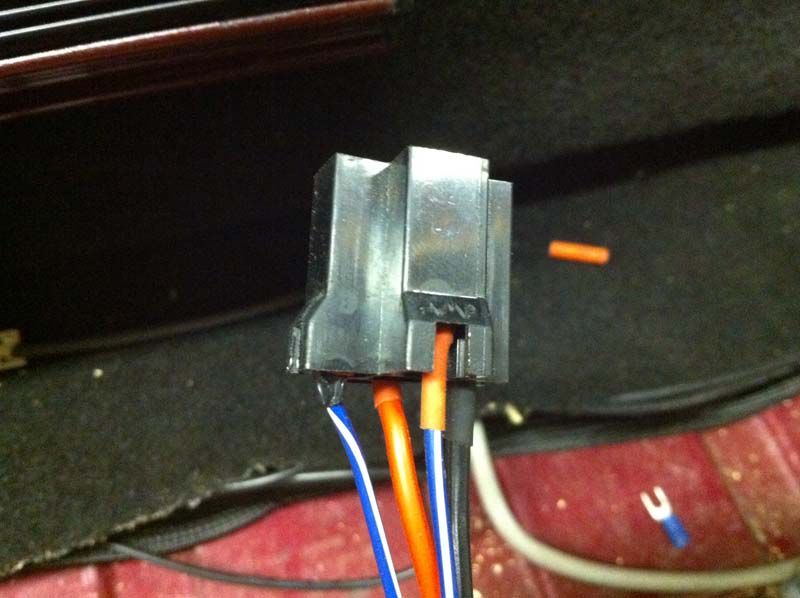
Put them into the holder and job done...one easily removable connector for the relay
Oh and the 12v has now GONE!
teamSPB
I put the fuse rack in and thought I would see how it looks
Also decided it would be wise to put a relay in for the remote turn ons....afterall, the headunit will be trying to power;
10 amps
Epicenter
Voltmeter
Bridging module
and God knows what else....
All connections properly secured, crimped in place first, then soldered, then heat shrinked
Put them into the holder and job done...one easily removable connector for the relay
Oh and the 12v has now GONE!
teamSPB
07-04-2011 | 11:19 AM
#204
Thread Starter
PassionFord Post Troll
Joined: May 2004
Posts: 3,386
Likes: 64
Some VERY poor videos of the vehicle playing....
Few things to point out...I was in my garage while playing this so couldnt turn it up fully as the neighbours will go physco, secondly the doors have about 10mm worth of deadening on them so are pretty stiff! And thirdly...only one battery was hooked up!
[media]http://www.youtube.com/watch?v=9zuBGmSFHWU[/media]
[media]http://www.youtube.com/watch?v=SM4xw_bSlps[/media]
Quick walk around
[media]http://www.youtube.com/watch?v=_iq13qhgsNQ[/media]
Alt setup now braced up!
[media]http://www.youtube.com/watch?v=Adabvnwptw8[/media]
Compared to this!
[media]http://www.youtube.com/watch?v=0-jNXn4IvXs[/media]
teamSPB
11-04-2011 | 10:32 AM
#209
Thread Starter
PassionFord Post Troll
Joined: May 2004
Posts: 3,386
Likes: 64
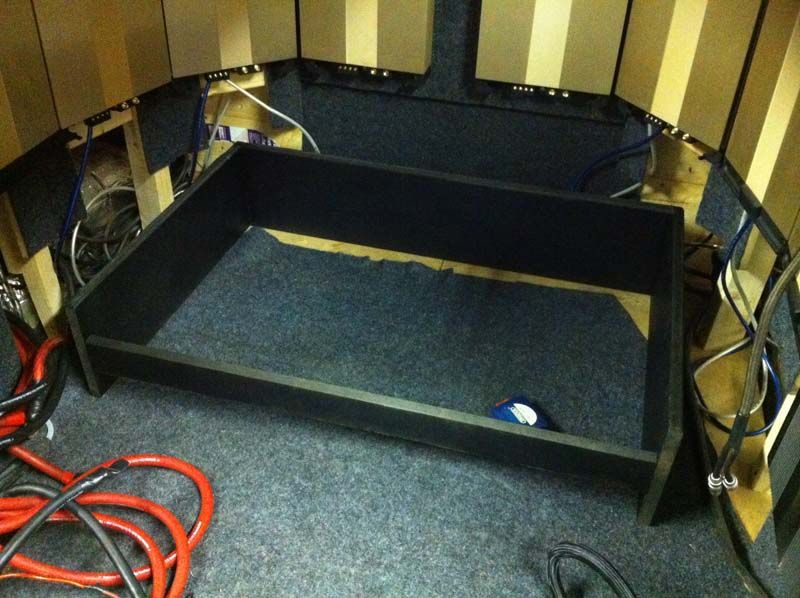
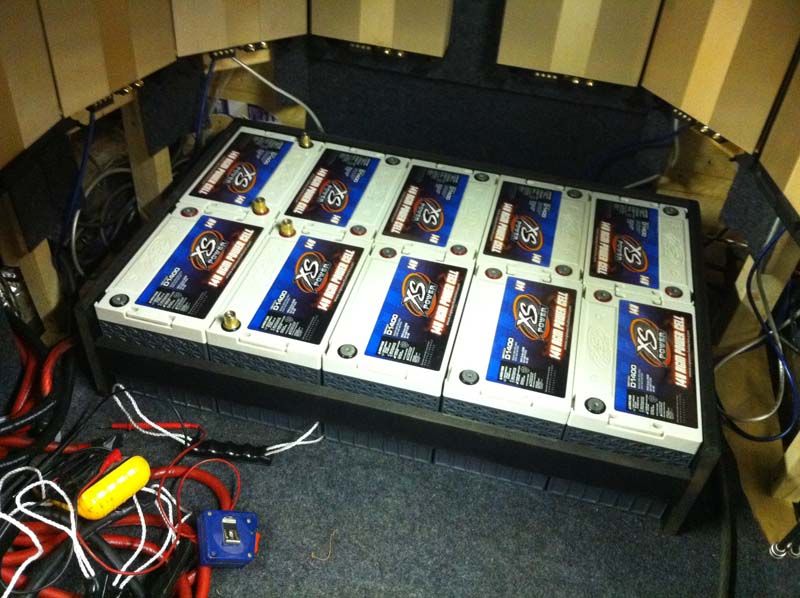
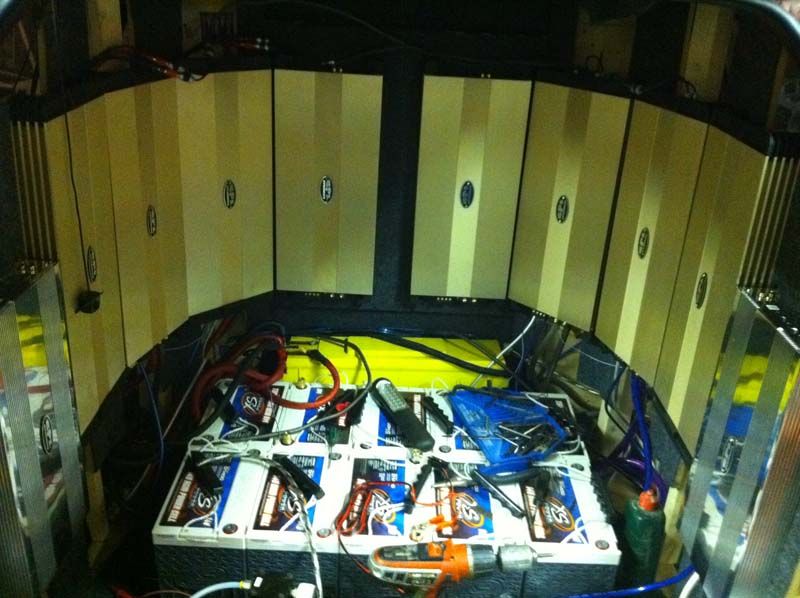
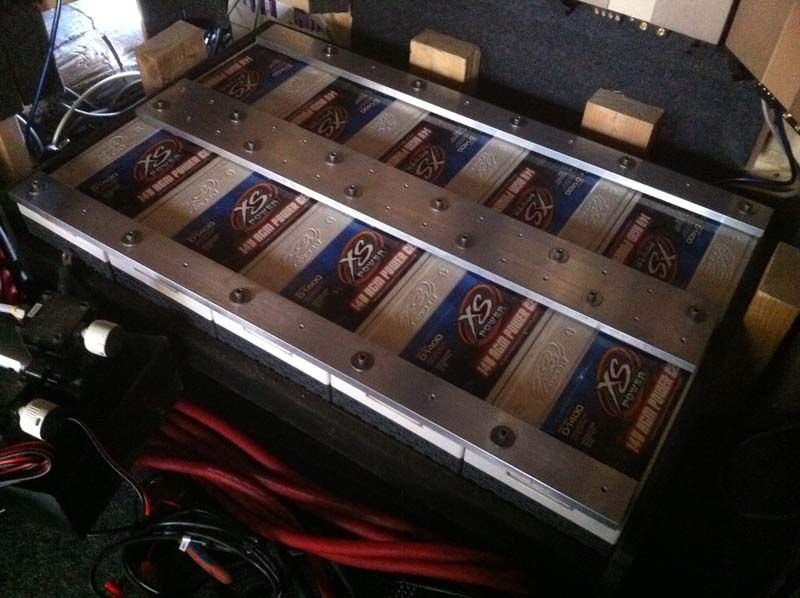
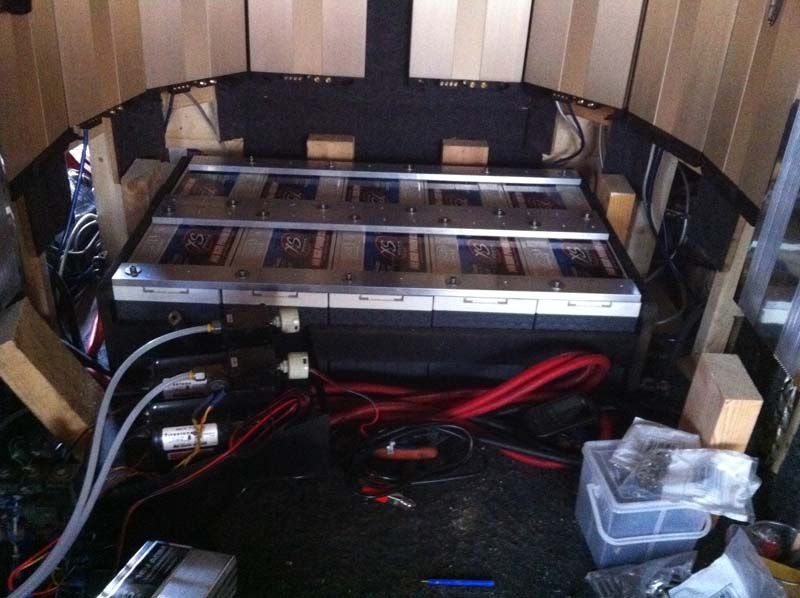
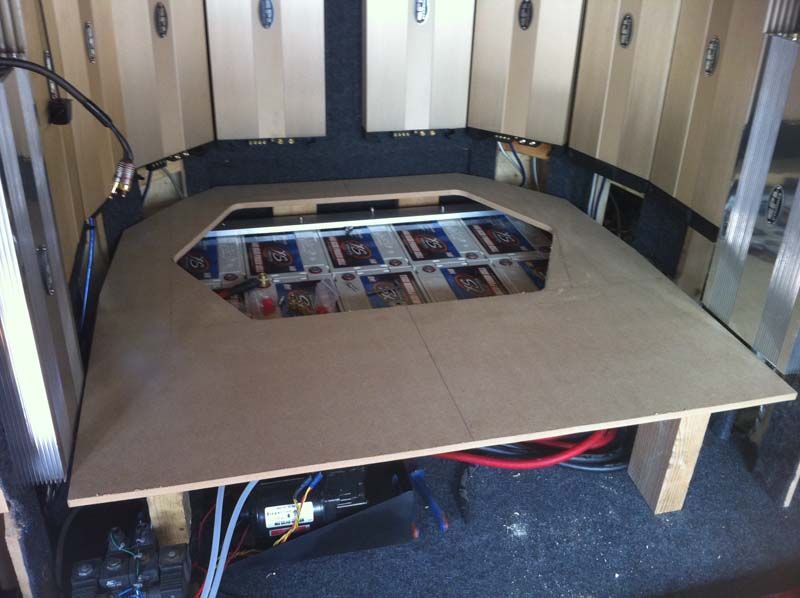
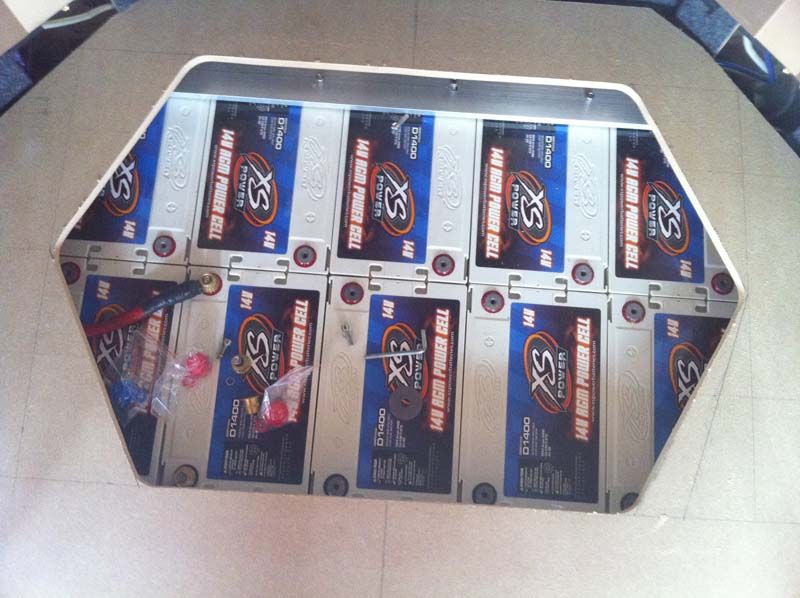
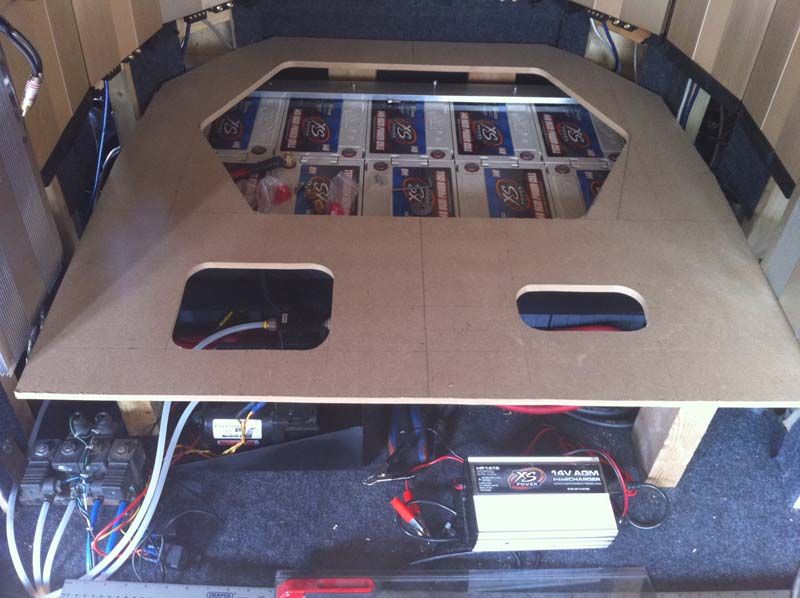
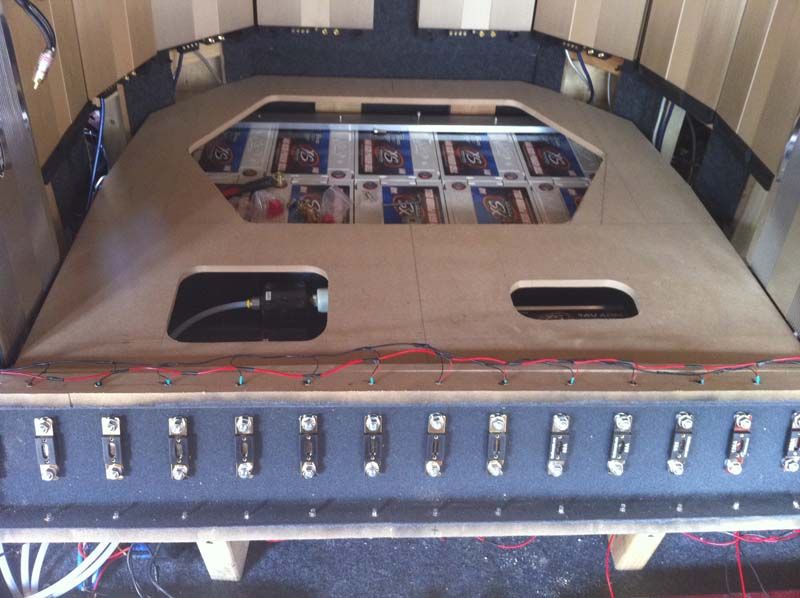
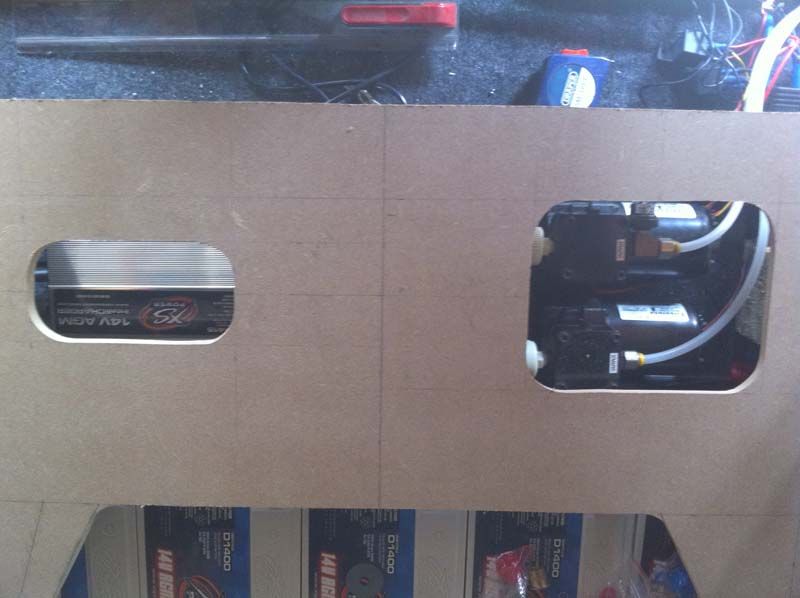
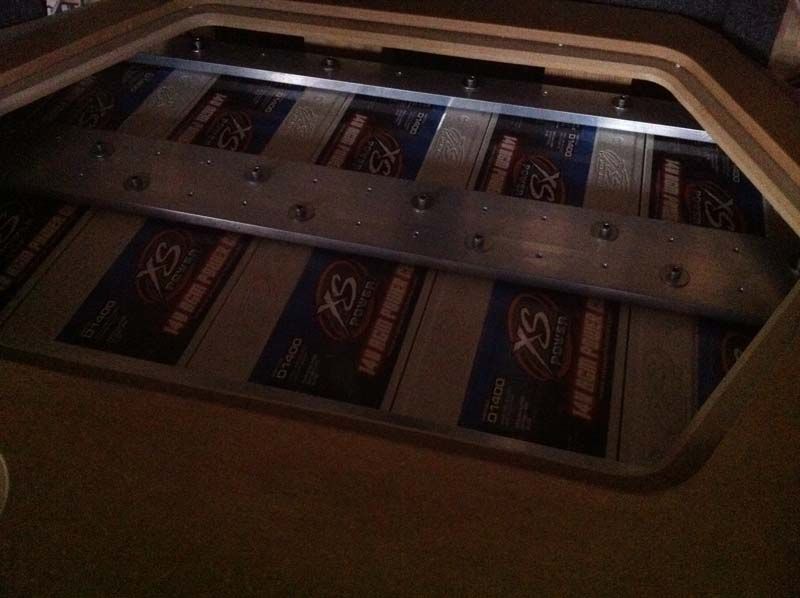
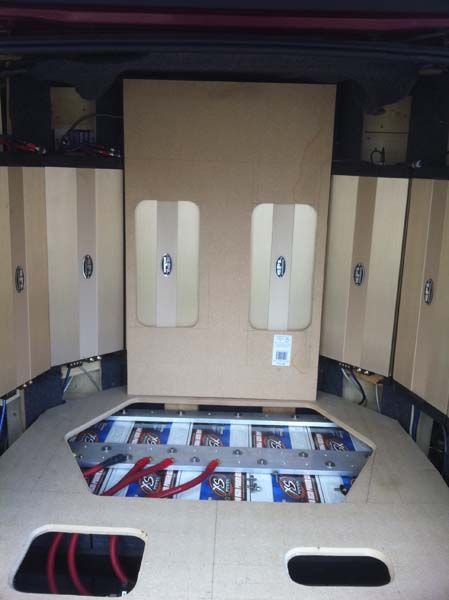
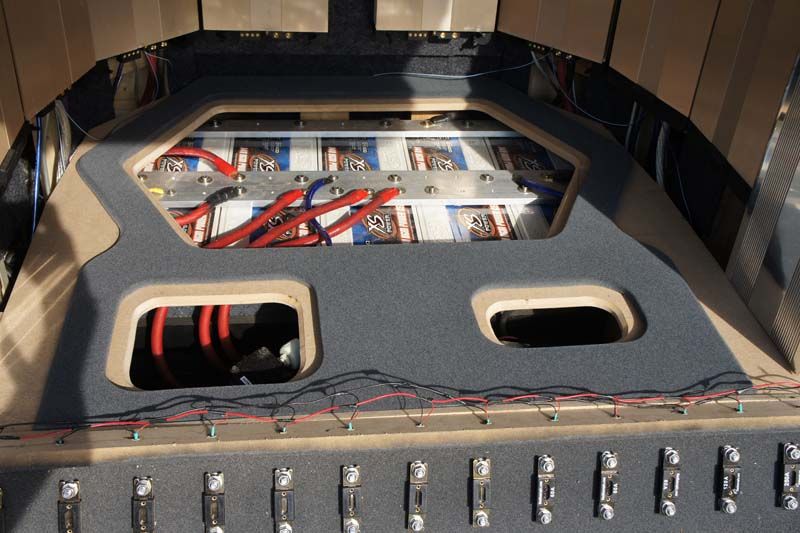
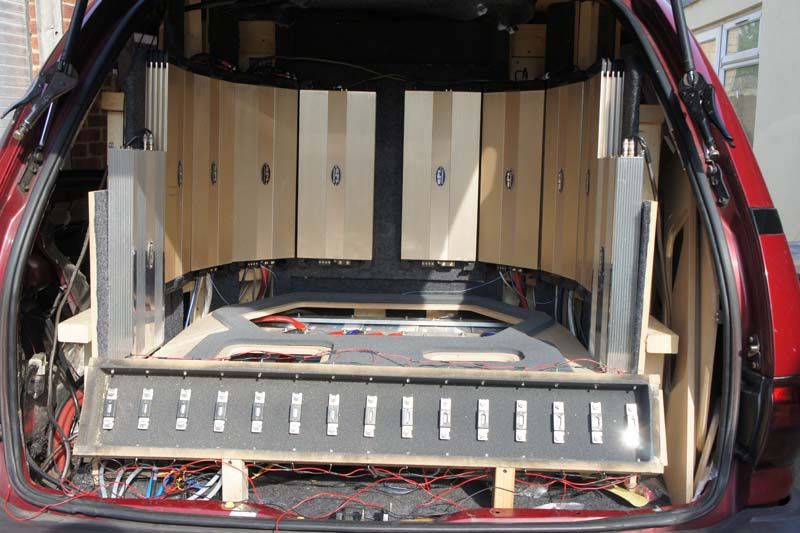
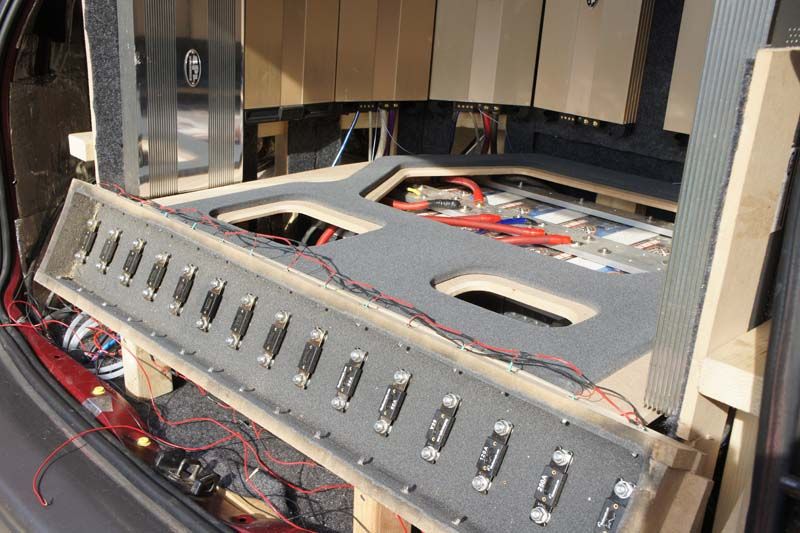
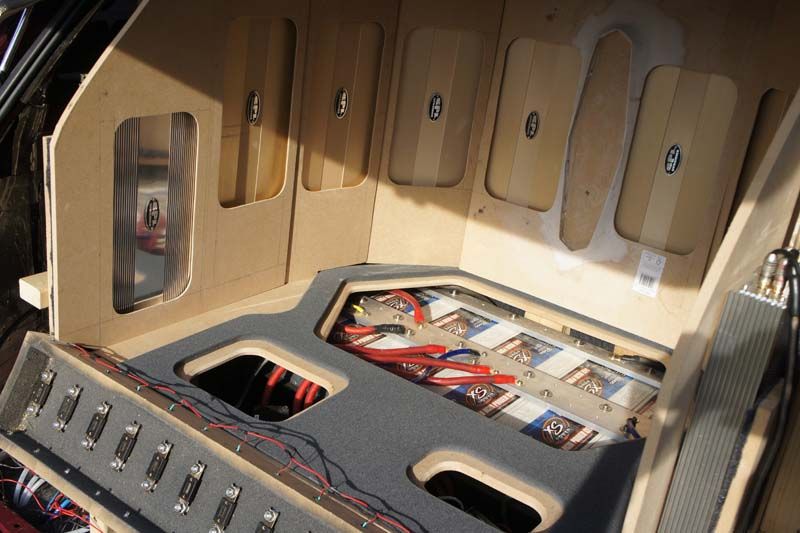
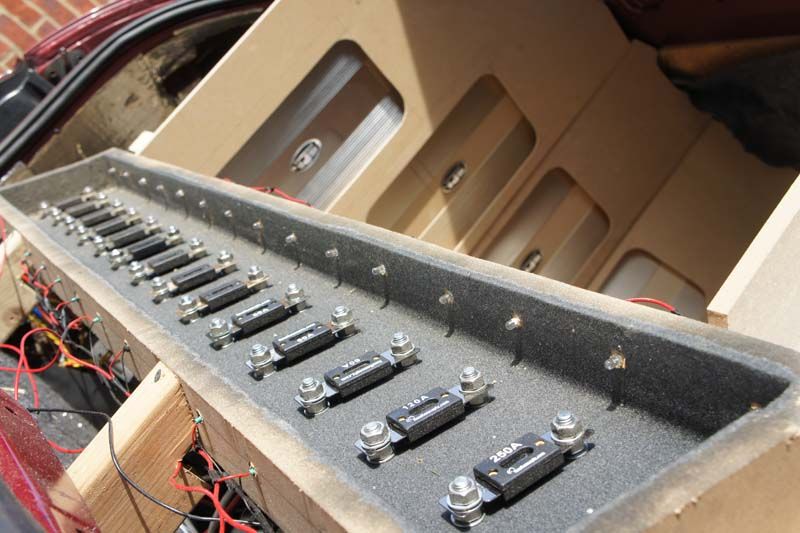
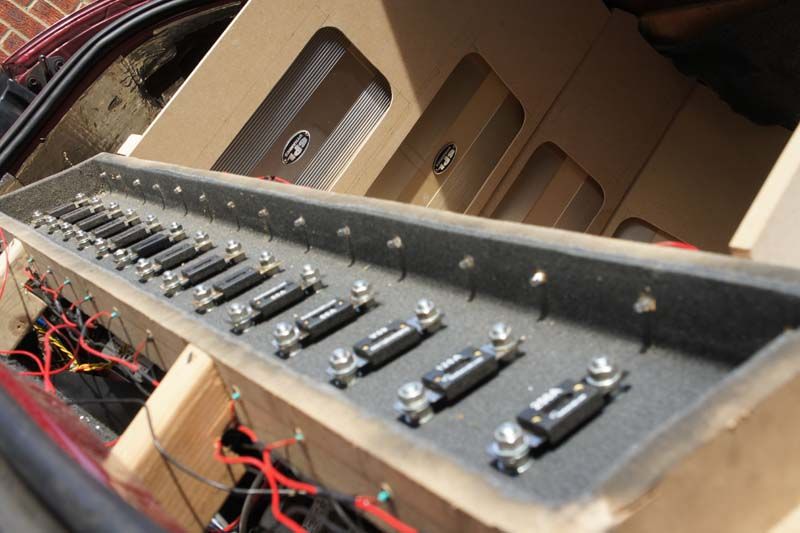
Battery rack being built
Sprayed black
Test fit
Had one of the batteries on charge...an hour after it came off charge this was the floating voltage
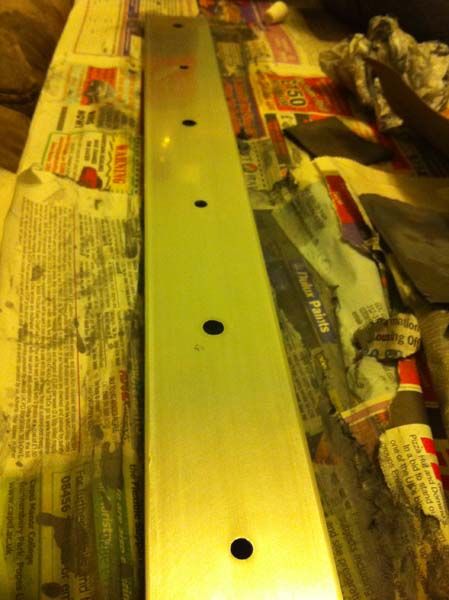
My buss bars also showed up after a little delay
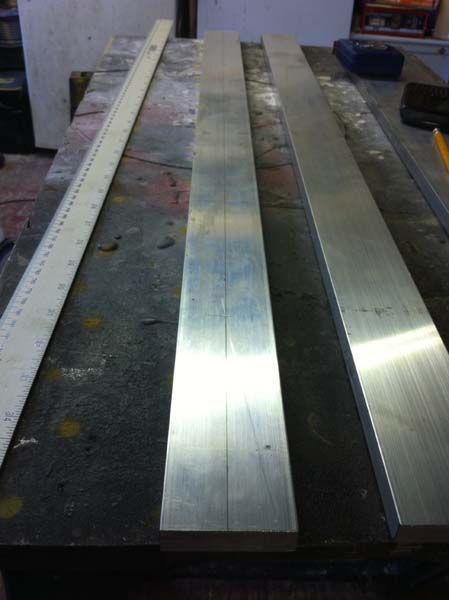
Earth bars are 50mm x 12mm
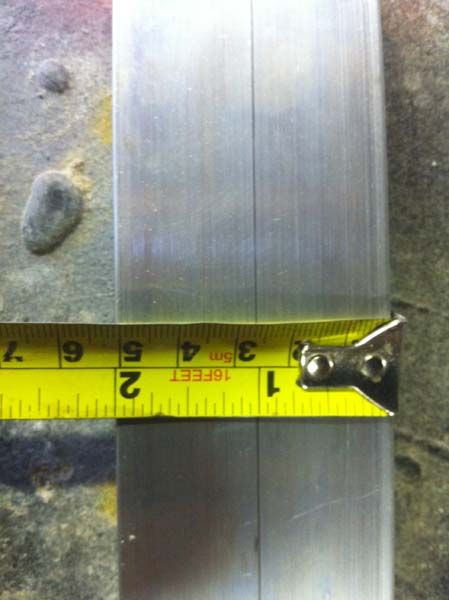
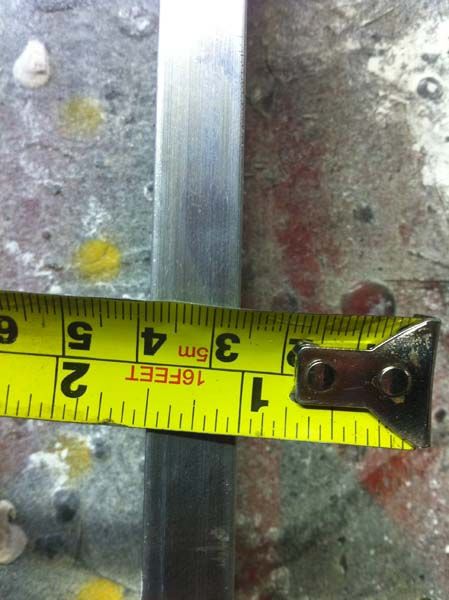
Positive is 100mm x 12mm
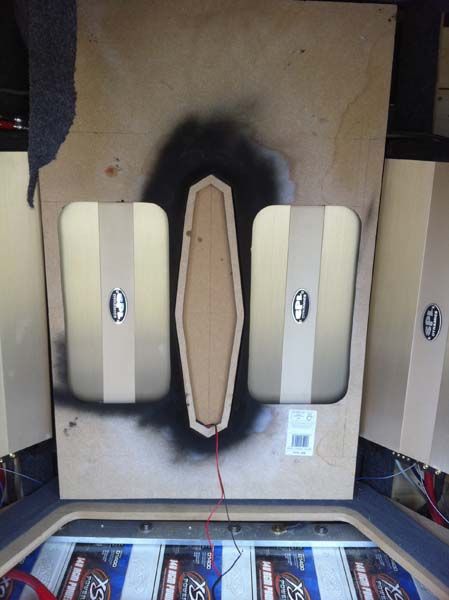
The eagle eyed amongst you may have realised the amp layout has changed also

I may post more later...see how I feel
teamSPB
Sprayed black
Test fit
Had one of the batteries on charge...an hour after it came off charge this was the floating voltage
My buss bars also showed up after a little delay
Earth bars are 50mm x 12mm
Positive is 100mm x 12mm
The eagle eyed amongst you may have realised the amp layout has changed also
I may post more later...see how I feel
teamSPB
 11-04-2011 | 04:33 PM
#211
Thread Starter
PassionFord Post Troll
Joined: May 2004
Posts: 3,386
Likes: 64
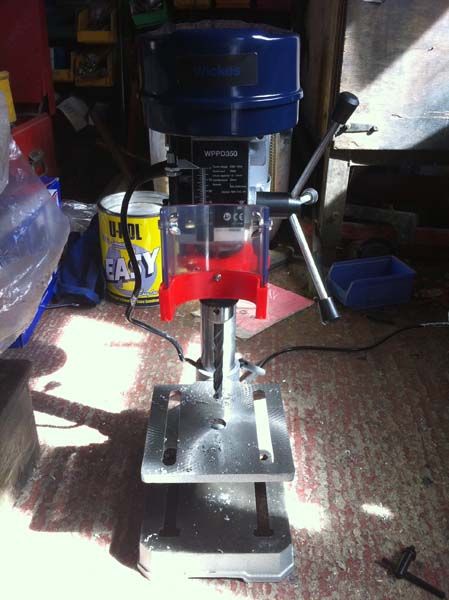
Right to buy in a new tool for the job at hand...a press drill/pillar drill...whatever you want to call it lol
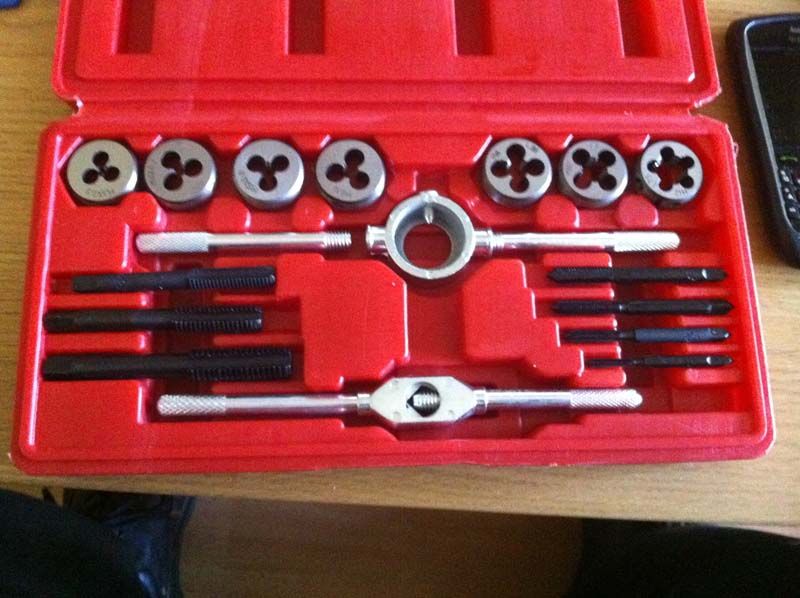
Out came the tap bits after God knows howmany years!
Drill in action

Making the threads
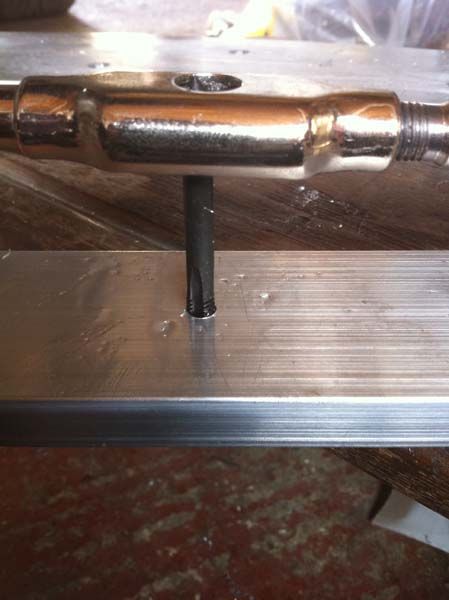
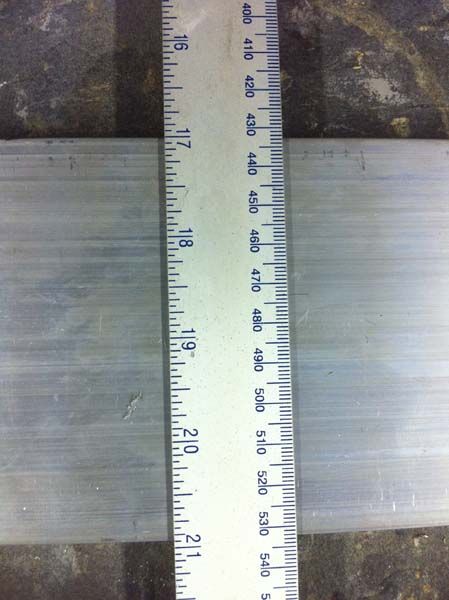
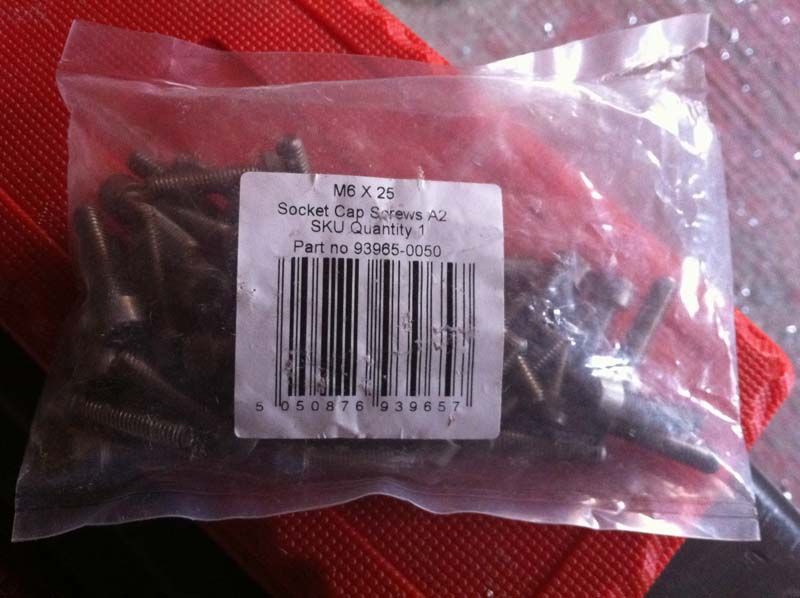
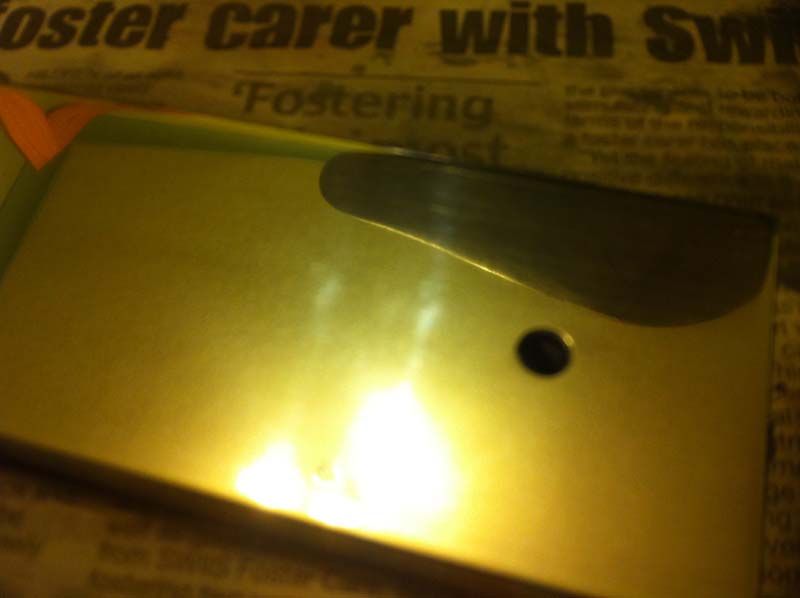
As the buss bars are pretty thick (1/2"), I had to get some longer M6 bolts for the batterry terminals...these are an inch long and have a good 8-10 full turns in them

All in all...30 or so holes were drilled and tapped!...Took around an hour and a half...and honestly...it was THE MOST BORING hour and a half of the build to date!!!!!
Fitted...will have to come off again though
Thats enough for today...more tomorrow!!
teamSPB
Out came the tap bits after God knows howmany years!
Drill in action
Making the threads
As the buss bars are pretty thick (1/2"), I had to get some longer M6 bolts for the batterry terminals...these are an inch long and have a good 8-10 full turns in them
All in all...30 or so holes were drilled and tapped!...Took around an hour and a half...and honestly...it was THE MOST BORING hour and a half of the build to date!!!!!
Fitted...will have to come off again though
Thats enough for today...more tomorrow!!
teamSPB


 20-04-2011 | 03:22 PM
#218
Thread Starter
PassionFord Post Troll
Joined: May 2004
Posts: 3,386
Likes: 64
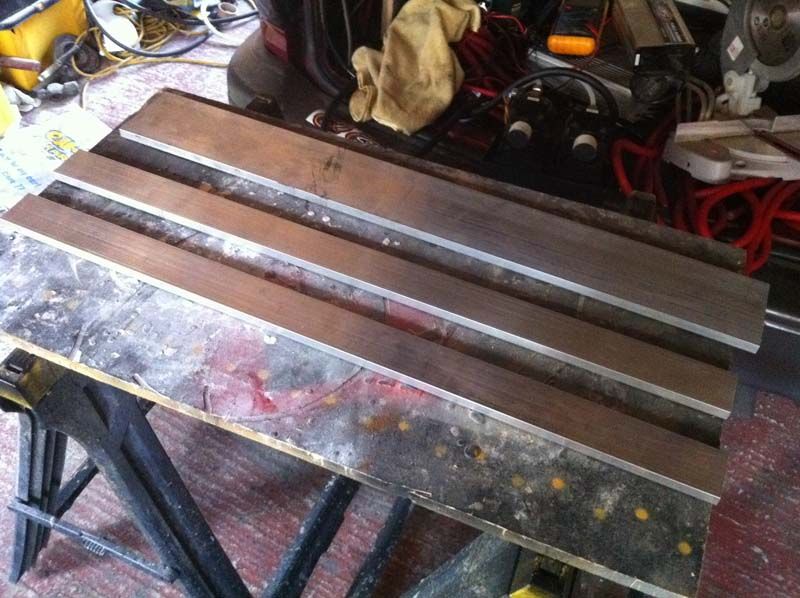
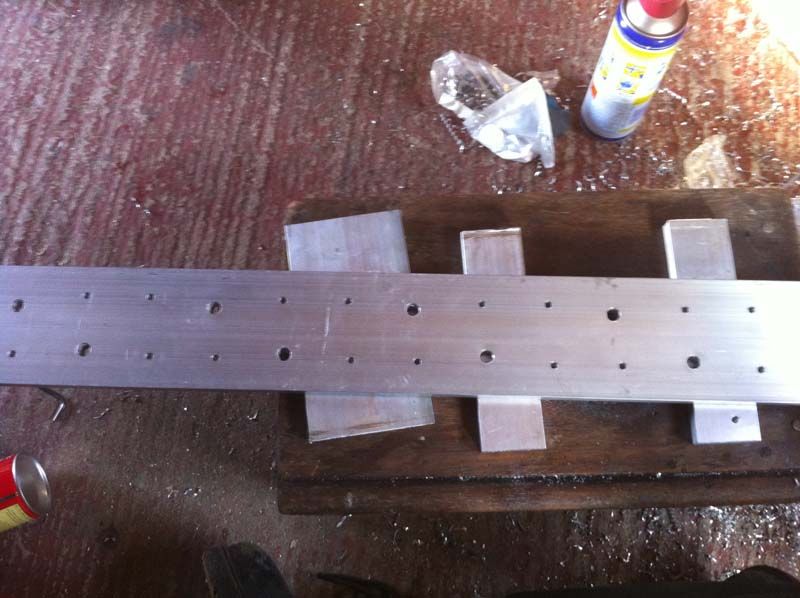
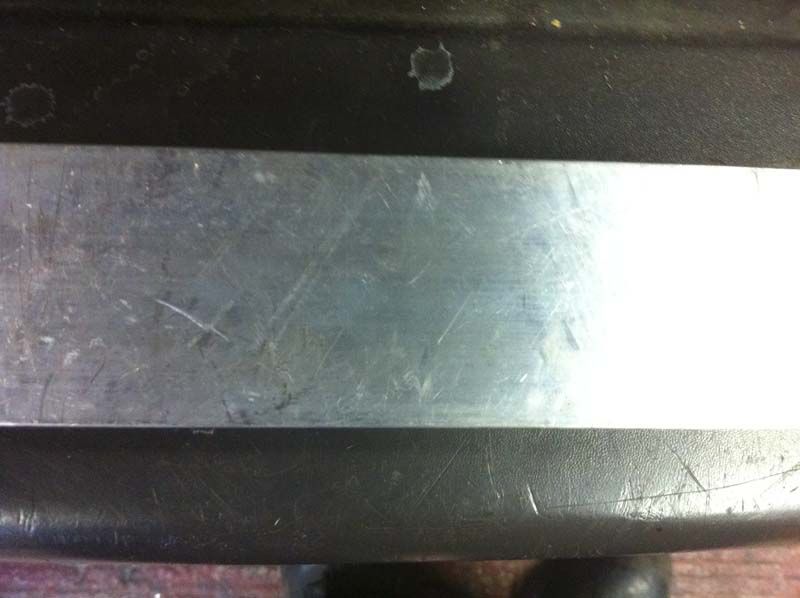
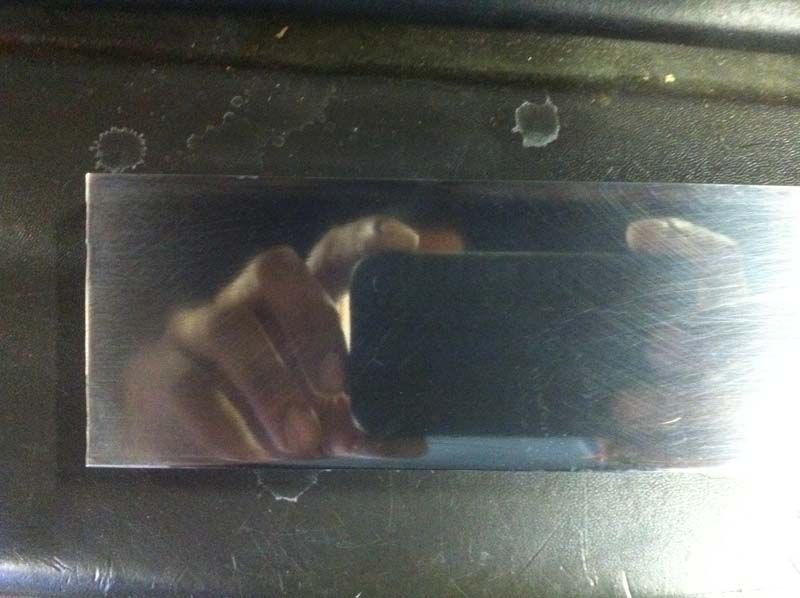
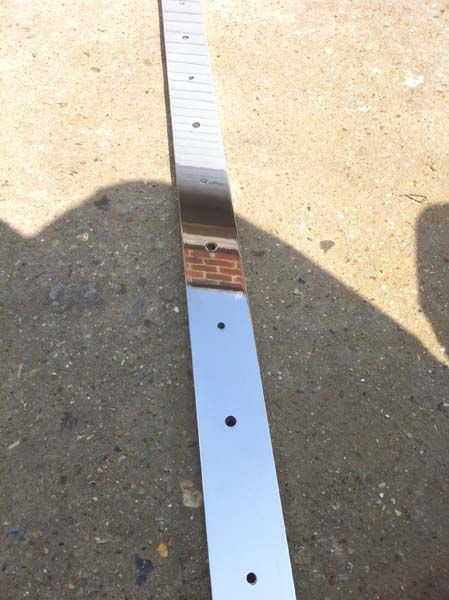
Right thought I would update on the buss bars...
They started life like this
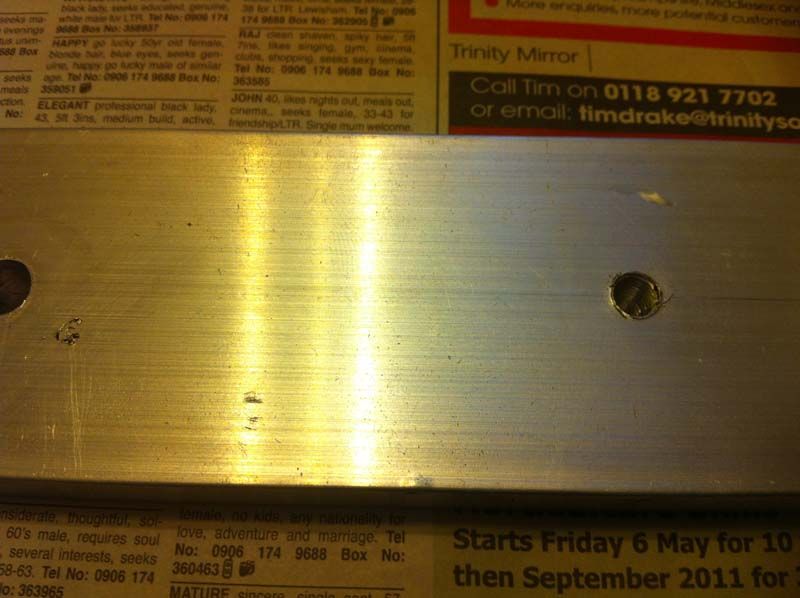
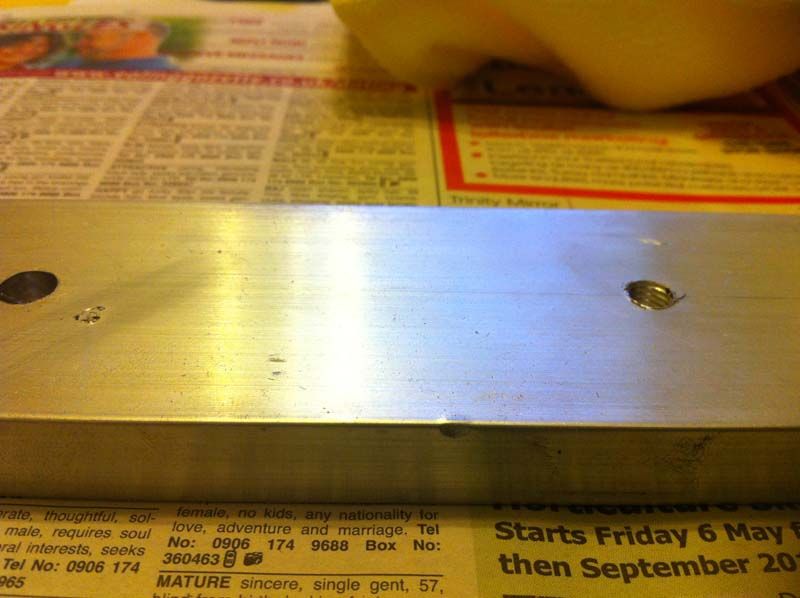
800grit wet and dry
1200 grit wet and dry
2000 grit wet and dry
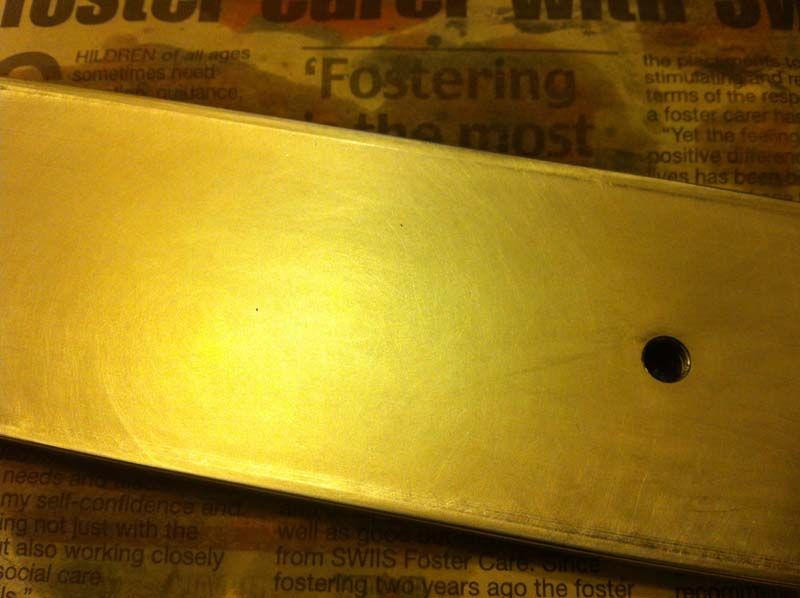
Then a final 2500 grit wet and dry
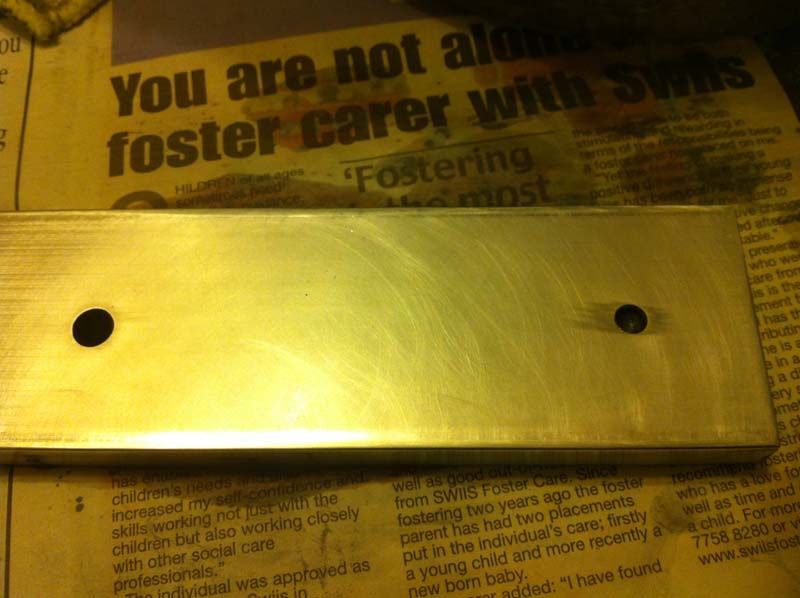
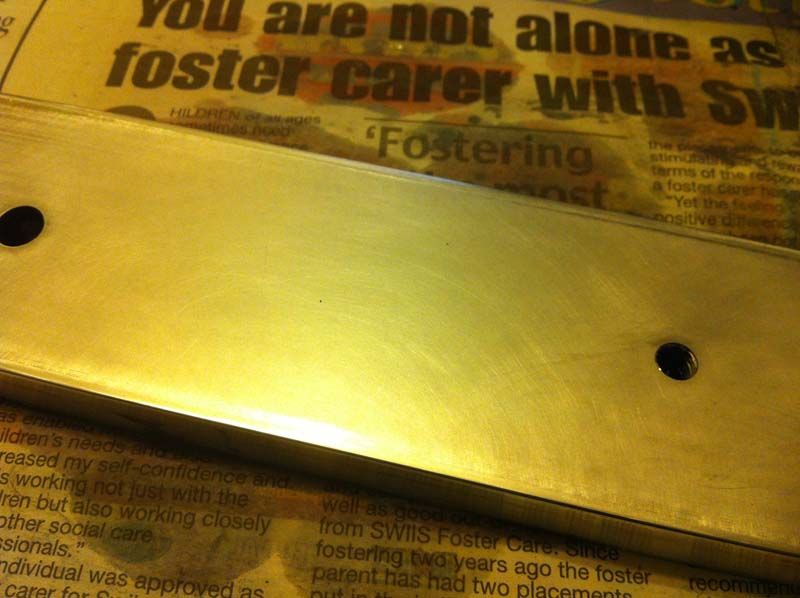
Then polish!
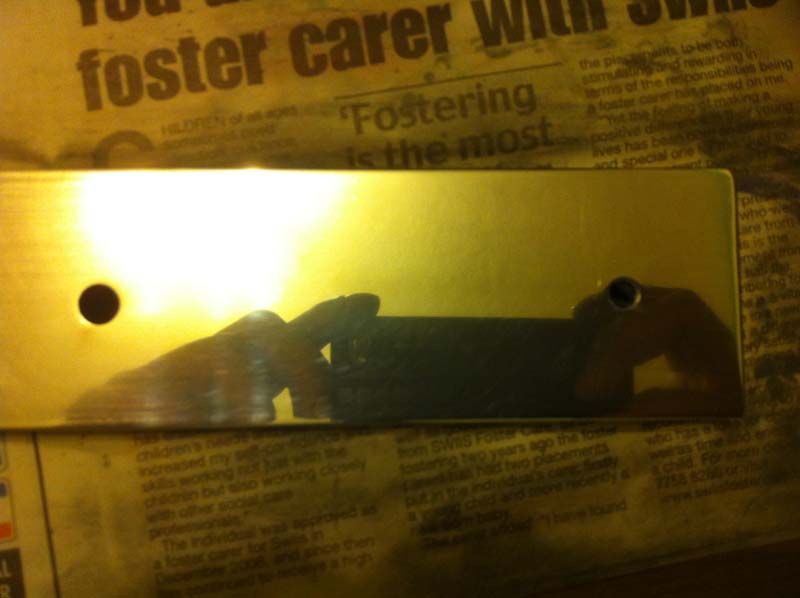
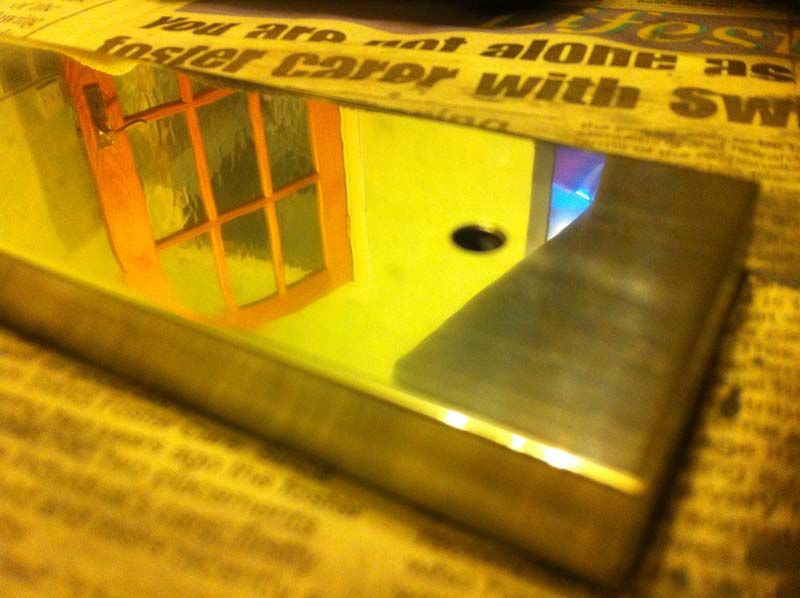
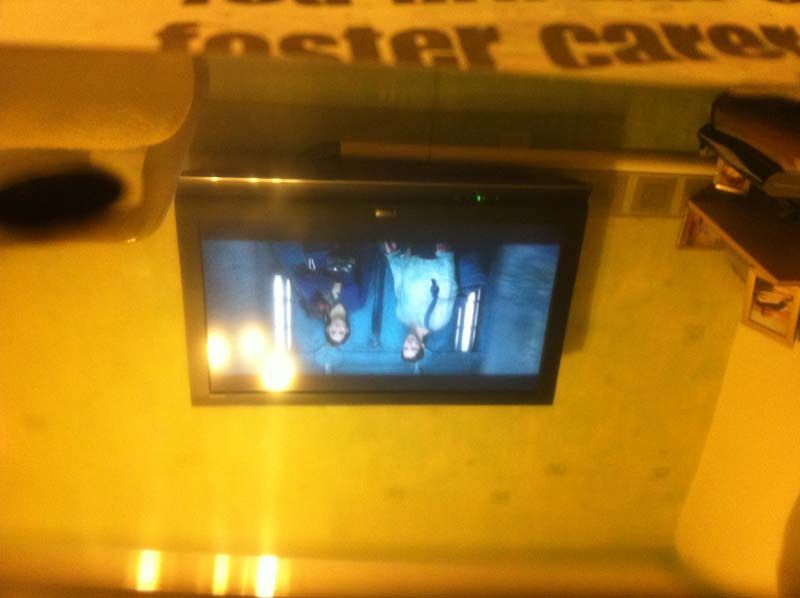
Reflection shot
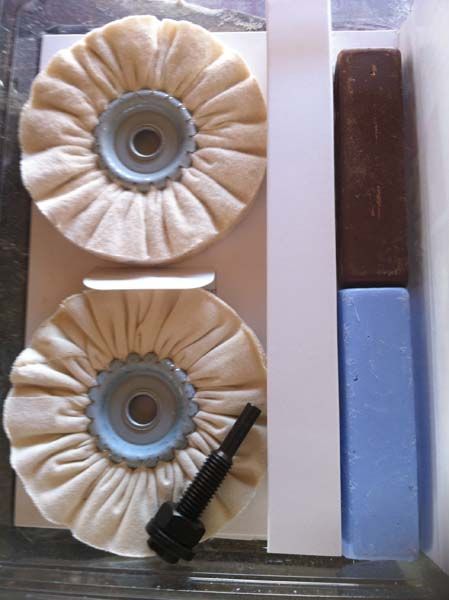
I wasnt too happy with the finish so I went out and bought a polishing kit...nothing special
And the results!
teamSPB
They started life like this
800grit wet and dry
1200 grit wet and dry
2000 grit wet and dry
Then a final 2500 grit wet and dry
Then polish!
Reflection shot
I wasnt too happy with the finish so I went out and bought a polishing kit...nothing special
And the results!
teamSPB
 04-05-2011 | 11:37 PM
#222
Thread Starter
PassionFord Post Troll
Joined: May 2004
Posts: 3,386
Likes: 64
Small update for you....
Had a few issues with the alts...for some reason, charging with only 1 alt didnt allow us to charge over 14.2v for some reason...when we ran all the alts, charging resumed as normal...turn it back to one alt, and it was 14.2v max again!
Gave Sonnie a call who suggested trying a few things all of which didnt help...so off to Sonnies workshop it went again!
The action plan was to remove all the alts, test them all individually, test the regulator and replace the weakest/faulty parts.
I dropped the vehicle off around 9.30-10am and by 2pm 1 alt was diagnosed as faulty and was being sorted...by 4pm the vehicle was back together and being tested....by 5pm, the decision was made to look into the other 2 alts in more detail as there was a slight humming noise coming from one of the pair....
Midday the following day, I get a call saying the vehicle was ready to pick up...
Went down to pick up the Previa, and talked through a few options and what had happened...
We think the problem had always been there with the faulty single alternator...everytime it was powered up, it always let off a loudish hum....when it was stripped down, we found 2 diodes and a complete winding had blown!! This was then replaced with a brand new core and diodes, and we finally had cured the problem...charging back up to normal, AND the humming noise eliminated! The vehicle also idles alot easier now and charges at 15.5-15.6v on idle with 1 alt!
The only issue we have now are the alts get pretty hot when all 3 are charging for prolonged periods of time at high volts (15.5v+)...I have a few ideas already floating around how to extract the heat from the alts which Sonnie gave me the initial ideas for...hopefully get those sorted soon...just need a Kenlowe fan for a start!
All in all.....BIG UP SONNIE from Grove Auto Parts again! These guys REALLY are the top dogs when it comes to electrics for the car - starters, alts, fab work etc etc!
Bring on the weekend and hopefully I may possibly find some time to work on it
teamSPB
06-05-2011 | 12:08 AM
#224
Thread Starter
PassionFord Post Troll
Joined: May 2004
Posts: 3,386
Likes: 64
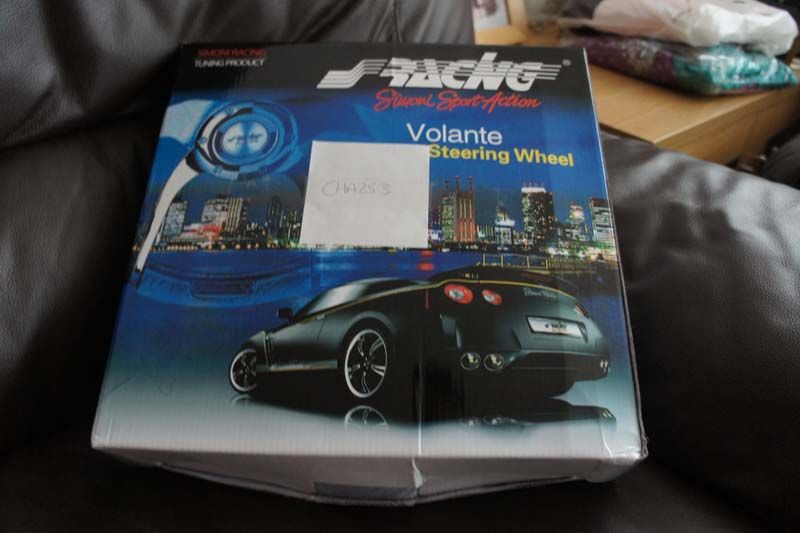
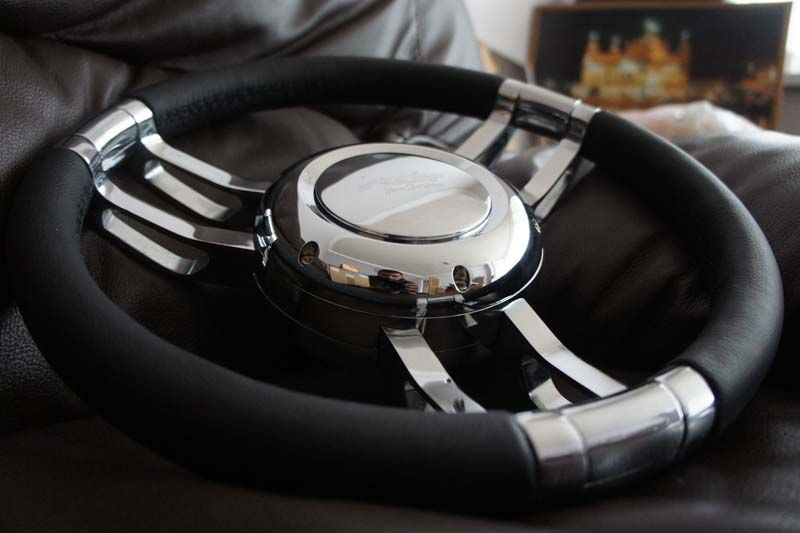
Another update for you all....ordered my steering wheel a while back now (must have been around a month or so back now), and it finally arrived today...
Ill get some high res pics soon, but these will do for now...
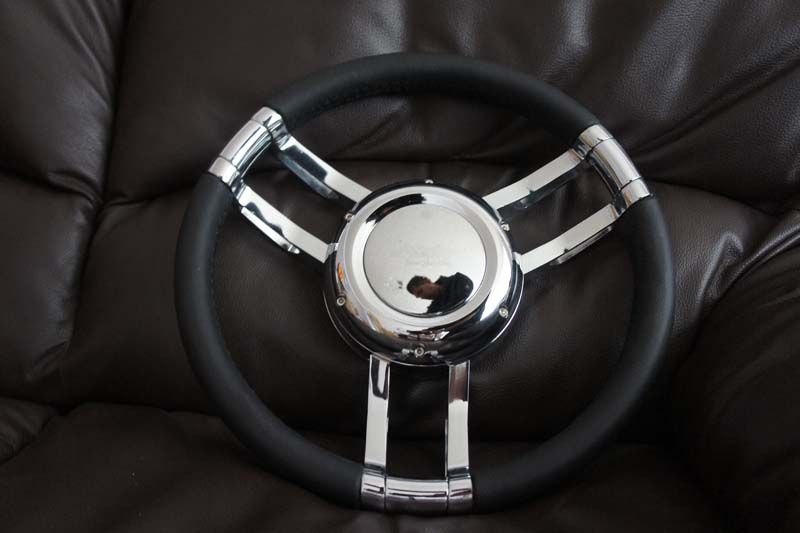
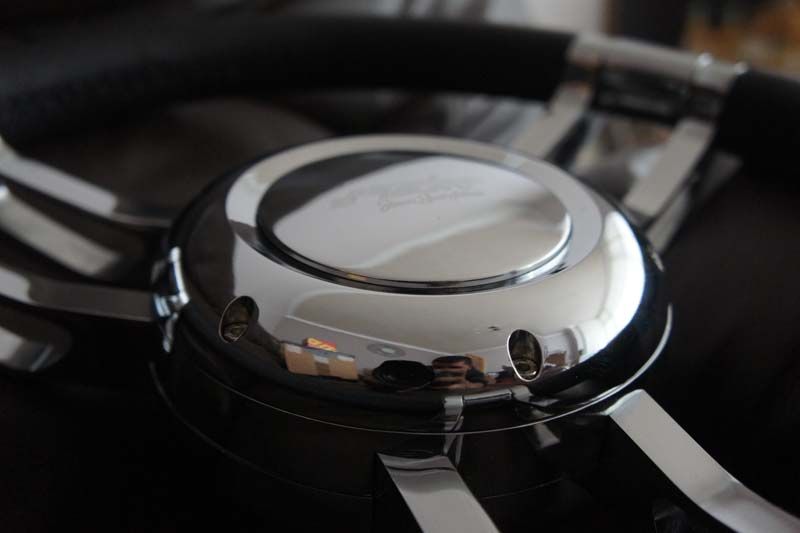
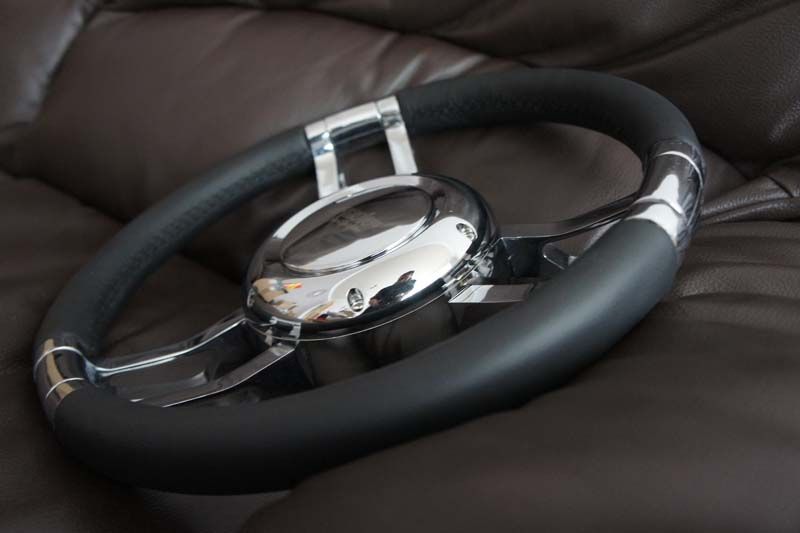
The steering wheel I settled for is a 350mm Simoni Racing Explorer...reasons for this is it has a hot-rod type appeal and I feel it fits in well with the rest of the vehicle...its pretty blingy, however, its makes a nice break to the eye inside the vehicle....
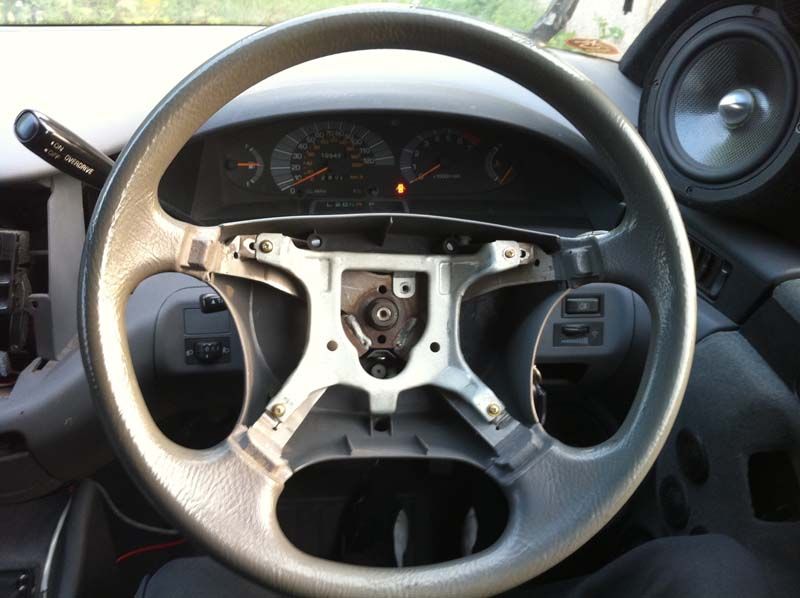
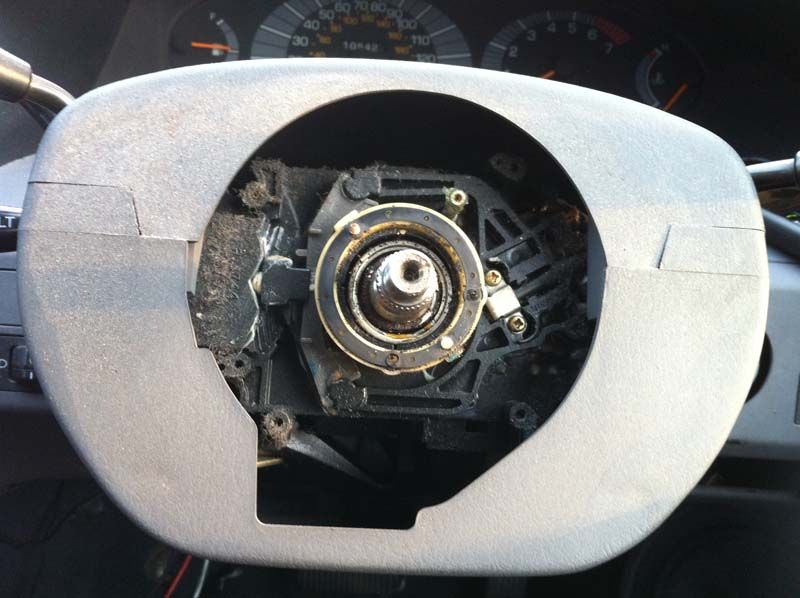
The old steering wheel coming off
New steering wheel coming together
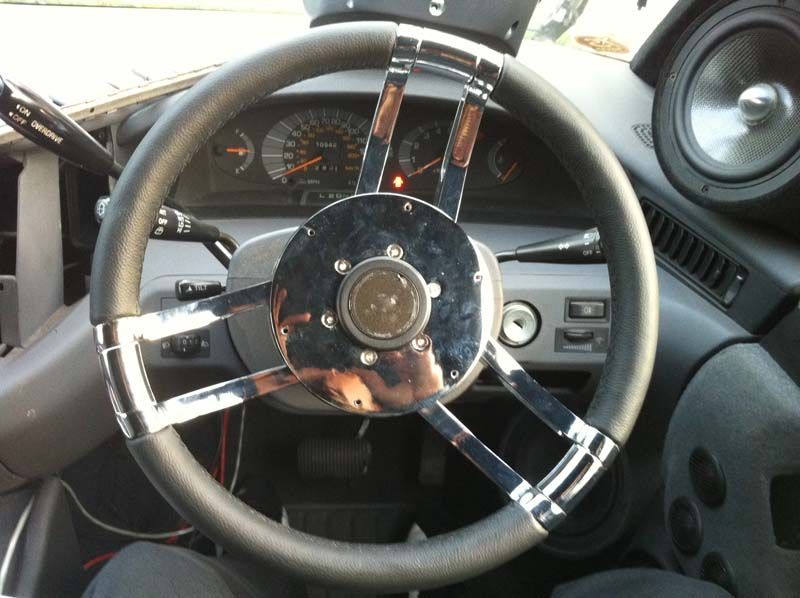
Installed...

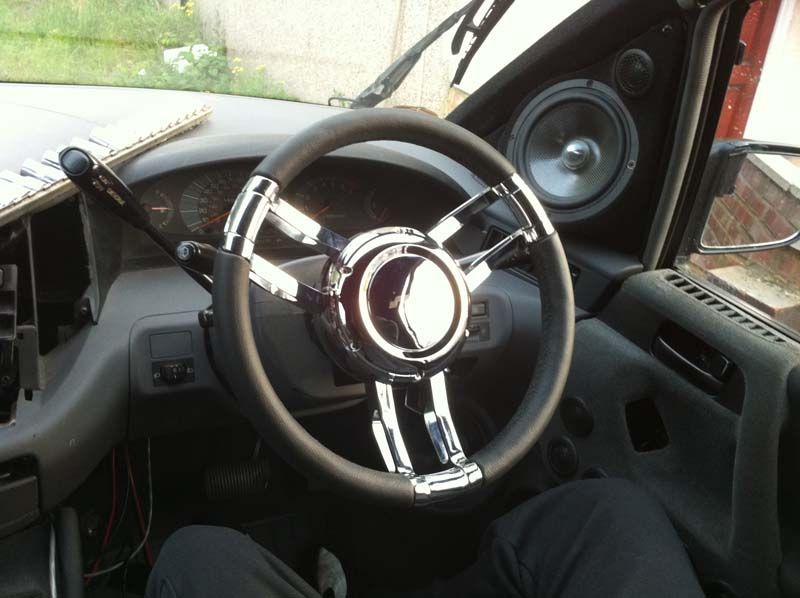
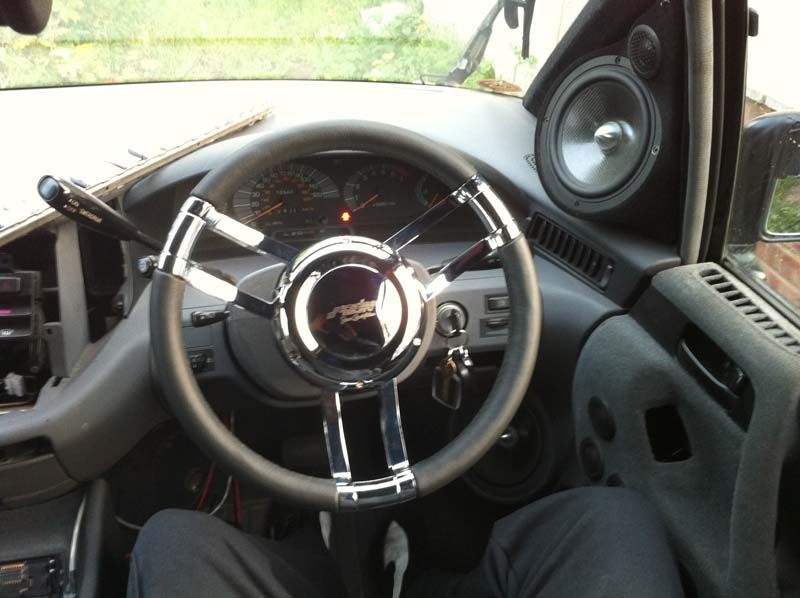

Its a nice size...I think the OEM one was around 380mm maybe...this is smaller obviously...but not too small that it looks odd! Any smaller than 350mm and I think it would have looked VERY odd inside such a big cabin!
The leather on the steering wheel also matches the vinyl in the Previa very well to so im pleased about that! Hopefully once the seats are trimmed up, the new roof panels go in...it should look VERY sweet inside!
teamSPB
Ill get some high res pics soon, but these will do for now...
The steering wheel I settled for is a 350mm Simoni Racing Explorer...reasons for this is it has a hot-rod type appeal and I feel it fits in well with the rest of the vehicle...its pretty blingy, however, its makes a nice break to the eye inside the vehicle....
The old steering wheel coming off
New steering wheel coming together
Installed...
Its a nice size...I think the OEM one was around 380mm maybe...this is smaller obviously...but not too small that it looks odd! Any smaller than 350mm and I think it would have looked VERY odd inside such a big cabin!
The leather on the steering wheel also matches the vinyl in the Previa very well to so im pleased about that! Hopefully once the seats are trimmed up, the new roof panels go in...it should look VERY sweet inside!
teamSPB

 15-05-2011 | 08:34 PM
#227
Thread Starter
PassionFord Post Troll
Joined: May 2004
Posts: 3,386
Likes: 64
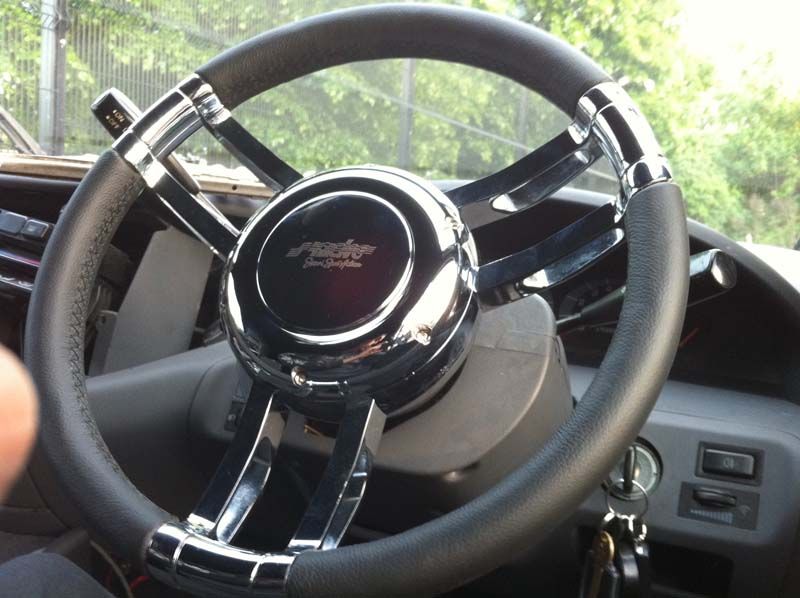
Ive recently been getting a few questions about the steering wheel....its a Simoni Racing explorer, I bought it off R-Tec in St Albans....I have got to know a guy there called Jason (one of the sales staff and not the workshop guy lol), and he sorted me out with a BRILLIANT price for the wheel and boss!
If any accessories are what you are after, then he will definately be the guy to speak to! Would be great if you could mention my name to! R-tec can be had on 01727 790 100 Great bunch of guys and Alex helped me no end!
The size is 350mm which is PERFECT for the size of vehicle...looks tiny in the thing! I cant imagine what a 280mm steering wheel will look like PMSL!!!
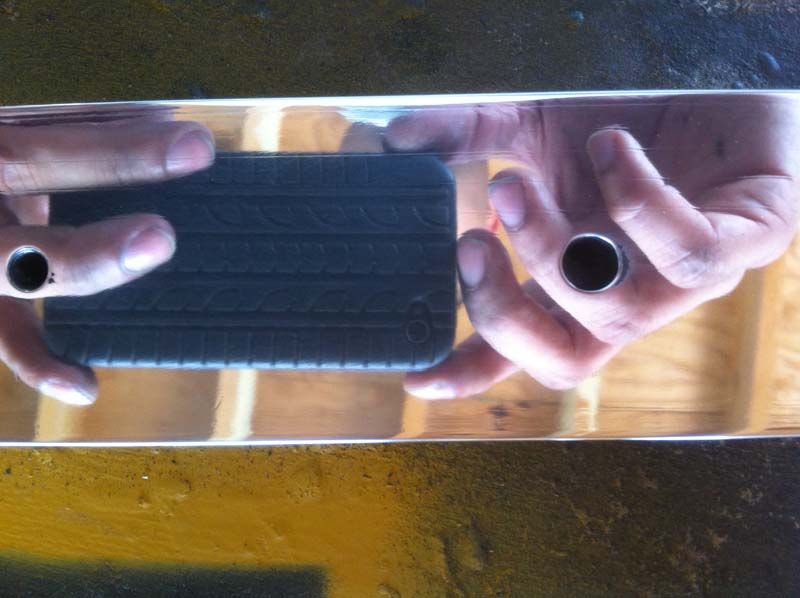
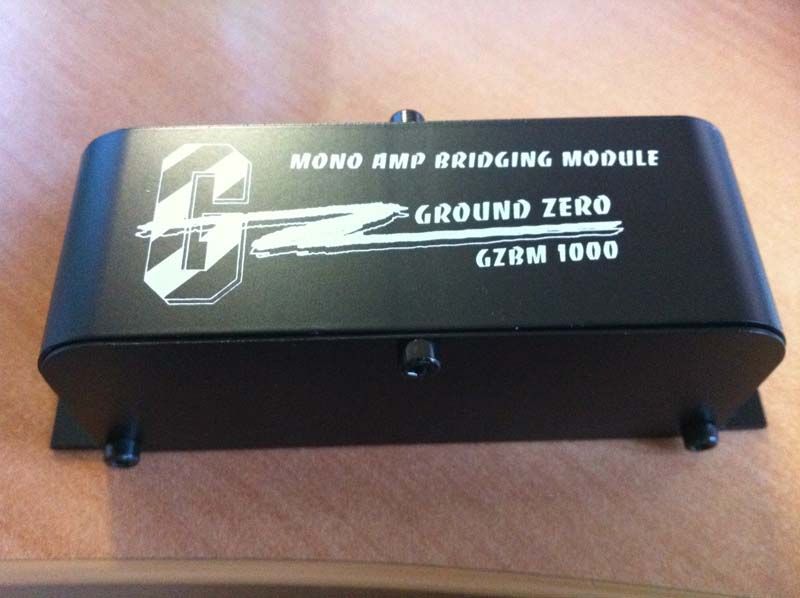
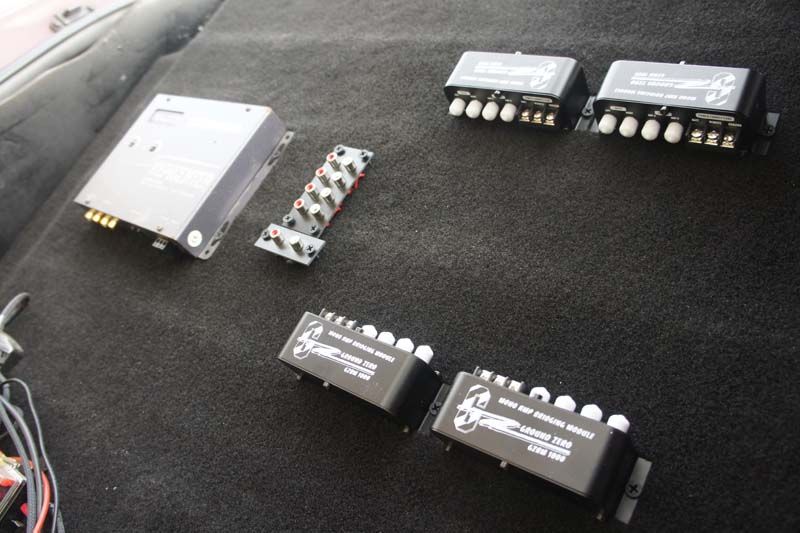
Also got these lovely boxes thanks to the new GZ distributors CAD!
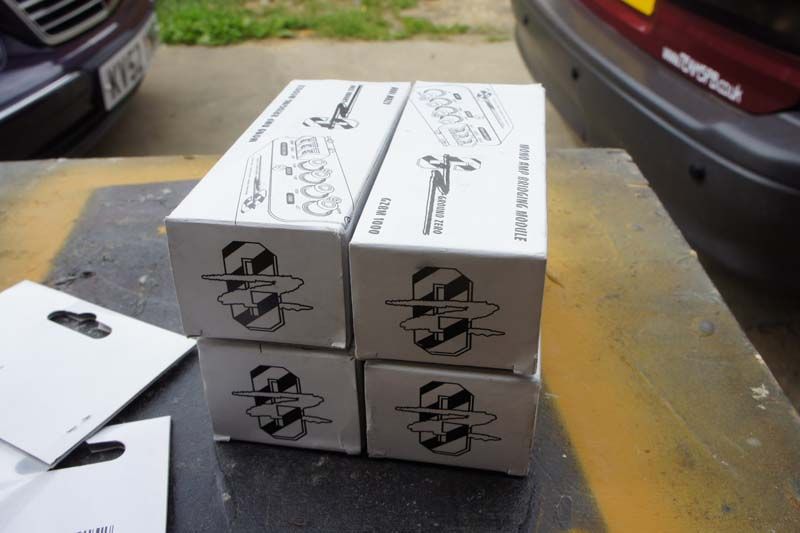
They are the bridging modules I have been waiting for! These will allow me to externally strap the amps together and fingers crossed, allow me to get the SAME output from each amp rather than different outputs like when using the master/slave function!
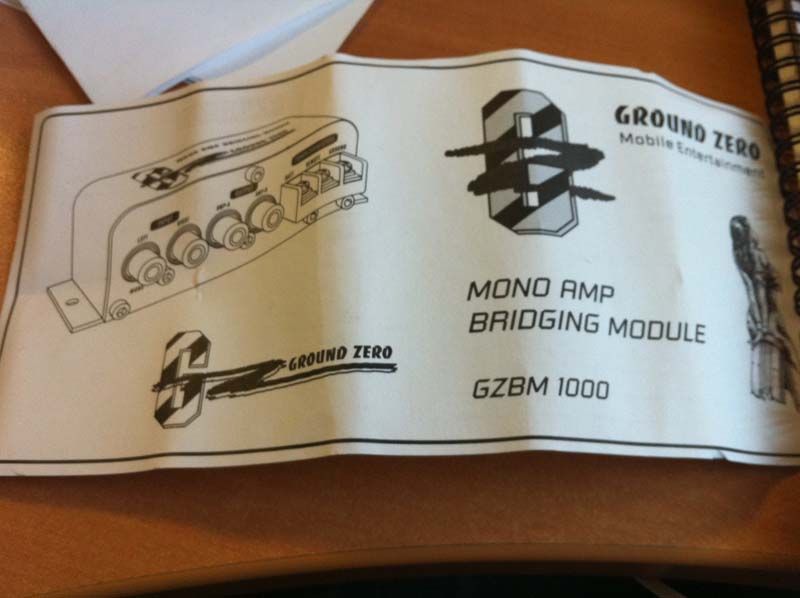
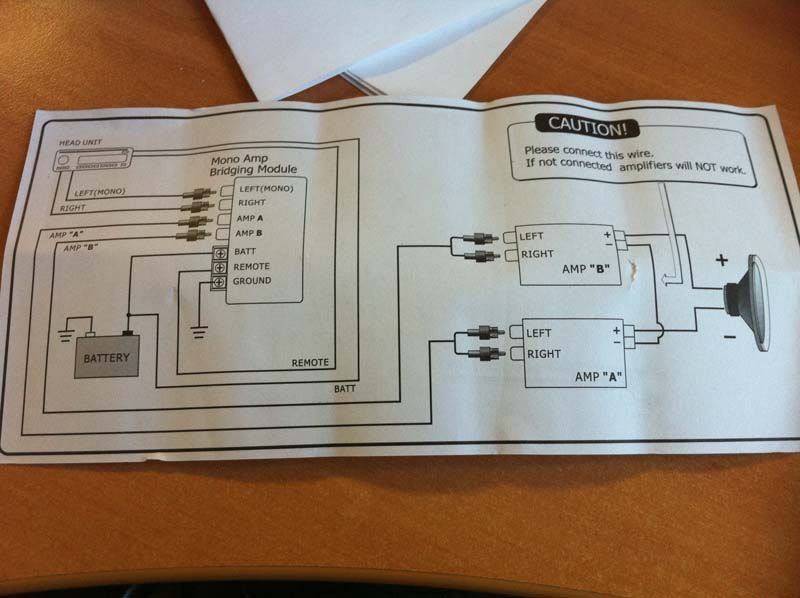
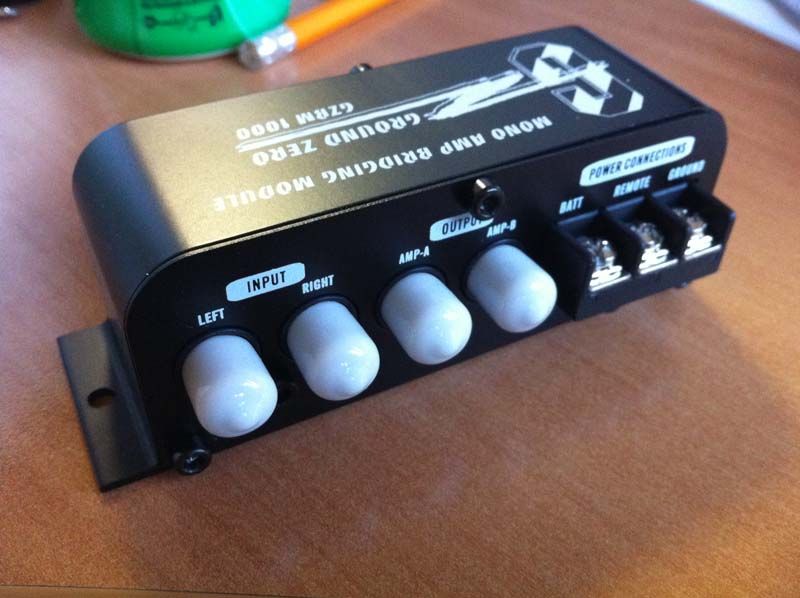
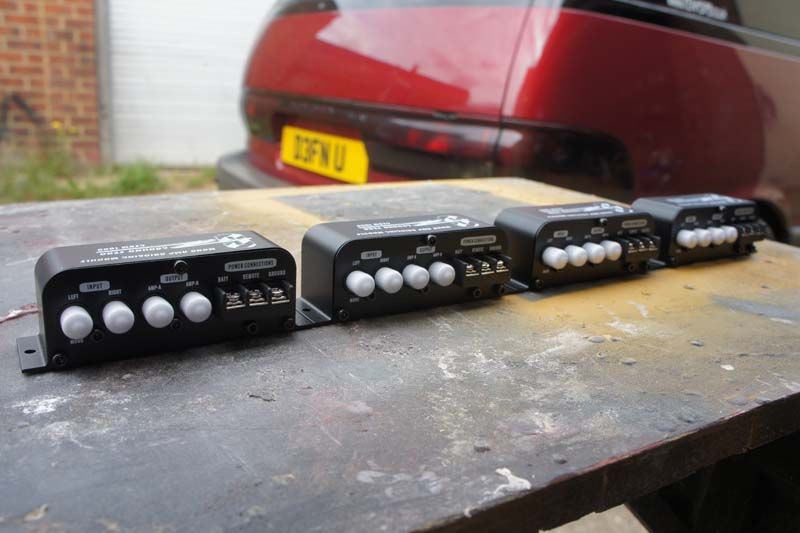
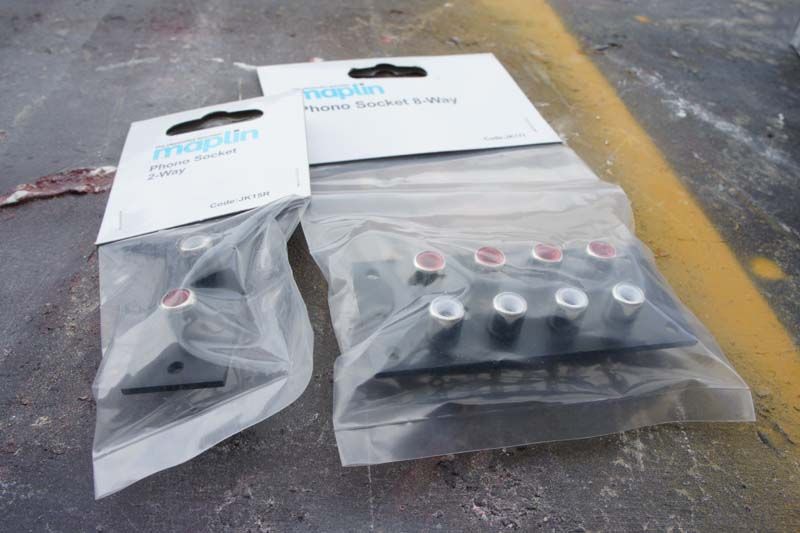
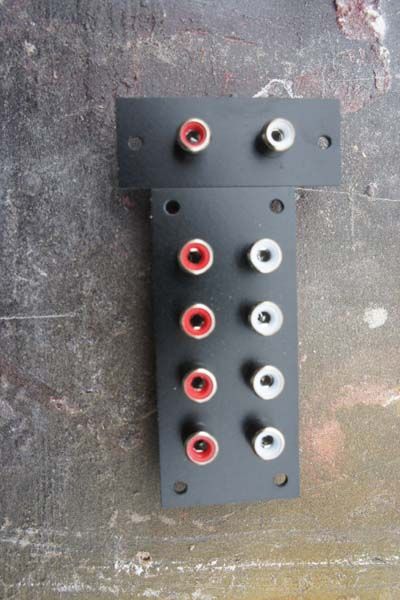
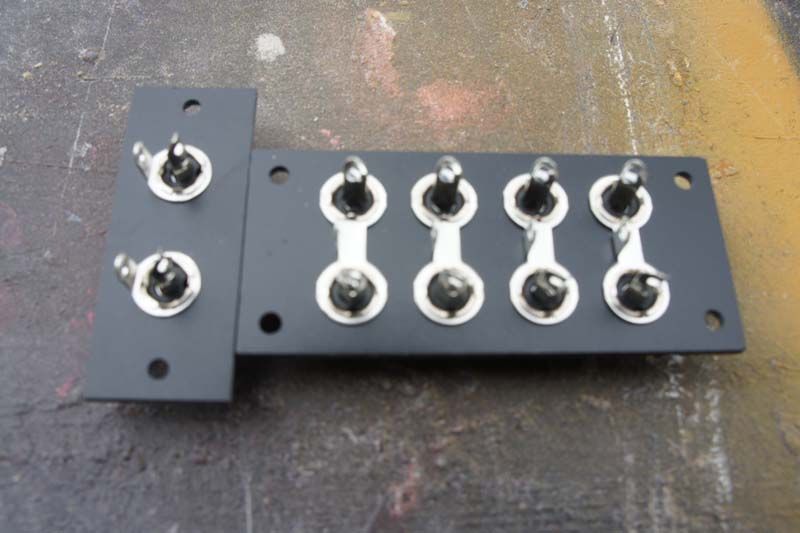
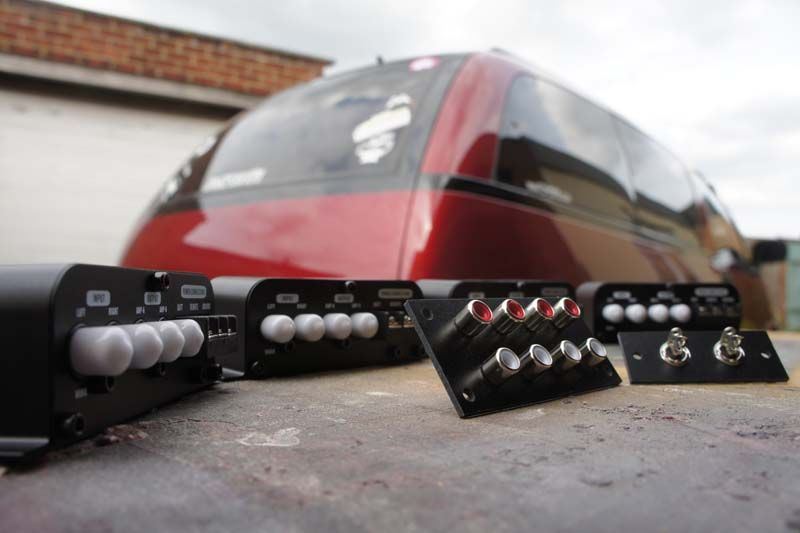
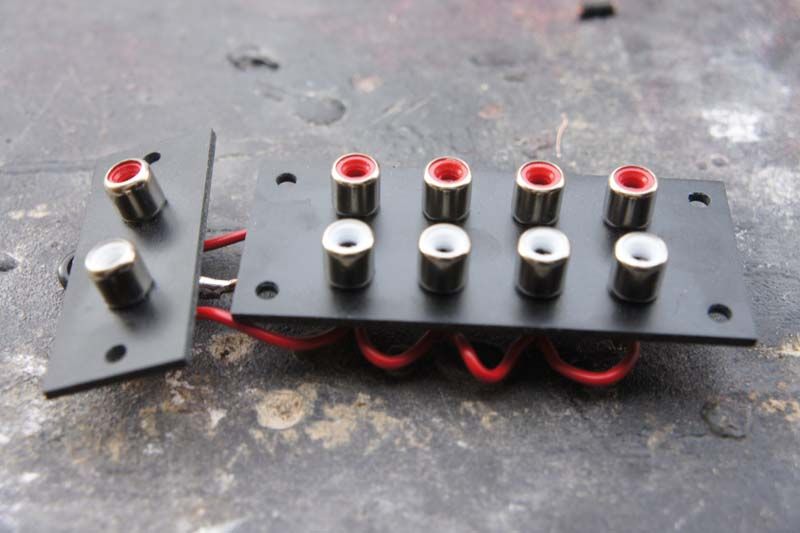
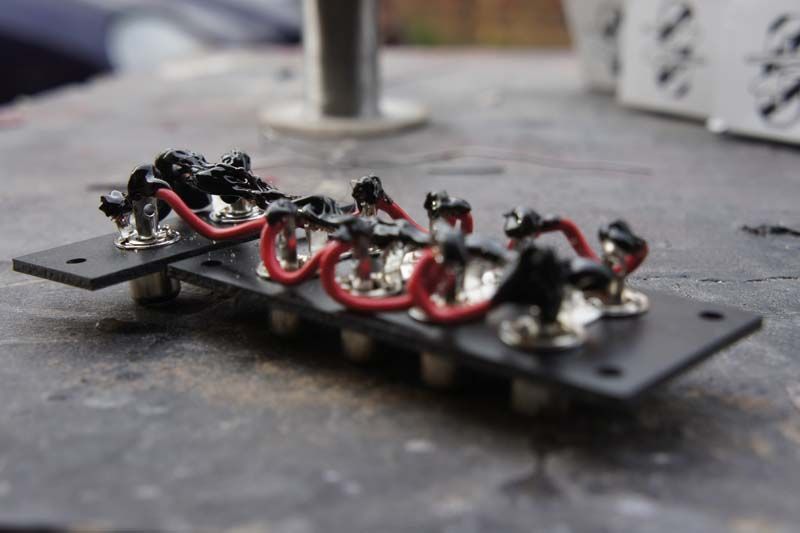
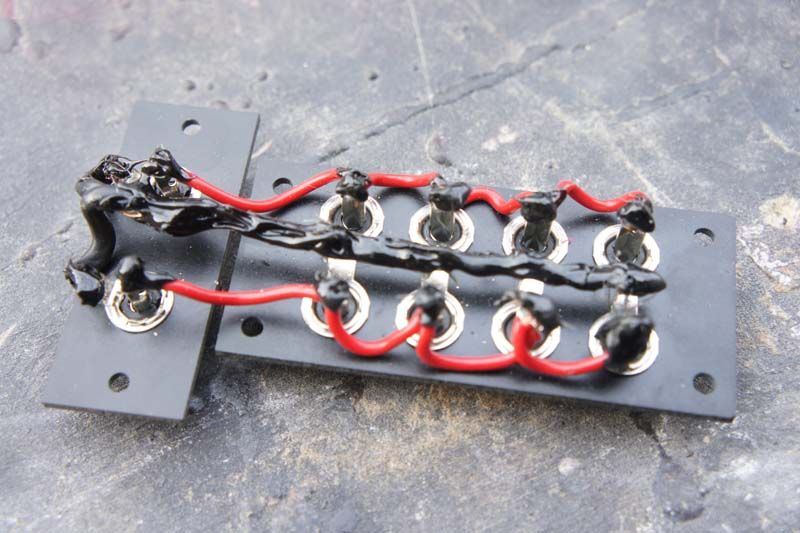
In order for me to use them, I need to split the input signal 4 times...rather than buying loads of Y-leads, I bought some bits from Maplin and got the soldering iron out!

Too much for one day?
teamSPB
If any accessories are what you are after, then he will definately be the guy to speak to! Would be great if you could mention my name to! R-tec can be had on 01727 790 100 Great bunch of guys and Alex helped me no end!
The size is 350mm which is PERFECT for the size of vehicle...looks tiny in the thing! I cant imagine what a 280mm steering wheel will look like PMSL!!!
Also got these lovely boxes thanks to the new GZ distributors CAD!
They are the bridging modules I have been waiting for! These will allow me to externally strap the amps together and fingers crossed, allow me to get the SAME output from each amp rather than different outputs like when using the master/slave function!
In order for me to use them, I need to split the input signal 4 times...rather than buying loads of Y-leads, I bought some bits from Maplin and got the soldering iron out!
Too much for one day?
teamSPB

 17-05-2011 | 11:07 PM
#229
Thread Starter
PassionFord Post Troll
Joined: May 2004
Posts: 3,386
Likes: 64
Got another little parcel today...nothing to do with the audio...just a little detail....
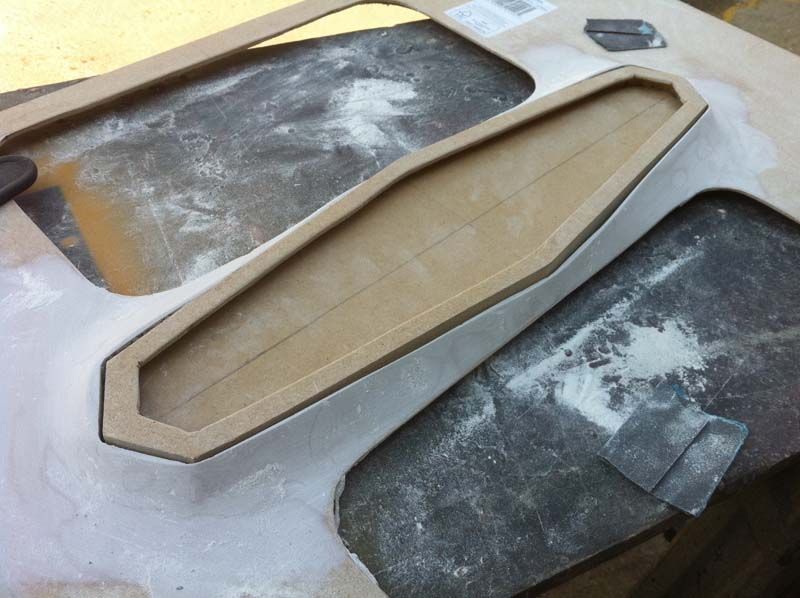
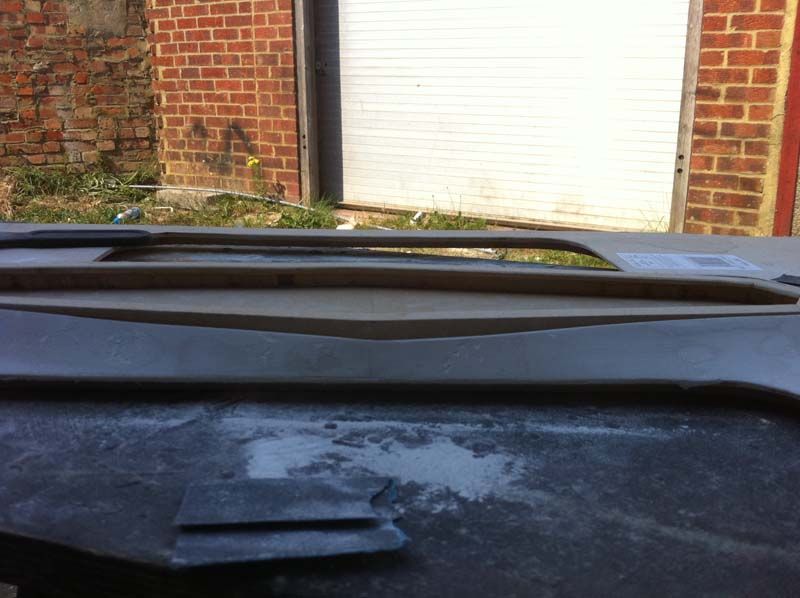
CNC machined 4mm thick aluminum SPB lettering for the rear build....AWESOME quality and great turn around time to! HUGE thanks to Stuart (i think his name was) for putting me in touch with Gavin! GREAT guy to deal with, if anyone wants his contact details, feel free to PM me and ill send you his details...he can work magic with any sort of CNC'ing that you need!

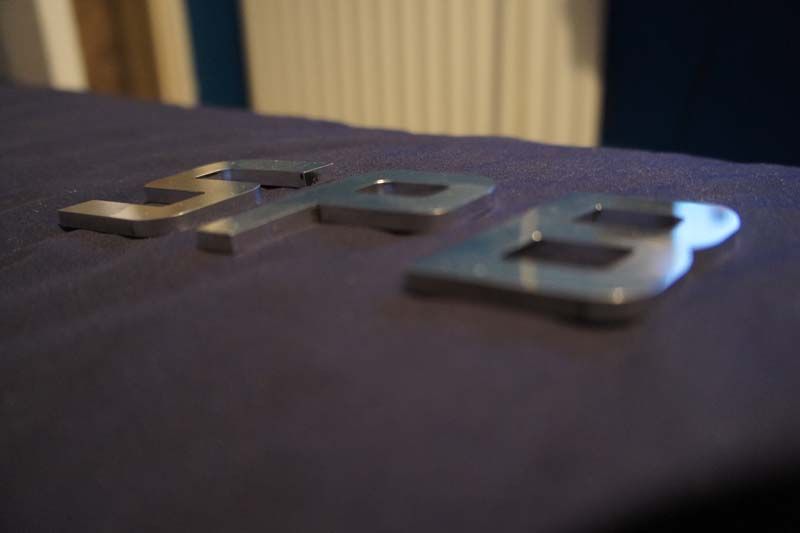
And some artsy shots of the back


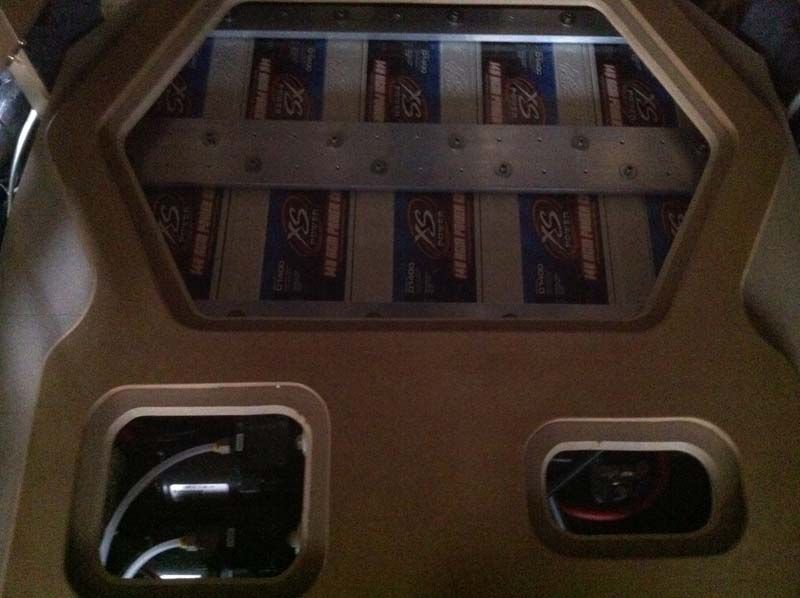
Charging up the batteries tonight....had them floating at 15.2v earlier and they werent fully charged yet either!
Wont get the chance to work on the Previa for another day or two yet as got a HUGE back log of boxes to build at the moment
teamSPB
CNC machined 4mm thick aluminum SPB lettering for the rear build....AWESOME quality and great turn around time to! HUGE thanks to Stuart (i think his name was) for putting me in touch with Gavin! GREAT guy to deal with, if anyone wants his contact details, feel free to PM me and ill send you his details...he can work magic with any sort of CNC'ing that you need!
And some artsy shots of the back
Charging up the batteries tonight....had them floating at 15.2v earlier and they werent fully charged yet either!
Wont get the chance to work on the Previa for another day or two yet as got a HUGE back log of boxes to build at the moment
teamSPB
30-05-2011 | 05:54 AM
#232
Thread Starter
PassionFord Post Troll
Joined: May 2004
Posts: 3,386
Likes: 64
As some of you are aware, we made it to Modded nats over the weekend and got some IMPRESSIVE comments about the system! But we didnt make it there without our problems!
Problem 1 - Bridging modules....for some reason the bridging modules cause the amps to freak out and pulse every second or so...and continously do so...these were then by passed and then each pair of 3500d, was then strapped using the master/slave function on the amp! Not the best way of doing things but the only way we could run big power for the weekend!
Problem 2 - Wiring issues....there seemed to be a gremlin in the wiring as somehow we would randomly lose 3db and then randomly find it again....very strange but all the amps were still giving full output...this boggled us for a good while! But battled through and the problem never arose again
Problem 3 - We broke my wiper during testing...so I was PRAYING there would be no rain!
Problem 4 - It now only does 200miles to a tank of petrol!!!!
Nevertheless, we battled on and got the Previa to Modded nats and showed what a relatively basic install could do!! 4 subs, 8 amps FTW!!!!
Initial testing, we saw the following figures:
157.2db @ 28 SEALED UP!!!! Yes thats db drag position!!!
Promptly followed by 157.5db on MUSIC!!
It plays SILLY flat...I think Am has the figures somewhere or may remember them more than me as I was too busy trying to hide from bits breaking lol!!!
I have to say a HUGE thanks to Am Singh from Blade ICE for all the help over the last few days getting it ready....It wouldnt of happened without you mate!! BIG BIG shout out to you!!!
Time for some vids!!!
http://www.youtube.com/watch?v=LMPKkmr8JMQ
http://www.youtube.com/watch?v=reBdGVR8zxA
30-05-2011 | 05:55 AM
#233
Thread Starter
PassionFord Post Troll
Joined: May 2004
Posts: 3,386
Likes: 64
30-05-2011 | 05:57 AM
#234
Thread Starter
PassionFord Post Troll
Joined: May 2004
Posts: 3,386
Likes: 64
30-05-2011 | 05:59 AM
#235
Thread Starter
PassionFord Post Troll
Joined: May 2004
Posts: 3,386
Likes: 64
30-05-2011 | 06:01 AM
#236
Thread Starter
PassionFord Post Troll
Joined: May 2004
Posts: 3,386
Likes: 64
http://www.youtube.com/watch?v=tWsne0qTc60
http://www.youtube.com/watch?v=b1dAF_lP1AA
http://www.youtube.com/watch?v=N-lvqYgQDnM
More coming a bit later
teamSPB
http://www.youtube.com/watch?v=b1dAF_lP1AA
http://www.youtube.com/watch?v=N-lvqYgQDnM
More coming a bit later
teamSPB
03-06-2011 | 12:15 AM
#238
Thread Starter
PassionFord Post Troll
Joined: May 2004
Posts: 3,386
Likes: 64
Cheers for the comments guys! Means alot! Definately makes all the hard work worth it!!
For it to do 157.2db @ 29hz sealed up and 157.5db on MUSIC means its pretty special straight out the box...its given us an EXCELLENT starting point to move forward from!
Some more videos for you
http://www.youtube.com/watch?v=zPw6Ks9h6P0
http://www.youtube.com/watch?v=NWGp8SU5CX8
http://www.youtube.com/watch?v=bs32dZa2DO8
03-06-2011 | 12:19 AM
#239
Thread Starter
PassionFord Post Troll
Joined: May 2004
Posts: 3,386
Likes: 64