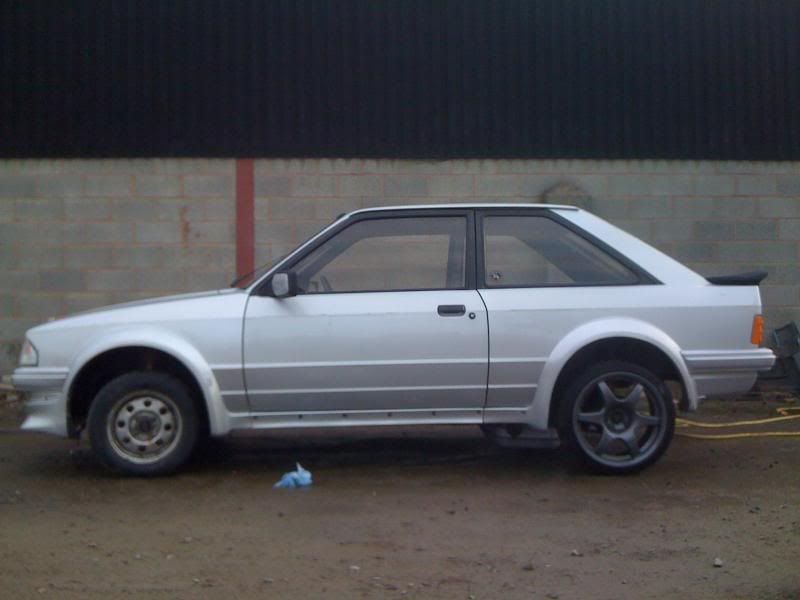
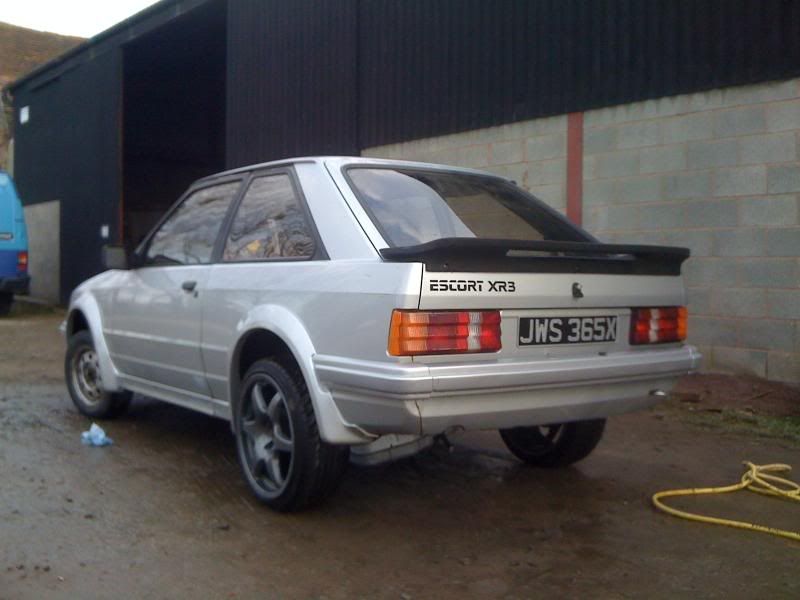
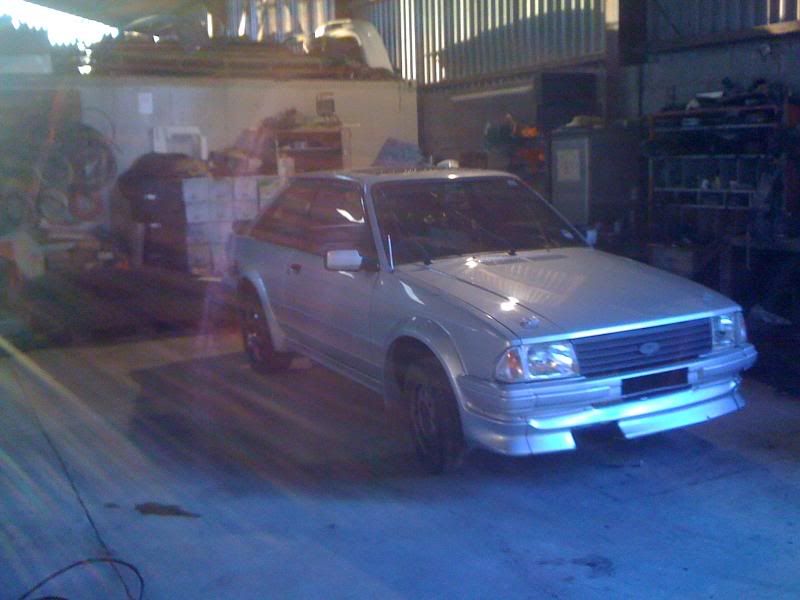
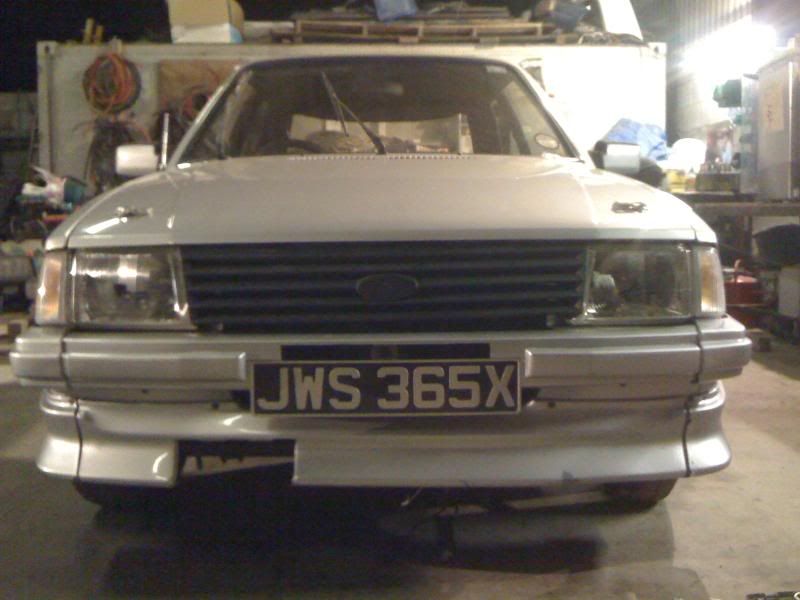
Muz's 1982 MK3 Escort 2.0 Zetec XR3.Up and running. Roll on MOT
 05-03-2010, 10:18 PM
#81
I'm Finding My Feet Here Now

Join Date: Jul 2009
Location: christchurch dorset
Posts: 141
Likes: 0
Received 0 Likes
on
0 Posts
when i 2.0my escort
i used
fiesta si loom
deep ecu
1.8 fiesta zetec clutch and flywheel
modded the cvh engine mount
the wiring i used fiesta
ecu relay
fuel pump relay
and 3 fuses
would make a diagram for yah but cant find my haynes manual
i used
fiesta si loom
deep ecu
1.8 fiesta zetec clutch and flywheel
modded the cvh engine mount
the wiring i used fiesta
ecu relay
fuel pump relay
and 3 fuses
would make a diagram for yah but cant find my haynes manual
 06-03-2010, 09:55 AM
#83
chatter 4 life
iTrader: (5)

Join Date: Sep 2004
Location: northallerton
Posts: 2,490
Likes: 0
Received 0 Likes
on
0 Posts
the wires on that plug and what they need connecting to are:
black/green = ignition live
brown/green = water temp gauge
black = 4amp ignition live
brown = earth from fuel pump *RELAY*
red = 4amp perminant live
brown/wite = earth
green = revcounter (the revcounter should work as normal with no messing about)
if youre making youre own fuel pump relay cricuit (easiest way) then insulate and disregard the black/red wire.
if you want to make youre own fuel pump relay circuit, its easy! get yourself a relay from halfords or wherever. itll have numbers on the pins which you need to connect up as follows:
87 - perminant live (from battery 30amp fuse if using erst pump)
86 - switchable live (ignition live.....from ignition)
85 - earth (to the brown earth wire mentioned above)
30 - accesory (to fuel pump)
make sure that the fuelpump hosuing isnt in anyway earthed to the car as this will blow the fuse and the pump wont work! ( Embarassed )
you should always use an inertia switch when running an electric pump, you should put this somewhere in the feed to the fuel pump and screw/bolt the inertia switch uprght to the shell, then you will need an earth from the fuel pump to the chassis.
aswell as these wires theres one or two earths in the main engine loom that should be connected up to the shell.
do all that and you should have a working zetec loom!
**the list of wires above are from an escort loom, fiesta and mondeo looms MIGHT be different**
06-03-2010, 10:56 AM
#86
Wye Valley Hardcore
Thread Starter
the wires on that plug and what they need connecting to are:
black/green = ignition live
brown/green = water temp gauge
black = 4amp ignition live
brown = earth from fuel pump *RELAY*
red = 4amp perminant live
brown/wite = earth
green = revcounter (the revcounter should work as normal with no messing about)
if youre making youre own fuel pump relay cricuit (easiest way) then insulate and disregard the black/red wire.
if you want to make youre own fuel pump relay circuit, its easy! get yourself a relay from halfords or wherever. itll have numbers on the pins which you need to connect up as follows:
87 - perminant live (from battery 30amp fuse if using erst pump)
86 - switchable live (ignition live.....from ignition)
85 - earth (to the brown earth wire mentioned above)
30 - accesory (to fuel pump)
make sure that the fuelpump hosuing isnt in anyway earthed to the car as this will blow the fuse and the pump wont work! ( Embarassed )
you should always use an inertia switch when running an electric pump, you should put this somewhere in the feed to the fuel pump and screw/bolt the inertia switch uprght to the shell, then you will need an earth from the fuel pump to the chassis.
aswell as these wires theres one or two earths in the main engine loom that should be connected up to the shell.
do all that and you should have a working zetec loom!
**the list of wires above are from an escort loom, fiesta and mondeo looms MIGHT be different**
black/green = ignition live
brown/green = water temp gauge
black = 4amp ignition live
brown = earth from fuel pump *RELAY*
red = 4amp perminant live
brown/wite = earth
green = revcounter (the revcounter should work as normal with no messing about)
if youre making youre own fuel pump relay cricuit (easiest way) then insulate and disregard the black/red wire.
if you want to make youre own fuel pump relay circuit, its easy! get yourself a relay from halfords or wherever. itll have numbers on the pins which you need to connect up as follows:
87 - perminant live (from battery 30amp fuse if using erst pump)
86 - switchable live (ignition live.....from ignition)
85 - earth (to the brown earth wire mentioned above)
30 - accesory (to fuel pump)
make sure that the fuelpump hosuing isnt in anyway earthed to the car as this will blow the fuse and the pump wont work! ( Embarassed )
you should always use an inertia switch when running an electric pump, you should put this somewhere in the feed to the fuel pump and screw/bolt the inertia switch uprght to the shell, then you will need an earth from the fuel pump to the chassis.
aswell as these wires theres one or two earths in the main engine loom that should be connected up to the shell.
do all that and you should have a working zetec loom!
**the list of wires above are from an escort loom, fiesta and mondeo looms MIGHT be different**
06-03-2010, 10:57 AM
#87
Wye Valley Hardcore
Thread Starter
07-03-2010, 08:30 AM
#88
formerly uyo1972
iTrader: (2)

Join Date: May 2004
Location: the midlands
Posts: 1,048
Likes: 0
Received 0 Likes
on
0 Posts
rears are off Muz got the 4 springs ready for ya bud i will phone you later to sort something out if you still want them mate im going out for dinner today were having a new kitchen fitted and theres only so many microwave meals you can have lol so it will be this evening i will phone you
07-03-2010, 09:53 AM
#89
Wye Valley Hardcore
Thread Starter
rears are off Muz got the 4 springs ready for ya bud i will phone you later to sort something out if you still want them mate im going out for dinner today were having a new kitchen fitted and theres only so many microwave meals you can have lol so it will be this evening i will phone you
 10-03-2010, 07:32 PM
#92
Wye Valley Hardcore
Thread Starter
Yeah you can. I have a BC box here though so want to keep that box and clutch.
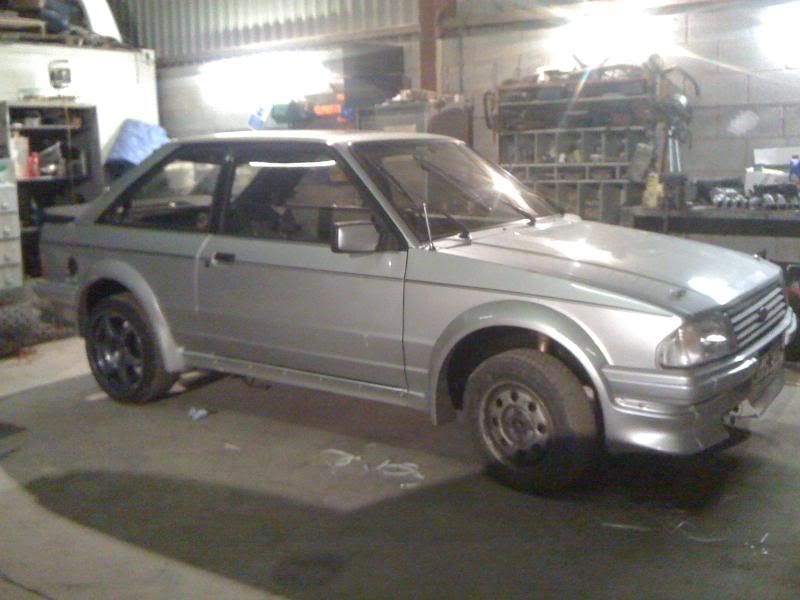
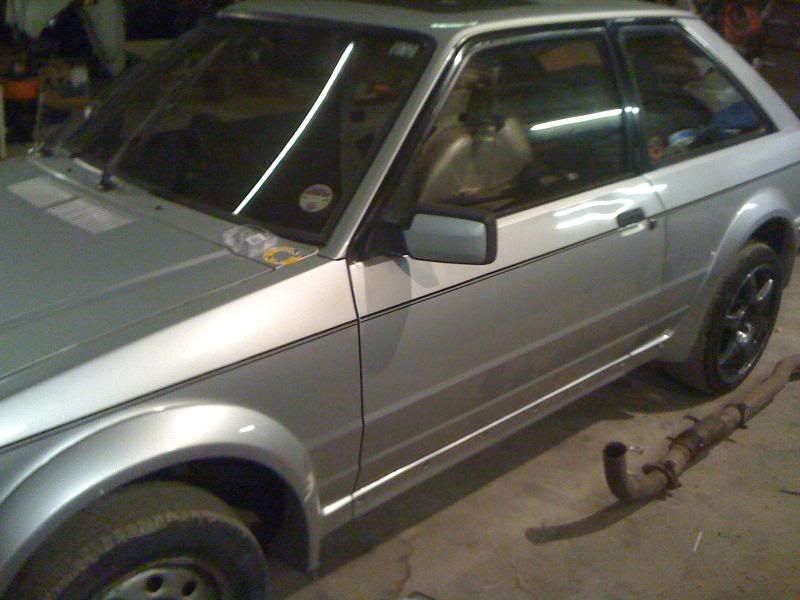
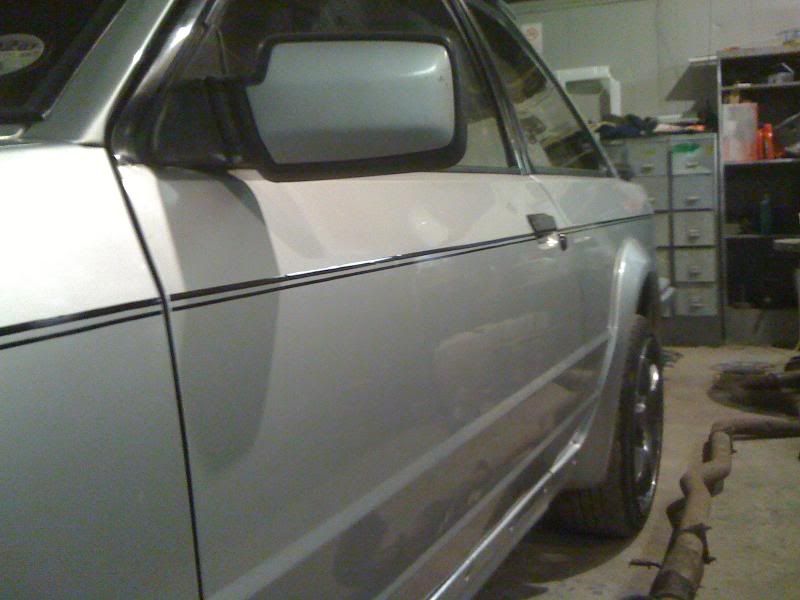
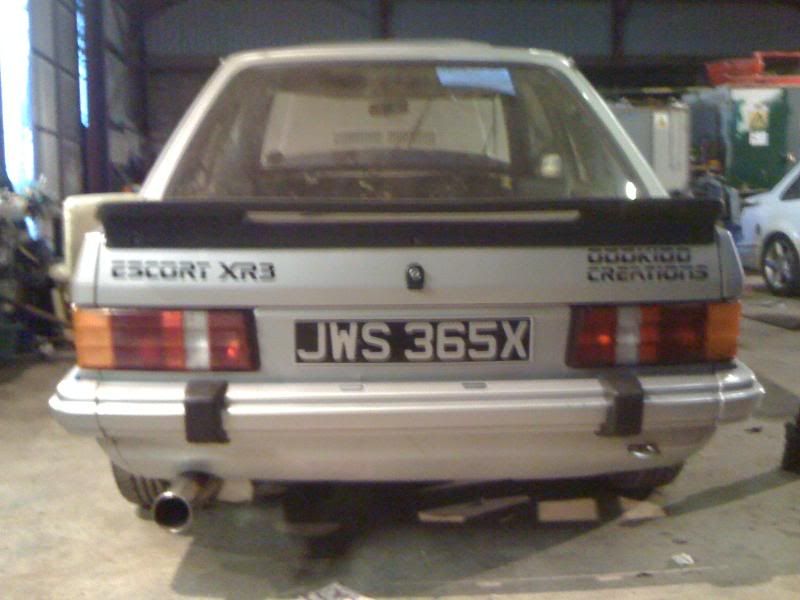
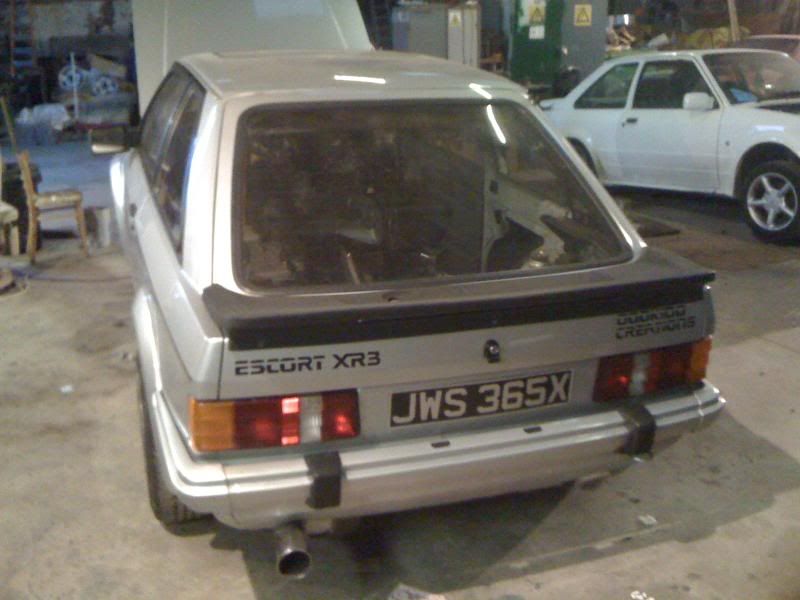
Gave her a wash today.
 Some proper pictures, clean, in proper light.
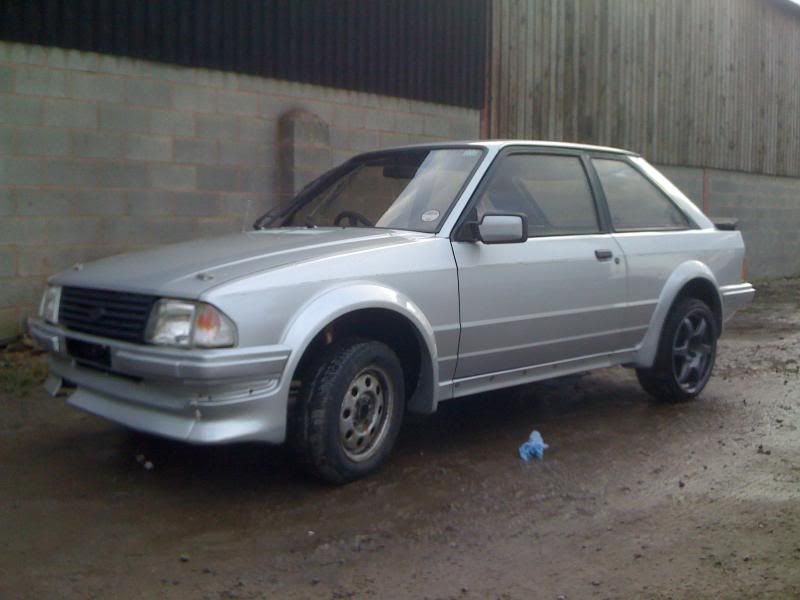
These also arrived today. MASSIVE MASSIVE thanks to Dave AKA DEERHUNTER who gave them to me absolutely FREE!

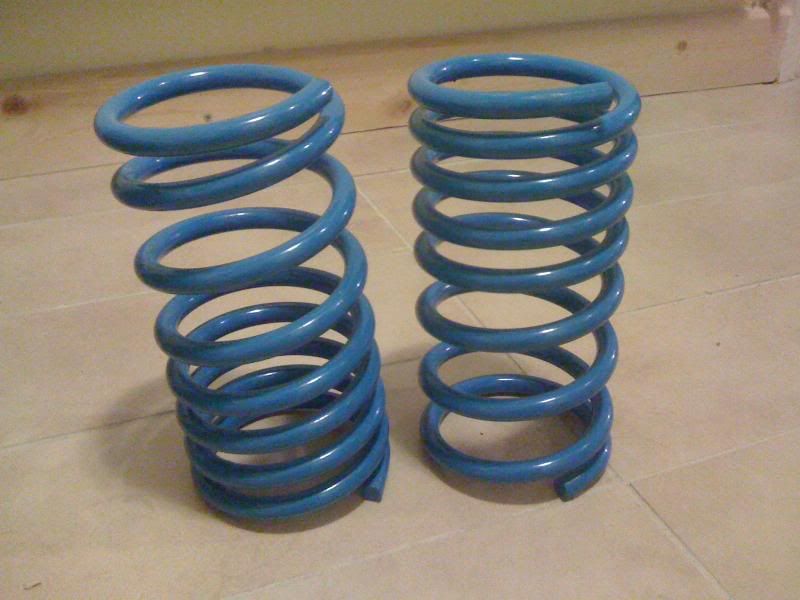
If only they had arrived before I went up there barn
 i could have fitted them today so it wouldn't look like a bloody truck.
Got some over riders on the way and off to pick up the 2.0 Zetec tomorrow.
Oh no Ghia. She's home alone now.
 10-03-2010, 07:43 PM
#93
formerly uyo1972
iTrader: (2)
Join Date: May 2004
Location: the midlands
Posts: 1,048
Likes: 0
Received 0 Likes
on
0 Posts
glad you got them ok mate the fronts will come up just as good ,i never got that far though just did the rear end resto to start with
im glad i could find someone who could make good use of them Muz
im glad i could find someone who could make good use of them Muz

 Muz just need the step ladder to get in it now
10-03-2010, 09:24 PM
Muz just need the step ladder to get in it now
10-03-2010, 09:24 PM
#95
Wye Valley Hardcore
Thread Starter
Cheers mate, really appreciate it. I've got some -35MM already on the fronts so I will see how it sits.
10-03-2010, 09:25 PM
#96
Wye Valley Hardcore
Thread Starter
 11-03-2010, 10:06 PM
#99
Wye Valley Hardcore
Thread Starter
Right got my one pair of over riders through. Mint condition and only �30 posted!

Will tie the black details at the back together nicely. The front two I haven't picked up off a mate yet, but will get them in time.
Also picked up the 2.0 Engine today. Looks to be in very good condition. Block is clean, still in origional Ford block paint, no rusty patches and no oil spils so should be a good 'un.
Also got with it a 2FCD ECU which means it is a 130PS XR3i item, so should be ok to use. Just need to find an XR3i loom now.
Hopefully some pics of the engine etc on Sunday.

 12-03-2010, 11:56 AM
#103
Wye Valley Hardcore
Thread Starter
 12-03-2010, 02:07 PM
#106
Wye Valley Hardcore
Thread Starter
 12-03-2010, 03:01 PM
#109
Wye Valley Hardcore
Thread Starter
12-03-2010, 03:07 PM
#110
I'm Finding My Feet Here Now
Join Date: Jul 2009
Location: christchurch dorset
Posts: 141
Likes: 0
Received 0 Likes
on
0 Posts
 13-03-2010, 07:51 AM
#113
Wye Valley Hardcore
Thread Starter
It came with the engine mate. It's a 2.0 Zetec, apparently from an auto coverd 57k and looking at how clean the block etc is I dont doubt it. Also came with a 1.8 L&B flywheel, FRST inlet (using a 130 Zetec item though) 2.0 throttle body and injector loom for �200
15-03-2010, 11:35 PM
#114
Wye Valley Hardcore
Thread Starter
Got the engine partly stripped down tonight. Took off all the crap like PAS, rear alt etc that I wont be using and was left with this.
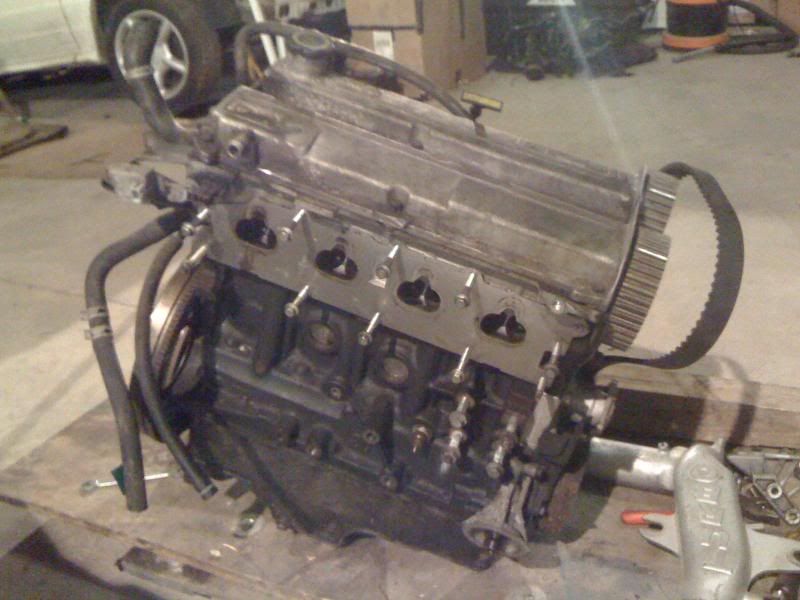

Chap I bought it off said its done 57k and from an auto, I thought yeah ok mate, EVERY secondhand 2.0 has done under 60k and from an auto but looking at it it looks pretty good. Blocks wearing its original block paint, its clean, no rusty bits or oil, the camshafts have no wear what so ever so lets hope its a good 'un.
Then I cracked on and added my Oddkidd sticker, having to make the end D in Oddkidd as they only spelt it with one
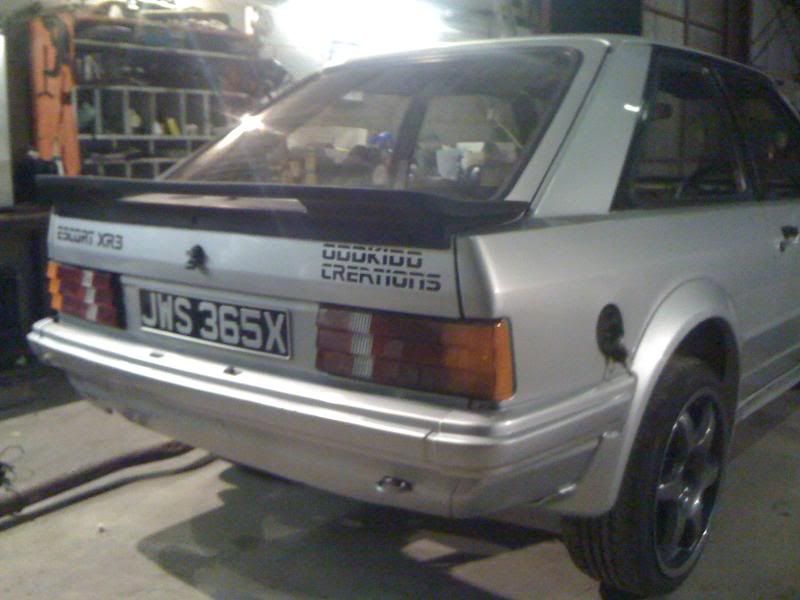
Then decided to put the coachline on. I didn't want one on at all, but the cars been painted in the past, and they have used the original coachline as a masking point so there was a noticable paint line.
Also no one made, or would make a 6mm/5mm gap/3mm coachline like the origional, and becuse of the paint lines it had to be exactly like the original, so I had to get a 6mm/3mm gap/3mm stripe cut it in two and apply them seperately
then fitted up the front plate. Can just about make out the cheaky Kenlowe fan poking through 8)
Chap I bought it off said its done 57k and from an auto, I thought yeah ok mate, EVERY secondhand 2.0 has done under 60k and from an auto
Then I cracked on and added my Oddkidd sticker, having to make the end D in Oddkidd as they only spelt it with one
Then decided to put the coachline on. I didn't want one on at all, but the cars been painted in the past, and they have used the original coachline as a masking point
Also no one made, or would make a 6mm/5mm gap/3mm coachline like the origional, and becuse of the paint lines it had to be exactly like the original, so I had to get a 6mm/3mm gap/3mm stripe cut it in two and apply them seperately
then fitted up the front plate. Can just about make out the cheaky Kenlowe fan poking through 8)
 looks good so far mate, keep it up
18-03-2010, 01:41 PM
looks good so far mate, keep it up
18-03-2010, 01:41 PM
#117
Wye Valley Hardcore
Thread Starter
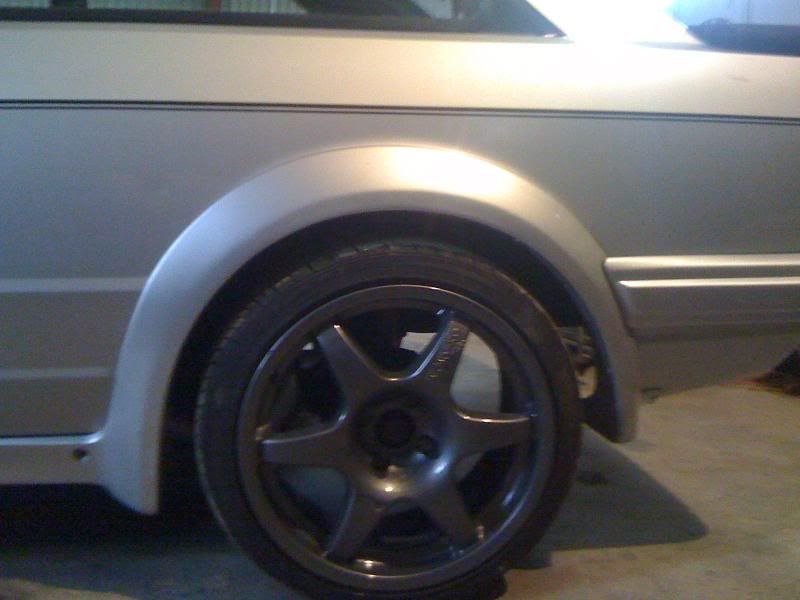
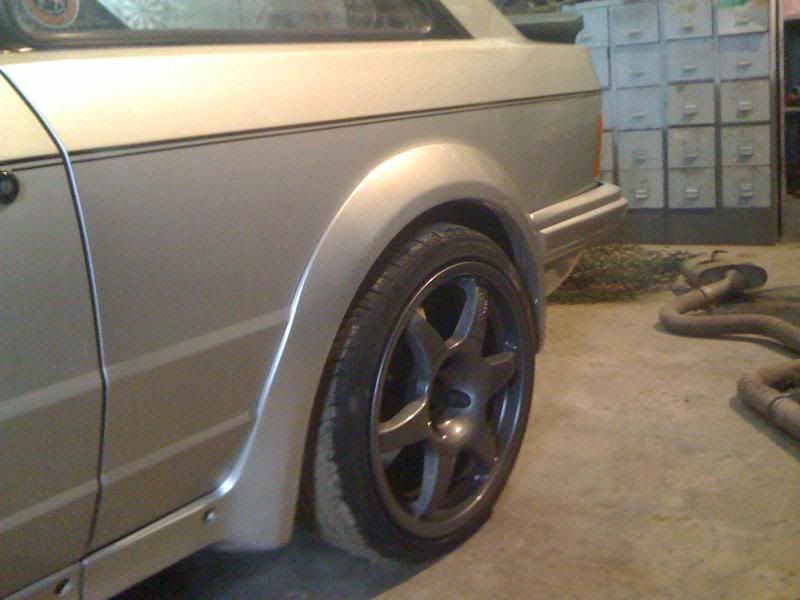
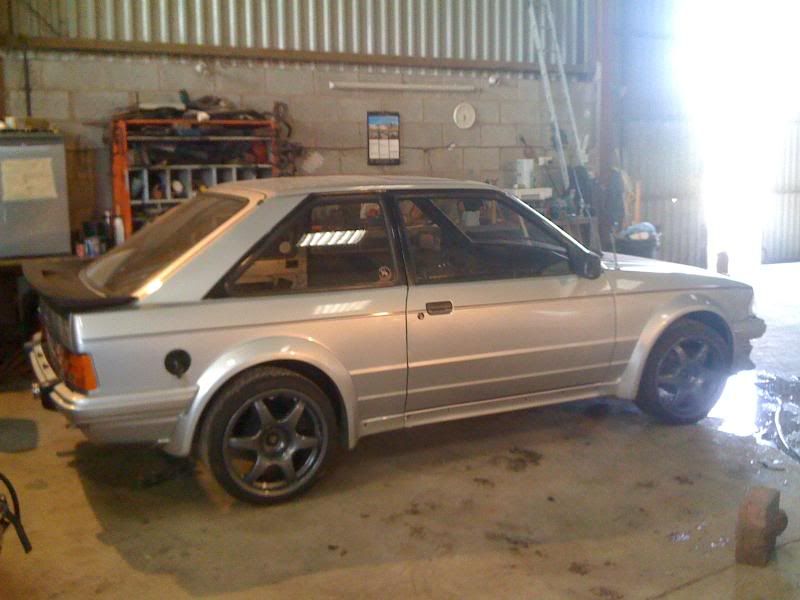
Re sprung the rear end.
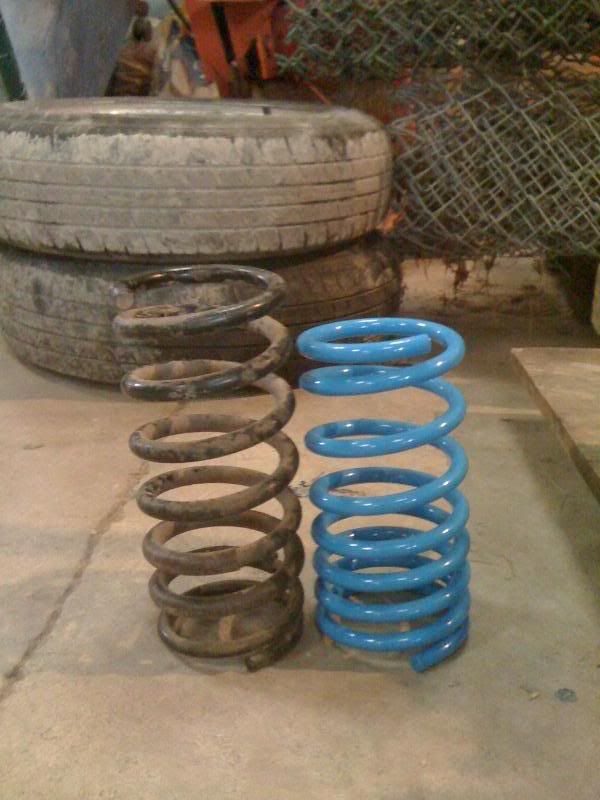
That's Better. Also needed to pop on a cheaky 5mm spacer for the rear wheels to clear the tie bars. 8J and a 5mm spacer FTW!
The 2.0 Zetec also needs more parts than I thought to get to fit in time for Central Day so.....

...1.6 Carb for now.
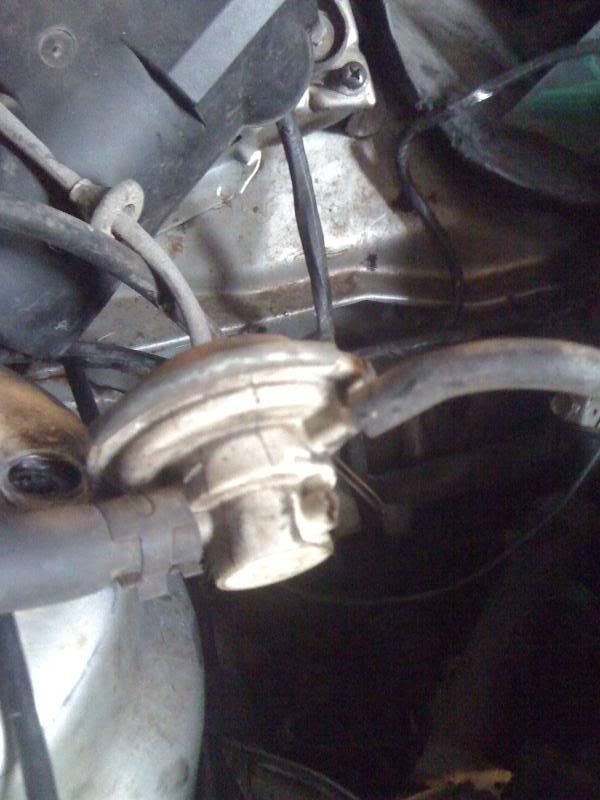
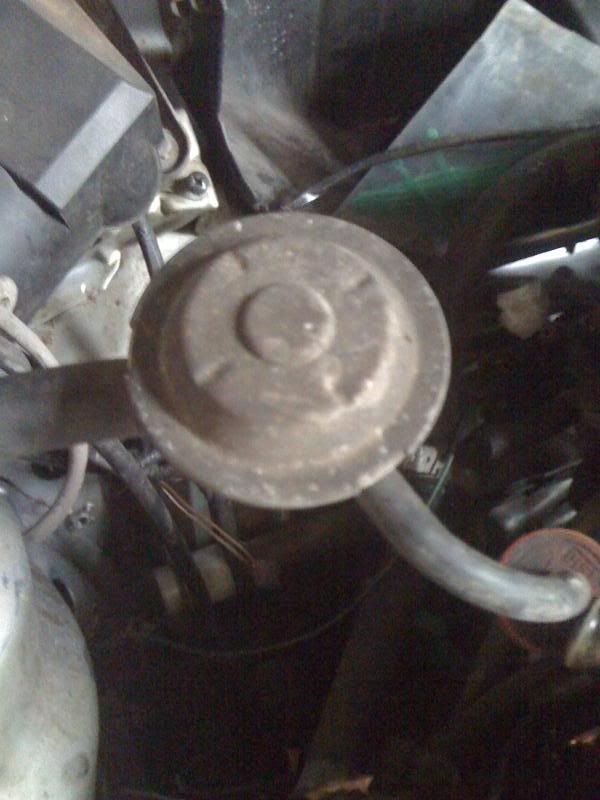
Managed to break this thing though. What is it? Might just glue it and see. Something to do with the breather.
That's Better. Also needed to pop on a cheaky 5mm spacer for the rear wheels to clear the tie bars. 8J and a 5mm spacer FTW!
The 2.0 Zetec also needs more parts than I thought to get to fit in time for Central Day so.....
...1.6 Carb for now.
Managed to break this thing though. What is it? Might just glue it and see. Something to do with the breather.
 01-04-2010, 11:23 AM
#119
Wye Valley Hardcore
Thread Starter
Update time.
Sorted all the wiring out and re fitted the dashboard.
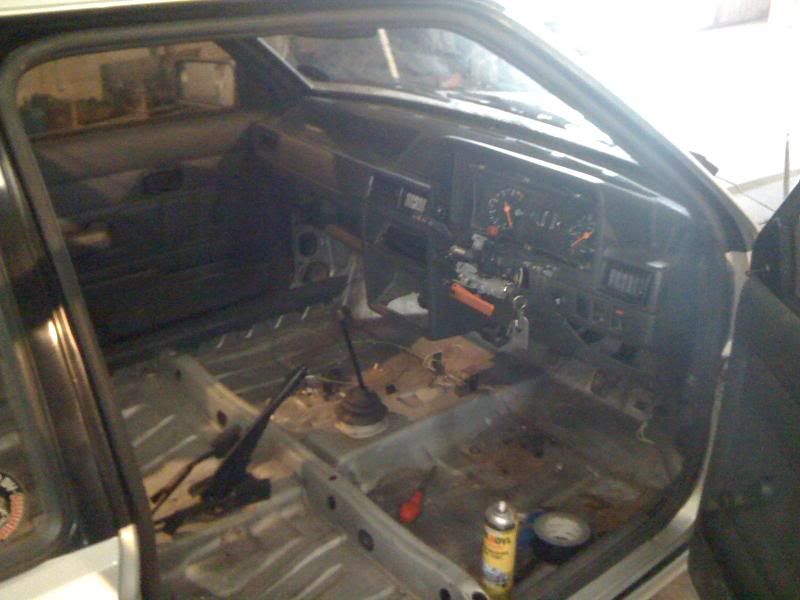
Note the can of Waxoyl. Theres 2 of thoese cans just on the inside of the car.
I also had to think of a way of joining my ERST Magnex exhaust to the CVH manifold but so I cant then use it when I go to zetec. So had to join them somehow, but not hard weld the two togther.
Took the CVH manifold
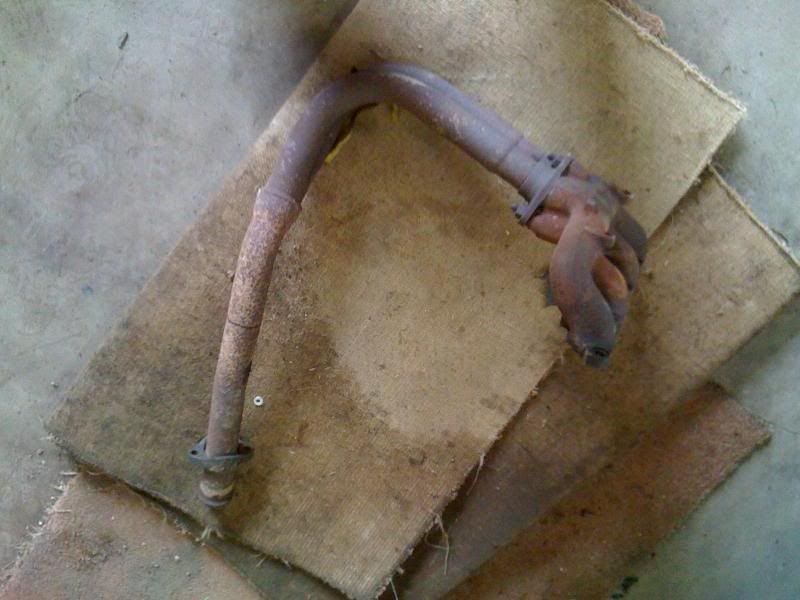
Took off the Magnex T3 downpipe leaving the flexi, centre, rear and back box sections. Then measured the T3 downpipe against the CVH manifold and cut the CVH manifold to the same length.
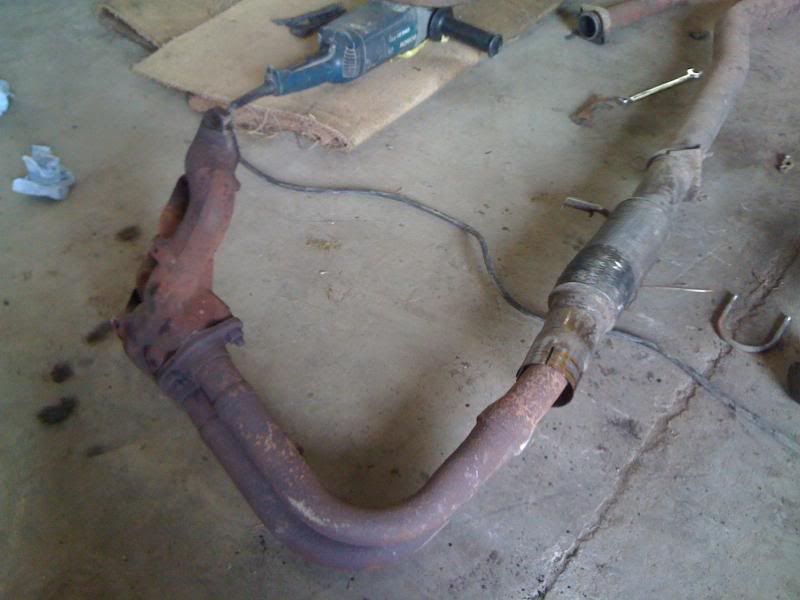
This left me with a slight difference in bore
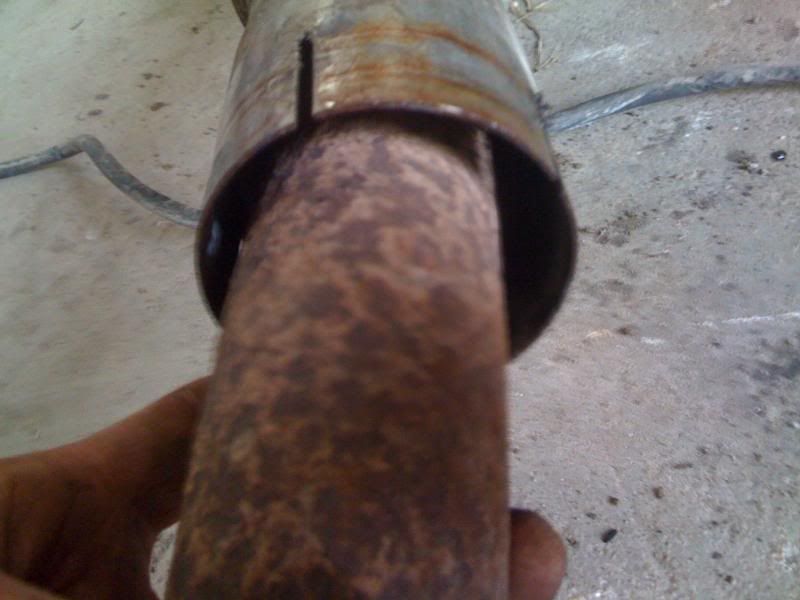
So I hunted around for some pipe to make a reducer and found this.
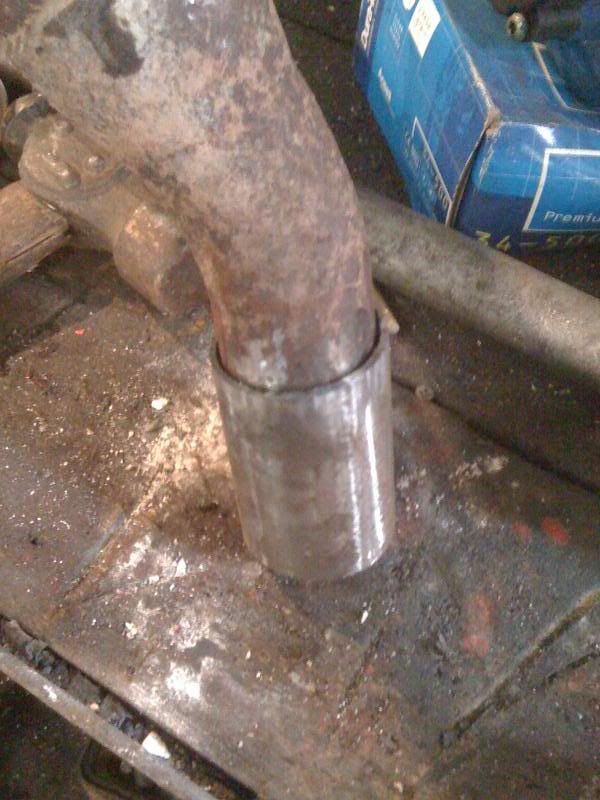
Fitted the CVH bore perfectly, but was still slightly too small to fully fill the bore of the Magnex. SO I wrapped it in some sheet steel I use to patch floor pans with, taking it down and using the rubber mallet to shape it round and the bench vice to keep it tight. 3 Layers later it was the correct size. Ending up with this bore spacer.
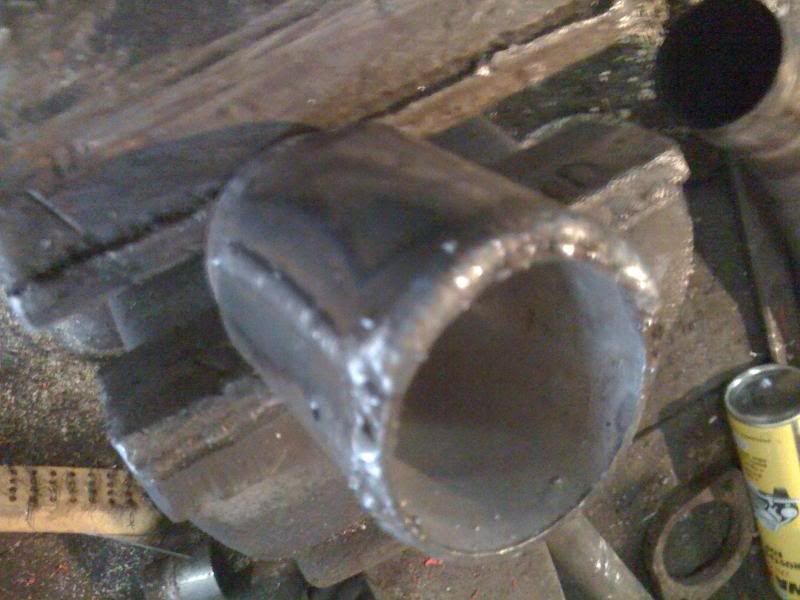
Welded it to the CVH manifold and conected it up to the Magnex system and It fitted perfectly

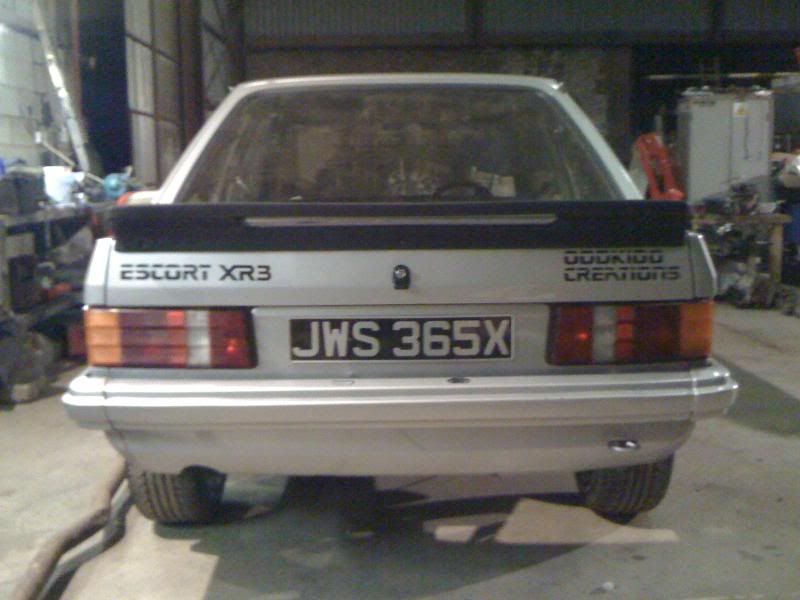
Fitted up my Rear over riders. Finish the back end of nicely.
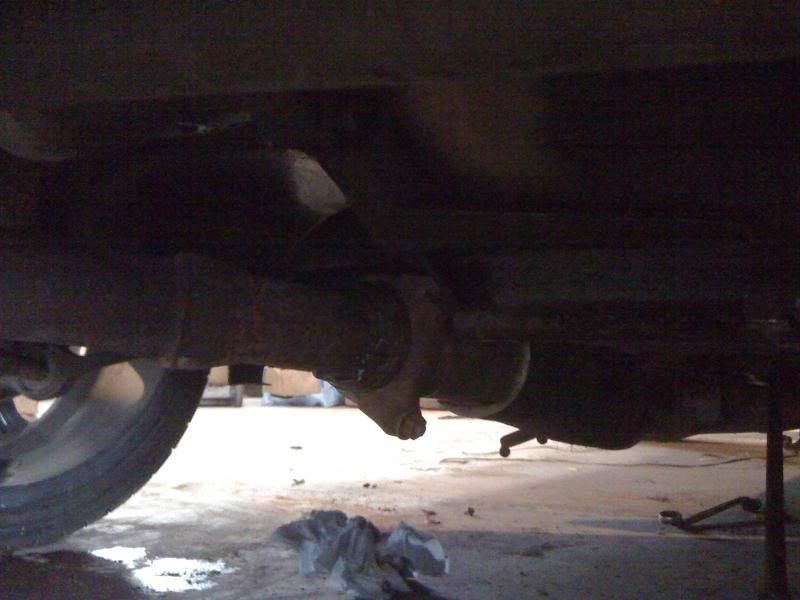
Down on all fours
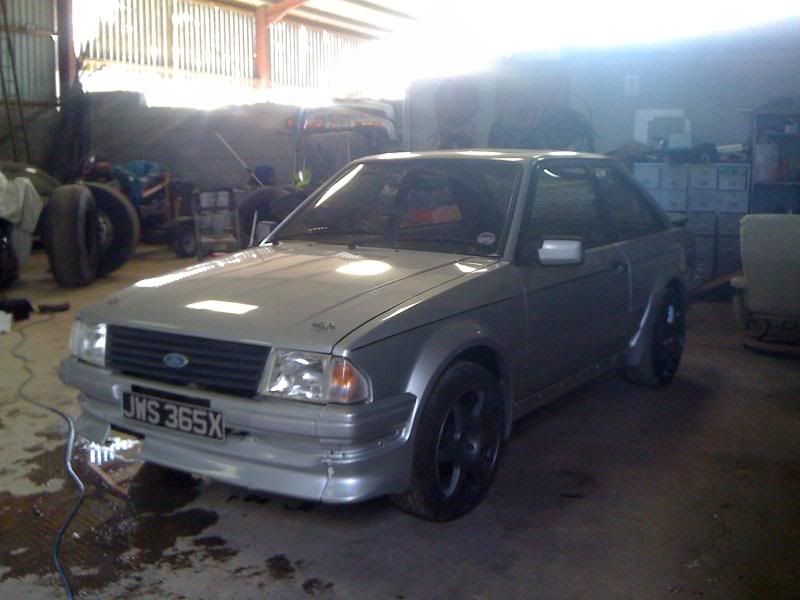
Ran it up to temp yesterday driving it down the private lane and around the barn, fan kicks in when it should, all lights and electrics work and it actaully sounds bloody fantanstic. I don't know if it's the carb being slightly rich and out of tune, but it really pops and bangs on the run down when you rev it hard. Sounds like a rally car!
So all I need to do now is bleed the brakes, wait for the carpet to arrive so I can fit the interior properly and put it in for its MOT. See you at Central Day
